



JR RS
FREEDOMLite
-
Joined
-
Last visited
Everything posted by JR RS
-
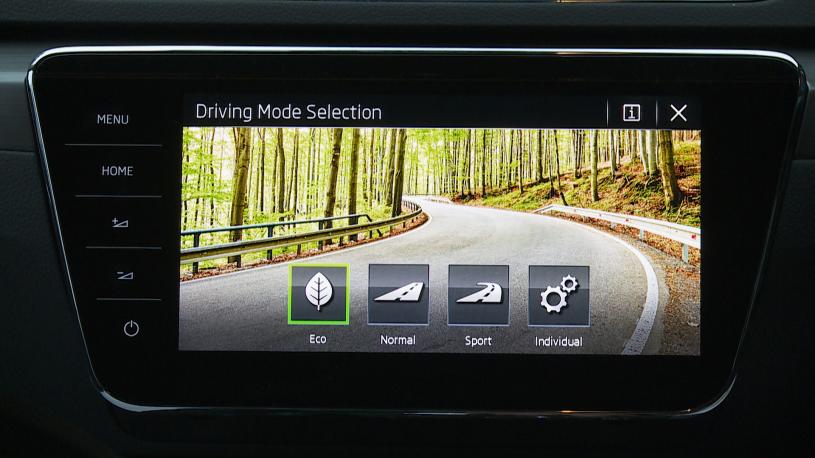
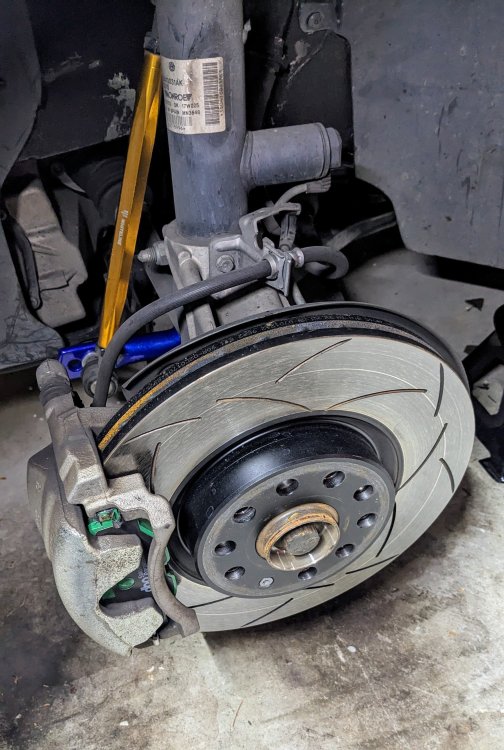
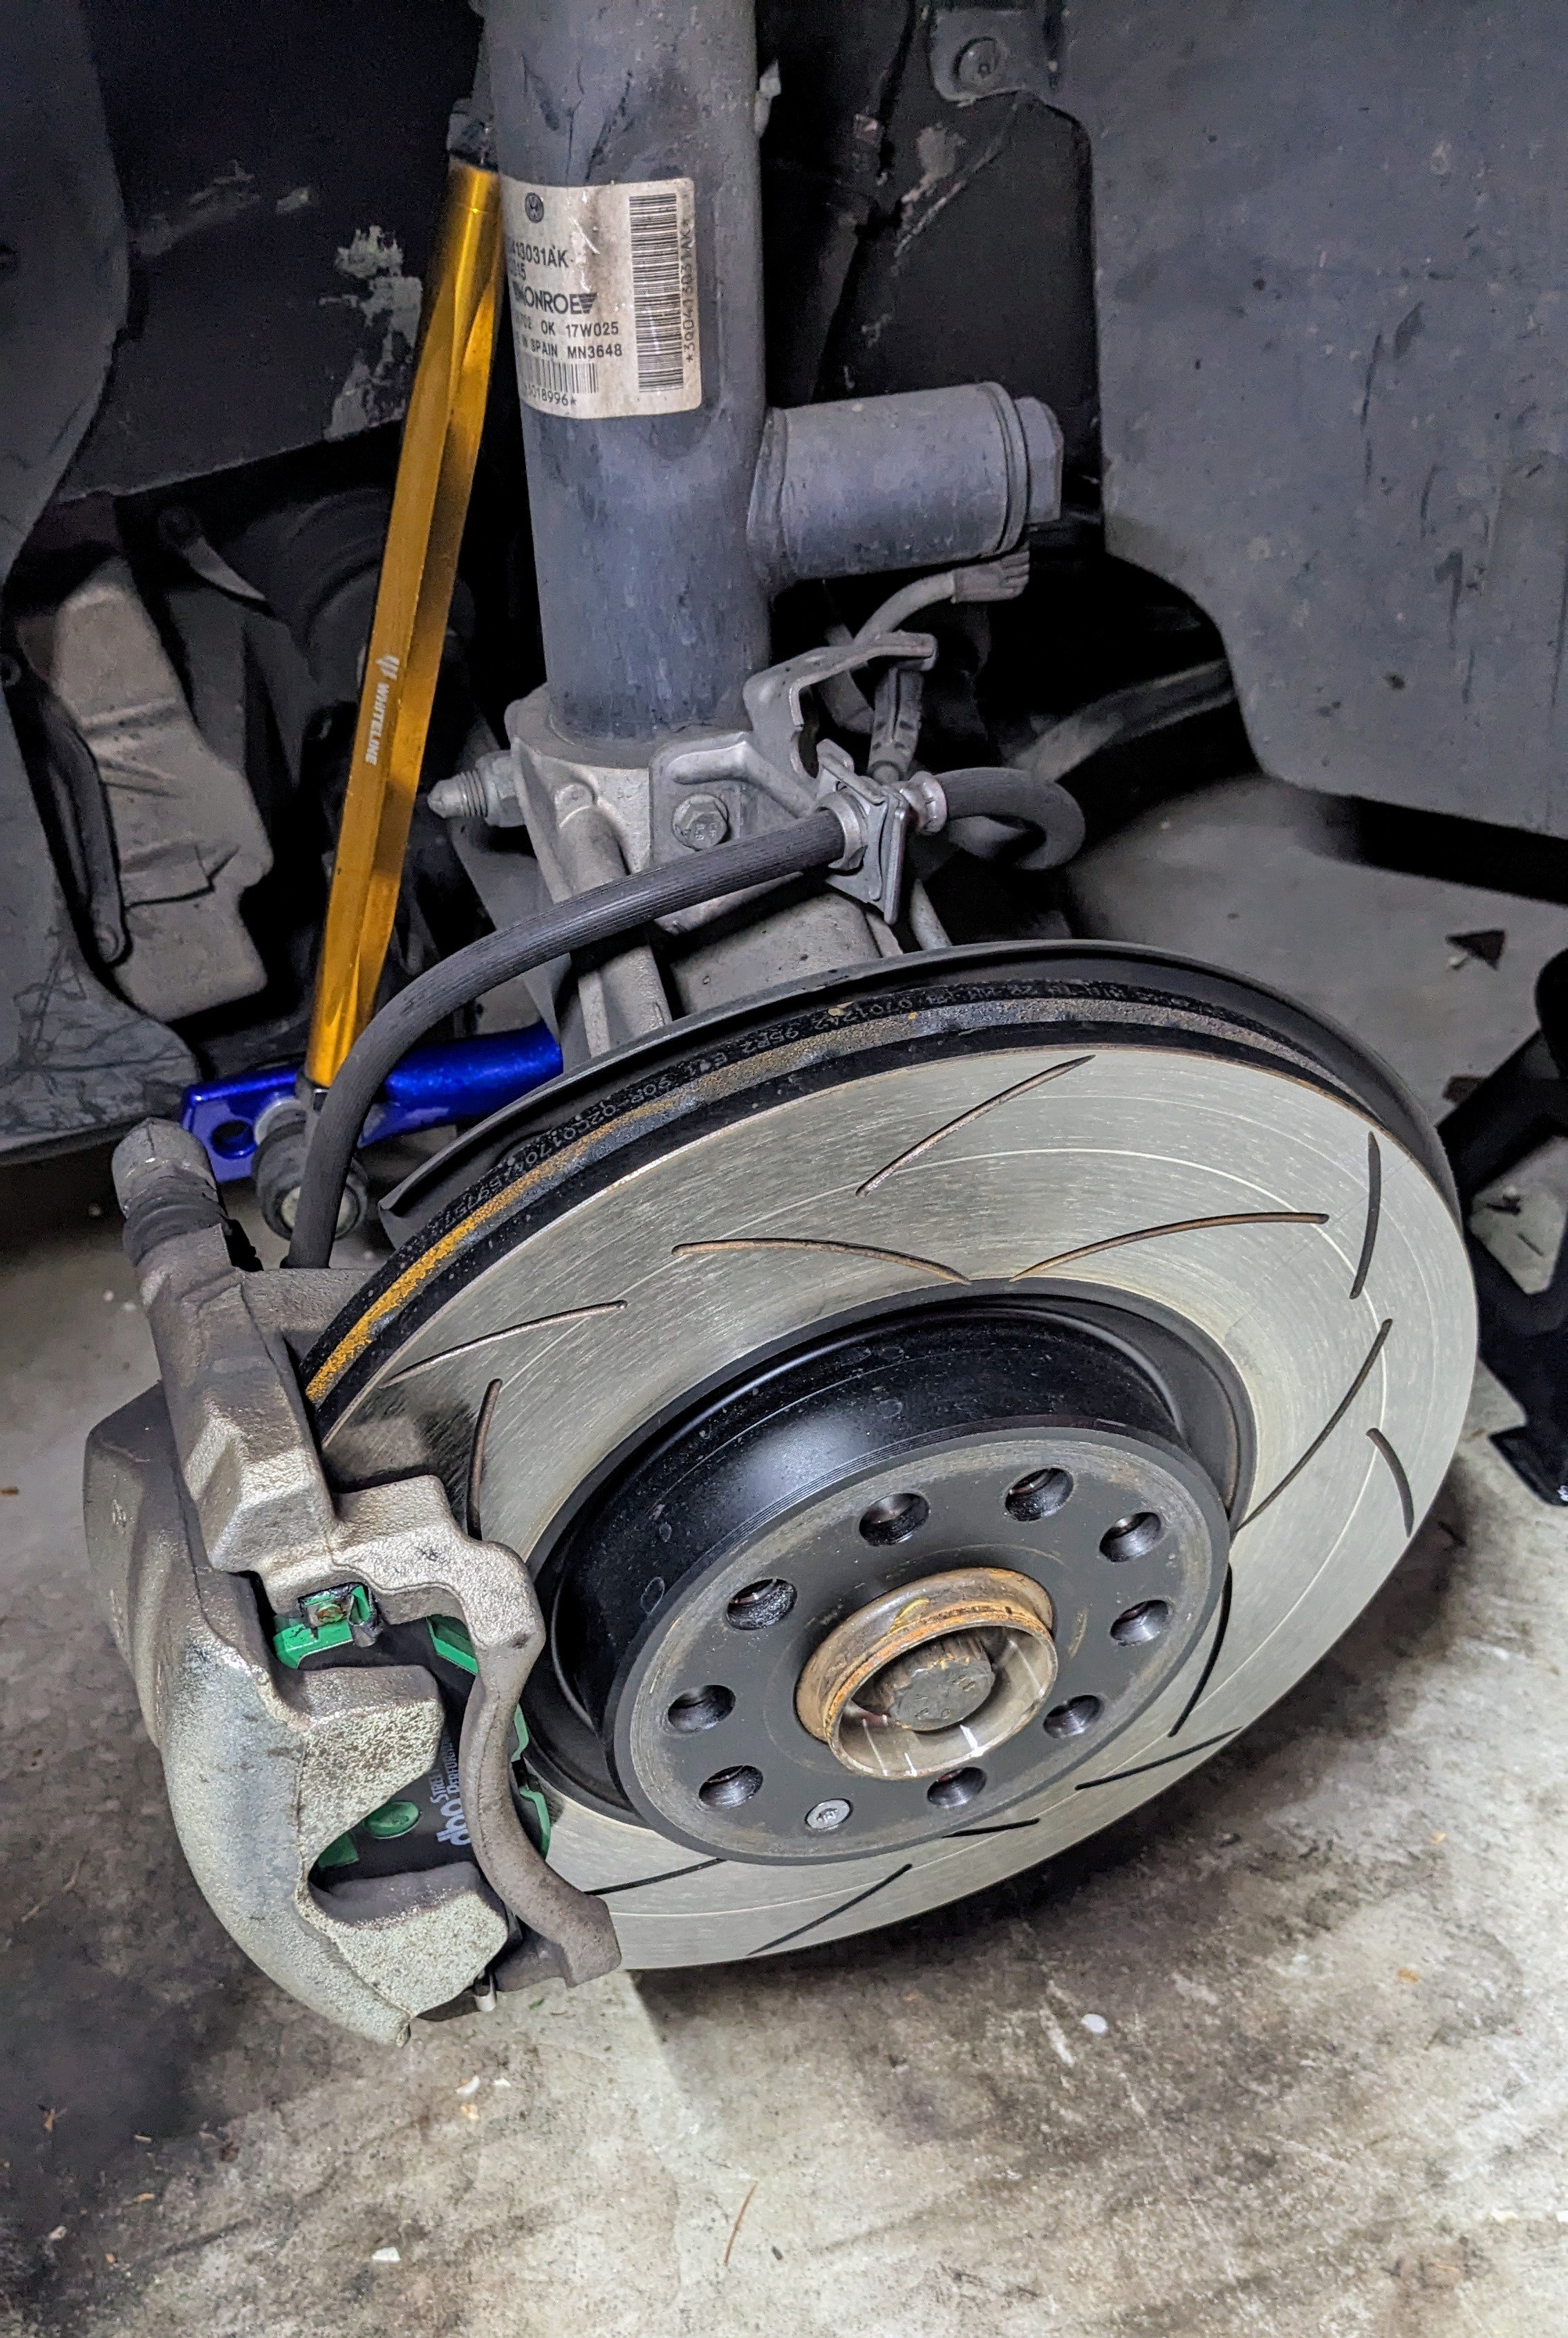
U can't tell by the buttons if the car has DCC shocks, but u can tell by looking in the infotainment menu by selecting the driving mode. Standard shocks only have Eco, Normal, Sport & Individual. The menu says "Driving Mode Selection" DCC shocks have Comfort, Eco, Normal, Sport & Individual. The menu says "DCC/Driving Mode" Alternatively, physically look at the shocks itself - there is a small valve cylinder that sticks out the side of the chamber, if it has DCC....like this.
.jpeg.c9292eabe7dfe77baf92359a9497dba4.jpeg)
-
As above, they started showing up from MY19 onwards, with the 280/272 Superb. Though in some markets, they continued to get the DQ250 for a few more years. DQ250 is DSG-6 wet clutch. DQ381 is DSG-7 wet clutch
-
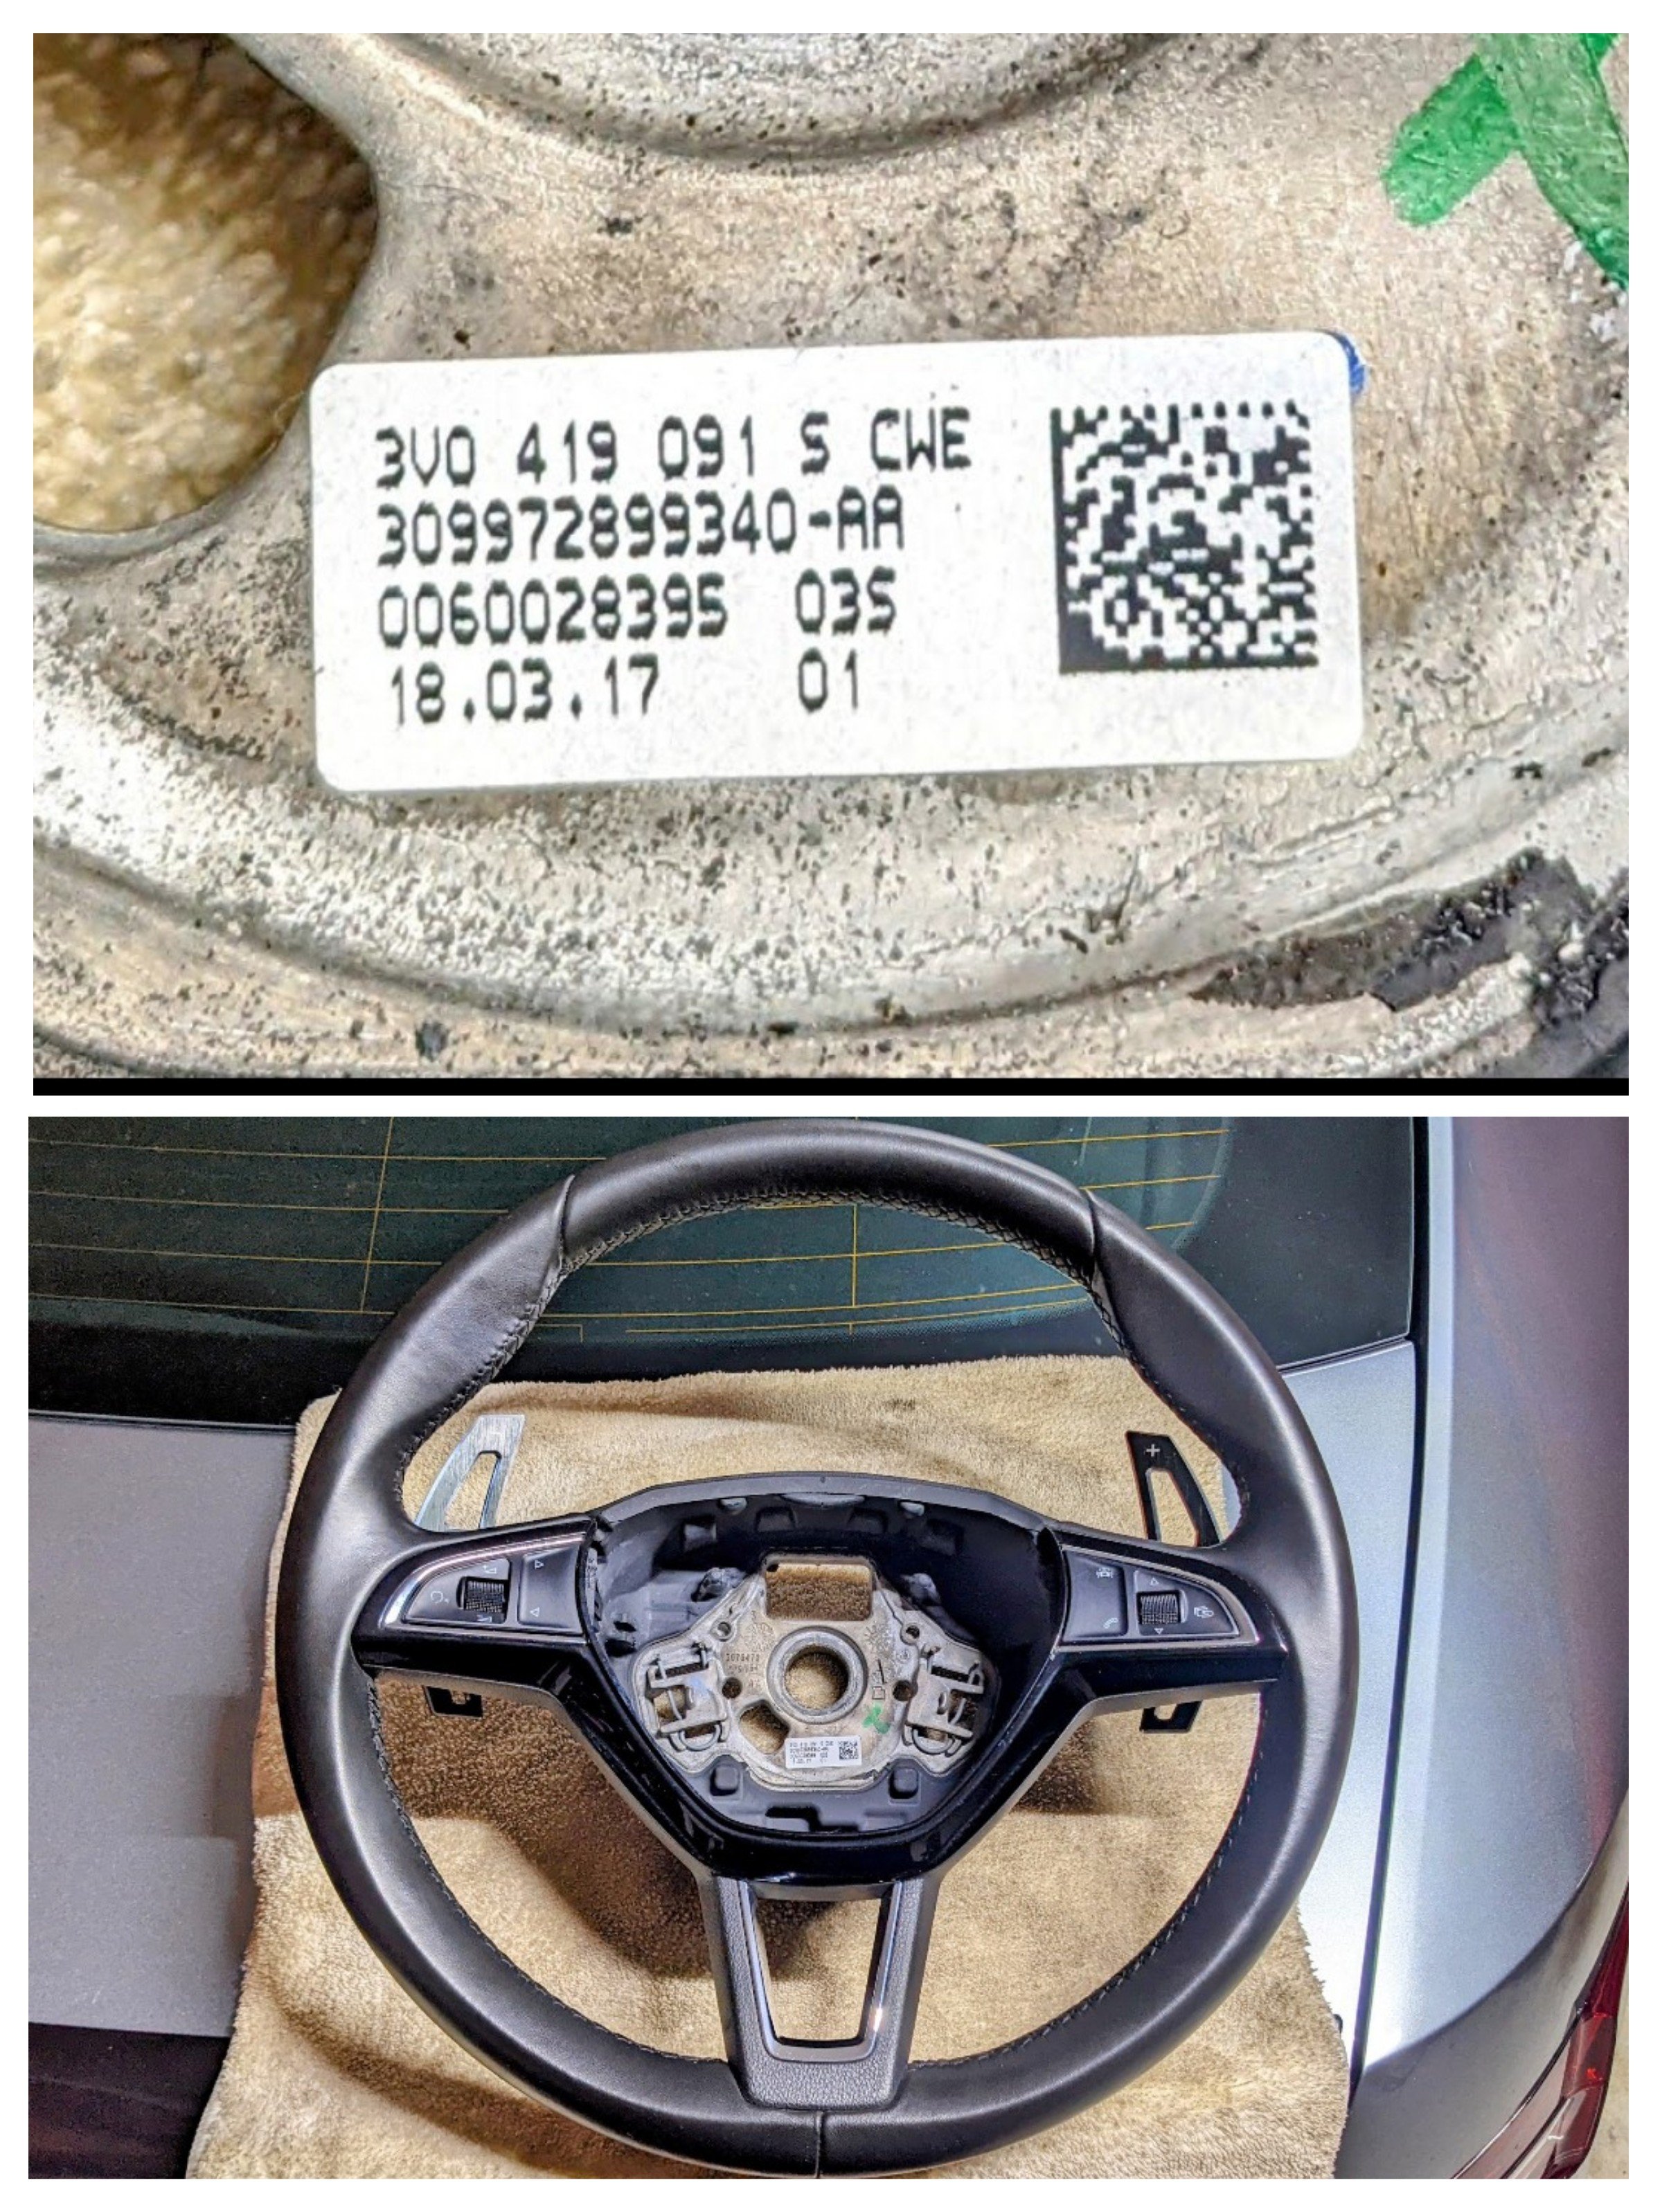
Woohoo...... finally u have ur steering wheel sorted! The paddle shifters r a nice touch.
-
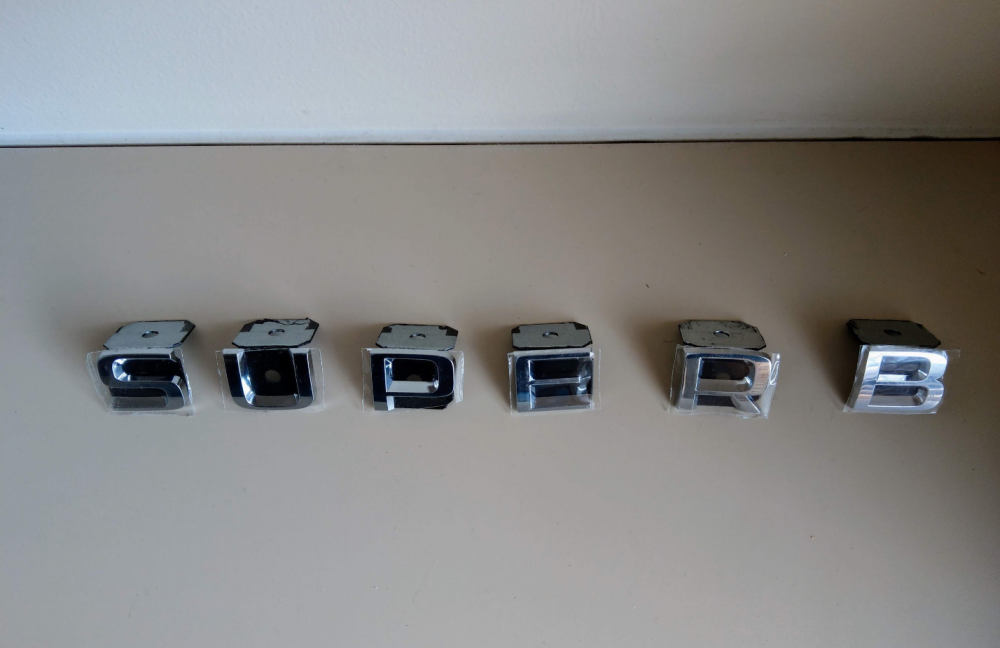
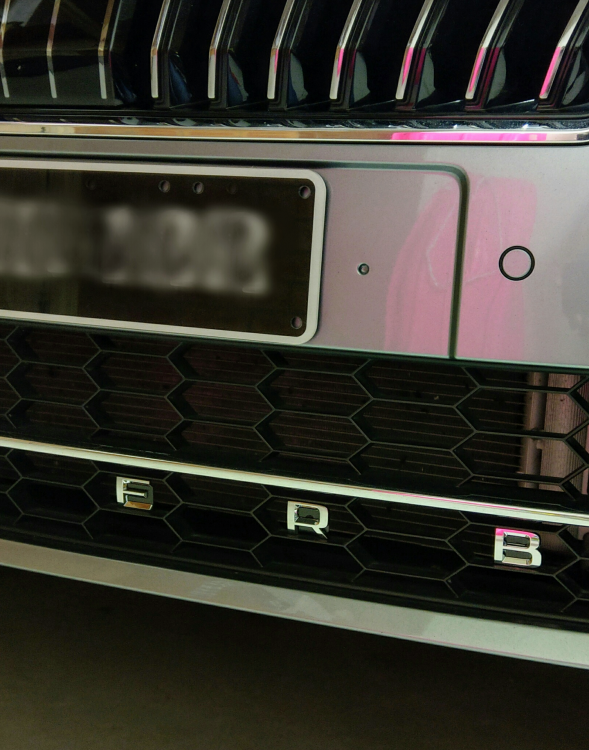
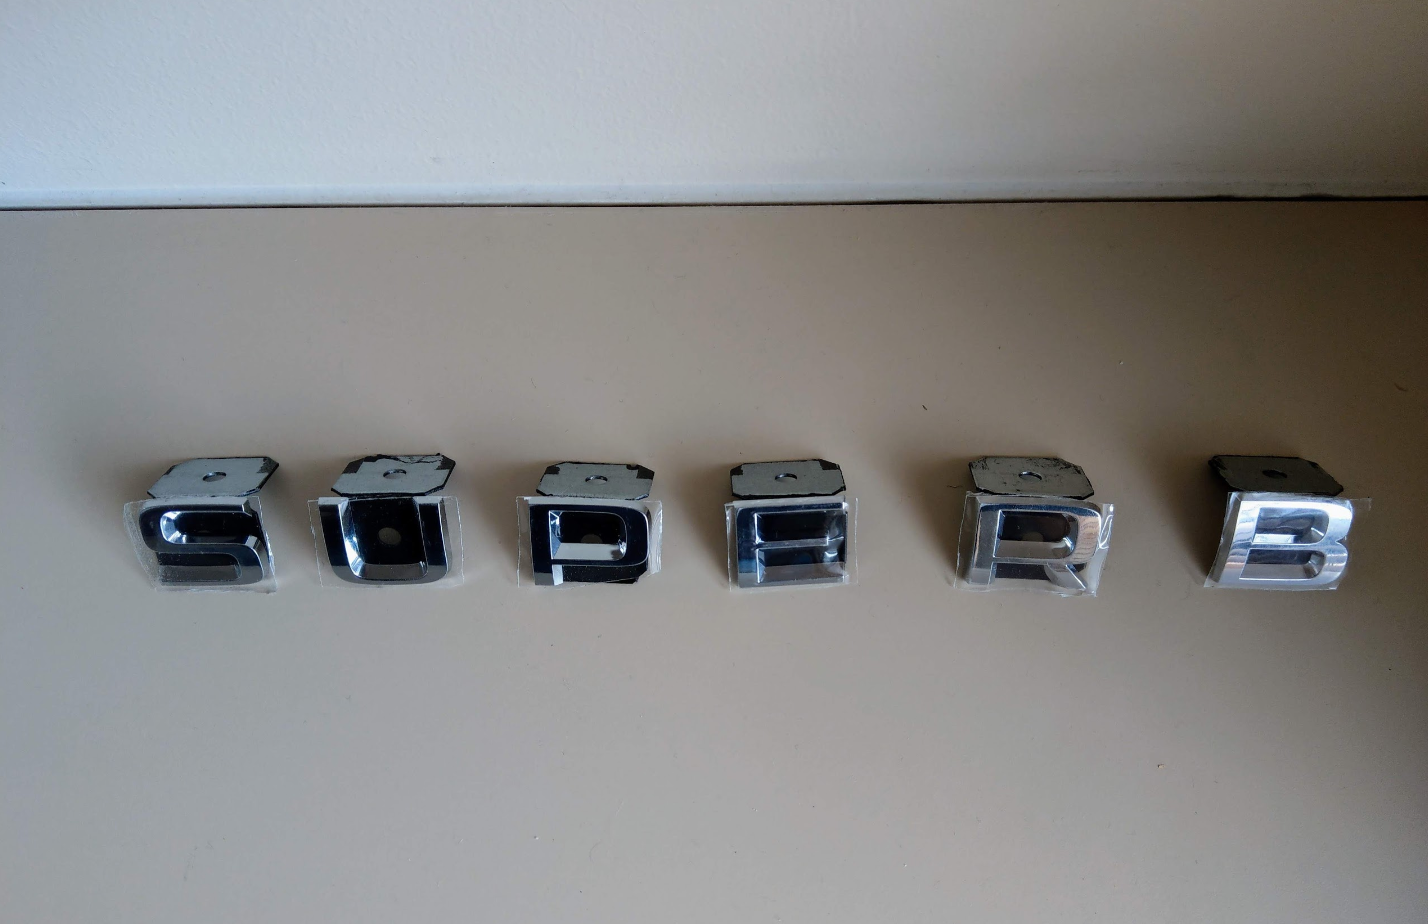
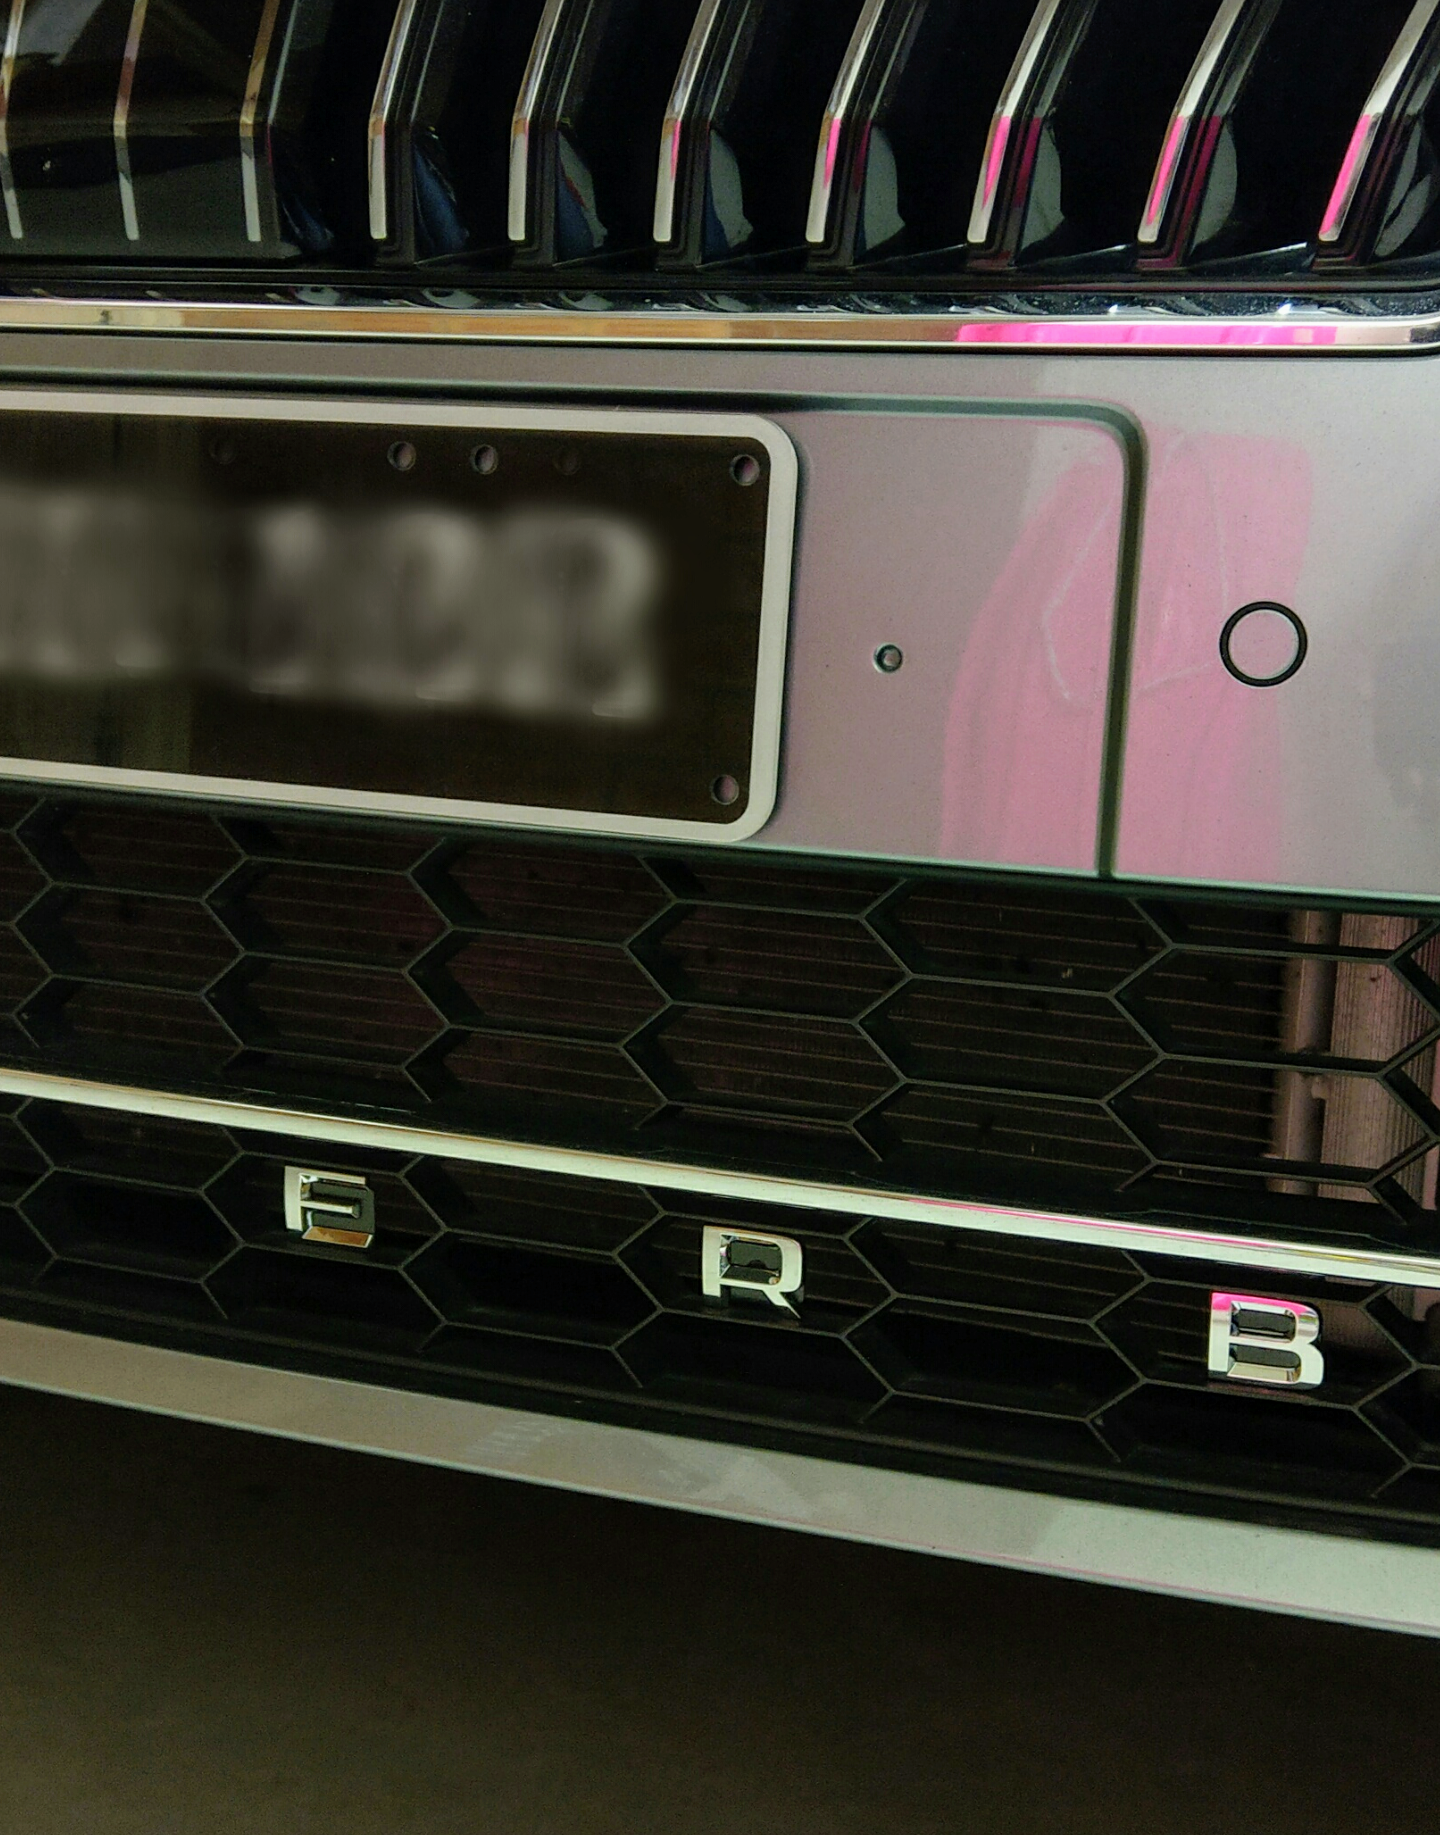
Nothing fancy - just the usual S U P E R B boot badge, with each letter placed on a 2cm L-shaped metal bracket, then super glued inside a honeycomb.
-
@Binx1310 - sorry to hear about ur passenger wing mirror!! As u've found out, they're definitely a lot of $$$ to replace. Keep an eye out at wreckers for a replacement mirror. p.s. car looks good 👍🏽
-
Did warn u about getting a heated version, difference in clockspring and airbag shape differences. All good, round is wat u prefer....round is wat u get. Fingers crossed the M version works out for u.
-
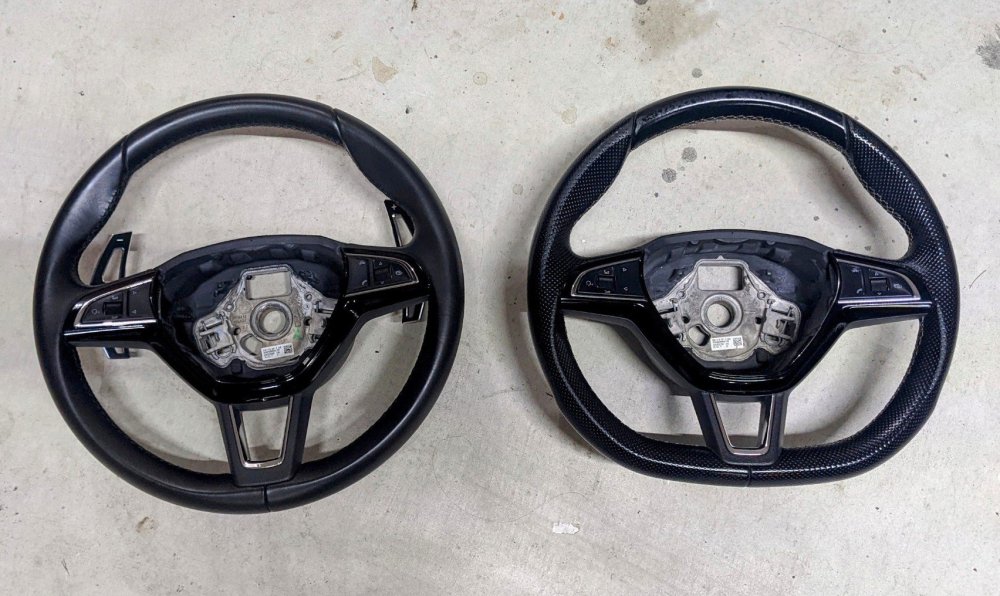
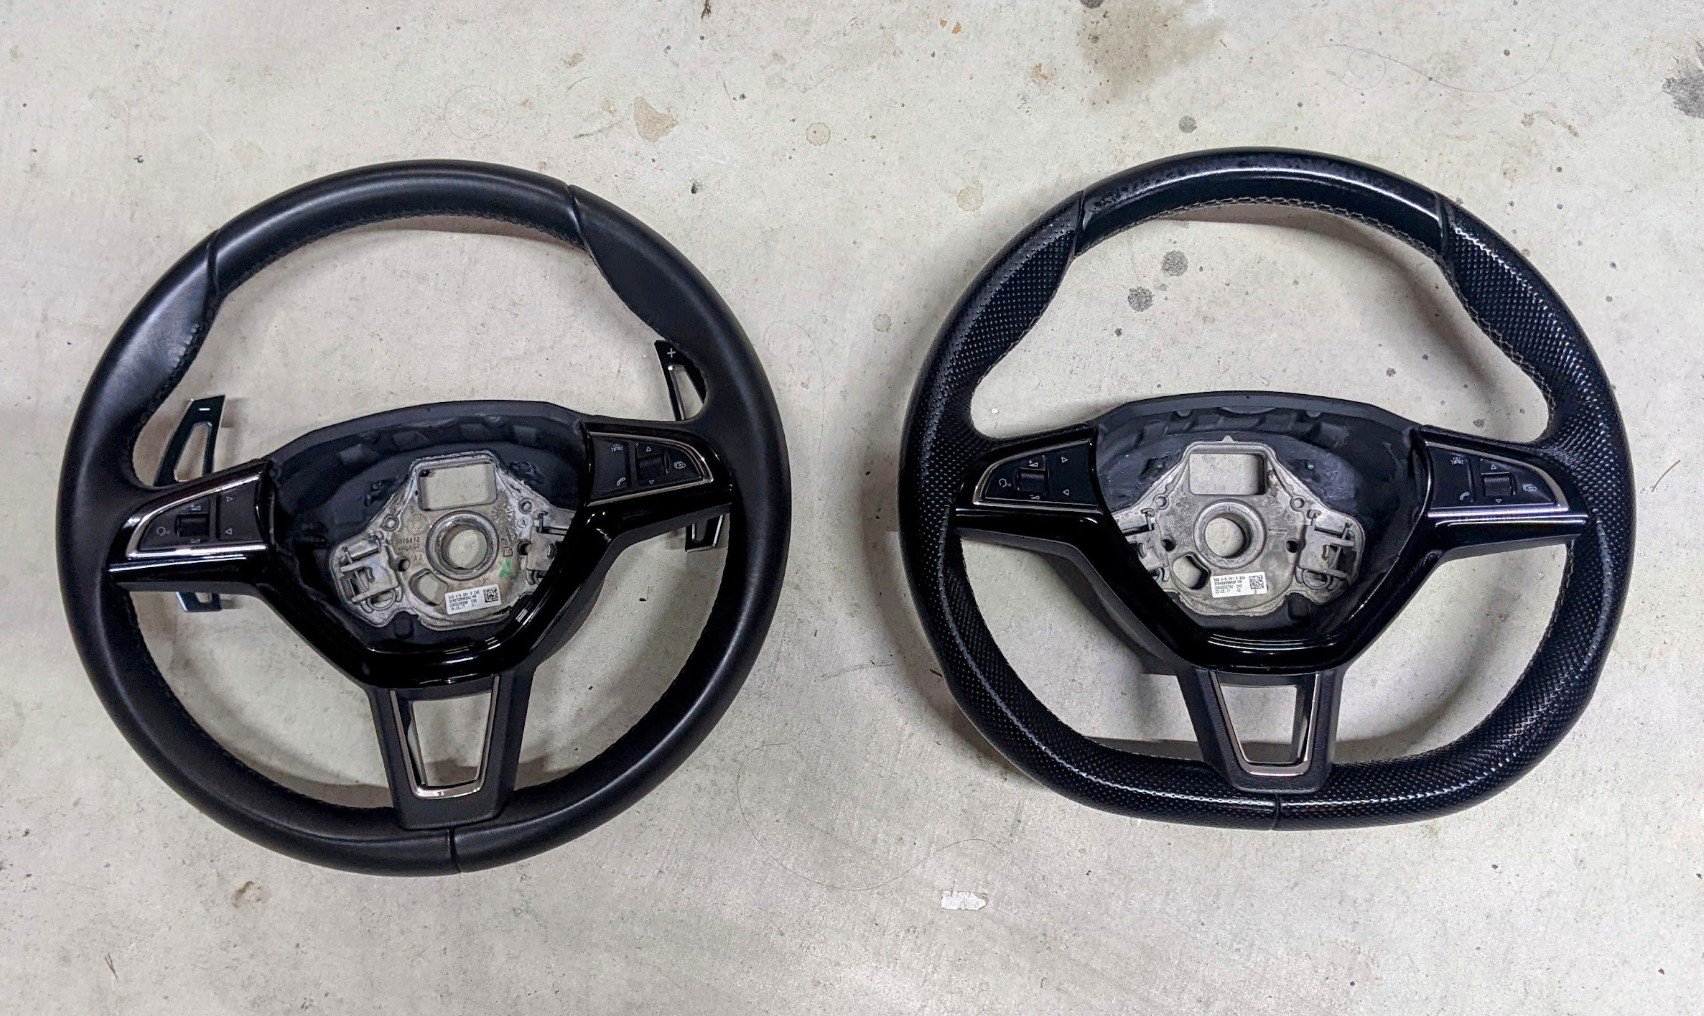
Which version of the Sportline wheel did u get? Wat did u not like about it? Here's a side by side comparison of the two I had/have. Both very similar in feel and thickness.
-
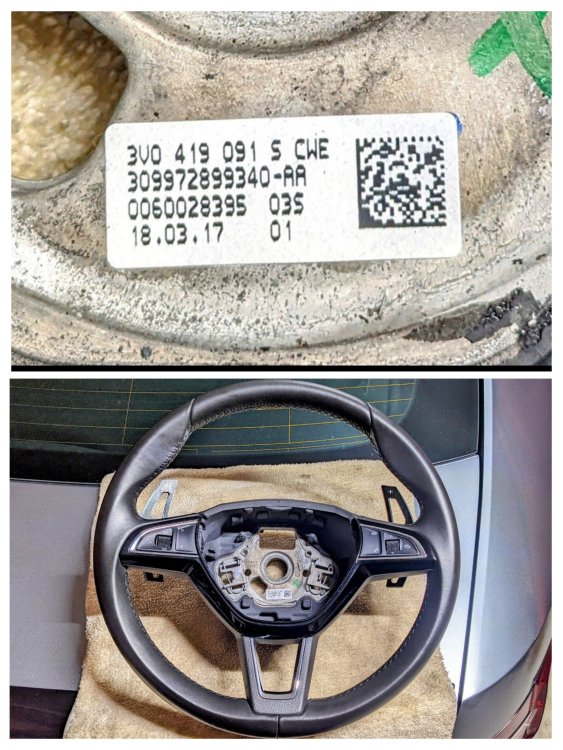
This was the original round steering wheel on mine (MY17) before I replaced it with a flat-bottomed steering wheel.
-
@nick6262 - hmmmm, I'm not sure wat advice I can give here that will help. Sorry. With the upgrade from MHI2_ER_SKG11_P3304_MU0836 to MHI2_ER_SKG11_K3343_MU1433 - that is a big jump. From memory, there would b some interim versions between to upgrade to before finally reaching 1433. I'm assuming u switched to 9.2" screen during the MIB2 to MIB2.5 upgrade process. This upgrade does not work with the 8" screen.
-
This one gets my vote
-
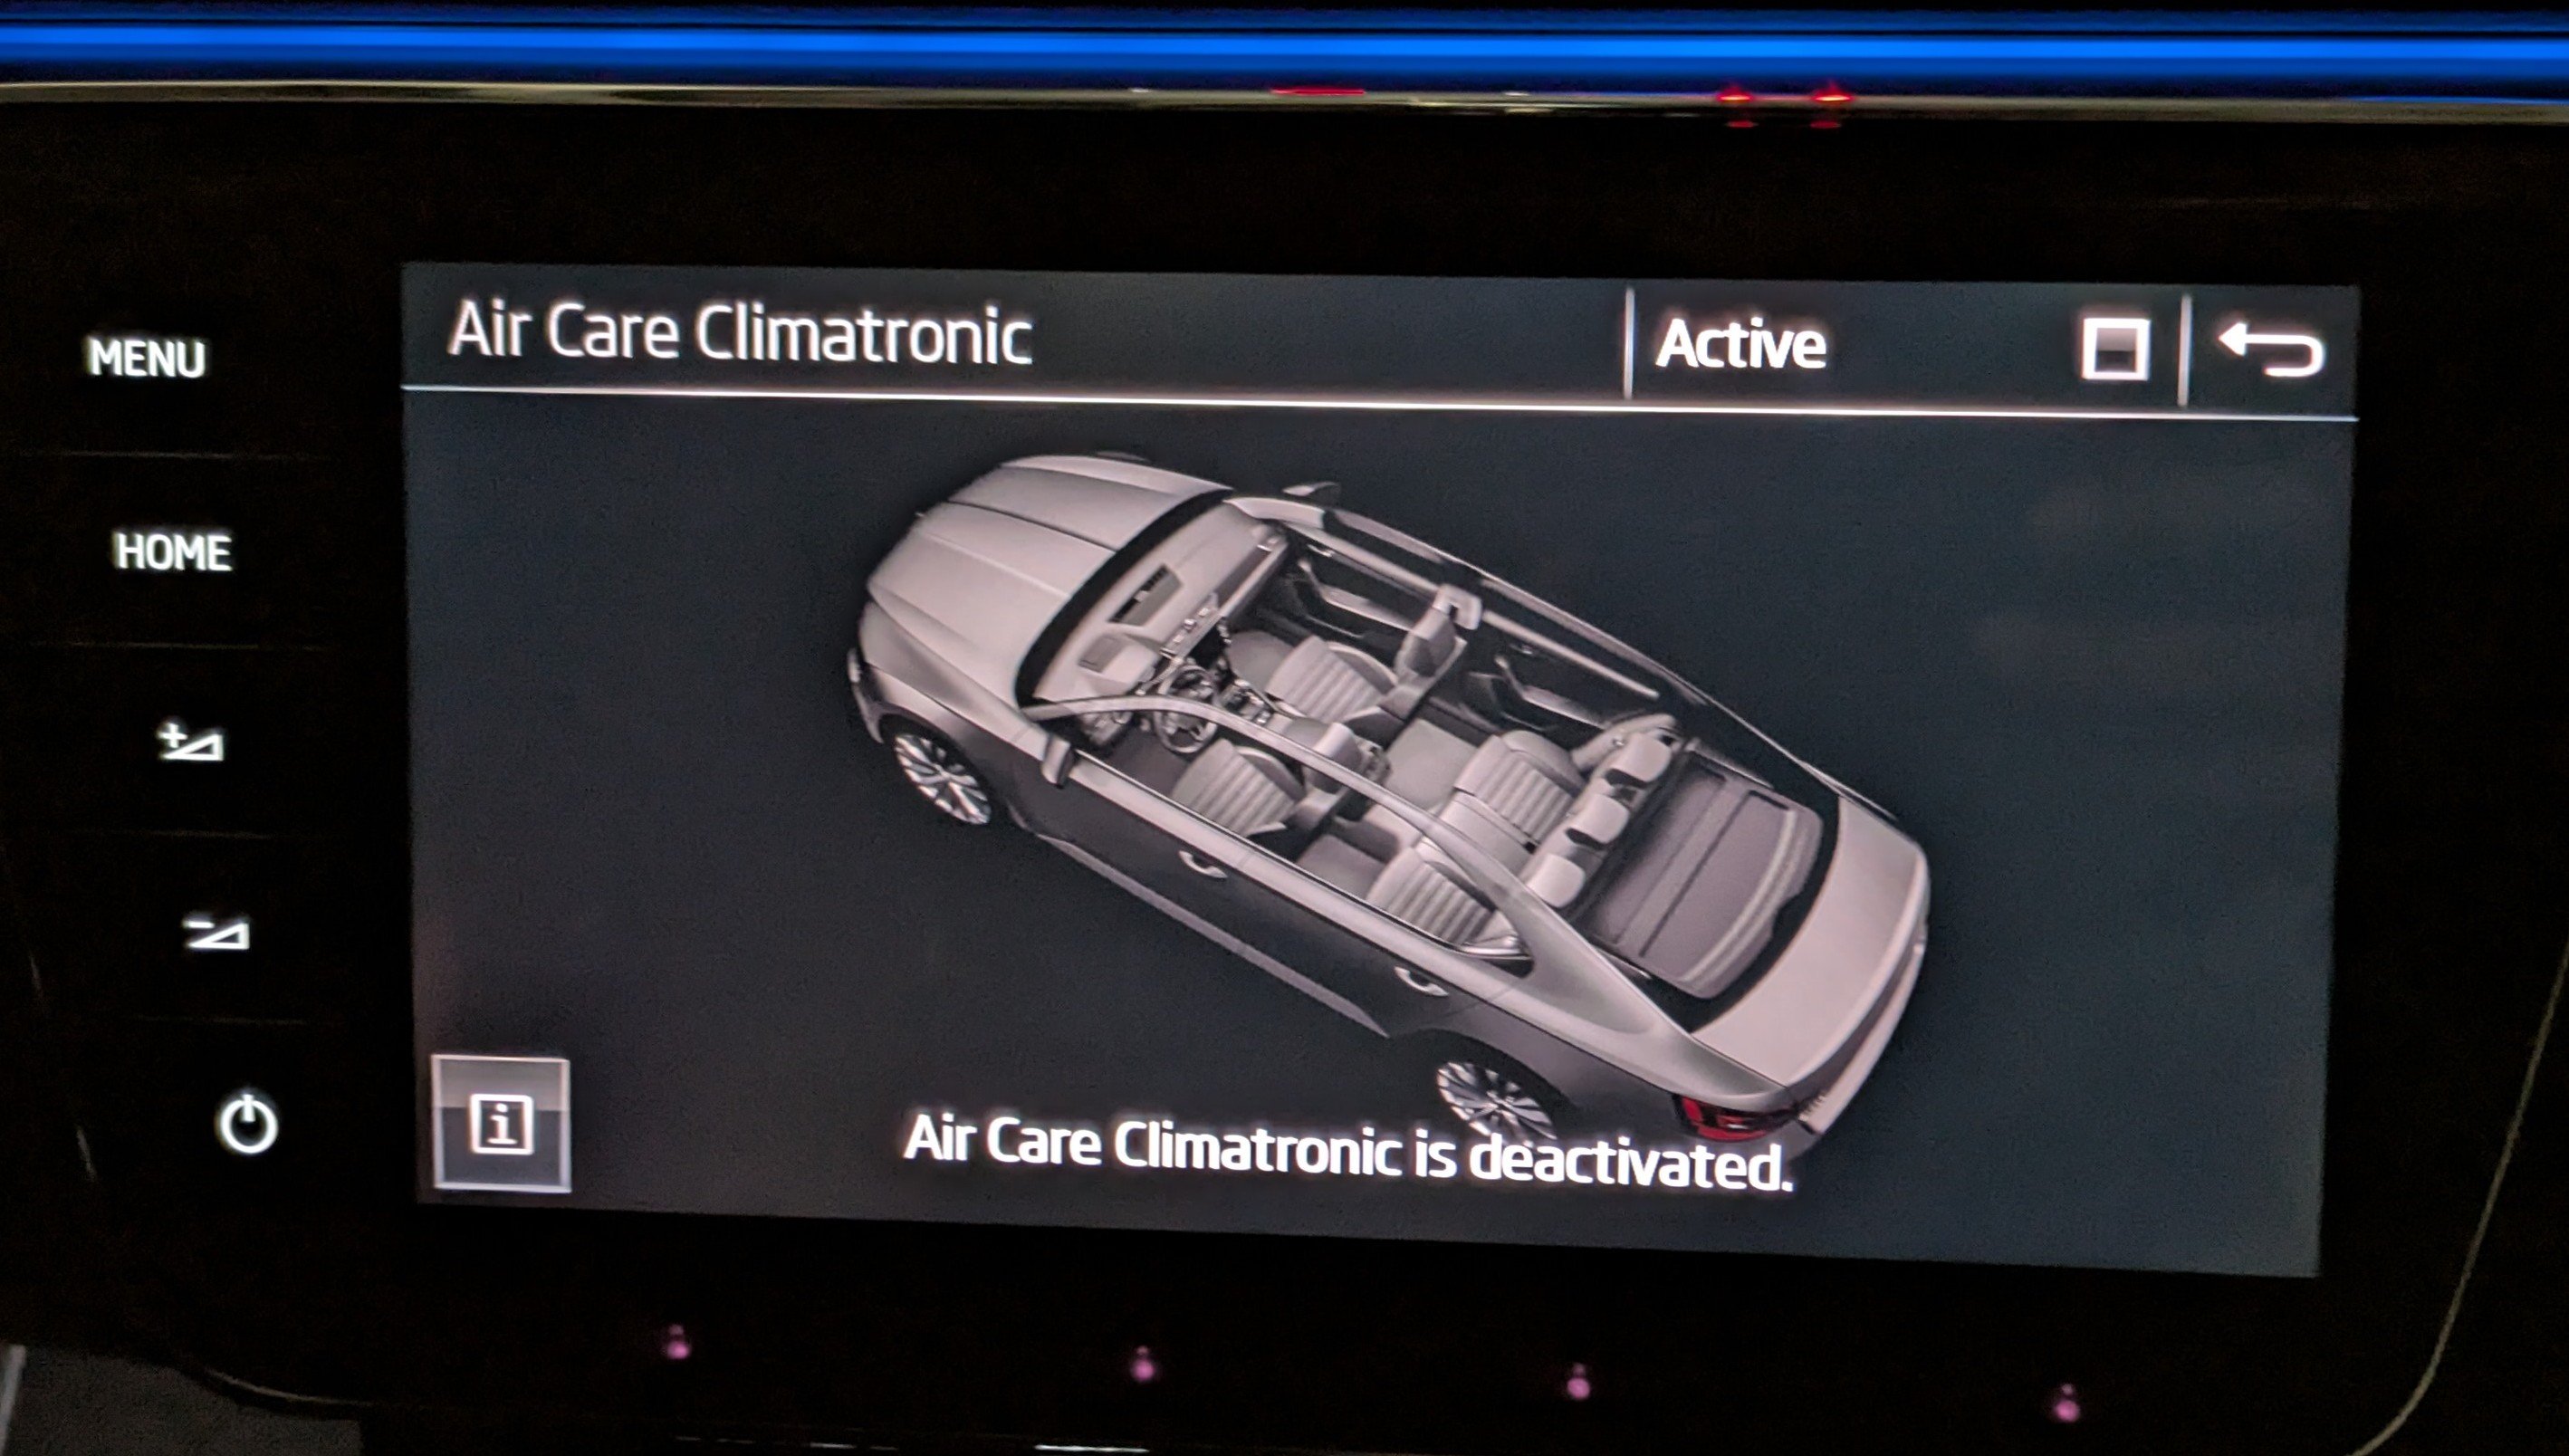
No thanks. I'm not going to bother with firmware updates or swapping modules out. I gave it a go via coding/adaptations alone - it didn't work, as I suspected it wouldn't. Firmware upgrades via VCP/ODIS or hardware (module) changes were not part of the deal. I've lived without AirCare for the past 8+ yrs. The current tri-zone Climate Control system in AUTO does a great job. I'm good the way things r now 👍
-
that's not what i've read in various Golf and Superb forums. i'm pretty sure those that have AirCare working on their mk3 Superb, NOT Seat Leon, will be MY18 or later. i checked Byte 15 Bit 5 on my 08 Air Conditioning module - it was already enabled. This is my gateway.... 19 Gateway System description: GW MQB High Software number: 3Q0907530AA Software version: 5366 Hardware number: 3Q0907530C Hardware version: 515 Serial number: 20031710802543 ODX name: EV_GatewNF ODX version: 013025
-
Yup, I've replaced that many many years ago - no more AQS error. I believe I have, based on my replies above, 3 yrs ago. @Cairus - software version is 4101. See below. Clicking the "Active" button checkbox does nothing, it won't activate. The issue is not saving the Active state, rather it won't activate at all. I'll check my Byte 15 Bit 5.... I think my suspicions r true that pre-MY18 models don't have the HVAC hardware for Air Care. Control unit: 08 Air Conditioning Active faults: 0 Inactive faults: 0 System description: AC Automat Software number: 3V0907044DT Software version: 4101 Hardware number: 3V0907044DT Hardware version: H34 Serial number: 00000B00440885 ODX name: EV_ACClimaPrehVW37X ODX version: 002019 Faults: No trouble codes found
-
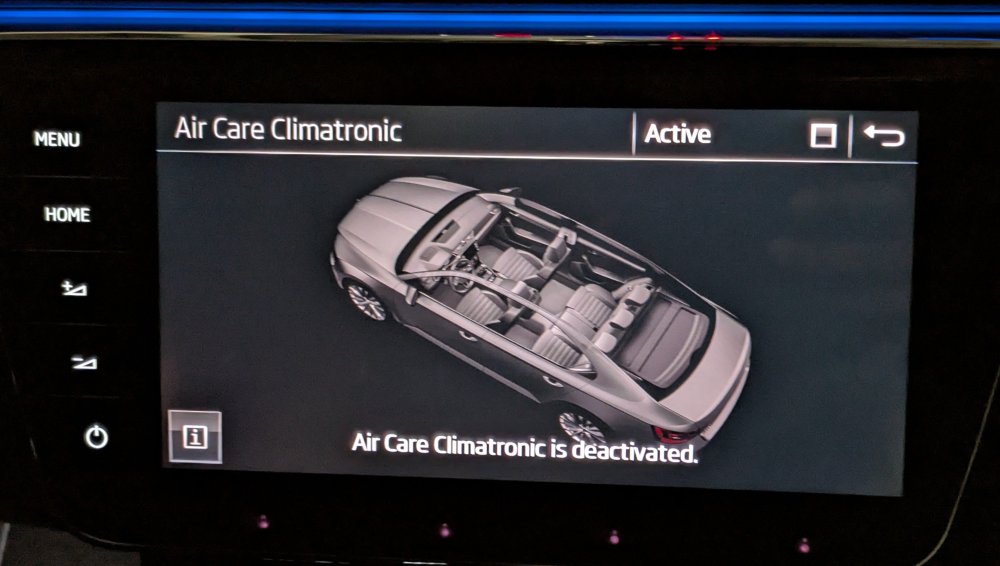
So I did the Climatronics Flaps/Actuator Recalibration thingy, this time via OBDeleven - sadly same no difference. Air Care still deactivated ☹️ There must b something preventing it. Interestingly, this time it has a message saying it's deactivated. Previously there was no message at all.
-
Whilst doing a radar recalibration with a wheel alignment is a thing (by the books), it is not really a must. Over the 8+ yrs I've had Gandalf, I've done at least a dozen wheels alignments without the radar calibration. No issues with the radar, steering or assist systems. All tracks well with ACC and Lane Assistance etc. etc. Even if u did want to do it, biggest issue is finding someone who can do the radar calibration!!
-
Trying the swapping the ballasts between left and right first, as they are easily accessible from the engine bay. If that makes no difference, then u'll likely need to drop the arch liners.
-
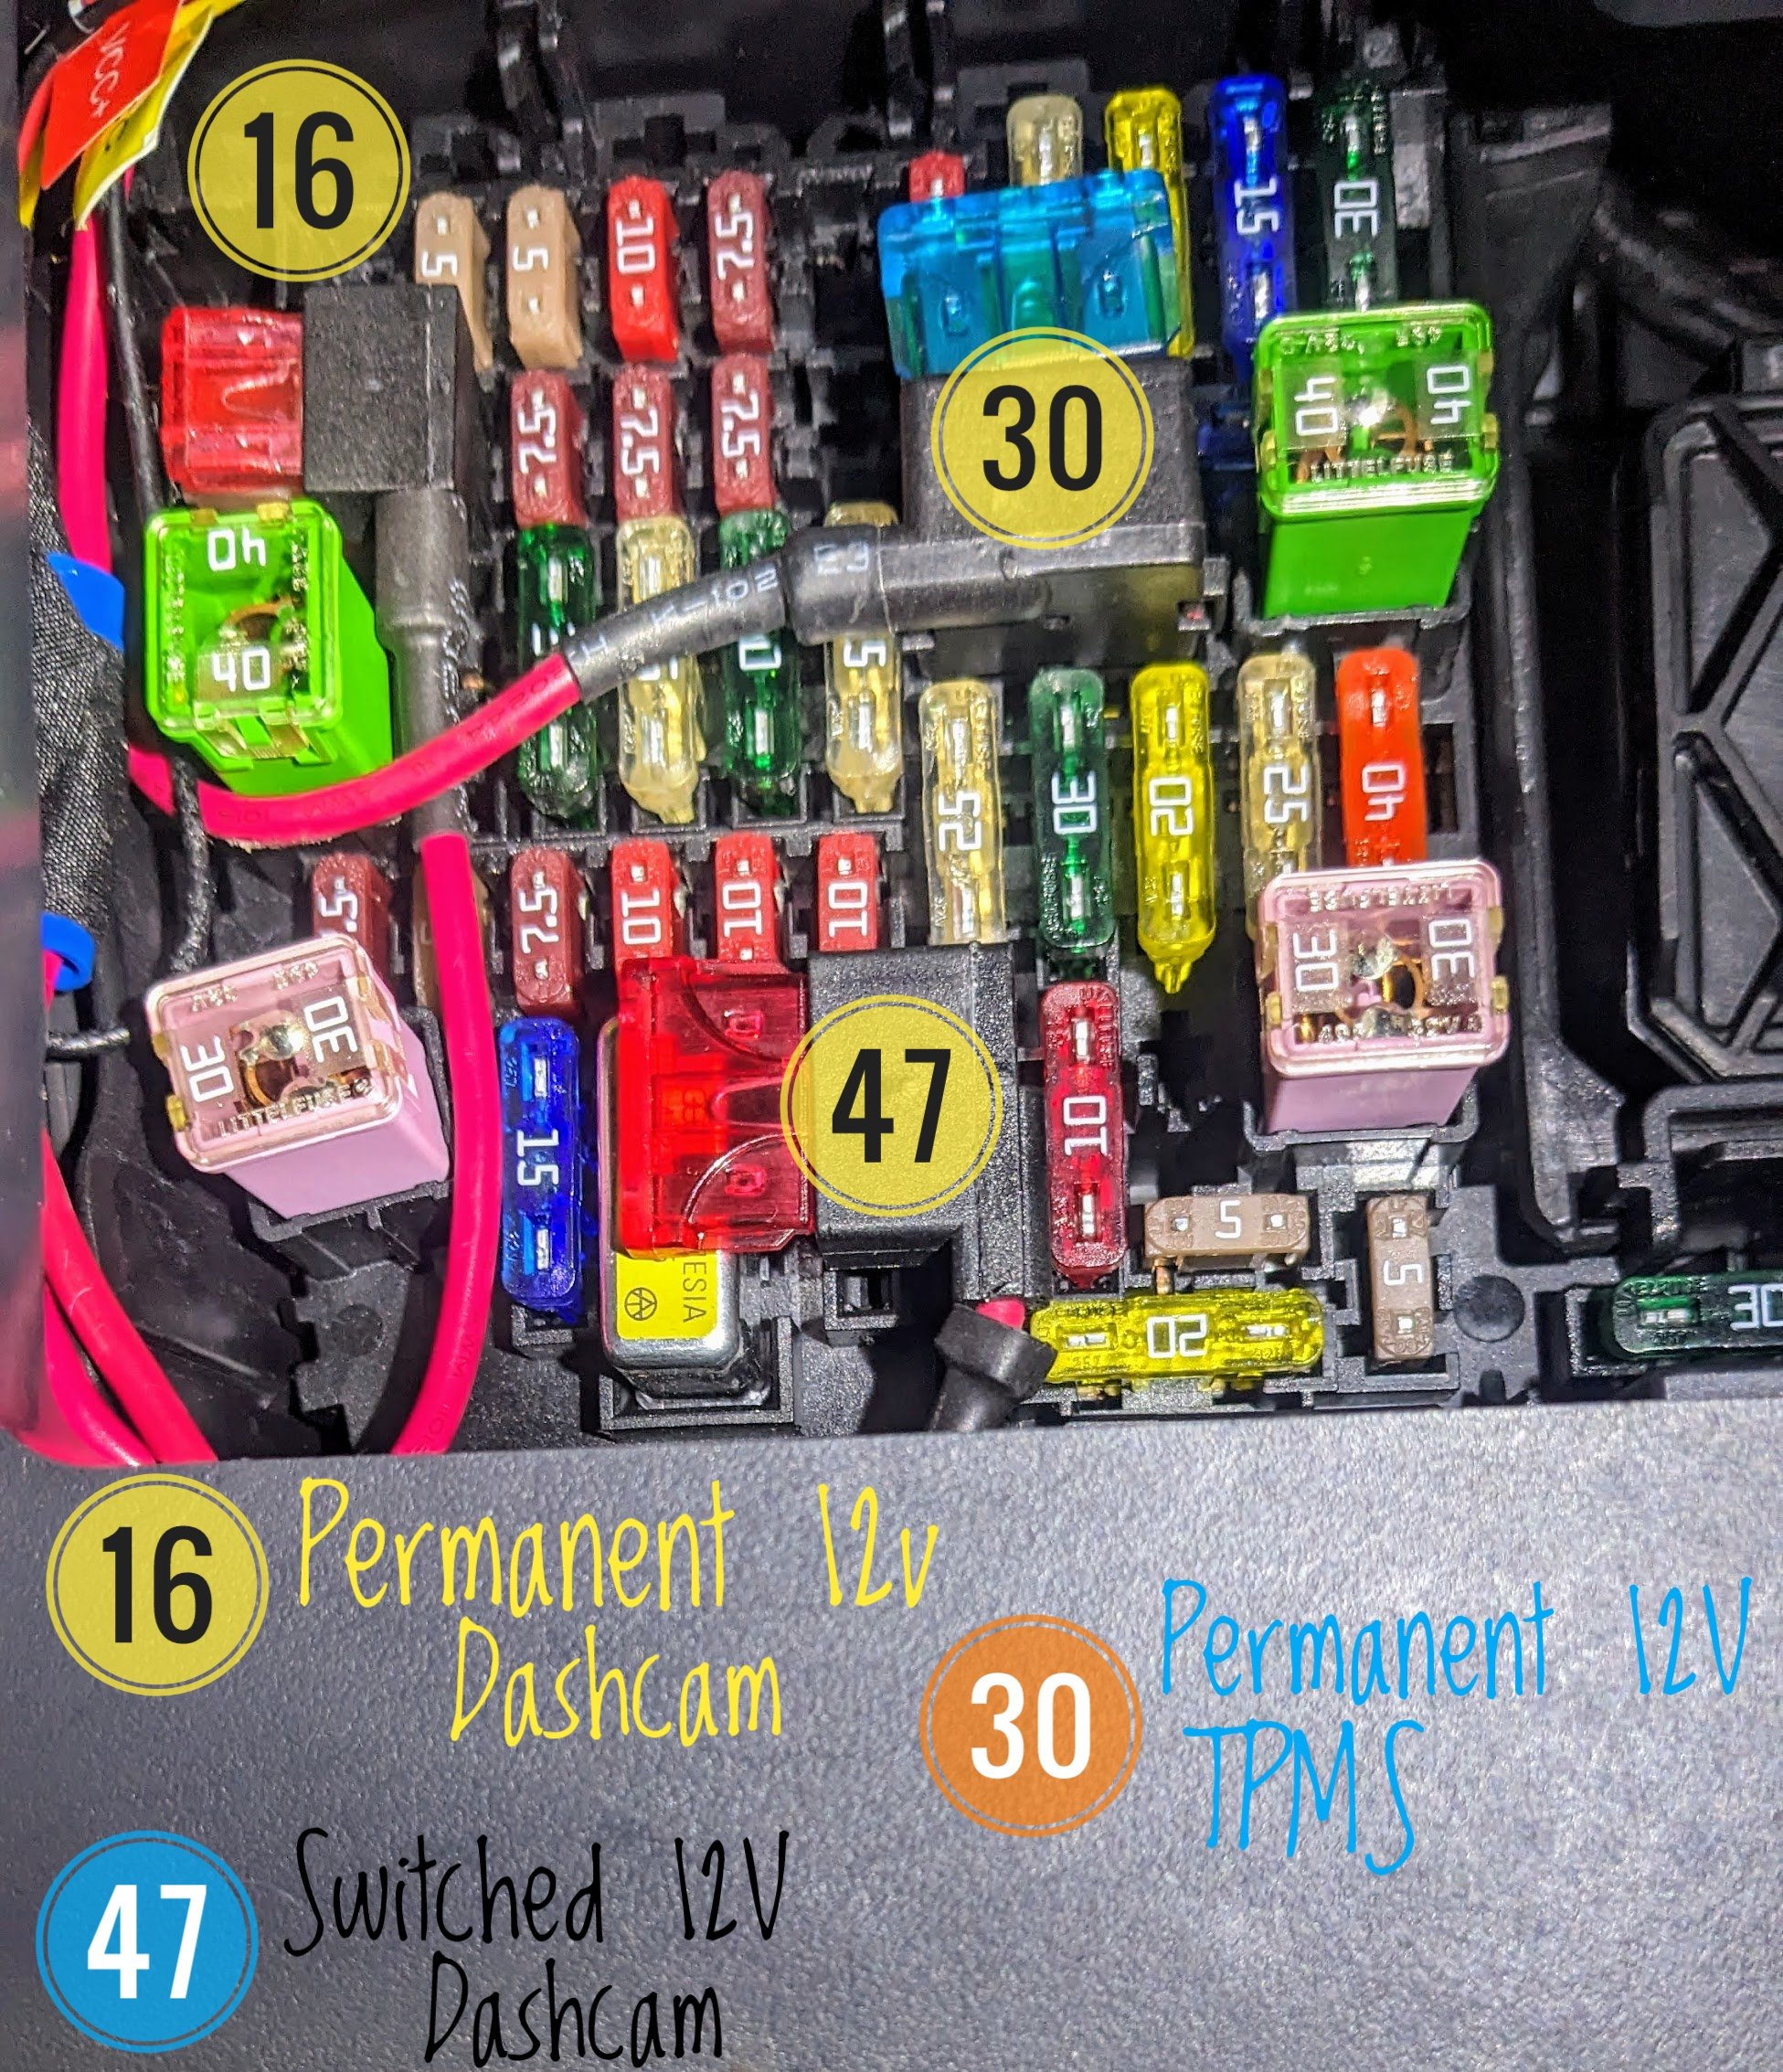
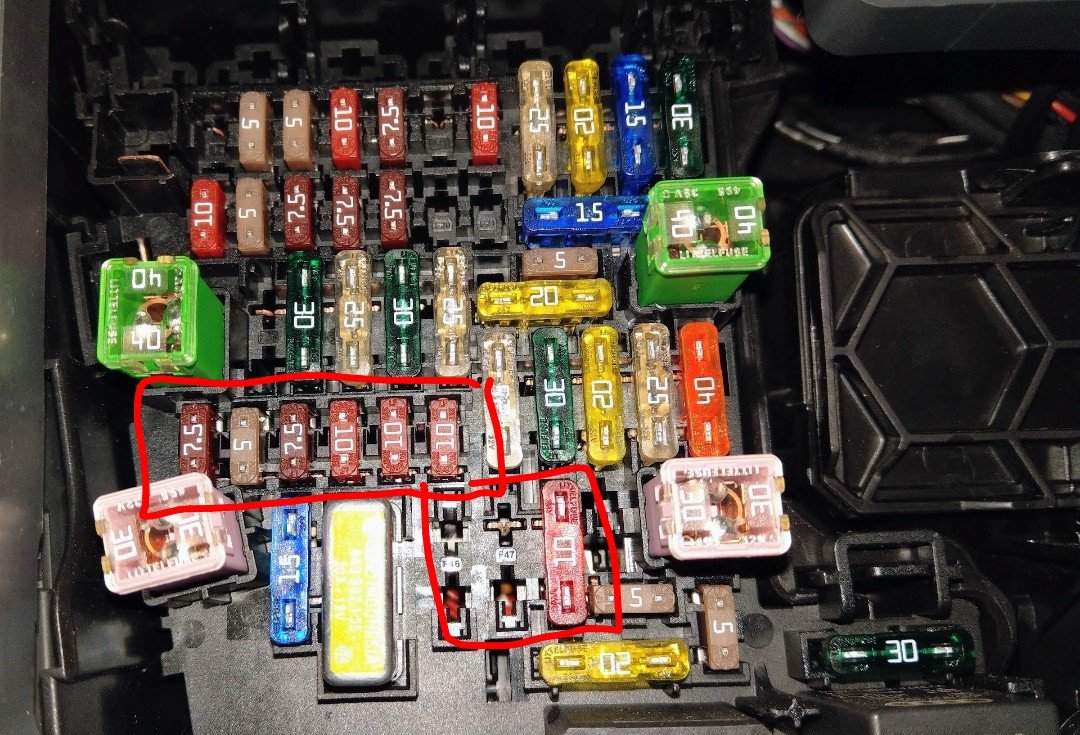
@sthatcher - do u have an additional USB port inside the armrest compartment? i.e. one next to the phonebox and another in the armrest compartment? If u do, u'll have a USB hub module, sitting inside the centre console trim - there is potential it has likely failed, though its rare for them to fail. its weird that u said the fuse in #9 was missing - that makes no sense.
-
Thanks for confirming that @UndertheRadar I don't have any associated errors or warnings associated to the HVAC, and my recirculate air works when I press the button on the climatronics panel. Perhaps I should do another Climatronic Recalibration process again, see if that makes any difference.
-
Sadly it still doesn't work even after performing the MIB2.5 upgrade. I gave up trying to get it working. I think it also requires a different air filter type, something carbon activated, which the sensors detect and knows to activate AirCare.
-
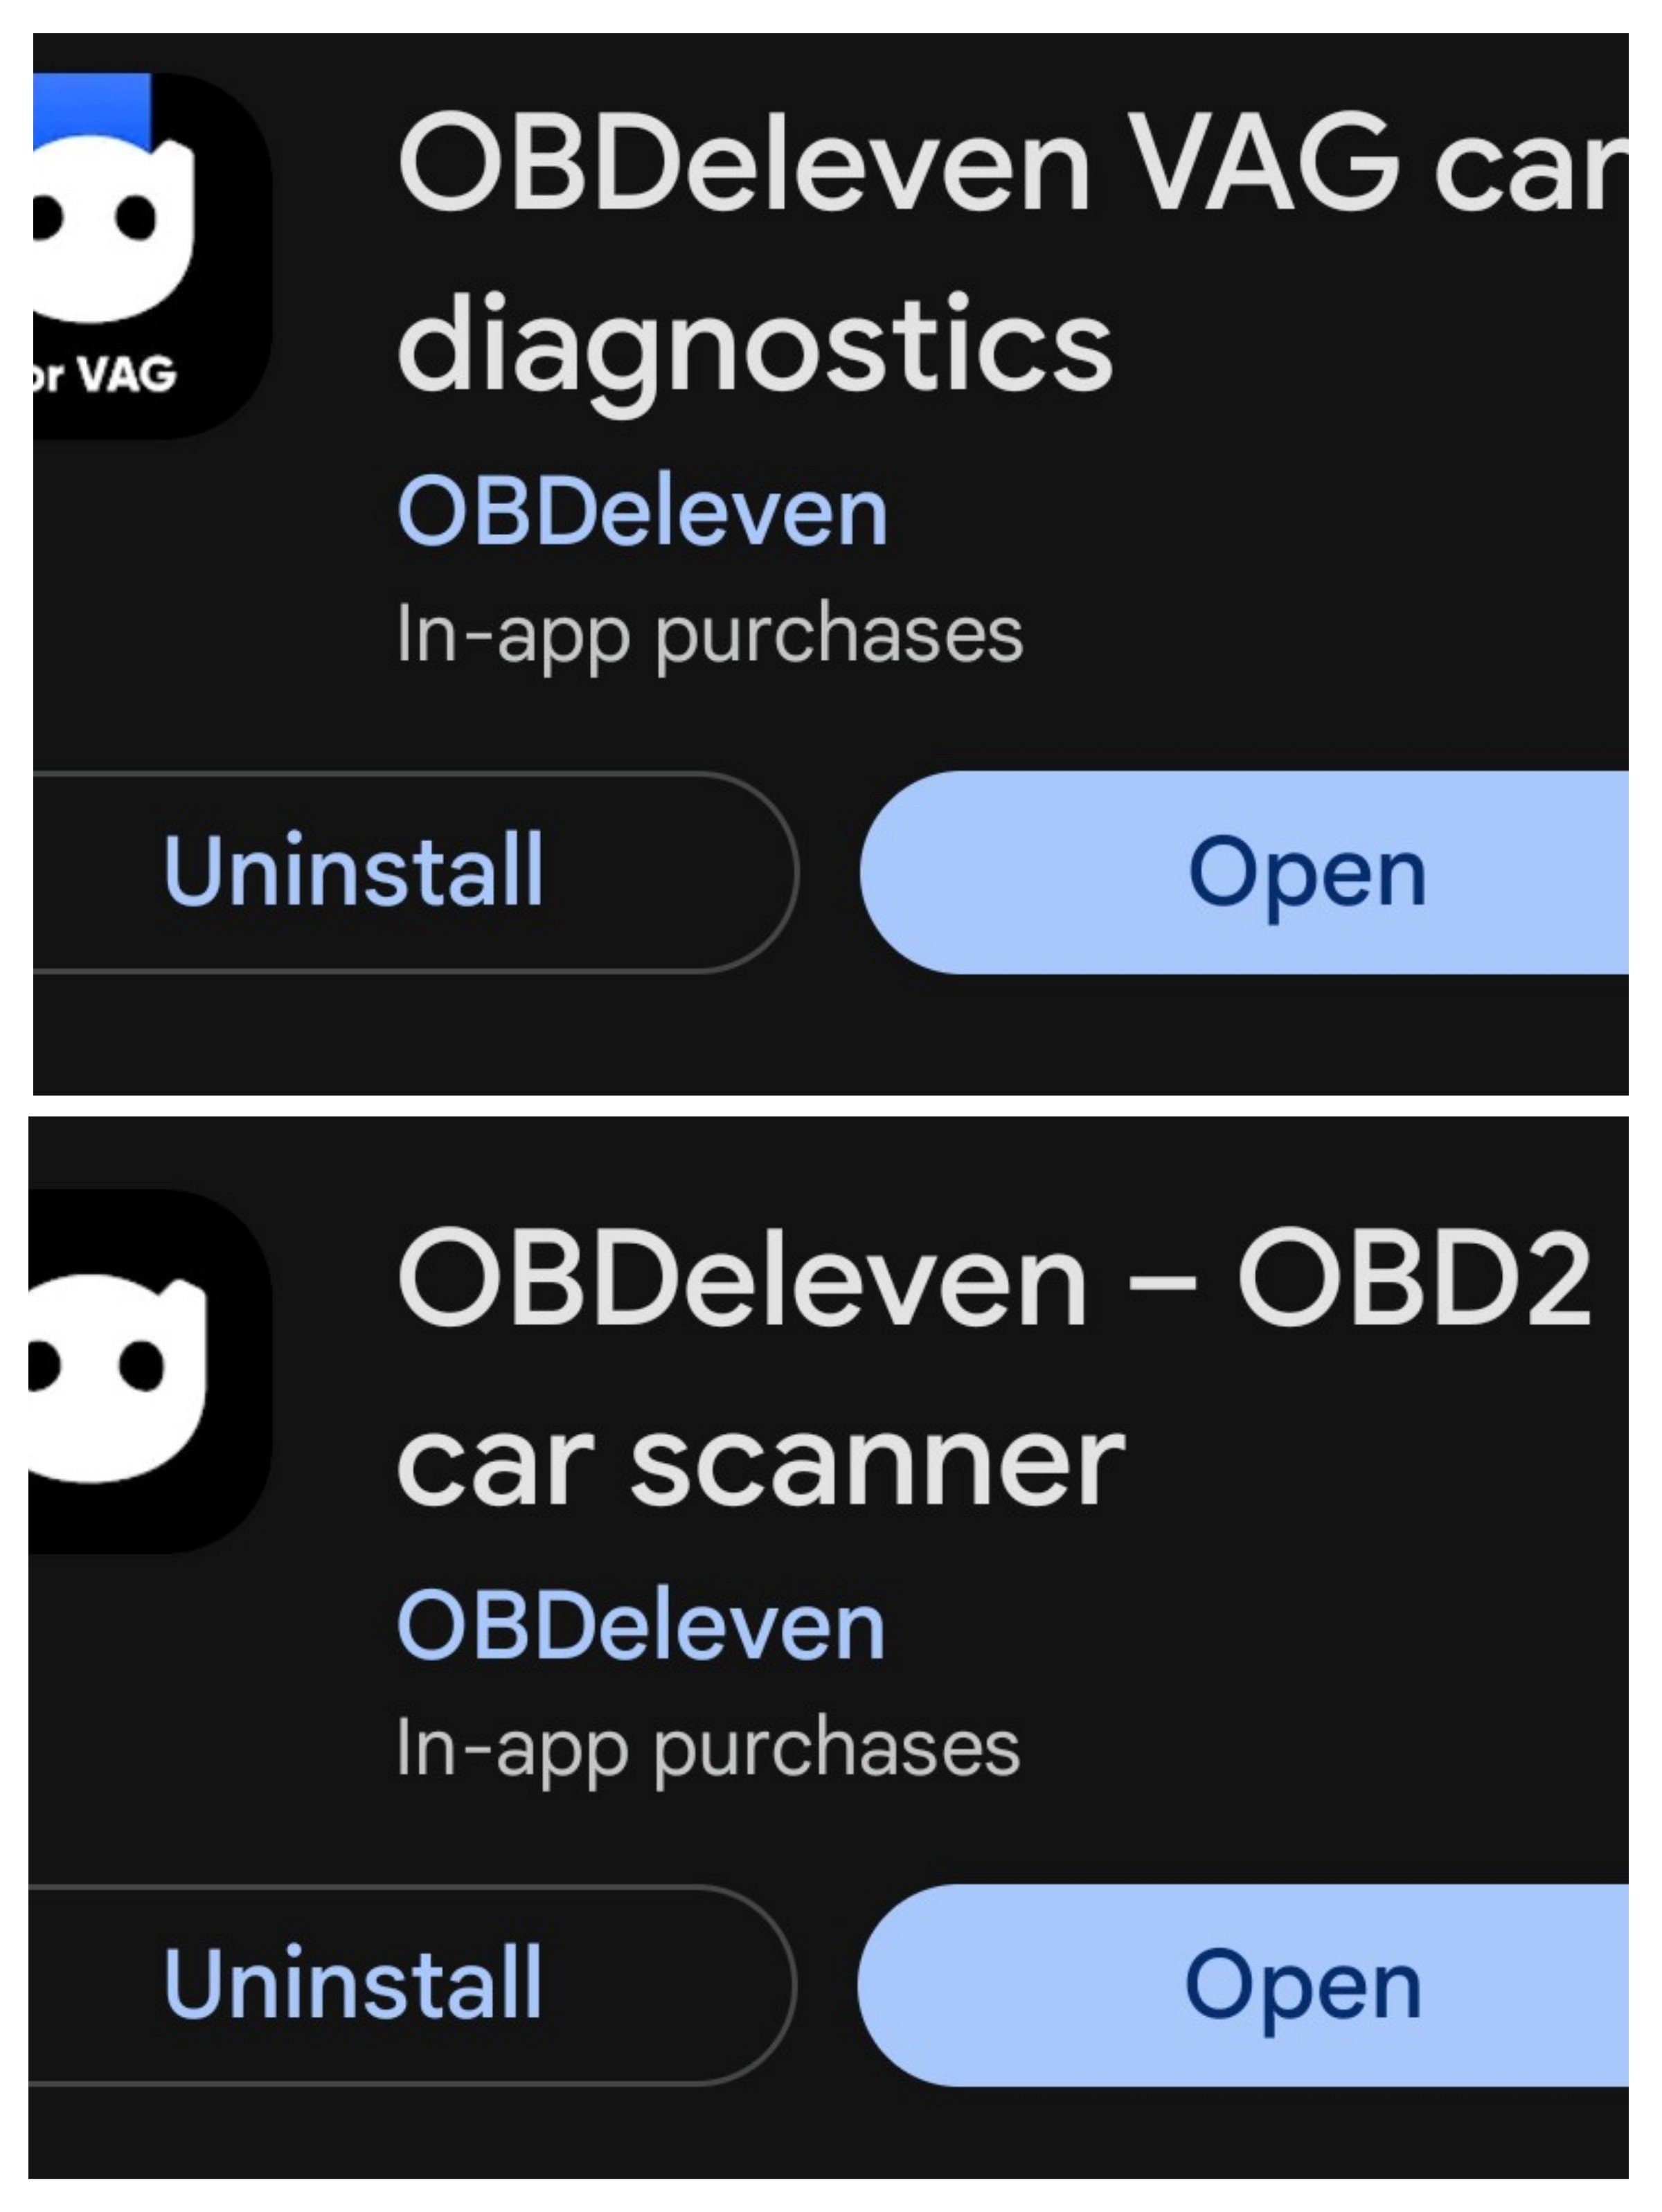
The VAG app version is better suited to us, i.e. VW, Audi, Skoda, Seat etc etc. Hence the VAG name for the app. The other one is less useful as it's more generic to cater for other car brands too. It does different stuff, but not as useful when it comes to Long Coding and Adaptations that u use with the Pro.
-
Make sure u get the right LCA cause Golf, A3, S3 etc LCAs r too short for the Superb.
-
They r two versions of the OBDEleven app - OBDEleven VAG vs OBDEleven OBD2 I'm using the OBDEleven VAG version, Google Pixel phone (Android). I have a Pro lifetime account.
-
-
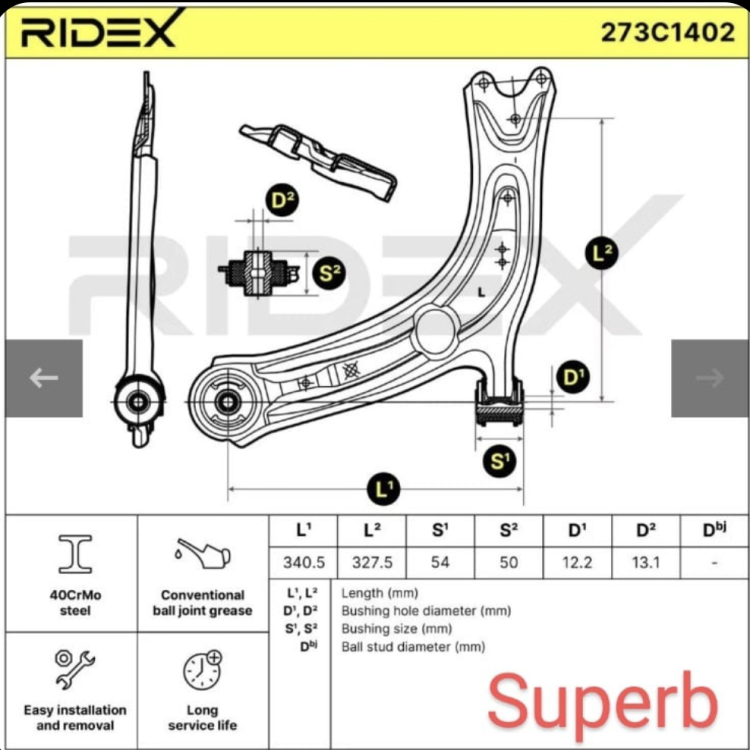
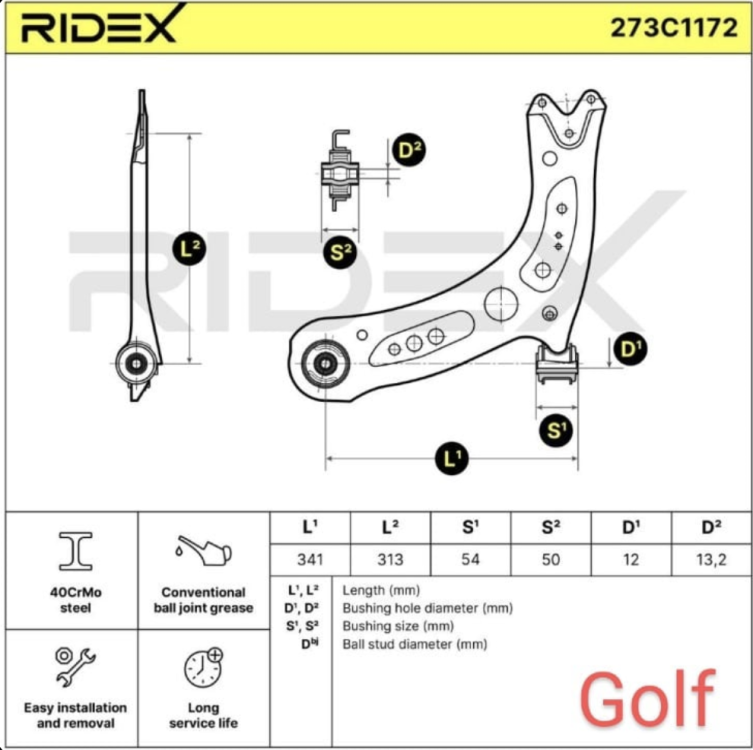
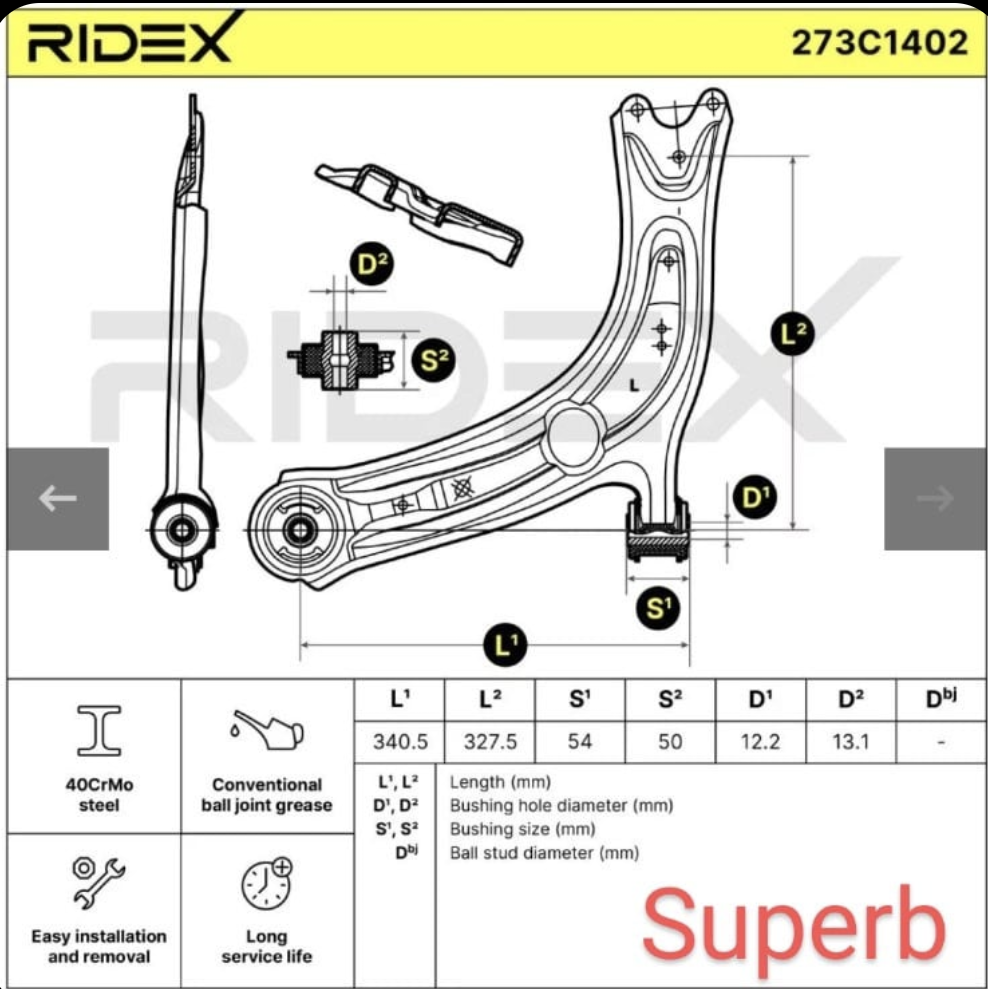
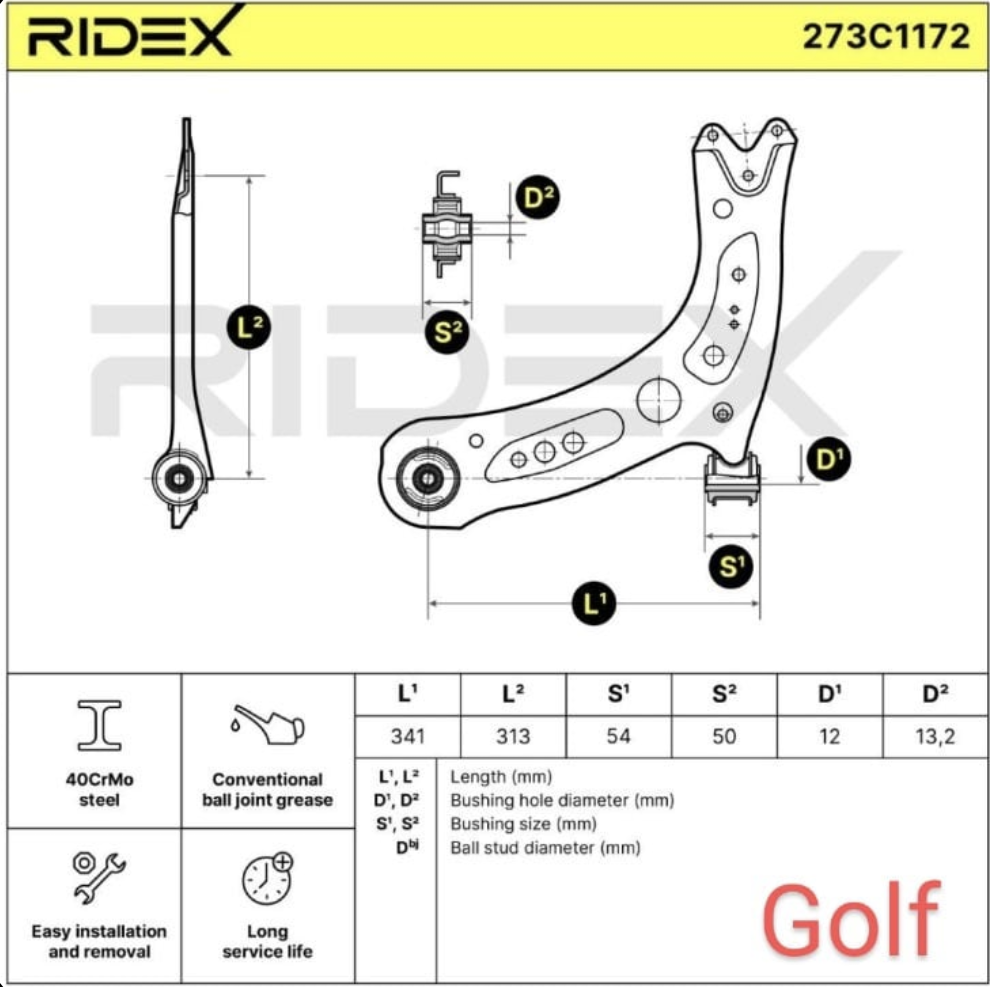
LCA for Golf, A3,S3 etc etc r the wrong size for the Superb. As u saw, it's short. Unlike other suspension components - LCAs r not compatible with the mk3 Superb. In the diagrams below, u can see L2 is considerably shorter for the Golf, compared to Superb. The rest of the measurements r similar or the same.
-




Important Information
Welcome to BRISKODA. Please note the following important links Terms of Use. We have a comprehensive Privacy Policy. We have placed cookies on your device to help make this website better. You can adjust your cookie settings, otherwise we'll assume you're okay to continue.