JR RS
FREEDOMLite
-
Joined
-
Last visited
Everything posted by JR RS
-
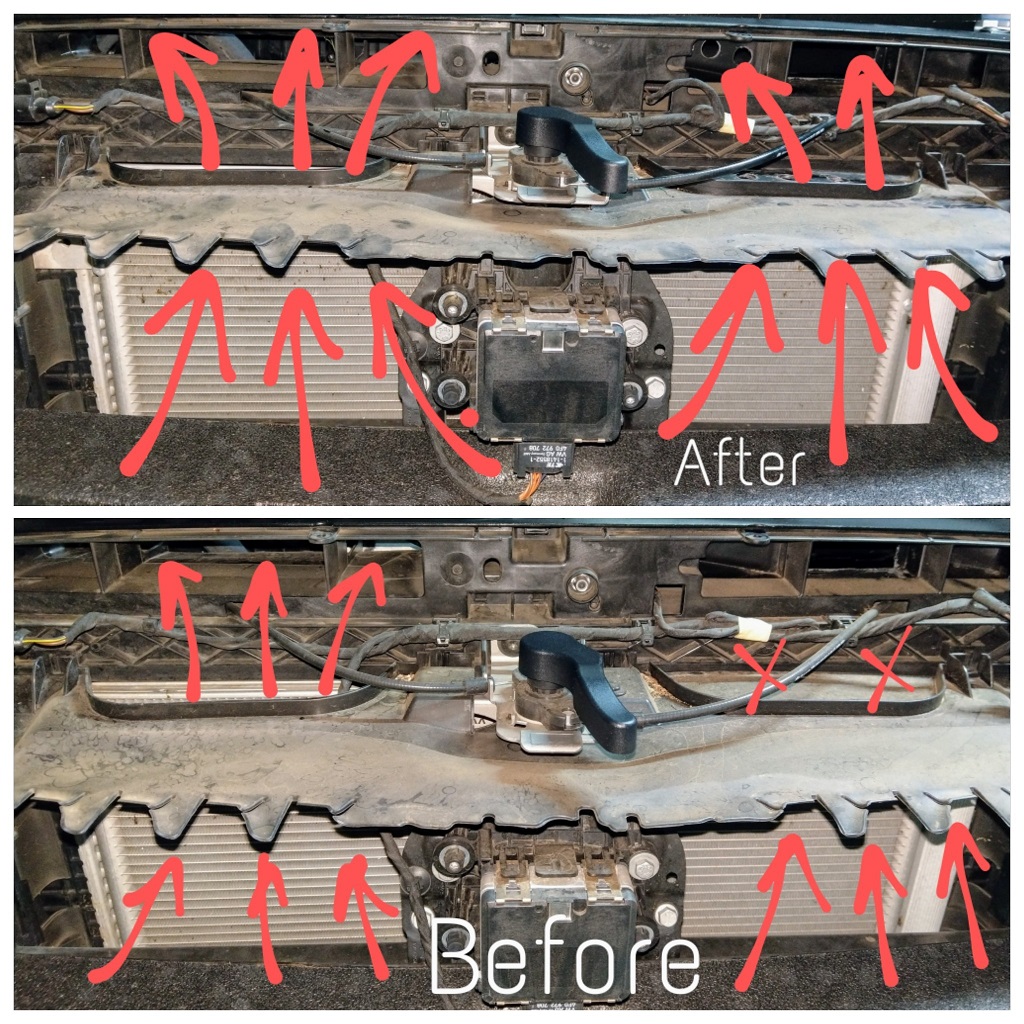
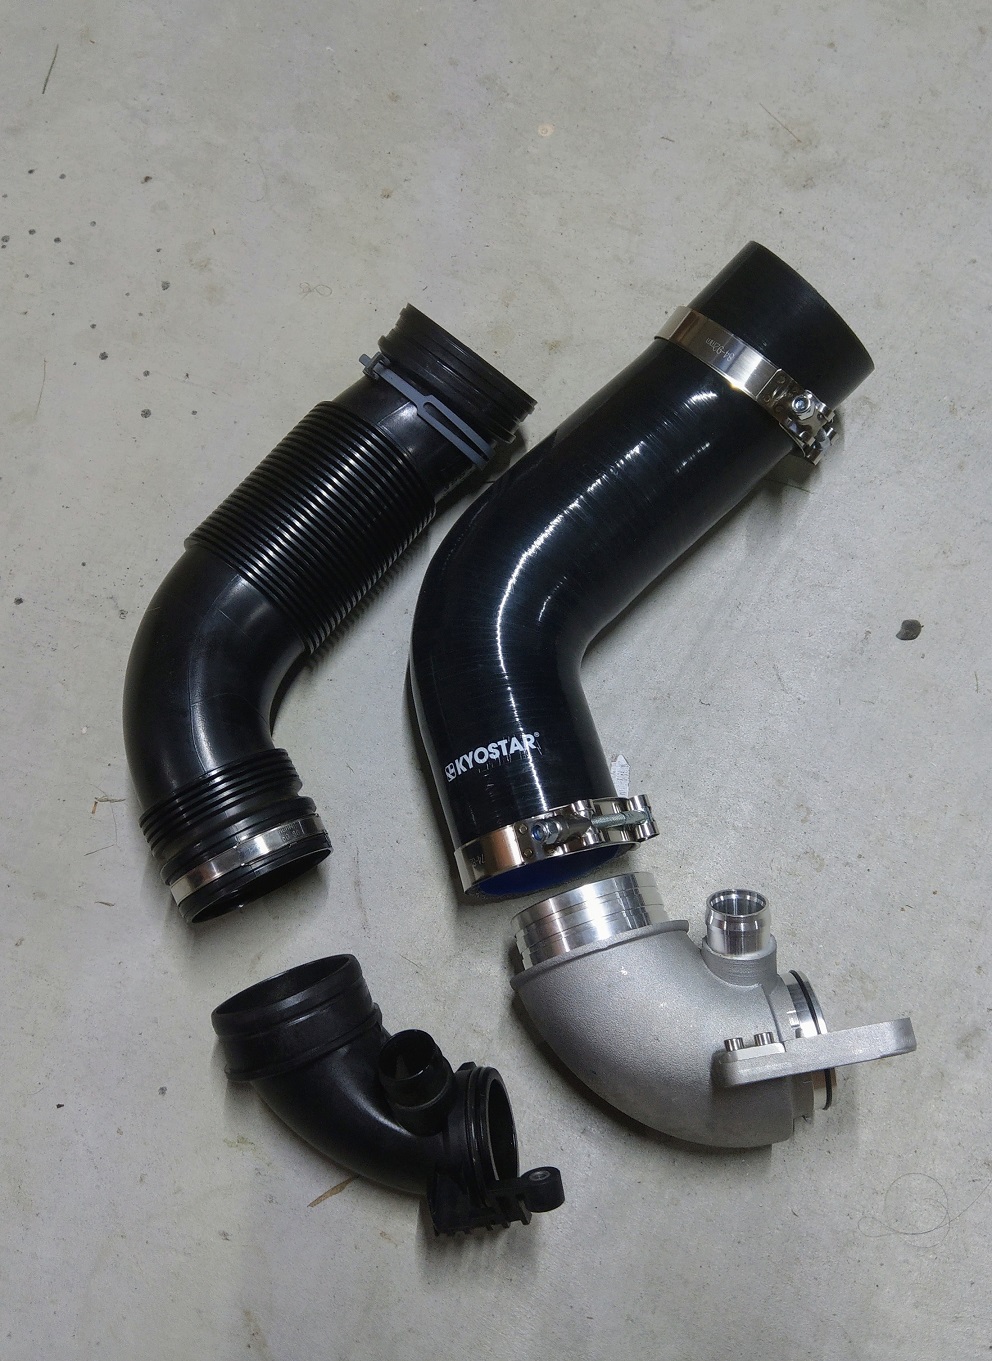
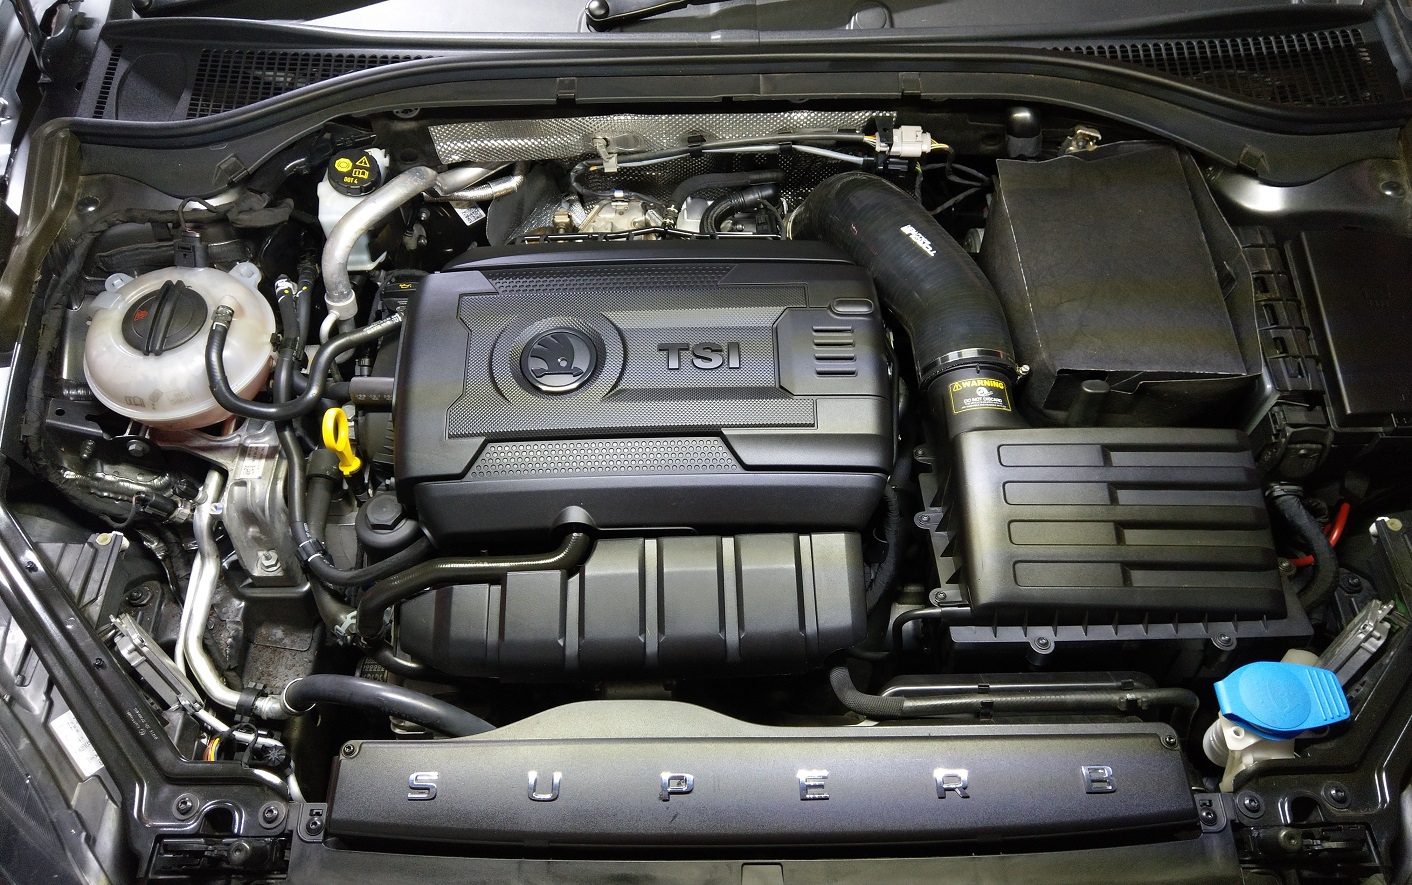
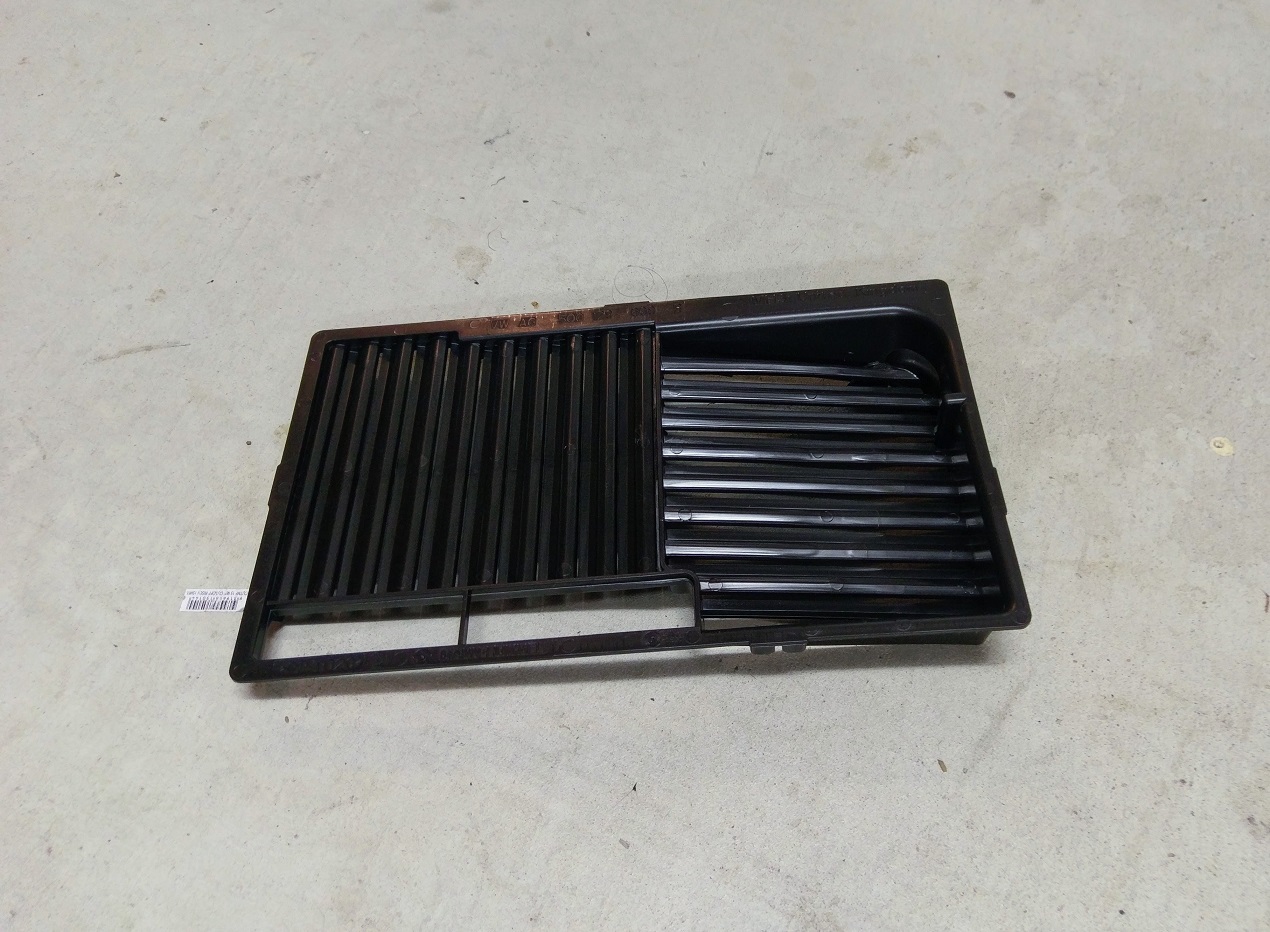
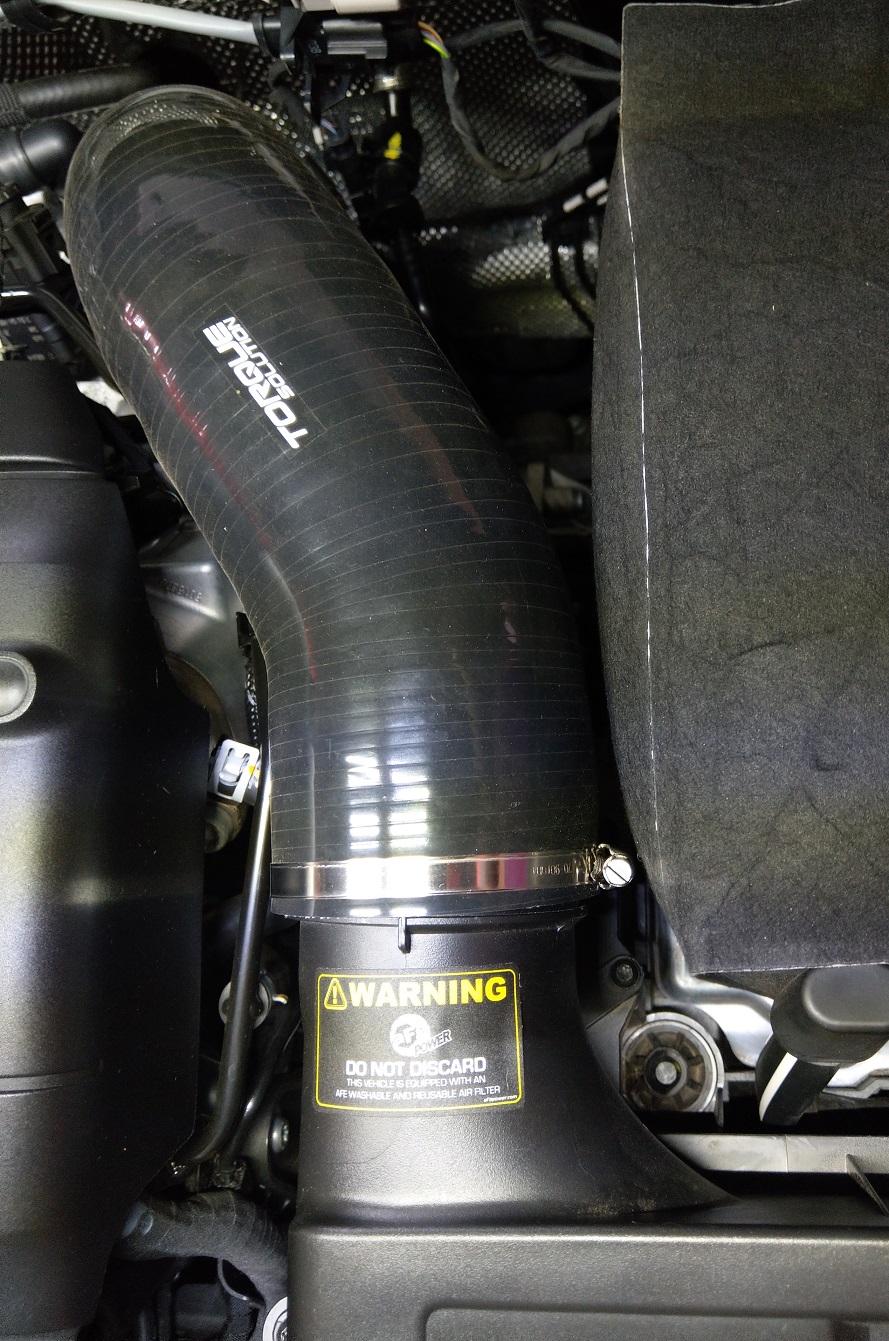
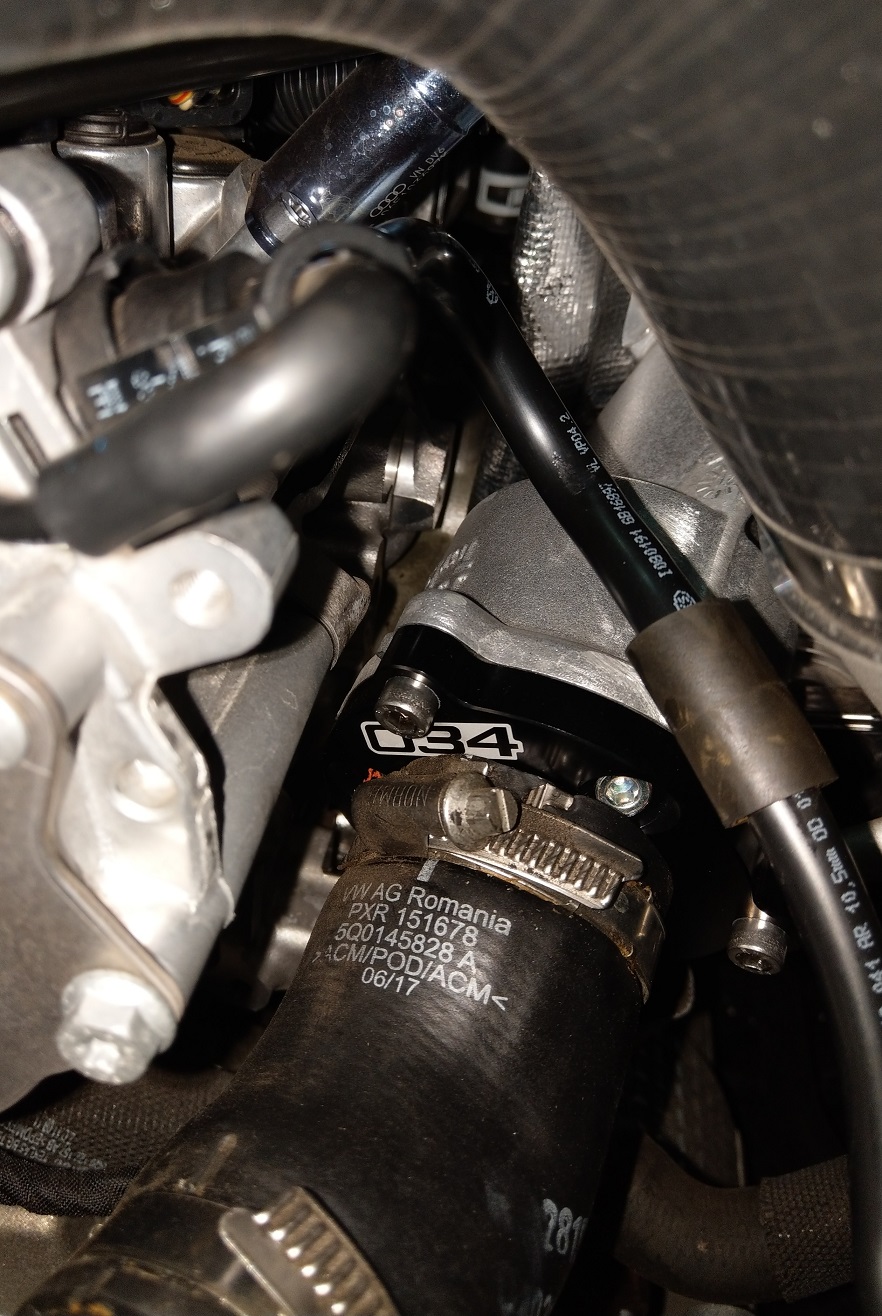
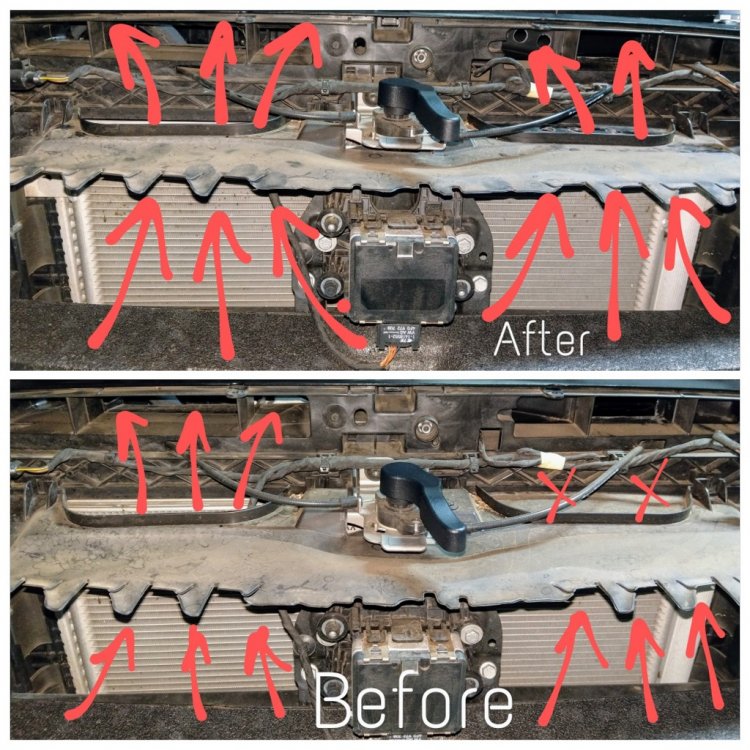
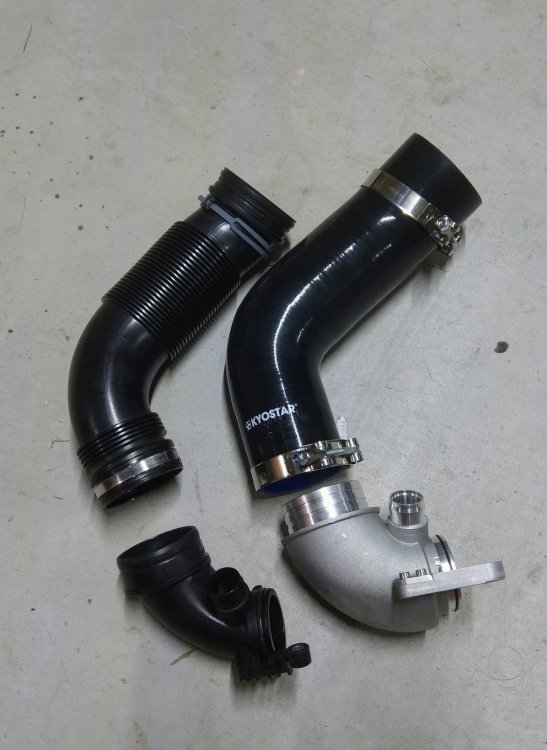
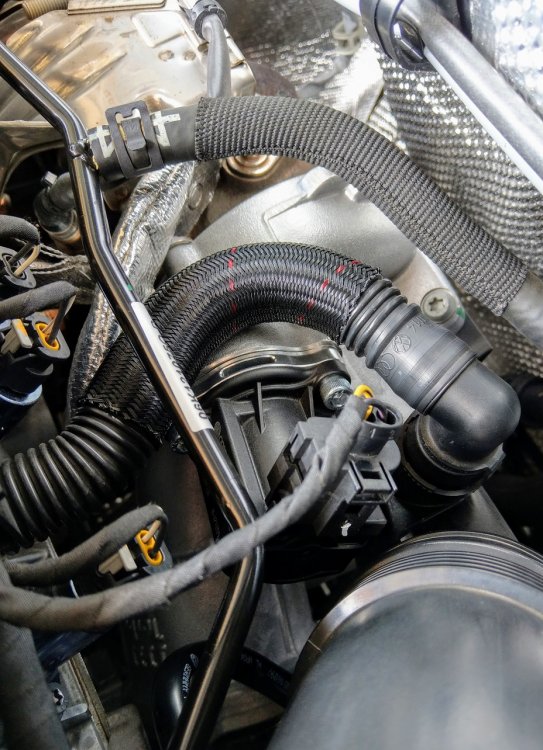
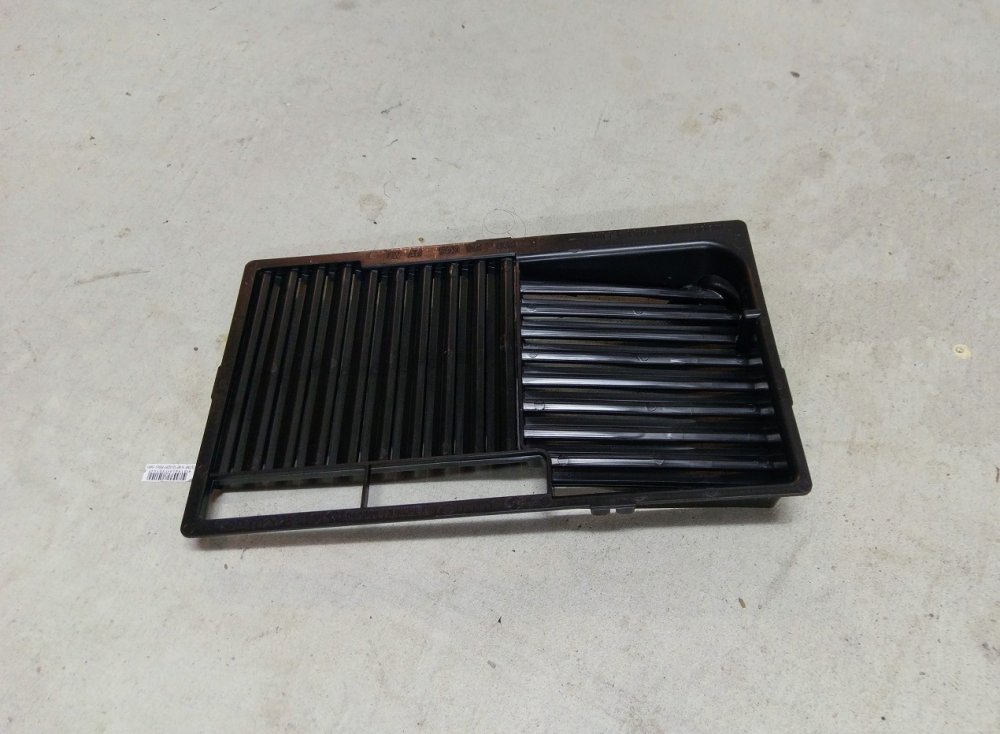
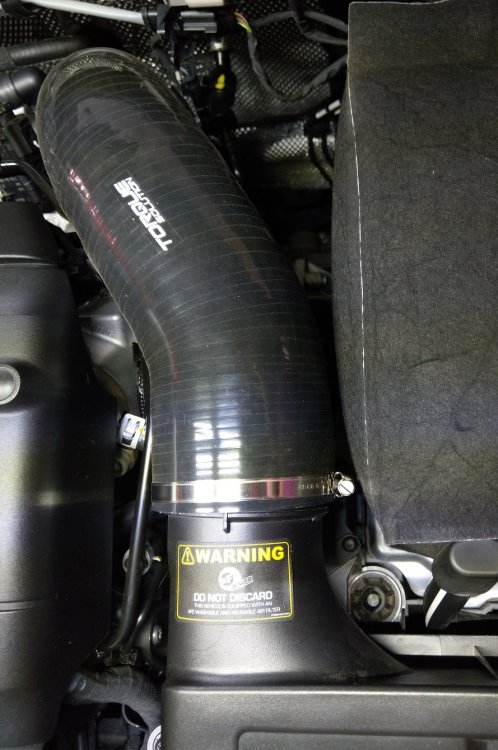
Mechanical Modifications - 034Motorsport Turbo Muffler Delete - CTS MQB Gen3 High-flow Turbo Inlet elbow - Torque Solution Turbo Inlet pipe - Modified air intake - unblocked air intake flap, additional holes in front of airbox - Snow Guard removal - aFe Magnaflow Air filter - Engine dust shield cover - ECS Atmospheric Diverter Valve Spacer (removed after 3 months)


-
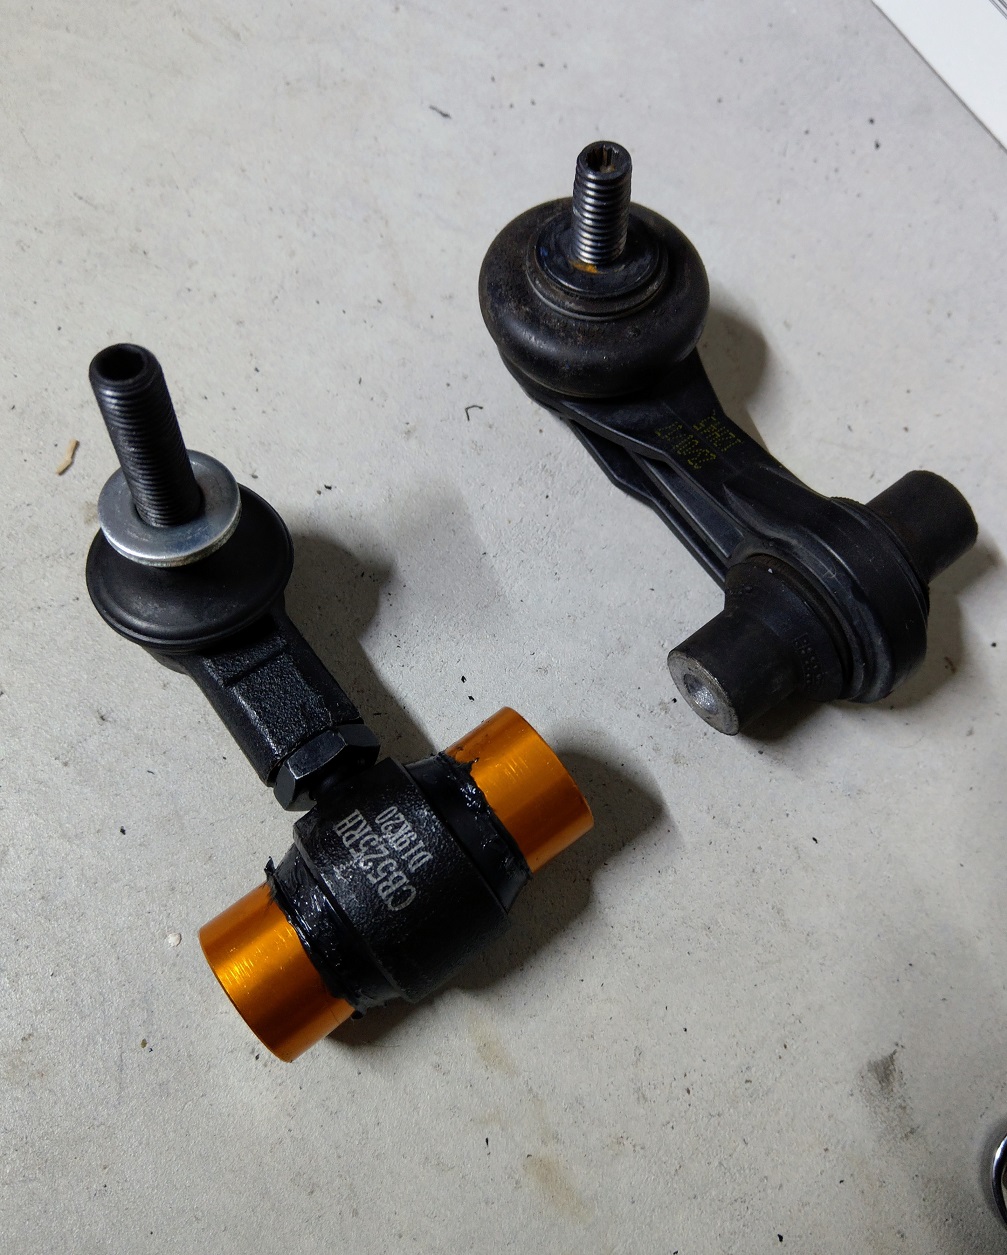
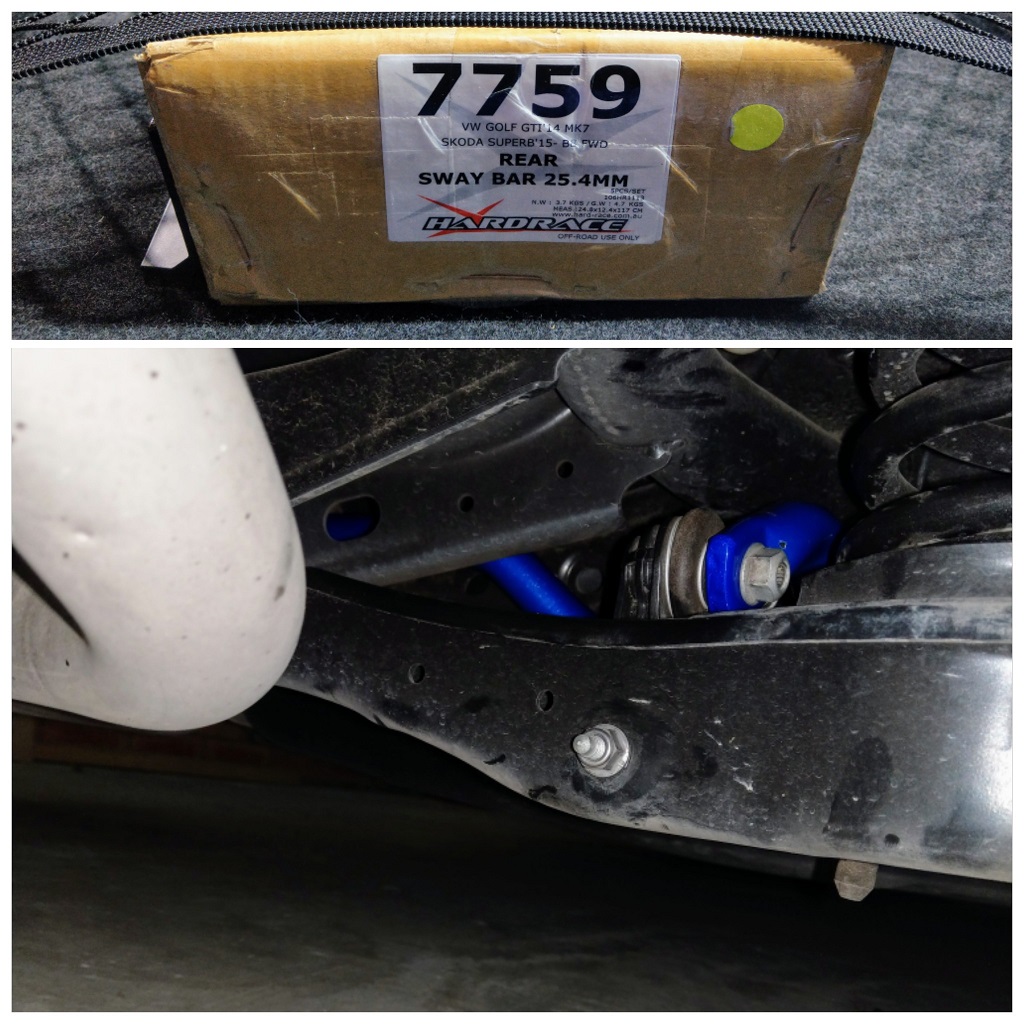
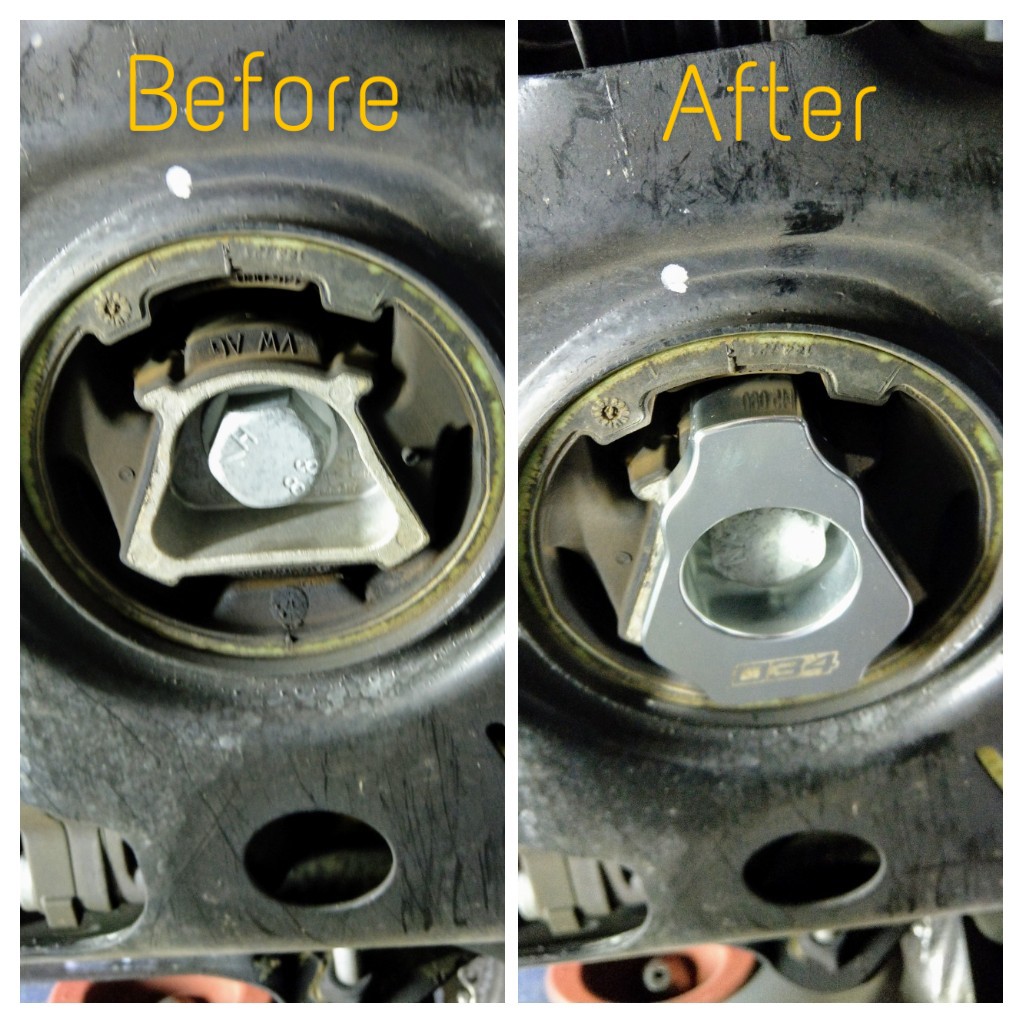
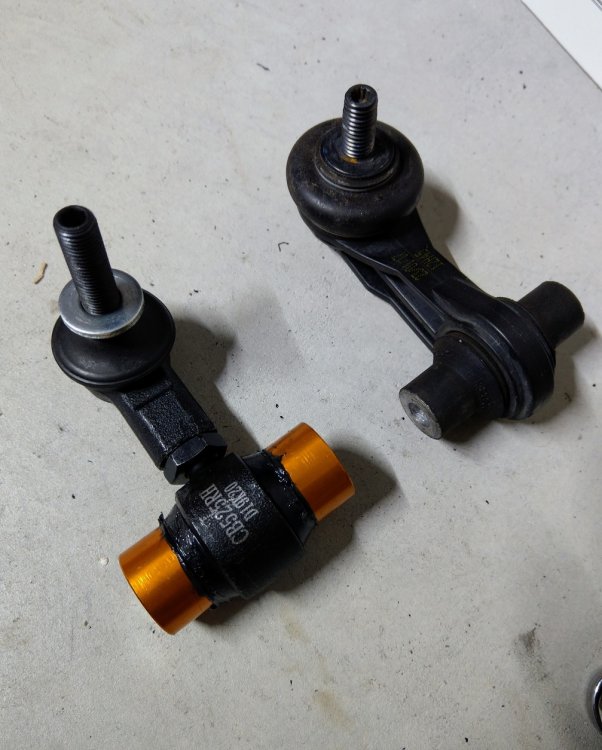
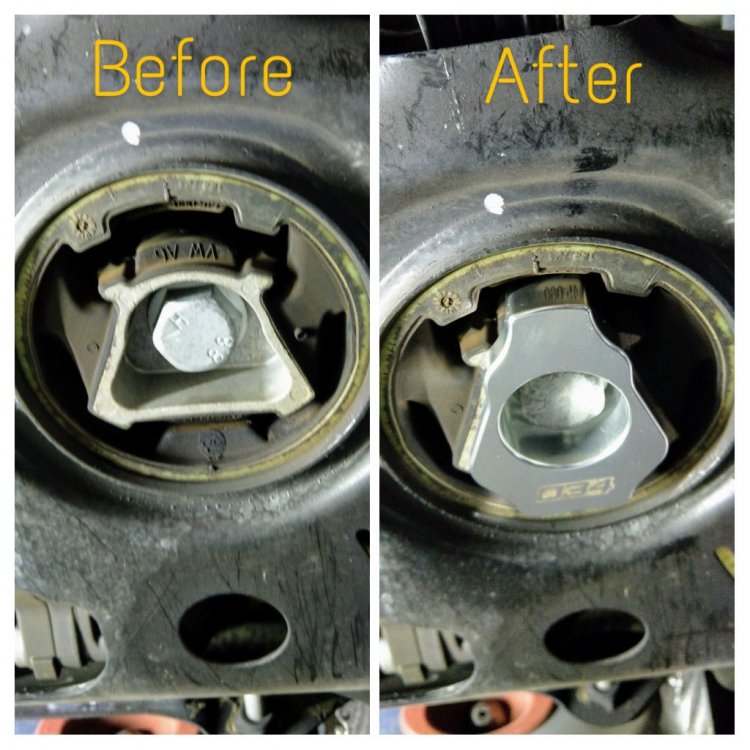
Handling Modifications - 15mm front & rear aluminum hub-centric spacers - 25.4mm Hardrace rear sway bar (P/N: HR7759) - Whiteline rear end-links (adjustable) (P/N: KLC202) left = whiteline right = factory - Eibach Prokit Lowering Springs (25mm) (P/N: 10-84-042-02-22) top = eibach bottom = factory - 034Motorsport Billet Aluminum MQB Lower Dogbone Mount Insert


-
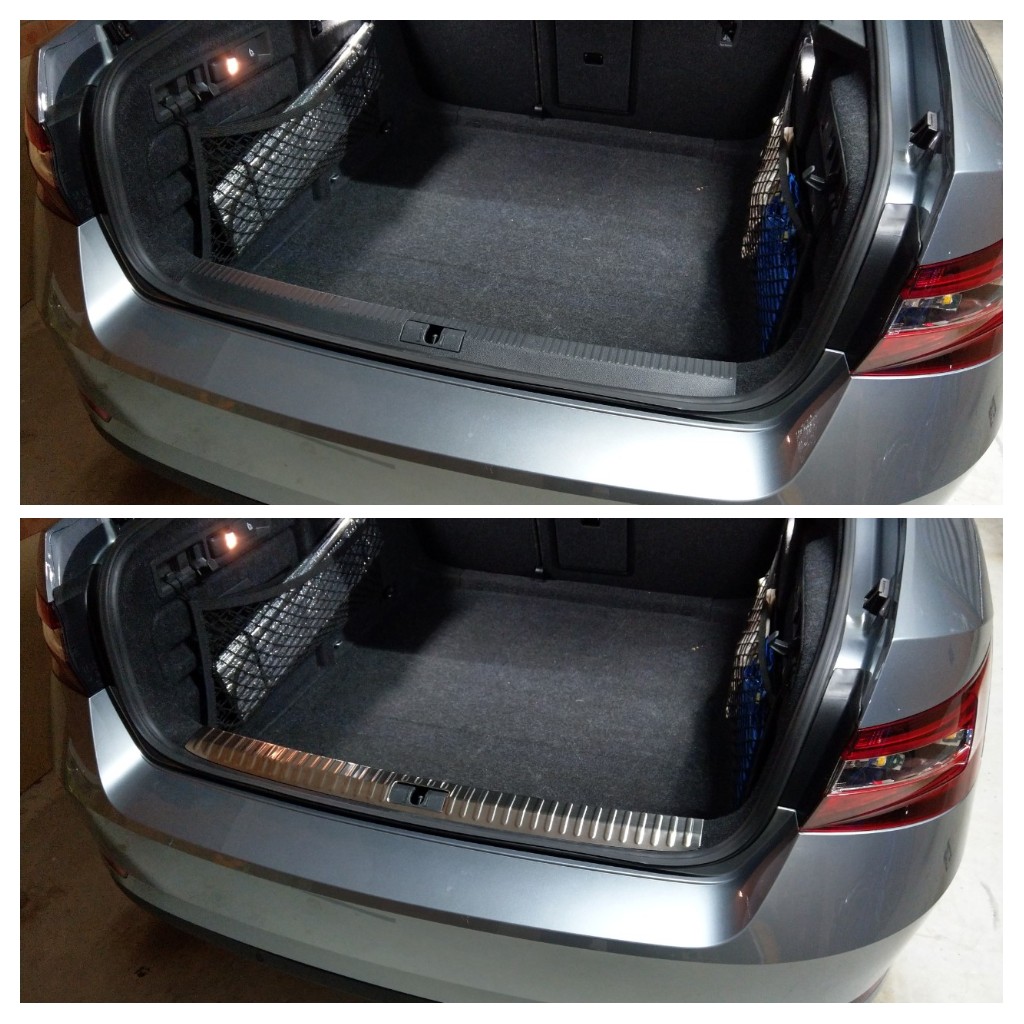
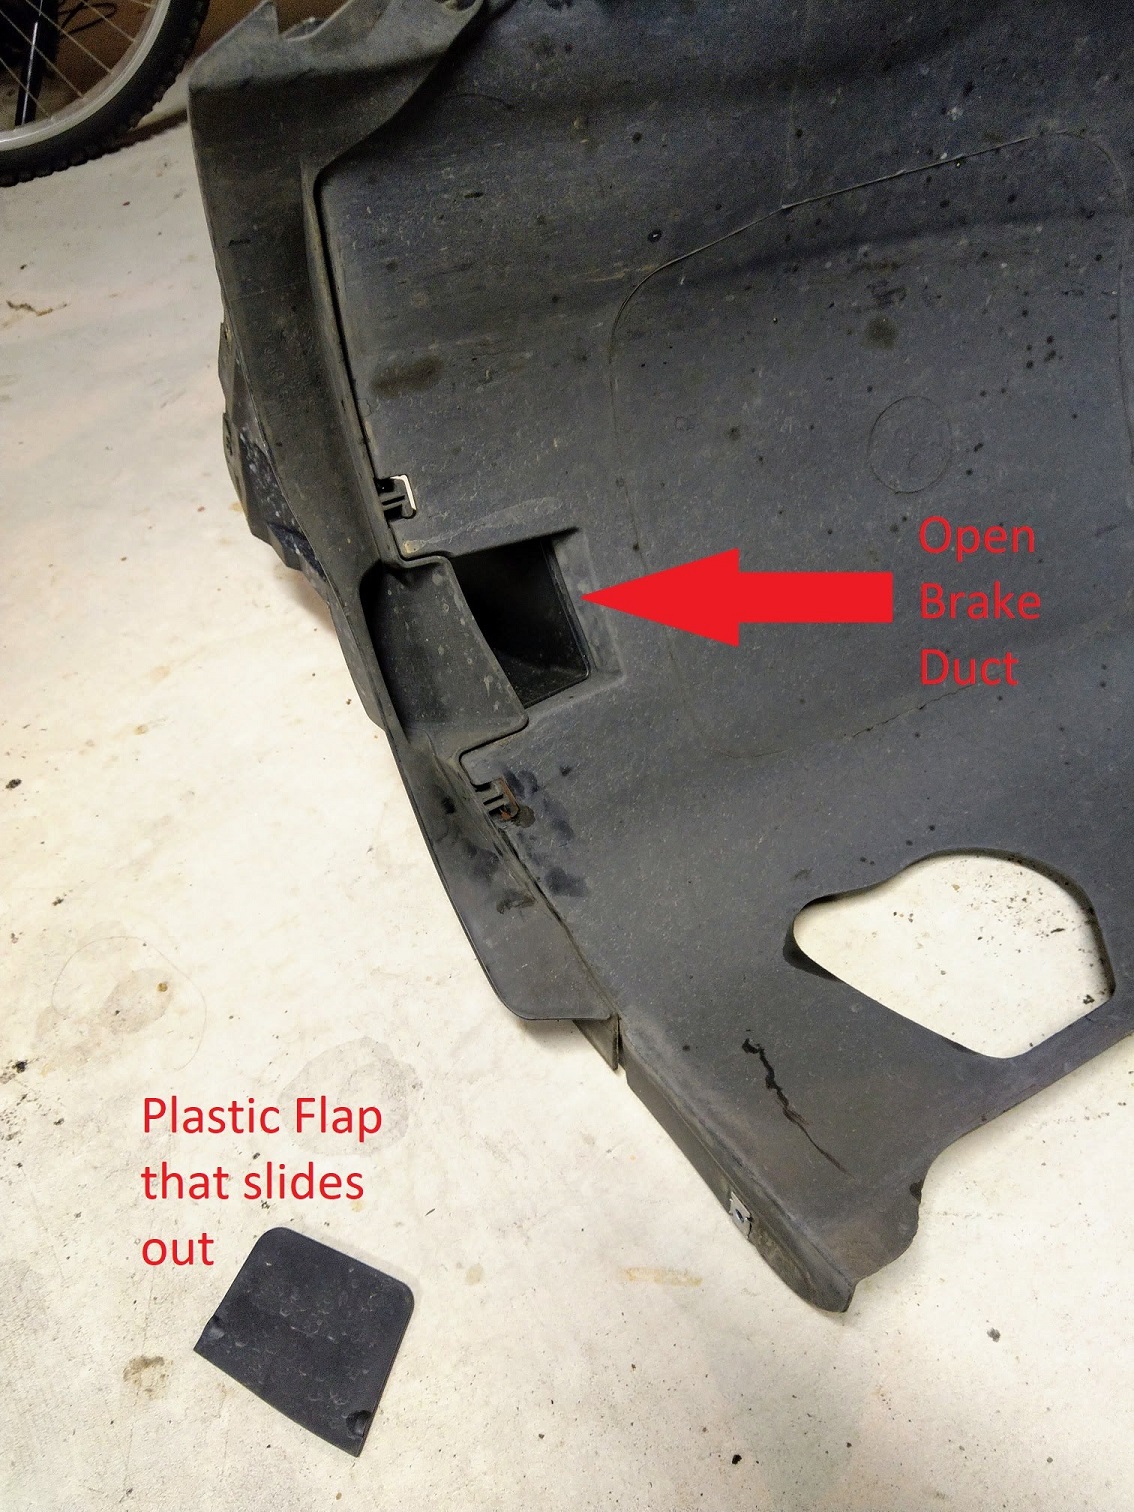
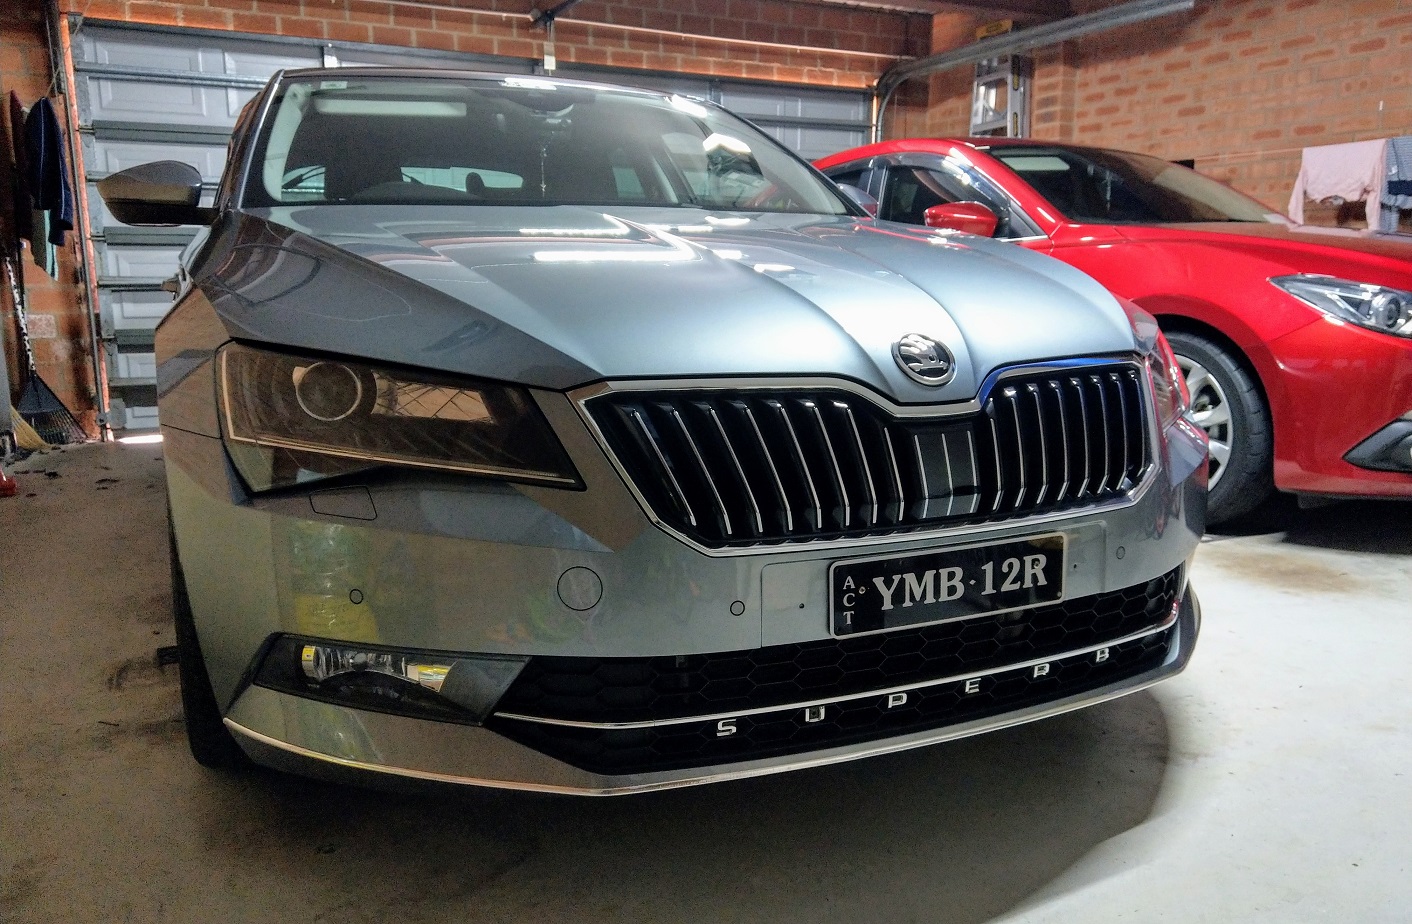
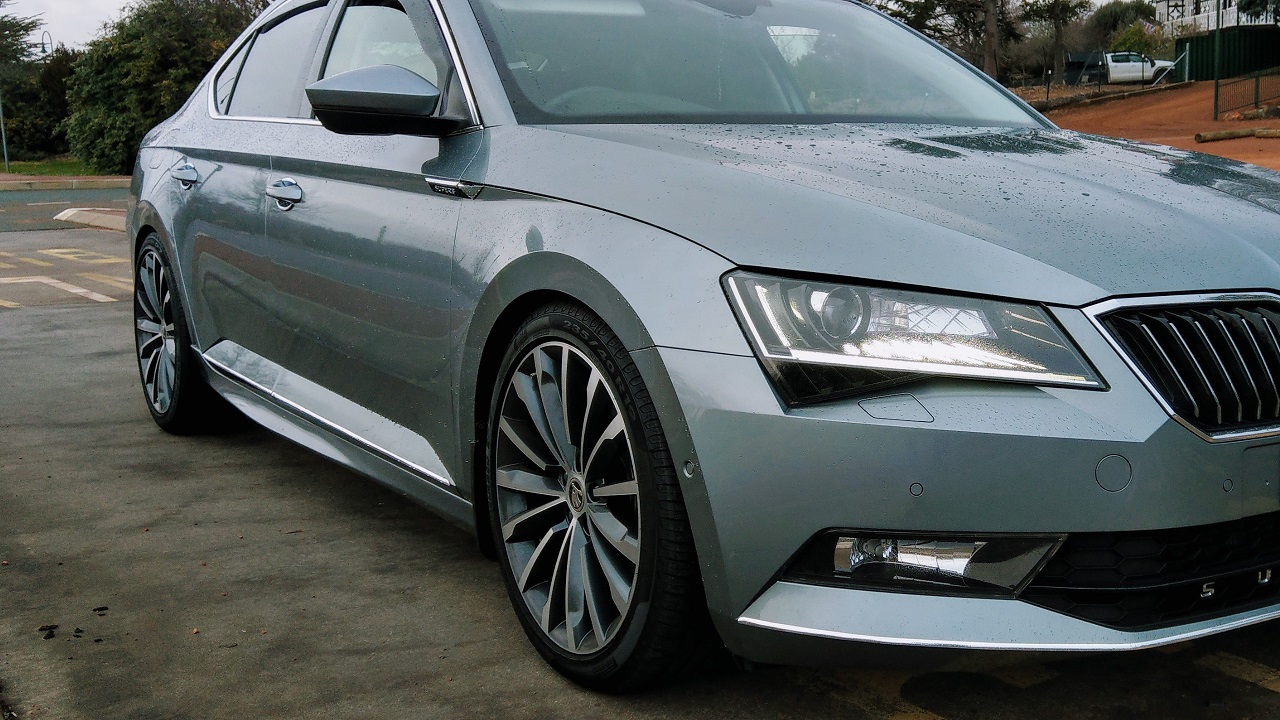
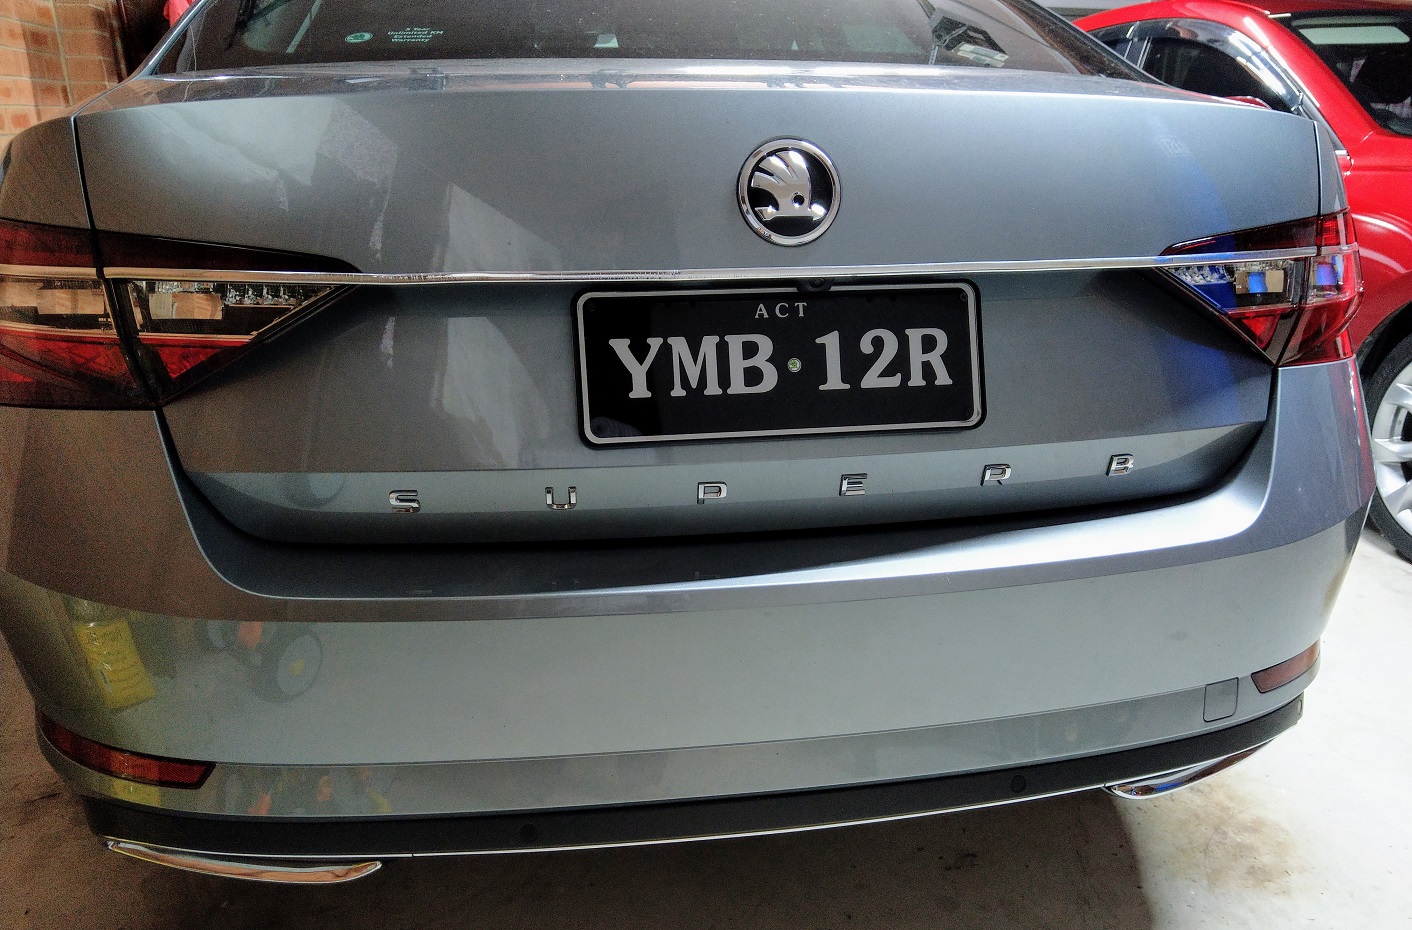
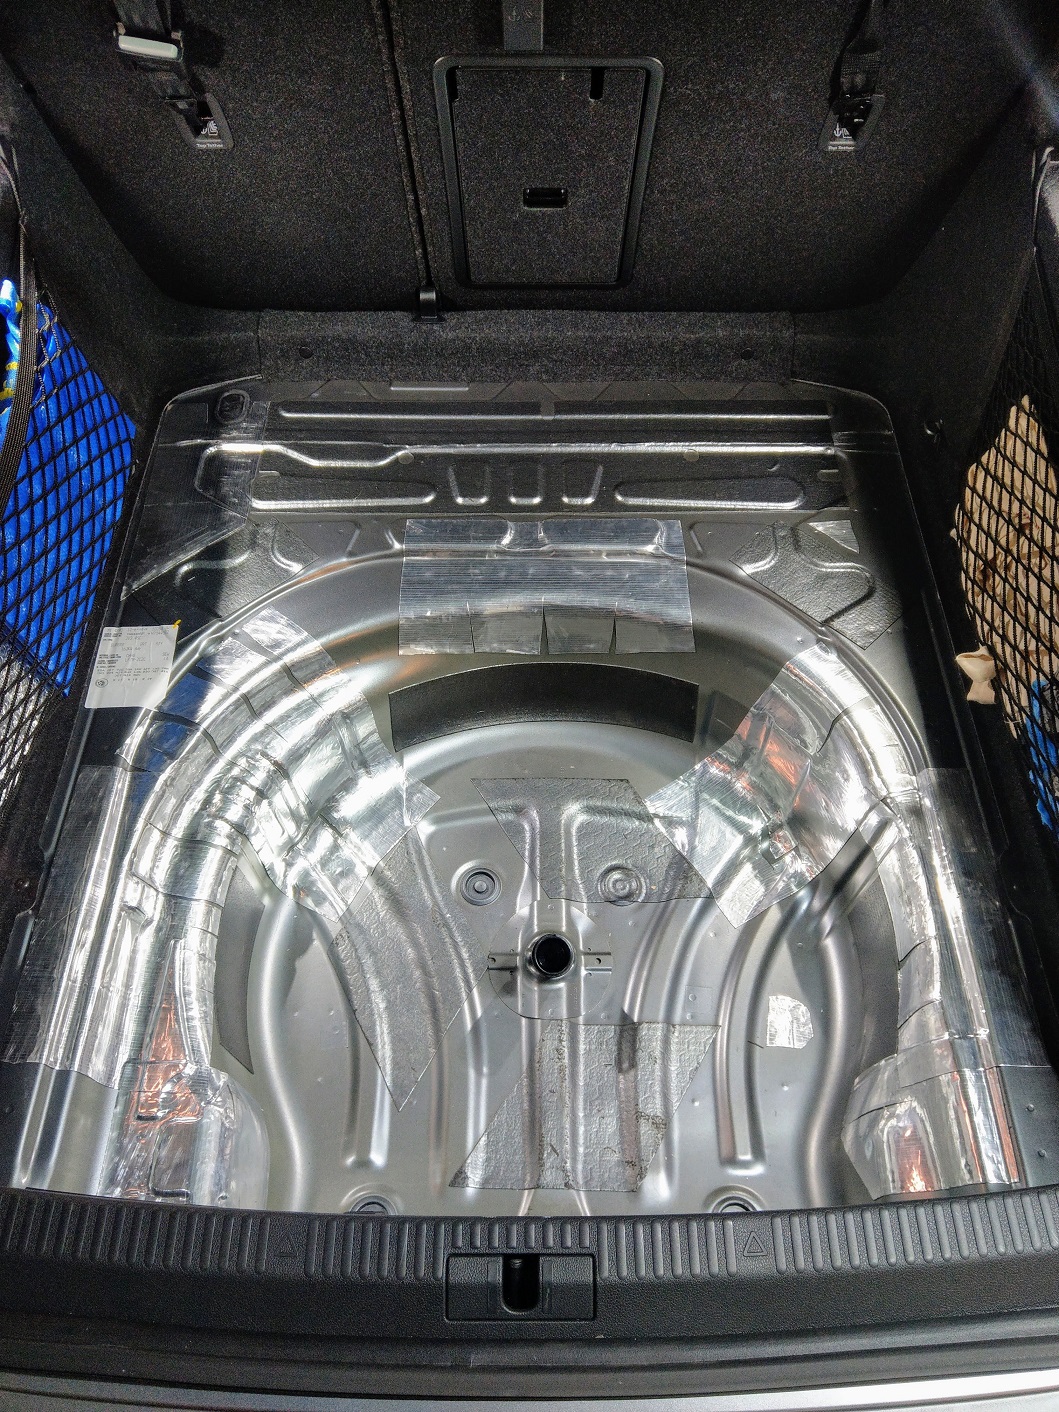
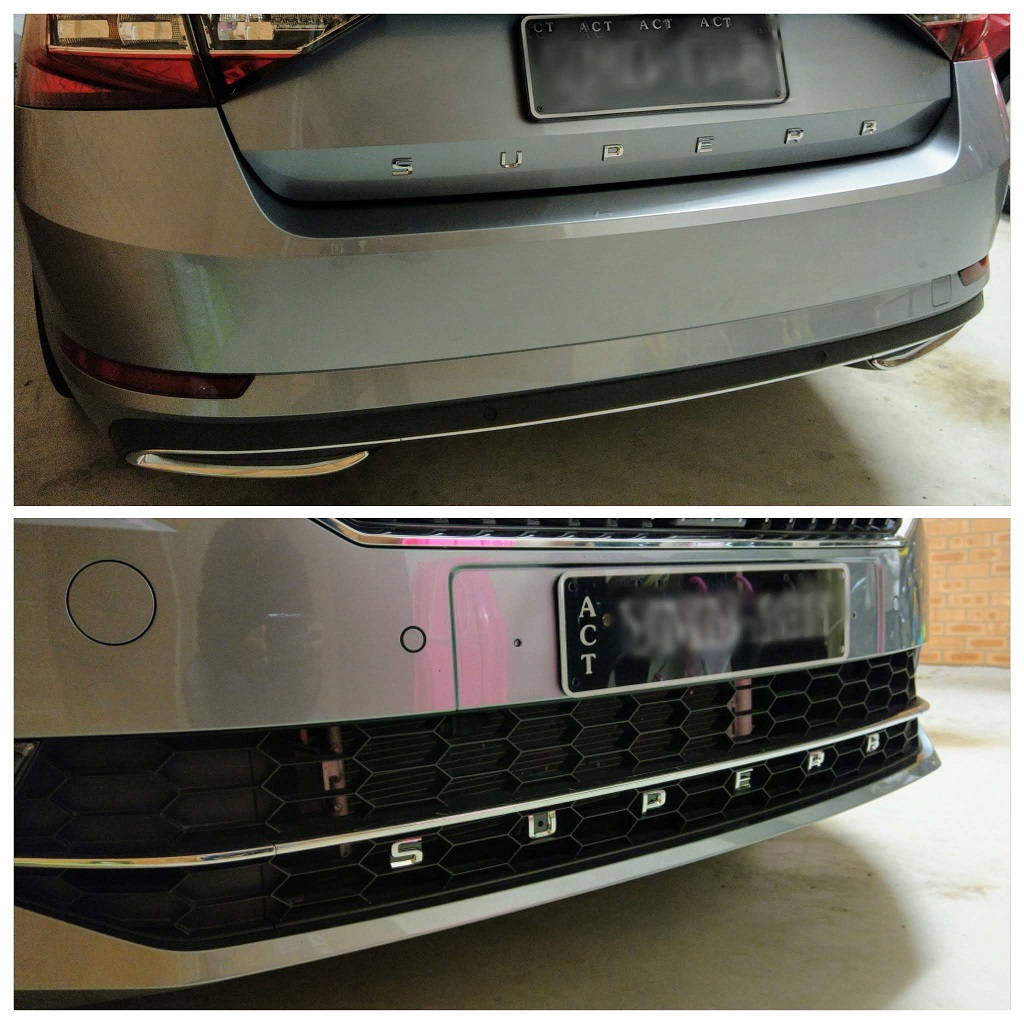
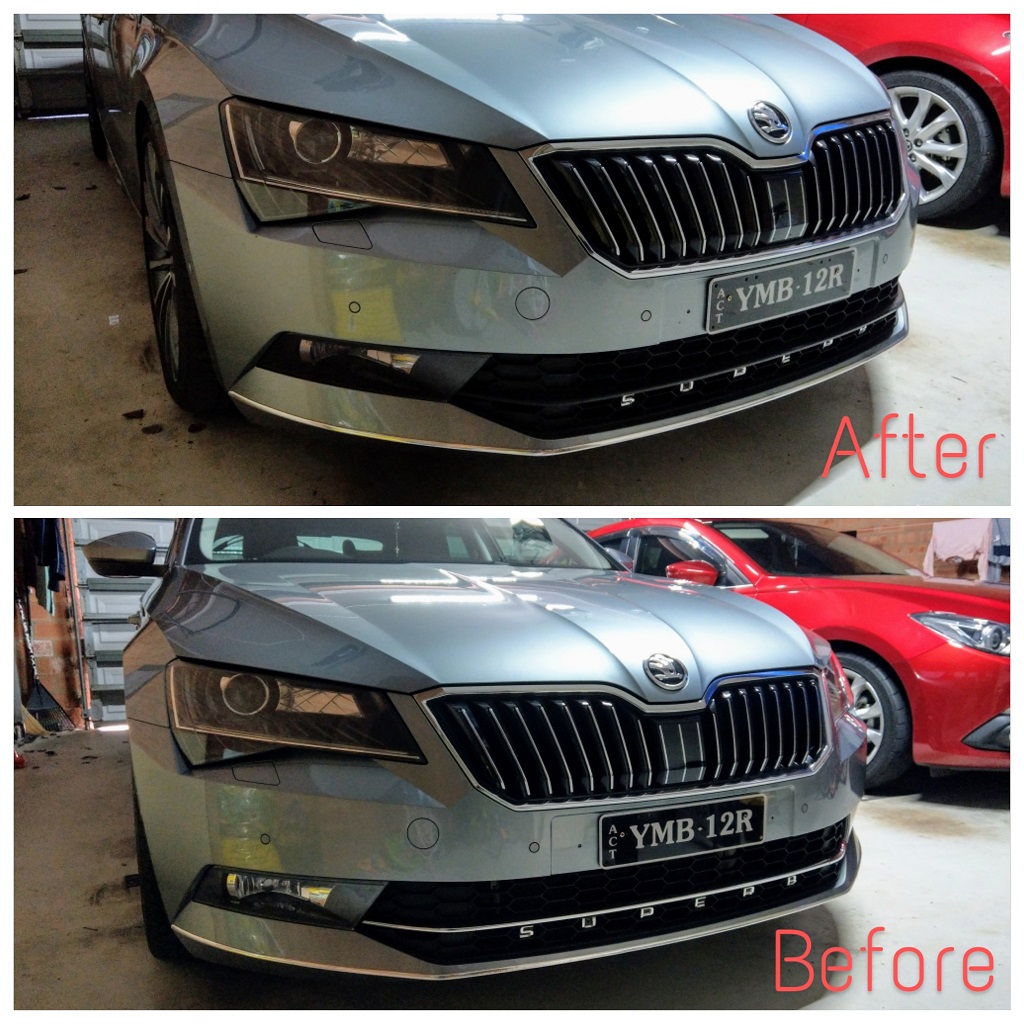
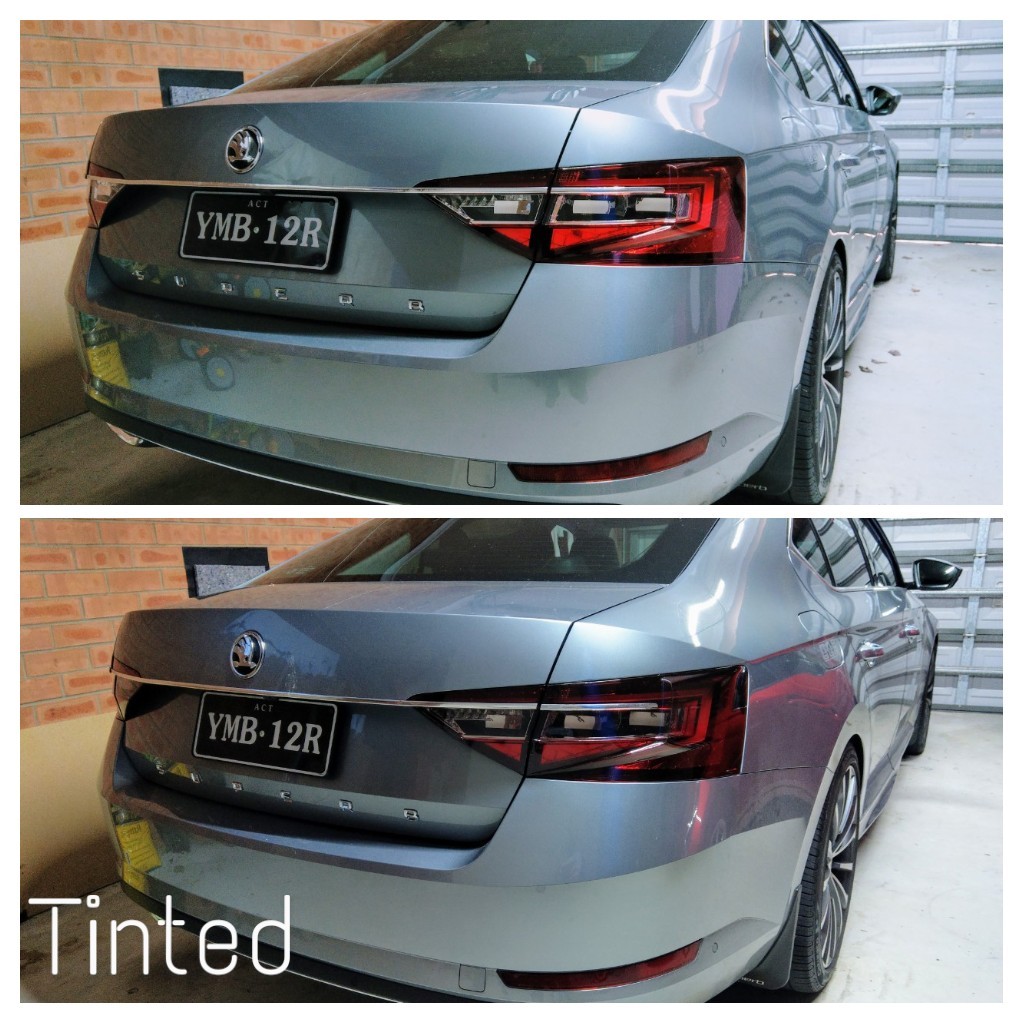
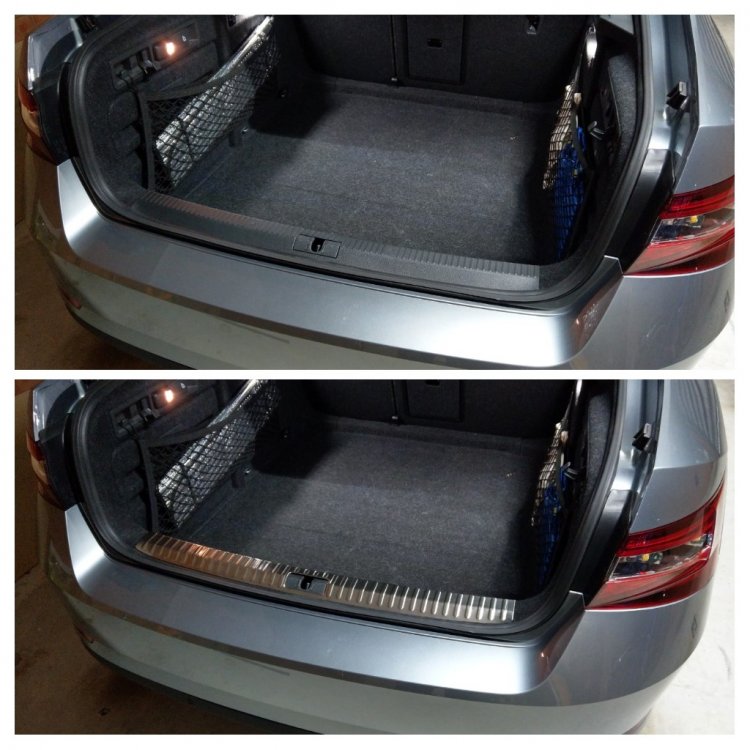
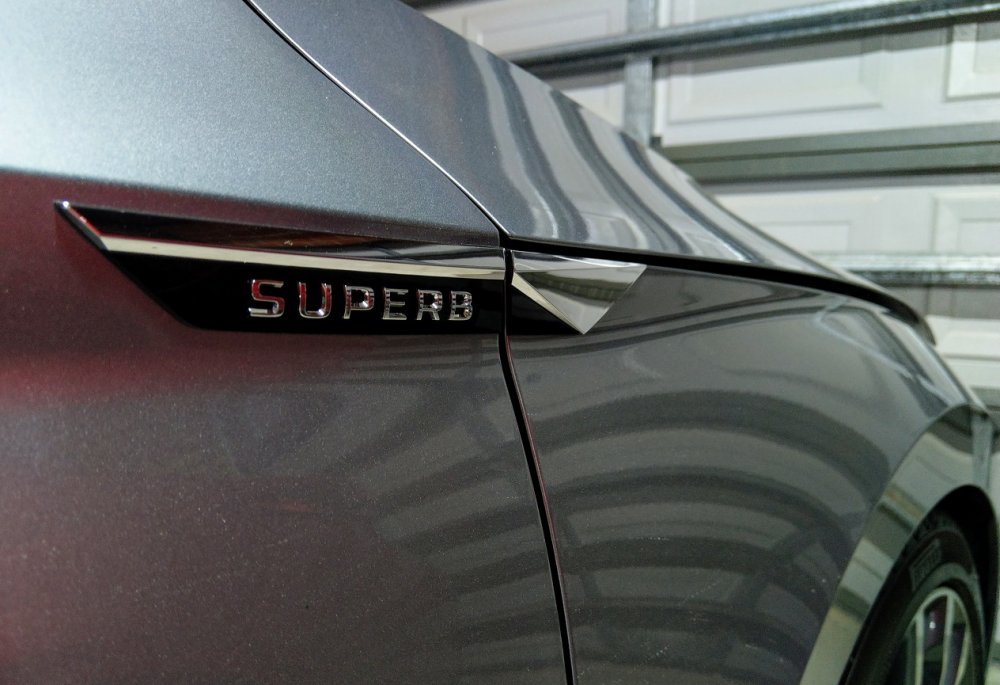
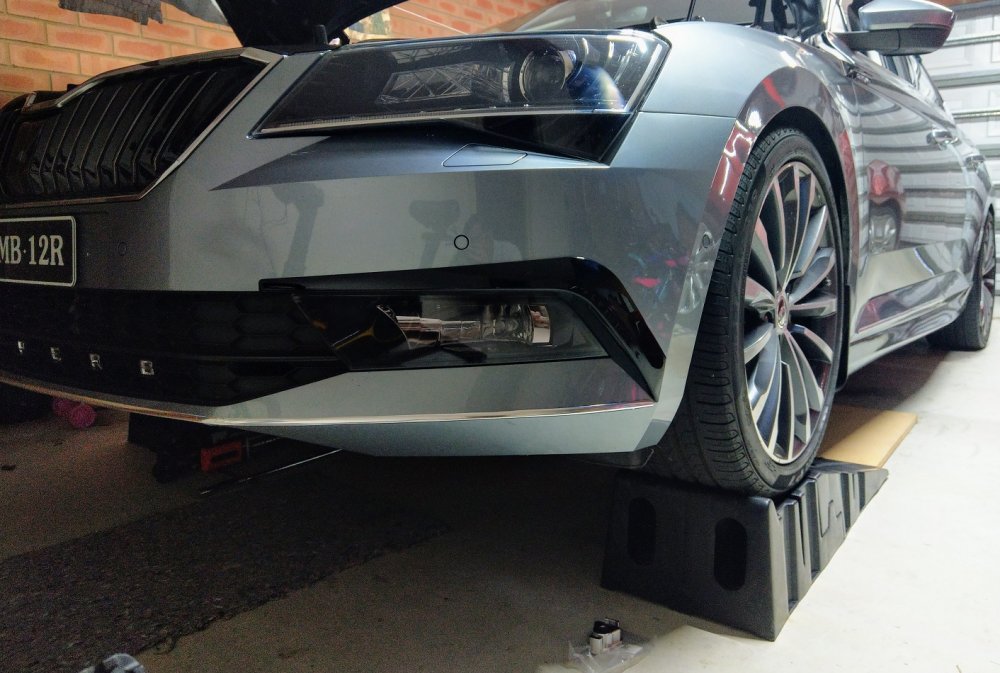
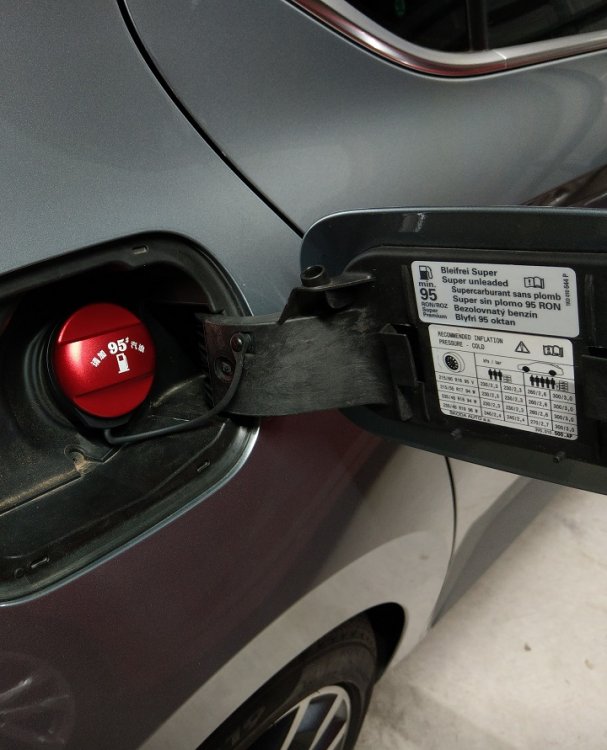
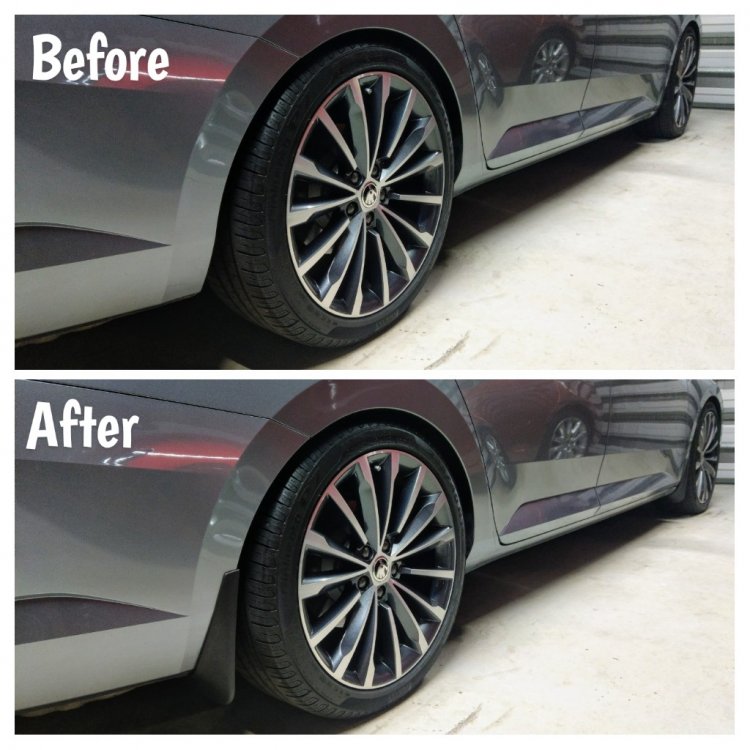
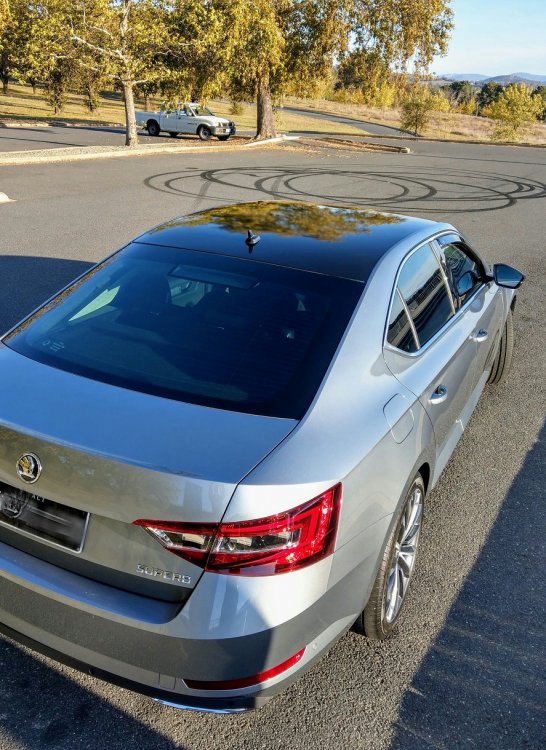
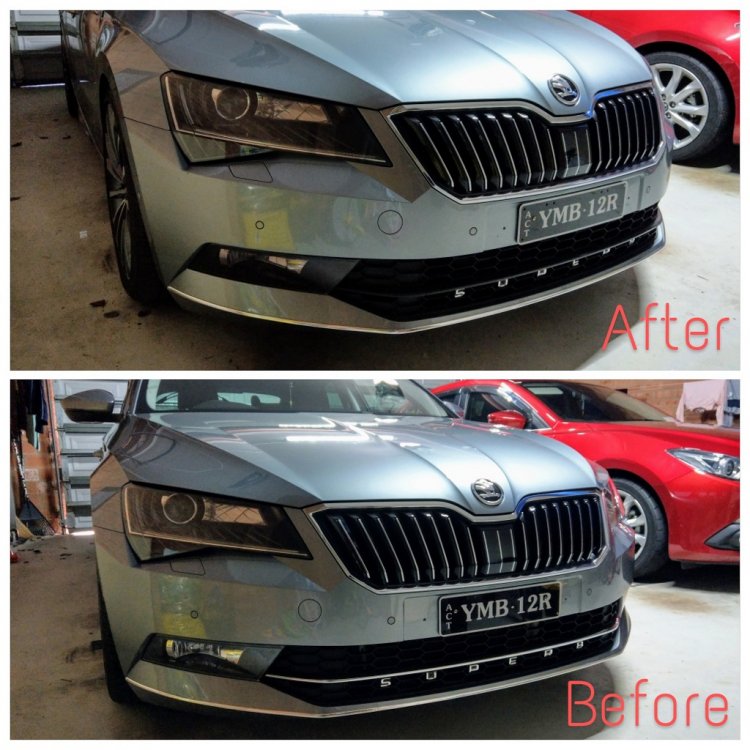
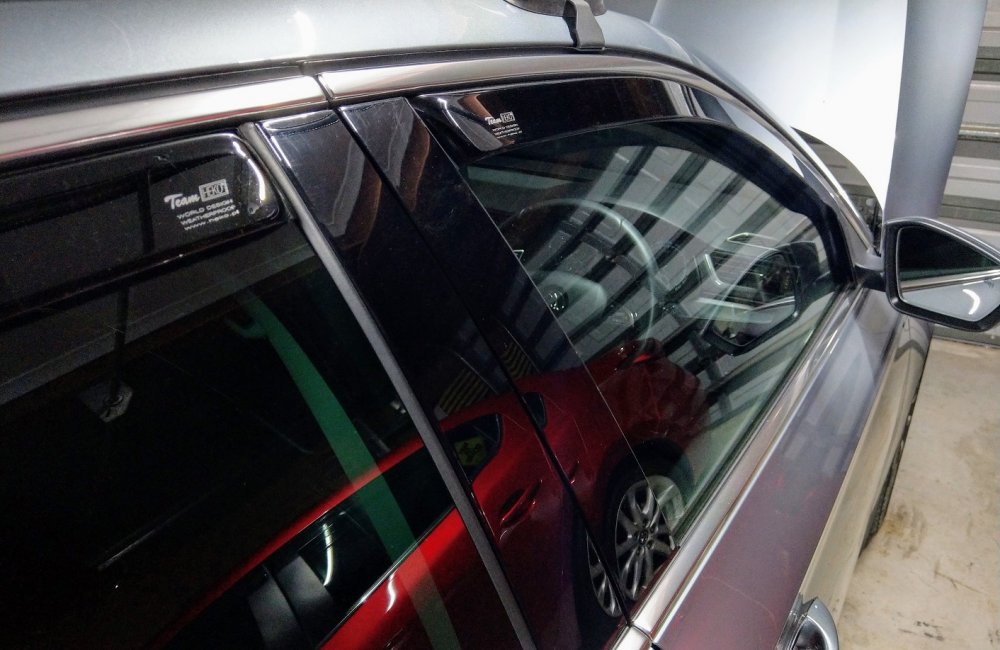
apart from painting of the side skirts, and wrapping the roof, I fitted/installed everything else. Exterior Modifications - Rieger side-skirts, color-coded (P/N: K00079041+ K00079042) - Black Fog light Frames - Sportline rear diffusor - Heko Wind Deflectors - Blackened (plasti-dip) front lower grille chrome bits - Spaced out SUPERB lettering, front & back - SUPERB fender badge - Roof wrapped Gloss Black vinyl - Chrome strip across rear lights and boot edge, like Facelift model - Chrome strip across lower door guard protector edge, like L&K models - Chrome strip across front bumper lower edge, like L&K models - Mudflaps, front (modified to accommodate side-skirts) & rear - Skoda tire valve caps - Aluminum alloy fuel cap cover - Stainless Steel door lock cover - Aluminum Boot Lid rear door sill - Chrome Door Handle Bowls - Lightly smoked tint rear tail lights - Lightly smoked tint fog lights - Sound deadening - boot floor, inside wheel arches (front & rear) - removed blocked brake duct in front wheel arches


-
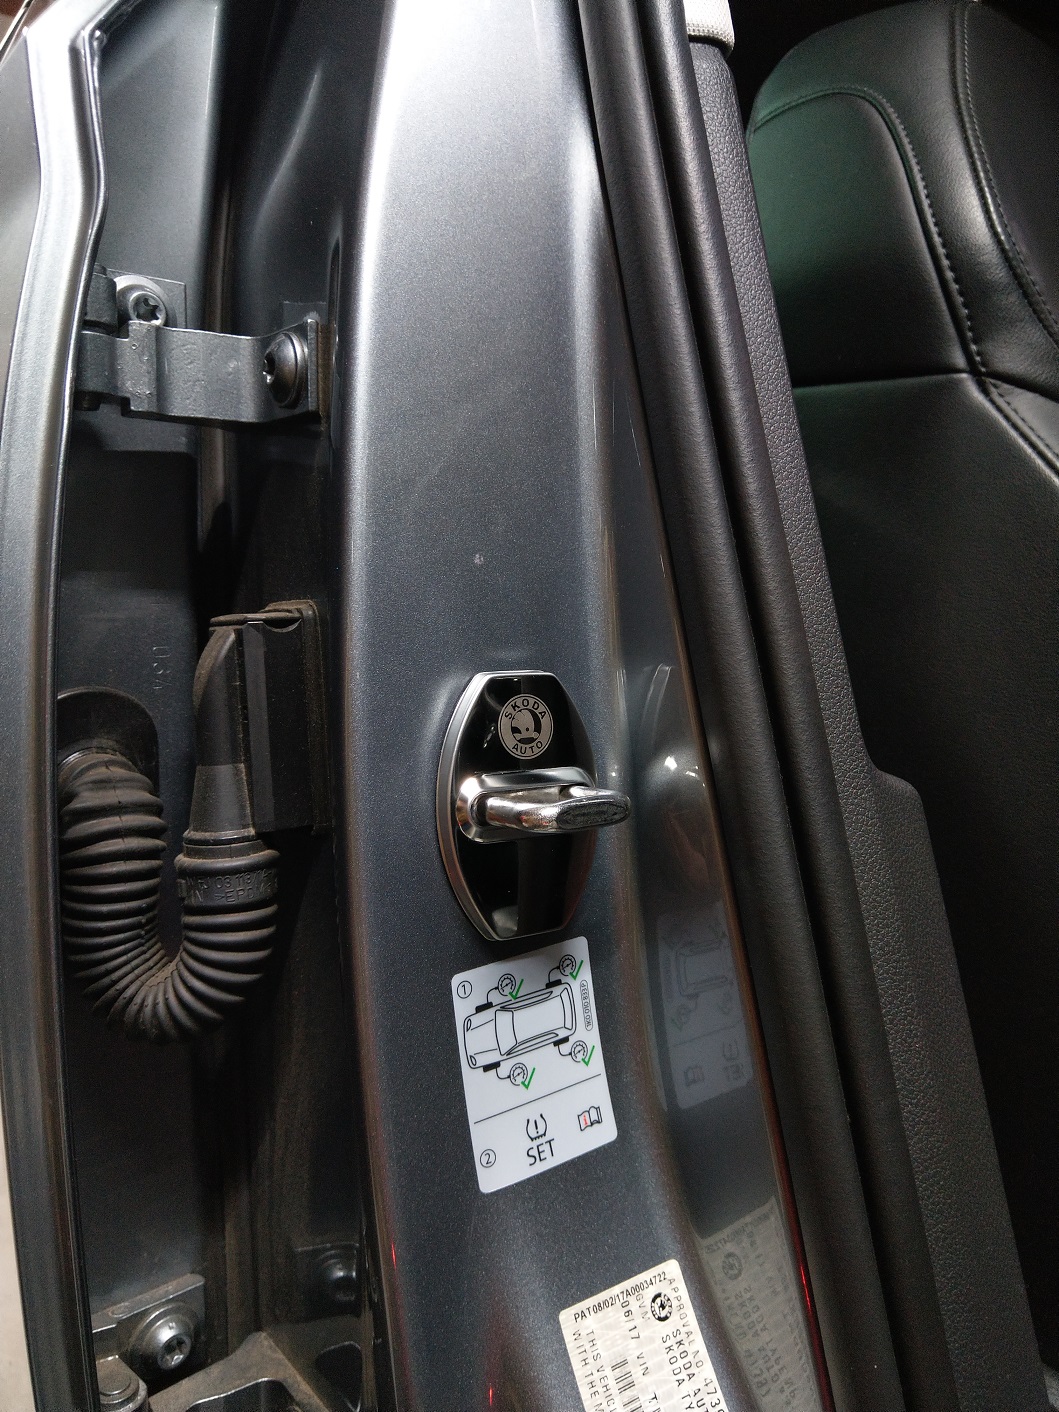
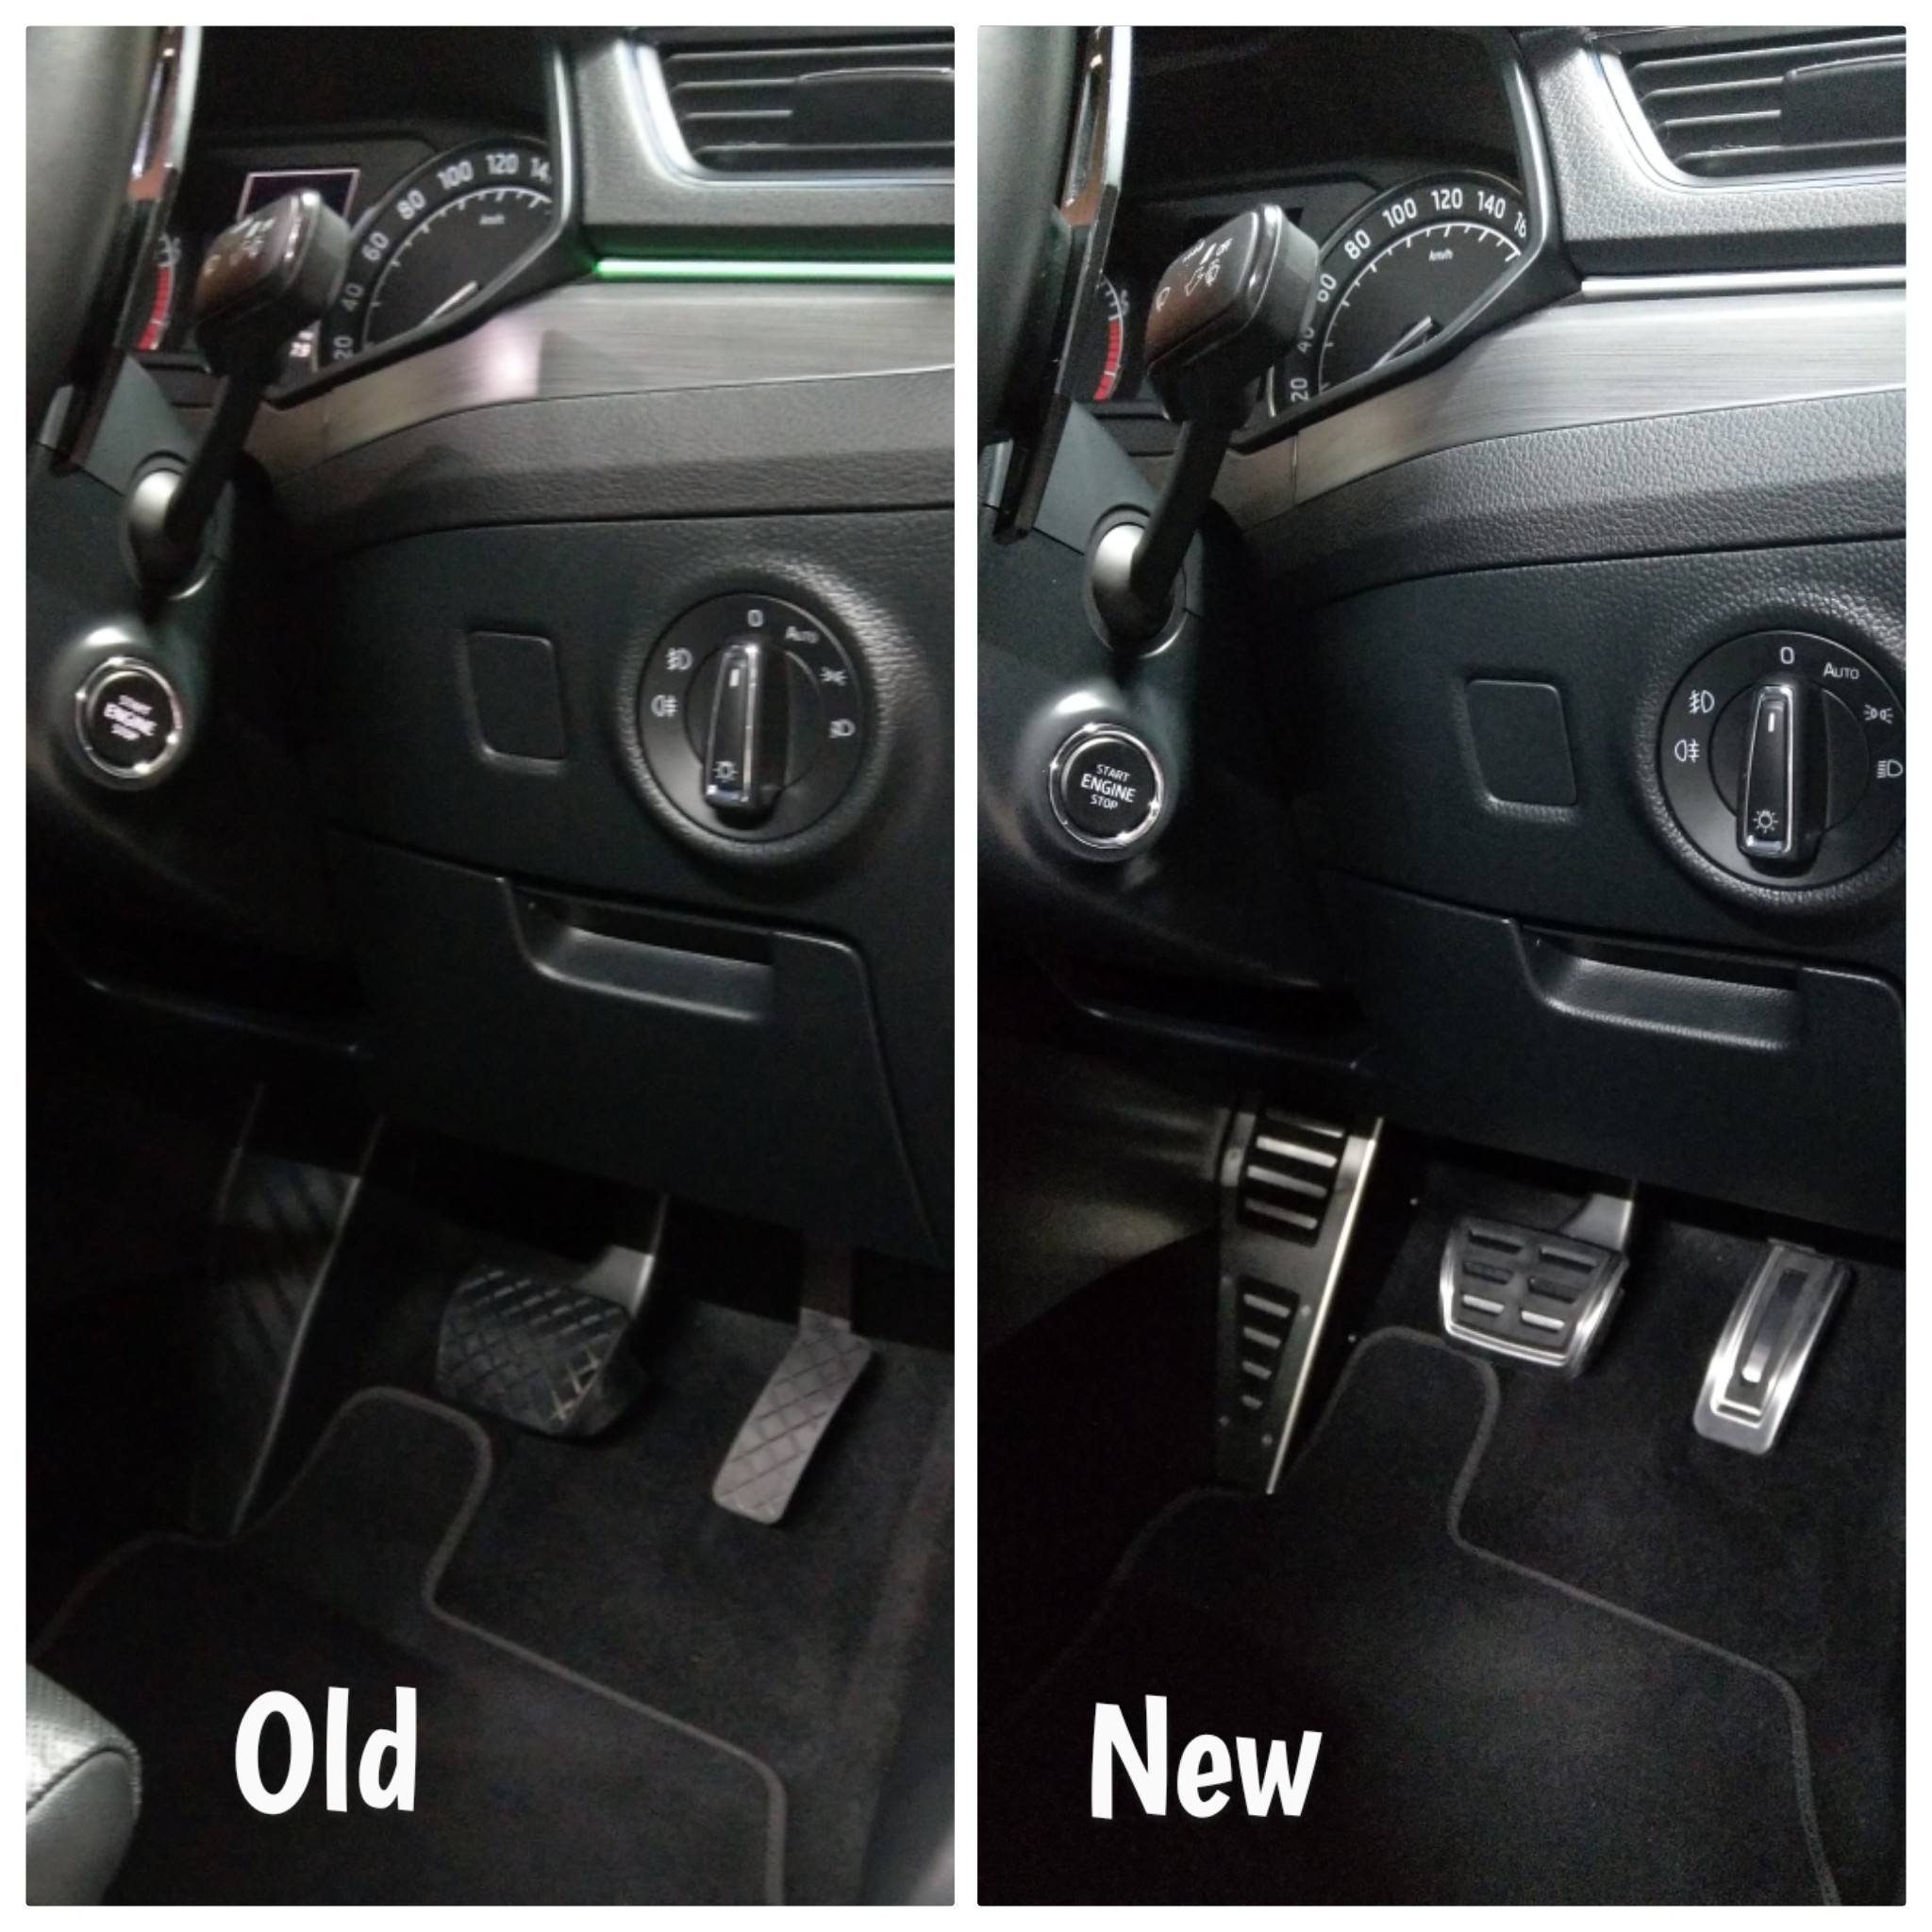
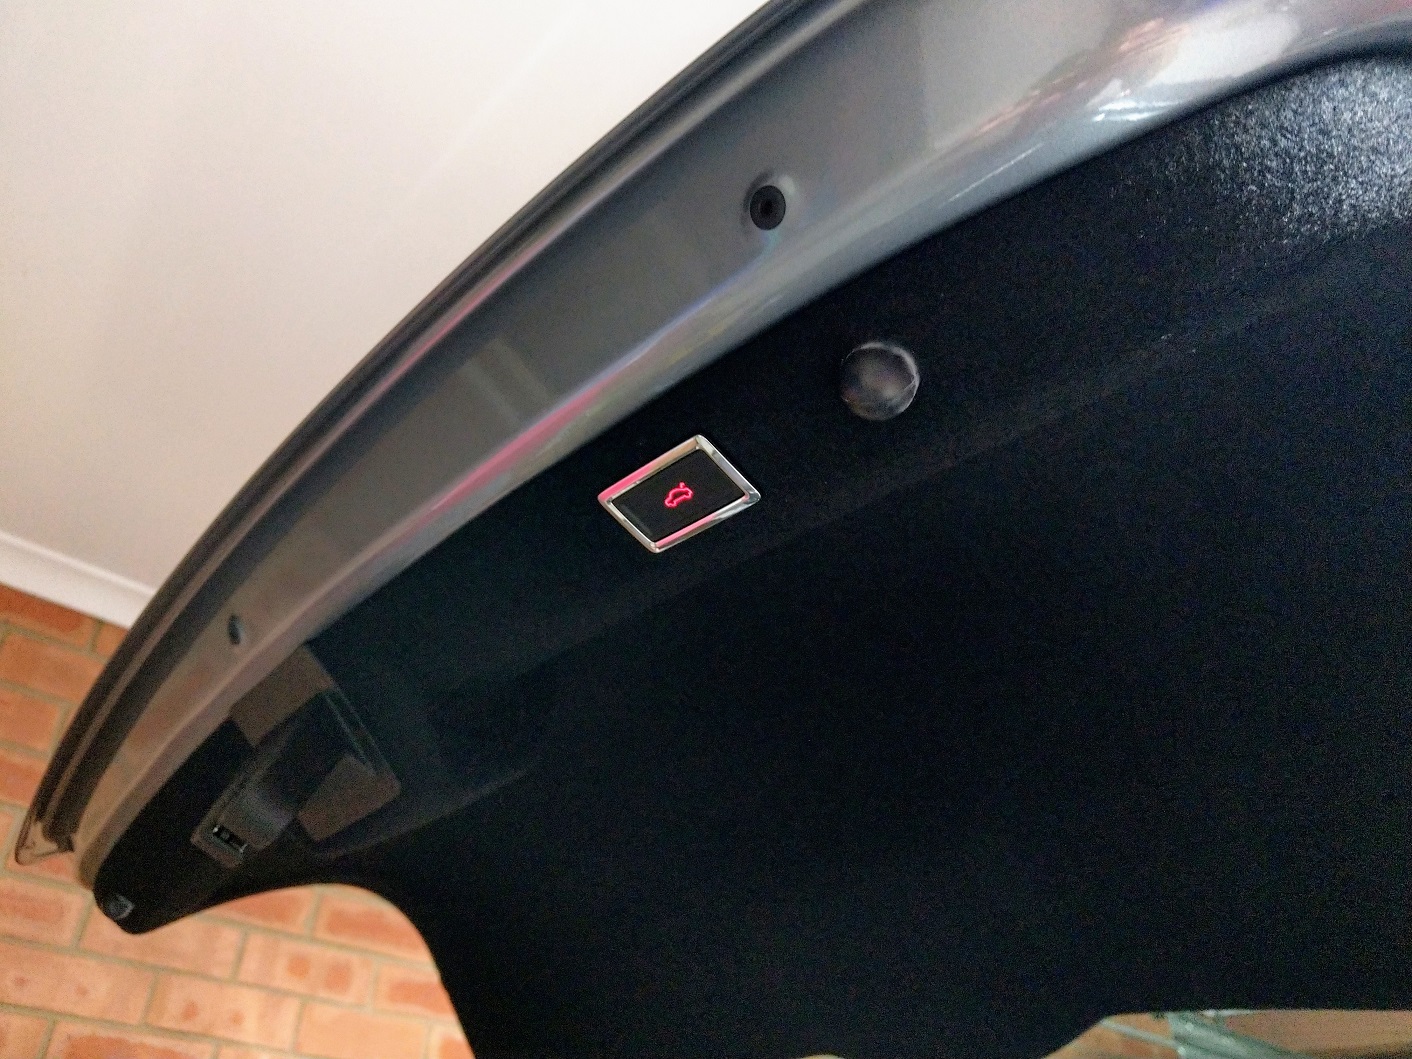
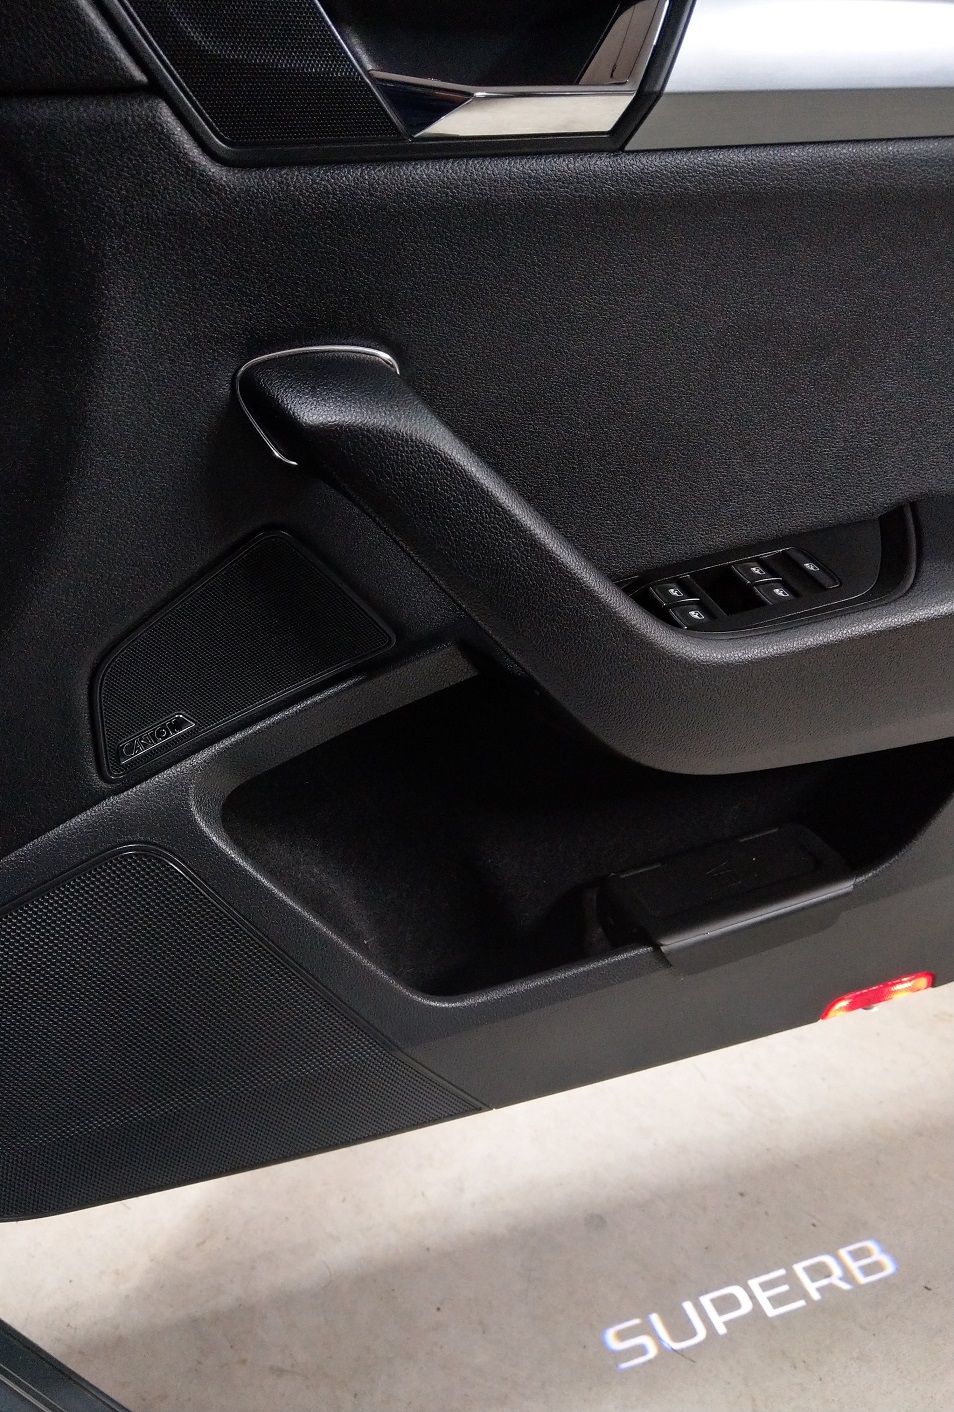
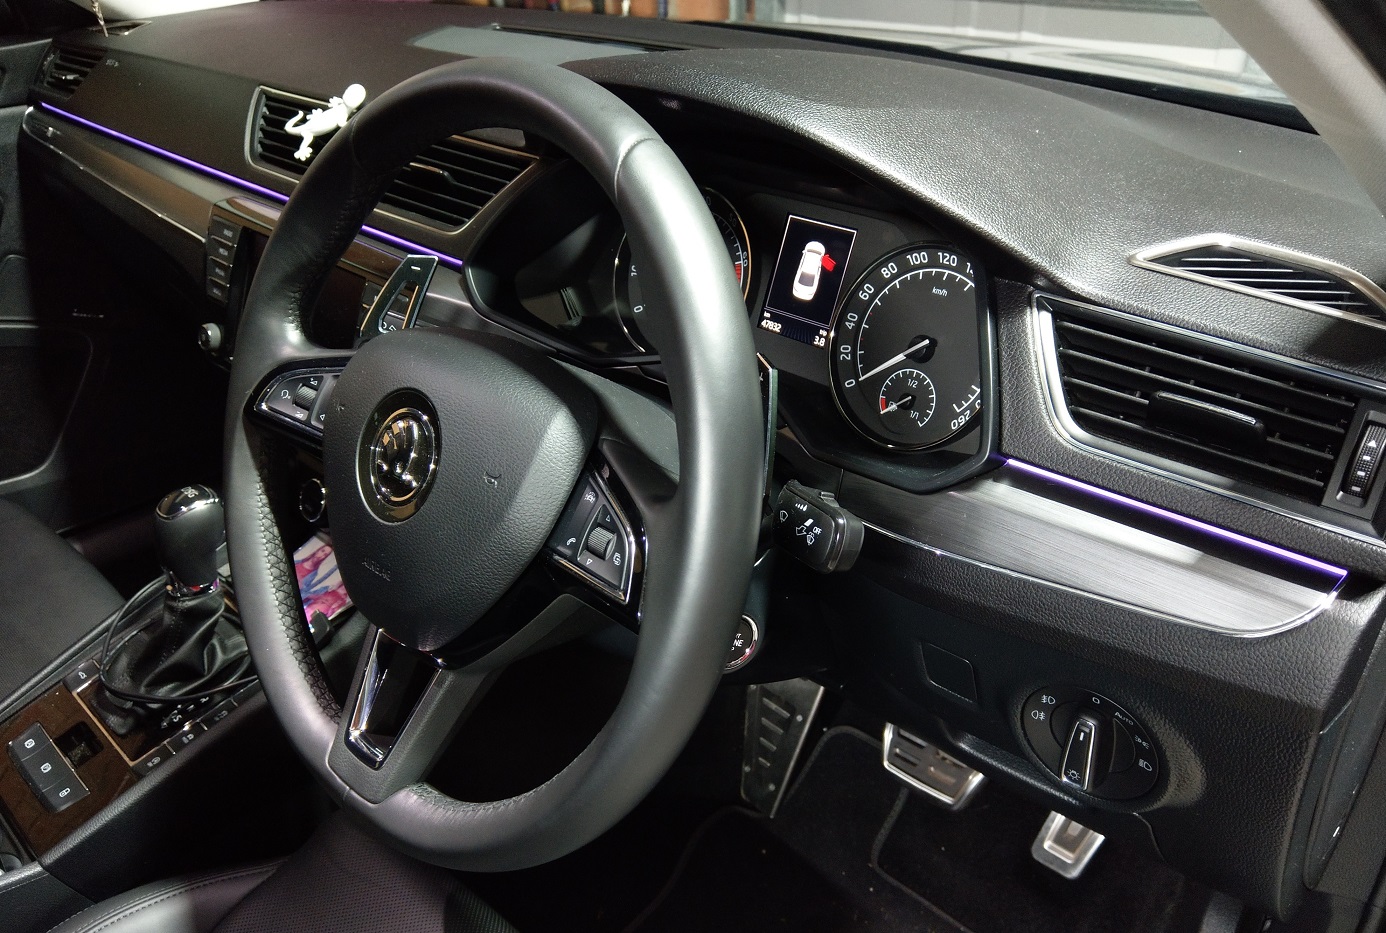
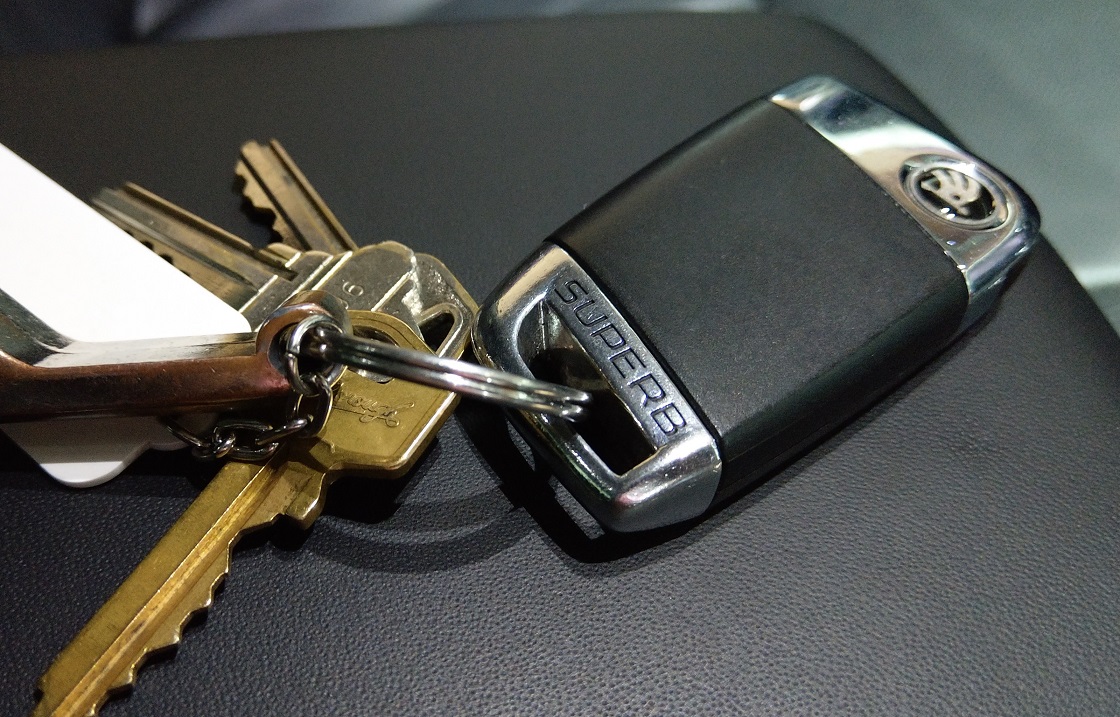
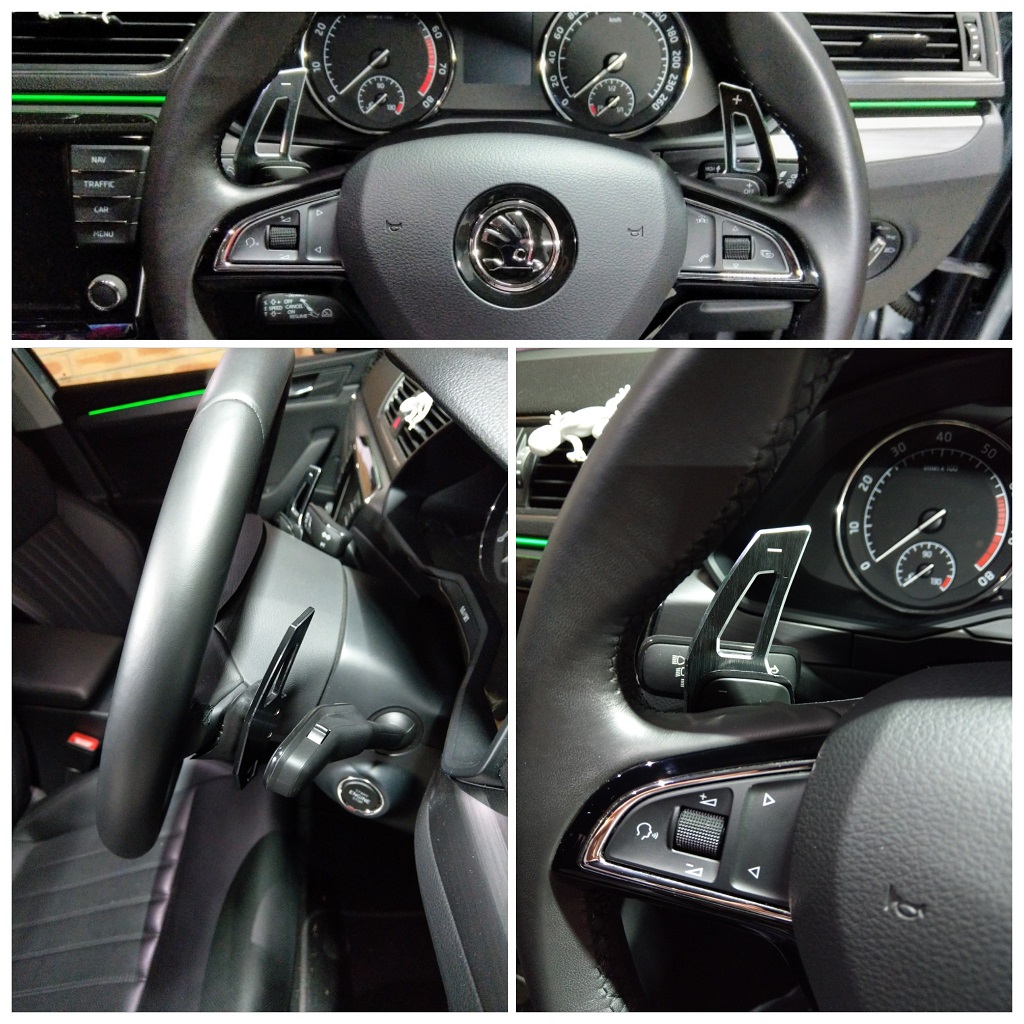
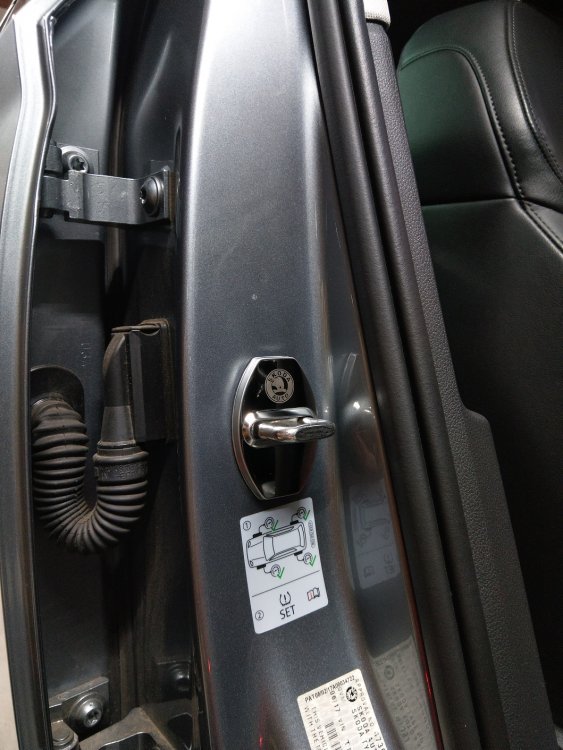
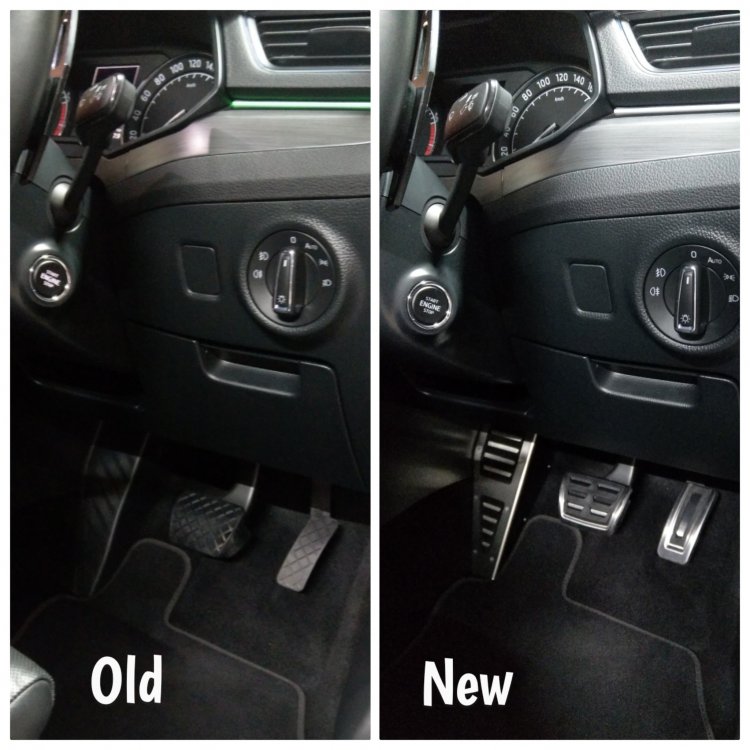
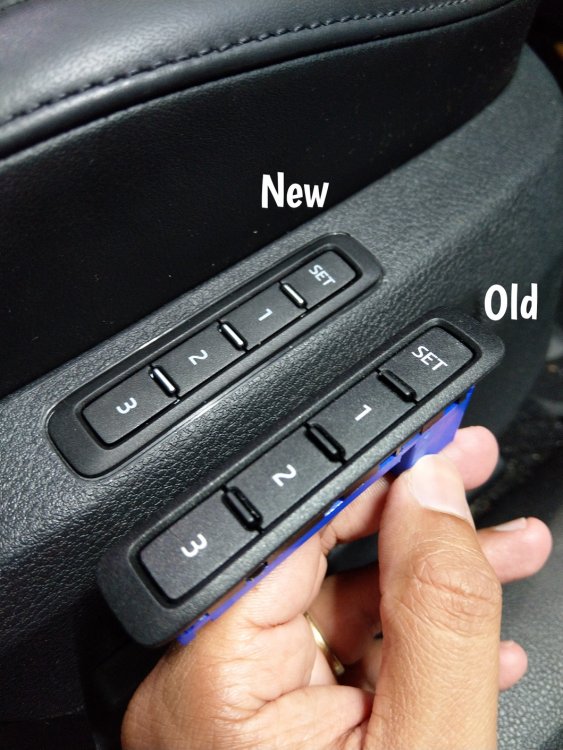
Interior Modifications - Chrome strip across dashboard. flexible chrome strip placed it between the silver trim and the black plastic. above the glovebox, and above the headlight switch. - Chrome rings on interior door handles flexible chrome strip wrapped around the top of all the door handles, as per the facelift Superb. - Aluminum alloy DSG paddle shifter extensions stick on ones. been 12 plus months. still solid and nice feel to it when pressing. - Chrome plated 12v socket cover - Stainless Steel footrest Accelerator & Brake Pedals - Chrome boot close button - Chrome Car Seat Memory Switch - Key bottom Chrome end tip RS6 style - SUPERB - Headrest multifunctional coat hanger - Rubber mat over rear tunnel


-
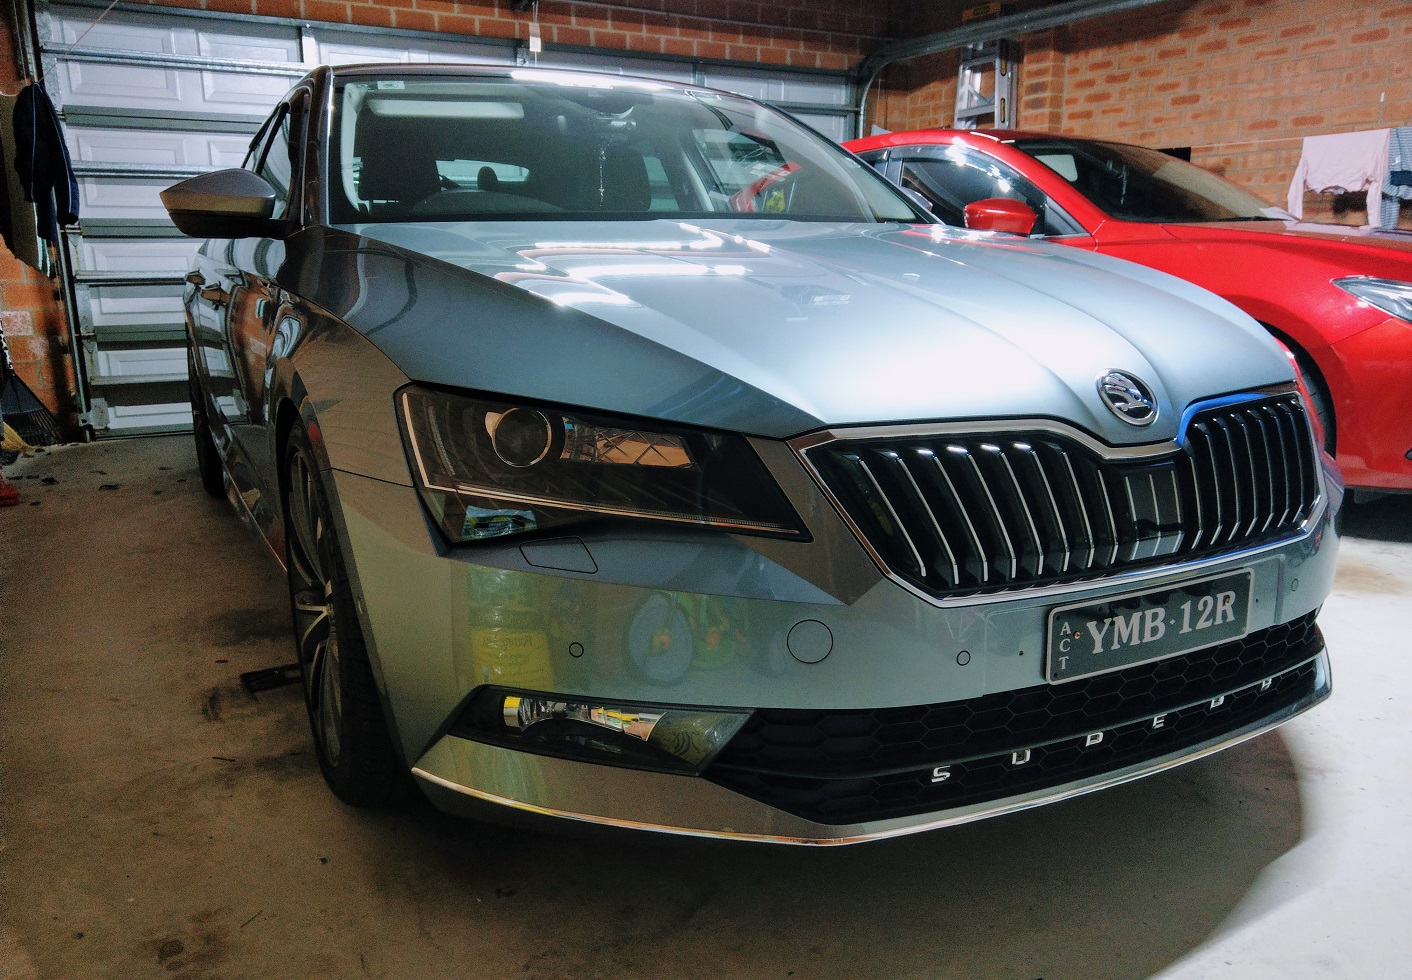
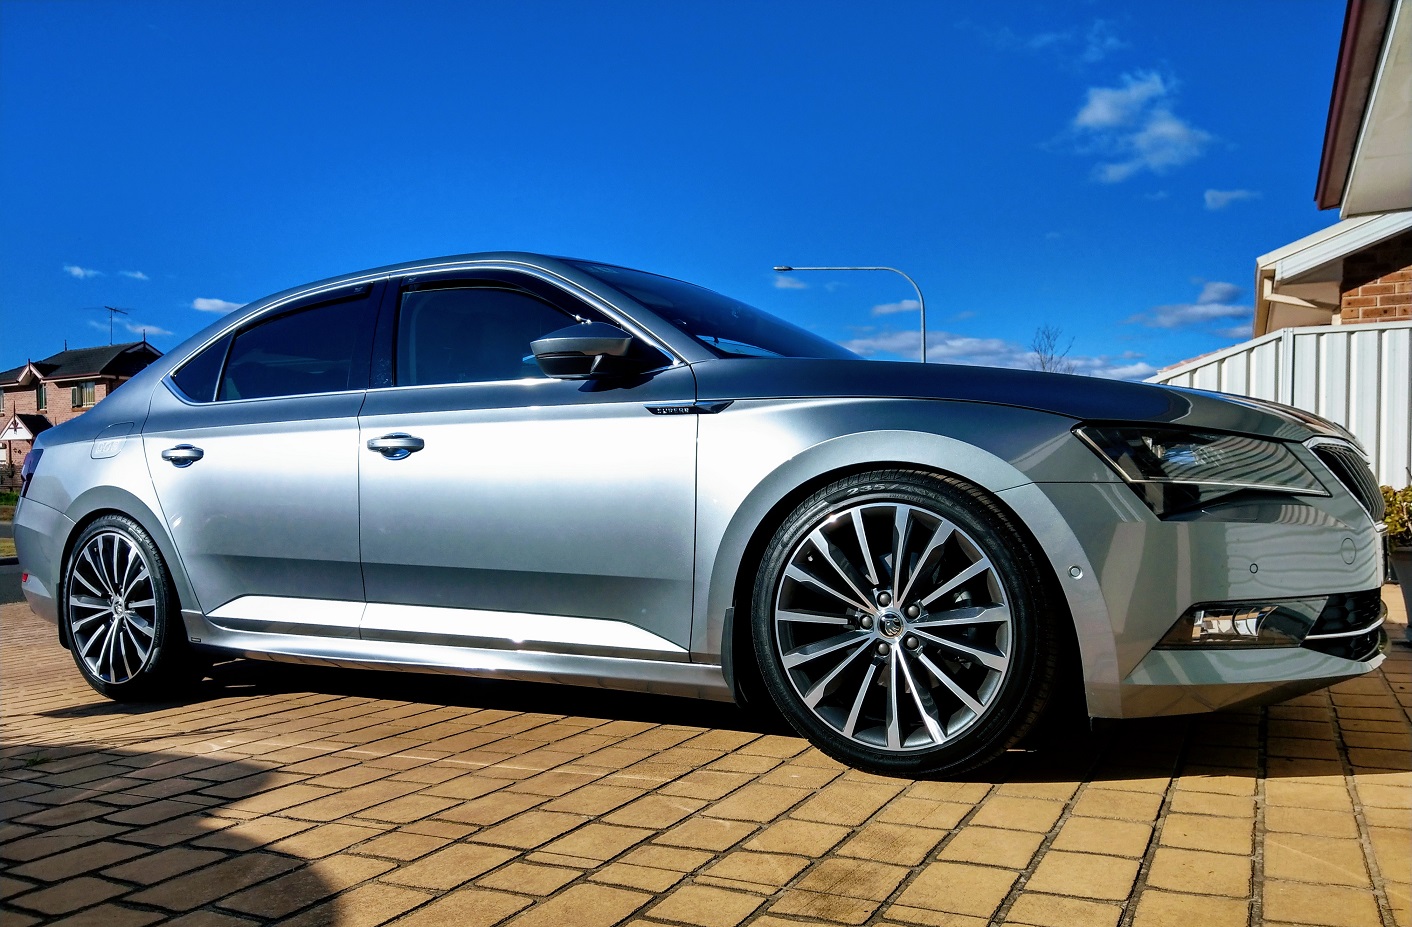
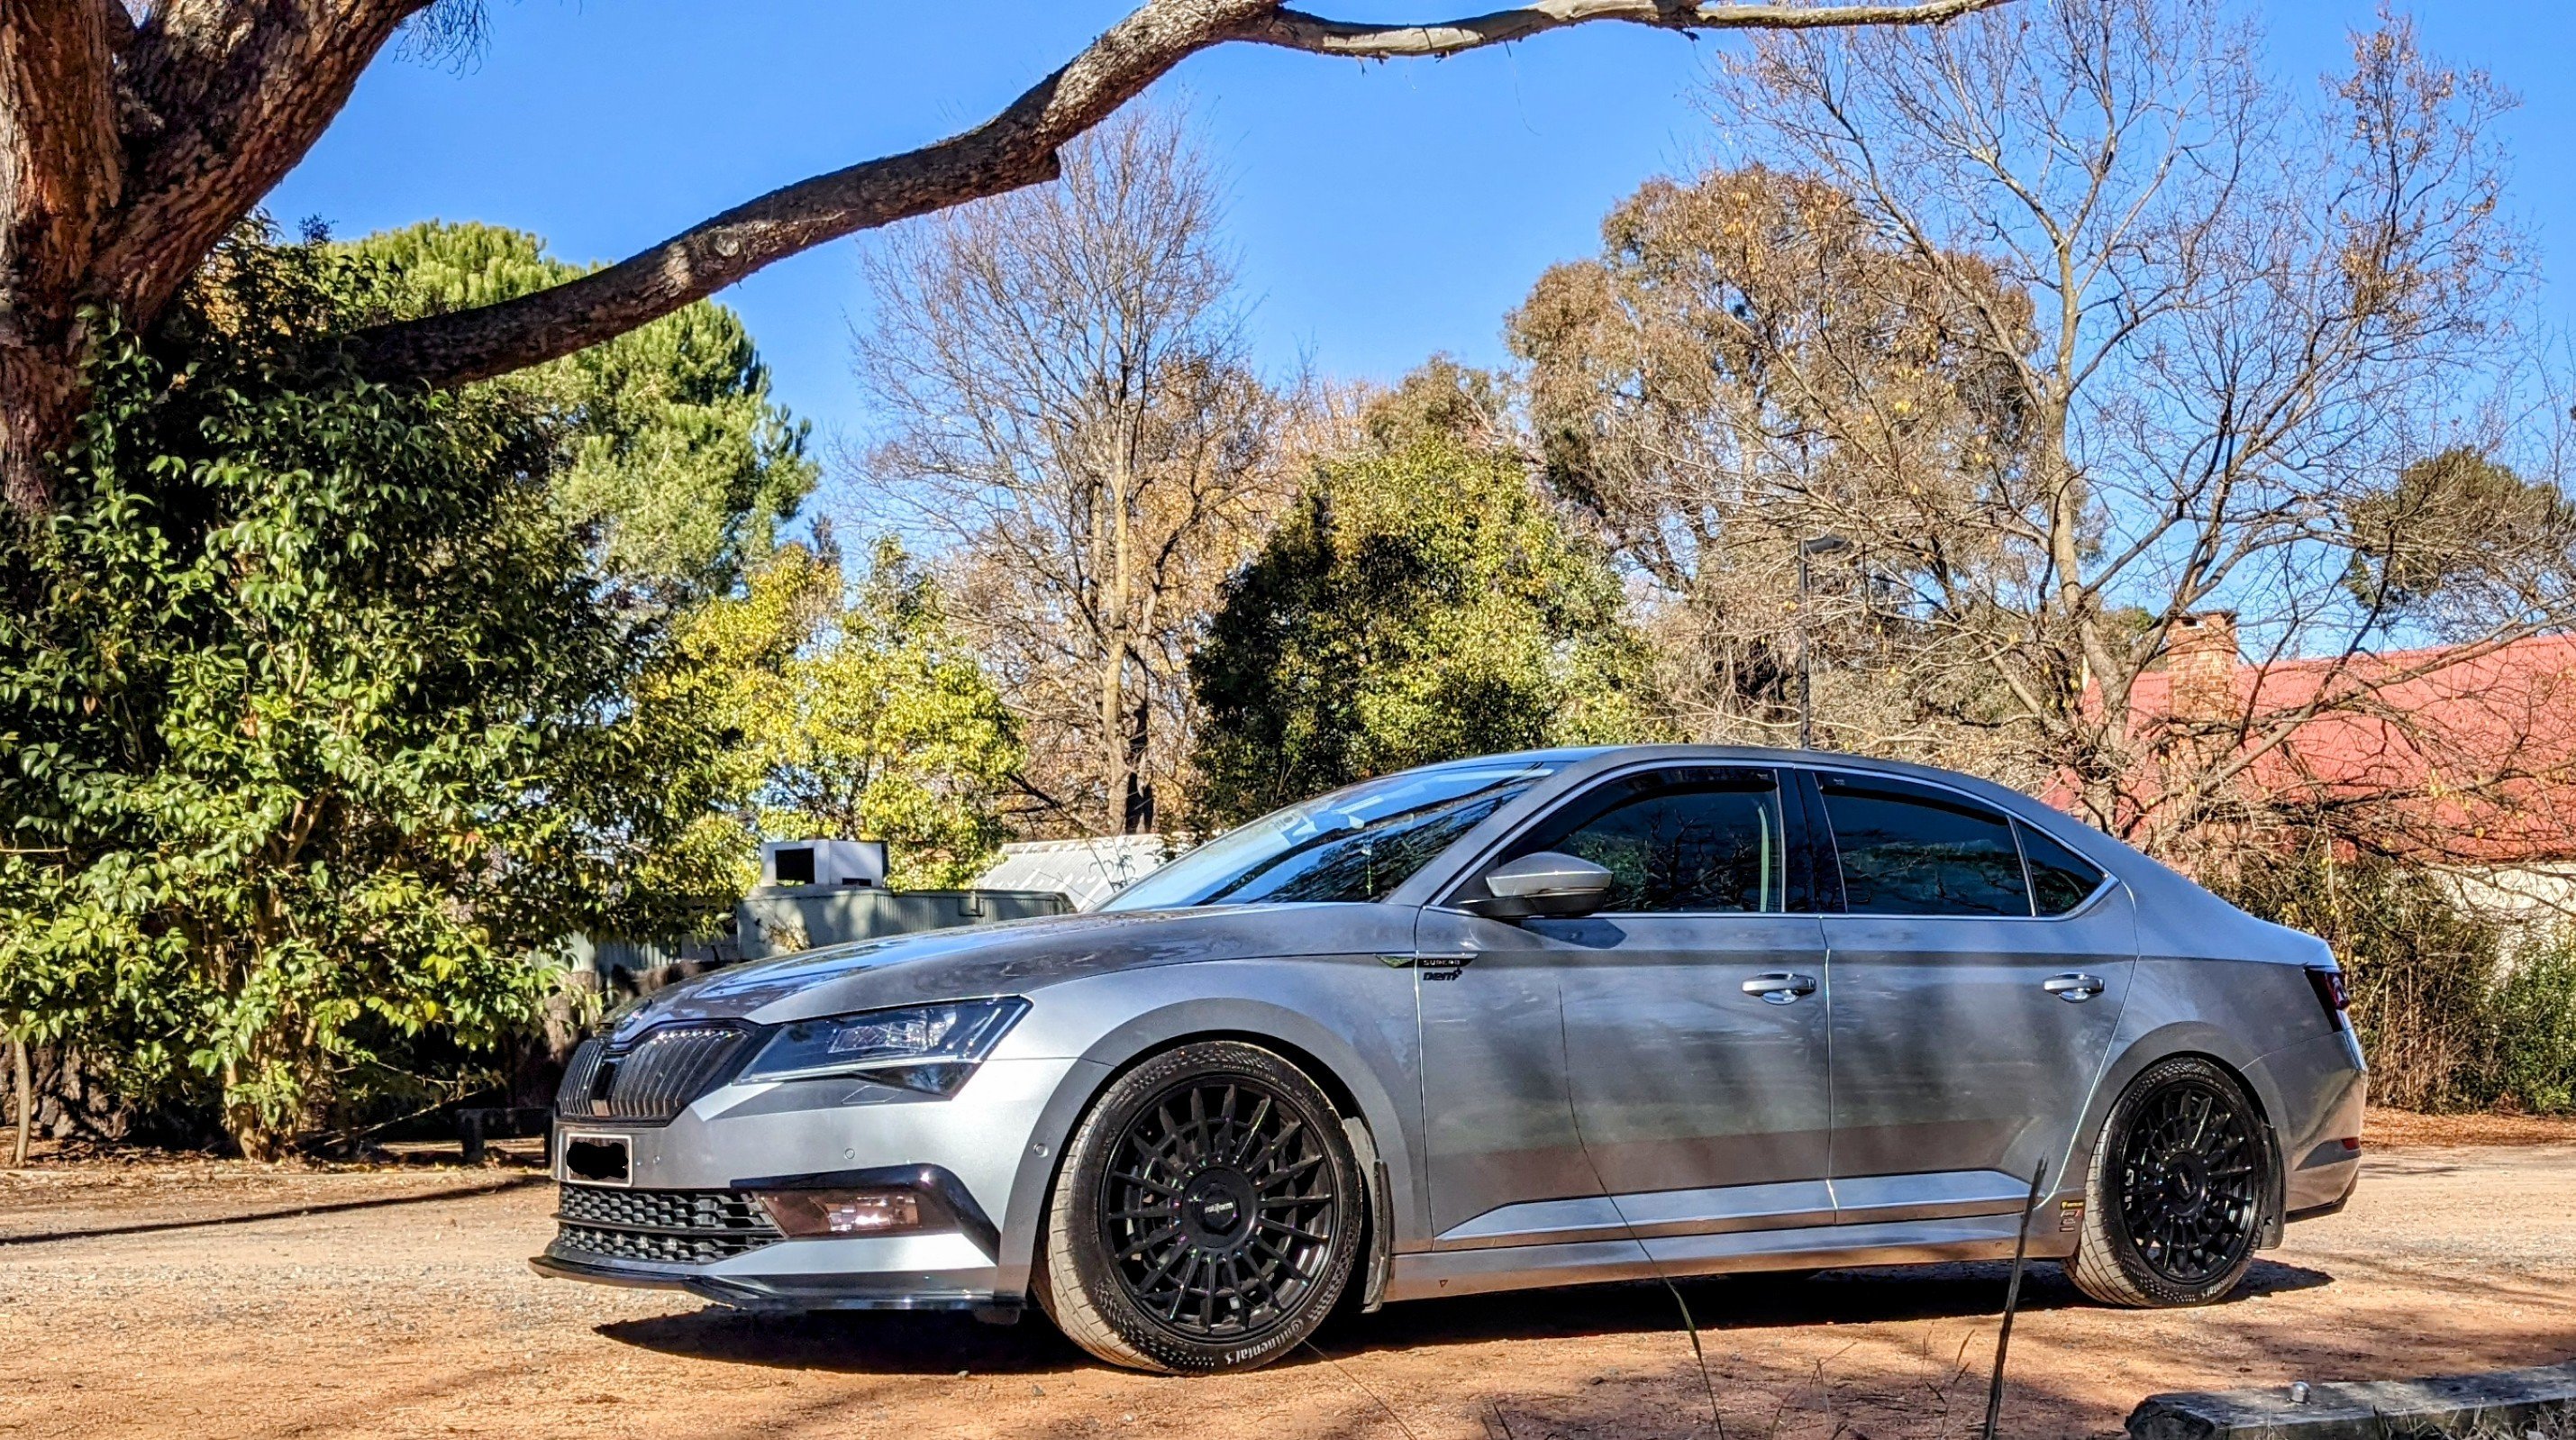
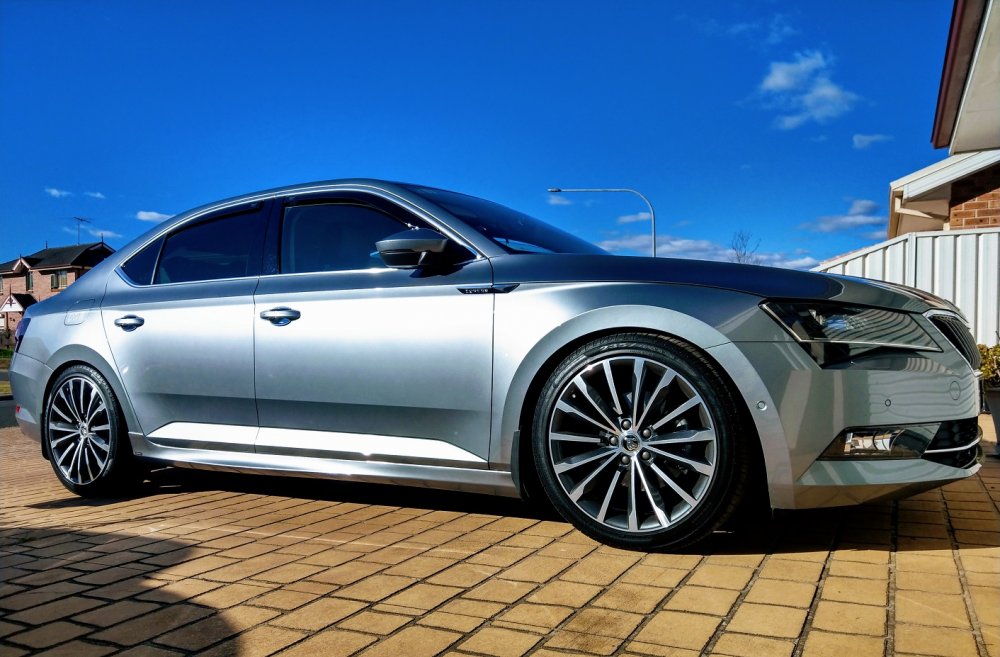
decided it is finally time to catalog all the bits n pieces I've done to Gandalf (MY17 Superb 162TSi). its been 3.5 yrs, and a lot has been done, but u wouldn't think that looking at it. below is full listing of everything I've done. all things small, and some big. Geez - there is a LOT of things!!! I didn't realise how many until I listed each & every one of them them down!!! yes, I need an Intervention hence, this is going to b a long long post - u've been warned!! firstly - a summary of all the things done, including links. This will b followed by subsequent posts of pics, and details for some of the things. things I may, or may not, do in the near future:- - ECU Tune - TCU Tune - Front Strut brace - Front End-links - illuminated front door sills enjoy, cringe or look away........ Interior Modifications - Chrome strip across dashboard - Chrome rings on interior door handles - Aluminum alloy DSG paddle shifter extensions - Chrome plated 12v socket cover - Stainless Steel footrest Accelerator & Brake Pedals - Chrome boot close button - Chrome Car Seat Memory Switch - Key bottom Chrome end tip RS6 style - SUPERB - Headrest multifunctional coat hanger - Rubber mat over rear tunnel Exterior Modifications - Rieger side-skirts, color-coded (P/N: K00079041+ K00079042) - Black Fog light Frames - Sportline rear diffusor - Heko Wind Deflectors - Blackened (plasti-dip) front lower grille chrome bits - Spaced out SUPERB lettering, front & back - SUPERB fender badge - Roof wrapped Gloss Black vinyl - Chrome strip across rear lights and boot edge, like Facelift model - Chrome strip across lower door guard protector edge, like L&K models - Chrome strip across front bumper lower edge, like L&K models - Mudflaps, front (modified to accommodate side-skirts) & rear - Skoda tire valve caps - Aluminum alloy fuel cap cover - Stainless Steel door lock cover - Aluminum Boot Lid rear door sill - Chrome Door Handle Bowls - Lightly smoked tint rear tail lights - Lightly smoked tint fog lights - Sound deadening - boot floor, inside wheel arches (front & rear) - removed blocked brake duct in front wheel arches Handling Modifications - 15mm front & rear aluminum hub-centric spacers - 25.4mm Hardrace rear sway bar (P/N: HR7759) - Whiteline rear end-links (adjustable) (P/N: KLC202) - Eibach Prokit Lowering Springs (25mm) (P/N: 10-84-042-02-22) - 034Motorsport Billet Aluminum MQB Lower Dogbone Mount Insert Mechanical Modifications - 034Motorsport Turbo Muffler Delete - CTS MQB Gen3 High-flow Turbo Inlet elbow - Torque Solution Turbo Inlet pipe - Modified air intake - unblocked air intake flap, additional holes in front of airbox - Snow Guard removal - aFe Magnaflow Air filter - Engine dust shield cover - ECS Atmospheric Diverter Valve Spacer (removed after 3 months) Technology/Lights Modifications - Start-stop memory device - Smart Light Assist (SLA) retrofit (P/N: 3V2941015B, 3V2941016B, 4H0941329 x2, 8P0941621) (video) - Direct Tire Pressure Monitoring System (TPMS) retrofit (P/N: 5Q0907273B, 5Q0907275B x4, 3G0907538) - Dynamic Wing Mirror Indicators (video) - Mega Power LED boot lights - Auxito LED bulbs - reverse and indicator bulbs. (video) - Lumileds LED fog light bulbs - Philips xTremeVision Gen2 D3S bulbs - Rear door warning lights retrofit - SUPERB Ghost LED door warning lights, front & rear - Blackvue DR450 front dashcam - Rear console 12v socket converted to Dual USB ports (in progress) VCDS Coding Modifications - activated alarm chirp when locking/unlocking - enabled SLA (next level up from HBA) - activated eyelashes (requires SLA headlights) - activated Fog lights as Coming-Home/Leaving-Home - activated rear lights with DRLs - activated DRL menu in infotainment - activated Traffic Sign Recognition (TSR) - disabled tailgate beep - activated refuel quantity - activated traffic notifications (TMC) - disabled undertaking prevention - enabled High Beam Assist (HBA) memory - comfort indicator from 3 to 5 flashes - enabled instrument (dash) illumination at all times - Throttle change to direct - Engine Start button strobe effect (video) VCP Modifications - upload SLA parameter file for 4B Multi function module - upload TPMS parameter file for 65 Tire Pressure module
-
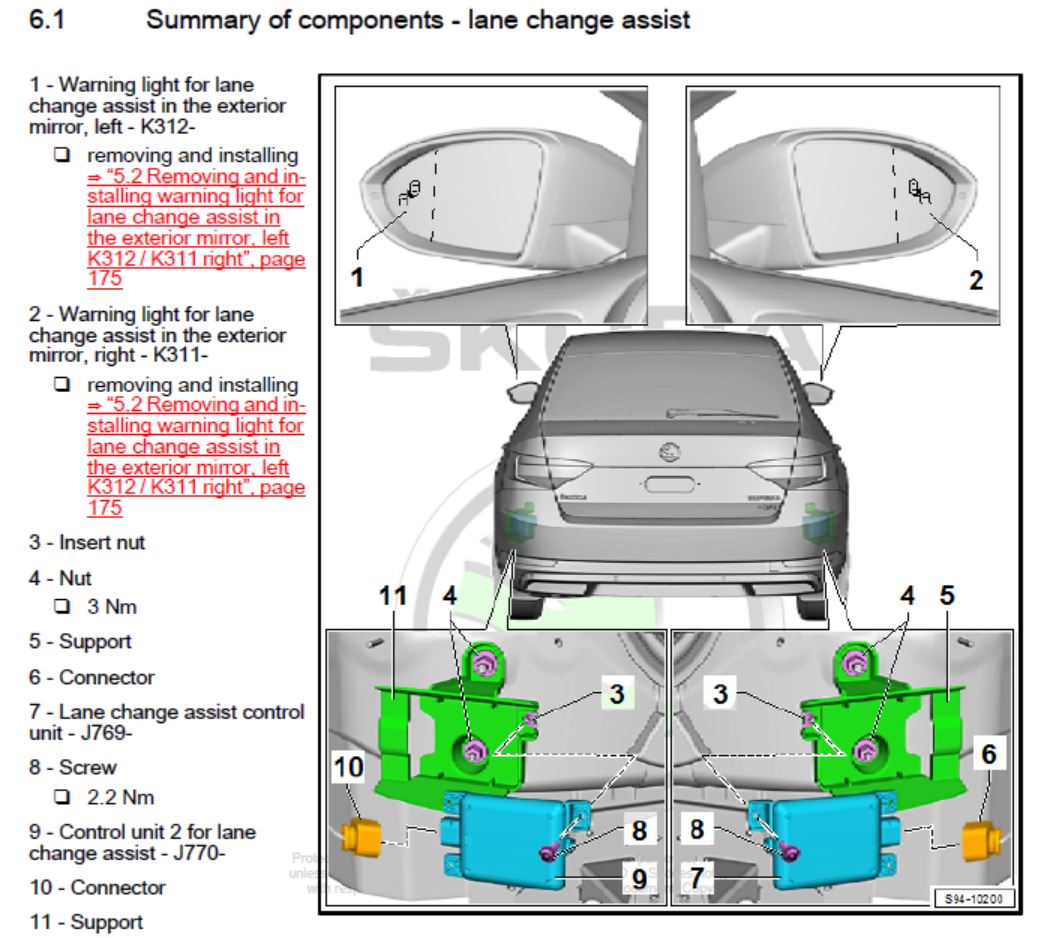
blind spot detection and rear traffic alert use the same radar, located inside the rear bumpers, one on each side. yes, its useful, and works well in real world situations.

-
that would b most likely referring to the Traffic Jam Assist (TJA) feature. u can have ACC without TJA. however ACC is a prerequisite for TJA to work.
-
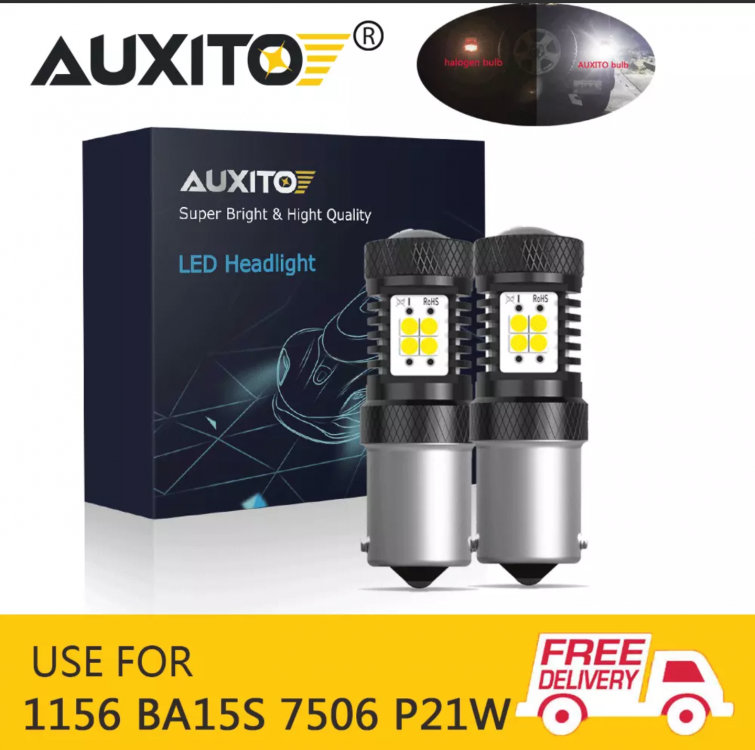
This is the specific one I have..... https://www.ebay.com.au/itm/Pair-Super-Bright-7506-1156-BA15S-LED-Brake-Reverse-Turn-Stop-Tail-Lights-Bulbs-/392980963000?_trksid=p2349624.m46890.l49292
-
@ope126recently had a heated windscreen retrofitted to his car.
-
Most definitely no. It's embedded in the car's safety systems. It's not just a Skoda thing.
-
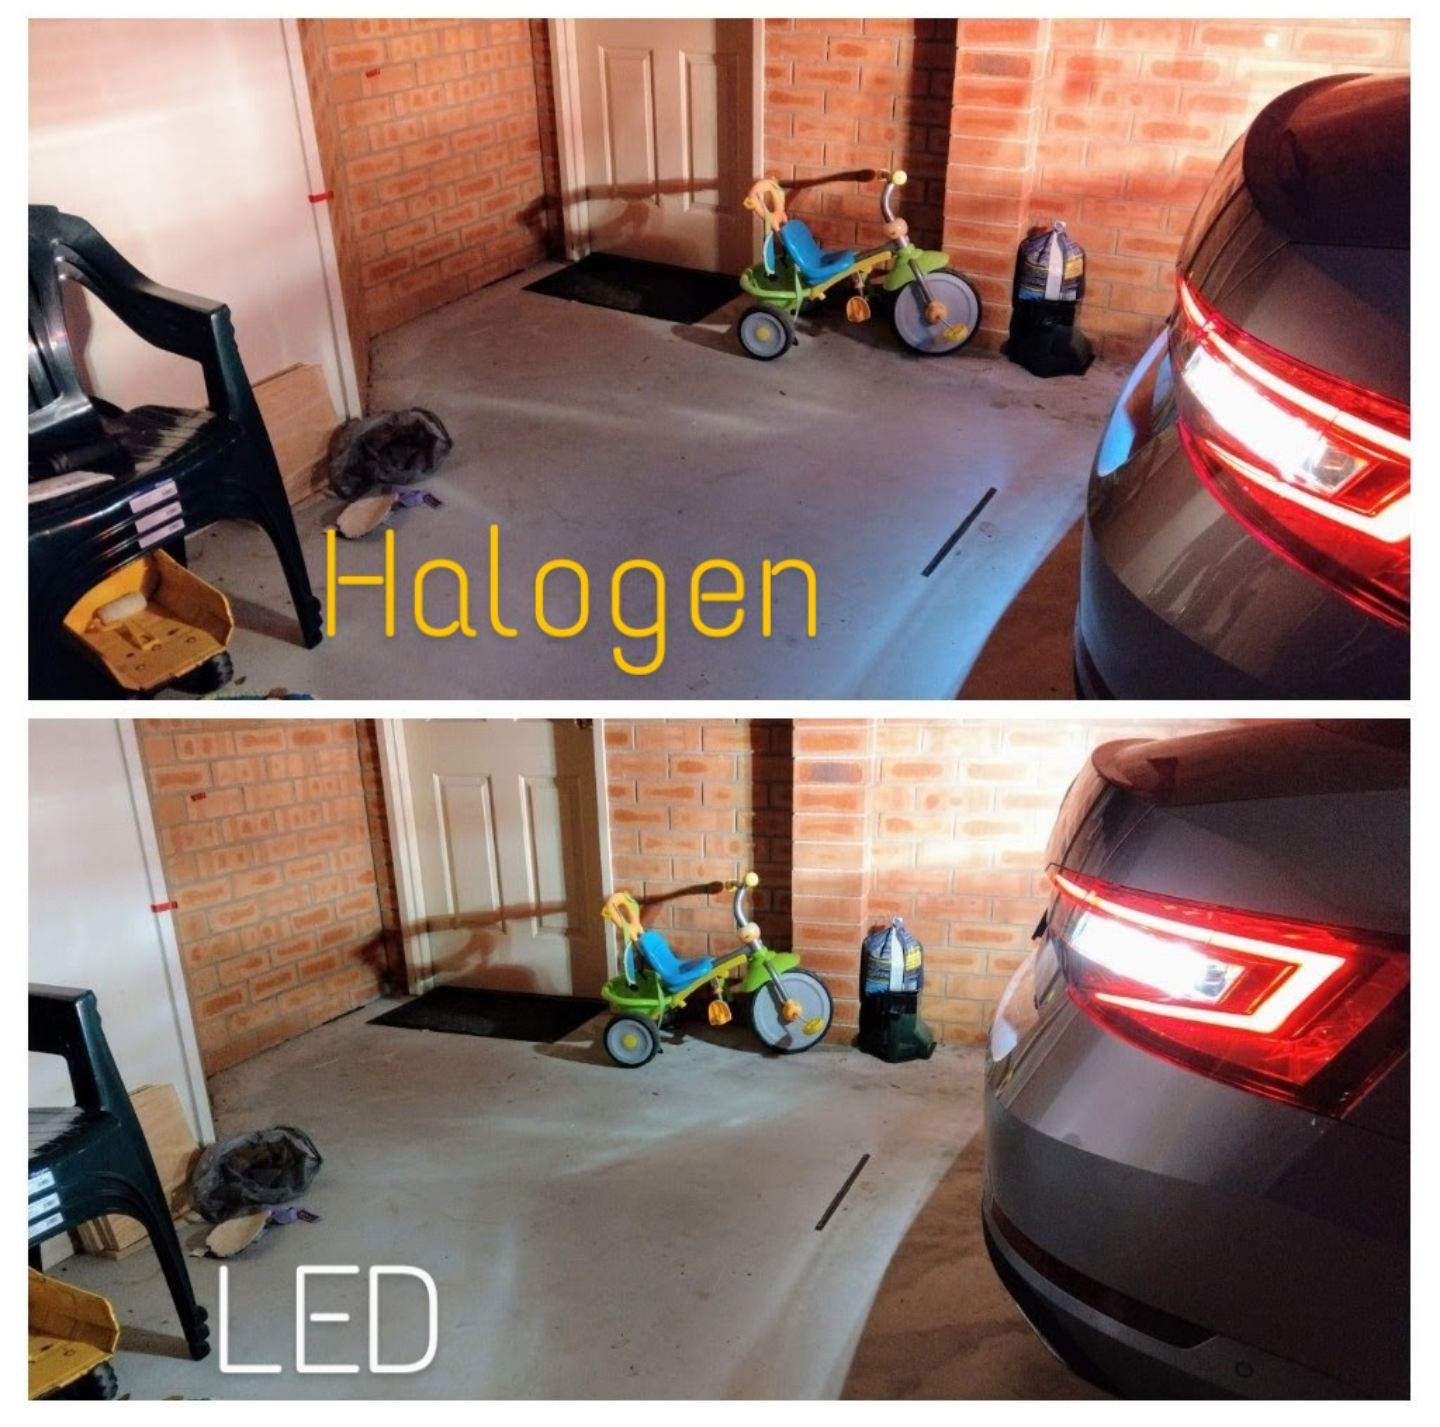
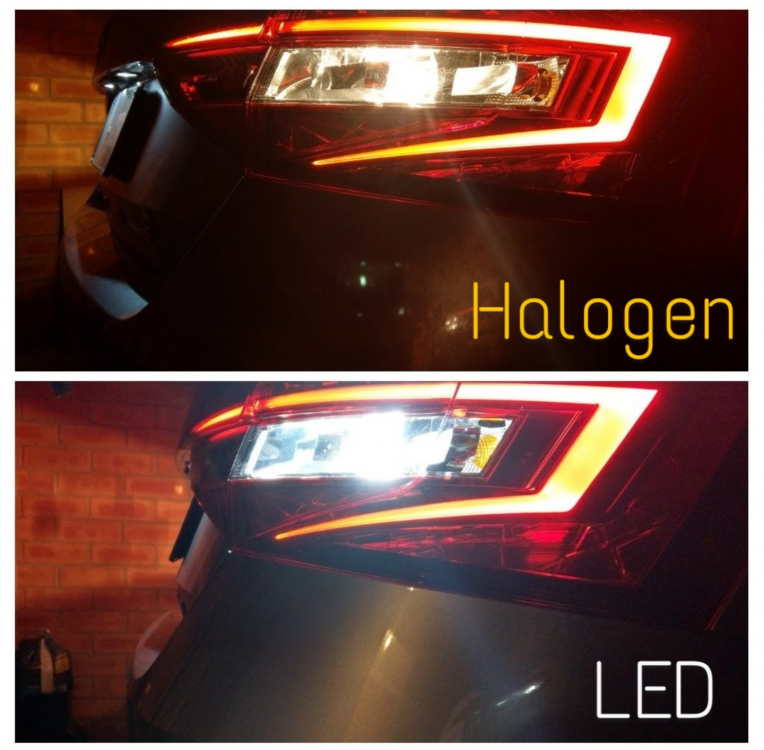
I've got Auxito LED reversing bulbs in mine, for a while now. Very happy with it, and it's useful light.

-
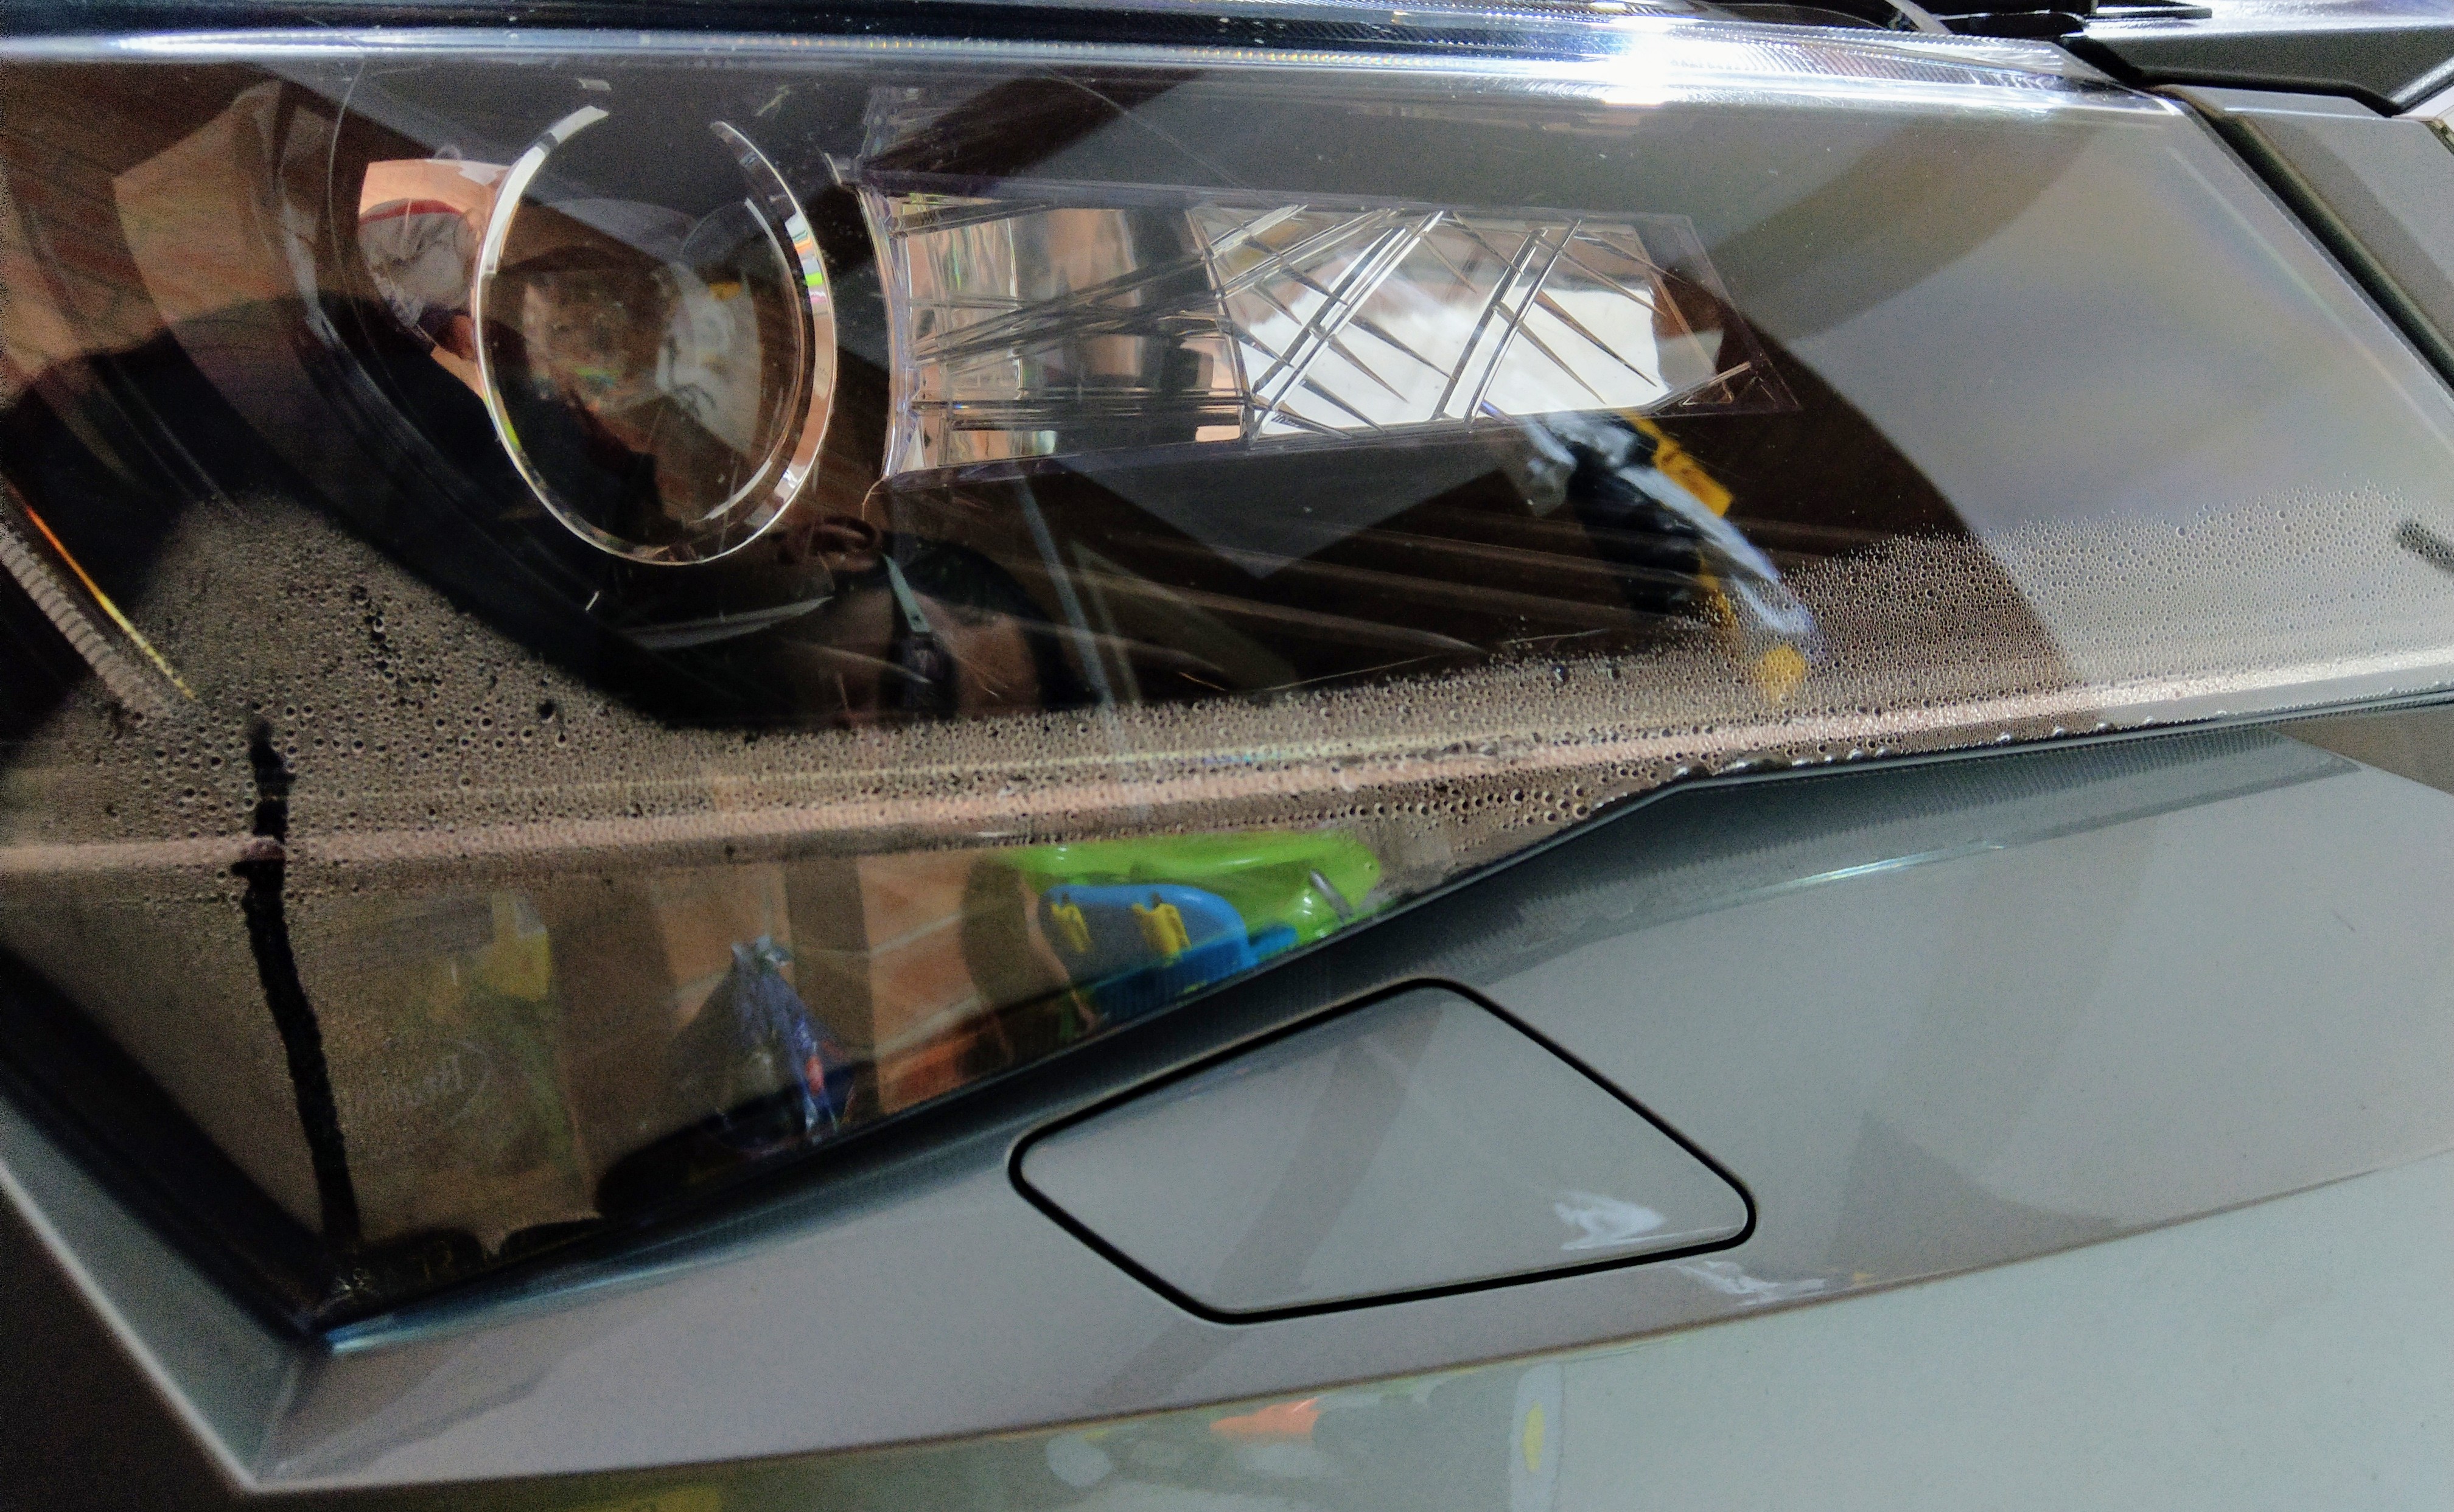
I did the same thing (minus the tampon) when my driver's side headlight fogged up for the first time in 3 yrs. Removed the back cover and drove for about 30-40 mins. Cleared up after that.

-
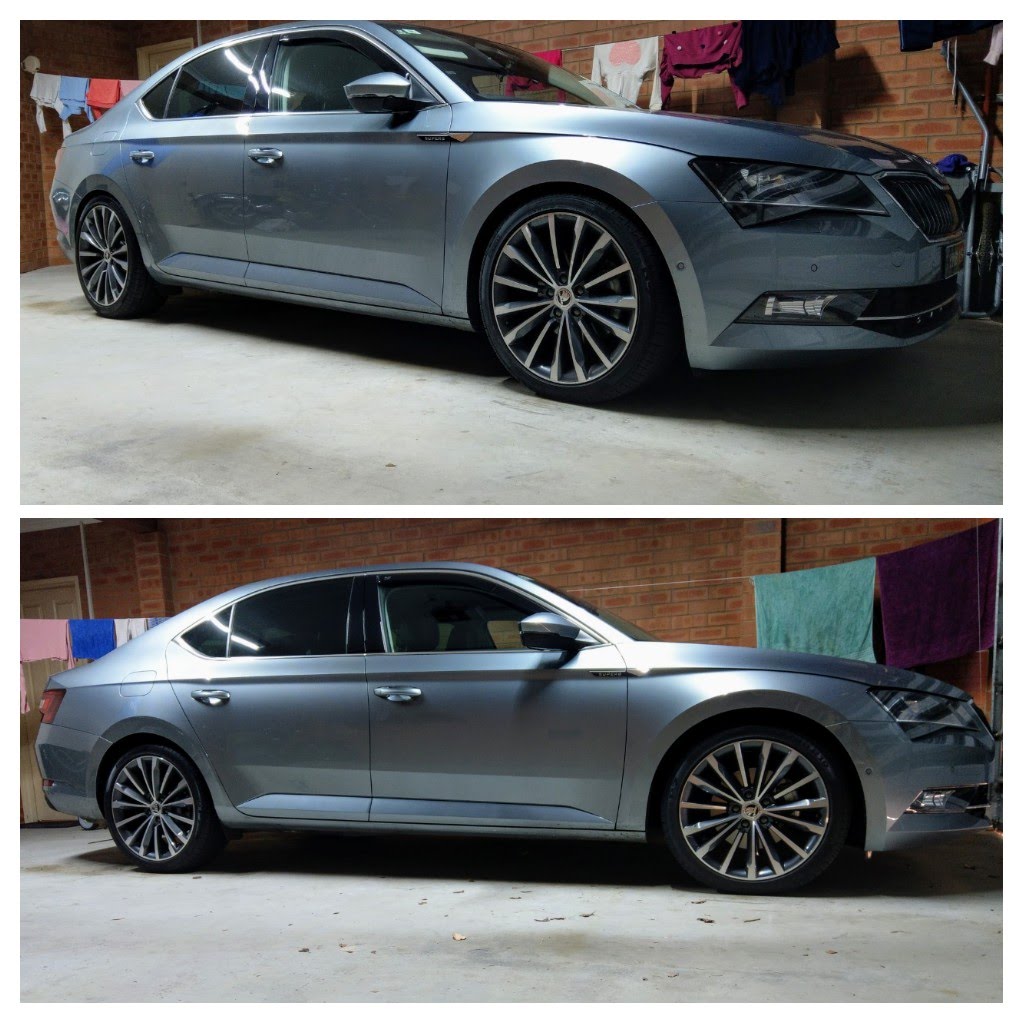
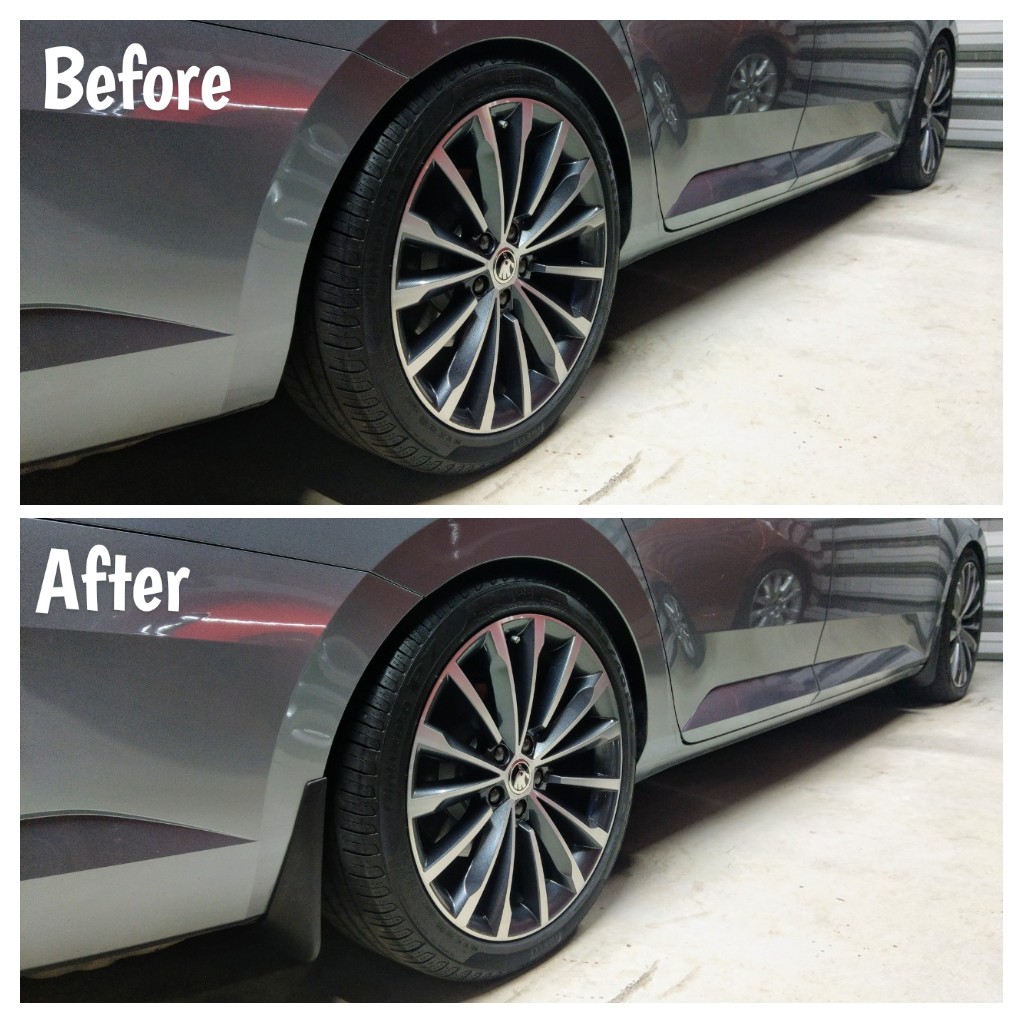
Lol, thanks. It's a long list of things I've done to Gandalf!!! I'll put a thread together, one day. However most of the things I do is subtle & no one will notice anything different unless I point it out, or when compared side by side to another Superb.
-
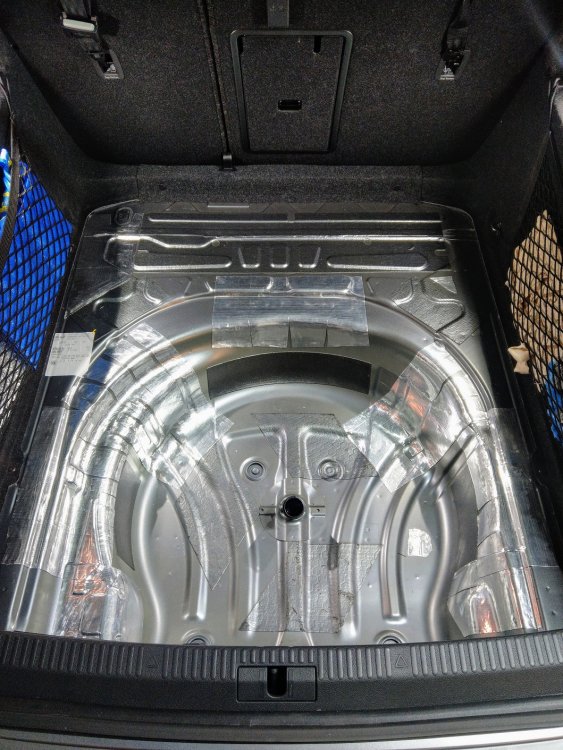
There shouldn't b any wires in the spare wheel well. Looks like something aftermarket. Factory fitted tow bar wires aren't visible anywhere in the boot area.
-
all good @john999boy i think because the Superb already has front door warning lights, the coding might have already been in place.
-
i used the plastic tool they provided, and wedged it in-between. i didn't remove any part of the door. with the corners/turns - make small slits along the black rubber bit, so it allows the chrome to stay bent. otherwise it will keep trying to straighten, and hence flex out of the groove/gap.
-
u'll need to tap into the window motor for positive connection, and into one of the door pins as the trigger (switched ground). you can read how I did it here. mine was wired up so it only turns on when the particular rear door is open. sorry, that is incorrect. there is no plug'n'play connector, nor is there any coding required. I don't know if it also applies to L&K variants.
-
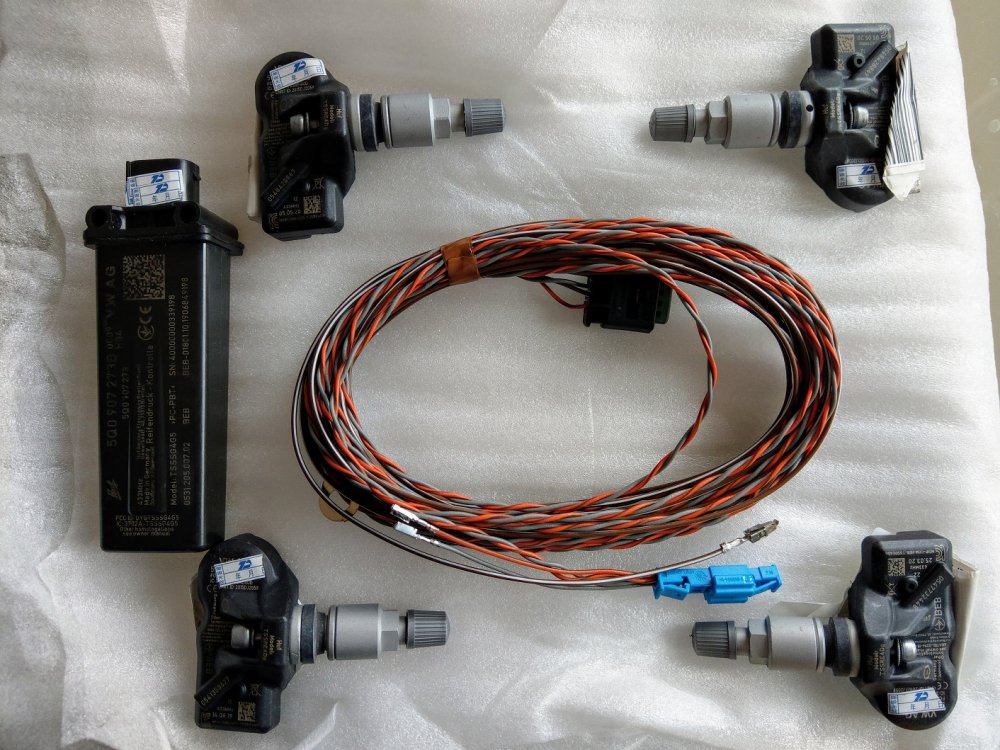
The alternatives r good, n do the job, but it doesn't beat OEM integration. Initially, after seeing the difficultly level on this direct tpms version, I was going to with plan b - the alternatives. But I decided to stick to my guns n go the whole hog. Happy I did.
-
Ah, I c ur scenario with winter wheels. Thankfully we don't have a need like that here in Oz. I'm not sure how, or if, the TPMS module is able to pair with two different sets of sensors. With regards to programming the sensors, I know that it is done via some specialist tools. Nothing ordinary. The usual suspects such as ODIS, VCP or VCDS doesn't cut it.
-
Nope, no coding of the sensors. e Each tire sensor had already been paired with the receiver. Plug n play. So when fitted, it knows which sensor is where based on the distance of the sensors relative to it. Hence why the receiver must b mounted right at the back.
-
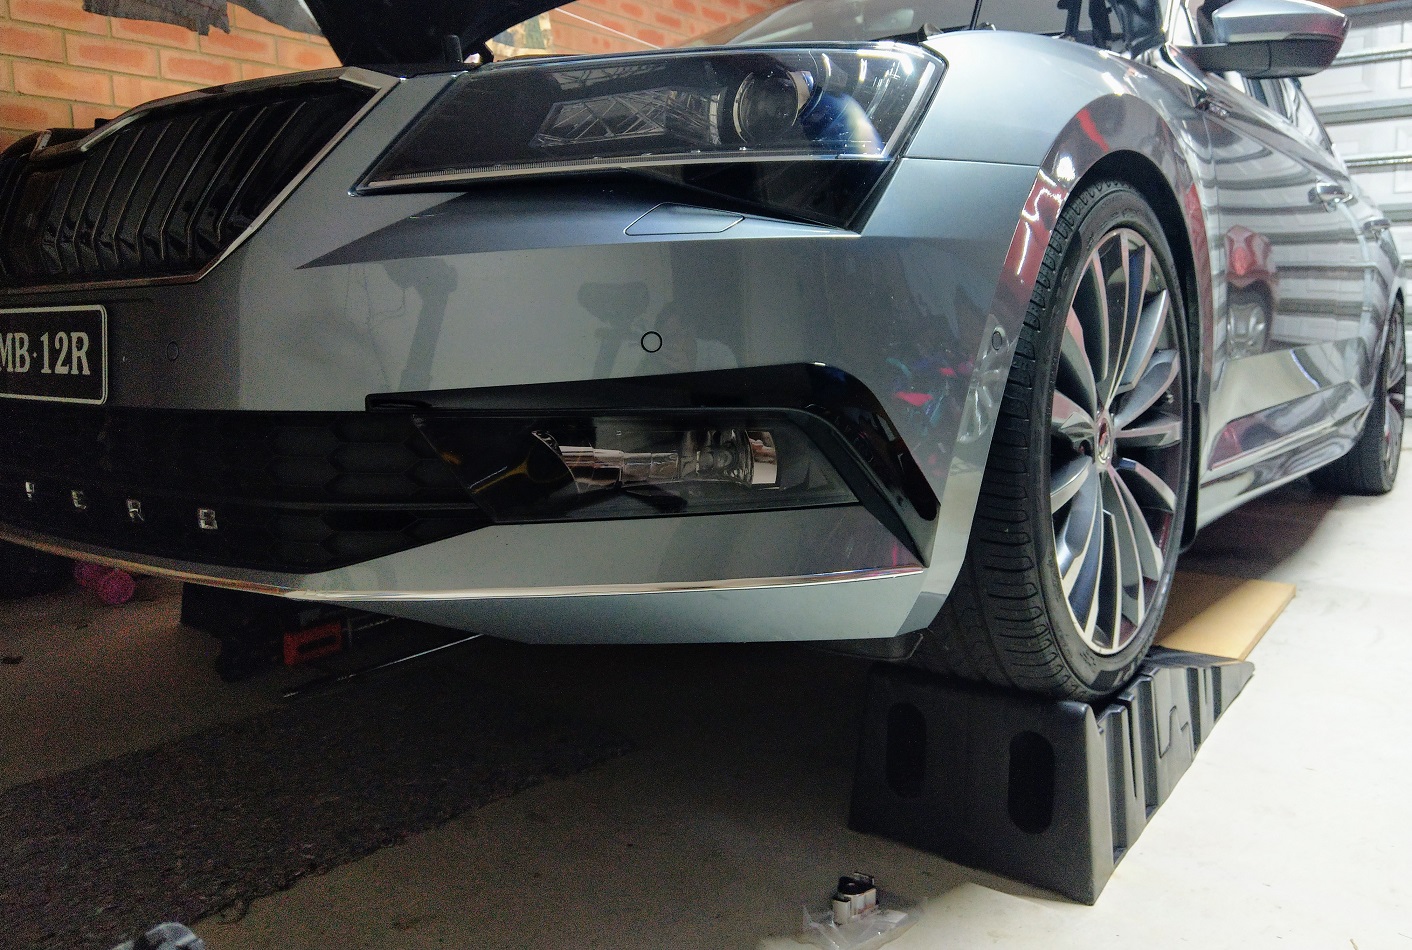
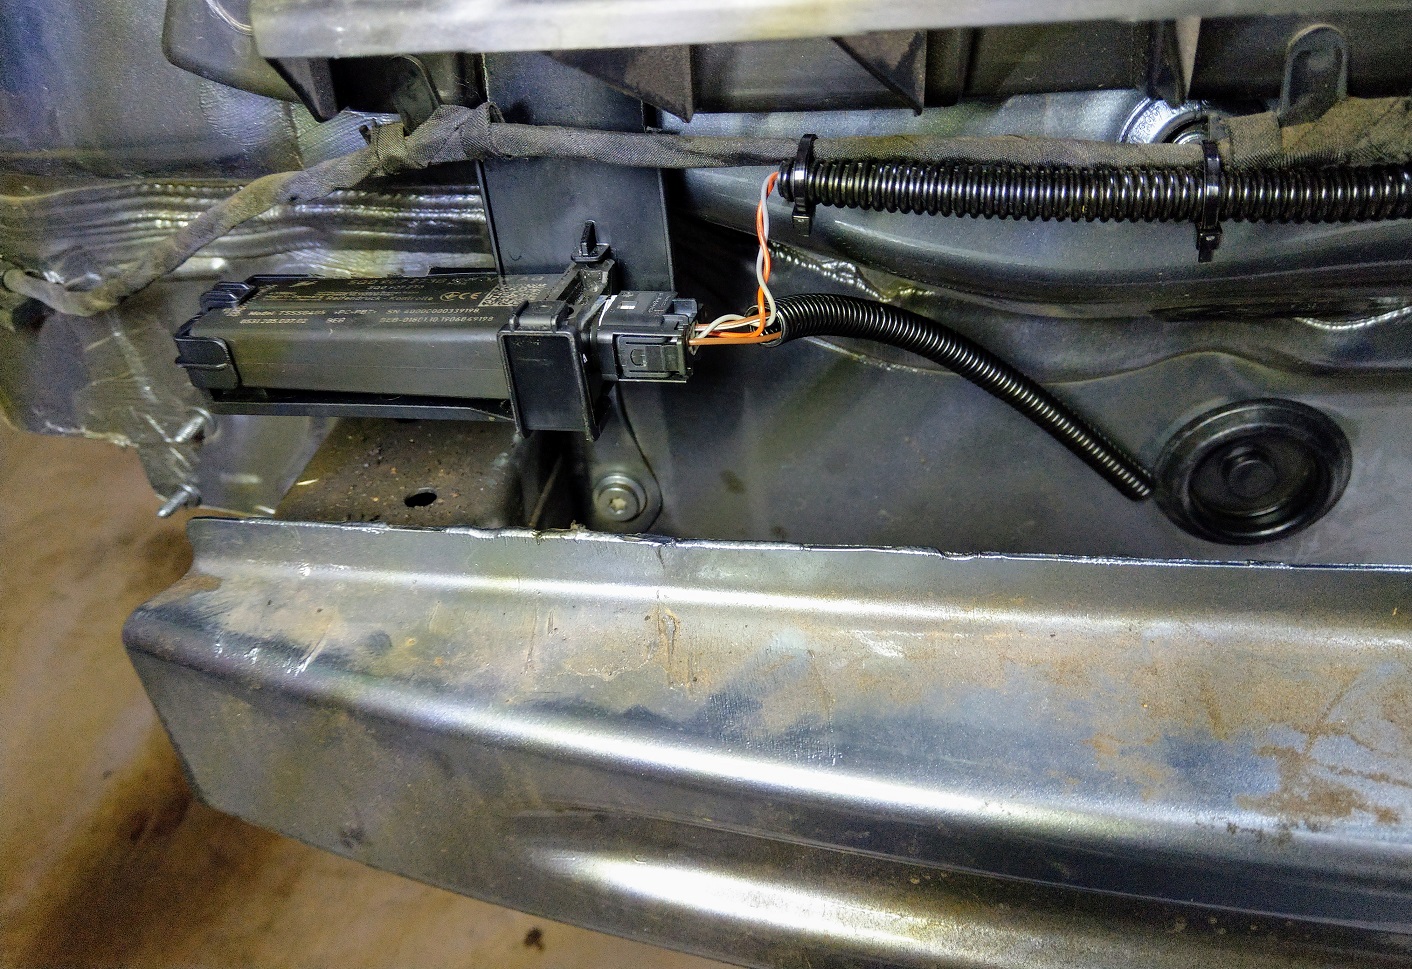
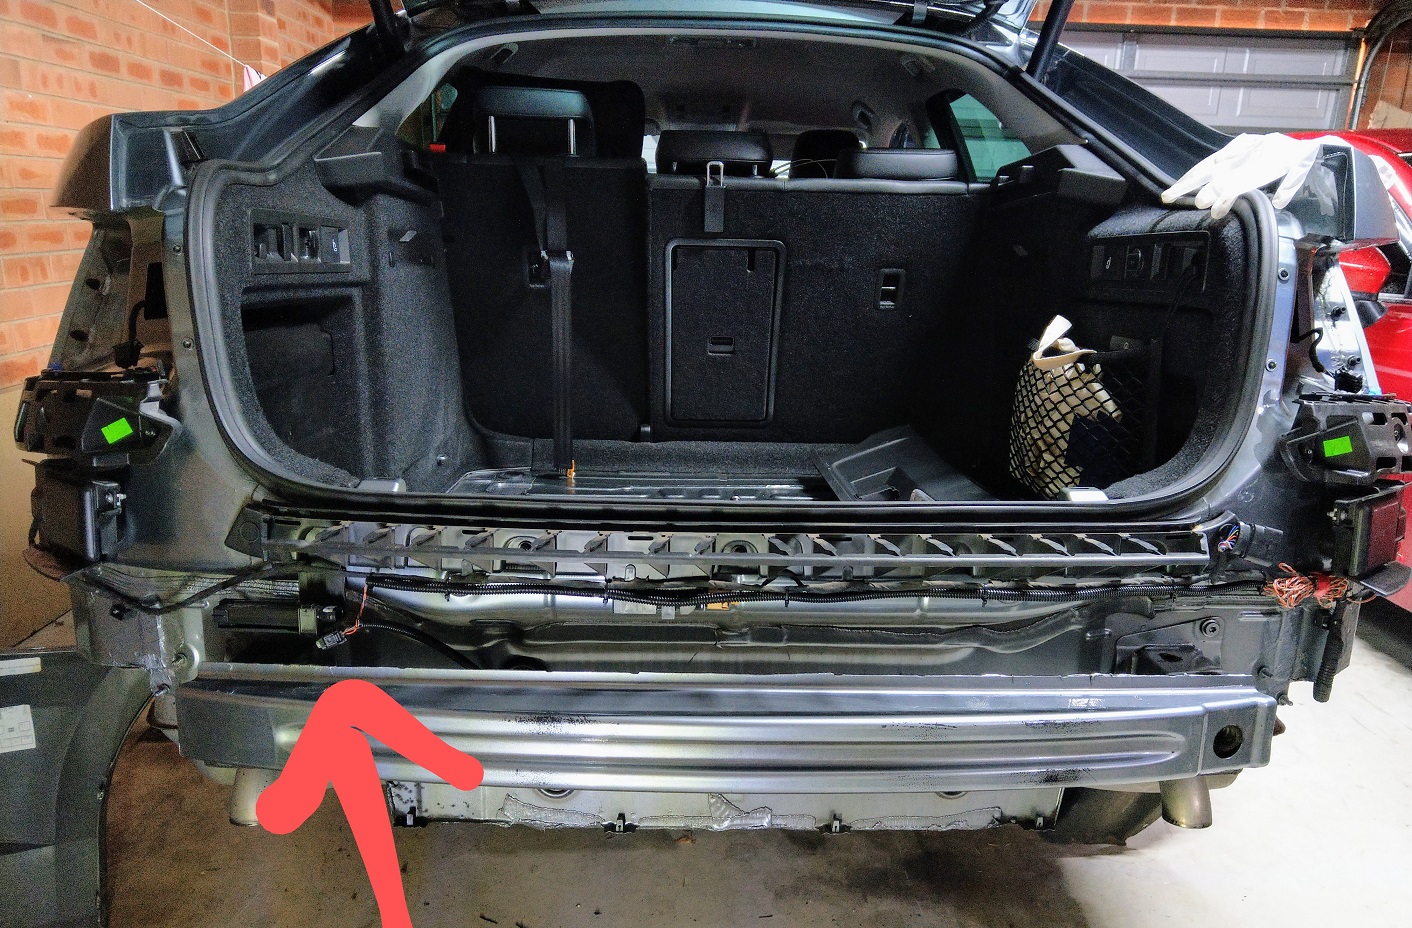
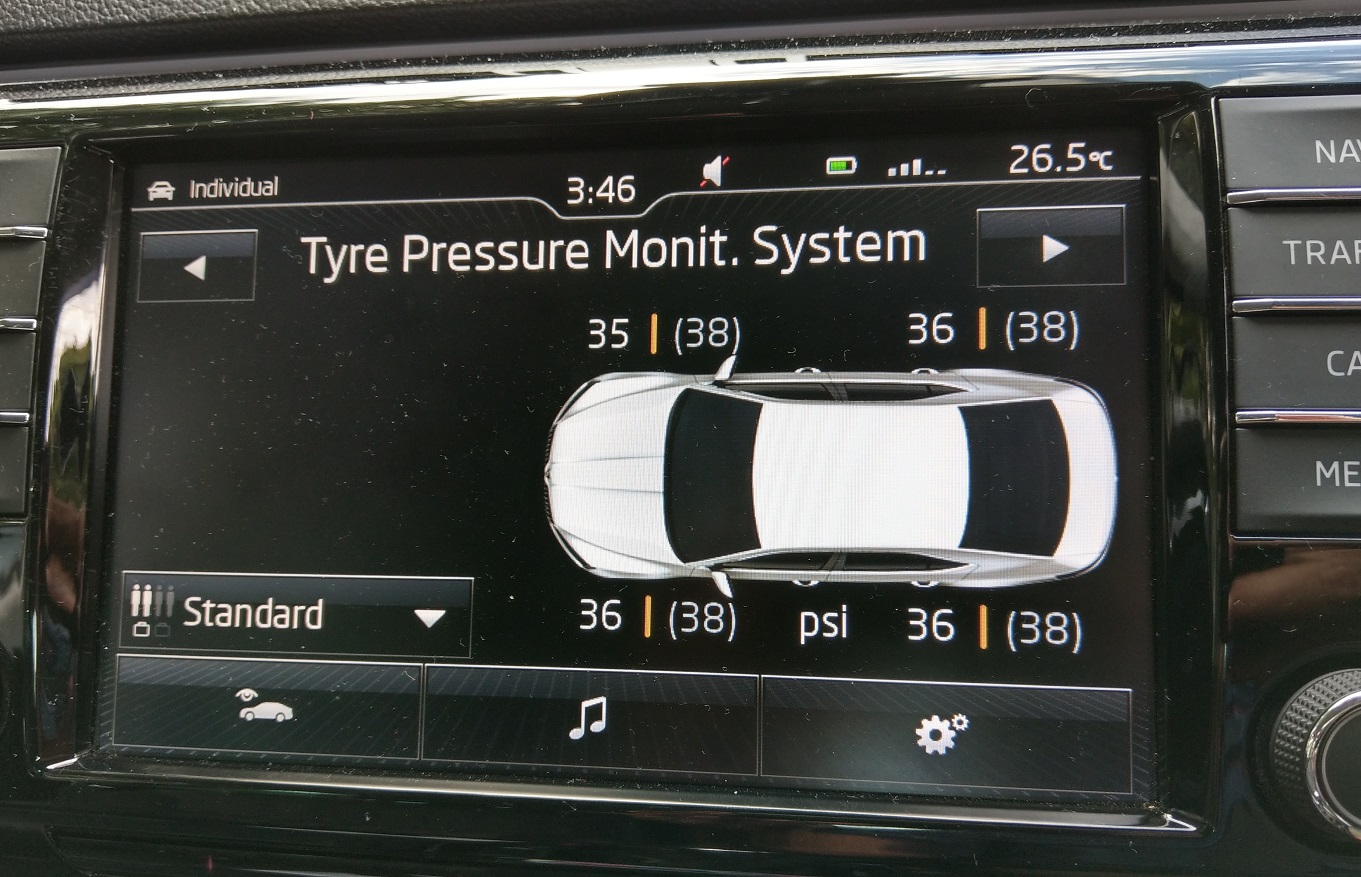
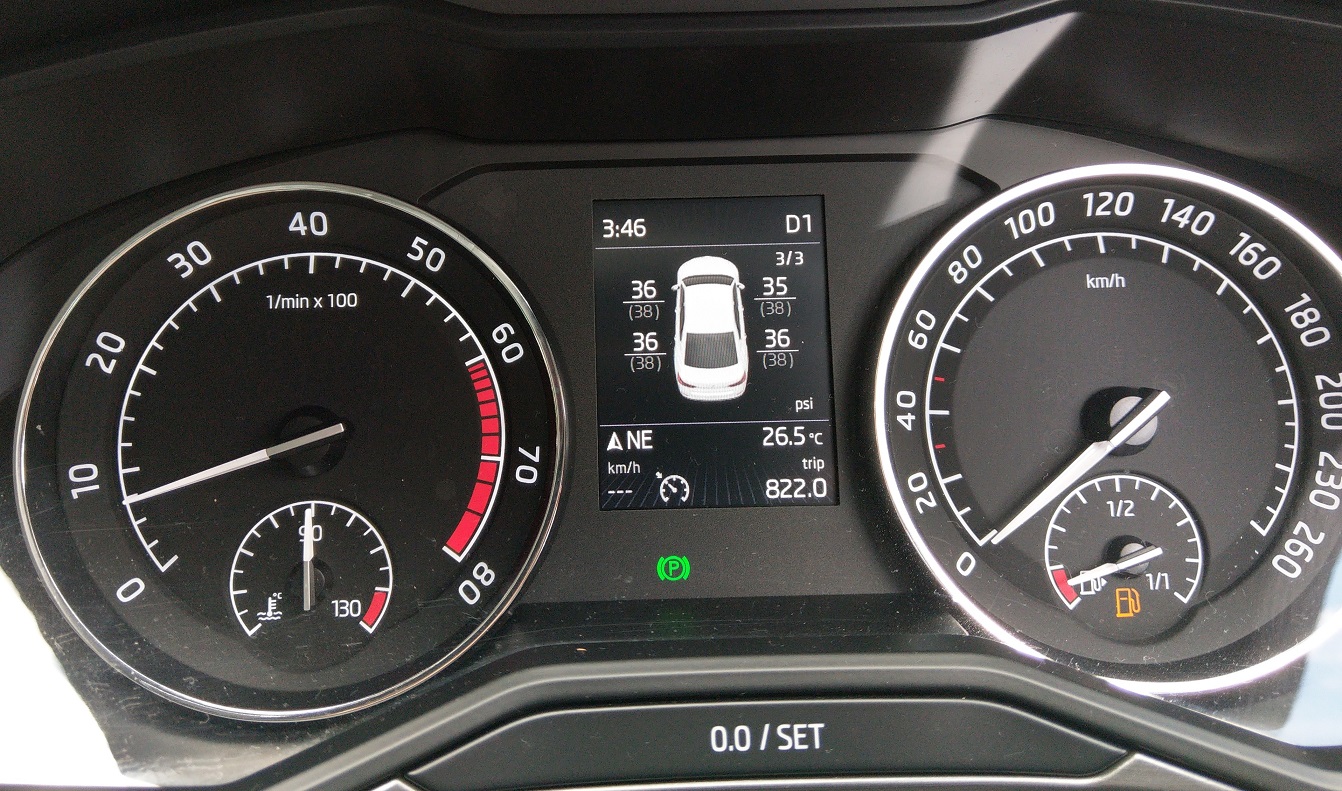
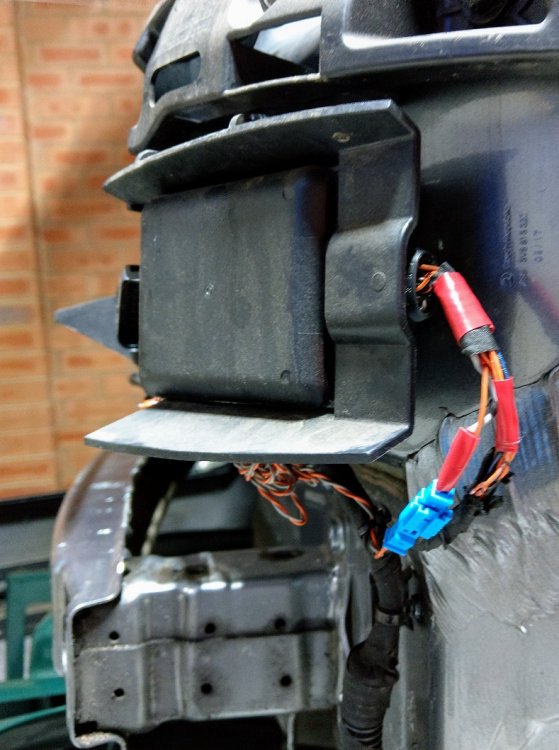
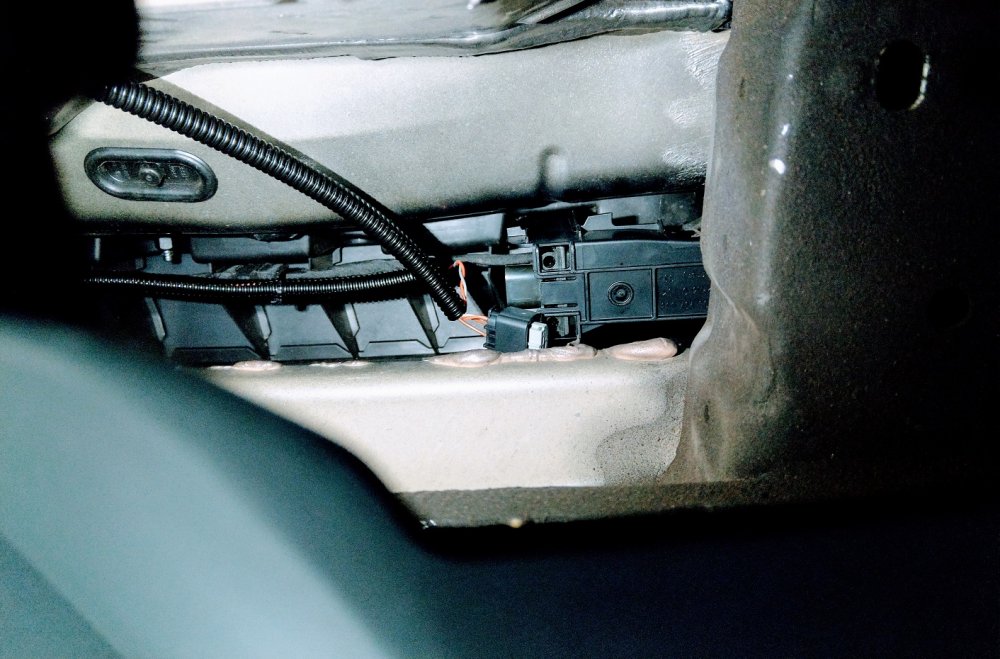
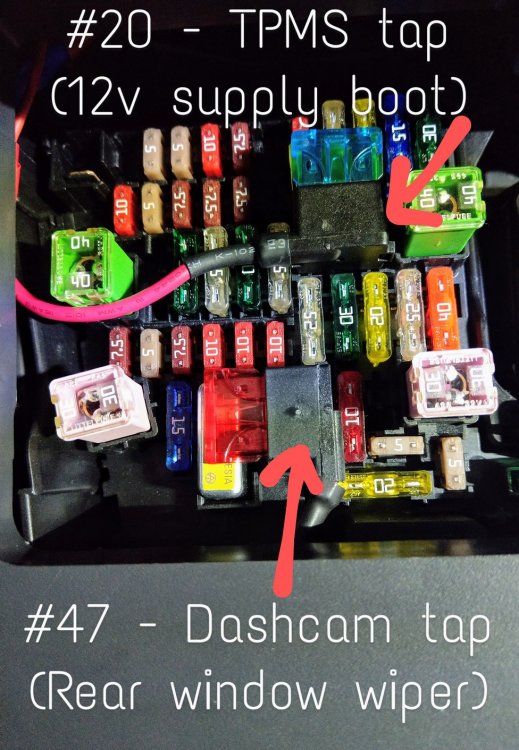
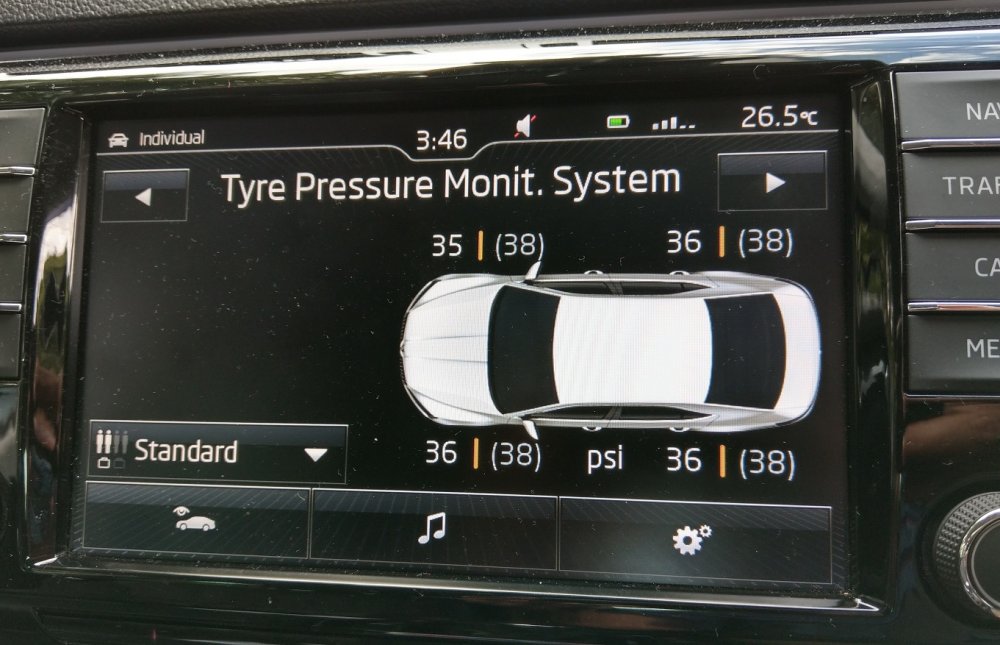
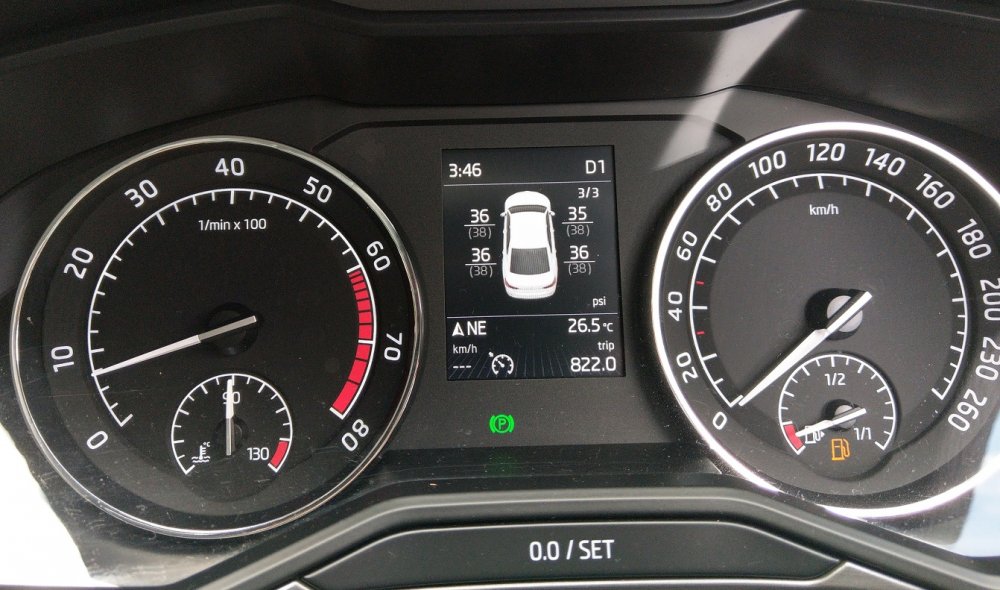
I can see Gandalf's Pressure now!! woOot 😁 After months n months of planning, I finally retrofitted the Direct TPMS (Tire Pressure Monitoring System). It all went well and everything is working as expected. Turns out the module (5Q0 907 273 B ) was already parameterized (the VCP bit), so once I did the VCDS coding bits, it was all running. I will however need to update (via VCP) the TPMS module's parameter file so it has the right tire profiles, but it's all good now 👍 Very happy I am 😊. I'll put a write-up together, but essentially it involves:- Part 1 - TPMS Installation. Mount module under rear bumper and tap (into the blind spot radar) CANBUS Extended. Part 2 - TPMS Power. Run power source through interior trim to fuse panel up front, for constant power supply.. Part 3 - VCDS Coding of CAN Gateway, Instruments and ABS modules. Part 4 - VCP to load parameter file for TPMS module. Part 5 - Install Tire internal sensor inside tire. some pics below...... the unit is accessible from underneath the bumper - no need to remove the bumper to access it. just incase.


-
Yes, different tail lights.
-
Hmm......that's weird. Try this - https://a.aliexpress.com/_m0Oj5cv
-
AliExpress link here.
-
Did u also change the headunit in the glove box? My understanding is that MIB2.5 screens require an MIB2.5 headunit to go with it.