Jump to content

wokwon

Members
  • Posts

    654
  • Joined

  • Last visited

Everything posted by wokwon

  1. Hi @SinglePointSafety I mucked around with the Brodit one that jams in the drivers side air vent but it kept falling out. I am now using a Baseus 10W Qi charger that I got from ebay. It was $35 AU Pesos which is about 50 pence Stirling after conversion. The suction cup works very well (it's really sticky). The bottom of mine rests on the edge of the dash soft plastic which stops it bouncing around on the arm. The cable started packing a divot in the dash so I've put an adhesive felt pad under it now to spread the weight. I had the first one fail after about a month (the electric mechanism that clamps the phone arms failed and started making grinding noises) but the seller replaced it with no fuss. Charging is enough to keep charging while running heavy apps like Tomtom Go and has no problem charging quickly while running Waze. In AU summer when the sun shines on the phone, the phone would stop wireless charging due to over-temperature so I printed a aircon vent redirector that blows the cool air over the phone and that solved that problem. It also was a handy mounting point for the Ultragauge. This mounts by some 1mm aluminium strips on the edge that jam down the sides of the air vents. I will print a thin support from this vent mount up to the Baseus phone mount to support it but it really doesn't need it. The mount is cantilevered a long way so it bounces a bit on rough roads but not excessively.
  2. No comments on the state of the grassed nature strip please.
  3. Me too for the ones at the rear most (that are covered by that board thing). Whenever I raise the board thing the nets go 'sproing' and come un-done. I have some pics from the last Kodiaq I had (that sunk) with all the coverings removed. If you can hang on a day or so I'll upload them so you can see what is behind the plastics.
  4. If you're talking about the infotainment, I think that setting pertains to the source of the speed signs for the sat nav screen. The choices are "map" or "traffic sign recognition". I don't know which is which. There is also an adaptation called 'something something fusion' that in theory should be able to set a source priority, so if the TSR didn't see a sign, then the source should switch to map. Unfortunately it's all in German so I have no idea which is which.
  5. Yep, and now I've done this mod I don't need ODIS-E any more (phew, it's a mess). in theory (not tested), by placing the controller in service mode, you can specify 1 set of pressures manually using VCDS. Not sure if it logs a fault due to being in service mode etc. It's alluded to here: http://wiki.ross-tech.com/wiki/index.php/VW_Passat_(3C)_Tire_Pressure_Monitoring Mine did log these until I uploaded the XML file. Specifically, the invalid data record from the controller (means no XML file uploaded) causes the errors in instruments. I suspect these codes would persist if the controller was in service mode. ------------------------------------------------------------------------------- Address 17: Instruments (J285) Labels:| 5G0-920-XXX-17.clb-SRI3 1 Fault Found: 13636608 - Control Module Incorrectly Coded U1014 00 [008] - - ------------------------------------------------------------------------------- Address 65: Tire Pressure (J502) Labels: 3AA-907-273.clb Part No SW: 5Q0 907 273 B HW: 5Q0 907 273 1 Fault Found: 12652550 - invalid data record B2005 00 [009] - - Confirmed - Tested Since Memory Clear
  6. @ZacDaMan72 http://htmlpreview.github.io/?https://raw.githubusercontent.com/joltcoke/rdks-tool/master/generator.html ^^ this website generates the XML that is uploaded by ODIS-E. You put in whatever you want. I just put in what was on the tyre placard. I'm thinking of adjusting them a bit as I tend to run higher pressures that what is on the placard. You can have up to 10 options for tyres / pressures and the name (that is shown int he menu) is free text, I just put in the tyre sizes. You could use "My tires" or "purple monkey dishwasher" or whatever you want.
  7. Forgot to mention, controller mounted against the sheetmetal that is just forward of the rear bumper, on the drivers side (this is on the right-side here in 'straya). There was an existing hole I put two 3mm bolts through. The plastic bracket is the genuine one 3G0907538 (for a Passat or Arteon and doesn't actually factory-fit anywhere to the Kodiaq that I could find) but you don't need it, you could zip-tie the controller on or something like that. It needs terminal 30 (unswitched power), not terminal 15 (ignition switched power). The lane change radar has terminal 15 so you'll need to run your own unswitched power to the module somehow. I had it in the boot already for other projects, so I just used that, out a spare grommet thats under the bumper-right-side and to the controller. I did try it on terminal 15 and it just logs 'module missing' sort of errors in VCDS and doesn't work at all.
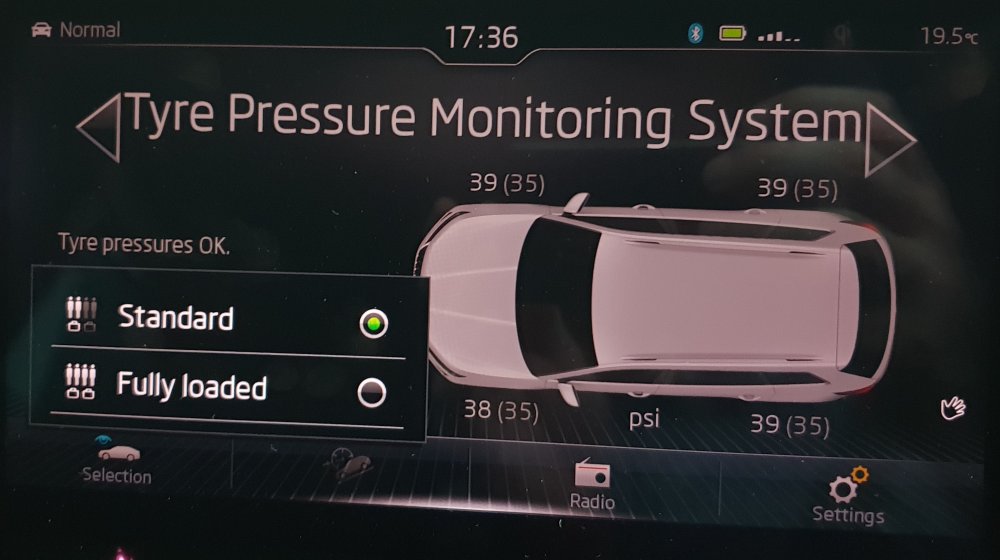
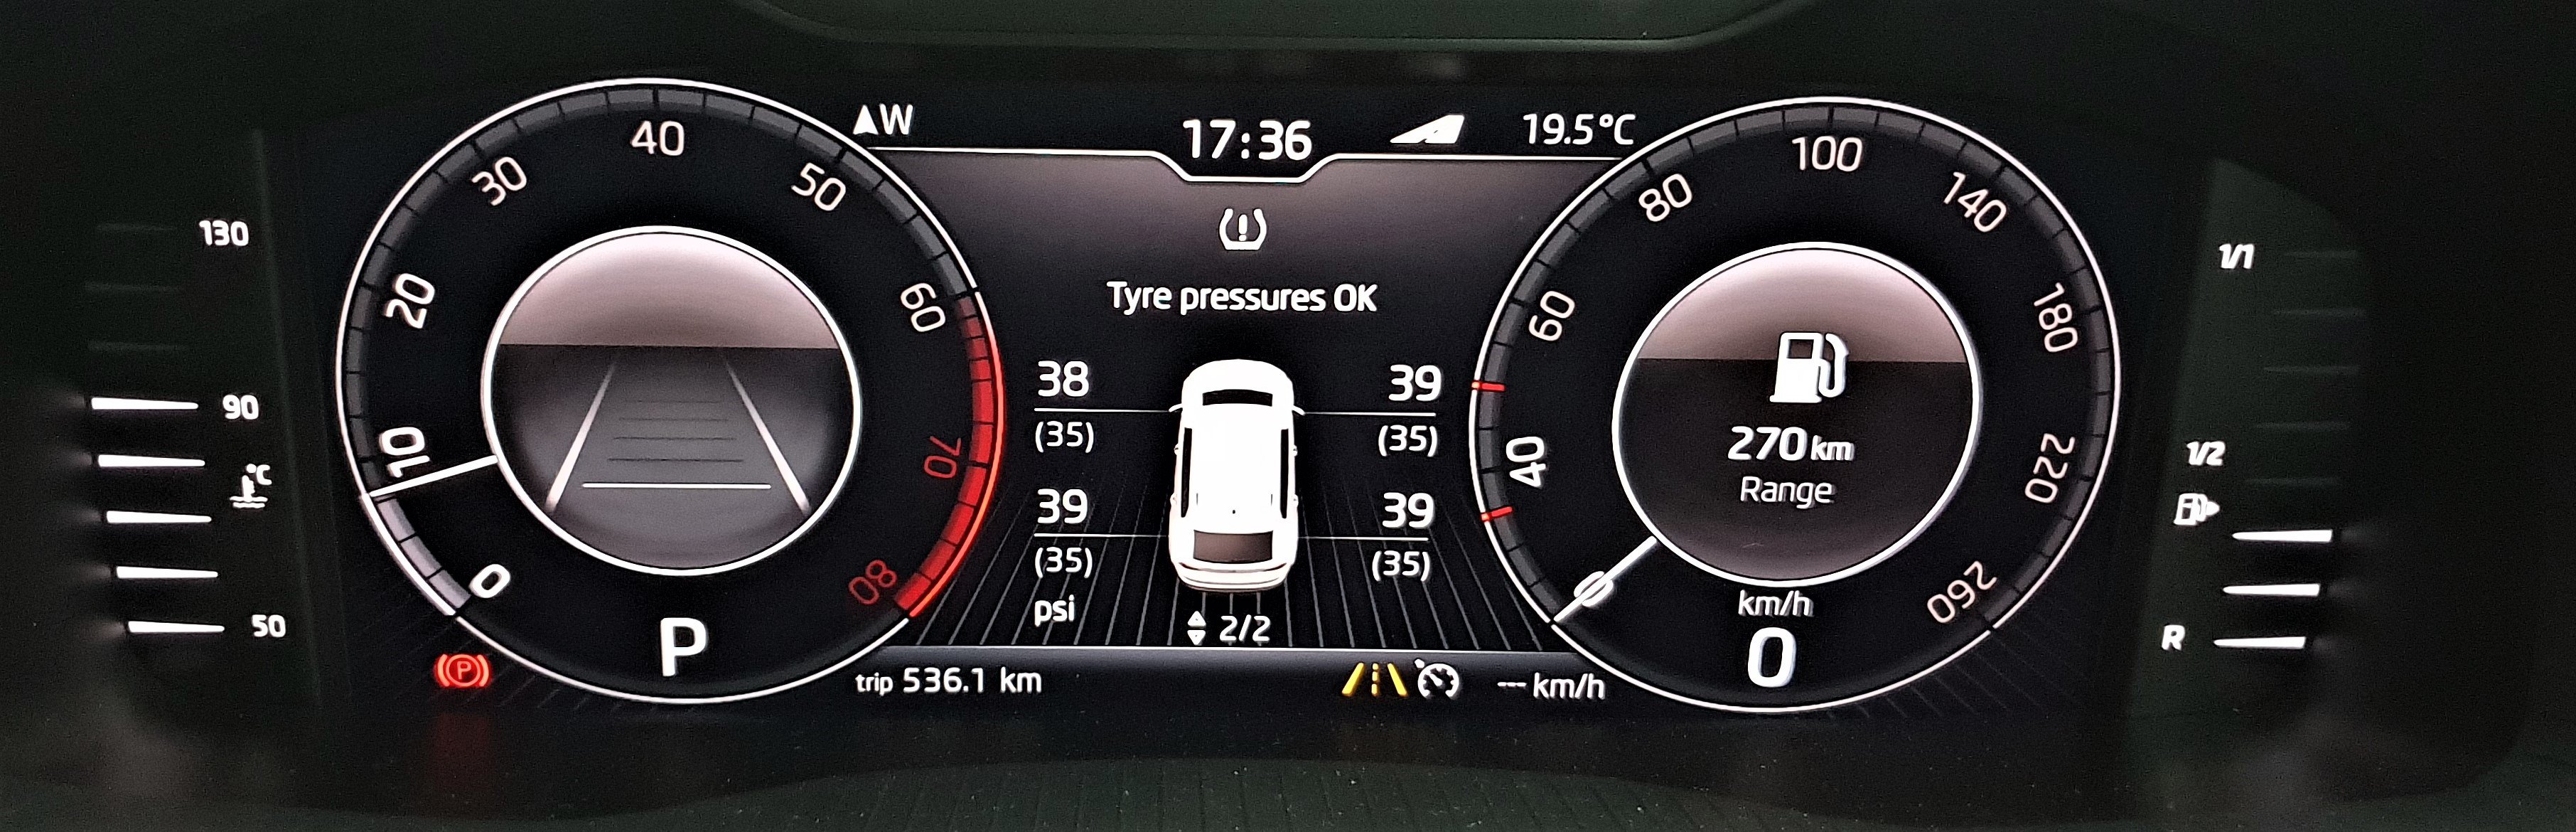
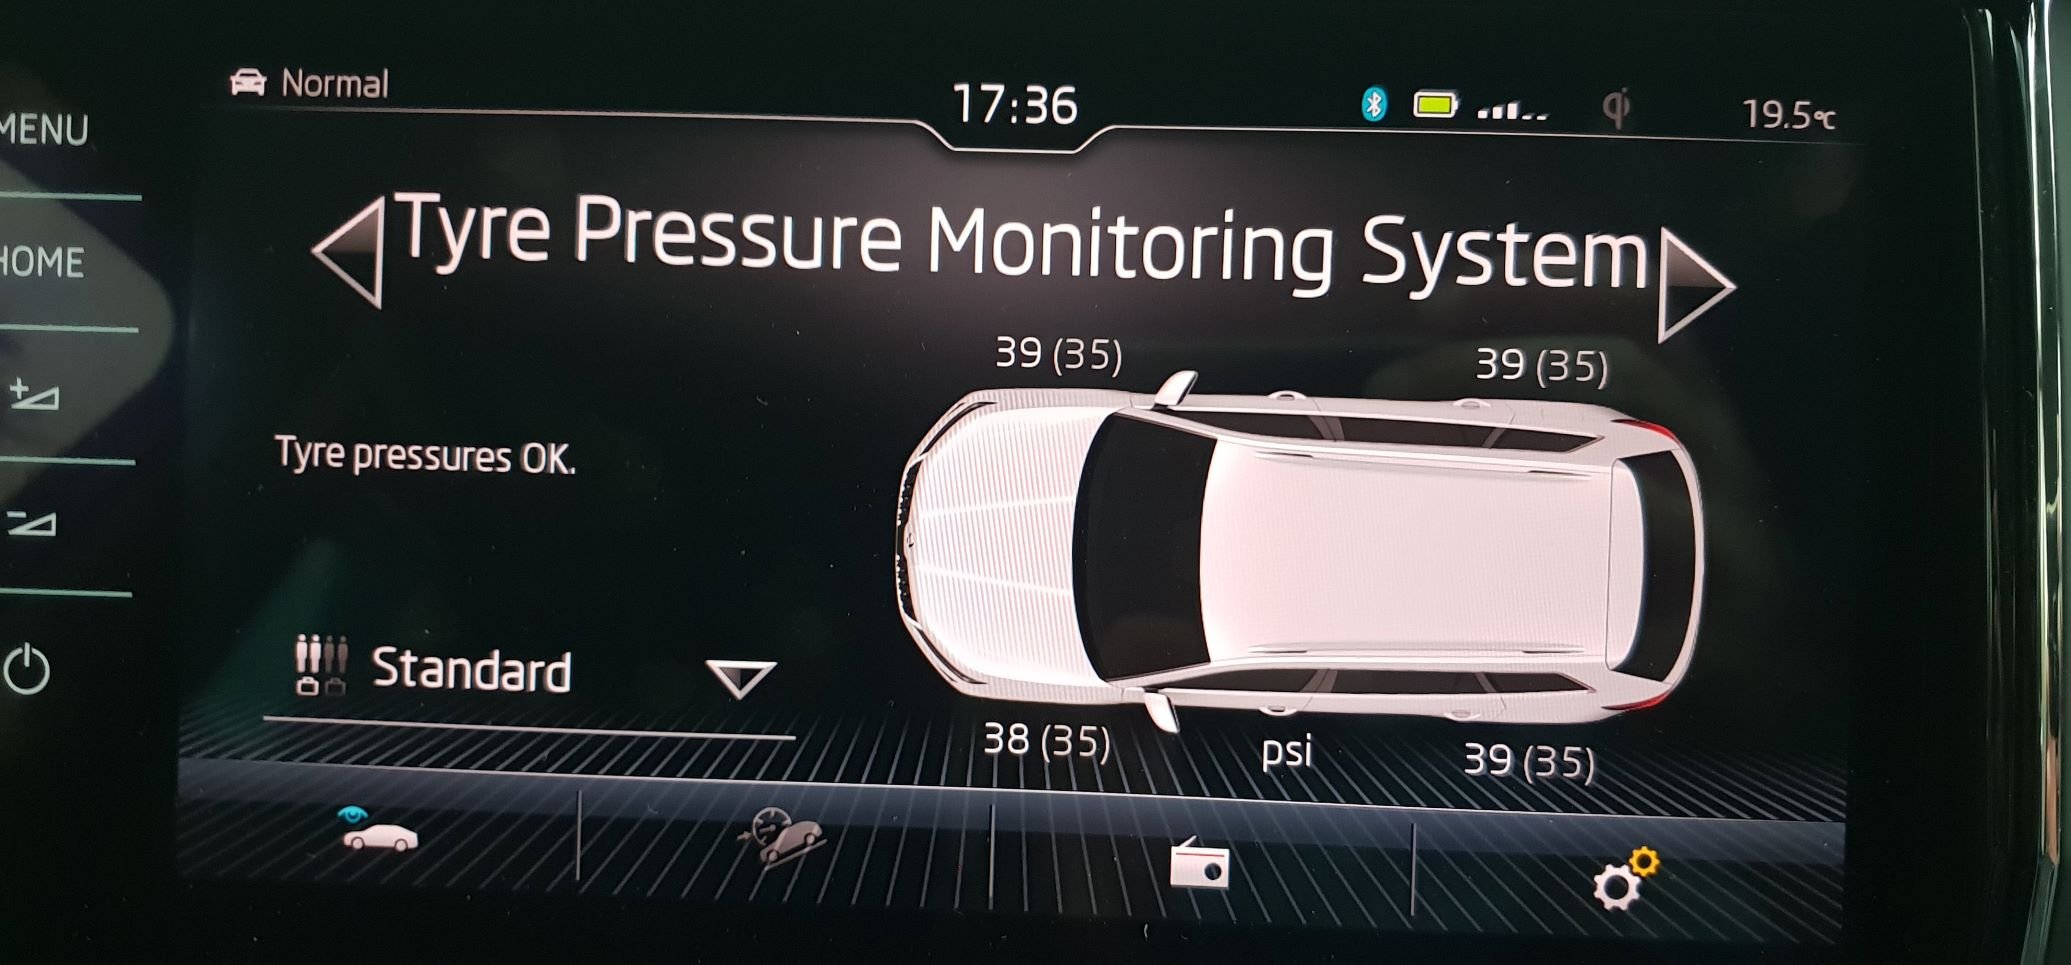
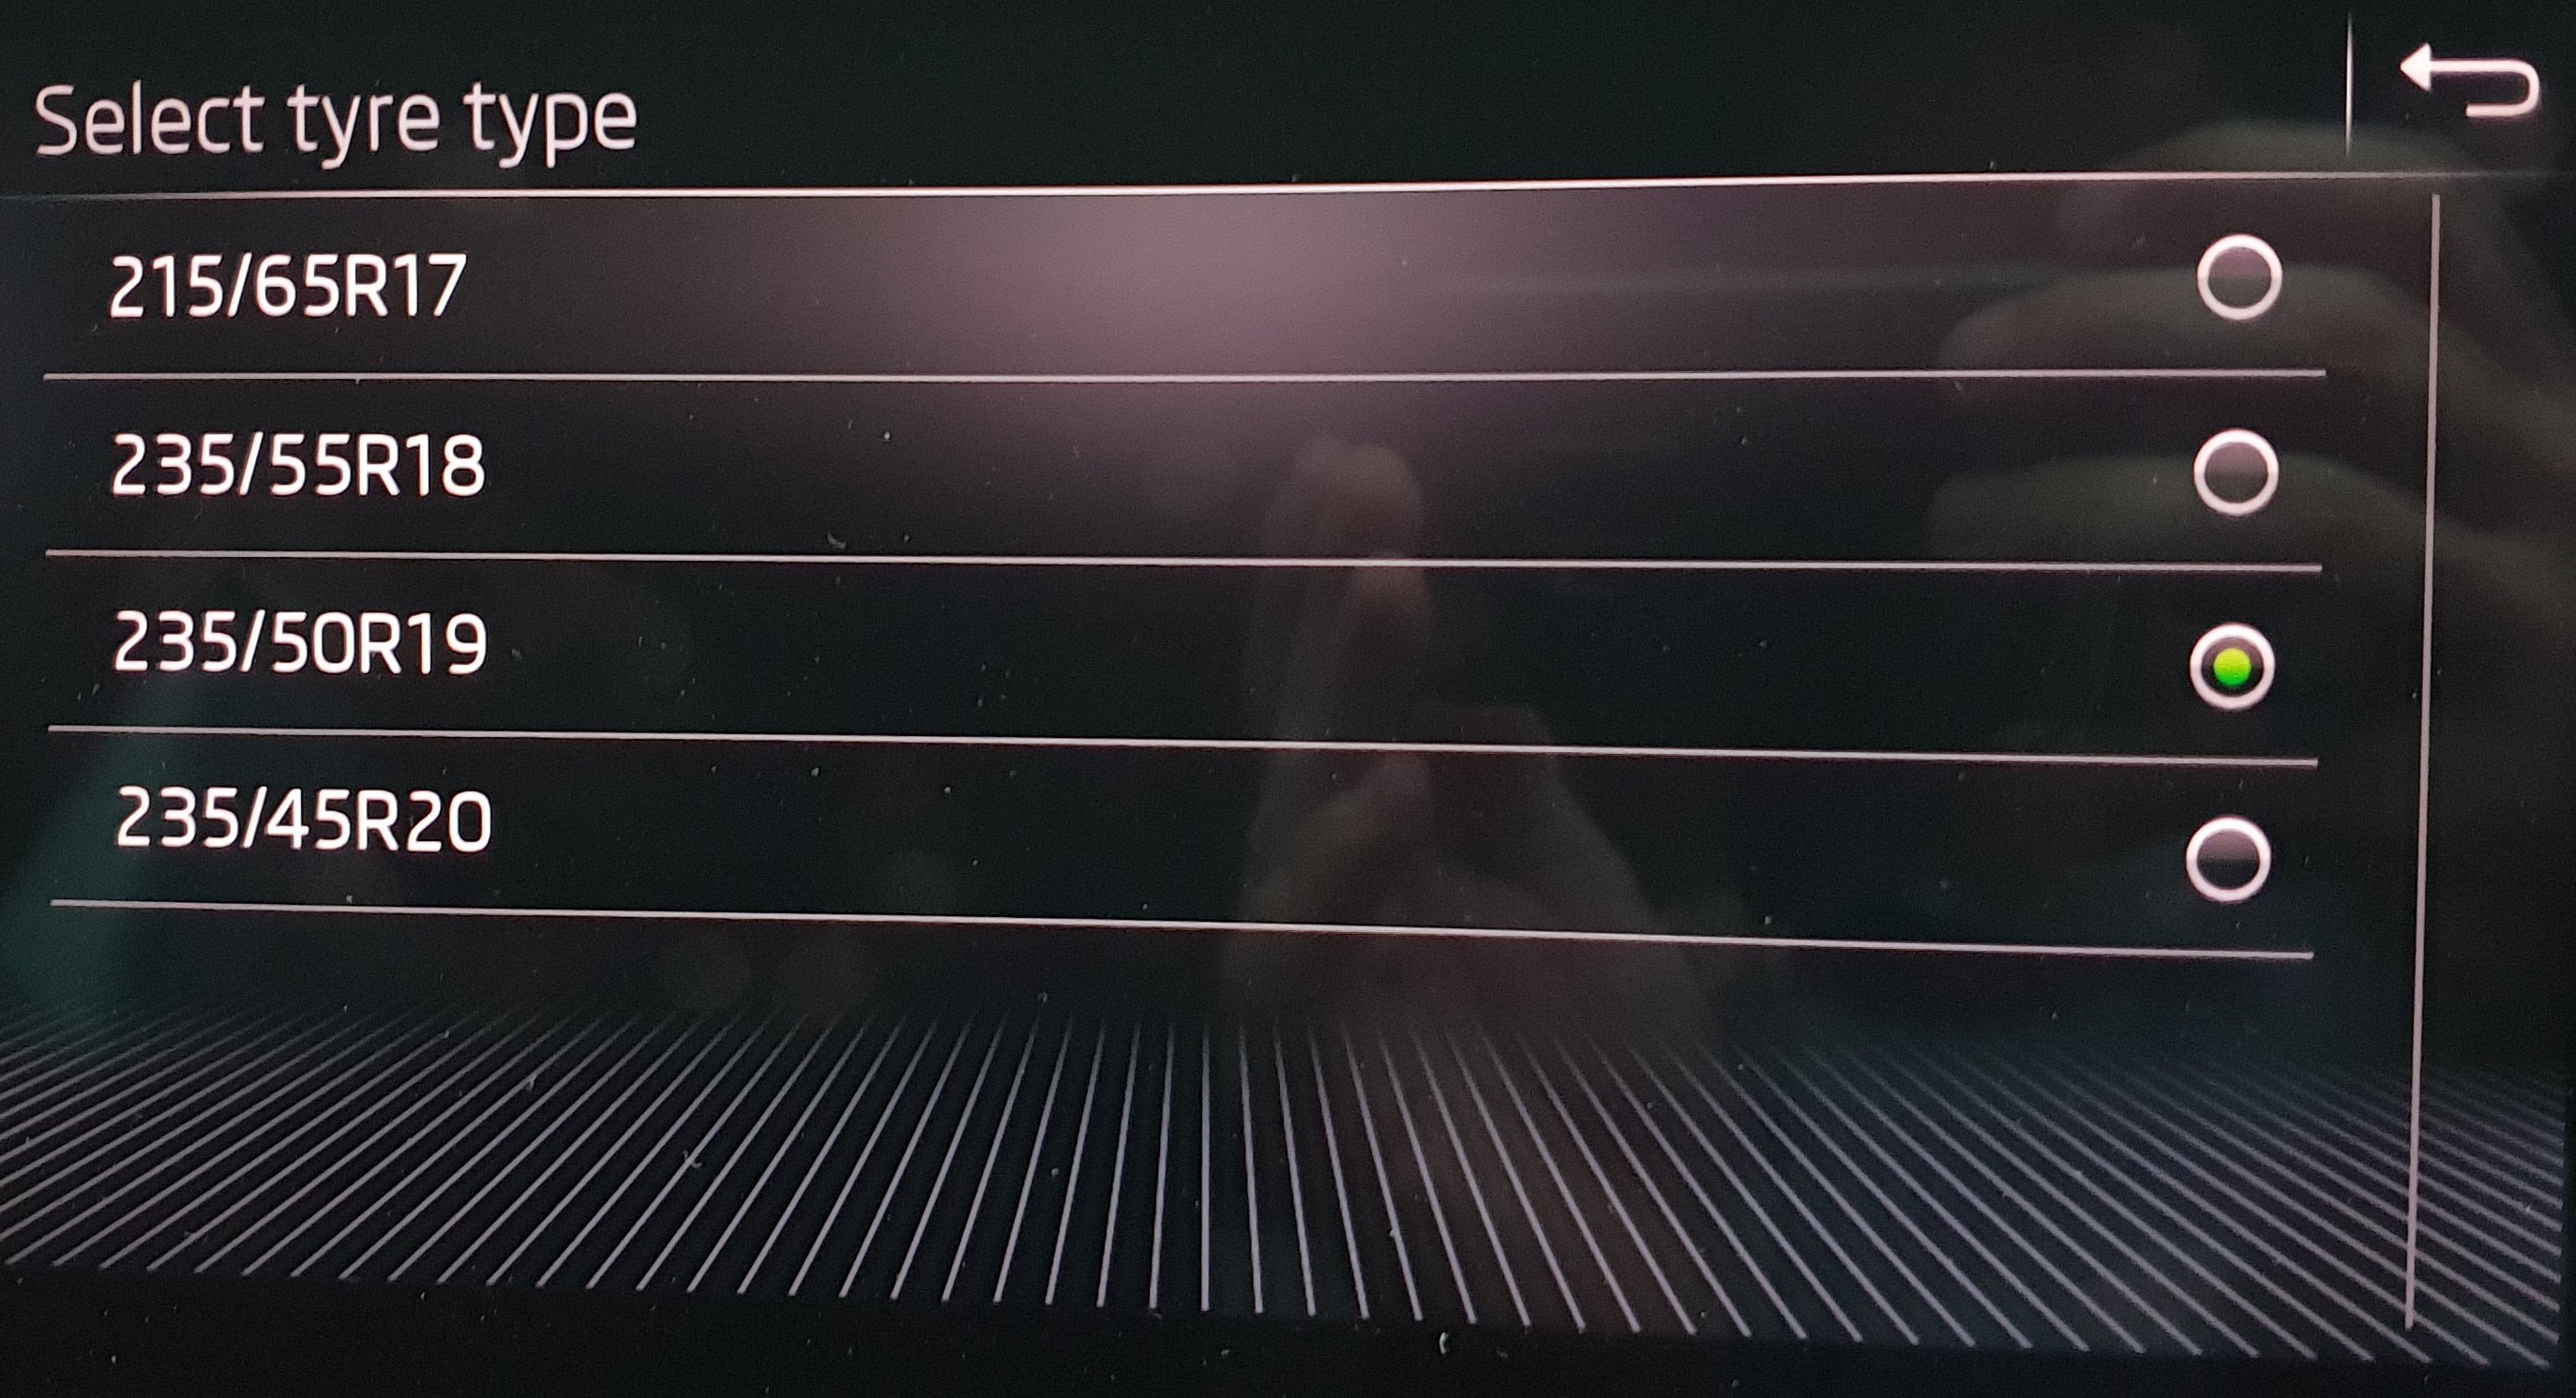
  8. Apparently in EU the MY20 Kodiaqs will have an option for TPMS direct (wheel pressure sensors) over the TPMS-indirect (use ABS sensors, measure wheel RPM). If you get the bits it works fine in the MY19s too. 5Q0907273B - Controller module thingy 4x 5Q0907275B - Wheel pressure sensor thingies I tapped off the CAN-bus-extended from the rear 'I can't be bothered doing a head check' radar controller. You need ODIS-E or Vag Can Pro for the initial setup to load in the tyre profiles and pressures (I just put in what was on the tyre placard (fuel filler flap). I used a Chinese VAS6514 and ODIS-E 8.1.something and getting it installed with the right driver etc was very painful. I used this excellent tool to generate the XML file that was then uploaded via ODIS-E: http://htmlpreview.github.io/?https://raw.githubusercontent.com/joltcoke/rdks-tool/master/generator.html The instructions were in Spanish, by a chap called XAGICO. If you Bing that you'll find the PDF. I seem to have an issue where the front-passenger sensor comes and goes. I suspect it's a signal strength problem as the other 3 work fine and the front passenger is furthest from the controller module antenna. I'll try to reorient the controller. Would I do it again? Nah, the ones with the little screen in the ciggy-lighter socket work fine (SteelMate has some good ones) and are zero effort (had this in my Superb). ODIS-E scares me (it's an incomprehensible mess UI wise; I think the same people who did IBM Notes did the ODIS UI) and when I flashed the XML file pretty much every warning light came up on the dash and the car beeped and bonged and carried on. You are permitted to make fun of me for using PSI instead of bar.
  9. In my case, it logged no codes while and after it happened. I suspect it's your door latch if you've not altered the boot lights. Dealer should clean/adjust or replace it.
  10. I had exactly the same thing but it was caused by me. I added extra lights in the boot. The lights were LEDs and I added constant current power supplies to limit the current. The supplies inputs were just in parallel with the boot light. The supplies were switch mode supplies so they were non-linear in nature. (this thread is here: ) Once the boot was closed and the car was locked, the dash display and hazard lights did exactly the same thing. I added a diode between the power supplies and the factory boot lights to prevent my power supply from back-flowing current to the electronic module that powers the factory boot lights. It fixed the problem. My theory is: - the power supplies input filtering capacitors or inductors were feeding stored current back to the car once the LEDs were off and not drawing current any more. The filters voltage probably decayed below the forward voltage of the factory boot lights so they didn't light and use up the last of the current. - For some reason, to see if the boot is open, the car checks if the boot lights are on (or the output to turn the boot lights on is enabled). I would have expected instead it to look for CAN messages but apparently not. - The voltage was at some indeterminate state (between logic levels) which caused the security system or whatever to thing the boot was open and closed at the same time or something like that. TL:DR If you've modified the boot lights, undo your modification. If not, unplug the boot lights (they just pop out of the trim) and also maybe reseat any connectors to the boot door control module. Failing that, the boot door switch that detects the boot is shut might be faulty.
  11. The Engrish section of the installation manual is attached here.Scan_001663.pdf First bit is the Ikea-style pictographs, 2nd bit is the written instructions. It's the template for the hole you cut out. Can't see it sorry as it's hidden by the bumper now.
  12. Hi, mine was dealer fit, before the car was delivered. See 2 pics of the bumper bar with the hole they cutout. They left this book in the car (pics attached) and it shows some part numbers which might help. Might be different part numbers as mine was homologated for 'straya and New Zealand. Car is a MY19 Kodiaq 132TSI 7-seat. They did an ordinary job fitting it, they mounted the kick-to-open sensors to the wrong part so the boot opened if you just walked past the rear. I had to take the bumper off anyway to fit the reversing lights and TPMS module so I re-positioned the sensor strips at the same time. Would it help if I scanned the installation manual?
  13. Nuh, that was the high point of the slosh marks when the car was pulled out and moved around to level again. The actual water level was quite a bit lower. Unfortunately it was bum down in the water (diagonally), so when it was returned to level all the lovely water in the boot ran forwards to the front of the car. It also wicked a fair way up the carpets and lining (including door cards which have some carpet-underlay-stuff on the back-sides. Car was written off due to uneconomic repairs.
  14. The pressure vents (let the air pressure out when closing the doors) are in the lower side part of the rear bumper. They're not water tight. I have verified this experimentally (but unintentionally) Black arrow in this post-experiment picture. The same experiment revealed that the genuine Skoda tow kit REMOVES the ability to screw in the rear recovery eye and that the electric tow bar will not descend when the controller (black box mounted to the floor near that black arrow) is full of muddy water.
  15. Hi Ahar, Does your aftermarket tow bar have the threaded hole to screw the tow-hook into? The dealer-fit OEM one that was fitted to my Kodiaq doesn't have this anymore, which means there is no way to fit the rear tow-hook any more. This may seem OK as you could maybe pull the car via the tow ball, but when I was stuck in a deep puddle with water some way up the rear bumper, the electric descending tow-ball refused to operate (as it was a bit under water) and popping off the plastic cover revealed that there is no hole to screw into for the tow hook. You can see on the bar on the attached picture, no hole any more.
  16. I just looked at the wiring diagram, power to the virtual pedal module is controlled by the J965 Interface for entry and start system so it might not be the best place to tap off Terminal 30 power. It may or may not work.
  17. Trailer loom, if you have it fitted, may or may not have a constant 12V (there are many variations). Rumor has it that it's only enabled when a trailer plug is in the socket too but I can't confirm that. The 'kick to open' thingo would also likely be powered all the time if you have that fitted too.
  18. Hope the attached helps (you don't need to remove the reader coil, the button can be removed out of the unit through the reader coil). The button slides out, towards the outside of the car (i.e. away from the steering column, not inwards towards the steering column).
  19. It's very easy to change, takes 15 mins tops. Take off the lower steering column trim (1 screw from memory). Unplug connector from button. Gently release clips on button and withdraw button (button can be pushed out from inside to outside). Slide in new button, attach connector and put the steering column trim back on. No coding required.
  20. Hi @jrrs Use this website to generate the XML: http://htmlpreview.github.io/?https://raw.githubusercontent.com/joltcoke/rdks-tool/master/generator.html I tapped into the radar for can bus extended. I had already run power from the fuse box to the boot area (for extra reversing lights) so I didn't tap into the lighter socket. That wouldn't work for me anyway as I changed the wiring for the lighter socket so that it is switched on and off with the ignition. If you haven't done this mod, you could use the lighter socket power. Feel free to reach out but I don't actually have a Kodiaq any more so I can only tell you what I remembered I did. See attached picture, the blue arrow is where I accessed the can bus extended.
  21. I got most of the way through it before my Kodiaq was written off by insurance 😣 Basically: - Yeah it's supported - You need the module - If the module is brand new, you need ODIS or VCP to code it (to upload the XML file that describes the wheel/tyre sizes and recommended pressures), or else you get an error "invalid data record ". VCDS cannot code this setting. - I put the module behind the rear bumper using an existing hole and made a bracket to suit - I tapped it into the wiring loom that goes to the lane-change-assist radar (got CAN-BUS-EXTENDED from that loom) - It needs terminal 30 (non-switched power) which I had already run to the boot, you could get this from the boot ciggy lighter socket (if you didn't convert it to switched like I did) There's a bit of dicking around with coding to get it to work, but it does work. I Now i'll have to do it all over again when the car is replaced *sigh*
×
×
  • Create New...

Important Information

Welcome to BRISKODA. Please note the following important links Terms of Use. We have a comprehensive Privacy Policy. We have placed cookies on your device to help make this website better. You can adjust your cookie settings, otherwise we'll assume you're okay to continue.