Leaderboard
-
EddGee
Members19Points1,002Posts -
Breezy_Pete
Sponsor9Points24,198Posts -
shyVRS245
Locked8Points0Posts -
TMB
Resident Member7Points8,210Posts


Popular Content
Showing content with the highest reputation on 15/04/19 in all areas
-
http://energysavingtrust.org.uk/scotland/grants-loans/electric-vehicle-loan
 1 point
 -
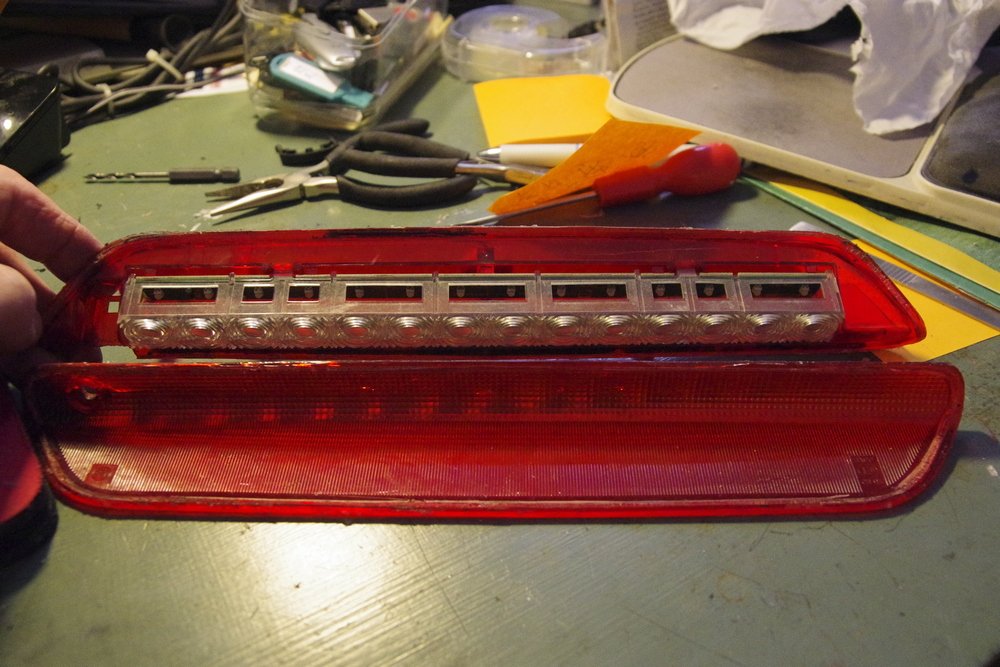
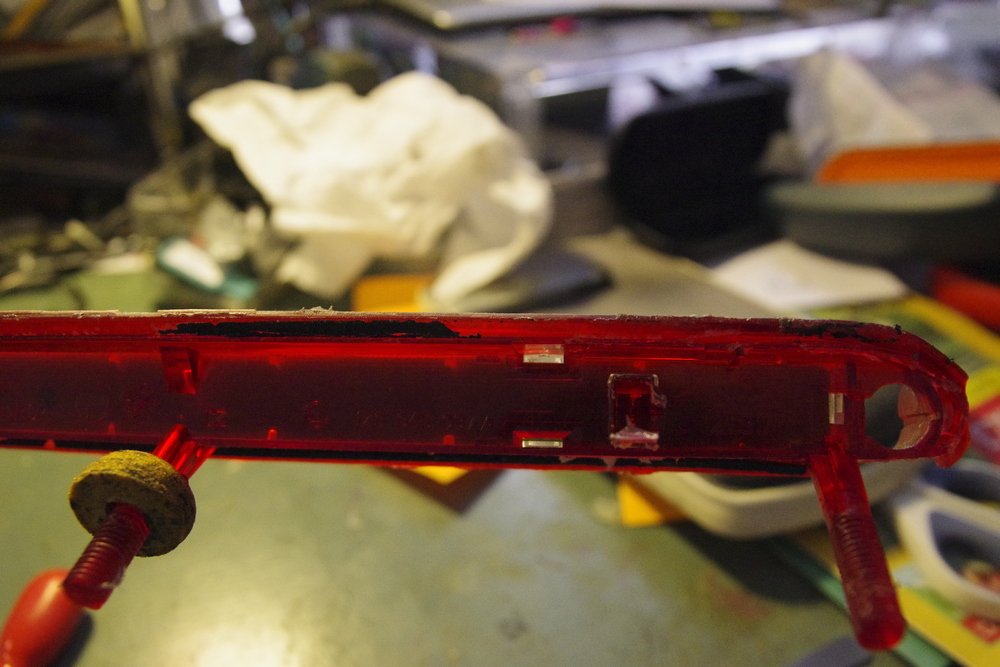
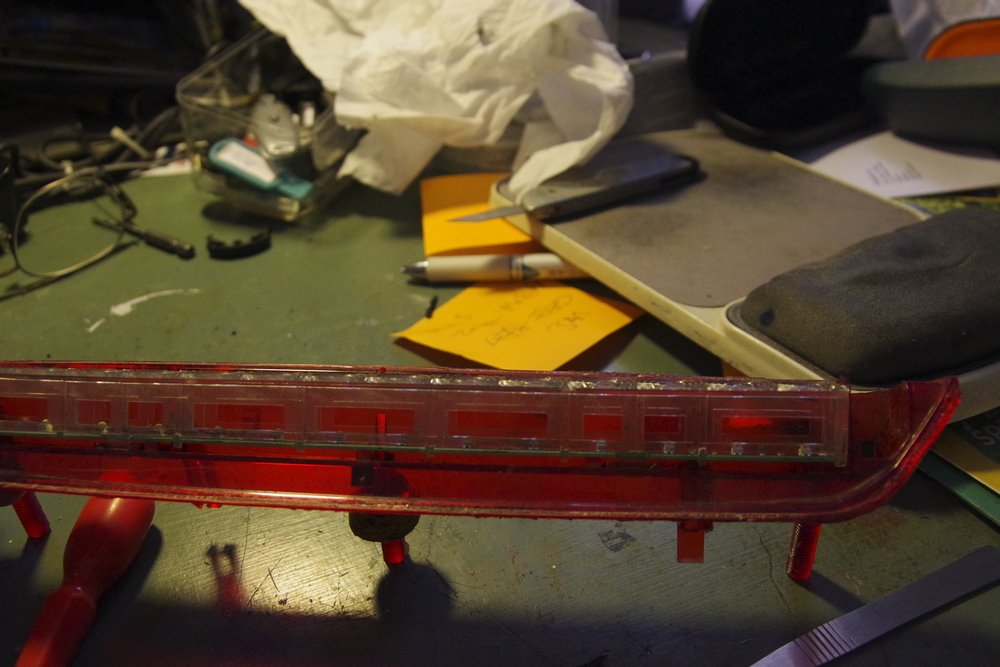
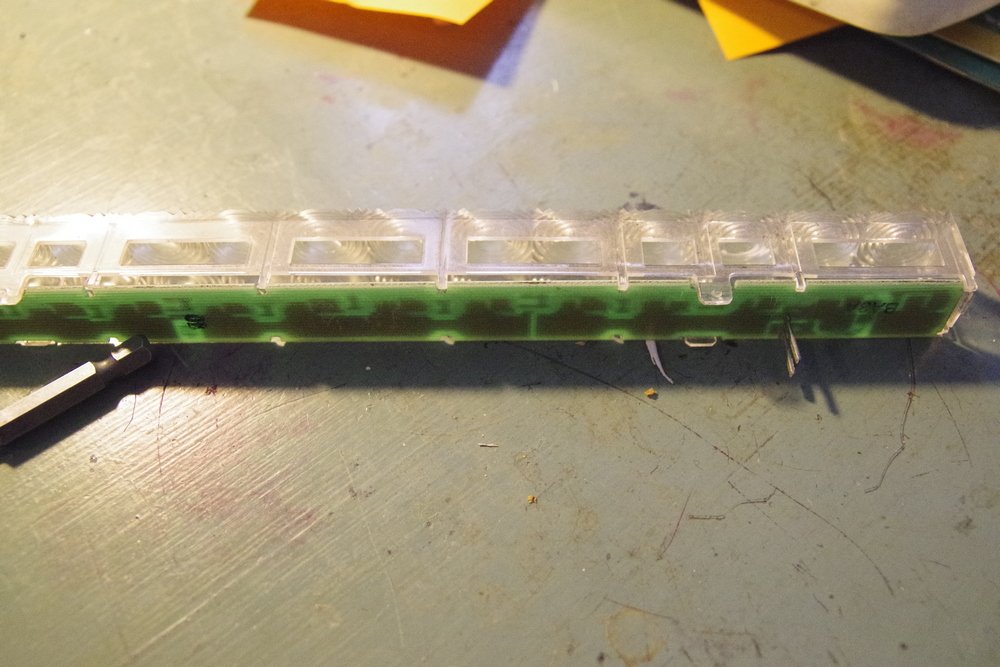
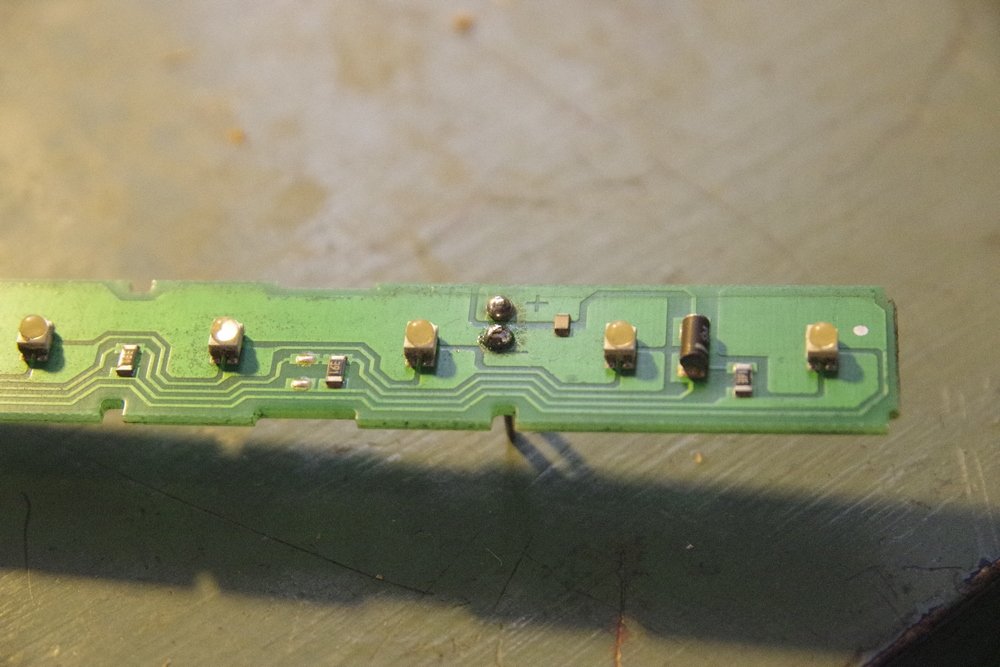
Good afternoon. This is an FYI for anyone who finds that the High Level Brake Light has totally failed (as I did in the pre-MoT check a few days ago) - Bare bones guidance only: - Remove the two interior trim panels on the tailgate - You now have access to the light fitting, and so unbolt from the tailgate (1 or more nylon nuts on threaded studs which are part of the fitting) - Run a semi-sharp blade gently around the fitting, and push from the underside, until you can push it up and out of the tailgate - be careful not to damage either the 2-core cable to the fitting or the pipe to the washer (or, of course, the paintwork!) - Carefully disconnect the plug on the 2-core cable from the fitting, and then the washer jet from the fitting - both have lugs on the sides which need to be gently released. - If the Amber outer lens of the fitting has not already come away from the main body (as mine did as I tried to get it out of the tailgate), then gently run a sharp blade around the edge until the two parts separate. - You will now see the clear inner lens assembly over the LEDs on the Printed Circuit Board (PCB) - it is held in place by lugs/latches at both ends and 1/3 of the way from each end, so gently lever the lens up whilst releasing the lugs. The PCB then simply unclips from the Lens. - Near one end of the PCB, and on the other side to all the LEDS, there is a pair of metal pins - these are marked "+" and "-" on the track side of the PCB, and are the terminals for the 12V input to the LED assembly. - Chances are that the soldered joints that attach them to the PCB are broken &/or corroded - so carefully clean the joints with a sharpish tool until you can see bright solder, and then reflow that solder with a small soldering iron whilst adding just a little more to make the soldered joints more secure. Having done that, all 14 of the LEDS should then light up (as mine did) when fed with 12V to the two power input pins.! If they don't then you have probably got the supply polarity wrong and so switch the external leads. Reassembly of the fitting is pretty much the reverse of taking it apart - probably the biggest issue is how to refit the outer lens to the main part of the fitting. Both items appear to be marked "PC" which I assume means "Polycarbonate". and a little googling indicated that you can use a wide range of adhesives, notably cyanoacrylates ("superglue") and expoxy resin, but I tried the solvent cement I use for joining PVC water pipes and it seemed to work (although I did have to clamp the parts together for a few minutes to let the adhesive set). After that, it is a matter of refitting the plug on the 2-core cable to the pins of on the fitting and then the reinserting the washer jet (with its foam sealant ring!!) into its hole in the fitting, and then remounting that on the top edge of the tailgate - having added some sealant to the edges before you finally push it into place - and finally refitting the nylon nuts which pull it snugly down onto the body of the tailgate. Then you have the relative nightmare of getting the two parts of the tailgate trim back in place - I did that on my own because I had to, but I would strongly suggest that it is really a 2-man job! PS: Don't know what the VAG price for the fitting is (dread to think) but the aftermarket part from ECP works out at around £34-£36 dependent on whether you order it off ebay, or through a branch and use a discount code. So, if you don't think you can repair your own fitting, then this is also roughly how to replace it with a new one. Some pictures are attached - these were actually taken as I reassembled the fitting, but are shown (I hope) in roughly the order you see as you take it apart - and the 2 pins to be resoldered can be seen at the top edge of the PCB in the last shot, i.e. IMG023a.jpg

 1 point