3T51704x4
FREEDOM
-
Joined
-
Last visited
Everything posted by 3T51704x4
-
Hi, the factory says to bleed the system with 2 bar pressure min to avoid issues. Then use a diagnostic tool to bleed the ABS hydraulics. I can give you some info to help visualise why you have not completely lost braking even though it feels like it: The reservoir is divided internally into three chambers, all of which use the same fluid until below the half way mark which will bring on the low fluid level indicator on the dash. As the leaking circuit continues to loose fluid due to blown cylinder seals, it's chamber will empty but fluid is maintained in the good circuit chamber hence you will still have some diagonal braking. Automatics will have the three chambers too, but the clutch one will be sealed off at the exit tube. The reason for compartmentalising the reservoir is to provide an emergency backup should a circuit fail as in your case. You will still have normal braking on one diagonal split which provides emergency braking. In your case the NSR and the OSF will still have a sound circuit, but you will have lost your OSR and NSF circuit. If you have a manual transmission, and the clutch circuit has sprung a leak, the fluid in the whole reservoir will drop to half way, then continue to empty the clutch chamber, but the two brake circuits will be protected from losing fluid from their chambers. Prob won't help you much as you need a pressure bleed by sound of it once the shoes and cylinder have been replaced. Adobe Express 2026-06-03 16.11.43.mp4 Did my daughters yesterday. Once pressure bled and less than 1/3 pedal travel confirmed, you use diagnostic tool to bleed the ABS. Both fronts then both rears at same time following GFF on VAS PC V19 until the end of the test.
-
But ........if you have lost your pedal, it will be the hydraulic side that needs addressing first, especially if the master cylinder has been replaced. ELSA says a minimum of 2 bar pressure is needed to bleed the hydraulic system; newer systems require more for the very reason you have experienced. Also, once it has been bled, you need to bleed the ABS with your chosen diagnostic tool in Address 03.
-
Hi where are you? you need to do proper volt drops on lives and earths at the abs ecu plug (word 03) to rule out verdigris in the loom from the source causing intermittent connections. Once that has been done, scope the comms to see if it is being pulled up/down or has noise. This can be caused by aftermarket sensors/devices/components which would need to be disconnected one at a time unitl function returns. ONCE these have been ruled out, look at getting the abs ecu tested/repaired. My 5J had a recent ABS issue for the motor (not the same as this issue but!) , I did a volt drop test and although the fuse showed 14.2V at the ecu plug (on Battery Support), when loading the circuit, the voltage at the ecu plug dropped right off. I will see if I can find a picture. This shows me initially checking the negative feed to the ecu plug under load of a test light. For larger drop checking I would use a higher load. The negative of the test light is on the positive battery terminal when testing the first two Terminal 31 pins. The negative of the test light is moved to the negative battery terminal to test the Terminal 30 and 15 positive pins. Negative Test Followed by Positive load test at the ecu plug.mp4 This is a factory breakout box connected to the ABS ECU plug. Each numbered pin corresponds with the pin on the ecu plug. The battery has been removed to gain access should I need to open up the loom to find a high contact resistance. The power is being provided by a 100A VAS battery support unit. Fuse at SA Fuse Box.mp4 The fault was traced to a fault fuse in the SA fuse box. No output at 10a to the ABS 38 pin1 ABS plug at pin 1 or T38a/1. I found a high contact resistance between the fuse leg and the terminal in the fuese box. The fuse link was fine. Voltage Restored to Pin 1 Via 40A Fuse.mp4 Confirming repair. NB volt meter also used when checking under load. Sometimes a much higher load is required, but not in this case.
-
I put my fingers around the leatherette and under the ring and just pull up hard, not screwed in, just agressive clips. You can clean that up with Isopropyl Alcohol as you suggested Should work fine. But you may need to GENTLEY scuff the contacts for better contact, the rubber bobbles are tipped with conductive material and they just short out the terminals to make the conection. They also may need to be scuffed. Check accross the resistors with a meter to see if they are still the correct value. Oh, sorry you ordered a new one anyway, didn't read down far enough. We have a special tool for removing the ciggi lighters. You can do it by carefully easing out the lock tabs. This is the tool I use
-
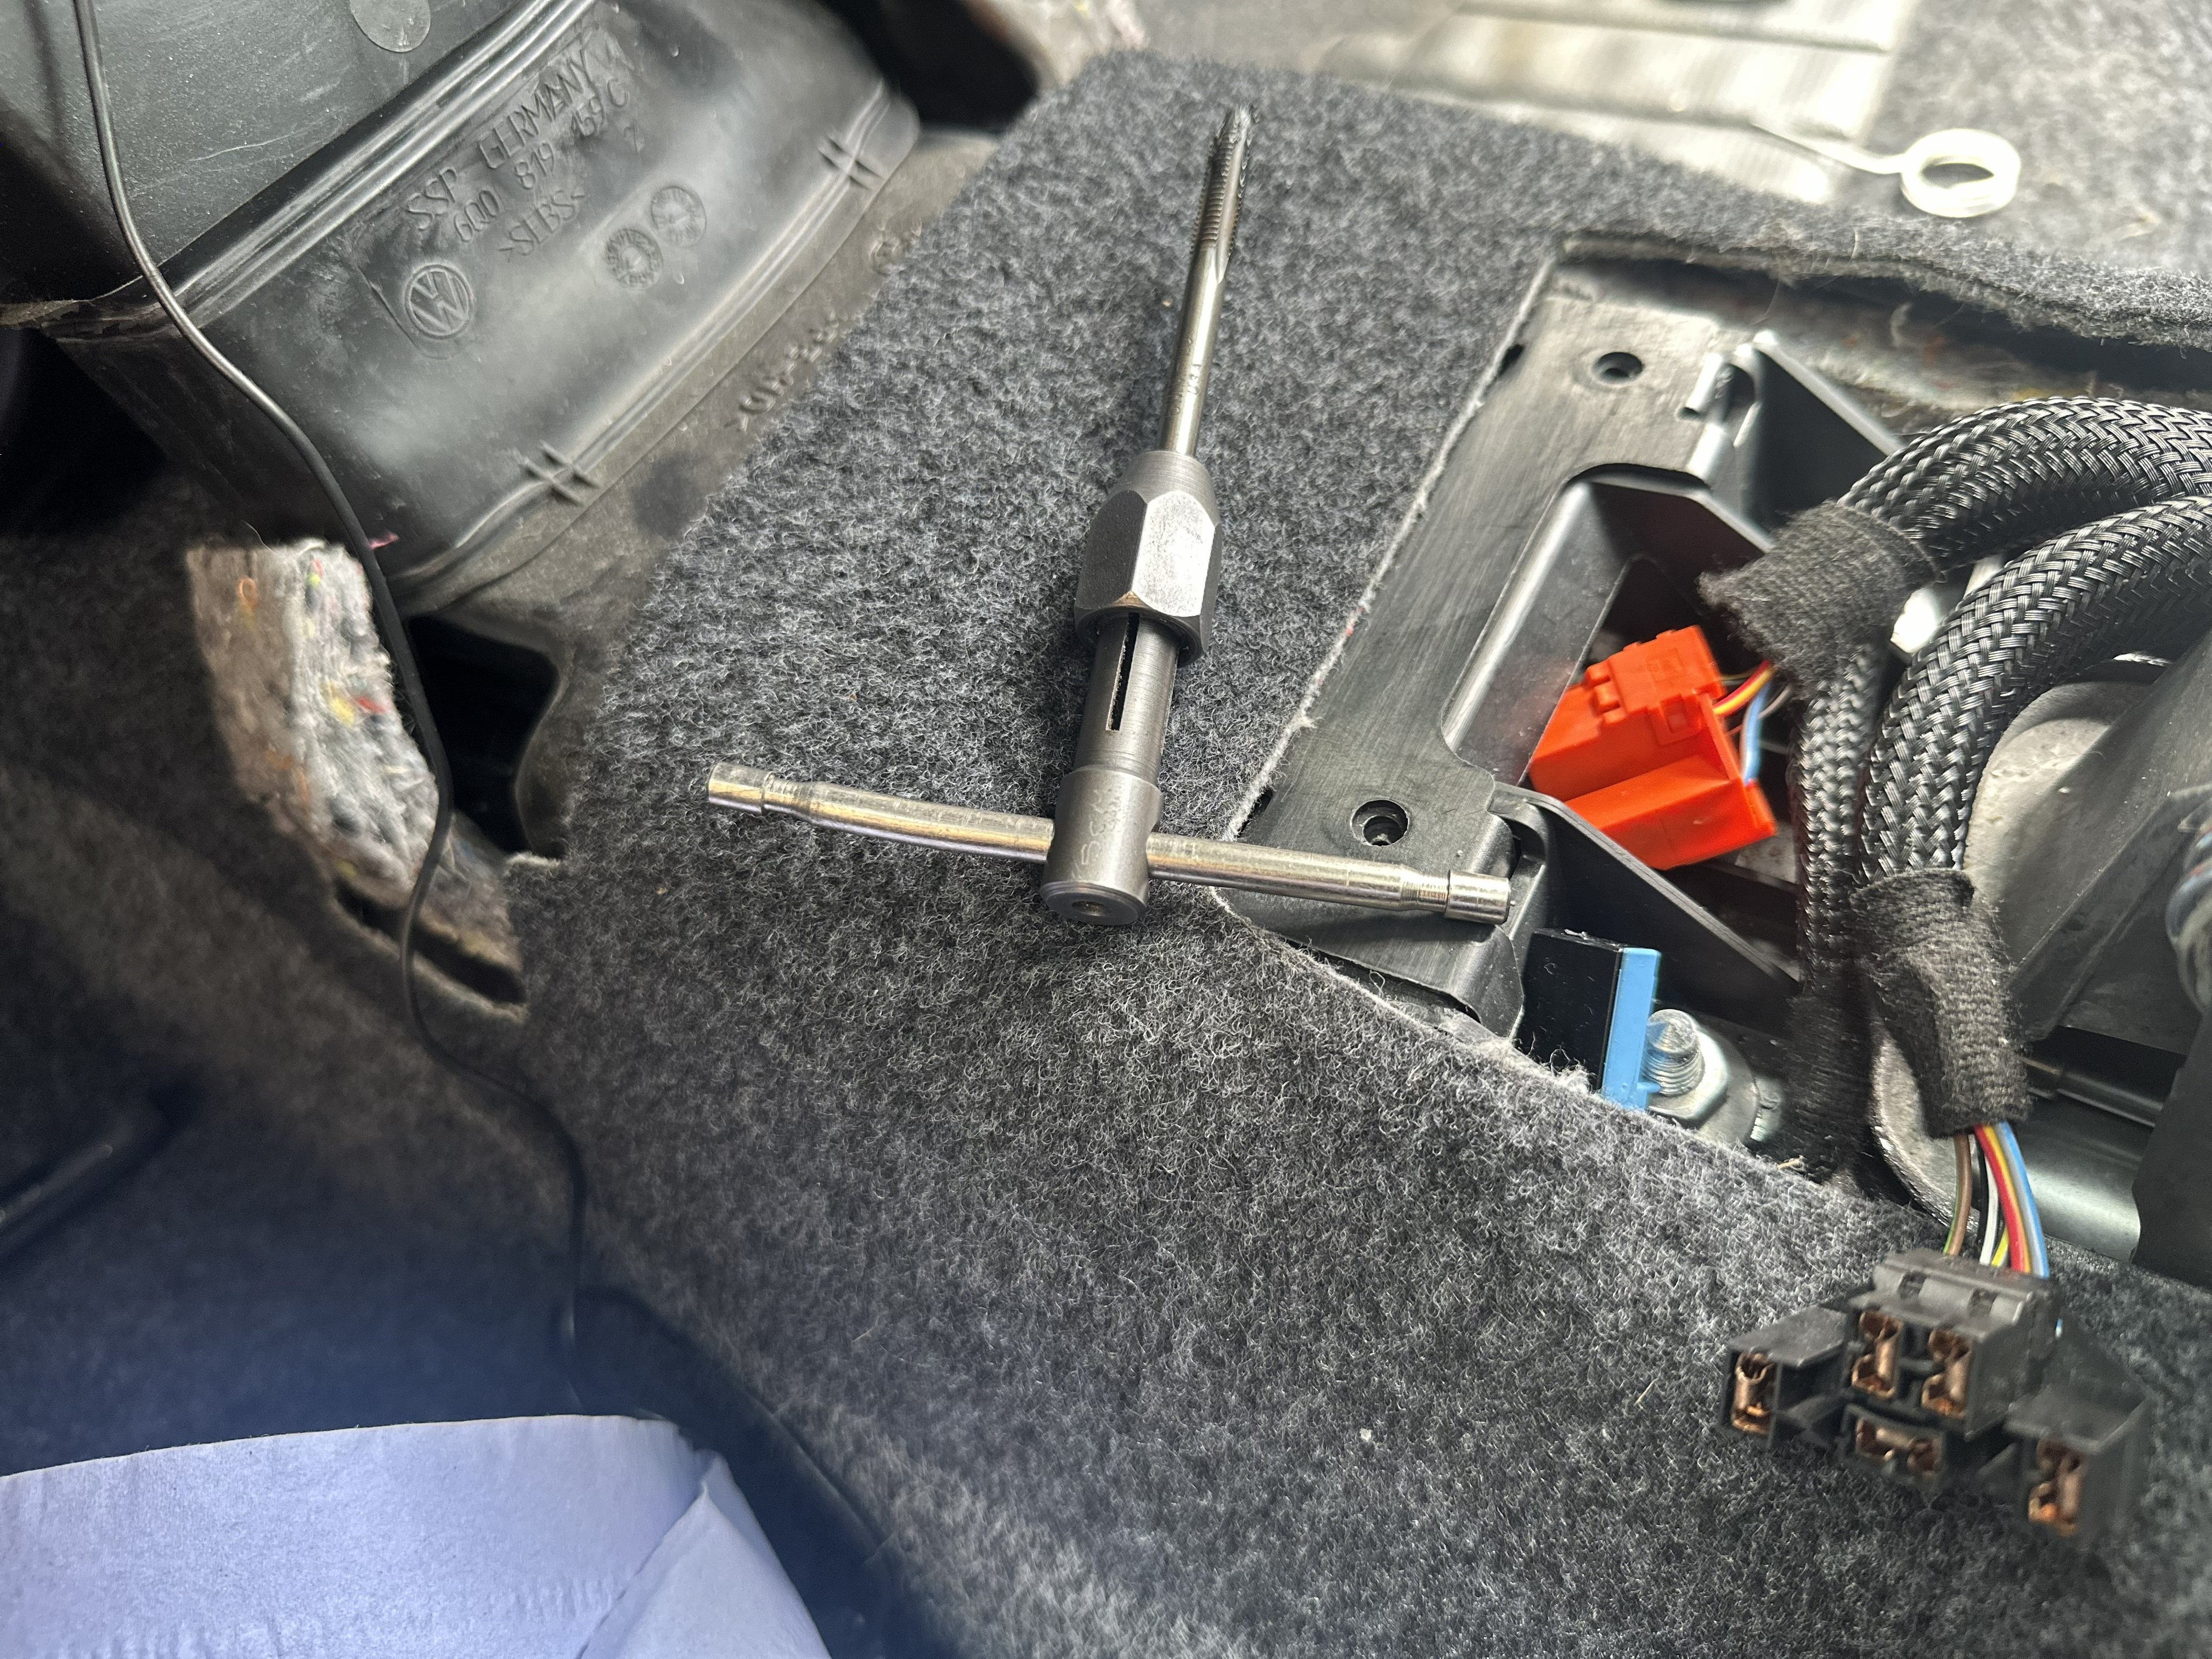
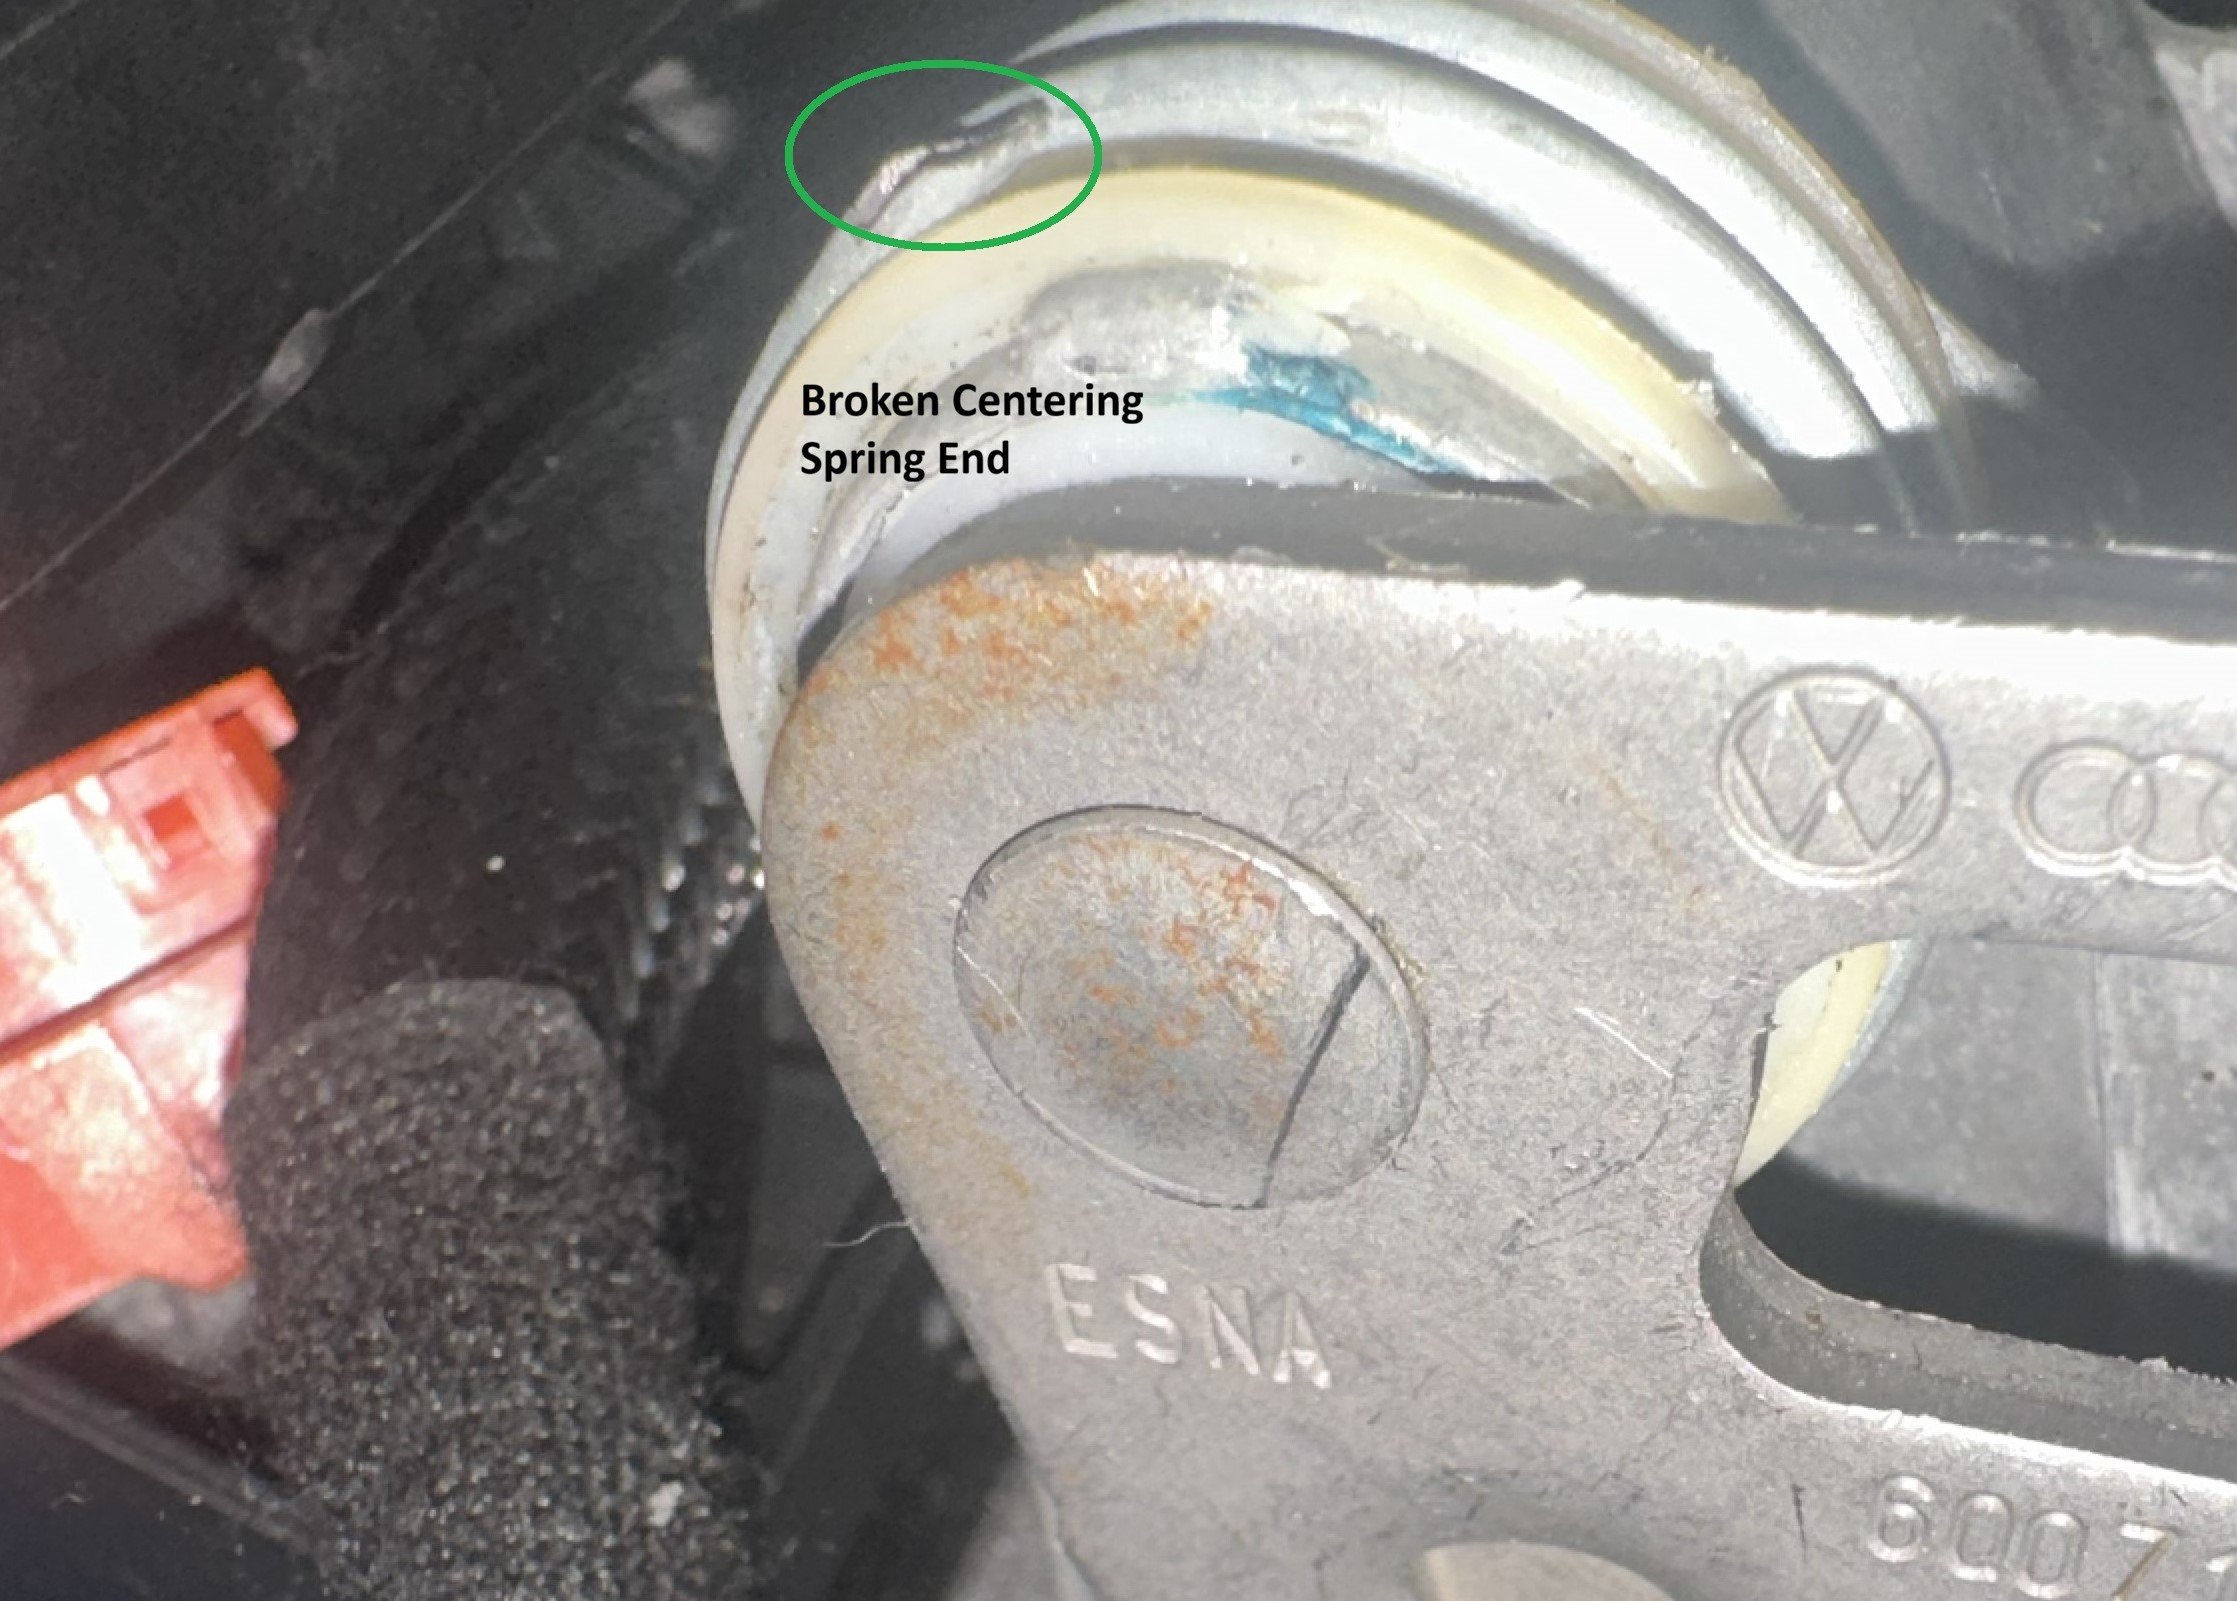
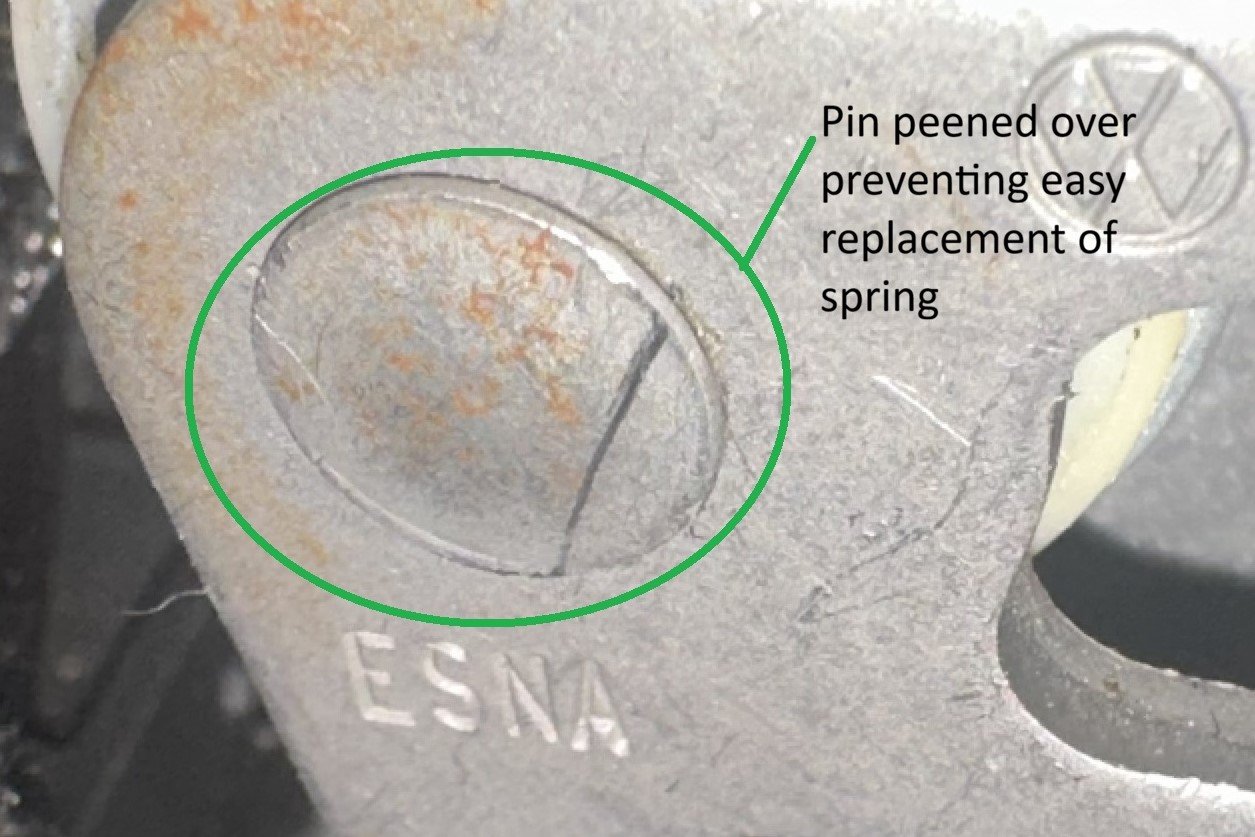
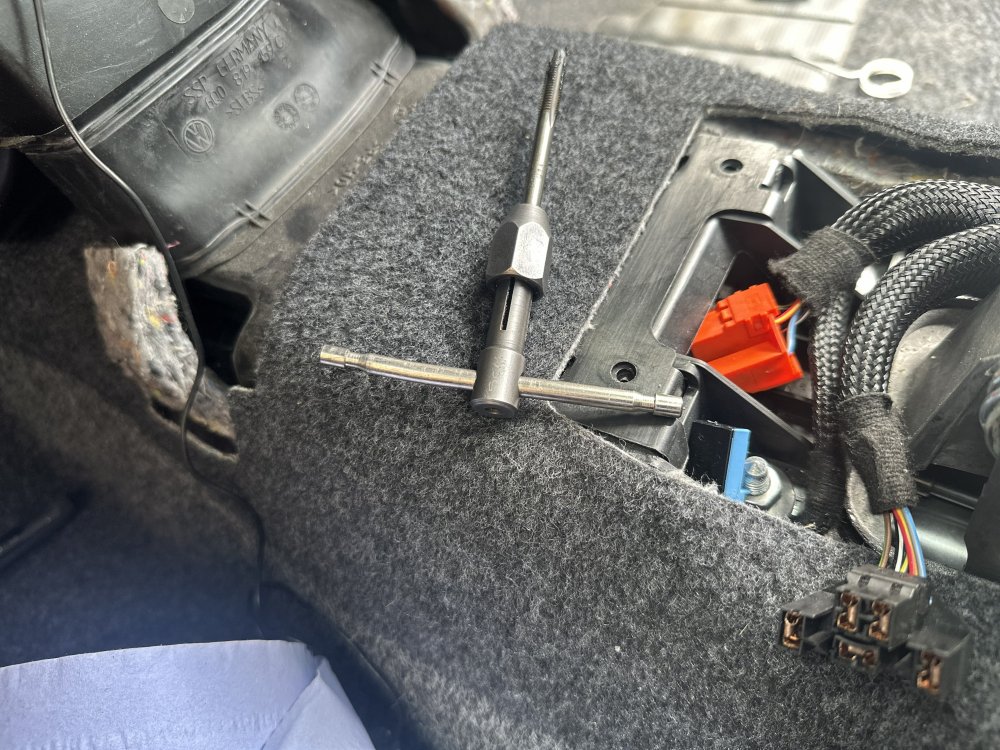
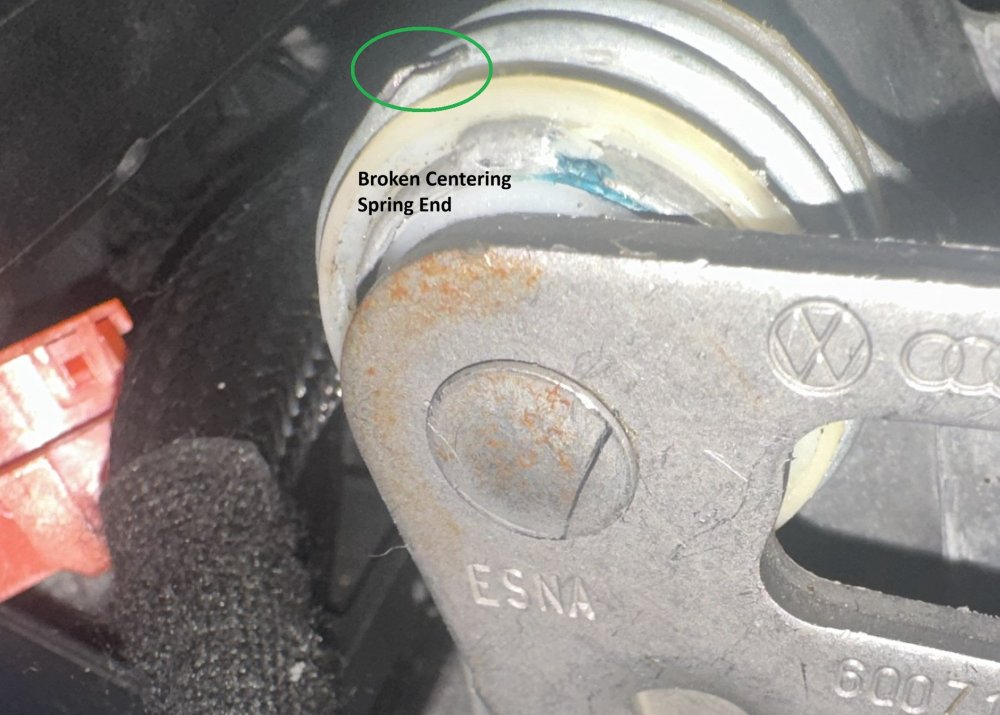
I gave my daughter our MKII Level 3 Fabia for her 18th birthday and decided to fix some issues. One of the faults was a floppy gear shift due to a broken return spring. Easy enough, I had the seats and centre console out anyway so I could Puzzi the carpets so easy access to the gear shift. I found a cheap spring kit online and set about replacing the spring, only to find in my car, the pin going through the lever has been peened over like a rivet!! WTF YOU ARE FREAKING JOKING ME SKODA, no way to change the spring without damaging the lever which is not available seperately. Great, I'm screwed. Put thinking cap on, these used to be secured with a bolt I'm sure. This may help someone else.... I decided to drill a 5mm hole in the centre of the shaft, used an M6 x 1.0mm pitch tap BEFORE releasing the shaft from the lever to give a stable platform to drill into the centre of the pin. I found a suitable T30 torx screw in my "out the **** kit". ONCE I was happy the screw fitted and held the lever in place correctly, using an 8mm drill bit inserted into the tip of the new bolt hole as a guide, I drilled and removed a very small ammount of pin retaining material to release the lever from the pin. Dont go too far, just enough to remove the outer material, this then leaves the machined part of the pin to locate the lever securly and allows the bolt to fit correctly. I used the tap again to clean up the first few threads damaged by the drilling. The spring can now be replaced. The new screw was fitted with thread lock: it is now serviceable for the future. NOTHING ON YOUTUBE OR FORUMS FOR FABIA FITTED WITH THIS POXY MONEY SAVING WAY OF SECURING THE PIN GERRRRRR. Hope this helps many people. M6x1.0mm Tap NB Drill a 5mm hole in the centre ensuring it remains straight as it goes in PRIOR to drilling the peened pin for stability. The peened pin has been removed for clarity showing the treaded bolt hole Use an 8mm drill bit to remove just enough material to free the pin. You dont want to reduce the size of the bush going into the lever. All done with new spring installed. Install bolt with thread lock. This bolt also had serrations under it's head providing more grip. Broken Leg of removed spring Incidentally, if anyone knows where to get the little 3 for the tailgate, let me know, someone nicked ours and they are no longer available from TPS. Peened Over 4.jpg.HEIC


-
My money is on a wheel speed sensor. I've done three in the last week exact same lights (other than the bulb out that is) , two yeti's and a Transporter T6, but only way to be 100% sure is to scan it to see which one. THEN check wiring for open or short to positive/negative or each other. Clean the bearing seal tone ring (if it is that type) or the segmented ring of debris/rust. then change sensor. If you look in word 03 MVB's you can watch the four sensor wheel speeds and compare. You could scope it if you have Picoscope or similar or just fire the parts cannon. Choice is yours.
-
What is up with the old unit?
-
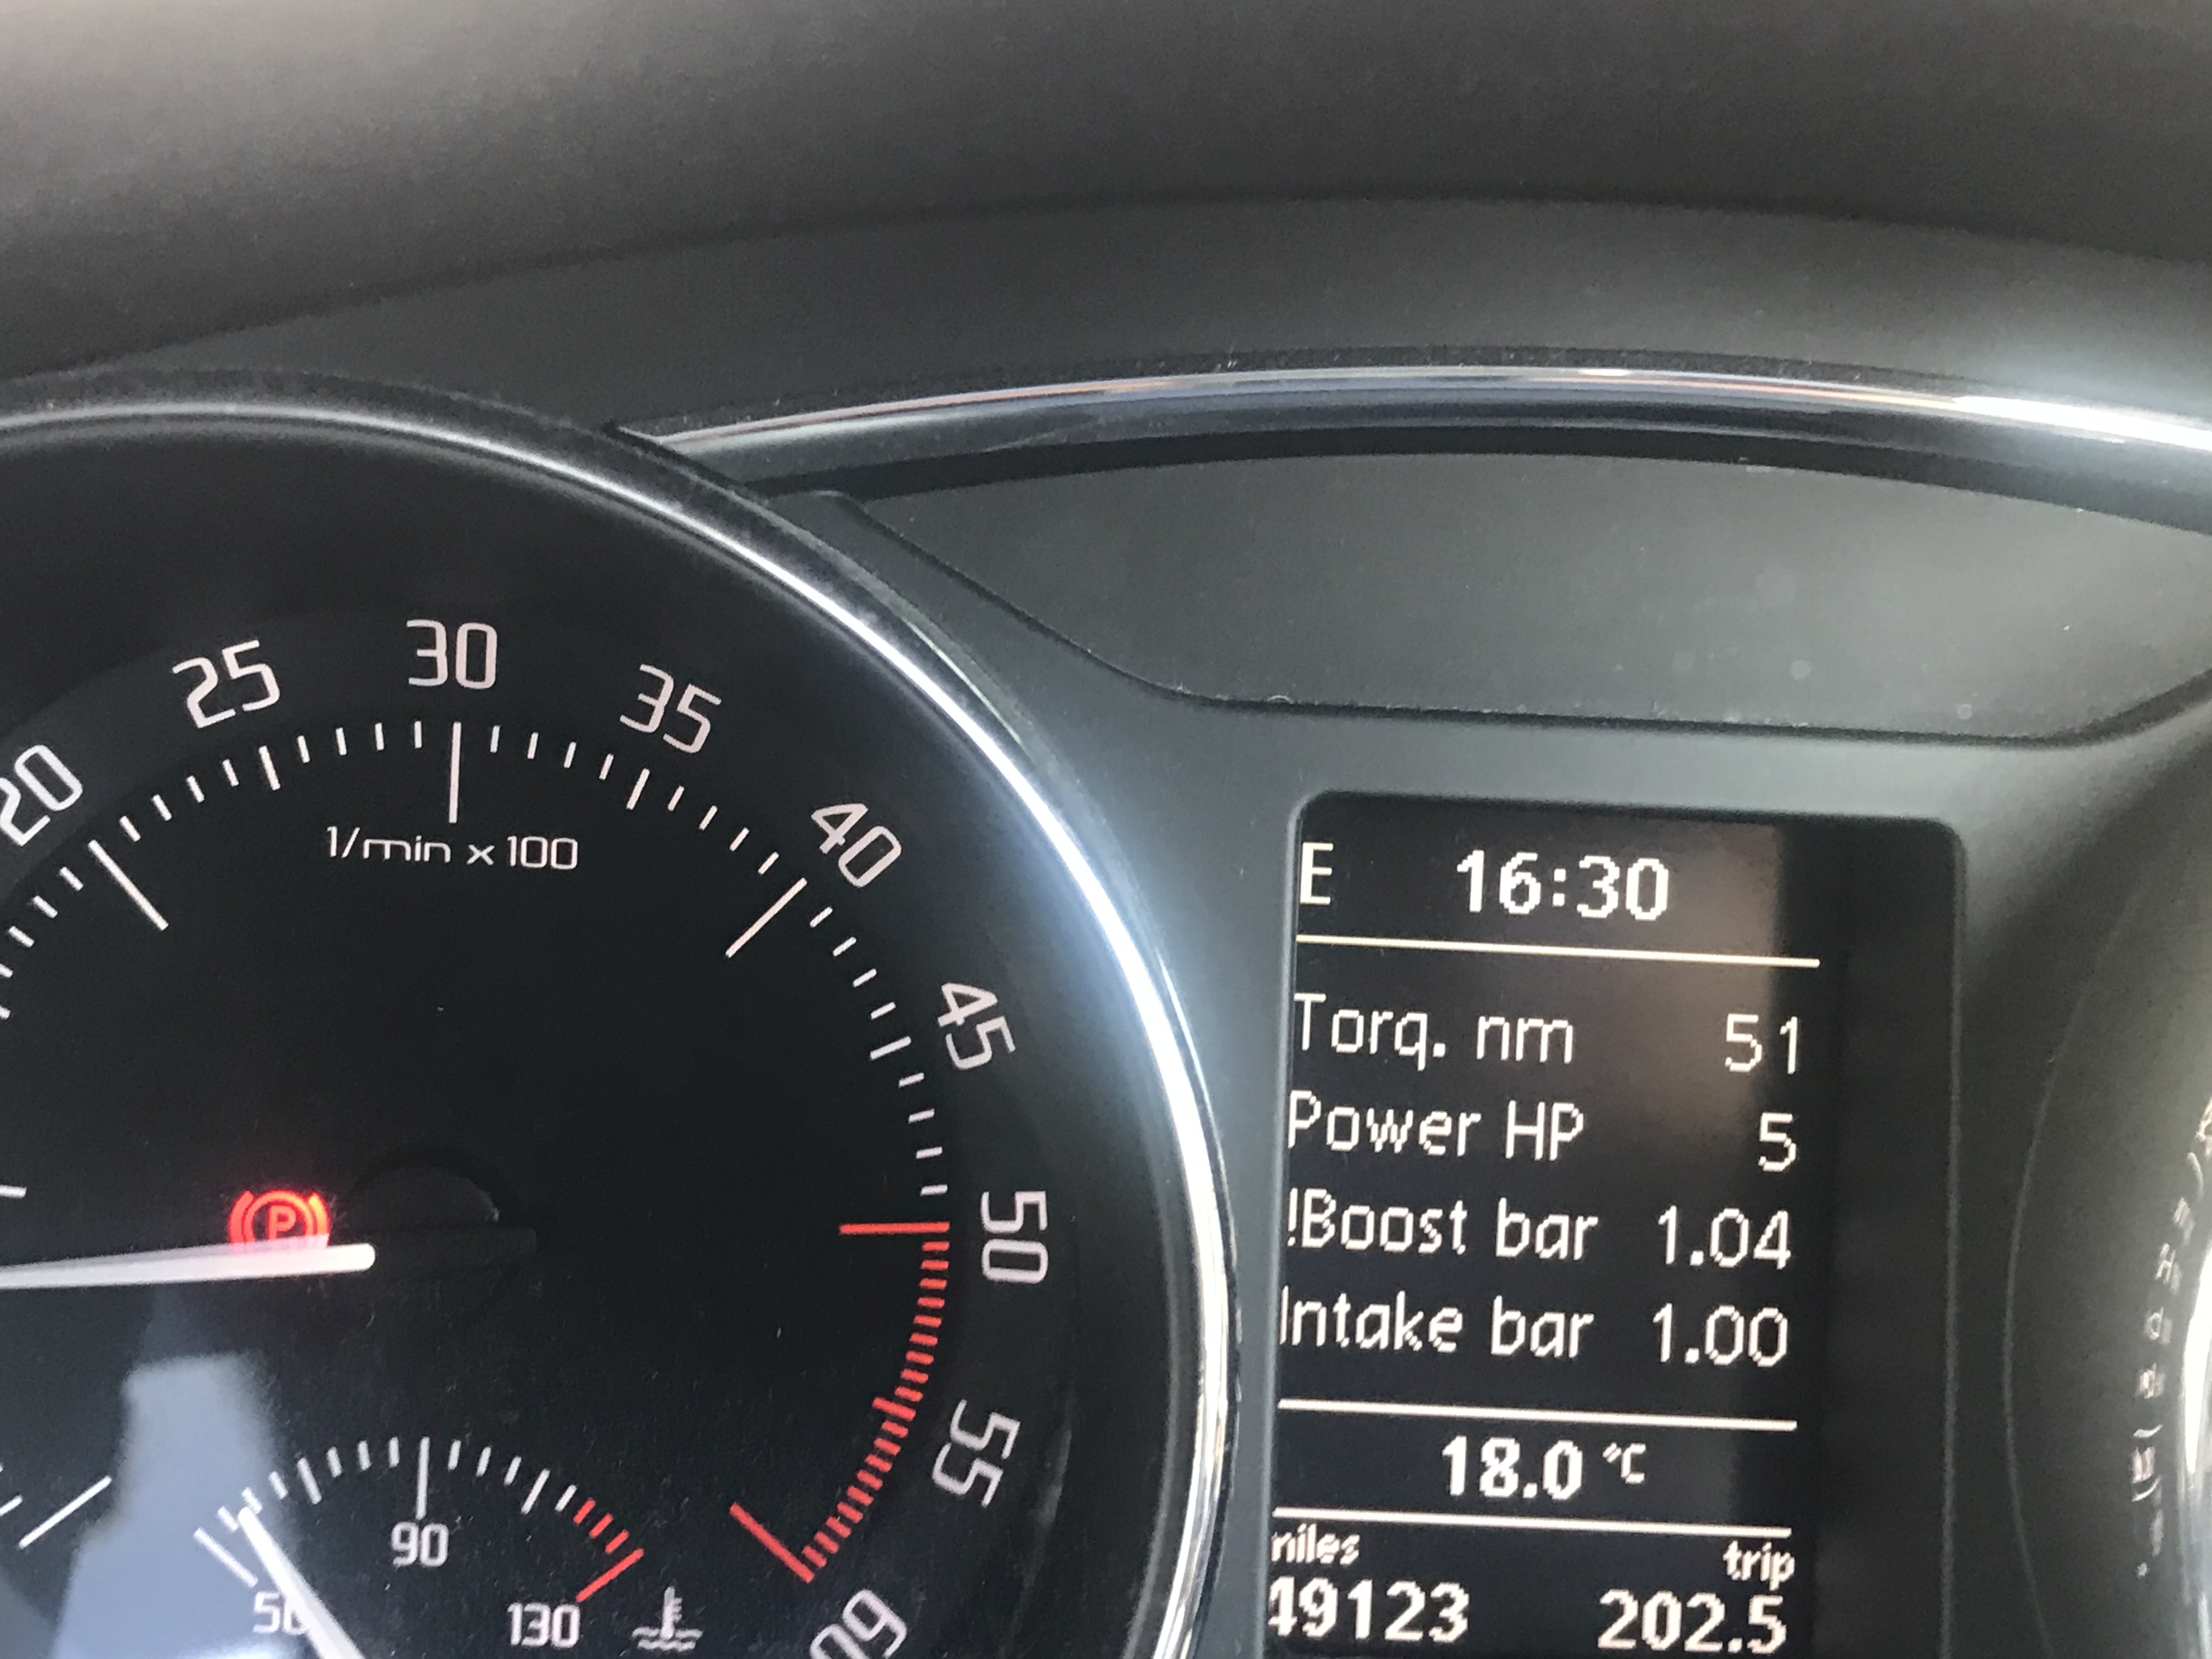
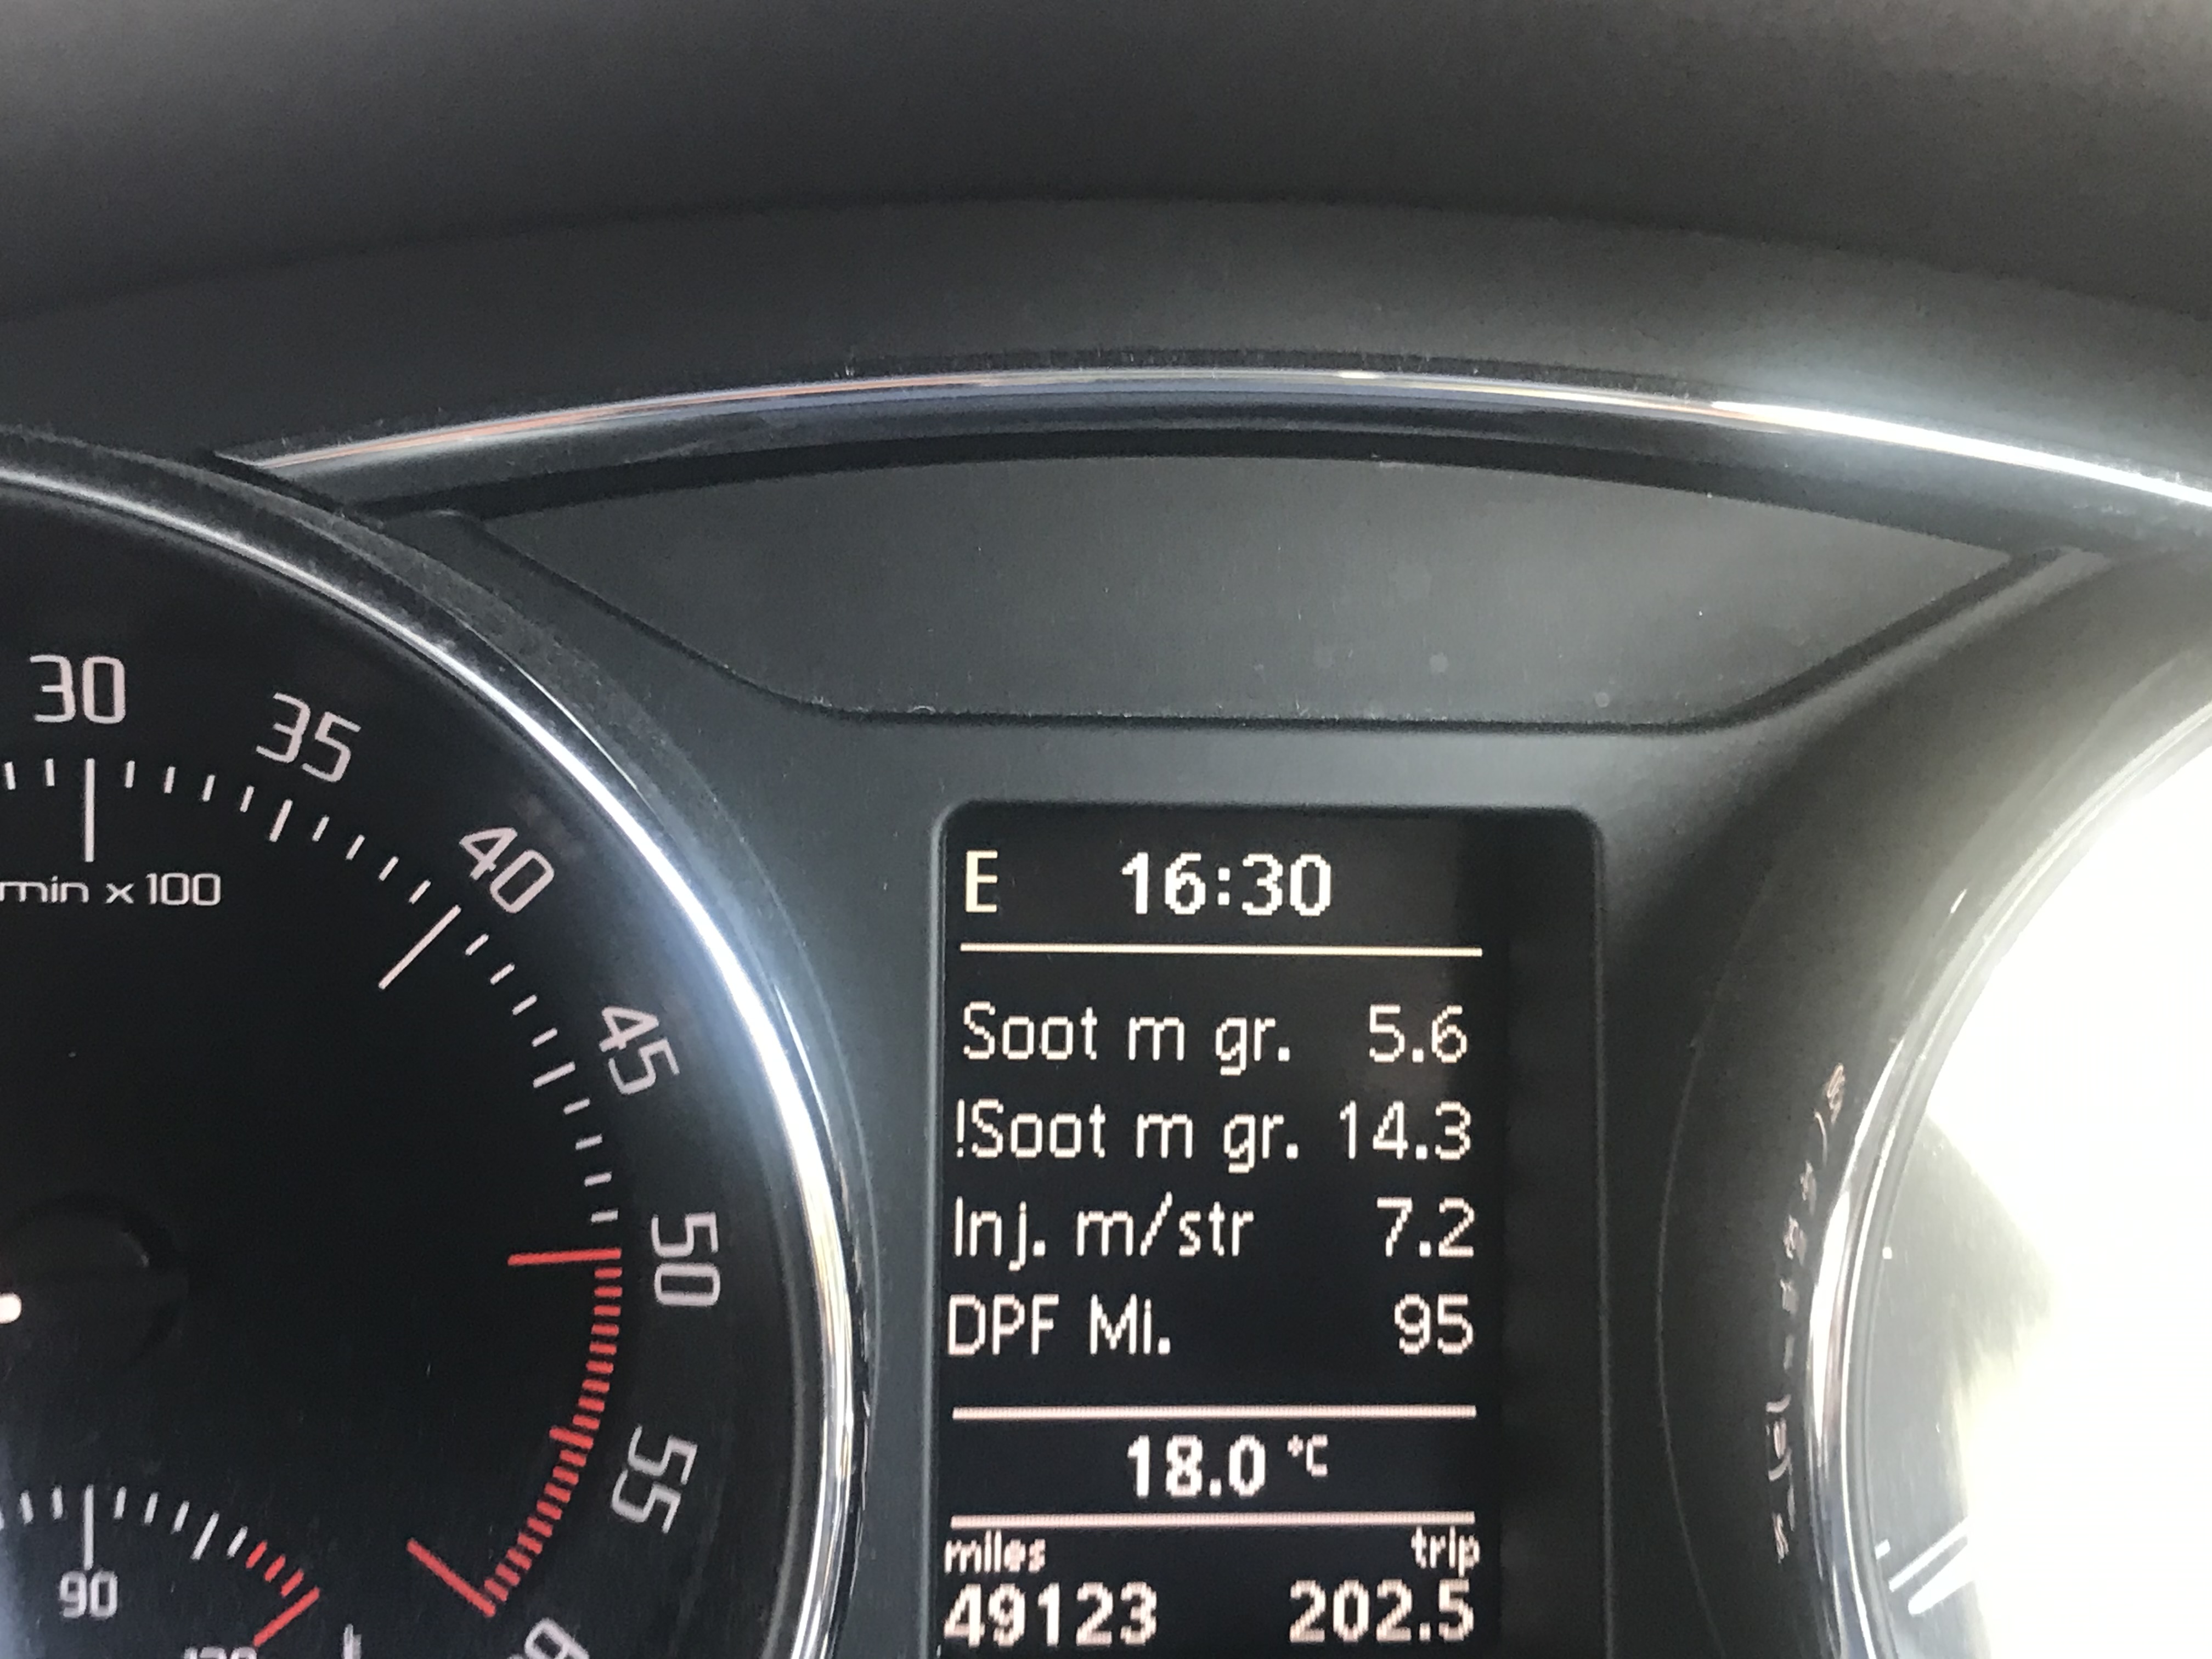
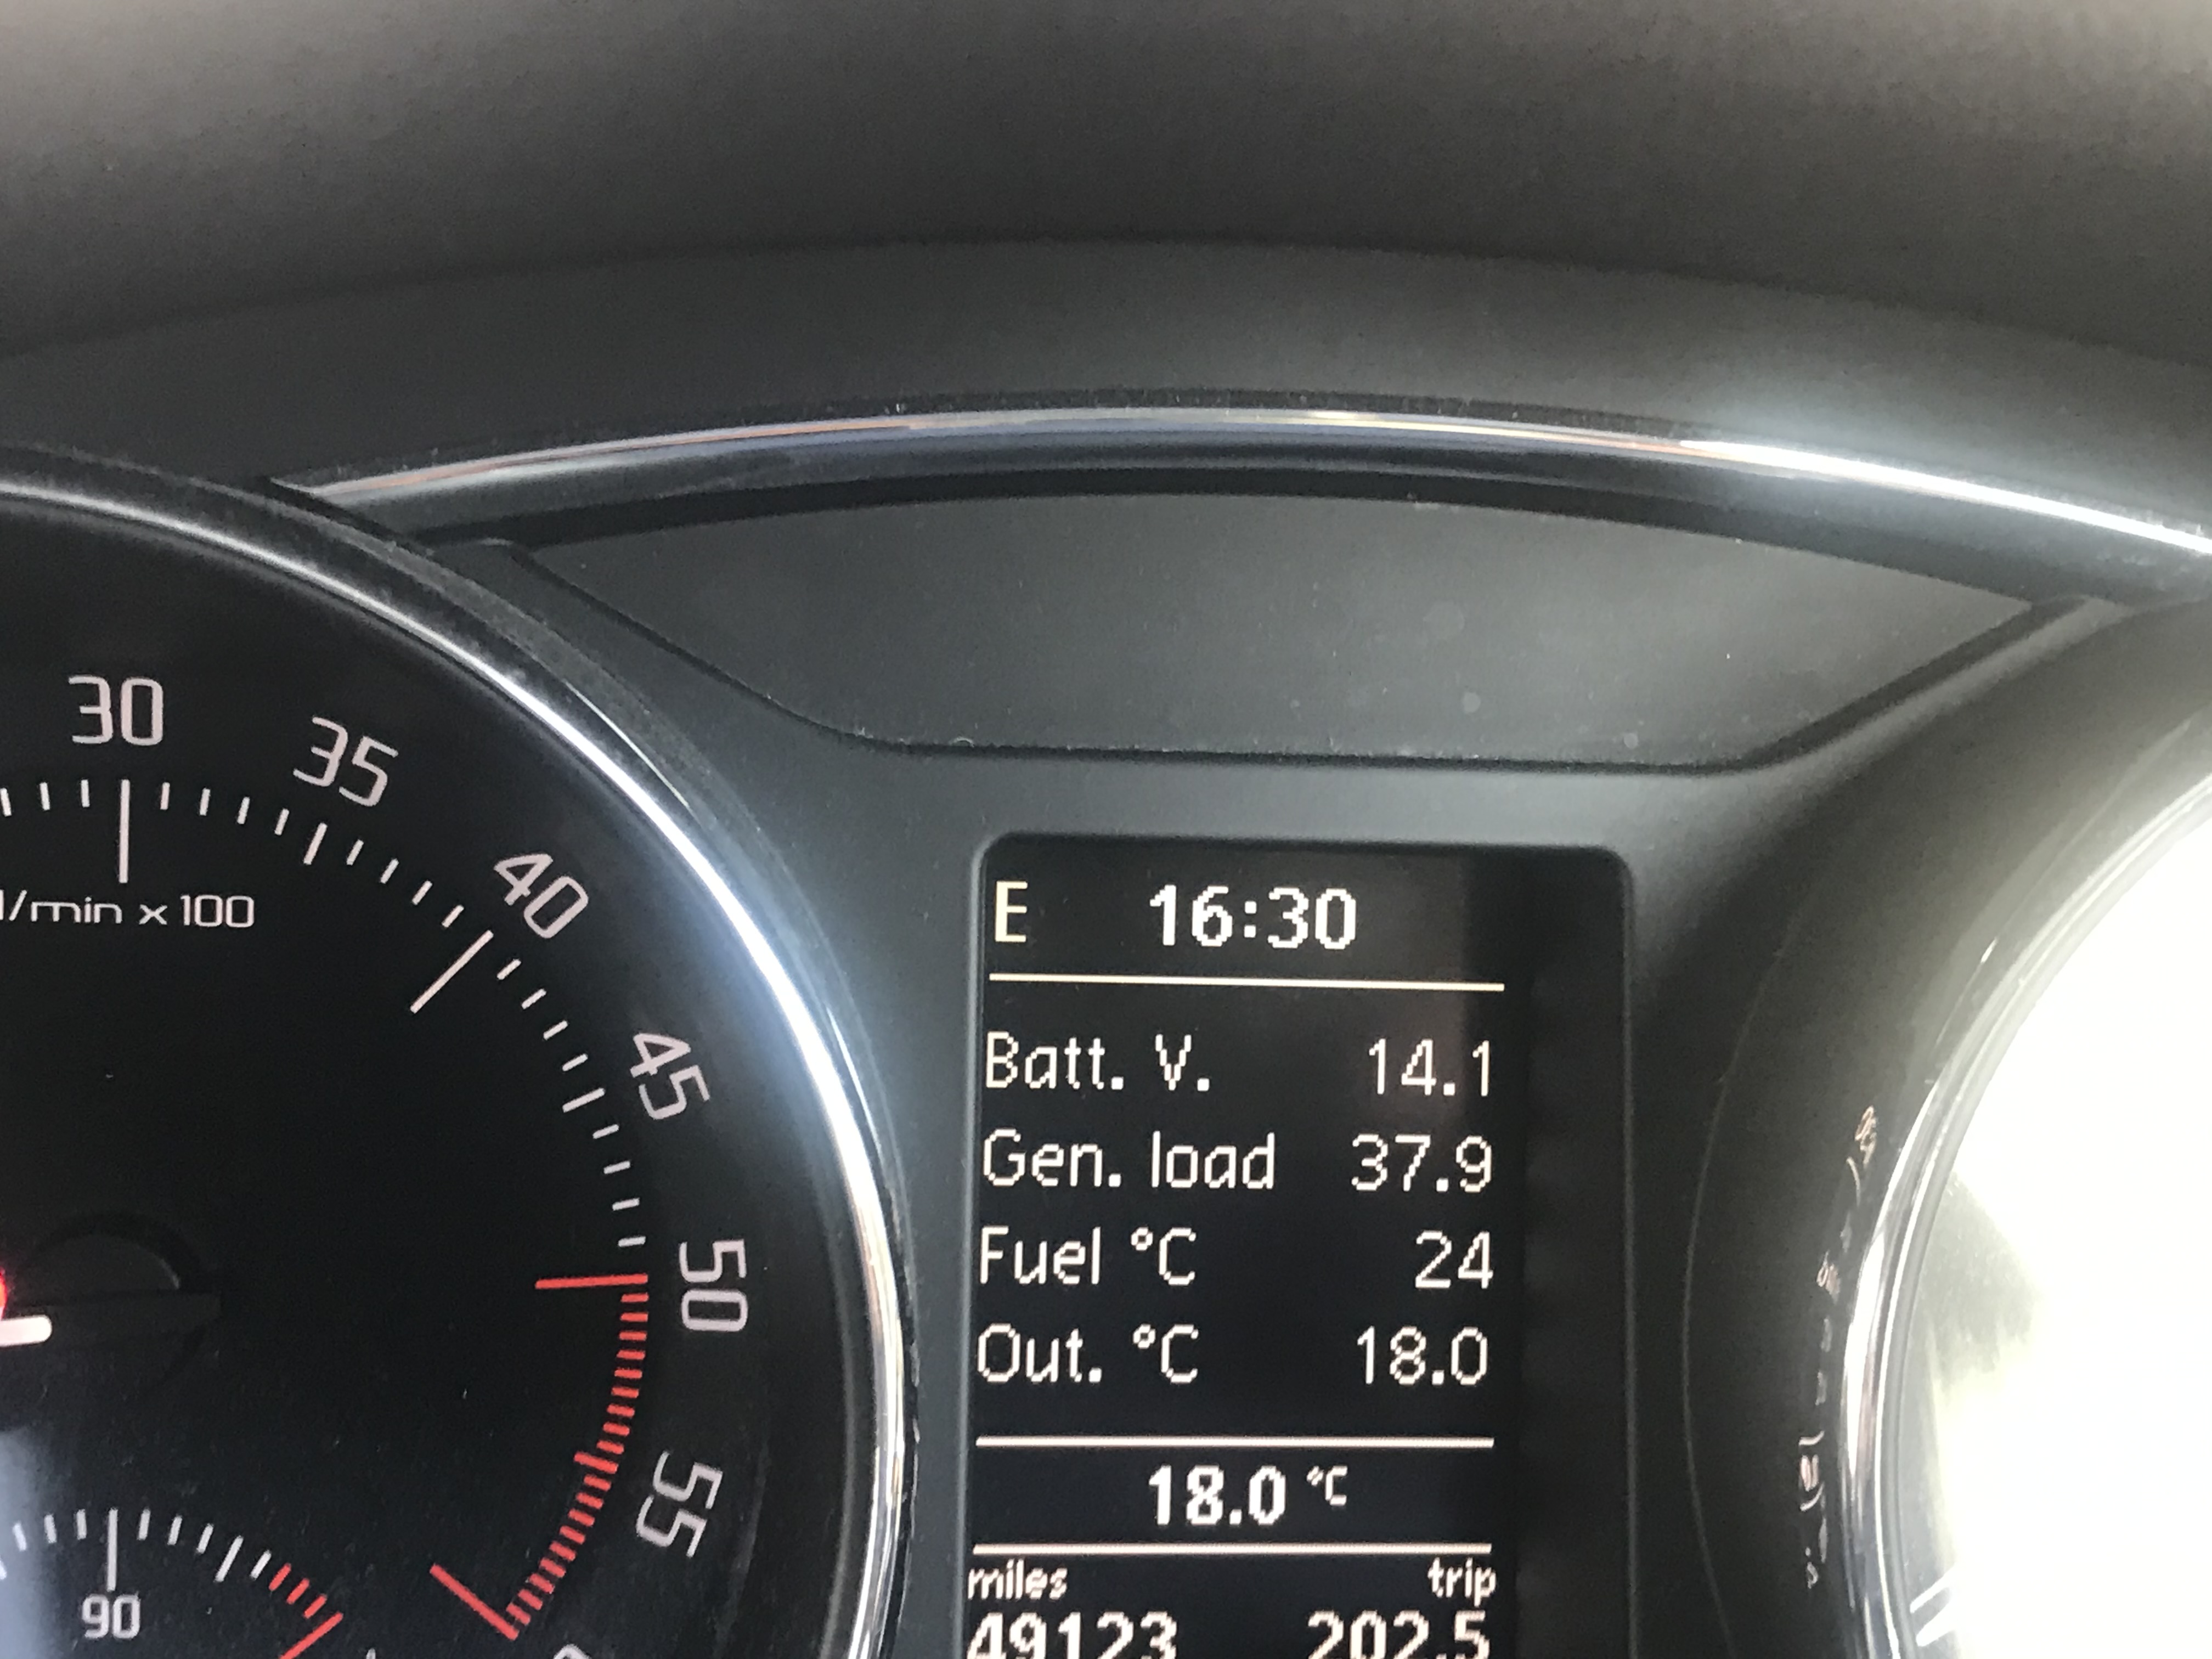
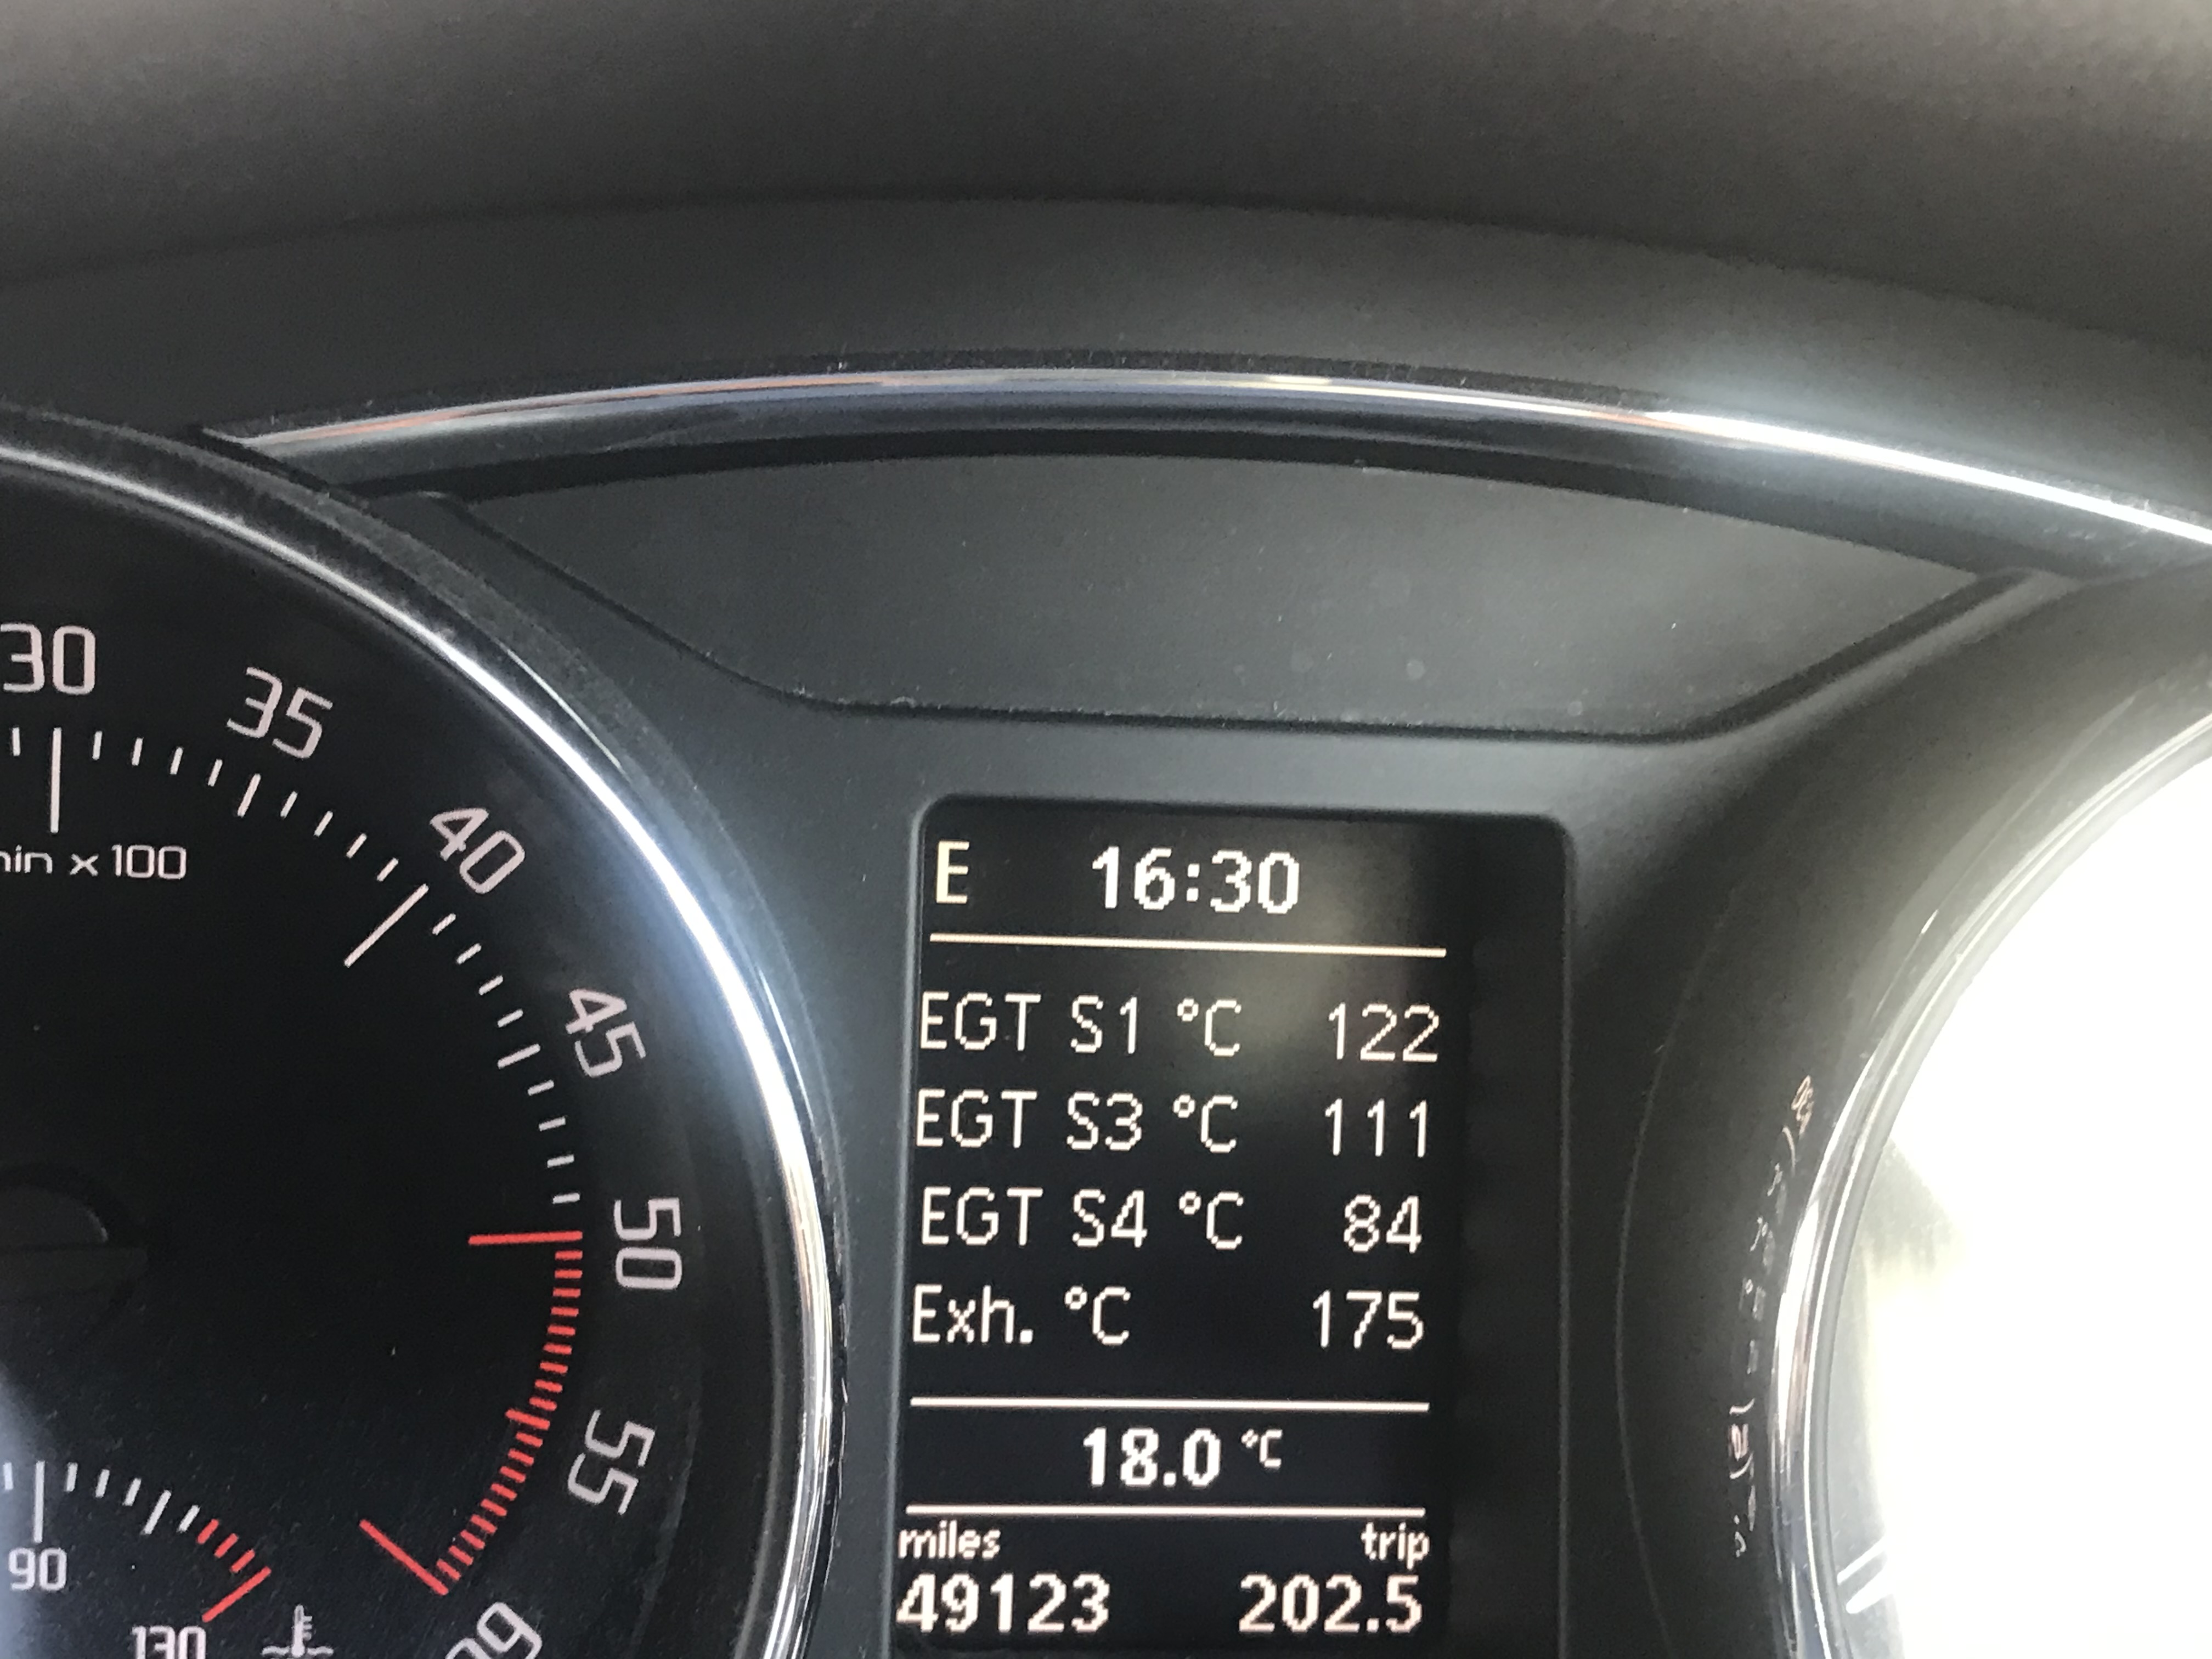
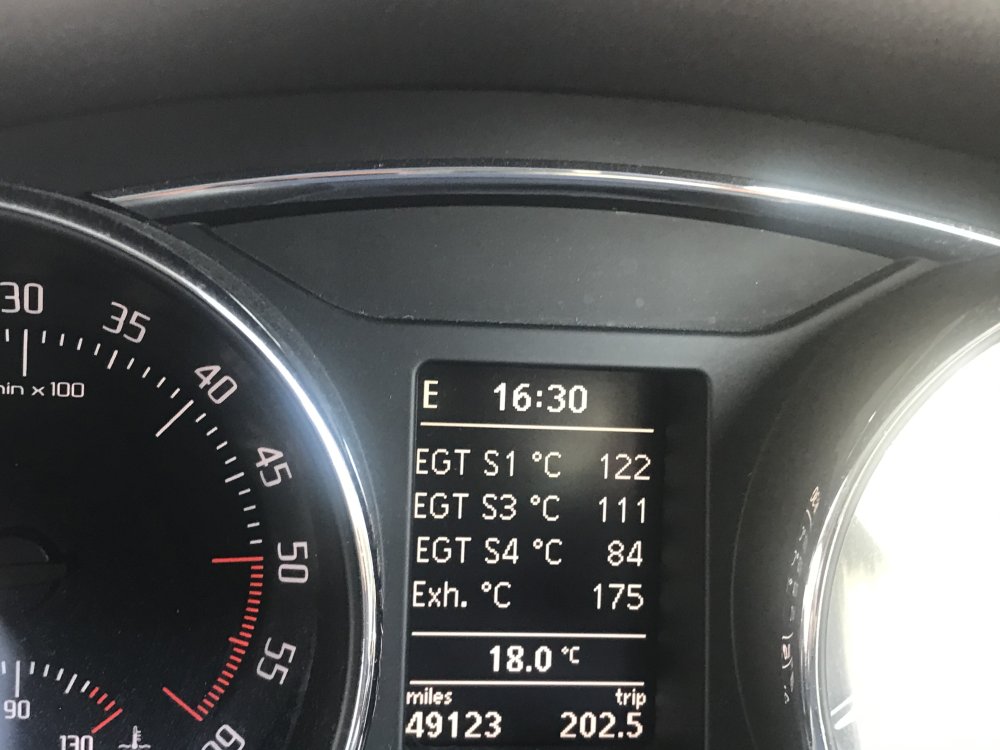
The fan normally comes on when the A/C is on to cool the condenser. Try turning it off and see if the fan stops. It can also be commanded on if a fault is logged in word 01. DPF will not regenerate until the exhaust gas temperature sensors start to read above a few hundred degrees C, with an engine check light on, with fuel below around 1/4 tank or accelerating hard. If you have low usable charge in your battery, it can jack the idle speed up, like the others have suggested, check the owners manual for detailed info. To see if the battery is low (as the car sees it) Check in word 61 for early cars and word 19 for later cars. Look in live data (measured value blocks) you will fine usable charge in Ah. Compare that to the rated Ah printed on the battery to see how much capacity you have in reserve. It is also possible to see the current the battery is taking to charge. A flat battery taking only 1 or 2 amps is worn out. A flat battery taking 30A and above is healthy, lots more useful info in there. Anyway I use a piggy back device connected to the gateway to get my cars basic engine info in the DIS, some of the pages shown in the images below.


-
Look at the measured values for the coolant temperature in the dash (word 17) and the engine ecu (word 01) to see if they match and are plausible. Also look at radiator outlet temperature. Then if they are OK, I would check the R134a fill level in the system. Low gas pressure can cause that too. You may be able to see the pressure in the A/C MVBs if it is late enough. I have a charging machine at home so I would pull out the gas and measure what came out. Think it should be 550g if my memory serves. Obviously that is the only way to know if it still has a full charge. If it is low, it then needs a Nitrogen leak test. Don't just fill it with a Halfords special. G62 is usually down the side of the head near the battery but ages since Ive done one. More likely to be chafed wire or green crusties causing the problem. look for the pastic water pipes with a grey bodied sensor. Change the O ring and clip to avoid disappointment later on ;-)
-
Blackvue front and rear camera with hotspot for 24/7 always on remote monitoring. Inc Blackvue lithium battery pack connected to aux battery in boot to isolate the starter battery in the engine bay. Retrofit genuine battery in the boot (as in the V6 3.6 version) with DC to DC charger with genuine 3.6 boot trim with battery logo and pyrotechnic shut off fuse box. Measured value info direct into DIS with gateway interface. Can read power, torque, battery voltage, alternator load, EGTS temperatures, Soot Loading of DPF etc etc. Retrofit OEM removable towbar and full electrics on 13 pin plug which allows charge input from Victron 30A mains charger by plugging into the towing socket. Keeps all batteries charged if left for long periods. Spring Assist inside rear coil springs.
-
If you get the screen out without damage, the rest would be fairly straightforward as you have everything you need on the donor car. Some minor VCDS code changes would get it working. I retrofitted a Swedish spec Passat front screen in my 4 motion Passat back in 2003. TPS had five of them brand new in their old stock thick with dust and sold them off for £62 each I was gonna buy a spare, but they went too quickly.
-
Hi, it is to stop you putting the negative on the negative battery post, (look at the messaging closely, shows NOT to place the jump lead at the battery post) bypassing the battery manager. By using the provided body earth, the current being introduced goes through the battery manager (we call it word 61) later cars has it as a slave to the gateway (word 19). Lots of very useful battery info in the measured value blocks if you know what to look for. Changed a few of these units where they fail if it gets spiked. communicates via LIN Bus.
-
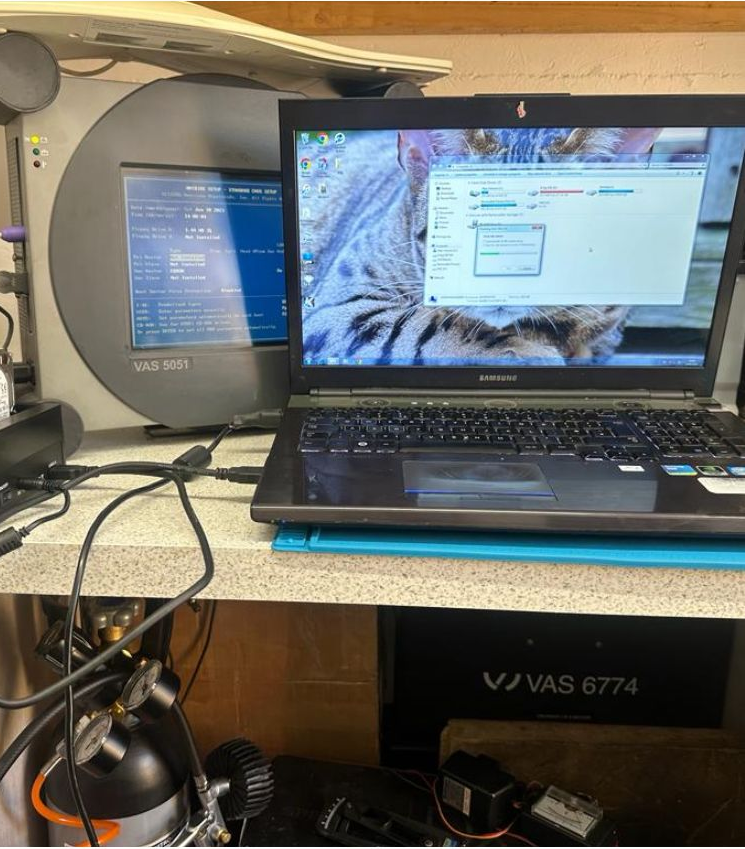
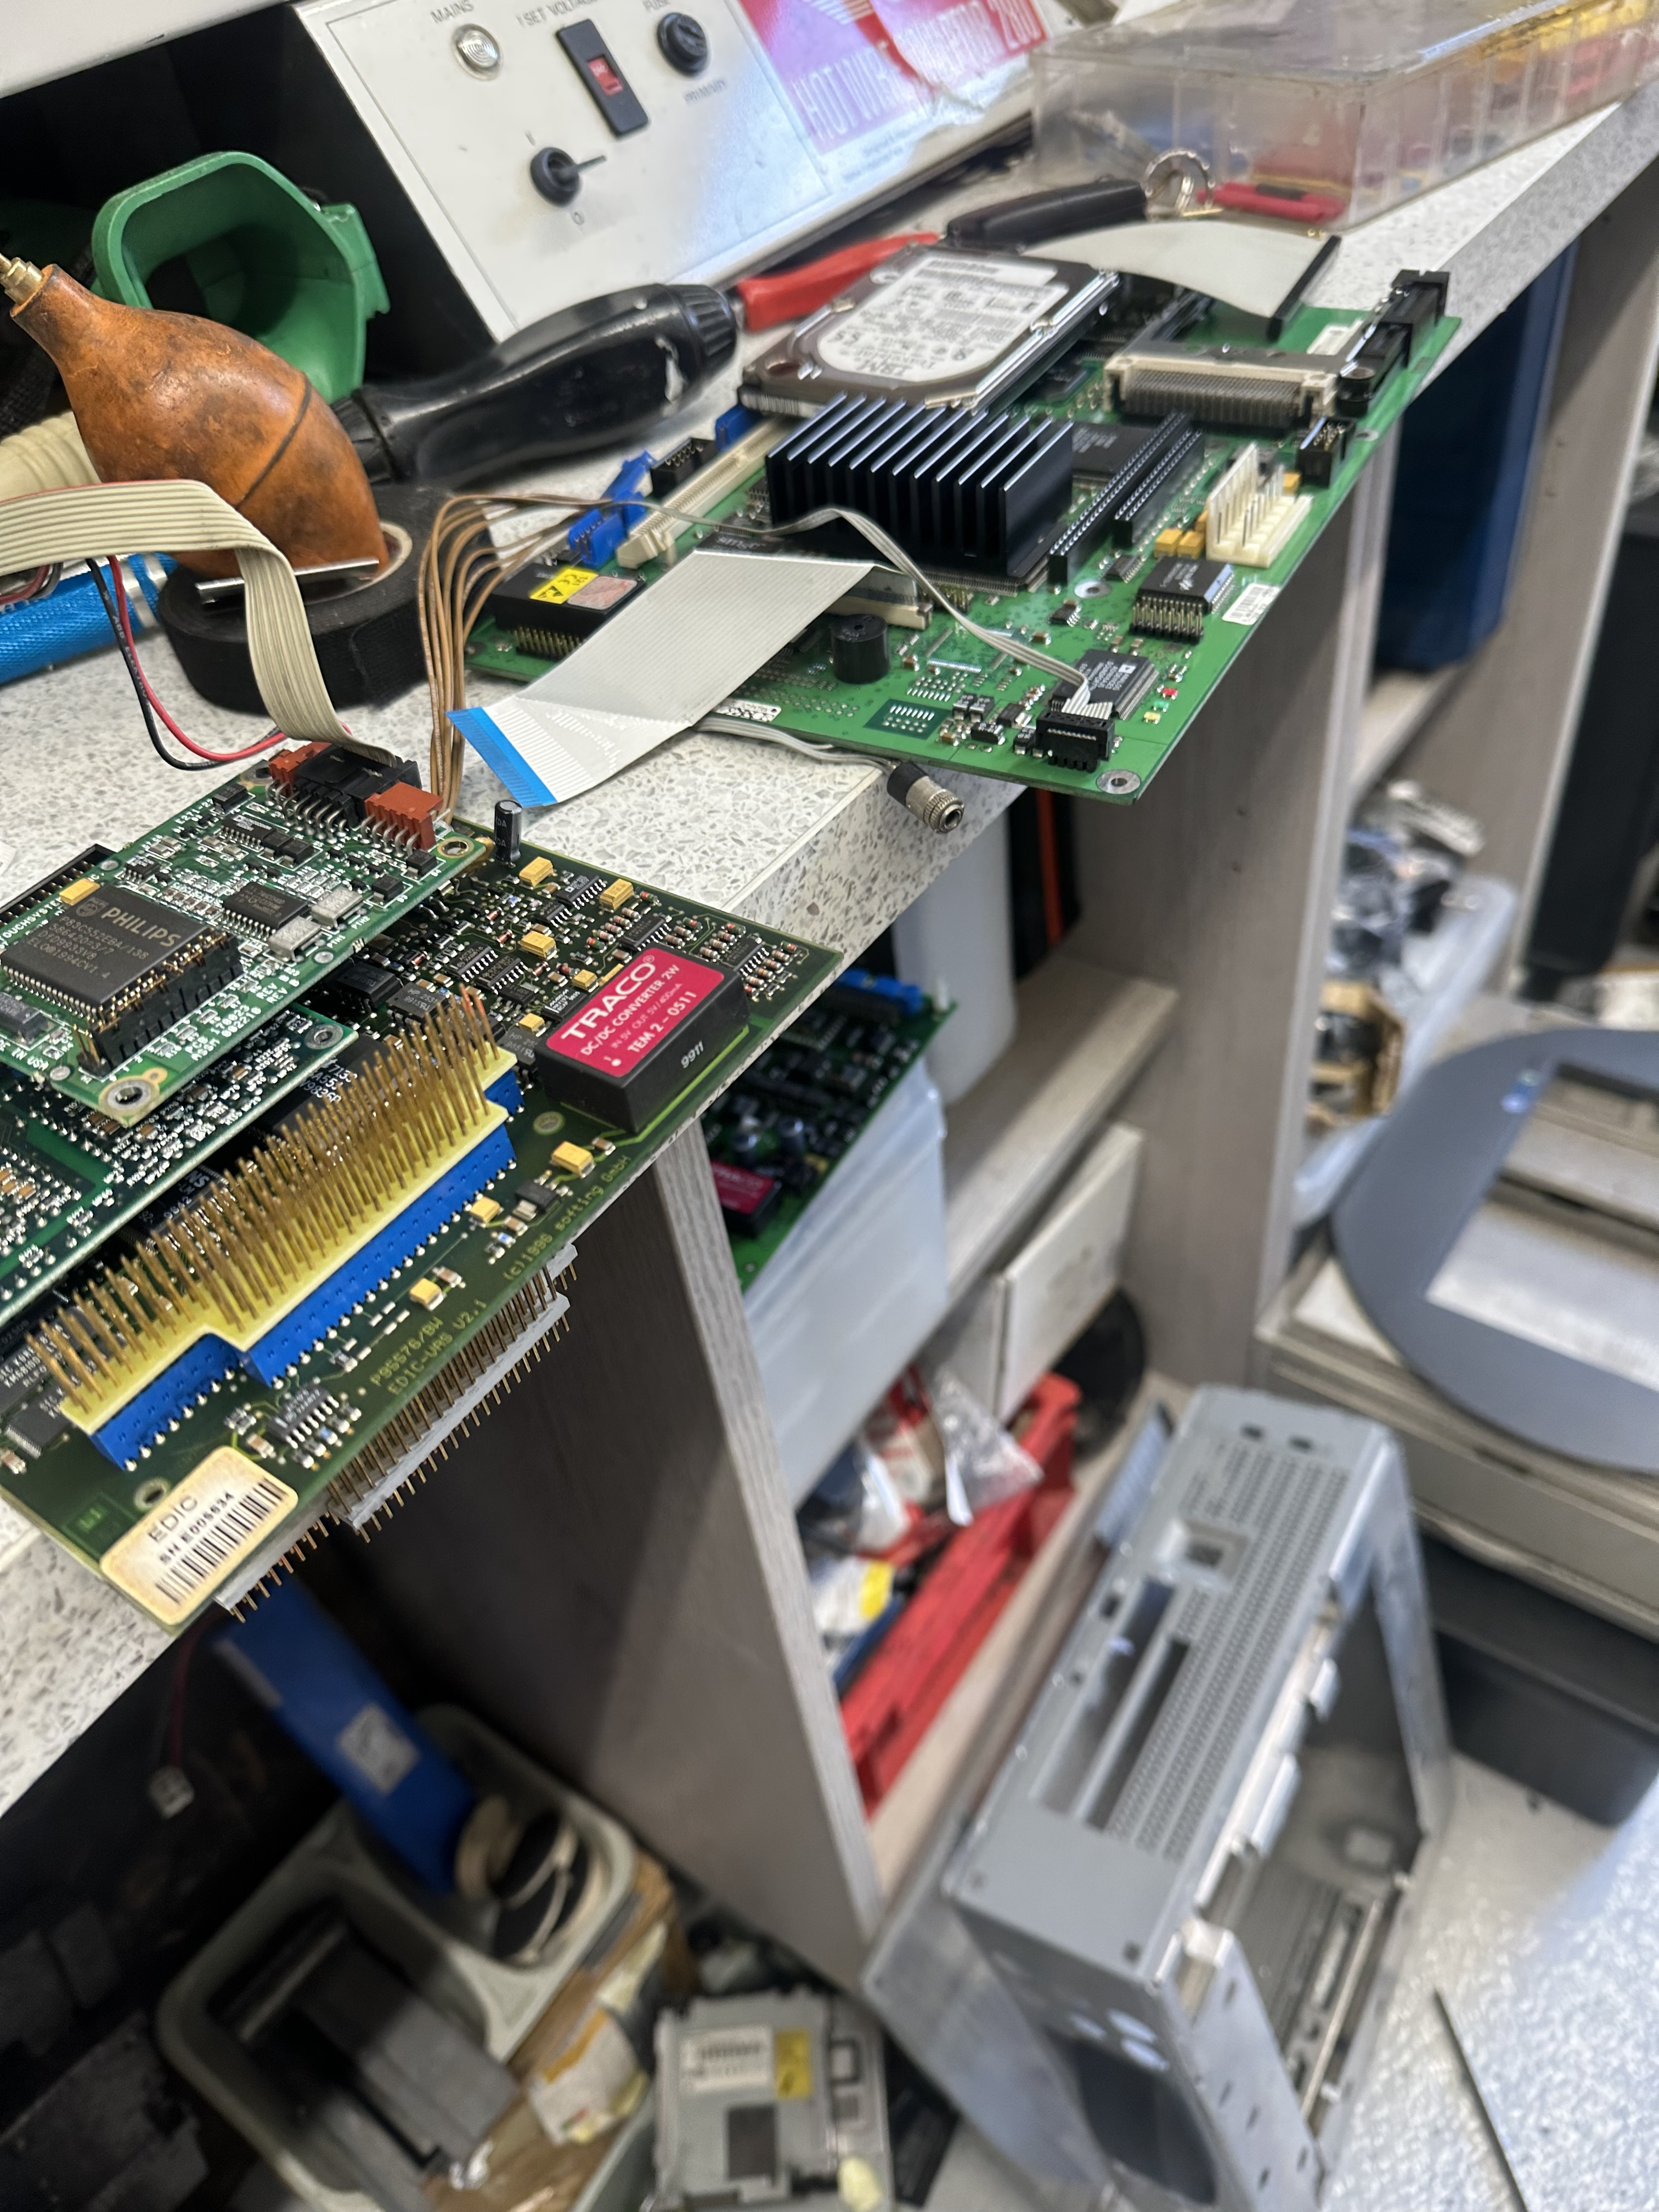
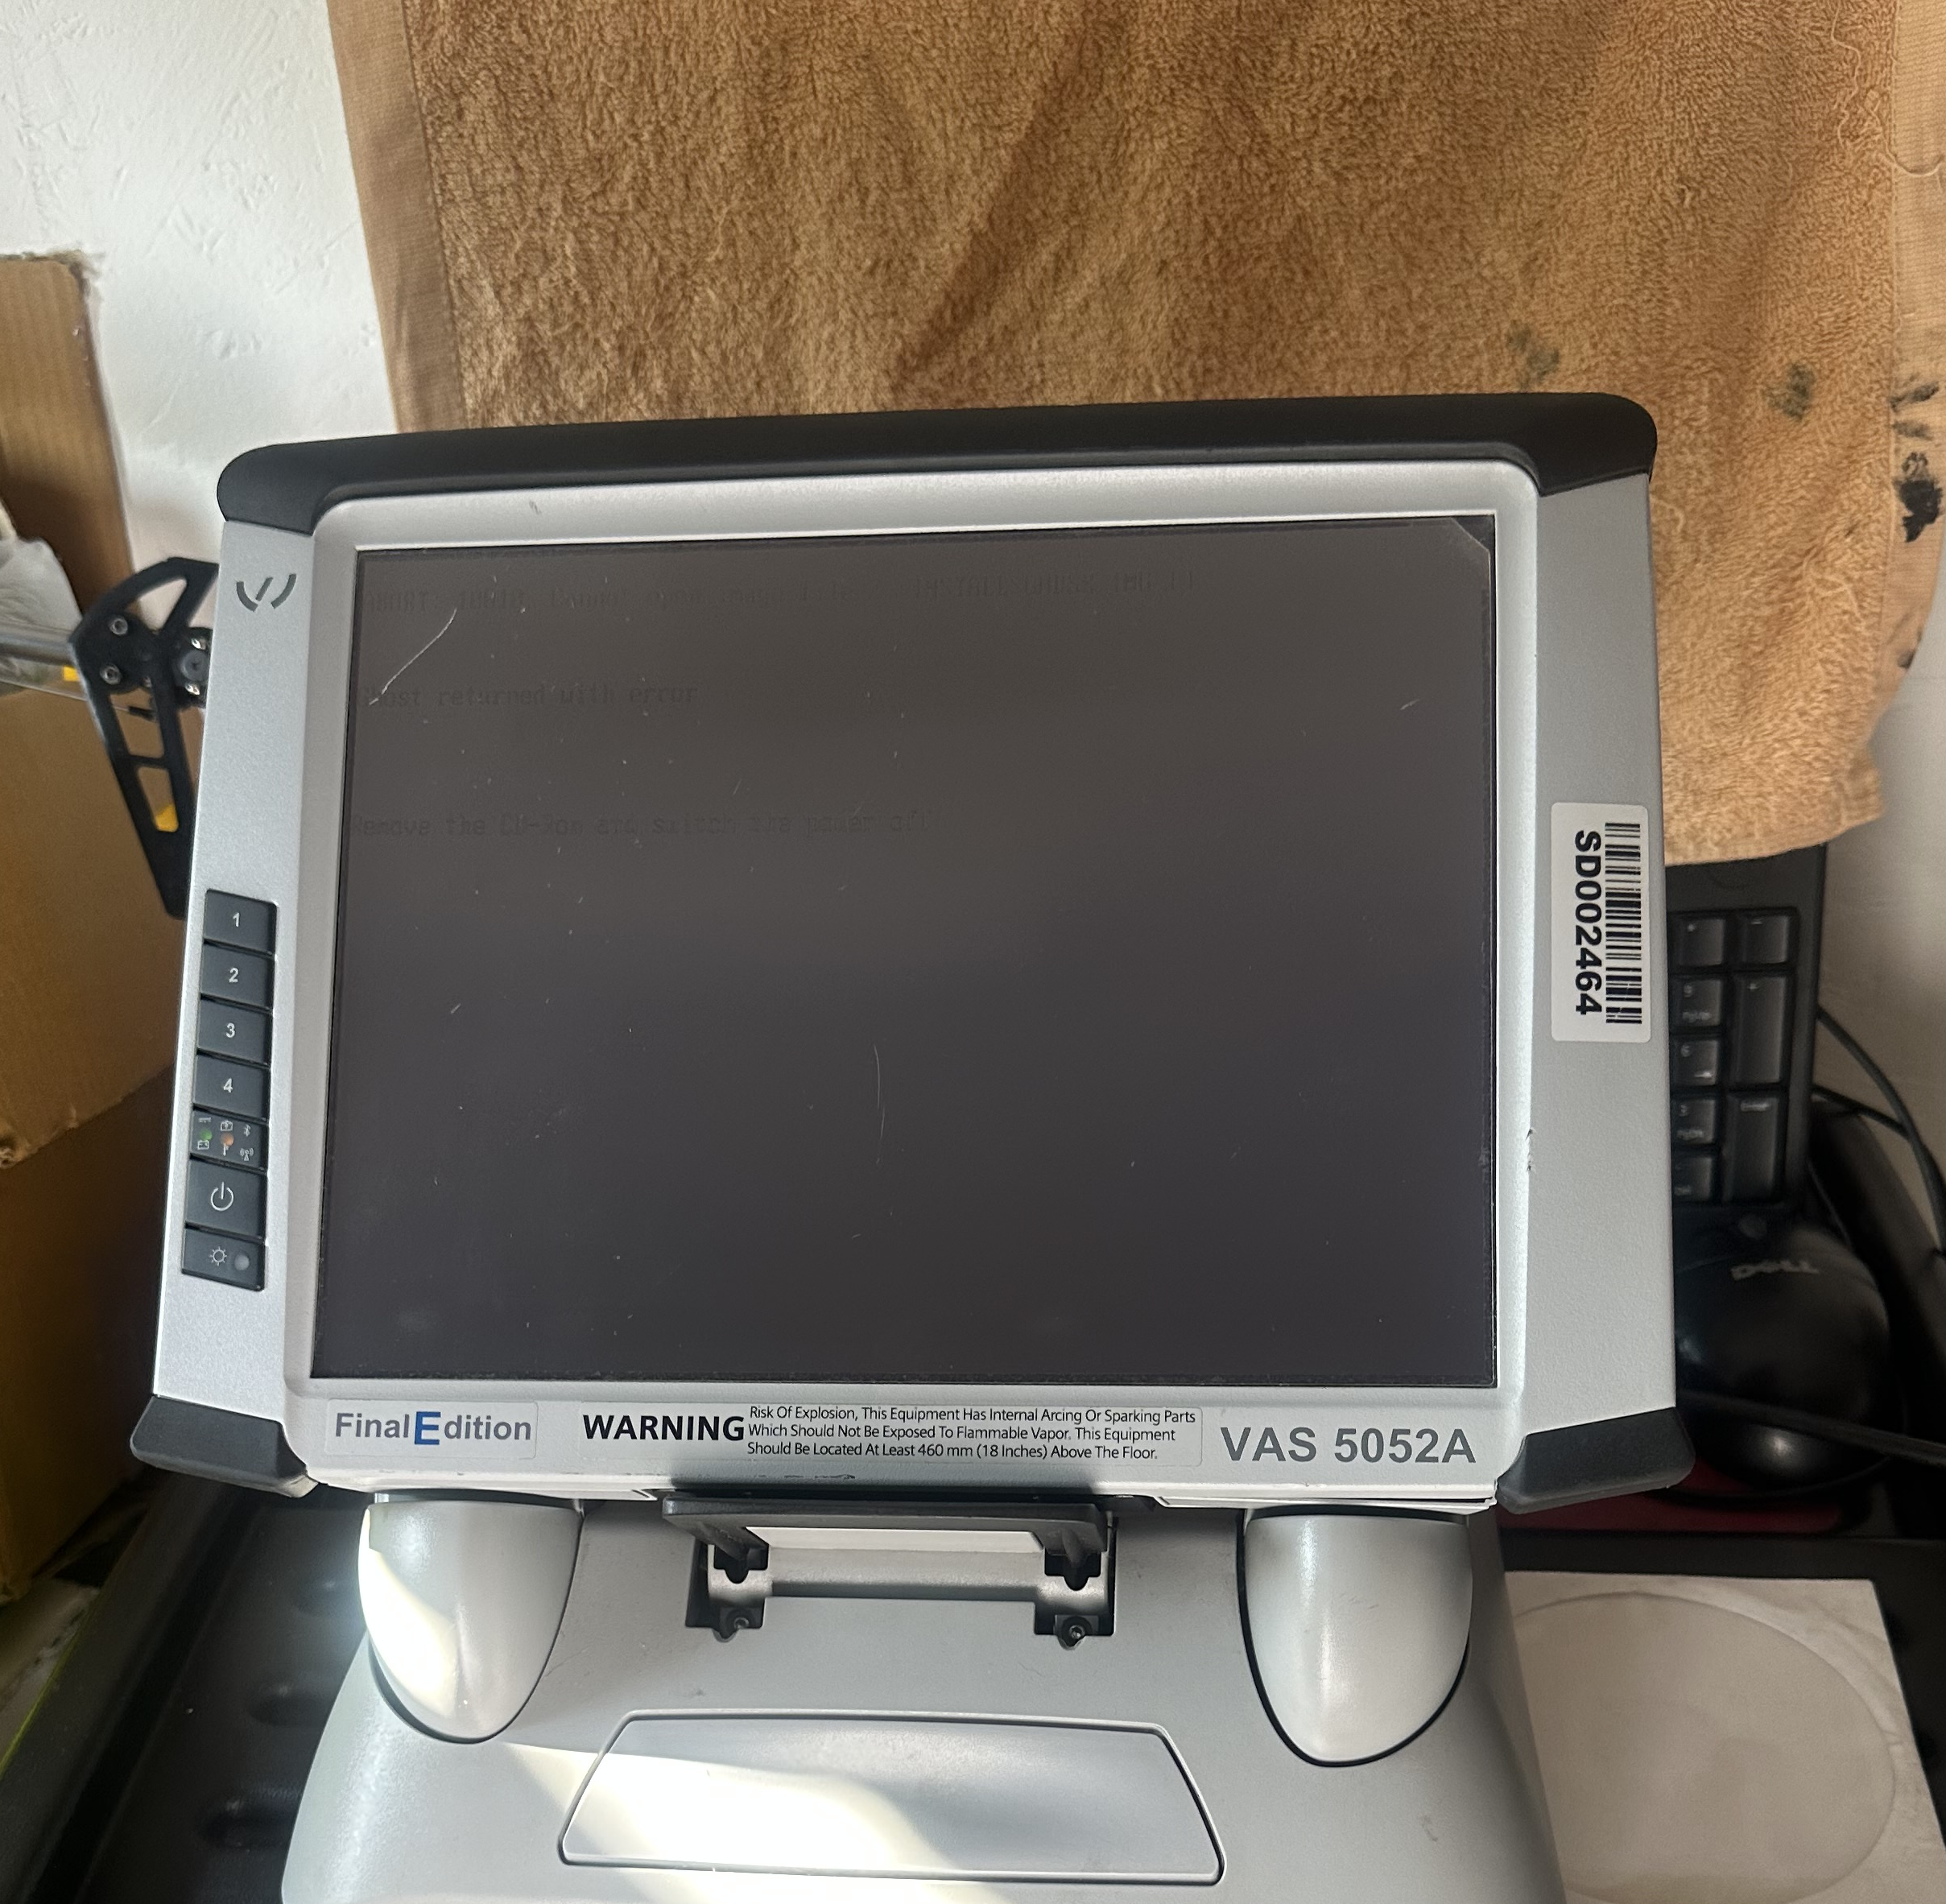
Strange and very specific request to any old network techs (VWG) for the base brand and utility software discs from version 6 to rebuild my old vintage VAS 5051A diagnostic machine. I have been looking around for a while but nothing available, probably due to workshops having to bin them for the group HSO audit. Anyway if you have some kicking around your toolbox let me know. I have the discs for my VAS 5052A and the VAS 6150E is updated online now, but the old software is difficult to get hold of now. Thanks.


-
Think I remember seeing something for water getting into the control unit plug along time ago with similar results. Got a reg or VIN (PM) will look up on Alldata.
-
What you need to do is to turn off the diagnostic fishing or bias voltage with a good coding device. So called CAN BUS which the internet like to say is the cause of the warning lights. It is NOT a CAN Bus issue. You do not have twisted pair of can high or low going to the bulbs or a LIN connection. What happens is J519 (also known as the BCM} sends out a small voltage across the bulb filament to check the circuit is intact. If the circuit is open, it will turn the bulb out warning light on. You can see this voltage when fitting LED replacements as they will flicker for a few seconds then turn off which can not usually be seen when a normal bulb is fitted. By using resistors, you are simply fooling J519 the correct wattage bulb is fitted. I had this when I retrofitted rear LED tail lights on my car, both flickered when turning the ignition on and I had to disable to hot and cold bulb monitoring, I think I used ODIS Engineering or something similar to do it at the time. Byte 18 is the section you need to change to retrofit the tail lights, can't remember where the bulb monitoring section was, but mine had a default 00 by memory and is hidden from the normal coding in VCDS (no guide to what the bits should be offered for byte 18). Be VERY careful playing around with coding and ALWAYS make a full scan copy of the ecu long coding or you may end up having to buy a new ecu.
-
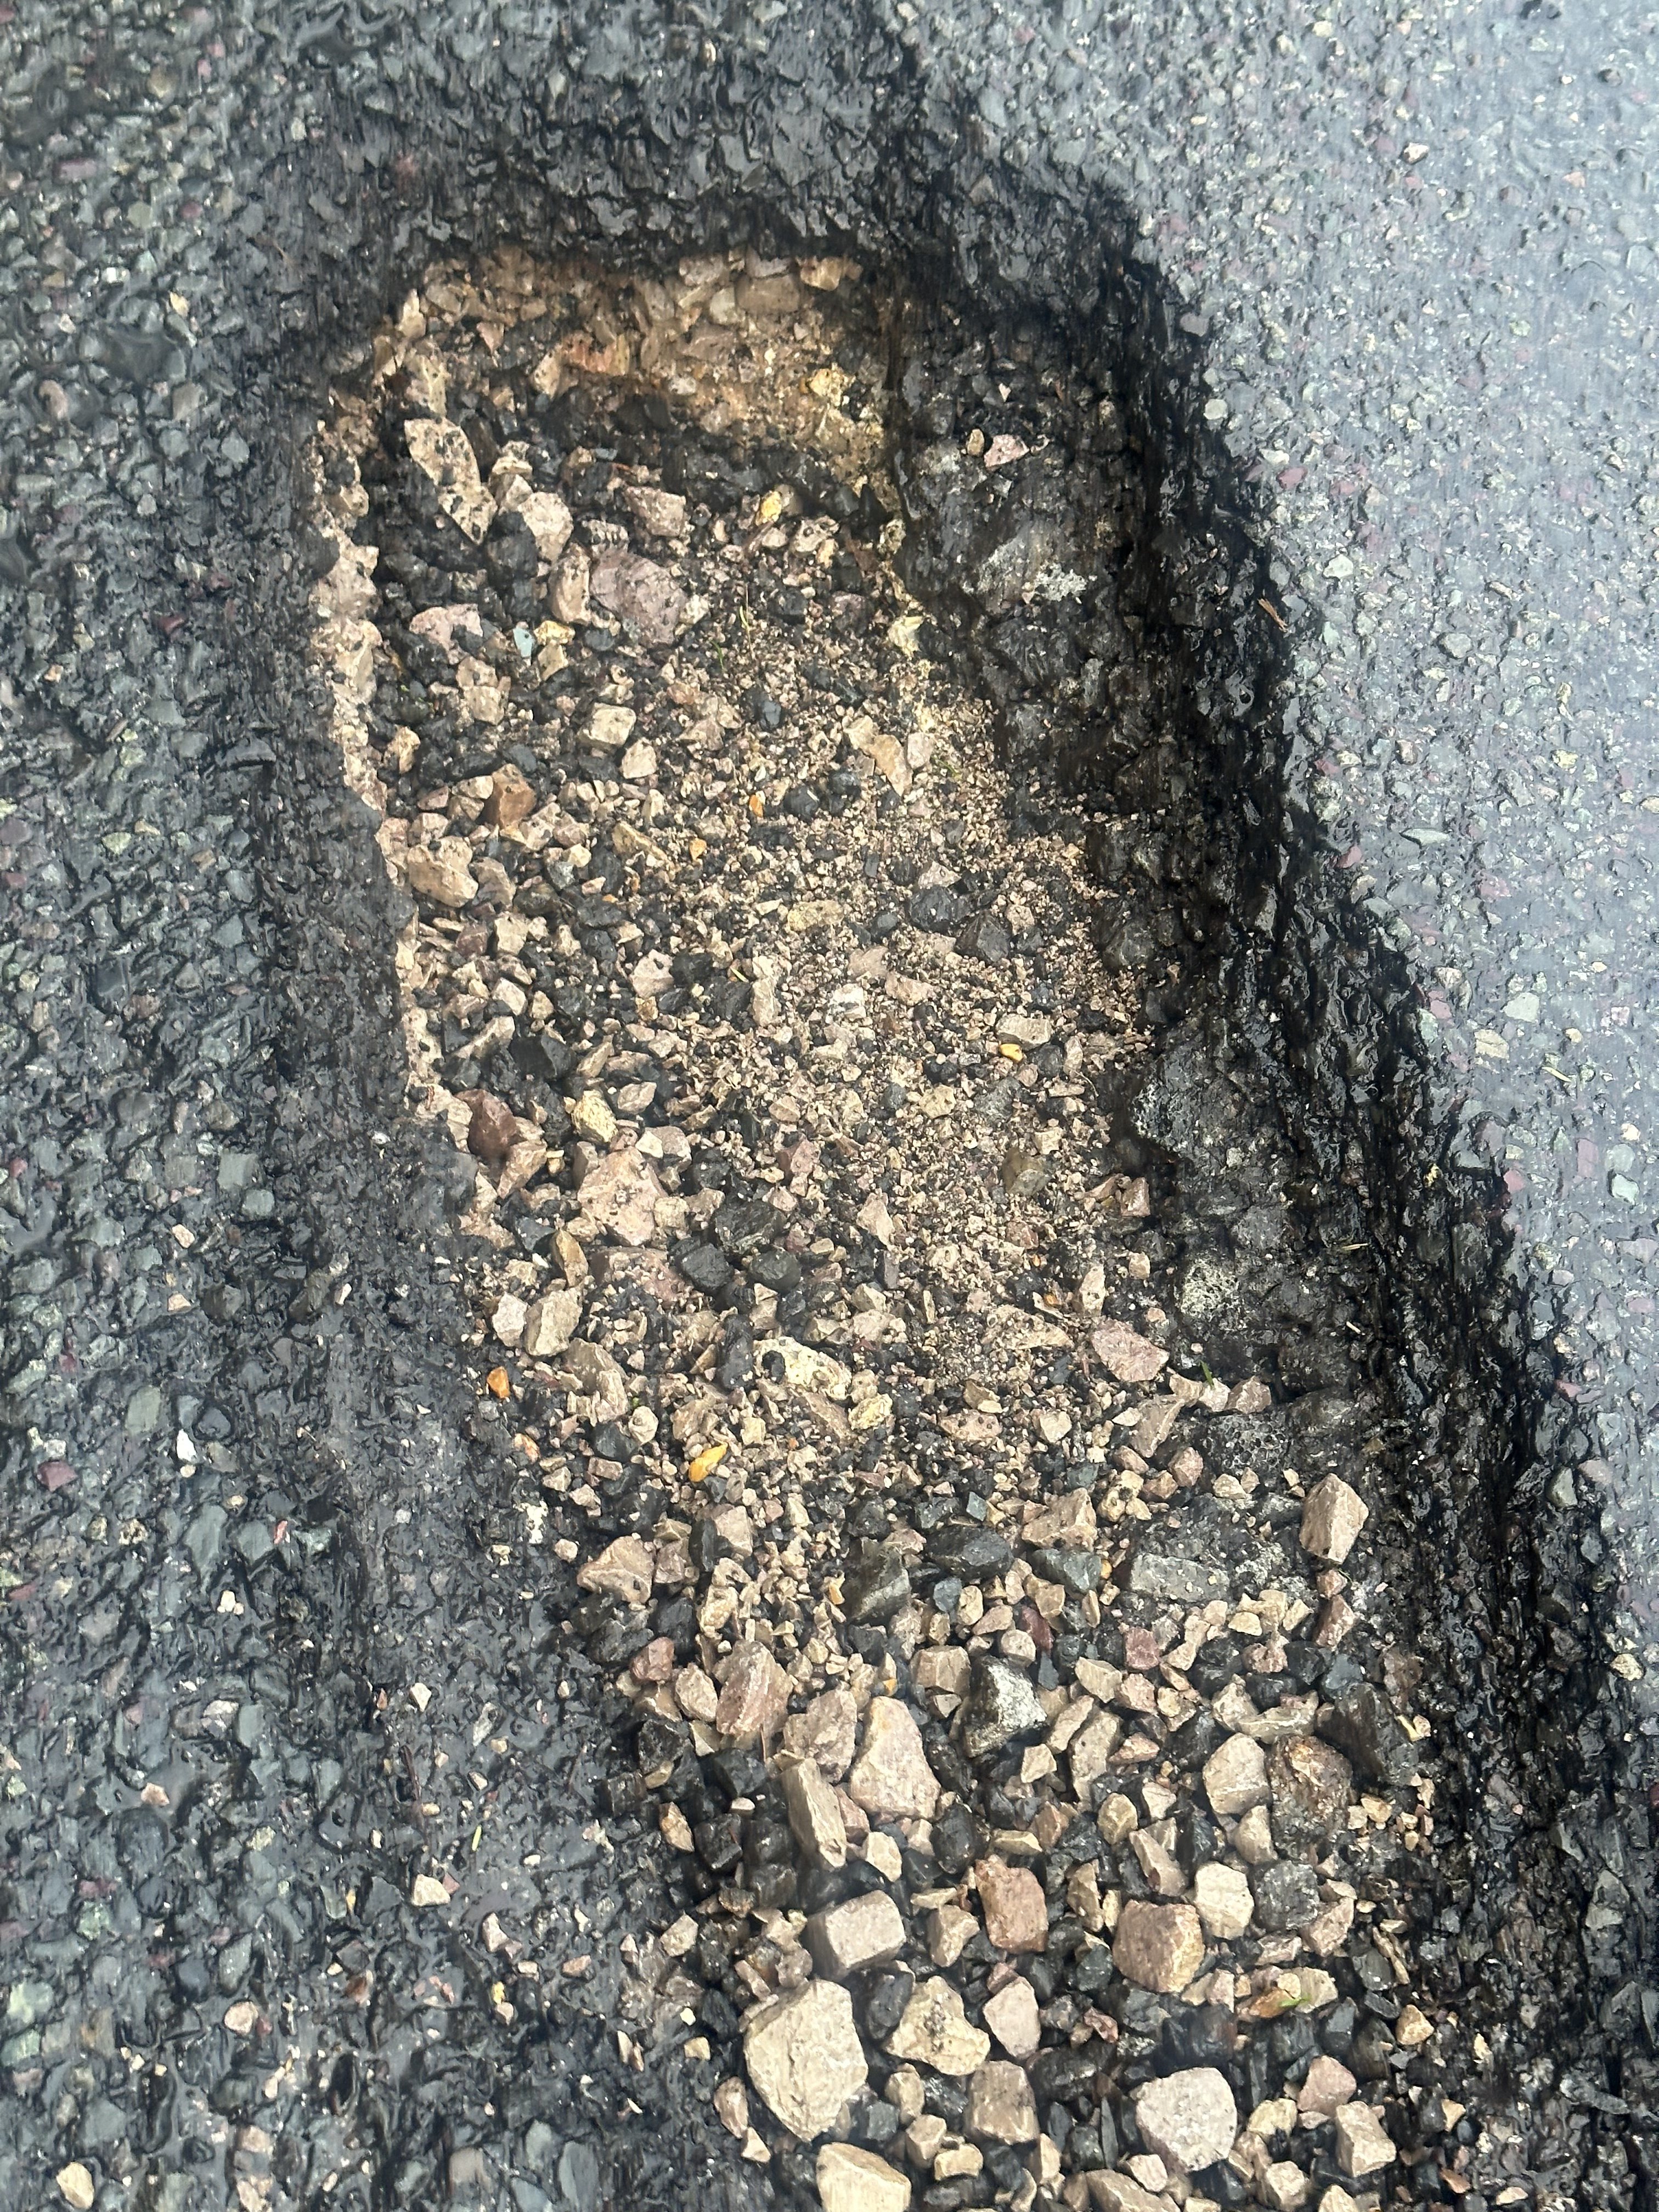
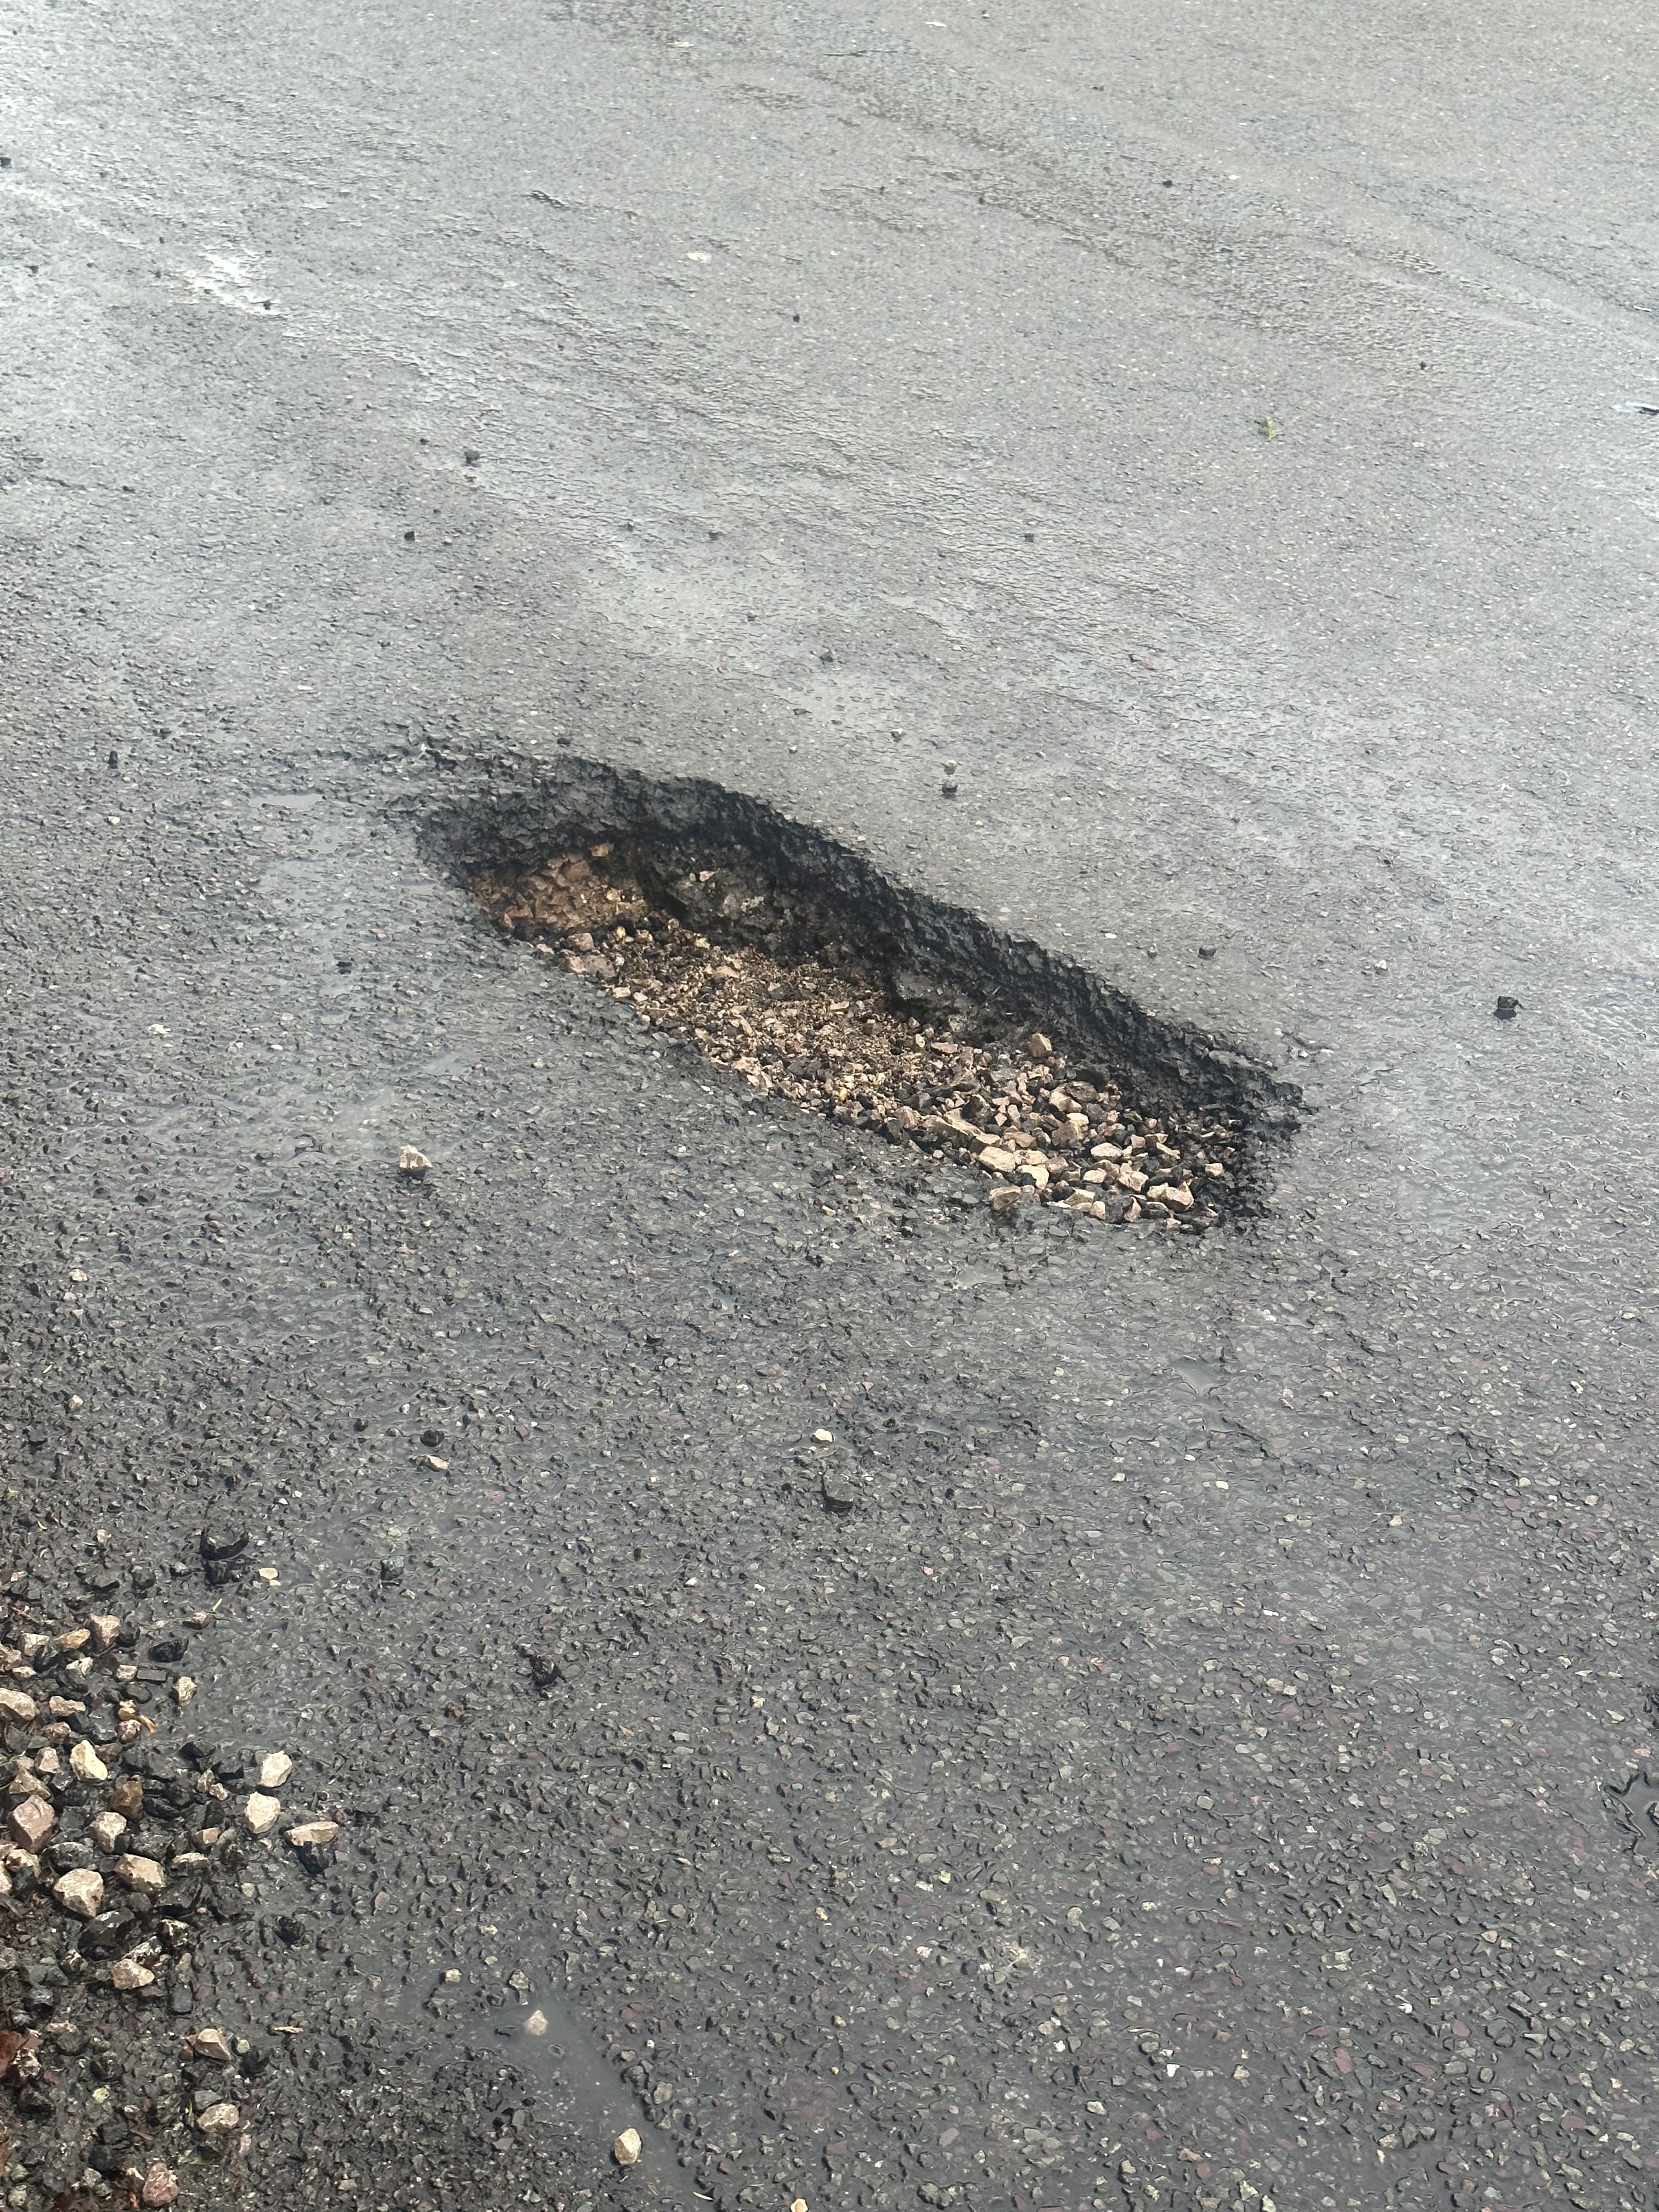
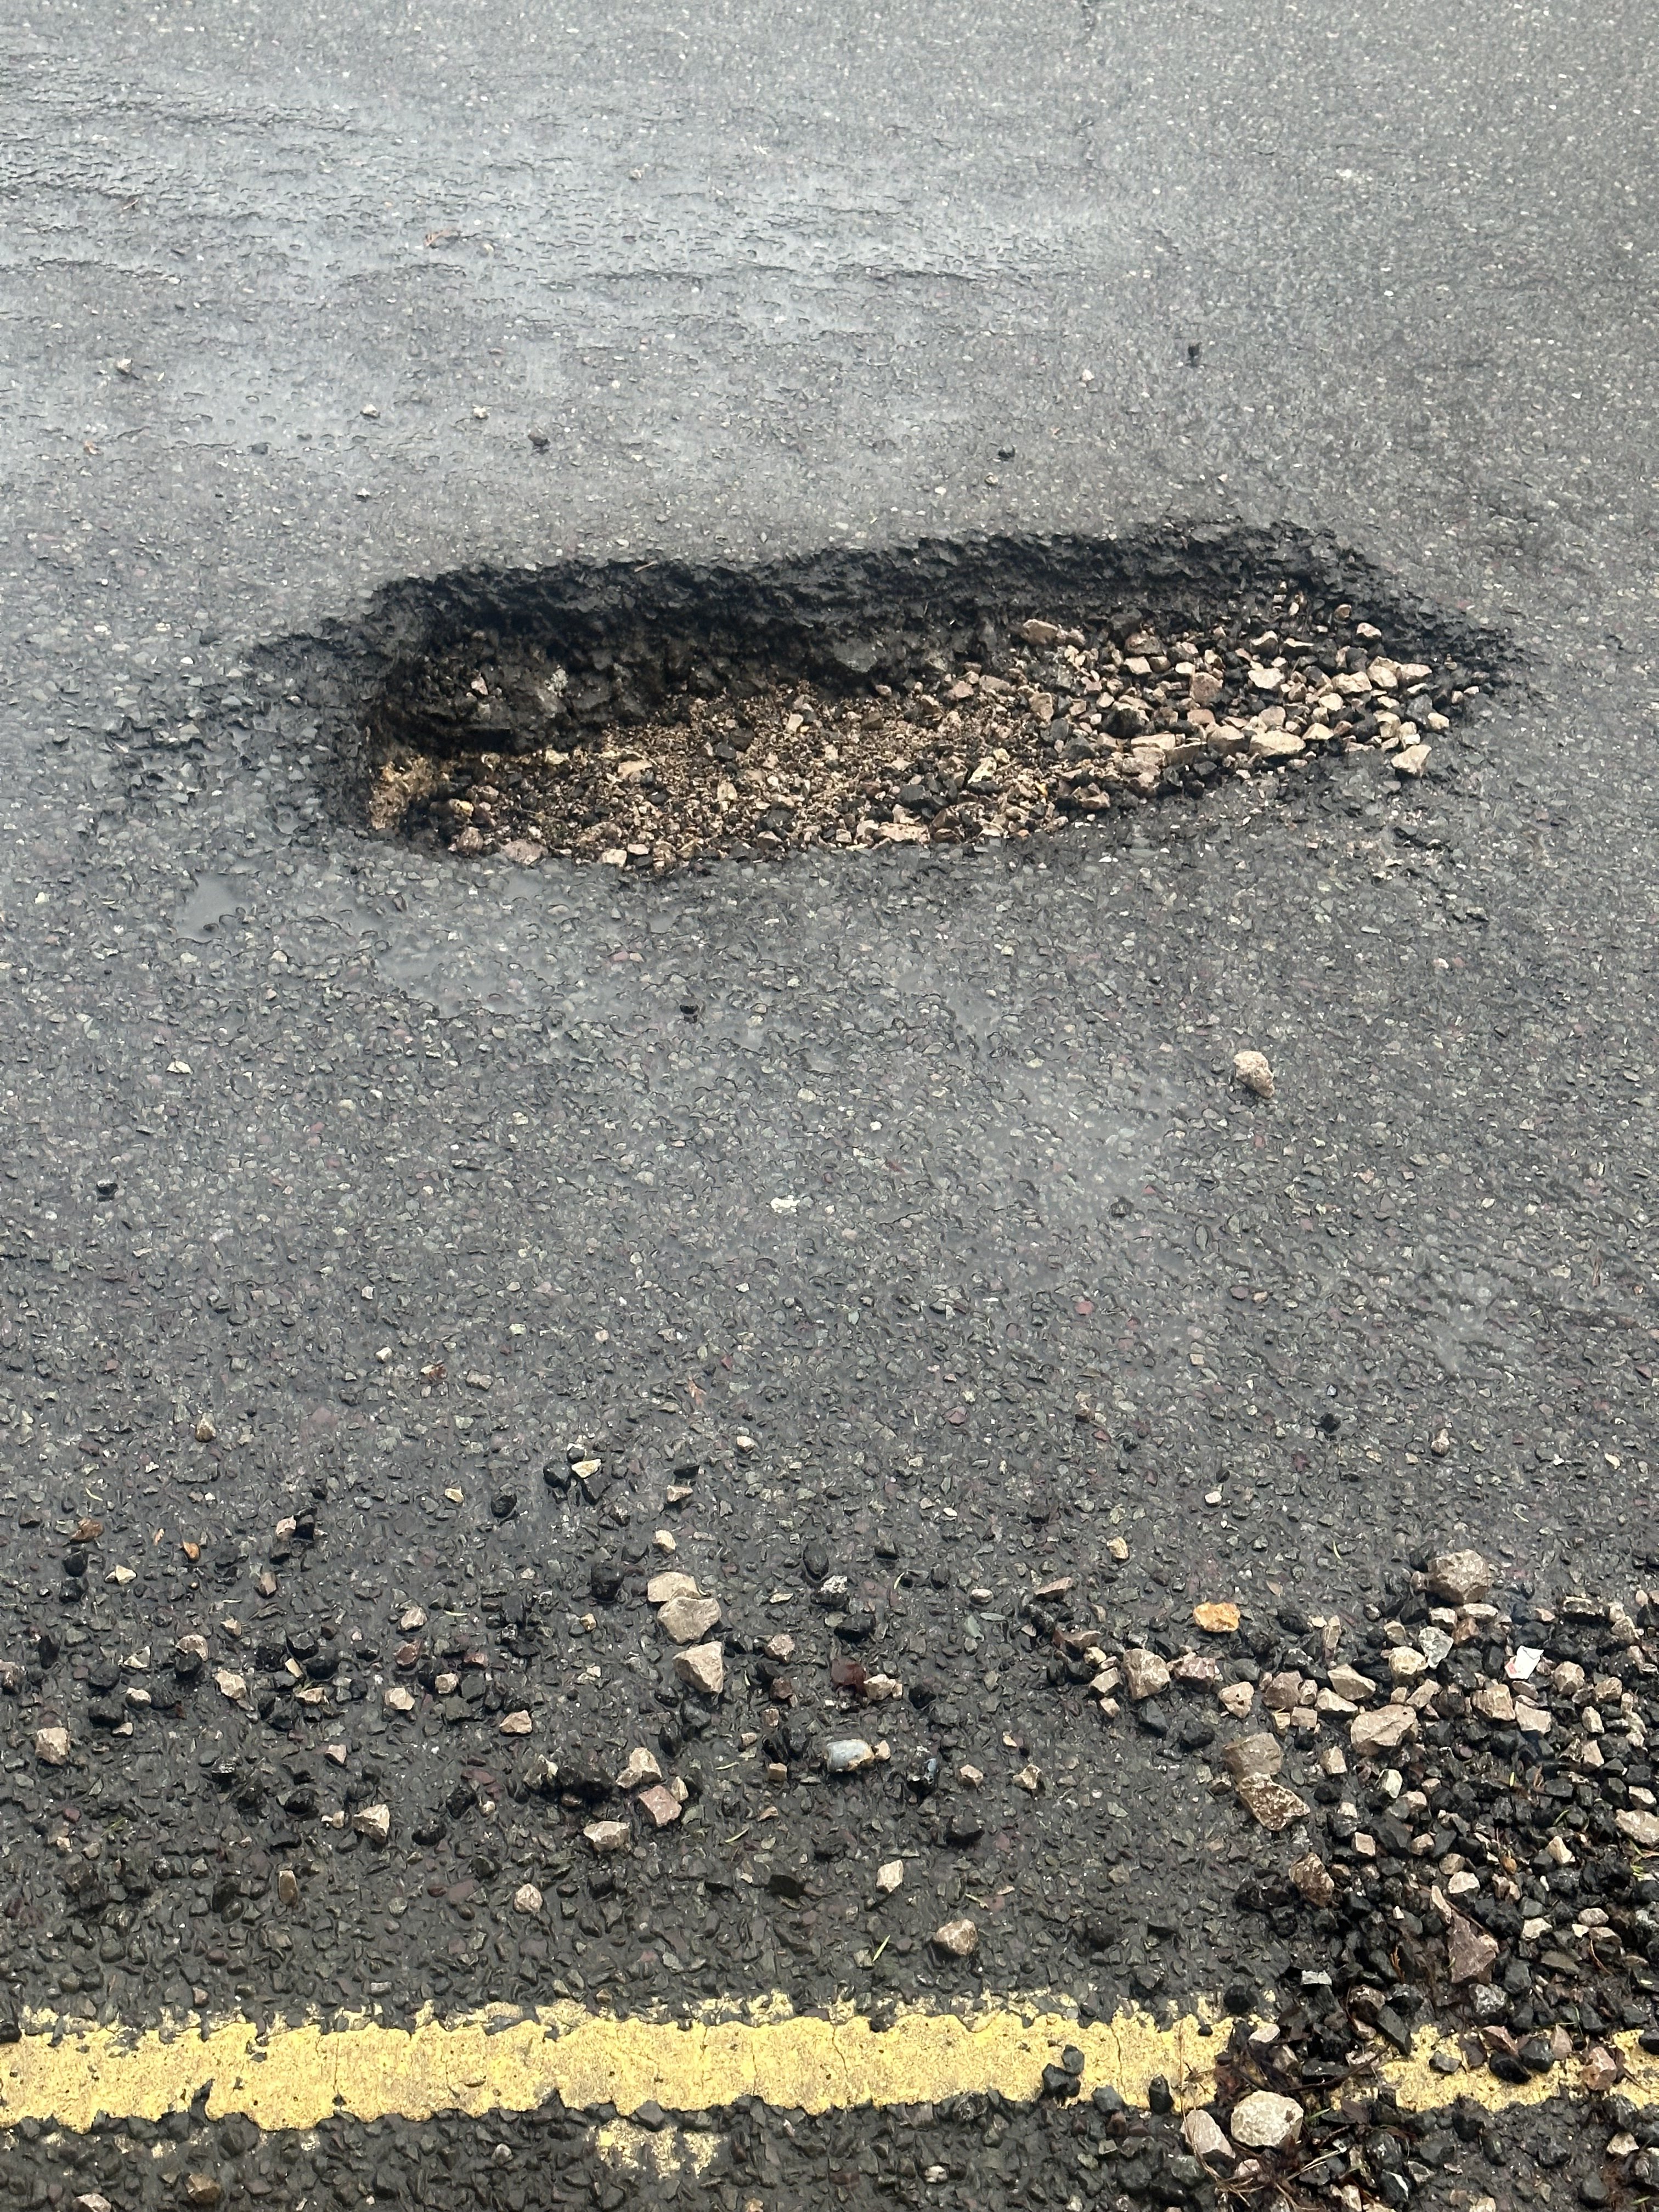
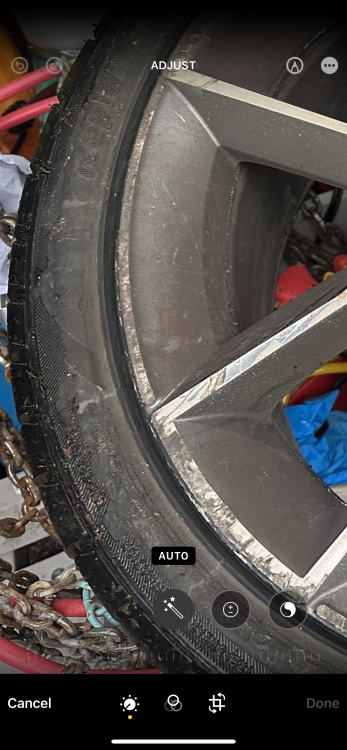
Doesn’t matter what tyre you run, hit a nasty unseen pothole obscured by water or unavoidable due to oncoming traffic your tyre is done. Had Q7s, Kodiaks Q4 étron Q8 étron Tiguans Touaregs all with torn sidewalls this week to deal with. Q7 needed a new wheel. But yes I take your point, you are more likely to suffer damage with a band of rubber masquerading as a tyre.
-
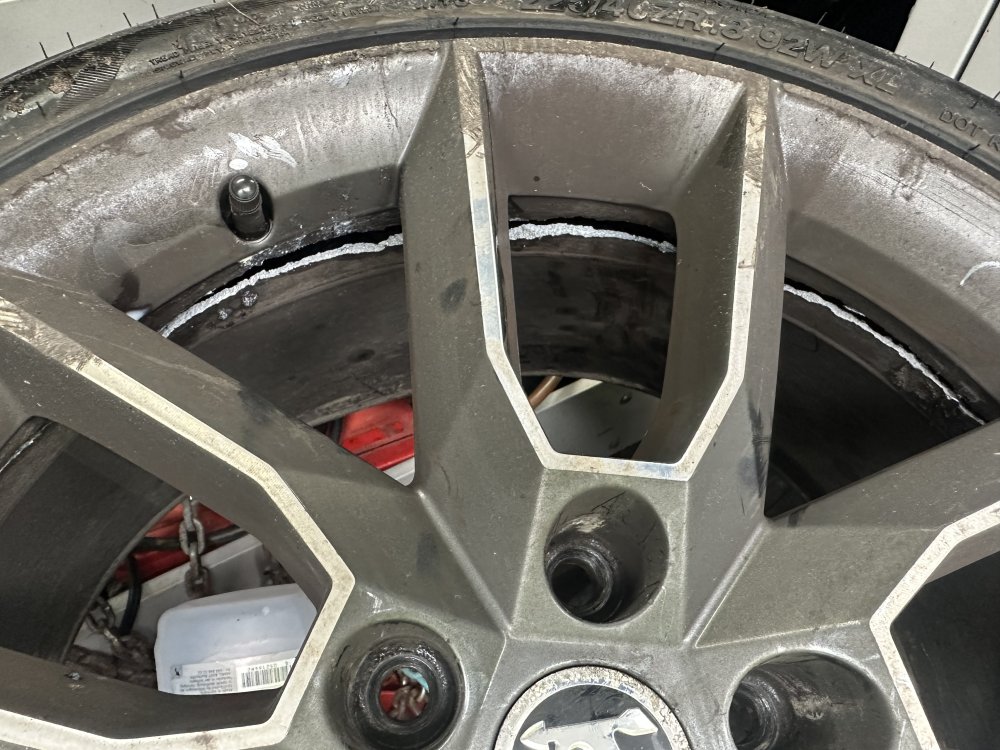
This is prob a better angle
-
@J.R.Do you seriously think I gave her this advice 🙈😂. This is for fellow enthusiasts who love their car and want to save £300 for tyres🤣 or the guy who split his £450 plus vat VRS rim and tyre on top. Save yourself some grief and money buy learning from our experience. Been waiting two days for the tyres to arrive so car off the road too. No illusion, low profile tyres on VRS. My superb is also running the same 18 inch 40 aspect ratio.I had considered swapping to 17 inch rims with 45 profile tyres. It came with the 18 inch Thermisto wheels. Someone in a Superb next to me in a drive thru once said my front tyre was flat. It wasn’t, just looked that way.
-
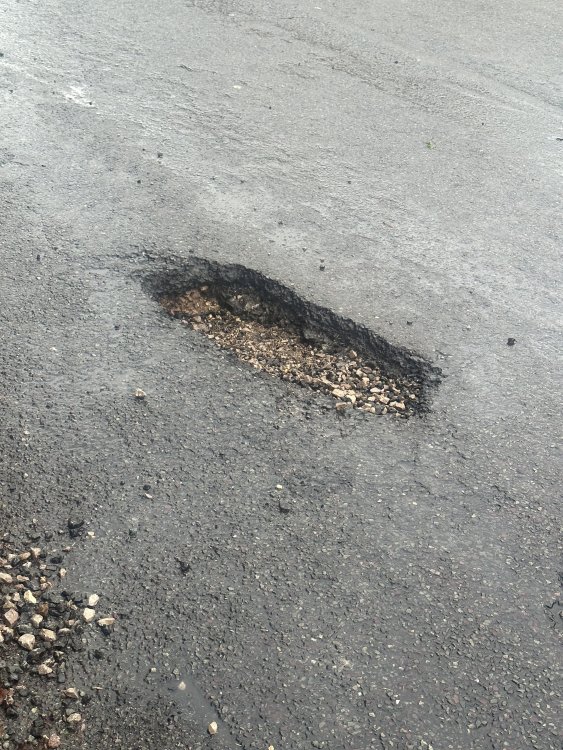
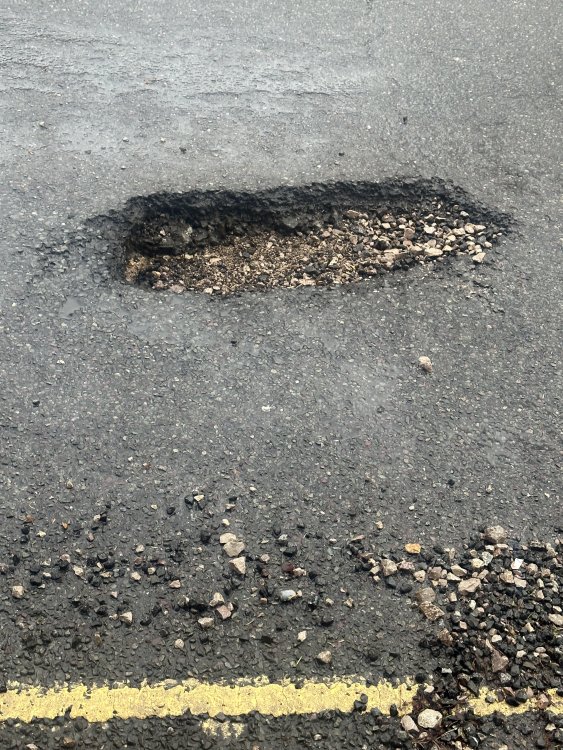
With the roads as they are, please be very vigilant of large potholes hidden by water. My advice would be to slow down or stop and not charge through standing water. My wife took out two tyres on our Superb as she couldn’t see the water filled hole. I went back a few days later and the council still haven’t filled it, One unlucky chap split his rim.

-
I think they now put stickers on to stop swallowed batteries burning a hole in the oesophagus re recent tragic incidents with children. As long as you stick to a named brand from a shop with a high turn over, you can buy them where you like. The factory supply mostly Panasonic button cells. So to avoid disappointment, steer clear of no name cells from a pack which has an inch of dust sitting on it from a flea market 😉 Also ensure you fit it the correct way up they only work one way round, there is a plus symbol moulded on the fob, but just try flipping it over if the LED (if fitted) doesn’t light up.
-
Yup, still happy with my ride height after sorting the rear out, no bottoming out with full load and bike rack, has tow bar and a rear diff. Well done!
-
Sounds like you have the common EGR fault which is NOT the same fix as the thread is talking about. EGR bearing fails causing the gears to strip or burn the motor out look here: which is why you still have problems. My advice would be to replace the EGR valve rather than introducing other problems.
-
Lookin good!! Once it’s done, you will be spoiled and will never buy a car without one. Prob just how the picture is displayed on my phone, but are they 6mm tails from the relay? They look smaller.
-
Hi, do you have the engine code, I will look it up. The shape of the sensor in the photo looks like an oil level sensor? Cam sensor will usually be bolted to the cam cover accessed by removing the air box housing. The number should be something like 036 (or 030) 907 601 E but need the engine code first.
-
Hope you get to the bottom of your issue quickly, at least you can keep your battery connected and use the car by just having the fuses removed. TPS is a branch of Volkswagen AG, they supply genuine parts to the automotive industry and operate a franchise system mainly to owners of the main dealers like Inchcape group, JCB, Harwoods etc. I only buy parts for my car from them, unless it is an accessory like a removable towbar or Blackvue dashcam. Look closely at the changes which need to be made to the other vehicle control units so they know a tow bar is fitted, most important one is 03 the brake system ecu so ESP is coded correctly with a trailer fitted. Also you don't want your parking sensors working with a trailer, or your (auto park system if fitted) along with the rad fan needing to work differently should you be in a hot country with a caravan towing in the mountains for example. By logging into the factory system, all changes are made with a single code input, but most folks need to do it manually with something like VCDS, lots of other companies are starting to emerge which can do the same, I only have experience with VCDS HEX NET and ODIS-S and E.