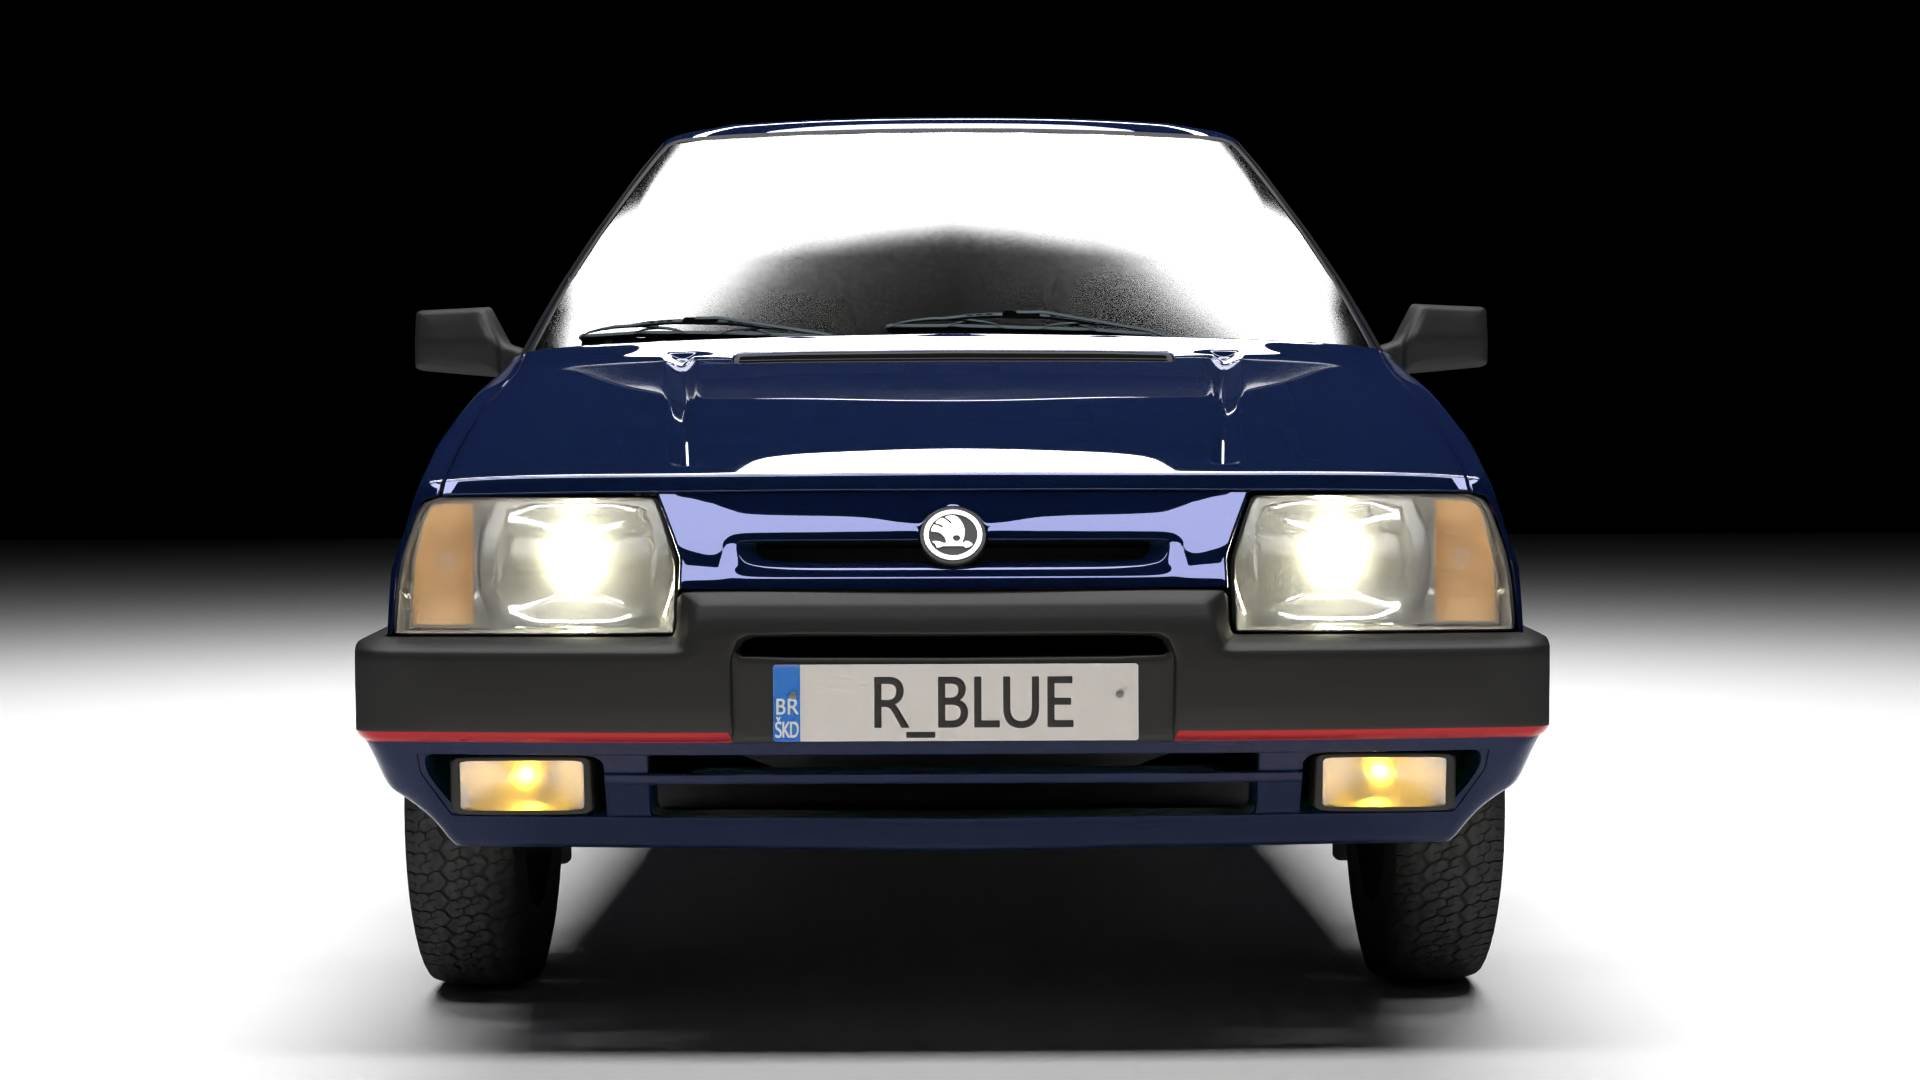

R_Blue
Members
-
Joined
-
Last visited
-
But? Why not? A custom ECU application would be the foundation of advanced mods. Let it be turbo or supercharger application or custom dashboards. You name it. There are advanced tools like 3D printers now to build the dream dashboards.
-
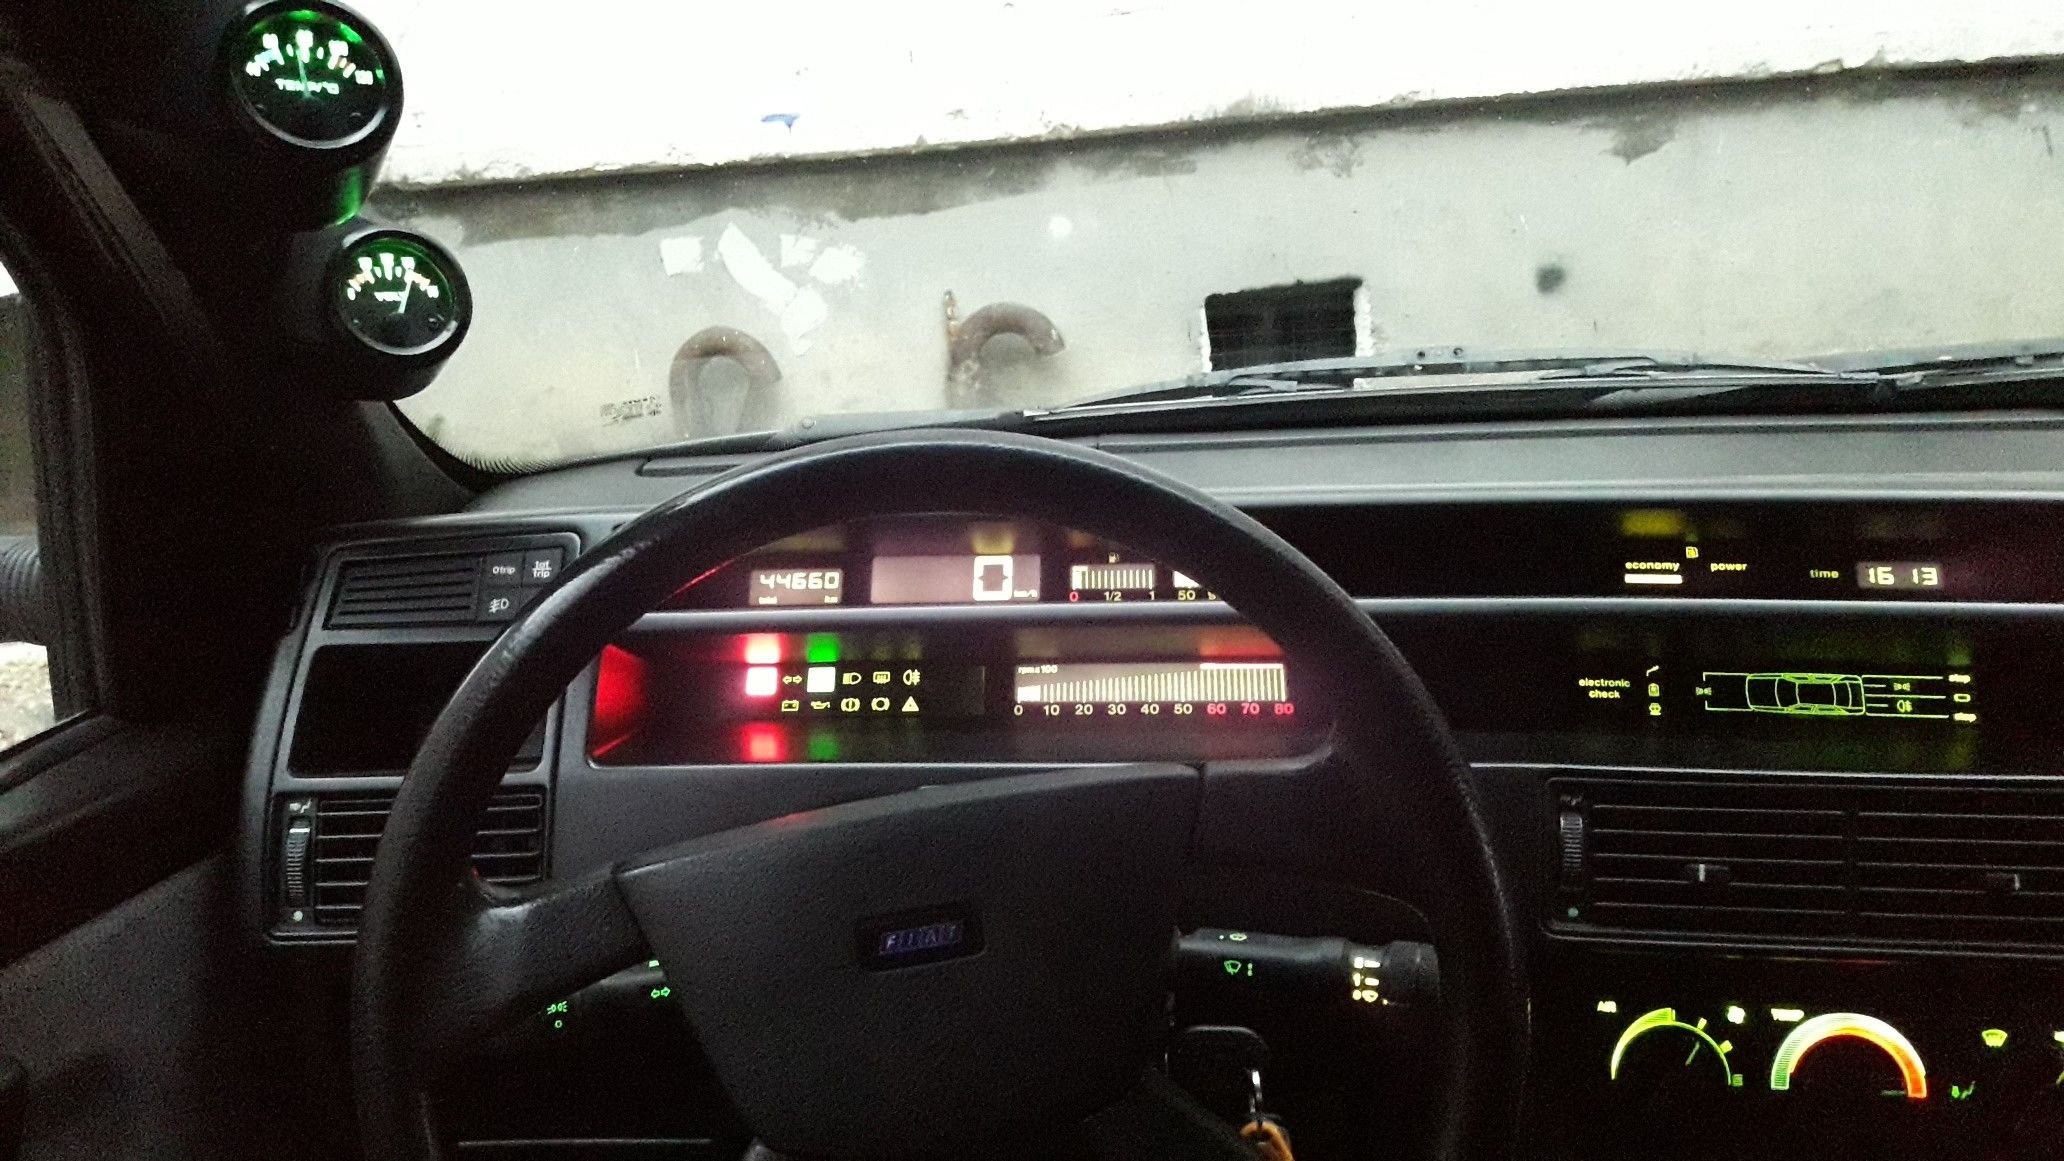
Some of them are over the top for my liking but great collection. Those were futuristic designs of that era. That future came as this:

-
Correct.
-
No, there is not any heating element like that. Something happened to me which might worth checking for you. The gas pedal started to get stuck, at the same time all of my carburetor fast idle and idle speed adjustments were gone. I discovered that, the gas pedal wire had lots of friction. I removed its end from the carb and lubricated it using a syringe filled with oil. I inserted the needle between wire and its sheath. After patiently oiling, I saw rusty oil coming from other end of the gas pedal cable inside the cabin. All of the problems disappeared after that. I've bought a new cable but forgotten to install it.
-
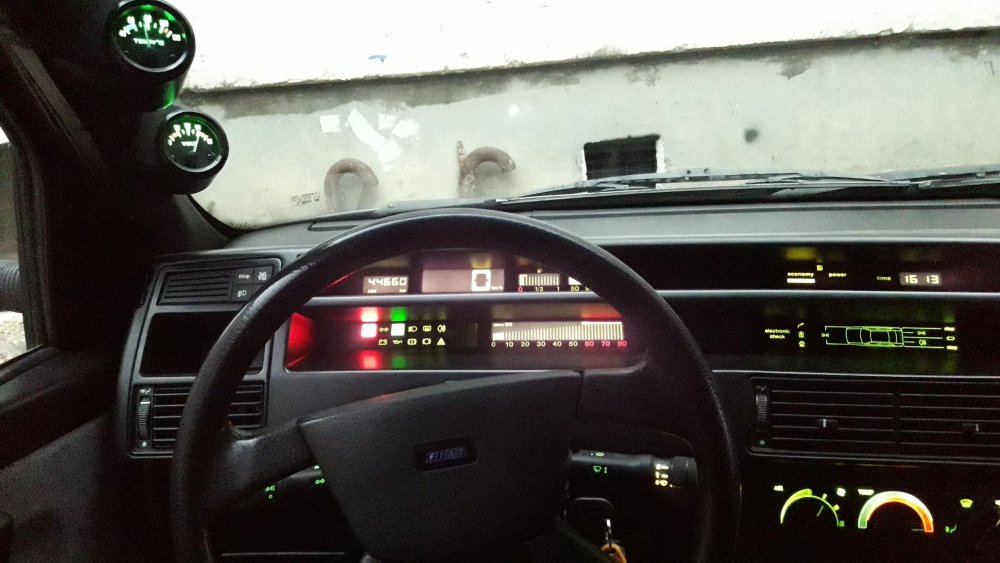
I like retro electronic dashboards too.
-
I liked the design of this wheel. Since my car doesn't have airbag or horn button at the center, it is perfect. Is it sturdy? Does it flex on the top section a lot?
-
After the engine start, could you check the thick hose going to the top of the radiator? After the engine start up, the thick coolant hose must stay cold until the thermostat opening. If the thermostat is stuck open, maybe the engine can not heat up properly. My hot air intake is completely disabled and sealed off. I don't even have the air routing plate on the exhaust manifold. Even below -10ºC carb doesn't ice with LPG. I've never experienced carb icing so far. But, that doesn't mean the carb should get ice without LPG. It's built in Czech Republic after all. If I were you, I'd reduce the fast idle from 1500rpm to 1000. Let the engine warm up without too much air velocity through the carb. I use fast idle to compensate the cold state hard turning of the engine.
-
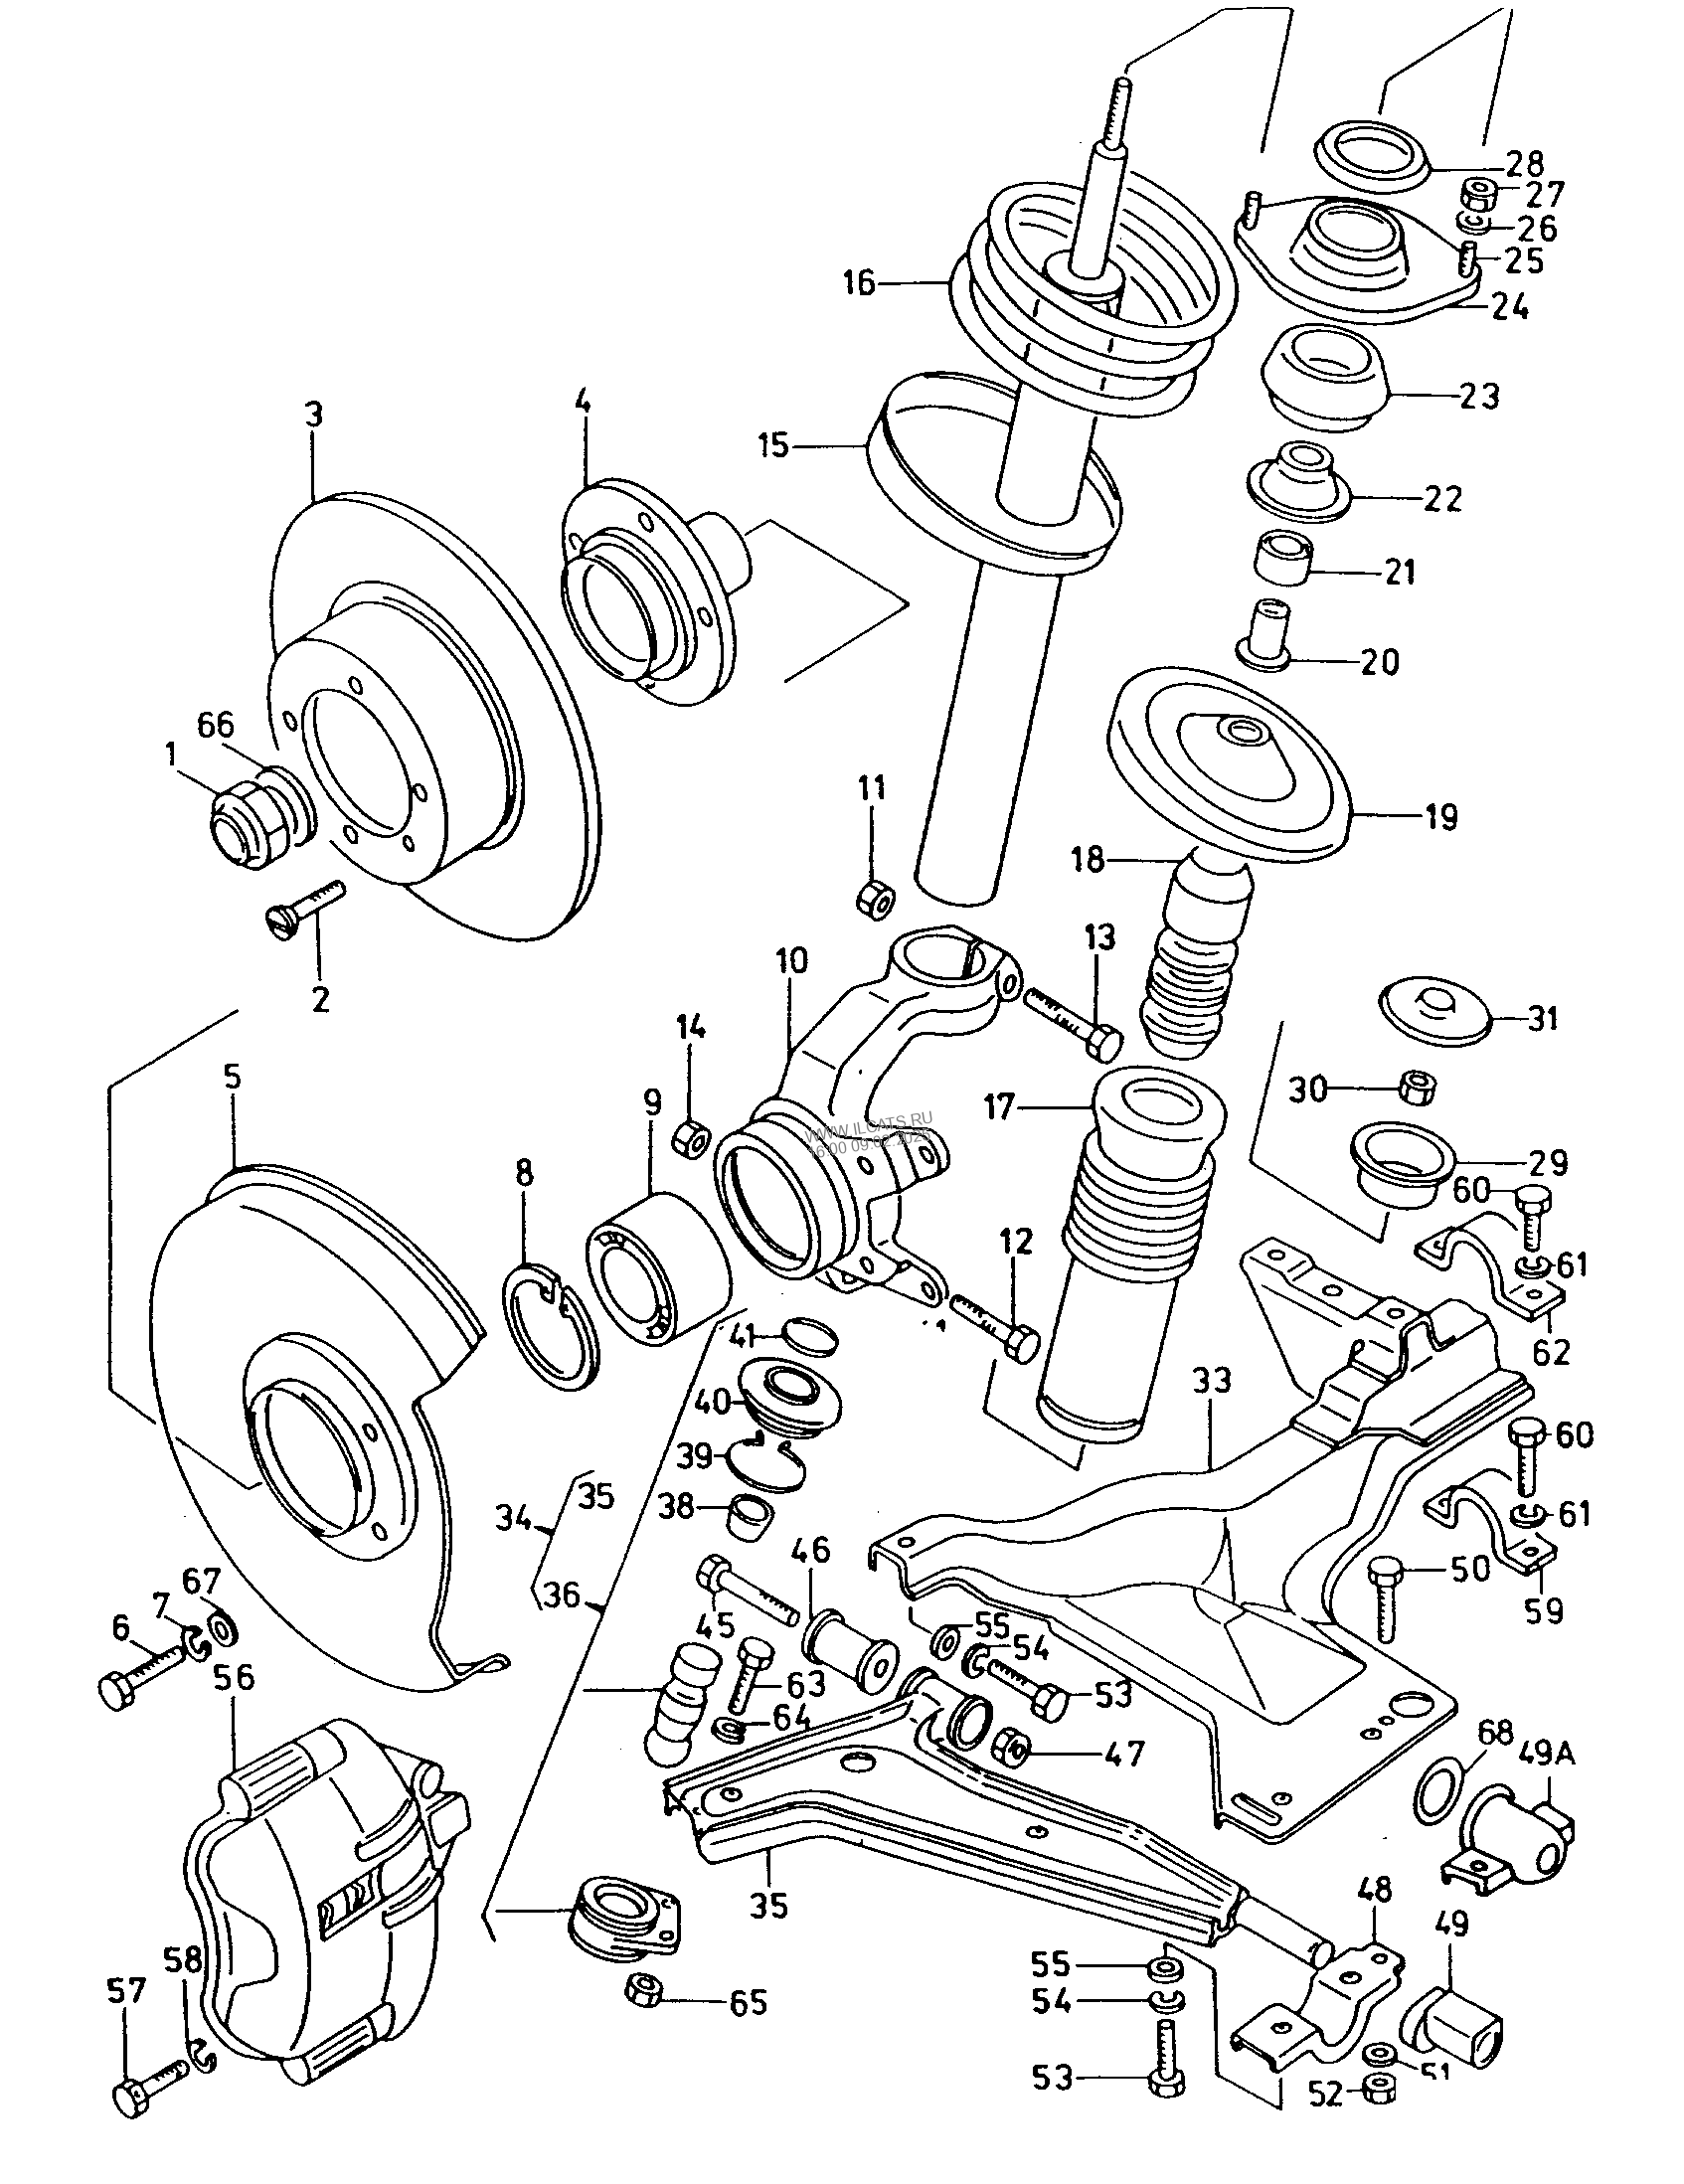
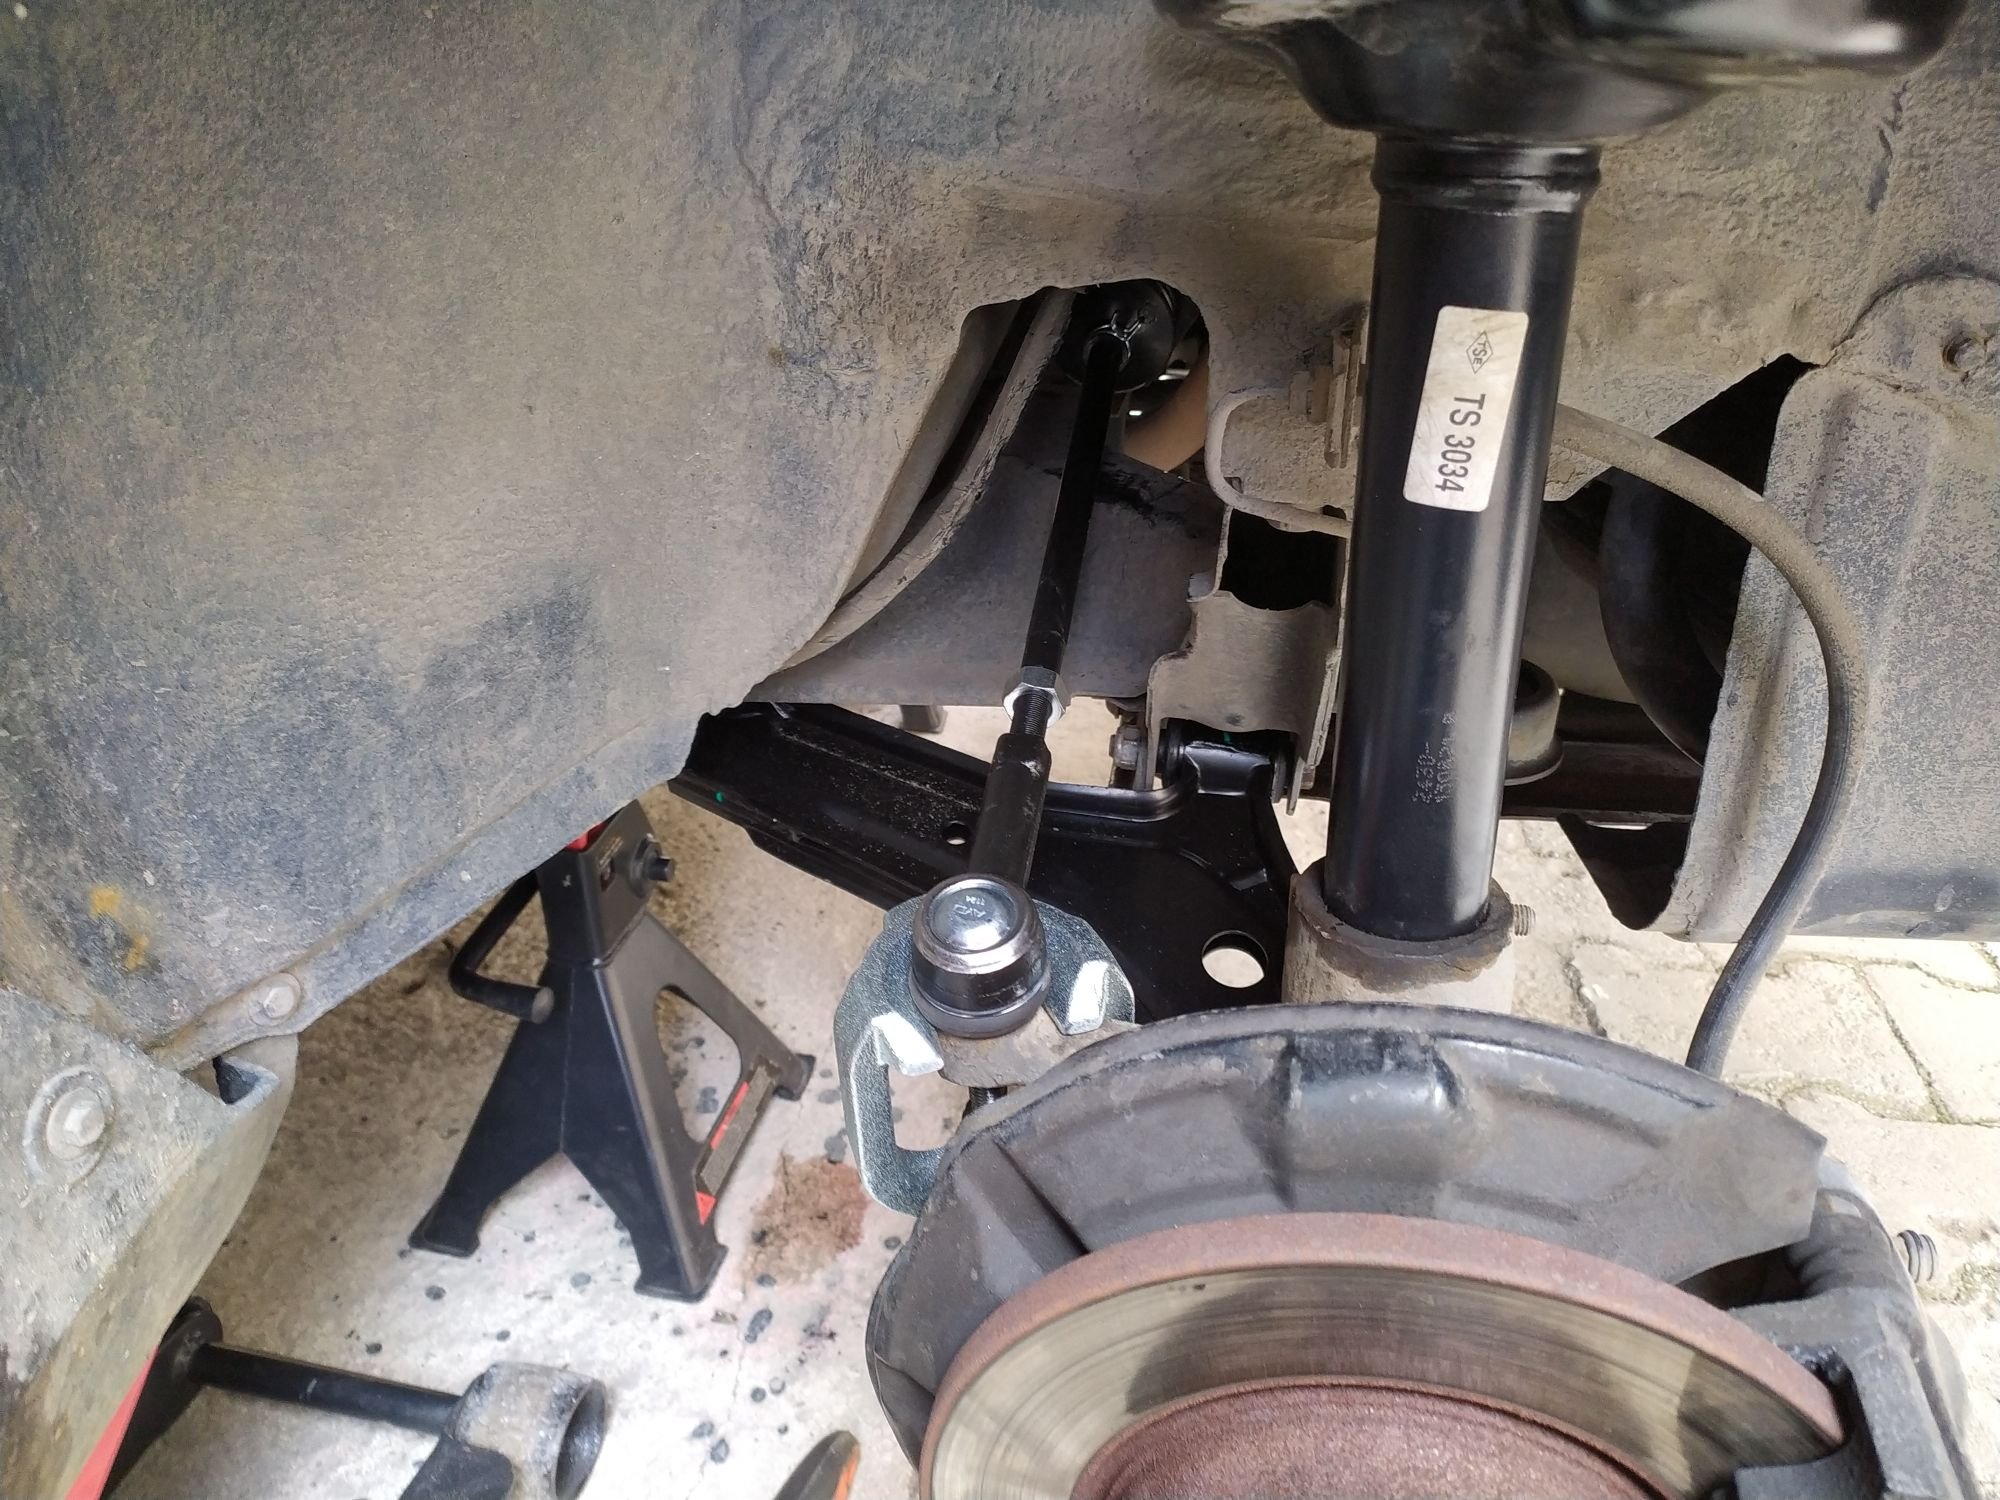
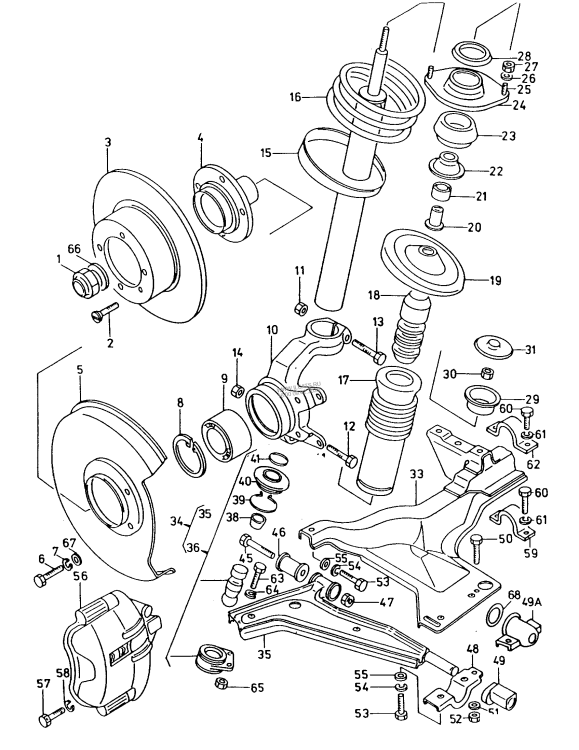
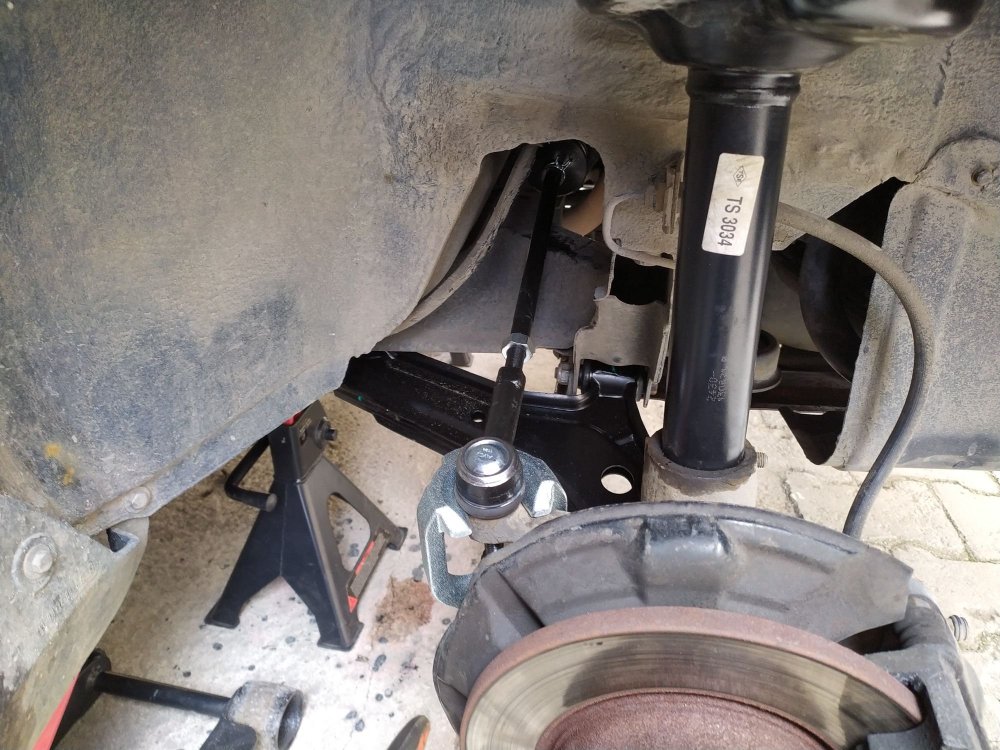
For anyone who want to do this work at home, Other than standard tools, (Socket wrenches, open ended wrenches, adjustable wrench, pliers, screw drivers etc) You need specialized tools: - To be able to separate the knuckle from the shock absorber, you need a 1.5 or 2kg hammer with a short handle. Otherwise, you won't be able to remove the suspension assembly. - You need a good quality, safe, spring compressor kit. - You need jack stands. - You need a trolley jack or a bottle jack to be able to push the knuckle back into the shock absorber. - Balljoint separator is a must have if you don't like to go bang-bang-bang on the knuckle ring. (Deteriorates it too) - For rusty and stuck bolts and nuts you need an impact wrench. I advise compact rechargeable models. I have AC corded one. Powerful but heavy and big. I can't use it everywhere. Pneumatic is good too but it needs investment into an air compressor and some accessories of it. - A breaker bar with 1/2" socket size minimum. - Long pry bar for pressing down on the track rod ends while tightening it down. (You get leverage from subframe mounting place) - Rubber hammer at least 600gr. (You use it on new parts when some concussion force needed without damaging the paint or causing dents) Replacing the swing arms is hard because of the position. Remove the track rod end balljoint, remove the lower balljoint. Remove the bolts securing rear bush clamp of the swing arm. To be able to remove the little nut, you must either pry the subframe and insert an open ended wrench to be able to hold the bolt or, try to pry the clamp itself with one hand with a flat big screw driver and while doing that, your other hand ready with the impact wrench on the nut. I cleaned the bolts' exposed threads with wire brush using dremel before making the attempt to remove. There was anti-gravel paint covering on the threads. After removing the clamp, finally you can remove third connection which is a rotating bush. The nut will come off but don't expect to remove the bolt easily. It's friction pressed. It can only be removed and reinstalled by hammering. Don't damage its threads. Reinstalling is the reverse of removal. But you have to use your jack again to be able to push the clamp on to the rubber bush. Watch out for the small bolt while rising the jack though. You don't want to break or bend the bolt. Make sure it is positioned well into its hole on the clamp. Removal of the suspension assembly: Remove track rod end balljoint. Remove the nut securing the shock absorber from below. Use a heavy 1.5-2kg hammer to hammer down the knuckle. Use penetrating oil to ease up the process. As the knuckle lowers down be careful not to drop the wheel hub suddenly. The brake line might get damaged. So hold the wheel hub and place something under it after the total removal of the shock absorber. To be able to remove the suspension assembly from the car now, you must remove the two nuts from the strut tower. Don't try to remove the big nut on the center!. Hold the strut assembly by your hand and lift it while removing the nuts from above. This way you will prevent stripping the threads. After removing it from the car, lay it down, use your spring compressors to be able to remove the nut on the top which holds all parts together. The spring force is severe. Use the spring compressor wisely. Clamp it secure and tighten it equally in pairs. When a spring is compressed, it is a loaded and deadly weapon. Don't forget that. One of the most important detail about the removal and reinstalling of the top nut is the requirement of holding the shock absorber shaft while trying to turn the nut. Don't turn the shaft with the nut. Normally you do it from the tip of the shaft using a proper sized wrench or adjustable wrench. I couldn't remove one of it and I had to hold the shaft from inside with big pliers and used impact wrench on the nut. You can do this if you are not planning to reuse the shock absorber but if you are planning to use it, whatever you do, don't scratch the shaft surface. It will damage the seal inside and the shock absorber will leak, rendering it useless. Maybe one can hold it with soft buffers placed between the tool and the shaft. Check all parts. Replace the rusty or worn or damaged ones. Strut bearings may be reusable. You can split them open and check inside. There are small steel balls inside which are free without a cage. So don't drop them. If there is not severe damage, clean, grease and reuse the bearings. Decompress the spring carefully and see its shape in free form. If it looks warped, replace it. If it has excessive rust, replace it. Check for splintered, cracked areas. If you see any, replace it. Measure the height. 356mm (with 12.6mm core thickness) for Favorit and Forman 340mm (with 14mm core thickness) for Light 1.3 Felicia. 356mm (with 14mm core thickness) for heavy equipped 1.3 and 1.6 felicia (I couldn't find info about the 1.9 at the time of this topic. So, sorry if you are looking for that) If your spring is collapsed beyond standard measurements, replace it. Otherwise, you can continue to use your springs. No: 23 is the top rubber bush. I'd replace it every time. You will find it crushed %99 guaranteed. Reinstalling is the reverse of removal. Hang the assembly on the strut tower with the two nuts. Hold it and press it up tightly beneath while reinstalling the nuts. Otherwise you will damage the threads. Clean and grease the knuckle's interior. Insert the shock absorber bottom into the knuckle, observing the security tab behind so it is perfectly positioned in the middle of the pinch opening. Using your bottle jack or the trolley jack, slowly and carefully lift the swing axle. The knuckle will slide and sit on the final position. There is a stop on the tab which will prevent further movement of the knuckle. Also you will see the securing bolt will be lined up with the security tab's recess. Insert your bolt and nut and tighten it according to the torque spec. Steering rack replacement is not hard if you know what you are doing. (I'm talking about the manual steering of course) Start by removing the negative terminal of the battery. Remove steering wheel. Remove the steering column covers. Remove the control arms to prevent accidental damage. Remove the bolt from the universal shaft at the bottom. Remove the steering tube bolts. (4 total) Memorize the order of washers, spacers and rubber bushings on the bolts. When the steering tube and the shaft is free, carefully maneuver it out of the fascia and remove the ignition switch cables. (Don't forget their positions and colors) With the whole assembly in your hands, try to pull it gently. If you are lucky, the universal joint at the bottom will slide off without much effort. mine was severely stuck. In this case, this method will save you from having a headache. There are two universal joints. One at the bottom, one at the steering tube connection. Give a slight angle to the upper universal joint and use a decent sized hammer, hammer it upwards from the universal joint base while continuing to pull the whole assembly with your other hand. It will slowly move upwards from the base joint and will be free. Remove the track rod end balljoints. Remove the four bolts securing the steering rack. You can remove the steering rack out of the engine compartment from right side of the car. Through the wheel well. (This is a LHD car.) Reinstalling is the reverse but you must prepare well before installing the rack or it will take a lots of time adjusting it later. I did a mistake by adjusting the new rack according to the factory data but it was an asymmetrical rack. So I ended up having wrong steering center. Measure the rack movement on the bench. Mark its center before installing. Make sure it is at dead center before installing. Install the rack. Use new clamp rubbers if required. As soon as you finish installing the rack, mark its input shaft position on the bottom plate inside the car. This is important. You must match the steering rack center with the steering tube center of locking. If you accidentally move the steering rack, you can use this mark to regain the position. Don't install the steering gear inside yet. Having the wheel hub straight, by your vision, adjust the track rod end ballojoint's position without moving the rack. Adjust the length of the balljoint so they fit into place by not moving the straight position of the hub. Mine new rack is offset so the measurement of balljoint extension is not equal. Install the road wheels and tighten the bolts slightly without moving the steering rack. Using a level meter, mark two points from the front and rear side of the wheel while referencing a detail on the wheel. Like hub edge. Do the marks on the same height on the other wheel. Using a tape meter, measure the wheel distance from the same tire grooves. One measurement from front. One from rear. We need equal measurement or slight toe in. But this measurement is very rough. Aim for equal measurement. We do this only for the initial run to the nearest computerized alignment shop. My adjustment ended up 0.7 degrees miss in each wheel according to their system. With the steering lock on, hold the steering tube and steering shaft assembly straight to its mounting place and insert the bottom universal joint carefully. One notch miss and you will end up steering lock not locking straight. Unfortunately you must demo the setup before full reassembly. So, just insert the bottom universal joint and screw at least the two bolts securing the steering tube. If the bottom side universal joint is not sliding in, use hammer again to hammer it in place. After securing the steering tube, slide the steering wheel in and demo the setup. You must achieve side to side perfect mirroring of the steering wheel. If the left stop position of the steering wheel does not fit the mirrored shape of the right, try re inserting the steering wheel while passing a notch to the right or left, which is required. If you achieve side to side mirroring but you end up road wheels not straight when the steering wheel is straight, too bad. Steering rack is not properly centered. If it's not severe, the wheel alignment shop can true it for you. Otherwise you have to adjust the rack center again, according to the straight position of the steering wheel. You do the adjustments again from the track rod ends to achieve straight wheels. Confusing right? It took 6 hours for me to adjust the rack center on the car and matching the lock center of the steering tube and reassembling everything back together. I think it takes practice to make it faster.
-
Imagine you are in a left turn. Front right suspension fully collapsed. You see a patch on the asphalt. There is about 0.5-1cm of surface difference. When the right wheel hits it, you hear a metallic BANG. Same for the opposite side. That was happening all the time. I have no other explanation.
-
They don't have any. The old ones are in the house. They don't have such internal soft stops nor the ones I've installed.
-
I wish I had a closed private garage. I'm working exposed to the weather as you do. If you have a trusted mechanic and enough money to pay, I'm sure they'll spot any sign of wear and tear. For the most basic checks, like you've said, They are asking money. Naturally. Regularly checking the CV boots is a good practice. As soon as one spots cracks, it must be replaced.
-
CO screw adjusts idle air. It is not related to fuel. You have air leak. %90 percent sure. In my carb, I don't have to fully set the screw in to see the revs dropping. When the screw is fully in and the car is still running, this means it sucks air from elsewhere. If the carb gaskets are OK, check brake booster hose. Disconnect the hose and plug its insert on the carb too see if there is any change. (Don't forget to reinstall it before driving) Check all of the small hoses around the carburetor. (Second stage, TTV hoses) for cracks and leaks. Some people spray lighter gas around the carb gasket to see if that is rising the rev. I find it dangerous. You can use an incense. By keeping it close to the gasket mating areas you might see the leak. Your idle system's fuel routes might be clogged too. Please, remove the air box and run the engine with the carb's top open. Listen to the carb from close. You must hear a constant hissssss from intake of the carb. Like listening to a vacuum cleaner's hose's end. If you hear, hissss....gro...gro...glog.hissss.glo..glog...hisss... that means vacuum leak.
-
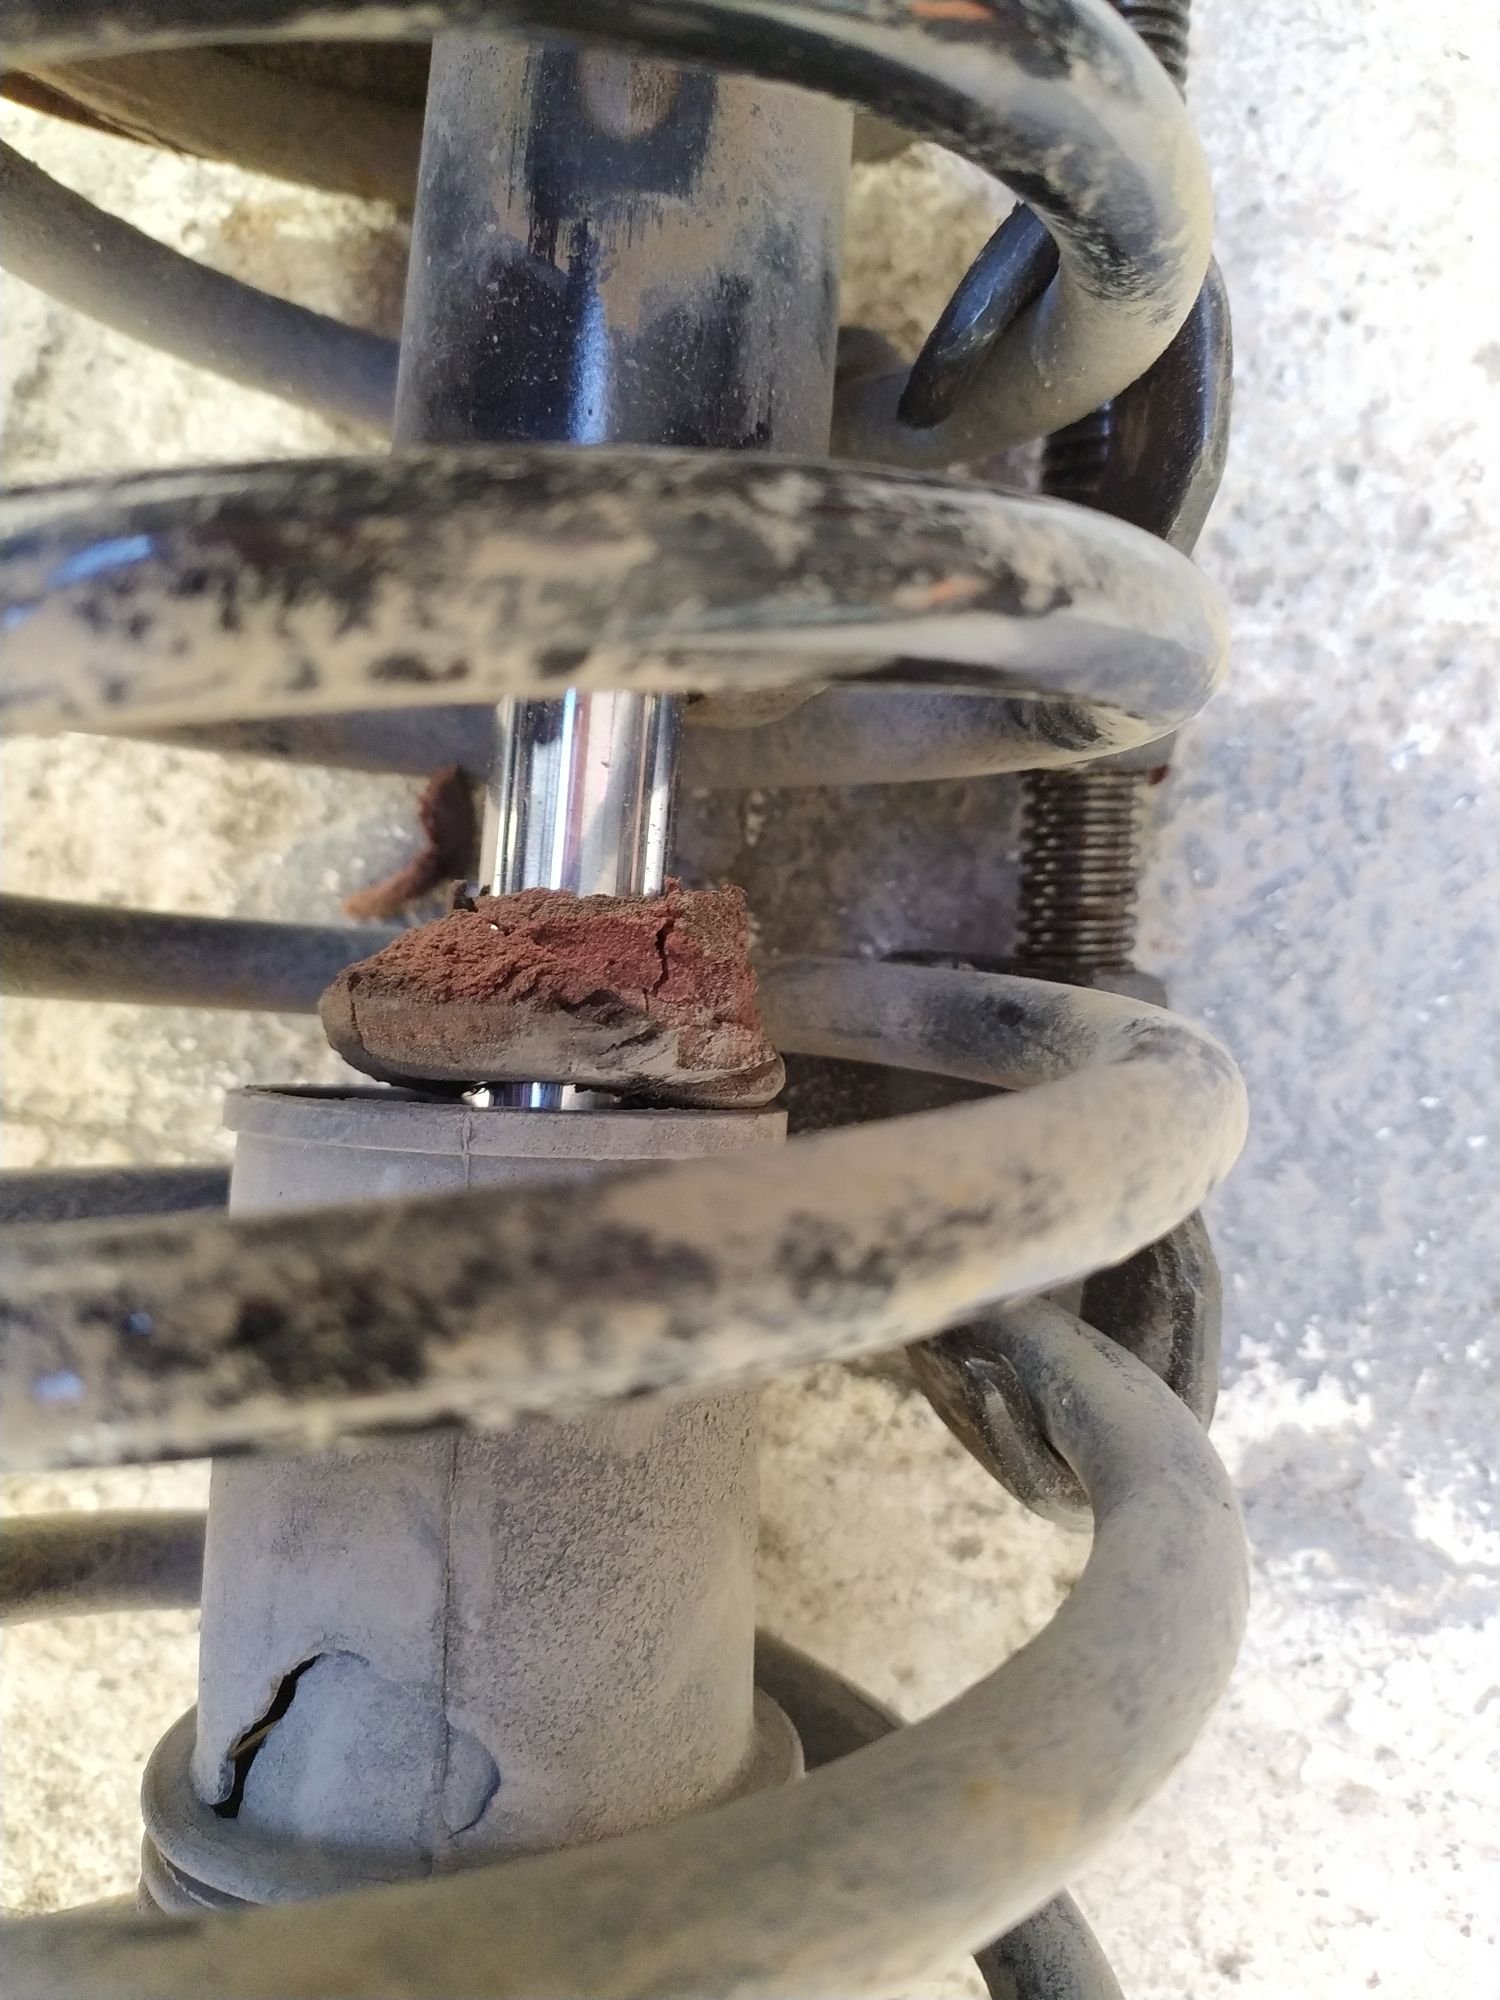
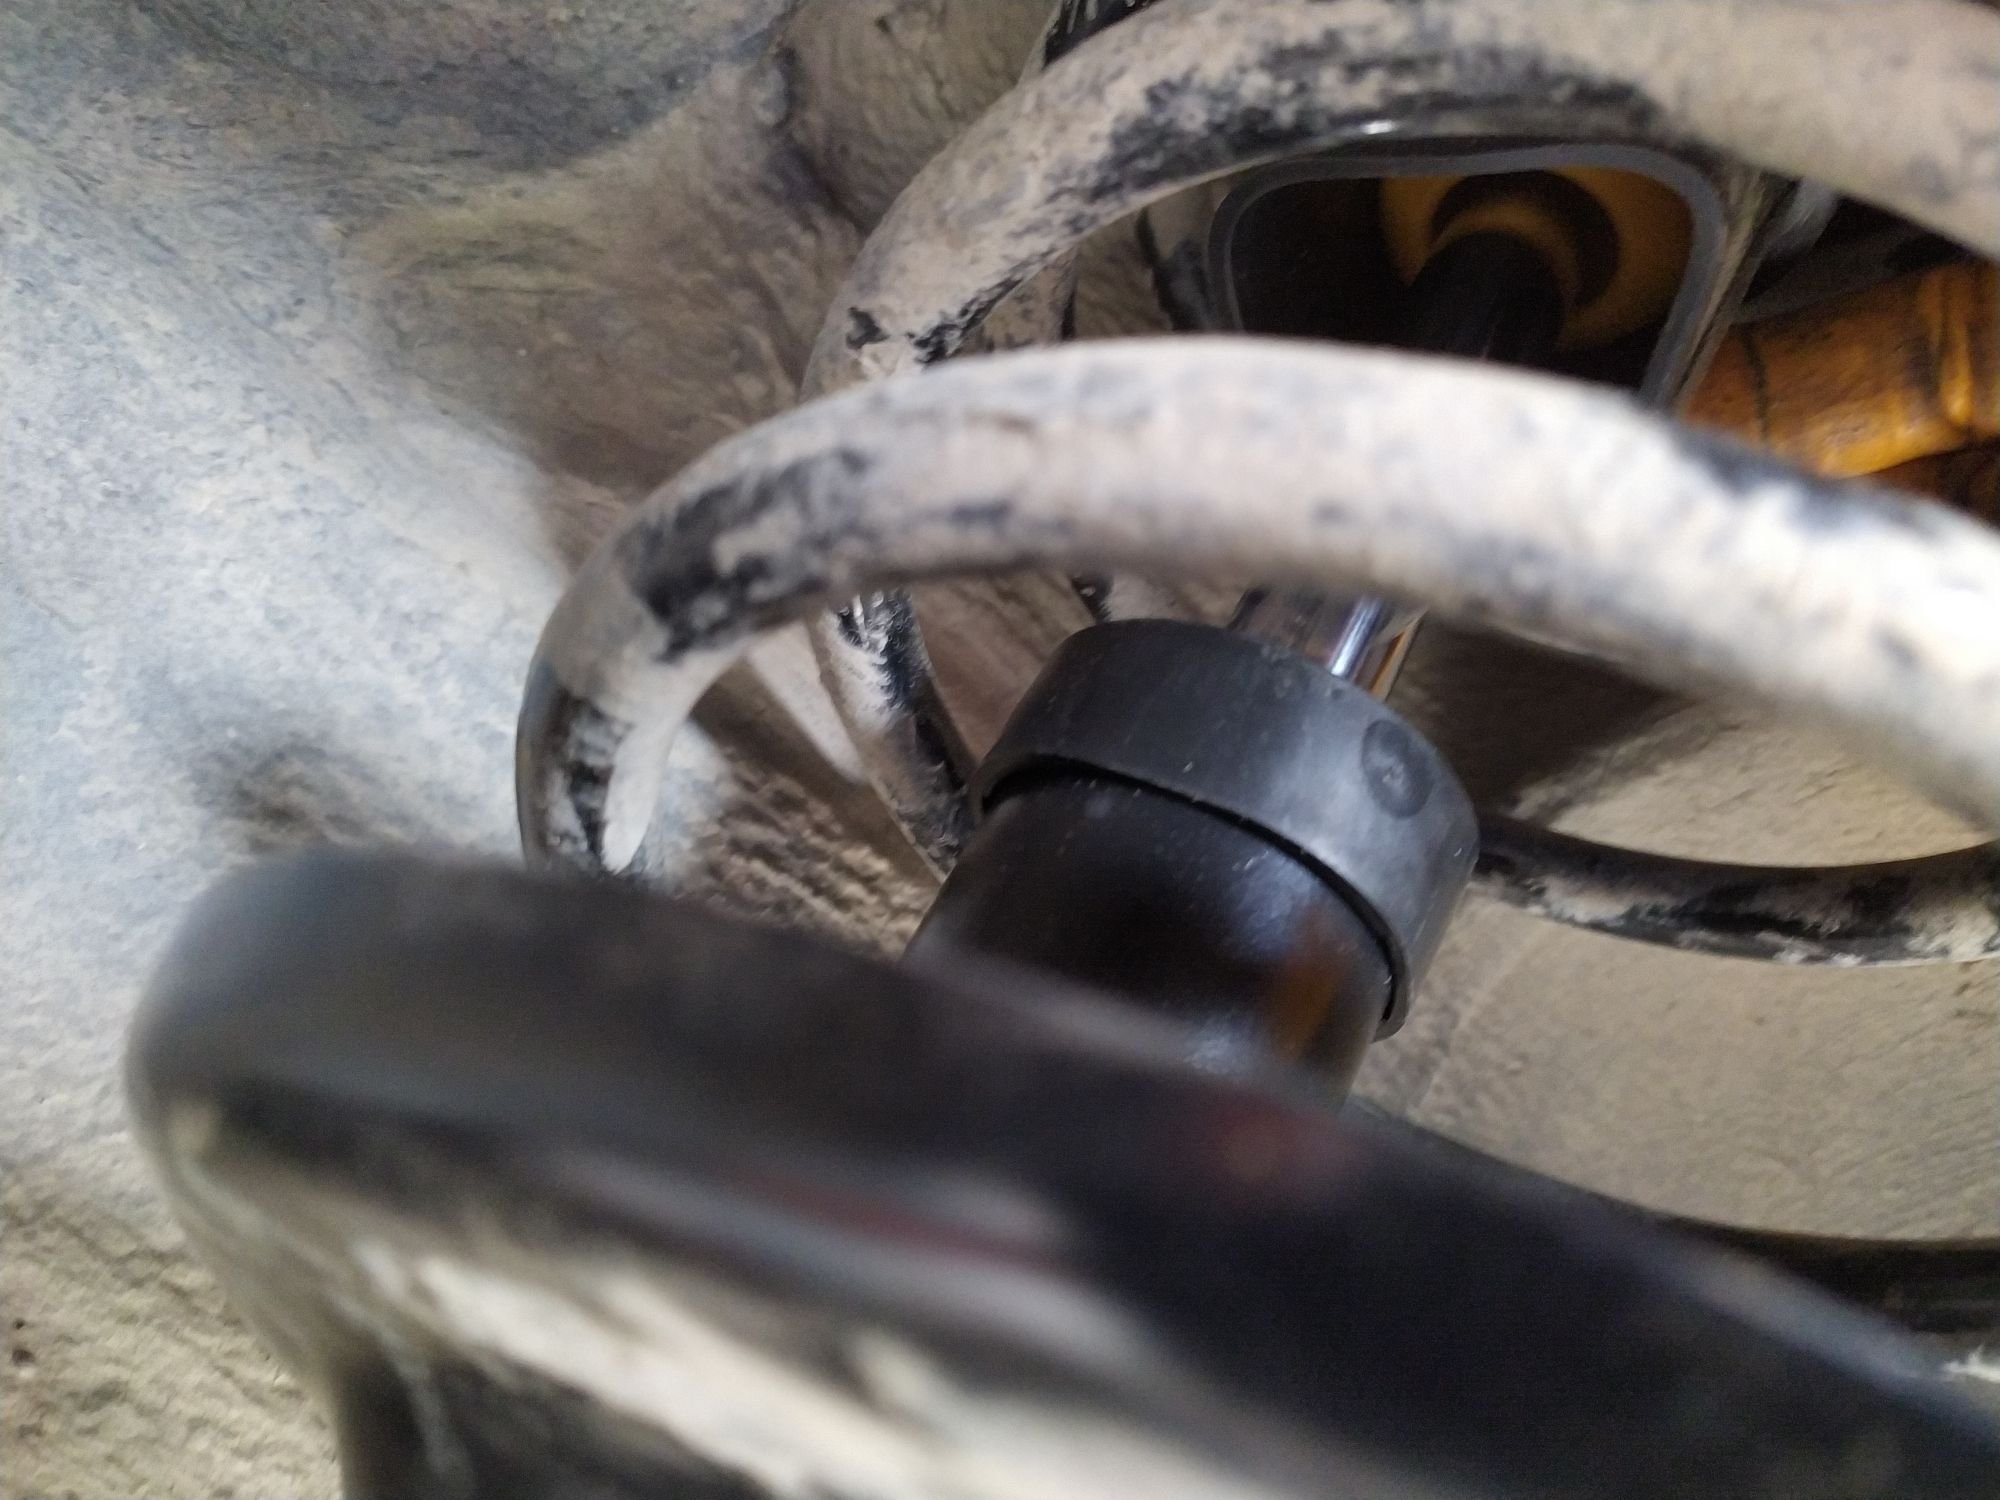
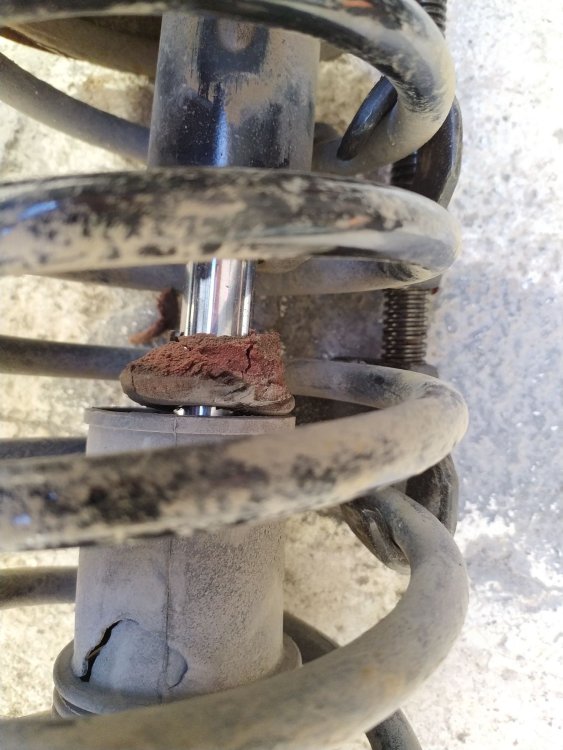
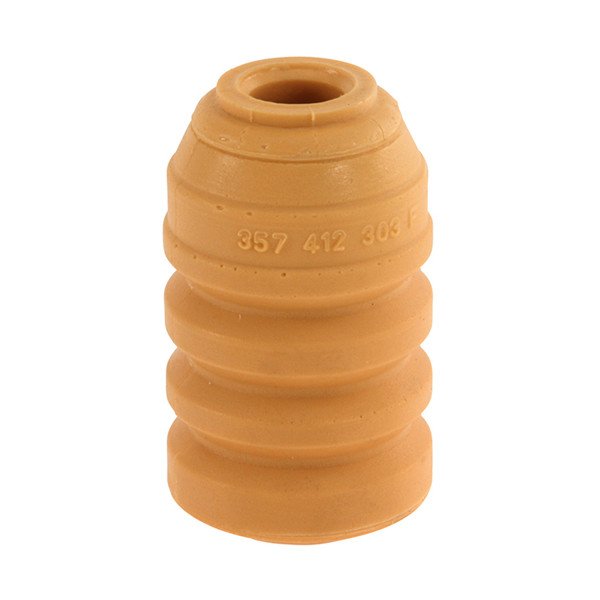
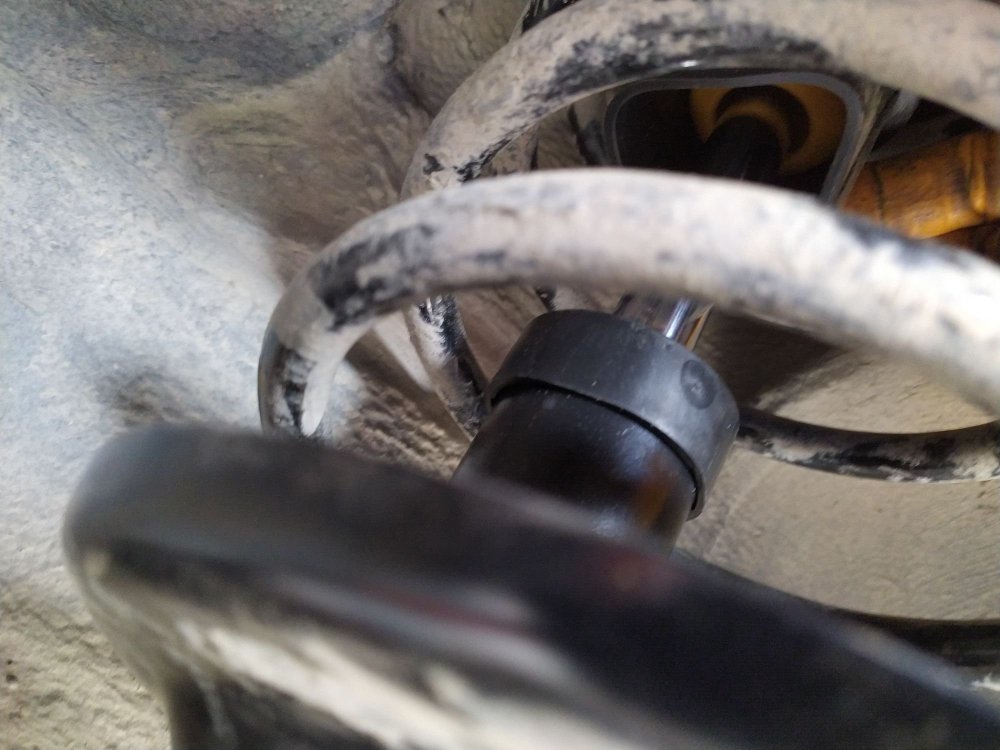
Here is the root cause of the problem. I don't blame anyone for something deteriorated to the point of being unrecognizable. This is a €3 part. Called "bump stop" or "helper spring" or "shock absorber rubber stop". In the pictures above you can trace its ruined remains. 10cm part reduced to 1cm. The front shocks were bottoming out in every excessive force. Resulting accelerated shock absorber wear. Every time the shock absorbers had bottomed out, it sent shock waves to the chassis. Resulting the top mount to get cracked. When I bought the car 4 years ago, all of the suspension items were shining new. Including the axles. This issue with suspension was present from day 1. So I've thought, this was an old car with very soft suspension. It must be normal to be louder than other cars when the front suspension bottoms. Compared to modern cars, everything is noisier after all. I haven't driven another Favorit too. It seems, either the previous owner had tried to save on this part ( €6 ? I don' think so) or they had an argument with the mechanic about the price and the mechanic had sabotaged the work by not installing the new bump stops. If you look carefully one of the ruined remains had been installed reverse! I have adapted a keen driving style to watch irregularities on the road to avoid bottoming out the suspension. I also memorize all potholes low manhole hatches. Maybe once in a month, one side bottomed out. Sometimes you can't avoid the big irregularities, you know. Especially when chasing a car in front of you. It suddenly appears. I think one of that occurrences had caused this crack to happen. Yes. Exactly. I'm glad my a** got frozen on the ground. %100 percent worth it. Disaster averted. Thanks to @nta16 and @Papez. My first choice was air shocks from Veka.(Not Vika! ) But one of them was leaked in its box. I returned both. So lesson from this story: Don't trust. Check everything. Every little detail. Check your bump stops. If they are destroyed or crushed that can lead to serious damage.
-
Let the other members try and chain the links together.
-
But why? There is a reason. It's in the last pictures.