
weyland
Members
-
Joined
-
Last visited
Everything posted by weyland
-
Just travelled 120 miles in the car (2.0 TDI vrs hatch), mainly motorways driving at a decent pace - 58mpg
-
2017 TDI hatch - averages 46-50 most days on short to medium runs, combination of normal driving and using the torque. I like the day to day usability & performance of the diesel, I find it more usable than my previous petrol one, though the petrol is great also. There's no doubt diesel is on the way out, you'd be daft to by a new one now but it has many years left. All down to what suits you
-
If this guide is useful please add a like
-
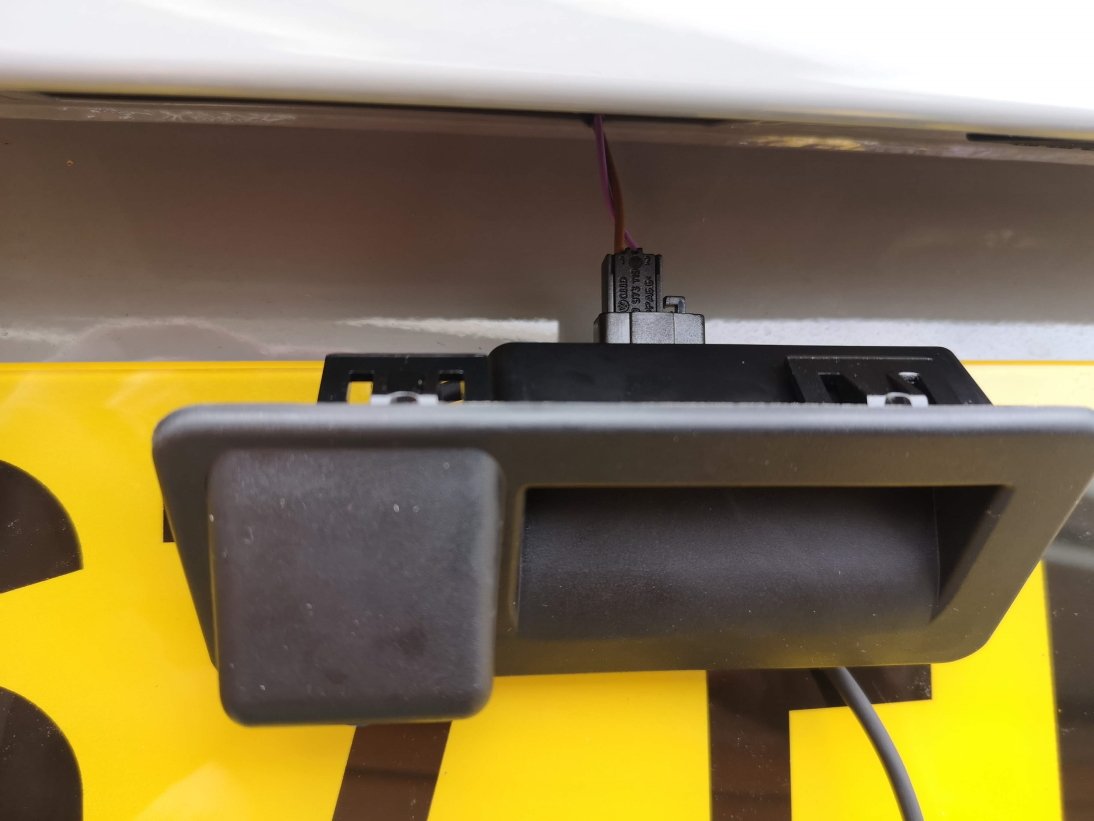
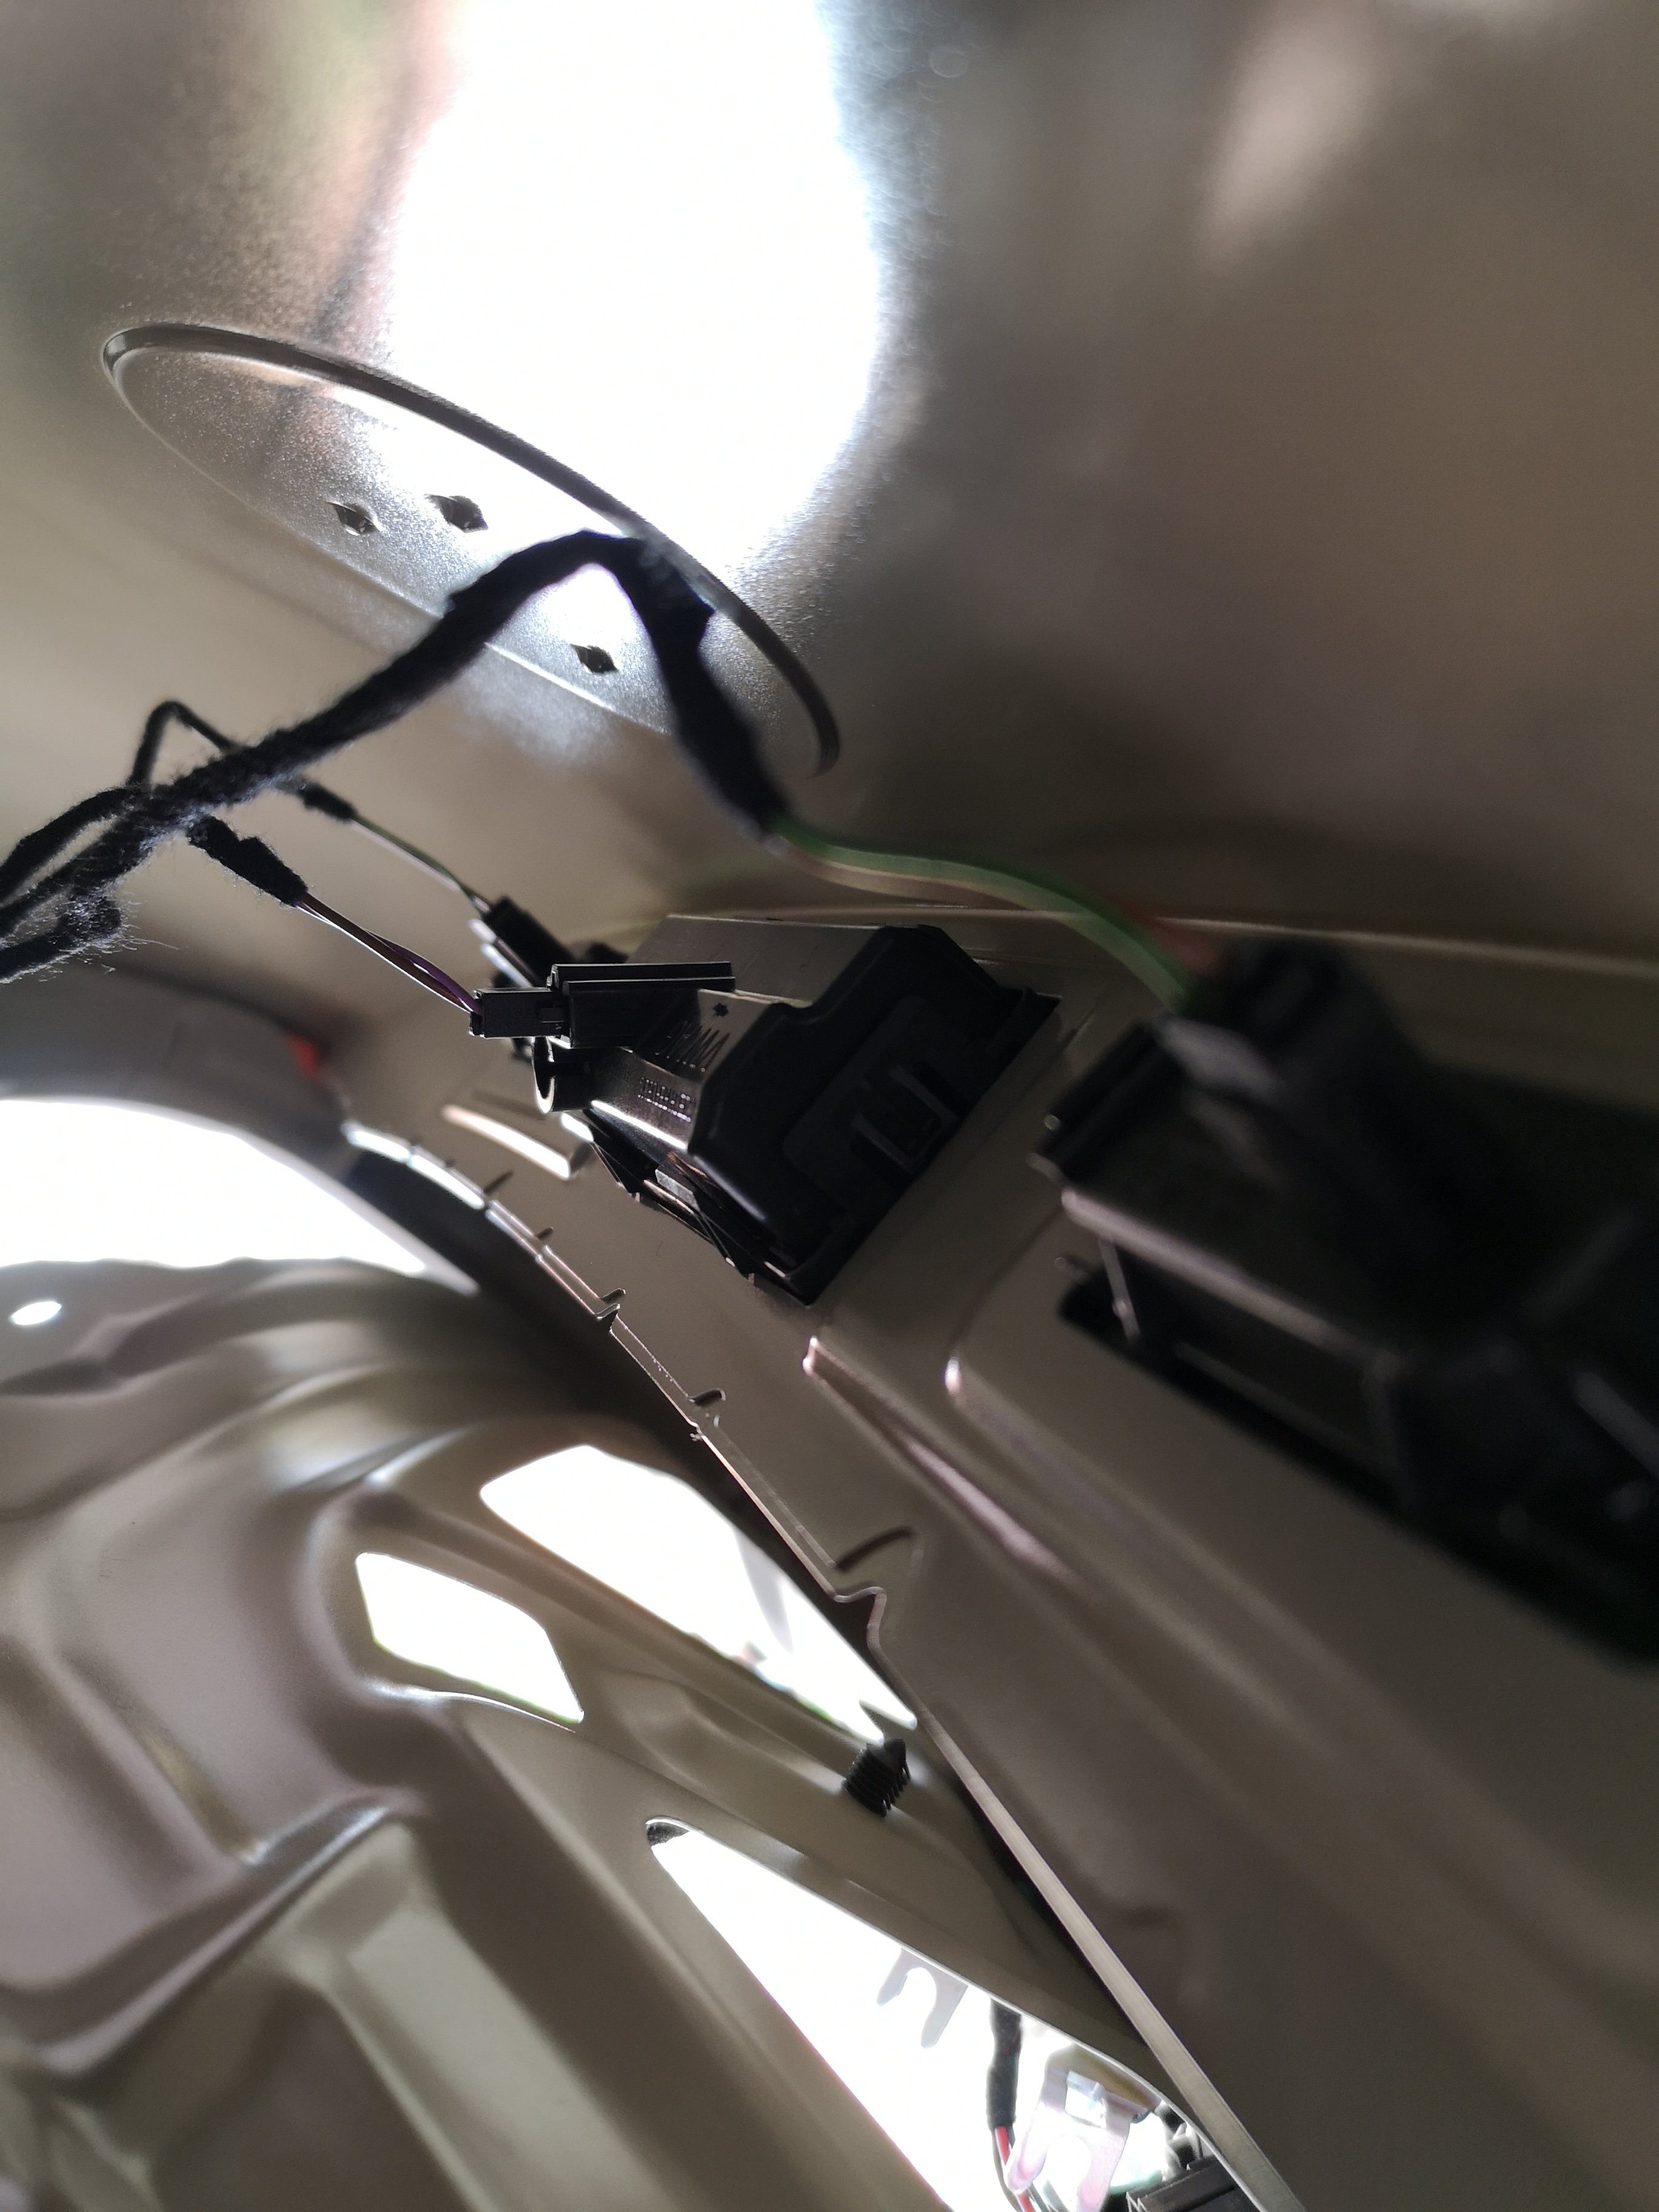
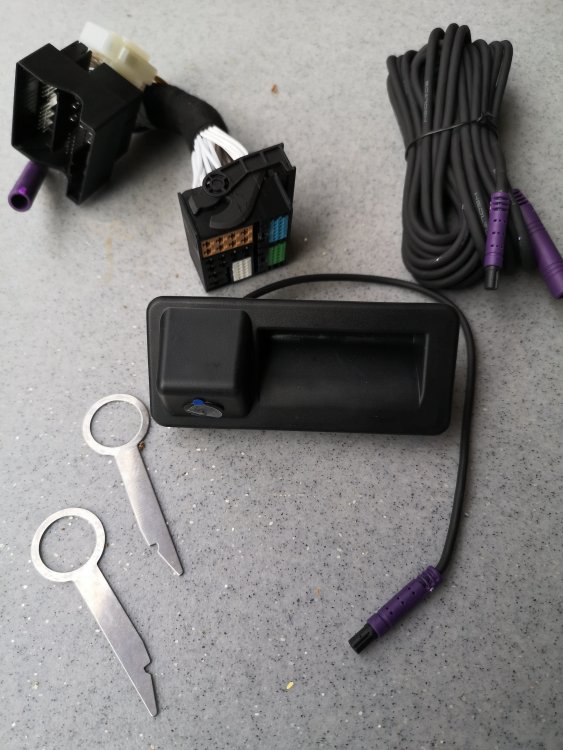
Hi, I wouldn't worry - your current boot release harness will plug into the block in the middle to provide the normal function, and the wire on the left with the purple connector is the only one you need to feed to the front and into the replacement media unit harness to provide all of the reverse camera functionality
-
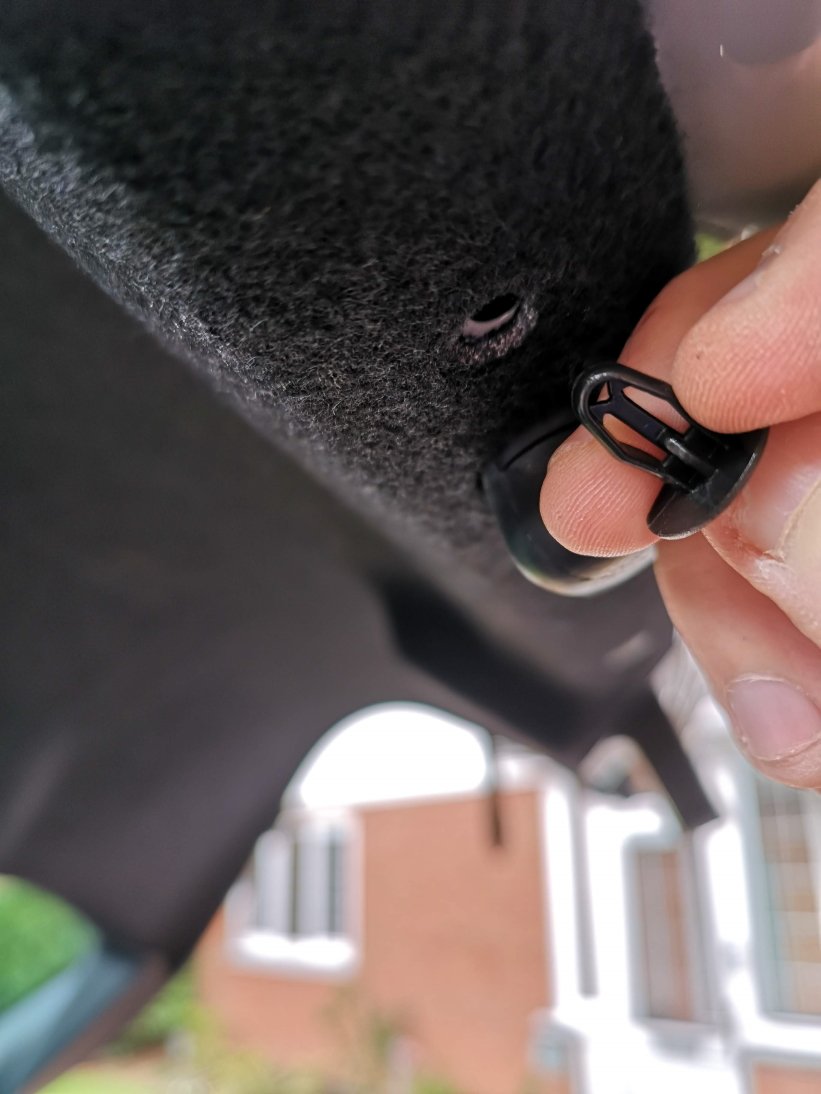
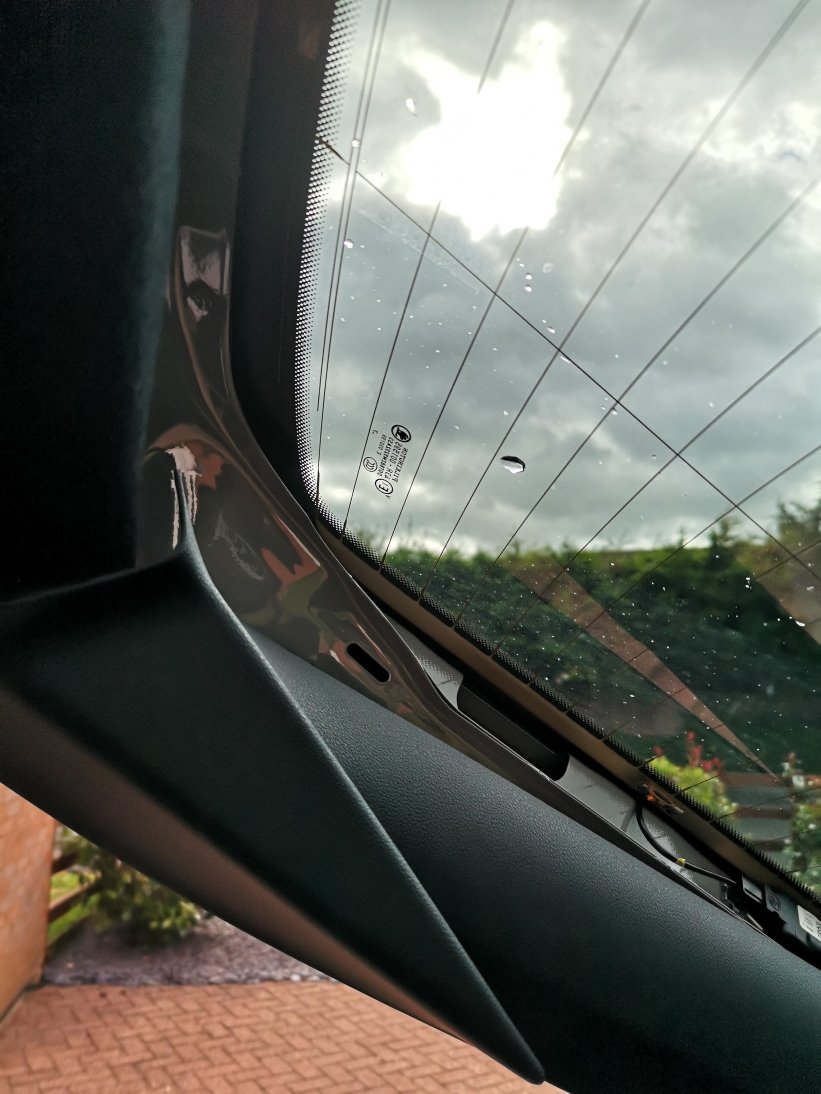
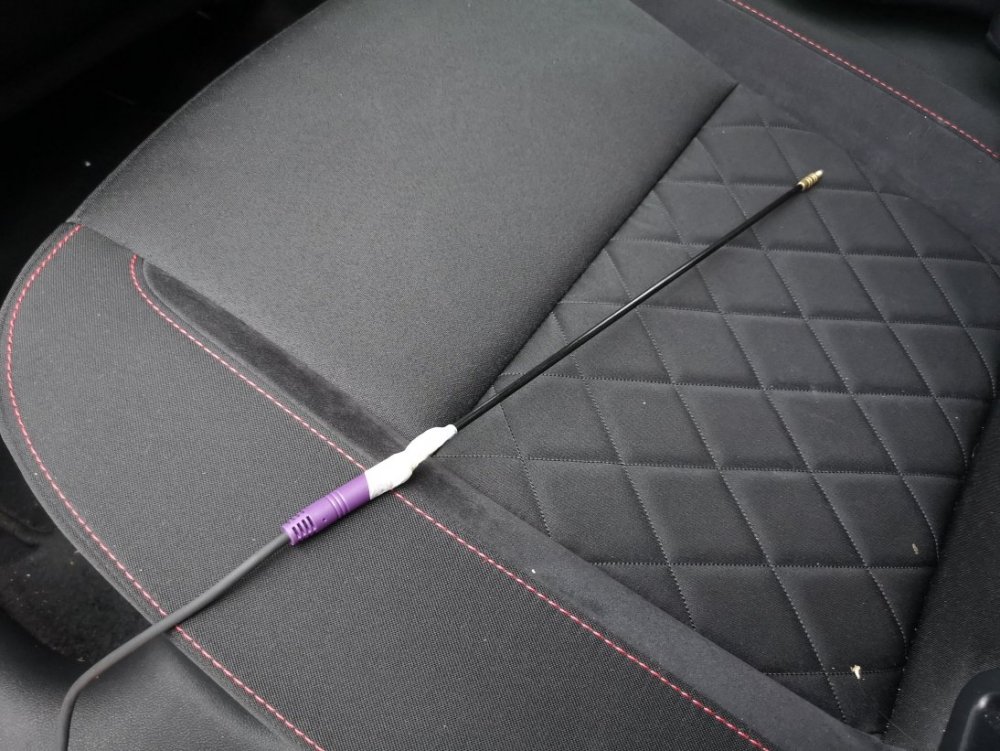
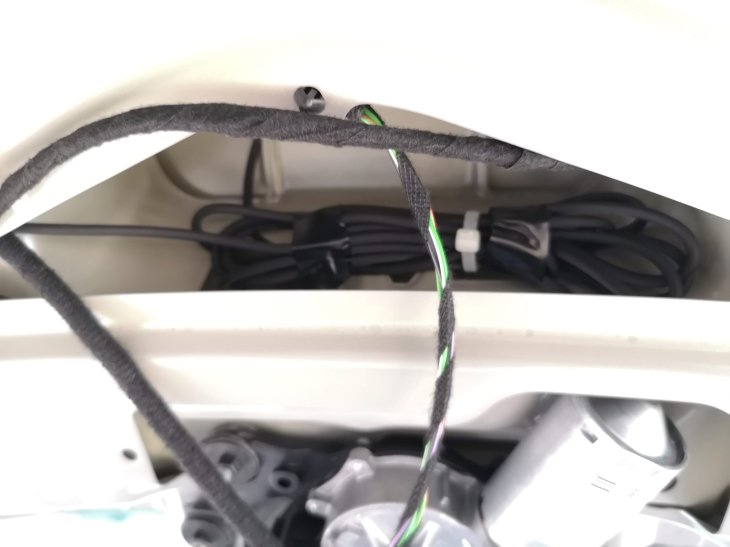
Have you got it through the rubber gator? If so you need a thick wire or rod to push it up the side - you can then grab it half way up by the heated rear screen harness, pull the wire all the way up, then feed it through to the bootlid. Getting it though the gator can be tricky, again a rod and patience is the key
-
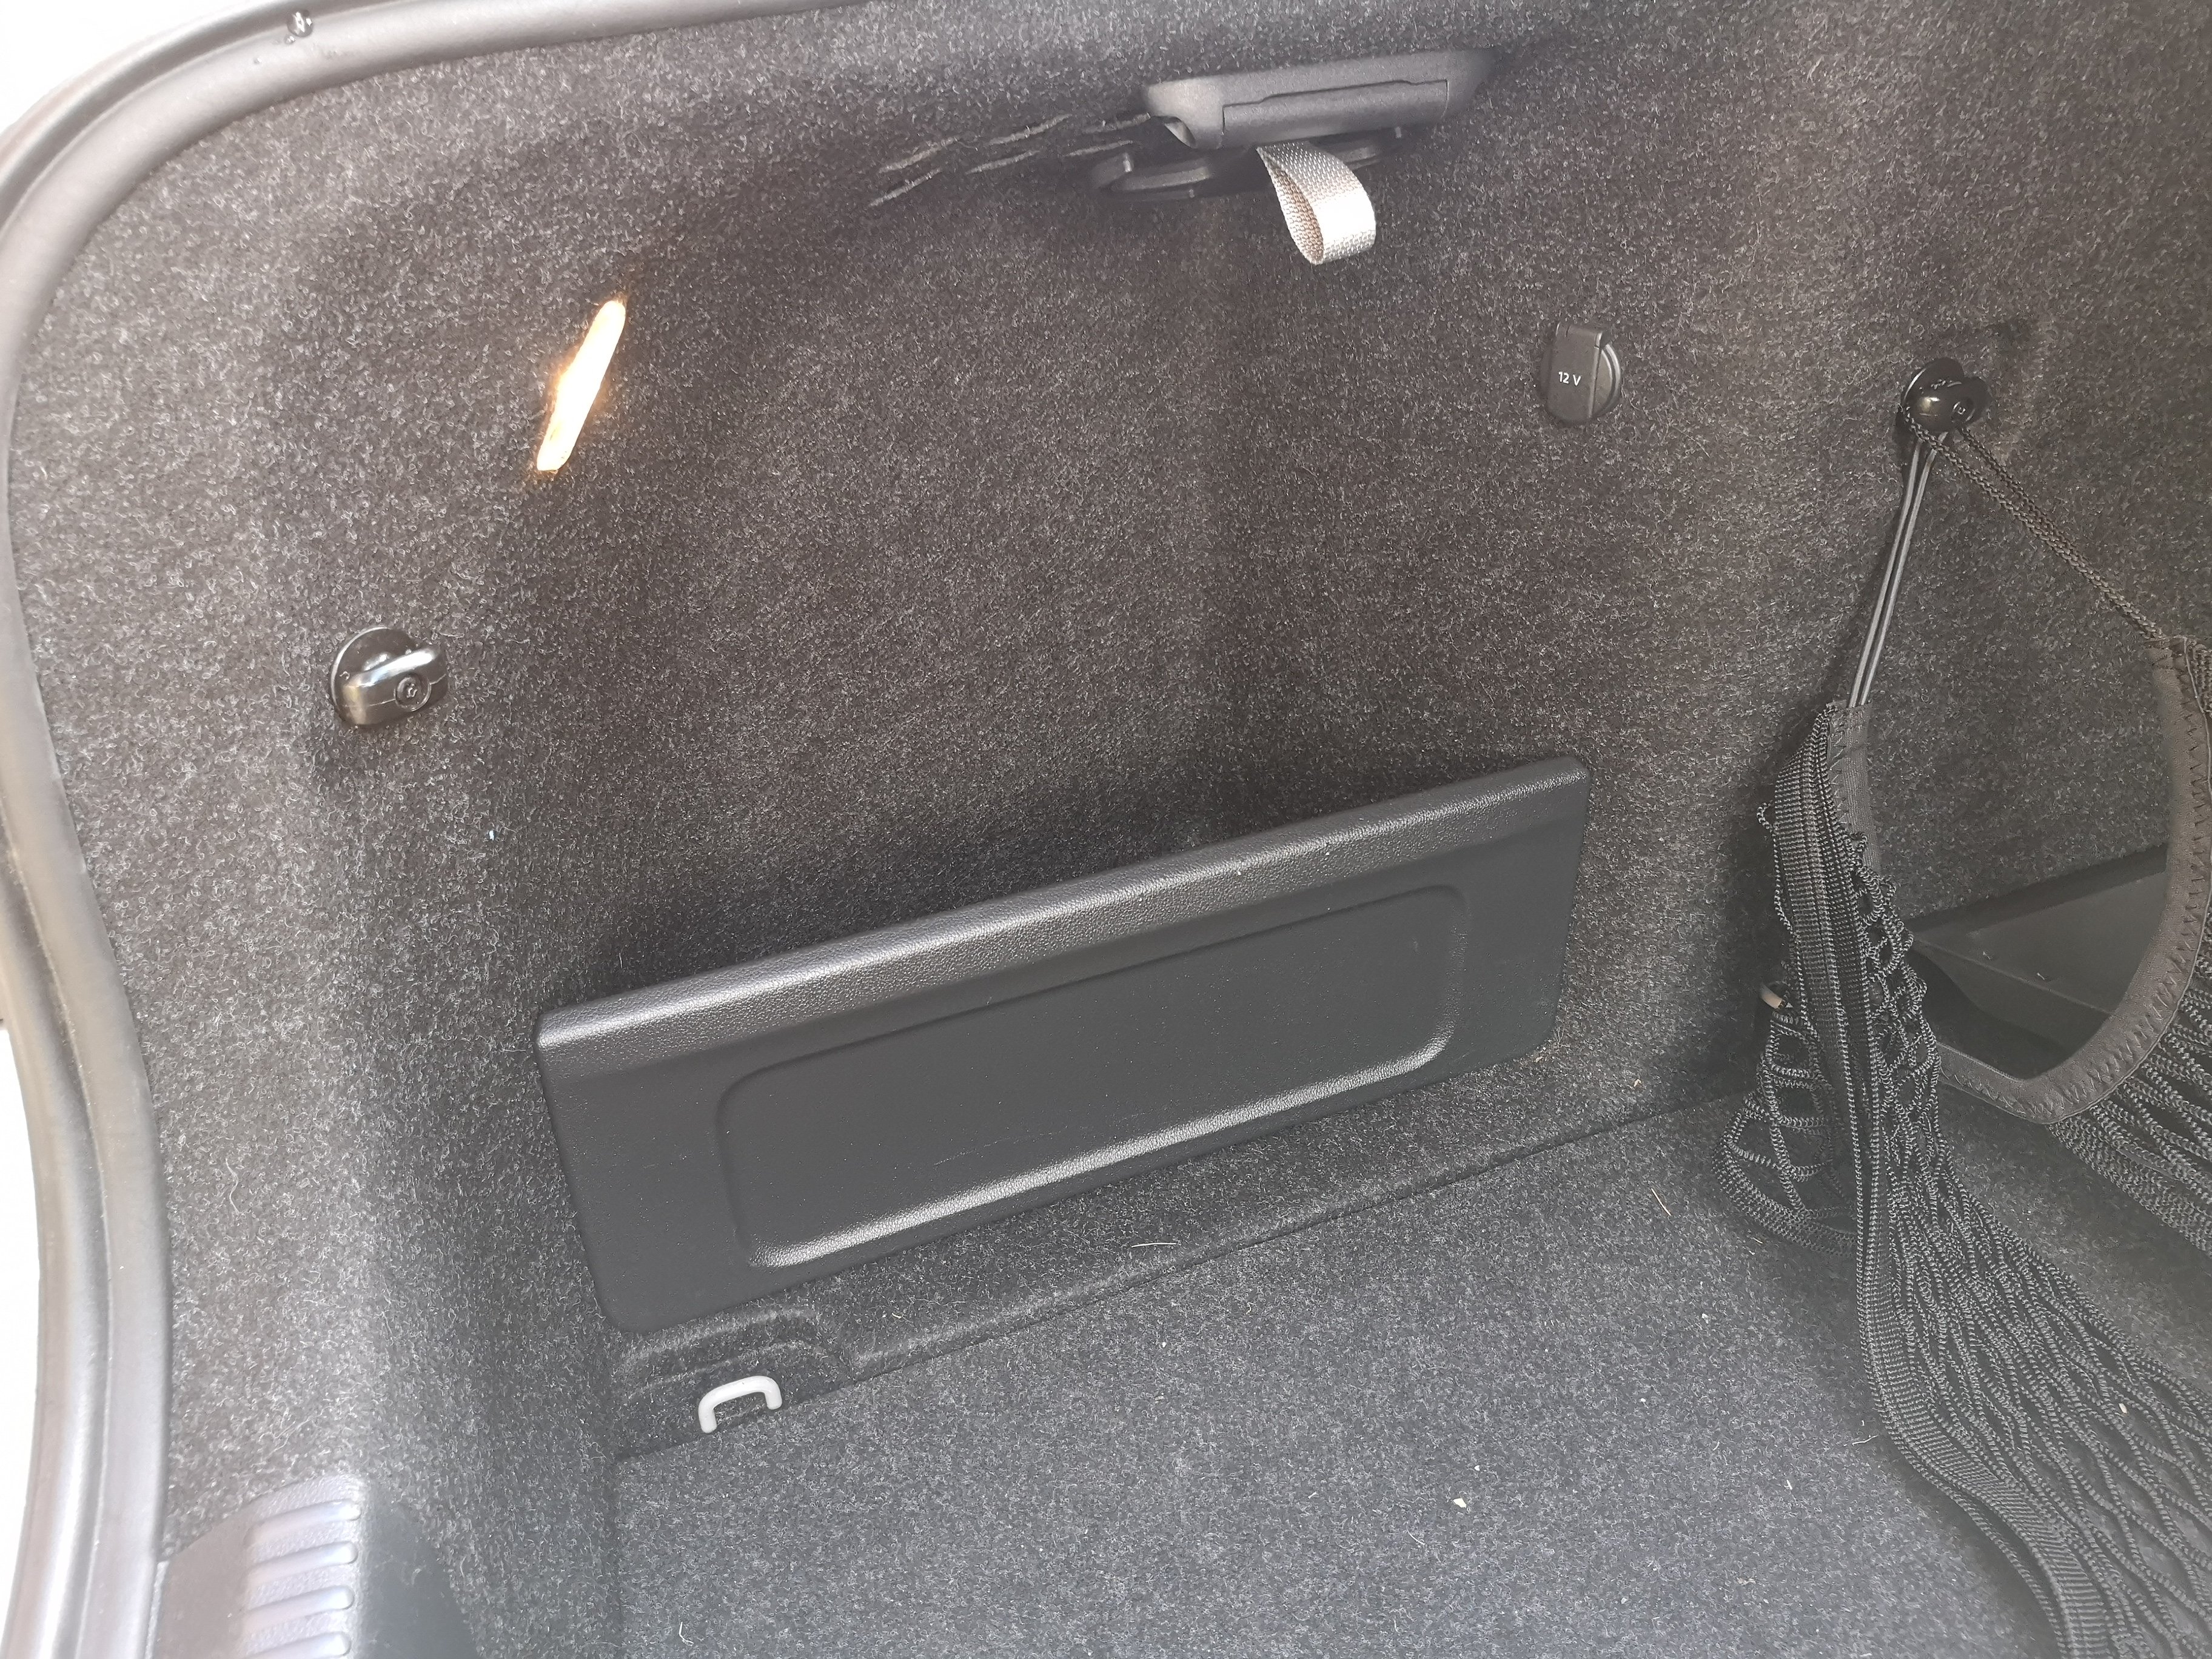
Funny you should mention that, I've just picked up the small bag. It's slightly too large to fit in my recess (might soften and fit better over time), but it's velcro backed so is stuck to the side - £3.99!
-
@mfizz This camera is plug and play, I think the harness has a big part to play in that. The media unit instantly recognised the camera and it worked straight away
-
In the VRS (mine at least) it's just a solid plastic divide:

-
There should be a small divider that slots in, this will have come with car
-
Hi, this may help you with costs and reverse camera fitting: https://www.briskoda.net/forums/topic/485897-how-to-reverse-camera-fitting-guide/ Also, might be worth changing your post title as it's none-specific to your question
-
I've put together a 'How to' guide here: https://www.briskoda.net/forums/topic/485897-how-to-reverse-camera-fitting-guide/ Thanks to SashaGrace and all those that have gone before me for the info on camera etc.
-
Agree, not worth the hassle to rewire if you by the right 12v USB socket as they sit flush with the trim, unless its something you really want to do!
-
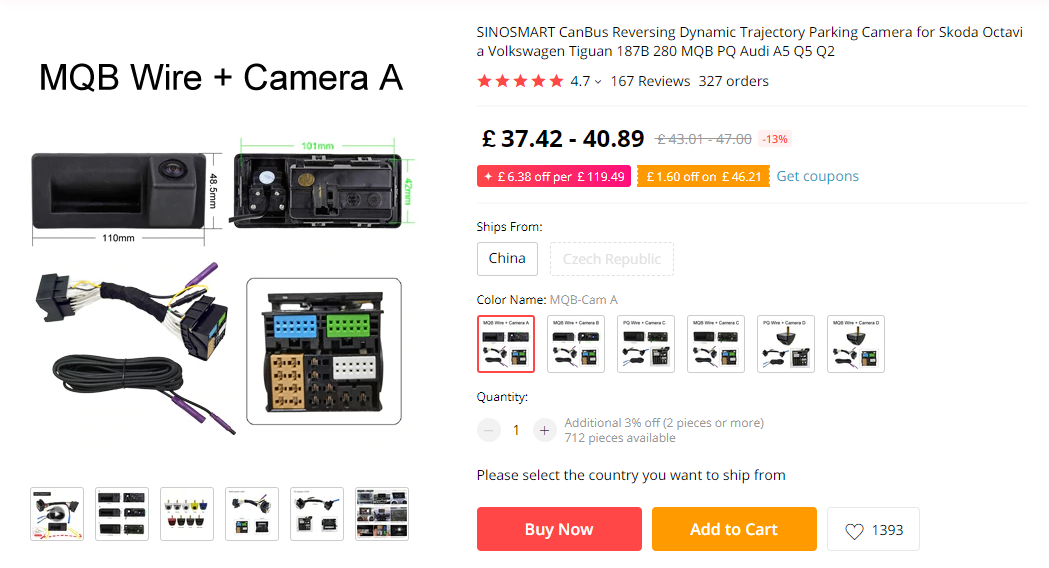
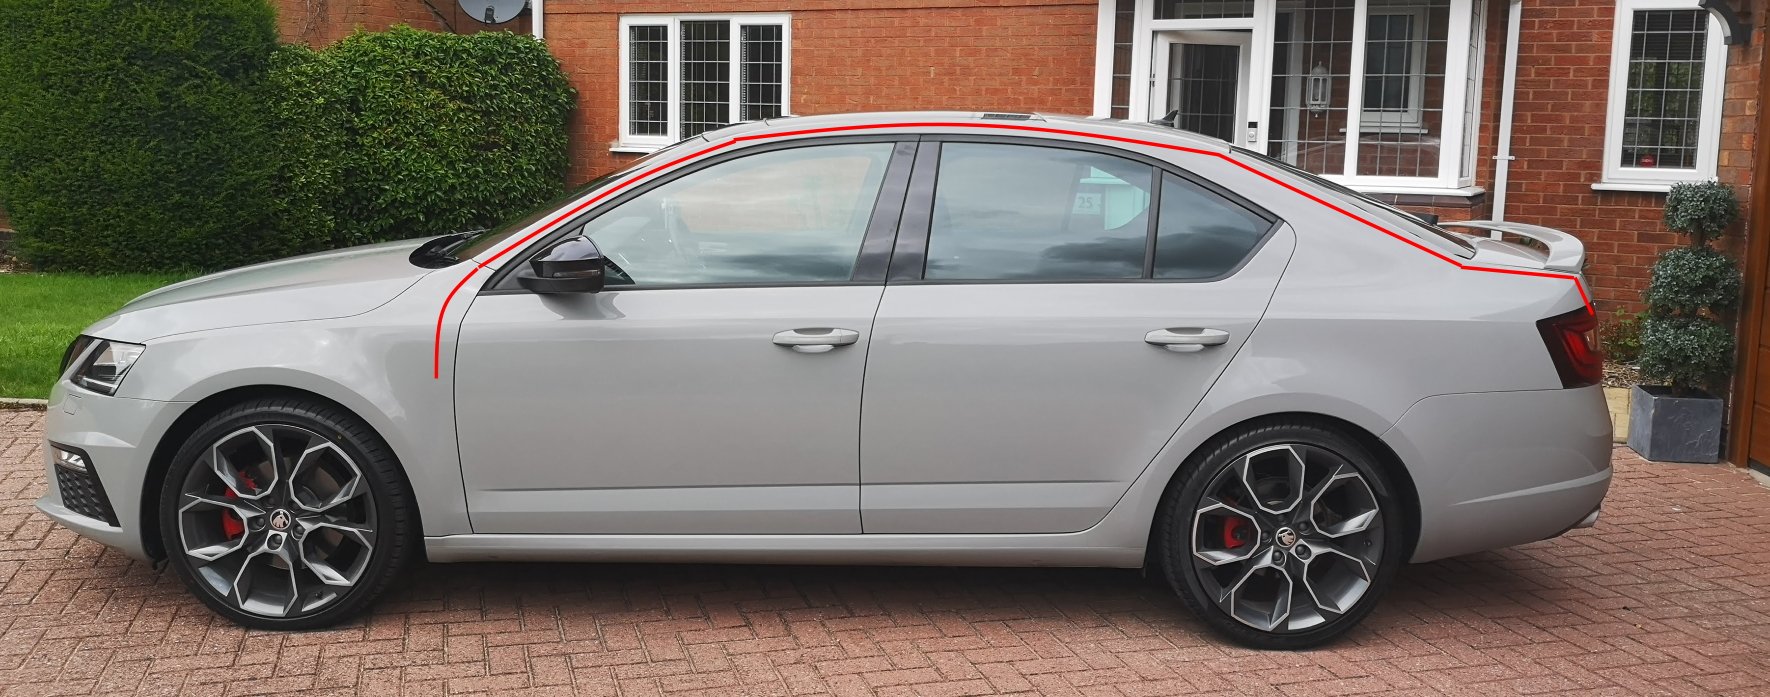
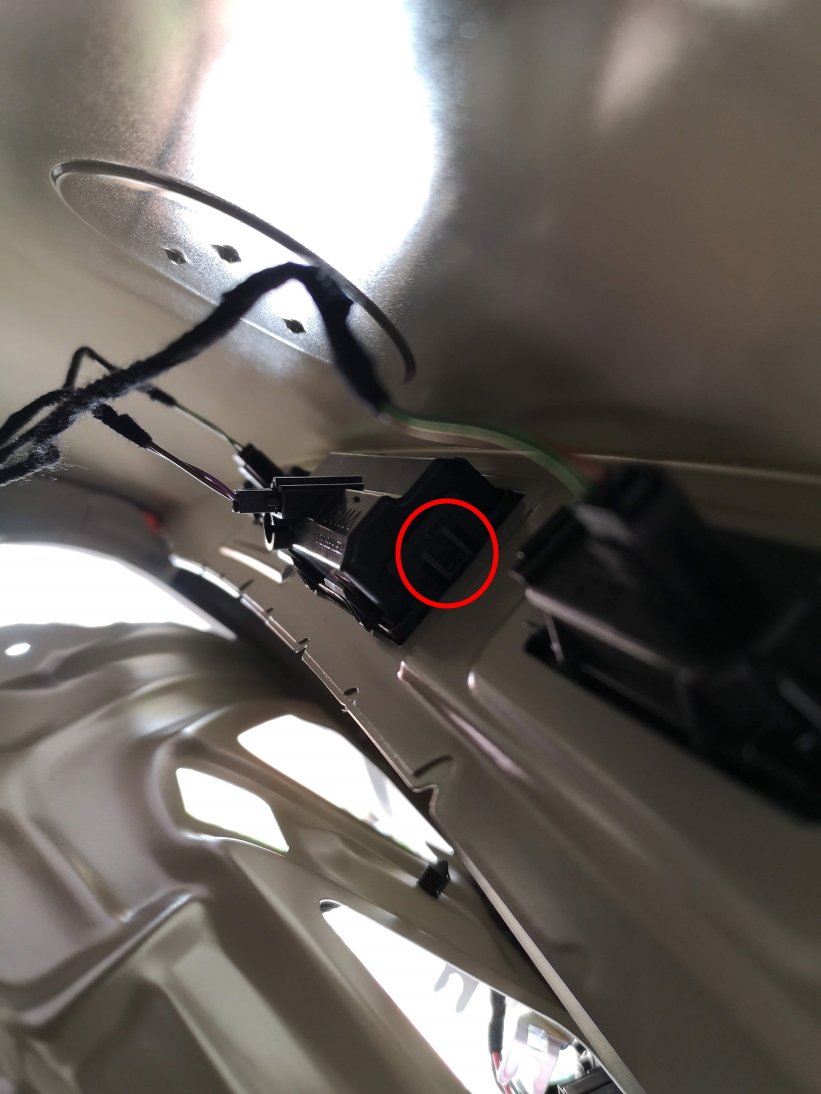
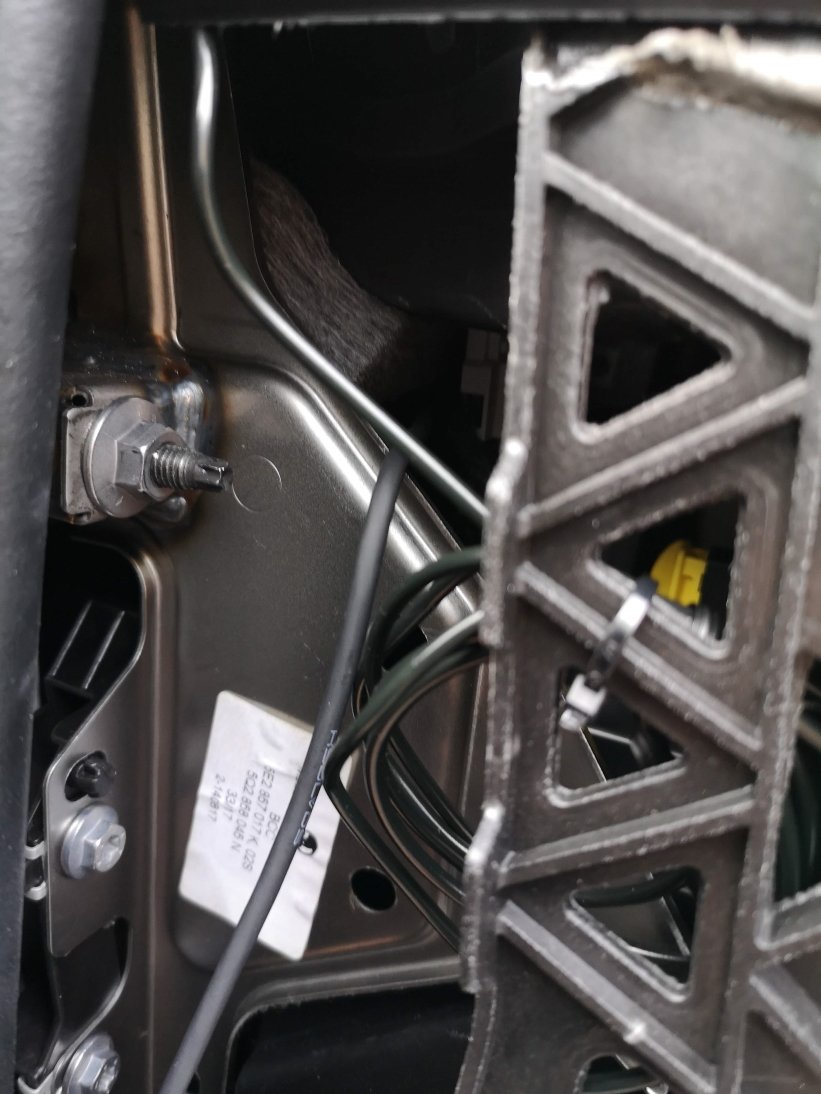
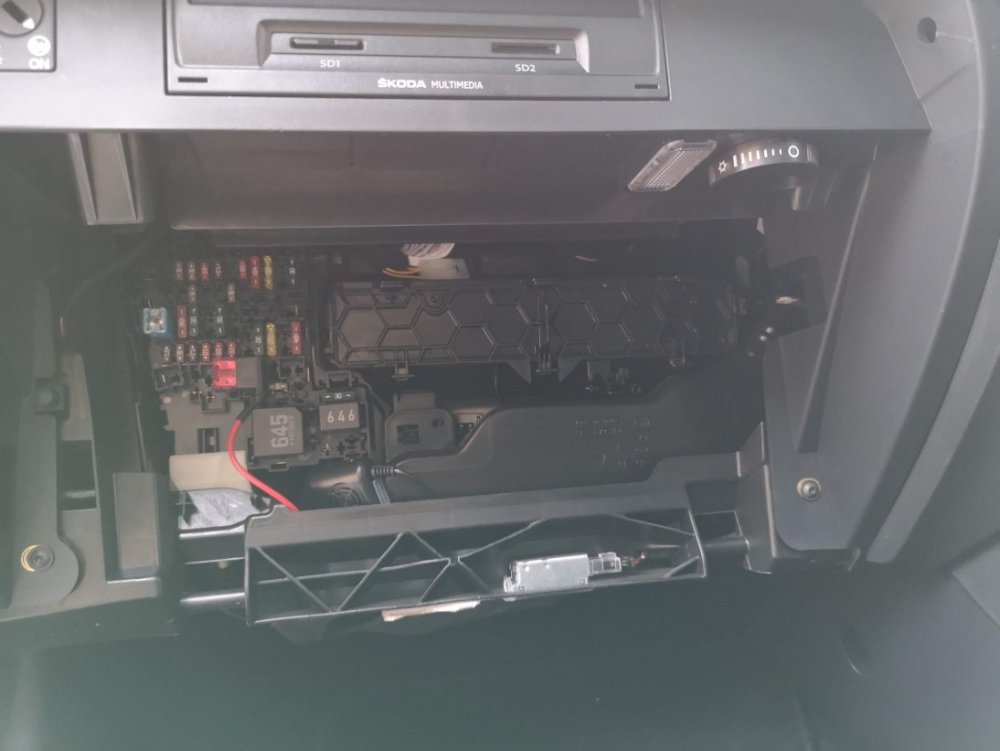
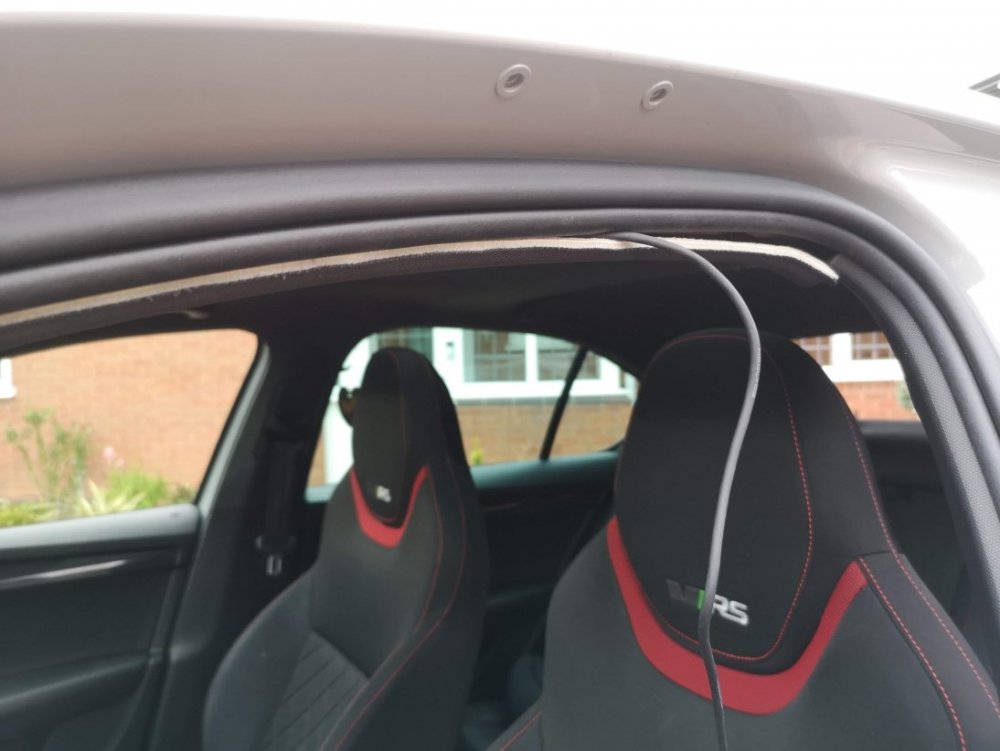
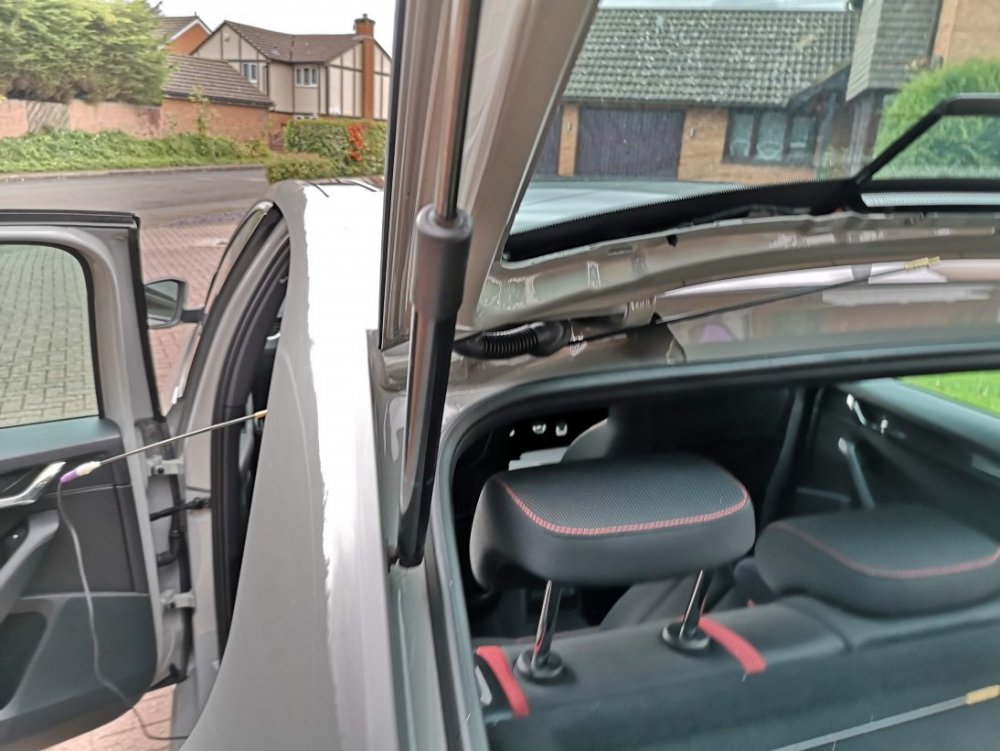
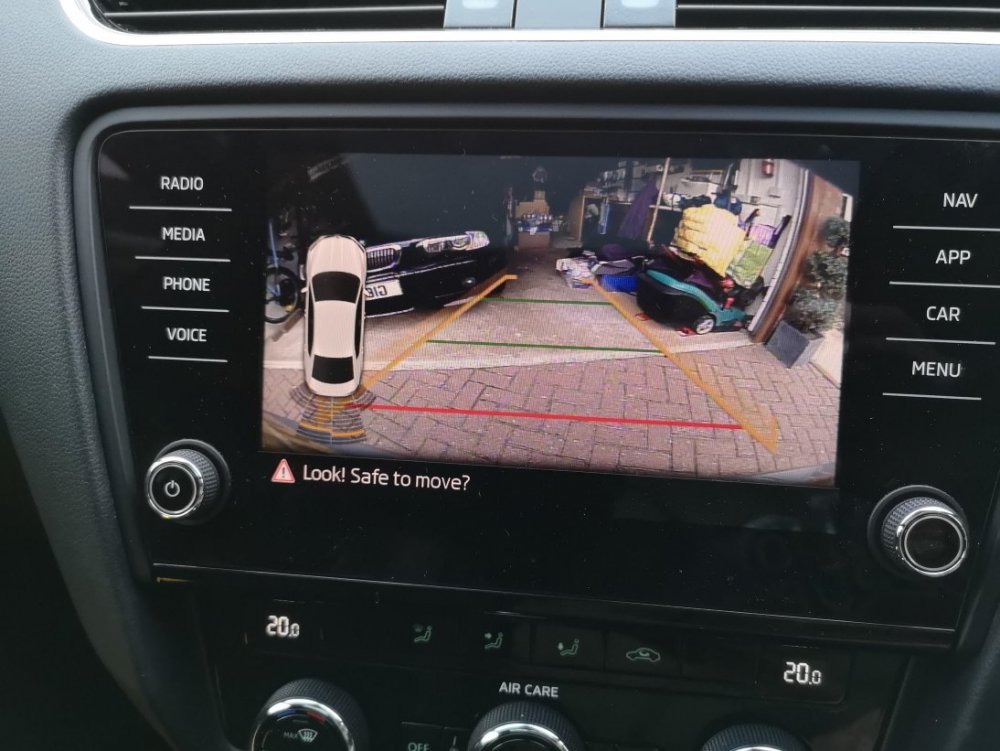
As there seems to be a lot of people asking questions about this lately, I thought I'd put together a quick guide showing how I fitted my reverse camera to a facelift VRS hatchback. They way that i've fitted this will apply to most models, with the key differences being the size of handle (based upon car model year) and whether hatch or estate (but this is just inside trim differences), there may also be wiring loom differences for earlier cars or none VRS models. I've benefited from info from these forums so hopefully this will be useful to others. I am by no means an expert & I won't be able to answer all of your questions, hopefully others will chip in and can add other info as well. First of all, this is the camera that I ordered for my MY 2017 VRS (Camera A/Handle A): https://www.aliexpress.com/item/4000230897829.html?spm=a2g0s.9042311.0.0.40694c4dTEPT93 (link may no longer be valid when you read this so screenshot below) No programming is required for this camera and it supports dynamic reverse guidelines Tools: Trim removal tools would be useful, but otherwise plastic tool that won't mark your car, or screwdrivers or similar with masking tape over the end. A T20 torx head tool is required if you have a hatchback to remove the pulldown boot strap Cable rods are very useful, I couldn't have fitted through the roof lining without. Stereo removal tools unless they come with your camera kit Cable route - I went with an OEM route for my cabling, following existing cables through the roofliner and out to the back as show by the red line below. The camera: The first thing that I did was to check that the boot release switch was working on the new unit - there's no way you want to wire this in and find it is faulty. You'll need to start removing the boot trim to access it. Remove the plastic clips from the lower boot trim- this consists of a few plastic clips which easily pop out with trim remover/screwdriver. There are 8 of these on the hatchback. After that start removing the upper plastic trim, this simply requires forces to release the metal clips. You don't need to remove all of this for now, but it will all need to come off later Remove the lower upholstered trim covering the tailgate. More metal clips - work your way around. You'll also need to remove the pull down strap with the T20 torx head. When this is down you should be able to drop the boot liner which will give access to the boot release handle. This can be awkward to remove, but can be done by pushing in the clip on one on the ends whilst also pushing down on the handle from the inside (ignore the clips along its length) - it should then pop out. Repeat for the other side. Unplug the harness and plug the new handle in - check the release switch works. You can either now push the new handle in until it clips, or leave it out to test the video connection later before fitting. To wire it in Remove the glovebox (open, rock left to right whilst pulling up & you'll hear the bottom clips release. Raise the glovebox lid up and inside the housing and reach in and remove the dampening on the left hand side) Use the stereo release keys to release the multimedia unit. The kit used here comes with a replacement harness that sits between the original one and the media unit & includes the video feed cable. Some people have removed the upper glovebox section to provide more access, be careful not to unplug the airbag connector if you do this. This can be fiddly, but I found the best way was to lie on my back with my head in footwell looking up at the unit from underneath. With the media unit slid fowards this gives access to the harness. It's the large one at the bottom and there is a locking connecting that needs to be pushed backwards to release. Check how it works on your replacement harness. Unplug old harness and plug it in to one end of the new one, push the harness in to the void and plug the new connector block in to the media unit. This took me a while to get it all to fit in. When done you can now test the video feed to the rear camera before your start wiring it in permanently. I took the camera cable over the top of the fusebox cage & out through the side panel I then ran the cable up the A Pillar to the roof lining and all the way to the end. Cable rods were really useful at this point, especially to get around the B pillar , and to go from the end of the roof liner through the cable exit point behind the rubber trunking where the original boot cables are. You can also run the cable in the trim above the sill and work your way back up to the roof lining on the C pillar. When you get to the end of the roof lining you'll need to unclip the rubber gator at the top of the boot so you can get the cable out of the roof liner and in to the boot via this gator. If you install the same way as me you only need to peel the roof liner down a few cm, being careful not to deform or damage it and you'll see the OEM cables behind. Once you've got the cable this far it's a case of feeding it through the rubber gator, up the side of the boot and over to the handle; connect the video cable and tidying up any spare cable. Everything should now be up and running. Retrace your steps to refit your trim. You now have a fully working reverse camera, activated when reverse is selected and with dynamic guidelines. The parking sensor guide now shifts to the left of the screen the same as an OEM reverse camera. I will come back and re-edit this tomorrow and resize pics as it's getting late. I'll tidy up any errors as I see them so please don't jump on me straight away!


-
I can't help you with your engine choice, but I'd recommend looking at Skoda Approved vehicles as they are currently offering 2 years warranty, 2 years MOT cover, 2 years of Skoda breakdown assistance and for £79 you can have a service pack to cover your next 2 services.
-
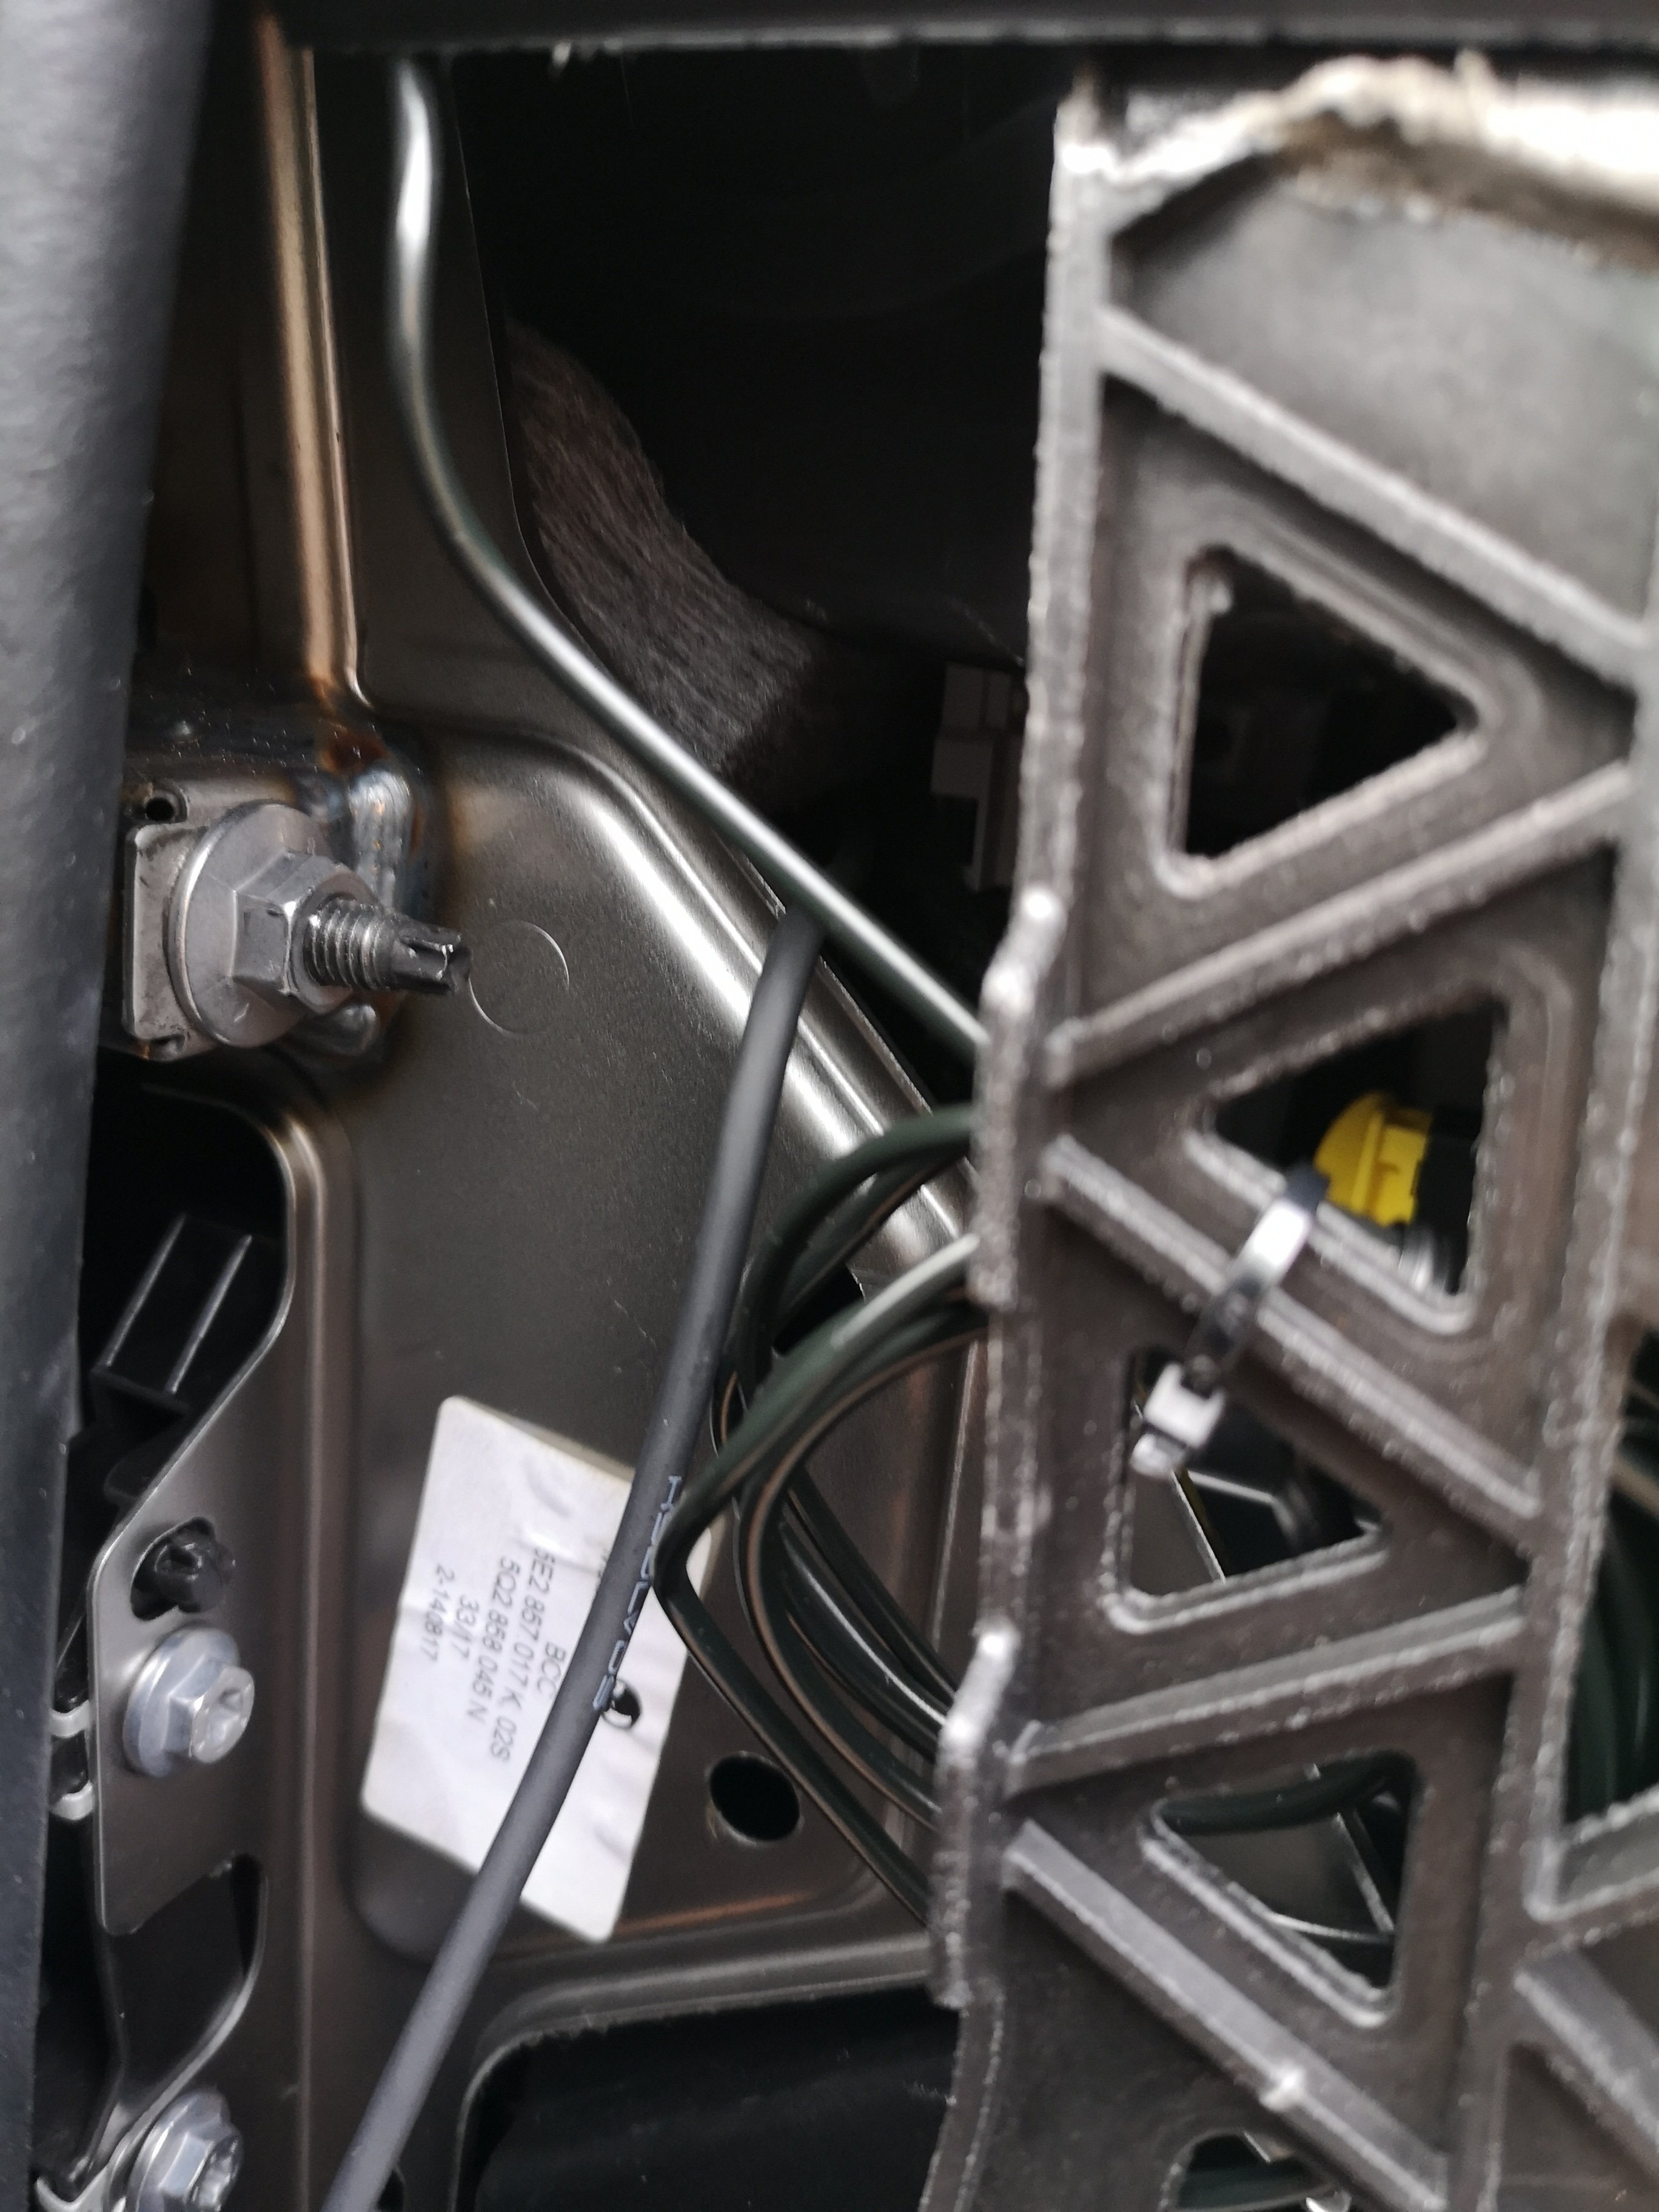
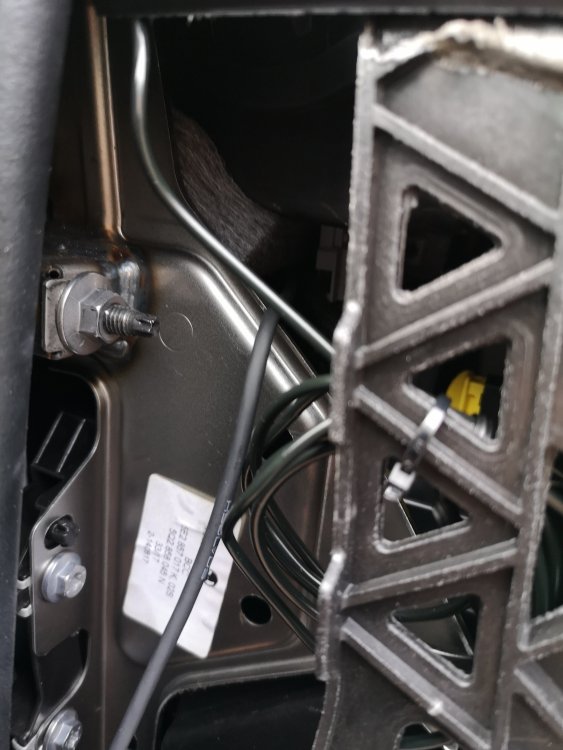
I used one of the nuts attached to the metal cage for a nice solid contact - it's accessed on the side flap next to the glovebox (just out of shot here but had the pic handy)
-
Up and running!

-
Thanks buddy, managed to get it out! Looking at the wiring now!
-
Boot switch to remove - any ideas?! (Camera inside cross beam)

-
Got mine to. Just gotta figure out how to remove the OEM boot switch. The trim is off and it looks like you have to push 6 clips in to release the handle - any pointers welcome! FL hatch
-
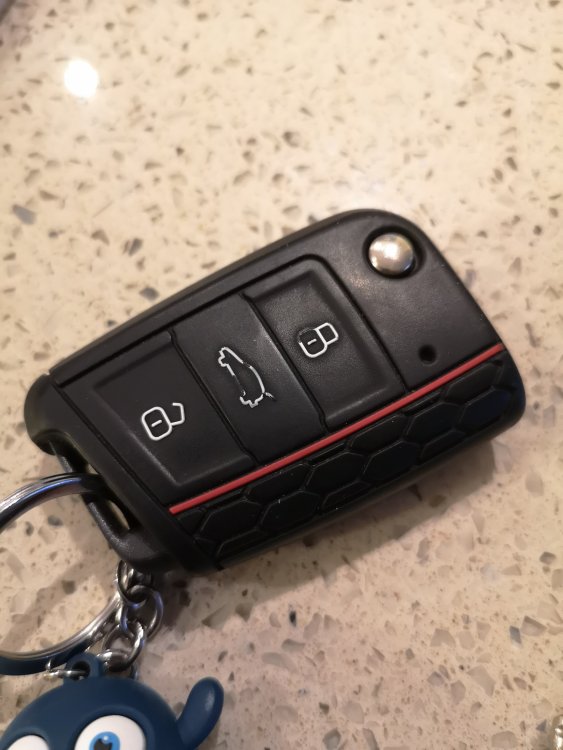
Once you're sorted I use this kind of thing if it helps: https://www.google.com/url?sa=t&source=web&rct=j&url=https://www.ebay.co.uk/b/vw-silicone-key-cover/bn_7024831188&ved=2ahUKEwij4vLCs5HsAhUNTBUIHSssBgMQFjASegQIBBAB&usg=AOvVaw2s39pRMQDc1_ZxsMWhhPF0 You'll find one that fits your fob perfectly, loads of colours and styles
-
The curse of diamond cut alloys! Would a wet sand and re-lacquer work? That's what I'm planning on doing to spot treat mine if and when it happens
-
-
-
I had a mk2 VRS a long time ago and upgraded the RARB to a whiteline one, the change to the handling was nothing short of amazing - much quicker response and turn in. A tyre with a stiffer sidewall also makes a big difference, I can't remember what I had fitted but it was a premium sports tyre, that and the RARB are a great pairing! I did a lot of trackway at the time so can confirm it's great for on road and on track - you notice it straight away. I had the work carried out at Jabbasport in Cambridgeshire about 12 years ago!
-