
Titanium_Man
FREEDOM
-
Joined
-
Last visited
Everything posted by Titanium_Man
-
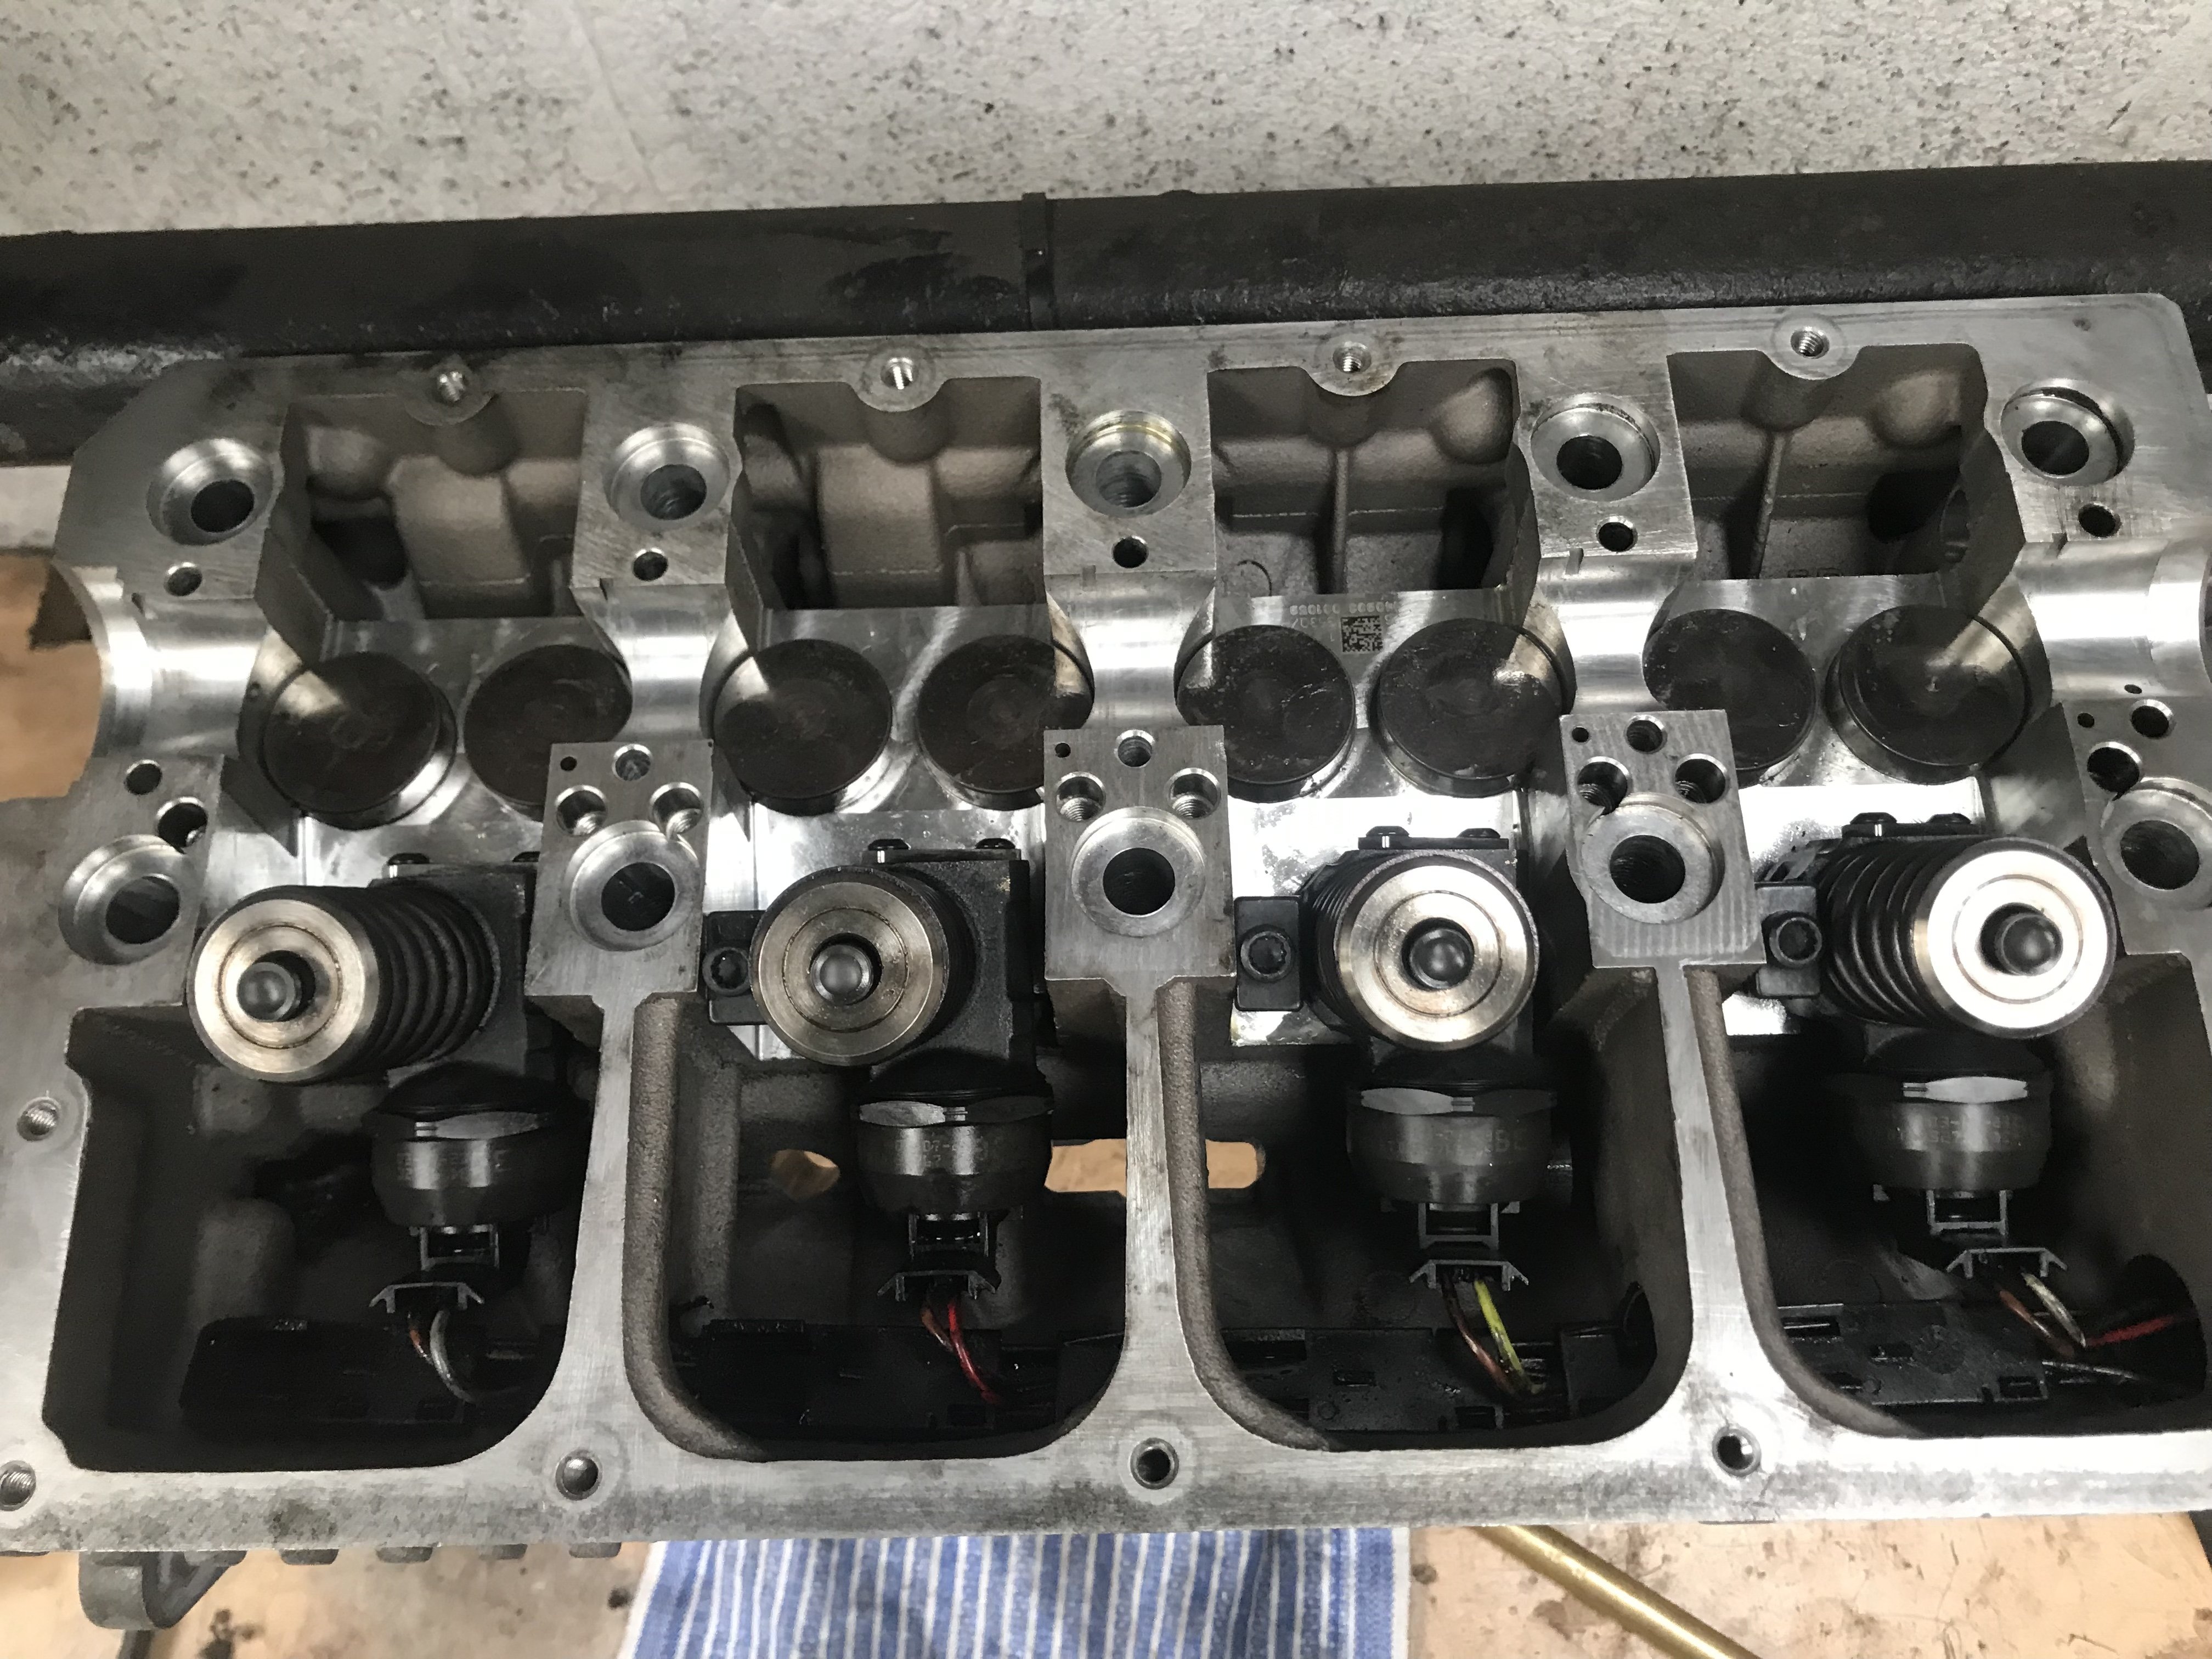
Managed to grab half hour or so on my head after work this evening. Didn’t get a huge amount done, but not trying to rush this. Injectors plugged in, before I forget 😛 Lifters were oiled, then fitted and injector clamp bolts torqued down to 12nm + 270 degrees. Thankfully, I have the used of a very flash and expensive Snap-on torque wrench that makes the last part of tightening very easy Hopefully, I’ll get some more done tomorrow.

-
Aircon deodoriser 👍 https://www.ebay.co.uk/itm/303081767194?mkcid=16&mkevt=1&mkrid=711-127632-2357-0&ssspo=UtC3VvnORl6&sssrc=2349624&ssuid=EtYD1QsGRvq&var=&widget_ver=artemis&media=COPY
-
Ok cool. Think I’ll just replace it then. Gives me an excuse to replace the door rivets with a better solution
-
On a other note, I want to shame myself into sorting out the below bits that need my attention; Feint fluctuation from front brakes Swap out the Powerflex ARB bushes for new, normal ones as there’s slight movement when on the MOT shaker plate - slight knock Drivers window regulator has a broken slider (Is there such thing as a repair kit for this, and if so, these any good?!!?) Repair or replace Weld front crash bar and paint Sort front end alignment Re-gas Aircon and deploy aircon bomb See to the rust rear arches and sills below front seats Take the 5th Spider to work and check if wheel is buckled Replace 1x map light bulb Other bits that need doing; Refurb Brembo 4-pots - keep or sell?! Refurb spare 256 rear callipers & carriers Fit my splitter and sort undertray New ballast for Xenons Pull off rear reg. plate surround and re-centre Paint rear stone guards
-
Cheers dude. Feels nice to be at it again to be honest. Part of me wants to keep the original seats but the sensible side of me says to get them proper mint and sell them. Time will tell what I end up doing with them!
-
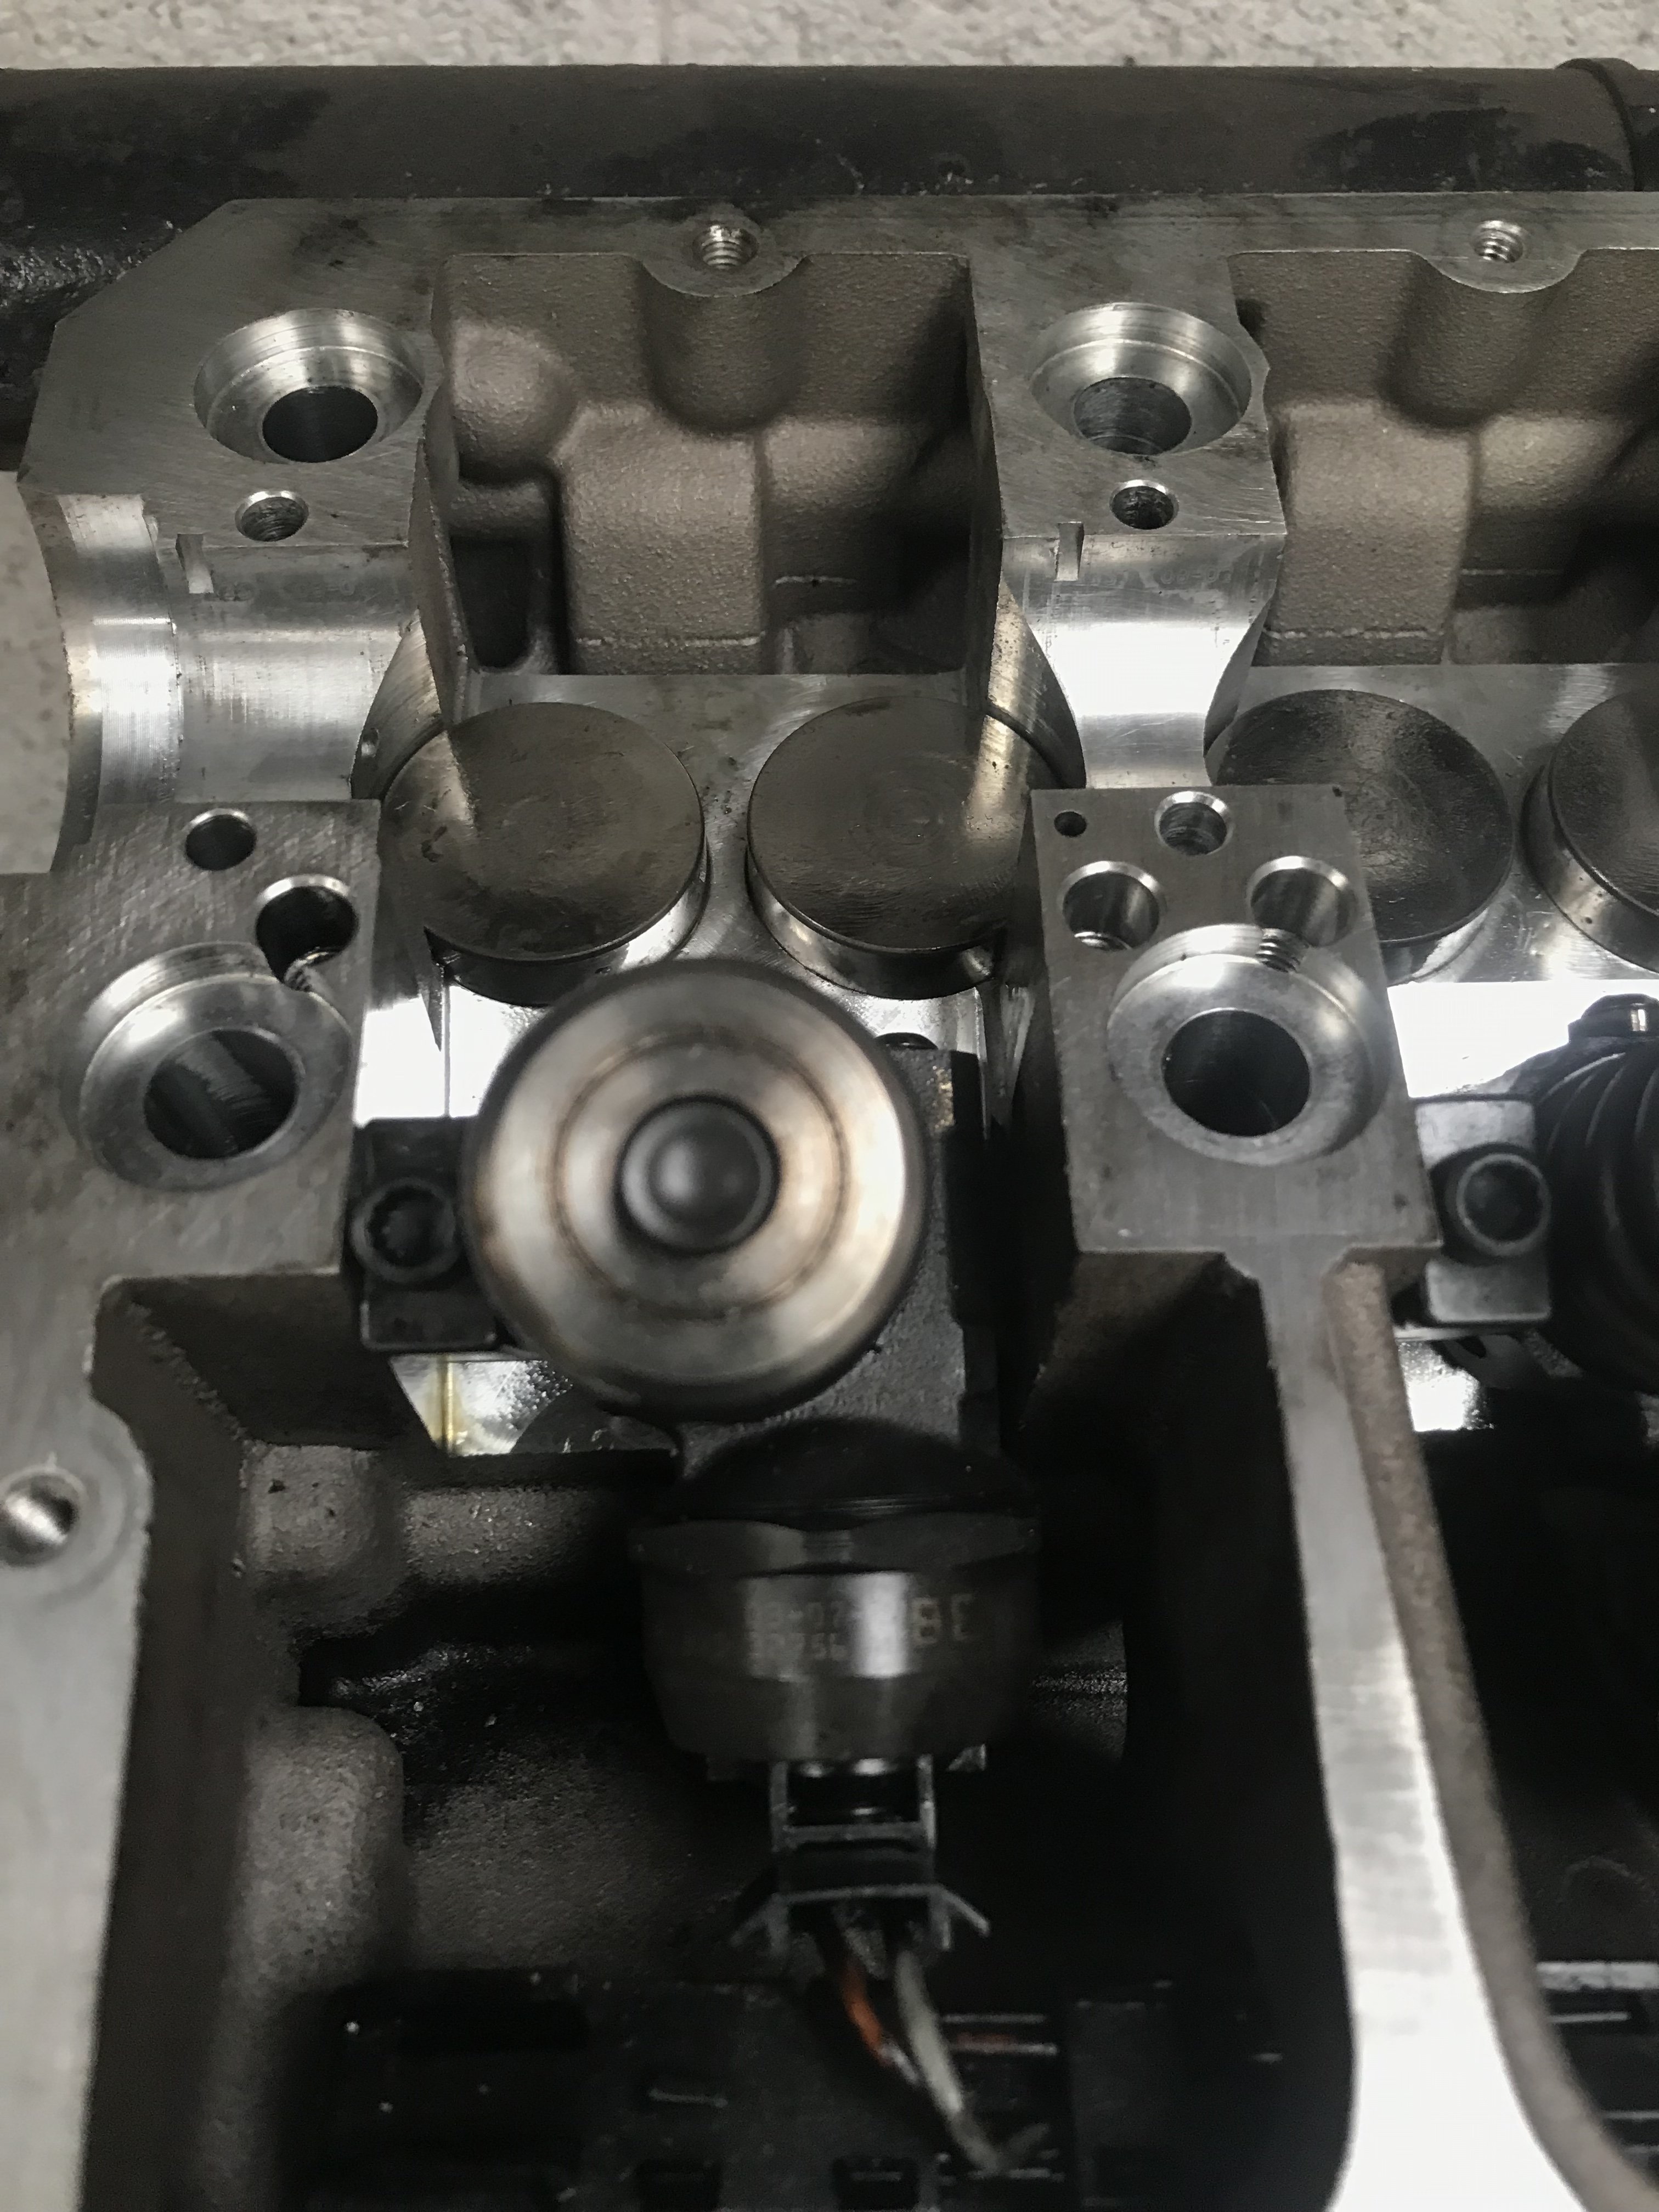
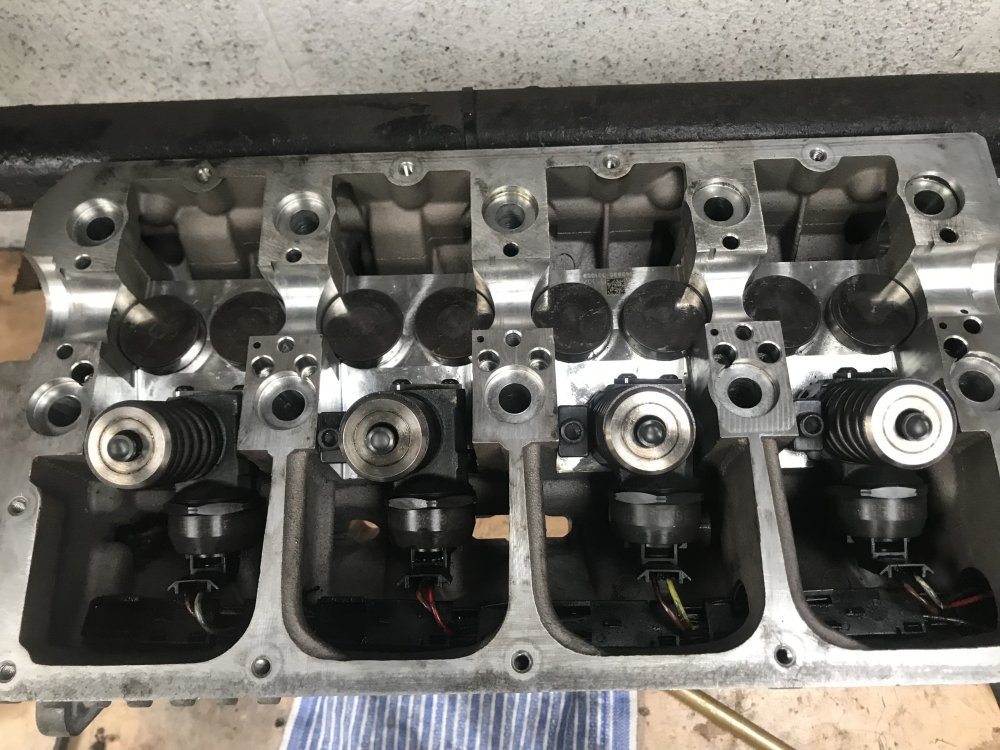
“Another day” was a half hour after work this evening, which would have been last evening if I had found the injector wiring loom! I quickly convinced myself that it found its way into the bag of engine bits I took home last year. Had a decent look at home…… Actually turns out that boy looking is really a thing and was at work all along To start, I put the head on a stand and cleaned up the side of the cylinder head where the loom connector is bolted to with a used scotch cloth, then cleaned up the engine cover bracket with a wire wheel and put a light smear of copper slip on the locating dowel. It didn’t take long to re-feed the wiring loom back into the cylinder head as the retaining clips aren’t working against you when refitting, which was nice! Before pressing home the injectors, I dipped my finger in some fresh oil and lubricated the bore. The injectors were pressed into their home whilst trying to twist at the same time. Once they were fully seated I grabbed the injector clamps and new bolts, fitting only as far as getting a thread on each bolt for now as the computer had been shut down and couldn’t get the torque down info without a big effort. Had just enough time to pick out and replace the small O-ring in the top of the injector and fit the new bishop on to said hole by simply pressing in.
-
Done naff-all on the seats since the above as Zee and I took her mum away for her 76th birthday at the weekend. That said, last Thursday I finally got the head down to the machine shop so to replace the valve guides & get them to check it all over before I replace the head on my daily with this one. I can hear you all now …. Why has it taken so long!! Well, after dismantling the head last year I came to the realisation that my cambelt was due April this year so might as well wait ‘til closer to the time as a year early on a cambelt change seemed like a bit of a waste to me. I got a call the following morning asking me to pop the valve stem seals down to the engine shop as he’ll fit them with the new guides. Managed to pop down during a test drive early afternoon and was surprised to see it was ready for collection 🤘Even fitted the valves and springs for me, which I didn’t ask for and actually wanted to put it all back together myself. As I was in work time and was out on a test drive I couldn’t hang around and chat about the work, which was a shame. Anyway, ended up with a truth-skim, re-angled the seat face on the valves as they were the wrong angle (not exactly sure how that happened. Perhaps I was a little heavy handed cleaning them up in the bench wire wheel?!) injector bores checked as the engine guy has apparently seen many PD130 cylinder heads where the injectors were not torqued correctly causing them to move around damaging the bores, which results in diesel to leak. Was also pressured tested, just to be sure. Once I got back to work I had a spare half hour or so until my next job was dropped off, so I grabbed the injectors from the doner engine to fit the Bosch seal kit….. I could have got a no-name kit for half the price but I didn’t fancy skimping here and have to pull it all apart again. That said, I’m taking a bit of a gamble putting these injectors in as they’ve not been used in 5 or more years, but I need working injectors for later and won’t cost me anything to rips these out if they are fubar other than my time. I even have a spare injector seal kit that came with the head gasket set if I need to refit my current ones So, a nice and easy job….. I used some small Vise grips to remove the copper washer, after spraying them with GT86 and leaving them for 10 minutes. I used a small pick for the rubber O-rings. The washer is actually held in place by a very small ring. These were, of course, replaced with the new ones in the Bosch kit. As you can see, there are two big, black O-rings, one of which has some grey markings on there. All four red rubbers were very brittle and broke on removal but the black ones still felt pretty good. When fitting the new O-rings it is wise to fit the middle / first black with the grey markings on it first because if you try to fit the top, plain black one first it will obviously sit in the middle ring recess. If this happens the temptation would be to grab the small pick to hook it out, which may damage the new O-ring. After replacing all the O-rings, I pushed on the copper washer and the small, metal retaining ring. Once I was finished I was left with three bits from the Bosch seal kit; a small rubber O-ring, the little bishop and the clamp bolt, which were put away for another day.
-
Yup. I’m on my second tailgate as the rust could not be stopped in that exact place on the original 😞
-
I don't think I’ve come across a good quality cv boot that will stretch! All decent ones need the cv joint taken off to fit…. It’s the stretch ones that I’ve personally had issues with.
-
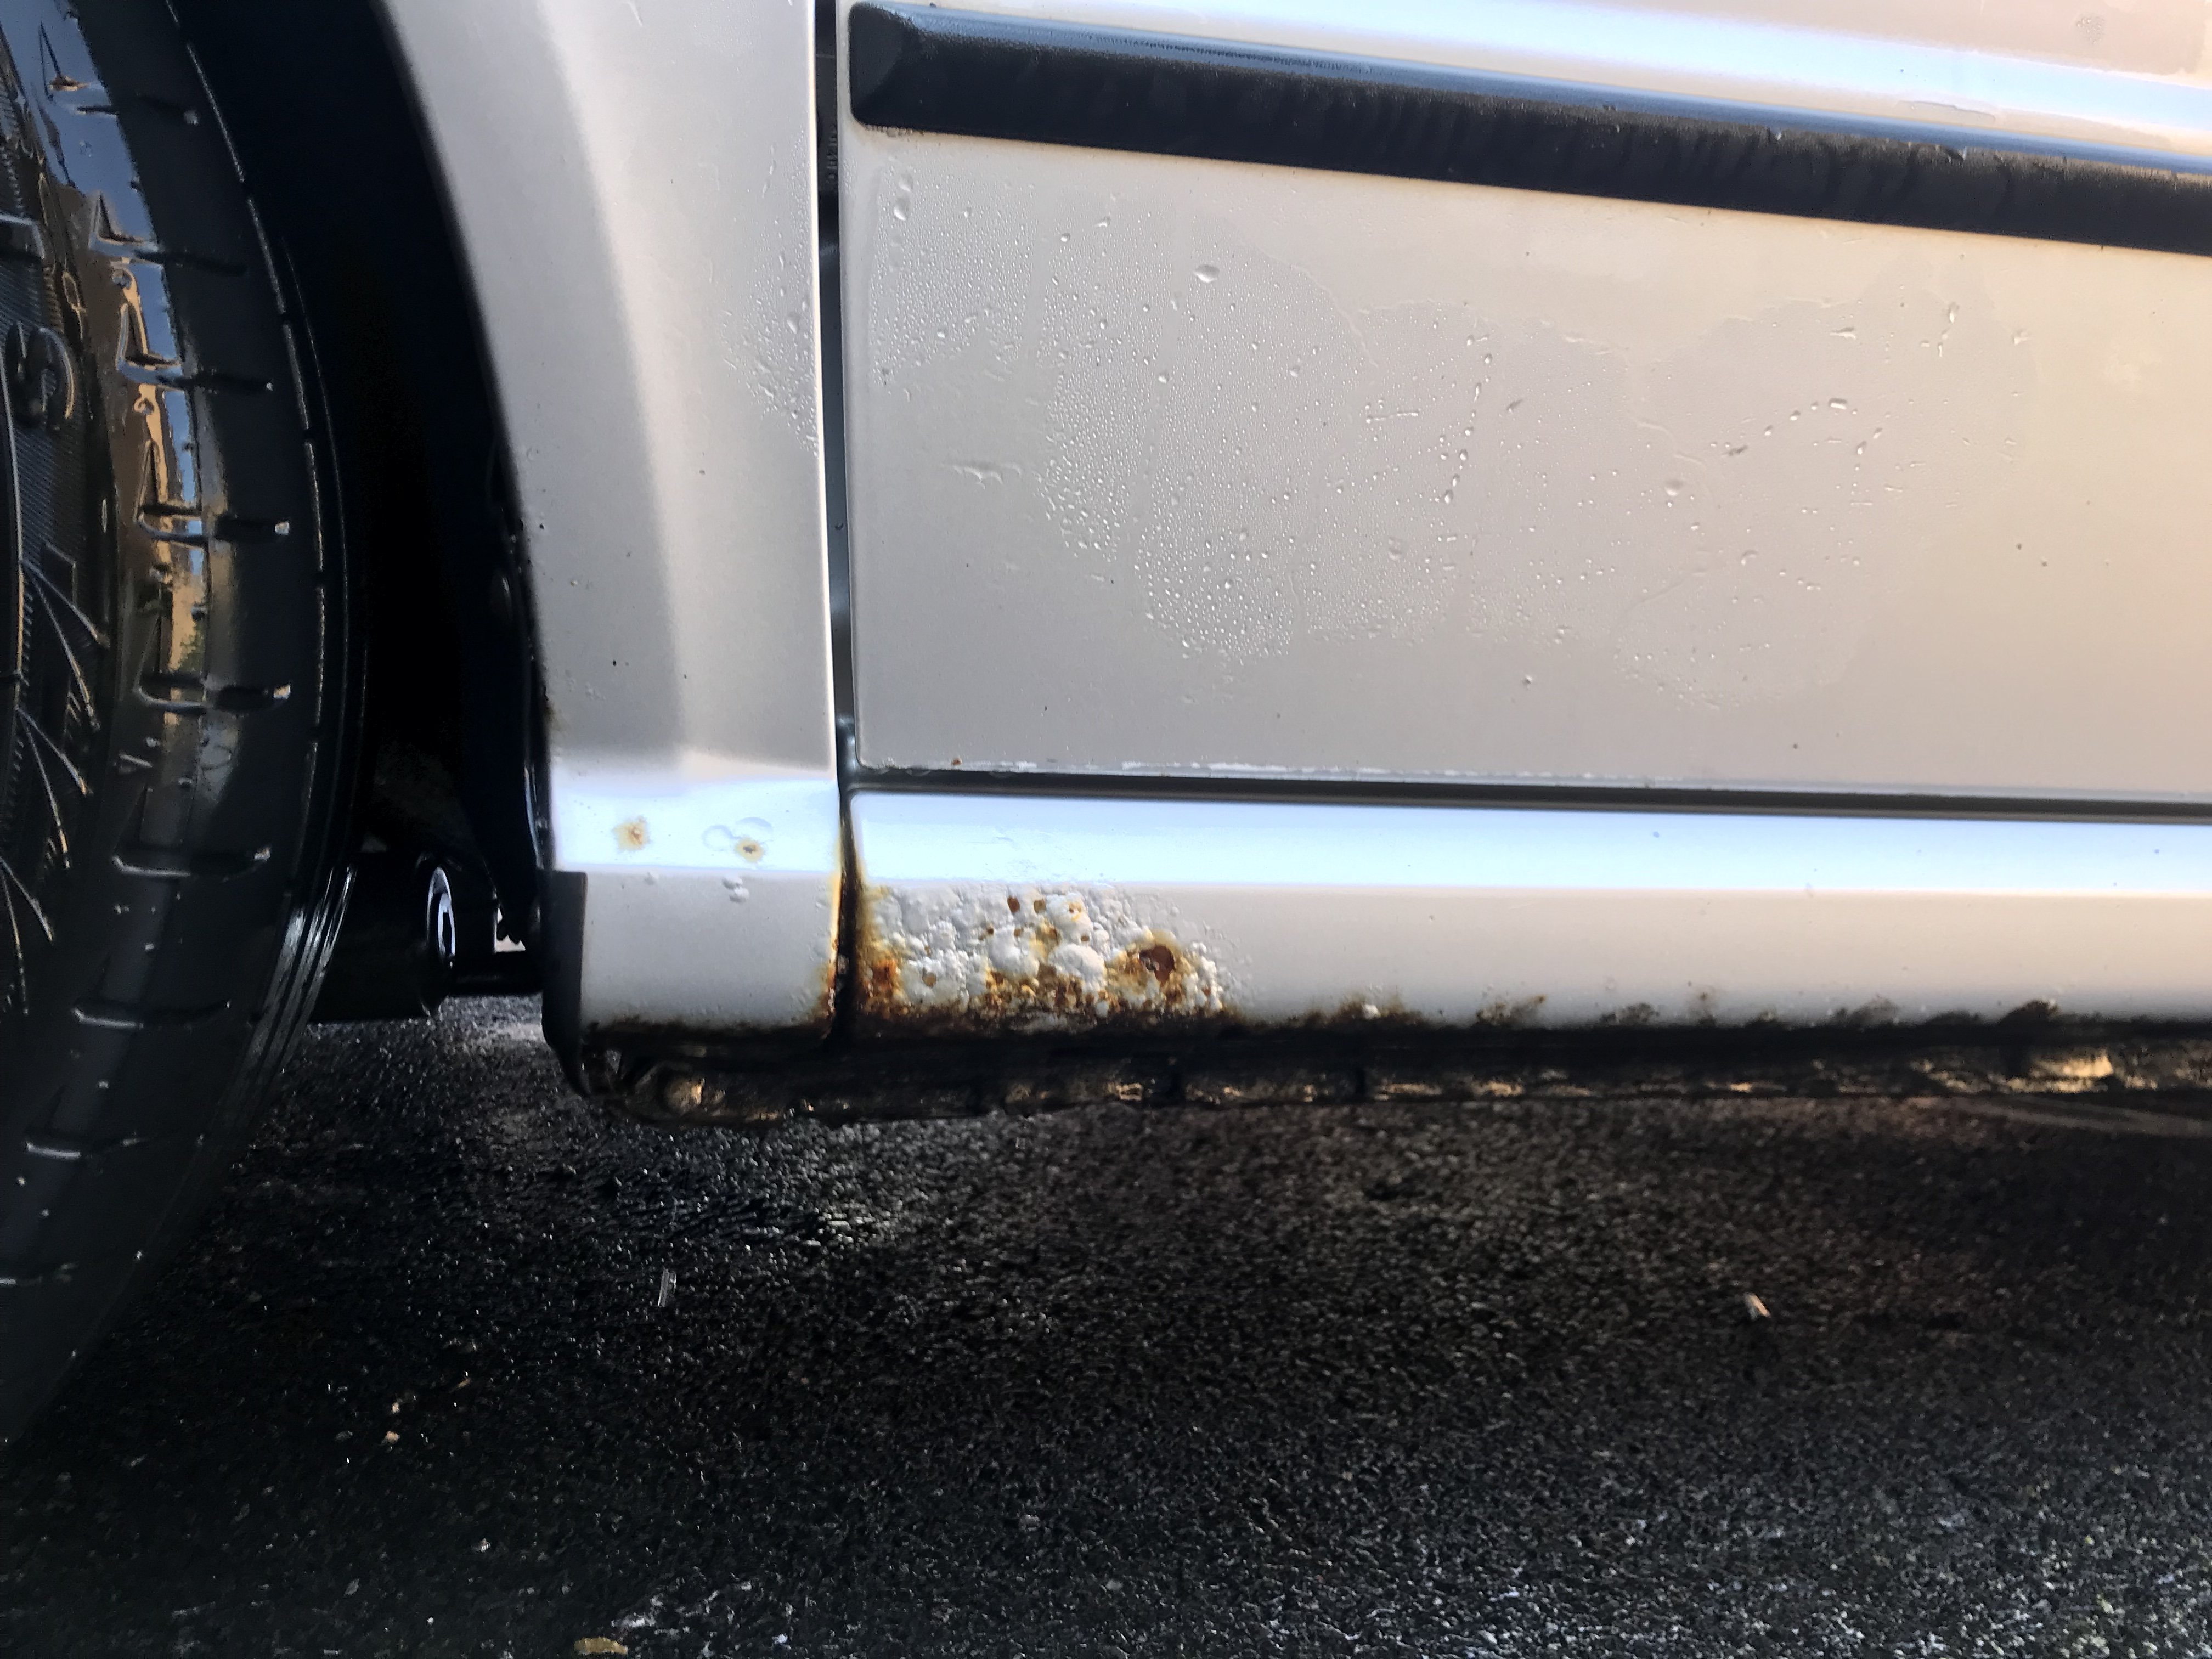
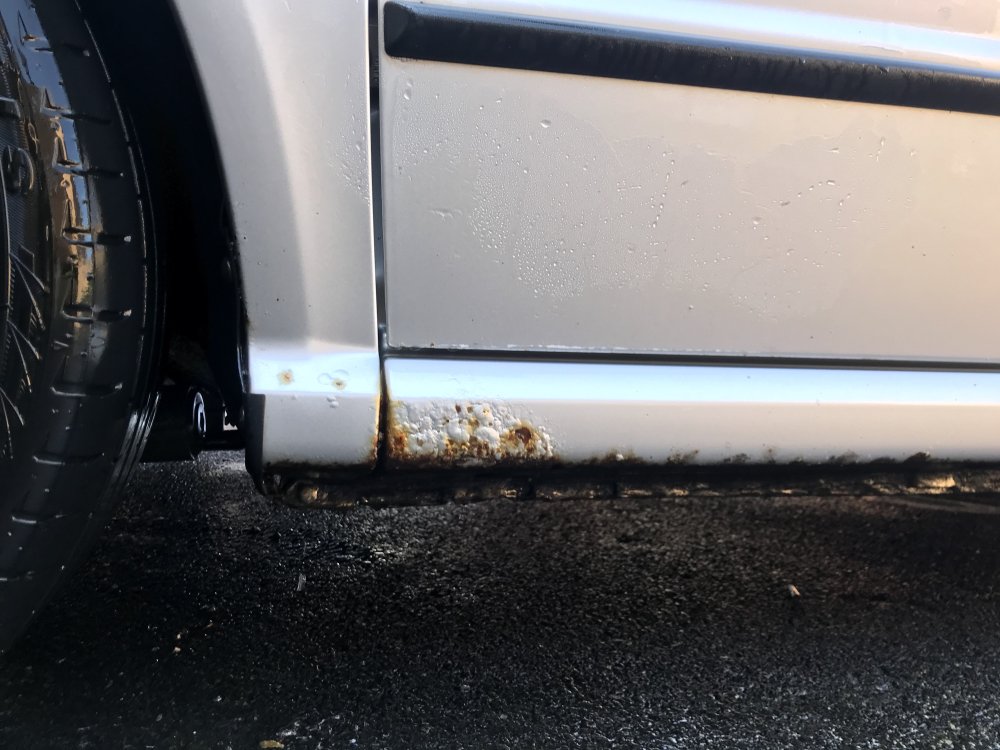
It’s obviously a Fabia thing as my passenger front sill is really bad and needs my attention this summer 😞 It’s so bad that I actively try not to wash my car that often as it makes it more obvious when she’s clean. Funnily enough, the drivers side is much less than this
-
I’m sure there’s no need for my input, but have to reiterate that universal CV boots are not worth the time or money IME. I went through four in six years, all on the same axle because the rubber is so thin and easy to puncture with a small stone. Go and grab a proper boot and a universal one and you’ll immediately see what I mean. I paid £40 cash for each universal boot to be fitted at a garage each time, then decided enough was enough and bought a proper one from TPS for not much more than a fitted universal one and learnt how to change it myself. It’s been in a few years now and I’m confident it will last until my 17 year old motor goes to the scrappy in the sky
-
Been persevering with cleaning the seat in situ rather than remove the covers, which has been driving me mad to be honest! Some serious muck is being pulled from the seat foam ….. but getting there slowly but surely Not gonna lie, the Vax does leak and make a bit of a mess 😛 On a more positive note, my fuel economy has much improved since the exhaust and off-side rear calliper was freed up. Before - 263 miles from the tank and we’ll into the red with just 5 miles showing as remaining until empty; After - 263 miles driving again but fuel gauge over a 1/4 tank and dash showing 120 miles remaining
-
54mpg over a full tank in my 200+ bhp 2005 Fabia, iirc averaging around 68mph
-
You were bang-on the money 👏 Much appreciated.
-
Not gonna lie, I’m not 100% sure or confident that I will be able to get the cover back on exactly as is was before. Your experience has given me more food for thought as I don’t wanna ruin a perfectly usable interior chasing perfection….: especially given I’m still not 100% sure that I’ll be keeping them now 🤗
-
Ah interesting, much appreciated. Those pesky rivets make me not want to see if I can do anything about it, but guess I’ll add it to the list of things that need my attention ☺️
-
Me too…. Mine has been playing up (when it’s half open and I go to close it with the one-touch it’ll close a little bit then open almost fully, plus it’s being a little lazy when closing) these last 12 months so waiting for the inevitable crunch sound, followed by lack of movement of the window 🥴 Had been thinking that I would put my hand in my pocket and get one from TPS or GSF as had read these cheap ones are not up to much, so glad I can benefit from TMB’s recent experience 😇
-
I jack up where the rear wishbone is bolted to the subframe.
-
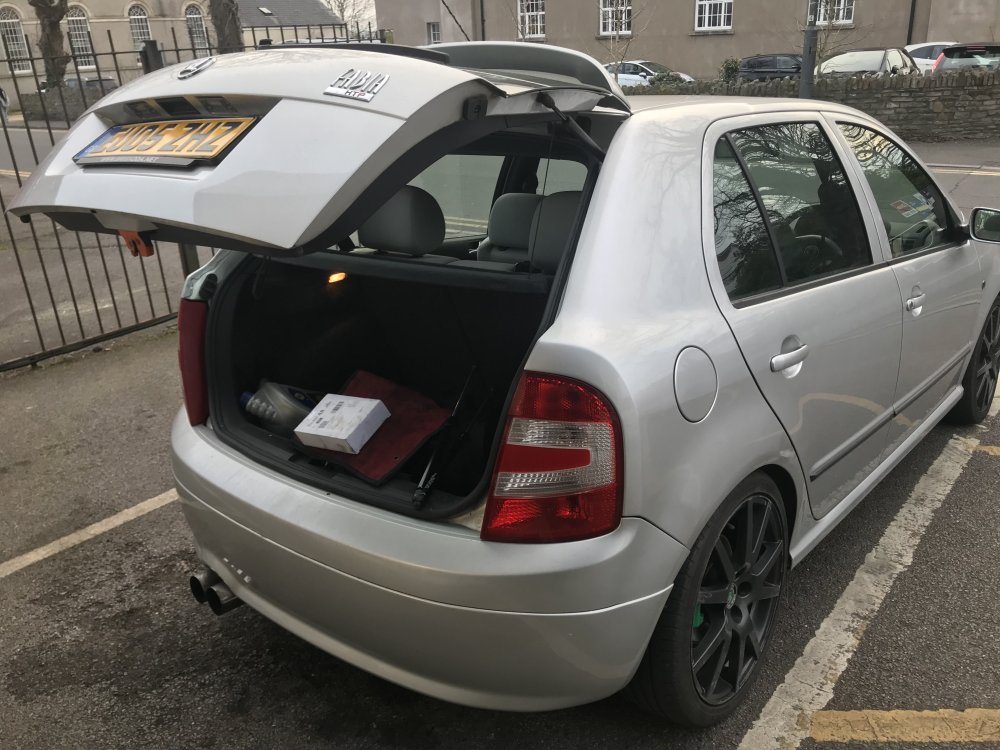
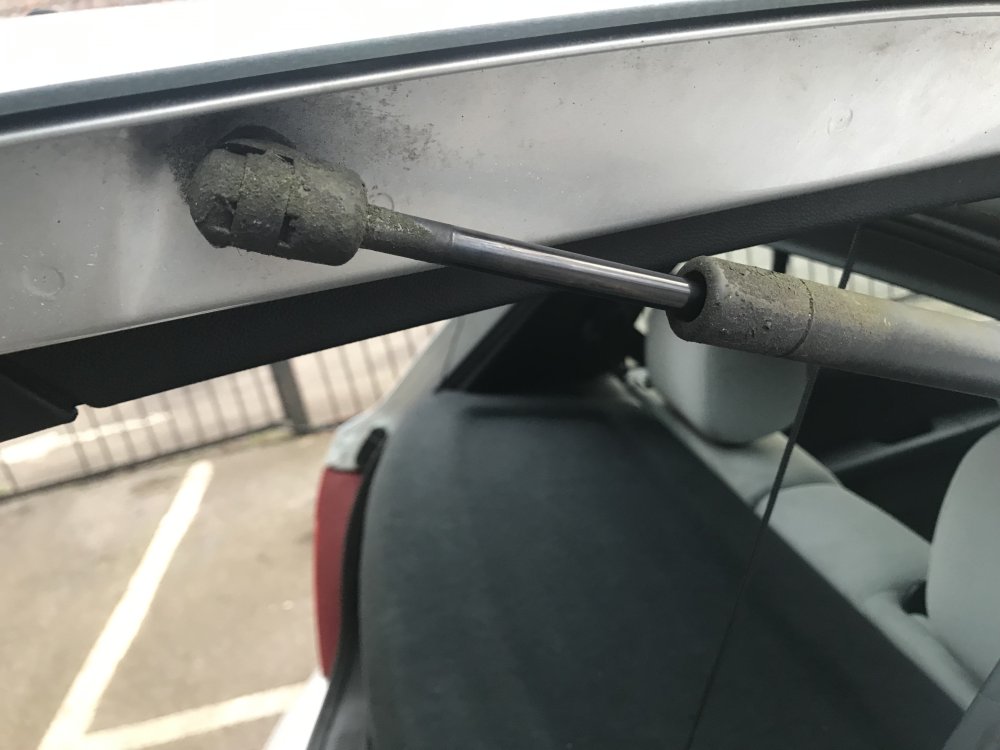
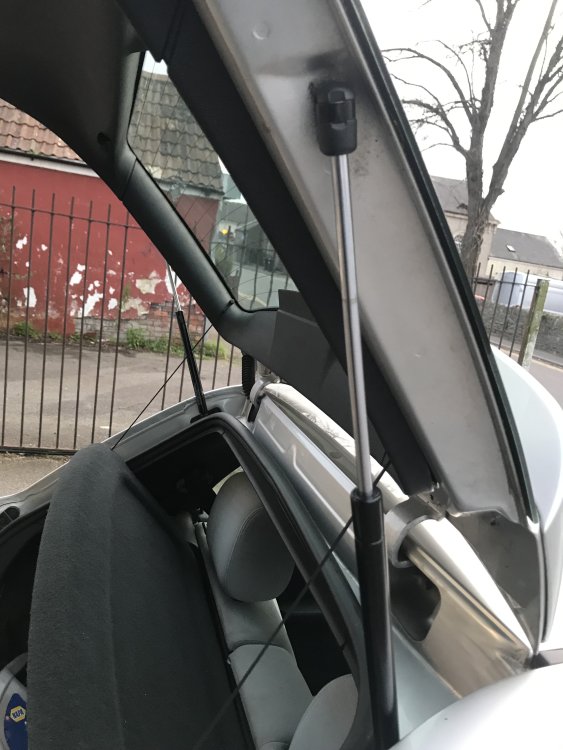
Not much progress with the seats…. Grrrrrrr! It seems like the Vax is pulling what looks like red mud or possibly even rust? out of the foam base, so I’ve decided to take the covers off and put them through the washing machine. Just waiting on some hog-ring pliers and rings to come. I have now managed to replace both of my tailgate struts as mine have been goosed for a wee while now. Found two on EBay for £15 that come with a life-time guarantee. Decided on these as I’ve fitted several different brands from differing motor factors at work and I’ve never really been impressed with how they felt…. A little cheap to be honest. Gotta say, the eBay ones feel really well put together and strong. I also went to replace my passenger door mirror as some **** smashed it, but the numpty seller sent me the drivers side. Not even apology from them! Gonna be few days for another one arrives, from a different seller!

-
Haven’t gotten as much done this week as I had hoped…. Had a heart monitor that I’ve gotta wear for the next 12 > 36 months inserted under my skin on Monday, which was a very weird experience, and was my wedding anniversary on Wednesday. I was very lucky to be trawling Brisky back on the 24th February when a very nice bloke started a thread asking what was the interior from the low mileage Fabia vRS he had just bought his son was worth. These types of threads usually end up as the OP trying to sell their bits without Freedom membership. However, after exchanging messages with @Owainsdad it was clear he wasn’t trying to sell them, he just wanted them to go to a good home as he had managed to pick up an SE interior from elsewhere. What a top bloke After sending me the link to the car he had just bought, I could not only see just how to today they looked, I also spied heated seat controls on the centre console ….. what an unexpected surprise! I was initially settled on removing the seat covers from the new seats and sticking them in the washing machine, then put the new, clean covers on my heated seats, but no need! I popped over to Newport last Saturday and on initial inspection these were in amazing nic, which was as hoped given they came from a 60k car! No tears, fag burns etc in any of the seats, just grubby with the odd darker marks The faces of the rear bench are possibly a little more stained than my current rear seats, but the centre seatbelt has a habit of playing up just before MOT time ….. But it’s the fronts that I need! As you can see, just a bit of work needed to clean them up…. Most importantly; no tear in the drivers seat All I need to do is swap over the seat belts from mine and re-attach the heated seat plugs as these used to have the OEM under seat CD changer that has been removed, so the plugs are just dangling around. Like most, the front door carriers have clearly been leaking on the car these came from ….. ….. I’ll sort the runners out before I install. On Thursday I made a start to the strip down and clean. Having done this many times, I was pretty confident that I could get these pretty much brand new. Plastic trim all removed and ready for a decent clean…. This was nice and easy; removed the several T15 torx screws from underneath, remove the two T15 torx screws from the height adjuster and pull off, then prize off the recliner wheel. Simples When I’ve Vax’d my interior before I used Scotch Guard, scrubbed in with a microfibre then used some Vax carpet cleaner solution to wet-vac the seats. However, I’ve run out of scotch guard and only had some AG interior shampoo to hand. I started to clean up the front headrests To my frustration, despite the addition of the Flash all purpose cleaner to try and get out these grubby marks, they’re not coming out as well as I hoped 😞 Maybe I’m using less of the Vax carpet cleaning solution, maybe the AG shampoo is not as great as people make out. I dunno. So. As a last resort, I brought home some neat Autosmart G101 all purpose cleaner from work yesterday, which is the ****z, and currently waiting for the headrests to dry out to see if they’re any better. The last resort is to remove all the covers and put them in the washing machine as I really want these to be perfect before I put on the Dodo Juice fabric protector and the new seat cover that I’ve bought in an effort to keep them mint! This all seems like a lot of effort, but I can’t stand looking inside my car at the minute
-
-
Quick hoover and wipe down of all plastics complete Even managed to make the very grubby passenger seat much better on the eye… not bad for a 2 minute scrub with a microfibre and all purpose cleaner Also brought some work into the house 😇 🤫 if I’m lucky Zee might not notice! More on these later in the week …..
-
Ah, ok. Thanks for the explanation👍
-
What’s the N75 conversion?!
-
Not done much to my car this week as I’m waiting on some small parts to arrive, but have really enjoyed having my car driving well again after the recent repairs I’ve done. Happy boy That said, the car still sounds a bit blowy, so took a other look at the down pipe repair and no black soot, so not blowing there. Not happy with this I looked back through the pictures I took and did notice the below 😱 …. what looks like a nice crack in the turbo manifold 😞 So I grabbed the KKK turbo that’s sat on my shelf in my garage and it doesn’t look like air could escape from here, but gonna have to take a proper look when I do the head swap & cambelt change in the coming weeks. I did quickly clean up the valves I removed from the head off the doner engine, cleaned more rubbish off the gearbox and that’s about it But, just for a change I was on Brisky the other day at the right time and place to come across some rocking horse p00p, but I’ll just leave the below picture for now….. My car is due it’s bi-annual interior strip and clean, which I’m gonna make a start on once I’ve finished my coffee in a minute …..