.jpg.f3785e57441e9f8c93a0ec812c4445c7.jpg)

D.FYLAKTOS
FREEDOMLite
-
Joined
-
Last visited
Everything posted by D.FYLAKTOS
-
D.FYLAKTOS replied to D.FYLAKTOS's topic in Skoda Favorit, Skoda Felicia, Skoda Fun and Skoda FormanLooks like the 6U0819371D that @Former posted here: https://www.briskoda.net/forums/topic/538952-skoda-felicia-pipes/ but in the end is different (yellow arrow) here as it is now on the car: The stock was one click close to an a/c hose that's why i had a layer of heat insulation patch on it. I don't see any marks on the coolant hose,even VIKA has and i wonder if it's indeed new or a used one in very good condition. 🤨
.jpeg.91ac7cbf148ace3a403c2dd803250d82.jpeg)
.jpeg.299ff05658fbd0d0a1735b8454c6fbb6.jpeg)
.jpg.df44ac96eb4fed55cf46487b4e6c9c66.jpg)
.jpg.d211348c98da77f7df68f98d8ff7174f.jpg)
-
D.FYLAKTOS replied to D.FYLAKTOS's topic in Skoda Favorit, Skoda Felicia, Skoda Fun and Skoda FormanThe problems continued,while preparing my car for Summer vacations i asked from my 2nd mechanic a brake fluid change and a thoroughly check ''below'' (steering wheel-CV boots-wheel bearing etc). The 2nd mechanic is in some points better that the 1st one but has two drawbacks, 1st even when finishes the job does not call you immediately to pick it up but the next day's morning and some times changes parts which thinks that will cause you problems without call you first. Does good job,clean,not sloppy but... I left the car early in the morning with the idea that i will take it next day,at noon i saw it parked outside the repair-shop,entered asked him "everything OK i changed a hose plus the coolant". I was surprised because he didn't informed me first (e.g i could have a spare coolant hose and a plastic can of my preferable coolant mixture) and then showed my the coolant hose and the coolant,he put G12 plus although i had G12 (i didn't liked the G12+ from previous test). 😡 At least he used the same brand that i like, the HEPU. Here is the original coolant hose, 26 years old.
.jpg.fdf5cd63691d522b1f341b4883576dd4.jpg)
.jpg.014188e0ce66127acde74e60215fc869.jpg)
.jpg.e853a37af066f3ba6c9fb401a8bdbbba.jpg)
-
After lot of effort the old guy came out and the new came in. The old was from 9 of 2020 so lasted 5 years and 9 months, i could charge it one more time and last exactly 6 years but since the Summer vacations are approaching i didn't want to risk it. I had the chance to save ''some battery'' at Winters while i am on work but from the other hand at Summers the car was outside many days with alarm On without to use it (due to heat and traffic i used a small motorcycle to go to work). A realistic life limit for this battery i think is 4,5 years.
.jpg.219e4e92df7a802311275af35426583a.jpg)
.jpg.8a4514a3b718fa248f9fb6b451f41f9d.jpg)
.jpg.f099bd9f366437e6f719bd89688486af.jpg)
-
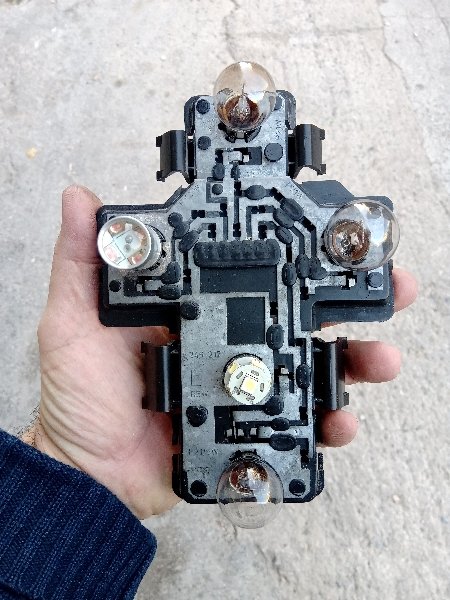
D.FYLAKTOS replied to D.FYLAKTOS's topic in Skoda Favorit, Skoda Felicia, Skoda Fun and Skoda FormanI found a photo from mine few months ago. Many years back i installed a cheap led bulb for Reverse (nothing special) and later a Led bulb for turn signal, that's it's very bright !
-
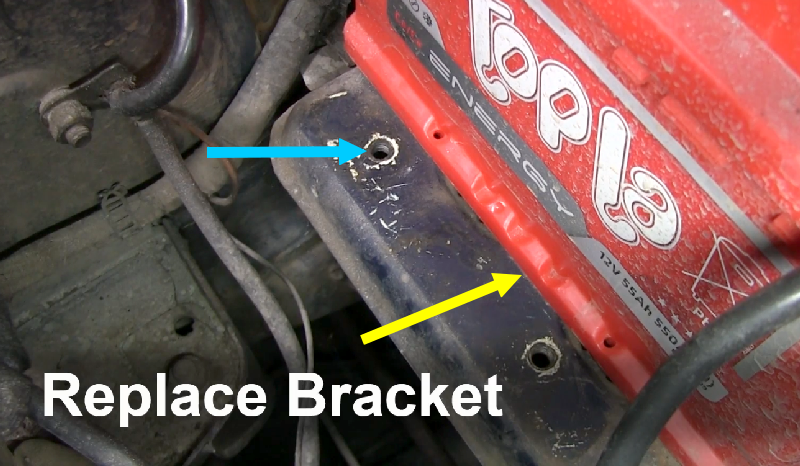
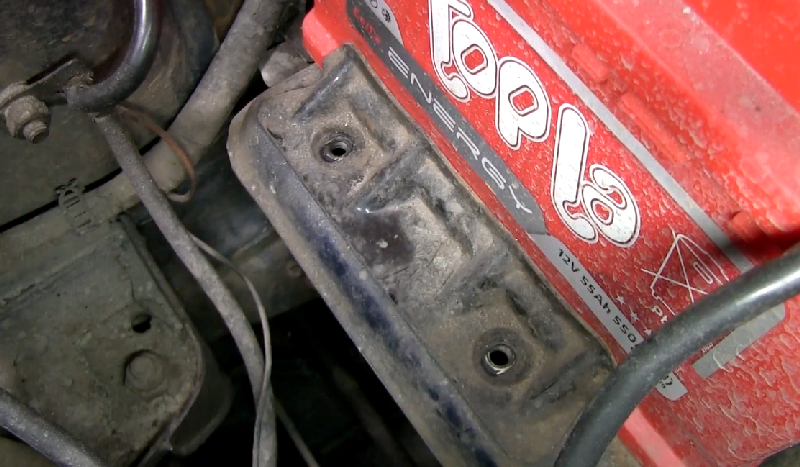
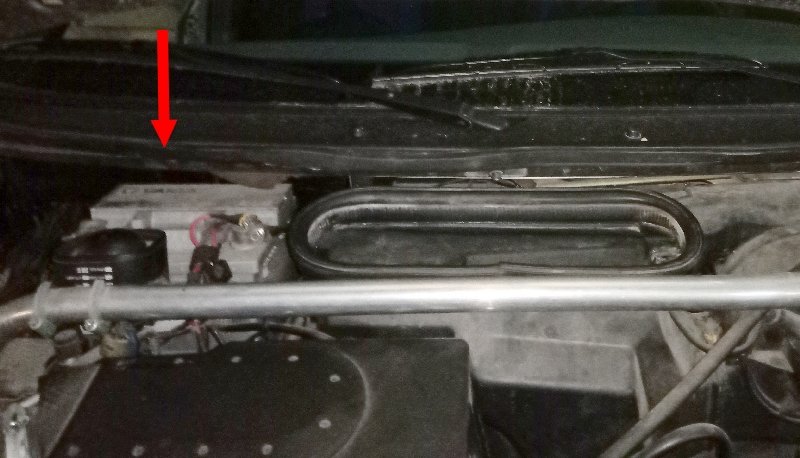
No need to open a new thread for this reason that's why i will post here no matter in the existing is very old. CarCareKioskBattery Replacement: 1997 Skoda Felicia LXi 1.3L 4 Cyl. https://d2n97g4vasjwsk.cloudfront.net/1997%20Skoda%20Felicia%20LXi%201.3L%204%20Cyl.%2FBattery%20Replace.mp4 Things are easy when there is no alarm unit and not strut brace, if those 2 exist then it's a nightmare. I face the same situation every time a change the battery, the strut brace makes me to bent the battery end pull it out forcing a bit the black plastic cover of the wind shield wipers (red arrow). Another 2 issues are: 1) The battery is not very stable and has some mm tolerance of moving that's why i put a piece of adhesive hard felt for furniture (yellow arrow) long as the battery and in the spot that the battery ''sits'' on it's place and then i tighten the bolts. Then the bracket holds the battery more steady. 2) After so many screw-unscrew efforts the thread starts showing signs of wear (blue arrow) so in the next time i had to make a small repair on this.
-
OK, "case closed" otherwise the @somean49 thread will ruined.
-
So it's time for a competition "who's alarm battery lasts longer from which brand-model and which location-enviroment temperature". This will take some years to complete...
-
Mine is in the alarm for 25 years and still working.
-
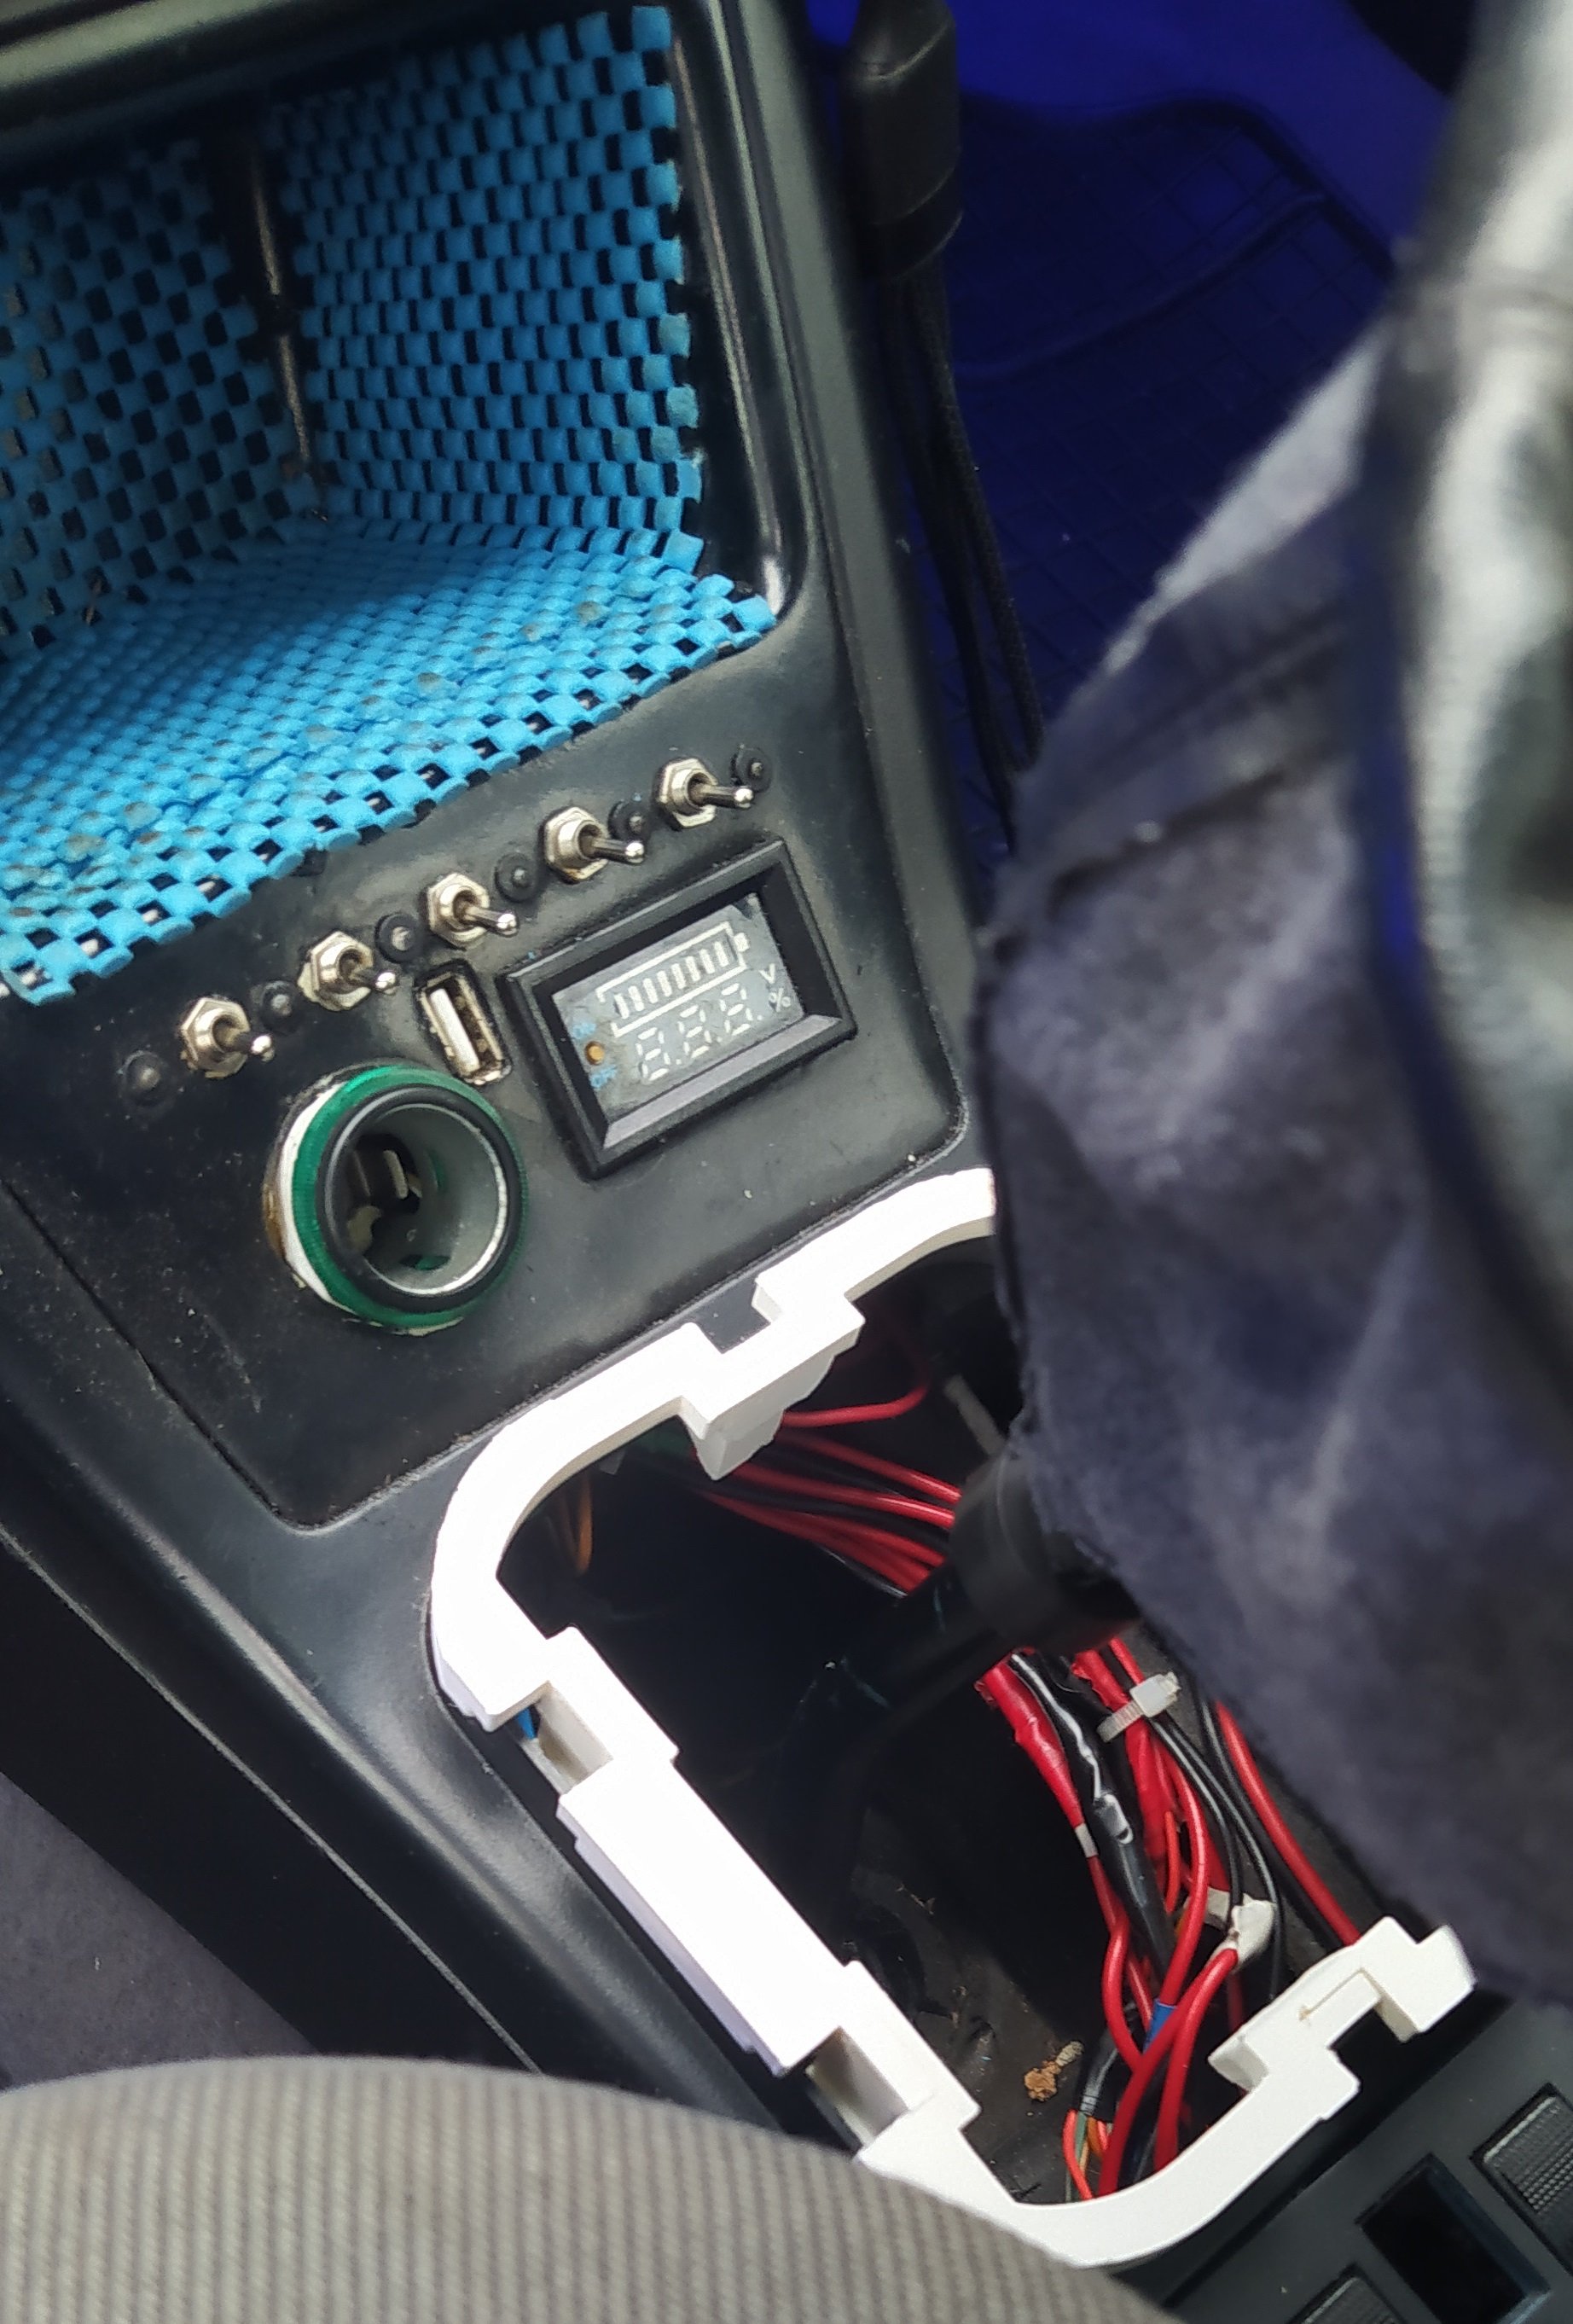
D.FYLAKTOS replied to D.FYLAKTOS's topic in Skoda Favorit, Skoda Felicia, Skoda Fun and Skoda FormanI began with the 2 round switches, the door-lock switch and one gauge and here it is finished: meanwhile the car was with the console full of marked cables and dust: I use a cordless hand vacuum to remove the dust and i telephoned to the car-electrician for an appointment to fit it, he said after 10 days with no charge due to the assistant's fault.
.jpg.cfcd5e6ebfd8ec4ccf4746497bdf3e59.jpg)
.jpg.e1c6ce45bd7f412f1174062532cef293.jpg)
.jpg.aaf64798eedac606856defd5e1aeed6b.jpg)
-
D.FYLAKTOS replied to D.FYLAKTOS's topic in Skoda Favorit, Skoda Felicia, Skoda Fun and Skoda FormanAfter few days the second car-electrician called me,he asked for an apology and admitted that the assistant tried 2 times but failed to paint it properly. When i got that insert in my hand i saw the terrible job, the paint was fainting even by touch and the lacquer wasn't good so i added more slander words for that assistant. The only solution was to take that insert and go to a car-painter to do it but i knew that this could take more days of searching because those paint-shops will always say ''i have no time for this" ,so i decide to take the whole case in my hands because as we say here in GR "the wolf has a robust neck because it does everything by itself". I sandpaper the item many times from low to high grit till it get very smooth like a baby’s skin. Looks bad but it was very soft in touch, i did it like this because i decide to use Leatherette. I went ton an Upholstery shop (not for cars because i knew they will not help me for such small part) which i am customer for House items (chairs-couch etc) and i asked for his help, he agreed to do it. I asked from him to do not cut anything and leave this to me, just apply the Leatherette and leave the rest to me. After one day he called me that the item is OK to collect it, i glued the corners so the Λ shape to be round and with a razor knife i start very carefully to cut the material (leaving some as spare) not exactly in the contour of each gauge.
.jpg.fccd1b9b54e60bfabbf7b1c03c7272eb.jpg)
.jpg.5da416800f713370288441535247b255.jpg)
.jpg.e47c699524c2ae9ad4cb7fc36db3caef.jpg)
-
No does not make it stop, it will keep sounding till the battery of the alarm drained. That's why there is a key hole in the side of the alarm's box and a set of 2 keys provided after the alarm installation. I think that the battery inside the alarm is Li-ion and lasts many-many years.
-
D.FYLAKTOS replied to D.FYLAKTOS's topic in Skoda Favorit, Skoda Felicia, Skoda Fun and Skoda FormanCorrection: 360° degrees, in 180° degrees does not fit (i learn this many years ago). The first years i didn't had this issue, after messing with console modifications-extra lights etc this phenomenon came-up so every time i finish a modification i know that one of these bulbs needs to be removed-make a full twist and installed back. Why this happens? I don't know...
-
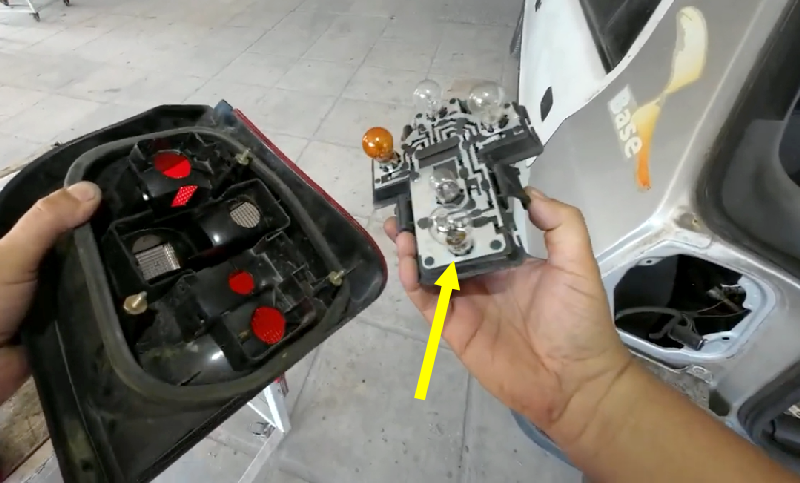
D.FYLAKTOS replied to D.FYLAKTOS's topic in Skoda Favorit, Skoda Felicia, Skoda Fun and Skoda FormanAs for the record: There is a weird thing that happens every (i mean it every single time) had been a modification to my car's electrical system. After this the bulb of the rear brake light (right or left) does not work,looks like it' burned. It's position is where the arrow points (photo from internet). The first 2 times i thought that some sort of short circuit happened but the 3rd time i discover that the solution is this: Take off the bulb,turn it 180° degrees and put it back,it works fine as it should be ! Why this happens? I don't know but after every major electrical repair or installation i look the mirror while parking and i see only one bulb lighting from the reflection to the wall, then i know the drill.
-
D.FYLAKTOS replied to D.FYLAKTOS's topic in Skoda Favorit, Skoda Felicia, Skoda Fun and Skoda FormanHe treated that insert like a stone which you can drop-drag anywhere,no respect at all for the customer's item ! Take a look how was in the past,in excellent condition. Look how it became due to that stupid assistant. I was very upset-angry and disappointed,i made a complain to the repair-shop owner and he promised that he would paint that insert in the next appointment which was almost 2 week later because "he was busy".
.jpg.a7e6e5f97700897078561765a0bb807f.jpg)
.thumb.jpg.44a3e6ea2592398ec5932e019f3488b1.jpg)
.jpg.13574dbd29d0fec1e55541569df00aae.jpg)
-
D.FYLAKTOS replied to D.FYLAKTOS's topic in Skoda Favorit, Skoda Felicia, Skoda Fun and Skoda FormanWhen he send me the first photos via Viber my first thought was ''Oh NO,he destroyed my console" and as you can image lot of slander words came out from my mouth. He hired an assistance which was Newbie in the job, obviously nobody supervised him and he didn't paid attention almost to anything ! The scratches and a crack on that insert are visible. Dust inside the cable space plus scratches. Extra cracks above-around the gauges ! I wonder that @#%&* 🤬 didn't saw the damages that he caused? 👿
.jpg.26e12106c7f4f0f252cd58a7b87b0a81.jpg)
.jpg.4c30947d8d7a6d6b4e1e60b5eb584db8.jpg)
.jpg.2aaf8f70c70387dc484f15b5b16cedbc.jpg)
.jpg.e63a328cb79dfac03200d6e630fa8a30.jpg)
.jpg.bbeba6fe6266ad4d144ef2522cf31f5e.jpg)
-
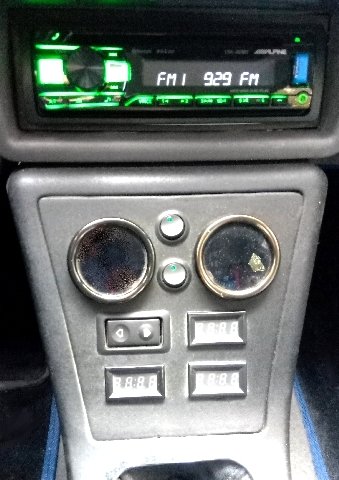
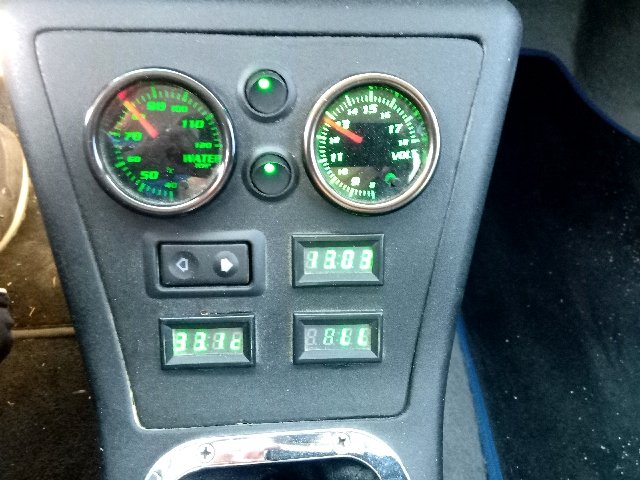
D.FYLAKTOS replied to D.FYLAKTOS's topic in Skoda Favorit, Skoda Felicia, Skoda Fun and Skoda FormanThere was a need for a button to lock the doors at night and since wasn't practical to press-pull the door safety i bought and asked for install a central lock switch. The design of the console changed a bit,initially was this but i didn't liked it. I ordered a new switch and became like this: Then the Age stroke,my vision got worst and i couldn't read the digital gauges at first glance,i had to bent my head and this was dangerous while driving so i bought a new set of gauges a bit bigger (for better reading) but this meant a lot of trim work and dust inside the car (especially in the cables behind) so i went the car to the repair-shop for the car-electrician to remove all the connections,get out the console and make the holes bigger in his bench. If i knew the ending i would rather ''take the hit'' to do it my self because....
.jpg.fd8a2fa08f56114a9097245d12e4cf13.jpg)
.jpg.1f93e5fdc447d80b34a8d3ba661b1af7.jpg)
-
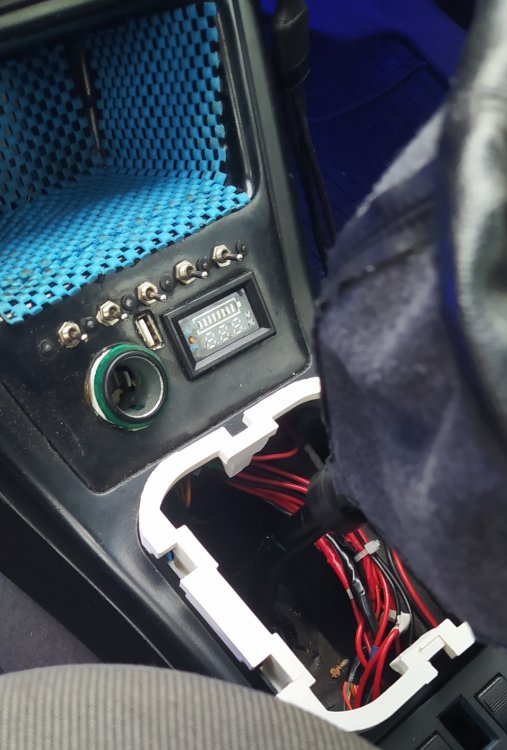
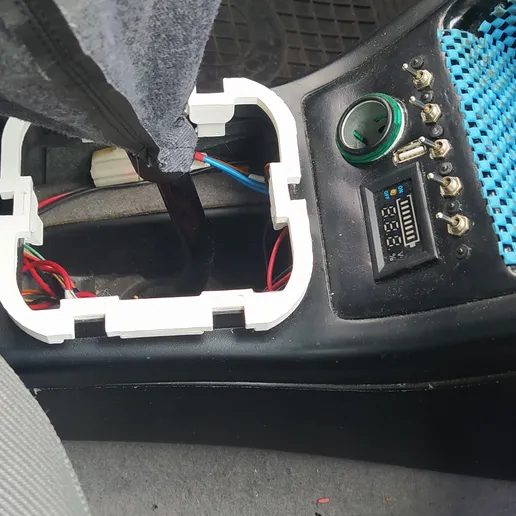
D.FYLAKTOS replied to D.FYLAKTOS's topic in Skoda Favorit, Skoda Felicia, Skoda Fun and Skoda FormanThe first series of 4 switches (green colour) was like this: After many years two of them start to don't work properly so i change them with a bit different design (white colour, couldn't find them in Green). I didn't want to do a project like this: Age, i will explain it in the next post.

-
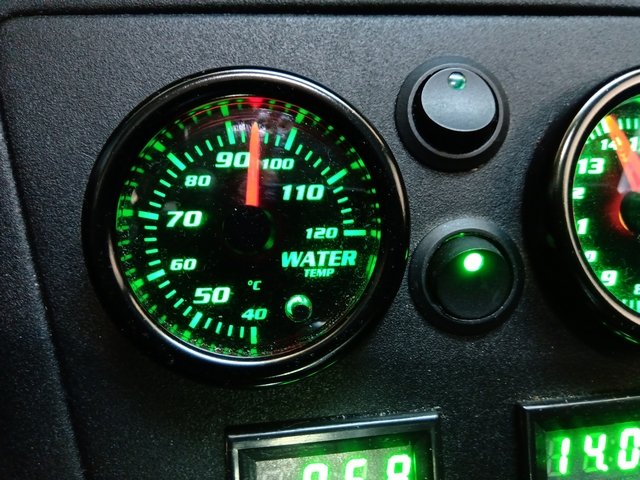
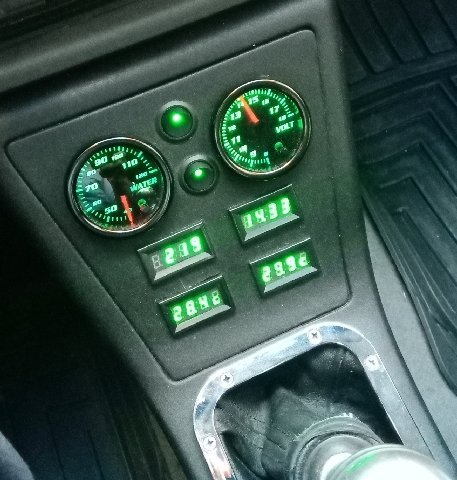
D.FYLAKTOS replied to D.FYLAKTOS's topic in Skoda Favorit, Skoda Felicia, Skoda Fun and Skoda FormanI bought 4 parallelogram shape digital gauges and 2 round shape analogue gauges and kept them in the self for years because i couldn't find anyone to install them. I was disappointed and i thought that all were over till one day i found via internet a shop which worked mainly with ICE systems,was far away from home but when i talk to him on the phone he agreed to make a new ''insert'' in the console. I remove it from the car,put it in a bag and went to his shop,we agreed for the design and after few days i took the new console in my hands,some sort of MDF wood with resin and in black mat paint. I start a new search for a car-electrician to make the harness-connections etc and finally i found a non local which said he can do it,meanwhile the situation in the console was this: After 2 days the console was ready: I was very happy and kept it for years till a new need came-up (central lock button) and the wear of time (me and the material) stroke.
.jpg.68c7102e98a9507f8539c3ff44129610.jpg)
.jpg.b1be45207d1f7c990b8540b193de8ecb.jpg)
-
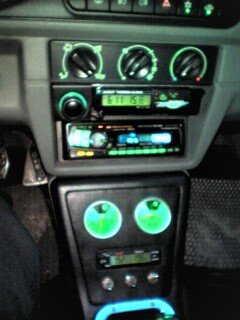
D.FYLAKTOS replied to D.FYLAKTOS's topic in Skoda Favorit, Skoda Felicia, Skoda Fun and Skoda FormanI made a rough draft and gave it to the car-electrician, after few days he called and show me the results. I forgot to say that before this i went to the local Skoda mechanic which installed the other 2 switches in the console for the rear windows so my Felicia had 4 electric windows. I stonished from the results, was unique to my eyes because i had no seen a Felicia like this. I kept this project for years, meanwhile i was member in auto-forums and start buying items from ebay-aliexpress and when wear signs start to show up in the leatherette i decide to change the console. The previous car-electrician was moved,i had no contact and i was very sad because any local car-electrician was asking to do the new project the answer was (more or less) that: ''does not worth it-i can't do things like this, will take time-i don't bother with old cars-no need to do it-i am very busy to lose time to work with a project like this" etc.
.JPG.d1b63480939d0b8323a5caffa8b7838f.JPG)
.jpg.d31496754d4385f5e7757f6cf9444ad3.jpg)
-
D.FYLAKTOS replied to D.FYLAKTOS's topic in Skoda Favorit, Skoda Felicia, Skoda Fun and Skoda FormanYou can see a recently console change by another guy: The video is from 2022 and of course when i made the first modification 20 years before i had no help from anyome,i didn't had even the Haynes manual. All according to my humble experience in modifications in motorcycles and my imagination.
-
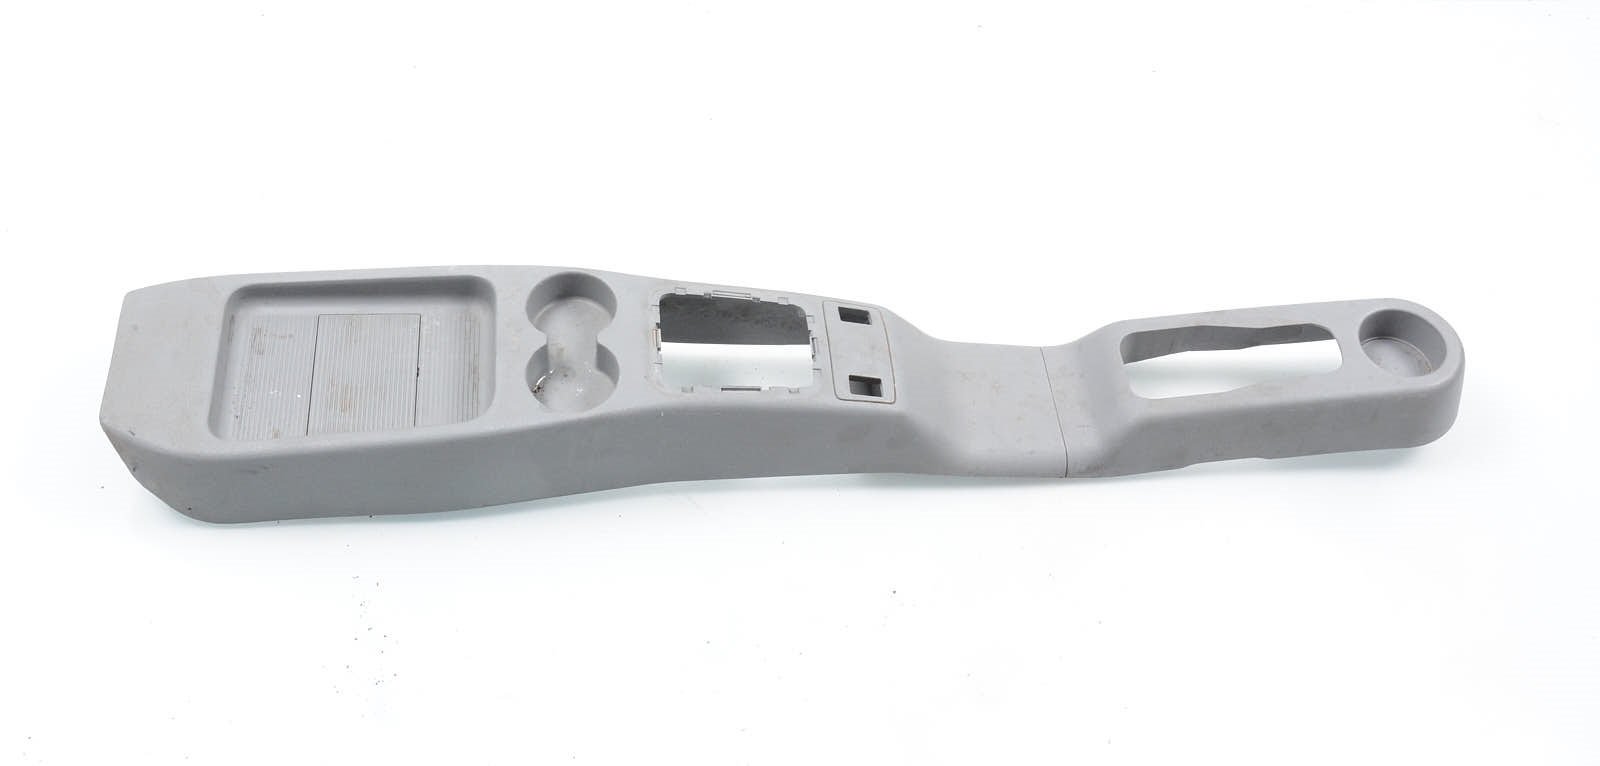
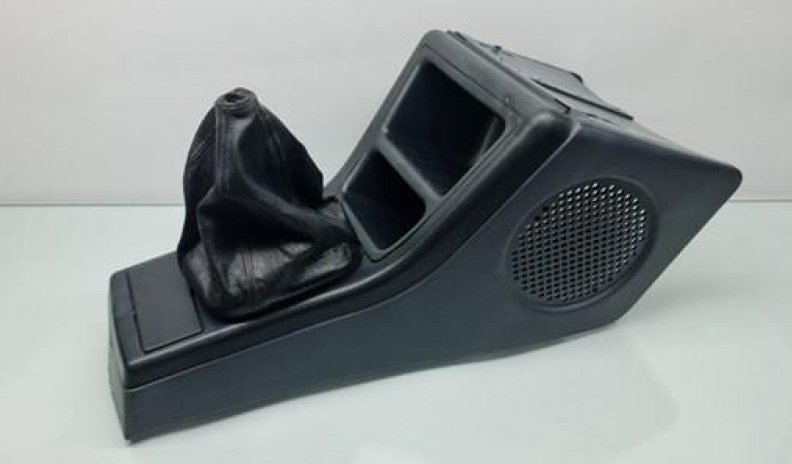
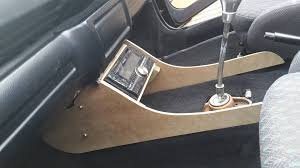
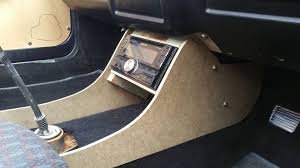
D.FYLAKTOS replied to D.FYLAKTOS's topic in Skoda Favorit, Skoda Felicia, Skoda Fun and Skoda FormanWhen i installed tinted widows films the guy there was working also with ICE systems and he told me that he could modify my console to have gauges and switches. The procedure would be expensive because he would make on from wood like this: I hesitate due to the huge cost but i just remembered that the local Skoda dealer had a catalogue with original Skoda accessories and among them was this console: Was cheaper that wood plus i wanted to have 4 electrical windows (the stock was only the 2 front) so i removed the old one and installed this console by myself, i made a patent for tight fitment on the upped plastic part of the radio system because was a bit ''wable" and now was far more steady. I bought from a local market two 0,56" round gauges with colours (i like the green) plus chrome switches went to that shop to remove the central part and fit them.
-
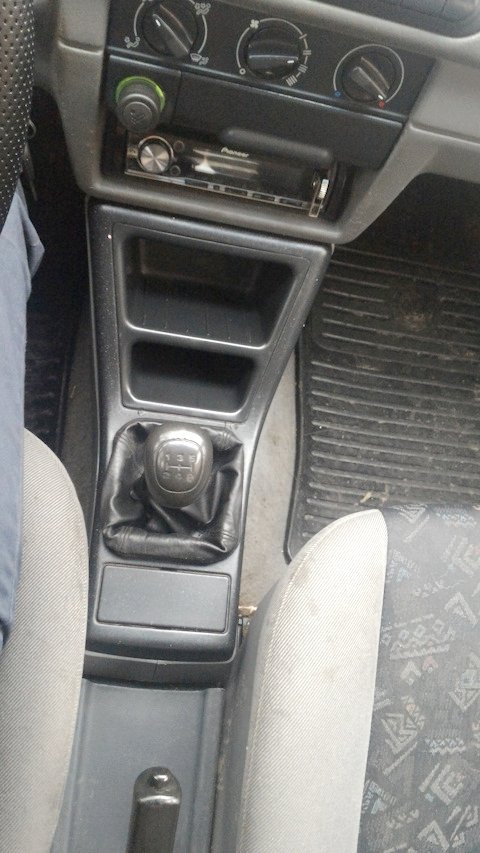
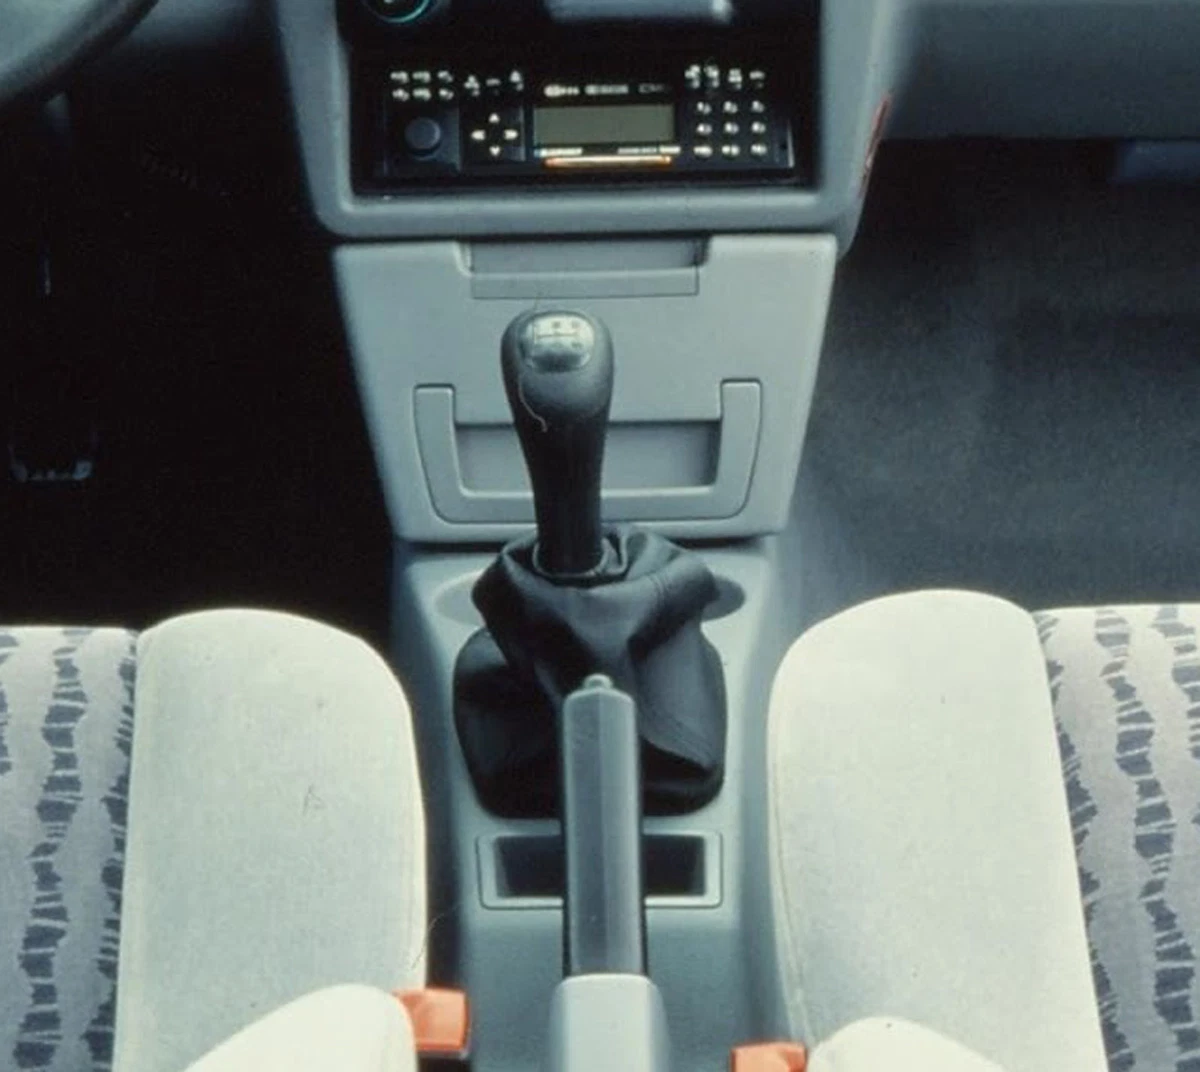
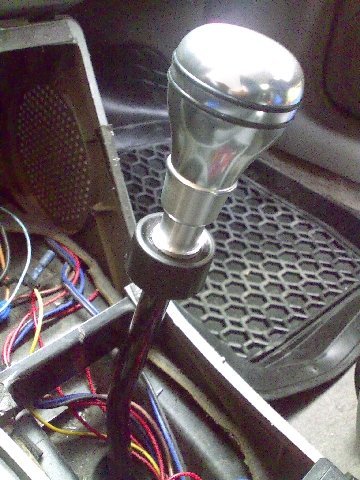
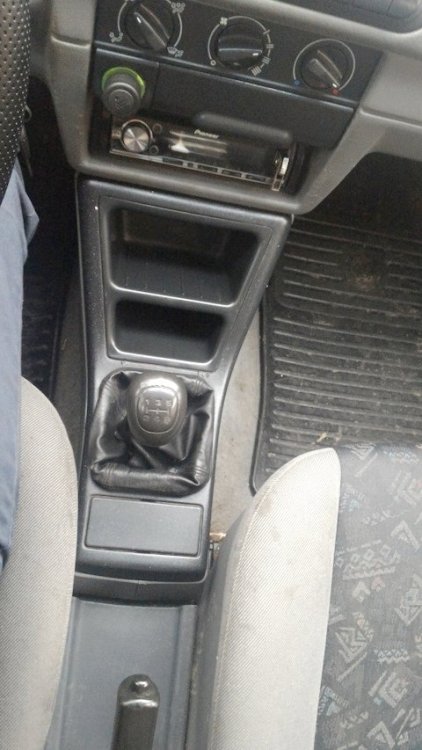
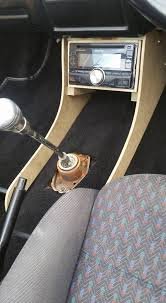
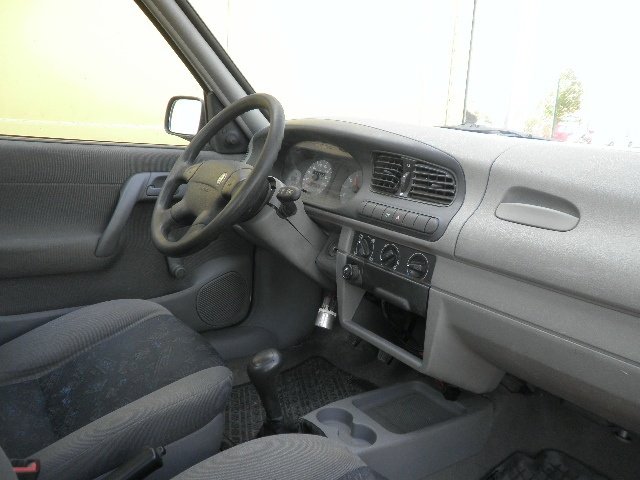
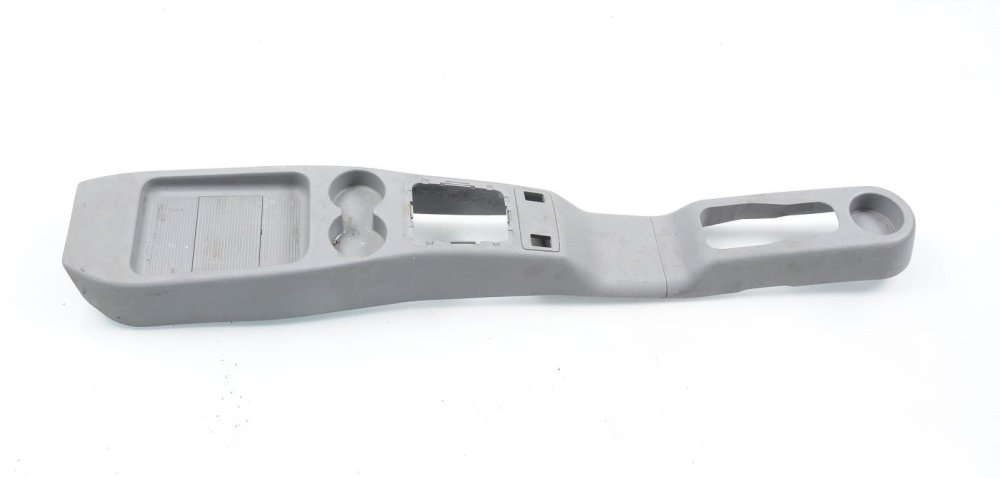
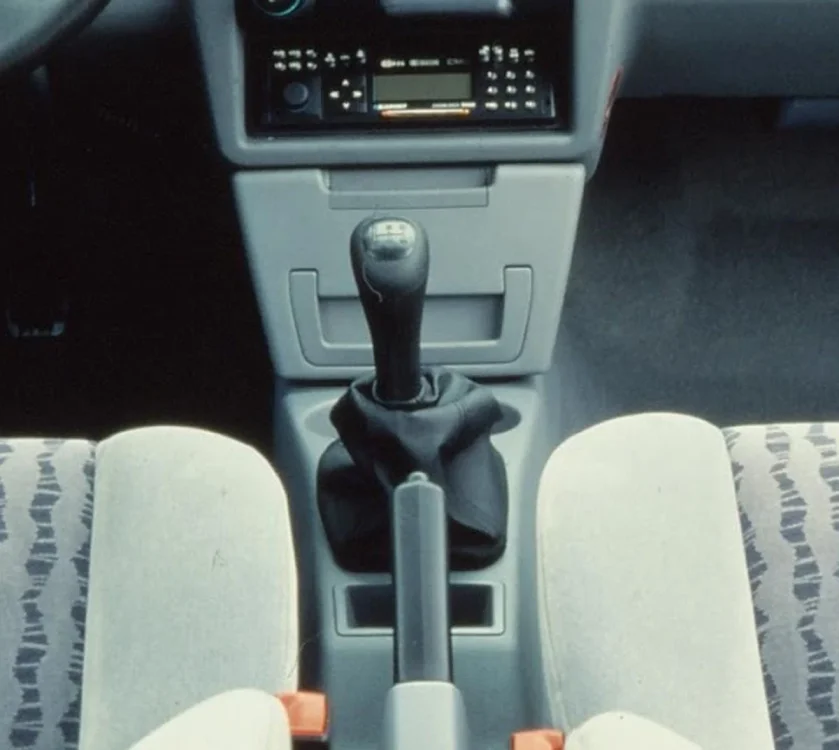
I know that i have posted in 3-4 other topics the photos of my modified console (in various stages) but i think it's proper to have them all in one topic plus informations for the step by step procedure. Maybe another member will read it and try to modify his or someone can find via Google Search the photos and have an inspiration. I have done an Upgrade in mine and in the future i will make another one modification so let's take everything from the beginning. Note: Some photos are from internet and not mine, when i bought the car i had no internet nor was a forum member so i have no pictures of my Felicia interior from this era. I bought it like this, with that clumsy gear lever knob and those 2 cupholders which of course could use because there were not secure. I bought also a ''drawer" that fits in that console but was not so practical because the item inside were not stabilised. I changed that useless plastic knob the first day and after some times i installed 2 analogue gauges where the cupholders were. No e-shop purchases so i bought 2 Veglia (old-time yellow colour halogen bulbs) with a hidden switch and as you can imagine some nights (weekend) i forgot them On and ruin my battery. I had to do something else for these gauges plus change the handbrake,i never liked that plastic case that it had...
-
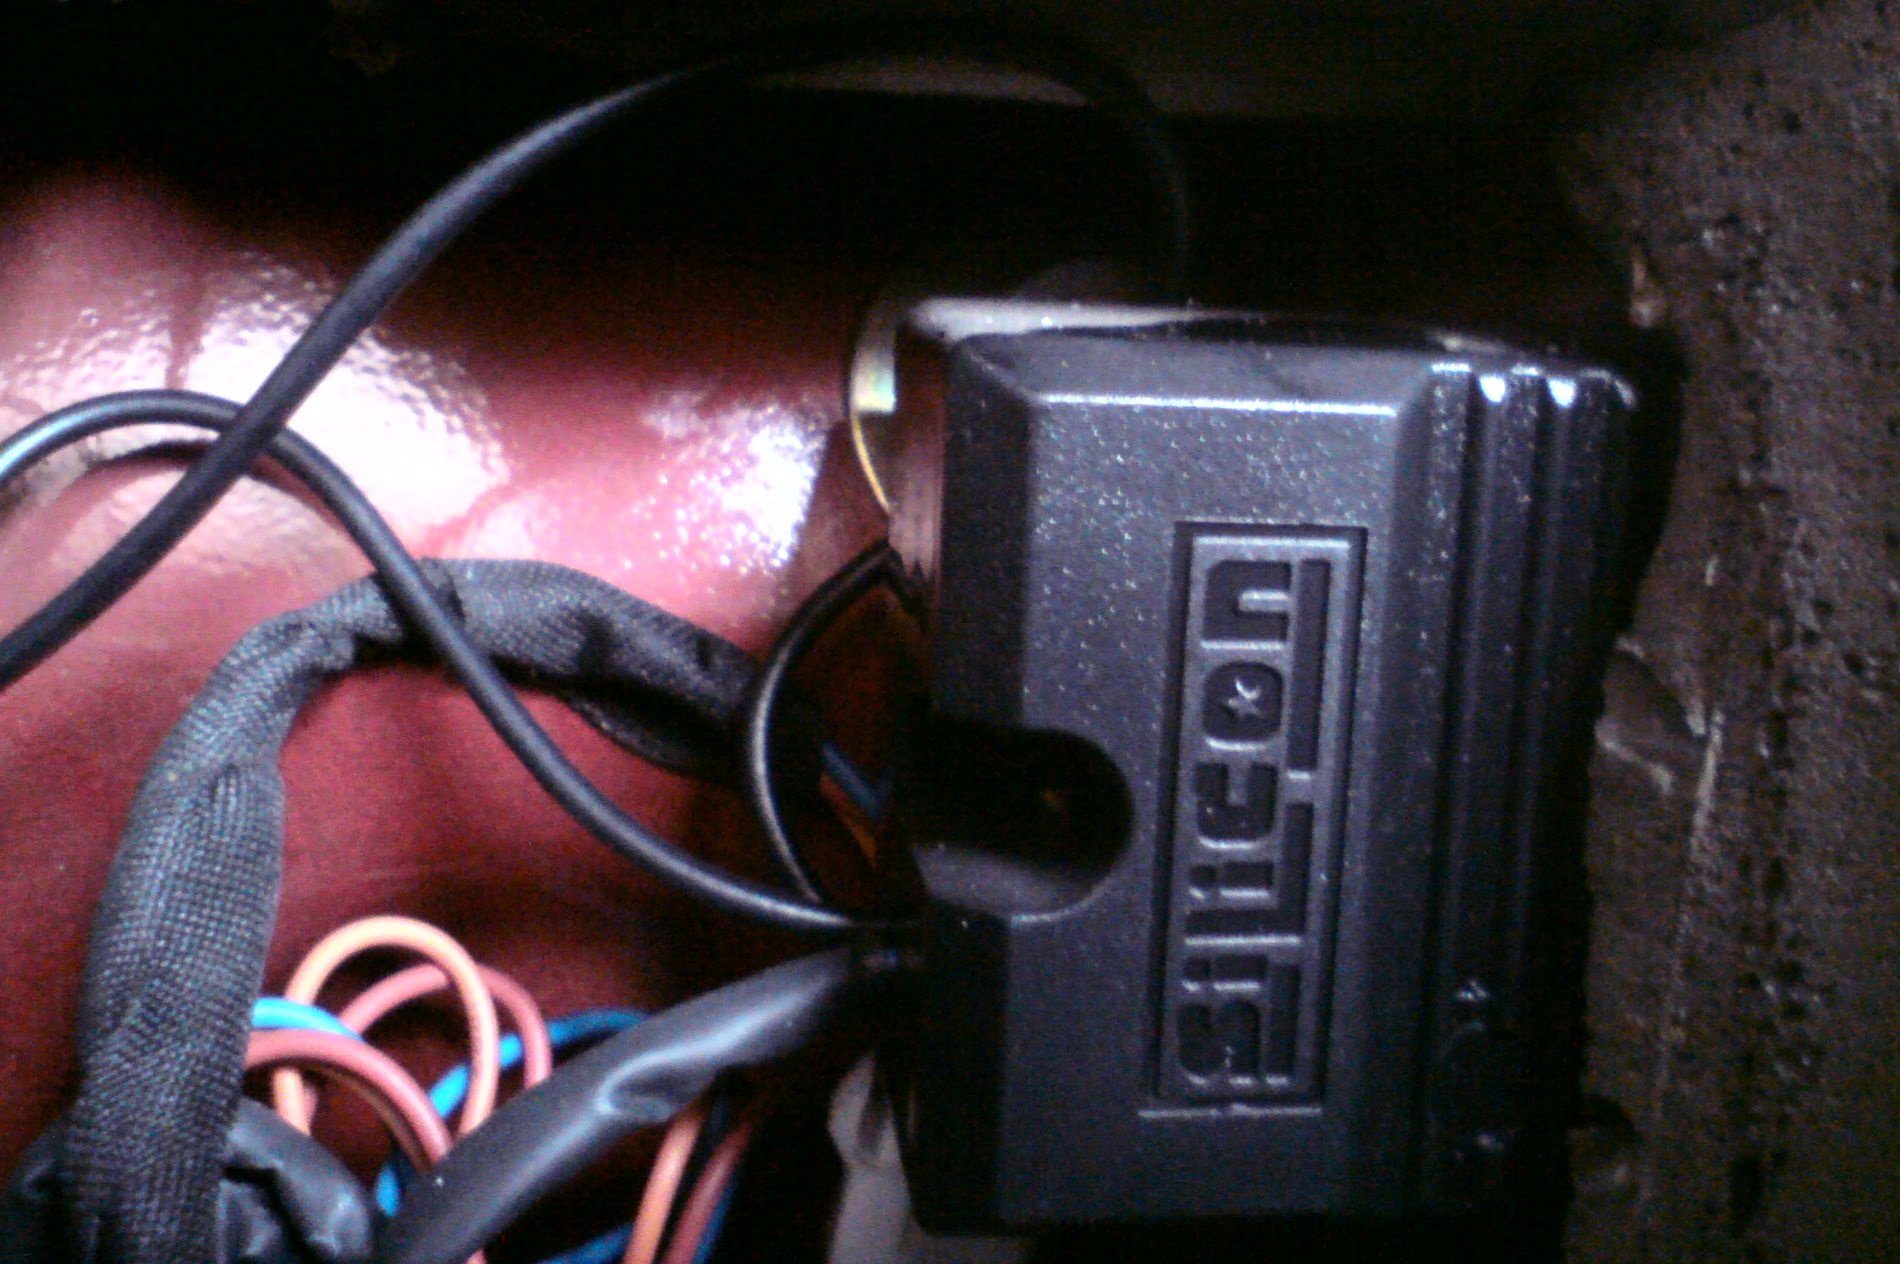
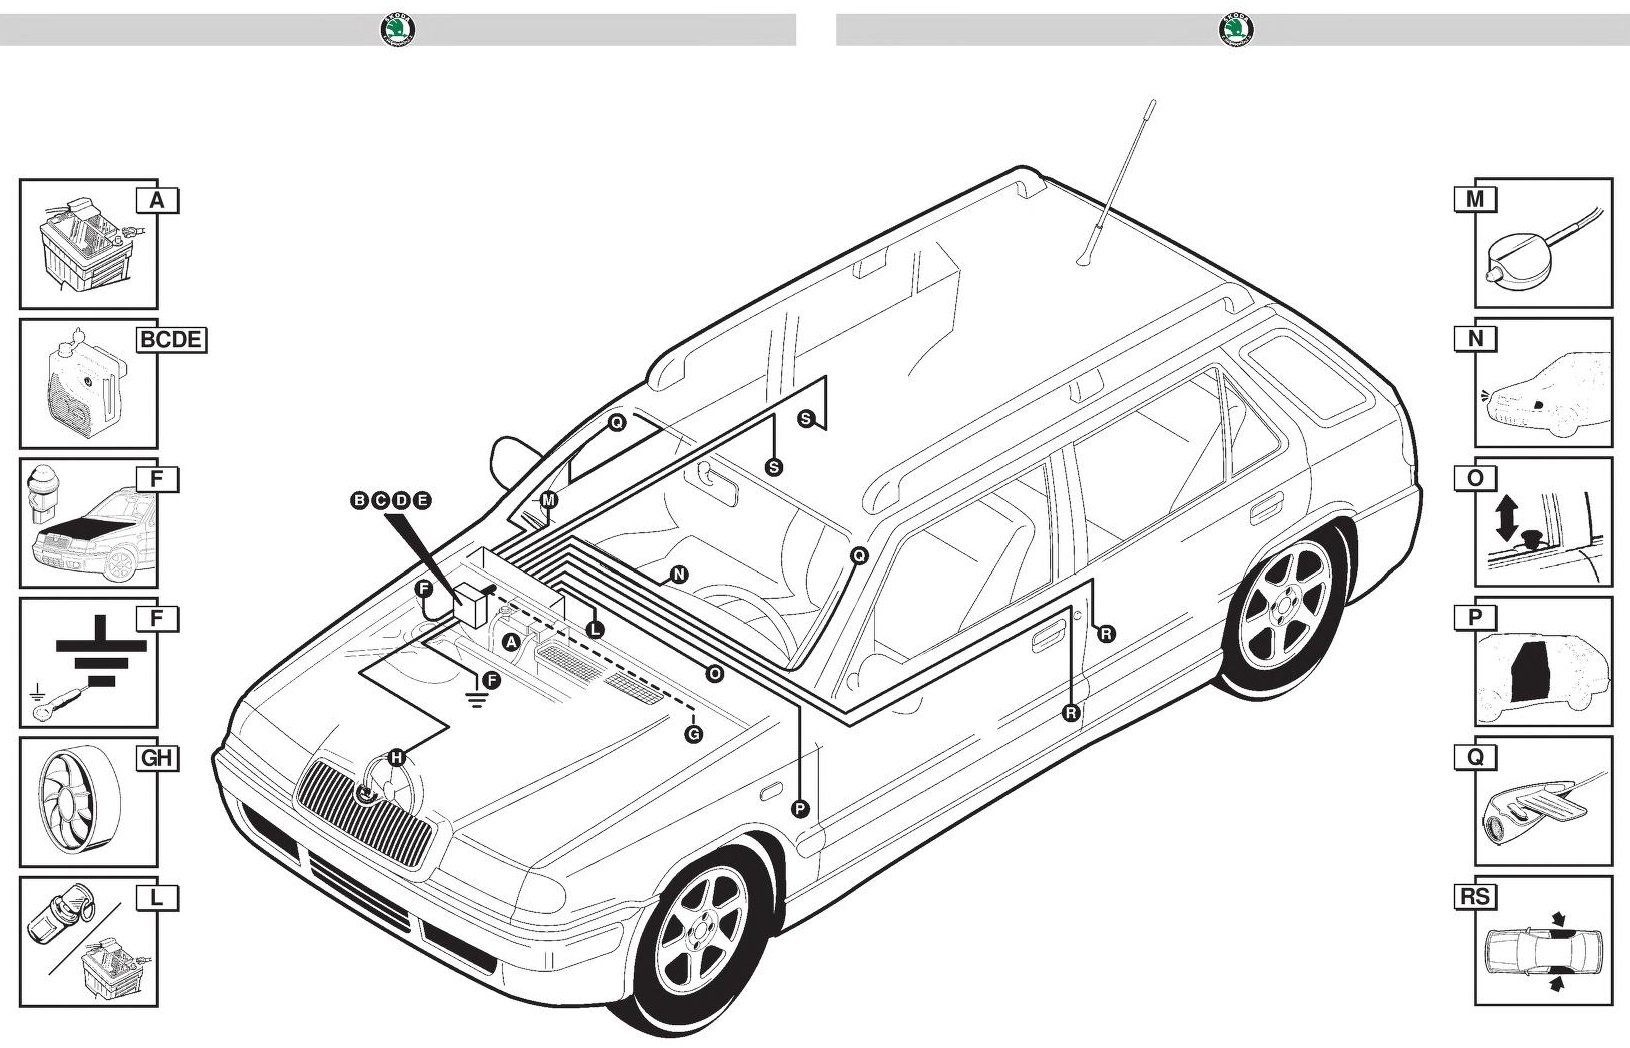
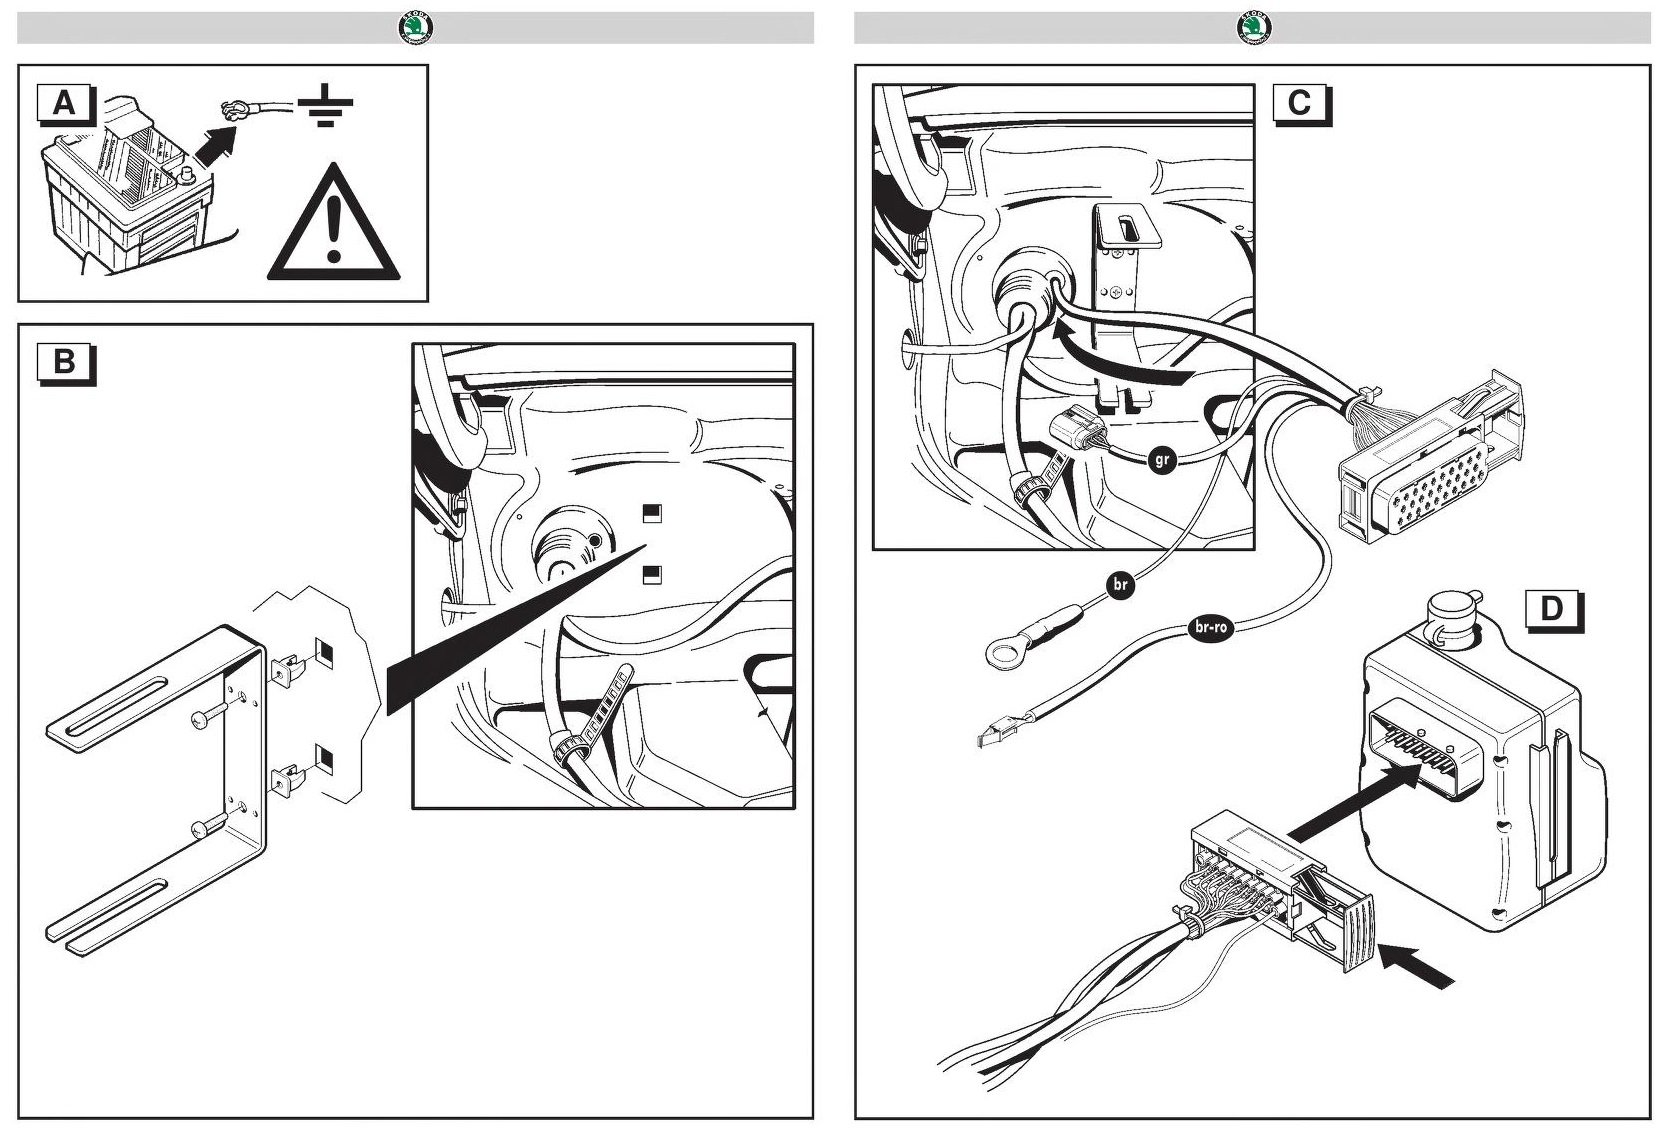
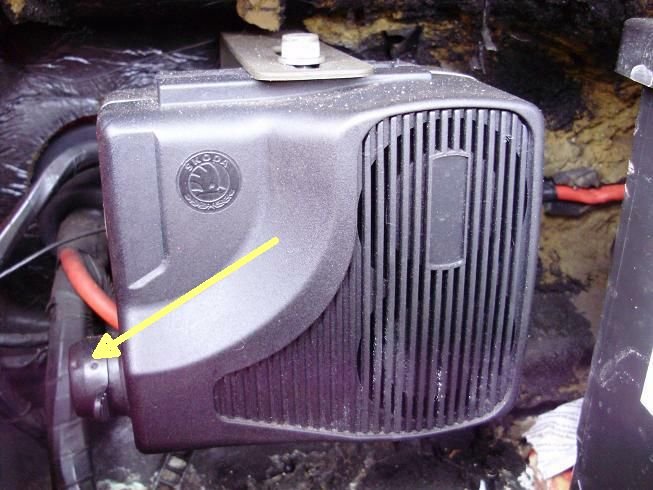
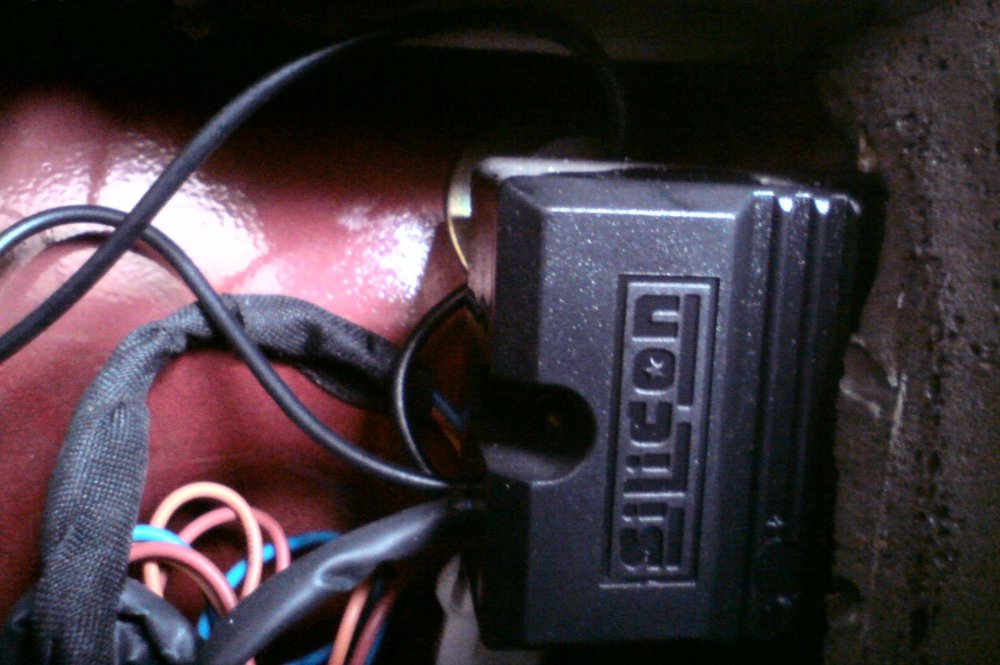
D.FYLAKTOS replied to TrentBarton's topic in Skoda Favorit, Skoda Felicia, Skoda Fun and Skoda FormanAnother 2 relative photos: The arrow shows the position of the key to cancel the alarm device (e.g. due to a repair) The reason that i post these photos is to find an idea to relocate mine,due to noise insulation that area is covered and it would be difficult to find it. When you have not front strut brace the procedure (remove batter-install new) it's easy,in mine it's a difficult task and you have to remove it in inclination pushing a bit the plastic cover of washers-windshield wipers.
-
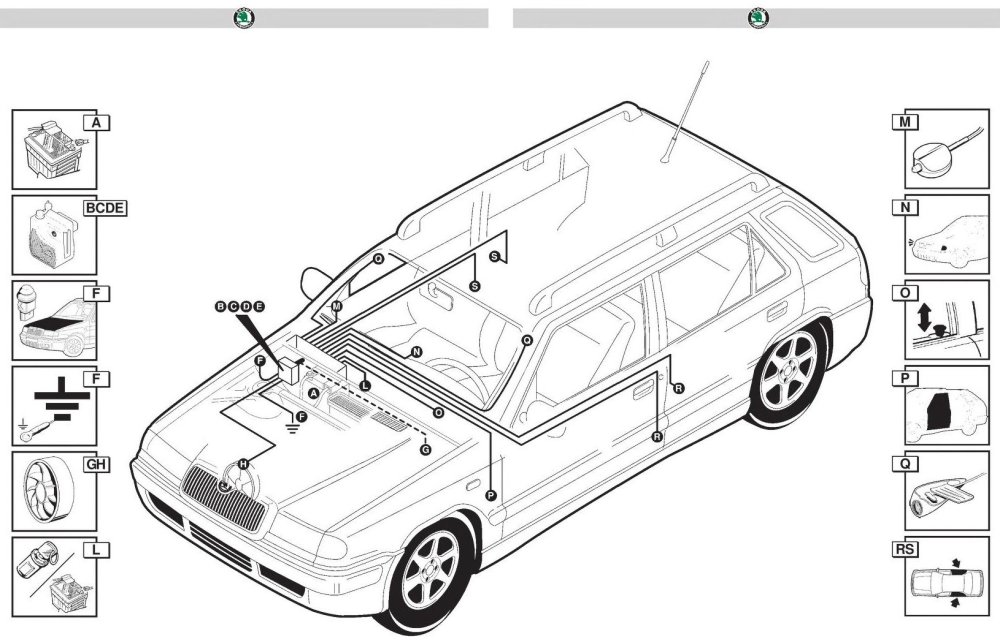
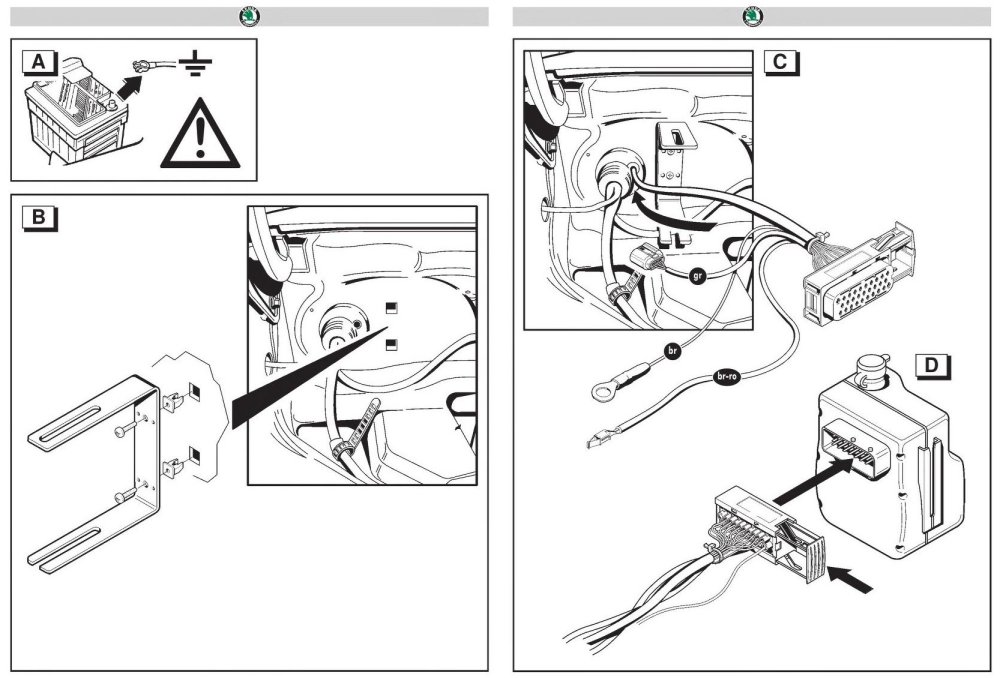
D.FYLAKTOS replied to TrentBarton's topic in Skoda Favorit, Skoda Felicia, Skoda Fun and Skoda FormanFactory position of Skoda Felicia alarm (Laserline):
-
D.FYLAKTOS replied to D.FYLAKTOS's topic in Skoda Favorit, Skoda Felicia, Skoda Fun and Skoda FormanUpdate: I manage to find the proper size oil drain plug and YES i manage to lost the original photo as i bought it. I went it to a lathe-machine shop and i bought an AH grade Neodymium magnet. Use again JB Weld epoxy glue (Temperature resistant up to 300 ° C) I have to wait for some months to install it,would be when it's time for a oil change. Hope there would be no problems.
.jpg.3cd381699c9658a1b3d538201e739aad.jpg)
.jpg.8580b6e67780b835c3120c89288dfea7.jpg)
.jpg.fd97f5a94c8a570852c5a0ae3d6c4fd9.jpg)
.jpg.e83ffb58500a063d3115016666bfaf96.jpg)







.jpg.015b3662b072b2aaa1ba43cb2a4fff6f.jpg)