R_Blue
Members
-
Joined
-
Last visited
Everything posted by R_Blue
-
So, what I know now, no one can tell exactly what will happen if I try DOT5. My master cylinder had been replaced before. It's a pick-up type. Who knows what kind of rubber parts in it? If everything goes OK, next brake fluid change will be in the next summer. After seeing its color now, I won't keep the current fluid in it more than one year. Another question: What makes the old fluid's color so black? Powdered and/or dissolved rubber? Or residuals of internal corrosion?
-
I know a local gearbox specialist here only dealing with such gearboxes. Especially the automatic ones. That shop is usually overflowing with cars waiting for the repairs. They drill those gearboxes from specific points to make them refillable. That's right. There is nothing fancy. No power steering, electric windows, ABS, A/C, airbag, ECU, sunroof. It has really good advantages over DOT4. I didn't know the seals were compatible with DOT5. It's not hard to make a complete flush. On the next fluid change, I will consider shifting to DOT5. I would choose DOT5 just for the reason of being paint friendly.
-
Hello and welcome to the forum Bastien. The part you've photographed is called TTV. Thermo-time valve. If you remove the pin from its plastic socket, you may be able to fix it by removing the broken end of the copper and trying to solder the cable to the pin. If done correctly, it can be fixed. If you are suspecting from an air leak, you should also check carb. middle gasket. (Where upper and lower parts of the carb. connects) Also, air leak can happen from any of these: - Brake booster hose. - Vacuum advance hose. - Idle cut-off valve seal. - Minor air hoses on the carb. - Idle mixture adjustment screw o-ring. When the engine stalls at idle, is it when the engine is hot (normal operating temperature) or cold? I've uploaded my carb. info collection for you. They are mostly for VW T3. Some of the adjustment values are different for our carburetor. https://pixeldrain.com/u/hrWnLTPR
-
I removed 6 unions in total with this wrench. Its other side is no:10. I used number 10 for bleeding nipples of the front calipers. If you add that, I removed 8 critical parts that would be very expensive to replace if damaged from stripping. We have months of salty roads here. So, effects of the corrosion is inevitable. I've faced "corrosion weld" before. It's a real menace. I'm an average person and it took all of my power to release the flex hose connections at the rear and when they released, they released with a "bang". When working on old cars, I think it's a good to choice to lower chance of failure whenever or however you can or DIY will turn into a nightmare. I didn't know about that... In the parts market here, if something is from EU, it is considered superb. I think today's products are specially engineered for limited durability. I checked its availability but it's not available locally. On the other hand, WD40 is like coca-cola. I didn't know if that is possible to switch to DOT5 with a system not designed for it. Thanks for all the help. I hope all of these will be useful for someone in the future.
-
Not without the invaluable help I get from here. You warned me about lower grade bolts and I found one 8.8 used in one of the caliper pins. I don't know if you can see it from the picture but it's very slightly bent! So it's very important to use proper bolts! I mentioned M10x45 bolts before for the caliper carrier but it's not the right size. Correct size is M10x28 for >93+ models. I read the wrong size from size from catalog. Please be informed. I had to cut the bolts for the carrier but I know the heat generated when cutting the bolts is not good. So I'll buy and replace the bolts with the proper size. It's very easy. For future readers, here are some extra notes about the work: First of all, the brakes are important for your own life and the other people. So if you have any doubt, don't attempt to this work yourself. I used a torque wrench for critical bolts like stub axle, caliper carrier etc. I recommend using a torque wrench. I used thread locker liquid on critical bolts that will endure heat. Like caliper carrier and caliper pins' bolts. Do not, never ever attempt to do this job with an open ended spanner on solid lines' unions. You WILL strip them! 100% guaranteed. This will render the car unable to move. The damage could be repaired only by a brake specialist with brake line building tools so you will be in a sh...ty situation. Buy this spanner. You won't regret it. It is called brake line spanner. The size is 11. On the flex hose side I tried using open ended spanner first but when it felt like it's about to strip, I used a ring spanner. If you can't insert it from one end you can always cut the old hose. You will trash it anyway. Deal with the spilled brake fluid. Brake fluid WILL KILL your paint work! Don't touch the car with brake fluid spillage on your fingers. Even one tiny drop of brake fluid will damage the paint! Removing the brake union spring clips may be hard. They could be rust-seized or they could have small stones stuck beneath them. They could have been painted with anti-corrosion stuff. I used this method to remove them: If you remove the union first, it will be easier. To remove retaining clip, I used WD40 to lubricate the hollow between the clip and the body extension. Then I tried to insert a small screwdriver between the flex hose head and the retaining clip. I used a hammer to gently tap to the screwdriver. If it's not moving, try this: Add more WD40 and gently squeeze and release, squeeze and release. Your Aim here is to help WD40 find its way inside. After that, I tried to tap the screw driver into that location before and it moved the clip outwards. I continued with a larger screw driver that I could turn after tapping it between the clip and the hose's head. After moving it enough with help of the screwdriver you can pull the rest with pliers. I used Bosch Superfit to lubricate the caliper pins, piston/brake pad touch surface, front brake pad side friction points and rear brake pad side friction points. For anyone who needs the correct size for the rear drum gasket this is the size: 40 . 52/58 . 7.5/01
-
Ouch. That's a really unfortunate situation. You warned me about rubber parts and I saw it firsthand right after your warning. Impressive. Two years ago I used best parts I could find because it's a brake job. Thanks for the rear parts being compatible with VW. I found most of the parts from VW stores. I used Meyle drums, Topran stub axles, Bosch brake pads, Bosch spring set and Swag bearings. Brake cylinders was TRW. This was one of the their boxes. This time I didn't have time to search. The part I found and installed now is this: If you can see it from the pictures I posted above, they have a difference in their design. The TRW has a narrower middle section. Maybe it was a fake part and not original TRW. I disassembled the removed TRW cylinder, here is a picture: Old caliper carrier: Old hoses: Hoses were replaced before. Rears are identical. Dated from 2017. Fronts are different. One is from 2019, other one has no info on it. DIY bleeding bottle and the color of the old fluid:
-
Second day: I had already found new (but old stock. dated 2011) caliper carriers several days ago and already painted them for the upcoming work. Before the work: I replaced caliper carriers on both sides. Like with the many aftermarket parts before, one of the caliper carriers refused to fit. I had to modify it a little bit. I also filed the edge of the caliper carrier mounting part. I applied paint to these places before mounting them for the final time. I replaced flexible hoses on both sides and of course fitted new brake pads. After the work on the front section: After this, the hard part came. Rear flex hoses are, as you know, placed in a very hard to reach place. Especially if you have to work on the ground. I applied WD40 to the brake hose unions. I know, from this point of view, just looking at the picture, it looks easy. But it's not... I don't know why but unfastening these joints was a real pain in the a.s. Quite literally. Both the unions and the spring retaining clips were stuck. After the work here: After completing the work at this section and before lowering the back side of the car; I removed and cleaned the brake fluid reservoir. After attaching it to it's place, I filled it with new brake fluid and started the bleeding process from rear right wheel. After that, I passed to the rear left. I installed the road wheels, adjusted the hand brake and lowered the rear. Thus, completing the work on the rear. I continued the bleeding process. Front right first. Lastly front left. I lowered the car and checked for leaks. After that, I went for a road test. Because of the run-in period of the new pads, the brakes were a little bit weak at first but I know that's normal. After the short trial, I checked again and there was no leak. Conclusion of the work at the end of day two.
-
You know, I was going to make this maintenance work. Maybe you won't believe me but, when driving downhill in the morning the car greeted me with a blinking brake warning light. That particular light wasn't working when I bought the car. I'm glad I fixed that. I already knew, the front brake pads were thin so I thought it's normal to have lower fluid level after some point, but it's worth checking right? There was no sign of leak visible anywhere. As a part of the maintenance, rear drums were going to be opened. So it seemed logical to check them first. When I opened the rear drums, there was a nasty surprise for me. First picture is from two years ago when I renewed rear brakes. If you look closer, you will notice damage on the paint. That means the cylinder was leaking. Also check this out: This was rear right. Rear left had a worse leak than this. Now why did they leak only after two years? Both wheels? So the work started with these. As you can see on the left side, the leaking fluid came into contact with the bearing seal. As a result, bearing seal was compromised. Inner side of the bearing got stuck on the stub axle. Some of the grease was escaped into the drum too. I had to remove the stub axle. As a result of the removing process, the bearing became unusable. I bought a new bearing set. Removed the old ones, and installed the new set for the left wheel. I cleaned the brake carrier plate. My previous paintwork was ruined. Due to the time constraints, I couldn't paint it this time. But I left a thin oil coating on the surface. I also lubricated the friction points on the brake carrier plate with special brake grease. I cleaned the brake pads with brake cleaner. Their thicknesses are well within specs. I also bought two new brake cylinders and replaced them on both wheels. I replaced the 8.8 stub axle bolts with 10.9 s. Brake cylinder bolts (M6x10 inbus) were rusty. I replaced them with A2-70 grade inbus bolts. Drums on both sides were OK. I replaced bearings and the gasket on the left side. I replaced the gasket on the right side. I wiped old grease as much as I can and renewed the grease. I cleaned the friction surface on the drums with brake cleaner. I reinstalled the drums and adjusted the retaining nut accordingly. Conclusion of day one.
-
You only have 16 posts on the forum so far, but I say, you ROCK! What you are trying to achieve here is on the highest difficulty level. Did you used Felicia 1.9D radiator and fan for cooling the engine?
-
I think who did this is very talented at electronics. I wonder, how did they converted analogue wire output of speedometer to digital with high durability?
-
Sorry for the typo. I was going to write 10.9. Here is the new set of bolts but there is one more problem now. They told me that it was very hard to find new M10x45x20 10.9 bolts. So I have regular M10x45. I know the not-threaded part of the bolt is there to provide extra strength. I don't know how the old bolts will come out or they had been replaced before. Would you use the old M10x45x20 (Half threaded, original 30yrs. old bolts)? or new regular M10x45 10.9 ?
-
I'll definitely buy a new caliper carrier & pin set. Thanks for the help.
-
One of the old ones had 10K written on it. So it's either 10.5 or 10.9 I think. Your advise is to use 10.5 right?
-
Actually I was waiting your measurement and gave the numbers in advance. After a quick search, I think normal pin diameter is either 8.1 or 8.3mm. According to what I've measured, looks like they drilled the carrier like you said. So, I need a new caliper carrier set. I saw this item listed as a set from some local dealers. Including the caliper carrier, pins, rubber boots and even the grease. (Checking availability right now) You are welcome. ---------------------------------------------------------------------------------- I'm still gathering parts and bits. I have a liquid thread locker. I've visited some grease sellers about the caliper pin grease you have mentioned above and they had no idea. They told me that mechanics use "normal grease". On-line searching, I've found Bosch Superfit TO100 or general purpose silicone grease. If the new pins won't come with a bundled grease pack, I'll order one of these. The bolts also seem old. They are listed as, M10x45x20 (half threaded) for the caliper carrier and M8x21 for the pins. Both set are 10.5 or 10.9. I have new bolts but they are rated 8.8. I think, I should search for 10.9 right? Because they play a critical role here.
-
Yes. They measure the brakes as "axles" and calculate the variation between two tires on the same axle. If it's too much, that means the car will drag to the sides when braking. It won't be safe so it can't pass the MOT. I think there must be a minimum braking power value too.
-
What's happening with my case is, I'm rebuilding the car part by part. 🤣 I've got used to that. From my first repair, until this last discovery, same story again and again. There are few sections which I haven't "touched" yet. Like interior parts of the gearbox and the engine. I wonder what perils await me in their darkest depths. 🤔 I've measured the thickness of the pin with and without its sleeve. With sleeve: 10.6mm Without sleeve: 8.25mm
-
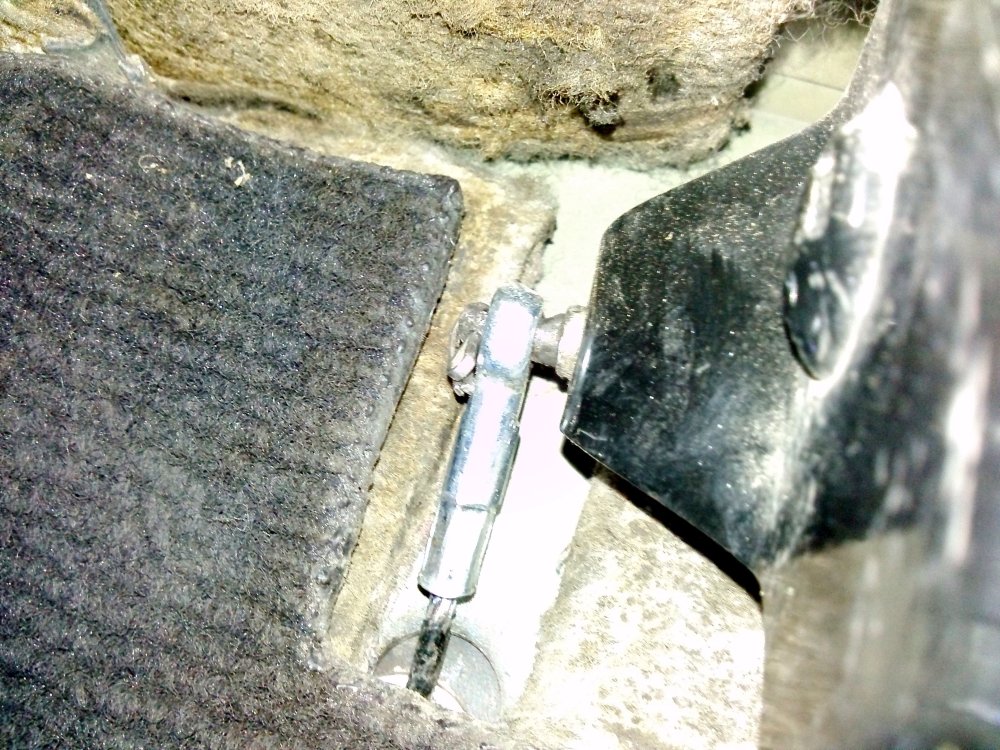
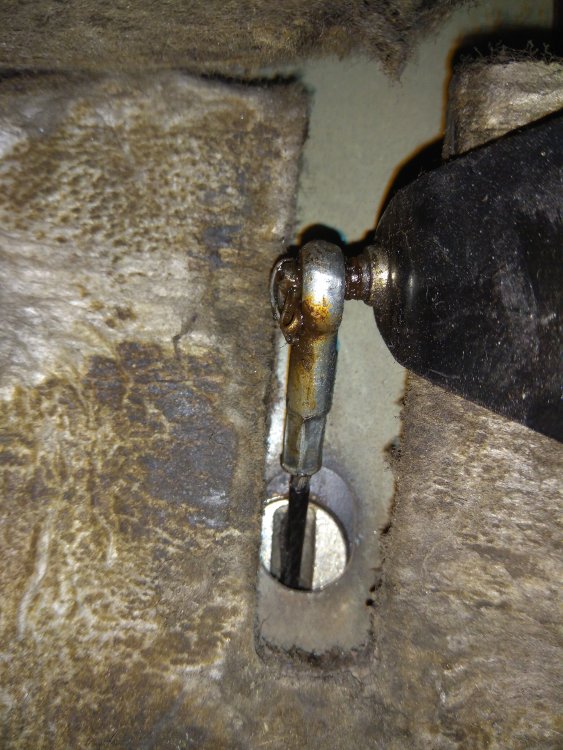
I have some good news and bad news. Good news first: I've dealt with the worn clutch pedal guide pin and its OK now. I found a half threaded bolt which has (roughly) 6.1mm non-threaded section and I pressed it in after removing the old pin. Then, I drilled a hole for a cotter pin and cut the excess of the bolt. I've placed washers on both sides to ease side friction. Now, the bad news: I've checked the condition of the front brakes and learned that flexible hose renewal is at the bottom of the list. When I got the car, front wheel bearings were bad. At that time I didn't have all the tools to remove the front hub carrier to make the job so I had to take the car to the mechanics. At that time, I had also provided new discs and pads so they can be renewed too. I also told them to tend to the guide pins and their rubber boots too. They told me that, there was a modification in the calipers done before but I didn't know what was the modification. They told me it was OK. They were leaving it that way by only replacing the boots. Now I saw what happened. - First, all rubber boots, (Right and left. 4 pins the same) had been attached only from one side. (WTF???) Their purpose had been destroyed this way. - I've found general purpose yellow calcium grease residue. - Guide pins' rubber boots are damaged. - There is uneven wear on the brake pads. Outer pads on both sides are thinner. Right side is the worst. It is also worn from top. (Top side is thinner than bottom side) - There are sleeves on the guide pins. (This was the modification they told me) Why there are sleeves on the guide pins? Any ideas? They look like some kind of plastic too. Maybe made from PTFE? To make these sleeves fit, they should have either drilled the guide pin hole larger or made the pin thinner. I don't know. So what to do now? There was only %3 brake force difference at the front wheels at the time of the MOT but there is something wrong here. I think I have to replace the brake carriers, pins and the boots. Right? (+ new brake pads)
.thumb.jpg.70e399db69847e106466e5a92228d961.jpg)
.thumb.jpg.59b3b6f8202ed3295e3024f5f57f0170.jpg)
.thumb.jpg.dd927ba1baf0055db193f34ffec03b81.jpg)
.thumb.jpg.0aa0fff8fe6544ae20ce1fc1239ed036.jpg)
.thumb.jpg.7bae69679b164e23c6c2725f89b8f276.jpg)
.thumb.jpg.16ec3971ba16e556b116f409bb7be76d.jpg)
.thumb.jpg.cb8d0ae100ace83b1a0b3dd210770bd5.jpg)
.thumb.jpg.82b5f3f784ab67428c11bfd3efe2ee9d.jpg)
.thumb.jpg.932f1f7f6aab9b2e40c7daa637086006.jpg)
.thumb.jpg.374720755ea4a6581a744d9e0fd92f7d.jpg)
.thumb.jpg.9f83b5b9b8bdb9bb7d7f56f9873a5ef1.jpg)
.thumb.jpg.973169ece751f9575a8e28c8f570f387.jpg)
.thumb.jpg.cd9ff248577c912a84ba62f44331ad7e.jpg)
-
I assume your engine is a AFH/AVY hybrid. 1.6 16V + A/C on a Favorit is just EPIC. I'd like to learn more about your car. I hope you will become a regular member. Welcome. (Looks like the black cat wants a part from the Felicia too. )
-
Is it OK to use universal silicone grease (-40,+200ºC) for rear brake lubrication points and for the front caliper guide pins?
-
I suppose it's not road legal. Right? The body kit and the rally style rims are looking cool.
-
Looks like the Felicia Fun is gone, but now, there is a Felicia Kit Car. https://www.car.gr/classifieds/cars/view/5046437-skoda-felicia
-
You da man! Many thanks. I saw it. So I'm right about the guide pin. Something happened before with mine. It won't be nice if it snaps in the middle of the traffic jam.
-
The clutch cable guide pin is looking worn and thin. I think there must be a c-clip to secure the clutch cable but there is a cotter pin there. (I don't know how it looks in its original form.) I've been told that there was only one type. So I don't know if there is another type... I think the factory service interval is 20K Km for checking rear wheel bearings. I checked them every time when replacing the tires and there was no abnormal play so far. In our rear drum brakes, only the hand brake needs adjustment.
-
It was very unfortunate to encounter a problem like this after all the work done. But, when tightening the clamps around the radiator hoses, I've always thought that something like this could happen. Now I got worried too. Can't you replace the radiator yourself? (Does the A/C radiator make the work complicated?) and... Wow... You did it. You have a second set of fog lights! Also I've noticed that you have 6U0823395A missing. You may have additional rattling noise because of this. Just FYI.
-
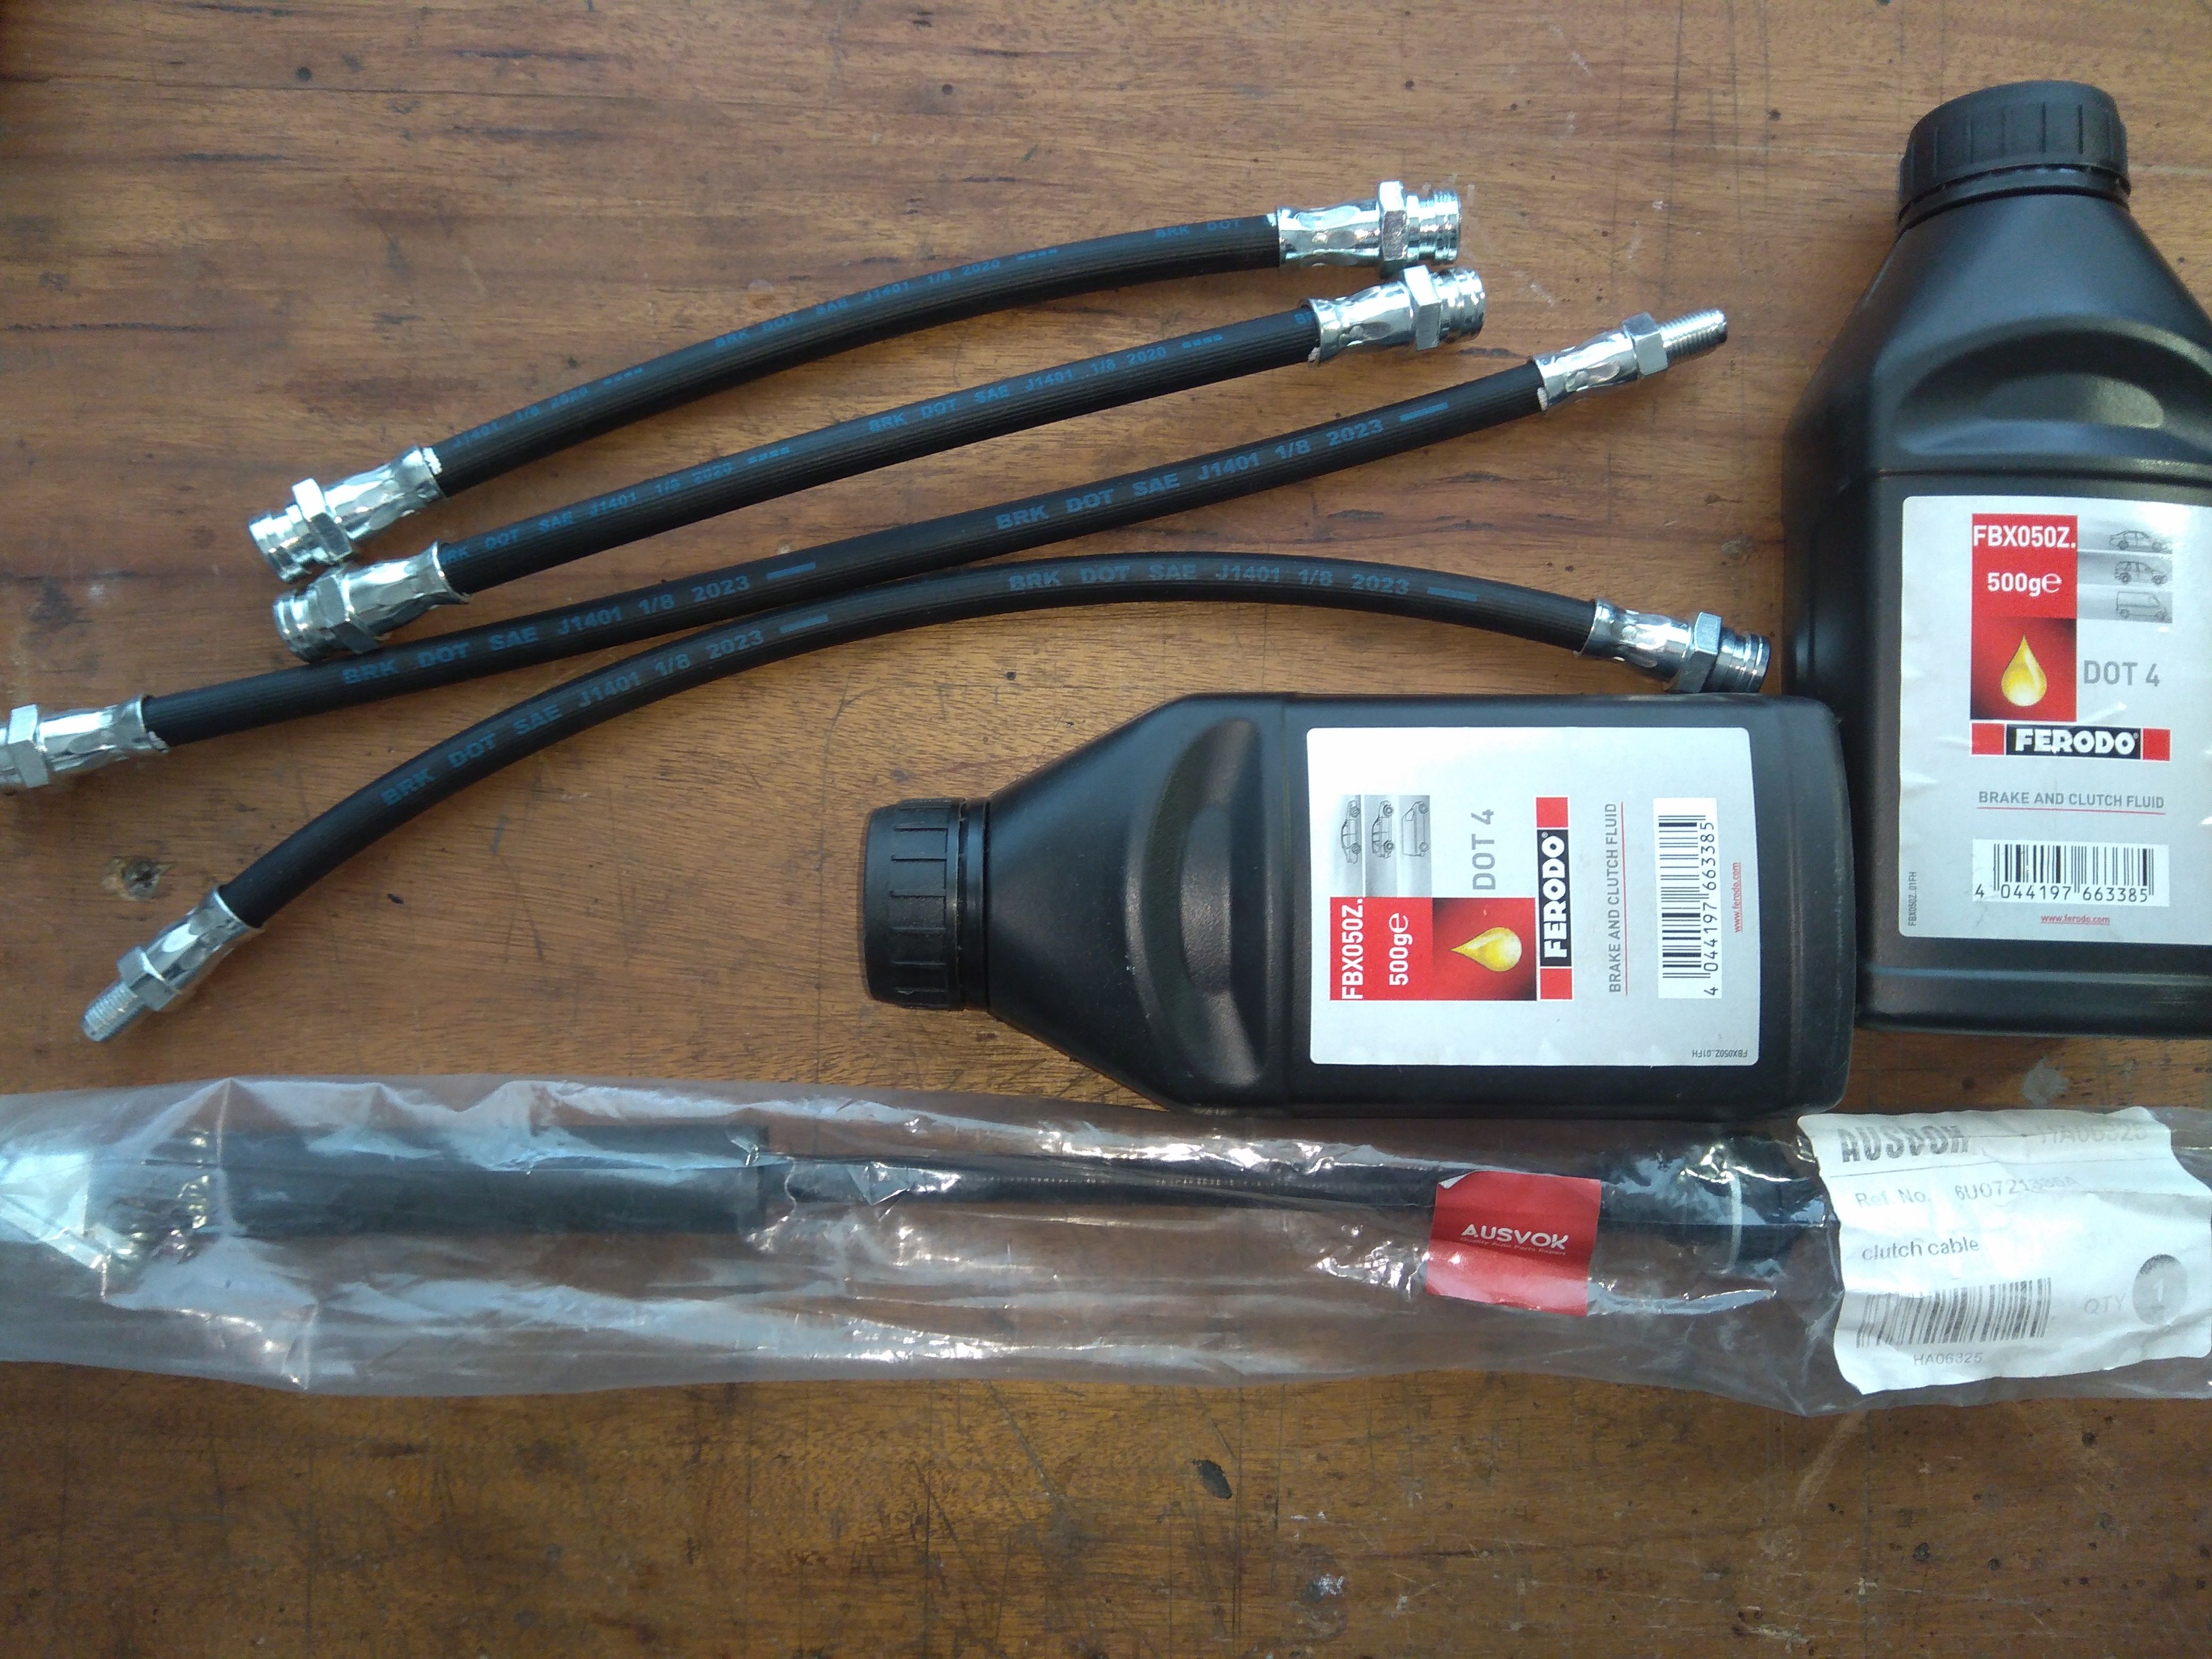
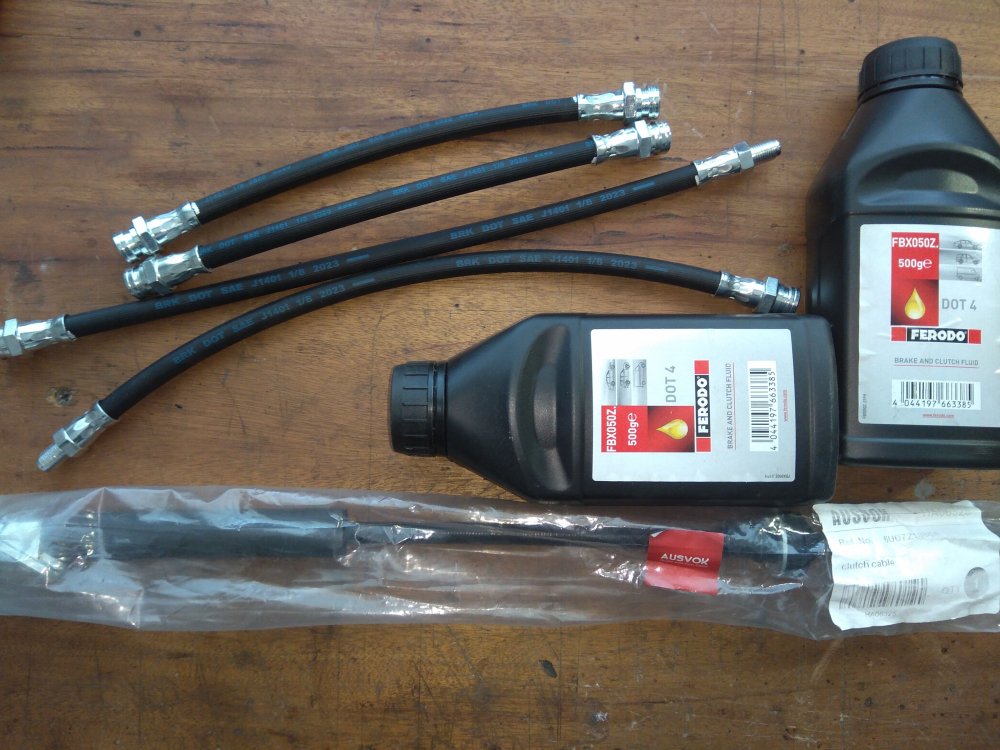
No, Sir. Absolutely not. I mean experienced. (Honestly, I was thinking...Will I be cool like nta16 when I'm at his age??? Really) I know people around claiming to had spent their entire lives owning and operating cars but when it comes to solving car related problems, suddenly they are green as grass. So, I think, the ability to learn something is not related to age. I had a teacher in uni. told us the importance of learning to learn. She told us that, if we get used to learn new things, if we train ourselves to be open to learn new things, that would be an awesome trait with everlasting benefits. She told us that, life is about learning. I appreciate it. Many thanks. ---------------------------------------- So according to common advice, I'll leave master cylinder and caliper pistons, etc. for now. The parts I've acquired for now: I have further questions. I'll open rear drums as per your advice. I've rebuilded rear brakes 30K Km ago. So this will be the first reopening after my renewal process. I know I'm going to need new cotter pins. Do I also need a new gasket for the rear drum? Do I need a new center dust cap? I know there is something weird happened here before me: I think it's a good time to do something about it. I couldn't find a pedal set so, it's going to be DIY. What do you think? Does it look reliable to you???


.jpg.c7aafb628d37f91f24b2ee050bf1fa82.jpg)
.jpg.7486ce0ae991051cc6df5173dc421028.jpg)
.jpg.a631be97c5bbbad0e68bb95b04ea8705.jpg)
.jpg.e99e4c234bf24aeb5e5835995e63263a.jpg)
.jpg.9b4f6efe4a11bd70e19ca307d541703d.jpg)
.jpg.c7eb6c448dd6d62688d4bcfac9aa6c4a.jpg)
.jpg.4151fa150f70c0338be54d5565ccf34e.jpg)
.jpg.4e3c8cc5055c0826ef60a166cd7a8157.jpg)
.jpg.3e0c00e4d09a79d8e390ca50f2b9195f.jpg)
.jpg.21ee7318c0912964284ecb7a1bca6efe.jpg)
.jpg.ee0cfb0ddc95e4aed70848ea3c3bb129.jpg)
.jpg.e315d0b8c416cdf1e020e803ed166053.jpg)
.jpg.8c6ceba4a052a42ab1b3355b20255d28.jpg)