encephalopathy
-
Posts
439 -
Joined
-
Last visited
-
Days Won
1
Content Type
Profiles
Forums
Gallery
Shop
Events
Downloads
Everything posted by encephalopathy
-
Tow Bar for bike rack only
encephalopathy replied to a1dan75's topic in Skoda Octavia Mk III (2013 - 2020)
most of the decent bike carriers - thule/strada will allow tilting of the rack and boot access i had an atera strada on towbar on my last vrs for the bikes but have thule aerobars and bikeholders on the current one pricewise decent towbar rack = roofbar mounted bike carrier but when you factor in the cost of a towbar the roof system is cheaper. but not much use if you need to tow something..... ps i killed my rear shocks on the last mk2 vrs hatch on a weekend away with 3 bikes on rear rack, 2 on the roof and the luggage for the 5 of us -
Tow Bar for bike rack only
encephalopathy replied to a1dan75's topic in Skoda Octavia Mk III (2013 - 2020)
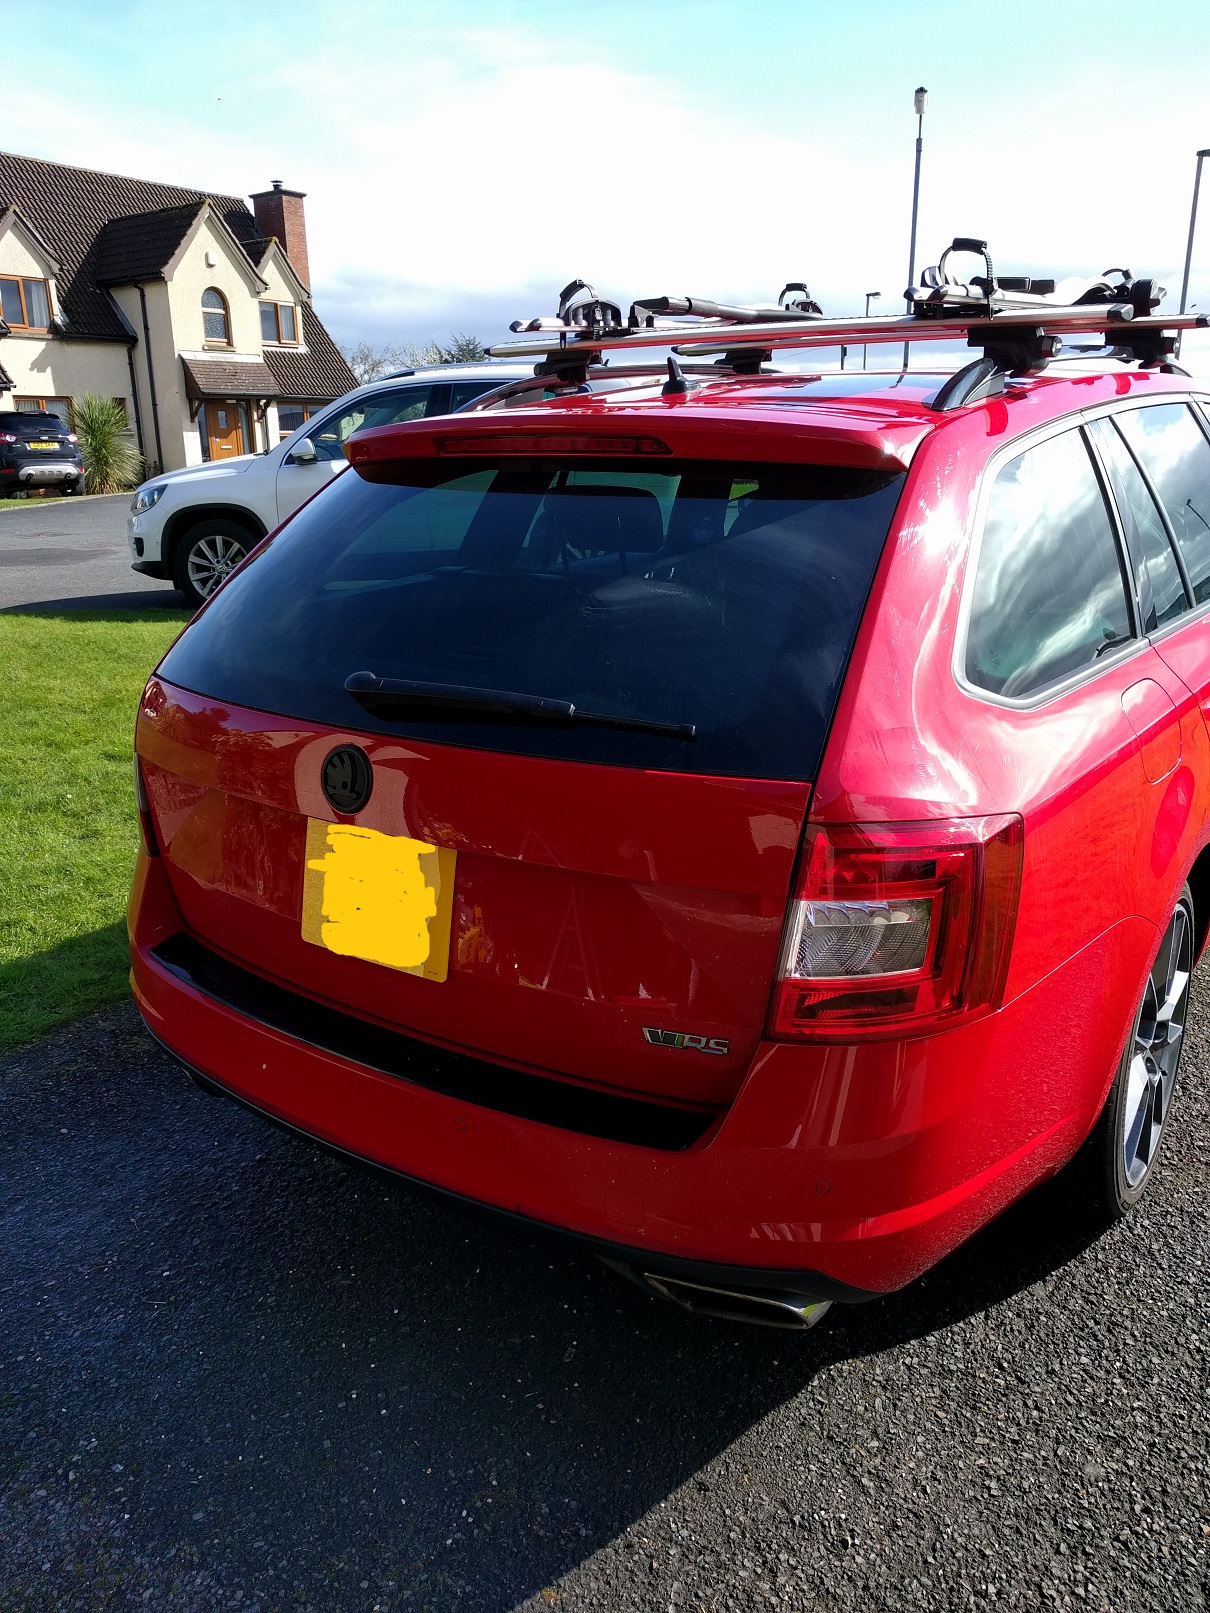
surely if you obscure the numberplate and rear lights with a bike rack/bike you will need a numberplate board with brakelights and indicators? if you don't i'm sure plod will eventually tug you about it -
or you could plastidip....

-
VRS with Eibach Pro Kit - creaking sound
encephalopathy replied to dskoric's topic in Skoda Octavia Mk III (2013 - 2020)
not sure but had similar problems with bushings on my alfa 156 - solved, albeit temporarily, with a generous spray of silicone lubricant -
Fitting LED numberplate lights
encephalopathy replied to encephalopathy's topic in Skoda Octavia Mk III (2013 - 2020)
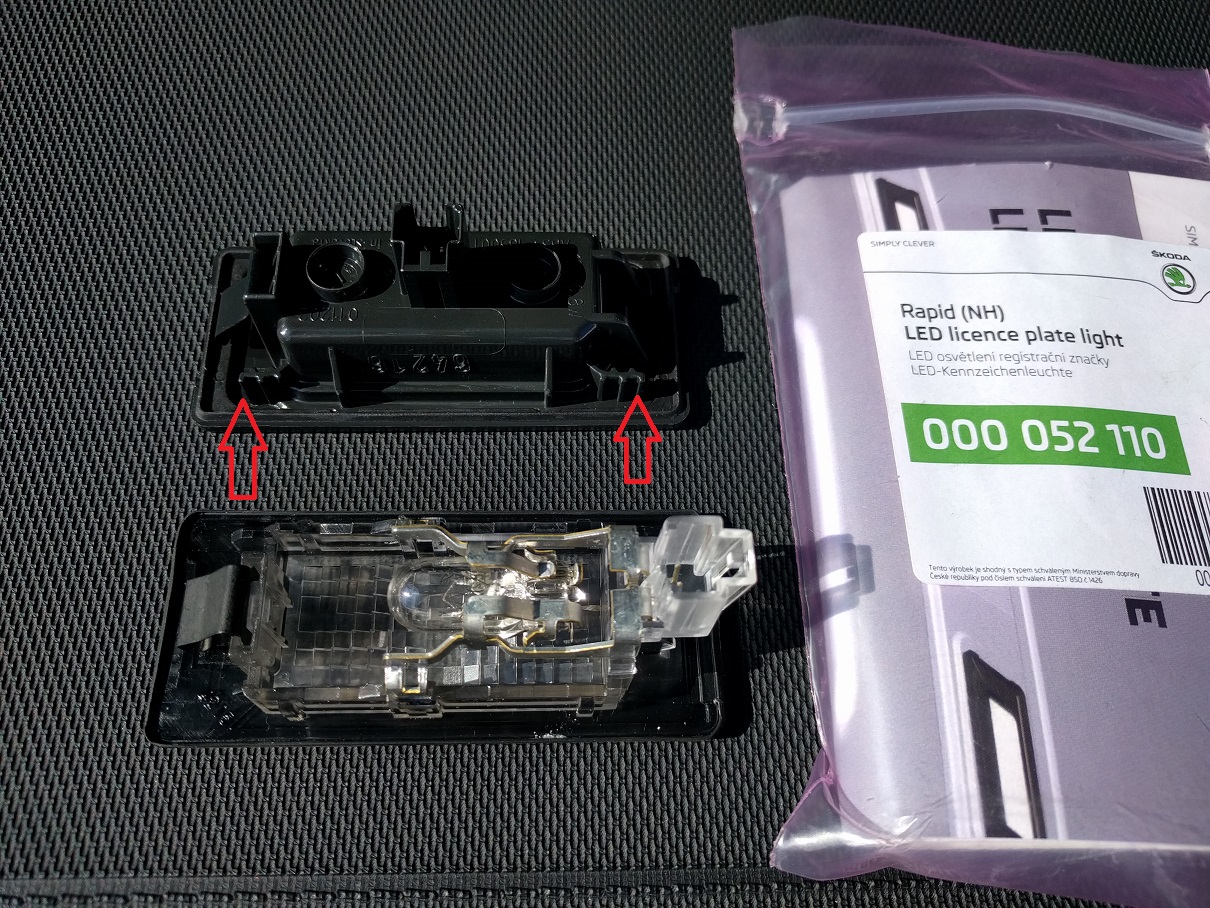
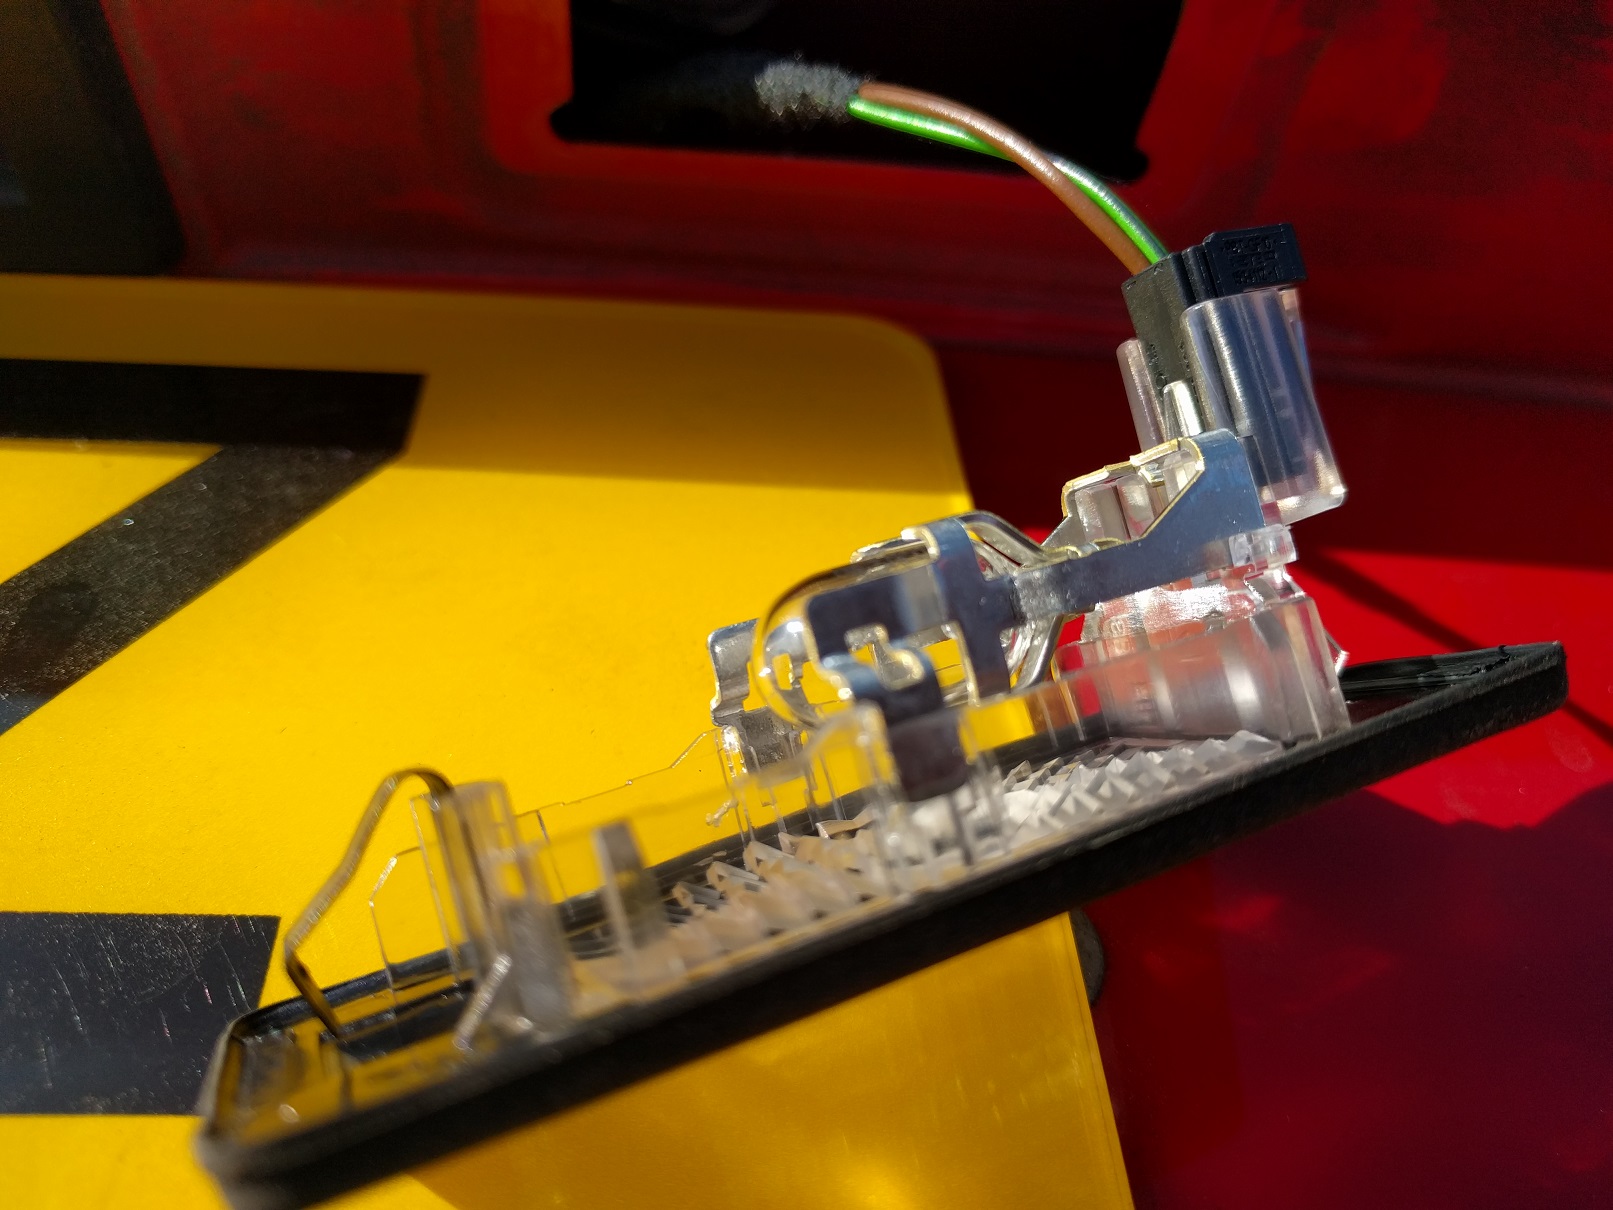
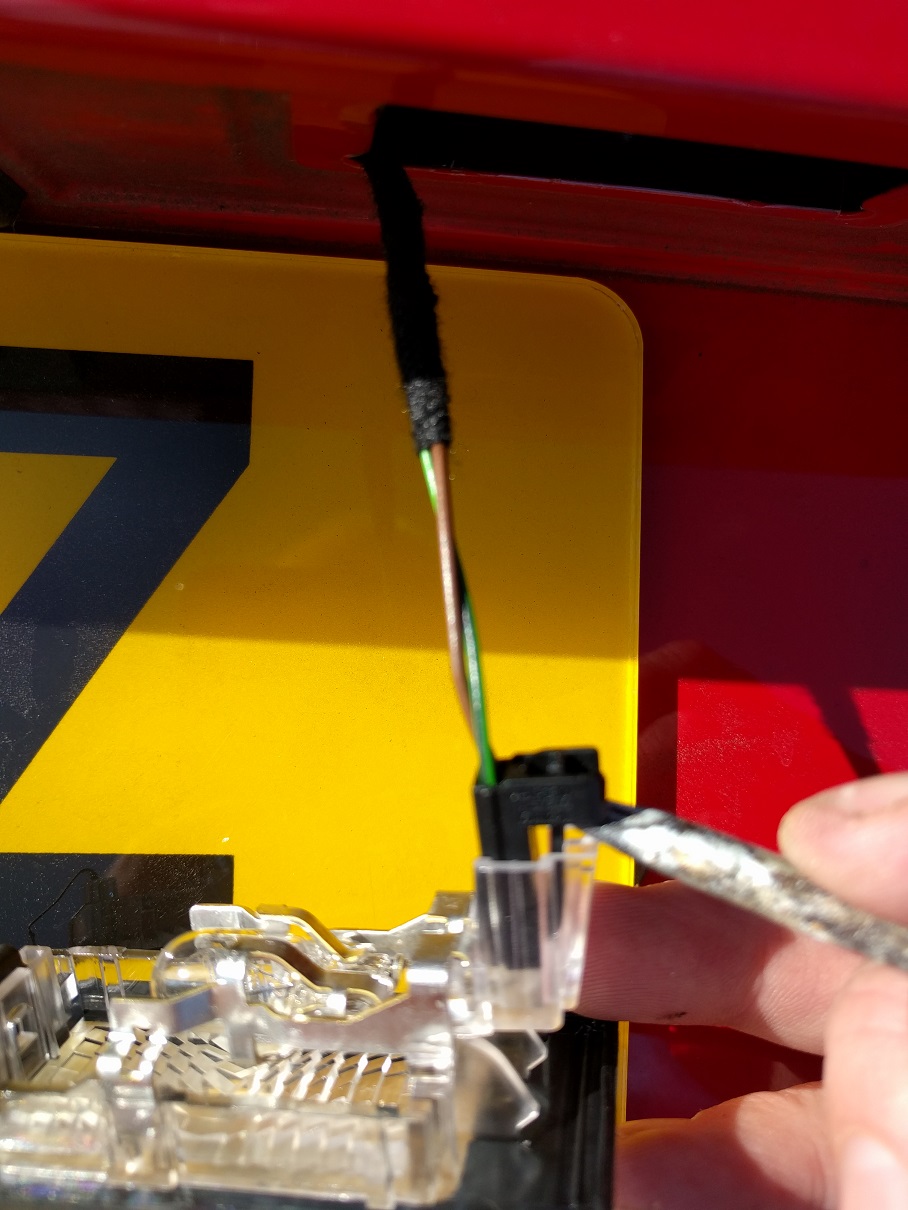
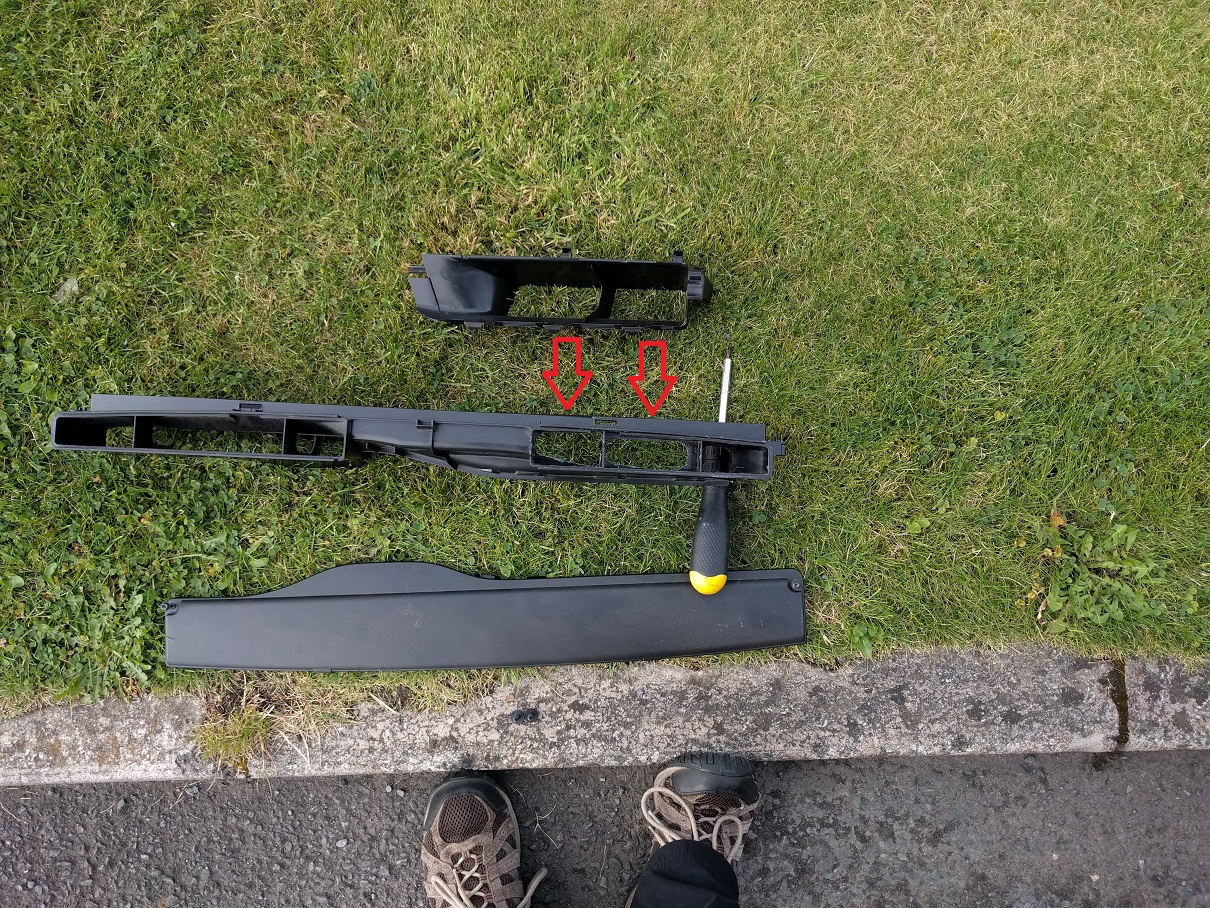
i tried both ways with no success until i used a craft knife to trim the vertical sliver off each side -
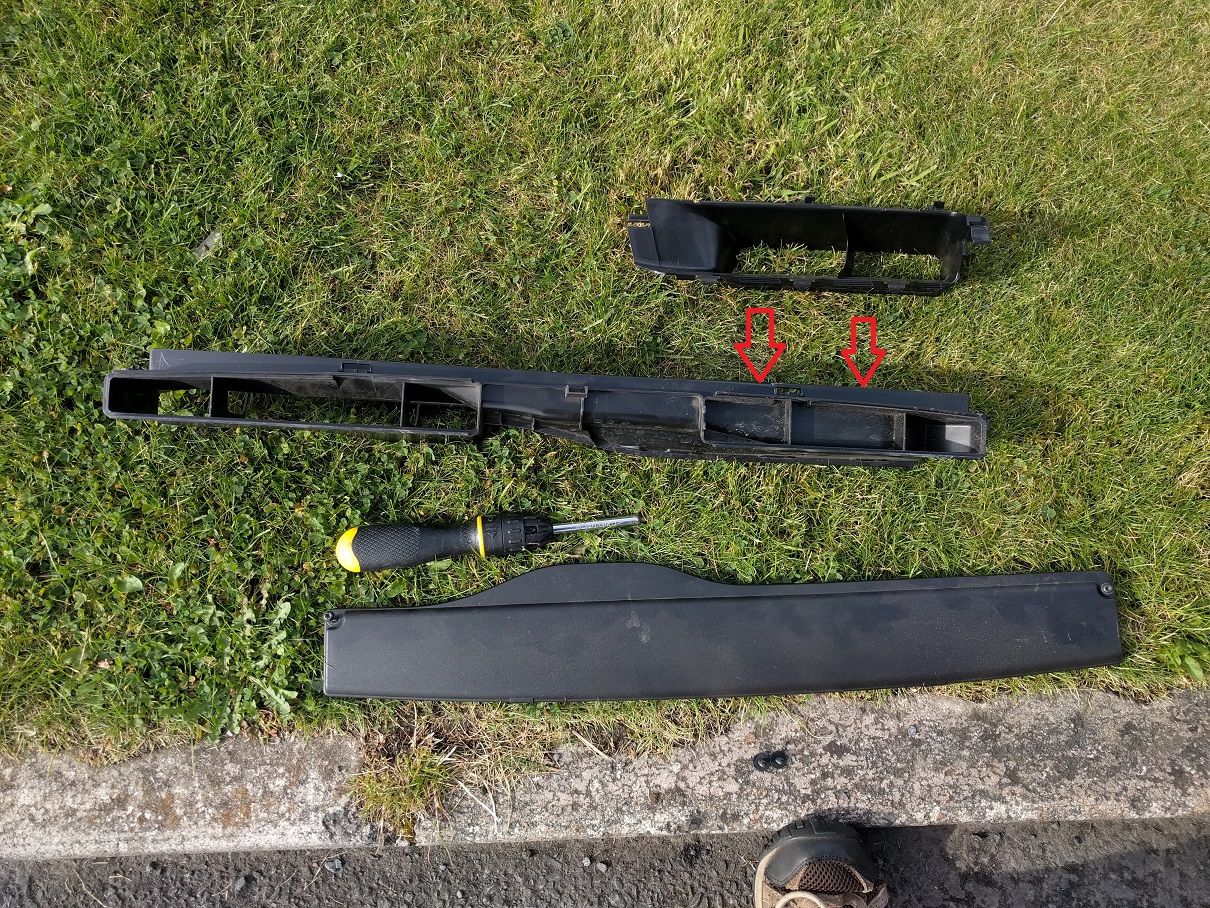
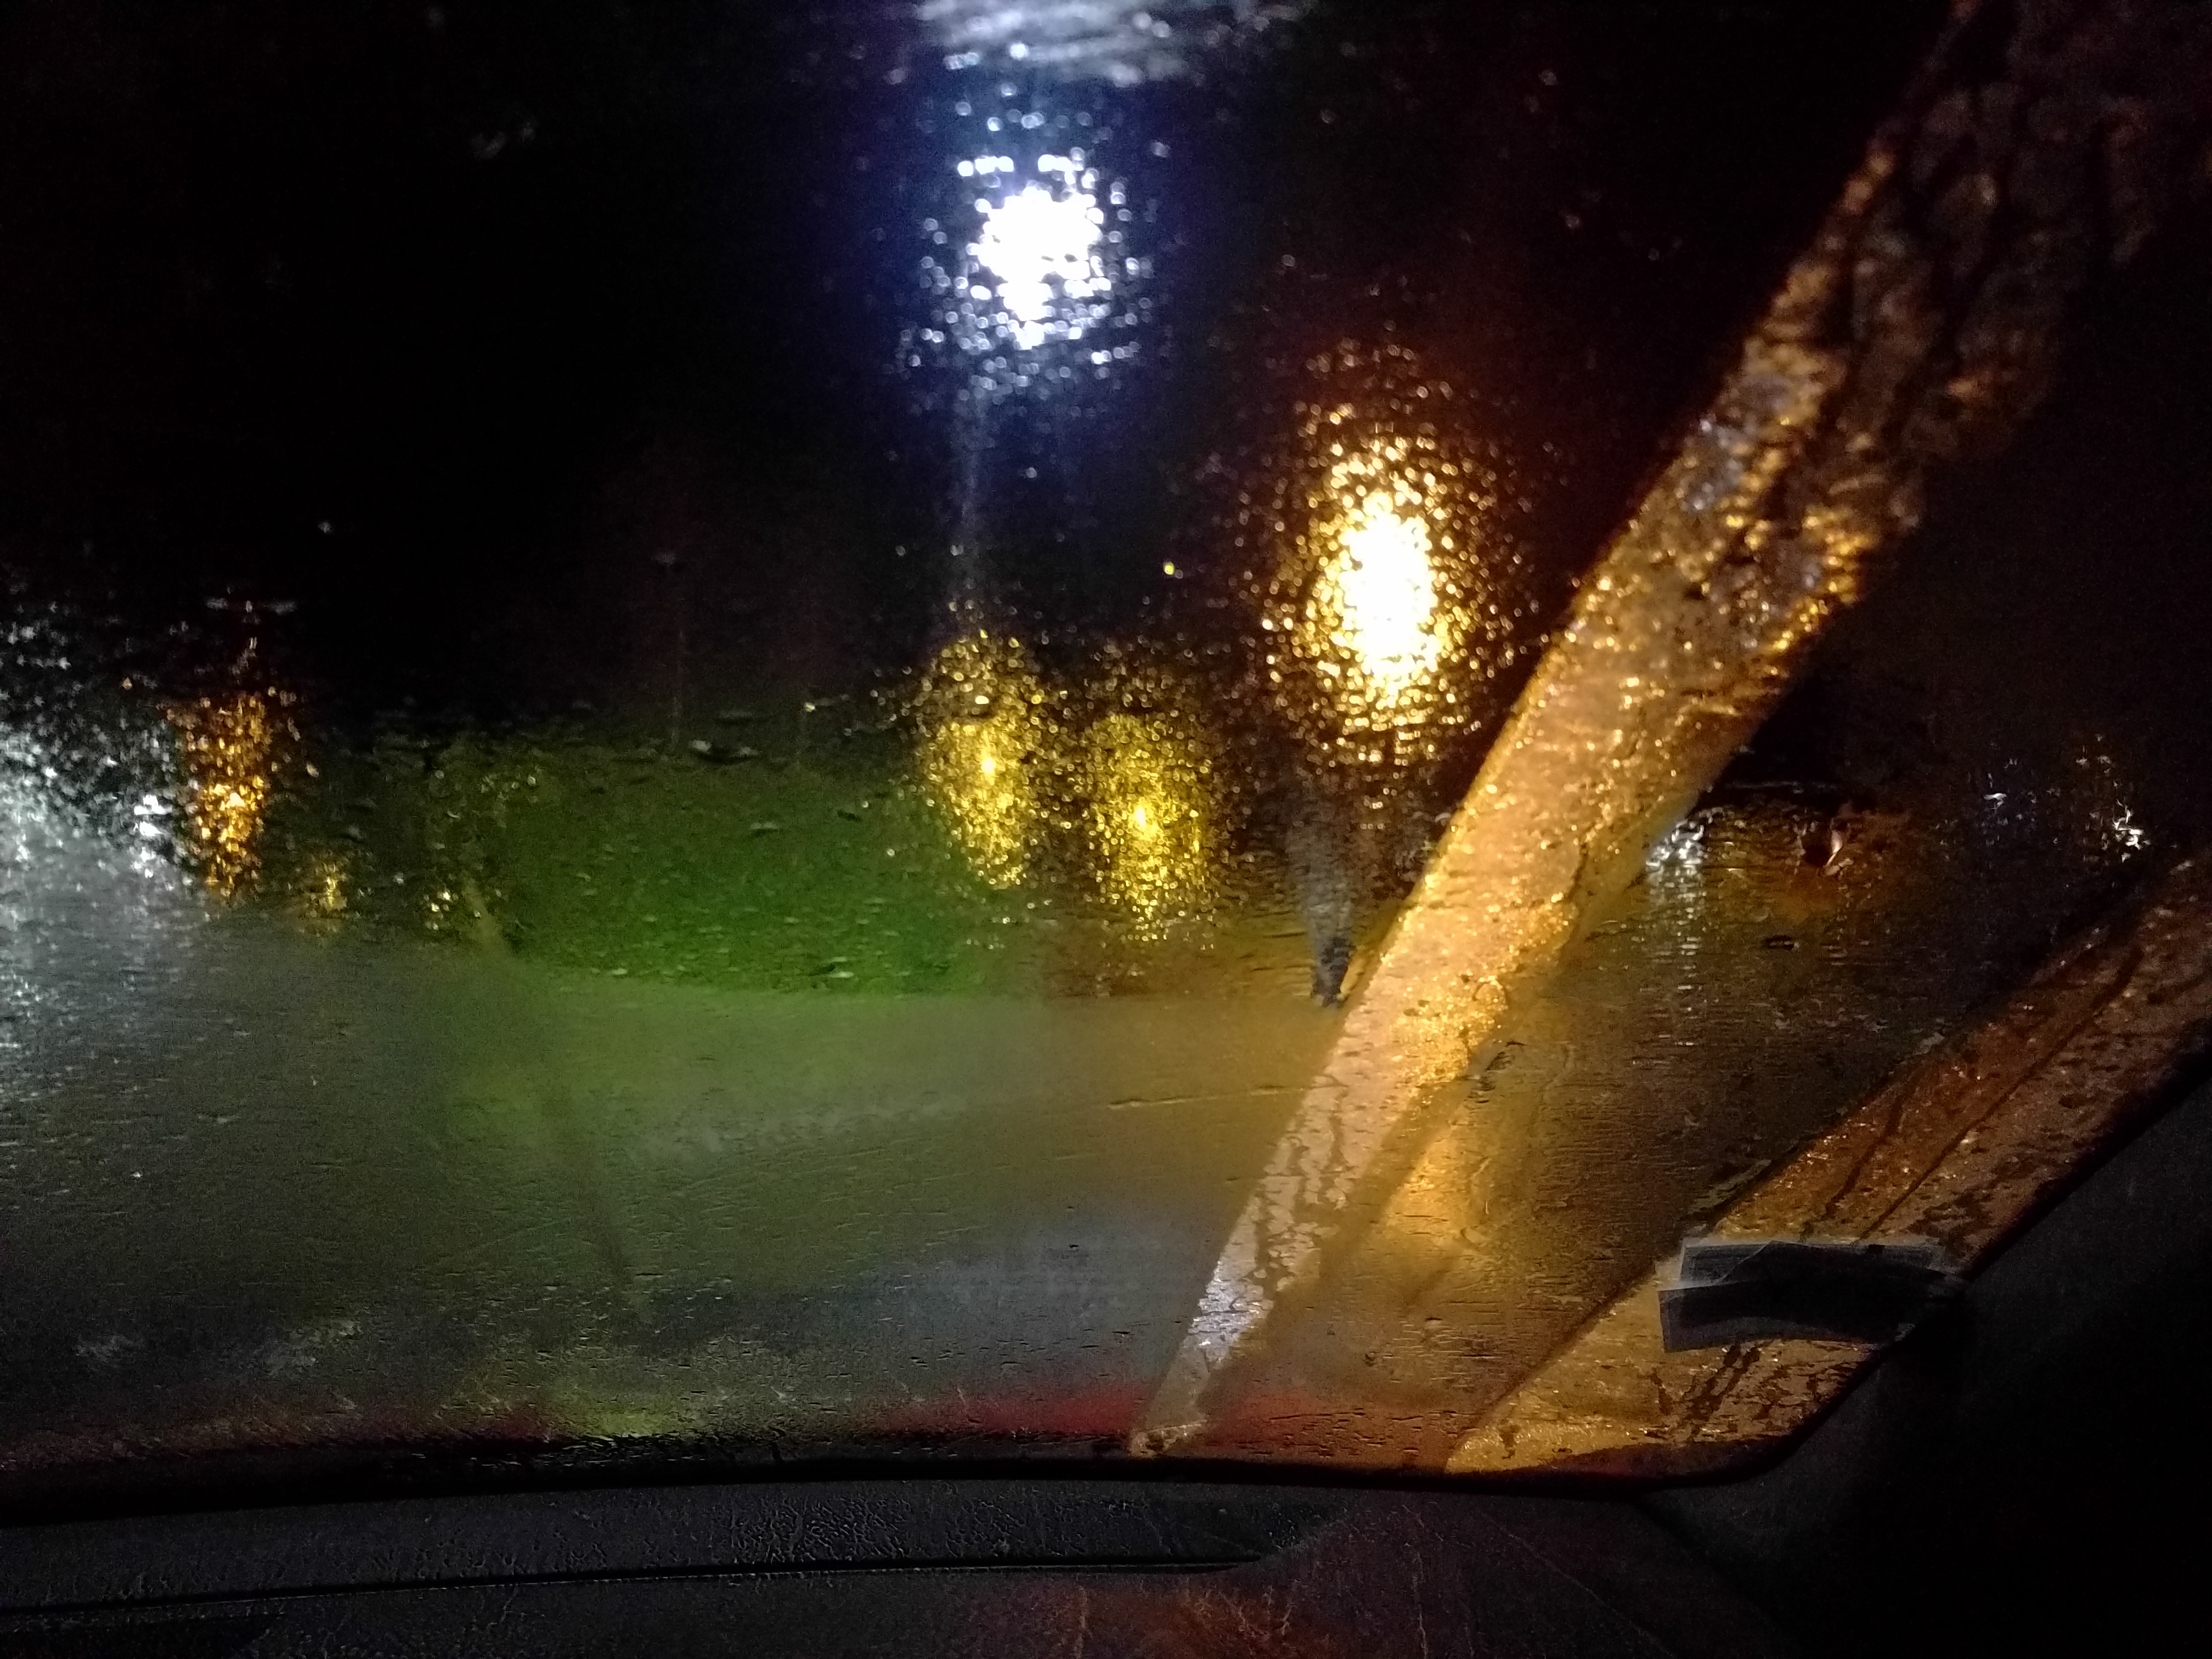
Fitted some Skoda Rapid LED number plate lights yesterday (see photo for code number) They needed the tiniest little bit trimmed from either side (red arrows) to fit properly. the connector is in a different place but easy to unlock with a flat screwdriver blade (sorry for the crap focus) Once fitted a quick code change via OBDeleven for the LED lights as per the VCDS sticky thread and everything works without error messages. the light is much better - will try and get a darkness picture for reference
-
i also fitted one of these off ebay Ramair Panel Air Filter for VW Golf mk7 R GTI GTD Cupra 280 ST FR S3 2.0tsi tdi
-
to save some cash you can improve the airflow by drilling out the blanking plates (red arrows) in the stock air intake stock drilled out
-
Octavia Estate Multifunction Box
encephalopathy replied to ccs-digital's topic in Skoda Octavia Mk III (2013 - 2020)
and the UK appears to be out of stock........ :( -
Show Us Your Rear Diffuser For VRS Combi
encephalopathy replied to BATVANVRS's topic in Skoda Octavia Mk III (2013 - 2020)
can you tell me where you bought the rear 2 line number plate from? interested in changing mine to this thanks! -
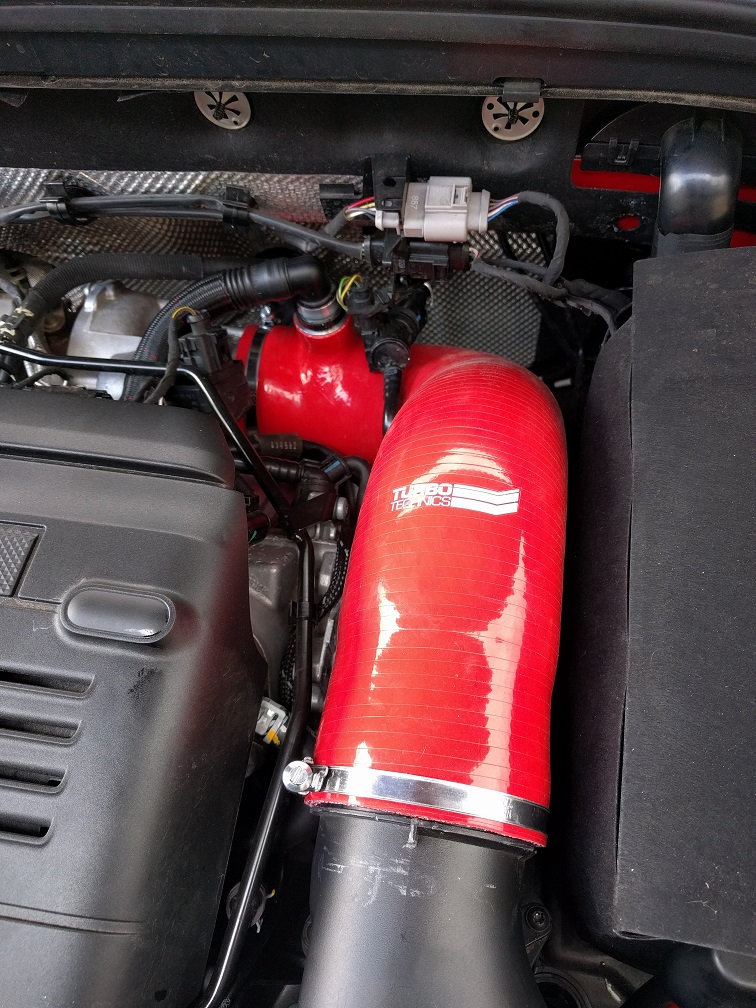
here is a good explanation of the process and some of the benefits VWROC i also used the code VWROC10 at regal autosports to get 10% off the price of the TT intake hose ! (~20 quid saving)
-
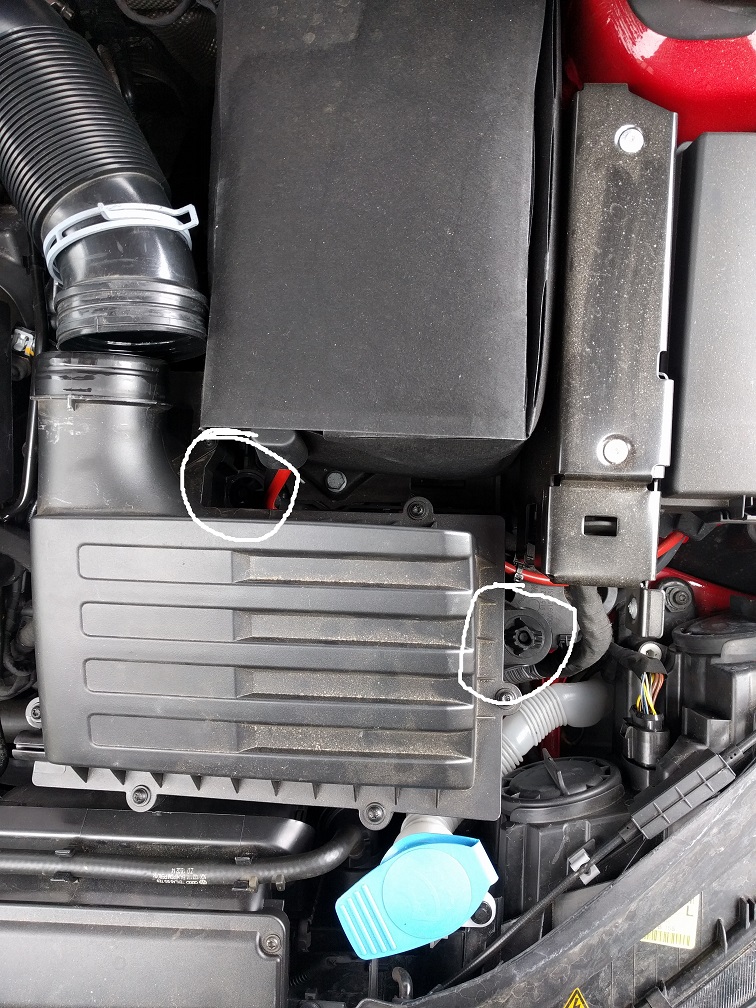
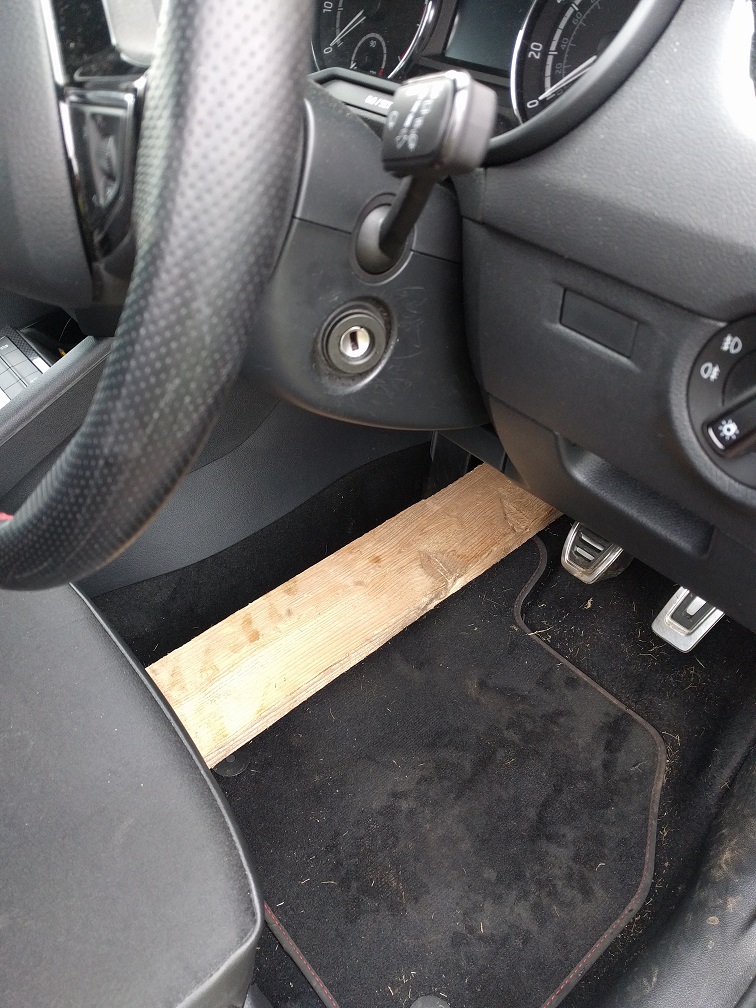
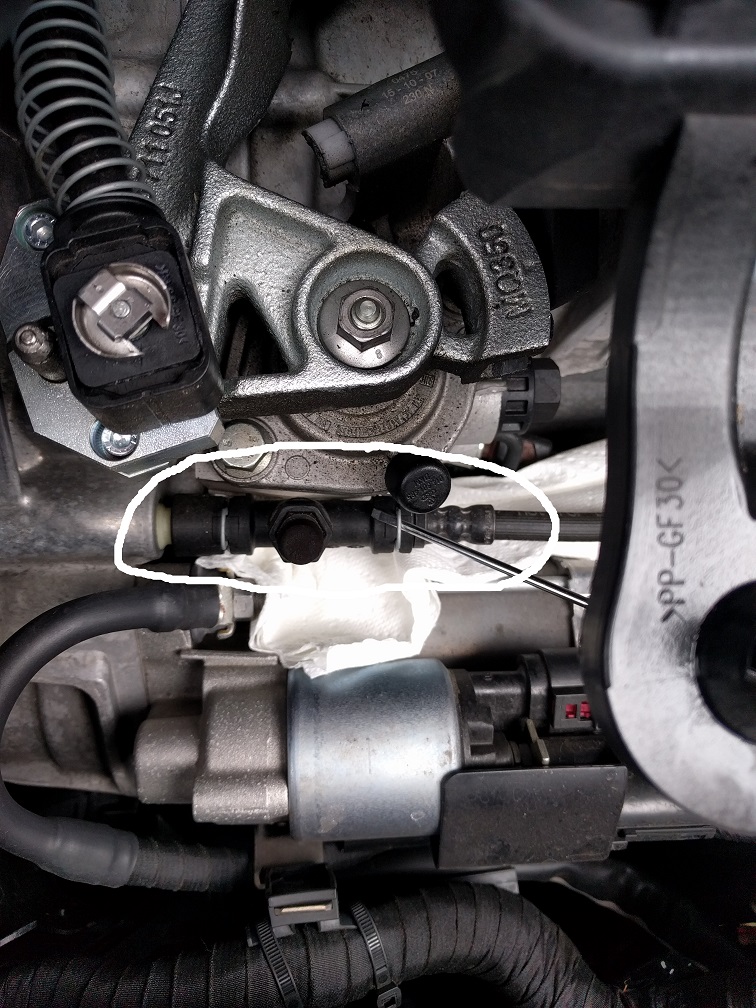
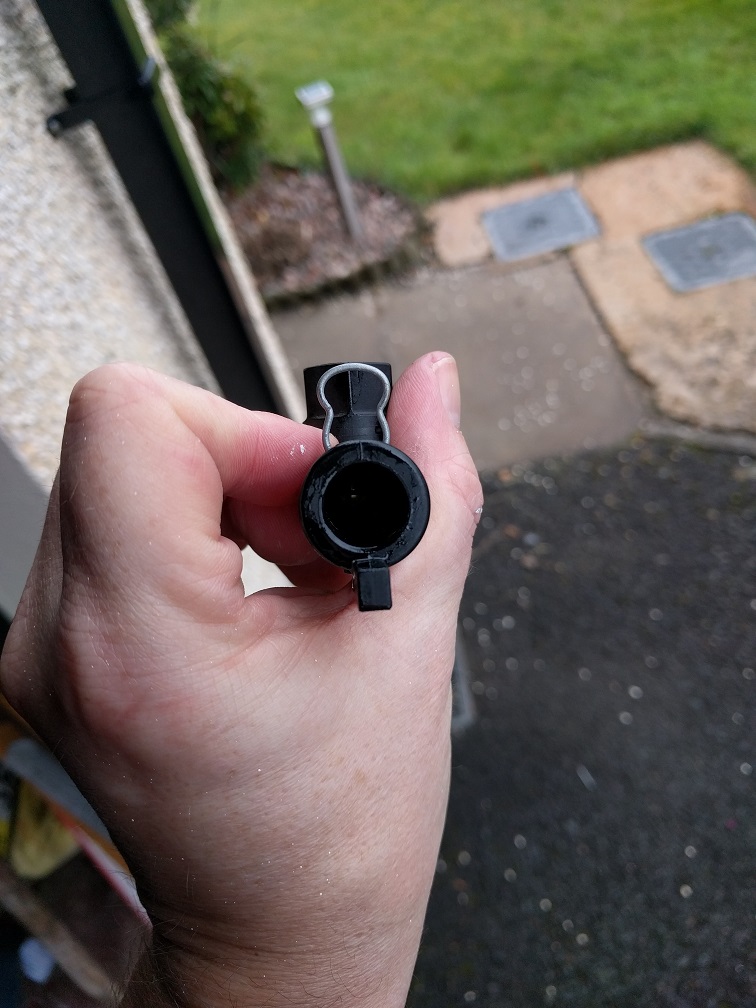
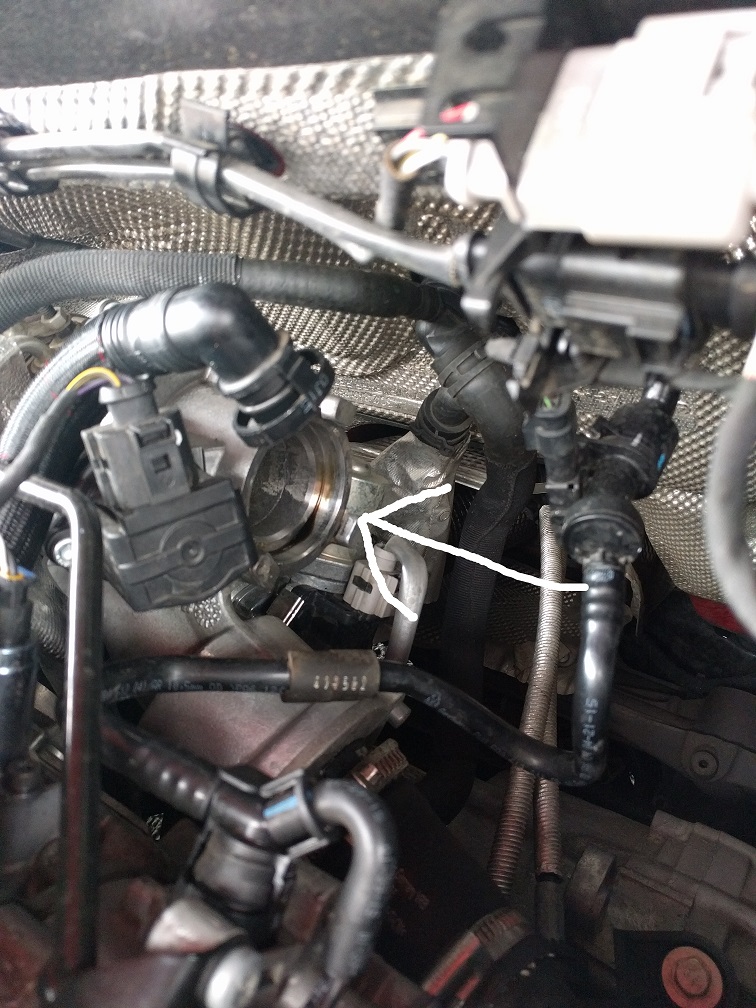
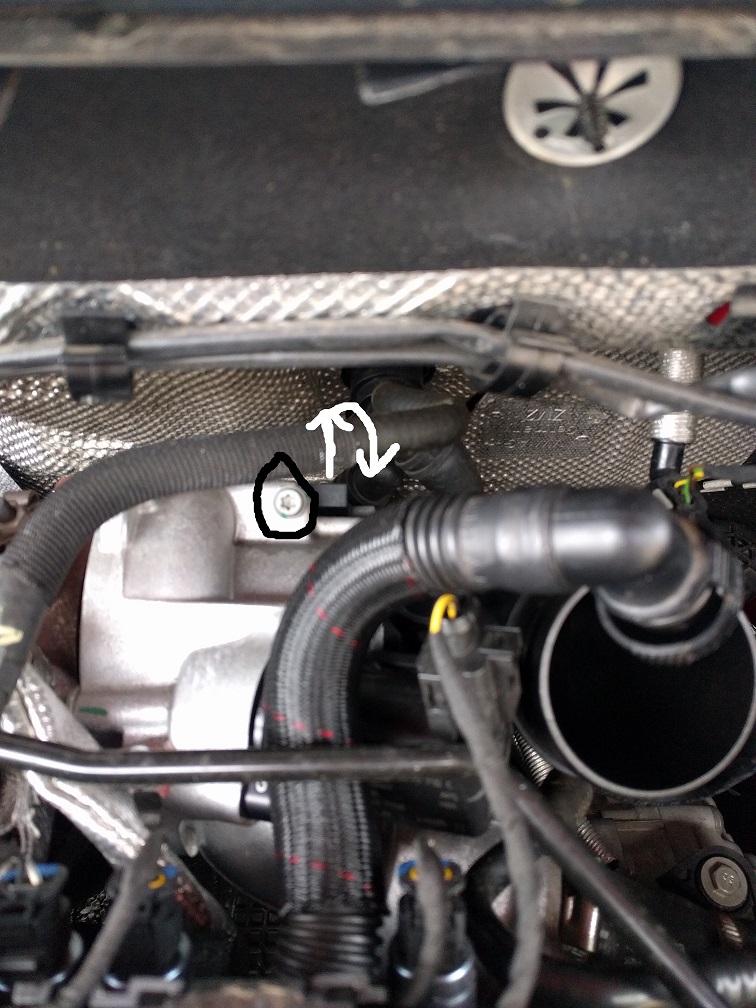
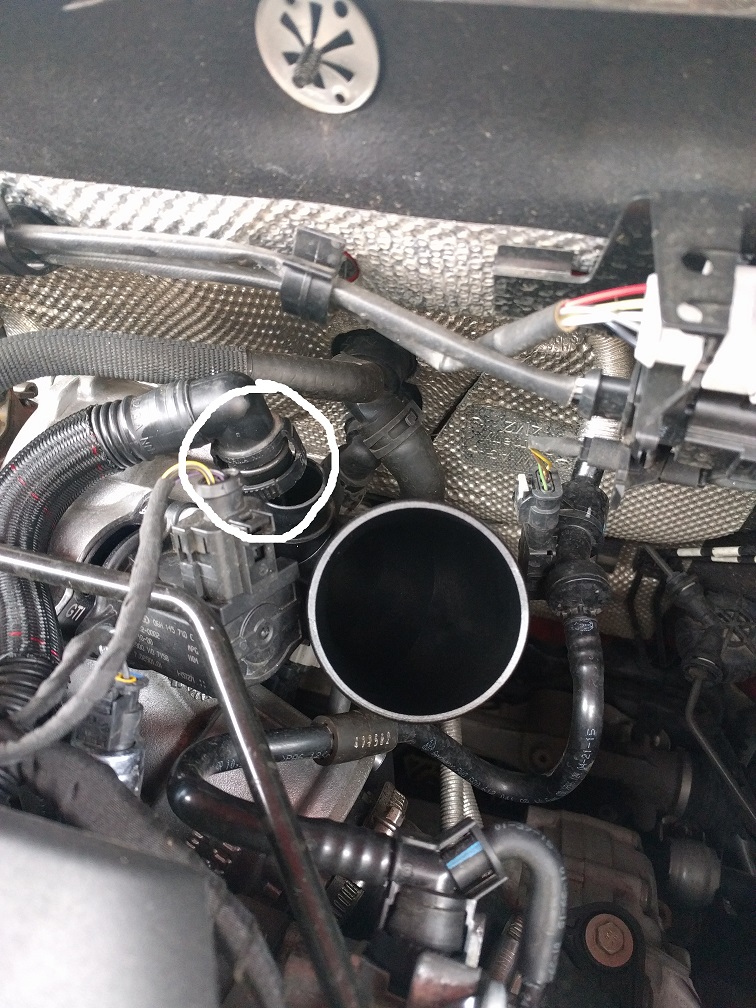
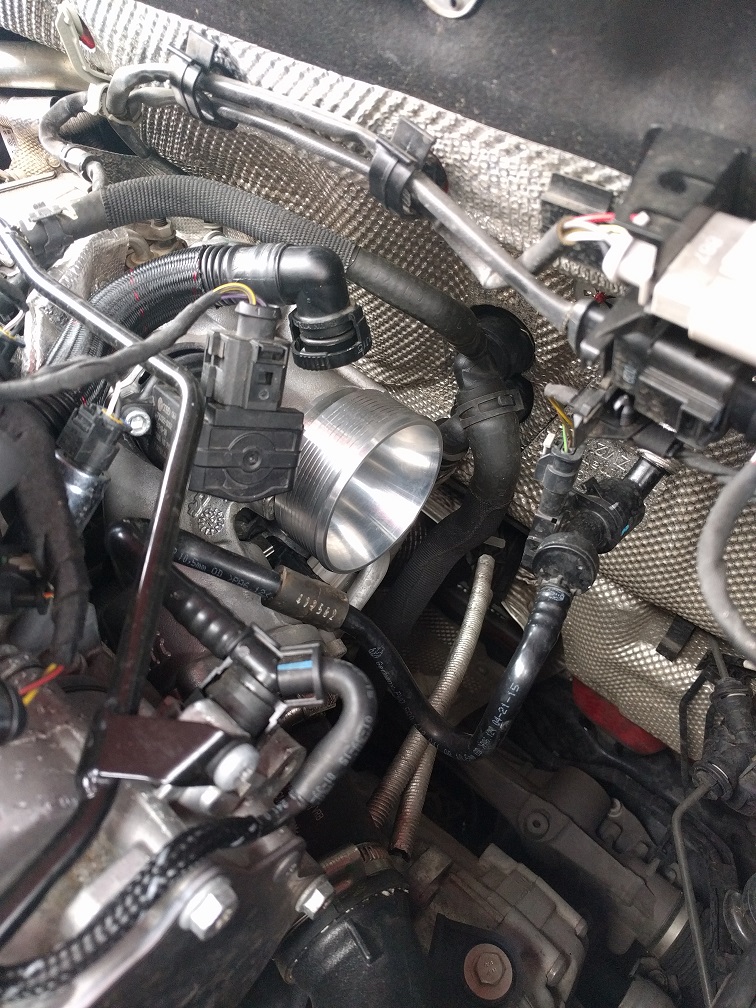
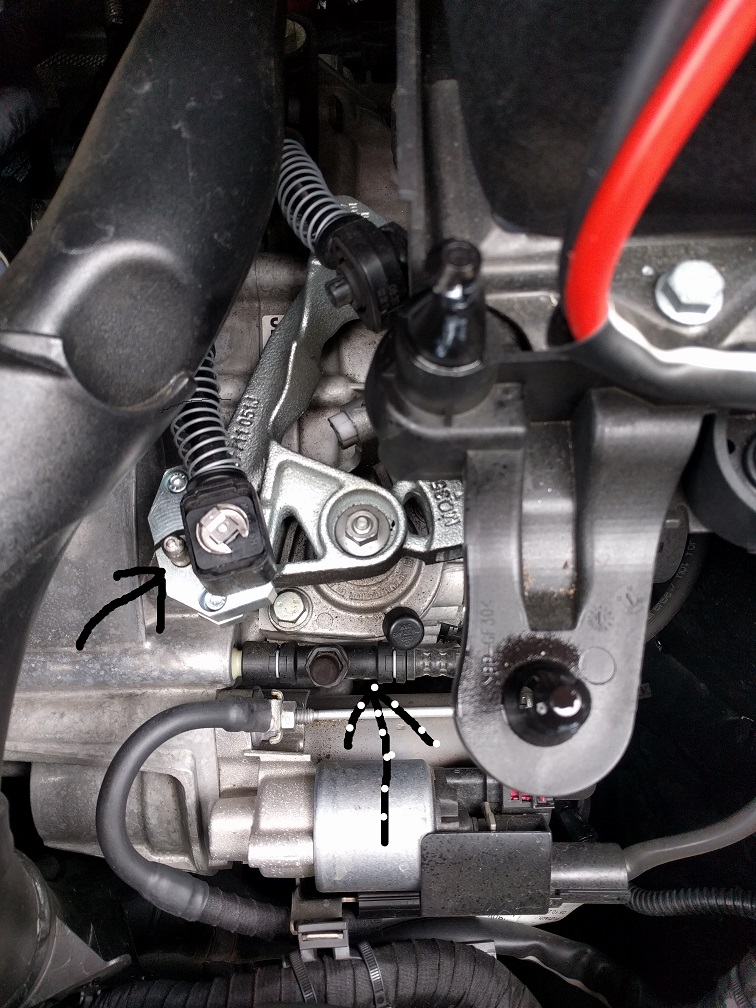
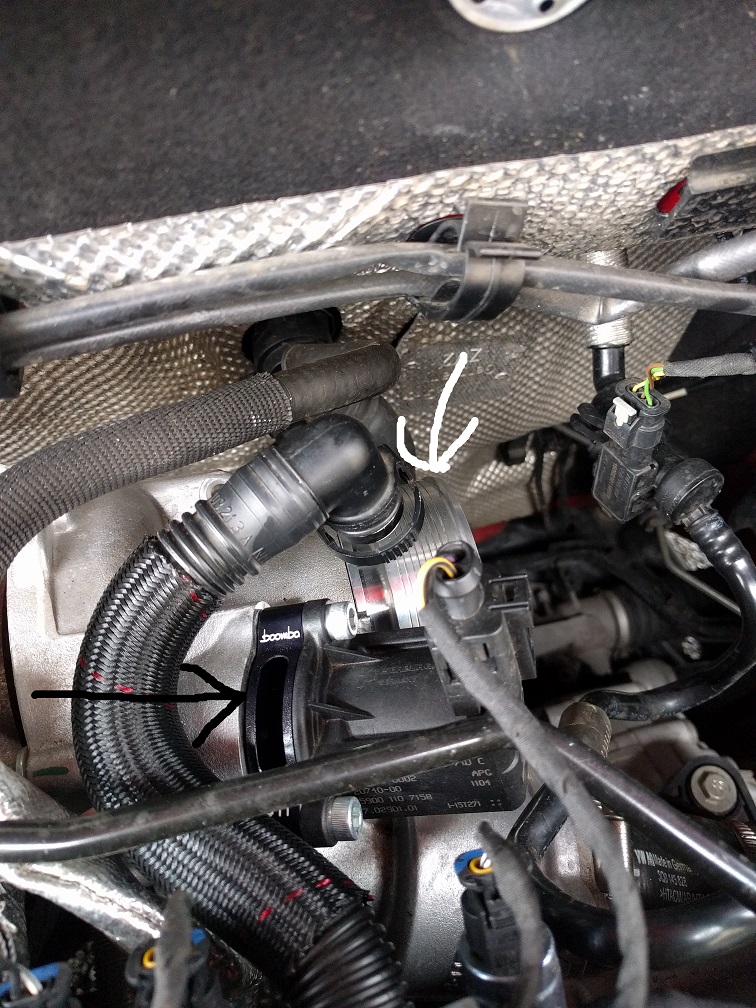
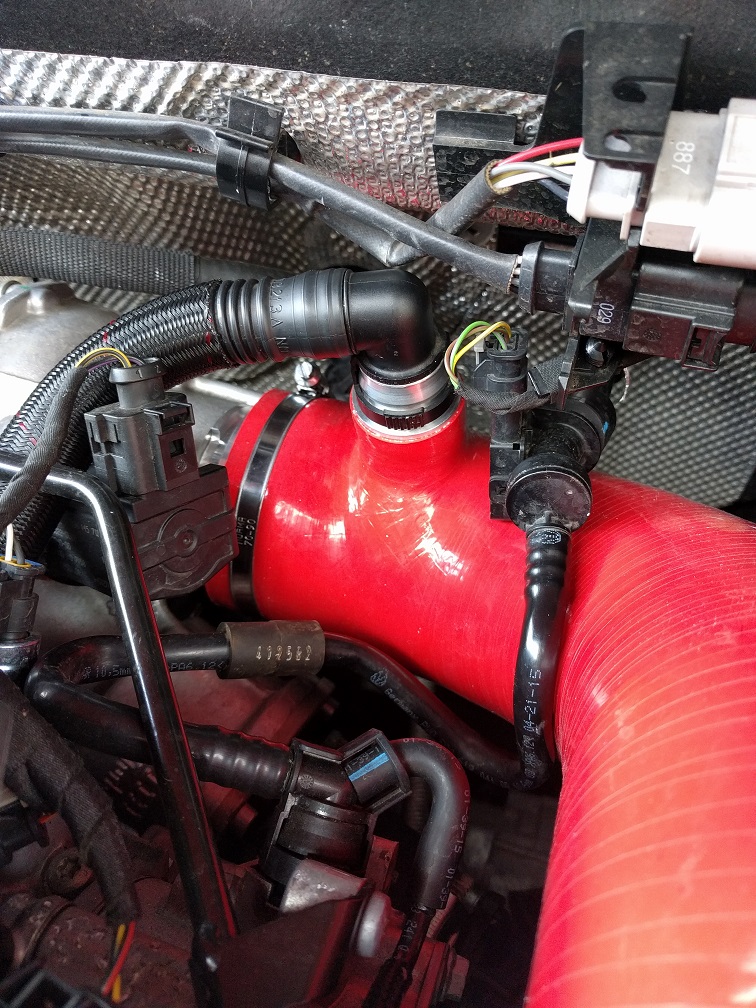
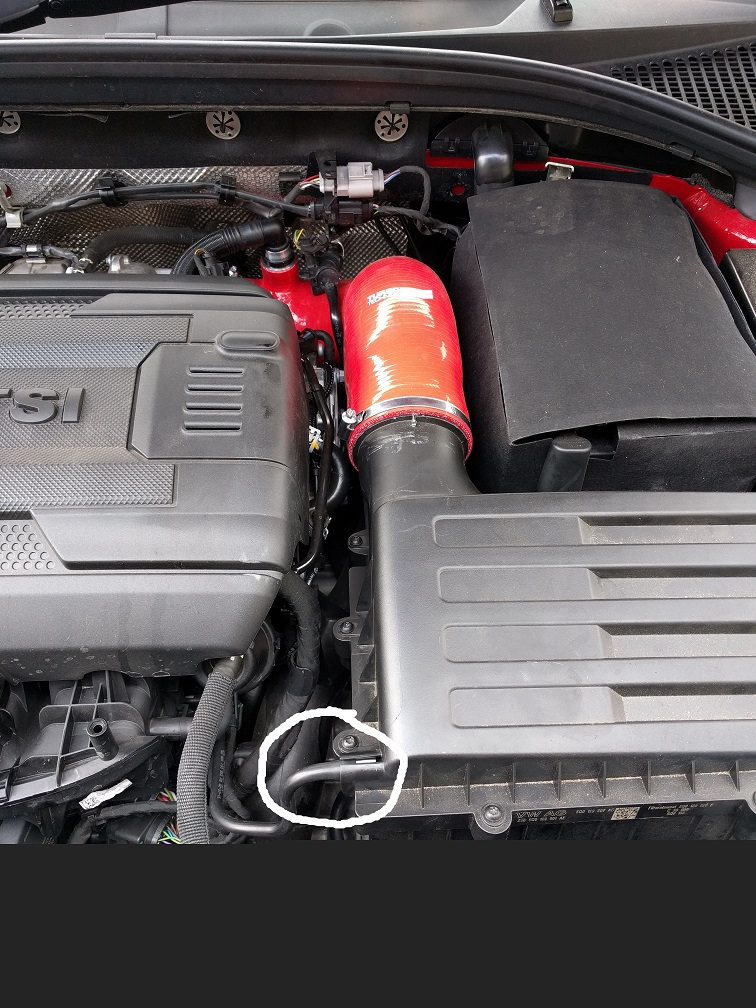
I decided to tinker a little and install a new intake from TT and also remove the clutch delay valve whilst the airbox was off and i had access. //edit post CDV removal - wow - clutch feels much better now when making quick shifts and has a more defined bite point. Wish i had done this mod earlier to remove airbox disconnect the flexipipe, pull out vacuum hose from bottom left corner of airbox then pull the airbox up on the rubber grommets (circled) there is a third one of these underneath. some tugging required!! this gives you a good view of the clutch delay valve (dotted arrow) and also the boomba racing shortshifter i had already fitted before (black arrow) I put some kitchen roll and levered up the 2 clips using a thin screwdriver (make sure you elevate them completely - 2 clicks, but dont pull them off!) Then panic a little as DOT4 brake fluid goes everywhere. this pulls out easily, remove the bleed nut at the top and then you can poke out the yellow valve inside (i couldn't get it out in 1 piece so broke it up) replace the cdv assembly and push down on the clips you levered up earlier with the screwdriver. make sure they go all the way down. Panic a bit more at the amount of fluid that leaked out! then you can bleed the system using a block of wood or if you have a speedbleeder use it (M8x1.25mm is the size needed). I topped the brake fluid reservoir up with some DOT4 (3 quid from local autoparts). you don't want the reservoir to empty as this entrains air and will result in the system needing rebled again when wood is positioned as so, uncrack the bleed valve slightly and airbubbles should come out. be careful as it splashed into my face. tighten bleed screw again, remove wood, pull up clutch then repeat a couple more times until no more air out So onto the TT bigger intake Remove the flexi pipe by undoing the jubilee clip and pulling it off the turbo elbow intake. squeeze and pull the hose (white circle) off the assembly - it just pops off Undo the single silver torx screw (black circle) that holds the turbo intake pipe in place. to the right of it push the black tab shaped bit down and away from you (white arrows) it only rotates about 1/8 of a turn. this unlocks the turbo intake and you can pull it sideways to the right to remove it this leaves you with the stock intake completely removed (white arrow) top tip - remember to do a trial fitting of the intake hose onto the venturi intake (it can be fiddly) Fit the TT metal venturi intake piece into the turbo - push in to fully seat it then rotate it to lock it in place. this took a bit of effort I had been worried that the intake pipe (white arrow) wouldn't fit beside the turbo muffler delete valve (black arrow) that i had already fitted, but there weren't any issues top tip#2 - remember to thread the jubilee clip onto the intake hose BEFORE mating it with the new venturi metal bit of the intake. reconnect the hose on the top (just pushes on) it is a bit of a stretch but not too tight. it took some manoeuvring to position the wires/black assembly thing at the elbow of the intake pipe (not sure if they could go below the red pipe or not, but this seems to have worked for me) reattach the airbox onto the 3 rubber grommets (i used a little silicone spray on these which made it easier) feed the jubilee clip onto the airbox end of the red intake pipe, mate them together and tighten the jubilee clip remember to re-attach the vacuum pipe to the lower left corner of the airbox (circled) and enjoy! Hope this is useful to anyone wanting to upgrade some bits. I am a complete mechanic muppet but still managed it
-
you can adjust the initial heat of the seats when you press the button but only as in the initial heat will be 1 2 or 3 bars (default is 3), you not able to change the level of each setting in actual degrees
-
really stupid question about spacers - if you fit them with the longer bolts i take it you no longer have a locking wheel nut?
-
what oil should i get for my 220 tsi? i fancy having some already in the car in case i need it
-
my advice is only make 1 alteration at a time and check that it works so if you need to backtrack it is easier
-
Have developed a problem with the heated windscreen - there is a 3cm wide vertical strip that no longer seems to be working. annoying as it is directly in sightline. it clears eventually but takes much longer than the rest of the window car is 15 months old now - is this a warranty fix? thanks for any advice
-
can i ask how the gaiter came out - did it unclip between the black gaiter and silver surround, or silver surround and the main panel?
-
Not exactly 'one of a kind' but keep an eye out Probably already across the border on new plates vRS stolen from dealer
-
what is the difference between the kit above and this? http://www.boombaracing.com/2015-volkswagen-gti-blow-off-valve-adapter-bov/
-
Need some advice on how to remove the boot/gaiter around the gearstick as i want to change the gearknob from the stock one to a different one. in order to remove the stock one the gaiter/surround needs to pop out but i cant seem to figure it out any info appreciated!
-
i'm not sure but i can tell you the shortshifter for the golf VII (european spec) from boomba racing fits and works well on the petrol octy 3. It takes around 20 minutes to fit, the hardest part is pulling/lifting off the airbox
-
VCDS & enabling Hill hold functionality
encephalopathy replied to ajoj2's topic in Skoda Octavia Mk III (2013 - 2020)
autohold is one feature on the tiguan with its electric handbrake i would like on the vRS not sure if its possible with manual handbrake octavia - maybe by increasing the duration of the hillhold (it only holds a couple of secs before disengaging) i suspect it isn't possible probably for good reason... -
i have trimmed the inside of the stock air intake to open it up. seems to improve pickup a little. lots of aftermarket air intake options via the golfmk7.com forums
-
you can activate it using obdeleven as well - it is one of the more straightforward ones to do