JR RS
FREEDOMLite
-
Joined
-
Last visited
Everything posted by JR RS
-
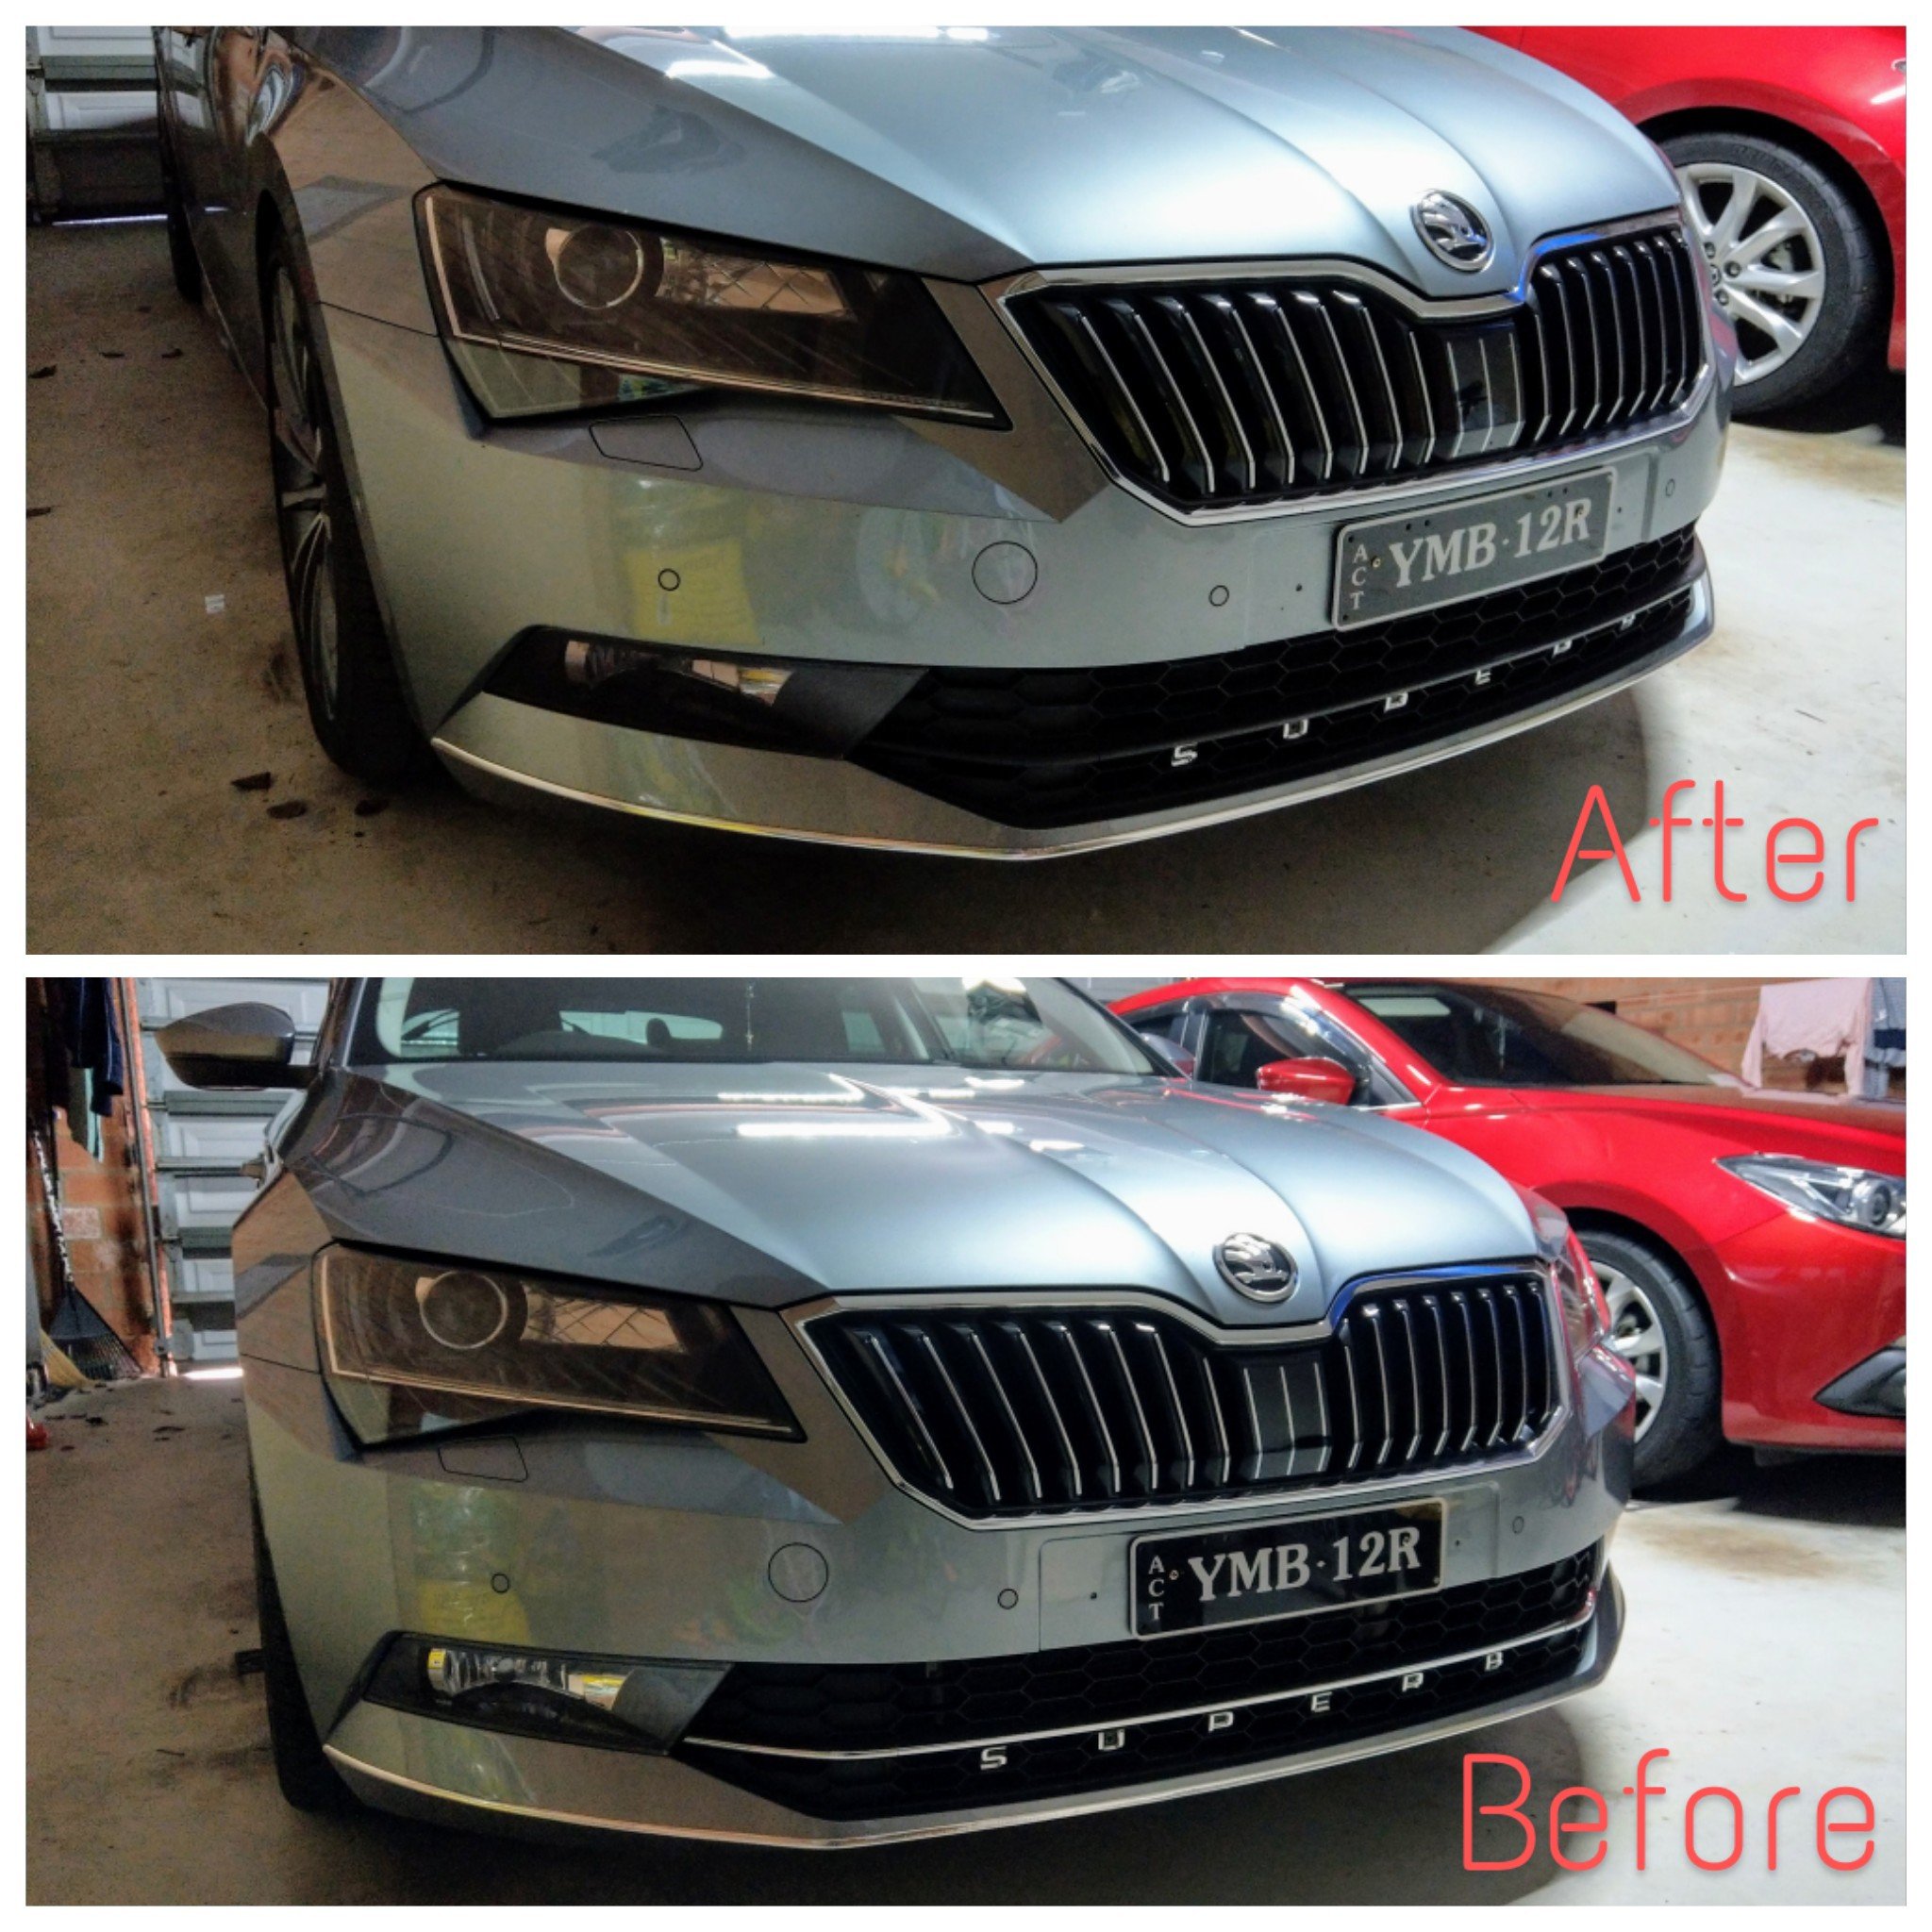
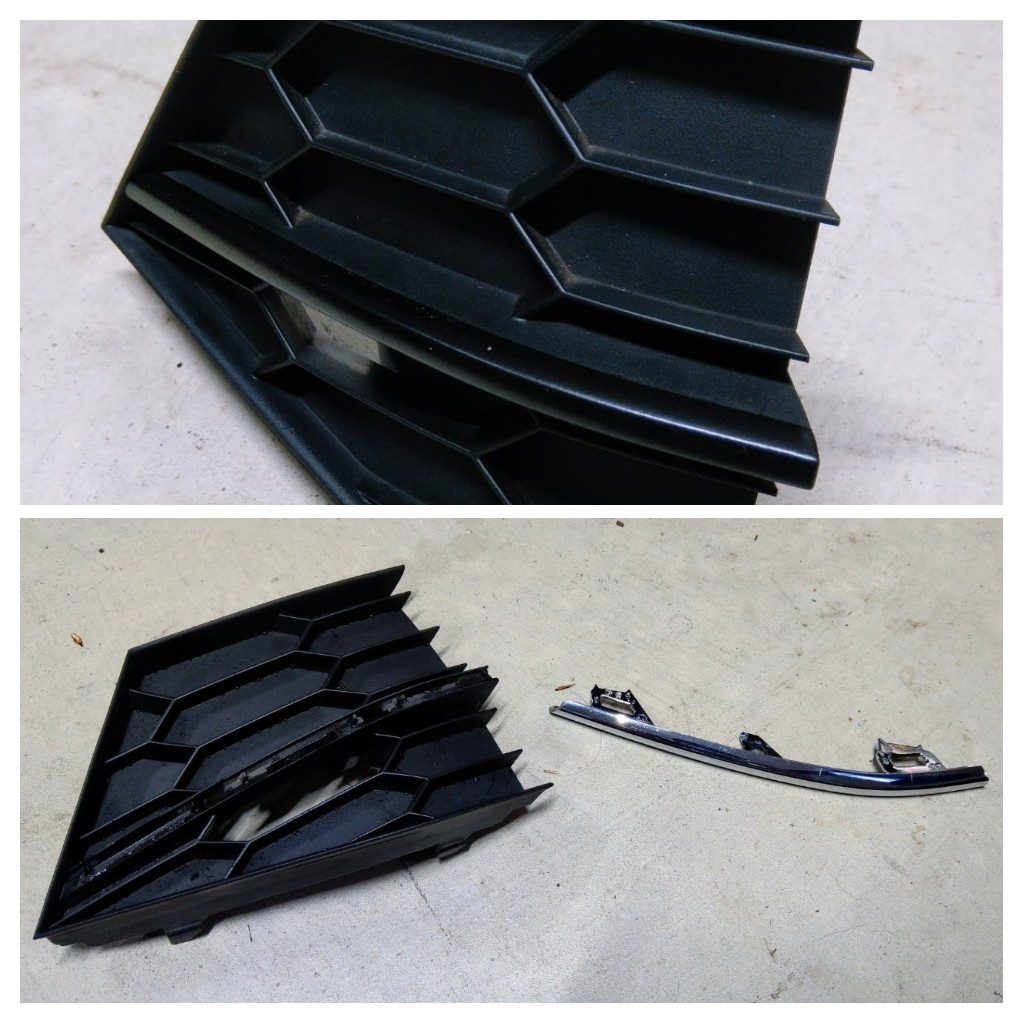
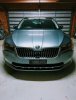
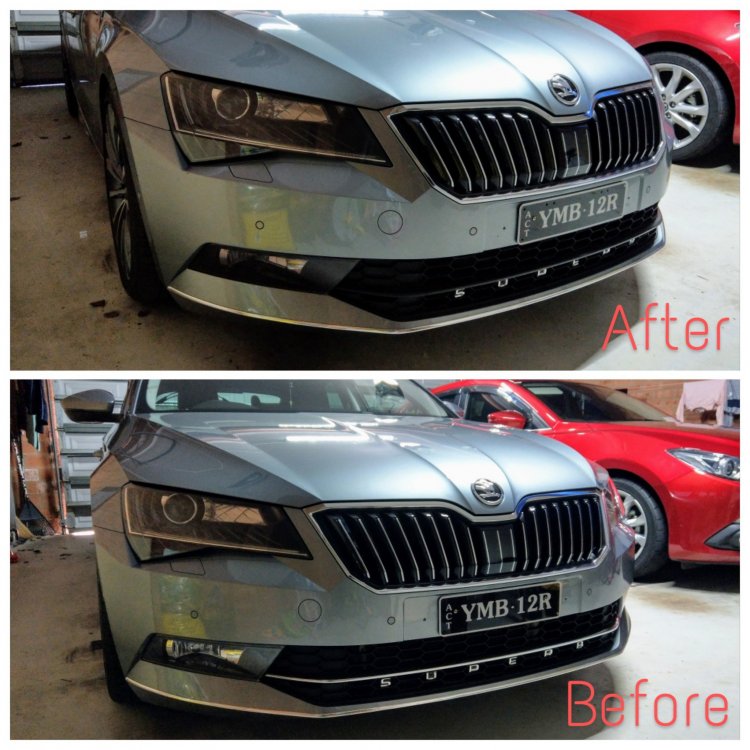
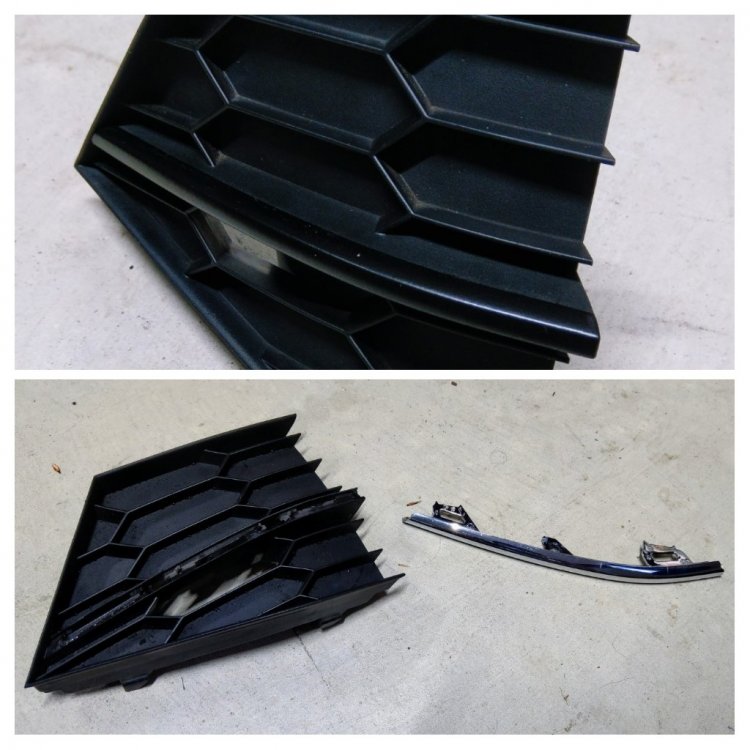
if ur referring to the chrome bit next to the foglights - yes its very easy to remove and clip back in. u simply pull off the side grille cover, then u can unclip or clip the chrome bit out/in. i separated the chrome bit so i could plasti-dip it black.
-
I don't think it's the same spot - urs (mk3) is located on the boot side wall, between the wheel well and the boot opening. The mk3.5, which @Richmixhas, says it's between the seat and the battery. Quite a few things have changed under the skin between the mk3 and mk3.5 Superb.
-
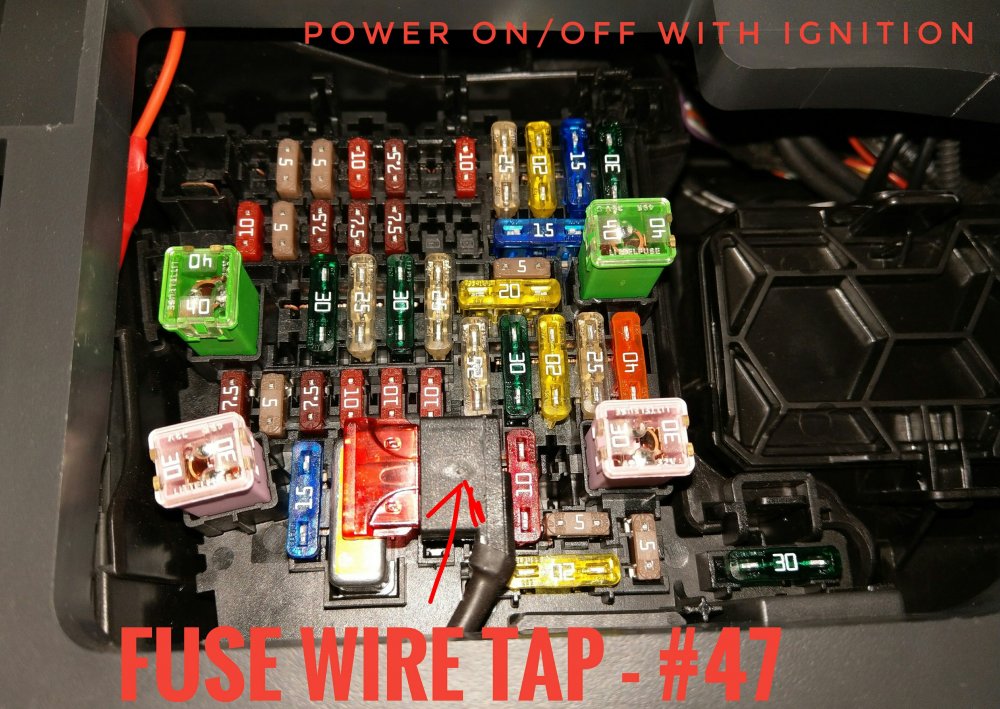
i used fuse location number #47. u can find more details in the link above.
-
Some markets have the option to get a larger capacity fuel tank. PR code is 1Z2. OM4 = Fuel tank (66 L) 1Z2 = Increase in initial standard fuel filling Here in Oz, the additional 1Z2 is included as standard on the Superb. Total capacity increases by 10-15L. Haven't been able to confirm the exact increase. The most I've put in is 78L.
-
Shocking eh!!! How did that pass quality check, or user acceptance testing?!?!? Sheesh
-
by the looks of that, there is plenty of room in and around that plastic flappy bit above the ACC radar ur right, they went overboard with the clips and screws to secure the grille!!!
-
with the iV models - is the Canton DSP amp still under the front seat?
-
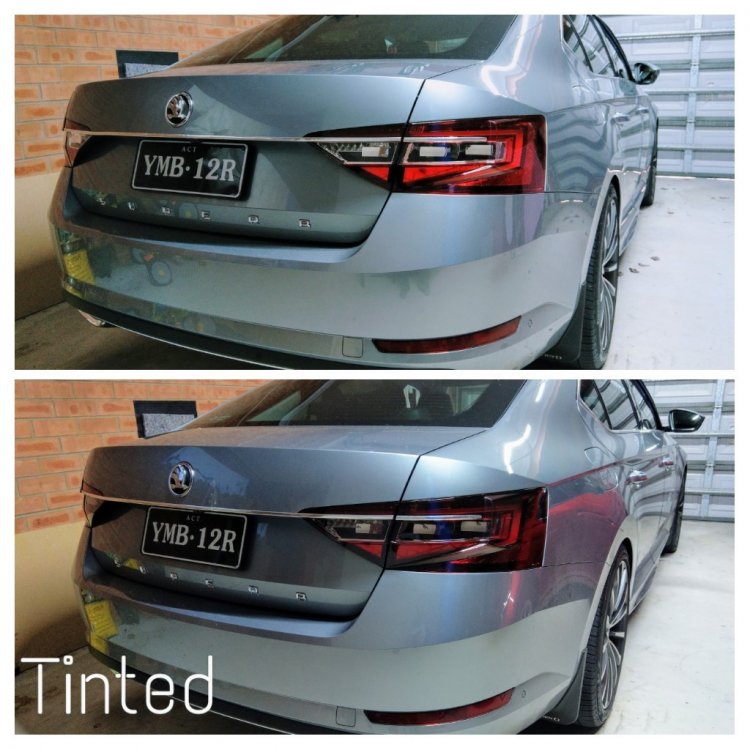
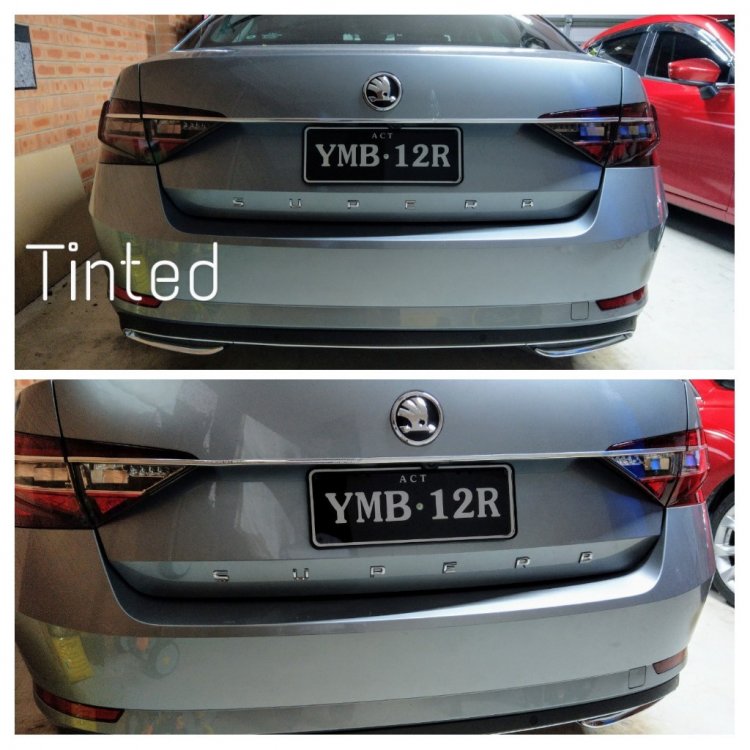
They say Smoking is addictive. Guilty. After smoking the fogs, I did the tail lights too. Bl00dy 'ell it was difficult to vinyl tint. I'm not happy with it, from up close the imperfections can b seen. But stand back and it looks good It's "lightly smoked", so the lights r no where near compromised at all!!
-
@TheBinarySheep- here is pic of behind the grille. Not an easy task. U can see all its mounting points. Circle = screw Dash = clip
.thumb.jpg.520a7219b9755d0bb4ddfda713d45164.jpg)
-
yes, DO NOT move/disturb the ACC radar sensor as that will require an expensive re-calibration exercise at the dealers!!!! with regards to doing it without removing the front bumper - yes, it can be done @TheBinarySheep , but as i mentioned before it will b very fiddly, and very little room to work with. the grille is held in place with not only screws, but its clipped in all around the edges. plus when u drill the plastic, there is going to be lots of plastic shavings that will fall everywhere. With the bumper off, I was able to comfortably put a sheet cloth covering the air intake, and covering the top of the radiator and inter-cooler. so all the plastic shaving would fall on the cloth sheet, allowing me to easily remove and clean up. u could use a hot knife to cut out the plastic in a rectangular shape, and thus minimise the plastic shavings, but u need to watch out for the radiator directly behind it.
-
you can find the coding steps in the link below. as @BOD20said - make sure u have the windscreen camera as per the second pic (big triangle looking shape).
-
@Dean391- u'll need to enable High Beam Assist (HBA) via vcds or obdeleven. Provided ur car has the correct A5 camera, the high beams will then automatically dip when an oncoming car, or trailing behind a car is detected.
-
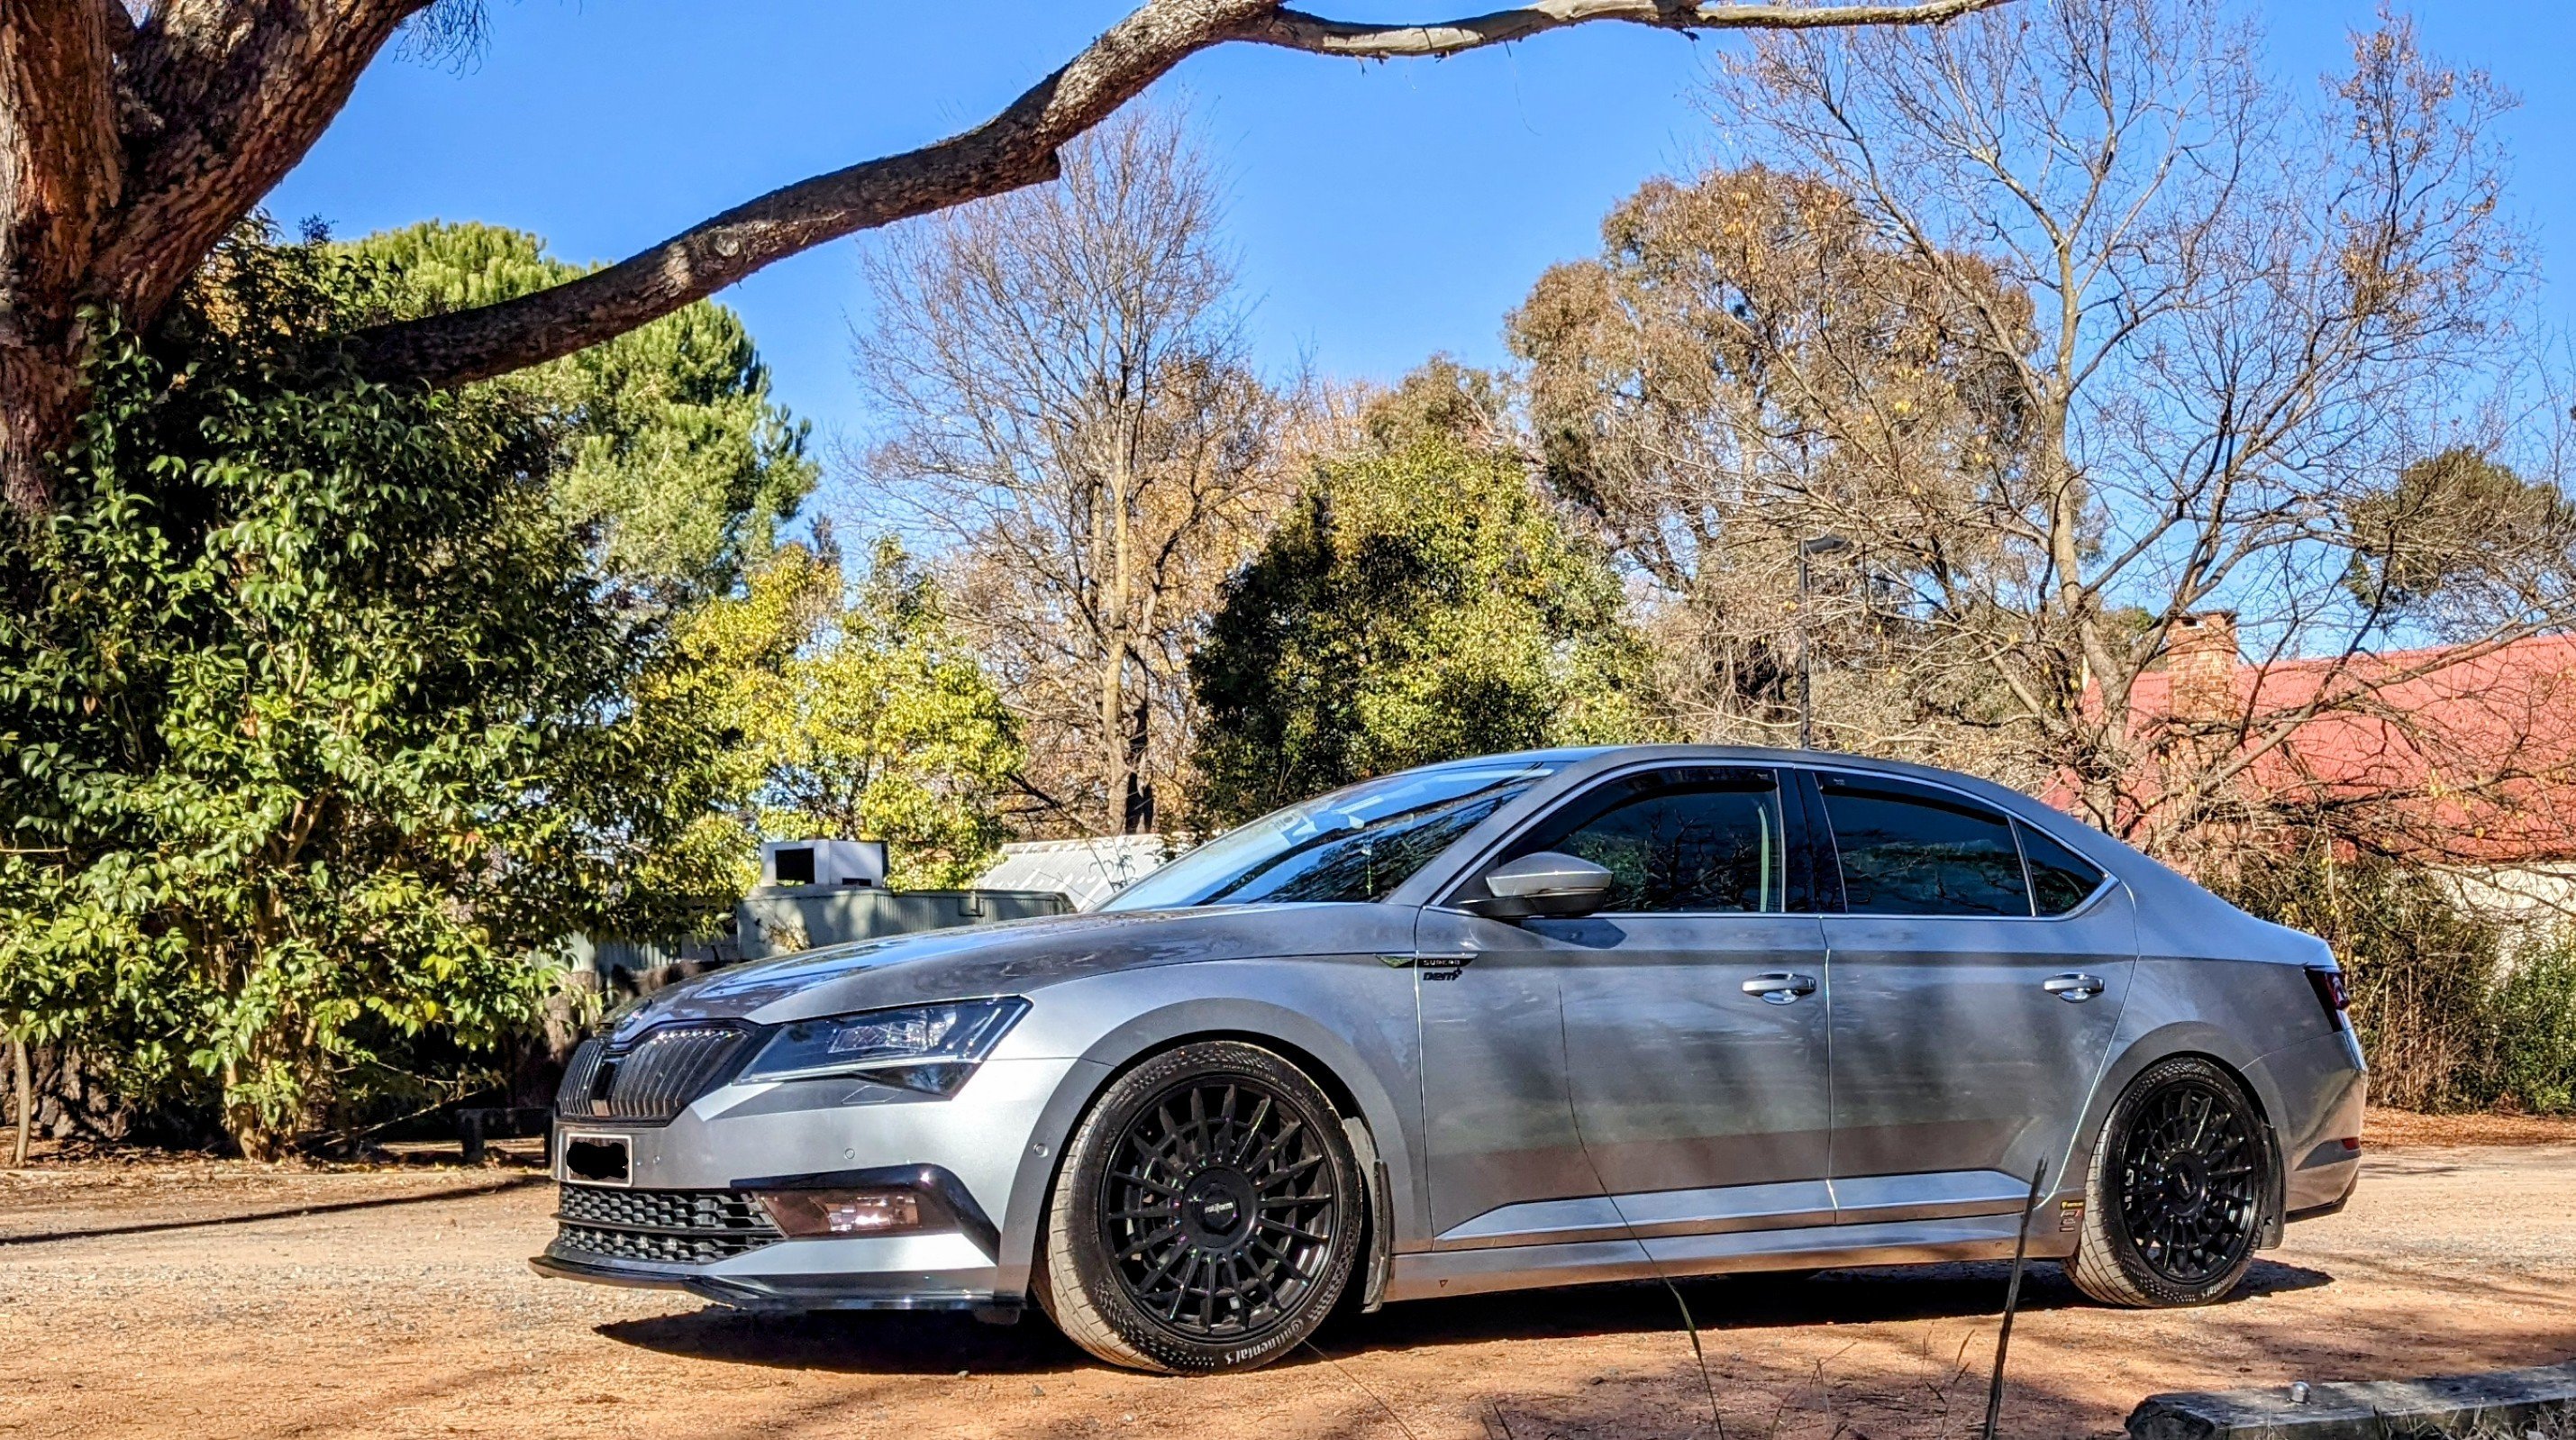
if its the "sporty look" ur after, but all the L&K bells and whistles, u can get an L&K and then:- - change (or plastidip) all the chrome bits (front grille + window surrounds) to black - change the wing mirror covers to black cover - change/swap the wheels to Sportline versions - shocks/springs combo if u want to finish the look the interior is a different story though and much harder to change as u get the following in the Sportline but not L&K:- - flat bottom steering wheel (u can retrofit this) - blackened interior roof-line and pillars (don't bother retrofitting this one) - alcantara door cards (u can retrofit this if u find a donor car) - sport seats - performance monitor on the infotainment (u can't retrofit fit this) .....now, this is the part i hide cause all the Sportline owners r going to start throwing projectiles my way!!!!
-
I did the same to mine a few months ago. It "Completes" the bay.

-
don't listen to those 280 folks - they got too much exhaust gases inside their heads and they flap too much :P
-
can u share a link or part number for the KW DCC shocks?
-
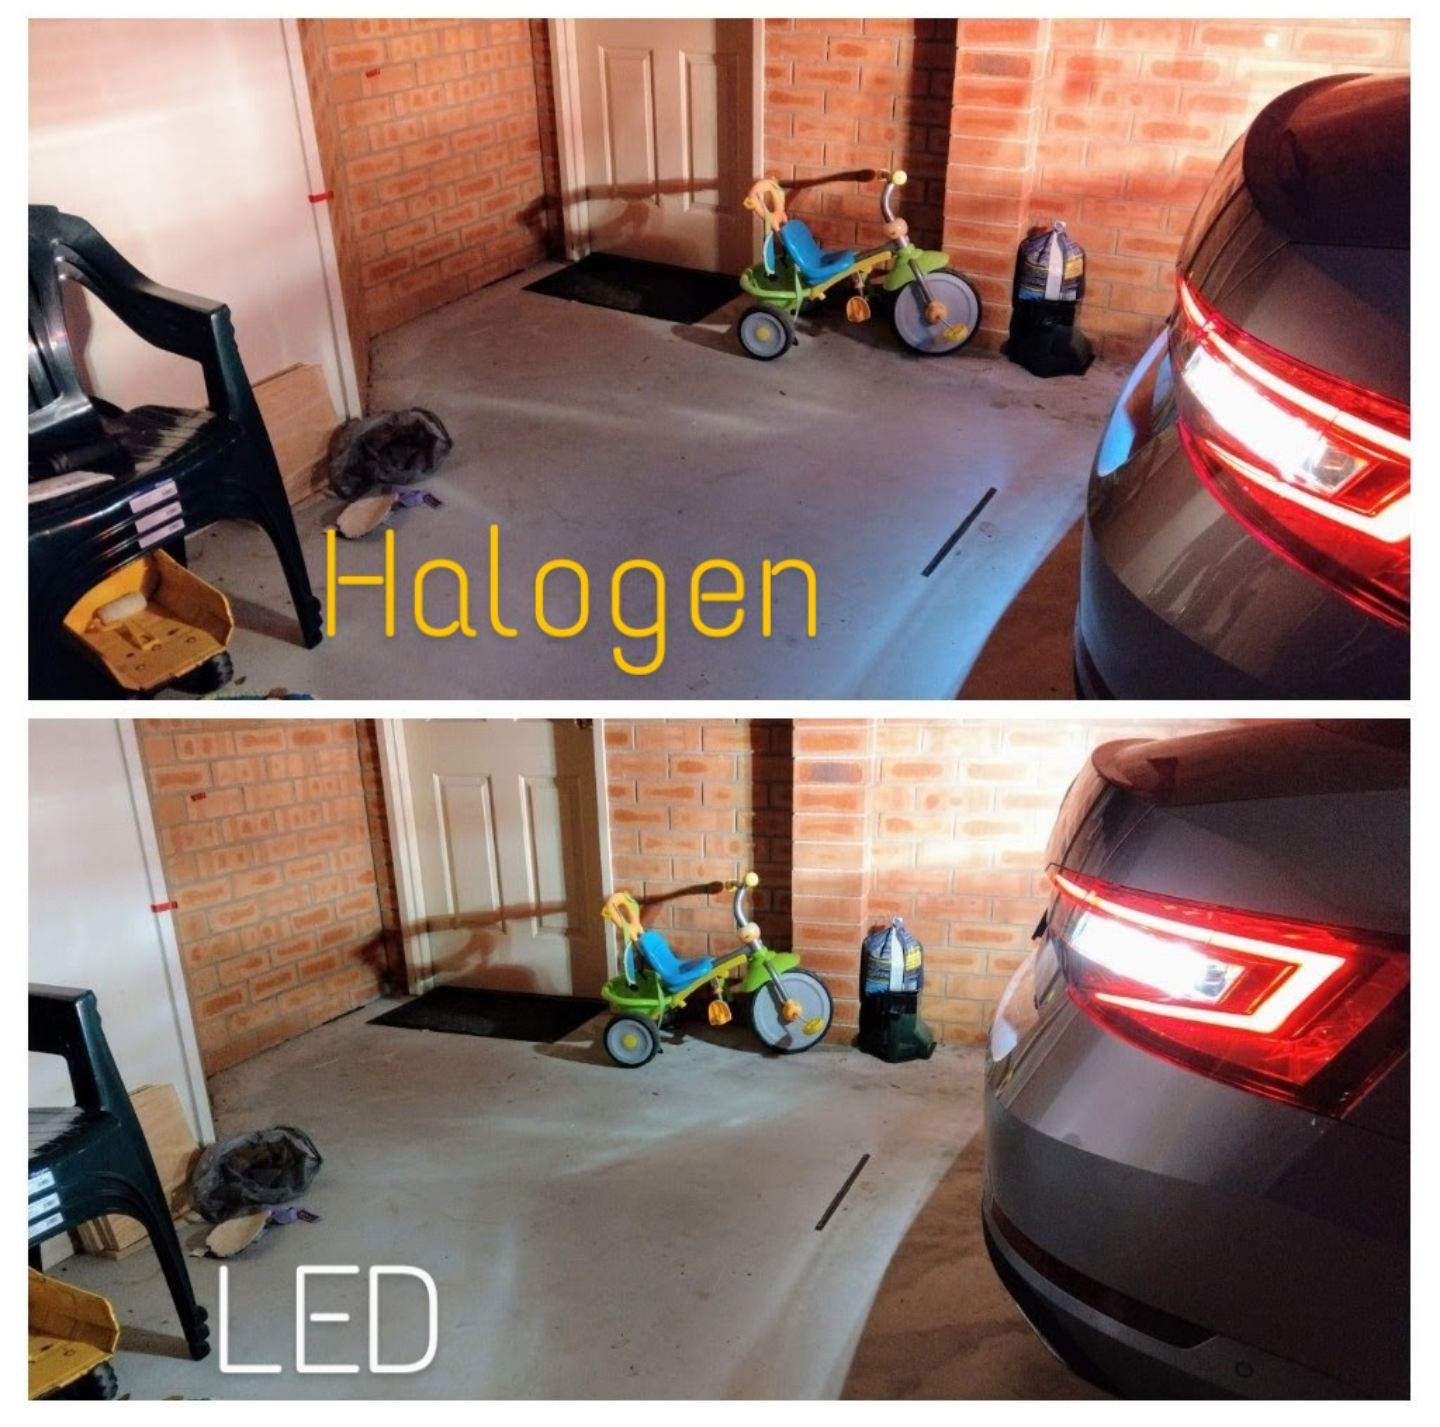
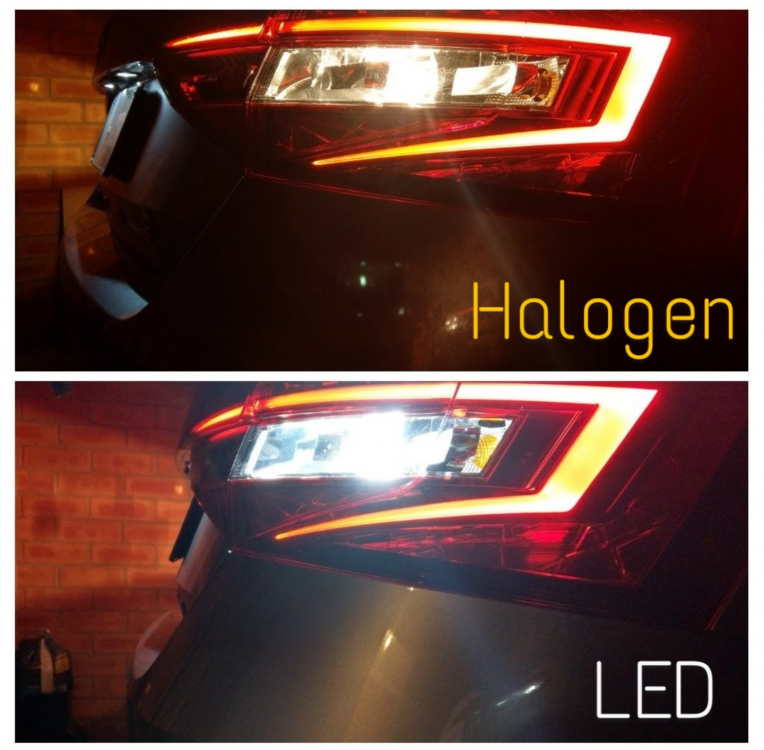
I replaced both the reversing and indicator bulbs on mine (MY17) with LED ones from Auxito. They're CANBUS friendly and throw no errors. Nor is any coding required. Much brighter. Video comparison of the LED indicators:-

-
its the standard 19" Vega Sportline and 19" Trinity L&K wheels that we get here. Vega = 8.0J x 19“ ET44 Trinity = 8.0J x 19“ ET44
-
Unfortunately with MY17 onwards there is no more long coding for 09-Electrics. It's all via adaptations now. So that thread doesn't help :-( I went through all my front wiper related adaptations in 09-electrics and I couldn't find anything related to park with ignition off. no luck.
-
yes, mine does that too - if u switch the ignition off while the wipers r midway through wiping, it will stop mid-sweep!! it is annoying really. would be nice if it completed the sweep and returned to base, or park position. mine is MY17.
-
hmmm....something is not right as simply changing the xenon bulbs should not upset anything, nor should it require any "learning". i've changed the xenon bulbs in mine without any issues. did u accidentally disconnect something else? are all the power and light control modules seated correctly on the headlight itself?
-
@defiant- I reckon it's to do with meeting emissions and not being "noisy" as that's not wat moat "customers" want. But yes, baffles me why they make the air work so hard to get to the turbo inlet.
-
@boydeee- I had a go at trying to remove the top plastic bit to access the back of the grille - but it was going to b a pain in the a55 and given that I didn't know wat challenges I was about to face with the blocked off panel bit, it was going to b a far better working space with the bumper off.
-
I did that about 3 yrs ago.......
-
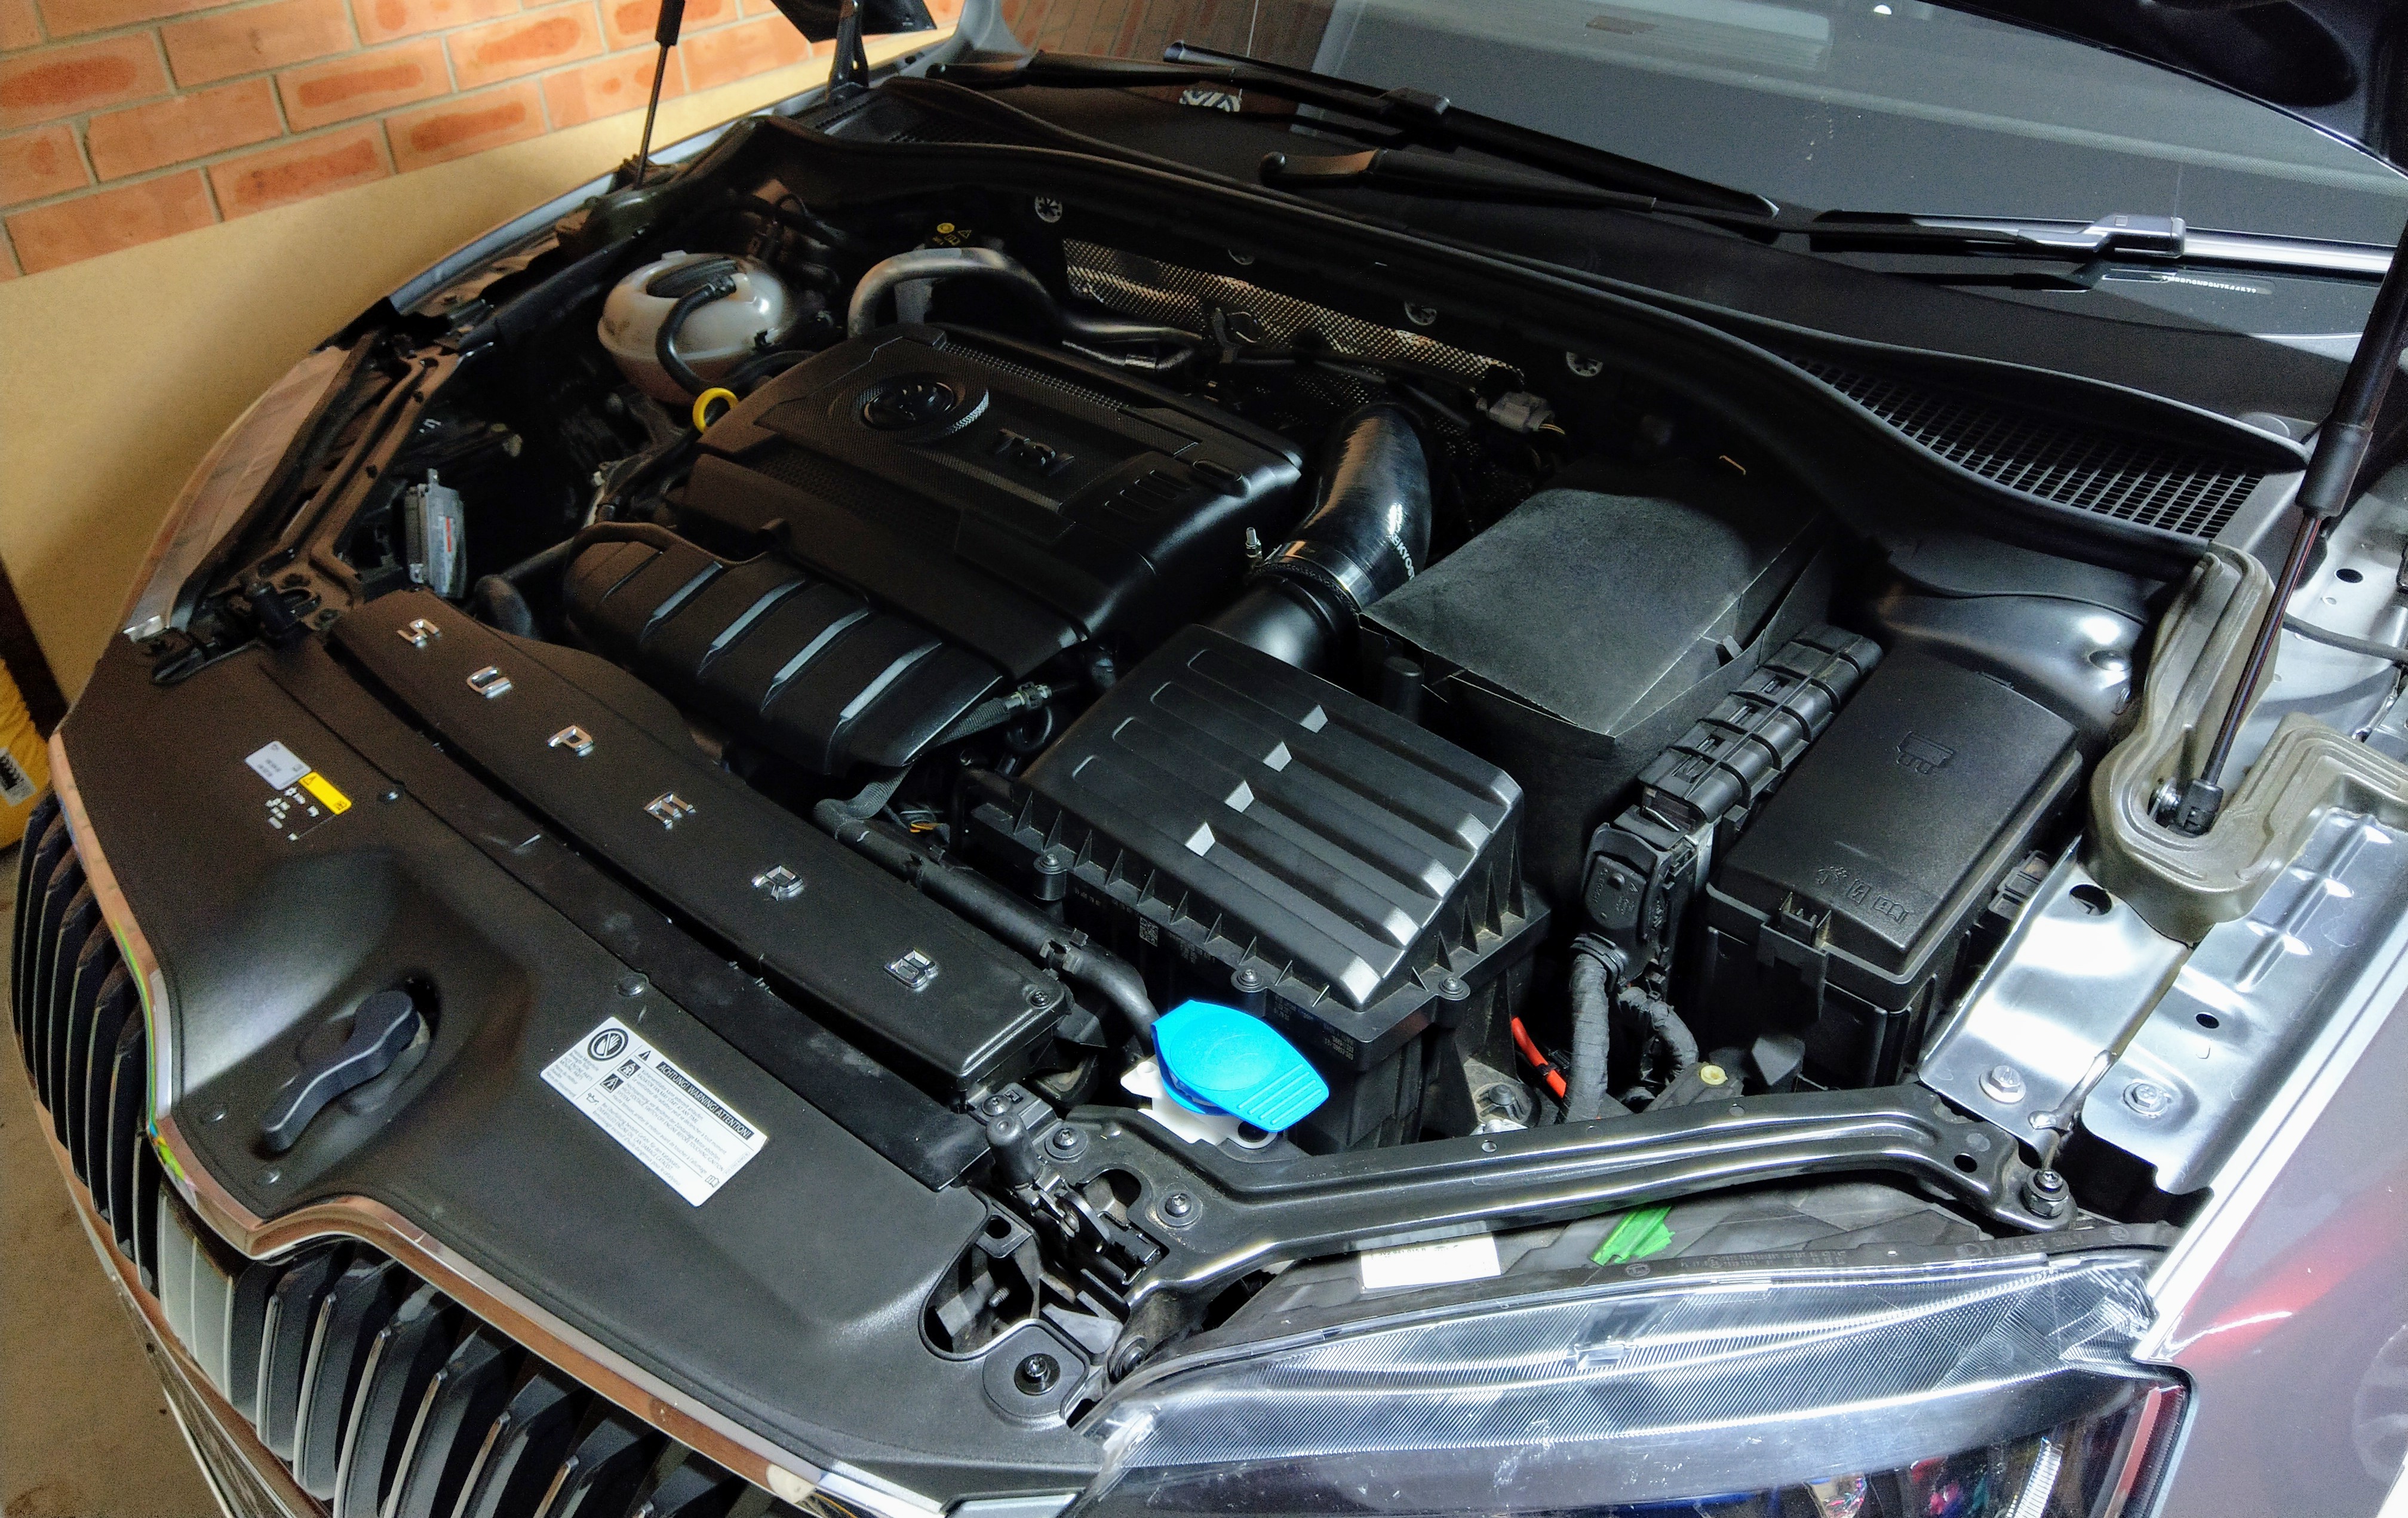
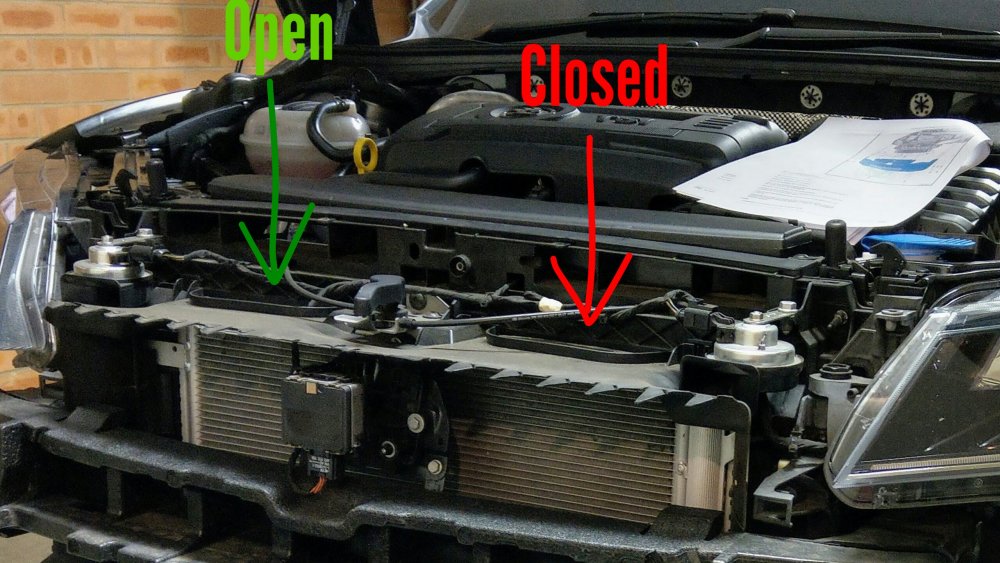
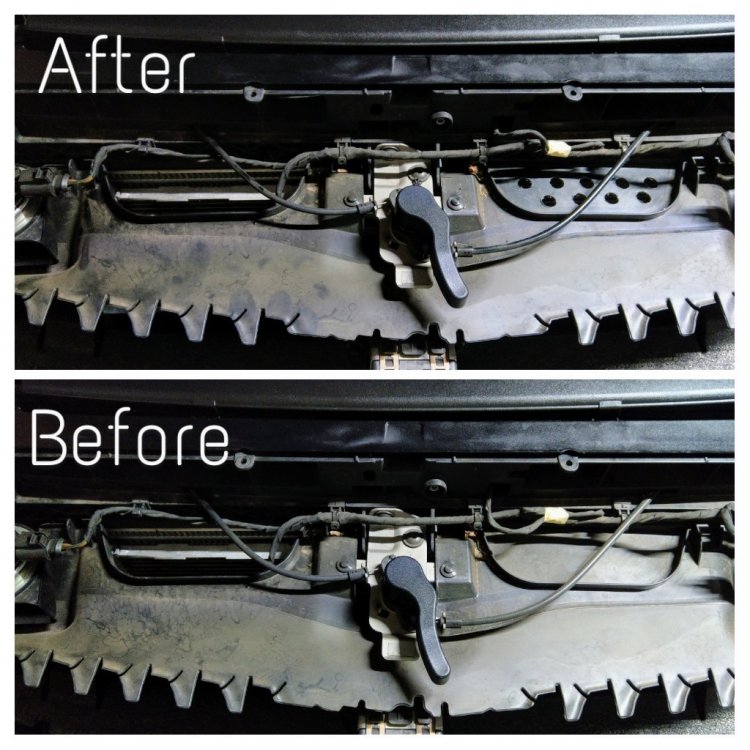
For those of u who have heard of the MK7 Golf GTi Intake Mod, I did a similar thing to my Superb's air intake, by opening up the blocked off bits on the right side. However, with the Superb, doing this alone won't be as effective due to the design of the front grille and the plastic moldings behind it. The reason for this is because top half of the Superb's grille is actually blocked across, with air only allowed to enter through the bottom half. This means the air going into air intake is restricted by two openings feeding the intake. For it to be effective, you need to also unblock the right side opening that sits behind the grille. This will allow a more direct air flow, meaning a happier turbo and hence better performance combined with my CTS turbo inlet elbow, silcone pipe and aFE Magnaflow air filter - it not only feels better, but it sounds good too. I won't explain how to modify the actual front air intake as there are plenty of YouTube videos on it. This will show the modification required specific to the Superb, that remove the restriction caused by the blank plate. Mine is a 162 TSi (220). The same would apply for the 206 TSi (280). Unfortunately there is no other way to make this mod, but to remove the entire front bumper in order to open up the blocked off panel. The top black plastic cover is fixed to the top of grille, hence can't remove that to access it. The entire grille is fixed to the bumper, hence can't remove that to access it. so its a whole bumper off job. again, i won't explain how to remove the bumper, but its a wheels off, wheel arches off and underbody skid plate separated job. below are some pics. this is the bit i'm referring to - from factory the right side is closed:- left side open:- right side closed:- the air flow on the left is unobstructed, and flows up and into the intake, most of the air going into the engine bay (as the back is open), and the rest travelling right towards the air intake box. this is the end result, i made holes in the panel on the right, thus enabling air flow to go directly up and into the air intake. Comparison of before and after. originally my intention was to move that blocking plate, so it looks like the one on the left. but it is one piece with the entire black plastic. only way was to cut it out. unfortunately again, that black plastic is metal riveted to the frame surrounding the bonnet release bracket. grrrr. so i went with plan B and drilled holes. finished product - sleeper factory look factory the only giveaway being the silicone intake hose pipe.
.thumb.jpg.4059450bdd71492b50ea561749148242.jpg)
.thumb.jpg.950412d9f0b61bda5b4d73ca10f13436.jpg)
.thumb.jpg.17c69769e90002311fc35dd2a2771104.jpg)
.thumb.jpg.e2f9120a914c412f4da76712816c9659.jpg)
.thumb.jpg.7c5cfa209f63836d9ceb55ebc68069d3.jpg)
.thumb.jpg.45d91c407212d1bf3b8c47d29f332797.jpg)