Everything posted by Breezy_Pete
-
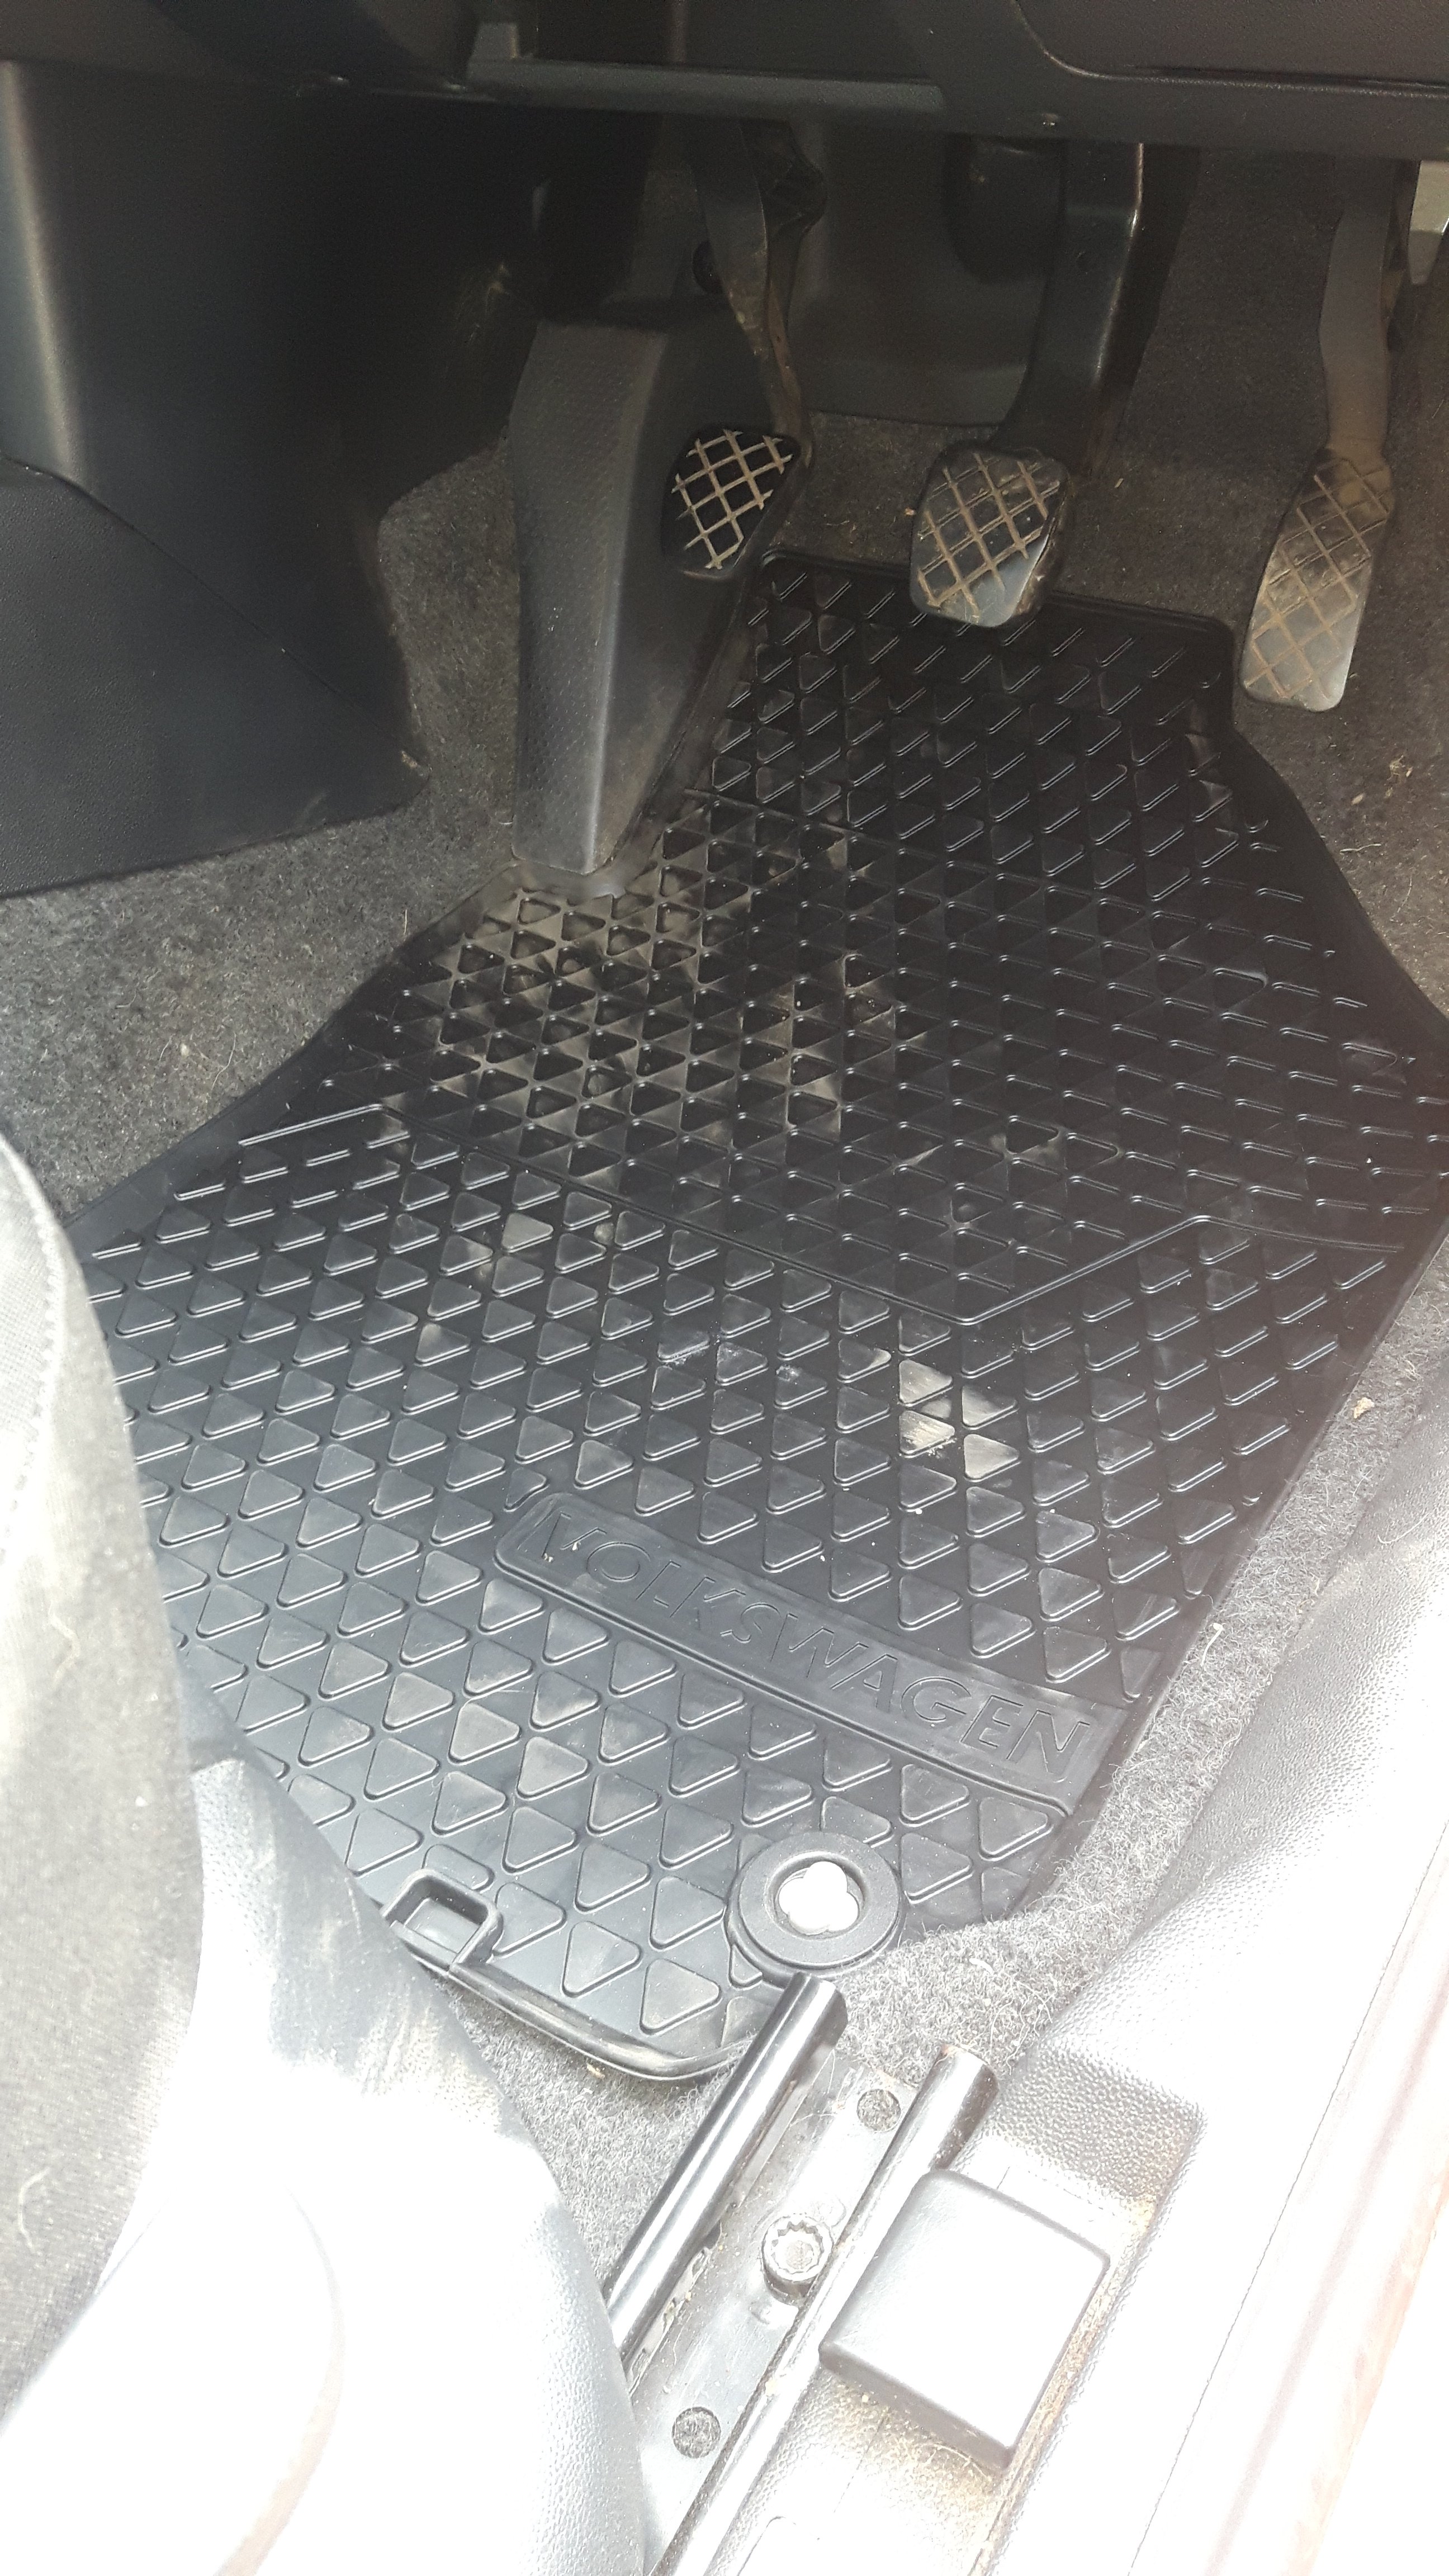
Here you go. Only test-fitted driver's side, but fit seems to be as expected. Did not come with the little twist toggles that screw into the carpet.

-
April fool.
-
I think it might be the connector that one is plugging into that is the real problem, like in the video of mine that TMB posted; pushing the connection is probably waggling the pin in the circuit board. l Part numbers are printed in tiny letters on the connector housing of what you're holding if you want to go for a replacement. Depinning tools don't cost much, they look like a little two-pronged fork.
-
Factory joint. Lots of earth wires do that. Check continuity from there to battery negative/chassis.
-
Blue/black wire on pin 4 is a 12V feed (whenever fuel pump relay is energised) to N75. Brown/white wire on pin 6 is the control connection to engine ECU pin 62.
-
I guess it could be a wiring fault on N75? Will try to find which wires are involved, hang on.
-
Top work @langers2k.
-
Apparently the lower stance is for improved aero, as part of the Greenline package. There are a lot of different spring types, not just standard/heavy-duty/lower. Each of those categories has 4 or more options within.
-
The thin brown wire going to pin 5 of the brown 6-way connector at the A-pillar is an earth shared by the lock module and the door warning light, so yes, that's a good one to investigate.
-
If you fit other springs the car will probably sit at a different height at the rear than the front. I guess you realise that though. You'll probably find some combination of orange white and blue dots: suspension; shock absorber (spring cyl.); for vehi... - Fabia(FAB) [EUROPA 2008 year] (7zap.com) (view on computer rather than phone to see all the info)
-
If you're not worried about what's written on them, and you only want fronts, there are some genuine rubber 9N Polo ones on ebay at the moment. Not sure if they come with the fixings that screw into the carpet, in case they're a different fitment to what you have now, I'll update when mine arrive (possibly tomorrow). NEW GENUINE VW POLO 9N 9N3 FRONT BLACK RUBBER FLOOR MATS SET 4039378276003 | eBay
-
Aftermarket springs won't have the colour sequences, no. But with the colour sequence you can find the Skoda part number, which then allows accurate cross-referencing with aftermarket parts. Sometimes genuine NOS ones turn up on ebay at reasonable prices too. What year is the car?
-
What is the colour dot marking sequence on the springs? That's the very best clue to finding out the correct part number for replacement. Kilen is the brand your Factor was referring to Should be just as easy to change as you've seen,
-
Brown pin 7 is earth. Wire from pin 8 is the door open microswitch. (Makes the connection to earth when door is open). Wires from pin 4 and pin 5 are status feedback about the state the lock is in (locked or unlocked) and the state of the key barrel (neutral, held clockwise or held anticlockwise) but can't remember which is which just now; I'll check those including the resistance values in each state when I get home in an hour or two. Wires from pins 1 and 2 make the motor run in the relevant directions for unlocking or locking depending on the polarity of the power sent down them.
-
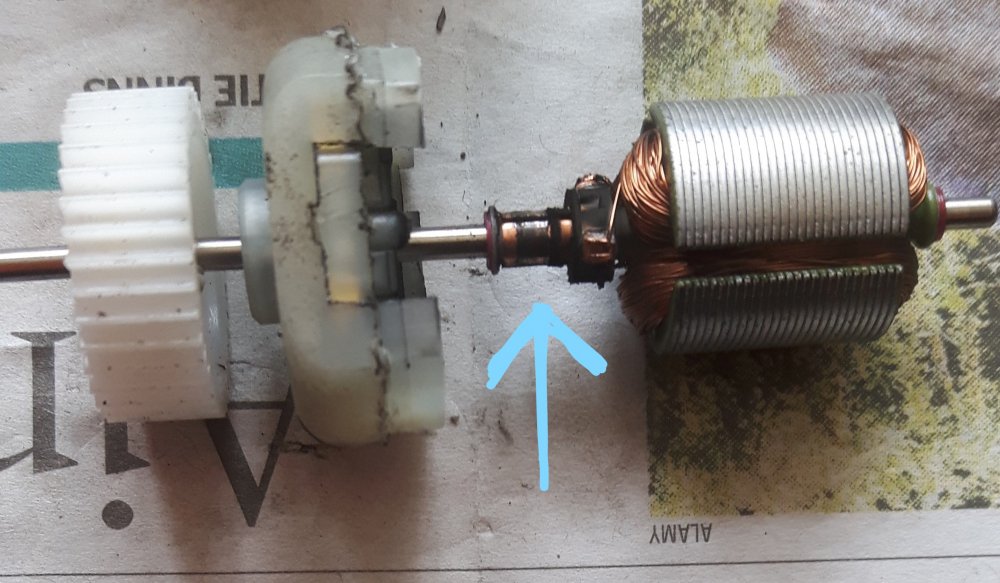
May also be the motor inside the passenger side lock unit. When you unlock the car with the key in that door, it doesn't need to do anything. When you unlock from the other side it does need to work. It's not very easy to get into, but on a Polo of mine, cleaning the commutator brought this one back to working properly.
-
No.
-
Have you checked the tyre pressures? Engine air filter condition? Sounds a bit low to me. based on the manufacturers claimed 6.4l/100km combined figure I'd expect the real world number to be 15-20% worse, so about 7.7 max. The type of driving you have been doing should make it better than that really.
-
Do whatever you need to do to get it off. The copper grease; do you mean on the clamp bolts' threads? If so then yes, good idea.
-
Blue/red on pin 1 is 12V heater supply, only present when fuel pump relay is energised. Brown/white* on pin 2 is heater control wire to/from engine ECU pin 13 Grey/white on 3 and grey/red on 4 are the sensor connections to engine ECU, pins 21 and 47 respectively. *might be white/yellow depending on year.
-
Still not 100% sure from those. Will have to get the old sleeve clamp bits off completely to be sure I think. The collision with the ground that picked up the debris may have been involved in the destruction before your mobile fella got involved. Why he didn't suggest replacing the sleeve clamp I have no idea.
-
45. They open up bigger and then close down to the nominal size as you tighten the bolts. Can you see the end of the pipe that's in the back half of the broken sleeve clamp? I can sort of maybe see part of the end of it in one of your later photos, but none of them show it clearly. Trying to clear up this debate about whether it's just the dual sleeve clamp that's sh@ itself or if the front end of the middle exhaust section also has some damage. If the mid-pipe is the original I'd expect it to be much more solid and intact than the sleeve clamp. Try to get a close-up photo with flash on.
-
Doesn't matter about before then; that sounds OK. Is it still showing a crank sensor code? Sounds like something's suffocating it shortly after it starts going. If you watch the throttle butterfly, leaning over to look down onto it, does it close completely just before it starts coughing?
-
Has a compression test been done before or since the timing chain was replaced?
-
If you do decide to have a go yourself please make sure the car is safely supported, and wear safety glasses or goggles. Otherwise you will get bits of rust in at least one eye and that is not enjoyable or wise.
-
I would've thought your local tyre and exhaust place would do it for half that to be honest.