ApertureS
Resident Member
-
Joined
-
Last visited
Everything posted by ApertureS
-
The black is just a coating and it wears off, they are mtec discs
-
Newest revision with no silikat is 5Q0121407M
-
Seems very very cheap considering its an L&K estate... even with that mileage considered. Id be taking someone with you to look at the car in depth or pay for one of the AA assessments to be done. If all checks out at that price, then its a very good buy.
-
I think this may be a FeC (function enabling code) which being the gateway controls it, It is not enablable i believe. I could be wrong on this though
-
Check the wiring itself with a multimeter by disconnecting from both ends, but theres a good chance its the handle itself.
-
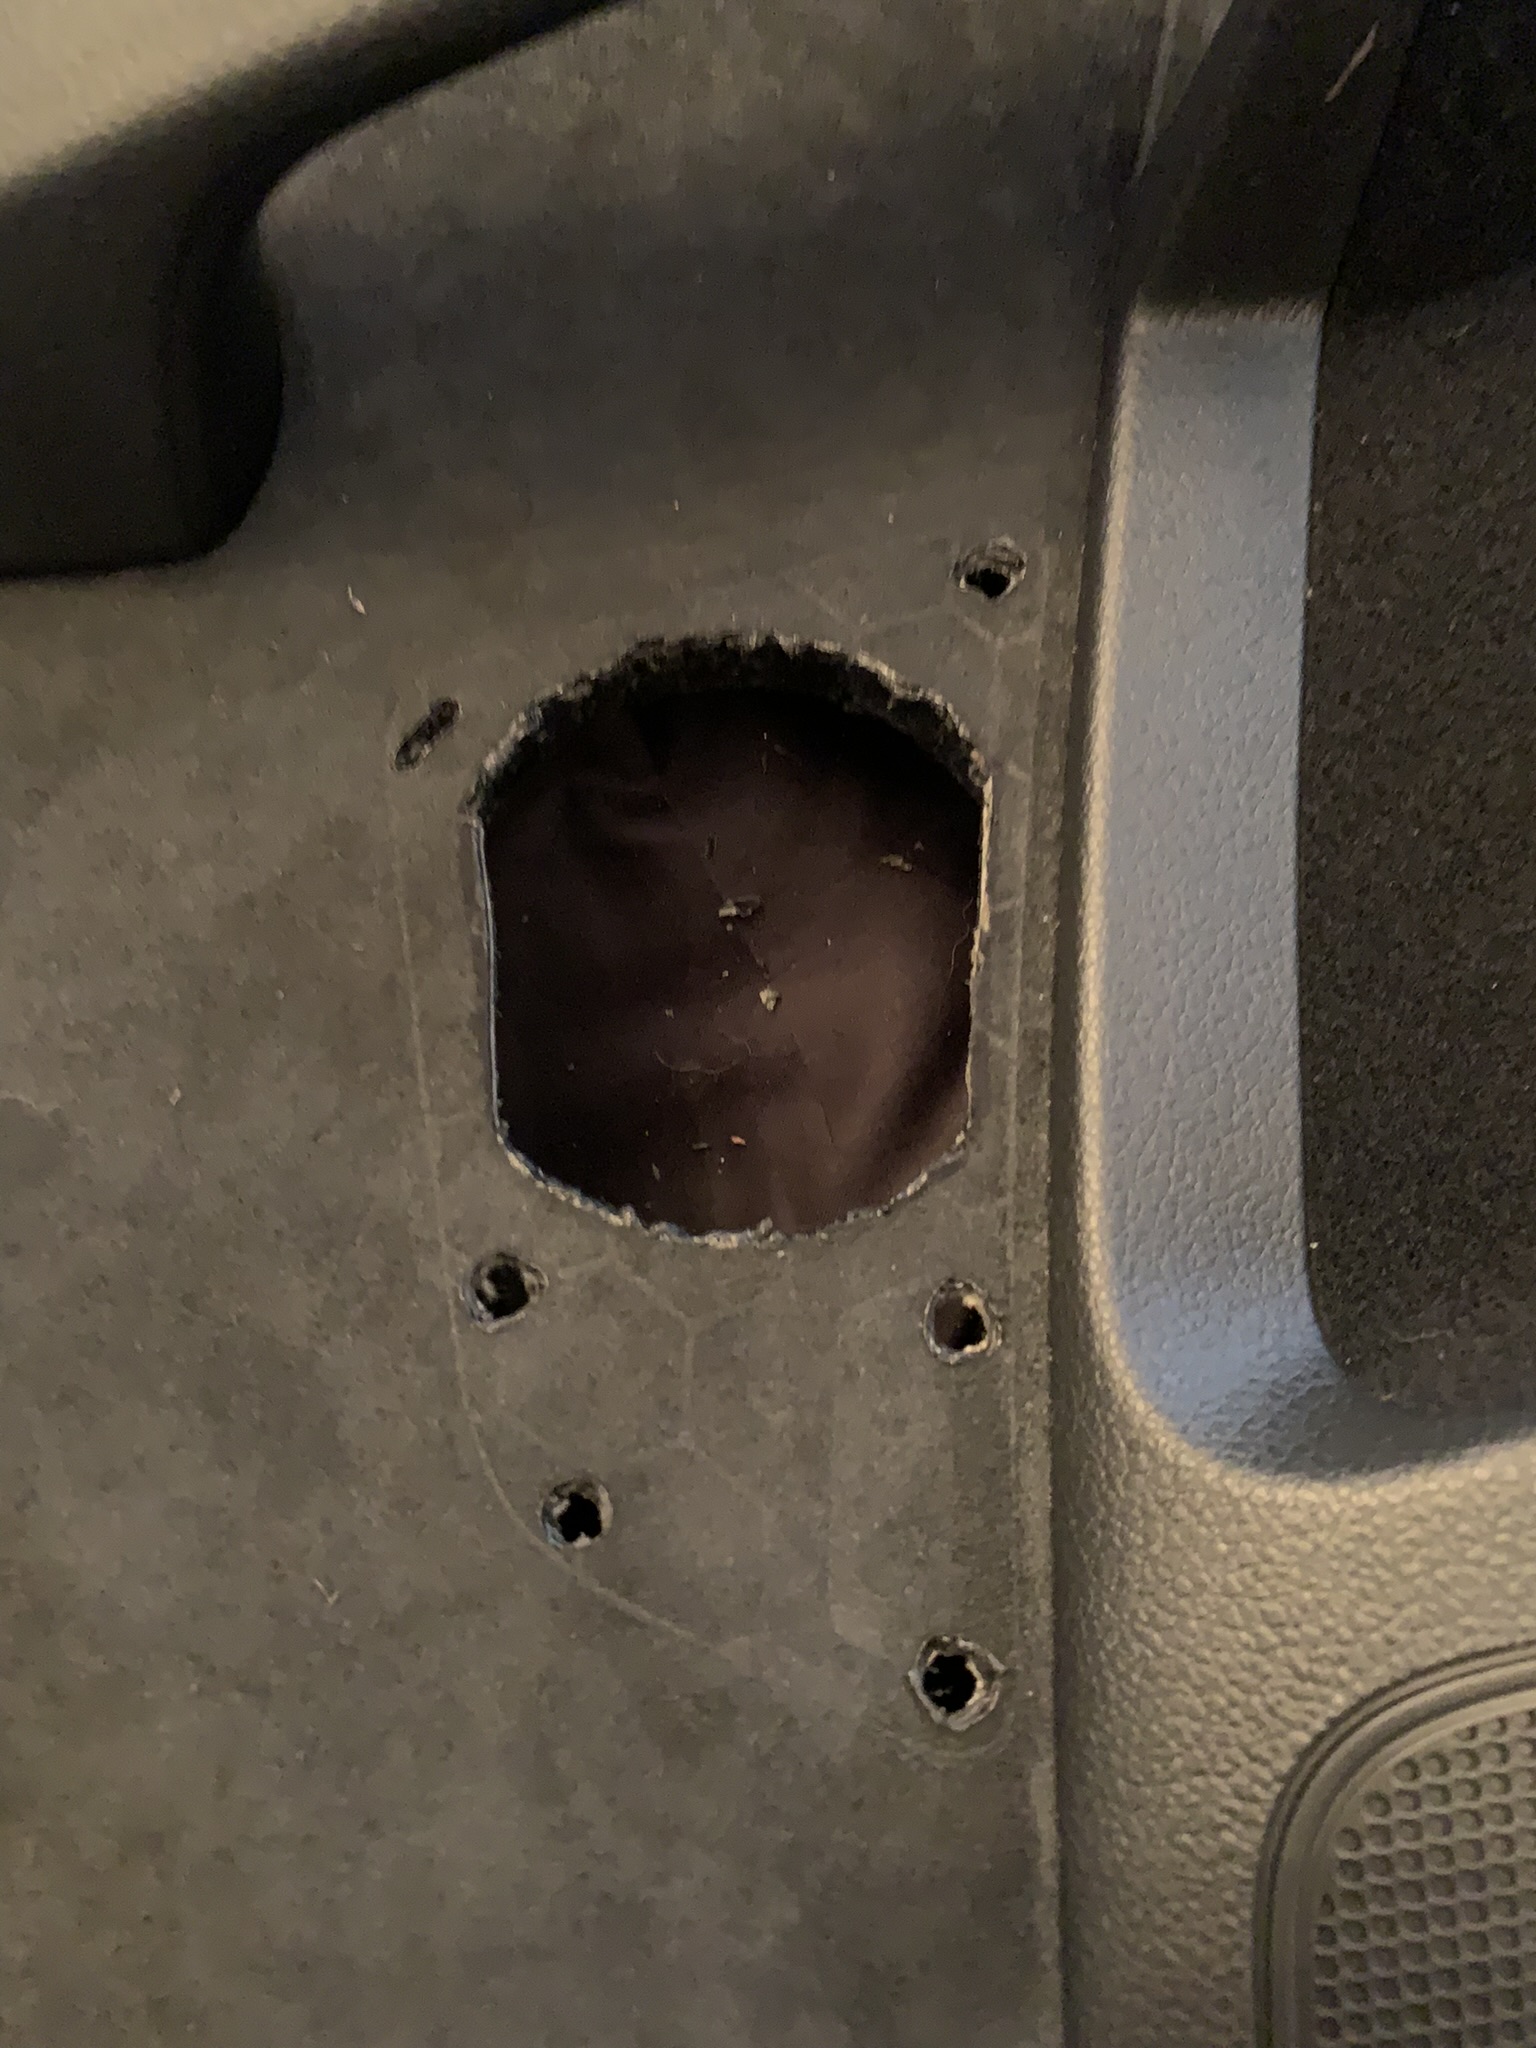
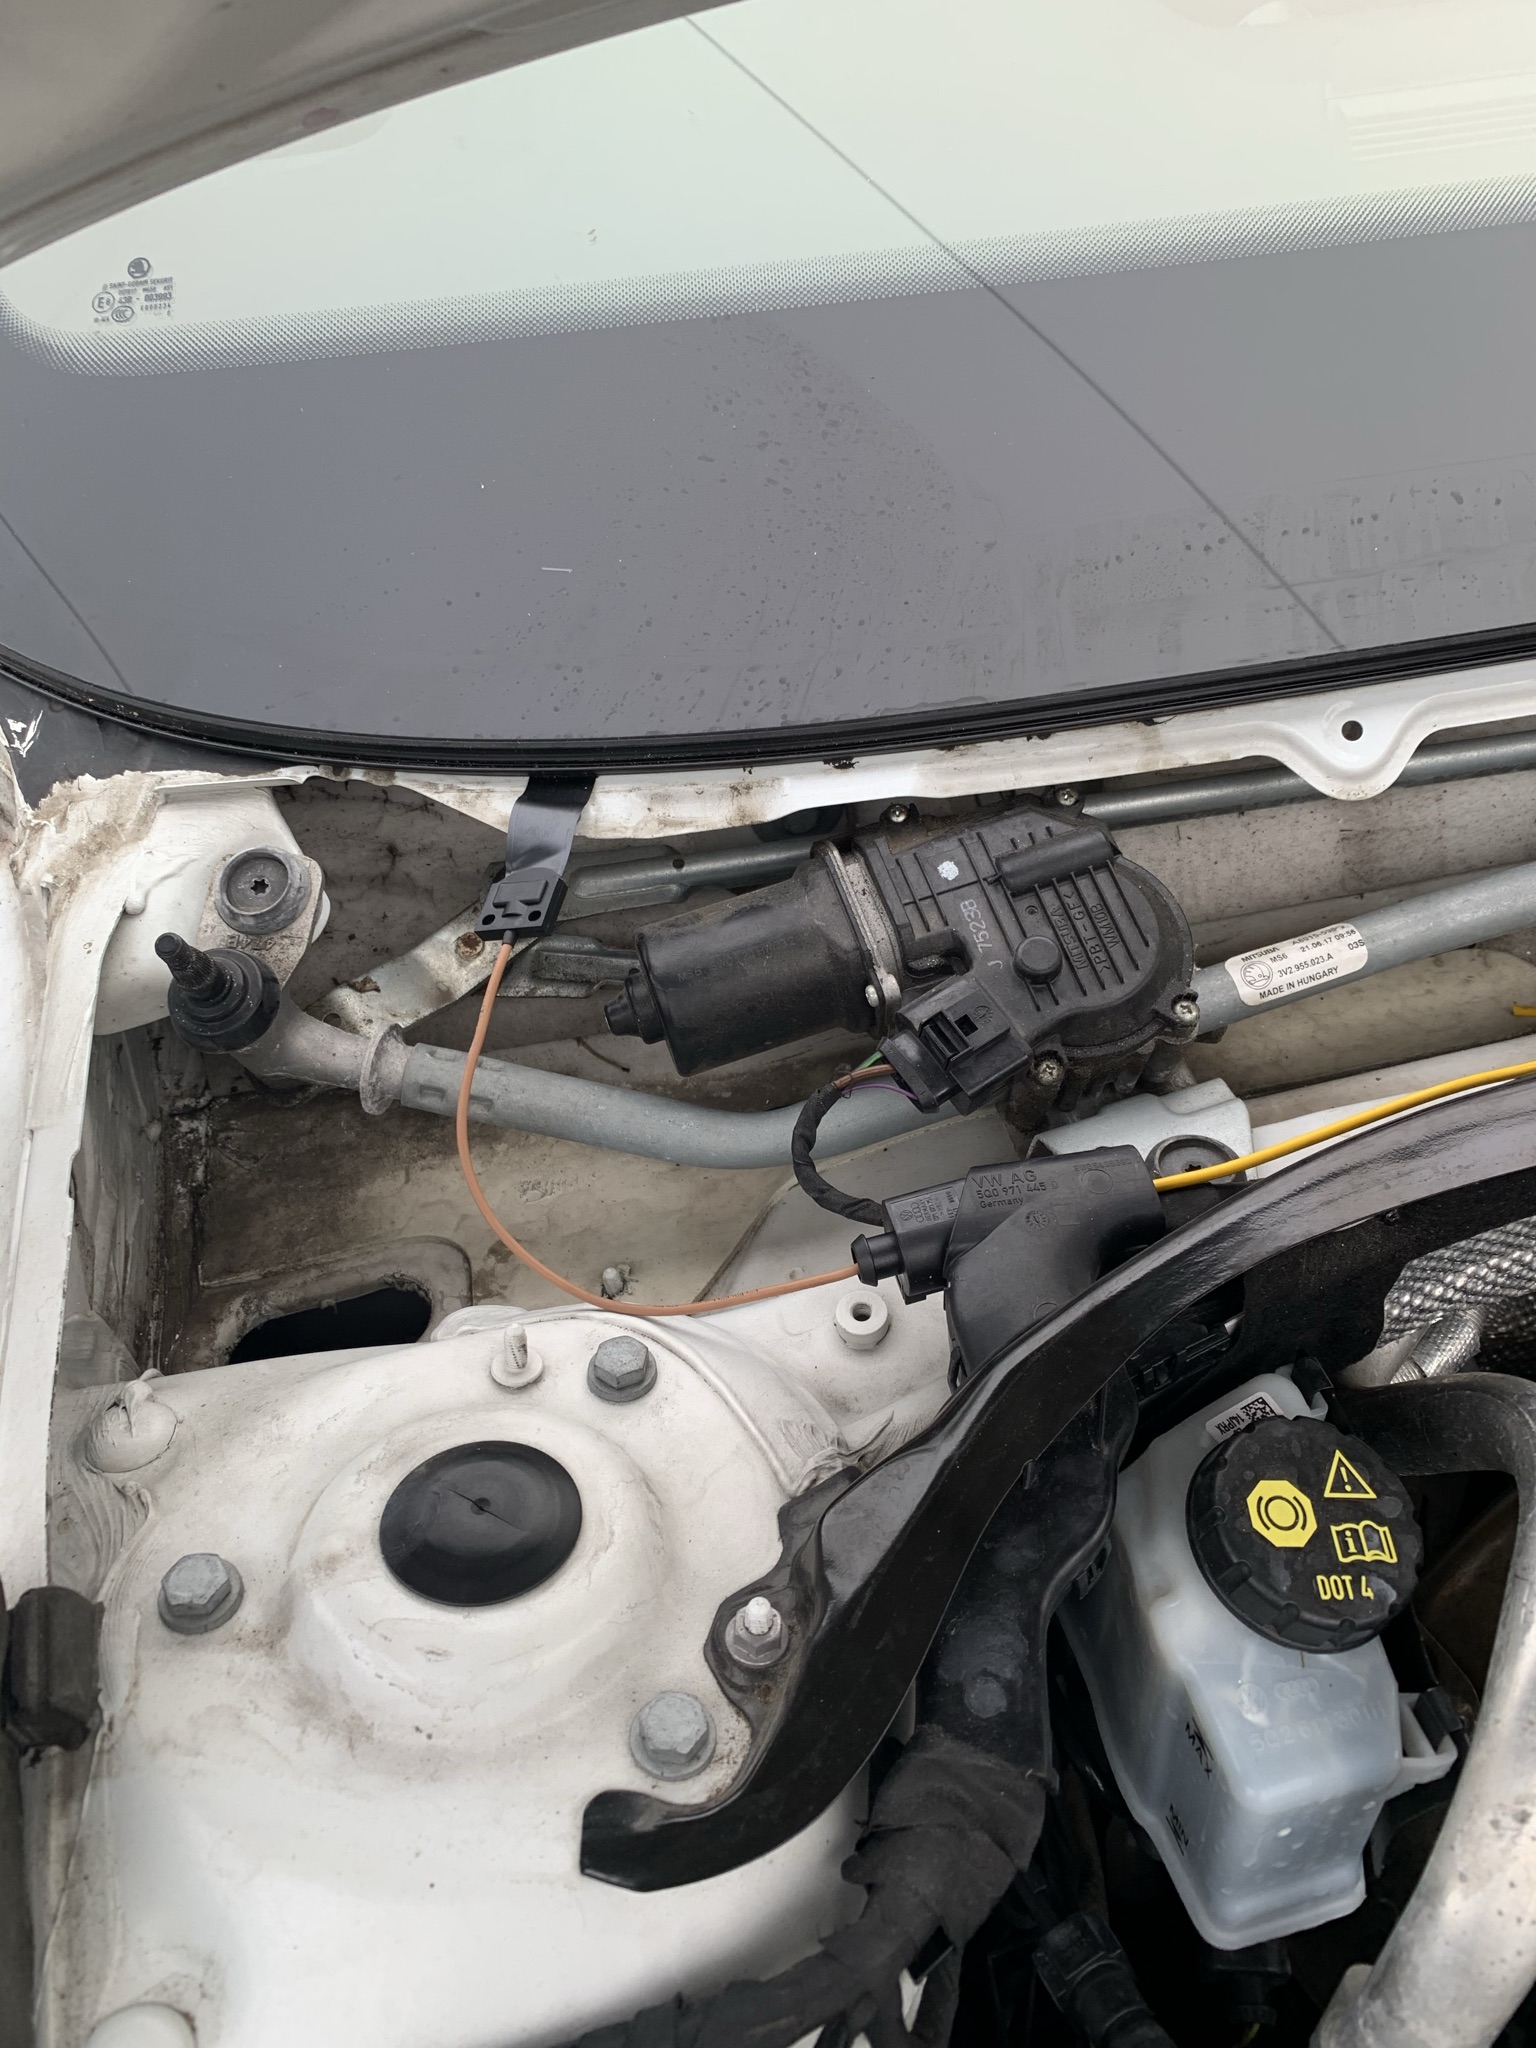
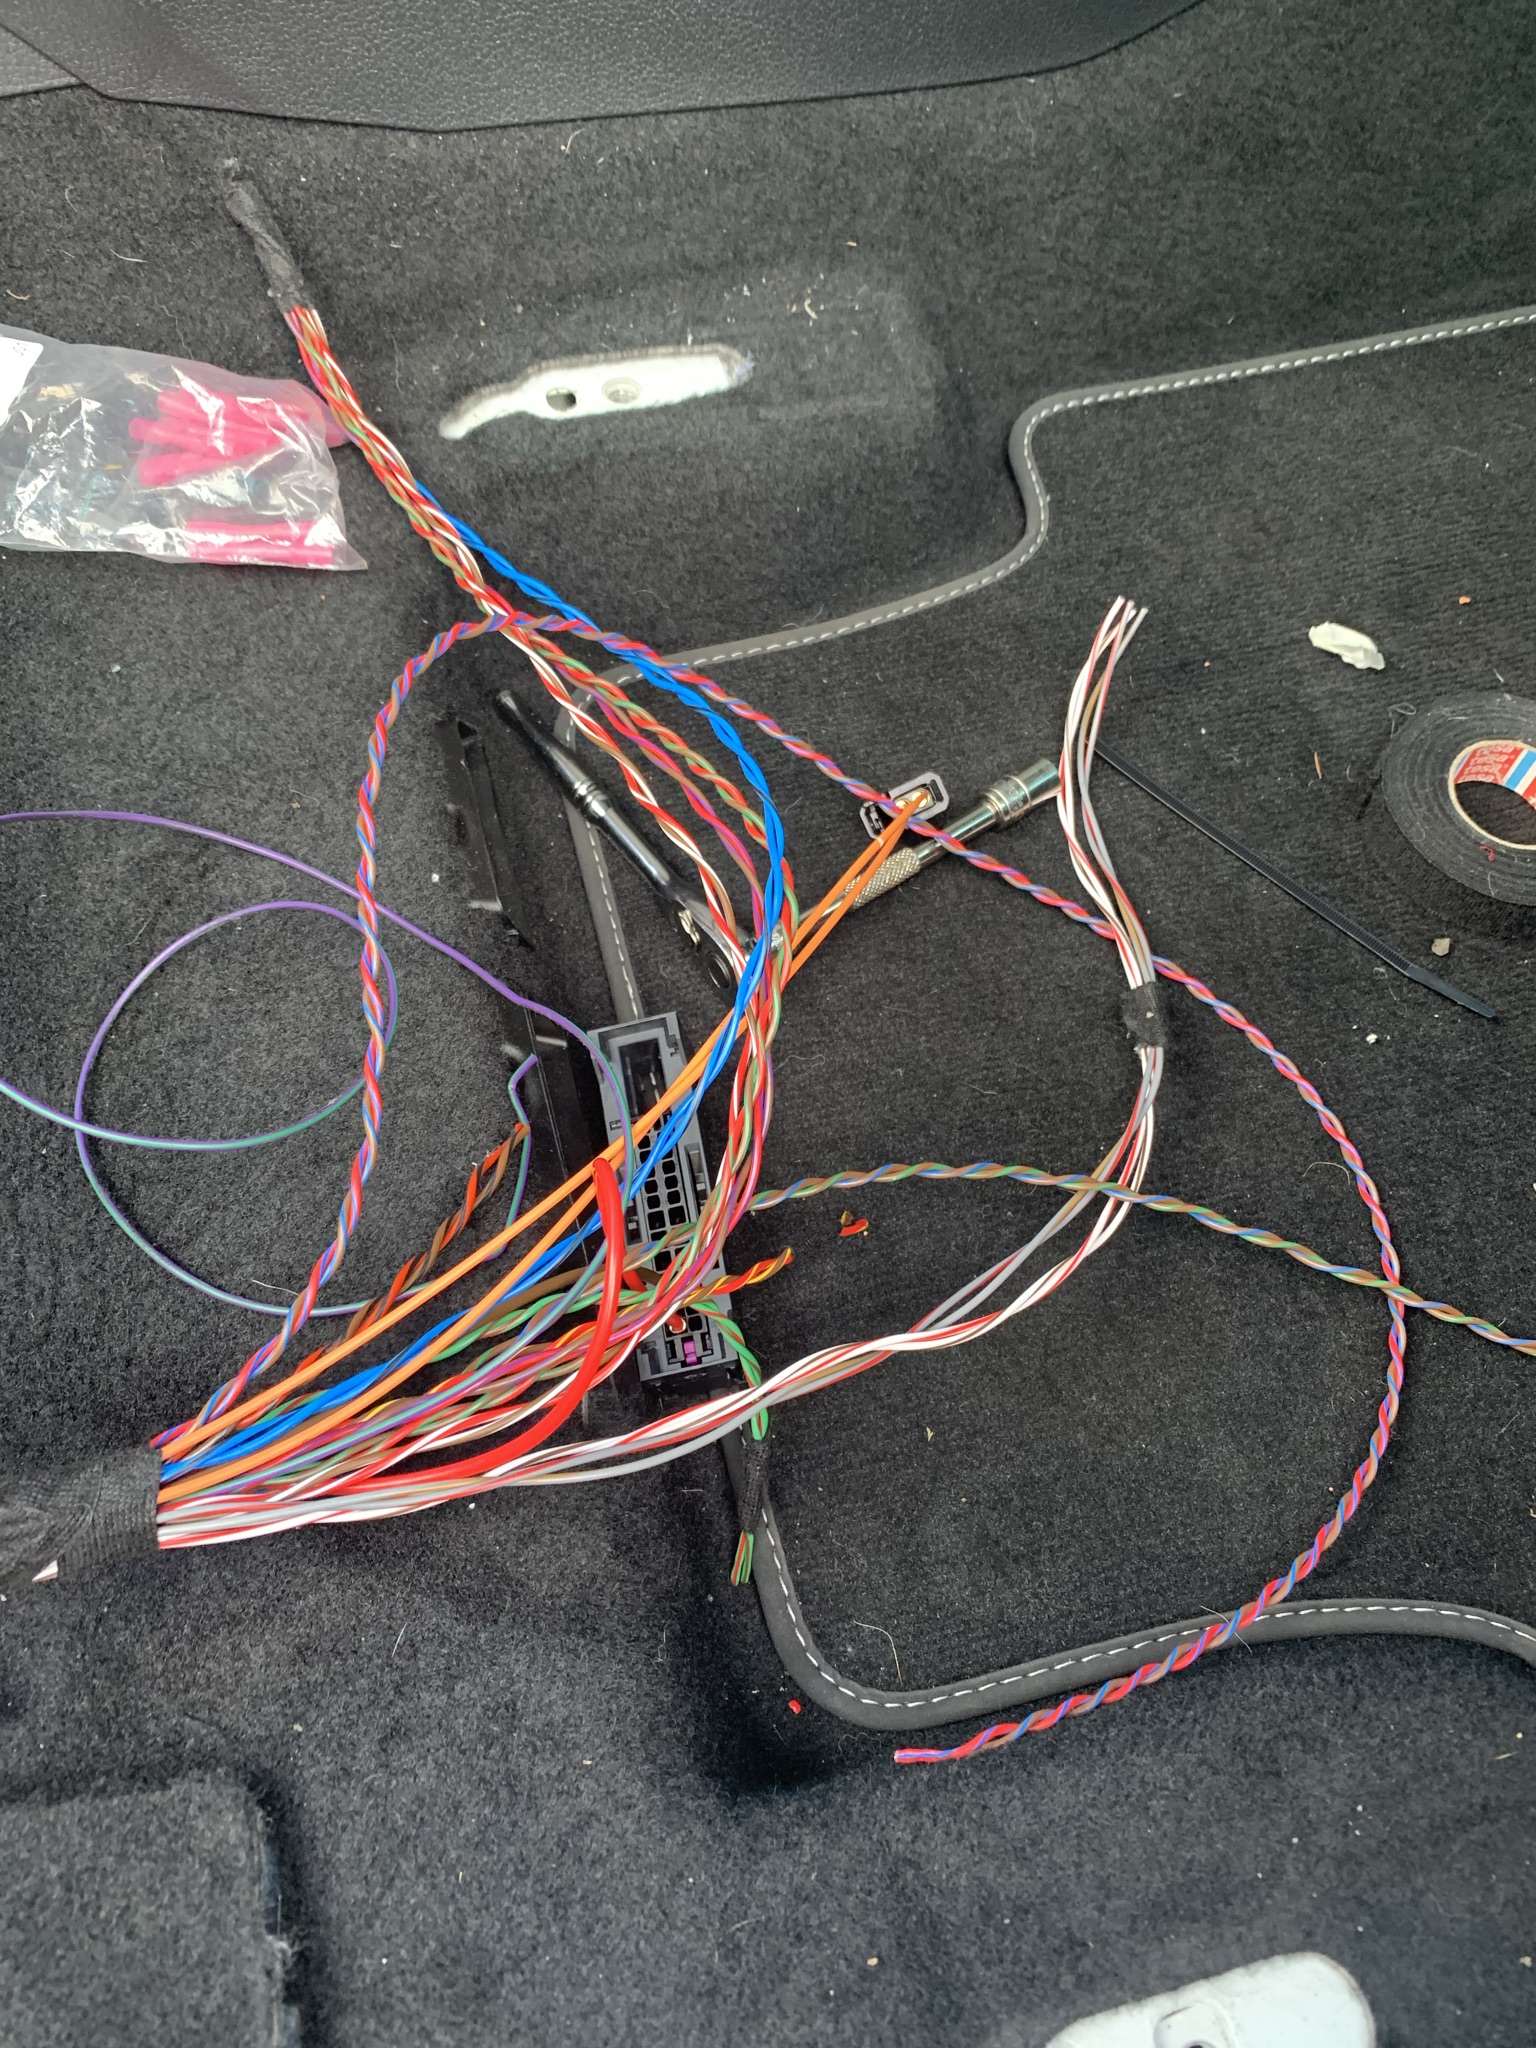
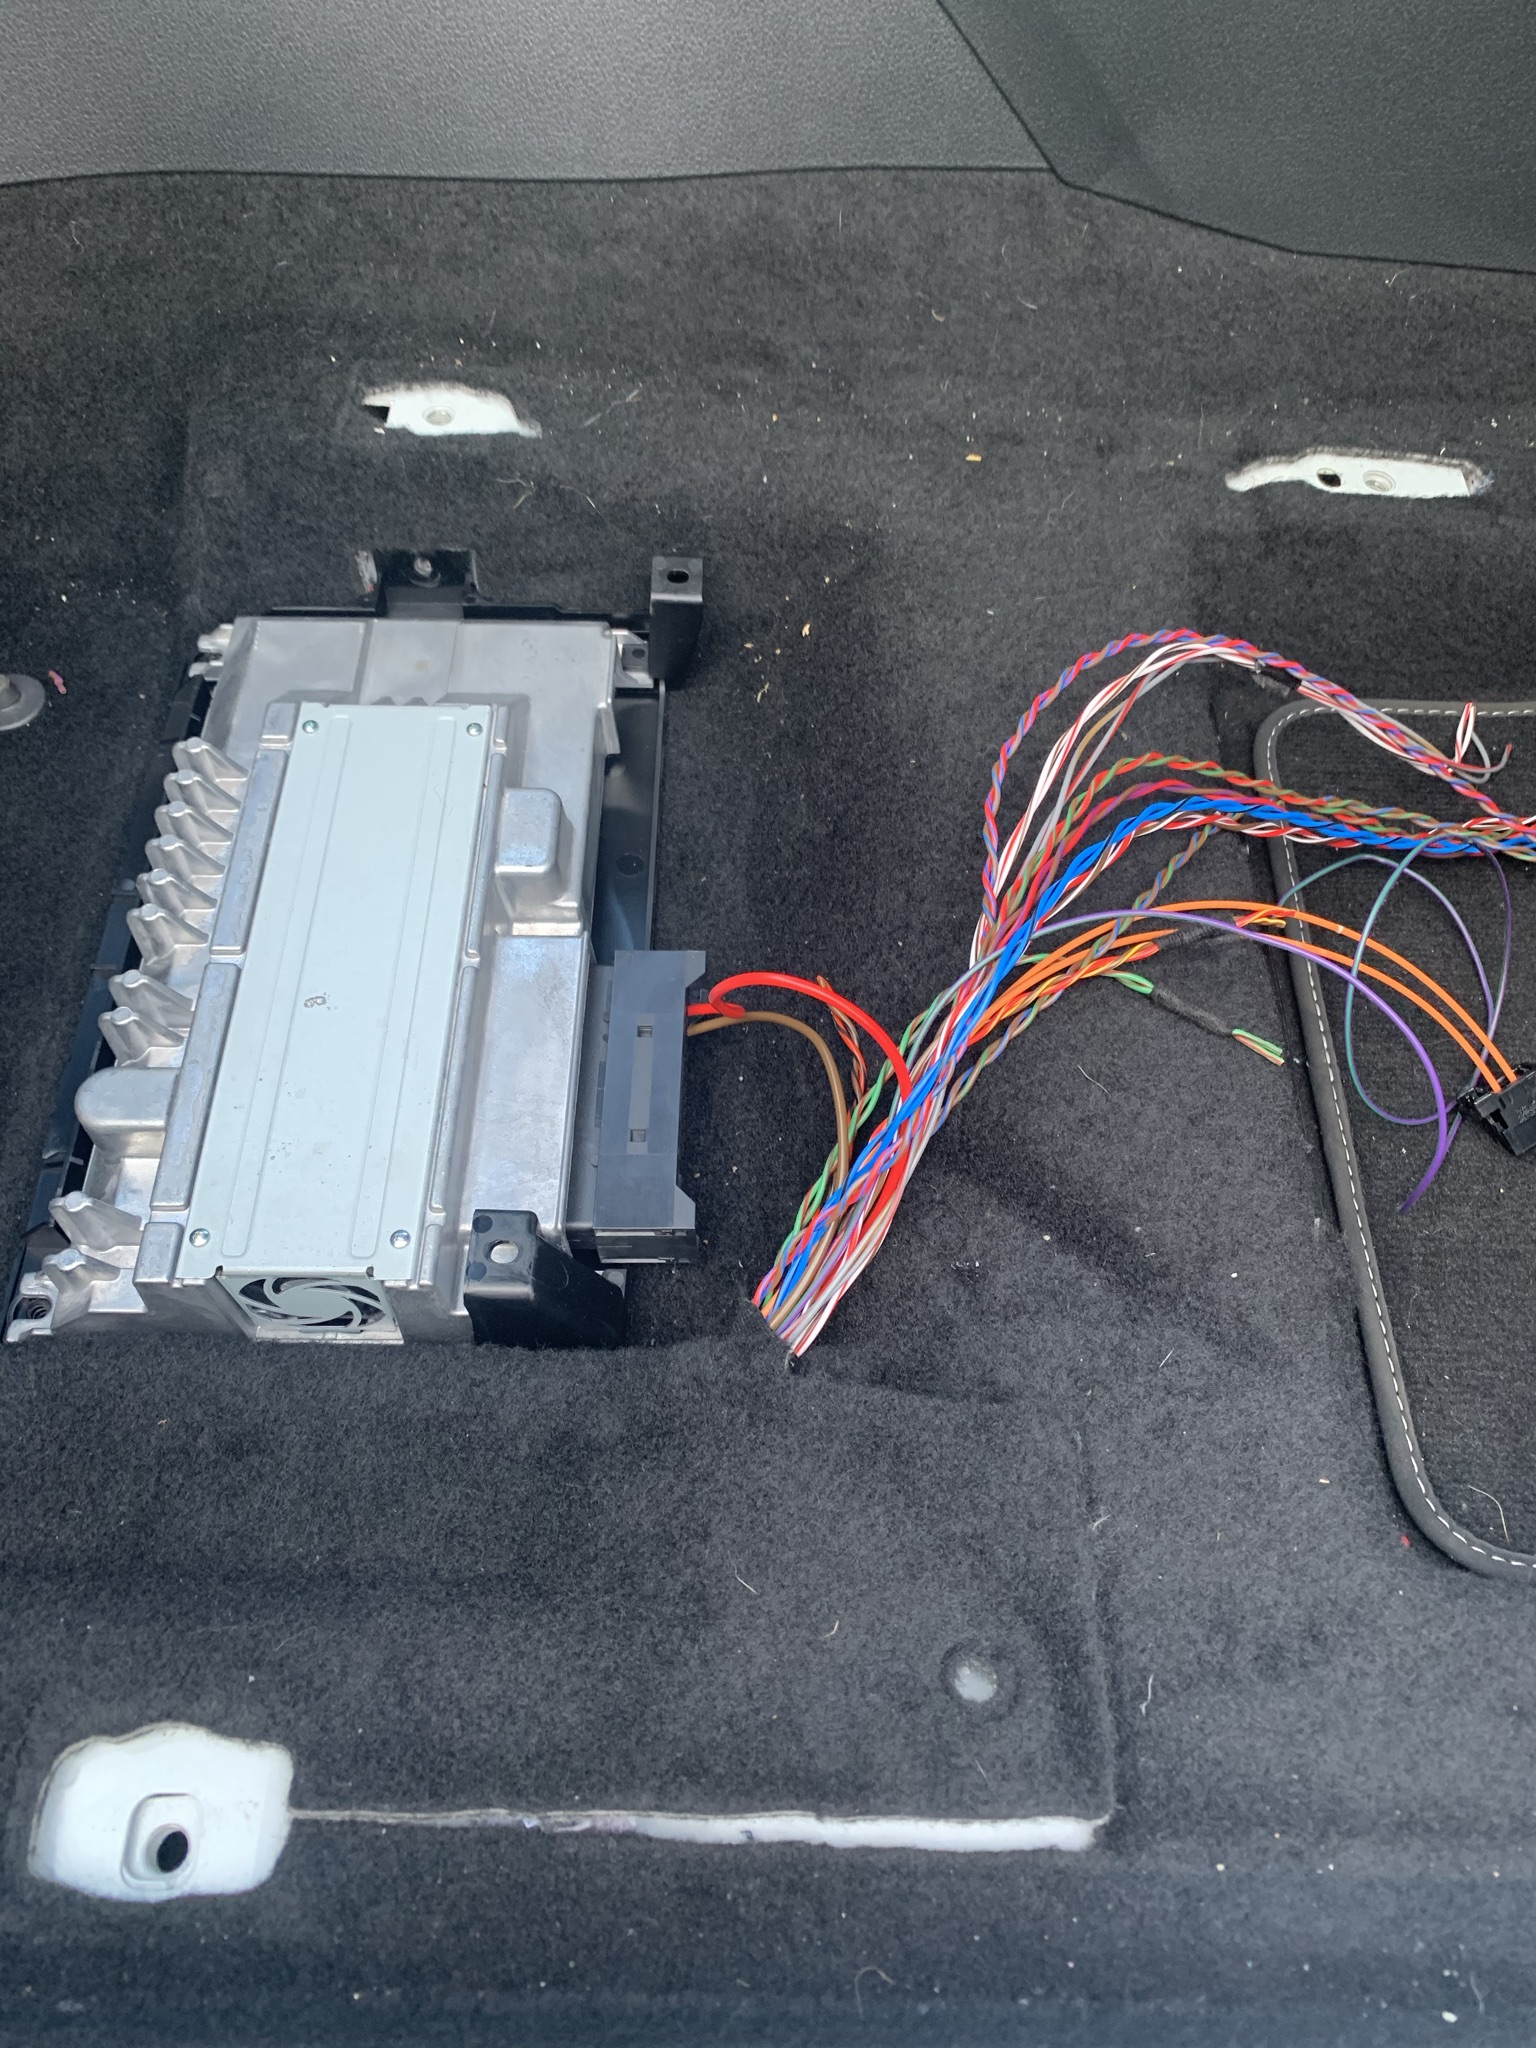
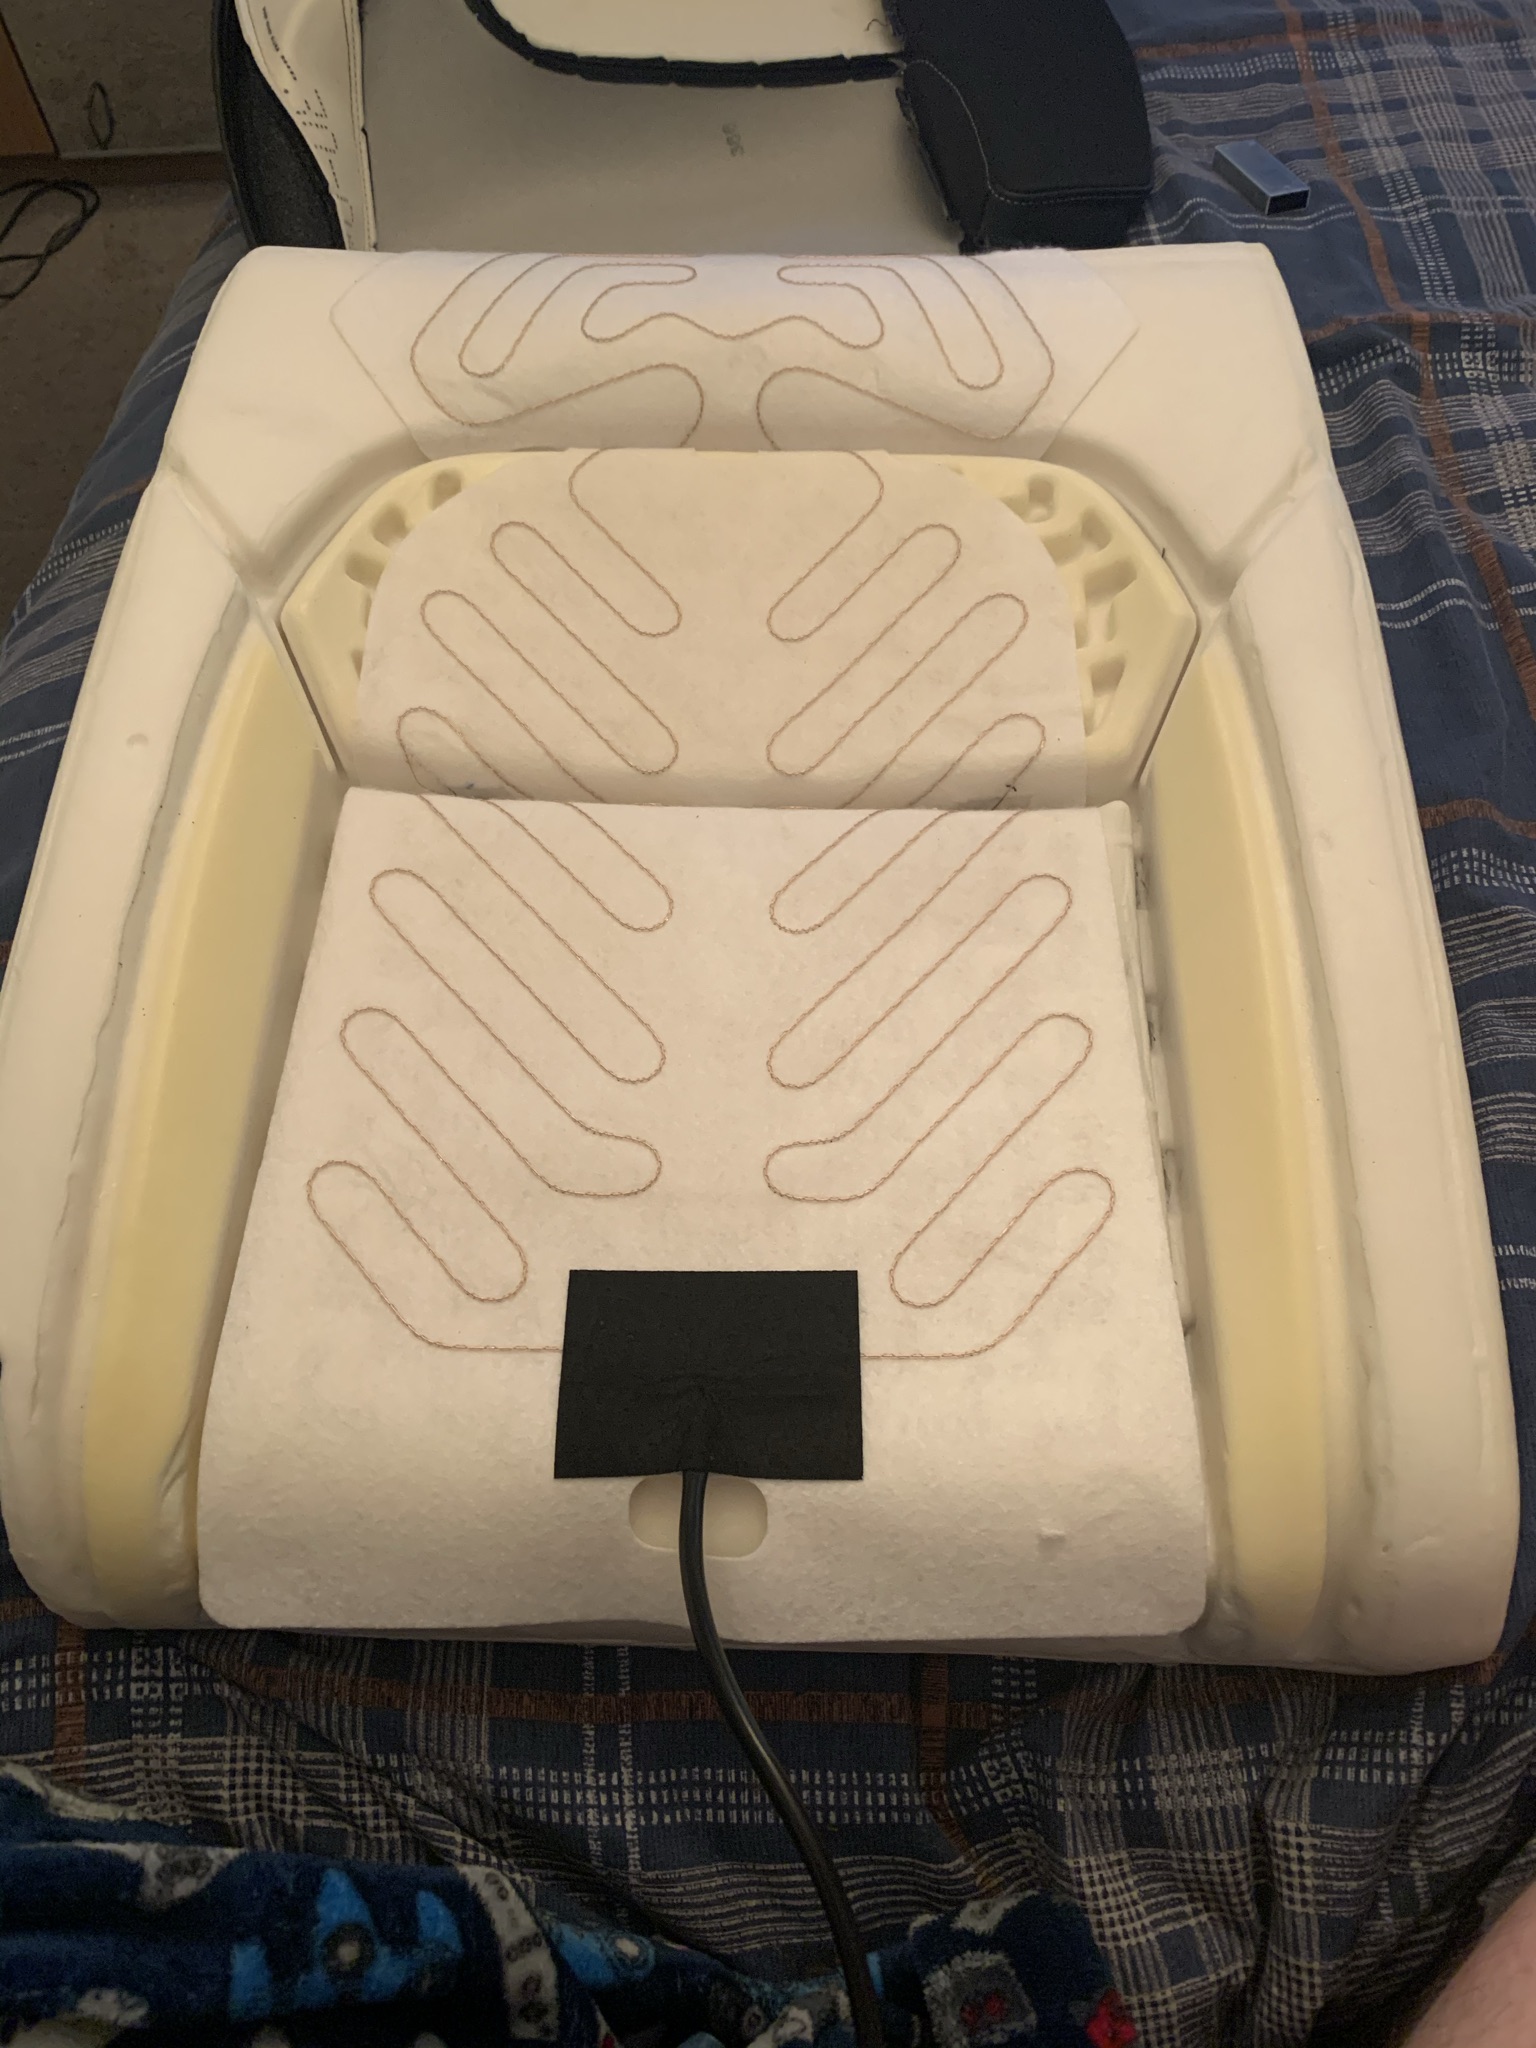
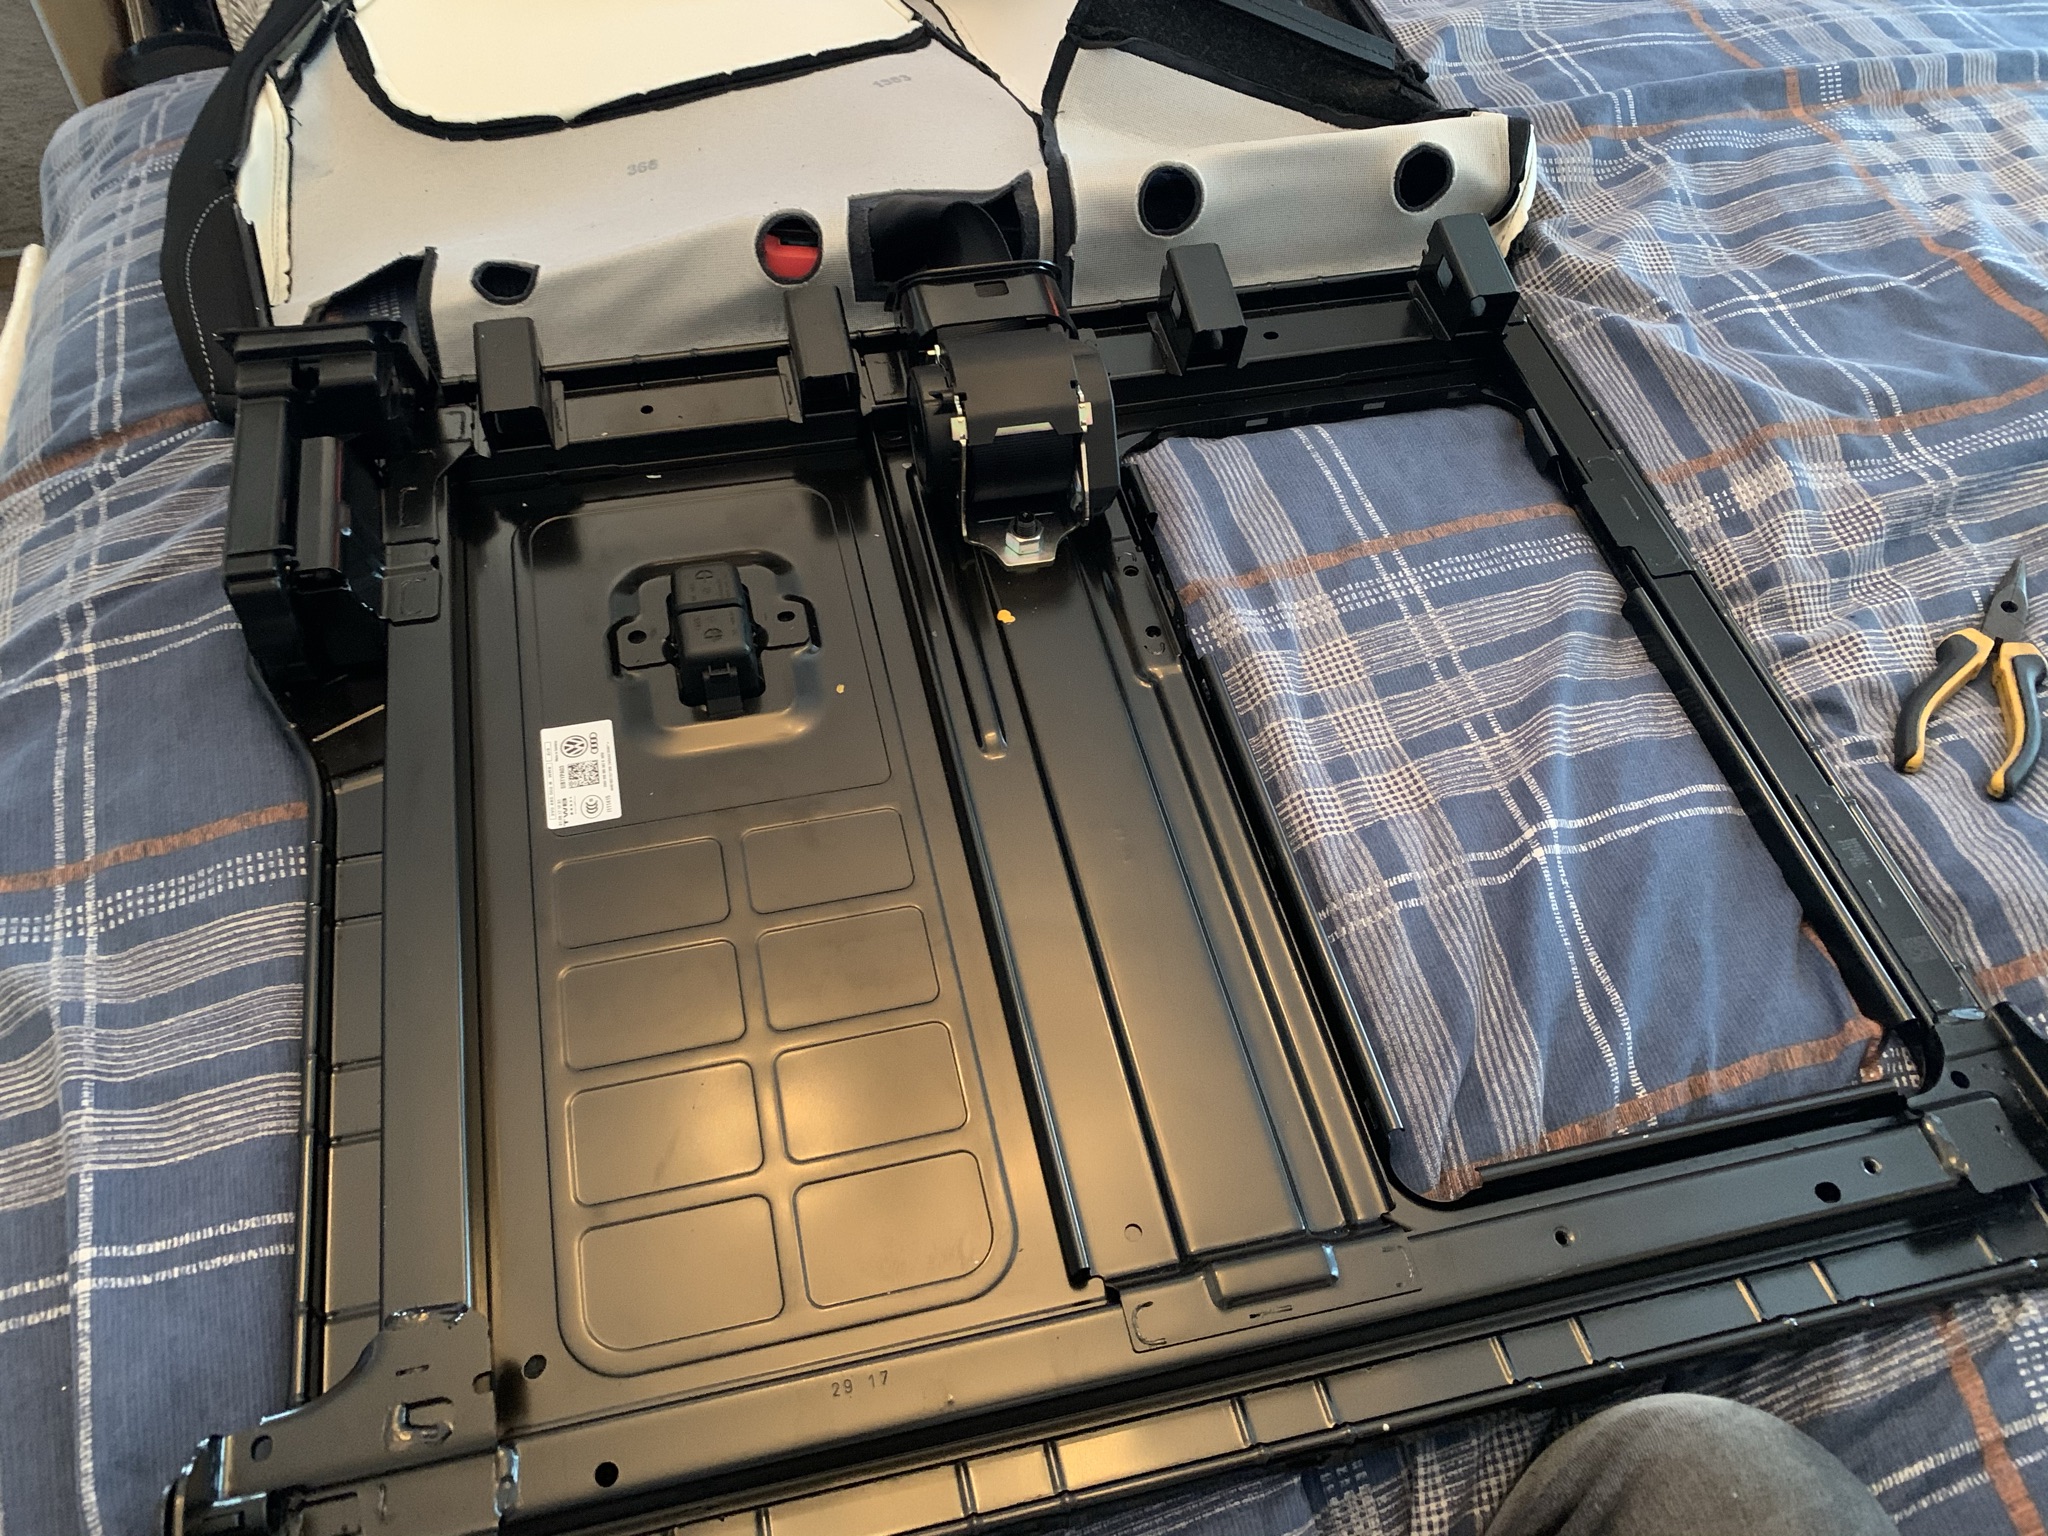
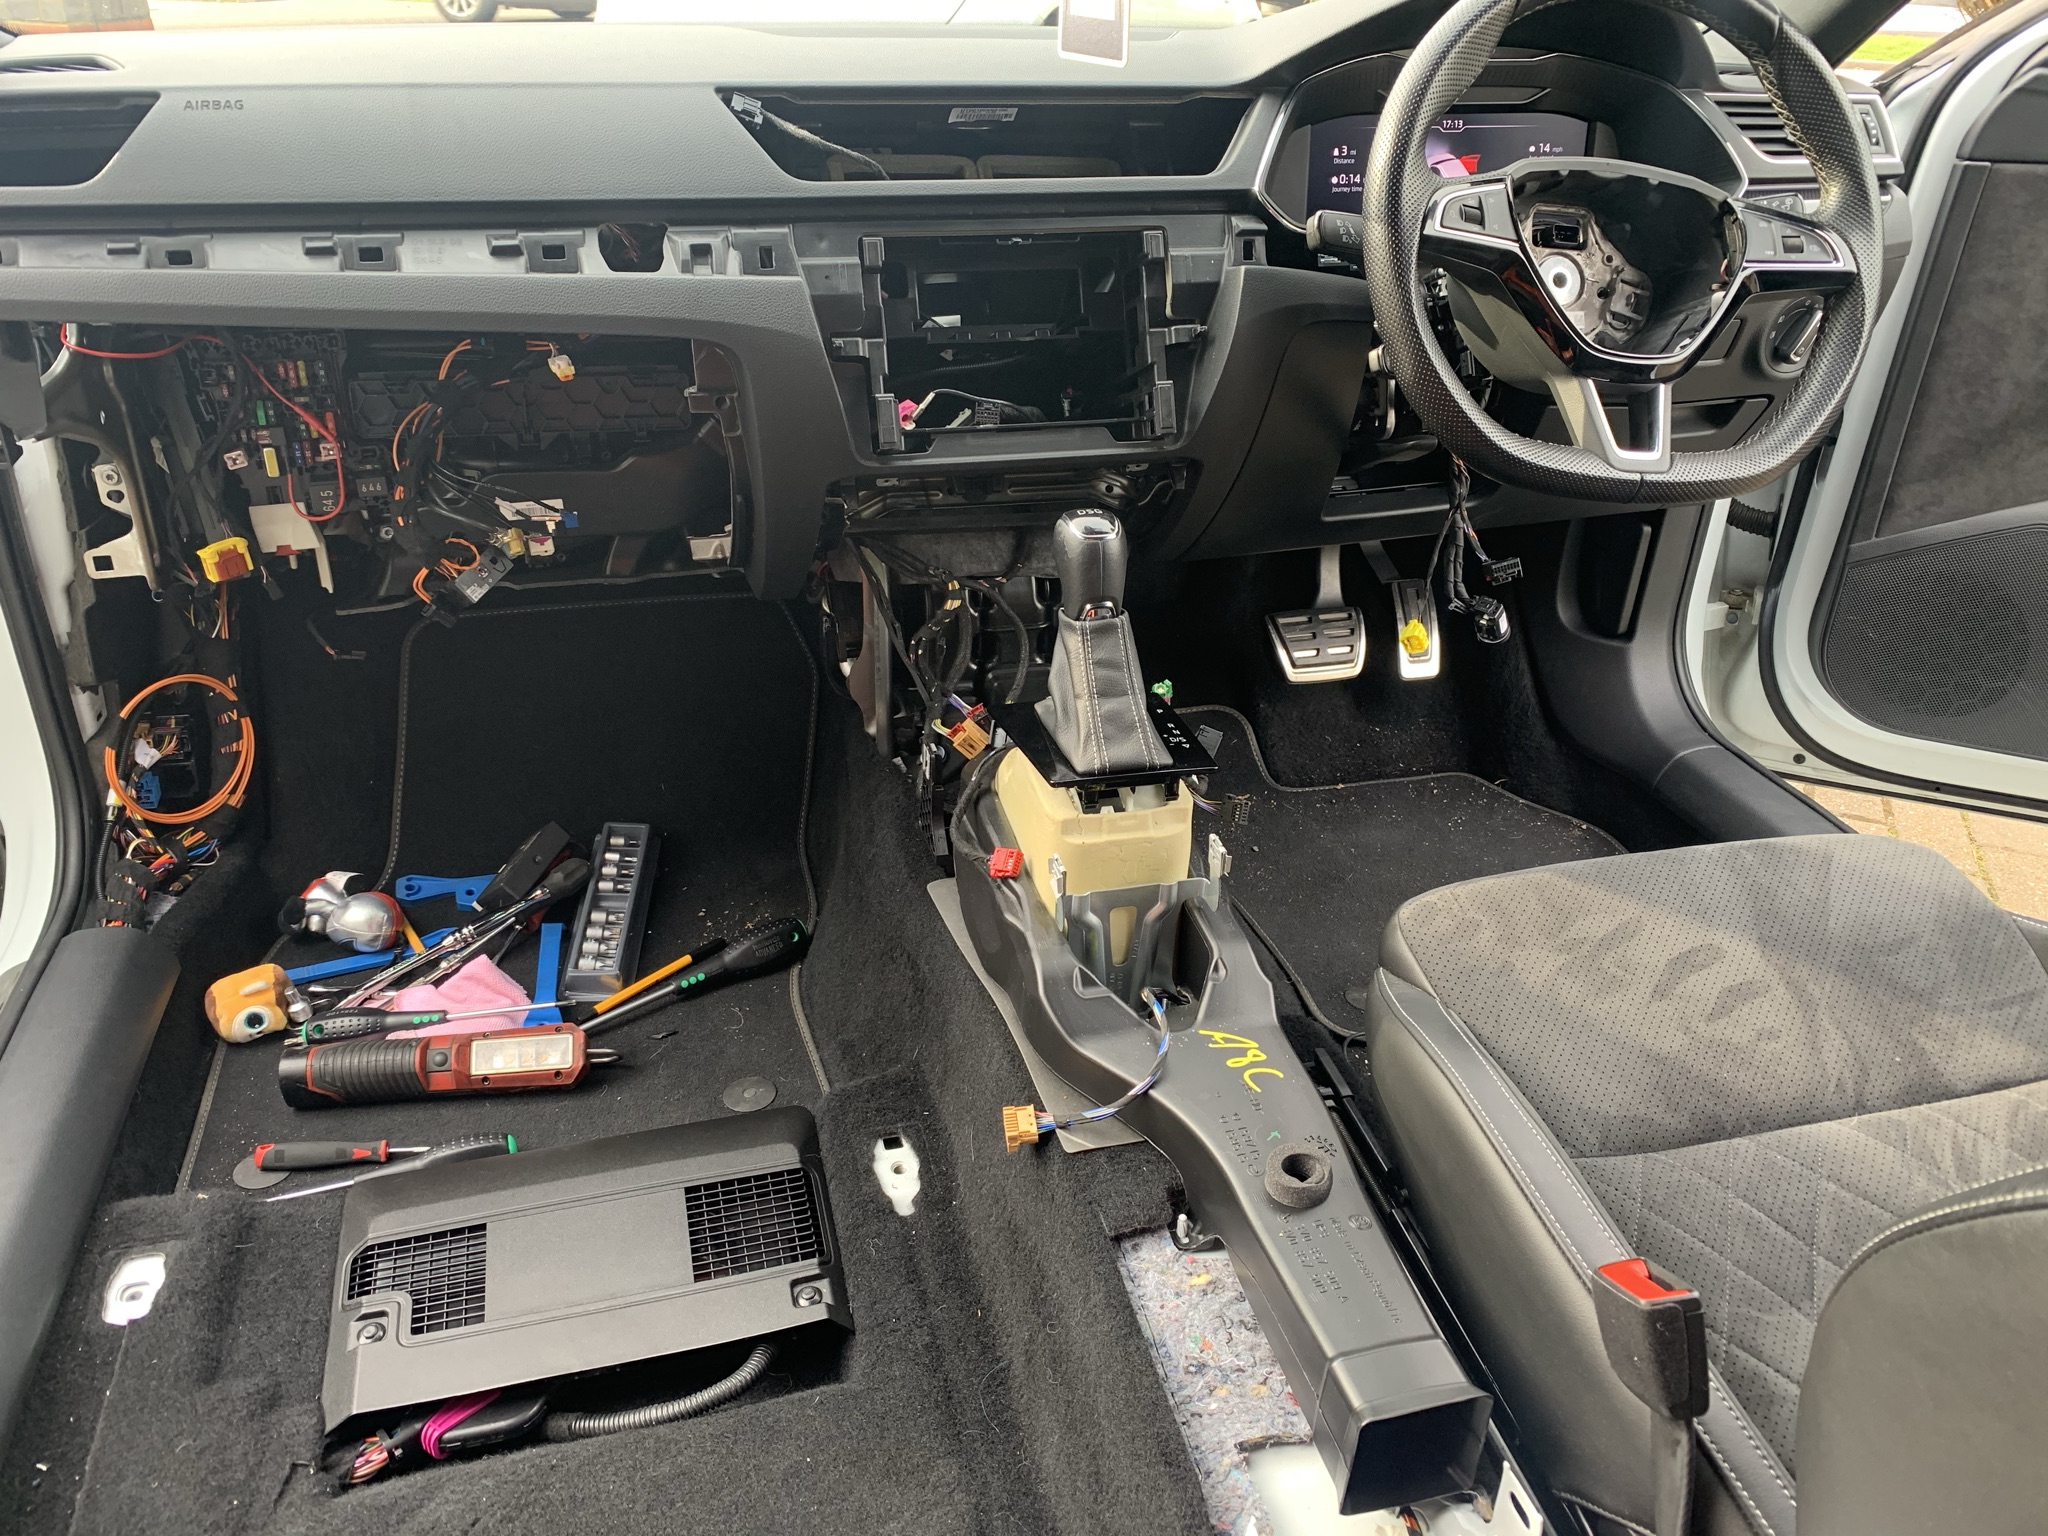
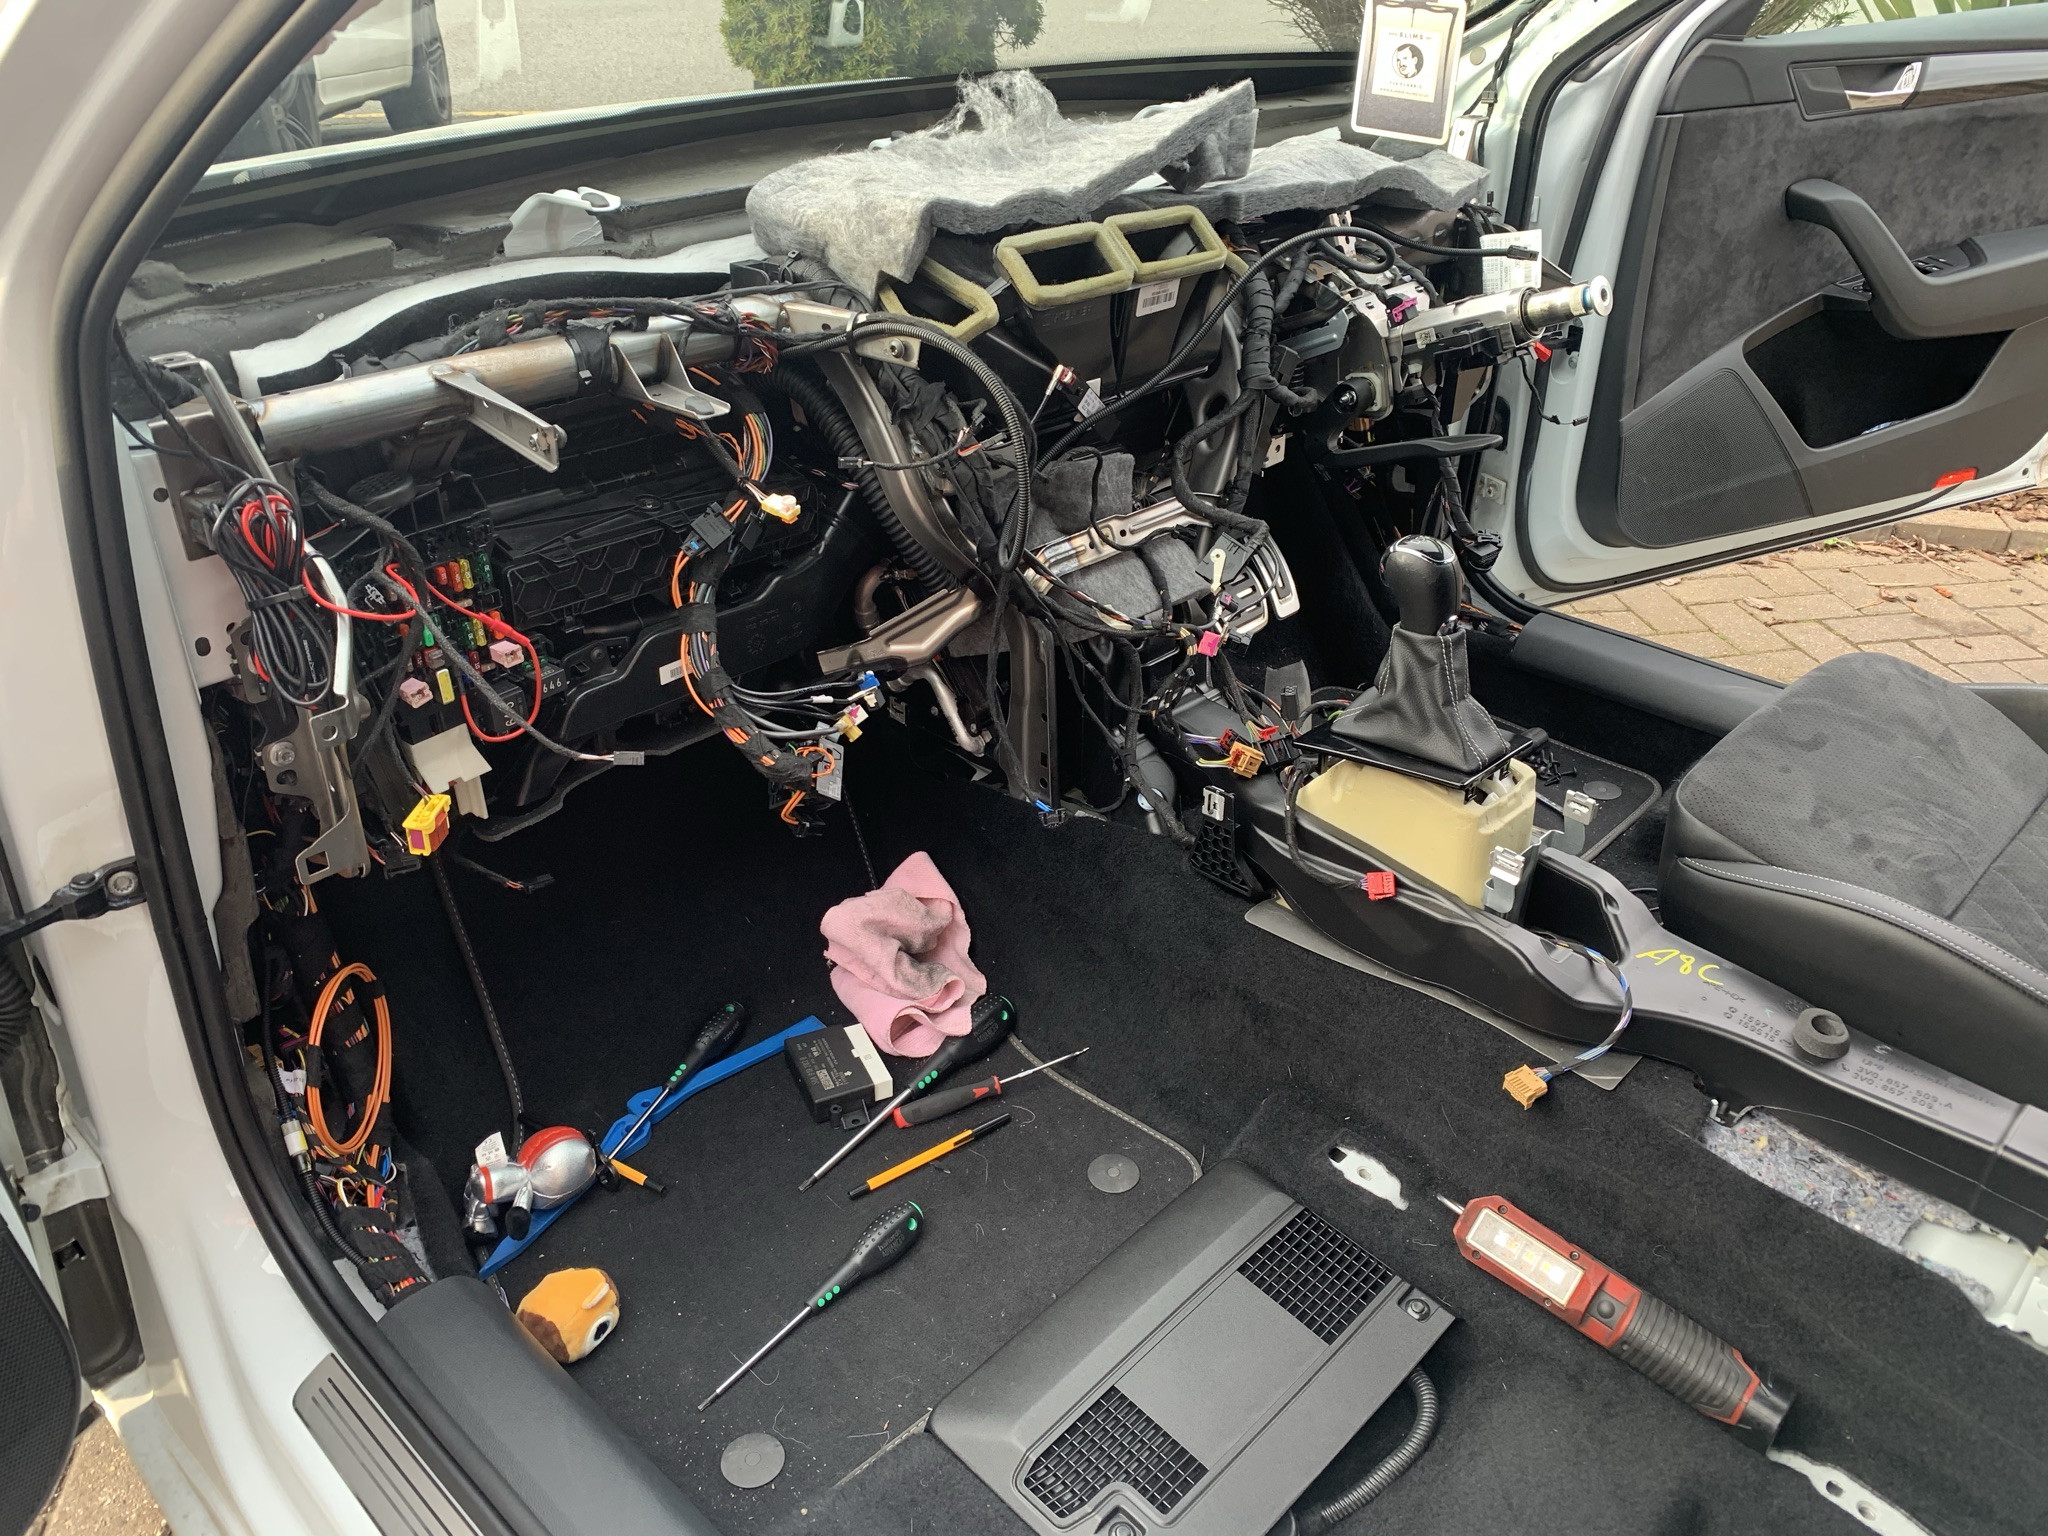
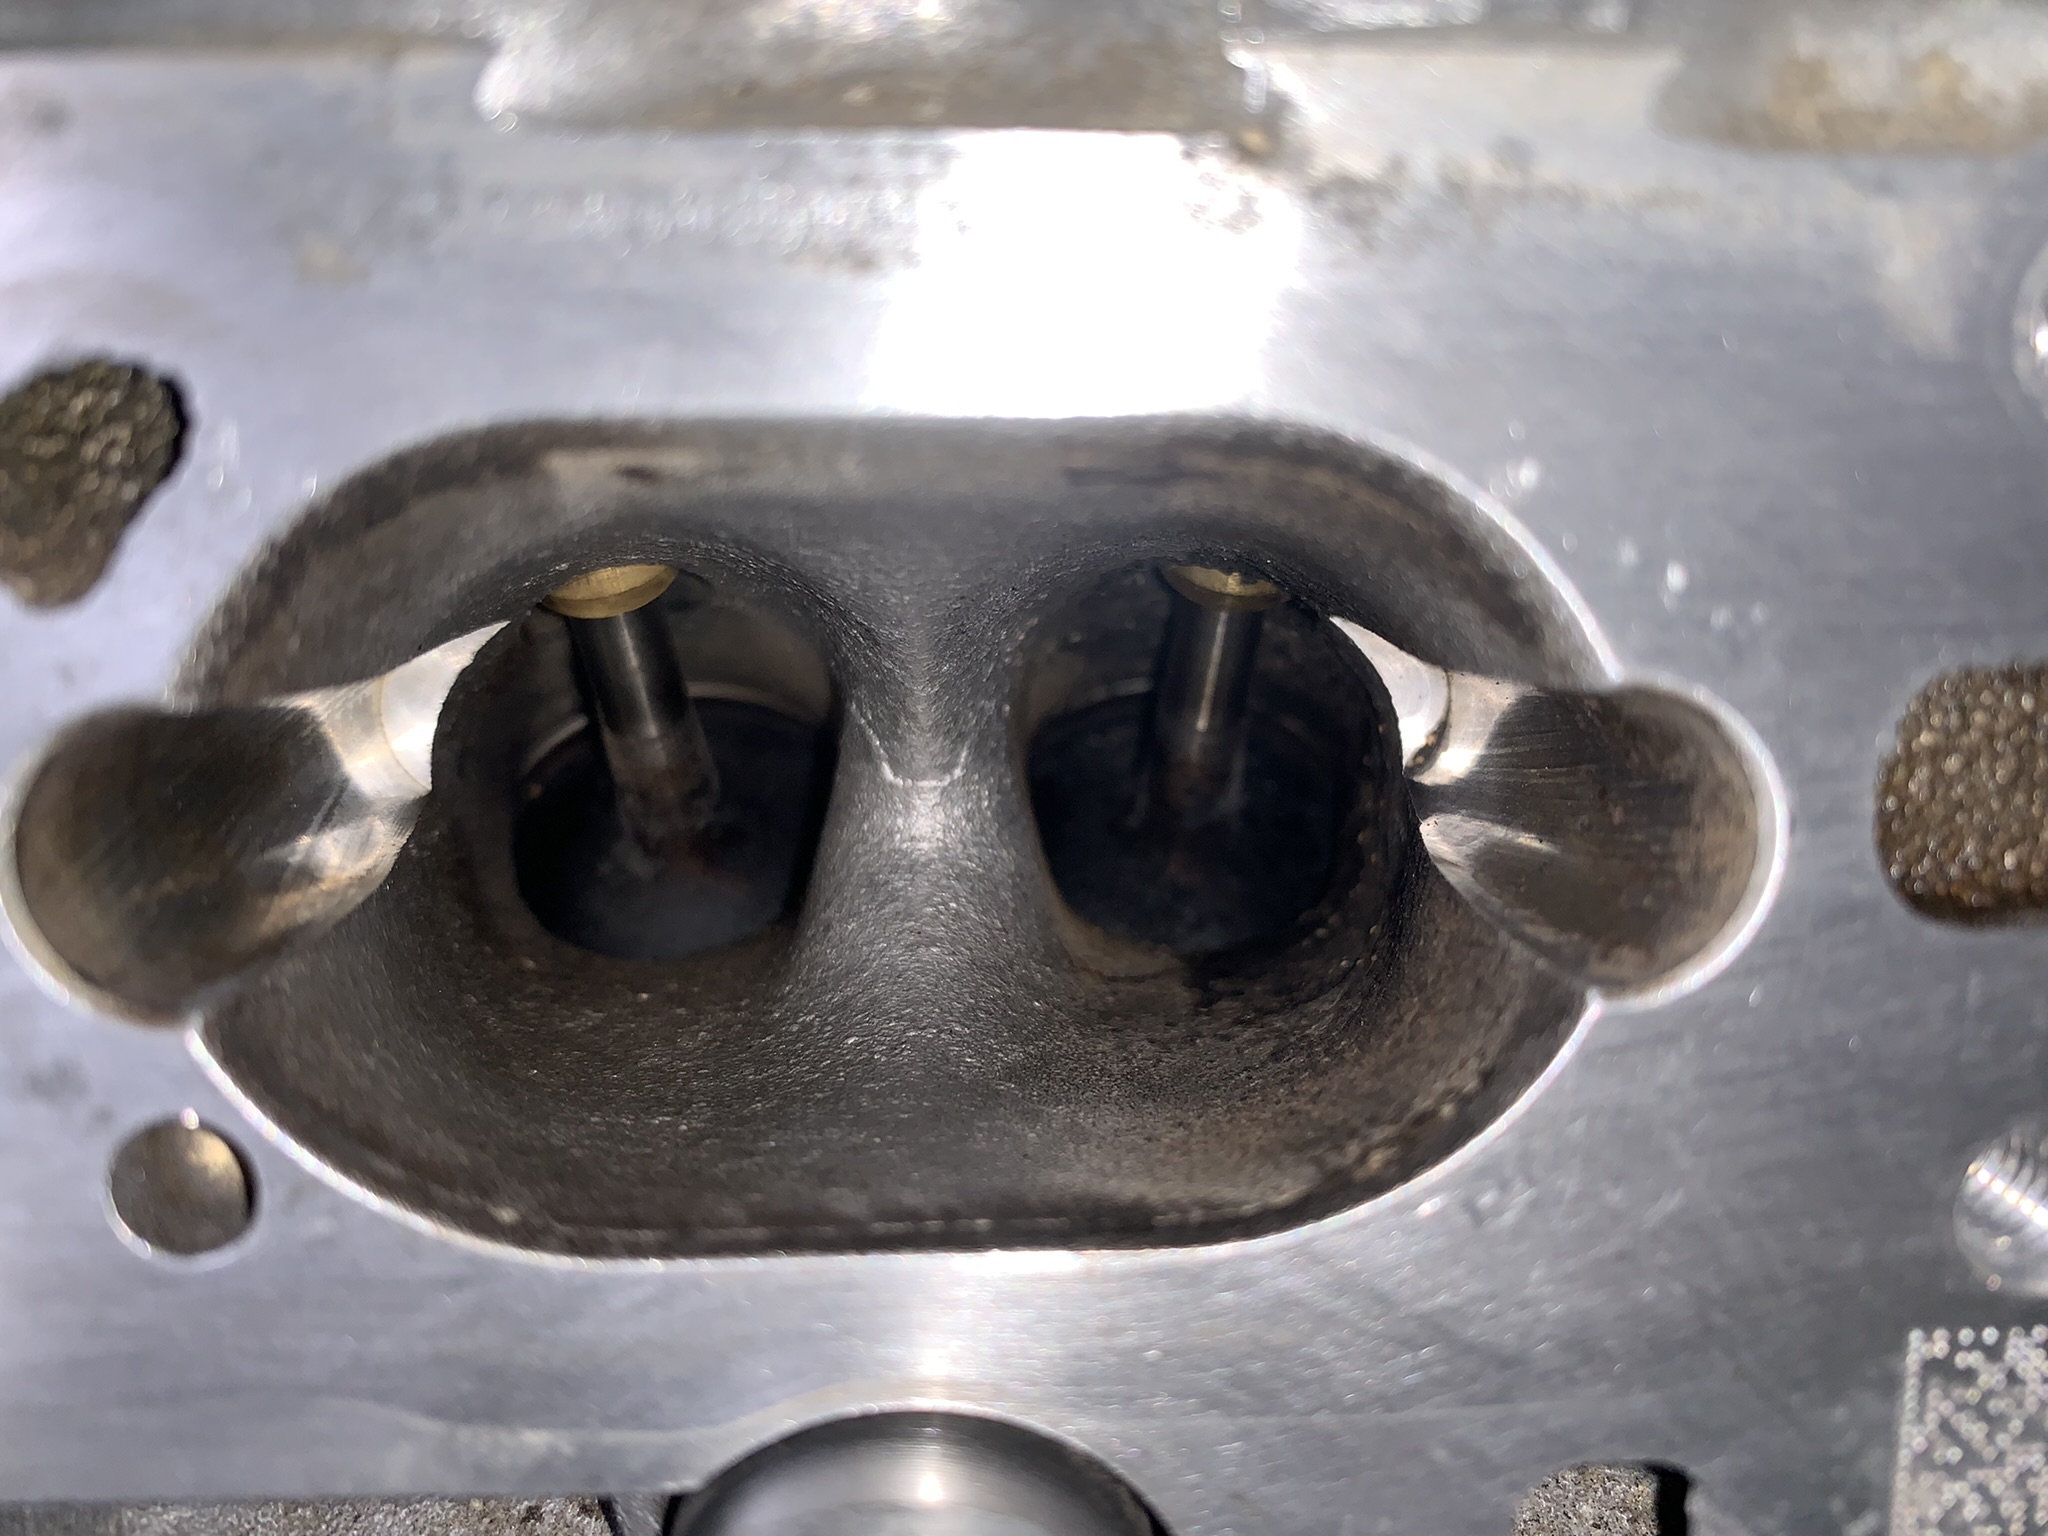
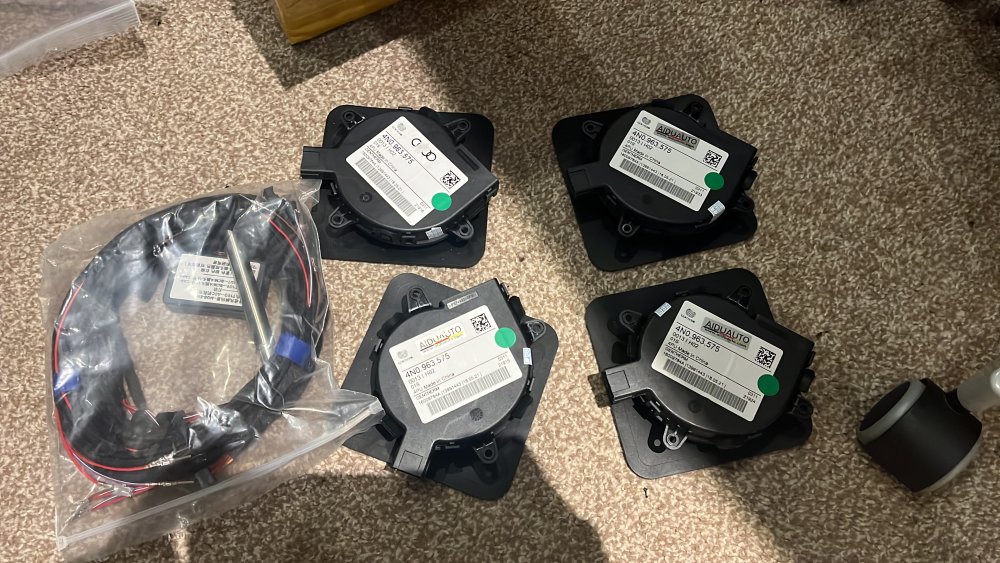
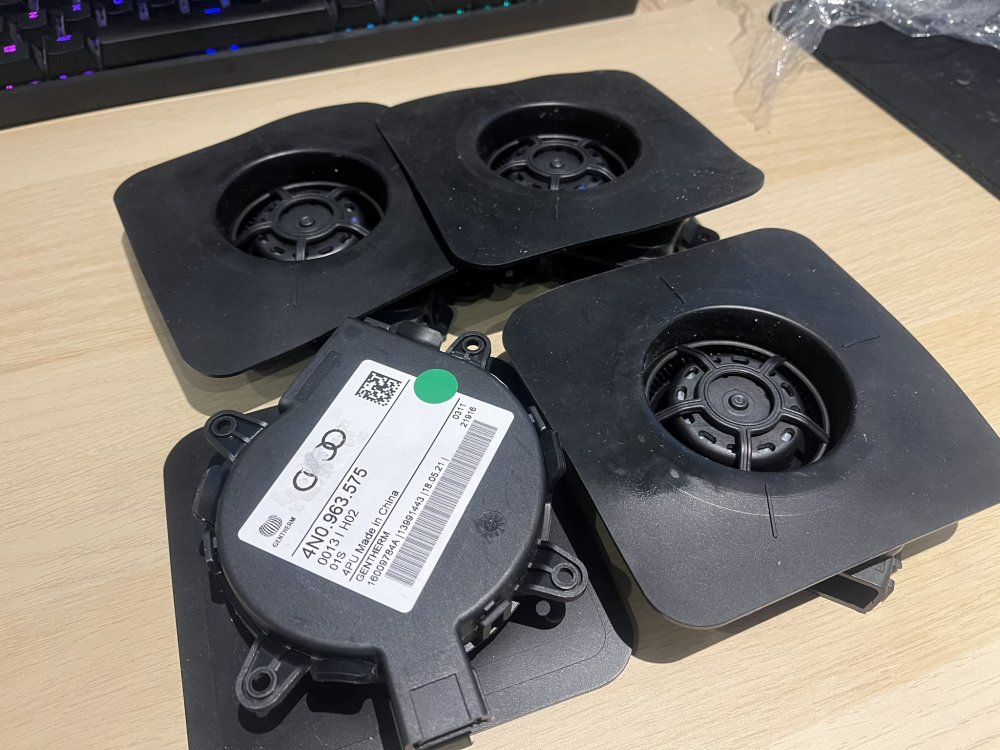
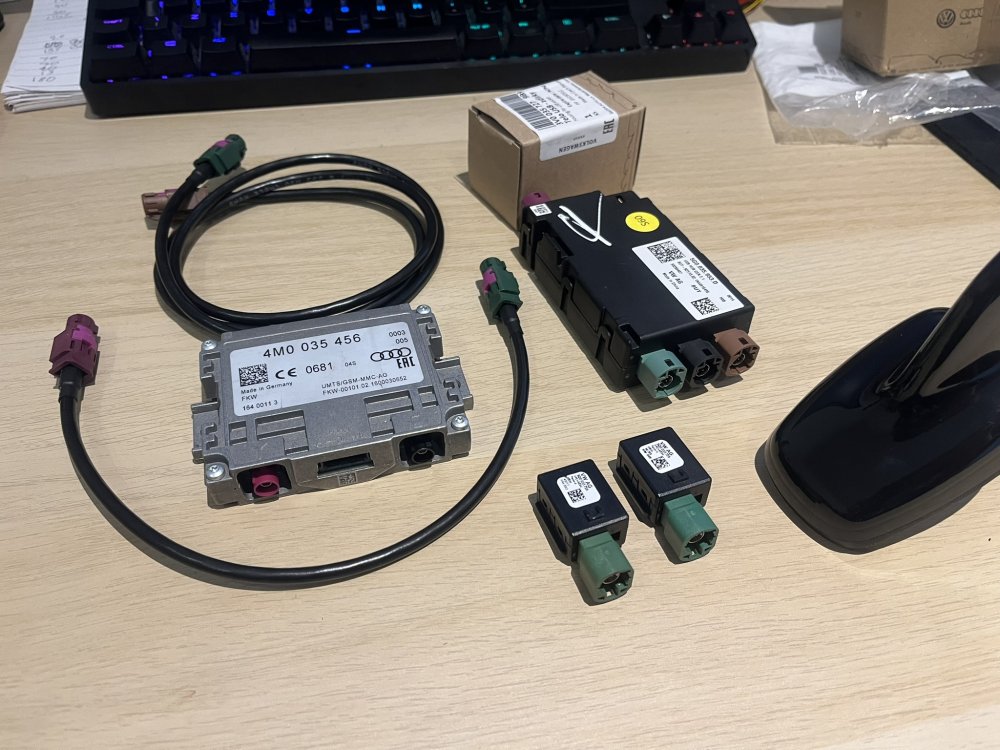
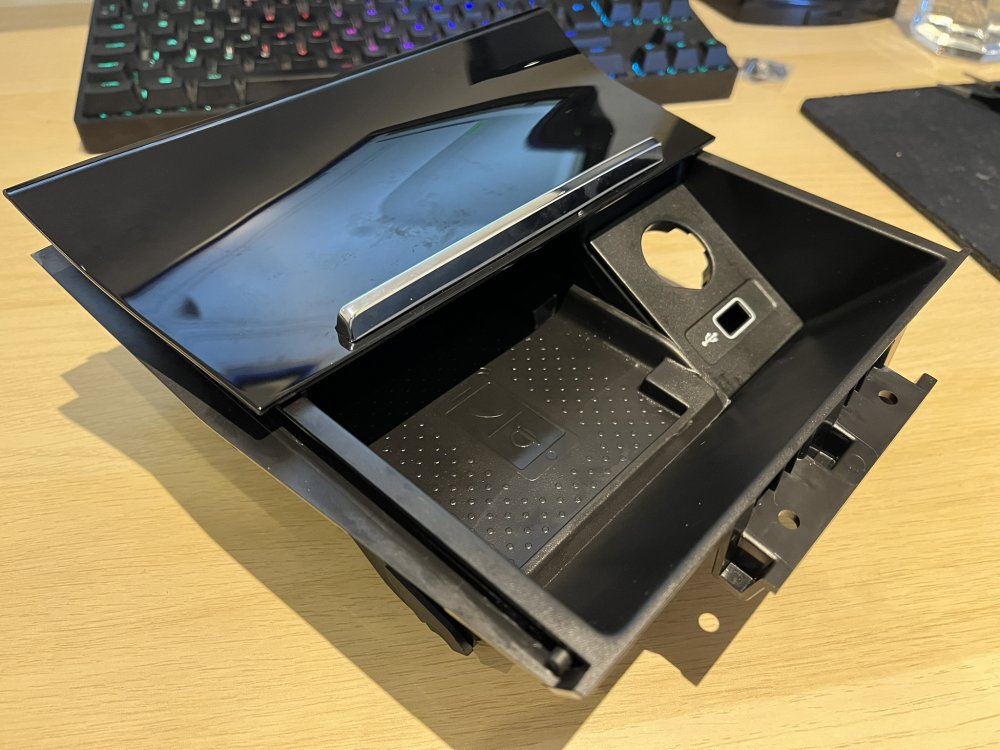
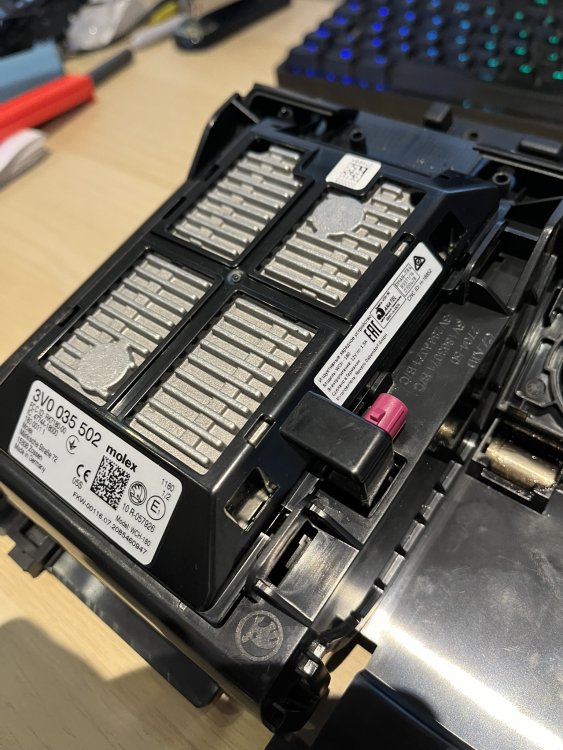
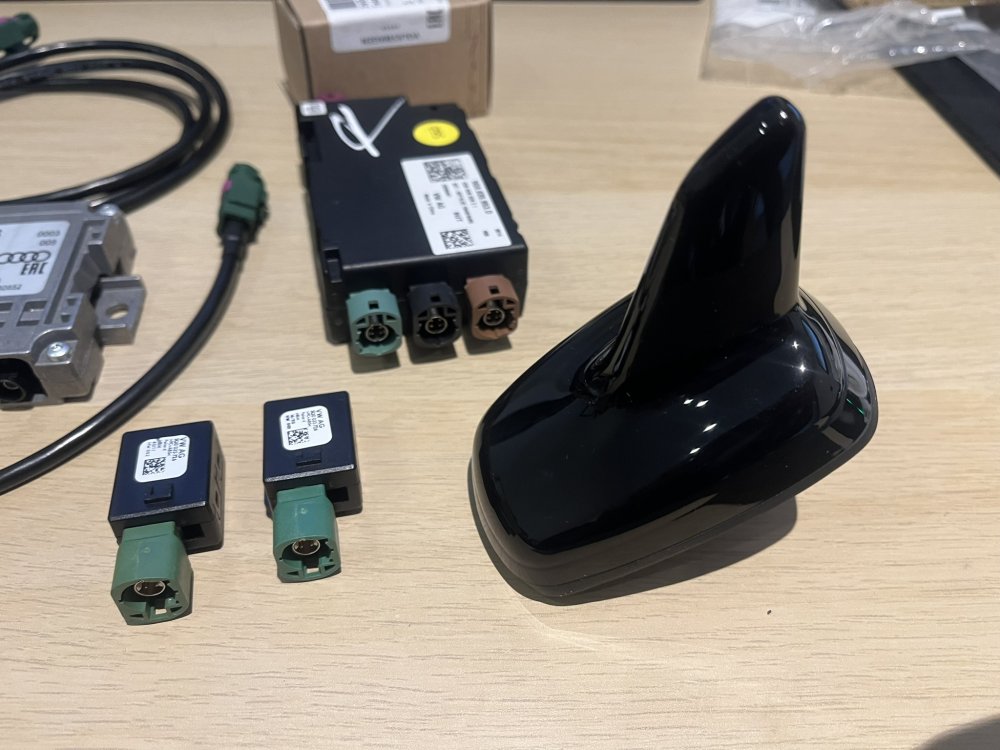
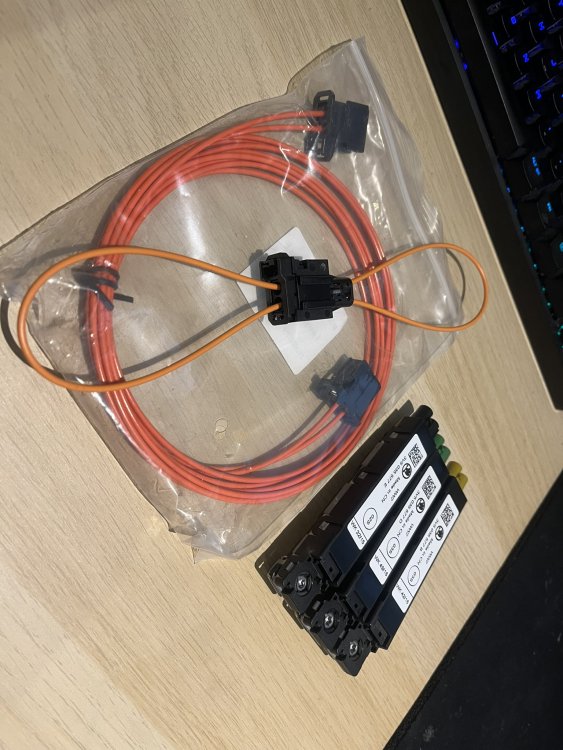
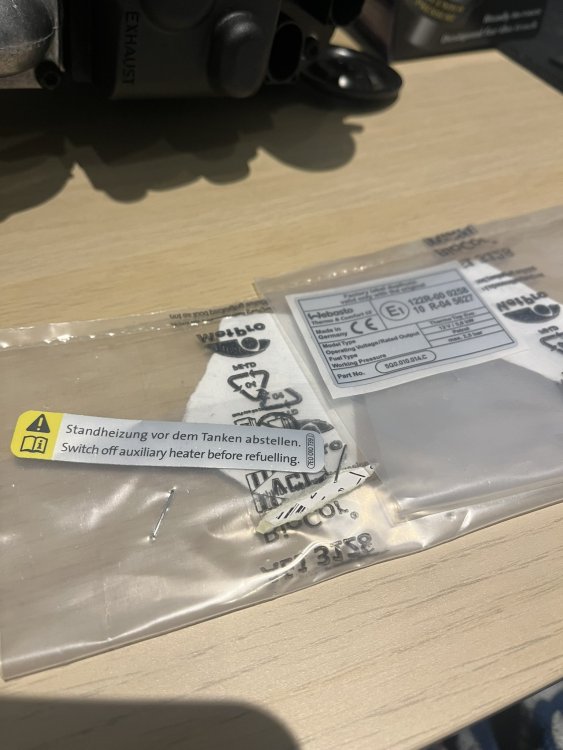
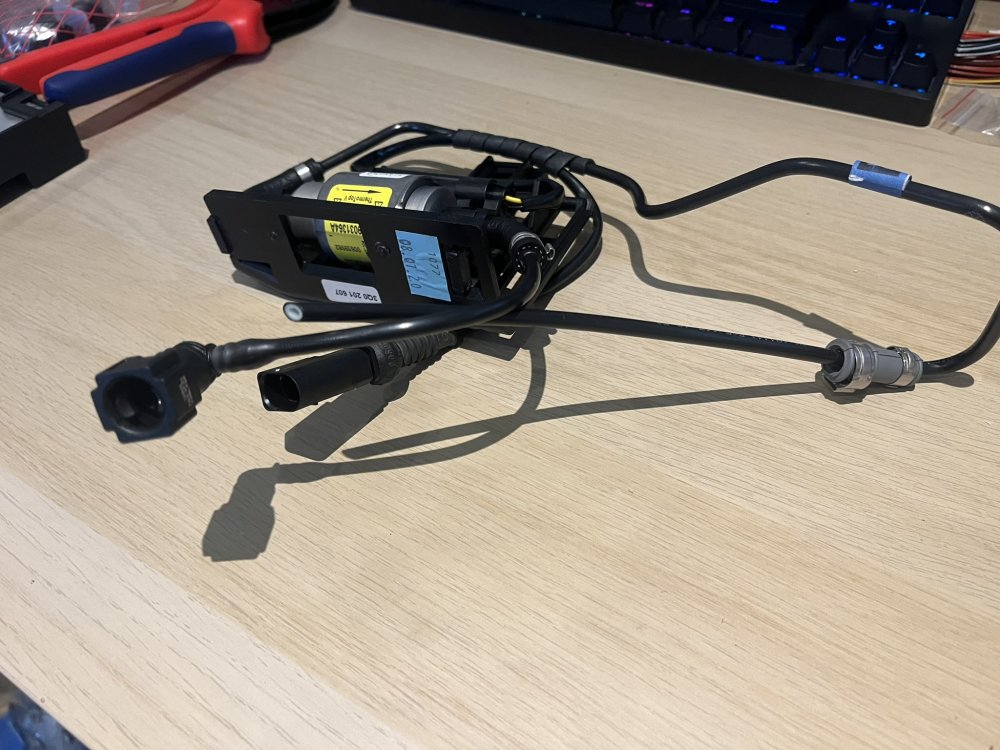
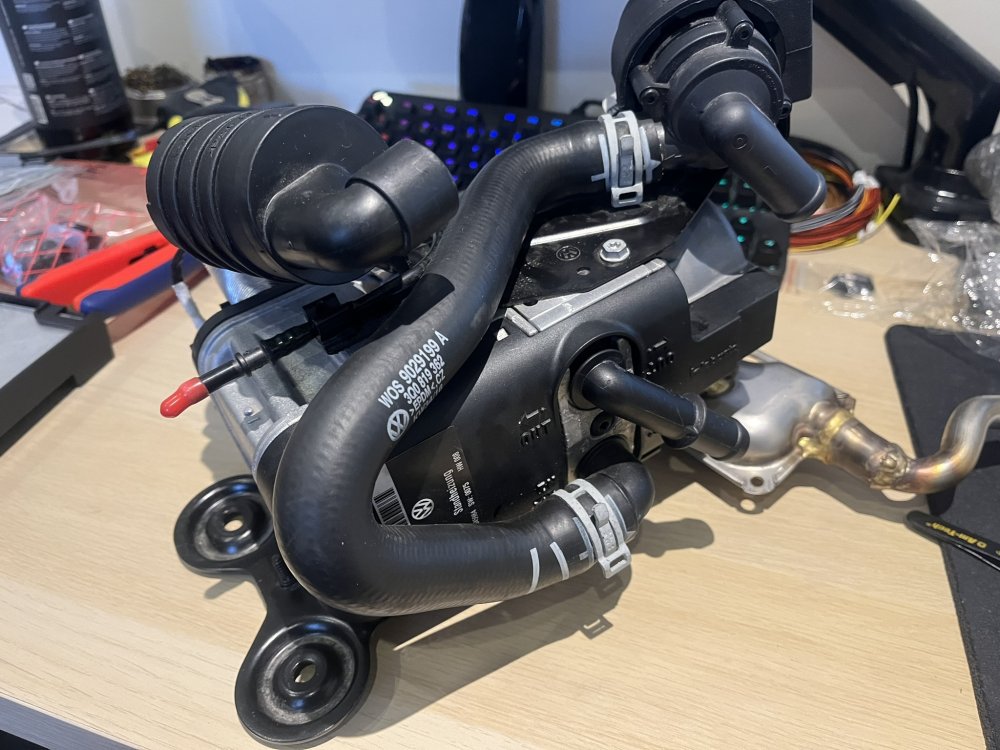
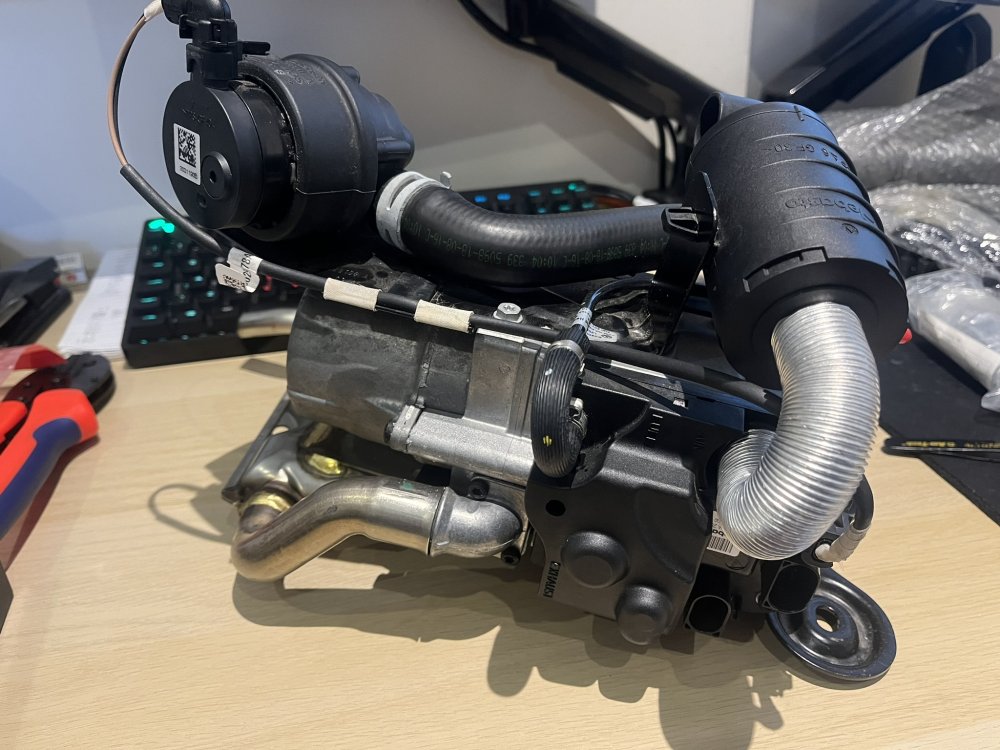
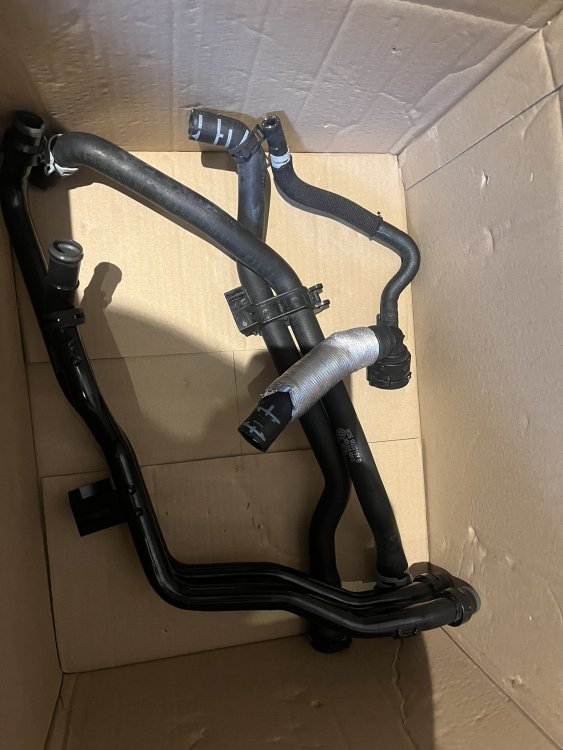
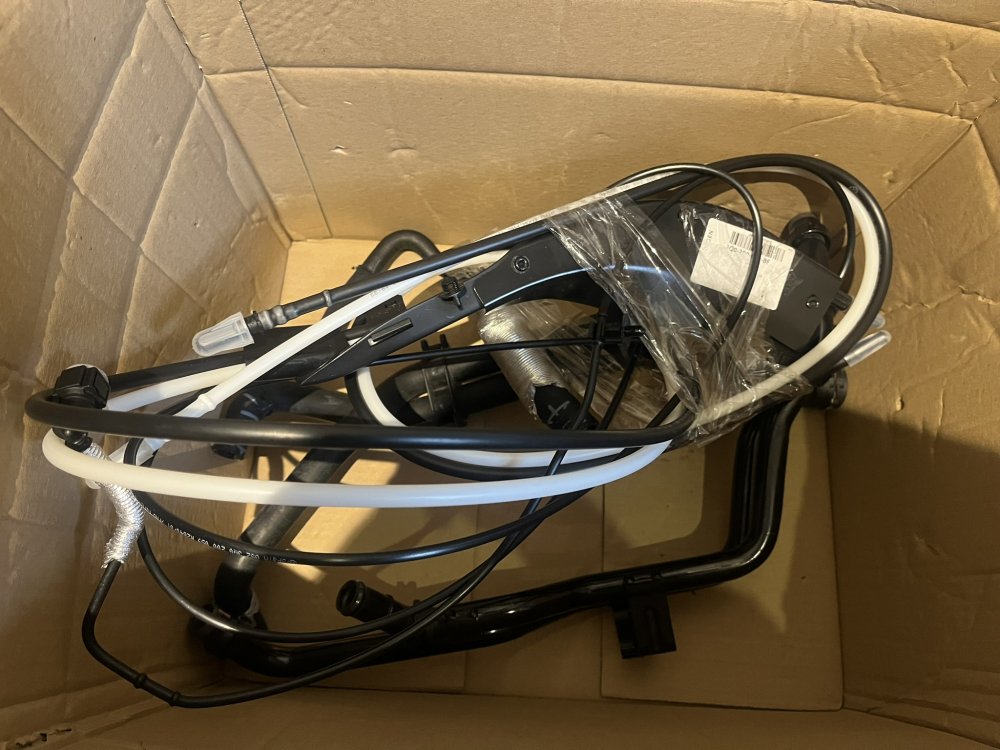
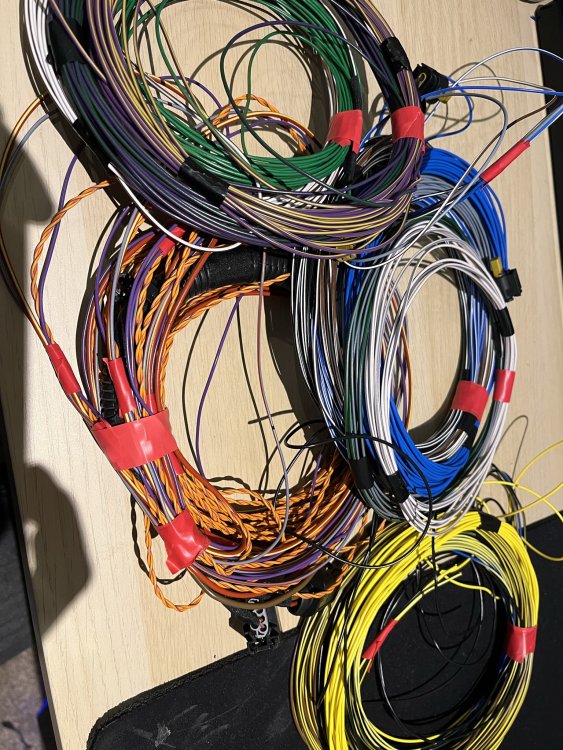
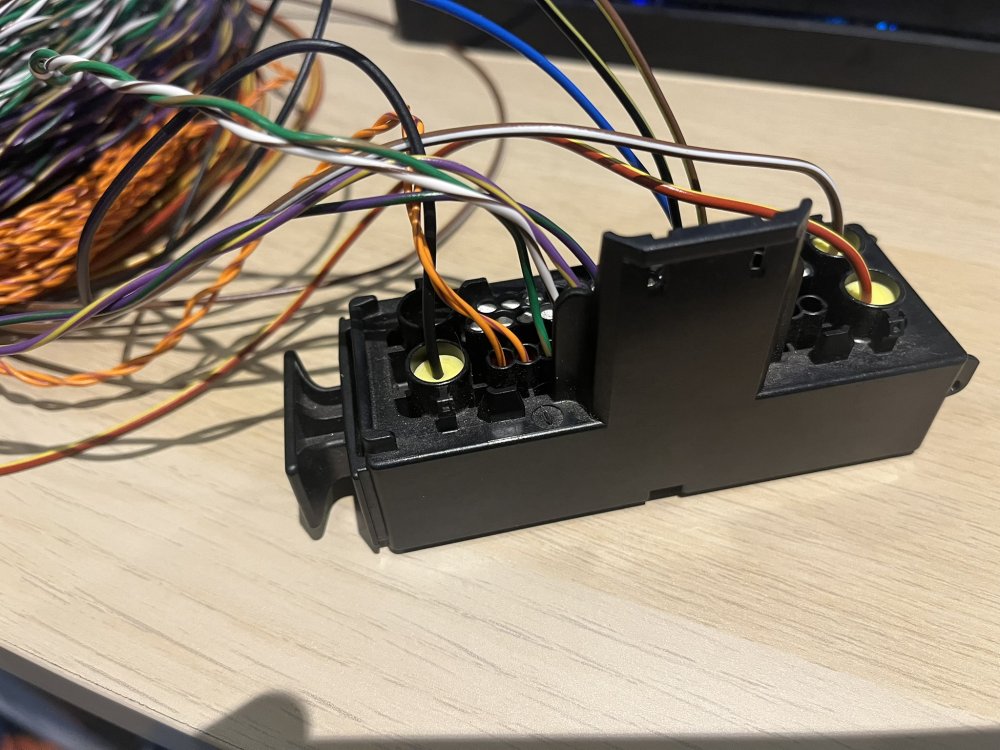
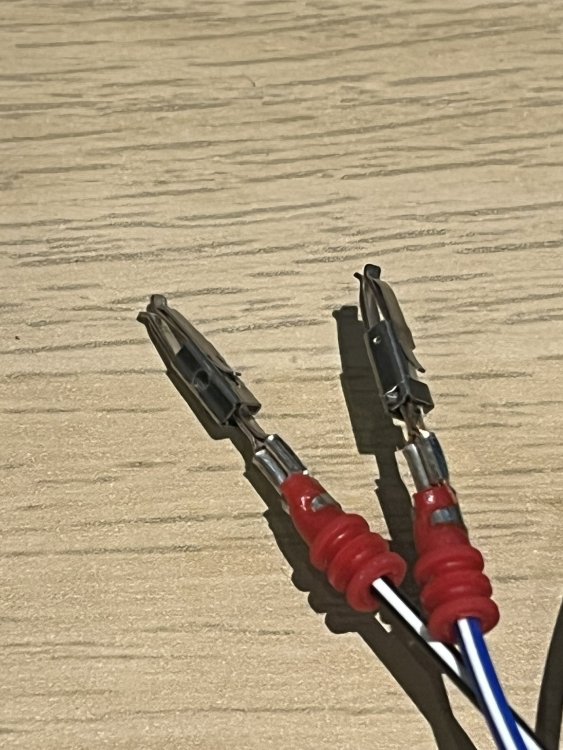
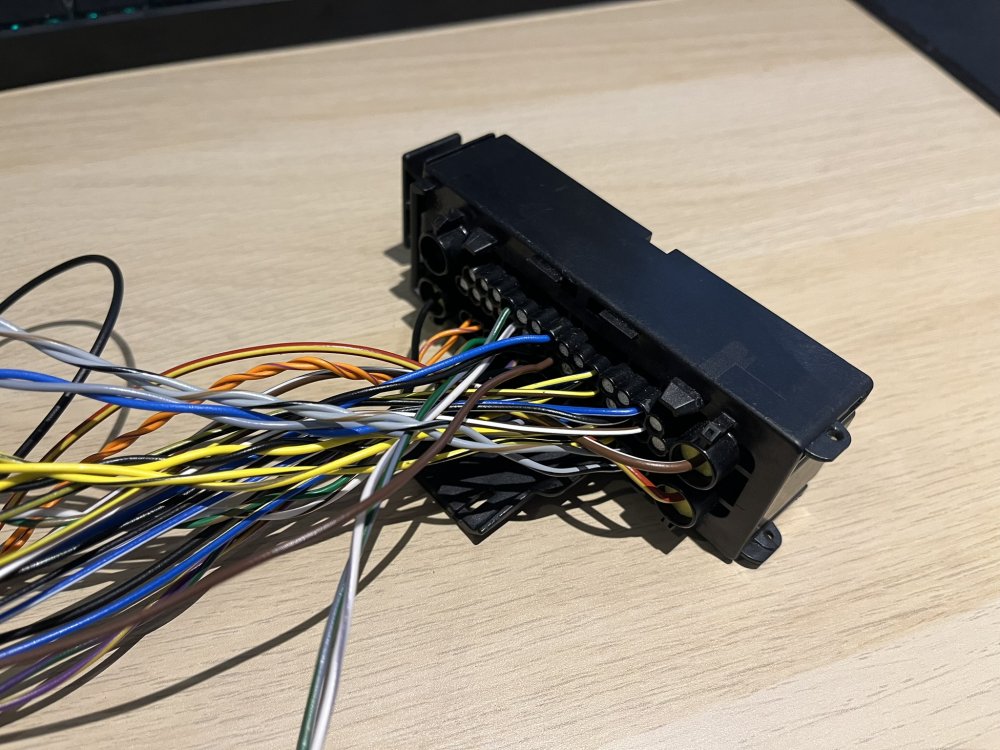
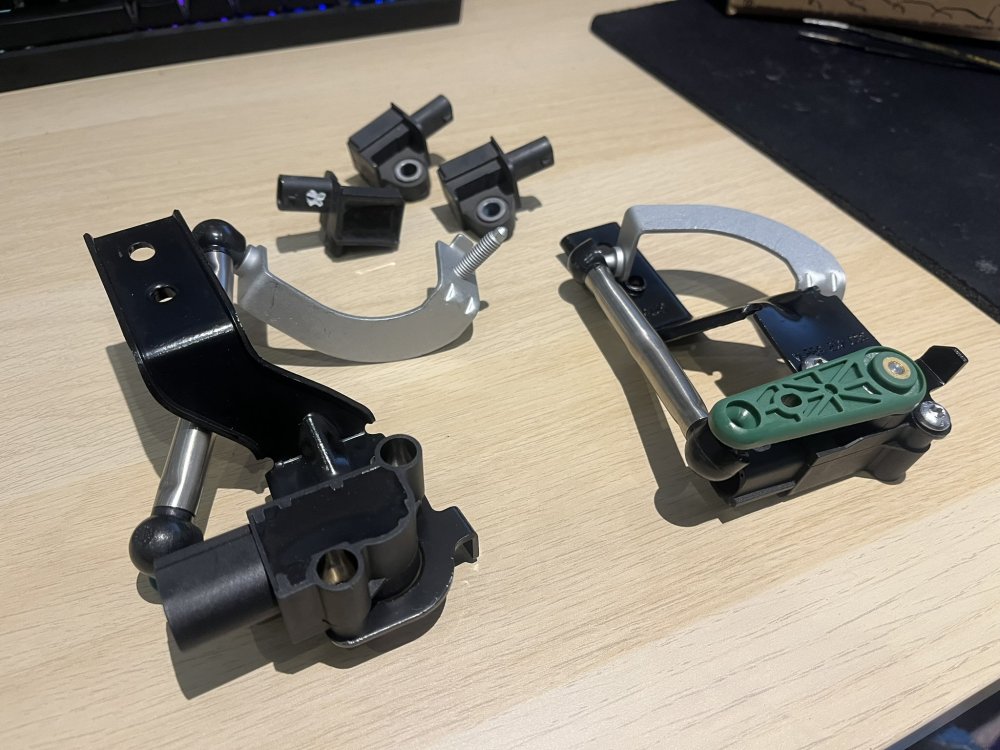
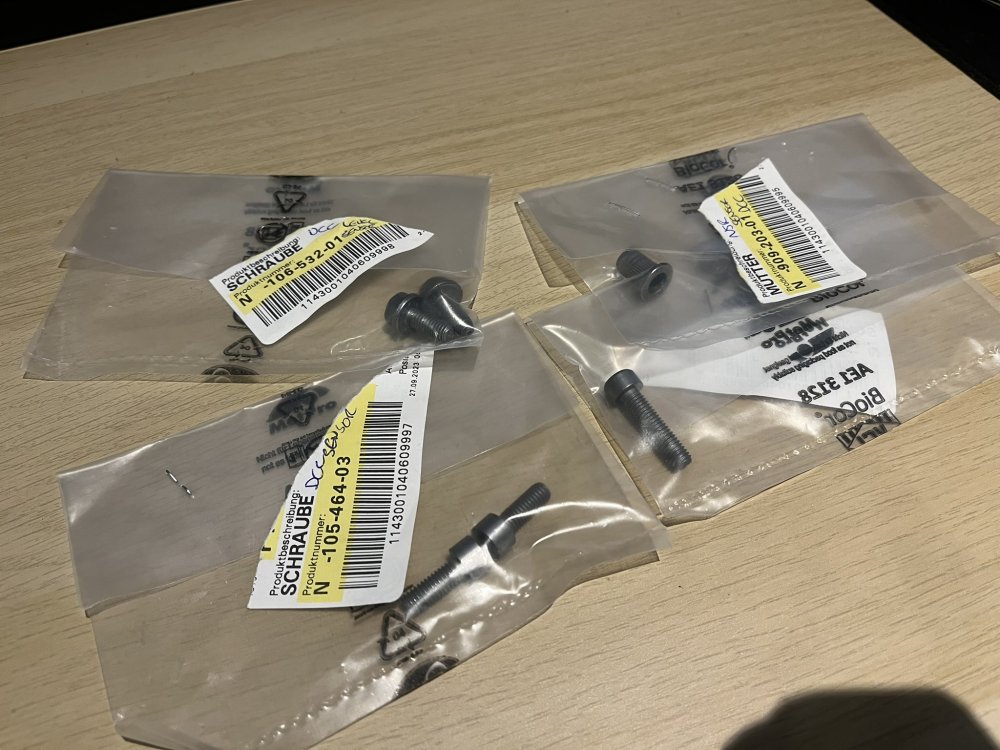
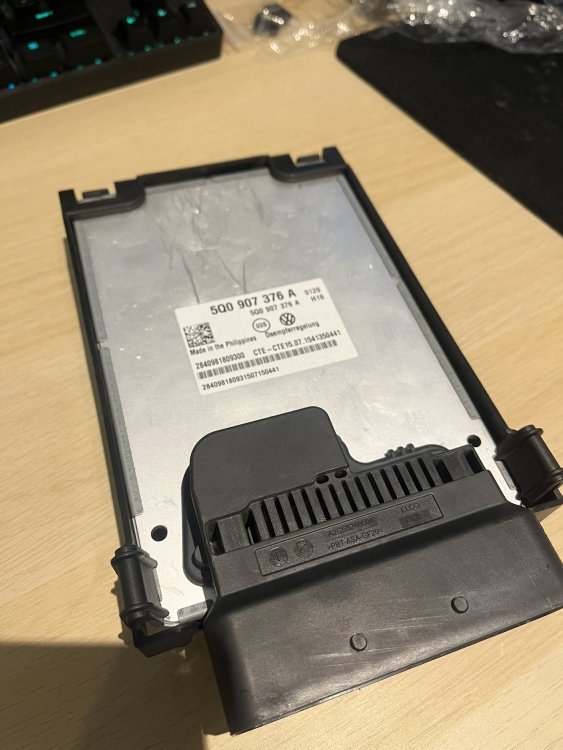
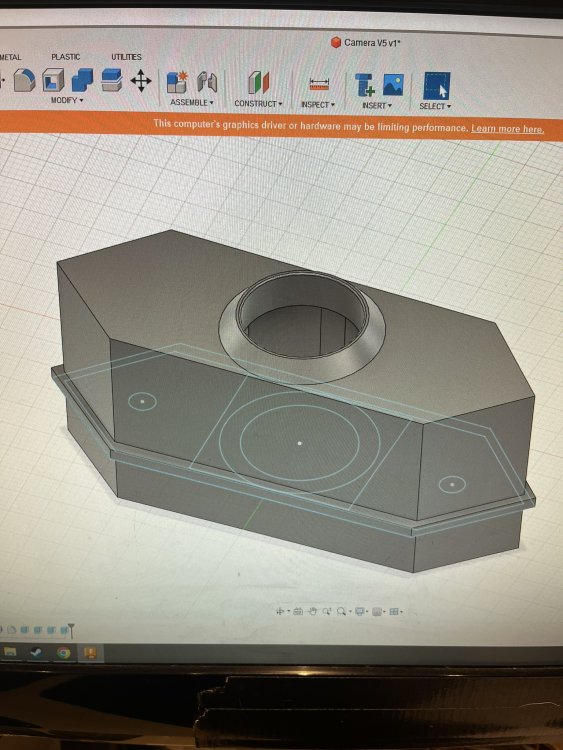
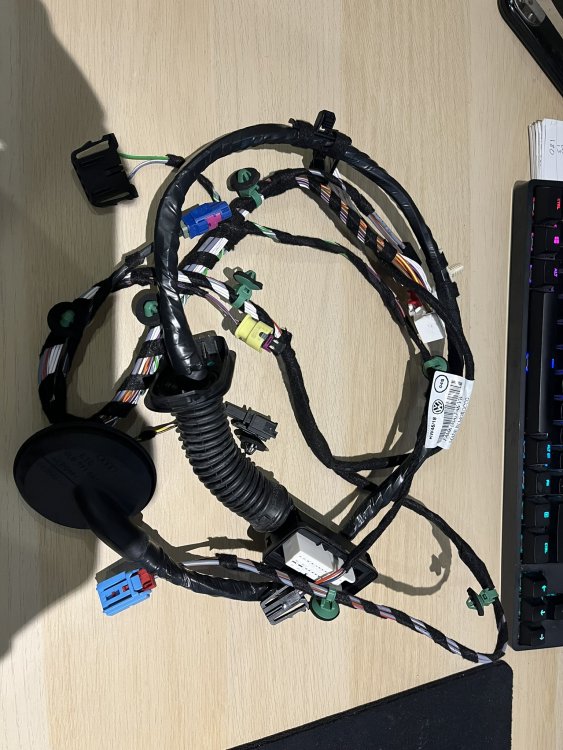
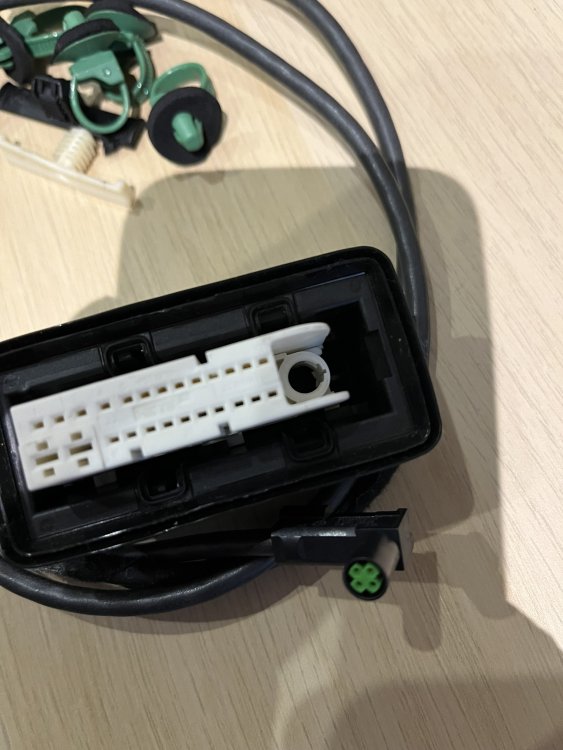
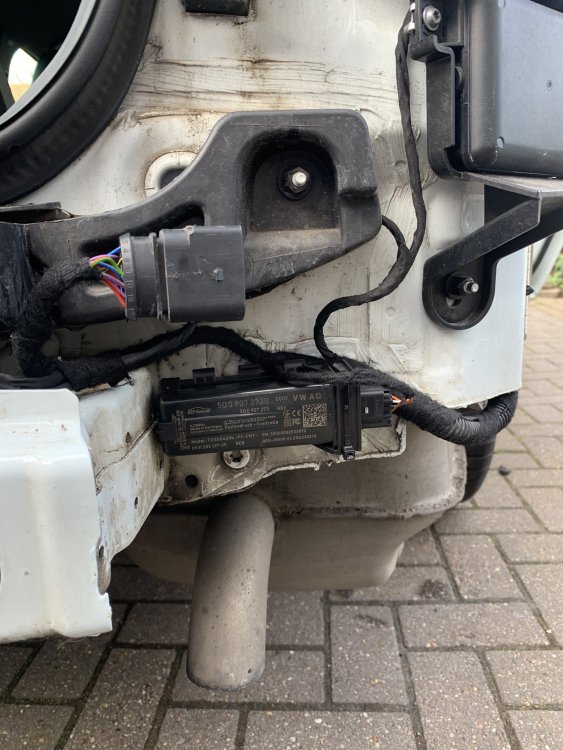
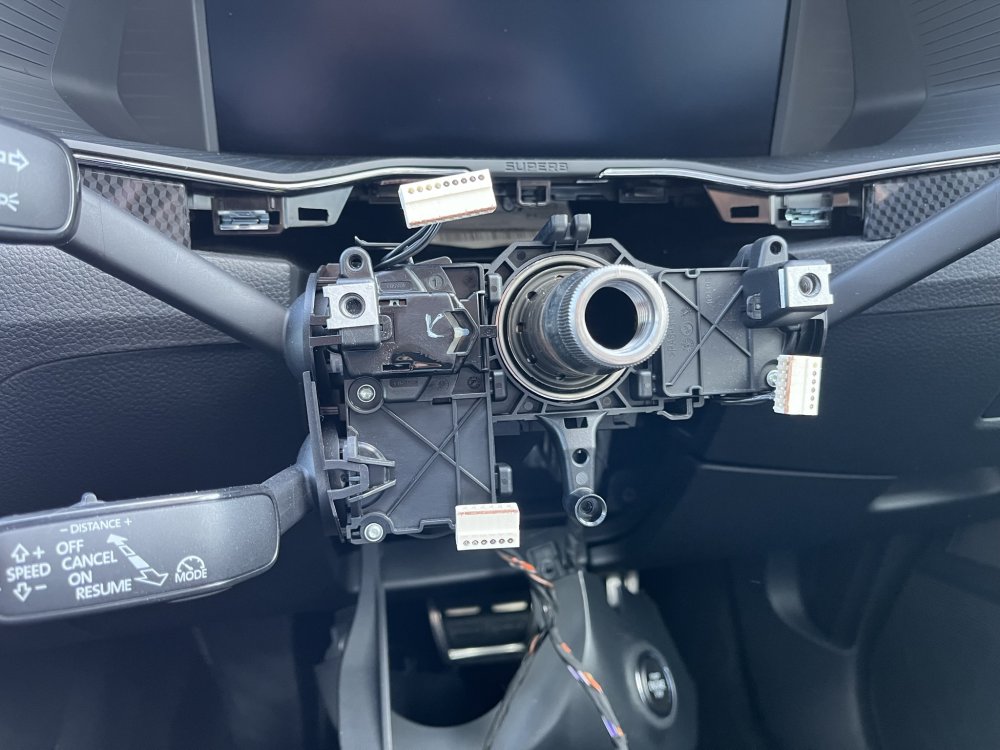
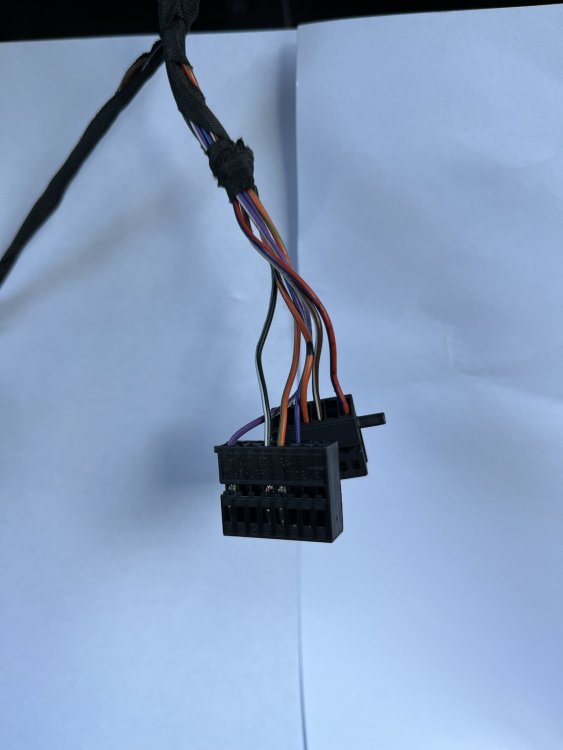
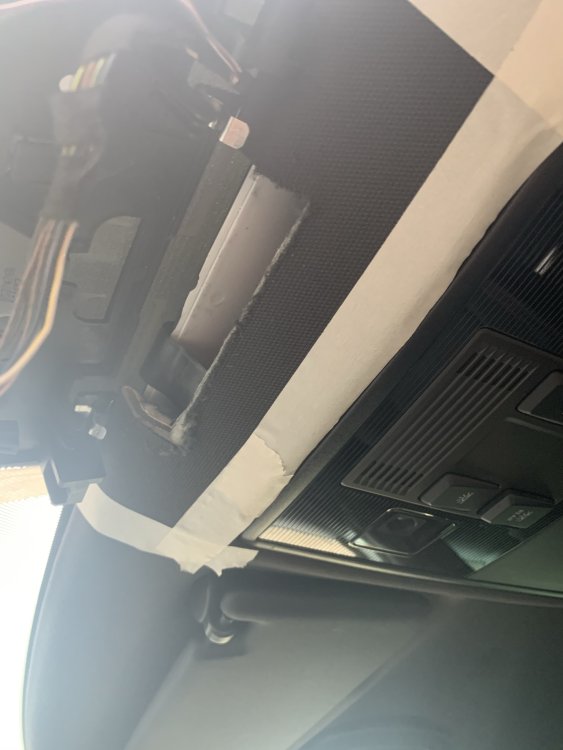
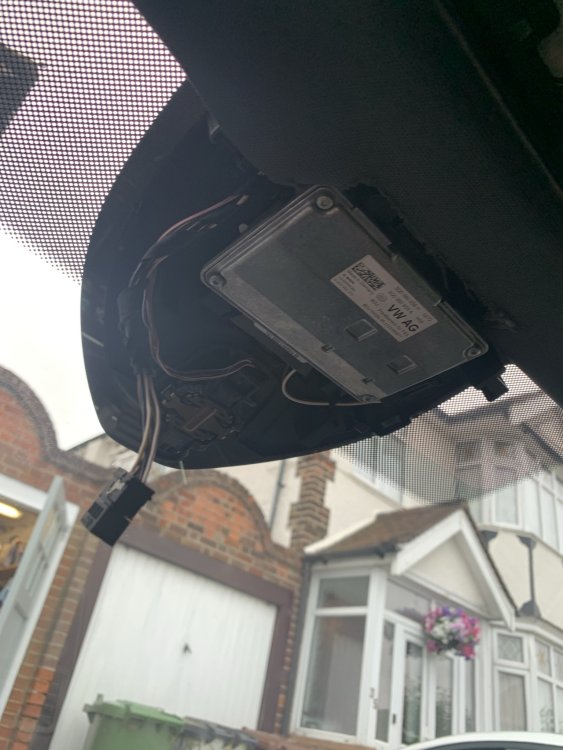
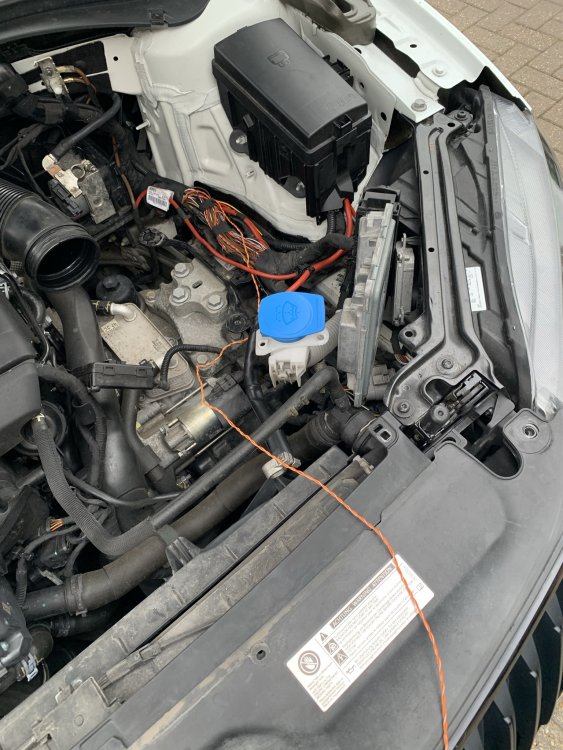
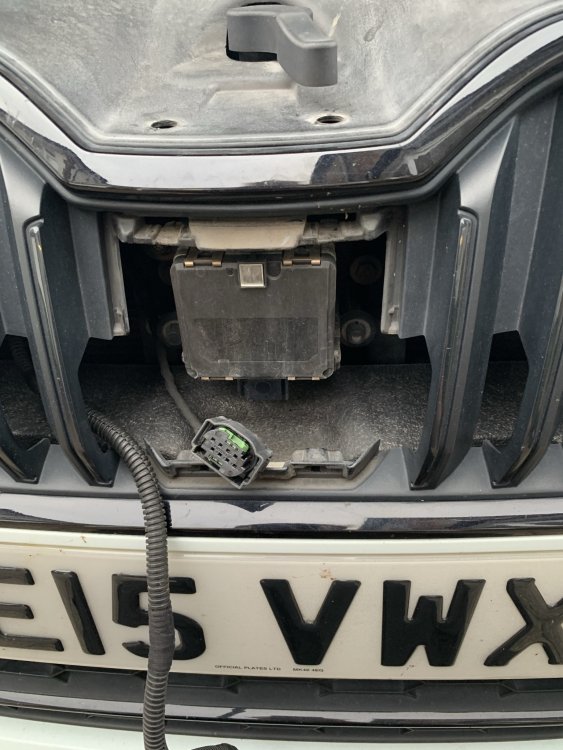
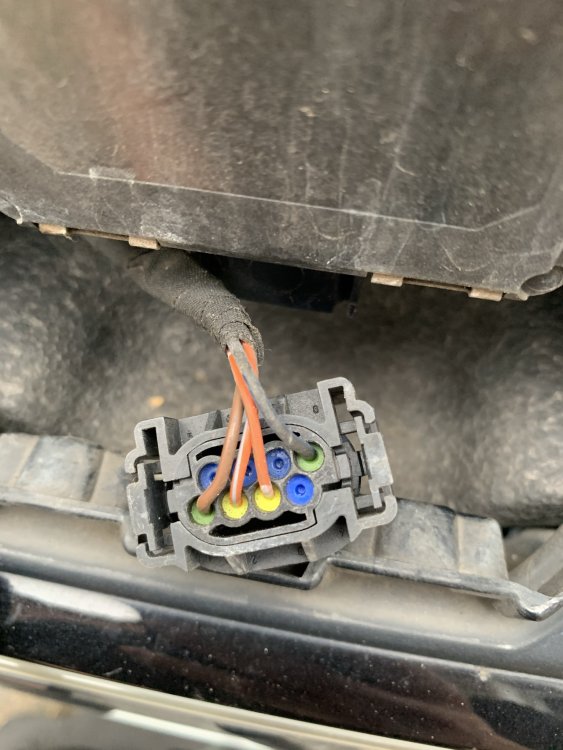
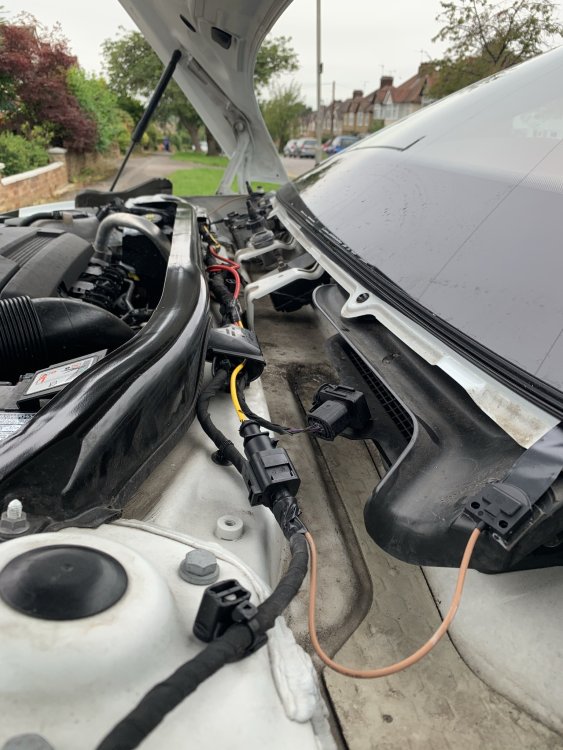
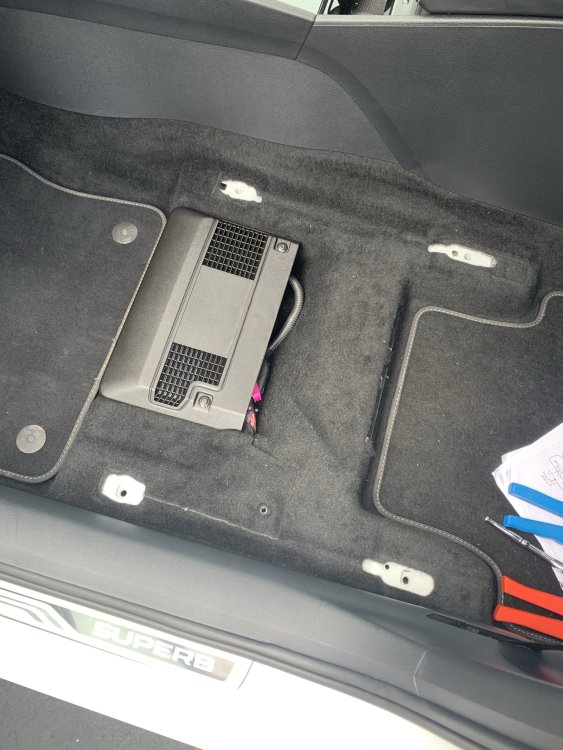
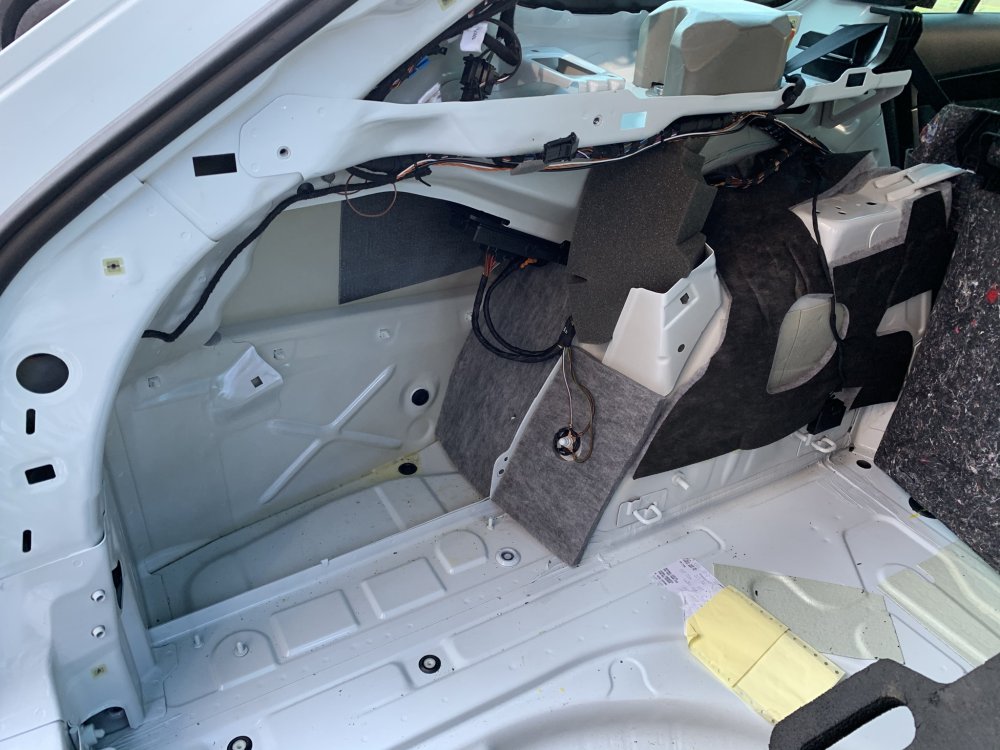
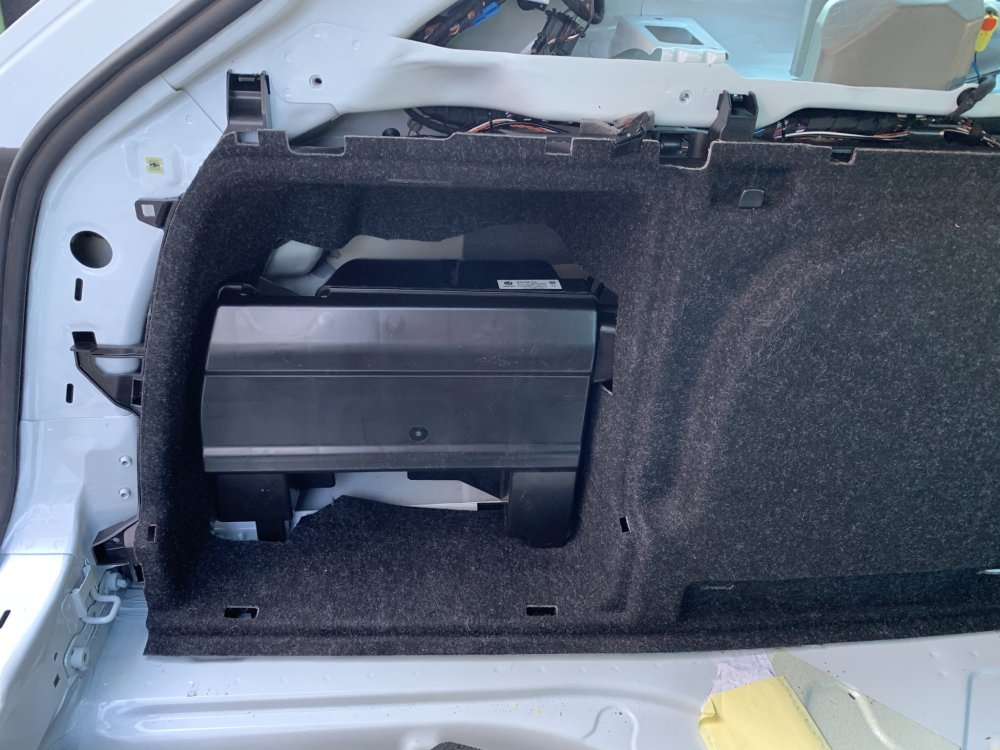
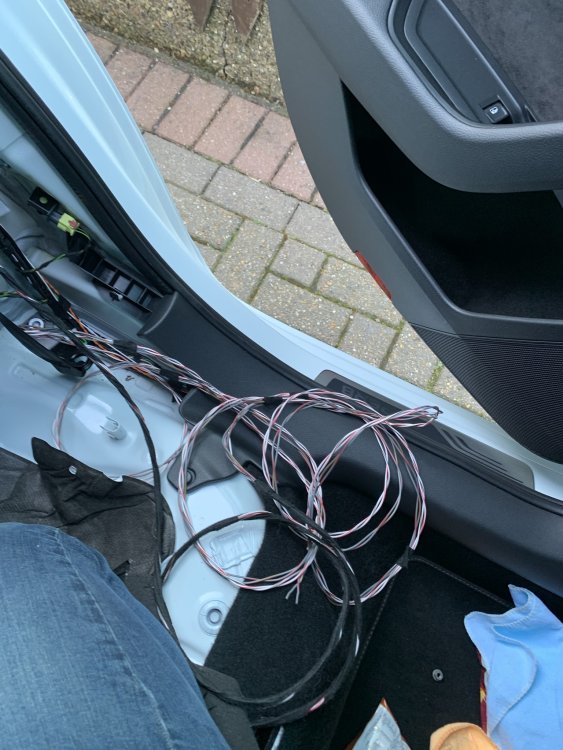
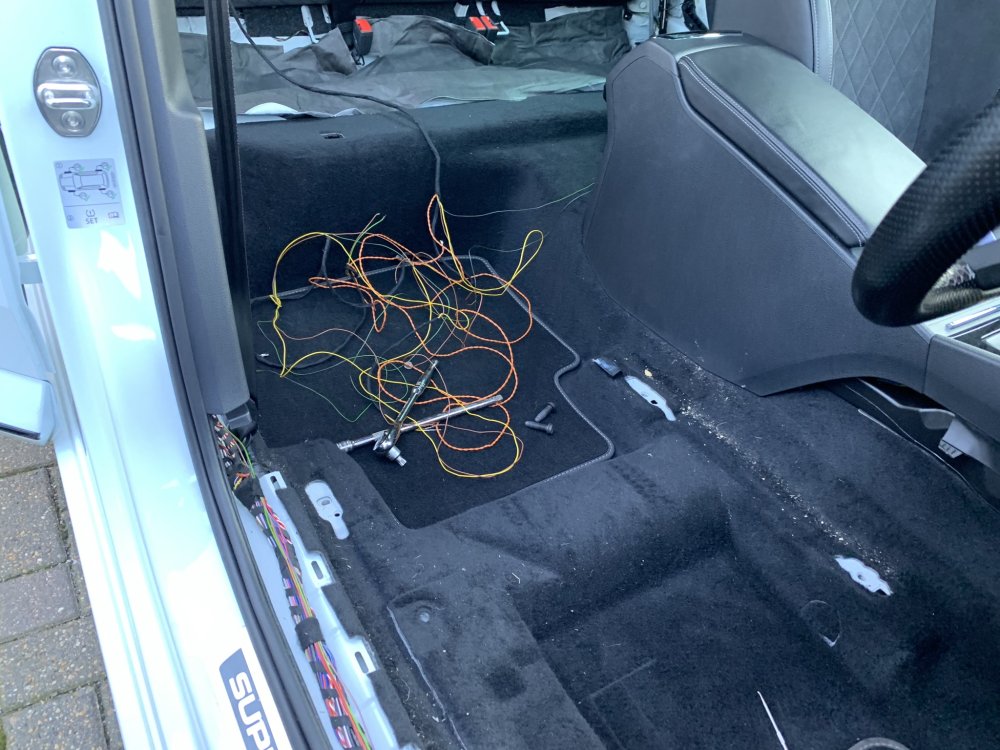
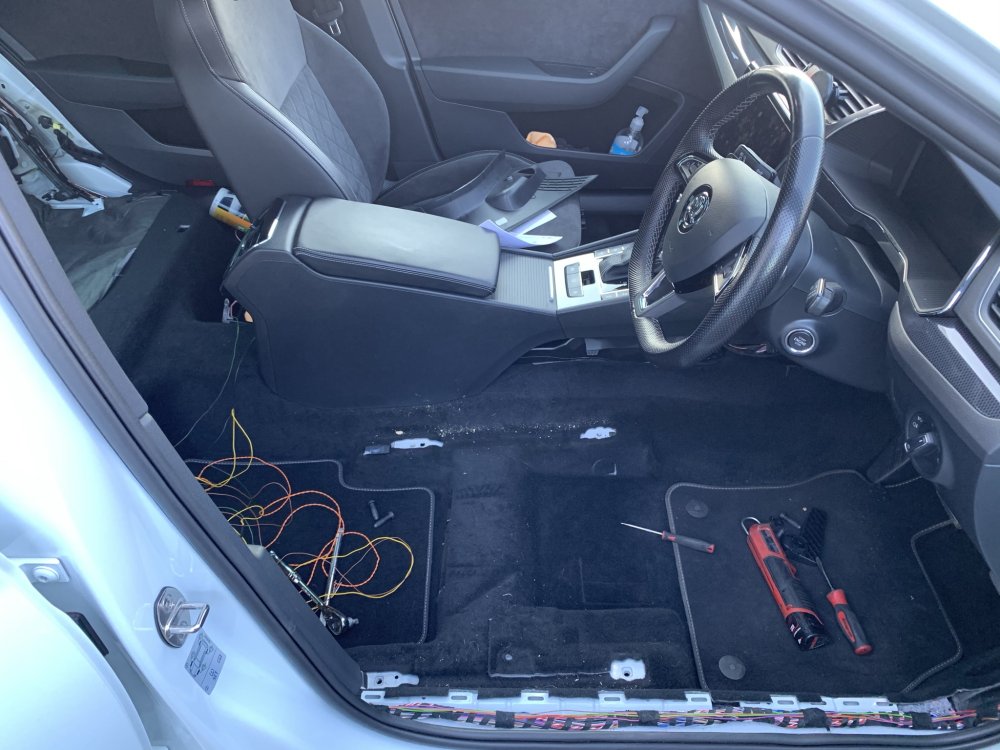
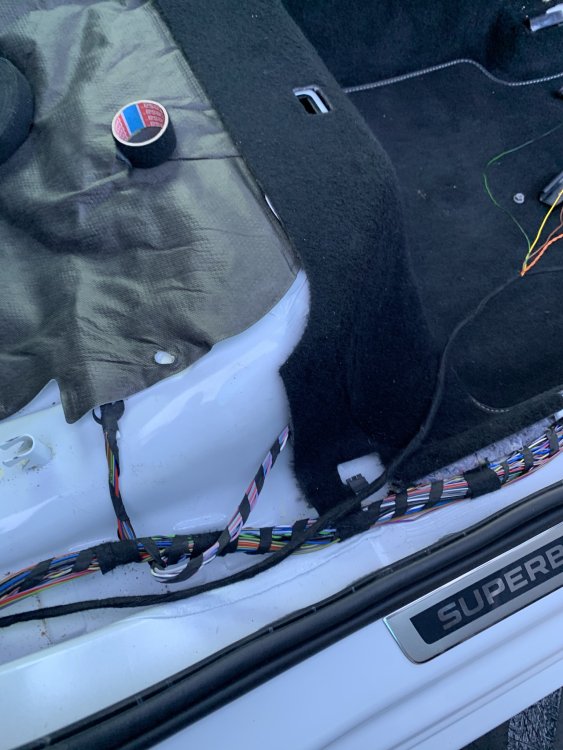
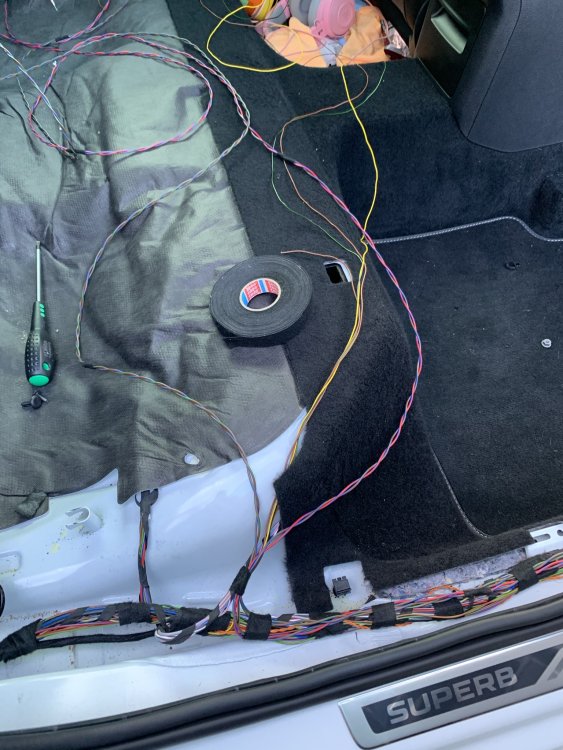
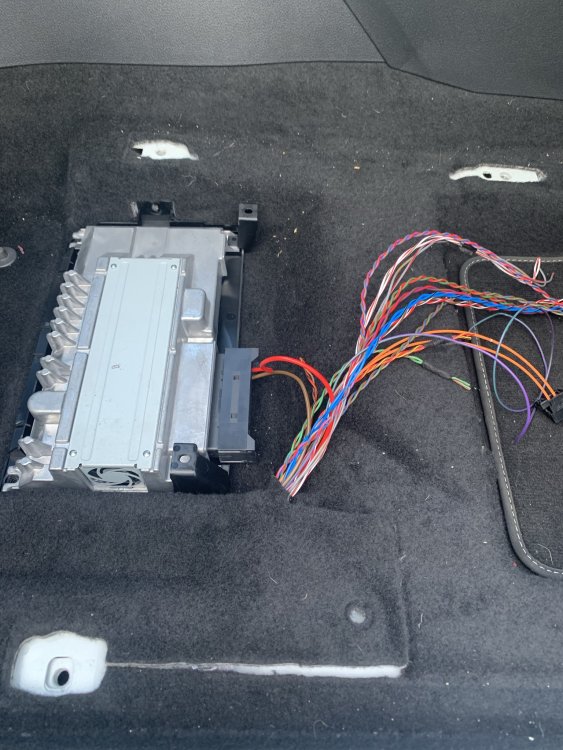
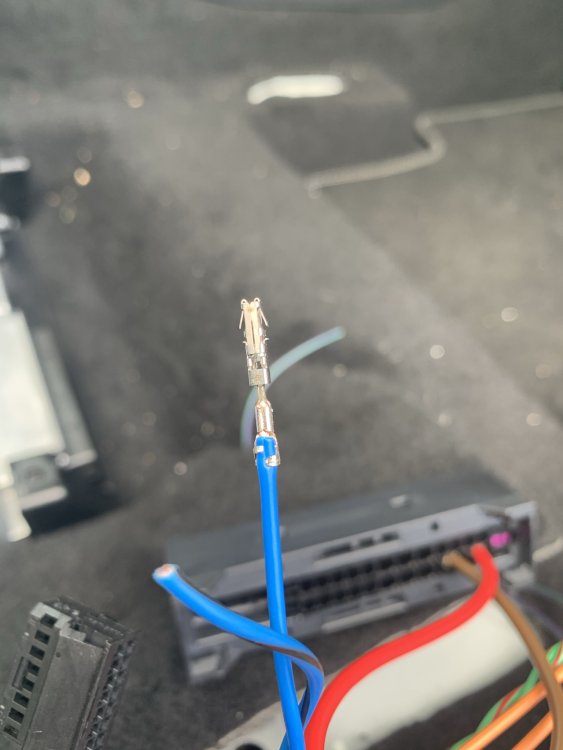
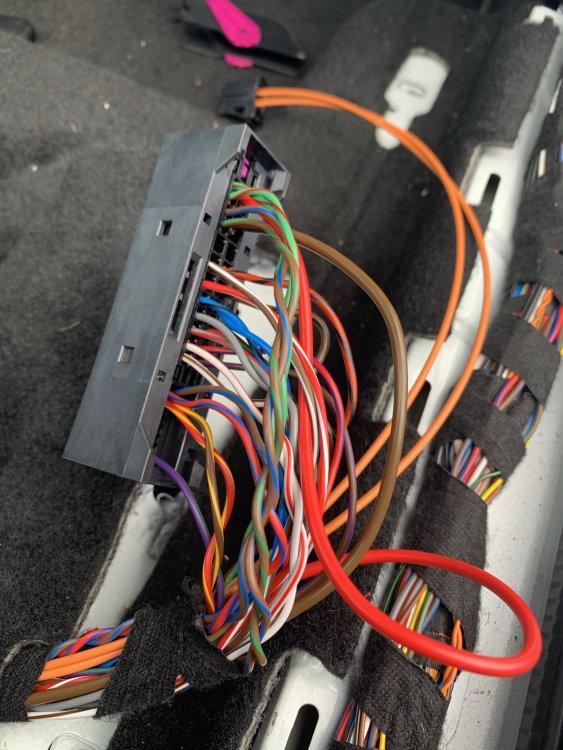
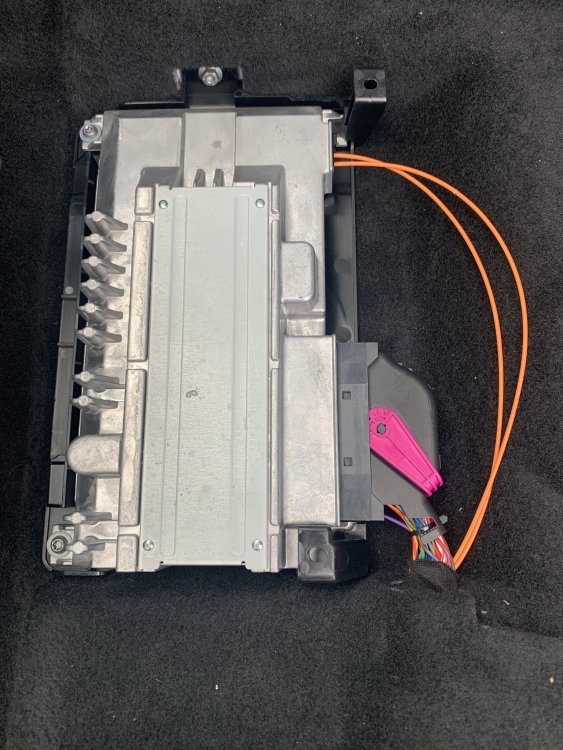
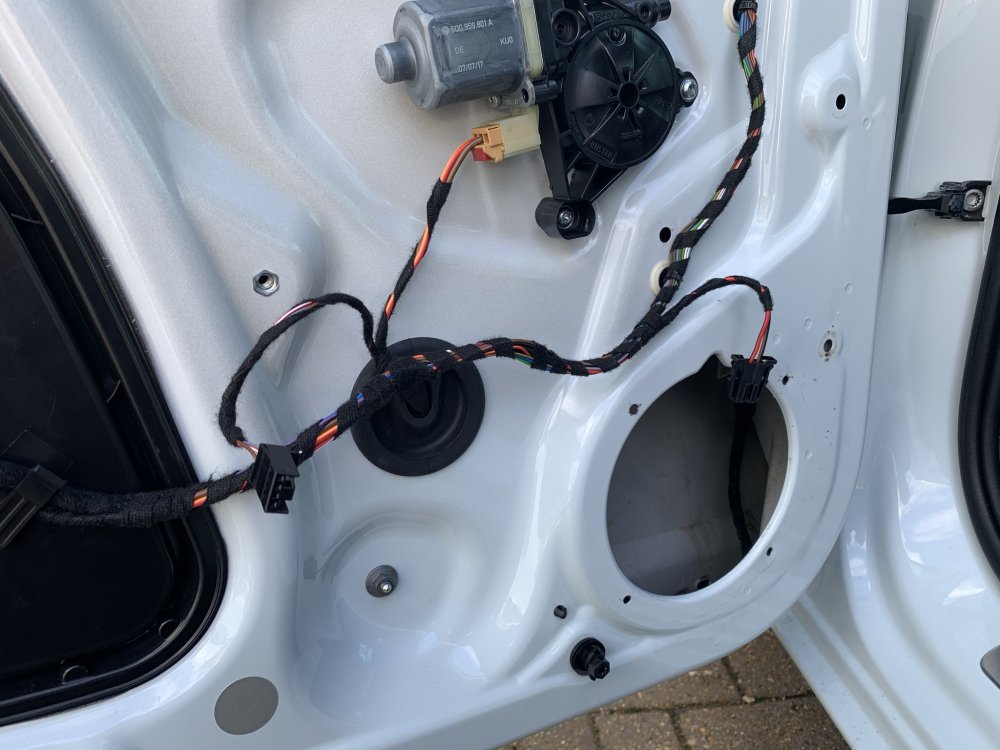
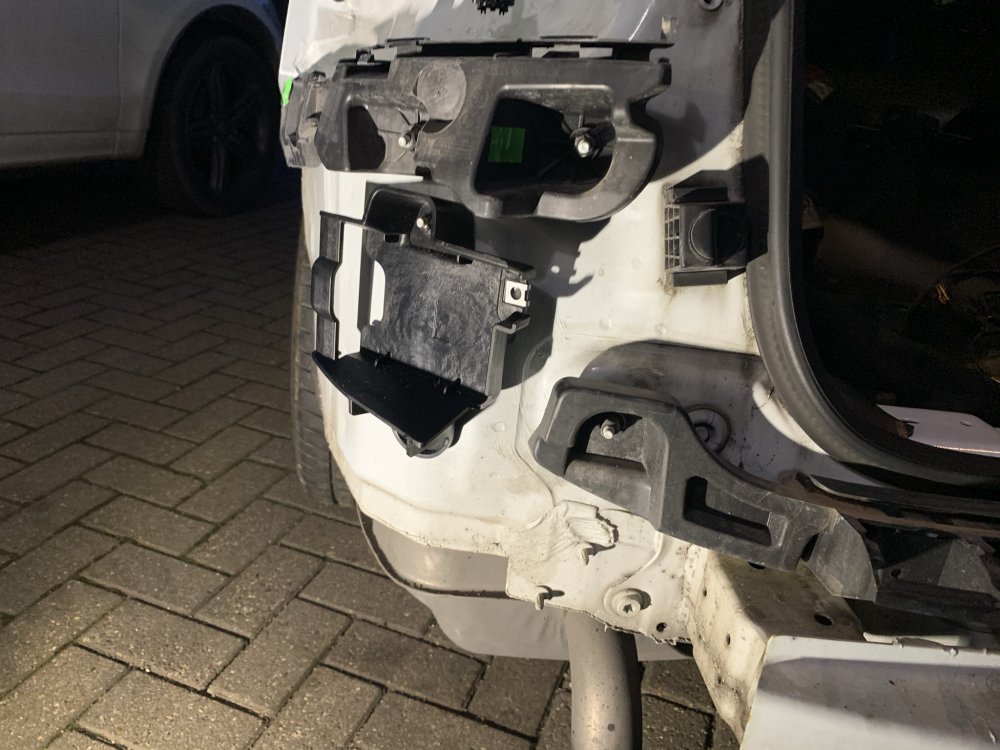
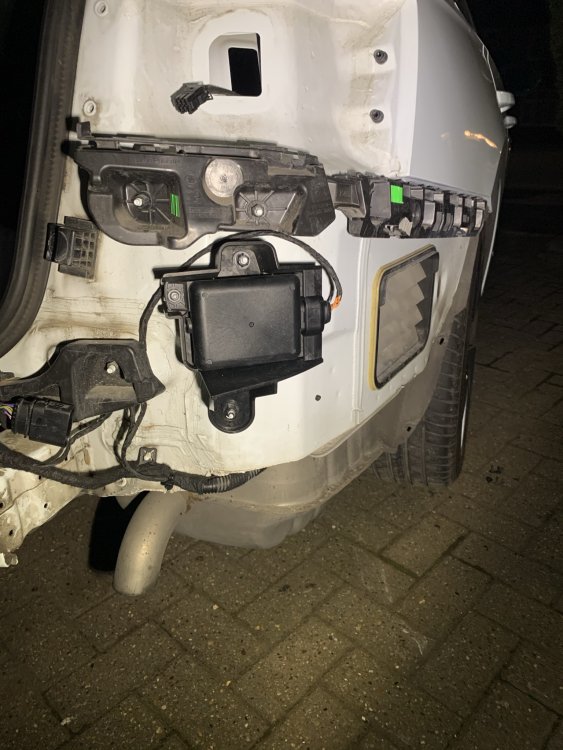
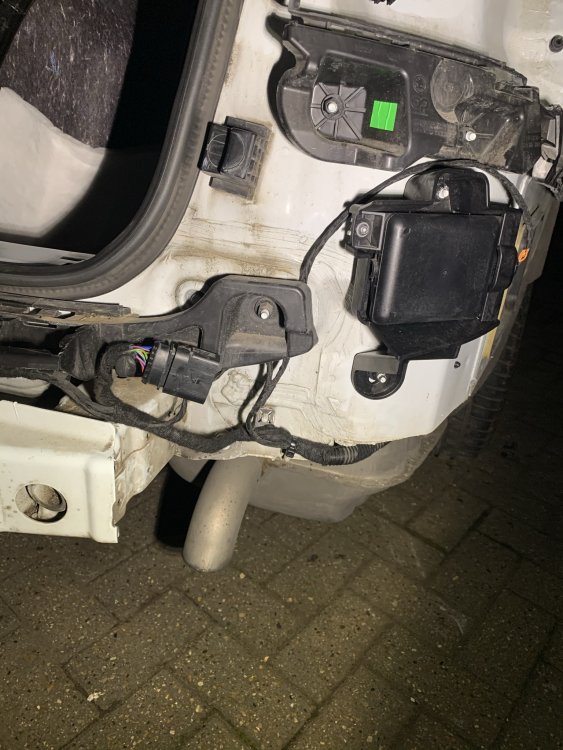
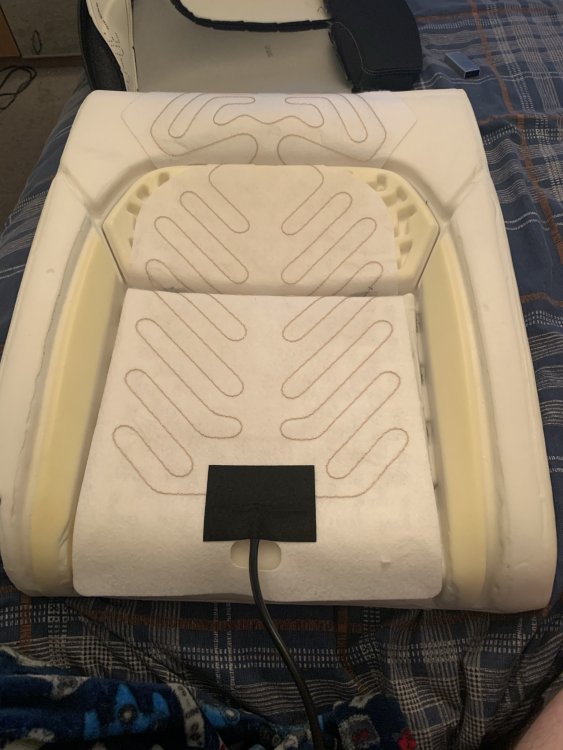
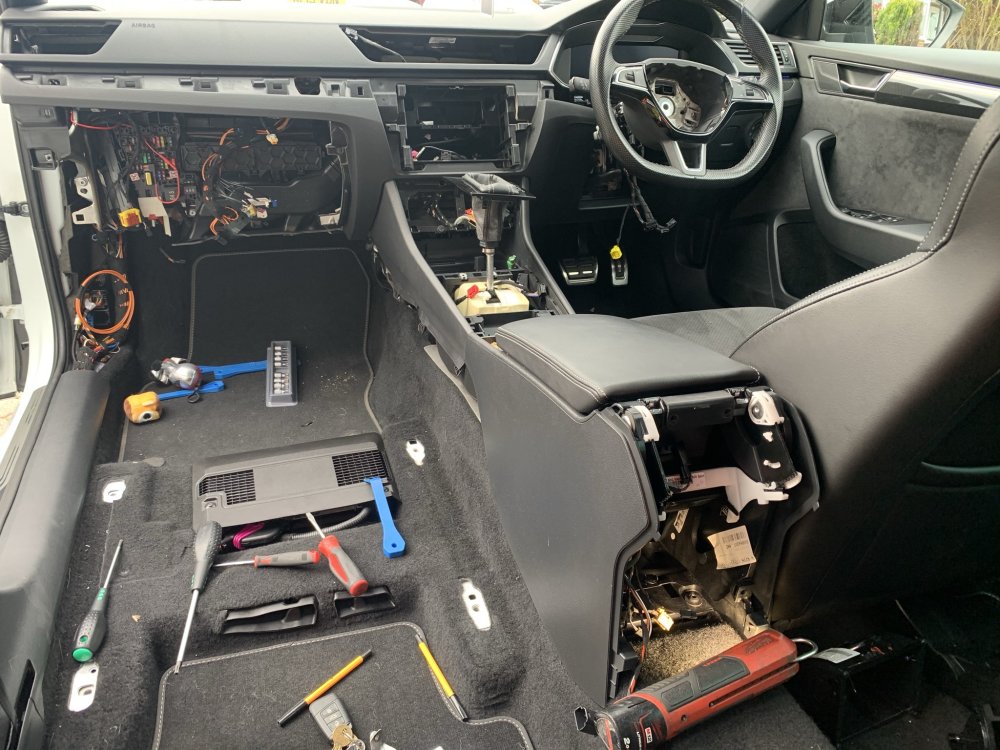
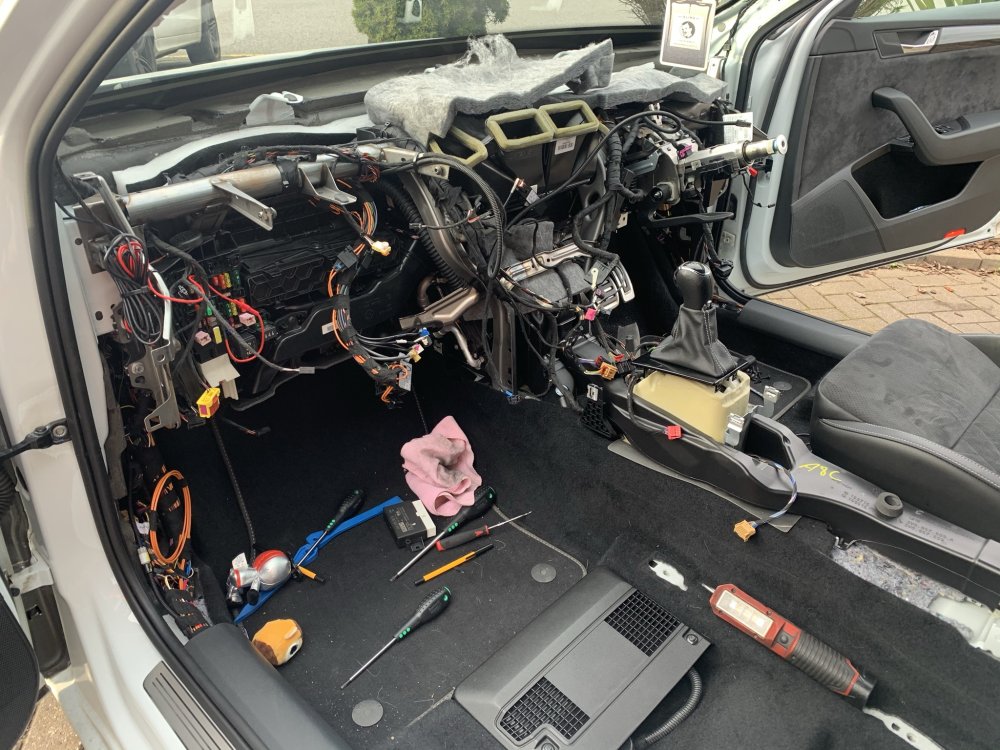
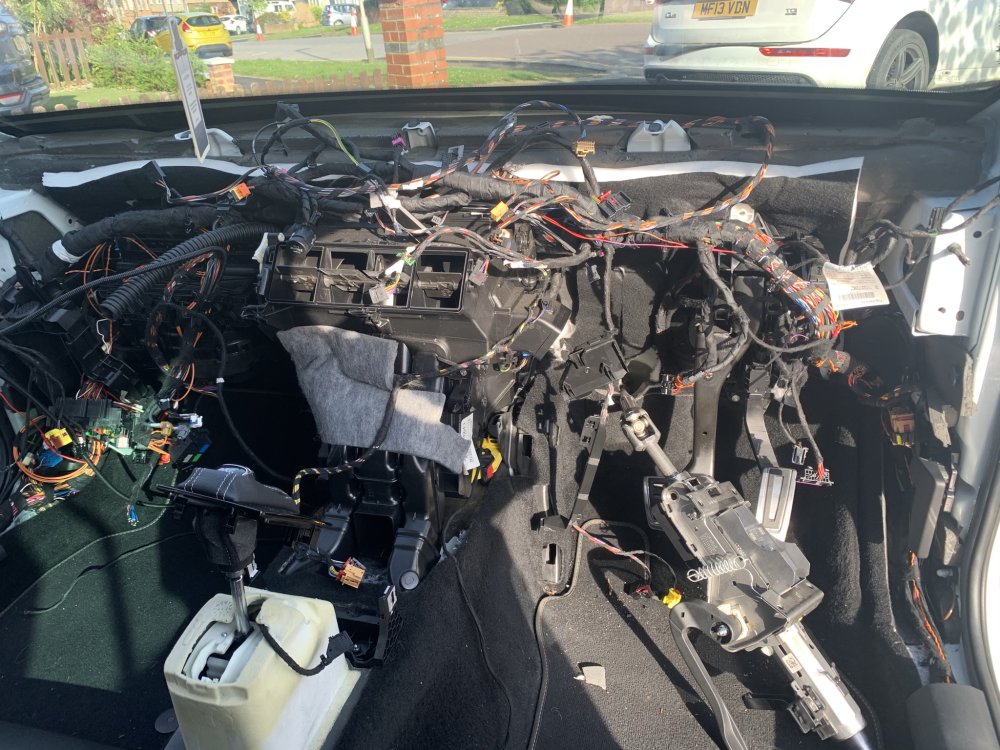
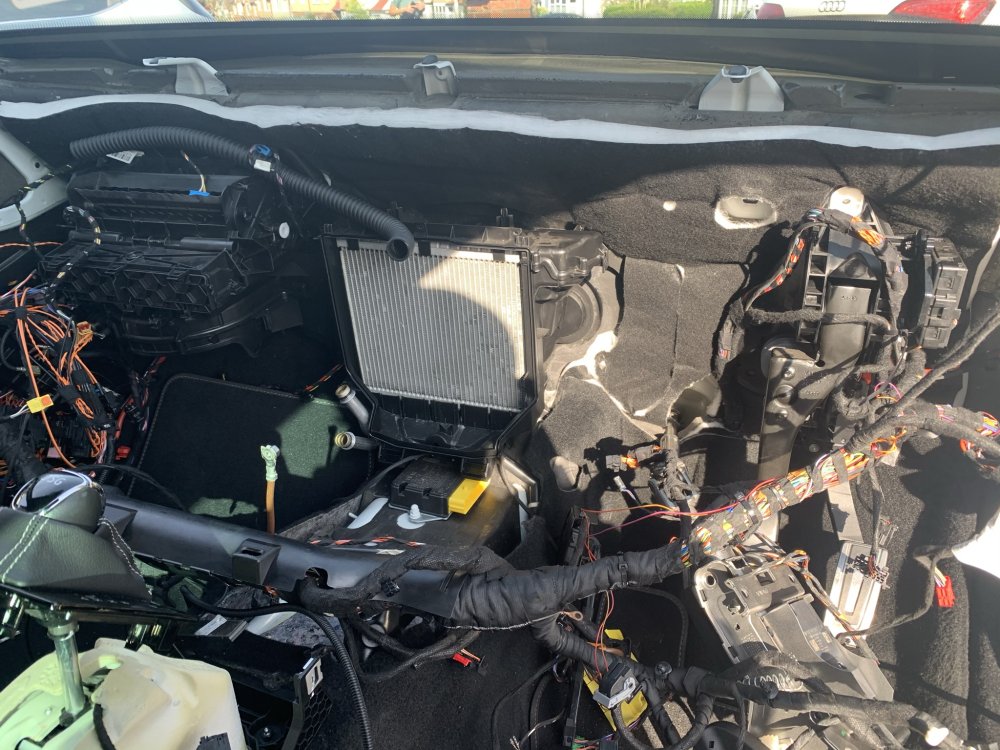
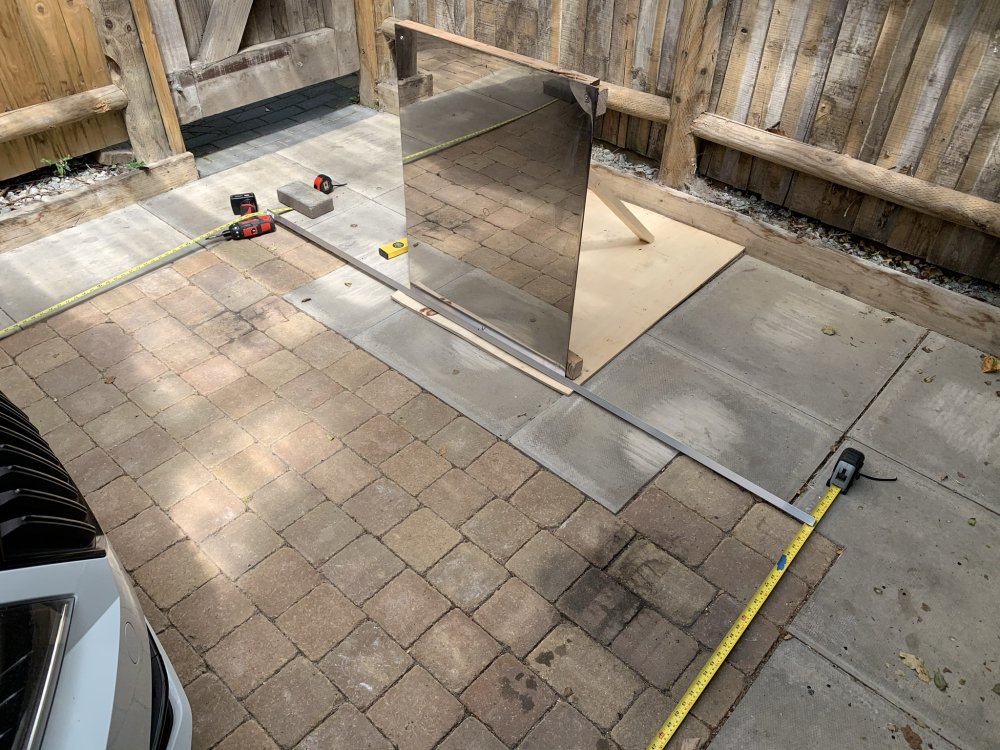
This part of the thread is for whats up next, including photos, whats involved and a fair bit more We are now moving into the wider territory (with some of the below) of very broad 'factory' retrofits and some of these youll see arent even options for the superb either for that model or that age. Heated washer jets Not a big retrofit and will probably make next to no difference, but this retrofit is as simple as 2 washer jet nozzles, 2 plugs, 4 terminals, a ground and a power wire to the BCM and only 1 adaptation change. Heated steering wheel I managed to source a steering wheel from sweden at a bargain price that matched the spec I wanted, After importing that and changing the airbag and clockspring assembly out, we then had to rewire the plug that goes into the clockspring, all well documented on other forums so no need to go into it too much. Most of the photos are above already but when the wiring is done, ill post more photos. Ventilated front Sportline seats Now this is where things start to get interesting, Ventilated seats were an option, but never ventilated sportline seats, and with the perforated fabric it looks perfect for the job. First it was near impossible to actually find a set of any ventilated seats for sale, let alone a set of stripped seats to see the internal workings. This means im working completely blind so i began doing some research to find out exactly how these work and what would be required. So the first part is the fan itself, you'd think these blow into the seat, but they actually suck out of the seat. So the fabric itself is perforated, below this is the heating element with all excess fabric removed, then the sponge has a lot of holes through it, below this is the spacer mesh which looks like a rigid spiders web, the last part is a sealed layer, the fan then pulls a vacuum through the entire seat. This is controlled by a LIN channel to the BCM which is the easy part. The hard part will be modifying the seats. I now have all the required parts, now its just finding time to strip the seat down. Door pocket ambient lights Another fairly easy and straight forward retrofit, 4x lights 4K0919390A/B/E/F and 4x plugs 8K0973754, these simply link into the ambient door light strips and need a few adaptation changes to turn them on. Wireless phone charger/booster Most would call this a fairly pointless retrofit but my plan is to add the USB hub, fit wireless carplay to the centre console, then the front pocket will be free to charge my phone. Lots of people complain about overheating from inductive charging so a small idea I had was to T off the glovebox cold air feed, run a small 3mm silicone pipe to the back of the phonebox and connect it to a 180 degree irrigation nozzle to blow a very small amount of cold air into the cubby area. Now the actually charger and booster, although it looks fairly straightforward, the entire front cubby area gets changed, then a fakra cable is ran to the NSR corner of the car where the signal booster is, another fakra is then ran to the roof antenna which also needs changing. This all links into the infotainment system and the kessy system even. USB Hub The photos above and below show this quite well but this basically transforms your single front USB port into a USB port at the front, and in the centre glovebox - both Apple and android compatible too! All thats needed is the USB hub and 2 low level USB ports (DONT use high spec ports) A very good guide is located here TV Tuner Another fairly pointless retrofit, but having spent a lot of hours sitting in my car, the TV would be lovely! This is quite the retrofit and the process varies a fair bit between estate/hatchback. The parts required are the tv tuner, 3 new antenna boosters, the trim panels and then the fun part of the wiring. Fakra cables need to be ran to both rear quarters and into the tailgate for all the new antennas, the new antennas dont always have wires to connect to the glass so this often needs to be soldered to the glass carefully! You also need a MOST cable but luckily I have the virtual cockpit so I can loop off of that. Webasto Parking Heater I wish I had this one ready for winter already, but sadly not - this would serve 2 purposes - the cold winter mornings going to work, and also when we sleep in the car on long road trips to keep it warm without the engine running. The parts involved in this are: External fuel pump, Fuel lines to front of car, Webasto unit, A whole bunch of coolant pipes, Remote control module, Remote control and then a whole bunch of wiring and plugs running all across the car! This allows you to either set a timer or use the fob remote to turn on the heater from a fair distance away! It also allows the ability to ventilate the car on very hot days to drop the internal temperature. (I even went to the added detail of ordering the 2 stickers that the car would have left the factory with.) Dynamic Chassis Control (DCC) With two of my shock absorbers leaking - the smart thing to do would be to replace them at £100 each. But no, I decided to spend a huge sum of money on brand new genuine DCC shock absorbers. This isnt an easy task and the wiring required is absolutely massive! 4x new arch looms, 2x level sensors, 3x accelerometers, 1x control unit and all the wiring to go with it. Not to mention custom datasets for a few modules. Custom twisted pairs were required for this to match all the factory wiring perfectly. As you can see from the photos - A LOT OF WIRING Areaview/Panoramic View/360 This one I think will ***** a lot of peoples ears up - Areaview was never an option for the pre facelift superb so a lot of parts dont fit, this means a fair bit of creativity is required. 4 cameras are added to the car, the rear camera is for 2019 onwards tailgates but luckily as I fitted the FL trim, I can fit the rear camera with no issues. The front camera on the facelift is in the grill, this is a problem on the pre-FL as we have a large radar there and it would interfere. After looking at how a lot of other cars do this, It seems that the pre-FL passat had theirs in the lower front grill, So with a bit of 3D modeling I am creating a bracket to secure the camera in the same place as a passat. The next issue is the wing mirrors - a brand new mirror is £700 each side and there are no used parts available. So the next best thing, LHD versions. These are yet to turn up and i'm sure ill be bitten in the ass when the LHD cant be used in some way on RHD cars (I believe the unit sits at different angles) so may have to get creative. Next is getting the HSD wires through the door into the car, many people just turn them into pins and use spare pin holes, but this isnt OE enough for me. So I purchased the correct door connectors and wiring from the FL which have a cut out for the HSD connector - these connectors are not standard so sadly I had no choice but to buy from Skoda. After I've made all the custom HSD cables and ran them into the car, next is where to mount the control unit, on the factory cars it is under the drivers seat (where my TV tuner lives) and even if not, it is only held in with a ugly piece of polystyrene, I plan to mount it under the TV tuner in a cut out, directly against the car body and held down by the TV tuner bracket. As more parts turn up, ill update this further.


-
The last car that I managed to fit in that garage was a 1986 VW Polo Coupe.... Granted it had no wheels and it was turned on its side!
-
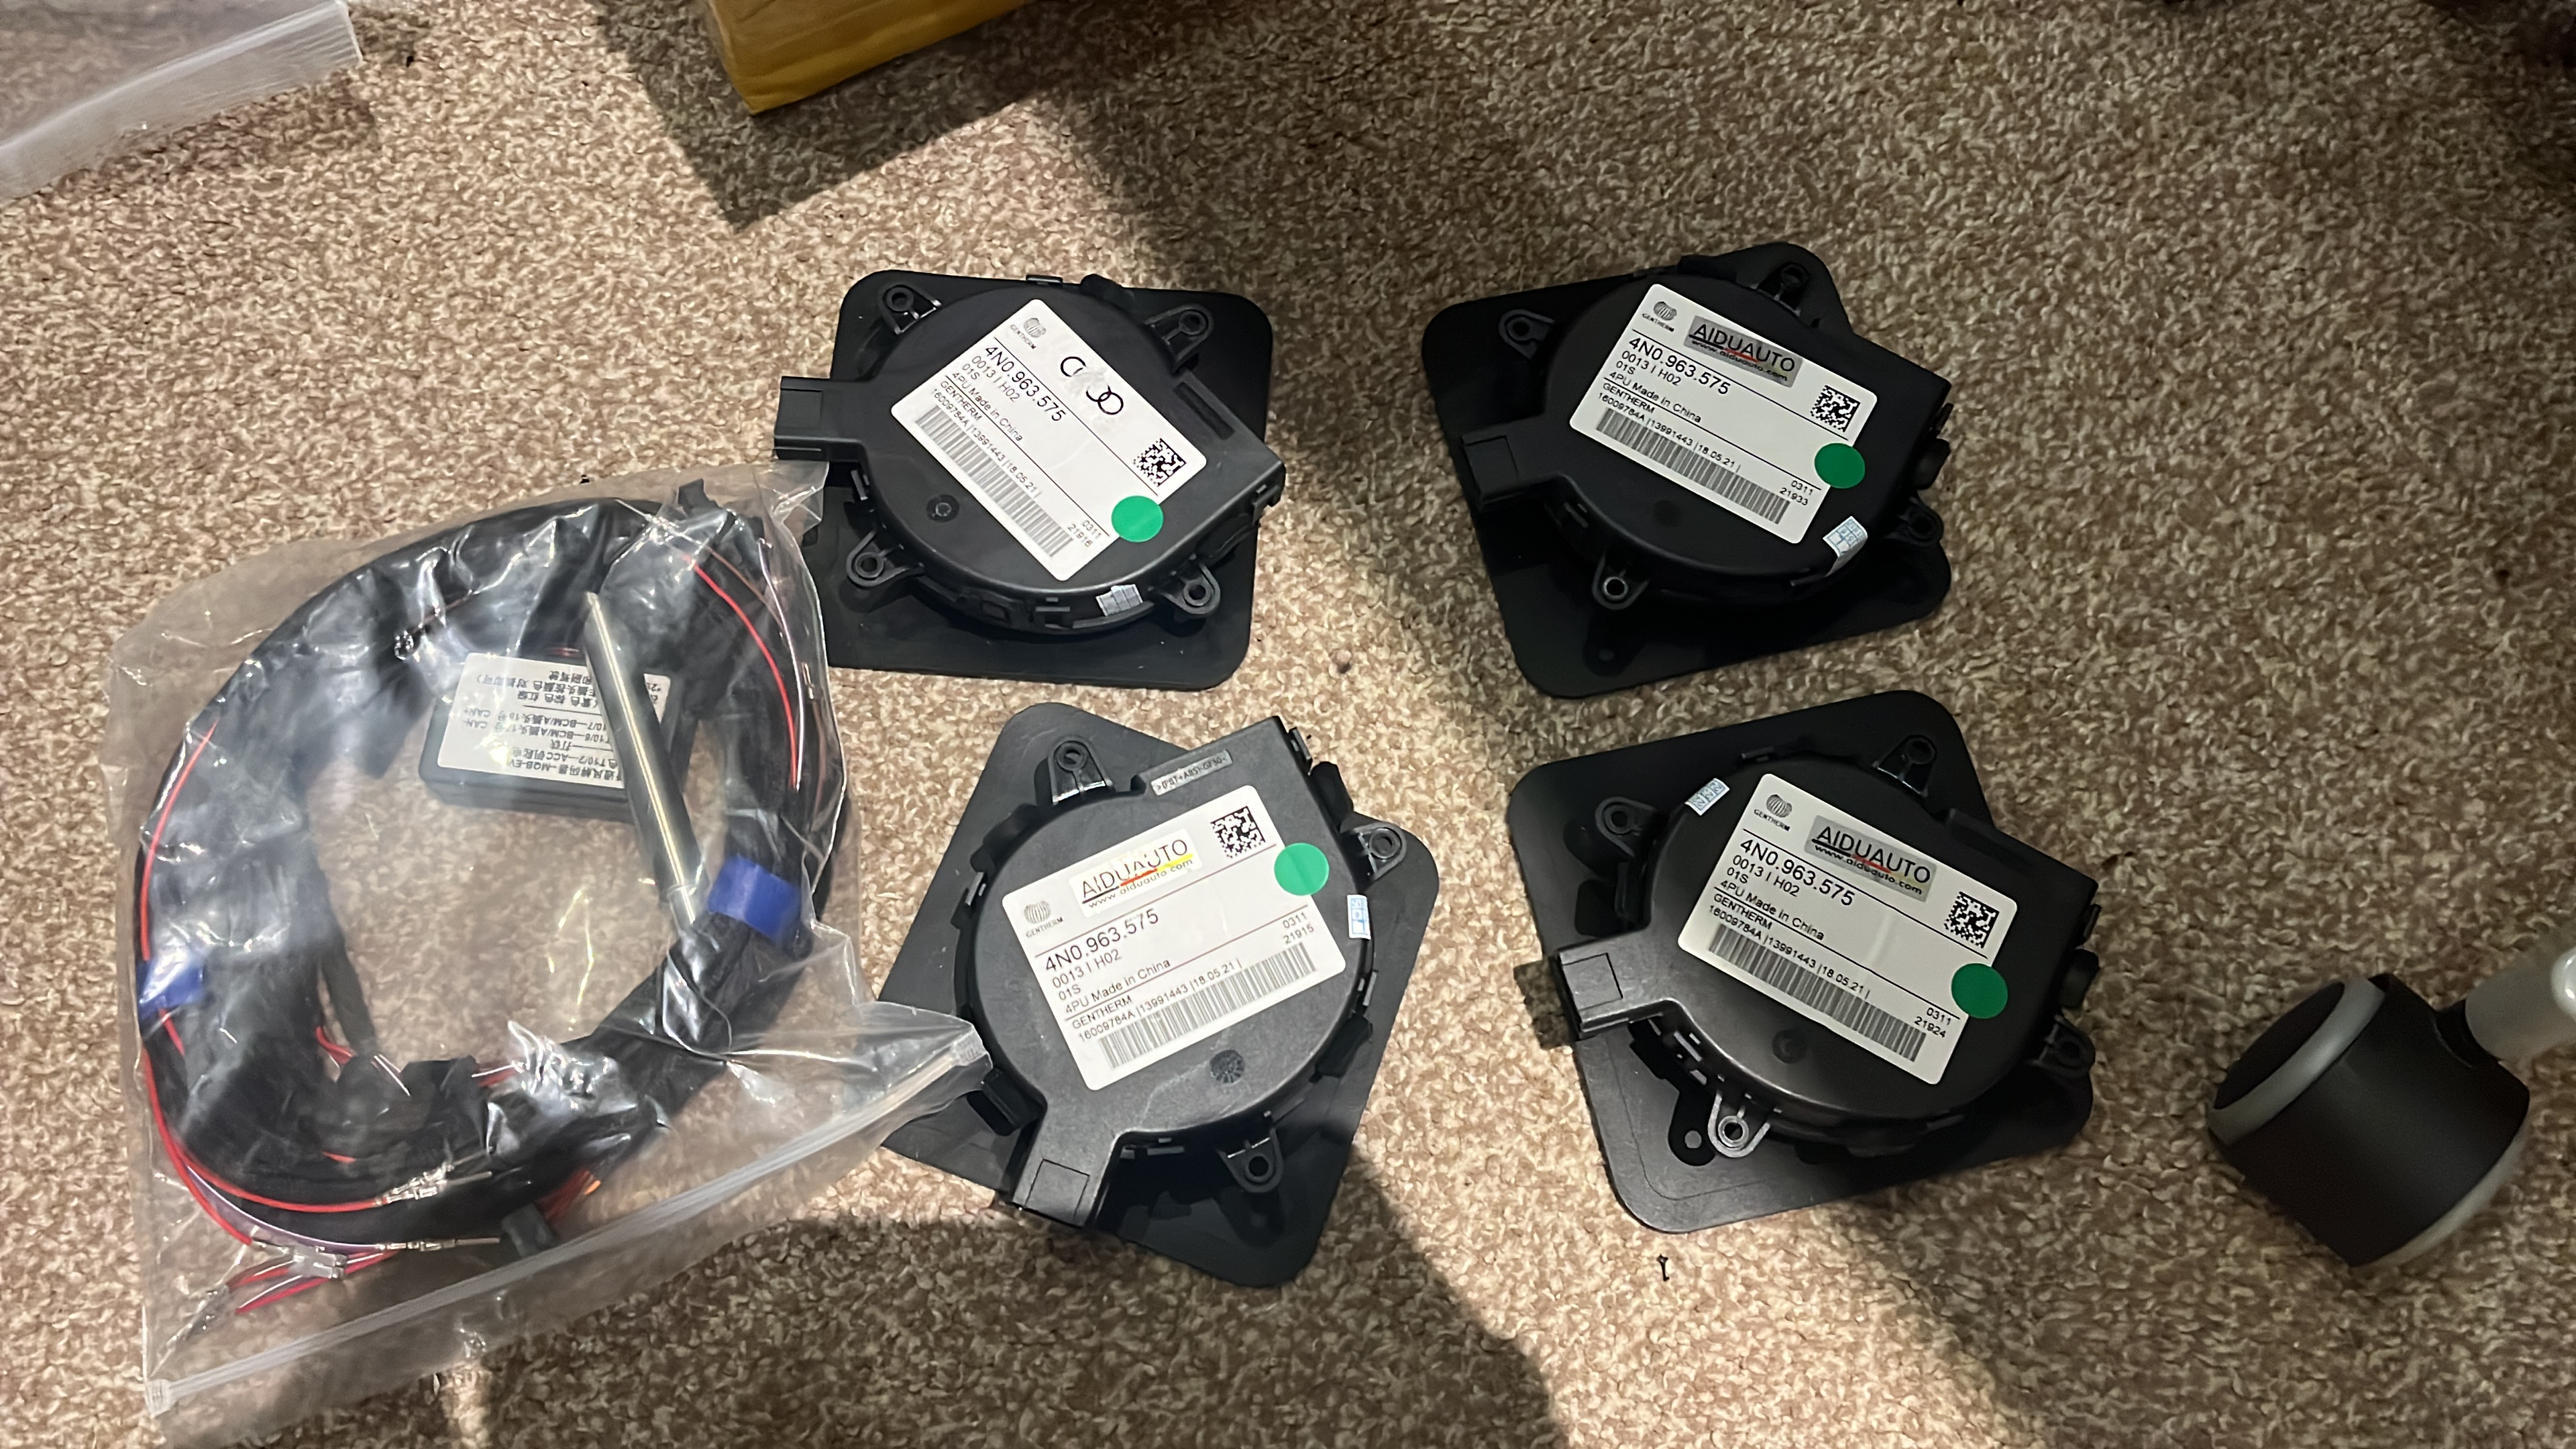
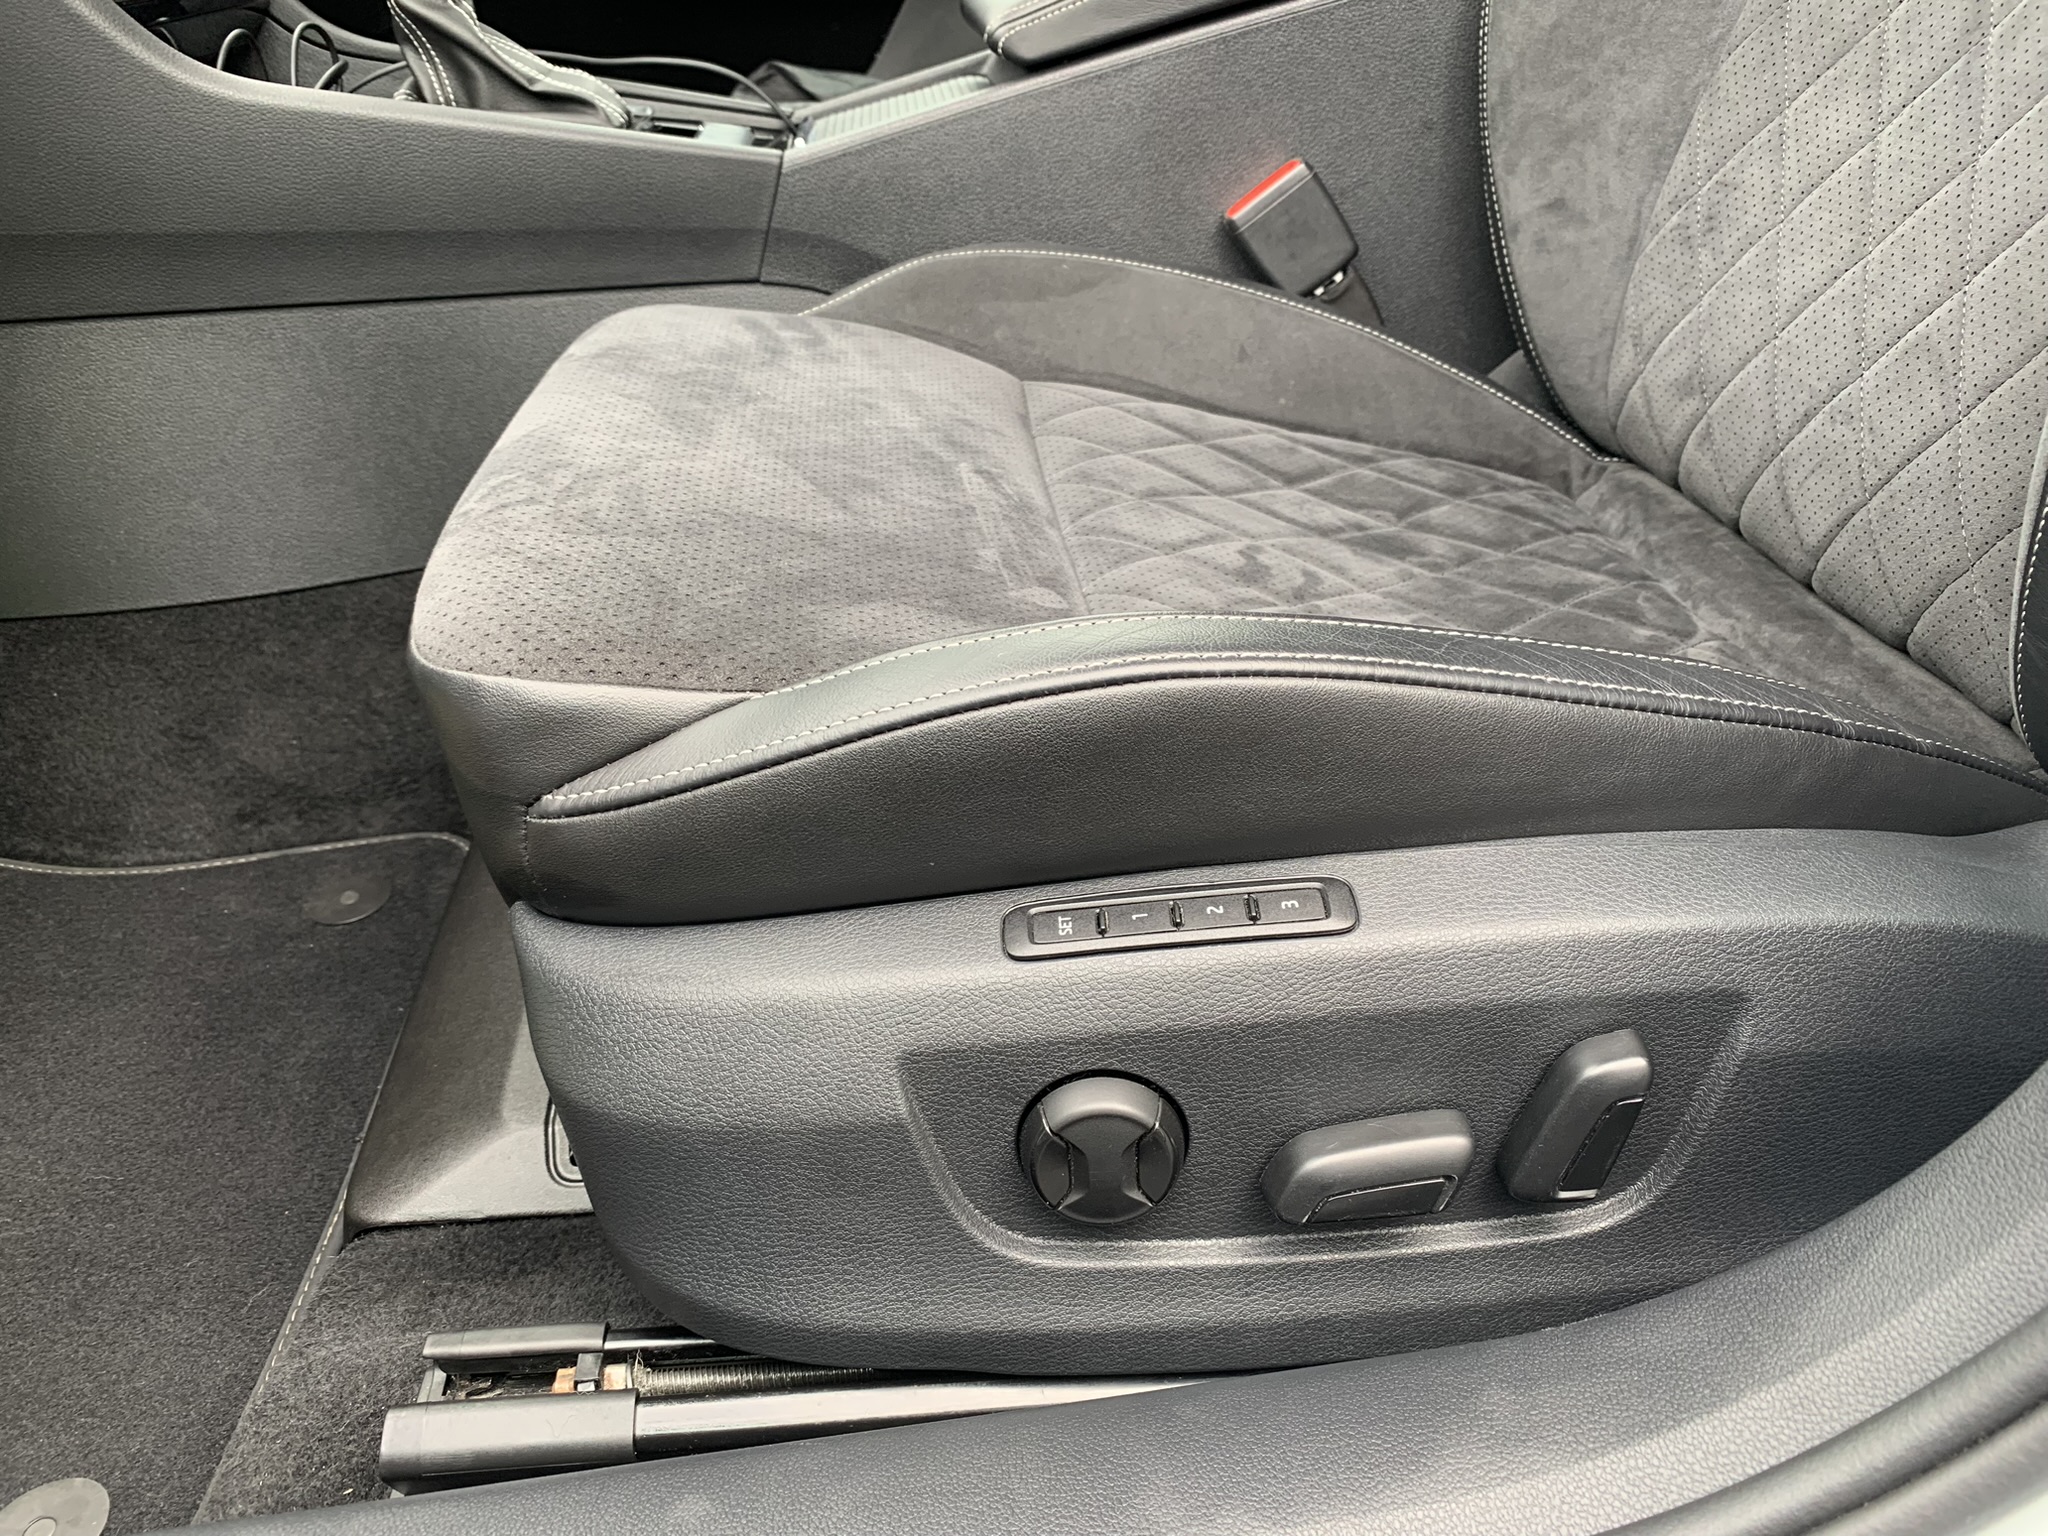
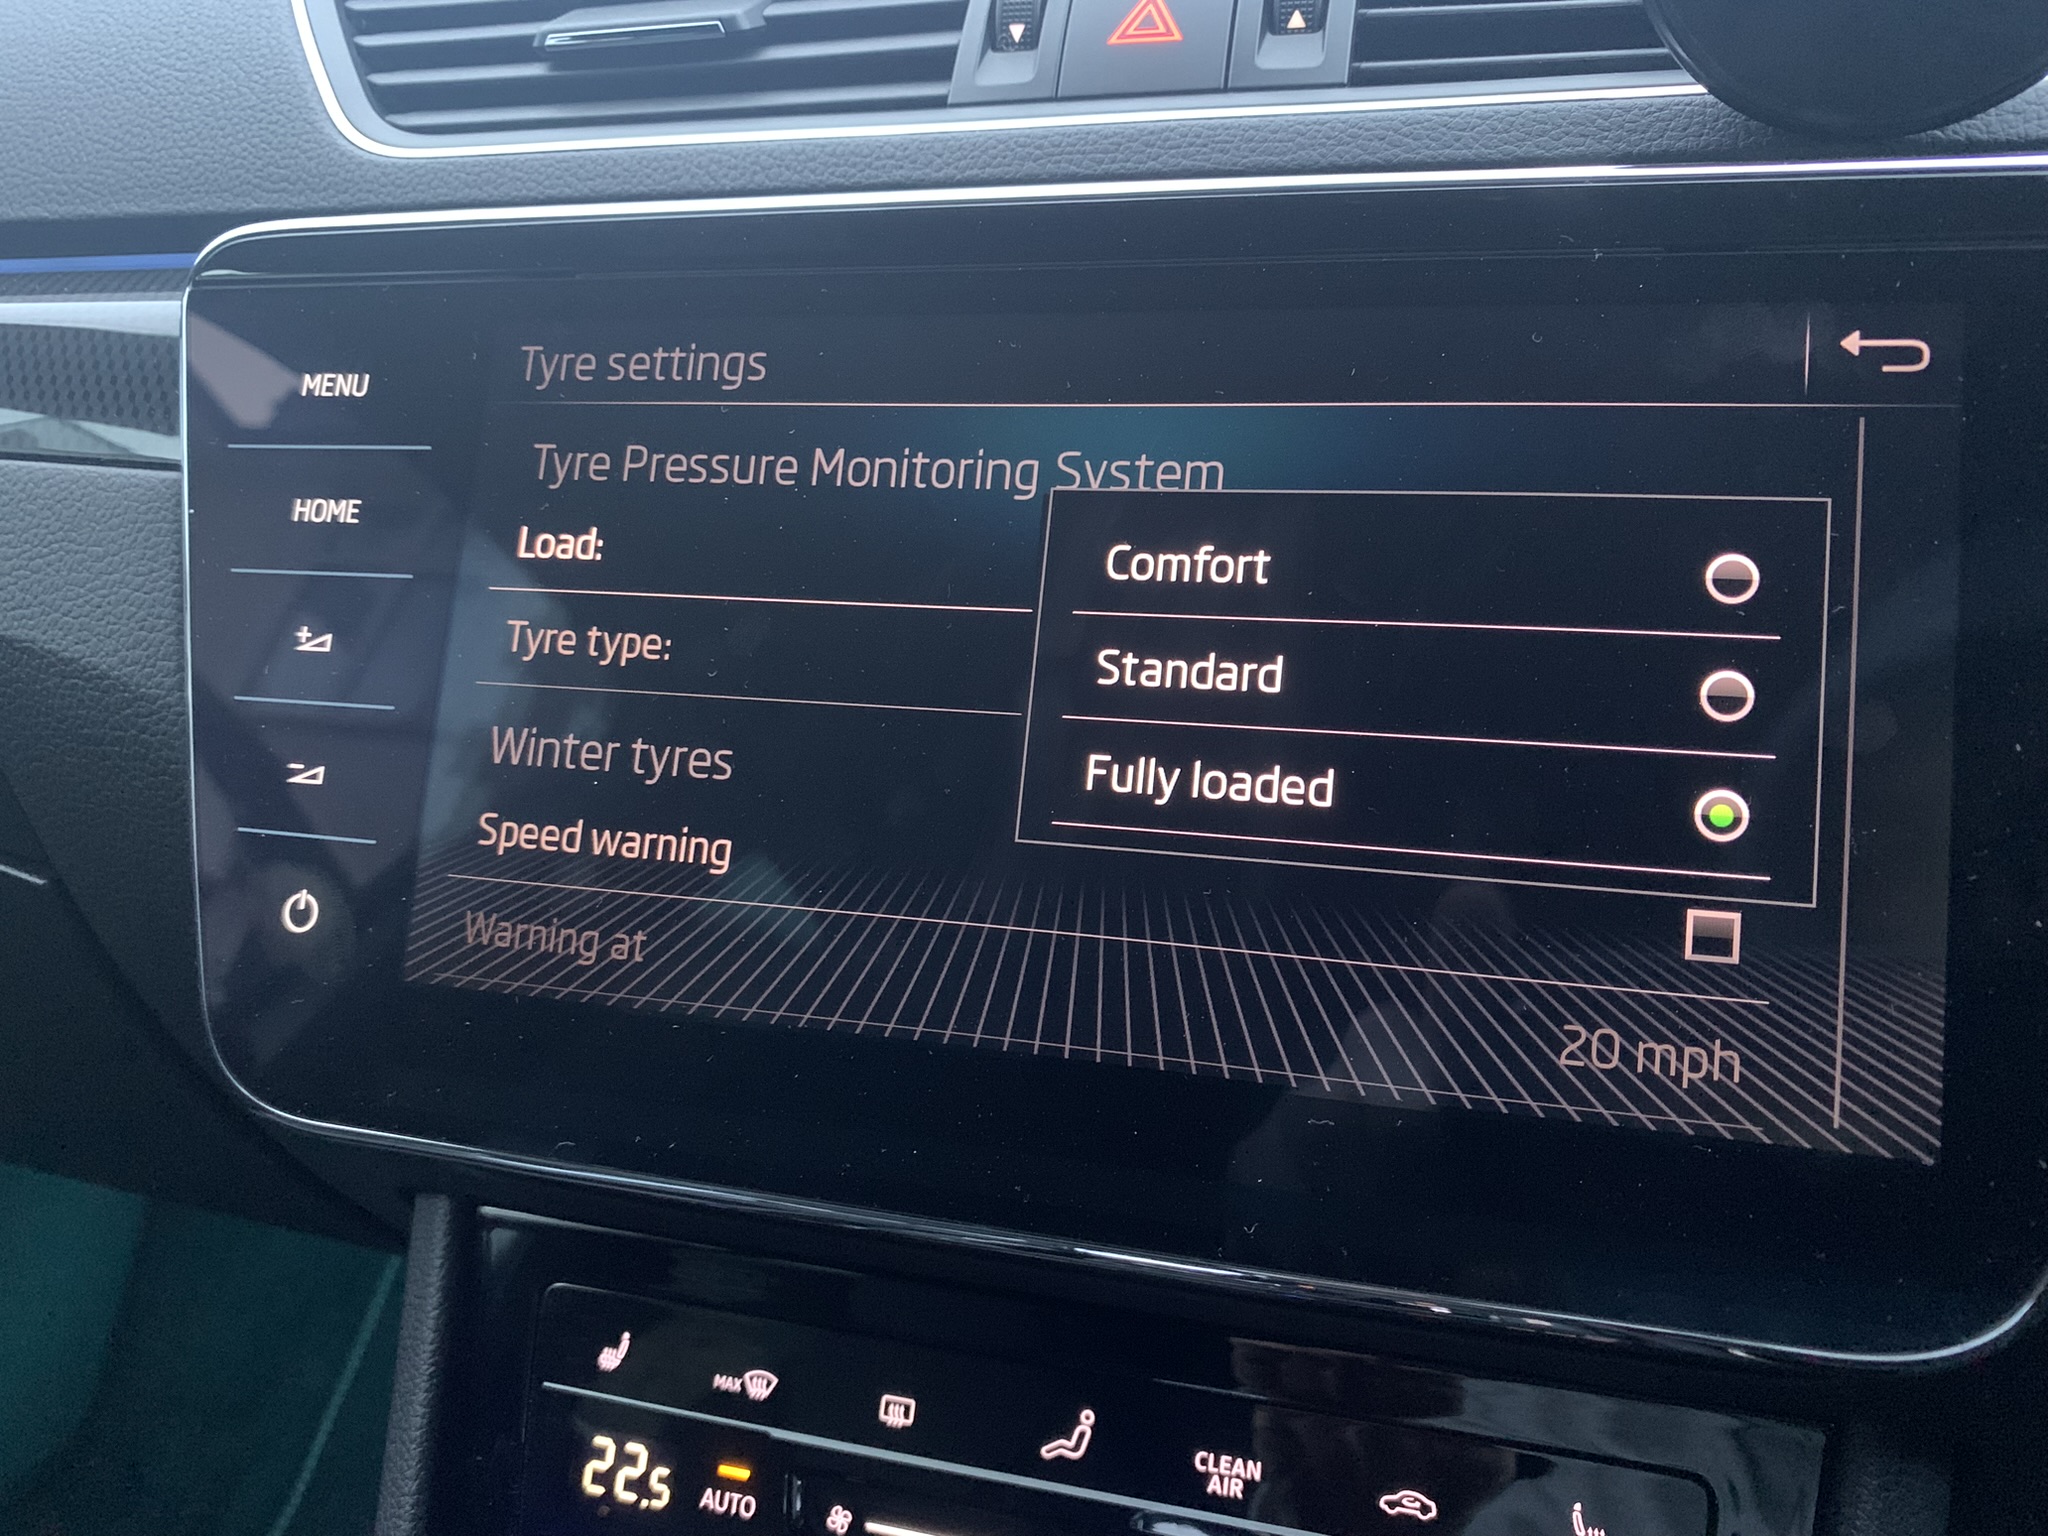
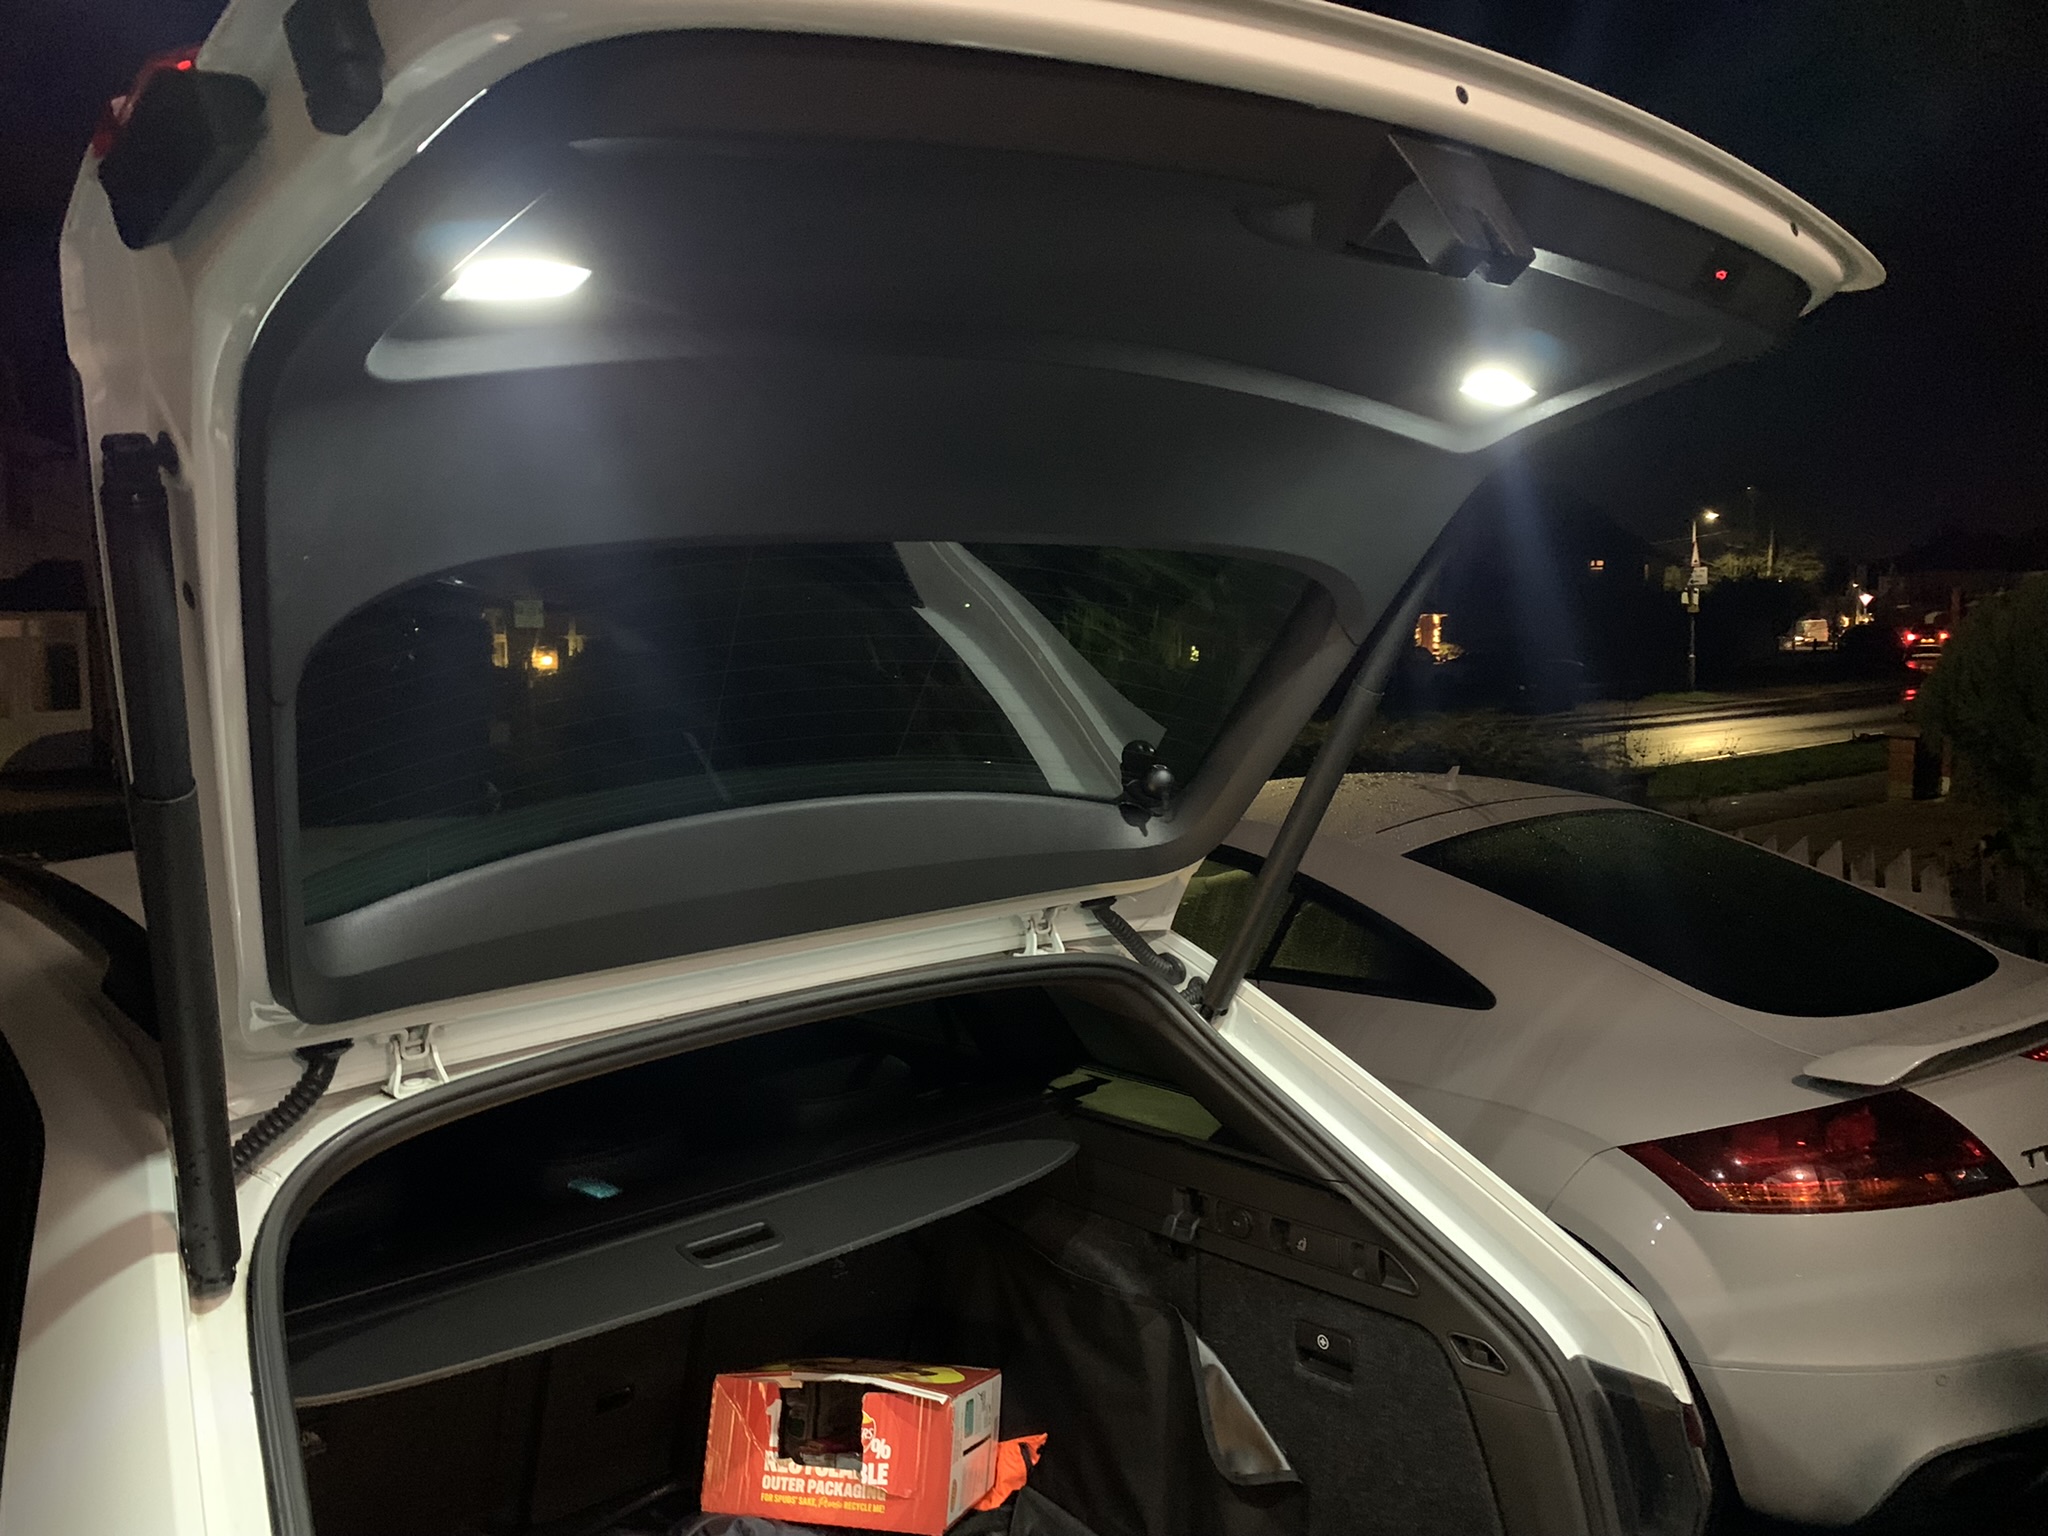
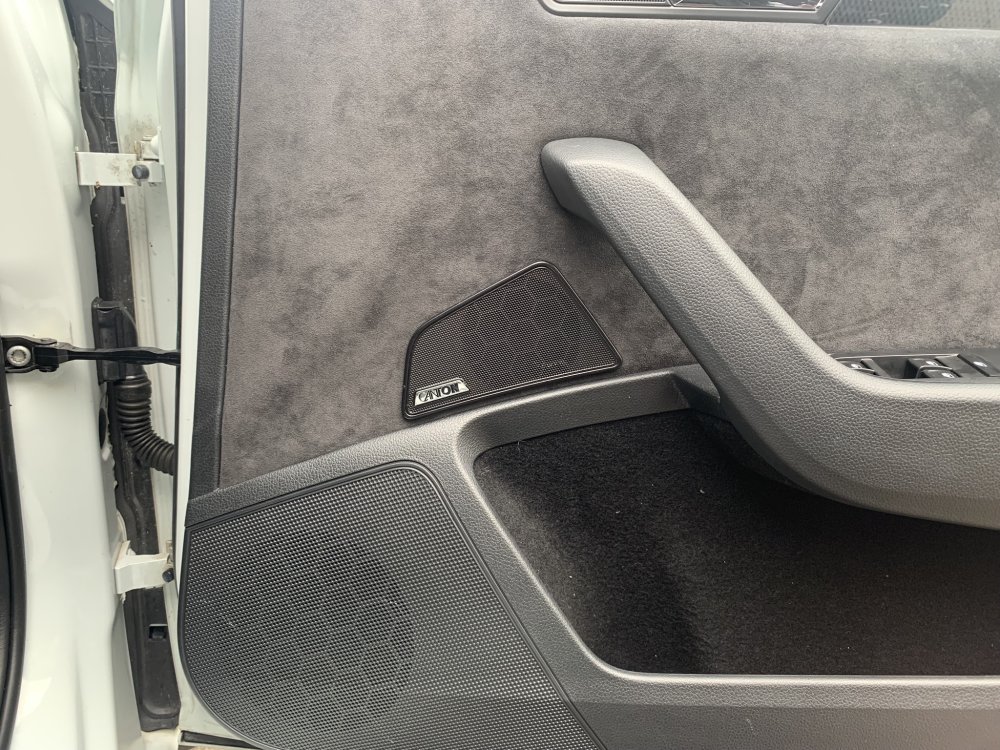
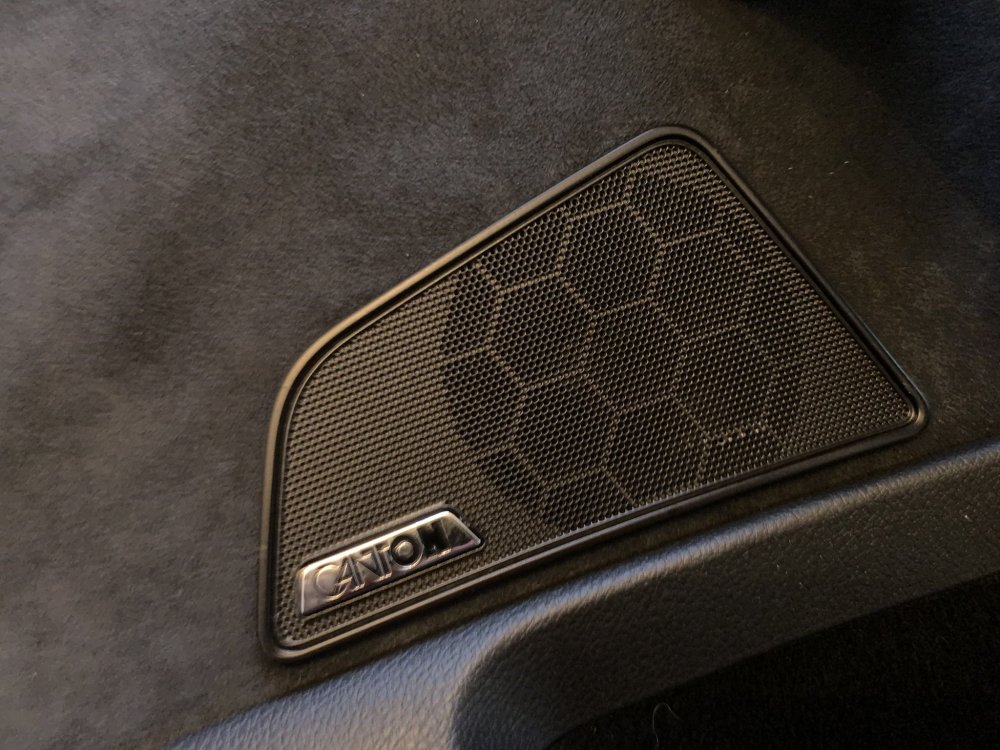
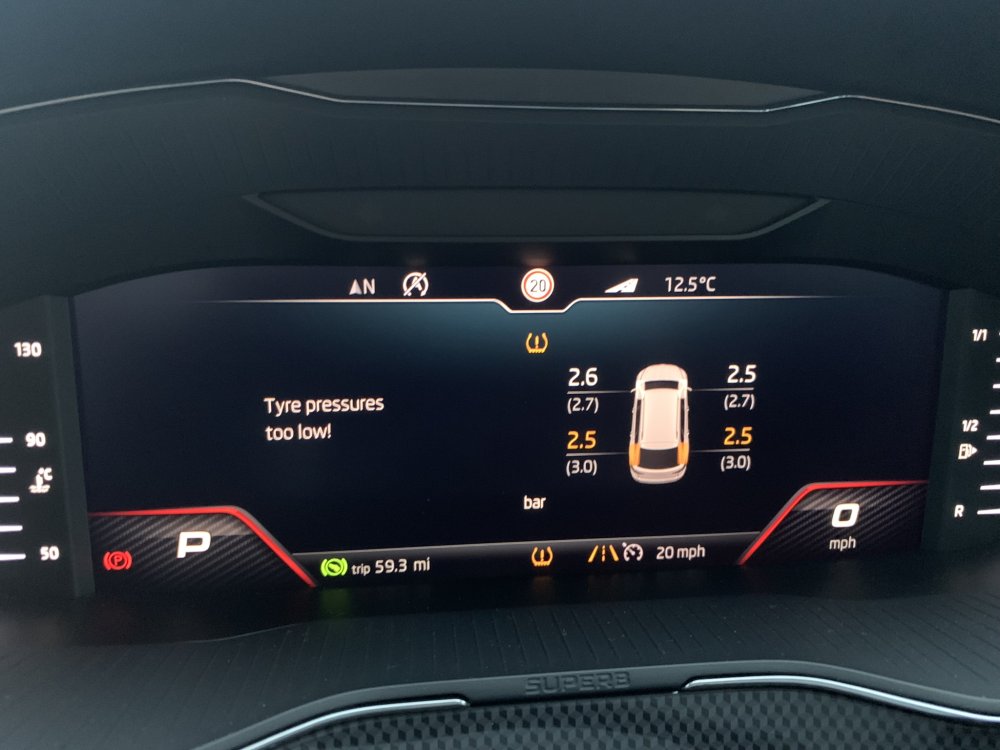
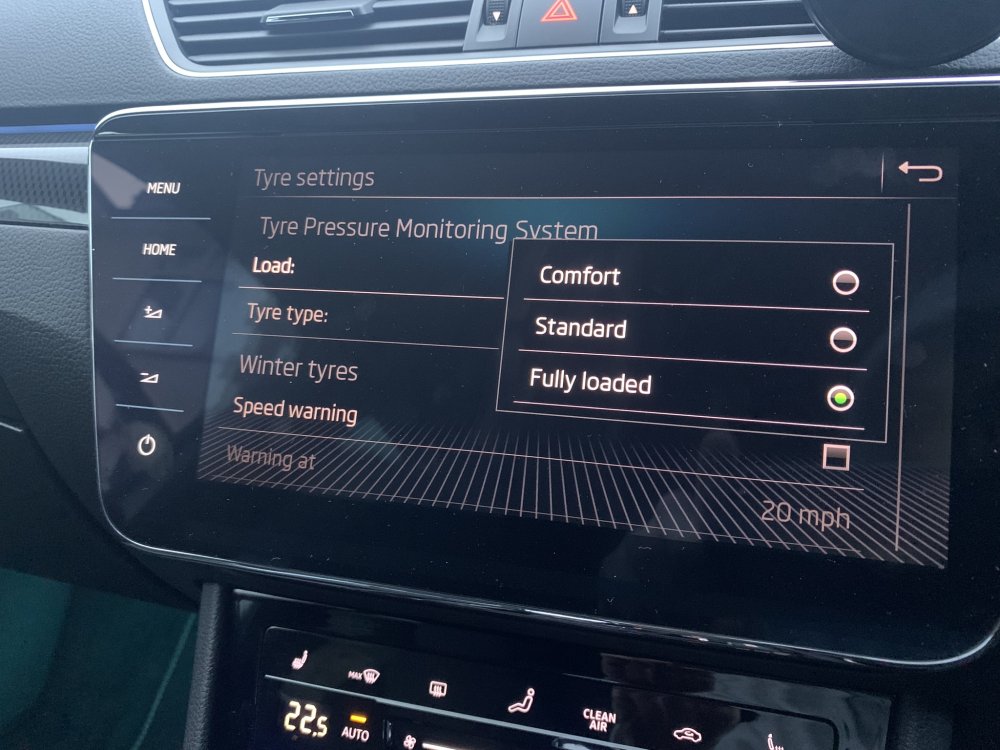
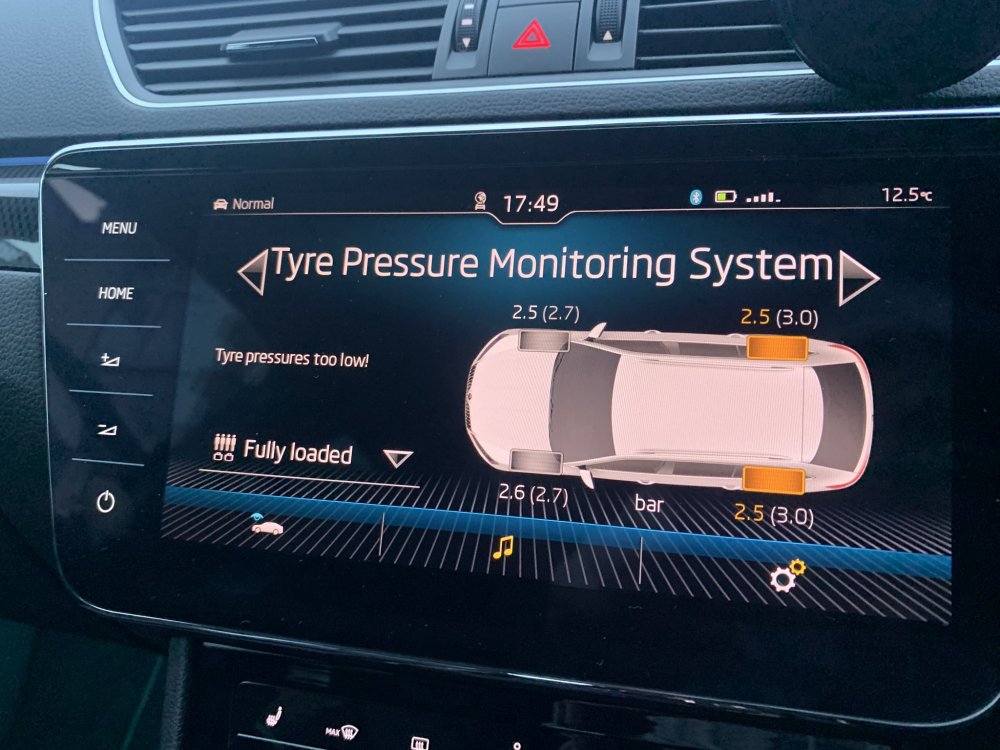
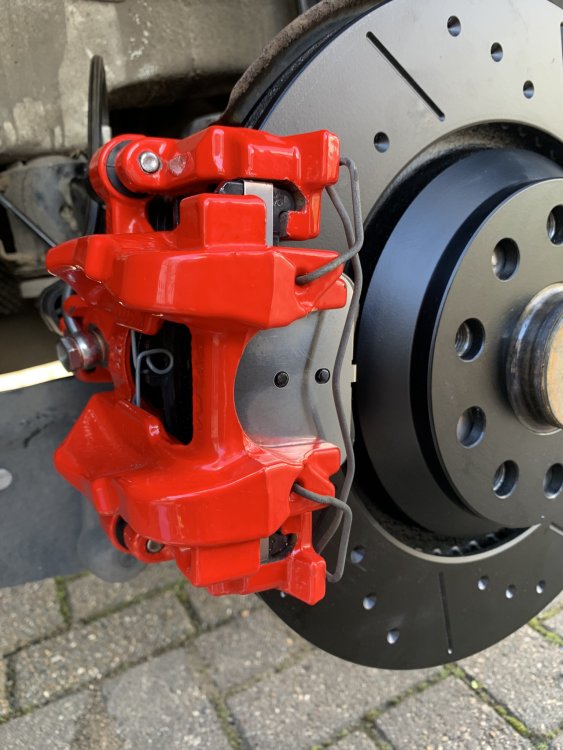
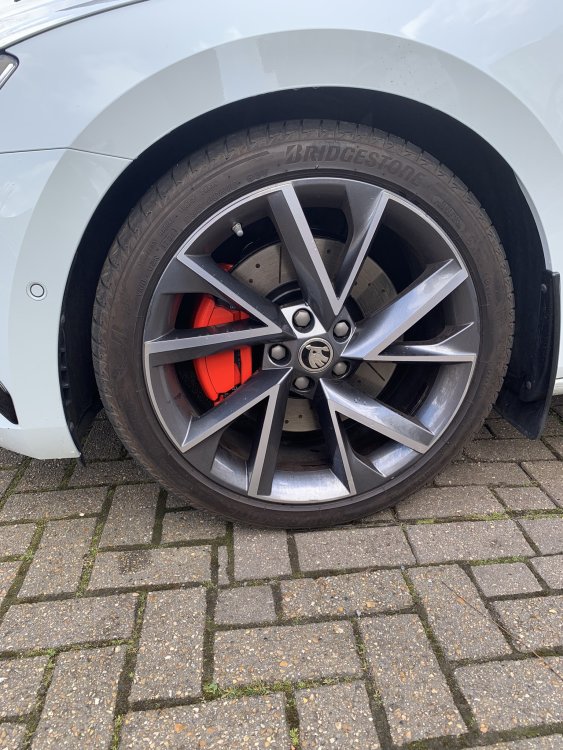
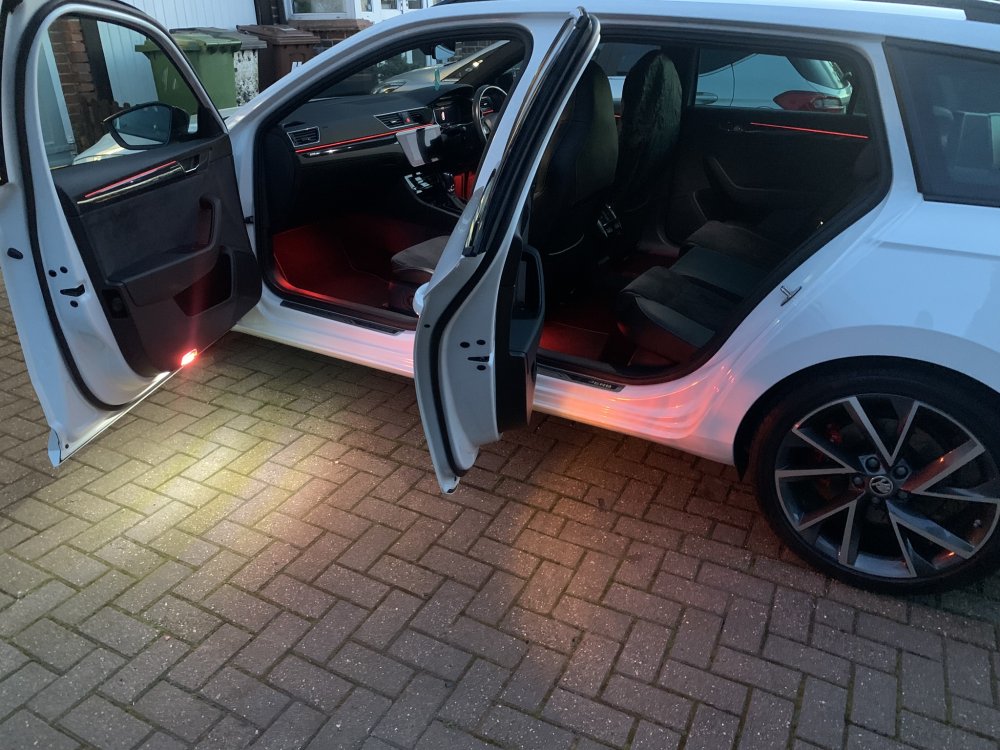
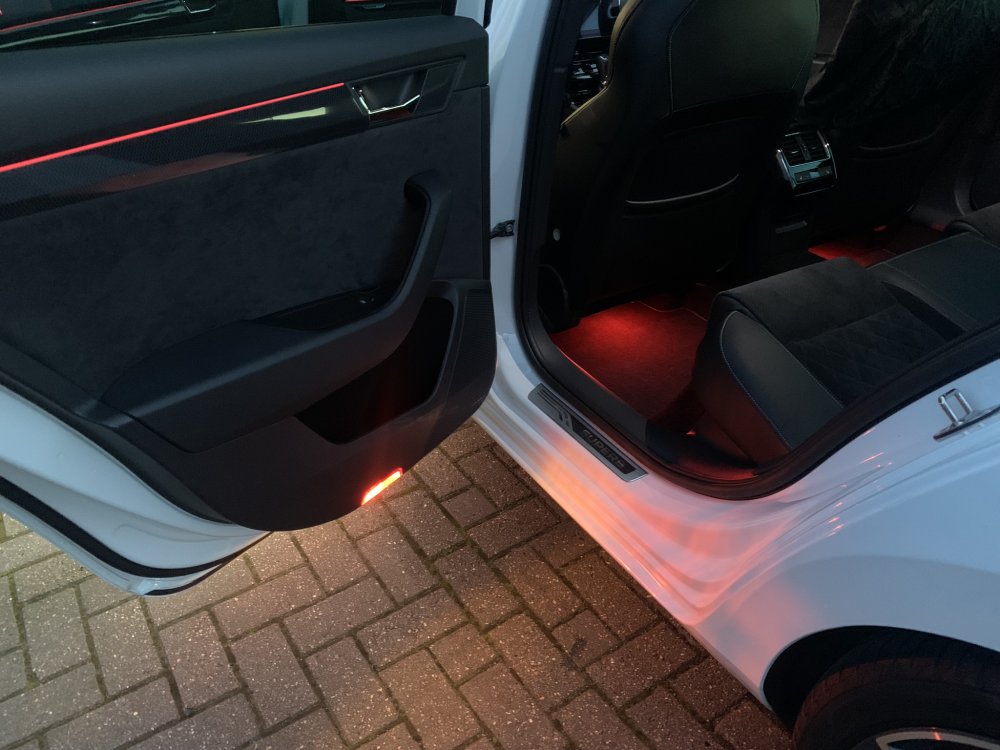
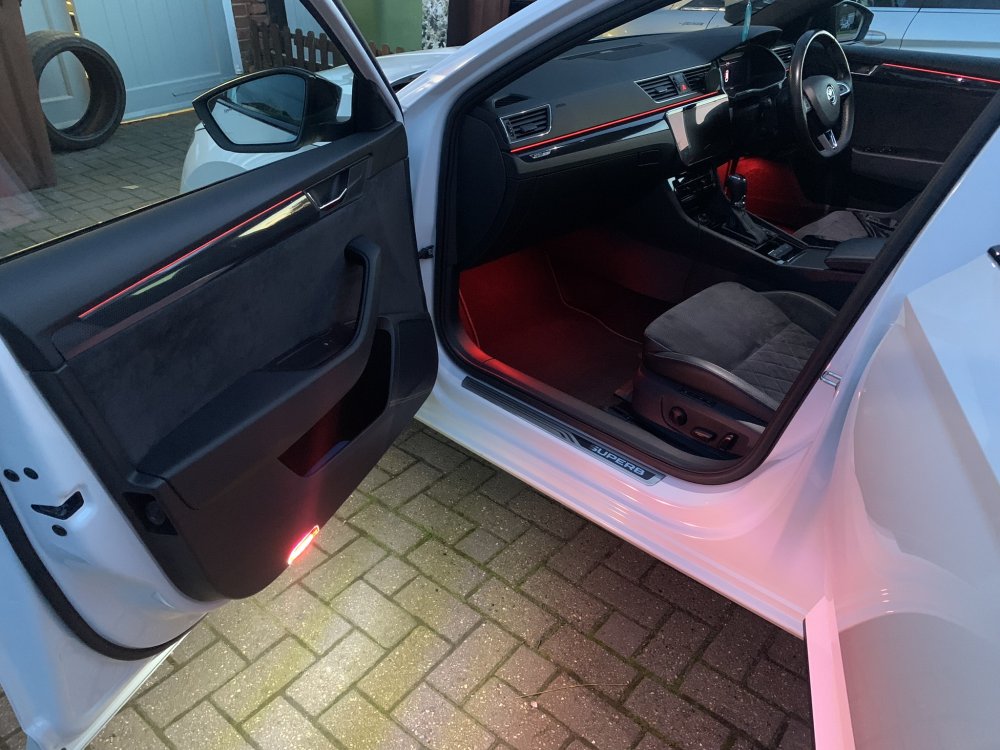
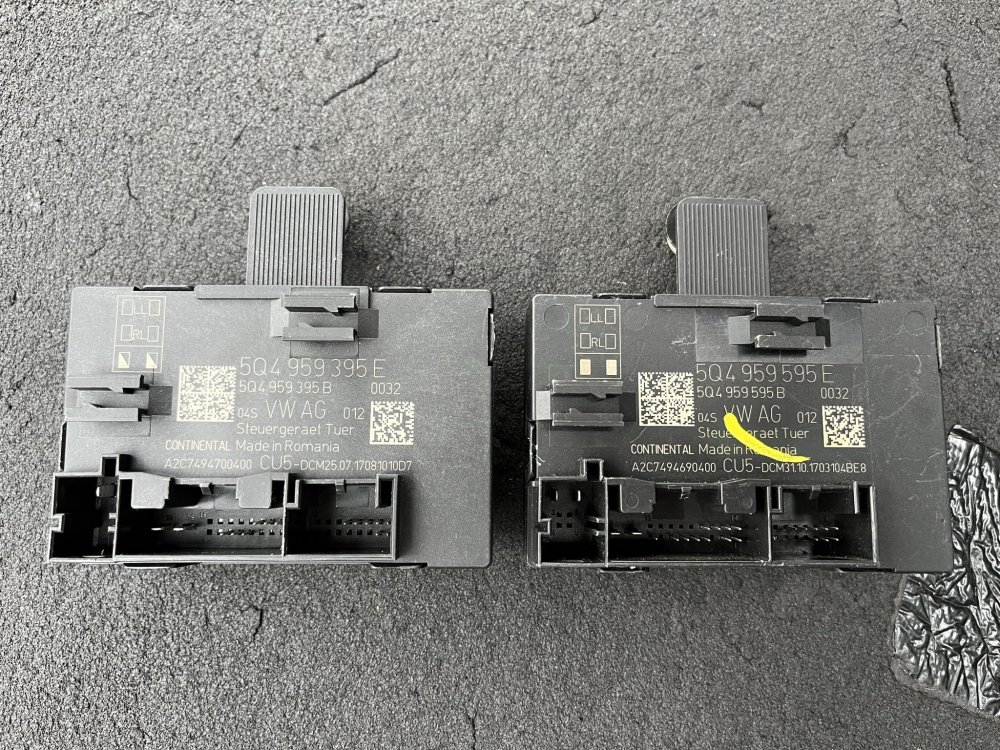
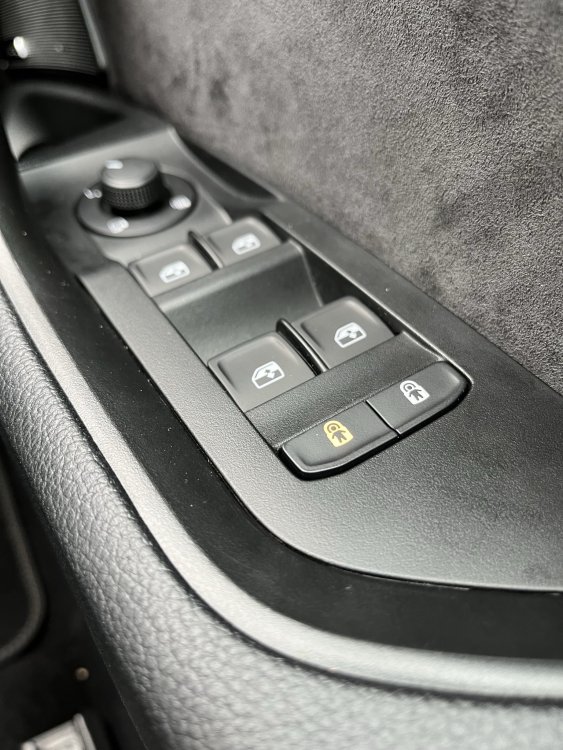
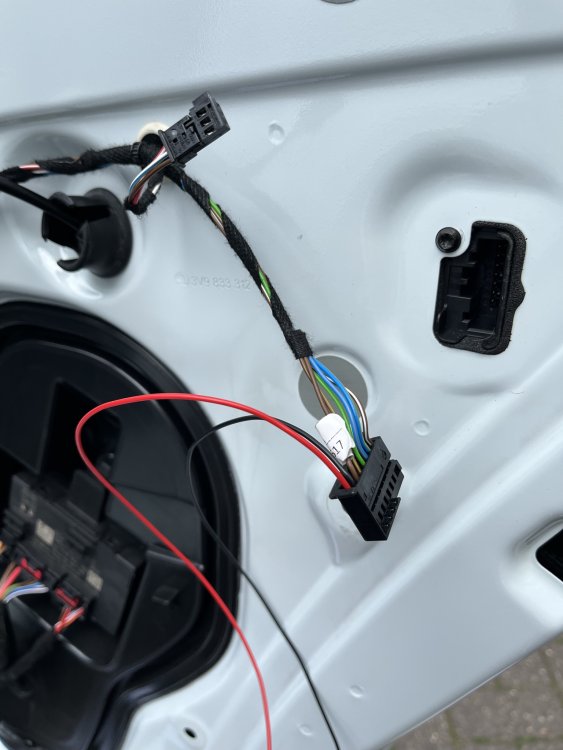
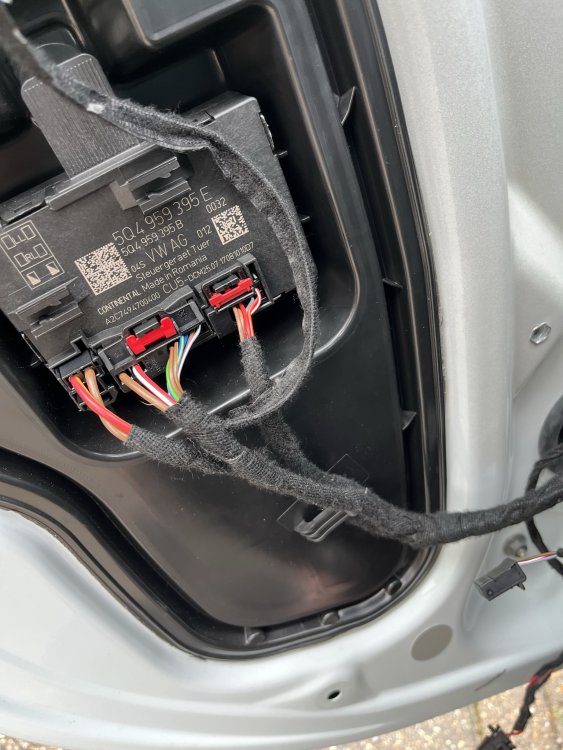
Canton speaker grills Since doing the canton retrofit I wanted the matching speaker grills, but at £450 per door card and almost impossible to find the correct spec sportline door cards, I got creative and found some cream canton grills, dyed them black and fitted them perfectly to the door cards Memory passenger seat This seat started life completely manual, It is now fully electric and has the memory and easy entry features Direct TPMS Allows full view of pressures from the dashboard Brake upgrade 280 rear brakes for the added vented discs Audi S3 brakes for the front - very similar to 280 fronts but with the added face plate Ambient light upgrades As well as the standard LED lights in the doors I thought id add matching footwell lights, The front warning lights were upgraded to LED and the rears got the same matching lights. Rear kessy Adding rear kessy handles (exact same as front) was such a useful feature, but did require a fair few new wires Electronic chidlock on rear doors Only an option after 2018, I wanted it on my 2017, not too hard but does require new rear door modules Heated steering wheel Not the hardest retrofit but fairly expensive as cars before 2019 require a new airbag as the design is slightly different These are all the photos I have of the current retrofits, The next part will be all the to come retrofits and a bit more detail as i go!


-
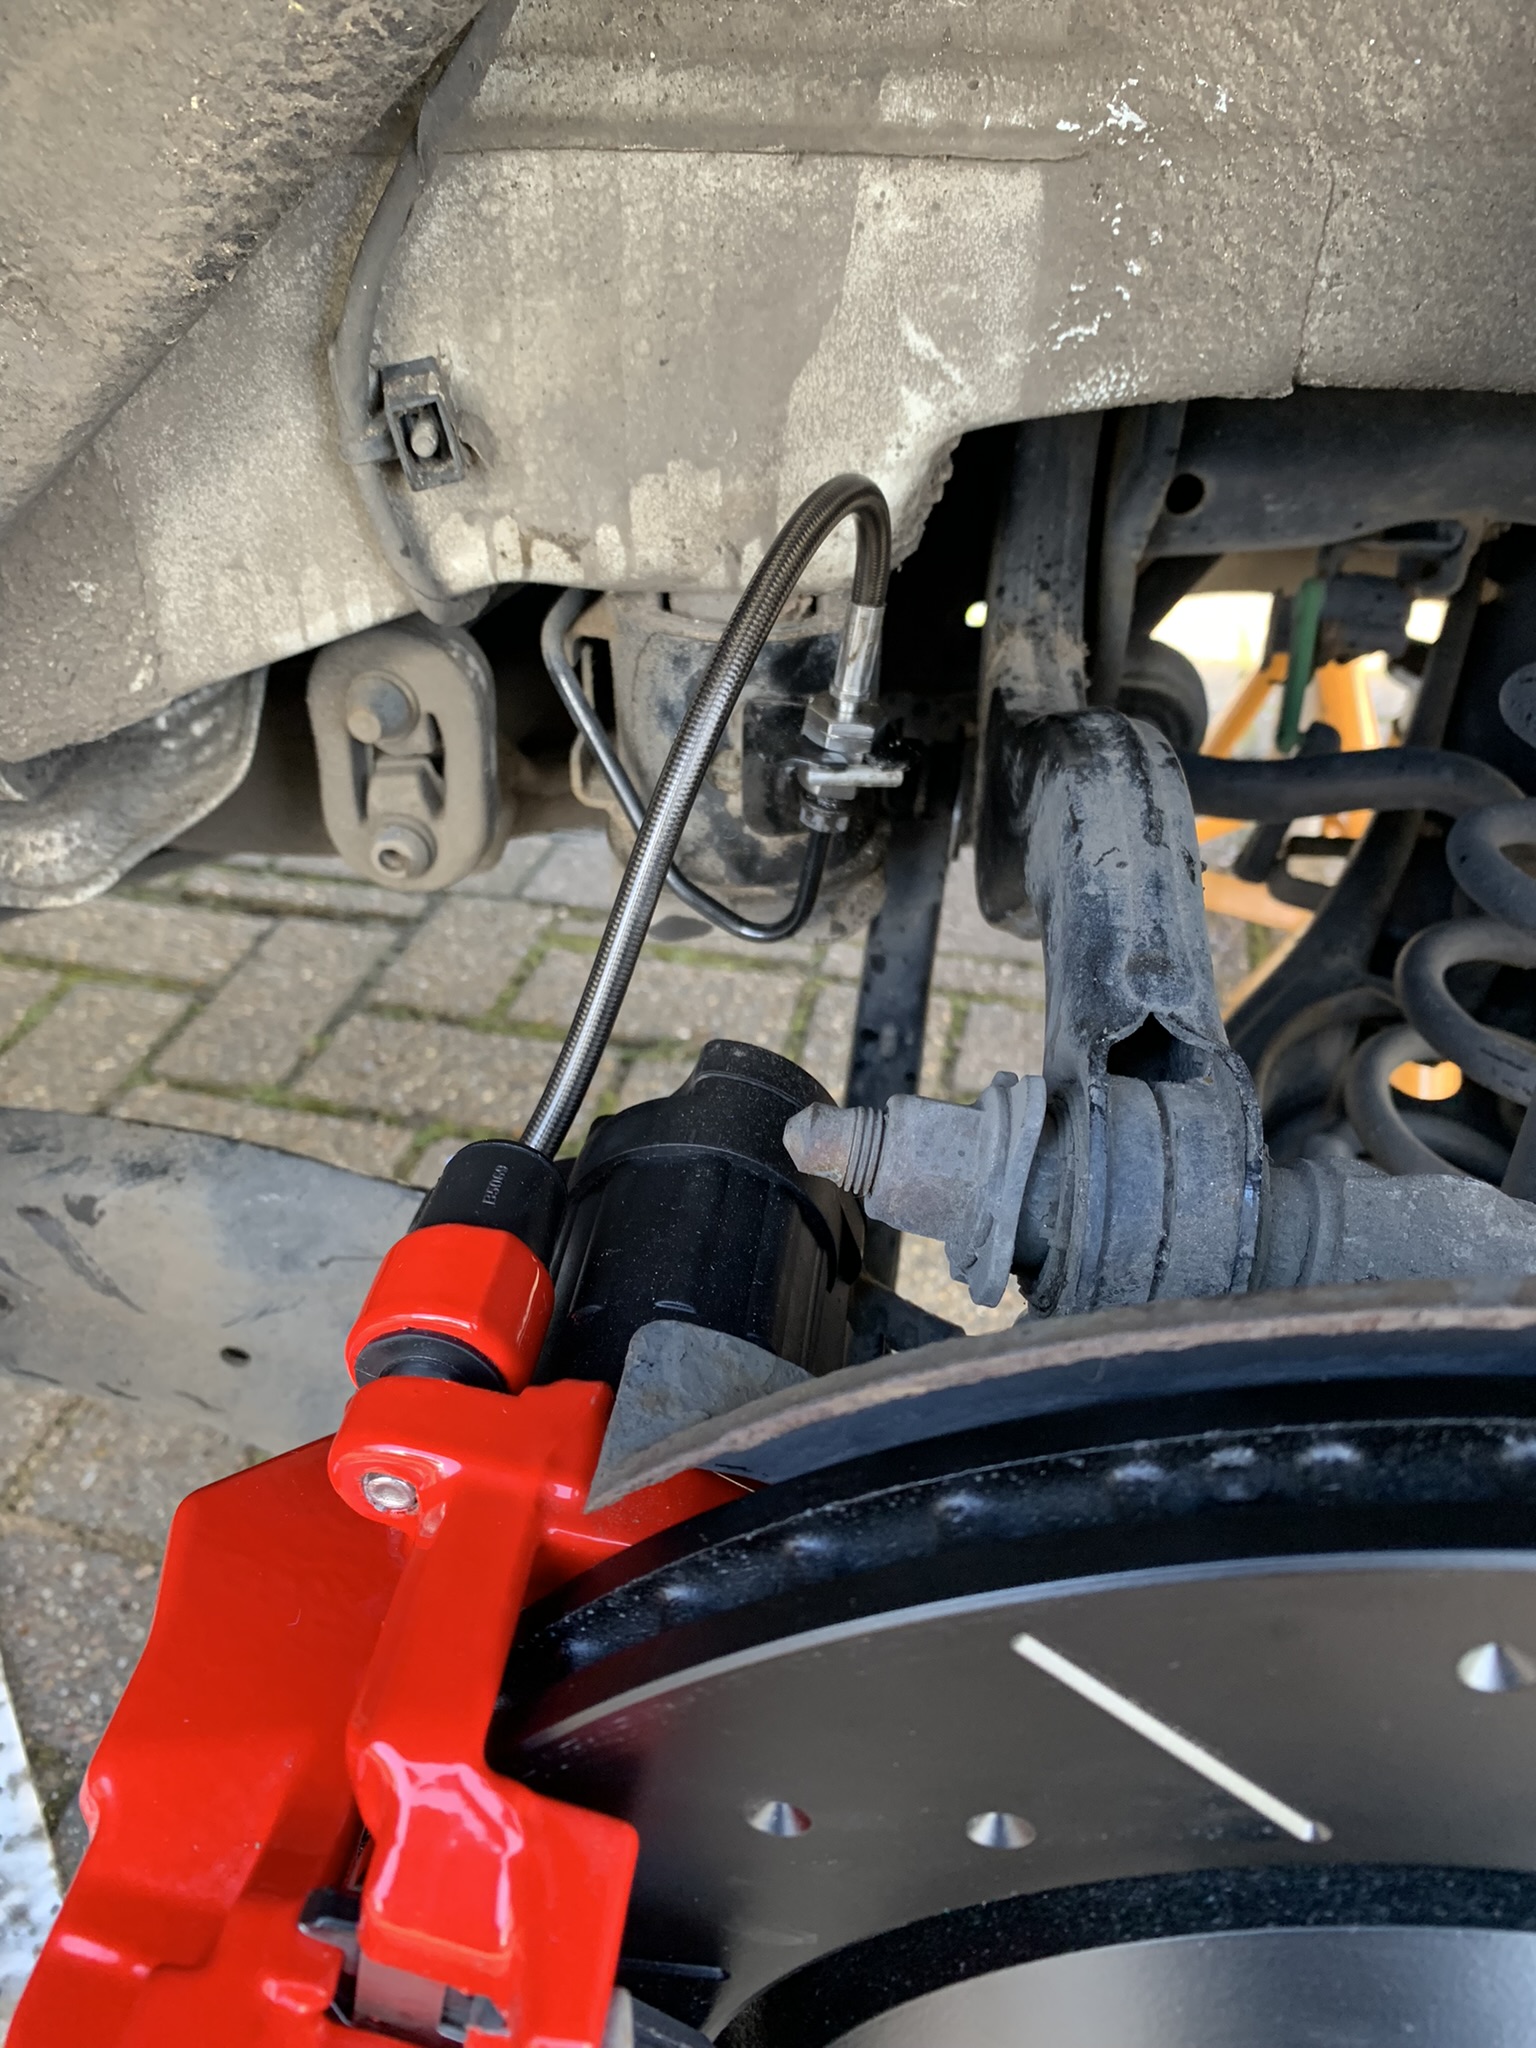
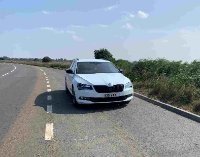
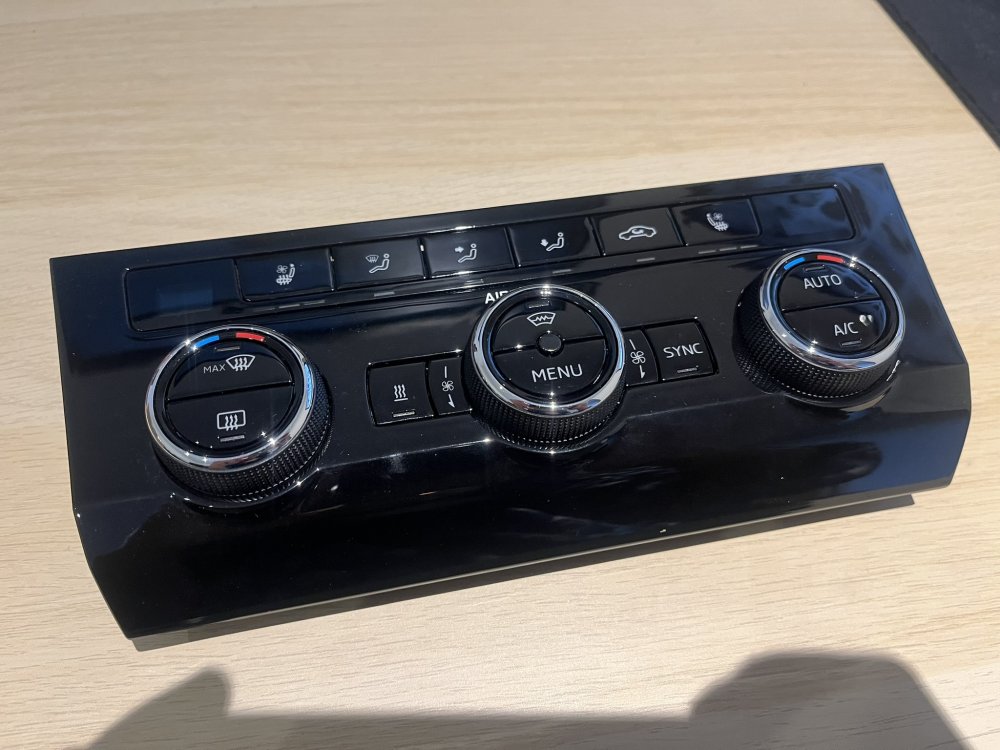
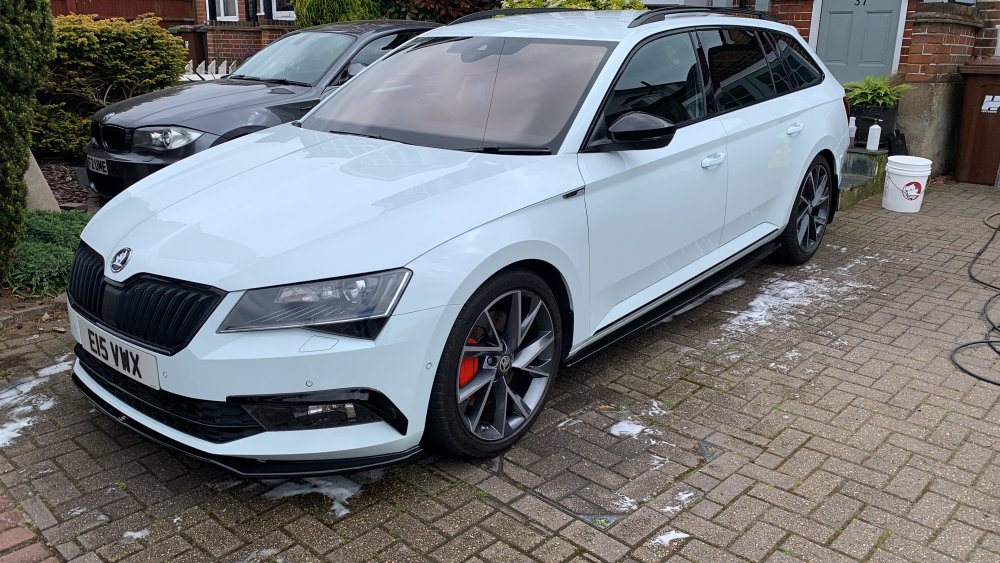
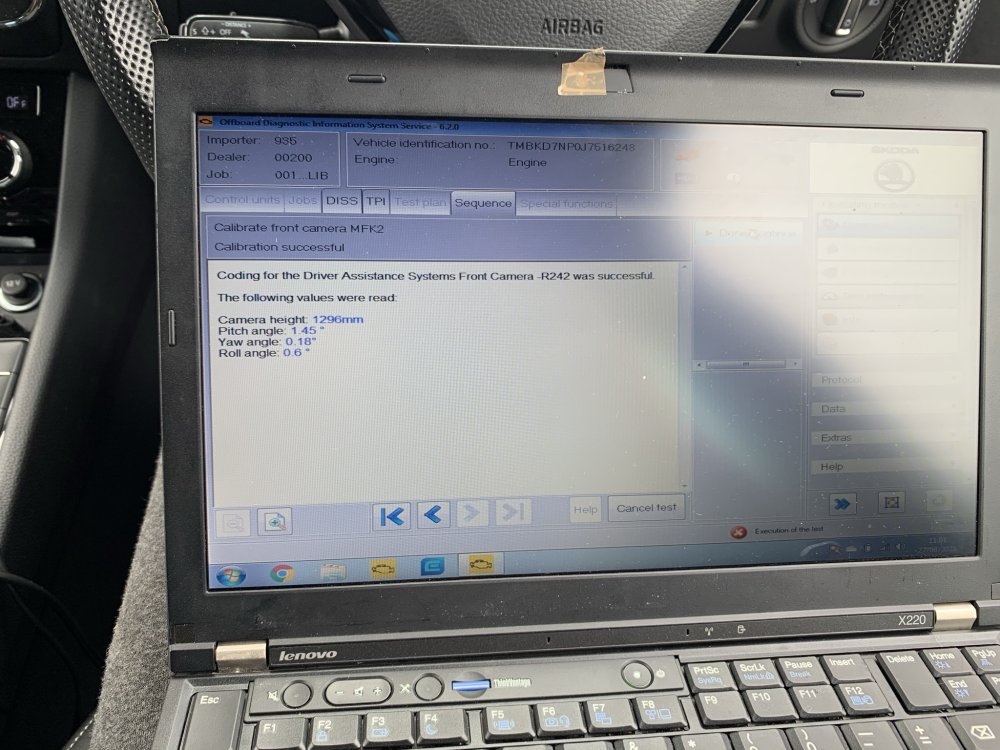
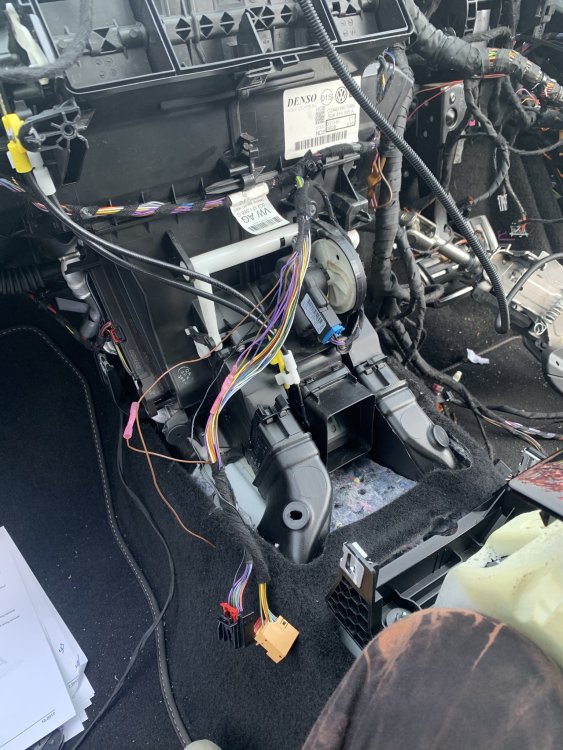
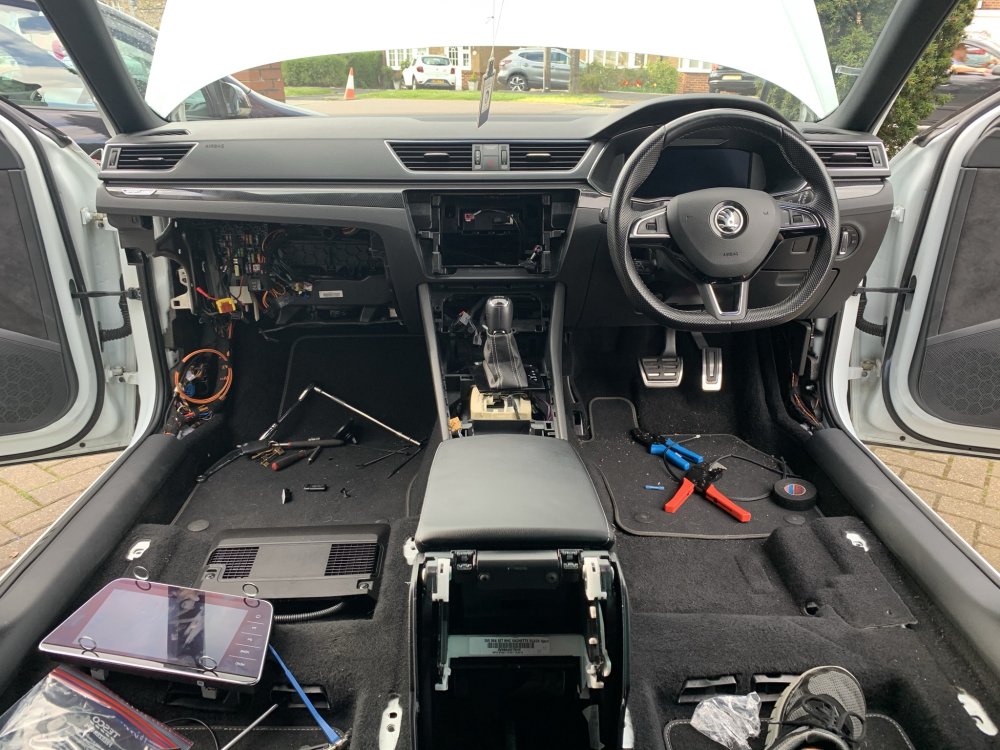
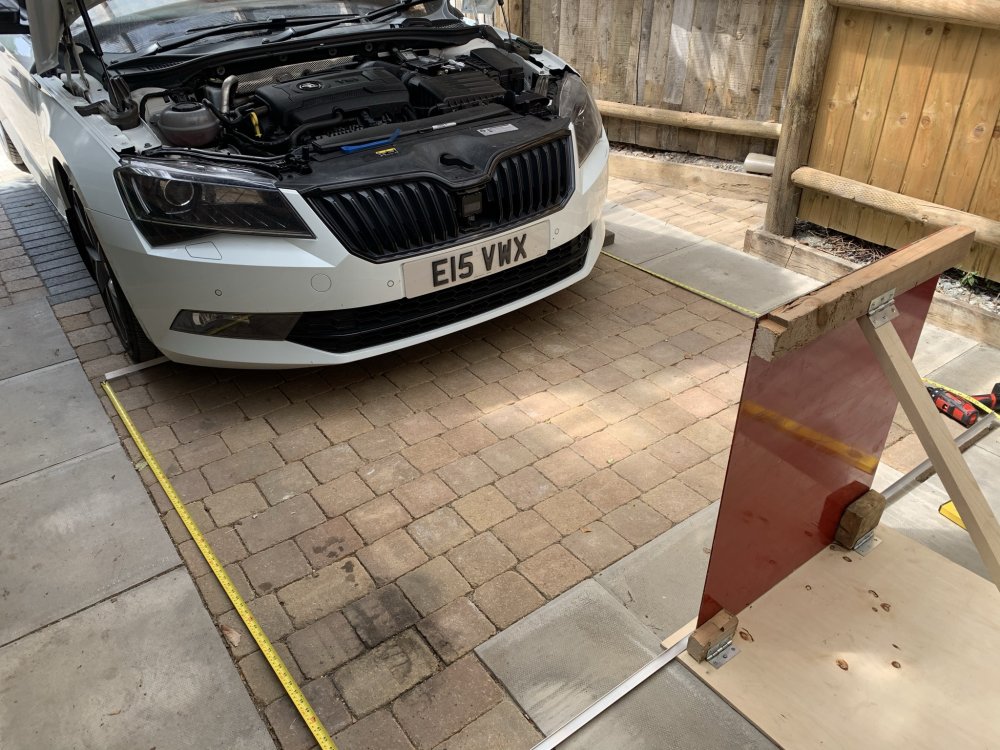
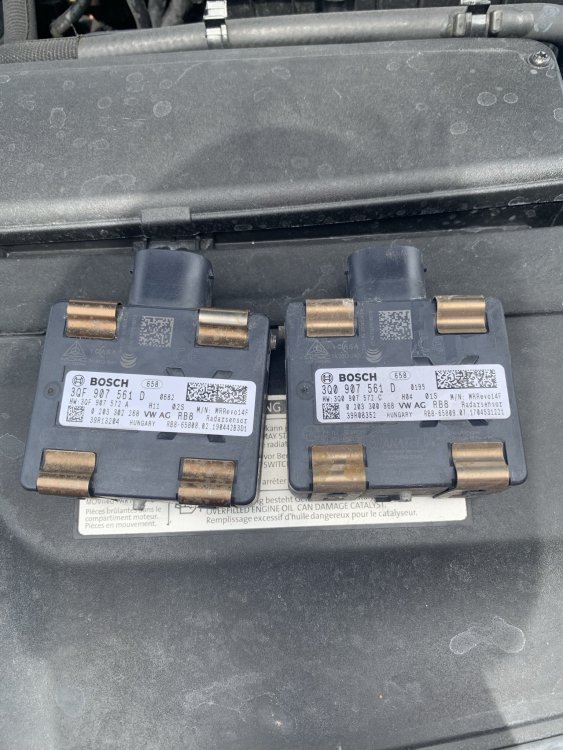
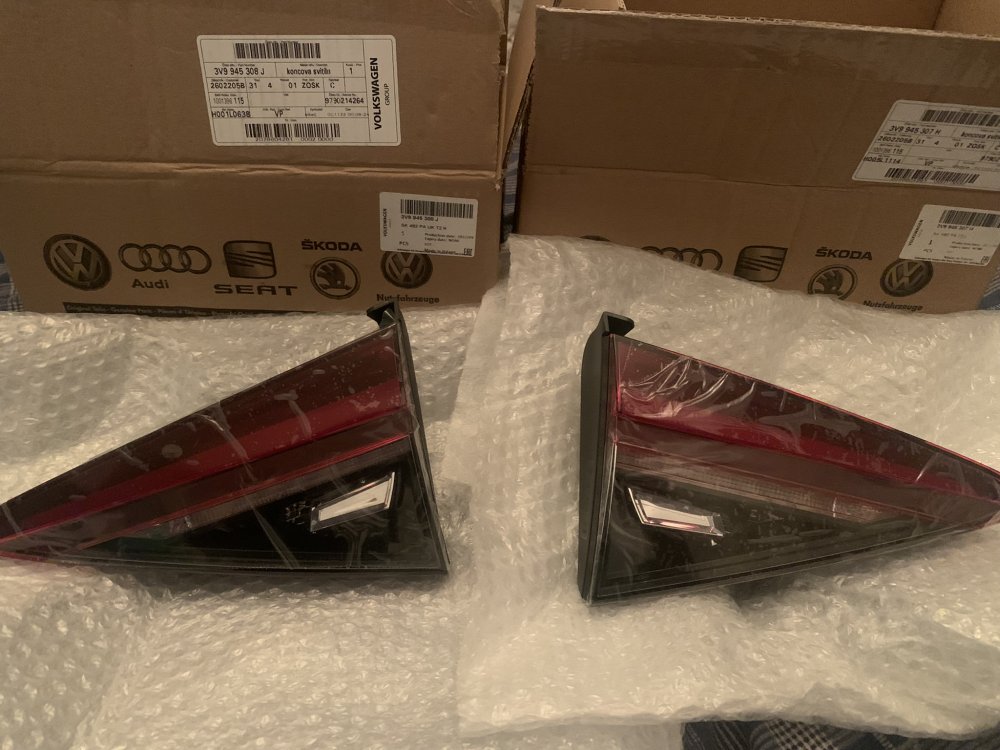
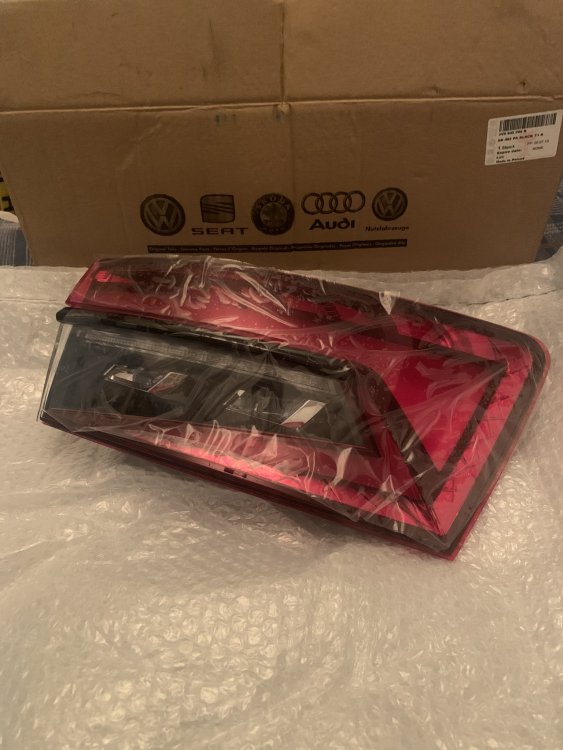
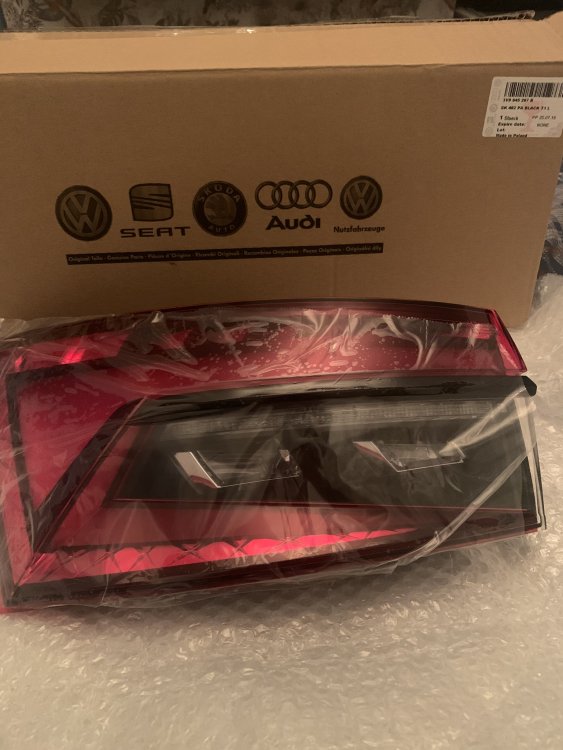
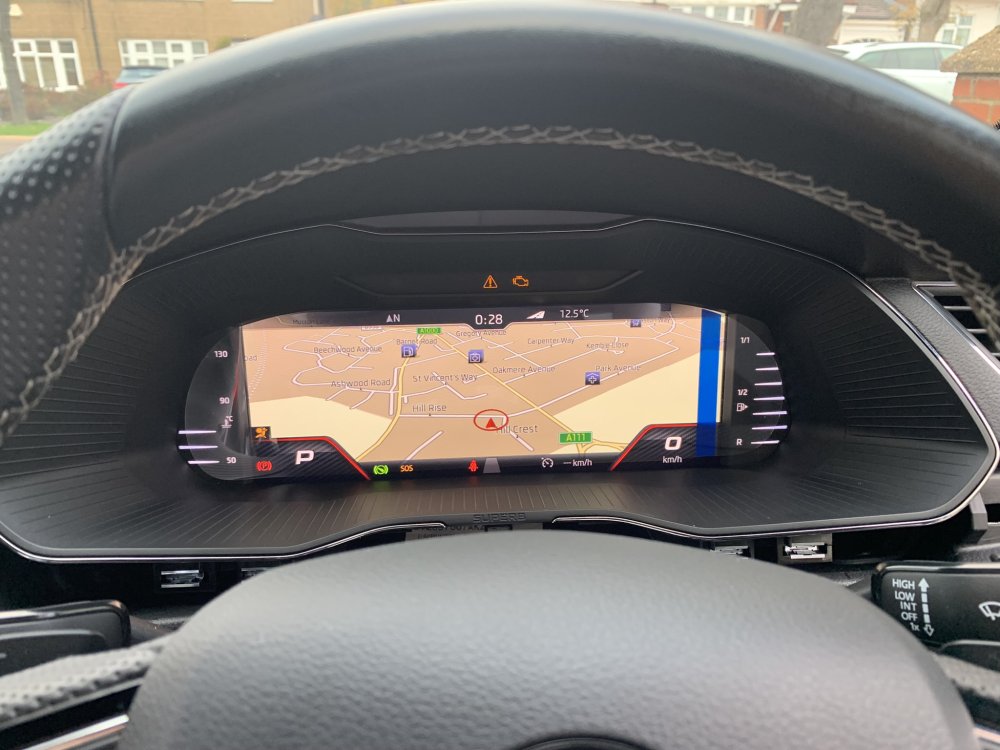
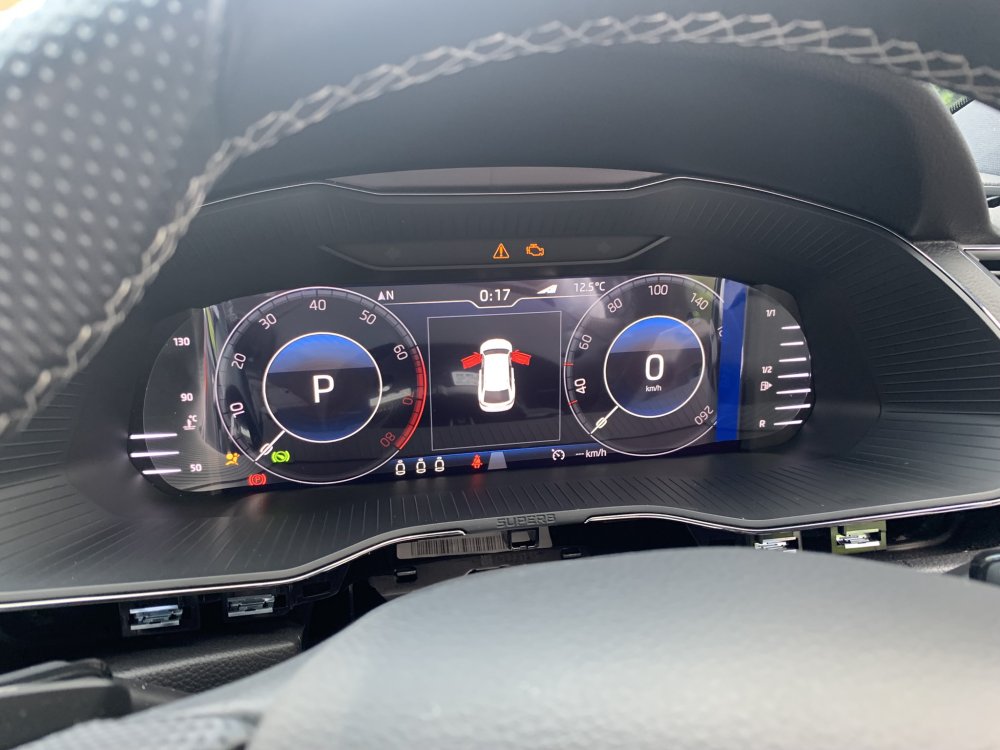
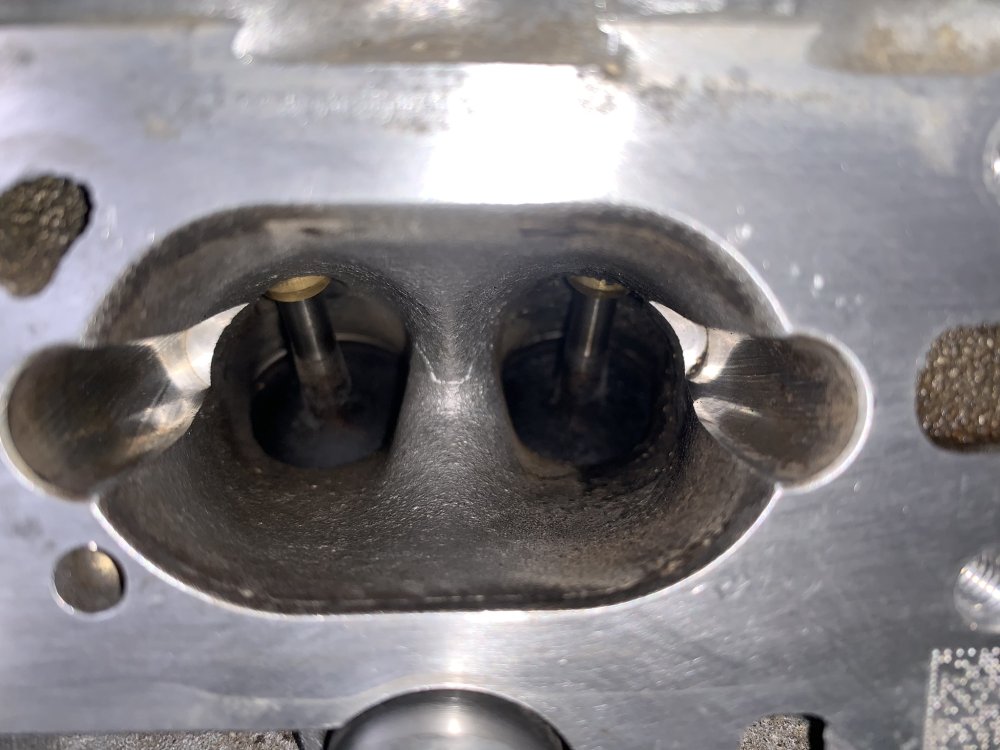
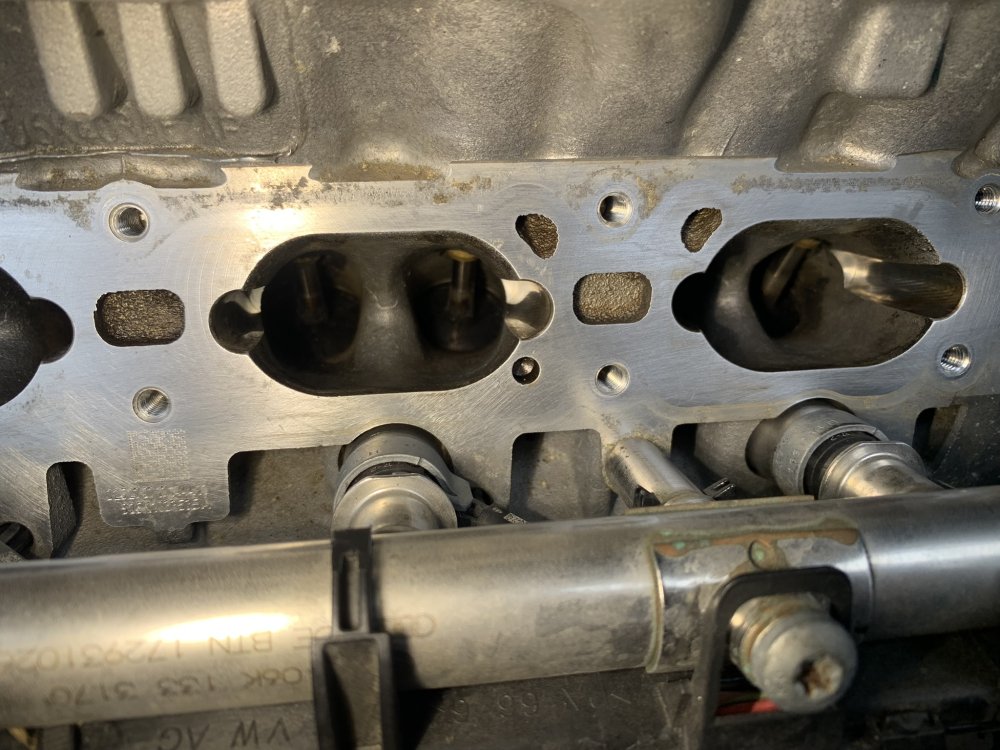
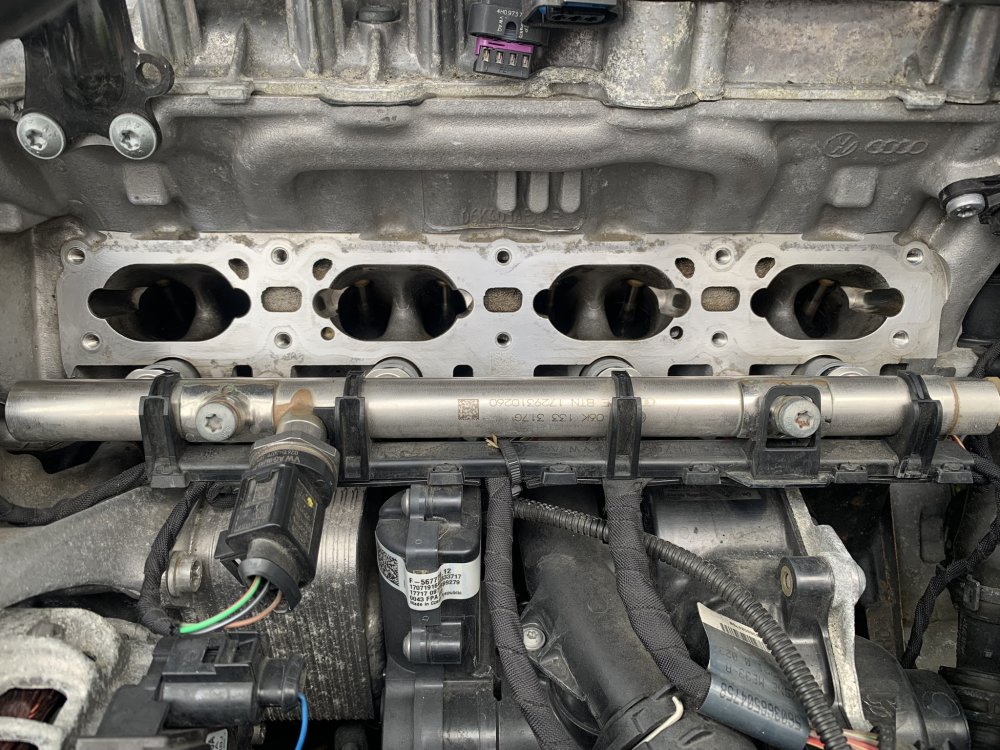
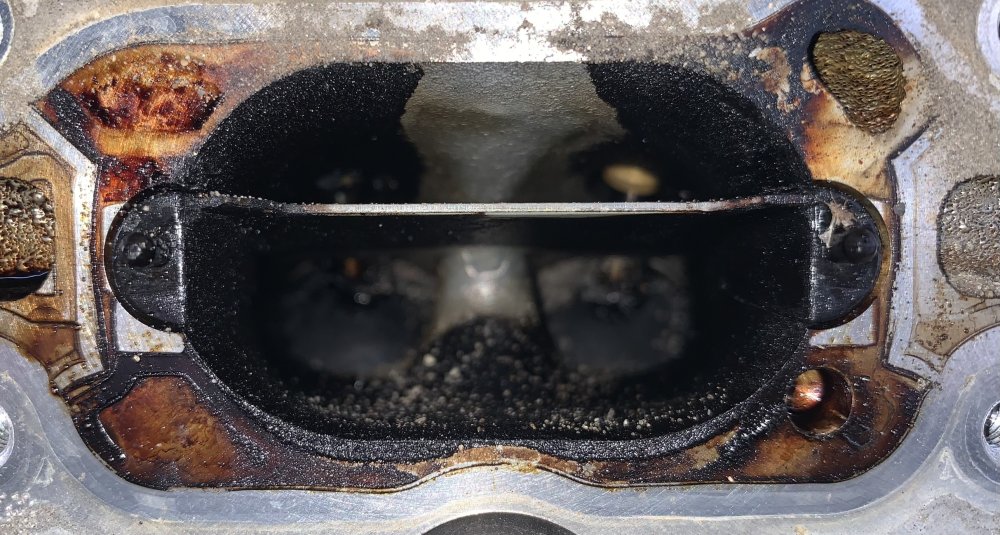
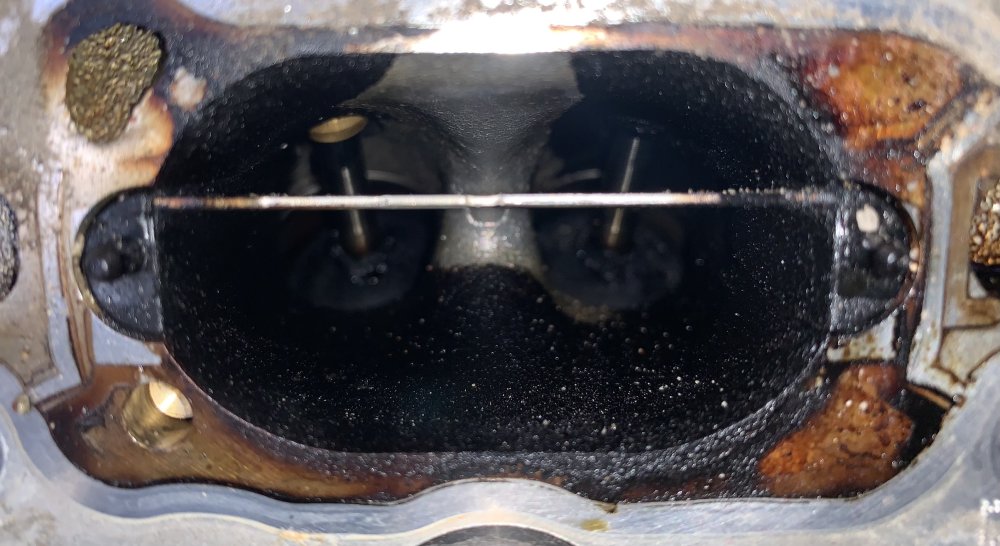
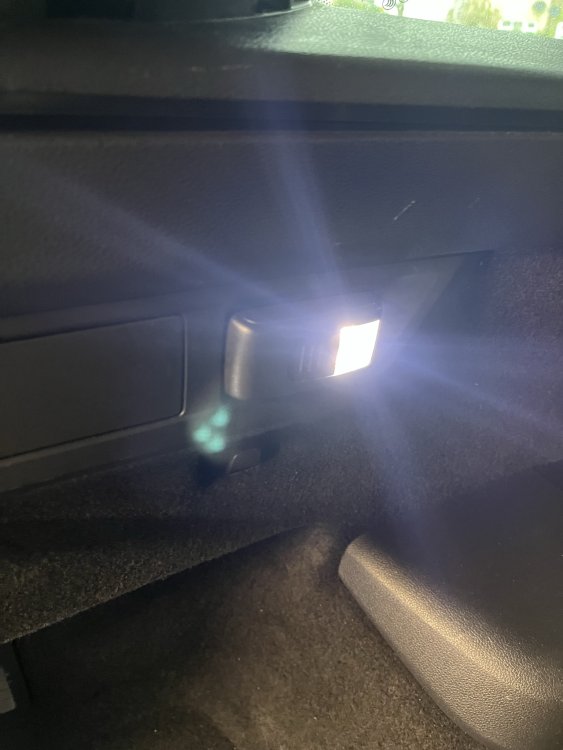
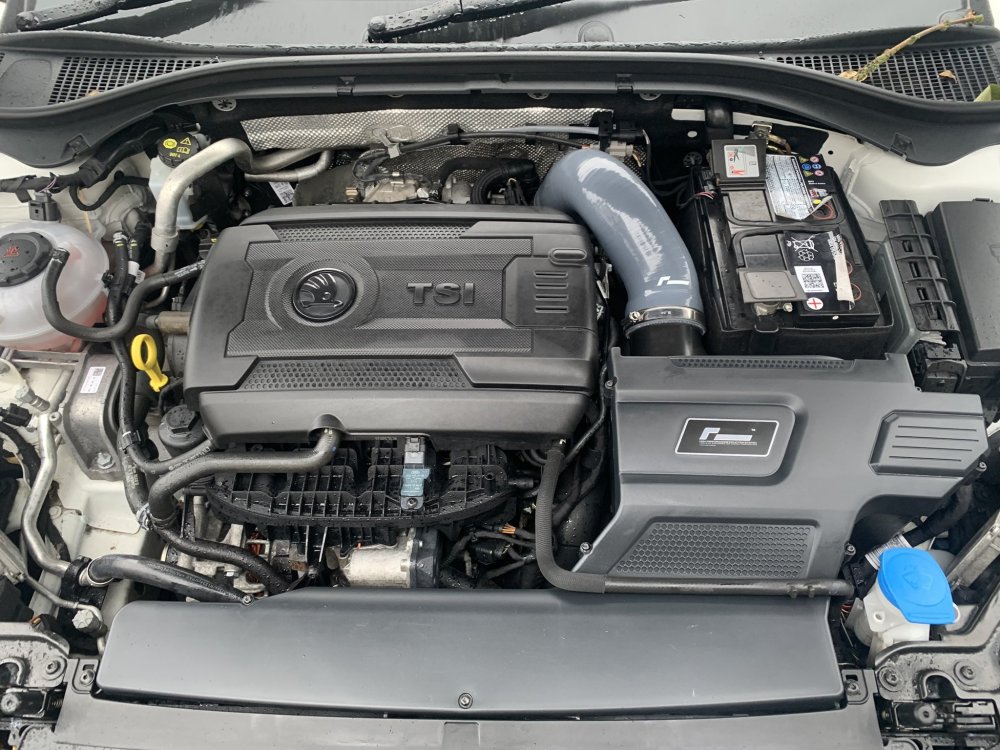
So this thread is going to be a bit of a hybrid! As well as outlining the projects I am doing on my car, Ill supply as much detail along the way for new projects to hopefully allow others to do the same and also to answer any questions you may have. Lets start with the car itself; Car Skoda Superb MK3 TSI Sportline Estate in Laser White Engine Standard 2.0 TSI EA888 with 220bhp Racingline air intake Racingline turbo intake pipe Racingline turbo intake elbow Transmission Standard 6 speed DSG DQ250 Suspension Currently standard original Brakes Audi S3 Front Calipers with plain fascia plates Superb 280 Rear Calipers with vented discs Drilled and grooved black discs OE brake pads Braided stainless brake lines Wheels & Tyres Standard Vega 19 inch alloy wheels with 235/40R19 Bridgestone T005 Spare wheel - Full size, same as above Exterior Standard sportline black pack Maxton side skirts Rear mudflaps Maxton splitter Maxton fog surrounds Interior Rear seat release from boot area LED boot lights White LED boot torch Electric tailgate Heated front seats Heated rear seats Heated steering wheel Ambient LED footwell lights LED front door puddle lights LED rear door puddle lights Electric/Memory front seats ICE & Security Canton sound system Rear door keyless entry Tailgate easy open/close 12 parking sensors MIB2.5 Columbus radio Virtual cockpit 3 zone climate control Heated windscreen Heated washer jets Front and rear dash cam ADAS Adaptive cruise control Predictive cruise control Adaptive lane assist High beam assistance SLA headlights Side assist Cross traffic assist Self park Rear view camera with lens washer As you can see, for a Sportline that started off with only the following optional extras: Electric tailgate, MIB2.5. Its came quite a long way and heres a few photos to show the work done so far, if anyone wants further details on any of the current retrofits, let me know, the future ones will be documented as I go. Lane Assist 3Q0980654 camera fitted as well as a new windscreen - all features enabled and fusion canbus ran to the front radar. Heated windscreen Canton soundsystem An absolutly massive retrofit requiring around 150 meters of new wiring, all corners of the car, a lot of new speakers and a lot of custom made wiring 0 Side assist/Cross traffic detection Another expensive retrofit requiring new wing mirror glass at £400 each side, new radars and brackets behind the rear bumper and all associated coding and wiring Release rear seats from luggage area & Heated rear seat elements 3 Zone climate control Another massive retrofit - stripping the entire dashboard from the car to replace the complete heater assembly to allow the 3rd climate zone, this also gave me a good chance to neaten everything up behind the dashboard and also flush the heater core. pACC/Predictive cruise control Required replacing the front radar and also a calibration of it - done perfectly with any solid smooth object and a few tape measures and patience. Facelift tailights Fitting these allowed for dynamic indicators and unlocking animation - these arent a straight fit and require custom wiring adapters and new wires running to the BCM Virtual Cockpit Quite a specialist retrofit this one, needs access to the main dealer tool for component protection and immobiliser recoding - but so worth it! Carbon clean @ 50k miles Not much a retrofit but after 50k of constant motorway miles i thought it would be a good time to give it a walnut blast. Cost around £40 in parts and my already owned air compressor and garage vacuum LED boot lights and engine styling Nothing too special, just a custom made LED torch, LED lights that dont fault and Racingline air intake and associated parts


-
You’ll need to supply the complete fault code please. I assume you’re using vcds/obd11? In which case the full fault code won’t contain everything, if scanned with odis it will tell you exactly what module is sending a fault and what message it’s trying to send. I also assume based on your other posts that you’ve made some software changes to your car? If so, have you tried reverting them as it will have been something you’ve done probably
-
If your car is for the U.K. market there is 0% chance you’ll have it. It wasn’t an option for the U.K. market. but it can be retrofitted
-
They are plastic welded/riveted into the door card so need drilling out if you wanted to do that
-
Have you coded the tow bar? Did you disconnect the battery? If so, turn the wheel slowly lock to lock with the engine running.
-
So ill break it down for you a bit better, The motor doesnt wind any piston back and forth to start with. The motor winds a ball screw inside that has a plate attached to it. This allows for the motor to push the plate out which pushes the piston out, and when released, only retracts the internal plate allowing the piston to retract on its own like it would in any other braking situation. Next on to the diagnostic side of it, With some good maths by engineers a lot smarter than yourself and I, they have worked out that as a motor begins to increase in torque, the current draw goes up also, and using this principle they have worked out the exact torque to current draw curve of these caliper motors. Why is this relevant? Well you dont want premature wear of the hand brake and caliper components by using too much torque and you dont want too little torque where the pad isnt being pushed hard enough against the disc. When you reengage the motor with a diagnostic tool it actually puts the handbrake on and off about 3 times, this monitors the current draw and sets the exact point it wants the motor to stop to excessive prevent wear on the parts. Now as much as you can get away with using a socket and winding it back yourself and reapplying it yourself, the motor is still using its old stop points and will over torque the motor or under torque it. TLDR; its not all some conspiracy to get you to spend more money for no reason and actually serves a purpose. Its also related to a safety component and it grinds my gears when people try and skip steps/cheap out on them.
-
It would need coding, component protection and a few other bits running, Regarding the camera you fitted, what camera was it? how sure are you that the camera hasnt caused this? (i hope it wasnt one of them cheap chinese 'plug and play' ones) Those radio keys you have used are completely the wrong type and there is a chance youve damaged the circuit board inside by using them.
-
Sorry but thats all wrong and confusing The front assist radar behind the grill is used for adaptive cruise control and front assist. The same part is used for whether it has one or the other or both and its controlled through coding and SWaP codes. ACC doesnt use a camera. The camera in the windscreen is used for lane assist, high beam assist, traffic sign recognition and pedestrian detection. The windscreen camera comes in two levels a low line which is just in the rear view mirror and this ONLY does high beam assist, or the high line in the top of the windscreen which does all the features. A car can have one without the other.
-
It is a supplementary heat booster which uses a large resistor to create cabin heat. The auxiliary heater is a webasto coolant heater located in the engine bay to pre heat the engine and cabin. Regarding your fault, id be checking the condition of whats left of the terminal for a loose connection, and also check the heater resistor for a short circuit which would also cause this.
-
The all seeing eye is watching over you. But in all fairness, thats a new one on me! where is it actually shown on the screen?
-
It could be one of a million things, the only way to find out is to get it plugged in to a diagnostics computer.
-
The physical fitting isn’t exactly hard. the hard part is you need to have the genuine ODIS diagnostic software and a GEKO security account to unlock component protection and code the immobiliser else your car won’t start.
-
If it’s on braking I’d be checking disc run out with a DTI gauge (hopefully the garage has one, most probably don’t with a replace instead of repair mindset) for the alignment, the machine is only as good as the person using it, not setting the car up properly or very slight errors in following the process can cause massive differences in the outcome of the machine. im not saying they’re bad or it’s related but it will 100% require looking into. another possibility is they have torn the rear bushes when adjusting the rear tracking (they often seize in) and this is causing the vibration.
-
-33???? Where are you?
-
A Polyurethane adhesive is probably your best bet - strong adhesion, waterproof and flexible. to be extra sure I’d get a 3M plastic adhesive primer first, else it’s gonna be a complete sunroof setup
-
Your part number is 5Q0955547, superseeded to 5Q0955547A then to the below which is current; 5Q0955547B Rain and humidity sensor
-
3V5 945 307 E LED tail light (left-hand traffic only) D >> - 30.05.2016 left inner 1 3V5 945 308 E LED tail light with rear fog light (left-hand traffic only) right inner 1 3V5 945 207 Tail light left outer 1 3V5 945 208 Tail light right outer 1