Breezy_Pete
Sponsor
-
Joined
-
Last visited
Everything posted by Breezy_Pete
-
Should be this, I think:
-
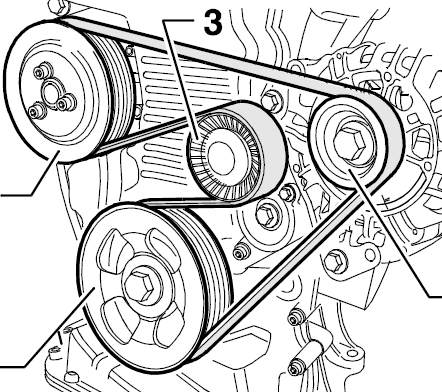
Are you certain that it isn't the belt tensioner pulley that's screeching? More common, I think. Belt for non-A/C version of your engine is 21.8 x 1453mm long. No reason it shouldn't work if routed correctly. Diagrams can be over-generic and confusing.
-
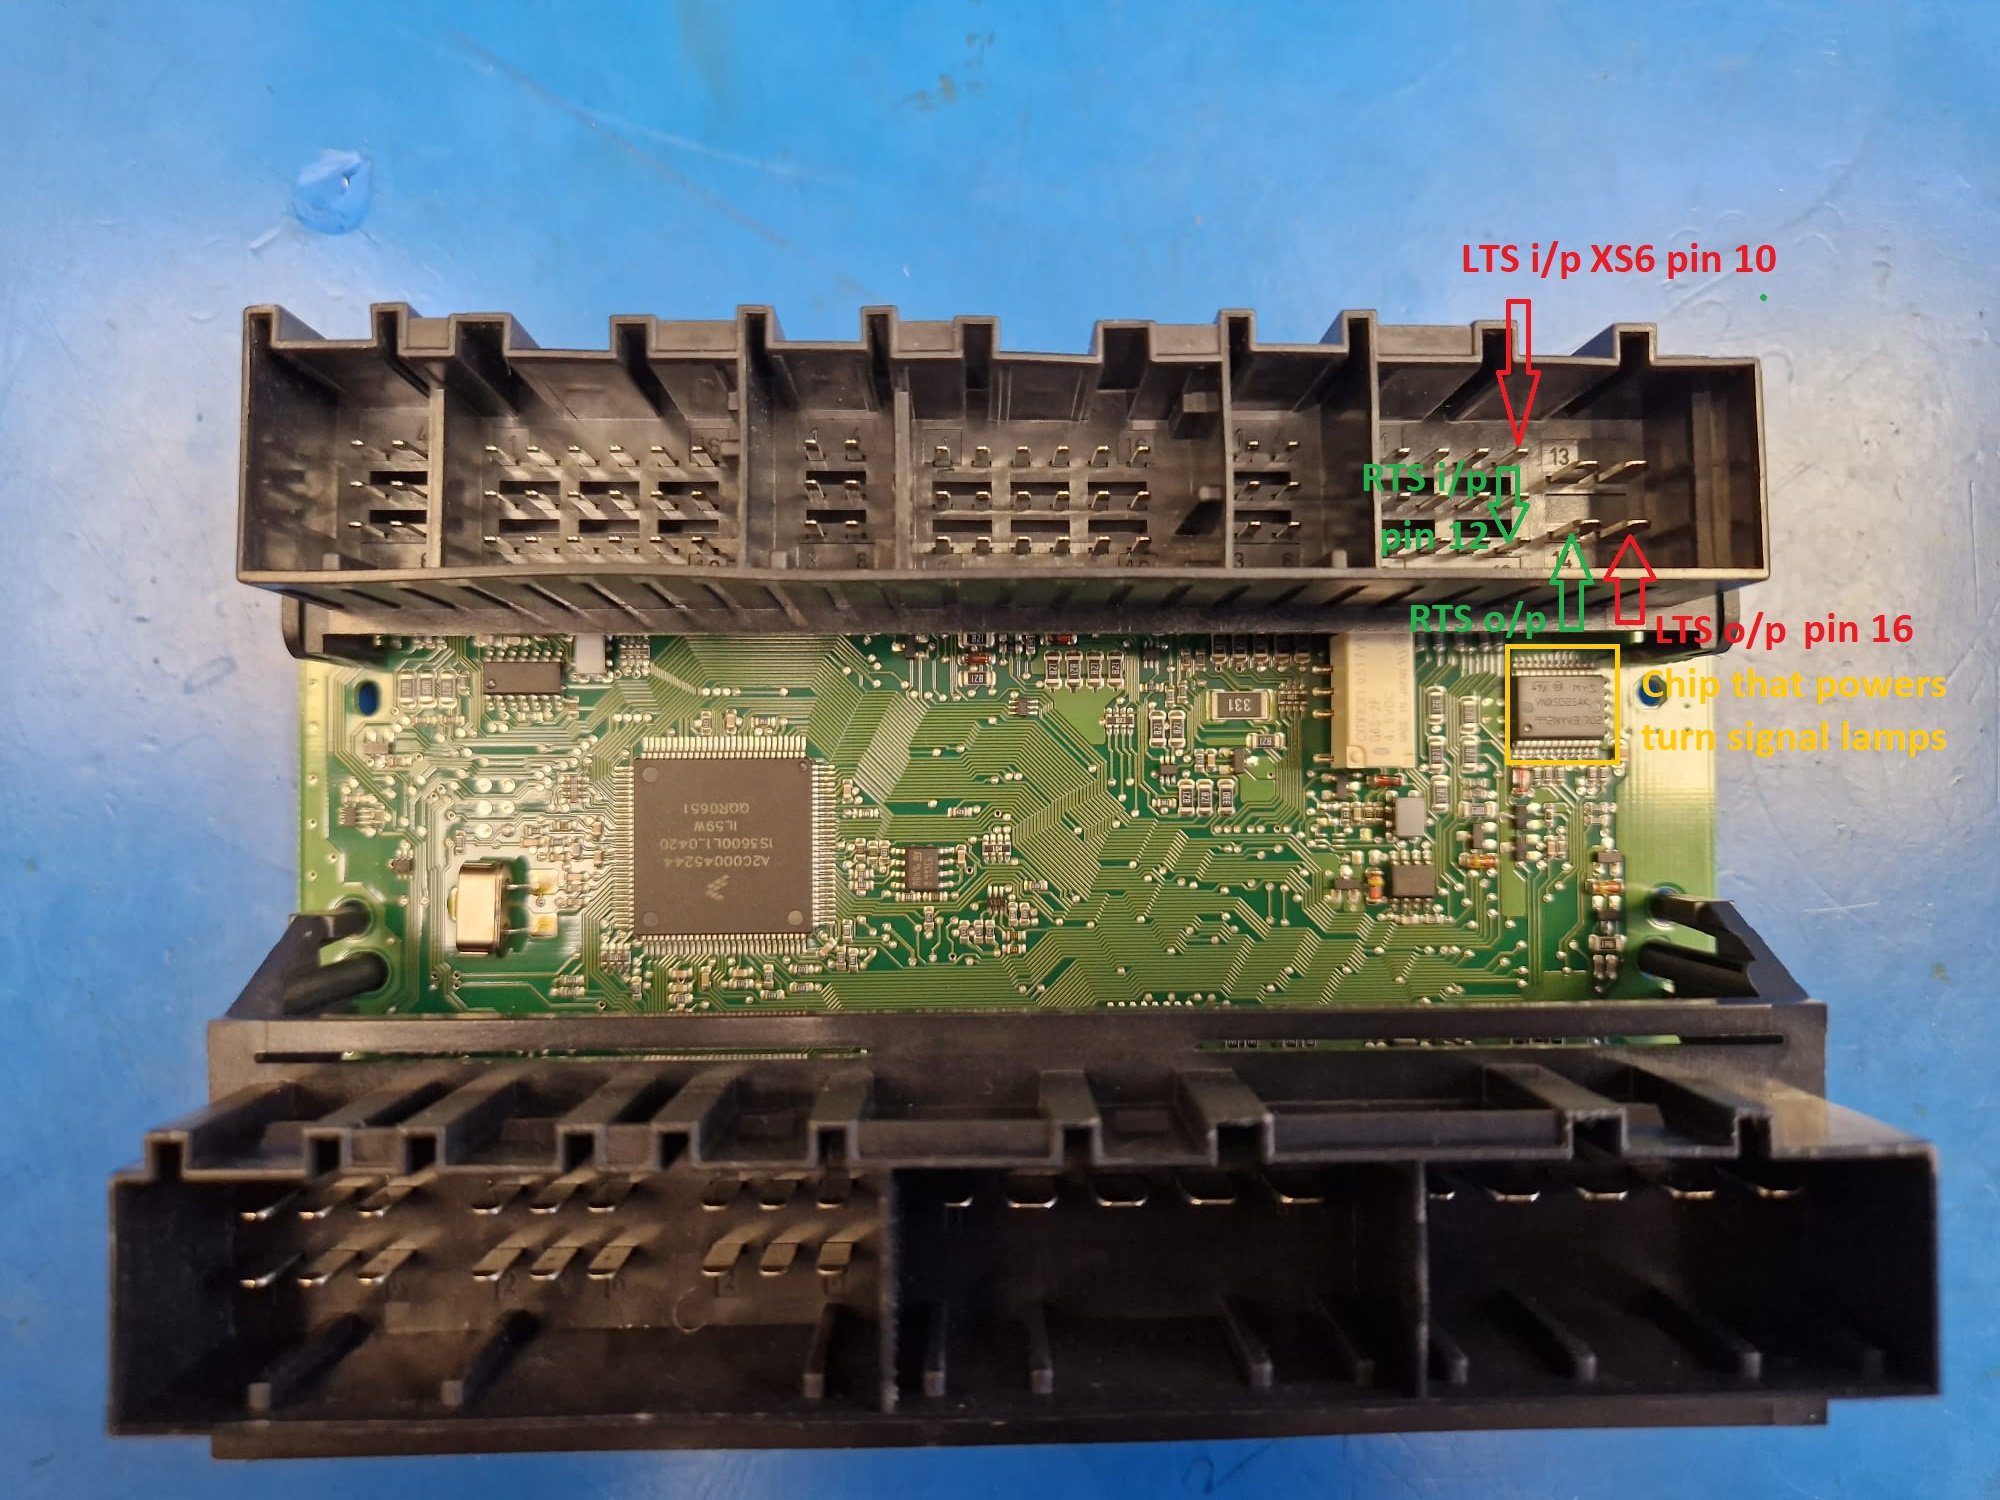
You may find that chip looks visibly destroyed if you open up and inspect the BCM circuit board. Nothing else is involved; if the input from stalk and output wiring to the lamps is OK, and fuse is OK. Can test all of those things with multi-meter at those connections I've shown.
-
Some more info for you, including inputs and outputs (inputs are just switched to 0V/earth by the stalk). Outputs go to the front, rear and side repeater lamps, all in parallel for each side. LTS = left turn signal, RTS = right turn signal.

-
Did you disconnect the battery before doing the work? Reconnected?? What is happening when you try to start it? Cranking, or nothing?
-
If you are 100% certain that the 15 Amp fuse number 49 is OK, then there may be visual evidence of failure of the integrated circuit in the onboard supply control unit (BCM) having failed. It's the large chip to the right of the white relay in this photo:
-
It's a bolted-in assembly that you replace. No pulling involved.
-
Use continuous mode whenever it's raining enough. Massively less wear and tear on relay contacts, and no noise.
-
Find the BCM and put soundproofing material between it and you.
-
Check for loose or corroded connection to starter solenoid.
-
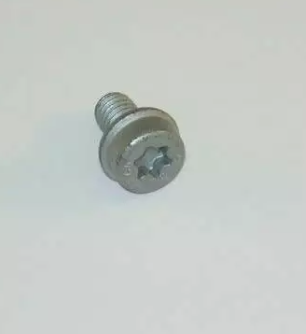
Pretty sure it's a Torx fitting, so hex will not go well.
-
Wheel cylinder is the usual description in English. Careful with the single screw fastening accessed from rear of backplate. Can't remember if it's Torx or hex, probably the former. Easily rounded out with insufficient tool insertion due to corrosion.
-
-
If it's a 2007 car, the first one. That means "for cars built up to and including 21st June 2009". The second one is for cars built from 22nd onwards. But as this page confirms, they're equivalent, so it probably doesn't matter: Bonded Rubber Bushing Febi 6R0501541A (skoda-parts.com)
-
Check cabin fuse No. 2 (5 Amp), and under bonnet fuses No. 4 (20 Amp) and No. 25 (40 Amp).
-
I'm sure it'll be fine, but you should prioritise finding why the level has fallen. Consumption of coolant should not occur.
-
There's probably another blown fuse, one associated with the ABS module. I can probably tell you which are good candidates a bit later.
-
Would certainly make better eating.
-
Well done. I'll PM you a little later, cheers.
-
Somewhere on here https://www.lllparts.co.uk/catalogs/skoda/CZ/OCT/753/1/199/199055
-
It'll be fine. Just looked up the melting point of ABS plastic and it's pretty high, 200+ °C. Not sure if it is ABS, but it may well be.
-
Well done. Whether it runs constantly or not depends on whether the refrigerant pressure dips under the switch-off threshold (6.8bar from memory) when fan is running This in turn depends on ambient and demanded temperature, and of course how much air is being pushed through the condenser due to vehicle motion alone. Keep an eye on the plastic that resistor is leaning on, I suspect that resistor is going to get very hot in summertime, should that ever actually arrive.
-
No, you shouldn't be able to operate from keyfob. On these LIN-based variants of motor modules there is no data connection to anything central, so only local action at one or other door can provide inputs to the windows.
-
Most important factor when changing oil in manual gearbox is that the car is level, front to back, and side to side when refilling. Drain and fill holes are both right at the back of diff, so if done with car jacked up just at front, you won't be able to get nearly enough oil in when refilling. Picture a car on a workshop lift, nice and level, that's how the 'refill until it runs out of fill hole' is designed to work. Refill volume is approx 2 litres I think, but I don't have the mk3 workshop manual to confirm. Can look up part number of oil with VIN, @alep, if you wish.
-
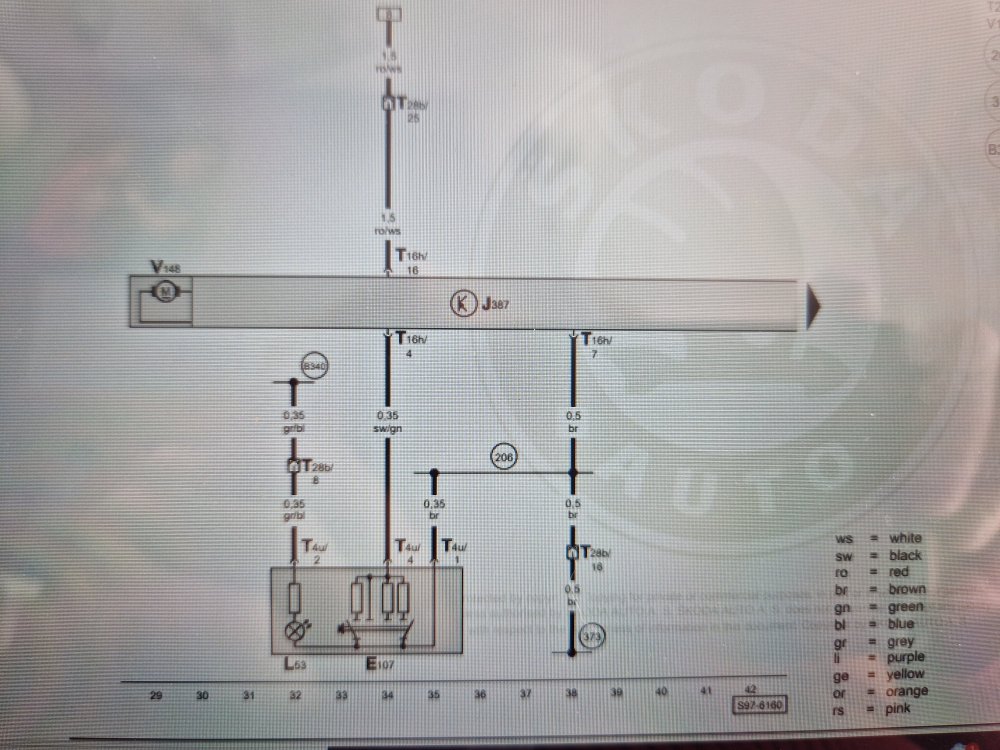
Two crucial wires and connections for passenger switch (E107) function are the brown earth from pin 1 of switchpack, and the black/green signal wire from pin 4. The fact that the backlight (L53) works suggests earth is intact, as it's shared.