Leaderboard


Popular Content
Showing content with the highest reputation since 02/11/03 in all areas
-
Hi Newbies This part of the forum is basically just for saying hello... and you can let us a know a bit about yourself and your car if you so wish. If you have a specific query, we would be grateful if you could post it in the relevant section… For example, you need advice on a battery for your Octavia?... then post it in the Octavia mk1, mk2 or mk3 section…whichever model applies to yours. You want to know what polish is best for your car's colour?… then post in the Styling and Car Care section etc etc... I promise you will get more views/replies that way, and also save us Mods a job moving it for you One final tip… If you need to know the answer to a question, chances are its been asked before, so try the search bar in the top right of the screen (Sometimes best to use general terms rather than be too specific for better results) Thanks, and Welcome to Briskoda165 points
-
A warm welcome to BRISKODA. The community was formed by enthusiasts of the Škoda range. We still are a community who enjoy driving, maintaining, modifying and some even enjoy cleaning our cars. Above all else we enjoy a mature respect for each other's views and recognise this forum has members from almost every country. We're here for similar reasons, so lets enjoy it! Your account with us is what we describe as a new account. Some features are not yet enabled on this new account. Don't worry, you can post new or reply to threads in the majority of forums. You cannot use the personal messaging system yet. This will be automatically available to you after you've made a few posts to the community. A few other features are not available, but as per the private messaging, they will be activated once you start posting to the community. But lets not worry about that for now. First Step? The first place to post is our introductions forum, http://www.briskoda.net/forums/forum/20-introduce-yourself/ Let us know about you, your car, say hi, simple as that. Try not to post any technical questions there, better to use our owners zones, covered in the next step. Second Step You've said hello, hei, hi, and met some of our community, now you need to get some help or ask a question/answer a question, lets look at the owners zones. Each Skoda model has it's own owners zone within the forums, these can be found under the > Skoda Owners Forums < You may also be new to Skoda... we have a forum for you too > About To Buy a Skoda < Let other owners help you, no commission, targets, or order form pressure here! Škoda Citigo Škoda Enyaq IV Škoda Fabia Škoda Octavia Škoda Rapid Škoda Roomster Škoda Scala Škoda Superb Škoda Kamiq Škoda Karoq Škoda Kodiaq Škoda Yeti Škoda Classics For example you have an issue with your Skoda Fabia, I would suggest posting to the Fabia owners zone. The owners areas and all our other areas are visible from the main forums list page at http://www.briskoda.net/forums/ Next Steps You are now well on your way with the community here on BRISKODA. Your account will be very close if not already upgraded to a full member, enabling uploads, the private messaging system and more. Why not join one of our social pages? http://www.briskoda.net/forums/topic/281773-official-briskoda-social-media-linkspages/ Once again, I warmly welcome you to the site, please be considerate in your posting. We welcome debate, but reject cheap insults or keyboard warriors. If you have any questions, please feel free to get in touch, my email is colin [at] briskoda.net Cheers, Colin.141 points
-
My cars all curb their wheels by themselves. I don't do it, and the wife denies doing it, but somehow it just happens.77 points
-
Seeing as the threads on the Octavia III section are getting clogged up with comments, requests etc, I am starting a LOCKED thread here with tried and tested VCDS adaptations. If you discover anything and have tested it, please start a NEW thread in the O3 section and include a full description and VCDS screenshots (as per the below), and if possible a photo or two of the results. Drop me a PM and I will then include on here and link back to your post and give you the credit. Any discussions around the mod can then take place in the original thread, and this thread becomes a 'bible' of mods that have been tried and tested. I will have to unlock this thread from time to time to update, please don't post if the thread is unlocked so I can keep it tidy. Any comments, additions, errors etc. please notify me by PM. Please remember to give a 'Like this' as thanks to these posts if you find them useful, and also to the original thread author. Thought I had better add a disclaimer - you perform any of these changes at your own risk. Briskoda does not accept any responsibility for your actions, and neither do I! If you aren't sure, don't do it! EDIT: Some features appear not to work on 2015MY cars. Rain closing definitely doesn't as a new RLHS sensor has been introduced. A new RLFS has been introduced as of MY16.5 and this does seem to support rain closing. Please use the latest VCDS version, which at 27/02/16 is 15.7.4 Earlier versions do not provide full support for the MQB platform, especially for MY15.5 and MY16 vehicles. 15.7.3 onwards provides support for 5F MIB2 units in MY16 onwards cars Most of these screenshots were taken with earlier versions of VCDS, so the Adaptation channel numbers may have changed slightly as more gets documented and different revisions of controllers have different features. On Adaptation channels it is the description that is important, not the number in brackets. Use the search function in the adaptation dialogue to narrow down the choices, especially on the BCM (Controller 09). Please note that any changes to lights configuration may not be legal in your region, it is up to you to check and ensure that any changes you make do not breach any regulations. These posts are only an indication of what is possible, not advice on the legality of the change. For MY16 cars with MIB2 Infotainment units you must use 15.7.4 with HEX+CAN USB leads. For those users that want to help make VCDS even better then please feel free to e-mail Ross-Tech a copy of your Auto-Scan If there are no descriptions in the ‘Coding’ long code then Admaps would also be useful... Ross-Tech can then include further information in new software releases. Index How to capture an adaptation channel map Enable cornering fogs (inc. vRS) Enabling both rear fog lights Enabling boot closing from the interior button and keyfob on Combi models with powered tailgate Enabling rear teardrop wipe Enable rain closing (MY13 and MY14 only) Enable refuel quantity in Maxidot Enable laptimer in Maxidot Enable needle staging (sweep) on Maxidot Enable traffic sign recognition Enable passenger mirror dip on selecting reverse Enable rear lights with DRLs Enabling DRLs only on AUTO Change the number of flashes for the comfort (lane change) indicator Change the upper speed threshold for cornering fogs Foglights as CH/LH Foglights as DRLs Enabling speed limit signs from map data on Columbus Enabling fan speed display in AUTO mode Heated seat level memory MIB Columbus VIM Permanently disable Start/Stop Various xpower lighting tweaks – LED number plate, DRL LED dimming on indicate, DRL dim on low beam but not sidelight LED Fog Light coding DRLs flash out of phase with indicators DRLs flash in phase with indicators Various hravec adaptations – sensitivity of humidity sensor, deactivate AM band, comfort entry for electric seats Enabling high beam assist to stay enabled permanently Number plate LED coding Retro fit footwell lights Enabling high beam assist Disable DRLs on Halogen headlights Towbar electrics coding Enable automatic daylight saving time on Columbus & Amundsen Enable direct CD ripping to Columbus jukebox Retro fit OEM LED rear lights Enable trunk lid lock delay LED sidelight bulb coding for Xenons Front Teardrop Wipe Front wiper park after ignition off66 points
-
This has been a long term project and one that is finally completed! The LT GTI was found in a garage and it was decided then and there to restore it to its former glory! Here's the story of it's journey! This is how we found her, rotting in a garage in the middle of nowhere! Phase 1: As you can see, not a pretty sight! A full detail and restore was needed! We'll skip the jetwashing/2 bucket method pics and go straight into the wash and dry phase. This got most of the grime off, so we moved onto the interior. Very dirty inside I can tell you! It needed the full George wet/dry treatment. Now onto the dashboard. Sonus cockpit detailer was tried out for this one. Here's Alice giving it a once over. Let's not forget to get any reisdue off! And of course the airvents needed cleaning using Meguiars interior adjustable brush! We now move onto the exterior of the car. We used new badges so to stop them getting 'run off' Alice decided that some 3M masking tape was required over the lights and badges. Some rock solid Collinite 476 paste was chosen for it's durability! Even the wheels get the treatment! The roof was given special treatment too! Here's the obligatory beading shot of the roof! Nice tight beading there on the Little Tykes - GTI! Phase 2: Some mechanical components were in need of complete replacement. This meant new wheels, headlining and parts of the dash. A highly skilled mechanic was used for these complex replacements! WARNING! Don't try this without the proper tools! A Little Tykes genuine electric screwdriver is needed! The engine needed a complete overhaul. Due to the rarity of these cars a makeshift wheel ramp was fabricated to raise the front of the car up so the mechanic could work underneath. Notice the nice blue the wheel ramp was painted in! DISASTER STRIKES!!! New bulbs were ordered but they didn't turn up! The suppliers were to blame so my mechanic got straight onto the phone to sort the situation out! Another set was promptly ordered! And arrived in time!!!! Phew! Say hello to some OSRAM Nightbreakers! Nearly finished. Fit the bulbs now. All that is needed now is to put super Shell V-Power into it and start her up! And here's the happy customer! Thanks for reading!54 points
-
Had to be done!53 points
-
Some videos. From older to newer: 1/4 mile in 12.88 seconds "https://www.youtube.com/watch?v=j71bjibQ5XA" 1/4 mile vs Nissan Skyline GT-R R32 "https://www.youtube.com/watch?v=aA3iWbw3Otg" 1/4 mile vs Mercedes A45 AMG "https://www.youtube.com/watch?v=Jehosa8HwvE" 1/4 mile vs Saab Aero 2.8t "https://www.youtube.com/watch?v=7oO01TUCk8k" 1/4 mile vs Focus RS mk2 "https://www.youtube.com/watch?v=RFxs0VnaGkM" 1/4 mile in 12.02 seconds "https://www.youtube.com/watch?v=jot-bGeZJGQ" 1/4 mile in 11.46 seconds "https://www.youtube.com/watch?v=qhyc80pqBQY" 1/4 mile in 11.46 seconds Dashcam "https://www.youtube.com/watch?v=7pR3rJtw4A4" After using the car in standard form for a few months, I decided that I needed more power and better handling to go with the comfort, extras and space offered by this model. I have been modifying my cars for the last 20 years, having purchased a variety of British, German and Japanese vehicles including some JDM special editions. The modifications ranged from simple remaps to adding turbochargers or swapping engines from different models. The Superb is our family car and, thus, I was looking at modifications that would not affect the way the car behaved, so hard or overly low suspension, extreme visual changes, loud exhausts or anything that would seriously compromise reliability was not an option. The first modification was to be a tuning box from a company I used in the past. I will not mention the name as I did run into some problems with it and I do not wish this post to sound like a complain towards them as they did their best to rectify the issue, alas unsuccessfully. The tuning box did indeed increase power, as you will see below but it also introduced an uneven idle which was why I had to return it in the end for a refund. The tuning box and the Turbo technics large bore intake hose (http://www.vrsnorthampton.com/en/home/127-mqb-large-bore-intake-hose-and-bell-mouth.html) increased the power to 318.5 hp and 301.6 ft/lbs (323ps and 408nm). The mid-range felt quite a bit more torquey and the car was faster overall. NOTE: Through this process two different dynos have been used, I had the car tested, using the same configuration, on both dynos and the results were within 1% of each other so for the purpose of this thread we will assume the results of these dynos to be comparable, as comparable dynos results can be (this is a story for another thread!). Racelogic vbox was used for measuring the car’s performance as well as a few ¼ mile runs at the drag strip (both Shakespeare Raceway and Santa Pod). SUPERB (280ps) 0-60mph: 5.1s 0-62mph: 5.4s ¼ mile: ??? SUPERB (323ps) 0-60mph: 4.7s 0-62mph: 5.1s ¼ mile: 12.88s @ 106.43 mph The next step was to try an aftermarket intake. I chose to purchase and test the ARP carbon intake as I liked the way it looked and most reviews were positive. This increased power to 331ps which was a welcome increase but not especially good value for money compared to the tuning box and intake hose. After returning the first tuning box I decided to try a different one from a German company, the Racechip Ultimate. Unlike the first box this did not affect the idle negatively while also giving the user the ability to switch between different maps using either an Android phone or an iPhone. The maps are downloaded from the company’s server and, importantly, can be modified to increase or reduce power accordingly depending on each car’s characteristics. After a few tests and tweaks the best result I could get from the Racechip was 340ps. SUPERB (340ps) 0-60mph: 4.6s 0-62mph: 4.9s ¼ mile: ??? After testing both tuning boxes I was offered the opportunity to test another similar box, Burgertuning’s JB1, albeit one that could control, in addition to boost, the car’s fuel pressure. According to other users, this allowed the car to run even more safely and produce more power. In addition to the above, JB1 also allows the user much more control over the car’s boost giving the option to modify the additional boost in increments of 0.2psi based on the RPM range. This provides both a more smooth acceleration as well as more control for manual gearbox users that want to avoid clutch slip. Using MAP 1 at 5.2 (adding 5.2psi to factory boost) the Superb now produced 345ps and acceleration improved more than what the extra 5ps would suggest due to the better power delivery of the JB1 box. SUPERB (345ps) 0-60mph: 4.3s 0-62mph: 4.6s ¼ mile: ??? Having decided to move from Stage 1 to Stage 2 I ordered a Forge intercooler and a BCS/Powervalve downpipe with a sport catalyst. This would allow more power and faster turbo spool while retaining delivery smoothness and keep inlet and oil temperatures down despite the extra boost. The intercooler and downpipe allowed me to use +5.8 psi on the JB1 and also tweak MAP 6 (which allows the user to specify the additional boost for every 1,000RPM range). This increased power to 368ps and made the power delivery much more flexible. Acceleration improved accordingly. SUPERB (368ps) 0-60mph: 4.2s 0-62mph: 4.5s ¼ mile: 12.52s @ 111.05 mph I had decided to stick with stage 2+ until I was offered a hybrid turbo at a price I could not refuse. As I already had a lot of the bolt-ons needed to move to stage 3 I decided to take the plunge. I purchased the Turbo Engineers’ TTE525 turbo and started planning my next steps. VRS Performance installed the turbo and ancillaries. Still using the factory cat-back exhaust but changing the spark plugs to 1 step colder ones (NGK R7437-8 IRIDIUM), the ECU was mapped by MRC tuning, along with the DSG box, producing 453.8hp and 415.7 lb/s (460ps and 564nm). SUPERB (460ps) 0-60mph: 3.7s 0-62mph: 3.9s ¼ mile: 12.02s @ 114.68 mph Next step was a custom cat back exhaust. Not wanting the car to become very loud, being a family vehicle, I decided to choose a professional company that makes custom exhausts for Aston Martins, RS Fabrications. Their systems are of excellent quality while both retaining low noise levels and allowing maximum power with minimal restrictions. This new and improved exhaust in combination with a 5.5 inch catalyst (compared to the 4.5 inch one I had before) designed for the RS3 and TT-RS and tested to more than 600ps allowed the Superb to make a very impressive 519.7ps and 686nm for the drag strip! A more conservative 506ps (500bhp) map is used for everyday purposes to cater for fuel quality variations. An Autotech Uprated High Pressure fuel pump was installed for increased reliability. The ARP air intake was replaced with a VWR 600 intake. The NGK R7437-8 spark plugs were replaced with the NGK R7437-9s, which are a step colder. This allowed for a very impressive 11.46 ¼ mile, a time comparable to the time of a Lamborghini Huracan SUPERB (520ps) 0-60mph: 3.27s 0-62mph: 3.47s ¼ mile: 11.46s @ 120.28 mph FULL UPGRADE LIST Summer wheels Autec Wizard 8x18 ET45 5x112 70 Anthracite + Michelin Pilot Supersport 235/45R18 94 Y ZR Winter wheels Team Dynamic ProRace 1.2 17x7 + Goodyear Ultragrip Performance Gen-1 XL 215/55 R17 98 V MRC remap (DSG+ECU) NGK R7437-9 IRIDIUM Spark Plugs & 06J905110 (K-revision) Coils TTE525 turbo & LEYO Atmospheric Dump Valve (VRS Performance) Forge Intercooler Autotech Uprated fuel pump 034 Motorsport Billet Aluminium MQB Dogbone Mount Insert Paddle shift Extenders Racechip Throttle Response Box Eibach 30mm lowering springs (tracking done by STS tyres) Eibach anti-roll bars (front & rear) Ferodo DS2500 pads Racing Line brake lines BCS (Powervalve) Downpipe with 5.5 inches sports cat RS Fabrications Custom cat-back exhaust - resonated VWR 600 Air Intake Turbo technics large bore intake hose and bell mouth Front and Rear Black Badges48 points
-
I had fancied visiting Chernobyl and Pripyat for several years, but never thought I'd actually end up getting there. However, it just so happened that I went last week. I enjoy a bit of photography and I have also dabbled with urban exploration in the past, which is one of the things that interested me about this place. I have always wanted to go to a ghost town. We visited reactor 4, the one which famously melted down on 26th April 1986 causing the evacuation of the nearby workers town Pripyat two days later. Pripyat is now completely abandoned except for a laundry, which is still used to wash the uniforms from the plant. We visited the secret military facility where Duga 3, the USSR over-the-horizon radar system was built and operated as an early warning system for US nukes. It was built next to Chernobyl plant due to the enormous amount of power needed to run the antenna, apparently the same amount as a fair sized town would use! The mast was secret, however caused an awful lot of interference with radio stations etc and was nicknamed 'Woodpecker'. There were all sorts of theories as to what it may be, but eventually people worked out it was an OTH radar. We visited reactor 5, which was never used as the disaster at reactor 4 happened before it was finished. It is almost fully constructed and incredibly dark. I didn't stay in there long as I didn't have a torch on me and there are sheer drops inside! We were allowed to visit the scrapyard, which apparently most people can't, because one of the organisers is friends with the man who runs it. (this organiser was also working on reactor 2 the night of the disaster and survived with an 80 year dose of radiation). The scrapyard has been used to bury tons of contaminated waste and there are also loads of vehicles there that were used in the clean up which are heavily contaminated, including tanks, helicopters, claws and other things. We had to wear protective over clothing in that bit otherwise they wouldn't have let us in! The final day and a bit were spent in Pripyat where we managed a whistle stop tour of all the main buildings including 2 hospitals, 3 schools, the fairground, the pool, cultural centre, police and fire stations, Jupiter factory, post office, hotel, Fujiyama (16 storey high rise) stadium, harbour, bus station etc. The whole thing was quite incredible! Here's a select few photos that some of you may be interested in. It's hard to choose just a few from the many things I saw! I have a load more in my album on facebook here. I actually still have some to add to that too! This is reactor 4 and the original sarcophagus. The new radiation shield known as 'the dome' is being built just next to it (to the right out of this shot). It is too dangerous to work directly above the reactor, so it will be slid on track over the top once it is complete (approx. another 2 years). Apparently it is the largest moveable structure that's been made. I feel it in my bones, enough to make my systems blow...... I'm radioactive by dreamzscape, on Flickr This is Duga 3 rising up behind one of the many abandoned building on the site. I can't actually describe to you just how incredibly gargantuan this thing is. It looks quite small on this photo! It is awe inspiring, literally to the point that you stand under it and just say 'wow'. The closer you get, the more it seems to grow and become more and more imposing, especially given the utter silence around you and the way it was rising up into the low clouds that day... All we hear is radio gaga... by dreamzscape, on Flickr This is one of the control rooms for the Duga antenna I want you to take over control, plug it in and turn me on by dreamzscape, on Flickr This is the frightening reactor 5. We also went to the cooling tower built for it. I'm waking up to ash and dust, I wipe my brow and I sweat my rust by dreamzscape, on Flickr This was in a nursery. I couldn't tell you where it was as it was on it's own somewhere in the exclusion zone! Not in a town or anything. One of the many memorials stands outside it. Twinkle, twinkle by dreamzscape, on Flickr A couple of the main hospital. A ward Hiding with your eyes shut tightly all the way to the Hospital by dreamzscape, on Flickr An operating theatre Anaesthesia by dreamzscape, on Flickr The infamous ferris wheel. There are also dodgems and a swing ride there. Like a ride up high on a ferris wheel, it ain't wrong to feel like you can fly by dreamzscape, on Flickr View of the main square in Pripyat from the top of the hotel. We live in cities you'll never see on screen, not very pretty but we sure know how to run things.... by dreamzscape, on Flickr mural inside the cultural palace I see your true colours by dreamzscape, on Flickr gym hall in the cultural palace Gym Class Heroes by dreamzscape, on Flickr The fabulous swimming pool, complete with diving boards So baby's gonna take a dive and push the shift to overdrive by dreamzscape, on Flickr The cells in the Police Station Cell Block Tango by dreamzscape, on Flickr Views from the top of Fujiyama This one with reactor 4 and the dome in the background Meet me in the Middle of the Town by dreamzscape, on Flickr And this one with Duga 3 on the horizon! (and it's not particularly close by either! Much further away than reactor 4 is!) Woodpecker by dreamzscape, on Flickr Classroom in one of the schools What I go to School For... by dreamzscape, on Flickr Gas masks on the school floor Little Doll by dreamzscape, on Flickr Mural in the post office Living in ruins of a palace within my dreams by dreamzscape, on Flickr one of the main rooms in the vast Jupiter Factory Drops of Jupiter by dreamzscape, on Flickr A Tunnel from my Window to Yours by dreamzscape, on Flickr48 points
-
I've spent a bit of time collating some of the available information about the Octavia Mk2 with regards to which oil to use, timing belt intervals, DPFs, service schedules, brake disc sizes, etc. I've tried my best to ensure there aren't any errors, but if you spot any let me know and I'll edit the info. Important - You make use of this information at your own risk! In the following documents and information distances are primarily given in kilometres along with the equivalent mileage value. This is because the distance guidance provided by Skoda / Volkswagen Audi Group is generally specified in kilometres, not miles. Engines, Cambelt Intervals, DPFs, Oil Capacities and Required Oil according to Servicing Regime The following two PDFs contain the general info I have collated with regards the engines that have been fitted to the Octavia Mk2 and also the VW approved oil lists. Octavia Mk2 Engine Info: Octavia Mk2 Engine Info.pdf VAG Approved Oils Lists (Split by standard / viscosity spec): Approved Oils.pdf Oil Standards: VW 502.00 – Fixed servicing on petrol engines VW 504.00 – Variable / long life servicing on most petrol engines (all 5W30) VW 505.01 – Fixed servicing on PD diesels (don't use 505.00 as 505.01 has additional anti-wear requirements to protect cams / lifters) VW 507.00 – Variable / long life servicing on any diesel and fixed servicing on any diesel fitted with a DPF (all 5W30) Servicing Intervals Engine Oil Change: Petrol Long Life / Variable - Up to every 30,000 Km (18,641 Miles) or 2 years maximum Time & Distance - Every 15,000 Km (9,320 Miles) or 1 year Diesel Long Life / Variable - Up to every 50,000 Km (31,068 Miles) or 2 years maximum Time & Distance - Every 15,000 Km (9,320 Miles) or 1 year Air Filter: Replace every 90,000 Km / 55,923 Miles or 6 years Cabin / Pollen Filter: Replace every 60,000 Km / 37,282 Miles or 2 years Brake fluid change intervals: Up to MY2010 - Every 2 years From MY2011 - Initial change at 3 years, then every 2 years Fuel Filter: Diesel - Replace every 90,000 Km / 55,923 Miles Petrol - Skoda state no interval / Lifetime fit, however would advise changing every 4 years (the fuel filter isn't expensive) Spark Plugs: 1.8TSI and 2.0 TSI/TFSI (BZB, CDAA,BWA,CCZA) - Replace every 90,000 Km / 55,923 Miles or 6 years All other Petrol Engines - Replace every 60,000 Km / 37,282 Miles or 4 years Haldex 4x4 Oil Change intervals: Up to MY2009 - Every 60,000 Km / 37,282 Miles From MY2010 - Every 3 years DSG (6 Speed) Oil Change interval: Replace every 60,000 Km / 37,282 Miles Alarm Sounder: Replace every 6 years - mine didn't last that long, but in real life I think most people only replace this when it breaks (the internal battery in the siren tends to leak) Battery: Replacement recommended when the battery is 5 years old. Brakes: The following PDF contains tables that are based on what was originally factory fitted, subsequent owners may have upgraded the disc sizes (e.g. 288 to 312mm front discs) so it is always worth measuring them to double check before ordering. Brake info removed whilst I amend the rear brake details for the VRS which are missing from the table. Hopefully the above info is useful and will help with some of the frequently asked questions in this forum. 0wl.44 points
-
If you are reading this post do not despair! The horrible burning smell coming from your new diesel car is OK. When you stop and turn the engine off and the fan stays on and the engine seems to be super hot, the car is OK. The above are clear signs of an active DPF regeneration and is normal for your new diesel Skoda car. To comply with the latest emission levels diesels have to capture the large soot particles and burn them up into smaller particles which are kept in the DPF, this process is called regeneration. A lot of regenerations take place during normal driving where the exhaust is hot enough to burn the soot in the DPF and are unnoticed and are known as passive regeneration. When the temperature in the DPF is not hot enough for an passive regeneration, the ECU injects diesel into the DPF which burns up the soot and is known as an active regeneration. When you stop the car part way through an active regeneration, often the car smells like it's burning and the engine fan will stay on to cool the car. Mods could you please edit this thread (if needed) and make it a sticky or just delete, thanks41 points
-
Here's a video from a rather bemused arial atom driver41 points
-
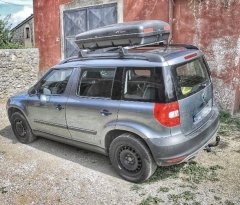
Guys, just in case its of any use to anyone that hasn't seen this in my project thread, I thought Id drop a copy in here also.... So, now an interesting development and the first negative of my Yeti ownership experience in the three and a half years I've had her. Ive often read that people have had issues with their panoramic sunroofs leaking into the foot wells of the car. However, ive never had an issue with water ingress and Ive even tried to make it leak in the past (being in warranty then!) with the use of a hose! The car has also been parked up in absolutely torrential storms in the last coupe of years (one was so bad that it almost trapped us in Altea, Spain by causing multiple landslides across the mountain roads below where we were staying!) But whatever conditions we've hit, the cabin has always remained 100% watertight. Therefore, you could probably guess how surprised I was to go to the car recently and see a few drips down the inside of the passenger foot well below the A-pillar. Admittedly, the rain over night was probably the longest and hardest we'd seen in years in the UK but I was surprised none the less! I removed a couple of internal panels to see if I could work out exactly where it was coming in. First I removed the dashboard passenger side end panel - I found a series of drips running down from above so that meant I had to remove the passenger side A pillar trim, higher up. This now gave me a clear look at the passenger side sunroof drain (in red) and the surrounding area. The drips were coming from higher up but I wanted to spend some time trying various methods of clearing any blockage before removing any more internal panels.... I tried different methods of clearing any blockage but I was concerned I could possibly cause more issue if I caught the rubber drainage duct internally with something too hard or from just being too aggressive. It was clear that there was certainly dirt and gunk built up inside the channels BUT when I poured water into the sunroof surround to test, most of it was appearing fairly quickly at the external drainage hole (the hole by the door hinge). Even though most was coming straight through and into the outside world.... there was still some dripping freely down the A pillar, internally into the cabin. So I carried on looking further up towards the roof... What I saw (and really didn't like) was the use of black cable ties directly onto the flexible rubber drainage pipe. The one at the top of the A-pillar appeared to have been done too tightly from the factory. Ive pulled the drainage channel down very slightly in the above photo so you can see the mark it had made. It was squeezing the rubber drain tight and restricting its flow by probably 30%. So, was this the problem? Well it certainly wasn't helping but the actual problem could be found still further up towards the sunroof surround... Having removed the rubber door sill slightly as well as the passenger interior grab handle and sunvisors from the roofs interior, I could just see up into the void between the interior roof skin and the sunroof surround. It looked as though the white connector on the end of the red drain channel was the part actually leaking. To me, it felt as though it had too much movement on the end of the black sunroof drain channel connector. So at this point I decided Id done enough investigating and hatched a proper plan to resolve not only this specific issue but to also ensure I wouldn't have the issue in the future... from either this or one of the other three sunroof drainage outlets. Over the course of the next three evenings I stripped the interior roof skin out so I had full and unhindered access to all four of the drainage outlets. Once done, how much effort did it take to see if my gut feeling was correct? Very little is the answer, the drainage pipe came away from the black connector far too easily for my liking. My plan: Remove each of the drainage outlets from the four corners of the sunroof frame surround. Clear out the drains properly by use of compressed air and cleaning agents that were kind to the rubber. Reattach the drain connectors with a specific waterproof sealer and adhesive. Cable tie the connectors to ensure a 100% watertight refit. Fully test for water tightness before refitting the internal trim panels. Just clearing out the drainage channels made a massive difference in how quickly water emptied from the sunroof surround to the ground via the four drainage point (front two by the door hinges, rear two out the back by the top of the tailgate). After my second evening, I ended up with this... Four connectors, all with waterproof sealant internally (very carefully done to ensure that none made its way to anywhere near the actual inside of the red drain pipe) as well as externally at the top of the white connector to the black sunroof frame surround and lower down on the underside of the white connector where it met with the red drainage pipe. Then I put a cable tie in place to ensure it was clamped tight. I wasn't taking any chances and wanted to do a proper job to save me any further issues in the future. Result: Problem cured and unlikely to happen again due to it being a better solution than the factory did imo and everything back together perfectly with no evidence of water ingress issues - mainly due to catching it quickly and resolving it within a couple of days. I can only assume that the heat and cold must loosen the connection between the hard plastic sunroof surround and the slightly softer plastic white connector over time. Trust it to finally 'let go' six months out of warranty but I'm happy with the fix.39 points
-
A few people have asked for this thread, so here it is. I'm not a mechanic nor an engineer, but I do have a fair bit of experience in this area (on both ends of the spectrum) and am happy to share what I've learnt so far. More importantly, despite other threads existing on the topic it might be an opportune time for other TSI owners to chip in with their experiences. Please forgive my verbosity and any omissions. Overall, I would start backwards by prefacing thus: Despite fierce debate online, and many conflicting articles, I really don't think running in a modern engine is rocket science. In the good old days, the big old push rod engines were made by hand and would have a lot of 'hone marks' on the metal, including inside the cylinders. Bearing in mind there was only one kind of oil - mineral - and it didn't last very long, running in was quite a complex procedure. You needed to provide enough lubrication to stop the engine lunching itself, but not so much the new moving parts couldn't wear each other smooth in perfect mating unison. All that worn metal left thousands of tiny (and not so tiny!) fragments floating around in the oil, which would then call for a 'running in service' not long after you took delivery of the car. Being too gentle could result in glazed cylinders, badly seated piston rings and bore wash - all of which are bad and all of which would require a top end rebuild to correct. Conversely, being too hard on a new engine (or indeed any engine) will accelerate wear and can cause its own problems, including a life of drinking its own oil. These days engines are (mostly) made by robots, which have a massively more precise output and are also infinitely more conforming. Engine 1 will be pretty much identical to engine 2, etc. In fact with modern synthetic oils, even after 150,000 miles one can expect the original factory honing marks to still be present and undamaged. Everything is built to such fine tolerances that the engine is perfectly 'just so' right from the factory. Because of this, many marques these days don't have any special running in procedure. They just advise customers to drive like normal and forget about it, and that certainly doesn't seem to cause any real problems. VAG (including Škoda) do still include running-in advice, and as such it'd be prudent to follow it. Regardless of what the Internet says, the people who designed and built your engine are likely the ones who know how best to treat it. That said, nobody can pretend that Škoda manuals (especially) are very clear or detailed - especially when it comes to the topic of running-in. The guidelines are very general, open to interpretation, and - respectfully - often in some Czech version of 'Chinglish'. Generally speaking though, the manual's suggestion involves not exceeding 3/4 of the rev range for the first 600 miles, and then progressively increasing the revs (including, shortly, trips to the red line when warm). The manual also advises not using full throttle, not labouring the engine at too low revs (manual gearboxes only, DSG would not allow this even in manual mode) and also not staying at constant speeds and revs for too long at a time during the running-in period. This makes sense, as the end result is a drive that allows the new engine to warm up, and then uses most of its rev range to help 'stretch in' the new engine and its many components. You're not just bedding in one thing, but rather thousands of complex moving components, all mated together 'just so'. Luckily, due to the aforementioned excellent manufacturing processes you won't find lots of swarf in your oil any more, and a running in oil change is no longer mandated. Your engine, regardless of how well built, is still a new beast however - and still requires some TLC. Here are my own observations, and I invite your own! Make sure the oil is up to operating temperature (~80oC) before you start increasing the revs past around 2,500rpm. That said, once the car is warm don't be scared to use the engine. The worst thing you can do is 'baby' it and just drive it everywhere on the low end torque, never seeing over 2,000rpm. This will be almost guaranteed to cause you problems with seating the new piston rings and can cause issues with oil consumption in the future. As per the manual, vary the revs. Your new engine will still be 'tight', and that is something you will physically feel as you start to explore the rev range over the weeks and even months after acquiring your new car. For example, there will be a slight resistance/hesitancy/flat spot in the power when you reach (for example) 3,000 or 4,000rpm. This is the engine resisting itself (to put it colloquially), and a manifestation of the parts claiming their space and rubbing up against each other under high load for the first time(s). Gently push through it, but gradually. Once you get past about 600 miles you can consider the car mostly run-in according to the manual. At this stage, if you have managed to restrain yourself thus far (and I hadn't!) you can start to push further up the rev range. Perhaps 5,000rpm when accelerating, before dropping into a higher gear for cruising, then 5,500rpm or 6,000rpm the next time, and so on. There are a hundred ways to skin a cat, but they all have the same end result if you're careful. Drive away soon after starting the engine, never leave it idling, don't thrash it when it's cold, and don't cruise in the same gear and at the same revs for long periods of time. Ideally, on delivery day you would have a route planned from the dealership and back home via the scenic route. Moderate hills, twisty roads, varying speed limits all interspersed with nice straights are the order of the day. That way you get to warm up the engine, and then give it a lot of varying loads, speeds and revs (30 in 2nd, 50 in 6th, then 40 in 3rd and 60 in 4th and so on). Once your oil is warm don't be afraid to push the loud pedal, certainly you want to be hitting 4,500rpm at points throughout your drive, or at least as that's what the manual recommends. Repetition kills new engines (at least figuratively, if not literally - eventually). Even if you have to drive on a motorway during running-in (can't you hit 'avoid motorways' on the sat nav for the ride home?), at least vary your speed and revs. Provided the engine is warm, give it some beans in a low gear up the slip road, then drop into 6th for a short while as you get your bearings on the new road. Then drop it to 5th or 4th (still at 70), and after ten minutes drop back to 60 in 4th, or 3rd, and keep changing gear up to 5th/6th and back down again. You are aiming to keep the engine 'guessing', and to not let it sit too still for too long. One important tip which all camps seem to agree on, no matter how they word it, is using the throttle to slow down as well as speed up, as much as you can. I don't mean full bore accelerations (though some do advocate this), but rather refraining from using the brakes as much as you can. This isn't actually anything to do with the brake system, nor the 'new' pads and disks. Rather if you're regularly cycling your speed between 30/40/50/60/70 (or more) and back again, doing it using 'acceleration sense' (i.e. by adding and removing throttle, without using the brakes) puts a lot of varying loads on the new piston rings, which in turn helps them 'seat' better against the cylinder walls. In the long run that will aid low oil consumption and prevent glazing. Belting down the slip road as you speed up to 70mph in 3rd, then taking off the throttle completely to allow the car to slow itself to 60 while you merge onto the motorway behind a HGV in lane 1 is one example. Sitting in lane one or two (as circumstances dictate) at 70/whatever in a particular gear, drop a few cogs and give it some beans into the next lane over, and then ease off the gas so that the car naturally slows itself back down, re-adding the power as you get towards 50mph so that you bring yourself back up to 70... all the while varying the gears and revs you're sitting in. That kind of thing. Those of you lucky enough to have advanced driver training (IAM, RoSPA, emergency services) will already be ideally placed. Just take it for a brisk run out across your favourite routes, taking in plenty of B roads, some fast A roads and a lot of changes in pace and gradient. Firm, brisk, and smooth - but definitely progressive - are the order of the day. Every drive - certainly after the first couple of hundred miles - can be a chance to push the engine, and its rev counter, that little bit more. You will literally feel it loosening up over the days and weeks after delivery, just enjoy it. Soon (especially after the magic 2,500 miles) you'll have a nice smooth, relaxed and revvy motor. You do have to bear in mind that not only is your metal new, but so is your rubber (tyres) and so are your brakes. That said, you can almost fully run-in a new modern car just on the way home, provided you have a decent and long enough route. It's always one of my great pleasures, and generally in our case involves a day out in Wales (well away from certain well patrolled main roads). Your tyres won't be providing optimum grip for the first few hundred miles, and your brakes will take time to wear in properly. A few firm stops can aid this, but don't plan them for when you are approaching that stationary HGV or a brick wall! In summary (again), just drive the thing. Let it get warm, don't purposefully abuse it or bounce off the rev limiter in 2nd all day, but at the same time don't be too gentle. In the past I collected a new (diesel) car and - being young and naive - didn't quite get the gist of the whole 'drive it like you stole it / give it death' ethos. Having read online how white vans and hire cars are generally the fastest and loosest things on God's green earth, I literally ragged the poor bugger from cold, right to the red line over and over, and thought I was doing tremendously well. Until, that is, I realised even a year down the line it was slow and wheezy off the line compared to my brother's (identical, collected the same day) car and that I always got about 5mpg less than he on the same drives. I'd knackered the poor thing. Don't mistake progressive and hard driving with a lack of mechanical sympathy. Provided you get it warmed up, keep an eye on the fluids, and don't treat it like it's made of glass, you'll no doubt end up with a fine specimen which rewards you with years (and many tens of thousands of miles) of trouble free service. Just don't be too scared of that gas pedal... or a loud, high revving trip or three. Remember, OEMs take new engines off the line and subject them to 'torture tests'. The poor things are strapped to a dyno - or into a sample car - and revved through the red line, and kept at full speed and load (V-Max) for many days and even weeks on end without ever letting off the gas. They must get through some fuel!! However, they test them this way to ensure that the engines are capable of taking sustained high speed, high load service for customers, without coming to any harm. So, compared to that, you can't really do much damage... again, provided you warm it up first! Here's a nice example from a Ford test to give you an eye opener to finish: Click me (YouTube link). Sorry this is so long, but I hope it helps give those who asked some food for thought. Feel free to add your own experiences, which - in these modern times - may well mostly echo the 'I just followed the manual and it's been fine' ethos.37 points
-
We all know exactly what happens, some join in with the artificial congestive queue that forms, some watch with bemusement and carry on. I opt for the latter but it does make my chuckle in dismay every time lol. This is motoring FACT! (NOT SUITABLE FOR WORK!) Not any more :p35 points
-
Hi everyone! Just to let you all know that my little Fabia SE has been been found and recovered! Received a phone call from someone this morning stating they'd seen a blue Fabia and someone removing some roof bars a couple of days ago. They'd also seen my shared Facebook post and the penny dropped! Just want to thank everyone that shared my posts and kept their eyes on the lookout! I guess Facebook isn't all that bad after all! Rhyan35 points
-
Quite often on this and most other forums people like to let off a bit of steam about other folks, I would like to offer my contribution to the other side of life and enquire if anyone has had a similar experience they would like to share? I have to drive into my garage nose first as if I reversed into it I can't open the drivers door, ( the entrance is on the left of the garage ) therfore I have to reverse out of it and pull in the driver side mirror, it is a tight fit, sadly yesterday morning I was a bit careless and rubbed the driver side wheel arch on the door post, I wasn't happy but accepted that I was getting old and should have been more careful. I went to the local body shop to see if he could do anything for me but he didn't even look at the damage and said that he was booked up until next year, then walked away, I guess that the job wasn't worth enough to him, Next I drove to a well known local body shop who took my details and said to come back next week when they would get one of their engineers to asses the damage. I said is it possible for someone to have a quick look and maybe give a rough estimate, more on how long the work would take rather than the cost as I have quite a few hospital visits to attend, but the guy told me that they were all too busy so I told him to forget it. As a last resort I drove down to a village called Airmyn near Goole, about 15 years ago I had used the garage to have a motorbike trailer sprayed and an indian chief head on the lid, all done to match the Goldwing I had at the time, When went in to the workshop he was on his back under a van fixing it. he came out and looked at the wheel arch then went back inside to fetch an extension cable and a polisher then proceeded to polish out the mark which had not broken through the paint, it took him about 10 minutes to complete the job then refused to take any cash from me, he said he remembered the trailer job and gave me the paint code number that he used on it, I tried to insist that he take payment for the job but he said no chance, and went back into his workshop this morning I took him a box of tea bags and a load of biscuits as a thank you, he was delighted and invited me to stop and have cuppa with him but I was in a bit of a rush. I just wanted to share this to show that there are still some people around who will do good turns for the sake of it. Best regards to all, George34 points
-
Firstly I would just like to thank all of those who have either PM'd or replied to a couple of threads started by members wishing me a quick recovery (one thing it's not going to be) all very much appreciated. Now over to my sciving for the past few weeks. As the majority of men out there do we tend to ignore 'illness' and wash it away with Lemsip and Nurofen, as I had been doing for the previous couple of weeks. Anyway, after having SWMBO nag me I popped for a check up, that was just over 2 weeks ago and during those last couple of weeks have found the following: On the Wednesday (5th) I suffered a stroke; although classed as major, barring a minor loss of field vision everything is OK. Am now chomping on countless amounts of pills to also sort out a dicky heart (dilated cardiomyopathy) But will probably be on these for the rest of my life. Without getting all sentimental it really does make you wonder; SWMBO's put it down to the fags and beer but a couple of quacks said it could be any number of reasons but at 30 years old there's not many people who would have seen it coming, me included, but I'll happily admit that it has **** the life out of me and made me think a bit. Doc's have signed me off for a minimum of 4 weeks; I will be picking up PM's now but may take a bit of time getting back if it's over technical. For anyone out there who thinks something may not seem quite right, don't try and brush it away, get to the GP's and get seen to ASAP - without your health your knackered. (Sorry for the lack of smilies etc, rather than the heart giving up the ghost the computer did).34 points
-
You've made it to this post, thanks for reading and being a part of this community. If you find BRISKODA useful, you may want to help support BRISKDOA to ensure it's survival and future development/events. This community is primarily supported by commercial sponsors/affiliates and adverts, like many other independent sites. We don't have investor money, we don't sell or mine your data liek the big social networks. You maybe also be surprised by the revelation that we get no support from the Skoda or the VAG group as a whole. We're wholly independent with a staff of one and a team of amazing volunteers. We're also supported by our community. You may see references to 'Freedom' pop up from time to time. Freedom is our supporters, paid membership. It's totally optional and more of a formalized wrapper around a donation to the community. We use the proceeds from freedom to do more, be that a big event, or smaller events, through to nice to have extras that you want, it's your community. You can find out more about freedom here > https://www.briskoda.net/forums/subscriptions/ < It's available from £0.016 pence per day. It's main benefit is the donation to the community, you do however get quite a few other things too. If you can't support us this way, that's fine, there are plenty of ways you can support us. Say hi to new members, answer posts, share posts on facebook/twitter and so much more... if you ever have any questions or think of something you can help us with, just get in touch. Either via the contact us, or email hello[at]briskoda.net33 points
-
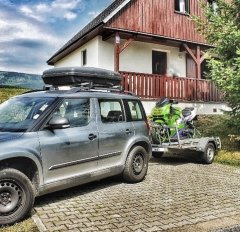
So today it started officially. This thread will be about my attempts to go from doing track days to real racing. I hope it is of interest and might give people that are thinking of doing the same ideas. Bought this from a mechanic that works at JDR (John Danby Racing) in Colchester who built my 500bhp Skoda Yeti. £5,000 including half a van of spares. My intention as a track day enthusiast is to get it right, make it a bit quicker and then race it in the CSCC (Classic Sports Car Club) Tin Top series. First up, I've sent off for the pack so I can apply for my ARDS test. I need to pass that to get my National B Race License.32 points
-
So after a very interesting three years I left JLR at the end of last year. A great insight into a very different part of the motor trade and learned some very useful new skills (CAD, engineering etc). I won't miss the stress or the 600 miles a week travelling thats for sure. So the new job? Something rather different, but still in the right side of the motor trade... I have got myself a position at Morgan as a chassis shop operative. Main duties will be making the plus 4 rolling chassis. So taking a bare chassis and adding the axles, brakes, engine, transmission, steering, bulk head etc. Really looking forward to a new challenge and the fact I can walk to work is a real bonus. Still got first day nerves even though I've already worked a morning there as part of my interview. Jobs at Morgan don't come up very often and I feel very lucky to have been offered a place.32 points
-
Disclaimer I thought I'd reciprocate the usefulness I got out of this forum over the past few months by writing a short review of my new S3, after having driven it for its first 1,000 miles. Everything you read below is my opinion and my opinion only... so don't take it too seriously! Also: English is my second language so... if confused, try to read in-between the lines. Note that I'm drinking Gin & Tonics as I write this, therefore I reserve the right to get a little happier the further I get on. BackgroundI've had a VW Scirocco 1.4 TSI DSG for the past 4 years (had it from new) and therefore can use this the basis for some of my views. Additionally, I have previously owned all sorts of cars... from toy-car Smart Roadster to truck-like Kia Sorrento, to self-decomposing Saab 9.3, to more premium BMW 330d and Mercedes E Class - you get the gist, I'm promiscuous when it comes to cars. The Spec SEL Exec 1.4 TSI DSG Optional extras: Candy White, Beige Leather, Pegasus 18" Wheels, Front Parking Sensors. 1.4 TSI Engine I ordered my S3 without test driving it and relied on my Scirocco experience to set my expectations - in the knowledge that being a heavier car, the S3 that is, performance would suffer a little. Also knowing that on-paper 0-60 was only 0.8sec slower than the rocco... I thought I could live with that - particularly as I got past my semi-boy-racer needs, present at the time of ordering the rocco and.. more importantly, I'm now the responsible father of one little precious 18 month old biscuit muncher. Anyway... after 1k miles and getting past the semi-gentle run-in period my view is that the engine is indeed just about OK. Of course, needless to say it is incomparable to the 2 litre petrol or even the torque delivery of the 2 litre diesel. However, it is smooth as... a baby's bum? Probably not the best analogy but I'm sure you get the point. It is very quiet and peaceful inside the cabin and - subject to the DSG box doing it's bit (more on that in a bit) - it is quite responsive too. Worth saying, have never noticed the eco-switch between 2 and 4 cylinders... apart from seeing an indicator appear on Maxidot when active... it seems to kick in when one takes the foot off the gas, sort of while in coasting mode. After a mix of both sensible and sport mode driving across all sorts of roads... MPG is averaging 42.4 - which is a massive improvement on the rocco's ever-best of 34.6MPG, considering the colossal difference in size and weight between the two. Note: all MPG figures hereby quoted are taken from the cars own systems, therefore - using a VAG-style disclaimer - these are for indicative purposes only and could double at any point in time. Bottom line if you're bored by now... great performing engine on such a big car. Perhaps the best of "all worlds" with it's power/performance/smoothness/economy mix - at a lower purchase price than the 2 litre diesel. DSG box Right... I read on various media reviews that the S3 came with a 6 gear DSG box, which differed from what I had in my rocco which had (and still has) 7 gears. Twas all incompetent rubbish really... it has 7 gears (plus reverse, of course). Similar to the rocco, the box spends most of its time in 7th gear... enabling greater fuel efficiency and lower emissions. The box's dual-clutch allows lightning-quick changes... so when more power is needed and one steps on the gas, a lower gear is nearly always there rough and ready for you. I say really always because... it's not always! There are times when the car seems emotionally confused over what do you mean by pressing the gas. This tends to happen when, for example, one quickly slows down in approach to a busy roundabout.. the car nearly stops... one promptly presses the gas hoping to squeeze in to a gap in the merry-go-round... the car goes speechless for what it feels like 2 seconds! Its probably far less than that but the reality is that it's just not the prompt response one would want. Having said all that... I love the DSG box. The above is just one relatively minor niggle which takes a little while to get used to. The box is a truly remarkable piece of engineering and totally complements both performance and luxurious driving - whatever your mood is. Quite some time ago (when I first got the rocco DSG) I read somewhere that these boxes are self-learning... as in, they learn your driving style and adapt gear changes accordingly. If true, it will only get better the more I drive it! One further thing I noticed in comparison to the rocco is that Sport mode is far less... stressful. The rocco used to get a little hyper and over-excited (revving) when i slipped in to Sport mode, which was excessive in relation to what was actually happening (i.e. the increase in speed). The S3 is far more composed in Sport mode... it does it's bit (i.e. keeps the car in lower gears for longer) but seems to appropriately make the most of them... when a certain gear is no longer performing, it moves on to the next one. Better rev mapping is my layman's guess. I can see myself using Sport mode fairly often... Start/Stop System Not an issue... no difference in any way to BMWs I have previously driven. It starts then stops... then starts again... no timing issues, no issues at all. Auto-Hold System Brilliant... when I remember it's there! (takes time to get used to it). Great for general traffic / cueing... traffic lights, etc. I noticed that, for example, when stopped at traffic lights and the auto-hold is on... as well as the Start/Stop (i.e. engine is off)... it is possible to gently touch the gas and get the engine to start without disabling the auto-hold. A further press on the gas will then disable the auto-hold. Alternatively, just one less-gentle press on the gas will start the engine / get auto-hold off / get the car moving... in a jiffy! One point worthy of note... when, for example, slowly reversing in to a space... one has to be careful with the auto-hold system... as when enabled (i.e. stopped), a careless less-gentle press of the gas can make the car spring backwards quite quickly (and more than you want it to!)... potentially hitting something or someone. One gets used to it (and aware of it) quite quickly but I can see it being an easy mistake to make when driving on auto-pilot or when distracted by something else. Adaptive Cruise Control Wow... very very useful system - I use it all the time, both single/dual carriageway and motorways. It does not undertake... and it cleverly knows when you're overtaking by detecting that you've put the indicator on! This leads the car to downshift a gear in prep for the overtake... and how quickly it accelerates can be pre-set via the Columbus system (by changing ACC from Normal to Sport mode). Windscreen Washers Shocking and difficult to understand as to why would Skoda procure and fit such useless kit... I mean, why!? Totally bearable though... just made me "WTF" when I first used them. Beige Leather Smooth and comfortable... elegant... makes the cabin bright, light and very enjoyable to be in. Some imperfections noted (minor marks/creases)... some not-so-neat stitching. I ordered the beige leather as I thought it would be easier to manage than black... considering I often have a little someone in the back seat making glue out of semi-chewed biscuits and other foodstuffs. To-date... it's been successful. Foreign bodies of the crumb-family appear less noticeable than on black leather and any minor marks are easily wiped with... baby wipes (always at hand). Fully recommended.. if able to order them. Candy White Not the best colour out of the few choices available... but not £600-ish either. My car is a company car so... I chose to spend the money elsewhere. Some will hate it... some will love it... I think its fine. Pegasus Alloys My only regret... the S3 is a biG car... consequently needs biG wheels. From an aesthetics point of view, my advice is... if you can, go for 19" wheels ! Columbus Very good system... easy to use plenty of features... really good to see manufactures finally adding more user-settings to in-car software... and then issuing updates when needed (rightly or wrongly, I thank Apple for this culture). Endless ability to add own music... SD card, Jukebox (own Columbus memory), USB, Aux, Bluetooth, CarPlay, DVD... Disappointing point I did not realise... CarPlay only works when phone is plugged in to the USB.. as in, with a cable! (we are in 2016 aren't we??) I look forward to the update that will address this... Skoda. Sat Nav can be a little slow on telling you what to do (as in, it tells you in time, a bit just in time though). I'm finding some of the wording a little confusing to compute... such as "leave the roundabout at 3rd exit" rather than the usual "take the 3rd exit" It may all be just a matter of getting used to it thought... I recall suffering from a similar syndrome when I moved from TomTom to iPhone Maps... lots of swearing involved for the first few trips. We both got over it in the end and got used to each other's manners. Steering Wheel Yes, a little thin... must come from the same supplier as the Windscreen Washers.. Nitpicking, perfectly bearable. Road Noise Compared to what!? Compared to the rocco... the S3 is very quiet. Compared to a Mercedes E Class... the S3 is quieter. Compared to a Rolls-Royce... I donno but probably a lot noisier. I'd advise you to get the Rolls-Royce if that's what you're looking for. Heated Seats Not sure if it's because the seats are in leather but the heated don't get that heated... the fabric seats on the rocco use to get so hot to the point of marginally burning... perfect for days with a bad back! The S3 seats warm up to OK temperature... not ouch-that's-a-bit-warm temperature. Wife not impressed.. Quality OK, the leather comments mentioned above... plus some of the plastics are a little cheap (such as the black plastic surrounding the climate control dials) but overall... I think the car has remarkable interior and exterior quality for the price. Yes it could be better... yes, it could be far more expensive too! Build quality... no issues to report whatsoever... to date. Trust me, I am as picky as they come when it comes to misalignments, imperfections, rattles, etc. - I suffer from it. Summary I'm out of Tonic so need to wrap up. Right now, it is clear to me that no car can match the S3 in terms of value for money... whether one goes for the more economic trims / engines or the more luxurious or sportier ones. Perhaps a hasty view as the car and I are still in our honeymoon period but... it has already crossed my mind that I may order the next Superb when the time comes to order another company car... in 69,000 miles time. Skoda should be very proud of what they've done with this car...32 points
-
Sound advice32 points
-
I have compiled an up-to-date Speed Camera file (July 2018) for the Amundsen Sat Nav using the excellent POInspector software configured for a “Discover (Pro & Media) Navi” SD card. You can download the Camera POI file (attached). The password is my username in lower case with no space between the two words. It's working welll on my Octavia lll MY2018 and may well be OK for other vehicles. Unzip and copy the zip contents to an SD card (any card will do provided it has a capacity more than 2Gb) To activate, place the SD card into your Sat Nav unit then go to "Settings", "Manage my memory", "Update my POI's" which will upload the data to your unit. Next, ensure that in "Settings", "Map", "Show POI's" is enabled and also in "Select Categories" scroll down to the camera POI's (FIXED,AVERAGE,REDLIGHT,VARIABLE,SECTION END and MOBILE) and ticked each one. Also, in "Nav announcements" enable "Note my POI's". The unit will make an audible sound when you are near a camera and the display will show which type it is. The Amundsen system is not intelligent enough to know which direction you are travelling in though so you will get warnings for any cameras in your vicinity and that is the best it can do. That should be enough to avoid unexpected fines though! If you would like me to provide regular updates (if I can) then please like this post and reply accordingly. Enjoy Amundsen Cameras July 2018.zip31 points
-
Driven it a bit. In a word, it is... INSANE!!!31 points
-
Update time. Waiting on clutch and driveshafts for final assembly of mechanical bits to the drivetrain.31 points
-
When I was 13, I hoped that one day I would have a girlfriend with big t!ts. When I was 16, I got a girlfriend with big t!ts, but there was no passion, so I decided I needed a passionate girl with zest for life. In college I dated a passionate girl, but she was too emotional. Everything was an emergency; she was a drama queen, cried all the time and threatened suicide. So I decided I needed a girl with stability. When I was 25, I found a very stable girl but she was boring. She was totally predictable and never got excited about anything. Life became so dull that I decided that I needed a girl with some excitement. When I was 28, I found an exciting girl, but I couldn't keep up with her. She rushed from one thing to another, never settling on anything. She did mad impetuous things and made me miserable as often as happy. She was great fun initially and very energetic, but directionless. So, I decided to find a girl with some real ambition. When I turned 30, I found a smart ambitious girl with her feet planted firmly on the ground, so I married her. She was so ambitious that she divorced me and took everything I owned. I am older and wiser now, and I am looking for a girl with big t!ts..31 points
-
After seeing so many people doing it the wrong way, I decided to make my own video30 points
-
I have starting this LOCKED thread to include the tried and tested VCDS adaptations for the Superb MKIII. If you discover anything and have tested it, please either start a NEW thread in the Superb III section or add them to the VCDS options on Superb III thread, please include a full description and VCDS screenshots (as per the below), and if possible a photo or two of the results. Drop me a PM and I will then include on here and link back to your post and give you the credit. Any discussions around the mod can then take place in the original thread, and this thread becomes a 'bible' of mods that have been tried and tested. I will unlock this thread from time to time to update it, any posts in this thread whilst it is unlocked will be hidden to keep it tidy. Any comments, additions, errors etc. please notify me by PM. Please remember to give a 'Like this' as thanks to these posts if you find them useful, and also to the original thread author. Thought I had better add a disclaimer - you perform any of these changes at your own risk. Briskoda does not accept any responsibility for your actions, and neither do I! If you aren't sure, don't do it! Please always use the latest VCDS software. Software versions older than 15.7.3 do not provide full support for the MQB platform. 15.7.3 onwards also provides support for 5F MIB2 units in the Superb MKIII Most of these screenshots were taken with earlier versions of VCDS, so the Adaptation channel numbers may have changed slightly as more gets documented and different revisions of controllers have different features. On Adaptation channels it is the description that is important, not the number in brackets. Use the search function in the adaptation dialogue to narrow down the choices, especially on the BCM (Controller 09). Please note that any changes to lights configuration may not be legal in your region, it is up to you to check and ensure that any changes you make do not breach any regulations. These posts are only an indication of what is possible, not advice on the legality of the change. Any changes you make to 5F are entirely at your own risk anything older than 15.7.3 does not fully support MIB2, especially with HEX+CAN USB leads. Some of these adaptations are courtesy of andyvee - as they are the same on the Octavia MKIII For those users that want to help make VCDS even better then please feel free to e-mail Ross-Tech a copy of your Auto-Scan If there are no descriptions in the ‘Coding’ long code then Admaps would also be useful... Ross-Tech can then include further information in new software releases. Many of the newer (2015 onwards) cars are now using controllers that the HEX+CAN etc interfaces cannot fully read, if you come across this then you are going to need the one of the newer HEX-V2 or HEX-NET interface.30 points
-
In preparation to install my new Blackvue DR500 (thanks to BossFox ) I decided to do the ground work now as I wanted it hard wired into the fuse box (for min wires showing) but didn't want to cut off the plug for camera so it can be used in another car if needed and allows easy installation of an additional camera or 12V device. I decided since I had a spare Multi 12V socket adaptor lying around that was fairly compact I could mount it in the driver side storage compartment as it's right by fuse box. The idea then to install camera cable routed to here and plug in also leaving me space in compartment to charge phones etc without wire on show in car (which I hate)! The same method could be used to help someone wanting to merely hard wire their dash cam / drive recorder directly to fuse box missing out the 12V multi socket adaptor obviously. ***Disclaimer*** The information below is how I have installed both items into my own car, should anyone wish to use the same method(s) it is at their own discretion. There are various other methods which could have been used along the way, I did not disconnect the battery as I was using a switched live ignition fuse and thought it pointless as with key removed this was isolated (if using a permanent live I still wouldn't have personally). I did used crimps rather than solder which would be arguably the better option because I couldn't be bothered. 5amp fuse used as I only have 1 device running off it at present and is sufficient. I used a fork crimp rather than a loop one as it was the best one in my 'ebay special' set I bought in true Skoda thrifty fashion. Parts used: 1. Multi 12V female socket adaptor (similar to this) http://www.ebay.co.uk/itm/12v-3-Way-Car-Cigarette-Lighter-Power-Socket-Charger-Adapter-USB-Port-Chargers-/360588838749?pt=LH_DefaultDomain_3&hash=item53f4c5075d 2. Blade fuse piggy back tap adaptor (purchased here good quality) http://www.ebay.co.u...=item2a14ad475d 3. Fork crimp (cheapo ones in link below) 4. 3M double sided panel adhesive foam (similar to) http://www.ebay.co.uk/itm/3M-VHB-Acrylic-Foam-Tape-4919-F-tabs-rectangles-x-10-Double-sided-adhesive-16x67-/191510154703?pt=LH_DefaultDomain_3&hash=item2c96e50dcf 5. 5amp blade fuse 6. DoD GS600 1080p HD, Full GPS Data Logging dash camera (2 years old soon to be replaced) http://www.ebay.co.u...=item2326cd8af7 7. Currently Mobius Action Cameras (front and rear) http://www.ebay.co.uk/itm/Mobius-ActionCam-Full-HD-Sports-Camera-1080P-30FPS-720P-60FPS-Pocket-Camcorder-/151071891306?pt=LH_DefaultDomain_0&hash=item232c961f6a 8. Windscreen mounts for Mobius most compact mount is self adhesive one http://www.ebay.co.uk/itm/Car-Windshield-Mini-Tape-Mount-Holder-Mobius-Action-Cam-16-Car-Key-Camera-/161054762107?pt=LH_DefaultDomain_0&hash=item257f9ca47b (or suction type) http://www.ebay.co.uk/itm/Car-Windshield-Suction-Cup-Mount-Holder-Mobius-Action-Cam-16-Car-Key-Camera-/181166005622?pt=LH_DefaultDomain_0&hash=item2a2e55dd76 Tools used: 1. Crimping / wire stripping tool (mine is 987 miles away so cheapo ebay set) http://www.ebay.co.uk/itm/273pc-Electrical-Crimping-Tool-Kit-/390525716539?pt=LH_DefaultDomain_3&hash=item5aed25883b 2. 13mm spanner (again mine are 987 miles away so stole one ) 3. Scissors (on your own for that one) Sorry for all the pics but I am posting them all anyway as I have nothing better to do this afternoon. First here is the driver side storage compartment (before) 12V Multi female 12V socket adaptor (with brightest LED known to man) Remove fuse box cover (slot for ignition key at bottom to release cover) Cut cable of 12V adaptor near male plug end Feed cable through hole in side of storage compartment Feed wire through gap in side of inner dash towards fuse box Pull wire through fuse box compartment Cut off and attach a piece of double sided 3M self adhesive foam to back of 12V multi adaptor Mount 12V adaptor to lower back of storage compartment Split 12V adaptors cable, strip and crimp a fork crimp to negative cable Loosen metal nut on bulkhead with 13mm spanner Insert negative cable with fork crimp and tighten nut Strip positive cable and insert into in line crimp on blade fuse piggyback adaptor and crimp it securely in place Remove rear wiper 15amp fuse (ignition switched live) and insert in rear slot of blade fuse adaptor and a 5amp fuse in front (fuse info below) ***To be sure on which position for fuse in blade fuse adaptor: Remove fuse for position to be used and test in each position whichever one it works in will be the primary fuse slot and the other can be used for the new fuse being added.*** Insert blade fuse adaptor back into rear wiper socket in fuse box Ignition off (visual check) Ignition on (visual check) Test performed with a sat nav (a work one just in case) There ends the first stage of installation and now I routed the cable for my current camera (soon to be replaced) Camera mounted on windscreen having fed plug through top of driver storage compartment, through fuse box Cable fed into head lining at top of windscreen (only visible wire) Cable fed behind trim on front pillar to right of windscreen emerging at top of fuse box Slack of cable stowed in cavity and final view of fusebox before replacing cover Camera 12V male plug inserted in 12V multi adaptor, fuse box cover back in place and ignition on Camera recording with GPS fix with ignition on Mobius later on The End until the new camera arrives ps. I have a blue plaster on my finger because I was attacked just before this by an Opel Astra's windscreen wash tanks lid, which was tight and when it finally came off nail caught on inner lip and split my nail down middle. Cheap GM rubbish! ***EDIT*** As the fuse box layout in my manual is utterly incorrect by sequence and allocations I have rearranged the original fuse layout card in a rather pikey fashion (MS Paint cut and past each one, took forever). Assumption is card supplied refers to LHD cars not RHD so all lines are back to front. Numbers are irrelevant as they do not correspond with the owners manual regardless of which order but symbols to locations are correct for my car now. The following is correct for my 2011 Octavia II FL CR TDi anyway (yet I have some extra unlisted fuses in car): I am printing it out to keep in car. Before After (This now corresponds to my fuse box as I look at it holding card upright)30 points
-
Our founding father Colin is 40 today. If it wasnt for his hard work and commitment, this place wouldnt be like it is today Feel free to comment your best wishes on this momentous milestone (or millstone :p) or simply like the post instead if you prefer Happy Birthday mate Have a great one Best wishes Damo30 points
-
Actually my Yeti is done. Until we move to phase two this winter and fit a 2.0tsi. While progress on the Citigo is slow it will be done one way or another by the end of the year, in time for meets and track days next year. I know the time it's taking has become something of a standing Briskoda joke, but these things take time. It certainly doesn't provide encouragement. I could have had it cracked out in six months or so, but the cost would have been astronomical. Like 80k. A lot to fund in a short time. It's being done around other jobs for a sensible price, by a garage that have had a few staffing issues. No, I'm not over the moon about it. But we have to keep plugging on. Not sure what other options there are? We need to finish building the car back up, now everything is known to fit. Then a wiring loom and mapping. I'm around £38k into the build, so pulling the plug isn't an option. Especially considering the total predicted cost of just under £50k is firm as all the main parts are bought and built. The expanding timescale had also had some fringe benefits, like allowing me to spread the cost of the project and do other stuff like the GT-R, Skyline and Yeti VRS...30 points
-
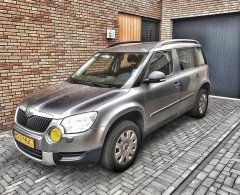
We have gone from this: To this: To this!!! A Race Blue Yeti! I need to get the Annapurnas on I think to complete the change.30 points
-
As many will know myself and Cheryl (missp) were married yesterday at Malvern college. We had a lovely day with family and friends. Thanks to Ali (unit18) who stepped up to be my best man As we met through Briskoda I thought it only right I thank the site for bringing us together. We still have 'Lissy' the Fabia that brought her to Briskoda and into my life.29 points
-
The homeowner has been reported to say that he now regrets having left the landing light on TAXI!29 points
-
I think I would have got in, gripped the steering wheel and made car noises for a couple of minutes, before telling them that I didn't like the ride and thought it was a bit underpowered.29 points
-
As there seems to be a lot of people asking questions about this lately, I thought I'd put together a quick guide showing how I fitted my reverse camera to a facelift VRS hatchback. They way that i've fitted this will apply to most models, with the key differences being the size of handle (based upon car model year) and whether hatch or estate (but this is just inside trim differences), there may also be wiring loom differences for earlier cars or none VRS models. I've benefited from info from these forums so hopefully this will be useful to others. I am by no means an expert & I won't be able to answer all of your questions, hopefully others will chip in and can add other info as well. First of all, this is the camera that I ordered for my MY 2017 VRS (Camera A/Handle A): https://www.aliexpress.com/item/4000230897829.html?spm=a2g0s.9042311.0.0.40694c4dTEPT93 (link may no longer be valid when you read this so screenshot below) No programming is required for this camera and it supports dynamic reverse guidelines Tools: Trim removal tools would be useful, but otherwise plastic tool that won't mark your car, or screwdrivers or similar with masking tape over the end. A T20 torx head tool is required if you have a hatchback to remove the pulldown boot strap Cable rods are very useful, I couldn't have fitted through the roof lining without. Stereo removal tools unless they come with your camera kit Cable route - I went with an OEM route for my cabling, following existing cables through the roofliner and out to the back as show by the red line below. The camera: The first thing that I did was to check that the boot release switch was working on the new unit - there's no way you want to wire this in and find it is faulty. You'll need to start removing the boot trim to access it. Remove the plastic clips from the lower boot trim- this consists of a few plastic clips which easily pop out with trim remover/screwdriver. There are 8 of these on the hatchback. After that start removing the upper plastic trim, this simply requires forces to release the metal clips. You don't need to remove all of this for now, but it will all need to come off later Remove the lower upholstered trim covering the tailgate. More metal clips - work your way around. You'll also need to remove the pull down strap with the T20 torx head. When this is down you should be able to drop the boot liner which will give access to the boot release handle. This can be awkward to remove, but can be done by pushing in the clip on one on the ends whilst also pushing down on the handle from the inside (ignore the clips along its length) - it should then pop out. Repeat for the other side. Unplug the harness and plug the new handle in - check the release switch works. You can either now push the new handle in until it clips, or leave it out to test the video connection later before fitting. To wire it in Remove the glovebox (open, rock left to right whilst pulling up & you'll hear the bottom clips release. Raise the glovebox lid up and inside the housing and reach in and remove the dampening on the left hand side) Use the stereo release keys to release the multimedia unit. The kit used here comes with a replacement harness that sits between the original one and the media unit & includes the video feed cable. Some people have removed the upper glovebox section to provide more access, be careful not to unplug the airbag connector if you do this. This can be fiddly, but I found the best way was to lie on my back with my head in footwell looking up at the unit from underneath. With the media unit slid fowards this gives access to the harness. It's the large one at the bottom and there is a locking connecting that needs to be pushed backwards to release. Check how it works on your replacement harness. Unplug old harness and plug it in to one end of the new one, push the harness in to the void and plug the new connector block in to the media unit. This took me a while to get it all to fit in. When done you can now test the video feed to the rear camera before your start wiring it in permanently. I took the camera cable over the top of the fusebox cage & out through the side panel I then ran the cable up the A Pillar to the roof lining and all the way to the end. Cable rods were really useful at this point, especially to get around the B pillar , and to go from the end of the roof liner through the cable exit point behind the rubber trunking where the original boot cables are. You can also run the cable in the trim above the sill and work your way back up to the roof lining on the C pillar. When you get to the end of the roof lining you'll need to unclip the rubber gator at the top of the boot so you can get the cable out of the roof liner and in to the boot via this gator. If you install the same way as me you only need to peel the roof liner down a few cm, being careful not to deform or damage it and you'll see the OEM cables behind. Once you've got the cable this far it's a case of feeding it through the rubber gator, up the side of the boot and over to the handle; connect the video cable and tidying up any spare cable. Everything should now be up and running. Retrace your steps to refit your trim. You now have a fully working reverse camera, activated when reverse is selected and with dynamic guidelines. The parking sensor guide now shifts to the left of the screen the same as an OEM reverse camera. I will come back and re-edit this tomorrow and resize pics as it's getting late. I'll tidy up any errors as I see them so please don't jump on me straight away!
 28 points
 -
Due to high number of requests let me make some short summary of units that can be installed in Octavia III cars. I have focused only on MIB2 / MIB2.5 units, to indicate differences between them. 1. Amundsen MY16 unit 5Q0035864A (without DAB) or 5Q0035874A (with DAB) 2. Amundsen MY17 unit 5Q0035864B (without DAB) or 5Q0035874B (with DAB) 3. Amundsen MY18 unit 5Q0035864C (without DAB) or 5Q0035874C (with DAB) 4. Columbus MIB2 unit 3V0035020x (with DAB, with regular Bluetooth, without LTE Modem) 5. Columbus MIB2 unit 3V0035021x (with DAB, with premium Bluetooth, with LTE Modem) 6. Columbus MIB2 unit 3V0035043x (without DAB, with regular Bluetooth, without LTE Modem) 7. Columbus MIB2 unit 3V0035044x (without DAB, with premium Bluetooth, with LTE Modem) 8. Columbus MIB2.5 unit 565035020x (with DAB, with regular Bluetooth, without LTE Modem) 9. Columbus MIB2.5 unit 565035021x (with DAB, with premium Bluetooth, with LTE Modem) 10. Columbus MIB2.5 unit 565035043x (without DAB, with regular Bluetooth, without LTE Modem) 11. Columbus MIB2.5 unit 565035044x (without DAB, with premium Bluetooth, with LTE Modem) All MIB2 units (as well as Columbus MIB1 which is not listed here) work with 800x480 pixels screens, either 6.5 or 8 inch. Amundsen MY16 has old style (rotating, monochrome) menu, with only 1 skin having 5 memory buttons in radio and phone menu. They don't support for APP key in 8 inch FL screens. Amundsen MY17 has old style (rotating, monochrome) menu, with 2 skina having 5 or 6 memory buttons in radio and phone menu. It may also support Media Command (depneding on FEC.SWaP codes installed). Amundsen MY18 has both old style (rotating, monochrome) and new style (pictures, color) menu, with 2 skina having 5 or 6 memory buttons in radio and phone menu. It may also support Media Command (depneding on FEC.SWaP codes installed). Columbus units have built-in DVD drive and HDD for maps and audio / video files. Only Coilumbus units can play video files. Every MIB2 Columbus unit can be reworked into MIB2.5 unit if required. MIB2.5 Columbus requires new 9.2" screen 5E0919606D. Every Columbus unit can drive directly subwoofer and central speaker (although this setup is not officially supported by Skoda). "x" at the end of Columbus units model number is letter A/B/C/D. Can also be missing. It makes no difference, just indicates original SW release family. Every of listed above units can be reworked into Plug&Play version (no need to visit SKODA dealer).27 points
-
So theses came up on ebay and I snapped them up, paid a small fortune for them, wasn't even sure they'd fit.... The front were a direct swap, I had to swap the air bag plug but that's it, the drivers seat belt indicator was the same, these are heated but ill need to find someone breaking a mk2 with heated seats and I'm confident I could have them working too. The rears wern so easy, anyone who has removed the rear seats will know the uppers are mounted on a single pin, one at each side, and in the centre there are 2 rollers, the new seats mount exactly the same way but the peg is much thinner so I simply had to file the original pegs down, then the pretty much dropped straight it, and with a little swearing the side "cushions" went in too. The base however does not fit at all. It's one piece and is around 4" thicker, I have 2 realistic options for this, fit a octy mk2 bench that is somewhat close looks wise, or take the new bench and the 60/40 old bench and have the new cover, "made to fit" Anyway, here's some pics, enough talking, here's some pics...27 points
-
Some of you may already know and hopefully most people wont, this project was purchased by Darkside From Clive ( missingmyvrs - Briskoda Forum) the week before Christmas 2017. He purchased the car from Richard (BossFox - Briskoda Forum), here is the previous thread - https://www.briskoda.net/forums/topic/243854-citigo-go-a-citigo-with-more-go/. We were alerted to the availability of the car by a random Facebook message and within a couple of days the trip ‘darn sarth’ was scheduled, the next few months would not be easy... After a good chinwag with Clive (more like an interrogation regarding the proposed spec, which remained secret until the car was presented in person!) The car was loaded onto our trusty T5 Transporter ready for the 220 mile journey back to HQ in Barnsley, South Yorkshire. If you are inpatient and can't wait to see how the car looks now, here is the full spec list - https://www.darksidedevelopments.co.uk/citigo-4-motion-2-0-tdi-16v-common-rail/ So the first job when getting back to Darkside HQ was to unload, have a good look around, get a plan together for the full build and make a list of parts that need to be ordered. Lots of little parts were missing that you would hope were there (bonnet pull, boot locks, wiper mountings cut etc), and a good chunk of the fabrication and machining that was already done needed to be rectified or adjusted, Engine Mounts, Wishbones, Pedal box, brakes, the list goes on! The engine choice was already made the day we set eyes on the car. Basically an engine specification similar to the Arosa, mated to an AWD 02M Gearbox with Ibiza Cupra TDI Ratios, linked to the haldex setup at the back, then finished off with Limited Slip Quaife ATB Differentials Front and Rear. By the end of January we had the fully built engine installed and running. Mid February the car was fully MOT ready and passed with flying colours. We still had a lot of finishing touches and lots of specification changes (sounds easy typing that now…) to get to where we are now. Tuning was always going to be a big job, and finding the time between a jam packed diary has been quite difficult, and there is much more to come. We only have a GTB2260vk on there running moderate boost and 280hp until we have proven the chassis. The engine should be able to kick out a reliable 360bhp that will take punishment for 100’s of miles a day on track with the GTD2872vr turbo we plan to run. We didn’t have time to install the WON REVO Nitrous system either but that will come later! When news got out that we had a new project, we were approached by a few Magazines and asked if we would keep the project under wraps until after the first photoshoot that was planned to happen on the 28th of March. It was a difficult decision, as we would have to limit what we could post on social media and who we could involve in the project. I’m sure we had a mole somewhere, as quite a few people did know what was going on but thankfully the nice guys kept their mouth shut We had to hold off transferring the TD1 1 AWD number plate onto the car for obvious reasons. Tuesday 27th mid afternoon the Citigo and our trusty Ibiza track car were loaded onto the truck and trailer ready to head to Snetterton Circuit for the cars first shakedown. We had very few road miles on the car due to the last minute issues we faced so we had to cross our fingers (sorry Paul!) and hope everything was alright. Also, this was my first ever drive since passing my trailer test so the pressure was never off, haha. We arrived at Snetterton just before 9pm to unload and hide the car away in our Garage ready for the day ahead... Wednesday Morning bright and early Adam Walker ( https://www.facebook.com/AJWIMAGES/) was on hand at to shoot the car for the upcoming VWG Magazine feature, be sure to keep your eyes out for that in the next few months! This would be the first time Clive saw the car, we didn't release any information during the build so he was shocked when he saw how far the car had come since last time he saw it back in December, a passenger ride was scheduled for after lunch. Luckily we fitted a larger passenger seat especially for this day, Sorry Clive! The car was amazing on track, we expected the soft springs and no front ARB to upset the handling slightly but we had a good time and impressed a few people. We had a lot of people saying the short wheel base and narrow track would cause issues but looks can be deceptive. Our Citigo has a 2.45m Wheel Base and 1.65m track width compared to a standard Fabia’s 2.46 & 1.64m, its still short for a car with plenty of shove from the rear end but not as bad as you might first think. With ‘only’ 280bhp and weighing in at 1160kg without the 2 fat people on board it was never going to be the fastest car on track. The rain helped show the benefit of the the Quattro Haldex system compared to our FWD Ibiza and was the main reason this project was interesting to us in the first place. A Front Wheel Drive version of this would have been immensely cheaper and much easier to build, and on a dry track likely faster but where is the fun in that... Maybe in the future we will look to build the car into a replica of the WRC car Skoda, No reply from Skoda Motorsport regarding the panels so if anyone can help us with that, please get in touch! I’ll be making further posts about the car build showing some of the major hurdles we faced along the way, some expected and most of them certainly unexpected! Any questions please ask! Ryan Oh and here's a photo we took while servicing a stock Citigo a few weeks ago27 points
-
LOL How nothing changes. My very much tongue in cheek analysis of the Briskoda life cycle of a new Skoda model. 1. Rumours of the new model are leaked. Excitement - has anybody seen the pictures yet? 2. Special editions of the old model and heavy discounts initiate a flurry of "I just got my new ...." posts 3. A few blurred images of heavily disguised test mules in Autocar - excitement grows 4 A few sharp images of a lightly disguised test mule in Autocar - hmmm... don't like that. No wait a while - that IS still disguised. 5. Unofficial photos in Autocar - Oh my God! It's awful, bland, not a good as the old model, it looks like a [insert carpy car model here], I'm going back to Ford if that is what Skoda think of its loyal customers, I like it! Shut up! Sorry! 6. The release - anybody test driven it yet? I won't have one, Skoda have really messed this one up. I like it! Shut up! Sorry! 7. A new section in Briskoda (unless it is just a facelift) Anybody ordered one yet? 8. The first orders are placed. Eager anticipation. 9. Cars are delivered - Oooh! Show us the pics. Wow, nice colour!! Needs lowering and 20" alloys... 10. Delivery problems. I have to wait how long?!?? 11. Things settle down... Just completed the first 5k miles in my new [insert model here] 12. Things go wrong... Has the widget bracket fallen off anybody else's? Ooh Sale of Goods Act! Reject it blah blah! Well actually they just fitted a new one under warranty! I would still have rejected I! Sale of Goods Act blah blah, not good enough blah blah. 13. Cars are modified... Just a little "I just put a centre armrest in..", or a little more "What! 4 wheel drive! In a Citigo?!!" 14. Things settle down..... I love my car! I hate mine, worst car I ever had, will never buy another Skoda. Can't judge a whole marque on the basis of one car with a problem. I love mine! Me too!! I don't! Shut up! Sorry! My widget bracket fell off - is this a common problem? 15 After 4-5 yrs, Go to 1 Go look at what those reprobates on the Fabia I forum were saying about your beloved Fabia II's - can you believe it was compared to a .... please sit down for this... It was compared to a 2CV. http://www.briskoda.net/forums/topic/86692-fabia-mk1-vs-mk2/?p=1059000 or (shock horror) a Picanto http://www.briskoda.net/forums/topic/86692-fabia-mk1-vs-mk2/?p=1058989 Don't you just love Briskoda and all the Briskodians! Best forum on t'internet by a LONG way27 points
-
Yes. One painted Citigo 4x4 shell and plans made for the next stage. Rebuild basics to allow for the loom to be made are being done over the next two weeks. Then a motorsport electrical specialist will be making the custom loom to save time. Then we need to plan the final build up, all the small bits, get it running and mapped to produce as much grunt as possible27 points
-
Asked me to marry him! And obviously, I said yes! Just thought I'd share because I am sooooooooooo happyyyyyyy! :D :D27 points
-
Arrived at work this morning with tales of how the catalytic convertor on his Chrysler 300C had gone pop on the way to work. later on in the morning got a phone call at 5 ish so there you go if your catalytic convertor is knackered and smelling make sure its not actually rotting chicken!!!!27 points
-
Quick update from today's appointment (3rd July), and it's relatively good news Had the usual blood test before seeing the haematologist, and then got the news that all of the levels (white cell count, platelets etc etc) in my blood are, due to the levels of tablets being taken, within the normal range That's about the best news I could have possibly got from today's meeting, so I've now got a similar prescription to take for the next five weeks before returning to see him on 7th August Although it sounds good, it's all down to the high level steroids I've been taking, so I'm aware there's still a long way to go yet They are still hoping to put me on a trial drug 'within the next two months', but I'm not particularly holding my breath that that will happen So, all in all, I've come away pretty happy, accompanied by another shed load of tablets to take The very good news though is that I'll be free to come to Gaydon at the end of the month, so I'll hopefully see you all there27 points
-
Step 1. Install the free VW Pre Compiled Database located on the download section of this site to your PC: https://free-speed-cam-updates.web2diz.net/ Step 2. Unzip/extract the files on your PC and copy the contents of the resulting folder onto a SD card. ( Important points to note: Only copy the contents of the main folder i.e. Do not copy the resulting extracted folder named Volkswagen PersonalPOI - just copy the contents that are displayed inside that folder which is a folder named PersonalPOI and a metainfo2.txt file. Delete the readme.txt file as well as that is unnecessary. Also further note that despite trying to use 2 different usb sticks unsuccessfully only an sd card would work for me. I used the sd card which contains my music files but remember to delete the copied files off afterwards as sometimes they may prevent your music from playing and they are no longer required as they have been copied to the internal memory of the Amundsen ). Step 3. Using the "manage memory option" of the nav settings upgrade the software. Step 4. In the "map" settings chose poi categories, scroll to the bottom and the newly added items should be displayed there. Tick these to activate them. Step 5. In the "nav announcement" settings of the nav settings make sure that there is a tick in the "My POI" item. This enables an audible speedcam alert. To sum up - it's pretty easy to do and it's free and there are monthly updates on the site. On the downside - I'm not sure how reliable and up to date the database is as I've already had to manually edit and remove an out of date camera from my location. IMO the audible alert is a bit feeble and can't be changed but it's better than nothing. I'm not too fussed on the camera icons either. I hope this post is of help to others and I would like to thank the contributors of the other threads regarding this topic on this forum from whom I have gained my insight. I have compiled my own version with my preferred choice of speedcam icons limited to UK fixed cameras and traffic light cameras using the VW database on the above site which I've attached below to share if anyone wants them. Remember to only copy the files as per the above instructions. My Uk Speedcams.zip26 points
-
Okay so I installed my EGR delete pipe from the group buy section of the forum. A few people asked how to fit it so I thought I'd take a few pics for those who asked and hopefully it might help them! I've never written a guide or anything before so apologies if I don't explain myself properly. I've circled some photos in Paint to show where the key parts are what i'm talking about. The guide is simply showing how to remove the EGR valve, whether you want to remove it to clean it or to fit a delete pipe. The kit i'm fitting may be different to darkside or allard delete kit so it may vary when it comes to the gaskets etc. I've put it into layman terms so most people can understand it. Begin! Remove the engine cover and you should get something like this (great start, if your engine isn't there i'm not really sure what to suggest haha) Now the bit we're focusing on is the thing in the top left of the image with the goldy spaceship looking thing on. Put a screw driver like shown behind the bayonet clip and pull upwards towards the sky, it will open up and you should be able to slide the black 90 degree silcone pipe out of the metal EGR itself. Do the same for the other pipe at the other end of this small 90 degree silicone pipe. On mine I have an extra jubilee clip securing my pipe on because I wanted to make sure mine wasn't leaking any boost at all. It should now look like this! Now directly underneath the space ship. An EGR pipe attaches to the EGR itself via two 6mm allen key bolts. You need to remove these as show in the following pics, its pretty tight for room but I found the best way is to get a small allen key and get a ring key spanner on it for leverage and undo. Circled is the bolt, it is pointing towards the sky and at the very top of the image just out of focus is the space ship looking thing for reference. The circles display where the bolts are, obviously on the circle at the top it is underneath the EGR. i just put a circle there to show you its rough whereabouts underneath the egr valve. Okay so now you should have removed two bolts now for the EGR pipe. The 3 bolts holding the EGR to the inlet manifold can now be removed. These are in the following locations: The 3rd bolt is underneath the valve and the circle shows its whereabouts roughly, its a bit fiddly again but you should find it easy enough with a long allen key this time. The bolt is horizontally facing like the other two bolts holding the egr to the inlet manifold. Arrow shows this I used a ring key spanner on the allen key as shown to get some leverage to undo the bolts. The egr is now loose and can be removed! It will be held on loosely by the vacuum pipes. One of mine is currently blocked up by a m6 bolt for the EGR as I can disable my EGR this way without an EML appearing. Yours should be attached to the nipple on the space ship. I've highlighted these vac pipes with circles here. Simply pull them off the EGR valve. Your EGR should look considerably worse than mine, i've recently cleaned mine out. If you're simply cleaning out your EGR valve you can just clean it out now and re isntall by doing the reverse of what i've done up to here but carry on reading if you're fitting the EGR delete pipe! The EGR delete pipe. Mines got a boost nipple for a boost gauge Now you have to remove this pipe that my fingers are on. This is the EGR pipe that transports exhaust gas to the egr valve. This is being removed and a blanking plate is going on the exhaust manifold instead. Remove the two clips holding the air intake pipe on. Mole grips I find are great for this as it holds them in place whilst you slide them along the plastic pipe. Remove the pipe. Okay so with this removed, have a look in the space you've just created and you should be able to see a goldy looking pipe connecting to the exhaust manifold. this is the egr pipe aforementioned that is going to be removed. Circled are the two bolts that need to be removed. They will be on TIGHT! Exhaust gas is hot and warps them slightly so be careful removing them. Lots of WD40 required. Mine were 12mm but test yours before as some engines may differ. This is a better pic showing the two bolts to be removed Remove them and give the pipe a wiggle and it will come out like this Now to fit the blanking plate, put the gasket under the metal plate and fit where the pipe just went. This picture shows the blanking plate being fitted to the exhaust manifold Now put the rubber gasket on the EGR delete pipe as shown in this pic Offer the pipe and gasket up to your inlet and stick the 3 bolts in. Do them all up finger tight, do not torque one up fully then the other then the other! You now need to remove the original coupler from the pipework, as you have a new egr delete pipe that doesn't use the shoddy bayonet clips. I used an angle grinder and cut straight through it. In hind sight I went too far and should have taken it steady as I cut straight through the rubber pipe which didn't give me much room to play with when fitting it back on the egr delete pipe But it went on perfectly as shown. I then blocked up the vacuum pipes. One is larger than the other so I used an m6 and an m5 bolt. The smaller one for the anti shudder valve. And that's it. Put the air intake pipe back on with the mole grips or whatever you used and you're good to go! Hope this helps someone, let me know what you think if it needs anything adding. Like I said this is my first written guide so it's probably not the greatest. Daniel!26 points
-
All, TL;DR Black friday discounts code at bottom. A little over 18years ago an idea formed and so it began. Now 18years is quite a good run... For anyone in the dark, briskoda, turned 18years this year Over the years we seen thousands of members post, read, learn, share. Over all models in the range, united by a common theme, if not always in agreement. Each month now we see millions of visitors, reading the rich trove of knowledge we have here. The community has grown, shunk, grown, and will always eb and flow, much like a river as it finds it's way through the countryside. The rise of social media was, and remains a concern. Many of us believe the forum approach offers more than the immediate here today, gone tomorrow of social media. But we do need you're help to keep it thriving. Post, share, spread the word, every action helps. Talking of action, climate action. Earlier this year I set about covering our ongoing carbon impact. The internet is a huge contributor to the problem, more so than driving this year We've been cabron neutral/negative for the services we host upon and consume for a few months now. I wanted to do more, carbon negative overall? This milestone seemed like a good point to do it. Looking back, it's almost impossible to say how much we've used to provide the community; we don't have a totally accurate record of trips to data centre x or y, so it's the best of british fag packet maths... I've taken what we use today, <1/2 tonne per month, still quite a bit eh? Then multiplied it back over time, then added a bit on; quite a bit on, because all those odd days here there, older it equipment was more power hungry and so on adds up... In numbers we might comprehend, it's around 250'000 miles. To that end I've offset an addititional 180tonnes of CO2 to cover our earlier years, that's 10tonnes per year, and includes some slack for driving to x and y, my laptop being on doing updates to the site at 3 or 4am the odd night... Going forward we'll be covering our continued use, so continuing to be negative, along with the tree planting programme. You can find out more about all this here: I'd like to thank the current team of admins, mods for doing what they do. I'd liek to thank former members of the volunteer force over the last 18years for doing there bit to bring us to where we are today. Thank you to all t hose who through freedom part with your own hard earned cash to support what we do here. Of course all that we do, would be for nothing without you, the community member. I thank you too, for your time, the dedication by many to sharing info and the helping others. Thank you all for being a part of, and in making this community. It's yours, you made it, each post, thread added a leaf to briskoda's tree of life. To think we've seen marriages, babies, life altering advice and support, and so much more, all from connections, people, through these few pages. Quite humbling, thank you. So it's 18years, time for a party? Heck yes. One small pandemic problem in the way. I'm begining to come up with a few ideas for next year, shows, trackday etc where we can get together in one way or another. We've all got many bridges and challenges to cross before then, so stay safe and keep in touch. In lieu of a party, I decided to make some space in the storage. So a 50% off stickers voucher code, and other stuff to clear from the shop. I guess you could say it's a black friday event... https://www.briskoda.net/forums/store/category/3-merchandise/ Discount on stickers other merchandise of 50% - code: 18years Old models t-shirts discoverd in a box - £5 ea to clear. Freedom, great value as ever from £6 per year.26 points
-
Hi all thought I’d share a story with you all that’s relevant to some degree here and it certainly put a little smile on mine and the kids faces. Yesterday, I was out and about with the wife and our two young girls when my wife asked if I’d stop off at Tesco whilst she ran and and picked up a couple of things. Naturally I obliged and we stopped outside and I waited in the car with the girls whilst she went in. At at the same time another Skoda Superb, same year, spec and colour parked up in front of me and I smiled to myself thinking ‘nice car pal’, as you do. The same thing with this Skoda. The driver waited in his car and his front passenger got out and went into Tesco. I then said to my girls, ‘I bet mummy gets in the wrong car...’. The girls laughed and nodded. A couple of minutes later my wife appears. In her own world as usual and not even aware there’s now two almost identical cars in front of her. Guess what happened next? She approached the strangers car, opened the door, got in, sat down, closed the door and I could see her going for the seat belt. At this point I was in too much of a fit of laughter to go and intervene and knew any moment she’d appear. Next thing the door opened and a very red faced wife appeared repeatedly saying ‘I’m really sorry!’ My wife got in my car saying ‘oh my god’ and we all carried on laughing. Wondered whether the driver was on here. Apparently he was laughing too and said to my wife ‘oh hello’ as she got in Not often I see a car that looks identical to mine. But to see one then it stop next to mine and then my wife get in it just made me laugh. Cheers for listening folks.26 points
-
Picture took on a Samsung galaxy s4 driving to work at 4.30am26 points
-
Called it a day at Snetterton at lunch after a hard hour + of track day abuse. Yeti went well, really well. So many susprised faces watching me wizz about and generally overtake a lot of other cars. Constant stream of people coming into the garage to see why they just got passed by a Skoda Yeti too. Intitially the car seemed to understeer a bit more, which you can explain with the heavier engine and gearbox. But then I realised it was because I was going faster than when it had 300bhp. With the front diff in it was biting harder so I was pushing on more... With the performance Haldex controller set to "race" (it ran stock haldex before) I was able to cure most of the understeer by using power to bring the back out and get a little oversteer as it was sending 50% of the torque to the rear end. It then felt well planted and was going really well. In the USA TT-RS tuning is becoming quite common and the main issue they have is the weak selector on reverse, 1st and 2nd gear. During a bit of over enthusiam I used 2nd when I didn't really have to, and immediately ran into this problem. I thought it was stronger, it wasn't. So it's now a bit notchy in 1st and 2nd. Fortunately 3rd is fine as the engine has so much torque and it pulls hard from around 3,000rpm. There isn't time to fit a new synchro before Saturday as Audi don't have all the parts, plus in the not so distant future the USA scene is going to be bringing out an improved stronger one. It'll be fine for Combe on Saturday, but I'll just have to avoid getting carried away and going for 2nd and giving it full power if there is slow moving traffic. Other than that, and the engine blowing a little bit of surplas oil out (was less than a mm under the full mark still after an hour of track abuse) it went amazing. Such a capable car, so much fun. Difficult to describe how fast it is, considering it's a Skoda Yeti. So here is a video of me trying to follow a friend of mine in his 520-550bhp R32 Skyline GT-R... You can see I haven't been to Snetterton for three years, not the tidiest lap and kept going deep into the hairpin. But overall a great day and considering it's a full build the car did amazingly well with no real issues other than the 1st/2nd synchro due to it's torque. Sounds a bit different to how it did before too...26 points


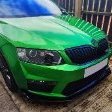


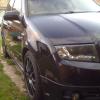


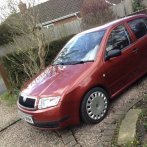


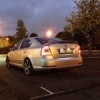

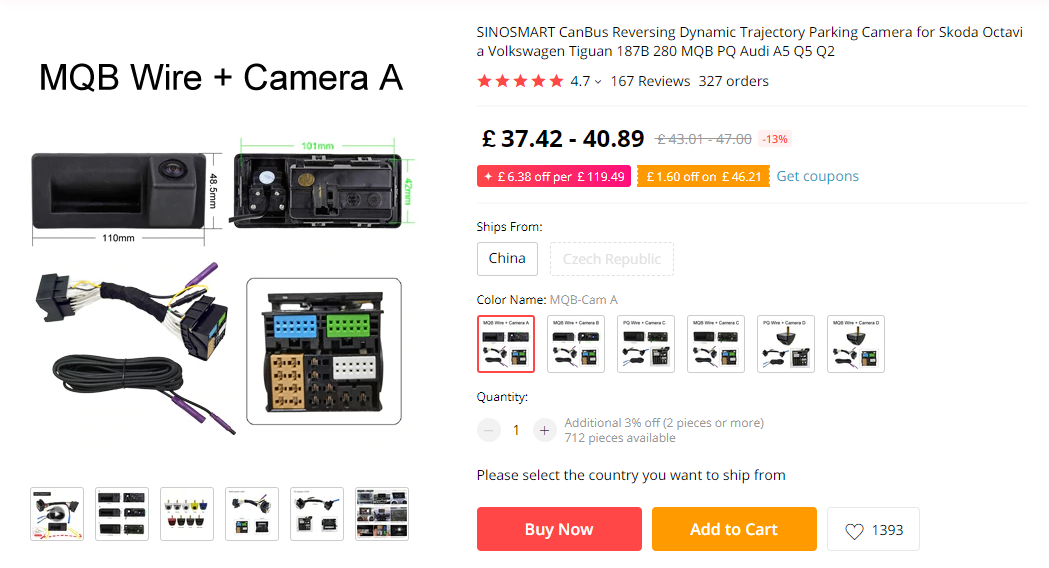
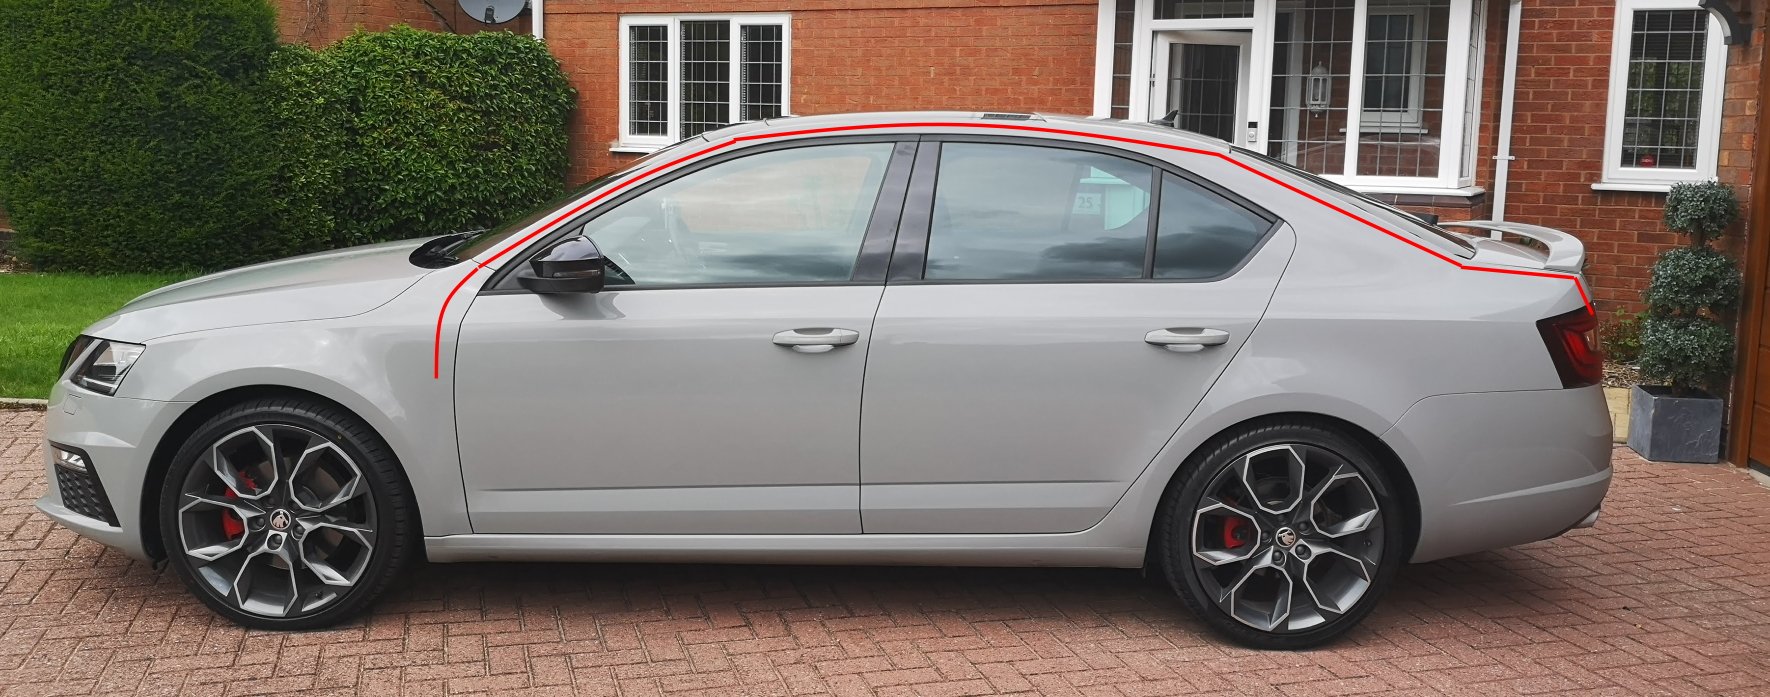

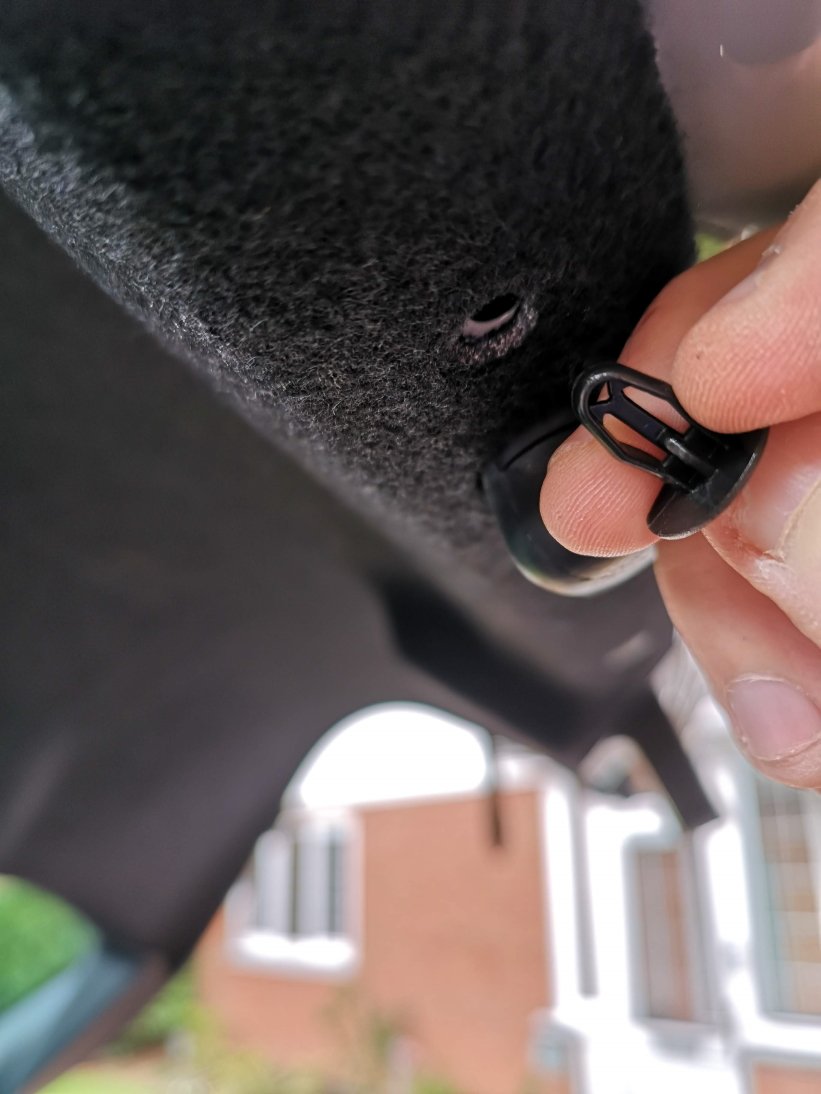
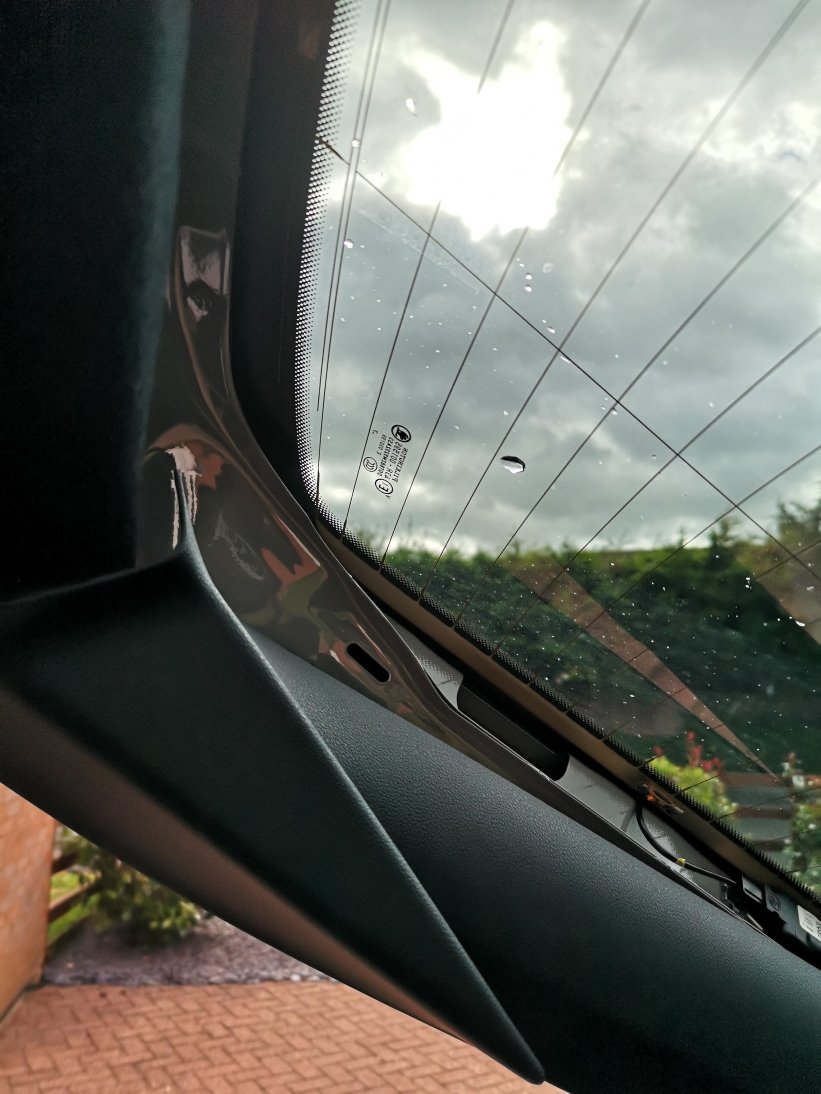
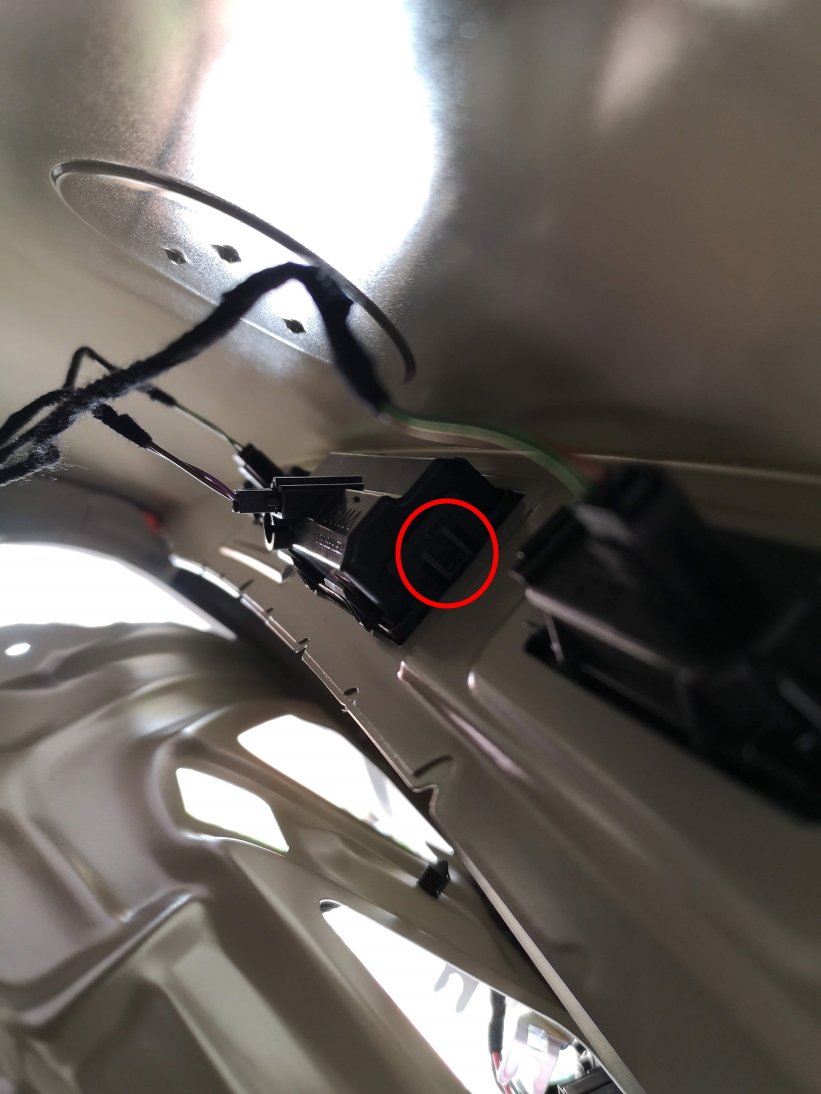
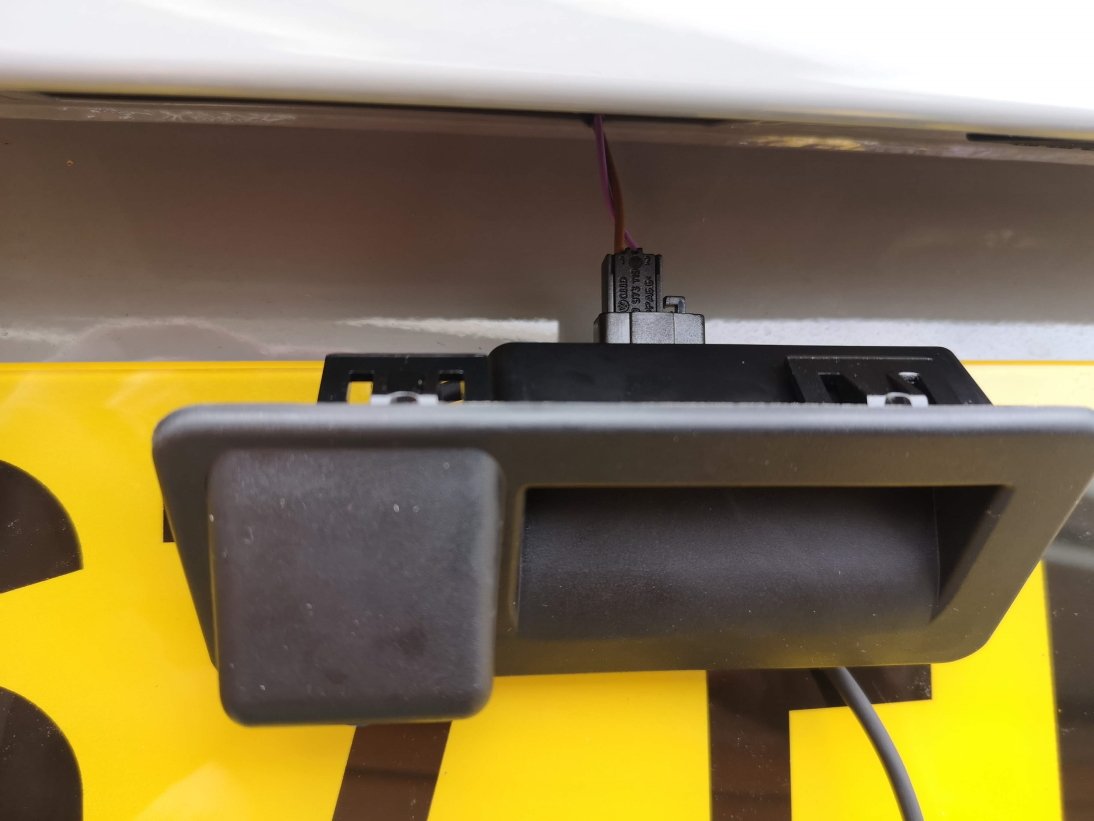
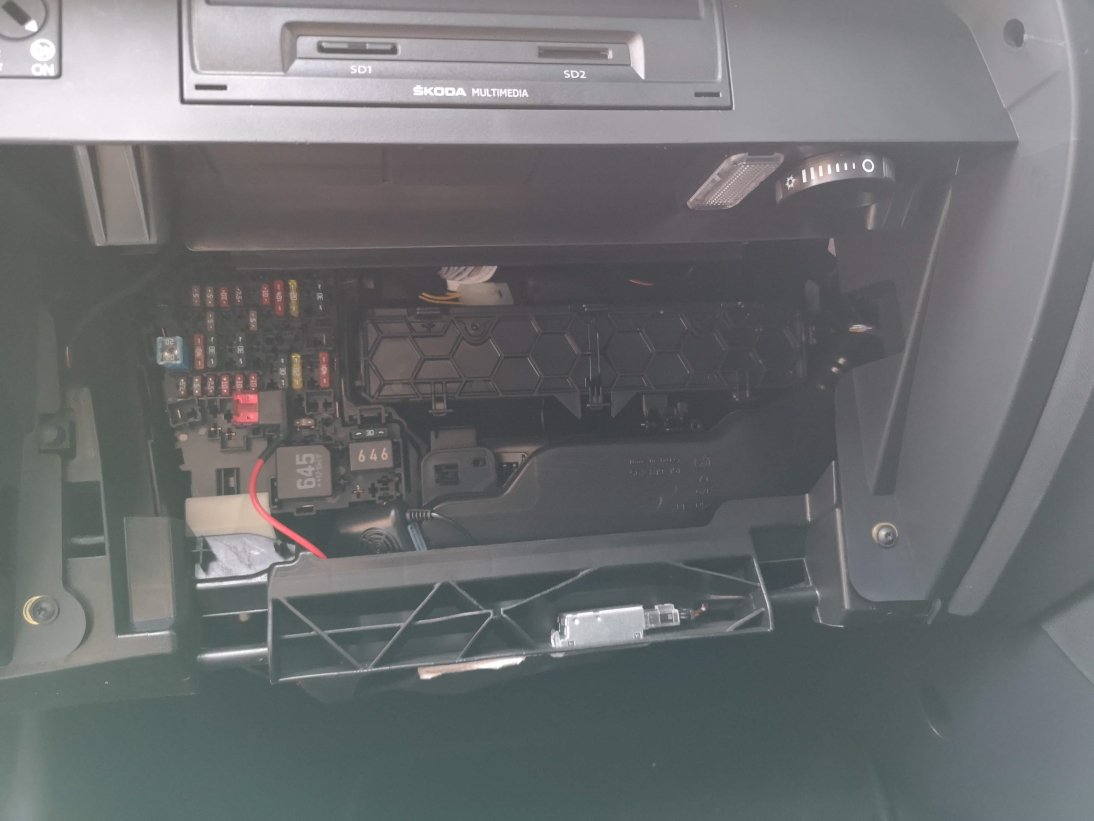
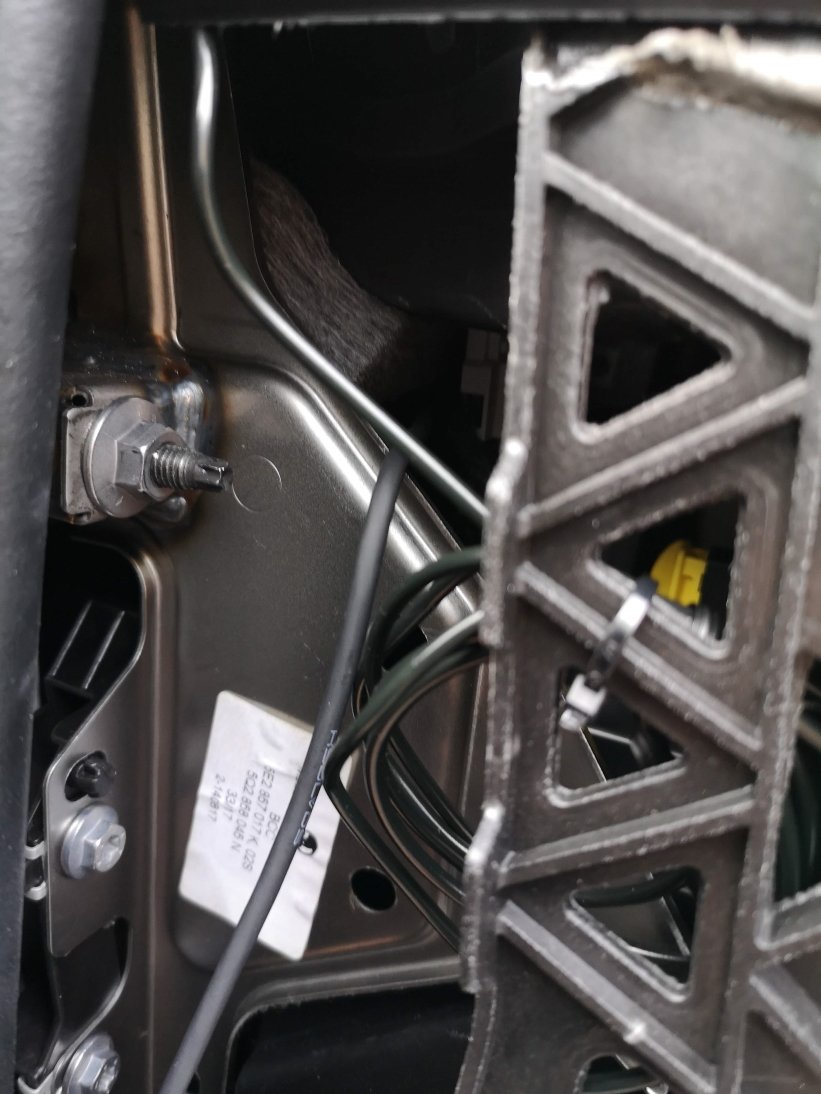
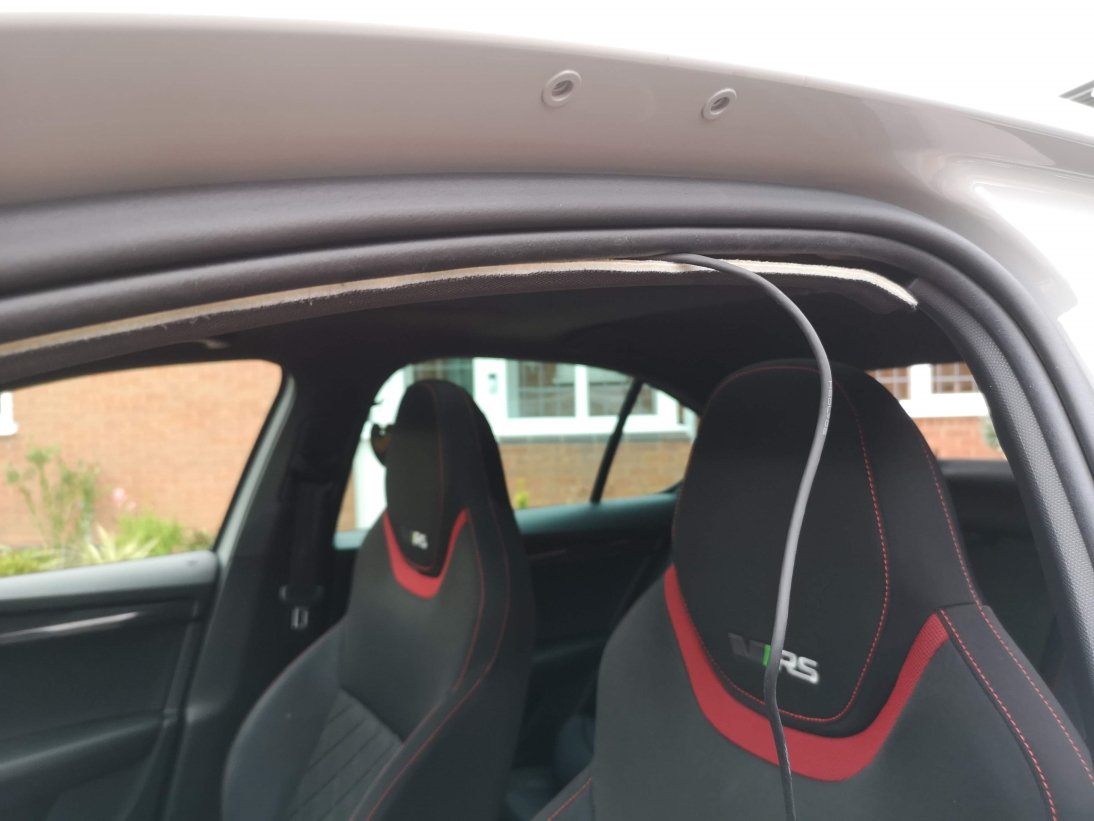
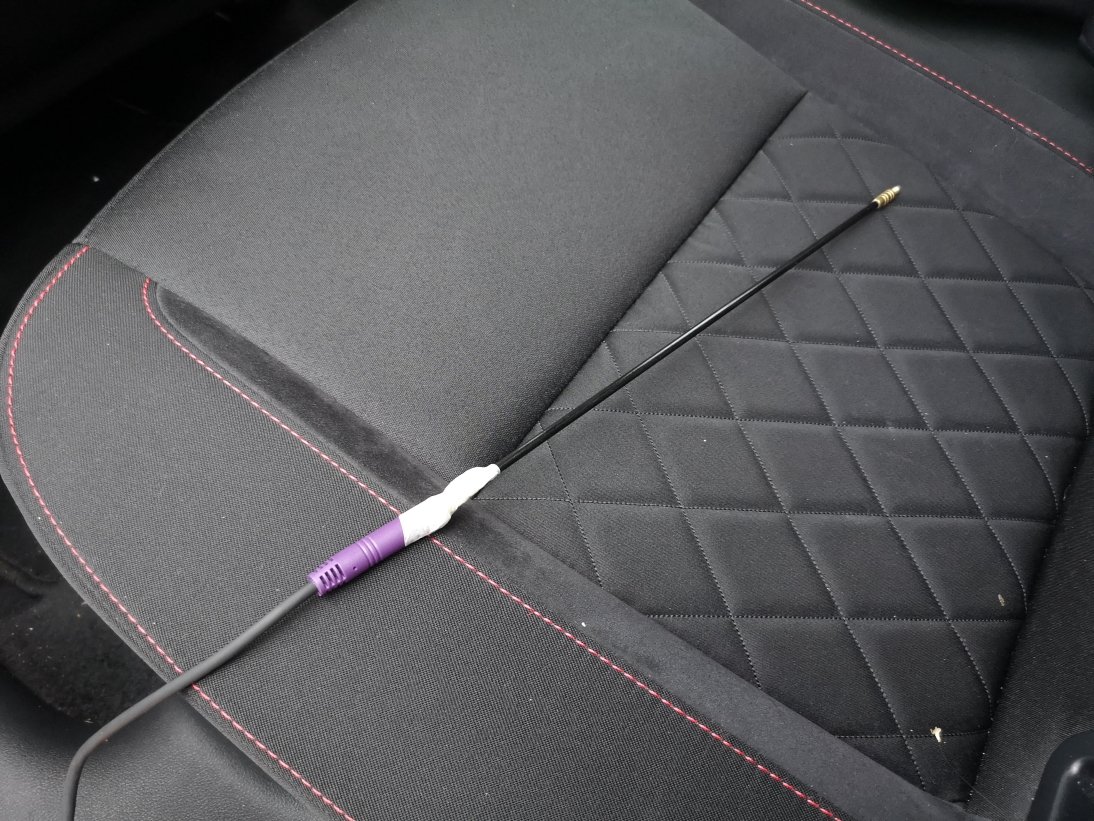
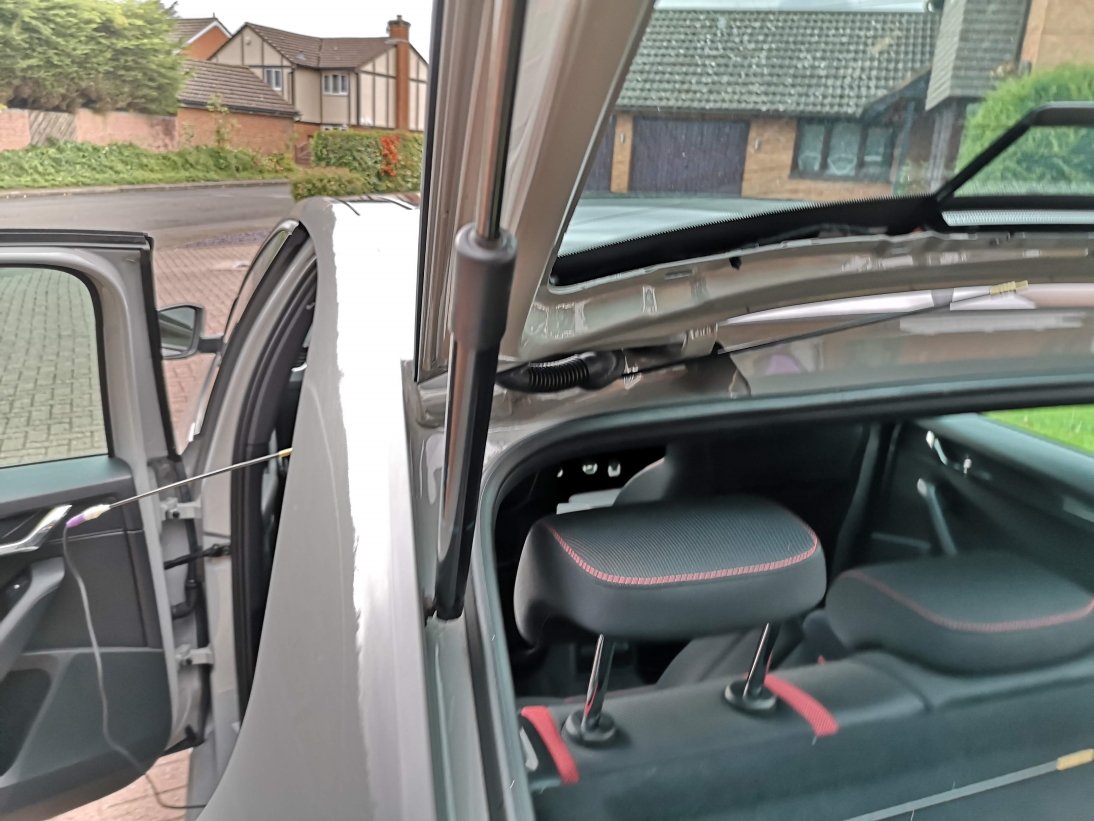
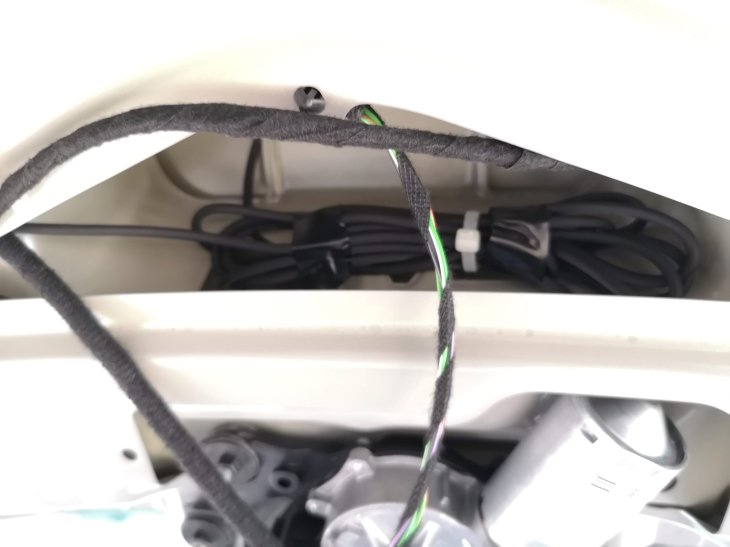
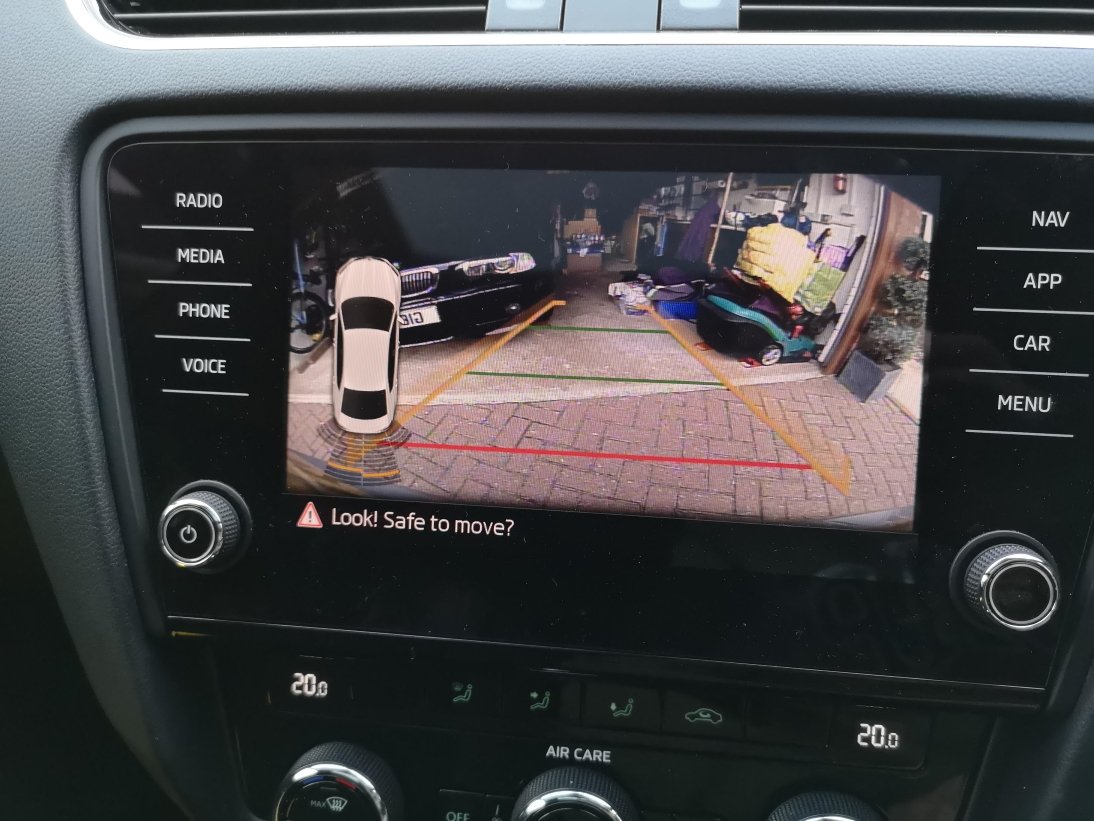


Announcements
-
About BRISKODA
BRISKODA is for the sharing of information on ŠKODA. Founded for all motoring enthusiasts, it's free to join and use. We have members from all over the world.
- Our Guidelines.
- Search the Site.
- Explore the Forums.
- Gaze into the Gallery.
- Make a date, the Calendar.
- Classic, custom or modified car insurance!
- Please be respectful when posting.
-
Images