Breezy_Pete
Sponsor
-
Joined
-
Last visited
Everything posted by Breezy_Pete
-
It's unlikely to have the PR code for the front brakes, which is separate from the rear brake PR code.
-
For RHD: Both sides - brown = earth black/red = brake light black/blue = reversing light Left side - black/white = indicator grey/black = tail light Right side - grey/red = tail light grey/white = fog light black/green = indicator For LHD: fog light swaps sides.
-
-
-
Found VIN in a message from you. Correct door lock module part number is 5N2 837 016C, for driver's door. Strangely, that seems to unavailable from Skoda as a spare part since before this car was built, with no supersession shown in partslink24. It just says: 5N2 837 016 C Door lock PR:L0R+4F1/ 4K3 £90.97 Dropped: Oct 1, 2012 (EKZ: F) Please contact your dealer for the parts interpretation. I don't understand that. Skoda-parts.com seems to list some alternative compatible part numbers at the top of this page: Door Lock - Front Right Škoda 5N2837016M Note that all of them have 2 as the third character, as I would expect for rhd car.
-
-
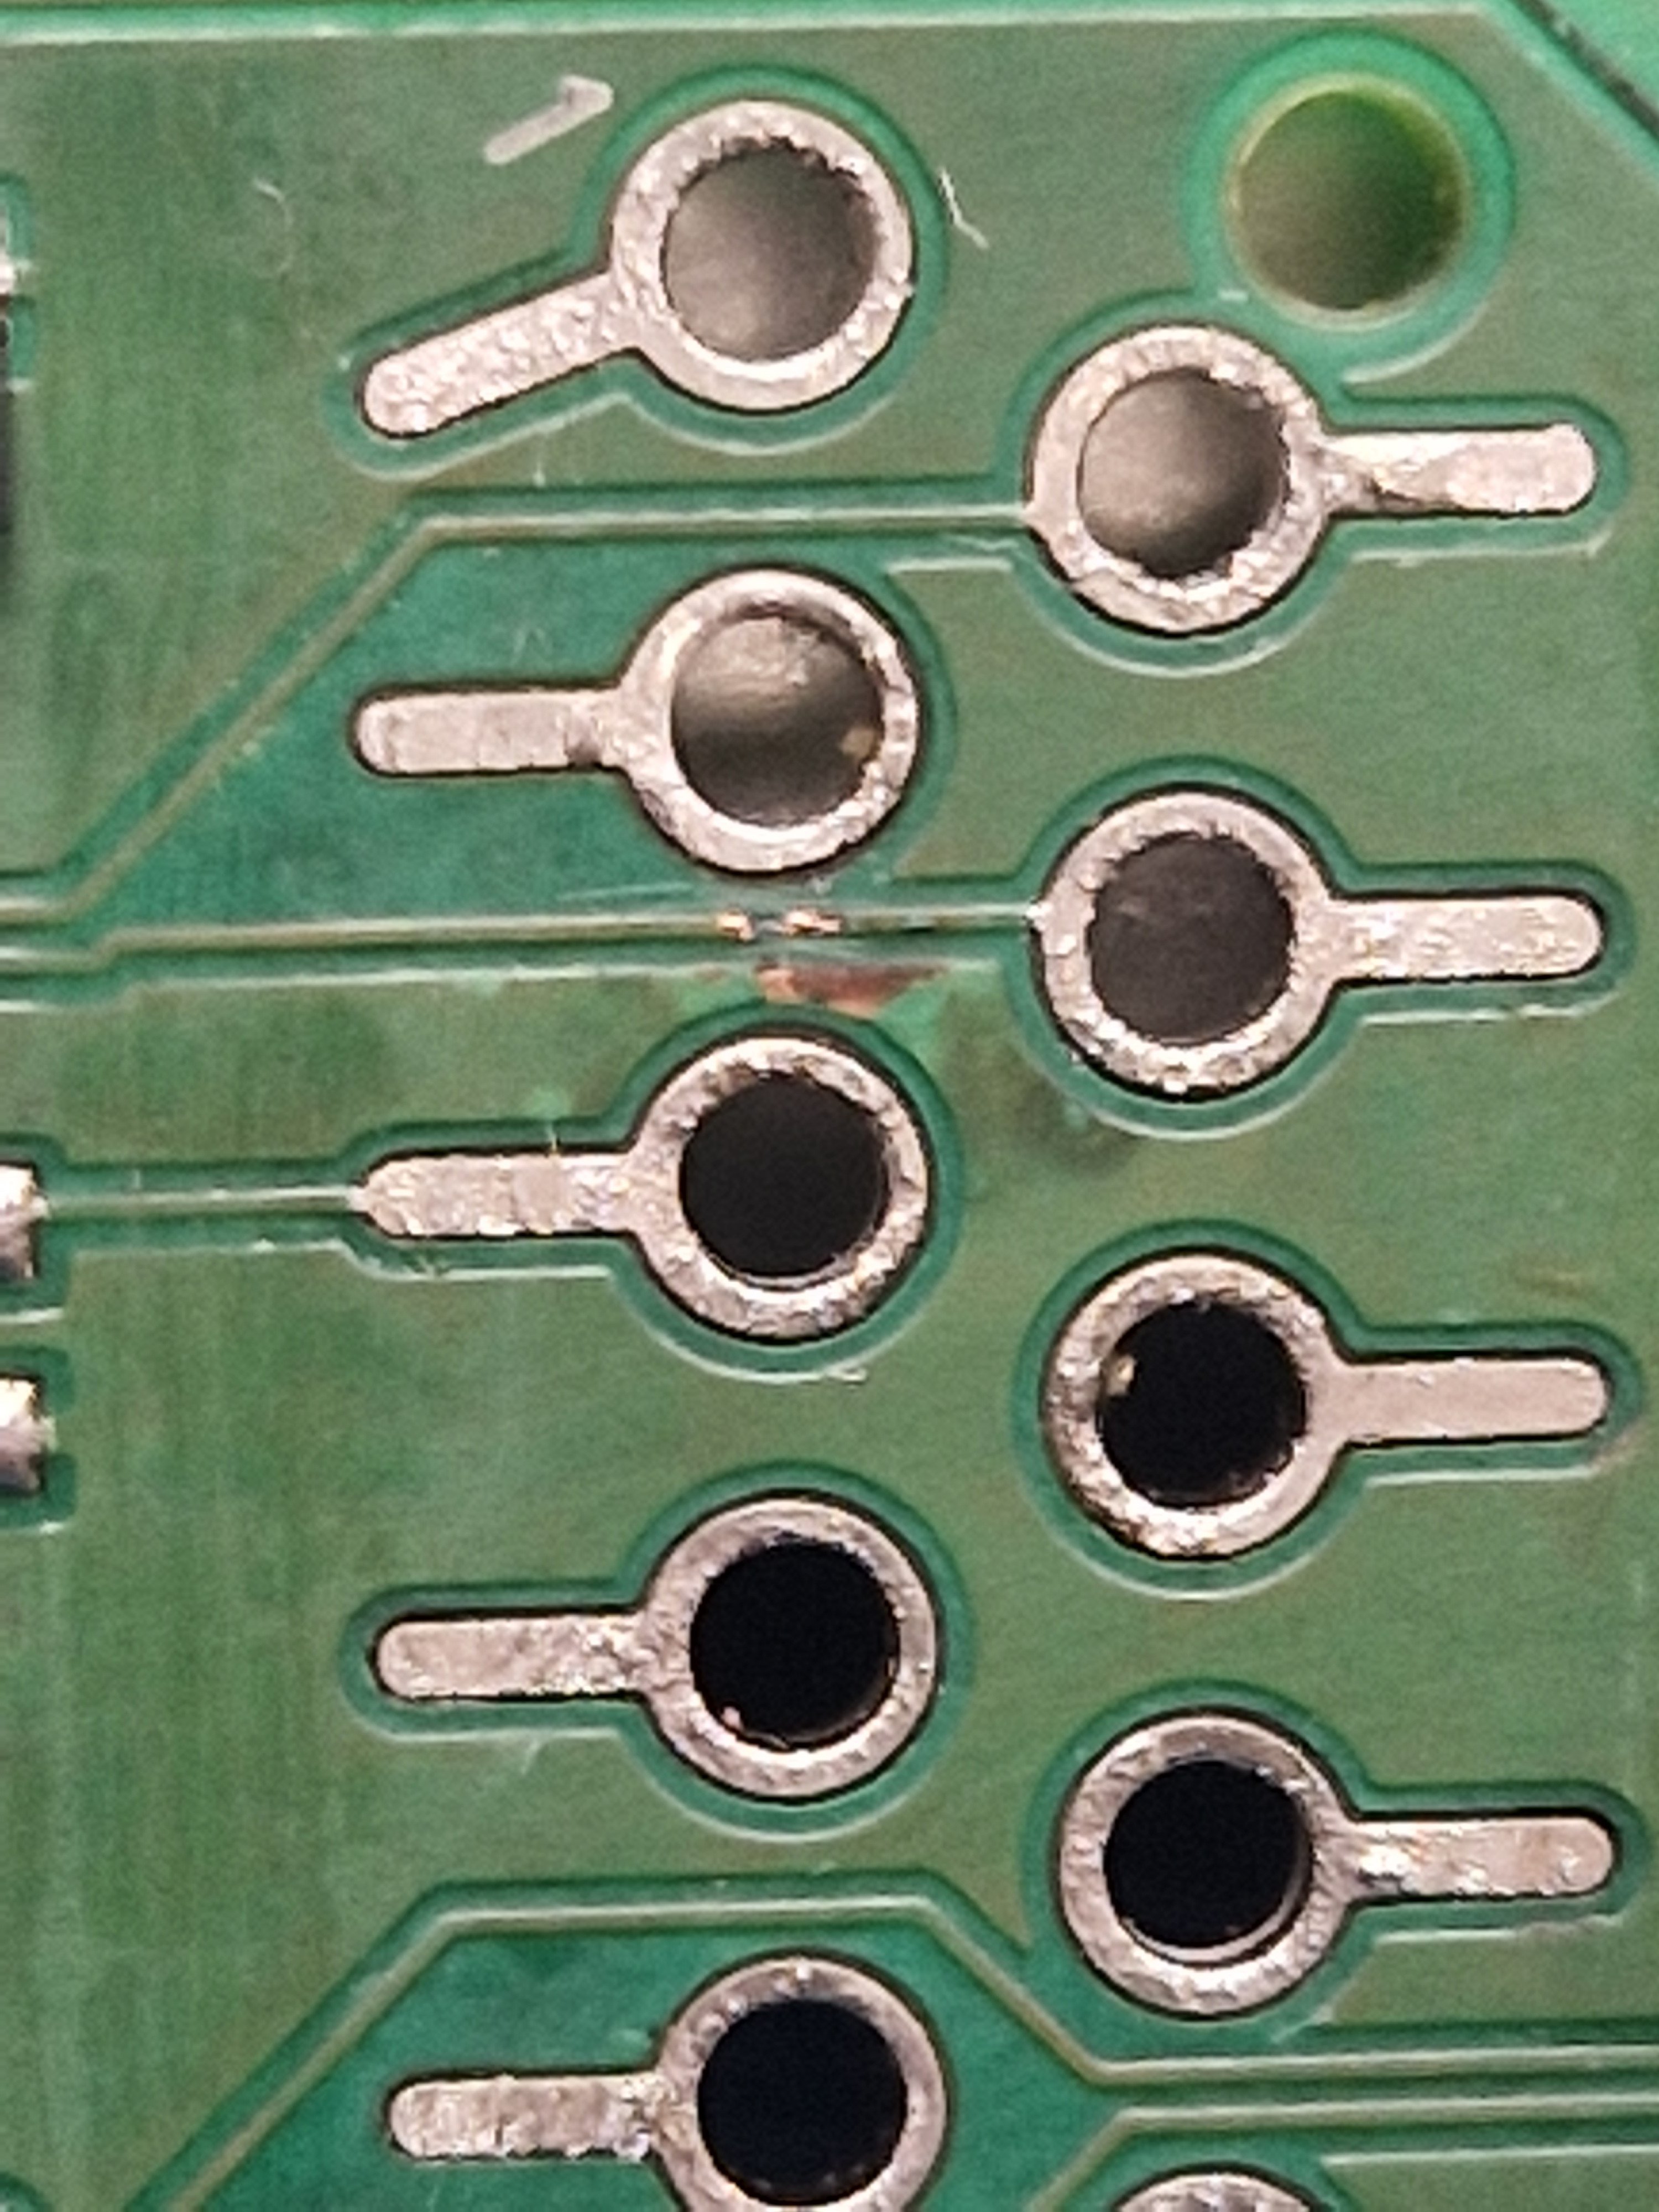
The damage in this picture is affecting the connection I would expect yours to have damage at. (Driver's window switch input)

-
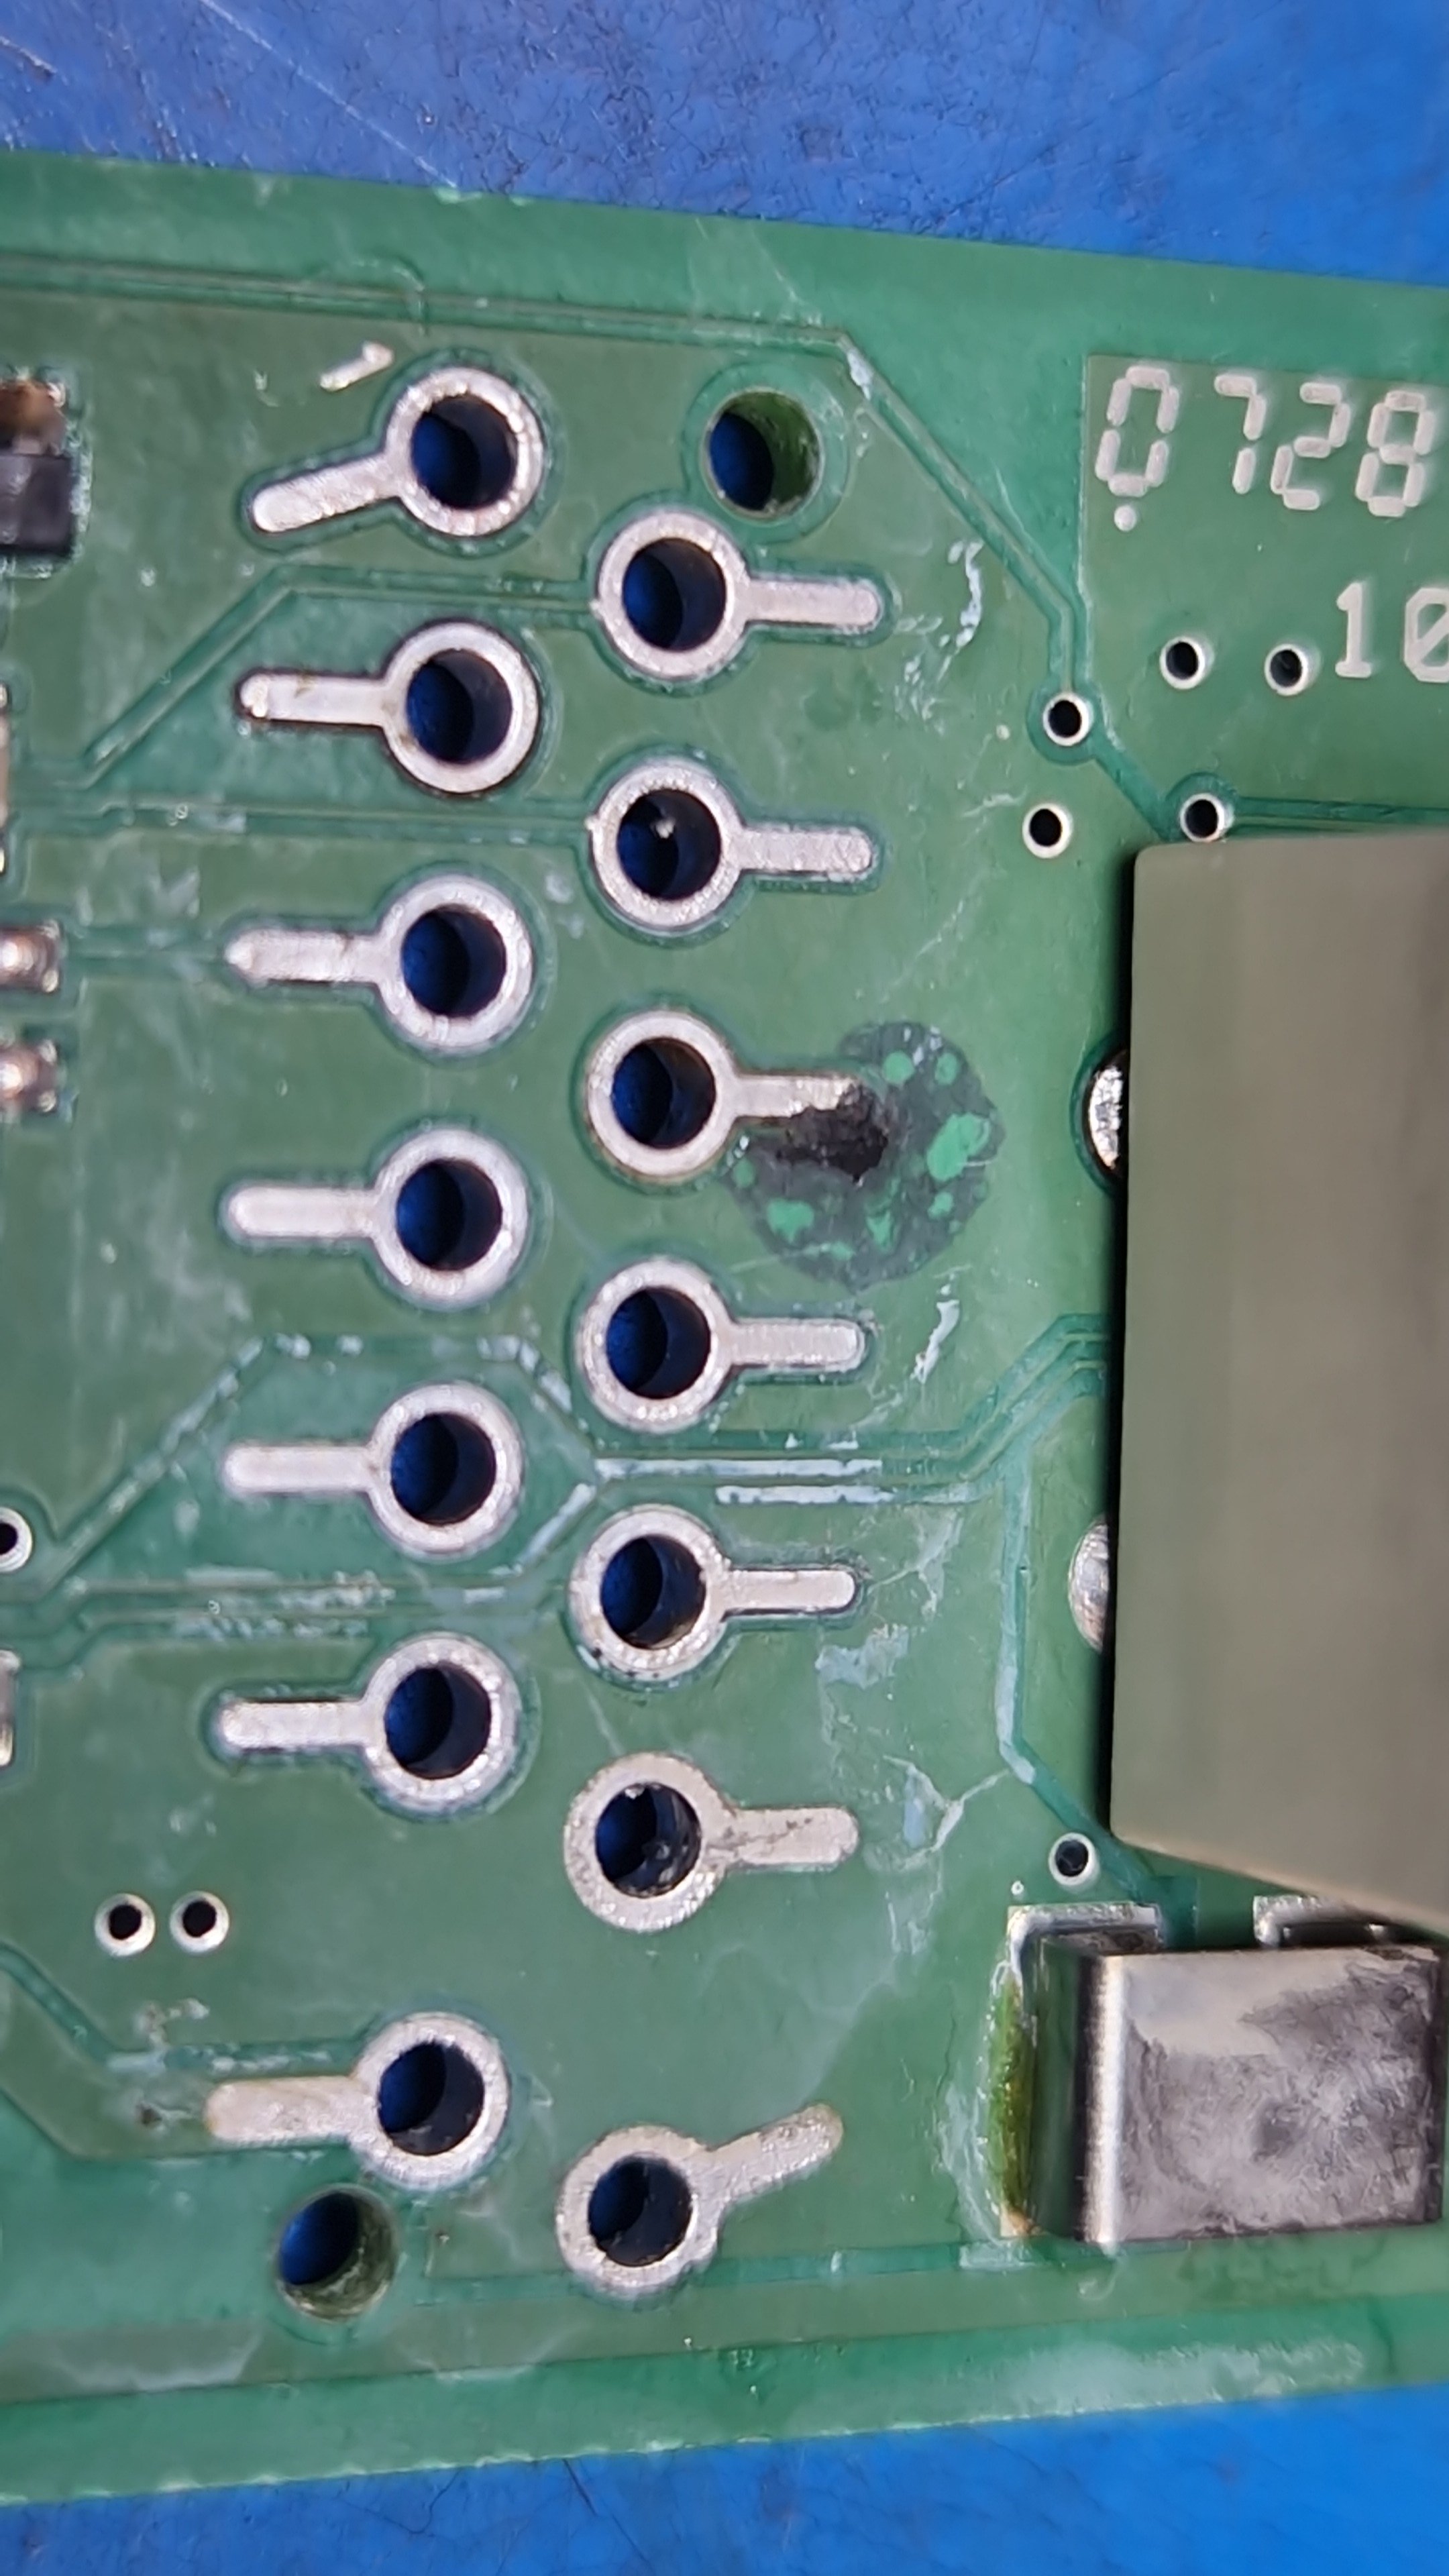
On the way to removing the board, the first step is to unclip the adaptor which connects door loom plug down onto the board. Close scrutiny of the contact forks of this that go down to the board-mounted connector will be worthwhile before delving any deeper, as there may only be corrosion on there, but I doubt it. (Second, obvious step is to remove the 4-off Tx20 screws holding metal motor can to plastic housing).
-
It's in the plastic part of the motor module. I made a little video which shows safe removal of it, in this thread: https://www.briskoda.net/forums/topic/537822-front-window-going-mental/#findComment-5996101 If the steel motor casing is just pulled out without the precaution shown in the video, brush damage is very likely.
-
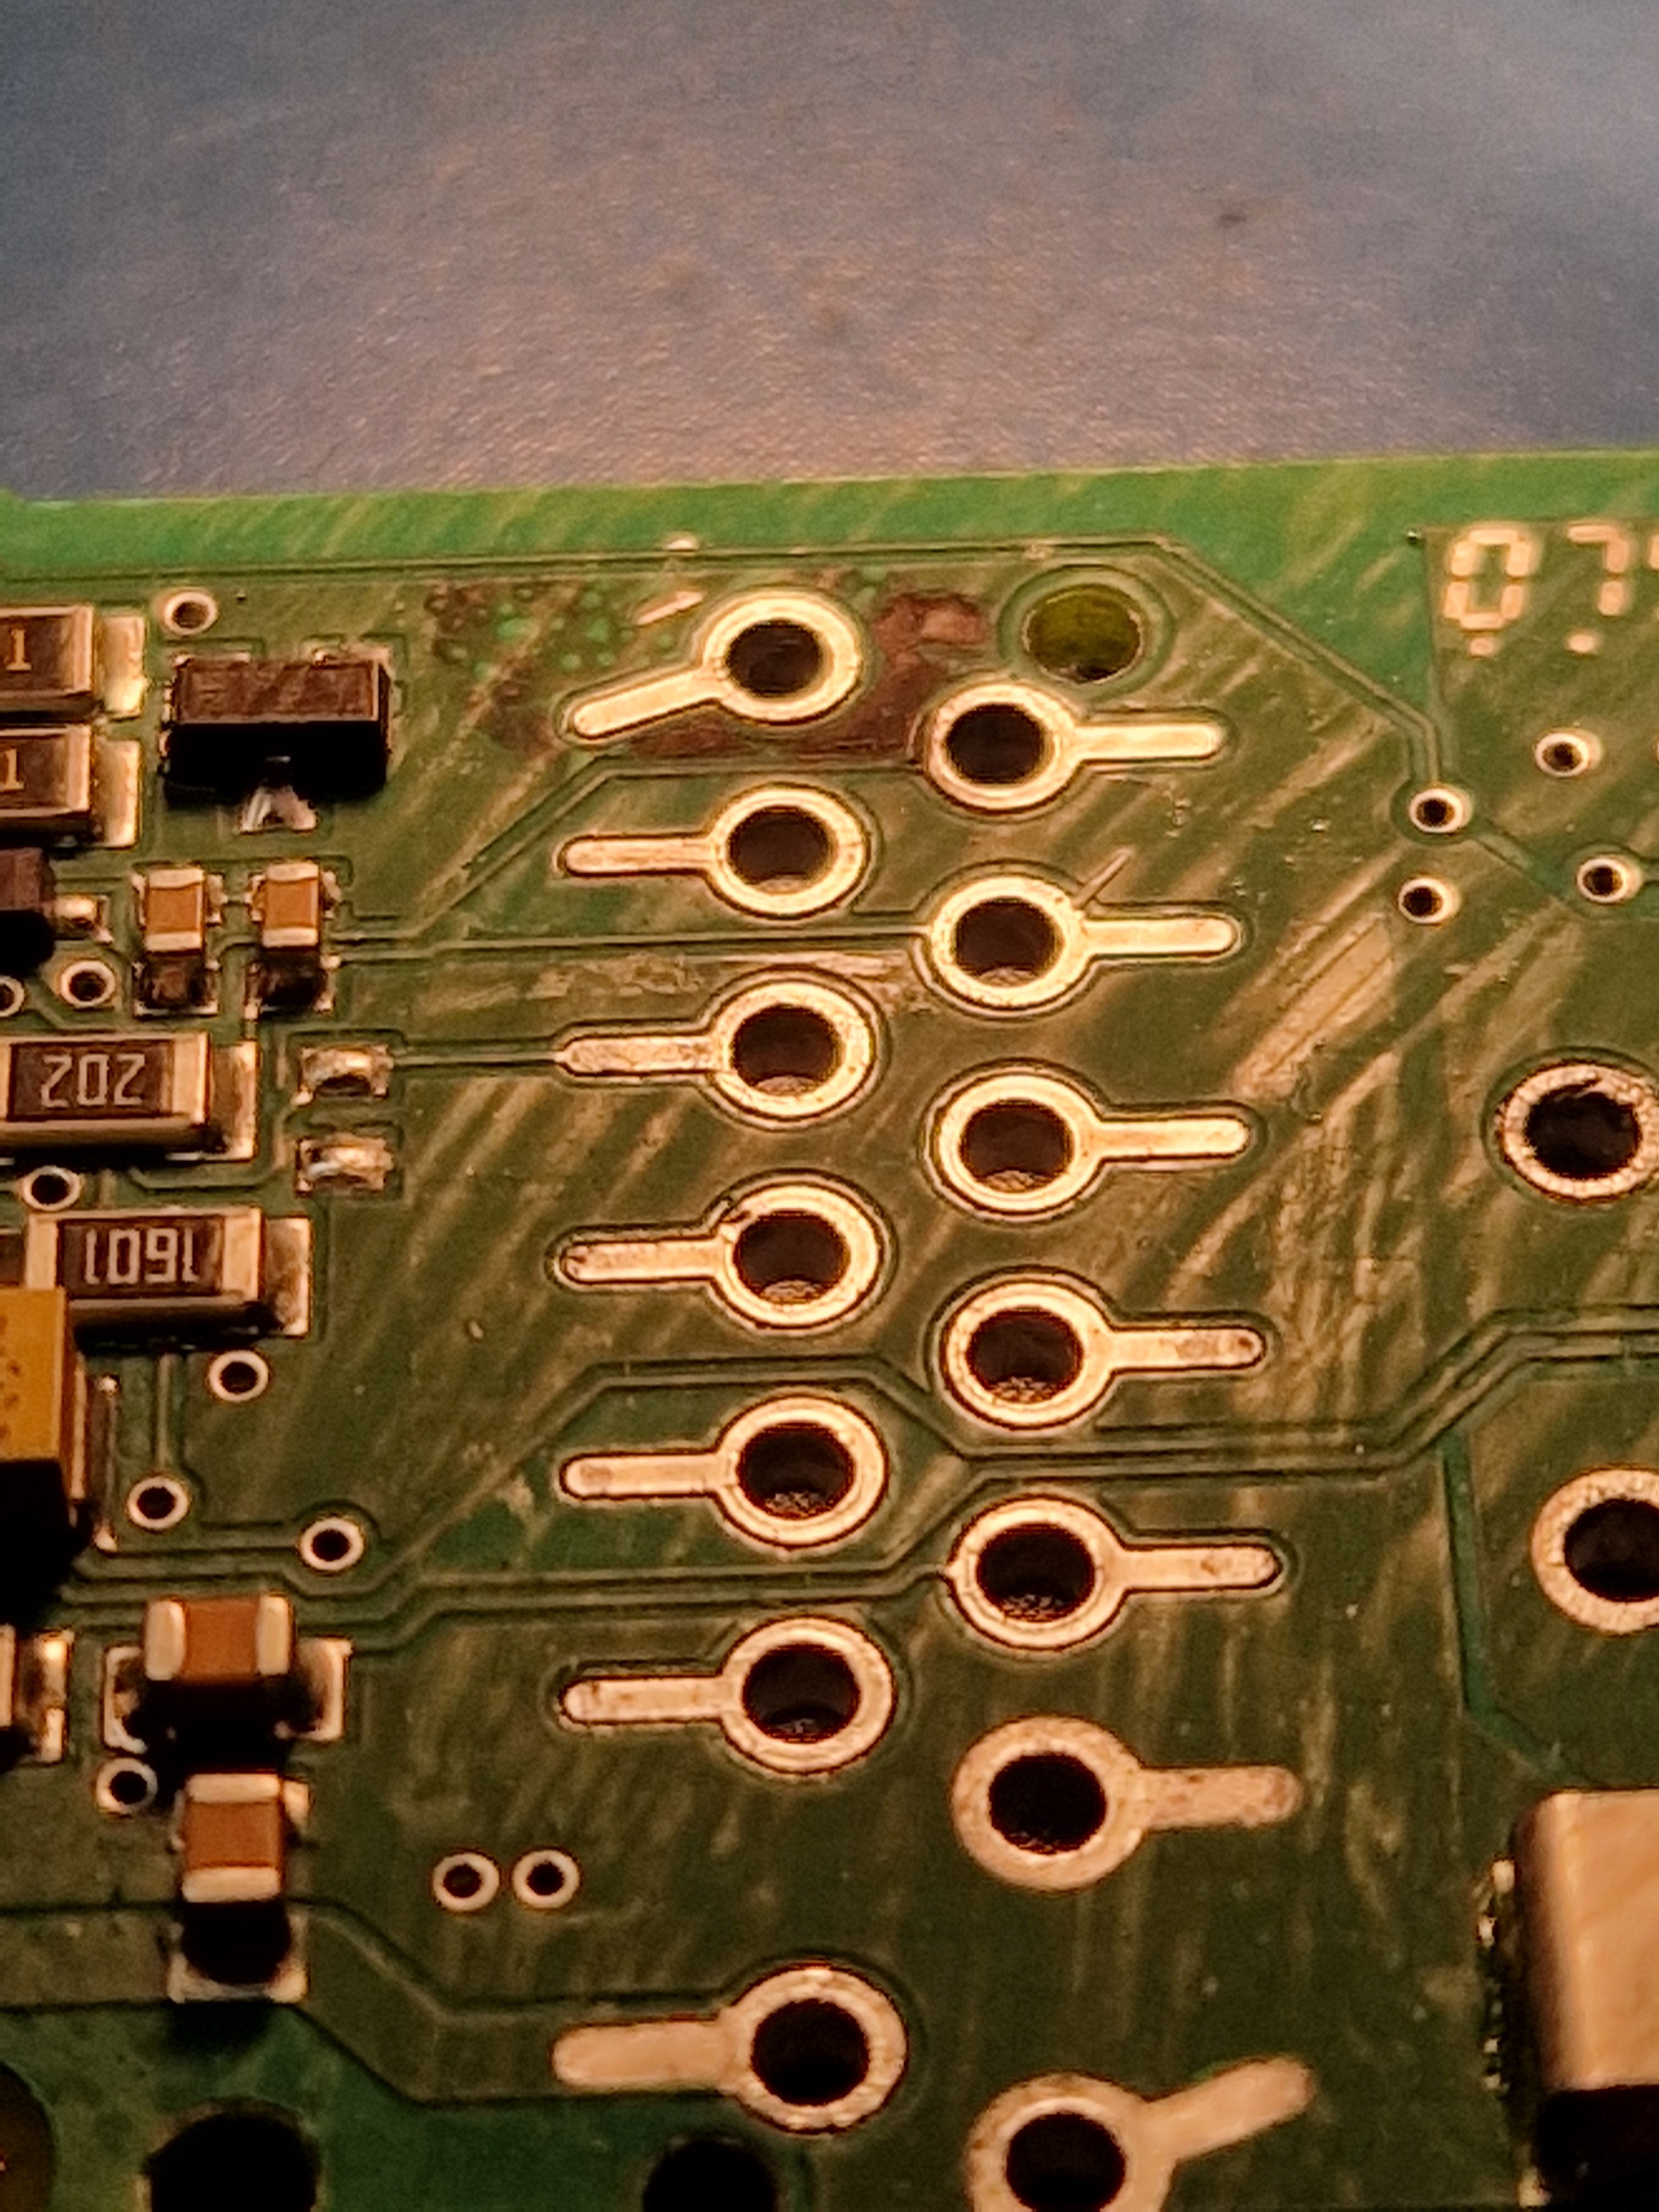
All of the above damage is produced by condensation in the gap between the plastic connector body (connectors have been unsoldered in all these images) and the board surface.


-
From your excellent investigations I would think the problem is almost certainly a corrosion problem that is affecting the driver's side motor module circuitboard. The pin of the connector on the board which is the input which controls the right (driver's side) window from the switch, specifically. I have posted lots of images of the sort of damage that can occur under the connector body, but can't remember which thread they are in. I'll search out one or two examples and post here shortly. Replacement or repair of motor will be only effective solution, I believe.
-
-
Yes.
-
Car Parts Catalog - LLLParts 2nd line down on that page, 6R0 825 237D is the only engine undercover I would expect to find on your car, I think, but message me the VIN if you wish me to check properly. Your service list contains a lot of items that should be deleted, complete waste of time and money, items 1, 2, 9, 10, 11, 13. Seriously; all of those are more likely to cause a problem if touched than to offer any benefit. A good mechanic should probably refuse to do most of these, knowing the waste of their time and your money. 9 and 11 might be worth doing in about 100k miles' time. Item 8 is also probably unnecessary but less likely to cause a problem, although a vacuum/pressure refill is recommended on the rather complex cooling system of these engines. Air pockets can remain and take time to work their way out otherwise, I understand. I don't have experience of using such equipment. Buy a genuine oil filter from Skoda, and make sure your mechanic doesn't leave behind the old seal when changing it; bad things happen to oil pressure and engines which suffer this accident.
-
Of all the mk1 Fabia engines, the 1.4 mpi is the only one that really seems to suffer HG failures. Fortunately, it's also probably the easiest one to change. Not saying it definitely is HGF, but it's probably worth doing a CO2 test on the coolant, if you haven't already, to try to detect combustion gases that might explain the pressure when cold.
-
See if the lights left on warning noise happens for each of the front doors being opened, with lights left on, keys out of ignition. If it doesn't, replace front door lock modules until it does. You'll probably find that doing this fixes tailgate issue, cos the tailgate is meant to stay locked until the car senses one or more of the car doors being opened first. Currently it seems not to be getting such info until you open a rear door.
-
Did you have a Freedom membership that has lapsed?
-
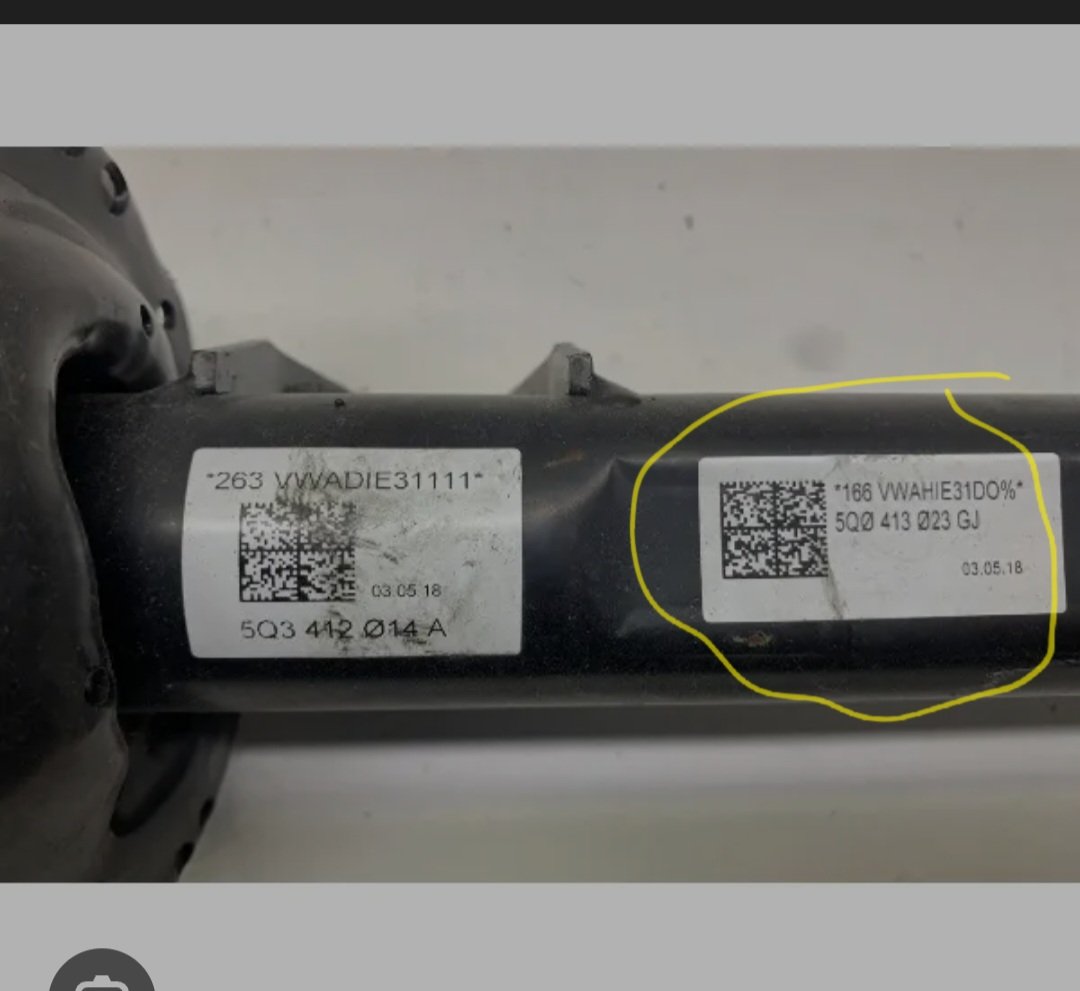
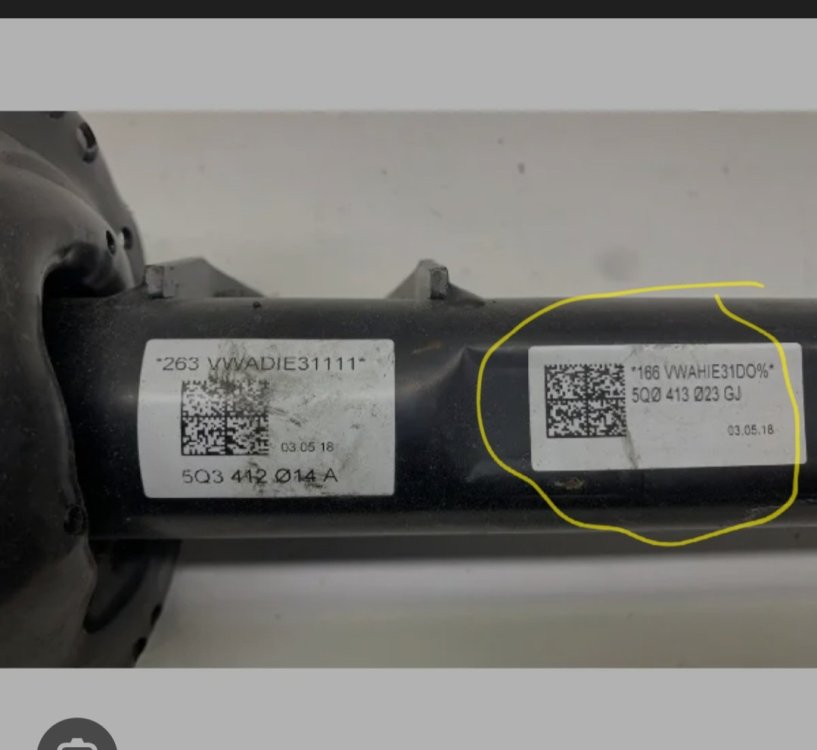
The sticker you've seen is possibly a part number of the whole strut assembly, which will likely exist as an internal VW Group part number that's very useful inside the factory. No such part exists as a spare part though, you have to buy all the bits separately. Shock/spring/bearing/topmount etc. The 5Q0 413... part number is that of the shock absorber only. The 5Q3... part number isn't found in the parts catalogue.
-
Look further down, e.g.
-
Nope
-
Or PM me the VIN and I can look it up for you.
-
Find a different sticker, that's not a recognised part number. Expect the correct part number to start 5Q0 413
-
If only you could understand that the fuel pump sucks fuel from the bottom of the tank ALL THE TIME, because that's where it takes the fuel from. Where else would it be? Fuel level makes no difference. It's sprung downwards against the bottom. I'm sure I've explained this to you before.
-
Looks like a Gen2 bearing/hub in parts diagrams. Needs special tooling, not a press.
-