varaderoguy
Resident Member
-
Joined
-
Last visited
Everything posted by varaderoguy
-
Welcome. If you do some research on Briskoda, you will find many threads about oil burning on the TDI engines. IMHO - it is down to the way the cars were bedded in from new....some burn more than others. For example, my 2019 TDI 184 Scout burns about 100-150ml per 2000 miles - which is nothing. Others will burn nothing, other cars will burn lots. I know that @e-Roottoot is the expert in regards to oil burning issues, so I'll bring him in at this point.
-
Welcome to the Forum. If you find it useful, please feel free to become a Freedom Lite or Freedom member [helps with the cost of running the forum].
-
@RobABarker Yes I agree with @langers2k that the VRS should have all the necessary bells and whistles, but it depends on the car. First things first - what MIB [or entertainment system] do you have? Is it a Amunsden or a Columbus? A photo of the unit will tell us. Then we will need to see the firmware version of the MIB system [press hold MENU, go to Software Version and Version and take a photo]. Then we can advise. Suspect that your MIB system will need a 0478 update for Amunsden. Some of the things you mentioned can also be enabled on the car via ODBEleven or VCDS [or you can take along to a member near you with that software who will hopefully be able to help for beer money].
-
So - you will be able to get Timpson's to cut the "key" part (if that bothers you), but agree with @Ecomatt that the dealer will need to programme in the new key. Recommend you get a new key from them, get them to programme it in and then go and get the key-part cut for your emergency "get into the drivers door" bit.
-
Sorry guys, You won't get an 18" into the boot - it is strictly a 17" tyre unless you want to boot liner to be sticking up. Recommend a 17" variant for your emergency wheel.
-
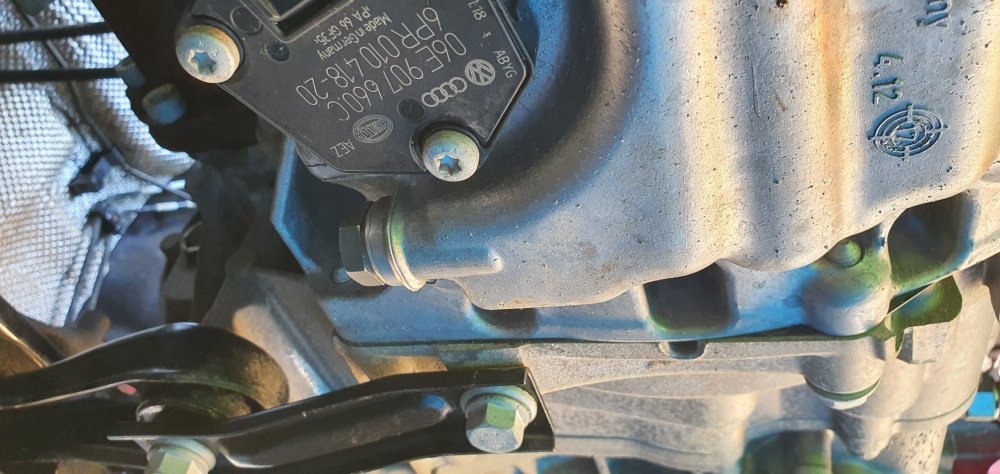
Unless the sensor which reads the gear position has failed.....
-
1) VCDS is a product created by a company in the USA called Ross-Tech. I think it used to be called VAG-COM in days of old. It is a diagosis and configuration tool for VAG cars. 2) There are two possible ways of interpreting that question - a) AutoScan for the Radio for presets? or VCDS AutoScan. The latter is shown here: https://www.ross-tech.com/vcds/tour/main_screen.php 3) You need to procure a HEX-V2 dongle to plug into the CANBUS connector under the driver's right foot. You will also need a copy of the ross-tech software. You can get both of these from Glendan - the UK retailers of the software. https://www.gendan.co.uk/product_VCHNU.html?gclid=Cj0KCQjwyZmEBhCpARIsALIzmnLKiuPOSd9VUU-BEjxekLPcfnFmBZN2JyEonF3KjgJBLO6wFFpZvIwaAiObEALw_wcB 4) That's been answered above - however - there are variations for MK3 Facelifted models that I can help with.
-
My husband's SE had a similar error message which was a failure of the Turbo actuator. Turns out that giving an Italian tune up solves the issue (he drives for economy, so never much accelator). Turbo actuator was cleaned up with brake fluid and replaced back in. Every week....a good hour of vigorous driving keeps the roarly little 3 pot a happy bunny.
-
Assuming that intermittent is switched off, the rear windscreen wiper activates when in reverse and also teardrops when the main screenwipers are on (unless you have switched that out).
-
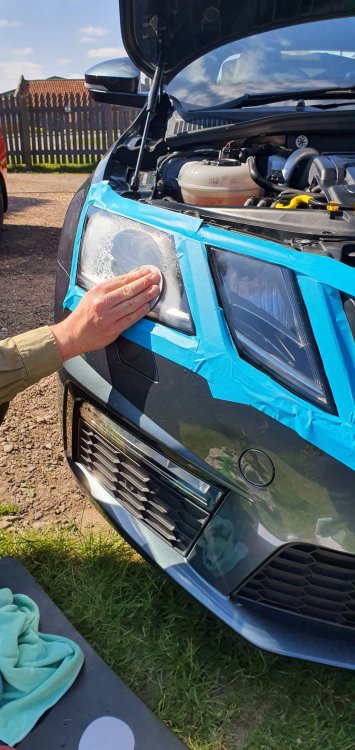
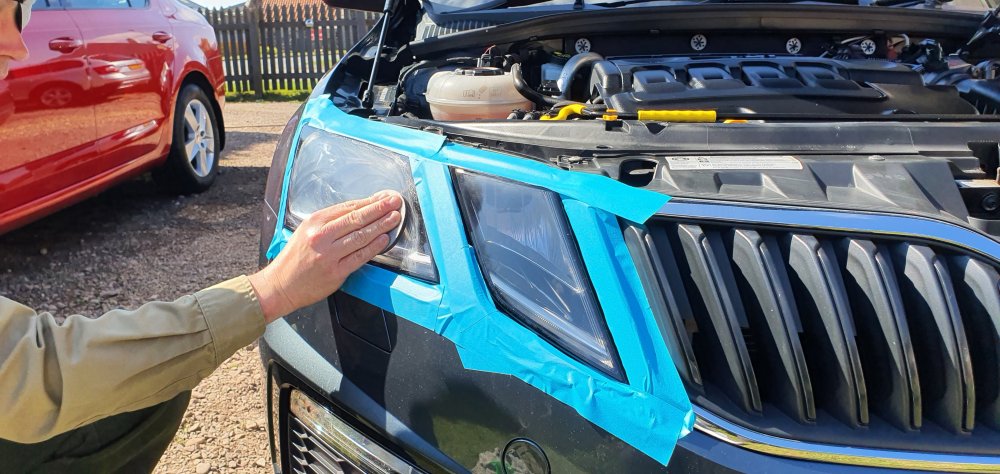
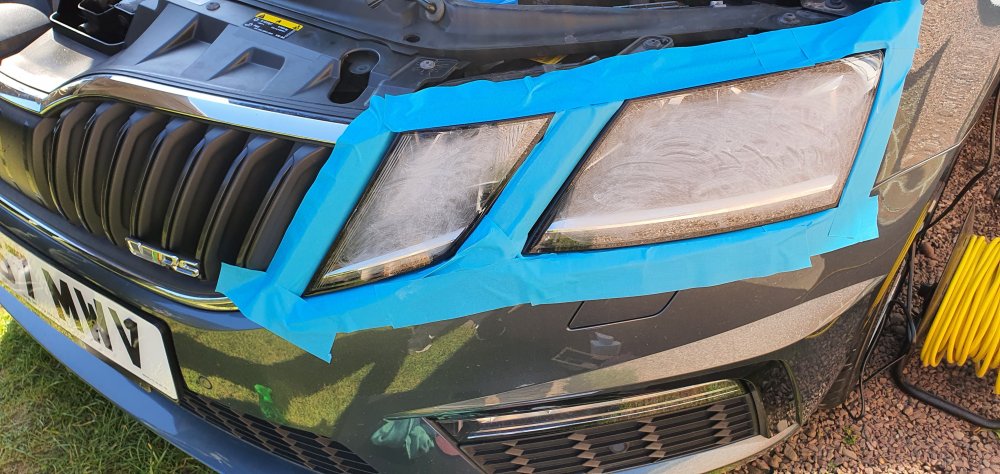
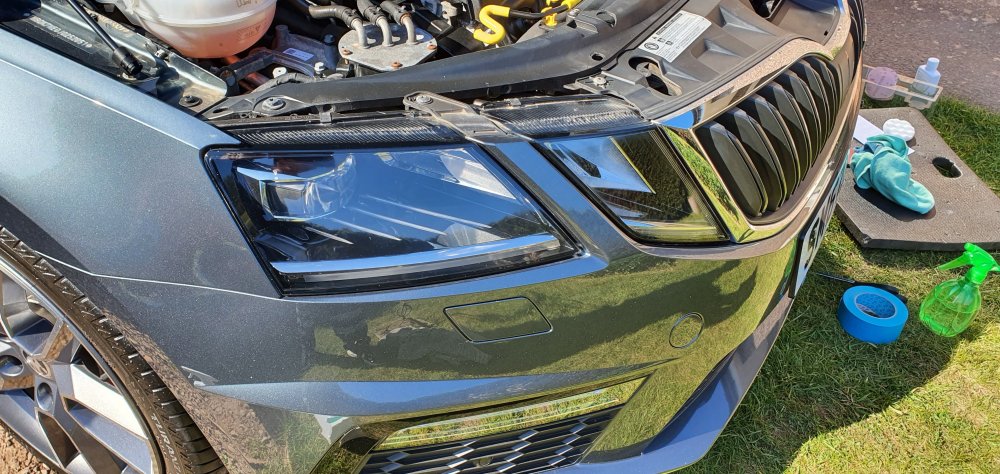
Headlight Restoration As usual, I'm using Autoglym products and their Headlight Restoration kit. You don't need a drill especially on a FL MK3, but you will also need plenty of masking tape. Husband decided to try it out. It was hard for me to photograph this but the headlights seem to have suffered from one too many Car Washes. The principal is that you have to use low grade sandpaper first working up to a very fine grade/grit sandpaper. Most of the fine scratches are now gone on the headlights. Here are some (scarry) photos whilst it was being done.
-
25/04/21 Update on the VRS. Its been a weekend of fettling the car. Let me put on record to say that I really detest some car dealers [sadly some of them Skoda dealers]. The selling dealer of this lovely VRS were less than honest in selling the car. That dishonestly shows when dealers say that the car has been fully serviced and had the oil/filter/haldex/air filter and cabin air filter done. Guess what....none of this has been done. Since we've had it, the DSG DQ250 gearbox has started to make some odd noises on shifting down the gearbox. I think it is the usual Flywheel issues that are a known problem; there are also issues with the grabby/snatchy nature of the gearbox when cold. Its going into West End Skoda to be looked at tomorrow: The selling dealer has also been informed, because like my previous VRS (where it needed a new clutch), I suspect the gearbox will need attention. Whilst it is there: 1) New Battery - VAG6161 shows that the battery voltage level is not holding its charge very well - half-capacity - this seems to be normal for VAG batteries, so I'm not too put out on that one. Its just disappointing that the car has been with us less than a month. 2) Selling dealer stated that Haldex service had been done.....no it hasn't....because the filter has not been changed. WES are doing that tomorrow too. 3) Gearbox being investigated..... 4) Might get WES to do another enhanced service on the car after the state of the cabin air filter - because you can bet the air filter is also not done. Sigh - people tell me that I expect too much from dealers; if they were honest and said there wasn't enough margin in it for them to get it serviced then that's fine.....its just when I'm lied to and they then have the gal to also put it down on the Service Record; that is when I get upset.
-
The other point of Investigation is the accelator pedal failing. This happened on a car with 15k miles on the odometer. However, if it is failing then you will see error codes on CANBUS. The symptoms are serging and similar issues to yours. You have to remember that the accelator pedal is electronic and they do fail.
-
Did you give the car a REALLY good run - I have found this same problem with my 2016 Scout; I had to get some really good heat into the car and give it a good blast to make it happy again. Light driving causes issues.
-
It could be internal lighting levels he has played with. Does the lighting for the dashboard also seem dim? Car->Settings-> Lighting.....
-
Yes, but it requires additional wiring and a new mirror base (easy to obtain). Speak with @SashaGracewho can give you the details.
-
The whole front bumper needs to come off - its a pain, but not impossible with a second pair of hands and some patience.
-
Donald - if you haven't made up your mind yet, my husband is about to sell his 18k miles 68 plate Octavia SE 1.0TSI Hatchback in Red in the next week. It will be traded in at West End Skoda in Stirling - and its a cracking car with some tasteful upgrades. PM me if you want further details.
-
There is an easy fix for Clock change issues.....you need to enable Automatic Summer Time via either ODBEleven (app) or via VCDS. That will deal with Clock Change. Please look in the VCDS modifications in the Octavia Forum (MK3) on how to do this. You might also want to consider a firmware update to fix MIB gremlins. That's quite random - that's not even UNIX Epoc problem (that 2038). What you can do is switch OFF GPS - set the time/date manually, and then switch on GPS again. That will at least get the hardware time correct.
-
Rear jets get blocked all the time - if you live in a hardwater area, the problem is even more acute. Decent screenwash helps and unblocking the jets is not too bad. Soak in hot water usually get the crud out. Failing that, you can easily get new nossles from the dealer. Its a minor design flaw [gets blocked easily].
-
Forgot to add - don't forget the cabin air filter - this will be super grotty after 22k miles. a) Remove Glove-box b) Release three plastic clips and open container (you might need a plastic tool to open the clips) c) note the correct way around for air flow (top to bottom) - usually the way up for the writing on the filter. d) insert new filter - put cover back on e) Reinstall glove-box (there are other guides on how to do that, but basically, insert Glovebox in under rubber bump stop, click-in bottom mounts, reinstall soft opening mechanism).
-
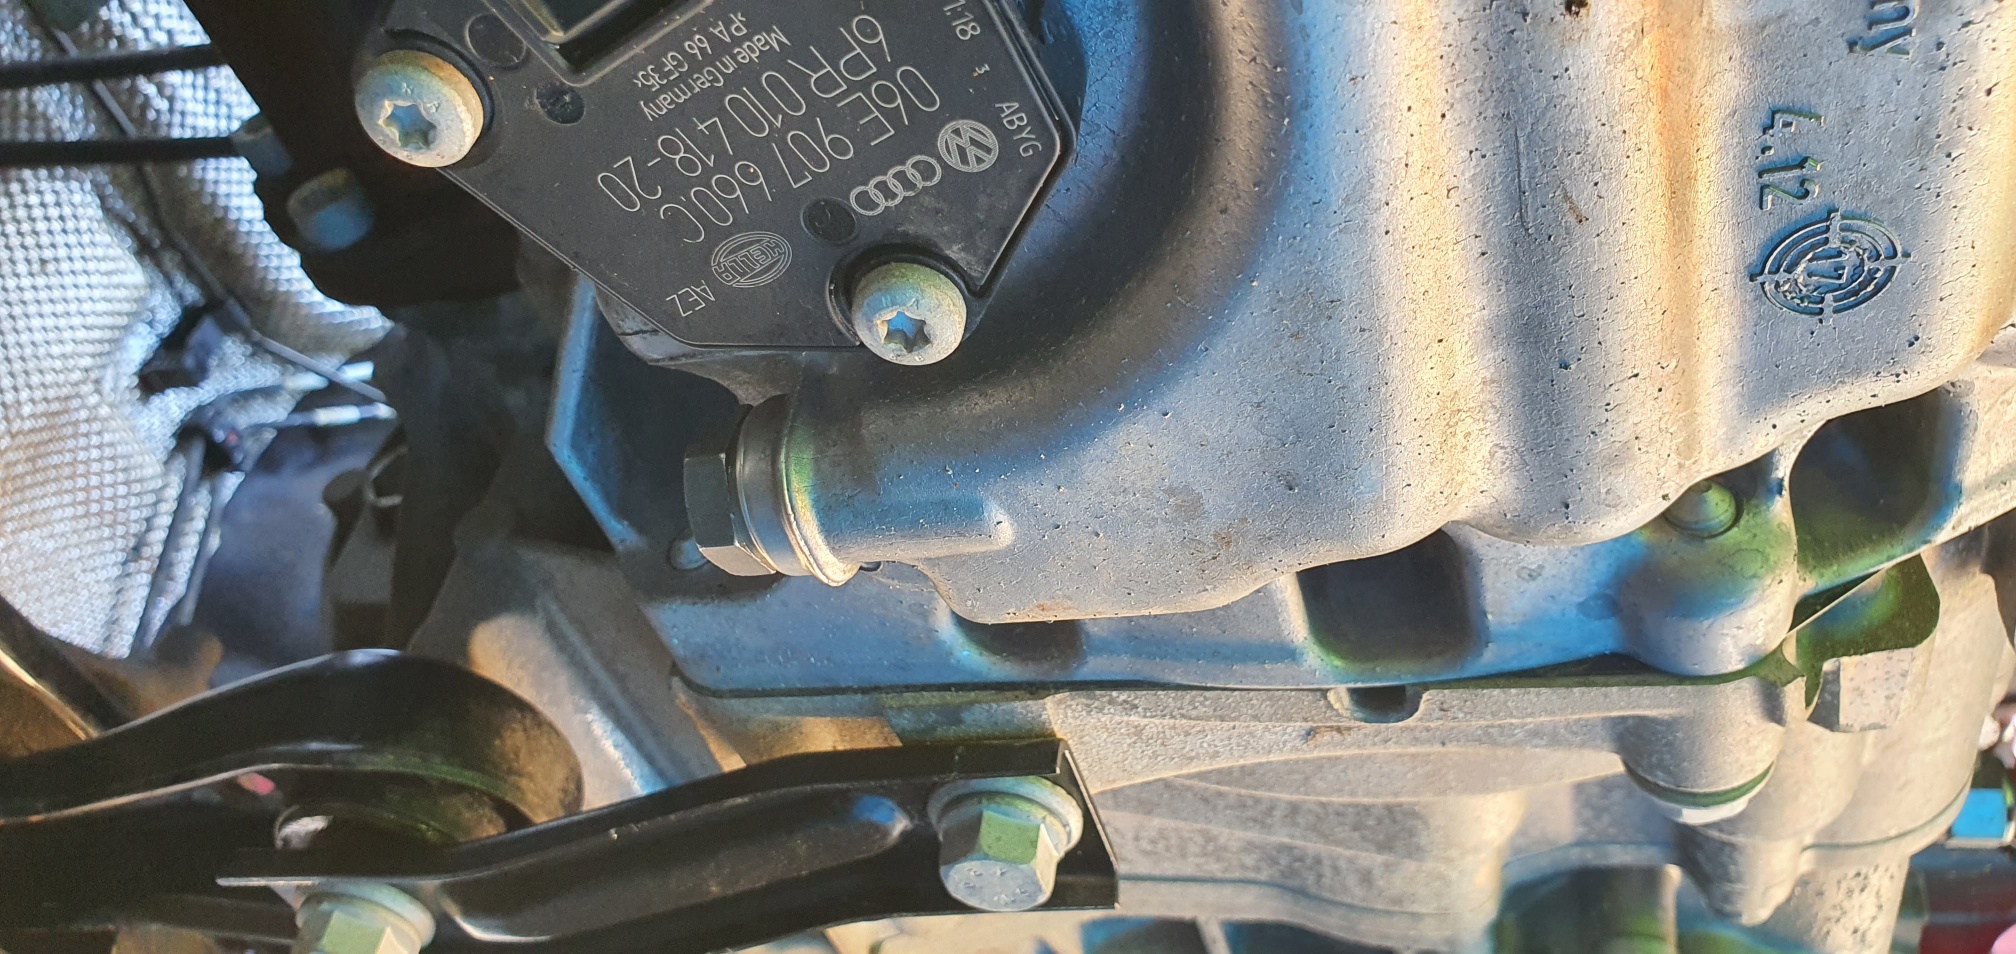
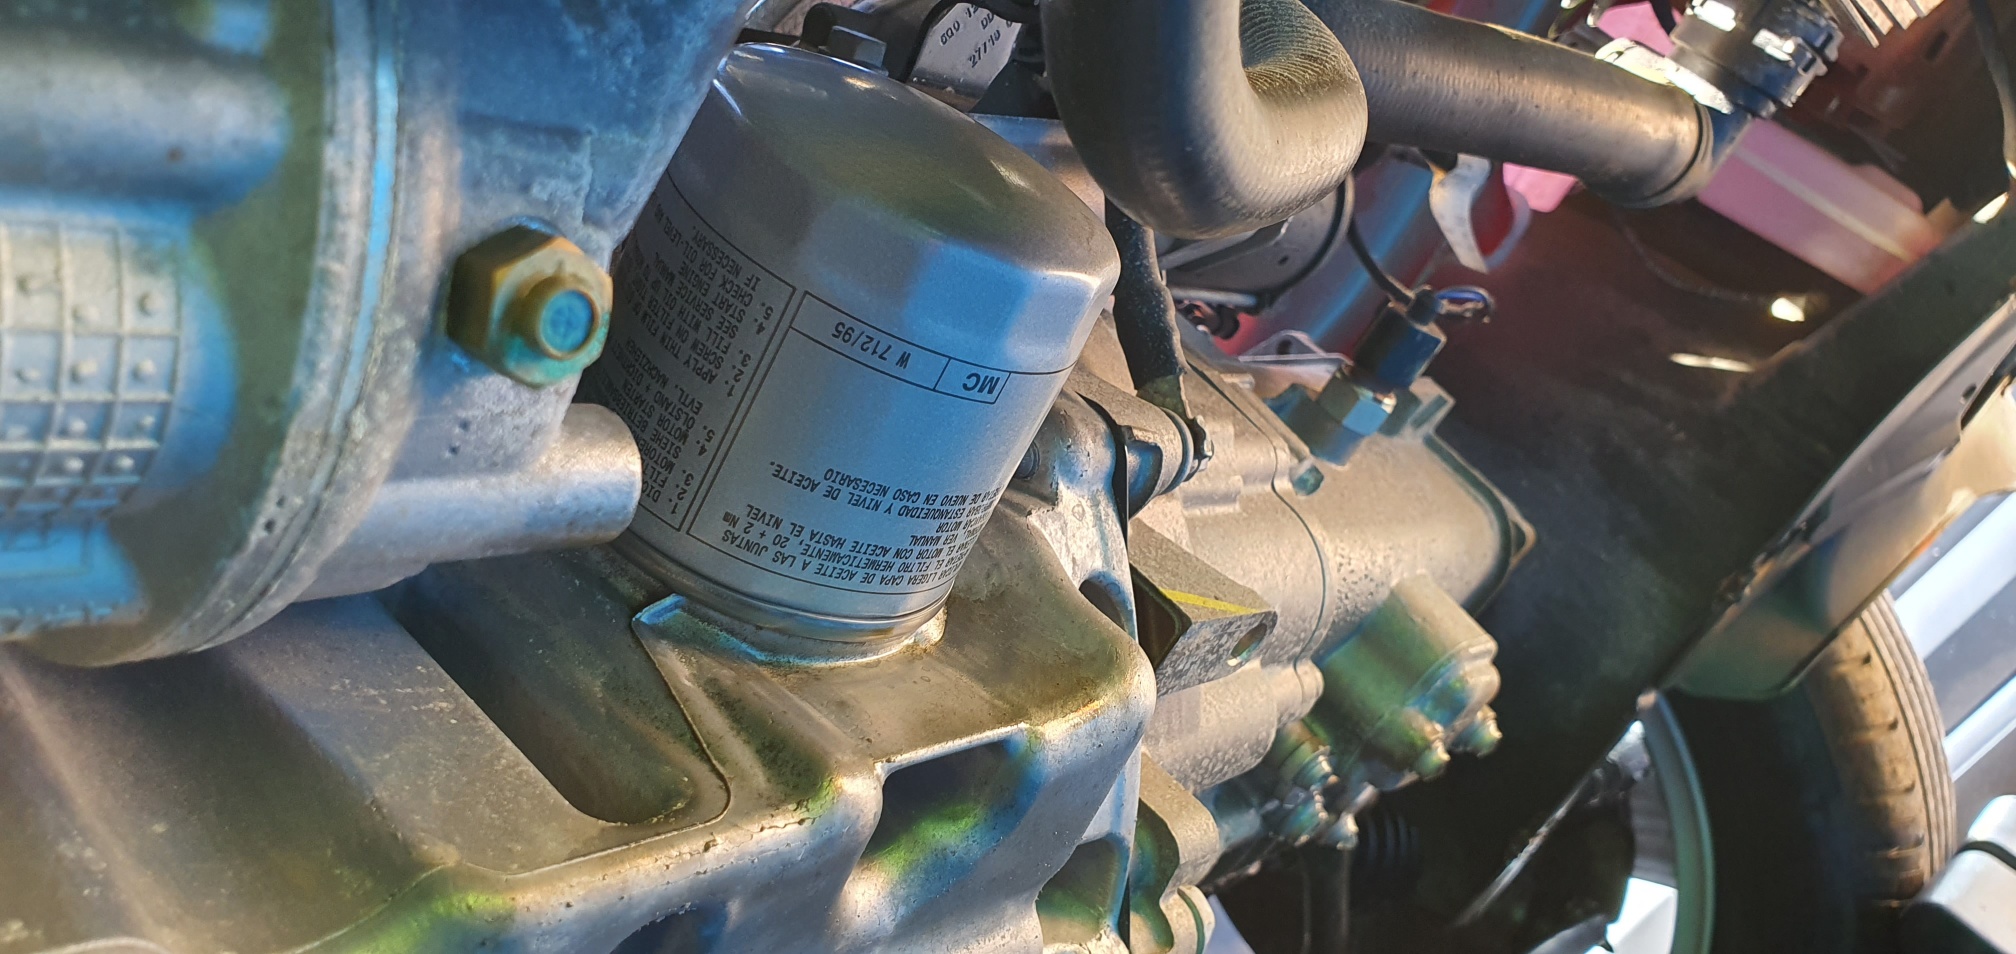
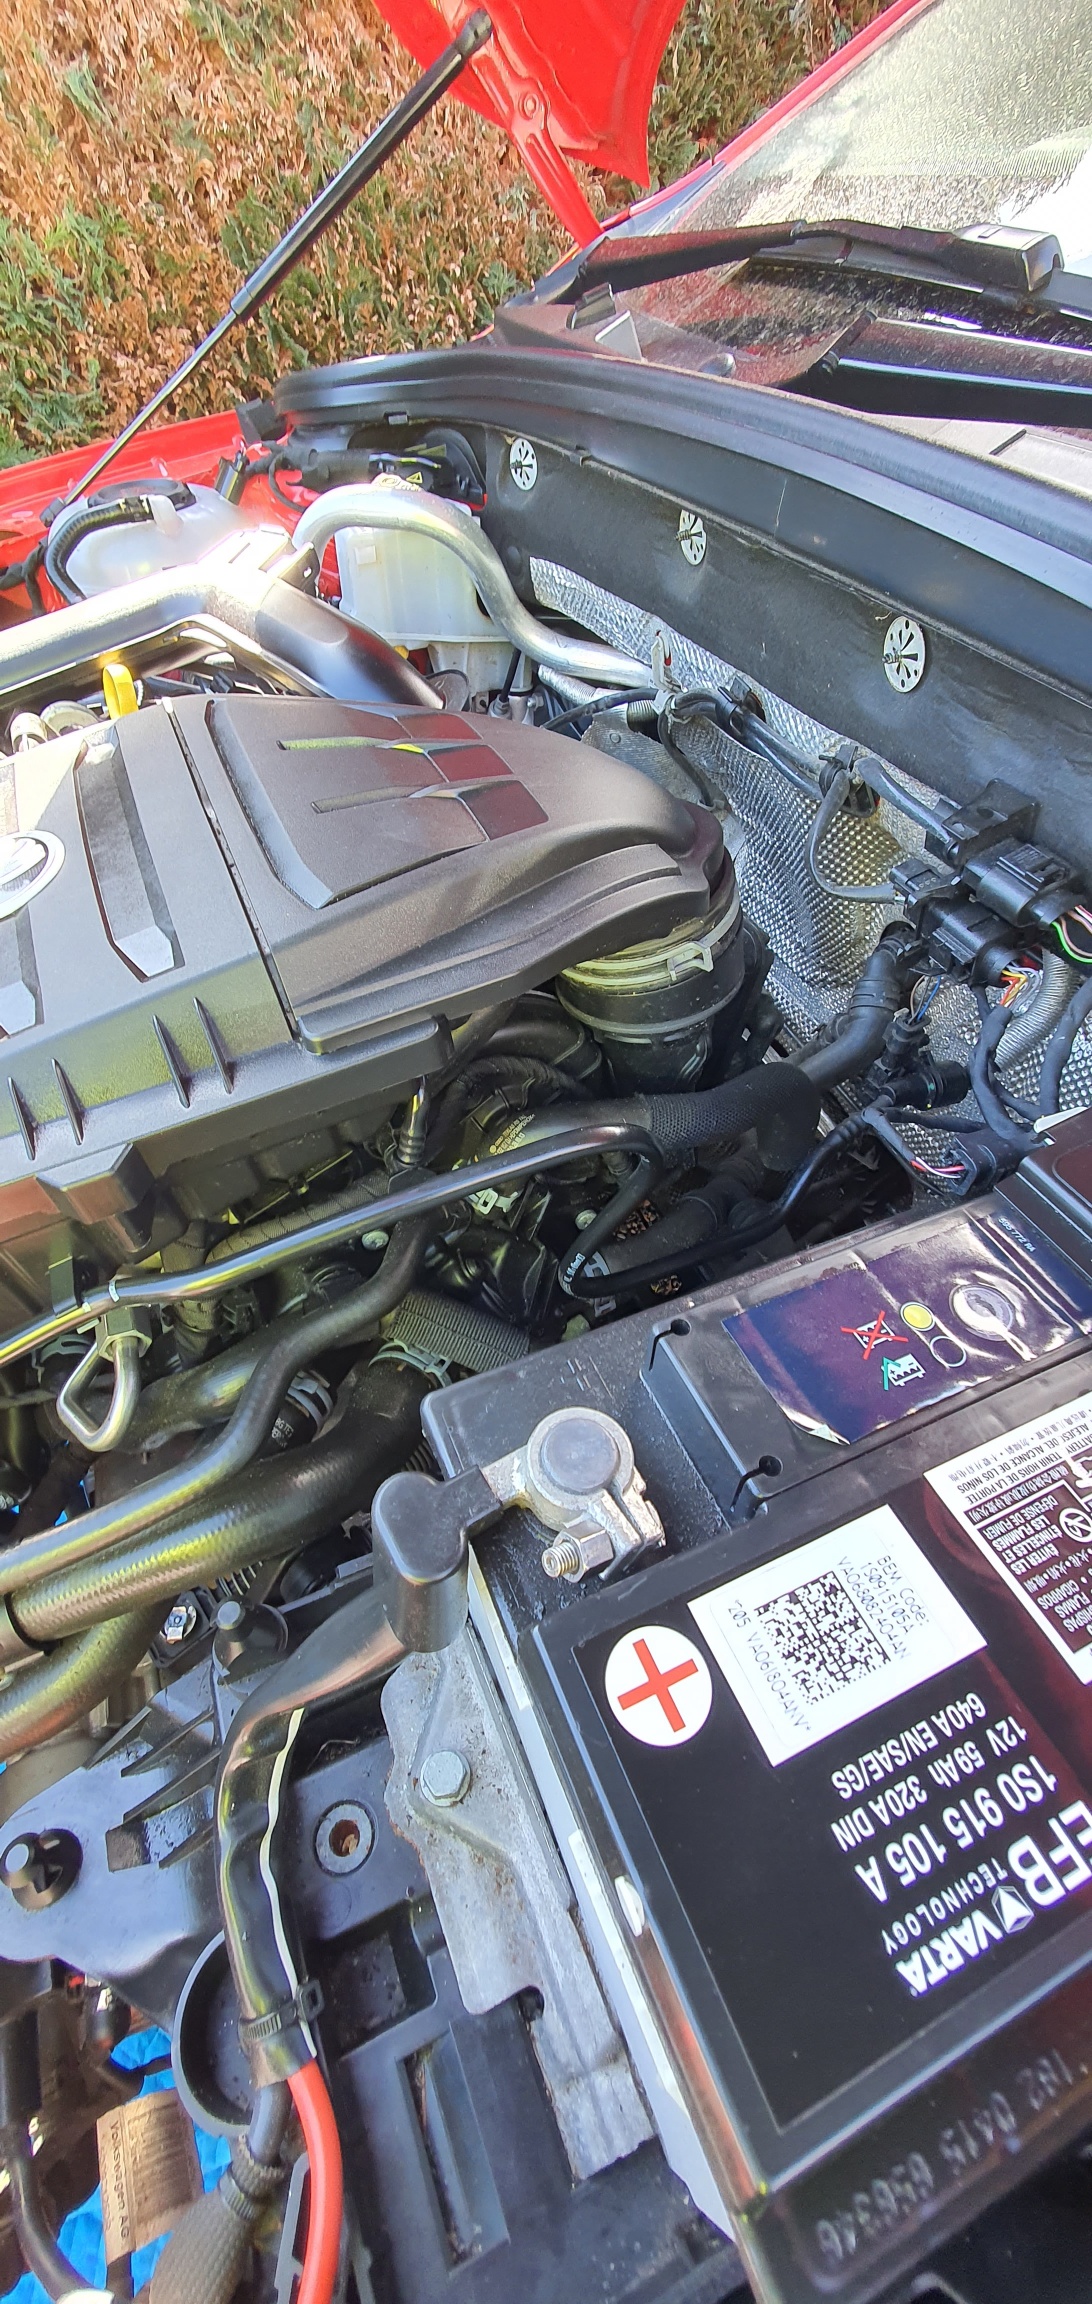
Dear all, When googling around for guides, I've discovered there doesn't seem to be a specific guide for doing an oil change and filter (and air filter) for the 1.0 TSI engine. There are plenty of guides for the 1.2 and 1.4TSI engines, just not the 1.0. My husband's car does lots of short journeys, so the oil is rather black after 6000 miles. To start, you will need the following: T35 + T40 star drives 19mm spanner oil filter remover torque wrench Long nose pliers Set of ramps (I purchased a set of Rhino Ramps + back stops from ebay) Overalls or dirty work clothing Tighter or close-fitting work Gloves Some old clothes or paper towel to mop up any oil spillage. For the parts - can I give an HUGE shoutout to Horton Skoda who supplied me the parts - I paid for the parts, but their service is excellent and I must give a mention to Matt in their parts department who has helped me on this and other Skoda related projects. Go to: https://www.theskodashop.co.uk - and under the top right corner (search) - type in the phase "major" and this will present you with a major service kit for a petrol or diesel. Select Petrol. On checkout, please put in your registration and put in 1.0TSI engine e.g. AB67 XXX 1.0TSI Engine. Parts will be sent out postage FOC and should arrive in 48hrs. Cost was £135 at the time of writing. In this kit, you get: 5 litres of Skoda Longlife 504/507 0w30 oil Air Filter Cabin Air Filter Spark Plugs Oil Filter Sump Plug and washer Oil catch pan (5 litre capacity) 1) Get the car nice and warm - take the car for a 5 to 10 mile run. 2) Come home and directly onto the ramp. Make sure the engine is off, the car is chocked, in gear and handbrake ON! 3) Time to get into your overalls and get under the car - removal of the undertray. There is a single T35 for the front of the tray There are three T35' on each side There are 3 larger T40 on the back of the tray The tray should now hang down - press UP on the tabs at the front of the tray. Tray will now come away - be prepared to be covered in crud and road muck. 4) You now have access to the underside of the car. Release the top oil filler cap to allow for easier flow of old oil. 5) You now need your oil catch can and the 19mm spanner. Undo the sump plug shown above. Watch out - oil will get on gloves - it comes out with force. 6) You now need to take off the oil filter - you will need your oil filter removal tool. Space is slightly tight, but suggesting getting purchase on the end of the filter. 7) Oil will come out from the filter, so be careful. Have some rags available to mop up any small spillages. 8) Put in new sump plug and washer. I've tried to find the correct torque settings - google suggests 30nm of pressure (which is quite a lot). Practice shows that you will get up to about 25nm and that is tight. 9) Put on the new oil filter - remember to put oil on the seal around the face of the filter. google suggests 20nm, in practice, this needs to be done up hand-tight (as tight as your hand can manage). 10) Fill up to 3.75litres (the sump capacity is 4.0litres). We also used an oil additive called Active8 (125ml), but this step is entirely optional. Fill oil until half way up dip stick. 11) Start up car and let car come off high idle to 1000rpm. 12) Let engine idle (do not rev engine here) for a minute. If there is an oil pressure warning light on here - switch off engine, check sump plug, filter and oil level. 13) Drive off ramp - and let engine continue to idle for a further minute - we are trying to achieve good oil pressure and lubrication and filling of the oil filter. 14) Switch off engine - go for a coffee or tea - let oil level settle. Come back and check level and top up to top of level marker on dip stick. 15) Air Filter - the air filter box cannot be accessed whilst on the engine. It needs to come off. 16) There is a T35 at the front middle of the airbox. Remove this. 17) You need to remove the air hose surclip at the back of the filter. 18) The air filter pops off (like pulling off the plastic cover from a TDI Engine). You can now access all of the T35's around the filter - and replace the filter. Please note the correct way around for inserting. Don't forget the T35 in the middle of the filter housing. 19) Put filter back onto hoses and top of engine rubber mount. Its fiddly - and its important that the clip makes a good seal (see photo above), otherwise you will have an uncontrolled air leak. Things we didn't get time to do: Replace sparkplugs, but the car has only done 22k miles (35k kms), so no great loss there. Things to do before your test drive: a) Put undertray back on - check for oil leaks. Suggest washing the undertray if you can.


-
Arh yes, there are two types - one is described as a "phone holder" and is useless for anything other than a 1990's Nokia and the other is called a "multimedia" holder. You are looking for the multimedia holder version. Photo 1 - the useless GSM holder - Useless GSM holder (standard) Photo 2 is the Multimedia Holder - this is the one you want - both are genuine SKODA products: Multimedia Holder - available from Kopacek in Czechia and theskodashop.co.uk (Horton Skoda)
-
Err..no. Rule is...leave it as it came in. A legitimate test drive would be within the range of 5 to 8 kilometres. It shows sloppy attention to detail which makes you think how well they have service the rest of the car. I would complain to the service manager if I was you.
-
There are some right cowboys and girls out there. Without naming the dealer which town or city did this happen at?
-
It takes anywhere up to an hour, but usually quicker; it depends on the updates being applied.