Breezy_Pete
Sponsor
-
Joined
-
Last visited
Everything posted by Breezy_Pete
-
It's a bayonet type fitting, like a light bulb isn't it? Push in and twist through a small angle to lock in?
-
Yes, naturally aspirated 1.4 4 pot petrol, 160k miles. So vacuum in inlet manifold makes PCV system relatively easy to implement.
-
So on my car there is slight suction pulling the cap back down, resisting removal, at warm idle. Not sure how clearly this snippet shows it. 20220606_171215.mp4
-
Sounds like nonsense. I only have petrol engines to play with, but slight suction is what I know as normal, I'll take a vid when I get home if I remember. If you're lucky @J.R. might do the experiment on his 2.0 TDI and describe the outcome for you.
-
This may help, although Polo-based rather than Roomy, same principle may apply (see posts from 17th Feb>): Deadlock hack
-
Impressive, but burning through tankfulls of fuel just to show yourself how economical your car can be seems a tad ironic. Why not just measure day-to-day consumption while driving necessary journeys; surely more representative than some eco-marathon?
-
Pretty sure they'll all be there. At least two on page 1 for instance G01& L18. Press the + button, middle of header, to zoom in for easier reading.
-
That's only a few of them Lee, often missing handy ones like the front brake PR code. The full car data runs to a few pdf pages of codes, with brief definitions of each; much more comprehensive. A helpful dealership parts counter person may provide the car data pdf FOC if you ask nicely.
-
Measure with either a drill bit or calipers/rule to see what size it is: triplesquaretable.pdf
-
Take the car back to the dealership and ask if you can get the discs upgraded to double-glazed ones. Just for poops and giggles.
-
Use Fuchs 502 00 rated, 5w40. Mainly because of the childishly amusing mame.
-
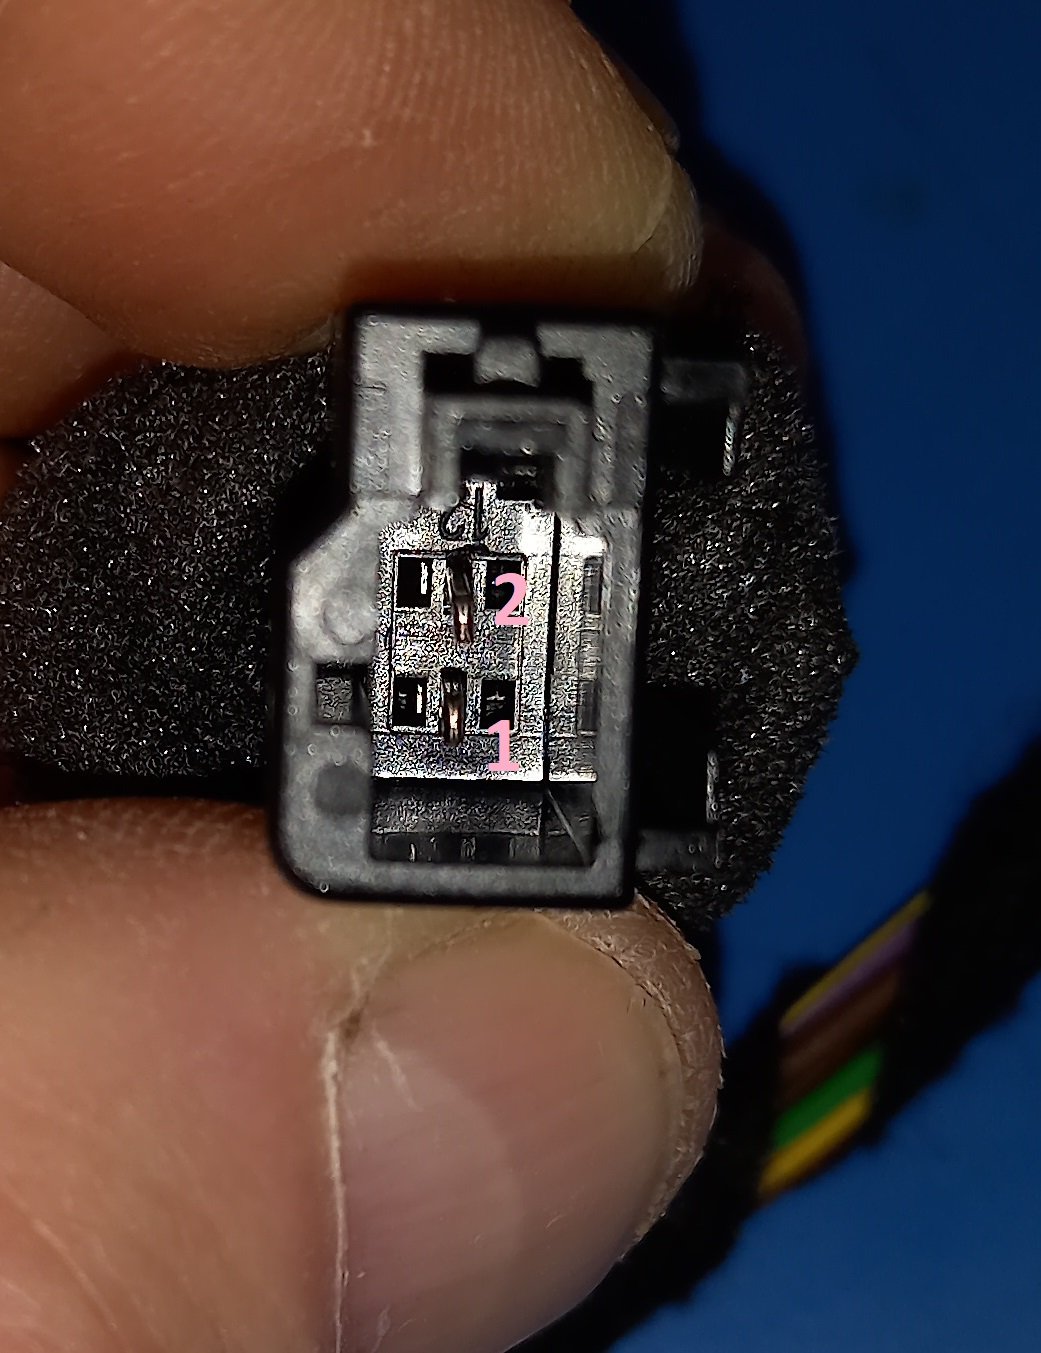
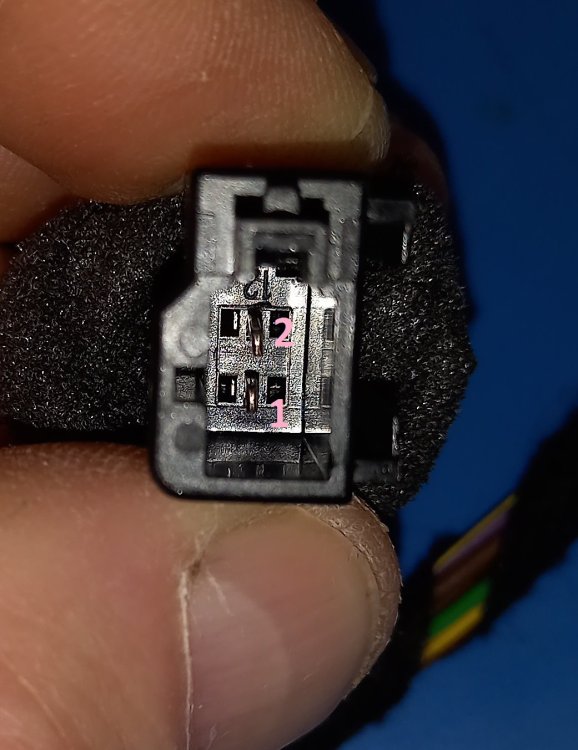
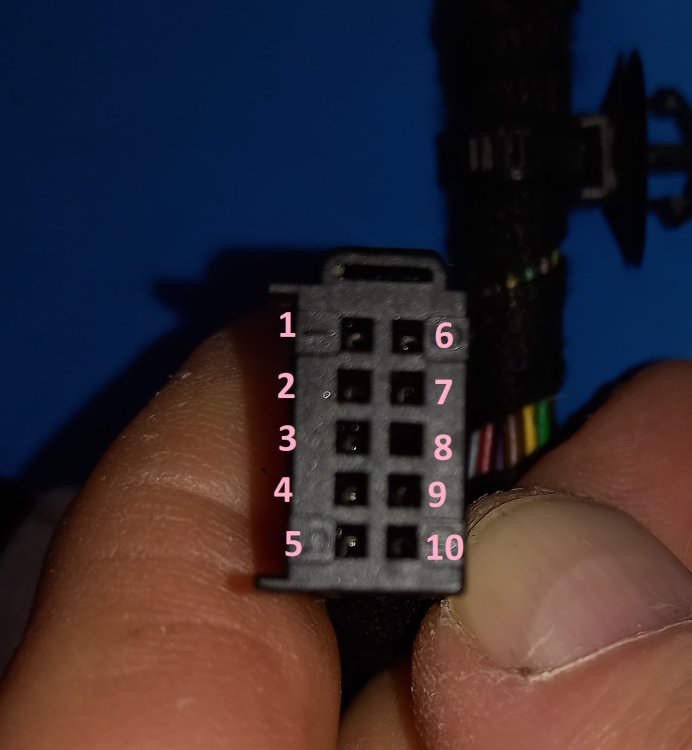
Yes, pin 1 position empty.
-
I have no knowledge or experience of that engine, sorry.
-
It could simply be that someone has dismantled the instrument cluster for genuine reasons (to repair a fault), and put back that gauge needle in a wrong position. It can be hard to get them back perfectly right on clusters I've worked on. Worth checking that all the warning lights that you should see briefly at ignition on are present though. One reason for getting into clusters is to mask stubborn warning lights...
-
Well done.
-
I think the QMM bit is probably your gearbox code, but scouring the parts catalogue for CRMB engine coolant temperature sensors has drawn a bit of a blank so far. This page should have one as item 9, but your engine code isn't in those listed, oddly: LLLParts Thus far I haven't found a listing for a second sensor, despite looking in electronics and engine subsections. I wonder if @nige8021 may have more success, with his greater familiarity with diesel engines? This previous discussion suggests that I should have looked at wiring info instead of parts catalogue, and that you may be chasing unicorns looking for a sensor no.2:
-
Probably close to the point the lower radiator hose attaches to the radiator. Engine code and the exact fault code might help to confirm. If engine code is a term you're not familiar with, see the relevant link in my signature. If you can't see my signature, view on a computer instead of a phone. I'm not convinced that the rapidity of the gauge reaching 90°C indicates a fault though. Modern engines have partitioned cooling systems deliberately designed to hasten warm-up. Much more actively so than just a thermostat keeping the radiator out of circuit for a while.
-
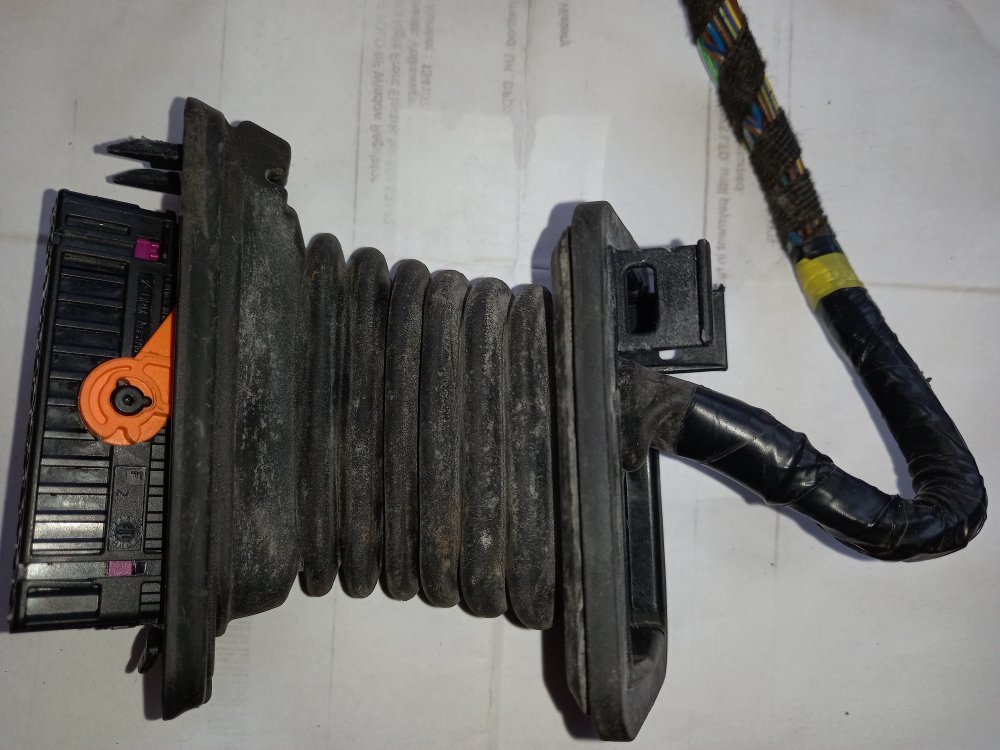
If you send me the loom I could repair and return, for a reasonable sum. The bank hols get in the way a bit, but let me know by PM if interested.
-
Lock-related signals go direct to the BCM via the wires in the last section of my word doc, but the LIN data comms line on 5/28 forwards that info to the window motor module, for functions where there's an interaction between door or lock position and what the windows should/shouldn't be doing.
-
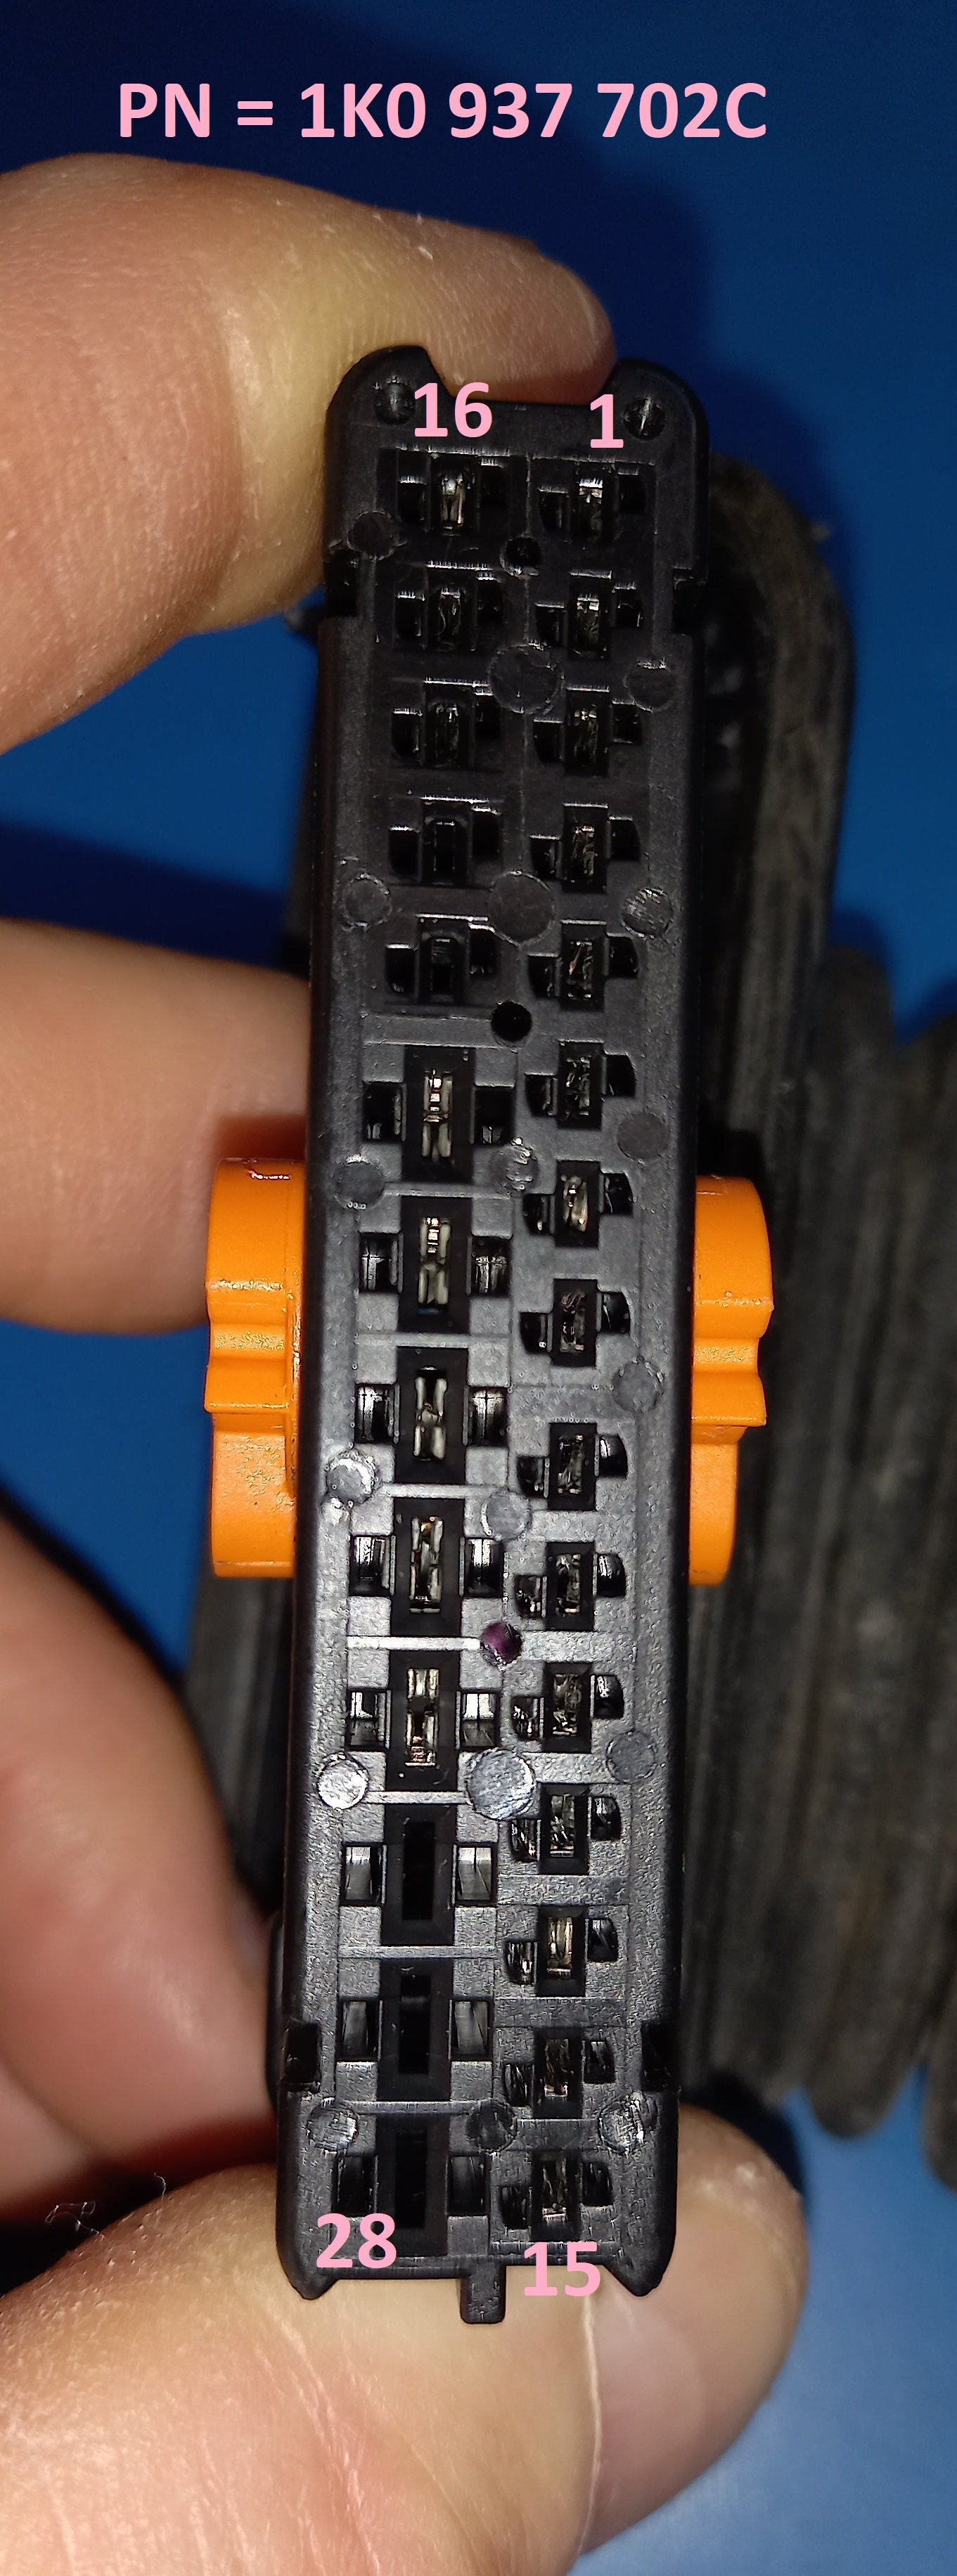
The loom from which these photos and wiring tables was generated was part number 5J0971120GK (made in late April 2012); if yours is a different part number the tables shouldn't be relied on 100%.
-
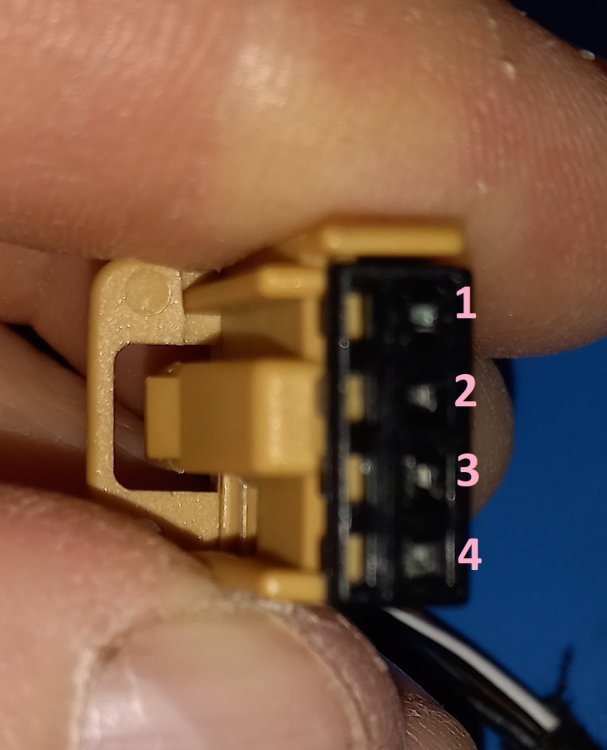
Yes, there's a purple plastic part that needs to slide one way to unlock all the pins, then you'll probably need a pin removal tool of some sort, not sure exactly which type suits, but generally a pair of stiff steel wires just the right distance apart to defeat the locking features of the crimp inserts.
-
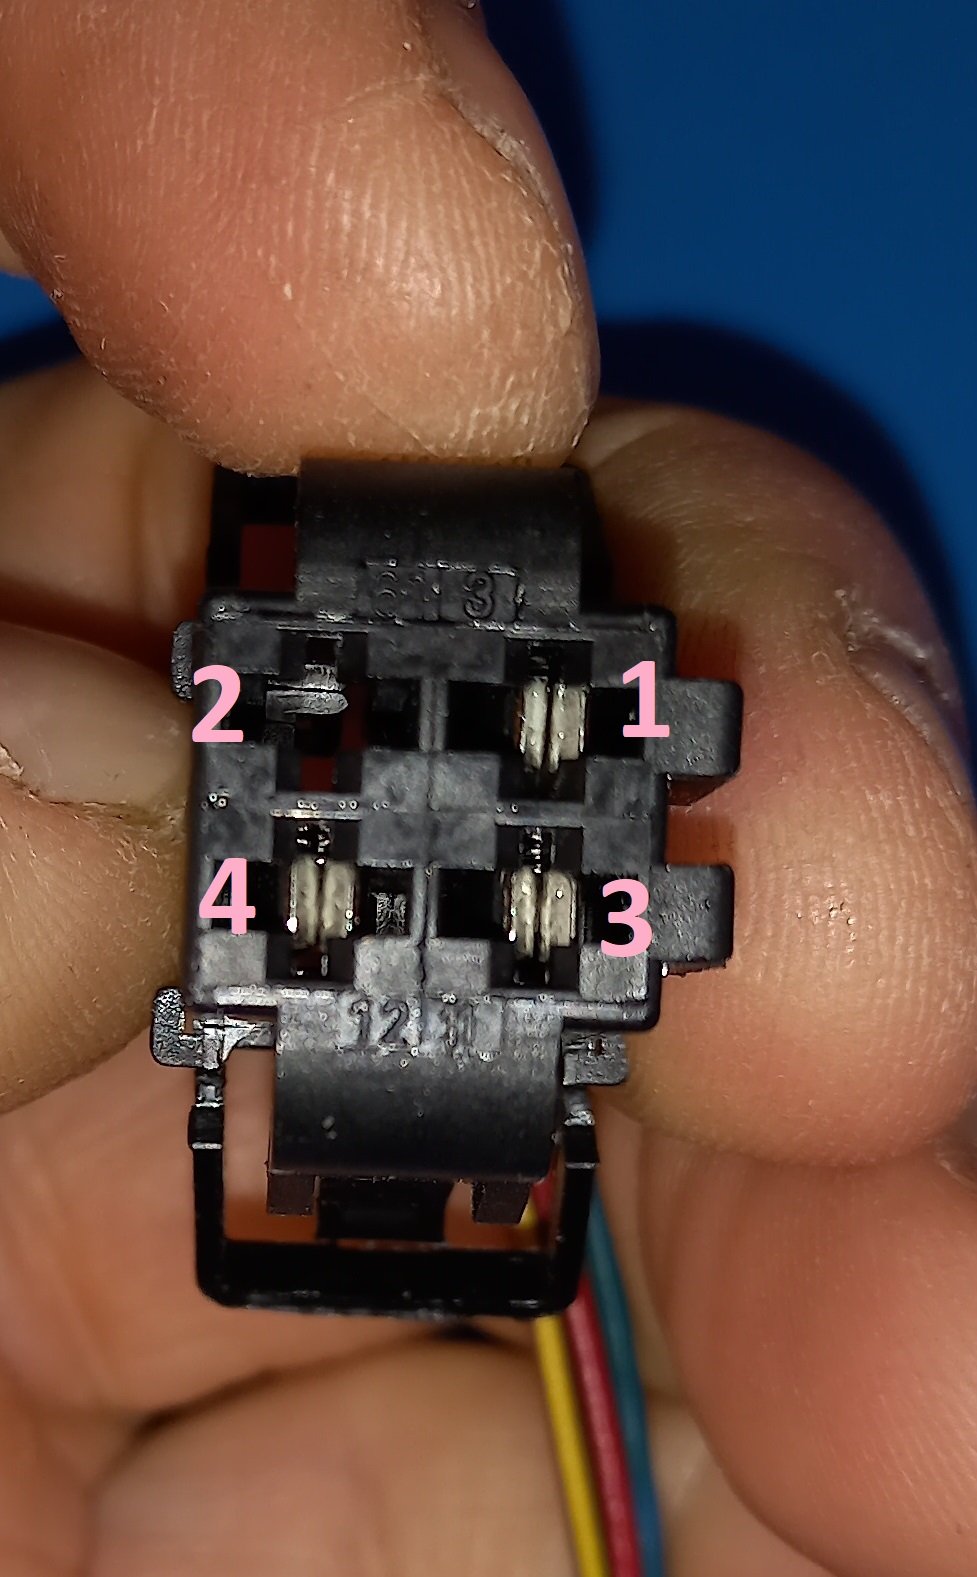
Not sure if it'll let me upload all the other pics at once, but here's my attempt: They could do with labels saying what they are, which I'll add and try to harmonise with the written info when I get round to the proper how-to . Be aware that if trying to buzz out with a multimeter, you're very likely to need a short piece of thin wire to poke into each connector 'pin' to ensure good contact with the multimeter probe, most of the orifices won't let a probe tip far enough in.


-
I see an error in my word doc where 3/4 got turned into three quarters, and another where I wrote 24/25 instead of 24/28; cheers!
-
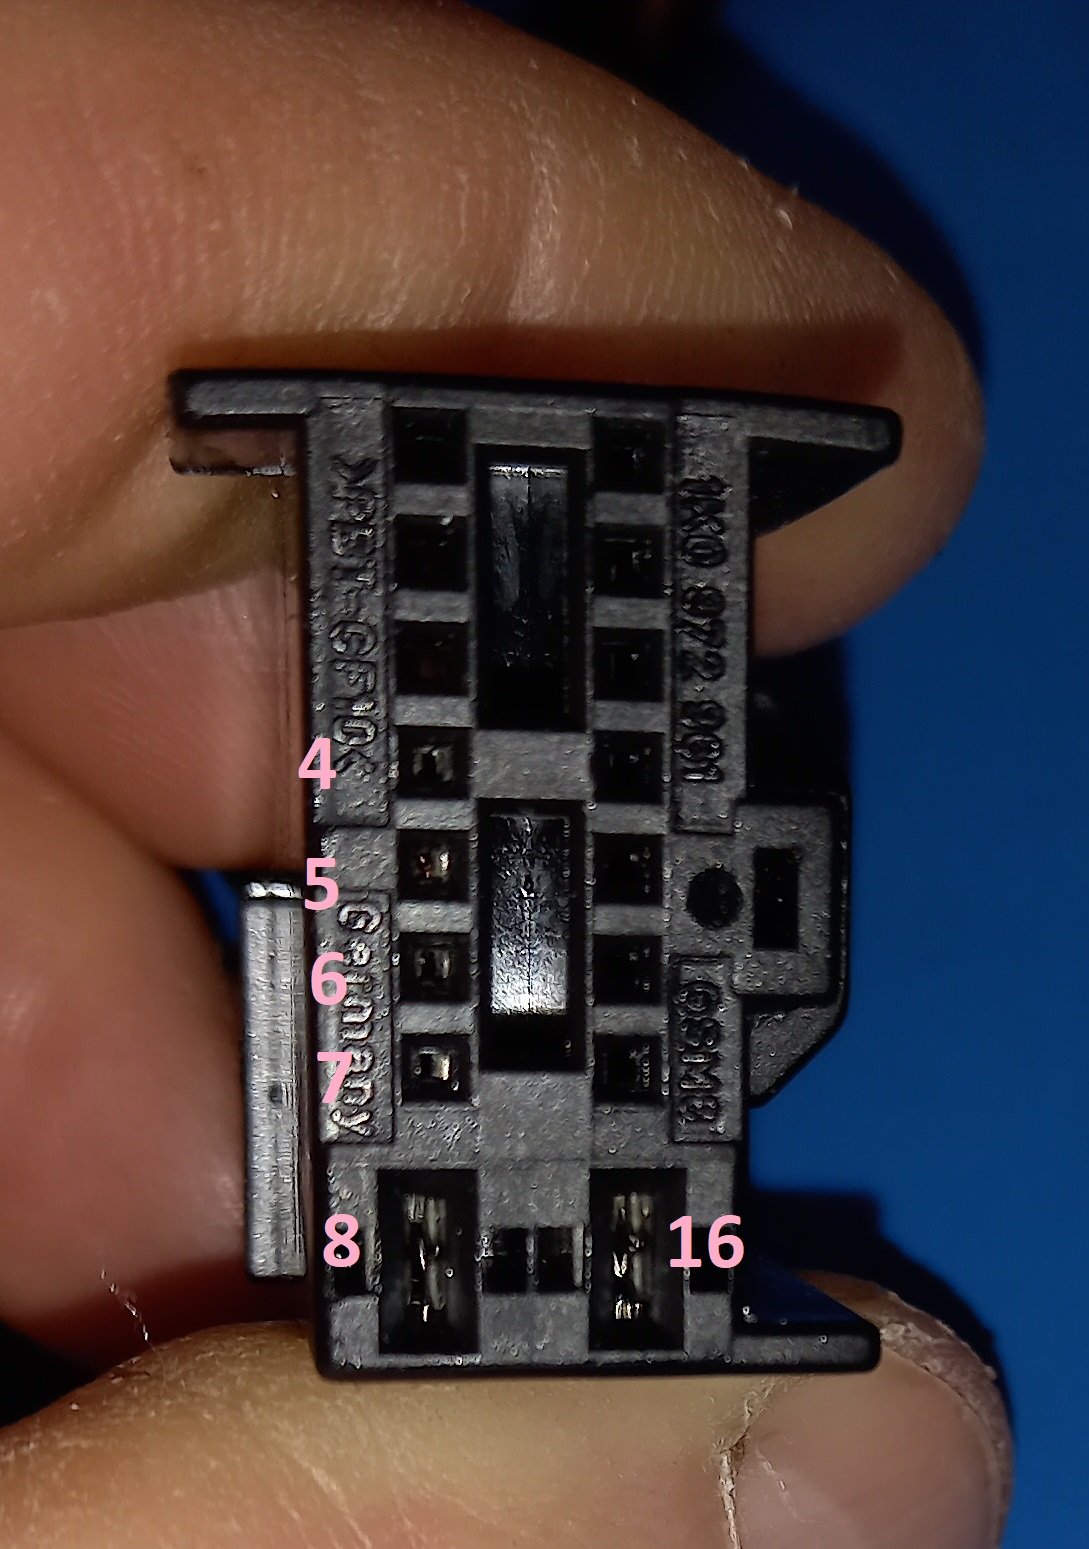
This is the pinout of the 28-way loom connector, viewed on the mating face

-
Yes, pin 5 of the 28-way at the a-pillar connector is the one you've heavily underlined. Column of pins nearest you, 5th one down.