Skip to content

All Activity

This stream auto-updates

  1. Past hour
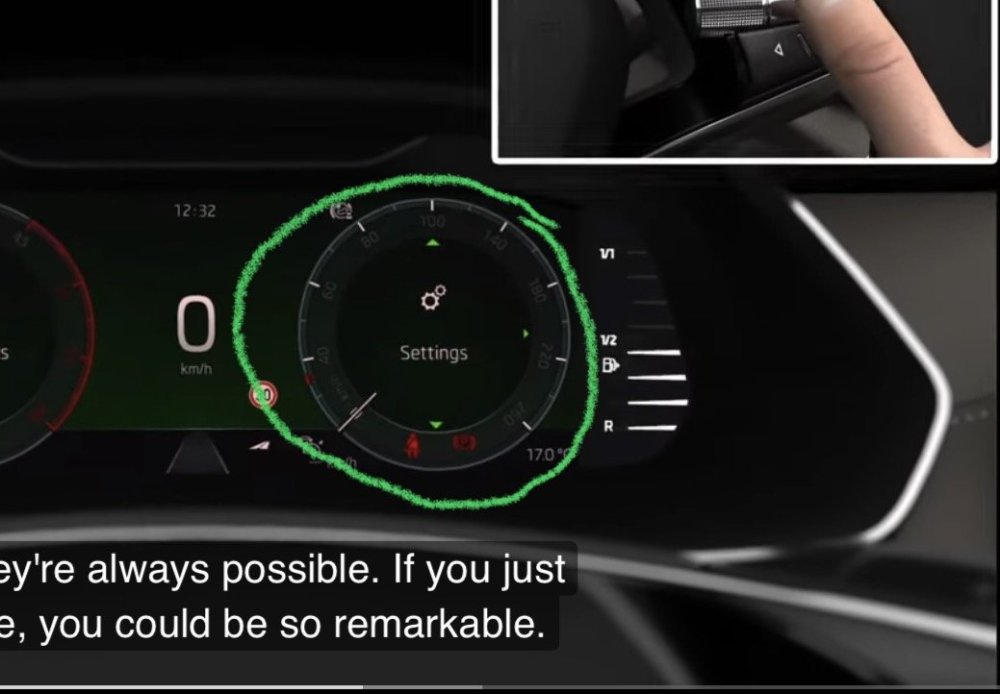
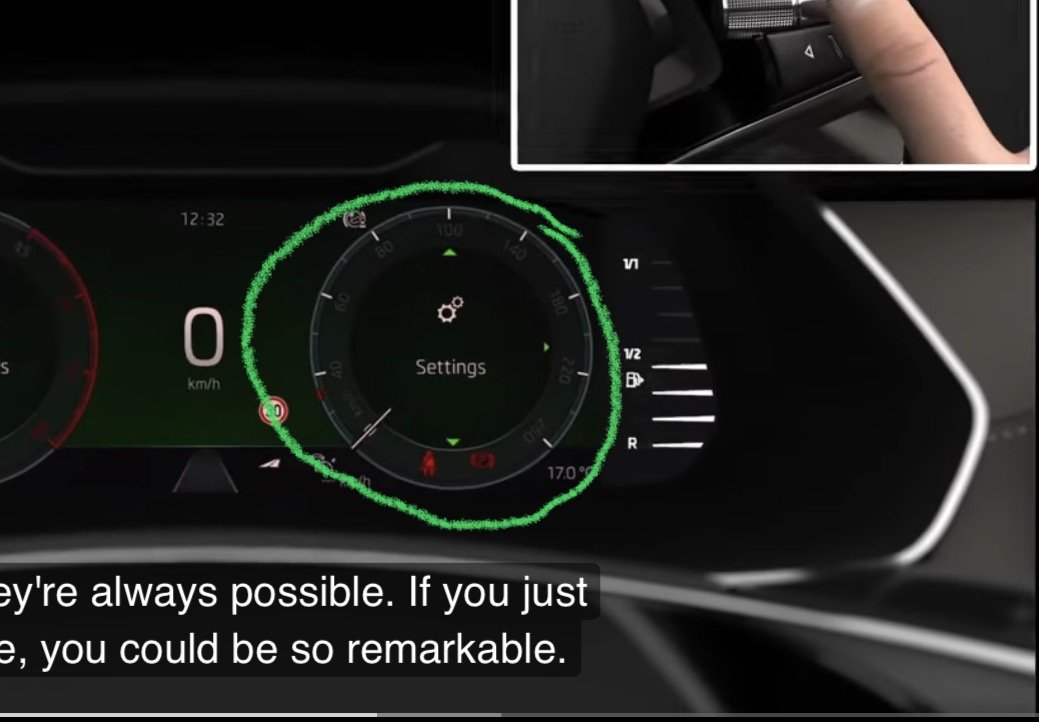
  2. Specifically, I am referring to this part I’ve marked in the photo.
  3. I have the older Mk4 Octavia, so unfortunately I can't help you. But I wanted to add that disappearing functions from the infotainment menu is a problem which is suffered in the Mk4 too. Skoda really need to invest in some decent software techs
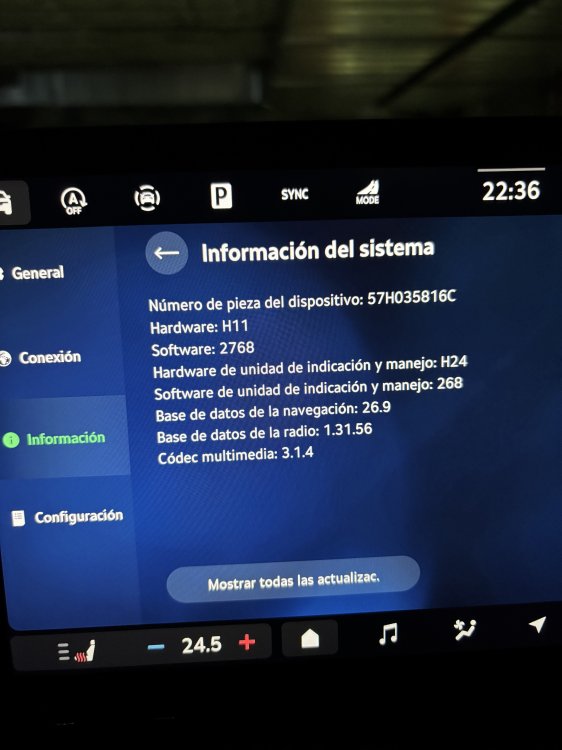
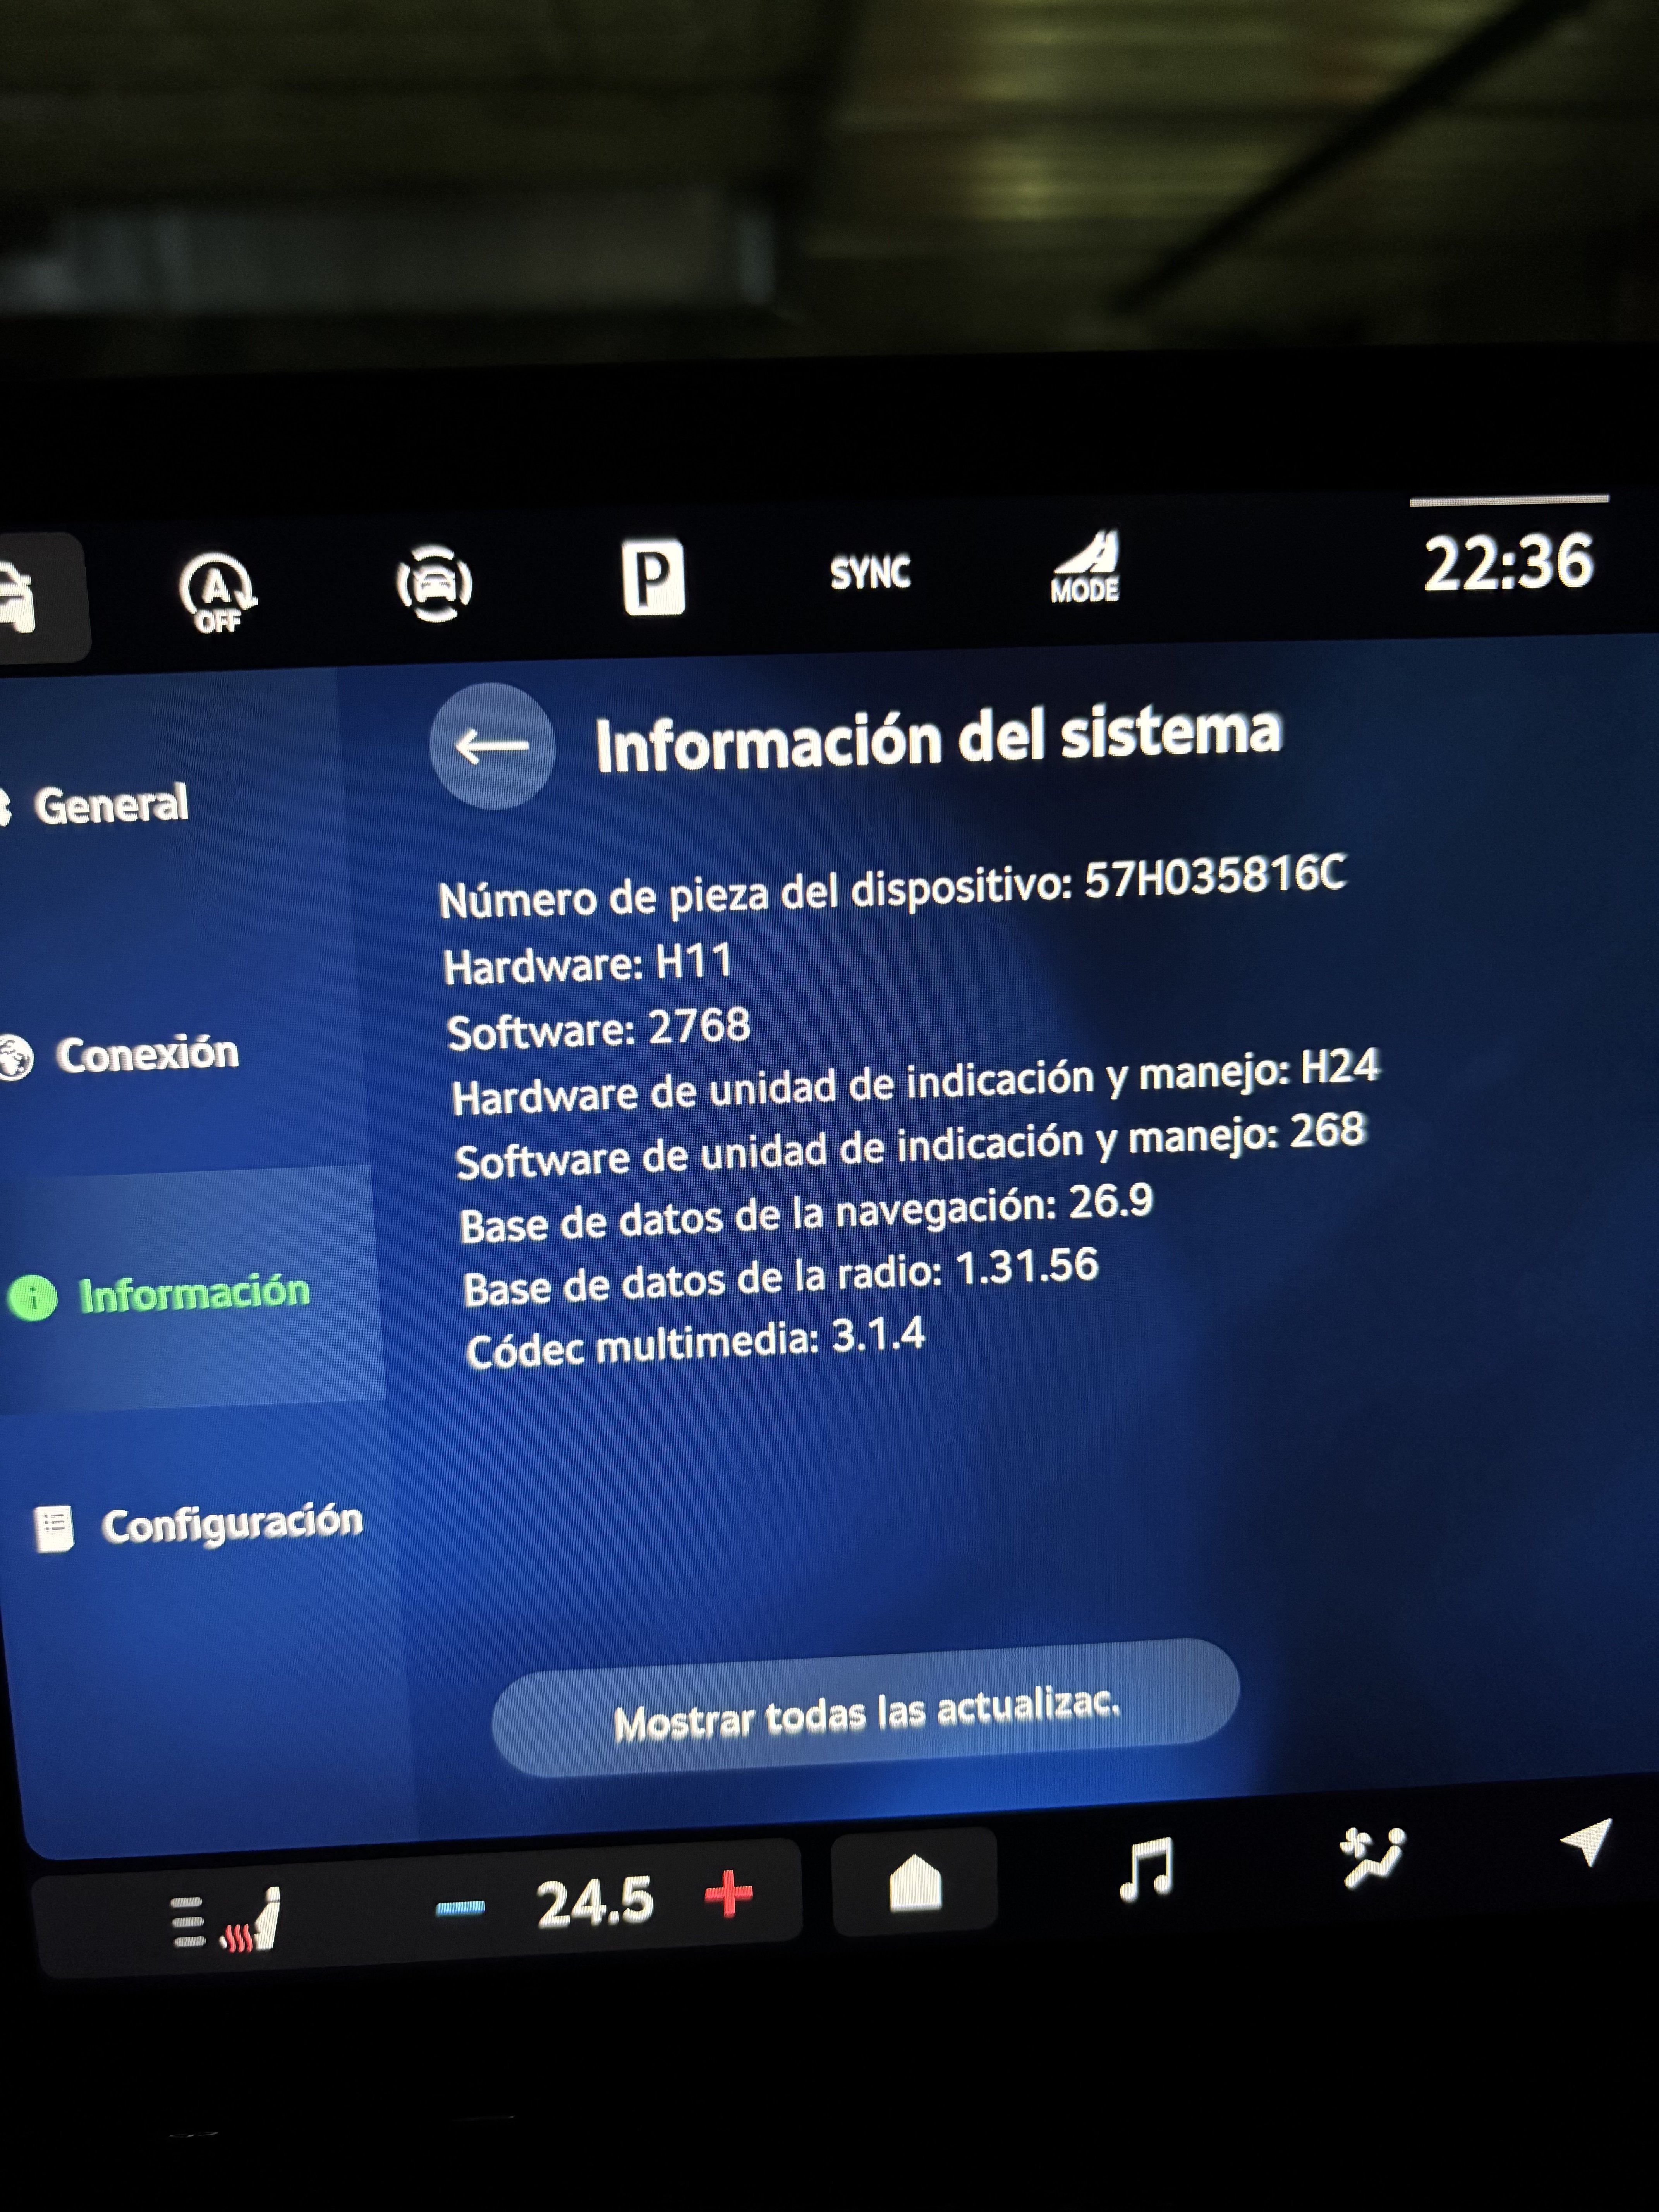
  4. I’ve had a 2026 Octavia Sportline (1.5 TSI) since August. The configuration option on the Virtual Cockpit display—used to add or remove data—has disappeared. I’ve reset the infotainment system, but I still haven't been able to get that function back. I’m attaching a photo showing my hardware and software details. Can anyone help me?
  5. Today
  6. Is this the kind of upgrade that you can tutorialise?
  7. red-ireland joined the community
  8. Indeed, glove box unit must be replaced. I will send you PM.
  9. I can do it for you, as I can see you are from Czech Republic and I am in Poland so shipping costs will not kill it... @CrazyWolf @Rocketeer125 check your PMs for MST2_EU_SK_ZR_P0480T download link
  10. lucky987 joined the community
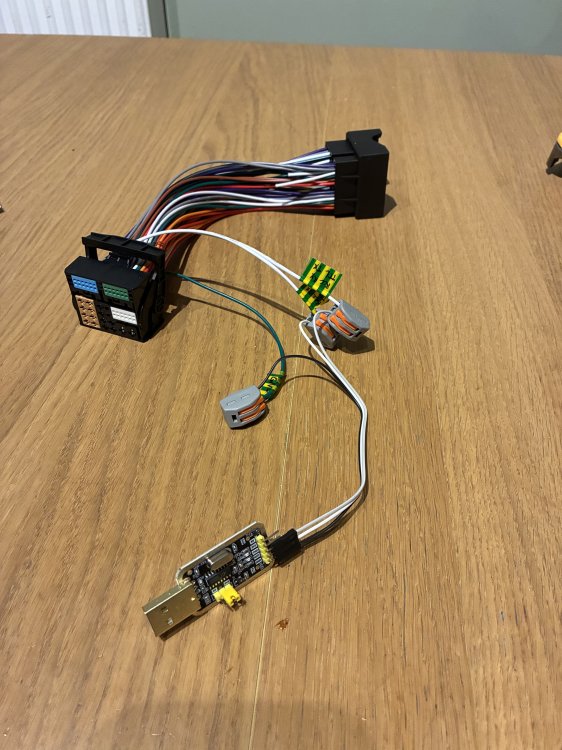
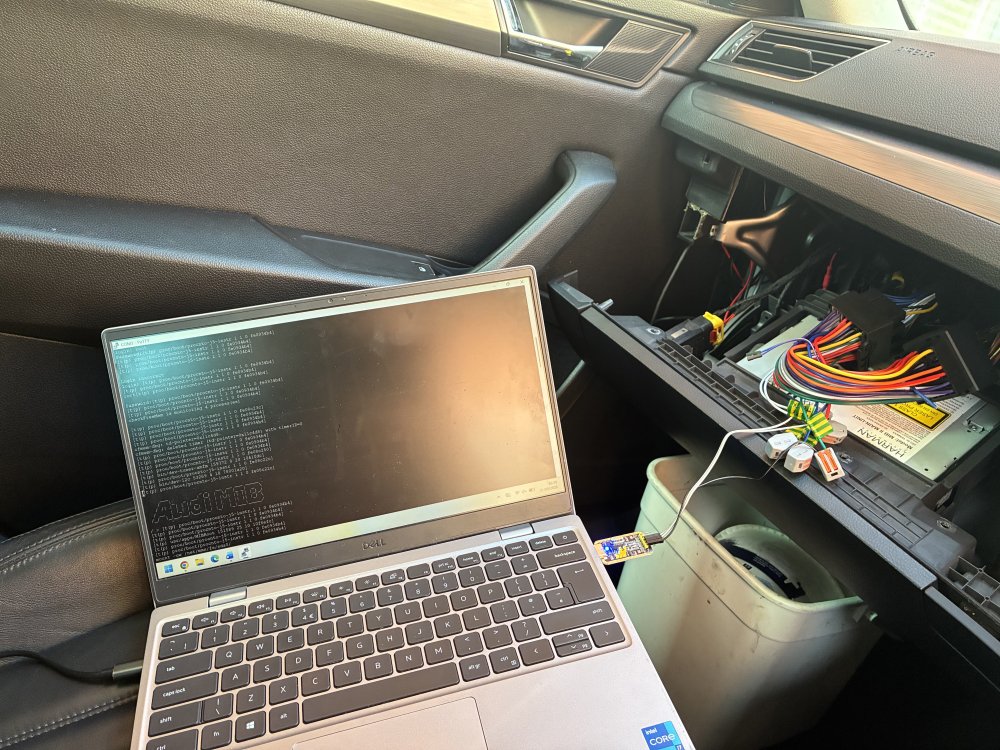
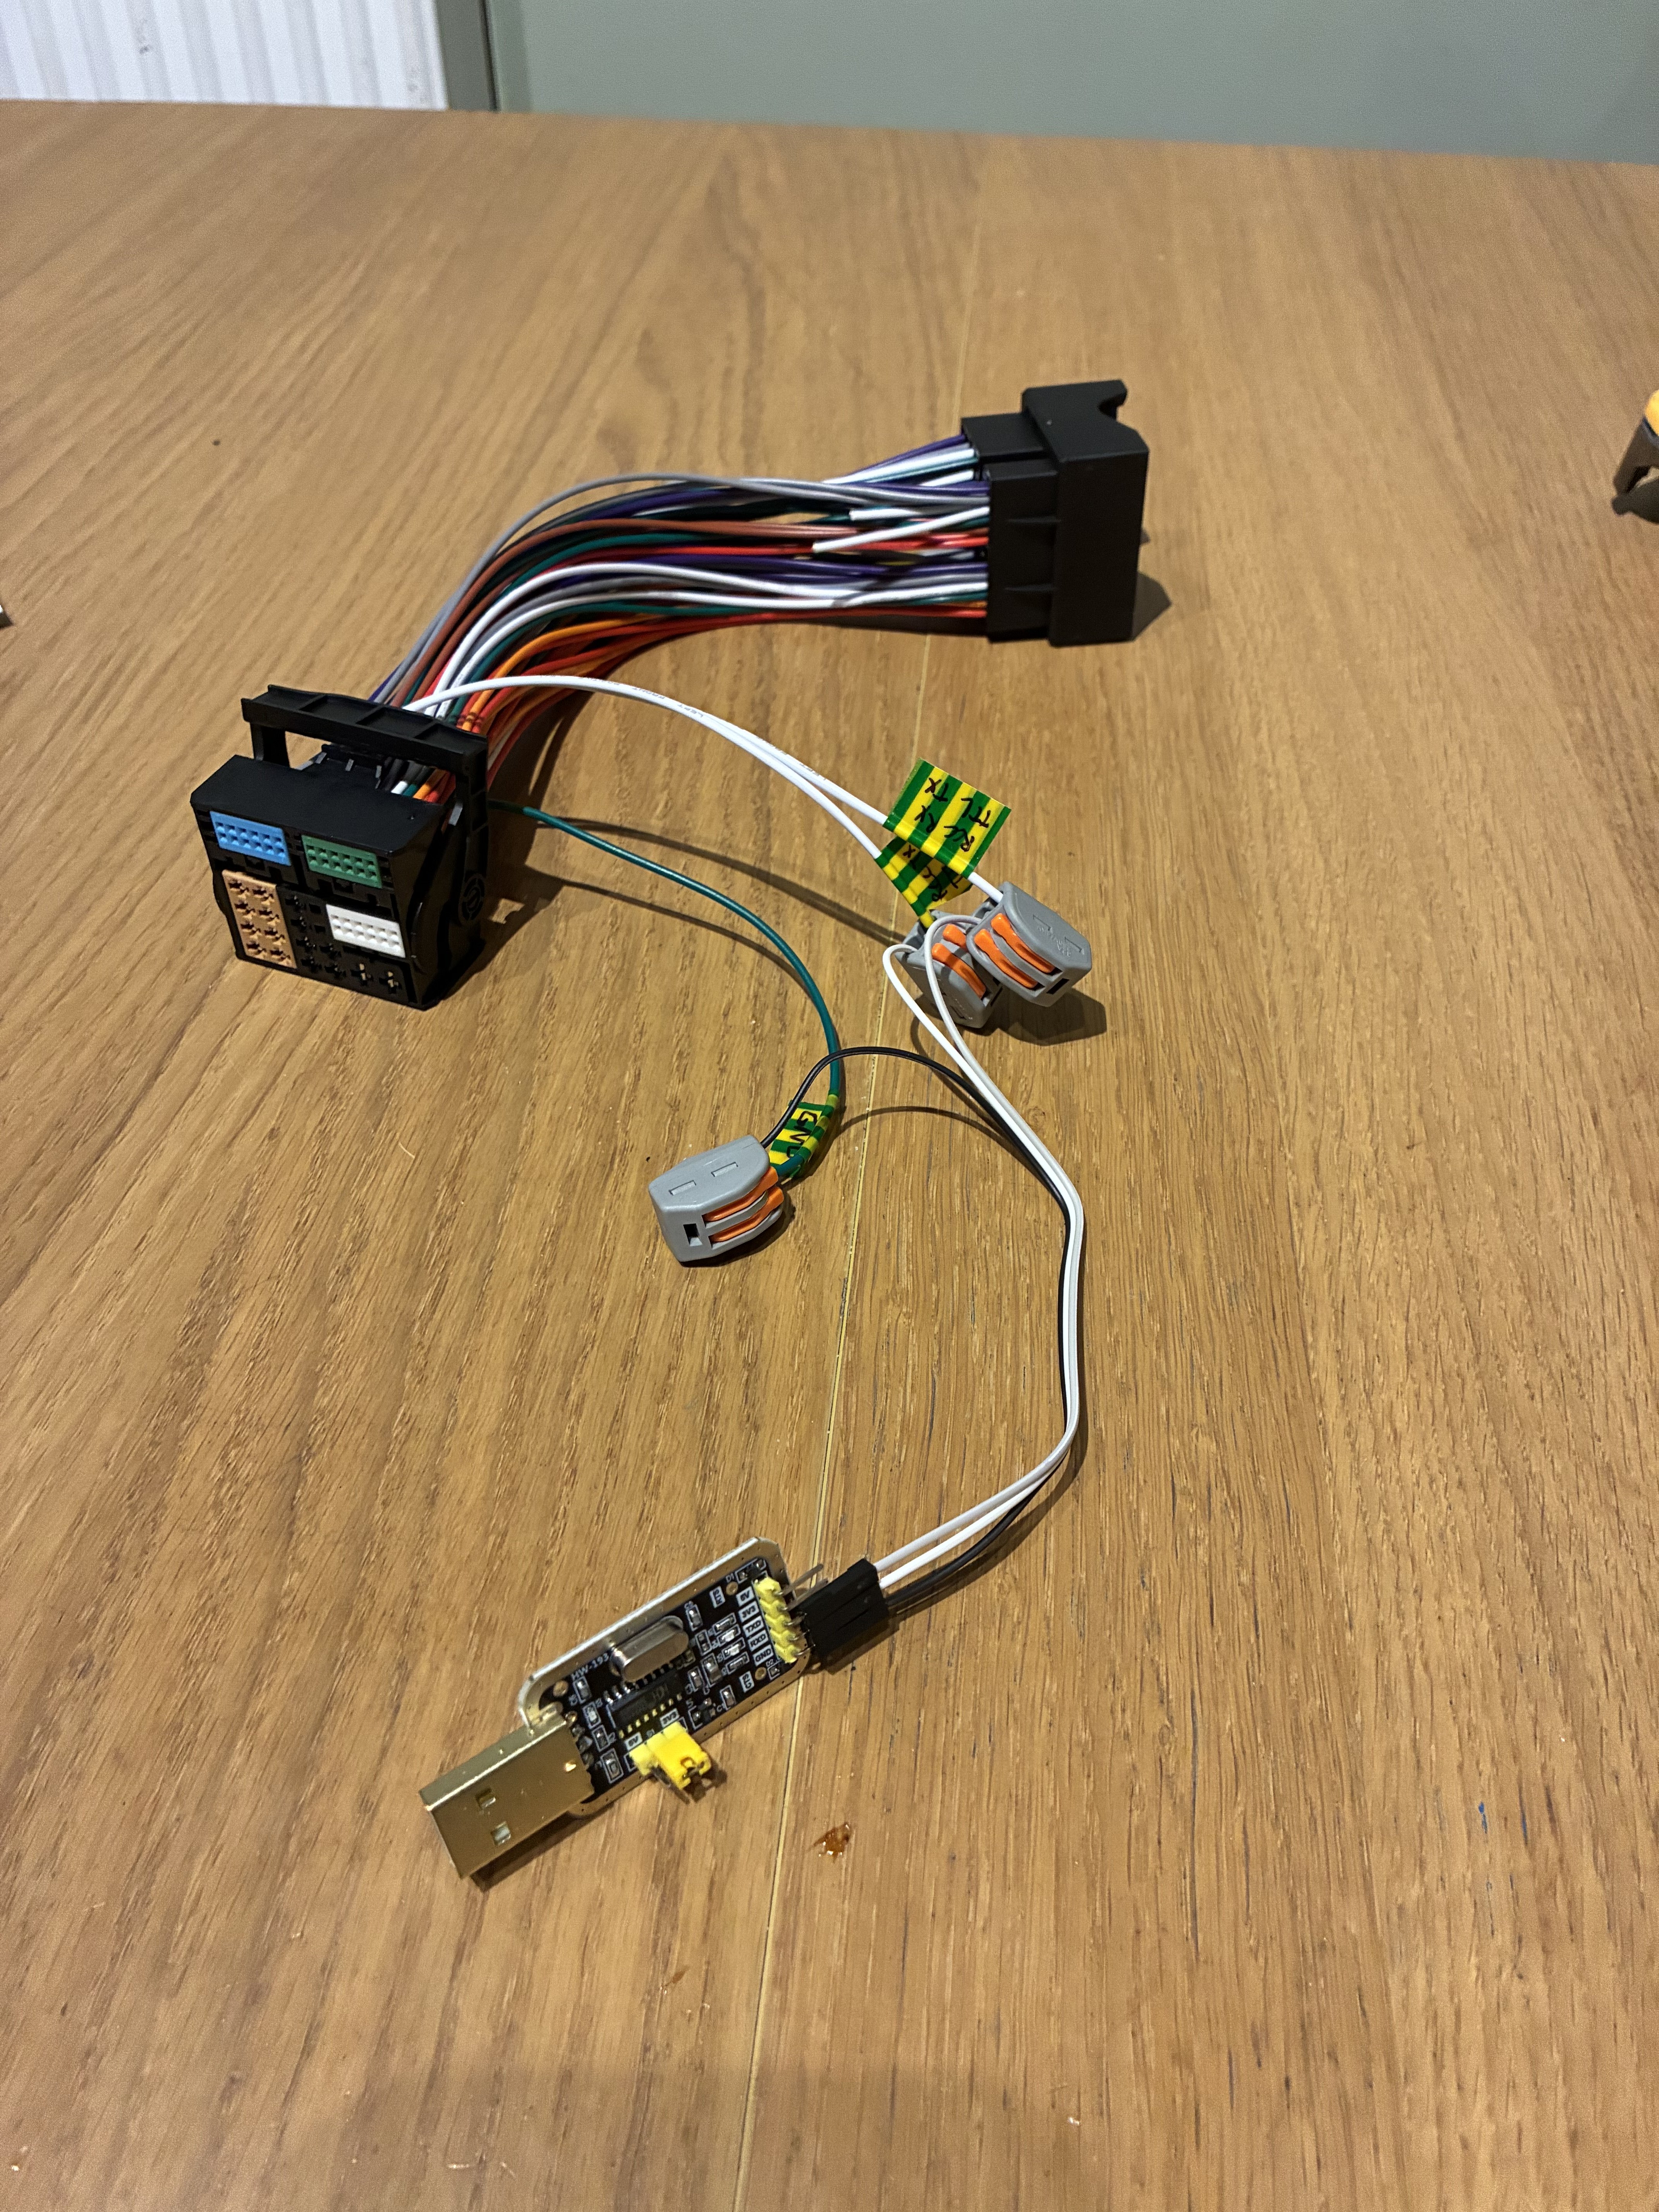
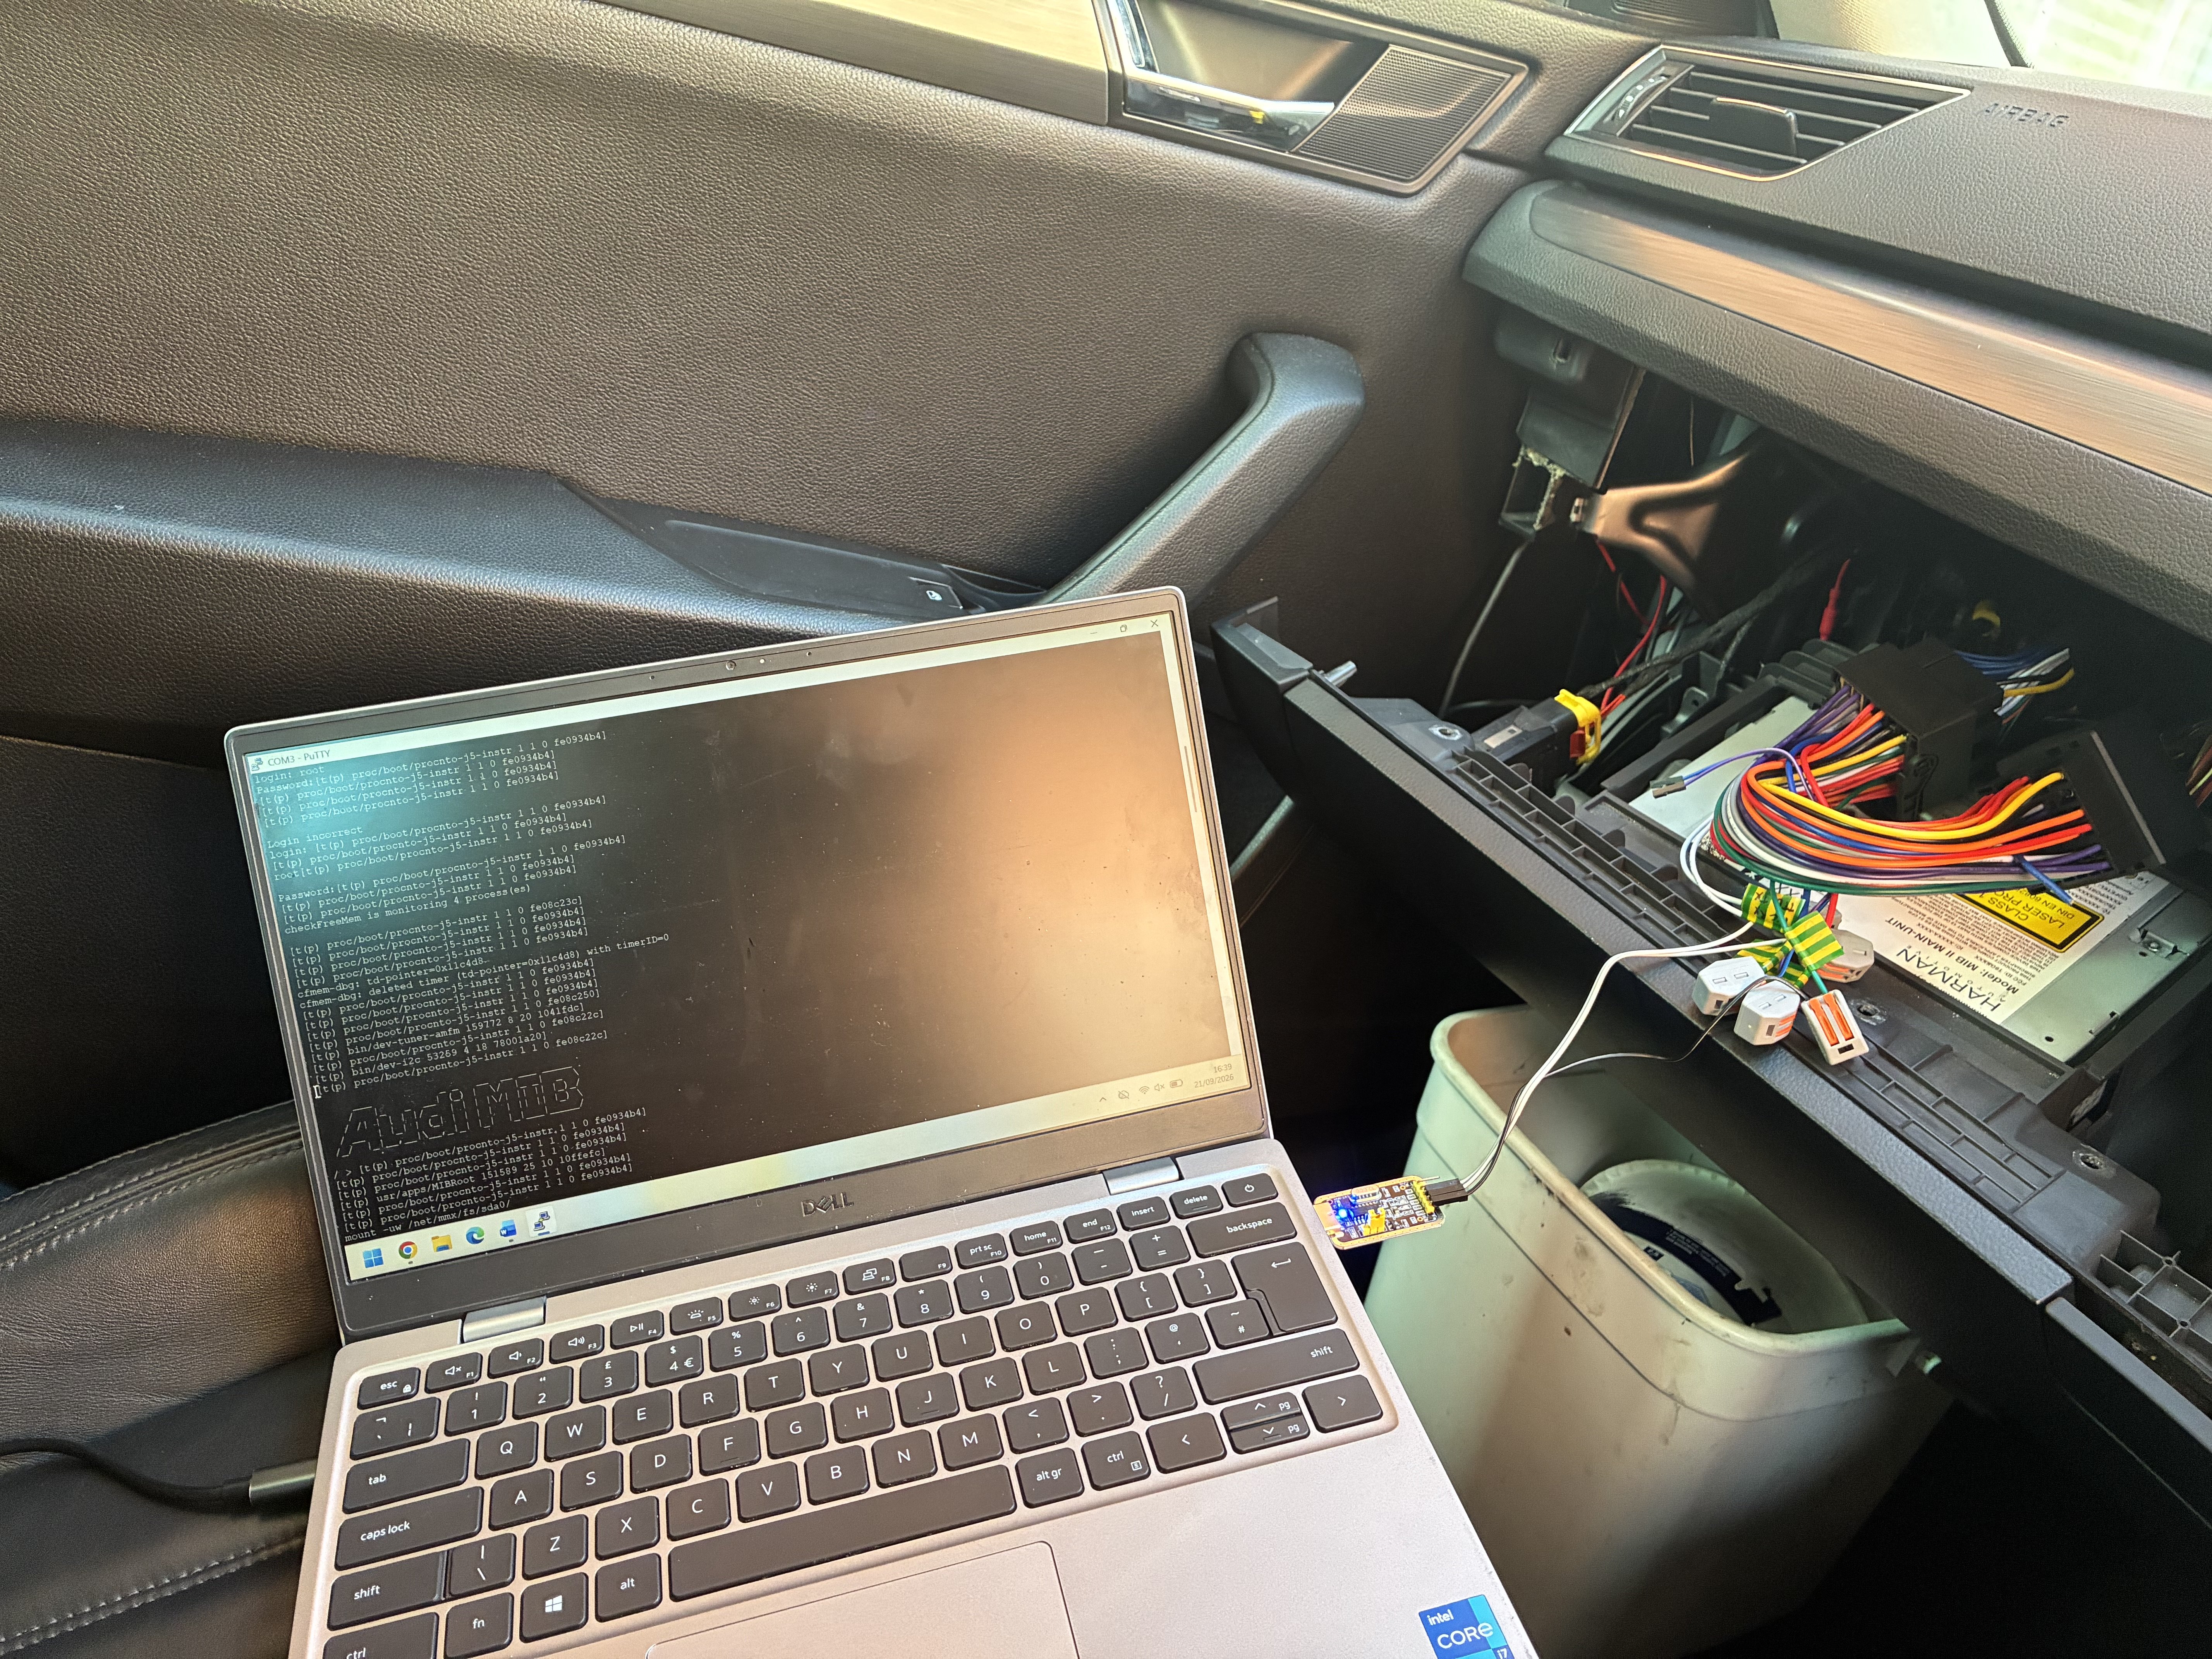
  11. Notta762 joined the community
  12. I wrote a guide for connecting by UART should anyone need it in future.
  13. Having had to do this recently to try to recover a bricked MHI2, I found the info to be a bit all over the place so thought I would gather it into one guide. You may well need the guidance of an expert such as @pab567 once connected to the MIB for the next steps in recovery/programming, but this set up will allow them to remote access to you to do so. I take no responsibility for any effect connecting in this way has and am in no way an expert on this process! Parts required: TTL to USB adaptor. There’s lots about on Ali or Amazon. Look for CH340 chip and you need to make sure it supports 3.3v. This is the one I used https://amzn.eu/d/03Rt3b1k Quad lock extension cable. Not completely essential but this is an easy way of connecting to the right pins and also allows you to connect cleanly and reversibly to the existing wiring whilst maintaining all the other connections to the car for testing purposes. https://amzn.eu/d/086O3DlR Connectors, such as crimp terminals or WAGO connectors. Laptop First step is to make up the cables following this guide https://www.scribd.com/document/849387823/Connecting-TTL-adapter-to-UART-on-quadlock-VAG-MIB2 find the correct wires in the quad lock extension cable and then cut them and crimp/connect on the UART connection wires so they connect to the lever plug end of the extension. I added some labels so I could ensure I connected them to the USB adaptor correctly. You may need RCC or MMX connection so I added in the wires for both and then just connected the right ones to the USB adaptor as needed. Next, prepare the laptop. Download and install PuTTY https://www.chiark.greenend.org.uk/~sgtatham/putty/latest.html Plug in the USB and find the correct com port associated with it in device manager. Then set up the connection as per the scribd article linked above. Save this as a profile for easy connection next time. Find the correct password required to login to the MIB based on brand and software version as per this article https://www.scribd.com/document/464567838/Audi-Mib2-solution And put it into a txt file so it’s ready to copy and paste. Now connect to the car. It is essential that the car battery is in a good state of charge. Connect a good quality battery charger during this process. I would highly recommend charging the battery for a few hours prior to starting this process to ensure it’s in a good state. You can take the MiB unit out of the glove box but I chose to drop down the whole glove box and rest it on a bucket as it allowed access to the fuses and keeps all other wires connected to the MiB. Remove the 20a fuse (position 12) from the fuse box to power down the MIB unit. Remove the quad lock from the back of the MIB unit and add in the modified extension you have just made by connecting it to the back of the MiB. And the other end to the quad lock of the car that you’ve just removed from the MiB. Ensure the correct wires are connected to the usb adaptor in the right way and that it is set to 3.3v. Plug usb in to laptop. My wires were quite short so I had to balance the laptop on the passenger seat. You can extend the wires when making the adaptor but they should not be extended more than a metre. Open putty and load the profile you set up. You should see a blank black screen. Now copy the password from the txt file. Insert the fuse for the MiB unit. You should see the screen now being populated with text and code as the client logs the activity of the MiB. Press enter and type root, then enter then right click on the black background. (This will paste the password you copied) and press enter. If the login is successful you should see “Audi MIB” in ascii characters as per the picture above. You are now logged in to the MiB. If you are being supported remotely ensure you have an appropriate remote access tool installed to allow your support to control your laptop to enter commands. Using certain command codes it’s possible to backup to an SD card as well as various things such as remove component protection or update fec codes/ program the eeprom etc. I have no information on how to do this! There is a high chance of bricking your unit so do not proceed unless guided by an expert or you are confident in what you are doing!

  14. Rolls Royce engineer. Think he prefers trains to cars.
  15. The Octavia is a great family car IMO. VAG cars do like pampering though and servicing can't be skimped on without risk. They're very good so long as you anticipate known issues and head them off. Some have high oil consumption, some have issues with silica bags in the coolant that can split and gum up your heater matrix. The more you learn about your car, the better you'll be able to prevent things going wrong with it. (I've no idea what the dealers are like these days as I ducked out of the dealer network as soon as my warranty was up.)
  16. We all thought EP 42 was the last, but wait, they've now brought out Episode 43. A little building but mostly testing.
  17. Soarific joined the community
  18. That's on my viewing list this weekend as well. I have to say that I'm impressed with Francis Bourgeois; having known that he was a very excitable train buff, I never expected him to be so knowledgeable about cars.
  19. I predict that you will find that the DFGA needs topping up with oil between services.
  20. Chusan joined the community
  21. The cxxb doesn’t use up the oil; as for the dfga, I’m not sure. I haven’t used the dfga much yet.
  22. I've just messaged the supplier as Google says it should be an ina tensioner pulley, not a gates
  23. Hello, The 1.6-litre engine has a lower ash content.
  24. Yes, music goes into the non-GPS SD port - can't remember, but I think that's port 2.
  25. Does the DFGA engine use/burn more oil than the CXXB?
  26. Which engine has the lower ash count - the 2.0 litre Adblu one? I'd think 60g is fairly high, but I guess it depends on how long it will take to add the remaining 20g.
  27. @Nexus21 How did the door seal check go?
  28. Not due yet if it was last replaced at 90K in 2020 - Skoda removed the 5-year cambelt replacement advice about 2 years ago so that their advice aligned with the rest of VAG world group, I believe present advice is around 120 to 140K without any time limit. You will find plenty regarding this subject on this and other VAG forums.
  29. Kei, kei-jidōsha, light automobile. Good episode on Grand Tour driving 3 Kei cars a few hundred miles in US and then up Pikes Peak ie up to 14k feet. The non turbo one took nearly half an hour and was gasping at the end. Not a problem with electric cars which get quicker with the less air !
  30. Unfortunately, DVSA were not interested in investigating or escalating the issue when I reported this fault to them last year! Their written response was "We do not consider this incident to constitute a fire risk as there was no ignition source present" I had substantial quantities of petrol running down the front of the engine and over the alternator!

Important Information

Welcome to BRISKODA. Please note the following important links Terms of Use. We have a comprehensive Privacy Policy. We have placed cookies on your device to help make this website better. You can adjust your cookie settings, otherwise we'll assume you're okay to continue.

Account

Navigation

Configure browser push notifications

Chrome (Android)
  1. Tap the lock icon next to the address bar.
  2. Tap Permissions → Notifications.
  3. Adjust your preference.
Chrome (Desktop)
  1. Click the padlock icon in the address bar.
  2. Select Site settings.
  3. Find Notifications and adjust your preference.