Leaderboard
-
jzhort
Finding my way26Points37Posts -
pinkpanther
FREEDOM14Points3,914Posts -

moley
Resident Member12Points10,121Posts -
shyVRS245
Locked12Points0Posts


Popular Content
Showing content with the highest reputation on 21/12/20 in Posts
-
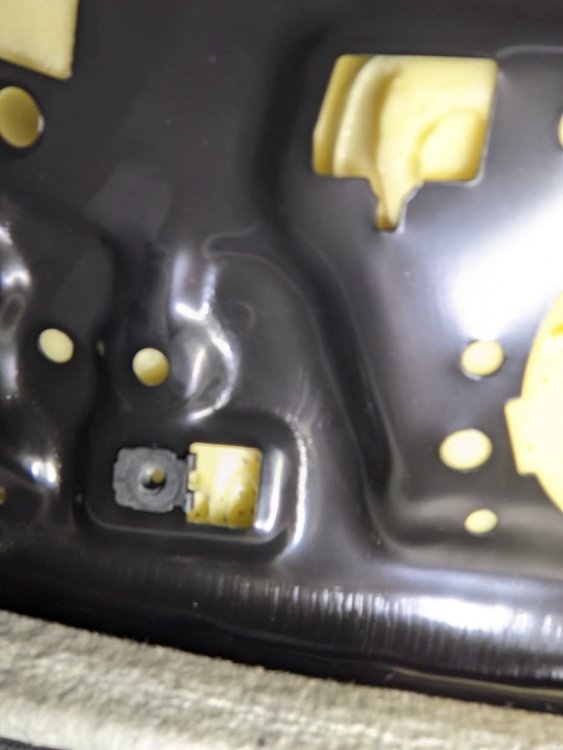
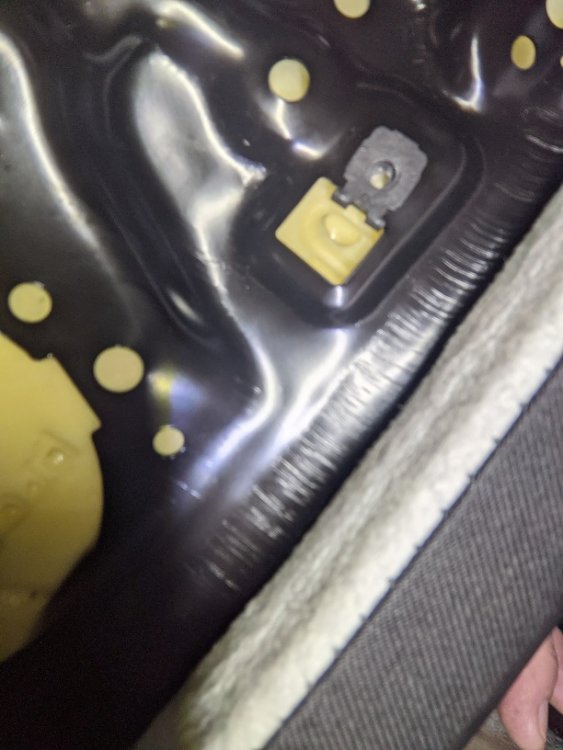
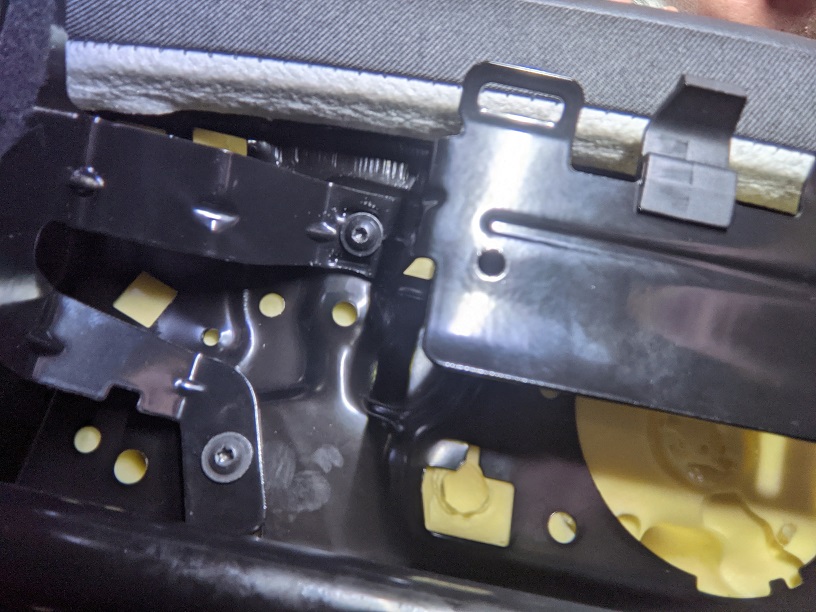
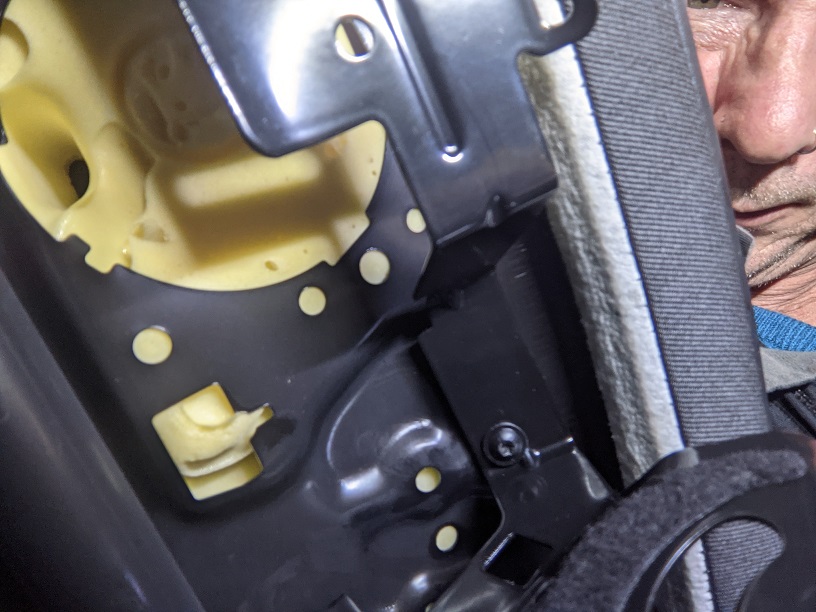
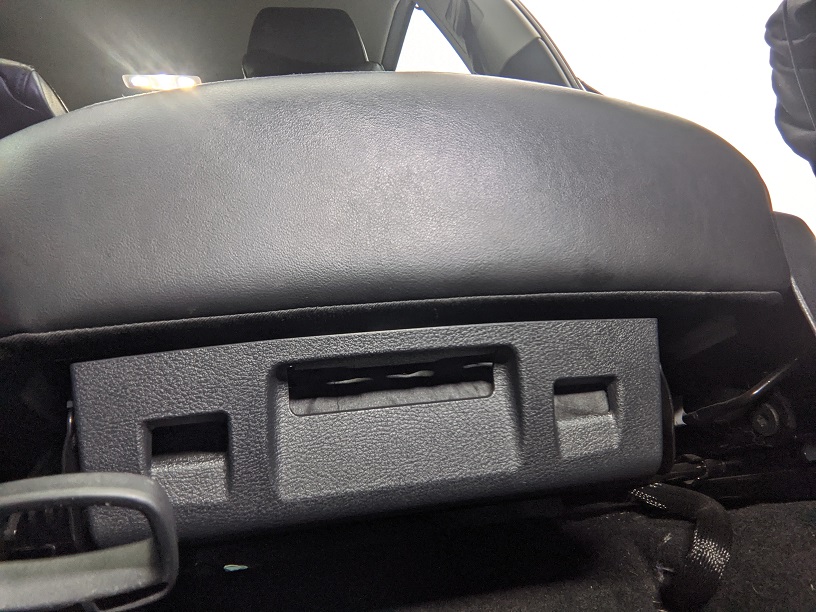
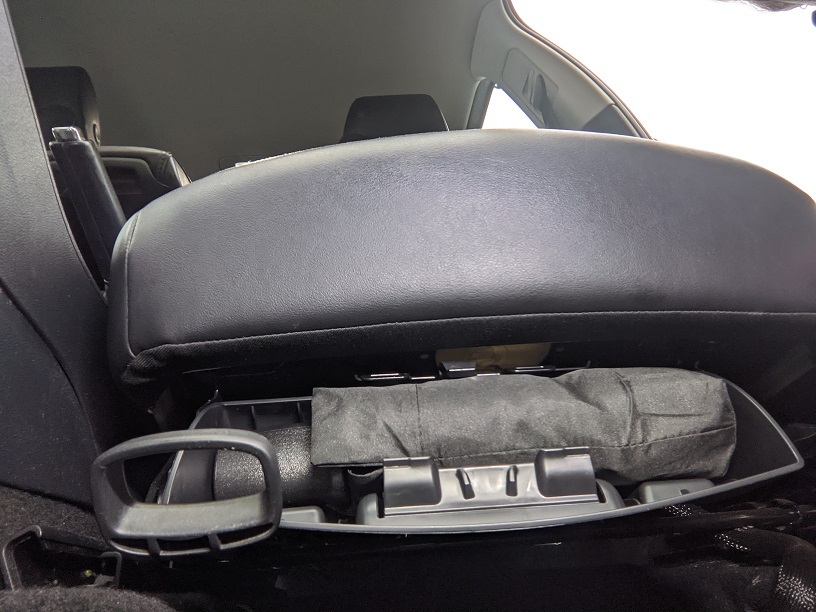
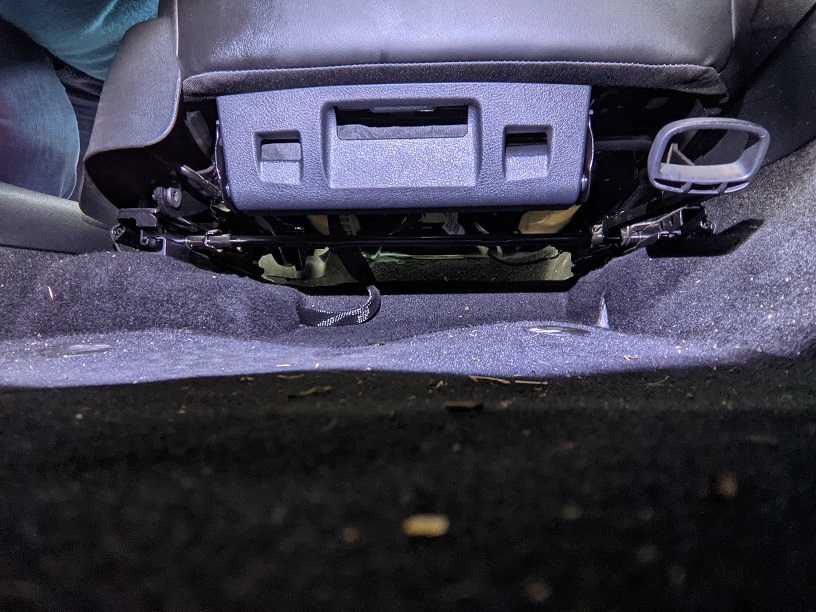
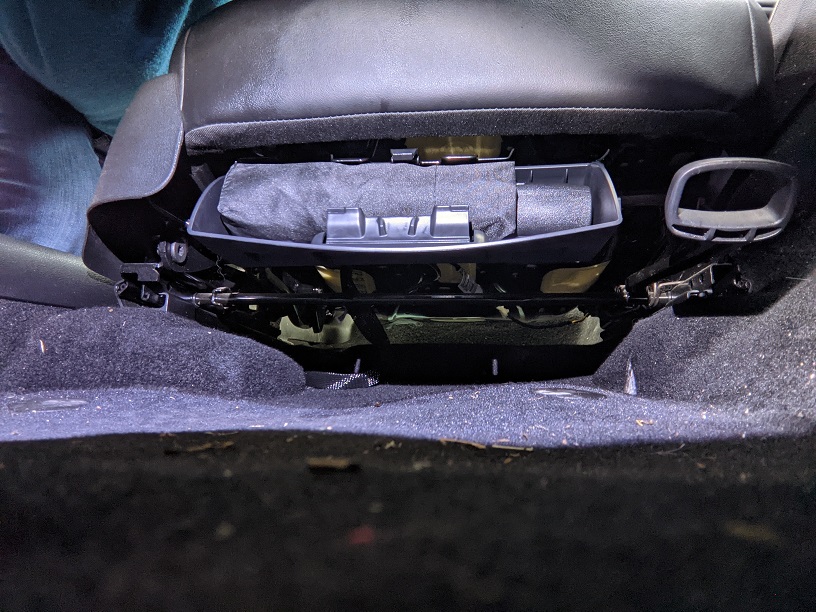
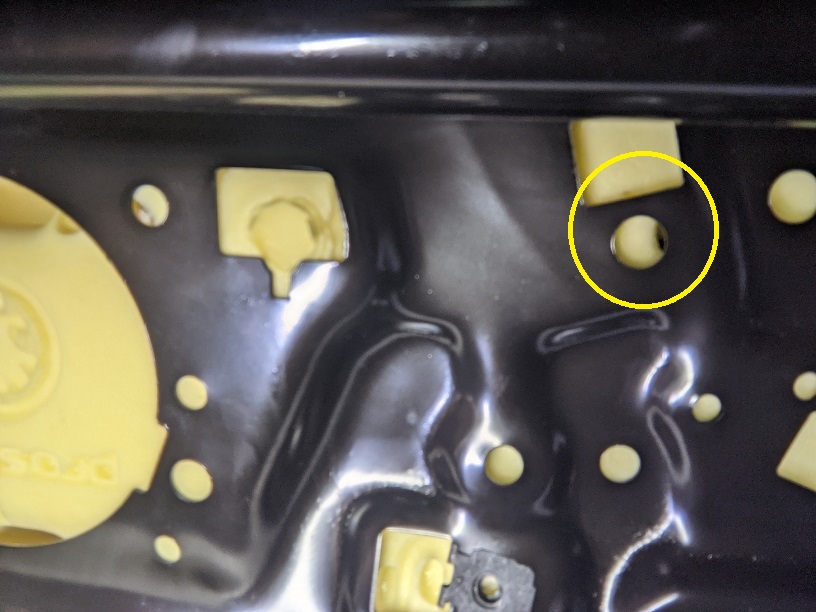
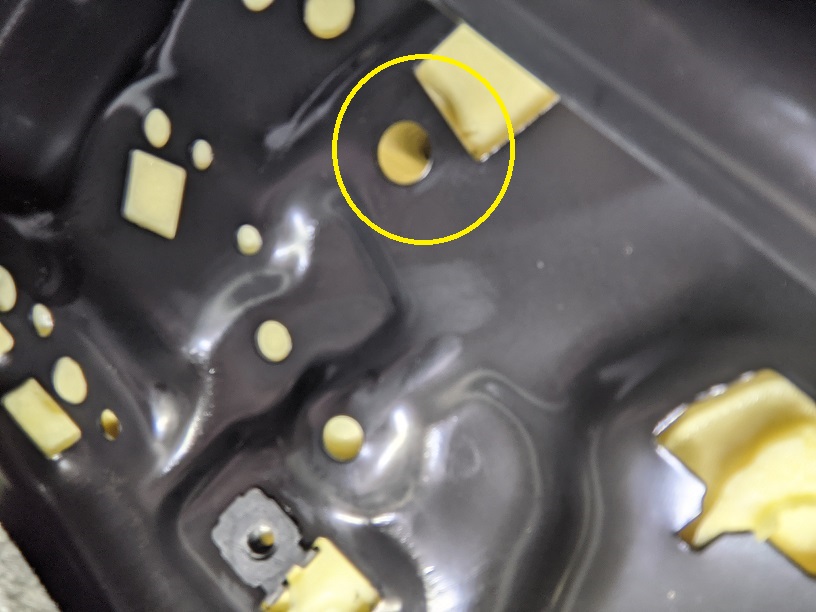
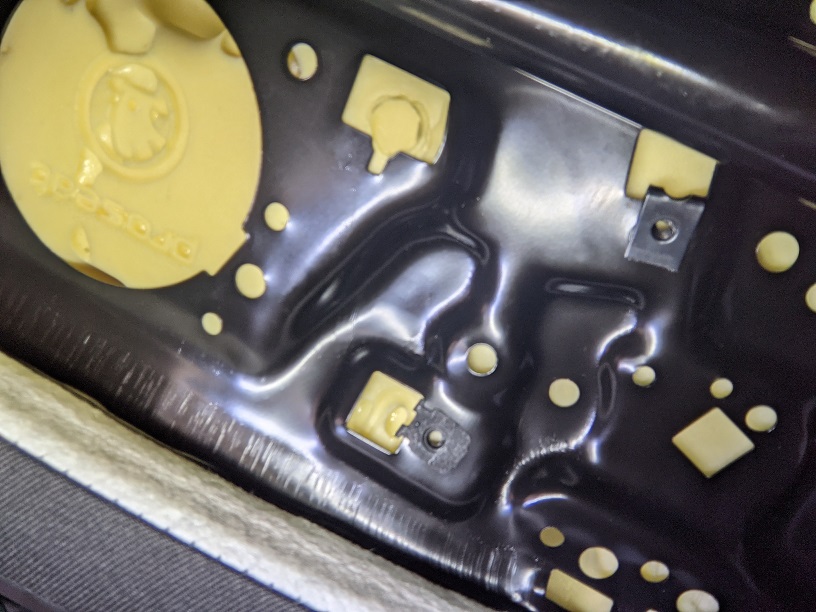
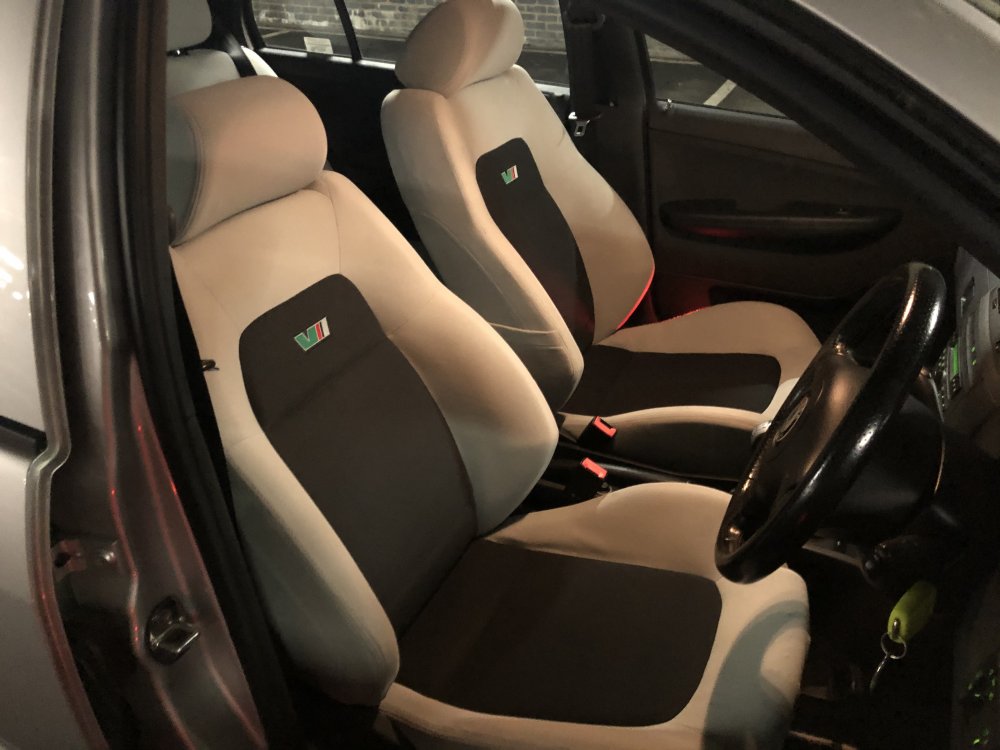
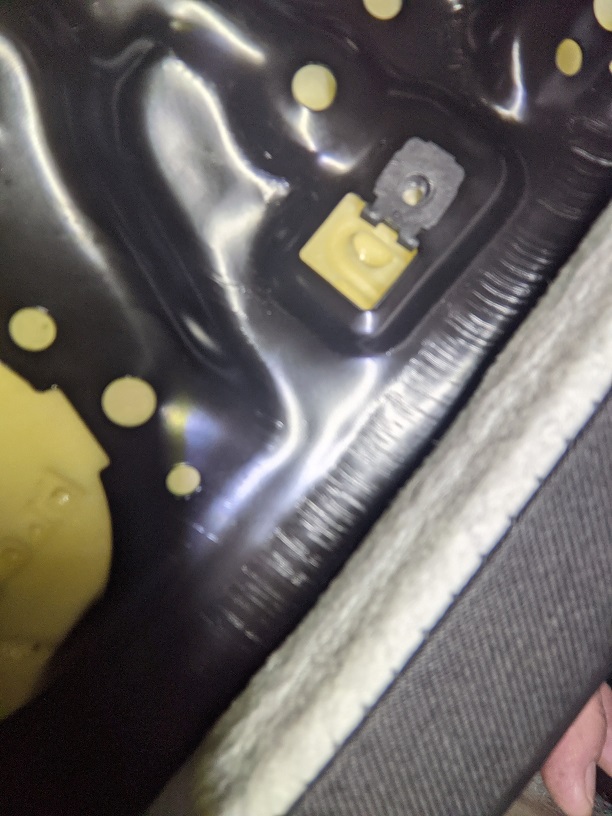
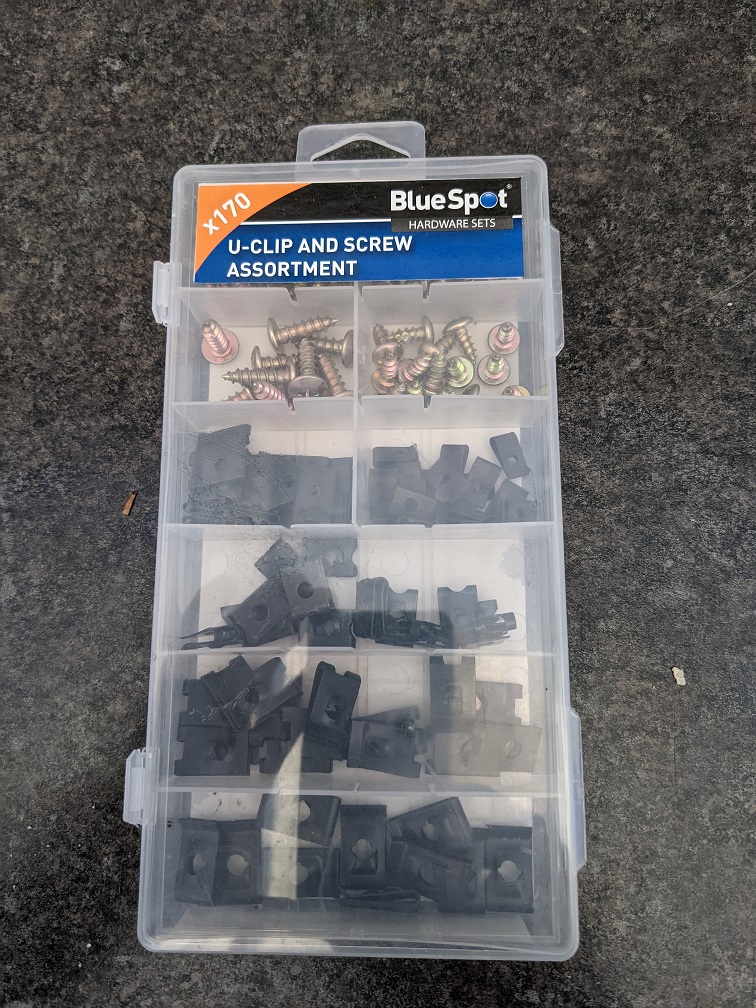
Just a quick guide to fitting the umbrella holder to the drivers seat. Note: I bought the umbrella holder assuming it fitted to the passenger seat. I fitted it but it fouled the manual seat adjustment so I had to remove it and re-fit to the drivers seat. Just bear that in mind when looking at the pictures below. Now in my case, that was great news because I would have preffered and in fact chosen the option of fitting it to the drivers seat had I known. So it worked out well. But please be aware, the part numbers I list are to fit it to the drivers seat of UK cars. So firstly, you will need the bracket: https://www.skoda-parts.com/spare-part/5e0881646b-umbrella-holder-skoda-39334.html Then the actual tray/box: https://www.skoda-parts.com/spare-part/5e0881197b9b9-umbrella-box-skoda-36232.html Optional 4 screws (you only need 2 if you are removing the hi-viz holder) https://www.skoda-parts.com/spare-part/nf812139e-screw-4-2x16-skoda-19321.html 4 speed clips/u-clips (2 if you are removing the hi-viz holder), part number: N0154672 (I used my own from an assortment box I got from Amazon). If you follow those links above, you will be able to get the part numbers. There is a A and a B variant. I bought the B variant. I assume the A variant will fit the passenger side (please check this yourself). But if you want the drivers side, pick the B version from the supplier above, or any other supplier of your choice. Step 1: Remove the hi-viz holder if fitted. This leaves 2 speed clips pictured. If you didn't have the hi-viz holder, you will have to insert your speed clips where these are shown. Step 2: Insert the rear speed clips (the bracket you are fitting requires 4 screws in total) These pictures show where they go. The smaller round hole is where the speed clip covers and where the screw will go, the larger square hole is to allow your speed clip access. This is the same above if you didn't have the hi-viz holder already fitted. As my clips weren't genuine VAG ones and were a little loose, I found it helpful to hold them in place using clear cellotape to stop them moving around. The genuine VAG ones wouldn't have this issue. Step 3: Screw bracket on Step 4: Fit the box Note: This is shown fitted to the passenger seat at the moment. Step 5: Realise it fouls the seat adjustment, so remove the lot from the passenger seat, replace the hi-viz holder and repeat steps 1-4 on the drivers side!! Pictures now show it fitted to the drivers side and not fouling the seat adjustment: It wasn't a hard job. It took maybe half an hour to do it all, twice. The second time I did it on the drivers side was a lot quicker since I knew what I was doing and it only took 10 minutes to do. Anyway, in summary, it was an accident that I ended up with a drivers side umbrella holder but I prefer it and I'm glad I got it. I'm much more likely to need an umbrella at my feat than a hi-viz jacket! Hope that helps Nick


 3 points
 -
3 pointsDefinitely the easiest job, but needs to be done with care. Get yourself some rubber surgical gloves b4 starting and plenty of paper towelling to mop up the G13. You will also need a 1l bottle of G13. The following process below is what I did on my VRS to fix the Silica problem (it had a double skinned tank). Check out this video showing the process on a VW Golf (identical under the bonnet): 1) Get a cheap fluid pump....I got one from my local general store for £8. On a cold engine, suck out all of the coolant from the header tank into a secure container (to be disposed of later) 2) Unclip the top hose and bottom hose. Try to catch as much coolant as possible. Leave as much coolant in the pipework as possible. 3) Remove the electrical connector (pull tab out and pull out connector). 4) Unhook the bottom clip where the tank sits. 5) Refit in new tank without the Silica bag 6) Put on the bottom hose (feed) 7) Put on the top hose (return) 8) Put on the electrical connector 9) Fill up the new tank with G13 mix or G12evo to maximum level. 10) Start up car - leave top off for the moment (this will become apparent in a sec) 11) As car starts to warm up, you will find there maybe an airlock at the top of the 'feed' (larger) hose going to the engine (noted if the coolant in the tank doesn't get warm). Gently Squeeze the pipe and tease out the air - there will probably be a large 'bloop' and the level will drop considerably. 12) Put the tank cap back on and let the car get up to temperature. 13) Wait until cooling fans come on and then off....then switch off the engine & let the car cool down. DO NOT TOUCH THE HEADER TANK - HOT COOLANT ALERT!!! 14) Next day, Before you head off, check the level in the header tank again - release the pressure in the tank by opening the cap up. Make sure the coolant level is correct. Be happy you have many 1000's of trouble free motoring in front of you.....enjoy.3 points
-
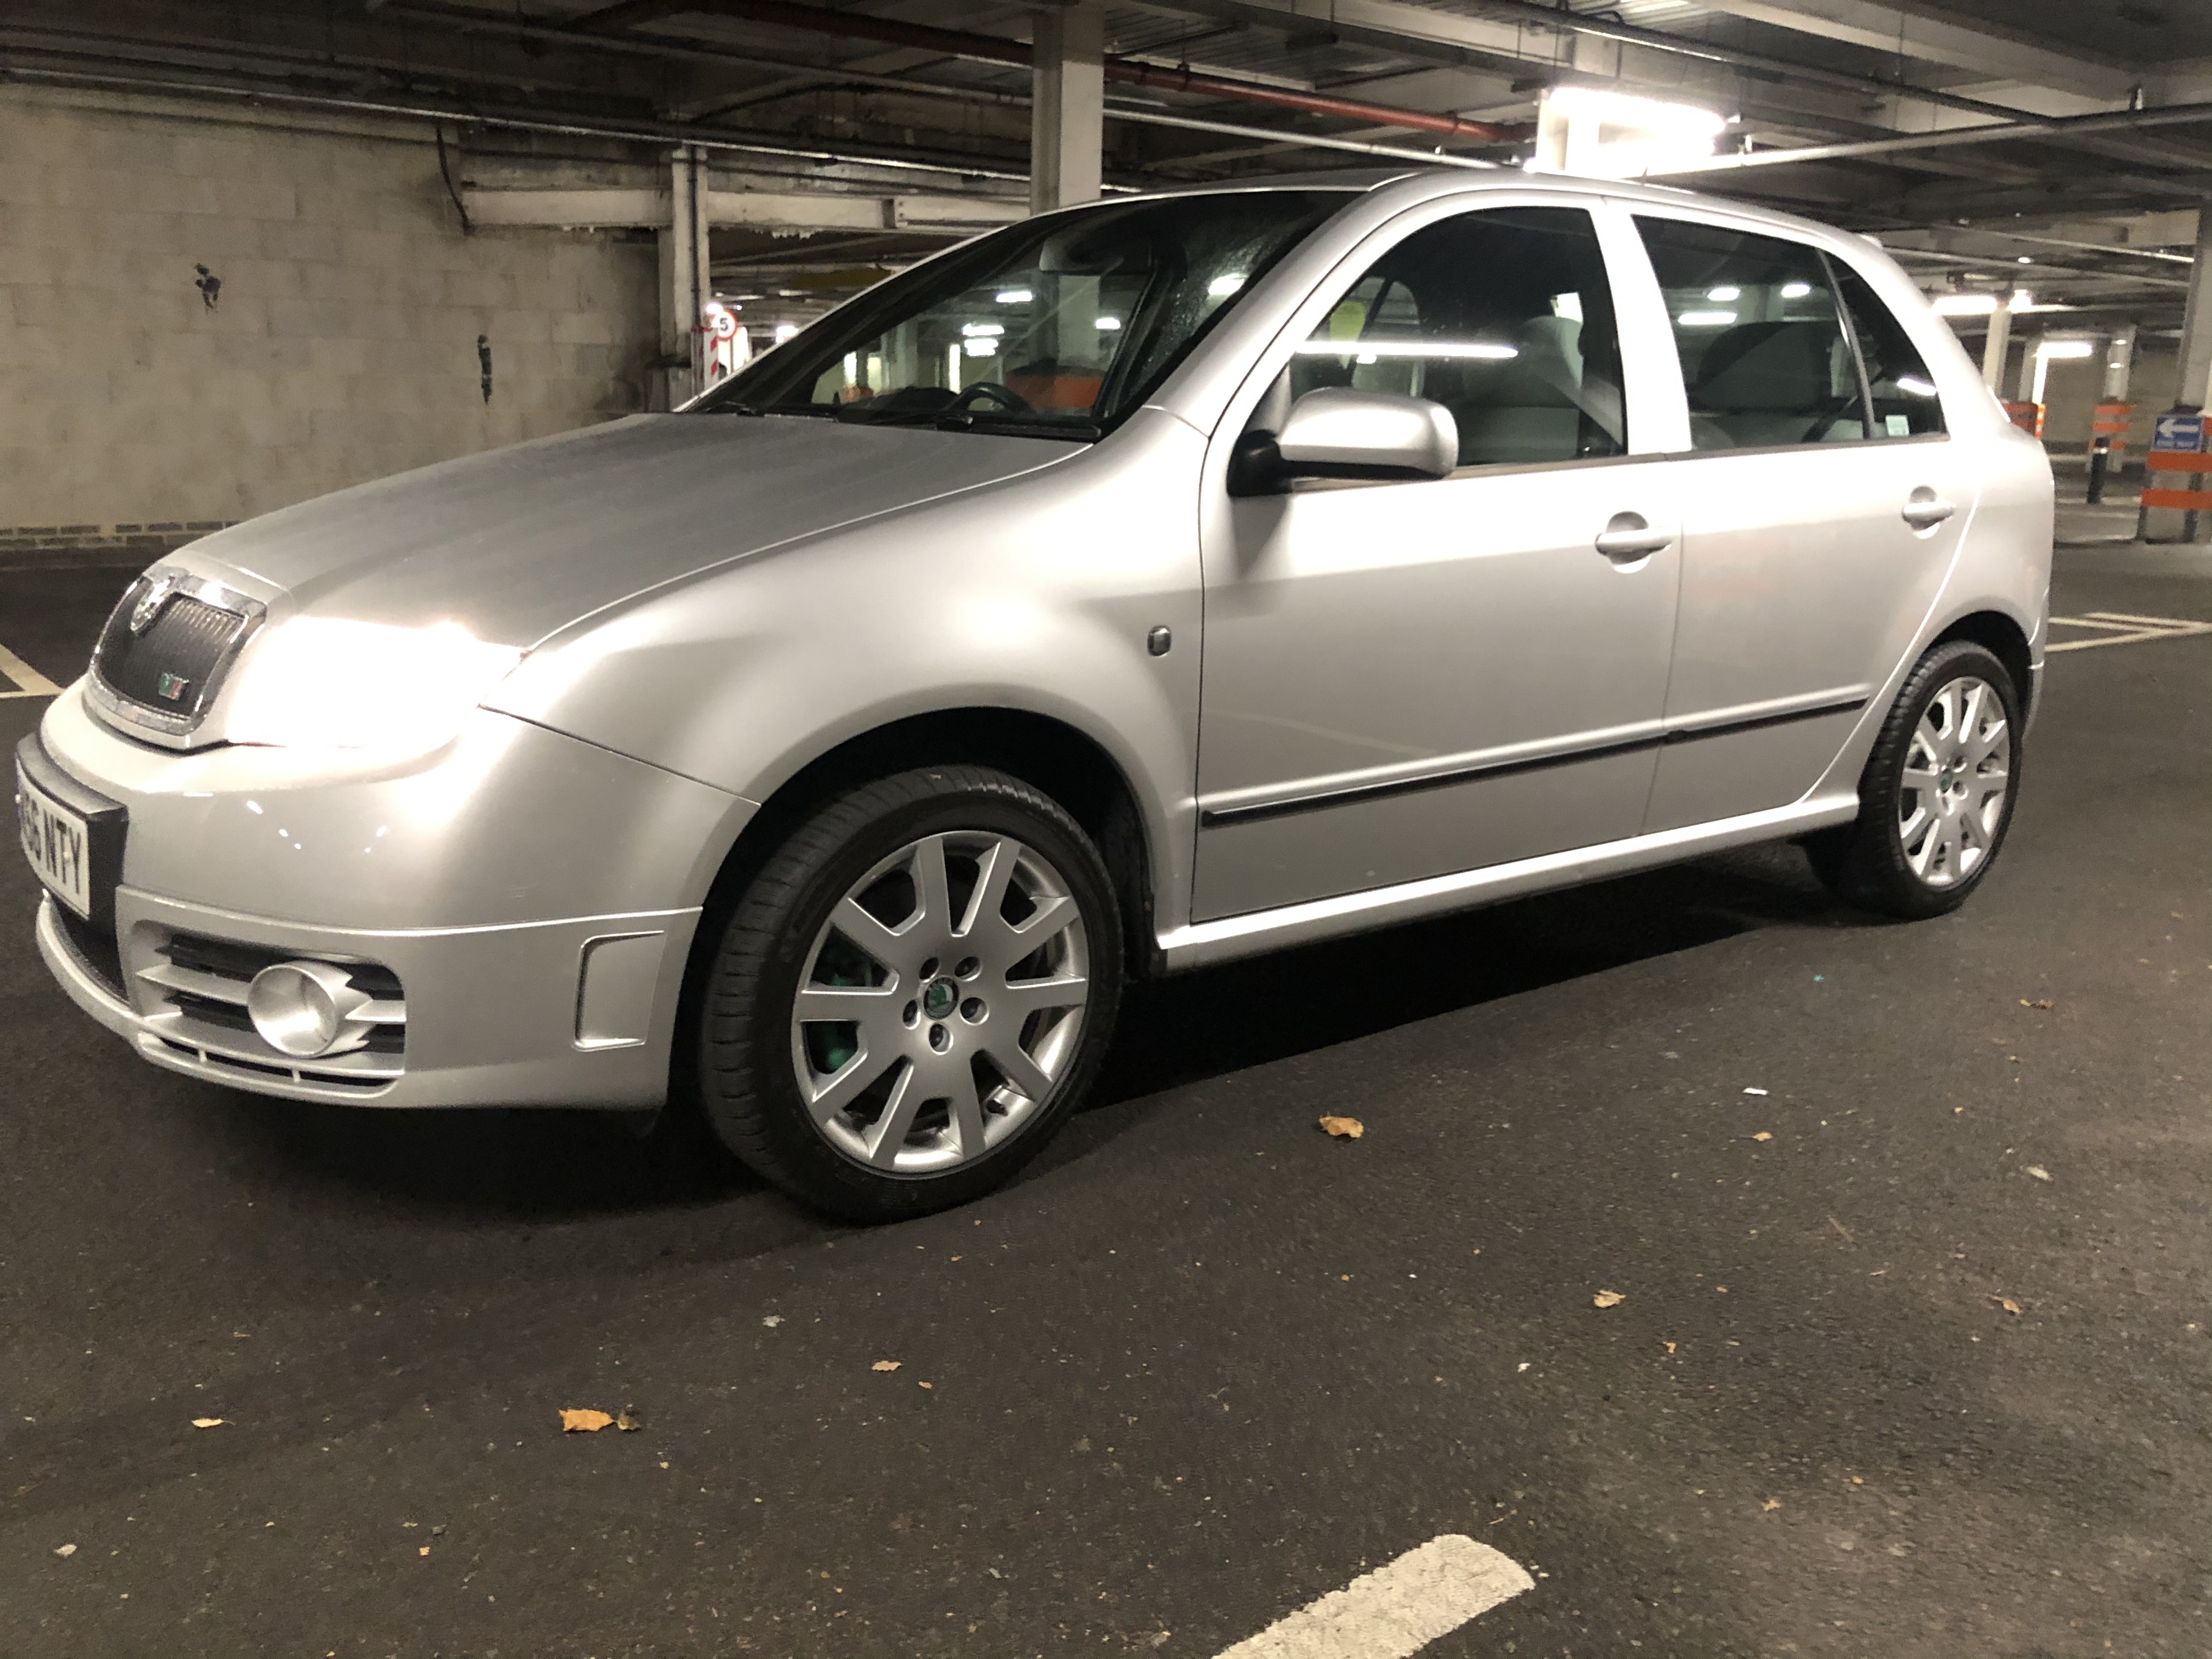
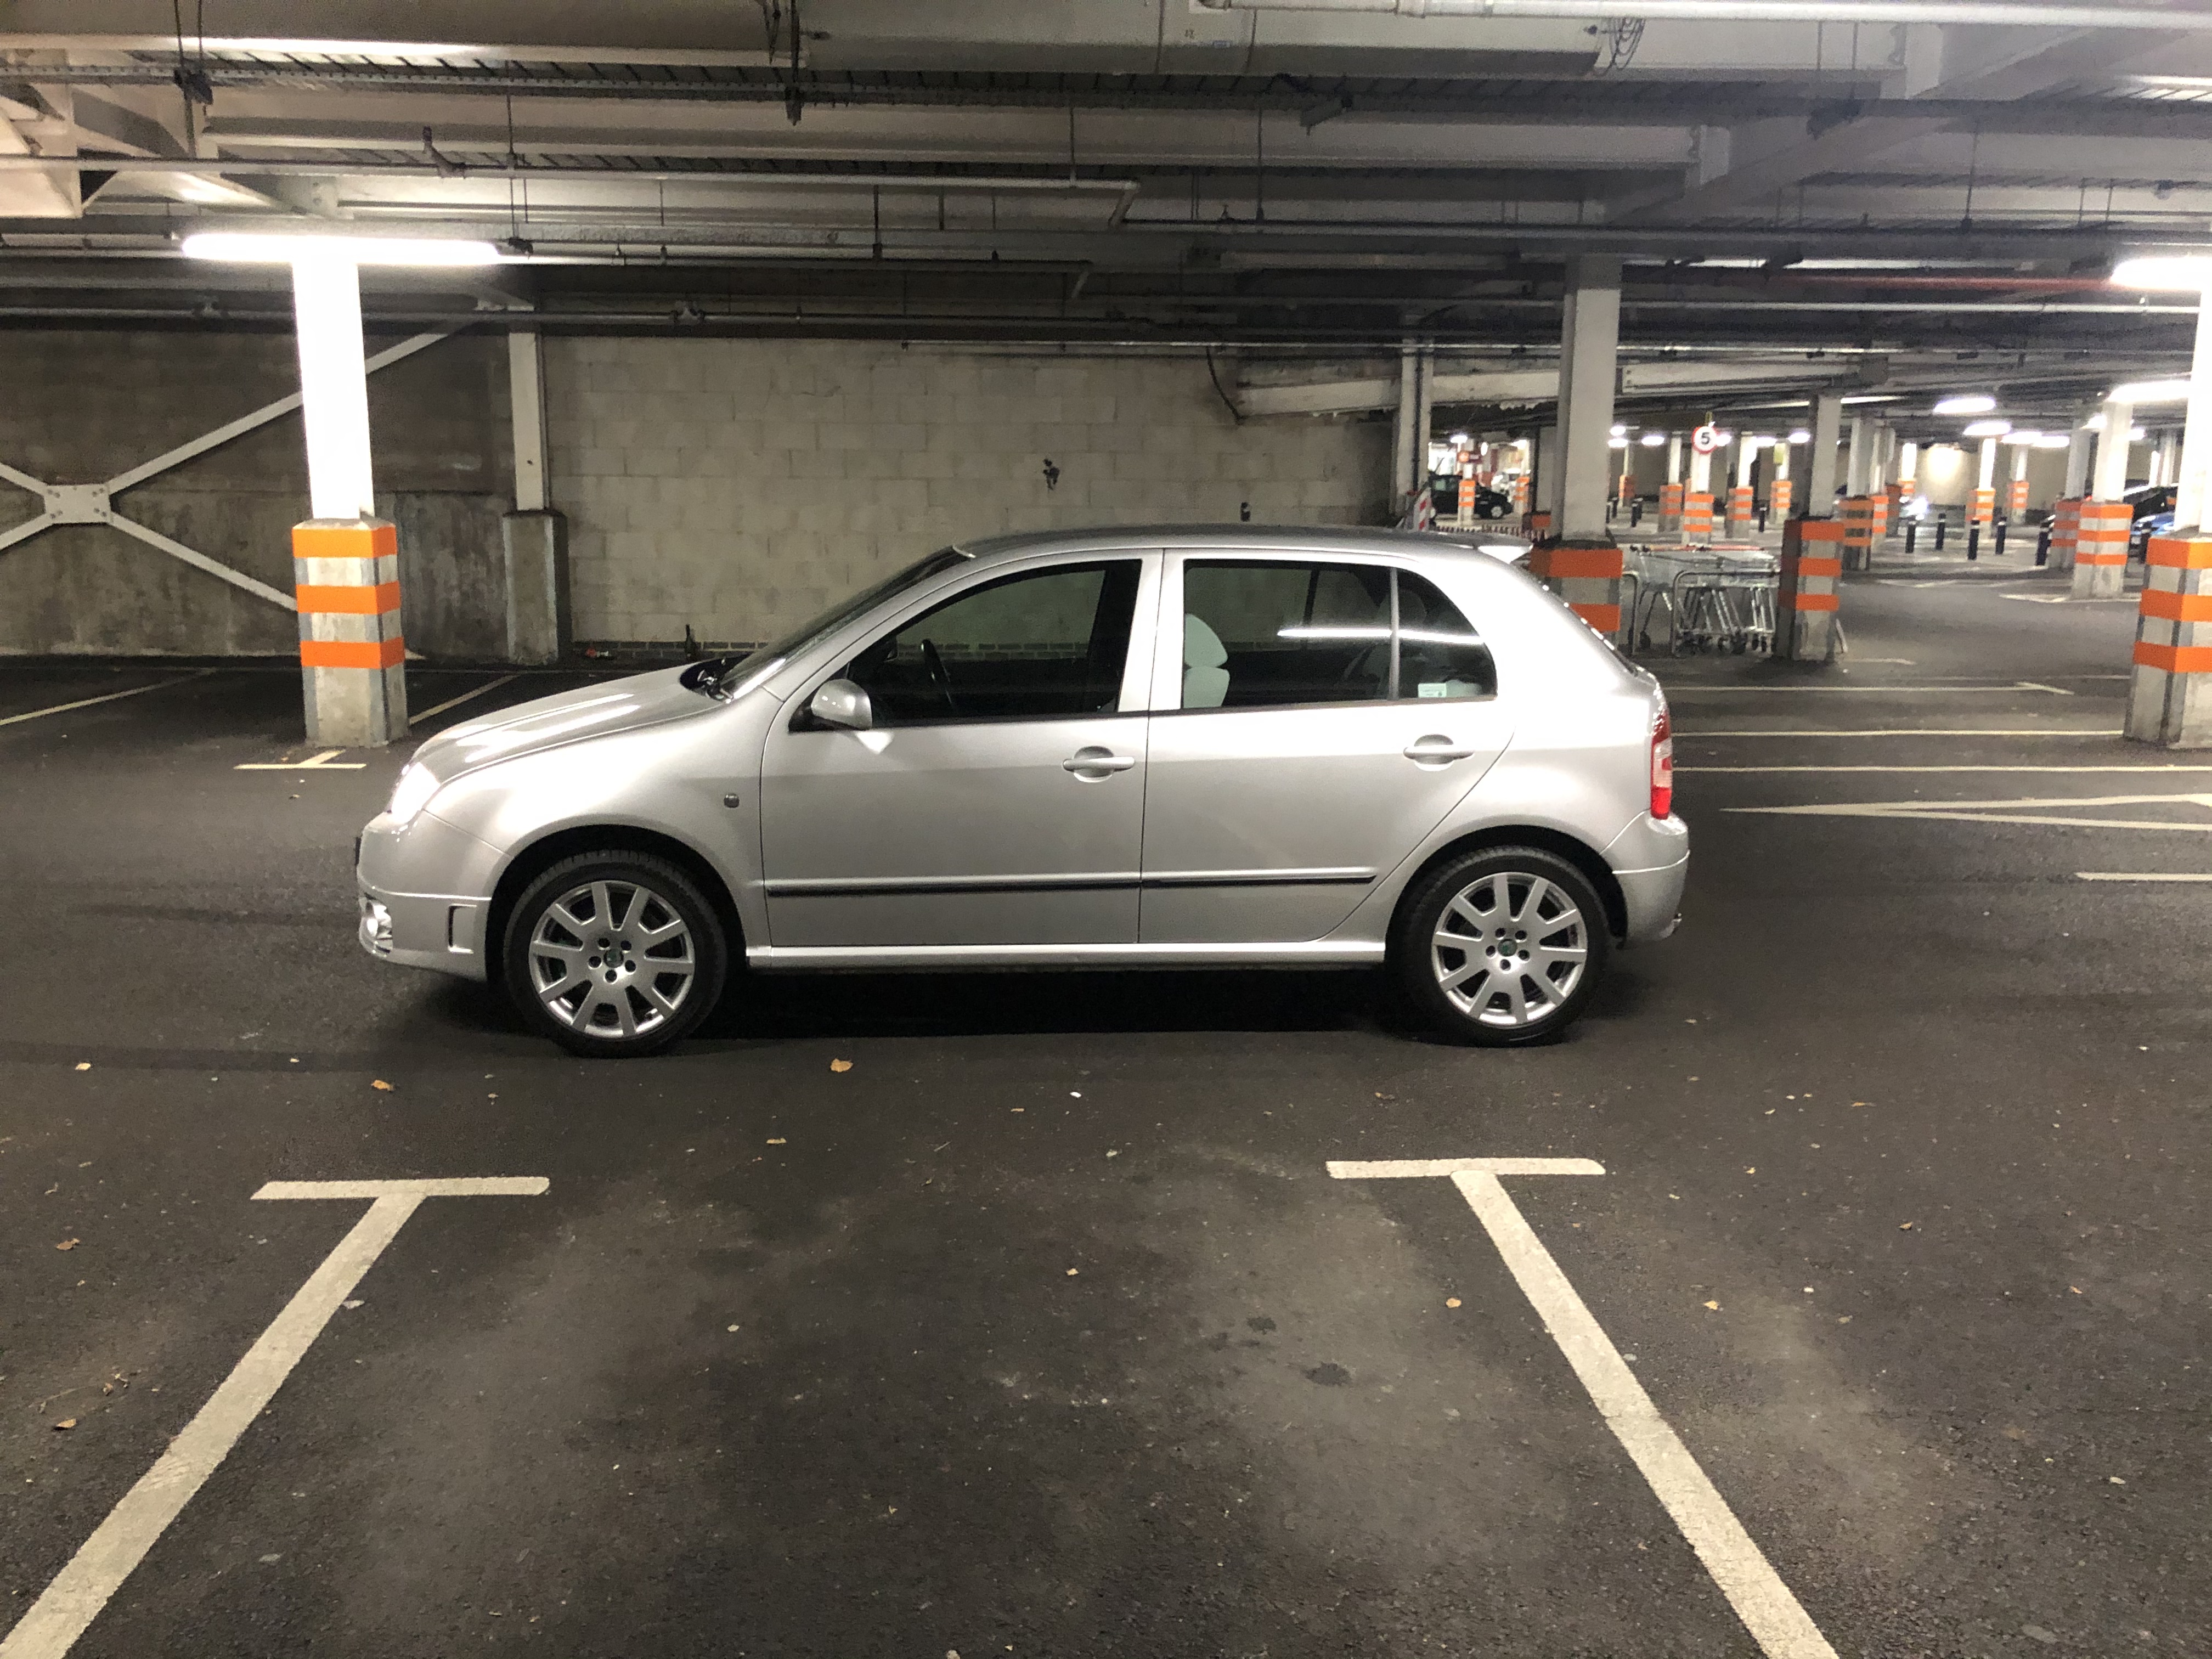
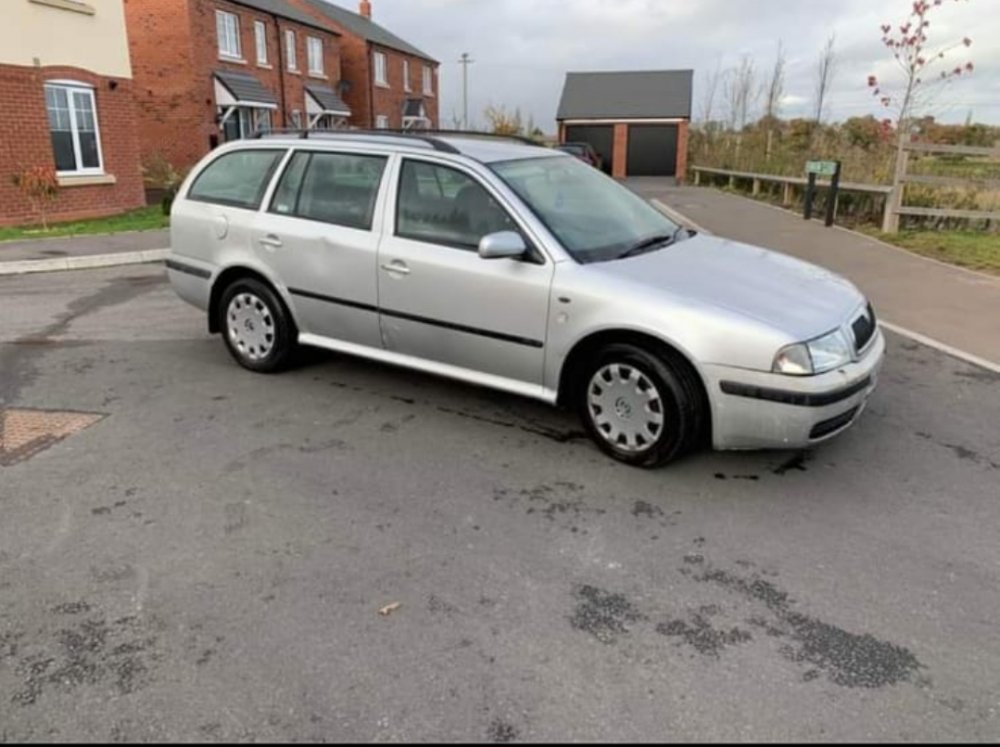
Not sure where to start with this but on the 13th November I managed to pick up this beauty in need of a lot of TLC. £500 full service history, 12 months MOT and 158k on the clock. I couldn't be happier!
 2 points
 -
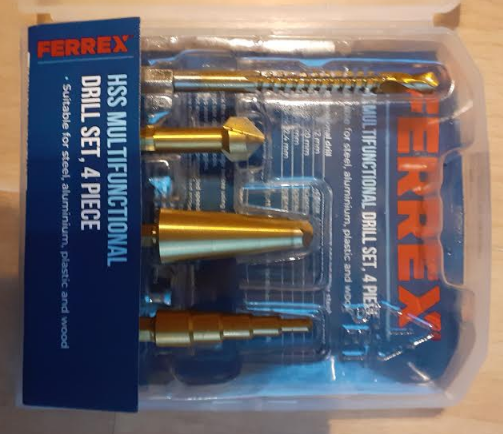
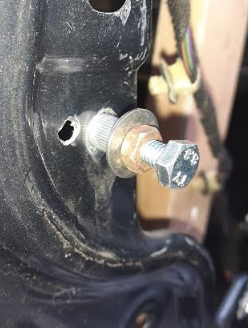
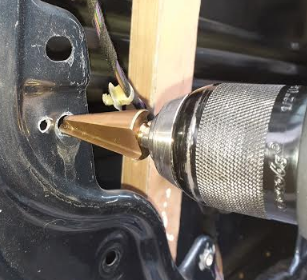
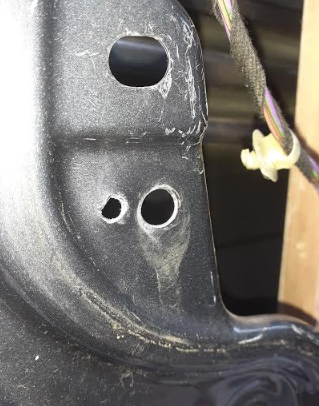
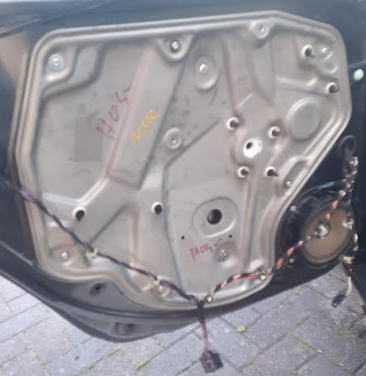
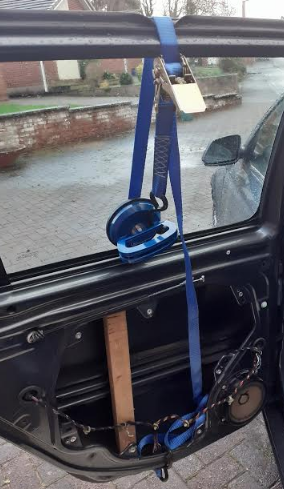
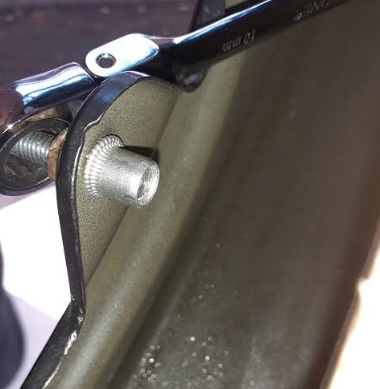
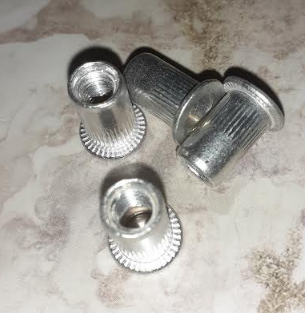
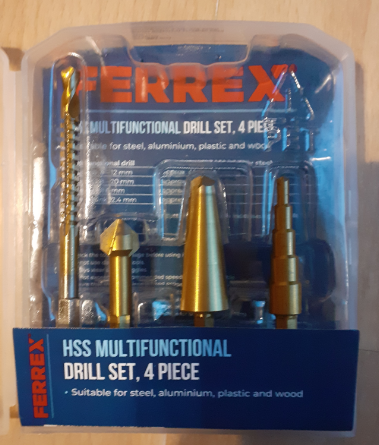
Hi, Just thought I would share my experience with a window regulator replacement on a 2007 Octavia 2. This is the left rear regulator. I used a bodywork dent puller suction pad and a ratchet strap (strap not really needed as the suction cup rests against the window rubber) to hold the window up while I replaced the regulator. The plastic window holder on the regulator had broken, along with the cable. I bought a 2nd hand regulator with the motor from an auction site for £16 . I didn't fancy re-fitting the regulator to the door with rivets as I don't have lazy tongs (large hand riveter), so I decided to buy a set of Aluminium Rivnuts with steel thread inserts from an auction site for £6 for a 100 mixed set (25 each M4, M5, M6 & M8). I bought aluminium Rivnuts because research showed that fitting by hand works best with Aluminium Rivnuts, without the need for special tools. I used a tube or cone drill (2nd from the right), from Aldi for £4.99 for the set. I opened the holes in the door frame to 9mm, which is the required size for an M6 Rivnut. This type of cutter is much better than a standard HSS twist drill when drilling sheet materials as a tube drill doesn't "grab" as breaks through the material like a twist drill can, plus, a twist drill can leave a slightly "out of round" hole, whereas a tube drill makes a perfectly round hole. Once the hole is drilled, remove the burr from the front and rear of the hole, using a counter sink bit (included in the set I bought). Now insert the RIvnut, with an M6 bolt, an M6 nut and two washers. Make sure the bolt is screwed in flush with the end of the Rivnut, to ensure and even spread of load on the thread as you set the Rivnut in place. Using a socket drive, hold the bolt (and the Rivnut) square to the hole in the panel, and using a ratchet spanner, tighten nut onto the RIvnut. The Rivnut may spin at first, but keep going and eventually it will bite on the rear of the panel. Then it will start to deform as it is drawn towards the panel. When the spanner starts to get tight, slow down, otherwise the Rivnut thread can be stripped. Once spanner is tight (don't go mad), slacken the nut, then remove the bolt from the Rivnut. The use of Rivnuts made it possible to remove the regulator unit for test purposes, which would not have been possible if rivets had been used. To get the glass to sit in the plastic holder on the regulator unit, remove the motor from the regulator (3x Torx T30) then move the plastic glass holder on the regulator up to the top of the movement, MAKE SURE YOU DON'T LET THE PLASTIC GLASS HOLDER GO OFF THE END OF THE REGULATOR TRACK, AS THERE IS NO END STOP!!!! Remove the rubber grommet, which then allows you to see the regulator track and the alignment hole on the plastic glass carrier (can only seen when the glass is lowered). With the glass slightly lowered (about 50mm opening) offer the regulator into place, while locating the glass in the plastic carrier. Now move the regulator into place and locate the metal dowels (on the rear of the regulator) into the locating holes in the door frame. Now fit the M6x25mm screws to hold the regulator in place. Once all screws are refitted, lower the glass using a pair of needle nose pliers to drive the regulator gear, until the hole in the glass is visible through the access hole (access hole in panel is approximately 40mm diameter). You can now push the larger plastic dowel into the glass, through the plastic glass retaining bracket (it should "Click" into place in the glass). Now gently push the small dowel into the larger dowel, which causes the larger dowel to expand slightly. Re-fit the rubber grommet. Check that the window can go up and down by turning the regulator gear with the needle nose pliers (carefully, but don't put anything in the splines of the gear, as this is what the motor drives). When you are happy with the operation, re-fit the motor with 3 screws. Re-connect the multi way plug to the rear of the motor. When you try the window, it will not do "one-shot" function until the window has been lowered fully (and is held there to mark the end of travel position) and the same for the upper movement. Once you have performed the upper and lower end of travel operations, the "one shot" function will work. Hope this helps. Russ

 2 points
 -
It will turn back up when you are going forward with enough speed.2 points
-
if you put the knob back to middle or right it will put it back or when u start driving off also auto puts it back, think its when u hit 10 MPH2 points
-
the mph/km is an ongoing issue with a lot of people, the dipped mirror it needs to be put to L as the handbook is for lefthand drive not sure why so only the left mirror dips, hope this helps2 points
-
Did this first thing after leaving it for a decent charge yesterday, thanks fo the tip. I’m beginning to sound a bit obsessive re getting as much juice in the battery but, cf my cars of the past, this is a bit of a learning curve and nothing better to do. I’ve had a good read around the subject, and re disconnecting the J367 battery monitoring system and it varies from “no problems, I’ve run like that for umpteen tens of thousands of miles” to “it’s there for a purpose and removing it will invite the 4 horsemen of the apocalypse and plagues on us all at once” , hence I’m leaving it alone. Well for now. Immediately after unlocking the car the DMM read 12.45v across the terminals. Left it 20 minutes and then remeasured and it was up to 12.84v. Will see what the SS does today but thinking it’s just coz it’s cold and the battery was a bit low from lack of use. Paranoia mode = OFF!2 points
-
2 pointsNew S3 1.4 iV L&K owner (from Friday) fully loaded. Al (Hertfordshire)
 2 points
 -
2 pointsThen it looks it doesn't depend on coolant but on the metals in cooling system.2 points
-
Sportline rear bumper diffusor installed on my L&K since yesteday! (Good bargain from Superskoda.com) Also installed these tyres valve caps (less than 1€ on ali) :2 points
-
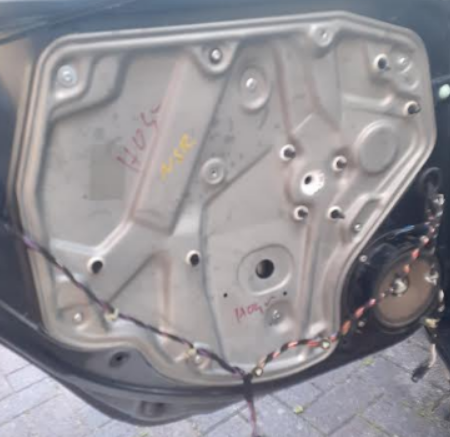
HI When you say "door panel cover" do you mean the metal one I pictured here? This is the part, I was told, was "the regulator". So this is the part that I secured with Rivnuts. I purchased this as a whole part, including the track, the cable and the motor, so I did not need to rivet the regulator track on to the regulator panel. This is on a Mk2 Octavia, I think Mk1 Octivia is a different regulator unit. The internal door panel trim (AKA Door Card) is fitted with some screws and a few clips. The other side of this regulator panel (the inside) looks like this: https://www.ebay.co.uk/itm/353189547441?chn=ps&norover=1&mkevt=1&mkrid=710-134428-41853-0&mkcid=2&itemid=353189547441&targetid=1055001932367&device=c&mktype=pla&googleloc=9045641&poi=&campaignid=10204071303&mkgroupid=104953043274&rlsatarget=aud-629407027585:pla-1055001932367&abcId=1145987&merchantid=7410404&gclid=Cj0KCQiAifz-BRDjARIsAEElyGKLLlbJDP1VkTkcLhhA2e8KyLDpvPvZpNEYZ8Df3WPNsl3kHIsxVqwaAhbQEALw_wcB The white plastic glass carrier runs on the black metal track and has a pair of cables which wind around the gear unit (white triangle bit), which is driven by the motor (through the panel). The cables/plastic carrier/gear are available as a kit: https://www.aliexpress.com/item/1005001562354481.html?src=google&albch=shopping&acnt=494-037-6276&isdl=y&slnk=&plac=&mtctp=&albbt=Google_7_shopping&aff_platform=google&aff_short_key=UneMJZVf&&albagn=888888&albcp=9604713100&albag=99283534296&trgt=296904913880&crea=en1005001562354481&netw=u&device=c&albpg=296904913880&albpd=en1005001562354481&gclid=Cj0KCQiAifz-BRDjARIsAEElyGJz0nOR8ugCgr8mA1Ivl0lbBHteINA69JRND7kUK0cIW81yanu33o4aAp6REALw_wcB&gclsrc=aw.ds But as both the cables are sprung at the carrier end, they can be difficult to fit, so I opted for a used one, for ease. It took me a total of about 5 hours including taking the internal trim off, drilling off the rivets, fitting the Rivnuts and re-assembling. Good Luck
 2 points
 -
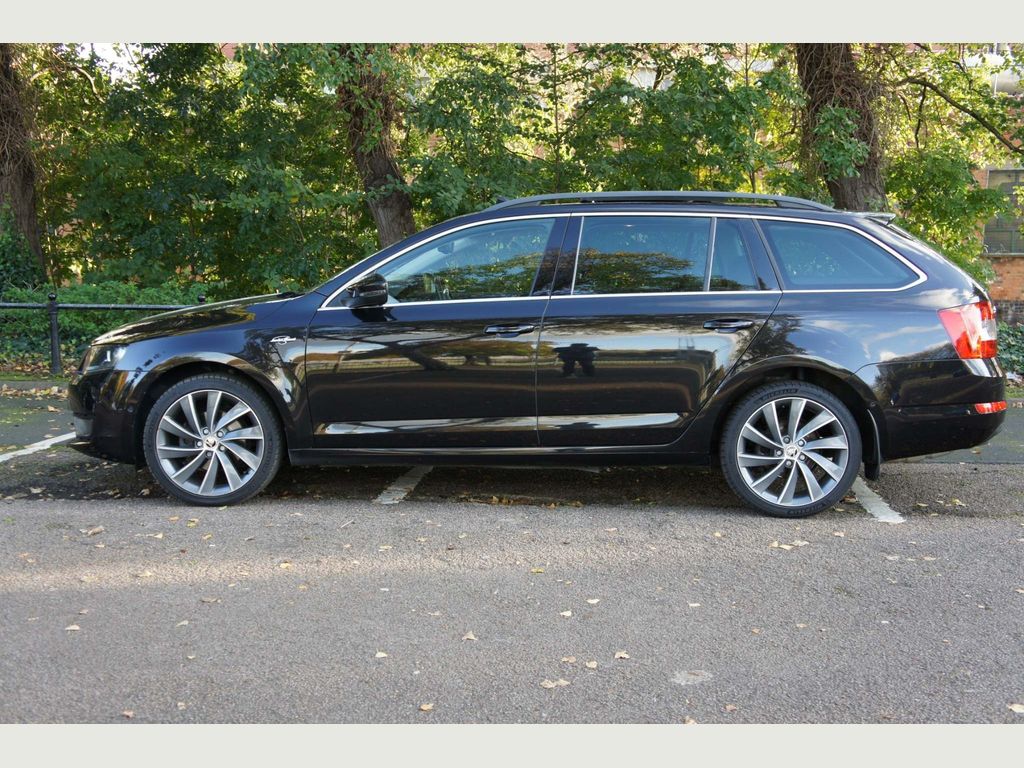
It's time to get some wheels and what I thought would look good on her is a set of Rotiform BLQ so that's what I decided to get myself, they come at a price but worth every penny2 points
-
I noticed that my one of number plate lights had blown and had a spare so swapped it out like for like before deciding to take the jump to putting LEDs in as well as one bulb was lighter than the other as you can see2 points
-
One thing that bugs me was the rear interior boot lights. I used to have to rummage around with my phone light in one hand the other trying to get my kit out. Not anymore I've replaced them for ultra bright LEDs. Hard to get the difference in picture but it really is night and day (no pun intended)2 points
-
2 points
-
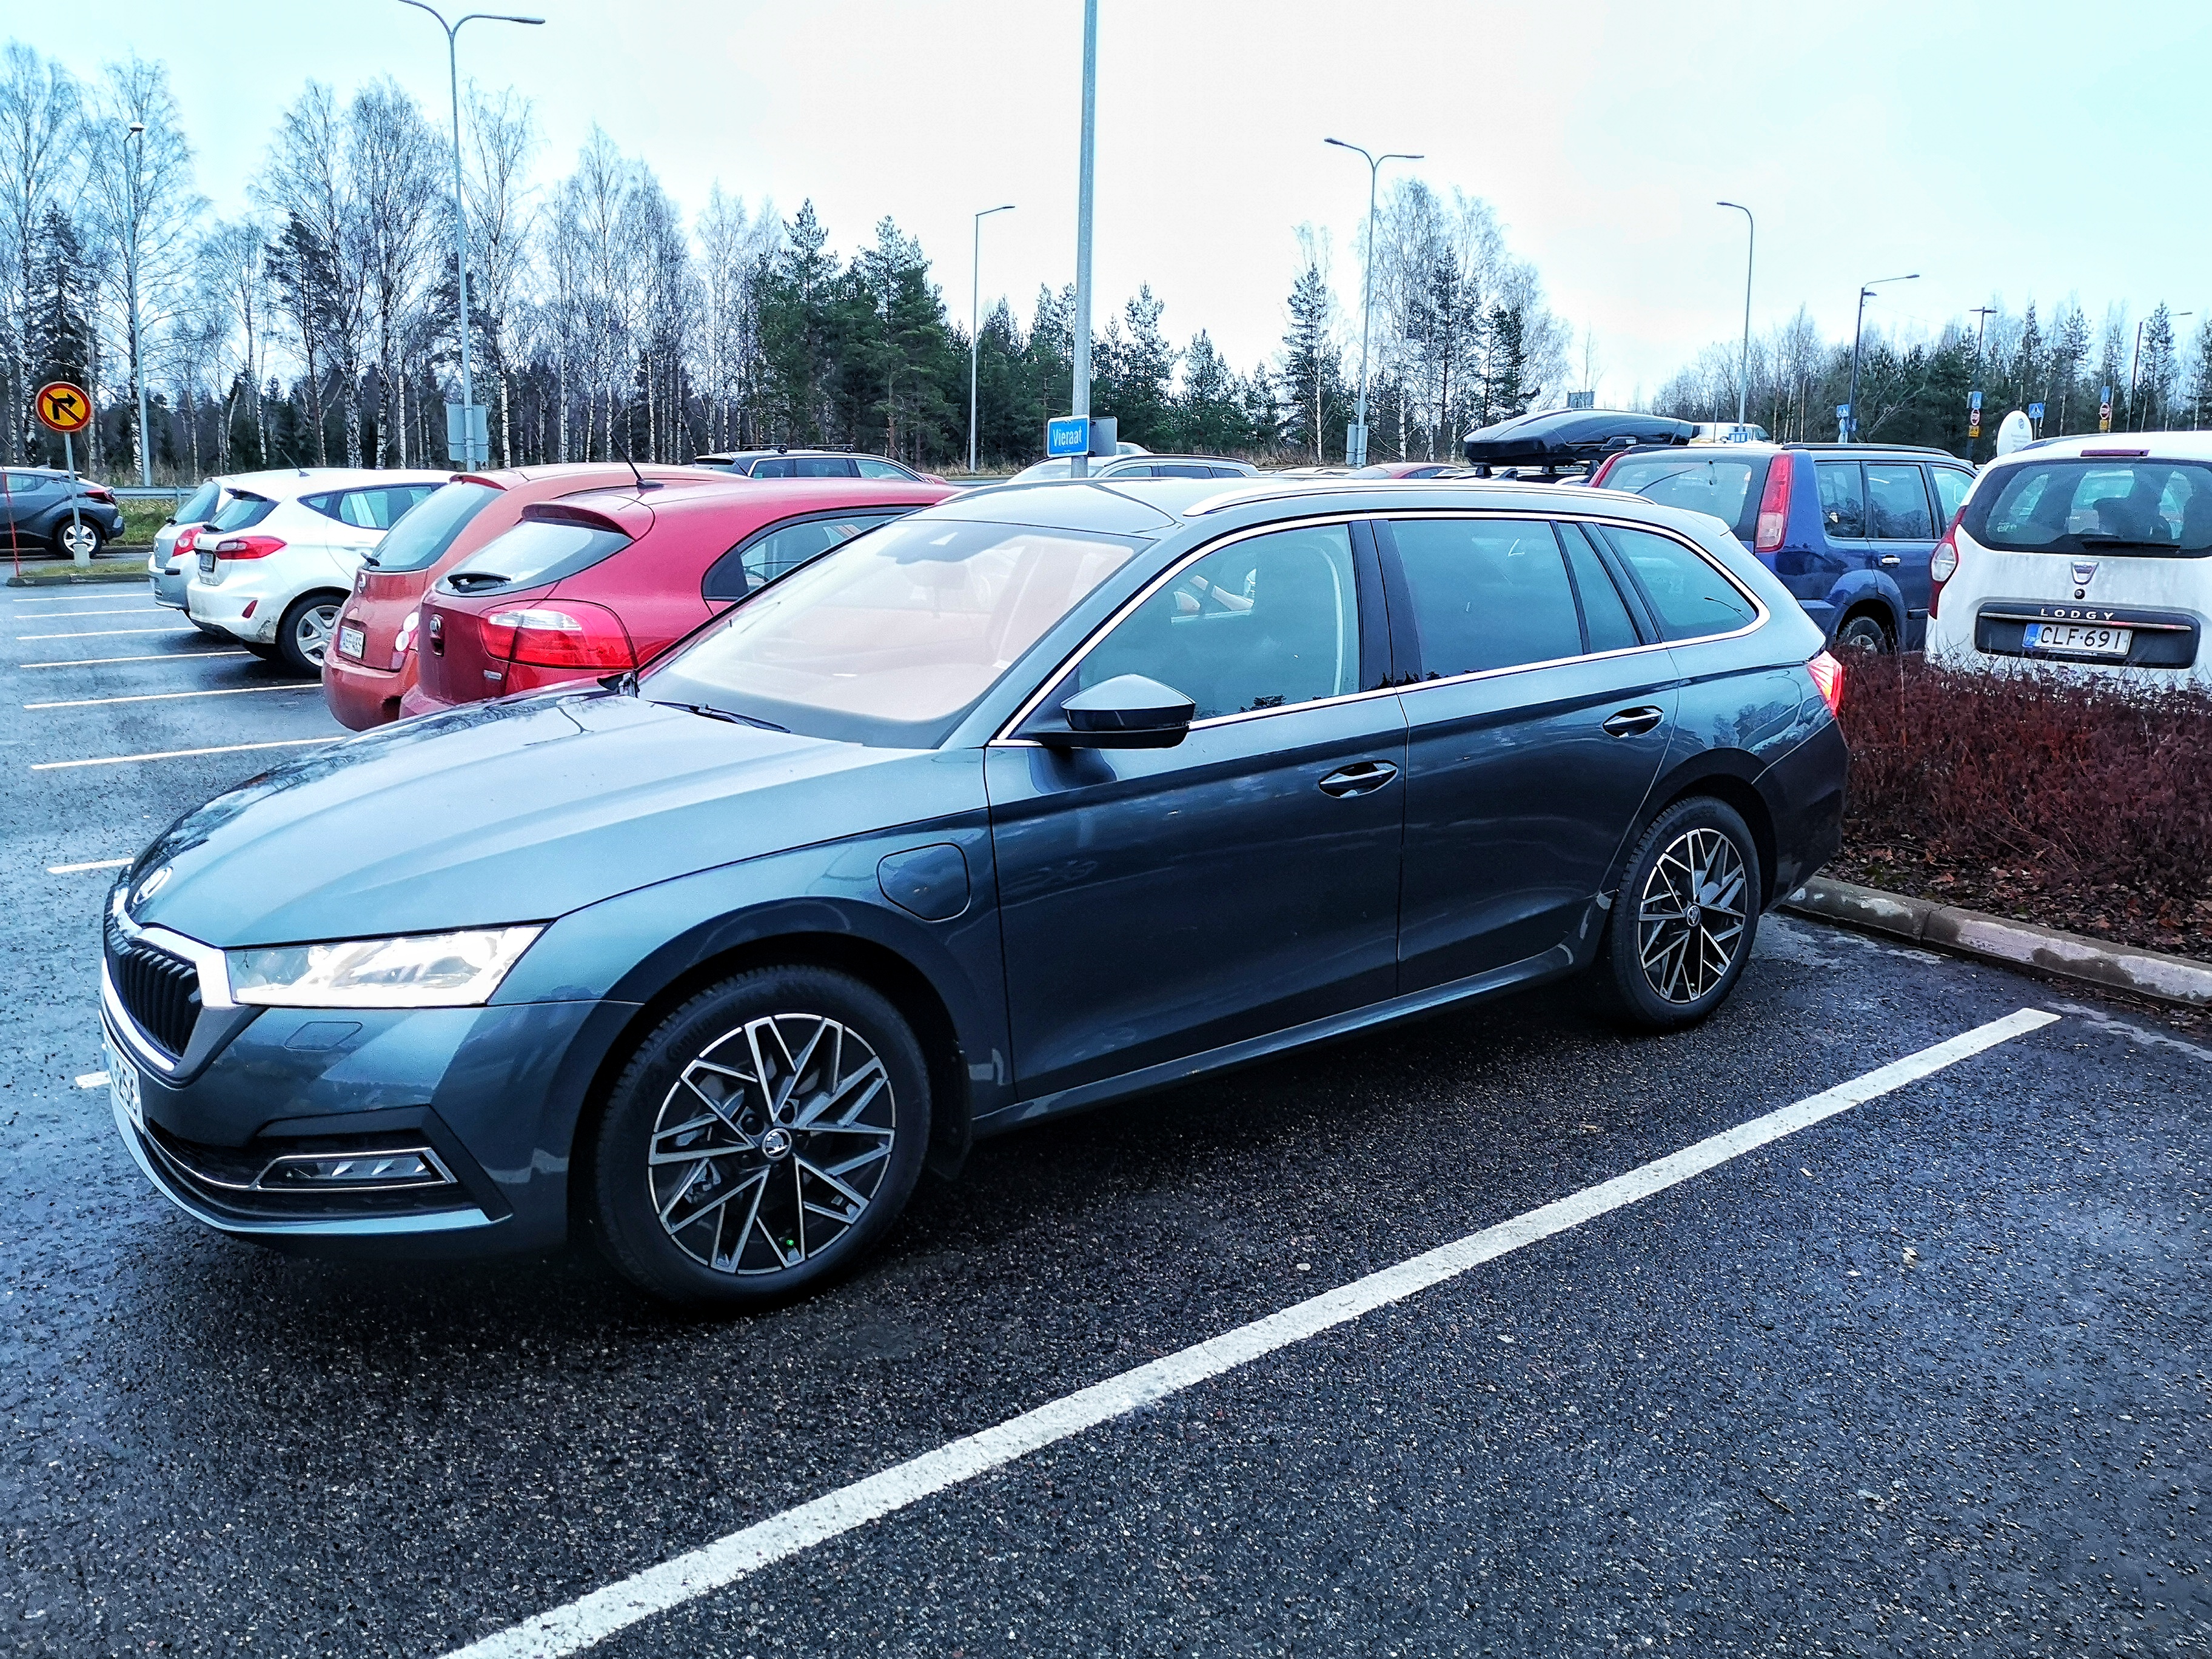
2 pointsMine with the 17" winter alloys. Got 18" different looking alloys for summer tyres.
 2 points
 -
1 pointOkay, so, Head Gasket is done, The header tank is keeping its coolant on max, lovely and pink! (nice new coolant tank I ordered febi) No mayonnaise in the oil filler cap, No pressure the next day in the coolant tank, and also no bubbles when its running, so fingers crossed it stays this way! Tappets sound lovely as well. Onto the next issue, It's still seems to be rough idling(as before), some hesitation now and again when accelerating, like its misfiring I'd say, I've plugged it backing VAG COM Shareware and the misfire fault as gone though? Also I did fit new spark plugs. Anyway I've just ordered a new coil pack on carparts4less, HASS, for £43 pound including delivery! (at least I can rule it out then), I didn't want to go the 2nd hand route just incase I got a dud Because I Love Throwing money at this car!! lol Hopefully this solves it, if not, I might be looking at replacing Fuel Injectors, but this seems an expensive option. I'll update when it arrives.. Just to add to this post, It had a new battery about 6 months ago, and I had been occasionally putting in that red injector cleaner in the fuel, not often but now and again when I was feeling flush, yeah not often also the hoses from the rocker cover are really soft, collapsible and perished, anyone know where I can find this, cant seem to find them on eurocarparts.1 point
-
1 pointFew jobs this week including alloy swap, Heko Wind defelctors, hardwire dashcam, funnel screewash cap.
 1 point
 -
1 point
-
1 point
-
Ahhhh.......... Perfect old persons car, fall in, so easily, and no need to get out... Just sign the finance agreement, life can be too short to worry. Too busy trying things out, launch control etc to 'turn on the bl00dy lights'. Once he did have on the lights and rear fog i wonder if he forgot to put the fog light off when no longer needed. (Maybe reminded by the camera person...)1 point
-
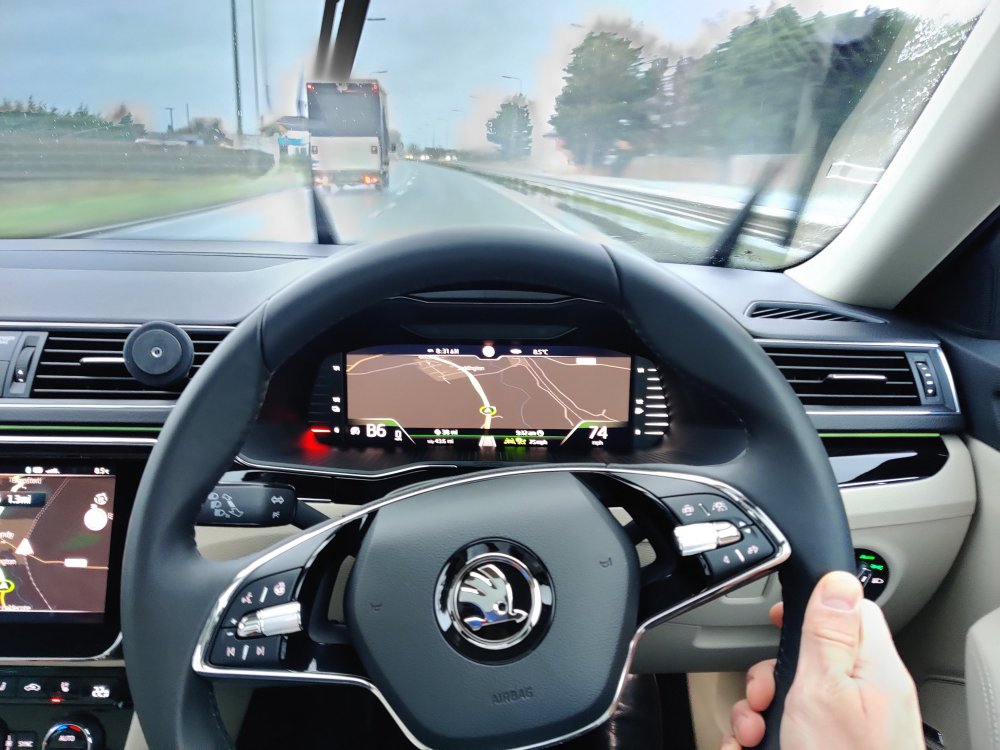
1 pointLane 'assist' may work on motorways but on country roads it is the most dangerous bit of kit I have ever come across. When you are getting near the hedge it is trying very hard to steer you into a head on collision with the tractor you would rather avoid. It also seems to be very good at reading the blobs of glue left over from temporary road studs, rather that the nice new while line about eighteen inches further over. It will quite happily try to steer you into the side of the Artic. It's a good idea in theory but is somewhat lacking in reality. There really needs to be a way of turning it off permanently (an axe perhaps?).1 point
-
Have you tried putting the mirror switch to L? I'm wondering if the instructions have been written for a LHD car?1 point
-
The car has been parked overnight in a barn in rural wales for the first 3 years of its life, or it may be local. I threw a rugby ball in its direction and it hid, so suspect its probably Welsh.... Useful tip regarding removal....Thanks1 point
-
Ordered Friday, delivered today, Monday! I had visions of it being at the bottom of a very big pile of bags of Chrimbo post. Will have a play later today.1 point
-
1 point
-
No, VAG (Skoda) have changed the message lengths used by many of the modules and it's no longer possible to make the HEX-CAN communicate with those just with software updates. You need either a HEX-V2 or a HEX-NET, and can either use an upgrade option or sell your HEX-CAN on an auction website (which I did earlier this year).1 point
-
Thank you. I've now had the door panels treated and new speakers installed. With the boot and door panels, the cabin is much quieter. All the mid and range frequency noises are gone. My suggestion to anyone considering a new stereo is to just deaden the doors and boot (and if possible the floors) and replace the speakers. The difference is remarkable.1 point
-
I'm a bit confused by what you have fitted in each position, because this diagram claims the you should have 03E 906 262C fitted pre-cat, and 03C 906 262 fitted post-cat on CEVA. Item numbers 1 & 6 respectively here lambda probe; (behind catalyst) - Fabia(FABI) [EUROPA 2010 year] (7zap.com) If you go to the furthest right column there is a button with horizontal opposing arrows which shows aftermarket equivalent parts for each. For 03E906262C, 03E906262B is shown as interchangeable. For 03C906262 there seem to be hundreds of equivalents. I get the impression that if it has the right number of wires in correct positions within right connector, and a cable that will reach, it will do the job.1 point
-
Yes, an extra £200 would have been worth it for peace of mind.1 point
-
1 point
-
If you leave the map and dsg as it is and add a pedal box, it’ll transform the drive of the car. The lag in mine without the pedal box is horrendous.1 point
-
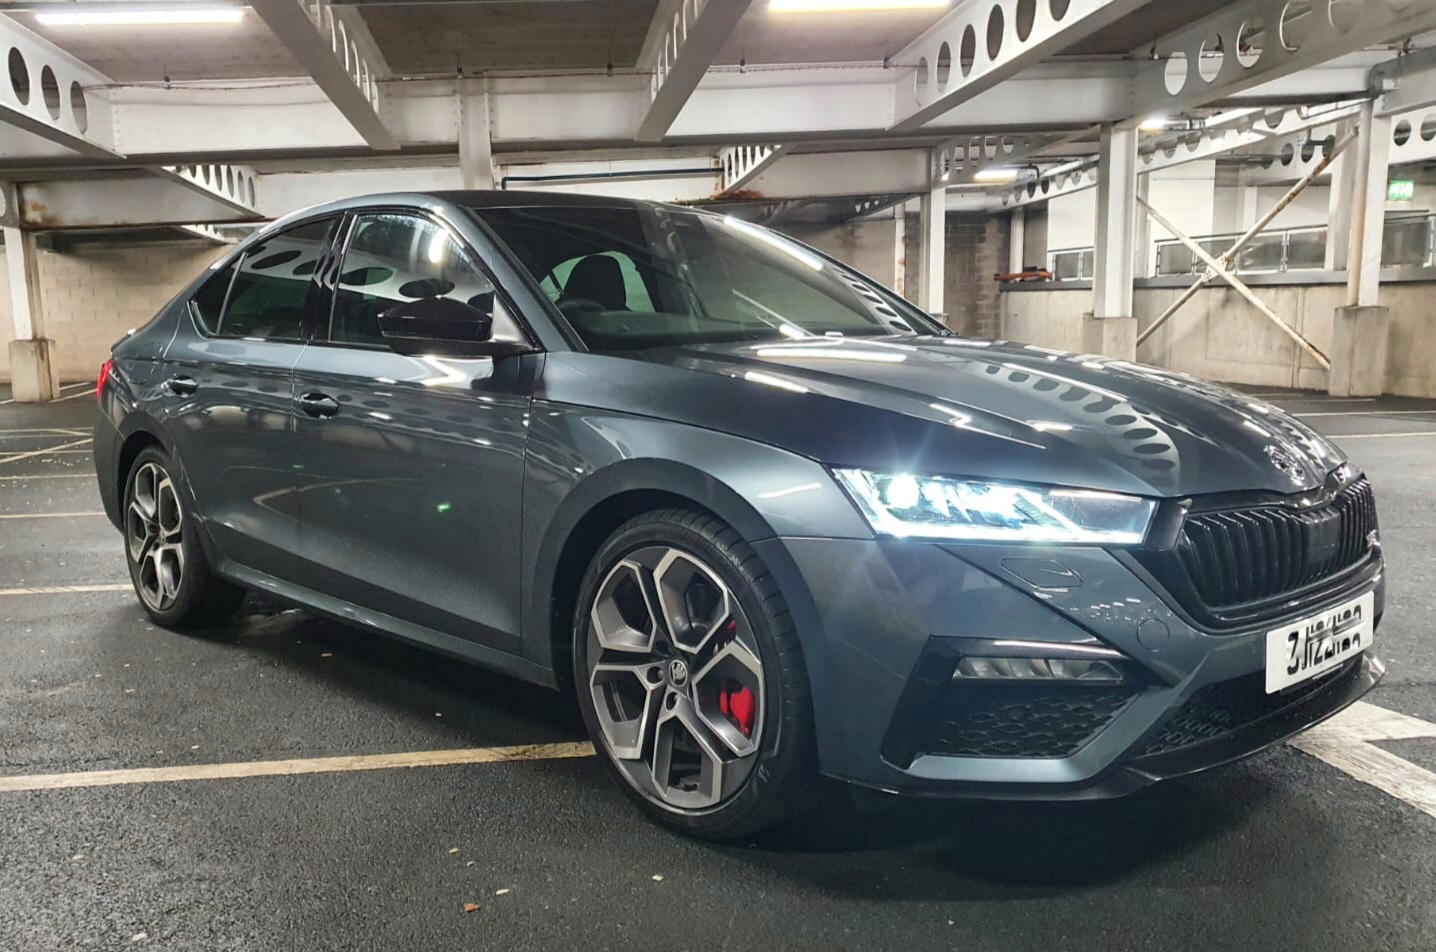
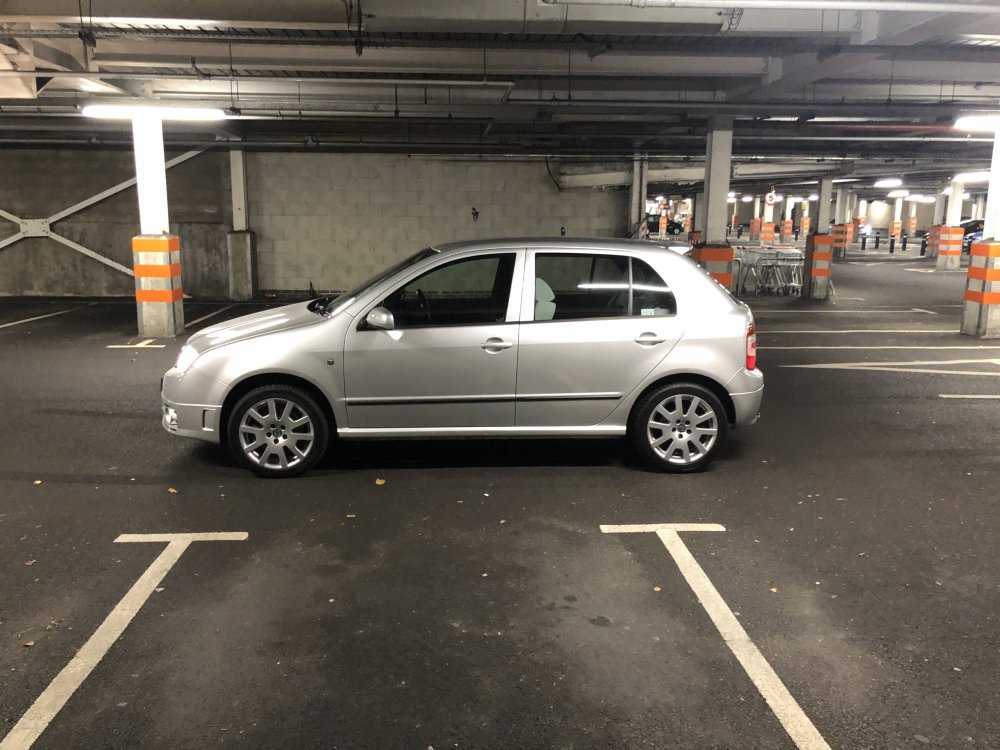
1 pointI’ve recently bought a 39k mile 56 plate that i have just finished a minor restoration on. The old boy who owned it left it sat outside for a while before he gave up driving. It needed: new headlights (originals cloudy) coolant rad (minor leak) a/c condenser discs and pads all round new rear brake callipers new windscreen scuttle 4 alloy refurb & 4 new ps3 tyres four new centre badges new vrs grille badge (local TPS had one left in stock) new Skoda grille badge cam belt & water pump egr valve a/c hp sensor all parts I purchased from TPS and are all genuine. I’ve bought the car to keep long term as part of my collection & hopefully a sound investment. I always wanted one when they were new (I wasn’t old enough to drive then). I’m lucky enough to have company car for a daily and the fabia is garaged for summer use only. I’ll likely rotate the fabia on my Nurburgring trips with my performance toy

 1 point
 -
Luckily they sorted my tire there and then but we're on to more bad news, my coilovers have arrived along with adjustable drop links. Set fronts up, took out bump stops and helper springs and starting working on the car. First bolt snapped clean down the middle so she's off the road for a few days until I can get a bolt and put her back together on the new coilovers. Will update as soon as possible, probably tomorrow knowing me.1 point
-
Well two days in now and these are my additional thoughts; So far absolutely no issue with kangarooing or similar issues when cold or warm. I had a few issues with Skoda Connect but leaving it a day seemed to sort it. Car play refused to activate yesterday but I think that may have been an issue with my phone. it was doing strange things elsewhere. a Fresh restore via iTunes seems to have solved that. You have to press the footbrake reasonably firmly for auto hold to activate. This is taking a little getting used to as i tend to be releasing the brake as I come to a stop to be smooth. Purchased a bed from ikea and was worried it wouldn't fit but with a bit of jiggling it was fineish. Infuriatingly I had used the extra length is the estate I previously had only a handful of times yet 2 days later it would have been very useful. Even though they are priced very similar (high spec Astra to poverty spec Karoq) the interior feels sooooo much more premium. i still cant wrap my head around the fact that the Karoq feels so much more torquier than the Astra even though its heavier and on paper has the same HP and Torque figure. although the 1.4T did sound a bit nicer and the handling was unsurprisingly better. At motorway speeds in rare for the eco mode/cylinder deactivation to active. Start/Stop is far exceeding my expectations. its ready to move way before I'm in gear. I've gotten used to the notchiness of the gearbox. no longer struggling to get 1st. fuel economy is on par with the Astra around town but slightly worse on the motorway but not by much. That screen is Amazing. so clear and responsive. The petrol blue shows dirt quite quickly but to be fair the weather had been horrible the last few days so its due a clean already. The wipers are dead silent. I know I have said it before but those headlights are so much better than the Vauxhall. I thought keyless start was a gimmick but not having to fumble to put the key in the ignition at night is a pleasure. That's about it. I always thought people who said Skoda was just a rebadged VW were wrong and naïve. I now know the opposite to be true. It's an absolute pleasure to drive and every opportunity I get I do so.1 point
-
We're now up to a month of ownership stage so I decided to treat her to a few more goodies! Tints all around, sunstrip, sharkfin, wiper delete (kill all wipers), private reg with 4D plates and a goodish clean including decluttering the back window1 point
-
Bit of a clean and a reflection of my progress at this point as I was about 3 weeks into ownership, I also got ride of the residue that was left on the front bumper from the number plate of the chap I bought it off, from the front doesn't even look like the same car anymore1 point
-
The front bumper looked like it had been run through hell and back so decided to take a trip to Wales and pick up a vrs one. Was an interesting experience as when we got there it fit in the boot perfectly but my rear passengers weren't too happy about having a bumper wedged between them (they was warned before we set off). Me and my pal ended up changing the bumper over in a dominos car park before putting the old one into there big bin, which we of course asked to do. Finally she's starting to take shape and look different.1 point
-
I’m gobsmacked to find this out! Old dogs & new tricks spring to mind.1 point
-
How odd! With mine I can set the arrows for next station to either change to the next preset, or the next station in the alphabetic list. However there is also a setting (for DAB stations at least) where if it loses signal it can change to 'a similar radio station'. However its definition of similar isn't the same as mine so I turned that option off rather than suddenly being treated to a radio station I didn't want to listen to! Chris1 point
-
No mate, the gizmo just senses the current going in/out of the battery and - when engine is running - can instruct the alternator to modify its output voltage accordingly. The gizmo can't stop current from an external charger going in. It's not a switch.1 point
-
That doesn't sound probable to me. When the battery is being charged by an external charger, the car doesn't have control over the voltage being applied. So although the 'gizmo' can measure the amount of charge being added, it isn't able to control it in the same way that it could if the alternator was supplying the charge (by varying the voltage setpoint of the alt). I believe further charging by the external charger will improve the state of charge of this battery.1 point
-
1 point
-
Hi @e-Roottoot, I think we may be talking about different combinations of features, which Skoda may package one way on one vehicle and another way on other vehicles. Here's what the 2020 A7 Scout manual says about Offroad mode: "Offroad mode includes functions that help to overcome routes that are difficult to navigate when travelling on non-paved roads. The following functions are integrated into Offroad mode. Hill descent assistant ESC Offroad ASR Offroad EDS Offroad ABS Offroad" As far as I can tell, these feature - particularly Hill descent assist - are ONLY available when offroad mode is enabled. Moving on to what the manual says about Hill descent assist: "The hill descent assistant (hereinafter referred to as assist system), with its automatic braking action on all wheels, ensures a constant speed is maintained on a steep slope when driving forwards and reversing. The assist system is automatically engaged under the following conditions. The engine is running. * For vehicles with Manual transmission the shift lever is in the neutral position and or the 1st, 2nd, 3rd gear, or reverse gear is engaged. * On vehicles with an automatic transmission, the selector lever is in the R, N, D/S position or in the Tiptronic position. * The downhill gradient is at least 10 % (when driving over sleepers, the limit can briefly drop to 8 %). * Neither the accelerator nor the brake pedal is pressed. Driving speed Initiate the downhill descent at a reasonable speed of approx. 2 - 30 km/h, the assist system constantly maintains this speed as you travel downhill. If a forwards or reverse gear is engaged on vehicles with a manual transmission, the speed must be high enough to avoid “stalling the engine”. The driving speed can be changed by pressing the brake or accelerator pedal. This is true even if the shift lever is in the neutral position and the selector lever in the N position. Engagement of the assist system is resumed after the pedal is released. WARNING For the correct operation of the assistant the road surface must be sufficiently adherent. The assistant cannot properly fulfil its function on slushy soil due to physical reasons (e.g. ice or mud). - there is a risk of an accident!" So, we can only get hill descent assist when offroad mode is enabled. Hill descent assist is limited to what I'll describe as "less challenging" offroad conditions (as the manual says, above, that hill descent assist won't work in particularly slippery conditions). My questions here related to hill descent assistant specifically, not to offroad mode generally. The relation seems to be imposed (by Skoda, on the 2020 Scout, at least) by making Hill descent assist only enablable when offroad mode is enabled. None of the above suggests that hill descent assist should NOT work well on a well-paved (but steep, defined above by Skoda as being at least 10%) road. And none of the above explains why my 2020 Scout's hill descent assistant is jerky, while others have reported not encountering this, and when I used another recent VW-group vehicle (2020 Tarraco)'s hill descent assist I found it smooth. I'd appreciate if we could set aside the arguments that I shouldn't be doing this (unless someone can find an actual reason why that's the case; simply claiming that I'm "not off-road" when I'm on a steep, well-paved concrete track" is an opinion, not an engineering or statement-by-the-manufacturer reason/justification), and focus on what engineering cause could result in this - other than possibly that my specific vehicle's hill descent assistant maybe isn't working correctly. thank you1 point
-
1 pointI've moved from an Octavia 3 L&K diesel 150 DSG to a Scala 1.5 Petrol DSG SEL First Edition. The build quality of the Scala is at least equivalent but the level of equipment lower by comparison to L&K specification but Skoda no longer do an Octavia in that specification in the UK. Ride quality in my experience is slightly better and handling slightly lighter (my Scala has chassis control but otherwise has same torsion rear suspension set up) Fuel consumption over first 1000 miles half of which was on motorway averaged 55MPG I'm ok with the touchscreen controls and like the virtual cockpit1 point
-
1 pointI actually think the onboard technology is above-par on the Scala, in general. I do also have to click the OK button on startup on the Amundsen screen, but that's about the only minor faff. Lane assist is not perfect, but then nor is the lane assist on my Volvo V90. It certainly doesn't warrant diving into the menus each time to switch it off at the start of each journey. With the climate control, if you leave it in Auto mode, you don't need to keep diving into the menus to change the blower direction, fan speed etc as it self-regulates. Compared to other recent cars I've owned, the climate control in the Scala is pretty decent. Rarely need to touch the controls at all and the full front windscreen max setting button is great if you ever get any condensation.1 point
-
1 pointVast numbers of Skoda drivers never use this forum so I guess there may be a few oldies been in a ditch. I am an advanced driver and in my own personal opinion lane control needs a bit more work before inflicting on all new Skoda cars. Alternatively can we have the ability to turn it off permanently along with stop start.1 point
-
1 pointi'll share few links saved for me self - #1 place took Airlift Perfomance V2 https://www.bmptuning.com/products/air-lift-performance-complete-air-ride-kit-mqb https://www.drive2.ru/l/500212095892062783/ https://www.drive2.ru/l/501003469386154446/ more likely won't be realized because it's huge price of kit and complicated installation but not removed from the list cause i still can't find stiffer springs without lowering effect and air suspension will give ability change height on the fly in case my car has DCC, the list of shocks is so short KW StreetComfort; Bilstein B16; Bilstein B4; Bilstein B6; first two comes in lowering only version, not for me. currently my choice stays on Bilstein B6 DampTronic - better performance for reasonable price, but as i told, stuck on choosing correct springs # Bilstein online catalog # http://web1.carparts-cat.com/default.aspx?11=18&14=4&10=E72CF059C0714555A320FD56FBC6F3BB018004&12=100 1100€ DCC Bilstein B6 Performance (DampTronic) https://www.briskoda.net/forums/topic/485647-bilstein-b6-dcc-shock-absorbers-available-at-last/ 23-254343 front for * 20-267537 rear for 2.0 AWD 20-267537 rear for 2.0 FWD 20-254353 rear for ? 1800€ Bilstein B16 Car Damptronic Coilover Full Kit 49-255874 https://www.ebay.de/itm/Bilstein-B16-Car-Damptronic-Coilover-Full-Kit-49-255874/253840584695 £290 DCC cancellation kit https://www.awesomegti.com/shop-by-brand/kw/kw-electronic-damping-cancellation-kit-volkswagen-golf-mk7/ https://www.briskoda.net/forums/topic/458494-dcc-on-a-sportline/?do=findComment&comment=5159332 1300€ KW StreetComfort Skoda Superb III Mod.2016 (3T) Limo o. DCC (VA 1041-1200kg) https://www.ebay.co.uk/itm/KW-StreetComfort-Skoda-Superb-III-Mod-2016-3T-Limo-o-DCC-VA-1041-1200kg/223424155292?hash=item34051e0e9c:g:rWkAAOSwaAlcdVdj 1700€ KW GFw V2 INOX passend für SKODA Superb, (3T) mit DCC / with DCC https://www.ebay.co.uk/itm/KW-GFw-V2-INOX-passend-fur-SKODA-Superb-3T-mit-DCC-with-DCC/274263733952?hash=item3fdb6476c0:g:gGEAAOSwuCBeRENK https://www.ebay.co.uk/itm/KW-GFw-V2-INOX-passend-fur-SKODA-Superb-3T-mit-DCC-with-DCC/274263733864?hash=item3fdb647668:g:OfMAAOSwlGpeRENG 2400€ KW DDC "Plug & Play" coilovers Lowering FA/RA: 30-55mm/30-55mm https://www.kwsuspensions.net/productfinder/SKODA_SUPERB_III__3V3__03_2015-_3V3_2.0_TSI_Petrol_162KW_1984ccm_ve*dl4Yqck5aLrErYqSkJQ~~/58/DDC/39080045 https://www.briskoda.net/forums/topic/454611-how-low-is-the-superb-combi-sportline/?tab=comments#comment-5107738 https://www.briskoda.net/forums/topic/447585-skoda-is-doing-well-it-seems/?page=2&tab=comments#comment-5034464 # Bilstein B6 non DCC 2.0 AWD https://www.drive2.ru/l/517090973767959908/ 35-229872 front 24-229890 rear # Bilstein B6 non DCC 2.0 AWD https://www.drive2.ru/l/505662649908855532/ # Bilstein B8 non DCC 2.0 AWD https://www.drive2.ru/l/541997660916155885/ 35-229919 front 24-229937 rear # Bilstein B14PSS non DCC 2.0 AWD https://www.drive2.ru/l/503236027746353394/ # Koni FSD 2100-4181 non DCC 2.0 FWD # Eibach E10-85-042-02-22 https://www.drive2.ru/l/474824097528807733/ # Koni non DCC 1.8 FWD https://www.drive2.ru/l/475995627168203394/1 point
-
1 pointWheetabix..... I mean have you tried removing it from a bowl after its soaked the milk in then dried? I’m thinking if they can find a way to put that in sealant, then they really have got a winning product.1 point


.thumb.jpg.f83a46b9b3c0d976b9dbffbb523c9874.jpg)