Leaderboard

.thumb.jpg.9dd3f612ba7f13d10be5c518d3c8d255.jpg)


Popular Content
Showing content with the highest reputation on 23/09/25 in Posts
-
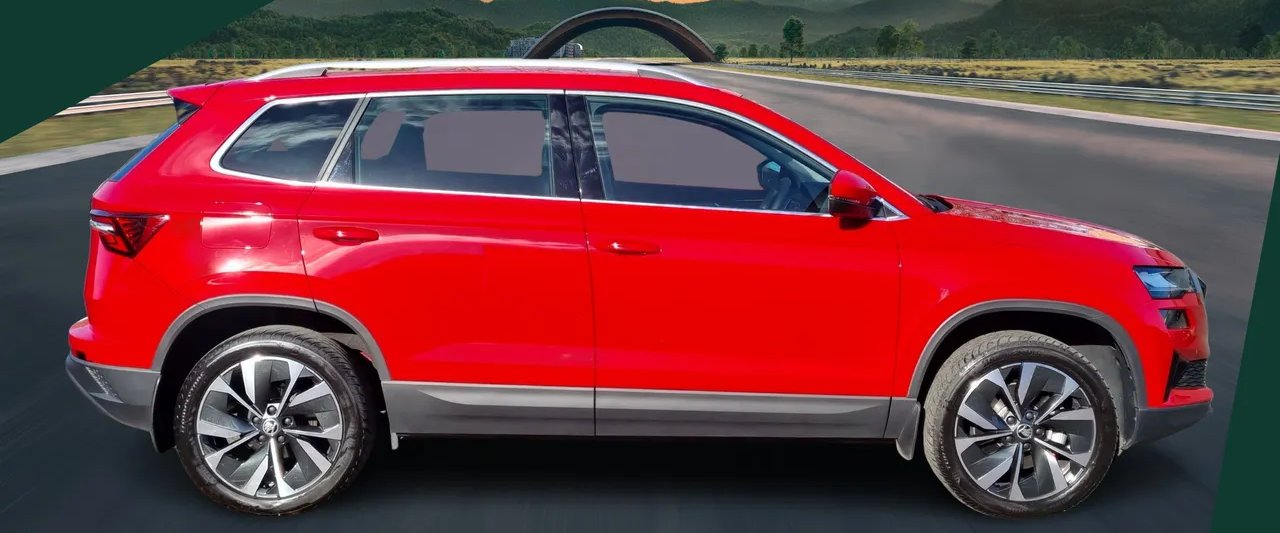
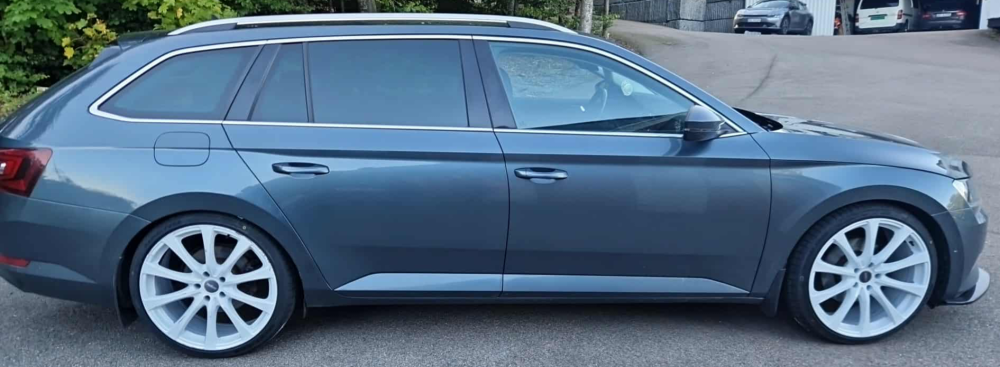
3 pointsThis is my 2016 L&K 9x20 et35 with 235/35-20 Saving up money for lowering springs and new dcc shocks💸 Coming up with some better pictures once i have cleaned it.
 3 points
 -
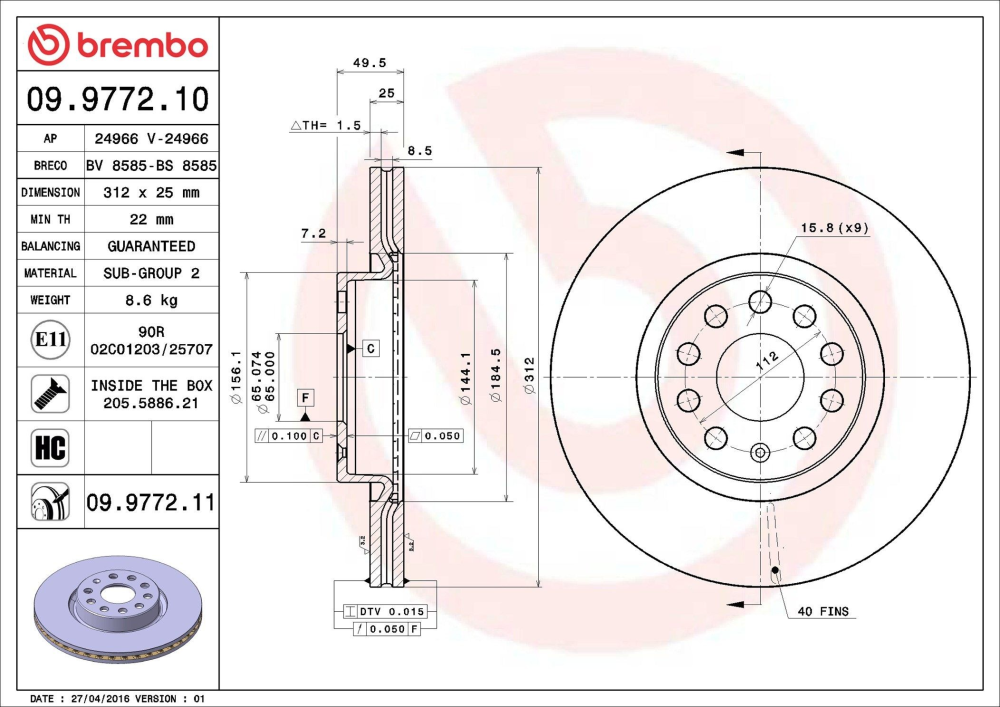
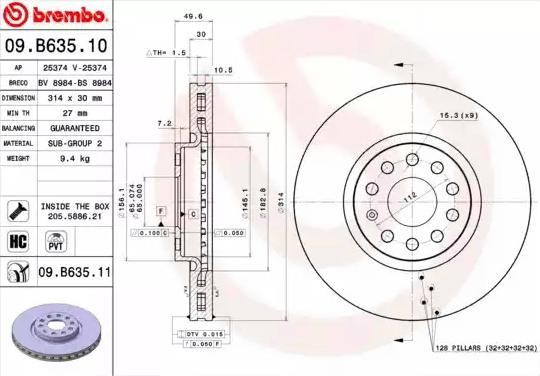
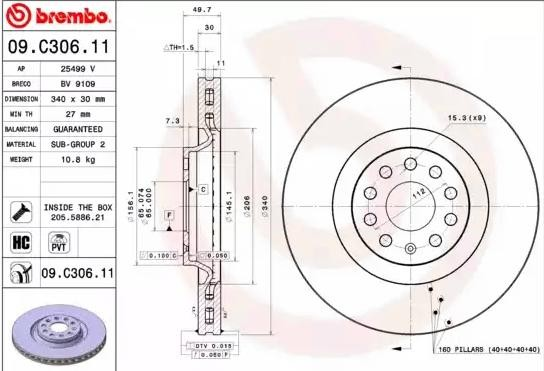
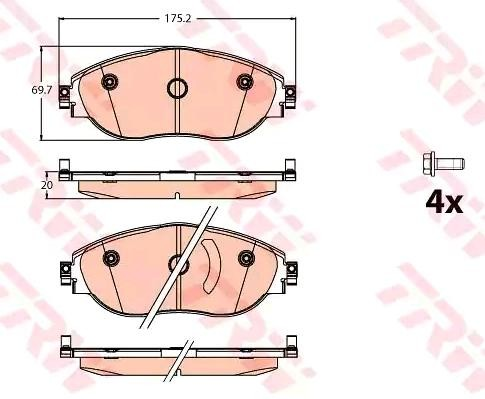
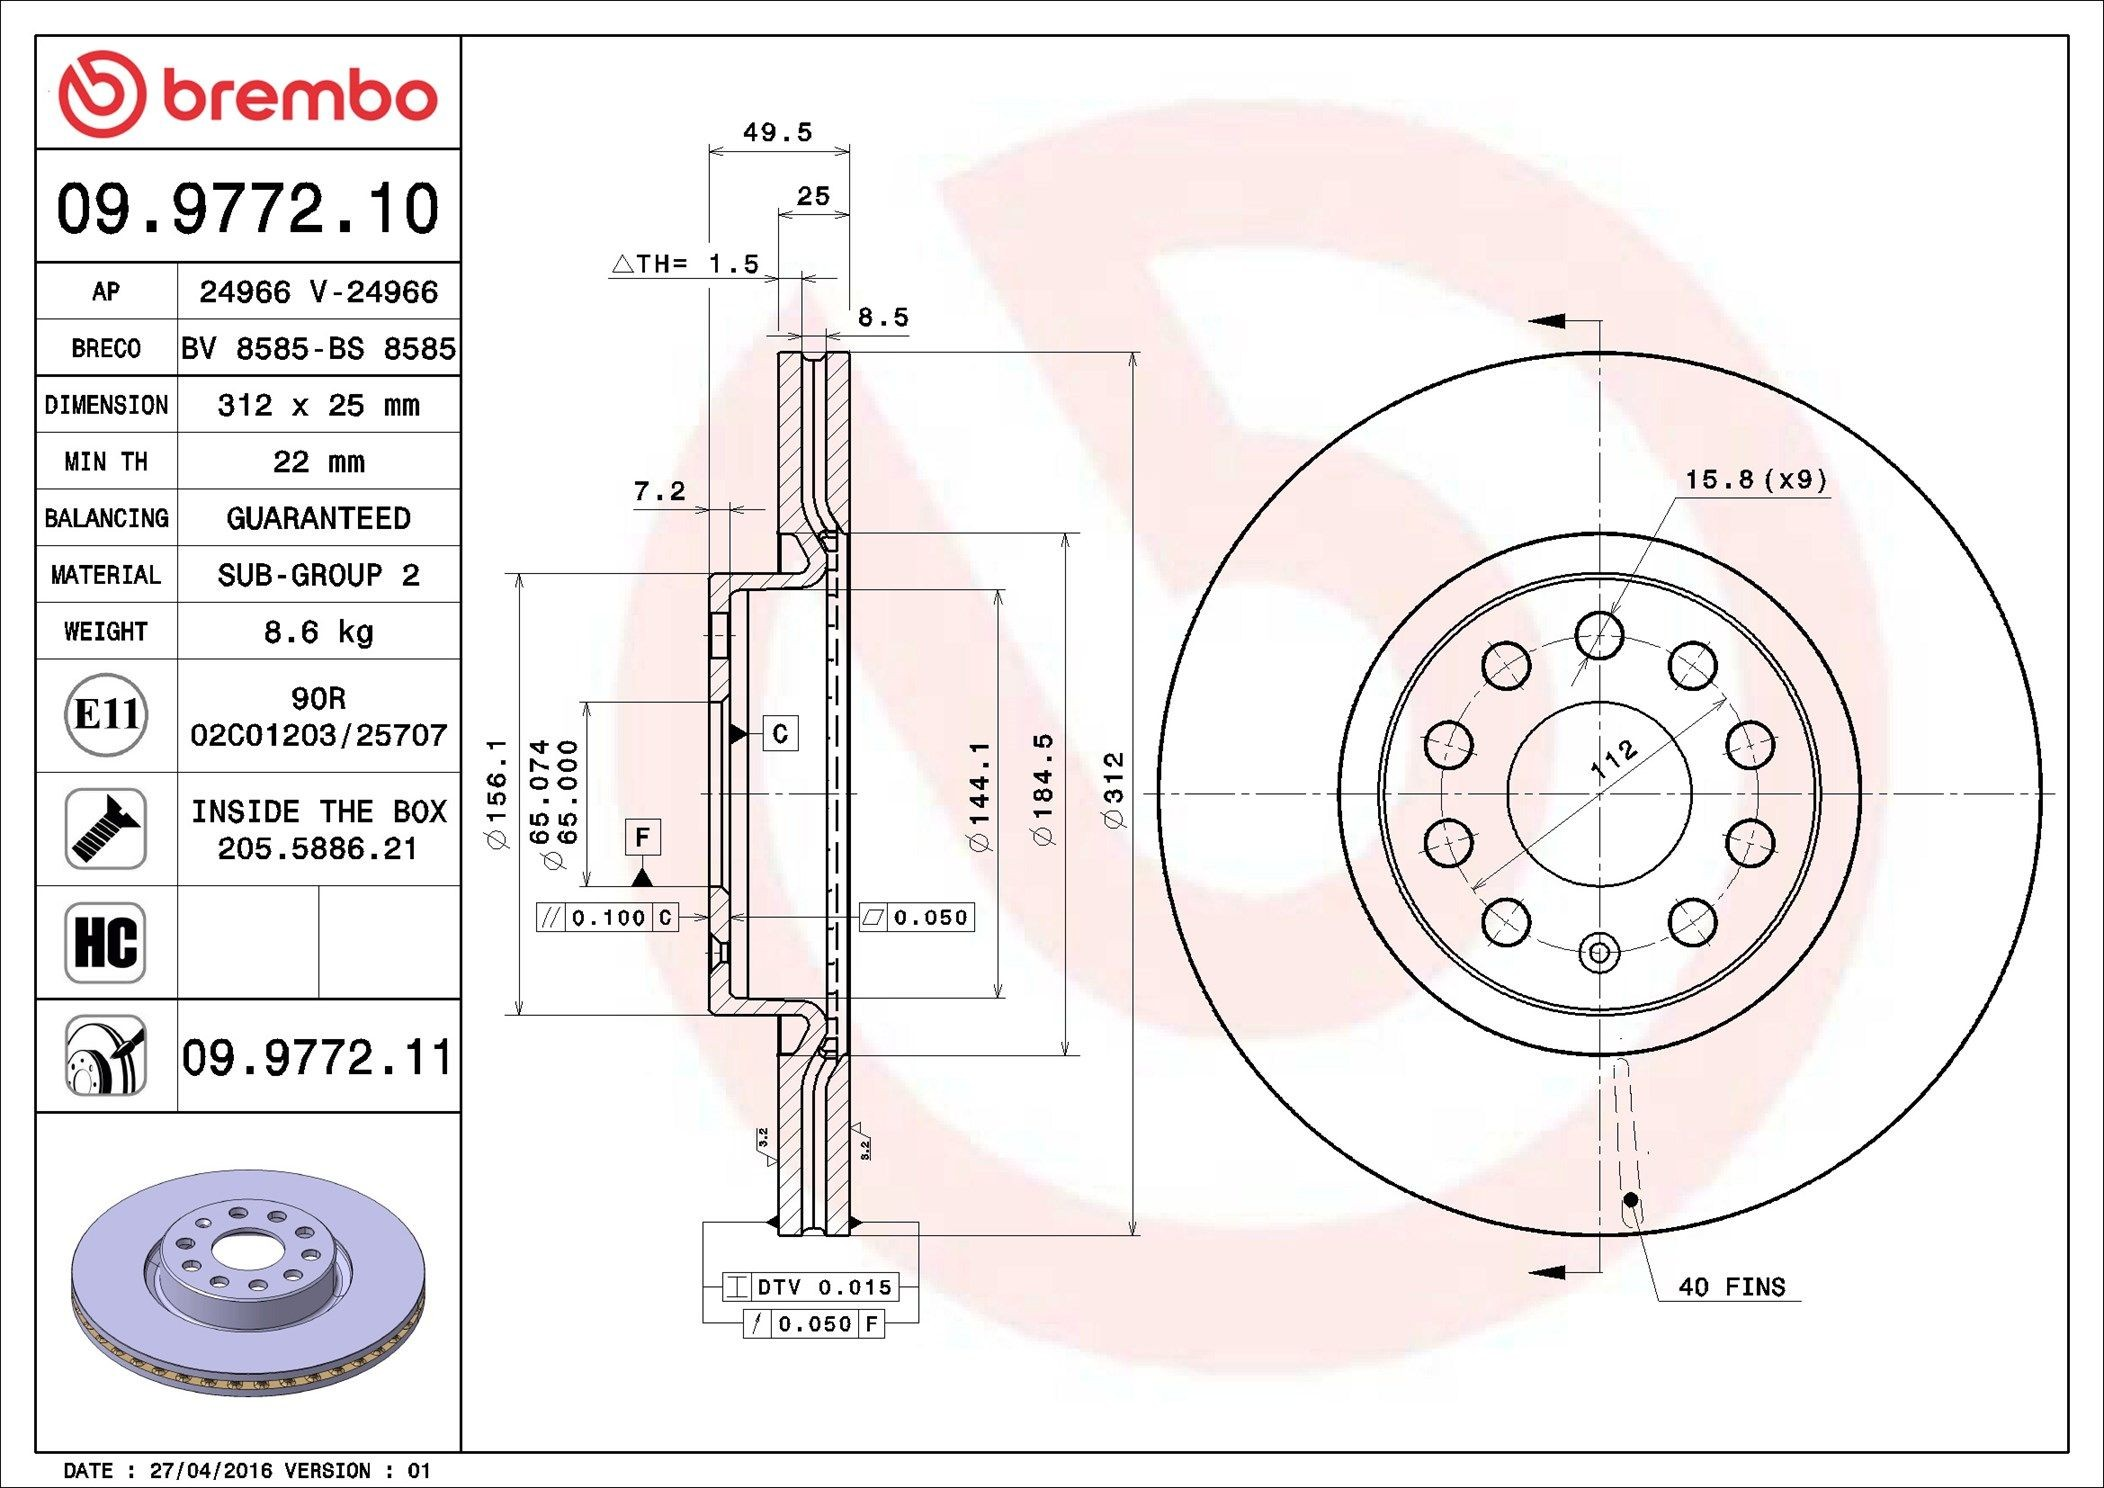
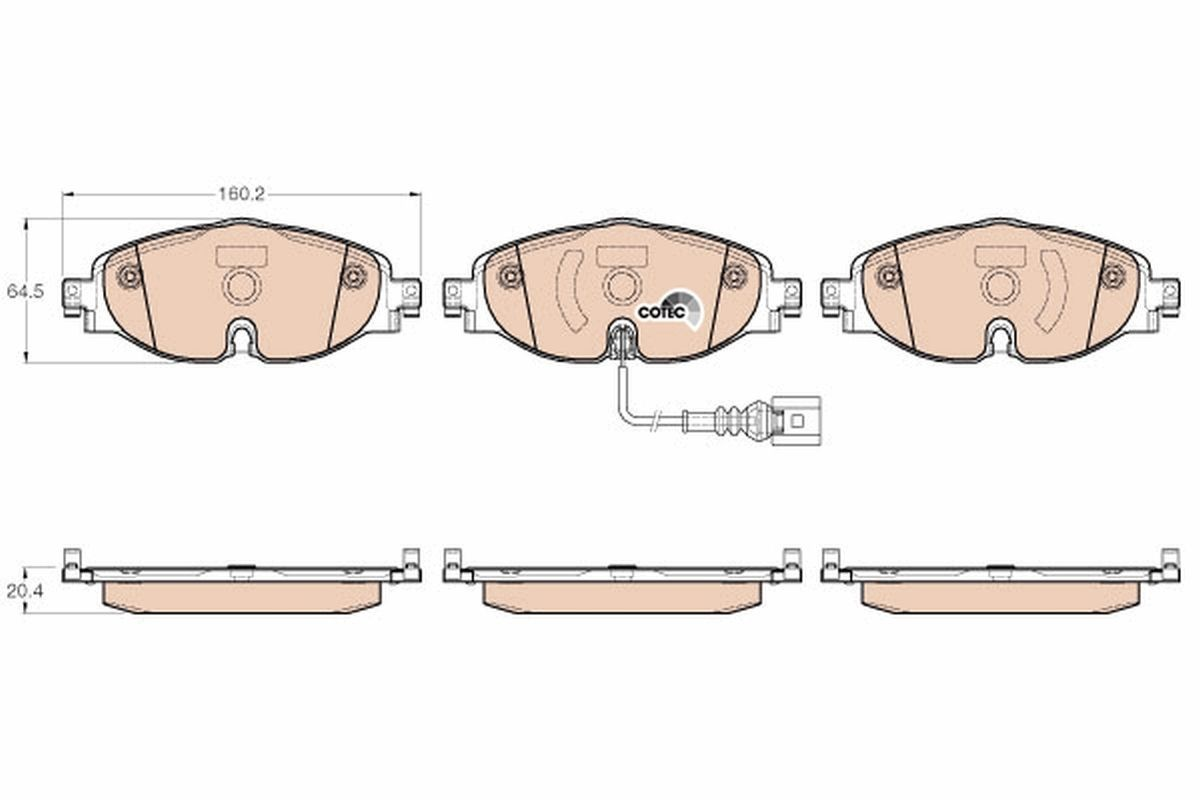
2 pointsAccording to Jurid/Ferodo/Valeo on autodoc, the Superb MK3 1.4TSI iV 160kW/218PS has 312x25mm front brake discs and 300x12mm rear brake discs. All Superb MK3 models use the 312x25mm front and 300x12mm rear brake disc combination except for the powerful 2.0TSI 272/280PS 4x4 models which use the bigger 340x30mm front and 310x22mm rear brake disc combination. The 312x25mm front brake discs could be upgraded to 314x30mm from the Kodiaq. The Kodiaq uses these 314x30mm front brakes discs in combination with the 300x12mm rear brake discs. The 314x30mm front brake discs use the same front brake calipers as the 340x30mm front brake discs. 314x30mm front brake discs enable the use of 16" wheels, whereas the bigger 340x30mm front brake discs need at least 17" wheels to clear the front brake calipers. One owner reported that the 310x22mm rear brakes also need at least 17" wheels to clear the rear brake calipers. The increase in piston diameter of the front brake calipers when going from 312x25mm front brake calipers to 314x30mm/340x30mm front brake calipers will increase the pressure applied to the front brake pads by 10.8%, ie. (60/57)x(60/57)=1.108033241 The increase in the surface area of the front brake pads when going from 312x25mm front brake calipers to 314x30mm/340x30mm front brake calipers is about 18.2% (estimate only as based on outside lengths and outside heights of front brake pads), ie. (175.2/160.2)x(69.7/64.5)=1.1818018175 314x30mm/340x30mm front brake discs have more effective cooling than 312x25mm front brake discs. The performance of the 314x30mm front brakes is probably closer to the 340x30mm front brakes than the 312x25mm front brakes. On the Superb MK3, all the master cylinders use a 23.8mm (15/16"=23.8mm) bore for both the 312x25mm/300x12mm and 340x30mm/310x22mm brake disc combinations. Piston diameter 312x25mm front brake caliper 57mm 314x30mm/340x30mm front brake caliper 60mm 314x30mm front brake discs (Kodiaq build code 1LW) (TRW brake calipers) Left caliper 3C0615123 Right caliper 3C0615124 Left carrier 7N0615125 Right carrier 7N0615126 Disc 1K0615301AJ Brake pads 8V0698151C https://www.lllparts.co.uk/catalogs/skoda/CZ/KOD/804/6/615/615010 312x25mm front brake discs 8.6kg 314x30mm front brake discs 9.4kg 340x30mm front brake discs 10.8kg Front brake pads for 312x25mm front brake discs Front brake pads for 314x30mm/340x30mm front brake discs

 2 points
 -
2 pointsI'm also a hobbyist, and I don't know where you get 800 Euros from, the real price for a 3 VIN licensed cable suitable for a hobbyist is GBP222 which is €255.2 points
-
Easy to repair in situ. If you are not happy to do it yourself or don't have a friend who can do it, then about half an hours work at an auto electricians. Probably less time than changing the loom.2 points
-
2 pointsHi everyone. Found this one https://updateportalmaps.blob.core.windows.net/maps/OI_P154_EU_202534_Offline_Update.zip2 points
-
1 pointI've got a direct link to the Roomster workshop manual , a PDF zip file to download and a link to it unzipped https://drive.google.com/u/0/uc?id=1af6lijSW9wMtIk78Ae4MEl9KtwEWyKkL&export=download for zipfile https://drive.google.com/drive/folders/1CZMS4GkOTdvjJcd52m3oa6Vp8ujO7tXF?usp=sharing for unzipped I hope it is useful.1 point
-
1 pointI remember looking on this brilliant forum a while back to try to ascertain the location of a rattle from the rear of my 2022 Kodiaq 7 seater. A few suggestions directed me to the second row seat belt clasp as it goes into the roof socket or the ones on the seat but it was still there. I finally discovered what it was and thought it might be useful for others. If you slide the rear seats forward then return them to their correct position, the handle under the front of the seat is the rattle. I found this by lifting it slightly and it seemed to clock into place. Each time I've had the rattle since, just a quick lift if the handle has cured it.1 point
-
1 point235/35R20 might not be able to support the maximum axle weight of the Superb MK3 because the load index of this tyre size is only 92(630kg) in XL (eXtra Load) form. The Superb MK3 usually uses at least a 94 (670kg) load index. 245/35R20 would have been better because that has a load index of 95(690kg) in XL form.1 point
-
1 pointHey, I'm just getting the hang of things so apologies if I've gone about things in the wrong way. We have two Yetis a 2016 1.2 petrol DSG and a 2015 2ltr L and K with a leaking sun roof, hence trying to remove the sun visor to drop the roof lining. The thread was the only one which had the same problem I am experiencing so reached out in desperation. We love our Yetis!1 point
-
There’s a thread you’ve commented on that seems to be a successful change. Might be a bit more straightforward finding a second hand set on eBay. Or: This? Would just have to sort the rears then. Should be plug and play quite easily1 point
-
Hello, no, doesn't have heated seats. I assume like me, it looks like a seat to you as well. Because it looks like a seat, I've been checking things related to seating. It's not air bag, that light comes on with ignition, and after a few seconds goes out. Seat belt light goes out when seat belt is plugged in. Not electric seats so not that. I just can't find anything in the manual or online that shows that light and what it's telling me..1 point
-
1 pointYou do realise the last post was only 3 yrs ago, not 7, and the age of the post is irrelevant if it’s about a topic someone (a new member, so that’s a warm welcome, laughing at them...) has searched and may be able to get help from?1 point
-
Excellent illustration of dry/cracked joints on the two connections just to the left of the pyre. Doubt that'll be repairable without some component replacement(s).1 point
-
1 pointHi, I'm removing my roof lining and I'm having the same problem removing the sun visor. Did you manage to remove yours? Thanks for any advice Steve1 point
-
If the wire is broken I normally just solder the wire together but if its at a point where it gets flexed if near a door hinge I tend to replace a section so the join isn't getting stressed. I generally solder a new section in and use heat shrink to cover the joins pus some insulation tape for extra protection. A lot cheaper and easier than replacing loom. Alasdair1 point
-
Theft alarm feature for the towbar?1 point
-
1 pointI've had VCDS for well over 10 years and it's paid for itself many tmes over with £100 in garage fees saved everytime I (or friends) have needed a fault diagnosis.1 point
-
1 point
-
1 pointDon't expect any help from Ross-Tech or on here when using your illegal rip-off clone of VCDS.1 point
-
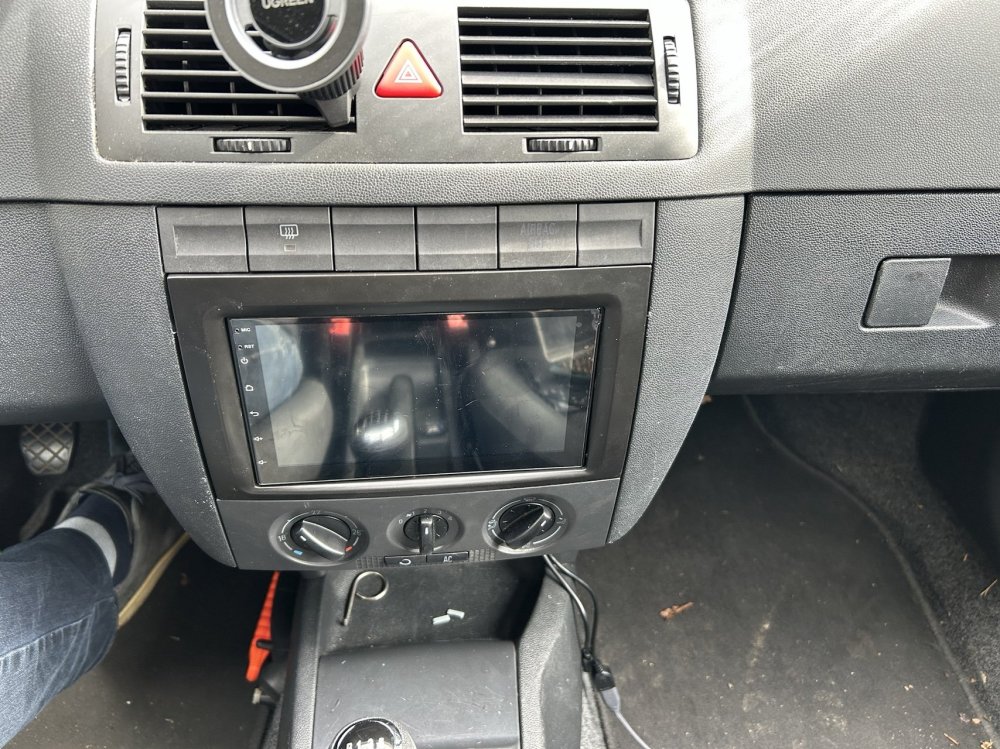
Still I don't think this 3rd party infotaiment are off any good1 point
-
Just got a call from the car electrician. He thinks he might have fixed the problem. This was his first try. Not bad price (as this was a rehearsal), 80€. Going to collect tomorrow. It's going to take a while to get it fitted to the Fabia but if it works I will take my other selector also to be processed. If this did not work I will send my other selector to Germany to be repaired.1 point
-
1 point
-
The 220 Superb FWD uses 312mm ventilated front discs and 300mm solid rear discs. The 280 Superb AWD uses 340mm ventilated front discs and 310mm vented rear discs.1 point
-
1 point
-
If OP is upgrading the 288mm fronts, then no. I've never seen any vehicle with larger rear brakes than the front (aside from those with rear brakes only - such as tractors or drag cars). I'm not clued up on the Superb, but generally, if the fronts are 288mm then the rears will be something like 253mm. If the fronts are 310mm, then the rears could be 272mm, or similar. These will all be solid. It is only on the more powerful cars that you go up to 310mm vented, which will be paired with 340mm at the front. The largest disc size in the MQB platform is 340mm, aside from the Mk8 R (and similar) with 357mm fronts.1 point
-
If you’re mechanically minded you’ll be ok. Rear lights are designed for easy removal for bulb changes. Then there’s some bolts behind them and a couple in each wheel arch. The Bowden cable housing has just one bolt holding it to the bar. Prising it open wasn’t easy. You need to be careful you don’t break it. Go slowly and you’ll be ok. 👍1 point
-
1 pointThanks PP, couldn’t quite get into the groove tbh, went down various rabbit holes with camera settings. The Quattro image made it worth it though.1 point
-
1 pointYep. I've used Motorway twice. The first time was really positive. They set a price, a chap turned up, gave the car a once over and they put the money in my account there and then. He drove away and that was the end of it. The second time, a price was agreed and a chap turned up. He then spent an hour going over the car and found lots of little things that he drew around with a pink pen. By the time he'd finished the car had little circles all over it and he spent ten minutes pointing them all out. He then called the dealer to tell them everything and sent photos to back up his findings. They then called me back and ended up taking £800 off the agreed price. I wanted rid of the car at that point so agreed but it was quite annoying compared to the first time. Based on what they said the car should have been in the body shop for a week or two but it was on their website within 48 hours looking suspiciously unchanged. Either they had a 24hr bodyshop or they'd just given it a very good clean and slapped it on the website. In the end though, the car was gone and I had some money but from what I can gather from others it's a regular occurrence. The dealers are now bidding to be first to view by offering a higher price and then they chip away at it when they get there.1 point
-
1 pointNot necessary unless previous oil changes have been badly neglected, or the oil has been contaminated with coolant - I think most engine manufacturers state that flushing oil should not be used. In the case where flushing is thought to be required, use regular lube oil, then dump.1 point
-
I scrapped it..... ...End of!1 point
-
1 pointGet the battery properly tested first, a rough test you can do yourself is to check the voltage at the the battery terminals (pref. with DMM) while the engine is being cranked. This test should ideally be done with the battery fully charged. The battery voltage should not drop below approx. 10.0 volts during the test, any reading significantly below this indicates the battery is failing. Adapting the battery (if replacing) is important and consists of entering the new battery capacity rating (Ahrs) confirming correct battery type, and changing the existing battery serial number - this informs the vehicles BCM of the replacement and should delete any registered battery defects that may be limiting the alternator charging rate.1 point
-
1 pointJust installed an Android 7" unit in my Mk1. The head unit was delivered with two mounting ears (?) which I had to cut to make them narrower. I also had to some of the top part of the ears in order to make the legs of the fascia fit. Didn't take any picture of the installation, only of the result. I do yet have to add the aerial adapter, so if anyone is interested, I can take some more photos when I do.
 1 point
 -
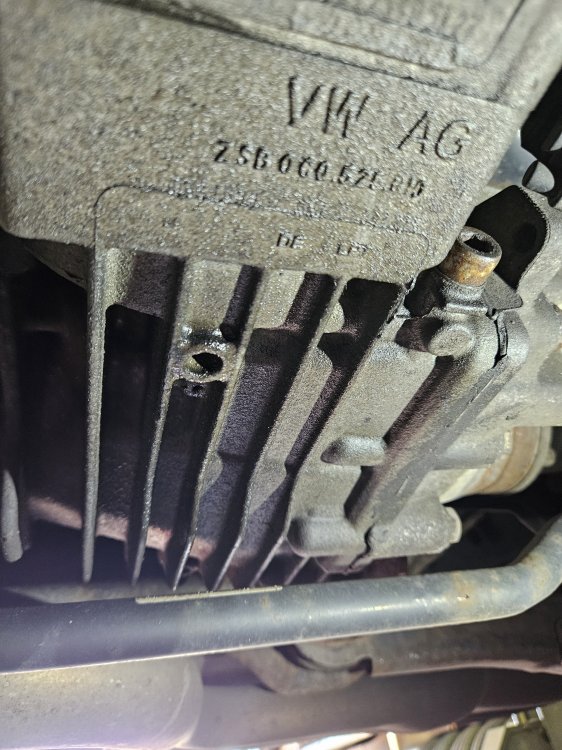
1 pointHi all, Forgive me if this has already been asked in the past, but I'm going around in circles trying to figure out which rear diff replacement to buy. I have a 2016 Octavia vRS 4x4 which had a failure in the bearings on the diff. I had the diff rebuilt by a VAG specialist about 18 months ago. Since then, I've moved 150 miles from said specialist and it has failed again. It makes a grinding noise, shakes at 70mph and I've discovered there's oil/fluid that has blown backwards from the diff. Rather than messing about taking the car back on a 150 mile trip and them worming out of any liability, I've decided it's just easier to swap the diff out with a different unit. I know the part number is 0CQ525010 but how do I know which revision letter to go for? The pic I managed to get from underneath the car only shows the part number above but no additional letters. Thanks in advance. Andy
 1 point
 -
Hi, took it to skoda, they diagnose timing chain was bad. 1400€ later and it works ok.1 point
-
1 point
-
1 pointAs mentioned above, the gateway is CP master, not BCM CP removal is a simple task, I've no idea why your local specialist cannot do it. Seems silly to go through all the effort and give up at what should be the easiest part1 point
-
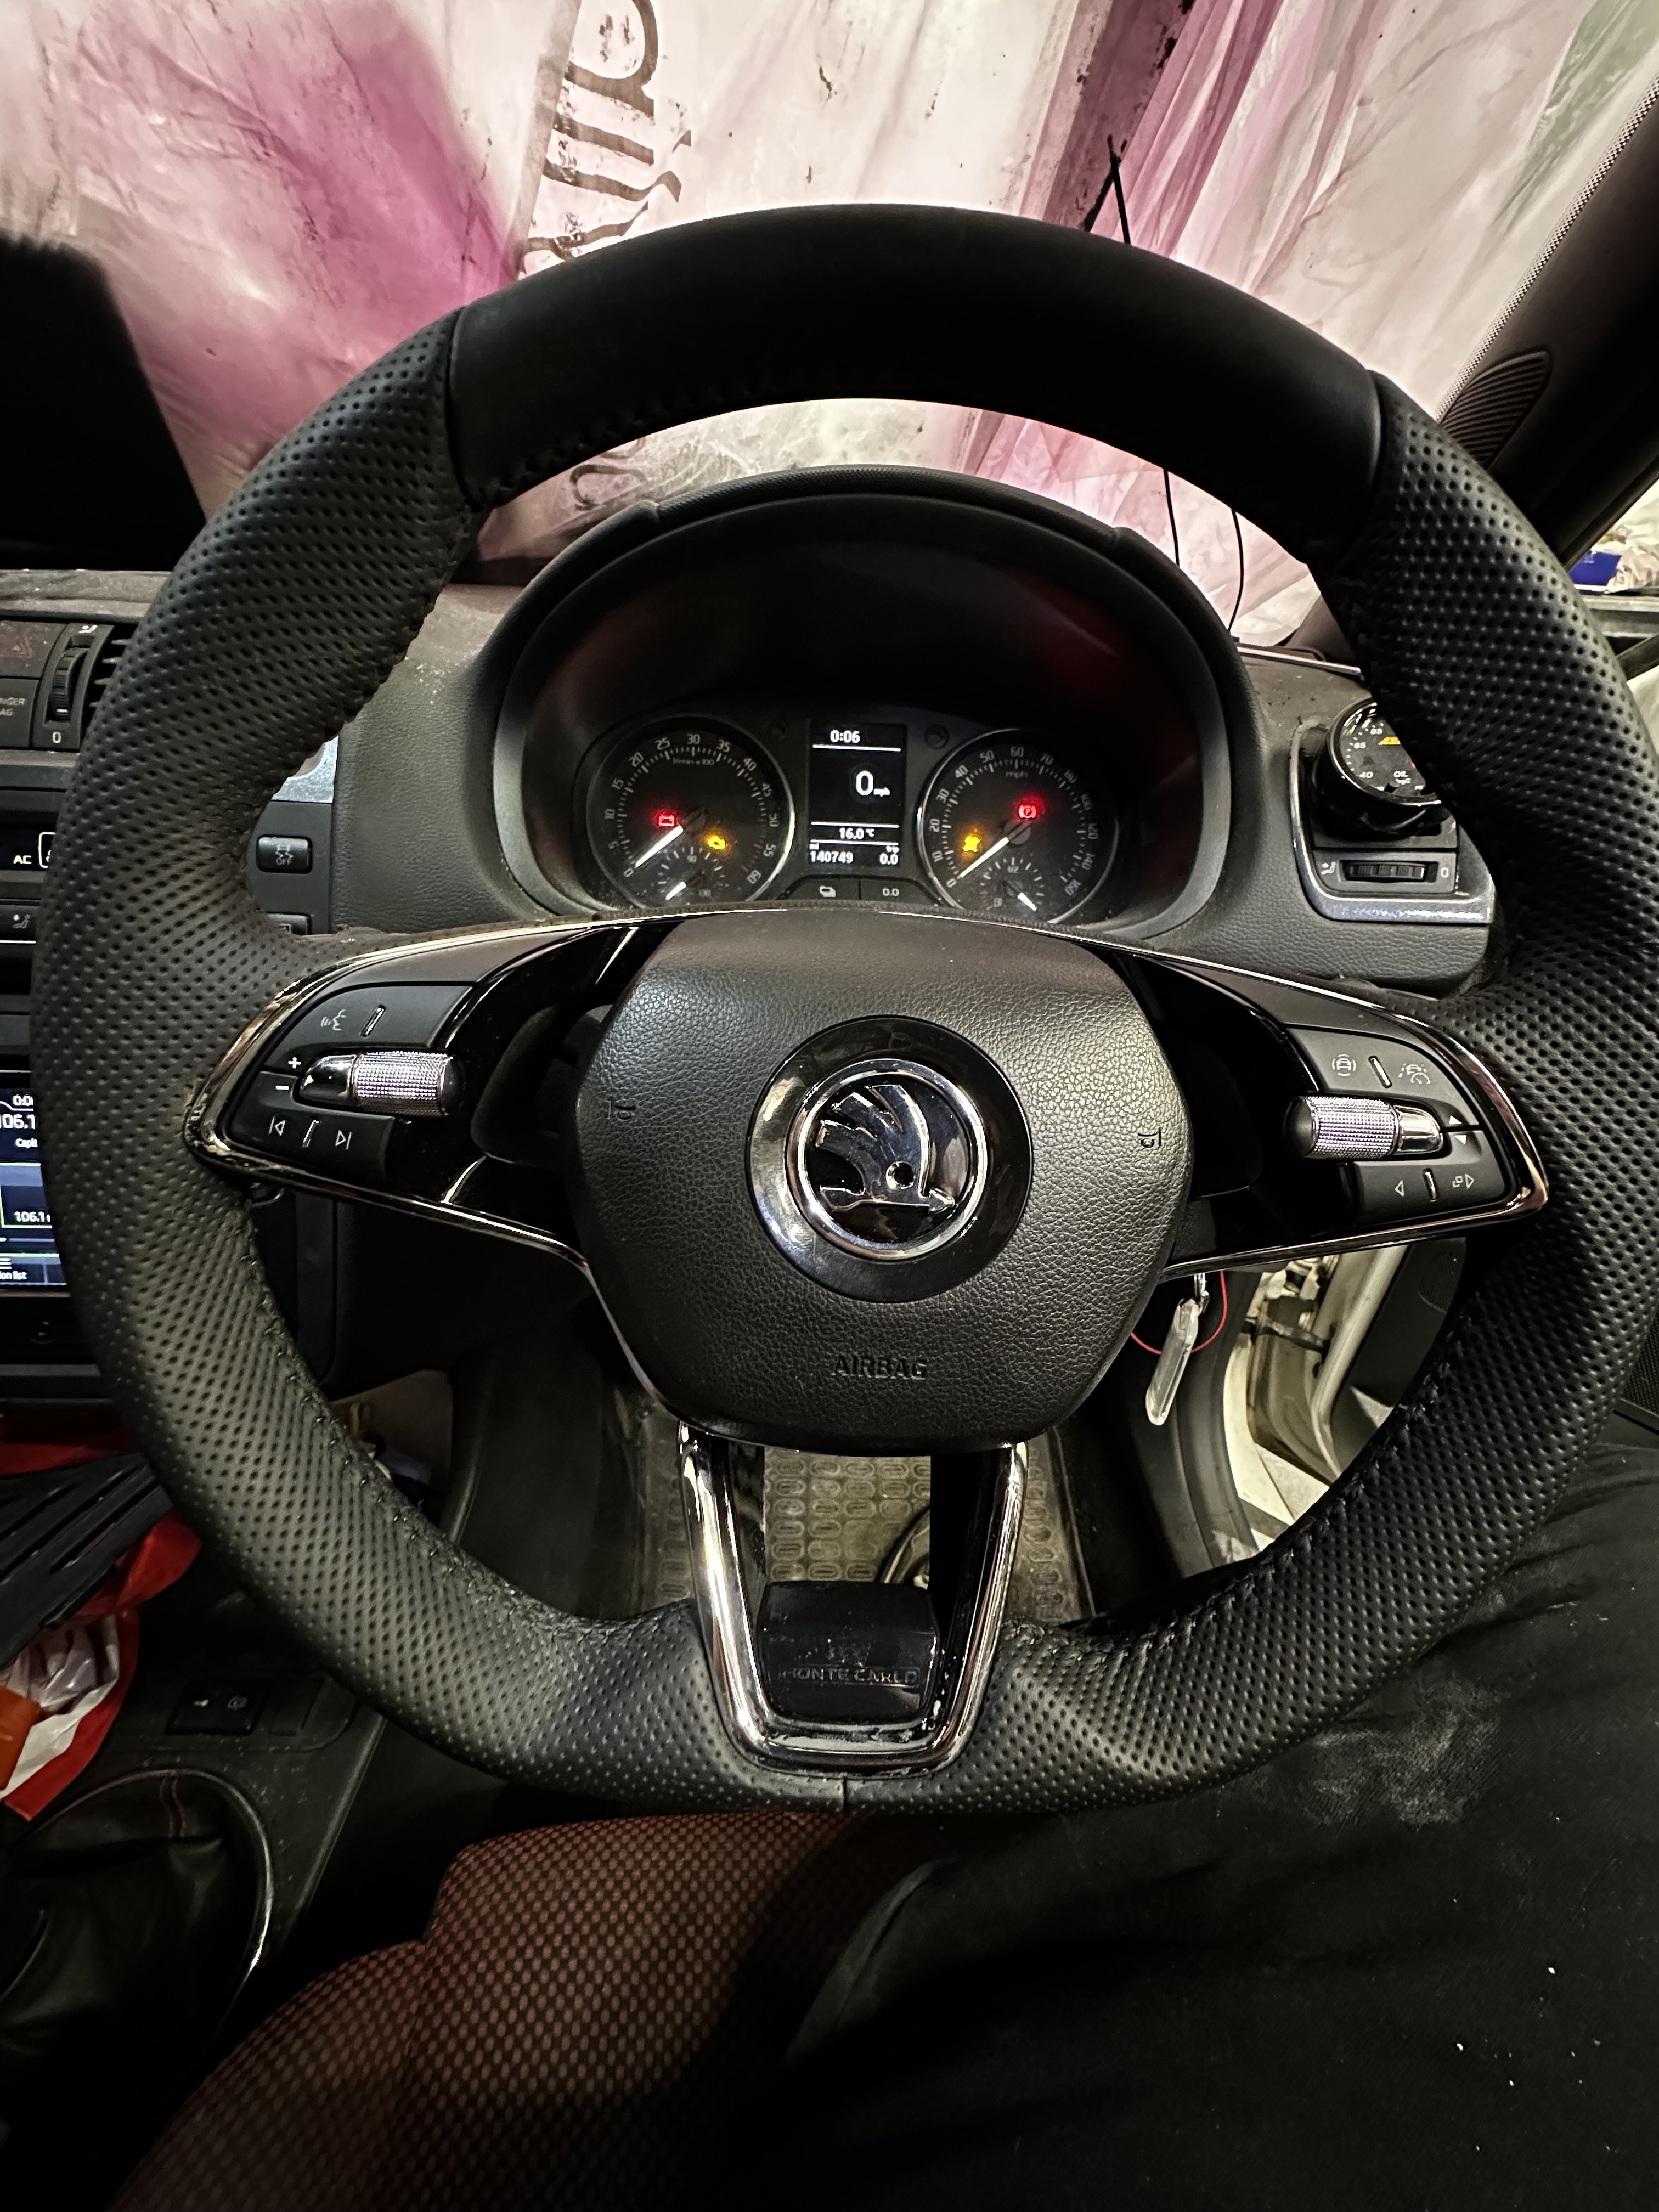
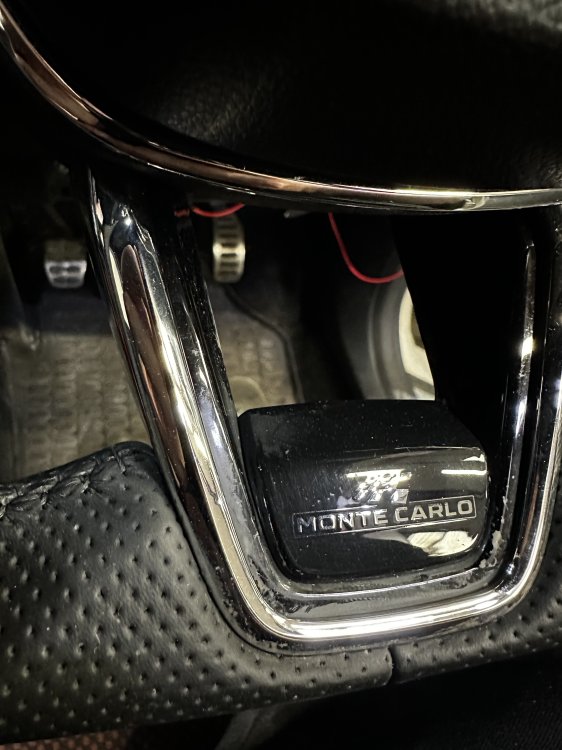
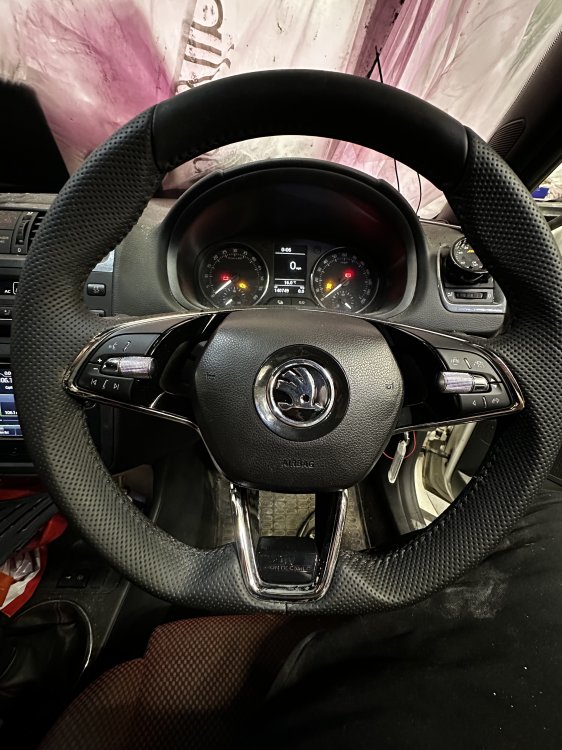
Liked the wheel in the superb so fitted a kamiq Monte Carlo one in the fabia
 1 point
 -
Have a bigger fuel tank would be my go-to ... (50L for the RS230 is small to get decent range ...) The only mod I did is changing the RARB to go to Golf TCR, cheap and effective way to control leaning in corners.1 point
-
I buy my oil that way too. 👍 The Launch should be good for the rear pads on other more modern Skodas with an electric handbrake. I haven't got Launch but I've used VCDS to retract the pistons on several VAGs. Works a treat.1 point
-
Not on a 2005 Octavia. The headlights will only go up and down. The turning lights were only introduced on the facelift around 2009.1 point
-
I have the 622GW front and rear and it works fine but be aware that the battery only lasts about a year before needing replacement (or just have it hardwired). The excellent Dashcam Talk website provides lots of info re: the latest choices and reviews. 👍1 point
-
So a while back I noticed that my cars power on lower RPMs was noticeably down from what it used to be. It did not happen over night but instead had steadily decreased over a period of a year. RPMs at which the turbo kicked in was becoming more and more sporadic. What came to my mind was an idea of a failing turbo. Most commonly the wastegate itself goes bad and no longer holds the pressure. Just by searching online I quickly found that these 1.2 TSI CBZ engines had various problems with turbo wastegate actuators and there are many different versions of these wastegate actuators just for this engine alone. Wow, could it be, another common issue with this engine? One more common issue was wastegate rattle on early engines. This rattle was fixed with a 2mm shim ( 03F 145 371 A ). Anyway I took a look at my wastegate actuator and at first glimps looked fine, it was moving when running a charge pressure actuator test etc. But when I grabbed the actuator rod I noticed that it quite freely moved back and forth about a +/- 5mm with no effort at all and I could hear the wastegate rattle. No surprise I was low on power. Well my idea was to take the actuator off and take it apart to see if I could do something to fix it, perhaps even add that shim even though my late 2014 made car shouldn't need one. Well, that did not go well. Actuator housing broke in half. Time for a new part then. But these exact actuators are no longer available. ( 03F 145 725 G ) So I looked for an alternative and found ( 03F 198 725 C ) which according to several people and sites should fit and work just fine. But then again I got some aftermarket one and the actuator rod was 3-4mm too short. This means the voltage reading from the actuator is too low and you can't do adaptation or use it. So I was stupid enough to cut the rod in half, threaded it and used a coupling nut. While I could adjust the length, it sadly still did not work. I was getting P334A code which indicates actuators electrical malfunction. Rod fully extended, voltage was 4.8v. Installed it was showing voltage of 2.8v. I tried adjusting voltage to 3.6v, 4.1v but none of these let me do an adaptation. In VCDS it kept telling me "aborted for safety reasons". After a while I gave up. Eventually I got a a whole turbo from a junkyard for 140€. It was from an older 2011 VW Golf VI that had driven around 150 000km. It came with a shim and everything. But I noticed that the turbo arm was badly worn. Not going to be using the turbo but still something I noticed. So either another problem with these. Something to do with the shim that was added at some point or it has done a bit more than 150 000km ( probably more like 350 000 km ). Turbo arm on my turbo is perfectly normal looking. I mounted my new junkyard actuator to my car. At first it was ceased, rod did not move and I could not attach the spindel to the arm but when I plugged it in and turned my car on, it moved and now I was able to connect it with no problems. There is very little play in the rod unlike the one I had originally on my car. So that's good atleast. I did not install it with the shim as I did not find it neccassary at first. Adaptation finished succesfully. Went on a drive and when RPM got up to 3000, EPC light turned on. Now it was telling me P334B which indicates actuator mechanical malfunction. Great. I installed the shim but now I was no longer able to do an actuator adaptation. and I was no longer able to even start a car without getting EPC light. Right before I was about to give up I removed the shim and cleared the codes. Went on a drive and no more EPC light. I did few quick pulls all the way up to 6000rpm and no problem. Car now has proper power again. Apparantly the actuator had ceased up from sitting for a while and using the shim helped it stretch its leg a bit and got it loosened up. So far seems to work great. I took my original actuator apart but I could not locate a reason why it had so much slop when it was plugged into the car. When I disconnected it, it no longer had that slop. Posted this just for others who might have similar problems.1 point
-
0 pointsSo sad to learn you can't diy your car anymore, my car has SFD 1 and even with obdeleven I don't know if I can unlock itt and the swap to vcds to do the adaptations The vcds I have is a clone one bought it with 40 Euros , but another 150 Euros for obdeleven just to unlock sfd once ?? It's a lot0 points


.thumb.jpg.f83a46b9b3c0d976b9dbffbb523c9874.jpg)