



Leaderboard
-
Baxlin
Members9Points705Posts -
Lee01
FREEDOM7Points36,849Posts -
Breezy_Pete
Sponsor6Points24,533Posts -
.jpeg.2be1ff23db65b1928106364ab86f4b3c.jpeg)
Binx1310
FREEDOMLite6Points891Posts

.thumb.jpg.9dd3f612ba7f13d10be5c518d3c8d255.jpg)

Popular Content
Showing content with the highest reputation on 04/09/26 in Posts
-
2 points
-
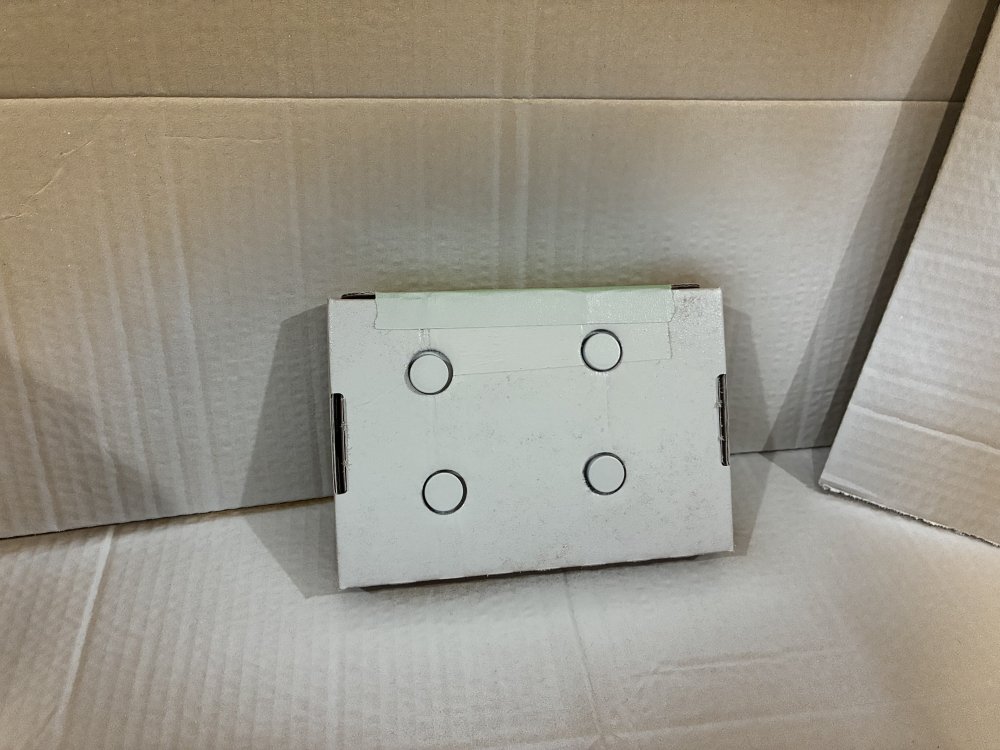
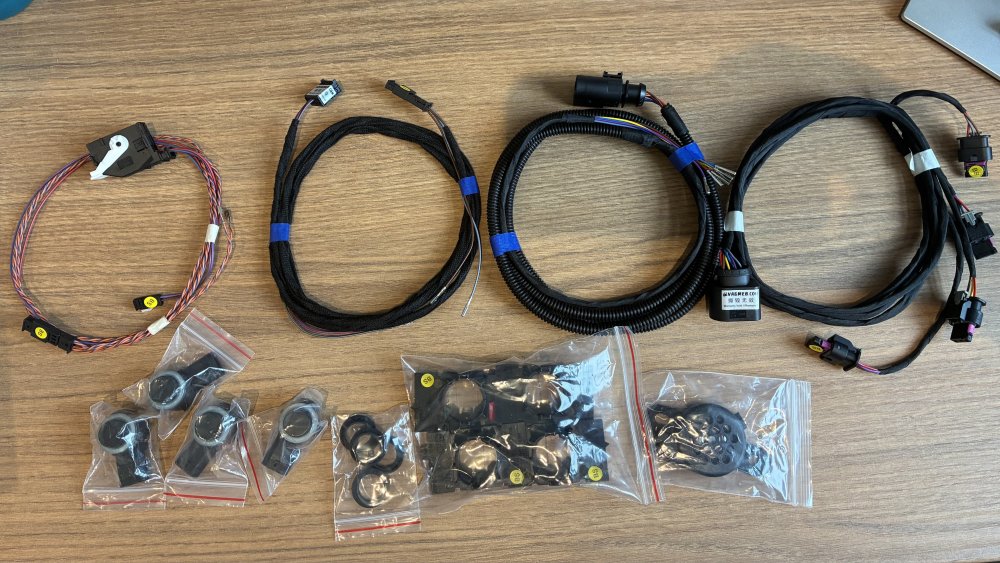
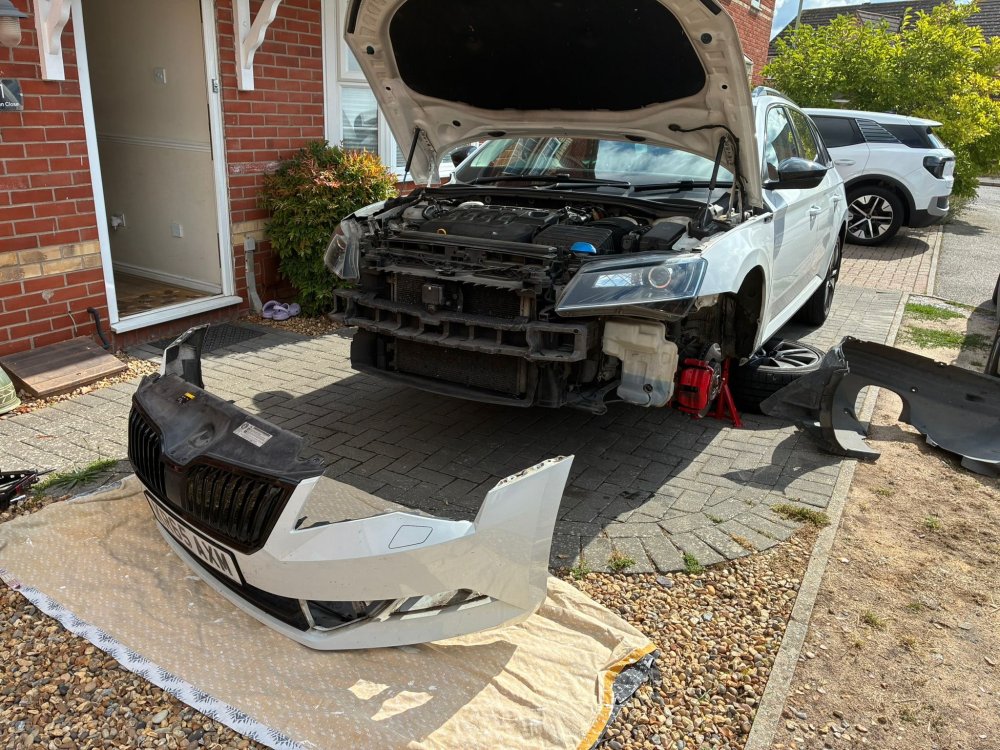
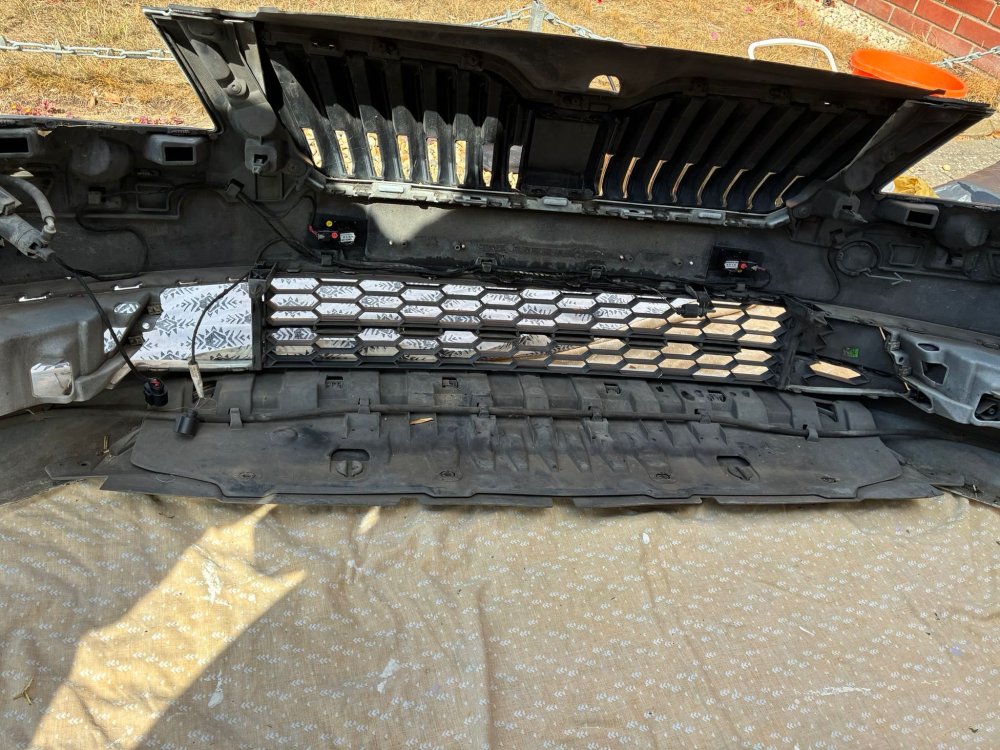
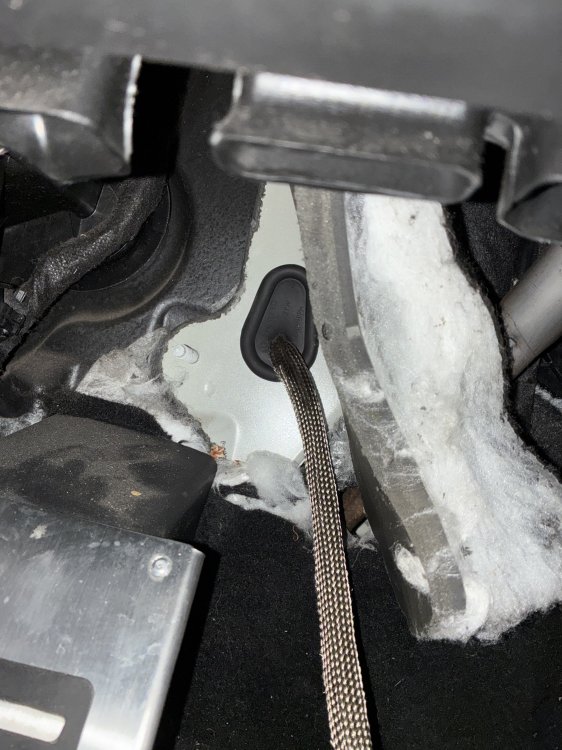
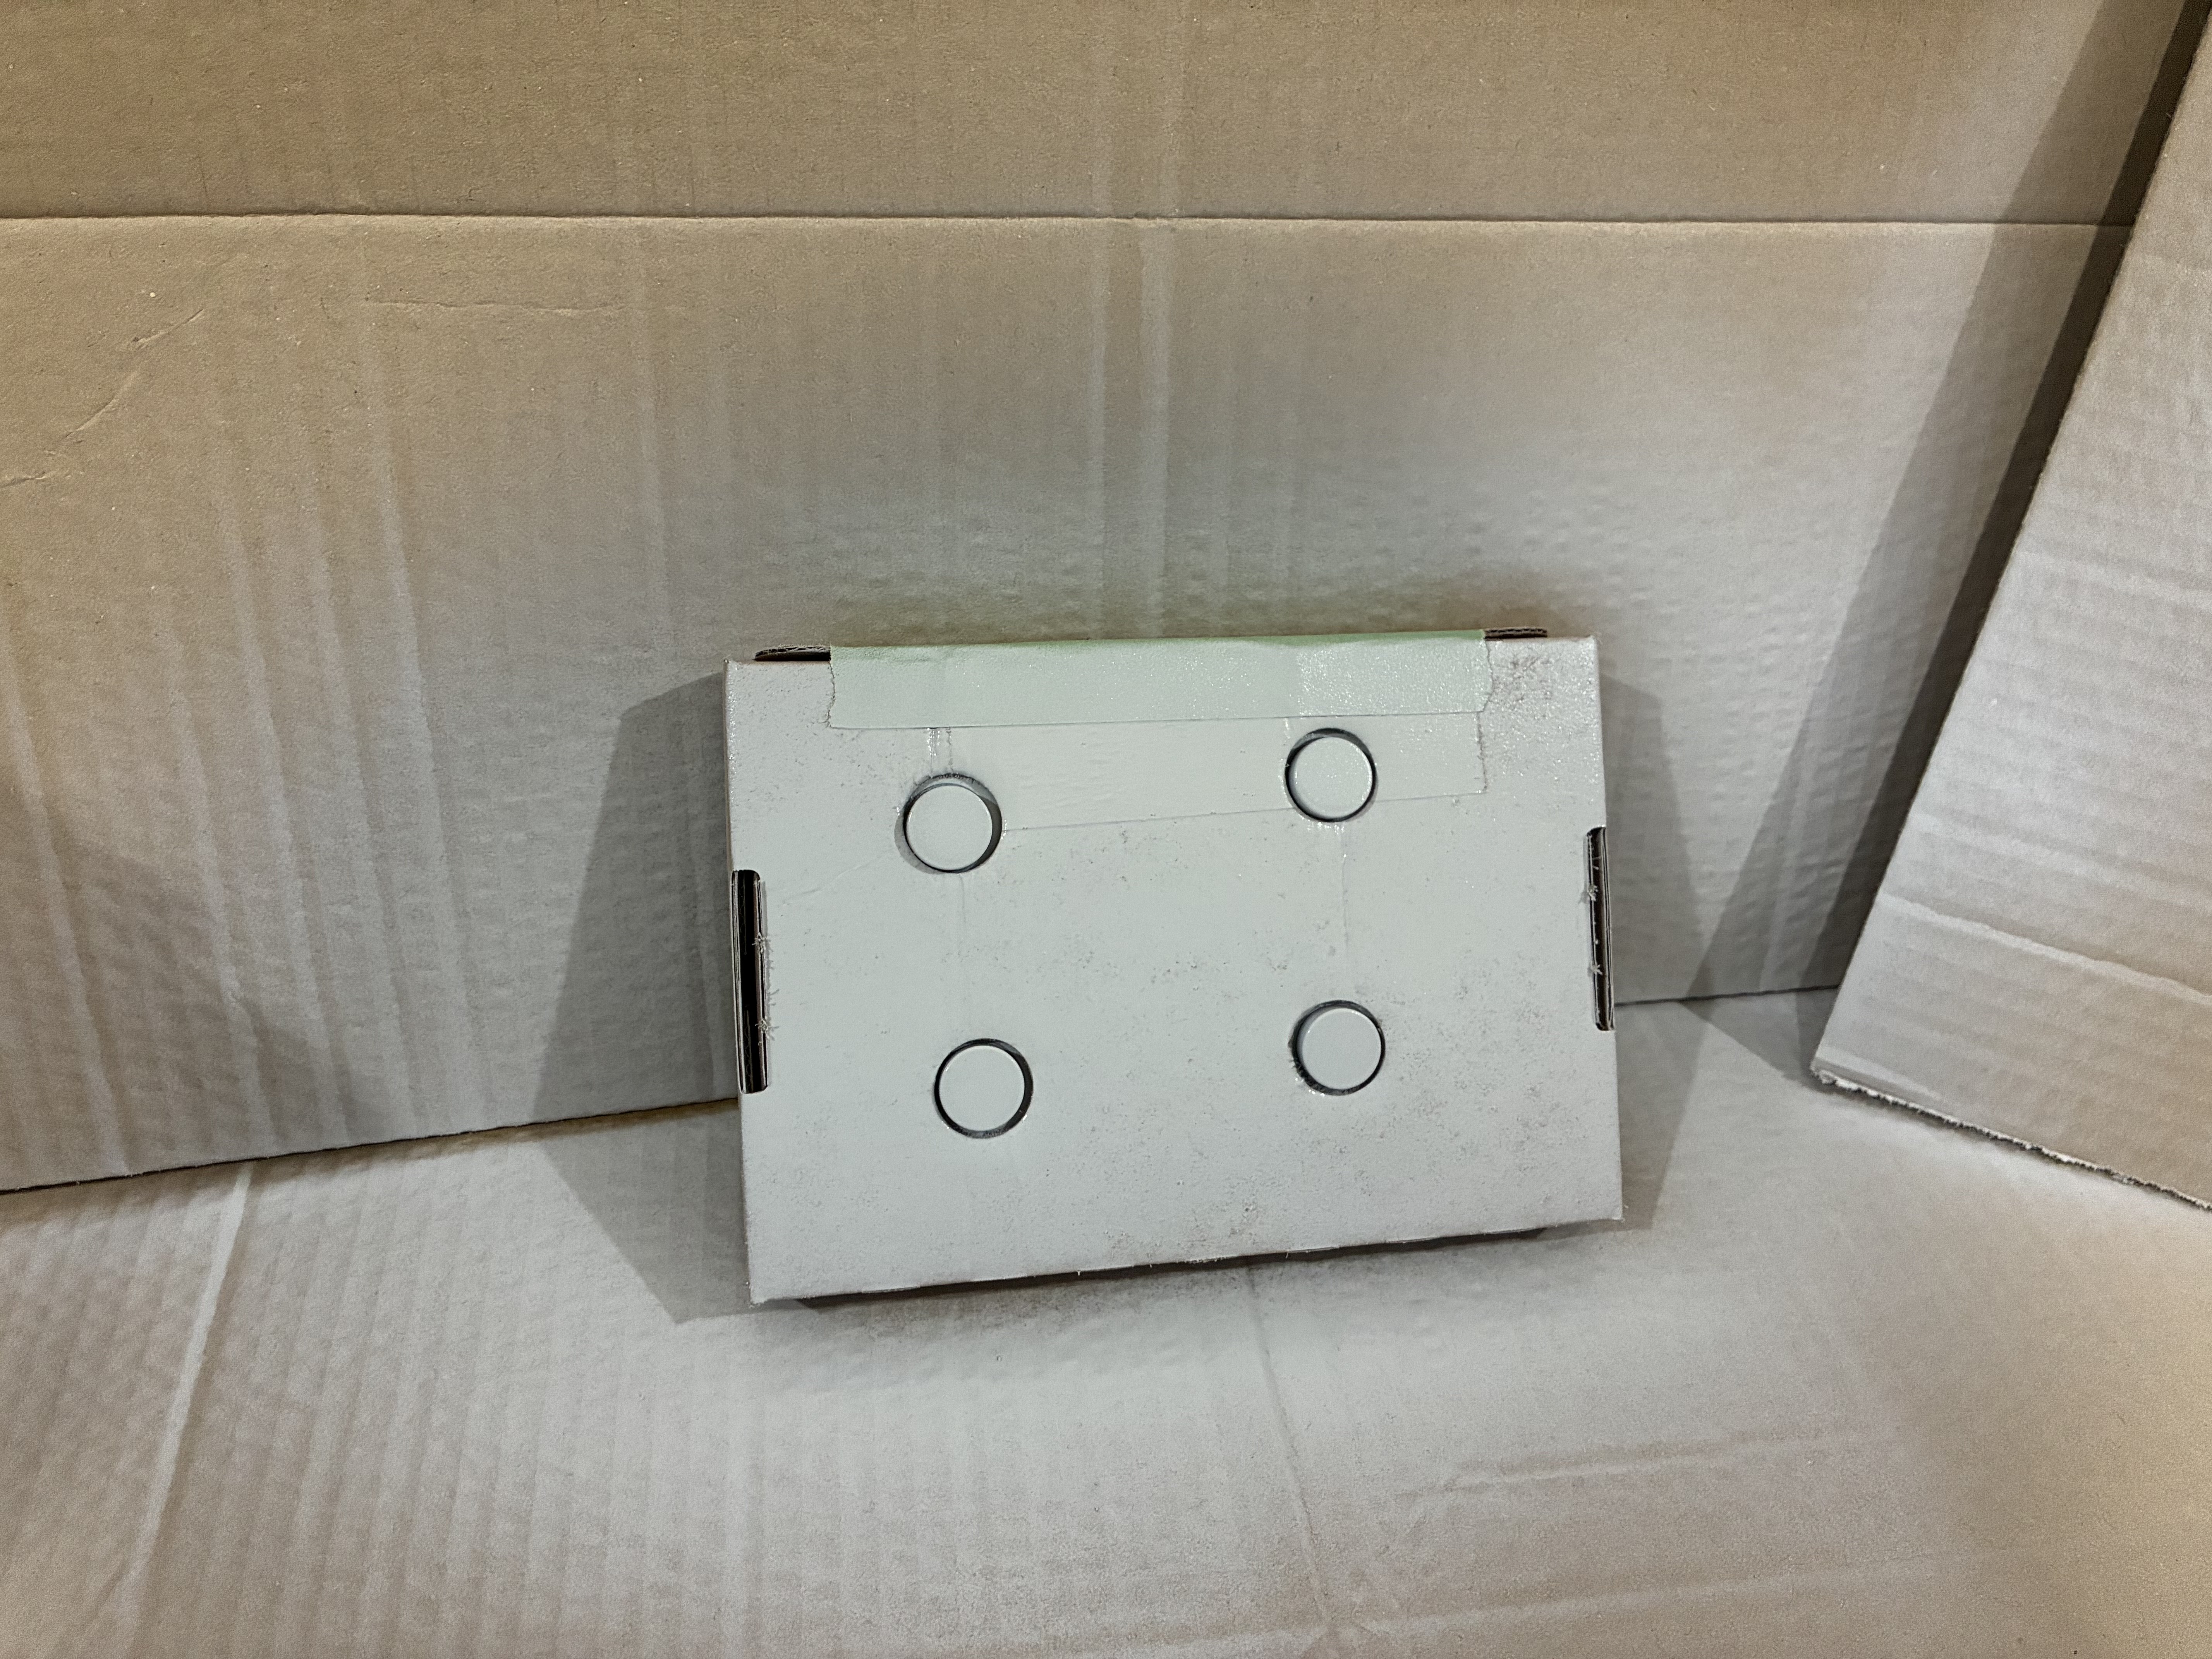
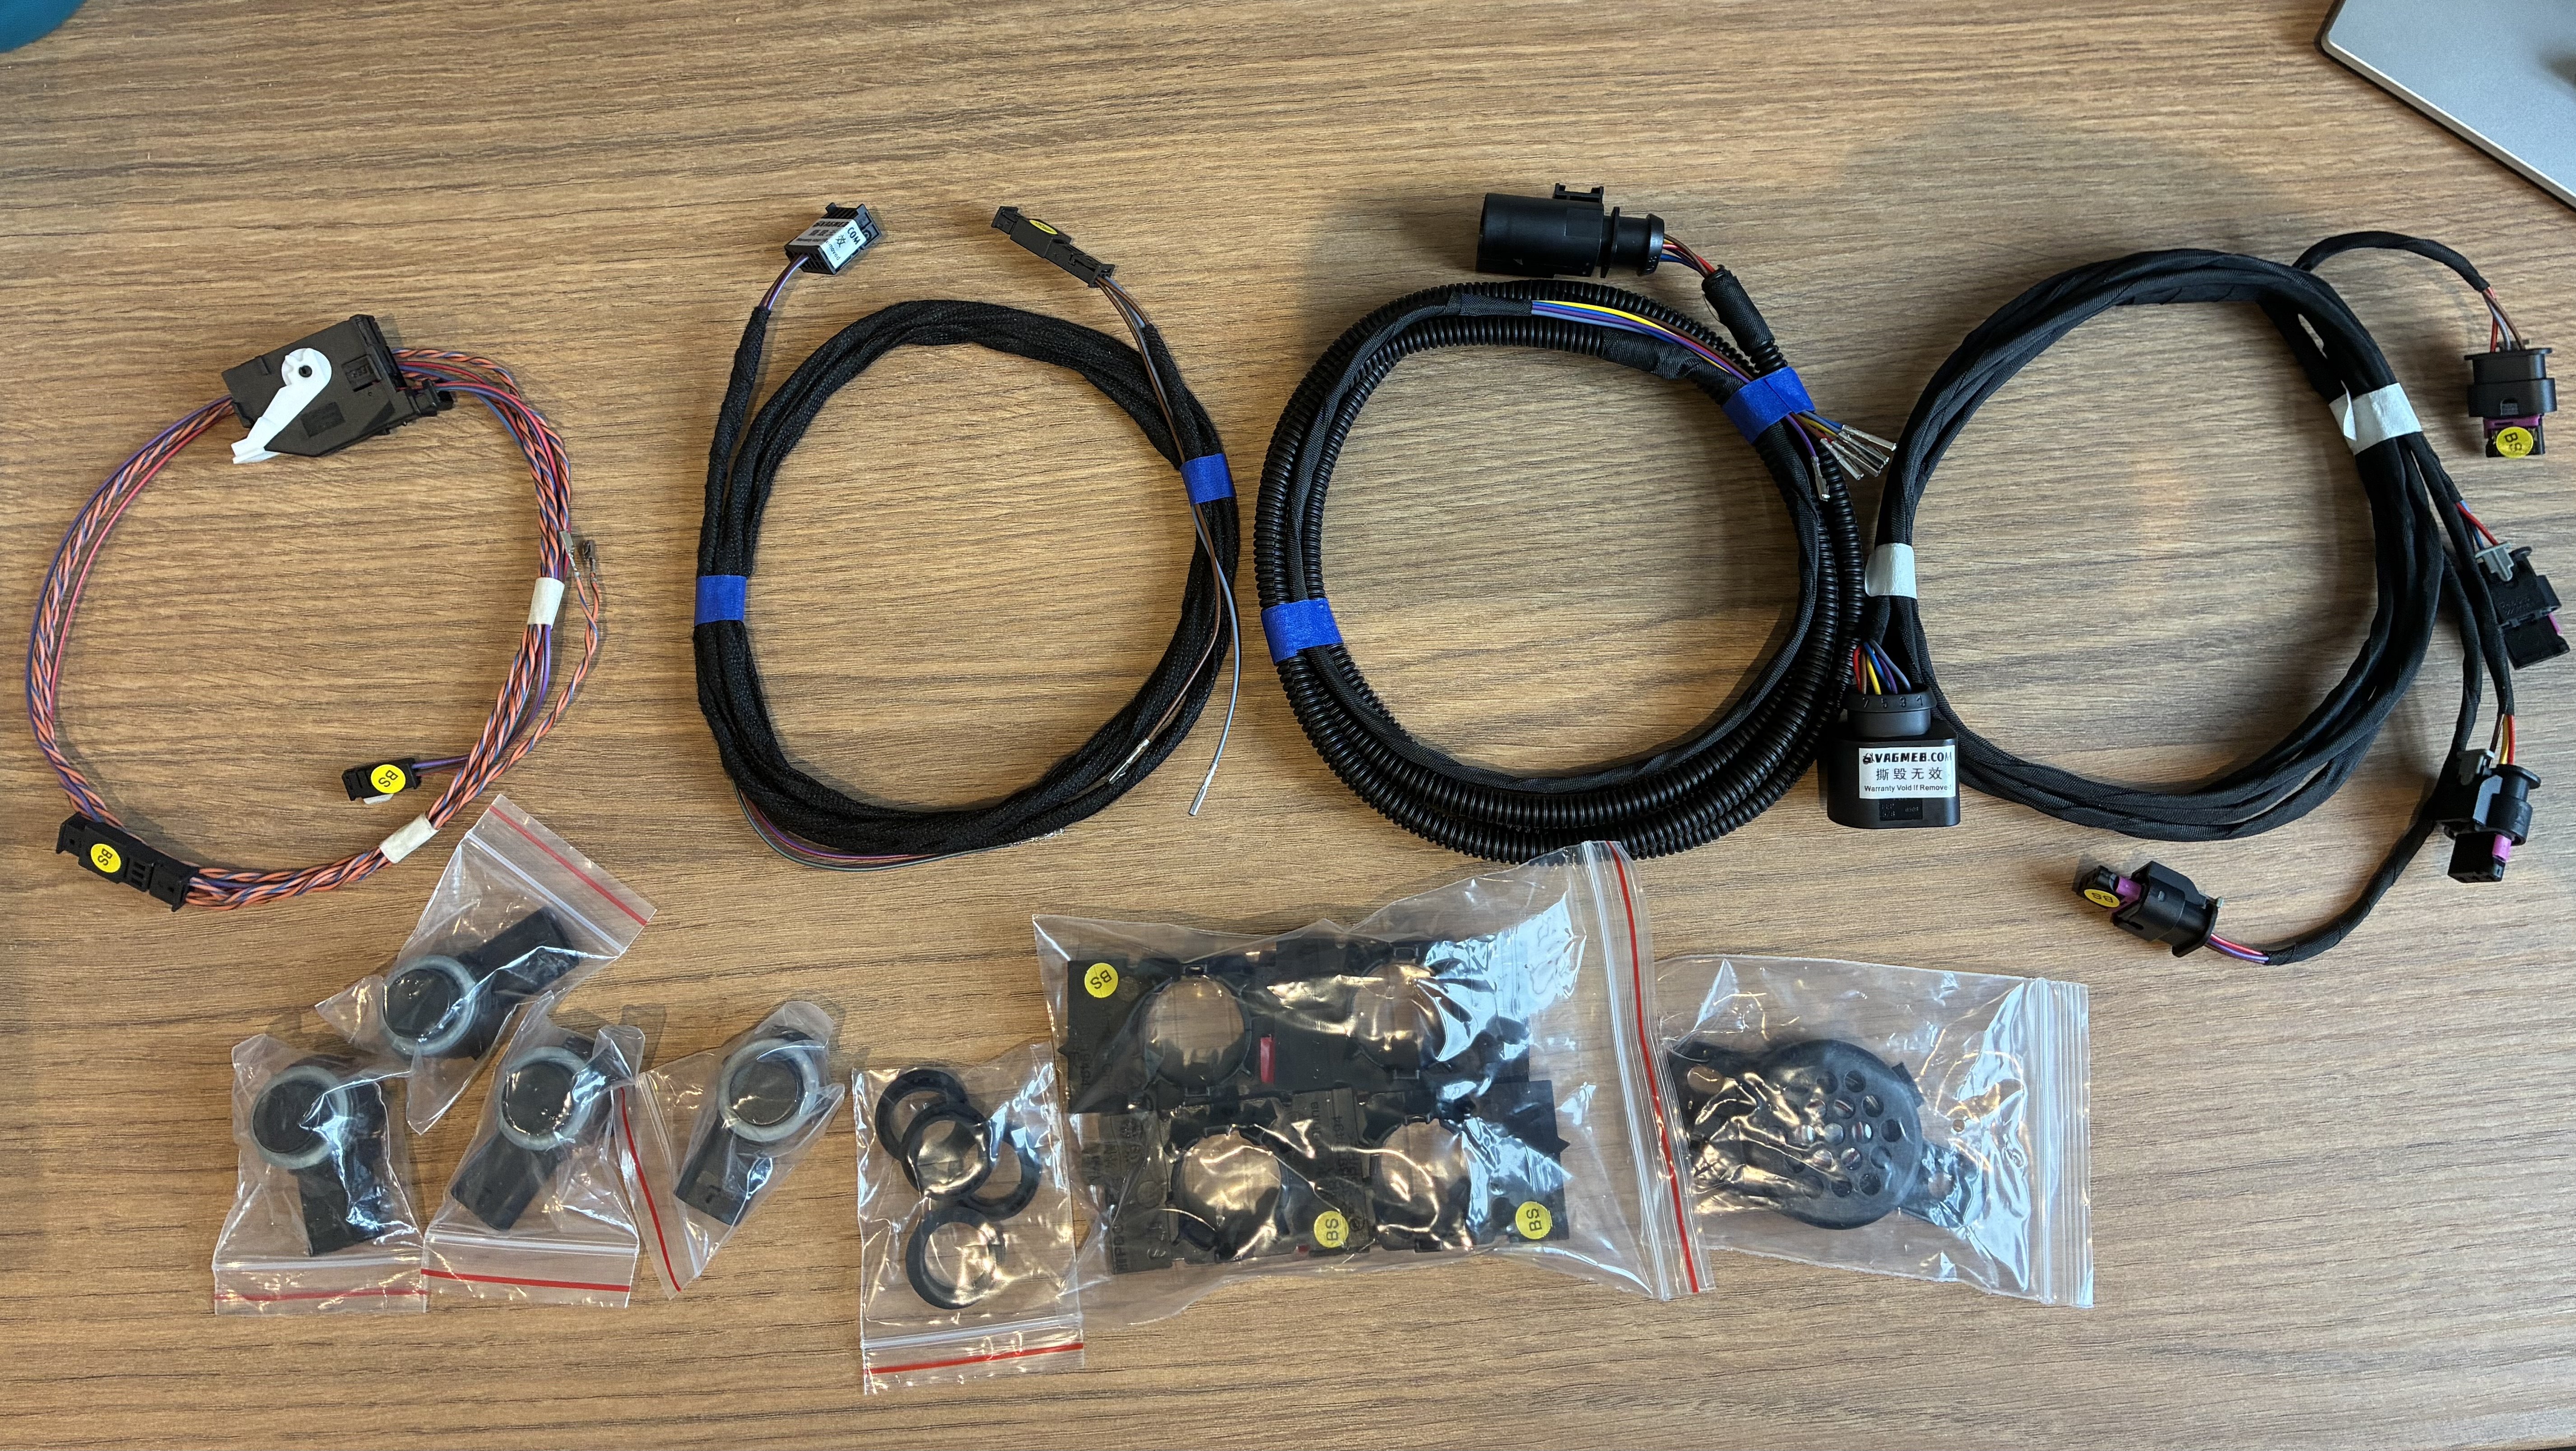
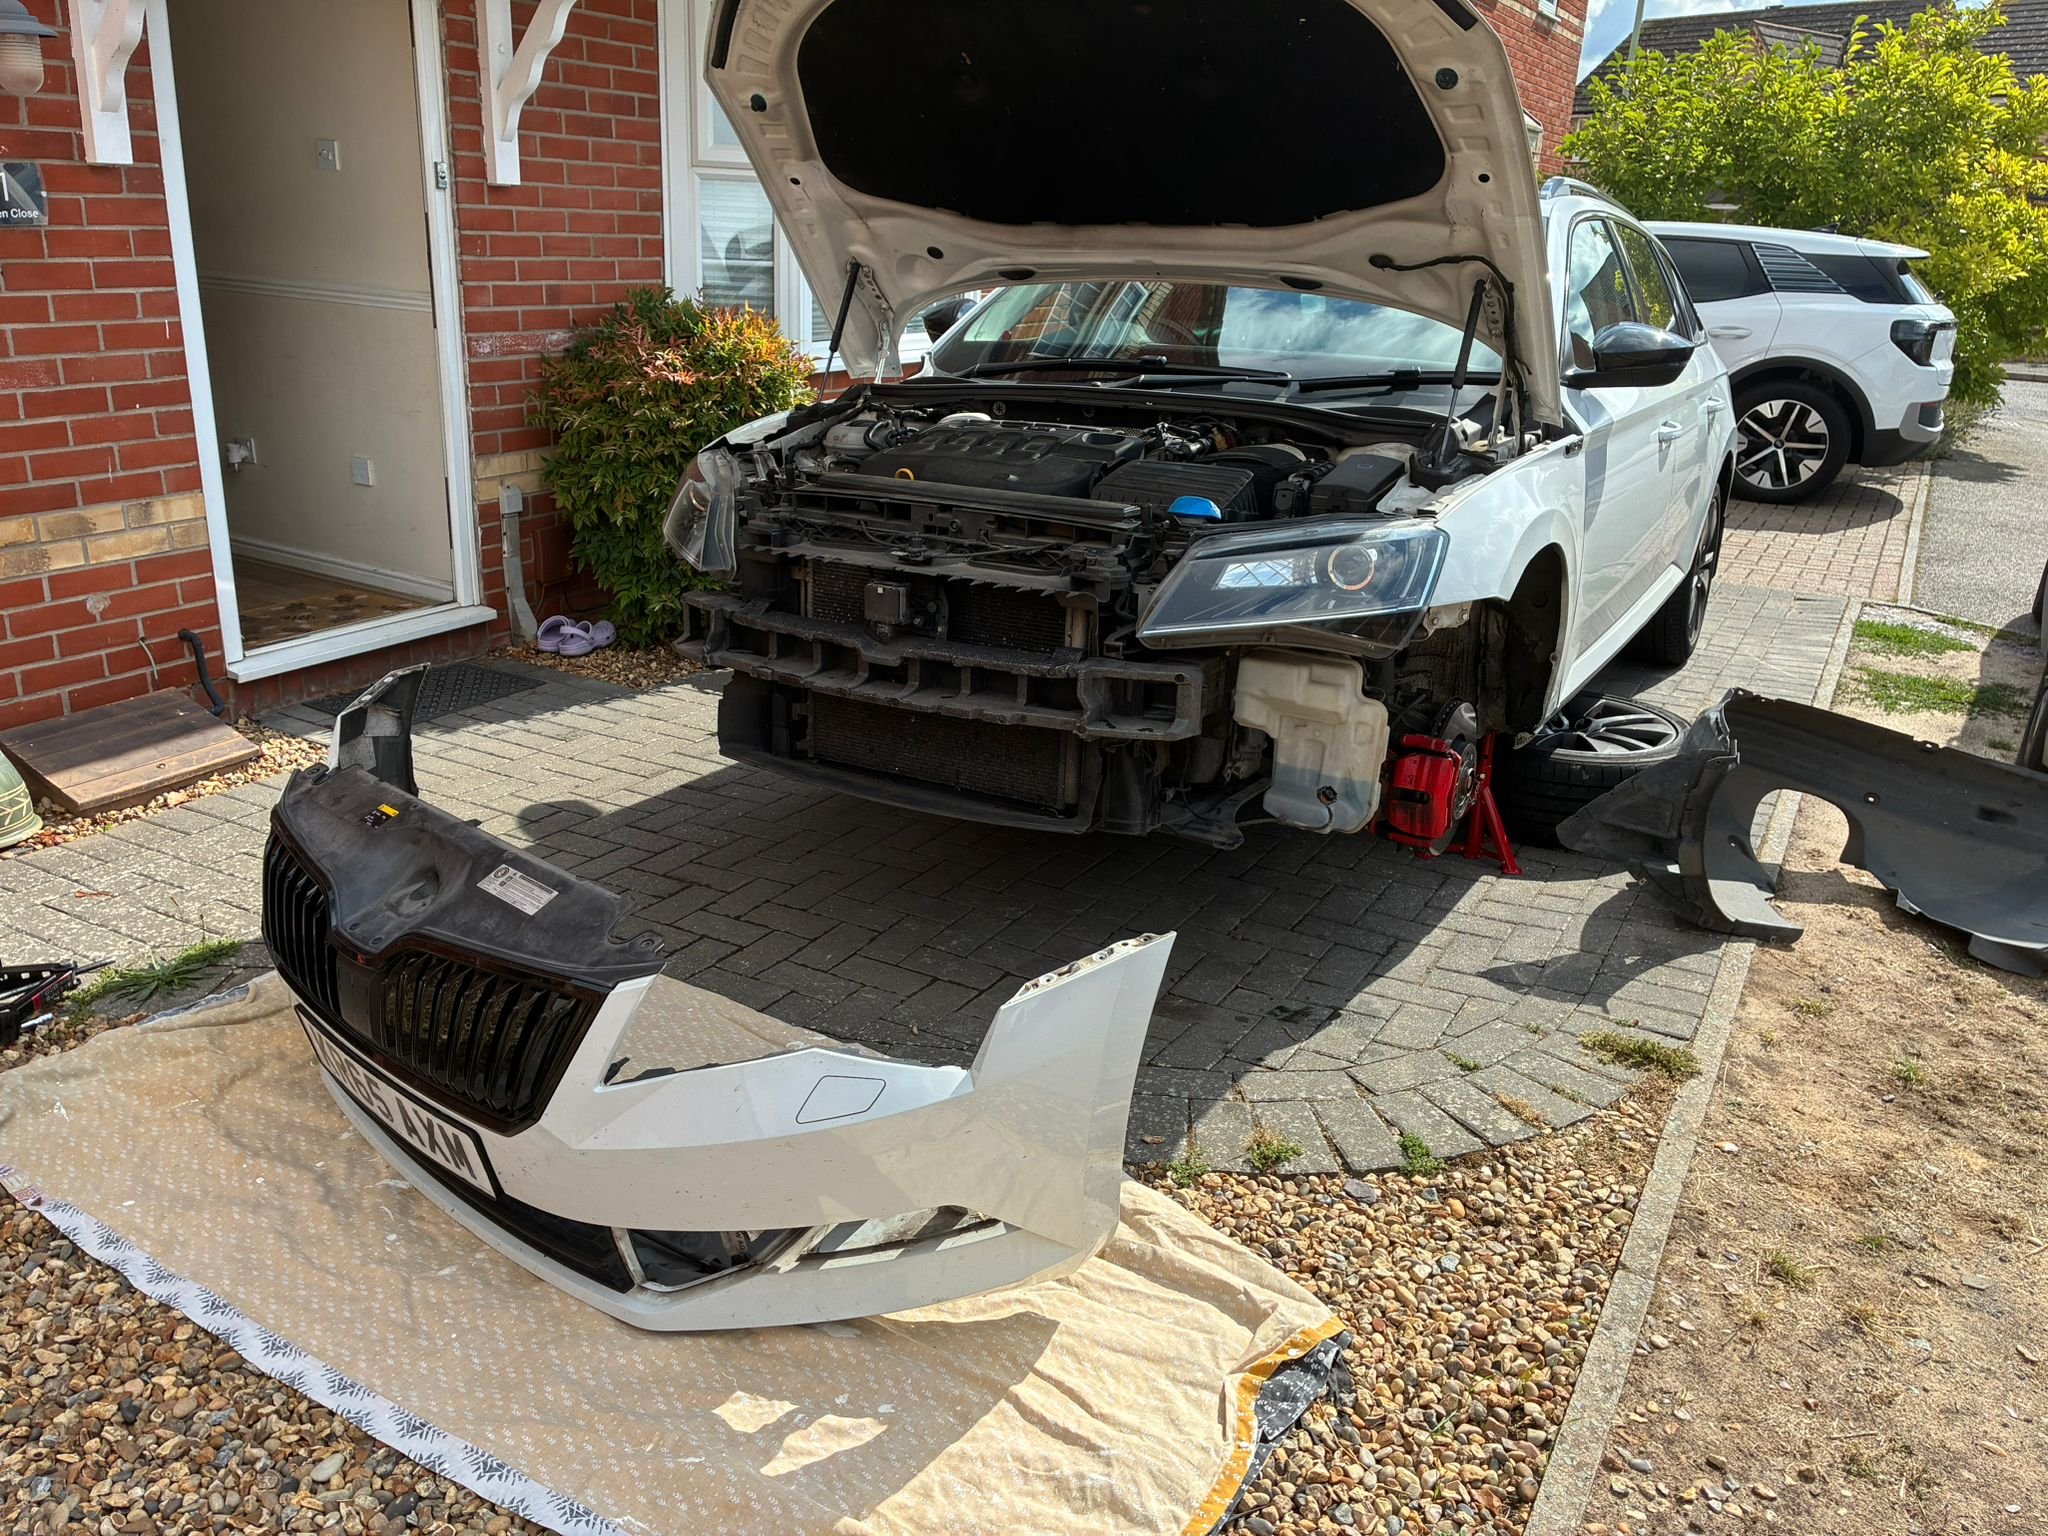
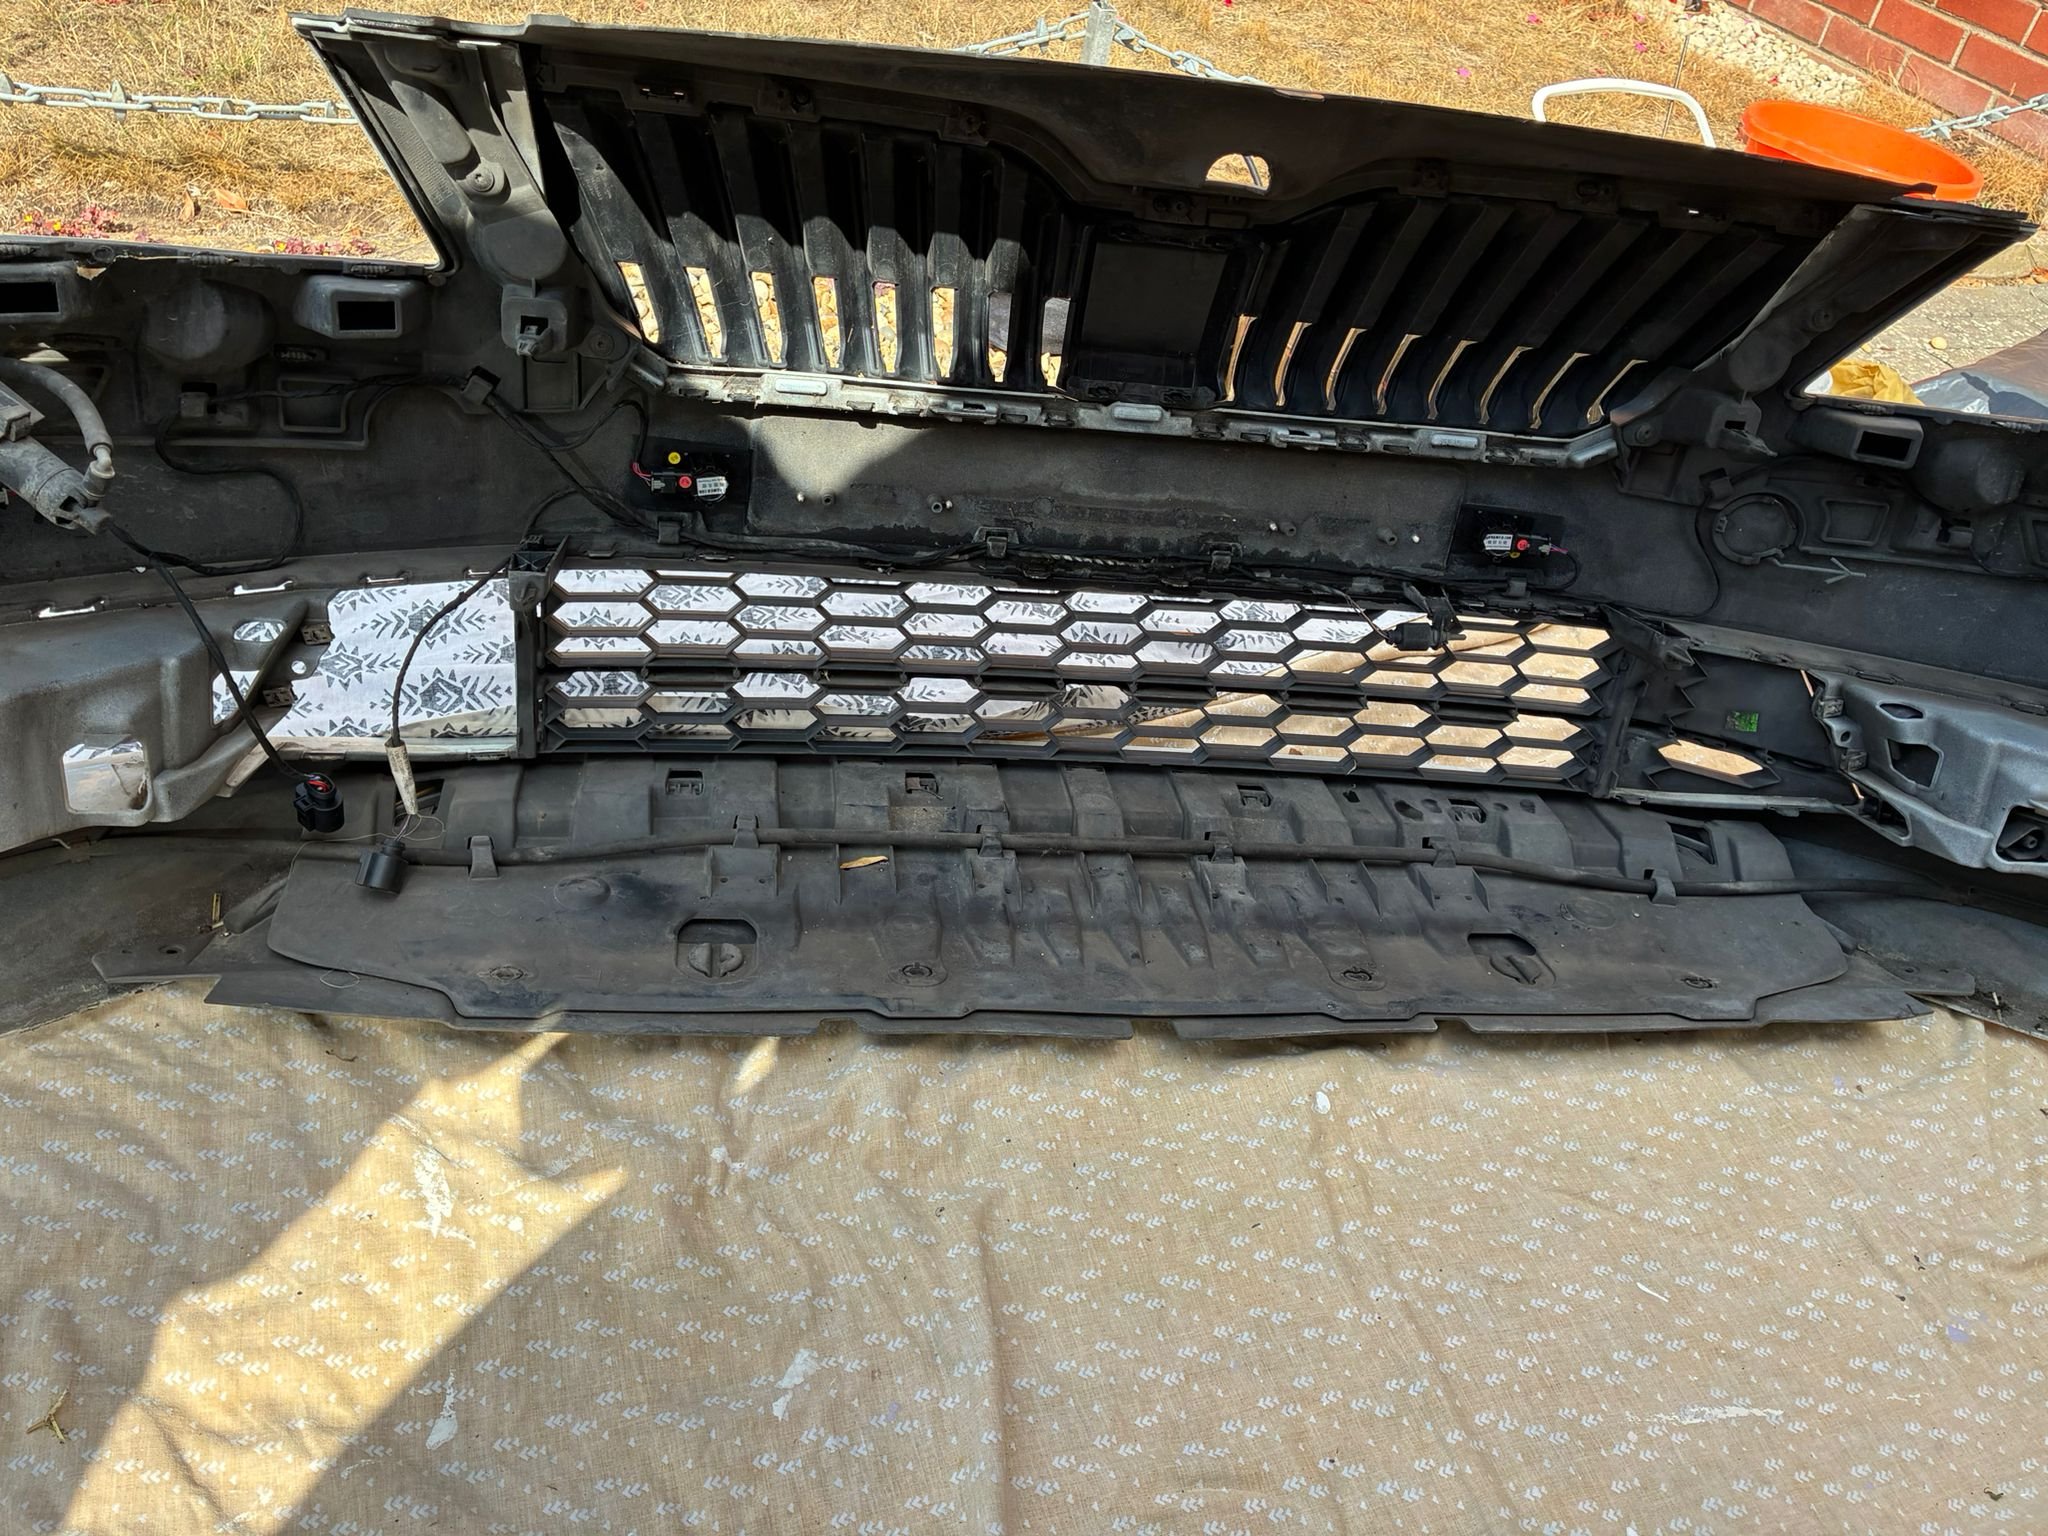
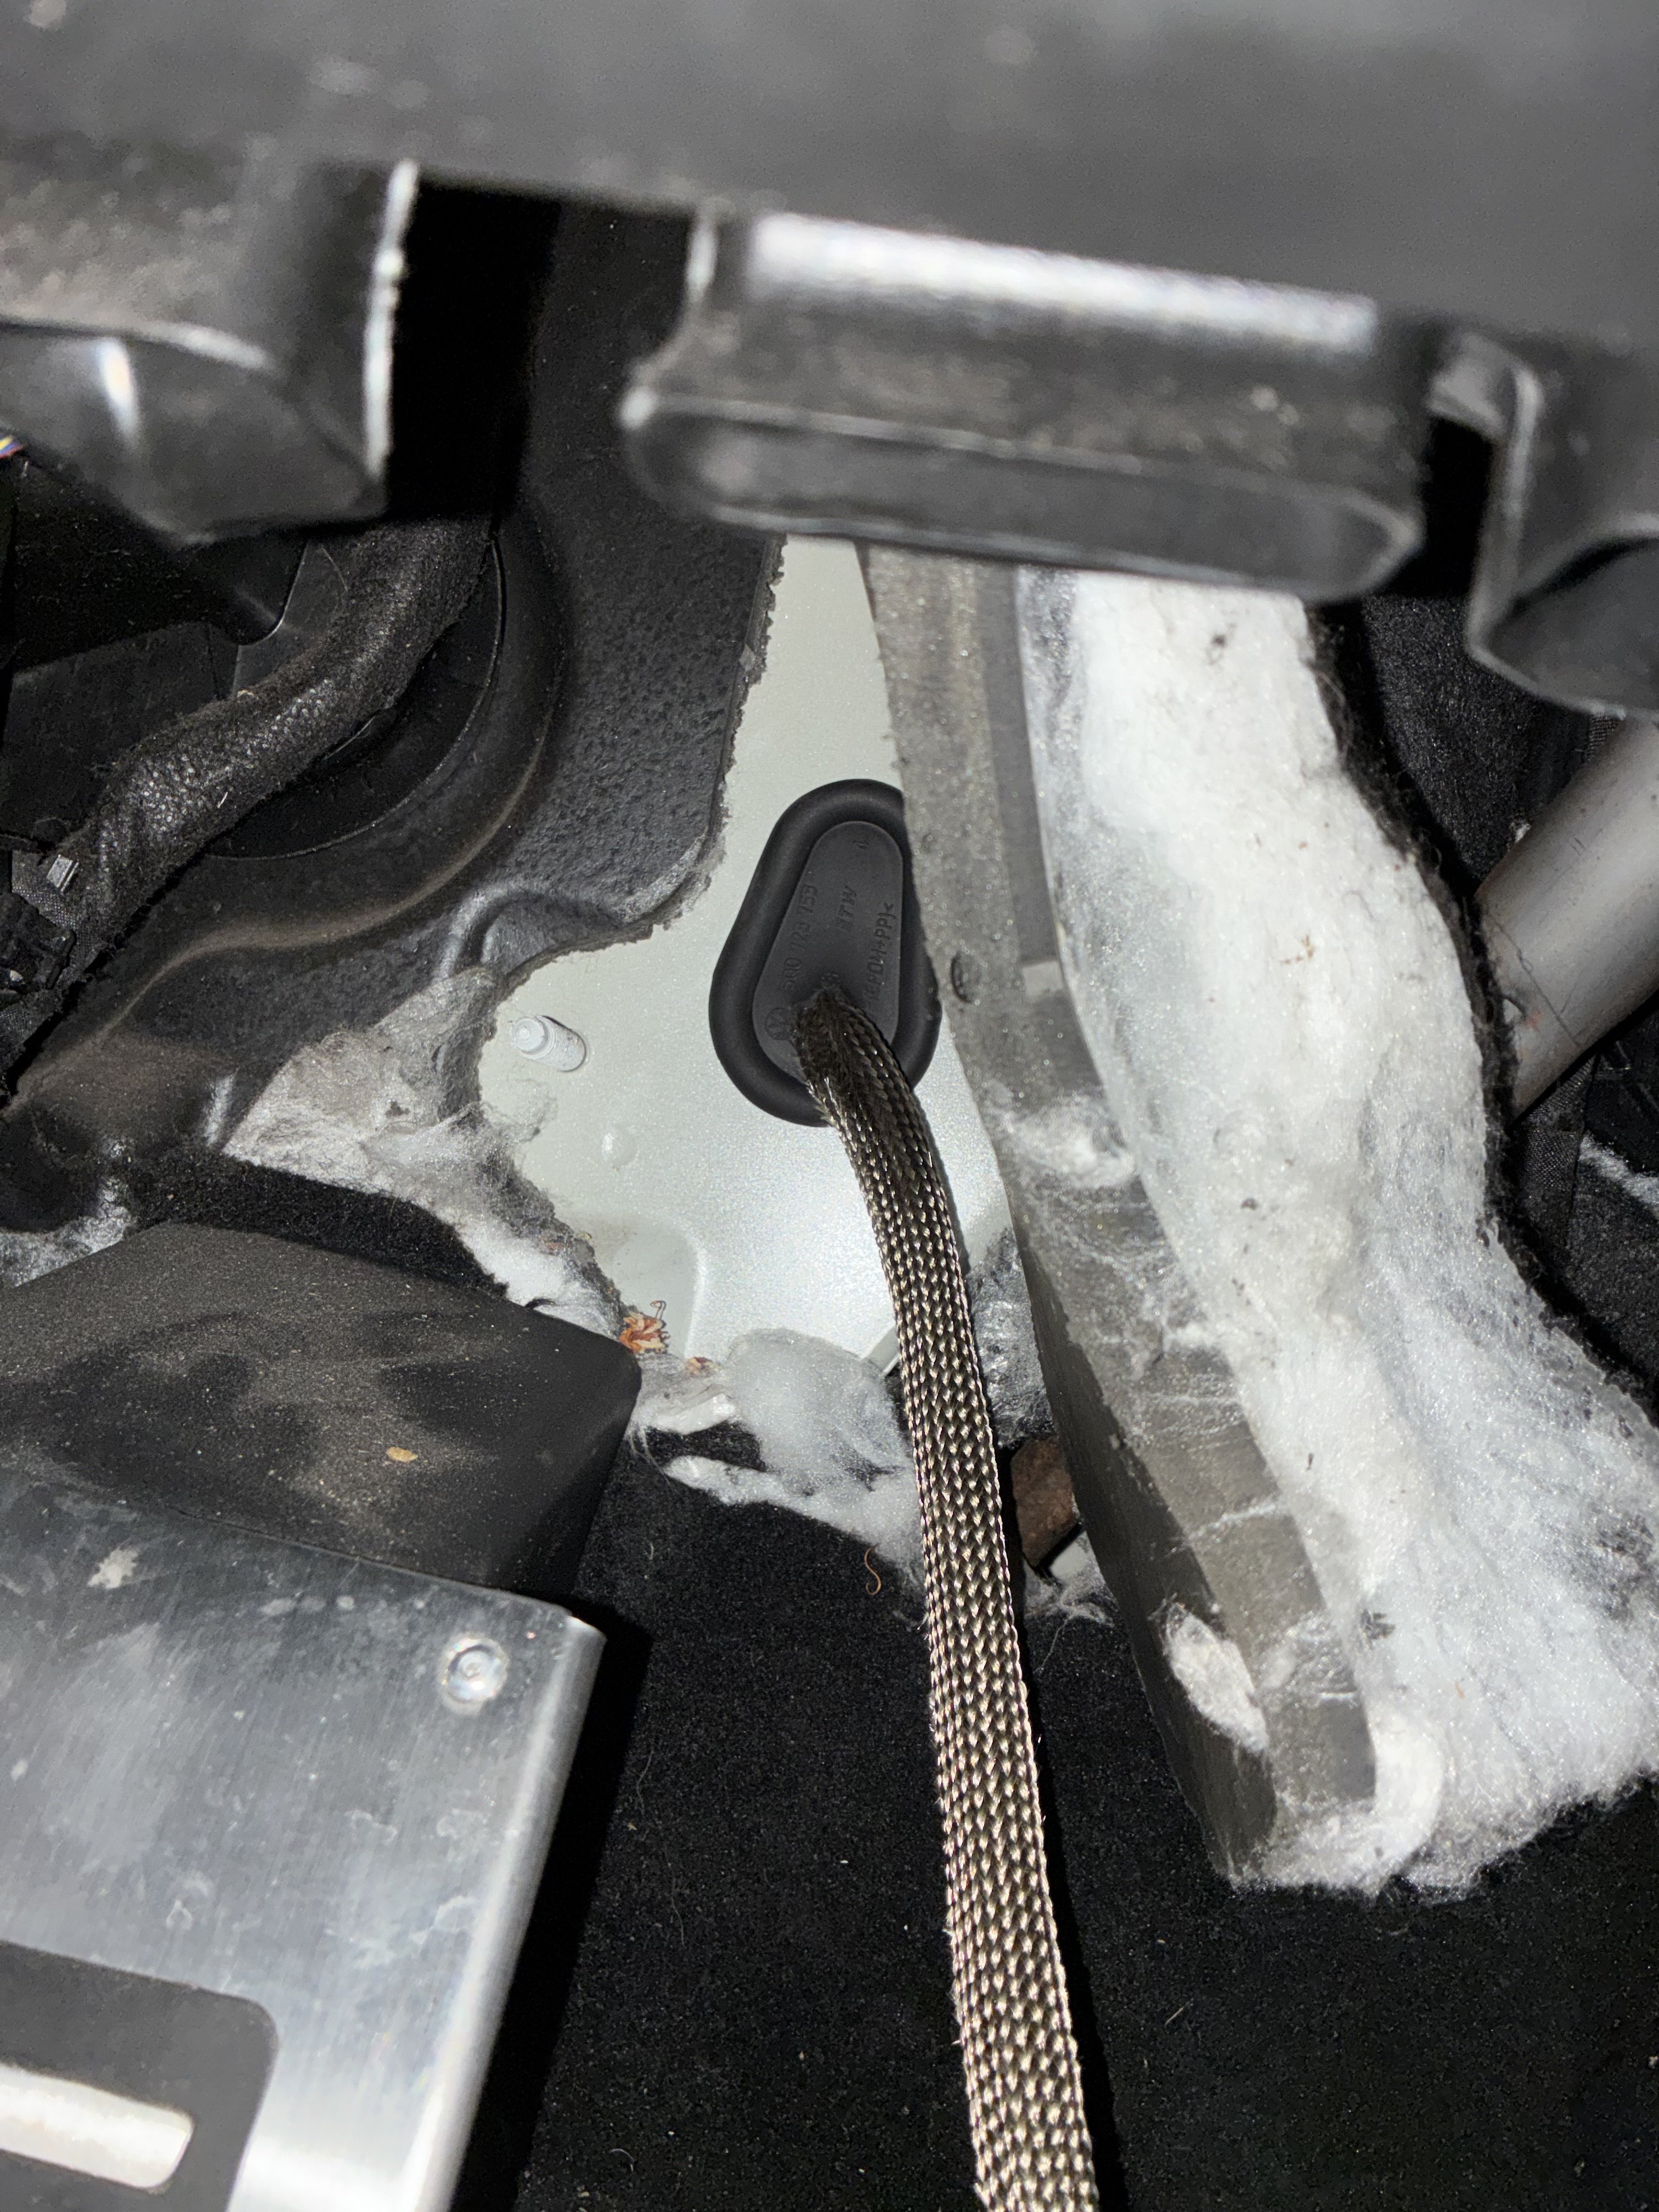
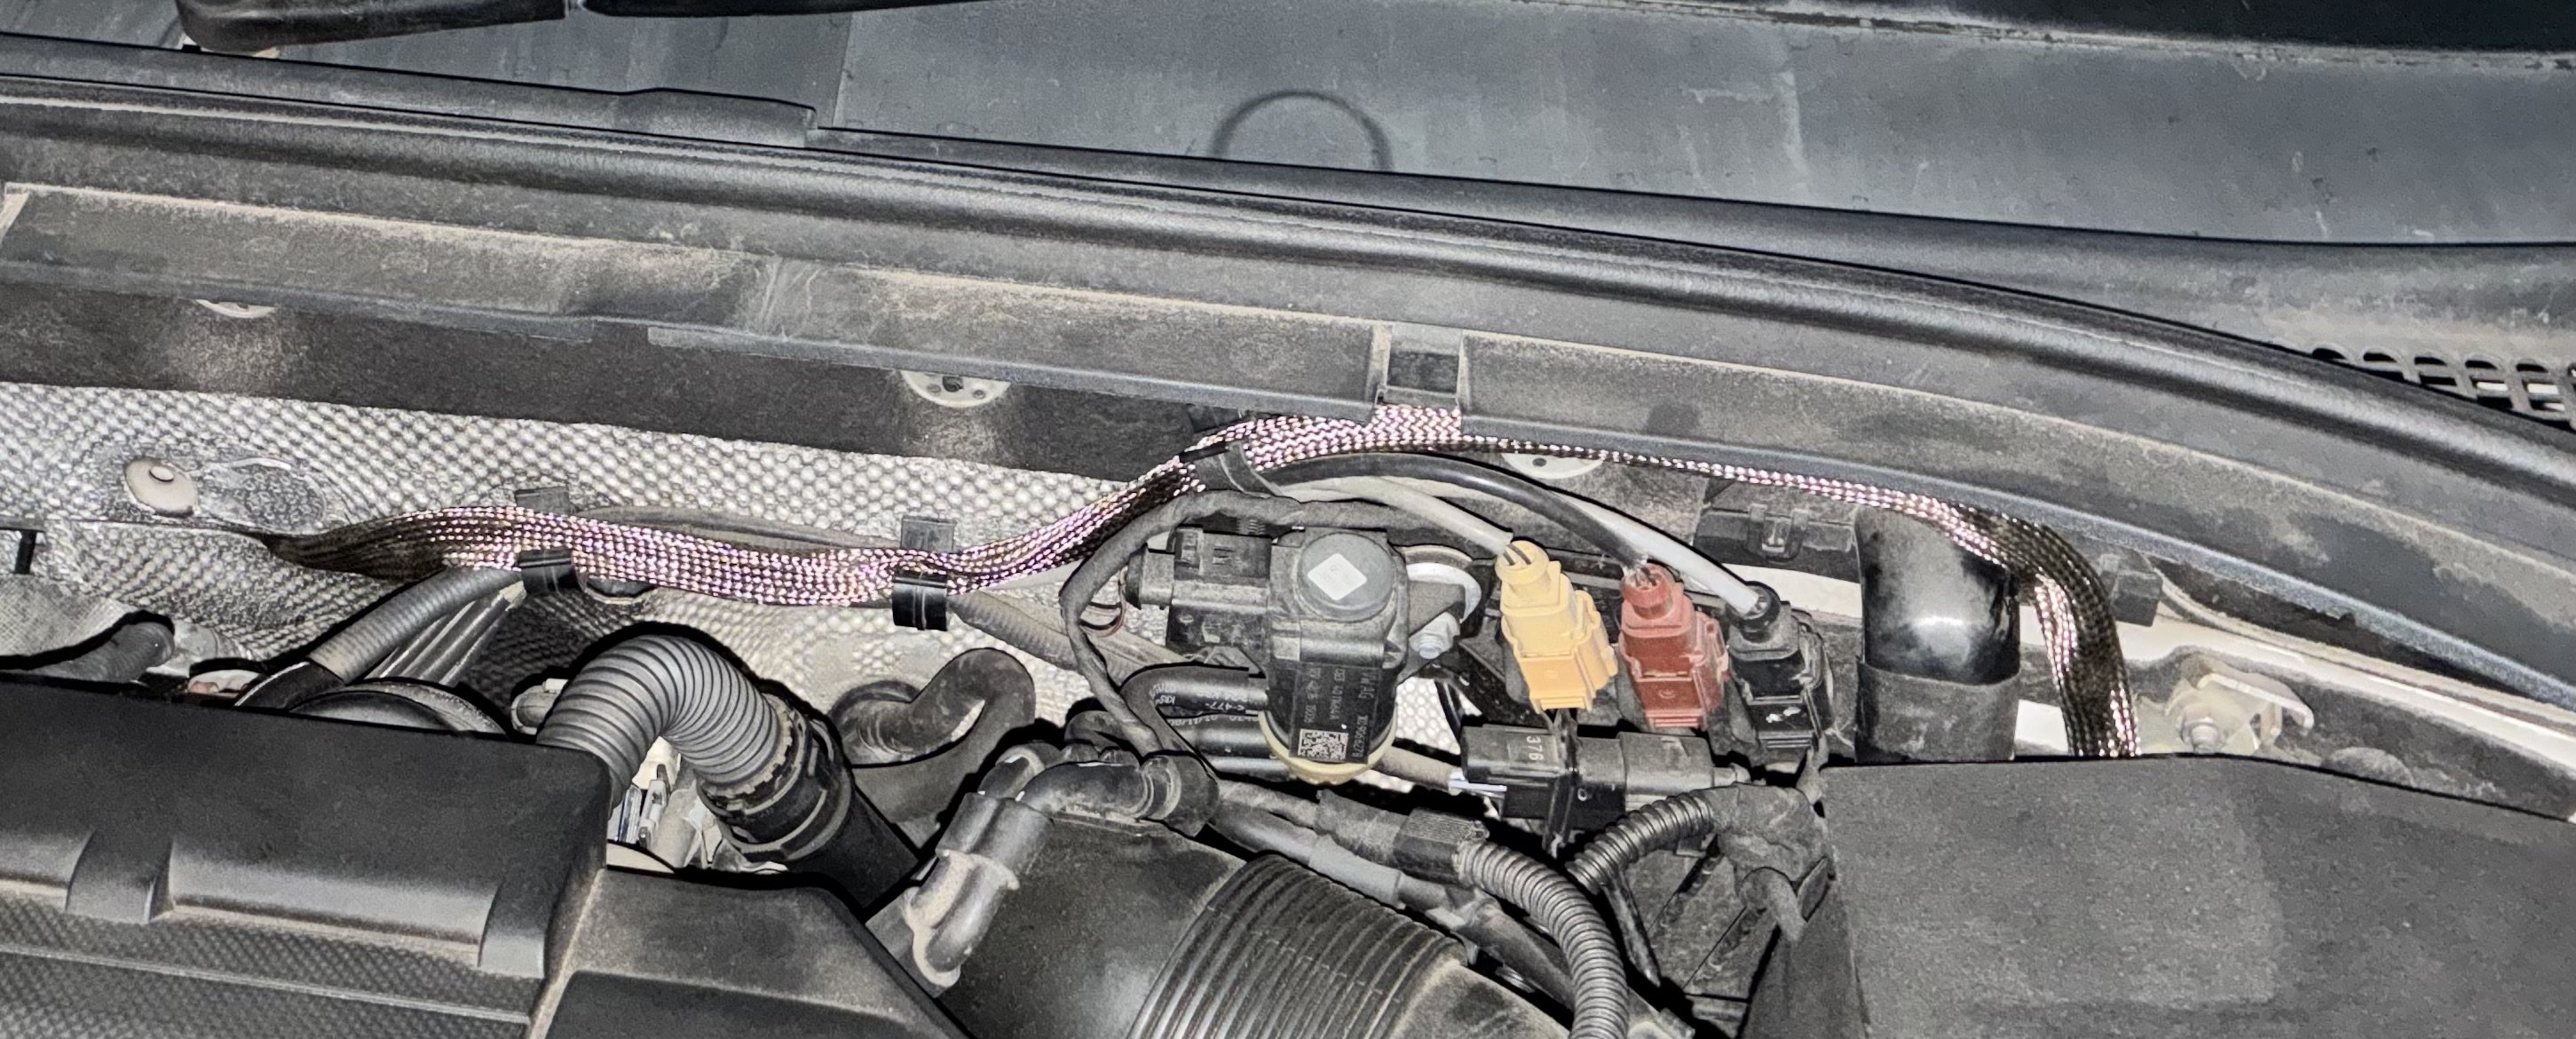
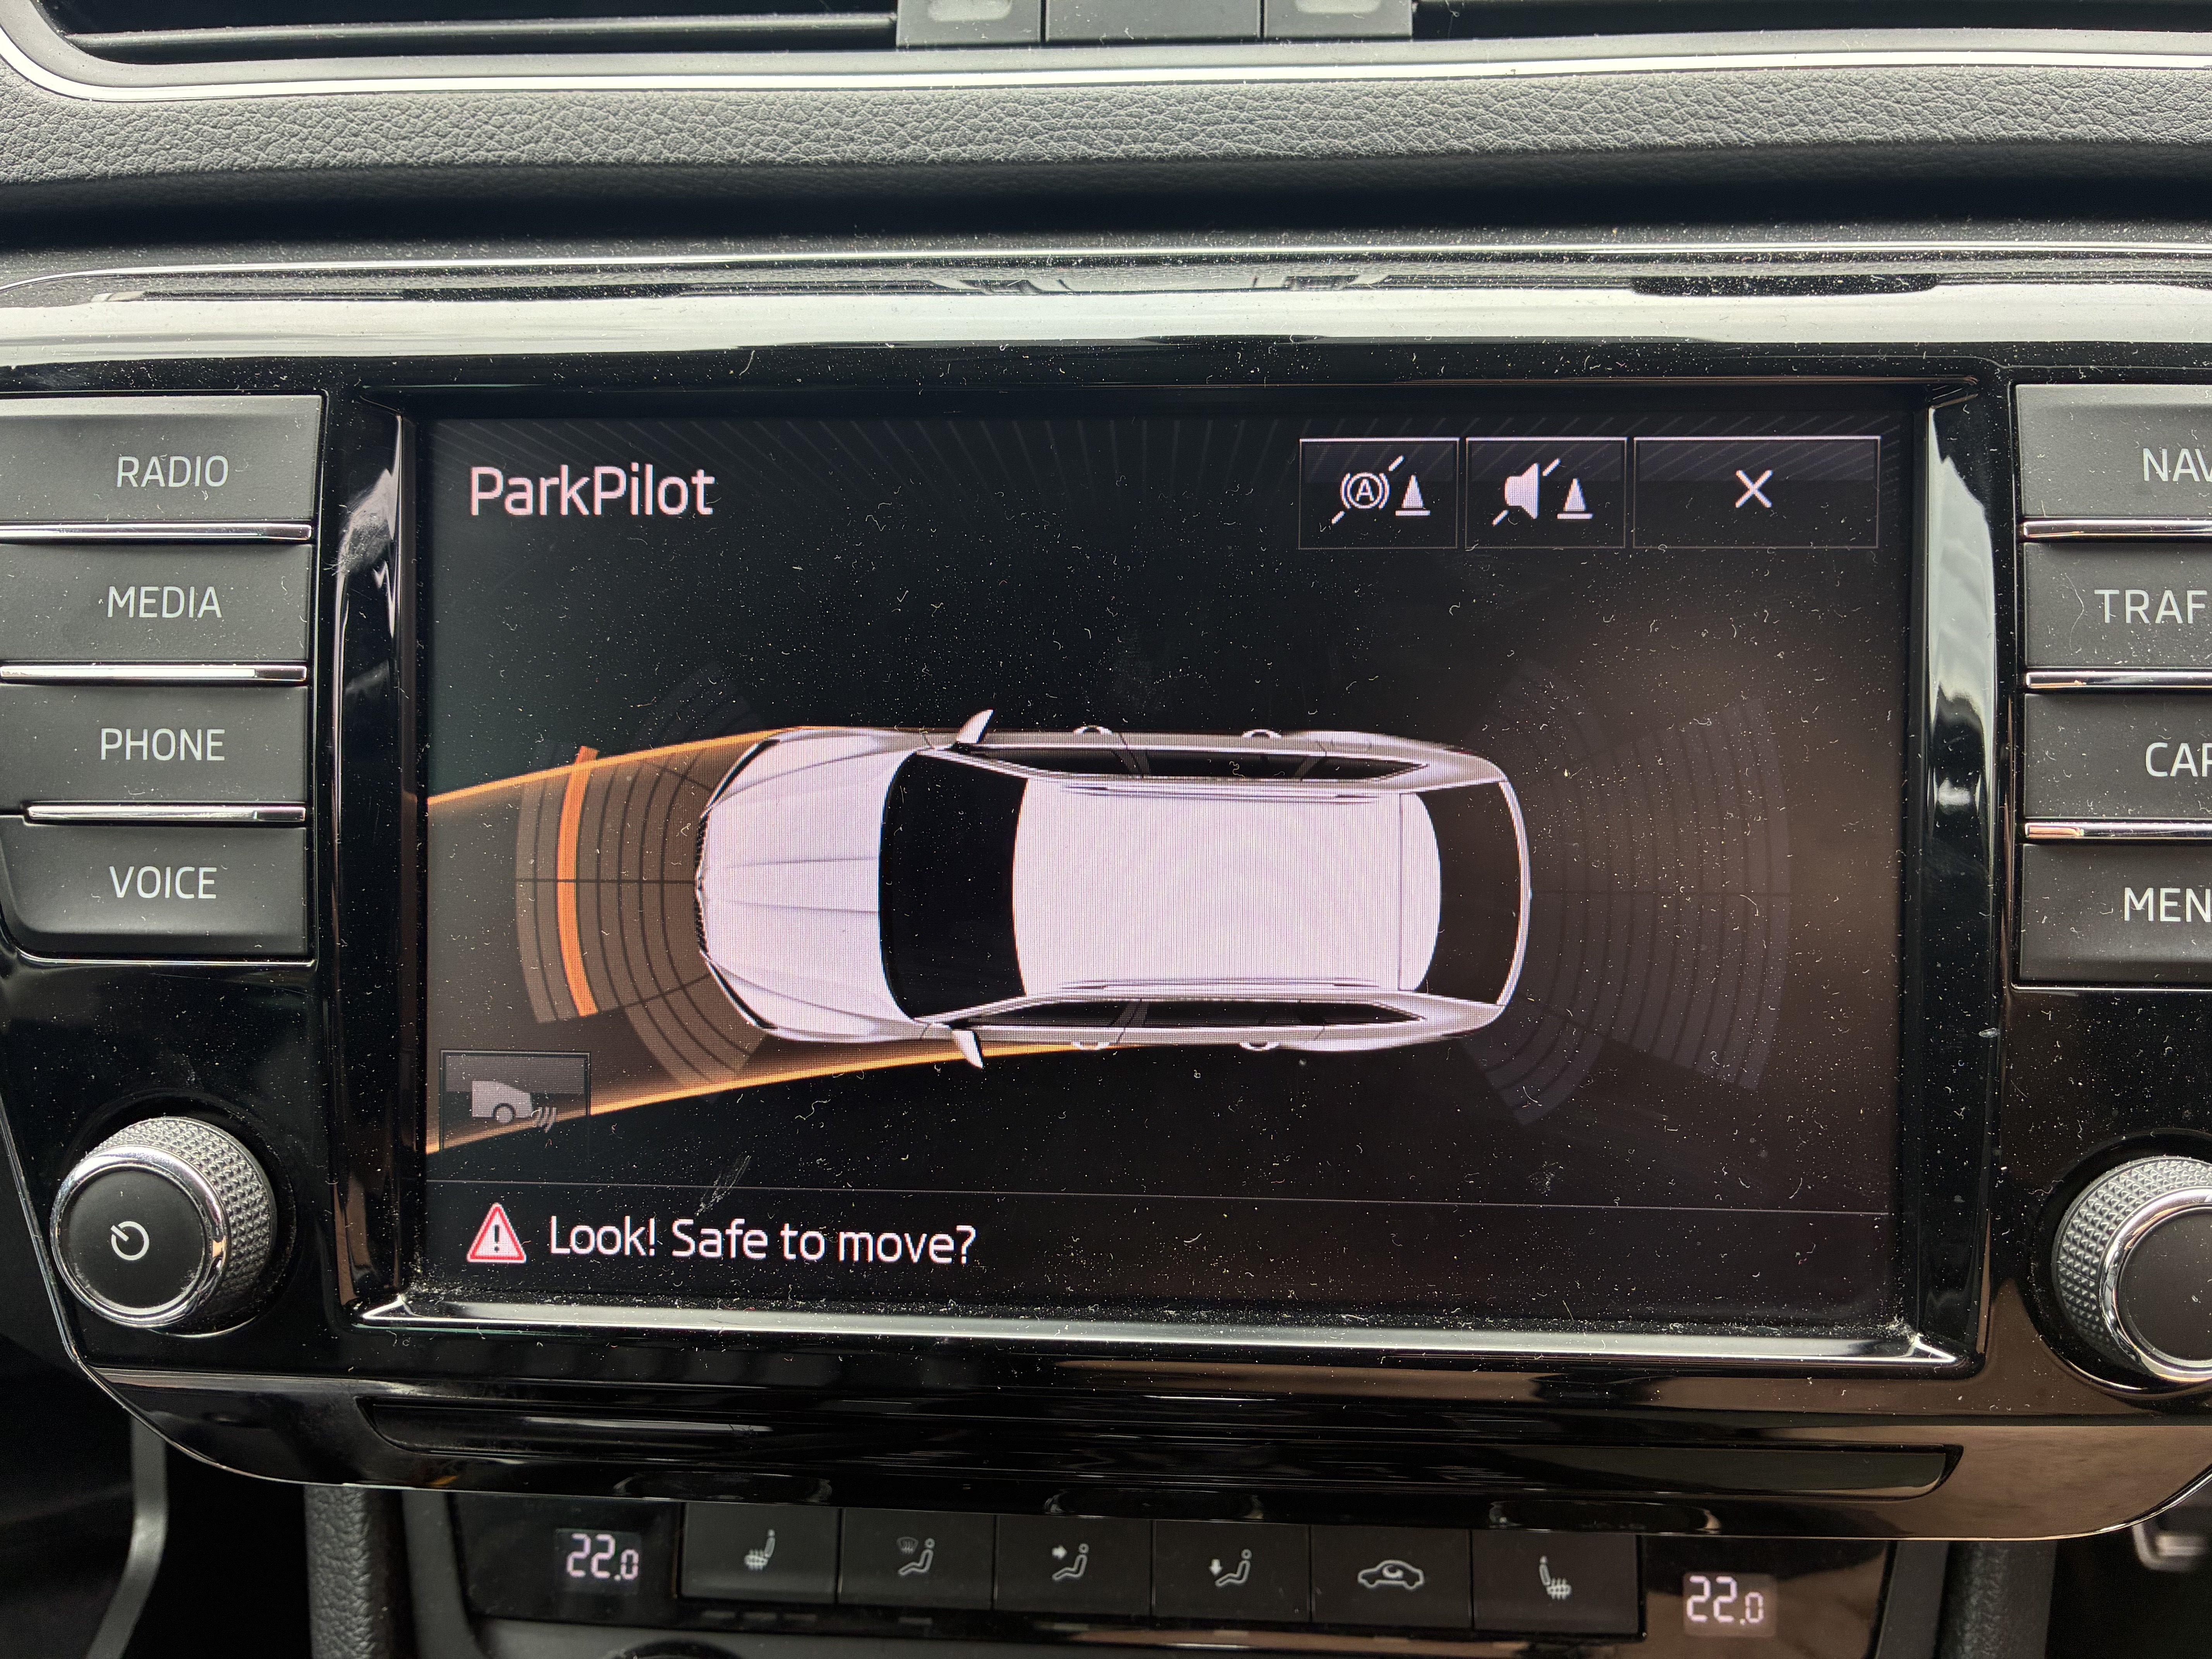
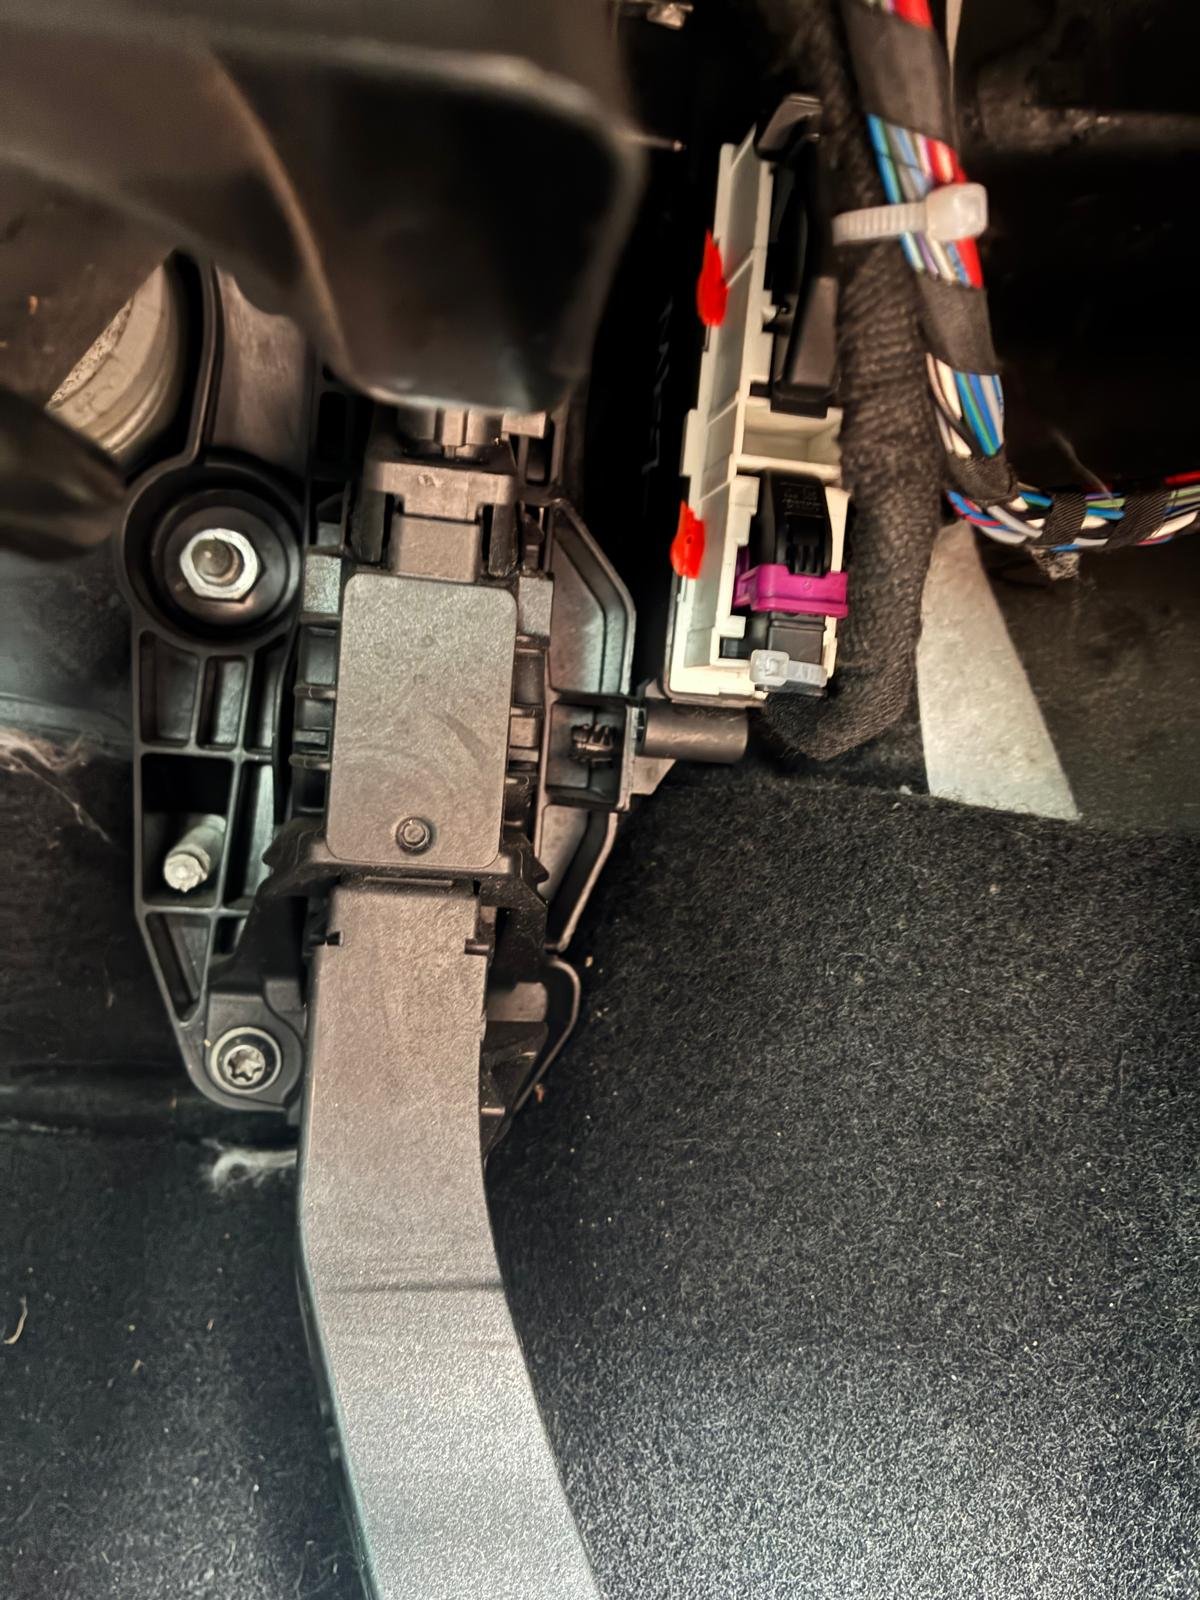
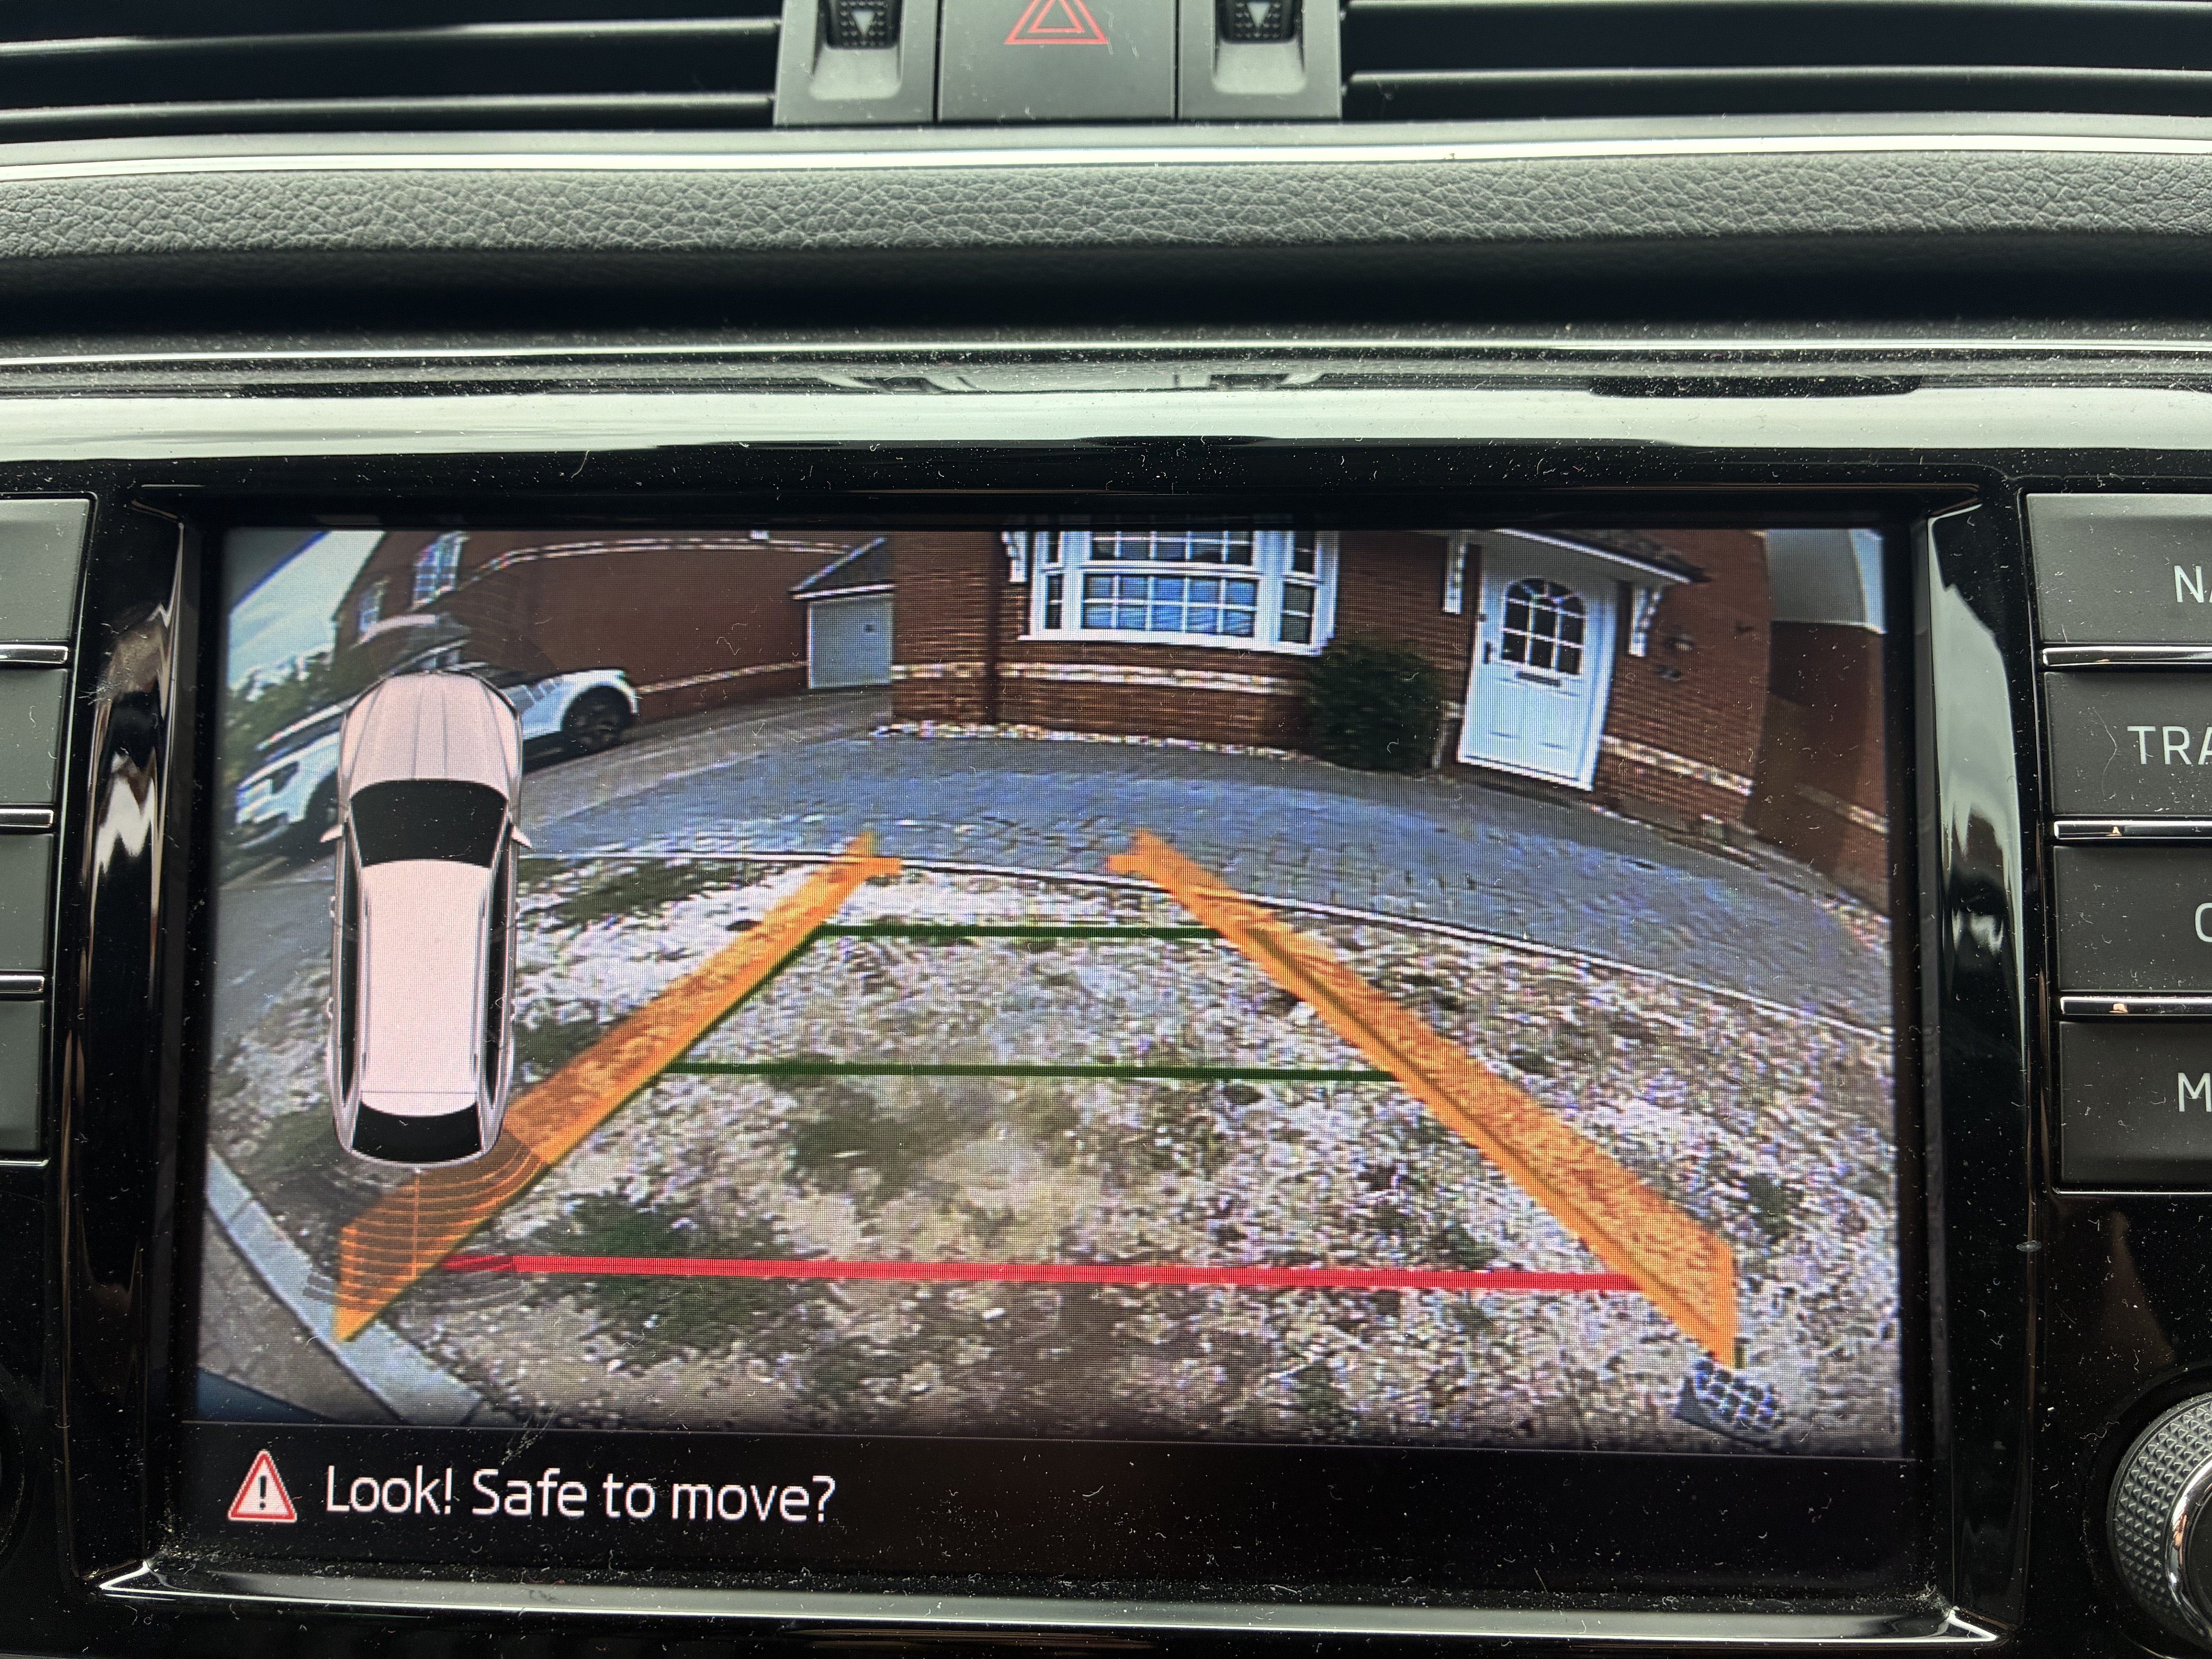
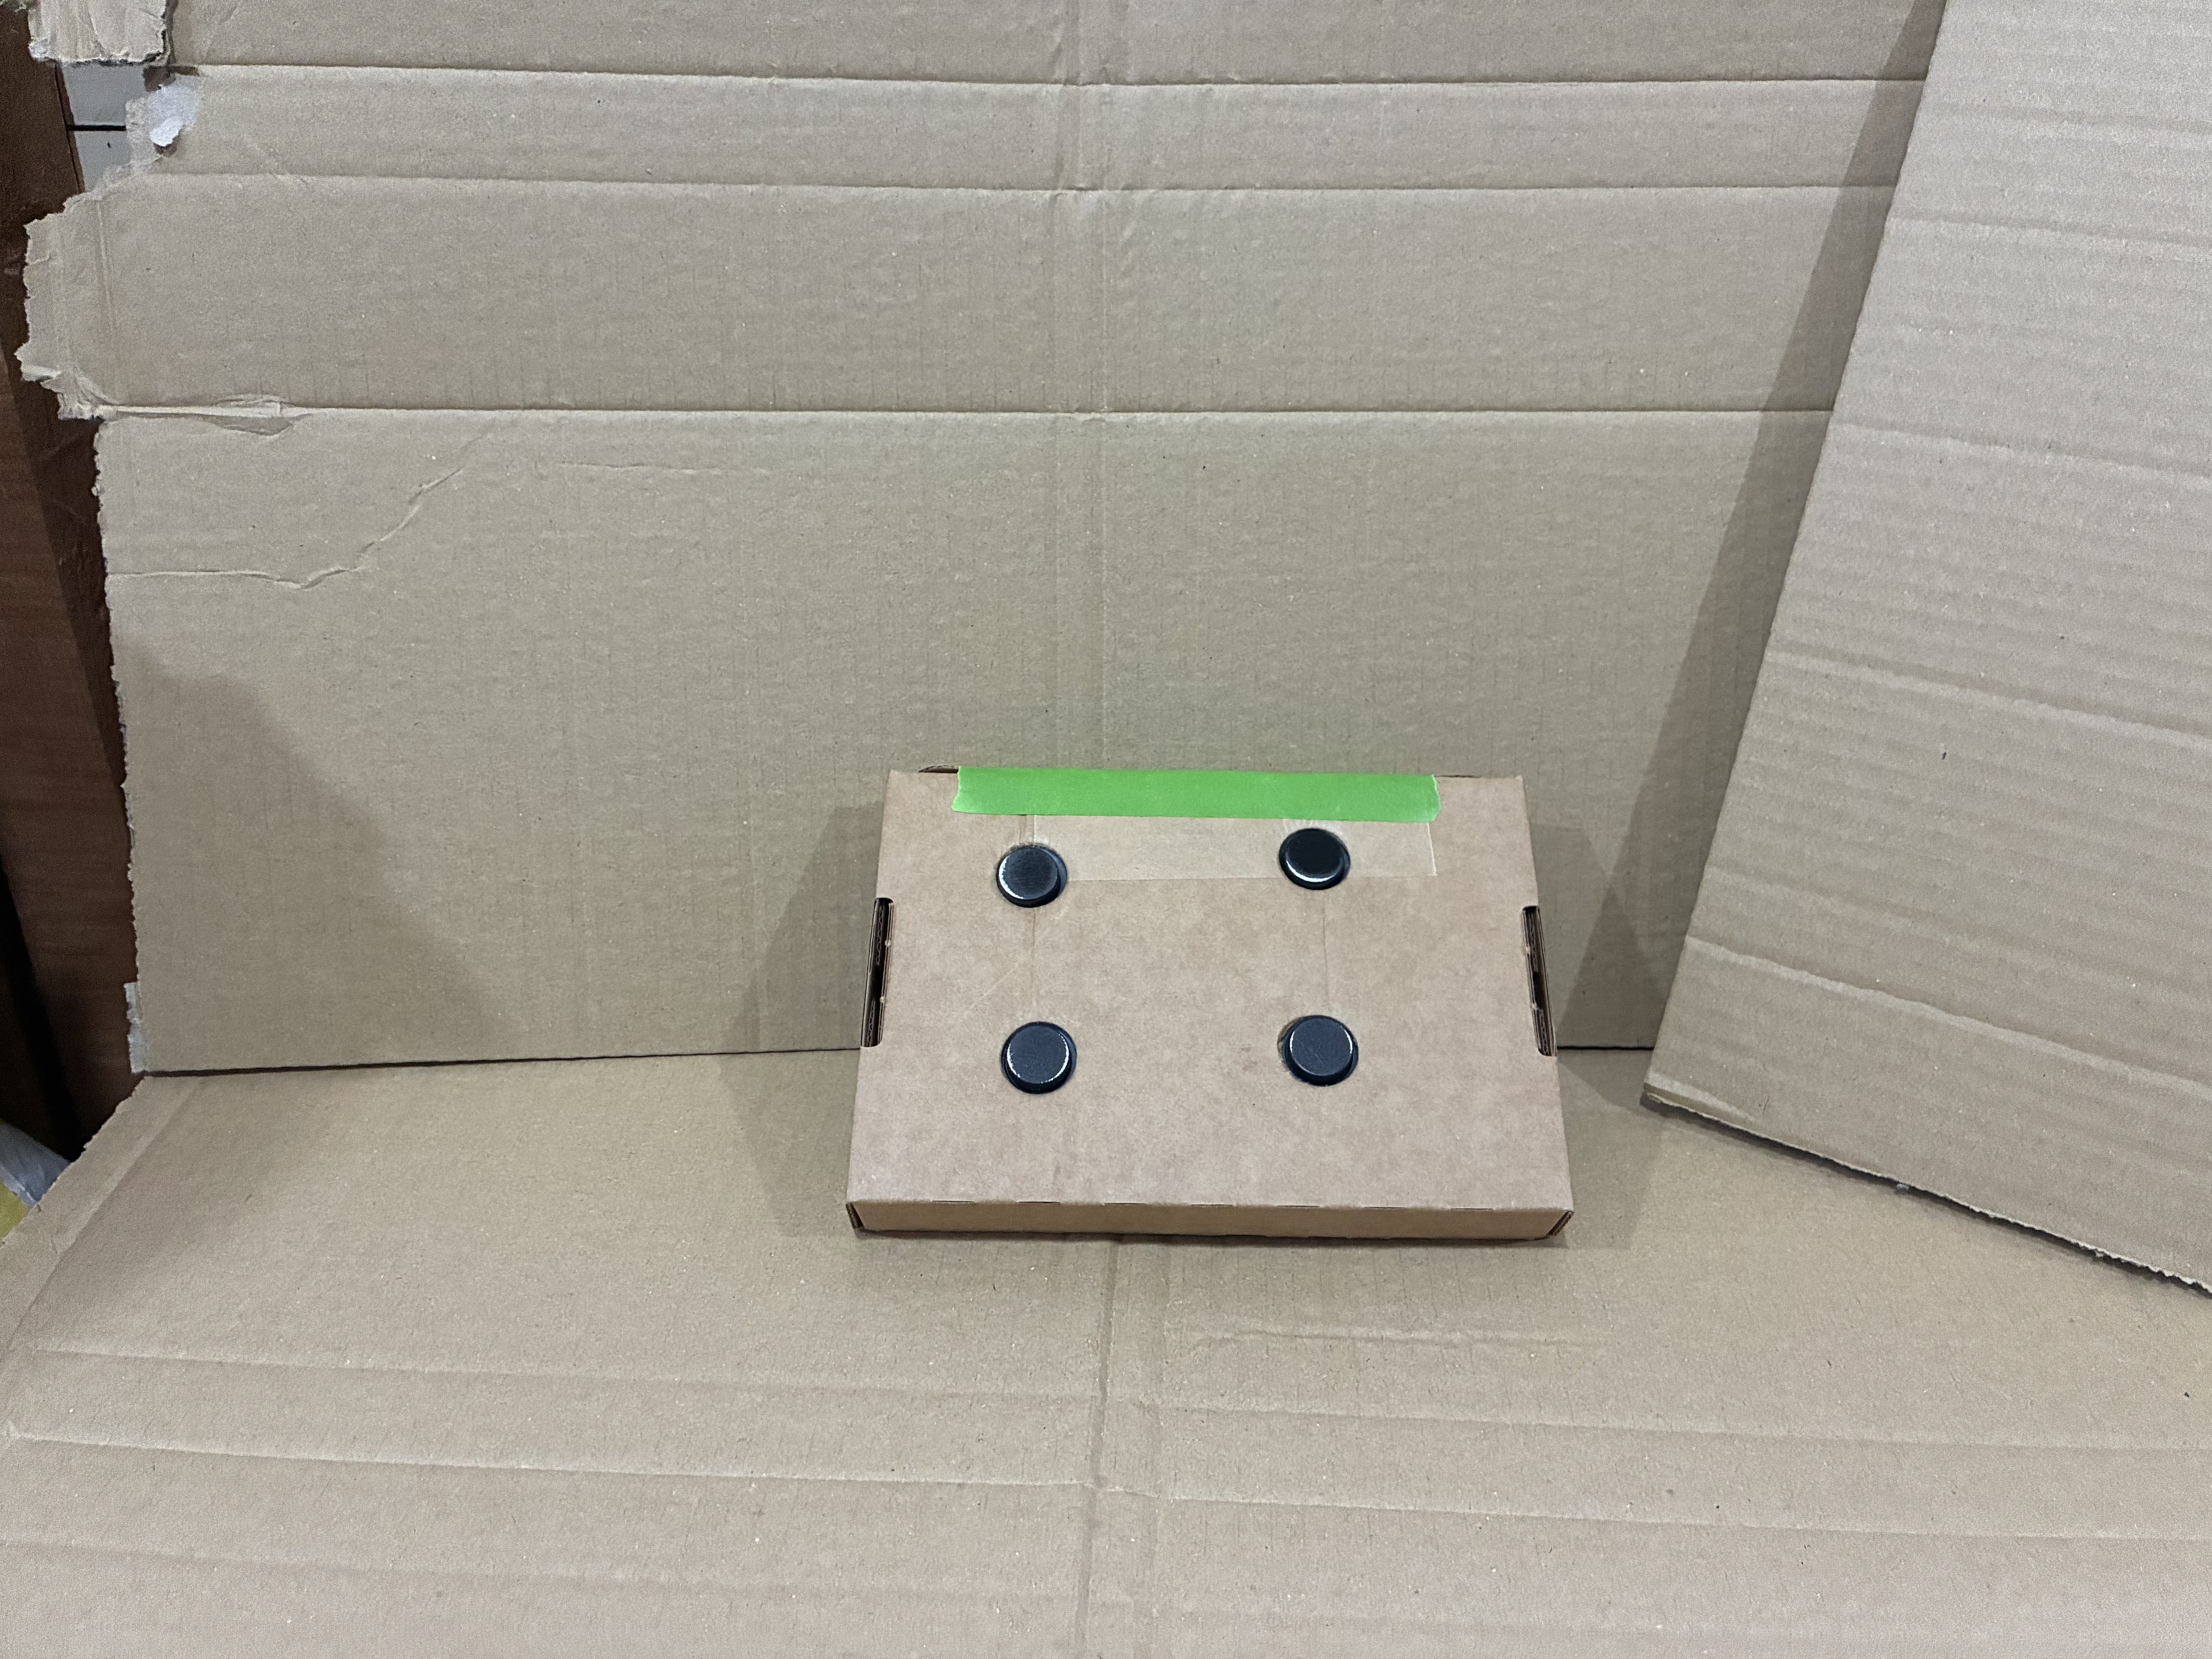
I thought it might be useful for others to have this information all in one place. I do not claim to be an expert but this is just my bumbling process of adding front parking sensors to my Superb. Parts list: Wiring harness, sensors and brackets - Kit is for LHD and the 18pin plug was missing - seller refunded the cost of replacement plug Tool for cutting holes in bumper (18mm) Cable to extend wiring harness (0.35mm2) - I ordered 3m of each of the 6 colours for the loom to keep it consistent, if you label them well you can do it all in the same colour 18pin plug (was missing from the kit) 5Q0972718A - This is available cheaper from Ali but I bought it from a UK supplier for speed of delivery. 8k Parking module 5QA919294B - sourced from eBay - find one where the donor car matches yours as closely as possible in terms of age and spec, and it shouldn't need any parameterisation. Parking sensor switch (Find the part number for what you have currently plus the parking sensor button. Mine was electronic boot only originally so part number is 3V2927132Q) Colour Matched Spray paint - I had some left over from painting badges. Find your paint code for the perfect match. Cloth loom tape Heat Proof Conduit Possibly not necessary but I used some as a precaution. Wiring Diagram - Superb 3 8k Front parking sensor Wiring Diagram.pdf If you are not experienced in reading these, watch this to help understand them. @JR RS Guide to removing the front bumper Removing Front Bumper.pdf Seat Cupra guide to a similar retrofit Mostly similar but some coding is different. Firstly I laid out the wiring loom. This kit included the 26 pin plug (Which is part of the standard Rear only set up so is not required) but not the 18 pin plug for the front sensors. Some wires were already pinned into this plug. To remove them, slide the flat end open nearest the wires, then slide out the connector block. You remove the individual pins by pressing onto the silver part with a gentle tension on the cable. You have to do it twice as the pin comes out of the block. This kit also inlcuded some CAN wires, and the plug for the switches including some extra wires for that too. I removed the wires from that plug as I was going to add the wires I needed into the existing one. On this one there is a flap that opens (Under the warranty sticker) and it’s the same process for removing the wires. None of the cable colouring in this kit matches the wiring diagram. So I carefully traced which wire was which by looking at the pin positions on the plugs. I printed out the wiring diragram and relabelled it with the wires corresponding to my loom. As this kit is intended for LHD, I knew I would need to extend some wires. I used sleeve crimp terminals to extend the engine bay section of the loom (The one in the plastic conduit) and used the pins from the plug kit to terminate them. I continuity tested the wires with my multimeter before continuing just to be sure the connections were good. Then I wrapped the extended wires in loom tape. (In hindsight I could have fitted everything in reverse, so that the loom went down the drivers side of the engine bay, and I probably wouldnt have had to extend it, just pin the signal cables into the plug in reverse, or I could have ordered another male/female plug kit and just plugged it in to extend it) Next I painted the sensors. Rather than masking them up, I used the cutting tool to cut holes in a small cardboard box and taped them into position using masking tape. Be sure not to lay the paint on too thickly. Just three light coats and a couple of clear coat is plenty. Now to the install. As not all the parts had arrived, I installed everything before testing the kit in the blind hope that everything worked! First, remove the front bumper according to the guide above. The OEM positions for the sensors are clearly marked on the inside of the bumper. Drill a 9mm hole at the marked cross in the centre of the circle. Then use the cutting tool (pulling from the painted side inwards) to cut the neat holes. Fit the sensors with the sealing rings and clip them into the brackets. Offer them up to the holes. My outer two didn't sit quite flush, but in hindsight I may have put them on upside down! I found the AliExpress brackets had extra tabs on that needed cutting off for the brackets to sit flush. Finally, clean up the inside of the bumper with some brake cleaner or rubbing alcohol so that they are nice and clean. Peel off the backing from the sticky tape on the brackets and carefully position in to place. Be sure to get them as level as possible and give them a firm press so they stick well. Connect the wiring onto the sensors, making sure to push them until they click, and then push in the little tab to secure them. There is cable management moulded into the bumpers and the plug should end up near the plug for the temperature sensor. Note the colours of the wires for each sensor, and make sure they match to how you have labelled your wiring diagram. Now I started to route the next section of the loom through the engine bay, starting with the plug near the other half of the temperature sensor plug. I threaded it up past the washer bottle and along the side of the ECU. I made sure to avoid crossing closely to any large red cables in case of interference. I like to rebuild as I go, so at this point I got the front bumper back on and the car back on the ground. This is the point where I then struggled to find somewhere to get through into the cabin. There is a couple of grommets on the passenger side but I couldn't find my way through them. As my car is a DSG, I knew there would be a grommet in the drivers footwell where the clutch would be mounted. I pulled the grommet out and fed some stout wire up behind the heat shield to come out just under the scuttle. This is where I ran the cables through some heat proof conduit as they are crossing the back of the engine bay near to the exhaust. There is some convenient cable management clips that it slotted in to. Once in the footwell, I then routed the cables up and over the steering column area to emerge next to the PDC module which is mounted just above the accelerator pedal. Now to pinning the plugs. Remove the small storage tray from next to the steering wheel for better access. I removed the existing 26 pin plug from the module (Push the button then the lever pulls down) Cut the cable tie, and slide out the connecting block. On these connecting blocks, the pin positions are numbered at each end of each side, and its a case of counting along to the right position. To this plug, you add the wires for the front beeper to pins 2 and 10, ensuring you get them the right way round according to how they are pinned on the plug that goes into the beeper. You also add the two cables to go to the button, to position 16 and 17. Make sure you know which way round you have positioned them so you can put them into the corresponding positions in the plug for the switch. From here I routed the wire up and over the steering coloumn under the dash, and around the side of the centre console (One torx under a little cover towards the front, and then pull down on the panel to remove). Then its just a case of prising up the surround around the gear shifter, and releasing the red plug on the original switches, and the row of switches then pushes out from behind. Add your new pins to the plug to positon 4 and 5 (16 to 4, 17 to 5), slot the switches in, plug in and put the trim all back together. Now you can pin the 18 pin plug with the wires from the front sensors. Be careful to follow the wiring diagram carefully as the 18 and 10 are very difficult to distinguish and I wired it backwards initially. Then plug both the 26 and 18 pin plugs into your 8k controller. I got some errors initially as there is some coding required. Some was already correct but I checked the following were activated: Module 10 - Byte 2, Bit 0 Module 10 -Byte 1, Bit 5 Module 17 - Byte 13, Bit 0 Module 3 - Byte 24, Bit 5 to enable manoeuvre braking. Thanks to @Cairus for guiding me on the coding. Clear fault codes and all was well. No further dataset or parameterisation of the module was needed. (I initally bought a newer module from an iV that gave me all sorts of errors, hence the tip above of finding one as similar to your car as possible) The last thing to do was tidy up the wiring with a few cable ties, mount the beeper somewhere up under the dash, and swap the modules. Removing the plastic pins used to mount the module was one of the hardest things of this project. I had to use a fine screwdriver to push the centre pin out from beind, then pull out the outer pin. But finally all was in place, closed up and working well. And looks good from the outside too.
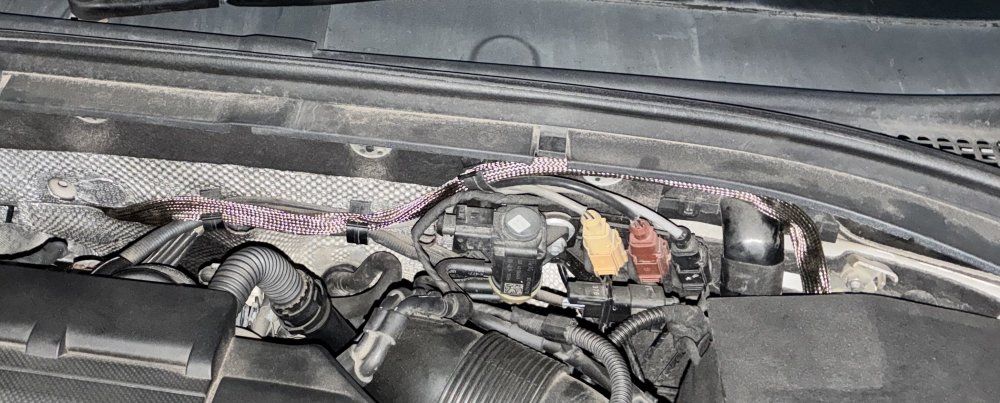
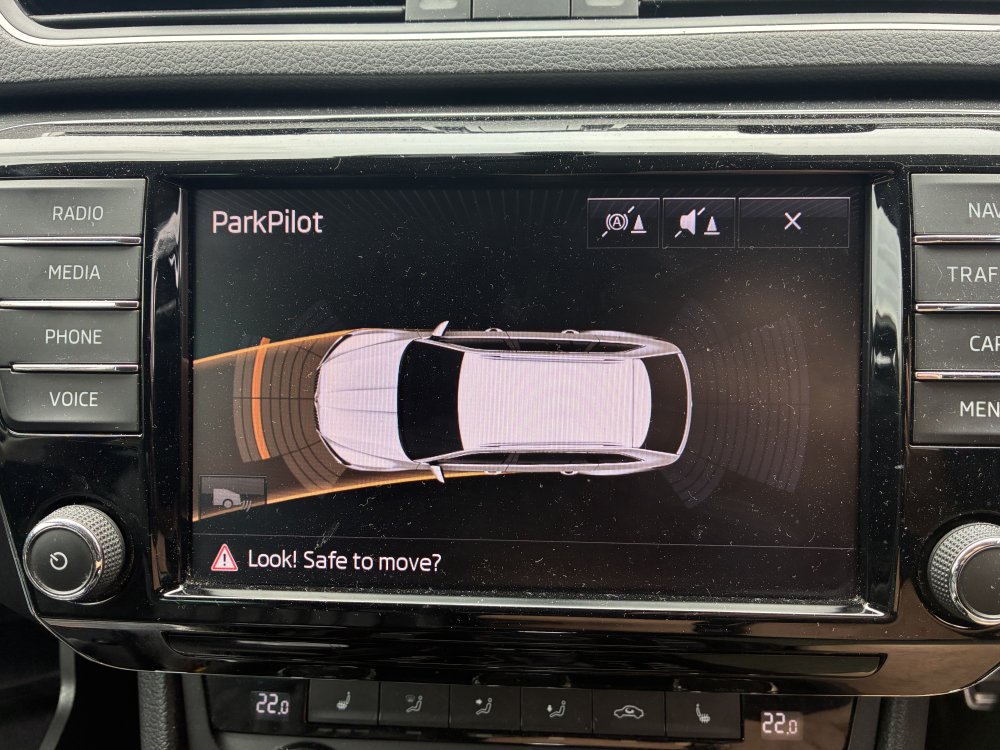
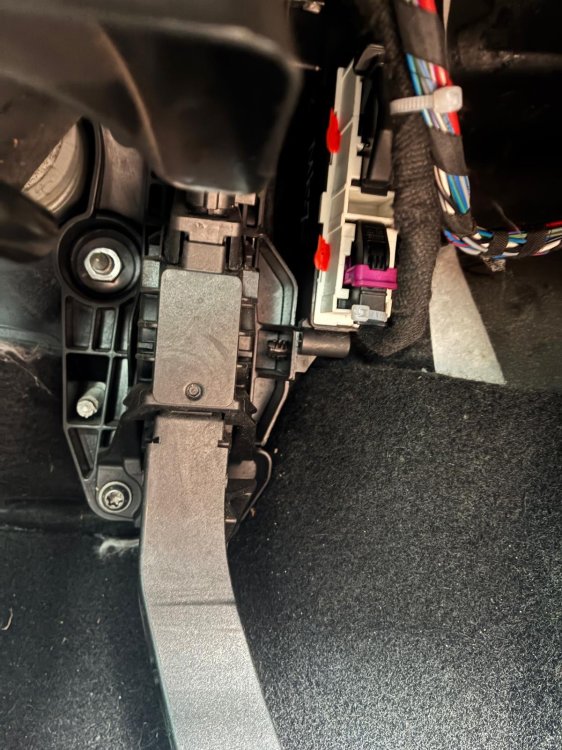 2 points
 -
More likely to cause problems while changing it than prevent problems that may be a long way into the future. If it ain't broke...2 points
-
2 pointson previous 2016 Mk3 TSI 220ps DQ250 FWD i coasting by default were present only in E on current 2023 Mk3.FL TSI 280ps DQ381 AWD it were also in D, had to code it out -> https://www.briskoda.net/forums/topic/516414-vcds-options-on-superb-iiifl/2 points
-
1 point
-
Hi, @Binx1310 Just sharing my humble experience. I used to have BSD LEDs in the mirror glasses on my ex Superb Mk3, but I way more prefer the BSD LEDs in the mirror housings on my current Kodiaq Mk1. Additionally, you can trim the LEDs intensity from the MMI (assuming you get OEM parts and correct coding). Much safer!1 point
-
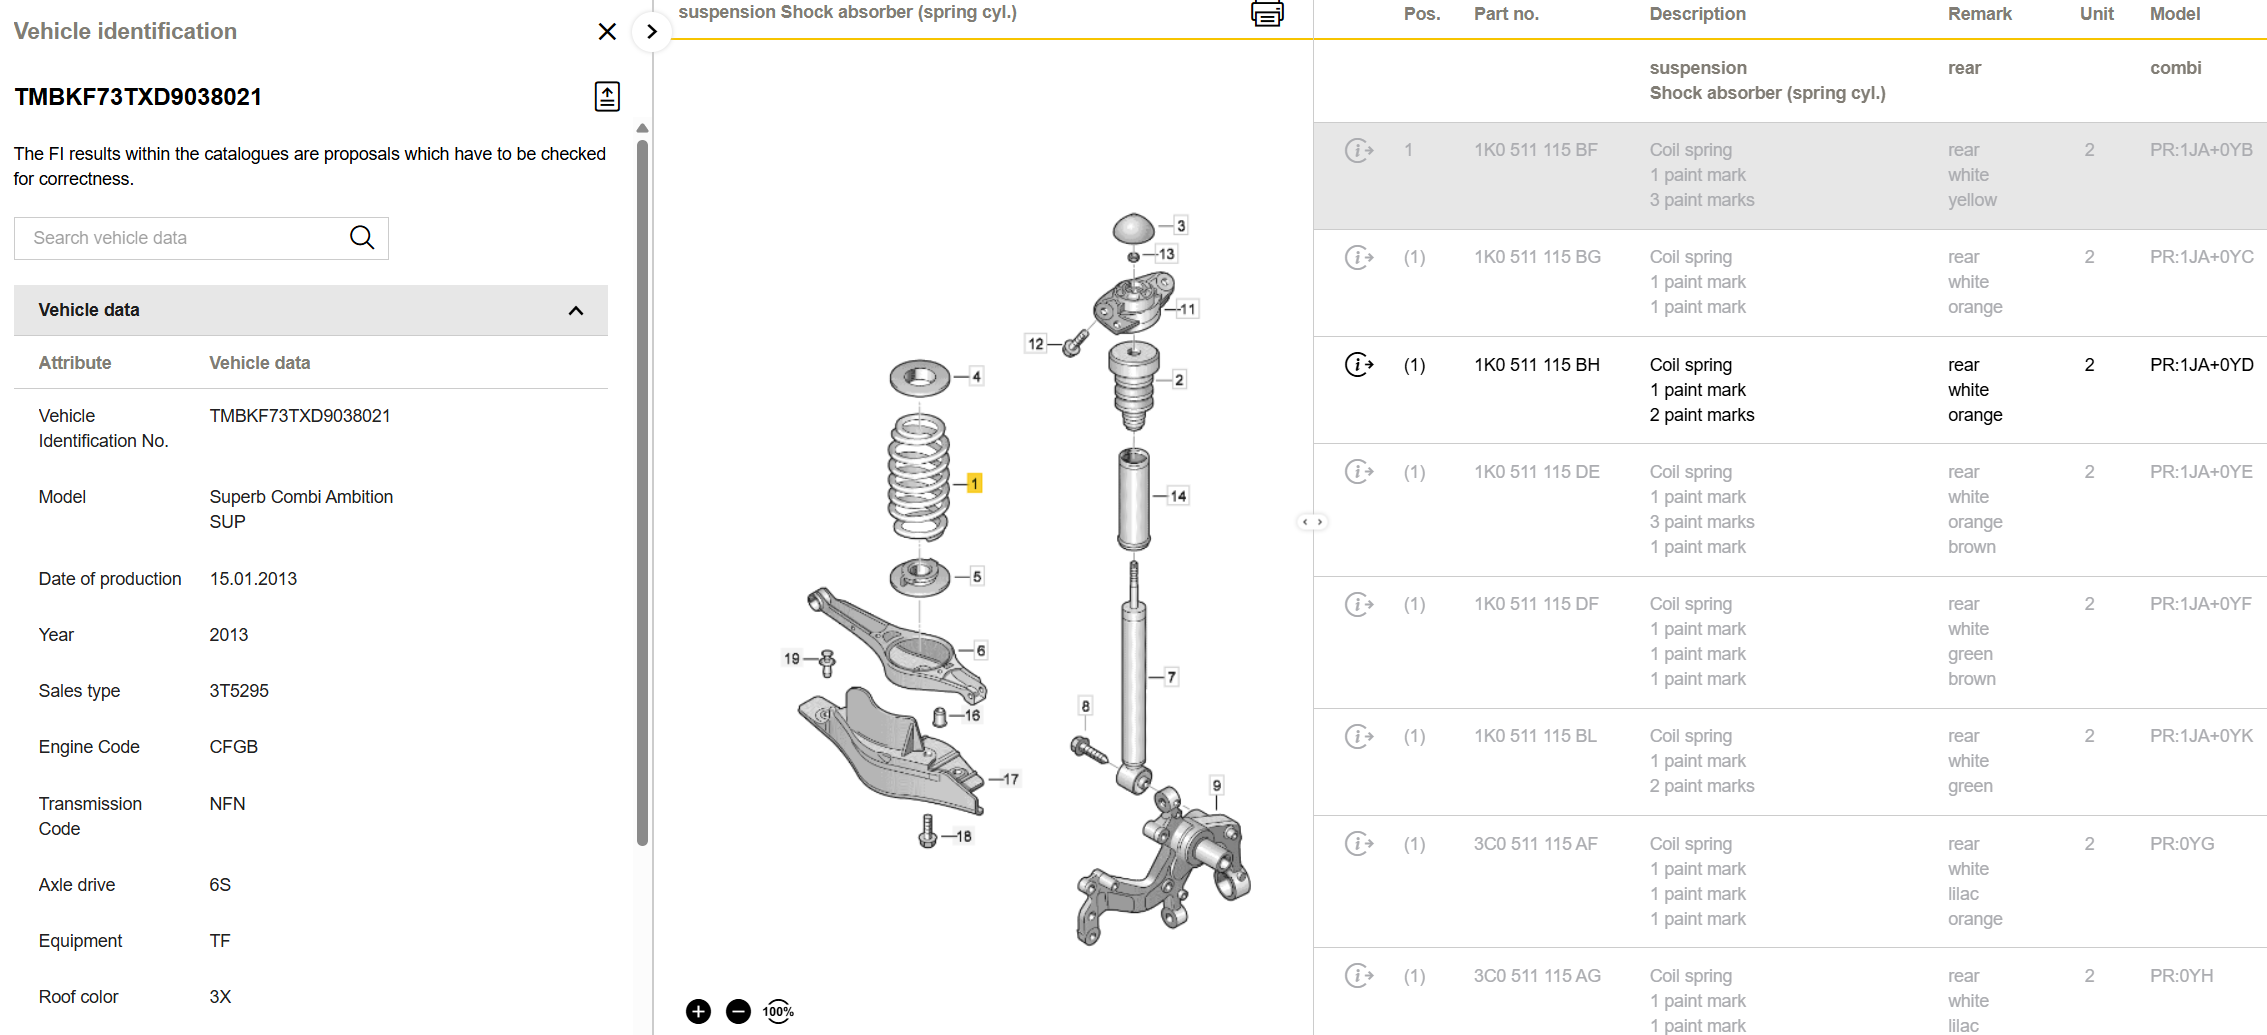
1 point@dave123314 I would always purchase an A-brand part. In this case the alternative for the original Skoda part (https://www.skoda-parts.com/spare-part/1k0511115bh-suspension-spring-rear-axle-skoda-24778.html) are the springs from Sachs, which is an OE supplier: https://www.skoda-parts.com/spare-part/1k0511115bh-suspension-spring-rear-axle-sachs-53323.html At Autodoc it is even cheaper: https://www.autodoc.nl/sachs/70641161 point
-
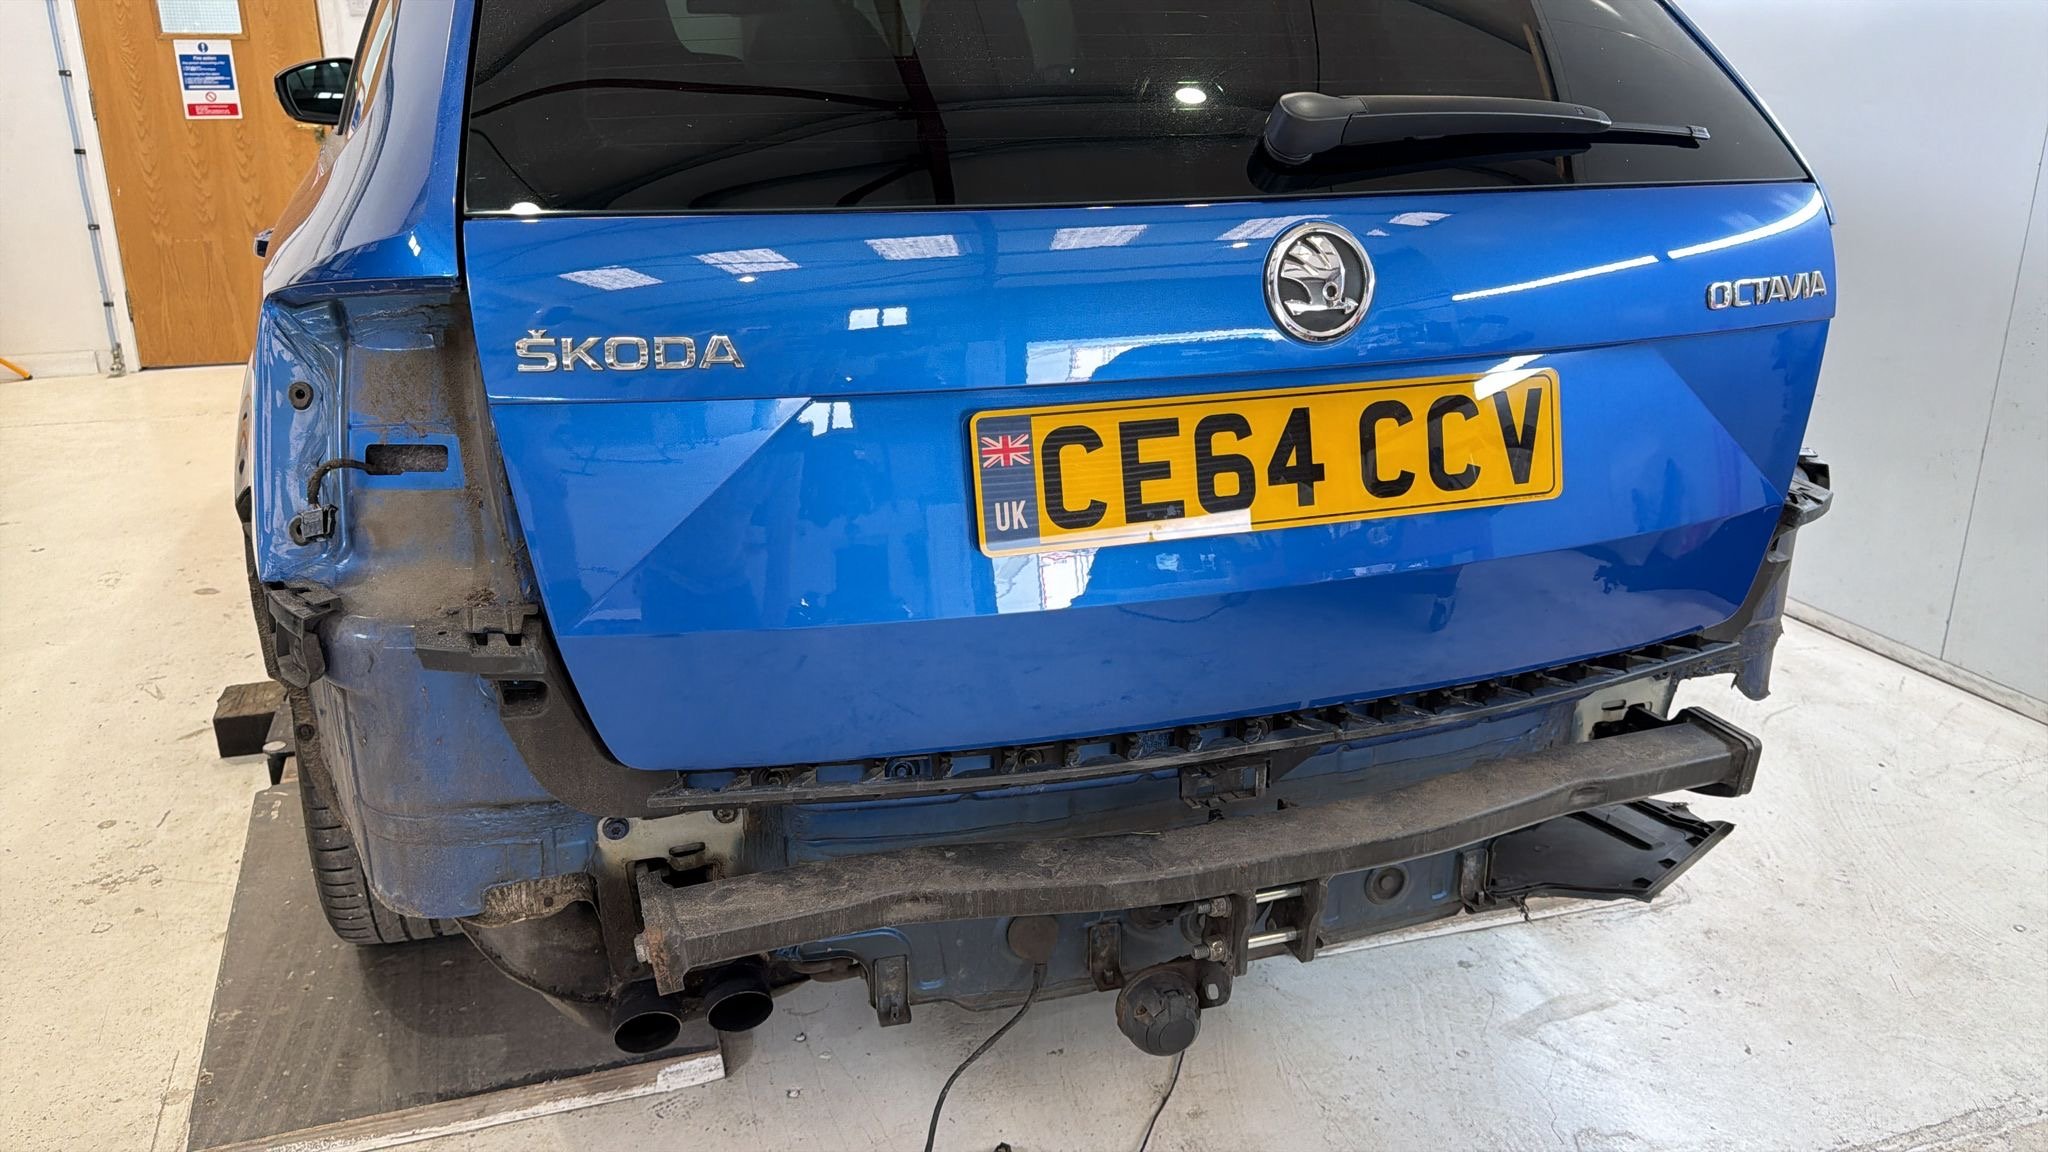
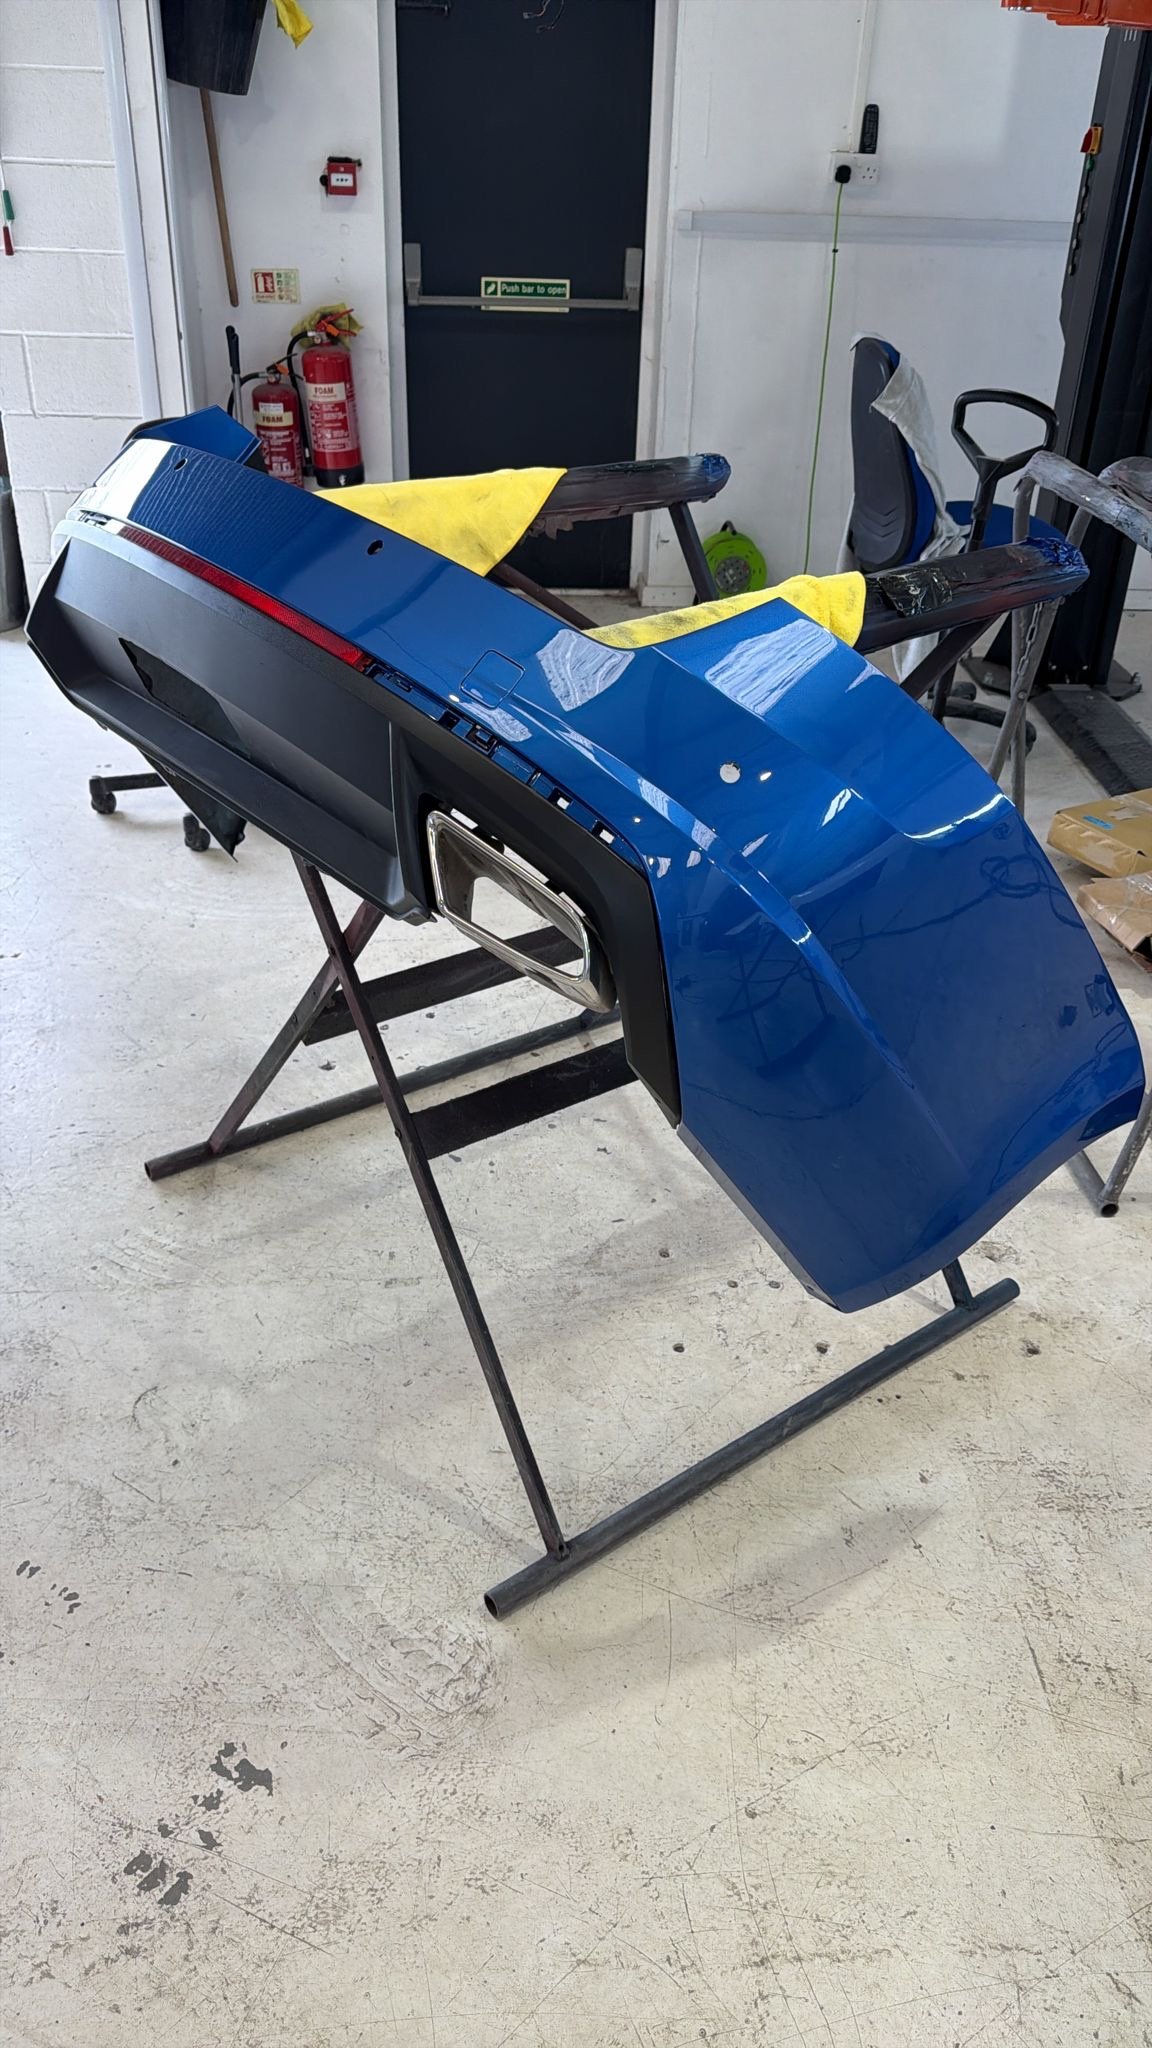
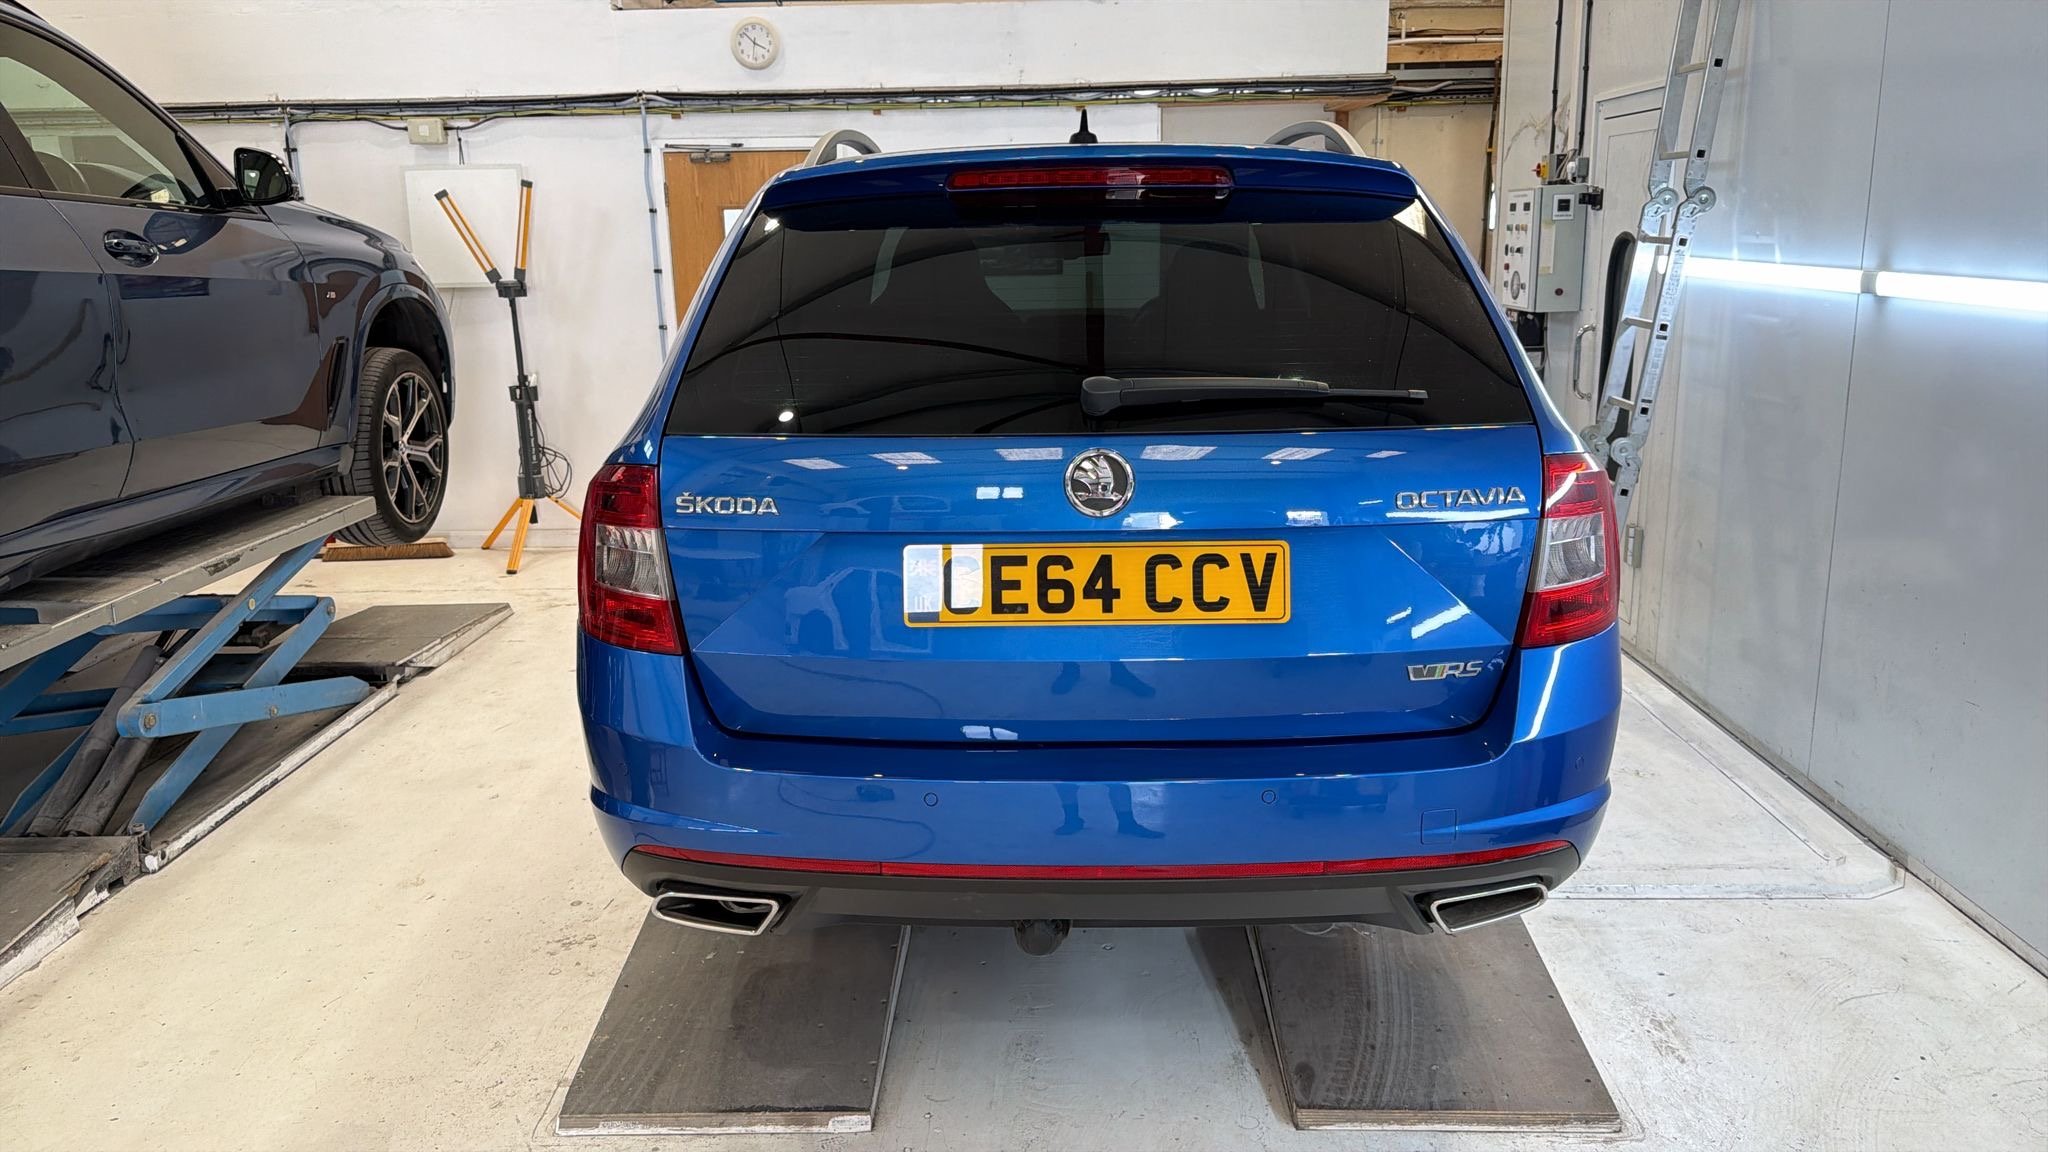
1 pointHello everyone! I won a Rapid Spaceback at a car auction and I’m happy to join this community. It has rear-end damage, but I’m a mechanic, so it should be easy to fix. Thanks a lot for the attention!1 point
-
perfection. Thanks once again for your never ending assistance!
 1 point
 -
Byte 5 Bit 04 is wrong. Turn off Byte 13 Bit 0-3 Set to yes ---> High1 point
-
1 pointDozens nearly new, demonstrators advertised in the UK. Just in Scotland new in stock, Parks, John Clarks, Arnold Clarks, Vertu etc etc.1 point
-
1 pointWhere I live and travel in Scotland from Aberdeen to Dundee to Perth Glasgow or Edinburgh and further north and south there is a total lack of Renault 5 EV,s parked or being driven. I see more Alpines than Renault 5,s . There are Renault dealership's around1 point
-
1 point
-
We have some success! New module works without any dataset changes required. No DTC on park assist module. However I do have 2 DTC on module 17. I did enable byte 5 bit 4 as per some instructions I found online, but carscanner doesn’t have the same long coding helper that vcds does so I may have done it wrong. @Cairus can you tell from the following what I’ve done wrong? Car Scanner ELM OBD2 Version: 2.1.46/2.1.46/iOS DTC report Connection profile: Skoda MQB, PQ26: Diesel DPF var.1 [EA288]Date: 9/4/2026 1:45:16 PM VIN: TMBKJ7NP9G70XXXXX ============================ OBD-II No DTC found. ============================ 17. Dashboard17. Dashboard DTCs: 2 ---------------------------- 13636608 [0xD01400] U101400: Control module incorrectly coded Steuergerät falsch codiert U101400: Control module incorrectly coded ECU incorrectly coded Status bits: 1 Priority: 2 Frequency: 1 Unlearning index: 91 Odometer: 213909 km Date, time: 2026.09.04 13:44:33 Status: Test failed, Confirmed ---------------------------- 16776980 [0xFFFF14] U112100: Databus missing message PLA_Status keine Kommunikation U112100: Databus missing message PLA_Status_01 communication error can_error_timeout U112100: Databus missing message PLA_Status_01 keine Kommunikation Status bits: 1 Priority: 6 Frequency: 1 Unlearning index: 91 Odometer: 213909 km Date, time: 2026.09.04 13:44:33 Status: Test failed, Confirmed 10. Parking Assistant 2 Application data identification: bL VAG Part number: 5QA919294B Software version: 0044 ECU manufacturing date (ASCII): 170813 ECU serial number: 00030841861722200441 Hardware Part number: 5QA919294 System supplier ECU hardware number: 00030841861722200441 System designation: PDC 8 Kanal Calibration date (ASCII): ( ASAM/ODX: EV_EPHVA18AU3700000 Hardware version: H07 ASAM/ODX version: 009035 FAZIT Identification: ATW-00113.08.17EC060080 Parameter set part number: V03935264LH Parameter set version: 0001 System abbreviation: J446 ECU manufacturing date (HEX): 170813 Date of last adaptation: 170828 Date of last coding: 000000 Diagnostic mode: 03 Parametrization date: 170825 Long Coding: 0471051811 -------------------- 17. Dashboard Application data identification: -------------------------- VAG Part number: 3V0920941 Software version: 6422 ECU manufacturing date (ASCII): 151119 VIN: TMBKJ7NP9G7041006 Hardware Part number: 3V0920941 System supplier ECU hardware number: A2C945862040000_D2255 System supplier ECU software number: FFFFFFFFFFFFFFFFFFFFFFFFFFFFFFFFFFFFFF System designation: KOMBI Calibration date (ASCII): &) ASAM/ODX: EV_DashBoardVDDMQBAB Hardware version: 213 ASAM/ODX version: 009046 FAZIT Identification: VD1-04819.11.1573958407 Parameter set part number: ----------- Parameter set version: ---- System abbreviation: J285 ECU manufacturing date (HEX): 151119 Date of last adaptation: 260329 Date of last coding: 260902 Diagnostic mode: 03 Parametrization date: 000101 Long Coding: 27A5090A2F90A60001887A011000000000000000
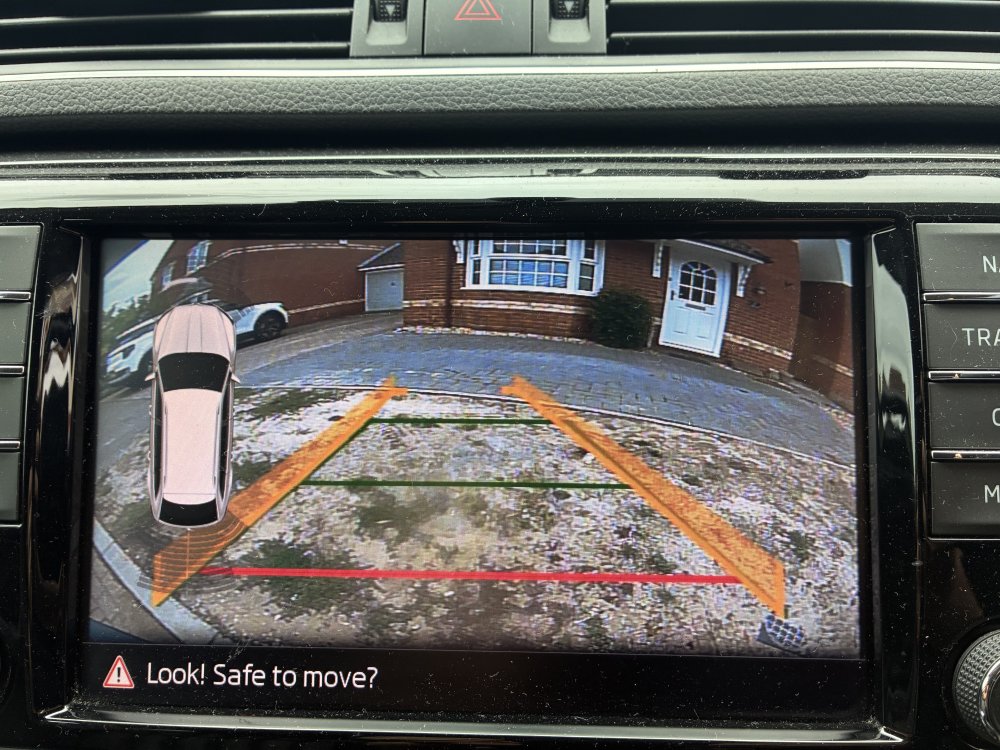 1 point
 -
1 pointThere was a post on here a while ago from a member who had their windscreen replaced. After it was done the windscreen wipers were randomly activating. It looked to be because they'd done a messy job with adhesive around the cameras. Here's the link: Link to forum post So I think you need to use the photo you've already got of the camera area, and then make sure it looks identical after they replace the windscreen or you could have issues.1 point
-
1 pointhttps://www.briskoda.net/forums/search/?q=Lowering%20Springs&quick=1&type=forums_topic&nodes=299&start_after=any&updated_after=any1 point
-
1 pointYou can use inline oil/dye injector can, basically an openable metal can plumbed inline or via a tee with gas. you fill the can with oil and then pump gas through it making sure oil goes with the gas. The nice thing about using this way is that you can also vacuum impurities from the new oil, just make sure the new oil stays in the can while you pump the system out. There exist also standalone oil injection kits (think high pressure syringe), but I'd steer clear of these as it is too easy to reintroduce air/moisture. As I had said earlier, another oil/dye injector can filled with filtering paper in it can be used for opposite purpose, i.e. extracting oil from the gas. One other thing I remembered about the job is that to get really good vacuum from the budget vacuum pump, you need fresh oil in the vacuum pump, in my case I emptied the system, closed off the pump, changed the vacuum pump oil again then ran it and then reopened the valve to the pump. I was able to get a lot better vacuum in that way, I think some of the remnant gases / vapours dissolve in vacuum pump oil and make for poor vacuum. Vacuum oil is not expensive, just mentioning it because it's worth getting a 1l bottle before the job.1 point
-
1 pointI've tried in any possible way to remove it in mine, both using VCDS and OBD11 and it proved an impossible task. Gone in all the menus "predictive sailing" et al. and nothing. I got recently the habit of driving in manual mode, since the logic of the gearbox upshifts and downshift is simply idiotic, so don't bother me much the coasting ... The few times I want to ride in 'auto' i put it on sport, or in the other modes I use the gearbox in sport, and upshift 'manual' when it lingers too much in the gears. I hope someday to make a TCU tune and hope some wizardy is able to make it gone. Since this is a sensitive topic, I remark this is "me", in "my" driving in "my" car. To each their own! 😉1 point
-
1 pointThe oil in "airco topup" kits is of unknown quality (unlikely to be synthetic/durable), usually contains dye and sealant. In large quantities, it clogs the system, expansion valve in particular, which really is a dog to clean. There is also way more oil in these kits than is needed for a full refill. Much better/easier to measure the correct amount of synthetic airco oil, it will last a lifetime if no further leaks and protect the system from wear. I used Denso DND12250 or ND-oil 12. Expensive at over £20 per small can, but considering I also installed a brand new Denso compressor at the time, worth the extra peace of mind. As an aside, for compressor replacement jobs (not this one), I think Denso ones are worth it despite much higher price , better compressing and much better overpressure valves than cheap Chinese substitutes. If there is even momentary overpressure or blockage, the valve on compressor will dump excess oil / gas but otherwise no damage / nothing to write home about. Compare this to once-only, cracking overpressure valves of lesser alternatives that basically require you to get a new valve (or a new compressor!) every time the pressure spikes. In DIY scenario, paying more for a decent compressor makes for lower long term expense. Condenser / dryer is less critical, Denso ones are again good, but a tad pricey. I have used a Ridex condenser/ dryer from Autodoc at half the price of Denso, works same as OEM, though I had to file slightly one of its aluminium mounts to get it to fit properly. HTH.1 point
-
1 pointIt could very well be a mix of things. I'm not sure if you have logged your DPF activity, but this could be very telling about the issue. A DPF regen on a healthy engine with no oil consumption will look something like this: You have a measured soot value and a calculated soot value. The regen of the DPF starts somewhere around 25g measured OR calculated. However, usually the calculated soot value raises faster and ultimately triggers the regen. This is dependant on the driving porfile, but you could say a normal regen interval is somewhere between 155 miles - 450 miles. Yes, the range is actually this wide. As an example, the measured value might still be at -0.3g (yes, actually in the minus. After a regen, this value often times is aroung -12g) while the calculated value is at 25g which triggers the regen. I've experienced this myself on my Golf 7 GTD Variant with the same CUNA engine. Oil consumption is high, regen interval is around 30 miles and the measured value always shot up and triggered the regen. We ended up replacing the DPF as it was clogged prematurely from the oil consumption. After the replacement, the interval increased to normal levels and the calculated value triggered the regen again. But not for long, as the calculated value started to raise faster and faster, as the oil consumption got worse and worse. So the DPF got clogged quite fast again, even after the replacement. Ultimately this is to be expected. Also noteworthy, after replacing the DPF, the oil consumption worsened. This is likely hinting towards a broken turbo due to the change of exhaust backpressure after the DPF replacement. Since my GTD had around 210k miles on it already and I've poured quite a lot of money into it already, I decided to sell it and not tackle the search for the oil consumption. At this point it really depends on your budget, how much you love the car and if you're able to get it diagnosed and perhaps sorted for a good price. I really don't want to paint the devil to the wall, but out of all the common things wrong with the CUNA, you could be looking at needing to replace the piston rings, turbo, DPF and worst case, if the cylinder walls are damaged, even a replacement engine. Other factors that would be cheaper to attempt and daignose first that could also lead to an increased oil consumption would be the valve cover, which houses the crankcase ventilation module. If the crankcase ventilation breaks, it can lead to increased oil consumption as well.1 point
-
1 pointThank you for that, very comprehensive answer, I may look at doing it through the winter ready for next summer. Not in a rush as the weather here has started to change, Autumn/Winter comes early up here. I may ask around meantime to see if any of the garages (limited choice) would be willing to recharge it after I've replaced the condenser. I see complete kits on Amazon inc pump for about £180. A question, why would you need gas without oil? Then get the oil separately. I figure even if it costs £300+ for DIY I will have saved over £400. Shouldn't be a problem removing and refitting the condenser, (I trained as a mechanic looong before a/c on cars).1 point
-
1 pointUsual suspects on the CUNA are the piston rings, specifically the oil rings that like to clog form long-life oil services. They coke up with oil coal and get clogged. That way the oil that would otherwise just be "wiped" away now gets burnt. Most of the time you can't chemically clean them anymore, so you actually need to pull the pistons and replace the rings. Then hope that the cylinder walls still look alright. The other mentioned suspect would be the turbo, depending on the mileage and how its been driven. However the piston rings are a common thing on the CUNA. The CUNA specifically really is a horribly designed engine when it comes to that. Poor thermals and pistons oil rings that have holes that are too small and like to clog easily. Mix that with the poor thermals and long-life services and you get this as a result. Its basically the entire 1st gen EA888 1.8 TFSI story all over again.1 point
-
1 pointI'm sorry I'm not in position to answer shuch question, pls ask supplier.1 point
-
1 pointso, more than 2 months later and unfortunately its back. i noticed it end of July it was starting to mist up again around the edge (base). it progressively reached a good 2-3 cms up the filter housing at the start of this month. i finally got the chance to see my mechanic about it yesterday - they said it's nothing to worry about given i'm not losing any oil, it's not dripping/leaking, nor is there any performance impacts. given the car is now at Stg 3, we can expect more "pressure" in the engine, so some of this is not out of the ordinary. i'll just have to take this as normal, and give it a wipe every couple of months.1 point
-
You could be unlucky and the battery has failed but check what voltage the alternator is puting out when car is running. If its too high it will fry batteries or too low and the battery will eventually go flat. Could be a failed voltage regulator. Had one fail years ago and was puting out 17 volts and above with high revs. New battery didnt last long. If its been flat for a week I doubt it would kill battery as its fairly new but battery may be down 20% due to sulfation Alasdair1 point
-
1 pointWhile the statement above is correct, I have DIYed it at home on the driveway, replacing condenser/dryer together with a failed AC compressor (in my Mk3 vRS, back in June 2023, no gas in the system). However, you do need a decent vacuum pump and twin gauges as the system first needs to be emptied of air and more importantly moisture, otherwise water may freeze and cause blockage. You also need specialist oil and gas, the generic "airco top up" kits won't do. The cost of refilling HVAC yourself at the time was under £150 including pump , pressure gauges and hoses/adapters (under £80 all in), synthetic oil useable with both R123a and R1234yf (either/or, not a mix) and the gas. At the time, half decent Chinese vacuum pumps and gauges kits were cheap, not sure now. 3 years on, vRS's AC works just fine with no topups since, so I must have done something right... Getting hold of gas without any oil mixed into it was an issue, though after that job, for a HVAC topup on the other car, I have figured a way to filter out oil, sealant and dye from Halfords supplied gas/oil topup mix by running it through an inline oil/dye injector filled with folded, good quality paper towel HTH1 point
-
1 pointJust how do the RAC arrive at that fact? I wonder, when there are more ICE (a mix of pure ICE and hybrids and PHEVs), the latter are highly unlikely to be plugged in compared to the pure electric ones being registered. Do you have anything to back up that interesting snippet? Regarding the Renault 5, I'm not at all surprised by what your dealer told you. That car has been widely accepted as a car worthy of consideration. One thing for certain is that if it was also available in ICE-drive variants, then the availability issue would be far worse than it currently is.1 point
-
1 point
-
1 pointYazz and the Plastic Population not Yazoo. They did Only You and Don't Go.1 point
-
1 pointNot that hard to change, if you're competent enough to remove the bumper readily. Home/DIY refilling is definitely a bad plan though.1 point
-
1 pointWhy are you concerned by that? Europe's voltage is actually 230V not 220V. Currently, we have a minimum approved voltage of 240V -6% = 225.6V, whereas Europe has an allowed voltage variation of up to -10%, so 230V - 10% = 207V. Now, given that most of our appliances are either sourced from Europe or made to their standards to allow us to sell to them, nothing major will happen. If we continue to use the 6% variation standard, then we will be better off than mainland Europe. Don't forget that because the voltage has dropped, so will the energy drawn, so bills will drop slightly. Proposed UK Mains Voltage Changes Explained | eFIXX1 point
-
Read online that it might be high pressure fuel pump not keeping pressure when engine off when warm. Pressure dropping due to heat/failure when engine off and takes 2-3secs to get to full pressure again. Think you can monitor pressure with vcds. Could also be sticking diverter valve.(GFB) DV+ According to google its something to do with brass piston in alloy casing that can stick when hot due to metals expanding at different rates. If it was installed dry it may need lubricating with engine oil or HT silicone.?? (acording to google so pinch of salt may be required) Alasdair1 point
-
1 point@jeffl Coasting is more intrusive on the facelift models which this is. It’s in all preset profiles rather than just Eco. The only way to avoid it is to have the individual profile setting for drive mode to sport and then gearbox will be in S so you need to then change it if OP didn’t want to be. Also in facelift cars, it always starts in Normal profile rather than remembering which profile you were in. So every time you get in the car you need to switch profile and then knock the gearstick back to be in Normal (if so desired).1 point
-
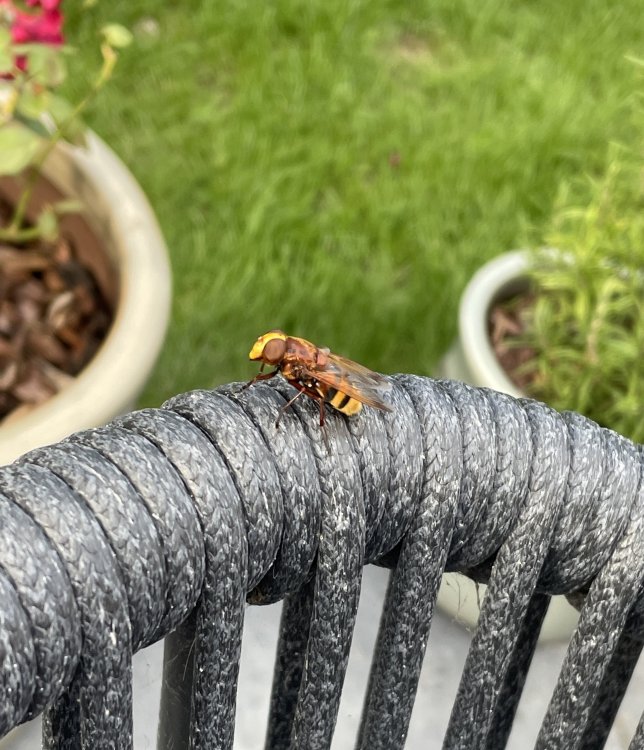
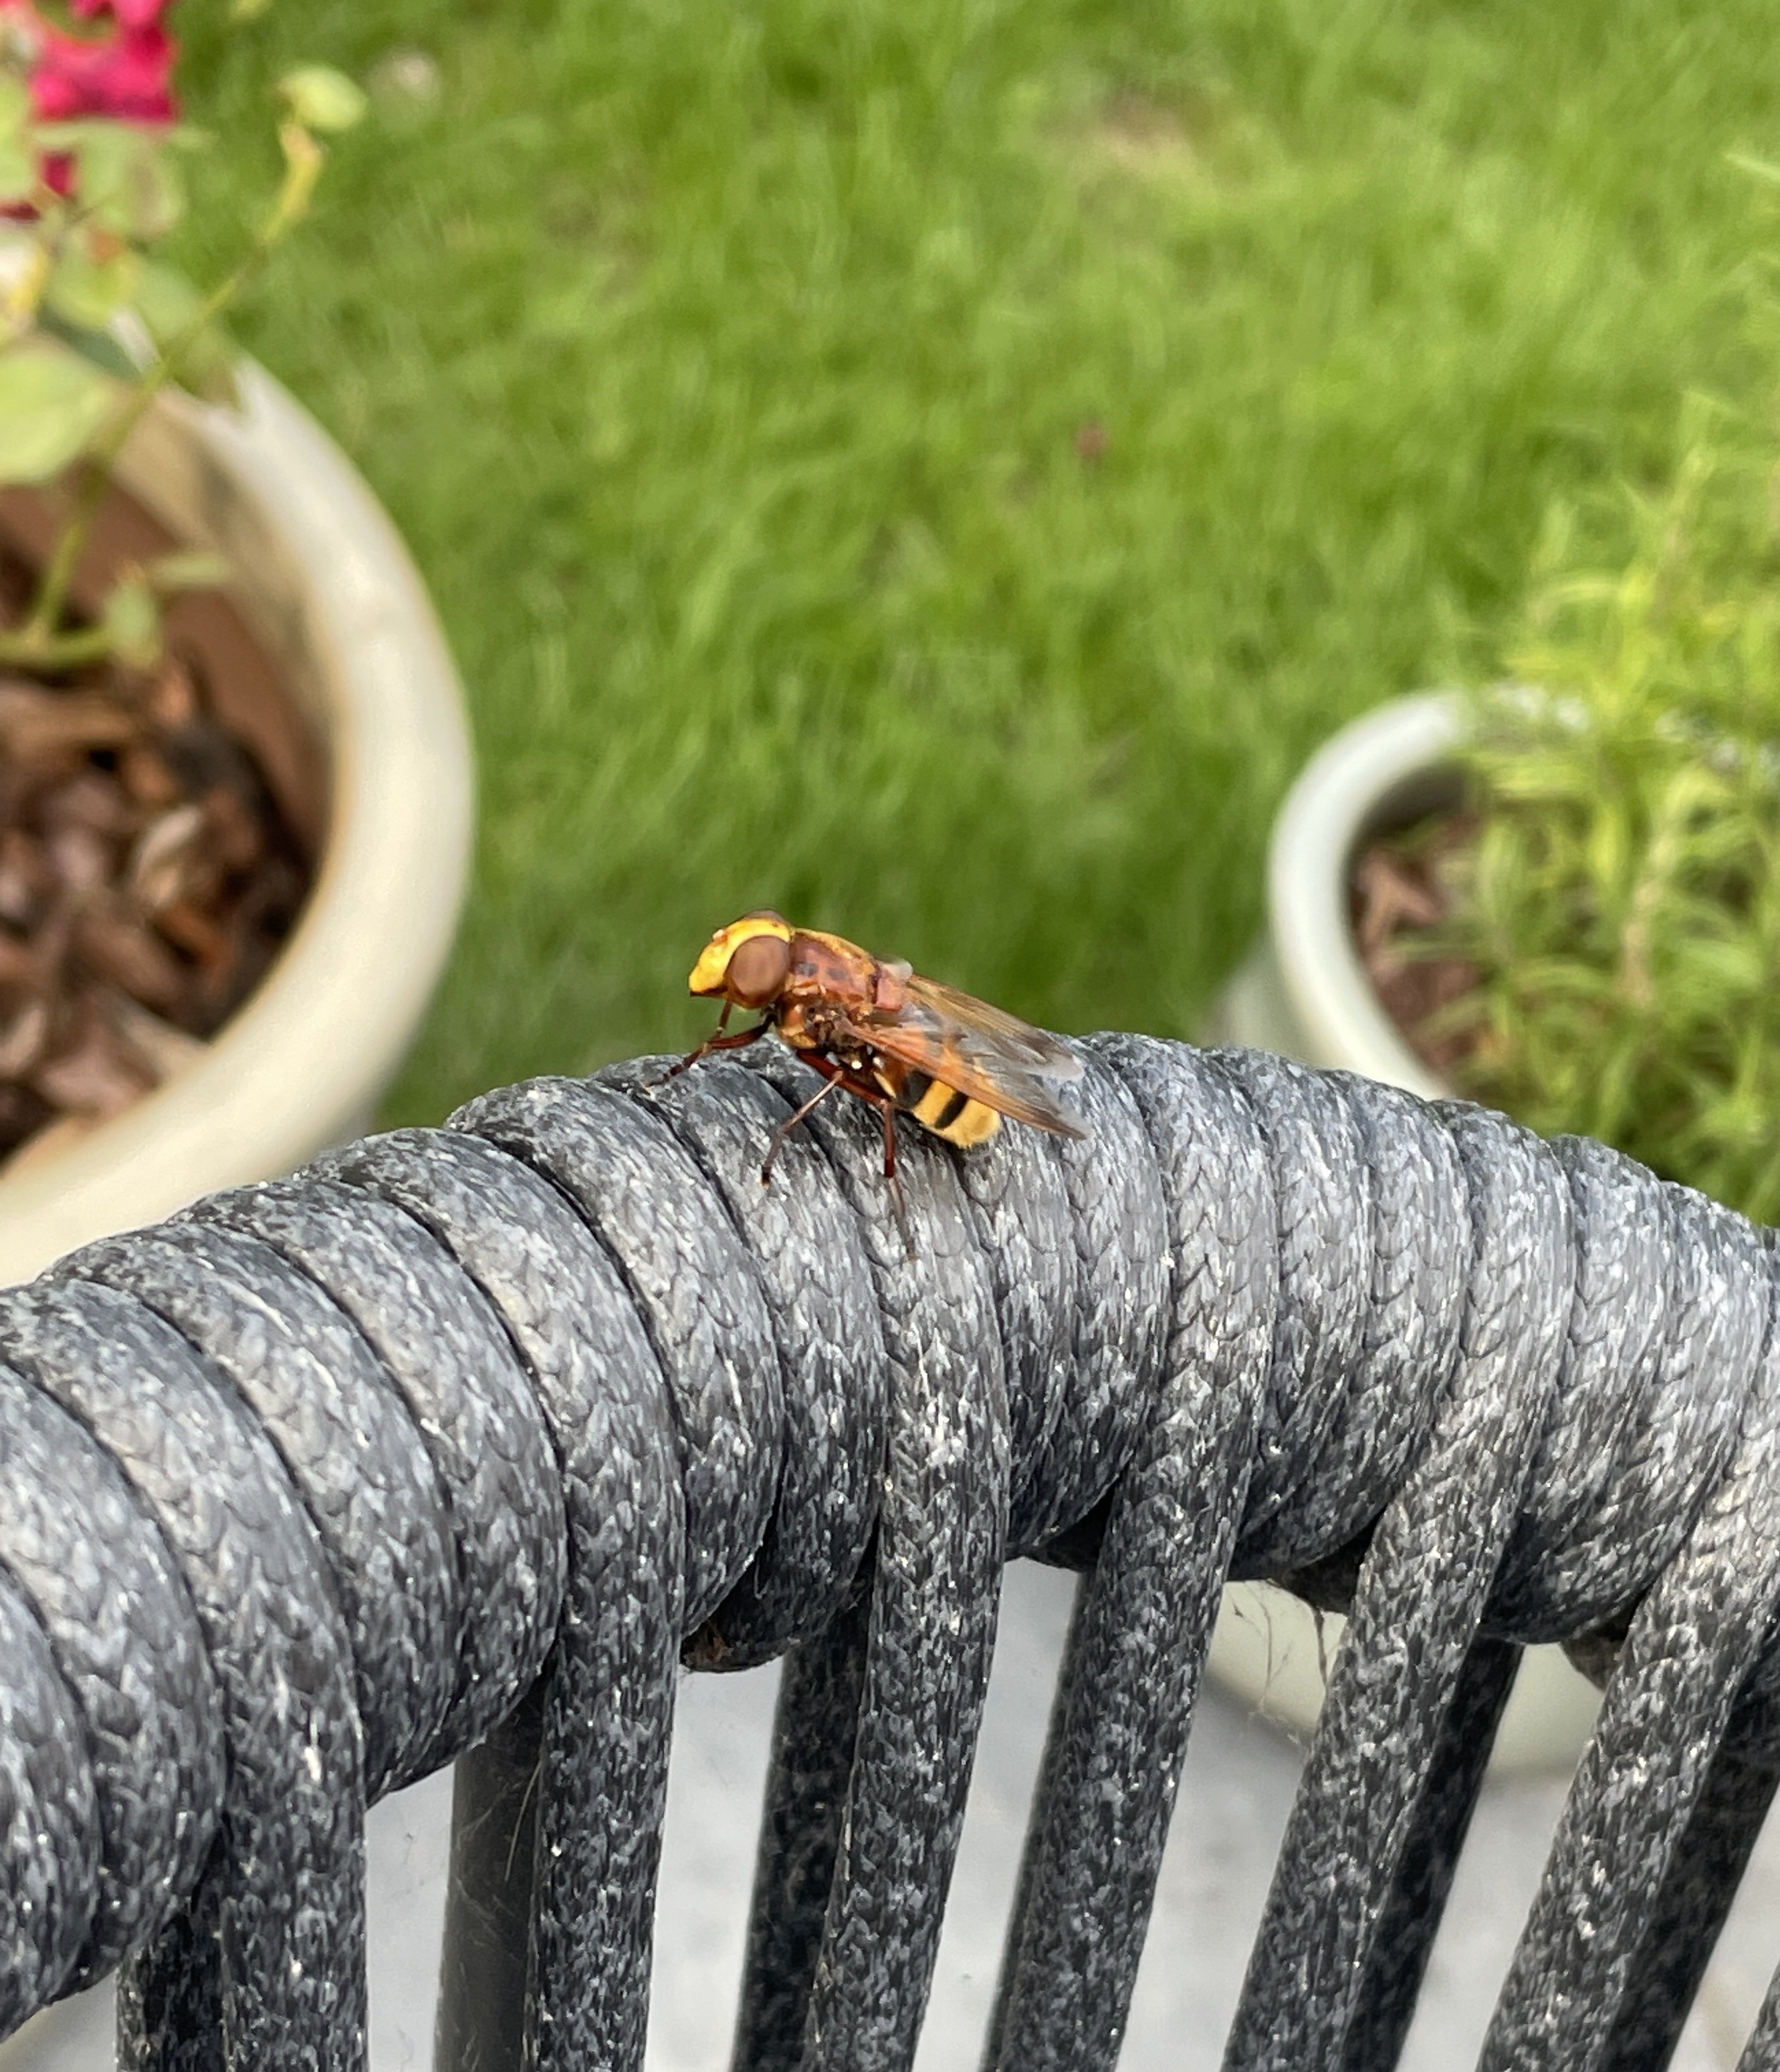
1 pointHornet Mimic Hoverfly in our garden. Not sure that I've ever seen one before - quite the whopper: Gaz
 1 point
 -
1 point
-
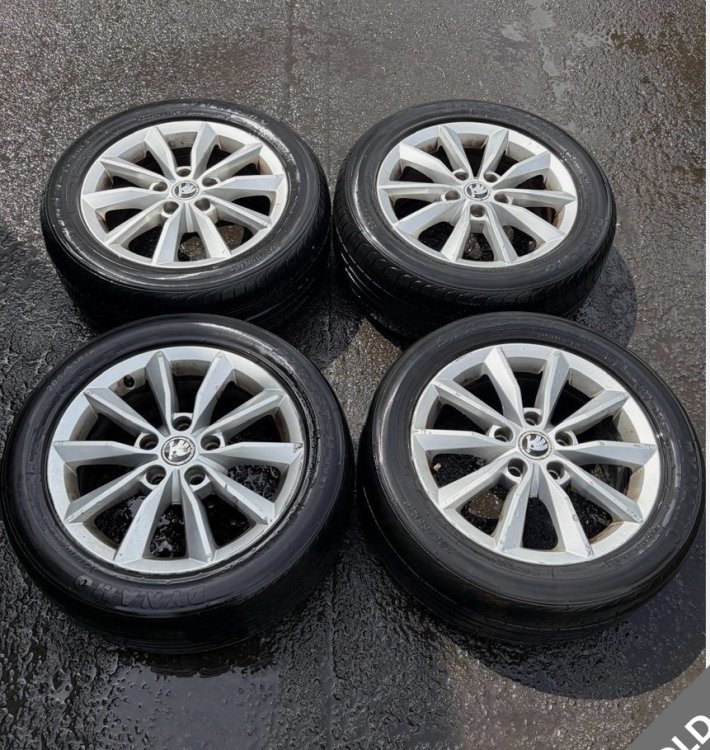
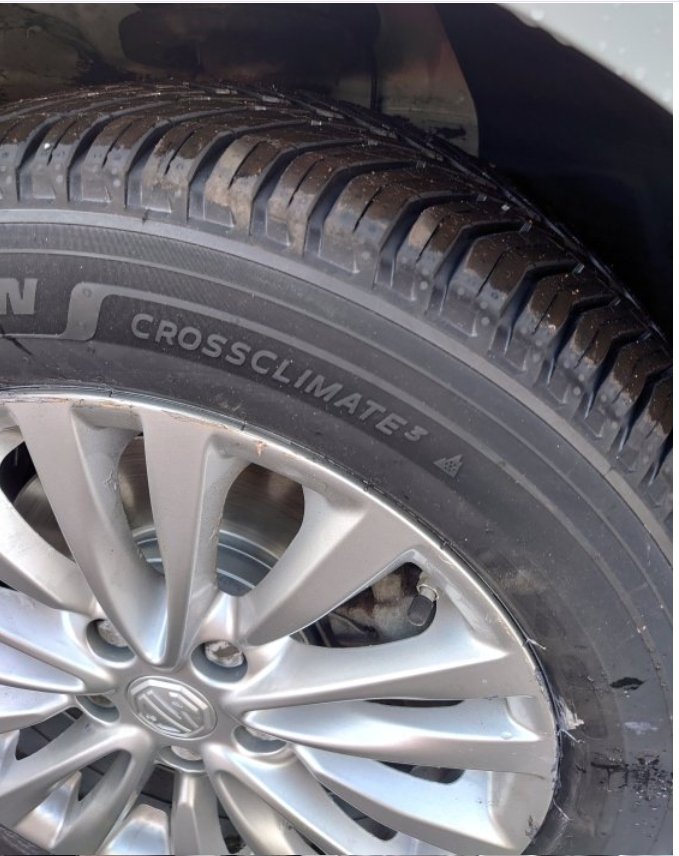
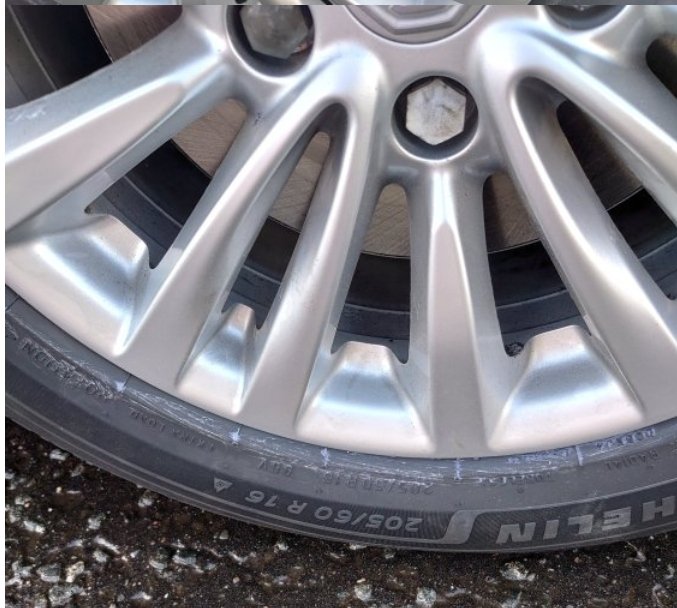
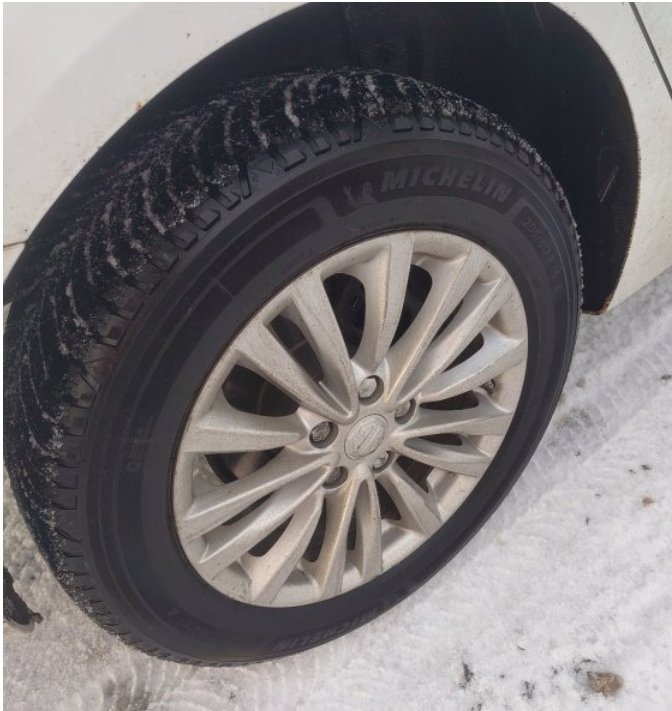
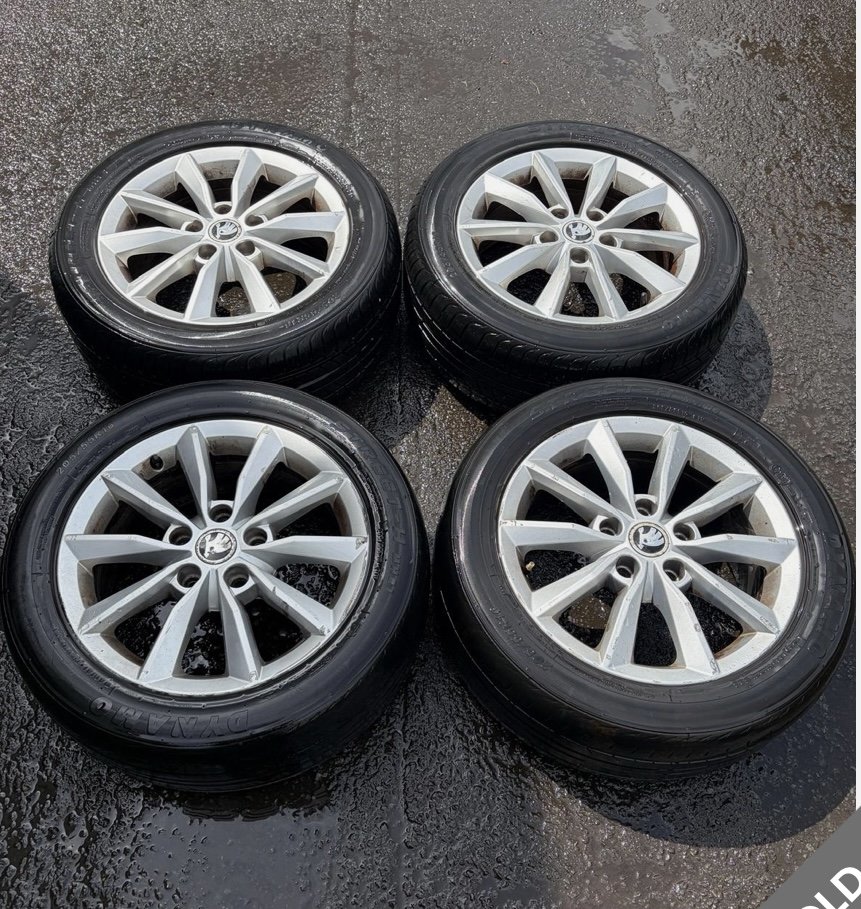
1 pointThanks all. I have acquired a set of 6.5 x 16” Octavia wheels, which I am now renovating. I think I will be going with a set of 205/55x16” (91V) Michelin Cross Climates.
 1 point
 -
Alright, final update! A few weeks in with the Revo Stage 1 tune and what an improvement it’s been. For my application, Revo is no longer making a high/low torque map. It’s just one file with switchable maps for 95/97/99 octane. The mid range torque is impressive and coupled with the TVS DSG tune, driveability has improved drastically compared to what the car was like stock. They complement other perfectly. Fuel consumption has stayed about the same (although there’s a bit more temptation to get a little heavier footed), and temps are still spot on both in the city and on long drives. As expected, my issue has now become wheel spin all the way through first and second gear, sometimes to the start of third, so better and wider tires are in sight. Overtaking and getting up to speed have never been easier. Overall, if you’re been looking for just a little bit more of everything from your EA888.4/DQ381 combo without making any sacrifices, I can highly recommend it. As always, make sure to stay on top of your maintenance and run the correct fuel map.1 point
-
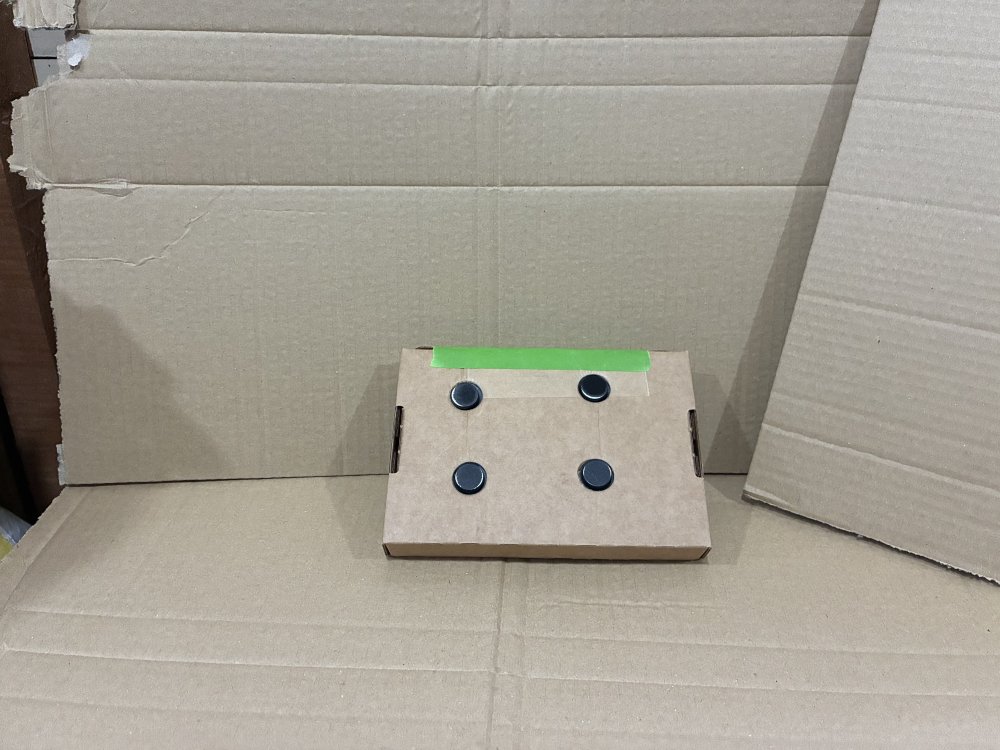
This evenings task was to get out the cardboard spray booth again. This time painting parking sensors for the front sensor retrofit project. I used the punch for the bumper to cut holes in a small cardboard box and taped them in place as an easier way of masking up the sensors. The loom has also arrived but is missing the 18 pin plug and is for LHD so some wires also need extending.
 1 point
 -
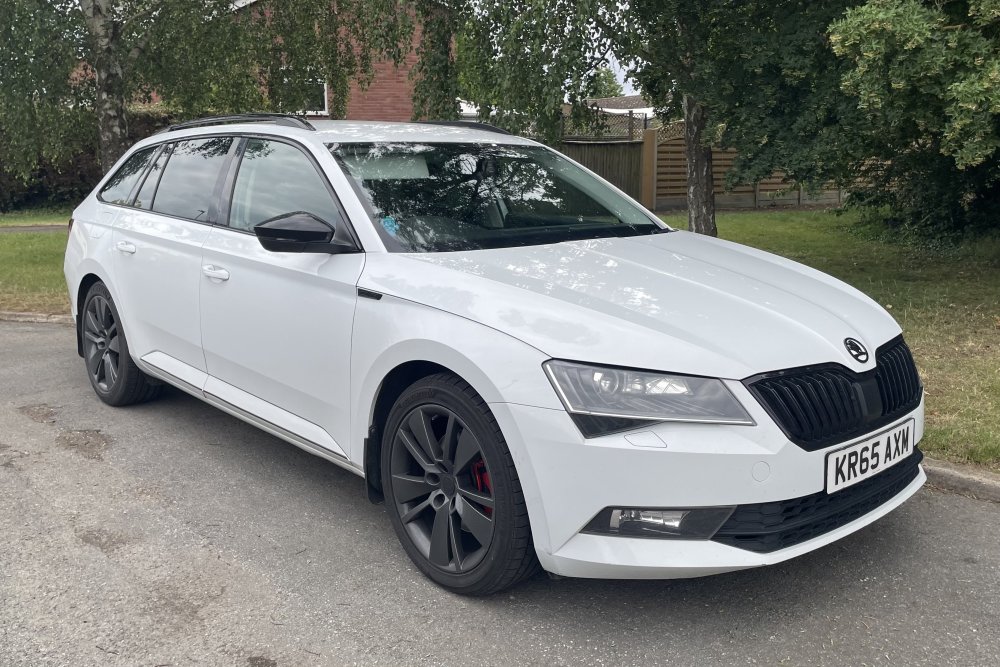
1 pointA couple of jobs done today. Replaced the drivers door inner seal as the original one had worn from driver getting in and out. The second hand one I got from eBay had a little wear but hadn’t split so I just rotated it about 45 degrees so the wear was on the back edge where it won’t wear any more. Pretty simple fit, you just have to take a couple of trim pieces off. As I had already had some of the trim off and it was finally a sunny afternoon I thought I would tackle installing the black roof rails. Thanks to @Kosin for the install tips. Pretty much remove anything attached to headliner around the edges, all pillar trims and top boot trims. To remove the sun visors and handles you need the OEM/Laser long nose flat pliers at £60 to £30. Luckily Ali express to the rescue again with a cheap tool that does the job perfectly for £3 https://a.aliexpress.com/_EHRShvy To access the rear of the front pair of bolts you have to disconnect the plug from the curtain airbag igniter. Not too much bother with the battery disconnected and an appropriate wait time to make sure everything is powered down. Apart from when I had fully reinstalled the liner and trims and got an airbag error warning and realised I had forgotten to reconnect the passenger side! Doh! So that half all got disassembled again to reconnect it. Now all done everything back in its place and all fault codes cleared with no issue. All in about 3hrs work. It would have been 2.5 without my airbag mistake! So that’s the last of the dechrome jobs done and now full Sportline-ish exterior spec (apart from wheels and stance both of which are outside the budget for now!)
 1 point1 point@gogiii @wim_rommens upgrading from 02xx to 03xx is possible but it requires unit to be patched first because, as Patch must be made to swdownload file, google for MIB STD2 TOOLBOX. Only after this is done you can upgrade to 0480. @prosist MIB STD2 TOOLBOX is also a solution for you to activate SmartLink. I sent you link to MST2_EU_SK_ZR_P0369T on PM. As I don't deal with aftermarket units I can't give any guidance. My personal opinion: if you can get OUE unit that matches your requirements then stick to it! @AlexScout you have download link on PM too!1 point

















Important Information
Welcome to BRISKODA. Please note the following important links Terms of Use. We have a comprehensive Privacy Policy. We have placed cookies on your device to help make this website better. You can adjust your cookie settings, otherwise we'll assume you're okay to continue.