


Leaderboard
-
MikeTheThinker
FREEDOM9Points8,481Posts -
MoggyTech
Resident Member7Points6,533Posts -
Aspman
Resident Member7Points21,151Posts -
Breezy_Pete
Sponsor6Points24,183Posts


Popular Content
Showing content with the highest reputation on 23/09/20 in Posts
-
4 points
-
3 points
-
3 pointsTwo on mine, I'd be wary of fitting only one due to the possibility of twisting the hood. I have seen other posters considering fitting only one though. I know there's only a single prop on original fit - but that supports the front of the pretty heavy hood.3 points
-
3 pointsIt should be on the list...but for the front! Every MQB chassis bbk will (should) fit on Superb, so there are several kits to choose from. But these are only for the front. Vagbremtechnic has a rear bbk, but it's made for oem calipers (like this one). Not all MY19 have flaps, my MY19 has not, built 02/19. Only the early 272s have flaps, the ones built till 10-11/18.3 points
-
2 pointsThought the following would be useful SE-L and Monte Carlo spec have 215/45 R18 89V tyres, not a common size For all season can get : Vredestein Quatrac Pro Continental all season contact Maxxis AP3 .....and that’s it (although older Quatrac 5 and AP2 might still be available at moment) being rare size, likely to cost £500-600 for set of 4 all season tyres For SE spec wheels with 205/55 R17 91V lots of choice For S spec wheels with 205/60 R17 92H also plenty of choice and lot cheaper than the 18 inch versions For those who live in the mountains, or where there are very steep hills. You may prefer to swap to dedicated winter set of wheels/tyres. Any of the above sizes are valid, as are 16 inch wheels with 195/60 R16 or 205/60 R16 Unlike the bigger cars, Karoq etc with 5 x 112mm wheel bolts, the Kamiq uses the small car size of 5 x100mm bolt, so if getting new rims make sure they are this size. Offset ET varies slightly by rim but is between 35-40 so ideally anything in this range is suitable. Hope this is useful, as these questions always come up this time of year2 points
-
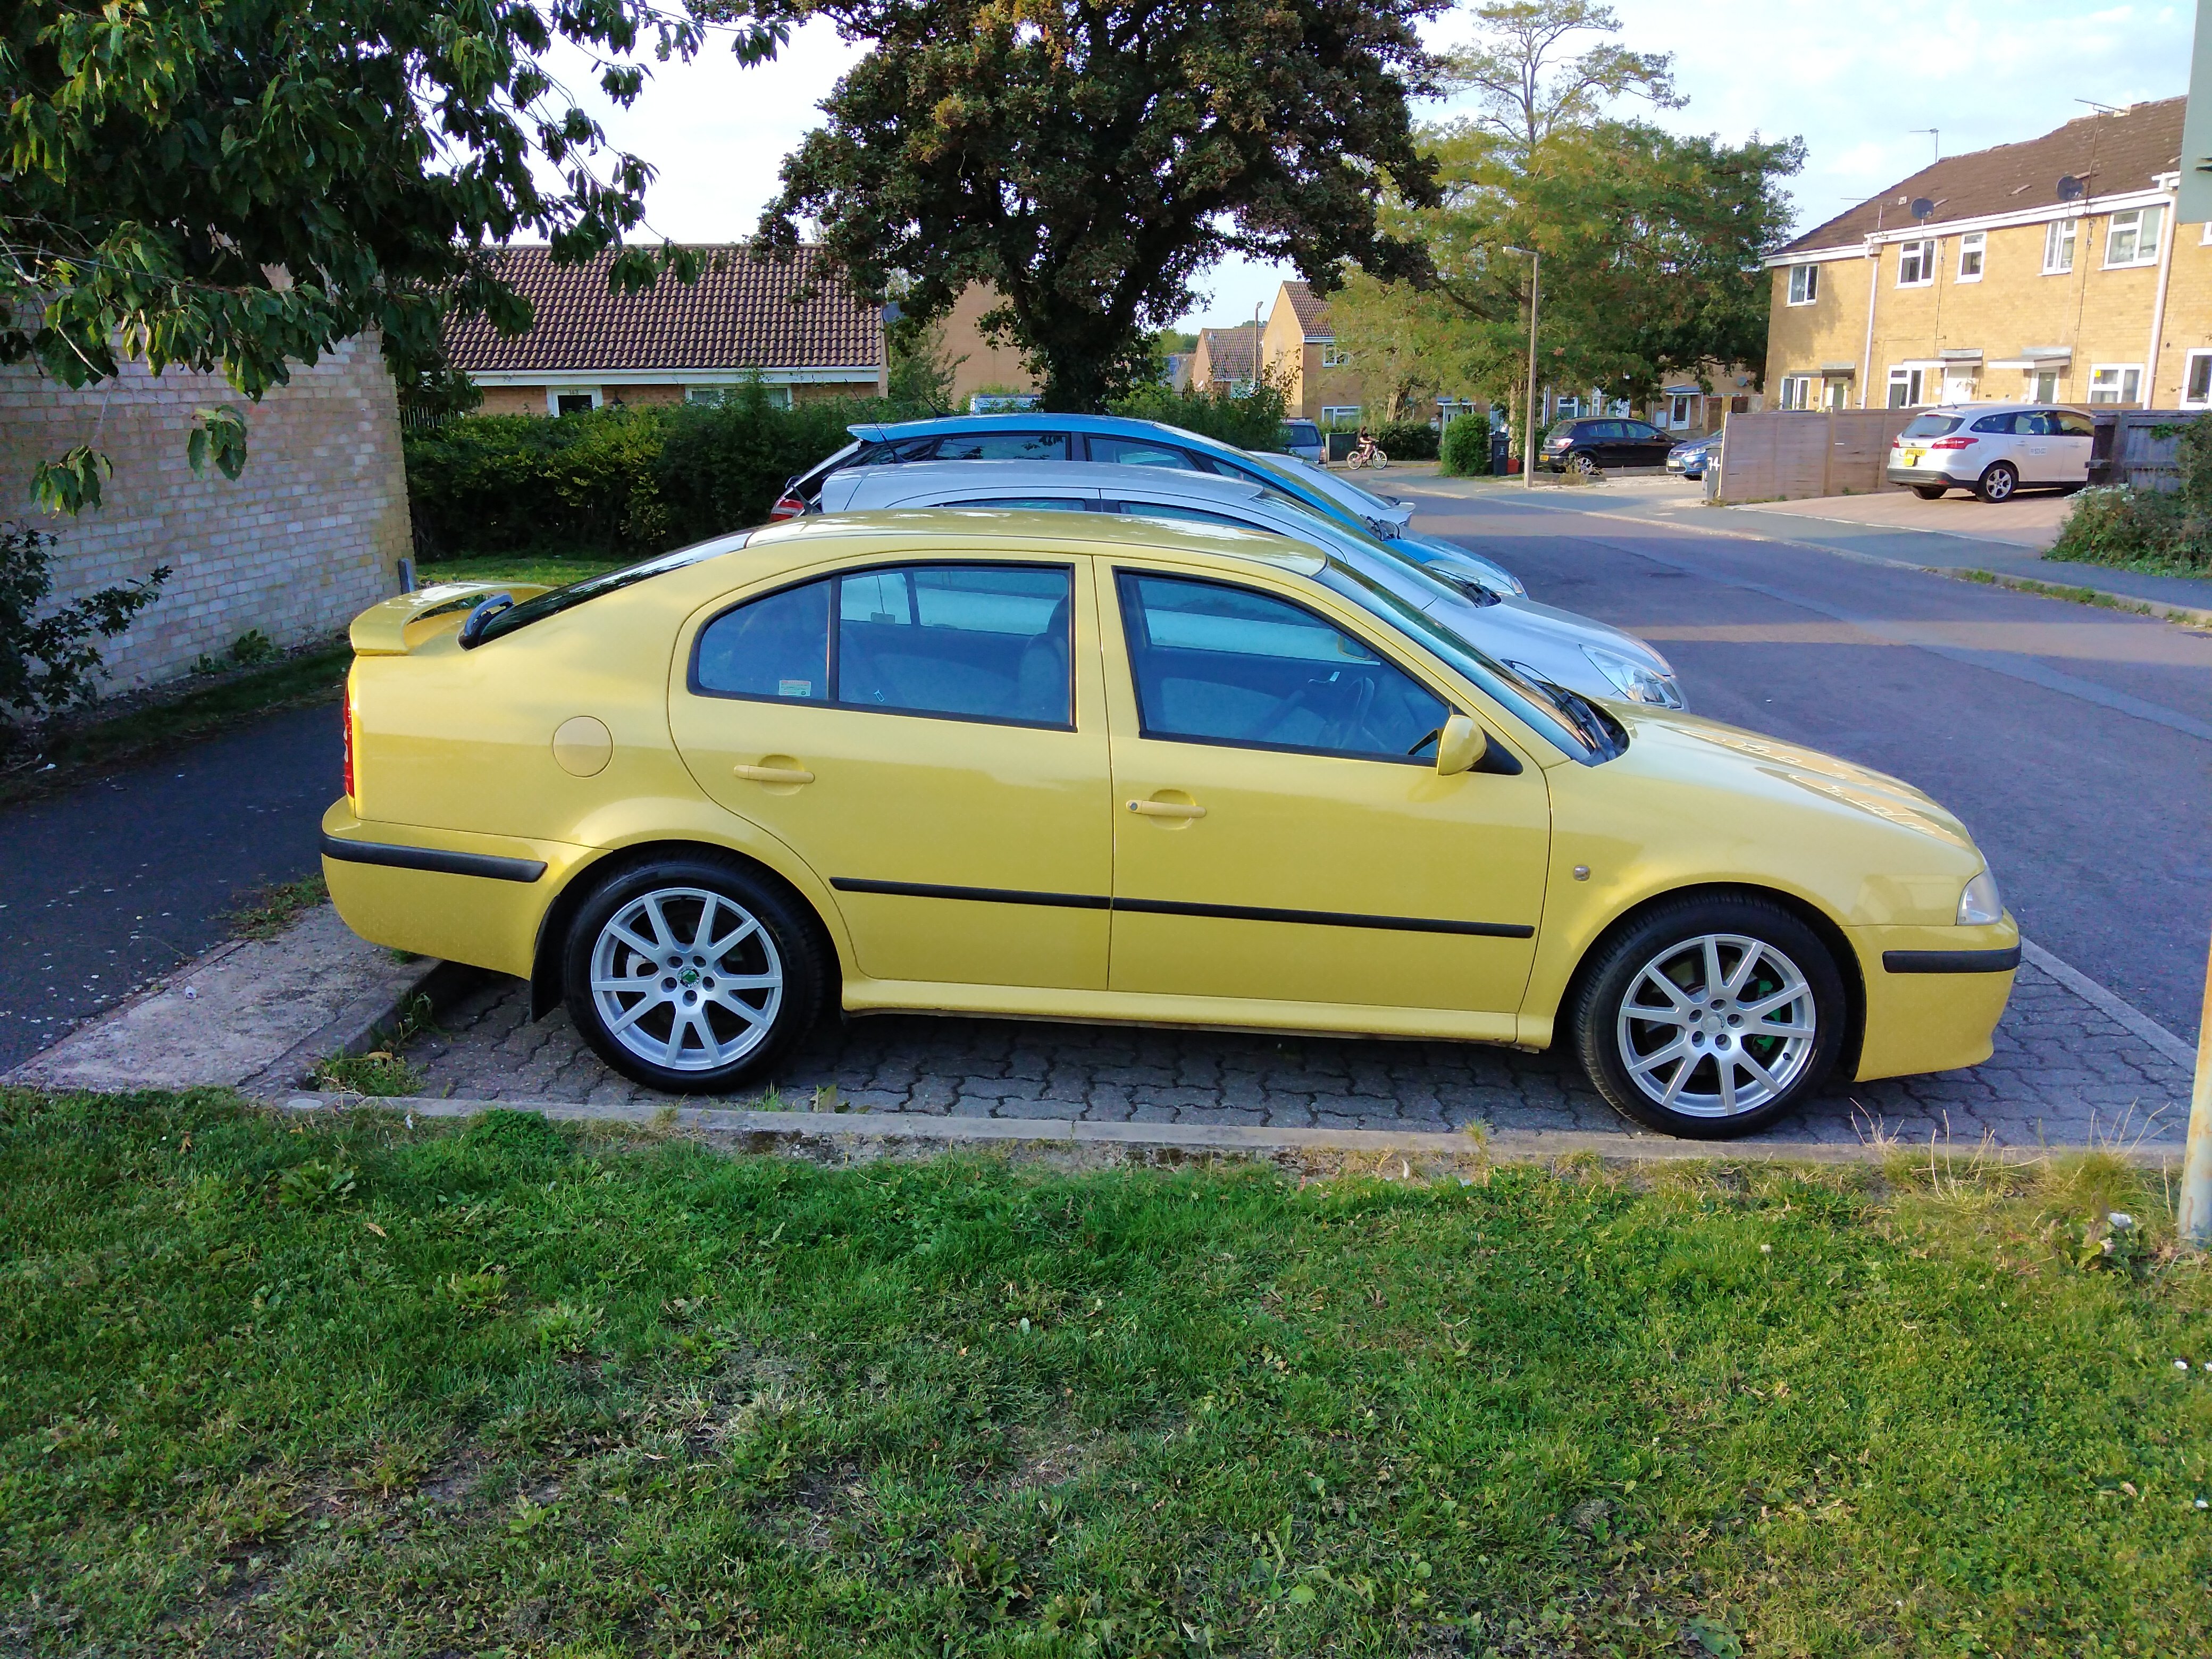
2 pointsNever created a topic on international forums. Because I really get a lot of information on Briskoda from fellow users, I think it is fair enough to show you guys my own car and what I've done to it. On 17th of April this year, I bought a Skoda Fabia MK2 1.2TSI 105bhp from 2010. Car itself is quite loaded and the owner before me already did some upgrades to it. How I got the car (changes I could see and find were the Eibach springs, Fabia mk3 wheels, retrofit Xenon headlights, Monte Carlo front grille and shifter. After I've collected my car and drove it around, the hunting for parts and upgrades started. Genuine Skoda roofracks. The speedo meter needle had issues (LED was trippin') so I've upgraded them from plain white to green. After that, I've tinted the windows by myself. No bubbles or weird cracks. Seems fully original. Very pleased with the results for a DIY. Added some colour (RGB) to the interior by placing ambient lights. Bought for a very good price a set of VRS wheels in 17" They needed a refurb but who cares for 100euros including tyres. Bought some Brembo 4 pots 323MM brakes from a Seat Leon Cupra R. No I don't need that moch stopping power (I know you guys love the 312mm setup and you upgrade the brakes after you upgrade the power ) but I always love to have big brakes because of 2 major things in my opinion: 1. Looks way better and cooler and 2nd. stopping better and earlier is safer in any circumstance. I've restored the calipers myself and painted them Skoda Rally Green. After fitting them on the car, the VRS wheels didn't fit anymore (the inside of the wheel is not meant to fit a BBK). Bought (again) for very cheap a seat of Audi TT wheels (I mean.. 50euros for a set?!) Bought some rubber in the correct size (205/40/17) and mounted them on the wheels and fitted them on the car. I was keen with what I had till I saw a good KW V2 set on sale for a fair price.. Well, we know what happened next lol After getting frustrated by the look of the wheels, I've decided to give them some paint. Primer: Graphite metallic: And this is how the car is right now Thats it for now. Plan is to fix the squeaking accessories belt and I'll try to drive it like how it is for a couple of months. when the turbo claps out, I'll swap it for a hybrid one to get to plusminus 170bhp with a custom remap. also wanna make the front lights darker since it is way to bright (don't like chrome). Thats it for now, will update later.2 points
-
If there was turbo leak, it would be accompanied by a pretty obvious exhaust gas smell. Had one when the V-band on my turbo wasn't properly secured after adding the 3" downpipe on the Scorpion system. After being tightened, it was considerably better. Everything else from the OP's thread seems directly related to the stock clutch not being adequate for the torque; which now seems fixed after a Sachs clutch upgrade2 points
-
2 pointsI've never had a yellow car till now but it is easier to find in asda carpark haha.2 points
-
2 points
-
2 points
-
Another update- Skoda guy that wanted to test the car again is now 2wks without contact, haven't tried to get in touch myself as testing for mystery tune issues and/or valve timing causing the revs to jump seems like a waste of time Regardless, the slip was occurring more frequently so I went ahead and got Sachs' 550Nm kit fitted this week. Car is now a completely different beast! The pedal feels about as firm as my GTi6 so I'll get used to that, however she is bitey! Although I managed to get home without stalling I did nearly smack my face into the windscreen trying to shift 3rd -> 2nd. Most importantly, no slip! I tried a few rolling pulls and it feels far more responsive, but now I'll have to be a good lad for a little while so it can settle in properly.2 points
-
Hi! I just signed up to post write this guide, as I couldn't find any info about it anywhere. What you need is an isofix bracked, two screws and two nuts. I believe there is also a plastic cover for the bracket, but I couldn't find the part number for it. Here's the backside of the front passenger seat. Start by removing the two small plastic clips on holding the plastic covers on either side of the seat. Do so by pushing the pins in the middle all the way through, then you can pull the clips out. Remove the adjustment knob on the right side of the seat by simply pulling it out. Pry out the covers to expose the holes where the isofix bracket is supposed to be fixed. Fit the nuts to the lower round holes. Here's one end of the isofix bracket. The round hole is where the screw is supposed to go and the pin goes in the rectangular hole in the seat. Bracked installed. Reinstall the pins for the side covers along with the adjustment knob and you're all done. Easy peasy!1 point
-
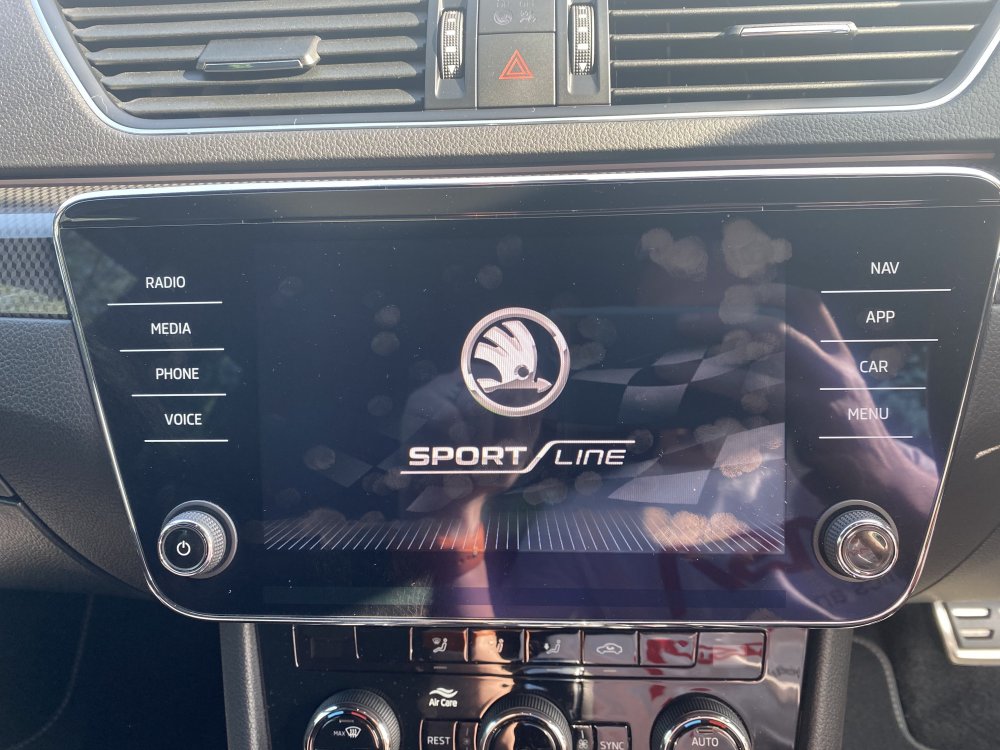
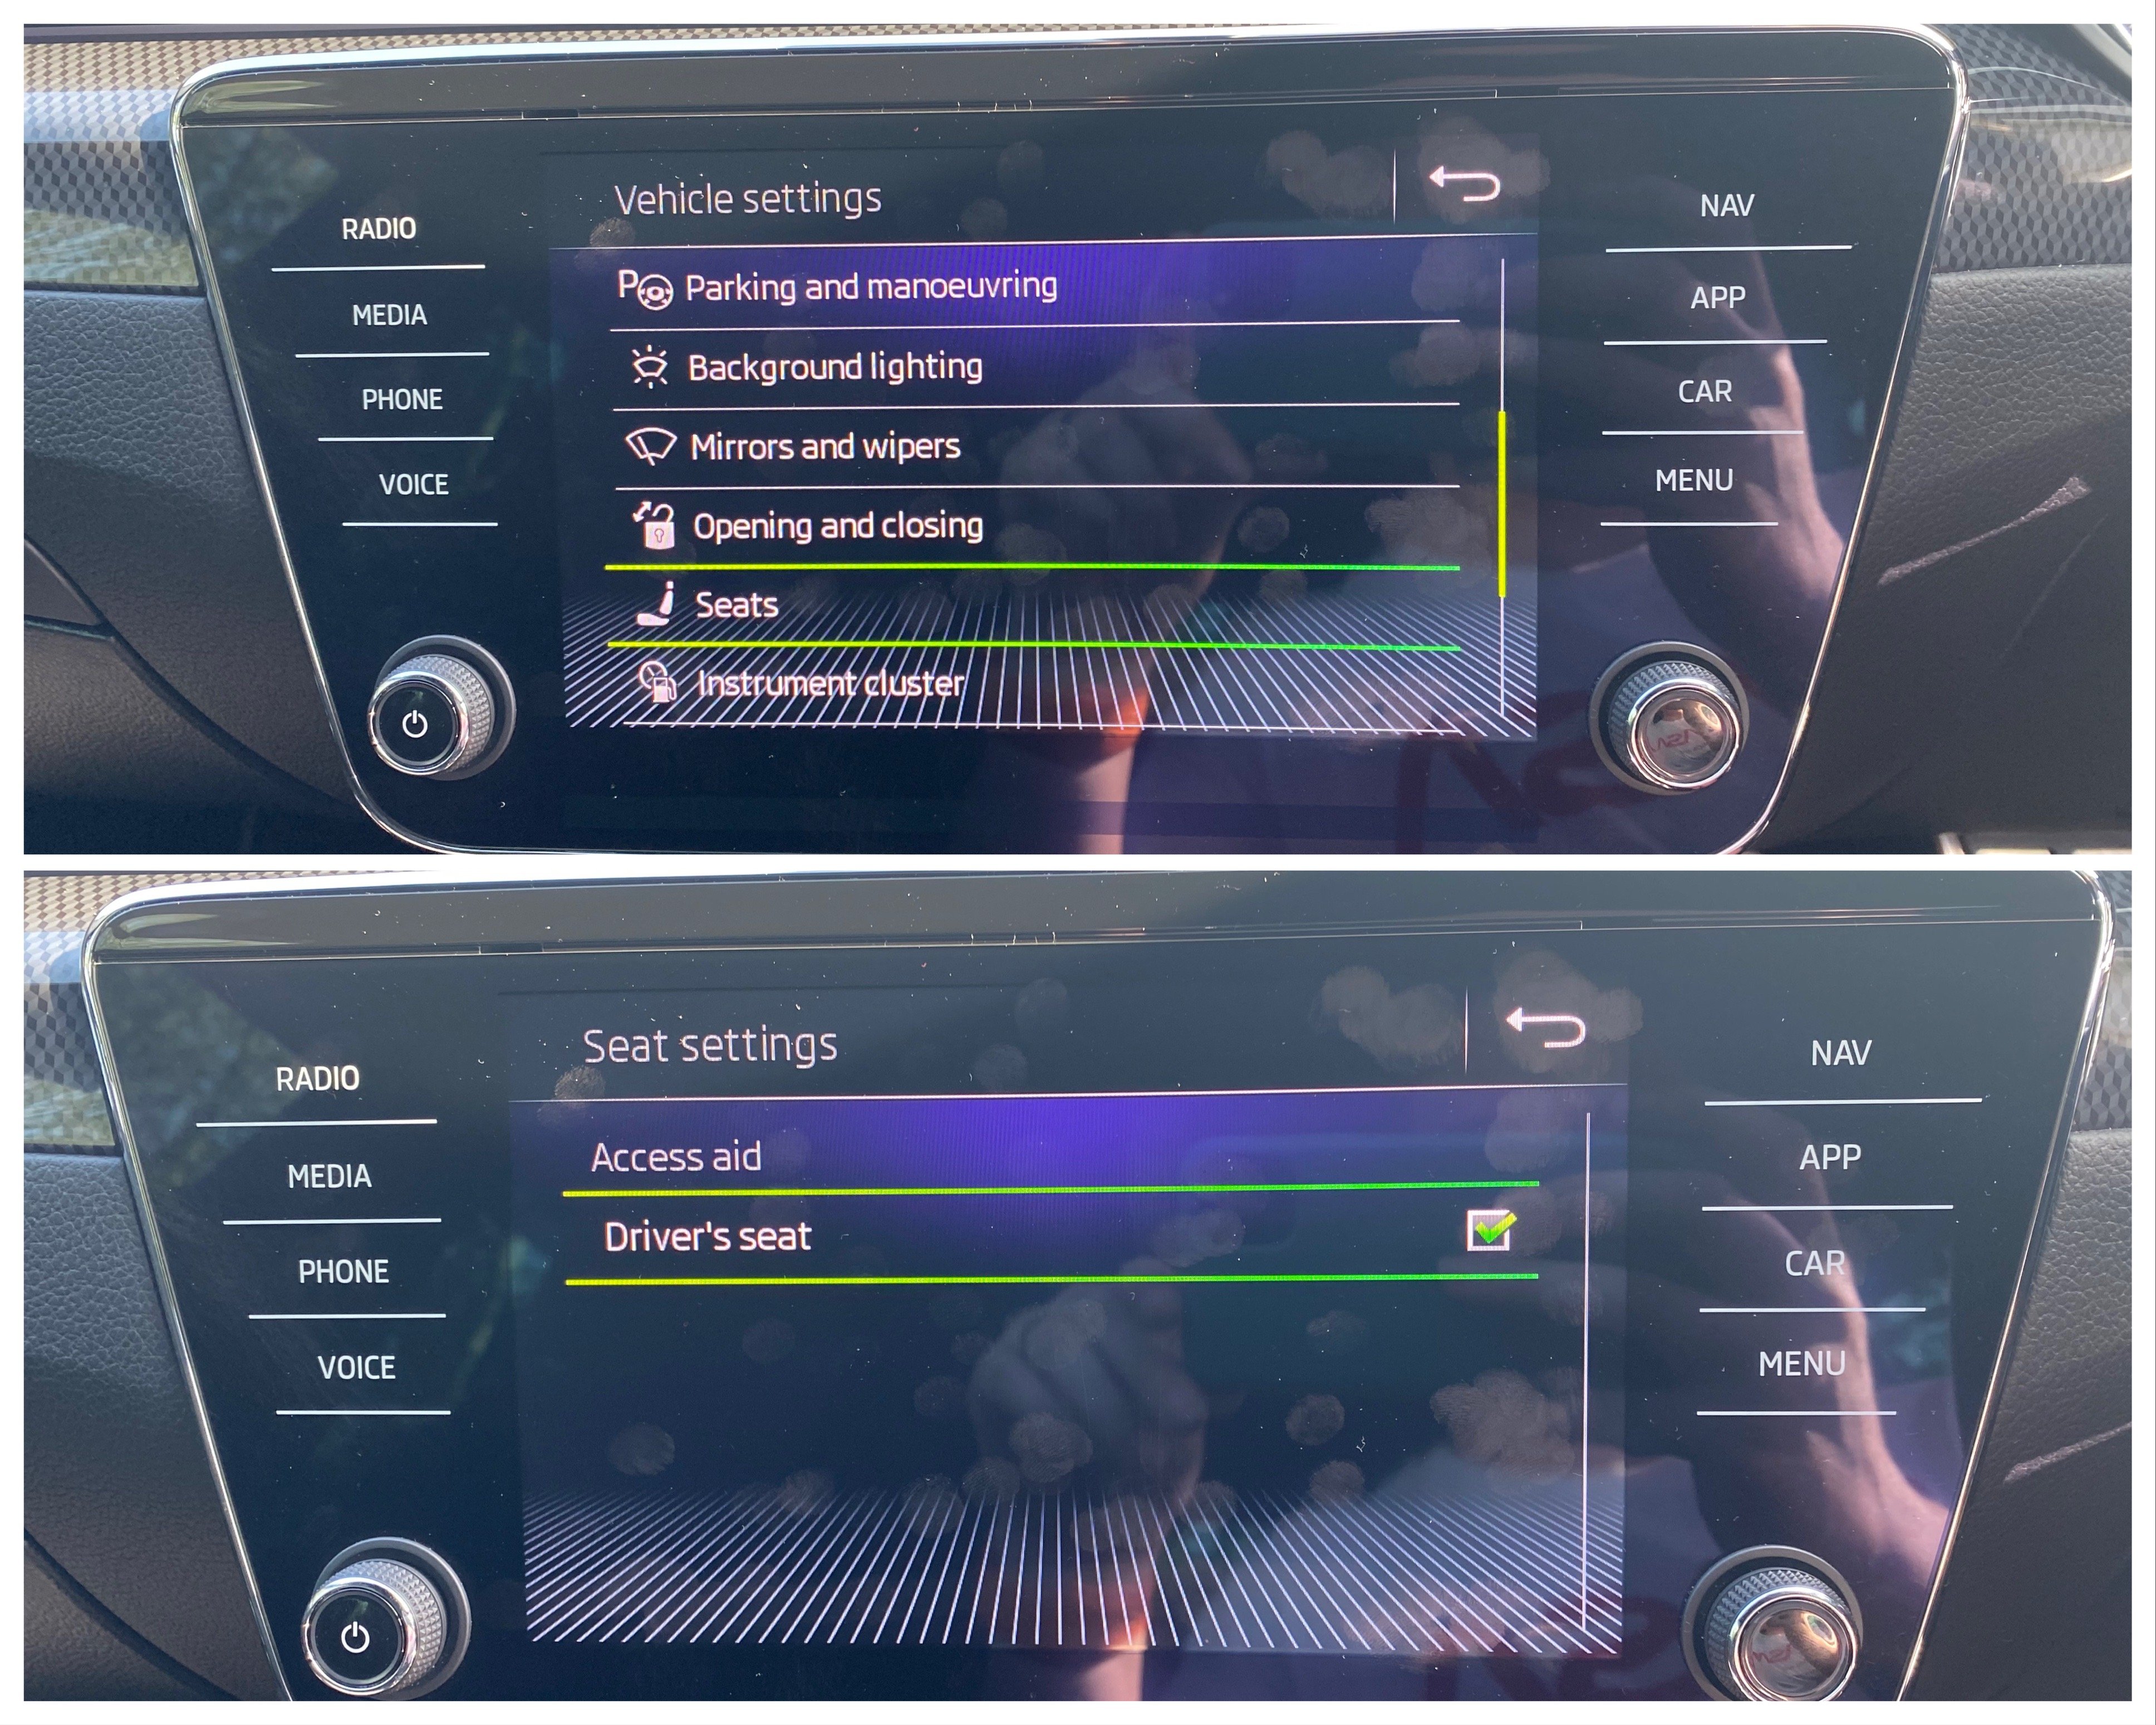
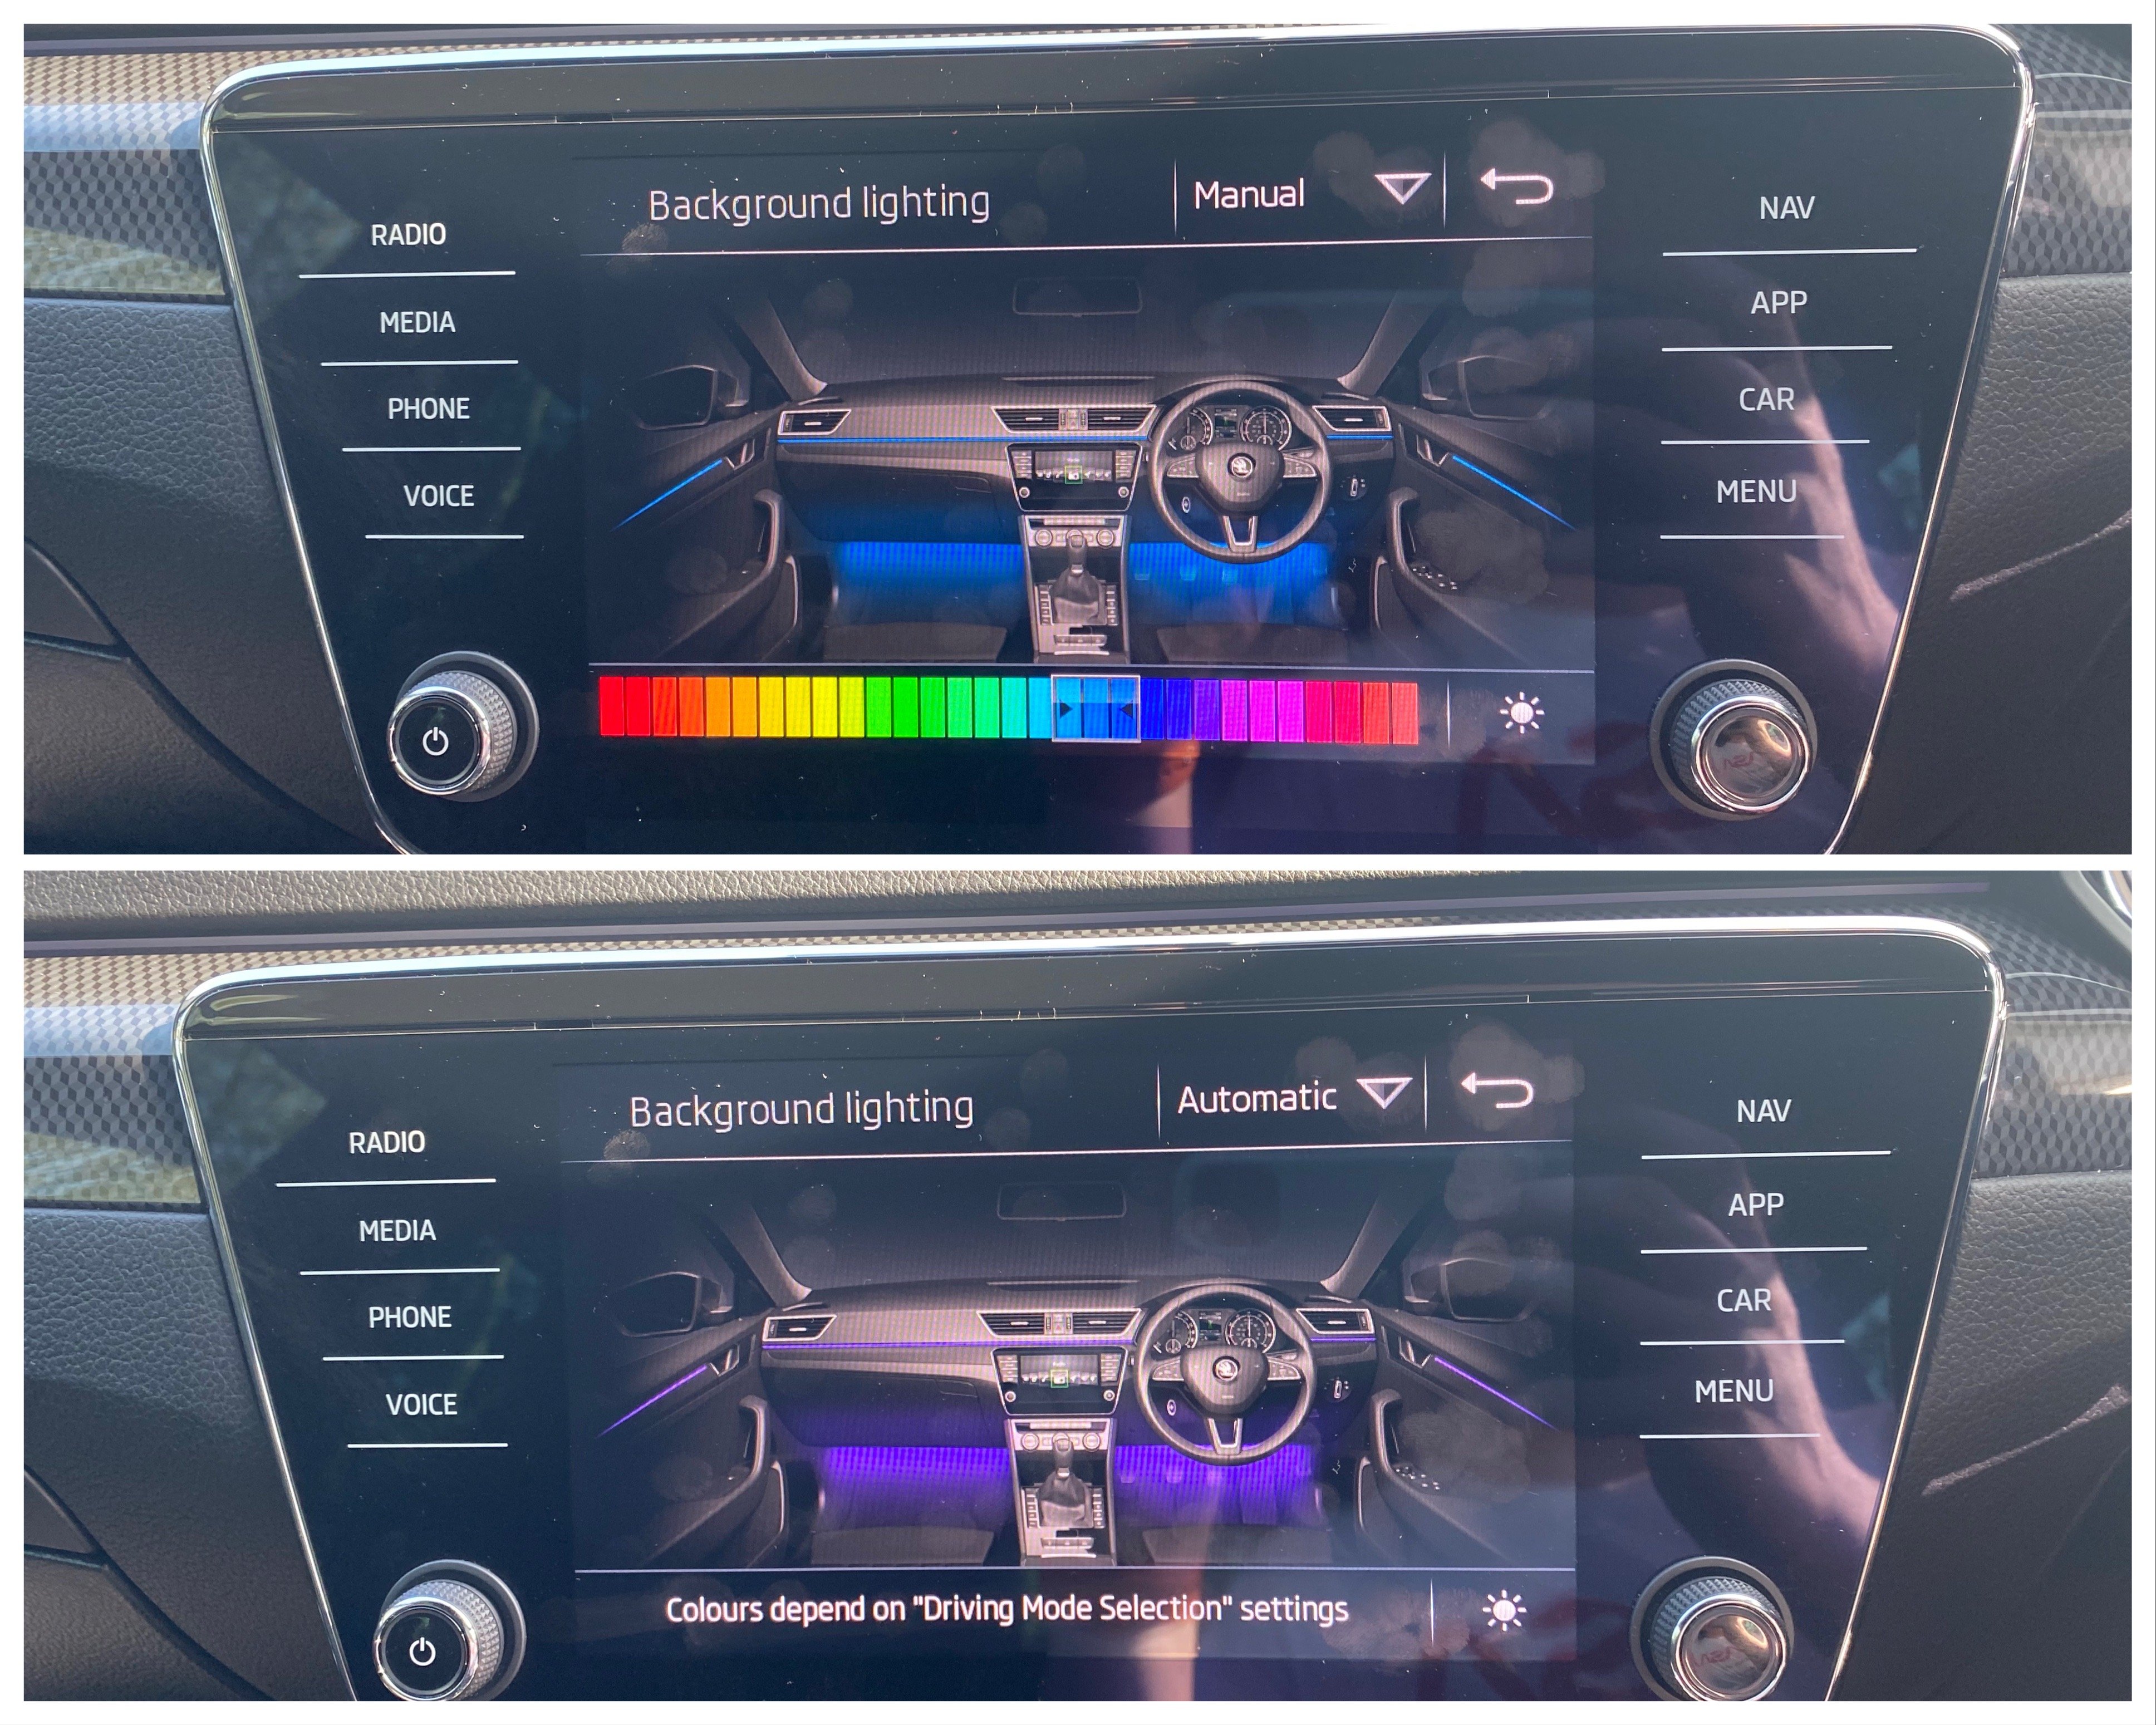
1 pointSo I could have sworn the SportLine I had in a few weeks ago had a radio splash screen that said SportLine. That car was a 2017 with MIB2 Columbus. Not sure if this only affects the cars with Amundsen but apparently there are people out there who have SportLine Superb’s and the radio splash screen just has the normal ‘Welcome to Skoda’ screen like the late 2018 (MY19) car I had in yesterday. So if this affects you, coding is 5F Byte 18 and you change the value from 8 to 13 in text mode, reset the radio and boom! SportLine splash screen. You’re welcome 😁 Also coded other goodies like the seat comfort access with working radio toggle And 30 colour lighting with pre coding for RGB footwell lighting which is a retrofit that is coming soon!!

 1 point
 -
Drone piccies by Chris Gorman; interesting article on a deserted UK under lockdown - https://www.bbc.co.uk/news/in-pictures-541818481 point
-
I think if it is definitely a 1.4l petrol it is belt driven. https://skoda.7zap.com/en/cz/roomster/ro/2006-481/1/ Can see 1.2s and 1.6s with chains, but not 1.4s.1 point
-
1 point
-
1 point
-
1 pointThanks for the info and advice, I took it back to the dealer this afternoon they apparently still can’t hear anything out of the ordinary, I mentioned that I’ve heard its a common fault and skoda have tpi out for it, then they admitted they know about the problems with them and so its booked in next week for a mechanic to have a look at it. 🤞🏻 They sort it1 point
-
Hello All, this is my first post so be kind. After owning a mk1 Fabia VRS for the past week or so I have stumbled across an excellent YouTube channel that has already been really useful. I thought I'd share on here in case anyone hasn't seen it as it covers loads of common Fabia faults. The channel is HatBoyHarvey (https://www.youtube.com/channel/UC6lpLCLK8tA835046d5aTng) Hope this helps someone out!1 point
-
1 point
-
1 pointCant comment on the specifics of Revo mapping but one thing I find is that you need less acc. pedal input at slow speeds so slow speed manoeuvring is more comfortable and also puts less strain on everything.1 point
-
I think a number of people use them to charge up dashcams overnight.1 point
-
1 pointSure can ... I wasnt sure if we did ebay links nowadays after seeing a post recently! This is a link to the updated lifters of the ones i brought (same seller as mine), they are £8.59. https://www.ebay.co.uk/itm/192589481940 If you wanted to use another seller, there are others on there, just make sure the length and NM are the same and you should be good. Work block those tiny url links so cant see what in them1 point
-
My mistake ... I didn't realise that >> !yhdd--xrkMGjNMEMslkXjLo4VgNzqtHzG1jumO6PsIU << was the decryption key 🤣 Thanks 🏆1 point
-
1 pointWhat I would probably do..... First thing to check is both sides of the slave cylinder move freely in/out and one side is not stuck/seized. The shoes may not be sitting centrally. The shoes can be slid up/down on the slave cylinder/bottom pivot. Release the adjustment wedge and make sure the handbrake lever at the shoe end is in the fully released position. I suggest you measure carefully from the edge of the hub to top and bottom outer edge of the linings. Push the shoe set up or down until these measurements are equal. After replacing the drum and T30 screw, the first thing I do is to very firmly stand on the brake pedal several times, releasing quickly, do not apply handbrake. This should help centralise the shoes and set the aduster. Check you can spin the drum. If it still binds, release the adjuster by pushing ot up through one of the bolt holes using a screwdriver. Spin the drum and again firmly the brake pedel to reset the adjuster and position the shoes. Finally apply the handbrake firmly several times, keep an eye on the T bar at cable ends at the handbrake end. Check they are more or less equal cable lengths side to side when applied. If this doesnt work, it could be the slave cylinder is faulty, sticking or something, you assembled something wrong, or the shoe kit has a faulty dimensioned part on that side (unlikely).1 point
-
So grateful to you for sharing your wonderful photos!1 point
-
1 pointMy 150 is mapped and was quoted around 190 when I originally enquired about the map. I explained that I wasn't that interested in the peak power but the drivability as driven daily you live in the mid range. I would always advise against maps that increase the torque too much at the low end as this will out excess stress on the clutch. Either way my car is much nicer to drive with the change and along with a pedal box it keeps up with a mates tdi vrs quite well. I also run posh fuel as a habit to help avoid dpf issues and also keep the general condition of the engine as good as possible. If you want any specific description on any aspect of the map let me know. I don't have numbers but happy to describe the characteristics.1 point
-
1 point
-
1 pointThanks - can't understand why Yellow would be so rare / un-popular (such a "distinguished" colour IMHO!!!) Great to see some others on here - great looking cars!1 point
-
Yes, sorry I have just been browsing and saw your post now. I’ve converted my green line to the Monte Carlo version headlights here in India and faced the same issue. Its possible to do and headlights them self have an extra cable inside which needs to be connected via relay to the shutter power which will provide the bulb power when you switch to high beams. I’ve done this and explained it here - https://www.team-bhp.com/forum/diy-do-yourself/180348-skoda-fabia-diy-monte-carlo-edition-mods.html I don’t recall taking pictures of the actual connection and will update his if I find any. Is definitely possible and has been working since. You can take the connection from the HL connector harness inside the headlight with wire taps or lug connectors soldered in and then use that (power to the solenoid) to power the relay to power the bulb (via a lug connector soldered to the bulb holder). I had made a harness to do this for both sides with one relay (30A). Im currently using Xenons (Osram) and they’re good. Thanks. Aayush1 point
-
The one you have quoted in your post still works, just copy and paste it in to a browser1 point
-
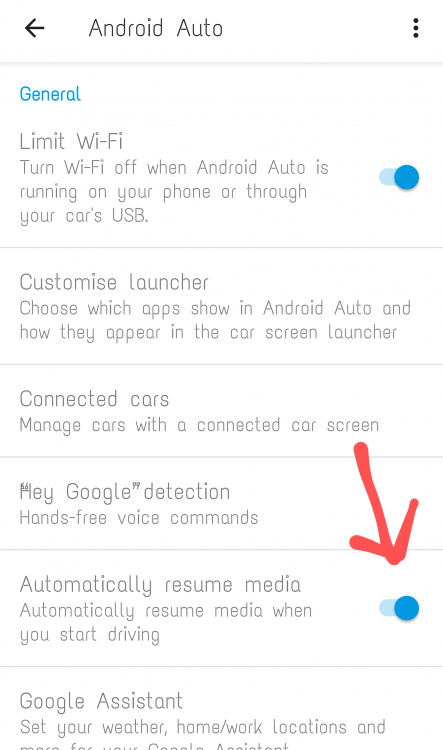
1 point1 point1 pointIt's in the settings for Android Auto. See image below. Do it via ur phone. U can't access the settings through the infotainment screen. Mine will resume playback with Spotify.
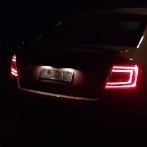
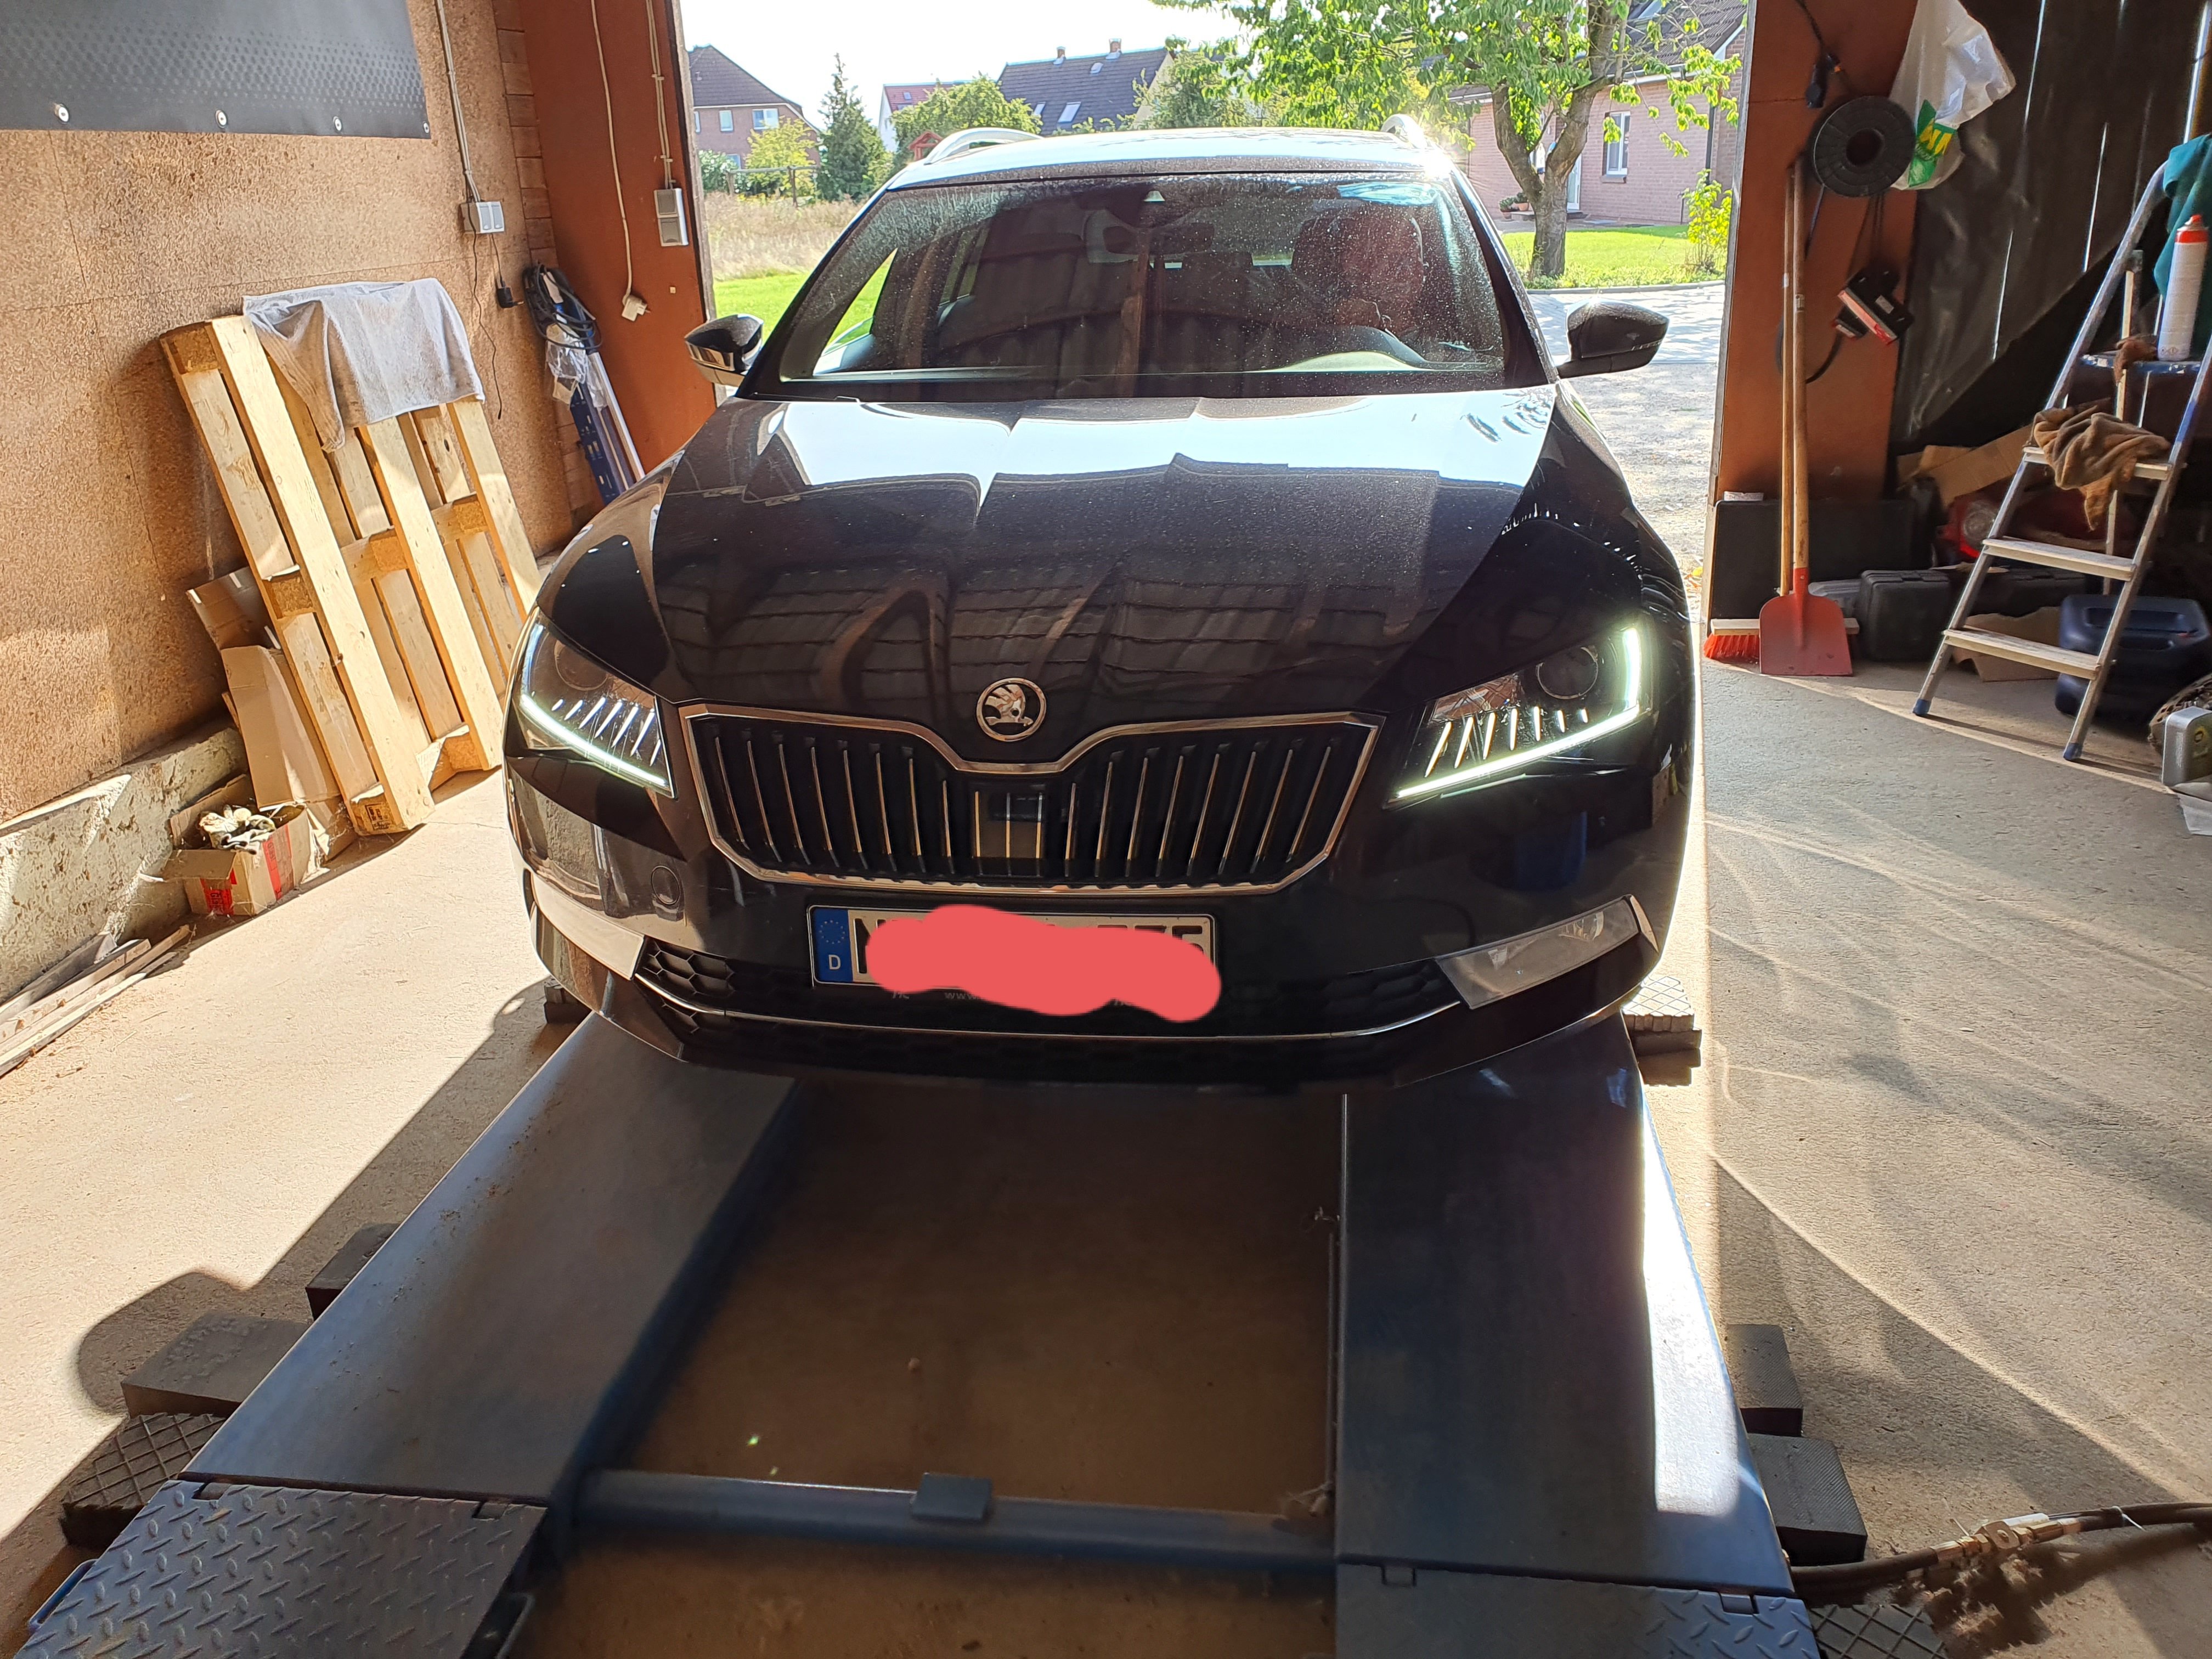
 1 pointIt will be a broken wire somewhere in the loom under the left side of the bootlid plastic by the glass1 pointThanks Dave, mine has been faultless until the last month, but Ineed the car for towing and it does that'superbly' too! I like the no fuss of the car, it simply gets on with it. The parts were a lot and the indie squeezed the labour too. the clamp ring was thick with soot, the old haldex filter well contaminated, but the pump works. I think it is important to expose these mini adventures so others can benefit too.1 point1 pointGut gemacht !!! Die Beschreibung ist einfach gebührenpflichtig. Ich bin gehört! Nochmals viele Dank an JR RS für seine Besetzung.
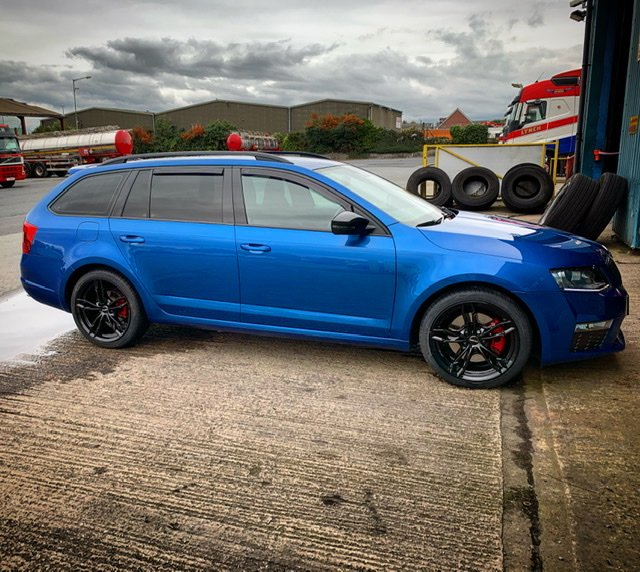
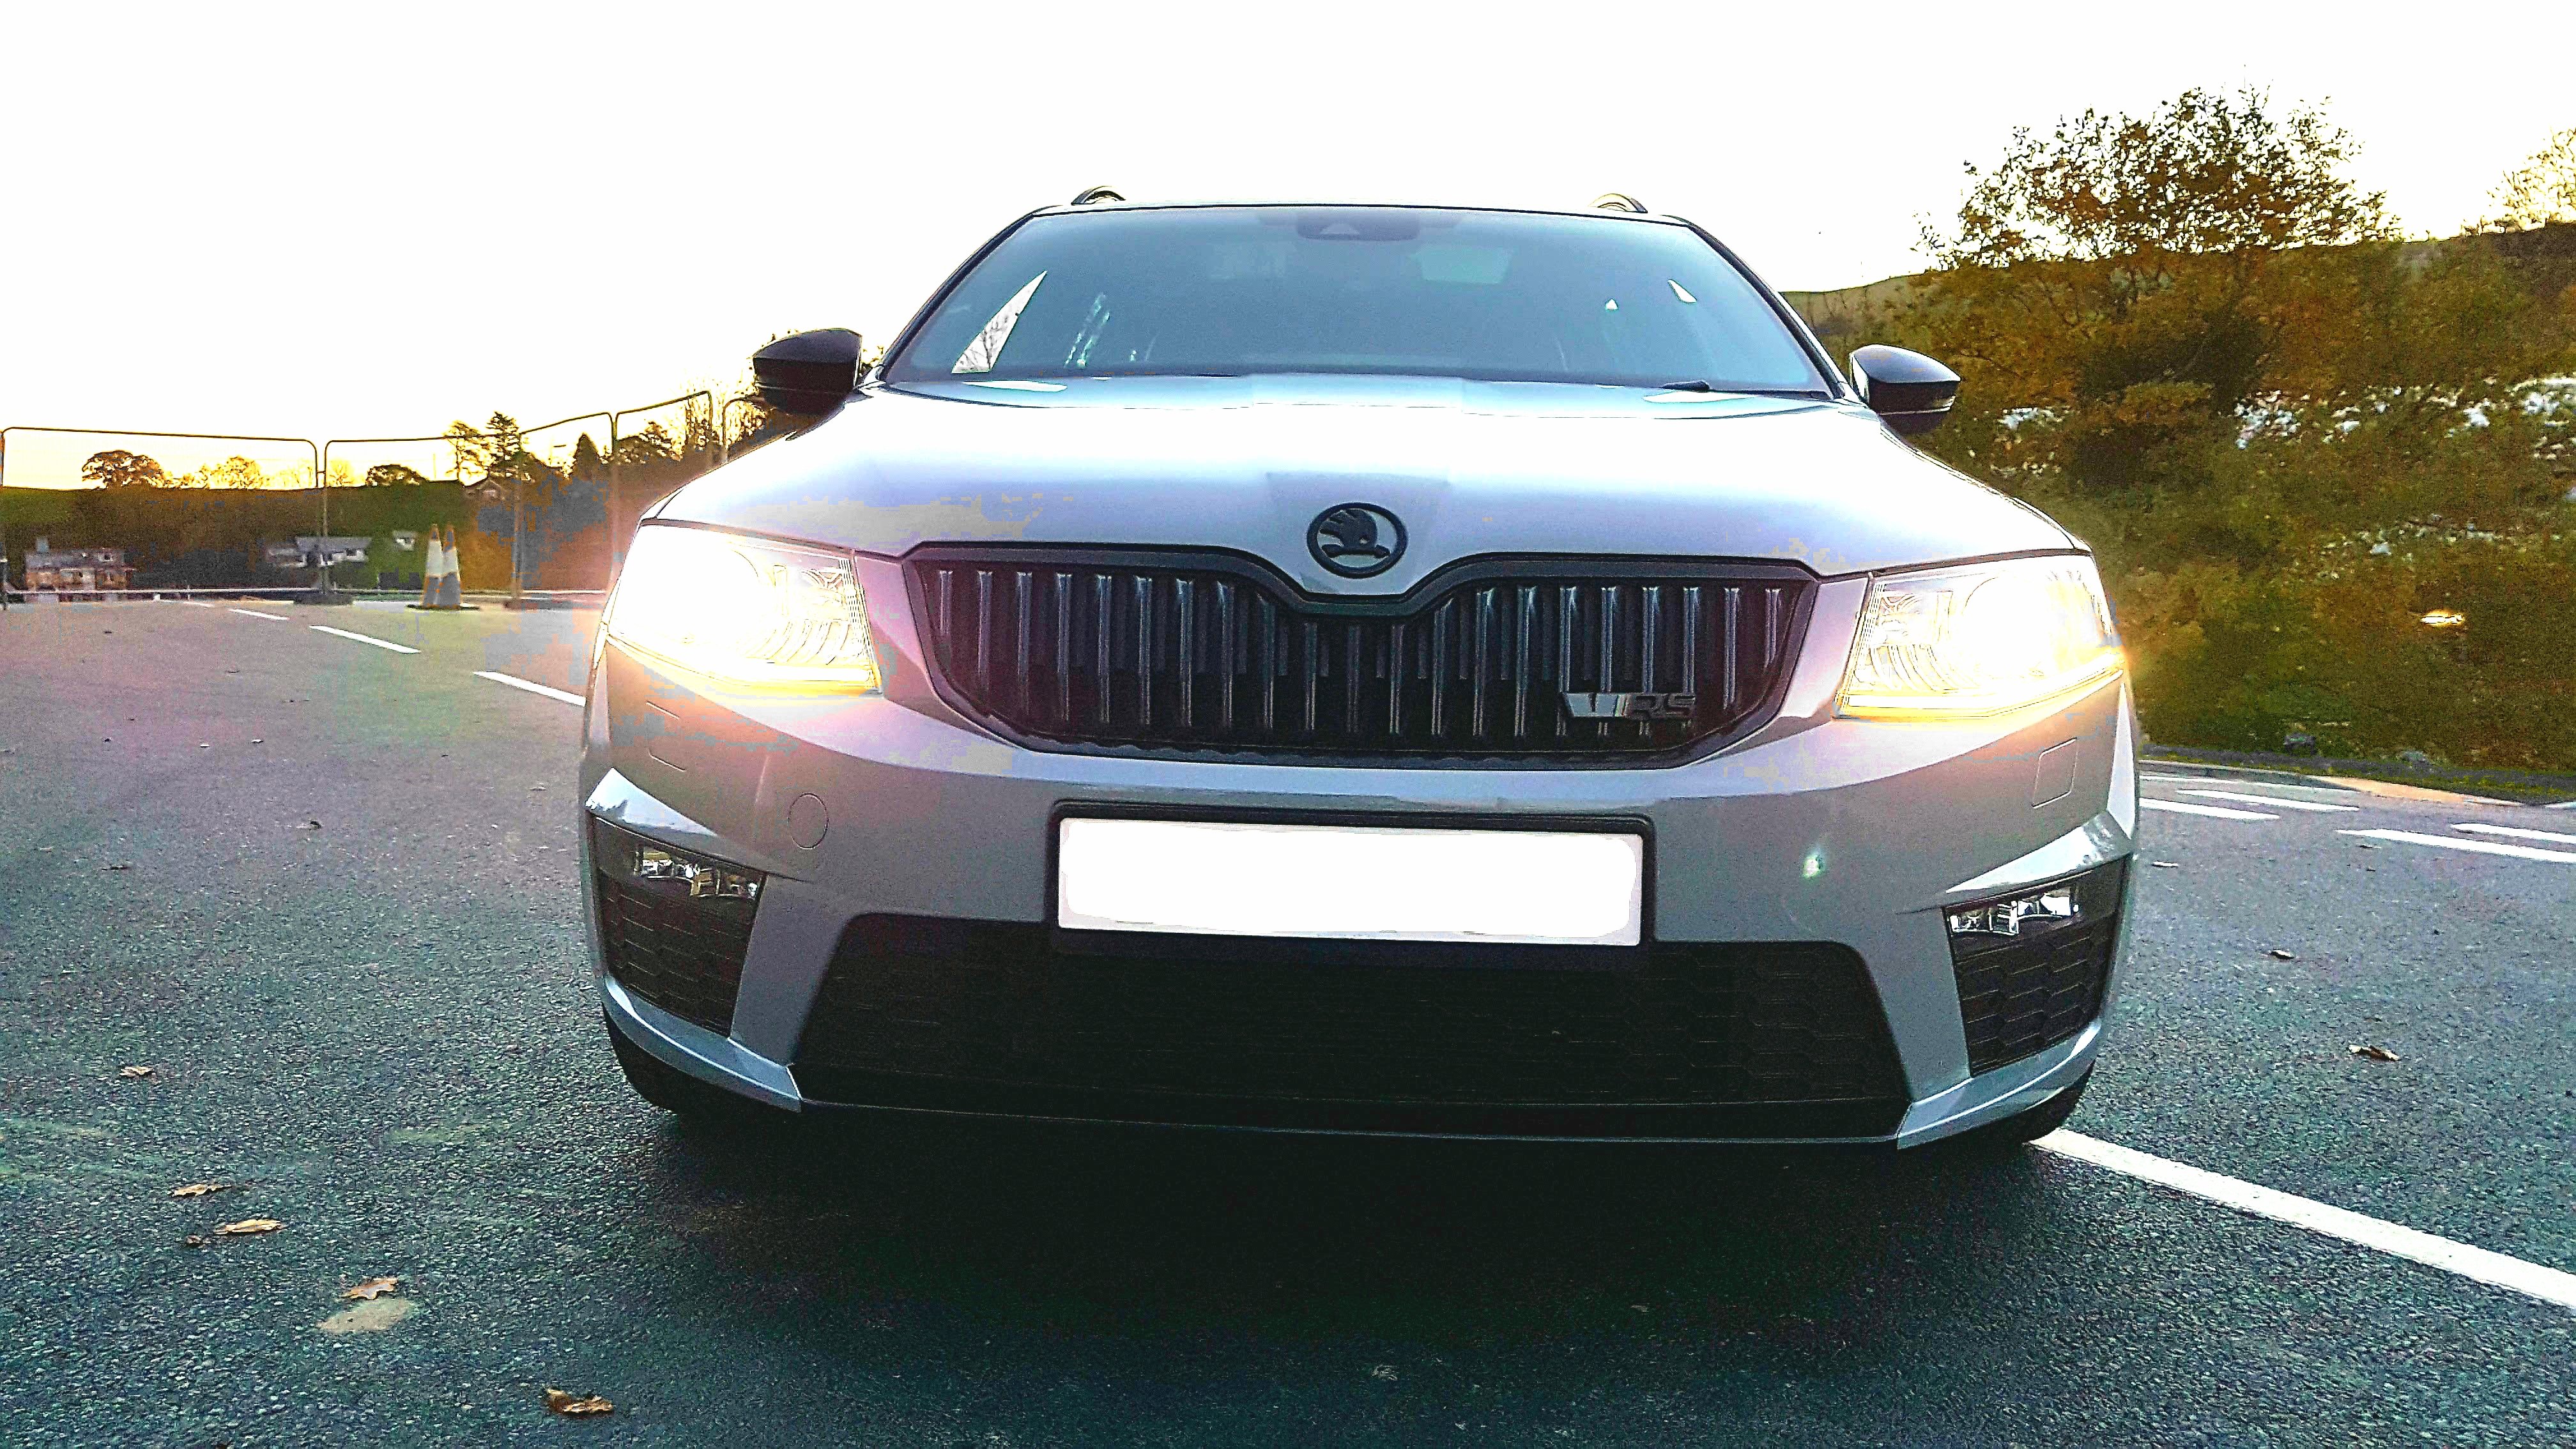
 1 point1 pointCouple of little updates, first of all had its MOT and another pass no advisories and some tlc for german invasion Pre registered for german invasion and was talking to bobby who has the darkside 1.6 tdi golf about going to it but as he lives in derby it is abit of a trek but then a few days before hand he told me he was going. People have been talking about me and bobby racing for nearly 3 years and even though we have met up a few times before its never been at the track. Race 1 bobby kept his road tyres on Race 2 bobby swapped over to his slicks Race 3 with data from vcds logs showing rpm boost and egt still struggling with wheel spin through 2nd so when racing a friend with a stage 1 dsg golf GTD i thought id try a little lift in 2nd so it stops spinning then back on the throttle again, think i lifted too much as it was my slowest time and trap speed of the day. When i viewed a couple of the pics from last time i thought the car was sitting too much on the 1st-2nd gear change and that was then lifting the front causing it to spin so thought id put the camera facing the back for the next run so i could see what it did. this one turned out to be my last and fastest run of the day, car ran 14.040 @108mph so exactly the same time as last time and i had a speed on one run of 110mph which are low 13 second speeds but wheel spin is killing it. Did notice the meth tank did have a small drip leak coming from the connector which ill need to sort out and find where its coming from exactly Really do love this car and still can't believe how far its came in 4 years as it will be 4 years next month since i've owned it1 point1 pointhave to say its a very nice little mod and the gentle opening of the bonnet is strangely satisfying....1 point1 pointUpdated photo for you all, have got the wind deflectors fitted and the rear windows limousine tinted. Also my three star wars companions sit on the dash now
_49520034211193.thumb.jpg.e1588622365e41f2d4a99e908d7e1988.jpg) 1 point1 pointI thought I would wash and polish mine yesterday and for a first stage it turned out alright. Just needs a claybar next.
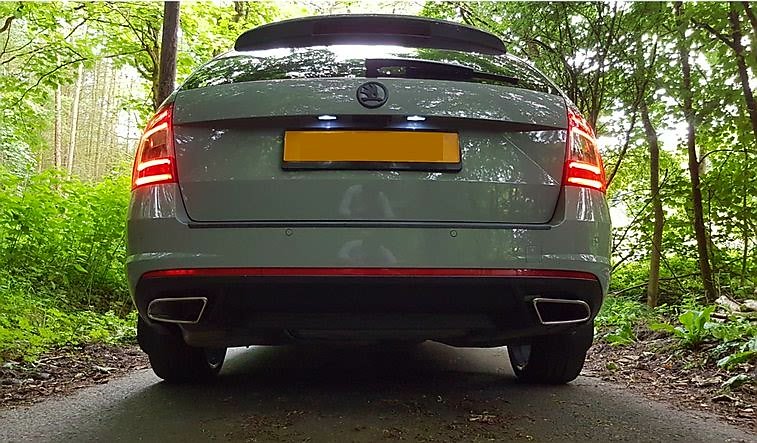
1 point1 pointI thought I would wash and polish mine yesterday and for a first stage it turned out alright. Just needs a claybar next.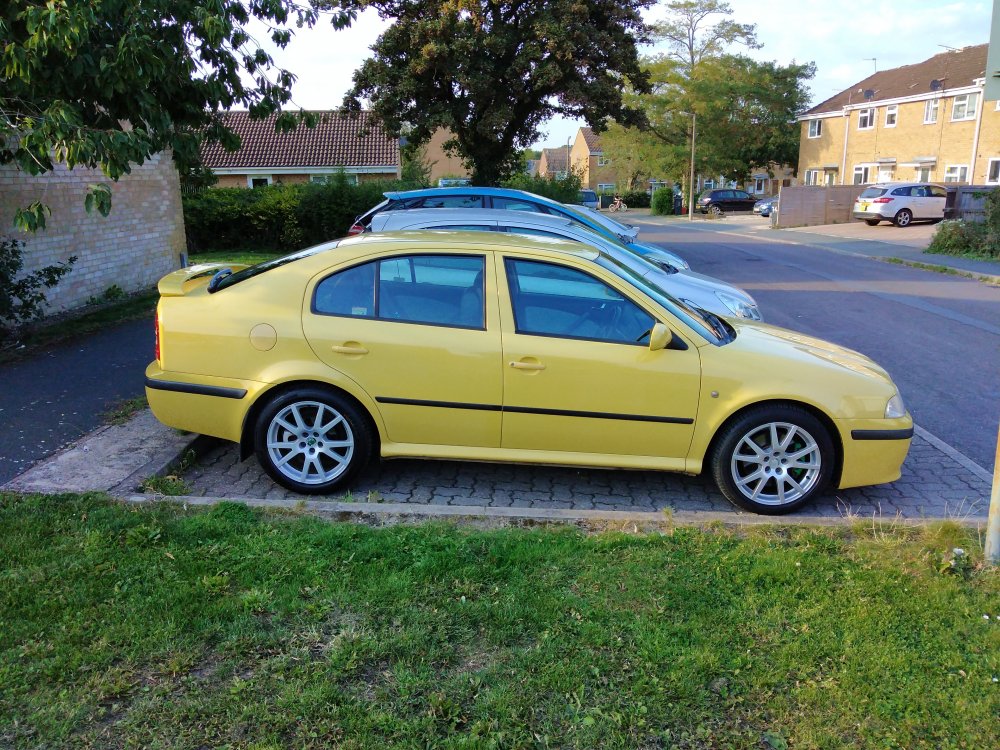 1 pointIt's gone now, but this was my favourite: Some more:
.jpg.f87527cbd1bcfa42b8a9fc87d88aca2c.jpg)
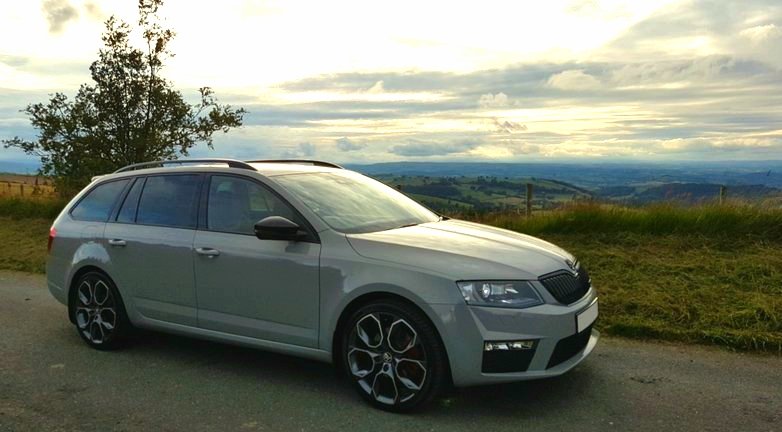
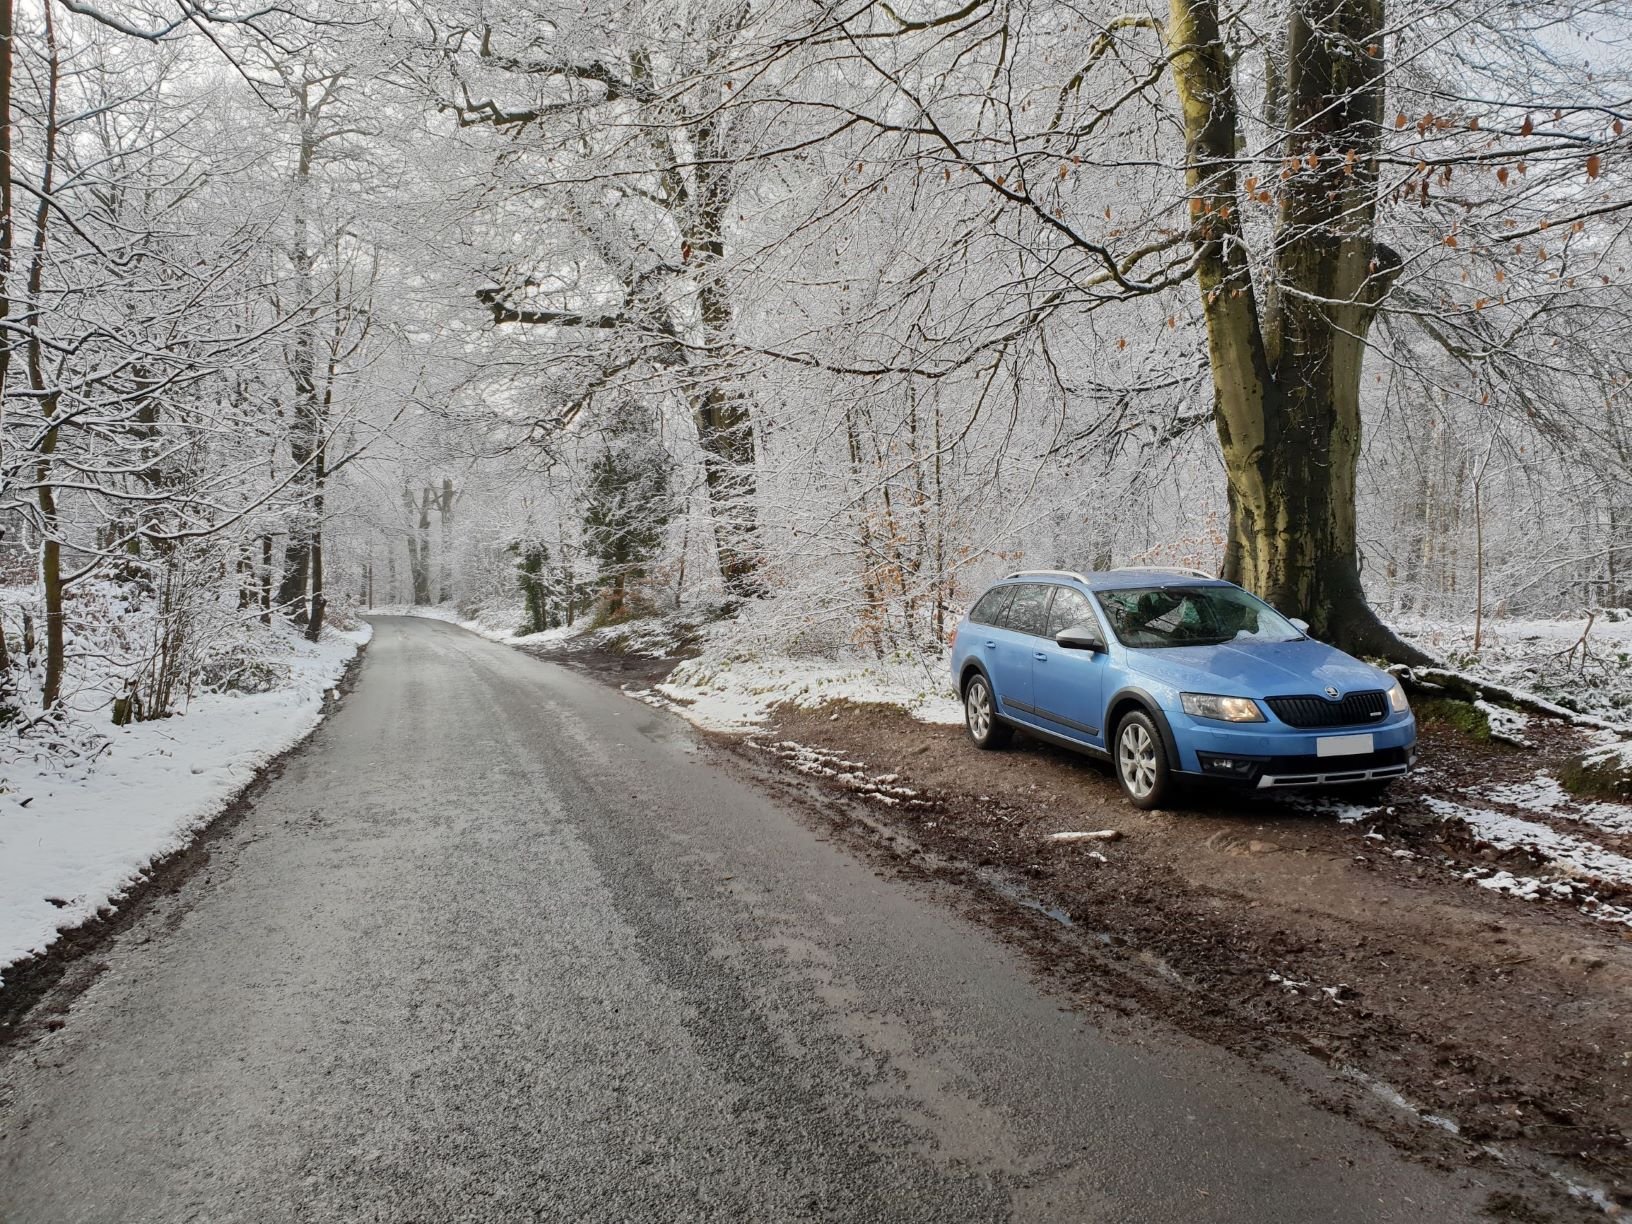
 1 pointMy old Octavia Scout on winter rims/tyres. Its was actually very dirty .... But hard to tell on Denim metallic.
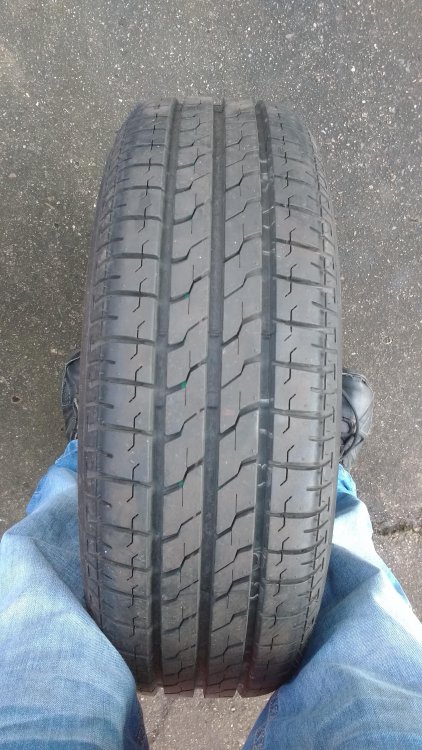
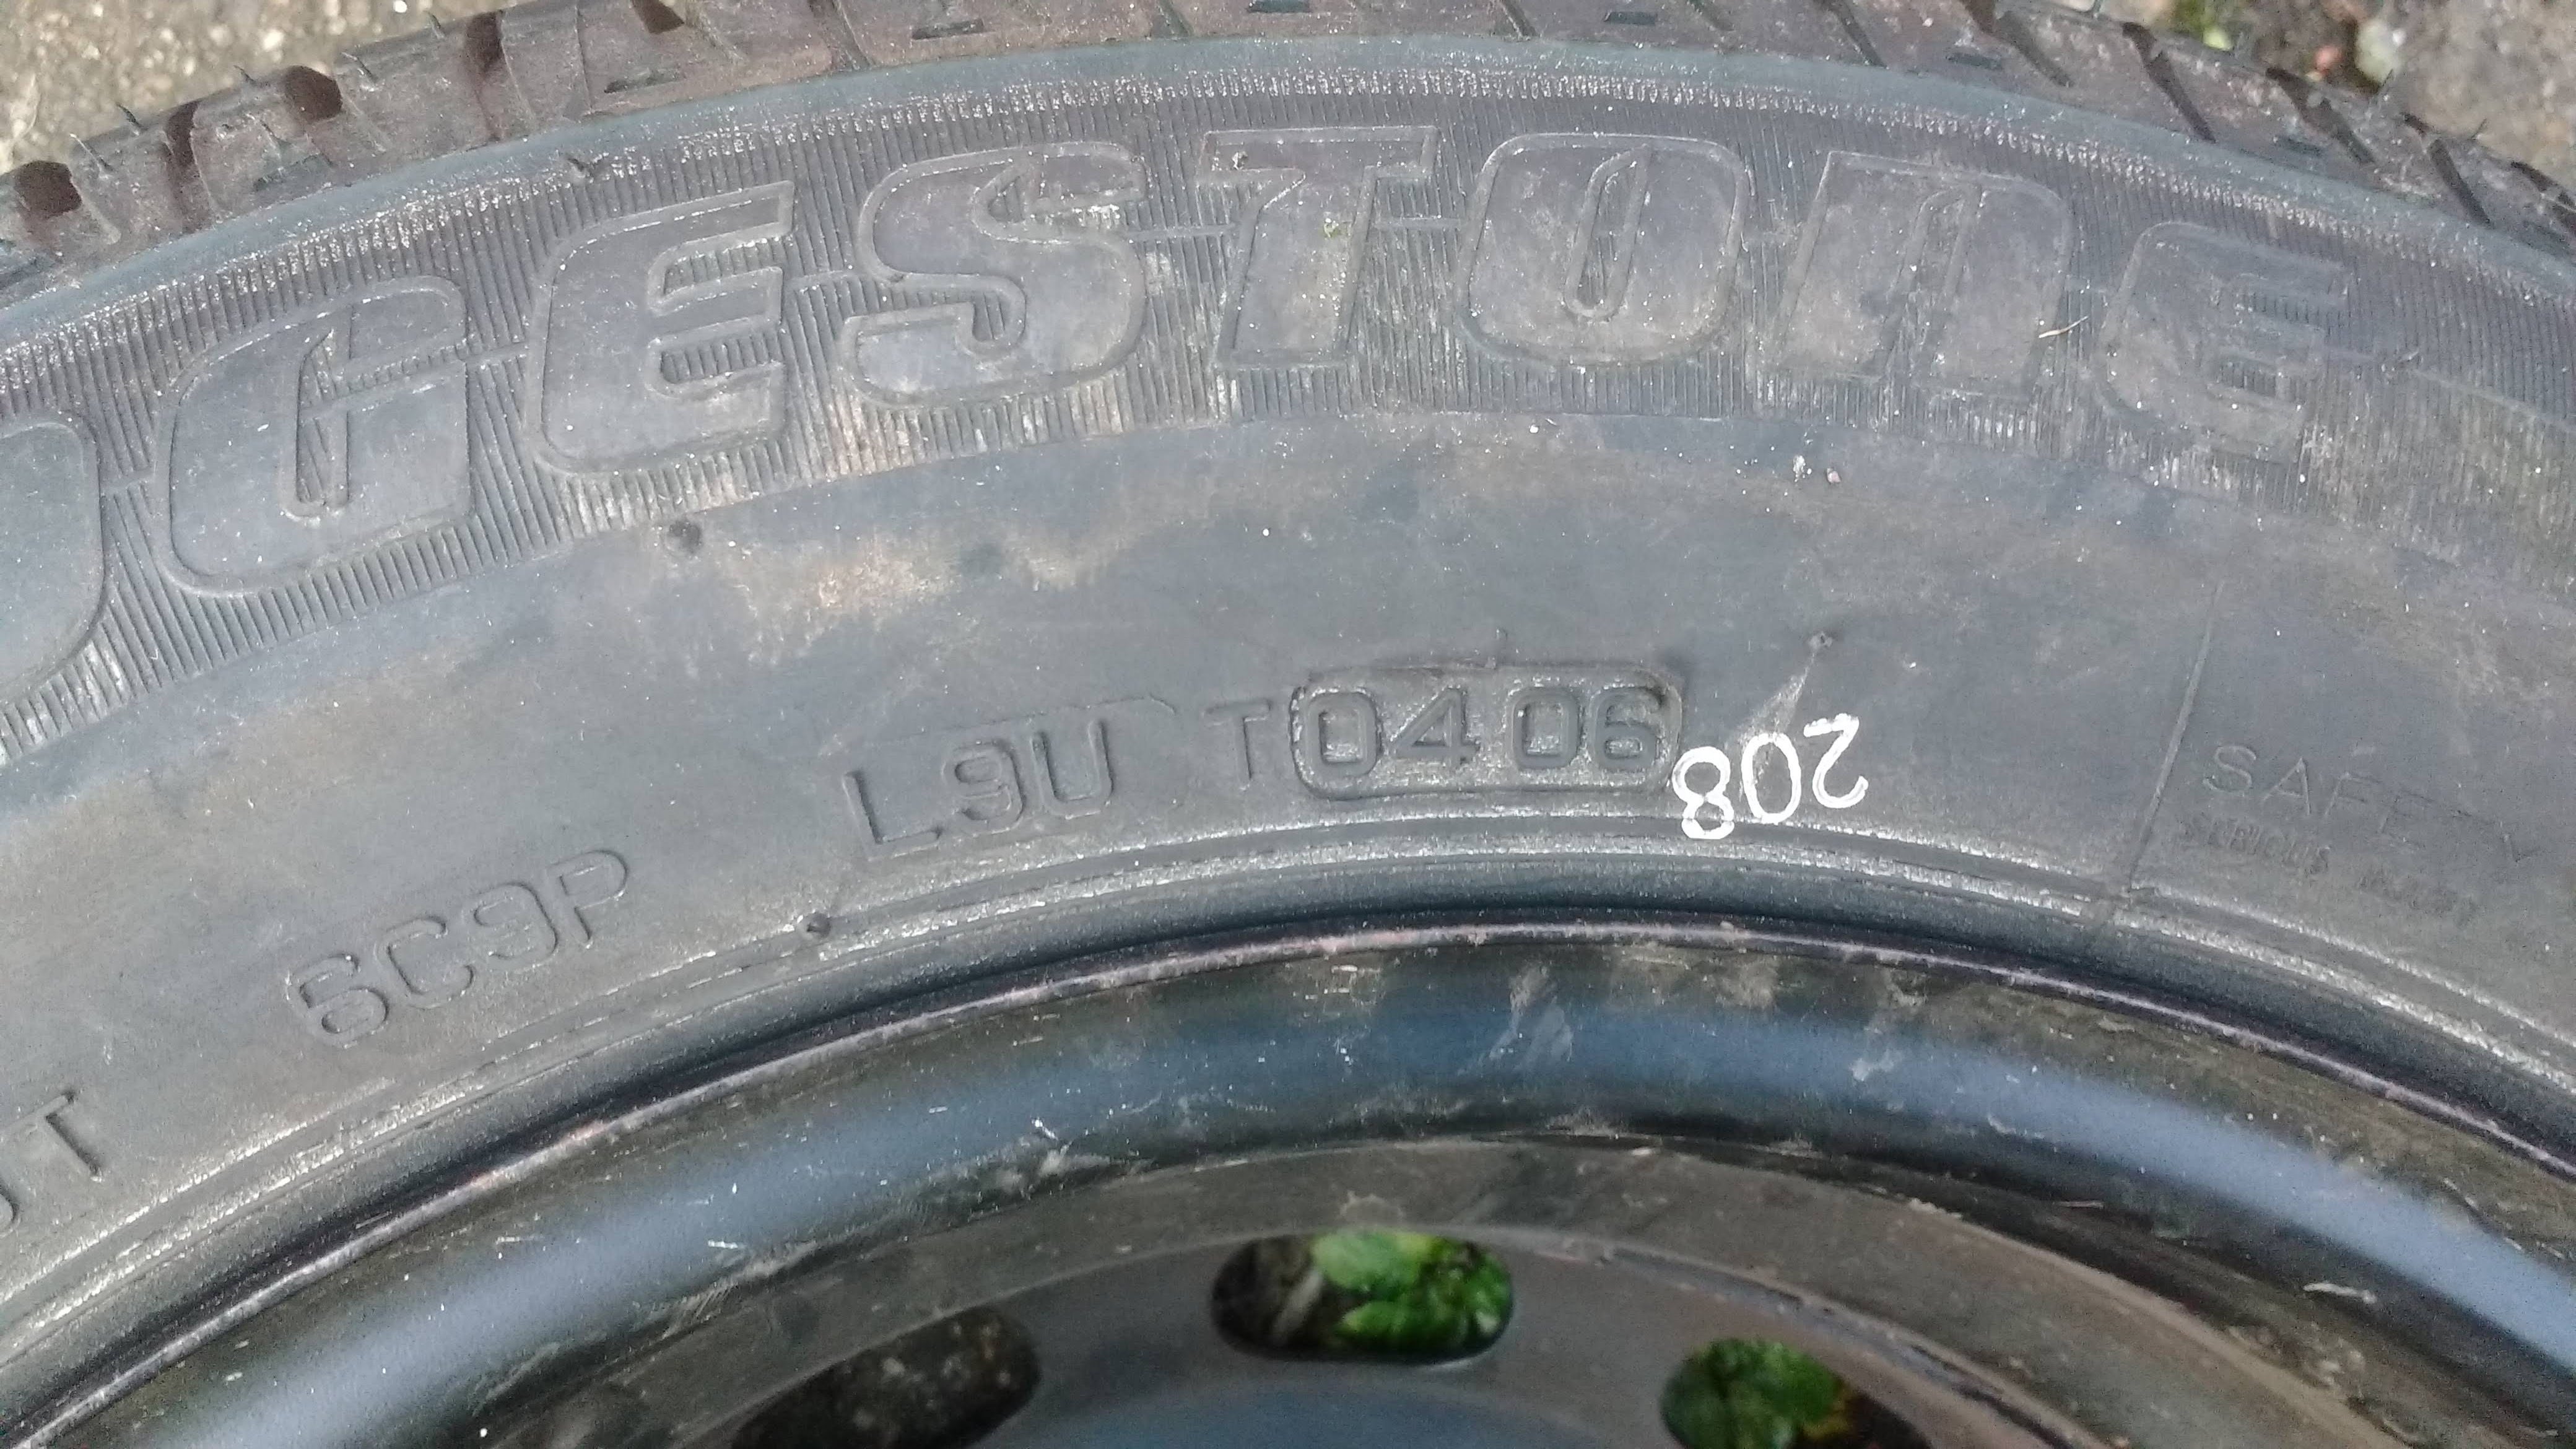
 1 point1 pointIt is best not to mix different tred patterns, so my advice is to swap the fronts and rears, which should slow the wear until they need replacing. Then replace them all together. Tyres are too important to mess with.1 point1 pointI always have a spare wheel and tyre that is the same as on the car. It then gets used / swapped so I don't end up with an old spare tyre. Thanks AG Falco1 point1 pointMy car (Mk 8 Fiesta) didn't come with a spare wheel and for some reason cars with pano roofs (like mine) didn't have the option to have one when new. I was able to have one from my brothers 2006 mk6 fiesta when his was scrapped. I was worried a 14 year old tyre might be too old, but can't see any cracks or problems with it. Pics of it attached below. I certainly prefer a spare than goo and compressor. My spare in my Fabia was still perfectly OK after 15 years being the boot. I did use it a few times, so very glad it came with one. Again No cracks or any problems.
 1 point


.thumb.jpg.d7eb88db3dcd2761d874e5649cc30b42.jpg)


.thumb.jpg.683fc09a88a36e3a8a88cc4faae6baa4.jpg)


.jpg.3a3470a4d0095a6354bf5843253f0fba.jpg)


_49520034211193.jpg.591a77d72389fbbe6cec1c861872696d.jpg)


Important Information
Welcome to BRISKODA. Please note the following important links Terms of Use. We have a comprehensive Privacy Policy. We have placed cookies on your device to help make this website better. You can adjust your cookie settings, otherwise we'll assume you're okay to continue.
Account
Navigation
Configure browser push notifications
Chrome (Android)
- Tap the lock icon next to the address bar.
- Tap Permissions → Notifications.
- Adjust your preference.
Chrome (Desktop)
- Click the padlock icon in the address bar.
- Select Site settings.
- Find Notifications and adjust your preference.
Safari (iOS 16.4+)
- Ensure the site is installed via Add to Home Screen.
- Open Settings App → Notifications.
- Find your app name and adjust your preference.
Safari (macOS)
- Go to Safari → Preferences.
- Click the Websites tab.
- Select Notifications in the sidebar.
- Find this website and adjust your preference.
Edge (Android)
- Tap the lock icon next to the address bar.
- Tap Permissions.
- Find Notifications and adjust your preference.
Edge (Desktop)
- Click the padlock icon in the address bar.
- Click Permissions for this site.
- Find Notifications and adjust your preference.
Firefox (Android)
- Go to Settings → Site permissions.
- Tap Notifications.
- Find this site in the list and adjust your preference.
Firefox (Desktop)
- Open Firefox Settings.
- Search for Notifications.
- Find this site in the list and adjust your preference.