


Leaderboard
-
Breezy_Pete
Sponsor9Points24,187Posts -
olduns
Members7Points1,921Posts -
.jpg.1006585dfe4e2977315b67c3d642e37b.jpg)
Guest_
FREEDOM5Points83,824Posts -
Aspman
Resident Member4Points21,151Posts


Popular Content
Showing content with the highest reputation on 27/04/21 in all areas
-
4 points4 pointsHey my fellow Skoda people. No news from the trimmer, he said he was flat out and of course i said "no rush" so i'll be back of the queue, ho hum. In the meantime i have yet another distraction arriving in the next day or so which will no doubt delay the completion of the Yellow Fabia..... A little old British lady (51 yrs old - GILF??) is coming to live in the garage with the bright and bold teenager from the Czech Republic, lets lope there is harmony? Matt3 pointsEasy with caveats....(@langers2k is too quick for me) See my article on how to do it.2 points2 points2 pointsLike many things they are probably just going to file papers you could have done for free yourself.2 points2 points2 points2 pointsDon't think so; just 280mm front discs 3-bolt, any other size 4-bolt, as far as I could see.2 points2 pointsHot hatch, unless I actually needed a capacity for rough road off roading and/or a 2 tonne plus towing capacity.2 points2 pointsThere are even adverts on TV. But then all sorts of Ambulance Chasers advertise on TV wanting people to claim for trip hazards and falls at work or in public where they are genuine claims or where they were just clumsy. If you want to claim because you had a Euro 5 diesels and somehow lost money then fill your boots. If the car was very economic and you got good MPG and longevity from the car and yet it polluted more than it should maybe give a few hundred quid to a charity for 'Sick Children'.2 points2 pointsFor my part, I would say I'm not angry, but I am disappointed with the Canton system. I spotted this post and thought it a good opportunity to let people know what they actually get, rather than what the marketing blurb suggests. I know what I do only because I've pulled the components out and felt a little cheated by what I discovered. I bought my car online via the Skoda used car finder and travelled to Cardiff to collect. I'm sure many others do the same, so they may well not get a chance to compare the stock system with the Canton upgrade. It's interesting that you mention " different door upholstery, dashboard, amp, subbox, additional speakers etc" And that really speaks to my point - there's very little difference for the Canton premium - agreed, there's an extra speaker grill on the door for the squawky sounding midrange standard VW speaker, but the stock amp and speakers are otherwise unchanged. From a HiFi brand that specialises in loudspeakers (Canton) and with the scant information that's provided to describe the upgrade, I expected more than a crude graphic EQ and a cheap sub. I think Skoda have really missed an opportunity to create a much nicer sounding system - it reminds me of mobile phone manufacturers that do deals with Hasselblad and Leica to simply add their brand magic to the phone, rather than adding actual tech, know how and higher quality. I'd happily pay much more to get it right from the start - out of the factory, rather than having to pay an additional £3K for the new components and door prep etc. Hopefully this convo helps others to make informed decisions - I would have been grateful for this information myself before selecting the "must have Canton" option in the used car finder. Ben.2 points2 points2 pointsAre you not able to keep to the limit then? It's not sarcasm, mate, I've never really understood why anyone needs to be warned that there's a camera ahead.2 points2 points1 pointhttps://www.volkswagen.co.uk/owners-and-drivers/my-car/how-to-guides/sat-nav
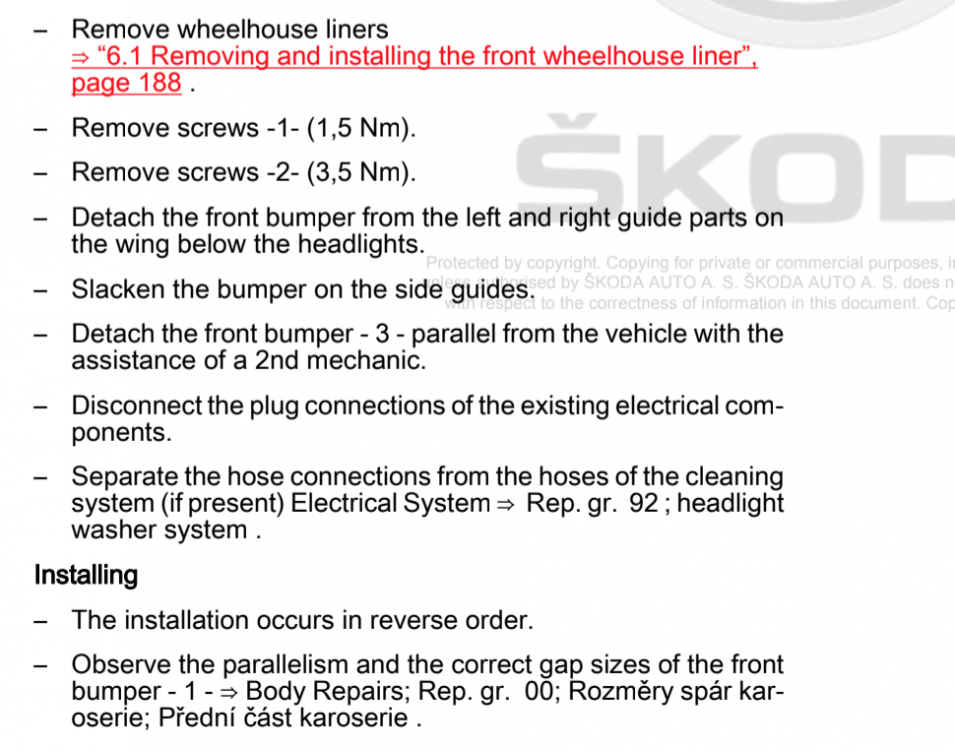
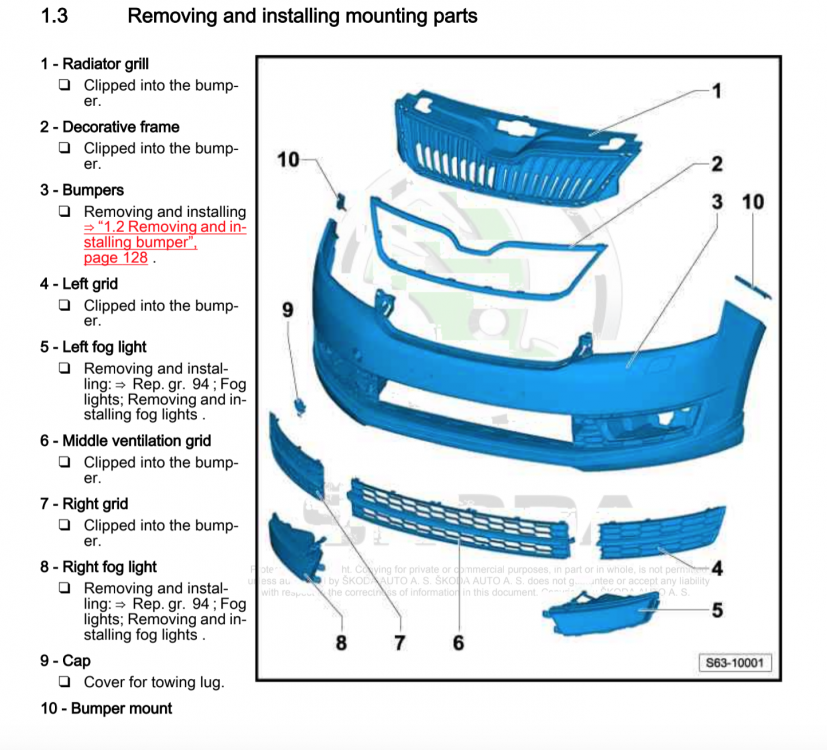
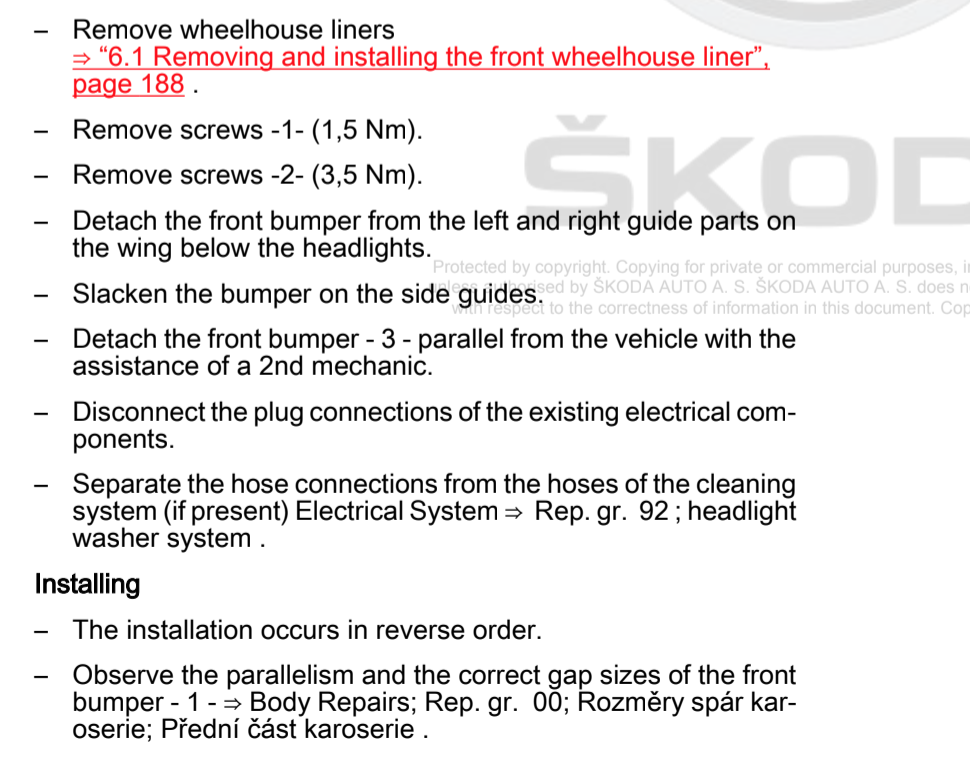
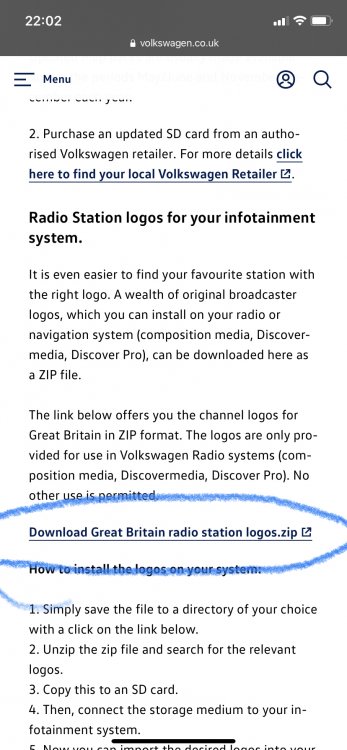 1 point1 pointI will say one thing which is slightly off topic but related to the fact we are dealing with a person on the other of the phone. Whilst organising a hire car, I required it big enough to transport a large dog, which after some effort Skoda managed to do so. Sadly though the day I picked up the car, our dog was diagnosed with bone cancer and had to be put to sleep. Very unexpected and upsetting! In an email response from a request by Kate to put blankets down in the boot I told her it was no longer an issue given the situation. Two days later, I received a food hamper and a condolence note from Skoda UK. it was a very thoughtful gesture. It just showed me that they do actually care about there customers.1 pointJust pour the old fuel back into the tank and get rid of it that way!1 point1 pointTo remove the upper grill its a bumper off job then remove. If you are trying to remove the chrome trim its 99% chance it will break up in your hands when removing. Here is some material on how to do it. Removing the grill
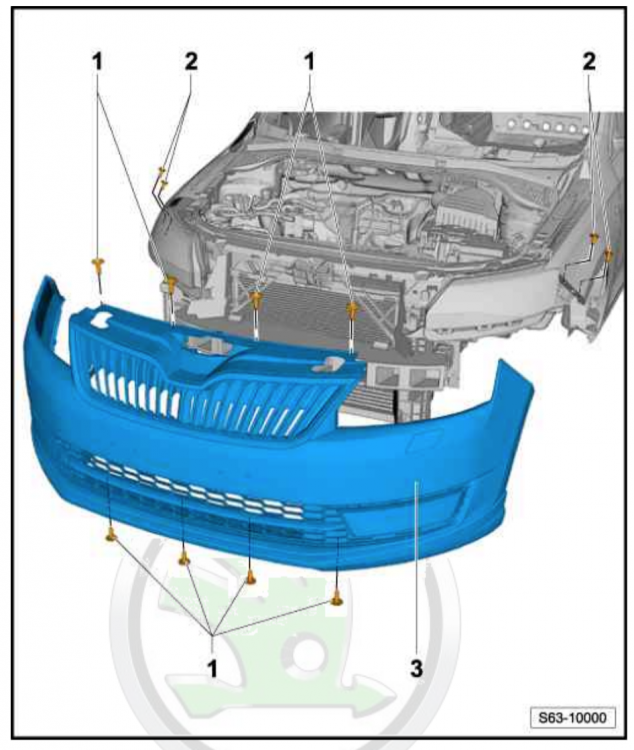
 1 point1 pointHad the same issue with by SEL after purchase. Lower each window fully, raise them until closed release and then hold the button up for another 1 second afterwards and that should enable the global opening and closing. Be warned though, I put my keys in my pocket soon after wards and was doing some work outside the back of the house. Went round the front and all the car windows were open. Me bending and working must have pressed the unlock button and lowered all the windows.
 1 point1 pointYou're right @Mario_Delgado, I just read their development page over my lunch break, seems like good stuff! https://www.onlyrevo.com/blog/volkswagen-golf-mk8-gti-revo-performance-upgrades/1 pointHey, thanks for the reply. When I checked it from the garage it will have been cold as I was at work for some hours while the car cooled. Wouldn’t have have been cold but warm when I checked it yesterday. Defiantly not operating temperature though.1 point1 pointI know on previous cars i have had (different manufacturers) this function is also linked to the 'one touch' window operation. If you reset those then the window closing from the fob may work again. Happy to be corrected1 pointWelcome. If you do some research on Briskoda, you will find many threads about oil burning on the TDI engines. IMHO - it is down to the way the cars were bedded in from new....some burn more than others. For example, my 2019 TDI 184 Scout burns about 100-150ml per 2000 miles - which is nothing. Others will burn nothing, other cars will burn lots. I know that @e-Roottoot is the expert in regards to oil burning issues, so I'll bring him in at this point.1 pointYeah Racingline is working on too as well as ABT. I am waiting for cold induction kit as well1 point1 pointThis morning, before you start the engine, pop the bonnet and unscrew the lid of the expansion tank. Listen for any hiss of escaping pressure. Tell us if you hear anything or not.1 point1 pointGreat drive yesterday with the VW guys. 270km over the Remutaka Hill to Lake Ferry. Gorgeous day and Rusty ran beautifully. Unfortunately when I checked the drip tray this morning we have a new leak. Sigh. Everything Wellington European did is dry and good, looks like maybe the rear seal. Always a challenge, this car.1 point1 pointThis foam insert with jack, wheel wrench, etc. is for the Octavia MK3. It might fit the Superb MK2, as they appear to use the same spare wheel mounting bolt. 1025CZK is about £34.47 https://eshop.skoda-auto.cz/cs_CZ/sada-pro-vymenu-rezervniho-kola-pro-octavia-iii/p/5E0093860B It might be worth seeing if a local Skoda dealer can get the correct spare wheel foam insert and jack/wheel wrench, etc. for your vehicle. For the spare wheel you could use a 6.5Jx16 ET46 steel rim with a 205/55R16 tyre, again from the Octavia MK3. There are other options such as a 6Jx16 ET50 with 205/55R16 tyre, as this is an approved winter tyre size for the Superb MK2. https://eshop.skoda-auto.cz/cs_CZ/kompletni-rezervni-kolo-16/p/5E0601011J Octavia MK3 6.5Jx16 ET46 steel rim with 205/55R16 tyre https://eshop.skoda-auto.cz/cs_CZ/kompletni-rezervni-kolo-16/p/5E0601011J Superb MK2 spare wheel foam insert http://www.oemepc.com/skoda/part_single/catalog/sk/markt/CZ/modell/SUP/year/2012/drive_standart/632/hg_ug/011/subcategory/11010/part_id/2546939/lang/e Octavia MK3 spare wheel foam insert http://www.oemepc.com/skoda/part_single/catalog/sk/markt/CZ/modell/OCT/year/2016/drive_standart/753/hg_ug/011/subcategory/11010/part_id/2546939/lang/e1 point1 pointA mouseover says that's a page on ar$ebook . Wouldn't a real firm of lawyers have their own named website even if they were named say "Fleecem and Scarper"?1 point1 pointVCDS Auto scan: A download from the cars brain, that shows each component (called modules) installed in the car, be it an ECU i.e engine or door locking controller or a CAN gateway (a box that connects all the boxes together). Depending on how highly specced a car is from purchase will have more or less modules. Some modules have sub modules to add further functions, i.e rain sensor for auto wipers. Each module is configured in various ways to allow it's functions. Some that were not there from factory purchase, may be enabled to gain new functions via an "Adaption" (recoding) of the module. So you can change the behaviour of a specific module and the network allows it to work without changing any components, it's all done in coding. Each module has a code (an adaption channel list or long code) specific to is functionality and will vary from car to car depending on how it was configured from the factory, i.e Mr Dealer, I'd like to buy the option rear parking camera on top of just parking sensors. Components are added and coded to the cars network to say, Hey there, when you put me in reverse, I can beep at you and you can see behind the car on a screen, that £600 option is bells and whistles DTC: diagnostic trouble code, simply an error recorded in any module to show a fault i.e bulb out or electrical issue. Can be cleared if fault is resolved.1 point1 pointI seriously doubt that both the clutch AND the gearbox have broken at the same time. It should be possible to get the gearbox into neutral if you can unload the transmission by jacking one of the front wheels off the ground.1 point1 pointSorry for lack of an update or replies, been busy repairing a bike and work and family and other boring stuff! Finally got my 12v working again though so that's something! Managed to stumble on some MK1 VRS alloys for £30! Think it makes the car look much nicer! http://Fab https://imgur.com/gallery/MjbvOoE Looking at acquiring some lowering springs to get it sitting a little nicer, anyone know how easy it is to acquire some sport/VRS springs new? Would usually go for normal lowering springs but don't fancy the cost and severe drop. Also looking for a nice splitter, any recommendations? Could really do with a new front bumper as when I was 16 I managed to crack the corner of the bumper and had to fibreglass it back, poor dad's first ever new car and his youngest breaks the bumper1 point1 pointAs @SkudMissile21 said. There is a wear sensor on front pads. Not very surprised with 95000 km. I've driven several VAG vehicles and I sold all of them before needing to replace the brake pads. Audi A3 Mk2: 119000 km. Superb Mk2: 117000 km. Audi Q3 Mk1: 133000 km (still used by my wife). All with original pads (TRW). Note: the Q3 pads min thickness is 9mm (incl. backing plate), they're still 12mm! On Superb Mk3, the min thickness (including backing plate) on brake pads is: Front: 7mm Rear: 7.6mm Have a look here on official Workshop manual (see P109 & 110): https://cardiagn.com/skoda-superb-iii-maintenance/1 pointDon't think you need worry. Its close coupled to the combined turbo/exhaust manifold high up in front of the engine immediately behind the radiator under a shield. You'd need to have access to the top of the engine and lots of time with the right tools.1 pointI think manual cars only have Neutral and reverse position sensor not the others1 pointI didn't think there was a gear position sensor on a manual. There is a sensor to say if it's in neutral but I thought the gear selected was just a calculation of revs vs speed.1 point1 pointDrop links are usually just a nut top and bottom ,easy to change with a socket set .1 point1 pointI haven't clicked on the link but they are all a 'scam' of some sort, regardless - even if they are legitimate or not they are simply out to make themselves money (not you!)... they'll suggest you are owed compensation for VW's emissions defeat devices and mis-selling but, at the end of the day, what specified 'loss' do you deserve compensation for??1 point1 pointIt's a Škoda Octavia 2017 Estate, 1.6L, SEL 7 speed automatic Diesel. Funny facts: I was against Škoda brand, against diesel engines and against automatic gearboxes. Got all in one and not regretting so far
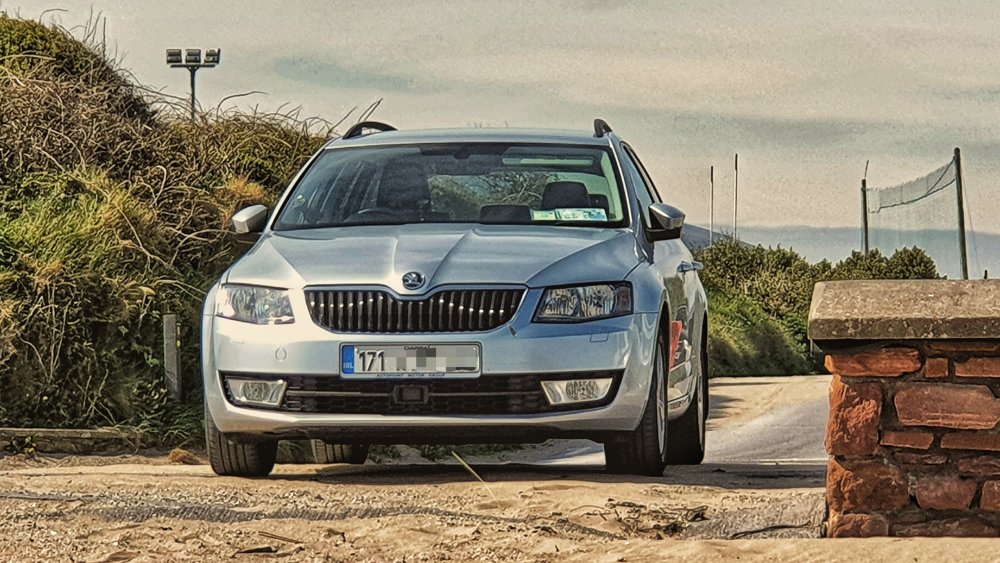 1 pointI've had a 2013 1.6 diesel estate Octavia and currently have a 2019 1.5 petrol estate Octavia, the diesel was by far the better of the two engines! Just be careful before rushing to buy the 1.5 engined cars as the software fix done on my car (by Henrys in Glasgow) worsened my cars fuel consumption by at least 10%, best average mpg now is in the low 40's running around locally but the 1.6 diesel never did less than mid 50's mpg when I had it and recorded up to 70 mpg on some longer trips.1 pointPart is SK-SU-3-K-CAP1 but wouldn’t recommend if you have a sportline as it doesn’t fit properly - I spent ages with a heat gun trying to mould it and get it sitting nice but still no where near perfect1 pointmy quads are knackered.... decided to do a climby challenge for a change. had to get off and walky pushy the last 800m of the ascent... good god its steep! 31mins to get up there, i was home in 11... worth it for the view...

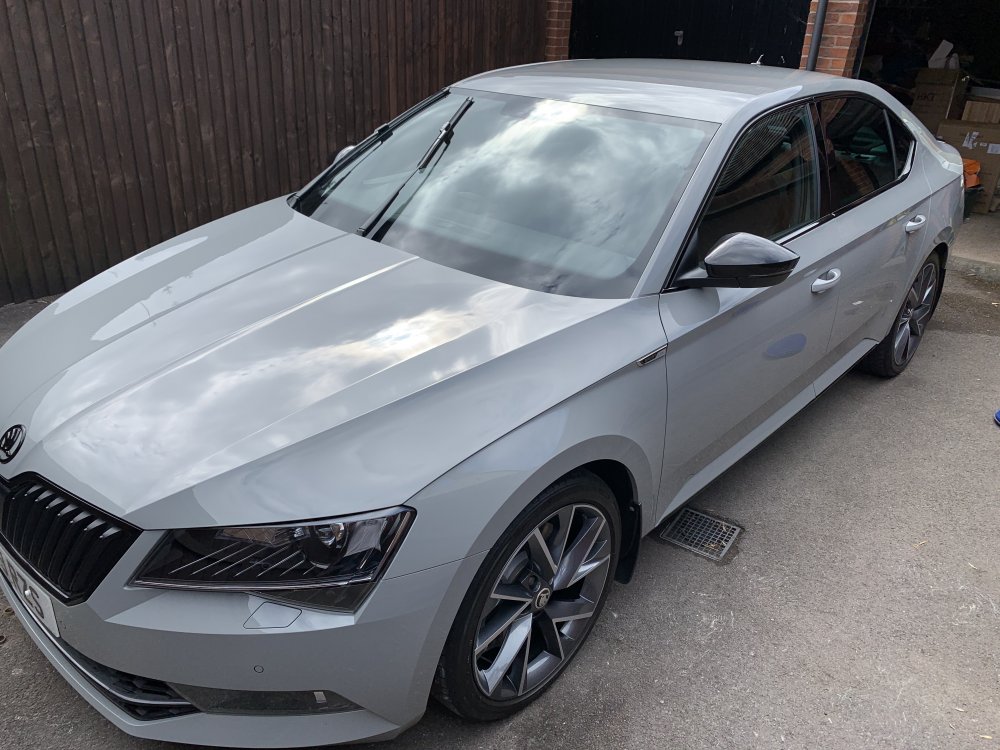
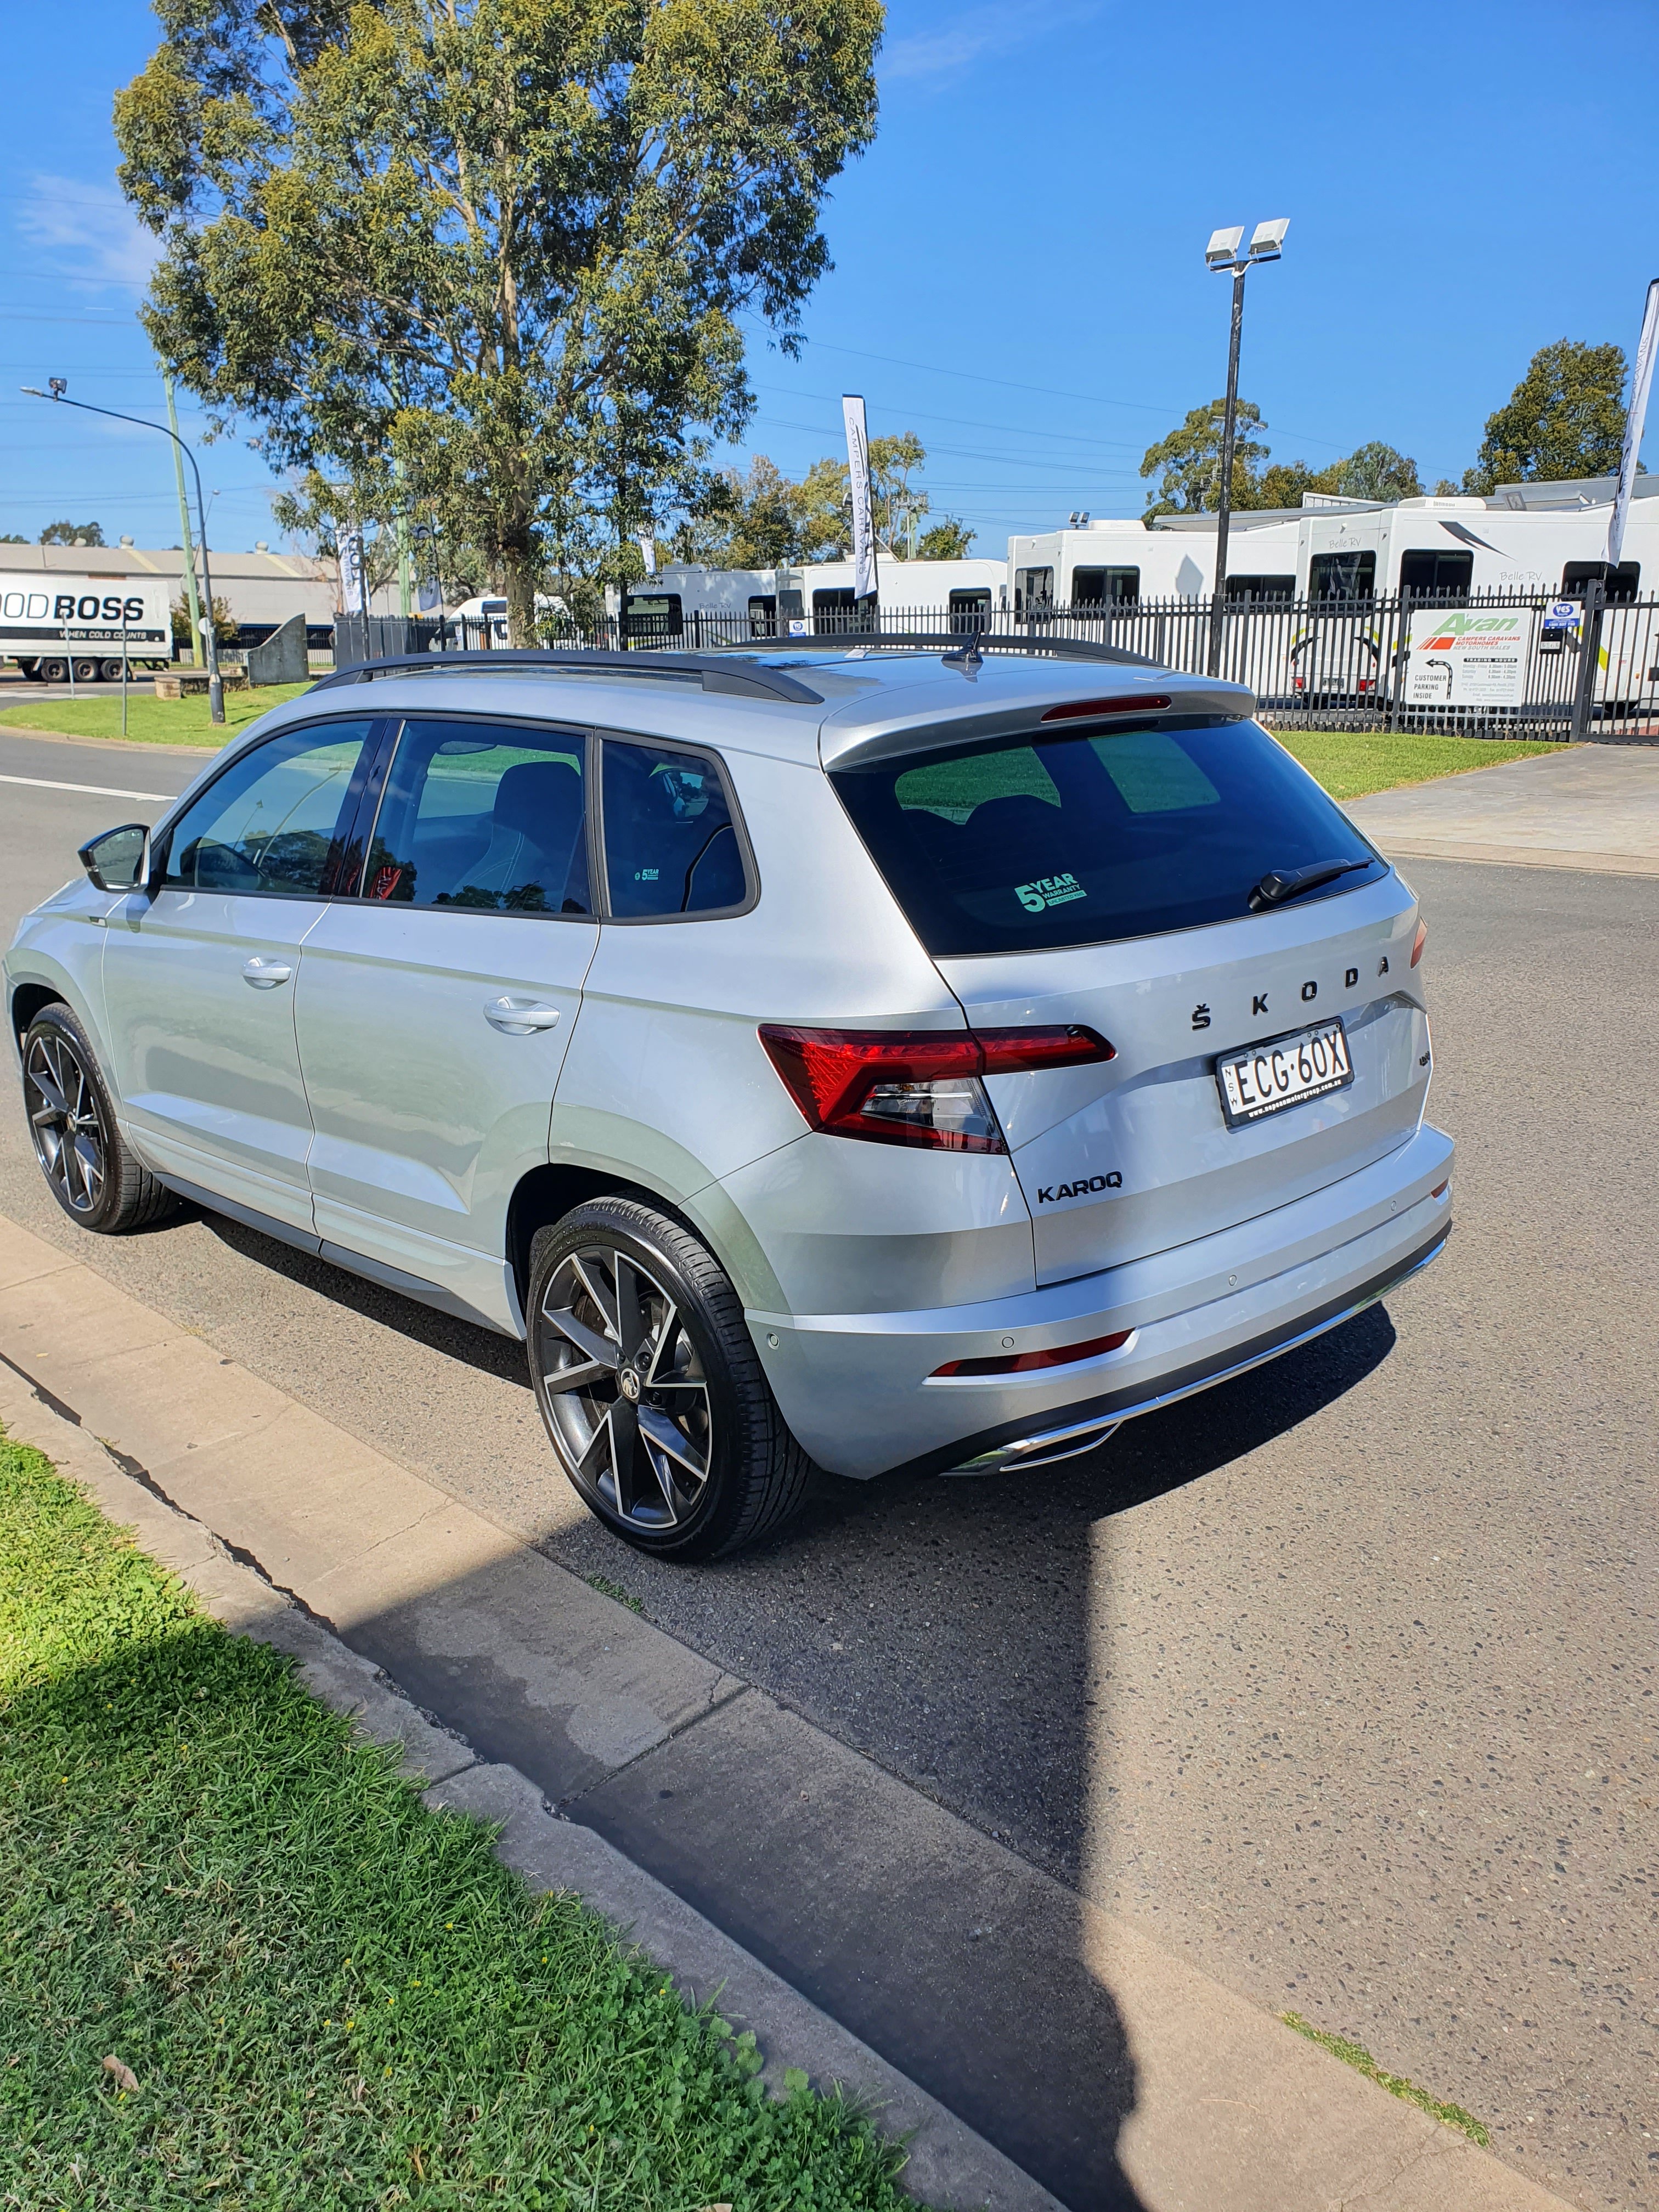
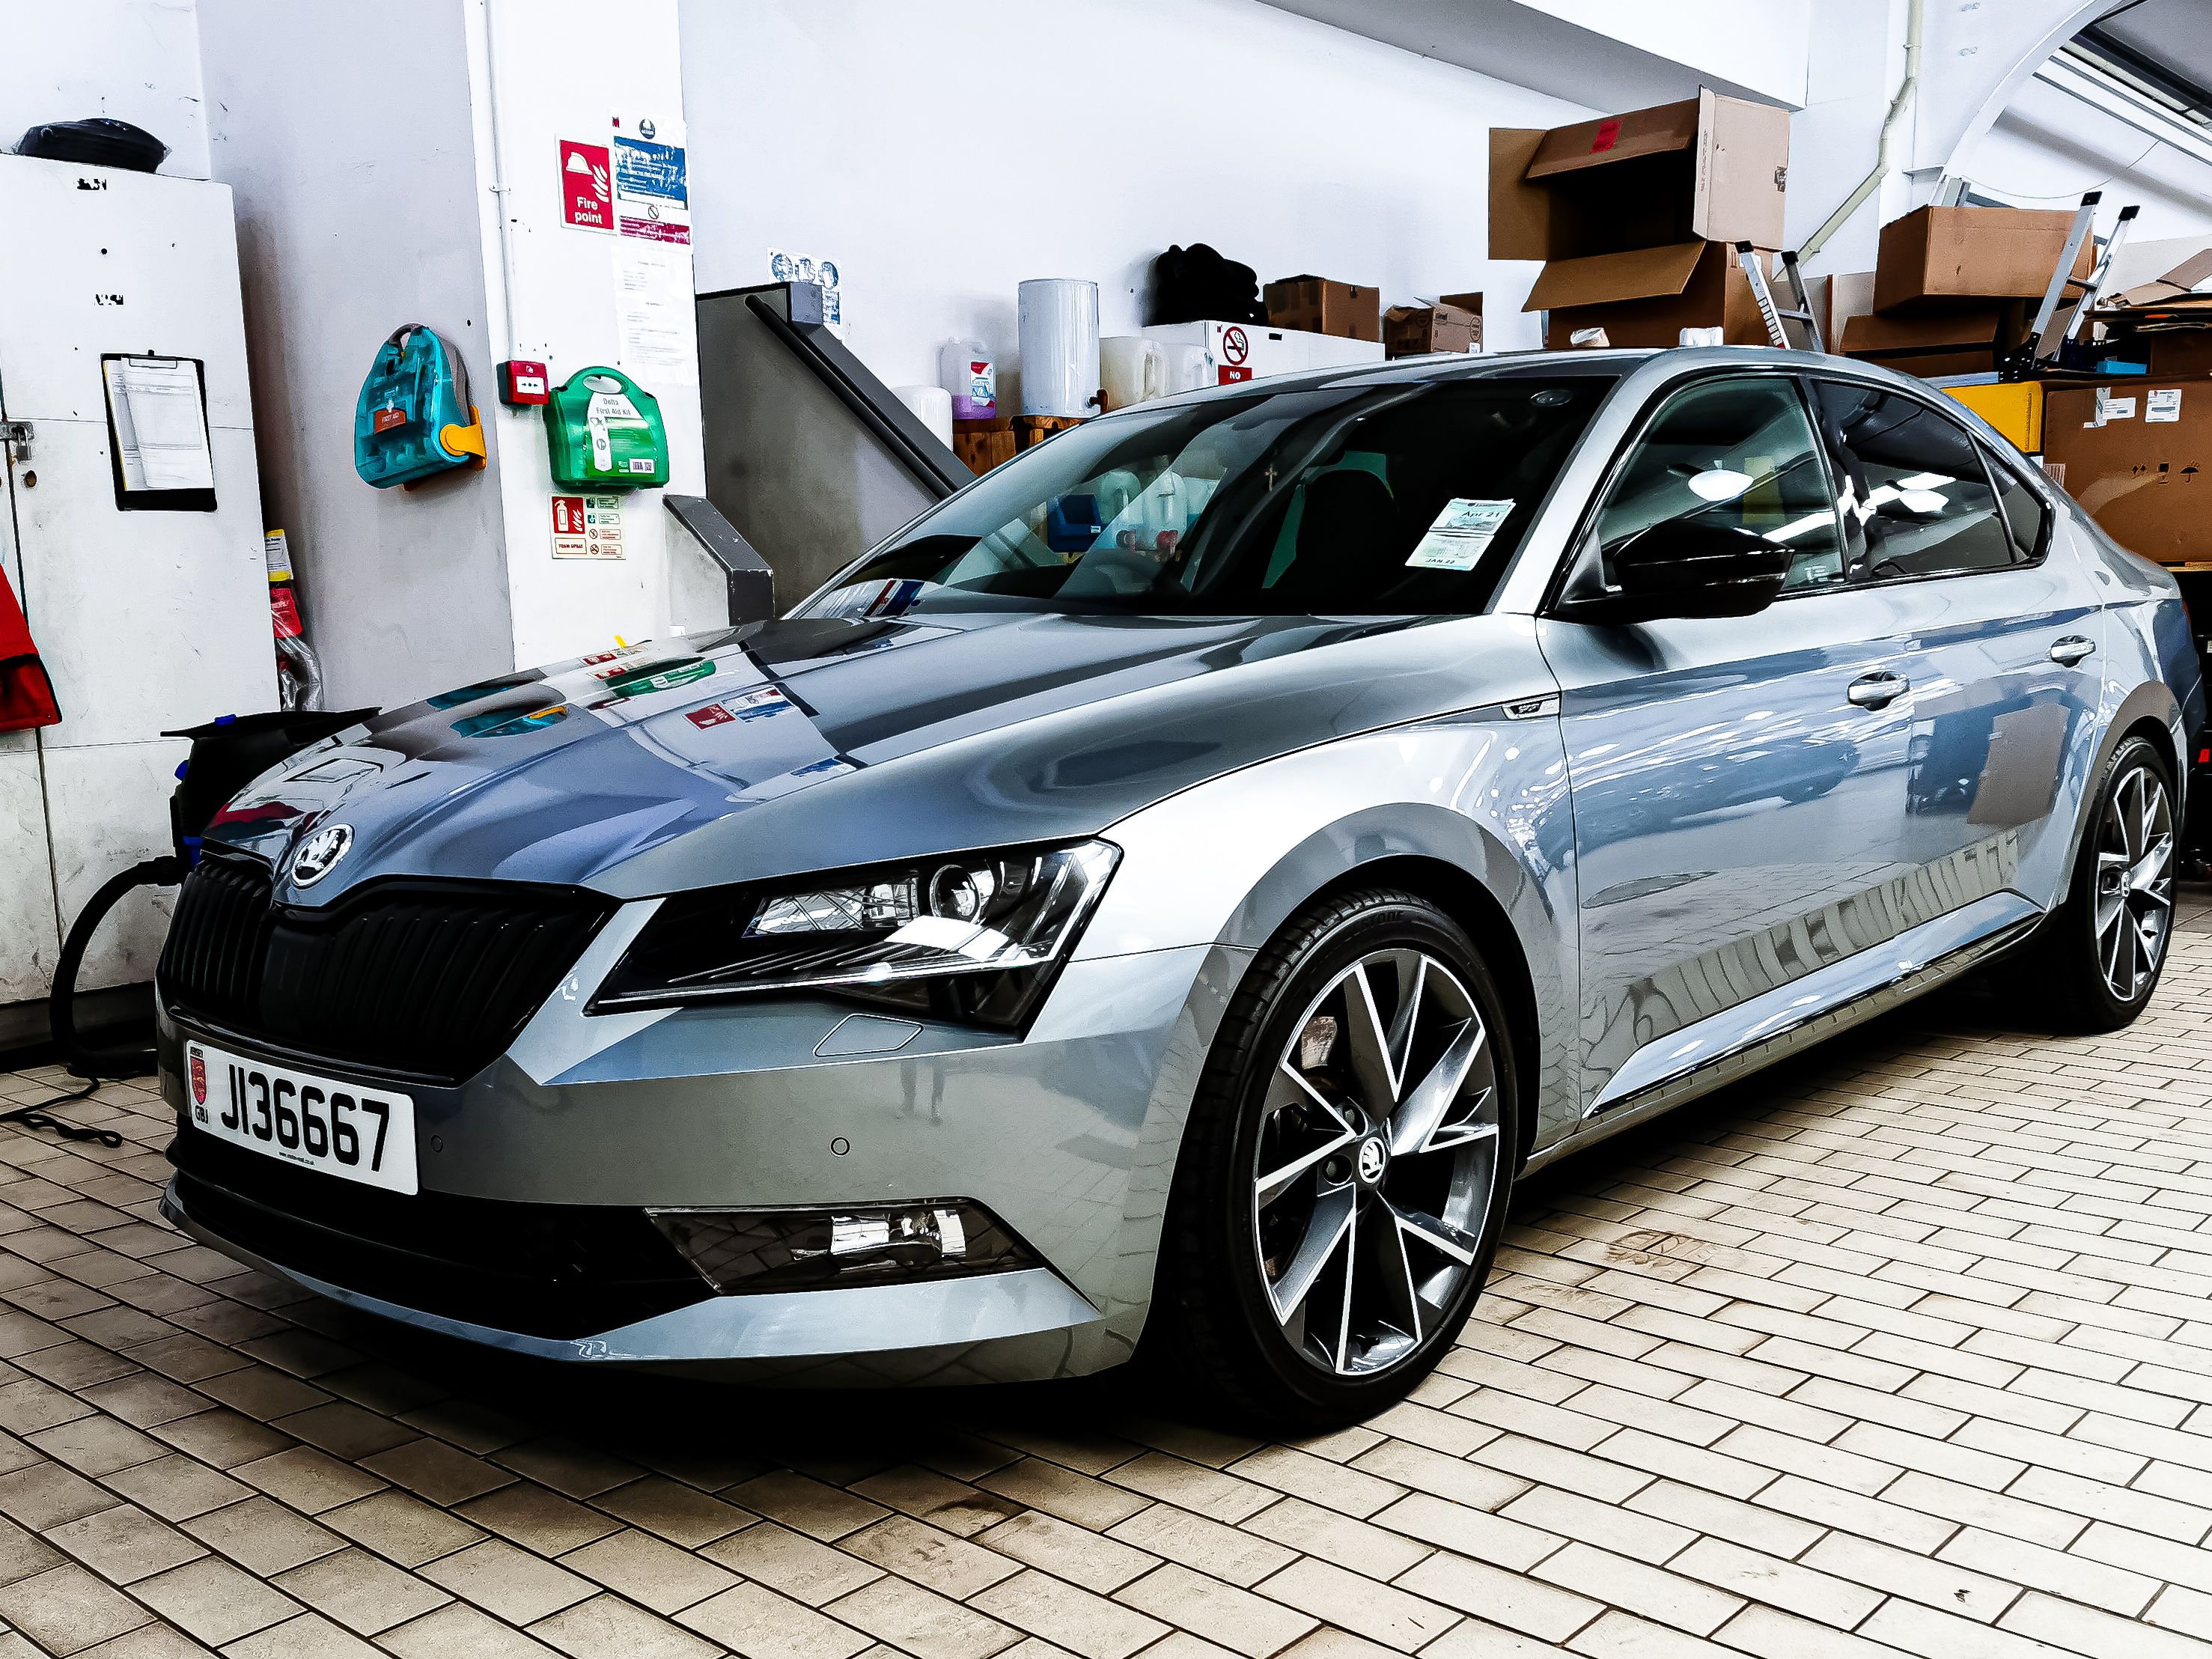
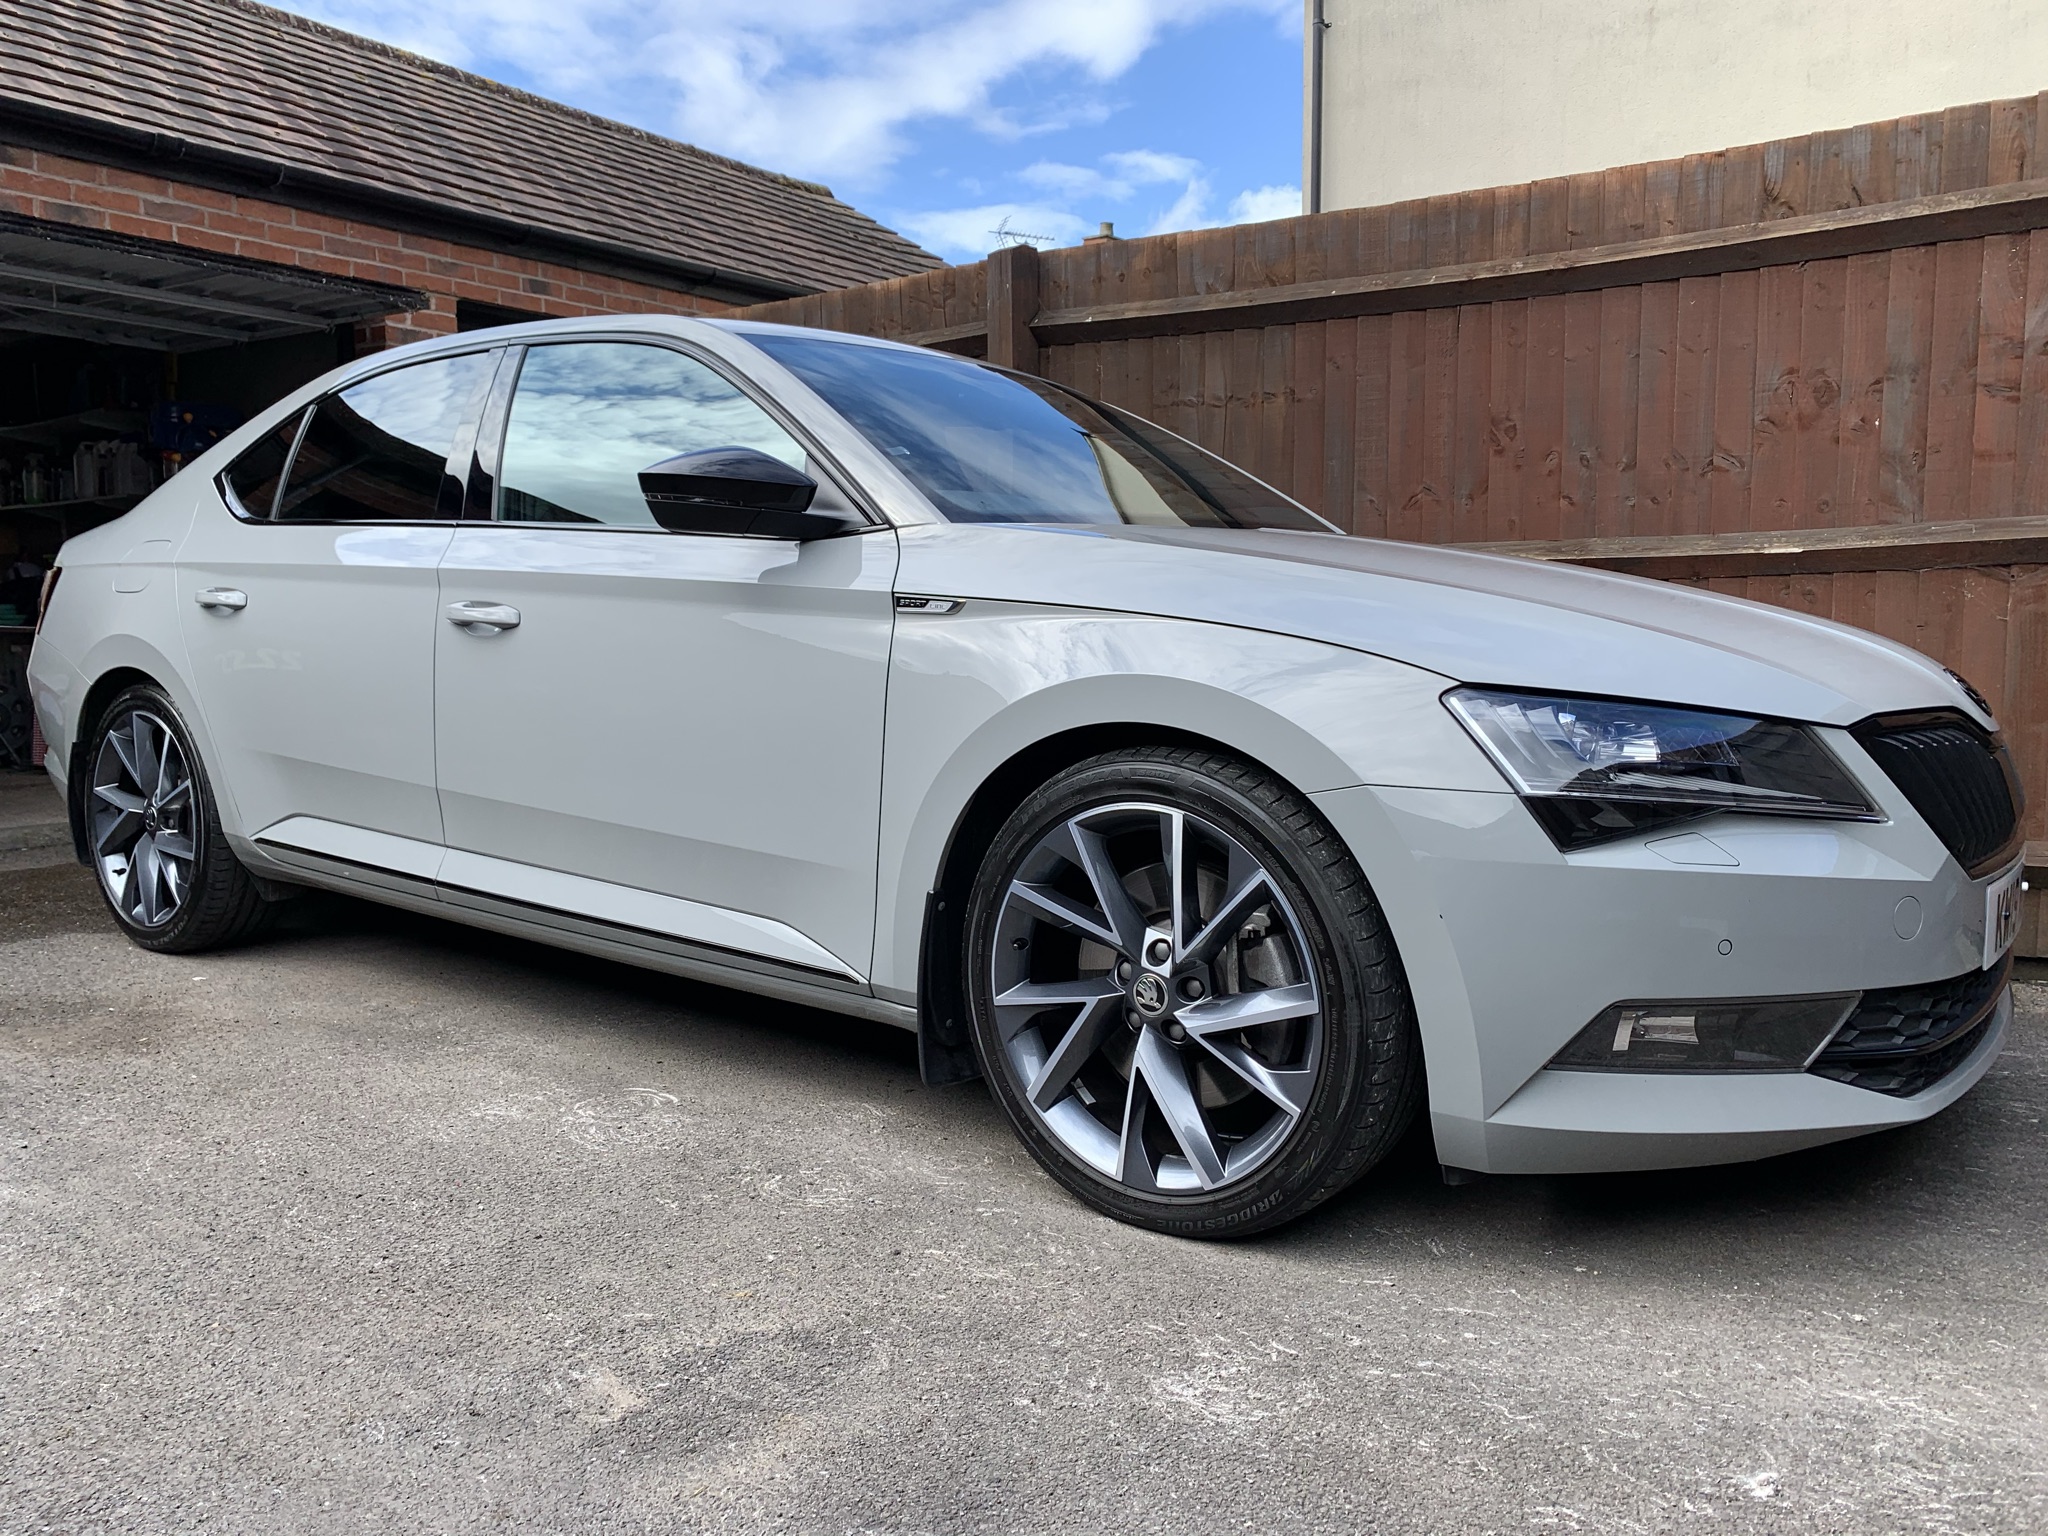
 1 point1 pointI run a ST X. Mine is a little lower tjan yours and soft. My alloys are 7,5x18” et39,5 with 215/35 and they scratch the top screw that holds the innerfender1 point1 point2018 sportline 280 in business grey... Jb4'd, this is picture from today after I've ceramic coated her...scrubs up well for a 3 year old girl 👀
 1 pointLike many, I haven’t visited this part of the site for a while. A now 3 year old somewhat put paid to detailing for a while (except a quick maintenance wash) but my car got some TOC a couple of weeks ago, so I thought I’d add it to this thread to help build some momentum! My process was: Snowfoam using Garage Therapy Decon Clean wheels using Bilt Hamber Auto Wheels and Bilt Hamber Surfex HD Rinse 2 bucket wash with Harage Therapy Decon Dry Decontamination using Bilt Hamber Korrosol and Auto Finesse Tardis Clay using AMDetails clay Single stage polish using Carbon Collective Hex 15 polisher using Sonax 04-06 compound on greenHex Logic pads Wipe down using Car Pro Eraser Coated using 2 coats of Gyeon Can Coat Wheels coated with Carbon Collective Platinum Wheels Tyres dressed using Gyeon Tyre Wheels coated with H2Go
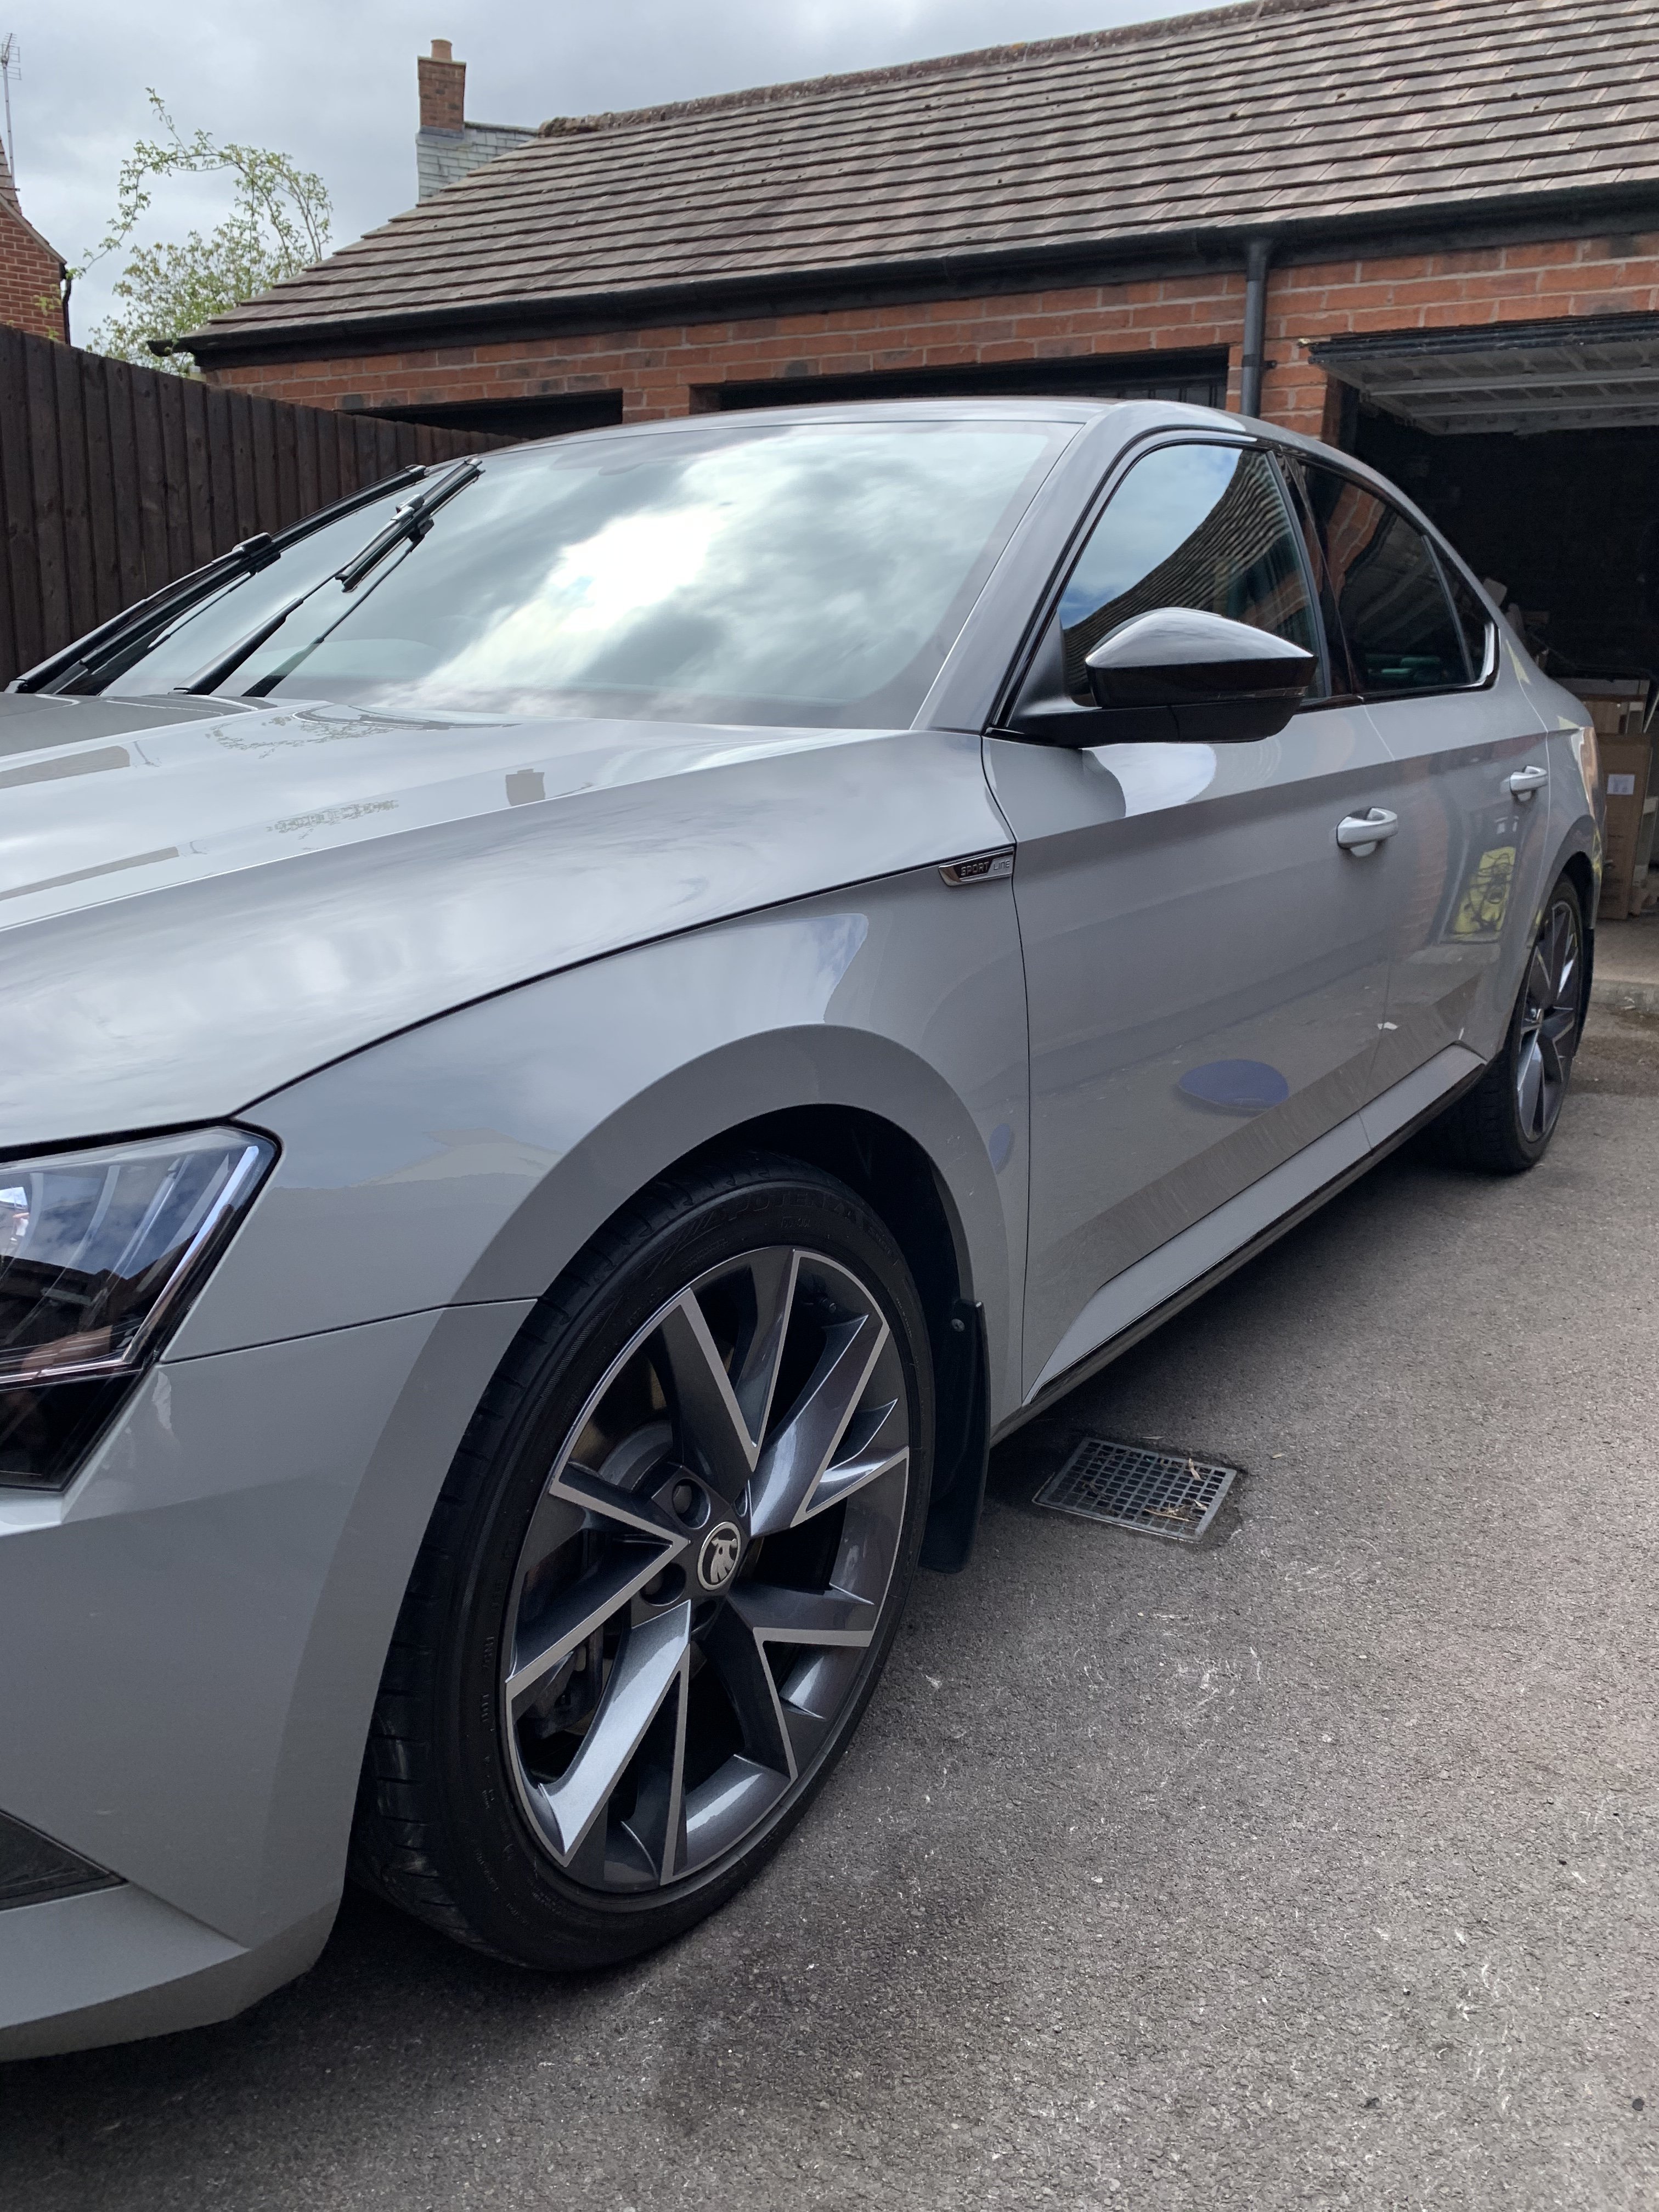
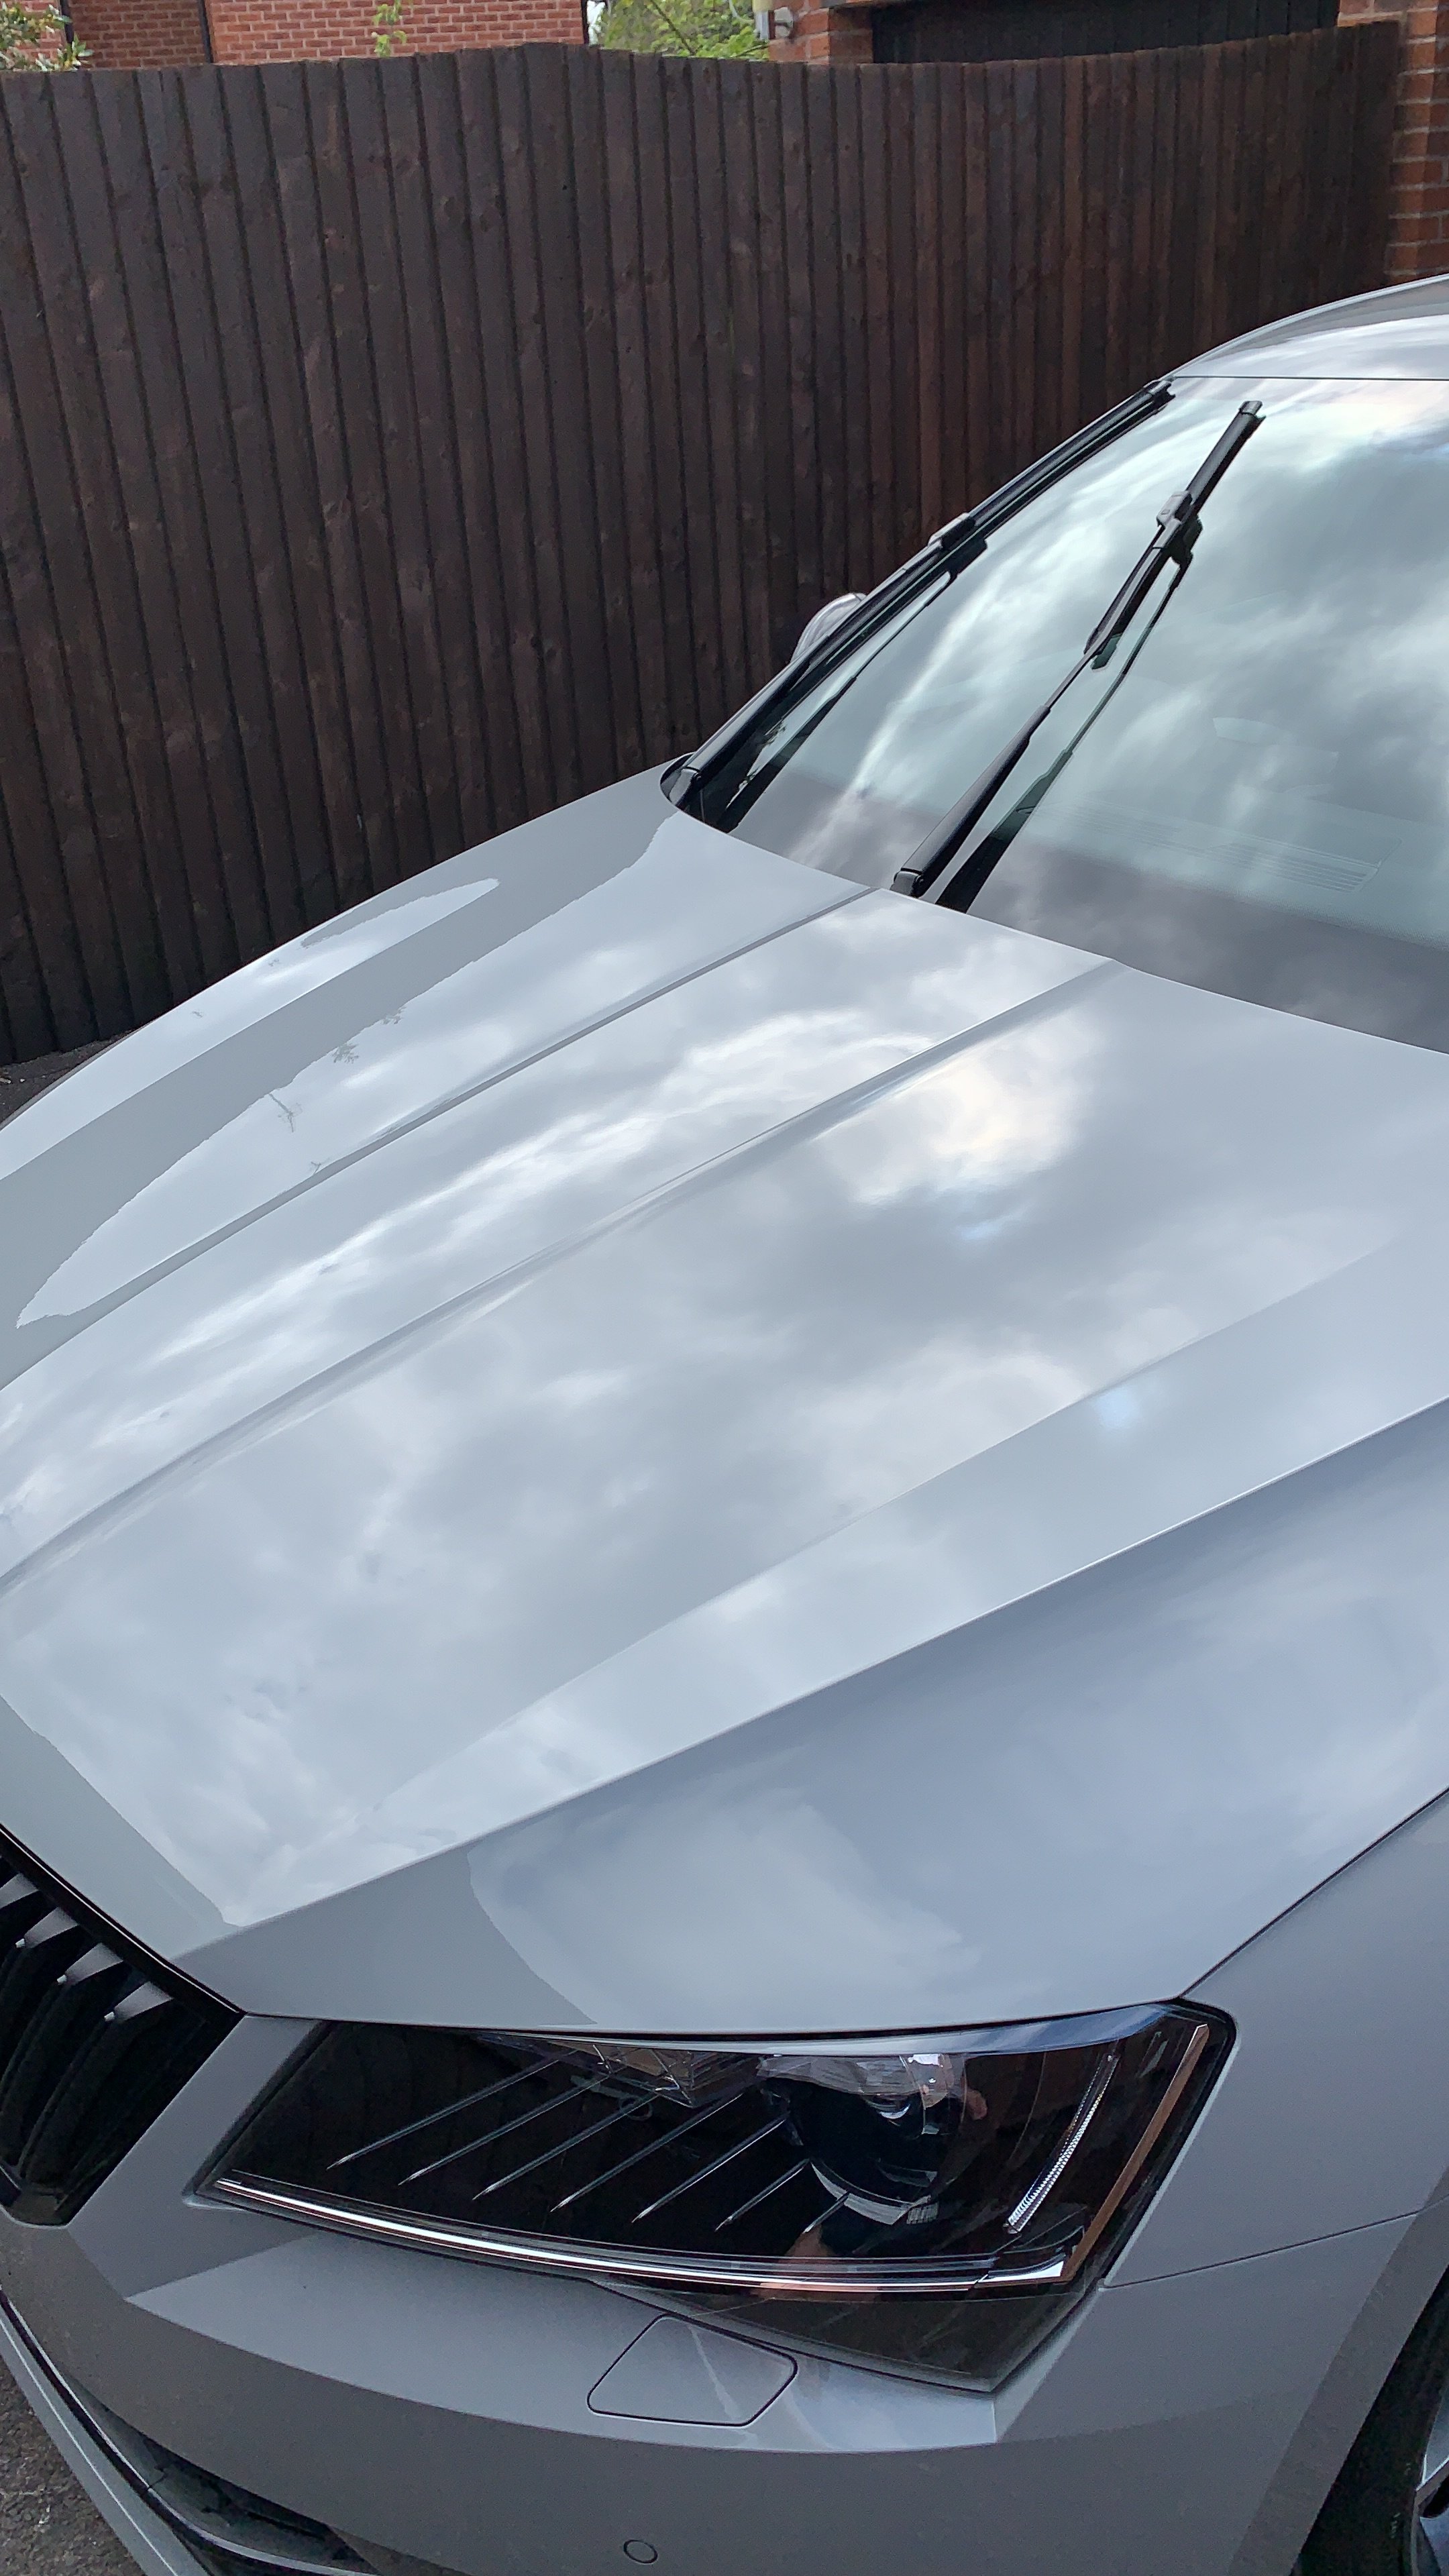
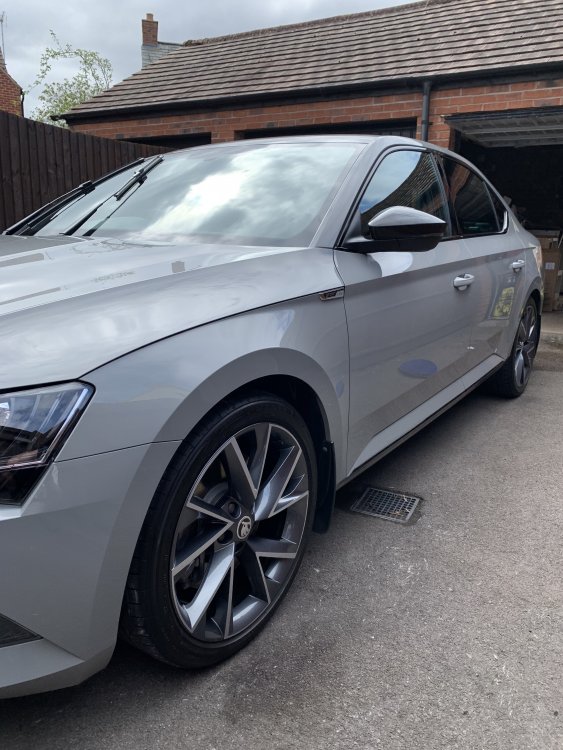


 1 point1 pointI had a Celtic tuning remap done on my 2.0 TDi diesel engine, it was done by one of their agents rather than their mobile fitters and as they had a promotion on at the time it was £50 cheaper. I believe it is the manufacturers map, it certainly feels like it, nothing untoward to report, if it is the manufacturers map then the peak power is less than they claim but I never take much notice of claims, it drives well and gives me the power & torque where I wanted it.1 point1 pointAn important point that's been mentioned but is now in danger of being overlooked. It's not just a coding issue. Several different models across the range (not all, and not just Skoda) require uprated radiators and/or oil coolers and/or brake system components if a car is used for towing. The factory prep includes any model-specific uprating where necessary. Further details are in some of the "?" pop-ups on the configurator pages. It doesn't matter if you're just putting on a bike rack with one or two bikes (as I do) or a caravan with the maximum permissible weight, the existence of a towbar/ball allows everything. You can't just say "I'm only putting a bike rack on". There's a real - but in my totally unqualified view, very unlikely - risk of damage to any of these components if they don't meet the towng specifications. In theory this could then lead to litigation and/or unjustified warranty and/or liability claims. I suspect that there are as many opinions on this as there are car salespeople and towbar fitters, and I've spoken to a number of each. I'm keeping my opinions to myself, so don't read anything into my posting about this, I'm just mentioning the hypothesis.1 point1 pointI did replace the badge but its not the same colour (race blue) as the car so might spray it on the car !!!
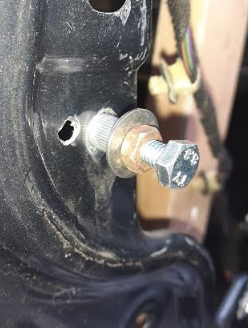
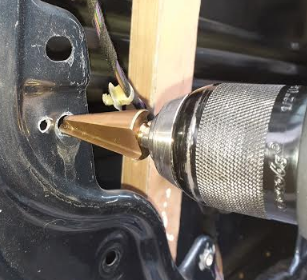
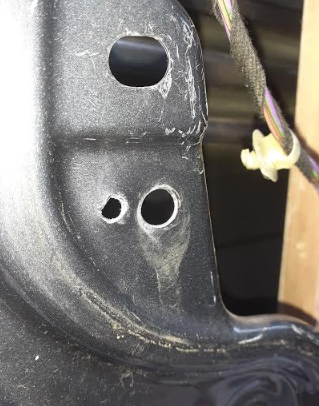
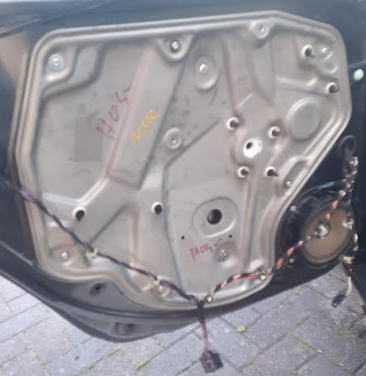
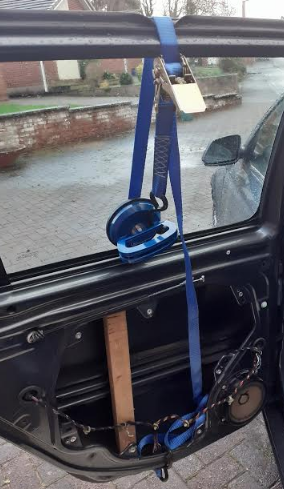
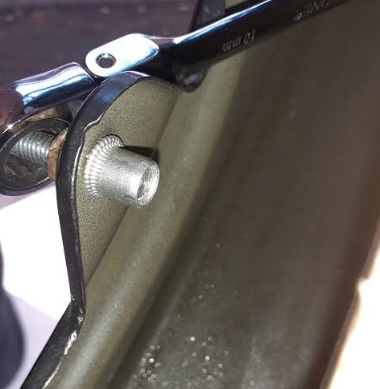
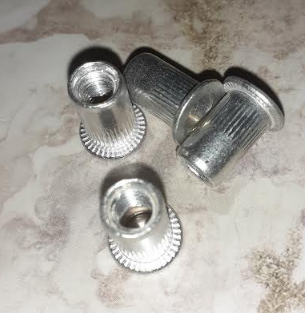
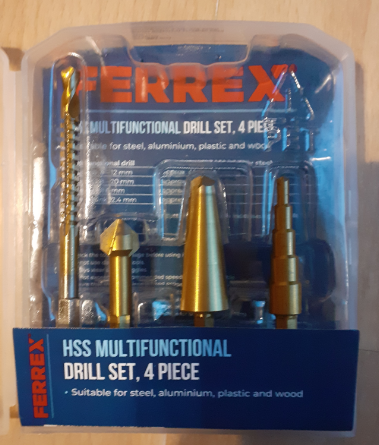
 1 point1 point1 pointHi, Just thought I would share my experience with a window regulator replacement on a 2007 Octavia 2. This is the left rear regulator. I used a bodywork dent puller suction pad and a ratchet strap (strap not really needed as the suction cup rests against the window rubber) to hold the window up while I replaced the regulator. The plastic window holder on the regulator had broken, along with the cable. I bought a 2nd hand regulator with the motor from an auction site for £16 . I didn't fancy re-fitting the regulator to the door with rivets as I don't have lazy tongs (large hand riveter), so I decided to buy a set of Aluminium Rivnuts with steel thread inserts from an auction site for £6 for a 100 mixed set (25 each M4, M5, M6 & M8). I bought aluminium Rivnuts because research showed that fitting by hand works best with Aluminium Rivnuts, without the need for special tools. I used a tube or cone drill (2nd from the right), from Aldi for £4.99 for the set. I opened the holes in the door frame to 9mm, which is the required size for an M6 Rivnut. This type of cutter is much better than a standard HSS twist drill when drilling sheet materials as a tube drill doesn't "grab" as breaks through the material like a twist drill can, plus, a twist drill can leave a slightly "out of round" hole, whereas a tube drill makes a perfectly round hole. Once the hole is drilled, remove the burr from the front and rear of the hole, using a counter sink bit (included in the set I bought). Now insert the RIvnut, with an M6 bolt, an M6 nut and two washers. Make sure the bolt is screwed in flush with the end of the Rivnut, to ensure and even spread of load on the thread as you set the Rivnut in place. Using a socket drive, hold the bolt (and the Rivnut) square to the hole in the panel, and using a ratchet spanner, tighten nut onto the RIvnut. The Rivnut may spin at first, but keep going and eventually it will bite on the rear of the panel. Then it will start to deform as it is drawn towards the panel. When the spanner starts to get tight, slow down, otherwise the Rivnut thread can be stripped. Once spanner is tight (don't go mad), slacken the nut, then remove the bolt from the Rivnut. The use of Rivnuts made it possible to remove the regulator unit for test purposes, which would not have been possible if rivets had been used. To get the glass to sit in the plastic holder on the regulator unit, remove the motor from the regulator (3x Torx T30) then move the plastic glass holder on the regulator up to the top of the movement, MAKE SURE YOU DON'T LET THE PLASTIC GLASS HOLDER GO OFF THE END OF THE REGULATOR TRACK, AS THERE IS NO END STOP!!!! Remove the rubber grommet, which then allows you to see the regulator track and the alignment hole on the plastic glass carrier (can only seen when the glass is lowered). With the glass slightly lowered (about 50mm opening) offer the regulator into place, while locating the glass in the plastic carrier. Now move the regulator into place and locate the metal dowels (on the rear of the regulator) into the locating holes in the door frame. Now fit the M6x25mm screws to hold the regulator in place. Once all screws are refitted, lower the glass using a pair of needle nose pliers to drive the regulator gear, until the hole in the glass is visible through the access hole (access hole in panel is approximately 40mm diameter). You can now push the larger plastic dowel into the glass, through the plastic glass retaining bracket (it should "Click" into place in the glass). Now gently push the small dowel into the larger dowel, which causes the larger dowel to expand slightly. Re-fit the rubber grommet. Check that the window can go up and down by turning the regulator gear with the needle nose pliers (carefully, but don't put anything in the splines of the gear, as this is what the motor drives). When you are happy with the operation, re-fit the motor with 3 screws. Re-connect the multi way plug to the rear of the motor. When you try the window, it will not do "one-shot" function until the window has been lowered fully (and is held there to mark the end of travel position) and the same for the upper movement. Once you have performed the upper and lower end of travel operations, the "one shot" function will work. Hope this helps. Russ
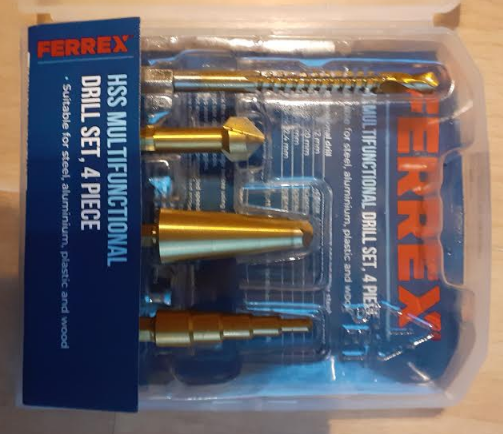

 1 point


Important Information
Welcome to BRISKODA. Please note the following important links Terms of Use. We have a comprehensive Privacy Policy. We have placed cookies on your device to help make this website better. You can adjust your cookie settings, otherwise we'll assume you're okay to continue.