Leaderboard
-
.jpg.1006585dfe4e2977315b67c3d642e37b.jpg)
Guest_
FREEDOM21Points83,824Posts -
AnnoyingPentium
FREEDOM16Points5,646Posts -

Lee01
FREEDOM12Points36,160Posts -
Lady Elanore
FREEDOM9Points24,875Posts


.thumb.jpg.9dd3f612ba7f13d10be5c518d3c8d255.jpg)

Popular Content
Showing content with the highest reputation on 09/12/21 in all areas
-
7 pointsJust had a call from my dealer to say my car is on it's way and should get first week of January. VRS 245 Estate DSG - Race Blue, Canton, Reverse Camera, Winter Pack and Spare Wheel on the 17th July.7 points
-
4 points
-
3 pointsWe had a phenomenal double rainbow on Monday. Unusual light around as well. Picture doesn't do it justice of course:
 3 points
 -
2 pointsRefurbished head liner collected from Kohl Customs Can’t wait to get it back in the car.2 points
-
2 points
-
Neither, because this guide is for Favorit/Felicia 1.3 litre, not for the Fabia. And Haynes are, as usual, talking through an orifice normally covered by their trousers!2 points
-
2 points
-
2 pointsCheck the wires in the rubber boot by the door hinge. The wires might be fractured & making intermittent contact.2 points
-
The video calculations are not quite right. A 9 years old Leaf cannot hold 24 kWh charge, I'd estimate my car to hold 18-19 kWh absolute maximum. Even new, it won't hold 24 kWh, that was the gross capacity. Another point, public EV charging is always cheaper at slower speed. Eg, outside a friend's central London flat, there was a Polar 50kW rapid and a Ubitricity lamp post charger. Only a foul would solely use the rapid charger to power their car. But main point of video stands, check electricity rate, solely use rapid charging can wipe out fuel savings. I'm on 13p for E7 off peak and 23p for other times with Bulb variable tariff. My smart meter was installed a few months ago and I've been offered their EV tariff of 4 hour 5.5p and 24p other times. I plan to sign up after Christmas when WFH guideline lifts. But now that Bulb is disappearing and I have my gen2 smart meter, I want to switch to Octupus.2 points
-
2 pointsAll depends where you're likely to be driving I'd probably choose ECE5 give it covers the UK and a good chunk of Europe. - If you need Spain and Portugal, choose ECE1 - If you need Denmark, Finland and Sweden, choose ECE6 If it's just the UK, then they will all be fine2 points
-
I am currently paying 14.9p plus VAT ie 15.65 for normal electricity and 4.76p plus VAT for 0030 to 0430 electricity ie 5p per kwh. Gas is 3.64 p per kwh. This is with Octopus GO due to the EV charging during the late night period and the Flexible Octopus for gas. Wondering if I should go fixed for gas but Martin Lewis says do not change but also that April could at 40% rise in rates.2 points
-
In this guide you will learn how to adjust the valve clearance. The guide is aimed at the most common engine mounted on Felicia, 1.3 MPI. The procedure is similar for other engine types, but check the Service manual for specific clearance values. Prerequisites The engine must be cold and the air temperature must be below 20 C. Remove all spark plugs. Remove the valve cover. In order to be able to rotate the engine, jack up the front right wheel and shift in 4th gear. By rotating the front right wheel clockwise by hand, the crankshaft of the engine will rotate easily. Tools needed Flat screwdriver 11 mm ring wrench Feeler gauge set Torque wrench (optional) The "5" method We will apply the method known as the "5" method for reasons described below. Definition: Valve overlap - we say that the valves overlap when, for a short time, both valves (intake and exhaust) are open. This moment occurs when the exhaust stroke ends and the intake stroke begins. In terms of crankshaft angle of rotation for all Felicia 1.3 engines, the valves overlap for 20 - 39 degrees. We can assess that moment fairly precise for each cylinder by watching the movement of respective rockers. We look for the precise moment when the exhaust rocker is ending to move up and the intake rocker is starting to move down simultaneously. So let's do it! Rotate the crankshaft until: Cylinder 4 valves overlap --> Adjust valves clearance on cylinder 1 Rotate the crankshaft 180 degrees until: Cylinder 2 valves overlap --> Adjust valves clearance on cylinder 3 Rotate the crankshaft 180 degrees until: Cylinder 1 valves overlap --> Adjust valves clearance on cylinder 4 Rotate the crankshaft 180 degrees until: Cylinder 3 valves overlap --> Adjust valves clearance on cylinder 2 We see now why the method is called the "5" method. The sum of the cylinder numbers for overlapping and adjusting is always 5 (4+1, 2+3, 1+4, 3+2). The process is shown in detail in the figure below. Adjustment Insert the ring wrench over the locking nut of the rocker and unscrew it half a turn. Insert the corresponding feeler gauge between the rocker and the valve stem (see photo below). Rotate the screw with the screwdriver until the feeler gauge moves with a slight drag. Keep the screwdriver still and lock the nut with the ring wrench. Optionally torque the nut at 15 Nm with a torque wrench. Repeat the process to all eight valves. Then rotate the engine two turns and recheck all eight valves again. Assemble everything in reverse order.1 point
-
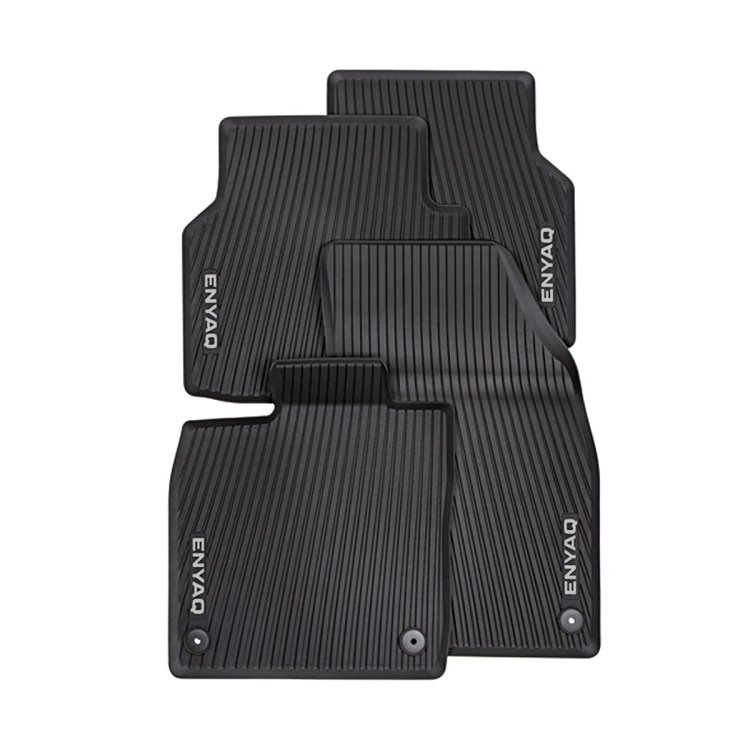
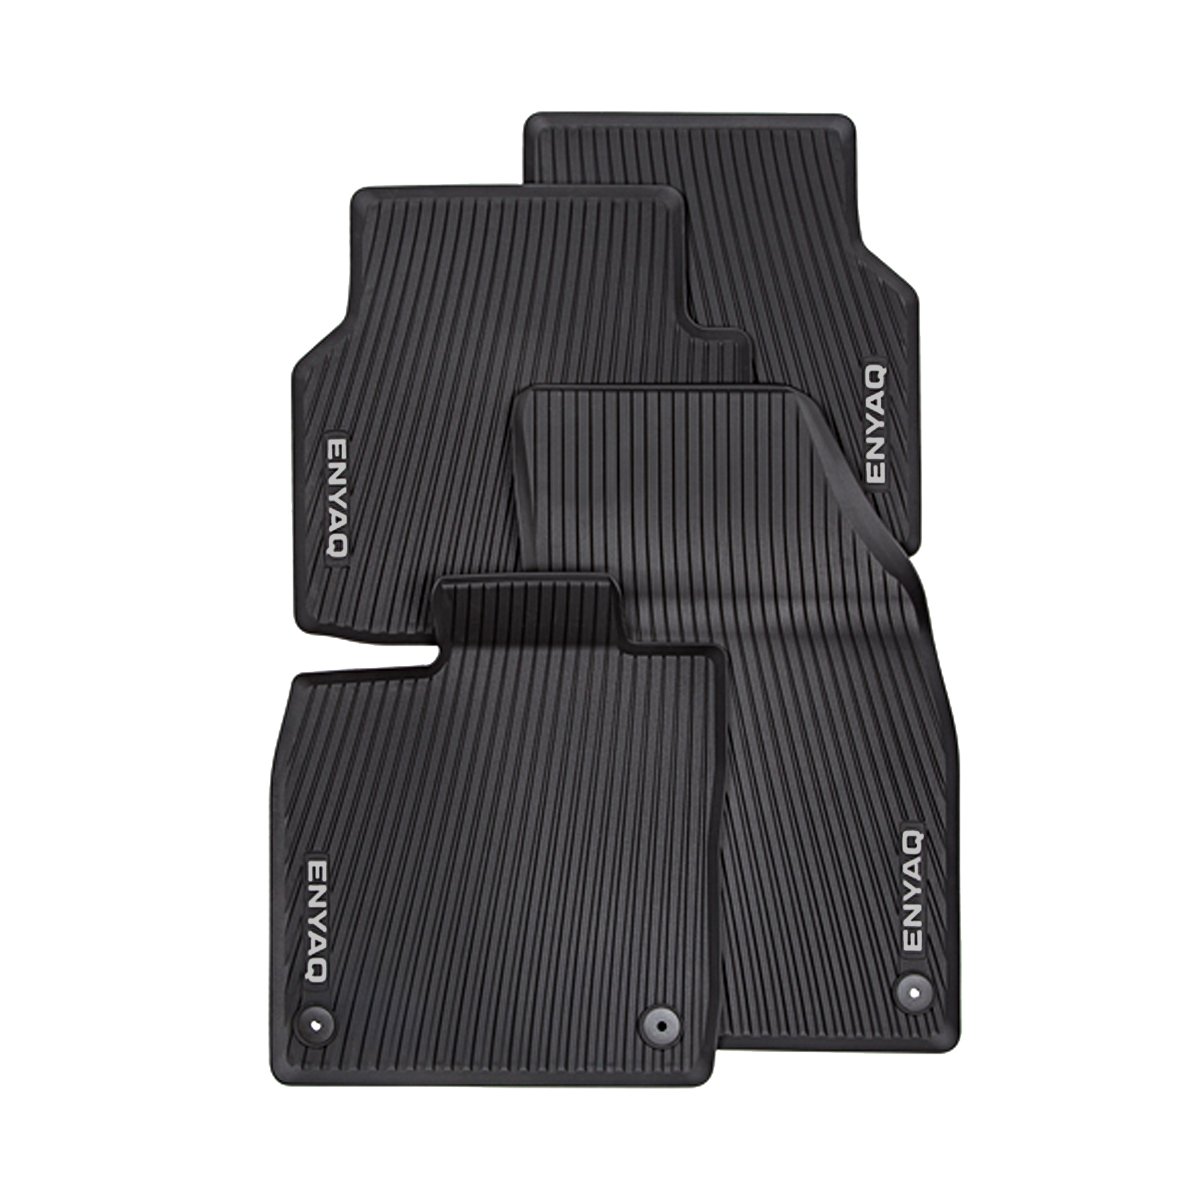
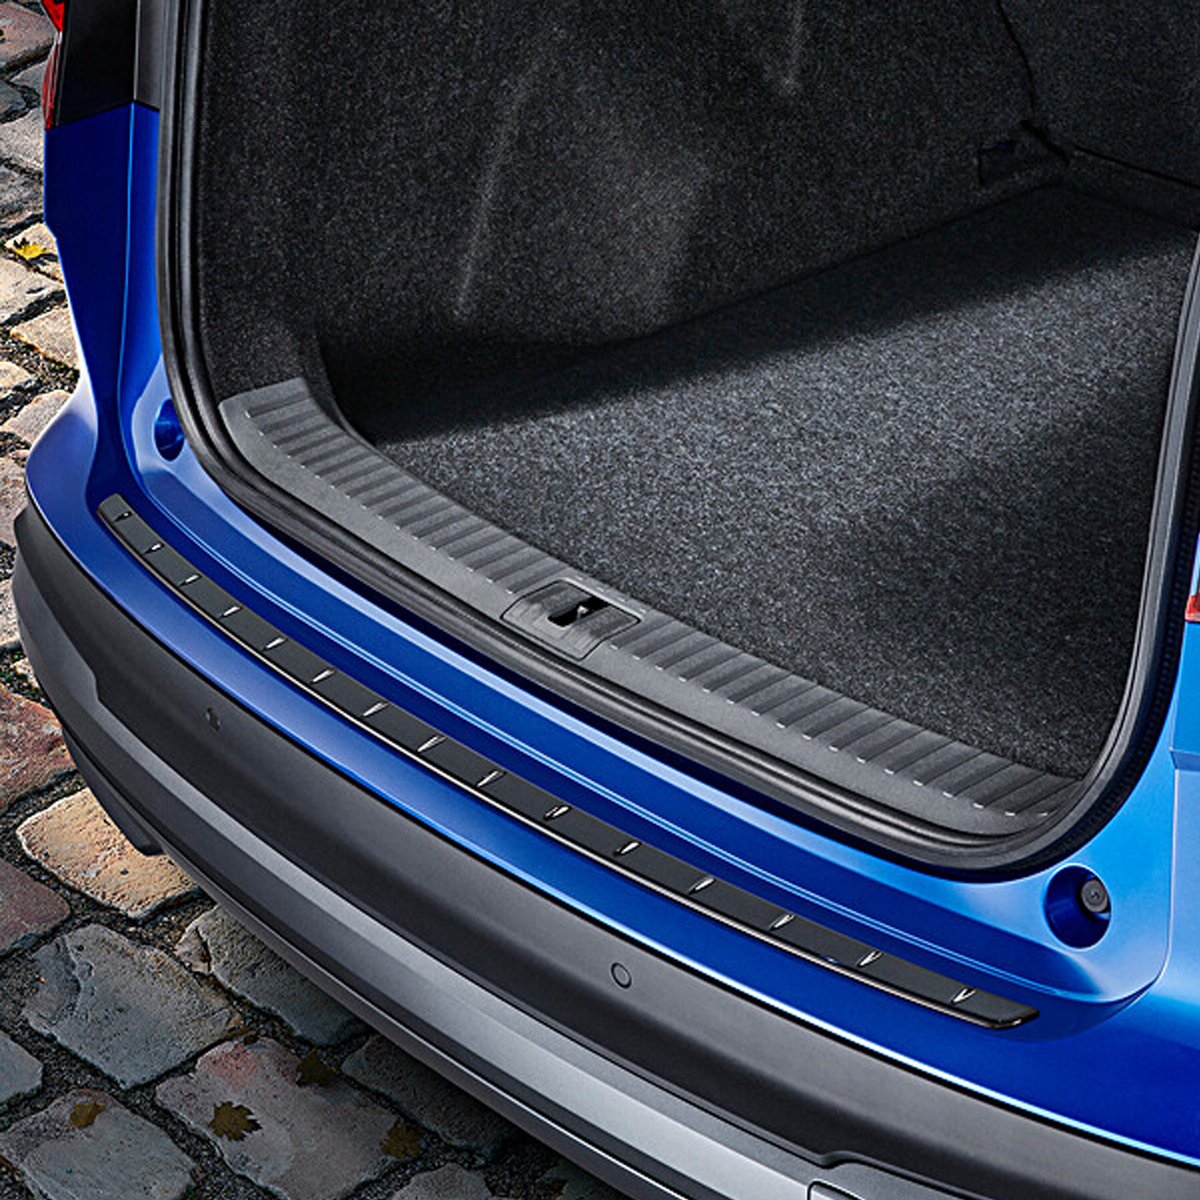
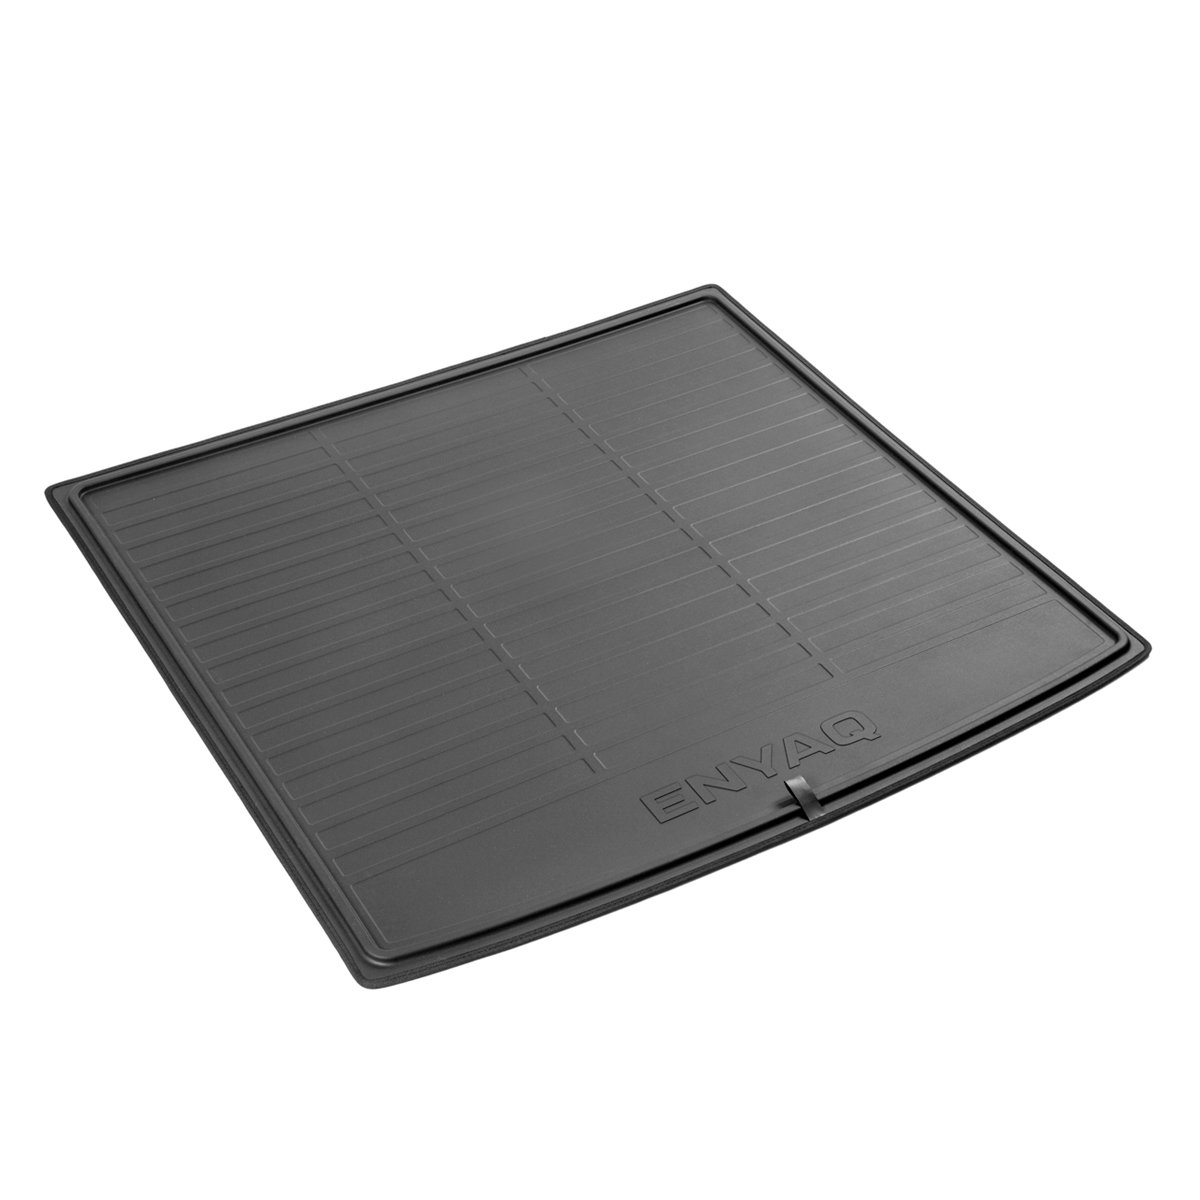
1 pointHas anyone bought any accessories or made any modifications to their Enyaq? The sportline I have ordered comes with black lettering on the back but the badge on the front is silver, I have been looking to either get it wrapped or change it out. I have also ordered the rubber car mats, boot liner and a bumper protector. Also looking to swap out the horn to one that doesn't sound like its from a clown car, but I will wait to see how hard it is to access it when I finally receive the car! 🤞


 1 point
 -
1 pointEver since I bought my car, the fronts spin up on attempted quick exits from t junctions or entering roundabouts. This resulted in a new set of tyres at 10k miles!!! Two services at supplying dealer indicated no problem other than my right foot, and an offer to sell me some tyres. Yesterday, third service at different main dealer, and technician drove car and agreed a problem, found out of date software for traction control and updated. Like driving a different car, now. Also fixed the clunky first gear uptake, as well! Nice to find a dealer that cares (Rainworth Skoda of Mansfield, Notts).1 point
-
1 pointYou Tried a racingline dealer near you mate. Their oem+ stuff for your engine was developed on the octy tdi. Think there is a place in bath.. have a look on their website.1 point
-
1 pointI will do a test once mine is fixed lol atm mpg and performance is shot.1 point
-
Wooohooo! Well done. Your free membership to this site has served you very well, I'd suggest you stick around and get more great advice. Here's mine, these cars have very invasive computer programs, if the car battery charge gets low even if perhaps the car still starts and the lights seem bright enough, the car battery can still be too low for the computers and their programs and they may start to throw wobblies and play up in all sorts of ways. So keep the car battery charge level from going low, if needed get an appropriate battery charger (trickle better than fast) or you might see Xmas lights on your dash away from Xmas. Good luck, thanks for reporting back.1 point
-
1 pointI'll just sit here like "uh-huh, I can totally understand what it's like to drive either of these cars, yes."1 point
-
1 pointDoubt it against mine....even the head mechanic/tech at the Skoda garage (who I knew) said was faster than any other (non vrs) Fabia MkI that he had driven & that included the 2lt....but mine was modded!.. Also I had nothing go wrong with my 1.4lt AUB drivetrain in 14yrs of ownership....😛1 point
-
1 pointCarts returned, refund received, original ordered, arrived today. In, working and tickety boo 👍 Gaz1 point
-
1 pointI wonder how that engine compares with the 1.4 mpi 8v for performance.1 point
-
1 pointId love to take it off your hands. Drop me a mail [email protected] if you can or a PM here. I’ve just joined to chat to about this bike.1 point
-
1 point
-
1 pointWay more spritely!!.. That 2lt 8V..dates from 1988..used in other 1st gen Skoda (totally new cars under VW)..& various older Audi (80 & 100 series)... VW Audi Engines - VW 2.0 EA827 engine (1980-2013) (motor-car.net) List of Volkswagen Group petrol engines - Wikipedia1 point
-
I've never had anything useful from a Haynes manual besides profit selling them on eBay!1 point
-
1 pointSorry, both, I wasn't disbelieving anyone, I'm not sure what I meant to put, I meant I wasn't sure about what the garage said, typo/editing error. I meant the Northampton Dealership asked the same to either get more work or it's something the bookings/collection person is told to say - yeah so just looking for more work really, to confirm that Warrior193's garage wasn't alone in this practice.1 point
-
1 pointInteresting, a shame they dont use technical translators as some of the terms dont make sense until you make the connection, duct = port etc, also "charged" means something else like "in operation". What a truly overcomplicated piece of kit and its not even EU6 😲 I learned somethibg right at the end, the silicate teabag in the header tank is a preventative measure in case the system is filled with water and not G13 coolant. Mine looked like brown water recently, I removed the radiator, intercooler etc to replace the crashbar nearly 2 years ago and it looks like I refilled with water and forgot about it, 2 x 5 litres of G13 concentrated should arrive today, I was lucky last winter by the looks of things although I did buy and use a pen coolant tester.1 point
-
1 pointThe Elegance was the top spec at launch (& when I got mine in Jan 2001) before the vRS came out..which was later... I decided against the 2lt as it was 115BHP & 125lbft & 0-62mph in 9.9secs & 36.2mpg combined -vs- the 1.4lt 16V 100BHP & 92lbft & 0-62mph in 11.5secs & 39.8mpg combined The 2lt was also heavier by 45kgs (all in the nose weight) & polluted by 17g/km more CO2 than the 1.4lt. manual (75bhp 1.4lt auto polluted the same as the 2lt) If I remember it was the old 8v from the Mk3 Golf Cabriolet.. My Fabia after some mods was defo faster than the stated brochure specs anyway..1 point
-
1 pointMost MOT testers are not there to bust your balls & won't go looking for something that they probably agree with and would do themselves, if its in plain sight and could not be missed then they could well cover their backside. The only visible part is the new connector to the MAF sensor and the loom to it which looks identical to the stock one.1 point
-
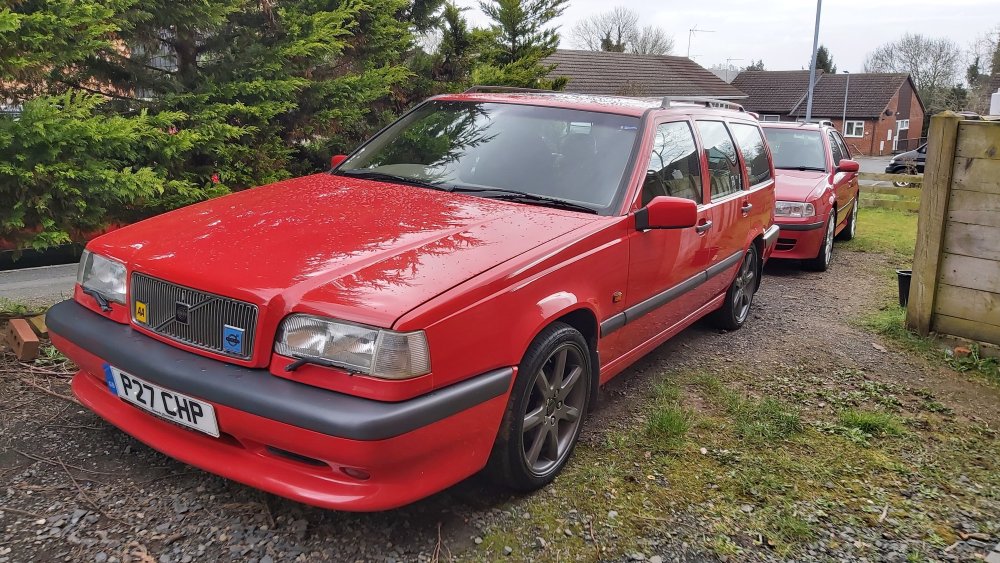
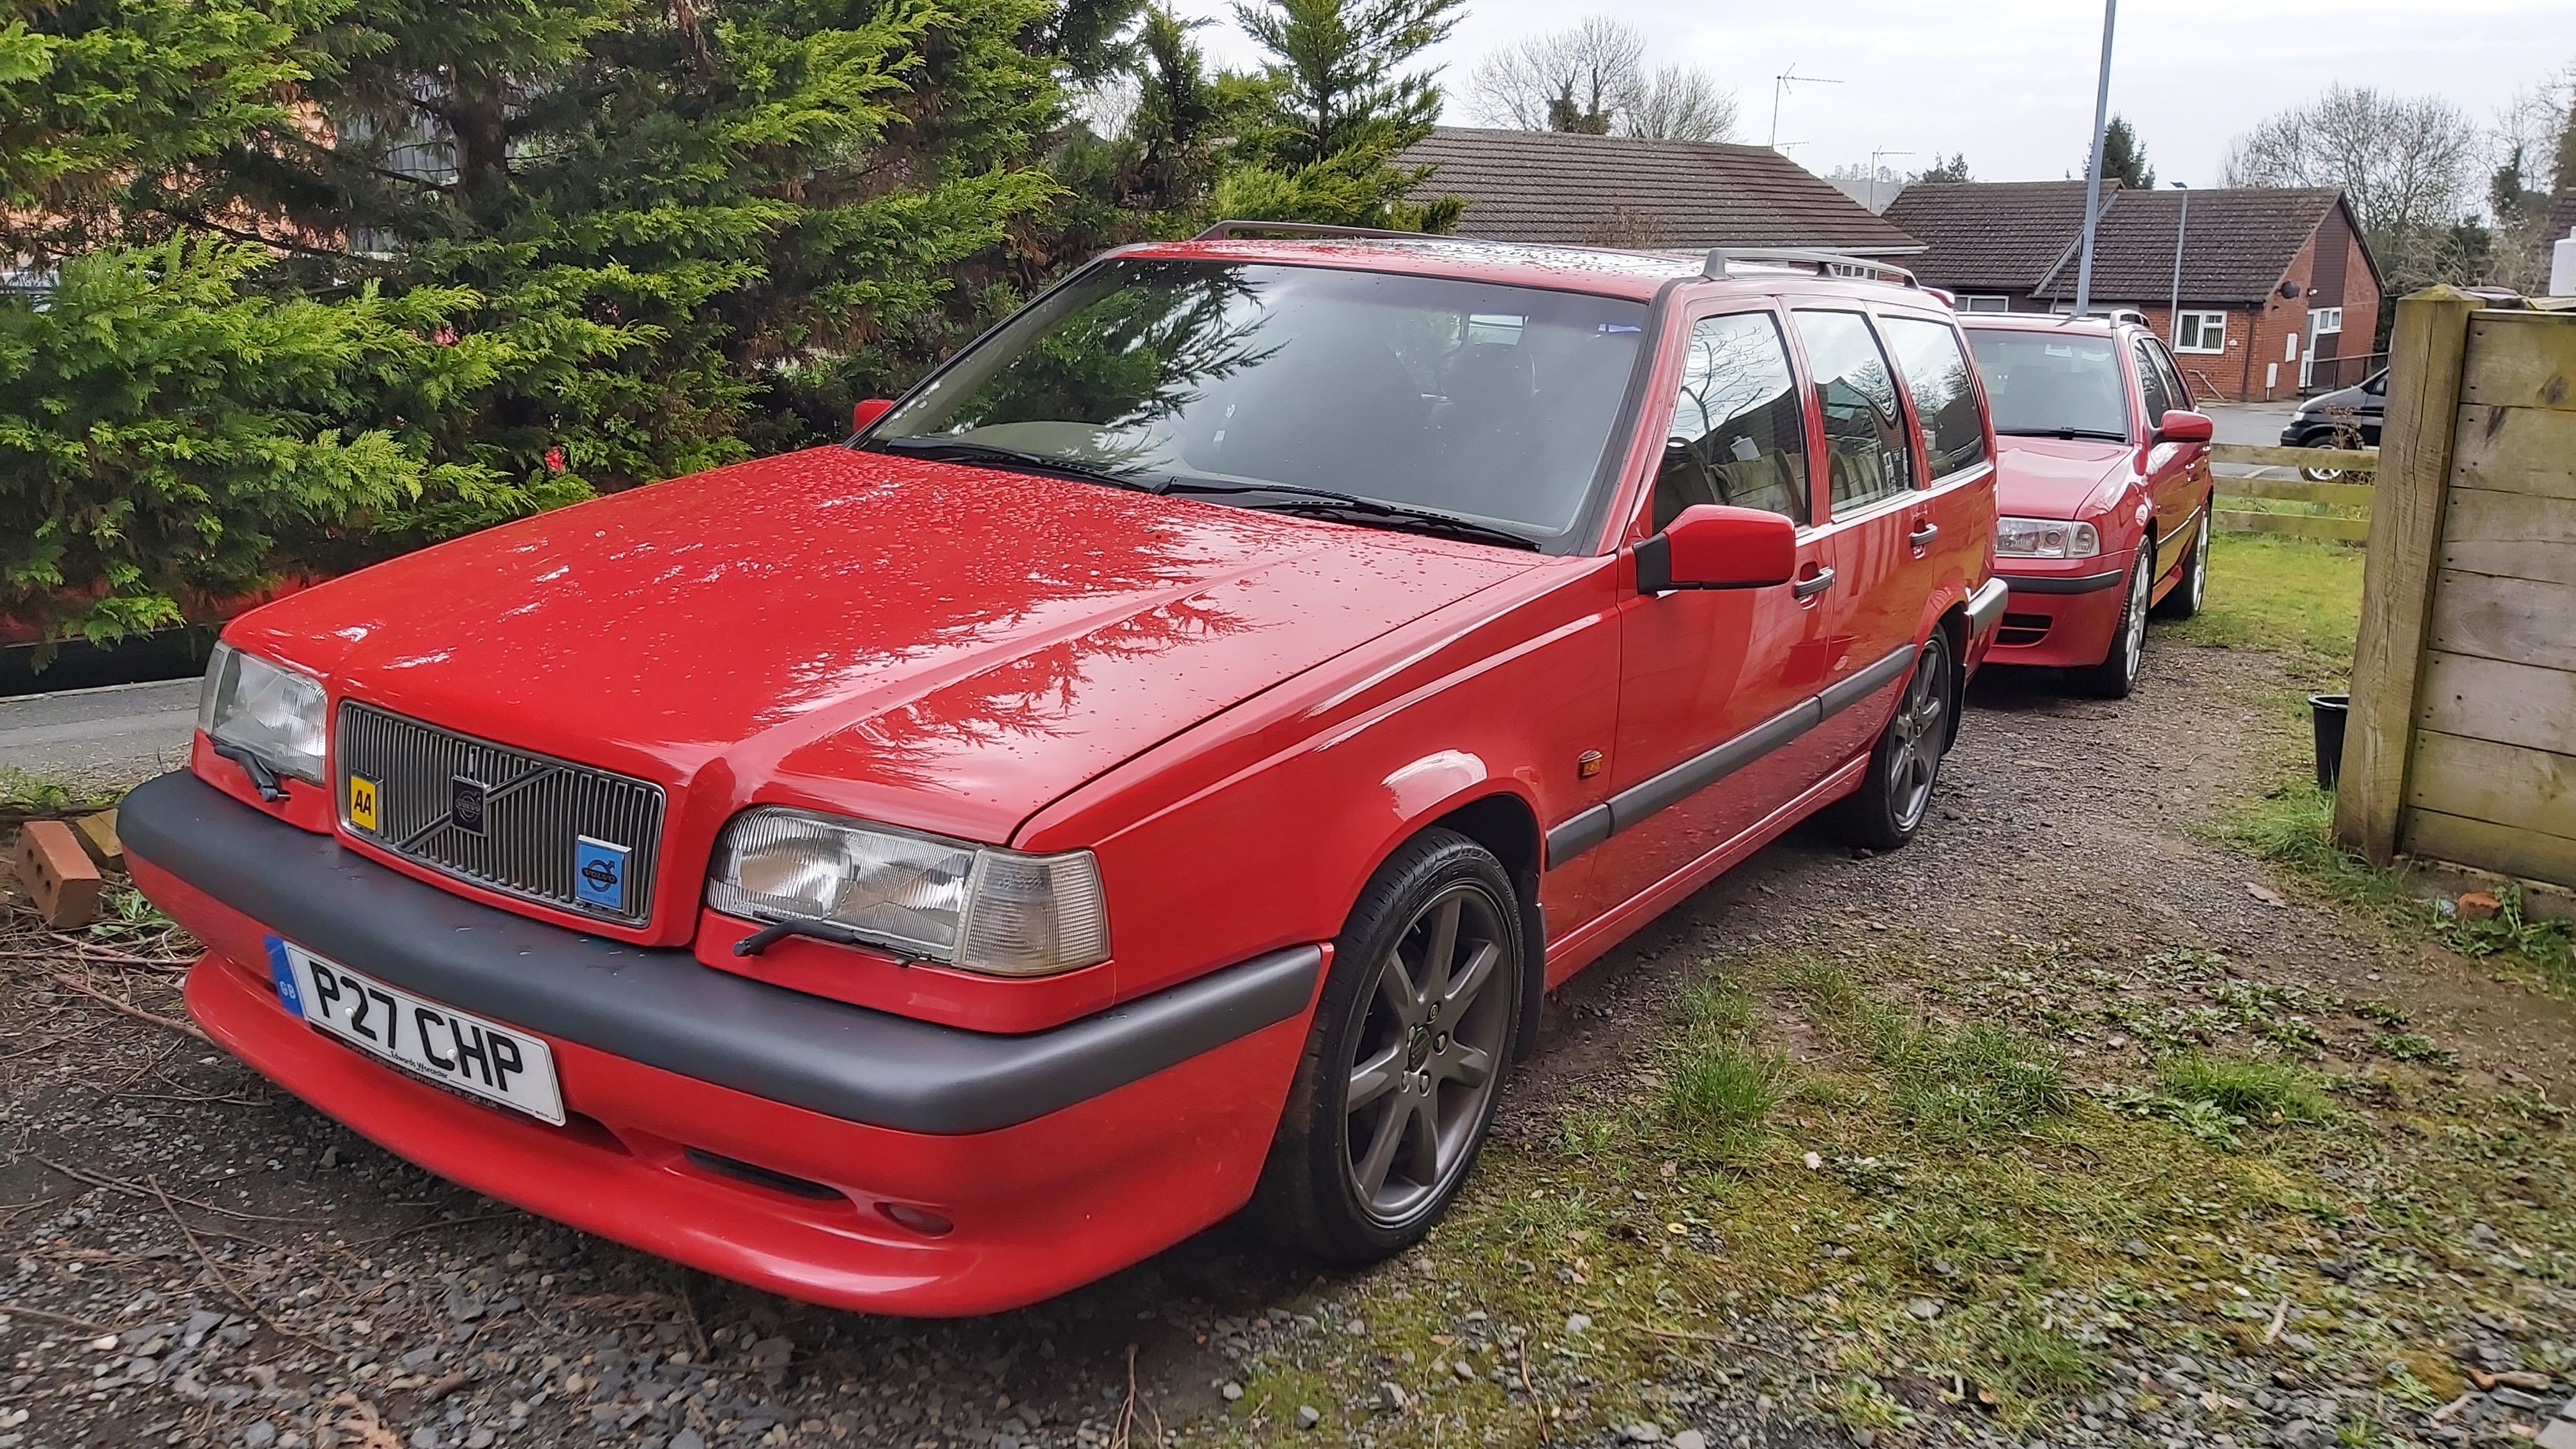
1 pointHi Peter, thank you for your comment. Well the Volvo might be for sale next year 😪. Here is a good photo of it.
 1 point
 -
I have seen even 5 litre per 100 Km this way but in city traffic the things are very different.1 point
-
The backrest release handles are still available from TPS and they are very cheap. I certainly would rather have a new one than used as they do degrade over the years. I think I paid less than £3 each for them earlier this year.1 point
-
1 pointNo. Are you? Almost invariably happens across 61,500 miles in the three Skodas. Almost invariably never happened in the previous Saab 9-5 2.3t, putting 220bhp through the front wheels over twice the Skodas' mileage. The Saab weighed around 300 Kg more than the Octavia vRS or the Karoq.1 point
-
The Big & the Small.1 point
-
1 pointThe service - i mean the dealership. They are still newbie with this type of car..1 point
-
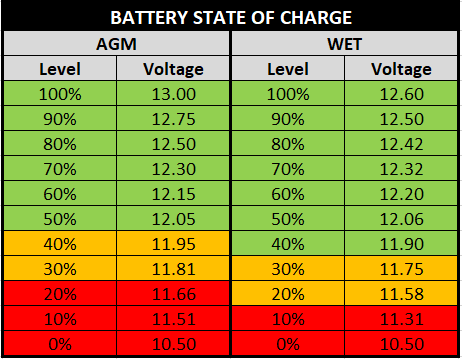
1 pointAs above you really need to check the resting voltage when all systems have shut down. 12.2 v does not indicate a duff battery, bearing in mind the smart alternator/ micro hybrid charging system only charges the battery to around 80% to allow capacity for the alternator space to dump charge on the overrun.
 1 point
 -
I have minus 20 *c windscreen wash in and it was minus 4 or lower earlier on. Driven 30 miles and outside temp between 0 and 1*c but still no windscreen wash available. Without a heated coolant container / pipes and nozzles this is just how it can be with the coolant bottle in an unheated bonnet area with an EV. I knew this from last winter which is why I have good coolant in. Sitting charging now with heater on and dead cozy and now getting a squirt....1 point
-
You are on the good rate which you got on prior to summer 2021, I assume - well done. For my area, Go is now 25.9p peak but still 5p off peak. Octopus are not taking on new customers right now though and if already with them advise to stick on the tariff you have.1 point
-
1 pointTheres one or two hanging around Ireland and on southern plates no less. Saw one up on donedeal a while ago on an 07-MO plate The one that hung around me over the m50 was an 07-KE plate. Not very useful, but considering how expensive its gotten to import them its kinda cool to see such a rare car here in the south. Must be a handful of them here at most.1 point
-
1 pointYou could try following the instructions I wrote a while back: As per the warning, the latest full Europe maps no longer fit on a 16GB card regardless of how you format it. You'll need to remove files as per the post I've linked1 point
-
1 pointI see thanks for the replies. Here, if you don't drive a lot leasing is a tad more expensive.1 point
-
1 pointI had seen them thanks, pulled the trigger on one that 'should' be here Fri/sat, ringing the garage tomorrow to sort something out1 point
-
1 point
-
1 pointThere are two ways forward here; you can either delete all of the files and put the new files onto the card and install the new map files OR: You need to format the SD Card to a small cluster size. Assuming SD Card is drive E: for example: format E: /FS:FAT32 /A:4096 /Q Others might want to chip in - as I'm not a Windows person..... One formatted, re-insert the drive and put the files onto the SD Card again.1 point
-
Rory has a very good home tariff if he pays only 14 pence a kWh when not using off peak.1 point
-
1 pointBolts work by stretching (Hookes law). The pressure on the bolts is reduced when other bolts are holding as tight or tighter, so If I release the locker first the other bolts are sharing the load. Same when re fastening. The other 4 bolts are squeezing the wheel to the rim already so less pressure on the locker - and I don't fasten them quite as tight. When I've had lockers fail it's been the head that fails, in that you can't put sufficient force on them to undo the nut - what caused the failure who knows - but If it helps then it's worth it. You have 5 to tighten and undo so it's the same work anyway.1 point
-
1 point
-
1 pointItching to take it for a drive but it keeps raining and I have no sunroof as it’s away being re-trimmed.1 point
-
Try one of these, I’ve used one to get at nuts etc down the back of an engine or in vey confined spaces. https://www.halfords.com/tools/hand-tools/all-hand-tools/rolson-led-claw%2Fmagnetic-pick-up-tool-710299.html1 point
-
1 pointI’m on the point of swapping my Superb Estate L&K for an Enyaq SportLine 80x in Arctic Silver. I ordered a 60 in mid August and was advised of a February delivery, the SportLine was set to be a showroom car but we worked round that and delivery could be as early as today. I test drove the fairly loaded demonstrator in July and was impressed by the overall quality of the car, and even on 21” rims the ride was very good. Looking forward to trying out the 80x with 265hp and 4wd!1 point


.thumb.jpg.06721e8c8b33ed0eea16572ff131b291.jpg)