


Leaderboard
-
.jpg.1006585dfe4e2977315b67c3d642e37b.jpg)
Guest_
FREEDOM18Points83,824Posts -
Lady Elanore
FREEDOM13Points24,875Posts -
MikeTheThinker
FREEDOM11Points8,481Posts -
AnnoyingPentium
FREEDOM9Points5,646Posts


Popular Content
Showing content with the highest reputation on 27/11/22 in all areas
-
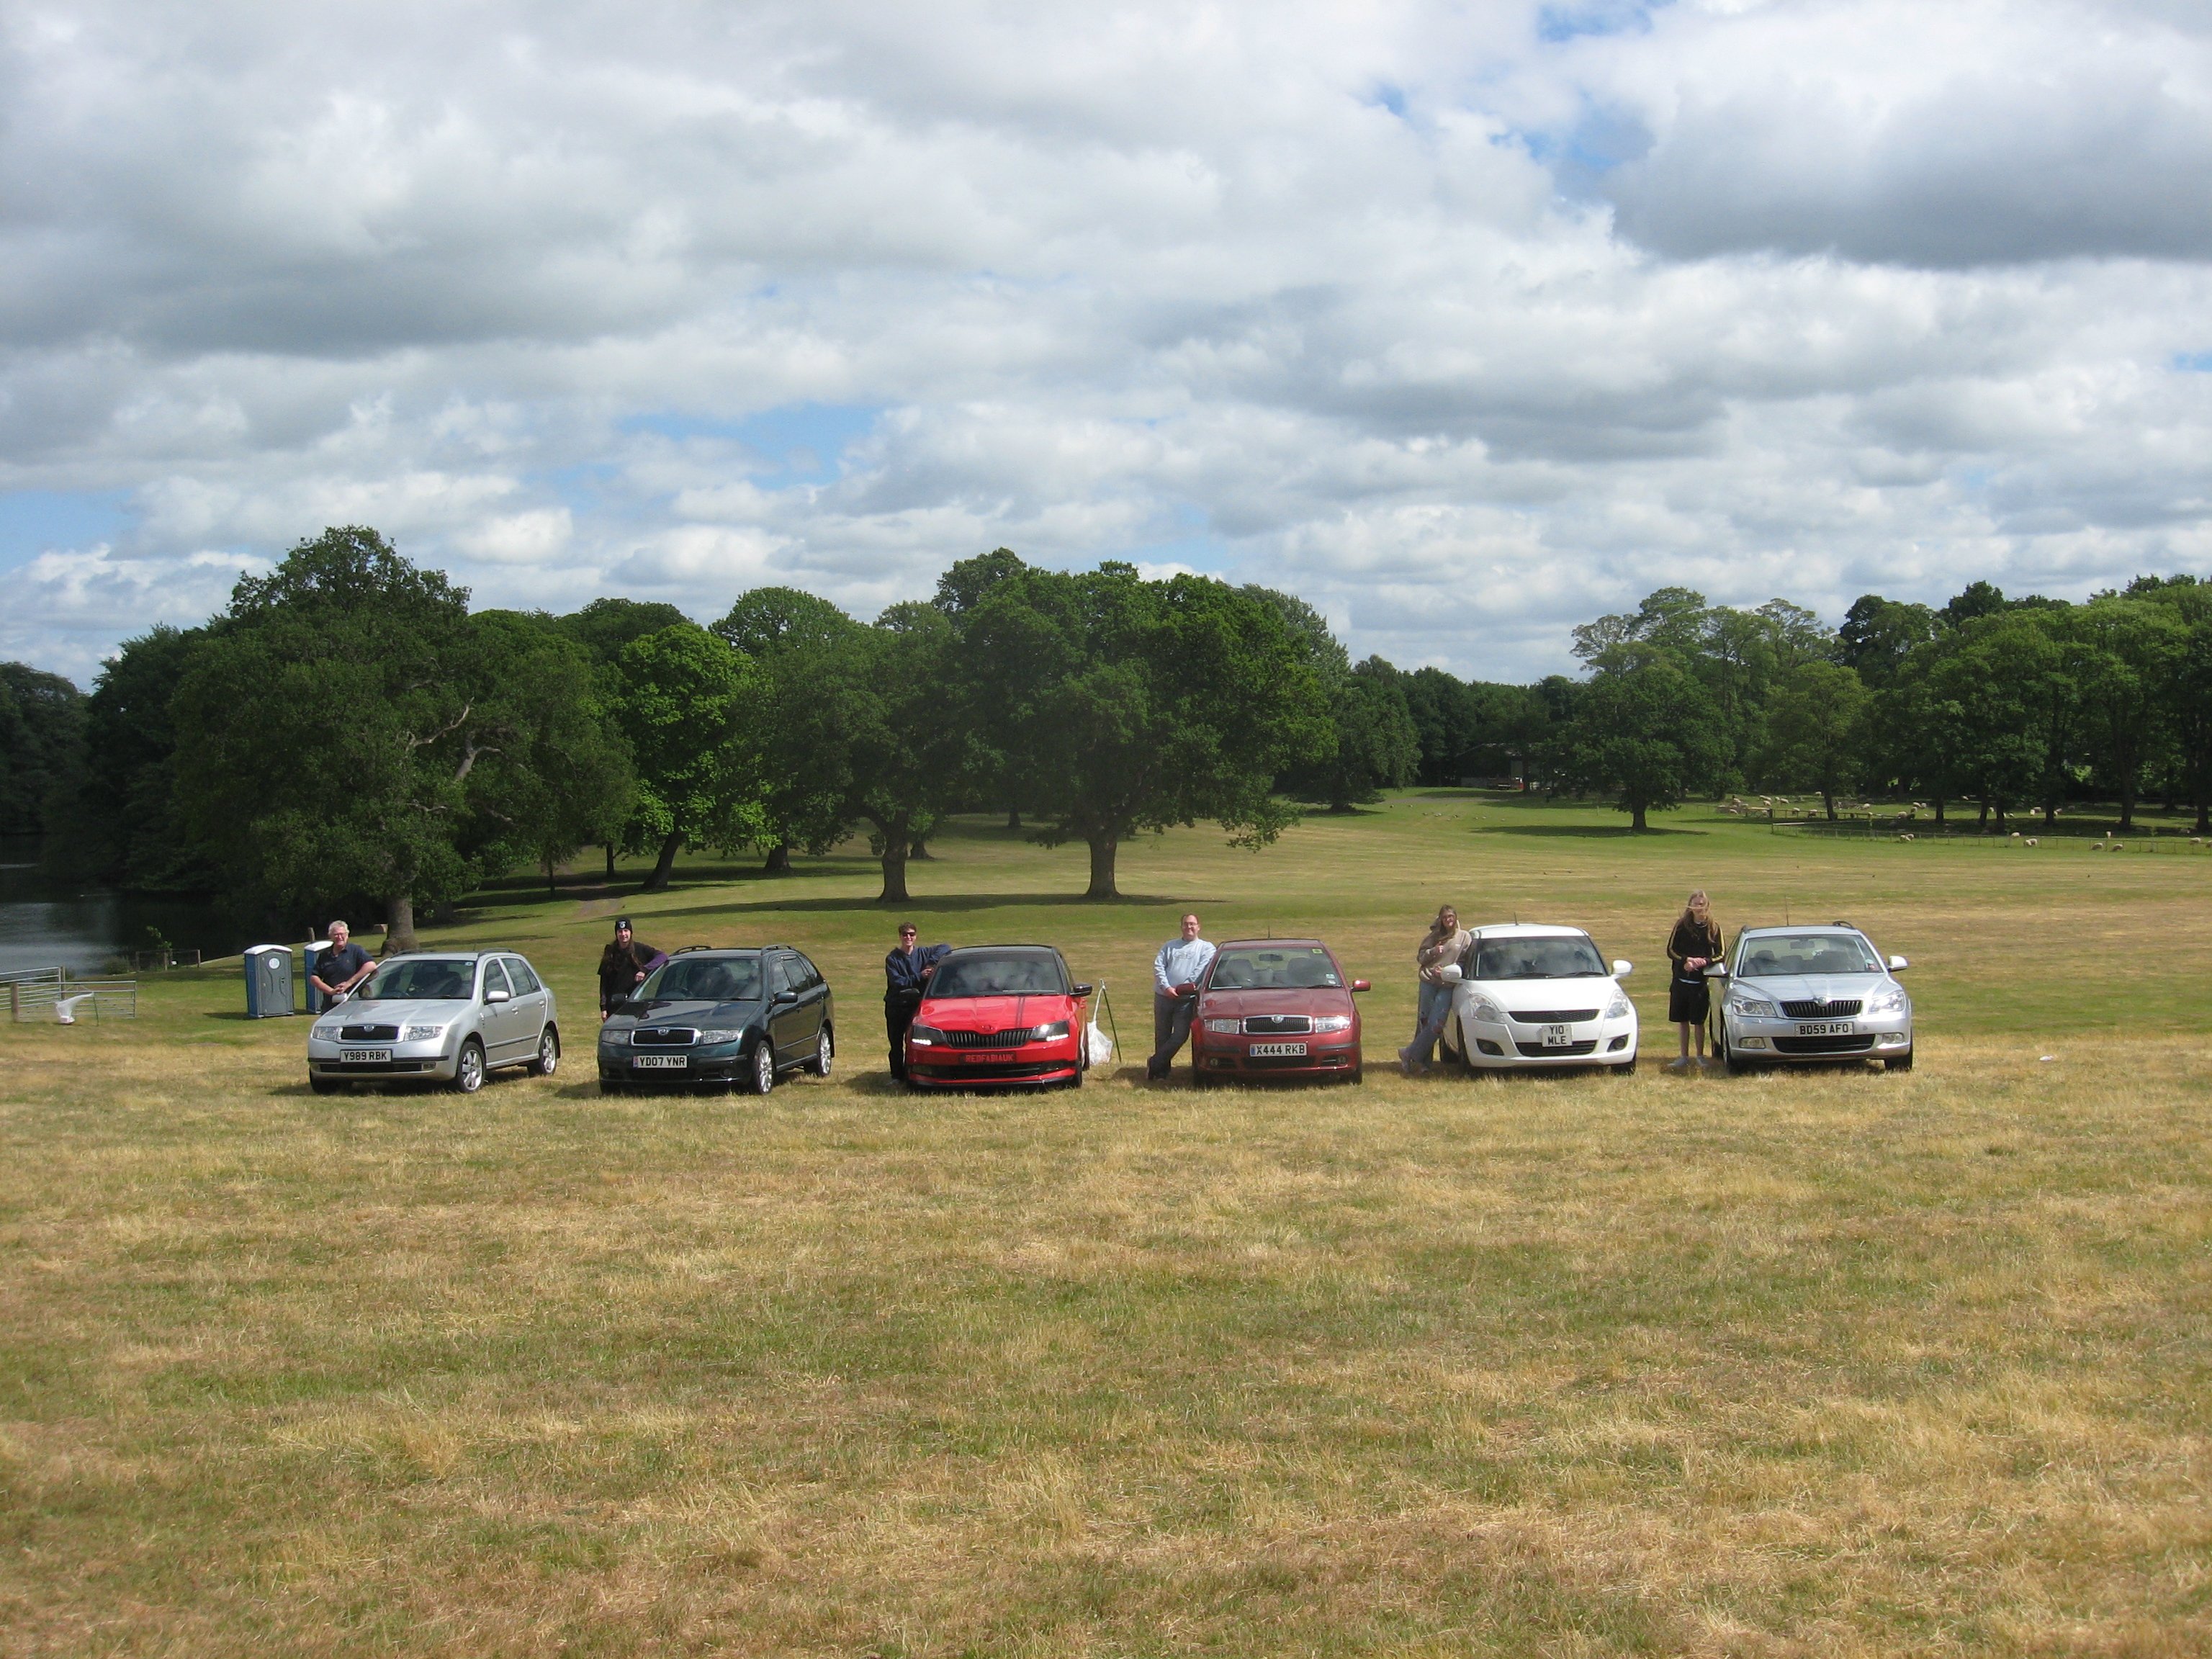
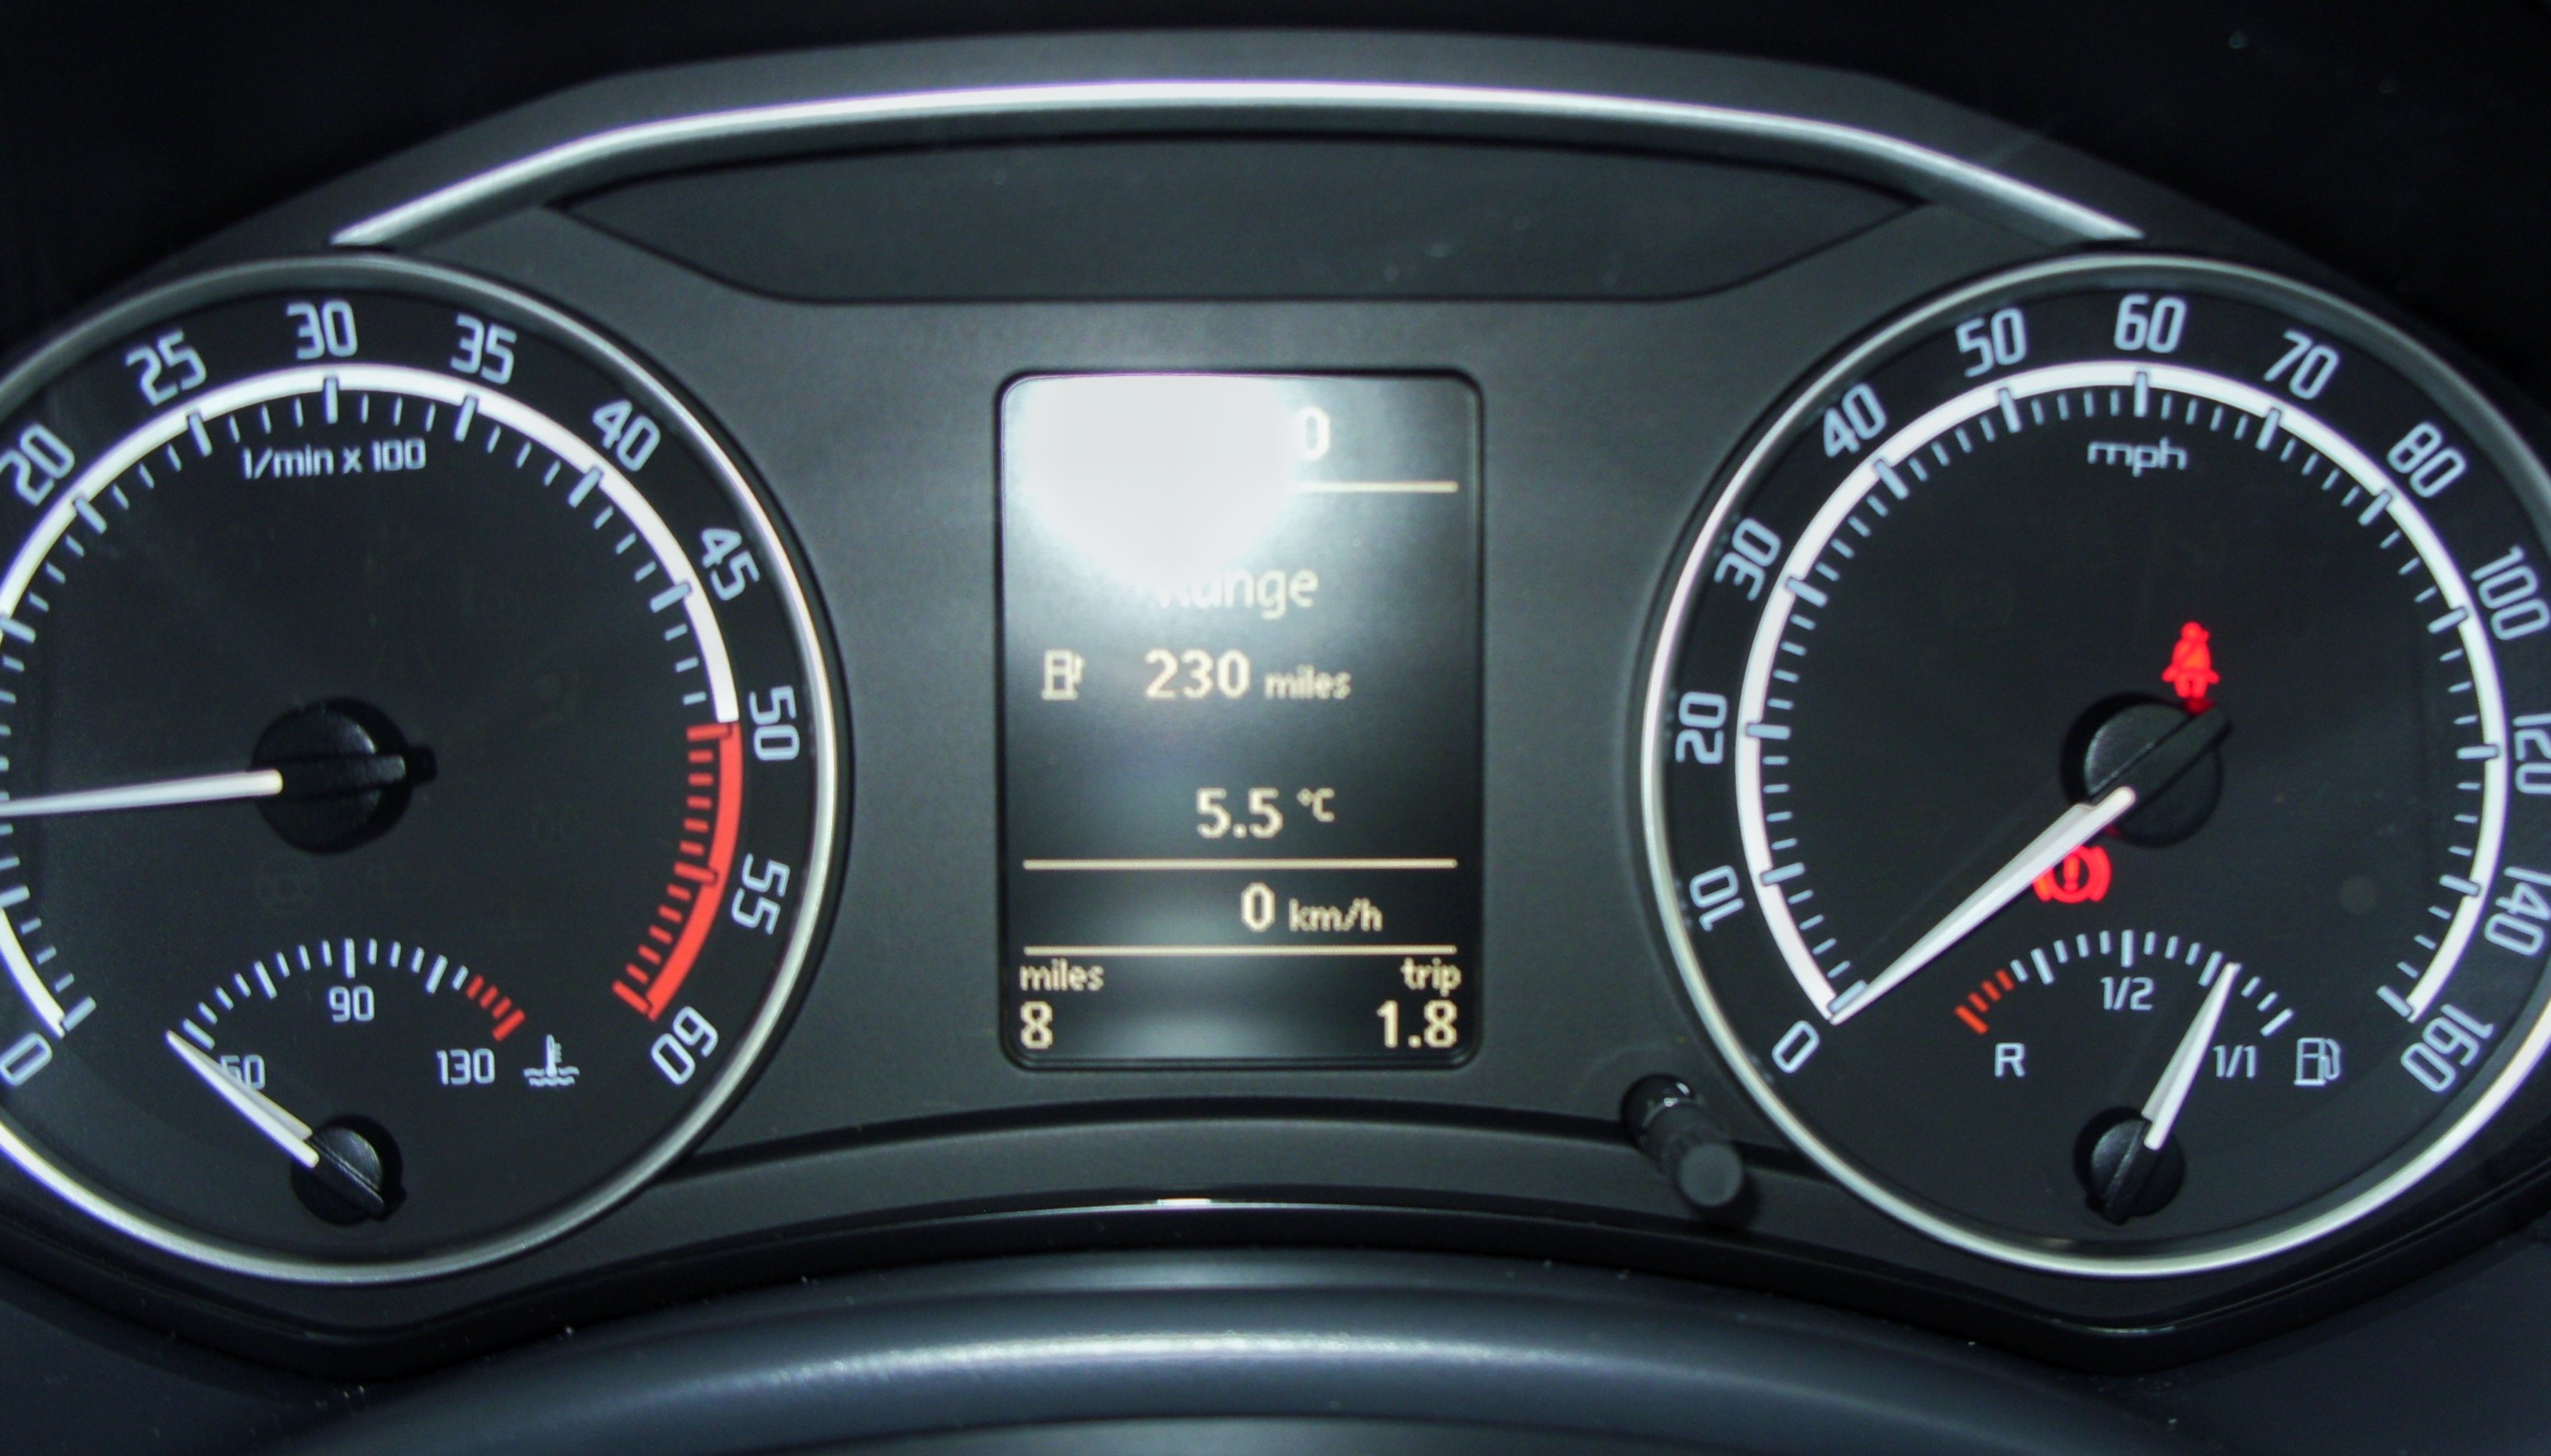
Oh I can't have that! Here is my car from the start of this thread, after driving it 1.8 miles to get to filling station.
 4 points
 -
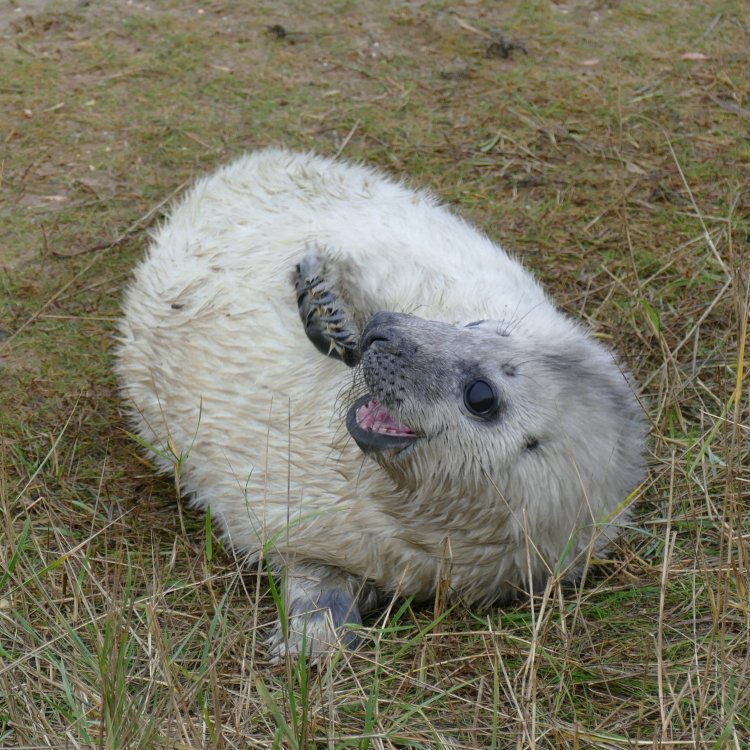
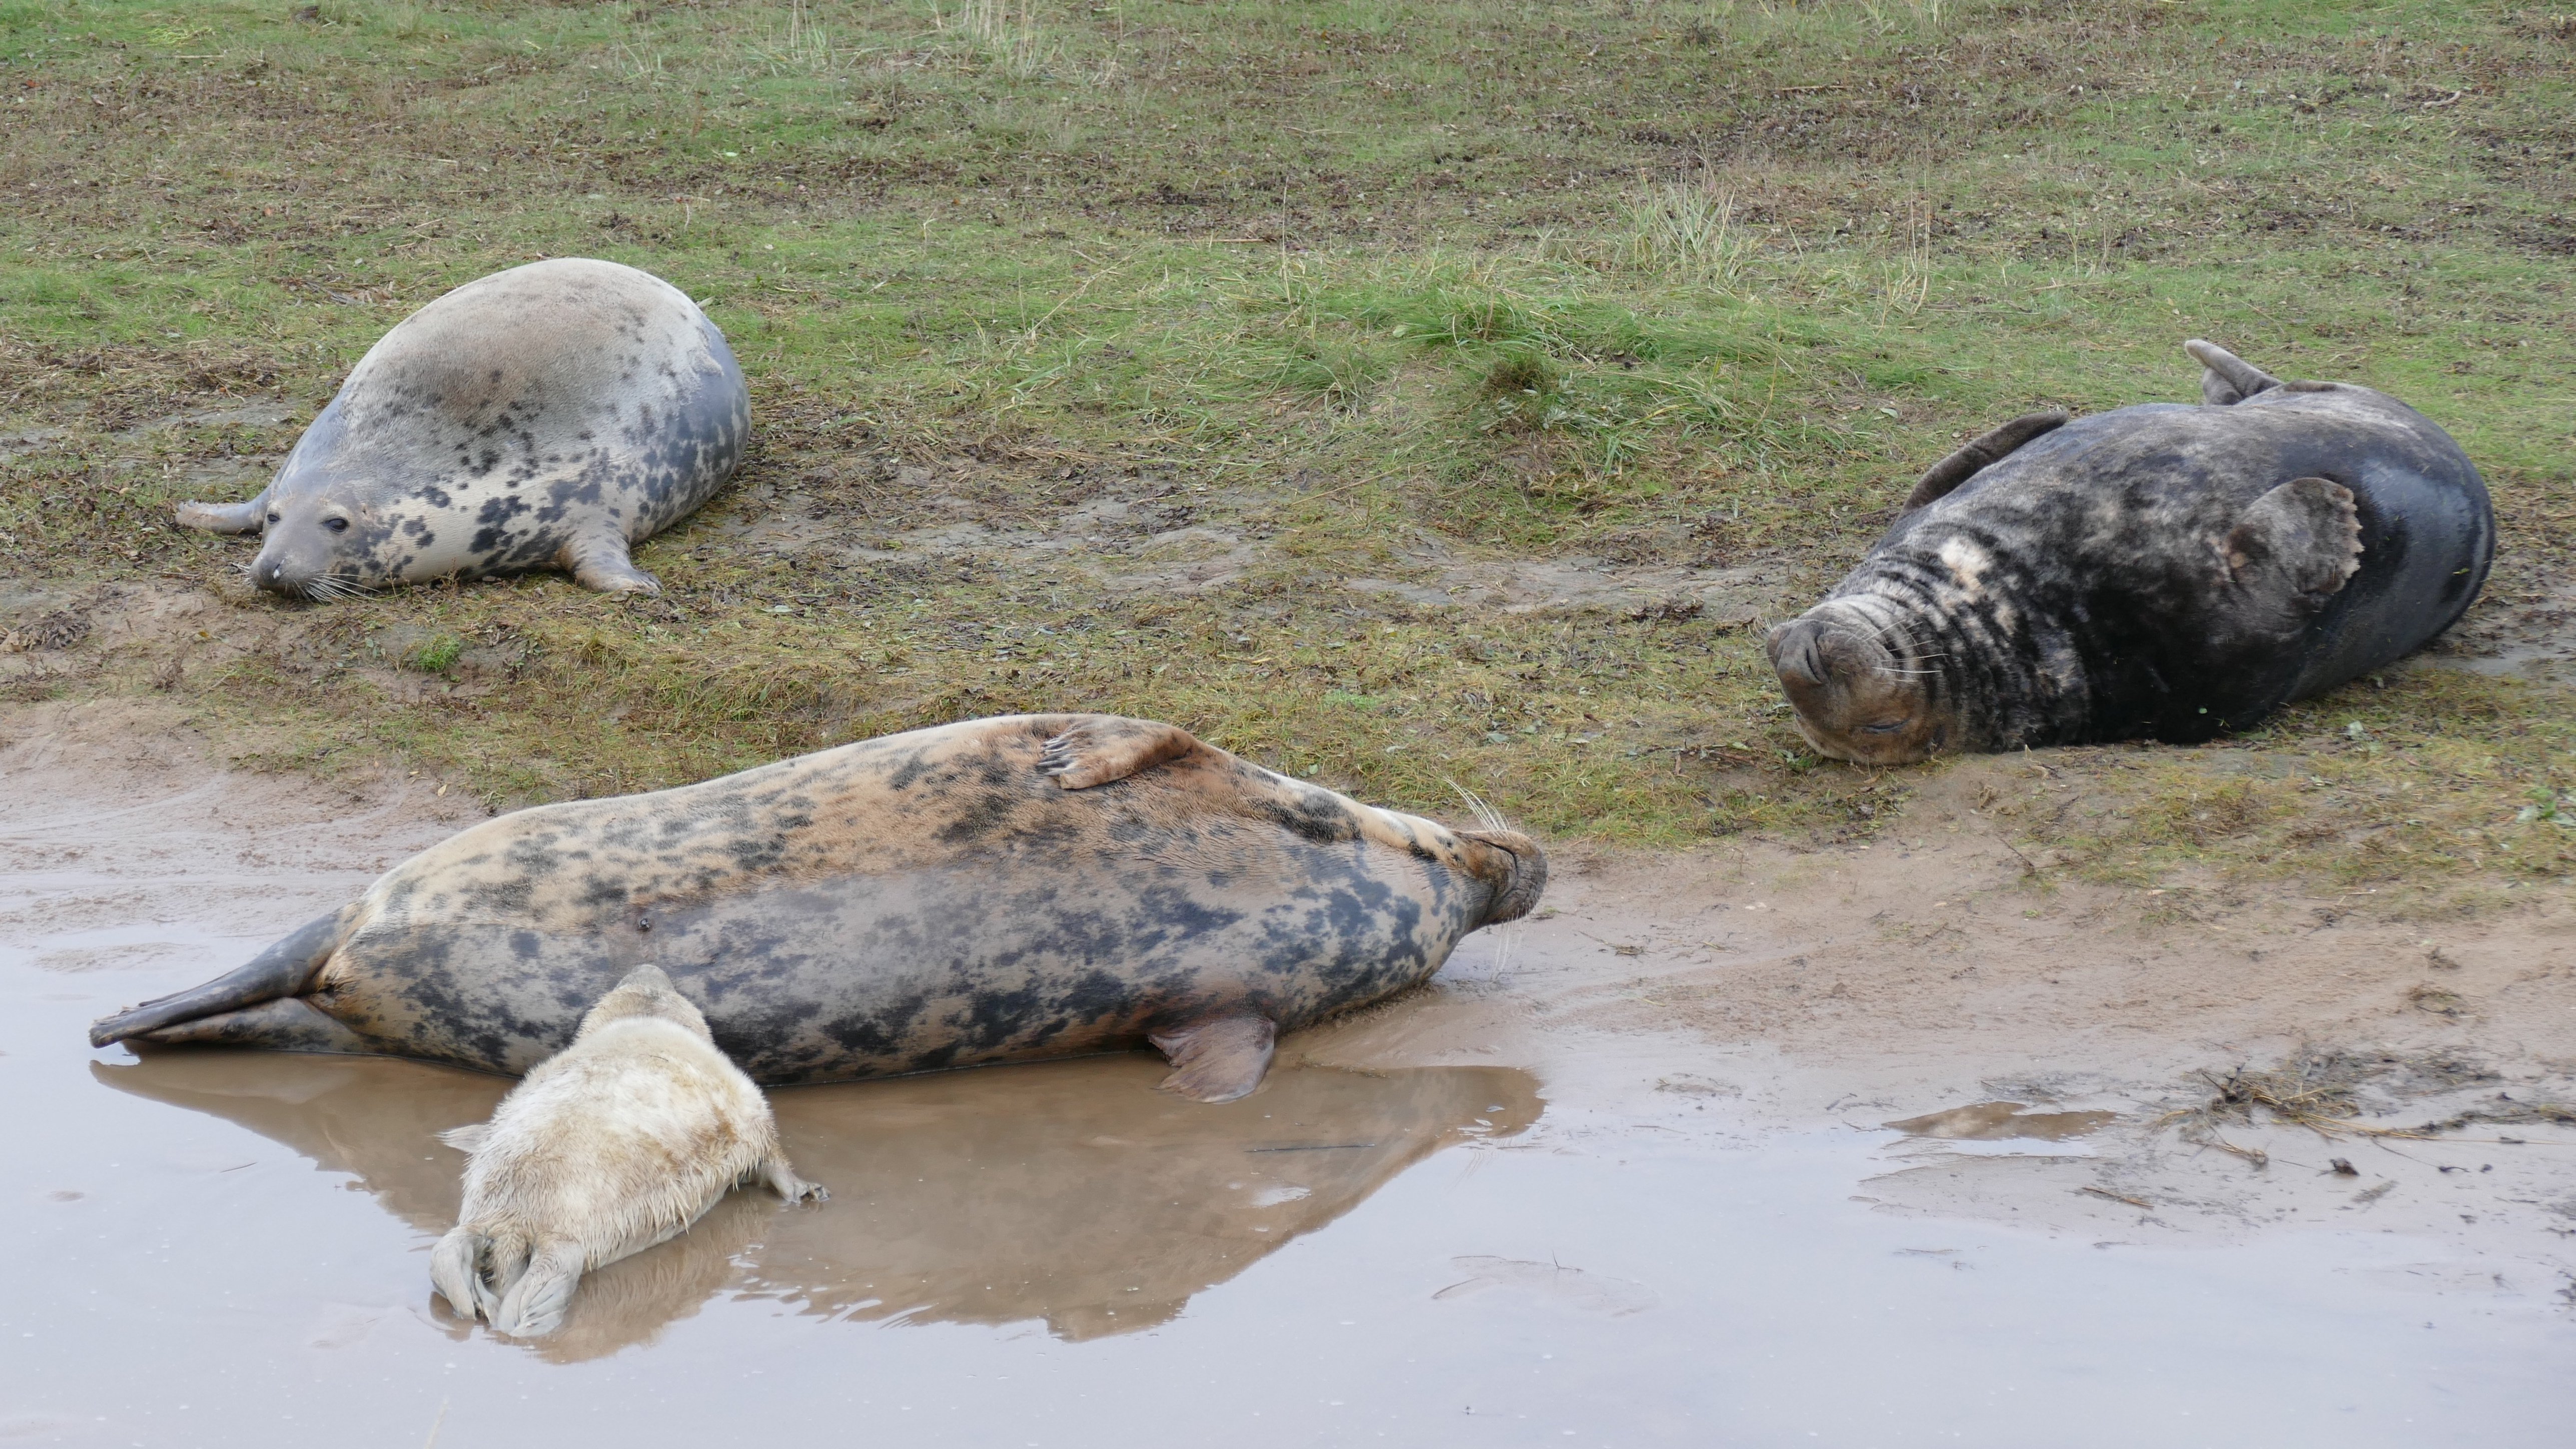
3 pointsToday was our annual pilgrimage to to RAF Donna Nook - reassured to see the seal numbers look very healthy (and comparable with last year👍)


 3 points
 -
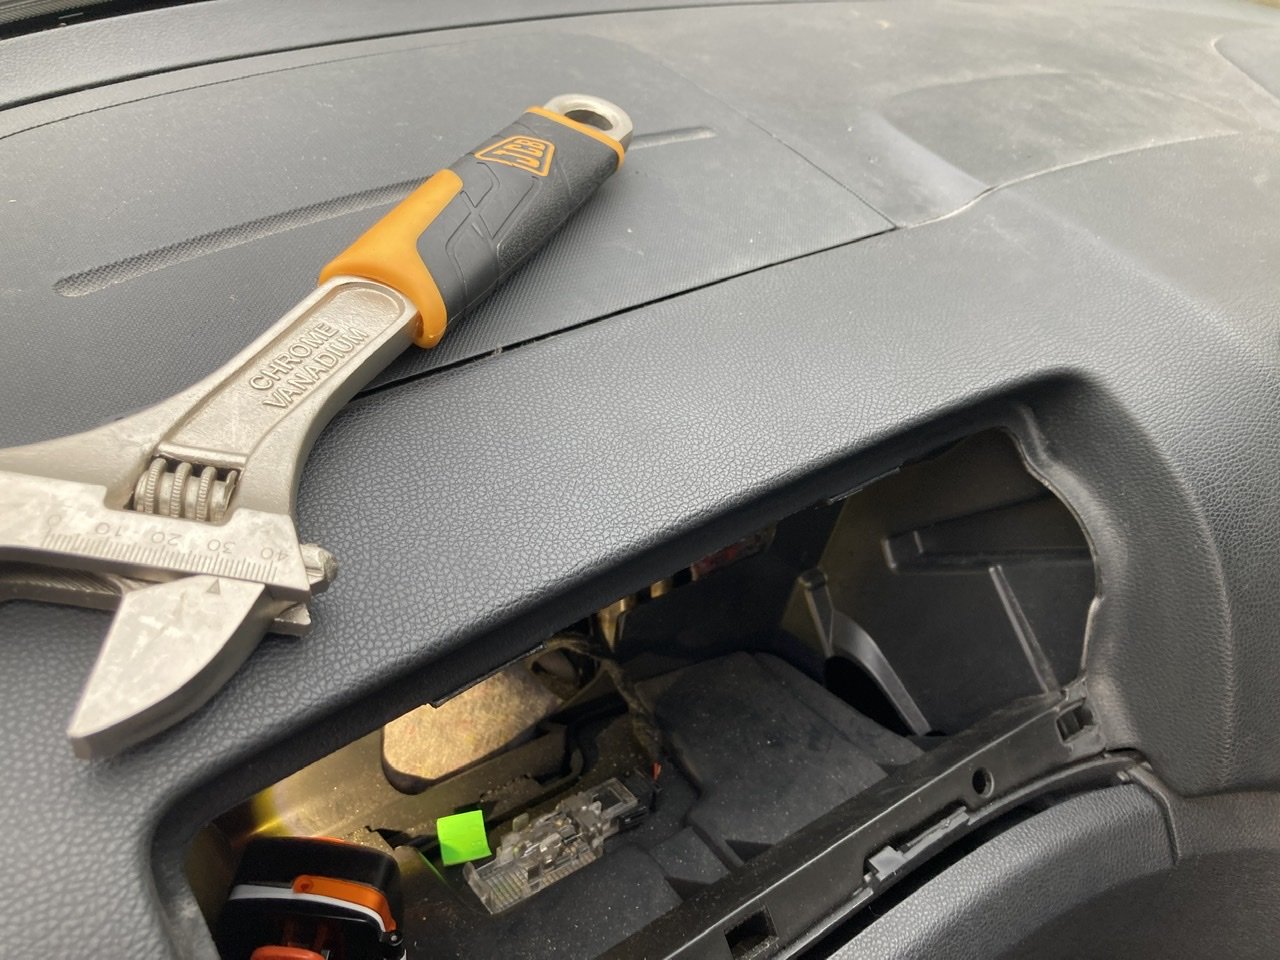
Thank you again for the input! I am delighted to say… Haaaaaaaaaleluyah! Turns out, as is often the case when the problem-solving route has failed, I just had to hit it harder. Though for @ApertureS’s peace of mind, it was more ‘weight plus gravity’ than an actual whack. And I still appreciate the chemistry info 😁 I love to know how and why things work (or don’t). And @UrbanPanzerit wasn’t a silly question, and it was an excellent thought! but I was so drilled by my dad in the careful collection and storage of bits and pieces that I’m borderline incapable (famous last words) of missing something like that. Makes me veeeeeery slow though 😕 On to the next thing now - the bloody door loom. Wish me luck.
 3 points
 -
also @AnnoyingPentium I'd say offside front 3/4 view.3 points
-
Has my Daughter added a new dimension to this thread?: 5dc8ee10-d45e-4ed1-9eef-8afd68e81b23.mov3 points
-
Variety is the spice of life, as they say 😛 Nothing exciting, but gotta be the lowest on this thread 🤗
 3 points
 -
2 points
-
Most of them don't have a mat under the bonnet so any heat will get through to the bonnet easily. It should heat up quickly being a petrol, certainly after 20 mins. It's normal for oil temps to hit 115/120 but not go over that and in the winter should sit closer to 100. Sounds like something I would walk away from. If its not the colour you want, service history is non existent and high mileage for the age that would be enough to put me off. High mileage in itself is not a problem if its been serviced. Age can be as bad if not worse than mileage but on a 3-4 year old car that's quite high. May be motorway mileage though. You can get a pre-facelift TSI with similar mileage for less if you look around. In terms of power, yes they are less from factory but if you plan to map them they all map to the same. There is some things that only really came to later models, depends if you are picky on spec/seat colour and finish. Looking on Autotrader, as an example, there is a 2016 pre-facelift meteor grey hatchback with 55k on for £14,600. Black pack, DSG, parking sensors, etc.2 points
-
2 pointsOkay, fair. I assumed, with the cars being the same parent company and much of the same Internals, that the codes would be the same. Yep that’s it. I’m seriously considering rejecting the car to be honest. By the time I get it back I’ll have about 3-4 days at the most of the 28-day rejection period and I don’t feel like that’s long enough to evaluate whether it’s been properly fixed or not.2 points
-
2 points@alessio92 Sorry to hear this. ? Is this the 1.6TDI you posted about? ? What age and how many miles on it? EDIT. So a 2013. Likely / almost certainly had the Defeat Device Emissions fix. So might cost the SEAT Dealership some money to fix. http://briskoda.net/forums/topic/508648-coil-light-flashing...-possible-causes http://briskoda.net/forums/topic/508665-dpf-for-dummies @alessio92 PS Least of the issues. But TPMS warning tend to come up leaving dealerships if tyres / pressures are changed an the TPMS not reset. Often a warning of lax pre-sales prep.2 points
-
Hey guys thanks for that I recently bought the csr from a dealer it has 34842 miles. I've tried driving it around but it don't help. So my best option would be to call the dealer for them to look at it.2 points
-
Yes yes, I know. I'd have had to have been in that garden for the front end, mind you. Post has been edited.2 points
-
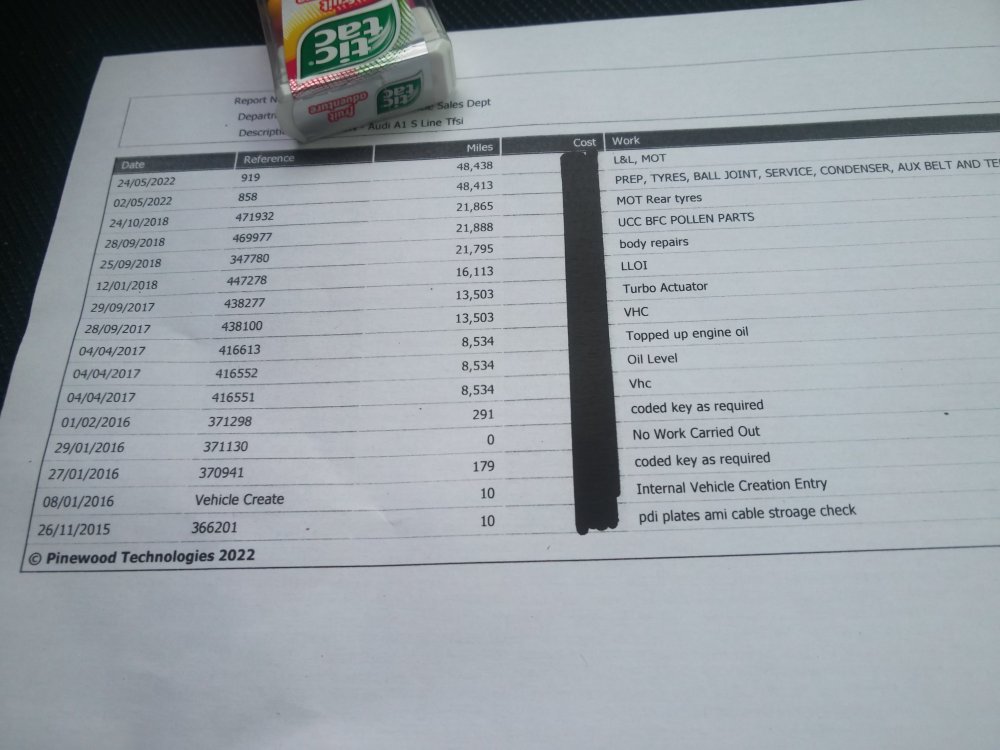
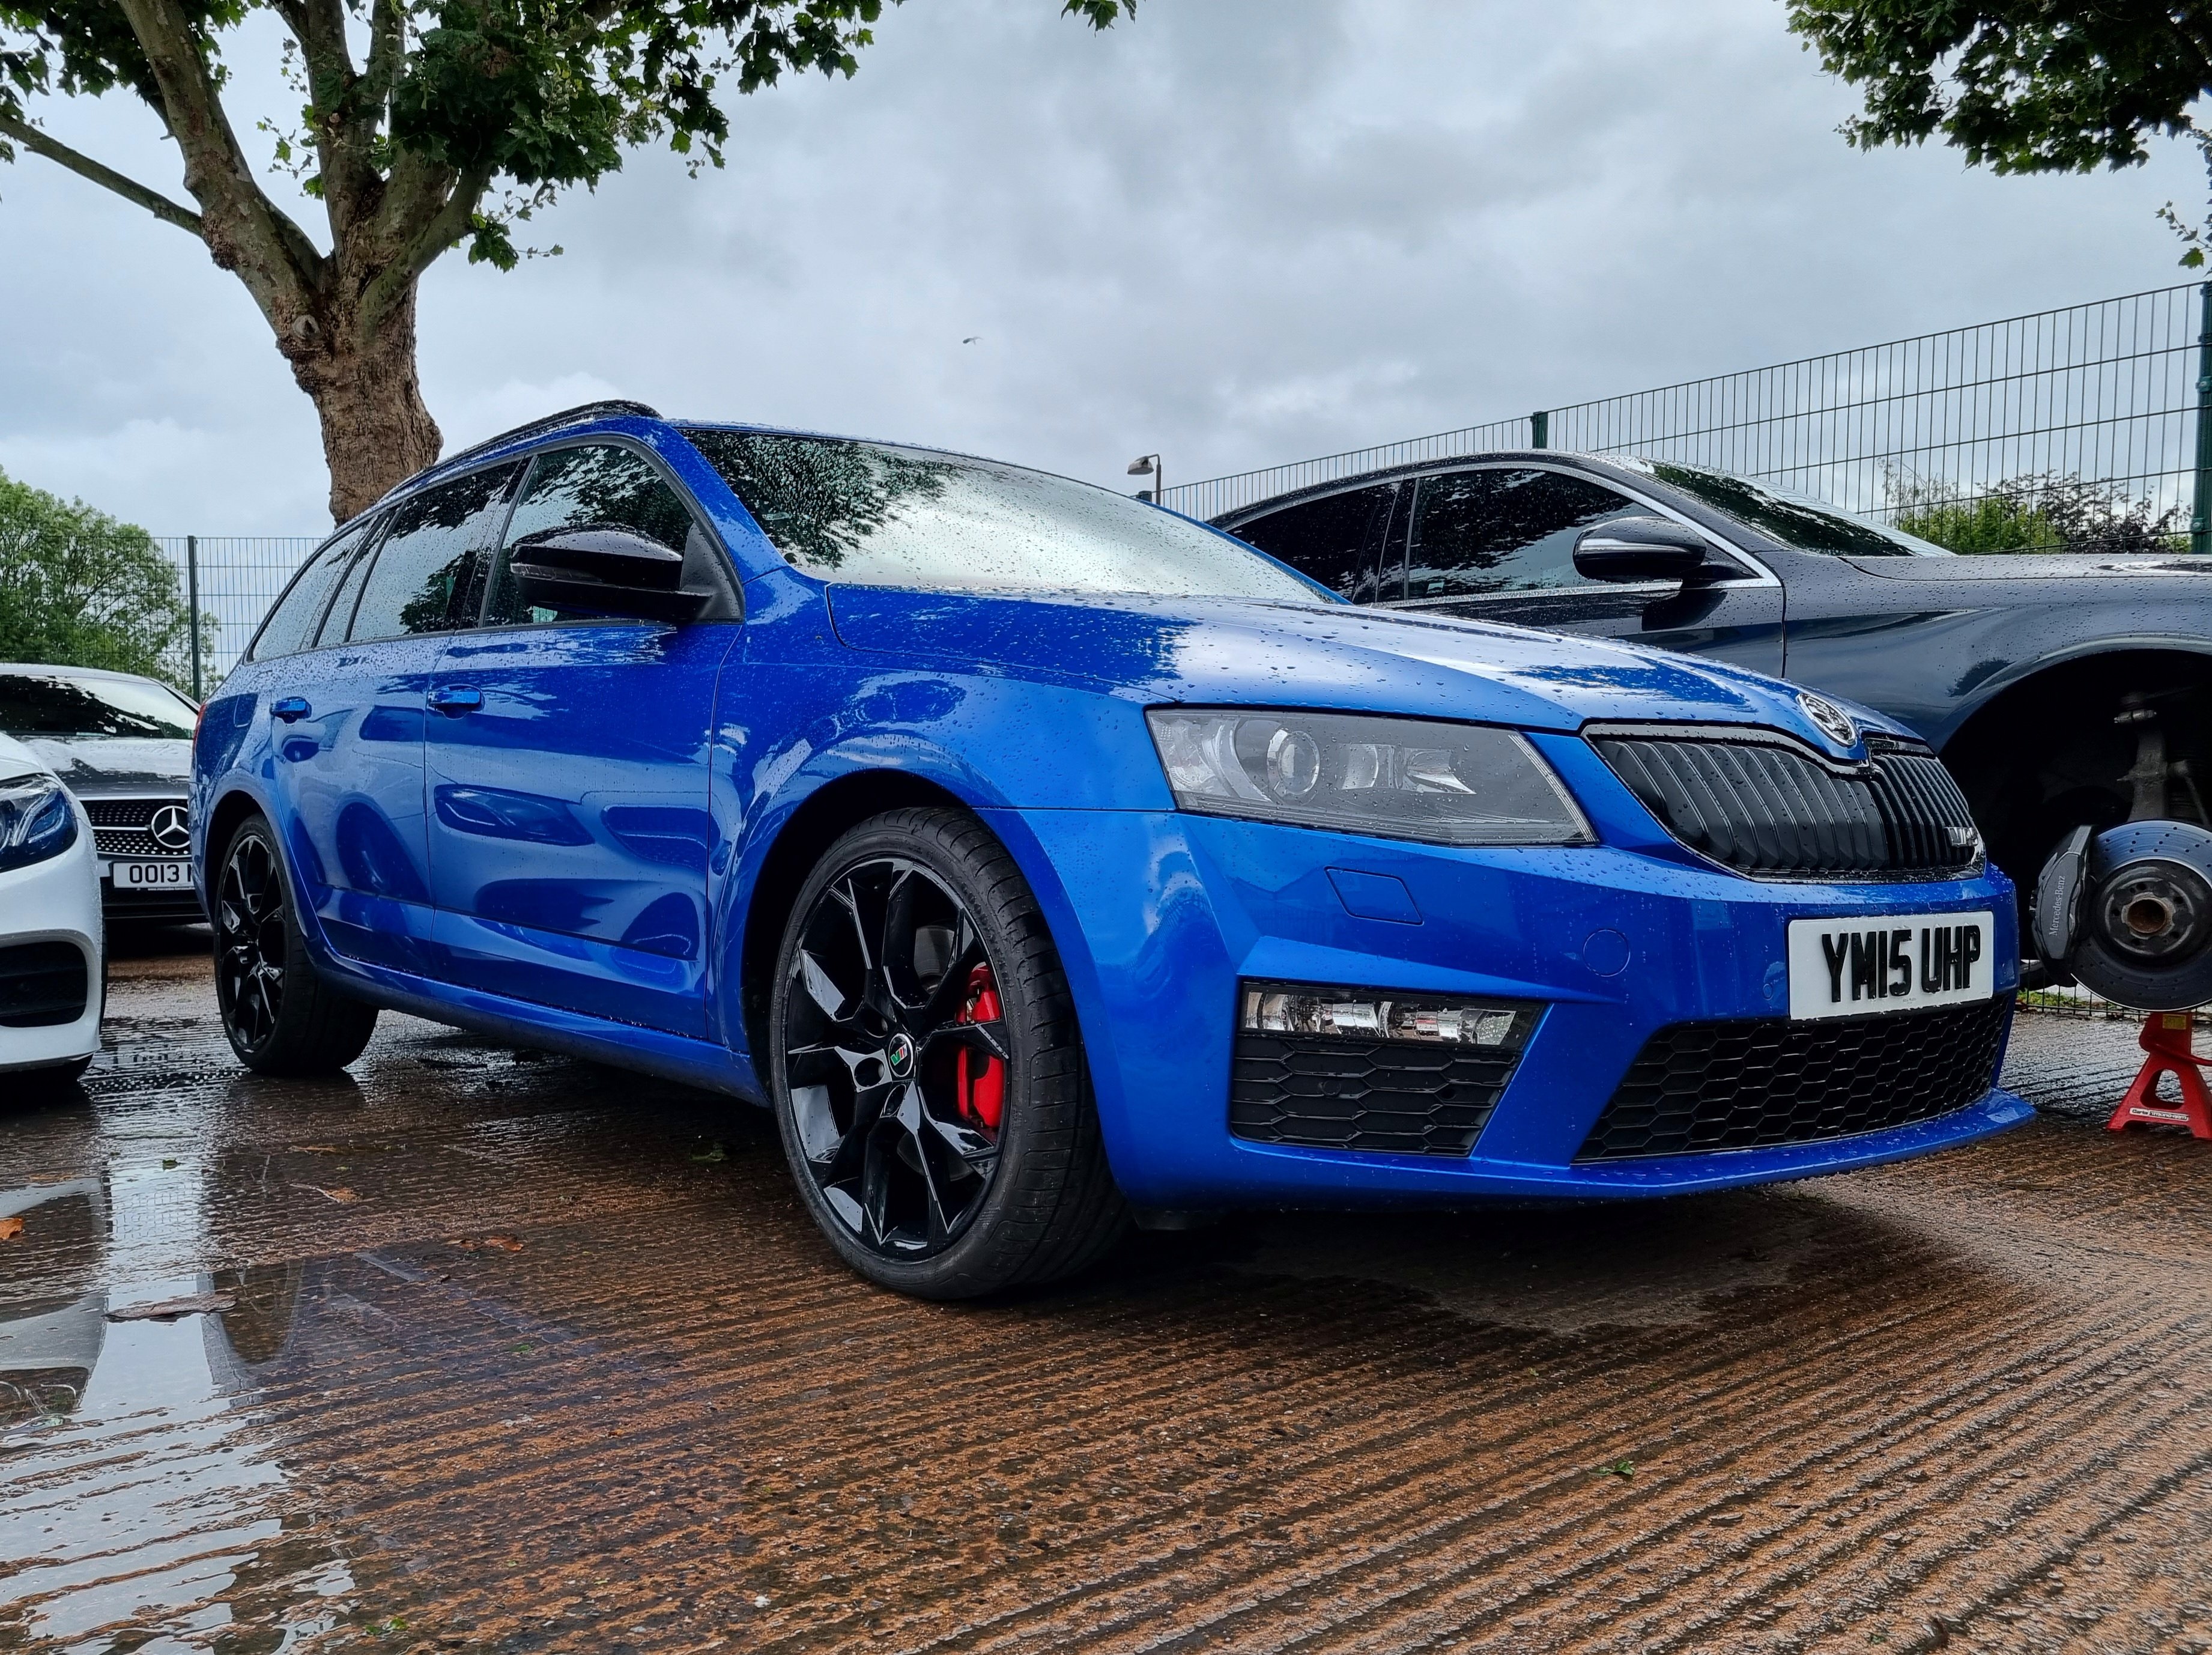
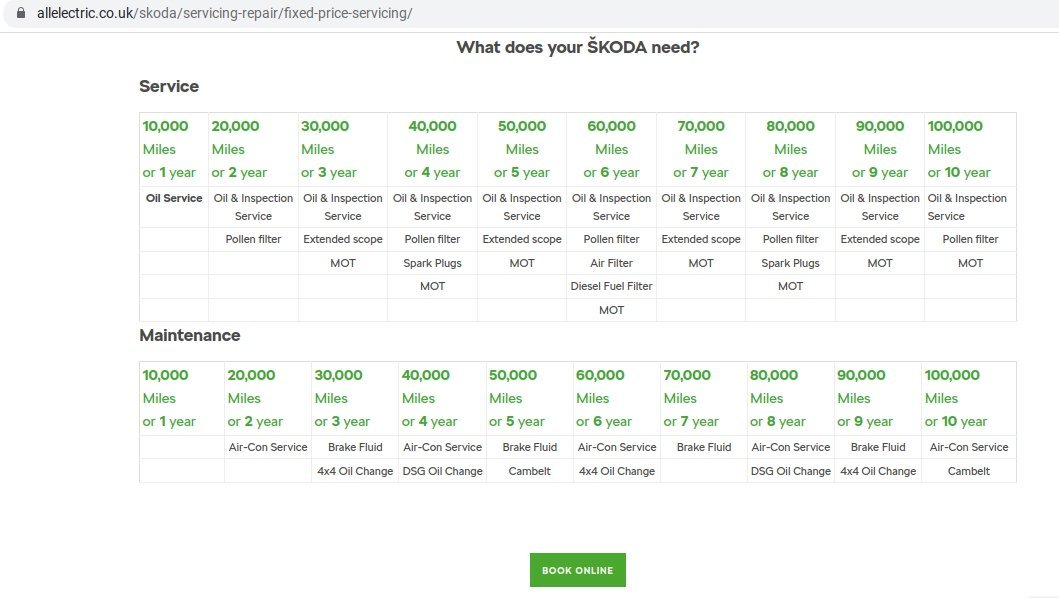
2 points2 pointsI suspect that 99% of your trouble is down to the infortainment system, it is now the beating heart of the car and VAG has decided to funnel all the user messages through. There are many threads here on the SOS fault, and the main software of the units being generally being trash from factory. Everything has to work in harmony, so if you update one control module or the main infotainment system, then everything has to be raised up to the same sort of level, otherwise messages are read by it, and it doesn't understand how to display it (so crashes or throws up fake messages) It might be an idea for you to go to your car and try to read in the software version loaded on your infotainment system and post back here. You will be holding down Menu/Setup button a few seconds to get up the version infomation. Then I can check what is out there available and then you are armed with the information to be able to say to the dealers there is a TPIxxxxxxx number for this exact problem I am having. Pop Pop SOS Fault Infortainment and SOS faults SW1896 - Probably one of the better update, and going forward OTA updating2 points[//:Pedant] Isn't that the offside? 😇 [pedant/ends] Gotta love a Mk2 ❣️ Of all the cars we've had, I reckon the Mk2 is possibly the best for a home DIY enthusiast 😎 Gaz2 pointsPossibly. They might say FSH. So what is the history. Were the spark plugs changed, the VAQ serviced. The brake fluid changed.? Doubt it or it would be at a Skoda dealership. So I expect the wheels are rufurbbed. Check which wheel has the odd one out tyre. Maybe all are good. Look for the body repair. Check the spare. Check the windscreen, chips, scratches, poor fit. Even open the air filter box. Dip oil cold before car started. Look at coolant level. Is it very full. Too full. Wind them up. If not enough petrol for a long road test ask then to put in petrol. Or say you will put in a gallon because you are going for 30 miles. They will love you. Not.2 pointsBuy it if the T&c,s are good and they are covering stuff that might not have been serviced properly but they supposedly checked, approved and sold you. But once you have the salesperson all excited thinking they have a sale. They have checked about your holiday, been to see their manager to get the best deal because you are a pal. Walk. Say you can not sign today. Then you ask for them to throw in the extended warranty and serviced plan at the original cars asking price without extras. And do not put the VED on finance. Just do a DVLA monthly DD. Still go home and think about it. And do not trade in a car.2 pointsPS. Forget all the Up-selling at Motor Choice or the likes. 'Paint protection Treatment' on a used car. £30 or less of product and time multiplied by 10 sometimes in cost to you. Tell them to deal with scratches and chips properly and polish or wax the car. Not just do Kerb Side auto touch up / colour match that just wipes off. Fabric protection on a used car. A daft Warranty extension if a car has not got the correct service history, and they do not even know if remapped. All of the above on the Finance and costing you a fortune and earning them a lovely commission.2 pointsPost up the ad Matty, I'd be intrigued to have a look!2 points2 pointsI'd guess that they've damaged the wiring to an abs sensor whilst doing the shocks... If it was just the normal lights after disconnecting the battery, I'd expect the lights to go out after a 100m or so.2 pointsI got my 245 new in Feb 2018 and it's really only been driven by myself so always warmed up properly, driven around road imperfections and parked miles away from the shop entrance. However I do enjoy a good blast now and then and it's towed our decent size caravan for the past 3 years so hasn't had an easy life. It's on 44k miles with full service history and has had ZERO faults. Attempt to look for an unmodified or lightly modified example that's likely to have been owned by an enthusiast (x4 decent tyres, FSH at specialists, rear bumper protector, detailed ...?) The only 'issue' is the lack of sound insulation, but that's VAG's fault not the Octavia's 😉2 points2 pointsUnfortunately (or worryingly depending on how you look at it) the Haldex service is definitely not optional. Dealers are quick to point out gaps in the vehicles service history when it suits them i.e. signing up to their 'All-in' warranty etc. Even then Skoda UK's official workshop procedure for the Haldex service misses out on an important procedure, to clean the gauze filter. It doesn't matter how fresh the oil they replace is, if it can't pass through the filter the pump will be starved of lubrication. A classic sign of a failed pump is non-functioning 4WD i.e. any front wheel spin. Usually by this point the pump is already dead. My dealer offered to clean the gauze filter for a small extra charge when requested. Mine was already pretty sludged up at three years old.2 pointsYou will need to stretch your budget to MK3 territory if you want the 1.4 tsi with timing belt2 pointsHi all, After much procrastinating I collected a Superb 280 Sportline Estate at the end of January. I was toying with getting a new Skoda Superb and found the posts on this forum really valuable. I've been on here quite regularly as a guest, reading your experiences, hints and tips and am very thankful for all the useful info. I've only just registered an account so by way of giving something back here are some details of a 2-channel dashcam I've just fitted to my Superb. Hope this helps anyone considering a similar install. I decided I wanted a good quality but discrete 2-channel dashcam system recording front and rear simultaneously and ideally one which would do a little stealth recording whilst parked and switched off. I wasn't worried about a built-in screen as I'd take videos off with a smartphone or simply pull the memory card out when necessary. I've tinkered with car audio in the past and am not afraid of a little wiring if required, but I wouldn't call myself an expert by any means. Enthusiastic amateur if you will... I first looked at the Nextbase Duo (https://www.nextbase.co.uk/dashcams/in-car-cam-duo/) which has a screen, but decided against it due to the fact the Superb estate is such a long beastie, I doubt it would see much out of the rear window. In addition the front and rear cameras do not pivot up and down so once you've set the front angle best to see the road ahead, some people had found the rear camera recording more of the headlining or interior. It was quite a sizable thing and the inclusion of screen made me think I'd feel nervous about leaving it in the car. I decided against. Blackvue models looked good, in particular the DR650S (http://blackvuehd.co.uk/product/blackvue-dr650gw-hd-2ch-2) however for "parking-mode" recording it needed an additional "Power magic" adaptor thing, or a very expensive battery pack which added additional cost and complexity. Definitely looked the best in terms of aftersales support though. After much research I settled on one from Lukas/Qvia. A relatively unknown company I found initally, with very few reviews on the web, but with most of these things being made in China, Taiwan, South Korea etc, being from the latter didn't particularly concern me if there was a knowledgeable UK distributor. TTW were the guys and I found the one I wanted here: https://lukashd.co.uk/product/qvia-ar790-wd-2ch-dash-camera/ I chose the snappily named Qvia AR790-WD. It looked very similar to the Blackvue above, being quite small and with no screen included. It came with a very small front and rear camera and the inclusion of a super-capacitor (rather than a battery) meant it would last better in hot sun / cold weather and because all the power "smarts" were built in, no additional battery packs or adaptors were required. Once fitted, the super-cap charges up and holds some current and the camera has a built-in fail-safe setting to shut down if it detects the car's battery voltage drops below a certain level. The cameras can then be set to record when motion is detected front or rear, or to continually record on a kind of timelapse mode. So far I've opted for the former and it's worked well. Fortunately the only thing it's picked up so far are cars coming and going and the odd late-night wheelie bin deployment by myself and the neighbours. Anyway, on to the install. You can see enough pics of the camera itself at the lukashd link above, so here's how it went for me: First of all, the installation instructions provided are not that great. Enough to give you an idea, but given the breadth of cars out there, clearly not enough for your average novice in a specific vehicle. Proceed with caution and if you're not comfortable pulling bits of trim off your shiny car, get a friend to help or professional to do it for you. The instructions said to mount the front camera first and run the wires behind the headlining. This dashcam has two wires - one to supply power and one to connect the rear dashcam. Both cables would be run across the headlining to the passenger side of the car. The power cable would run down the A-pillar to the fuse box behind the glove compartment and the rear-camera cable would stay at the headlining level, running to the rear of the car. Fortunately the front lip of the Superb's headlining had a nice recess into which cables can be easily tucked (it's like the expect them all to be used as taxis...) What you see behind the rear view mirror - i.e. not very much: (and the eagle-eyed of you will see I took this picture after I'd finished as you can see the rear camera in the mirror) Next task was the remove the front left A-pillar trim. Not complicated, I had some cheap trim removal tools but this one was easy enough to prise away with fingers. Pull outwards away from the pillar at the top edge and continue pulling away from the pillar down the windscreen side. Eventually you can pull upwards slightly away from the dash and it should come free. Behind you can see the airbag and some other wiring. I chose to run the power cable above all this keeping well away from the airbag: Power cable secured with some cable-ties: (I wanted to avoid anything rattling around after all the trim was back in place.) Cable tucked down through the same hole through the foam insulation. Next, open the passenger door and remove the side dashboard trim. No screws, just find a leading edge you can get a trim removal tool under and prise outwards. Note: the trailing cable is still laying ready to be tucked down through the foam insulation at this point (previous pic). Close up of the side panel removed. Get your hand in there and fish out that power cable poking through the foam insulation: Again, once fished through I decided to cable tie to something solid in order to prevent rattles: At this point I removed the glove box, which the manual explains fairly well and I see others have covered in other articles. What comes next depends upon your specific vehicle and the fuse you have. This dashcam requires a permanent 12v supply and a ignition or "accessory" fed supply, along with an earth connection. The dashcam came ready for hardwiring, but I understand a cigarette lighter kit was an option. I opted to use 19x19mm piggy back fuses: https://lukashd.co.uk/product/fuse-holder-adapter-ato-19-x19-mm/ but you might prefer using the mini 11x16mm fuses https://lukashd.co.uk/product/fuse-holder-adapter-mini-111-x16-mm/ The idea with these is that they're a simple way to extend an existing circuit. They come with two slots for fuses - one for the original circuit and one for your new added dashcam circuit. You remove an existing fuse, place the removed fuse into the unoccupied piggy-back holder fuse slot, ensure your 10A dashcam fuse is seated in the other slot and then press the adaptor into the position you removed your vehicle fuse from. I used a tester to find the 12v and accessory feeds, with a little trial and error turning the ignition on and off. Fuse 38 (Trailer electrical socket) was live with the ignition on and Fuse 48 (Blind Spot detection) was a permanent 12v. This is what I ended up with: (Fuse 38 is the top piggy back and Fuse 48 the bottom one) In my case both fuse positions were empty - no fuses present as I have neither of those options on my car. So I had to buy another couple of 10A fuses to complete the circuits. The ground wire was easy to attach, but I didn't take a picture of it. There's a convenient earth screw position just under the glove box to the left hand side. Easy to find. With wires in place it was on to running the cable to the rear camera; by far the most time consuming part of the job. I didn't bother taking pictures of tucking the cable into the headlining across the front left passenger door and rear left passenger door, as it was fairly trivial to feed the cable behind. Just remove a little of the headlining tuck the cable behind and replace. It's very tight around the b-pillar, but again with a bit of help from the trim removal tool, it wasn't too hard. Once you get the cable to the C-pillar that's where the fun starts. In a saloon I guess you have it easy and run straight across the rear headlining. However in the estate (and hatchbacks as well I guess) you get the quandary of how to get the cable through to the rear window properly. Ideally you don't want a loose cable spanning the gap between the headlining and the boot, especially when the hatch opens and closes. This is the cable tucked just into the headlining, optimistically thinking there'd be some easy way to go from here to the boot lid. Nope. The only way to go is through the c-pillar, out through the connecting boot grommets and up into the tailgate. So C-pillar trim needs to come off and cable threaded through into where that top grommet meets the left side of the car. Here's the C-pillar with the trim removed (comes off much like the A-pillar one). The cable needs to come down from the headlining into here: Enter stubby oaf-like finger to tell you where to run the cable. I chose the C-pillar to hold all the surplus cable. Don't do what I did and thread it all through to the tailgate, only to find you there's no room for all the surplus up there. Don't pull it all through to the tailgate like I did, only to have to pull most of it back through again... This was not fun. With one hand poking the cable up through the c-pillar, somehow you have to feed it to the hole where that rubber grommet was. I opted for cable ties and insulating tape. If you can get the cable ties through to your cable, tape the insulating tape to the cable (carefully protecting the metal plug on the end) and pull it carefully through the hole: Now we're on one side of the grommet ducting thing. The cable needs to go through that and there isn't much room in there. Enter the cable-ties again to pull the wire through: Note: those grey plastic bits hold the rubber grommet ends tight to the body panels. They are easy to get off and a right pain to get back on again - especially if you have chubby fingers like me. Deploy the missus or someone with small fingers to help. Now the cable's ready to be threaded into the boot lid. My worst fears - the whole boot interior trim has to come off. Lower section has to come off first, then the upper section around the glass. First of all, pop out the electric boot release button (if you have one) and the two interior lights. Remove the plugs from all three of them and poke the wiring back into the holes inside the boot lid. The lower interior trim section just pulls free now - again like before pop out one section (I started near the very bottom of the boot lid) and work your way carefully around, popping out the trim panel with a trim removal tool. The clips are much harder than the interior trim and I was quite worried about damaging the panels. Everything went OK for me, but go careful! Bottom panel removed: One the lower panel is removed, you can start on the upper panel around the glass. This time I started around the sides near the gas struts. Again, level and pop them out carefully working your way up each side first, then across the top. Once free the whole lot pulls downwards away from the raised boot lid. The upper panel removed and laying in the boot: (just so you can see all the clips) With both trim panels removed, the top edge of the boot lid looked like this: You can see the cable hanging out from the rubber grommet. Use the cable-ties again, threading one through from the left hole in the boot lid above to the grommet hole. Tape the camera cable to the cable tie again and pull through. This whole part took me a couple of hours to do tidily and safely but it was worth it. The camera can then be mounted where you choose on the rear window and the cables will be tucked safely out of harm's way. I wrapped the cable in a little extra insulating tape to protect it where it passes under the rear trim. Up to you. Test the camera, make sure everything works OK then refit all your trim panels. Here's the rear cam. There's a little raising of the interior boot lid panel, which I guess could be solved by cutting a small notch into it. However it doesn't bother me that much. The rear camera cable would've been better with a right-angle plug in my opinion, but again, not the end of the world. Hope this helps. Any questions, feel free! Roy.1 point1 pointFor me, this image is key - if you book your car in for a service, then you're only going to get the stuff done in the service bit. The maintenance bits are always going to be extra and not included in any service - but I totally agree that dealers should be telling customers what maintenance is required on their cars.1 pointThanks mate. Crazy how big a difference that is. I'll definitely get a couple of quotes. I am actually in the Newcastle area if you wouldn't mind sharing where you got yours done.. thanks for the help, really appreciate it.1 pointRacing Blue is definitely a good colour! I wanted either Meteor Grey or Racing Blue, estate, DSG, black pack, winter pack, cruise and larger screen. Managed to find it after several months. Definitely seems more around now than there was when I was looking earlier this year. As for DSG vs Manual, I've never found manual VAG cars to be brilliant however each to them own. If you plan to map it however, you'll probably want an uprated clutch at some point. Worth making a list of must haves and wants. Lots of bits are optional extras but I think the VRS are a bit rarer and original than Golf GTi's.
 1 pointThis was the mechanical bit I was trying to get more info on tbh. Sounds like a big deal? I do like the face lift model. Got a few more viewings comming up :), im going to be broke for Christmas, although I have been good this year. As for the DSG, I fancy the manual :). I think my silver issue is because I see it as like a standard colour? Maybe. My favourite is the racing blue, but I guess that's pretty standard haha. cheers for all the help everyone! Much love!. there's also some golf gti in my price range, but much prefer the octy though, the things I could do with that bootay.!1 pointTo each their own, I guess - I actually like that colour. A lot.1 point1 point2.0 TDI or TSI never had DQ200 Twin Dry Clutch DSG's. Just cars / vans with 250 Nm or less. 1.0, 1.2, 1.4, 1.8 TSI's, 192 ps or less FWD or 1.2, 1.4 or 1.6 TDI FWD,s.
.jpg.329efe0695a8a0f4fa8725c4326b07a0.jpg.2613-c0a4d91b2a6516585b45f1.jpg.7523967dafc236006f607ede73e30253.jpg.b084fd80196a158c07b5f7315aafa759.jpg)
.jpg.5f53ec69a42f4b4748f373fac50e3393.jpg.cd21baaca9391ac217ff52b26084586f.thumb.jpg.16994dc3c56533b717b51ac7e4be3131.jpg) 1 point1 point1 pointPut simply, you set the lash so the injector gets a full stroke of the piston, therefore you adjust the rocker until the injector bottoms out then back it off half a turn.1 point1 point1 pointScotland biggest dealership group which is also in the rest of UK are no better, or some of the next biggest dealership groups. The biggest even have the courses at their own colleges for training those in the trade. https://gtg.co.uk https://gtg.co.uk/about
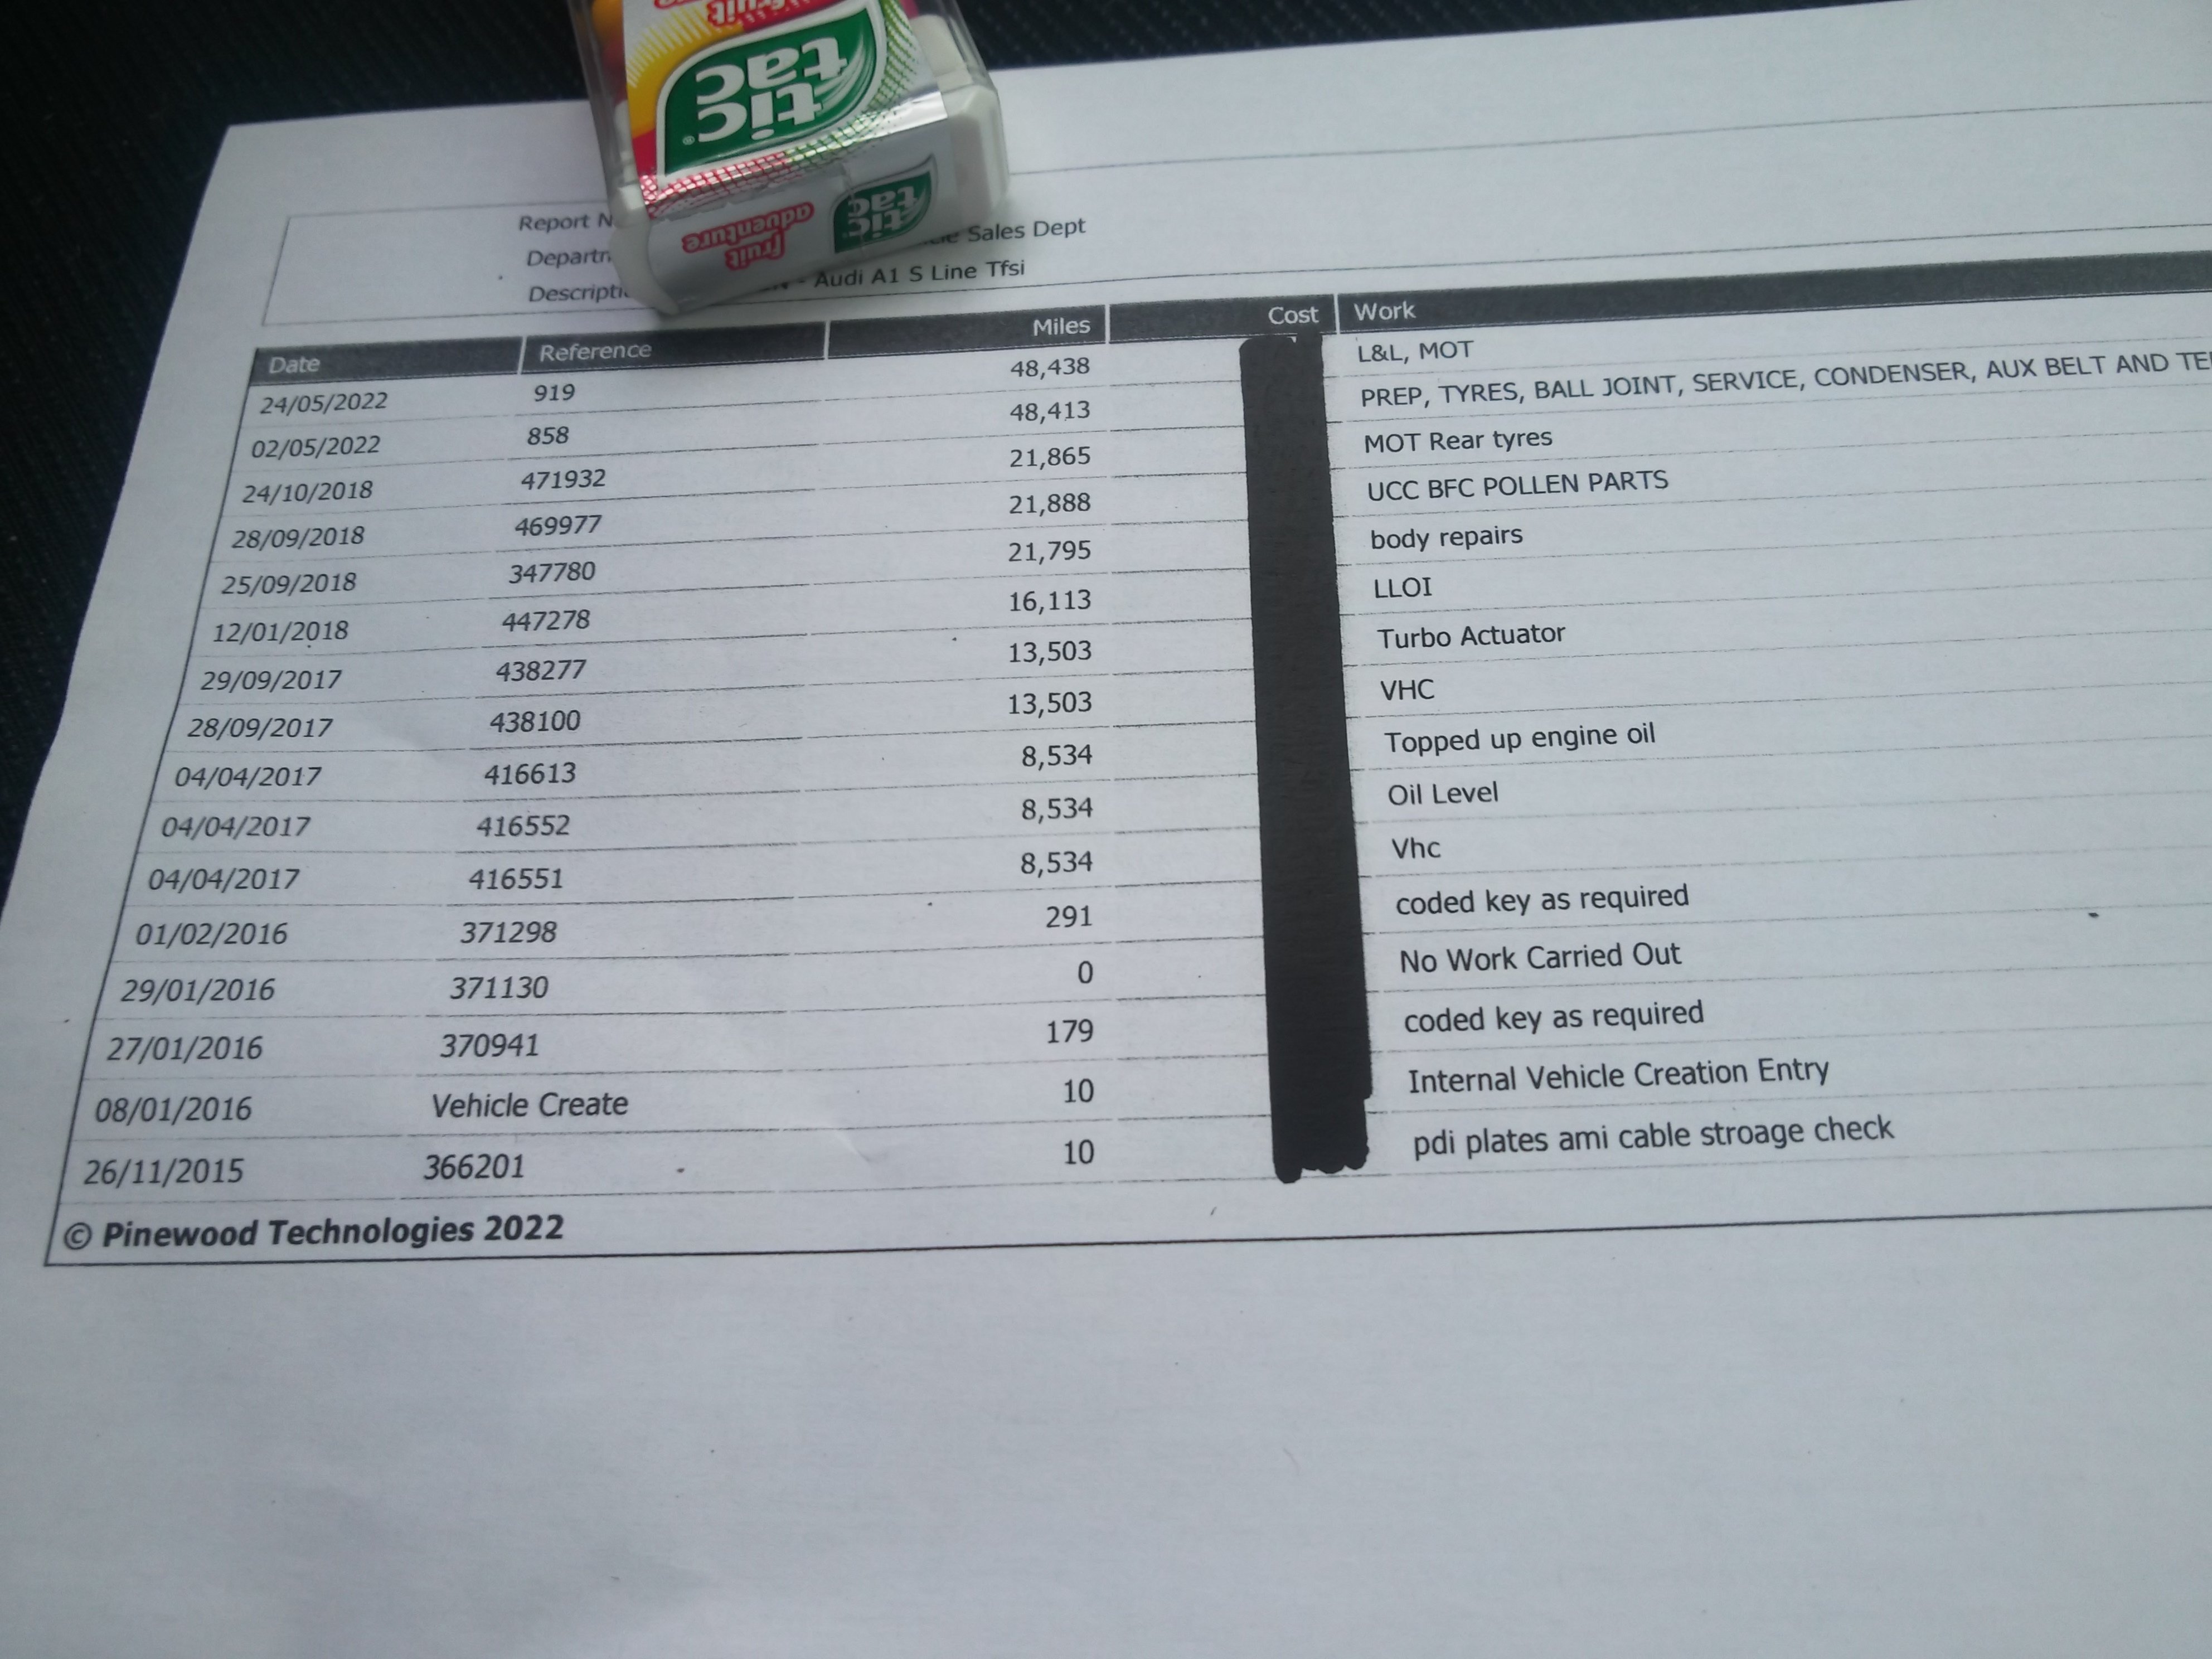
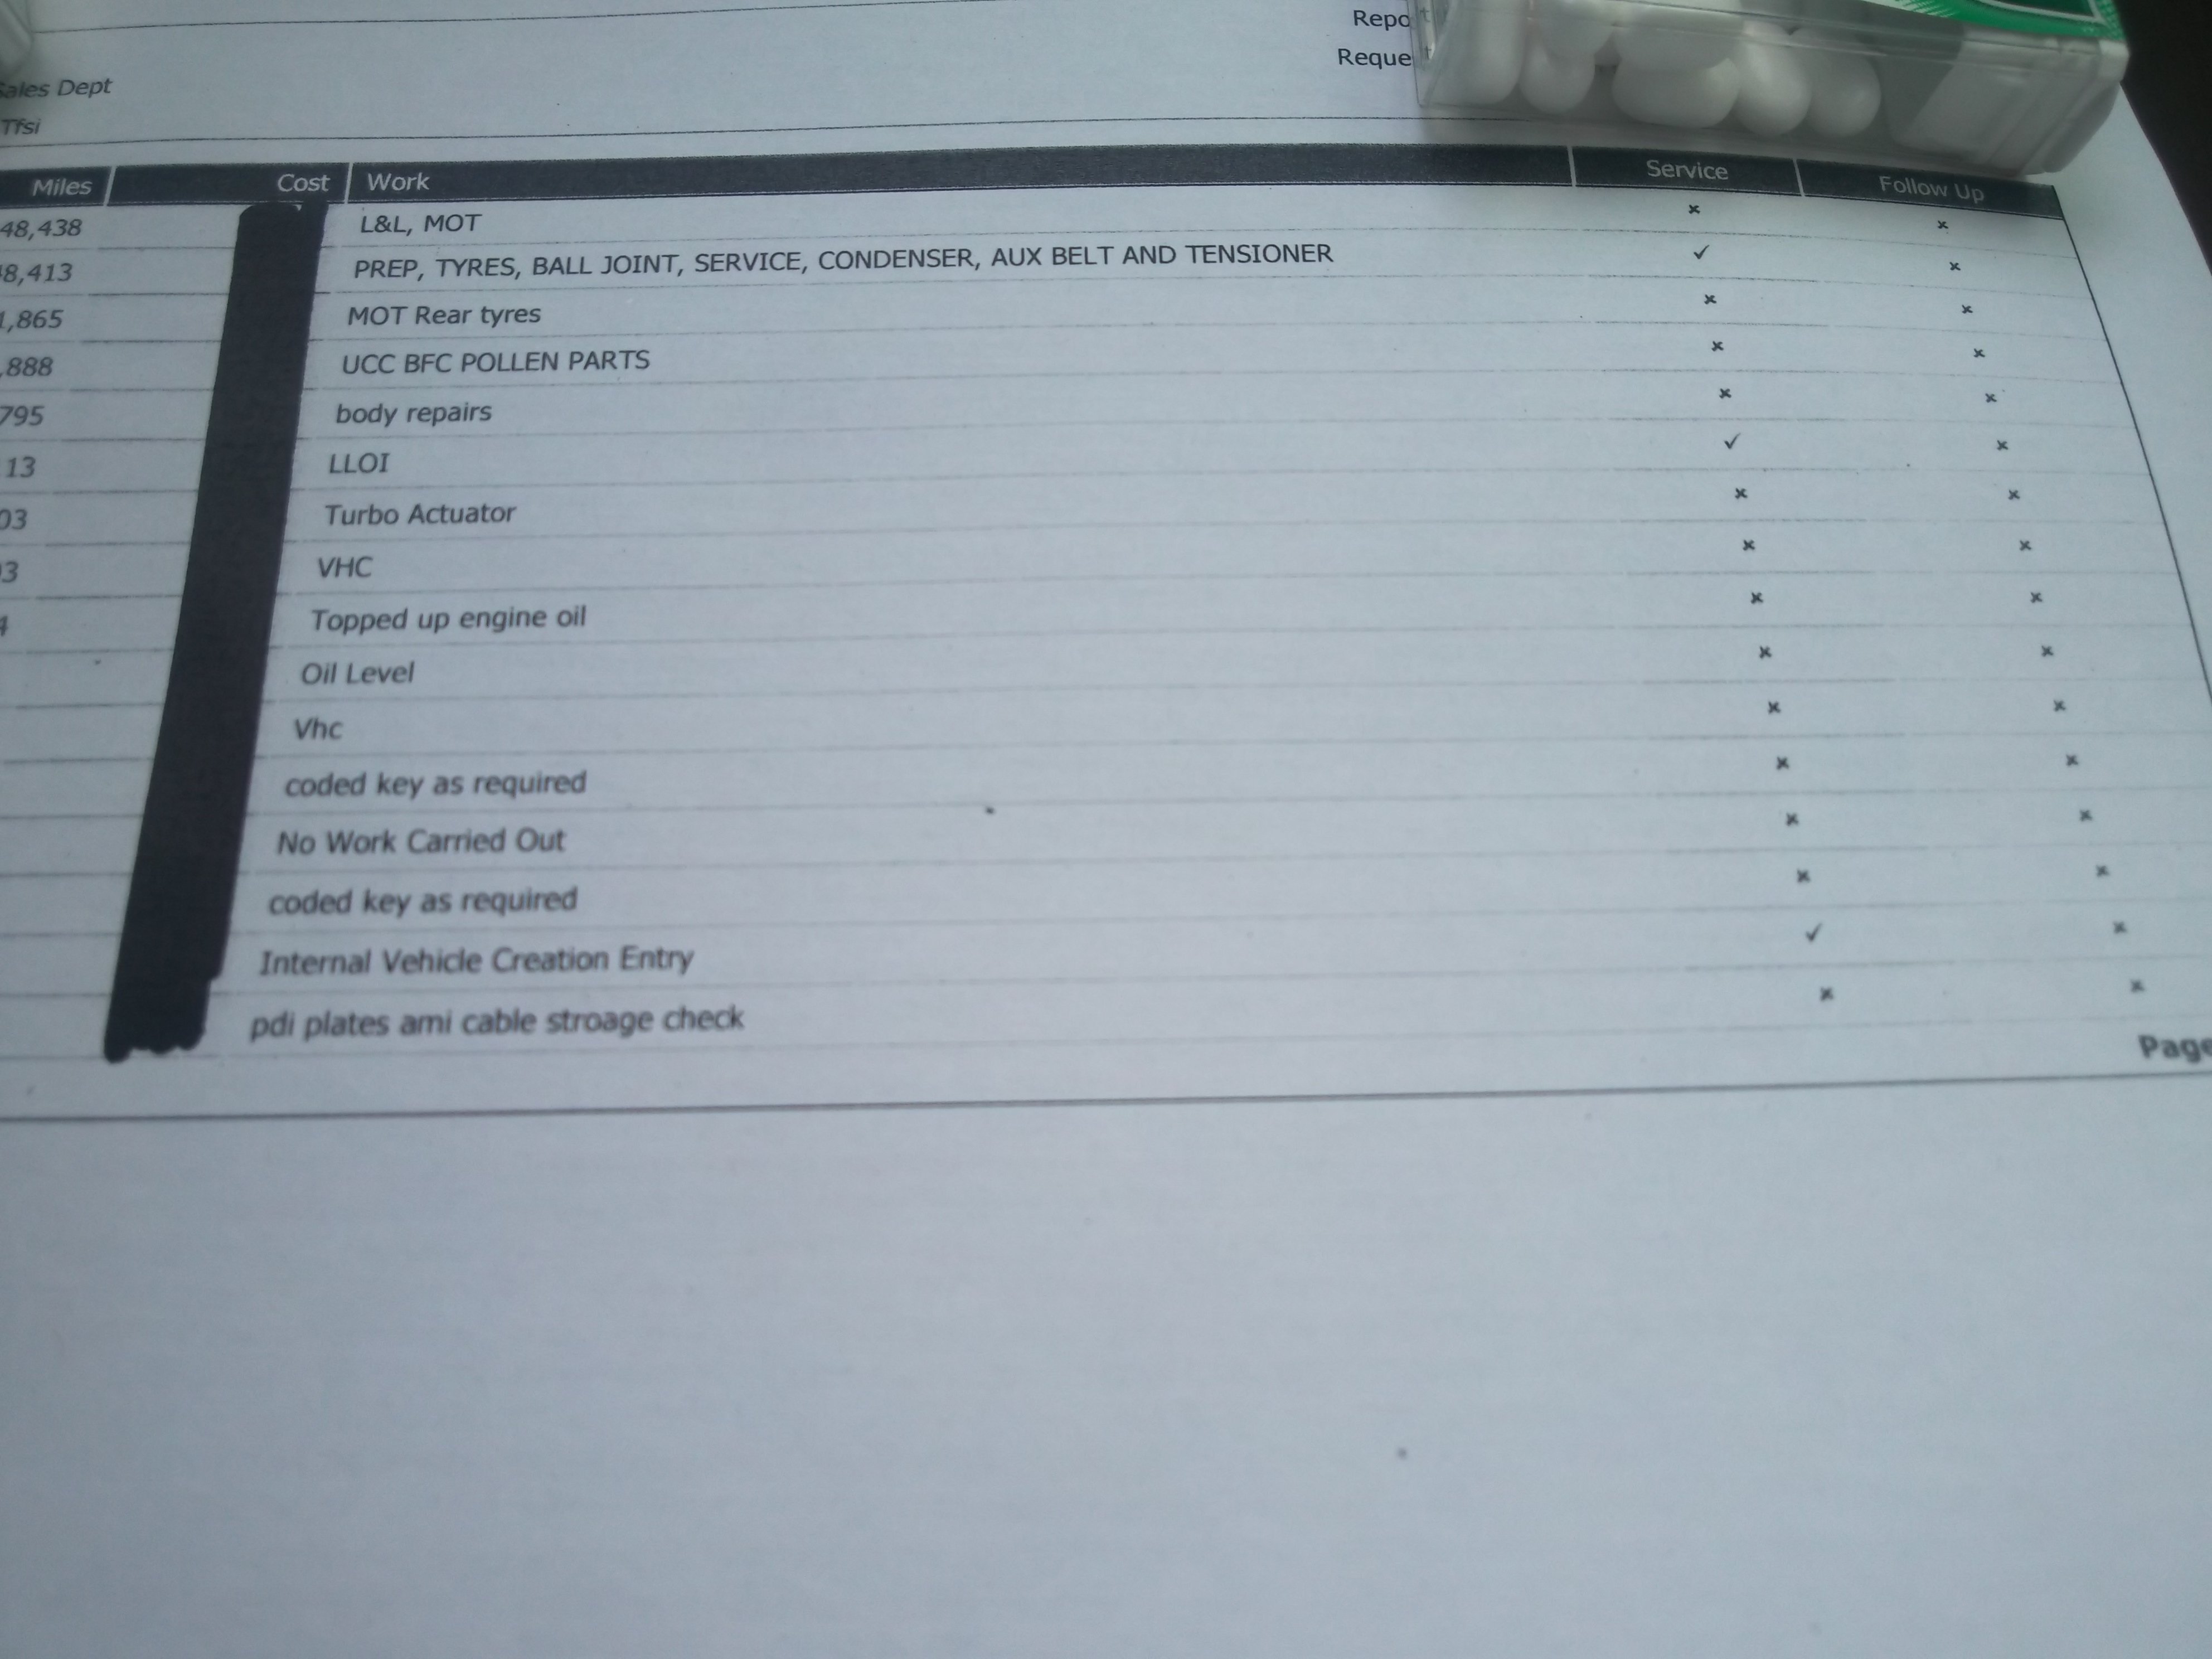
1 point1 point1 pointPut simply, you set the lash so the injector gets a full stroke of the piston, therefore you adjust the rocker until the injector bottoms out then back it off half a turn.1 point1 point1 pointScotland biggest dealership group which is also in the rest of UK are no better, or some of the next biggest dealership groups. The biggest even have the courses at their own colleges for training those in the trade. https://gtg.co.uk https://gtg.co.uk/about 1 point1 pointPlease note - I am not a mechanic or expert in anything. They don't need to know but they do need to be trained and equipped with the information to easily look it up and pass on, this of course requires the Dealership and Skoda/VW UK and Skoda/VW to provide the information, easy look-up and training - but of course as many (most? all?) Dealerships in England (UK?) are well below this level and Skoda/VW UK and Skoda/VW don't seem to always be a lot better or perhaps even worse.1 pointDisconnecting a battery does not make a airbag 'safe'. The chances of any of these happening is slim to absolutely none, but still take precautions. Dont drop it as it could cause an accidental trigger. Dont put anything on or near the electrical terminals, chances of a spark/static triggering are probably none, but dont risk it. When put down, point the airbag to the sky, not face down. If it goes off you dont want it flying upwards. At the end of the day its still an explosive that can do a lot of damage so its never 'safe' until after being triggered and the explosives are used up.1 point1 pointCould have done with that extra sidewall cushioning when driving thru Brum last night on 205/55/16s.1 point1 pointYes, they all use the vehicle speed signal (to turn off the parking sensors when moving and to vary the steering assistance). I had the same set of warning messages and lights when a rear wheel speed sensor failed on my previous 1.4TSI Octavia 3.1 pointJust double check are you saying I should avoid any extended warranties?1 pointThank you so much for taking the time to send that!. Too sound like a noob, what does the VAQ stand for? ☺️1 point1 pointTook 3 weeks from being told it was built and receiving VIN to being informed that it was on the boat.1 pointIf the car has had Official Dealership servicing they can call that up, even though they are not VAG dealers. As to the Service History the car does have, they know what they know as they bought the car. Ask all the questions. Get them to print out what they have and what they have done pre sales, & are there 2 or 3 keys with the car. VAQ due 3 years / 30,000 miles. Overdue if not done.
.thumb.jpg.f6aa3e4d857b8a604f917ce68a998a77.jpg)
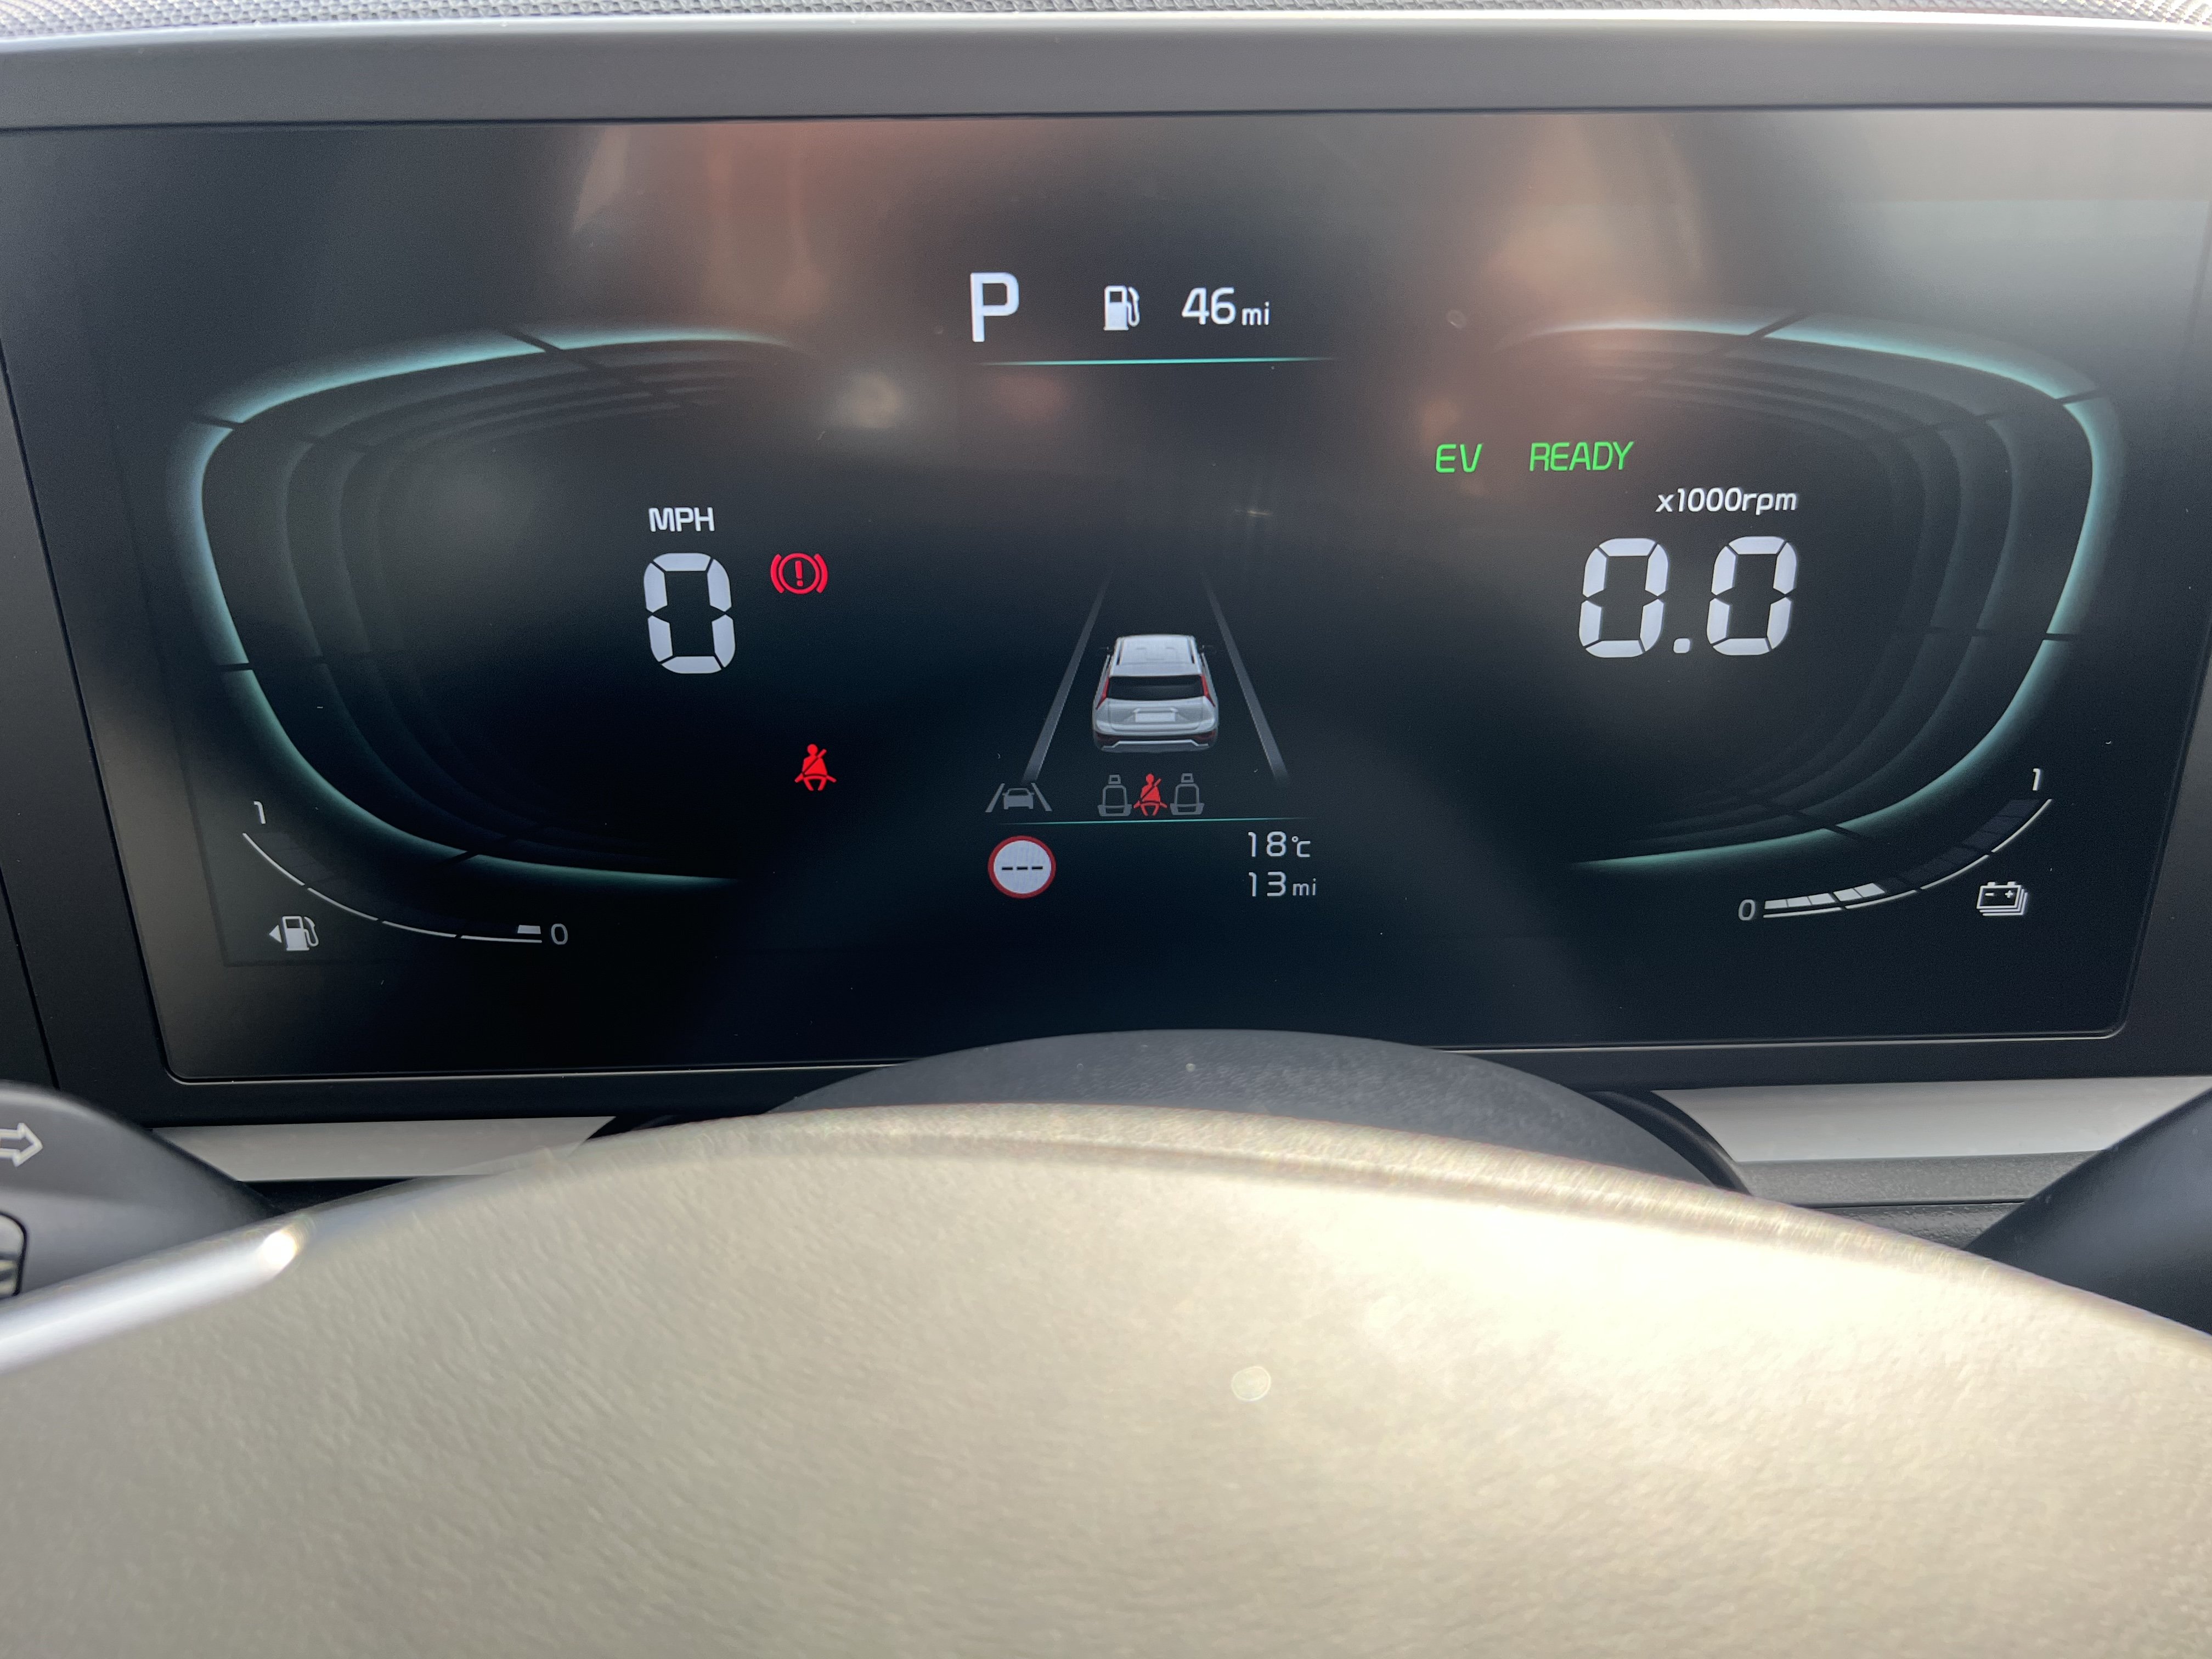
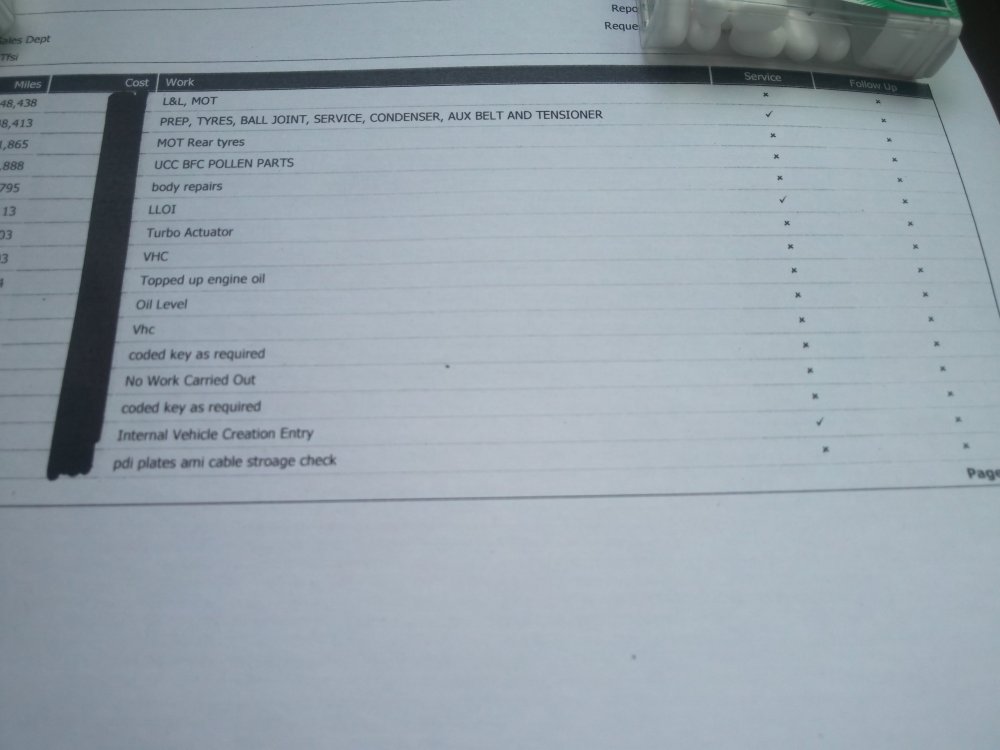 1 pointTried my best, can see the numbers a bit now, fixed the speed to match though!
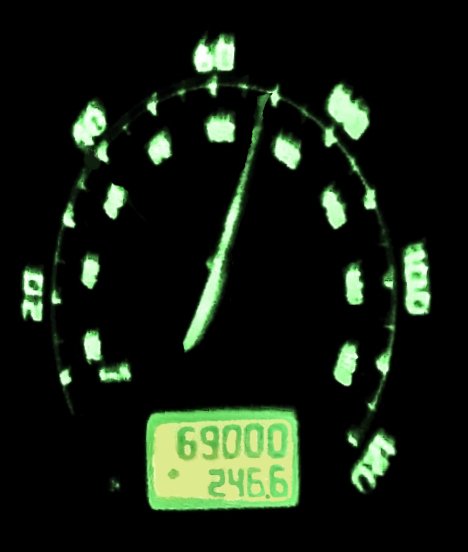 1 pointi have similar GPS issues. GPS location is totally wrong, sometimes for more then 200 km apart from my current location. This triggers the chain reaction with other assist systems ( dynamic road sign recognition, ACC, matrix headlighs, SOS) which then do not work properly. Strange thing which i was also noticing is, that sometimes (not always!!!) while the GPS is out of sync also the GPS location on carplay (google maps, apple maps and waze) are also wrong and shows the same wrong location as the built in sat nav. I have always tought that the GPS signal for carplay is independant (provided by mobiles phone GPS) from GPS signal for built in sat nav. Apparently its not. Than again, sometimes when the built in nav is out of sync the maps on carplay show the correct location. I just cant figure it out. Ofcourse went to the work shop, they've made a diagnostics and the result is that GPS antena is malfunctioning. So i will get a new one once it is on stock (been waiting for 3 weeks now). Hope that resolves my issues.1 pointAnother supporter of the racechip xlr here. Fitted once I managed to psychologically overcome the concept of locking the car with the front door open. Stored in cubbyhole, job’s a good’un.1 pointI just can’t leave things alone. The supplied exhaust clamps were ok, just not quite ok enough so I have stripped them apart, acid bathed the plating off them and have zinc plated and yellow passivated them myself. The 3” V-band clamp between the Downpipe and the mid section broke while I was undoing it, otherwise that would’ve been done as well. The sections of the exhaust are being prepped and coated in POR-15 Ultra hight temp Manifold Grey colour which should keep it tidy under there.1 pointSo while I’m waiting for the exhaust bits to arrive I decided to put some rivnut fixings in the tailgate so that it’s easy to swap the road number plate for the showroom vRS plates when at shows etc. The road plate was held on with double sided foam strips so no easy way of swapping them over and over. Pretty uneventful, not really photo worthy but I drilled the factory punched square holes out to 9mm then fitted two m6 rivnuts into the bootlid. Carefully measured the hole centres onto the show plate then drilled two 8mm holes for the black plastic m6 screws to go through. I’ll keep yellow screws in the car for the road plate obviously. looks quite smart with the small Detailing World sticker as well.. Speaking of stickers, I’ve put this underneath the bumper purely for the MOT man’s (and other nosey folks) amusement 😂 more soon when the exhaust gets here.1 pointExhaust located - couldn't get any sense out of the lad with a supposed Milltek back box so based on the research I've done, a Piper 2.5" rear box will mount to the Milltek 2.5" mid-section. With this information I spent some time on the Piper website and they list a 2.5" rear section, without a silencer and with a 5"x3" oval tailpipe. This is only intended to be a temporary measure until I can get it into the custom exhaust place for my 3" downswept tailpipe section in due course. It should be here within the week so I can get it on and the car ran up to see how it sounds. I'm expecting it to be similar to my Black vRS which had the unsilenced Ulta Tip exhaust on it and that was acceptable.1 pointTest fit of the front bumper was a success. I even found the fixings after all these years. Bumper is back off now as I’m painting the inside edges, be back on tomorrow along with the fig light surrounds. Once it’s finally on I’ll give it a good clay barring then machine polish it. The 30degree boost hoses were an inspired choice, they take all the struggle out of trying to manipulate a short straight hose and fit almost perfectly. More pics when it’s all buttoned up at the front.1 pointGird your loins chaps, I have progress to report. I'd had a great idea many, many months (if not years now) about mounting the Darkside "SEAT Sport" intercooler in the same way that the Forge coolers mount, hanging off the front panel. Whilst it worked in theory, due to the deeper height of the intercooler, it then fouled on the bumper as it stuck down lower than the rad pack, so I've had to revert to the standard wonky way the coolers align using the SEAT brackets. This does mean that there would now be a chew on getting the silicone hoses to fit but I think I have got a way round that. I have ordered a set of two boost hoses with a 30 degree bend in them, which will hopefully give the right angle of deflection for them to fit without much swearing. They are due to arrive today. In the meantime, I have now fitted the intercooler, refitted the slam panel, fitted the new Xenon headlights and got all of the bulbs in, ballasts working and the gaps in the best position possible. There is much cleaning to do in the engine bay still as despite the bonnet being closed and the car under its cover, dust from the DIY has found it's way everywhere so when it's back outside i'll be giving everything a good snowfoaming down and thorough washing off before getting it brought back up to standard. Once the boost hoses are here, trimmed and fitted I'll test fit the bumper back on and try and get a step closer to getting it off the stands and moving under its own power. Still need a Milltek back box though......1 point


.jpg.5f53ec69a42f4b4748f373fac50e3393.jpg.cd21baaca9391ac217ff52b26084586f.jpg.523555fcd103ce5d38d9210c570f5bbe.jpg)


.thumb.jpg.f83a46b9b3c0d976b9dbffbb523c9874.jpg)

.jpg.983f2cf3ac65ed161256ac7ec8a04acf.jpg)


Important Information
Welcome to BRISKODA. Please note the following important links Terms of Use. We have a comprehensive Privacy Policy. We have placed cookies on your device to help make this website better. You can adjust your cookie settings, otherwise we'll assume you're okay to continue.