


Leaderboard
-

Lee01
FREEDOM26Points36,166Posts -
Gaz
FREEDOM13Points7,748Posts -
Colin170CR
FREEDOM12Points2,356Posts -
pinkpanther
FREEDOM12Points3,913Posts
.thumb.jpg.9dd3f612ba7f13d10be5c518d3c8d255.jpg)


Popular Content
Showing content with the highest reputation on 11/09/23 in Posts
-
3 pointsMy hope is that the rapid chargers are free and working. The 350s seem to better than most, but far from perfect. Presently I assume no destination charging, but it’ll be nice if every parking space got 16/32 Amp type 2. Hydrogen fuel cells have worked for a long while, it’s the infrastructure that needs to catch up in the Uk (Familiar theme) Your point of doing it right first time is one view, the other would be regular smaller steps to get benefit as quickly as possible. Ability to recharge is a headache for many, so taking petrol/diesel and replacing it with hydrogen is a step. Fuel tax at two rates one for green a much higher for blue should help. I agree neither are perfect, my preference is getting people off ice ASAP.3 points
-
3 pointsEven I can answer that one for you, and I don't have an EV, yes you should be totally safe despite some of the posts you might have seen here, some of which are probably posted by me. The truth that EV's are in fact currently less likely to catch fire than a normal car of the same age.3 points
-
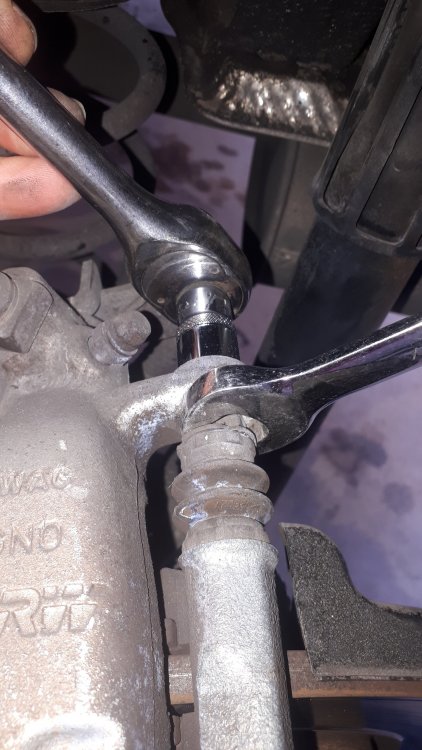
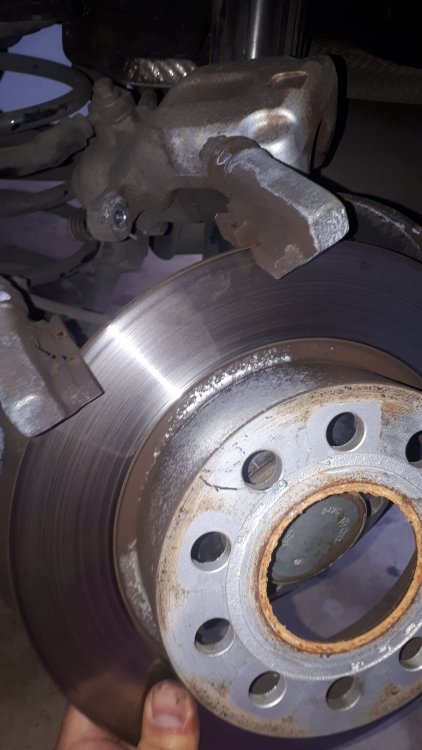
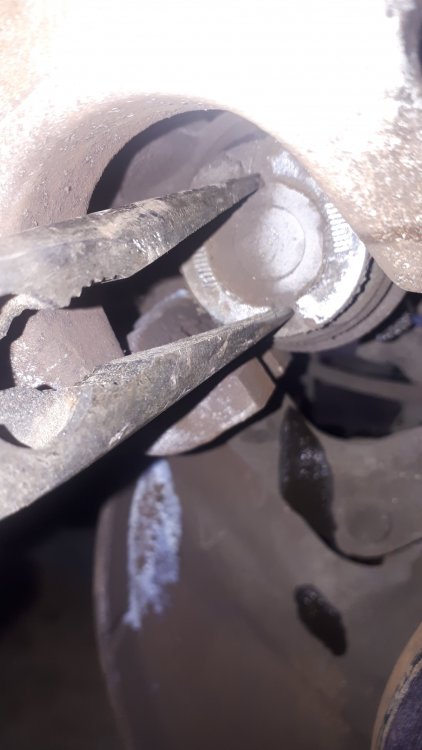
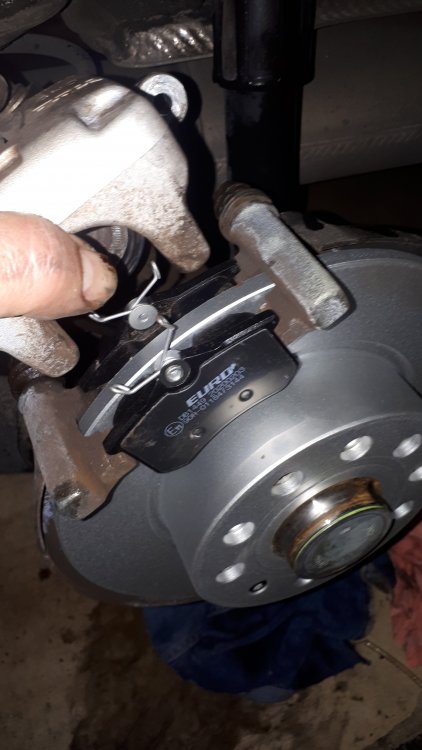
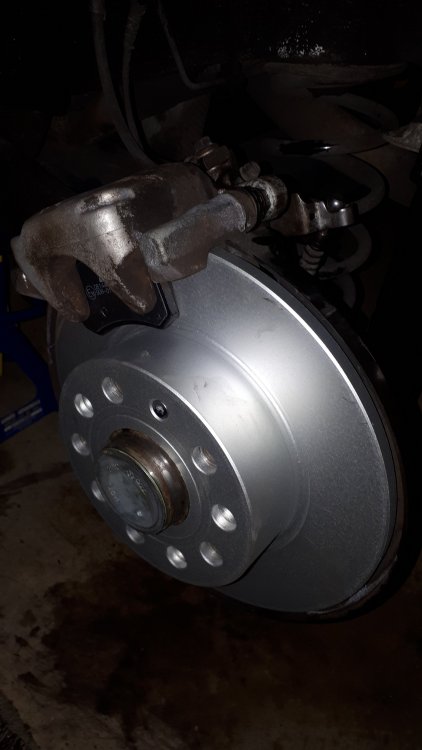
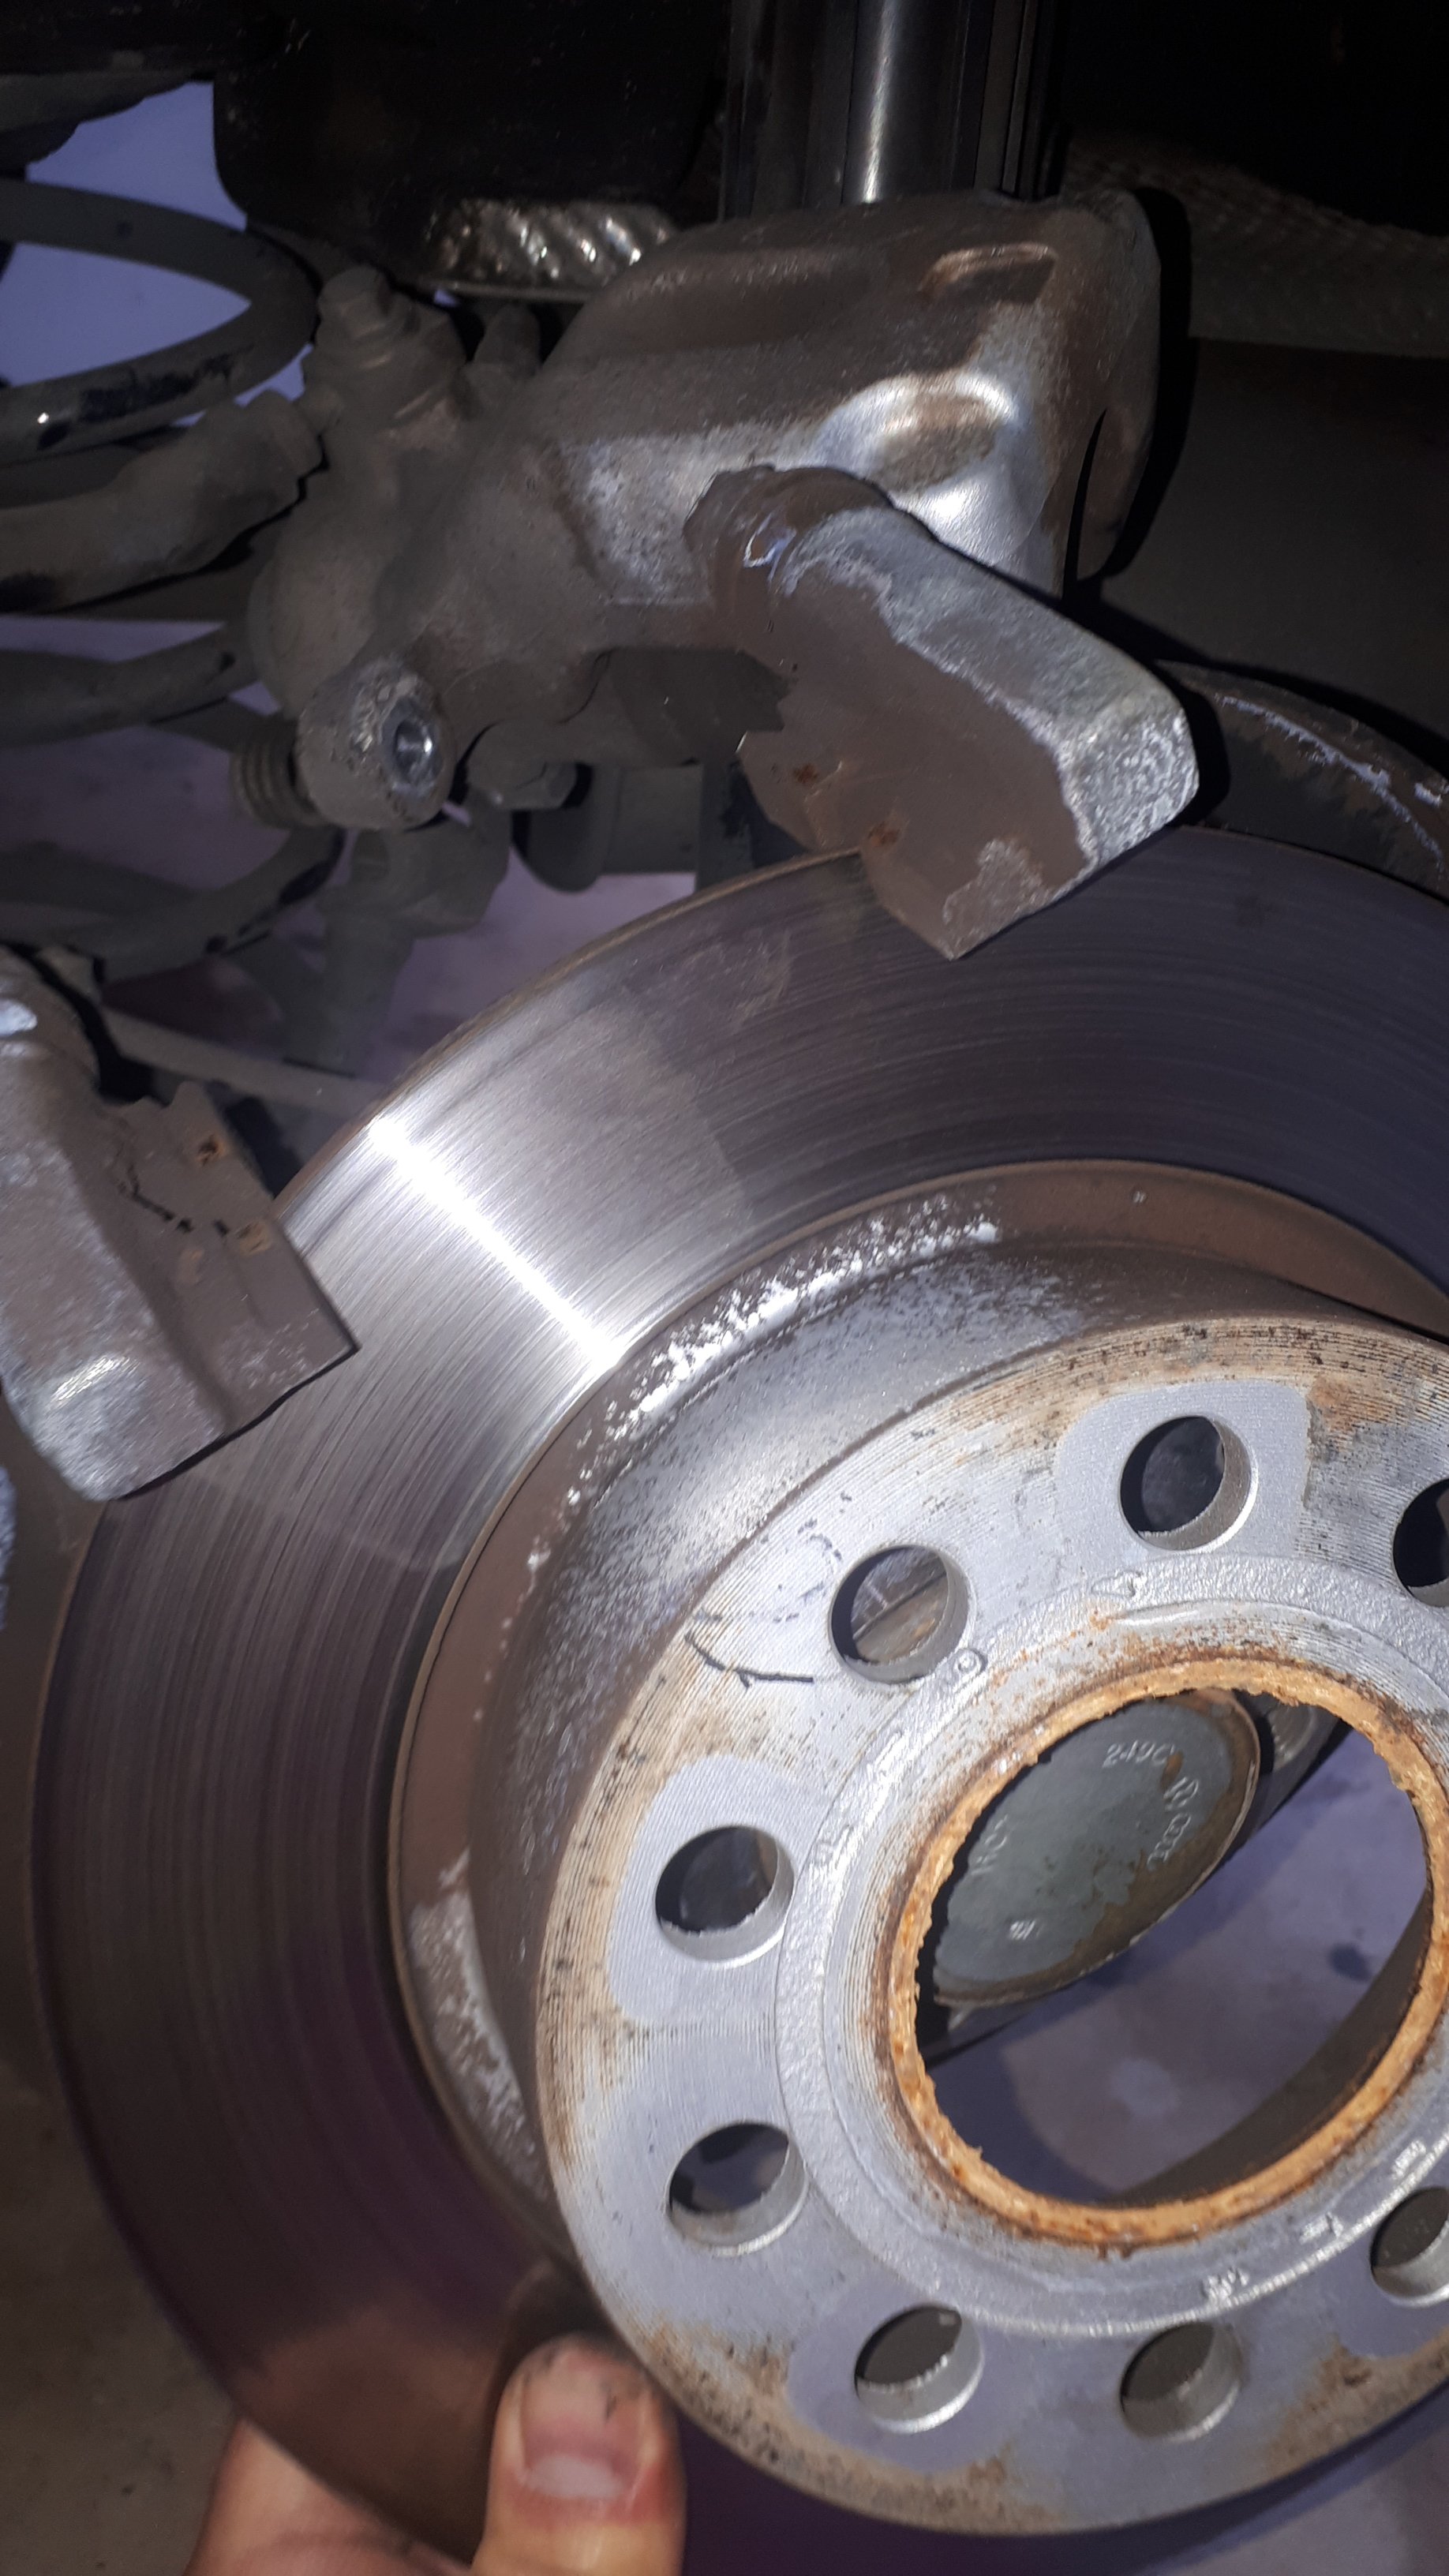
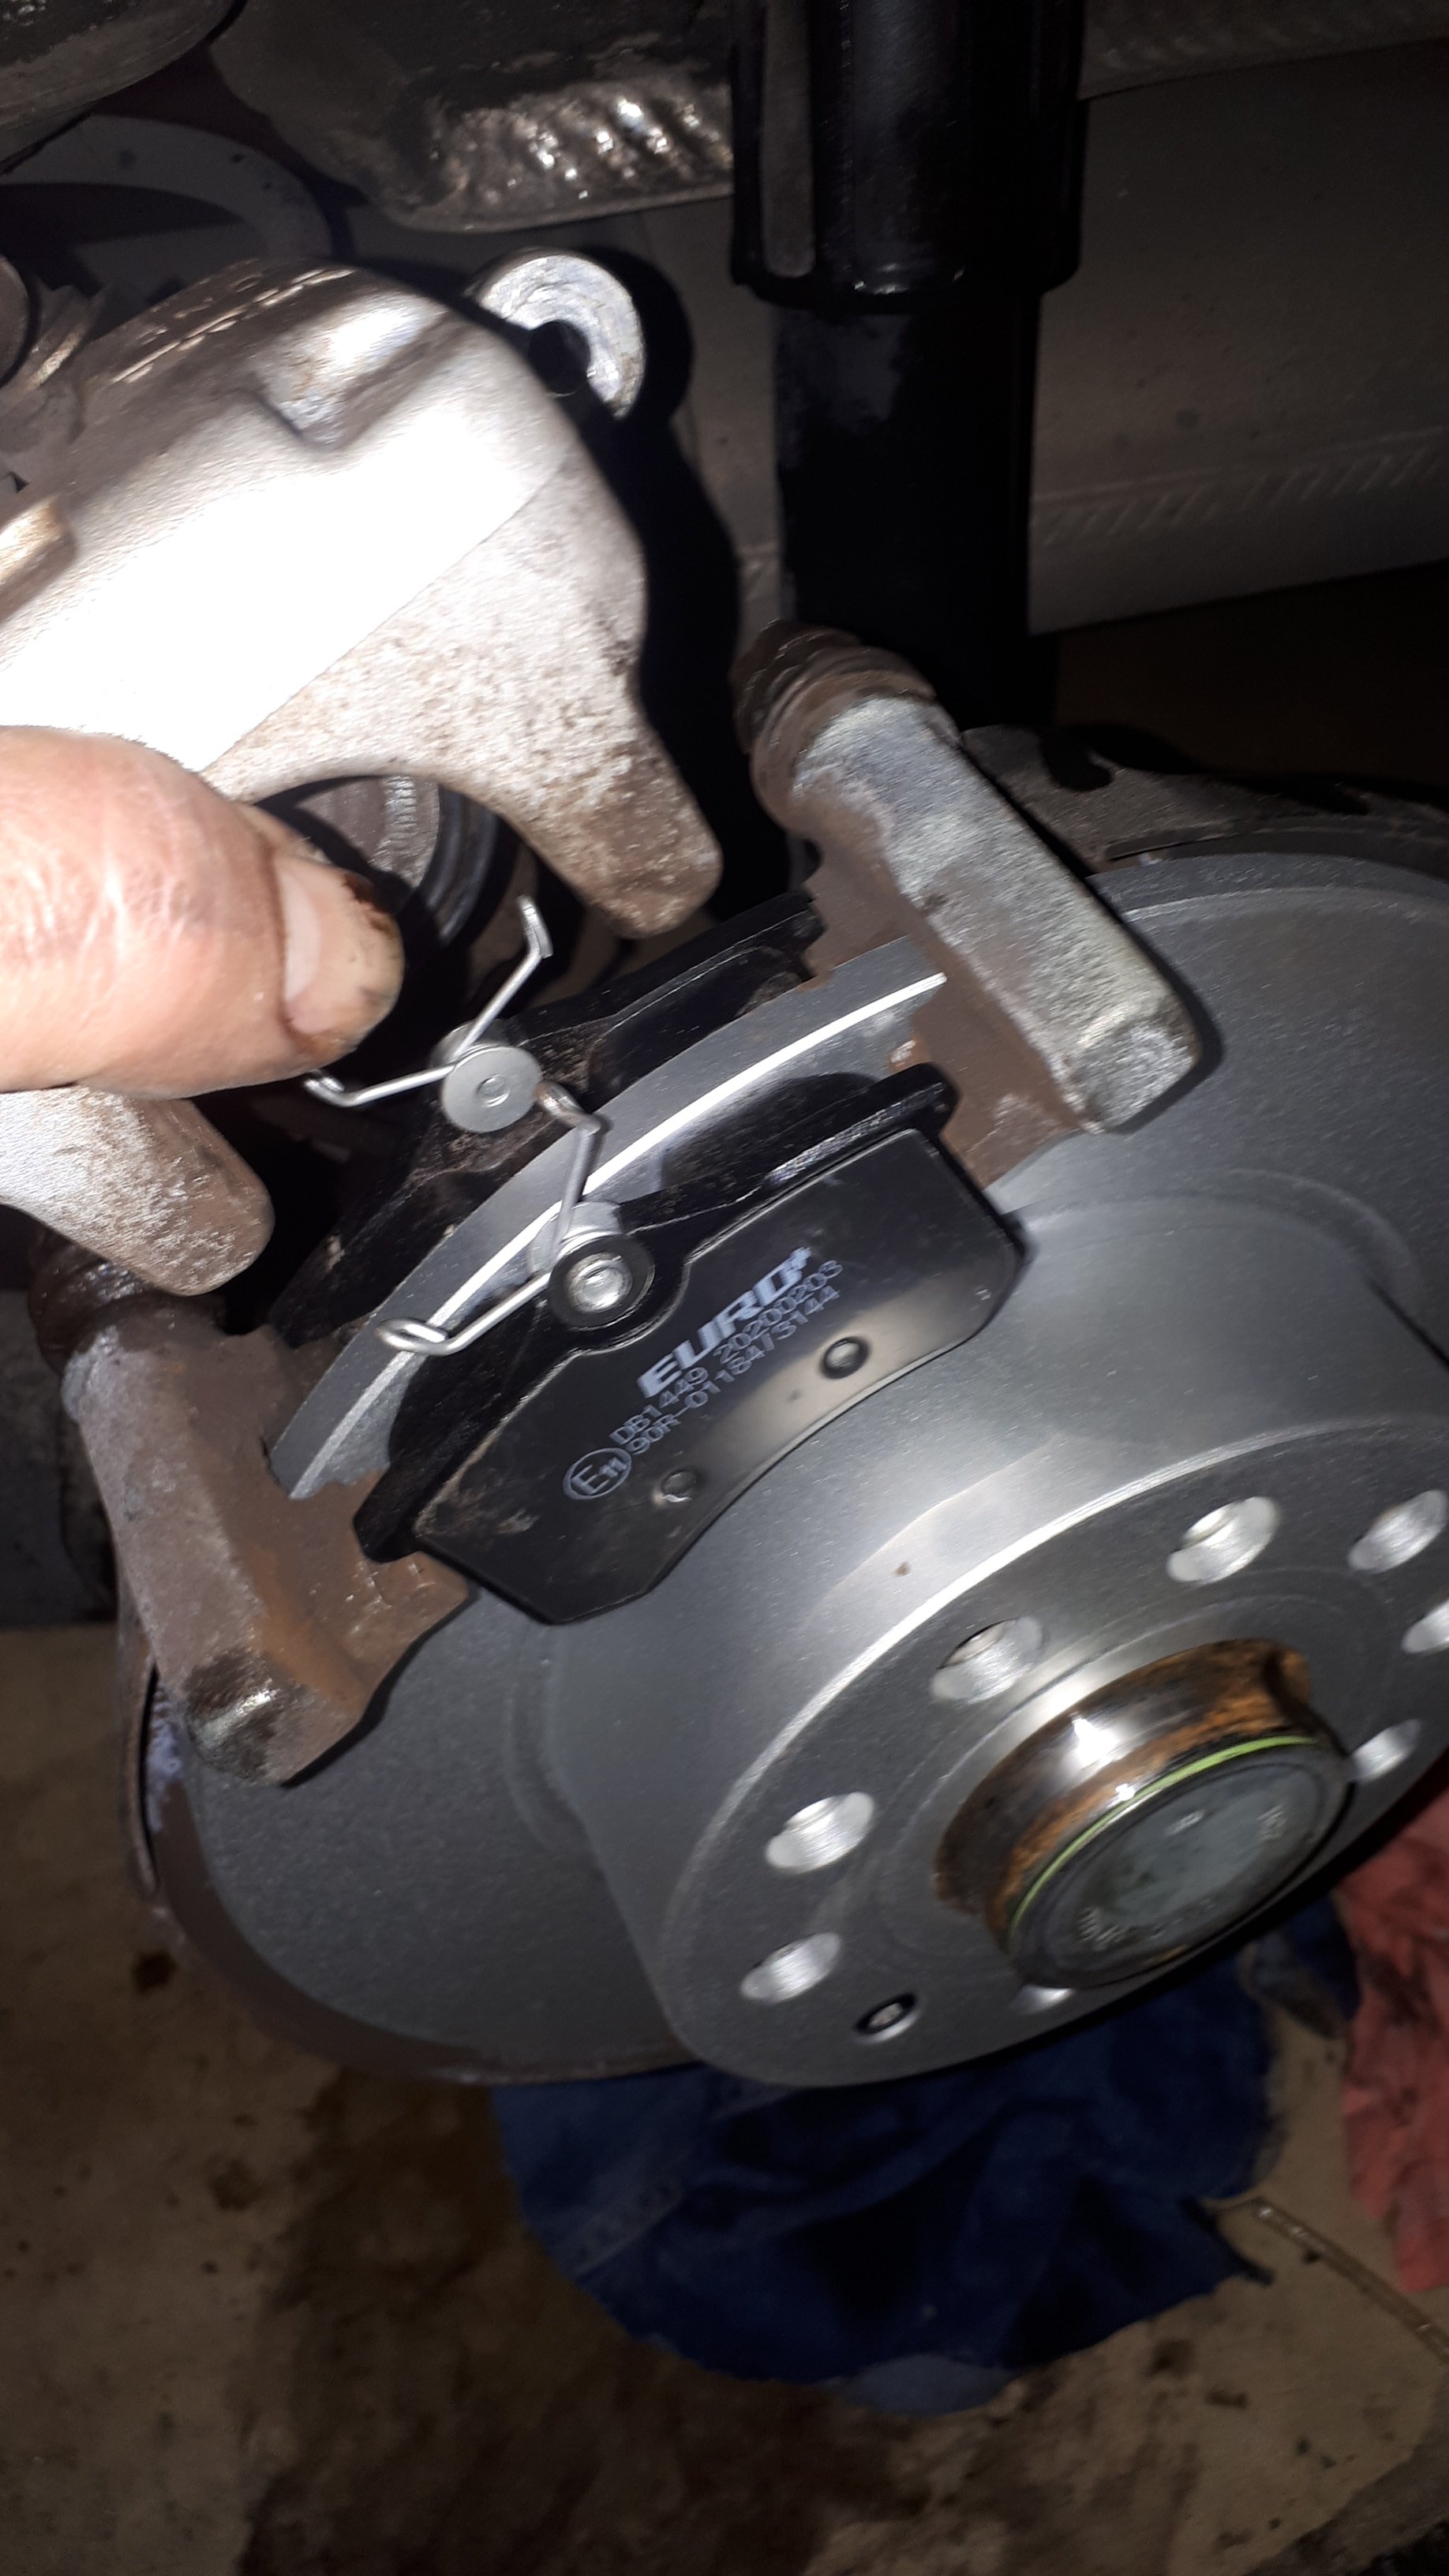
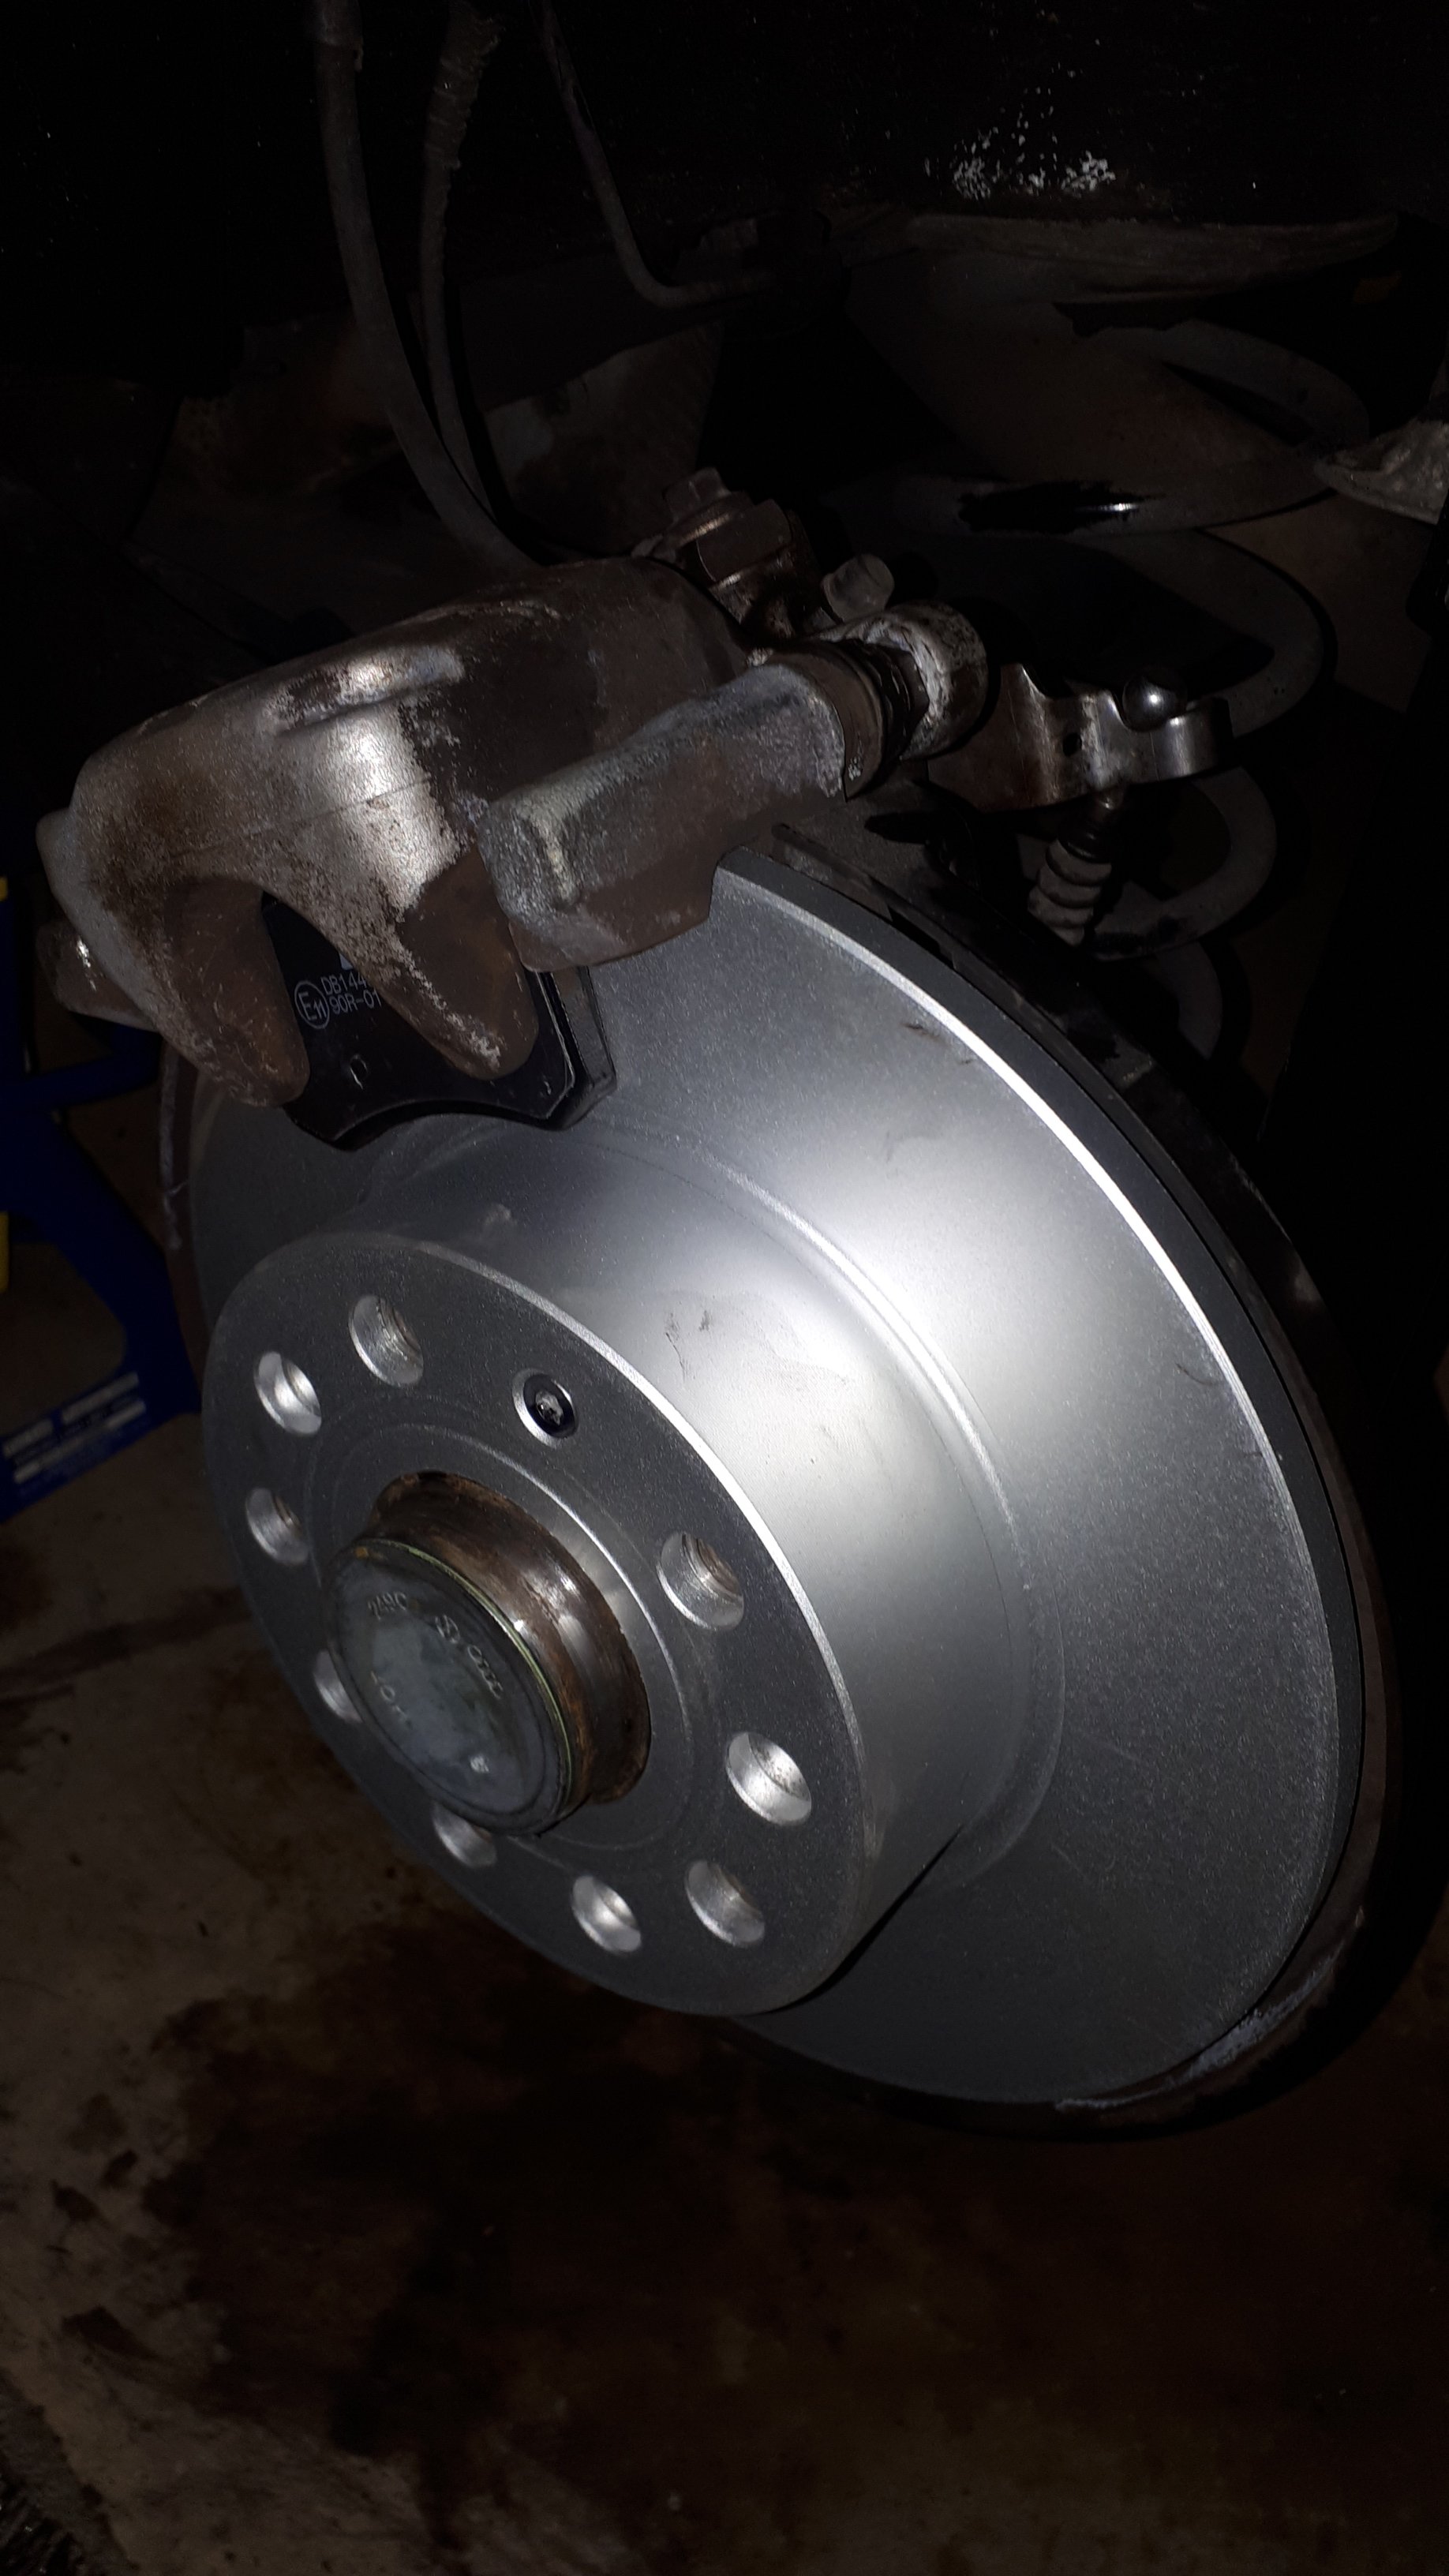
2 pointsI spent the day swapping the rear pads and rotors on my 2015 1.4TSI Estate and thought I would put a little write up on here. 1KD Rear Brakes Rear Rotor DBA2811 253mm Rear Pads DB1449 Tools: Wheel Chocks (block of wood or brick) Jack 2x Jack Stands Lug cap removal tool Tire Iron Brake Cleaner 11mm (optional), 13mm, 15mm Wrench T30 Torx Key Rubber Mallet or block of wood and small hammer Wire Brush Needle-Nose Pliers or socket adapter or piston pressing tool Brake Bleeder hose and tray (optional) 1. Park car on a firm, level surface. 2. Chock the front wheels. Put an auto transmission in "Park", leave a manual in gear. Release the park brake. 3. Jack up rear of car slightly to take weight off rear wheel. 4. Remove lug caps (if present), then loosen the lugs. 5. Raise rear wheel completely off the ground, place jack stand under a strong, stable point, and lower car onto the stand. Ensure the car is stable. 6. Remove the lugs and the rear wheel. 7. Repeat steps 3-6 on the other side. Work on one side at a time. That way if you have any questions you can reference the other side. 8. Open the hood and loosen (but don't remove) the brake fluid reservoir cap. You want to leave the cap on top to prevent any debris or water from falling into the reservoir. 9. Check the fluid level. It should be about halfway between Min & Max. The level will rise as you install the new pads and you do not want it to overflow. If it is near Max, you may have to remove some with a clean, dry syringe or medicine dropper, or pump a small amount out of a bleed screw. 10. Spray the brake caliper down with brake cleaner to settle any dust. Do not use air. You don't want to risk breathing the dust. 11. Disconnect the park brake cable from the rear of the caliper by pressing the lever down and pulling the cable ball out of its cradle. 12. Use a 13mm wrench or socket, and a 15mm wrench to remove the bolt at the back of the two caliper sliders. The 15mm nut is quite narrow so it may be difficult to get the wrench fully on it, but as it loosens there will be more room. 13. Once the slider bolts have been removed you should be able to pull the caliper up (may have to wiggle it a little). Do not let the caliper fall or stress the rubber brake line. It could easily damage the line resulting in potential failure. 14. You can now remove the old brake pads. If you plan to reuse the old rotor, skip ahead to step 19. 15. To remove the rotor, use a T30 torx wrench to remove the small retainer screw. It should come loose easily. 16. Use a rubber mallet and/or block of wood and small hammer to gently tap the rotor off the hub. Using a hammer directly on the rotor could cause cracks resulting in failure if you plan to reuse to old rotors. 17. Once the rotor is loose, you should be able to pull it off without removing the caliper carrier. 18. Use brake cleaner and a wire brush to clean and smooth the hub face. A dirty face can result in a misaligned rotor resulting in warping, pulsing, and poor performance. 19. Now you need to retract the caliper piston back into the caliper to create enough clearance for the new, thicker pads. On front calipers you can usually just use a clamp to press it in, but on rear calipers you need to twist the piston clockwise while pressing it in. There are tools you can buy to make this faster and easier (a ratchet adaptor, or a special tool just for twisting and pressing rear pistons), but I just used a set of needle-nose pliers inserted into the two recesses of the caliper piston. It may take a while before the piston retracts (I have spent more than an hour on one piston). If it doesn't seem to be retracting, opening the bleed screw with an 11mm wrench can help relieve pressure (attach a length of hose draining into a pan to avoid a mess). I have also found that turning the piston counter-clockwise for half to a full turn can help free it up. 20. Now that the piston is retracted, you can install the new rotor and secure it with the T30 set screw. 21. Install the new pads into the caliper carrier firm against the rotor. 22. Slide the caliper over the pads (you may have to wiggle it a little or give it a thump). Line up the caliper and reinsert the caliper slide bolts. Tighten them firmly with the 13mm and 15mm wrench. 23. Reattach the hand brake cable. 24. Inspect your work against the other side to ensure everything is back in the right place. Spin the rotor to be sure it moves freely (light rubbing from the pads is fine). 25. If everything looks good, repeat steps 10-24 on the other side. 26. Now that you have new pads and rotors installed, apply the hand brake, mount the wheel back on the hub and tighten the lugs in a starfish pattern. Double check to be sure all the lugs are evenly tightened. 27. Jack the car up and remove the jack stands. 28. Take the car for a spin around the block. Accelerate to a moderate speed, check that traffic is clear, and brake firmly to a stop (not a panic stop, but firm). Do this a few times forward and a few times in reverse to bed the brakes while listening for grinding or squealing, and feeling for pulsation, shaking, or pulling. 29. Visually inspect the brakes to be sure everything is still in place and there are no signs of uneven braking. 30. Get yourself a beer or vice of your choice and bask in the glow of a job well done.
 2 points
 -
Never mind, found the files and was able to update. The animations and navigation sure do feel faster. I like it. Hopefully also the end of reboots and the last few errors although I only had them occasionally.2 points
-
2 pointsIt's possible you're going to get a few comments about the a/c using a lot of fuel. A lot of factors are involved. I run it all the time in auto mode with the temp set around 20-22c, with the profile set on eco mode. Does the job for me. It's never been serviced or re-gassed. Long term MPG 60+2 points
-
New day - new solution (and dead easy)! Take 1 cable tie about 9" long. Wrap it round the wires leading to the bulb holder BEFORE threading it together. Pull it through until the resulting hoop fits down the lamp holder tube. Guide the hoop onto the bulb holder & while holding it in place with a (fat) finger, gently pull the straight end of the cable tie (with the other hand silly) until it engages (like a lasso) around the bulb holder. Now pull & hey presto - the bulb holder is out!
 2 points
 -
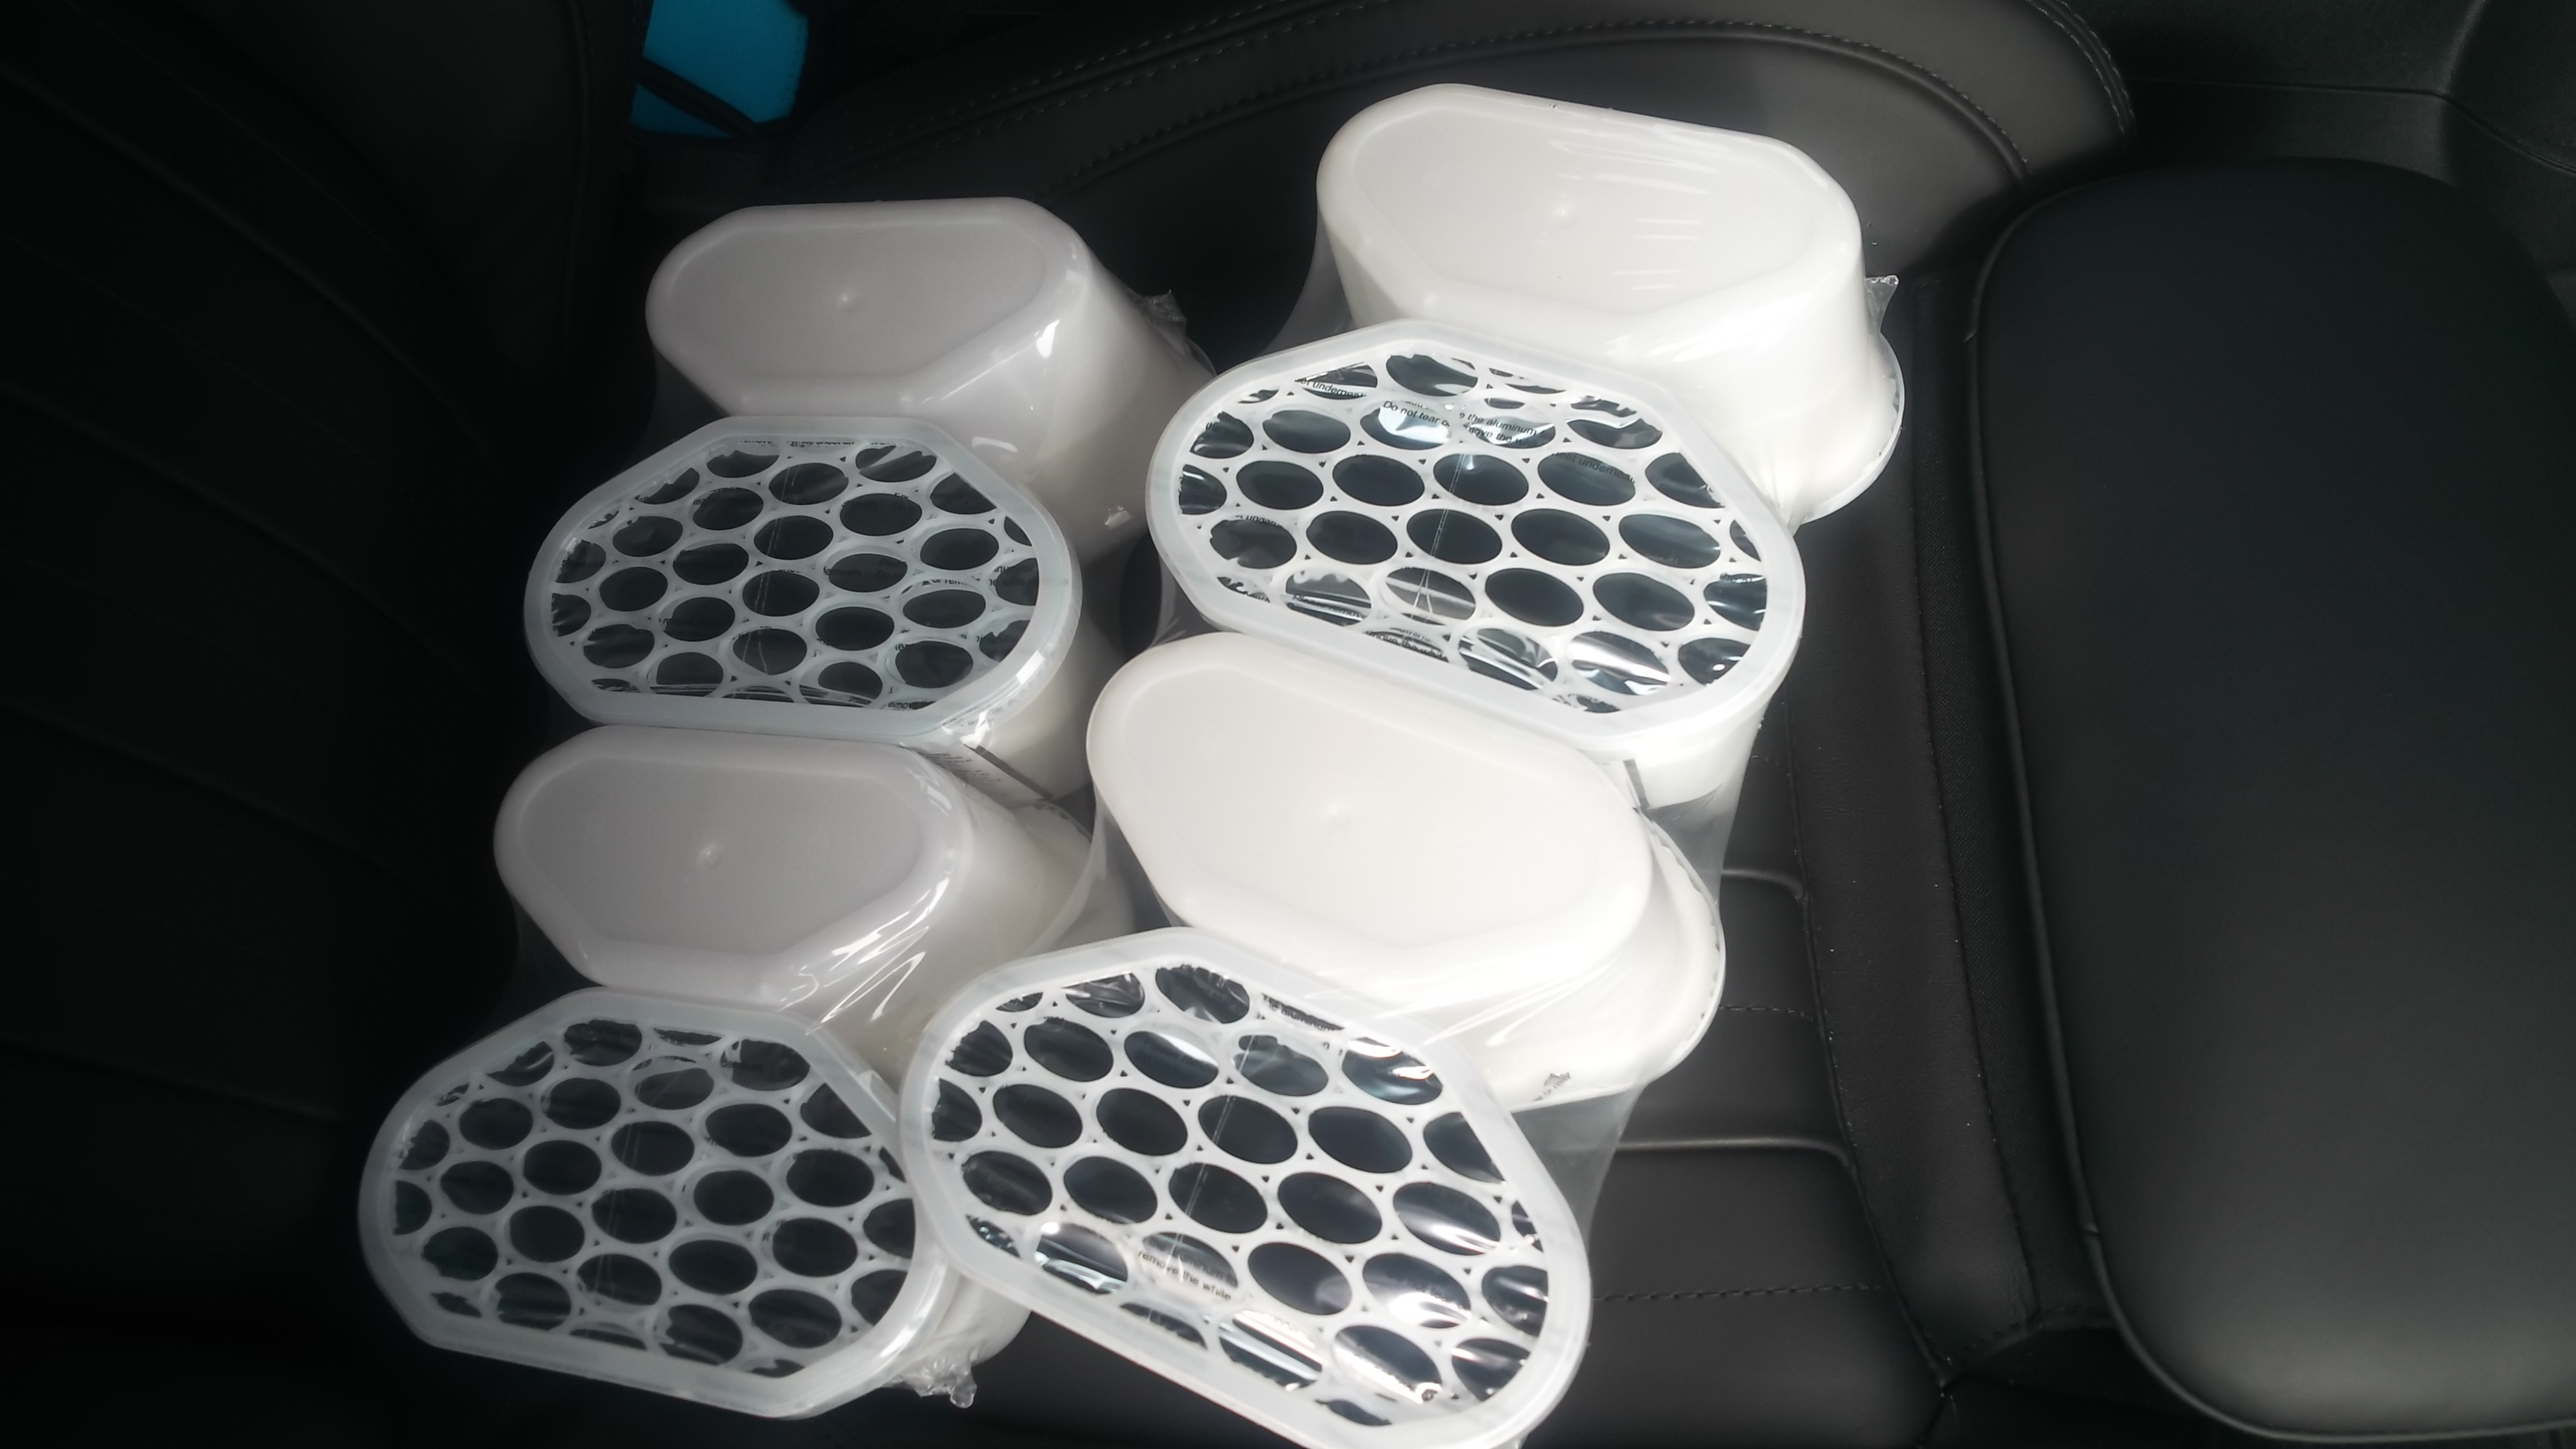
2 pointsThat time again for stocking up pre condensation season. £4 for 4 packs in Asda. Other retailers are available. But this is in Household. The car / travel section has loads of discount ticket stuff including oil to VW 504 00 / 507 00.
 2 points
 -
2 pointsGrrr, some people are the worst. More importantly, free stuff never works from ensuring good level of service point of view. When Ecotricity Electric Highway machine had been on free-vend, people flock to it and what used to be reliable quiet 2 charger location becomes unreliable for charging. The charge point in Asda next to Leicester space museum are also free. There's always DPD vans hogging them. I'd happily pay and use it as destination charging when I'm visiting the museum, so I don't need to think about en-route charging. EV are easiest when making full use of destination charging.2 points
-
2 pointsWhen I was ordering the factory options I specified a full size spare (steel not alloy) never keen on the space saver options & would only have one as a last resort ! Would at the right price have the matching alloys like the SEL versions have fitted from new.....only had the spare out to check the pressure !😉2 points
-
I've experienced the Front Assist kicking in unexpectedly a couple of times. Each time, like you, I had noted a potential hazard but concluded there was no risk so carried on, the car clearly thought differently. On each occasion I didn't need to lift off, brake, steer as no 'driver input' was needed. However, in similar circumstances more recently, I have tweaked the steering slightly &/or lifted off slightly and the car Front Assist has not reacted - I assume those small driver inputs were enough to inform the systems that I've seen it, I'm reacting to it, I know what I'm doing.2 points
-
2 pointsWe had some pretty dense mist and a lovely sunset on the way home earlier - so pleased we took the scenic route 👍


 2 points
 -
Hello, my Karoq 1.5 TSI DSG is coming up for three years old, Skoda have offered me extended warranty at £204 per year with a £100 excess. Is this good value? Have any other members used this warranty or have experience of other warranties? thanks in advance1 point
-
1 pointAberdeen busses are hydrogen, and bin lorries and other vehicle. There are 2 filling stations for them. Like in Fife where there are a fleet of hydrogen vans. But then there is plenty excess electricity to produce Green Hydrogen there. There are hydrogen filling stations, just not enough.1 point
-
Very clear instructions. Glad I found a how to for 1kd because I wasn't sure if M14 XZN was mandatory or not. If I can add some tips. Dont forget to clean and put some Grease if needed1 point
-
1 point
-
1 point
-
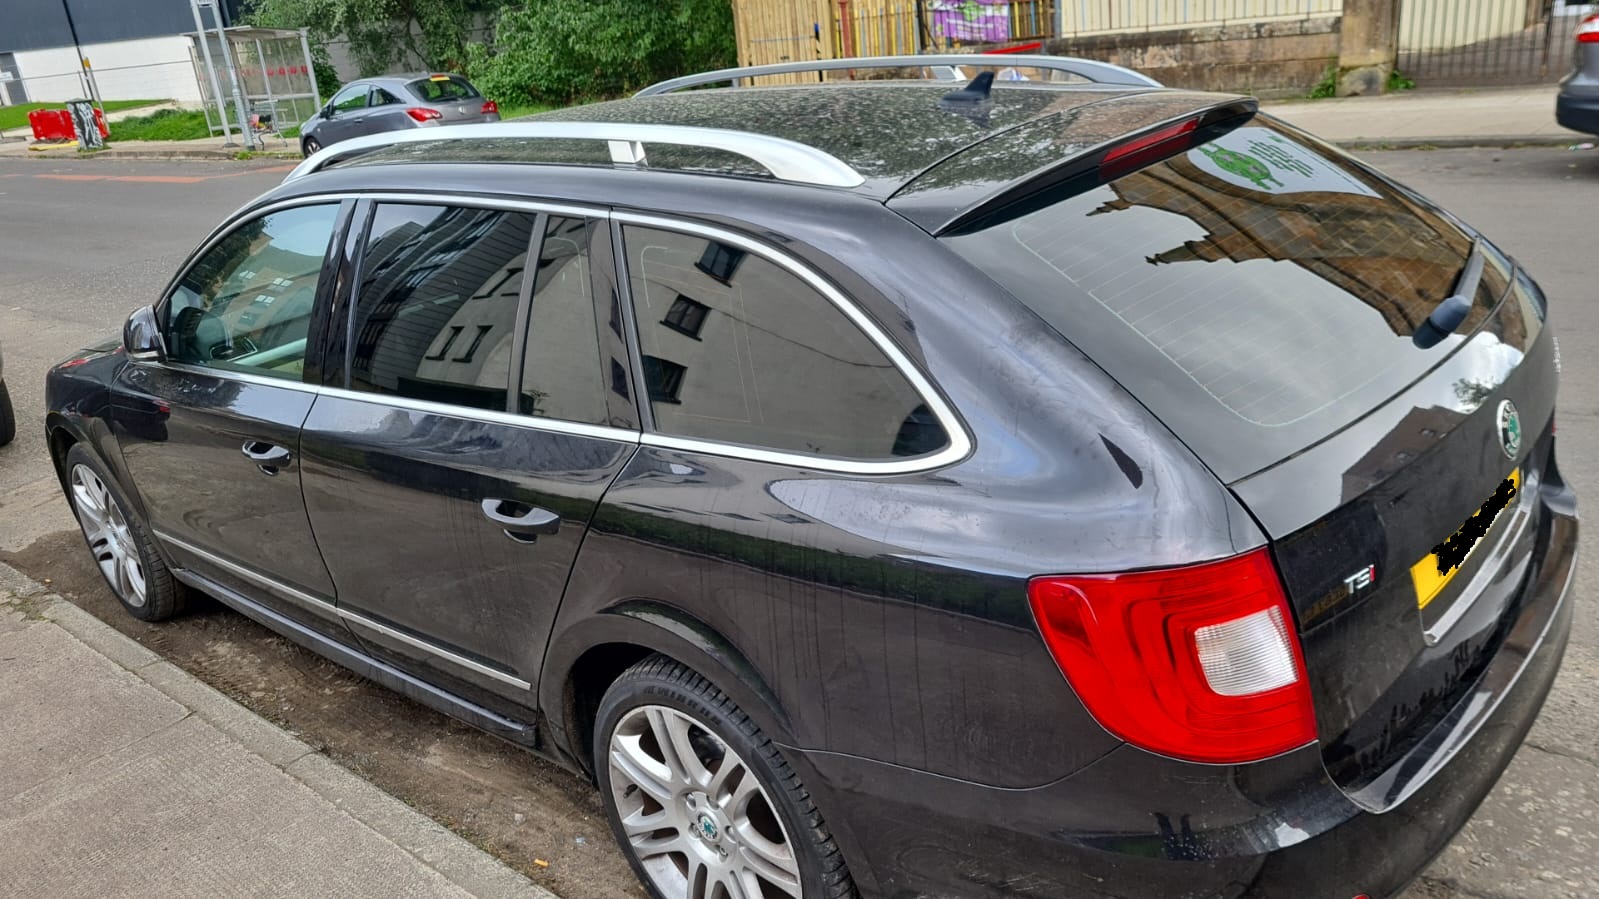
I have bought a L&K car with these wheels on. Do they have much value? In generally good condition with minimal lacquer peel etc. I'm trying to decide whether to stick with these or sell them to put tyres on another set.
 1 point
 -
1 pointI've got 245/40/19 tyres on the factory 19x8 rims. Car is also lowered and on 10mm spacers at the rear & 12mm at the front. No scrapping or scrubbing issues.
 1 point
 -
1 point
-
1 pointI'm using 245/45/18 whilst lowered on coilovers and can confirm there is no scrapping, even with a full load. So if you are standard suspension then you shouldn't have no issues at all.1 point
-
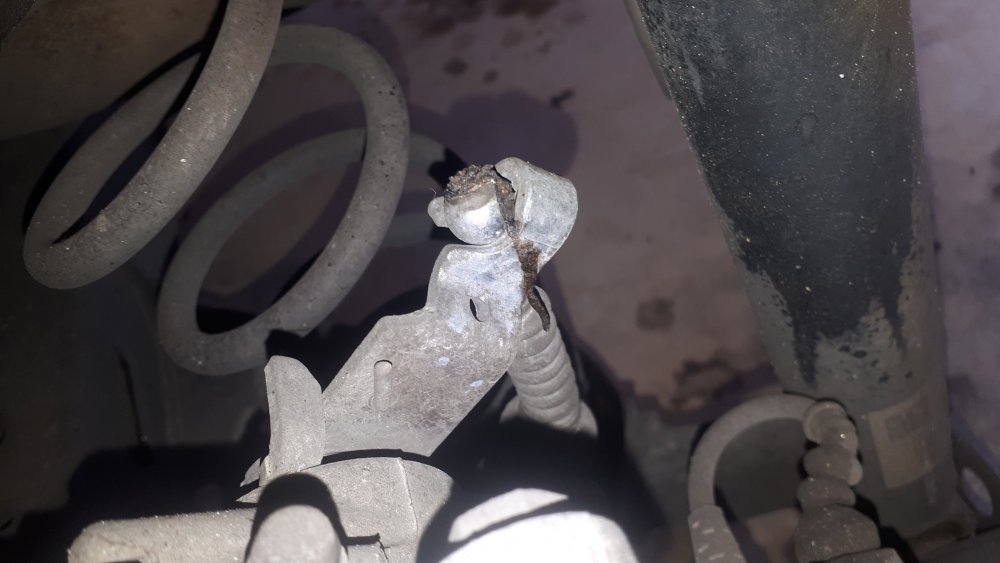
1 pointI cant really tell what it is from the photo but from the words I suspect its the angle drive gearbox from the FWD differential to drive the rear propshaft, they are known for developing leaks, very very expensive to have replaced by VAG but in reality it will be nothing more than seal or O ring. If I am correct and the photo was taken from the front of the car then stop driving before you cause any or further damage, if you will be relying on the main dealer to replace it then you can run it into the ground, the noise will likely become unbearable before anything makes a bid for freedom.1 point
-
1 pointVery little danger of that with anything powered from the lighter socket.1 point
-
The first thing I do when I get in my car is turn this and lane assist off. It’s like cars are being designed and built for morons these days, let ME drive my car, not the other way round.1 point
-
In the case for Leaf, warranty is only triggered when BMS recorded health goes below certain value. There are stories Nissan isn't honouring warranty when there's individual cell failure. Eg. https://www.speakev.com/threads/nissan-leaf-30kwh-cell-failure-nissan-not-honoring-warranty.168576/ I am sure there's another case, can't find it at the moment. My Skoda Octy didn't get any good will gesture on well known water pump failure a few months out of warranty, despite full main dealer service history. Another time, in warranty, when I asked for software update to cure warm weather engine start up hesitancy, printing pages from this forum, dealer wouldn't lift a finger to help in any way. So my "trust" in main dealer is very low.1 point
-
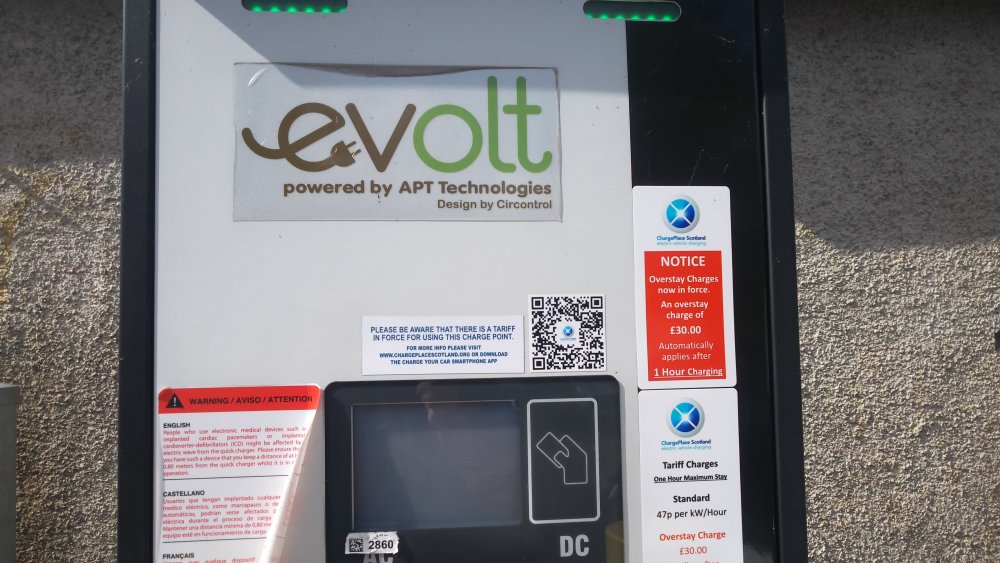
1 pointThat's the law I'm afraid. Your front windows and windscreen needs to allow 75% light through. The rear ones can be as dark as you like. I've gone for 5% on the sides and the back window is 15% It really cuts down the heat to be honest. https://www.gov.uk/tinted-vehicle-window-rules1 point
-
I've been in a couple of situations exactly like the one mentioned by Steve and solved it similarly. For example, another car might be turning off the road, crossing a raised walkway, with it's rear hanging slightly onto the road still. If the other car is moving, it will be well clear of the lane when I pass that spot and there's always been plenty of room to steer around it while even staying in my own lane, but the car seems to think otherwise. Front Assist would then start braking, beeping and showing me the huge red symbol on the dash. A touch of throttle input calms it down.1 point
-
1 point
-
I had Front Assist intervened a few times because of pedestrians, but it always started slowing down gently or just beeping at me. Never it slammed brakes. IIRC, according to car's manual, on speeds above 30 km/h it shouldn't start braking before giving alarm. Manoeuvre brakes are other story, scared me a few times in my garage slamming brakes so hard as if someone hit me.1 point
-
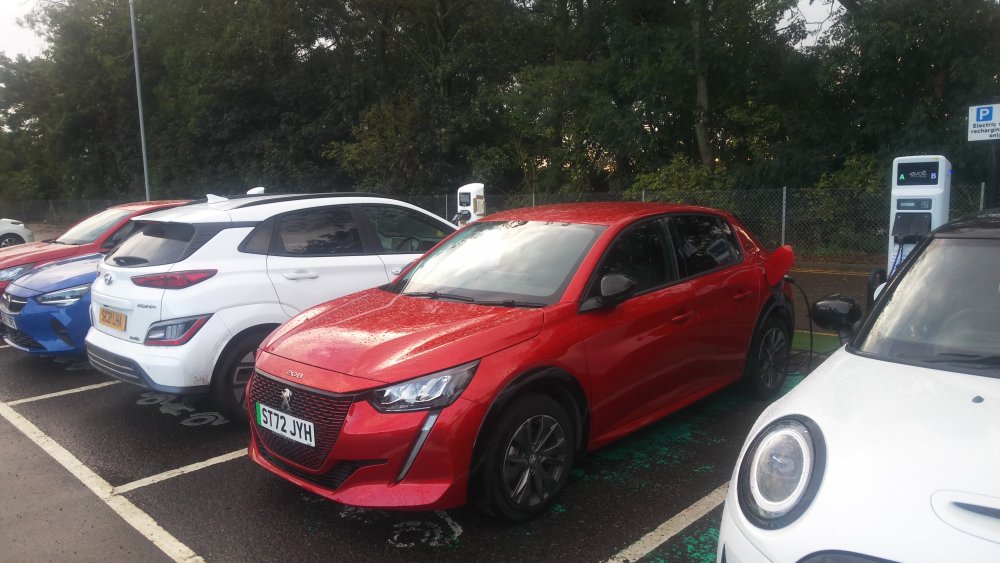
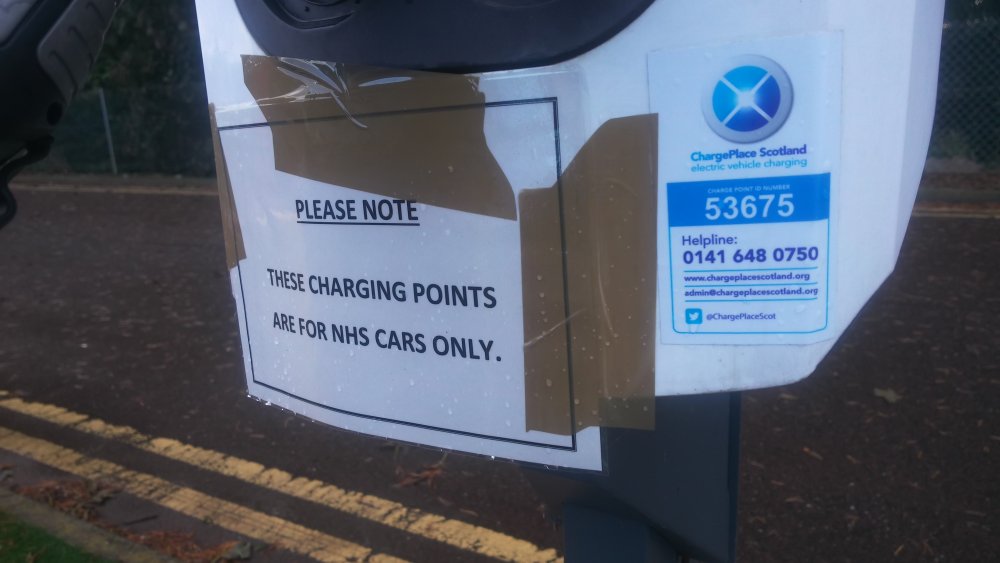
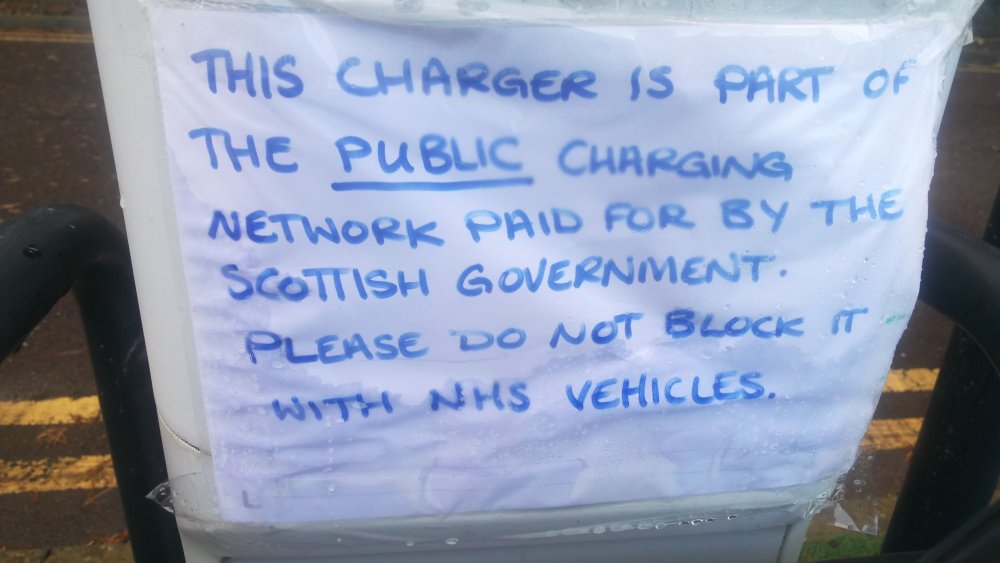
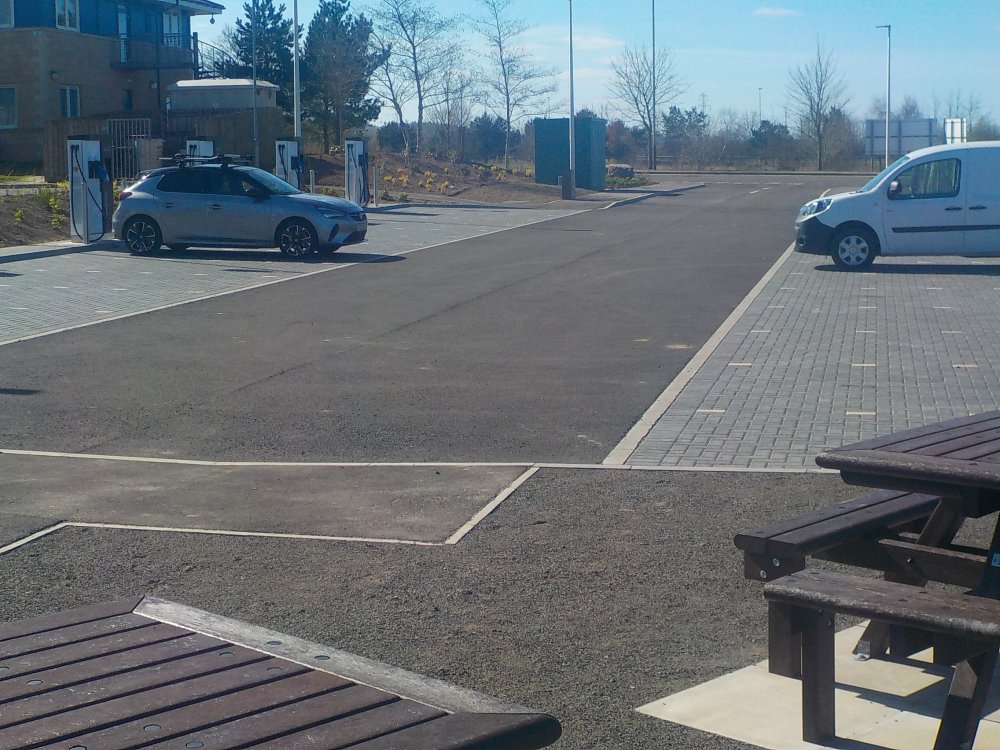
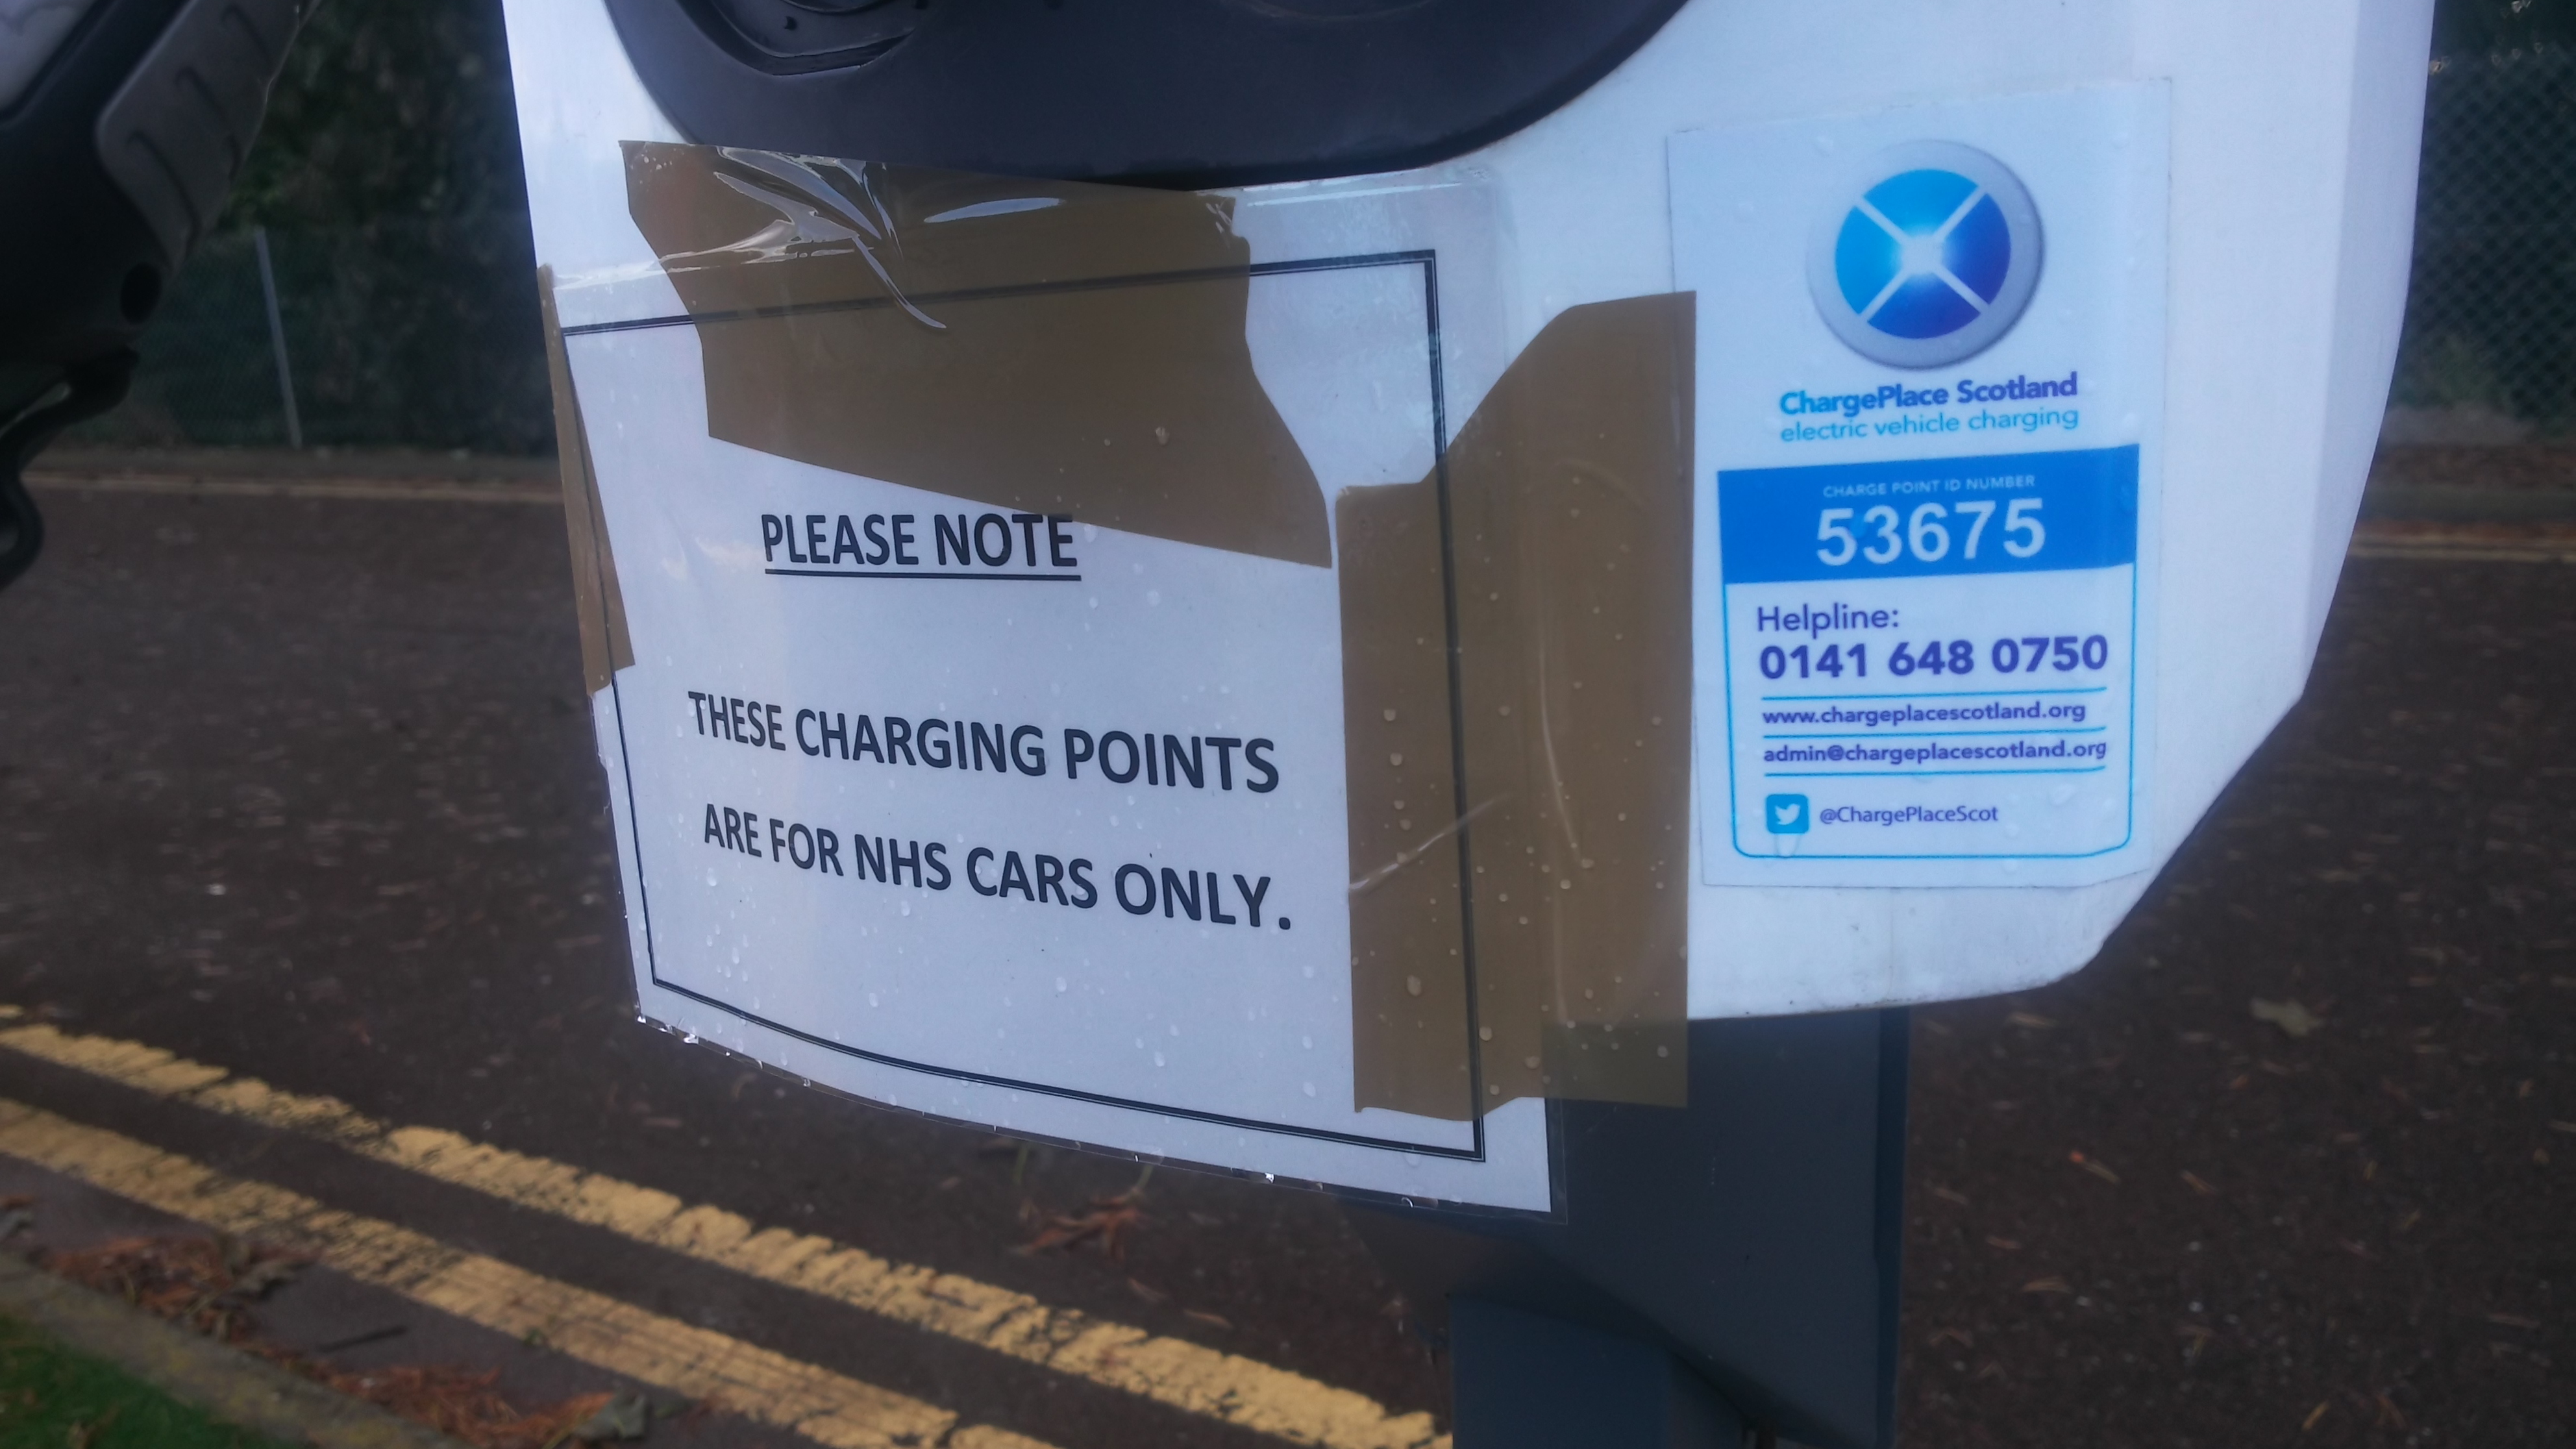
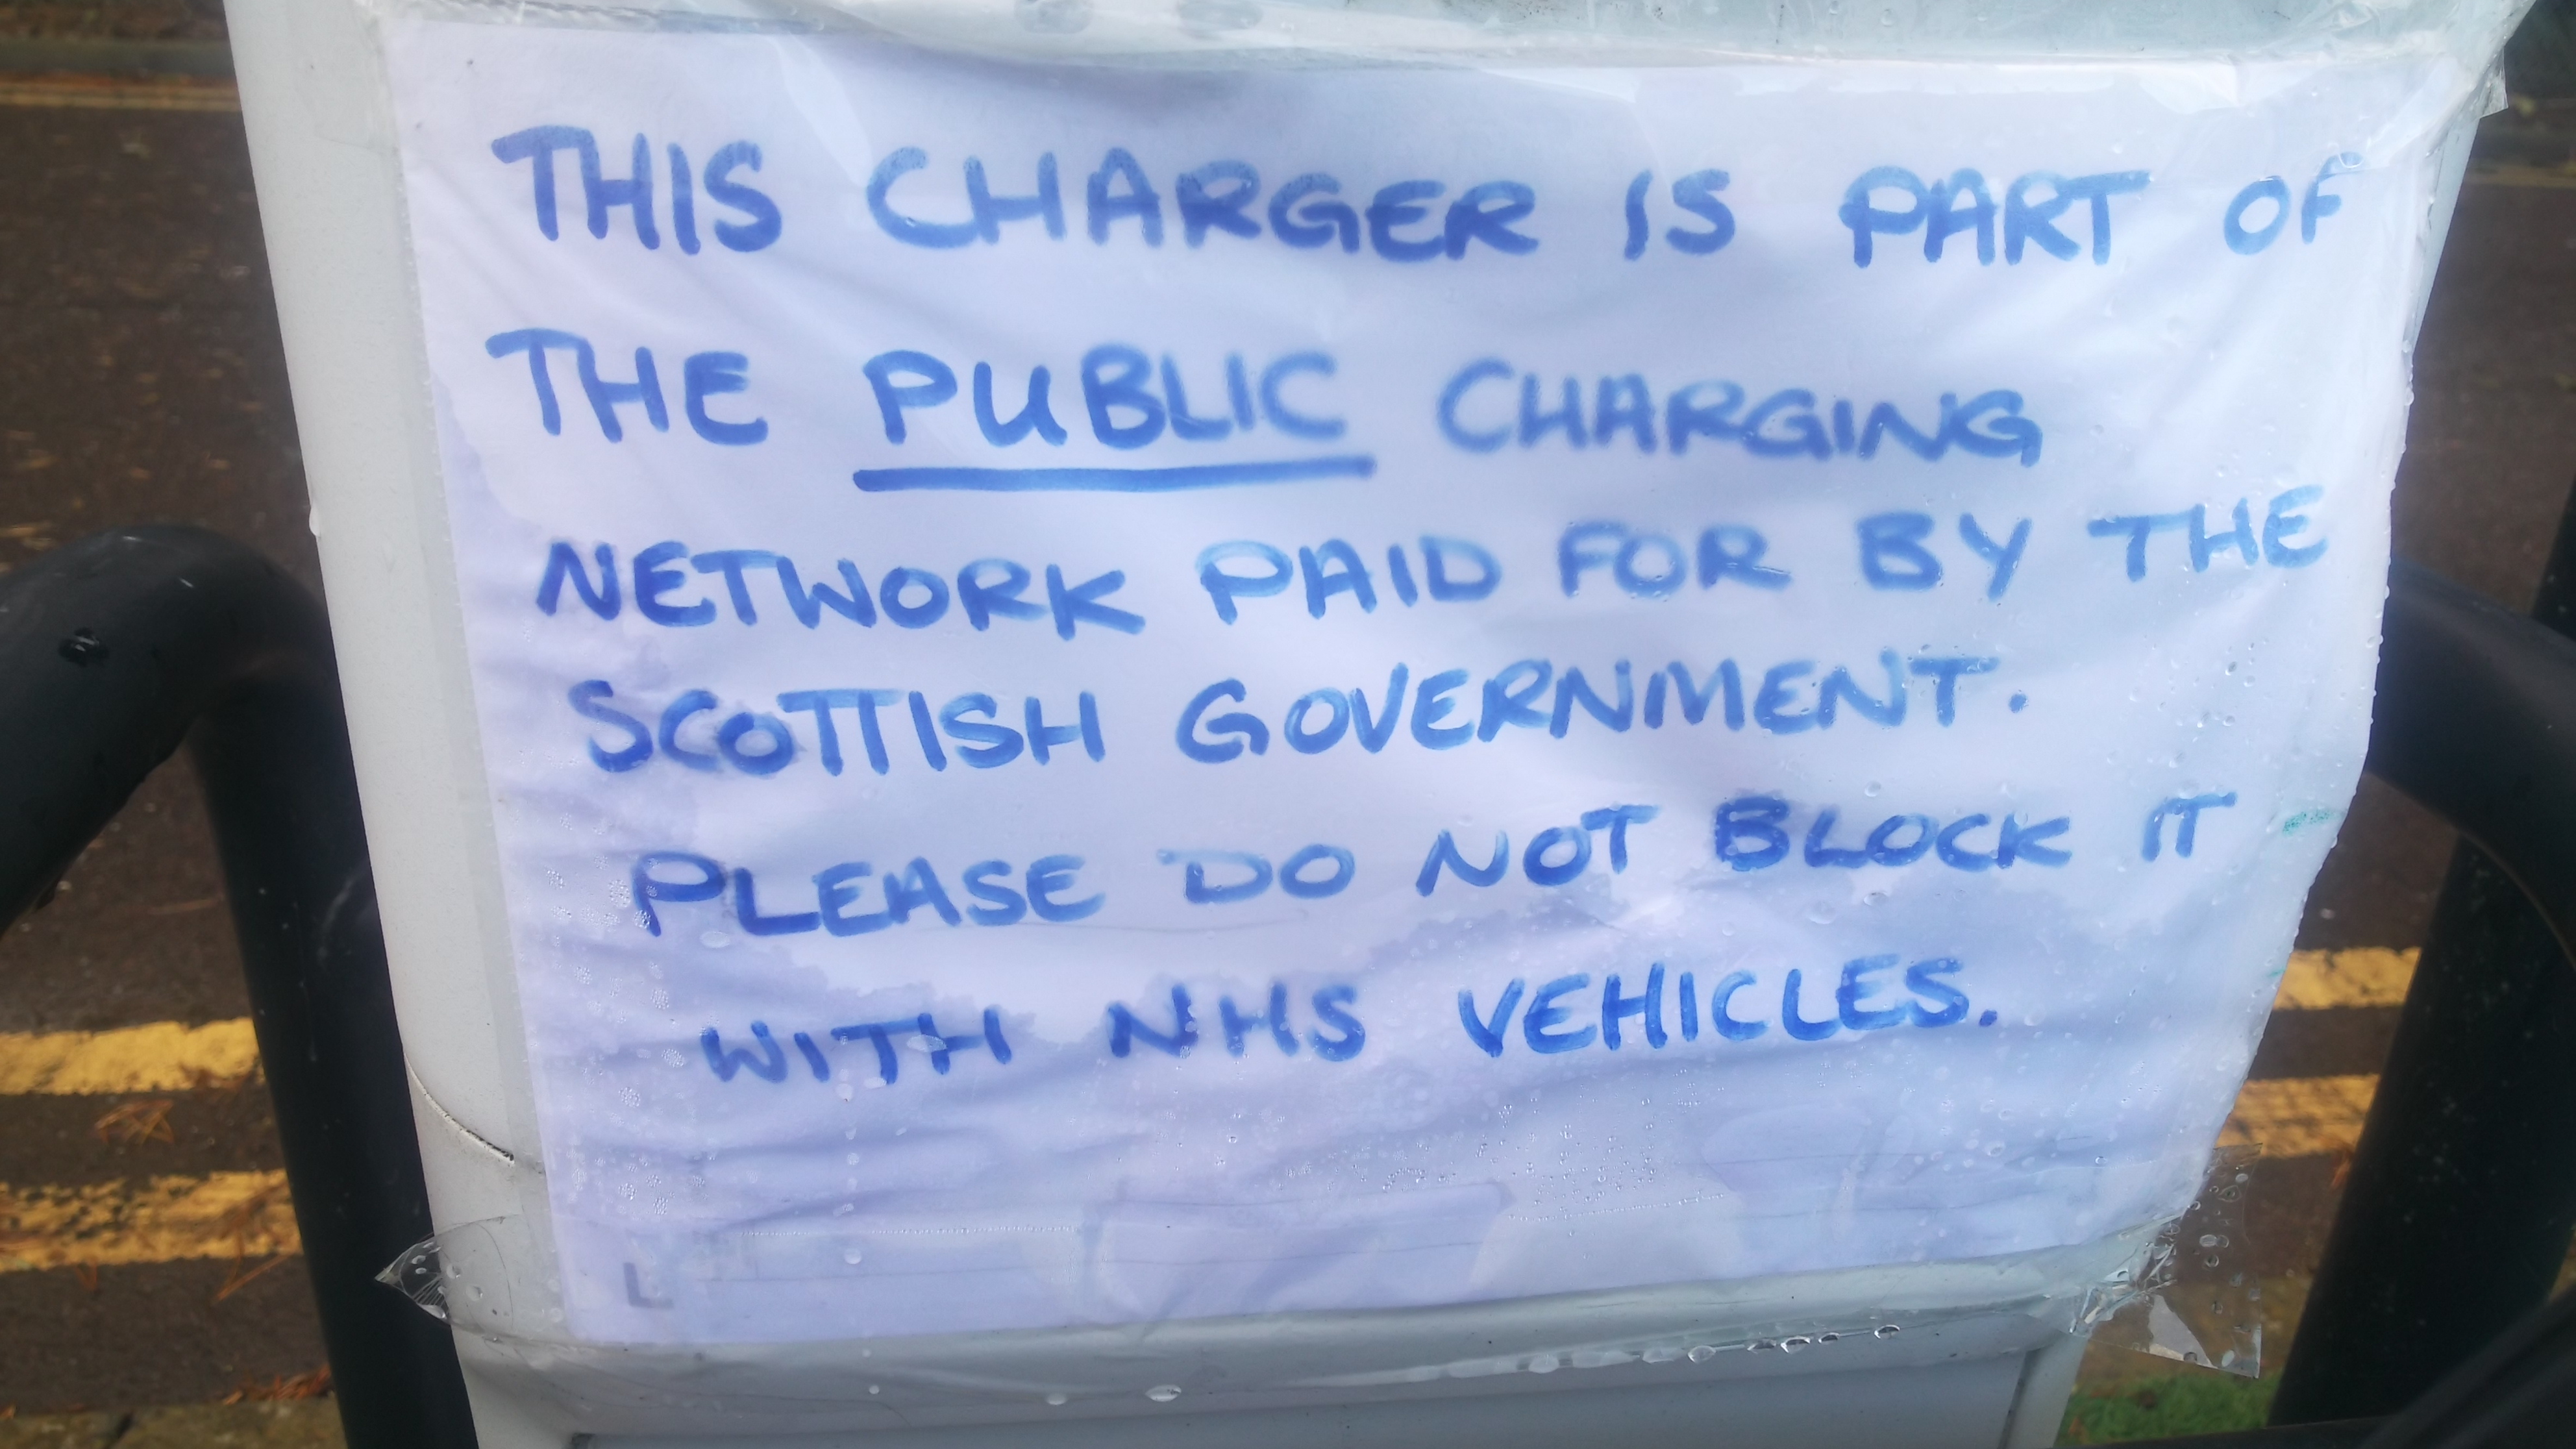
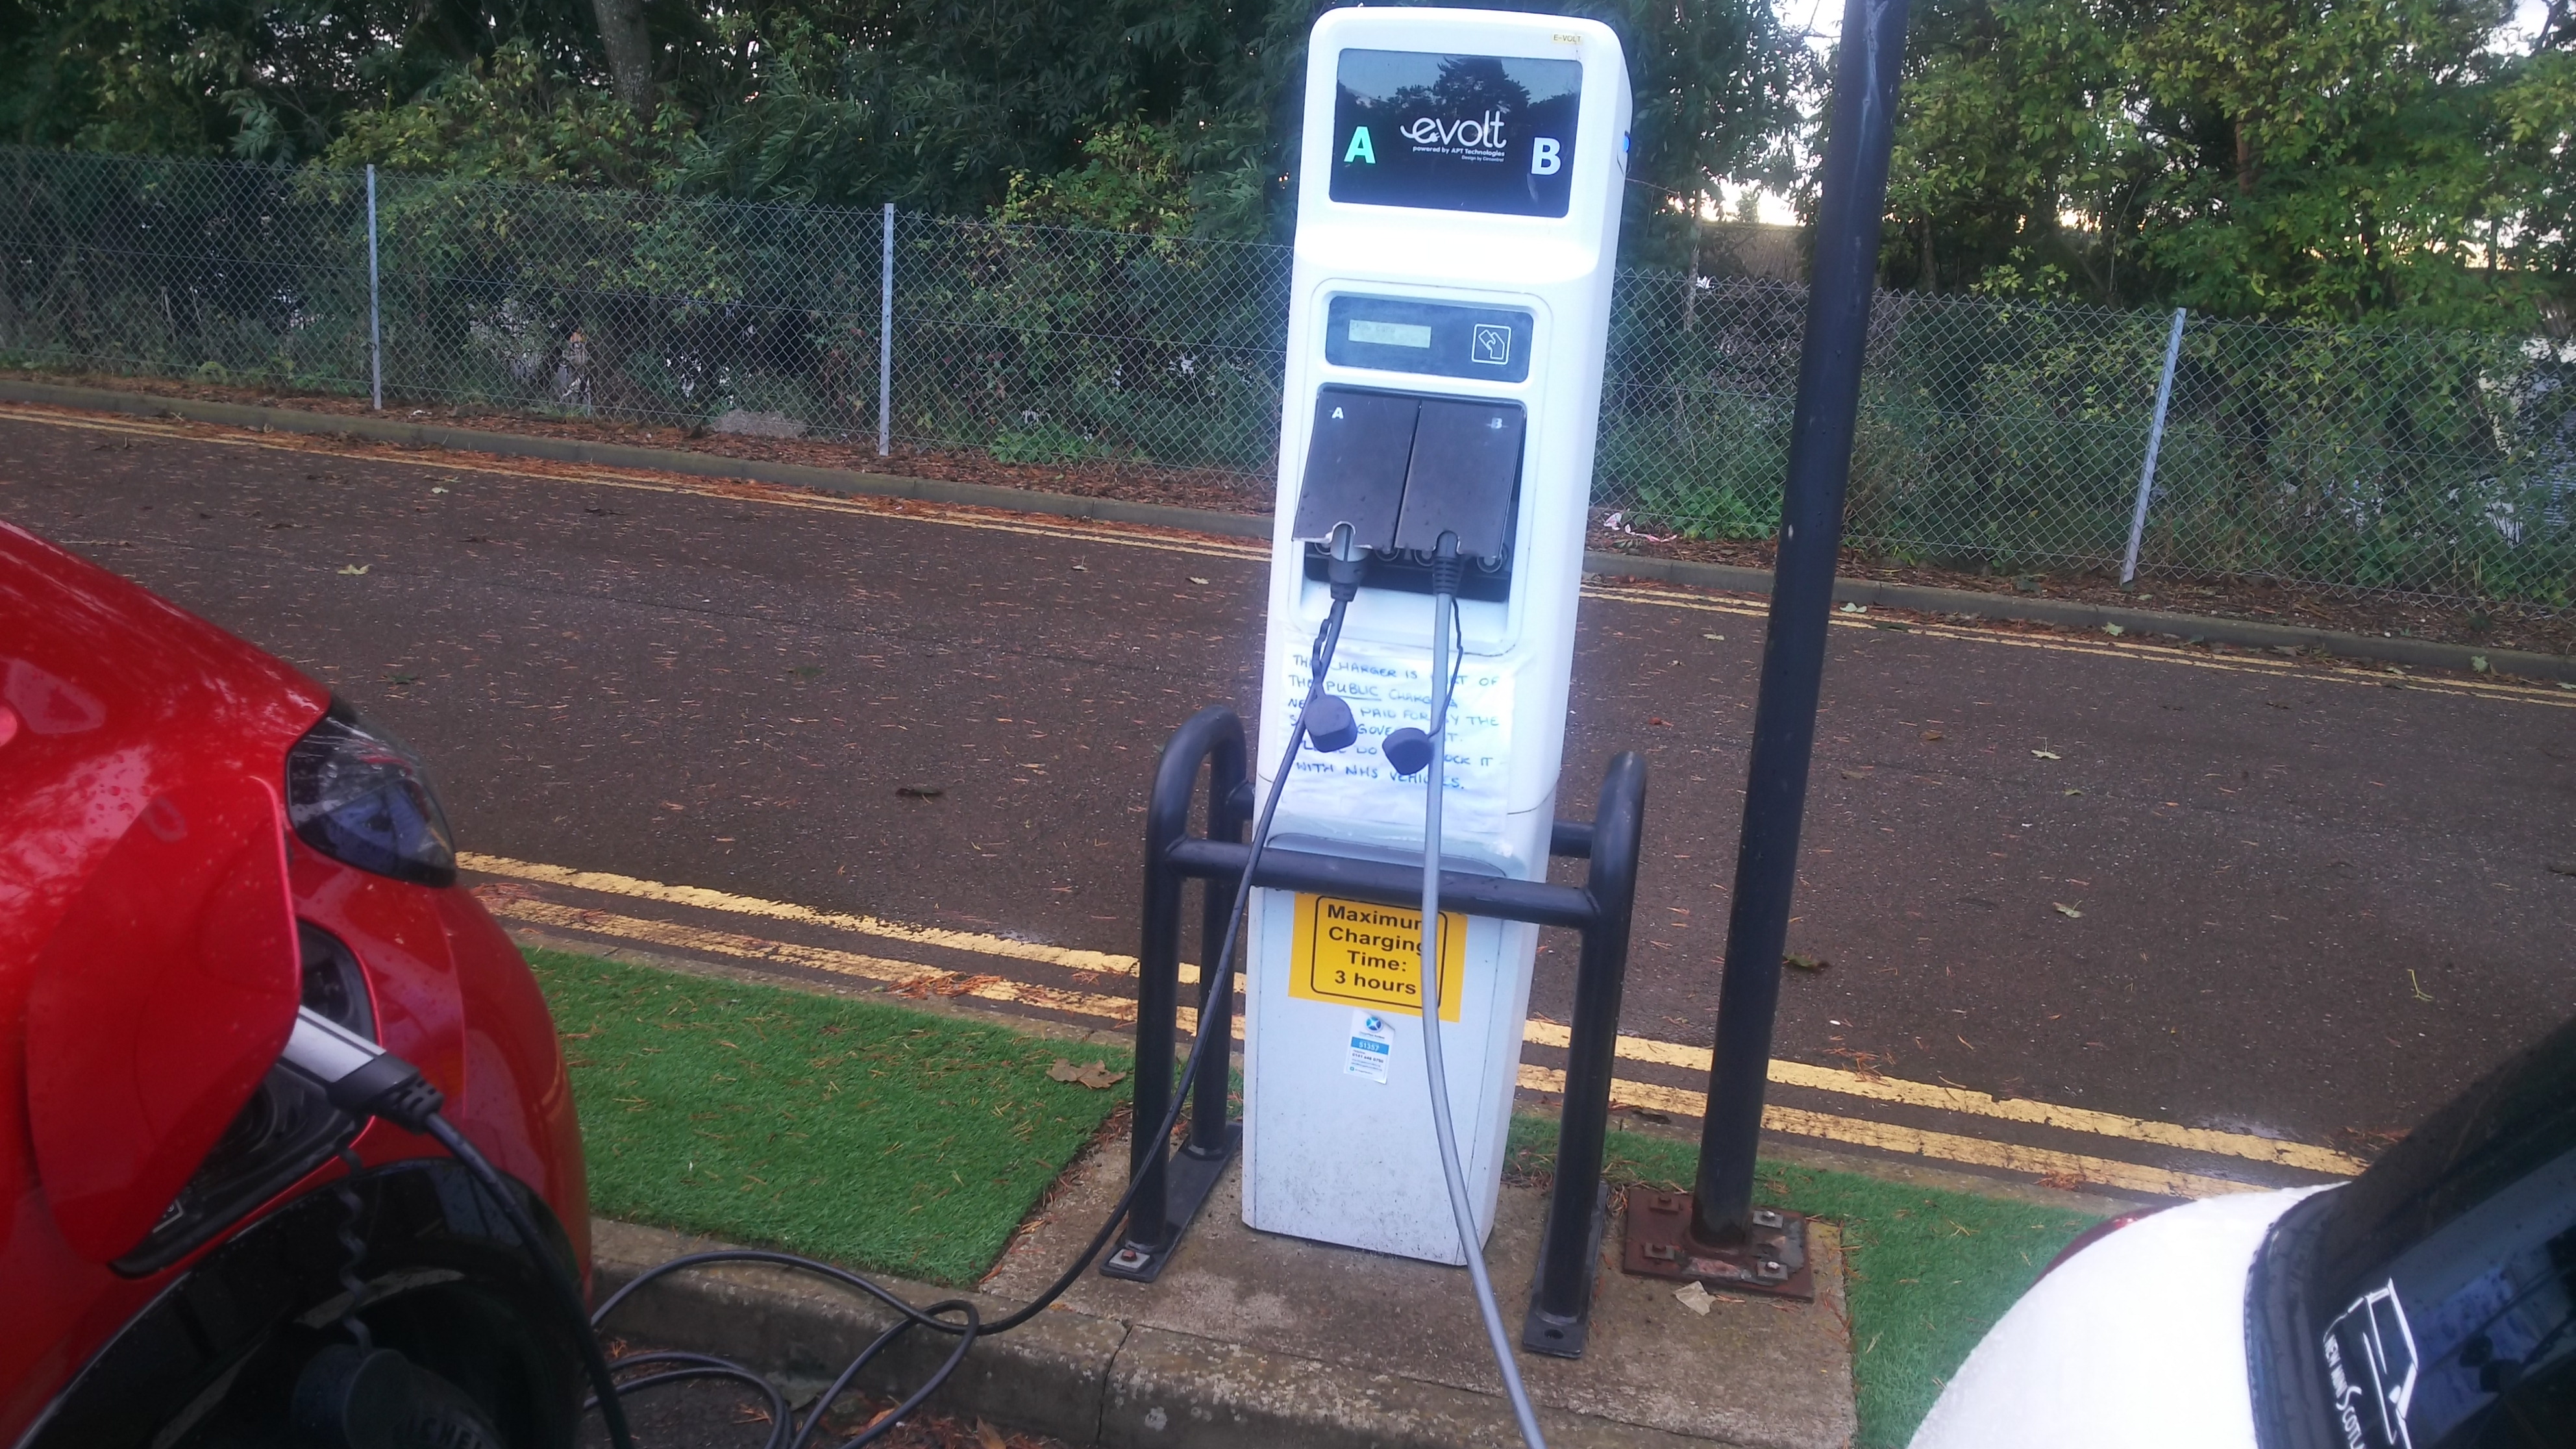
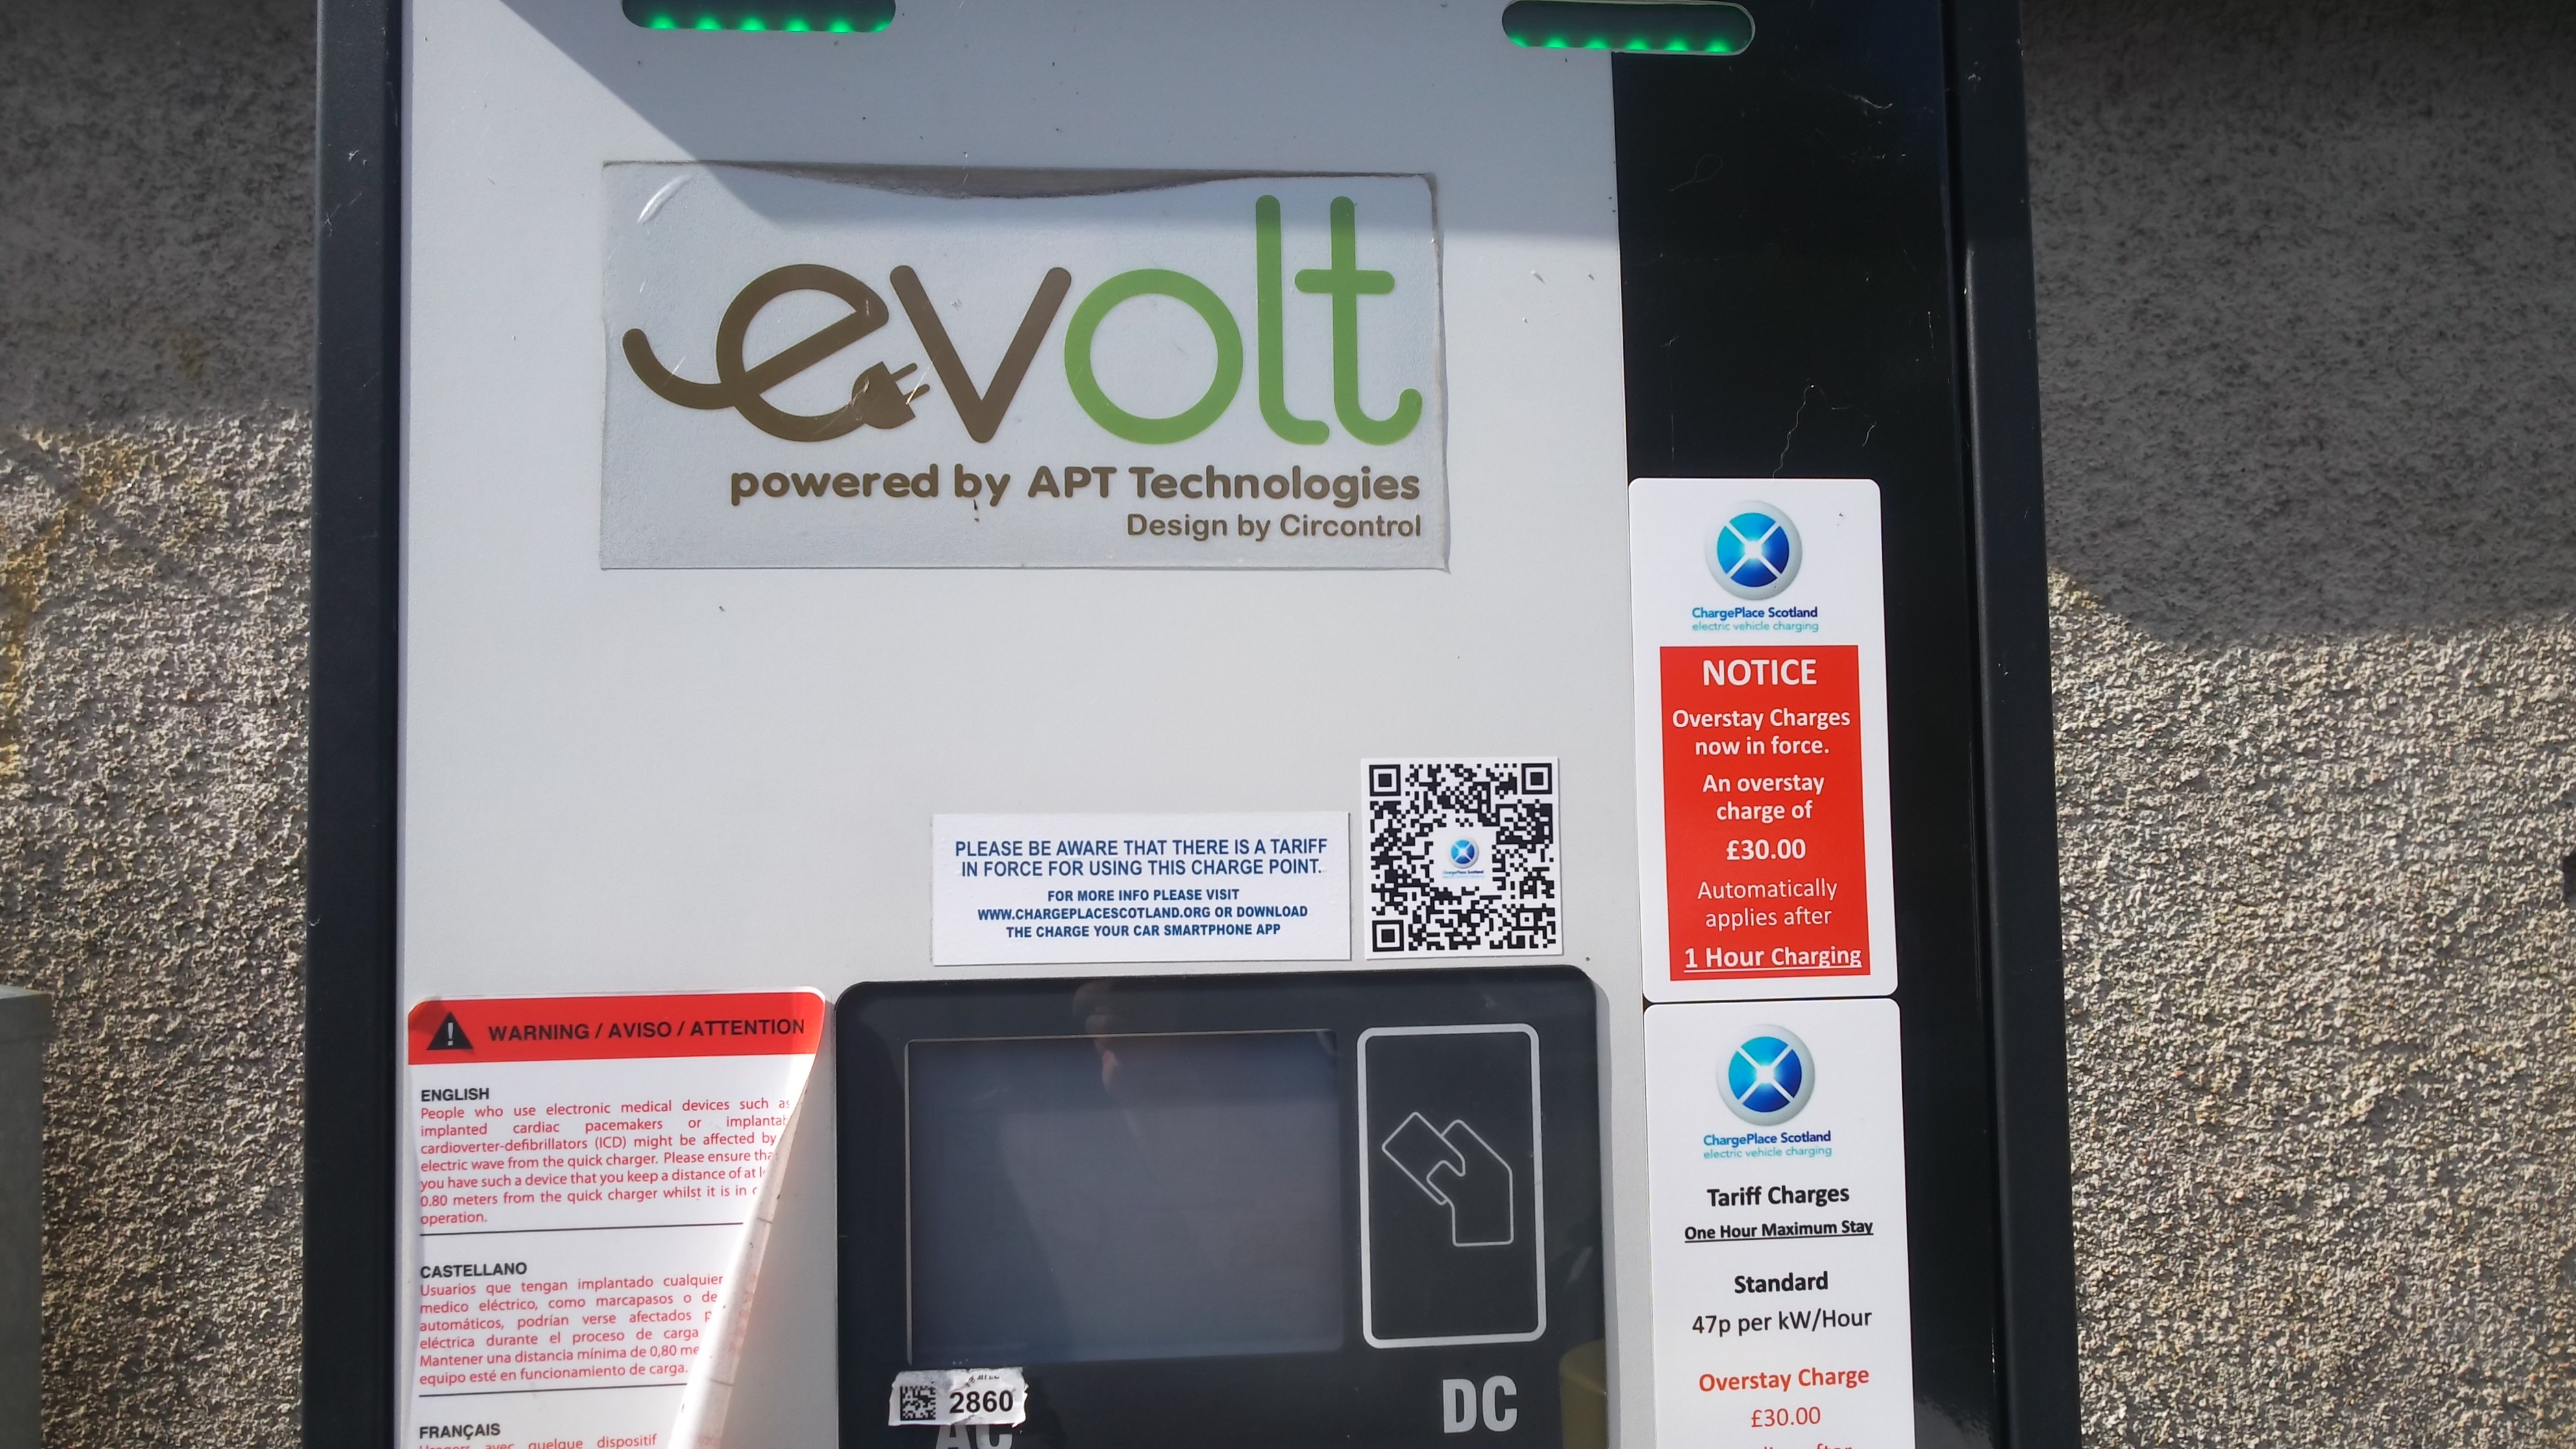
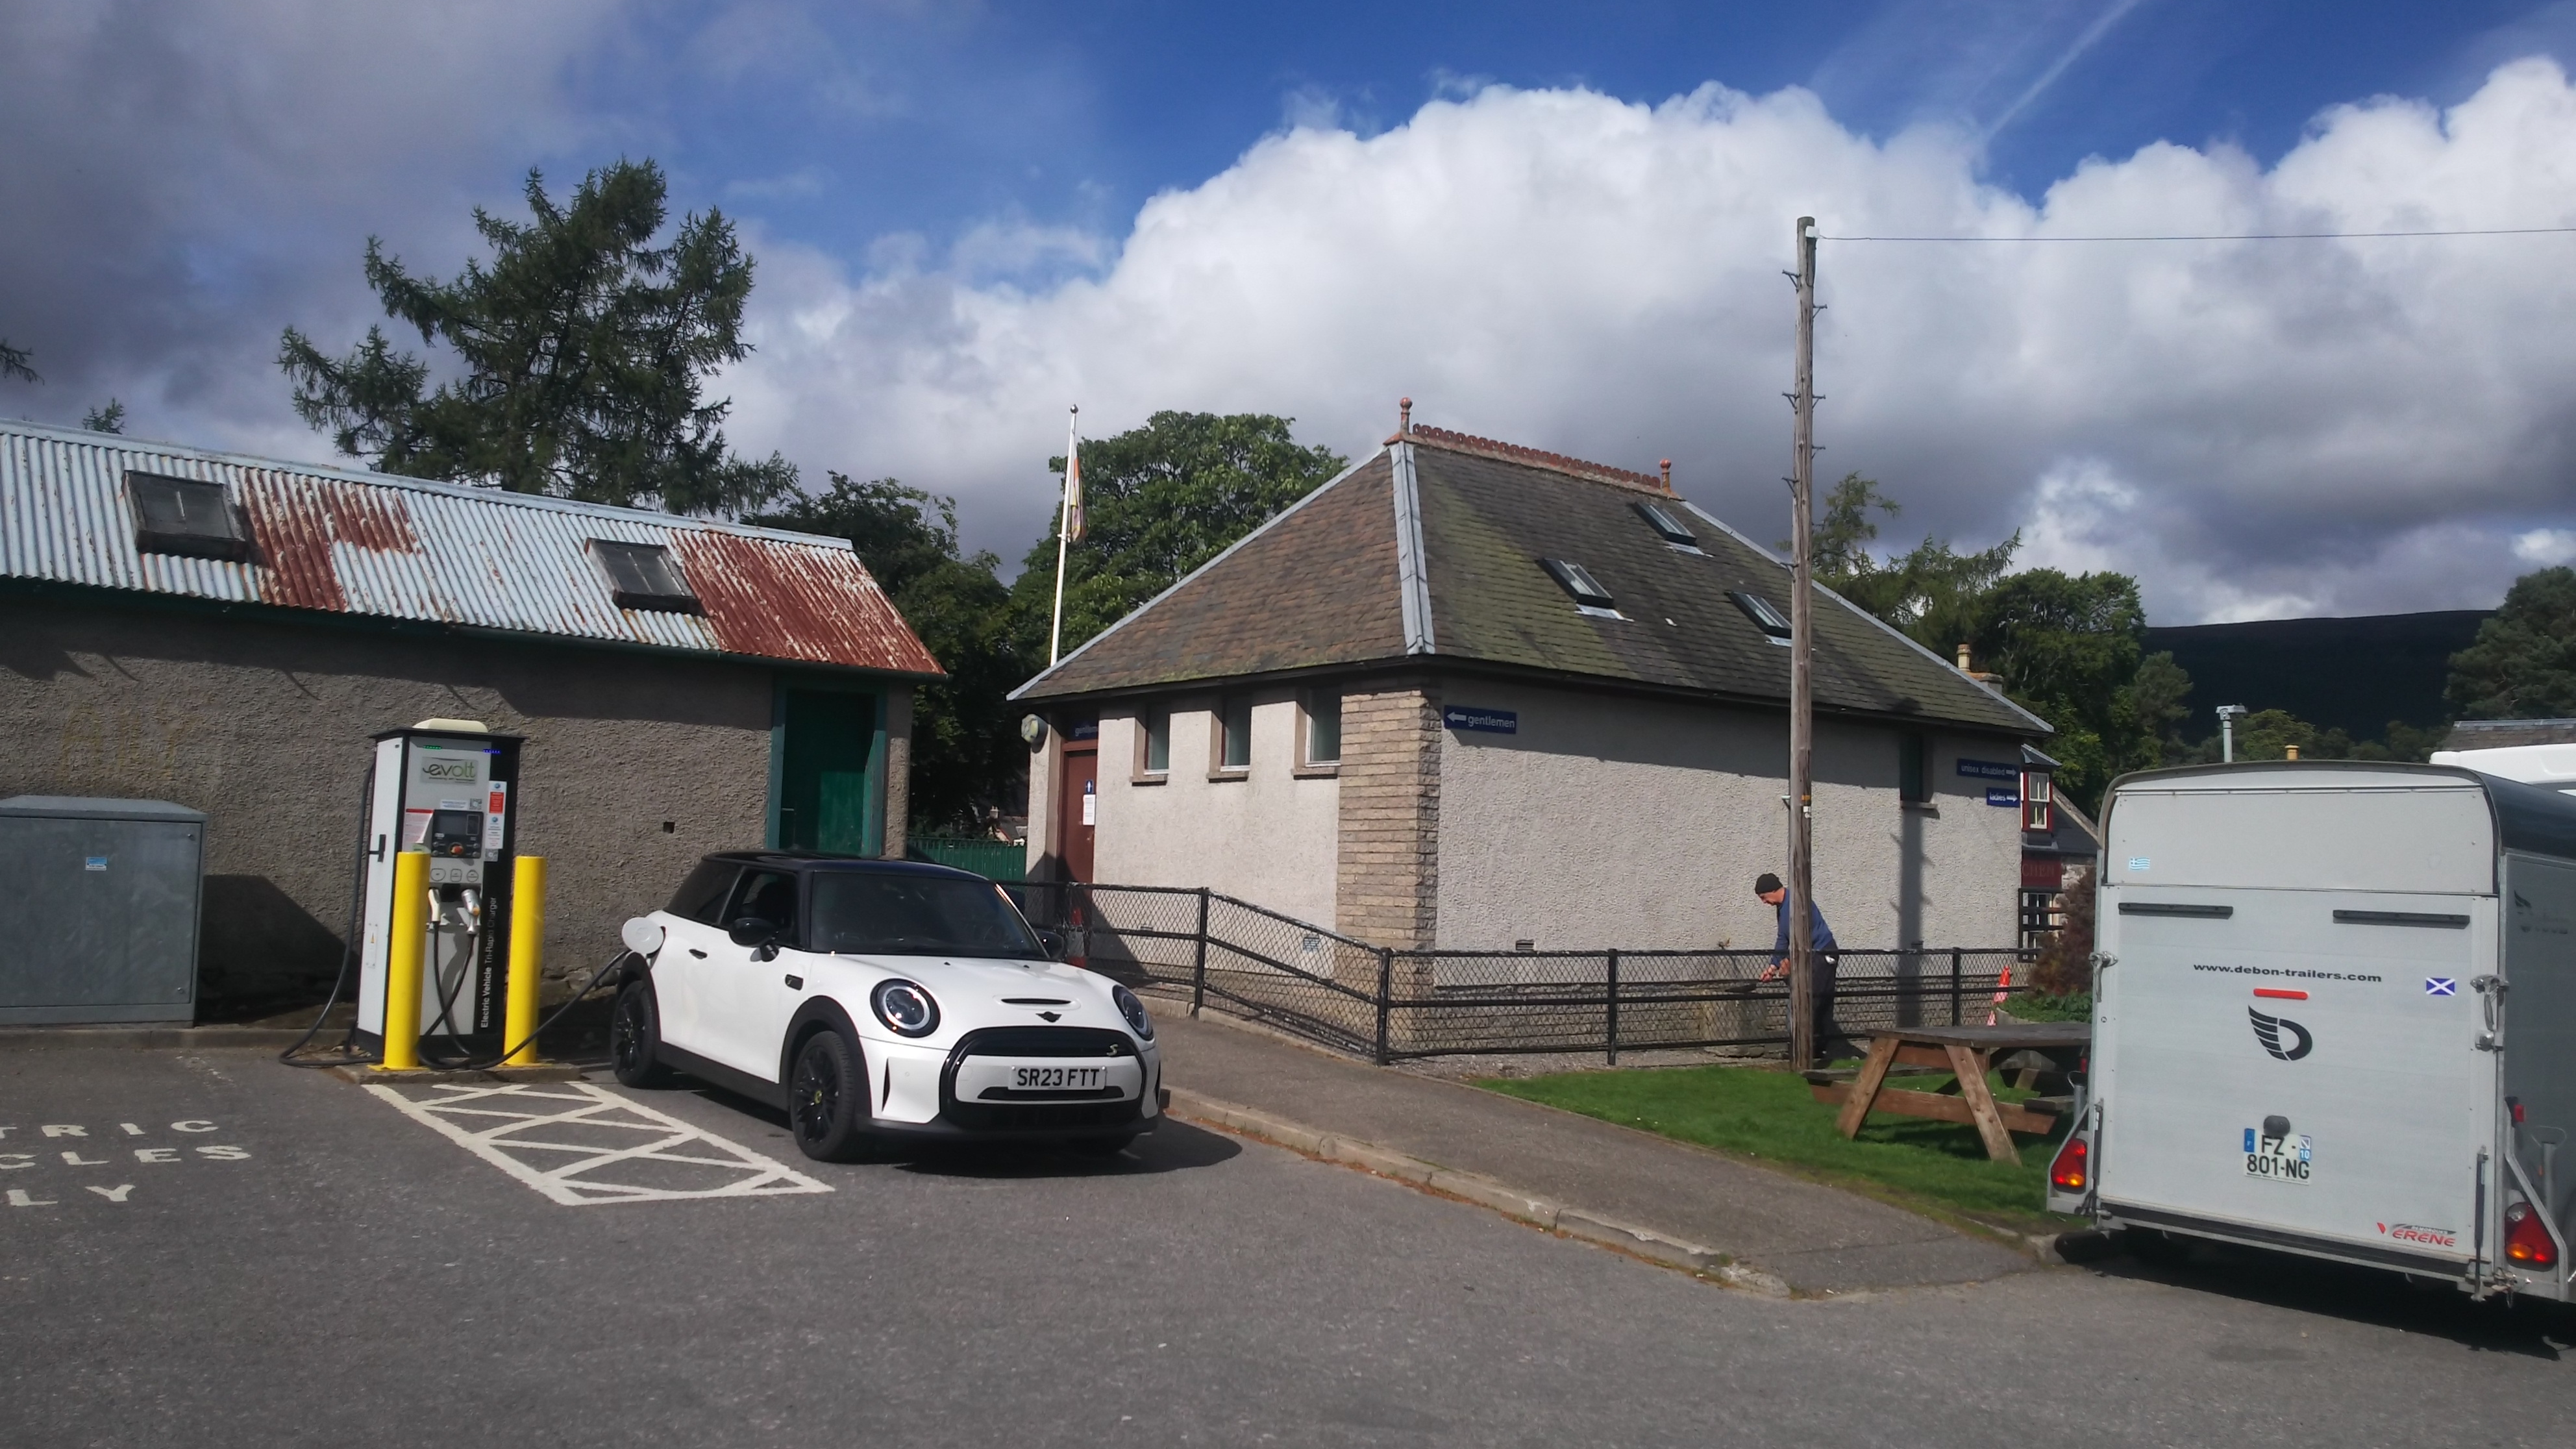
1 pointAnger this morning at the community hospital charger. The NHS bays where occupied all weekend with their cars. They have put up notices that they are theirs. One of their cars blocked bay next to A socket that has never worked for me anyway but seems to for NHS users. Not that I have ever seen them when plugged in drawing power. Anyway B was available early. I will move if a NHS car or worker turns up. There has been a notice posted by a member of the public in the charger about being a public charger. Well yes it is. But the NHS is paying for the electricity, and if there was maintenance that. (I know public money but use ones brain) So anyway out comes hospital soneone from admin and removed the notice. As they do. Ignored me. Normally the ones I know chat about the abusers here including ICEing. But I had already posted replies in zapmap and Plugshare moaning about the situation, this was to explain what happens here and the charging is free and abused. At about this point one who abuses the chargers, comes here and abandons their car and heads off someplace for the day pulls up, opens their window and says am I going to be long? Yes I said 3 hours. Not happy bunny. 5 mins later up pulls a staff member looking to charge. I give them wave and get out and move. I expect abuse from the lovely looking lady with the gob and with her brand new SUV EV that thinks this charger is for her free use and not really just visitors to the hospital.
 1 point
 -
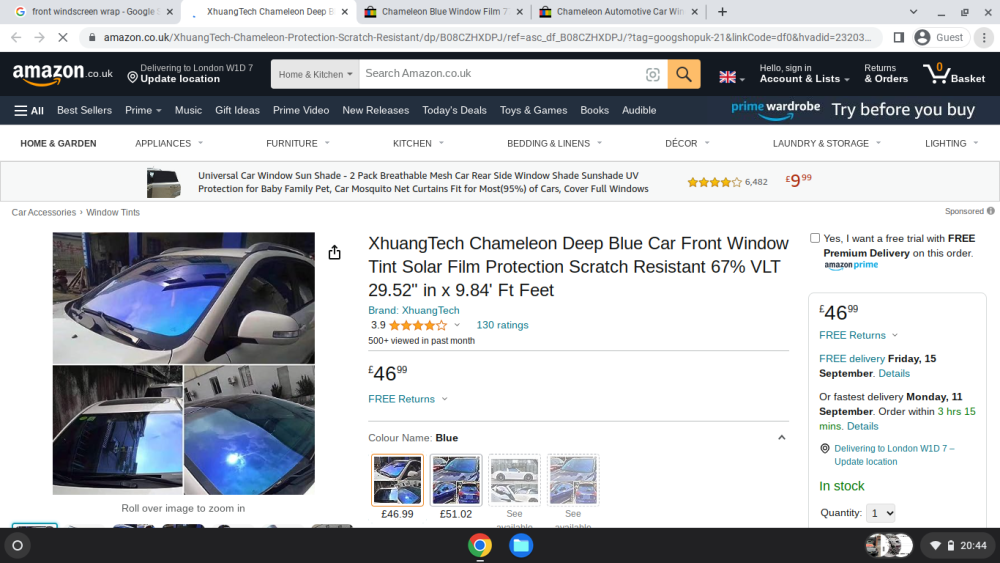
1 pointYeah I agree, those chameleon window tint things did not appeal to me at all.1 point
-
1 pointWell, I went ahead with it. So, a before and after pic. I think it looks pretty good!
 1 point
 -
1 point1 pointAgree completely, this was the first thing we bought for Mrs B’s Nissan. I was fortunate to find a complete set fairly locally on eBay. edit: The spare in my 2018 Octavia seems to be full size, albeit steel. Certainly not yer typical skinny version. So, does it have to be a space saver? You could remove a wheel and check it fits into the well. If it does, buying a road wheel might be cheaper, and easier to find. (and a better option). Then buy the other bits separately. HTH1 point1 pointjust looking thru' some interesting thoughts here then this question jumped i to my head would you be ok sitting in an EV whilst it was charging ... to not fear a flame moment ?1 point1 pointYou get 24 hour road tests, pre covid weekend road tests were common. You can hire EV,s cheap enough, get Car Club EV,s etc. Most Rapid chargers in Scotland had no covers / canopies until hubs were built that do have them, then often with solar canopies. Muppets even face charger screens where they get cooked by the sun through the hottest hours of the day because they are not bright enough to consider the brightness of the sun and how a little shade helps or some cover just to keep a touch screen & RFDI area dry. Bleached out screens are common.
 1 point1 point@carefreewe have to guess where you live. Mystery. Not in Scotland i would say where there are maybe 6 major Motor Groups with Skoda franchises and 4 are pretty crap really, lots of branches. Wee country with lots of big mouth car owners and lots of chancers in dealerships, but there are people that do a proper job but will soon shut up your gob if they feel like it1 pointThe AliExpress ones are terrible and often cause more problems with the LINbus network. a new genuine one can be had for around £75 so I’d recommend that.1 pointAccording to my dealer you should not be allowed to remove the key unless the car is in the Park position ! Something to do with a safety precaution.1 point1 pointCheck this post I made (use Chrome to translate) in 2015 about the tensioner problem. If your tensioner has never been replaced, you still have the old type, which is prone to fail. My advise would be to have a capable garage replace the tensioner a.s.a.p. Only start the car one more time (if you dare) for the visit to that garage. Edit: If you read the complete thread resulting from the post above, you have all the information you need, including the official Skoda TPI about the tensioner versions.1 point1 point1 pointNo they don't. Driver / passenger front and windscreen only. Now there is the impossible to see into front screens about though. Just horrible IMO and i have no style or taste.
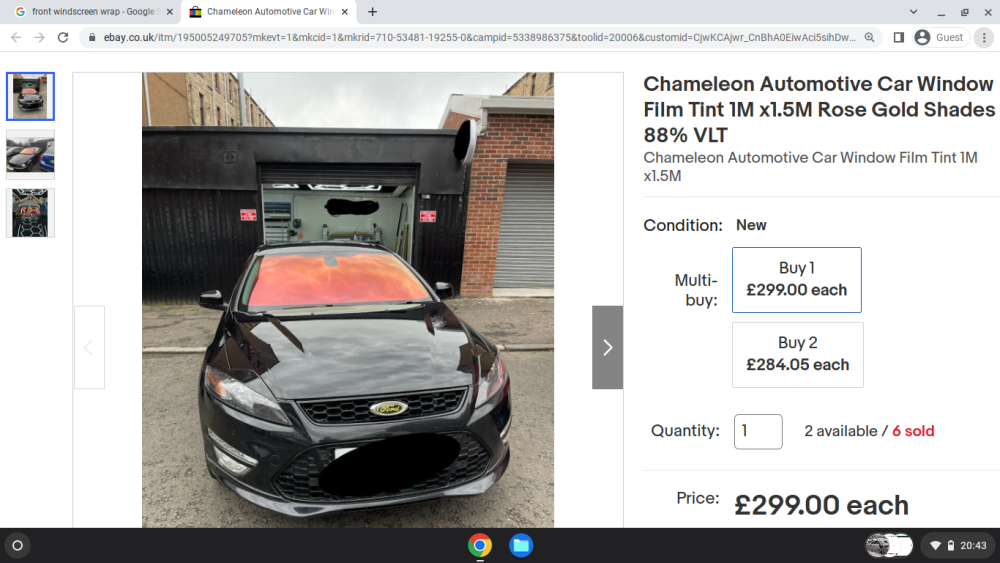
 1 point1 point1 pointThe link is ACAUTO AC compressor clutch AC-06DL18 | online shop (autopartspro.co.uk) it fitted my 2014 skoda octavia vrs 2 ltr diesel1 point1 point1 pointA couple from last weekend - a trip to N Wales. Stunning 2km of glorious beach at 11.30 on a Sunday morning - you don't get it that quiet in the South of England!

 1 pointWhen selecting reverse, the action is broadcast on the CAN BUS and the HVAC system closes the air intake door so you don't inhale your own fumes as you are reversing.1 pointThat's about what I thought. I'm selling the car they are pictured on (our old elegance) but intend on keeping the wheels to go back on the 1 owner L&K we've bought. Reason for swapping in the short term is the tyres on the elegance wheels are almost new whereas the L&K ones are 10 years old!1 pointSome versions may need removal of the caliper carrier to allow the disc to be removed. The 272mm disc for example. On our Yeti that needed a 14mm XZN spline tool (AKA triple square)1 pointGood write up. I changed the pads on mine last year. Get yourself one of those caliper rewind tools they make it a thousand times easier.
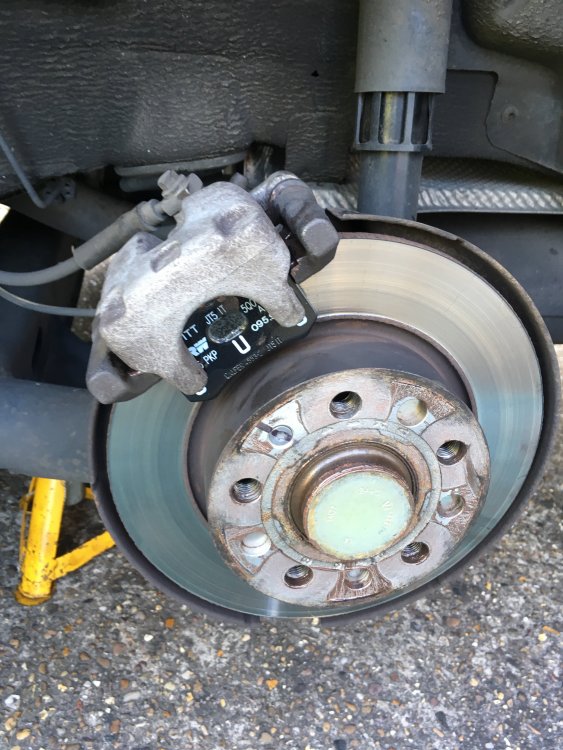 1 pointA couple notes I want to add: This process is for a 2015 Octavia 1.4 TSI with the torsion beam rear end and 1KD 253mm rear brake. The process is likely very similar for cars with other brake packages, but there may be differences. The code for your brake package can be found on a sticker likely placed in the front cover of the service manual. Check the brake fluid level regularly while pressing the caliper piston in to be sure it doesn't overflow or that the level doesn't fall too low if you have opened the bleed screw.1 point


Important Information
Welcome to BRISKODA. Please note the following important links Terms of Use. We have a comprehensive Privacy Policy. We have placed cookies on your device to help make this website better. You can adjust your cookie settings, otherwise we'll assume you're okay to continue.