Leaderboard
-

Lee01
FREEDOM18,818Points36,412Posts -
.jpg.1006585dfe4e2977315b67c3d642e37b.jpg)
Guest_
FREEDOM17,550Points83,824Posts -
MikeTheThinker
FREEDOM14,758Points8,508Posts -
Lady Elanore
FREEDOM12,635Points24,906Posts
.thumb.jpg.9dd3f612ba7f13d10be5c518d3c8d255.jpg)


Popular Content
Showing content with the highest reputation since 22/07/20 in Posts
-
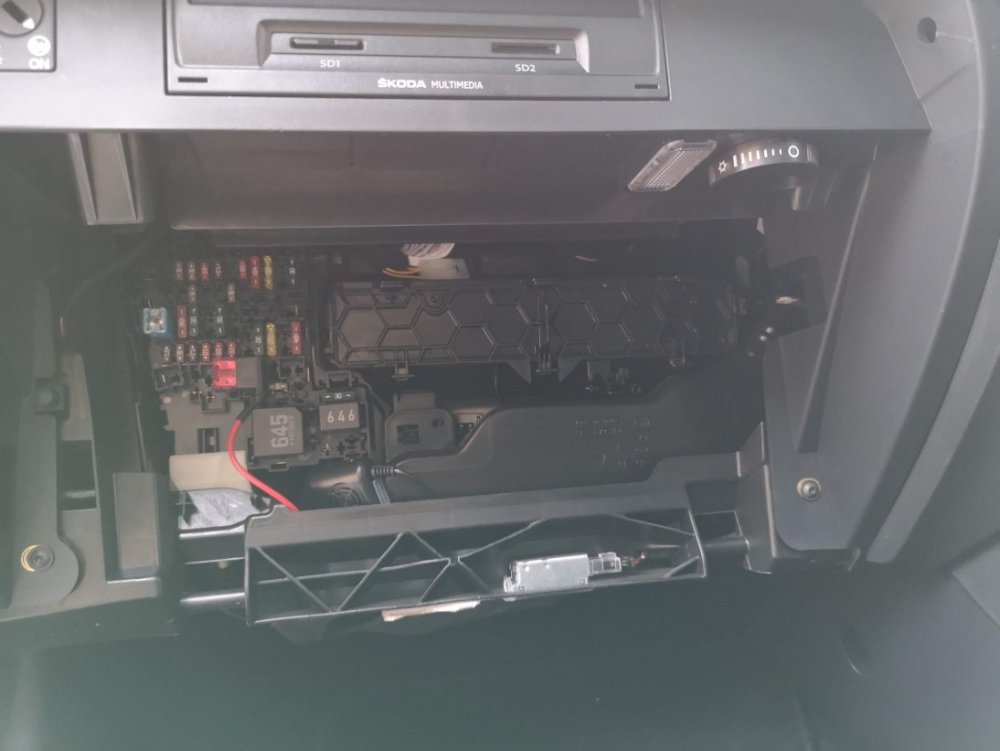
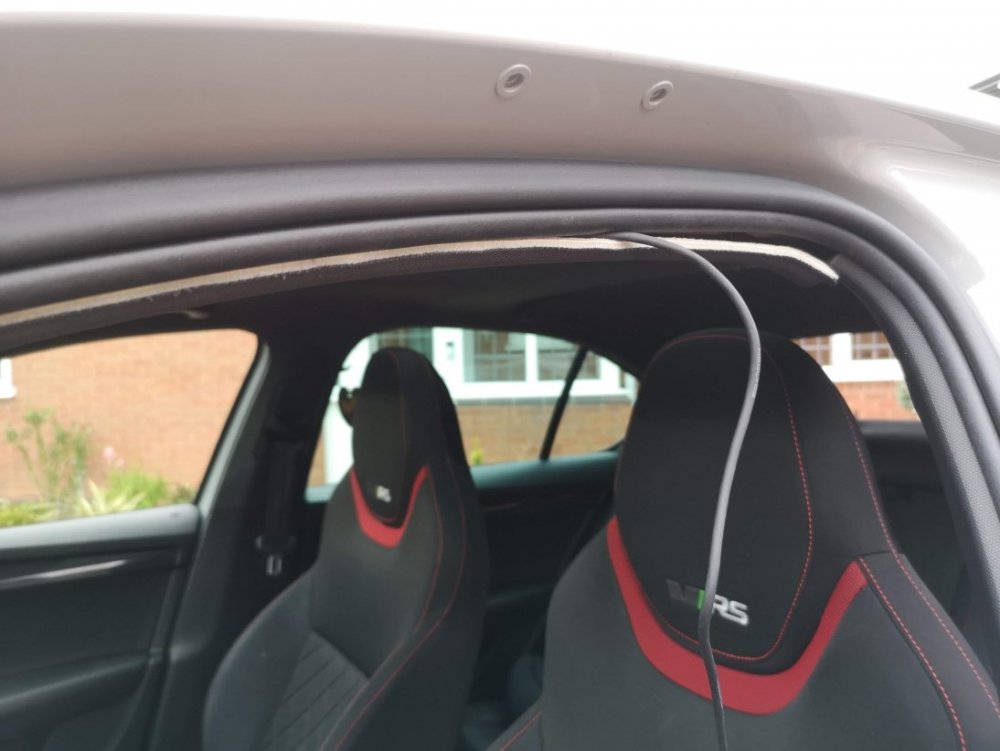
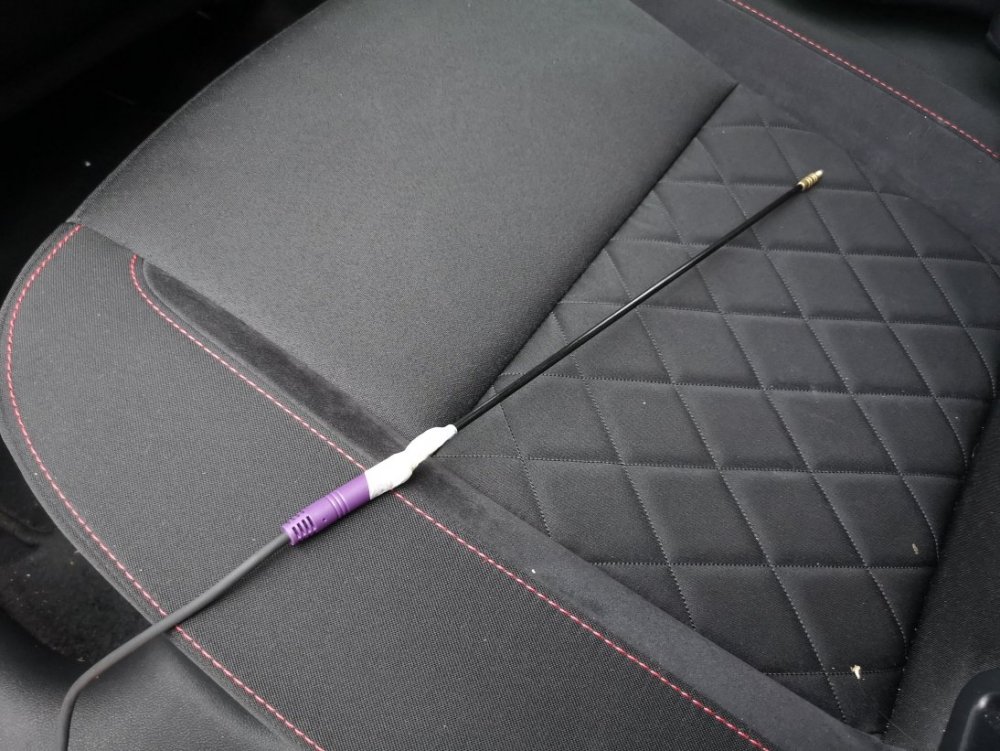
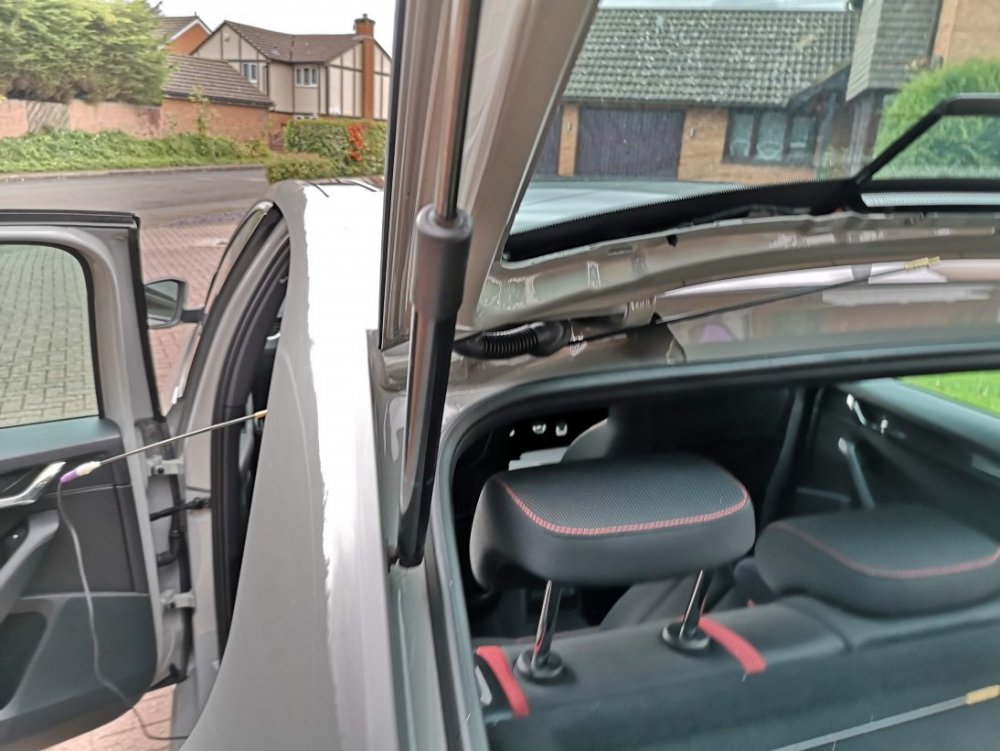
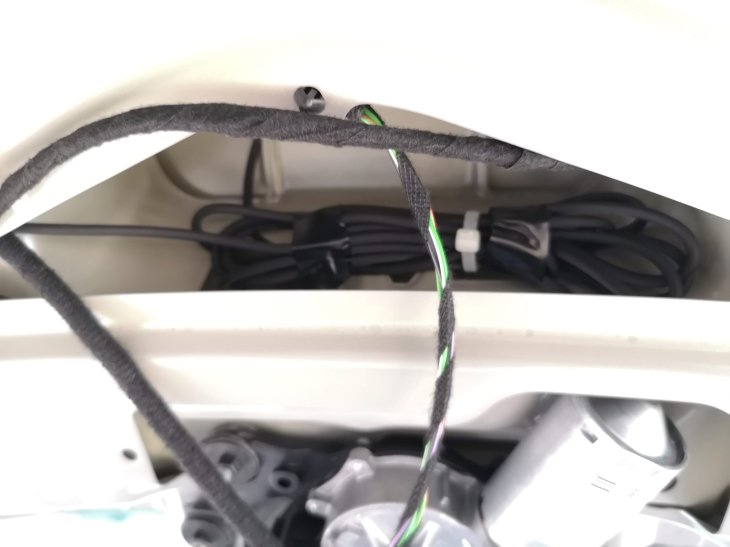
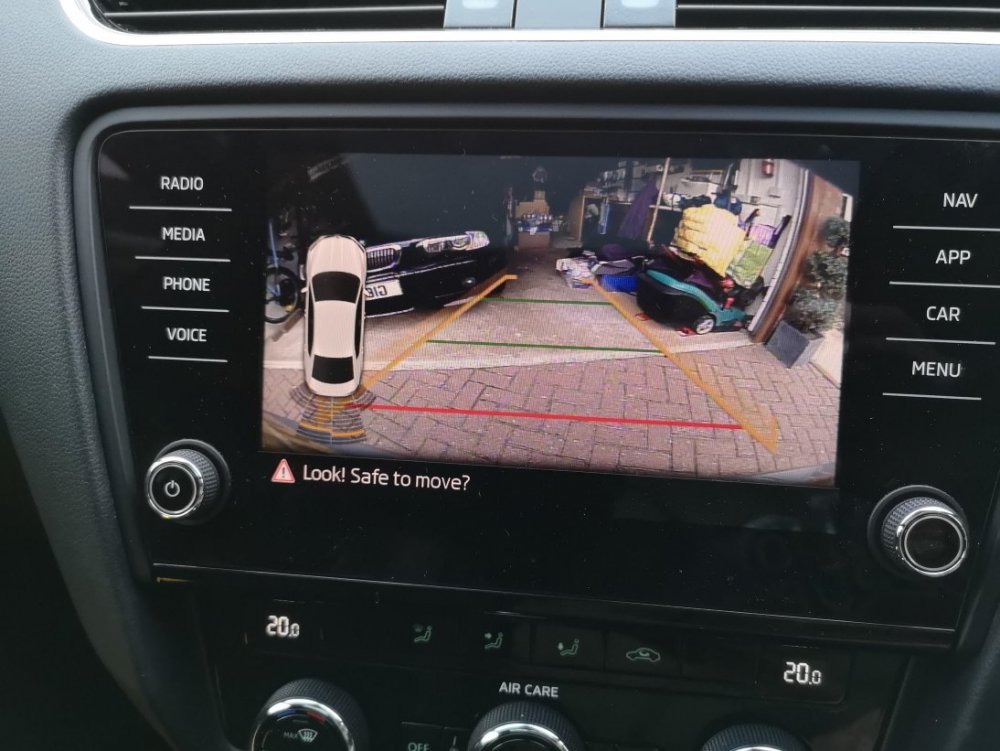
31 pointsAs there seems to be a lot of people asking questions about this lately, I thought I'd put together a quick guide showing how I fitted my reverse camera to a facelift VRS hatchback. They way that i've fitted this will apply to most models, with the key differences being the size of handle (based upon car model year) and whether hatch or estate (but this is just inside trim differences), there may also be wiring loom differences for earlier cars or none VRS models. I've benefited from info from these forums so hopefully this will be useful to others. I am by no means an expert & I won't be able to answer all of your questions, hopefully others will chip in and can add other info as well. First of all, this is the camera that I ordered for my MY 2017 VRS (Camera A/Handle A): https://www.aliexpress.com/item/4000230897829.html?spm=a2g0s.9042311.0.0.40694c4dTEPT93 (link may no longer be valid when you read this so screenshot below) No programming is required for this camera and it supports dynamic reverse guidelines Tools: Trim removal tools would be useful, but otherwise plastic tool that won't mark your car, or screwdrivers or similar with masking tape over the end. A T20 torx head tool is required if you have a hatchback to remove the pulldown boot strap Cable rods are very useful, I couldn't have fitted through the roof lining without. Stereo removal tools unless they come with your camera kit Cable route - I went with an OEM route for my cabling, following existing cables through the roofliner and out to the back as show by the red line below. The camera: The first thing that I did was to check that the boot release switch was working on the new unit - there's no way you want to wire this in and find it is faulty. You'll need to start removing the boot trim to access it. Remove the plastic clips from the lower boot trim- this consists of a few plastic clips which easily pop out with trim remover/screwdriver. There are 8 of these on the hatchback. After that start removing the upper plastic trim, this simply requires forces to release the metal clips. You don't need to remove all of this for now, but it will all need to come off later Remove the lower upholstered trim covering the tailgate. More metal clips - work your way around. You'll also need to remove the pull down strap with the T20 torx head. When this is down you should be able to drop the boot liner which will give access to the boot release handle. This can be awkward to remove, but can be done by pushing in the clip on one on the ends whilst also pushing down on the handle from the inside (ignore the clips along its length) - it should then pop out. Repeat for the other side. Unplug the harness and plug the new handle in - check the release switch works. You can either now push the new handle in until it clips, or leave it out to test the video connection later before fitting. To wire it in Remove the glovebox (open, rock left to right whilst pulling up & you'll hear the bottom clips release. Raise the glovebox lid up and inside the housing and reach in and remove the dampening on the left hand side) Use the stereo release keys to release the multimedia unit. The kit used here comes with a replacement harness that sits between the original one and the media unit & includes the video feed cable. Some people have removed the upper glovebox section to provide more access, be careful not to unplug the airbag connector if you do this. This can be fiddly, but I found the best way was to lie on my back with my head in footwell looking up at the unit from underneath. With the media unit slid fowards this gives access to the harness. It's the large one at the bottom and there is a locking connecting that needs to be pushed backwards to release. Check how it works on your replacement harness. Unplug old harness and plug it in to one end of the new one, push the harness in to the void and plug the new connector block in to the media unit. This took me a while to get it all to fit in. When done you can now test the video feed to the rear camera before your start wiring it in permanently. I took the camera cable over the top of the fusebox cage & out through the side panel I then ran the cable up the A Pillar to the roof lining and all the way to the end. Cable rods were really useful at this point, especially to get around the B pillar , and to go from the end of the roof liner through the cable exit point behind the rubber trunking where the original boot cables are. You can also run the cable in the trim above the sill and work your way back up to the roof lining on the C pillar. When you get to the end of the roof lining you'll need to unclip the rubber gator at the top of the boot so you can get the cable out of the roof liner and in to the boot via this gator. If you install the same way as me you only need to peel the roof liner down a few cm, being careful not to deform or damage it and you'll see the OEM cables behind. Once you've got the cable this far it's a case of feeding it through the rubber gator, up the side of the boot and over to the handle; connect the video cable and tidying up any spare cable. Everything should now be up and running. Retrace your steps to refit your trim. You now have a fully working reverse camera, activated when reverse is selected and with dynamic guidelines. The parking sensor guide now shifts to the left of the screen the same as an OEM reverse camera. I will come back and re-edit this tomorrow and resize pics as it's getting late. I'll tidy up any errors as I see them so please don't jump on me straight away!


 31 points
 -
26 pointsAll, TL;DR Black friday discounts code at bottom. A little over 18years ago an idea formed and so it began. Now 18years is quite a good run... For anyone in the dark, briskoda, turned 18years this year Over the years we seen thousands of members post, read, learn, share. Over all models in the range, united by a common theme, if not always in agreement. Each month now we see millions of visitors, reading the rich trove of knowledge we have here. The community has grown, shunk, grown, and will always eb and flow, much like a river as it finds it's way through the countryside. The rise of social media was, and remains a concern. Many of us believe the forum approach offers more than the immediate here today, gone tomorrow of social media. But we do need you're help to keep it thriving. Post, share, spread the word, every action helps. Talking of action, climate action. Earlier this year I set about covering our ongoing carbon impact. The internet is a huge contributor to the problem, more so than driving this year We've been cabron neutral/negative for the services we host upon and consume for a few months now. I wanted to do more, carbon negative overall? This milestone seemed like a good point to do it. Looking back, it's almost impossible to say how much we've used to provide the community; we don't have a totally accurate record of trips to data centre x or y, so it's the best of british fag packet maths... I've taken what we use today, <1/2 tonne per month, still quite a bit eh? Then multiplied it back over time, then added a bit on; quite a bit on, because all those odd days here there, older it equipment was more power hungry and so on adds up... In numbers we might comprehend, it's around 250'000 miles. To that end I've offset an addititional 180tonnes of CO2 to cover our earlier years, that's 10tonnes per year, and includes some slack for driving to x and y, my laptop being on doing updates to the site at 3 or 4am the odd night... Going forward we'll be covering our continued use, so continuing to be negative, along with the tree planting programme. You can find out more about all this here: I'd like to thank the current team of admins, mods for doing what they do. I'd liek to thank former members of the volunteer force over the last 18years for doing there bit to bring us to where we are today. Thank you to all t hose who through freedom part with your own hard earned cash to support what we do here. Of course all that we do, would be for nothing without you, the community member. I thank you too, for your time, the dedication by many to sharing info and the helping others. Thank you all for being a part of, and in making this community. It's yours, you made it, each post, thread added a leaf to briskoda's tree of life. To think we've seen marriages, babies, life altering advice and support, and so much more, all from connections, people, through these few pages. Quite humbling, thank you. So it's 18years, time for a party? Heck yes. One small pandemic problem in the way. I'm begining to come up with a few ideas for next year, shows, trackday etc where we can get together in one way or another. We've all got many bridges and challenges to cross before then, so stay safe and keep in touch. In lieu of a party, I decided to make some space in the storage. So a 50% off stickers voucher code, and other stuff to clear from the shop. I guess you could say it's a black friday event... https://www.briskoda.net/forums/store/category/3-merchandise/ Discount on stickers other merchandise of 50% - code: 18years Old models t-shirts discoverd in a box - £5 ea to clear. Freedom, great value as ever from £6 per year.26 points
-
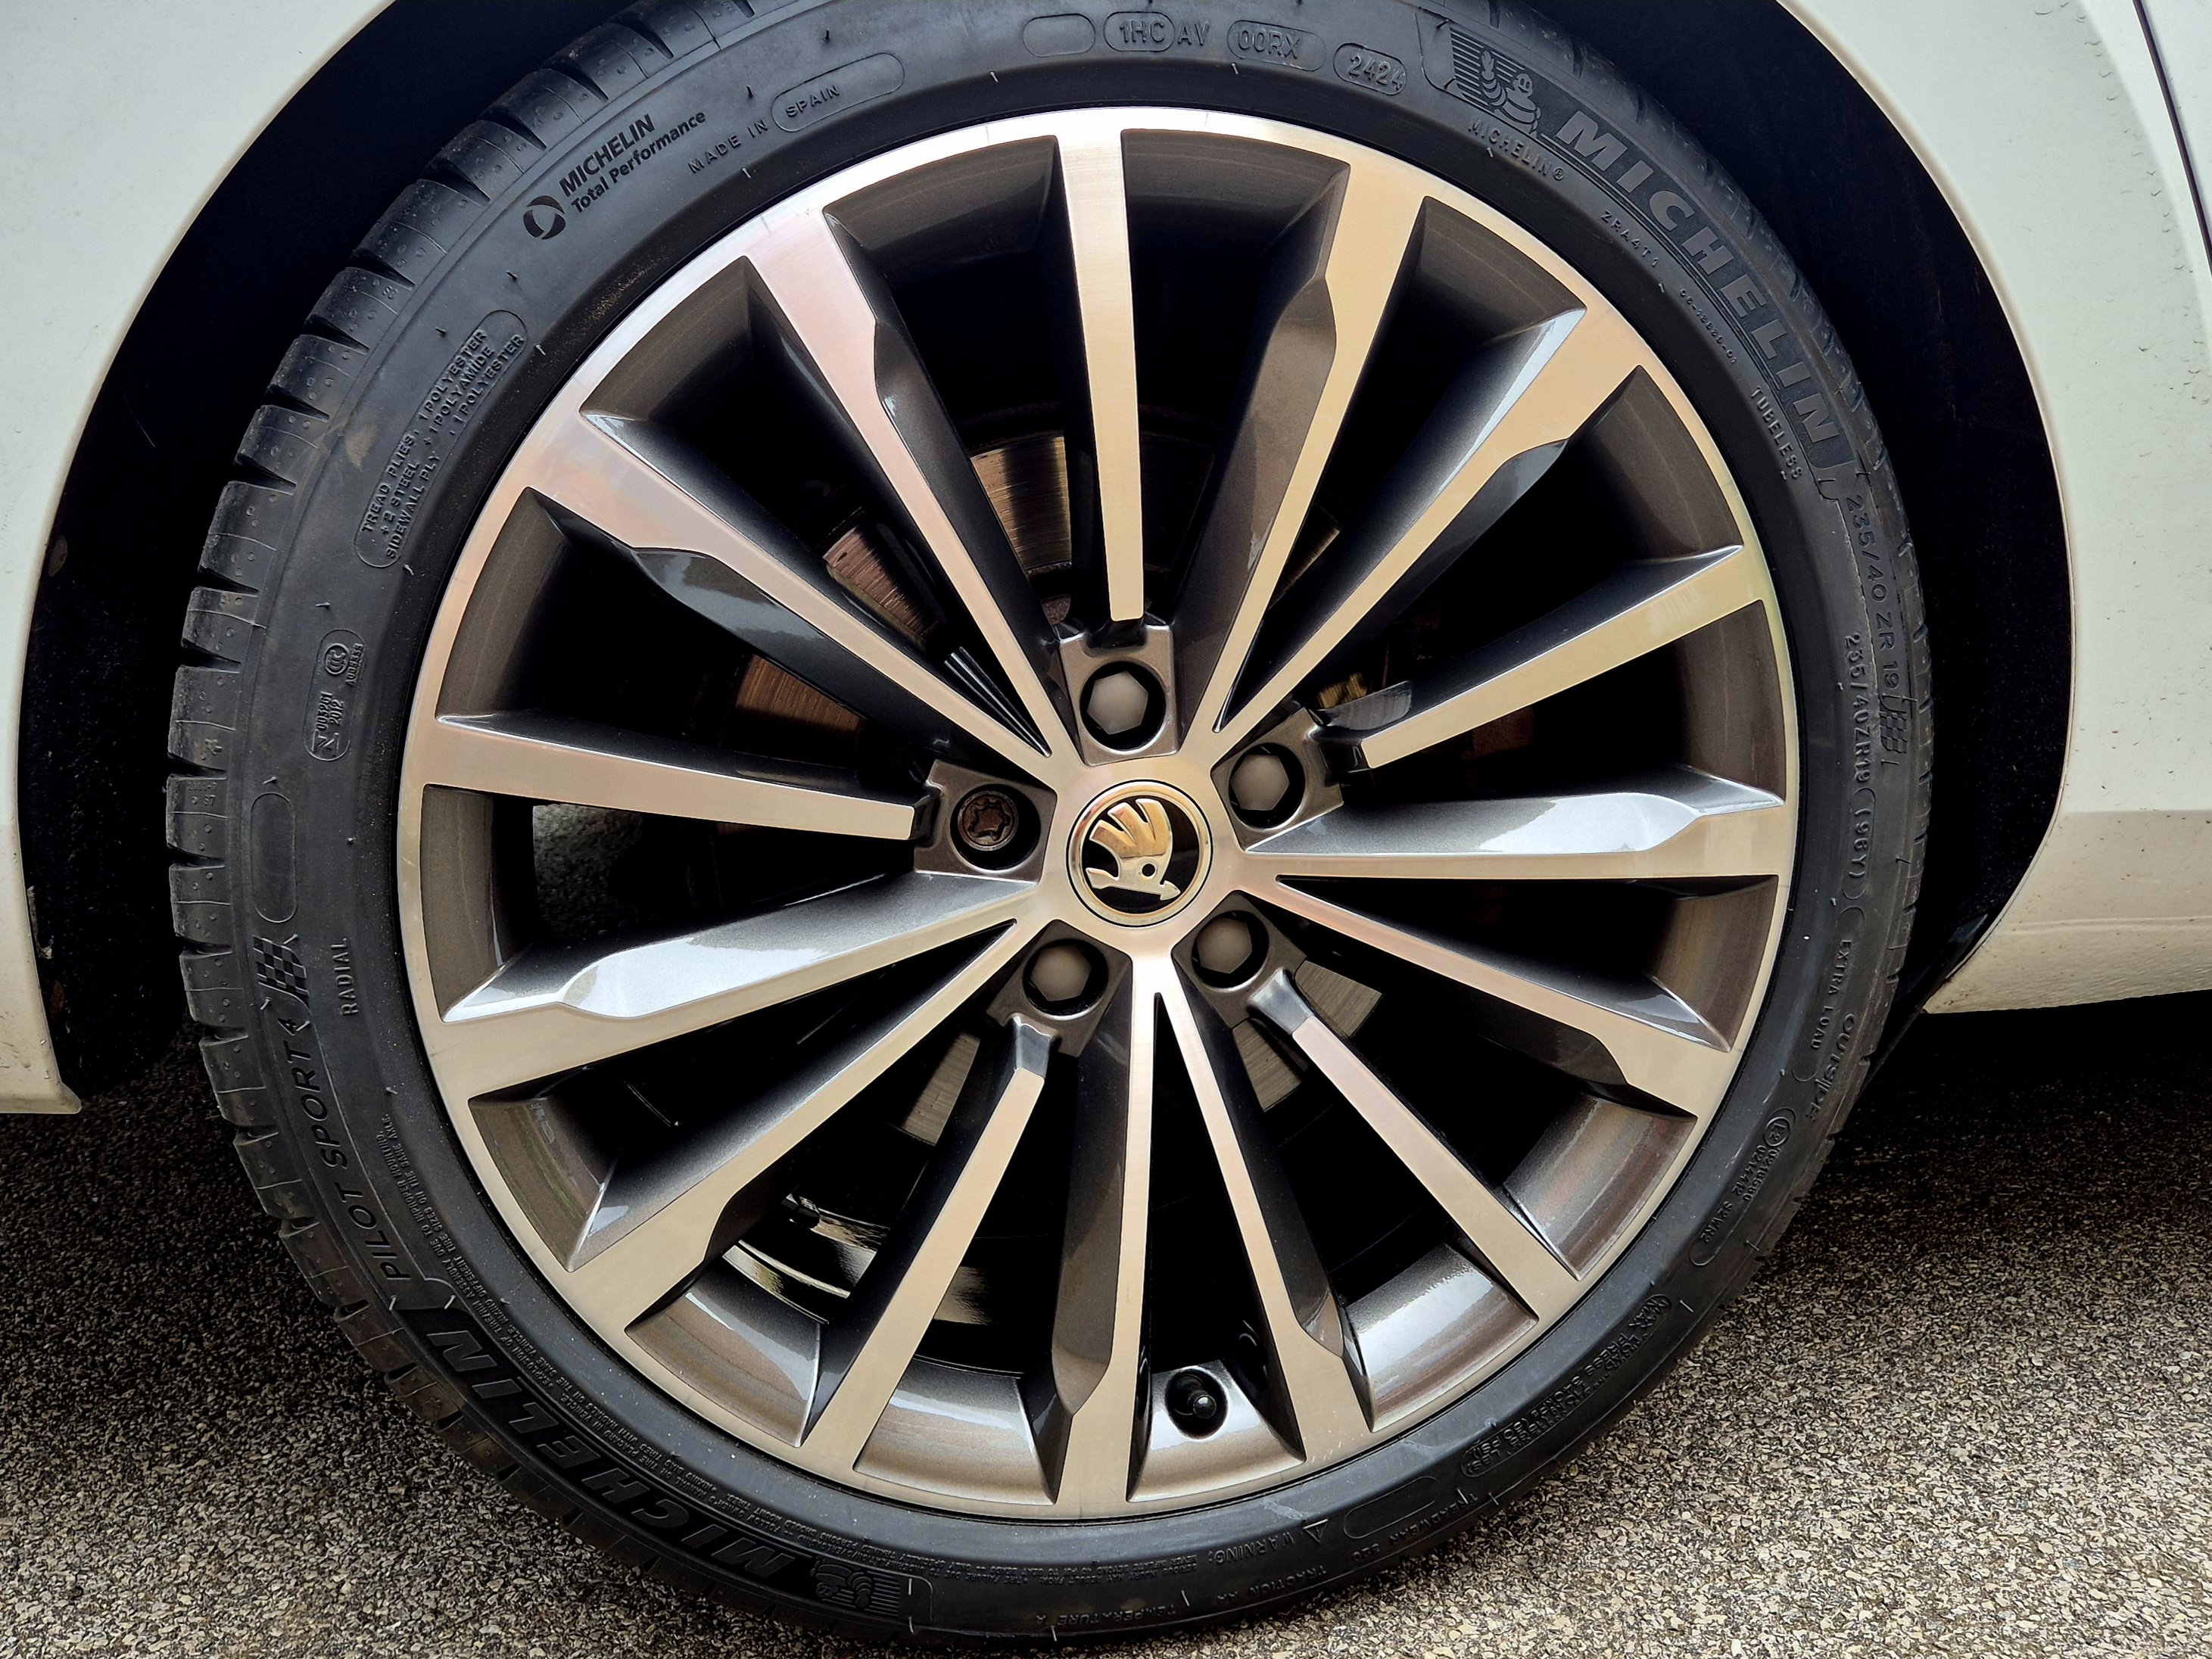
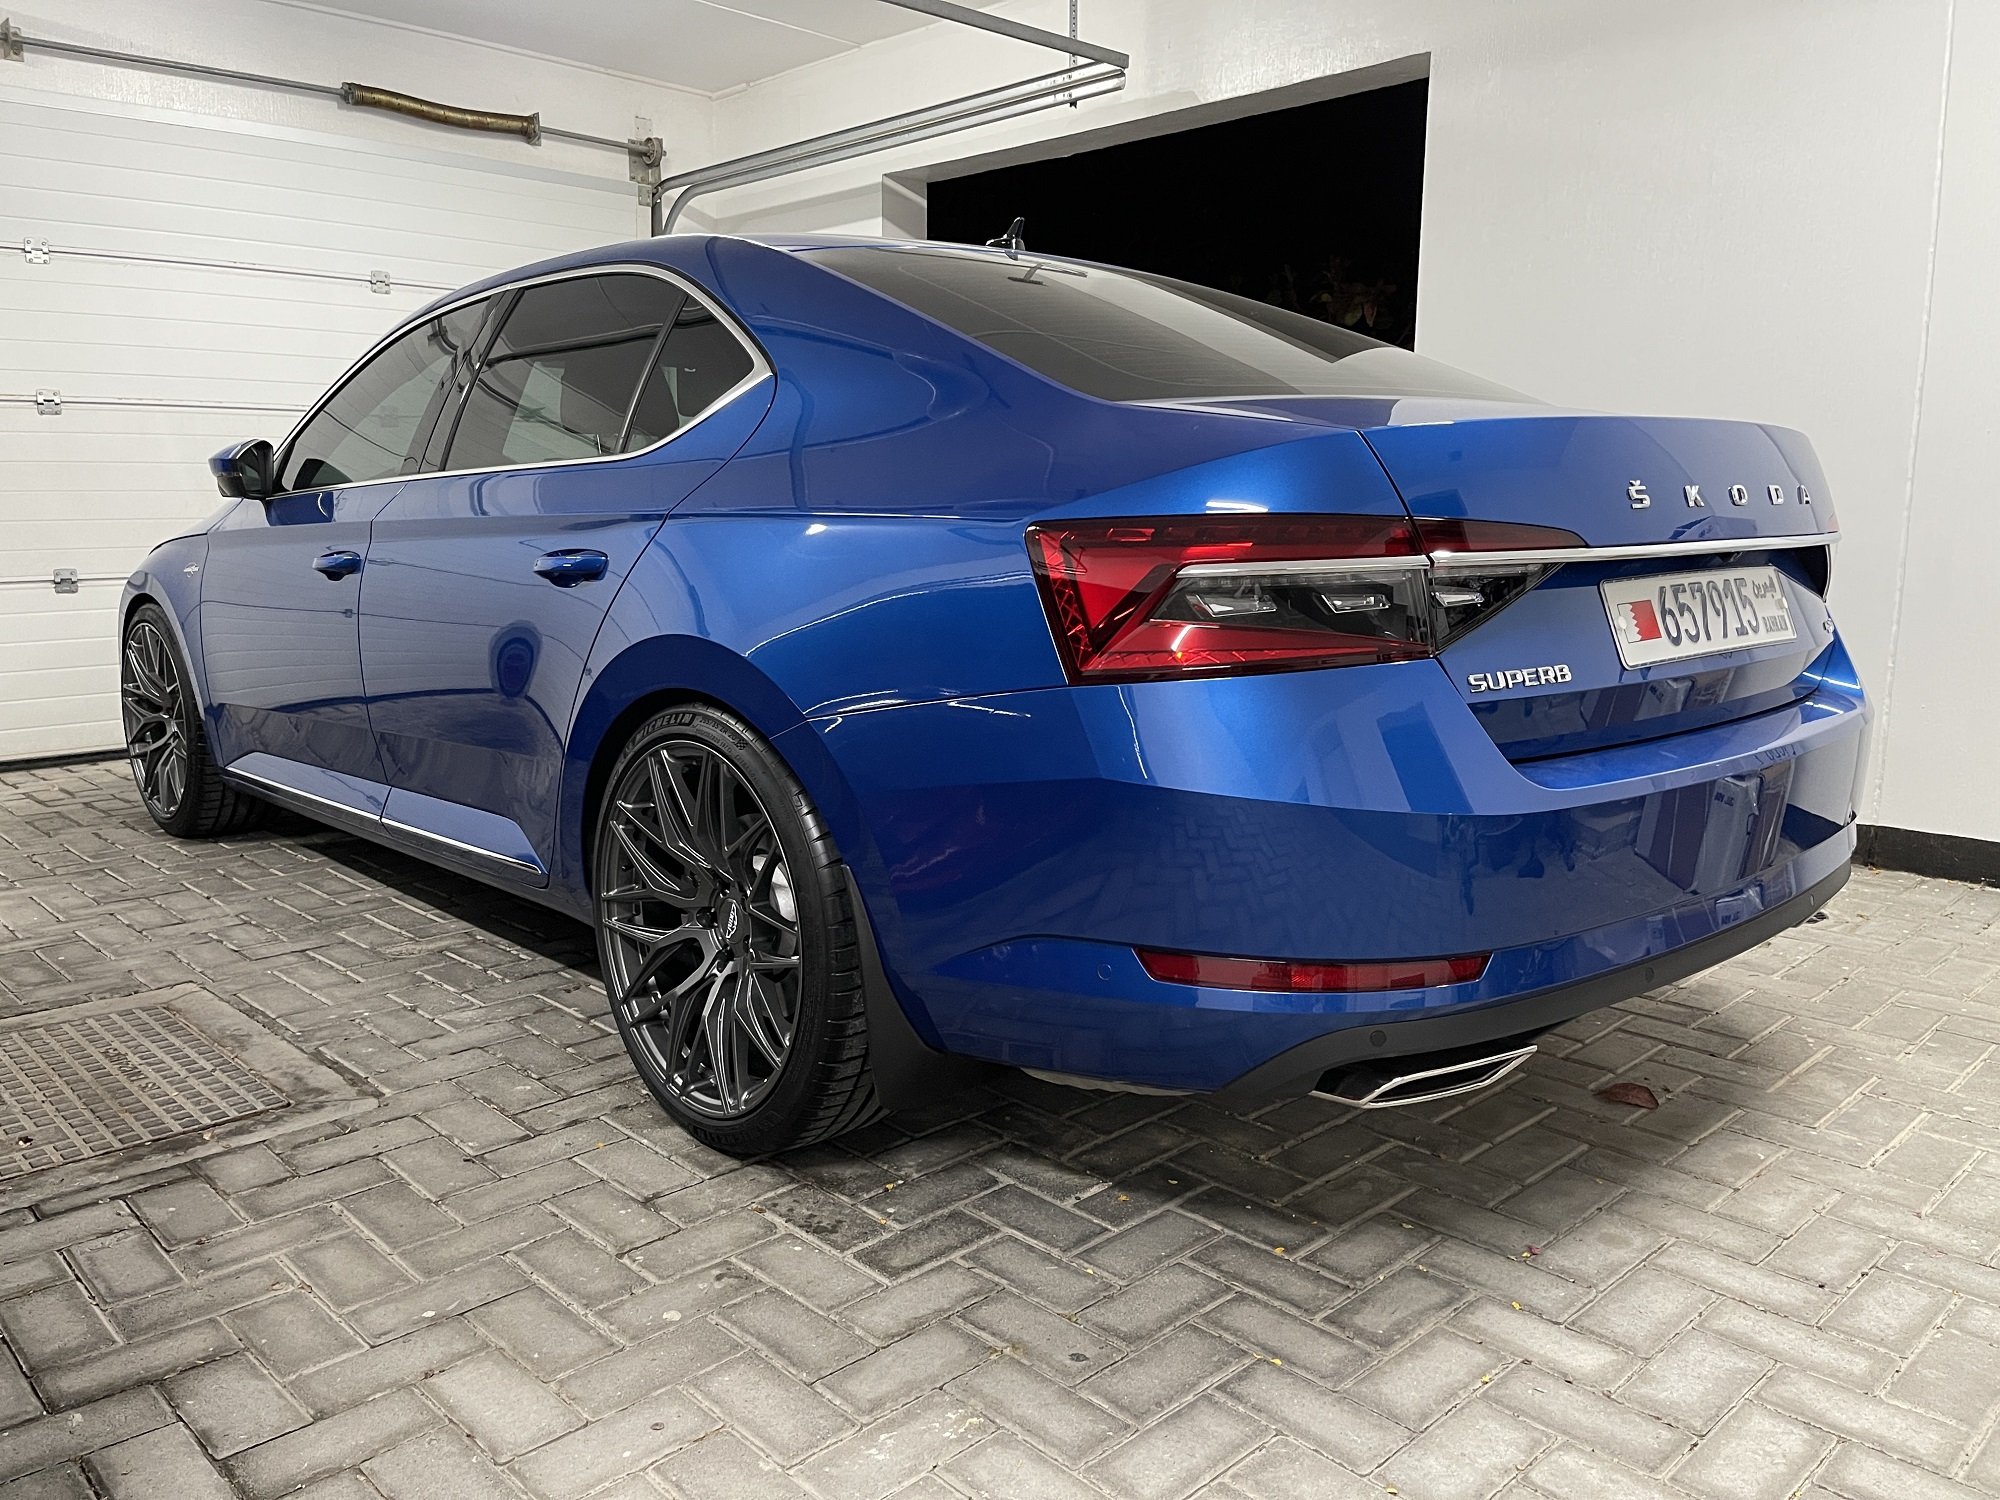
22 pointsCollection day has finally come around and I’m super stoked to be a Superb owner at last! I only grabbed a couple of pics as I was hoping it would be light and dry when I got home to take more but it was neither. Here it is on the forecourt It’s a MY2020 Facelift Superb SportLine Plus 2.0 TDI 190 DSG with the following options Exclusive Dragon Green paint Supernova wheels Virtual Pedal Reverse cam with washer Spare wheel Virtual Cockpit All of which put the list price at pennies under £40,000 which is nuts considering what I paid and the paltry 6560 miles it had when I collected it this morning. The 260 mile trip home was fabulous and I look forward to a much quieter build thread compared to my Octy as it has so much spec there is little to do, but I’ll be sorting a few things for sure! Badges are a start and some cool lighting mods too. More soon

 22 points
 -
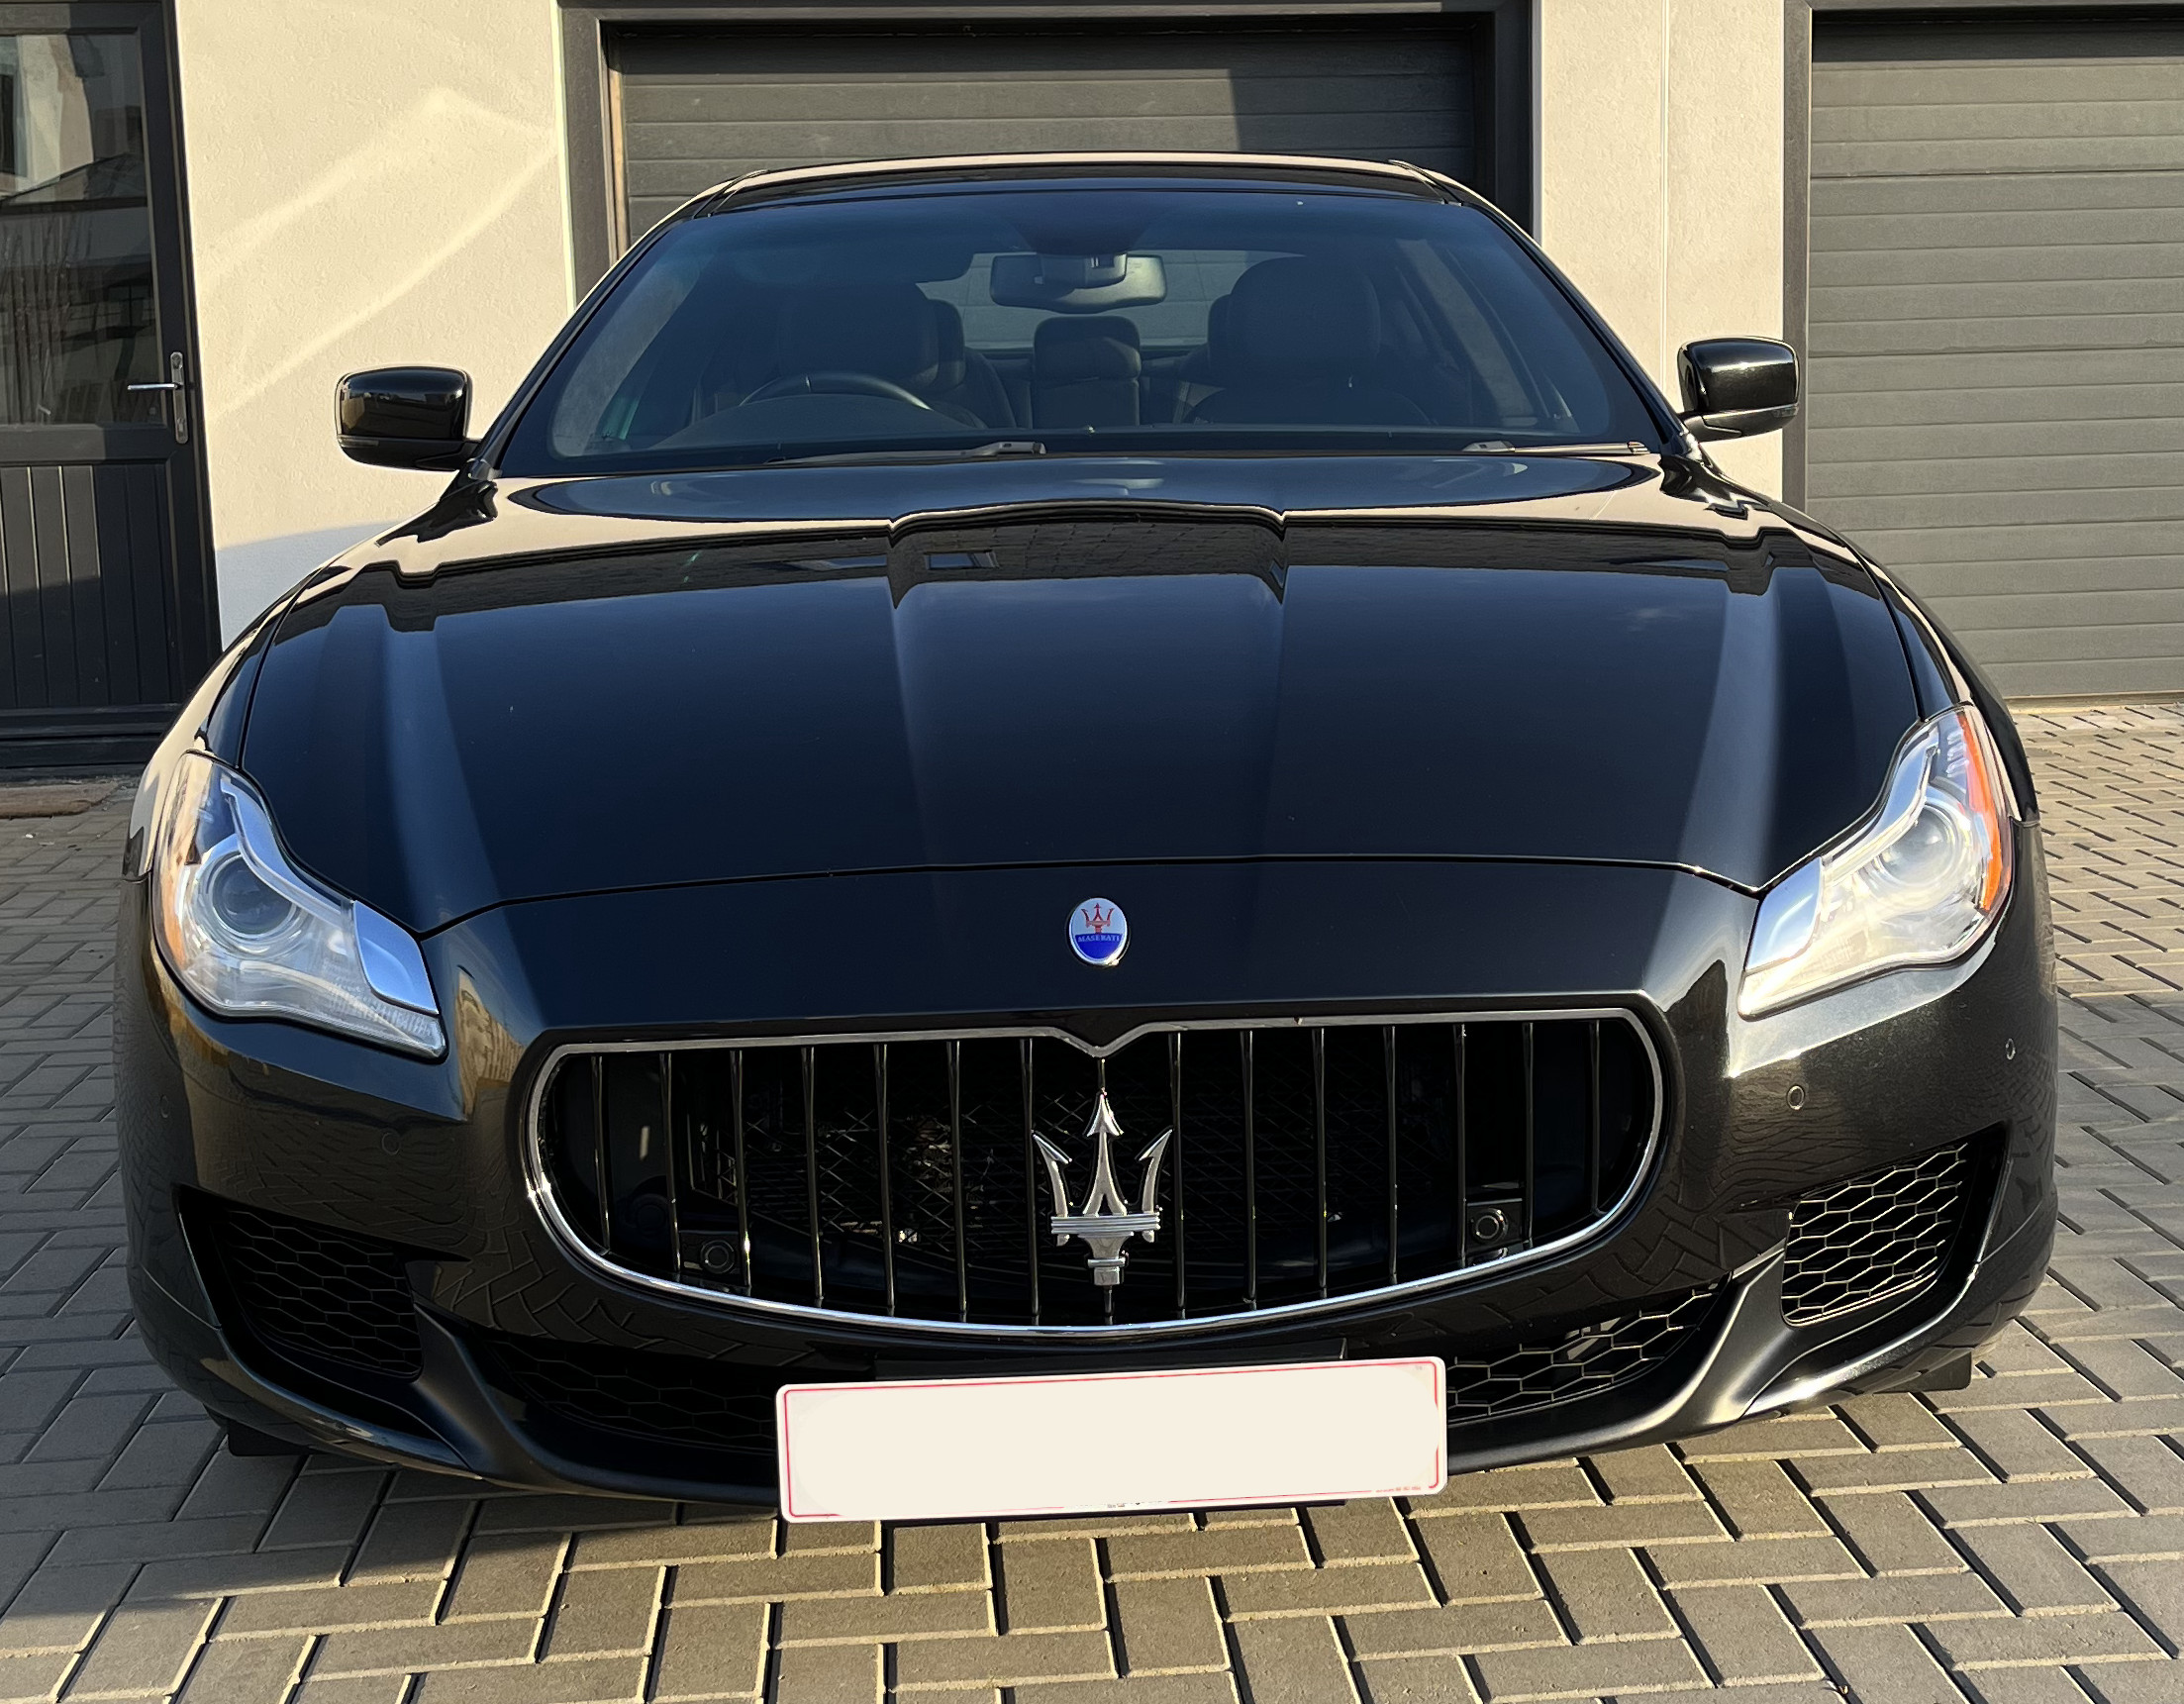
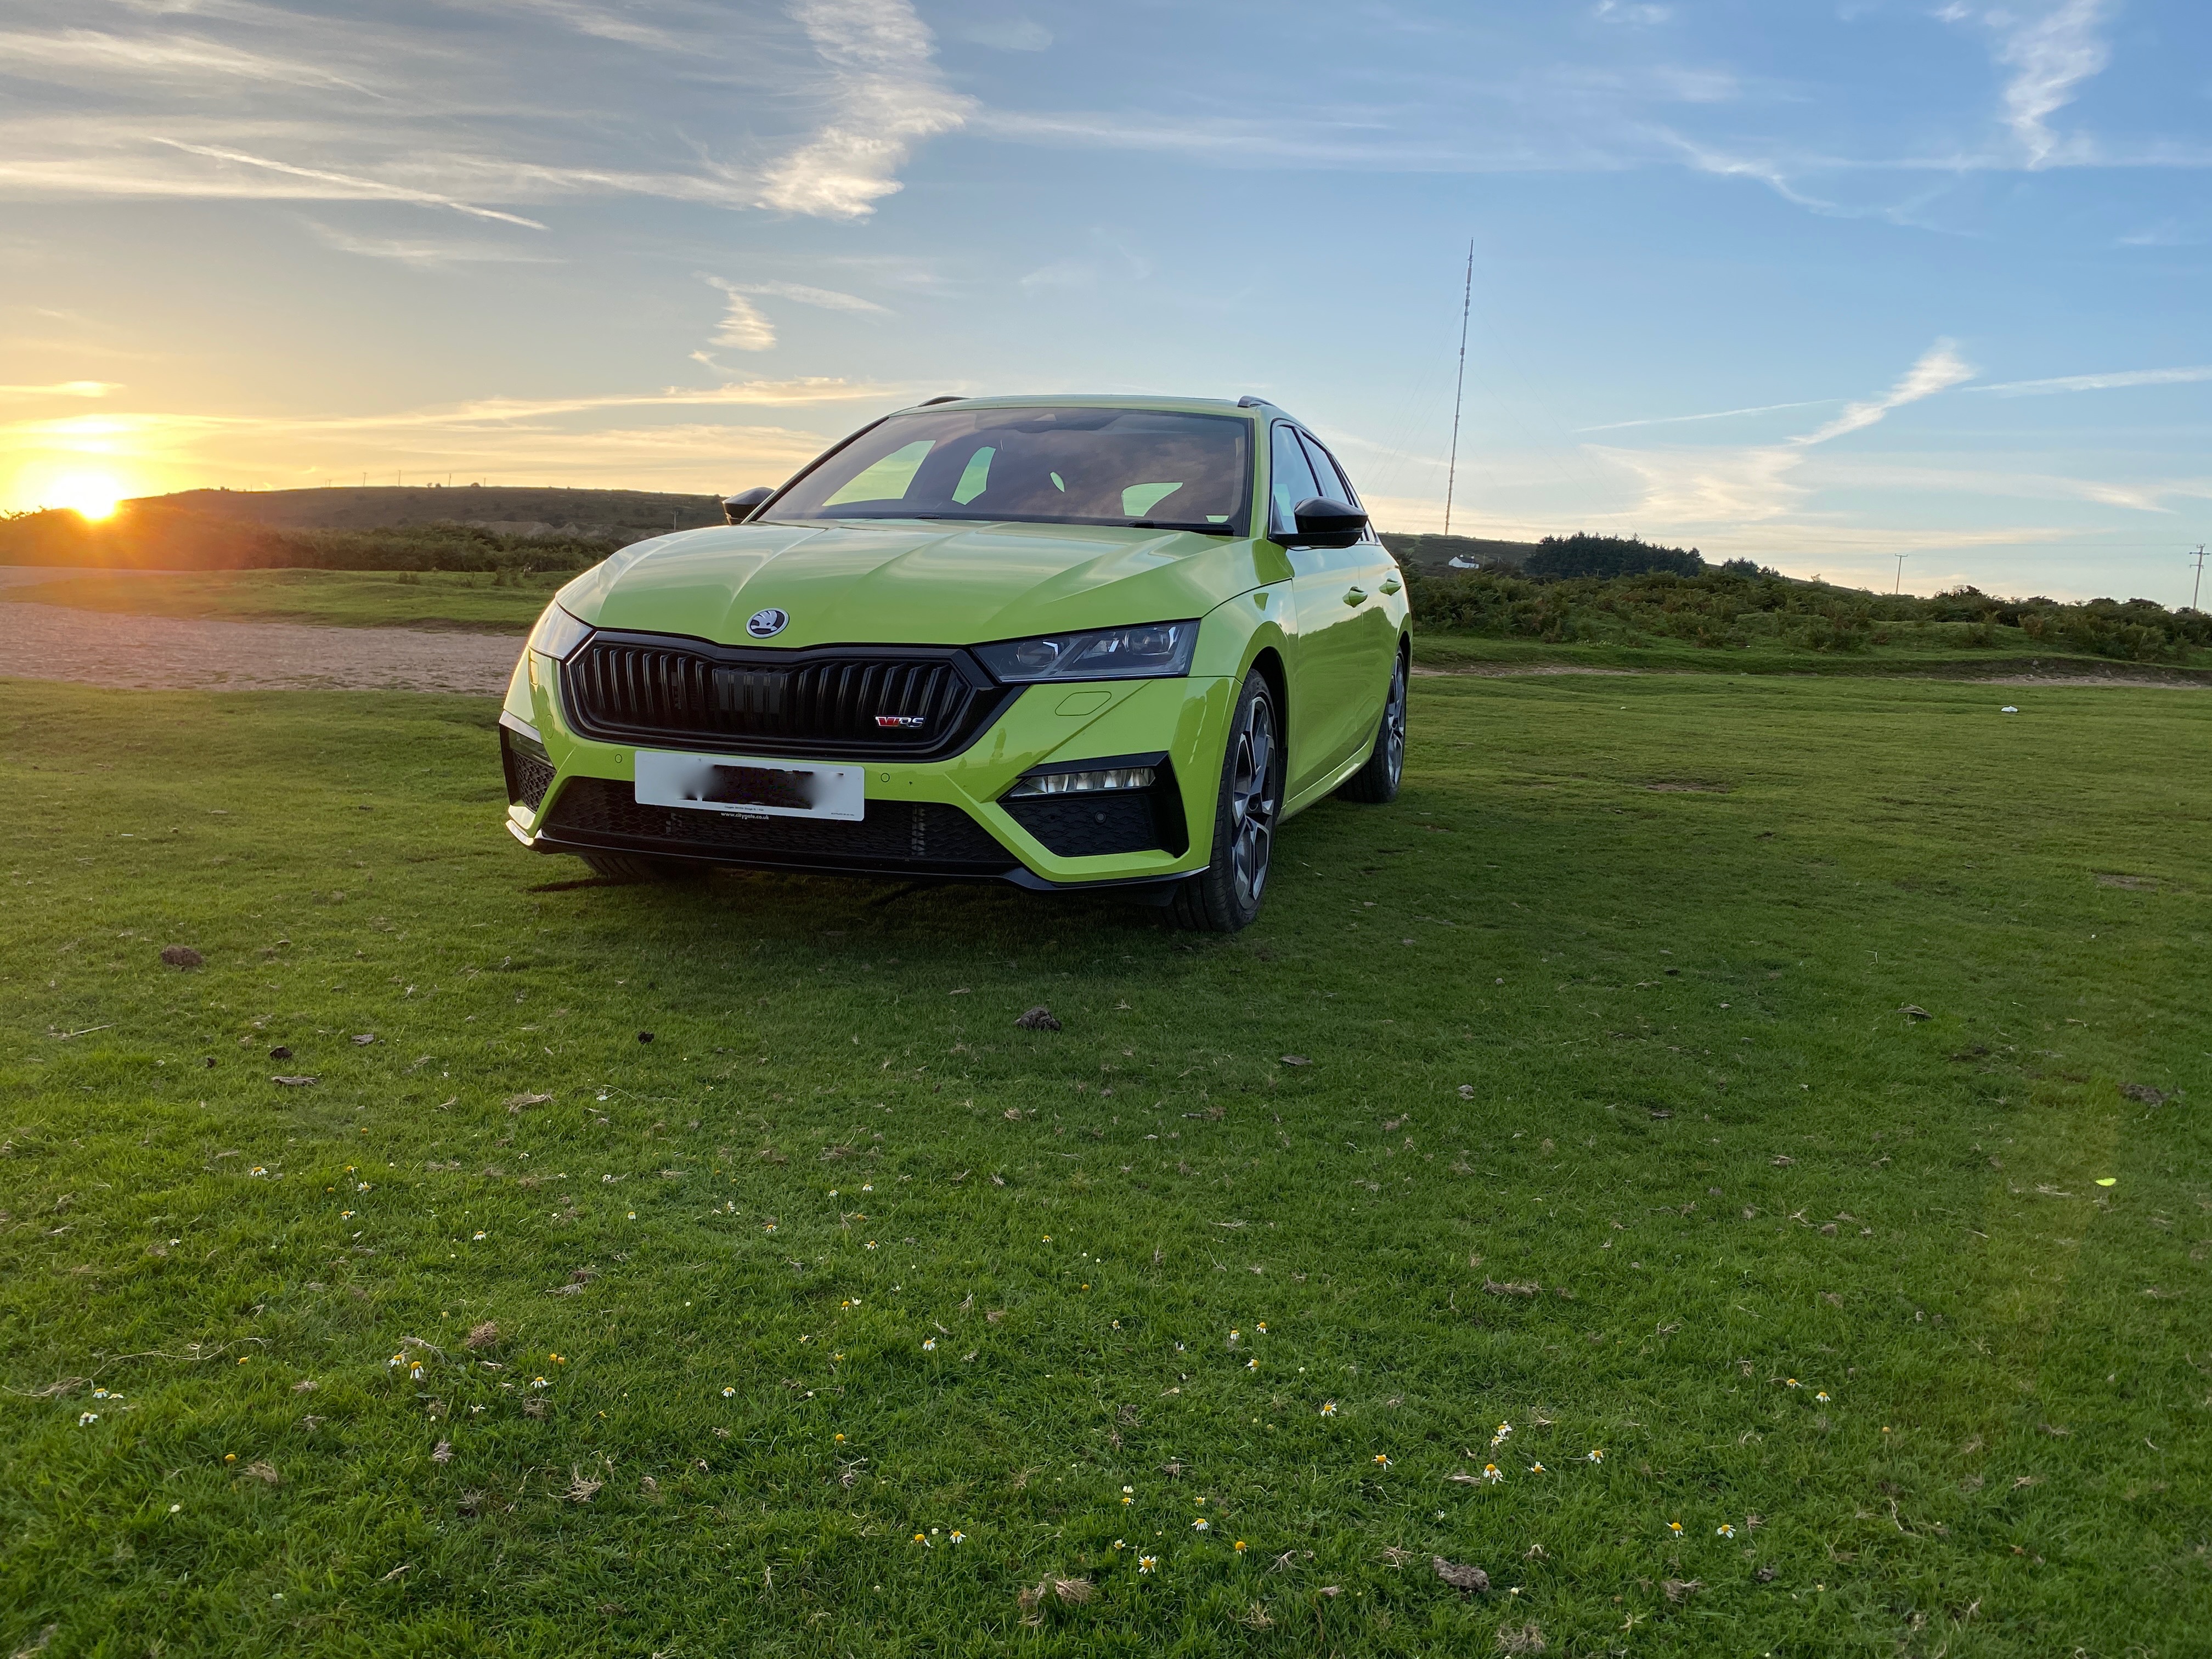
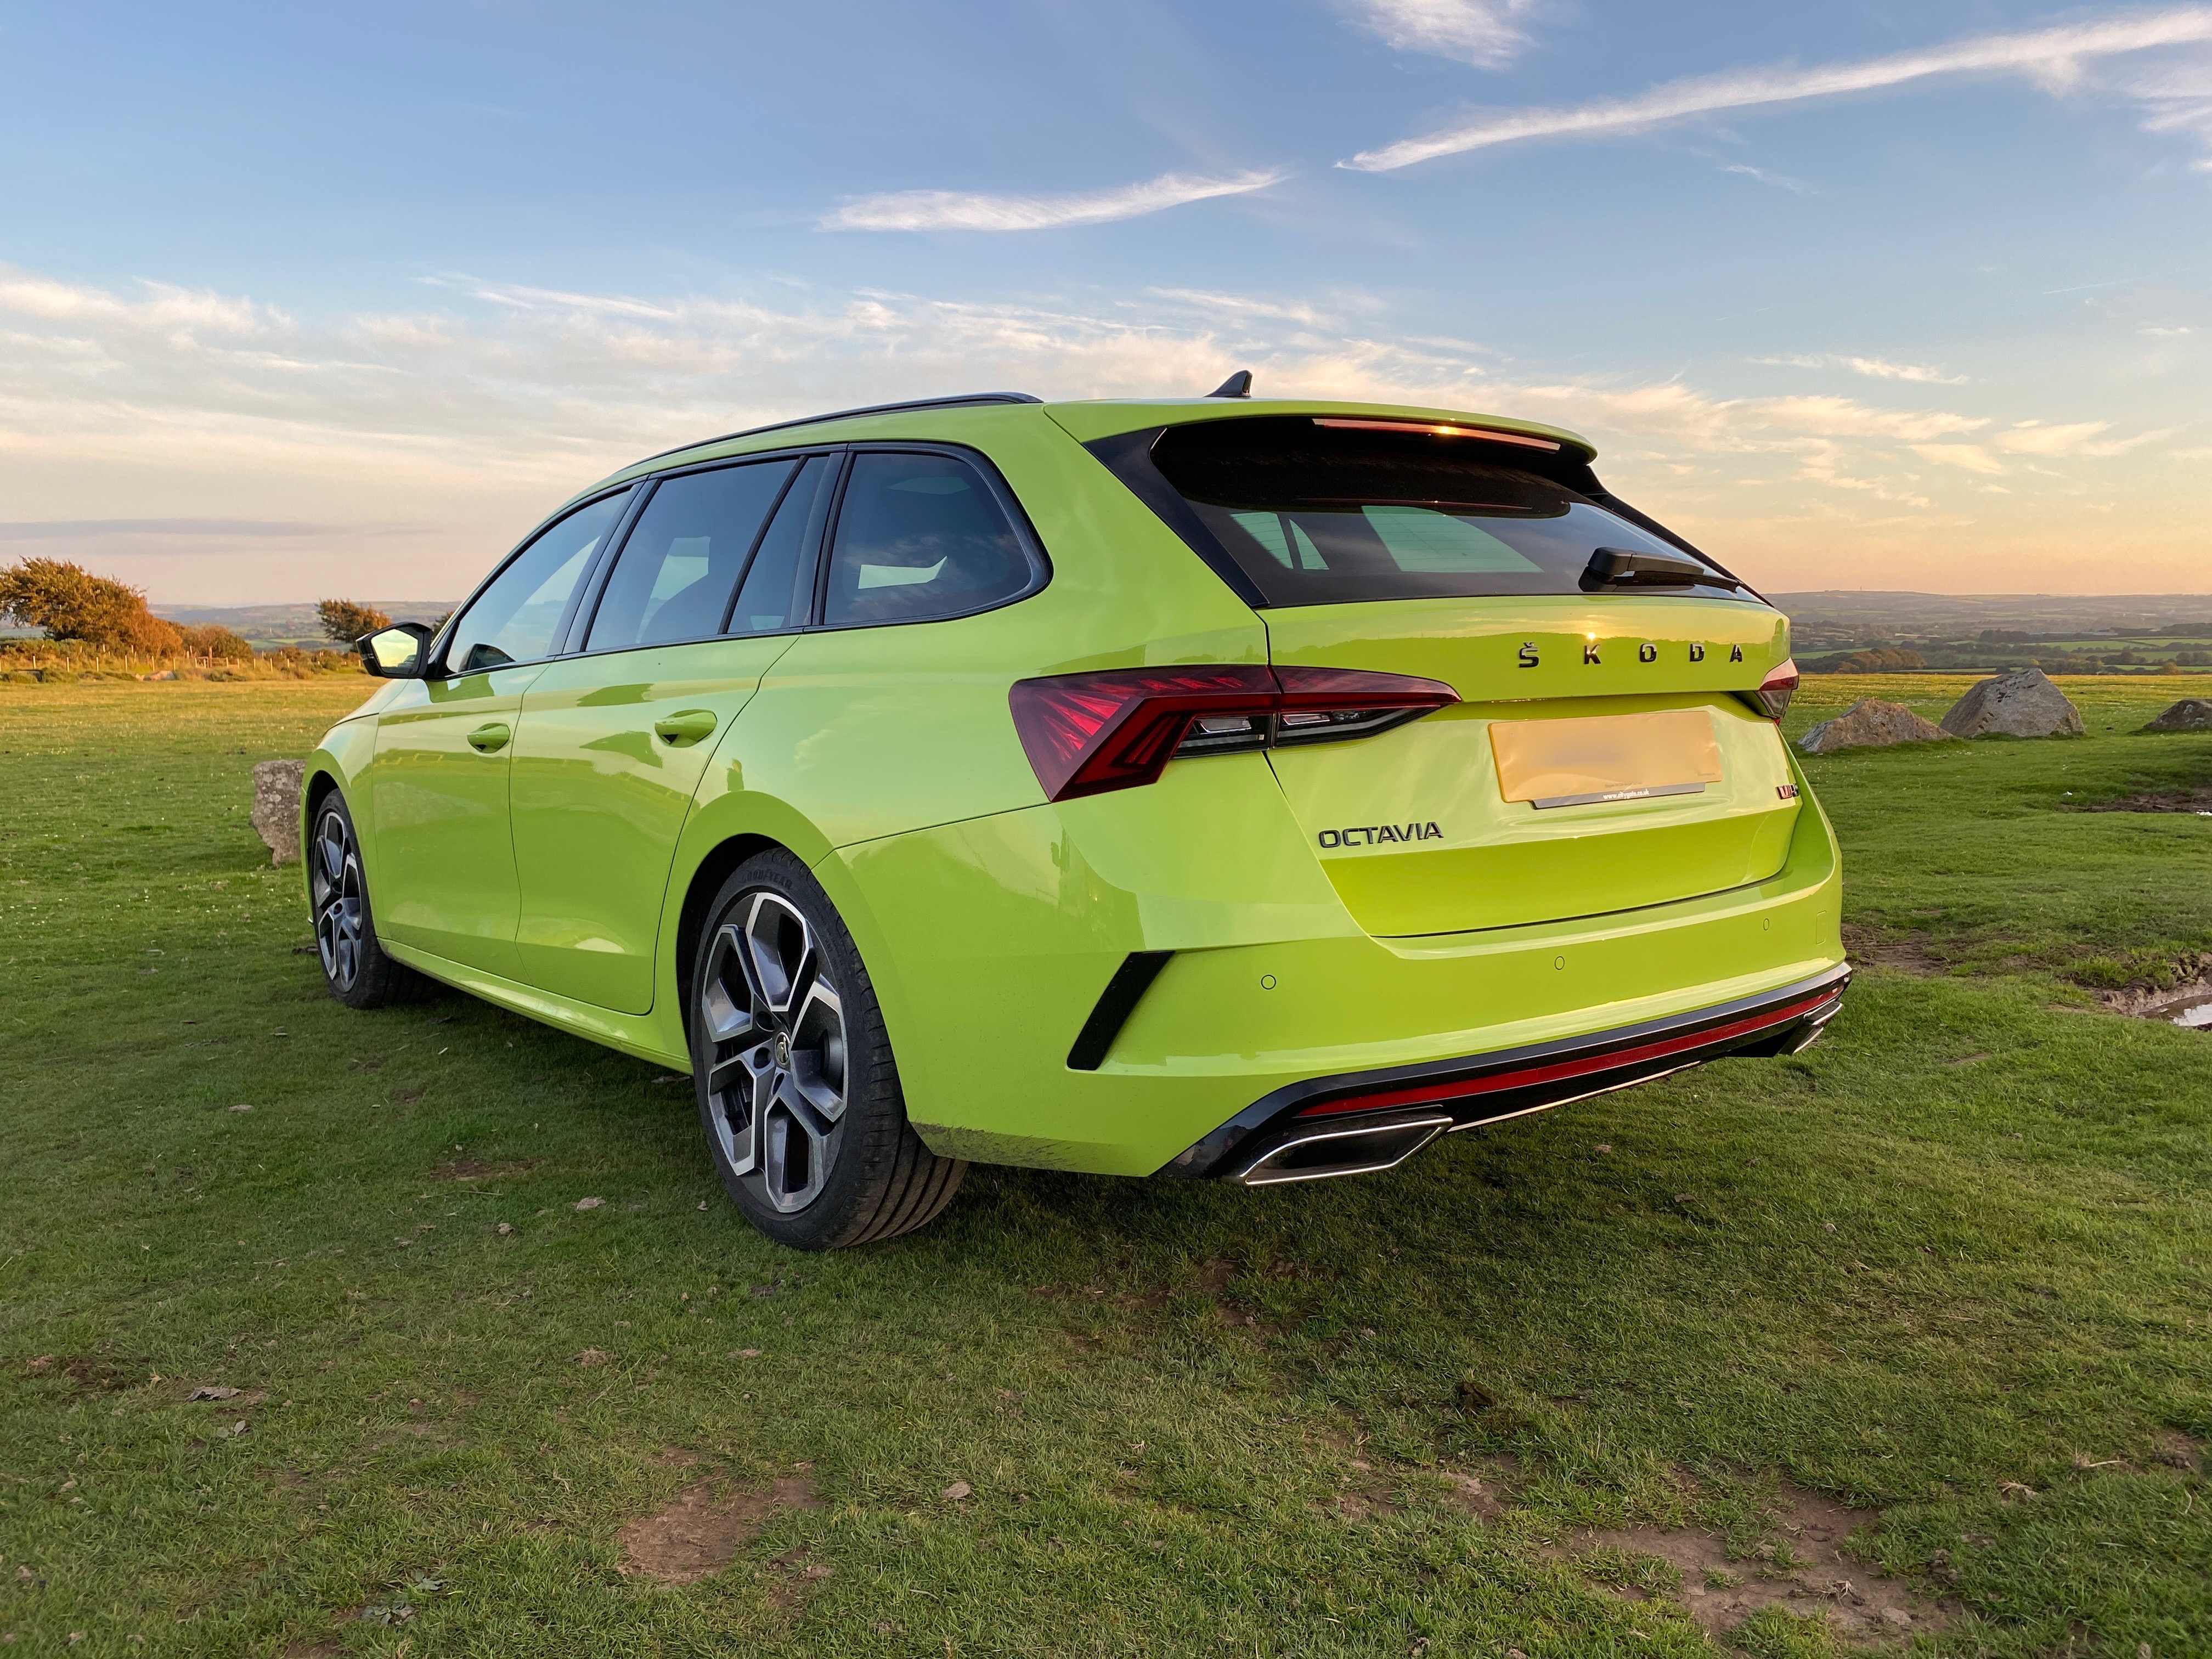
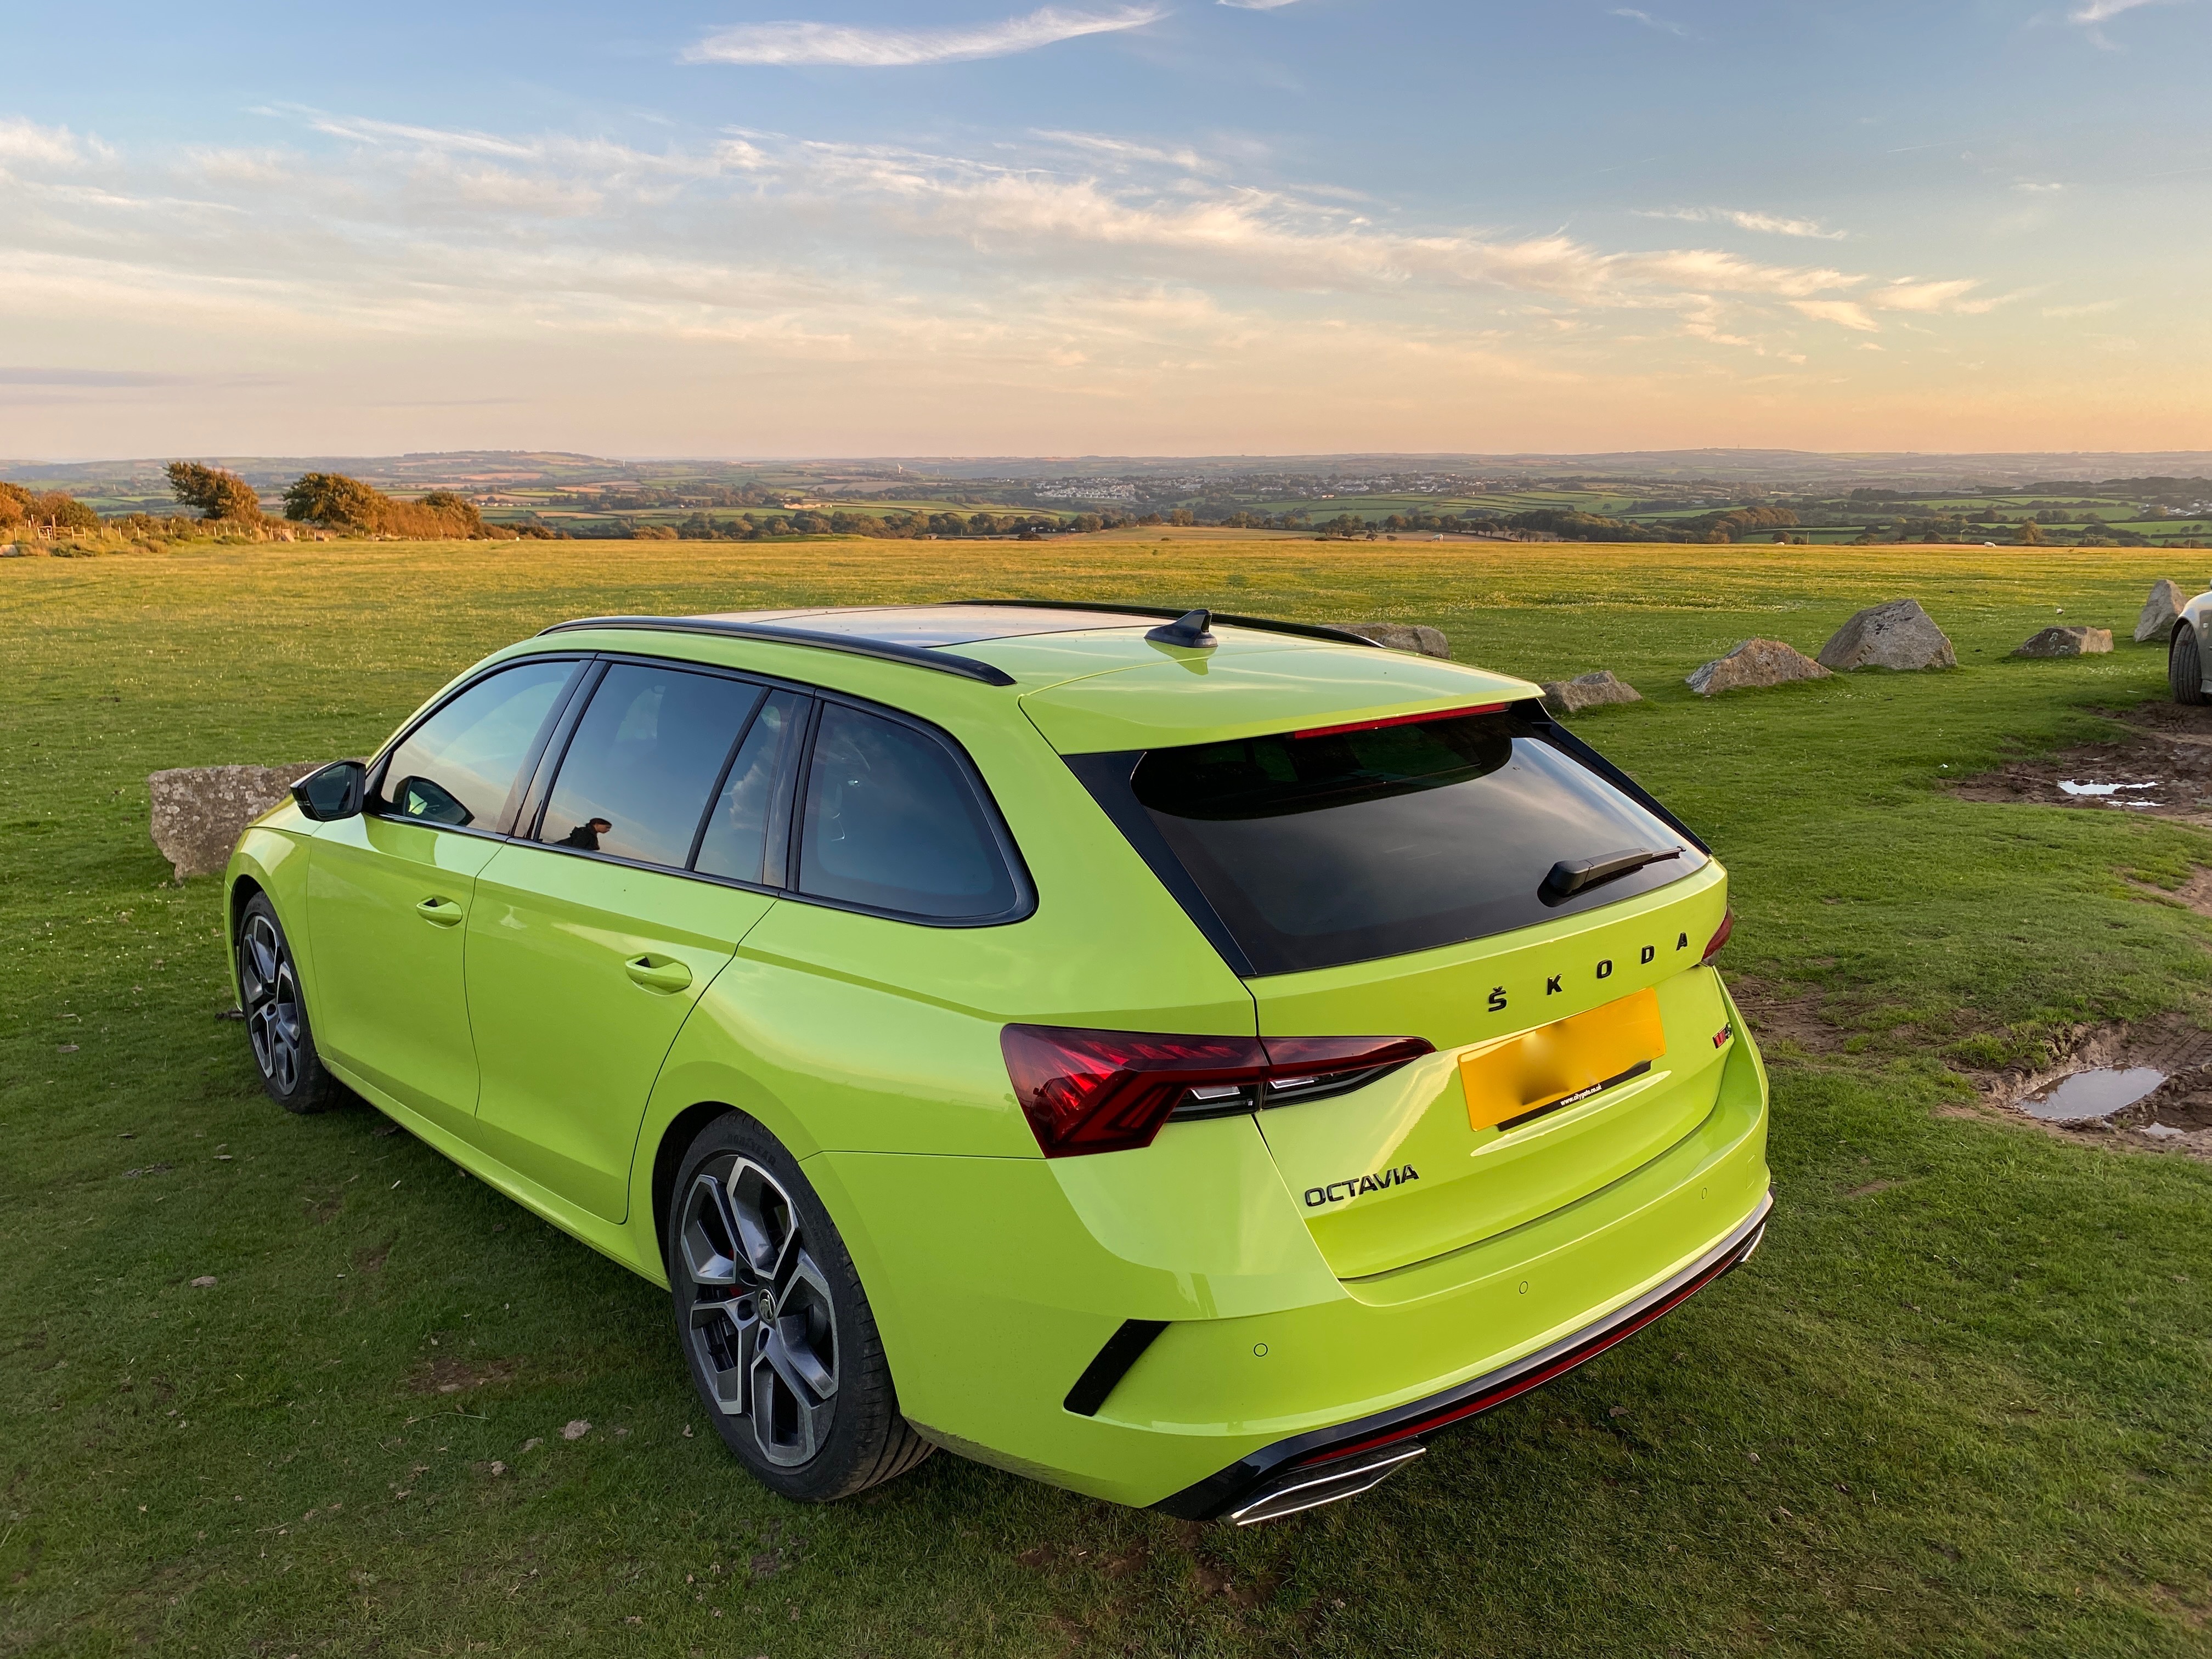
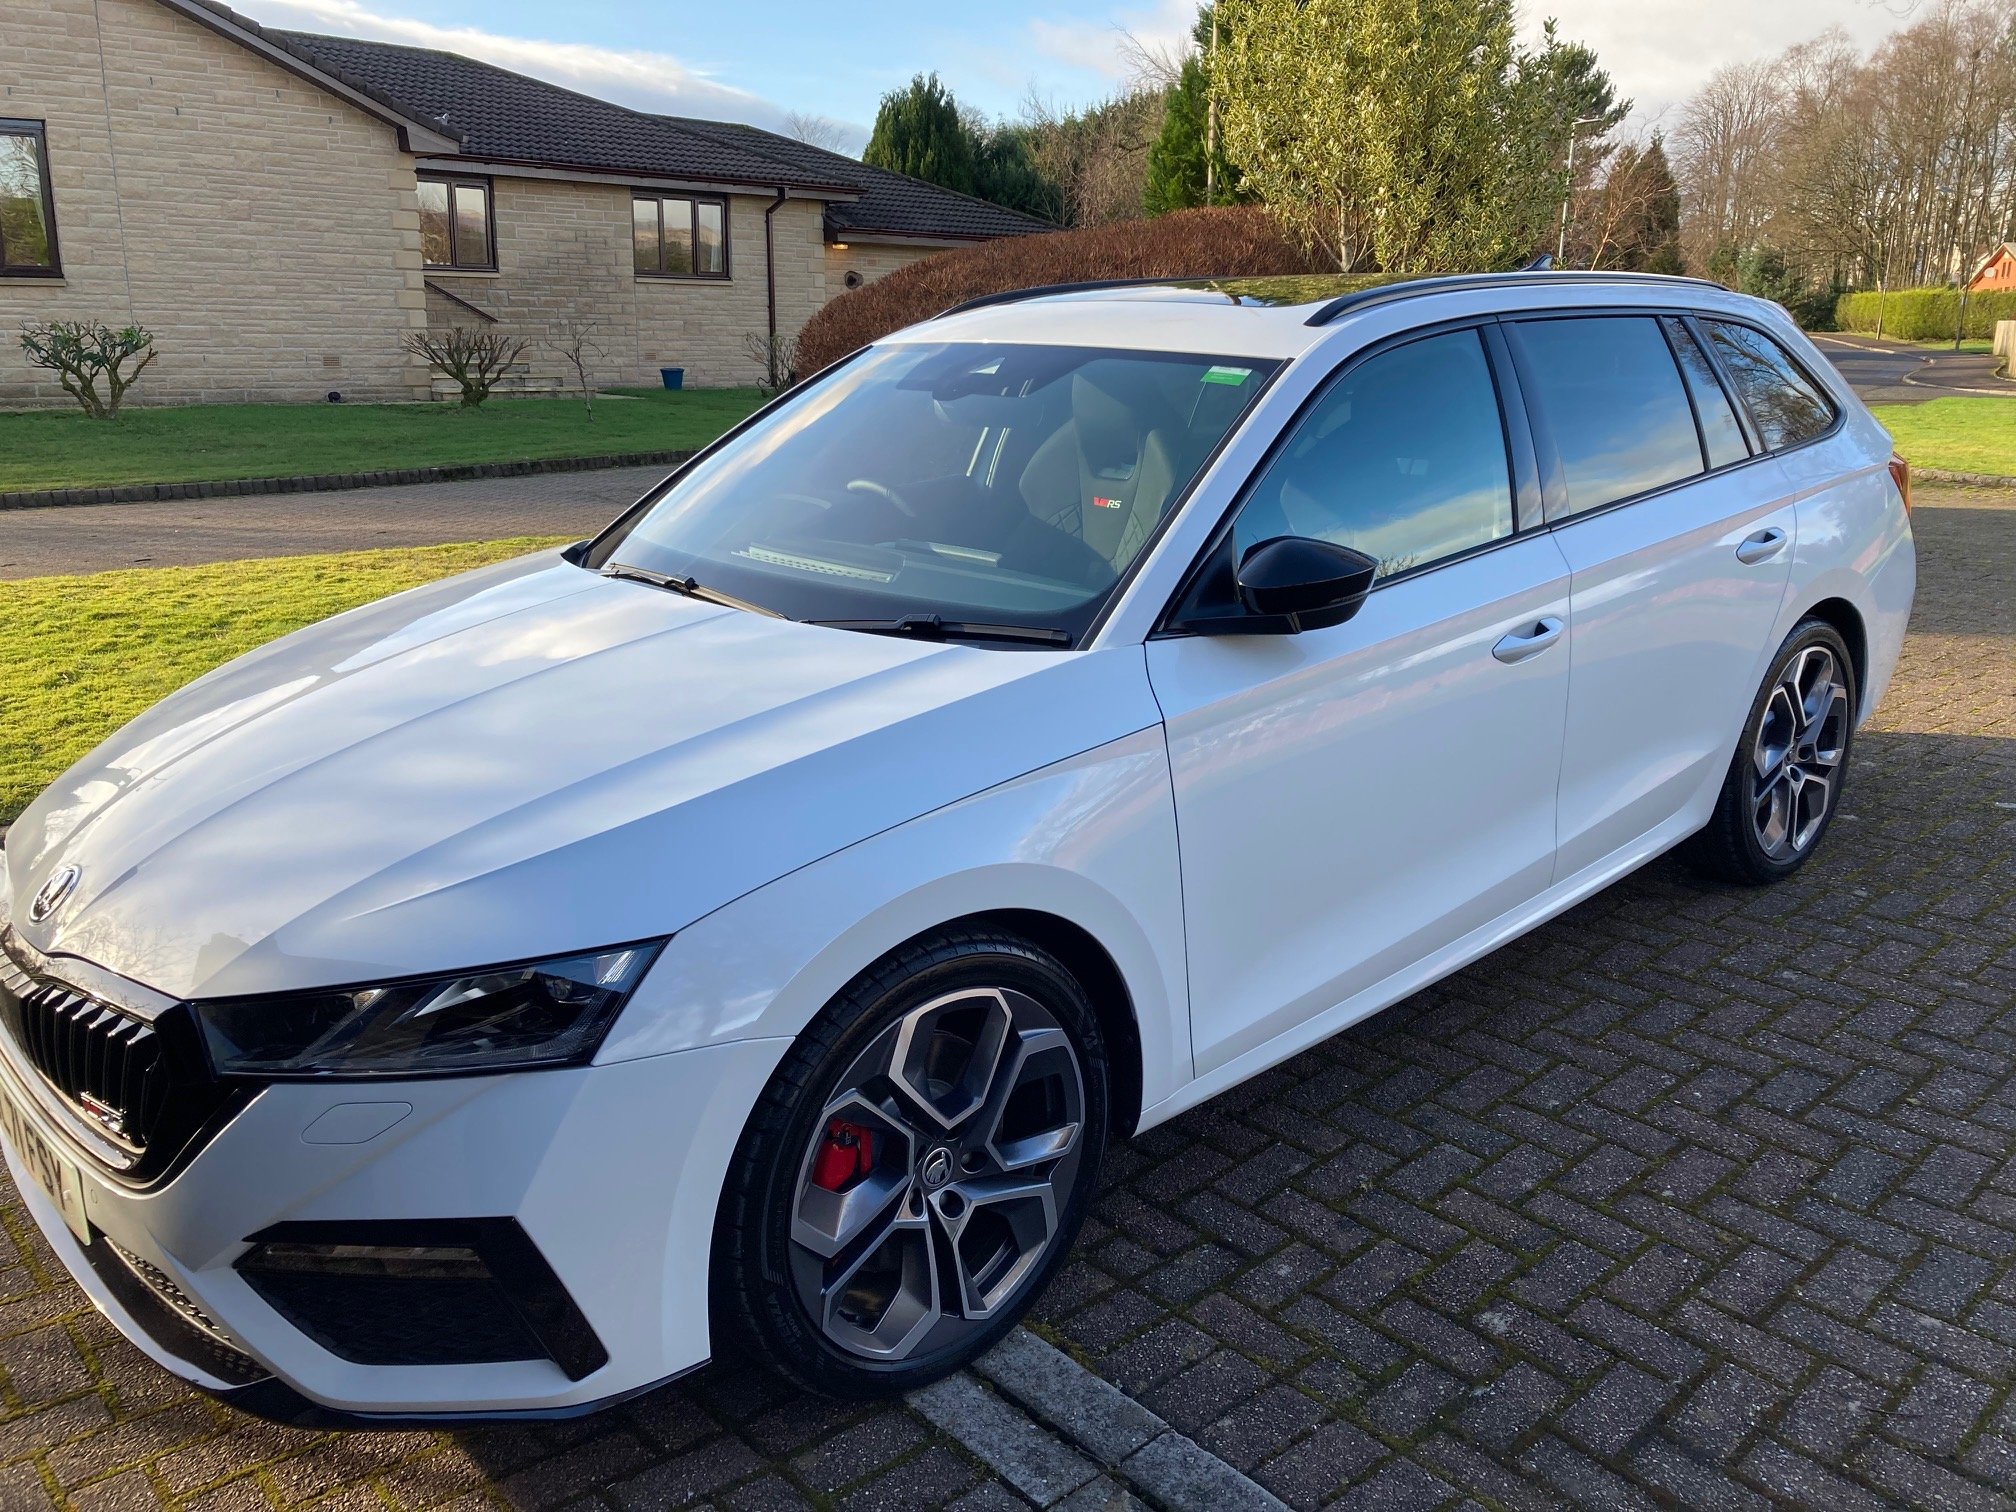
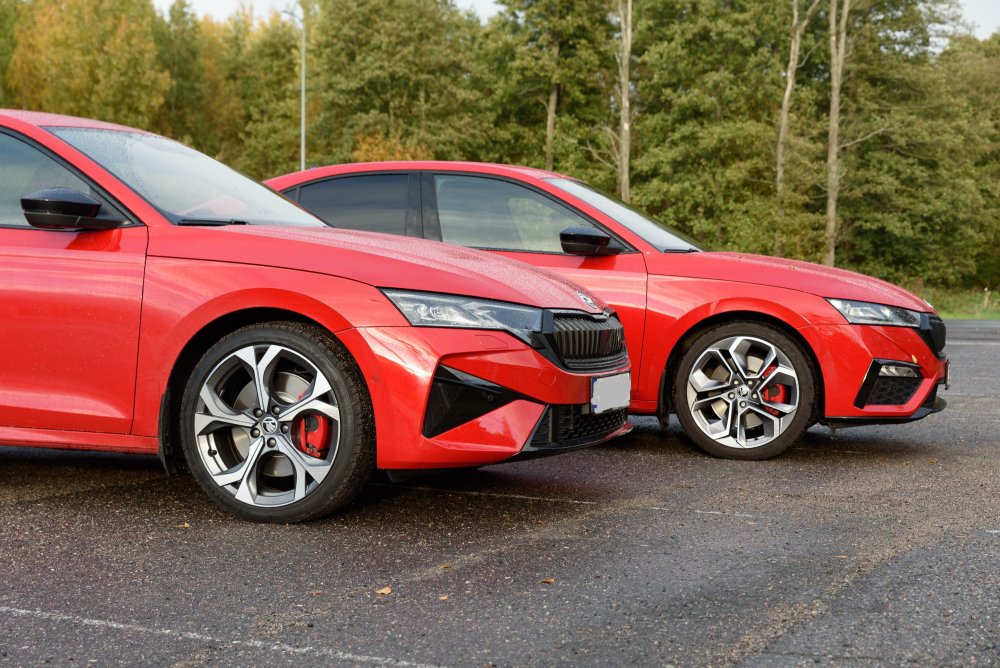
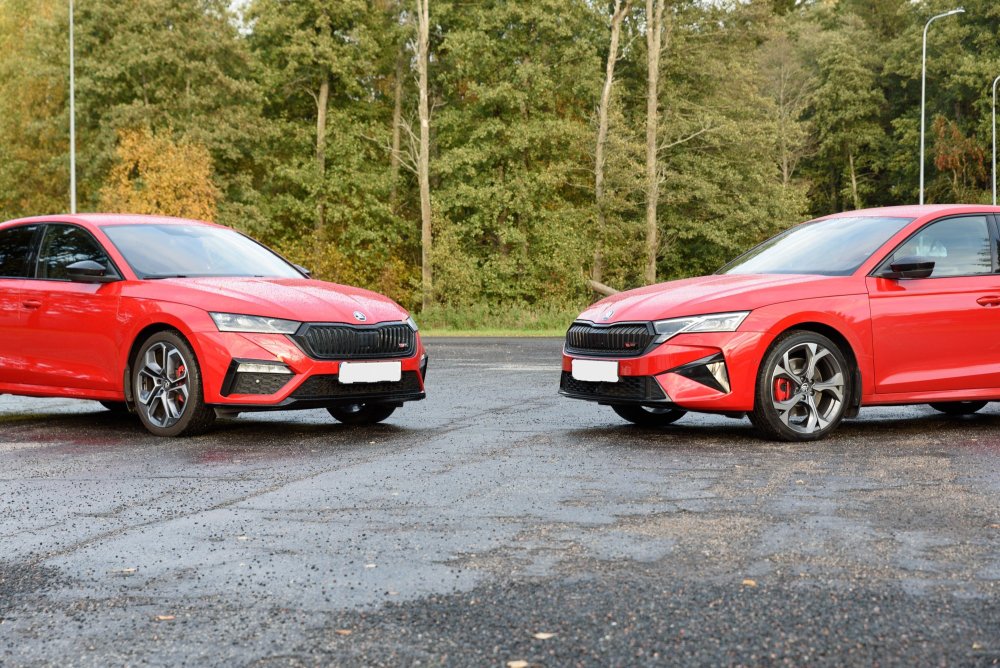
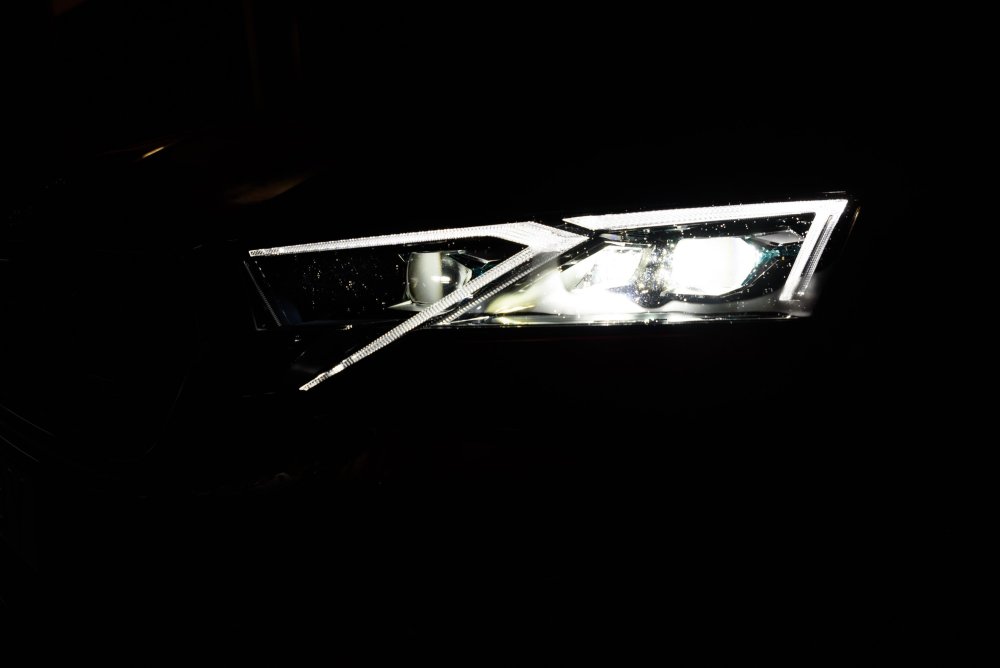
21 pointsHello I just became an owner of a spanking new Octavia vRS mk 4.5 and I'd like to share my first impressions but before that a bit of a background story. Last year I was looking for a new car to replace my Ford Mondeo Titanium S from 2009. It served me well but it was time for something newer. I guess my criteria mostly were that the car had to be practical but also a bit sportier than the previous one. Initially I was looking at Cupra Leon Sportstourers (also estate) but I was eventually mesmerised by a velvet red Octavia RS mk4 liftback. I thought I got a pretty nice deal on it as it was just barely used (~3000 km), so no new car tax to pay for me anymore, and it had ton of extra equipment as well. I was super happy with it. Then in February the facelift was announced and I admit that I didn't think much of the RS facelift at that moment. I was definitely thinking that the front lights were cooler on my current RS, I mean the fog-lights were a separate unit and the front bumper was also much more aggressive and edgier. Also nothing really bothered me too much about the infotainment system. But....as time passed the design of the facelift had started growing on me and in addition some of the improvements here and there (a bit more power, newer infotainment system). And by July I managed to convince myself that I want the facelift RS, so I ordered one! It arrived at the end of September. However, by that time I still hadn't found a new owner for my mk4. I had some offers but nothing good enough yet so I asked the dealership to wait a bit and give me more time to sell my mk4. Then I finally found a buyer and told the dealership as well that I'm now ready to receive the new car. But I guess I jumped the gun there a bit as the deal to sell the old car hasn't been quite finalised yet. So that means that I'm in a unique position where I currently own a mk4 Octavia vRS and a brand new mk4.5 Octavia vRS and they are both velvet red! But it's a good opportunity to compare them. So finally, here are my thoughts on the differences: The specs Both of my cars have a ton of extra equipment but there are slight differences (just some quality of life extras really). I really liked the extra features on the old car so I mostly copied them when speccing the new car as well. But most notable ones: Both cars are liftbacks Both are velvet red mk4.5 has 20 extra horse power but cannot test it yet if I can actually feel the difference (still break-in period) Both have DCC, Adaptive Lane Assist Both have Suedia (leather) seats (as part of Challenge Plus package on the old mk4, separate option on mk4.5) Both have 19" wheels (Altair on mk4, Elias on mk4.5) Both have a Heads Up display Navigation was a separate option on mk4 but I think it's part of the base RS spec now. I couldn't spec preheating for mk4.5 in my region (wasn't available in the spec sheet and still isn't in the configurator) I added Canton sound system on the mk4.5 (yet to review it properly) Exterior The biggest difference between mk4 and mk4.5 is the front part of the car (as you've probably seen from pictures yourself). As I also mentioned above, it took some time for the new design to grow on me but I really like it now. The rear lights are also a bit different (the shape/light bar of the turning signal is now horistinal and straight, see picture). Also the stripes/trails within the rear lights seem to be illuminated (more). The design of the 19" wheels is different. I don't like the aero cover (or however you call it). I think the Elias wheels look much better without it so I removed the covers. However, beware that if you decide to remove the covers you need to purchase a set of centre caps and lug nut covers. Otherwise it's a bit ugly still. the vRS logo is different, I think the new one is better in the sense that you can actually understand that it says vRS (I remember one of my friends asking what VIRS means and the old logo can absolutely be misinterpreted that way) Door sill protectors have "Octavia" written on the, not vRS. Interior Interior design is mostly the same but there are more and less noticeable differences: The biggest difference (literally) is the size of the infotainment screen. It's 13" on the new one vs 10" on the old one. However, the larger screen size is in any way disturbing. The upper edge is still below the dashboard and isn't blocking the view in any way. Coupled with the upgraded infotainment system it's a really nice upgrade. Some of grey coloured pieces (door handle, the plastic around the gear shifter, rotating knobs on the steering wheel) is dull/matte whereis it was shiny on mk4. The design of the wireless charging pad/compartment has changed a bit and it feels like it's holding the phone a bit better in place. The icons on the physical buttons have changed a bit. Infotainment system/Virtual cockpit That's the big change on the inside and in short, the improvement is huge. The infotainment system is very responsive. The new style feels a bit more modern The digital instrument cluster is a more customisable as well (The right arrow on the steering wheel now switches between different display modes eg map, trip info, gear info (D, S, M), while the left one chooses between display style (with tacho and speedometer or without) No custom vRS animation on the instrument cluster when entering the car anymore, it's mostly black with SKODA fading in. 😞 The gear information (D, S1-S7 etc) can now be displayed with a huge font between the tacho and speedometer (vs being displayed in the bottom left corner on mk4). That's super awesome now. The normal gearbox mode (D) will still display only D and not D1-D7. The Adaptive Lane Assist button is now gone from the steering wheel but the option to switch to it from ACC is now hidden in the same menu (left upper button on the right side of the steering wheel). When I first saw that the button is missing I thought that they forgot to install it and actually had to double check that it's there. There's now always an indicator bar visible in the speedometer dial that shows how much range you have left to go, so now you can select something else to display in your speedometer dial. The physical button for selecting your driving modes now toggles through driving modes, that's nice! There's a ton of customisable shortcuts at the top and at the bottom of the screen (eg can set shortcuts for car, assists, lane assist, heated front windshield at the top; media, phone, navigation, android auto/carplay shortcuts at the bottom) The widgets on the infotainment screen are slightly less customisable but that doesn't really bother me: there's a couple of templates that you select from when creating pages/screens, previously you had more freedom here. I wish the HOME button was slightly bigger though. It was easier to press it on mk4 infotainment screen as it was actually a separate "button" on the left of the screen in mk4. Now it's an icon on the screen. The style of the integrated navigation system feels more modern but haven't used it that much as I'm more of an Android Auto user. Audio As mentioned, my new mk4.5 has Canton sound system. My initial reaction is that's it's not much of an improvement (still), let's see if I can figure out some good settings for it. I did have to check whether the subwoofer (squeezed into the spare wheel compartment) actually worked. Yeah, you can feel and here the vibration when you open the boot but not that much in the driver's seat. I do hope that the only result of the subwoofer won't be the body panels falling off in the back and that I can at least feel the bass when that's happening. There is an extra setting to adjust the subwoofer in the Sound menu. So in short, default settings seem a bit lacklustre but I still need to play around with settings before drawing a final conclusion. Some missing features/changes I've encountered some inconveniences on the new mk4.5 (not a deal breaker though) I think the biggest feature that's missing on the mk4.5 and that I found quite useful as well is the lack keyless lock/unlock on the rear doors. In other words, when you previously could unlock the car by just pulling the read door handles and it would unlock (and could also lock it using rear doors) then that's now gone. You have to take an extra step to touch the front door handle. Another annoyance that I found is that the speed limit warning is turned on each time you switch on the ignition. Unfortunately that's done so to comply with legislations (manual says so). However, Skoda did add a shortcut to disable it quickly (same button and place where you can disable Lane Assist). However, not all has been perfect! When I logged in with my Skoda account into the car and added myself as the main user, it wanted to load some settings which I assume were from the mk4. It did load my seat position but also a lot of icons appeared in the infotainment menu that were just loading (had the loading animation). Perhaps there's a more clever way to solve the issues but I eventually deleted and recreated my Skoda account. I took the car for a first proper drive over the weekend and had a yellow/amber "Emission control system fault" icon appear in the instrument cluster. No errors/warnings in the infotainment menu (status is fine there) as well and car drives fine as well. I plugged in my bluetooth OBD scanner to see what it comes up with and it reported fault codes P2080 (P2080 Exhaust Gas Temperature Sensor Circuit Range/Performance Bank 1 Sensor 1) and P2084 (P2080 Exhaust Gas Temperature Sensor Circuit Range/Performance Bank 1 Sensor 2). So now I'm taking it back to the dealership. I hope it's just an improperly installed sensor (as per repair manual it seems that both sensors are wired into the same connector) but let's see. That's it for now. Feel free to ask questions and I'll try to answer them. And some pictures as well:


 21 points
 -
20 pointsWhile everyone’s entitled to their opinion, I think the way one has chosen to express it is unnecessarily derogatory. It’s one thing to prefer another website, totally fair, we all have our preferences. However, t’s another thing entirely to come into this community and trash the site in such a dismissive way. If the roles were reversed, I’m sure VerticalScope the owner of the site you prefer would be thrilled to know one of their members was out publicly belittling other communities online. That kind of behavior reflects more on the individual than on any platform they’re talking about. There’s always room for improvement in any community, and thoughtful, constructive criticism is always welcome. But this kind of negativity doesn’t build anything, it just tears down. If you’ve got suggestions, let’s hear them. If not, maybe consider the kind of energy you’re bringing into the space. We’re all here to make things better, not bitter. Enjoy your site, and don’t let the door hit you backside on the way out…20 points
-
20 pointsSo the time has come to move my beloved Octy on and I’m super pumped to say that I’ve paid my deposit on this lovely lean green machine 💚 It’s a 2019 Superb SportLine Plus 2.0 TDI 150 DSG with the following options Variable Boot Floor Folding tow bar Exclusive Dragon Green paint That’s all it has for now but there’s a laundry list of retrofits to get through on it in time. It’s having a service and DSG oil change currently along with a full prep this week for collection in early March. I legit can’t wait to finally be a Superb owner!!!!20 points
-
19 pointsDue to high number of requests let me make some short summary of units that can be installed in Octavia III cars. I have focused only on MIB2 / MIB2.5 units, to indicate differences between them. Simplified Bolero MY15 unit 5Q0035819 (without DAB) or 5Q0035820 (with DAB) Simplified Bolero MY16 unit 5Q0035819A (without DAB) or 5Q0035820A (with DAB) Simplified Bolero MY17 unit 5Q0035819B (without DAB) or 5Q0035820B (with DAB) Simplified Bolero MY18 unit 5Q0035819C (without DAB) or 5Q0035820C (with DAB) Bolero MY15 unit 5Q0035840 (without DAB) or 5Q0035842 (with DAB) Bolero MY16 unit 5Q0035840A (without DAB) or 5Q0035842A (with DAB) Bolero MY17 unit 5Q0035840B (without DAB) or 5Q0035842B (with DAB) Bolero MY18 unit 5Q0035840C (without DAB) or 5Q0035842C (with DAB) Bolero MY19 unit 565035840 (without DAB) or 565035842 (with DAB) Amundsen MY16 unit 5Q0035864A (without DAB) or 5Q0035874A (with DAB) Amundsen MY17 unit 5Q0035864B (without DAB) or 5Q0035874B (with DAB) Amundsen MY18 unit 5Q0035864C (without DAB) or 5Q0035874C (with DAB) Amundsen MY19 unit 565035864 (without DAB) or 565035874 (with DAB) Columbus MIB2 unit 3V0035020x (with DAB, with regular Bluetooth, without LTE Modem) Columbus MIB2 unit 3V0035021x (with DAB, with premium Bluetooth, with LTE Modem) Columbus MIB2 unit 3V0035043x (without DAB, with regular Bluetooth, without LTE Modem) Columbus MIB2 unit 3V0035044x (without DAB, with premium Bluetooth, with LTE Modem) Columbus MIB2.5 unit 565035020x (with DAB, with regular Bluetooth, without LTE Modem) Columbus MIB2.5 unit 565035021x (with DAB, with premium Bluetooth, with LTE Modem) Columbus MIB2.5 unit 565035043x (without DAB, with regular Bluetooth, without LTE Modem) Columbus MIB2.5 unit 565035044x (without DAB, with premium Bluetooth, with LTE Modem) All MIB2 units (as well as Columbus MIB1 which is not listed here) work with 800x480 pixels screens, either 6.5 or 8 inch. MY15 unit support MirrorLink only (no support for SmartLink). SImplified Bolero units do not support rear view camera and voice command. Simplified Bolero, Bolero and Amundsen MY15 and MY16 have old style (rotating, monochrome) menu, with only 1 skin having 5 memory buttons in radio and phone menu. They don't support for APP key in 8 inch FL screens. Simplified Bolero, Bolero and Amundsen MY17 have old style (rotating, monochrome) menu, with 2 skins having 5 or 6 memory buttons in radio and phone menu. It may also support Media Command (depending on FEC.SWaP codes installed). Simplified Bolero, Bolero and Amundsen MY18 has both old style (rotating, monochrome) and new style (pictures, color) menu, with 2 skins having 5 or 6 memory buttons in radio and phone menu. It may also support Media Command (depending on FEC. SWaP codes installed). Columbus units have built-in DVD drive and HDD for maps and audio / video files. Only Columbus units can play video files from USB/CD/DVD/SD. Every MIB2 Columbus unit can be reworked into MIB2.5 unit if required. MIB2.5 Columbus requires new 9.2" screen 5E0919606D. Every Columbus unit can drive directly subwoofer and central speaker (although this setup is not officially supported by Skoda). "x" at the end of Columbus units model number is letter A/B/C/D. Can also be missing. It makes no difference, just indicates original SW release family. Every of listed above units can be reworked into Plug&Play version (no need to visit SKODA dealer).19 points
-
Latest Updated Speedcams - December, 2022. It's been a long while but at last here's the latest update of my customised version of EUR Speedcams ( December, 2022). They consist of the full EUROPE speed cameras which I've split up into four consolidated poi categories i.e. Fixed Speedcams, Average Speedcams, Variable Speedcams and Redlight Speedcams. They come supplied with my own preferred personal choice of icons, shown below, to match each of the speedcam categories. Remember to Install them as I explained in the first post in this thread i.e. after extracting the zip file remember to open the newly extracted folder and place only the PersonalPOI folder and metainfo2.txt file onto your sd card ( Please Note: a usb stick will not work! ). Also, please remember to select/tick the relevant newly added poi categories and the poi audible warning alert in your infotainment map menu settings after performing the update or they will not display on your map or audibly alert you. Hope you all enjoy them! EUR Speedcams December, 2022.zip *** A brief update*** For all those who have asked - I am still continuing to update these files but since the Covid situation I have found it difficult to get hold of a good FREE reliable updated database. I continually regularly check the forums and when I come across a suitable database I use some software to check the cameras in my area before I decide whether to convert and compile them as it does take a bit of time and effort to accomplish this. For instance, some average speedcams were installed about 3 years ago in my area but no database has yet reflected this change. It's therefore been pointless doing any updates. Thankfully, this new updated database has finally recognised them so perhaps things are starting to get back to normal. Rest assured though these files will be updated as and when I come across any further suitable databases.


 19 points
 -
Read the guide below and watch the YouTube video which is extremely useful and shows you an update process in real time. Only perform this procedure if you are confident in doing so and it is at your own risk. Apparently, Skoda has stated this will be the last major software version update for the Skoda Octavia Mk4s, although I imagine the mid-Mk4 facelift models will get further updates. I applied the update to my Octavia Estate First Edition 2021 plate and all seems to have gone smoothly but it goes without saying manually update only if you are confident performing the procedure and it's at your own risk. FYI, I updated from version 1969. You will need an ExFat formatted USB-C type drive - oddly my Sandisk Micro SD Card with USB-C adapter wasn't detected by my Octavia so I switched to a 1TB USB-C Lacie hard drive I had lying around and that worked fine. You can tell if your drive is "compatible" and has mounted when you start the update process as, at one stage you will have to select either "USB1" or "USB2" - if a drive is mounted/detected one of these will be in bold. 1. Download the compressed package from one of the two links below: Octavia Infotainment Update Version 1985 - Google Drive https://e.pcloud.link/publink/show?code=XZSh8xZ7iUQu9K1u4uwTGbHqtxFE7m0OFtV 2. Create a temporary folder on your PC or Tablet, for example, MU1985 3, Locate the downloaded compressed file package and then right-click on it or press and hold on it, so the menu appears and it should offer you the opportunity to Extract here or elsewhere, tell it to extract the files to the MU1985 folder and let it get on with it. When it has finished extracting the files you will have the following TWO folders (previously there has been a third file but not this time, just the two folders below): Data Meta 4, Copy the above two folders directly to the root of your ExFat formatted UB-C drive. These two folders need to be at the root / top level of the USB-C drive, not contained in any other folder and you don't want anything else on that drive THERE MUST BE NO OTHER FILES / FOLDERS THAN THIS. Once done you are ready to move to your car to start the update. 5, Insert your USB-C drive into one of the front USB ports and put your car in ignition mode, which you need to do to apply the update, just press the Start Stop button on its own, without depressing the Clutch / Brake which you would do if you were starting the engine I also switched off the climate control before proceeding although I imagine the Update process would disable its functioning anyway. At this point, you must have a full or very well-charged car battery so that the car doesn't shut down halfway through the process. The ignition needs to be ON, the Engine needs to be OFF (NOT RUNNING)! DO NOT START IT DURING THE PROCESS. 6. Hold the "Menu" button until the engineering menu appears. 7, Watch this video which essentially shows you in real-time the update process. It's in German but it's easy to follow and the video relates to software version 1941 but it's essentially the same process. https://youtu.be/4AsSbGd3caU Be warned, there are moments when the screen goes black, the system reboots and the CPU upgrade stage looks like it has frozen but it hasn't. Just be patient, let the system do its thing and you should get a successful update of your system. UNDER NO CIRCUMSTANCES MUST THE PROCESS BE STOPPED ONCE IT HAS STARTED OTHERWISE YOU'LL MORE THAN LIKELY NEED A NEW INFOTAINMENT SYSTEM. Notes. After it has finished updating the system, give it a couple of minutes to ensure that all is well and like it shows on video press resume an wait for about 90s or so and the system will restart just, like in the video. DO NOT START THE CAR UNTIL THE SYSTEM HAS RESTARTED After the update the built-in manual is unlikely to be available for about 48hrs, it does come back! You will more than likely receive another OTA update, it's OK to accept it. Ultimately if you are at all worried about doing it, take it to a VW Independent or Skoda dealer and ask them to do it for you.18 points
-
After seeing so many people doing it the wrong way, I decided to make my own video18 points
-
18 pointsMine. I have it 5 months now, the first 3 we were in lockdown and it didn't move much!
 18 points
 -
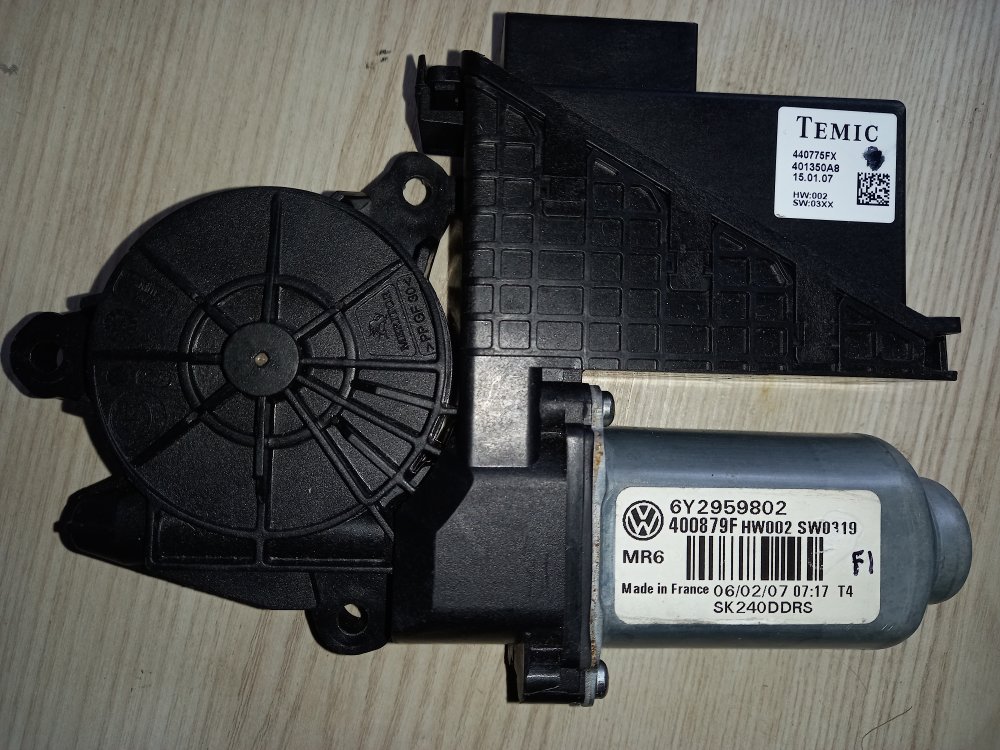
17 pointsHello Briskodians, I would like to offer a repair service for some types of electric window motor module as fitted to a few Skoda models, as well as one or two VWs. At this stage it applies only to two specific, exact part numbers fitted to the driver's side front door, as follows: 6Y2959802 Fitted to later Mk1 Fabia, from around October 2004. 6Y1959801 Fitted to Very early Mk2 Fabia and Roomster until end of October 2007; as well as 9N3 Polo and a few Transporters. (And some late 9N Polos I have learned). Private Message me a VIN if you'd like me to check whether your car has this part number fitted. (As described a few posts below, either of the above part numbers + suffix A on the end can also be repaired. Also happy to try with units of the subsequent generation, with part numbers 6Q1959801F, G, H, or J.) Note that both of these are driver's side units, the difference in part numbering is due to the orientation/positioning of the motor module on the panels they mount to. These parts suffer a type of intermittent, progressive failure where they 'sometimes work fine, sometimes don't work at all'. Eventually they just completely stop working. This is what I can fix for you. I will test your faulty unit, confirm the problem, repair it to full working order and post it back to you for £59, total. You'd post it to me - less than 1Kg so can be sent for around £4.25 on a tracked24 service purchased online at Royal Mail. I would aim to turn it round within 2 days of receipt, and send it back tracked24. This is the what the part looks like: Central locking via remote will still work in the absence of the window module, so you will be able to secure the car as normal while it is away. Obviously you'll want to ensure that both front windows are fully shut, as in the absence of the driver's side module the passenger side one will not operate. New units are no longer available from Skoda/VW, and ebay 2nd hand ones with these part numbers tend to go for big bucks. I will charge you just £59 including return postage. Cheers, Pete Edit 30/08/25: To get in touch, please click on my username which will take you to my profile, with contact info.
 17 points
 -
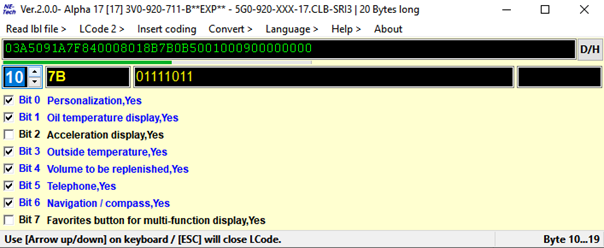
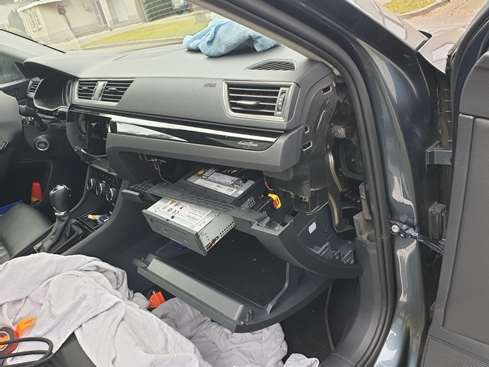
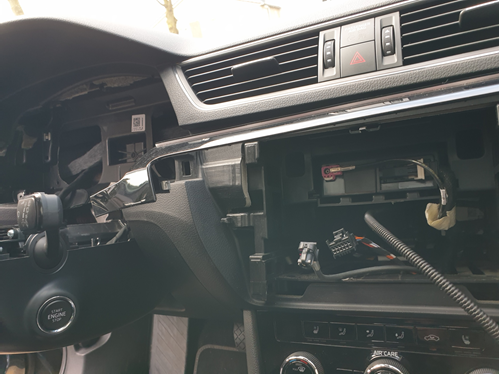
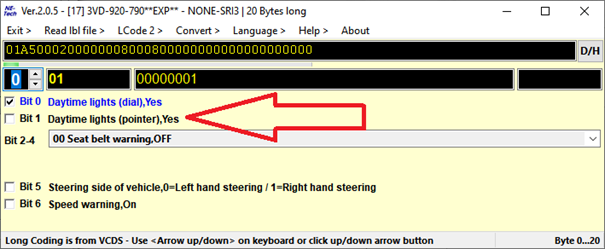
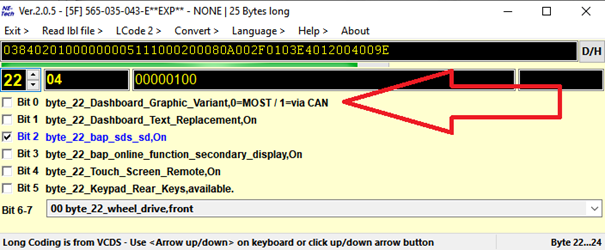
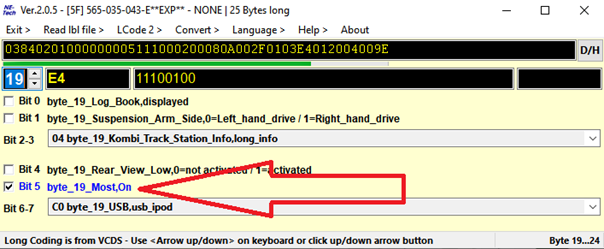
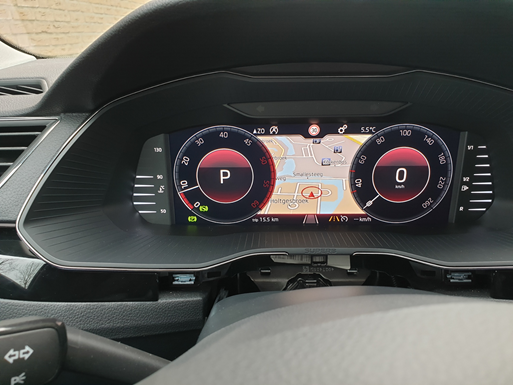
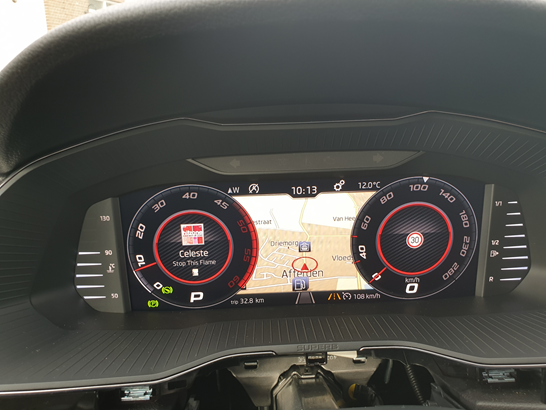
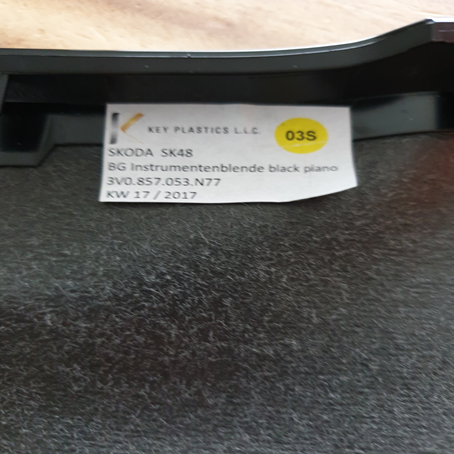
17 pointsLast week I retrofitted a VC to my Superb 2.0 tdi MY18. Because the info on this subject is scattered all over this and other forums I decided to bundle it into a how-to. First of all a big thank you to RomanB, langers2k, Richie2019 and Camarao69 for the help with coding and with finding the correct parts. Before you start, make sure your car is able to do the retrofit. As I understand it, you will need a Mib 2.5 and also the correct gateway to be able to have a map display in the VC. If the part number of your gateway starts with 3Q0 it should work. Maybe also with other part numbers, but you will have to check. You can check the part number of your gateway with VCDS. What about Amundsen? I have read that with certain types of Amundsen it should also be able to show maps on VC. But coding is a bit different. And, as I don’t have Amundsen, I can’t really tell. I ordered the VC on ali: https://nl.aliexpress.com/item/1005001320853346.html?spm=a2g0s.9042311.0.0.27424c4dWnYaQ3 This VC comes with the optical MOST cable you will need for display of maps on the VC. Before you order, send the seller a message and ask for a discount. Also ask for him to declare a lower value (+/- 100 dollar) to customs. I paid around 60 euro import tax based on this value. If you have the CANTON sound system, you will need a Most splitter. https://nl.aliexpress.com/item/1005001590588805.html?spm=a2g0s.9042311.0.0.27424c4dWnYaQ3 Or https://nl.aliexpress.com/item/33003652246.html?spm=a2g0s.9042311.0.0.27424c4dysj90l (about the MOST splitters: I ordered both, but you will only need one of them. The first link looked like the better quality item, but it had 2 male connectors and 1 female. What you need is 1 male and 2 female connectors. The VC came with a spare female connector, so I used this spare connector to convert the splitter into 1 male and 2 female. It’s easy, just mind the arrows on the connector. They depict the data stream direction. The item from the second link is ready to be installed and does not need to changed. However just eyeballing it, it did not look as good as the one in the first link.) Vag audio removal tools: You need 4 pieces. https://nl.aliexpress.com/item/1005001502327510.html?spm=a2g0o.productlist.0.0.61f03aa8VhZ892&algo_pvid=87f048ac-c0af-469f-a3a5-aa59929ac254&algo_expid=87f048ac-c0af-469f-a3a5-aa59929ac254-0&btsid=0bb0624716157231348261767efc60&ws_ab_test=searchweb0_0,searchweb201602_,searchweb201603_ Trim removal tools: https://nl.aliexpress.com/item/32963954415.html?spm=a2g0o.productlist.0.0.477d61553u3Dn4&algo_pvid=40621dfe-6b26-4916-954e-3a1a0de8cdfc&algo_expid=40621dfe-6b26-4916-954e-3a1a0de8cdfc-0&btsid=0bb0623d16157232258103800e5d6b&ws_ab_test=searchweb0_0,searchweb201602_,searchweb201603_ And a Vas5054a for pairing the keys to the cluster via remote coding. Links to a Vas5054a come and go. They don’t work for long. Look on ali and read the reviews. Disregard complaints about the software as you will not need to install it. Often there are choices in quality. Choose the best one available. Bluetooth is not necessary, I just used a usb cable. And you will also need a windows laptop. I also ordered a screen protector for the mib 2.5 and for the VC. Just to protect them while do the installation: https://nl.aliexpress.com/item/32931529165.html?spm=a2g0s.9042311.0.0.27424c4dtJsu3p and https://nl.aliexpress.com/item/1005001805982326.html?spm=a2g0s.9042311.0.0.27424c4dtJsu3p And of course you will also need a VCDS-cable or a similar device. Wait until the parts arrive and, in the meantime, find an online coding service for pairing the keys to new cluster, remove component protection and to set the odometer to the correct setting. I used: Vag retrofit and Coding. Telegram: https://t.me/vagretrofit Facebook: https://www.facebook.com/vagretrofitcoding/ Cost: 75 euro for 2 keys and 100 euro for 3 keys. Maybe there are cheaper/better alternatives, but this worked for me. The VAS 5054a comes with software. You do not have to install this software for use with a online coding service. You will only need to install TeamViewer. Before you start tinkering: Make an autoscan with VCDS and save the log to your computer. This saved my ass, because after the online coding of the VC, my sunroof lost it’s coding. With the autoscan available it was easy to fix. I also made screenshots from every byte of my old cluster, using the long coding helper (example, of just one byte, below) With this, it’s easier to setup the VC. See the service manual how to unclip the various trim parts. There is a certain sequence in releasing the clips. Before I used the online coding service, I installed the MOST cable. It was a pain. The wires behind the Mib unit in the glovebox were too short. So I needed to dismount the entire glovebox to get access.I connected the MOST splitter to the existing MOST cable and the new MOST cable. Removed the Mib headunit and old cluster to pull the new MOST cable in place. If you don’t have CANTON there may be a protective cover over the MOST connector on the Mib. After you have pulled the MOST cable into position, reconnect your Mib headunit. It needs to be connected while the online coding is being done. This it to remove component protection. Also reconnect your old cluster. You will need it connected at the start of online coding. I also tested my audio, just to be sure it was working after the MOST splitter install. A video which gives an idea how to remove the cluster: (the screws are behind the left and right trim parts. Not under the center one) A picture from pulling the cable: After all this you can start with the online coding process. Have all you keys readily available. It took 2 full hours in my case. When you install the VC, make sure to remove the grey protector in the MOST connector on the VC: After the online coding you can start your car, but your dash will light up with faults because of the lack of coding. Coding the cluster: I now took all my screenshots of the long coding from my old cluster to code the VC. Just one note: Leave Byte 0 bit 1 unchecked. It will give an ‘’entry out of range” error message if you try to code it. After you coded everything in, the error messages will disappear. Just take caution with your fuel gauge and make sure it is accurate so you don’t run out of fuel. My fuel gauge tends to read fuller than with the old cluster so I don’t trust it yet and may change the coding on it. Coding 5F (mib): Long coding: Uncheck byte 22 bit 0: Make sure MOST is on (for non CANTON cars) Byte 19 bit 5 Adaptation (5F): For imaging through MOST: - ENG122230-ENG142097-Dashboard_Display_Configuration-ability_switch_nav_maps,OFF - ENG122230-ENG122343-Dashboard_Display_Configuration-call_picture,On - ENG122230-ENG122341-Dashboard_Display_Configuration-coverart,On - ENG122230-ENG122340-Dashboard_Display_Configuration-crossroad_detail_map_compression_mode,H264 - ENG122230-ENG122344-Dashboard_Display_Configuration-crossroad_detail_map_resolution,resolution_3 - ENG122230-ENG127006-Dashboard_Display_Configuration-crossroad_detail_map_transmission_mode,MOST_streaming - ENG122230-ENG142153-Dashboard_Display_Configuration-dynamic_icon,0 - ENG122230-ENG127501-Dashboard_Display_Configuration-fastlist_most,On - ENG122230-ENG122338-Dashboard_Display_Configuration-navigation_map_compression_mode,H264 - ENG122230-ENG122339-Dashboard_Display_Configuration-navigation_map_resolution,resolution_3 - ENG122230-ENG127005-Dashboard_Display_Configuration-navigation_map_transmission_mode,MOST_streaming - ENG122230-ENG122342-Dashboard_Display_Configuration-stationart,On For the Virtual Cockpit menu on the MIB: - IDE11524-ENG137043-Vehicle function list bap 2nd generation: expansion-display_configuration_0x45, Activated - IDE11524-ENG137044-Vehicle function list bap 2nd generation: expansion-display_configuration_0x45_msg_bus, Comfort data bus - ENG122227-ENG142087-Car_Function_Adaptations_Gen2-menu_display_Display_Configuration, Activated - ENG122227-ENG142088-Car_Function_Adaptations_Gen2-menu_display_Display_Configuration_clamp_15_off, Not Activated - ENG122227-ENG142089-Car_Function_Adaptations_Gen2-menu_display_Display_Configuration_over_threshold_high, Activated - ENG122227-ENG142090-Car_Function_Adaptations_Gen2-menu_display_Display_Configuration_standstill, Not Activated - ENG122227-ENG142091-Car_Function_Adaptations_Gen2-menu_display_Display_Configuration_after_disclaimer, Not Activated Now restart the MIB. (hold power button until it reboots) You now have the normal dial VC: If you want to have the carbon look: 17 – instrument, adaptation: - IDE12467-Tubes illustration, Variant 3 - IDE02489-Display depiction, Variant 1 or 3 (can’t remember which one) If you want to change the end value of your speedometer because of reasons: 17 – instrument, adaptation: IDE13094-Tachometer end value. I used setting Variant 1 for 280kmph. Might be different for MPH. Trim Piece I needed I new trim piece which is now on order. As I understood the partnumber you need can be easily obtained. Note the partnumber on the white label of your old trim piece. In my case 3V0 857 053 N77. N77 is the colour code for my trim piece. To obtain the part nr for the new trim piece just add an ‘A’ after 053. So in my case: 3V0 857 053A N77 is the part nr for the new trim piece. There is also the possibility to fit new MFSW buttons with a VIEW button. - 3V0 919 719 E (manual) - 3V0 919 719 F (DSG) - 3V0 919 719 G (manual + heated) - 3V0 919 719 H (DSG + heated) I've been told that DSG versions work in manual cars and that heated versions work without heated wheels. I did not fit these buttons yet so I do not know if these part numbers are fully correct. If there are any omissions or errors please do tell. Also feel free to add more adaptations.

 17 points
 -
Hi all, As many VAG cars, my Superb Mk3, is fitted with a DSG6 (DQ250) gearbox. Here is a tutorial to change its oil and filter on your own. You'll probably tell me: What's the point with it? Just have a look on Google or YouTube and you'l find plenty of them! That's true, but having done this exercise, I could see that it is very rare to have all information in a single tutorial. I will therefore try to be as exhaustive as possible. Here a list of some Skoda models also DSG6 equipped (I nevertheless let you check on your own, since depending on engine type or MY, some may be DSG7 fitted⚠️ instead of DSG6) ! - Octavia 2 - Yeti - Kodiaq - Superb 2 - Superb 3 First of all, here is the DQ250 gearbox: We're going to focus on the following items: #17: Filter housing - Tightening torque : 20Nm #18: O-ring - P/N N910 845 01 (normally sold with the filter) #19: Oil filter - P/N 02E 305 051C #26: Oil pipe - Tightening torque: 3Nm #27: Seal ring - P/N N 043 089 2 (normally sold with the sealing plug) #28: Sealing plug - P/N N902 154 04 - Tightening torque: 45Nm Not shown on this pic: DSG Oil - P/N G 052 182 A2 - 6l - Difficulty : 2 - Time needed : approx. 2h - Number of person needed : 1 - Necessary tools : ¤ VCDS software (or similar, To be confirmed) ¤ 24mm socket ¤ 8mm and 14mm Hex ¤ Torx 25 and 45 ¤ Ratchet or classic wrenches for disassembly ¤ Torque wrench(es) to apply specified torques (3 / 20 / 45 Nm) ¤ Short and intermediate extensions for ratchet or torque wrenches to enable easier access to screws ¤ Small flat screwdriver ¤ Filling hose VAS6262 ¤ Wooden toothpick ¤ Small fork ¤ Slip joint pliers ¤ Oil drip tray ¤ Twine (about 80cm long) or an old metallic hanger (wire one) ¤ Wide masking tape ¤ Rags ¤ Lifting means Concerning VAS6262, you can find one on numerous website at various prices. Without switching to a much more expensive pump model, I suggest taking a filling hose with a 1/4 turn shut-off valve close to the adapter on the can side. These ones are less widespread but still at affordable price and of course easier to use, since you can work without being 'showered' with oil. I've chosen this one on toolstogo-uk.com https://www.tools2go-uk.com/13664247/gear-oil-filling-hose-for-vag-dsg?g…=&Lng=en Dealing now with the DSG oil kit, you really have to be careful on the kit content ⚠️. Indeed some kits only content DSG oil and oil filter, but no sealing plug nor seal ring! ⚠️ Warning: Prices can really be different from a website to another (starting form 90€ up to ~200€ !) Chose the right one! After hours of searches and checks, I finally bought the Febi-Bilstein kit, which can be found on autodoc.co.uk for 100€-ish https://www.autodoc.co.uk/febi-bilstein/15821763?search=FEBI BILSTEIN Transmission oil change kit (171762) It effectively contains: - 6l of gearbox oil - DSG oil filter (#19) and its O-ring (#18) - Sealing plug (#28) and 2 seal rings (#27). By the way, I still don't understand why 2 rings?🤔 Note: I did not take time to ask for OEM spare parts prices by my local dealer. Step #0 : Preparation You need to lift the car high enough to get under the car and to get enough space to move your arms comfortably around the gearbox. Note: Though you've lifted the car, it needs to remain horizontal to make a proper filling with right oil level (see step 7). Step #1 : Air system removal Start with removing the air box. You first have to remove the 2 T25 Torx screws (#1), then unclip the cover on the rear face (#2) and lift it by rocking it as shown by arrow to avoid breaking the 2 lugs at the front side of the cover (#3). Finally simply push to the rear to release the lugs (#3). You now have to unclip the 2 lugs, where the 2 torx screws you have just removed where tightened (#1). Be careful for this step, since these 2 lugs may break. I've seen 1 or 2 pics of broken lugs on this forum. ⚠️ Then, you need to push the airbox backwards, so that its front side can 'rip' other the bonnet slam panel. Then unclip the hose (#3) and with a rocking motion back and forth, release the front side so that the airbox can be fully removed. However, do not hesitate to put one hand on the back of airbox to be able to pull forwards more easily (#4) and take the airbox out, which is quite large. This being done, you need to remove the air filter housing. This is simpler. Start with unplugging the small hose (#2) at the air filter housing outlet and unplug the air flow meter connector (#3). ⚠️Be careful: There's a small grey latch on the connector (if equipped) to unlock before pulling the connector off, otherwise it won't come out or you risk ripping it off. Now, remove the metal collar (#4) on the large air hose downstream the air flow meter. Use a slip joint plier for this. You can now unclip the air filter housing, which is simply fitted onto 3 shock absorber pins (#1). Pull vertically upwards. Don't hesitate to pull hard (continuously and not jerkily), it holds up really well! The 3rd pawn is under the air box (dotted circle), but it comes out quite easily when the other 2 are already out. Once the air filter hosing has been unclipped, all you have to do is disconnecting the large hose, downstream from the flow meter. Be careful to 'close' the hose to avoid any foreign object damage or even just dust towards the engine. Masking tape will do do the job! Step #2 : Battery removal To take it out, you need to remove a 13mm hex screw, which tightens a retaining bracket et holds the battery in place. This screw is on the front of the battery (#5 on previous pic). Then remove both battery terminal covers (by lifting vertically) to access the clamping nuts of both battery terminals posts (10mm Hex socket). Warning⚠️: Start disconnecting the "-" terminal post before disconnecting the "+" terminal post! For more safety, wrap them with masking tape as well if you want. Battery can be then removed easily, even if it weighs! Step #3 : Battery fixing plate removal You can now access the battery fixing plate, which is held by 2 10mm Hex screws (blue squares) and one 10mm hex nut. Sorry, the latter is out of the pic, but it can be found easily (just follow blue arrow). Be careful don't be too quick at this step, several fixing staples are indeed attached to the battery holder. You might be tempted to cut the tie-wraps, but these are attached to small brackets, which are simply stapled (red circles) or clipped (orange circle) to the battery fixing plate. Staples can be removed by simply pushing them with a flat screwdriver, while the clip-on holder can be pulled out with a small fork. There is now a small Control Unit attached to the battery fixing plate. Unclip the small lug (red circle) and pull the control unit vertically (as suggested by arrow) to remove it from the battery fixing plate: The battery fixing plate can now be removed. Step #4 : Oil draining You can finally access the DSG oil filter housing: A 24mm hex socket is necessary to remove it. Once done, protecting the filter location against foreign object damage or dust is necessary. Aluminium foil will do the job. FYI, here is the difference between a new filter and a filter with 60,000 km on the clock. Now remove the sealing plug with the 14mm Hex. Once done, the oil flow will be very thin, due to the oil pipe. Remove the oil pipe, using a 8mm Hex. After that, the oil flow is more important. Step #5 : Oil filter replacement Once the gearbox is empty, you can put back in place: - The Oil pipe (still using the 8mm Hex. Tightening torque = 3nm). If you don't have a torque wrench complying with such a low range. Take it easy! Just to give an idea, it is roughly the same order of magnitude as for closing a jam jar lid. (Sorry, this is the only simple image I found quickly ...). Well just keep in mind, it's light !! - The new DSG oil filter (don't forget to moisten the O-ring in its hole) - The new O-ring on the filter housing (don't forget to moisten this one too) - The filter housing, which must be tightened at 20 Nm (with the 24mm Hex socket) Step #6 : Reassembly Steps #1 and #2 can be processed in the reverse order to reassemble : - The battery fixing plate (and the small control unit) - The Battery - The air filter housing and the hoses - The airbox. Step #7 : Oil filling The filling hose can now be screwed in the sealing plug thread At the other end, donc forget to shut the 1/4 turn valve, before screwing it onto the oil can. To make it easier, you can attach the can to the bonnet with a 80cm long twine or an old metal hanger (wire one), that you can shape to transform it as a can holder. If you want to fill the gearbox faster, you just need to make a little hole in the can bottom (now upside down ) to enable air getting in the can. Of course, don't forget to open the 1/4 turn valve. http://img.xooimage.com/files1/b/e/c/whistle-1bb1.gif You have to fill approximately 5,5l. Once again, don't forget to shut the 1/4 turn valve upon each oil can change http://img.xooimage.com/files1/b/e/c/whistle-1bb1.gif. Warning: Do not make a hole in 6th can, otherwise there could be some side effects... http://img.xooimage.com/files1/3/e/0/33-2bc7.gif When the 6th can is half empty, shut the 1/4 turn valve, remove the can from the filling hose. Put now the free end of the filling hose into the dip tray. You can now open the 1/4 turn valve to start adjusting the oil level Step #8 : Oil level adjustment ⚠️ Now, start the engine and keep your foot pressing the brake pedal. Move the gear lever in accordance with the following sequence: P to R, wait 3s R to N, wait 3s N to D, wait 3s D to S, wait 3s S to D, wait 3s From this point, most other tutorial suggest getting back directly to P. I personally rather got back step by step, still waiting 3s after each step. Once back to P, you can remove your foot from the brake pedal, but keep the engine idling. Now, connect your VCDS cable and select the gearbox controller (02 Auto Trans): Once in the gearbox controller menu, there are 2 options: 1) Either get into "08 Meas. Blocks". then in the new window, get into "Group 019" and check the Temperatur cell of "ATF (Auto Tranmission Fluid)" parameter. This is at least what I've found in several other tutorials. But though owning an official VCDS cable, the "08 Meas. Blocks" is greyed on mine. (may be my Micro-CAN version starts reaching its limits). Hence I had to use option #2 below. 2) Or get into "Adv. Meas. Values" menu: From this point, type "trans" in the search cell to find all parameters related to the gearbox. In the results list, tick "ATF temperature - Transmission fluid temperature": Now with the engine still idling, just wait for the oil temperature to get between 35 and 45°C. It may take several minutes. Be patient. When oil temperature is close to 35°C, you can remove the filling hose completely. Don't worry temperature is increasing really slowly. The oil flow from the oil pipe starts decreasing. Once the oil temperature is within the 35-45°C range, you can observe that a slight amount of oil flows out via the overflow tube every 30 seconds, independent of the oil level. This is caused by oil pulses, which cool down the coupling. According to workshop manual, this oil quantity is not a criterion to determine the correct oil level. Therefore, they must not be taken into account when assessing oil level. You can now screw back the sealing plug (with 14mm Hex). Tighten it at 45Nm. From this point, you only need to stop the engine, disconnect your VCDS cable and put the soundproof housing back in place under the engine, and... That's it! Well, non counting the specific tools, you've just saved ~200€! Note: I'd also like to write special Thanks to @J.R., who helped me to translate some technical words I was missing! Much appreciated.👍 _17 points
-
16 pointsAfter being pestered by my Daughter for the need to charge a phone in the back seats of the car. I thought I would go OEM and fit the rear USB sockets in the centre console as my model of car didn't have them. Parts needed; I ordered these from www.skoda-parts.com, it took 1 week to deliver the parts from Europe. The only thing I didn't order from Skoda was the actual USB unit, as it worked out too expensive, it was £45 for the usb and extra for the cable. I got this from aliexpress instead as it worked out around £20 with shipping. https://www.aliexpress.com/item/4000454430275.html?spm=a2g0o.search0302.0.0.48f2d710S9U8kD&algo_pvid=d763b097-fa97-4d9d-84fc-cabfb2587725&algo_expid=d763b097-fa97-4d9d-84fc-cabfb2587725-26&btsid=0b0a555a16212796060048113e0e8c&ws_ab_test=searchweb0_0,searchweb201602_,searchweb201603_ These are the parts I ordered from Skoda parts. 5E0 863 284 D 9B9 Storage Compartment - Rear Škoda 1 × 21,84 EUR 5E0 863 229 9B9 Cover left Škoda 1 × 0,53 EUR 5E0 863 230 9B9 Cover Right Škoda 1 × 0,53 EUR 5E0 857 346 A 9B9 Cover Škoda 1 × 7,49 EUR 5E0 857 289 F 9B9 Center Tunnel Cover Škoda 1 × 11,09 EUR POST14.00 Shipping 1 × 16,80 EUR Total price incl. shipping and VAT 58,28 EUR The only tools i needed was a Torx tx20 bit and the ratchet to put it in. Small flat screwdriver to help remove the 12v cigarette lighter socket. A plastic trim remover might also help, but never needed one. A lighter socket removal tool would probably help too as I had to press the tabs in quite a bit, to get the socket out. So I first started off in the rear of the car moving the front seat forward to give me more room to work in, this is how it looked originally. First I removed the ashtray, just open it up, and give it a gentle pull towards you, it should unclip nice and easy. There is an area for an LED at the back of the ashtray which i'm guessing is used in some models but not in mine. Next up put your hands in the hole where the ashtray was up towards the rear vents, just give them a gentle push from behind and they will pop out, put these to one side. Next up remove the 4 torx screws shown in the following picture. Then again I just pulled the trim part towards me, you may use you trim removal tool there are two raised parts which clip in near the bottom shown in the picture. Next up round to the front seat, move the seat back as far as you can just to give you more room to work in. The next thing i did was to pull the bottom trim down this just need a gentle pull downwards and it pops out. again just to give a bit more space to work in. (be careful if left in place when sliding the chair forward as it can get caught up). Following that time to remove the cigarette socket, (It may be a good idea to remove the fuse or take the battery wire off as this socket stays live when the car is off and if you slip with the screwdriver may cause a short). There are two small black tabs near the top which need pressing in to allow the cigarette socket to out of the black housing. I had to press them in up to the point I thought I was going to break something I ended up bending the metal slightly but bent it back before I replaced the socket. So maybe the removal tool is the easier option. Next you want to unplug the socket from the wiring, and remove the black plastic ring. The loom you get with the USB plugs, just plug between the cigarette lighter plug and socket. so you can now plug in the loom to the car wiring and pull the red plug and wire down through the hole. and for now out of lower trim that was removed. The black plastic ring can go back over the new plug. And the cigarette socket can be plugged back in. I left it out of the trim for time being until i could test the usb. After this i fed the wire with the red plug for the USB unit back past the inside of the seat. Then moved into the back of the car, moving the seat forward to allow access. This bit was quite fiddly as my hands are quite large, I fed the wire up with my right hand and had my left hand in the hole where the ashtray was as far forward as it could go under the air vent pipe. it took a couple of tries but eventually felt the wire and managed to pull it through. out of the rear trim. You can see in the picture where it is going up into the trim (it looks like it is looped around the chair but it isn't I haven't pulled it taught yet). Then it was time to screw the new trim piece in put it back making sure it clicks in place then using the 4 torx screws that were removed screw them back in. Next up I clicked the USB unit into the small trim piece, it only goes one way and the aliexpress unit was a perfect fit, I could now plug the red plug into the unit and test it worked.! ....It does. So carrying on I routed the wire where I thought it should go, there was a small hook on the left hand side so used that. and clicked the second trim piece into place. the blanking pieces were next they were straight forward and only go in one way. And the vents were next make sure the vent pipe is seated right as it is loose in there and I had moved it when squeezing my hand in there. These just pushed straight back in make sure you hear them click in place. Also the new smaller Ashtray just clicks in the same as before. Following this i tucked the wire up inside the centre console, and clipped the front piece of trim back in place again it just clips in place nothing too awkward. and pushed the black clip and cigarette socket back into place. The last picture looks patchy its because i had just wiped my greasy fingerprints off of it.!! And Voila one happy Daughter can now charge her phone in the back of the car.
(Medium).thumb.jpg.6688e89b0c63420d94fe0fe1b3f14858.jpg)
(Medium).thumb.jpg.80e46995412b1f29a77887c06ece2f70.jpg)
(Medium).thumb.jpg.3c8c9228442b20201a5f64362ea3c0e3.jpg)
(Medium).thumb.jpg.5663d7810450dbe229e23d285495f1e5.jpg)
(Medium).thumb.jpg.098d0f2f34f3c6a118cd63fa025826fd.jpg)
(Medium).thumb.jpg.2c64e212d58043763669786d1a215c3c.jpg)
(Medium).thumb.jpg.8c4e26ad8c909c4f52f0475819a6e2e0.jpg)
(Medium).thumb.jpg.b9361d4367df025c35b5003c8d05a4dd.jpg)
(Medium).thumb.jpg.d39f8ccf17afebb5293c60a3f0d036df.jpg)
(Medium).thumb.jpg.97c7e4799c5354901245c53053bb9647.jpg)
(Medium).thumb.jpg.f8d640b5fbc1be3c6dc3cb488f3b4f79.jpg)
(Medium).thumb.jpg.09f035abed98cb6cd5b2ac1c1b13c220.jpg)
(Medium).thumb.jpg.c77a90493a1bd50aa374ba08bd6d9b10.jpg)
(Medium).thumb.jpg.71cf9ca808b4fbe753464786eb34fa4c.jpg)
(Medium).thumb.jpg.c58b54466ab242ddb86b9fc64c45f95f.jpg)
(Medium).thumb.jpg.832fd1b17ef10174cbf145c896633a56.jpg)
(Medium).thumb.jpg.85ce909f0f561aa9183bbe955fa339fa.jpg)
(Medium).thumb.jpg.6285e09f9e8d6f129c9f88a528e96e38.jpg)
(Medium).thumb.jpg.6134d597e622f2cd2ba3713be3ebd381.jpg)
(Medium).thumb.jpg.2768b9525fe4159206ef34fc4c83a307.jpg)
(Medium).thumb.jpg.dbc932225a24501736b7ccf9251317d7.jpg)
(Medium).thumb.jpg.62deb2908b1540829b74ccd5bceec512.jpg)
(Medium).thumb.jpg.f2eea7c6e8700ba9c731b75627c2fb46.jpg)
(Medium).thumb.jpg.1df60f214179eed23961ccfdeb0d3f7d.jpg)
(Medium).thumb.jpg.942730103777cbc2dbfe2bf5277de8e2.jpg)
(Medium).thumb.jpg.b6a6defdab135ca181ff14f88f43a05c.jpg)
(Medium).thumb.jpg.d8b9efcc1b06374ae4176ed29ab348c8.jpg)
(Medium).thumb.jpg.059a64aa80d49b0ae90c6e9c973906b3.jpg)
(Medium).thumb.jpg.07002ea95bce34532159f52097ea84e3.jpg)
(Medium).thumb.jpg.7b153c9829d516a761e880409de5a204.jpg)
(Medium).thumb.jpg.a2eb0c055b7e0dd66fc5bc903790cf3b.jpg)
.thumb.jpg.98a993b080ea68559724fbc18a15c173.jpg)
(Medium).thumb.jpg.b36ee1f2e524e536bcf57c7689acd4f8.jpg)
(Medium).thumb.jpg.d48f9fb7b38ab20364bb41085e635b92.jpg)
(Medium).thumb.jpg.f0dc44d0f0bc124af959ebff5e75a8d0.jpg)
(Medium)_LI(Medium).thumb.jpg.54220ce1ec6f8fe721ca1273e144f3af.jpg)
(Medium)_LI(Medium).thumb.jpg.6923ac60f148d97ef78625aa637fe191.jpg) 16 points
16 points -
16 pointsHello there. Freshly downloaded. Take a piece if you need ;) https://1drv.ms/f/c/d868f7f8e8ece8e8/Eh7N58_7gyZCtogSIt8kgisB4ZszuIGLrZTSSsdabNOtZw?e=5mWfuG16 points
-
16 pointsAfter 13 months waiting my SEL iV Plug in Hybrid arrived. All seems good with it so far, just to understand some of the infotainment features!
 16 points
 -
16 pointsWell 13.5 months waiting and I finally collected my Octy Estate vRS yesterday. I couldn't be happier 👍😀
 16 points
 -
16 pointsNew owner, took delivery this week. Pretty happy with the colour!
 16 points
 -
In the style of Jim from Friday Night Dinner.... "Hello All....." It's been a while, nearly 12 months in fact since I gave a proper update, it's been a busy old year. We moved house mid November 2019, not far, less than 2 miles in fact but we have gone from renting to owning again after a few years. Needless to say, the house that was pretty much perfect, move straight in etc has occupied every single hour of spare time and money and the poor car has sat under cover in the new garage. Good news is the house is pretty much finished and the enforced COVID-19 lockdown period has allowed me to finish 5 years worth of house DIY in 6 months! Some of you may remember the slightly bigger garage at the new house, in fact it's a usable large tandem garage that has been significantly enhanced in the period we have been here. I have insulated the roof, plasterboarded, 7x new 6' Twin LED lights, cut and installed a large double glazed window where there was a plain wall, new composite door to the patio as well as grinding the whole concrete floor by hand before laying a screed of Ardex K301 concrete floor compound. Oh yeah and a new electric roller door. The plan was to build a lovely space to keep the car / cars and have a well lit, warm and dry place to do detailing & maintenance, so I have fitted the end of the garage out with units and worktop/tiles to finish it off. Here is how the garage looked to start with.. Fast forward many months of graft, DIY injuries, late nights, early mornings and we're nearly finished now... Coupled with the internals, we have had the front of the house changed, new driveway, fences, as well as rear decking - and I though cars could absorb money.... Upshot is, if anyone's still reading, is that i'll be back on the car soon, getting some more part from TPS the weekend so I've no excuse now to get stuck into it. Just need to Epoxy resin coat the garage floor first.... Thanks for reading! Matt16 points
-
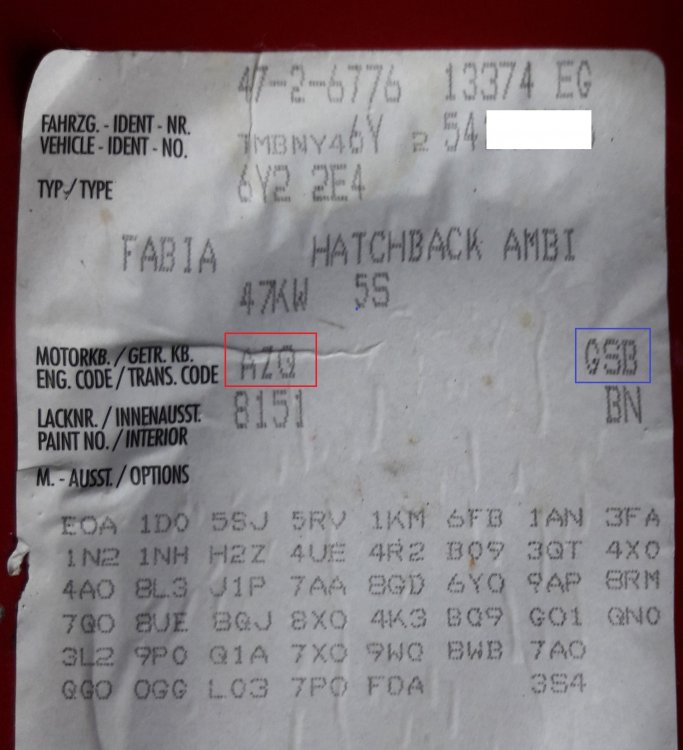
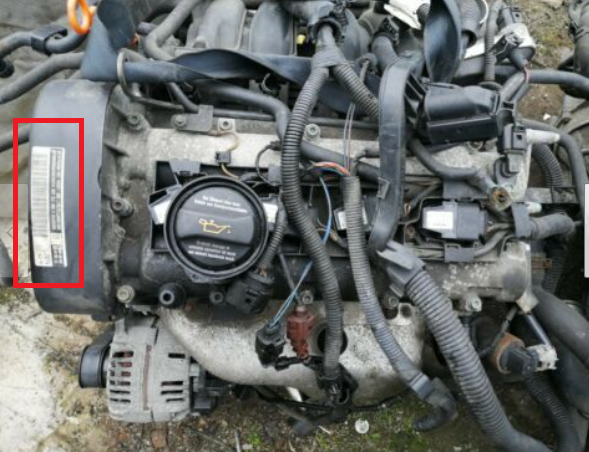
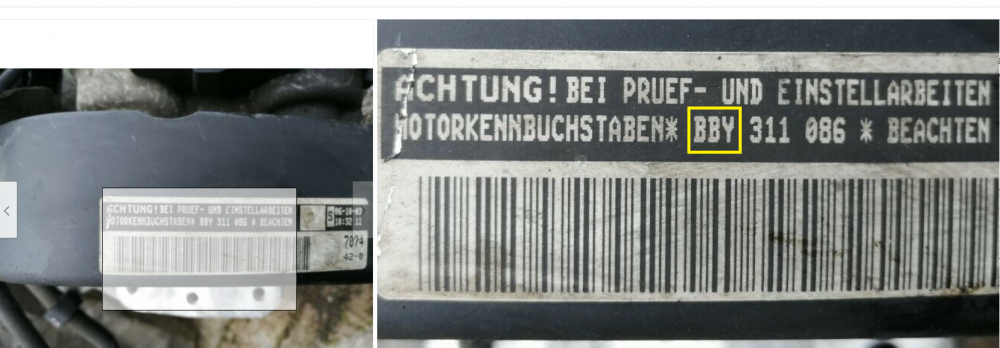
15 pointsMost people don't know their engine code. That usually doesn't affect their lives too much, but when asking questions of a technical nature on a car forum it can be very a useful thing to be able to mention. Why? It gives a more specific, precise definition of the engine in question than any other description you might otherwise use. Why is that important? 1. Information in parts catalogues, particularly for anything even slightly engine related, is often different depending on which engine code is being looked for. 2. Information (relating to the engine at least) in factory wiring diagrams is split up into sections by engine code. If you don't know the engine code, there might be a number of different diagrams with significant differences which could lead you astray if you pick the wrong one. 3. Questions concerning diagnosis of a fault should often vary depending on the engine code. If you have a 1.2 litre 3-cylinder petrol engine for example, it might have an EGR valve if it has certain engine codes, and not if it has others. It is very likely to even have a different number of camshafts and valves depending on which code. EGR faults are very rare on cars that don't have one! 4. If you know your engine code, you can put it into ebay as a search term (e.g. "AZQ engine") and you will see listings of ones for sale. These can be very useful for finding things on the engine or working out how to get to them, as they often include good photos from several angles of engines on pallets, with varying numbers of ancillary items fitted. Much easier to see what's what than from more or less any angle while the engine is in the engine bay. How and where can I find this code? On cars up until about 2018, there tended to be a paper sticker on the boot floor, often near the spare wheel well. Duplicate could often found at the front of the service book. That includes a certain amount of info about the vehicle, including engine (and gearbox) codes, paint code, all sorts. Example (engine code in red square, gearbox code in blue): Many cars also have a barcode sticker on the upper cambelt cover, like this one: The engine code is the letters (in yellow box) just ahead of the engine number: See also Nige's reply below about finding the engine code on your V5c. Letters ahead of the engine number. Consider adding this engine code to any info you may have already put in your profile and or signature, and keep it updated if you change cars.
 15 points
 -
Having taken delivery of a new MY21 Superb Sportline 280 hatch, I thought I would provide a little summary of my observations compared to my previous MY19 Sportline. Background: I had a MY19 Sportline 280 hatch for just over a year until it was written off in a collision last September by an SUV driver running a red light and t-boning my vehicle in the side and front (car safety was excellent and I walked away without a scratch). My insurance cover was for a full new vehicle replacement and after allowing for COVID factory shutdowns, semi-conductor shortages and shipping delays, I finally received a replacement MY21 Sportline 280 hatch just over a week ago. Note: The Aus-Spec MY21 Sportlines do not (yet) need to conform to Euro 6 regulations so my new vehicle retains the 280hp engine without a particulate filter. It is also retains the 6 Speed DQ250 DSG transmission. Everything else is consistent with European MY21 vehicles. Pros: DSG appears to be recalibrated and is far more lively and crisp than previous versions with virtually none of the dreaded hesitation and lurch at initial take off. It’s the first time I can say I’m actually enjoying a DSG. Paddle shifters are larger and better shaped (but see cons below) Matrix LED headlights work well and rear LED light animations are cool ‘Sportline’ start-up instrument panel animations add a little theatre More bass/mid/treble settings for the Columbus Canton system than before, although the overall Canton sound is much the same The black lettering on the rear suits a Sportline, as do the rear dark tinted and smoked light lenses KESSY on the rear doors as well now Wireless Apple CarPlay works seamlessly The blindspot warning light in the mirrors has been relocated to a much larger warning light on the car window side of the external mirror housings. This is a great improvement over the MY19, which had a tiny light built into the mirrors surface and was impossible to see in bright sunlight Cons: The quad outlet exhausts with valves has been deleted. Despite retaining the previous 280 engine and running gear, the quad outlets and valves I had on my MY19 vehicle have been replaced by a simple dual exhaust and no valves (single outlet each side). Rather sad about that… Related to the above, it seems that Skoda spent whole minutes working closely with Dyson to specially tune the exhaust note. A little rumble would have been nice (and no, I don't want a resonator-delete and I'm not taken with the couple of aftermarket systems I've seen on here for the Superb) MIB III infotainment system ‘user experience’ is definitely a step backwards. The Skoda dealer warned me everyone hates it and I’m starting to join that club. The menus are clunky and finding some of the settings buried in sub-menus and sub-sub-menus with odd titles takes way more time than it should The Performance Gauges with configurable dials like turbo boost etc that used to appear on the centre screen has gone completely (thanks again MIB III) Driver profile settings are not remembered when you switch off the vehicle. So, if you set 'Individual' with your own settings (for example: DCC and Steering switched to Sport), the vehicle will automatically revert to the standard default settings when you next start it up, and you will then need to flick through the menu to put the vehicle back into 'Individual' mode again. My previous MY19 vehicle stuck with whatever Individual settings I had when the car was restarted. Paddle shifter shape appears to be unique. ie. different shape to previous Superb (MY19 and earlier), and looks like a different shape to VW Golf Mk8 etc. So no paddle extensions available to fit, nor can you easily fit full replacement shifter paddles as the fastening pins that were accessible on previous models have been hidden inside the wheel boss. I have both Carista and Ross-Tech VCDS and it’s clear VW/Skoda have locked out a great many features previously accessible on my MY19 – there are very few VCDS tweaks available on MY21 (at least at this stage) Only one USB-C port and one standard USB port in the entire vehicle and none in the rear. This should have been resolved for the MY21 update I like the new steering wheel overall, but the leather stitching design is more basic and less attractive than on the previous wheel You now only get one Skoda umbrella per vehicle, just in the driver’s door (although the Skoda dealer was kind enough to put another one in the front passenger door for me) The removable flashlight in the boot has been deleted, even the mount Modifications so far: · BMS Throttle Controller (best value single upgrade in my opinion) · 034 Motorsport Air Intake with a Pipercross panel filter · HG-Motorsport hi-flow aluminium Turbo Inlet Pipe · JB1 stage 1 piggy back ECU ...and a full tank of 98RON! Overall, the 2021 Sportline is a fantastic car: well built, quiet, sure footed AWD and genuinely fast. After six months in a little Hyundai rental car, it’s a joy to be back behind the wheel.


 15 points
 -
15 pointsHello from Kaohsiung, Taiwan! My Octavia Combi MK4 in graphite grey.
 15 points
 -
15 pointsI've been on this forum for about 9 years now and it was invaluable in helping me to firstly decide the Yeti was a car I'd rather not live without and then to decide on spec. (and indeed what some of the options actually were) and it was through the advice of some of the earliest members I took the trouble to get my Elegance supplied on 16" rather than 17" wheels, which I've never regretted. Throughout most of that time there has been light-hearted banter, excellent advice and on many occasions clear disagreement about the "right" way to do things. But posters seemed to be able to agree to disagree and leave the OP to decide what advice to follow and what to ignore. You quickly learnt who "knew their stuff", for example The Plumber was held in high regard for his technical knowledge, Llanigram was the go-to guy for off-roading and had an impressive knowledge of legislation and there were others of their standing or close to it. I learnt a lot along the way, most of which I will never put into practice but at least put me a little less in the role of sheep-to-the-slaughter when the car goes into the garage for work. But what I don't remember was any unnecessary and sometime sustained unpleasantness - usually about something totally inconsequential. Unfortunately owners have moved on and, at least in my opinion, some of the newer members seem to think they have a monopoly on being right and aren't slow in expressing that anyone holding a different view is either incompetent or a fool. A couple of recent examples are the tirades being delivered about where to put the locking bolt (if at all) when the OP simply asked about replacing a rounded-of bolt and the "discussion" about the possible insurance consequences of changing the ride height and, by inference, handling characteristics. It's perfectly reasonable for a forum member to point out modifications can affect insurance and totally out of order to say that this isn't appropriate for a car forum. If you don't like any advice, don't take it but it might be helpful to others now or in the future. I will continue visiting the forum because there is always something to be learnt and also hopefully occasionally I may be able to help someone with their issue but I have to say that these days there's an increasing urge to use the "ignore" button for some members and their content. If this posting offends anyone sorry about that but I'll happily add you to my Ignore list as I'd simply rather correspond with posters who can respect the views of others even if they can't agree with them. Best wishes for the New Year to the many, many forum members able to participate in a sensible and civilised manner.15 points
-
Latest Updated Speedcams - November, 2021. Here's the latest update of my customised version of EUR Speedcams ( November, 2021). They consist of the full EUROPE speed cameras which I've split up into four consolidated poi categories i.e. Fixed Speedcams, Average Speedcams, Variable Speedcams and Redlight Speedcams. They come supplied with my own preferred personal choice of icons, shown below, to match each of the categories. Remember to Install them as I explained in the first post in this thread i.e. after extracting the zip file remember to open the newly extracted folder and place only the PersonalPOI folder and metainfo2.txt file onto your sd card ( Please Note: a usb stick will not work! ). Also, please remember to select/tick the relevant newly added poi categories and the poi audible warning alert in your infotainment map menu settings after performing the update or they will not display on your map or audibly alert you. Hope you all enjoy them! EUR Speedcams November, 2021.zip
15 points
-
15 points
-
14 pointsI thought it would be useful to create this separate topic and collate information as now Infotainment Software Version 1969 is out in the wild I imagine user interest will increase. All credit to those who posted information in other threads - I hopefully have credited you all where necessary. Feel free to comment on your own experiences and observations. Despite saying I was going to wait for this update to come OTA, based on the principle of “If it ain’t broken….” I bit the bullet and applied the 1969 update manually this morning (I'm a sucker for an update). All went very smoothly and took around 20 minutes. Seems an obvious point but to put your car in ignition mode, which you need to do to apply the update, just press the Start Stop button on its own, without depressing the Clutch / Brake which you would do if you were starting the engine I also switched off the climate control before proceeding although I imagine the Update process would disable its functioning anyway. I followed a previous guide for version 1941 by @TheWanderer which was invaluable. I highly recommend watching the YouTube video in the instructions as you are updating as it is a useful reference of the stages your system is going through. I have copied and pasted his guide below but it’s not my work, full credit to @TheWanderer for this: Create a temporary folder on your PC or Tablet for example MIB3 UG. Then find the zip file and then right click on it or press and hold on it, so the menu appears and it should offer you the opportunity to Extract here or elsewhere, tell it to extract the files to MIB3 UG folder and let it get on with it. When it has finished, format a usb memory stick so it's completely empty, then go to the folder MIB3 UG open it and copy the 2 folders and other file directly onto the memory stick. When it has finished copying the files to the memory stick it should look something like this... THERE MUST BE NO OTHER FILES THAN THIS. Once your memory stick looks like this, remove it and take it to the car. Insert it into a USB port, press and hold the menu button for about 10 seconds and the update menu will appear. At this point it's vital that you have a full or very well charged car battery or a battery charger attached so that the car doesn't shutdown halfway through the process. Ignition needs to be ON, the Engine needs to be OFF (NOT RUNNING)! DO NOT START IT DURING THE PROCESS. Here's a video that shows you what to do, albeit in German, you'll get the English version! If you watch it carefully you'll get the gist of what to do. UNDER NO CIRCUMSTANCES MUST THE PROCESS BE STOPPED ONCE IT HAS STARTED OTHERWISE YOU'LL MORE THAN LIKELY NEED A NEW INFOTAINMENT SYSTEM. Notes. After it has finished updating the system, give it a couple of minutes to ensure that all is well and like it shows on video press resume an wait for about 90s or so and the system will restart just, like in the video. DO NOT START THE CAR UNTIL THE SYSTEM HAS RESTARTED After the update the built-in manual is unlikely to be available for about 48hrs, it does come back! You will more than likely receive another OTA update, it's OK to accept it. Ultimately if you are at all worried about doing it, take it to a VW Independent or Skoda dealer and ask them to do it for you Once it has been updated, there should be no more random restarts or crashes on the infotainment system, the pop pop issue should be gone too.. https://youtu.be/4AsSbGd3caU
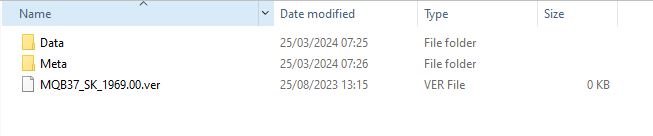 14 points
 -
Let me introduce you to my project, hopefully you find it interesting. It's a ex Leicestershire Police MK1 VRS, 160k miles and a total shed! (Don't be fooled by the photos of the outside, they make it look much better then it is). I've been looking on and off for the last 10 years for one of these, from the time the early ones first started to be retired from service. My plan was always to preserve one in its original police spec, and that's what I hope to do with this. My plans are to get this back to a decent useable car first, while researching it's police history. I'd like to be able to use it without fear of catching the plague from its disgusting interior. I need to strip this out to dry it out as it's got the usual soggy footwell. I'll try to keep this thread up-to-date but it will be a slow process as I don't get much free time to work on the car. Anyway, enough waffle, here's a few pics of the car in service and also what it looks like now. If anyone happens to have any pics of the car either in service or when it was retired or knows the car and can share any history on it that would be appreciated. Credit for the in service photos goes to their owners on Flickr and Facebook


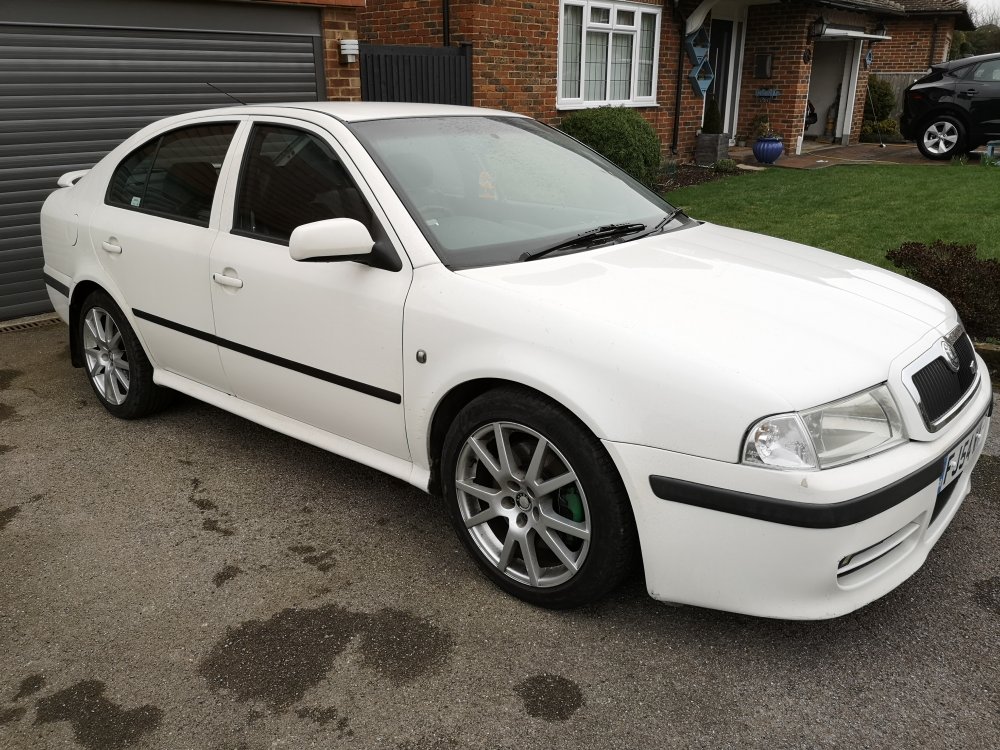
 14 points
 -
So this thread is going to be a bit of a hybrid! As well as outlining the projects I am doing on my car, Ill supply as much detail along the way for new projects to hopefully allow others to do the same and also to answer any questions you may have. Lets start with the car itself; Car Skoda Superb MK3 TSI Sportline Estate in Laser White Engine Standard 2.0 TSI EA888 with 220bhp Racingline air intake Racingline turbo intake pipe Racingline turbo intake elbow Transmission Standard 6 speed DSG DQ250 Suspension Currently standard original Brakes Audi S3 Front Calipers with plain fascia plates Superb 280 Rear Calipers with vented discs Drilled and grooved black discs OE brake pads Braided stainless brake lines Wheels & Tyres Standard Vega 19 inch alloy wheels with 235/40R19 Bridgestone T005 Spare wheel - Full size, same as above Exterior Standard sportline black pack Maxton side skirts Rear mudflaps Maxton splitter Maxton fog surrounds Interior Rear seat release from boot area LED boot lights White LED boot torch Electric tailgate Heated front seats Heated rear seats Heated steering wheel Ambient LED footwell lights LED front door puddle lights LED rear door puddle lights Electric/Memory front seats ICE & Security Canton sound system Rear door keyless entry Tailgate easy open/close 12 parking sensors MIB2.5 Columbus radio Virtual cockpit 3 zone climate control Heated windscreen Heated washer jets Front and rear dash cam ADAS Adaptive cruise control Predictive cruise control Adaptive lane assist High beam assistance SLA headlights Side assist Cross traffic assist Self park Rear view camera with lens washer As you can see, for a Sportline that started off with only the following optional extras: Electric tailgate, MIB2.5. Its came quite a long way and heres a few photos to show the work done so far, if anyone wants further details on any of the current retrofits, let me know, the future ones will be documented as I go. Lane Assist 3Q0980654 camera fitted as well as a new windscreen - all features enabled and fusion canbus ran to the front radar. Heated windscreen Canton soundsystem An absolutly massive retrofit requiring around 150 meters of new wiring, all corners of the car, a lot of new speakers and a lot of custom made wiring 0 Side assist/Cross traffic detection Another expensive retrofit requiring new wing mirror glass at £400 each side, new radars and brackets behind the rear bumper and all associated coding and wiring Release rear seats from luggage area & Heated rear seat elements 3 Zone climate control Another massive retrofit - stripping the entire dashboard from the car to replace the complete heater assembly to allow the 3rd climate zone, this also gave me a good chance to neaten everything up behind the dashboard and also flush the heater core. pACC/Predictive cruise control Required replacing the front radar and also a calibration of it - done perfectly with any solid smooth object and a few tape measures and patience. Facelift tailights Fitting these allowed for dynamic indicators and unlocking animation - these arent a straight fit and require custom wiring adapters and new wires running to the BCM Virtual Cockpit Quite a specialist retrofit this one, needs access to the main dealer tool for component protection and immobiliser recoding - but so worth it! Carbon clean @ 50k miles Not much a retrofit but after 50k of constant motorway miles i thought it would be a good time to give it a walnut blast. Cost around £40 in parts and my already owned air compressor and garage vacuum LED boot lights and engine styling Nothing too special, just a custom made LED torch, LED lights that dont fault and Racingline air intake and associated parts
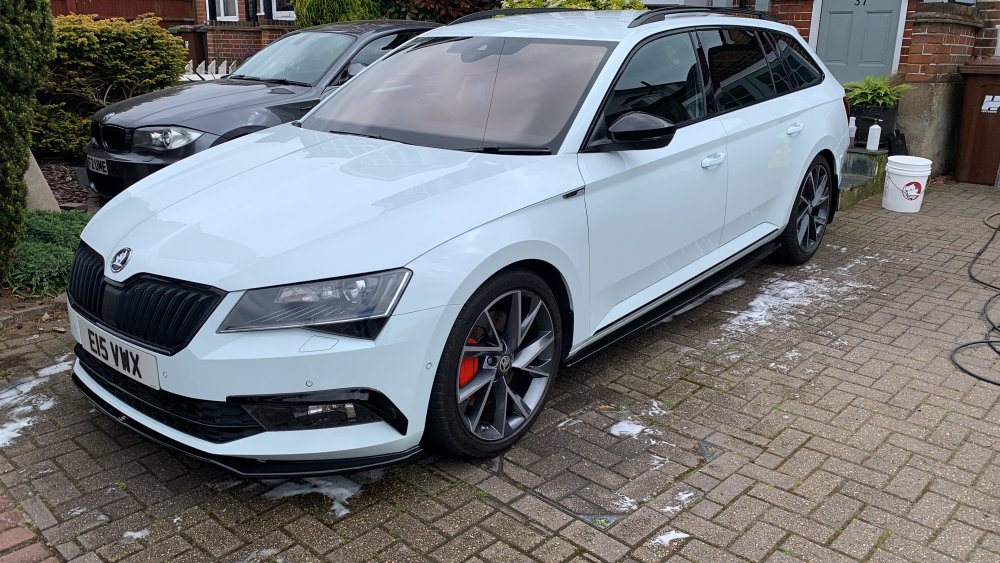
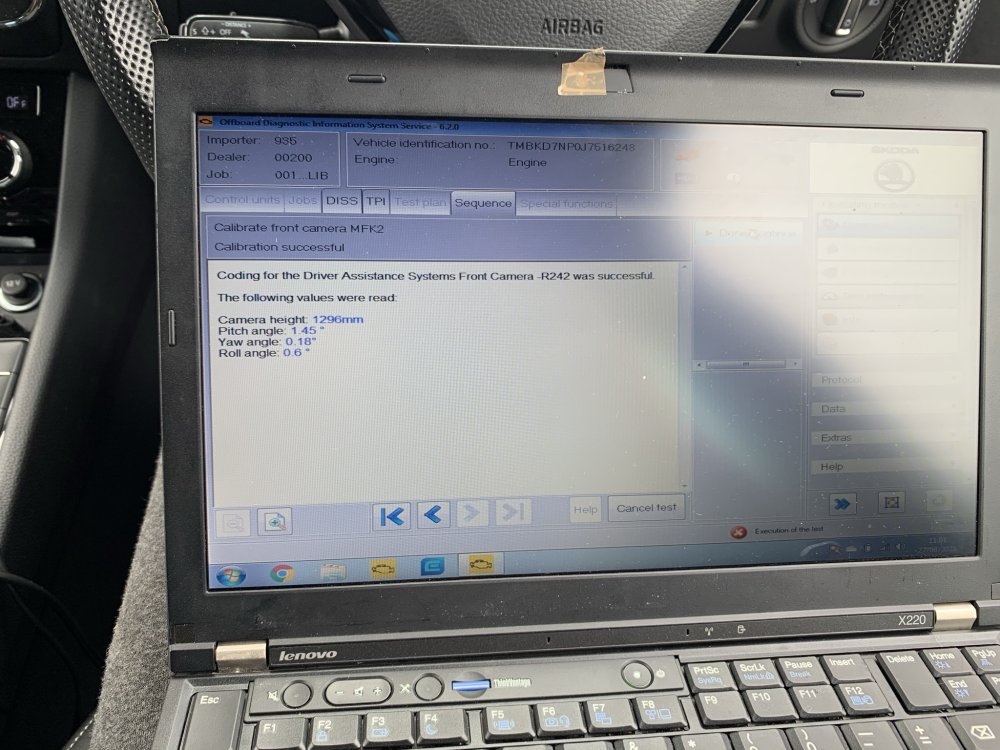
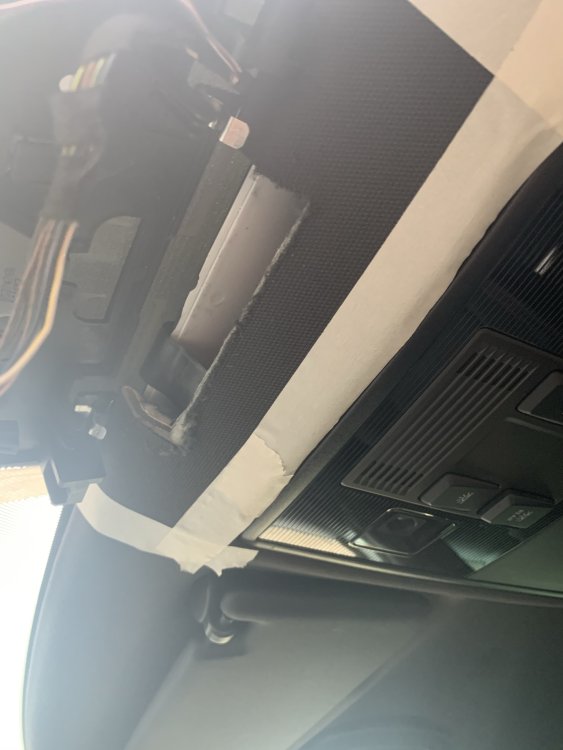
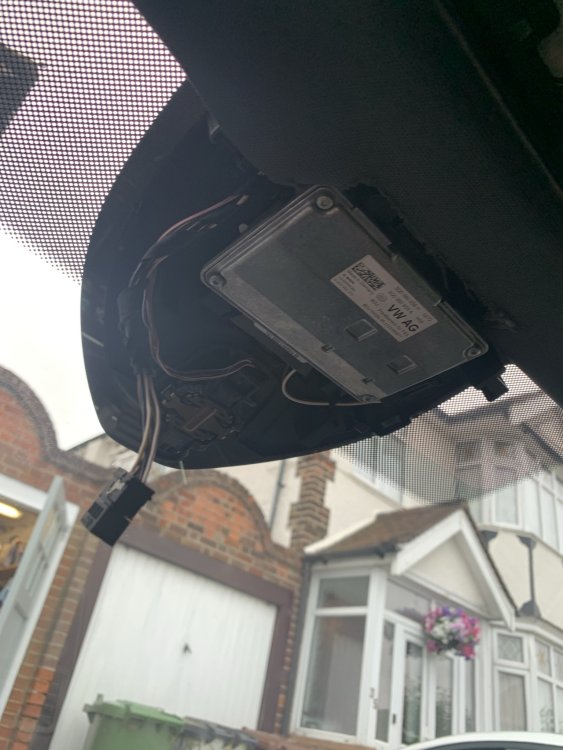
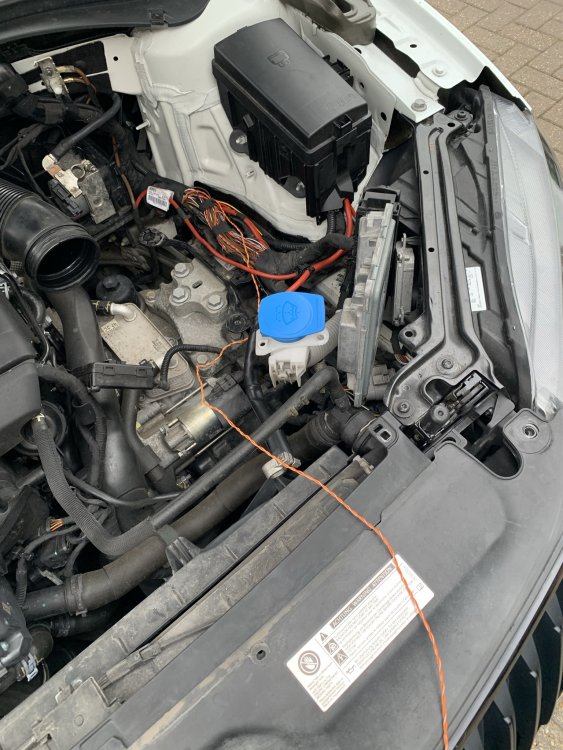
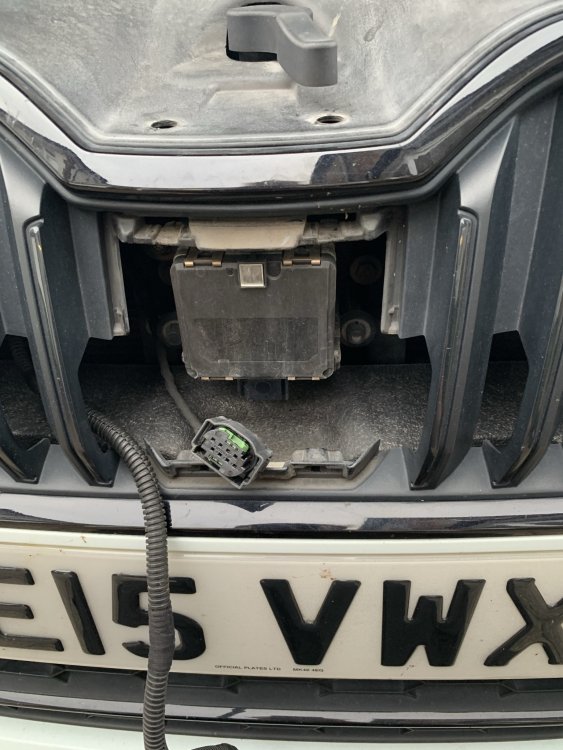
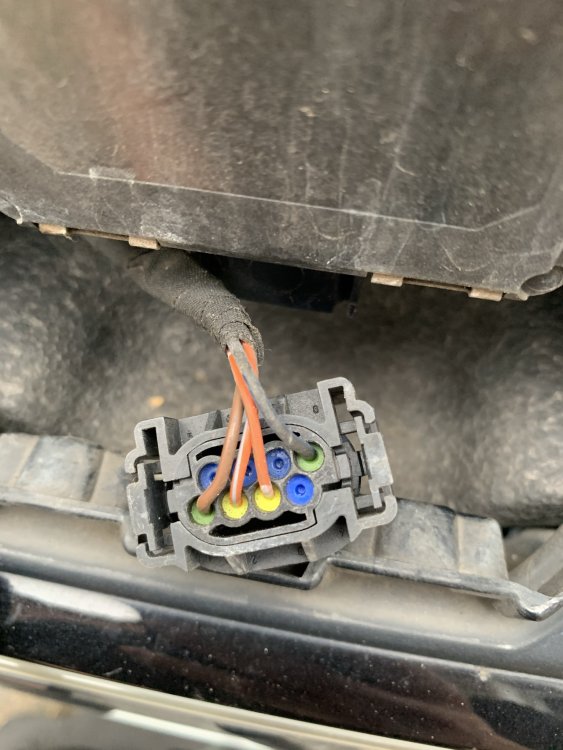
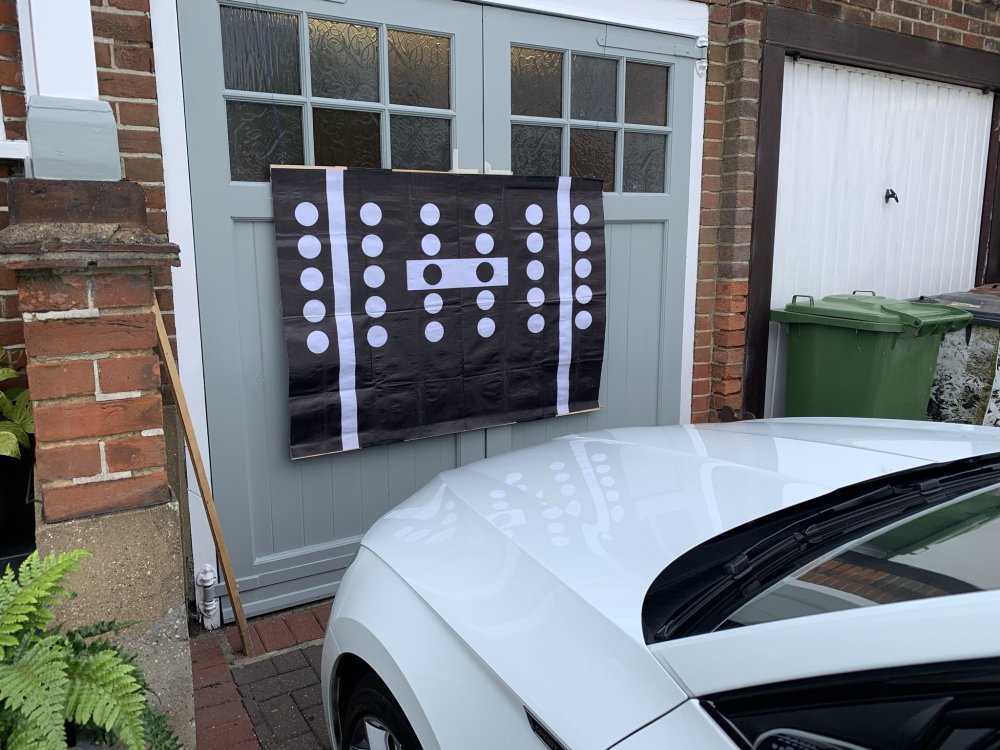


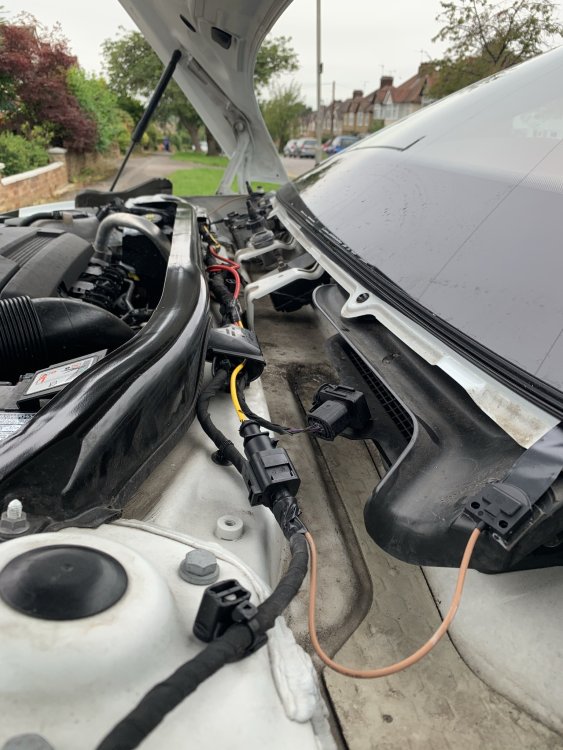
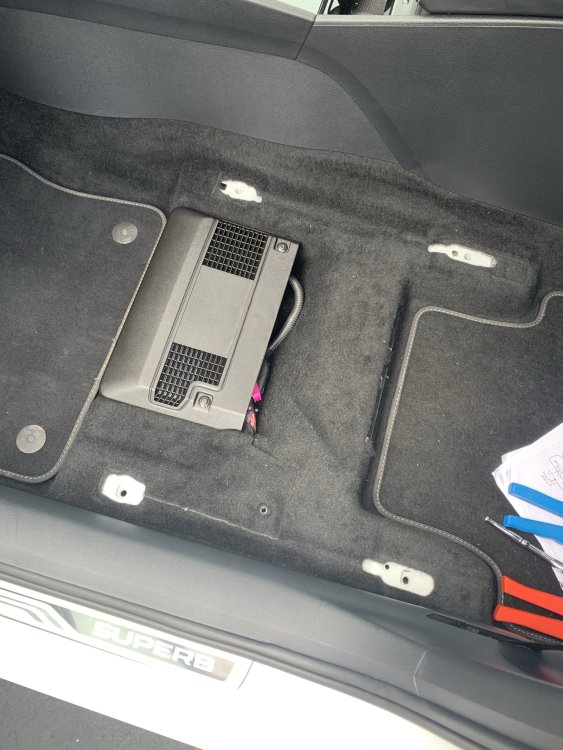
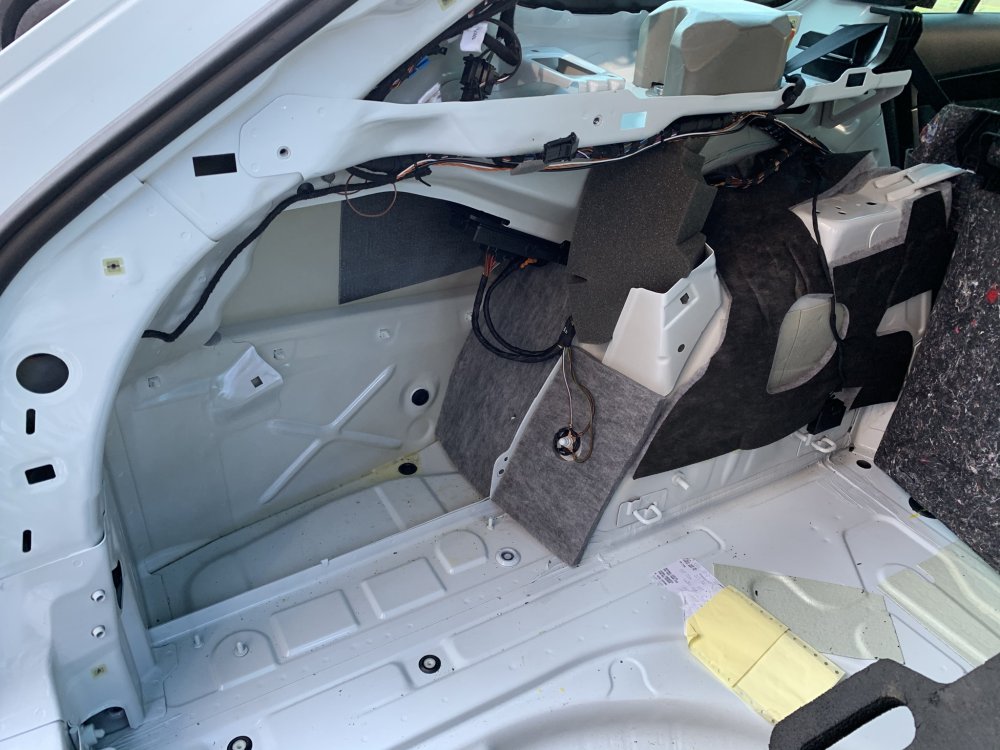
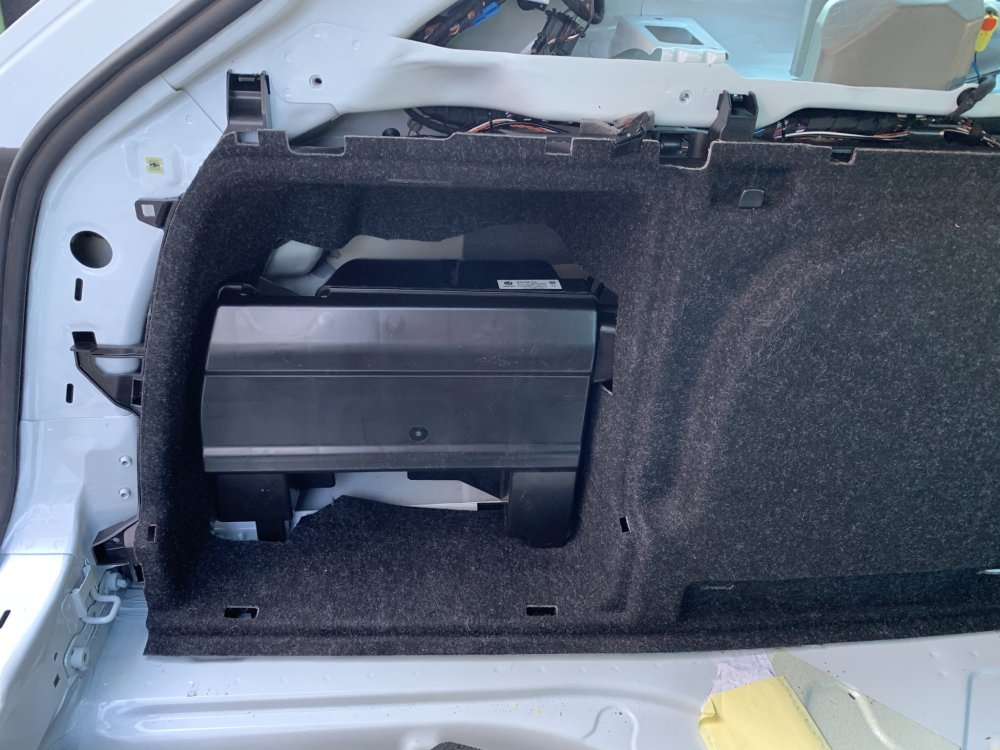
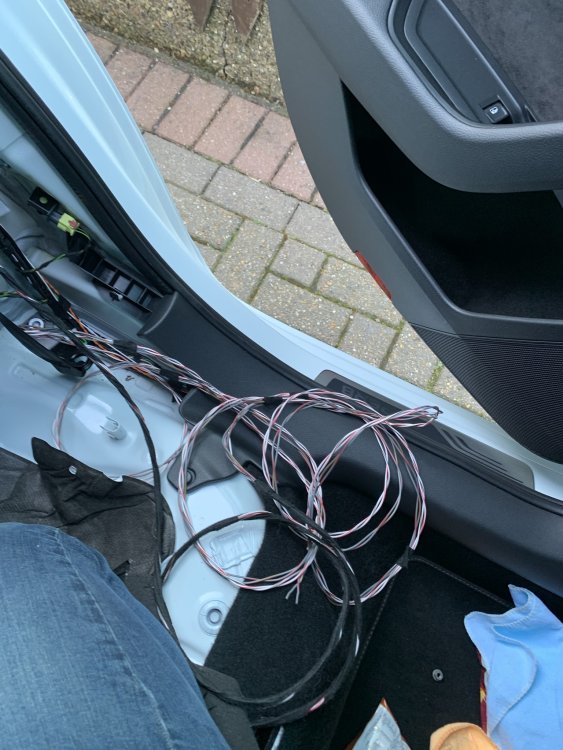
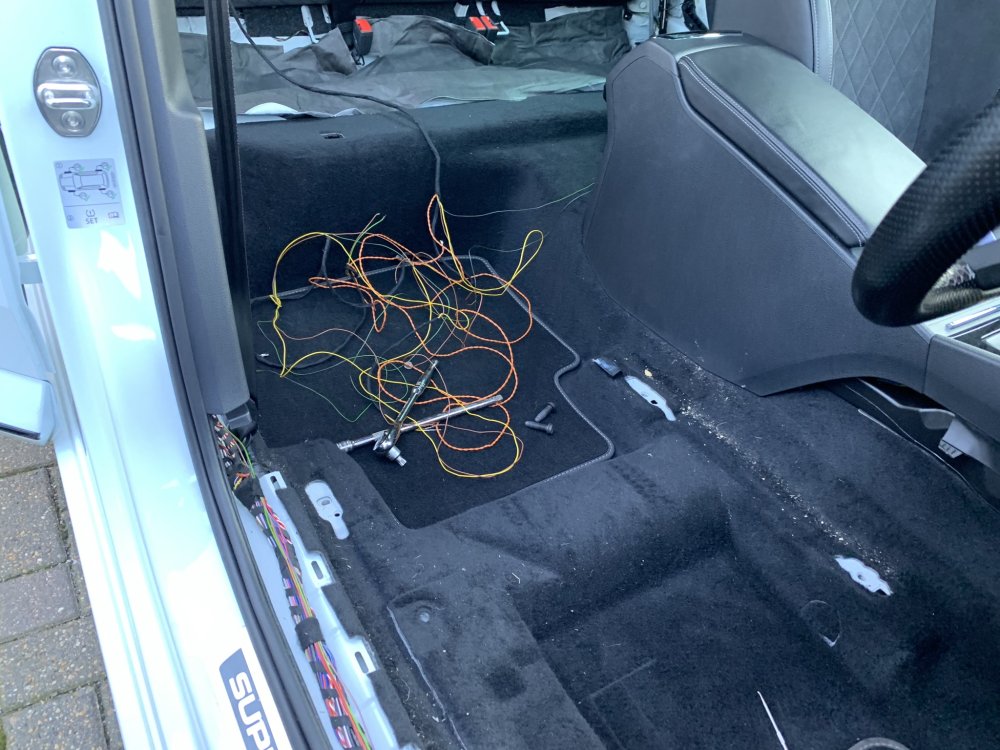
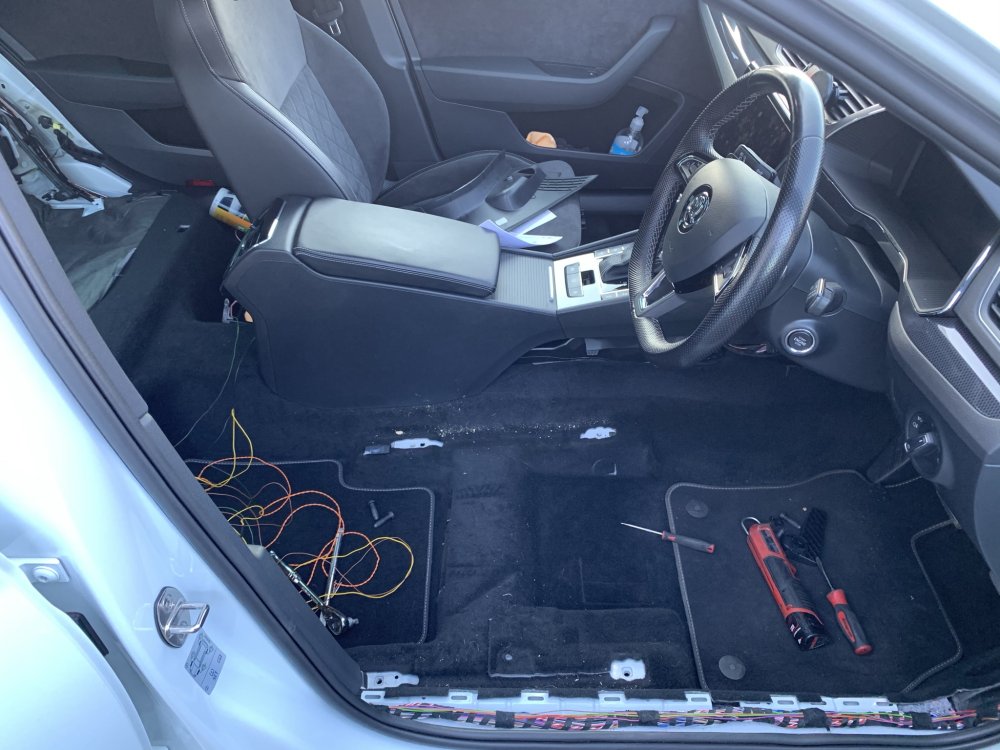
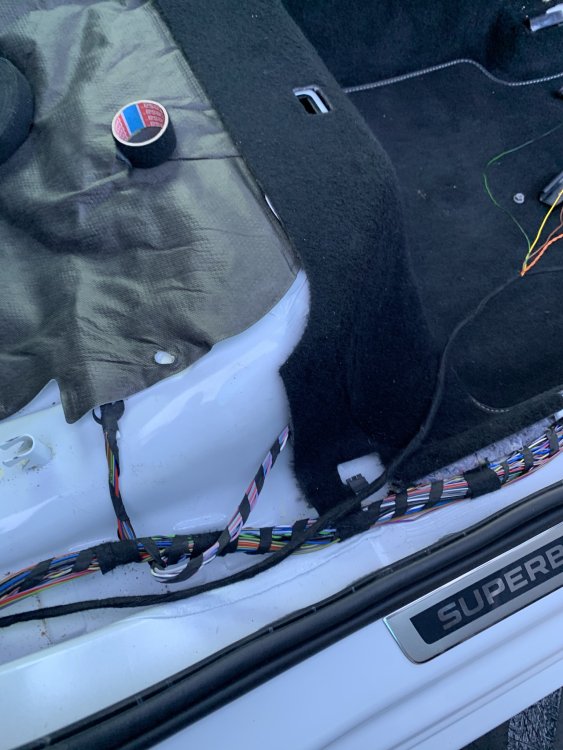
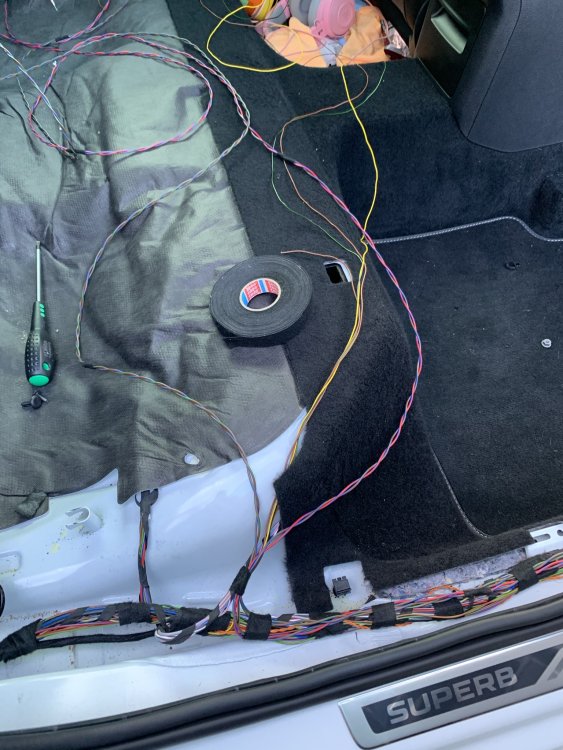


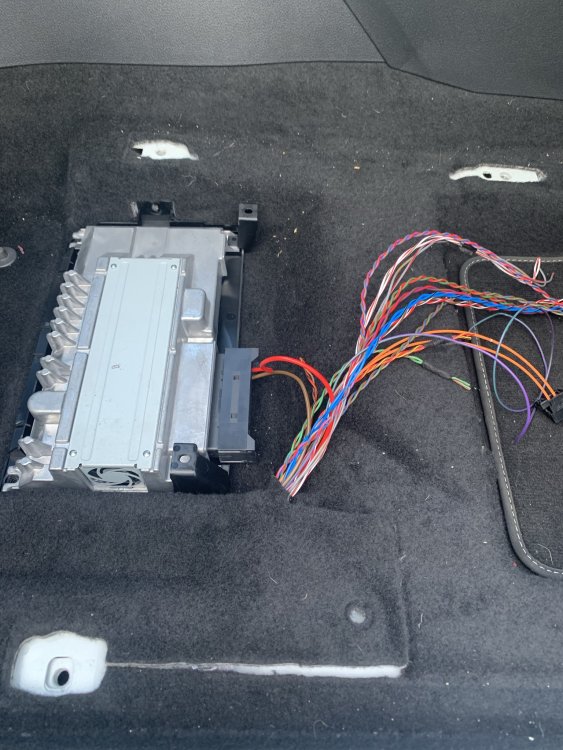
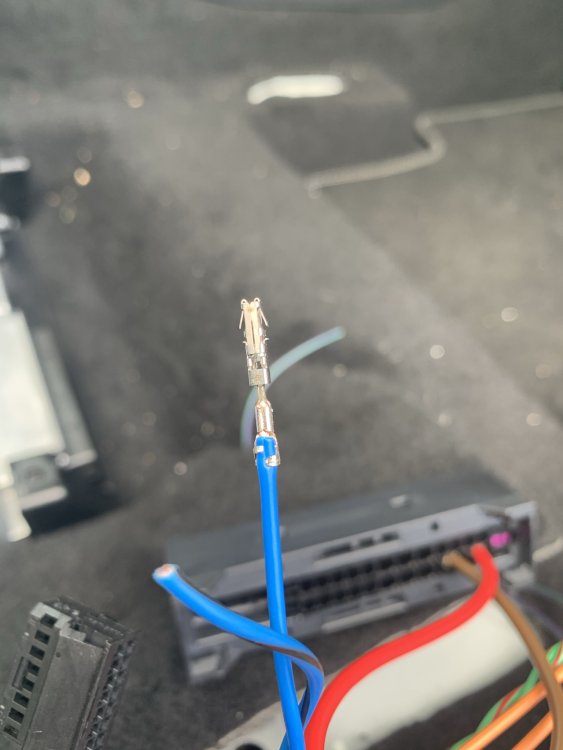
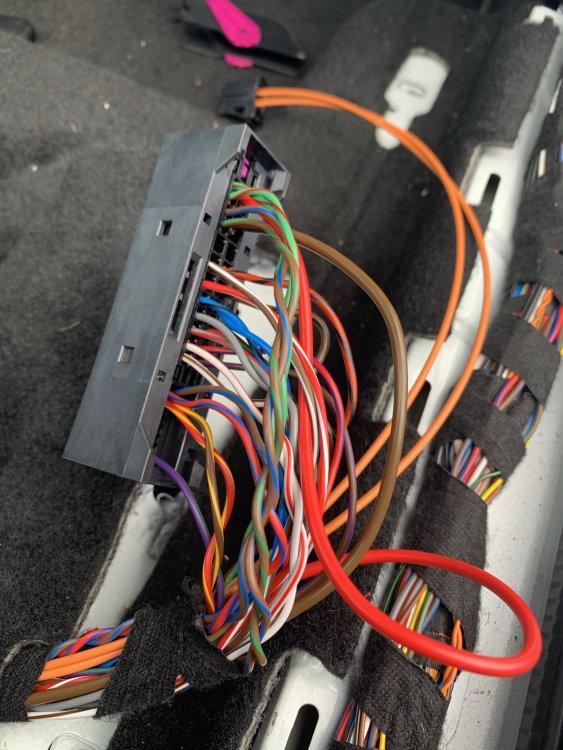
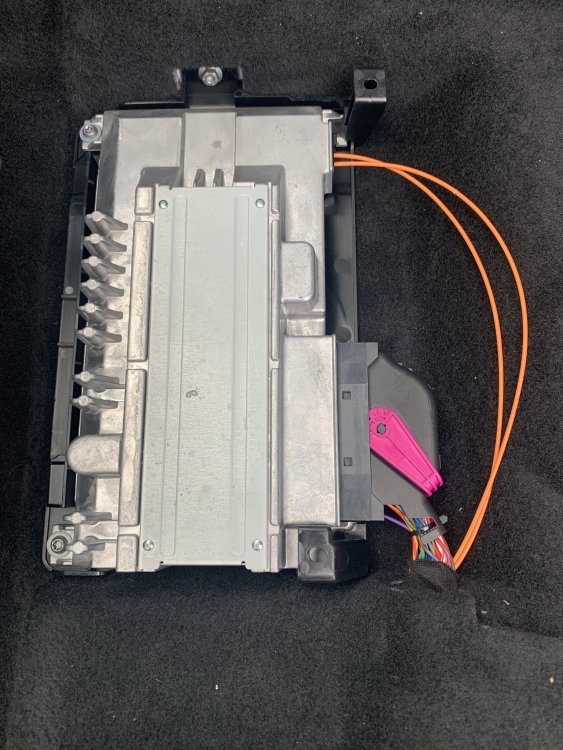
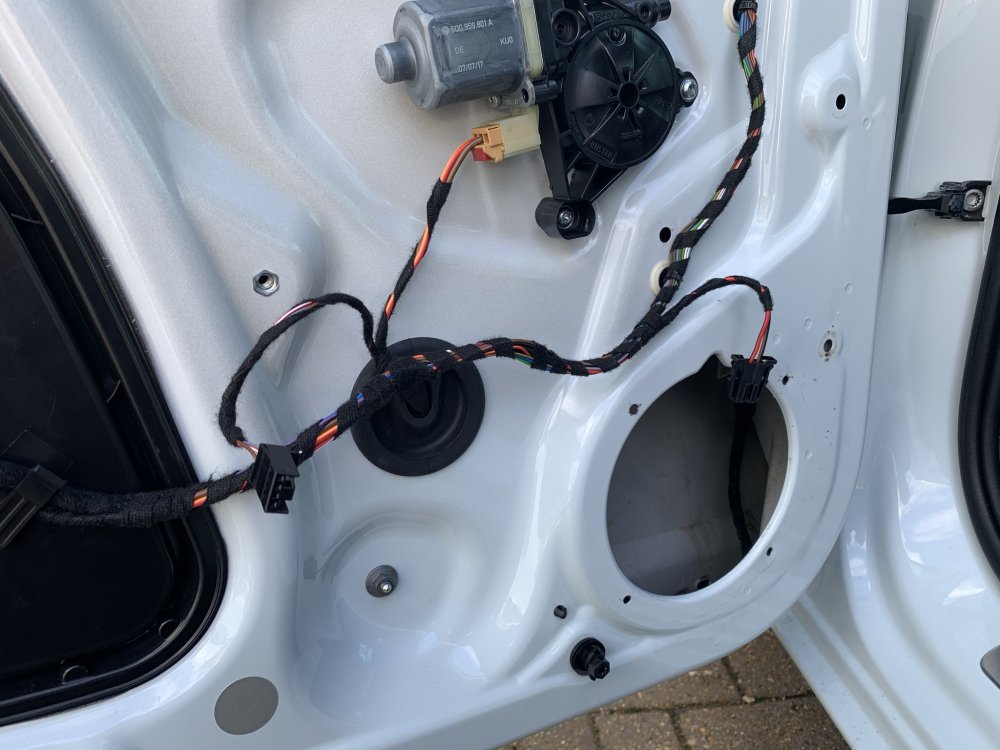
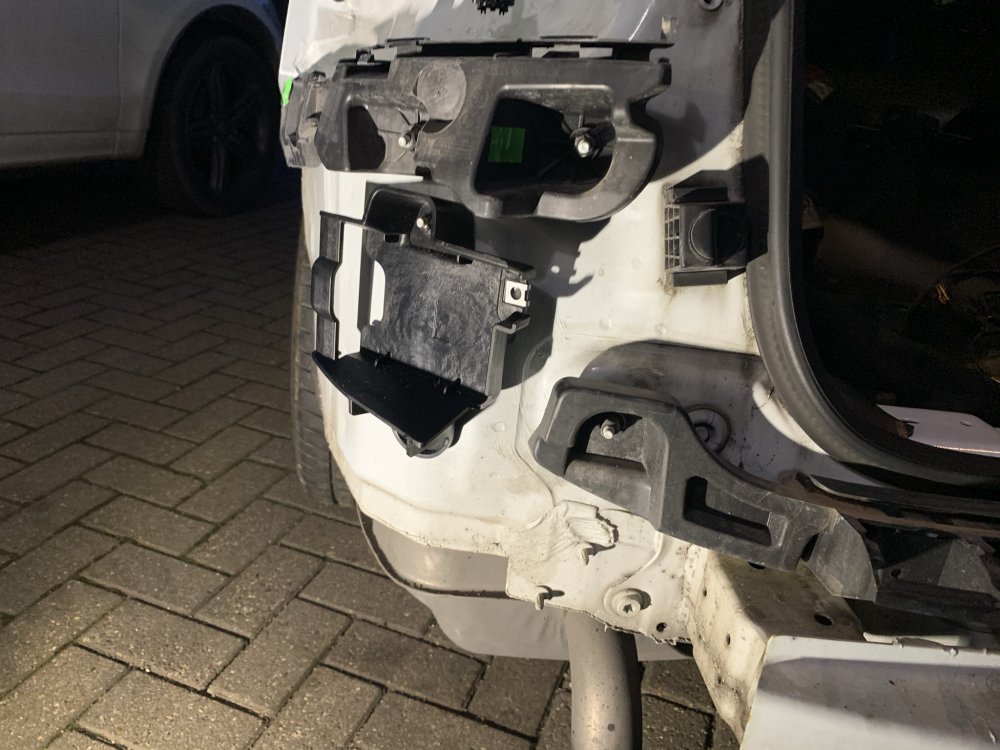
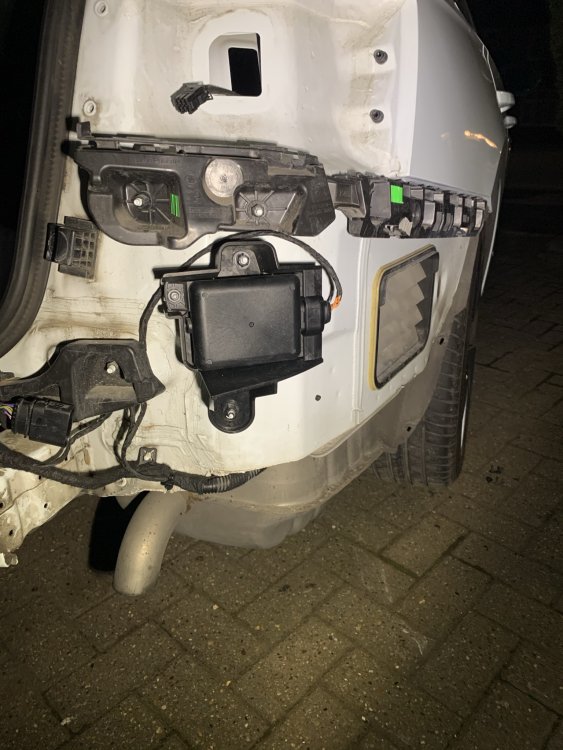
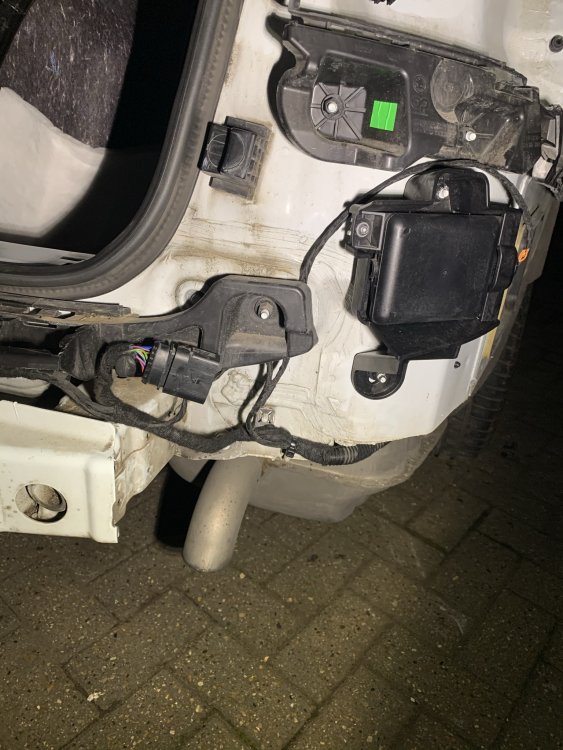

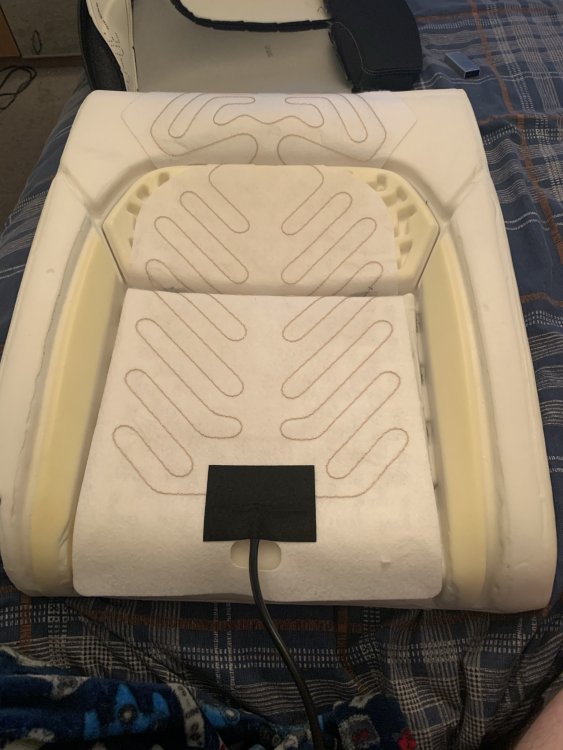

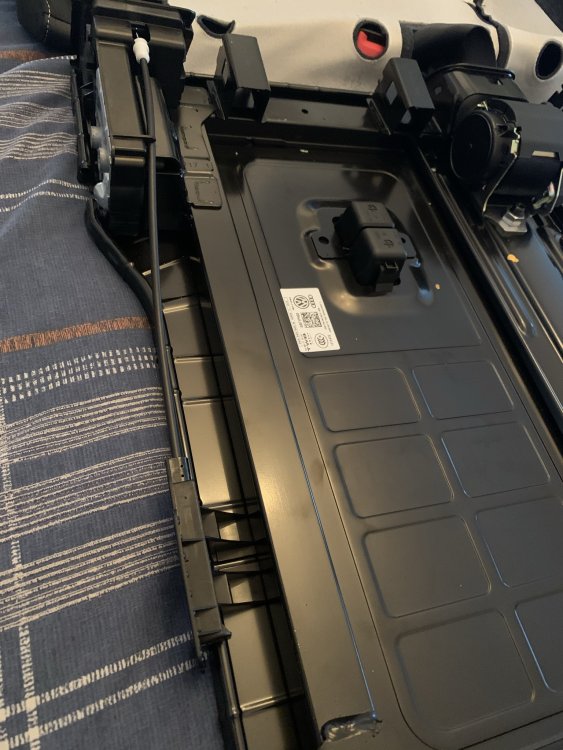
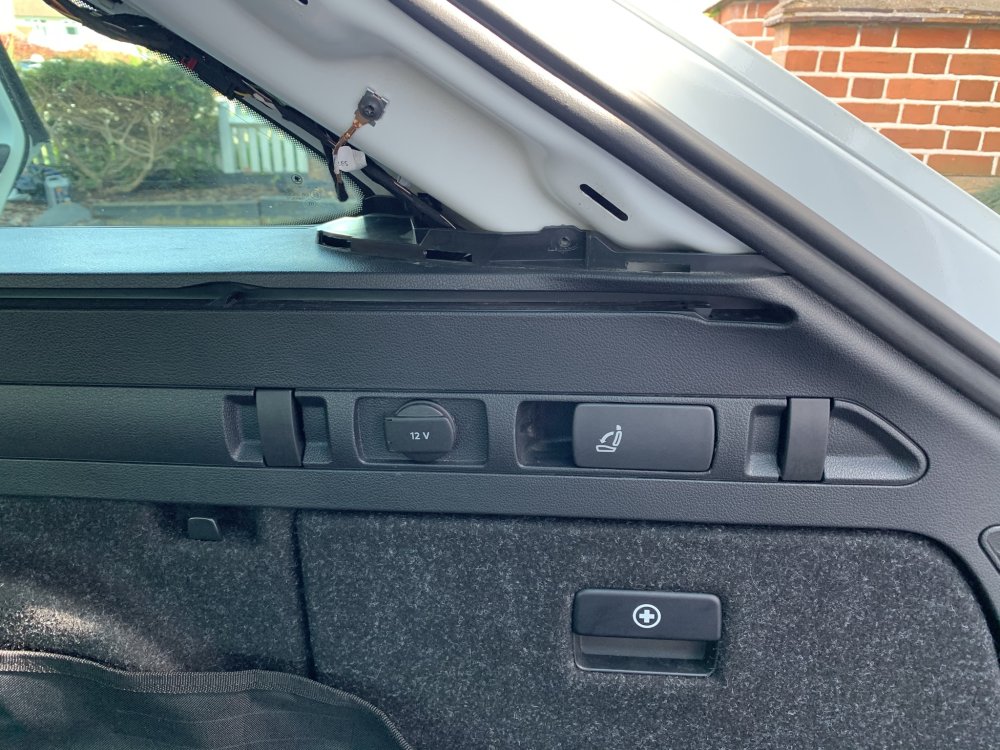
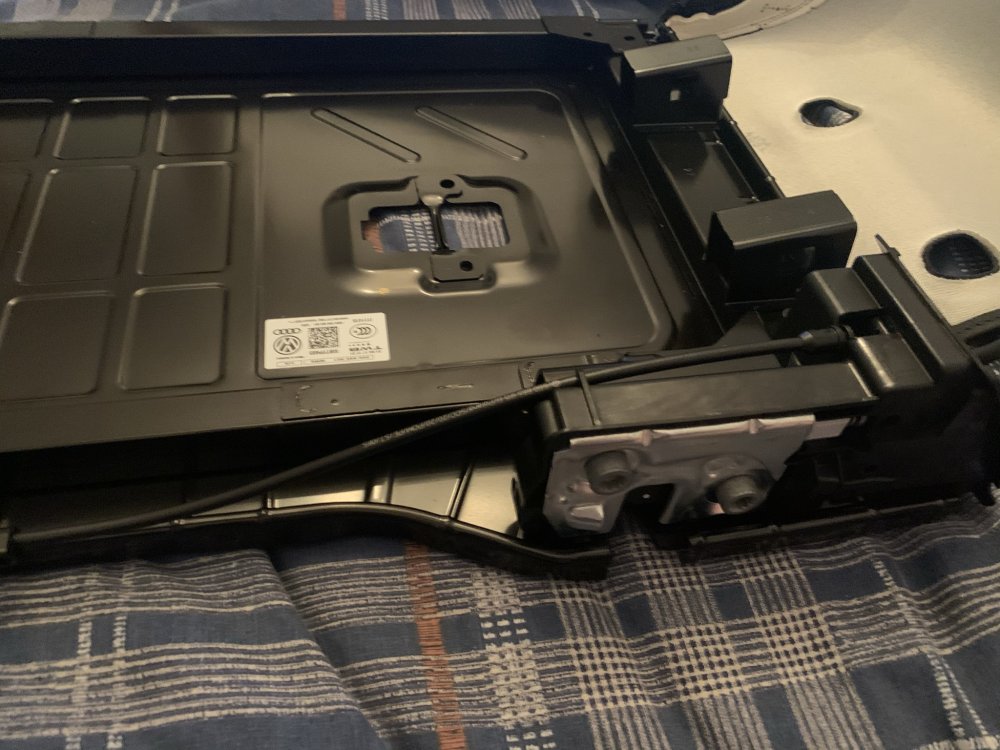
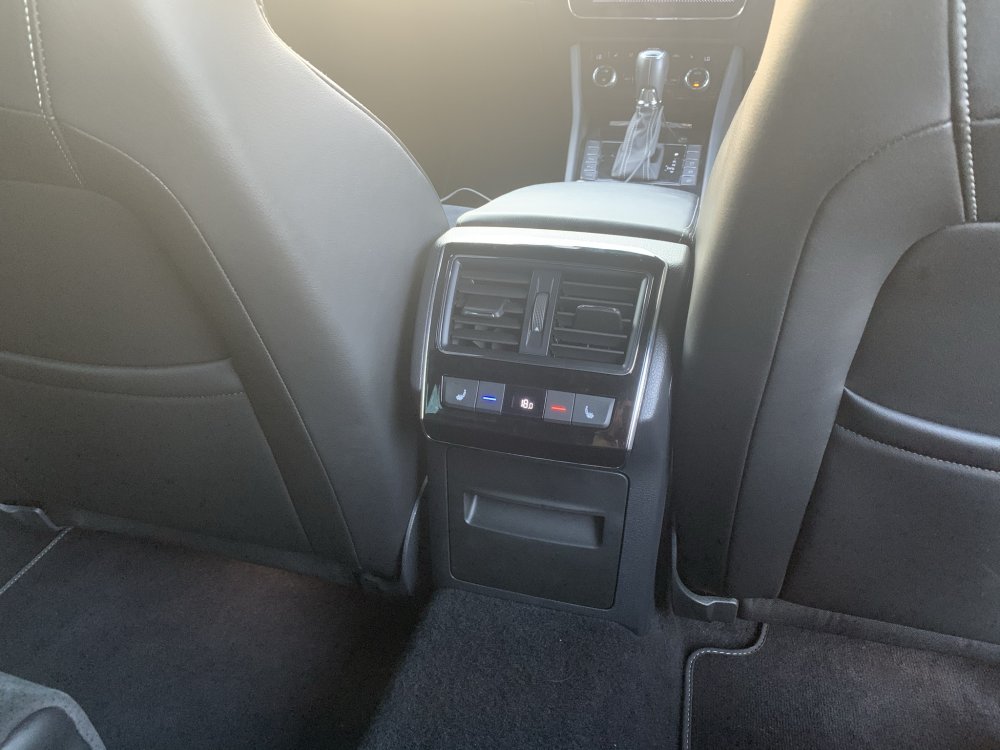
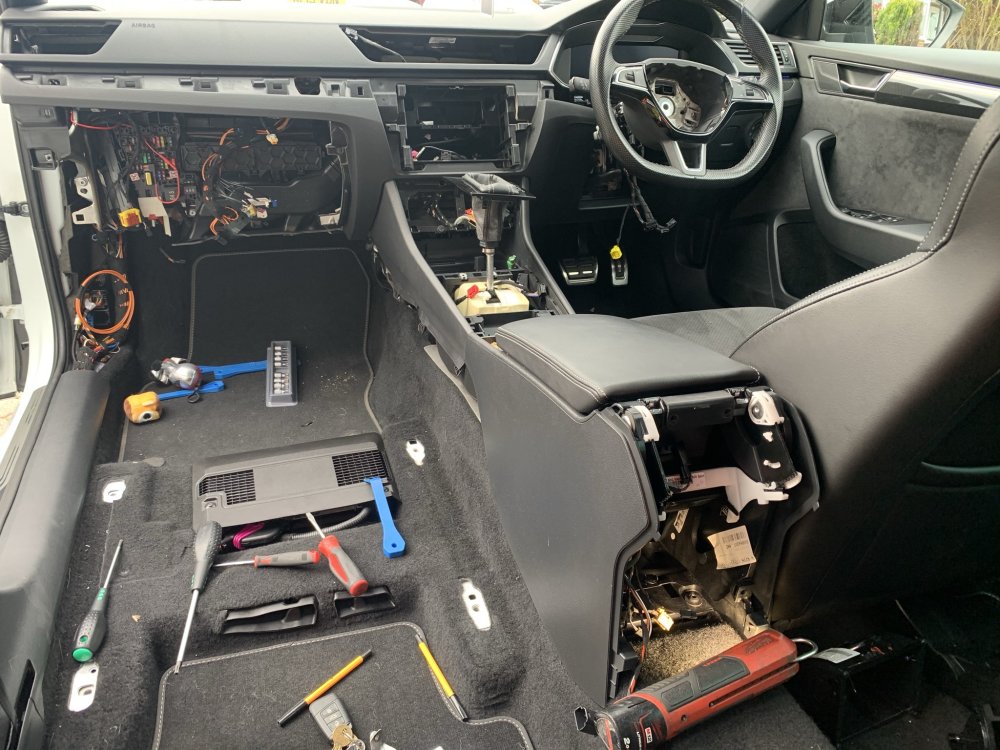

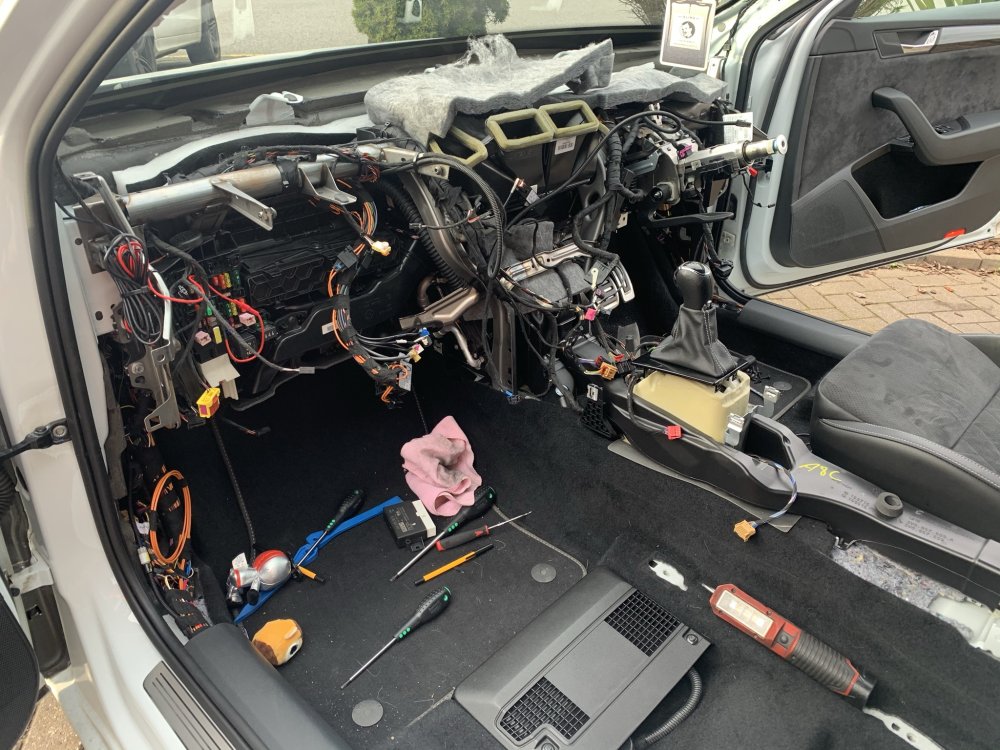
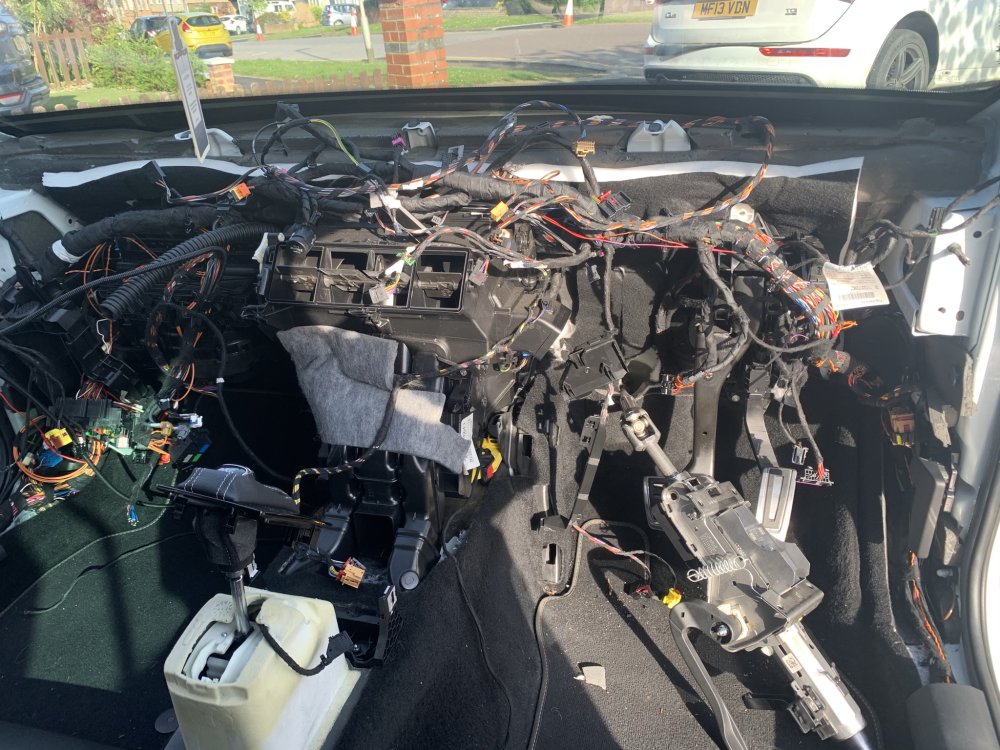
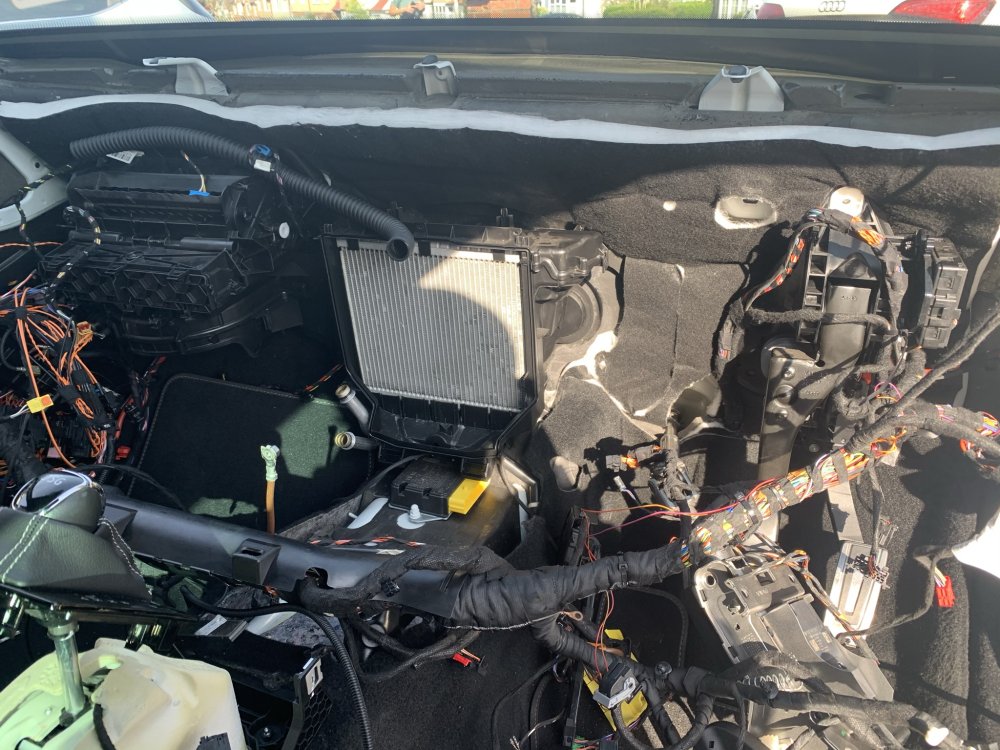
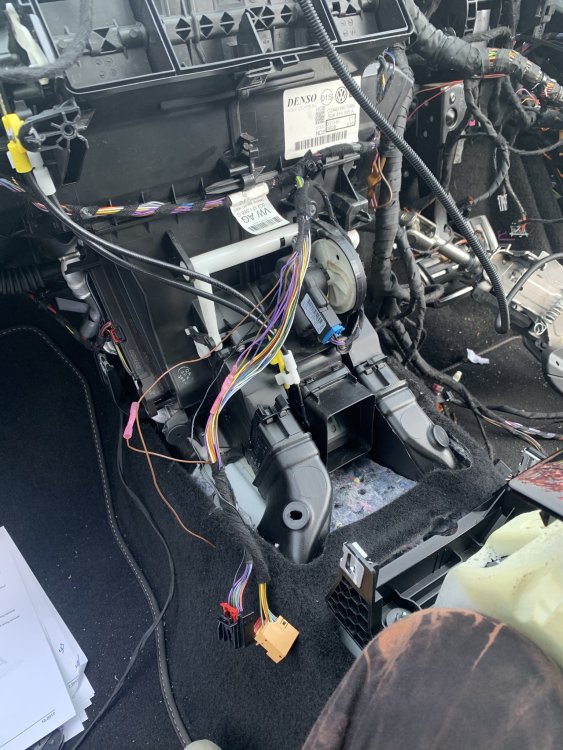
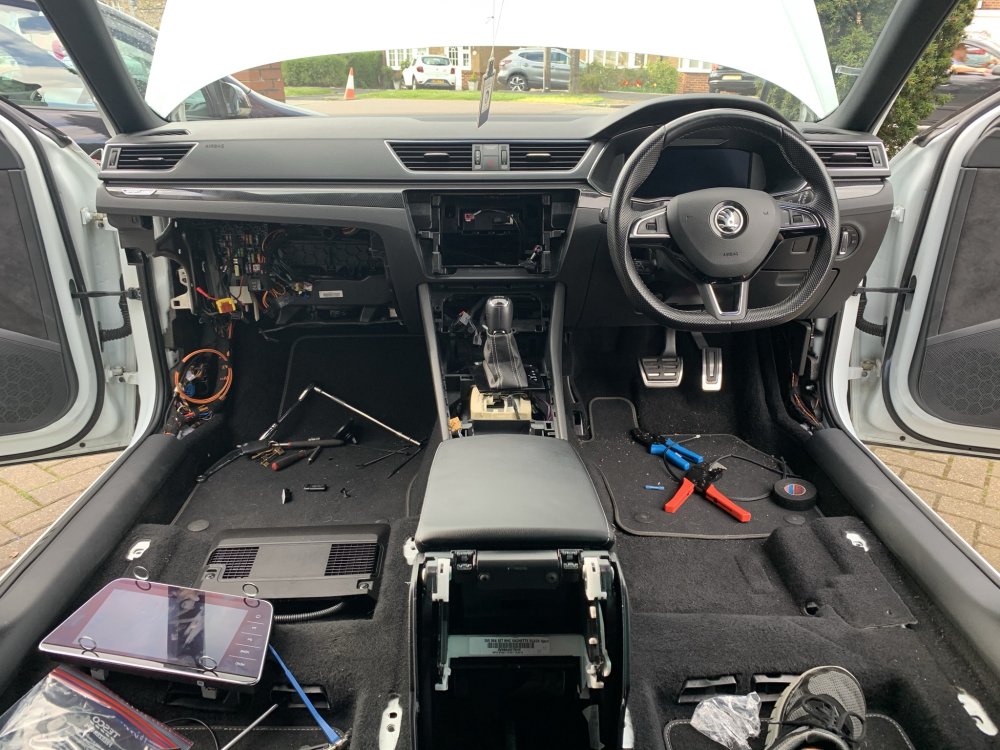
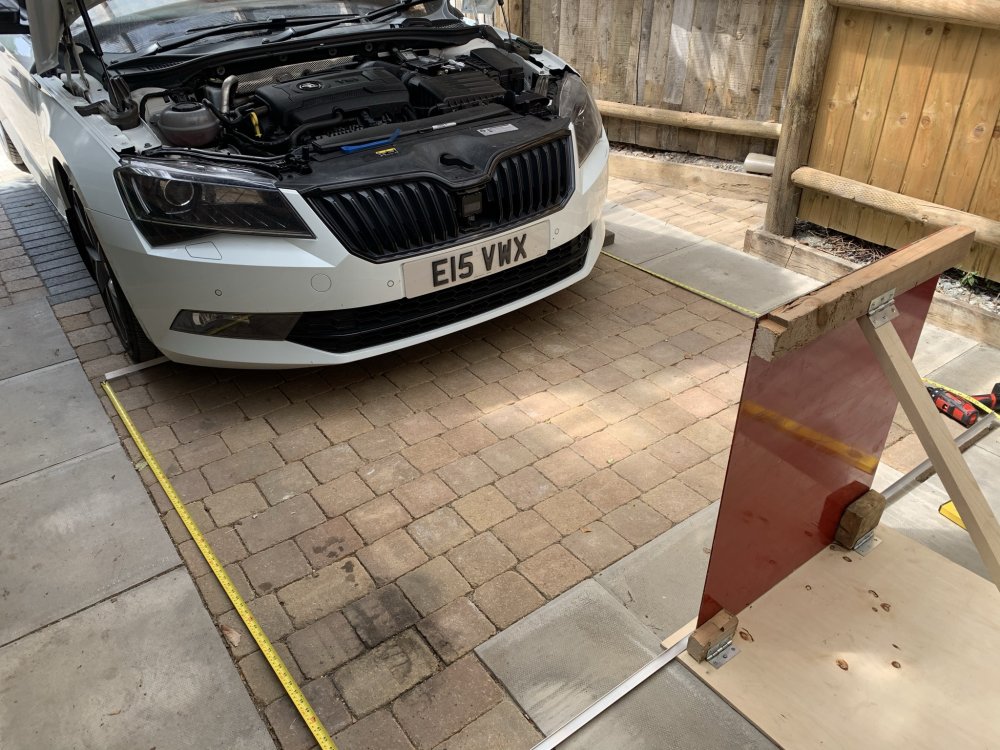
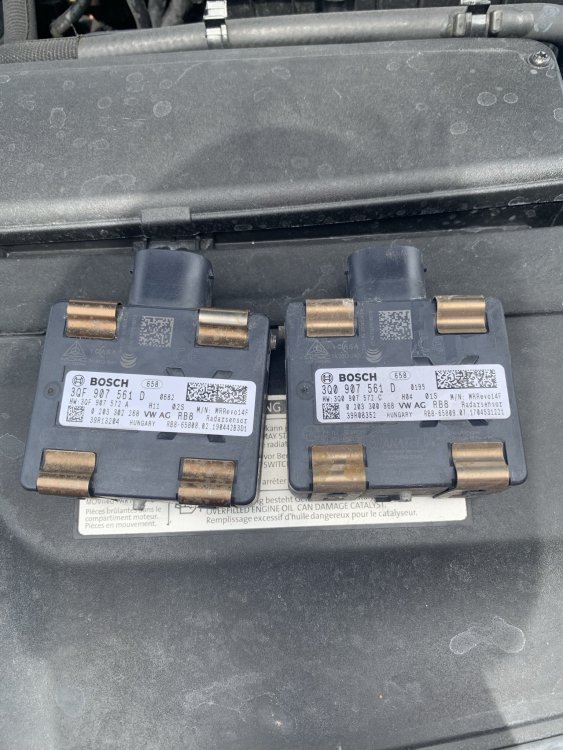
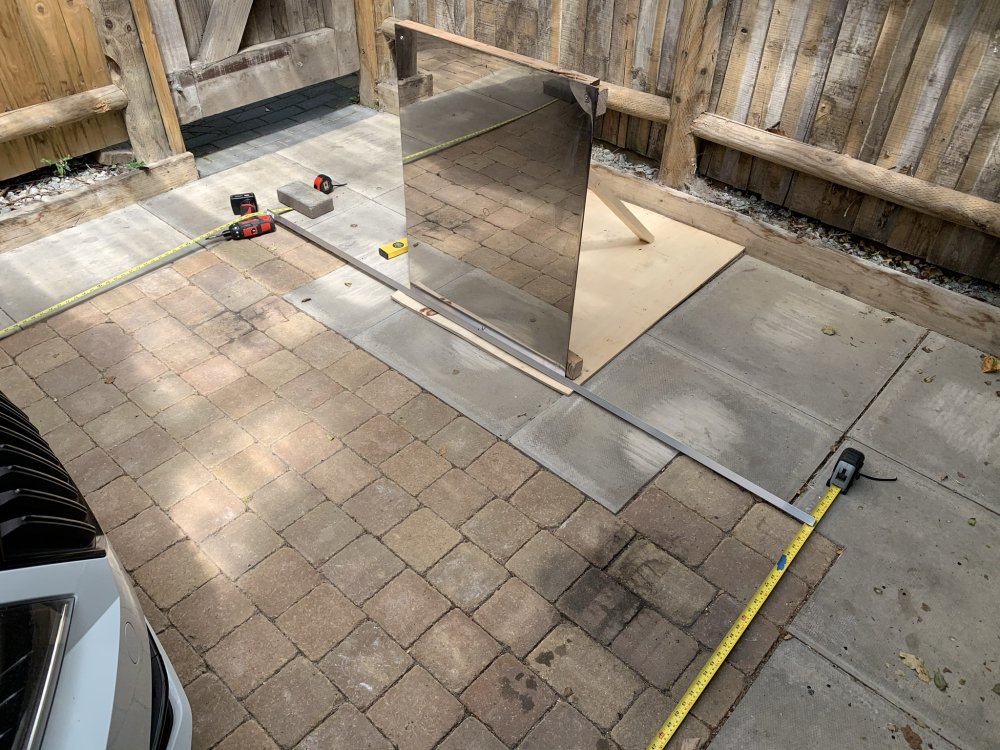
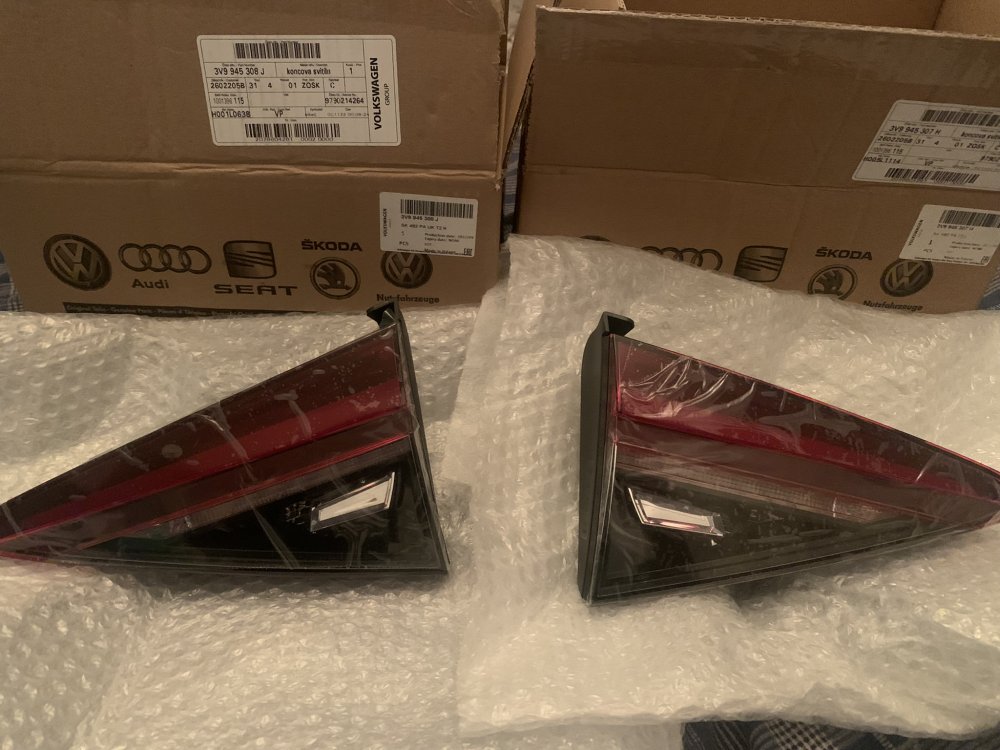
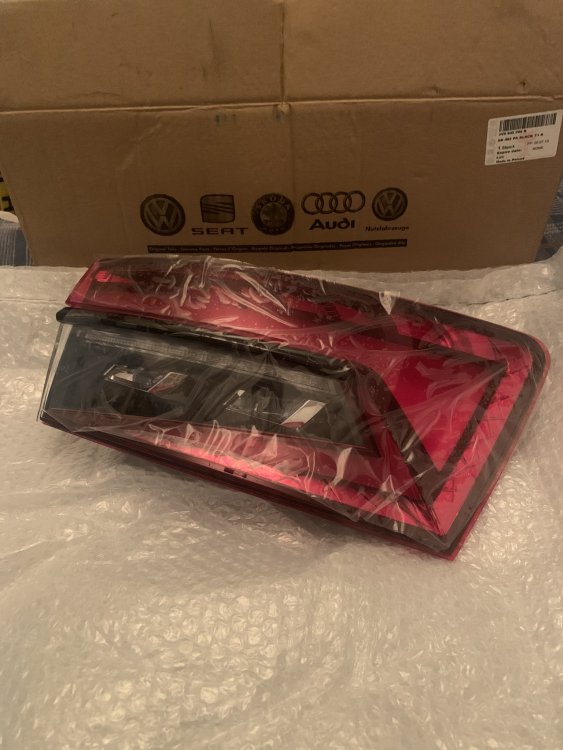
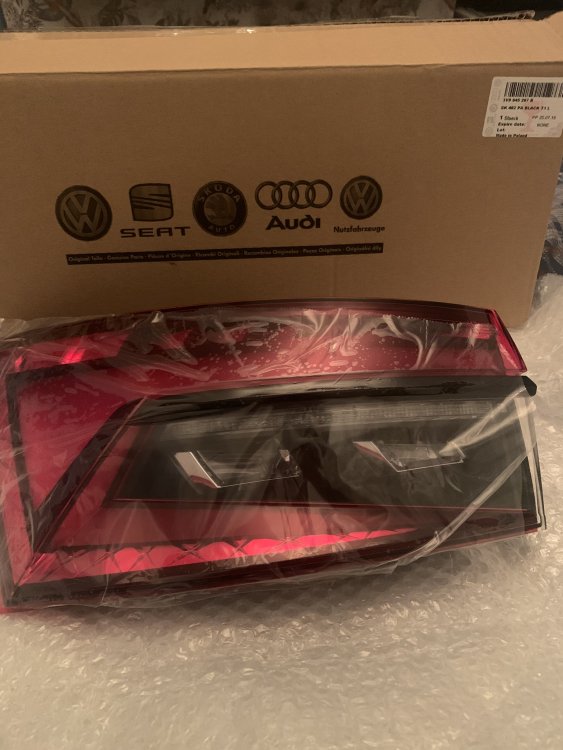
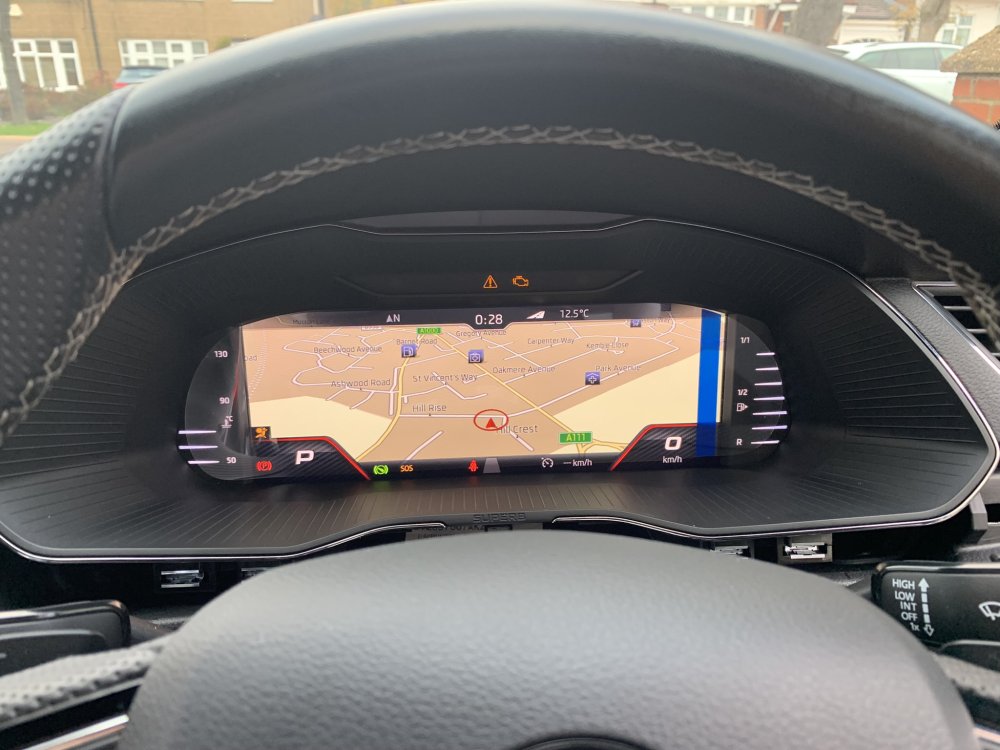
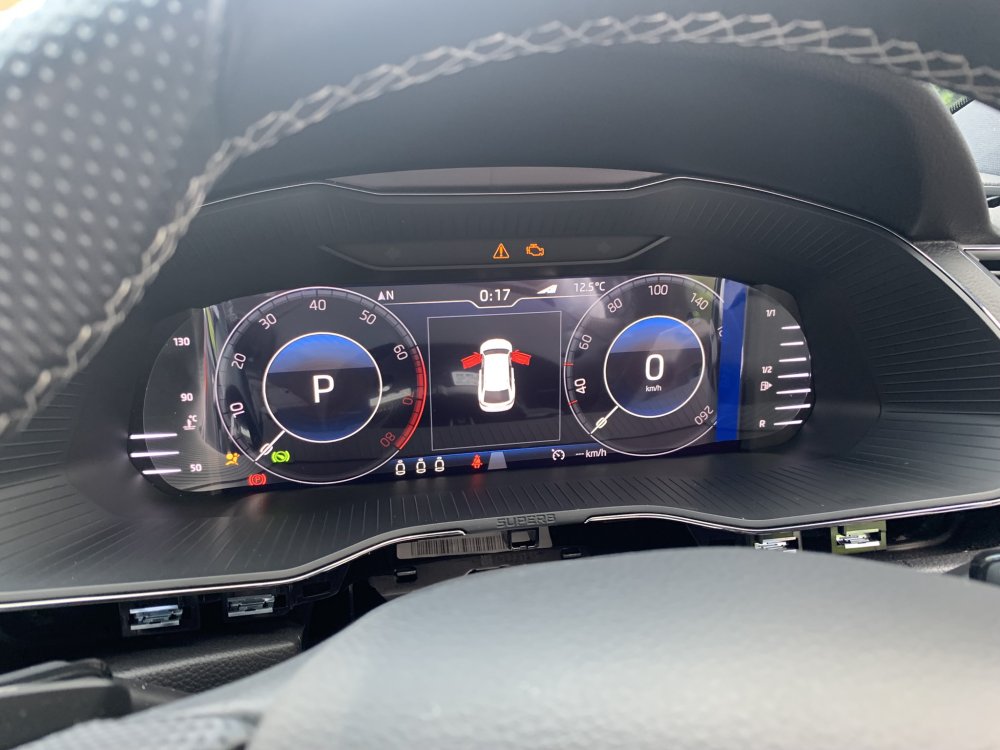
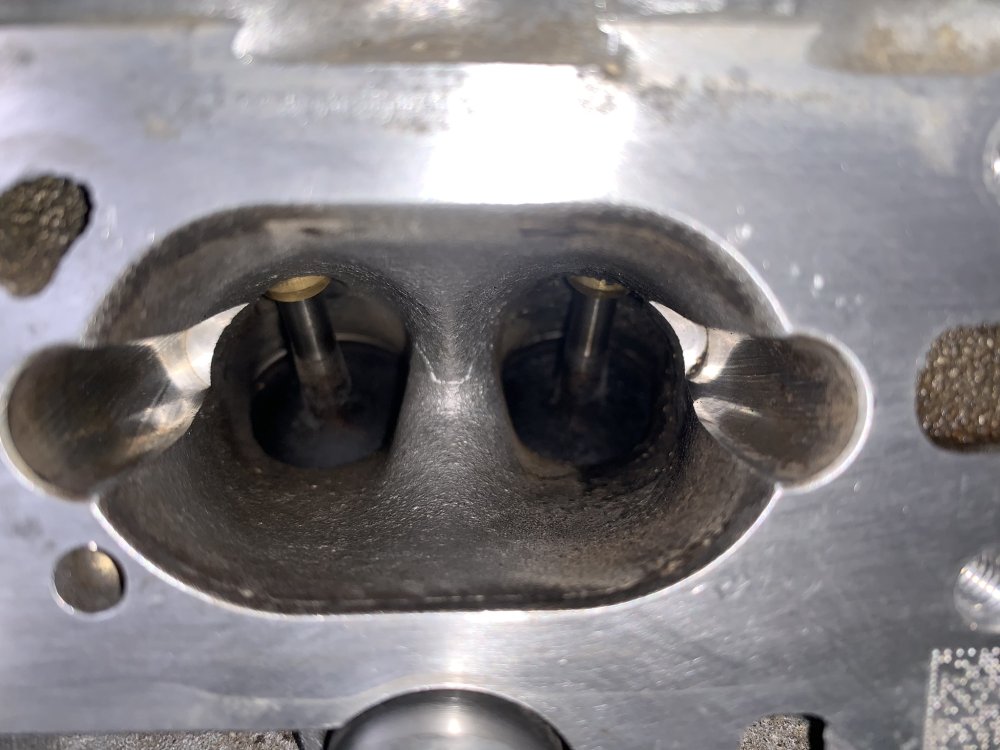
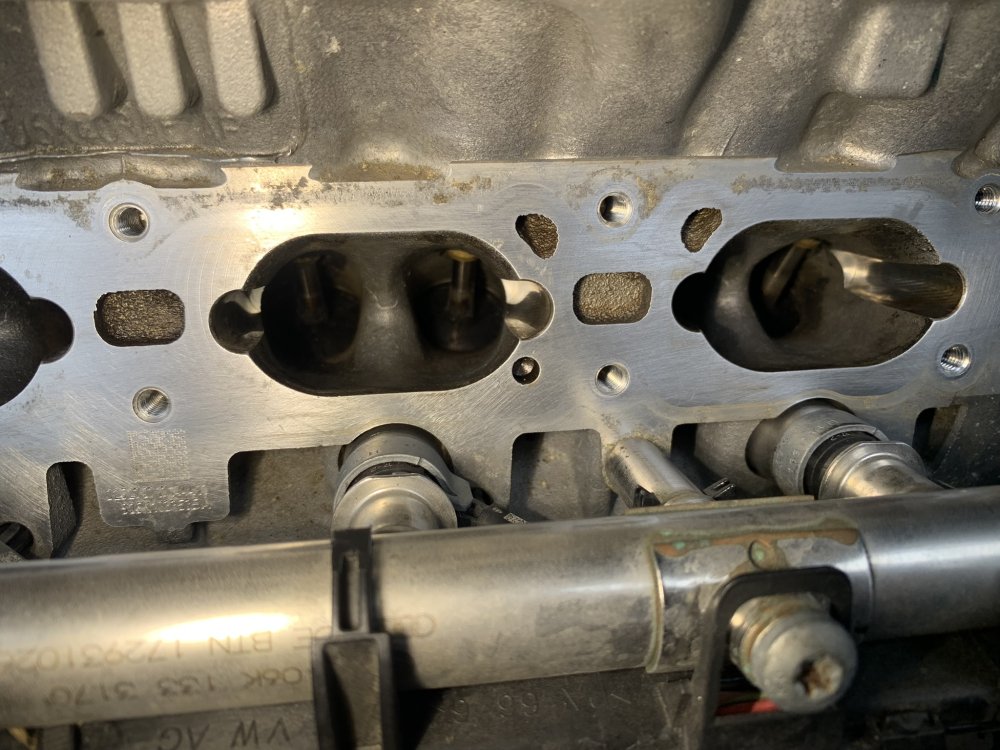
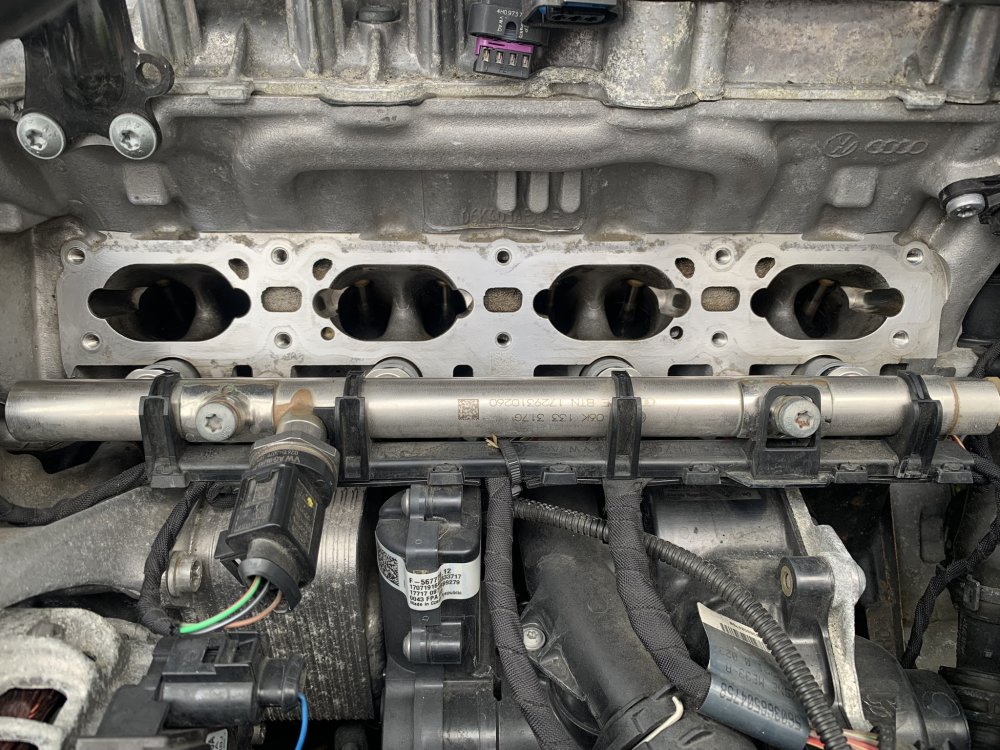
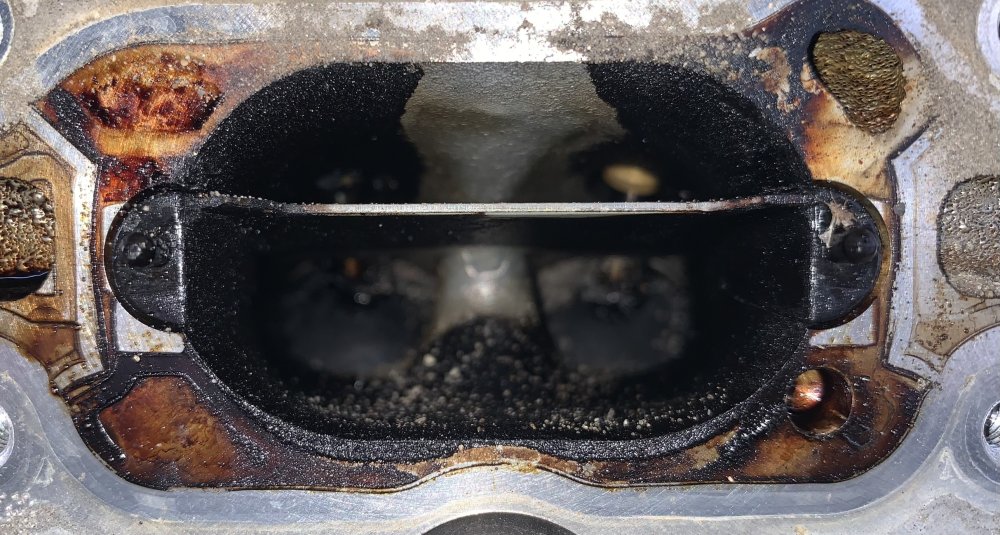
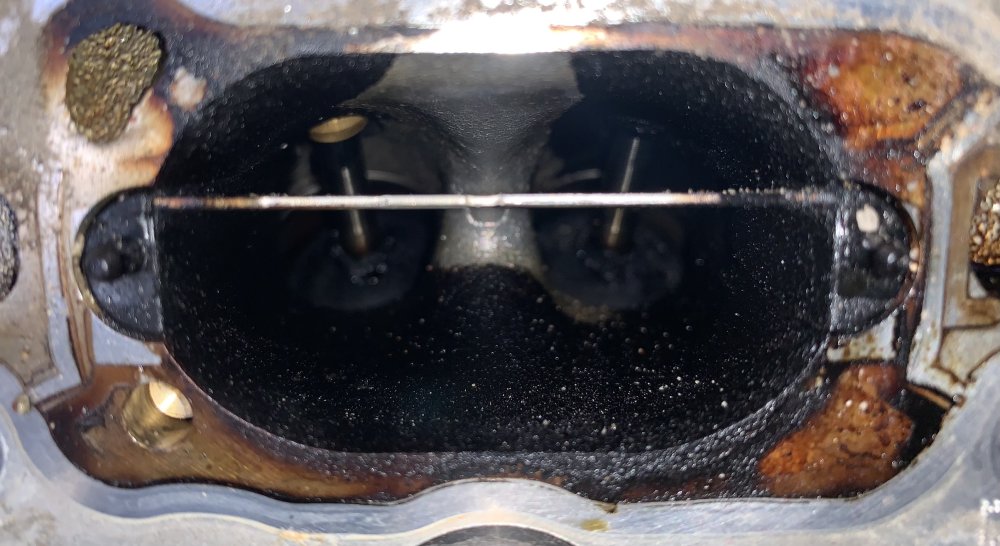
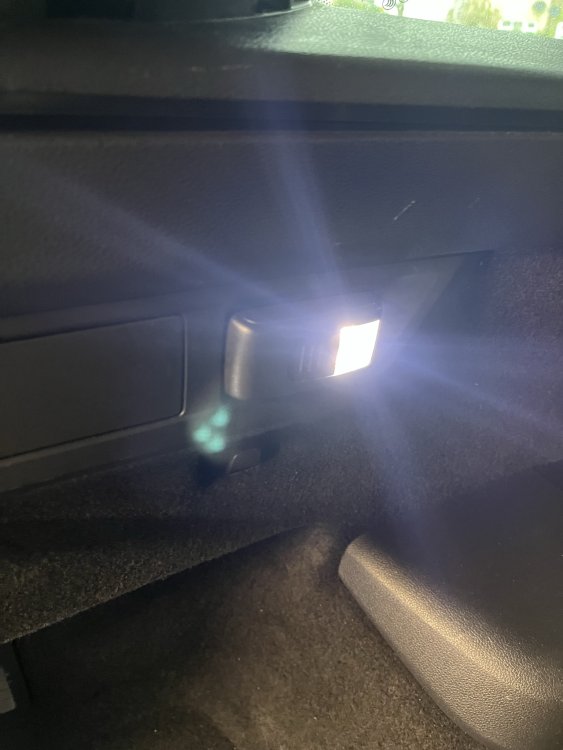

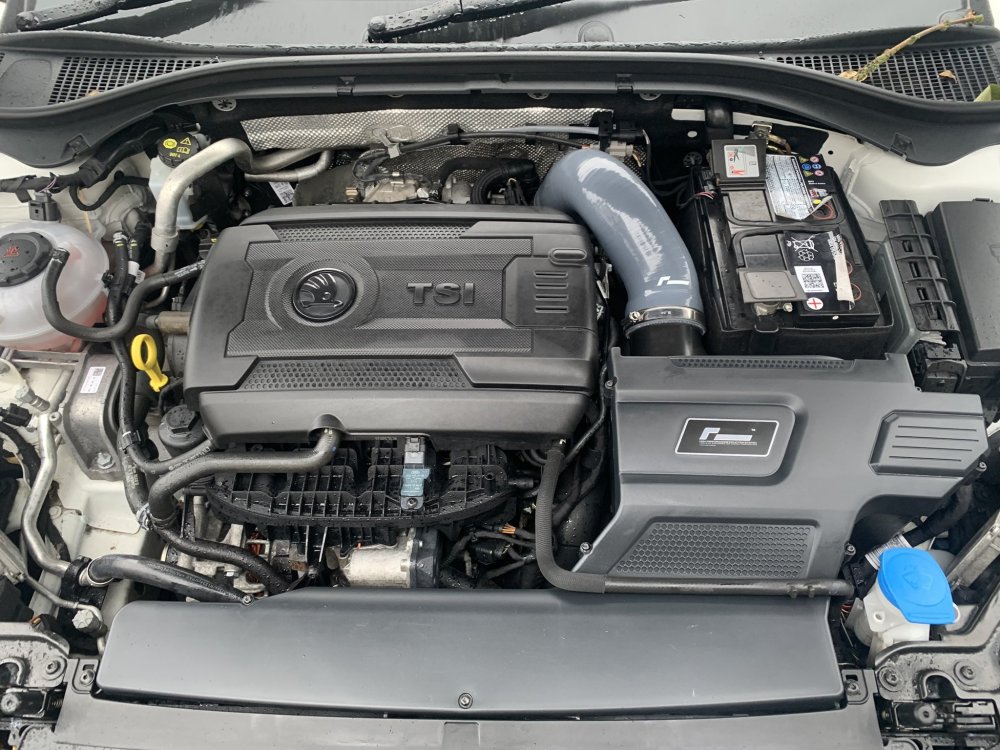 14 points
 -
14 pointsFinally got my car a couple of weeks ago. And it pains me to admit it but I’m glad I waited.
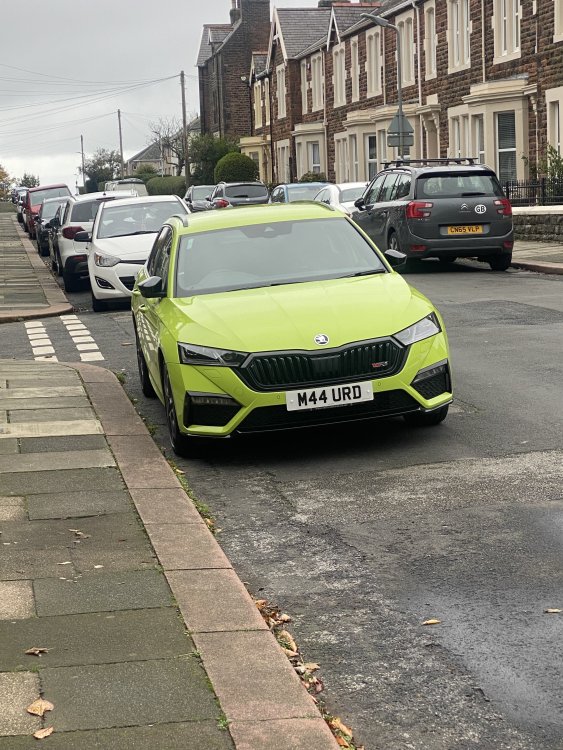
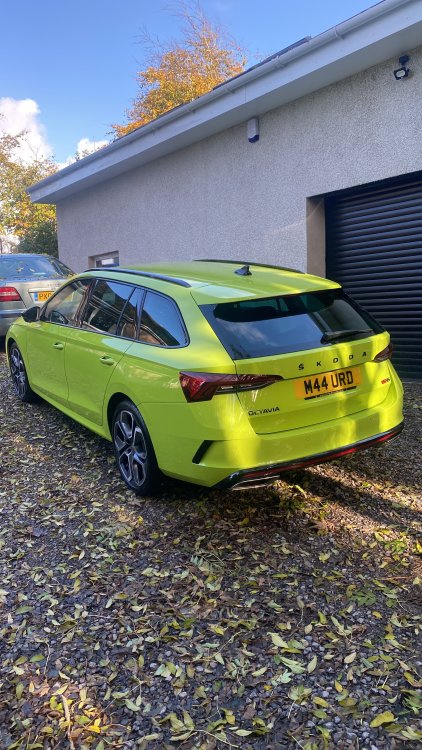 14 points
 -
14 points
-
14 pointsCollected today and love it, love it, love it! I'll post in the pictures thread soon 🙂14 points
-
14 pointsGuys I cannot believe it. My car is in Slovenia and I can get it next week. So 15 months waiting time all in all. I honestly thought this day would never come.......14 points
-
14 pointsHi kind regards from Poland. Superb 2.0 TDI 200HP Colour : Imperial Violet Equip: Style + all other possible options (excluding leather and 19 inch alloys). My second Superb
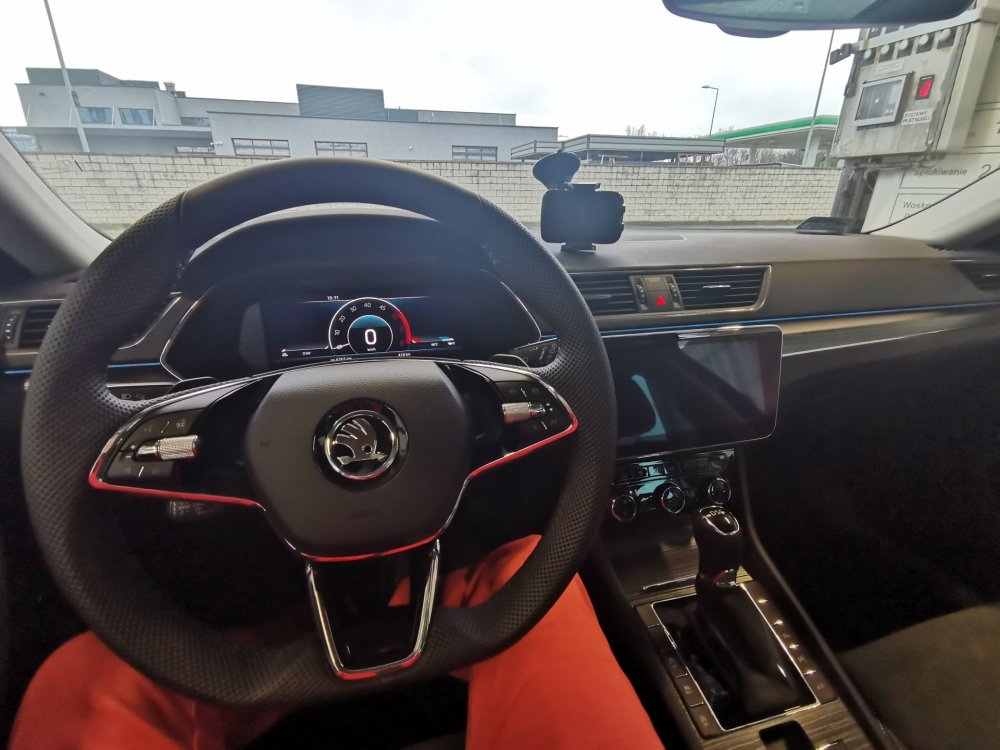
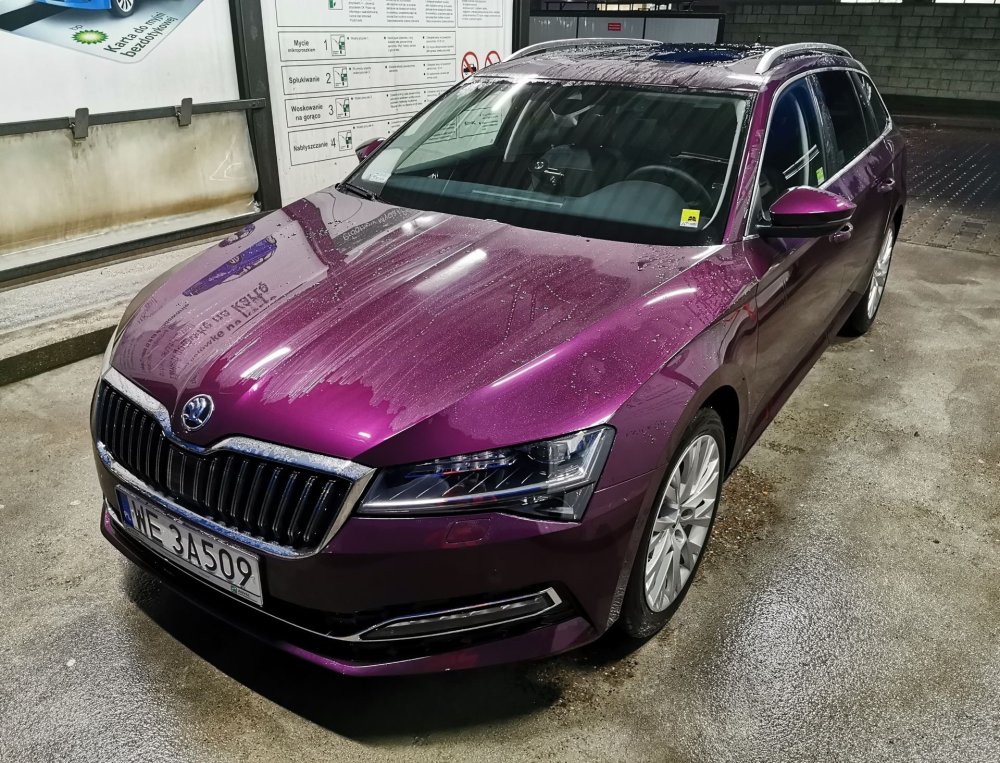

 14 points
 -
14 points
-
14 pointsNew car round 2!! Finance accepted and deposit paid on this one from Marshall’s. I am much happier with the incredibly thorough service from Marshall’s, have been through all the history, had a video sent to me, no pressure throughout and they’ve cut me a deal I’m really happy with on it. Collection on this one will be 3 weeks today as I need to wait for the Octy to go first as it is a bit more than the other one but it’s a facelift with some options which is what I really wanted. Let’s hope this one is better 😍 Will start a fresh thread when it arrives, keeps things separate 😊

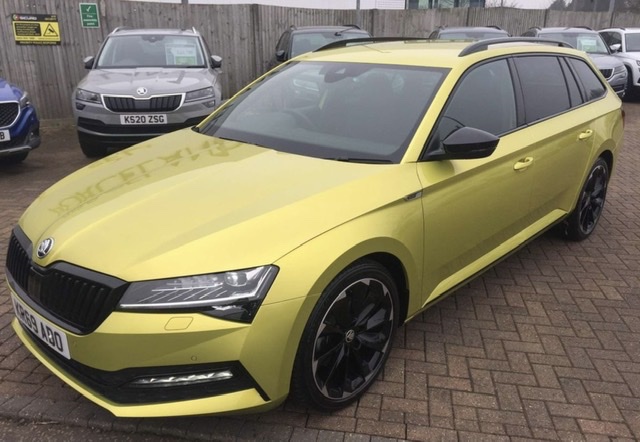

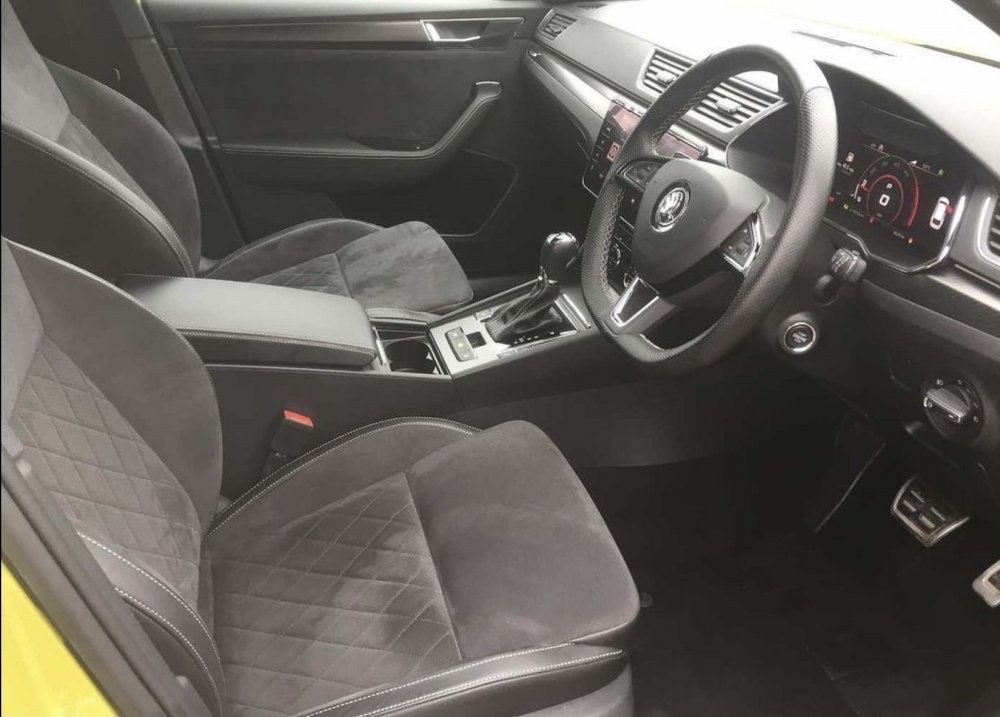
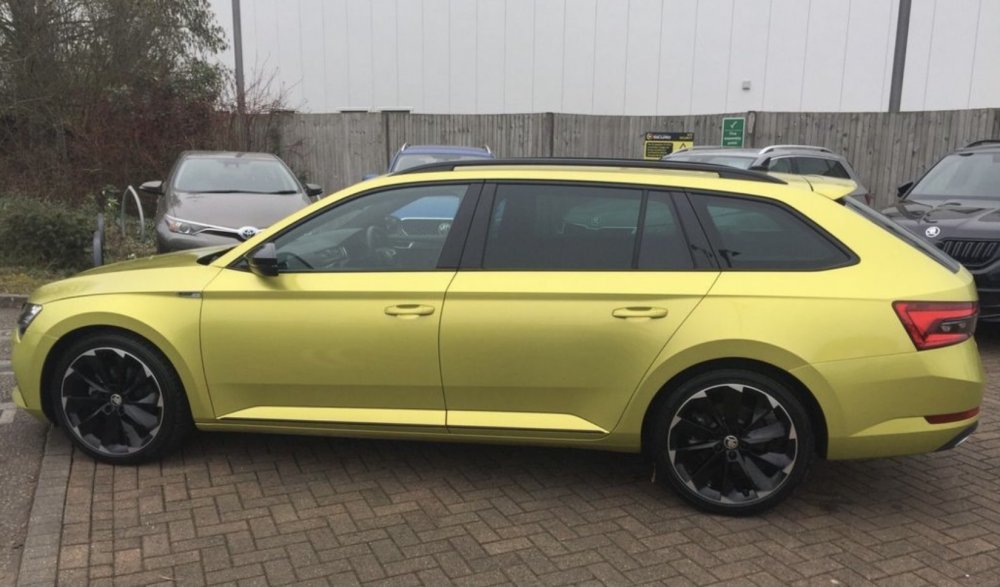
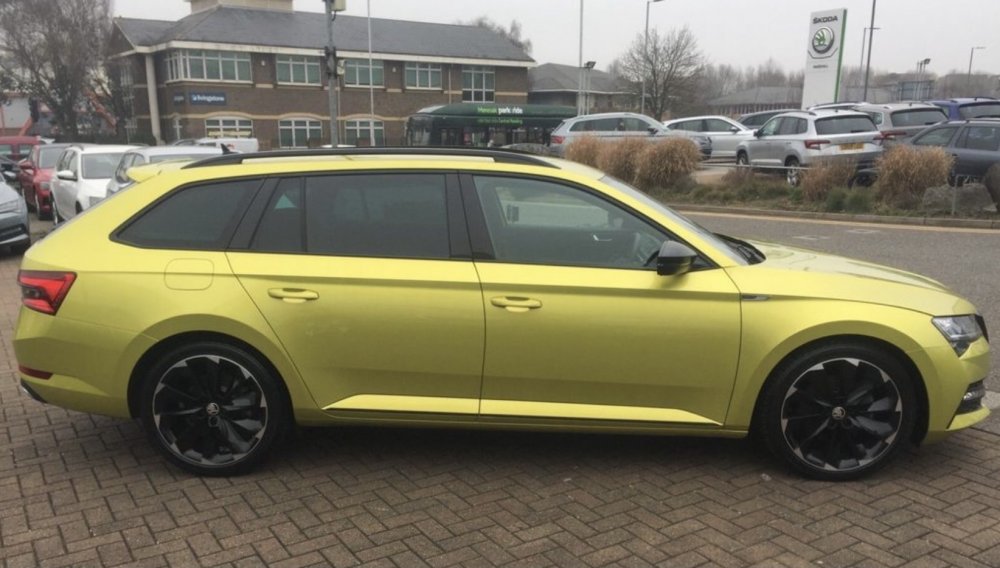
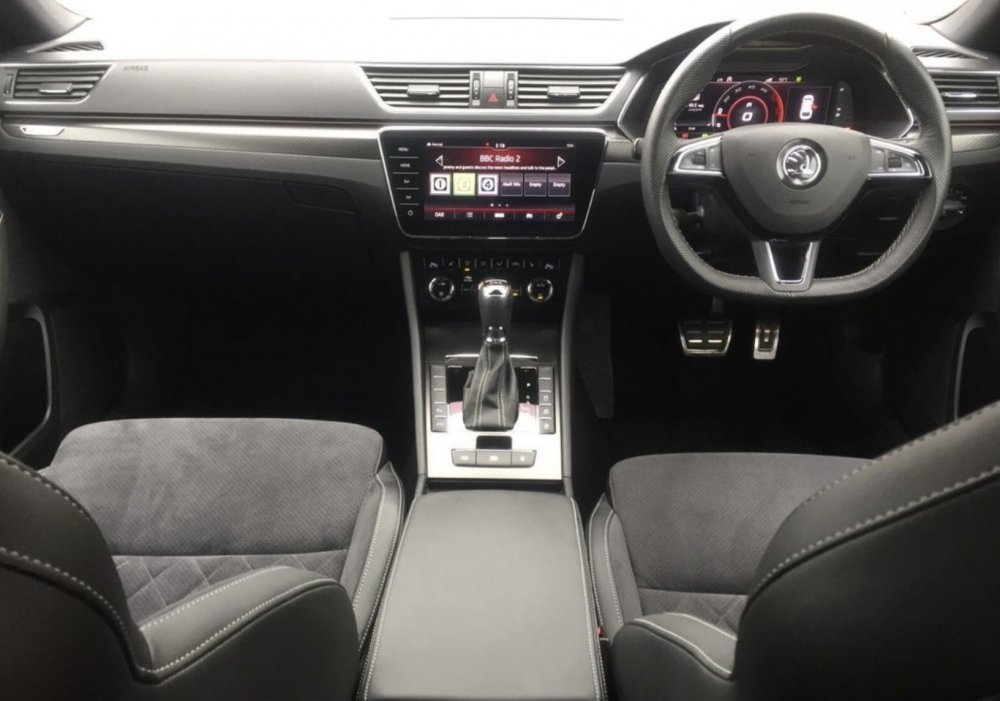 14 points
 -
14 pointsYou make it sound simple, but it isn't. Even with a car right in front of me I can't always accurately diagnose a problem because modern engines have become so complex and so many systems have complex interactions which are not easily separated from each other. Back in the old days you could say, "it's the ignition" because there was no spark then break it down further and eliminate components until the problem was found. Imagine how much harder it is doing this remotely where your eyes and ears are a person five thousand miles away who has no experience to draw upon and very few tools or skills and often cannot even articulate themselves properly in English.14 points
-
14 pointsNice trip upto Scotland last week! 1200miles and never skipped a beat! Managed to get nearly 500 miles to a tank which i'm well happy with! Normally only managed 380-400 to a tank! Had 20mm spacers fitted 2 days before we left for Scotland as well and love how it sits now! Didn't like how they made it look at first but i've got use to it now

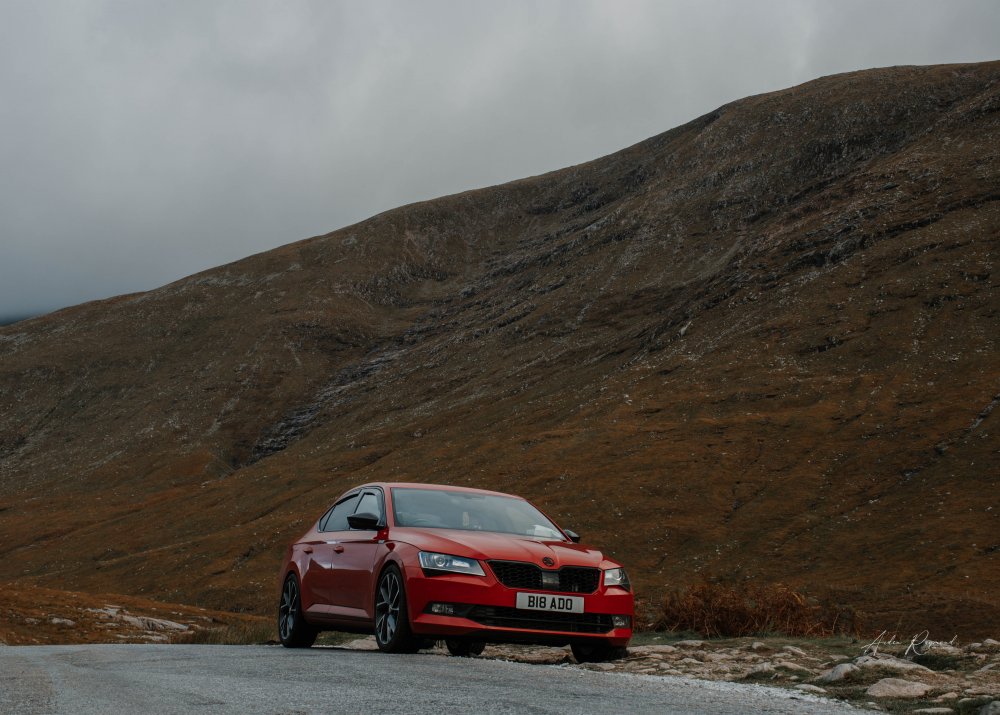

 14 points
 -
14 pointsOnly did 500 kilometers in last two months due to the lockdown. Need to do a road trip ASA the lockdown is lifted.
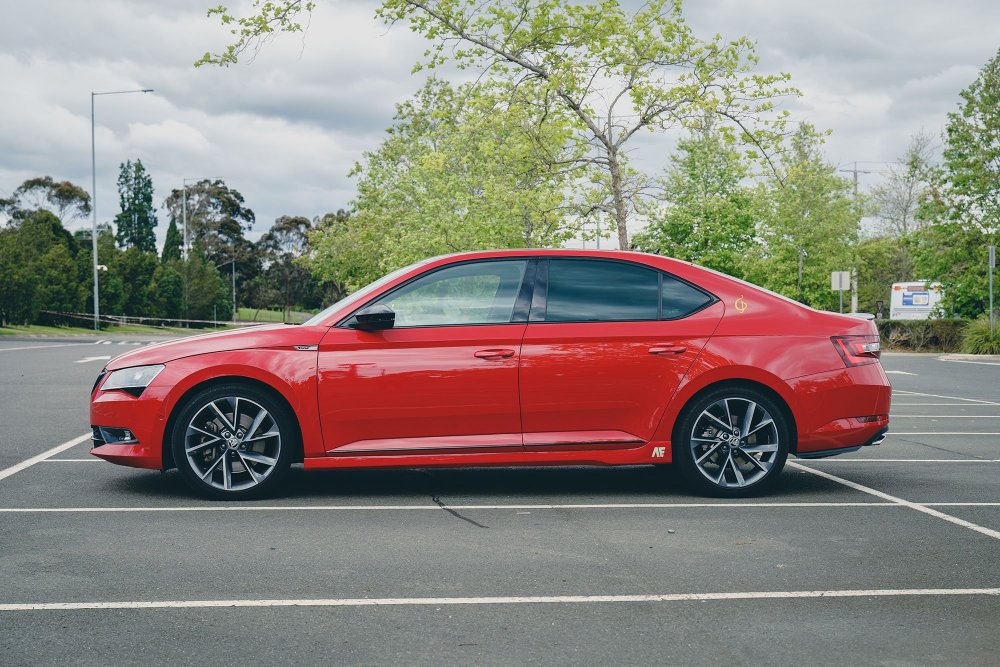
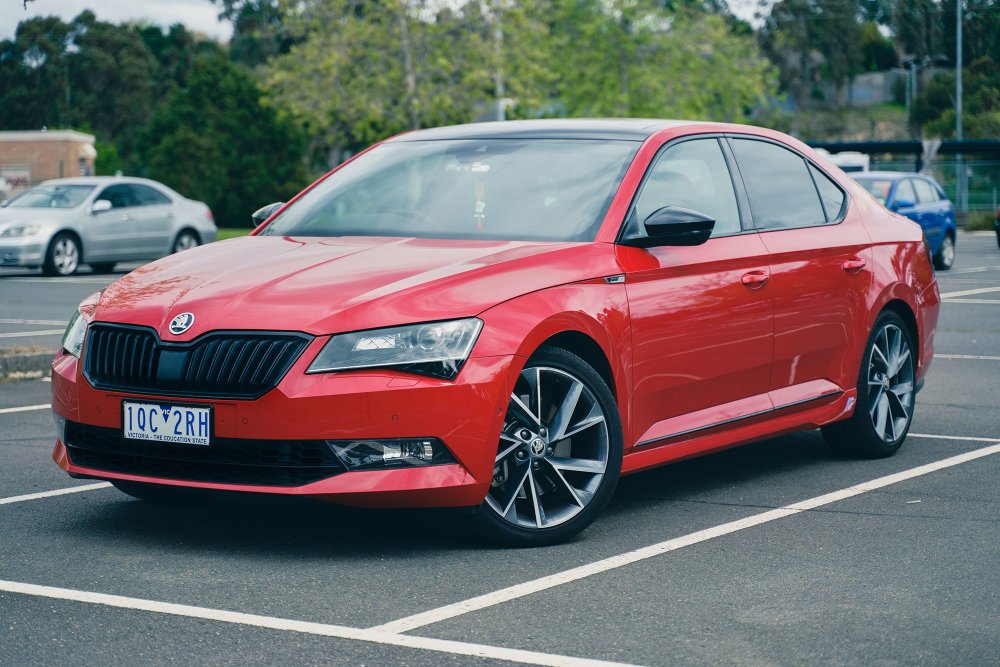
 14 points
 -
14 pointsGloss Metallic Chameleon Purple Blue wrap using Teckwrap USA . The metallic chameleon finish brings out the muscular lines of the Superb and accentuates the side profile spectacularly as well.14 points
-
13 pointsPlease no spam only post new coding that is not here... if you like the manual give me a like thx OCTAVIA IV CODING tested working coding obdeleven To verify 3 steps unlock SFD, 1 is registration add name ... which was normal, then parking brake must be on, hood open, ignition on... SFD unlock each module in aplication , not only 1 , u need to unlock all... Lane Assist to "Last setting" (asistent jazdného pruhu na "posledné nastavenie" ) EN- driver assistance (module A5) > long coding > Configuration for lane departure warning KI15 > change to "last setting" SK- asistencia vodiča (modul A5) > dlhé kódovanie > Konfigurácia upozornenia na vybočenie z jazdného pruhu KI15 > zmena na "posledné nastavenie" VRS CLUSTER THEME: Control unit 17 - Adaptations - view activation (Zobraziť aktiváciu) - all which are OFF should be ON (Set all views to active) Speed warning: Control unit 17 -long coding-speed warning take off or on G-meter: Control unit 17 - adaption- configuration of displayable contents -set G-Meter -> active Charging pressure ( turbo boost show) (zobrazenie turba): Control unit 17 - adaption- configuration of displayable contents -set charging pressure to active (bost pressure) Engine torque and Engine power: Control unit 17 - adaption- configuration of displayable contents- engine power and torque set active Oil temperature Control unit 17 -long coding-oil temperature display-set active, this function factory set on.. Automat transmission temperature , oil temperature and coolant (water) temperature: Control unit 17 - adaption- configuration of displayable contents- Transmission temperature set active Disable seat belt warning: Control unit 17 -long coding- seat belt warning verison1, version 2 or off- set off to turn off warning Show Volume to be Replenished (zobraziť kolko l dotankovať): Control unit 17 -long coding: volume to be replenished set active or on Laptimer: Control unit 17 -long coding- lapcounter set to active or on, other activation: Control unit 17 - adaption- configuration of displayable contents -set lapcounter-active Control unit 17 - adaption- personalization- display_laptimer to active Staging, Needle Sweep, indicator celebration: Control unit 17 -long coding-Staging set yes Rear DRL Lights (rear daytime running lights) (zadné svetlá ako denné) 1.Module 09 - Electronic control unit 2.Adaptation 3.Daytime running light 4.Tagfahrlicht-Dauerfahrlicht aktiviert zusaetzlich Standlicht: - (Change value to On) CONFIRMED WORKING ADD Enable / Disable daytime running light in menu radio: DRL In lighting menu (Attivazione e disattivazione delle diurne da menù) - Select control unit 09 - Select Adaptation - Select Daytime running lights ( Per gli italiani, Luci Diurne) - Select Tagfahrlicht Aktivierung durch BAP oder Bedienfolge moeglich, Set to Active Lock when car engine runs: Control Unit 09 Adaptation ZV allgemein funk bei klemme15- set active Menu of control door locking view : Menuesteuerung Tuerentriegelung: or in English Menu control door release: -Select Multimedia 5F ecu -Adaption - Vehicle menu operation menu_display_central_locking > not activated ( original is activated and where is off take on)menu_display_central_locking_over_threshold_high > not activated (set activated)13 points
-
Had the wheels refurb'd... and new centre caps and new tyres all round. Much much nicerer. Before and after
.thumb.jpg.c91e0dbd3cabea5d7edfd79a2dde8009.jpg)
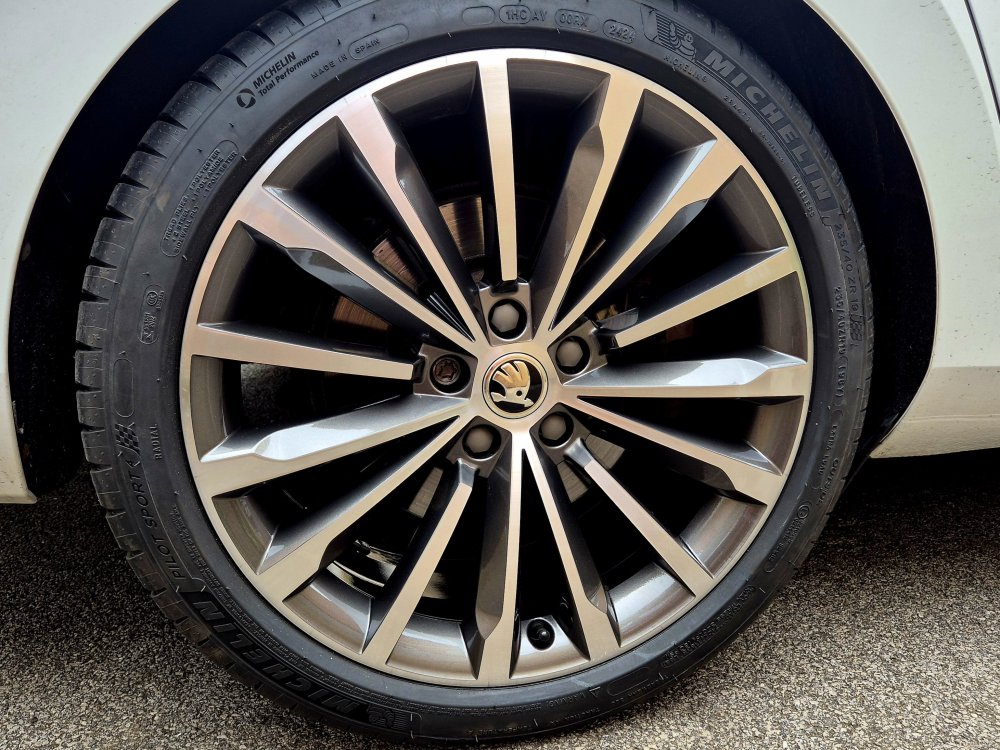 13 points
 -
13 pointsThe breeze wasn't my friend this morning in the Hope Valley........ A2 Pacific Blue Peter blasts through Edale with it's first revenue earning train in approx. 22 years after an extensive overhaul.


 13 points
 -
13 pointsNeeding a larger family car that would cope with long journeys I started digging around for something. I was mainly after something interesting. So after spotting a Maserati Quattroporte online I popped up to drive it and after a short and fruitful haggle I bought a Maserati Quattroporte V6d. It's fairly rapid (275hp), huge inside, and possibly the quietest car I've ever driven. The ICE is dated (probably dated when it was new) but does bluetooth and DAB and that's 95% of my needs. Some of the switchgear is a bit meh (Chrysler stock) other parts of the car are pure quality. Dash is walnut and leather. Dealer put on a full set of front disks and pads (OEM), two new front springs (caused a 6 week delay), oil and filter change, and a very good valet. Bought from the dealer owner who owns a GTS version and is clearly a Maserati fan himself, I'm guessing the previous owner was also very careful as it it mint. Already terrified of kerbing the alloys and it's a total PITA to park as it is over 5.2m long. But, just look at it....snaps knicker elastic at 100 yards.
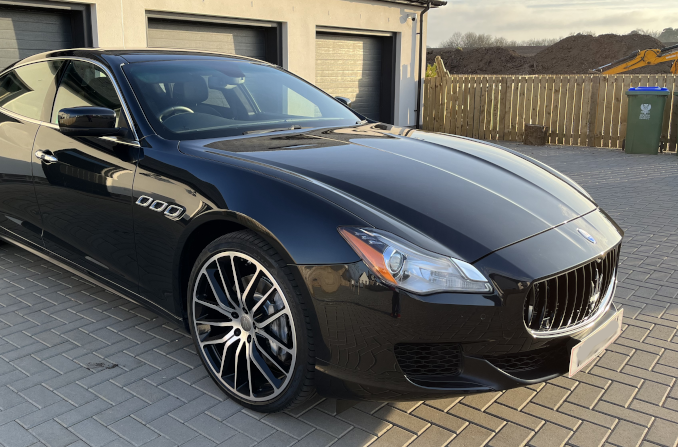
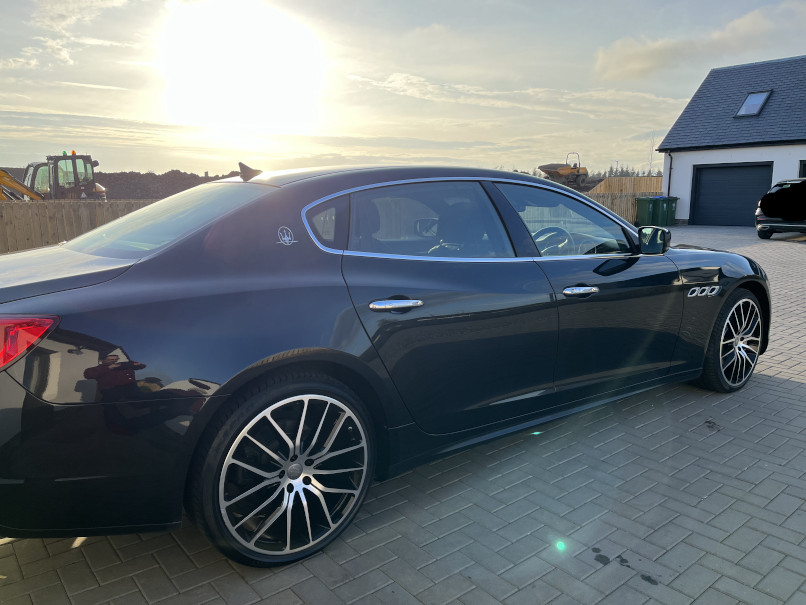
 13 points
 -
13 points
-
13 points
-
13 pointsSo, after 13 months (5 of them being parked), my 2.0 TDI DSG is finally finished 🥳🥳🥳 My dealer called me today around lunch time but it’s been such a hectic day at work that I couldn’t share the news with you guys sooner. It should be ready for pick up in about 2 weeks. Doesn’t show in the app yet though. So the time has come, my budget is about to get significantly thinner 😉 Will keep you updated ofc 😊13 points
-
13 pointsSo I finally collected my car on Saturday the 20th August so 13 months after placing the order on 17th July 2021. A great day only marred by the fact that I ordered Quartz Grey and they delivered a Graphite Grey car, dealer didn't even mention this until I raised the issue. I have accepted the car of course and am very happy with it so far, My daily commute of 28 miles has been possible on all electric so far. Fingers crossed for all of you out there waiting for yours.
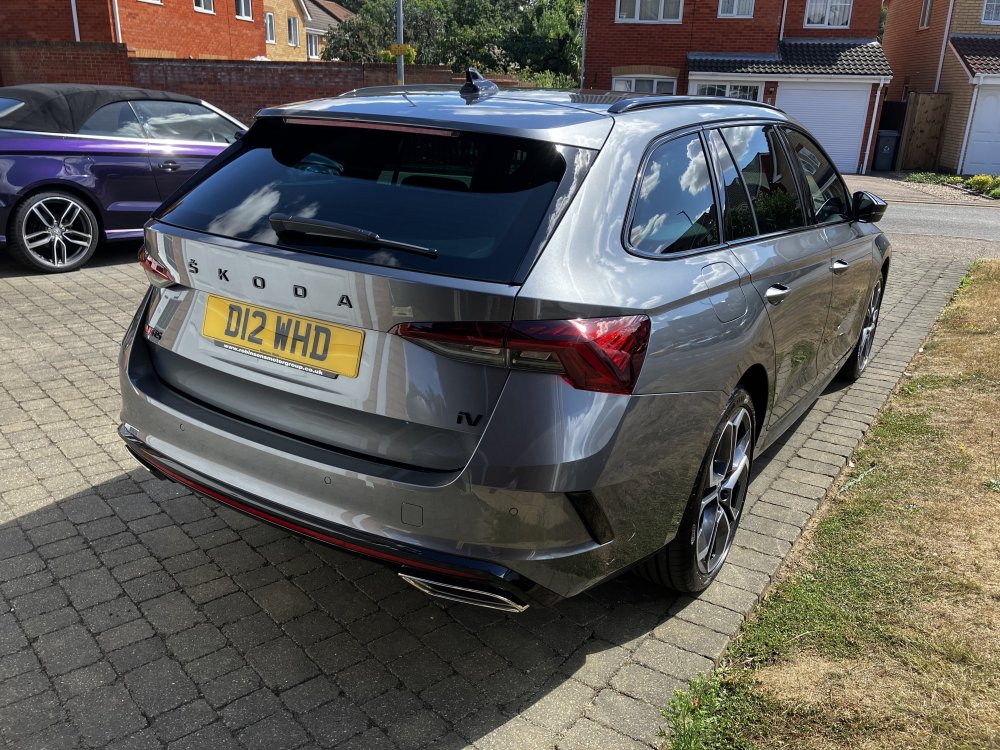
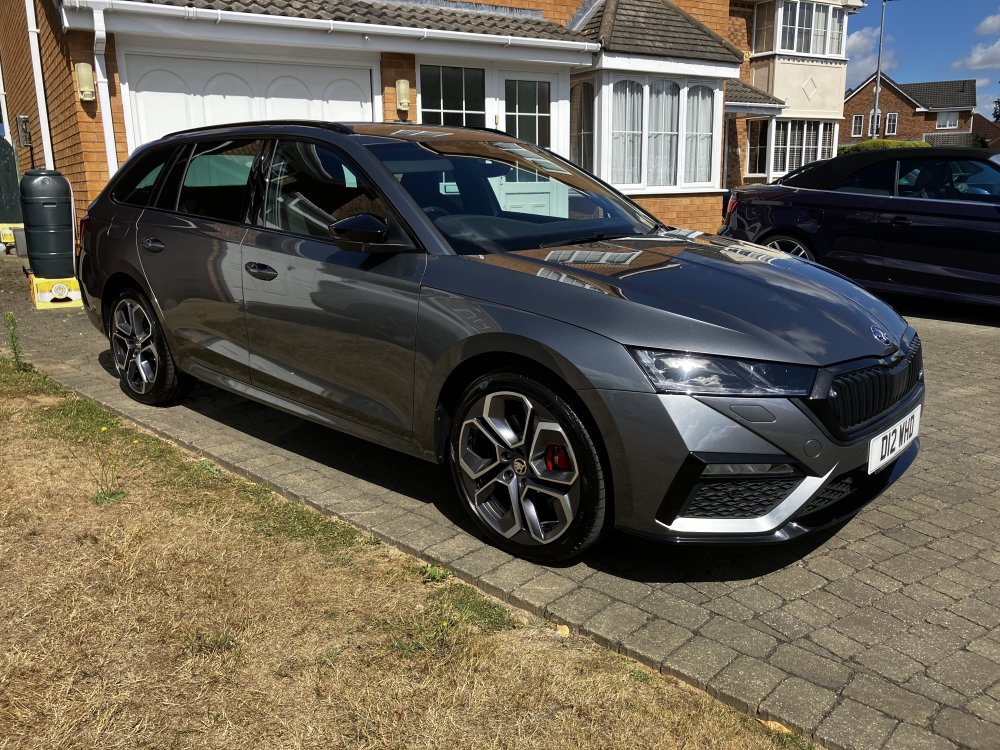 13 points
 -
13 pointsSo, almost 5 months into ownership, and I'm still really liking the Superb. Went down the road of lowering, with Eibach Pro-Kit, a few weeks back, and that pushed me to either buy some spacers as a temporary solution, or finally make my mind up on some wheels. Read as much as I could on sizing and offsets, but still needed to take an educated guess/leap of faith. Straying from my Japanese wheel roots, I ended up going with Judd Model One, 20x9.5 et40, in Gloss Gunmetal (would have done Brushed Titanium if they were in stock). Tyres are Michelin PS4S, 255/35r20 in size. Yes, I know that's a little larger than stock OD, but it was a deliberate choice to maintain some sidewall. No rubbing so far, thankfully. Outside pics are with the stock wheels/tyres loaded in the back, hence why it sits a little lower in those pics. Will try and get some better pics sometime over the next week or so.
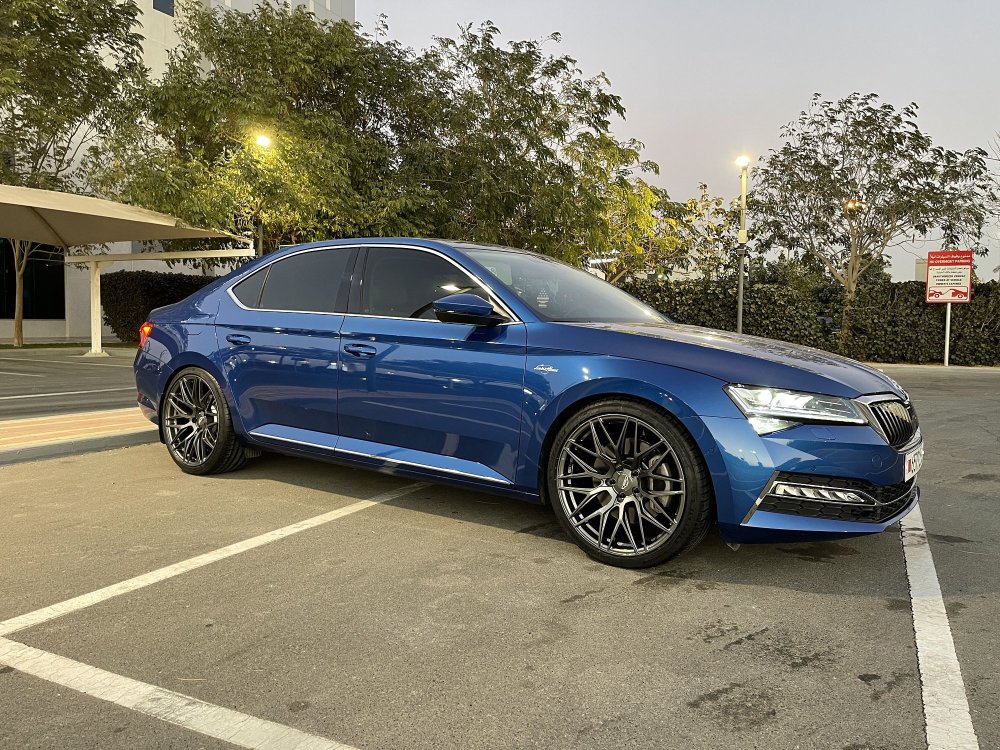
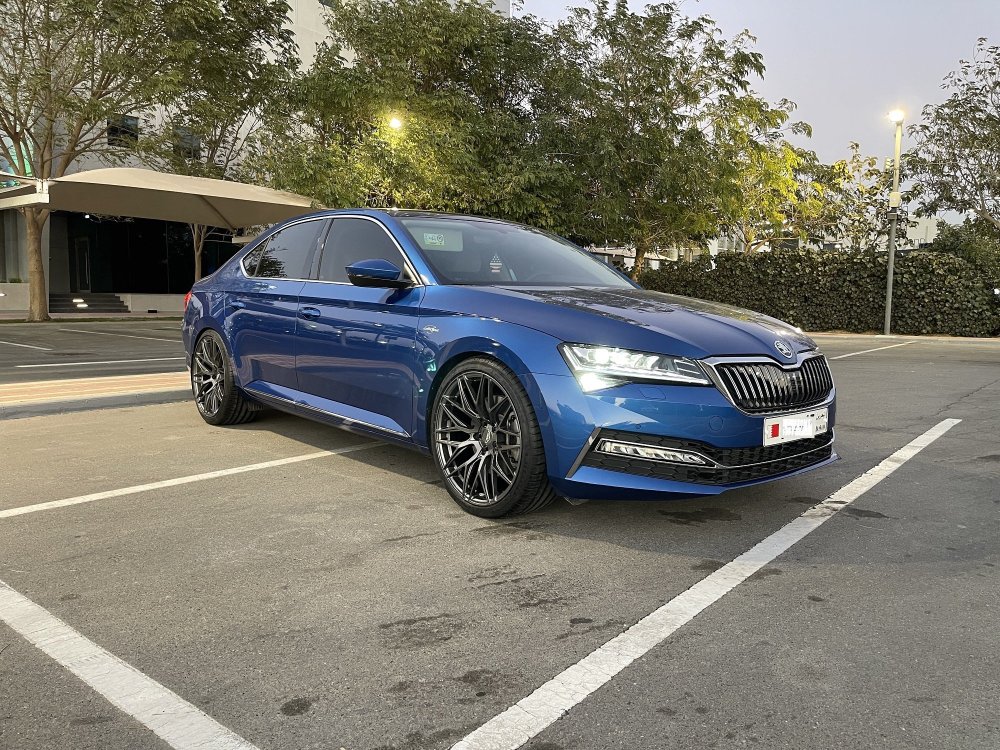
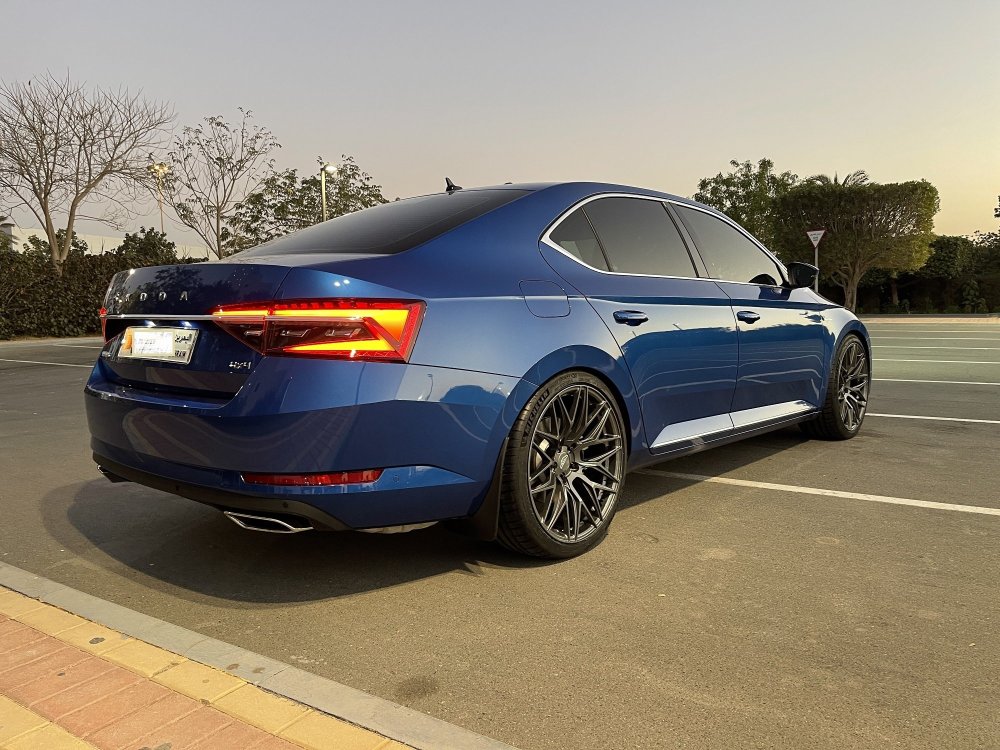

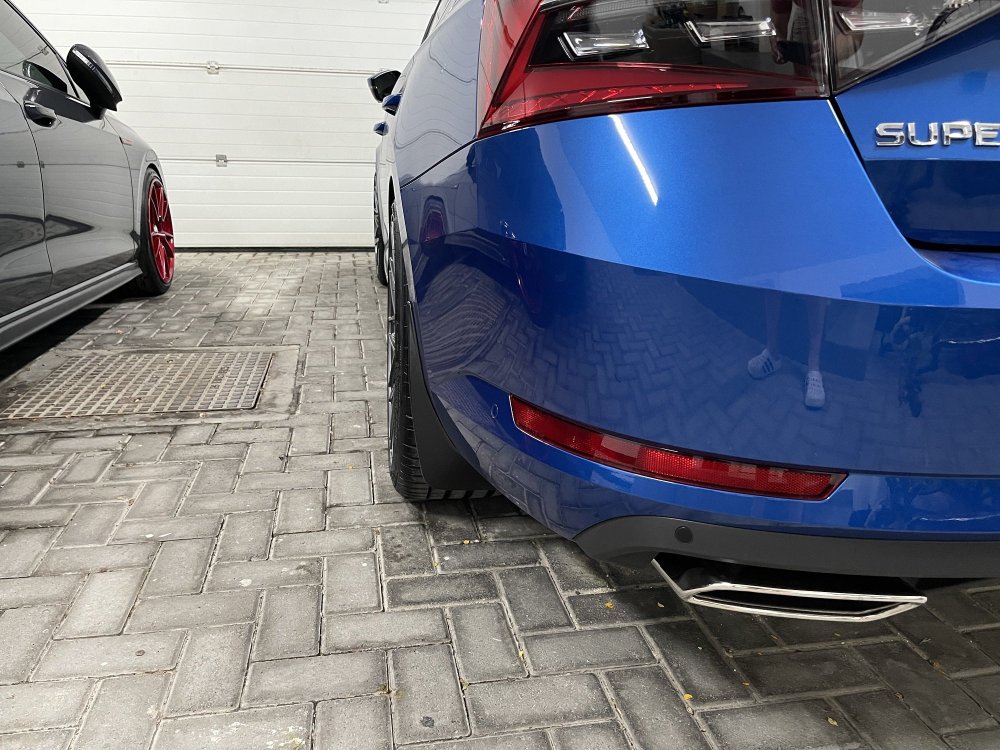
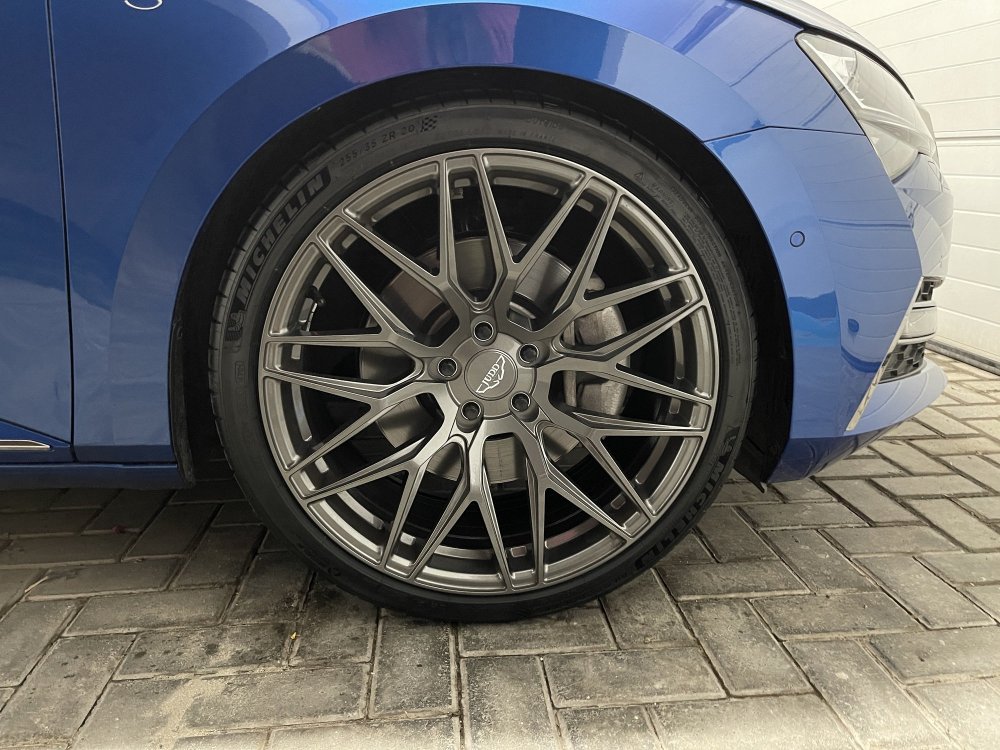 13 points
 -
13 pointsGoodby old VRS, hello new VRS - first impressions, brilliant - a big step up!
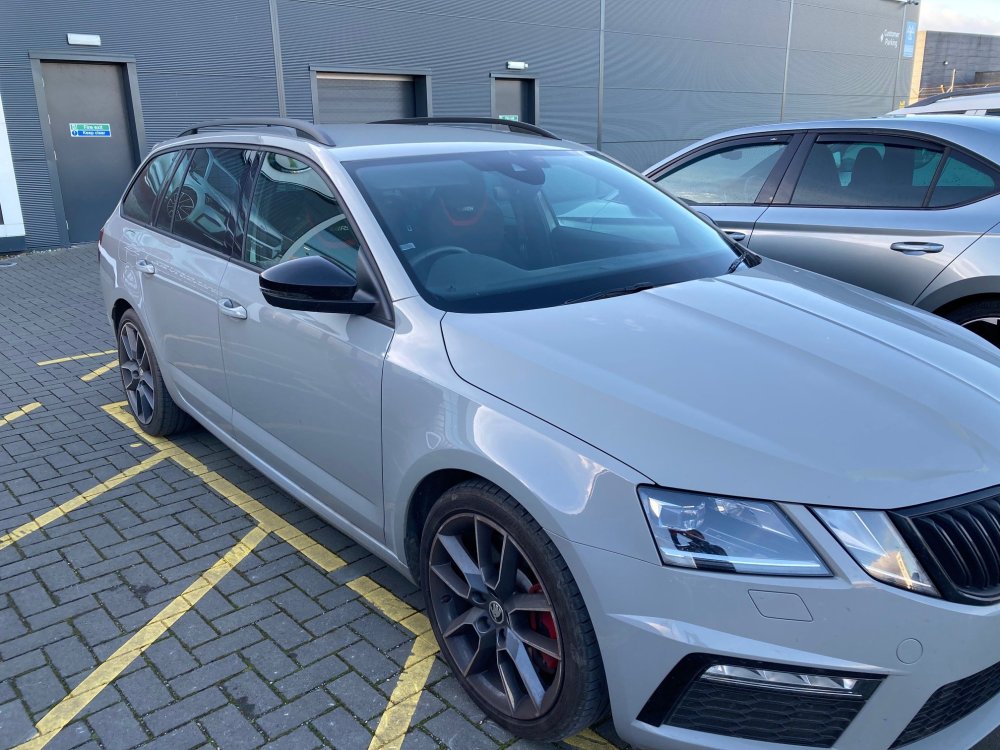
 13 points

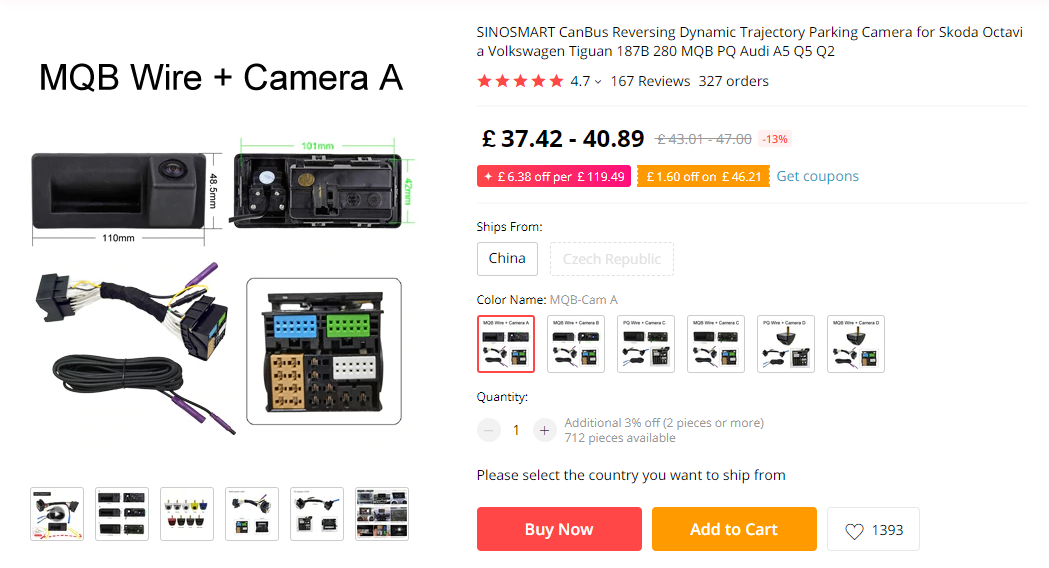
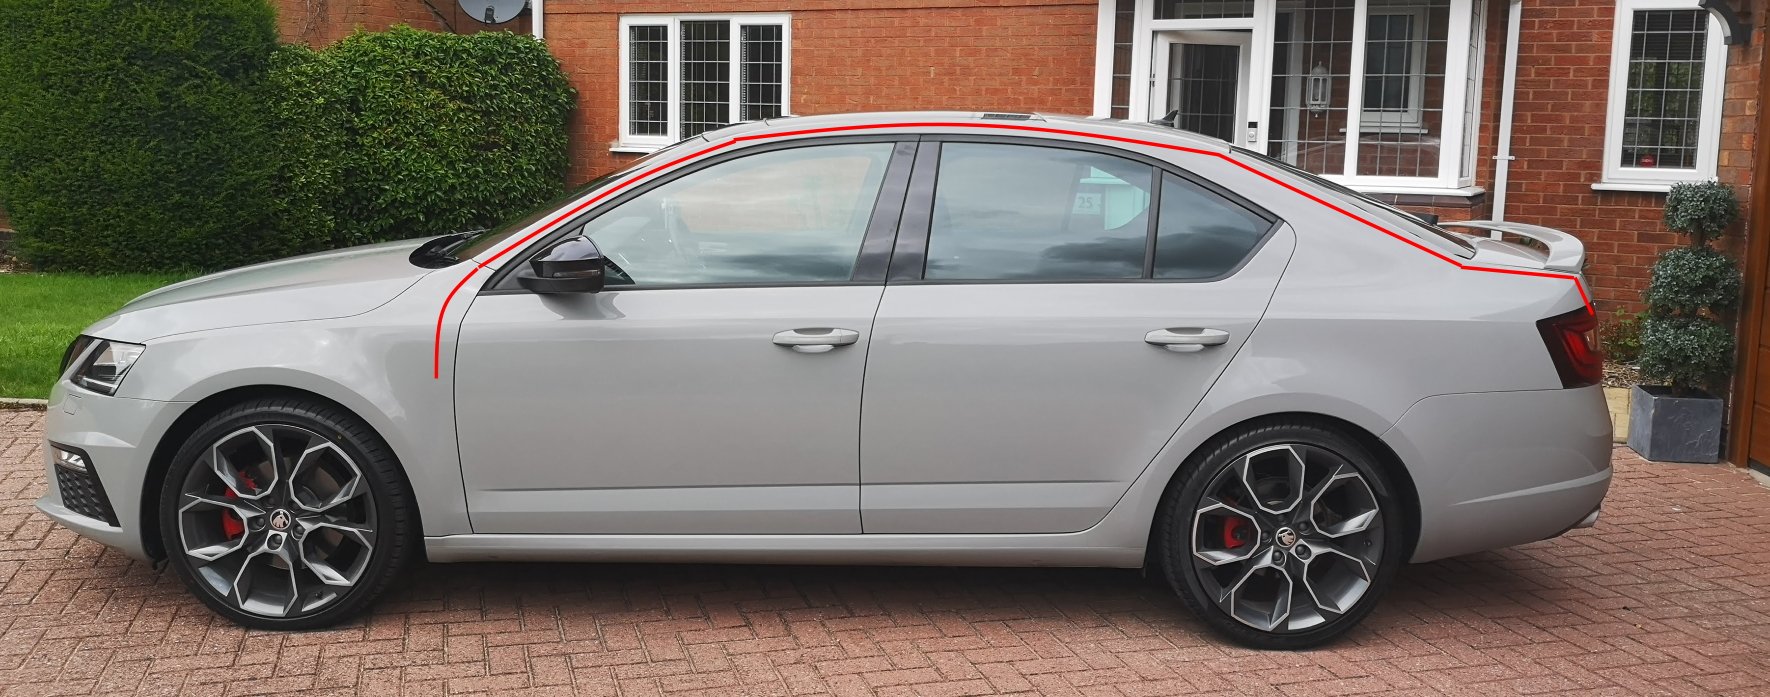

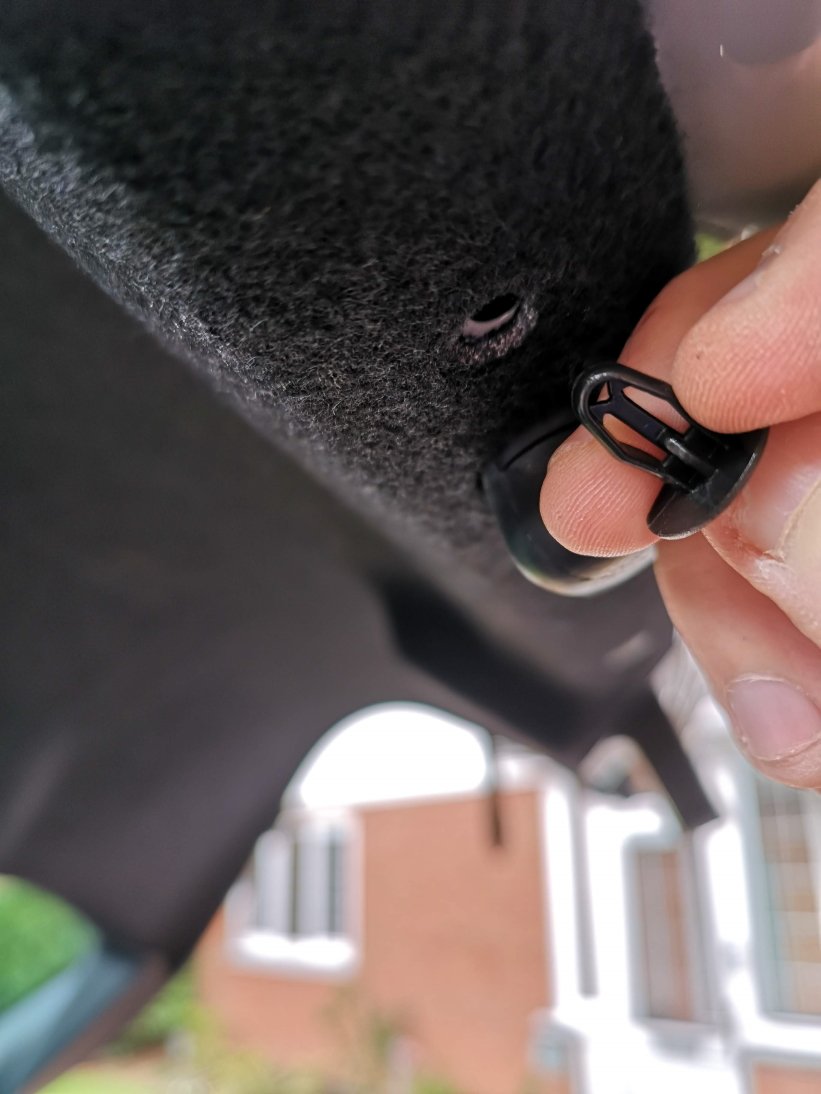
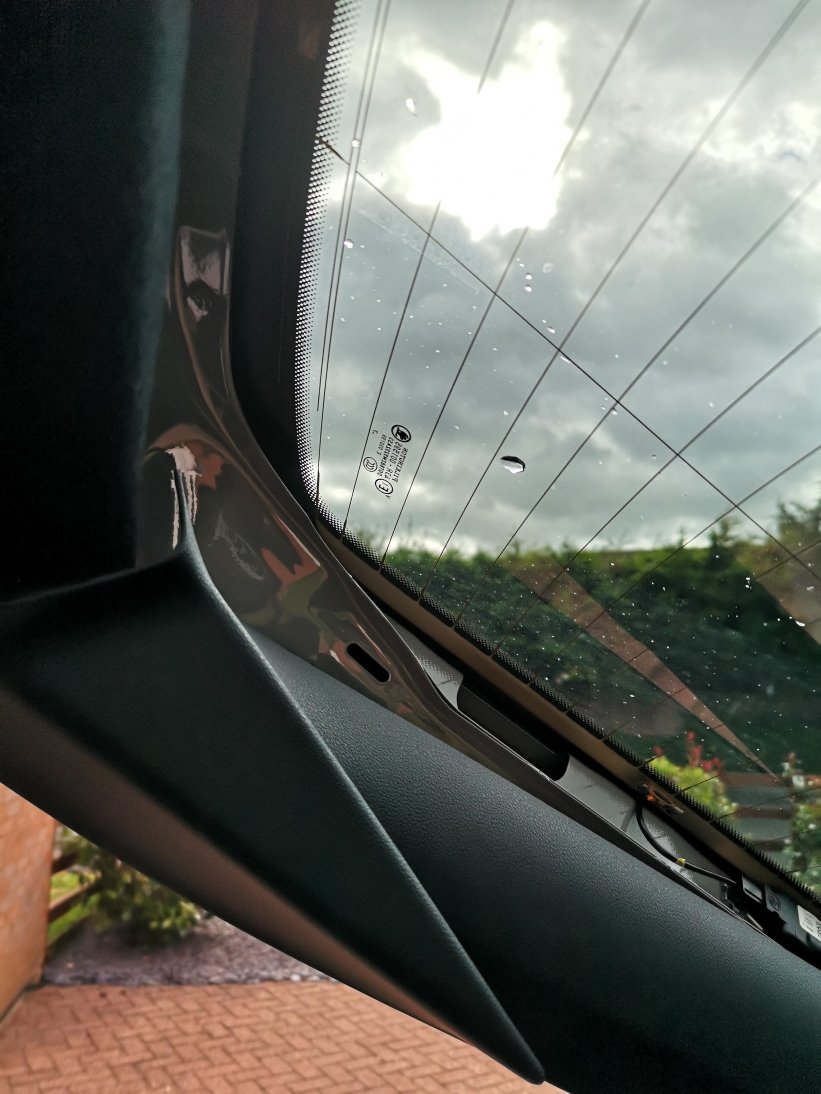
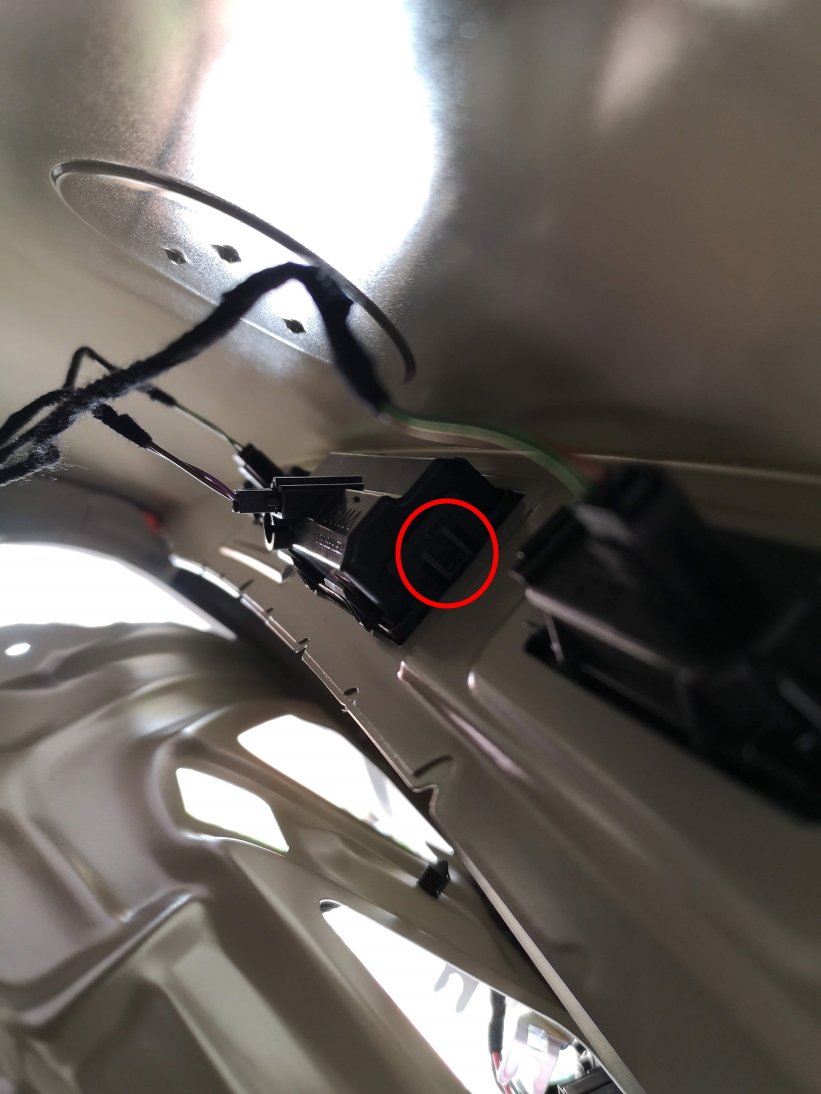
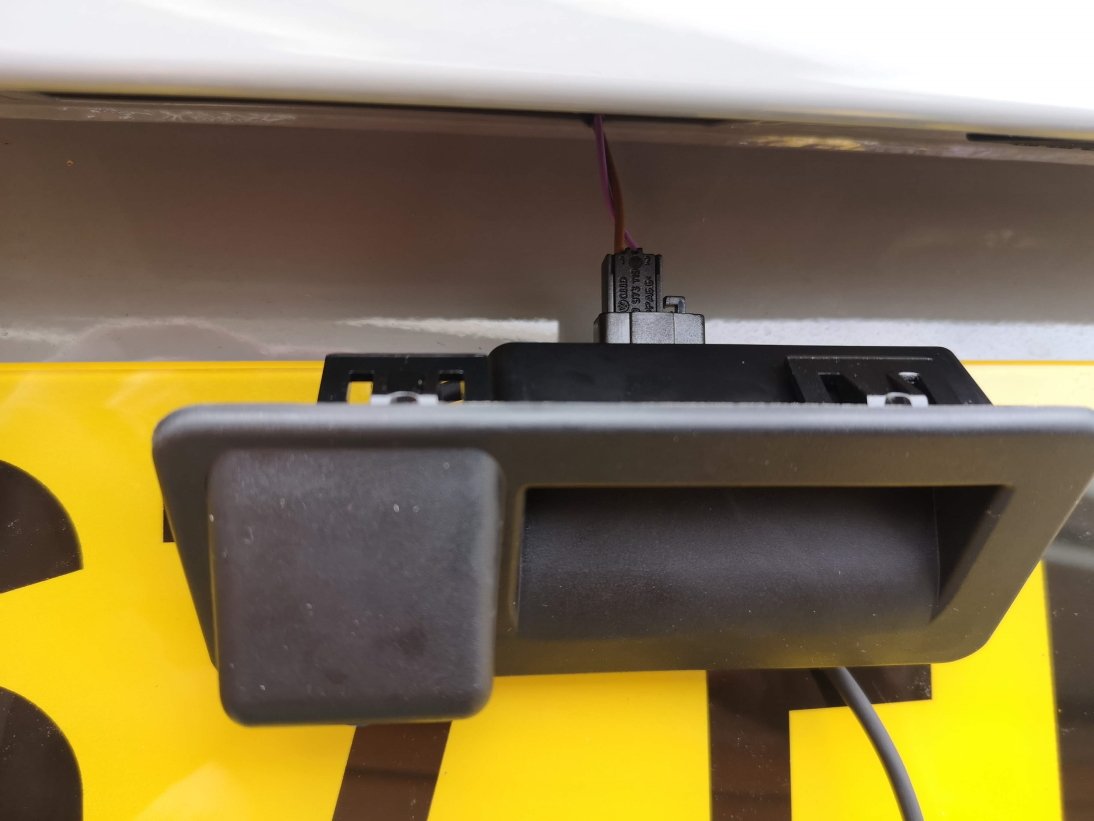

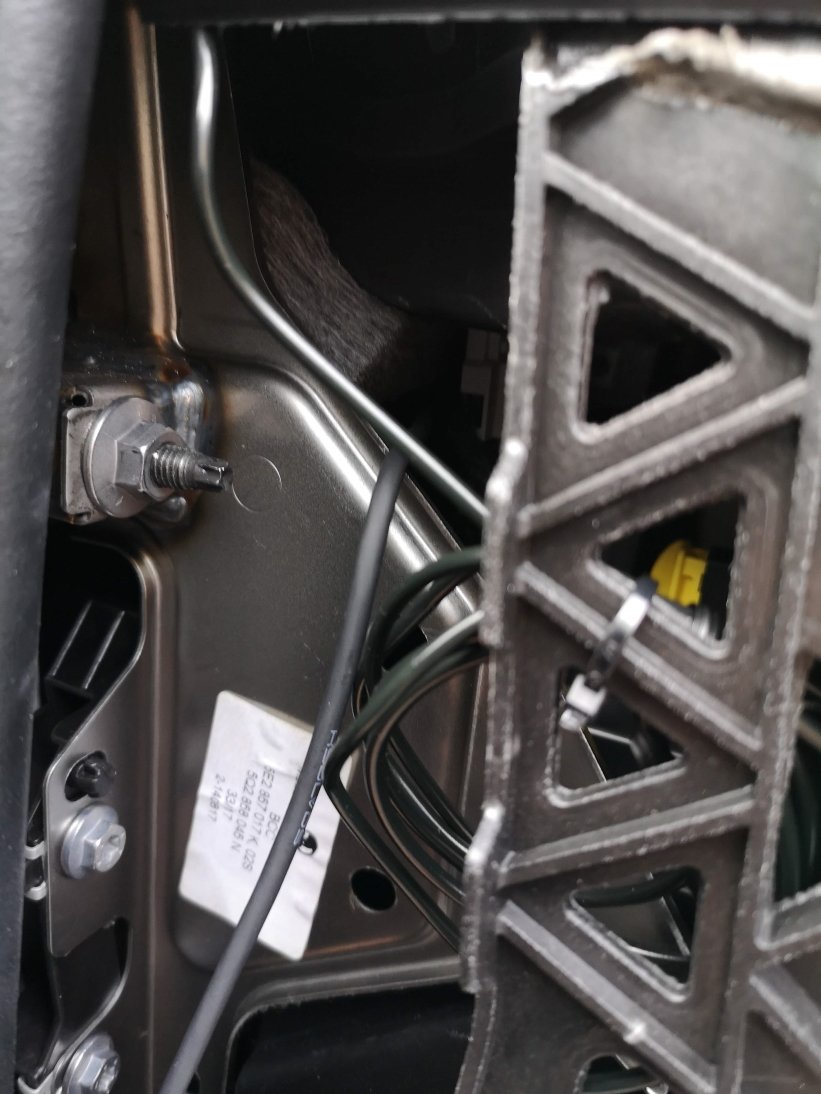


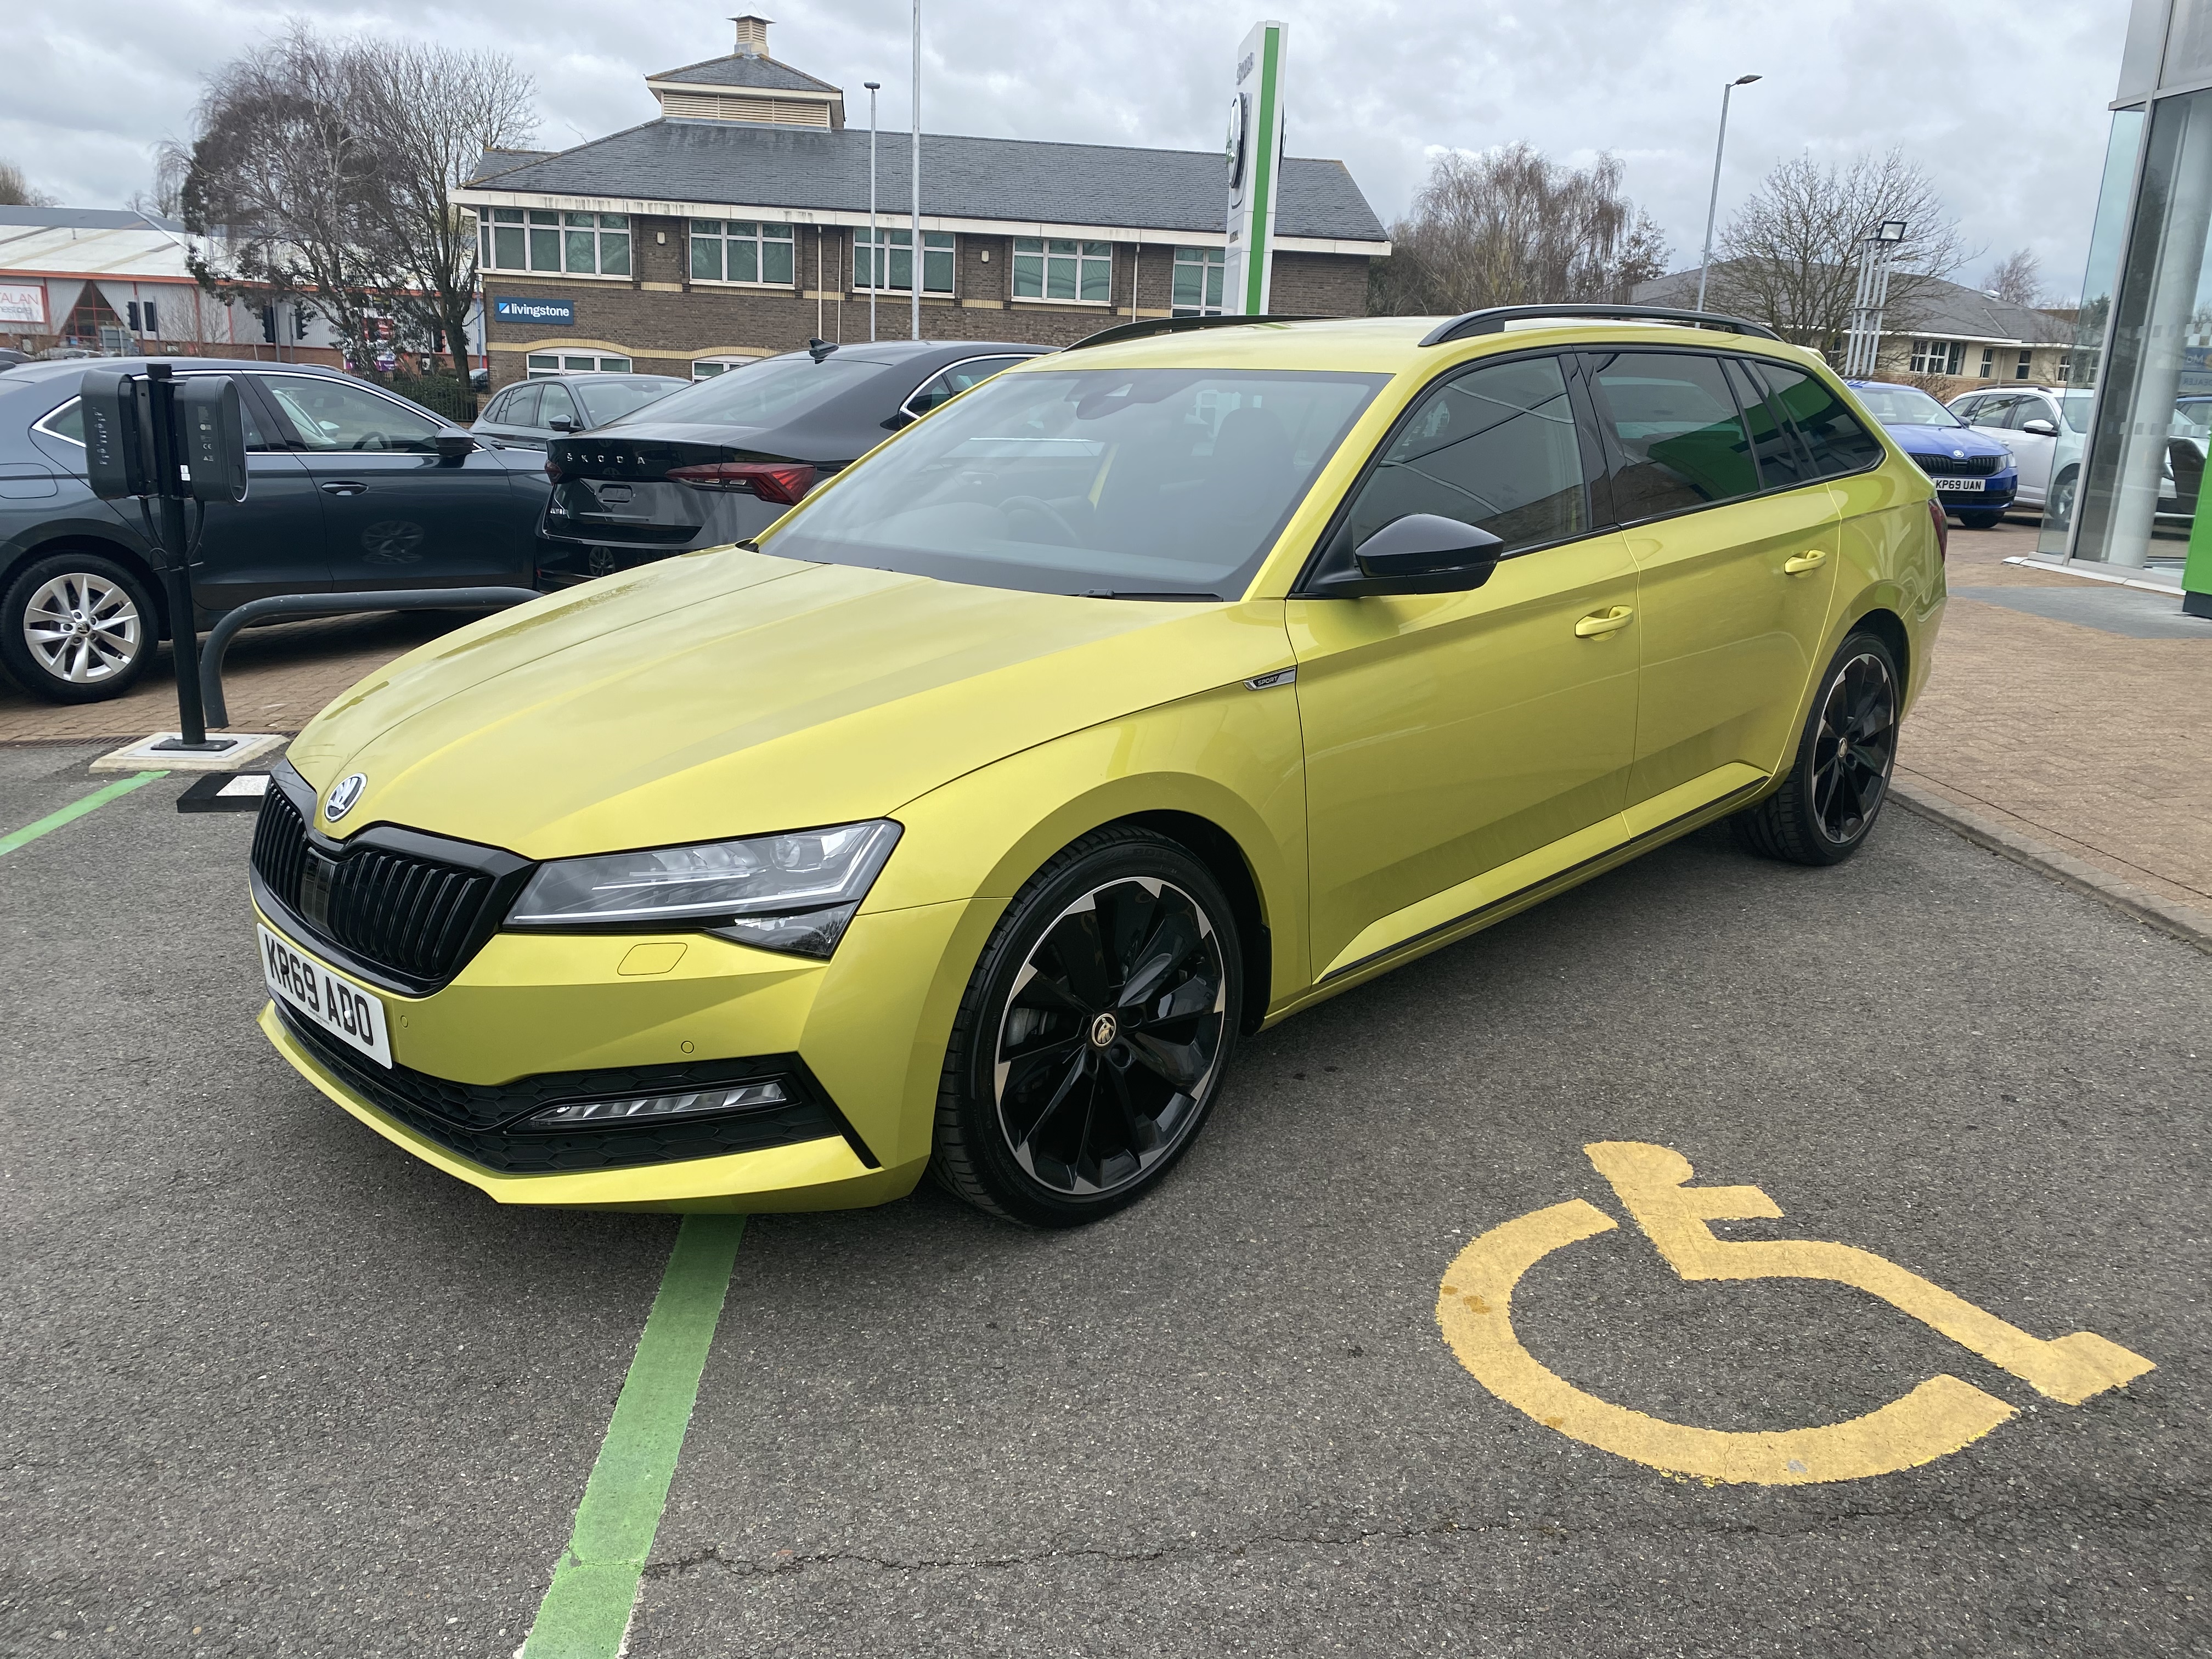
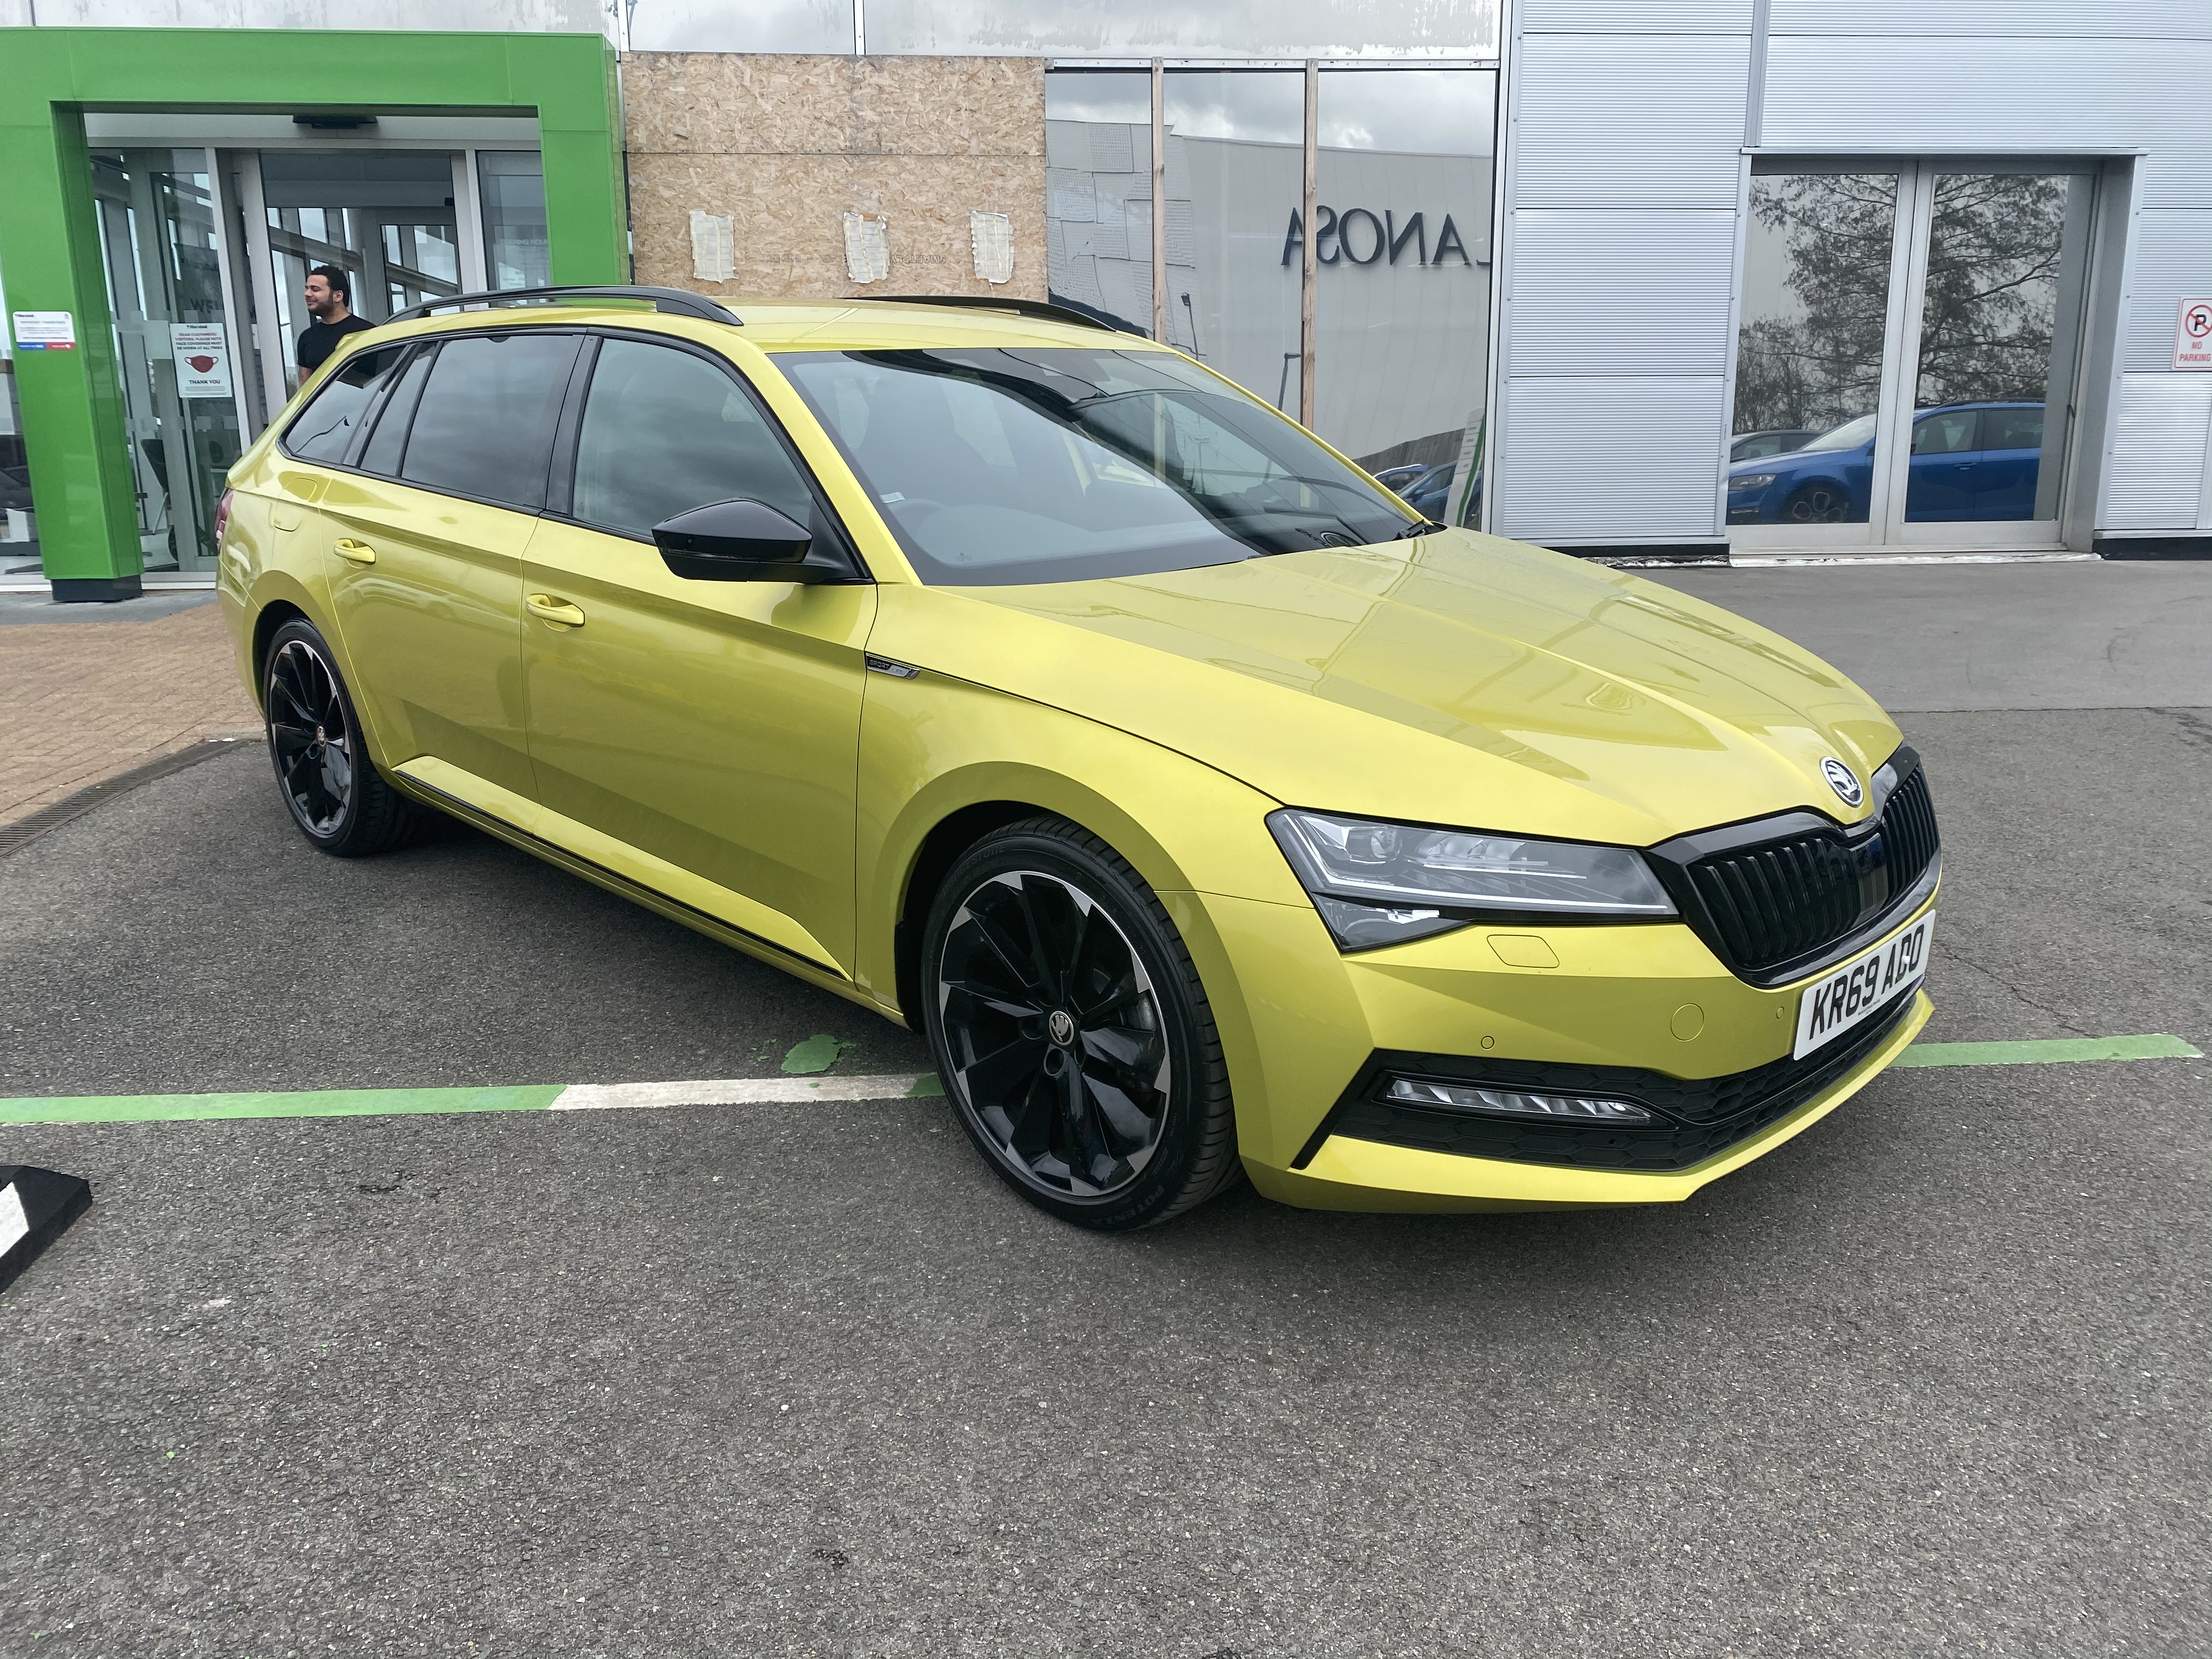


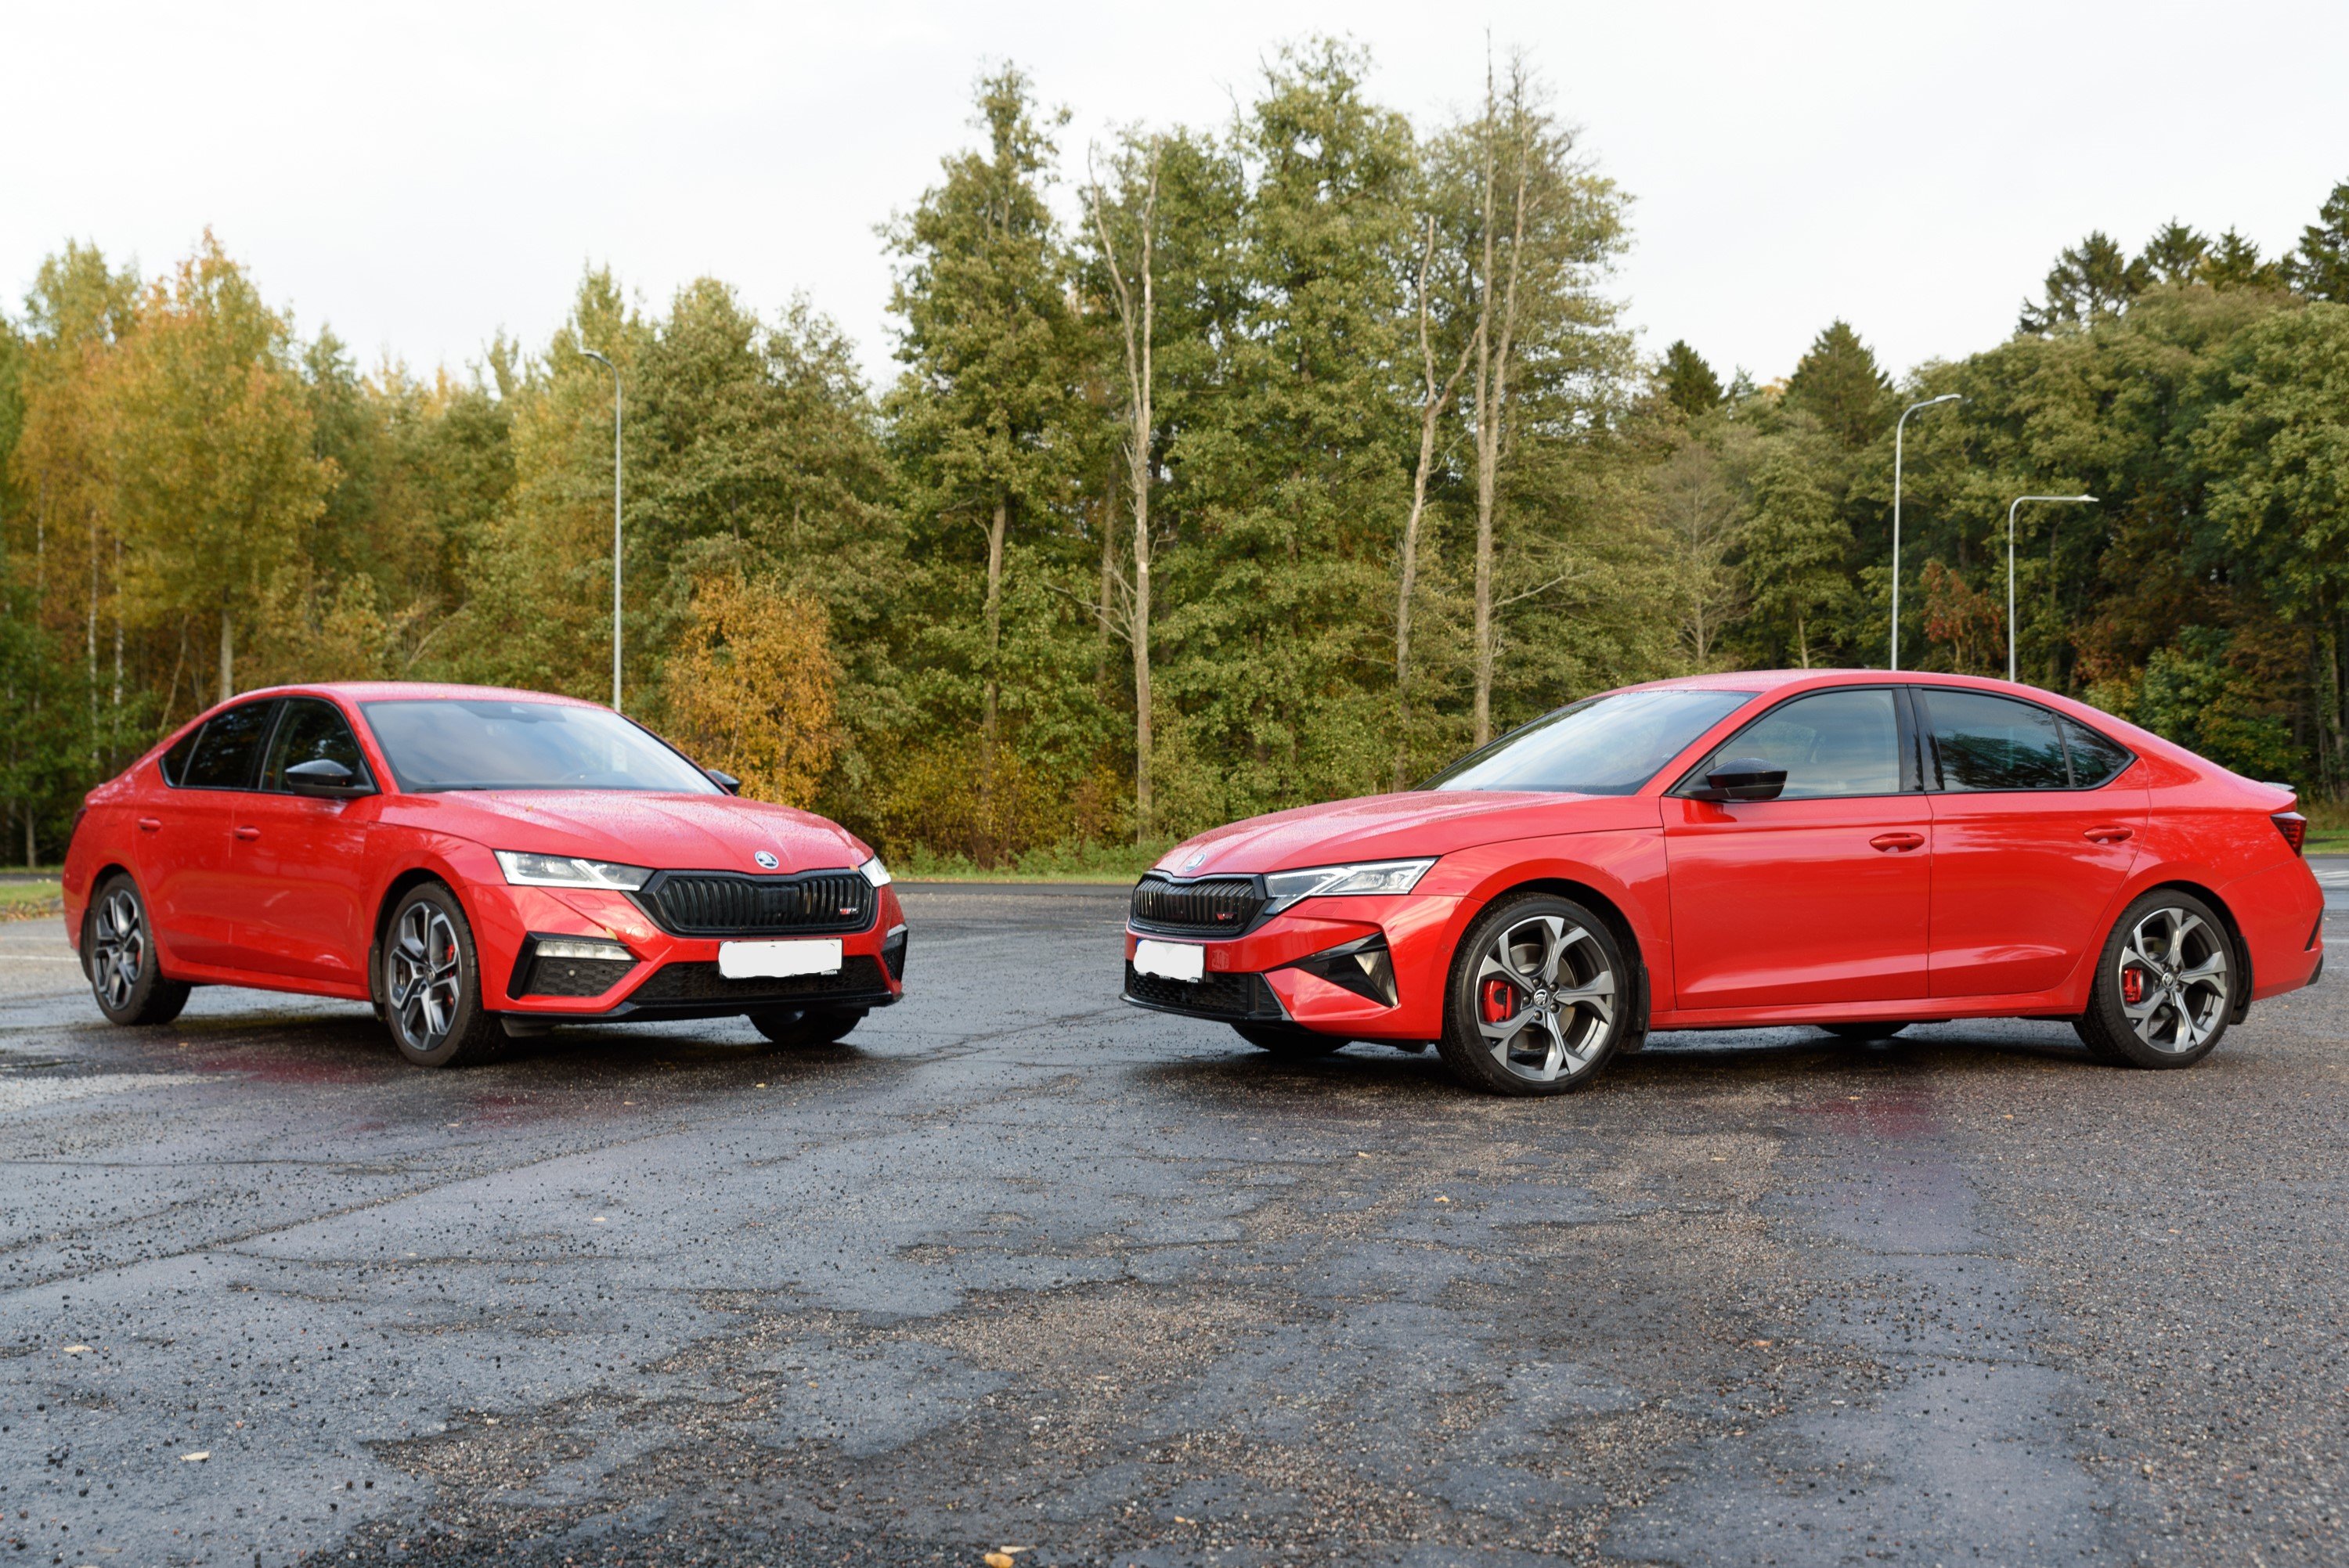


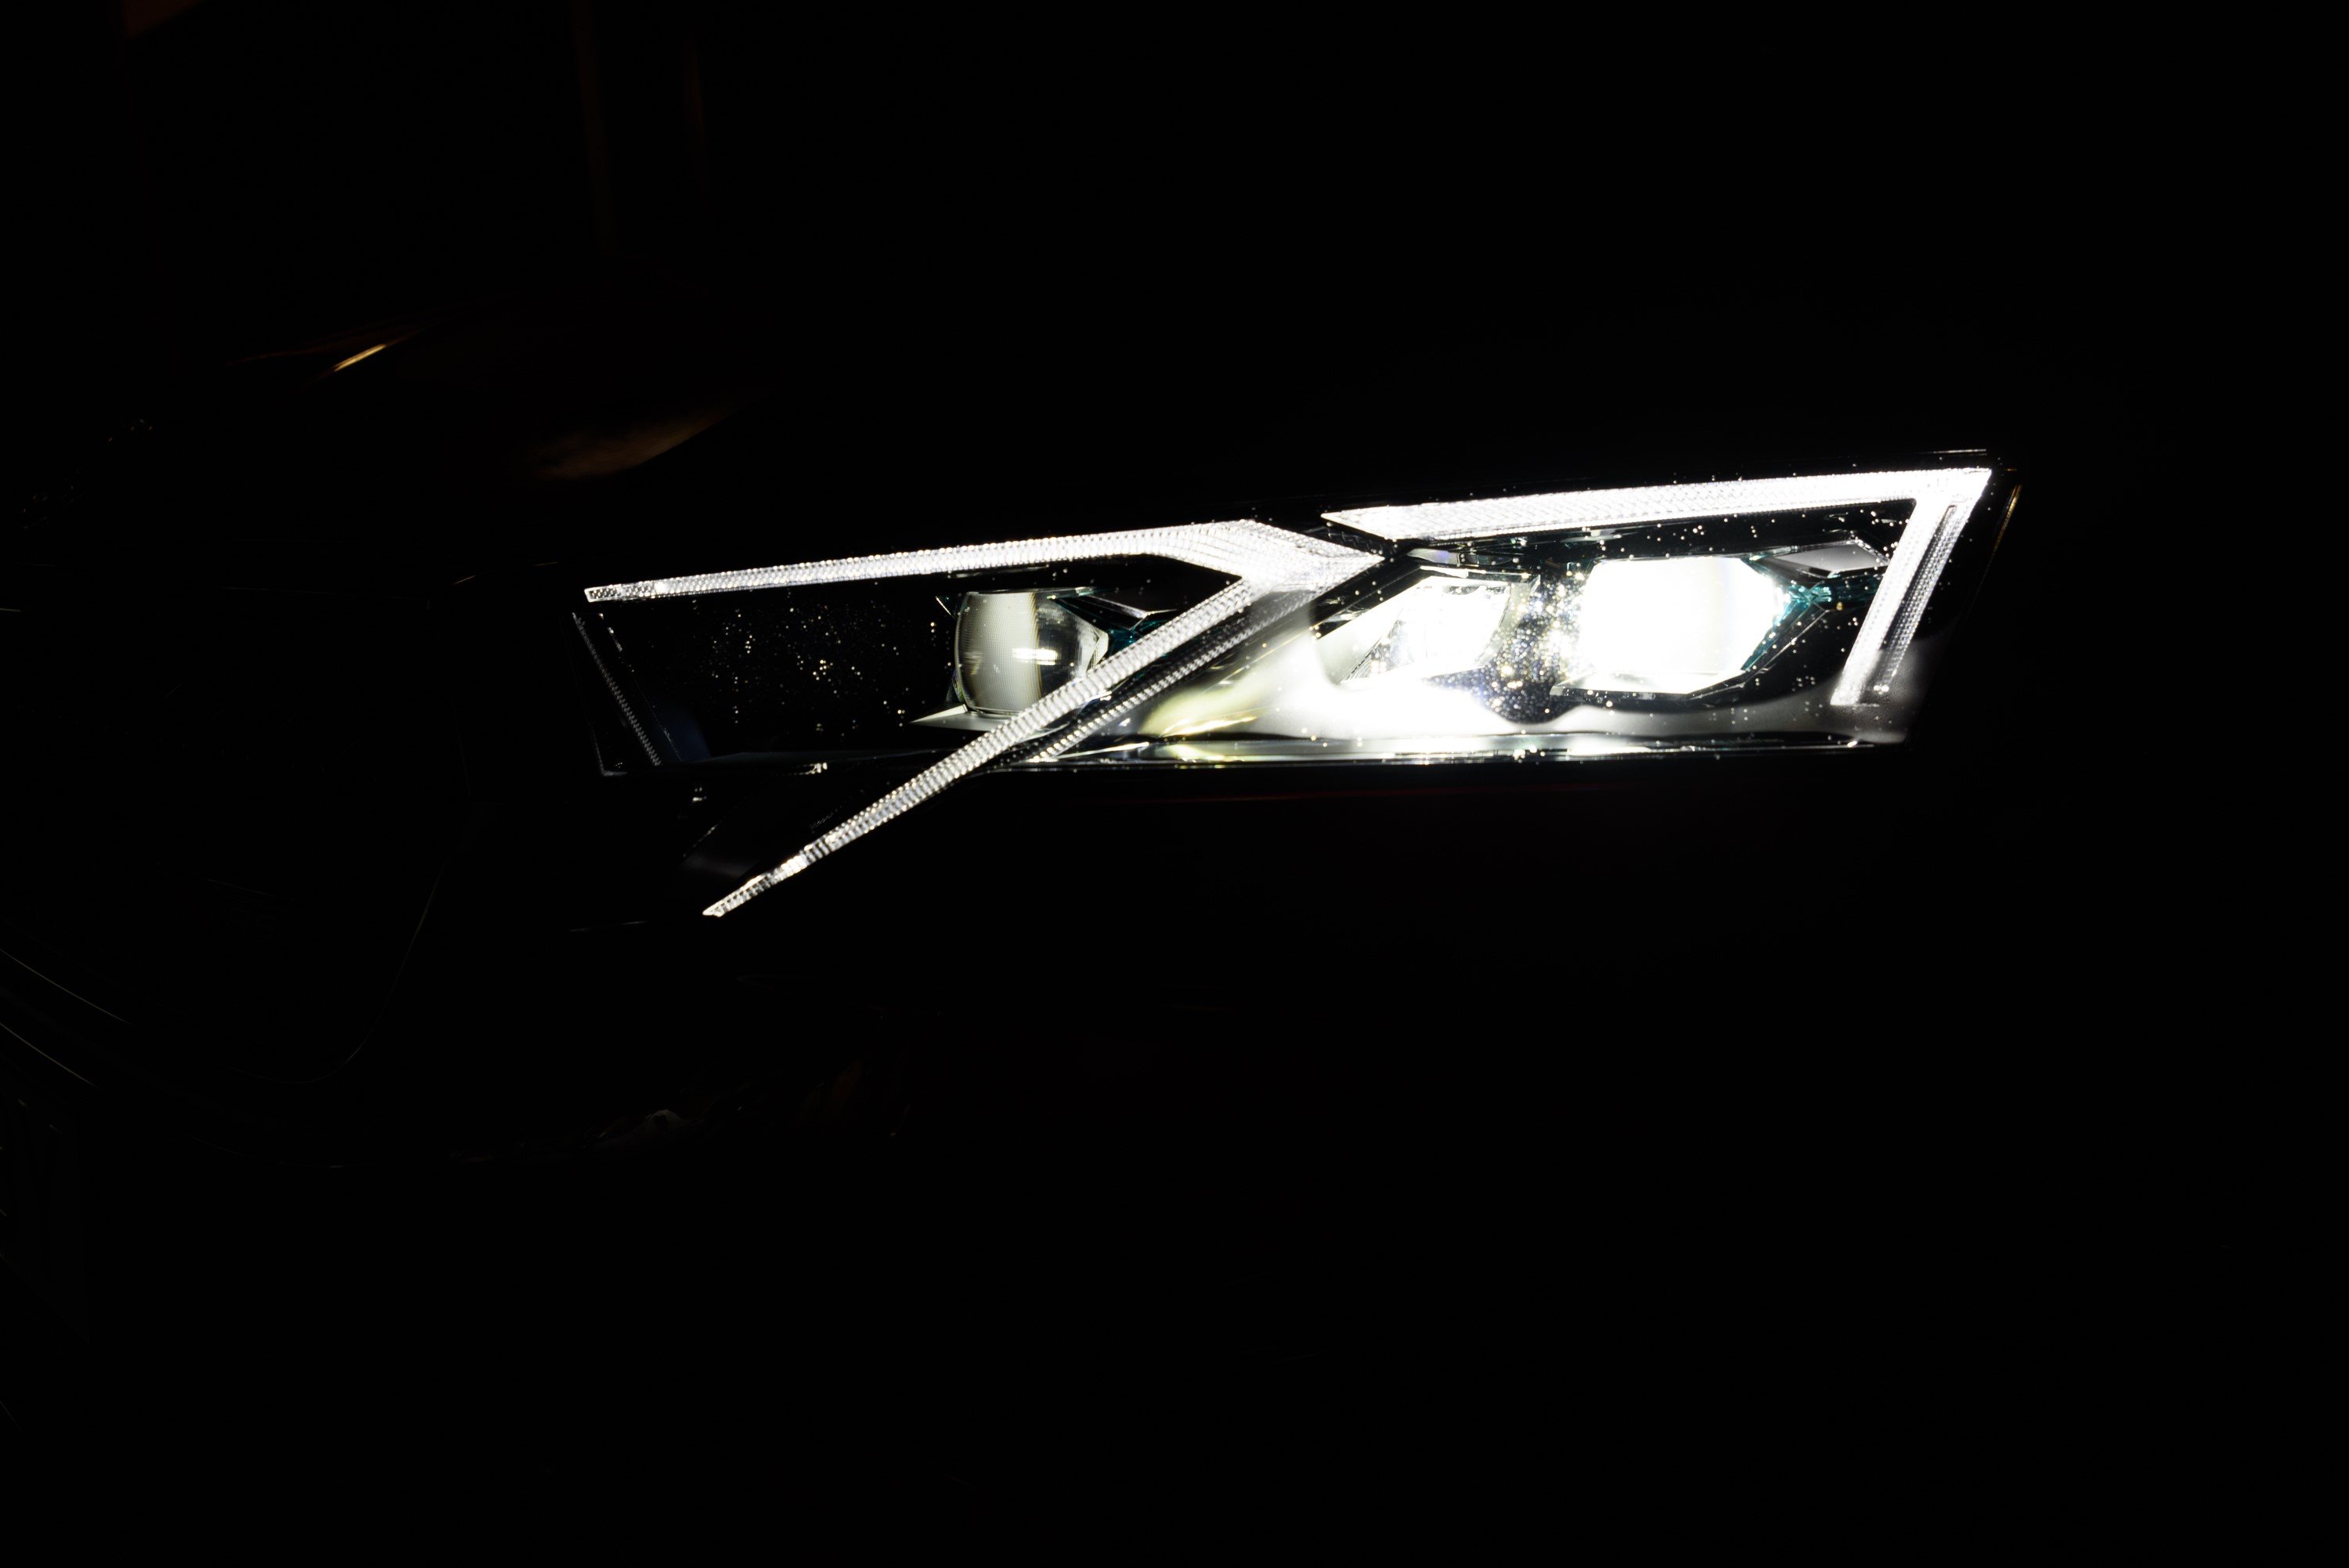
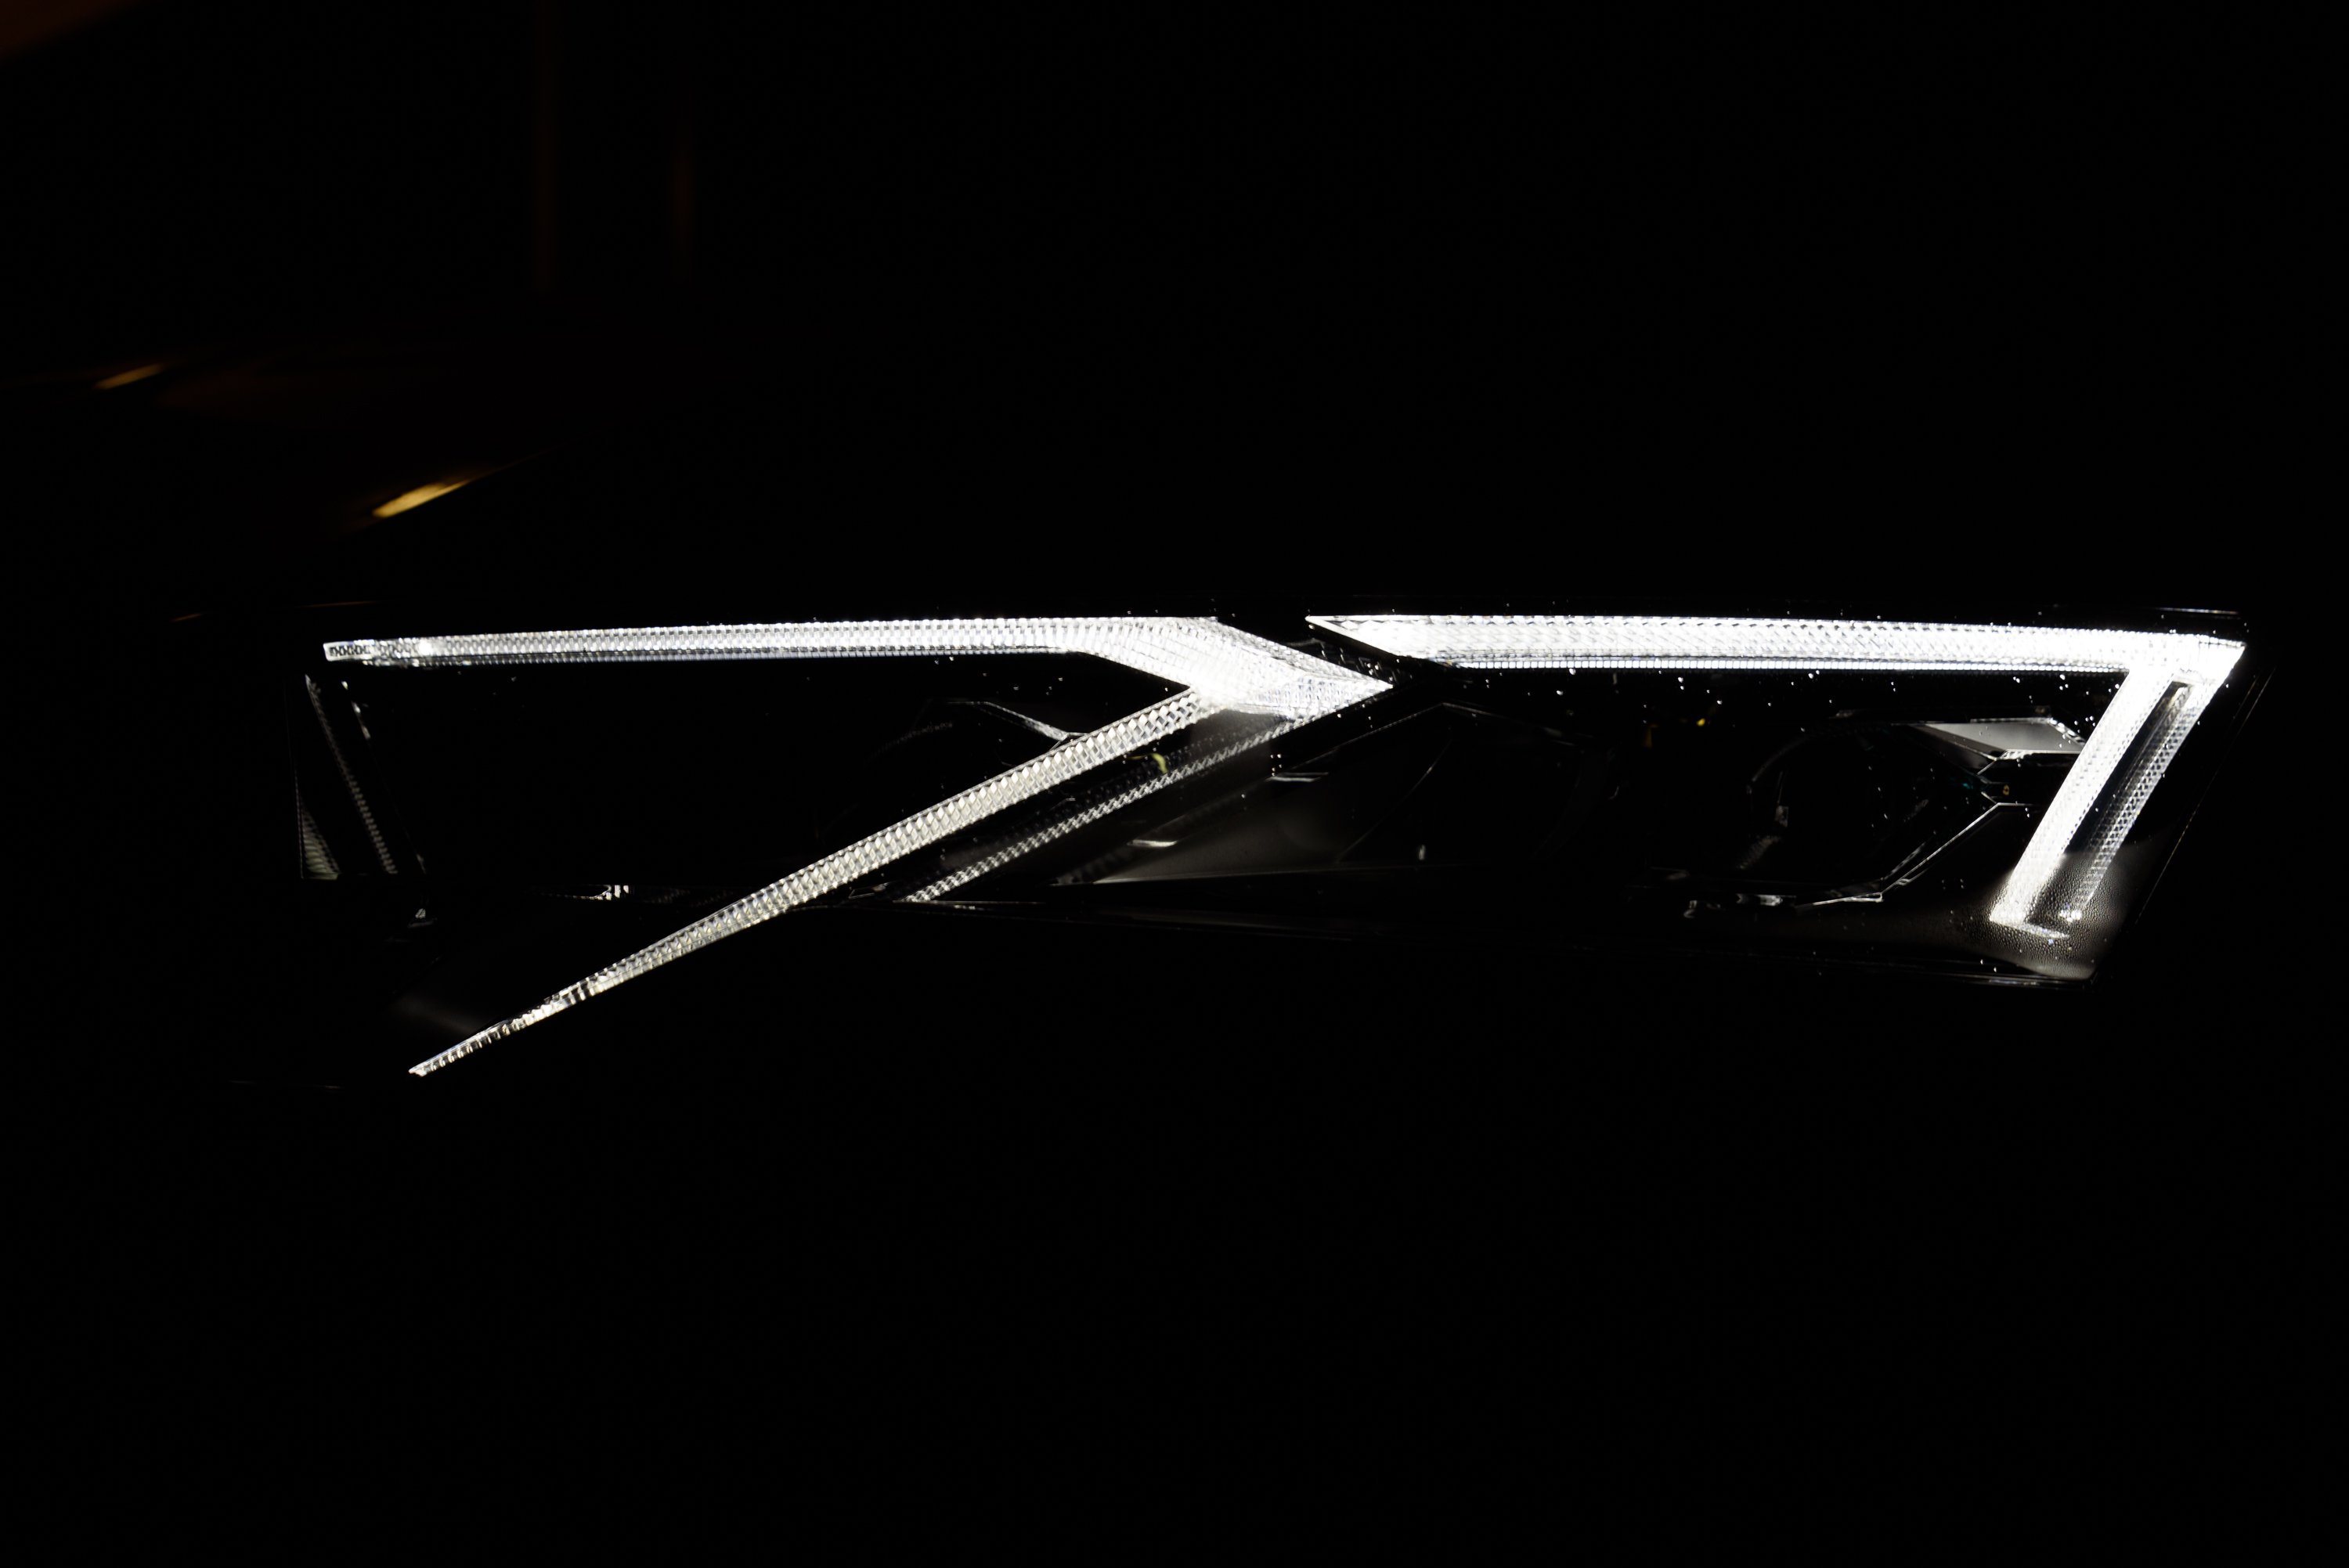
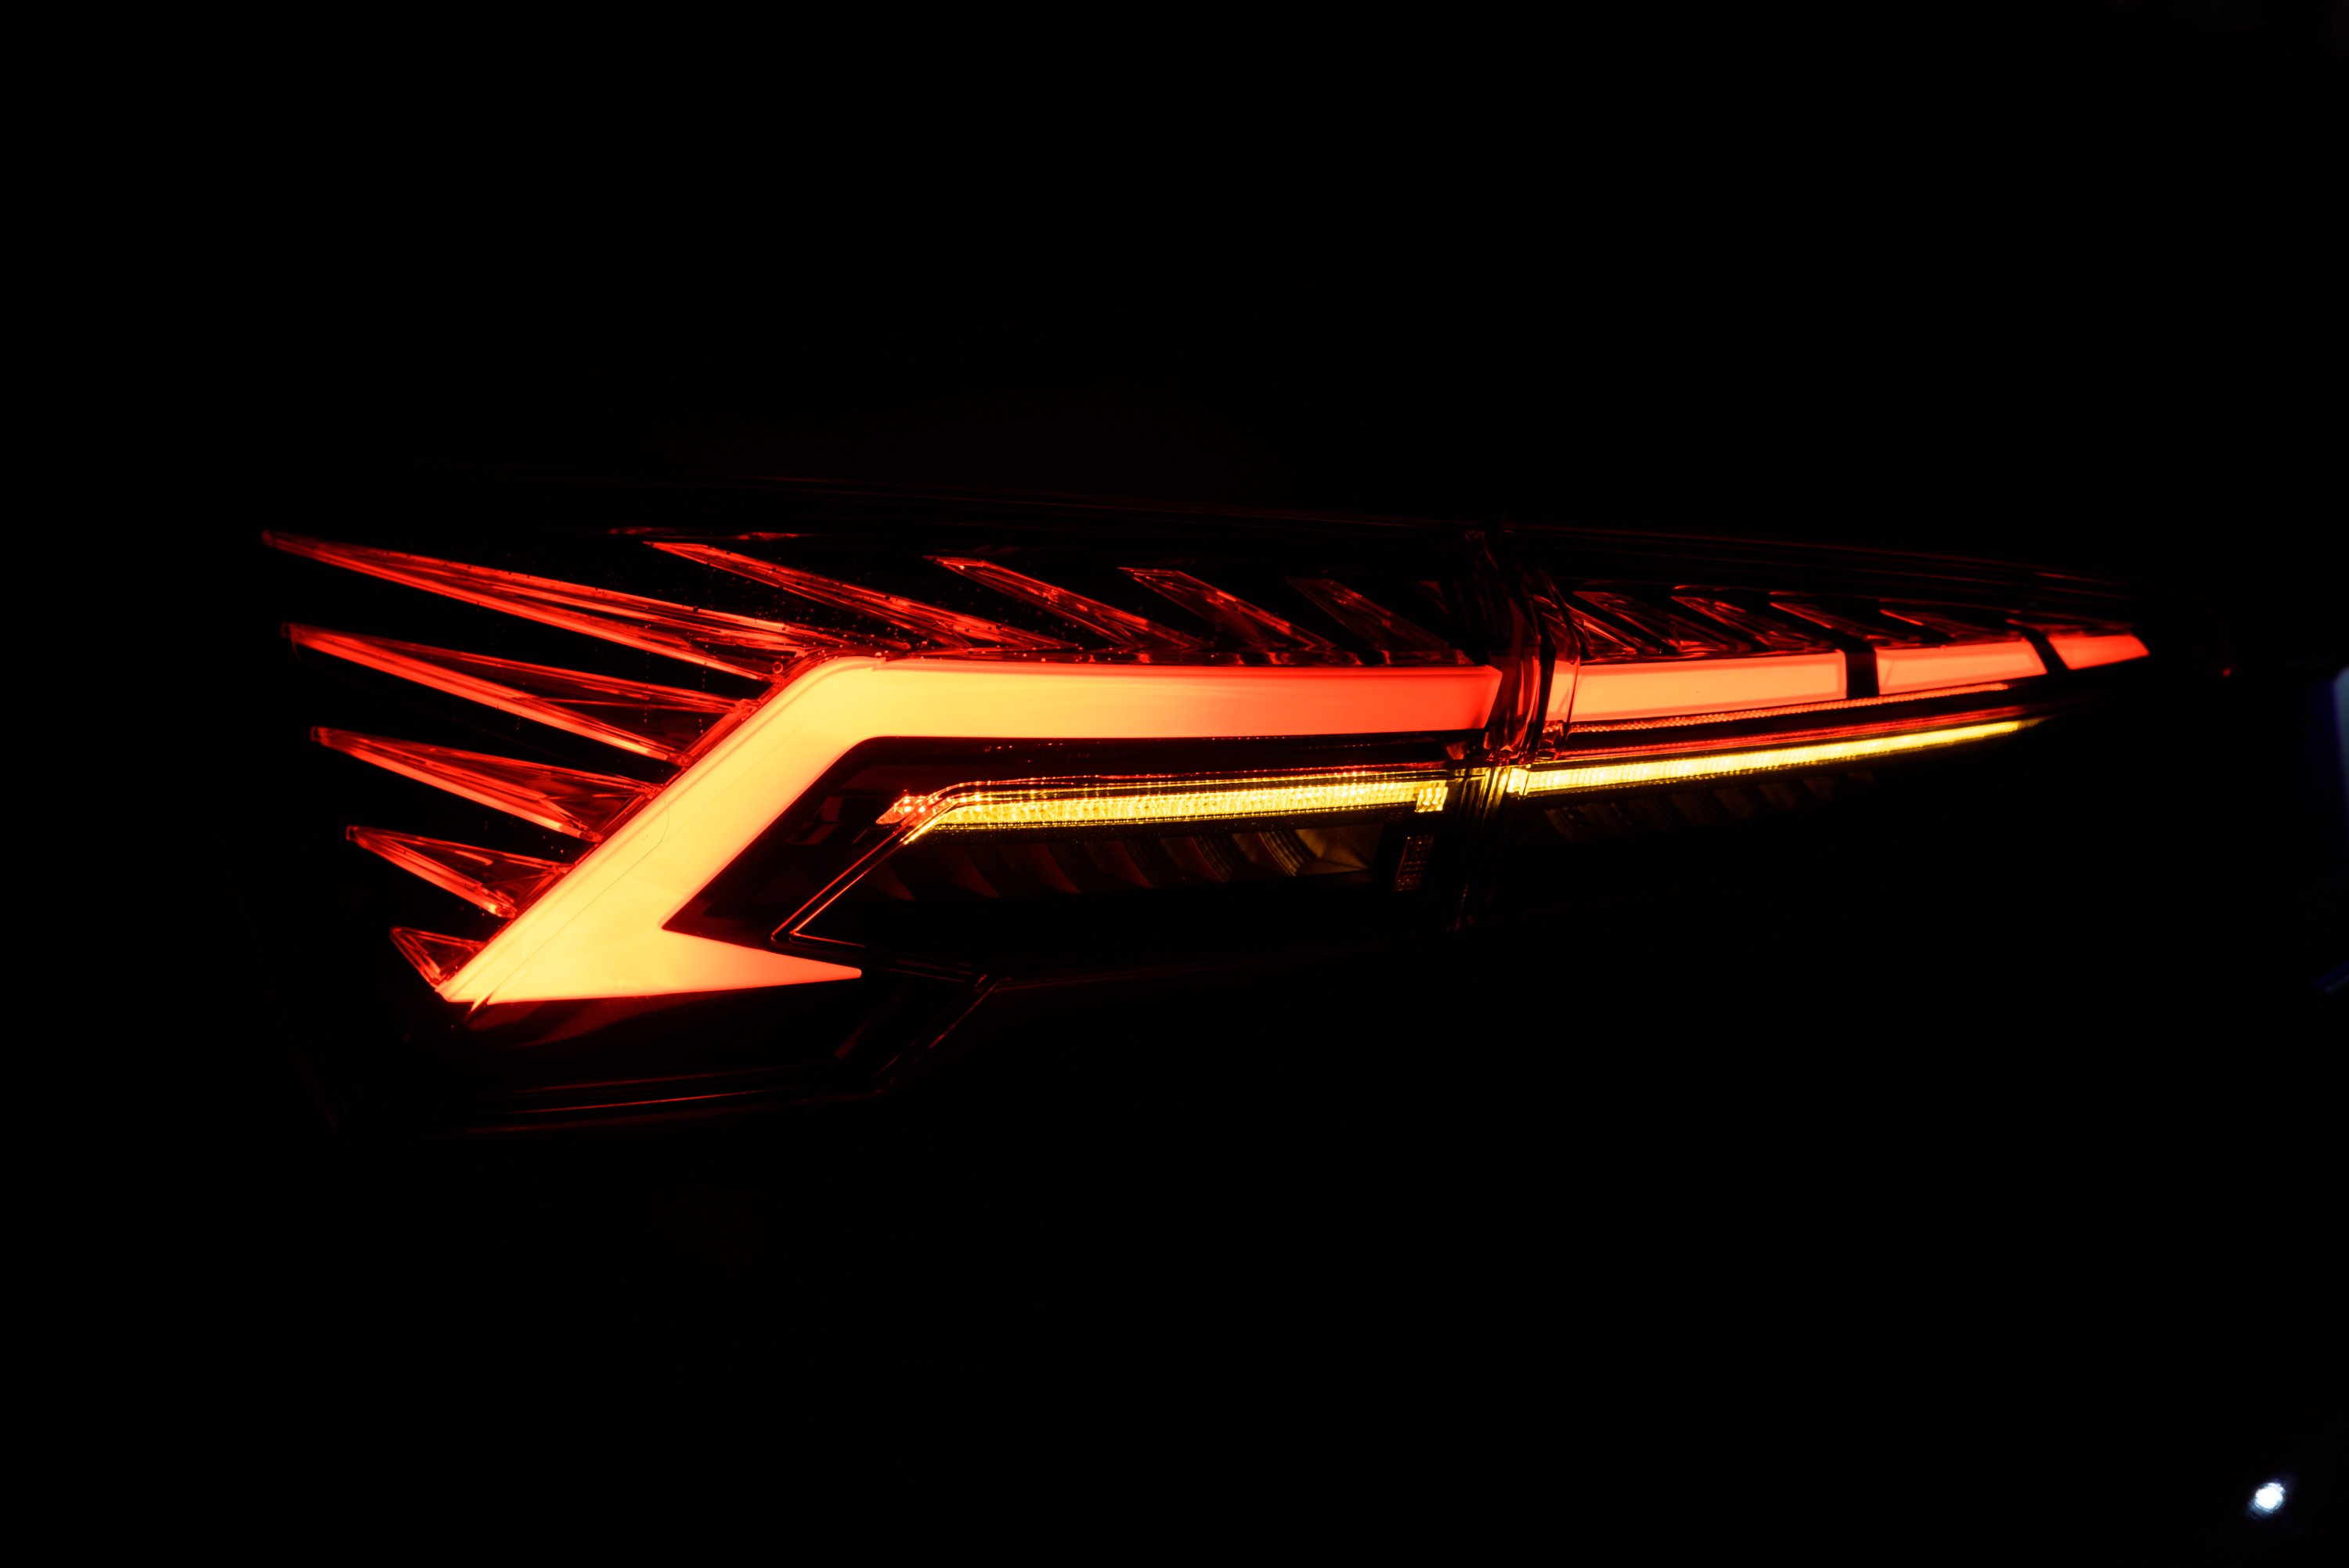


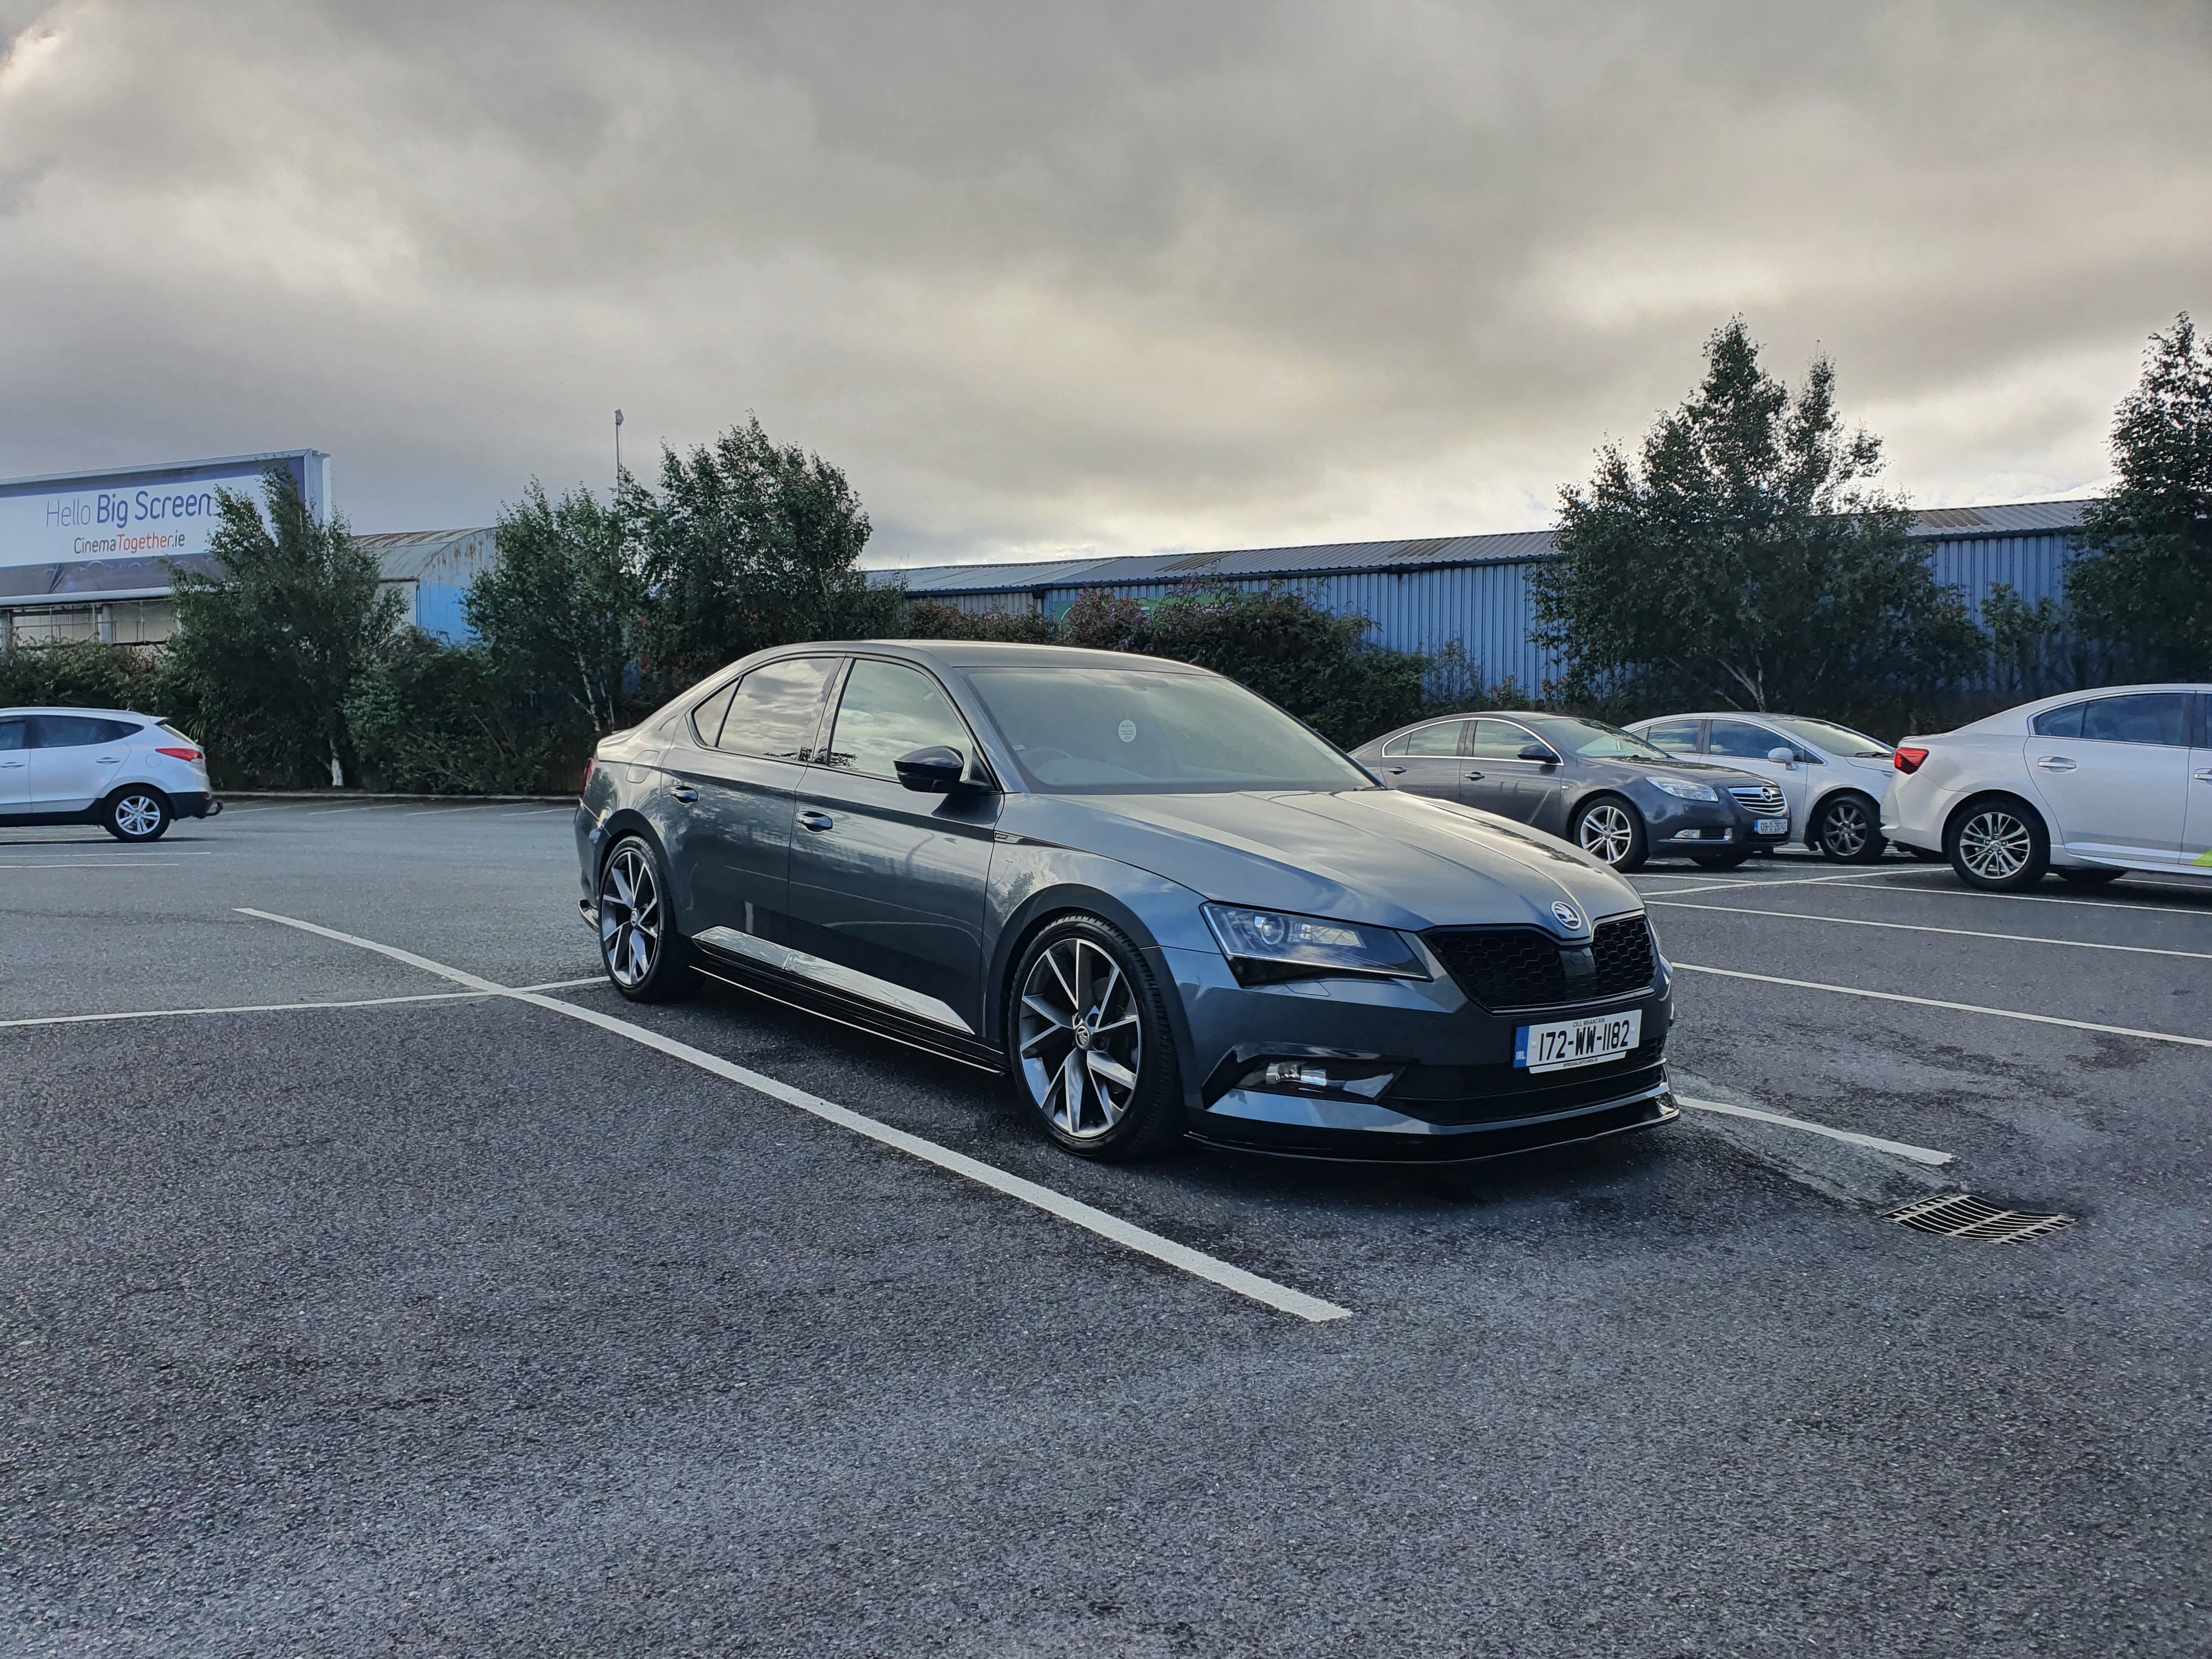


(Medium).jpg.d5526a8d29f35bc76a57252e7686ecf3.jpg)
(Medium).jpg.8ee09c90fc5a9a8174328ce9091a2065.jpg)
(Medium).jpg.0c7b7810e9957e403b691d008410872a.jpg)
(Medium).jpg.b6536bad2a8b178c4b358f037c475881.jpg)
(Medium).jpg.6deb4e69f2dfdb2cdbbe85a4b94607ba.jpg)
(Medium).jpg.5bedbcb4c7fd5b2a215170d9701da4ce.jpg)
(Medium).jpg.7126d1b1749cd7eb970c38d13d01ec9b.jpg)
(Medium).jpg.866253fa925664b6748219868ae94693.jpg)
(Medium).jpg.d3f8e5ff346a54835171769a5faad379.jpg)
(Medium).jpg.58f7d40b6cadb135b7026f110e194c27.jpg)
(Medium).jpg.075a6b56322378cb394033c3d92f3d3d.jpg)
(Medium).jpg.f7e7842179ea02ef04405e9b1ea418e8.jpg)
(Medium).jpg.5bf6bdf346f76044f69c7f0cb74d7d38.jpg)
(Medium).jpg.90aa970a7e6e6b95fafbf6ef56cd8831.jpg)
(Medium).jpg.7ac6c64df1b5a2780014ee37d621697d.jpg)
(Medium).jpg.30a1bf68a17098b3c3133f2abec611fd.jpg)
(Medium).jpg.750d7986be5b5b3a4175f8dd076fd85f.jpg)
(Medium).jpg.d7de602802925fe46a6380f30a363cac.jpg)
(Medium).jpg.01618b7eb98a3d04af1aba421b6a3351.jpg)
(Medium).jpg.fe9fbea44f2e9f3604e9ea1788c3ab5b.jpg)
(Medium).jpg.6de2204c1acfdb6ed9480de8cd678da6.jpg)
(Medium).jpg.6b75306fd1cf7925669a1ad3936af261.jpg)
(Medium).jpg.ab985acf7ae385beff573f40cf47ef95.jpg)
(Medium).jpg.35256f0e11f7bde25cdc15e2541490f0.jpg)
(Medium).jpg.64bfdb698a6e69f82578436e0071c978.jpg)
(Medium).jpg.19b212682559b9dee773cdd8cefe004c.jpg)
(Medium).jpg.9942b828bd0a641636196cdf38aefc93.jpg)
(Medium).jpg.cdae4b9a8636032ce3e7f94f2991957b.jpg)
(Medium).jpg.095fd9fc2bd550e760d50c69478eb471.jpg)
(Medium).jpg.eebbe8ed00cf92b2d92c2c613aa26255.jpg)
(Medium).jpg.852b70f9676569f0d85925bacb0dd64e.jpg)
.jpg.1015e5e288a9b13da689b5ddc79d56ad.jpg)
(Medium).jpg.946199e8b6becff74c7849bc4cf6475a.jpg)
(Medium).jpg.25e521b1abc5d4606a9d83ac092f9c99.jpg)
(Medium).jpg.75f66cad7061802fbfc34ddfabd7aea1.jpg)
(Medium)_LI(Medium).jpg.1523f4b4f23e93b76bdc9b858cfafb73.jpg)
(Medium)_LI(Medium).jpg.6d1d6f4b9a9eb9e88a2da1c53182d56c.jpg)


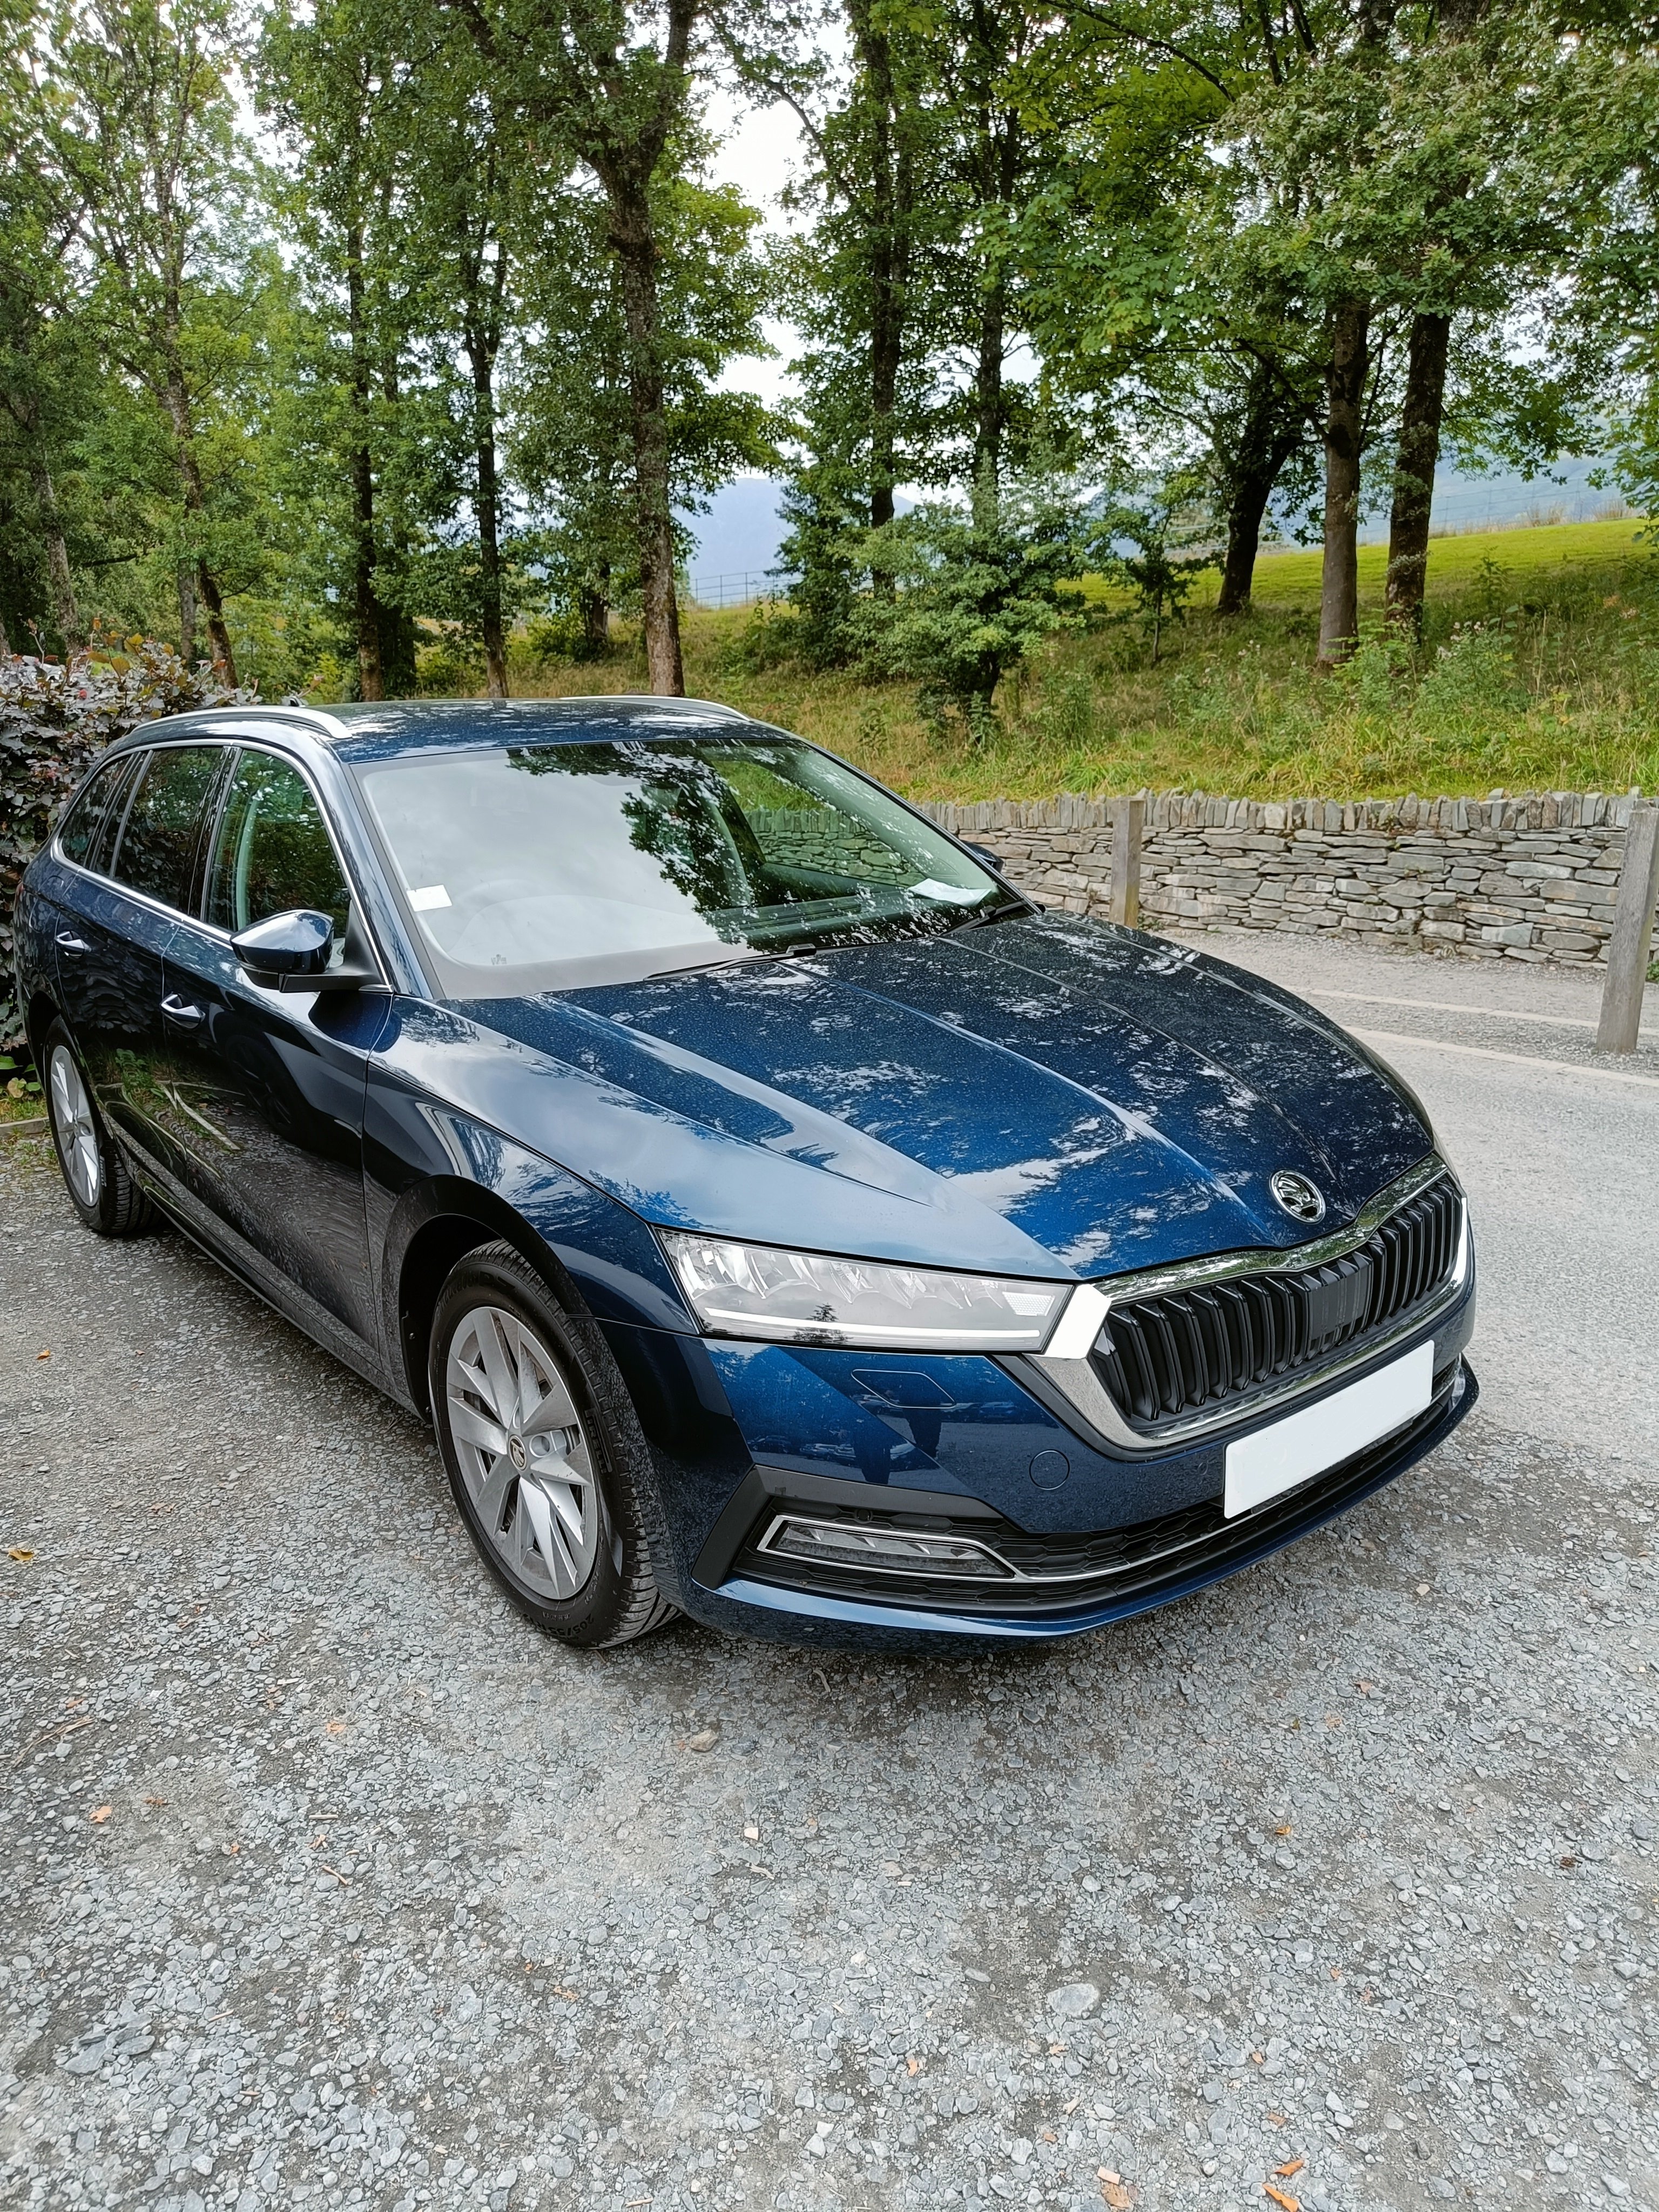

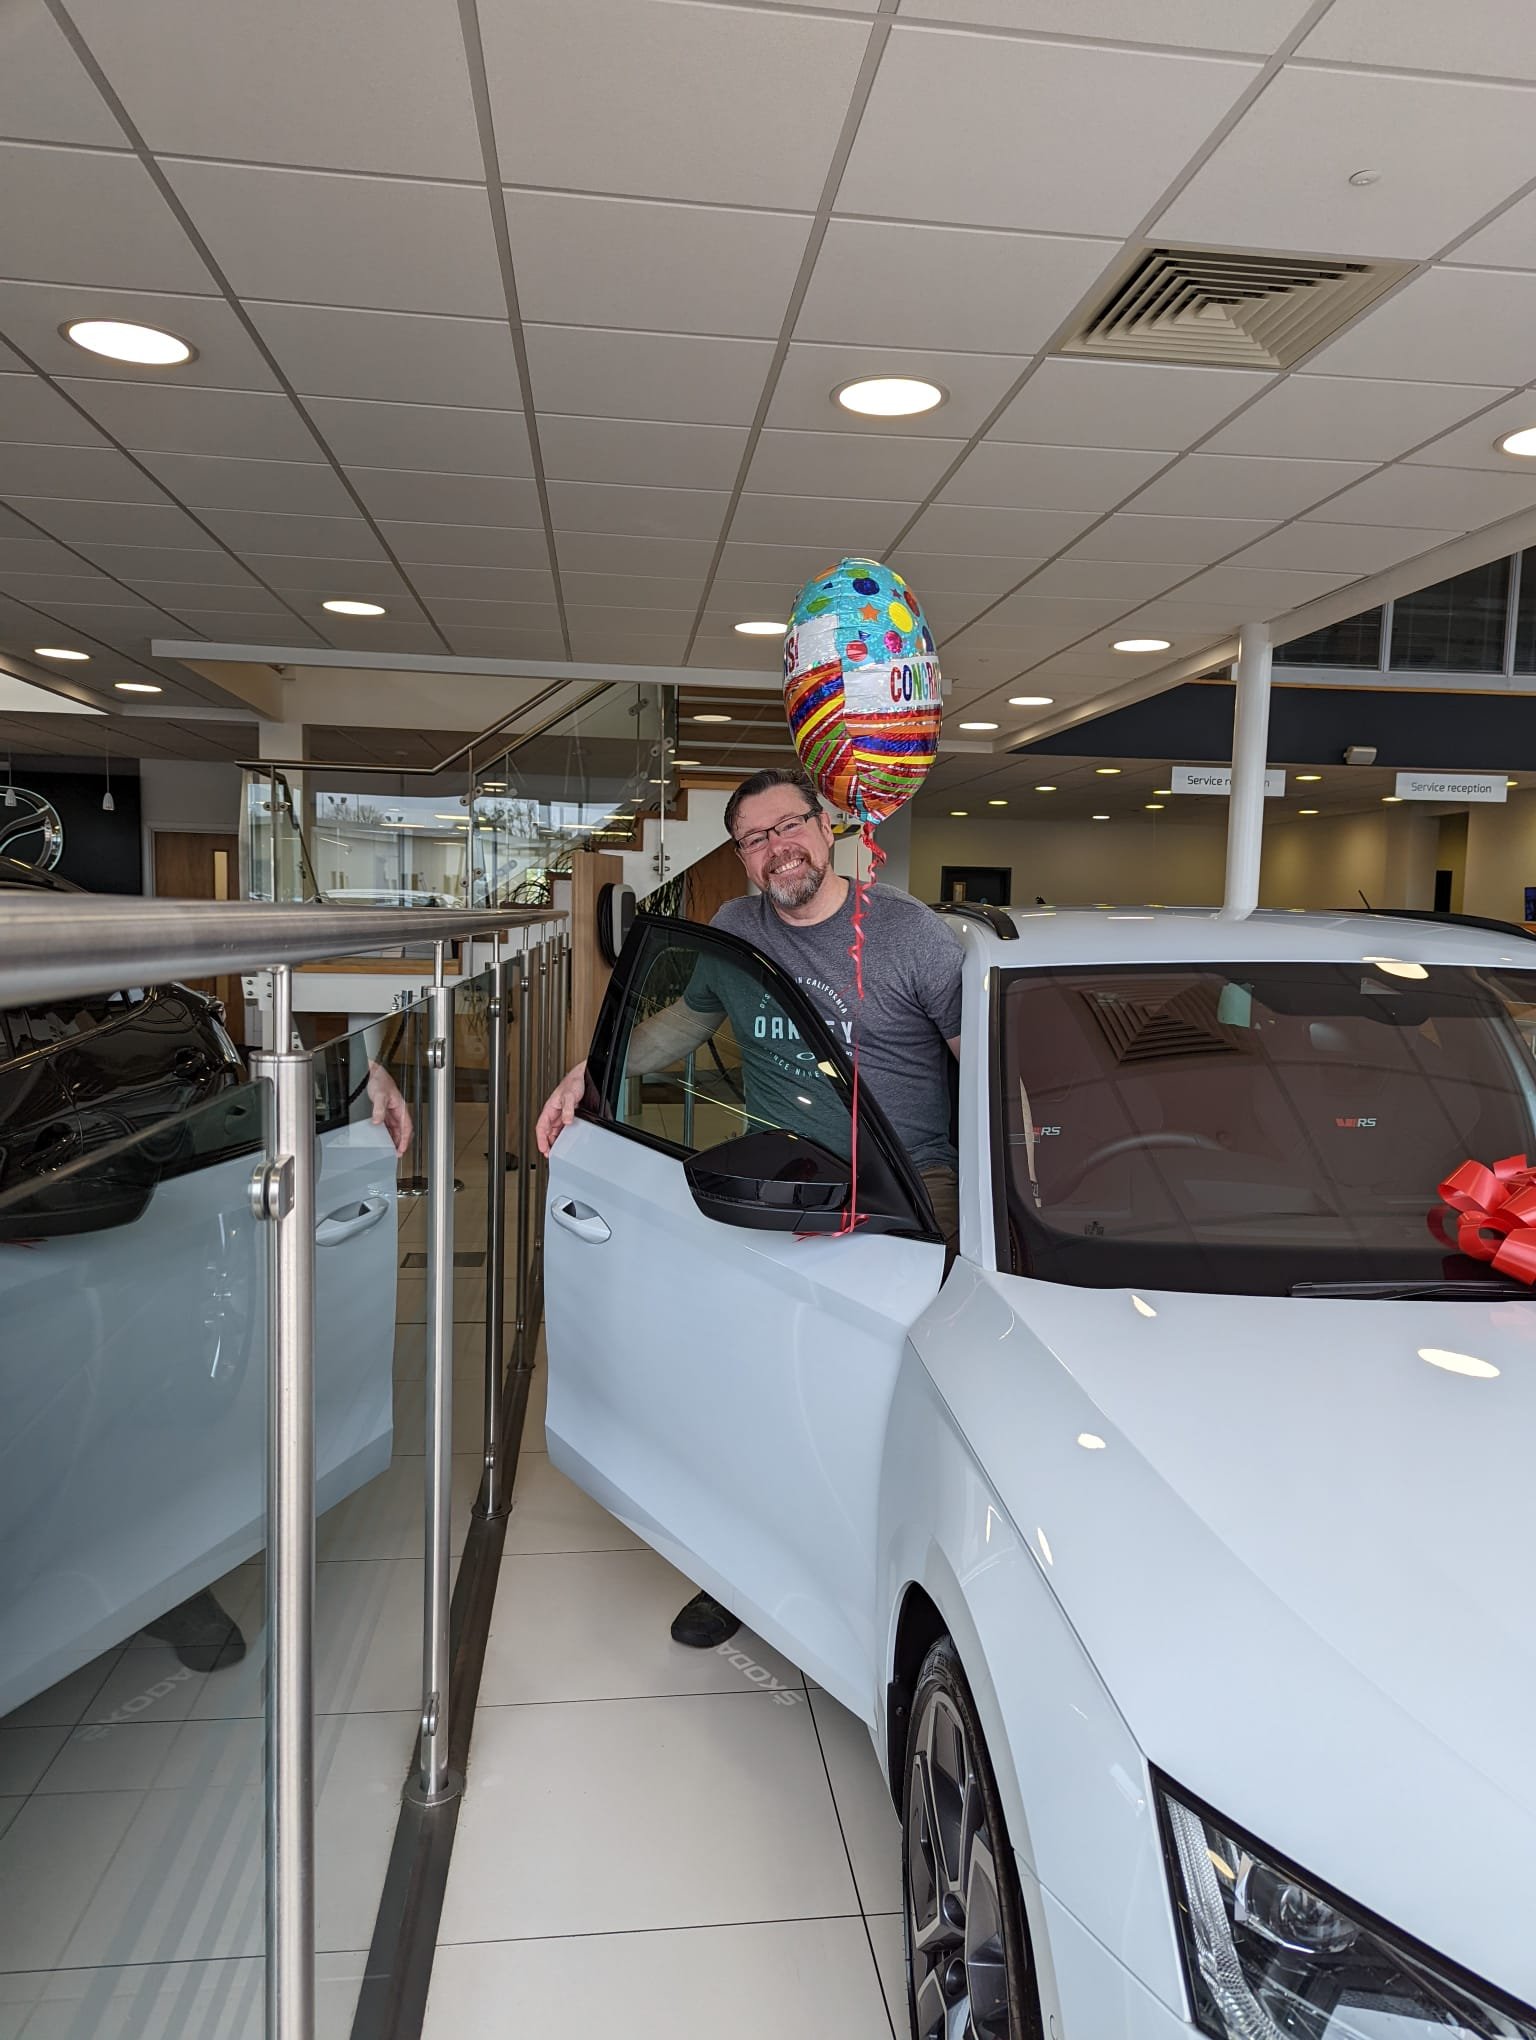

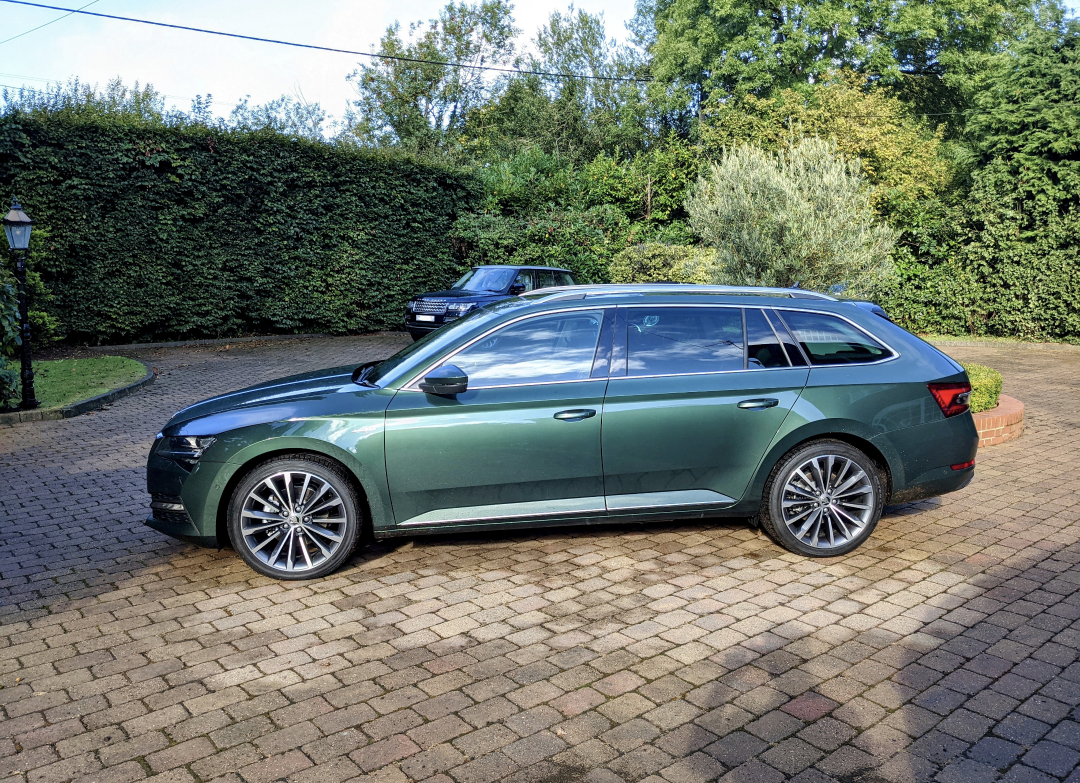


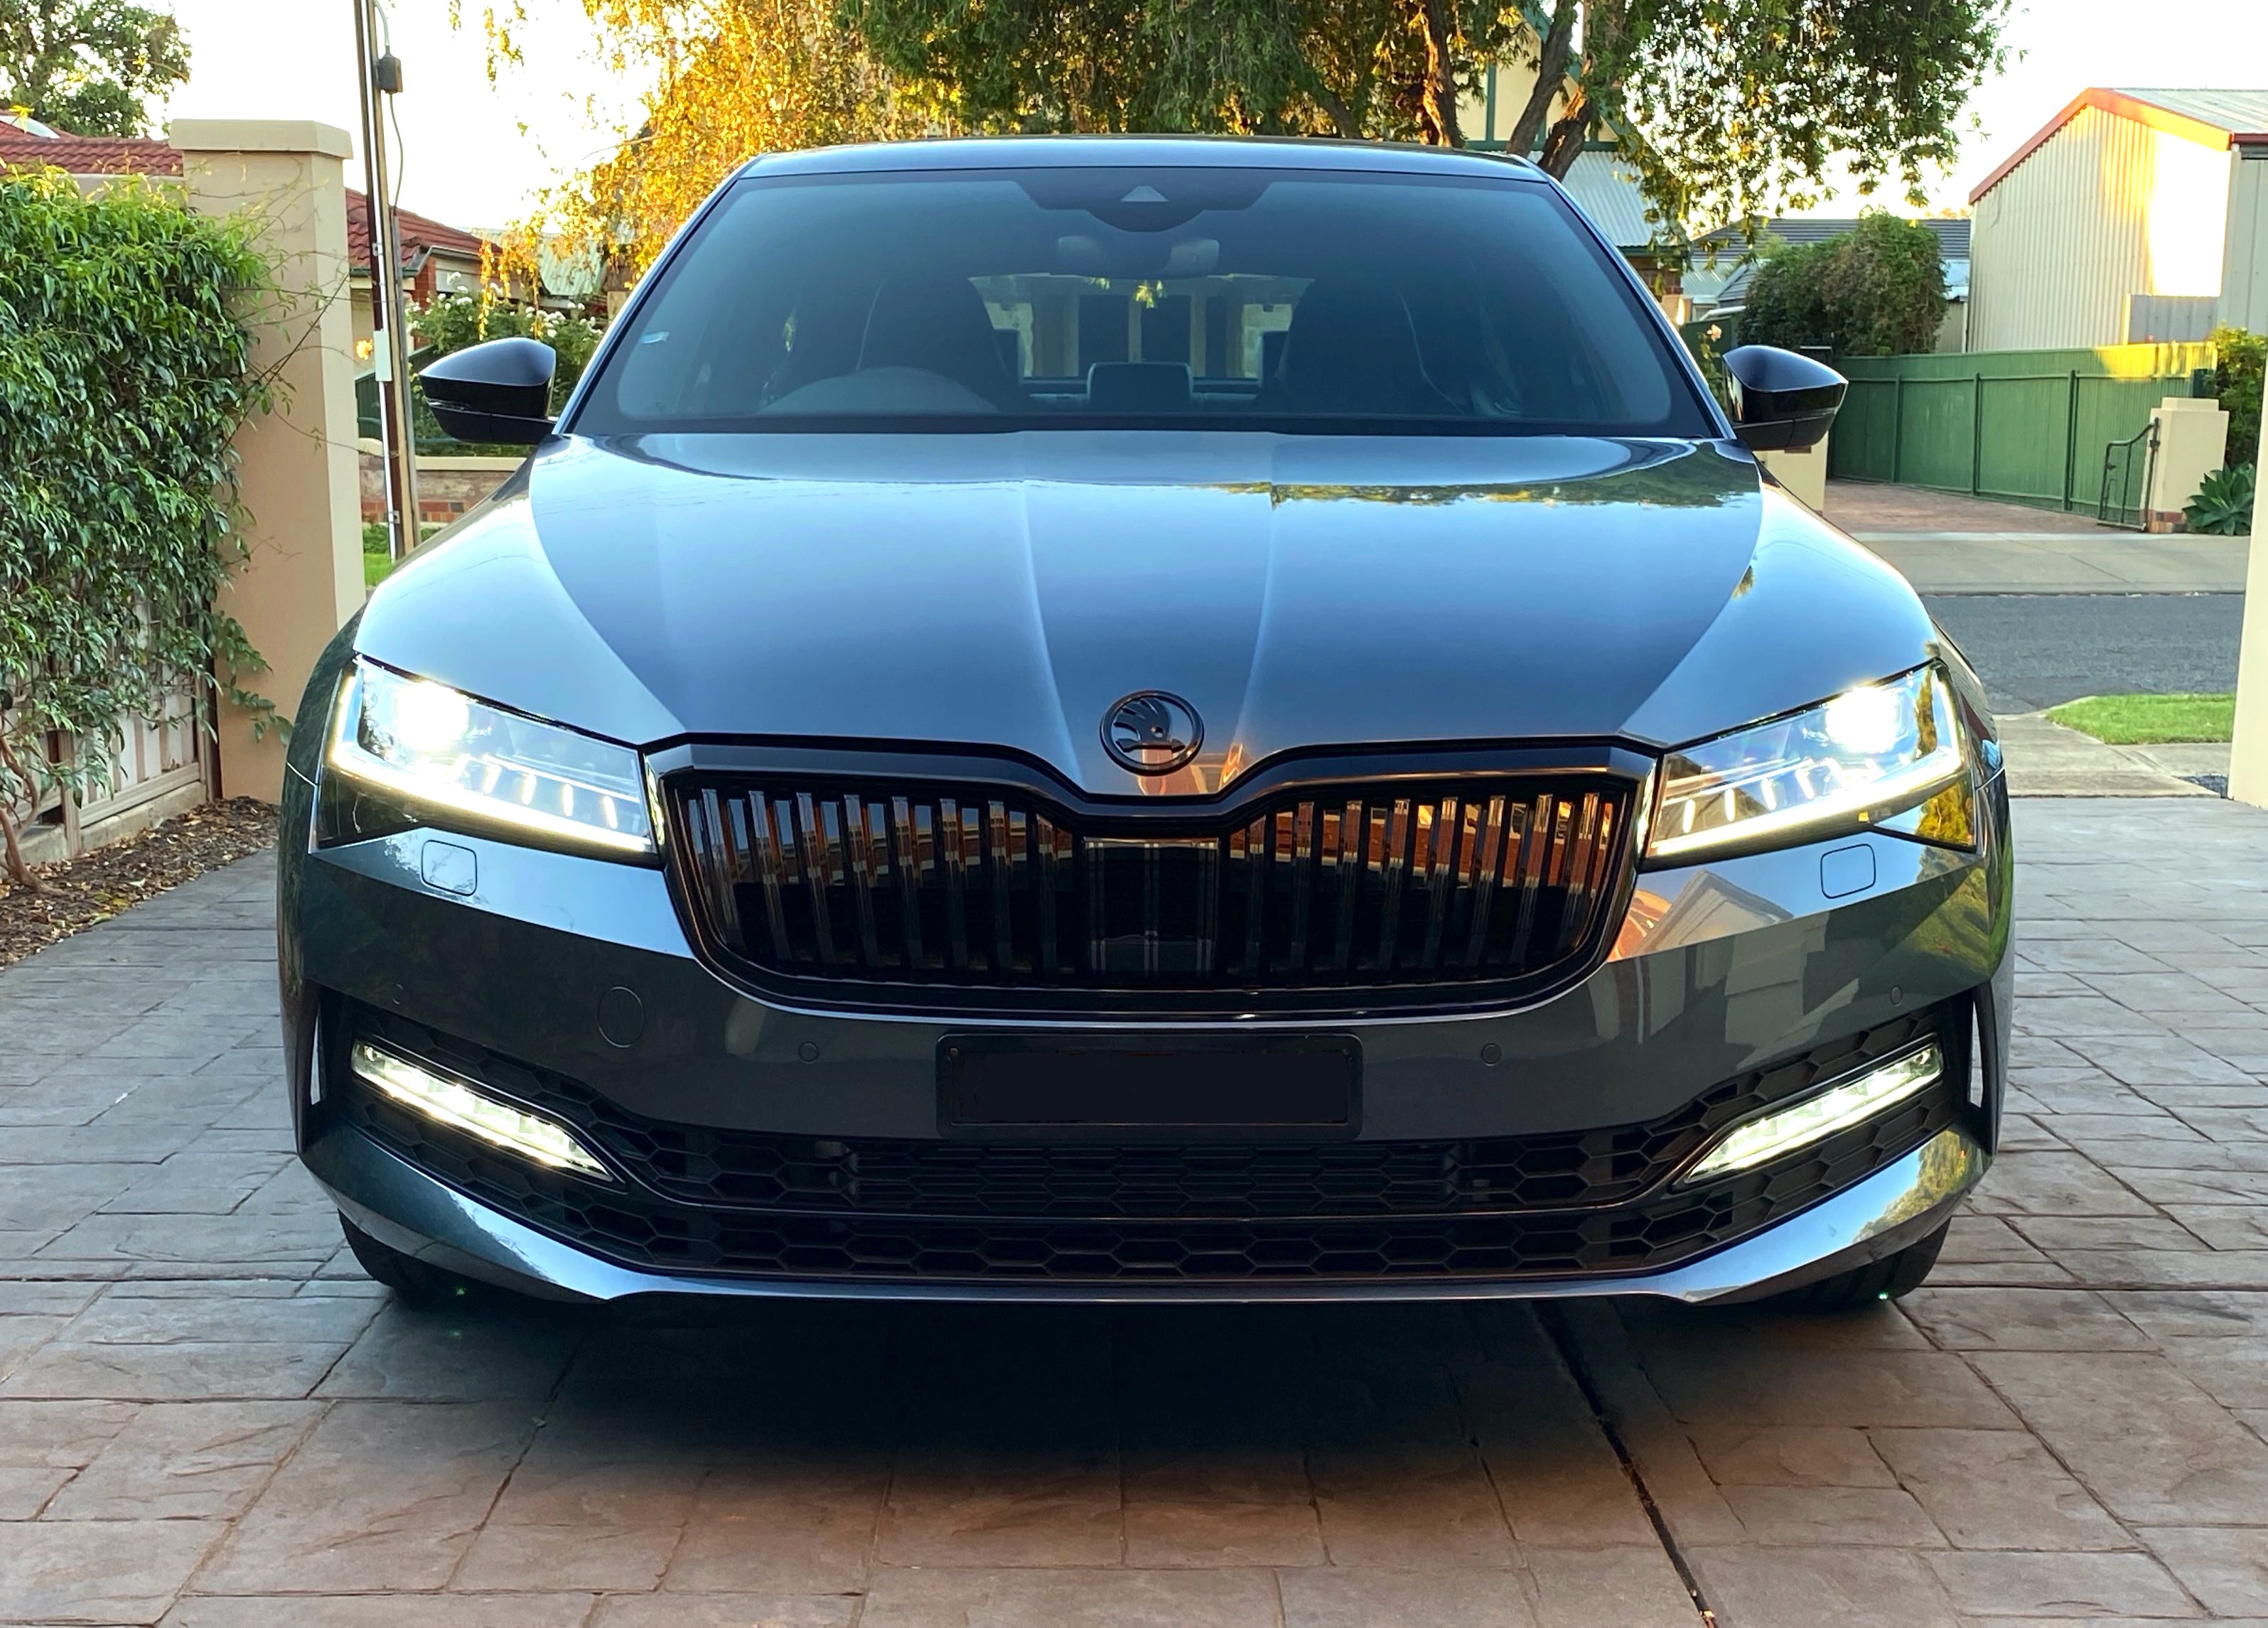
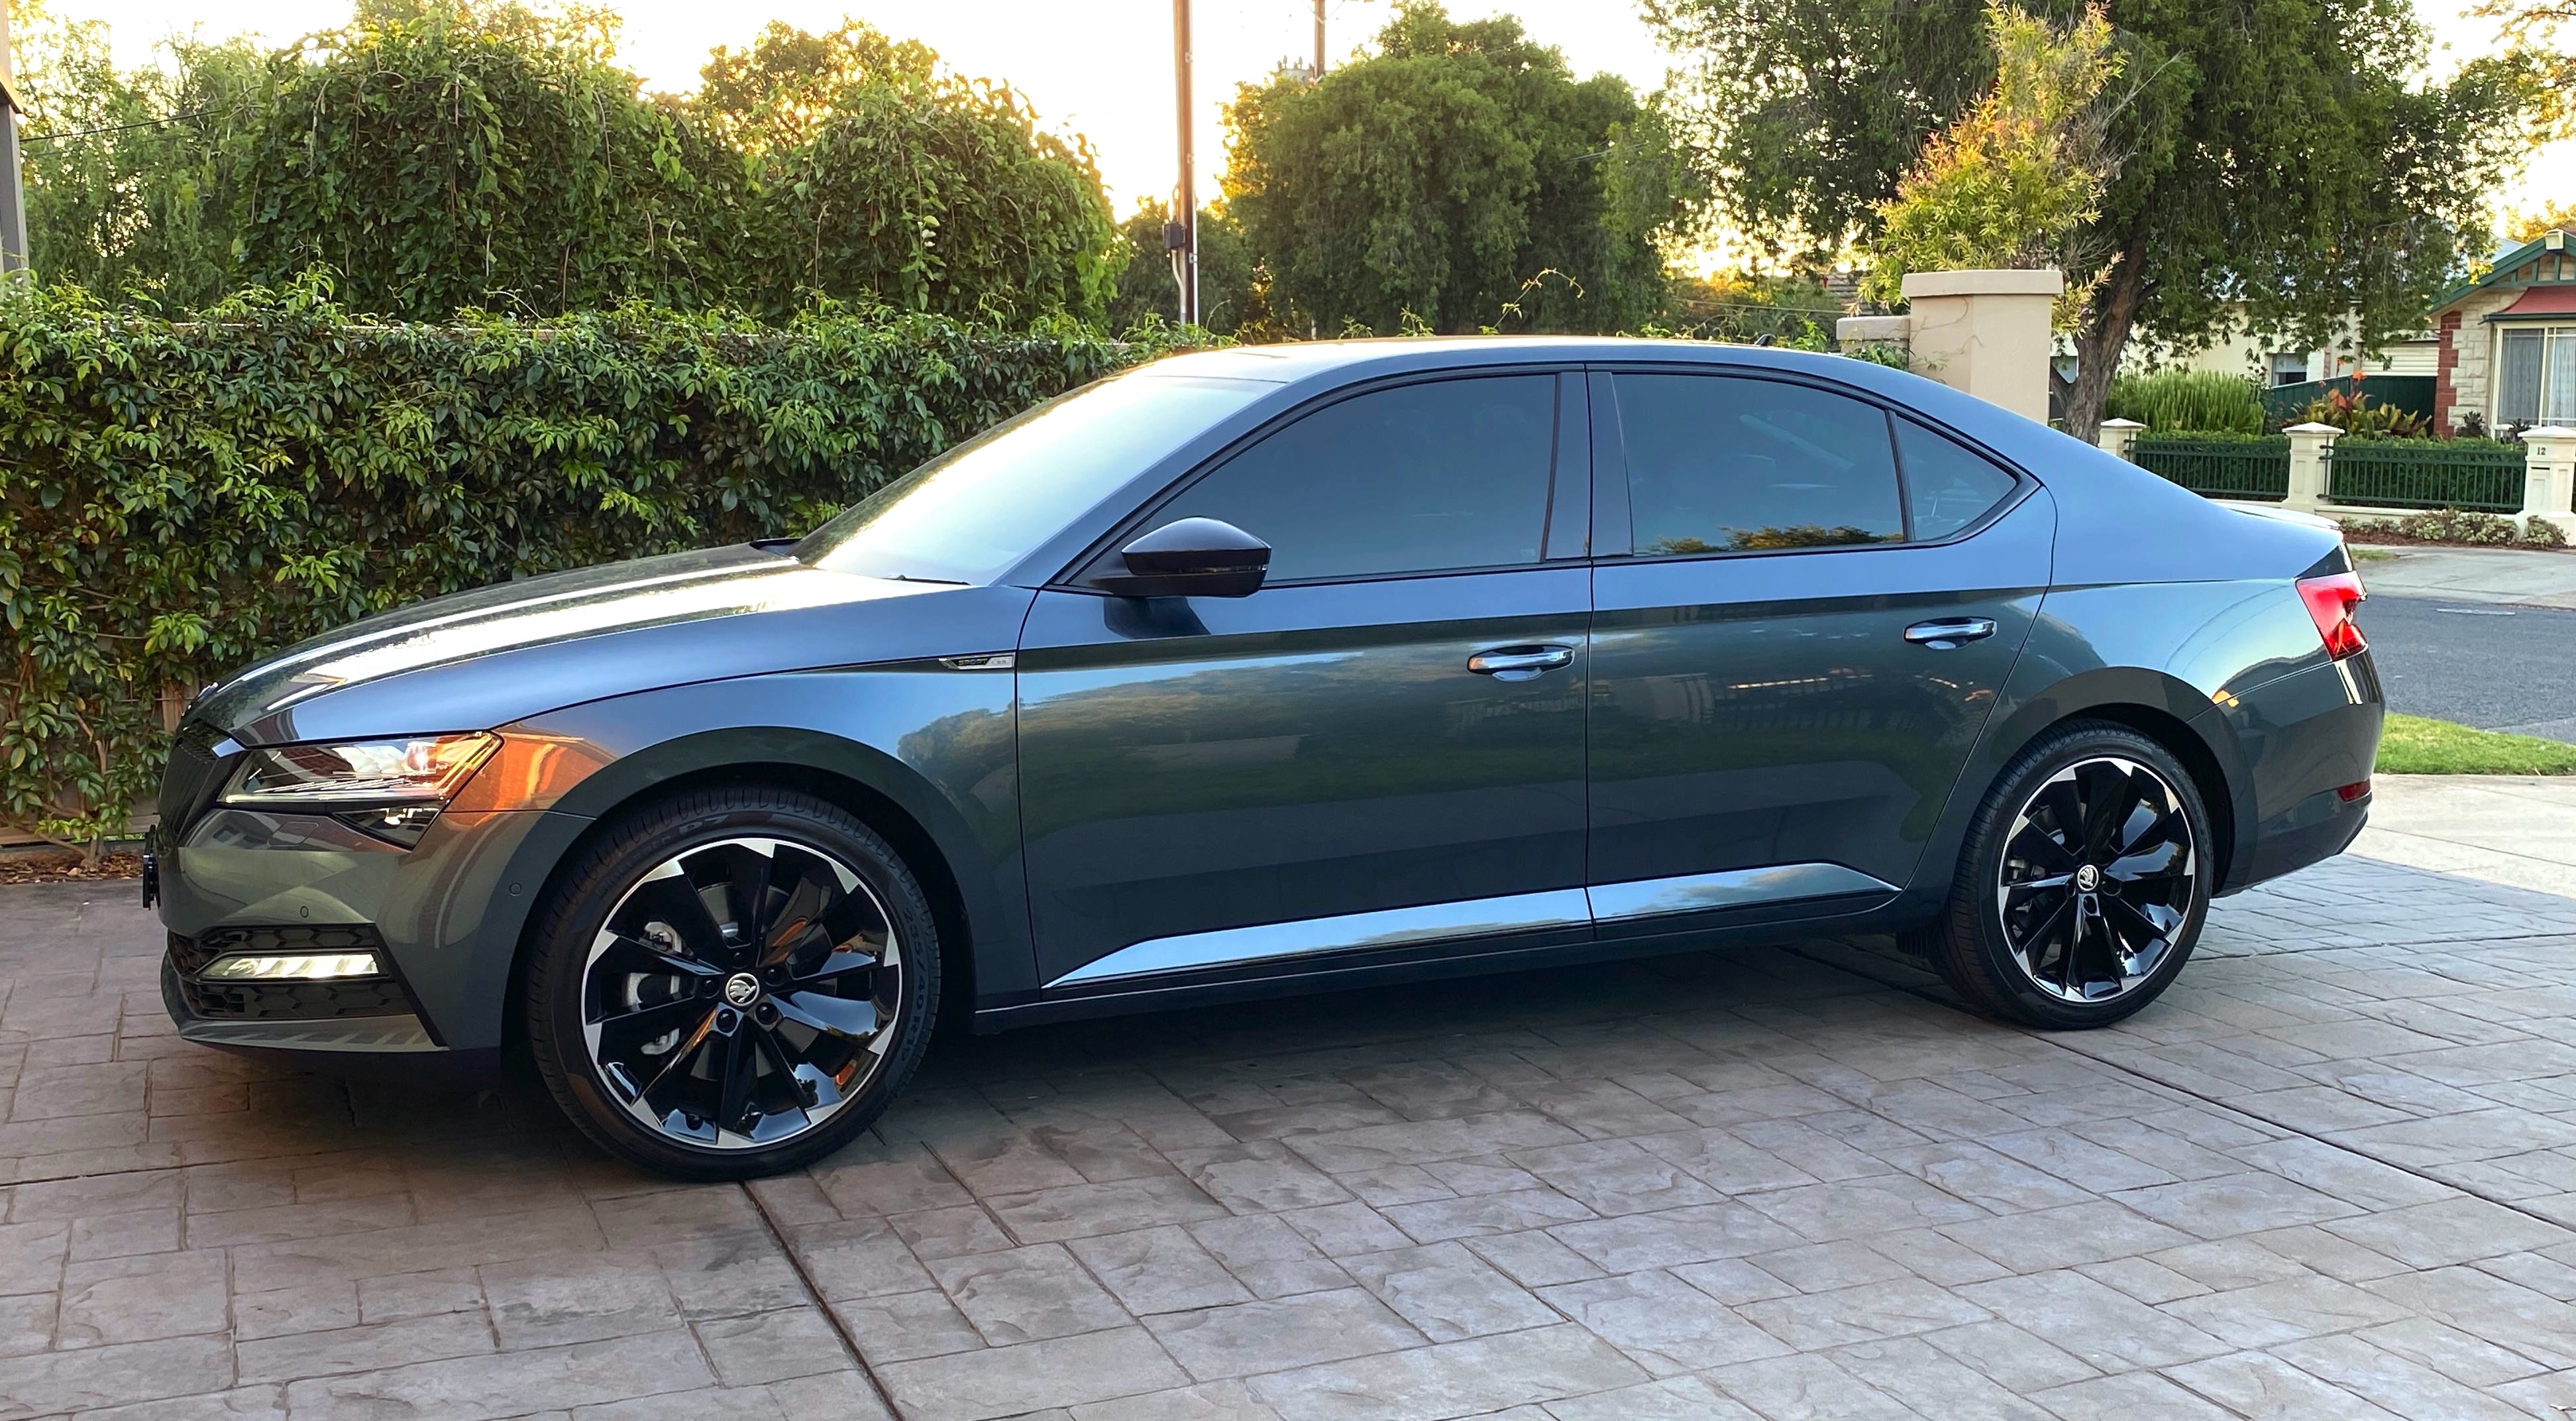
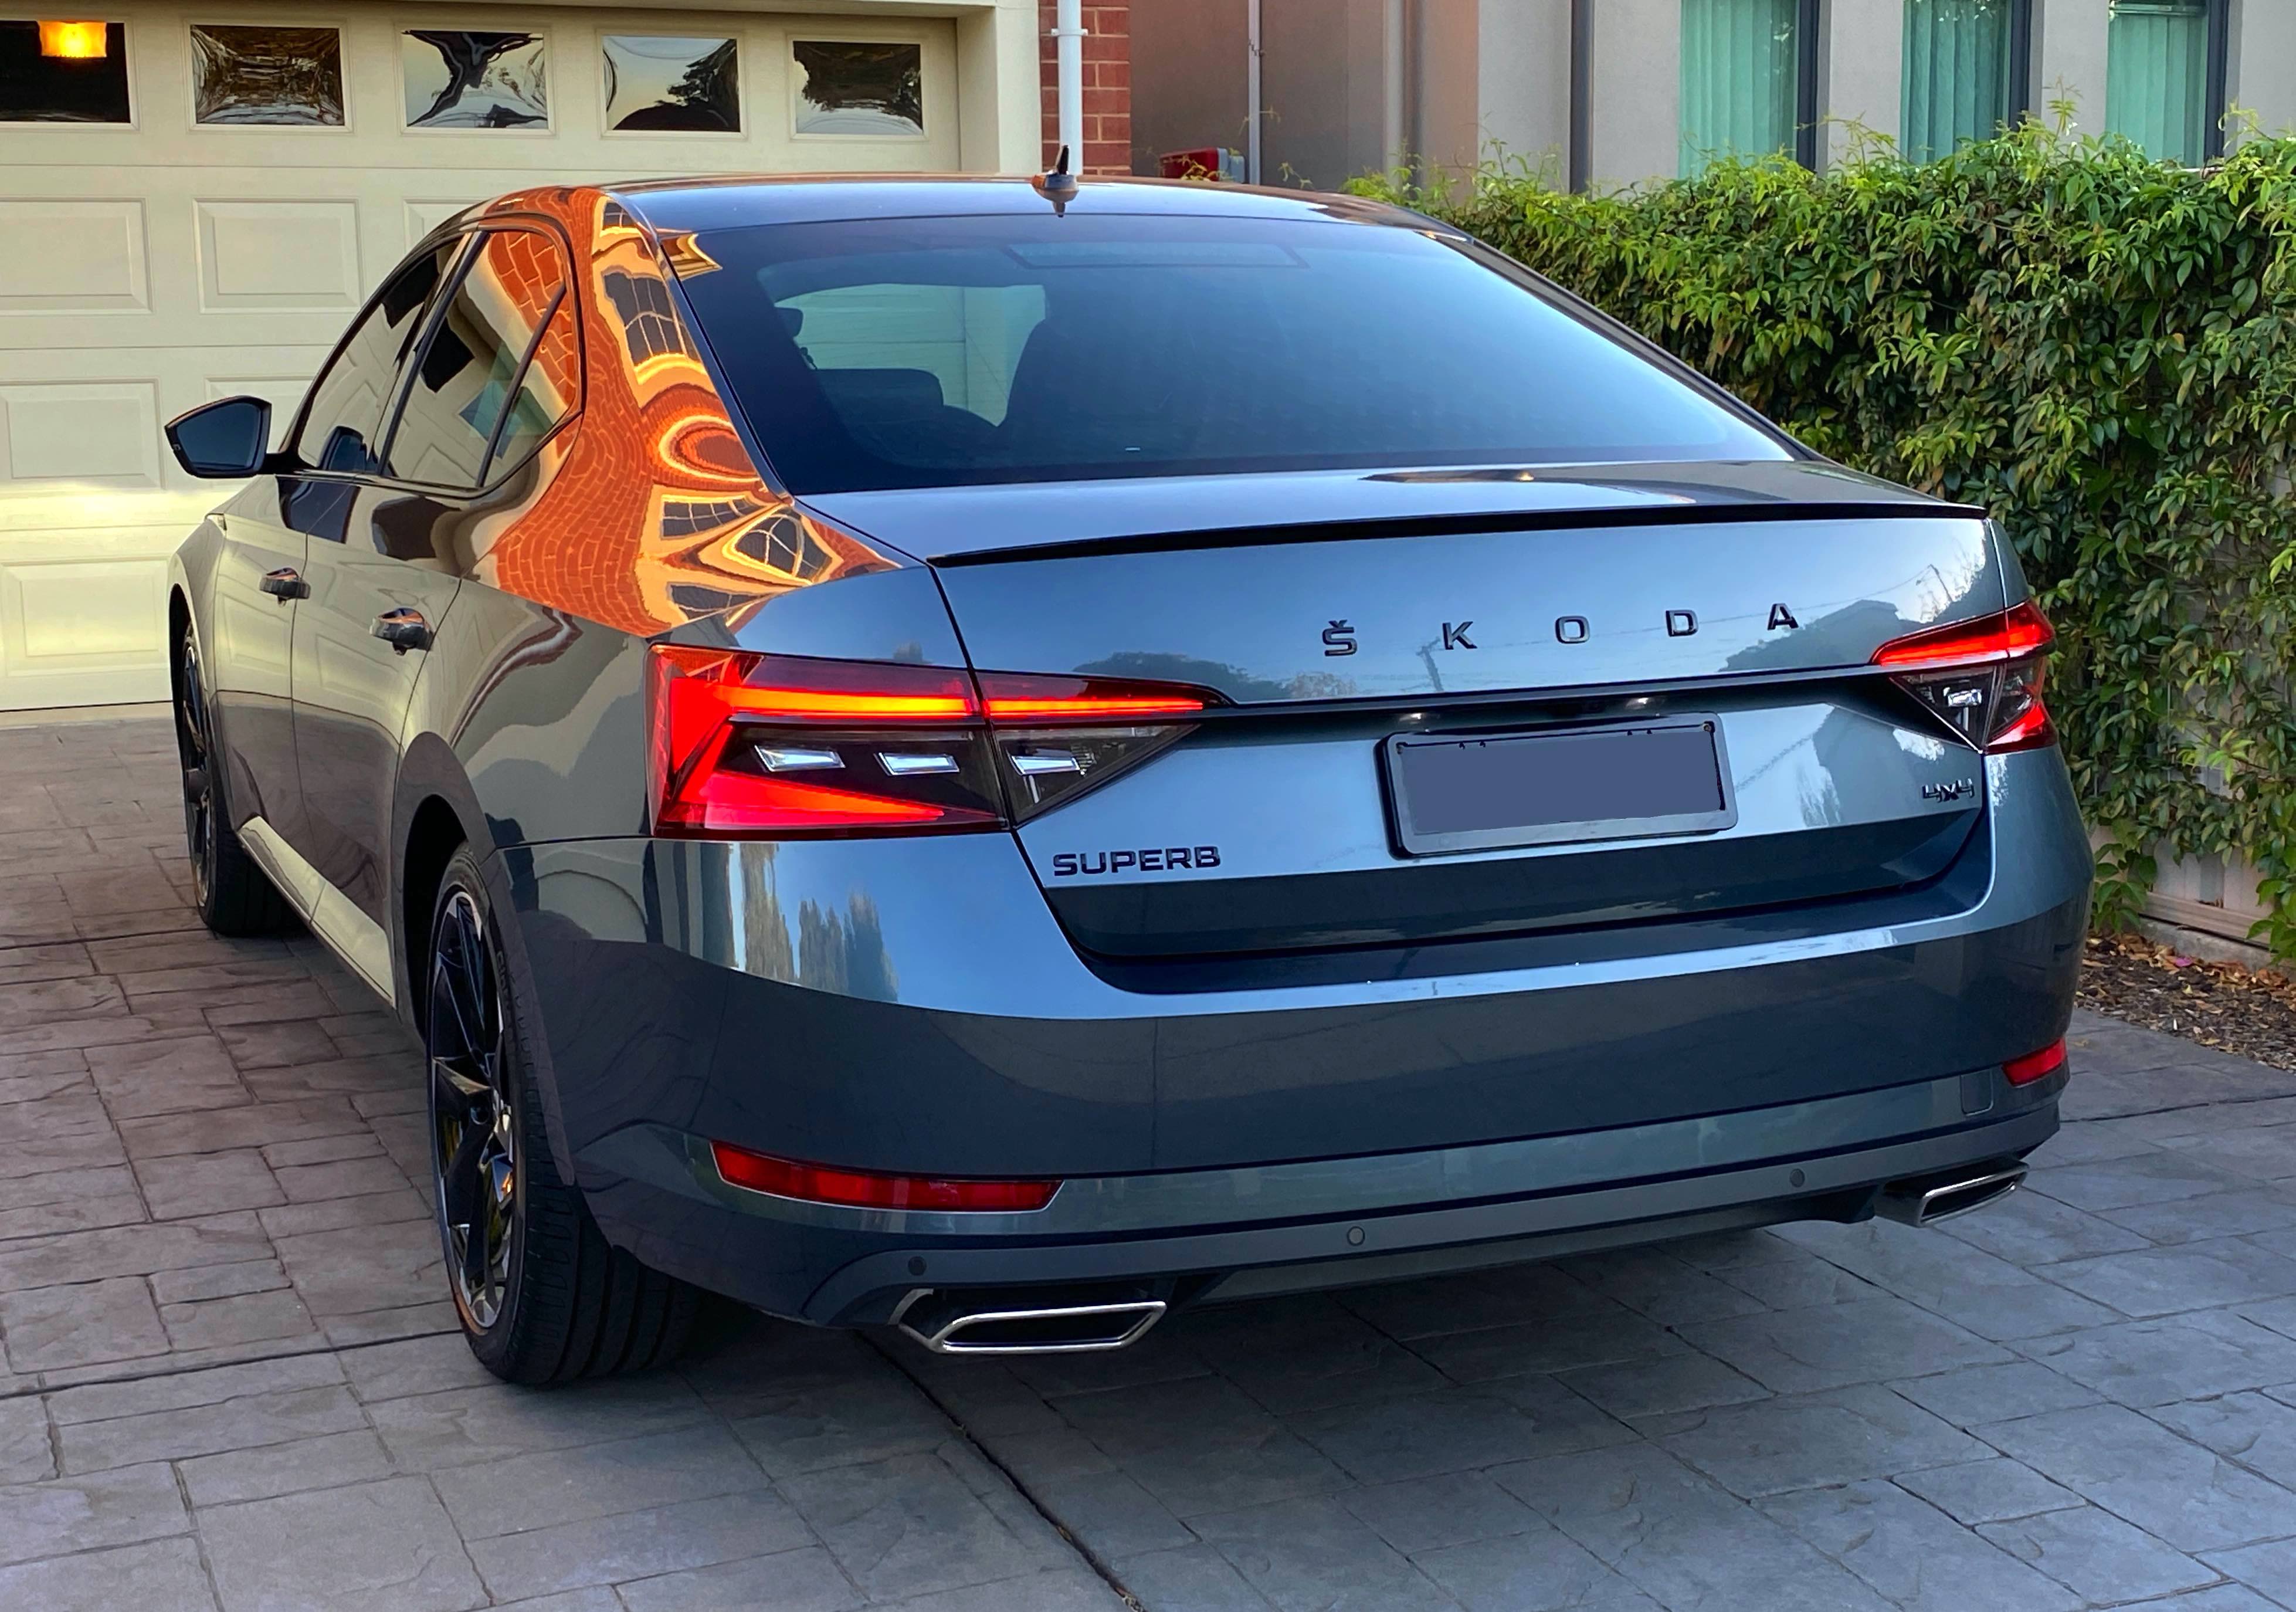

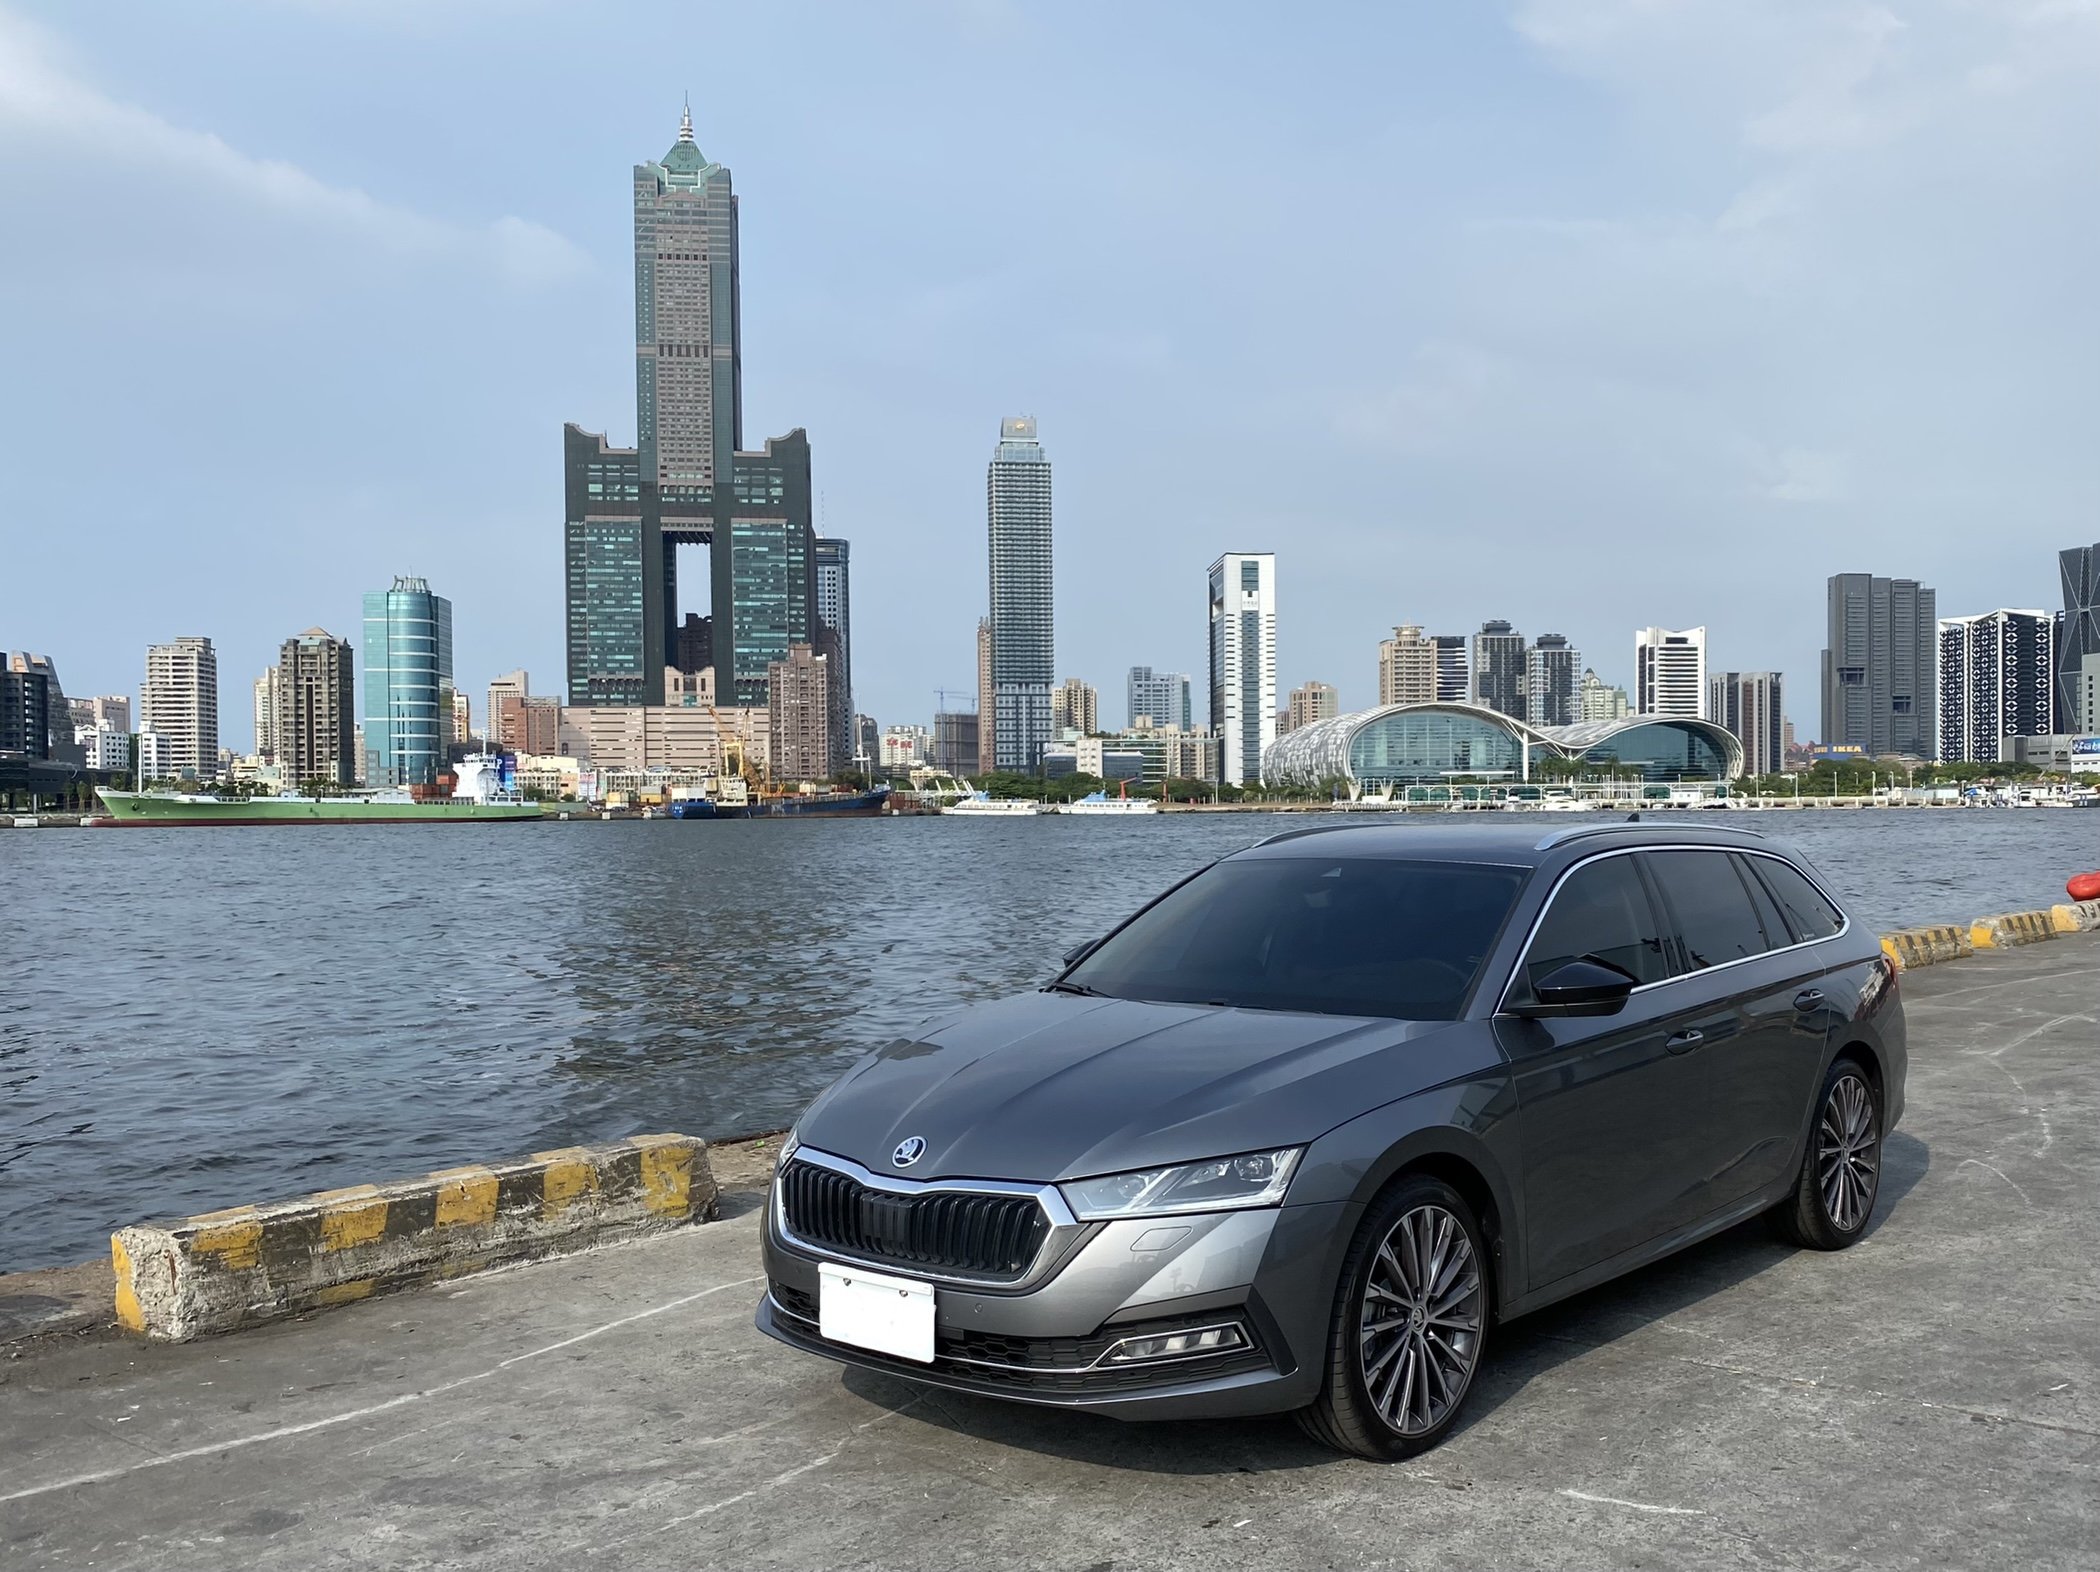

.thumb.jpg.94ac72c6cb19c11c887370b31f058b4b.jpg)
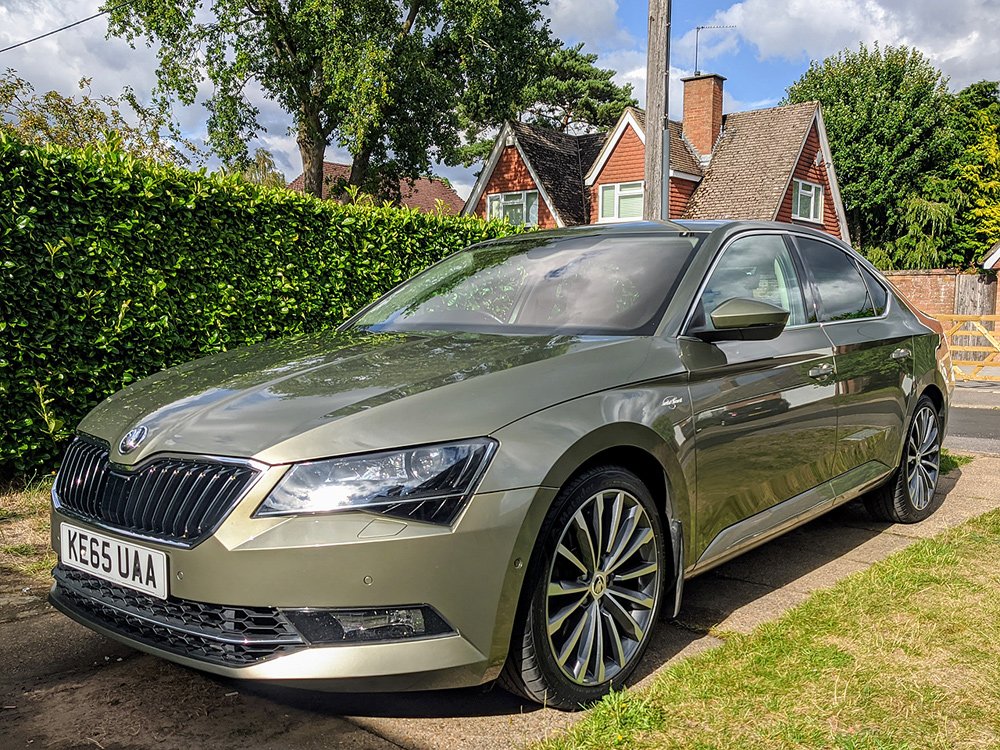
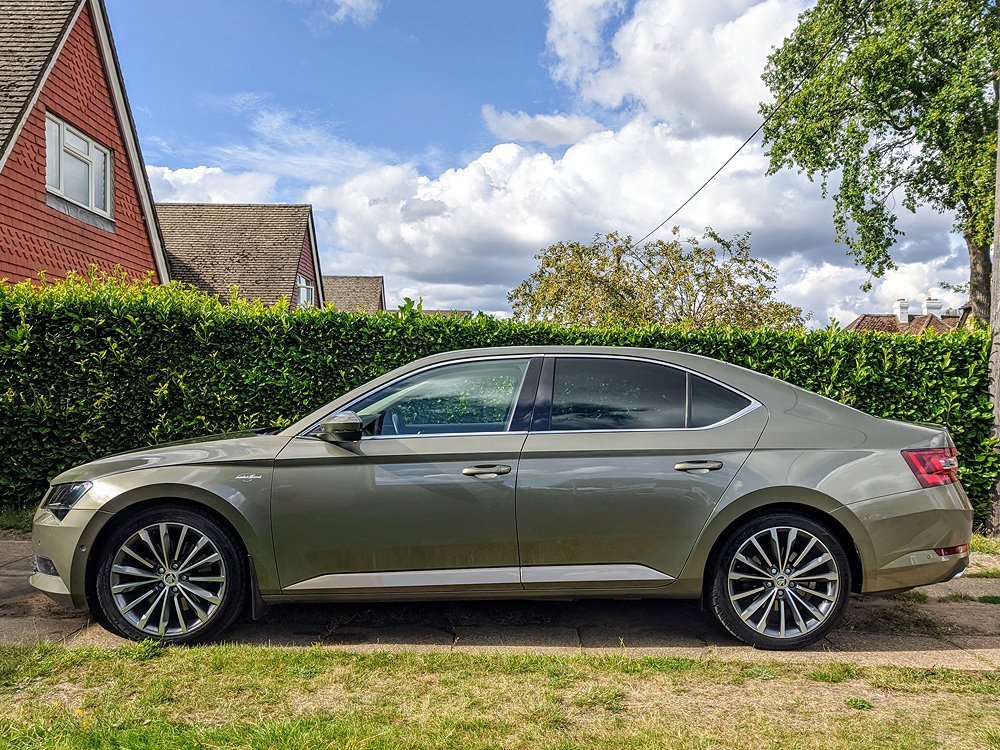
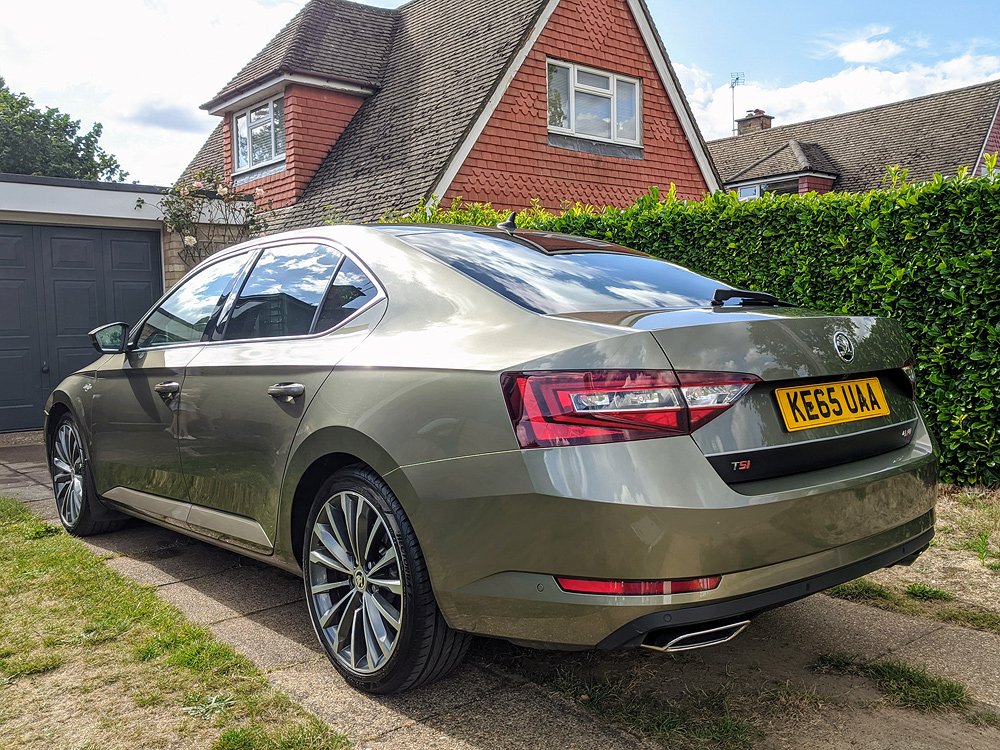
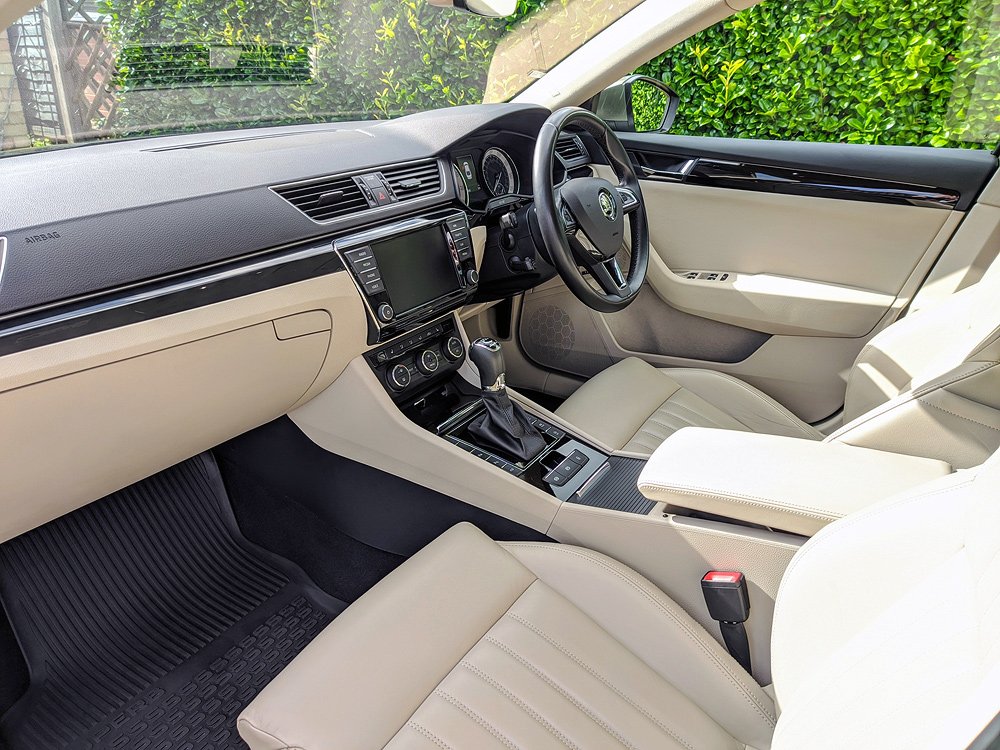
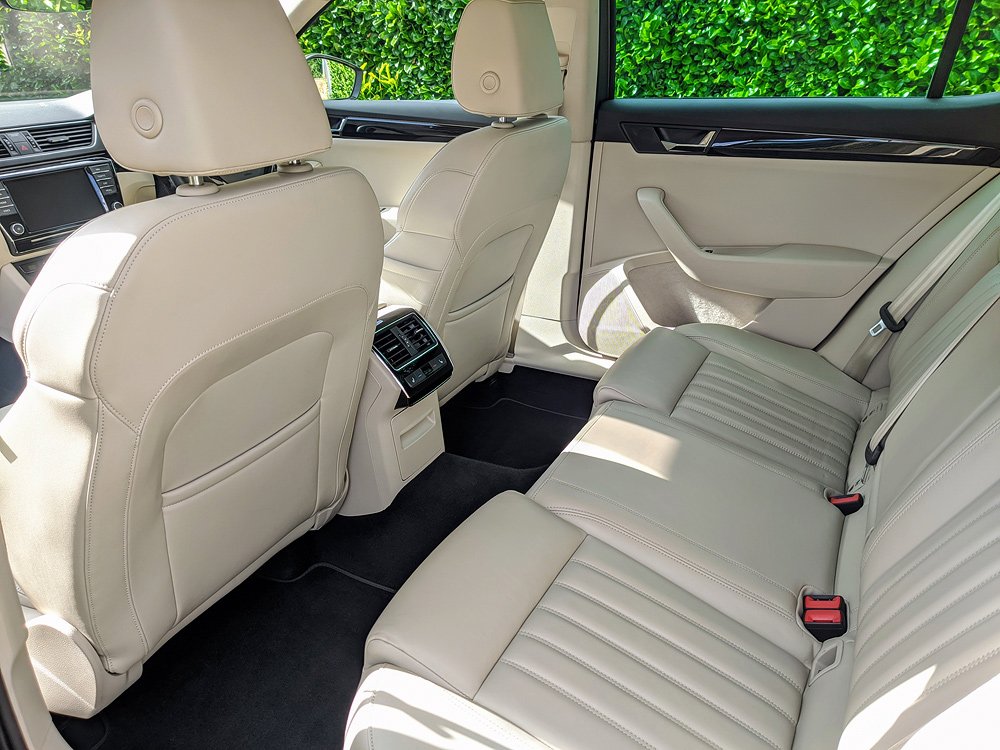

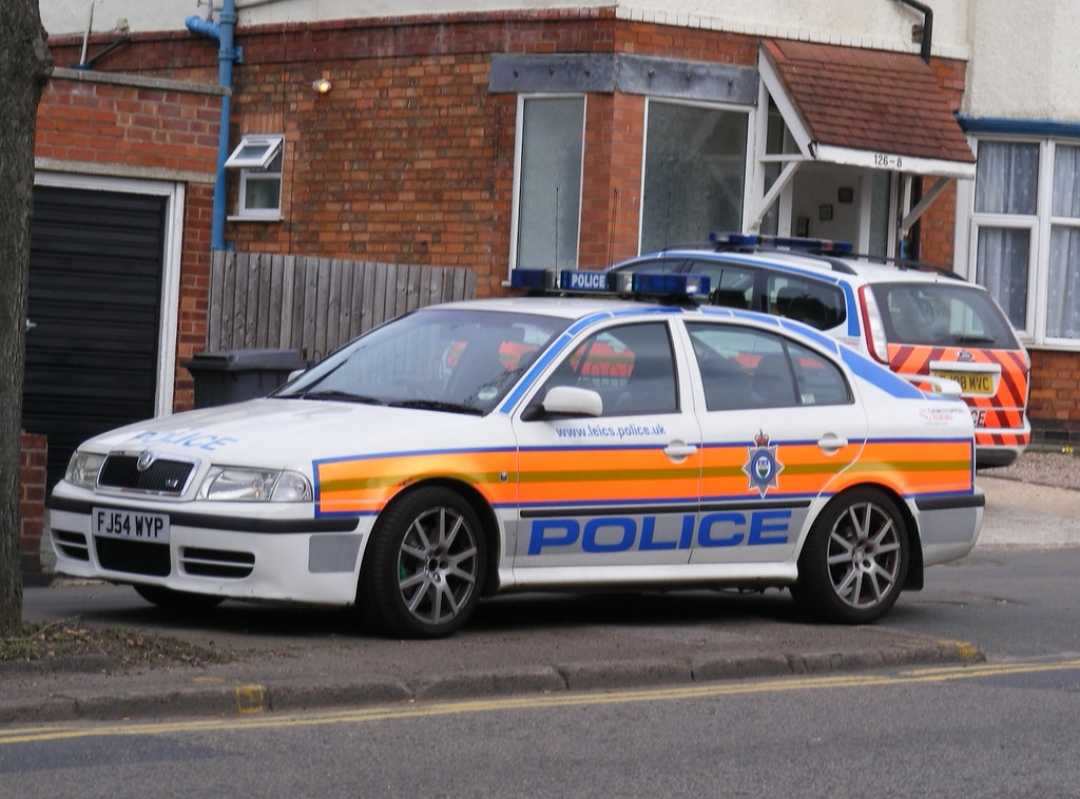

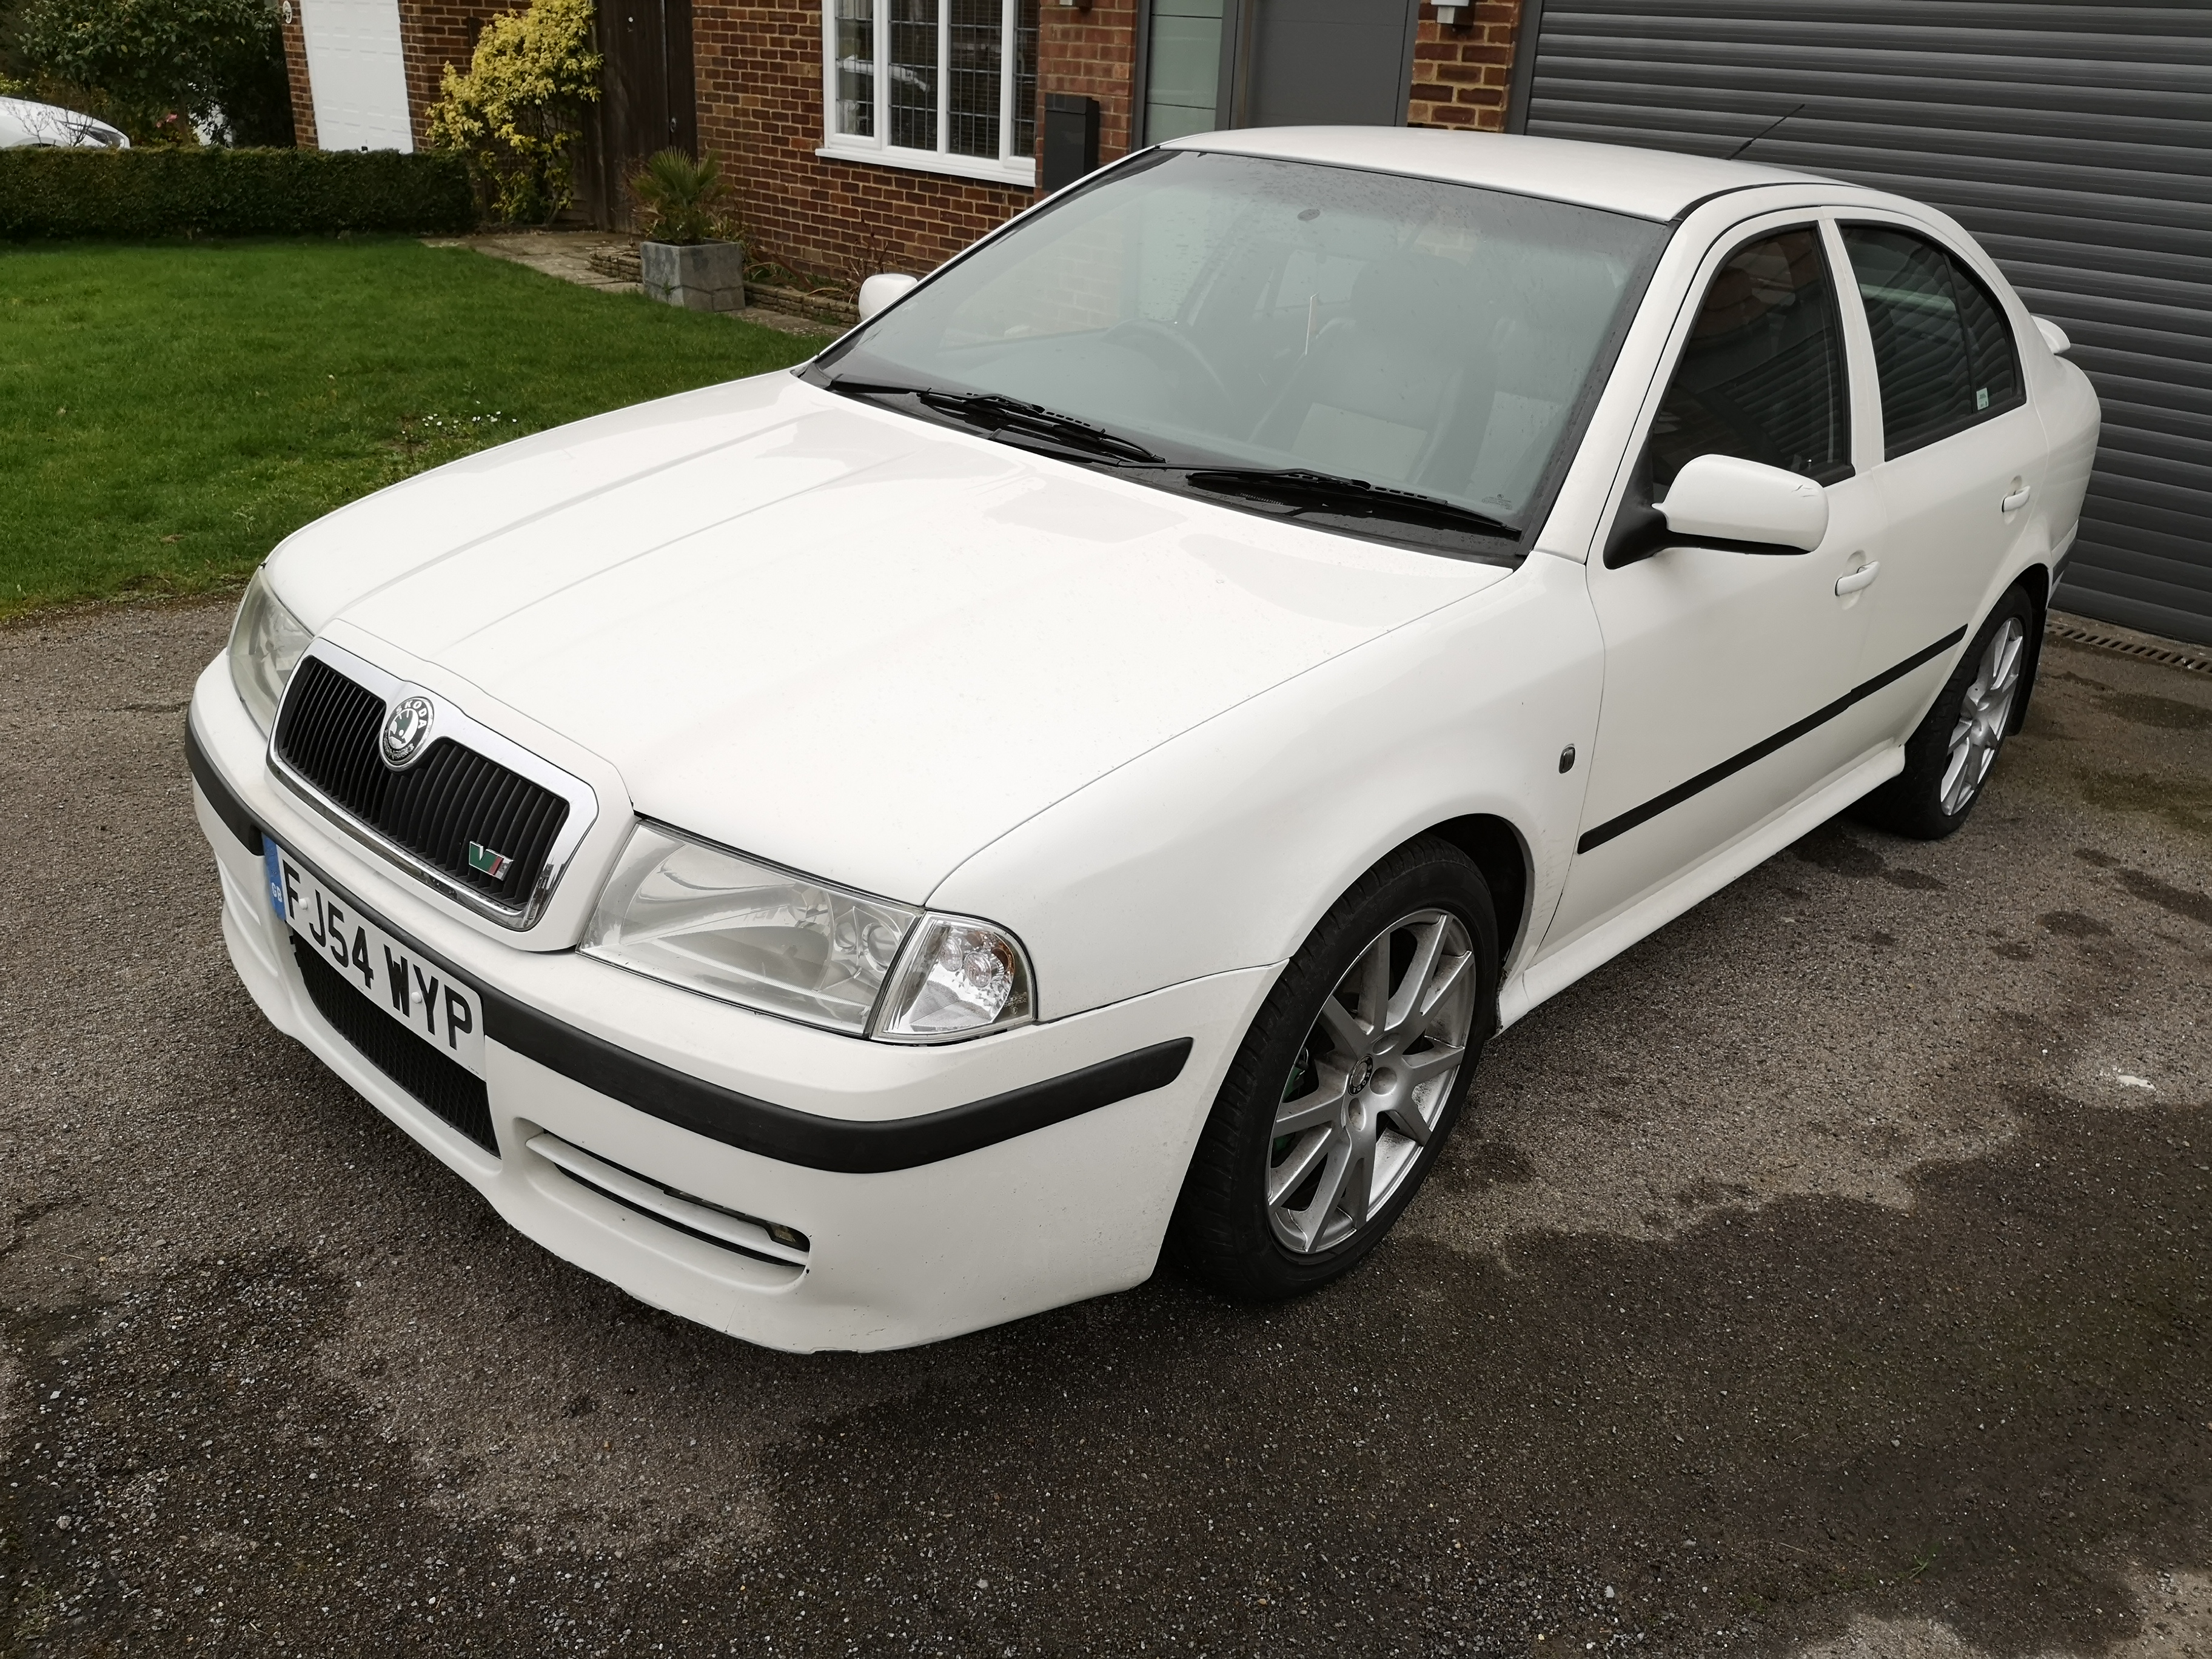


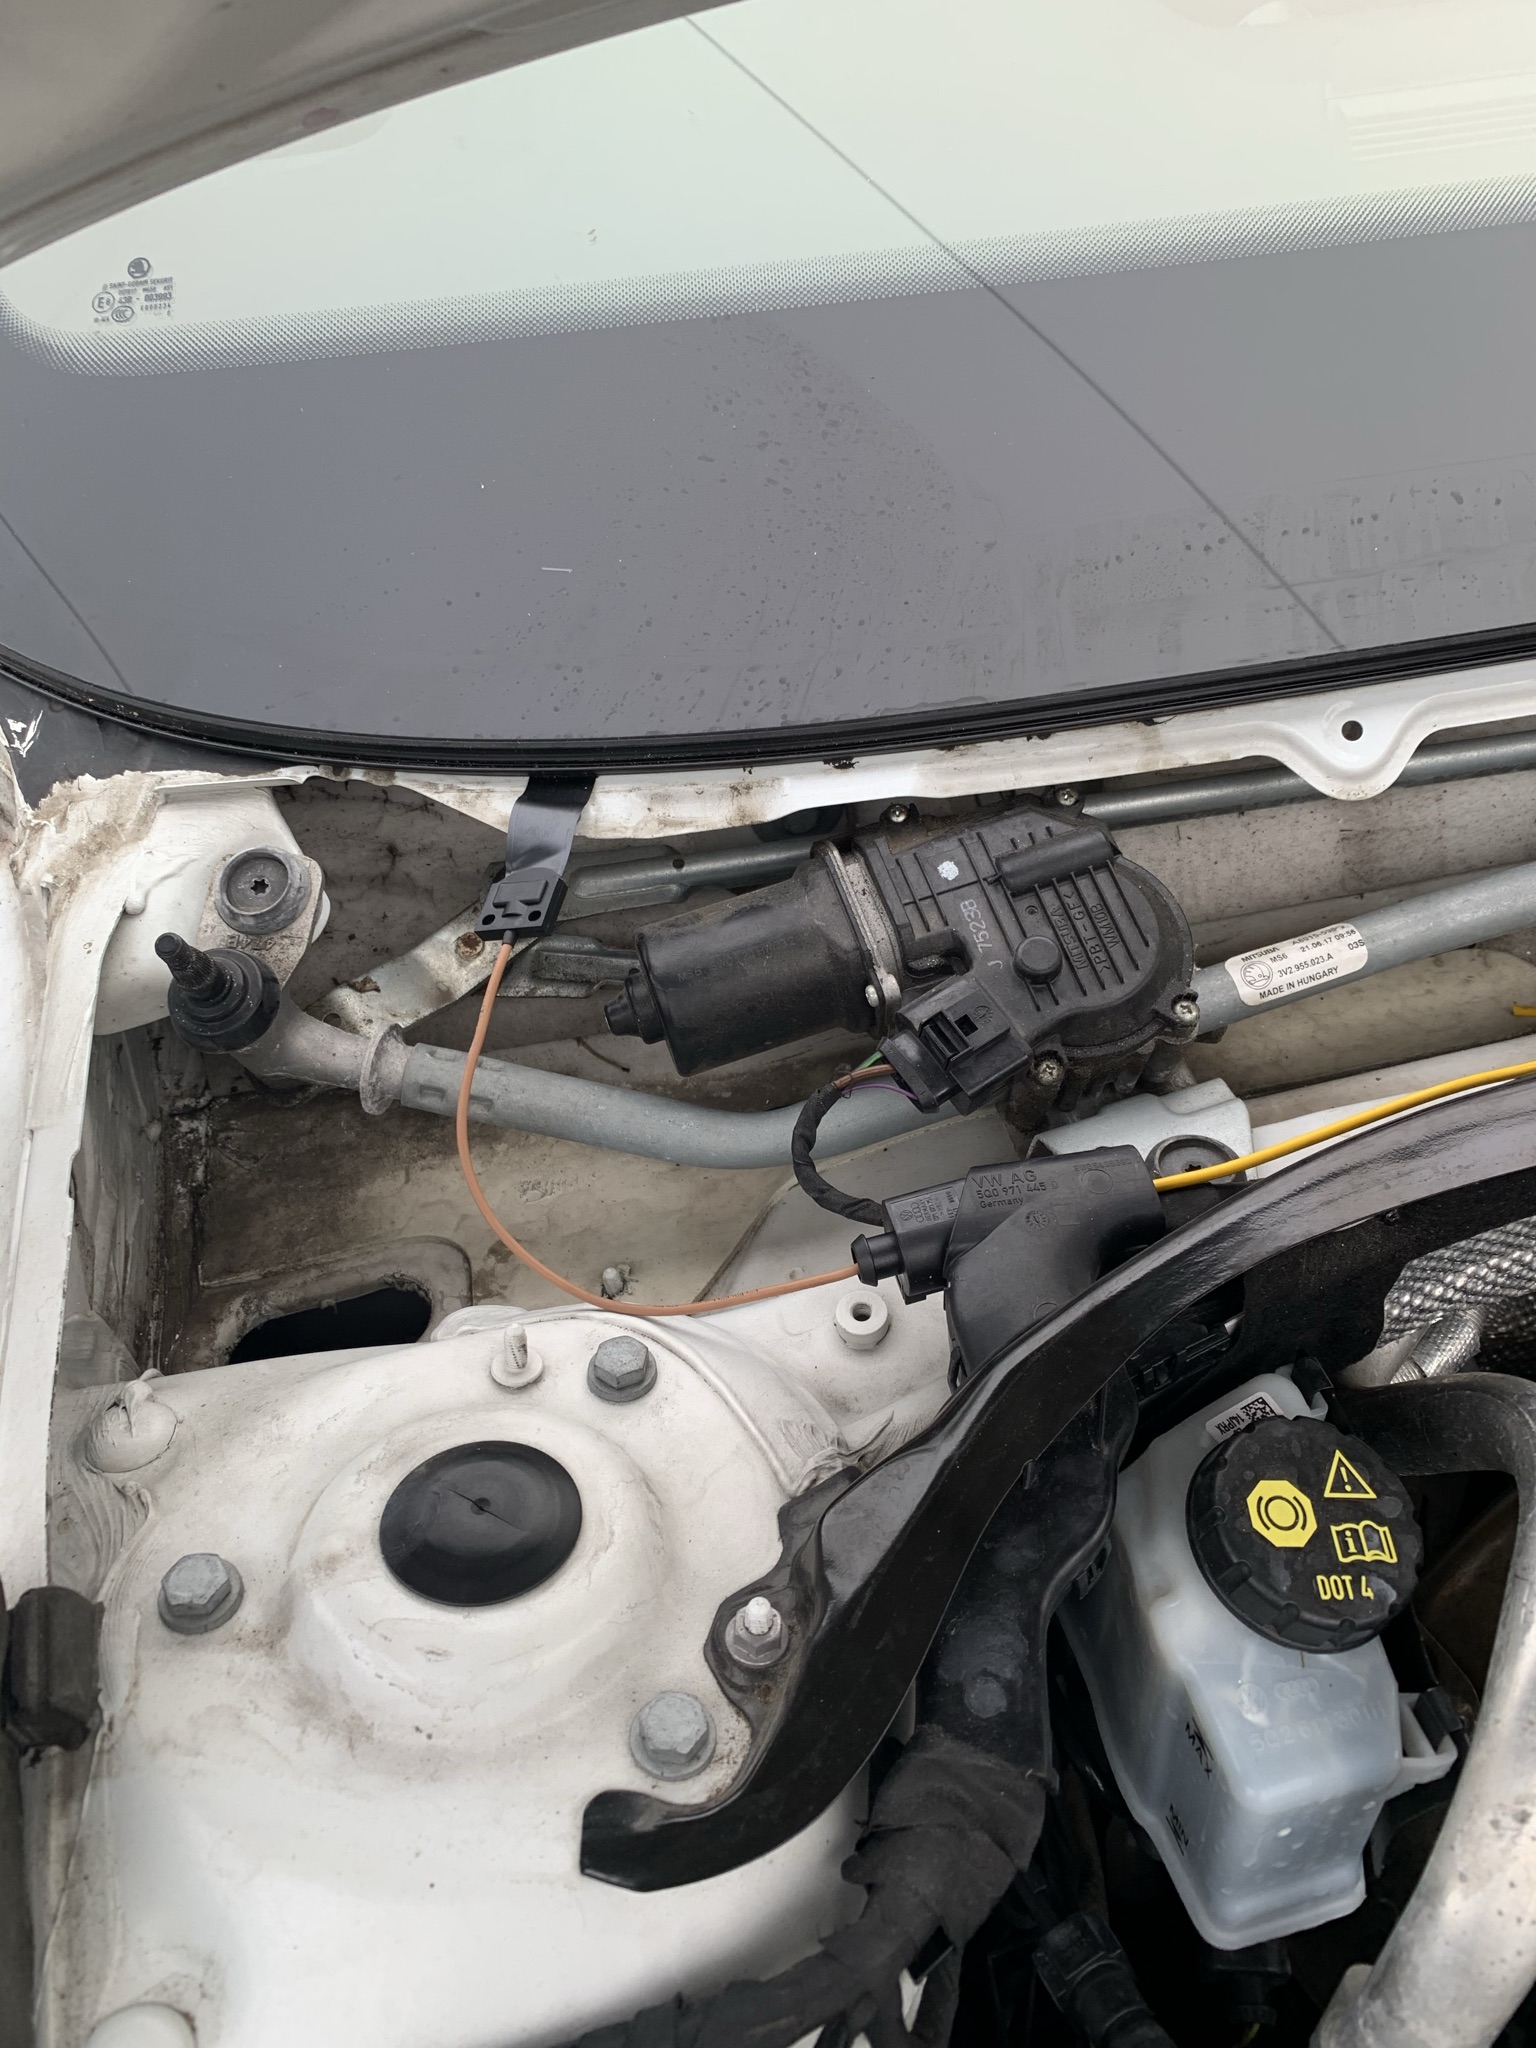


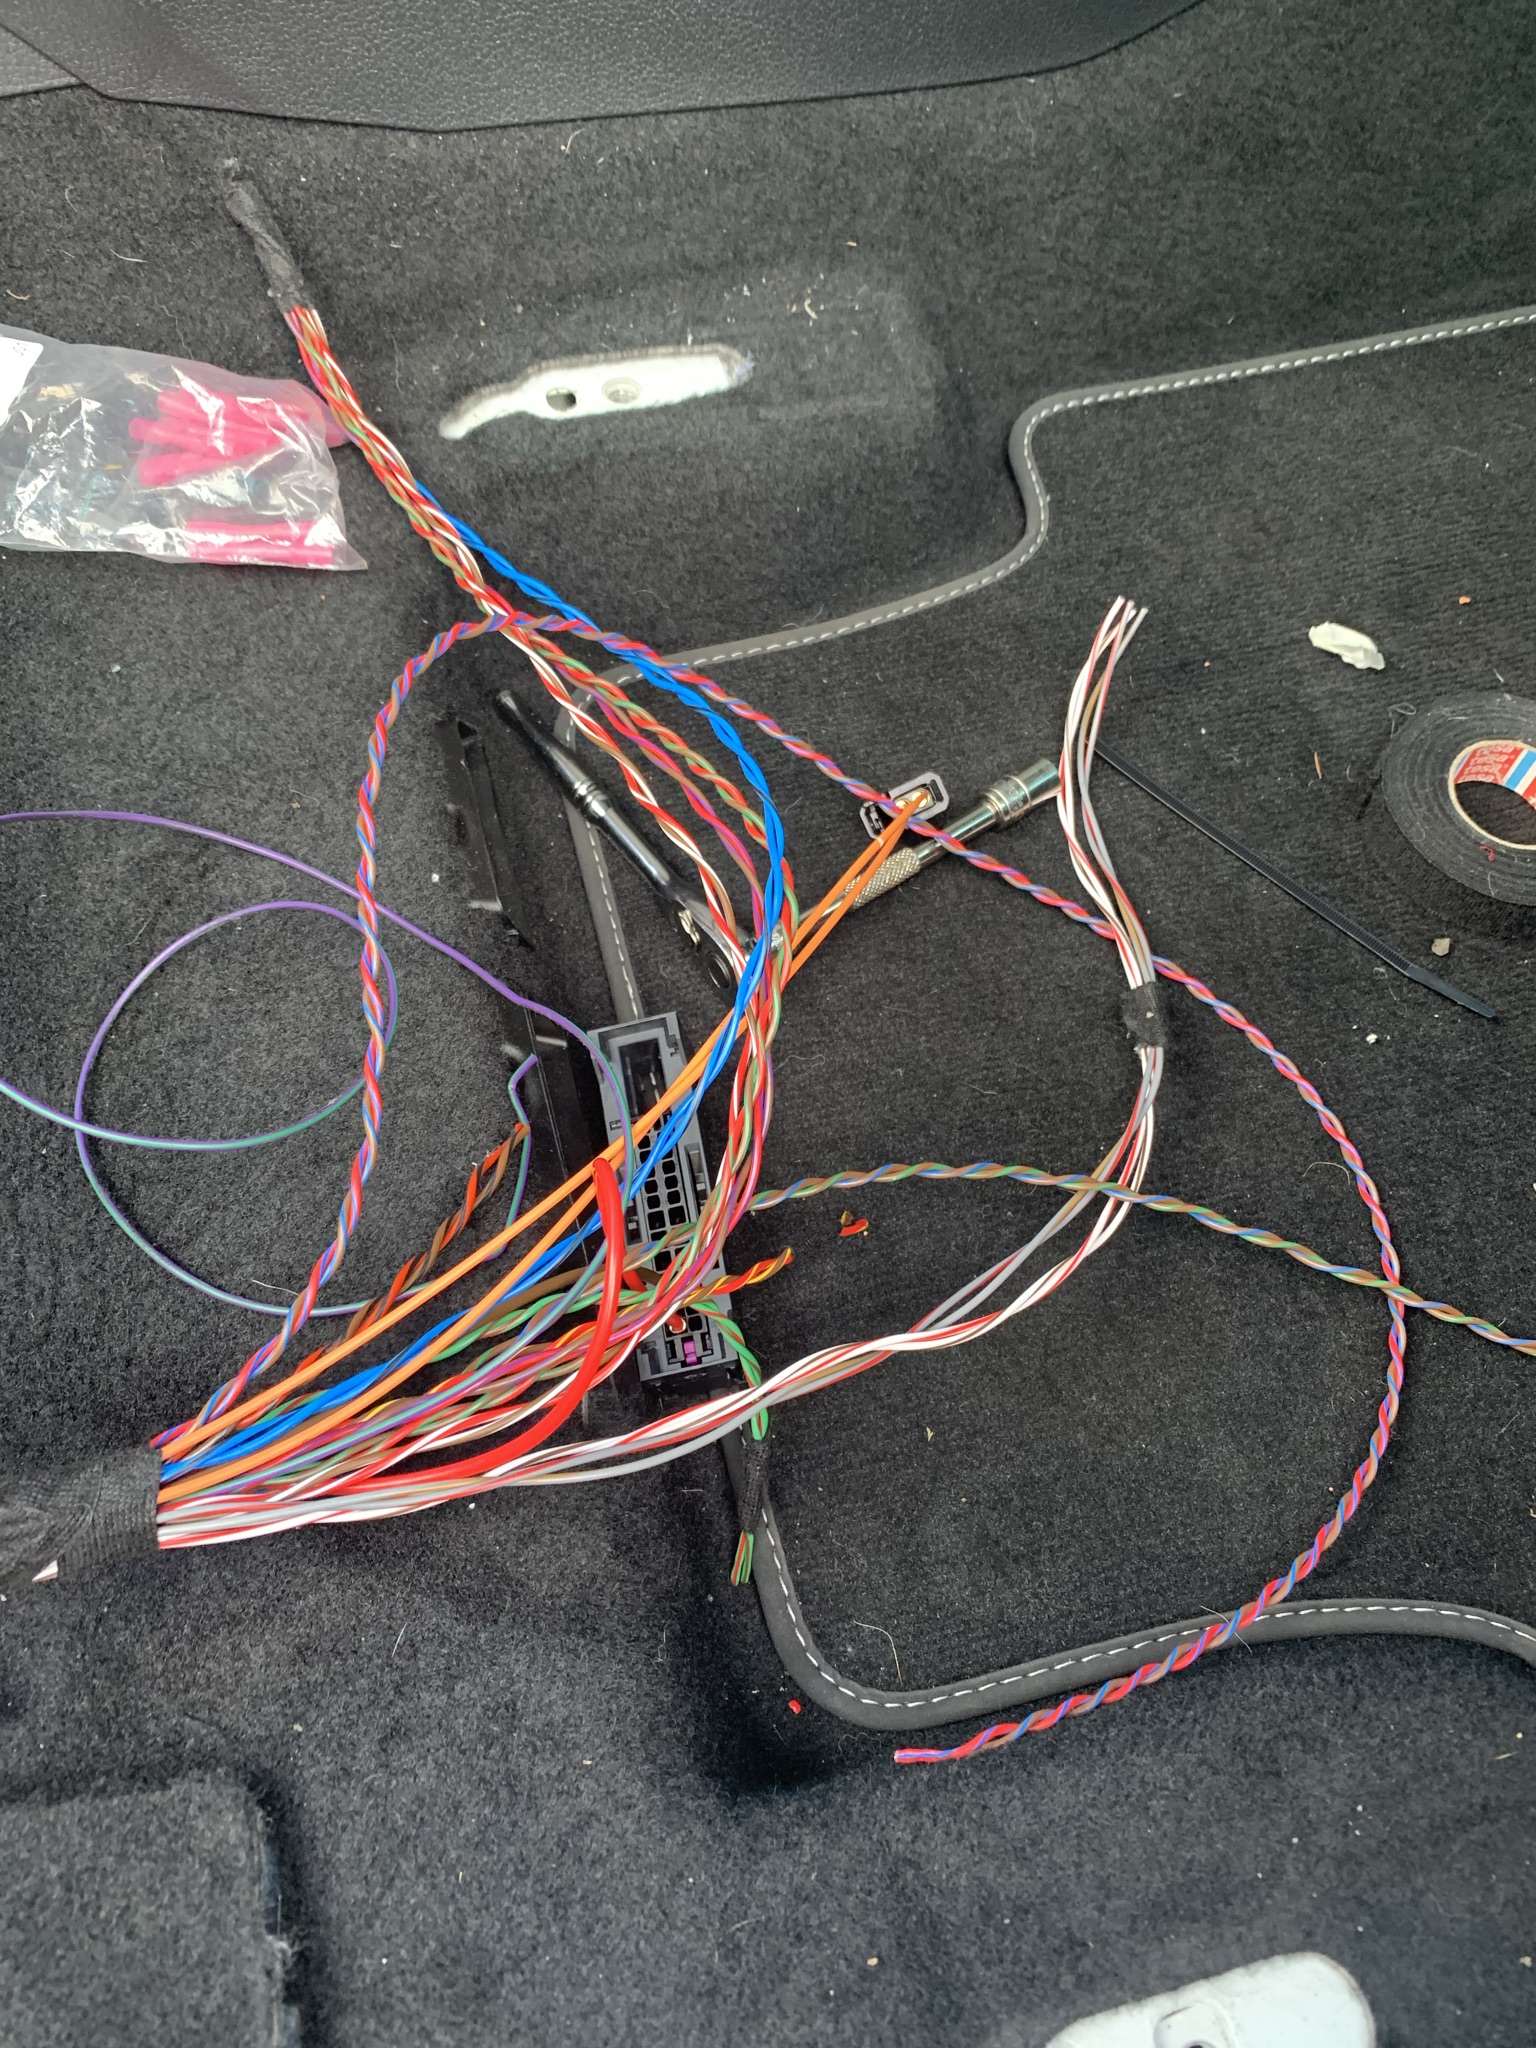
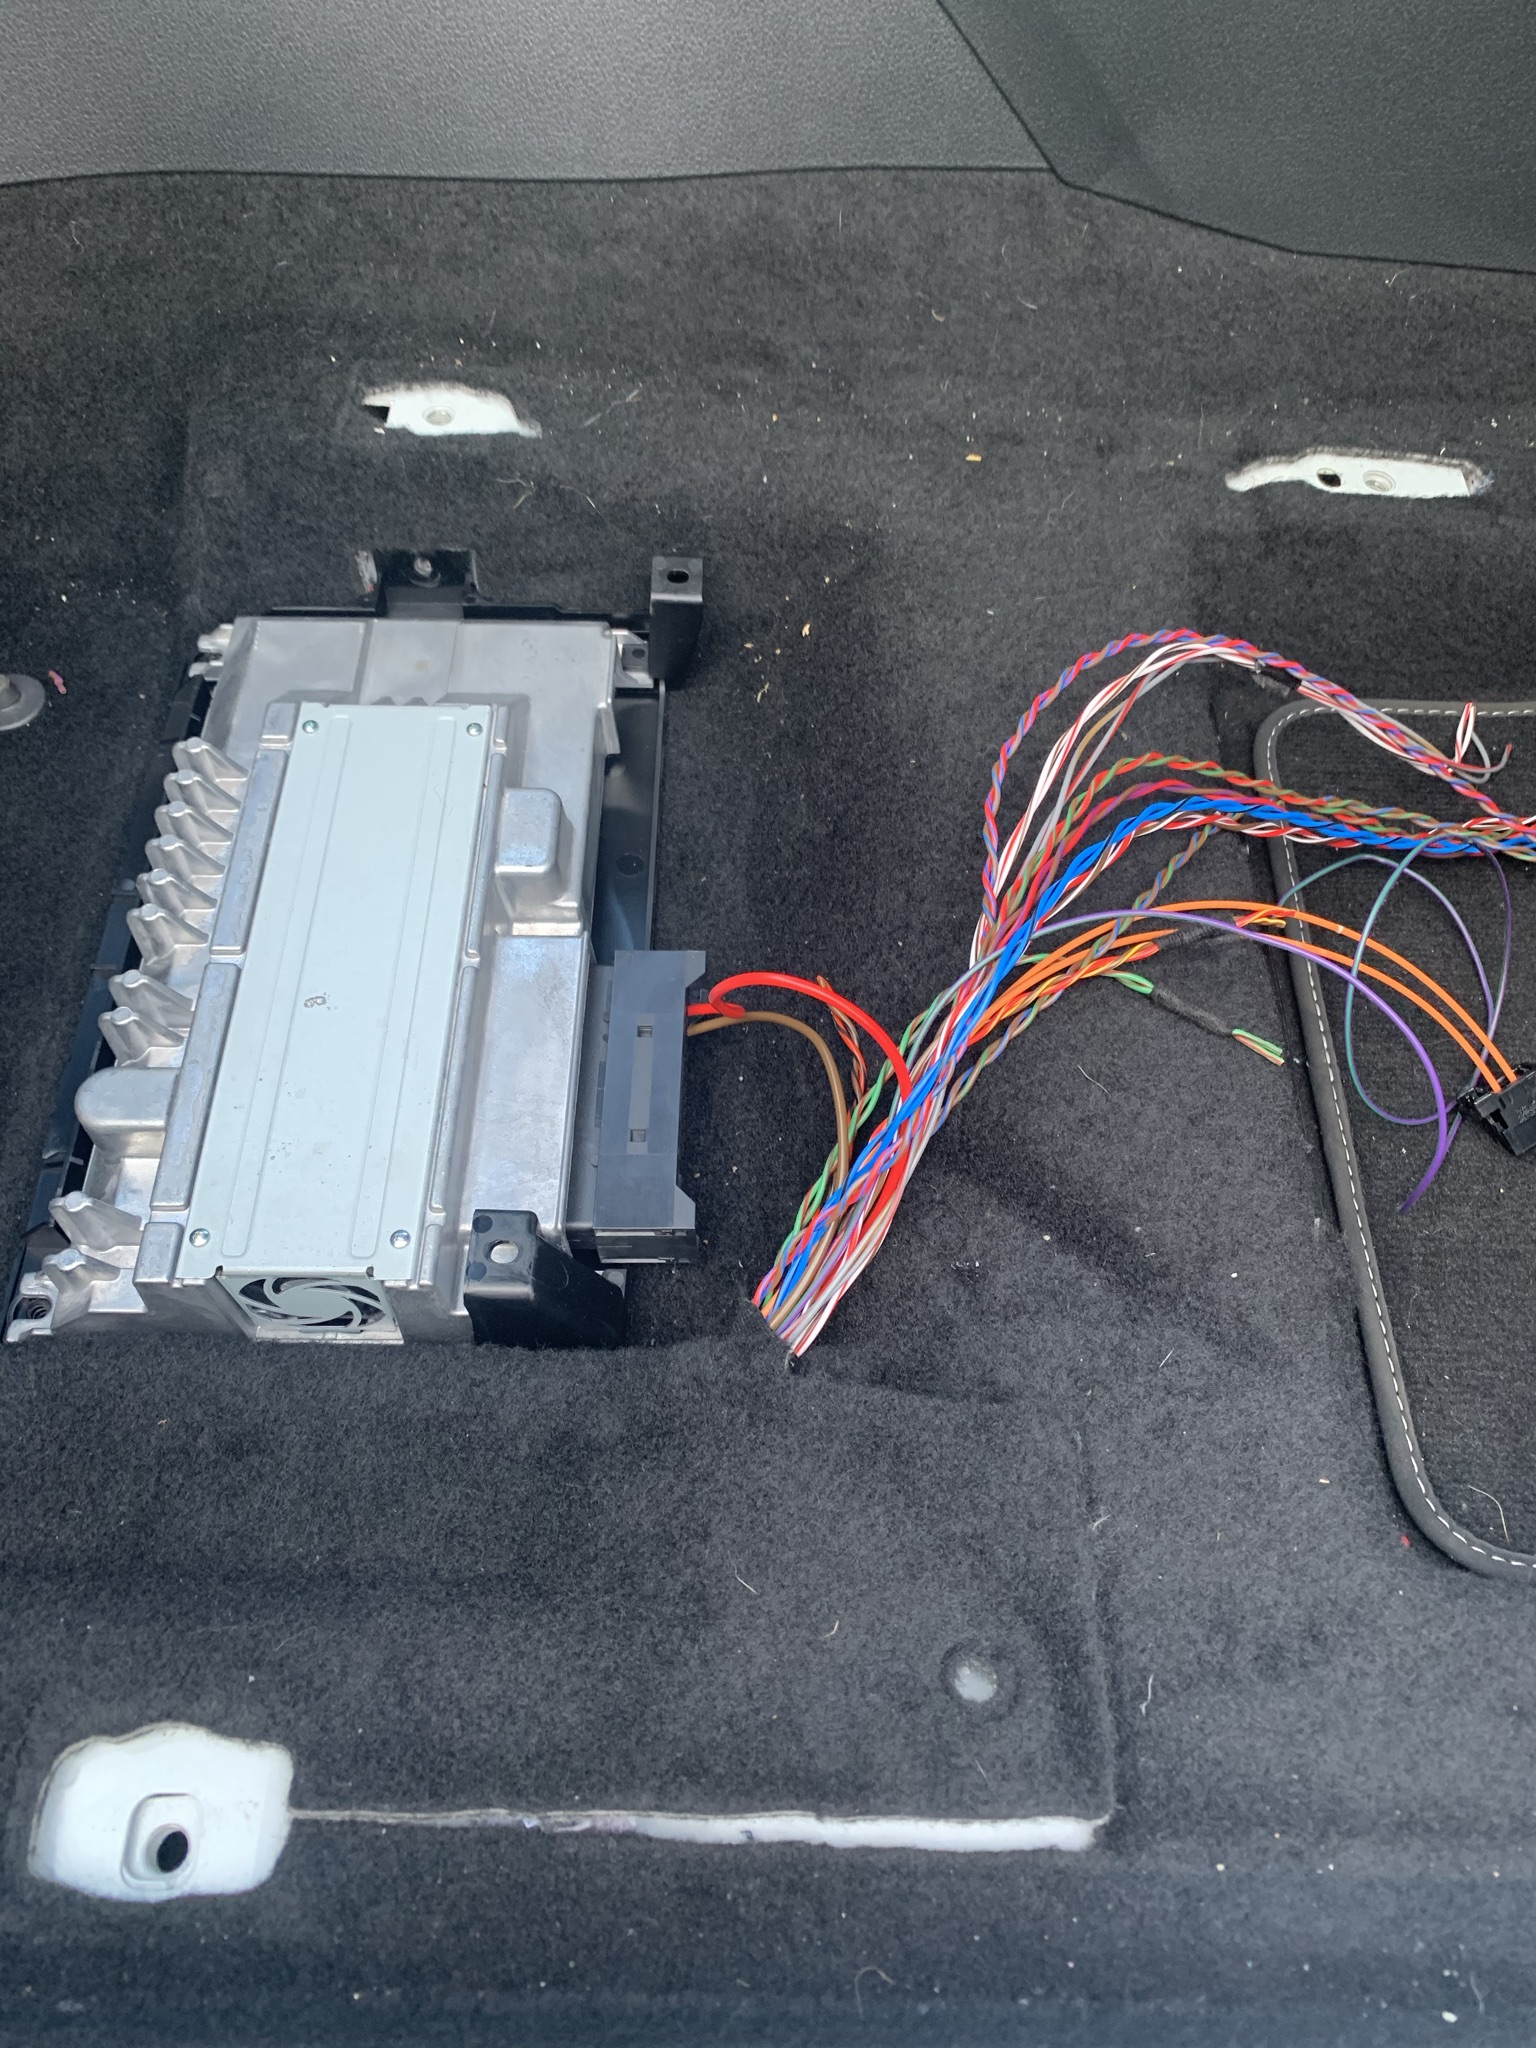


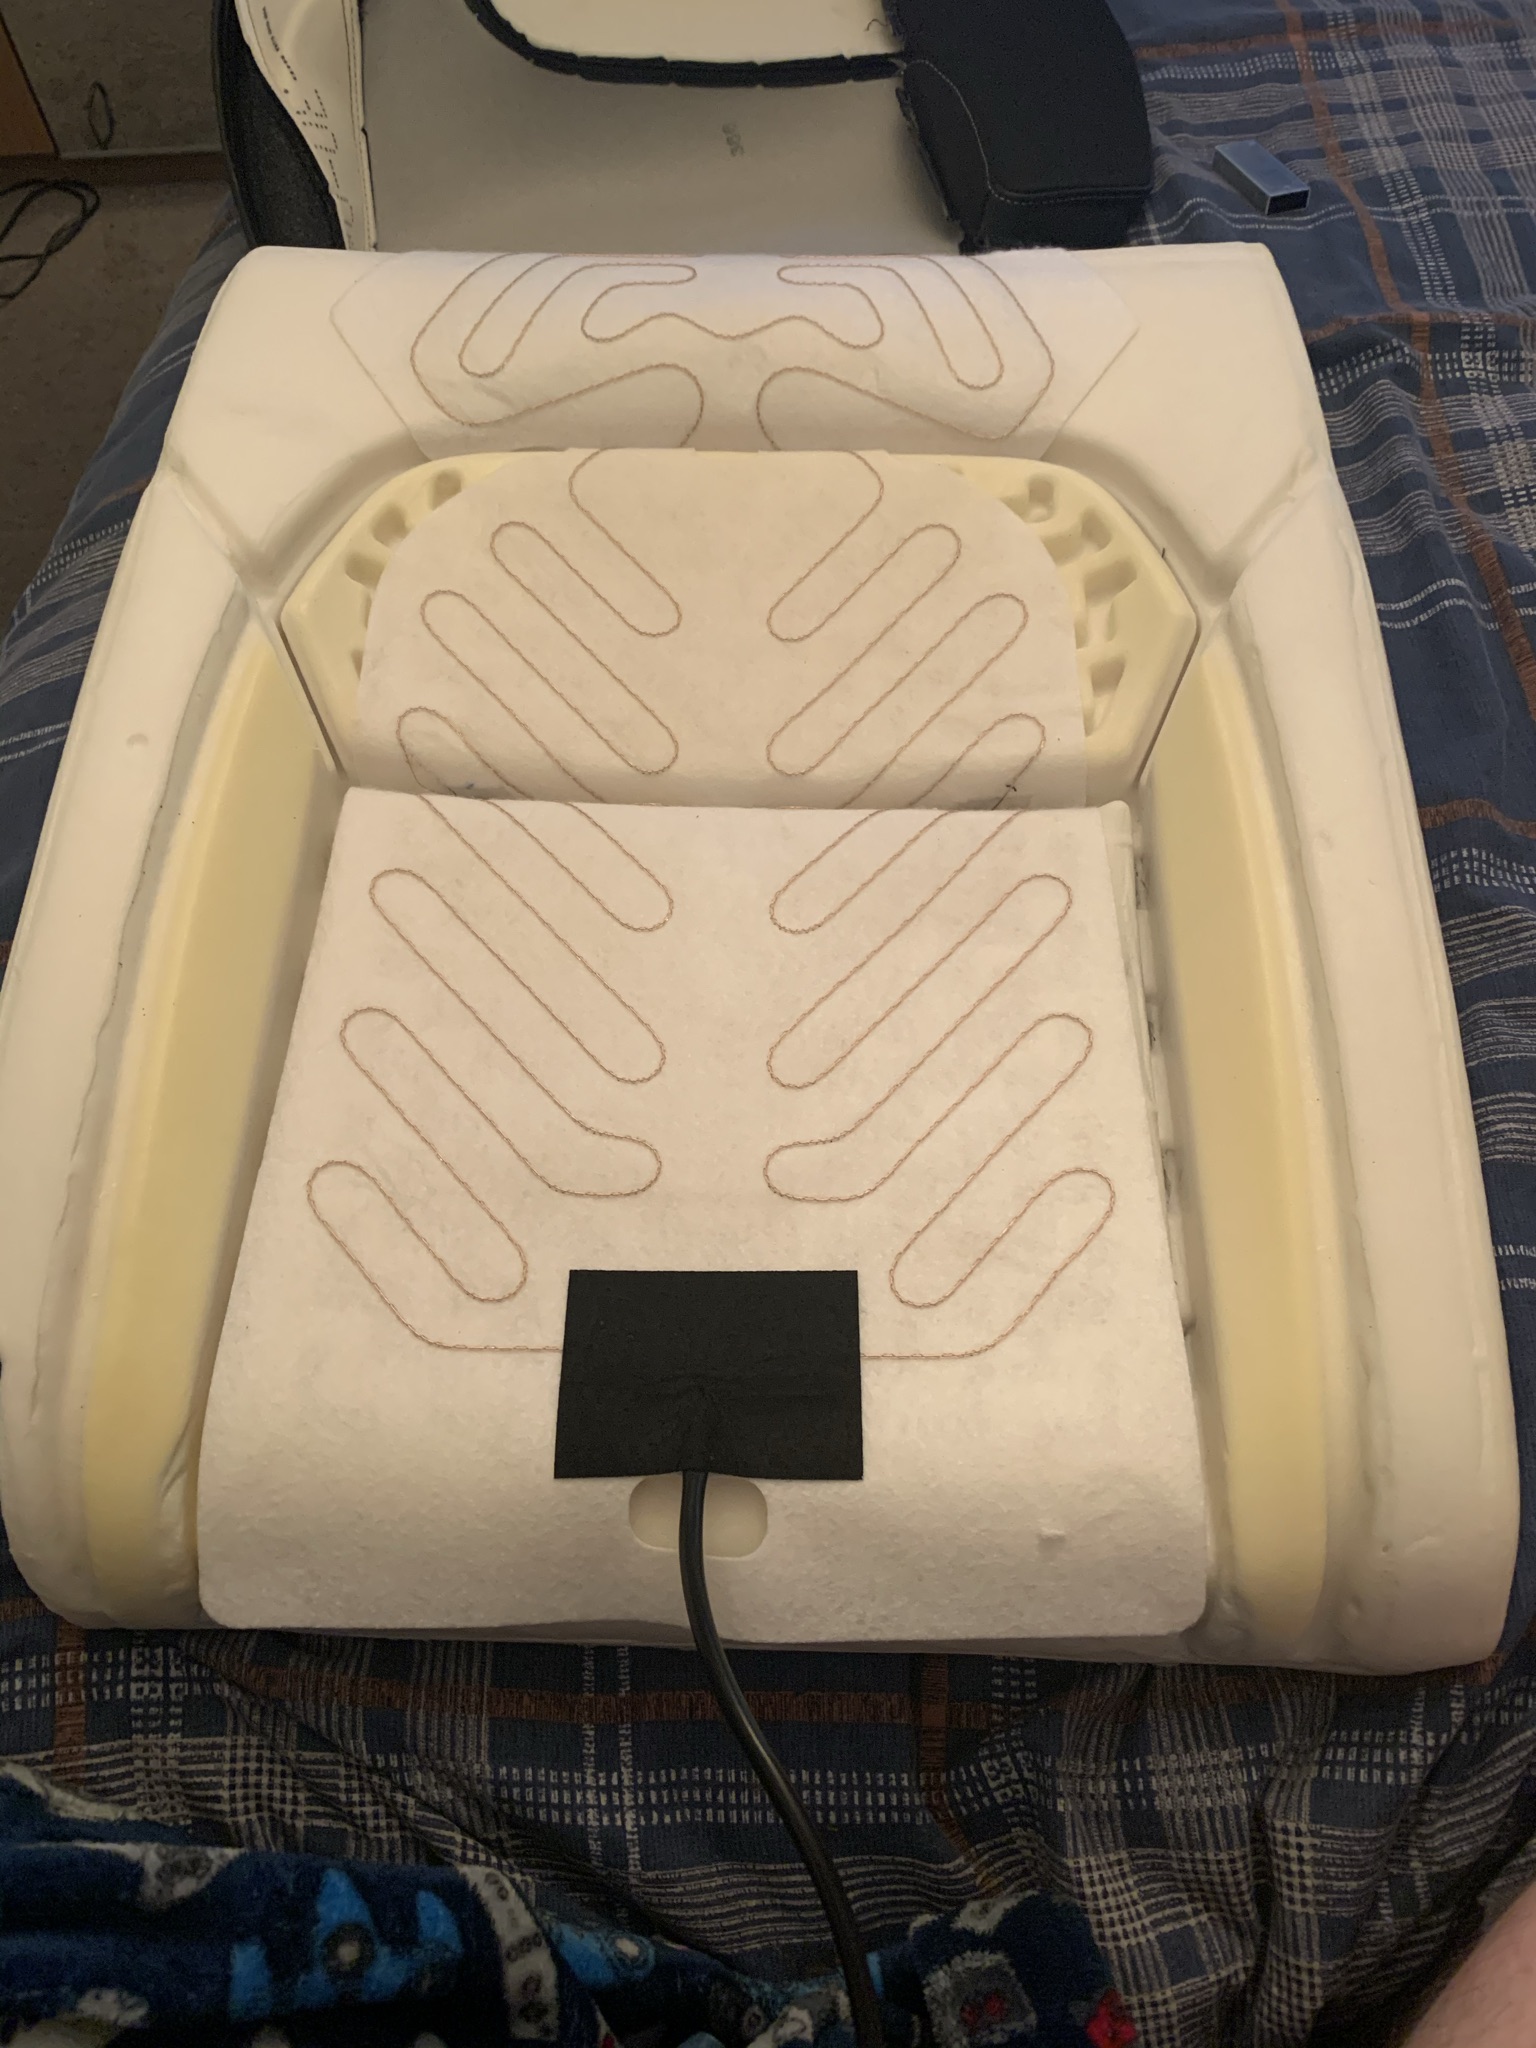
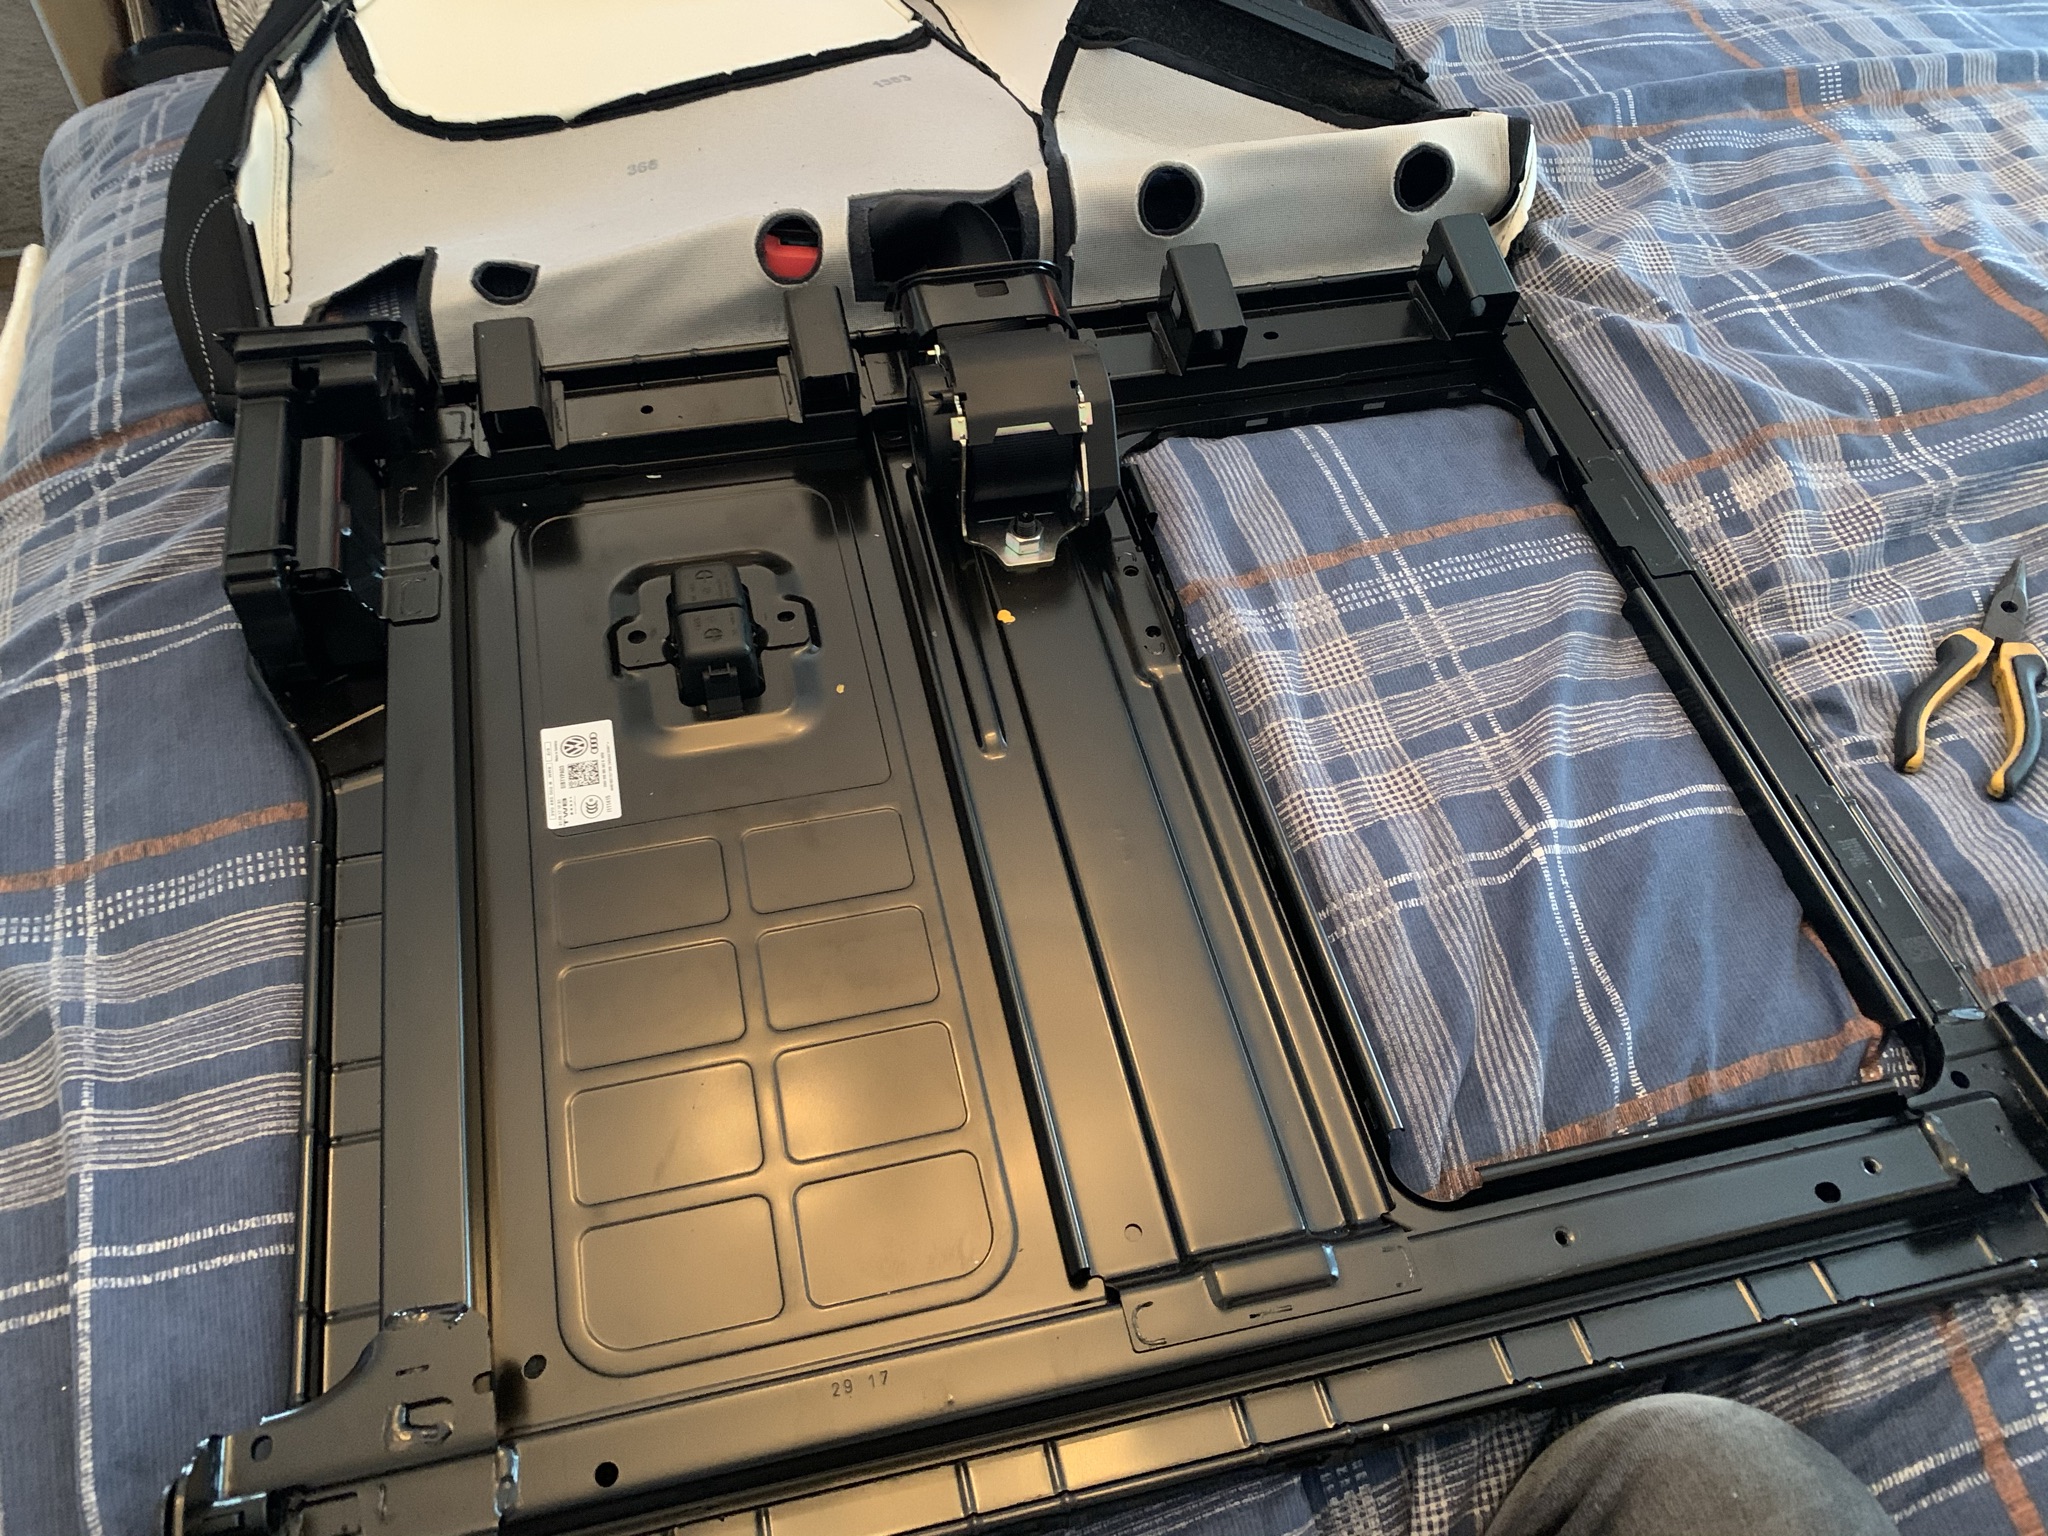


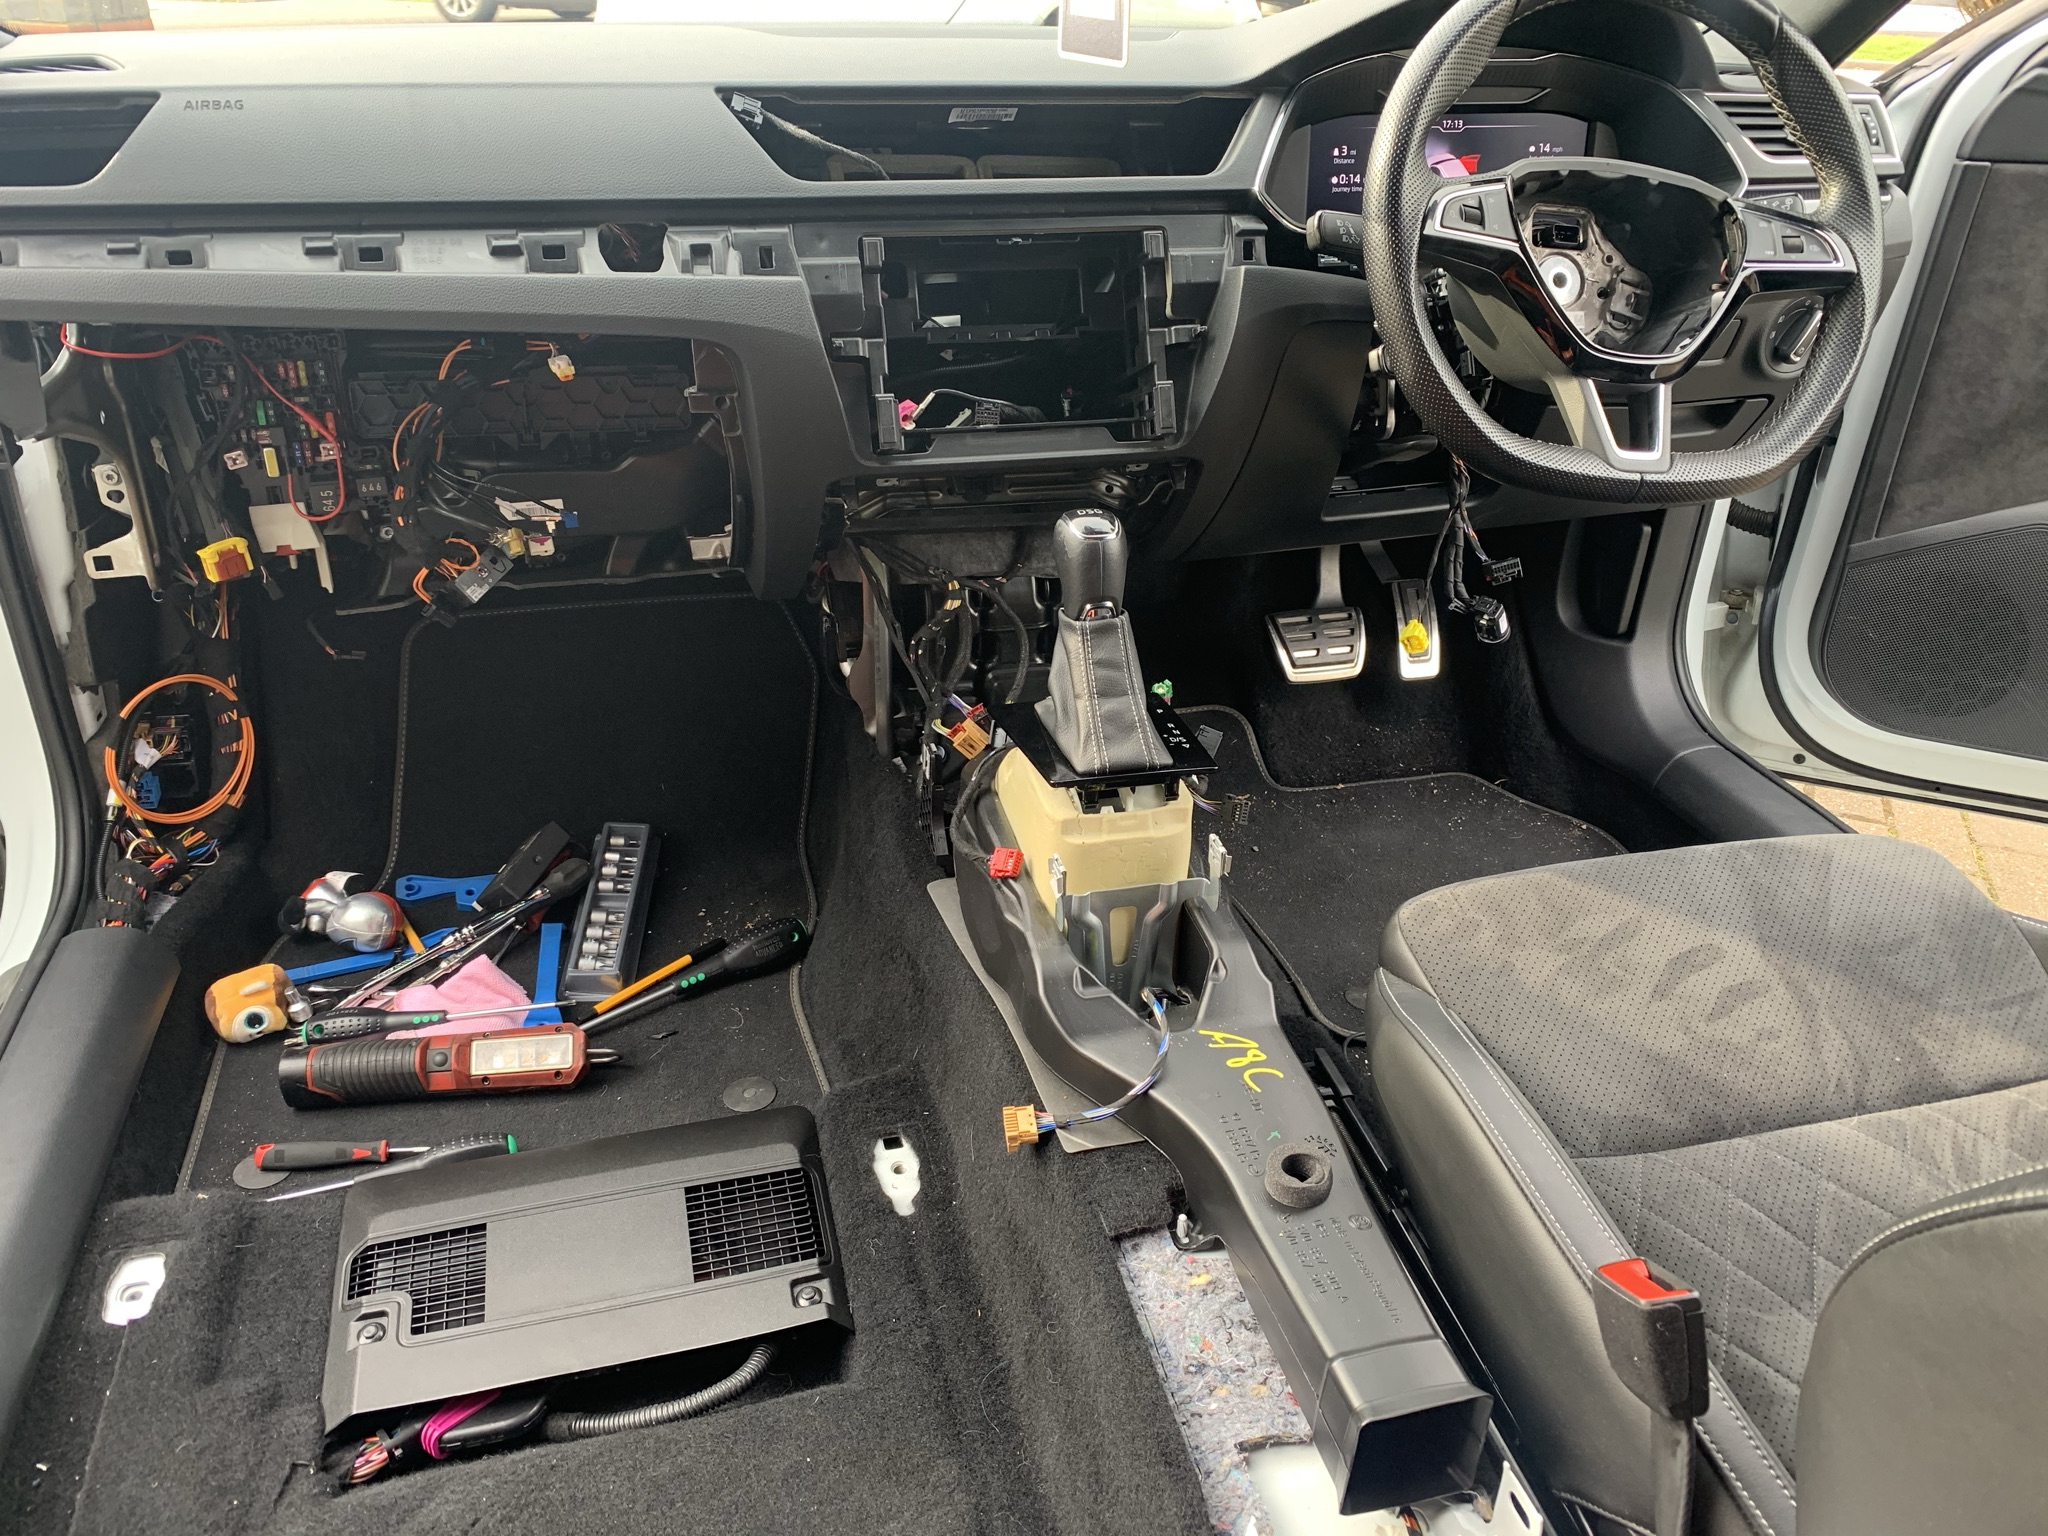
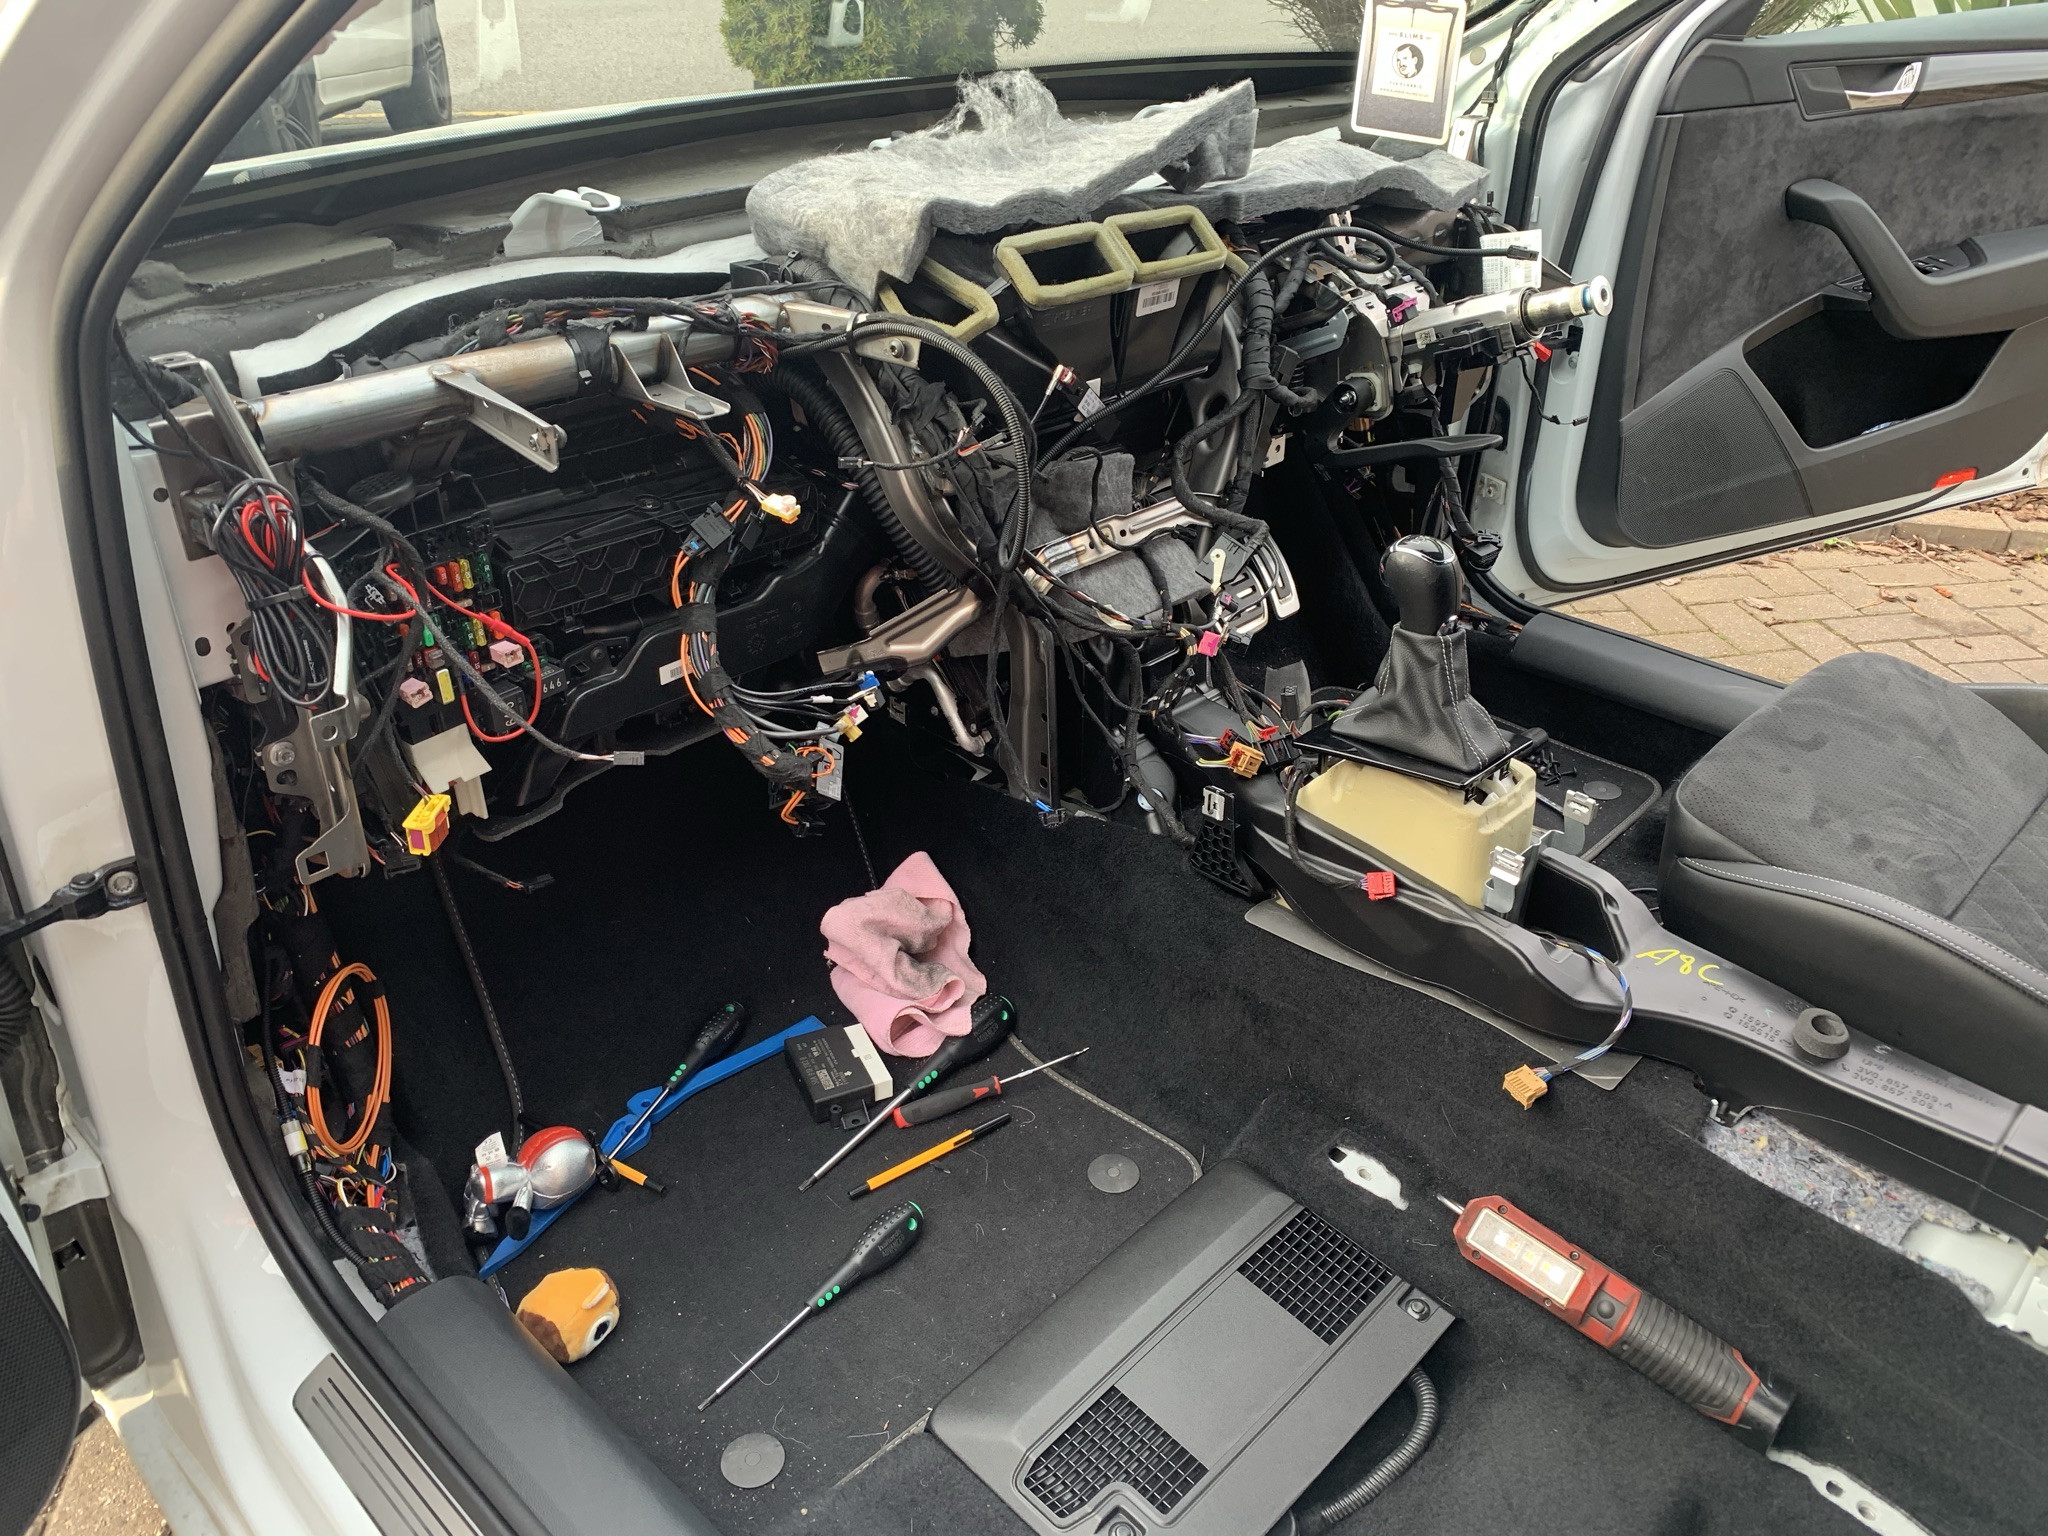


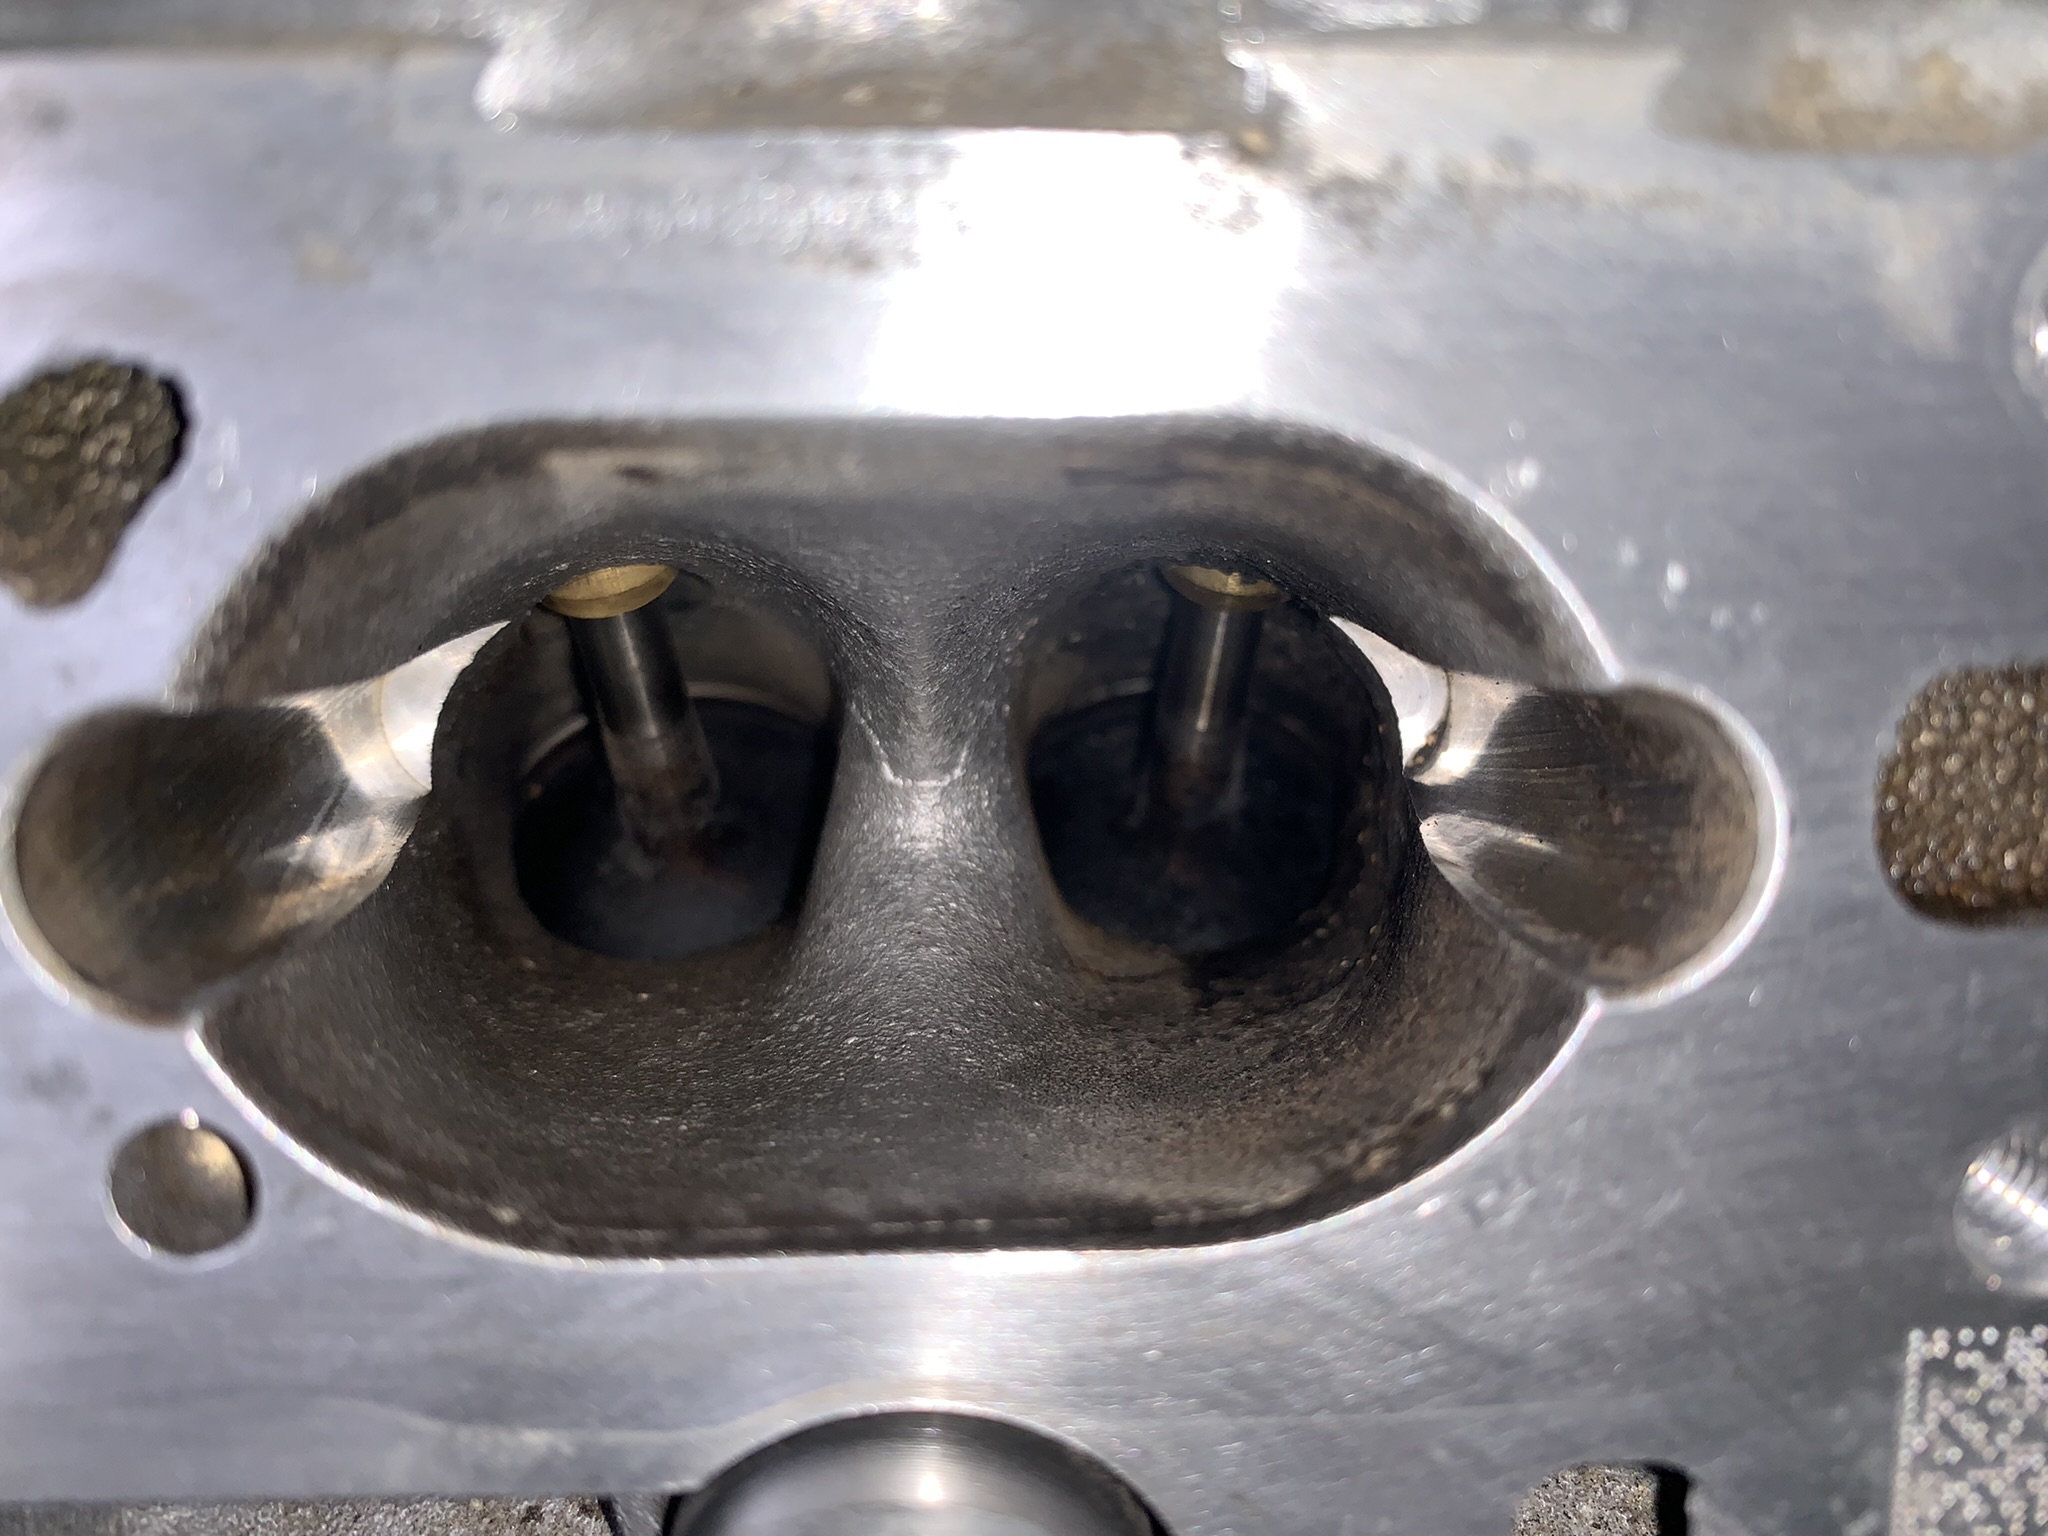


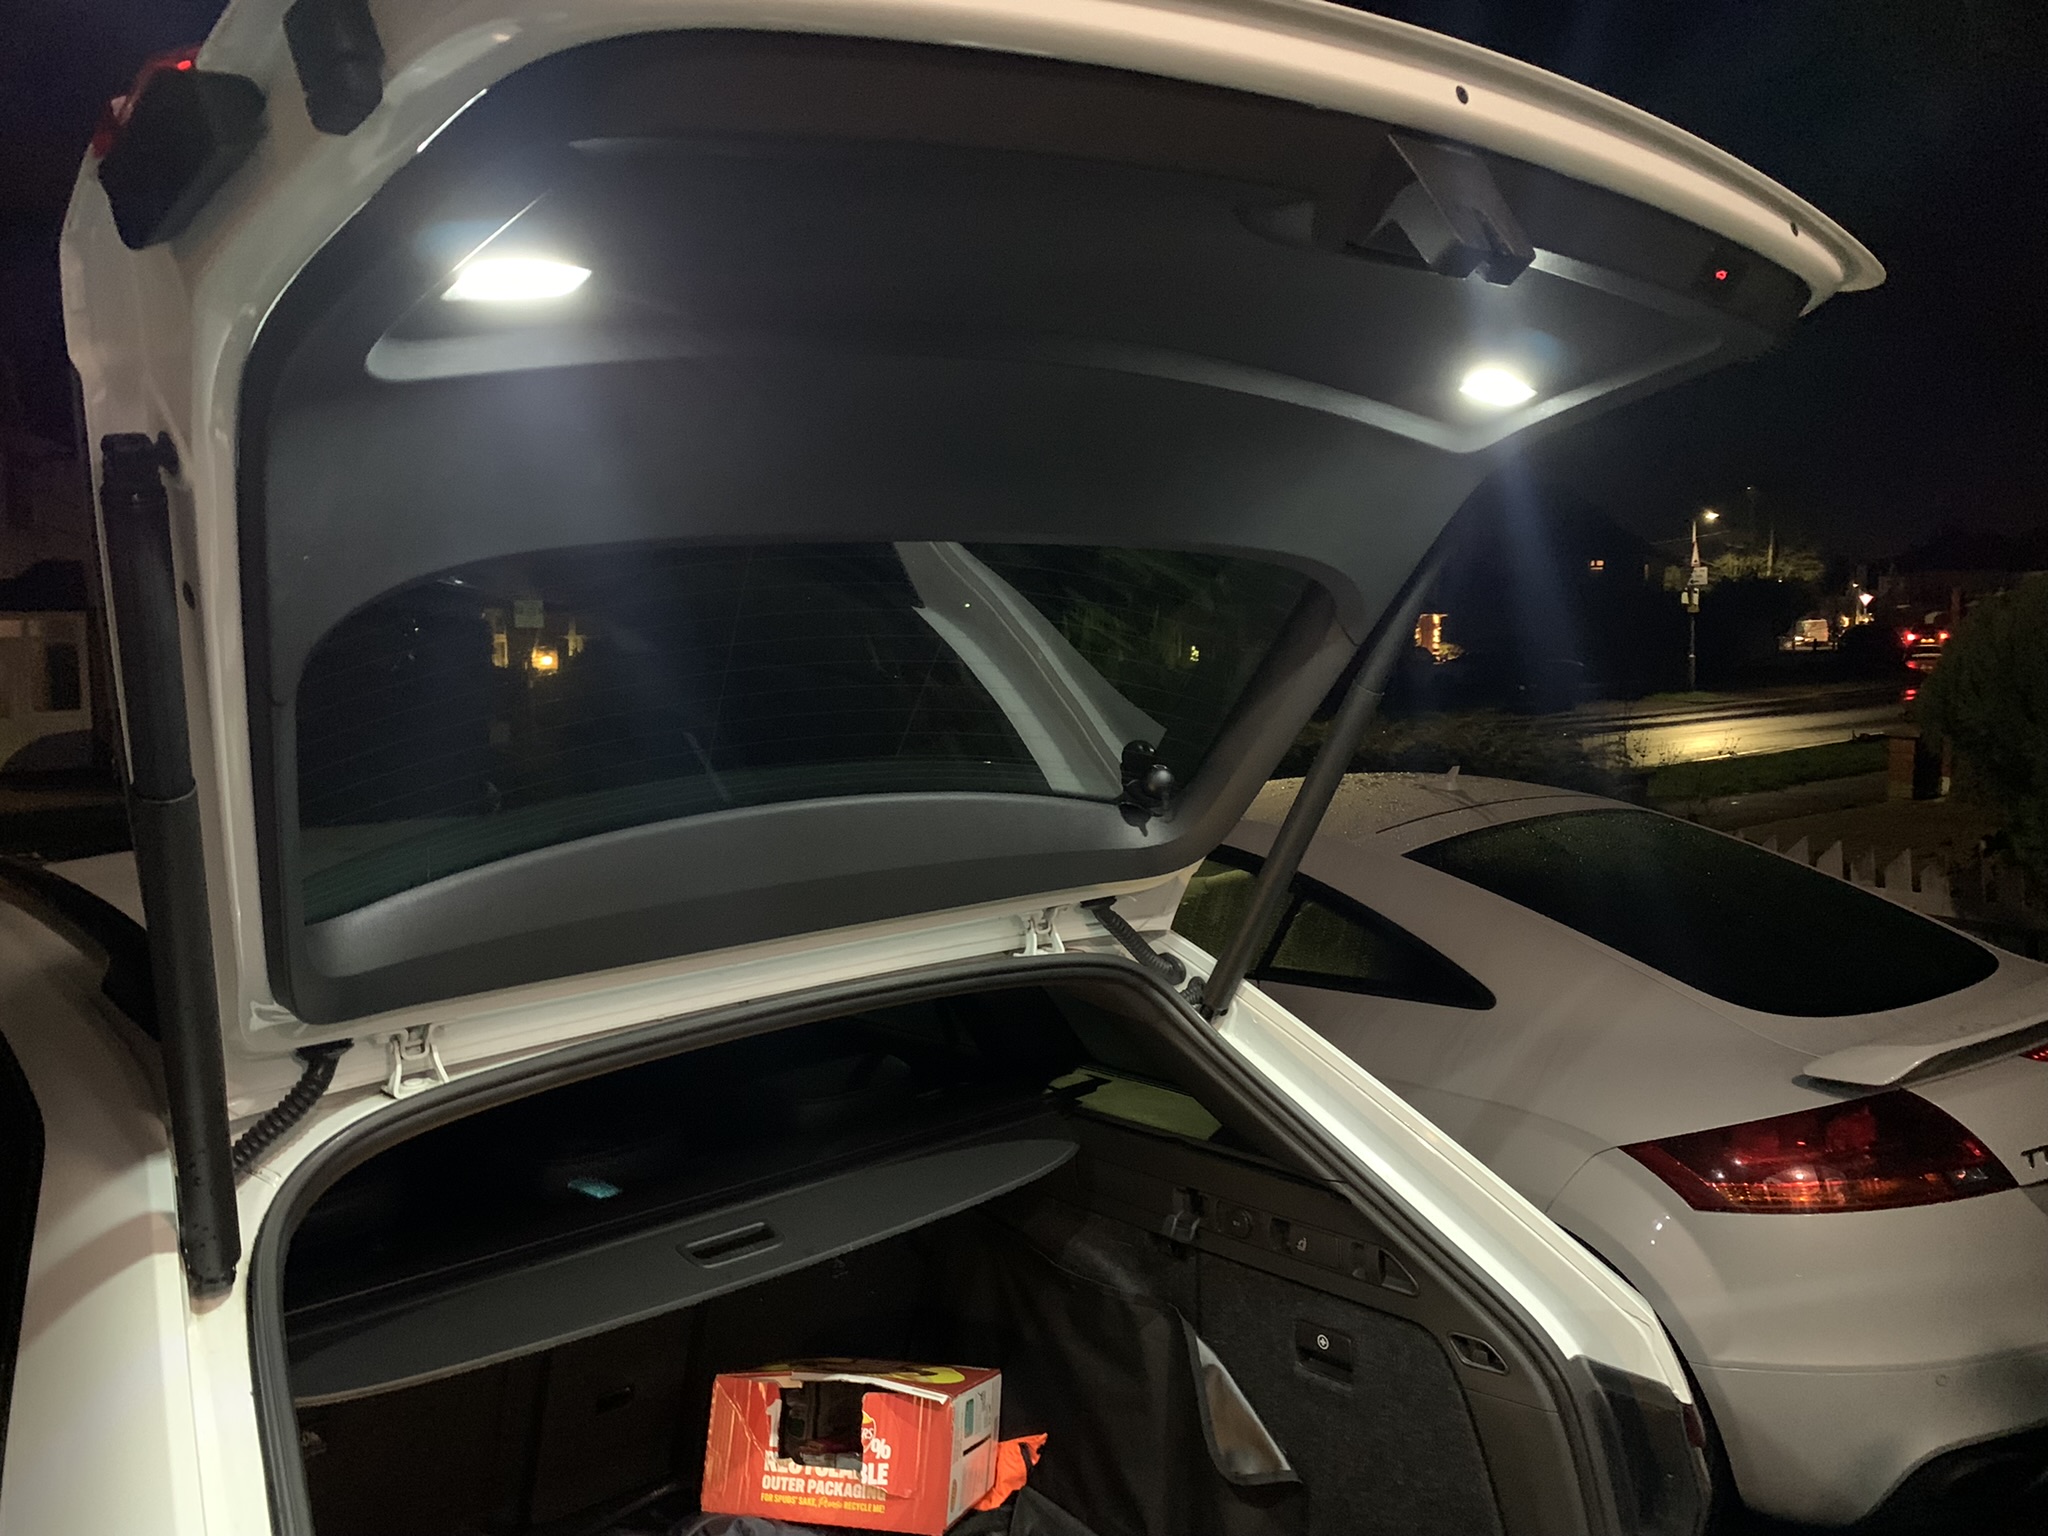


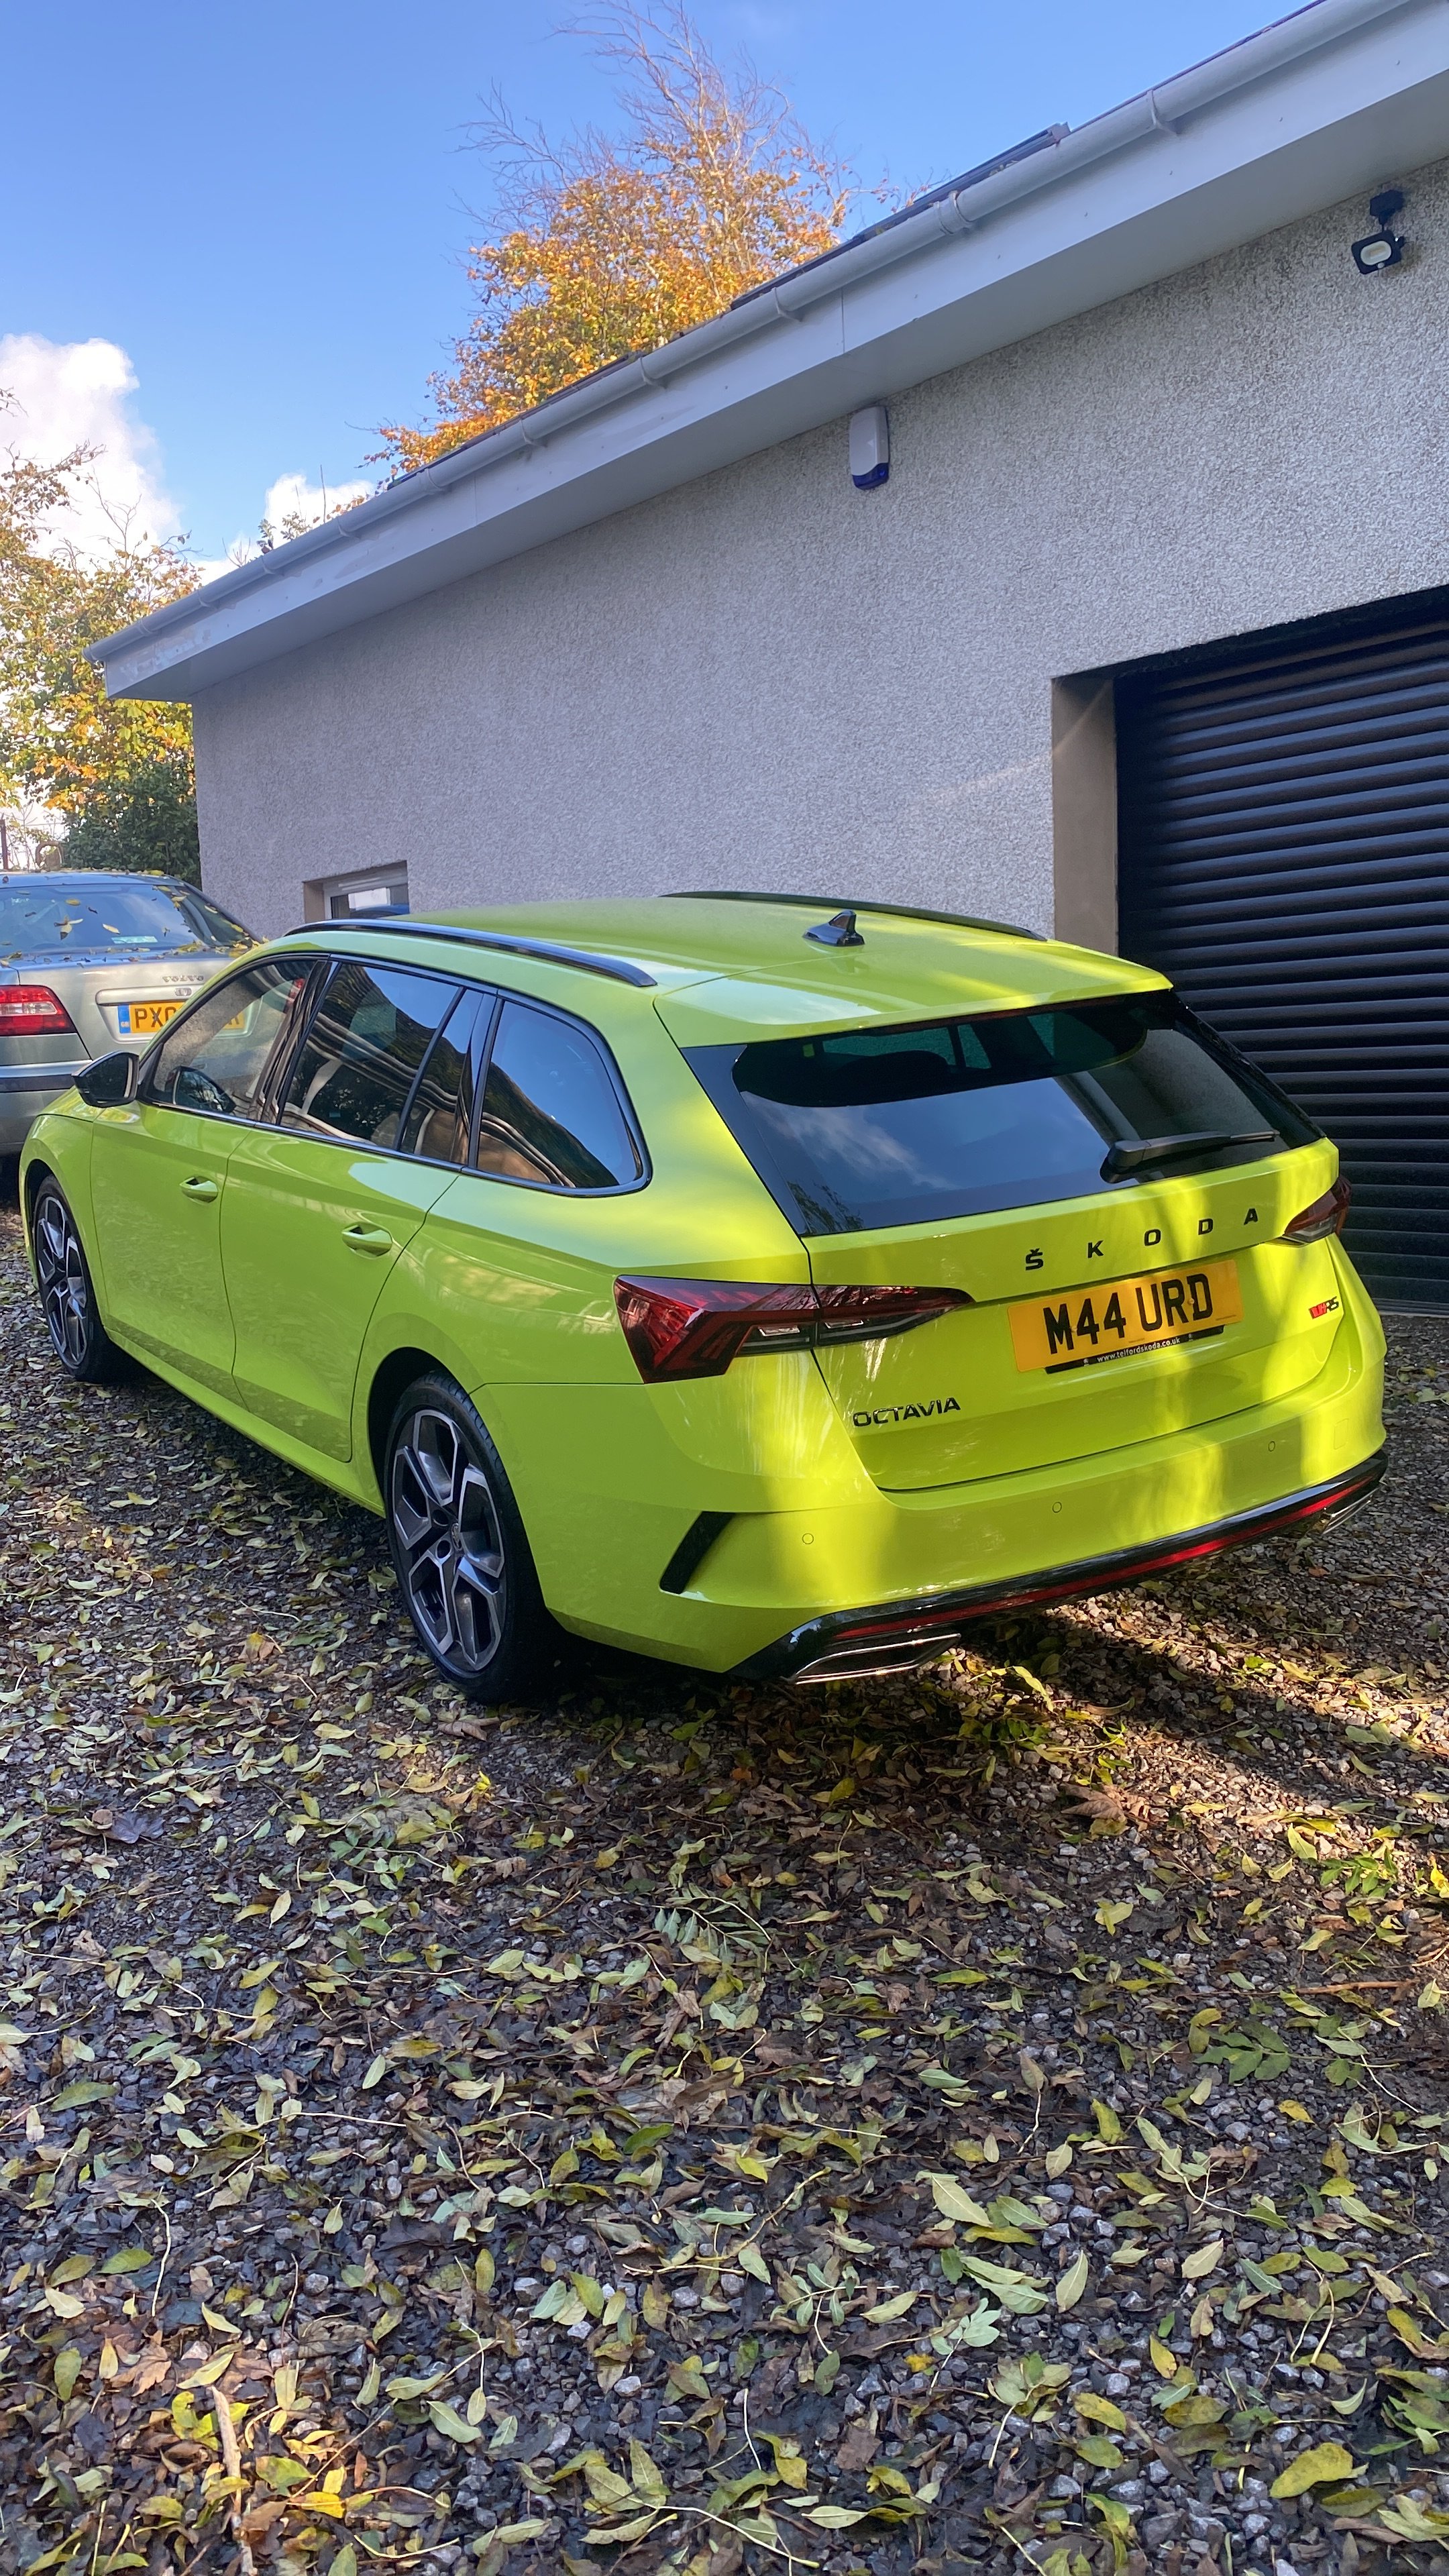

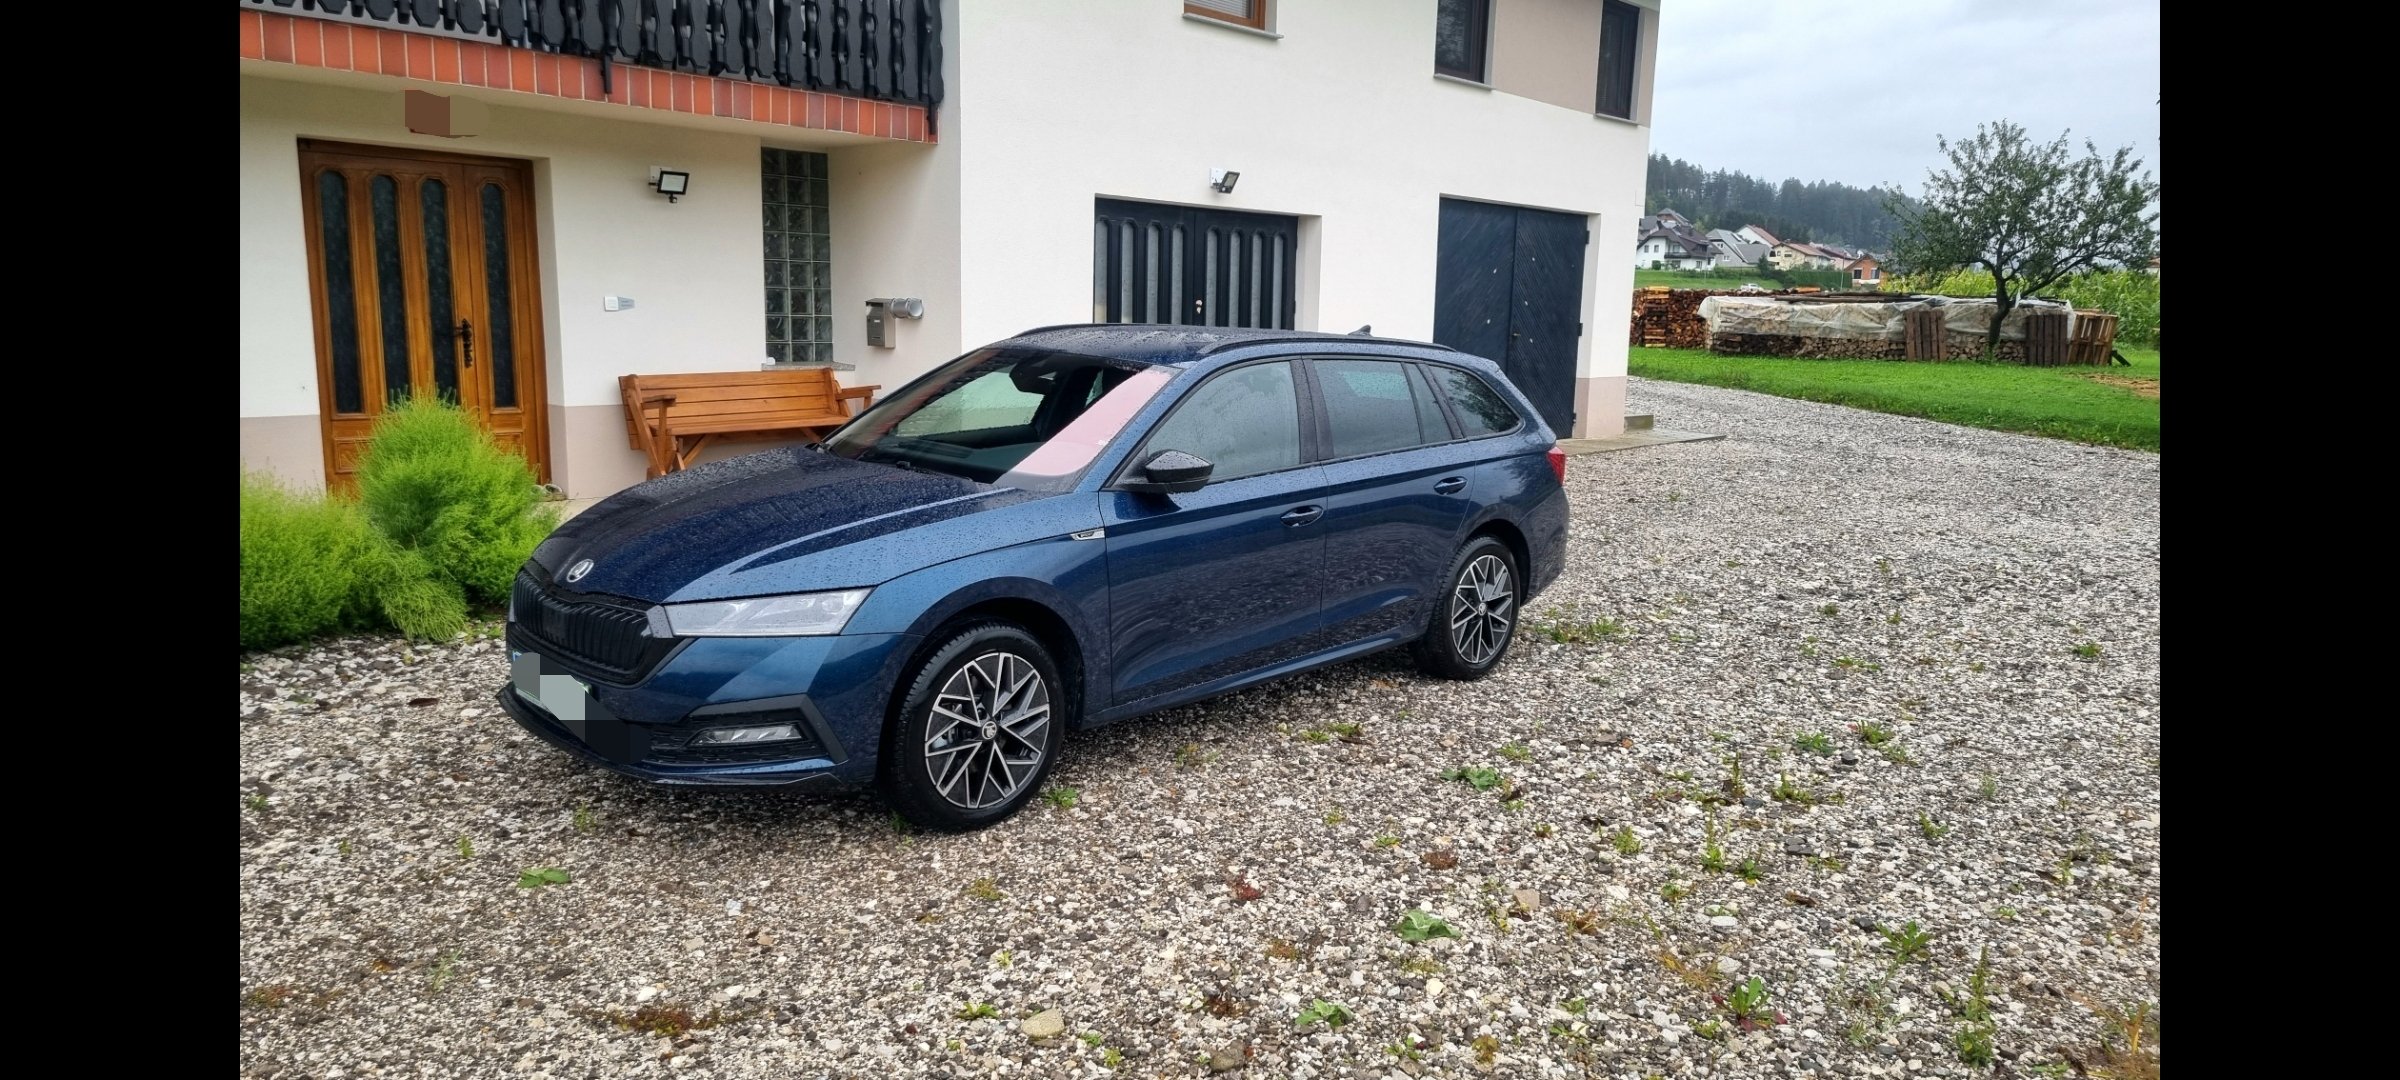


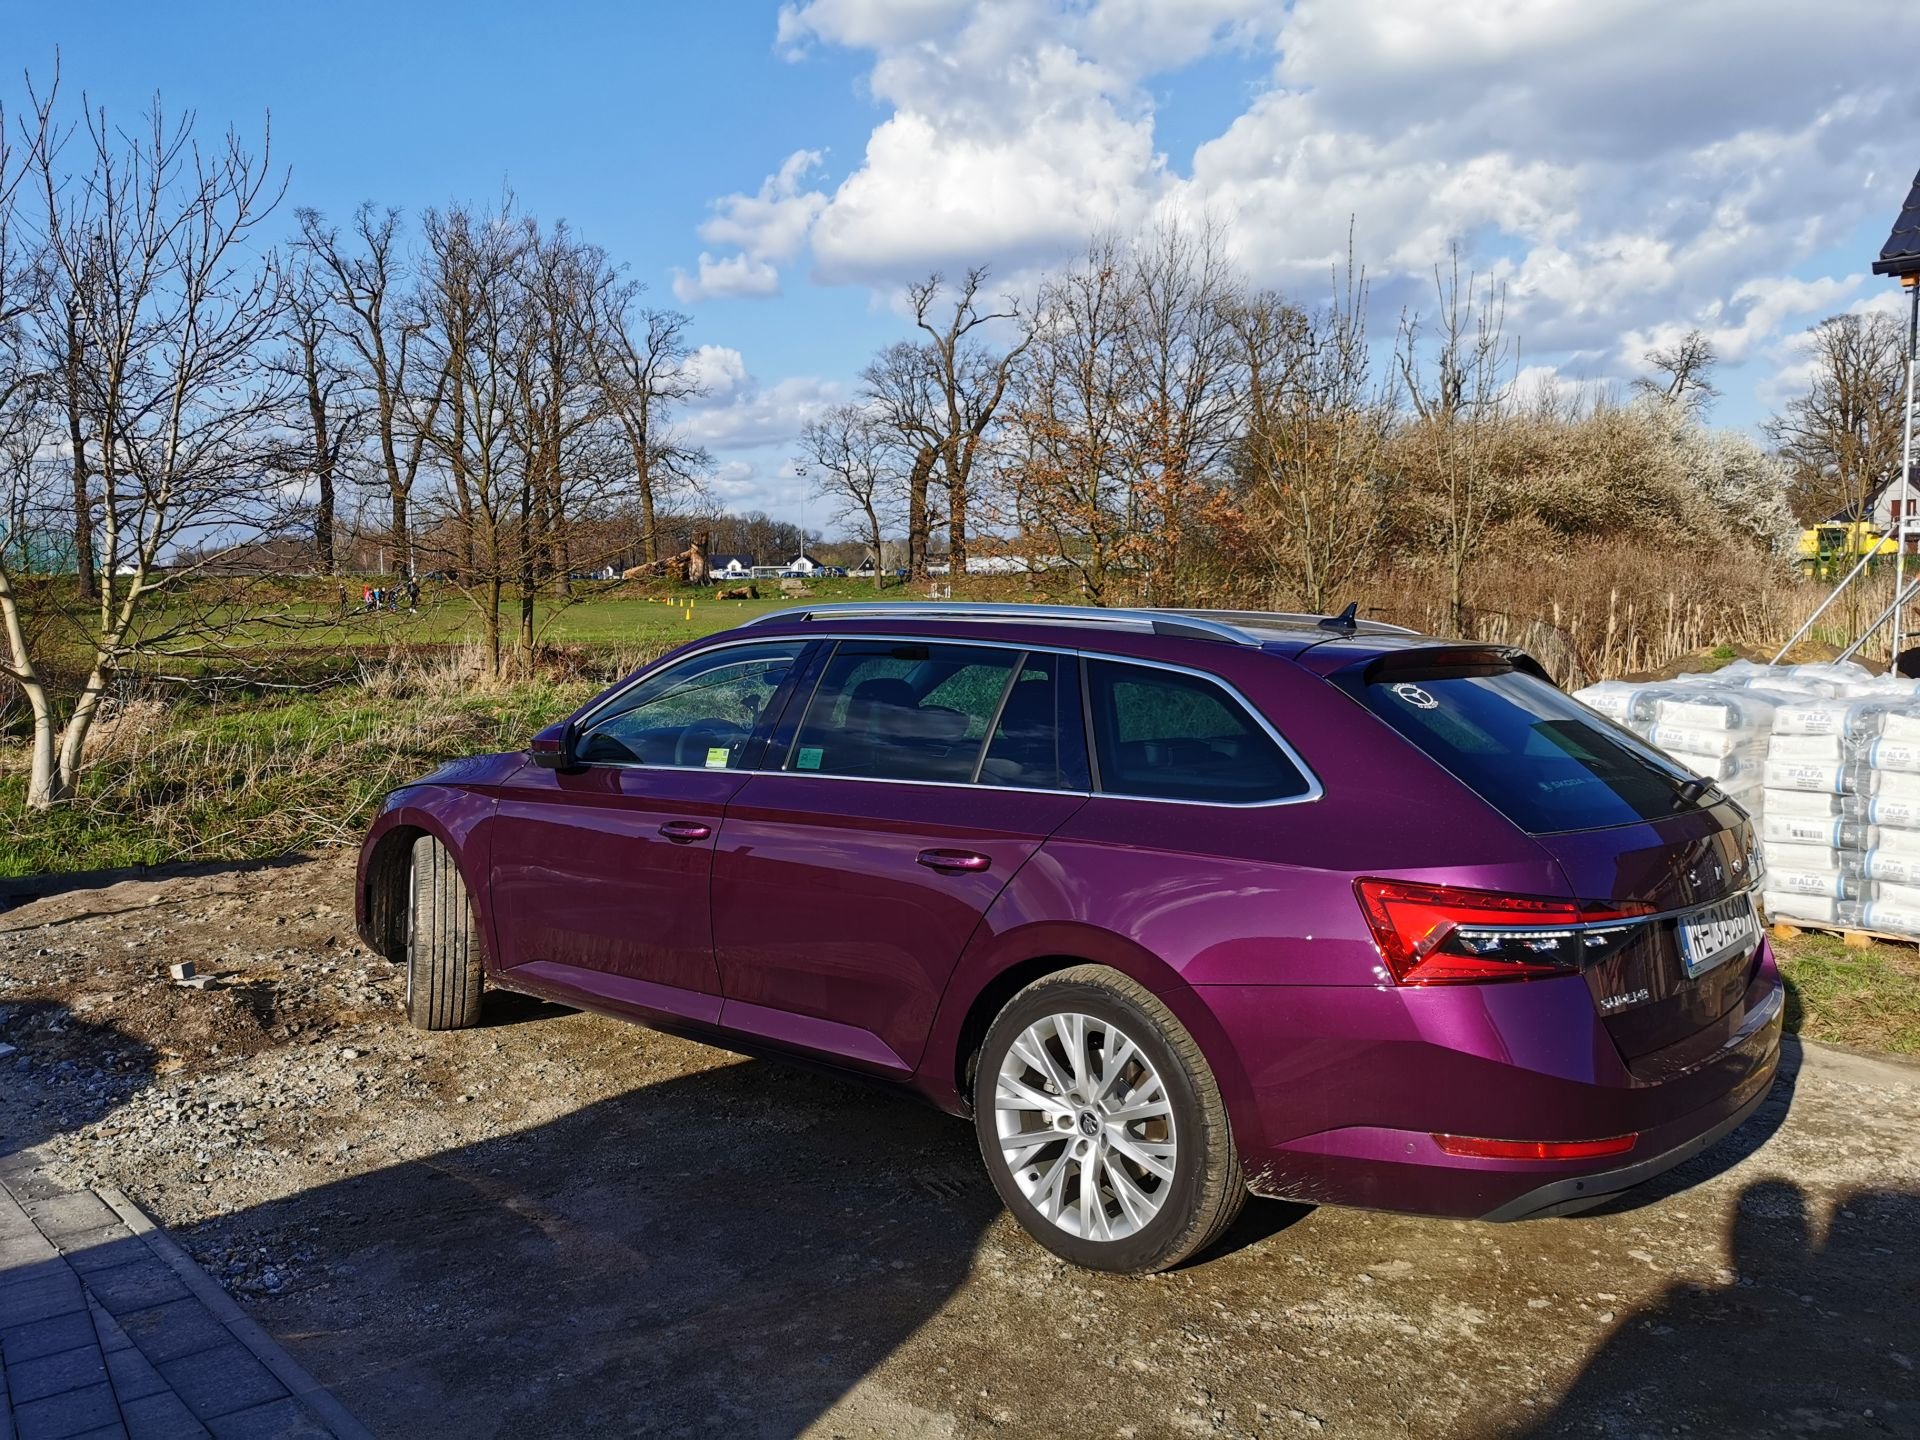


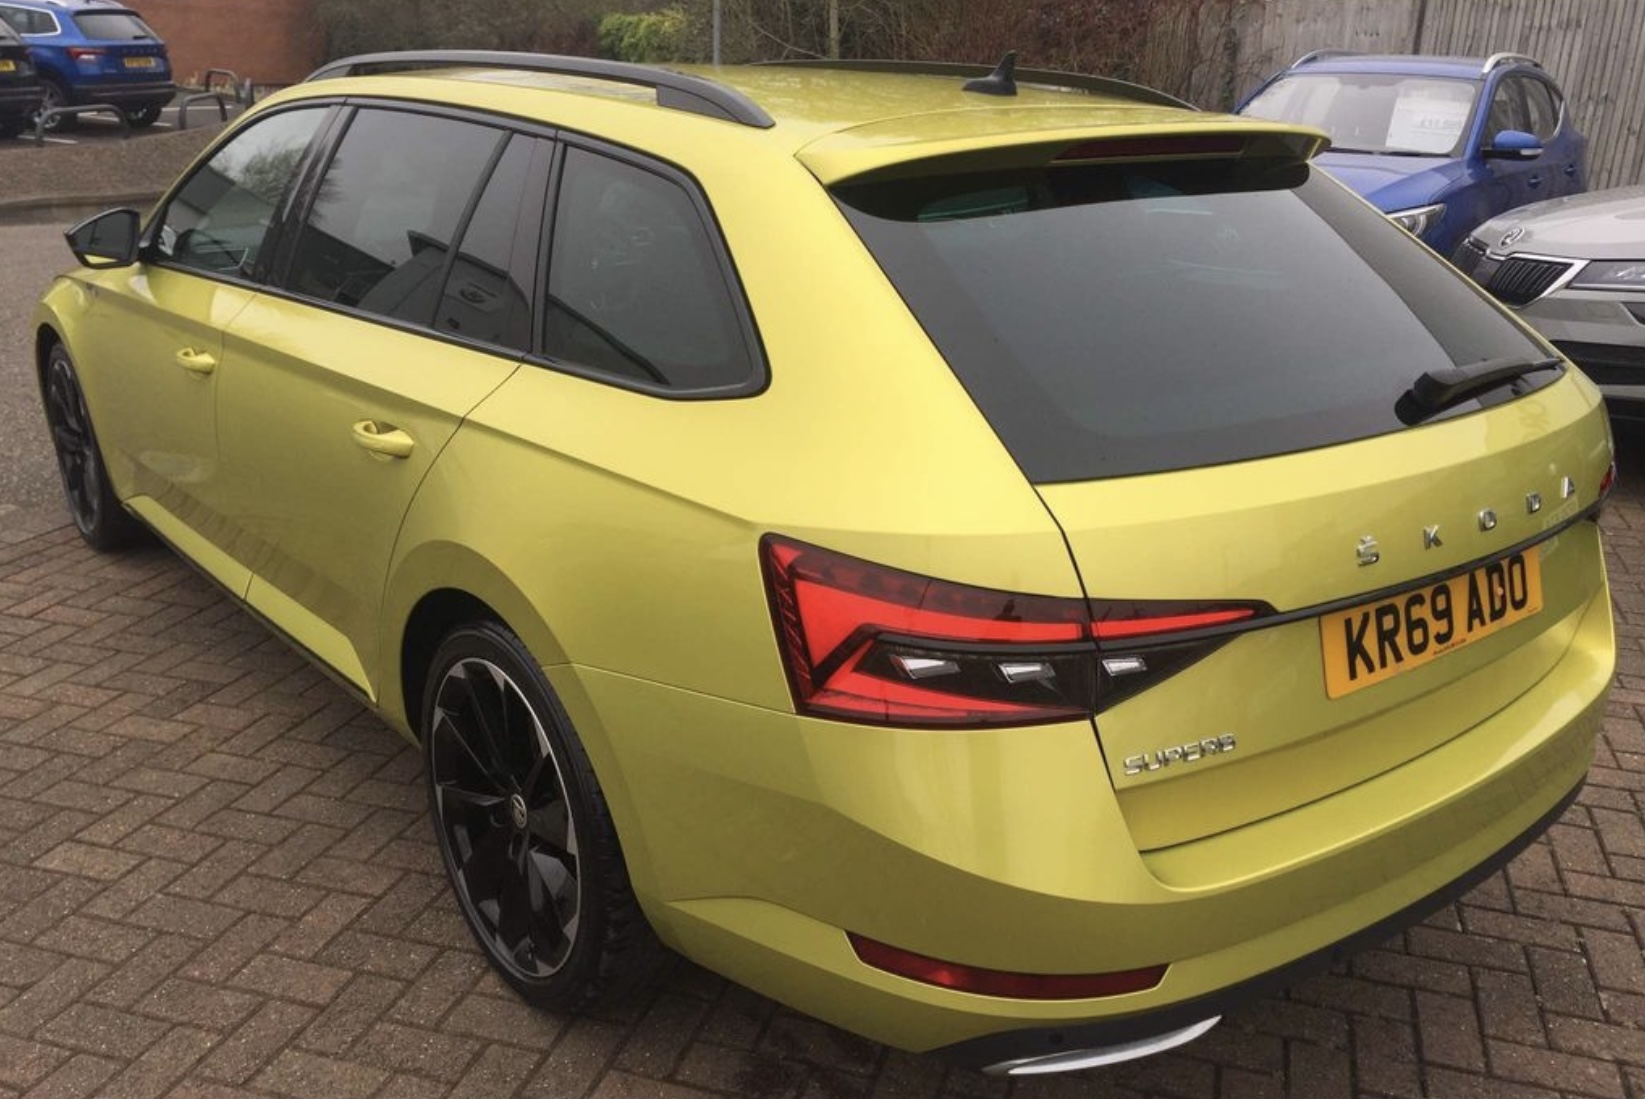


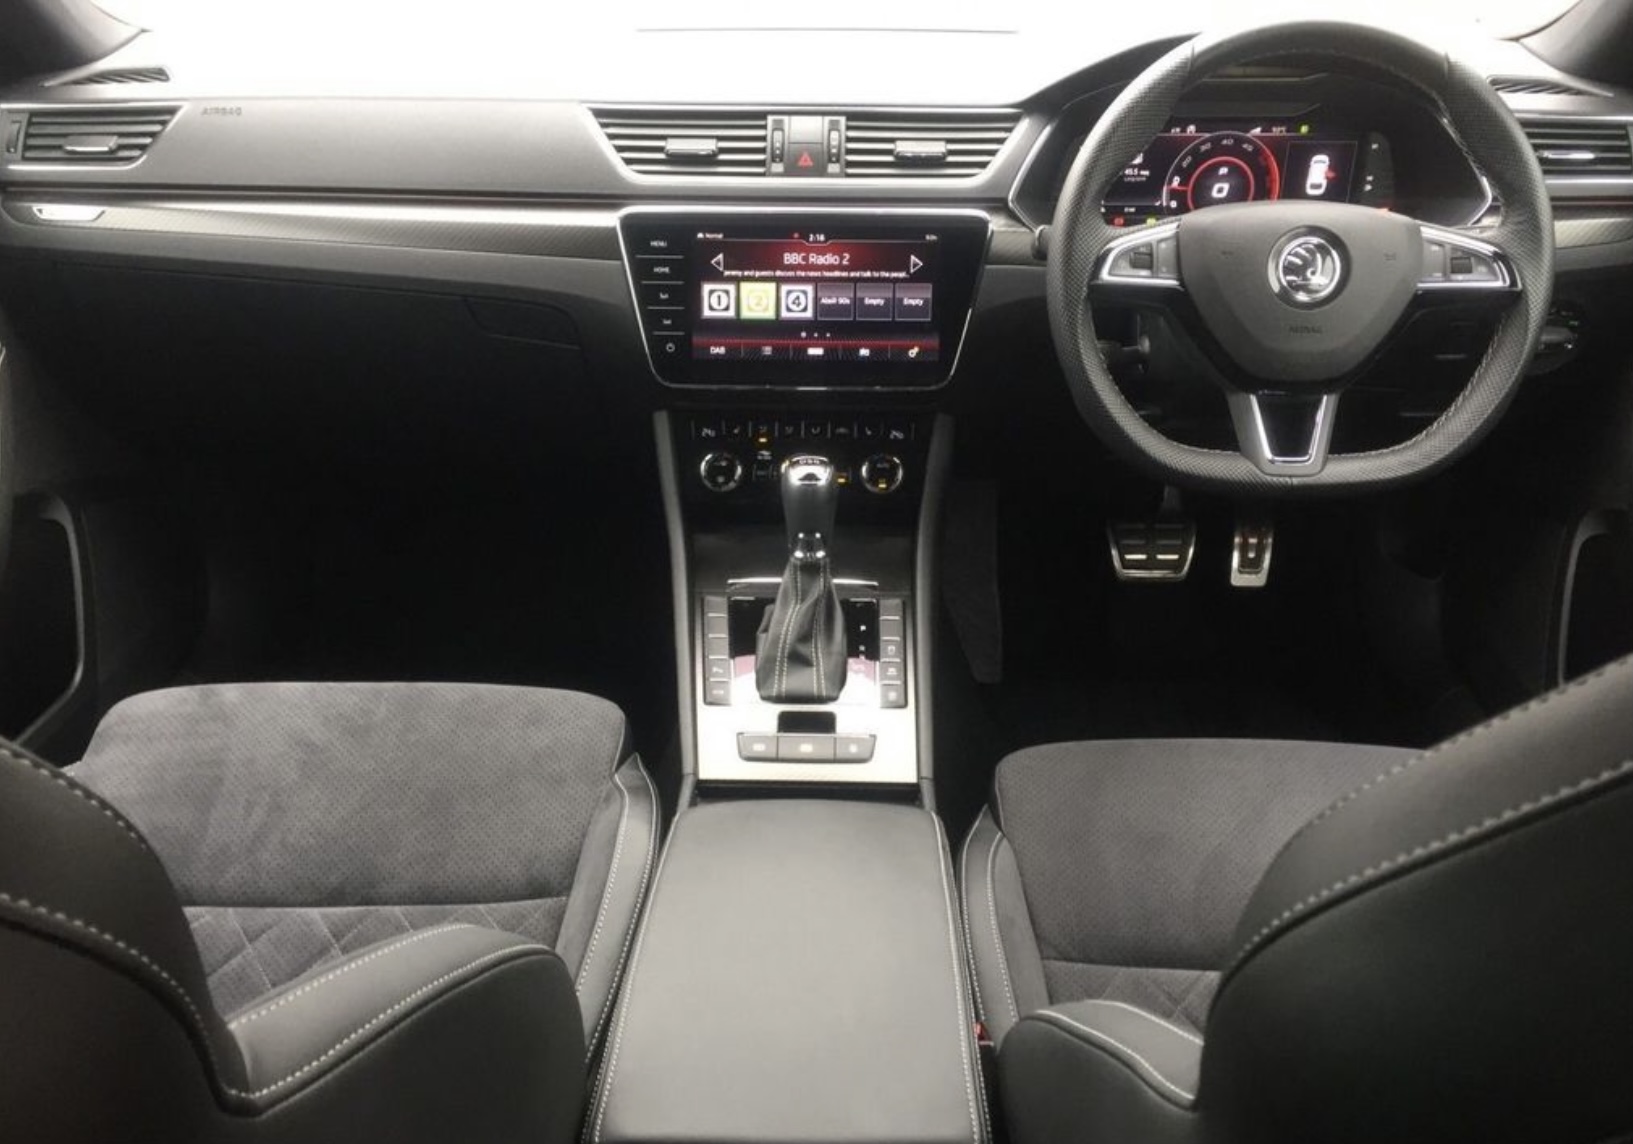


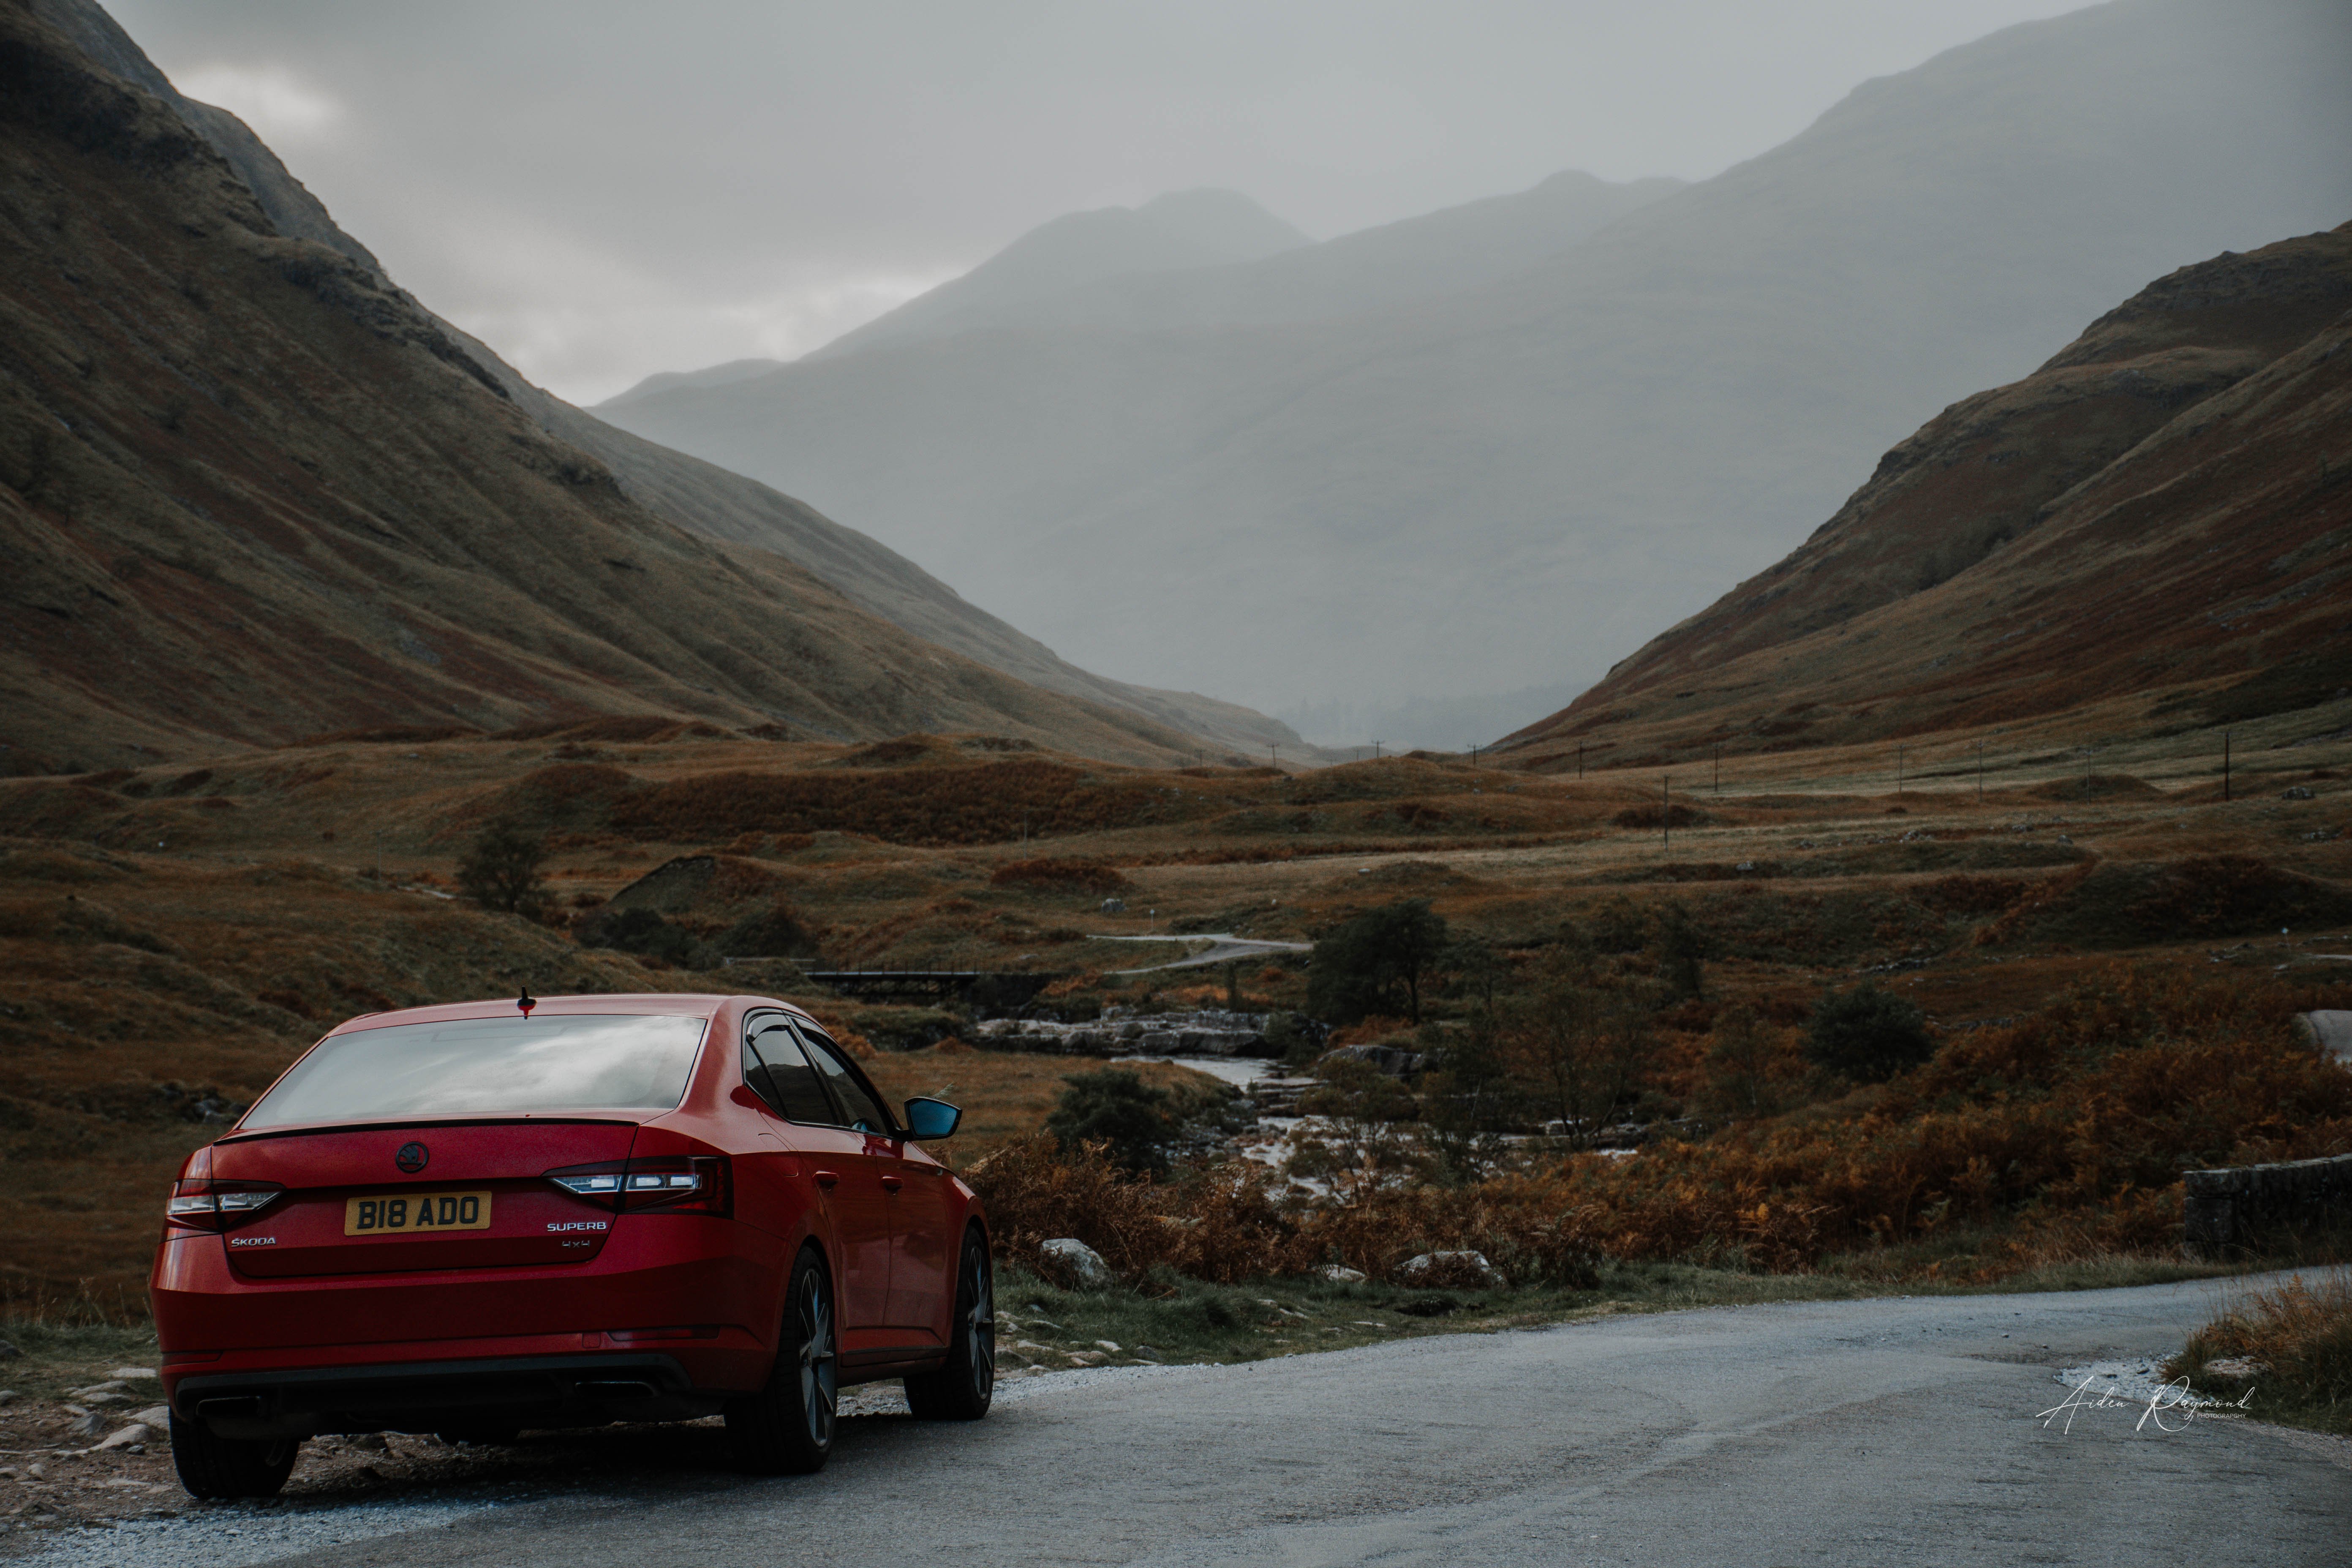

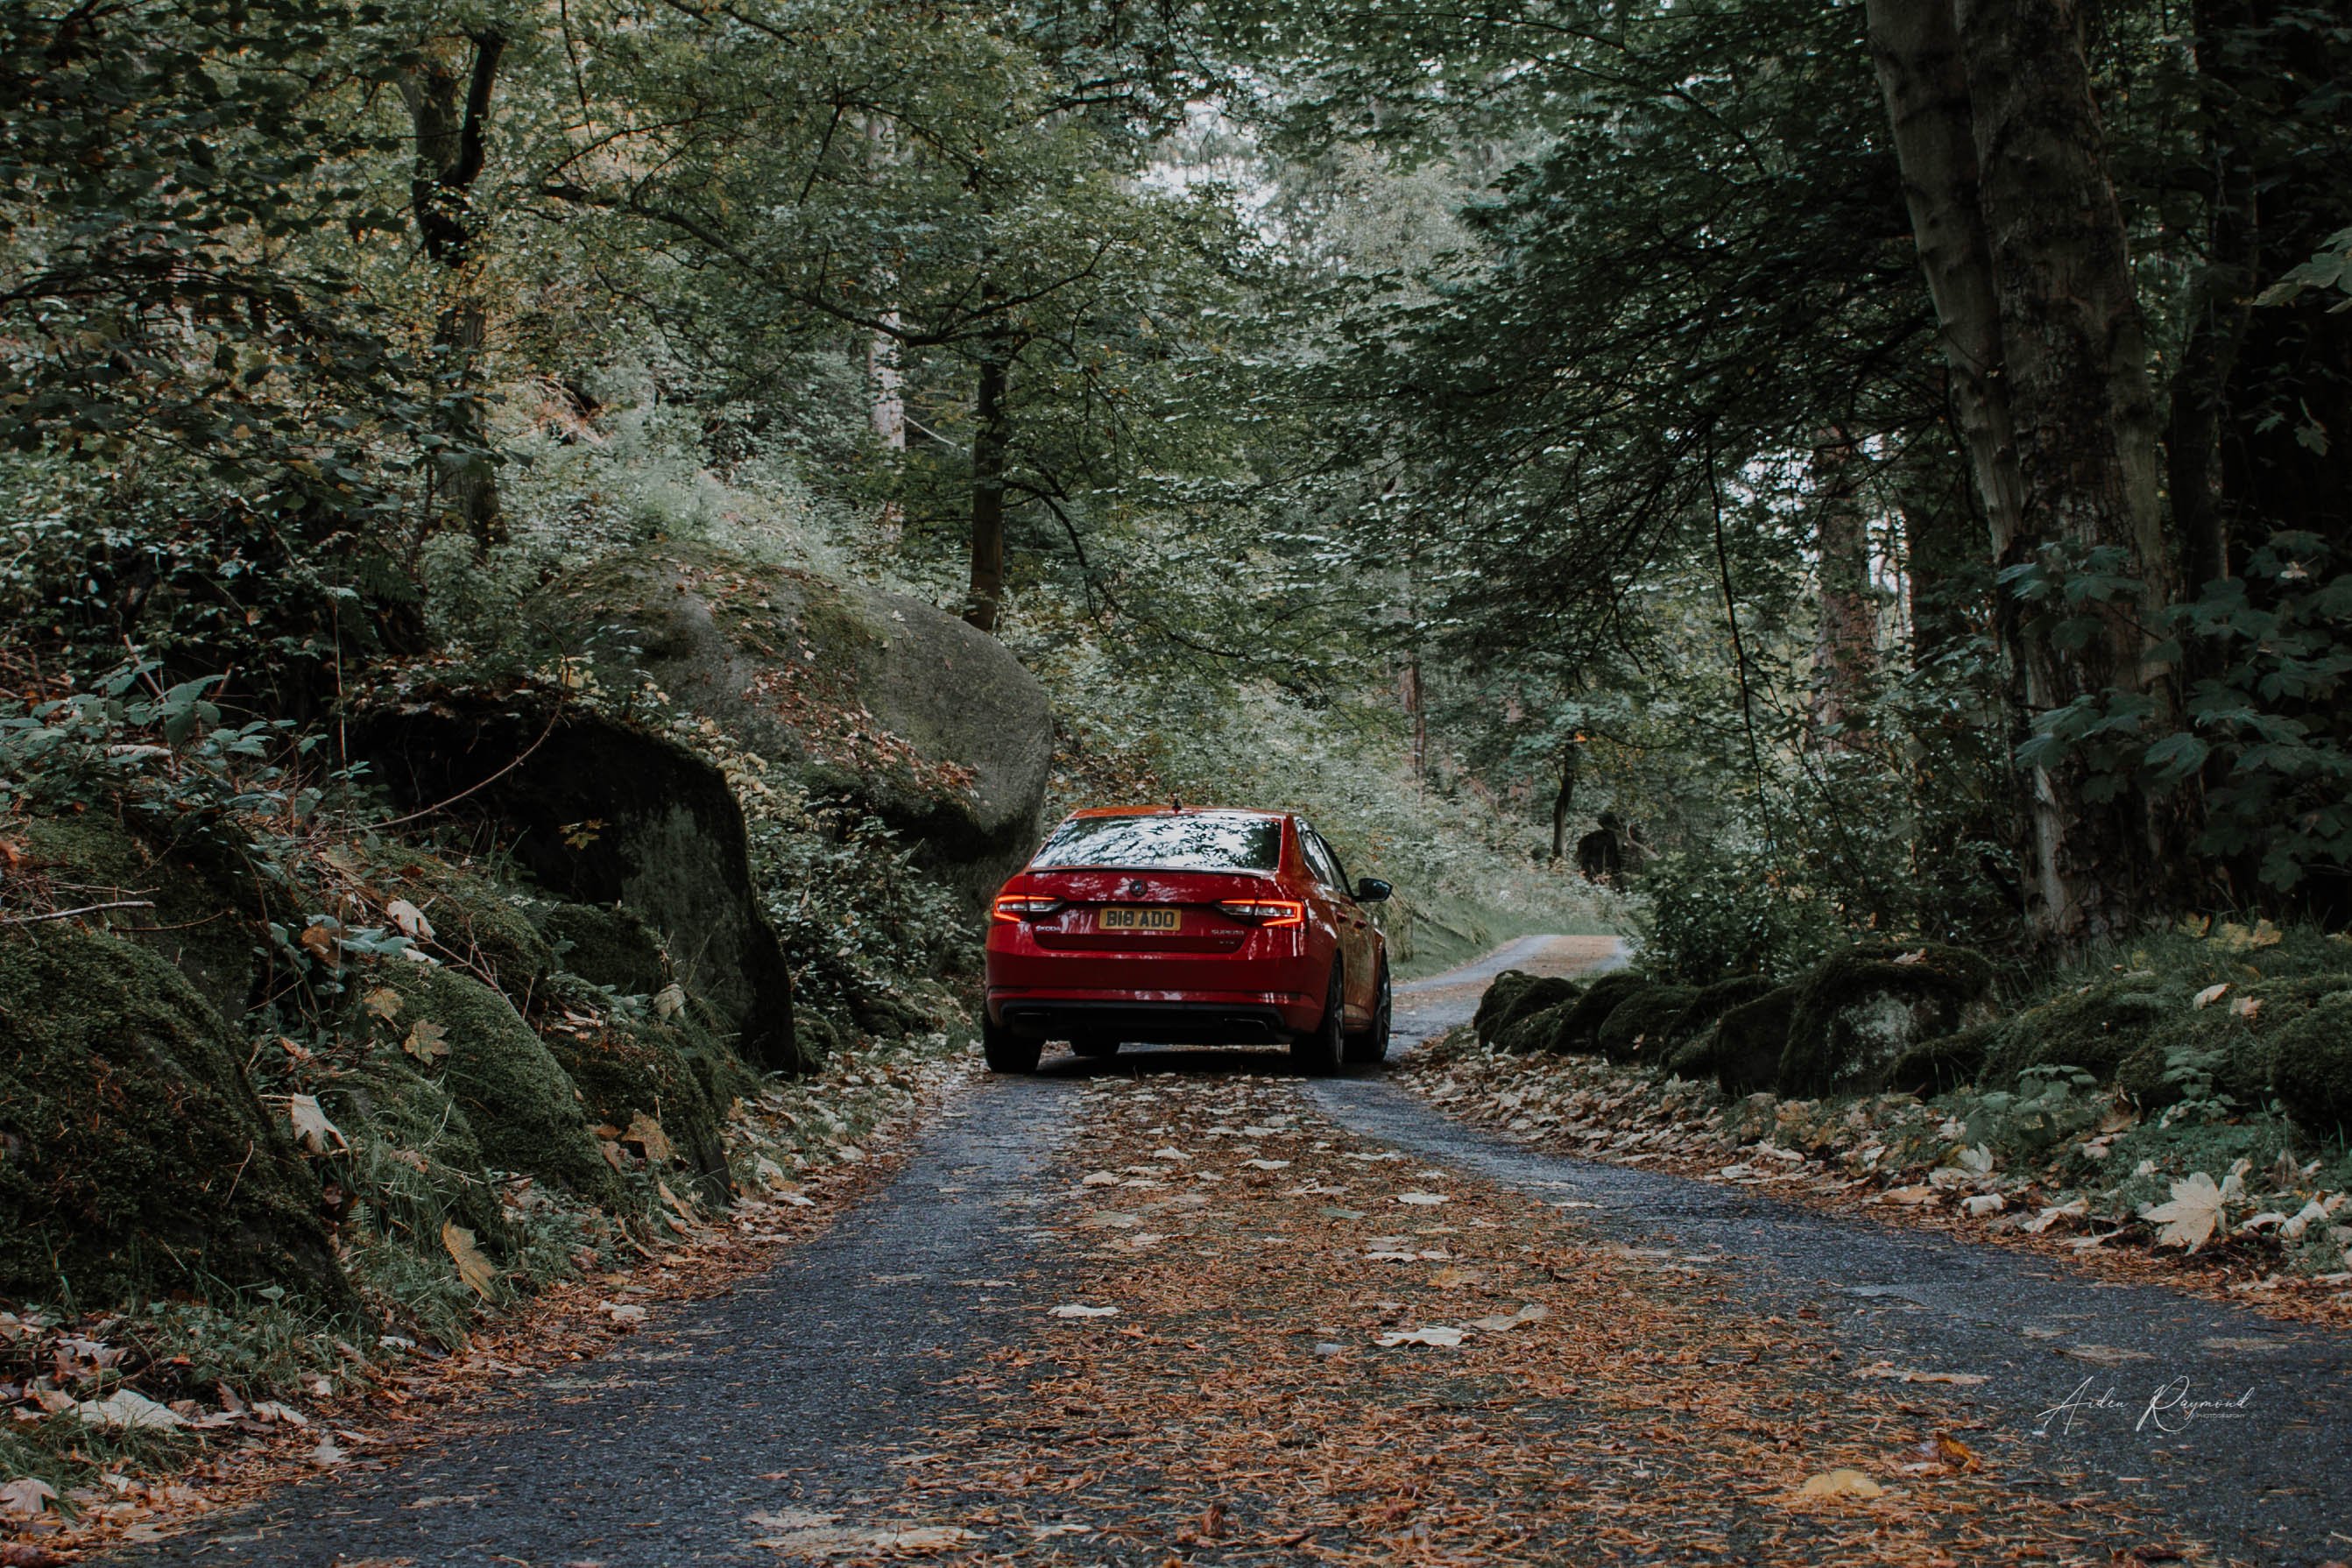
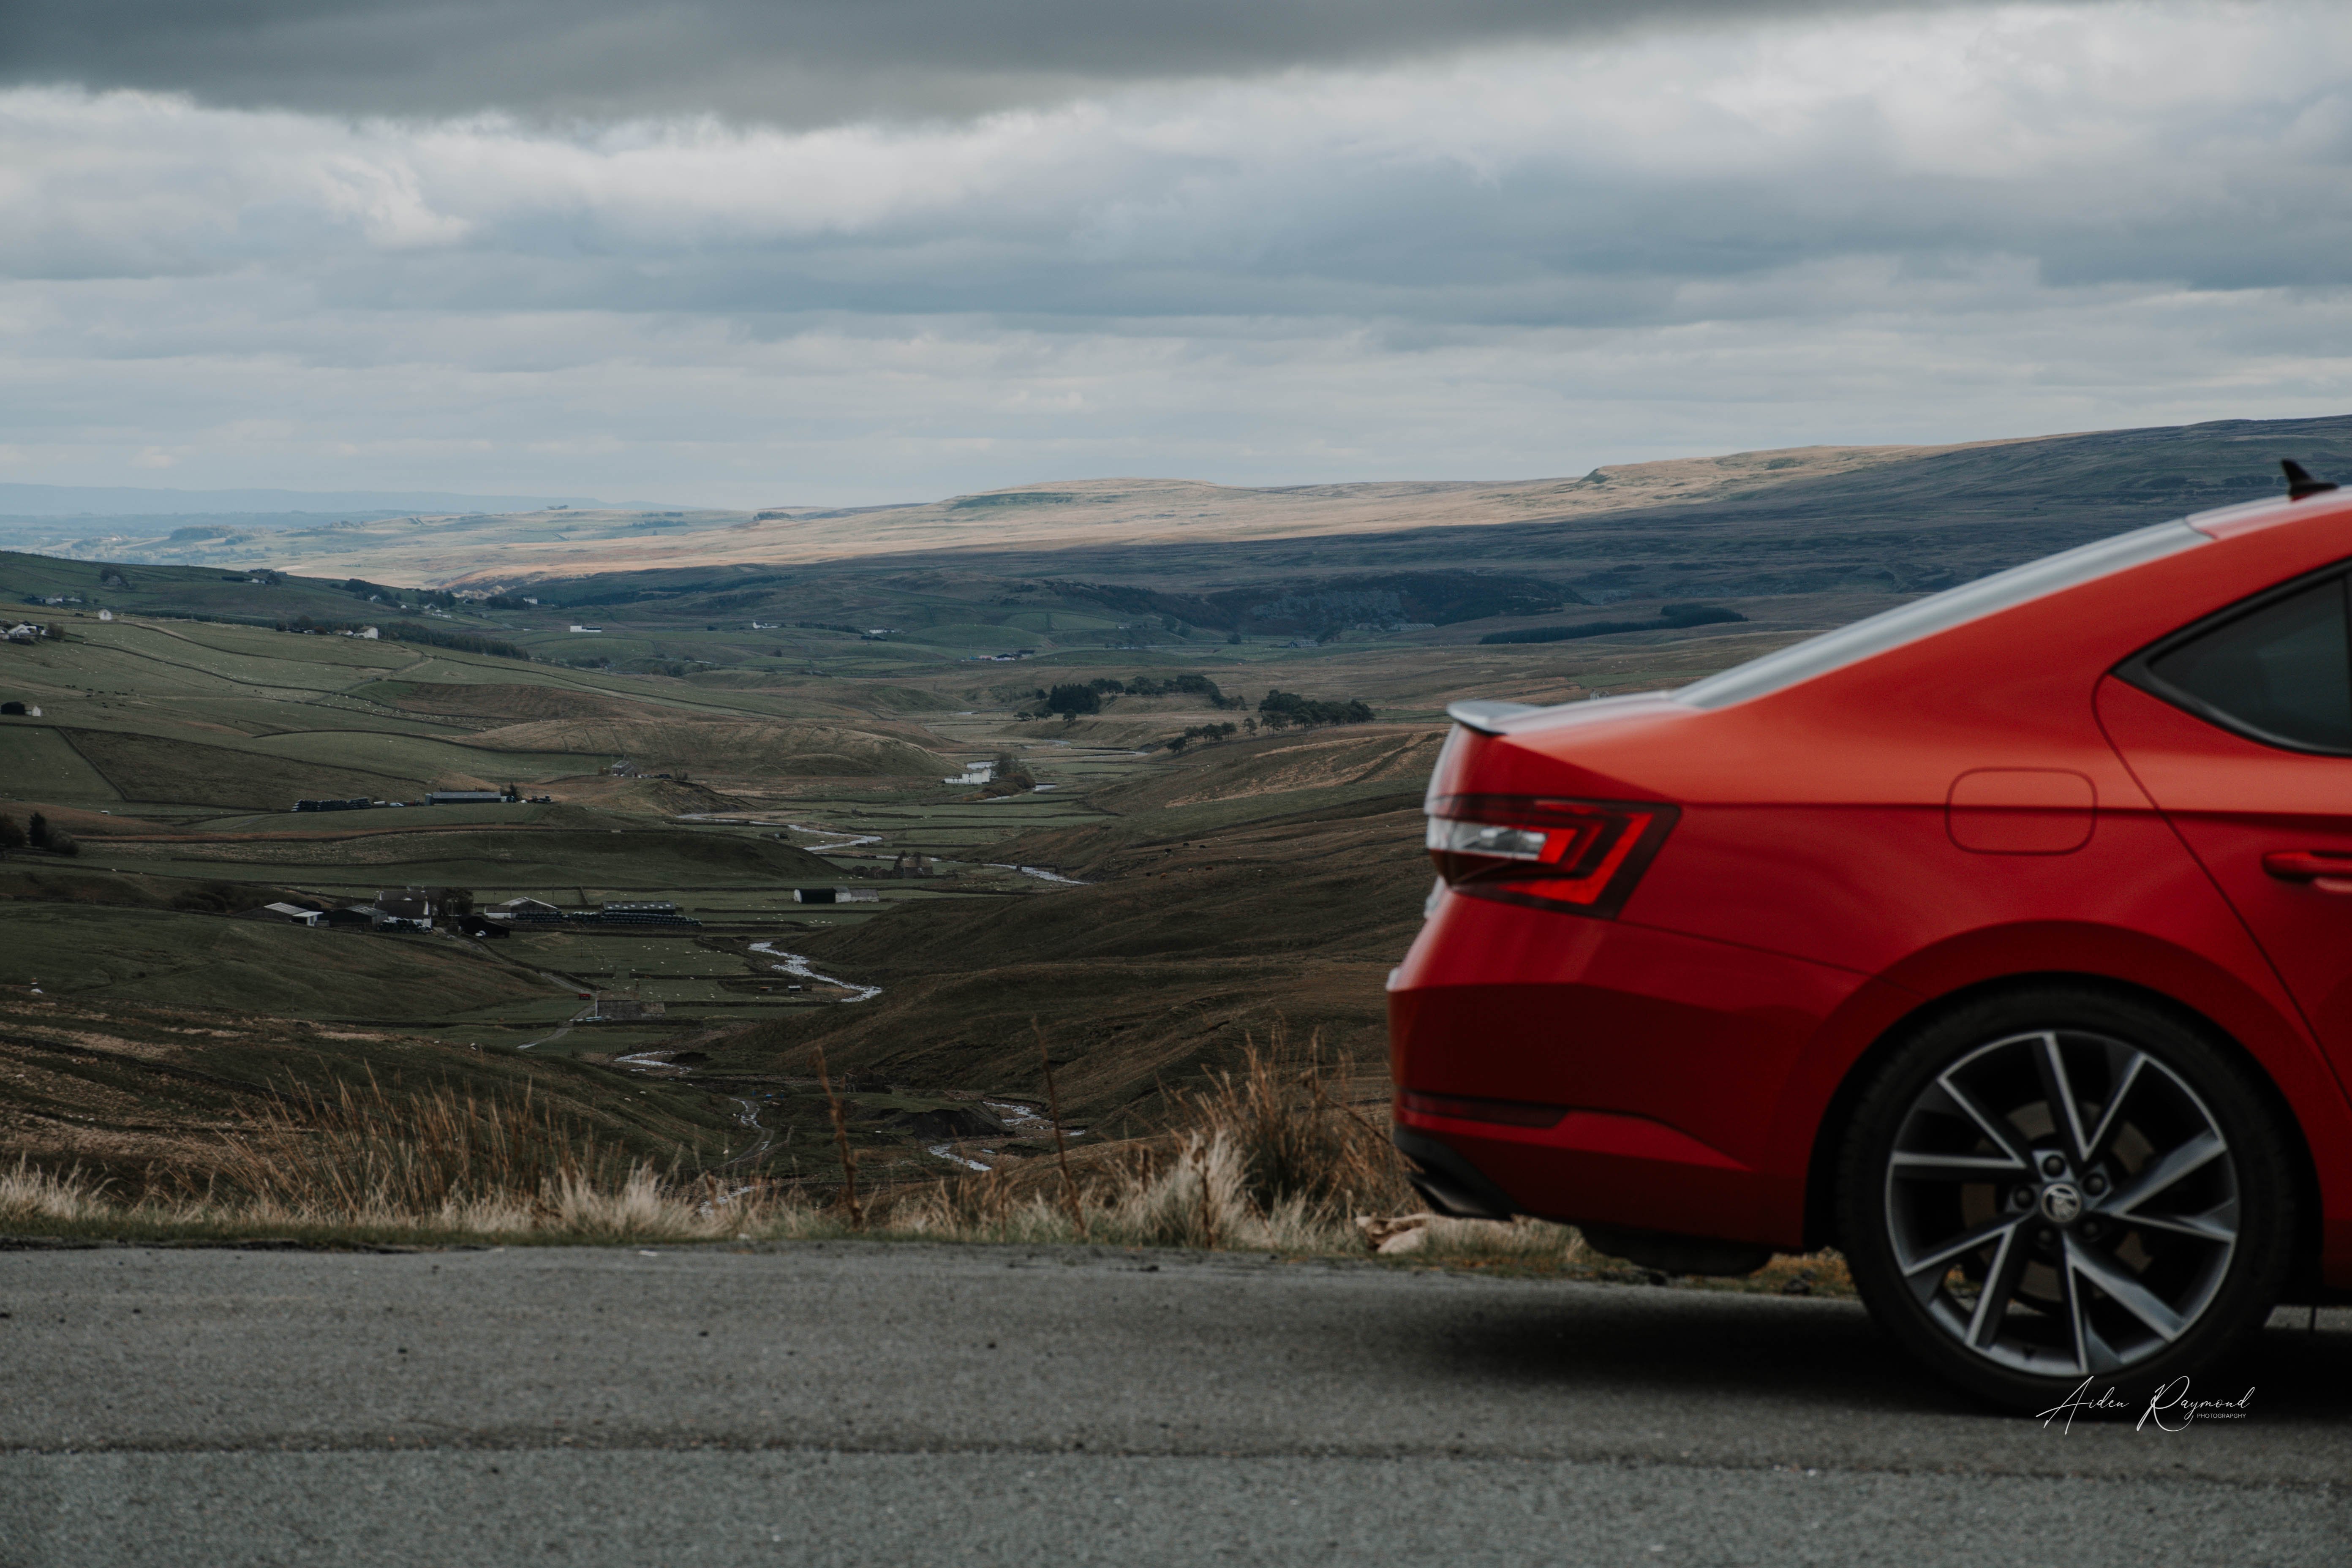


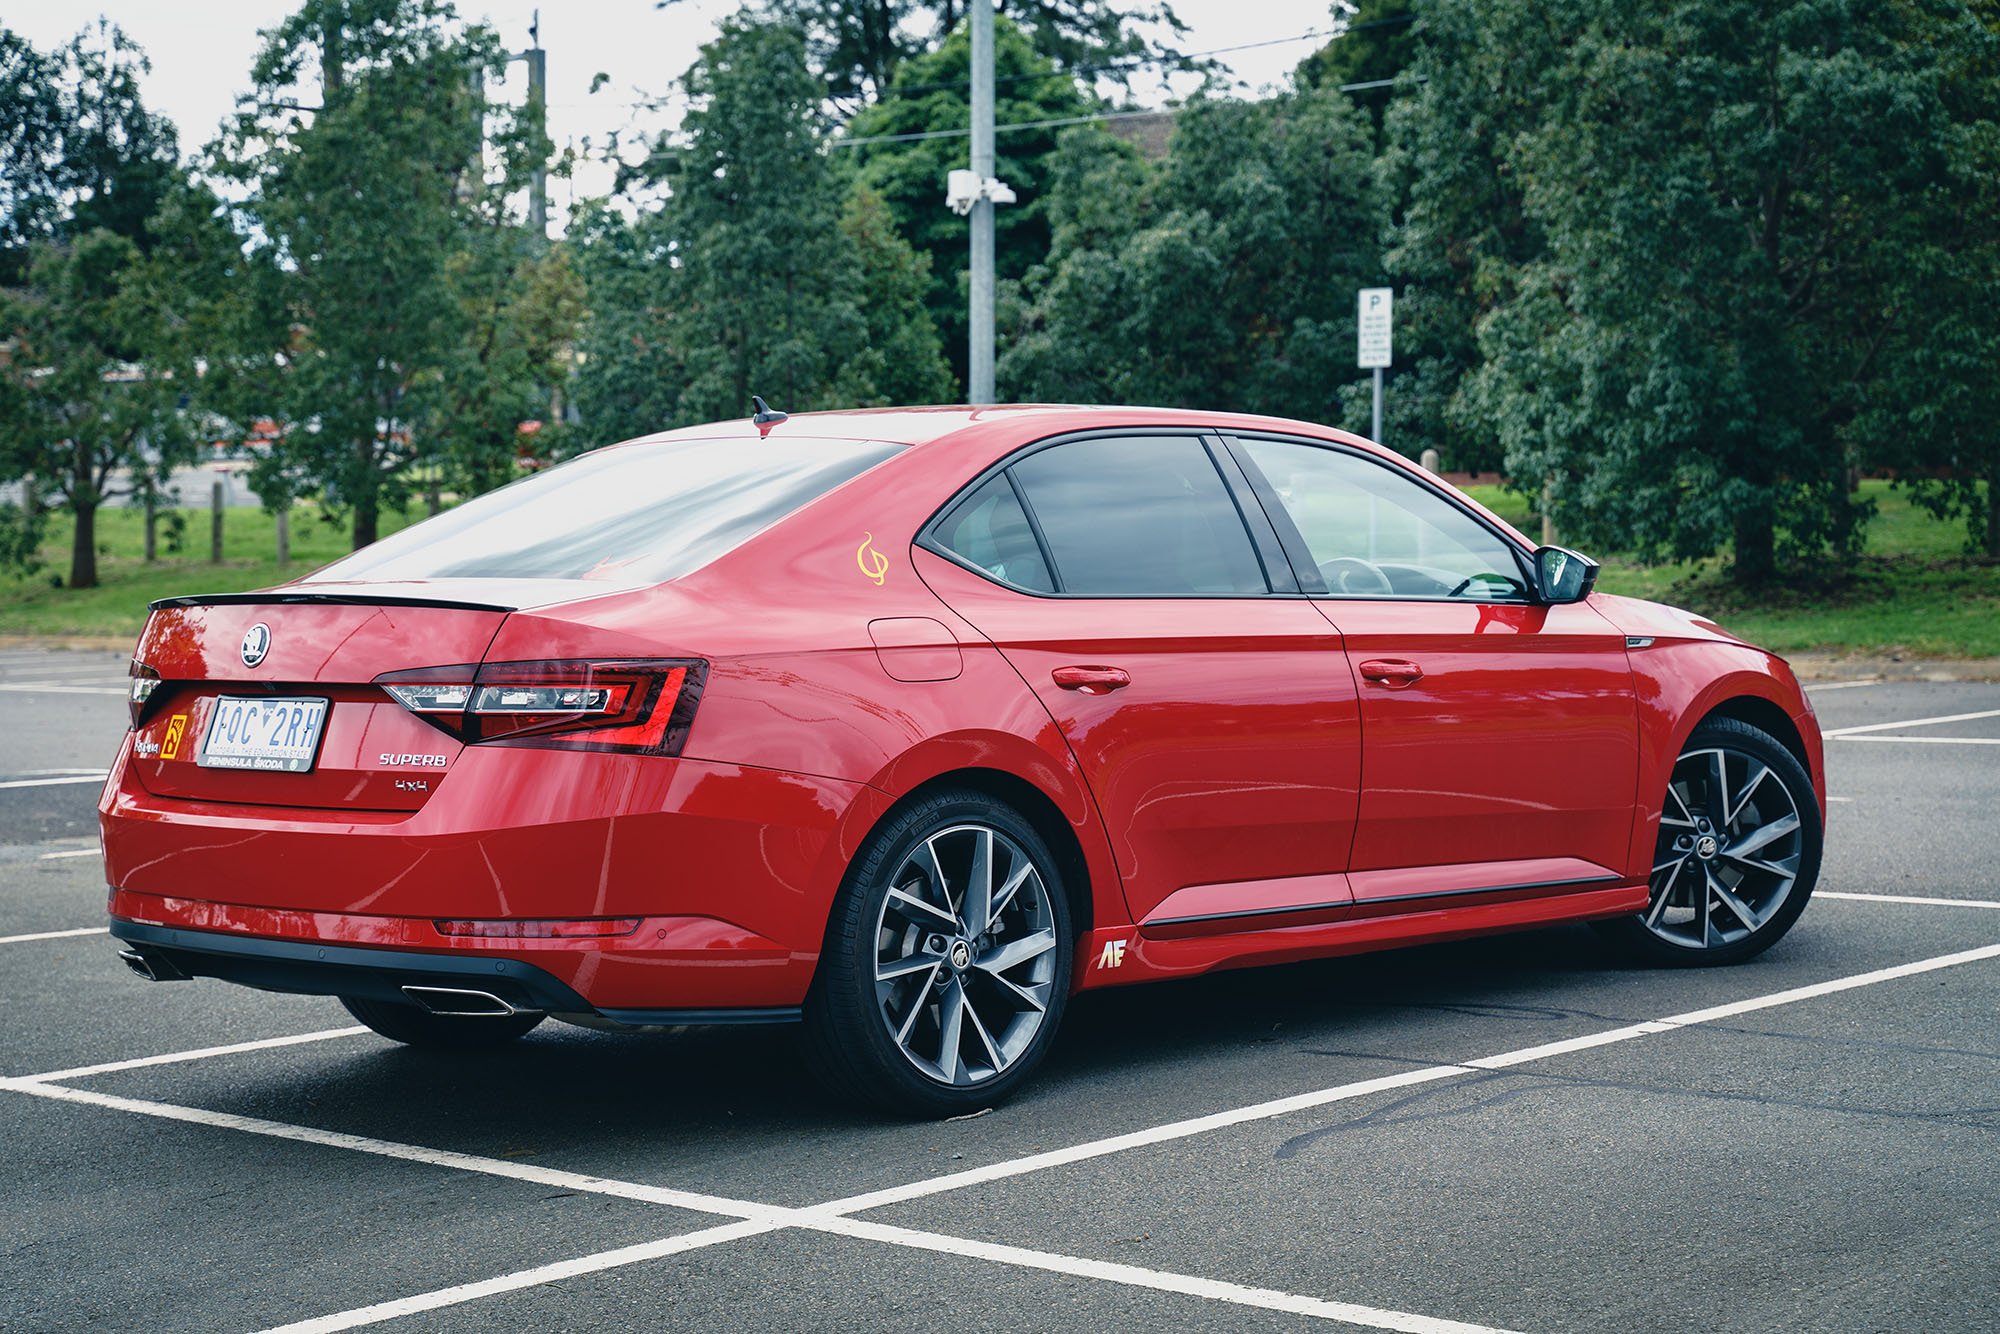


.jpg.442b7e67dcfc1df9ddbce34ae1bea6d7.jpg)