Everything posted by Breezy_Pete
-
My 53-plate petrol Polo is compliant. No plans to get anywhere near though.
-
The thickest two wires (power and earth for the window motor) are 1.5mm² cross sectional area of copper, the others are either 0.5 or 0.35mm², so if you used 0.5mm² everywhere except the two thickest, you should be OK for repairs.
-
I think that last bit about someone having a go before must be the explanation for what you're finding. £118 sounds like £98.70 + VAT.
-
Will check wire sizes after I've eaten, but that VIN gives 5J0971120HG as the current part number for the loom, at £98.70 + VAT retail. That has a single (28-way) connector at the A-pillar, like what you're seeing in the repair sets suggested earlier though.
-
That sounds more like a mk1 Fabia? But a 2011 1.6tdi Fabia has to be a Mk2 🤔 Can you tell me the VIN, I can look up loom part number for you, and wiring info with that.
-
That suffix-C part isn't showing as having been superseded by anything else either.
-
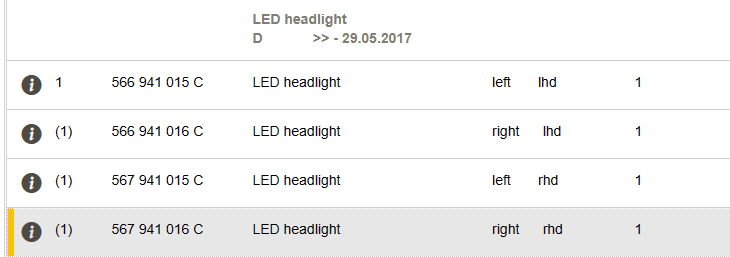
Yeah, just found it actually, but only listed for cars built up til 29/05/2017
-
That link goes to 566941016C, I'm not sure that 567941016C is an available part number, Skoda-parts.com doesn't seem to find it, nor OEMwolf, both of which are handy sites for checking equivalences. Are there photos of this part number in the listing you're seeing @Vista321?
-
Alternators in recent cars with start/stop will not put out a constant 14.5V, so are no longer easy to test. An independent test of the battery at a non-Halfords establishment is a good idea.
-
Or being sprayed out of jets to cool pistons...? Sorry, not buying it.
-
No, I doubt it. It's always in contact with air anyway, once you pour it out of the container.
-
I think air is able to find its way out of oil...
-
No problem. You get nice surprises sometimes with things being less than expected. Not often mind!
-
Retail price appears to be £39.50 + VAT at Skoda dealers, so £47.40 by the time it's in your hand. TPS may be cheaper, if you can blag your way to getting served. LLL parts generally are cheaper, even after postage, but I'll leave you to check that out, by starting here: Skoda Satin Black 5E98677669B9 - LLLParts Not usually lightning-fast with delivery, but if you were previously going to wait for it to come from afar, then that probably doesn't matter.
-
Just on the road, but yeah, can do in an hour.
-
6Q0407255S then (last character is an S, not a five).
-
If that ^ doesn't sort your problem, then start by knowing the part number of what you're looking for. Left or right?
-
-
A bad attempt at spelling Briskoda?
-
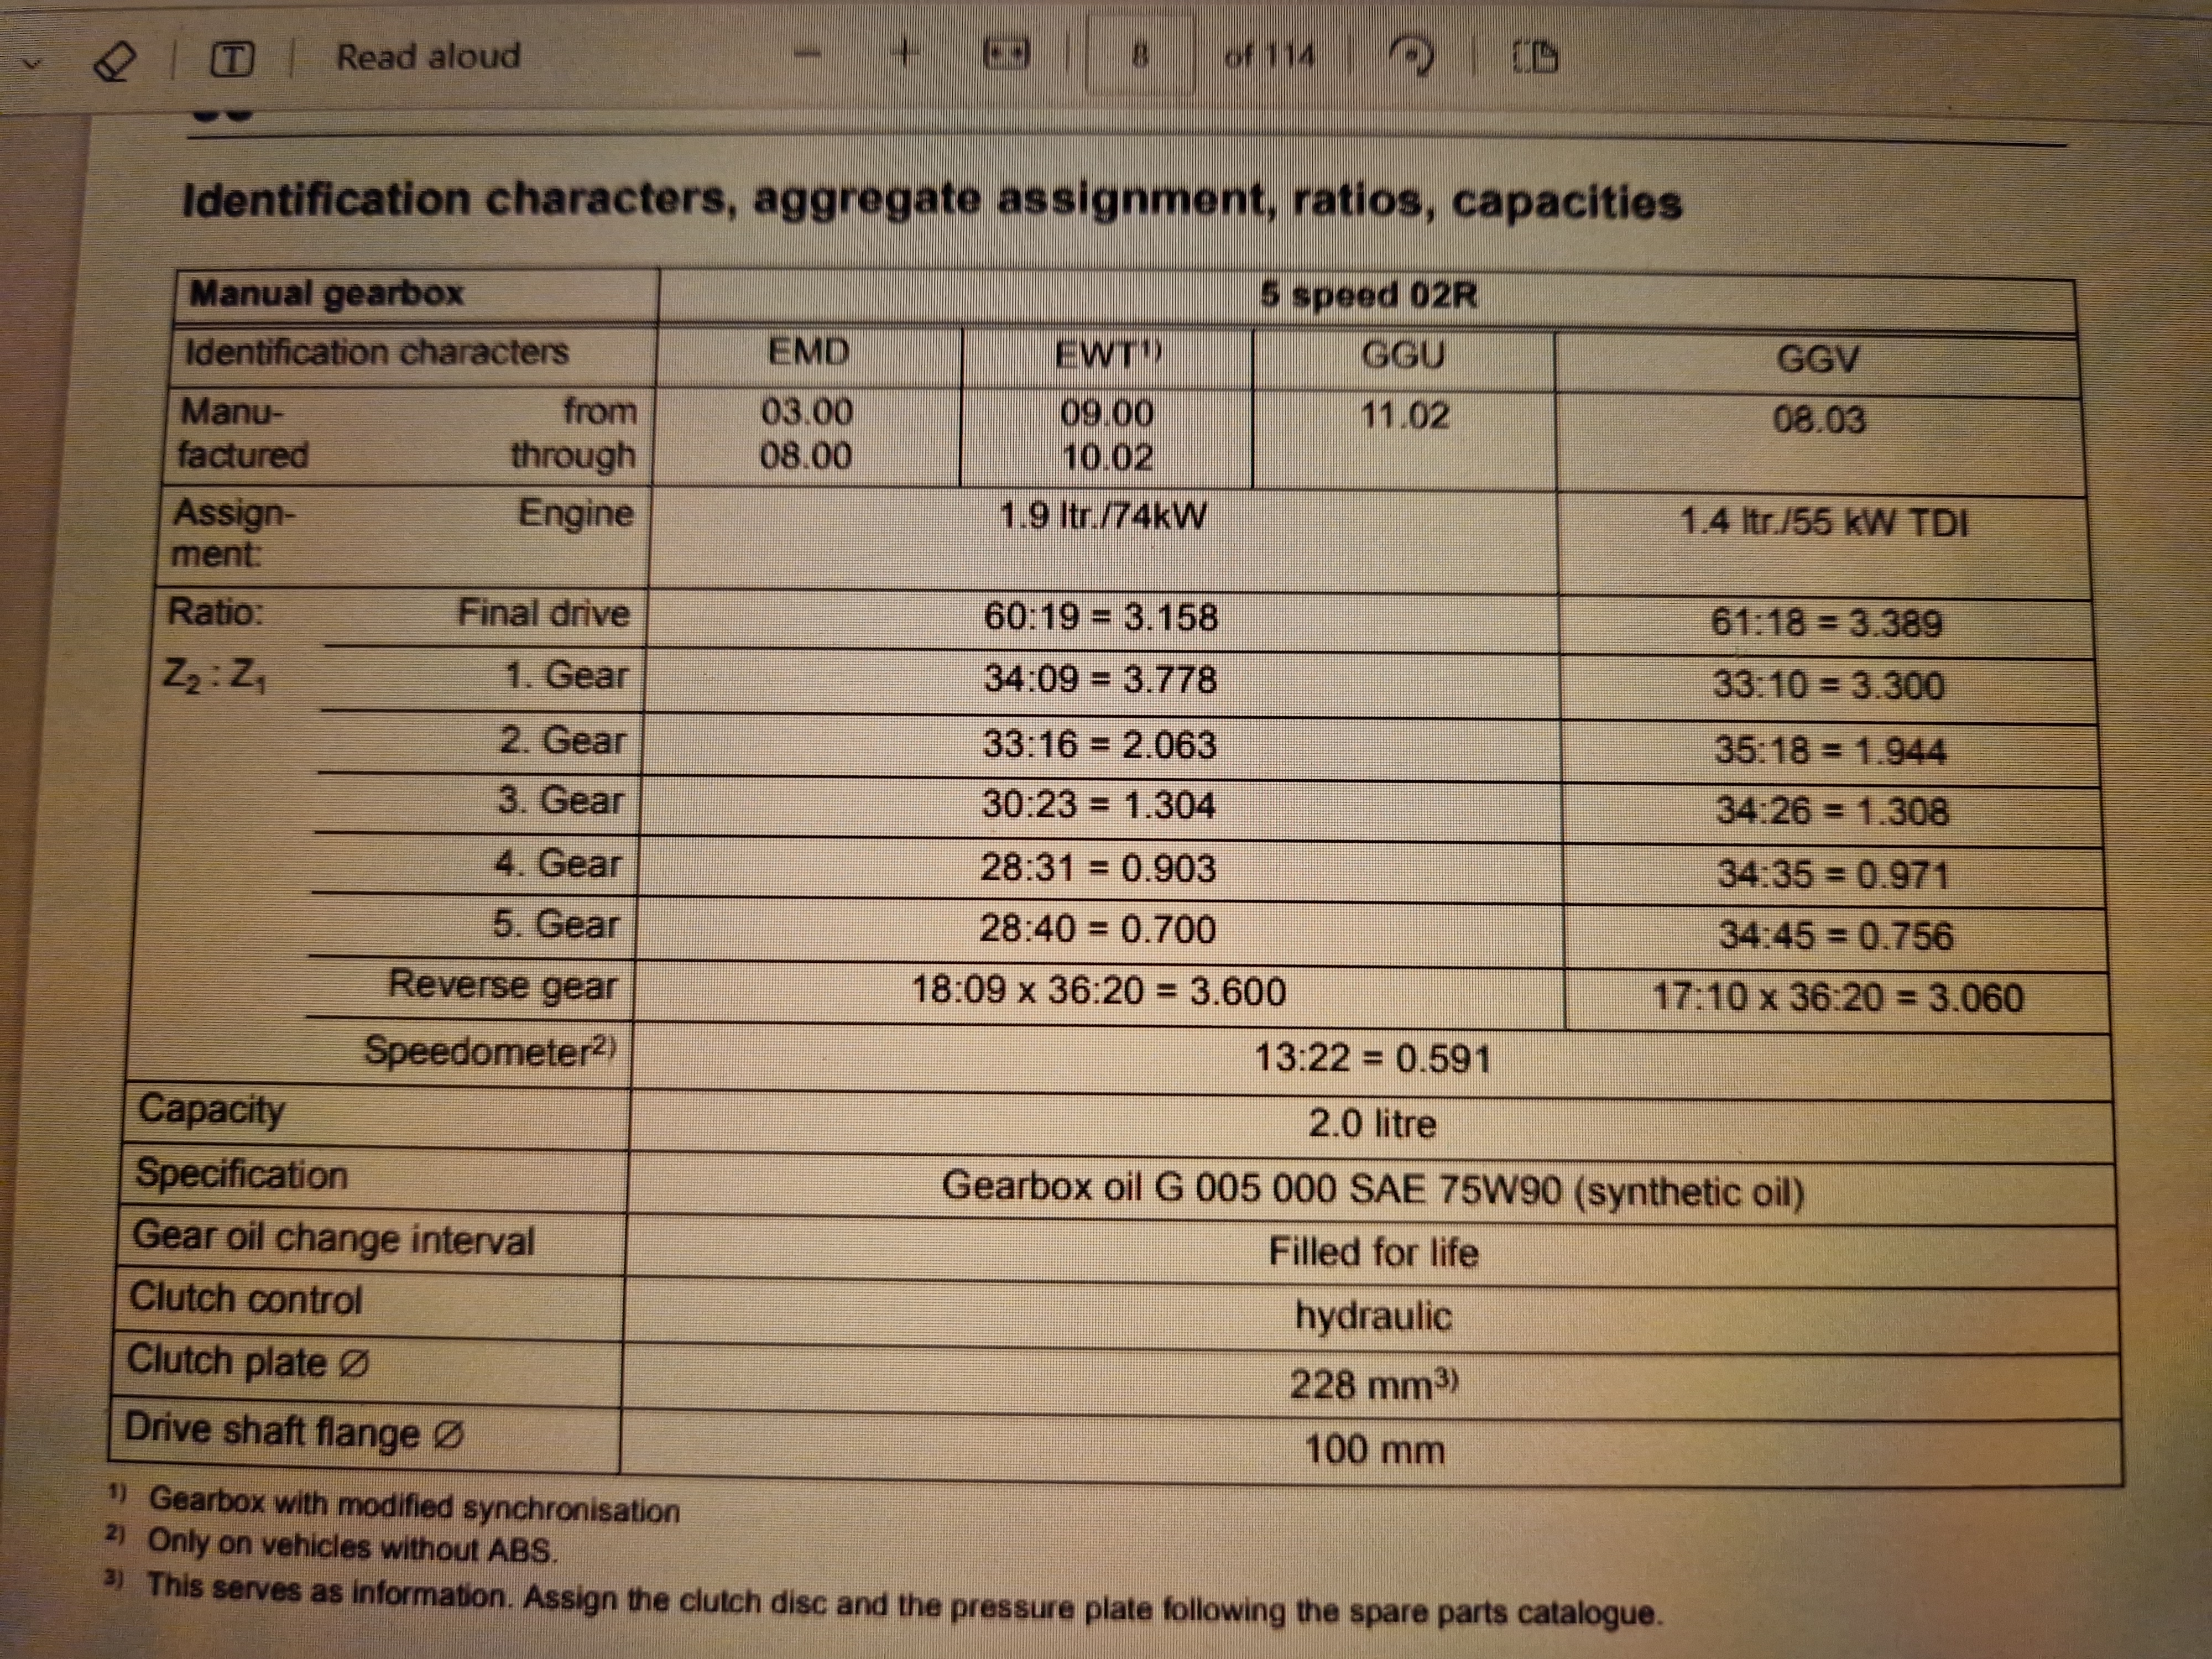
EMD and EWT codes were used before GGU on same engine, to widen search scope a little, maybe.
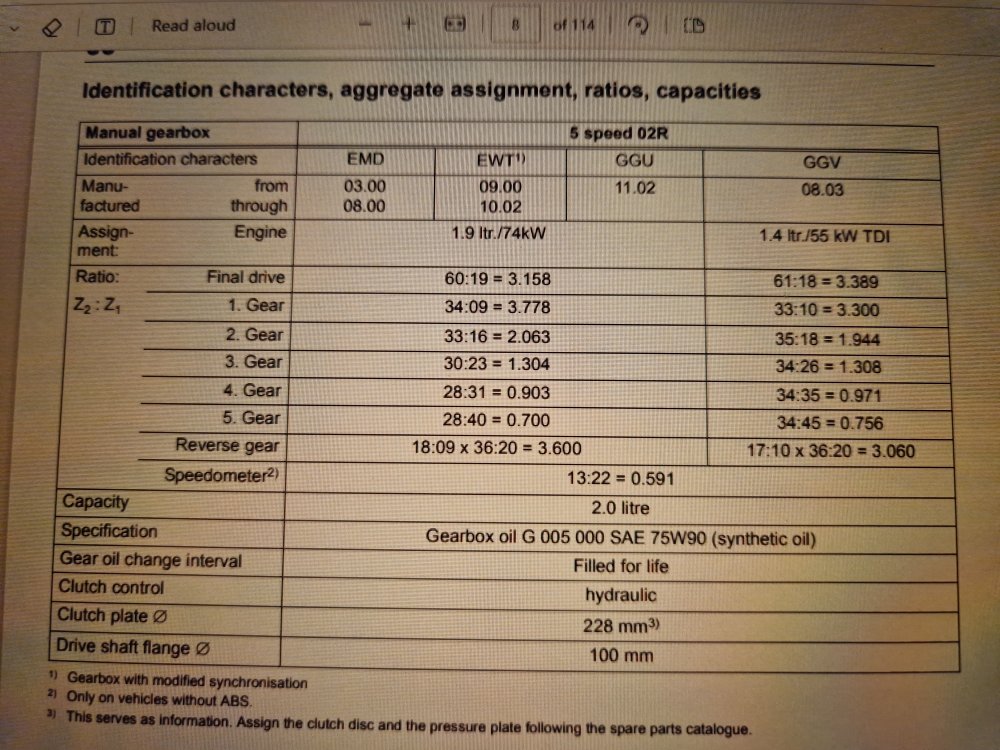
-
Switch or wiring break at switch connector.
-
Minimum thickness is often stamped into the disc, either around the edge, or on the 'bell' part.
-
For the fan to be triggered by the radiator thermoswitch, the temperature of the coolant at the thermoswitch location needs to exceed the threshold temperature. Normally the position of the thermoswitch means it is measuring the coolant temperature after it has flowed all the way through the radiator, so you really want to know what the temperature is locally, where the thermoswitch is mounted. I think the thermoswitch threshold temperature for low speed fan action is about 95°C. I would not be at all surprised if the coolant had lost more than 9°C of temperature between the engine head where your VCDS temperature is being measured, and the radiator outlet. So yes, leave it for longer. Or get the engine working harder.
-
Yep.
-
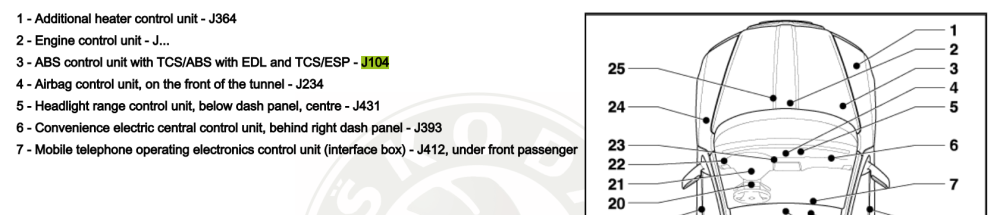
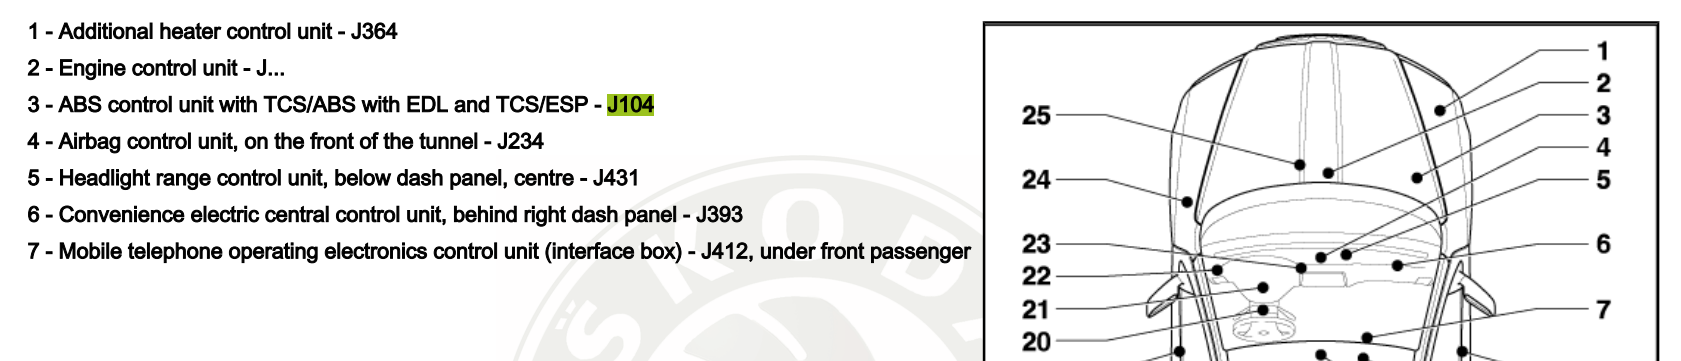
If your ABS module connector has two rows of pins (26 way) then the rear left sensor wires into pins 3 (black wire) and pin 2 (brown wire) If it has 3 rows of pins (47-way) the rear left sensor goes into pins 36 (black) and 37 (brown). Equivalent pin numbers for rear right sensor are 11 and 12 of 26-way or 43 and 42 of 47-way. Both again black and brown respectively. Location : see item 3