


Leaderboard
-
shyVRS245
Locked15Points0Posts -

moley
Resident Member12Points10,120Posts -
Lady Elanore
FREEDOM11Points24,878Posts -
.jpg.1006585dfe4e2977315b67c3d642e37b.jpg)
Guest_
FREEDOM9Points83,824Posts


Popular Content
Showing content with the highest reputation on 07/10/20 in all areas
-
4 pointsI quite like that one. Got my money back from Toyota today. All it took were 4 phone calls yesterday to chase all the unreturned calls that were promised An email to the CEO A fairly strong phone call with the franchise priciple who called me after the ceo got involved, which started off with him saying sorry it was a mistake but we're not paying anything and ended with them paying my expenses and delivering number plates to my house Another two phone calls today to chase the refund and the promised email from the franchise principle that never appeared. Nae bother eh!4 points
-
I am a little confused. I have just hopped over from the Octavia forum since we will be swapping from a vRS to a Superb and I came across this 35 pager that seems to always dominate the top of the forum. Can anyone tell me if there is anything useful in it as the last few pages seems to be full of someones holiday pics and people obsessing about mpg in a 272ps car? Thanks4 points
-
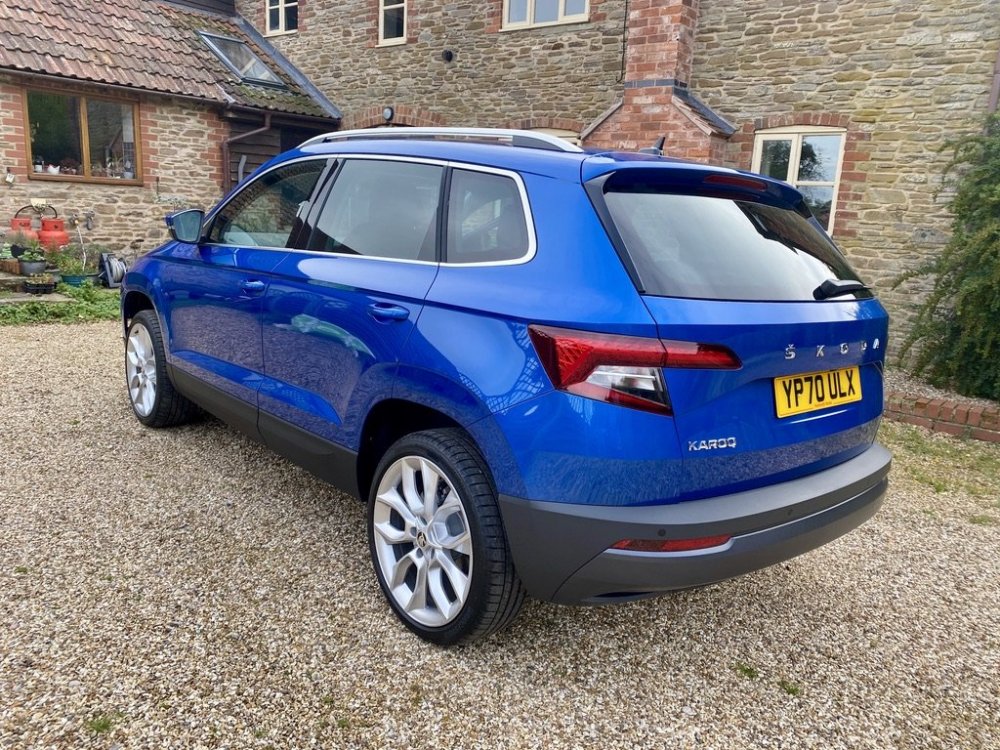
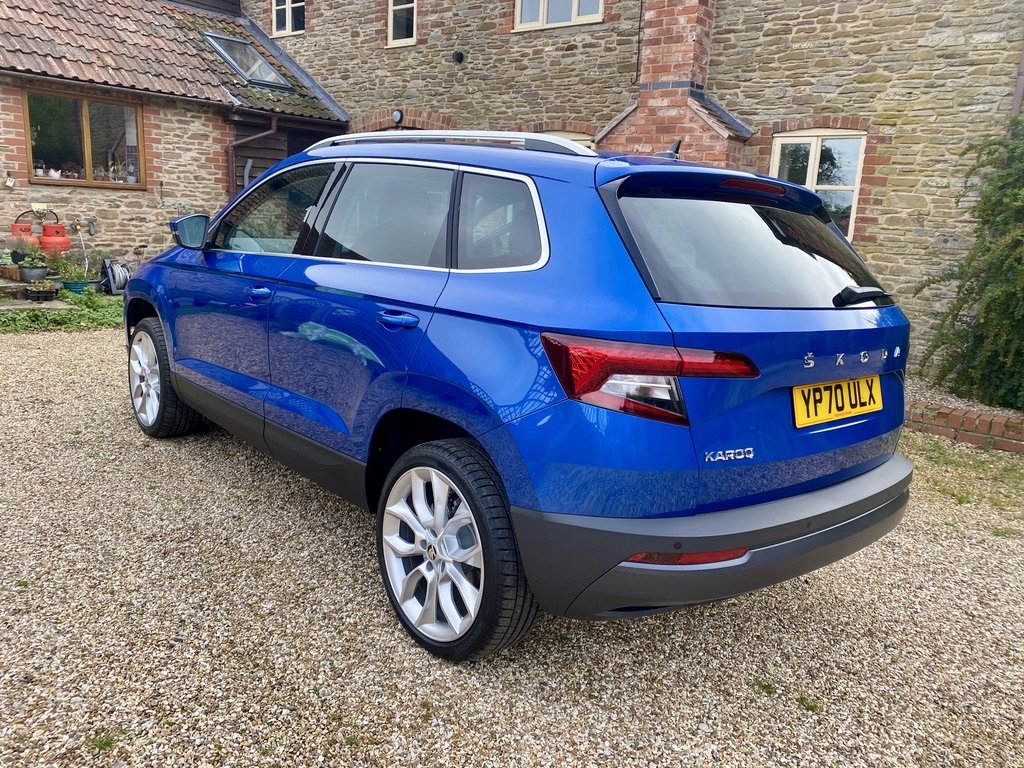
4 pointsThere she blows Had a great traffic free drive back from Sheffield. 150 miles, super comfy, great on the motorway, even managed to wrangle skoda connect to work. There are a few things I need to do (customise virtual cockpit, etc) but already it feels very familiar. I will have questions, probably on another thread!


 4 points
 -
3 pointsBuy Unimog drive to Toyota dealer Park Unimog on top of Land Cruiser Plant flag of victory through Land Cruiser roof and claim it as yours Post pictures on Briskoda Become all time legend3 points
-
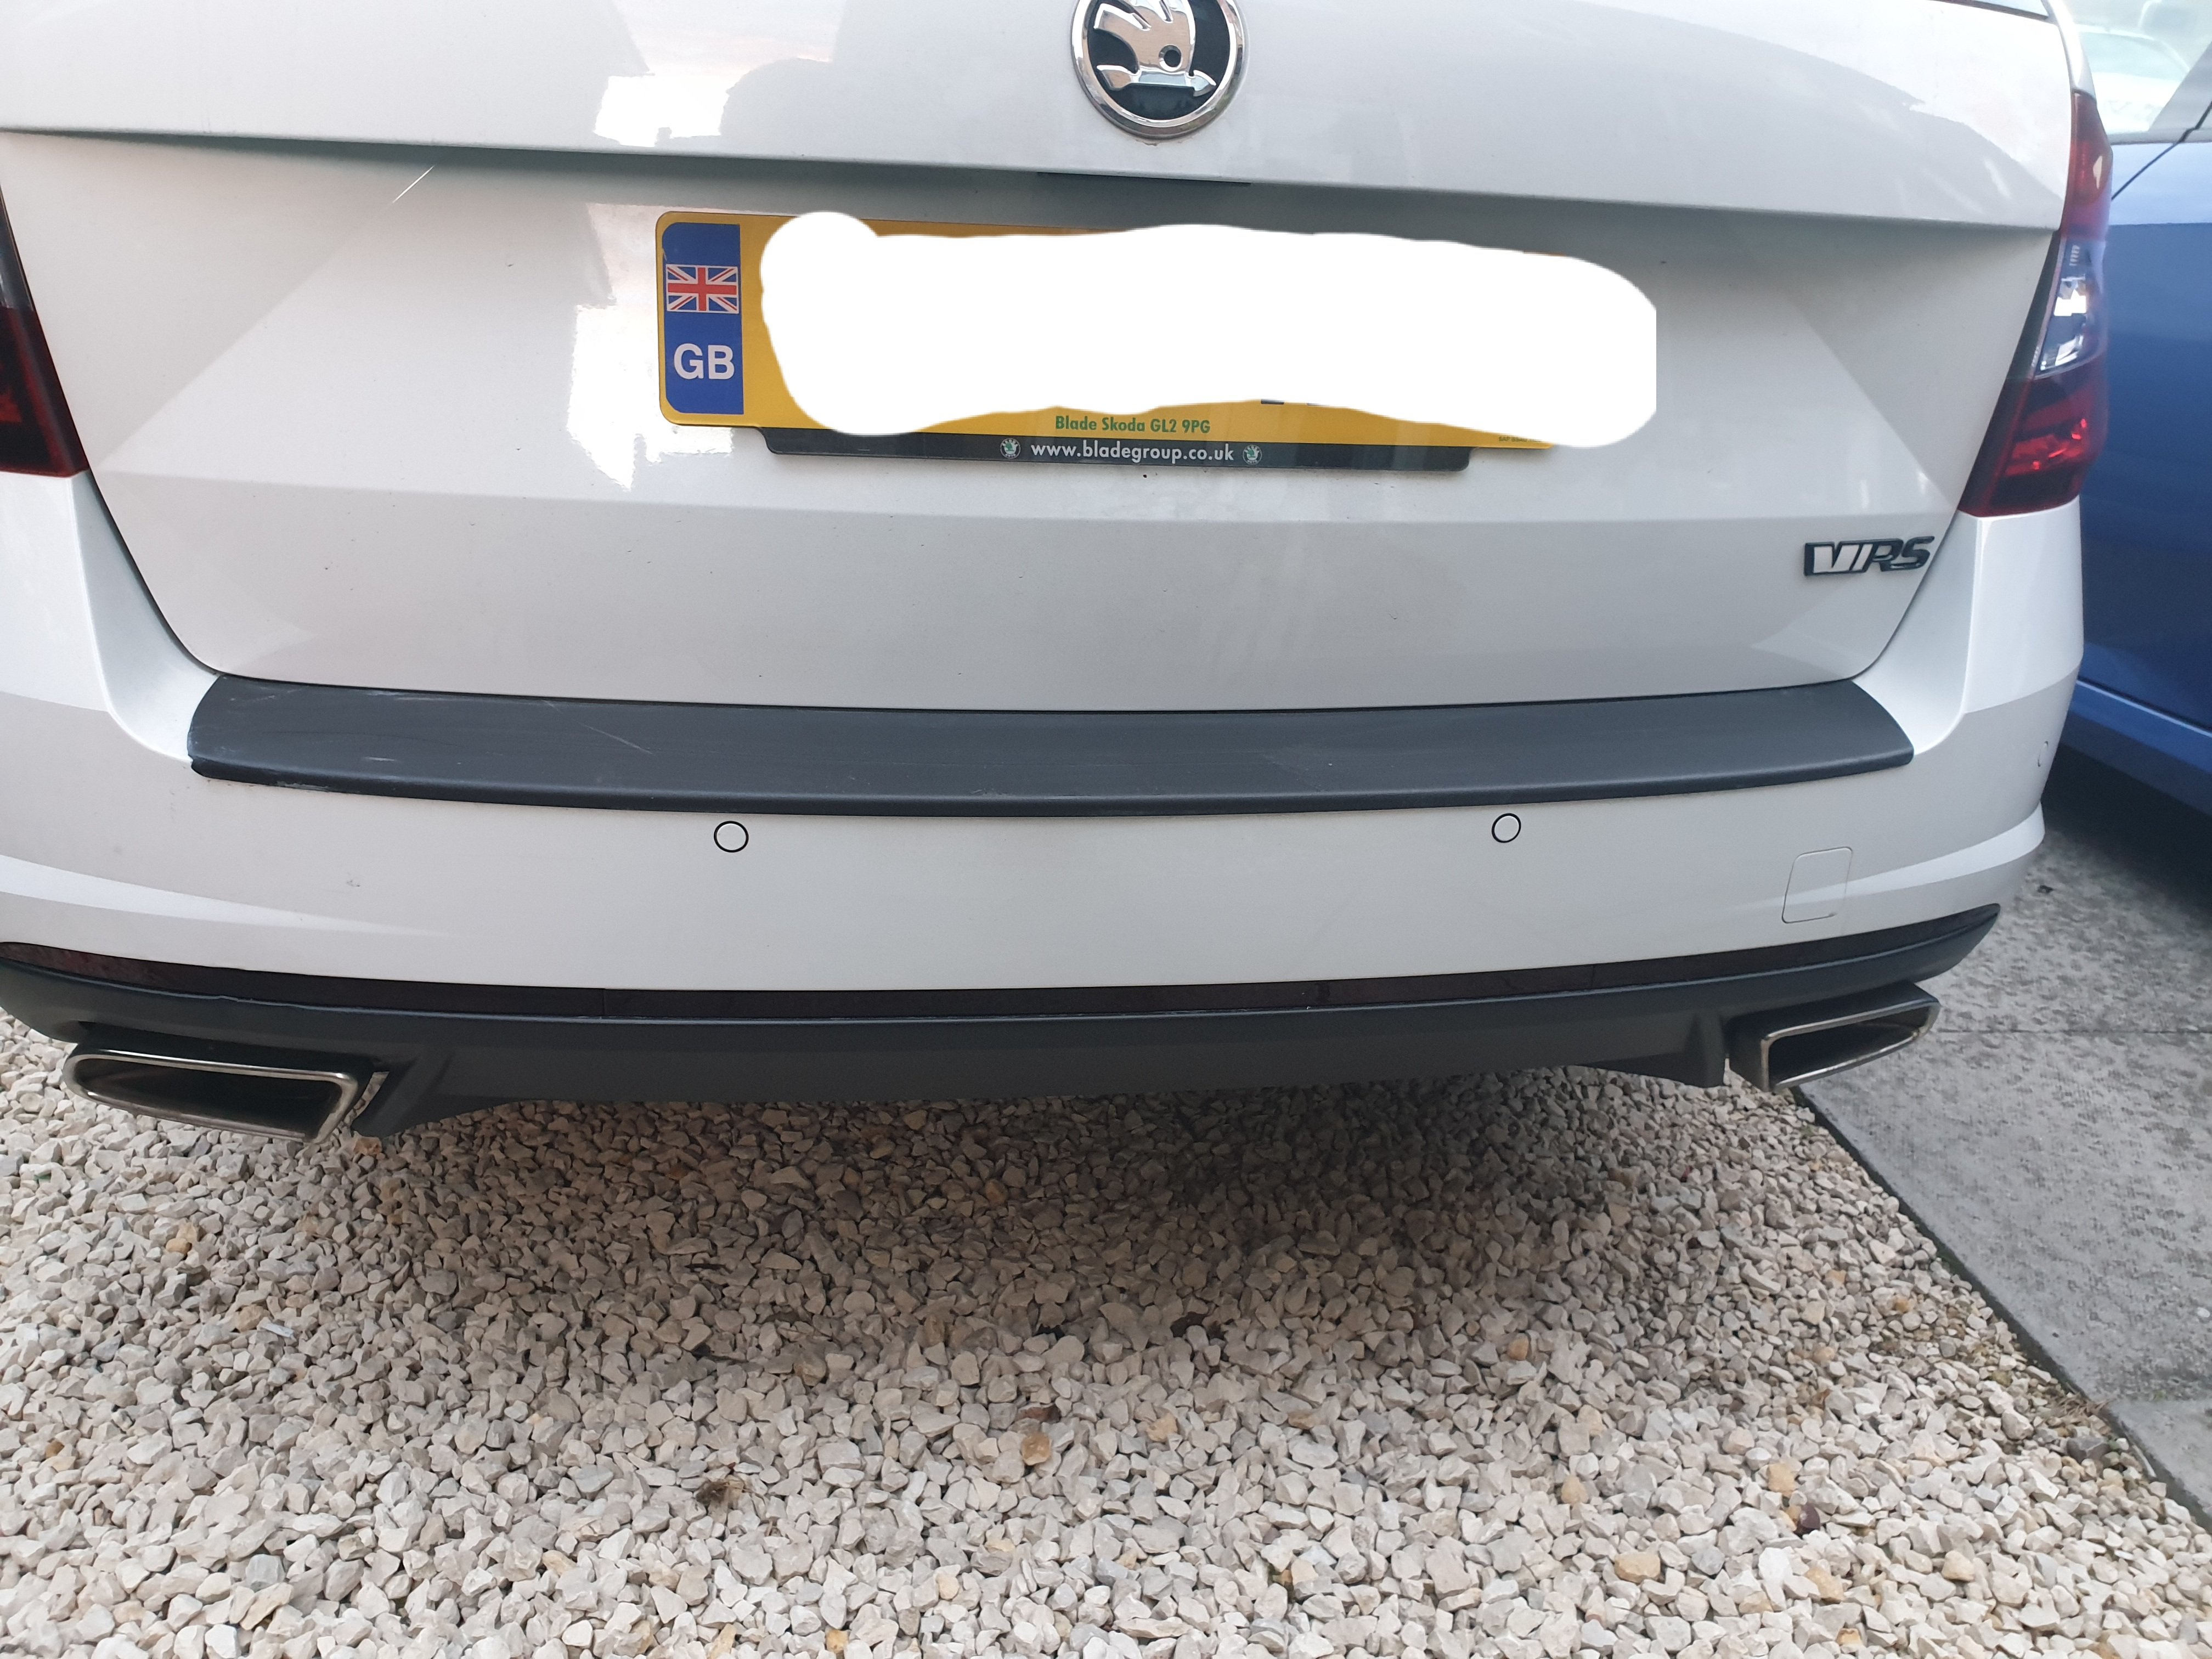
3 pointsIs it really worth the risk for a set of lights you never actually see (at the rear of the car) just to make the car look "better"???3 points
-
3 pointsOn my way to Sheffield. Travelling on a train for the first time in seven months has been somewhat eye opening! Hopefully an update and some pics later.3 points
-
2 points
-
At last! The constant reminders regarding the Forum Guidelines has finally been grasped.2 points
-
2 points2 points2 points2 pointsAs suggested I enlisted an auto electrician and he found the fault was in the wiring, now sorted.2 points2 pointsQuote: I doubt such a change of bulb could be used by an insurance company to leave you high and dry It could if a person following you rear-ends you and they claim that they were dazzled by your LED lights at the rear of your car. If it turned out that the lights were not UK road legal then your insurance would not pay up. You could be in line for the repair bills and also any personal injury claims if the person when crashed in to you was injured. Insurance companies will find any legitimate loophole to avoid paying out and that would be a legitimate reason. Your risk of course but anyone reading this may want to bear that in mind. Cheers, Paul2 points2 pointsWell said, the 1.5 TSi engine is not what you would call a normal engine. Personally I wish that I'd taken the cheaper 1 litre TSi engine than the 1.5 version as no matter how I drive it I cannot get anything like the fuel economy that it had pre software update and it feels kind of flat too. Yet some people with the mark 4 Octavia are reporting really good fuel economy with this engine straight out of the garage, without any great effort. It kind of makes me wonder whether there has been another secret software update to fix some of the problems that the first update caused?2 pointsThe 220 is basically the golf gti engine and the 280 is the golf r engine. 220 uses smaller turbo has a few different engine internals so although you can map it to about 280hp, you can map the 280 to 350hp or more. Just get the 280 4x4 unless you have a loyalty scheme with a tyre shop (wheelspin!)2 pointsWell good news is the engine turns over freely, nothing has stuck or siezed in the 2years since the engine went back in. Only wound it over with a ratchet on the crank bolt but it’s a start. I have now got a running in base map from Faboka (John) which will allow me to at least get it started and run in. Boost pressure is standard VRS which is more than enough to bed everything in. Battery is on a long trickle charge, hopefully it’ll come back to life after 4yrs off the car. Tomorrow evening will see the battery reconnected, a test of all systems, then try and load the new map onto the ecu with my mpps cable- if I can remember how to do it?? I’ll try and bleed some fuel through up to the engine and check everything for leaks. I’m not going for the big start until my two mates who’ve helped me out so much are round, beer and pizza have been mentioned so all will be good I hope. I have fitted the spare wheel tonight, cleaned all the tools and that’s the boot finished.. More tomorrow2 pointsNot sure about anyone else but I'm loving the look of the Cyan Racing P1800... https://www.cyanracing.com/news/2020/09/02/revealing-the-volvo-p1800-cyan
 2 points1 pointHi all The Superb Mk3 AWD is fitted with a 5th generation Haldex. Regarding VAG Group, and Skoda in particular, it also equips: Octavia 3, Superb 2, Karoq, Kodiaq. It may also apply to Scala and Kamiq, unless they're equipped with 6th generation. I actually don't know for these latter. Since I have limited trust in garages in my neighborhood and because I like 'DIYing' on my car, I've decided to change the oil of my Haldex system on my own. If one follows Skoda recommendations, workshop manuals (see cardiagn.com) only mention a simple oil replacement every 3 years and that's it! But when you start diving into documentations or in youtube videos about 5th gen Haldex, you can notice that the oil pump has an intern strainer, which trends to get really dirty, whereas it's never cleaned ! Hence, here is this humble tutorial ! I apologize, if there are any vocabulary issues... I'm French. Firstly, here are all elements, that we're going to look at: #13 : Bleeder screw (M10x30) - P/N N 910 827 01 (tightening torque 38 Nm for Superb Mk3, but on other VAG model it may be 32Nm - Have a look to the workshop manual corresponding to your car. See cardiagn.com) #14 : Filler screw (M10x1x10) - P/N N 902 818 02 (tightening torque 15 Nm) #3 : Retaining screw (M6X35) for the Haldex Control Unit - P/N N 105 540 05 (tightening torque 9,5 Nm) #11 : Retaining screw (M6X35) for the Haldex hydraulic pump - P/N N 105 540 05 (tightening torque 9,5 Nm) #9 : O-rings for the pump - P/N 0CQ 598 305 (⚠️Note : This P/N is a kit, which includes both O-rings, but also both retaining screw #11! Don't by these screws twice!) Gear Oil : According to ifinterface.com: P/N G 065 175 A2 or According to what dealer sold me: P/N G 60 175 A2 - 850 ml (~29.9 fl oz) By the way, don't forget to check that the oil can actually contains 850ml through the gauge on the side of the can. Indeed, just for the short story, the oil can I had bought only contained 750ml, though brand new and still crimped . I had to go back to the dealer to exchange the oil can. The requested volume for the maintenance operation is usually around 700-720 ml (24.6-25.3 fl oz), thus it leaves little room for error (and even less if the can is not filled correctly). The total bill was ~75 € for all parts (without screws #3, which you don't need to change). - Difficulty : 2 - Time needed : 1h30 approx. - Number of person needed : 1 - Necessary tools : ¤ Screws #3 and #11 : Torx T30 or 10mm Hex socket, if you don't have Torx ¤ Screw #13 : 8mm Hex ¤ Screw #14 : 5 mm Hex ¤ For Hydraulic pump strainer screws : Torx T10 ¤ Ratchet or classic wrenches for disassembly ¤ Torque wrench(es) to apply specified torques: (9,5 / 15 / 38 Nm) ¤ Short and intermediate extensions for ratchet or torque wrenches to enable easier access to screws ¤ A small flat screwdriver ¤ Oil drip tray ¤ Rags ¤ 1 wooden toothpick ¤ Lifting means ¤ Syringe for oil filling Dealing with the syringe, I've bought this one for 20-25€ on Amazon. It makes the job perfectly! Step #0 : Preparation You need to lift the car high enough to get under the car and to get enough space to move your arms comfortably. In my case, 370mm (~14.5") of ground clearance were enough. Note: Though you've lifted the car, it needs to remain horizontal to make a proper filling with right oil level (see step 5). If this case, I had to compensate the natural slope of the ground. Step #1 : Oil draining Start with the filler screw (#14 / blue square) removal for more safety. Indeed, if it's stuck, you won't be "snooked", with a completely empty Haldex oil tank and no way to refill it. Once you've removed the filler screw. Don't get rid of it immediately. You'll need it again temporarily for Step #4! Now, you can remove the bleeder screw (#13 / red circle). There's no difficulty to remove these 2 screws. There are 2 good news for this step: - The drain screw is long enough, so that you won't get surprised, when the thread gets totally disengaged from the housing. - Even if the drain screw has an horizontal axis, there's only a small quantity of oil, and since it is very fluid, it flows well vertically from the edge of the hole. Little chance of getting trapped with the oil, which flows suddenly and farther than the drip tray. Phew! However, it takes several minutes to really let all the oil drain: Step #2 : Hydraulic pump removal Whereas oil is still dripping, start removing 2 retaining screws (#3) for the Haldex Control Unit. They are quite easy to access with a small 1/4'" ratchet. After that, you can rotate the Haldex Control Unit, to bring the connectors on the top upside down. This simple operation will help you saving a huuuuuuge amount of time ! But this tip is explained / told nowhere!!! Otherwise, you will have to disconnect the pump connector 'blind'... And if you do this operation for the first time, You hardly understand how to proceed. Decency leads me to shut up the time that I spent trying to remove this µ%£$@&# connector before I changed my mind on the operating process. Pump connector before Control Unit removal : Once the 2 retaining screws of the Control Unit have been removed, you can easily access to the connector: Now simply insert a small screwdriver in the notch (red circle) and push in the arrow direction. Very simple... Then, you need to unclip the black plastic wire protection, which keeps the pump wiring away from the propeller shaft. It's clipped in 2 locations on each side of the shaft, You just need to pinch the 2 lugs at their end to make them go back through the hole in the housing. Left side (Control Unit side) : The upper red circle in the mirror shows what you hardly see in the lower dotted circle... It's clearly the circled part, that has to be pinched and then pushed/pulled in the arrow direction. Right side (pump side), just proceed the same way : The pump wire is now fully free. You can now remove the 2 retaining screws (#11) of the hydraulic pump (#10). Very easy too. Warning from this point, it will be 'Apocalypse pump' ! Please keep children and sensitive souls away from following pictures! Pull in the pump axis direction, while rotating it around its axis in one direction and then the other to ease the removal. Be very careful, when the pump is about to get out completely, not to strike the contact surface of the housing, nor to strike the pump strainer. FYI, the strainer is not sold alone. It's sold with the pump, which approximately costs 180-200 € (w/o VAT) ! And there, under your dumbfounded eyes , here is the sinister spectacle that awaits you: A strainer almost entirely clogged with sh**t! And the pump housing is not even better... FYI, this Haldex is only 2.5 years old and has only 45000 km (~28000 mi) on the clock. And considering the way I use my car, I don't think the Haldex faces a heavy duty use. Therefore, as I already mentioned somewhere on this forum, one can only notice that the oil replacement process in the maintenance manual for the Haldex 5th generation is clearly incomplete ! By the way, look at this video below from ~28 mn, you'll see the impact of the strainer cleaning on the pump demand signal ... It's clearly a proof that w/o a strainer cleaning, the pump unnecessarily faces severe conditions and that sooner or latter there's a risk of pump failure... Step #3 : Pump cleaning and reassembly Since the pump is now removed, you need to remove the strainer. Use a Torx T10 for both screws: Then wipe the pump dry with a rag, being careful not to get the dirt into the ports. Fort the strainer, a cleaning with some white spirit and a soft paintbrush. But be careful, not to brush to hard to avoid tearing the strainer mesh, which is very thin!!! Eventually, a simple soaking in a small glass of white wine ... sorry , I mean... White Spirit should help removing most of the dirt and finishing finely with the paintbrush. Let the strainer dry, while you remove both O-rings around the pump, using a wooden toothpick as a lever. It will avoid hurting the grooves. You can now, clean the area between both grooves with white spirit. Once everything is clean, you can mount the strainer back onto the pump. Be careful ⚠️ ! I didn't find any information about their tightening torque. Thus be sure to tighten enough to firmly place the strainer on the pump body (to make a good seal against dirt), but not too hard to avoid risks of cracking the plastic. Shall I remind you the price of the pump, just in case ?!? Now, pour some drops of fresh oil in a small container. By the way, FYI : Haldex used Oil 2.5 years old & 28000 mi on the clock / Haldex fresh oil Put few oil drops on both O-rings to lubricate them and install them onto the pump. Keep using the wooden toothpick if needed. The pump is now ready to be mounted back onto the car : Now, you can clean the housing with rags before putting the pump back in place: Don't forget the bearing surface, where the threads of the retaining screws are located. Here you can see some dirt left, that I removed right after taking the picture... You can now put the pump back into the housing. Be careful, not to pinch both O-rings . Once there's only 5-6mm (1/5 -1/4") between bearing surfaces of the pump and the housing, it gets a bit harder to push in by hand. This is probably caused by O-rings, which may act as a slight "bead" to efficiently seal. You now realize how clever it is, to lubricate both O-rings to prevent them from rolling inside out and to make this operation even more difficult. When the pump stops into the housing, you can put 2 retaining screws back in place (#3 - tightening torque = 9,5 mm) Put the black palstic pump wire protection in the correction position and clip it into both holes. Be careful, you still work 'blind' (unless you have a small mirror) . Reconnect the pump connector on the Haldex Control Unit and rotate the Haldex in its normal position. Watch out to rotate the Control Unit in the correct direction not to twist unnecessarily the pump wire. Put both retaining screws to fix the control unit (#3 - tightening torque = 9,5 Nm). For the lower screw, the propeller shaft flector is slightly in the way and leads you to put the bit with a small angle. But you can still manage to have enough grip with the bit to tighten. You can now install the new bleeder screw (#13 - tightening torque = 38 Nm). Step #4 : Oil filling According to the workshop manual, the filling shall be performed with an oil temperature between 20°C and 40°C (68°F / 104°F). If the ambient temperature is to low, put the oil can in a bucket filled with hot water for a while to bring the oil at the right temperature. You can now inject fresh oil in the filling hole (see blue square, on the 5th picture) with the syringe. You have to fill with oil, until it overflows. This should be approximately 650ml (~22 fl oz). Put the OLD filler screw back in place temporarily and tight it slightly. Yes, you've been told to keep it upon removal at step #1! Do you remember? ! Etape 5 : Oil level adjustment and ending Start the engine and let it run for ~1mn, to let the hydraulic pump fill with oil correctly. Shut the engine down, then remove the old filler screw again (#14 / still the blue square on the 5th picture ). Top up with oil until it overflows again, and you can put the new filler screw to finalize the operation (#14 - tightening torque 15 Nm). That's it! Fresh oil! Clean pump strainer! Happy Skoda owner! ... You can put the car back onto the floor now ! Now it's up to you!1 pointI hadnt realised the 4x4 was only on the 280, thanks for that heads up as i'd not picked that up Knowing the differences in the TFSI engines, thats the info i was hoping for! Thanks all for your comments and guidance, i'm definitely only looking for a 280/272 now!!1 point1 pointYes, we did more batteries after lockdown than during the previous winter. All through lack of use. Thanks, AG Falco1 point1 pointWhy was the 3rd service carried out so early, it surely wouldn’t be due til Jan 21. Has it missed its second service, as they normally want to carry out the air con service every 2 years. Haldex and brake fluid change is normal for 3rd service.
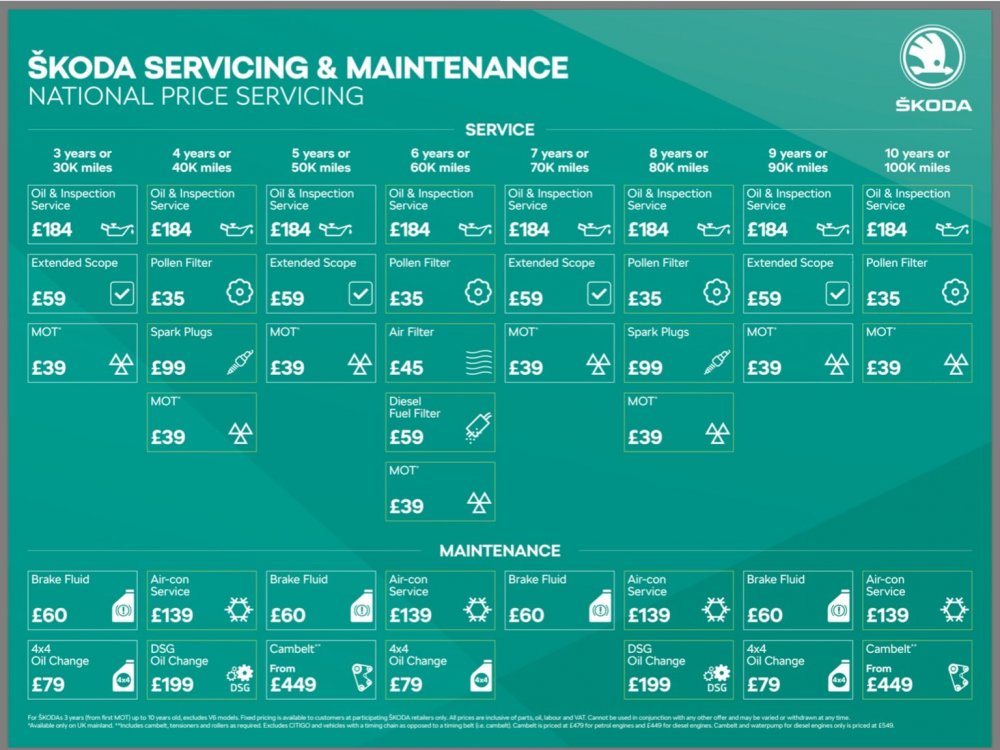 1 point1 point@maxychat You should maybe do some driving in the Scottish winters in various Skoda and then give an informed opinion.1 point1 pointFactory (or dealer) upgrades are quite expensive I think. Best bet is to take their offer of original system and then follow the advice on here for upgrade route to mib2 if you want more. If they are willing to upgrade you to mib2 for <£500 I would take it. As that year did not come with mib2 I doubt they will. Mib1 systems: -Bolero (your system): small screen, no nav -Amundsen: mid size screen, with nav -Columbus: big screen, nav, + other bits like hard drive for music I think all have dab and Bluetooth.1 point1 point15" wheels have NEVER been approved by Skoda for fitment to a Yeti and have NEVER been fitted to them in any market.1 point1 point1 pointUpdate folks, Fabia traded in for a new Karoq SE Drive 1.0 TSI manual. Happy again. Great car.1 point1 pointNot entirely sure to be honest - check in individual settings and see if there is an option for suspension. From what I've heard the standard suspension is fine on the SportLine, even if not DCC. The main thing is you've got the correct engine / powertrain1 point1 pointAgreed. I think I just need to take it somewhere who will actually carry out the requested work, regardless of whether they think it should be done.1 pointI had battery disconnected for half an hour perhaps. Air filter is basically looking like brand new.1 point1 pointSkoda Dealers can call it up, and Skoda UK CS's can tell you. & Motorpoint should know what the Service Record is if advertising the car with the Service Record. Maybe they have Print Outs / Invoices. If they have not the licensed equipment to check the VW / Skoda system this is an issue when they Service Cars which can not be put on the System. Someone will be able here to tell you how the System can be checked online by owners.1 point272ps 4x4 has 1. another turbine 2. bigger brake discs 3. visible exhaust pipes 4. lot more pleasure of driving in winter1 point1 pointTo give you an idea of time. We ordered a car which was coming into stock. It was built on the 30 August and was at the dealers on the 24 September.1 pointThe 280 has a bigger turbo, and produces more power at high revs. The outputs are very similar at normal revs (below about 3000) The 280 is heavier with the 4wd system. Like all high power variants, get skinny tyres, which might tighten steering feel for driver, but is going to do nothing for the limousine comfort of all those passengers which is your reason for buying it.1 pointAs @KeteCantek said there are differences between 220 and 280 versions. But the real gamechanger is 4x4, Superb is too long and heavy for 220+ hp on FWD, so there is no question: get a 280!1 pointok, let's put some closure to this topic, also for future references as there have been a number of various people reach out for help on doing this retrofit. below is summary of what needs to be done, from start to finish:- swap out version A headlights and put in version B headlights install 4H0 941 329 power modules into the version B headlights transfer the 4G0 907 397 Q power modules from version A headlights to version B headlights transfer 8K0 941 597 B ballasts from version A headlights to version B headlights transfer D3S bulb from version A headlights to version B headlights, utilizing the retaining ring 8P0 941 621. do the appropriate adaptations in 09 Central Electrics Go to Adaptations Search for: Fernlicht_assistent-Menuesteuerung Fernlichtassistent Change to "Present" Fernlicht_assistent-Menuesteuerung Fernlichtassistent Werkseinstellung Change to "Present" Fernlicht_assistent-Erweiterte_Fernlichtsteuerung Change to "AFS: FLA: Fernlicht (GLW:MDF)" do the appropriate coding in A5 Frt. Sens. Drv. Assist Go to Long Coding Byte 21, Bit 5-7 Change to "40" (AFS: FLA: Fernlicht (GLW:MDF)" Coding = 020408020000040100022355C050A90098000E100040 upload SLA Parameter file for 4B Multi-funct module Data to upload - "AFS_WITH_MDF" Once coding in Modules 09, A5 and 4B are completed:- Clear errors Run Basic Settings for headlights Acknowledge Basic Settings Clear errors Soft reset in MIB2 (Car > Settings > Factory Reset > Lights > Reset) Security codes 4B - 20103 09 - 31347 As to the marketing talk for what Smart Light Assist (SLA) is all about........Bi-xenon adaptive lighting system with dynamic high beam control (MDF). Optical dual headlight Module with Dynamic high beam Function (MDF). Unlike the AFS headlamp, the MDF dual optical headlamp module is equipped with an intelligent rotary shutter drive, which can be coordinated with the front camera and control electronics for dynamic high beam control. With SLA function, bi-xenon headlight driving light modules are constantly active. Based on the traffic information in front of the vehicle obtained by means of a camera mounted behind the windscreen, the light beams of the headlights are shielded in areas where they can cause other drivers to be blinded. In this case, the driver's field of vision is much better lit, which allows the driver to better navigate in space, providing a higher level of safety. SLA function is realized by means of installation of rotary blinds between xenon gas-discharge lamp and diffuser. In combination with the intelligent rotation drive of the entire module (provided by the adaptive lighting system rotation function when driving along a curved path) and the individual control of the left and right headlights, this additional shielding allows to close the light only in those areas that are potential sources of blinding.1 point220 isn't 4x4. Aside from that some more experienced users will be able to inform. I don't think there is anything in the spec that is different. Main thing will be engine in some way. Maybe fueling.1 pointMaybe so but they are the manufacturer specified sizes and as such can be fitted without any problems with insurance etc. Trading in a car with non specified wheel sizes can be problematic as well. Just saying it is simpler and safer to stick with specc'd sizes.1 pointain't got my money back ain't got any insurance ain't got the right plates on the car ain't got a V5 ain't getting any calls from the stealer Have just emailed the CEO of the group. Doubt it'll do much. Step 1 - get militarised unimog Step 2 - accidentally do bad 47 point turn around Toyota dealer lot1 pointUnimog will hold it's value you do realise we won’t give up on you getting a Unimog until you have a car on your drive .1 point1 point'Simply Clever' would be to sell the Citigo and buy an Up! GTI.1 point1 pointI've just compared the price and spec of the hatch to a pricing and spec brochure dated 13th November 2018, which was the month I picked up my early MY19 245 DSG. OTR £28,045.00 Extreme 19's £655.00 Heated Front Seats £255.00 Columbus £1,075.00 Front Parking Sensors £400.00 Adaptive Cruise £580.00 Kessy £410.00 Total £31,420.00 So in reality it's actually not a massive increase.1 point1 pointFear not I’ve sat back had a think about it, watched YouTube and I hadn’t quite aligned the disc properly- admin please delete this post 🤫1 pointMisfires, so 90% certain that it's one or more plug lead failure. Very common even at low mileage on pre 2012 engines particularly no. 3 lead which rests on or very near the turbo heat shield without the protection of plastic trunking found on later engines. They should measure about 9k ohms each end to end with a multimeter. Essential to replace these asap as a faulty lead frequently promotes coil pack failure due to over voltages in the pack. All your performance issues may disappear once the leads are changed as its just down to a very weak spark on two cylinders (the "waste spark ignition" design means plugs fire in pairs on this engine) Use a proper tool to remove the spark plug metal boots, dont pull by the leads as you will just break the fragile cores.1 point1 pointA few more bits I have done the past few months. Front engine cover and white stickers and blacked out reflector strip off superskoda with their black and white reflective vrs badges
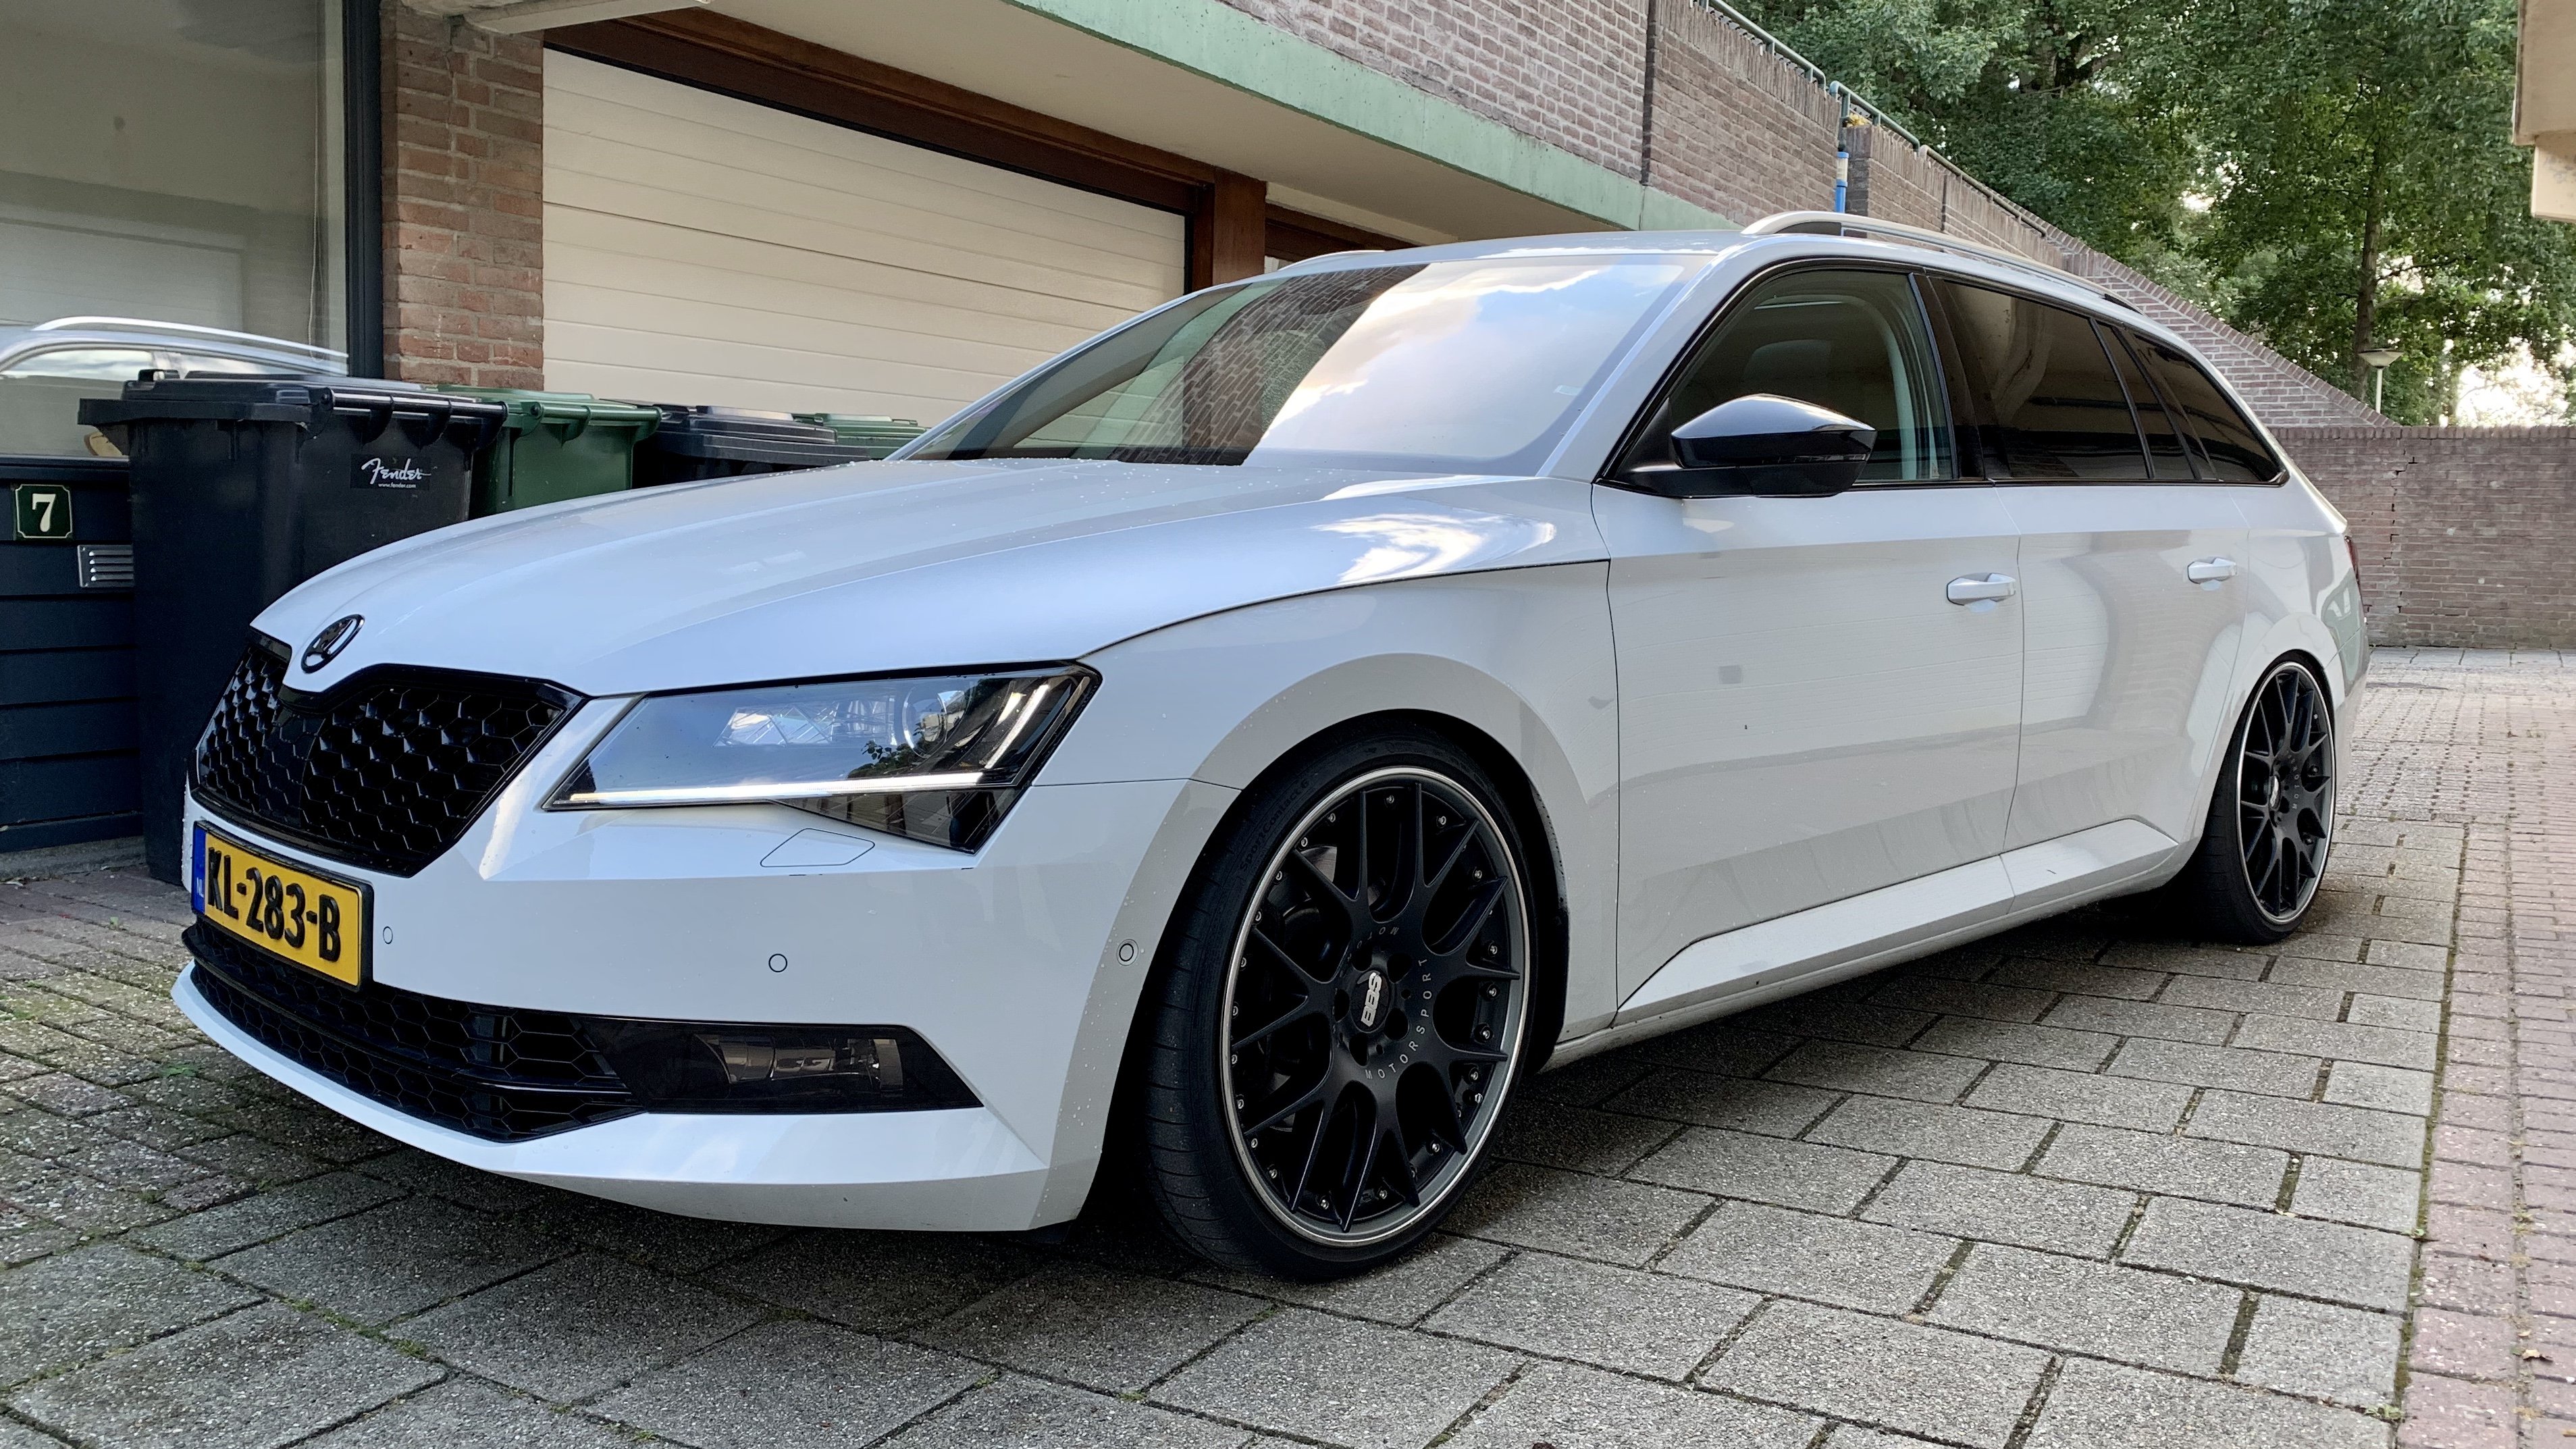
 1 point1 pointForgot to add I also have the grill which will be installed to cover the heater hole under the bonnet which leaves the motor exposed to leaves etc.1 point1 pointI've a few brochures that may be of use, one from Nov '17, one from Jan '18 and a final one from July '18. I've also got some from '19 if needed (I was toying with buying a Superb for entirely too long...) 11-17 superb_pricing_specs.pdf 1-18 superb_pricing_specs.pdf 7-18 superb_pricing_specs.pdf1 pointHi Stu, I strongly recommend the 1.4 TSI, although this would mean a 2015-2016 model. From the comments I have seen (I've never driven a 1.5 TSI) I think the 1.4 is the better engine.1 point1 point1 pointContinues to be a work-in-progress-project, but pretty happy about the exterior of my 2016 ŠKODA Superb 280. Lowered on H&R suspension, BBS 20” CH-R2s, sportline look with black mirrors, window trim and front chrome parts replaced, sporty honeycomb grill, logos colored, etc...
 1 point

.thumb.jpg.1e39dd961fc71e1294cc47f4c31b72c3.jpg)


.thumb.jpg.d7eb88db3dcd2761d874e5649cc30b42.jpg)


Important Information
Welcome to BRISKODA. Please note the following important links Terms of Use. We have a comprehensive Privacy Policy. We have placed cookies on your device to help make this website better. You can adjust your cookie settings, otherwise we'll assume you're okay to continue.