


Leaderboard
-

Lee01
FREEDOM14Points36,174Posts -
.jpg.1006585dfe4e2977315b67c3d642e37b.jpg)
Guest_
FREEDOM14Points83,824Posts -
MickA
Resident Member10Points2,854Posts -
Stonekeeper
Resident Member9Points2,849Posts
.thumb.jpg.9dd3f612ba7f13d10be5c518d3c8d255.jpg)


Popular Content
Showing content with the highest reputation on 27/04/25 in Posts
-
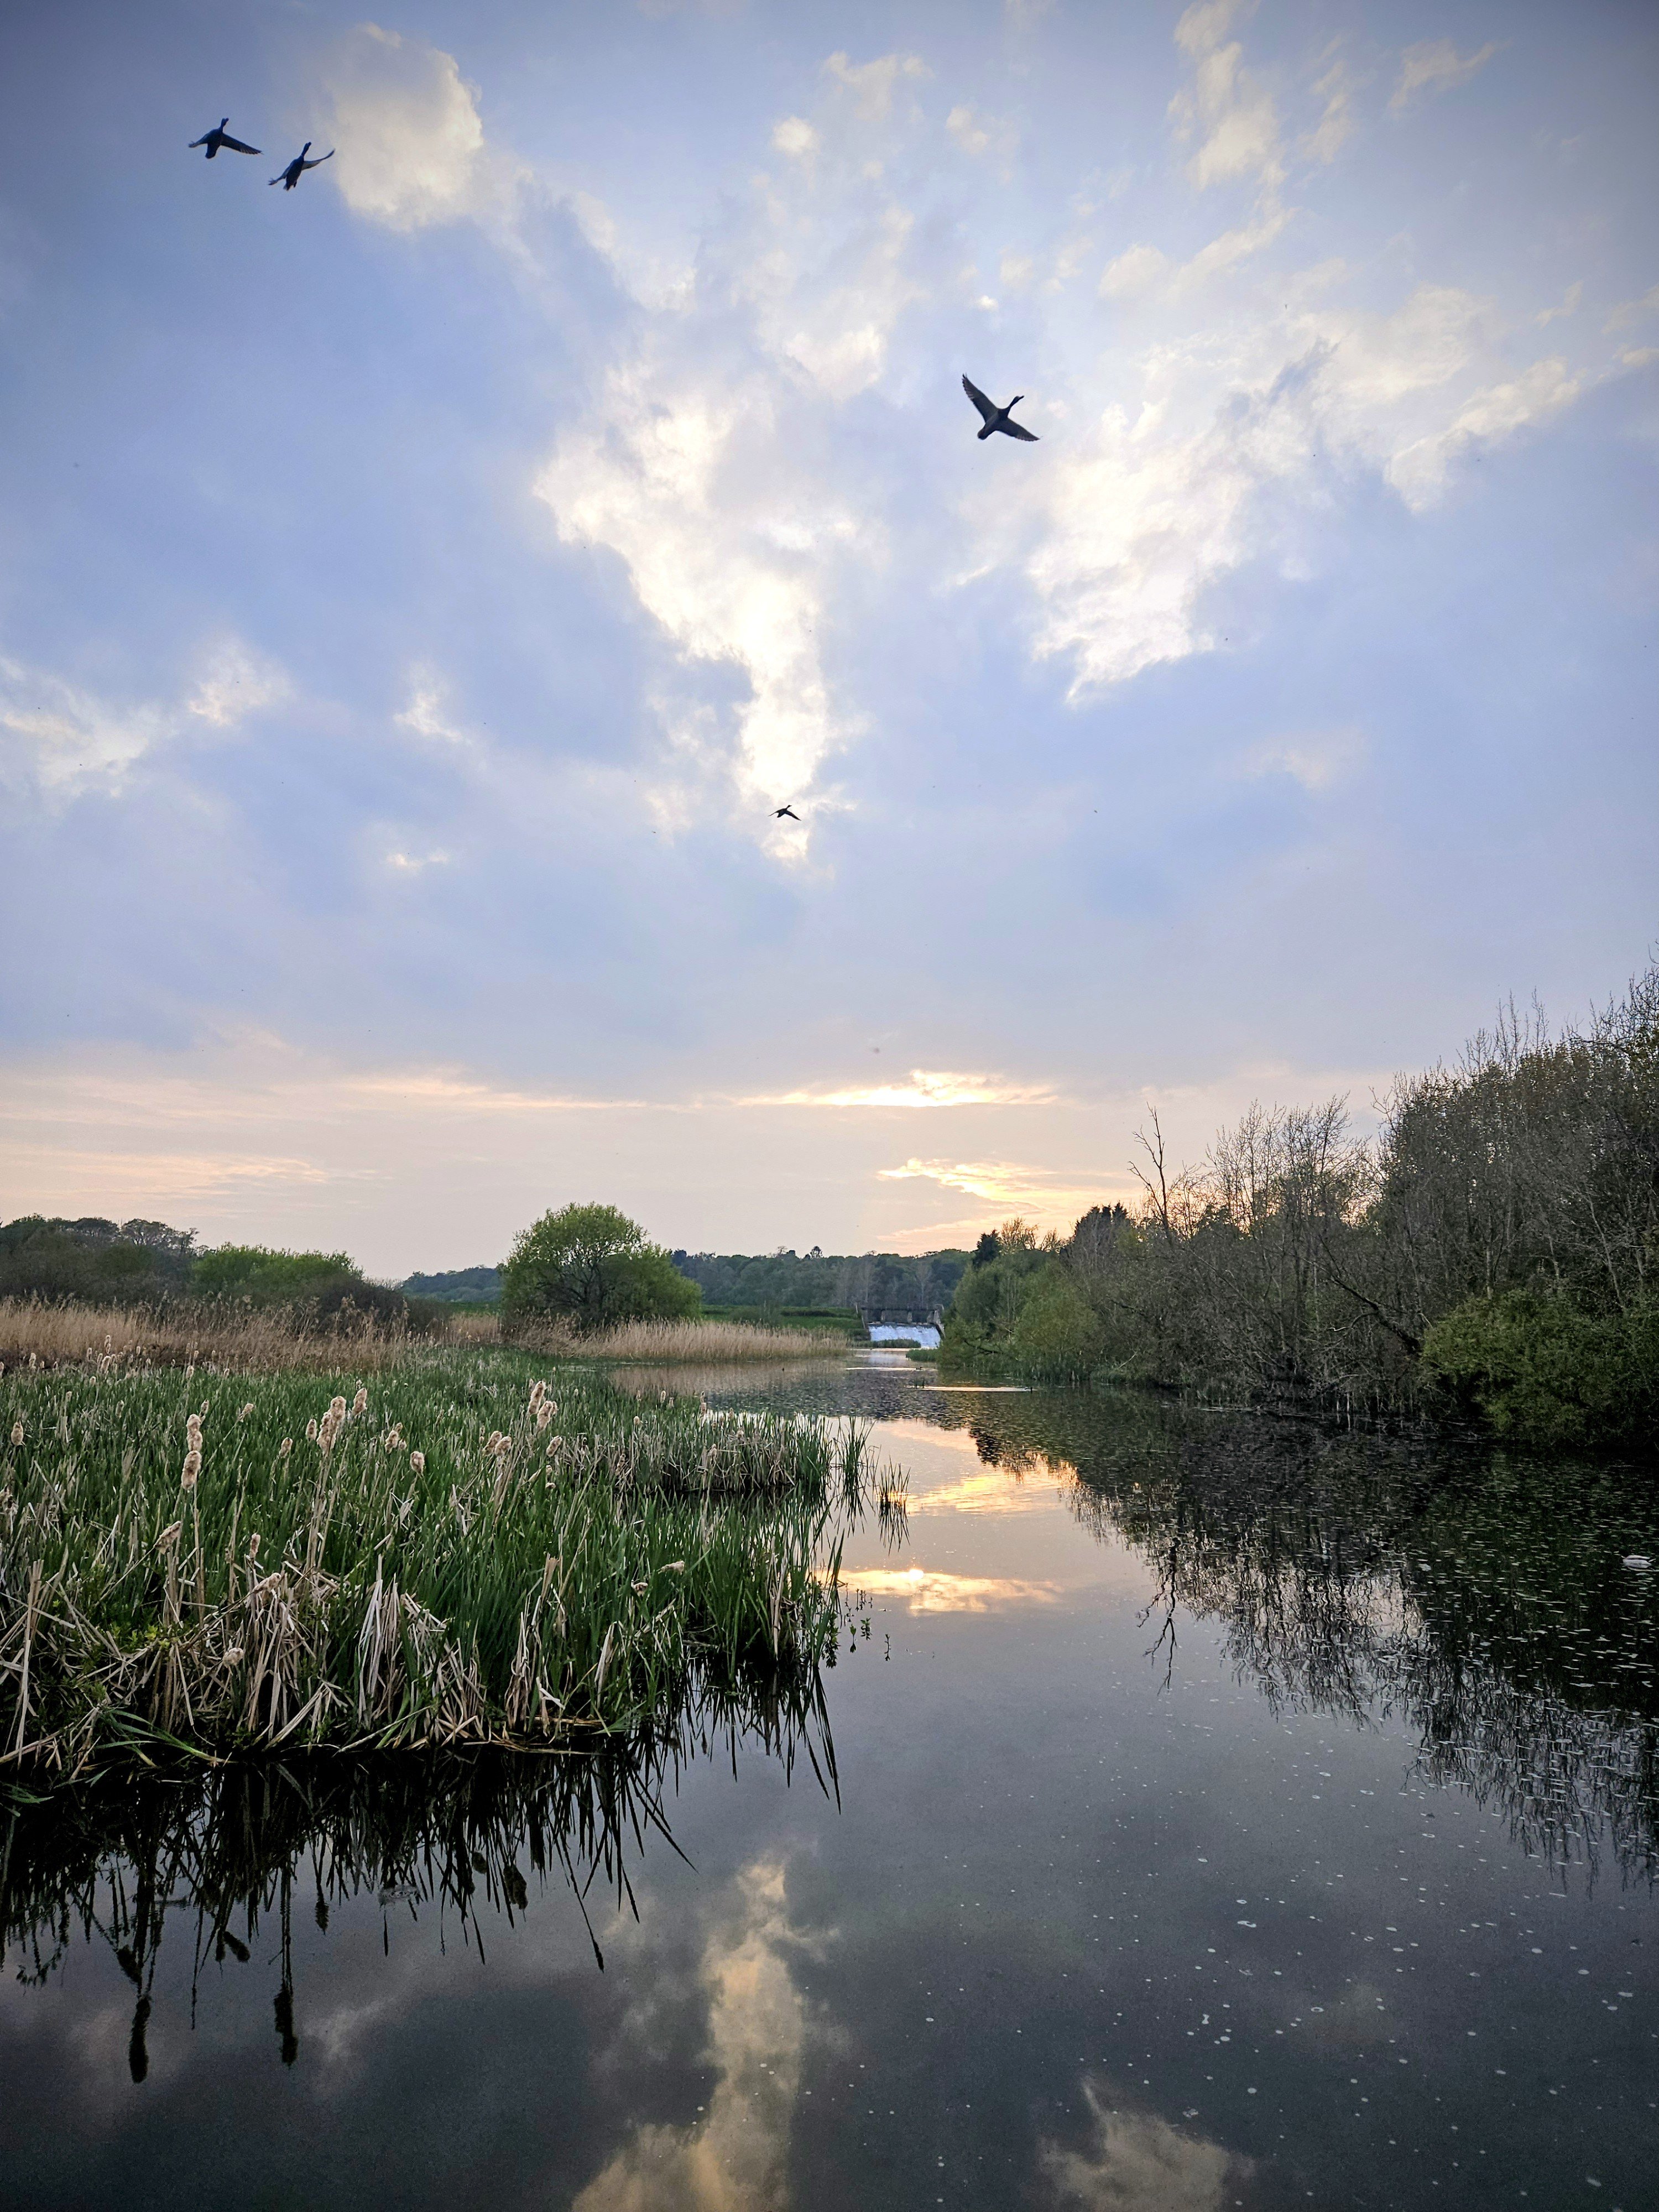
3 pointsHad to stop off on the way home to snap a shot of the Bluebells...........

 3 points
 -
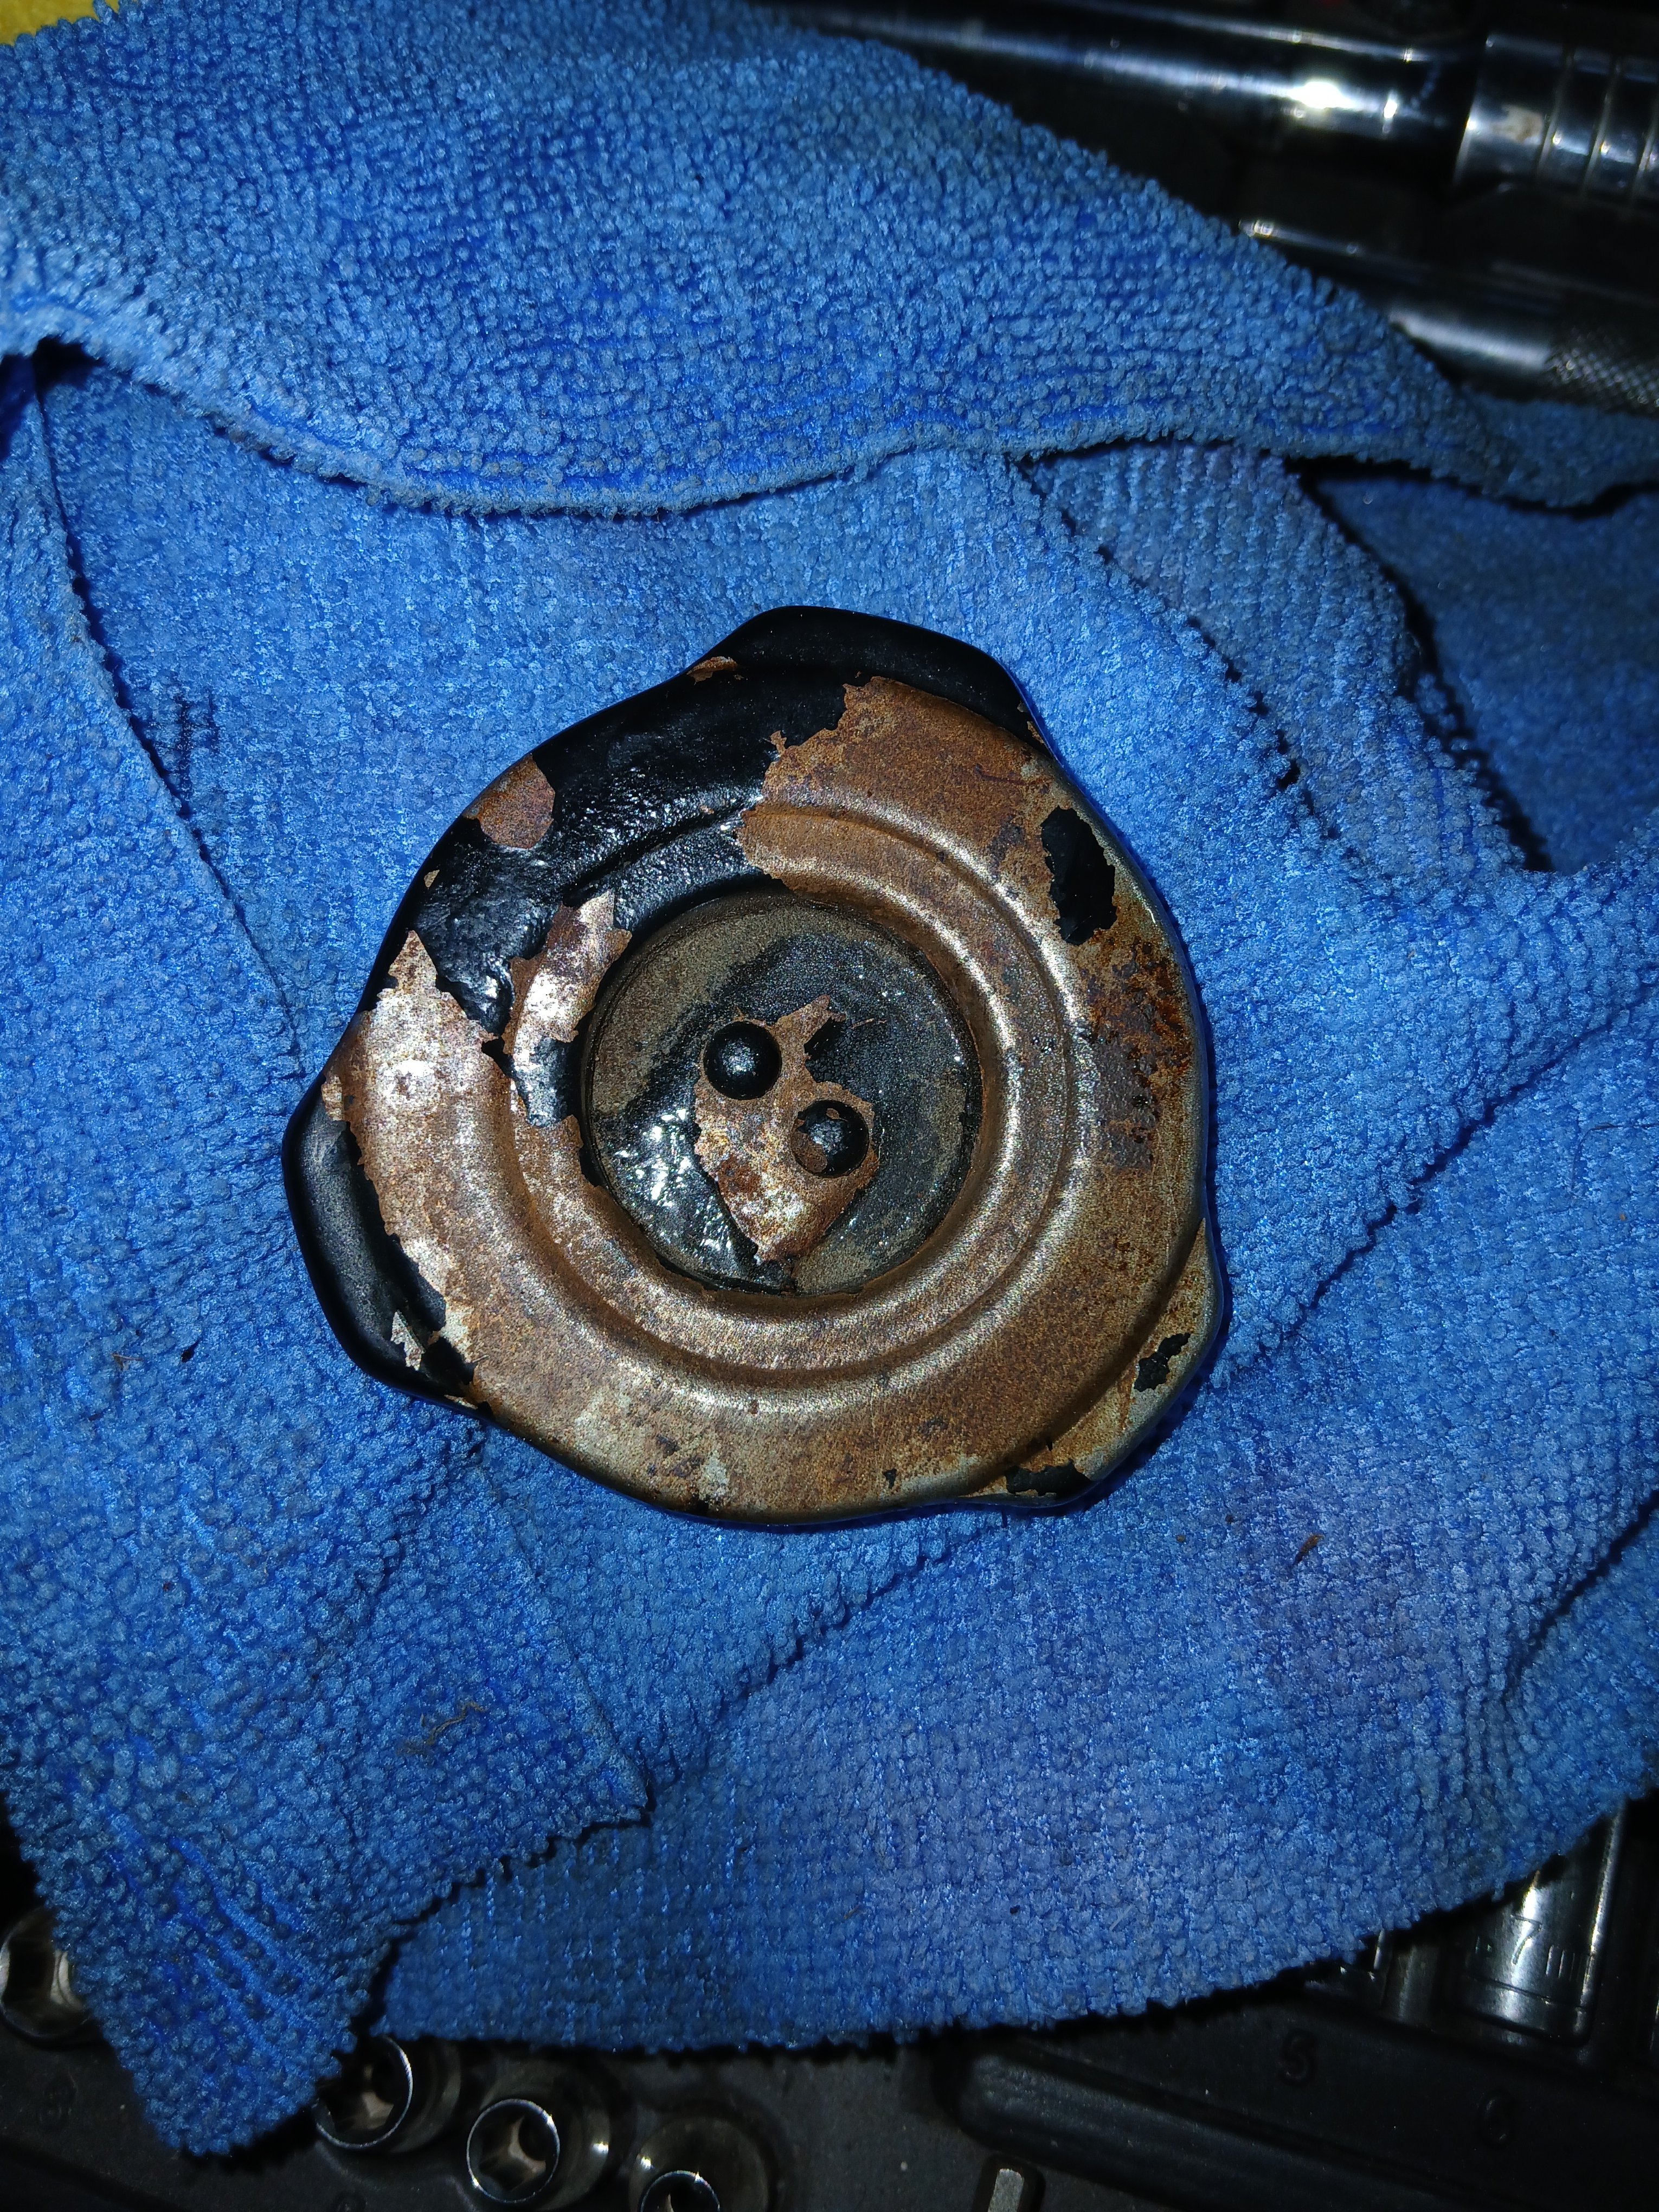
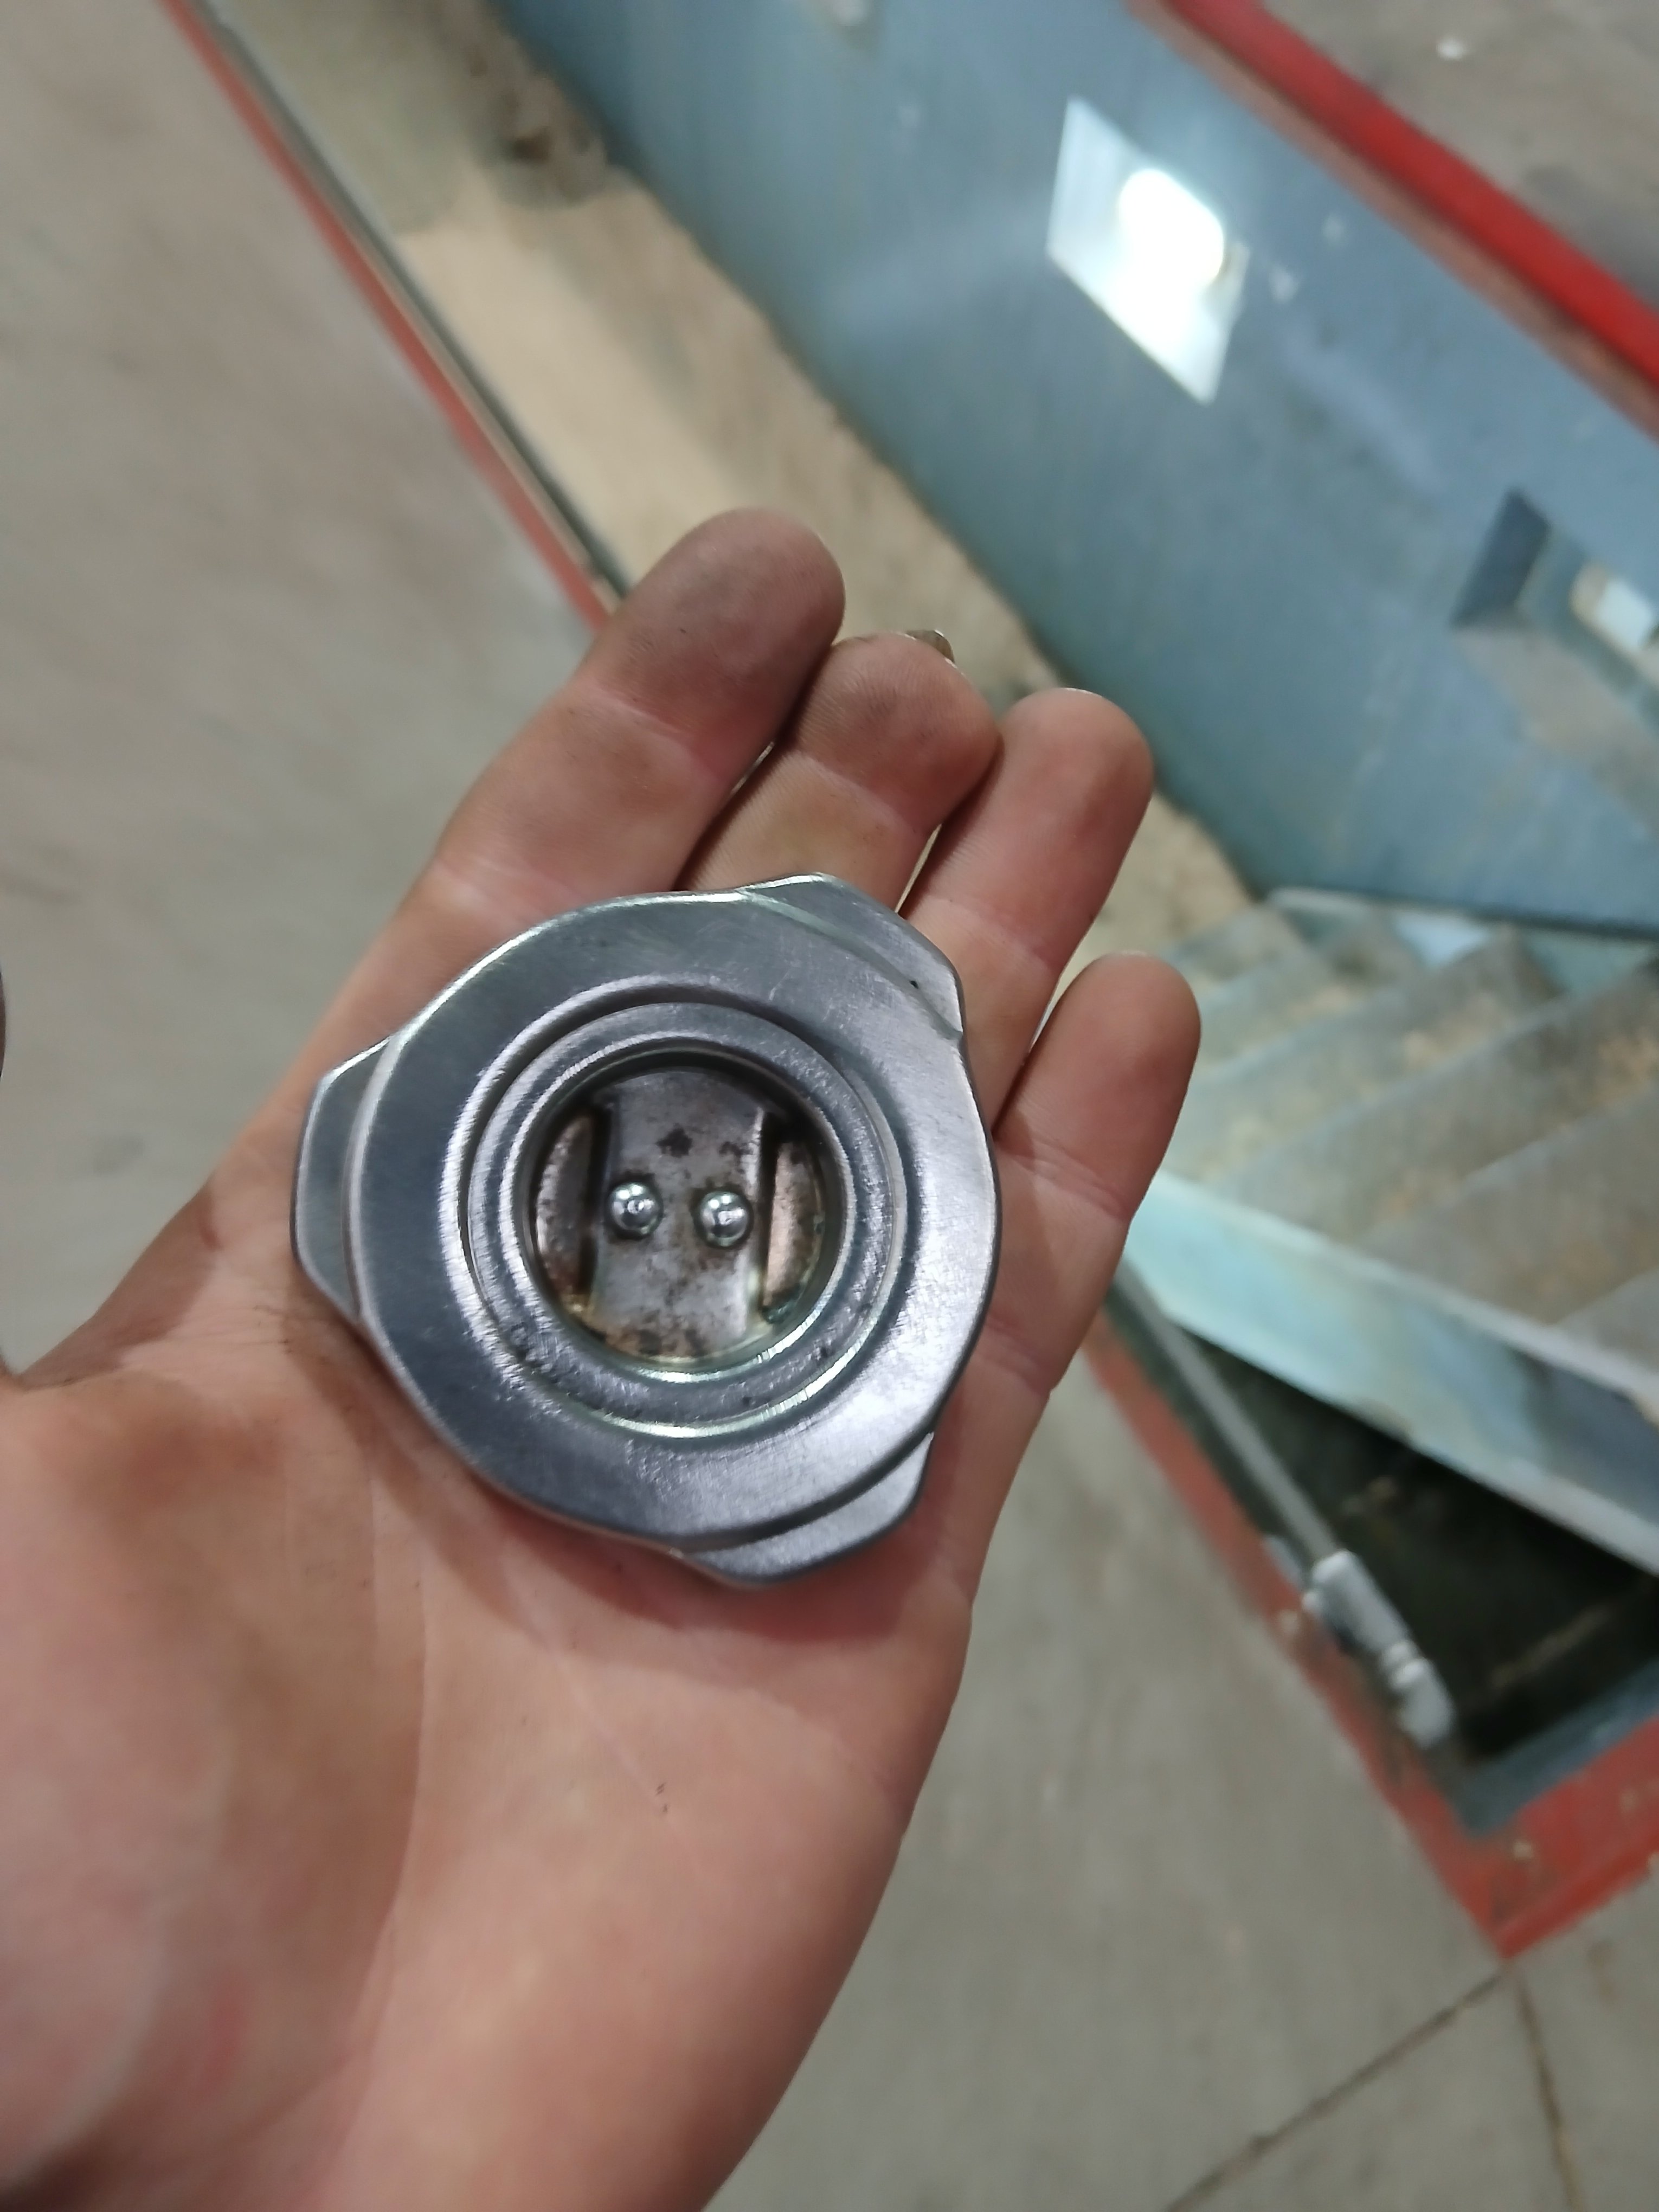
3 points3 points3 pointsI think it's why we now get more middle lane hoggers. Cruise control set to 70 car doing about 65 and the car behind is set at 70 but more accurate, or someone who sets to 77mph to allow for it being wrong. But the one in front thinks " I am doing the speed limit,so I don't have to pull over" I don't think changing the wheels and tyre spec helps either, it will mess with the ratios. You end up with the third and fourth lanes going slower than 1 and 2.3 points2 pointsA couple of comments, first, make sure that any nuts, bolts or threaded bar you buy that is going to be connected to your car, has the correct thread pitch, in this case that is not a problem, but in some other areas it will be. VW Group supplies hollow plastic wheel locating threaded dowels in the tool kit of some models, and a solid aluminium longer version - with a smooth but tapered end, both versions have a cross drilled hole - that will be to put a bar through it to make removing it easier, in the tool kits of the biggest/heaviest models. The first VW Group car that I bought new that had a plastic one in its tool kit was a 2000 VW Passat 4Motion, for some maybe strange reason, that car did not have a disc securing screw on the front hubs - or even a hole in the disc for a screw, so that plastic threaded dowel was more or less essential to keep "things lined up" when changing wheels. I'd rather not want to think about needing to change a front wheel at the side of the road and needing to fight with lining the disc with the holes in the hub and the wheel up before I could get a bolt in without having a threaded locating dowel in place. Edit:- what I missed saying was, the quality/strength of the steel is not very important, I've been using hollow plastic and aluminium wheel locating threaded dowels for almost 25 years - the same ones kept as "tools/aids" in my garage, and they are still fit for use.2 points2 points2 points2 pointsWaiting for paint to dry on the mx5 and another car I kept busy doing little things to this. Popped the rear fog lamp lense off and polished it. Pulled the original spare out and put a serviceable one from the parts car in. Did clean it first. Took the oil cap off to clean it up. Just wire wheeled it to death and gave it some metal Polish. Also Tinted the spotlamps. Before pic I had a fair bit of time, you might realise. Got some bare tools organised and set up for it. Gonna pull the dizzy and coil off the parts car to keep in it, maybe ott But I'm not wanting to be stuck on the side of the road soon.


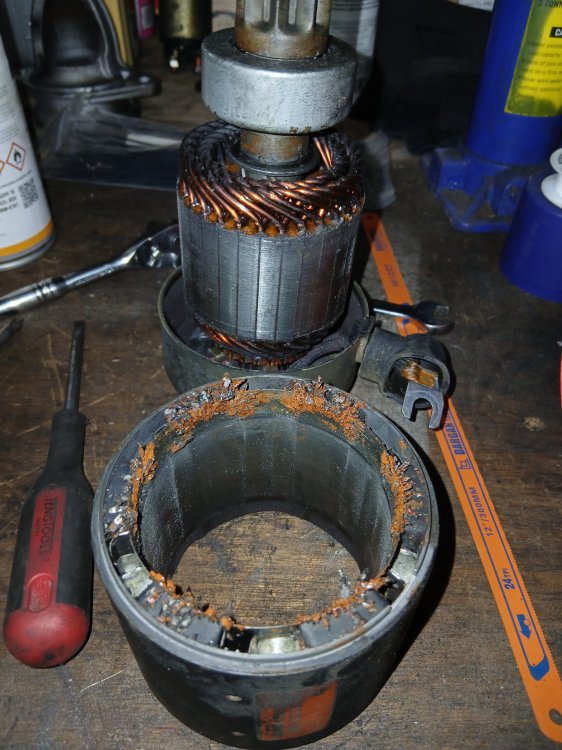
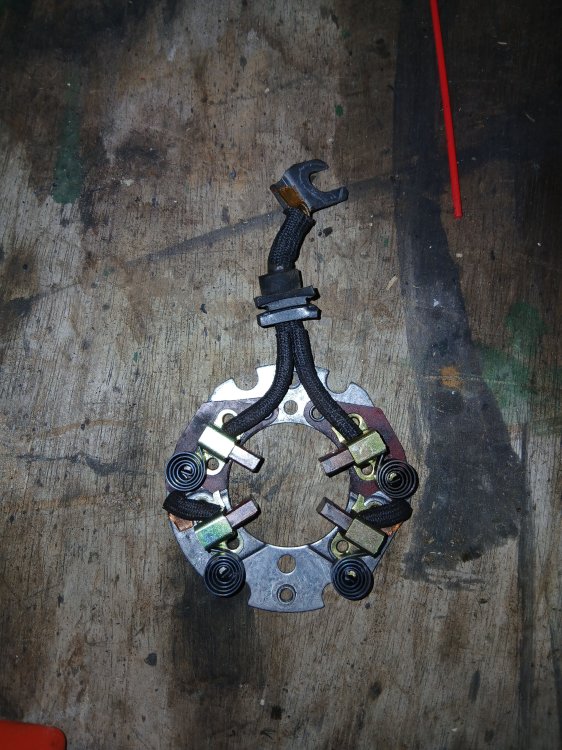
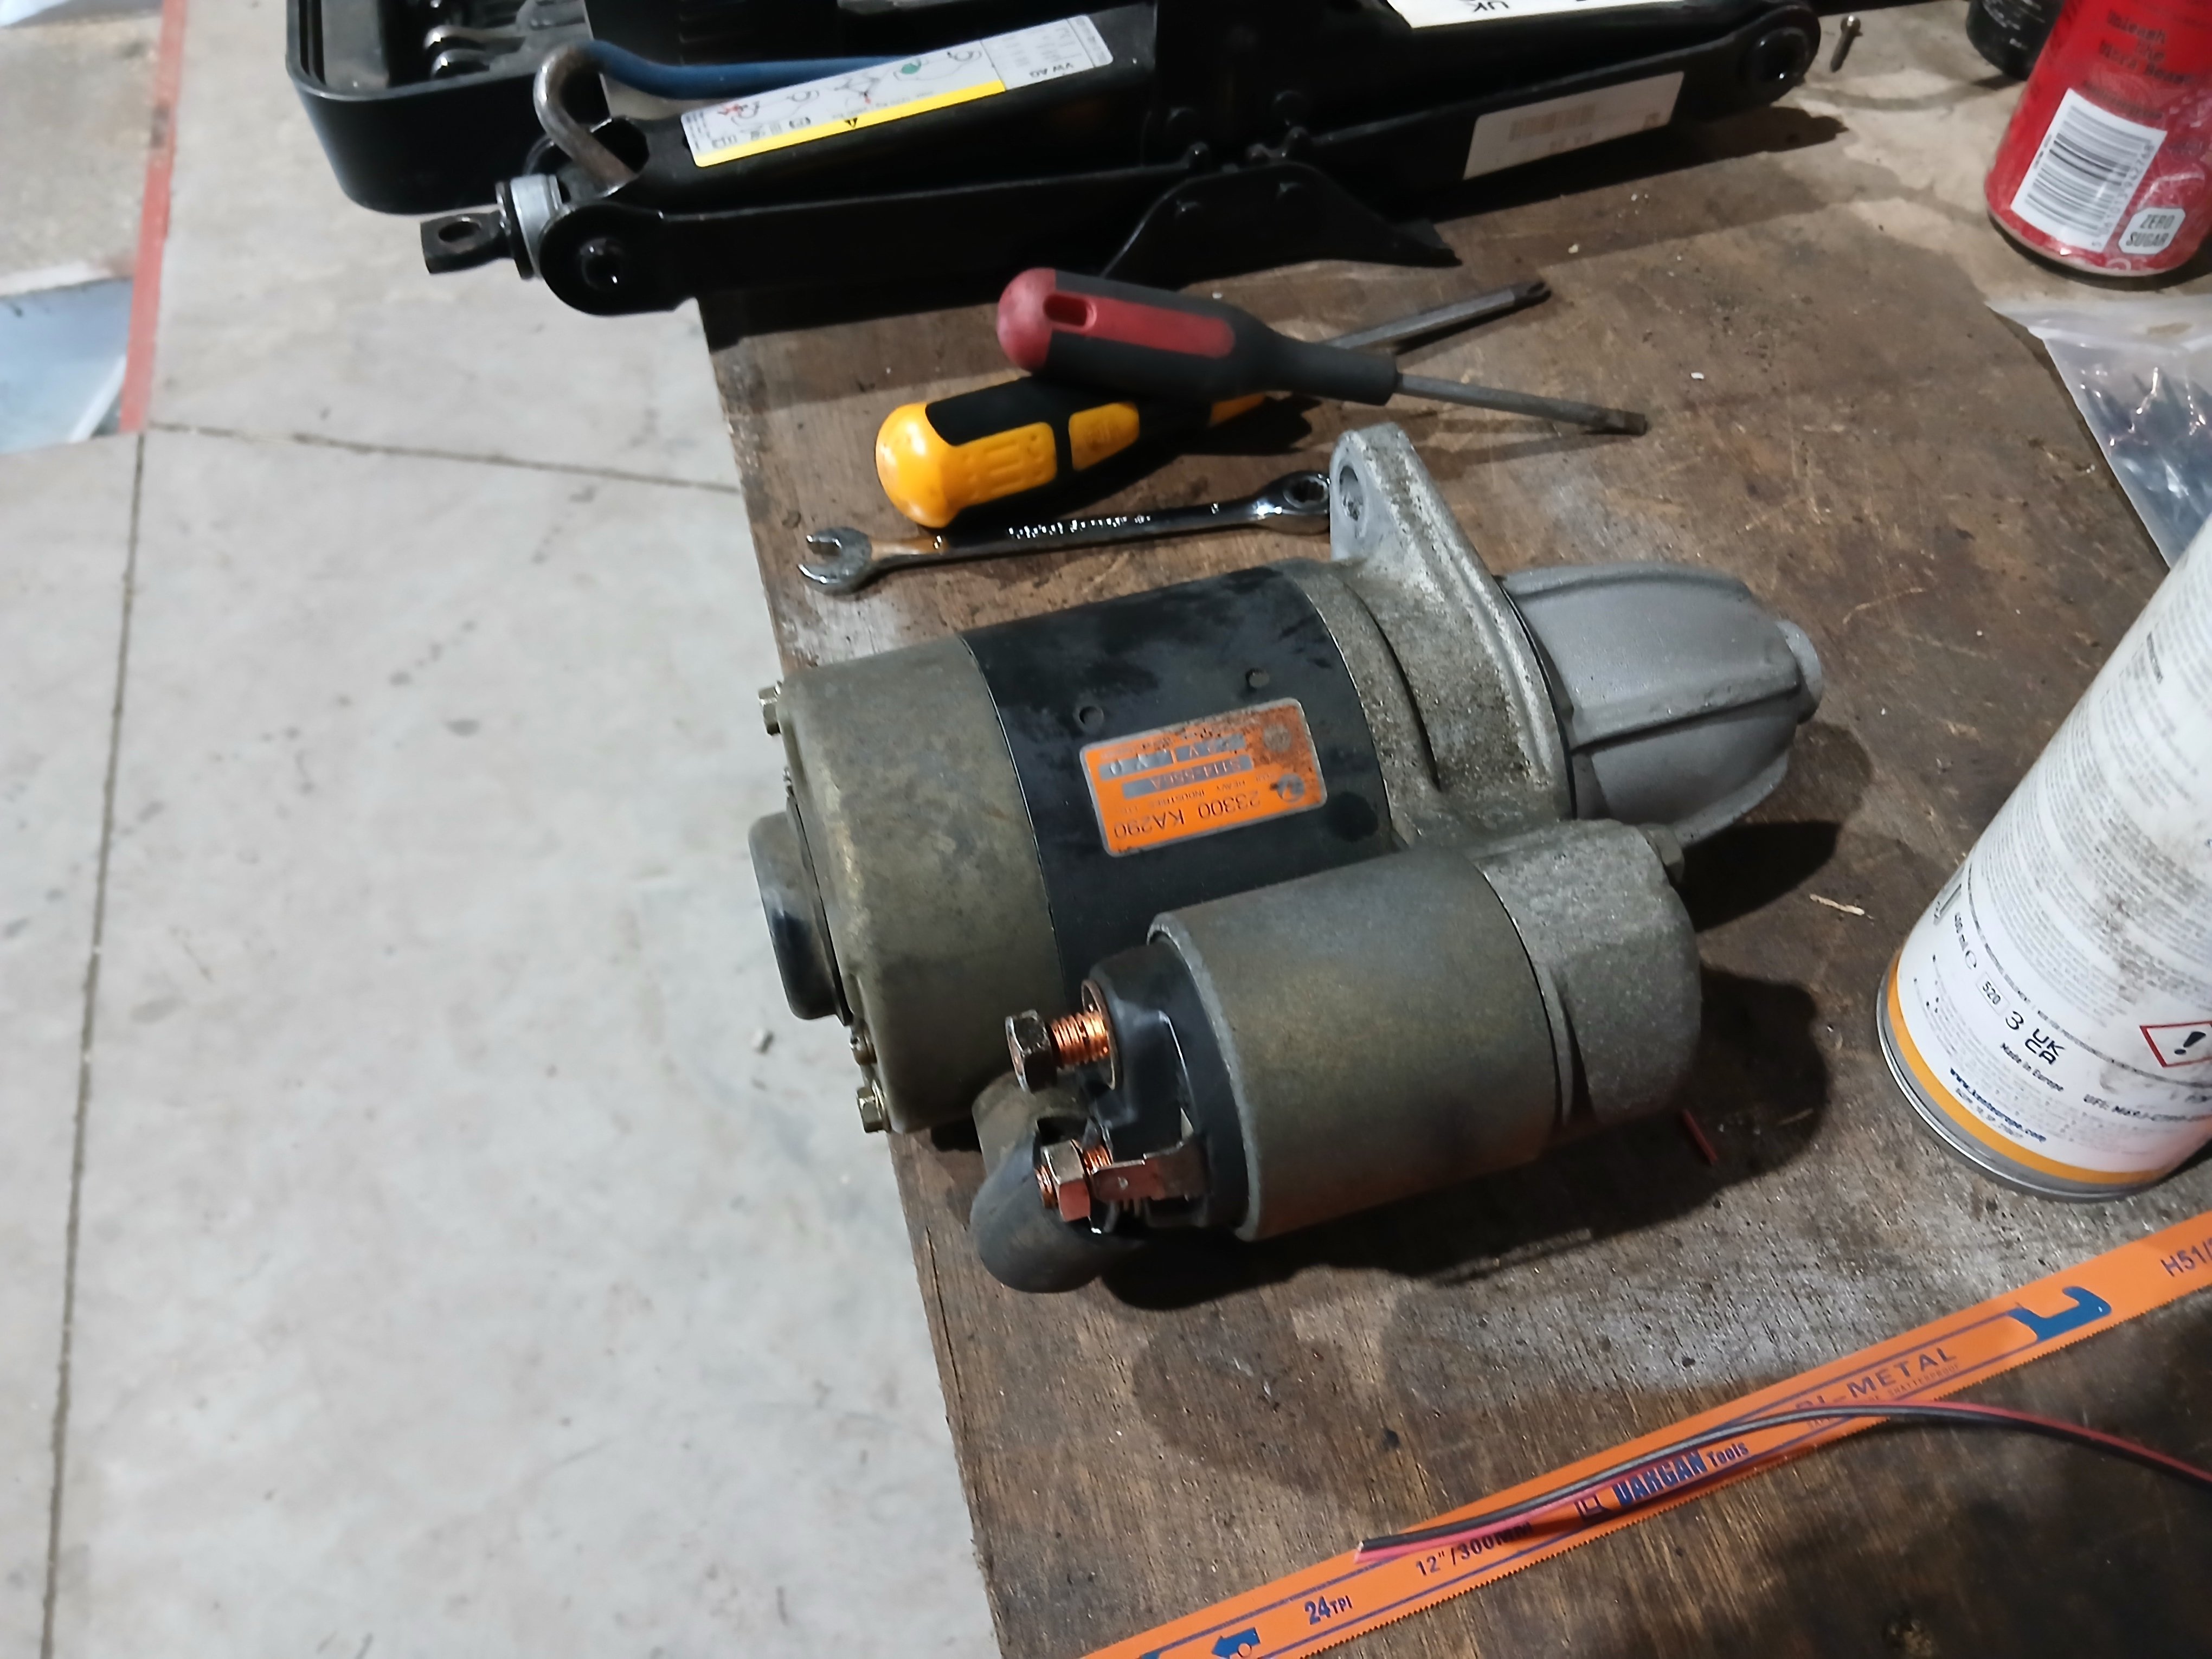
 2 points2 pointsTook the original starter apart to clean it up. Stripped it down, cleaned it up. Wasn't great, wasn't terrible. Put it in there and it seems to be doing a better job. Flywheel doesn't look wonderful on the teeth mind.
 2 points1 pointVAG doubled the service interval for the DQ381 7-speed Not exactly. The 7-speed DQ381 turned up about a year before the 2019 facelift, in line with the arrival of GPF. VAG have moved the goalposts on its servicing, I had one in a new 2019 Cupra and they were 40k at that point. By the time I bought my Superb in 2023, that had doubled and I'm not sure I would trust it.1 pointNot in this case, it's a Mk3 Sprite (Mk2 Midget, so a "Spridget") the lift-off fibreglass front isn't standard (those were fixed steel panels). It's a used car (unusual in the old-fart world of MG "classics") so has a few modifications, it's lost its 1100 and on a NOS later tweaked 1275 A-series for much later BL model but never fitted sounds, non-standard exhaust, it sounds like a 2-litre coming down the road. Banded 5" wheels (from the standard 3.5"). Needle front wheel bearings too to save common hassle of modern parts quality. It drivers very well.1 point@Warrior193 Thank you. That's all very helpful. I can confirm that there are indeed 2 screws on underside of airbox. A lot of faff to replace a single air filter ☹️1 point1 pointyes I understand. It is a little difficult, because it is fastened in 3 places. A little patience, start from the inner fastening, it comes out easily, the difficult part is the edge, that's where you need to be careful because the protrusion can break.1 pointQuite possible, I've seen at least one other reference to hard to start TDI being resolved by replacing a faulty temperature sensor.1 point1 pointStill enjoying and learning from reading your work. Should try a couple of these things for alignment ( right first time) when changing/ refitting wheels:
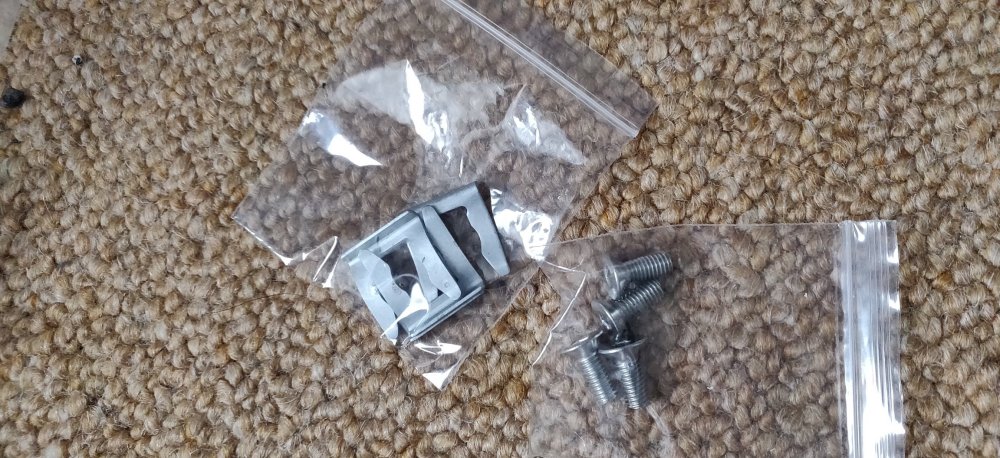
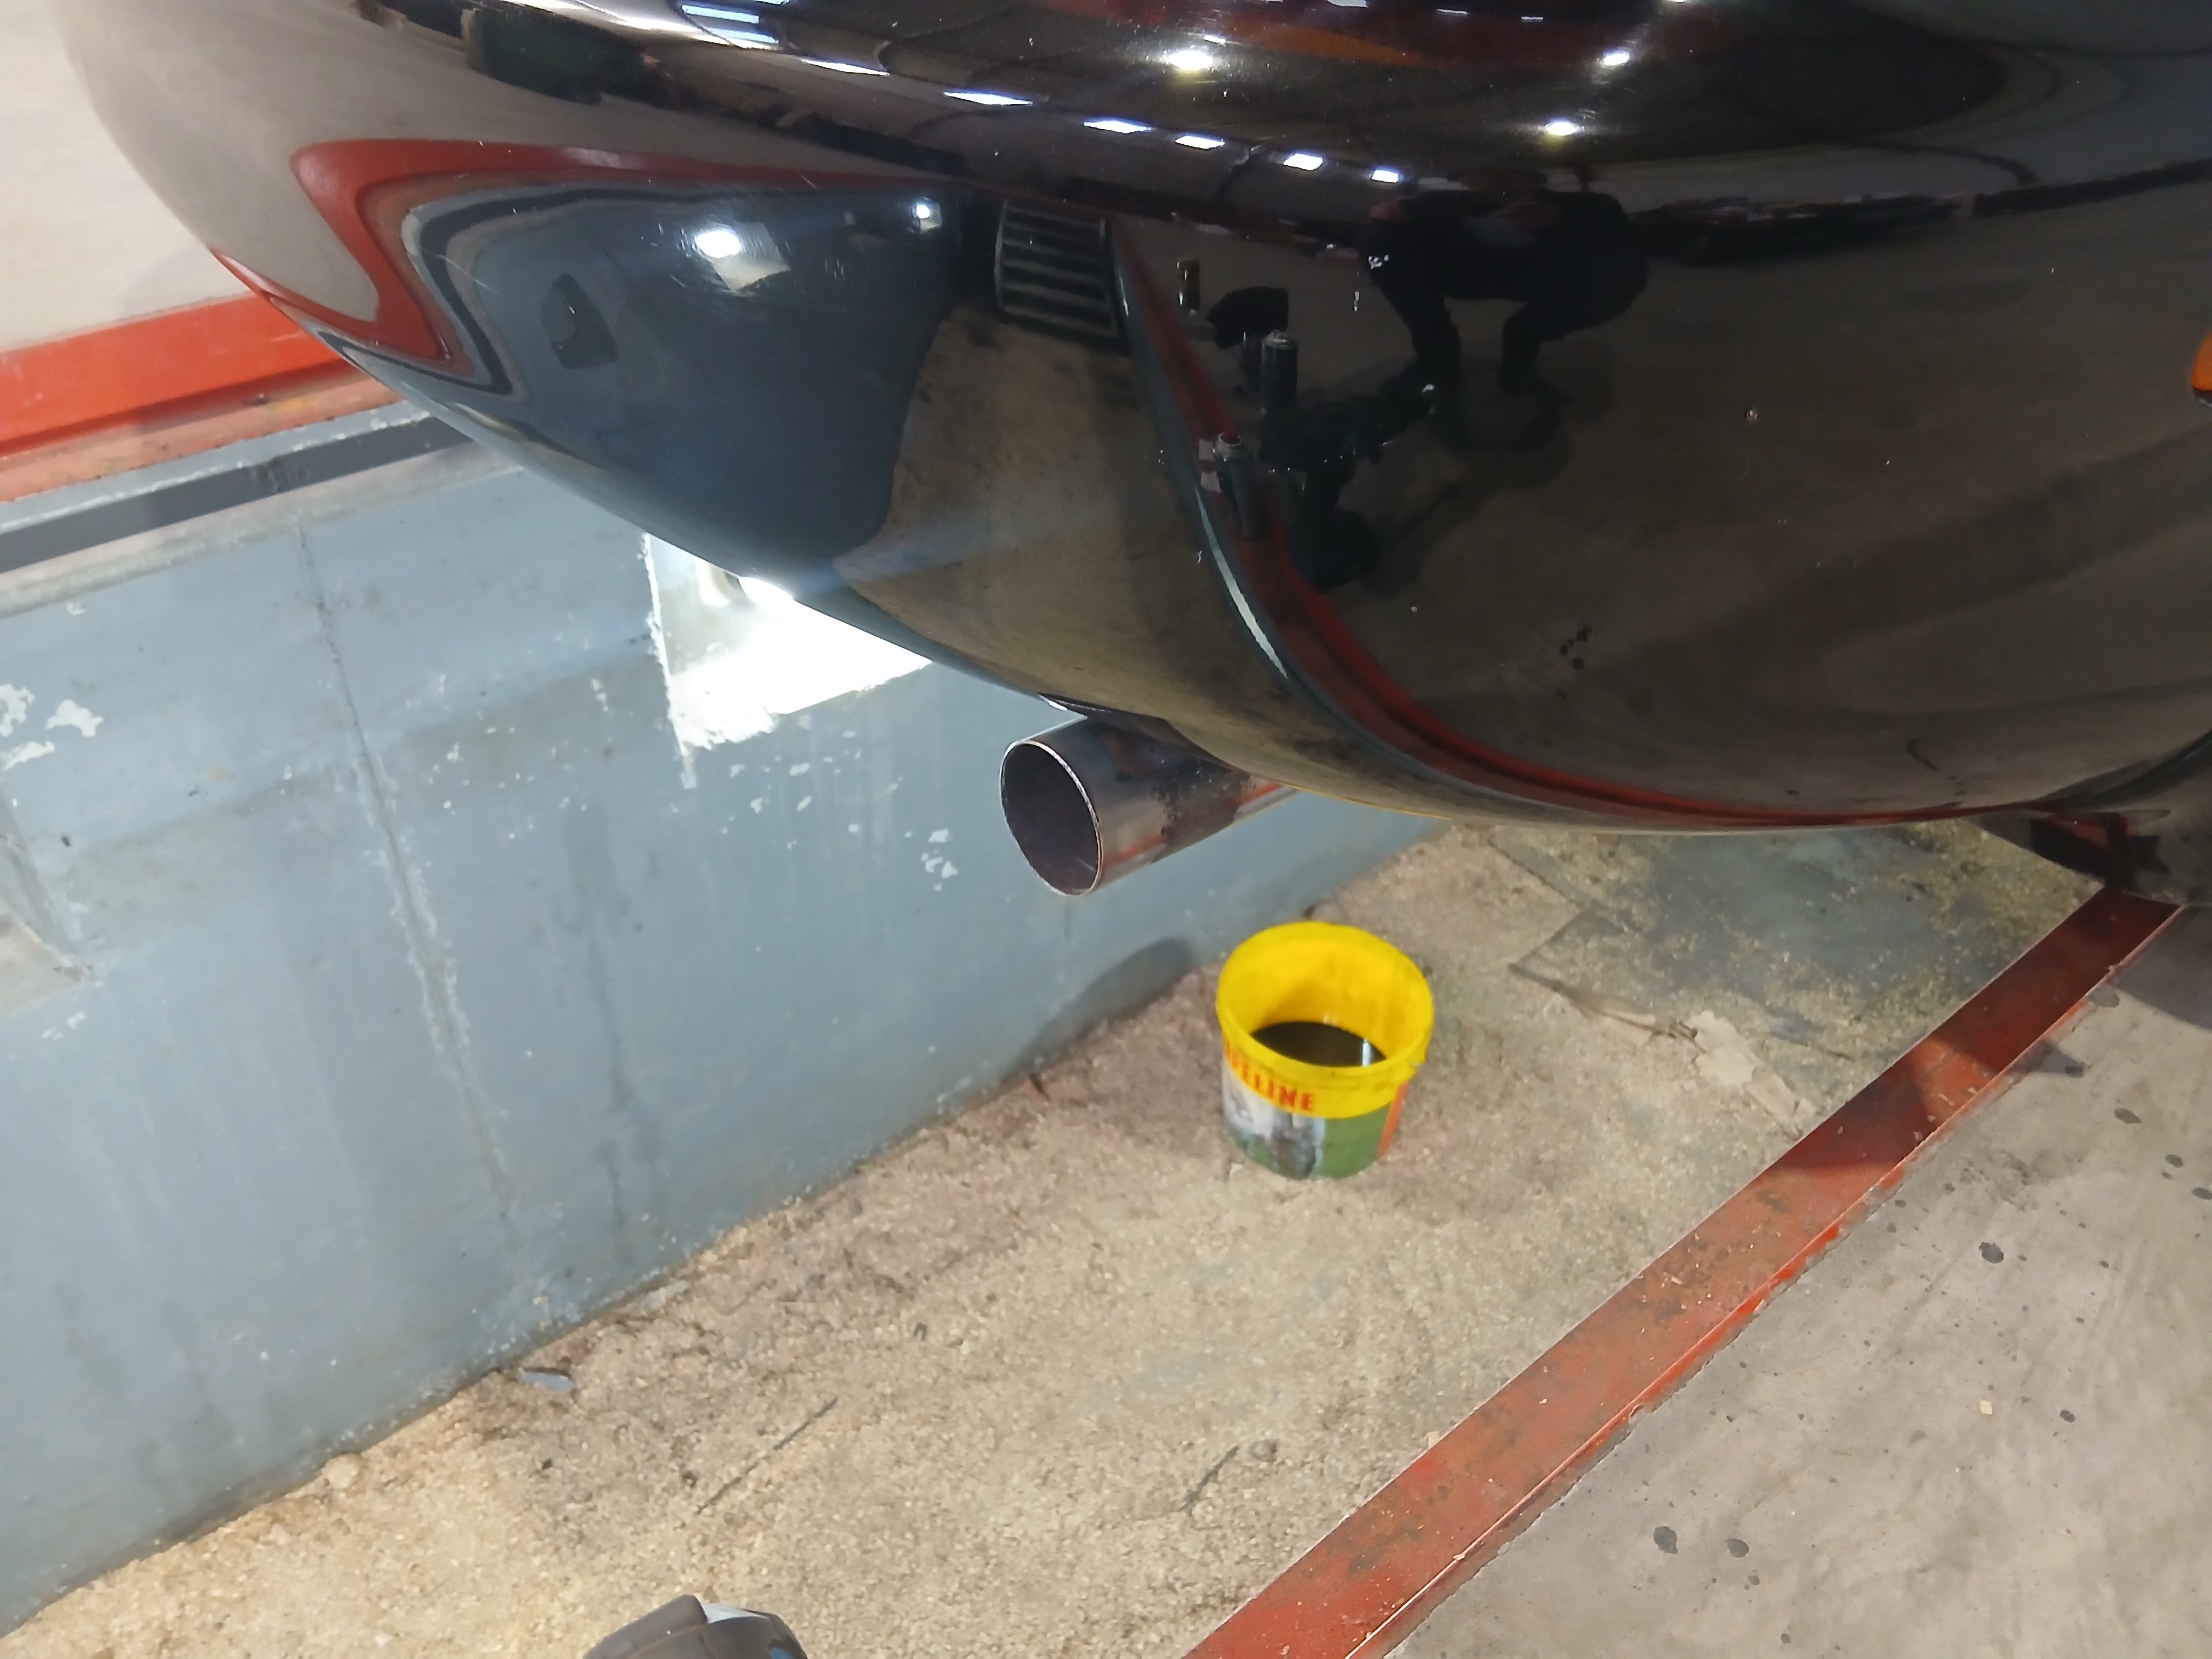
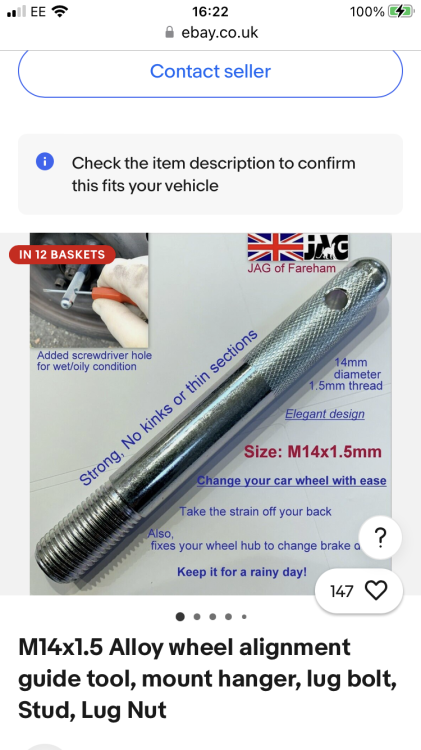 1 point1 point1 pointAnother option, possibly for future consideration, would be to get yourself one of the centre consoles out of a car (you possibly already have one!) and cut a hole for the lighter socket in that and extend the wiring. Could look pretty neat.1 point1 pointWeather's not been very kind, so I turned myself to the interior problem. I found the original case that the stereo cage goes in and copied it into freecad, made it a bit taller so hopefully the double din cage i have on order will fit snug. I very much like how the original design just has two screws on the bottom so despite the radio cage and stereo lock in you can steal the whole lot just by undoing two screws under the dash. nice work Skoda. I'm intending to put bolts down from inside so that even if you drop the nuts off the bottom you still can't get the bolts out without first removing the stereo. I think this is good enough for a first experiment, but I suspect I'm going to want to bring the unit further forwards in the end. The original cage is just shoved in there to show it's at least the right width :P Obviously I have to cut the dash and get rid of the fag lighter and ash tray. I can put a 12V outlet in the glove box or something for anything that needs charged.1 point1 pointI found the trick with the virtual pedal was to immediately step backwards as soon as you’d waved your foot underneath, I was told it was a safety feature to prevent being smacked in the face by the boot lid 😆1 pointNo worries, already found and replaced. I posted another thread with the details, part numbers & photos.1 pointI'm on 18s but have Fallen FK520SUV and have been happy with them. Good grip,, excellent stability, even in heavy rain and quiet. They've been on about 20k miles now and still look to have a decent amount of tread left but I'll eventually put all seasons on.1 point1 point1 pointSatellite navigation units (either portable or integrated into the car) calculate your car’s speed by measuring actual distance travelled over time using GPS satellite tracking. They repeatedly locate your exact position on earth via satellite and calculate how far you have travelled, then divide by the time it took for you to travel that distance. Satnav accuracy is determined by satellite signal quality and is unaffected by your car’s tyres. Many satnavs are unable to account for changes in vertical direction, so they may be less accurate if you are travelling up or down a steep hill. They are also inherently more accurate at higher speeds, as a larger distance over time reduces rounding errors, but a satnav will usually be much closer to a car’s true speed than the speedometer. Some factory satnav systems will also use data from the car to integrate with the GPS signal to improve overall accuracy. https://www.thecarexpert.co.uk/how-accurate-is-a-car-speedometer/1 point1 pointI think people conflate the two issues. 1: Speedometers can be up to 10% higher than the speed driven but not allowed to under read. "The UK law is based on the EU standard, with some minor changes. A speedo must never show less than the actual speed, and must never show more than 110% of actual speed + 6.25mph." 2: The RAC report that Am I allowed a 10% leeway of the speed limit?In the eyes of the law, you’re liable for a speeding fine as soon as you exceed the limit. So if you’re doing 31mph in a 30 limit or 71mph on a motorway, you’re breaking the law. Guidance from the National Police Chiefs’ Council (NPCC) does recommend giving drivers a so-called ‘10% plus 2’ leeway, to aid police officers in using 'discretion', however, it is well worth remembering this is only a recommendation, not the law. Most speed cameras have to be manually set to trigger at a speed, however, it is unconfirmed whether they are in fact set 10% above the limit. It's not worth gambling and assuming they give you 10% - never exceed the speed limit. When you are caught speeding by a mobile camera, it is up to the police officer's discretion to penalise you if you are over the speed limit in any way, they can choose to take the NPCC's guidance, but do not have to, because - as stated above - 1 mile an hour over is still breaking the law. It sounds like simple advice, but to avoid all of the above complications it's best to never speed at all. So my take on it is If a camera/speedgun catches you at 10% over the speed limit there is a fair assumption that you know you are speeding. E.G if you are caught doing 80mph the car is probably telling you 85mph or above1 point1 point1 pointI was under the impression that the "grace value" used by UK Police has been 5% plus 1.5mph for several years now?1 point1 point1 pointThe @outofspec channel use Sat nav for speed setting, in general the Tesla over reports it's speed by at least 10% which is why they set fsd to 85mph where possible Wow that is a lot and more than the 10% max error that I thought manufacturers were suppose to adhere to. Great for doing ones mileage claims if one relying on car odometer, lots of extra monies being claimed. First Japanese bikes were renown for over stating speed compared the more accurate Smiths speedo. Probably helped them sell much more bikes ie my 250cc bike does well over 90 mph, no is does not as it is the speedo well oer reporting. Italian bikes the same with their Veglia instruments or "vague-lio" as we used to call them. Interesting it is reported the TESLA are allegedly massive overreading distance and speed to get to the ned of warranty sooner, not cricket. Renault, seem to over read the speed by a few percent, I would say 3 or 4% but under read the distance by 1 or two percent. The speed, despite being a digital speedometer, I can understand to help people not lose their licences but the odometer under reading seems odd ie get people in sooner for their 10/18k servicing or whatever. Quite common to set the car cruise control at 11% over the nominal speed limit for these reason and police general setting their speed detection at 12% above nominal though that is cutting it a bit fine IMO and certainly not optimal car range speed in many EVS where 65 to 70, genuine speed, is optimal it has been shown but if one has a fast charging car and deep pockets cruising at this grey zone of speeds is oft done.1 point1 pointThe @outofspec channel use Sat nav for speed setting, in general the Tesla over reports it's speed by at least 10% which is why they set fsd to 85mph where possible1 point1 pointUK has quite a low speed limit compared to many countries ie France Italy and especially Germant but some US states have quite relatively high speed limits to the UK. Not sure if one can use the 10 %, plus 2% rile in all place ie speedo and tyres possible error percentages. Many EVs ate not great efficiency at high speed Polestars and Tesla seem to be but I would only consider one of those options. My Scenic not great with a Drag Coefficient not much under 0.3. Waiting for more over the air updates to introduce more regen levels including one pedal driving which gives a few miles more range. Better lower rolling resistance tyres would be a good addition. I need my breaks. My bladder is not longer range than even my 65 kwh car !!!! Charging at C times 2 ie 130 kws is good enough but over 200 kws for replacement car is expected with the rapid advancement of EV batteries and UK charging infrastructure.1 point1 pointNot much else on this, had more time than I'd wanted waiting between coats. So I Tinted the fogs and buffed the exhaust tip. Not much better, but mostly no longer brown and manky looking.
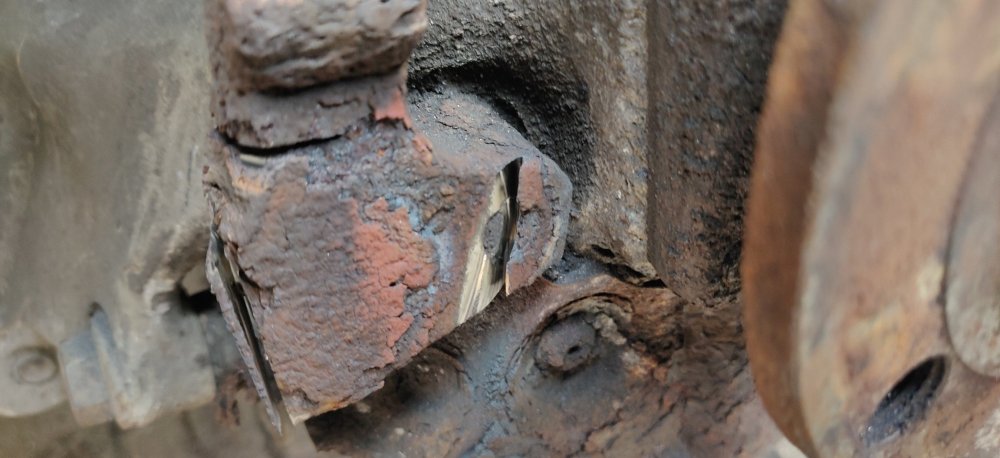
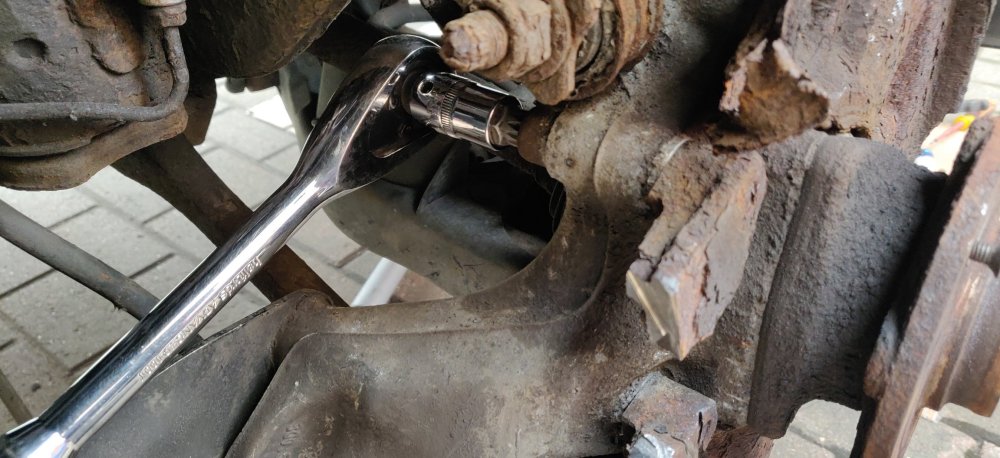
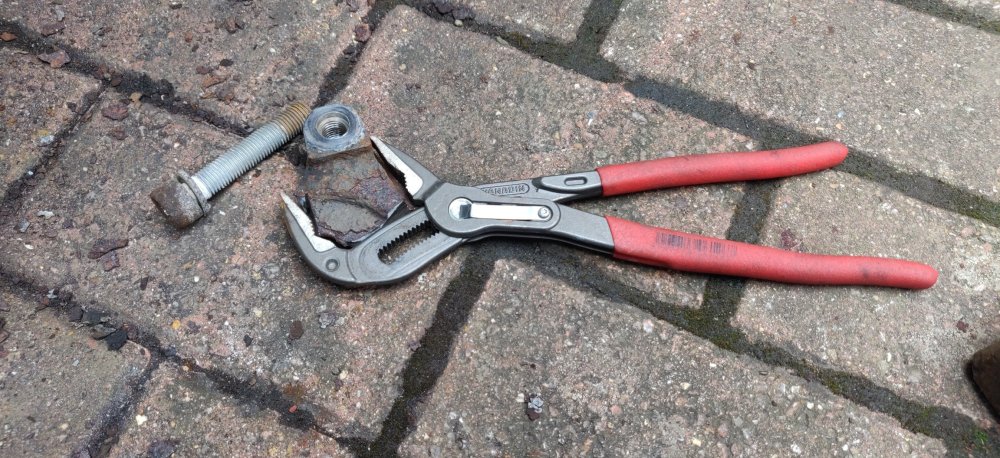
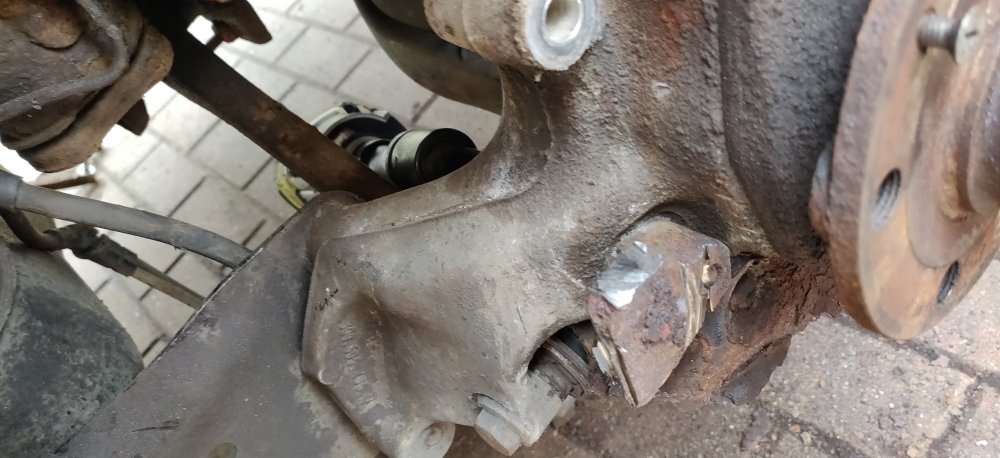
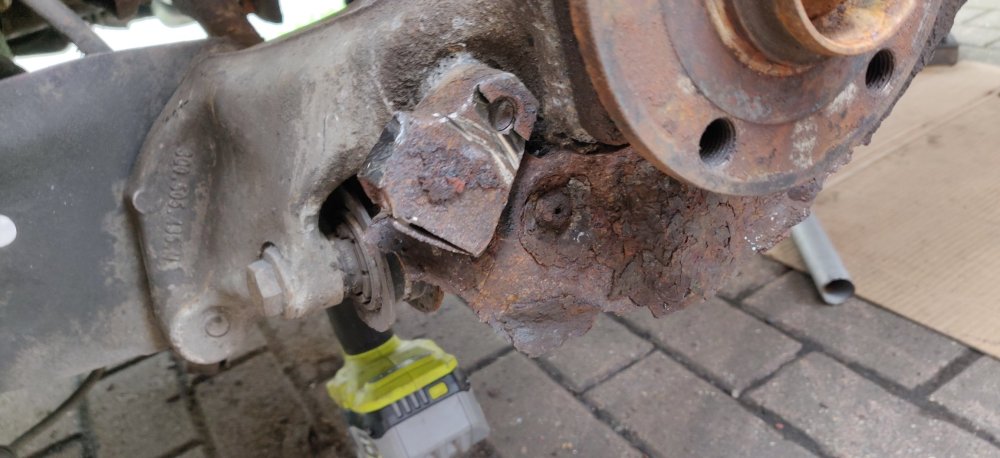
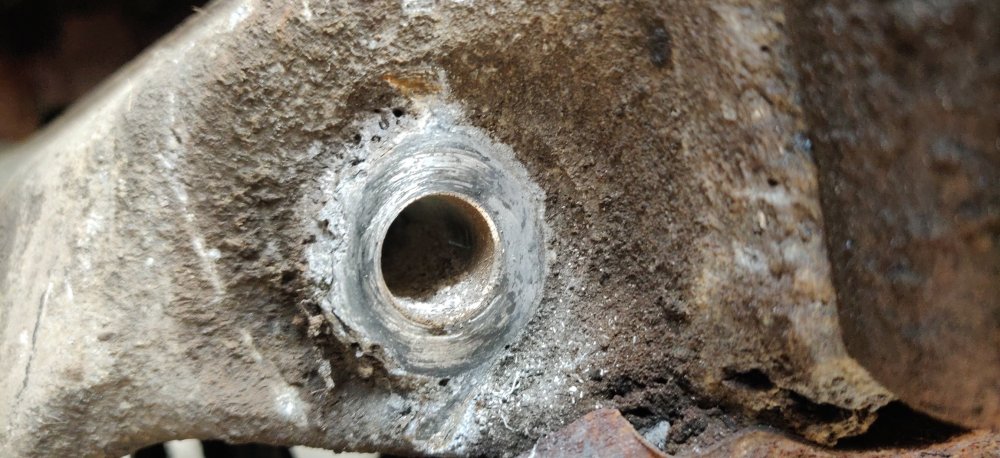
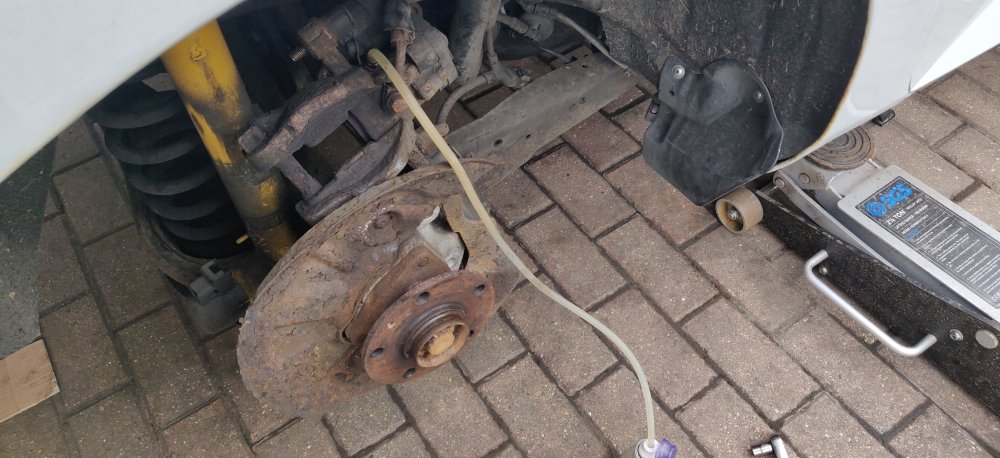
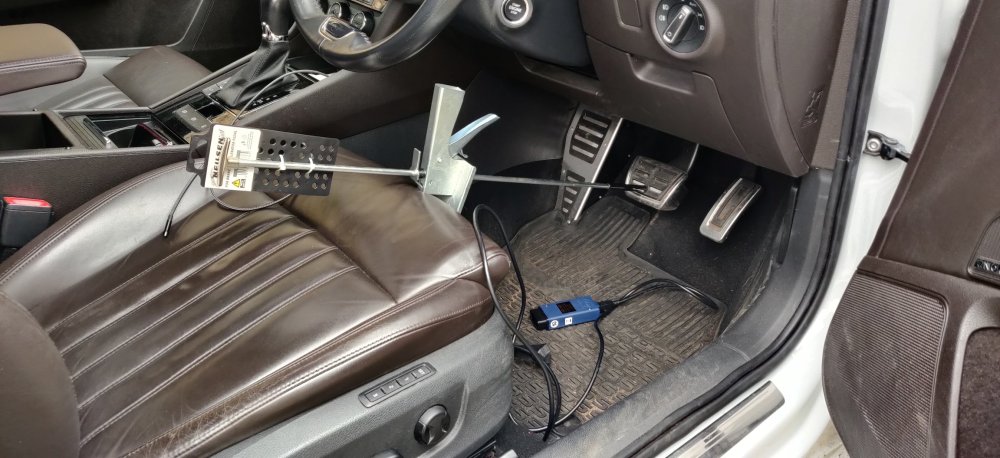
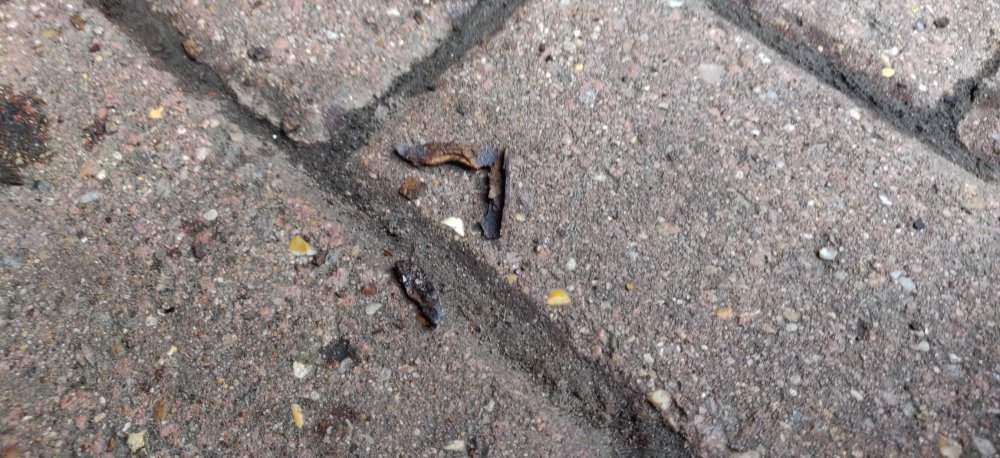
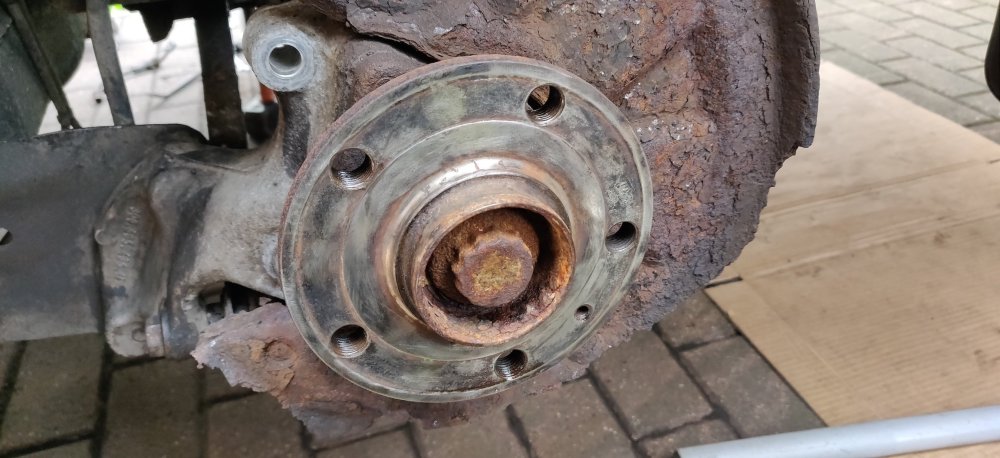
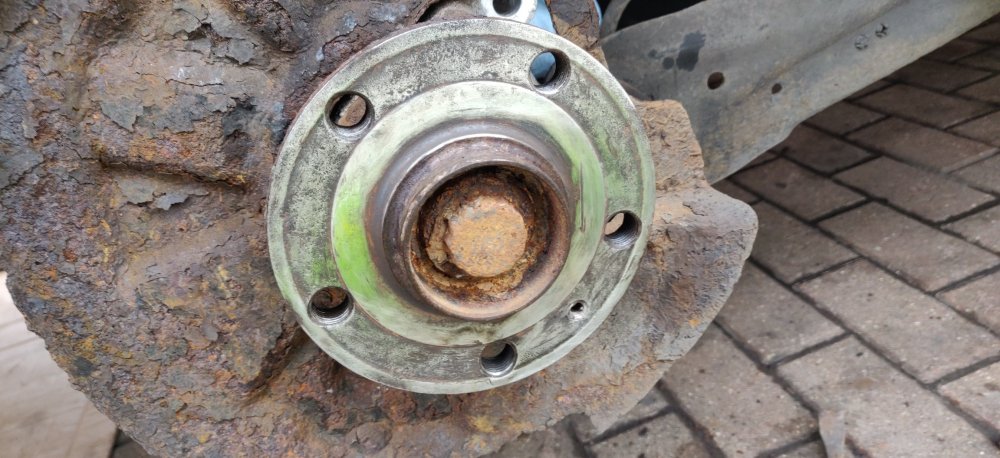
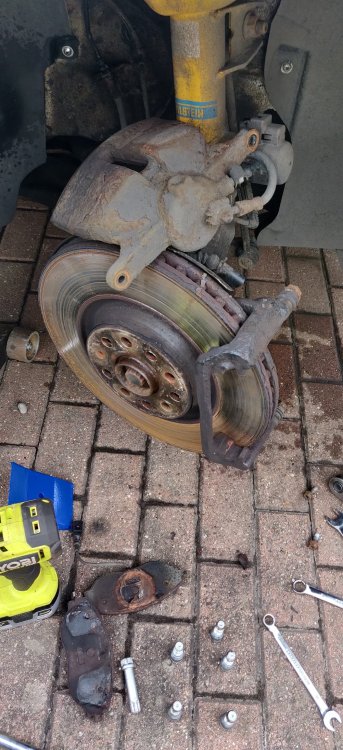
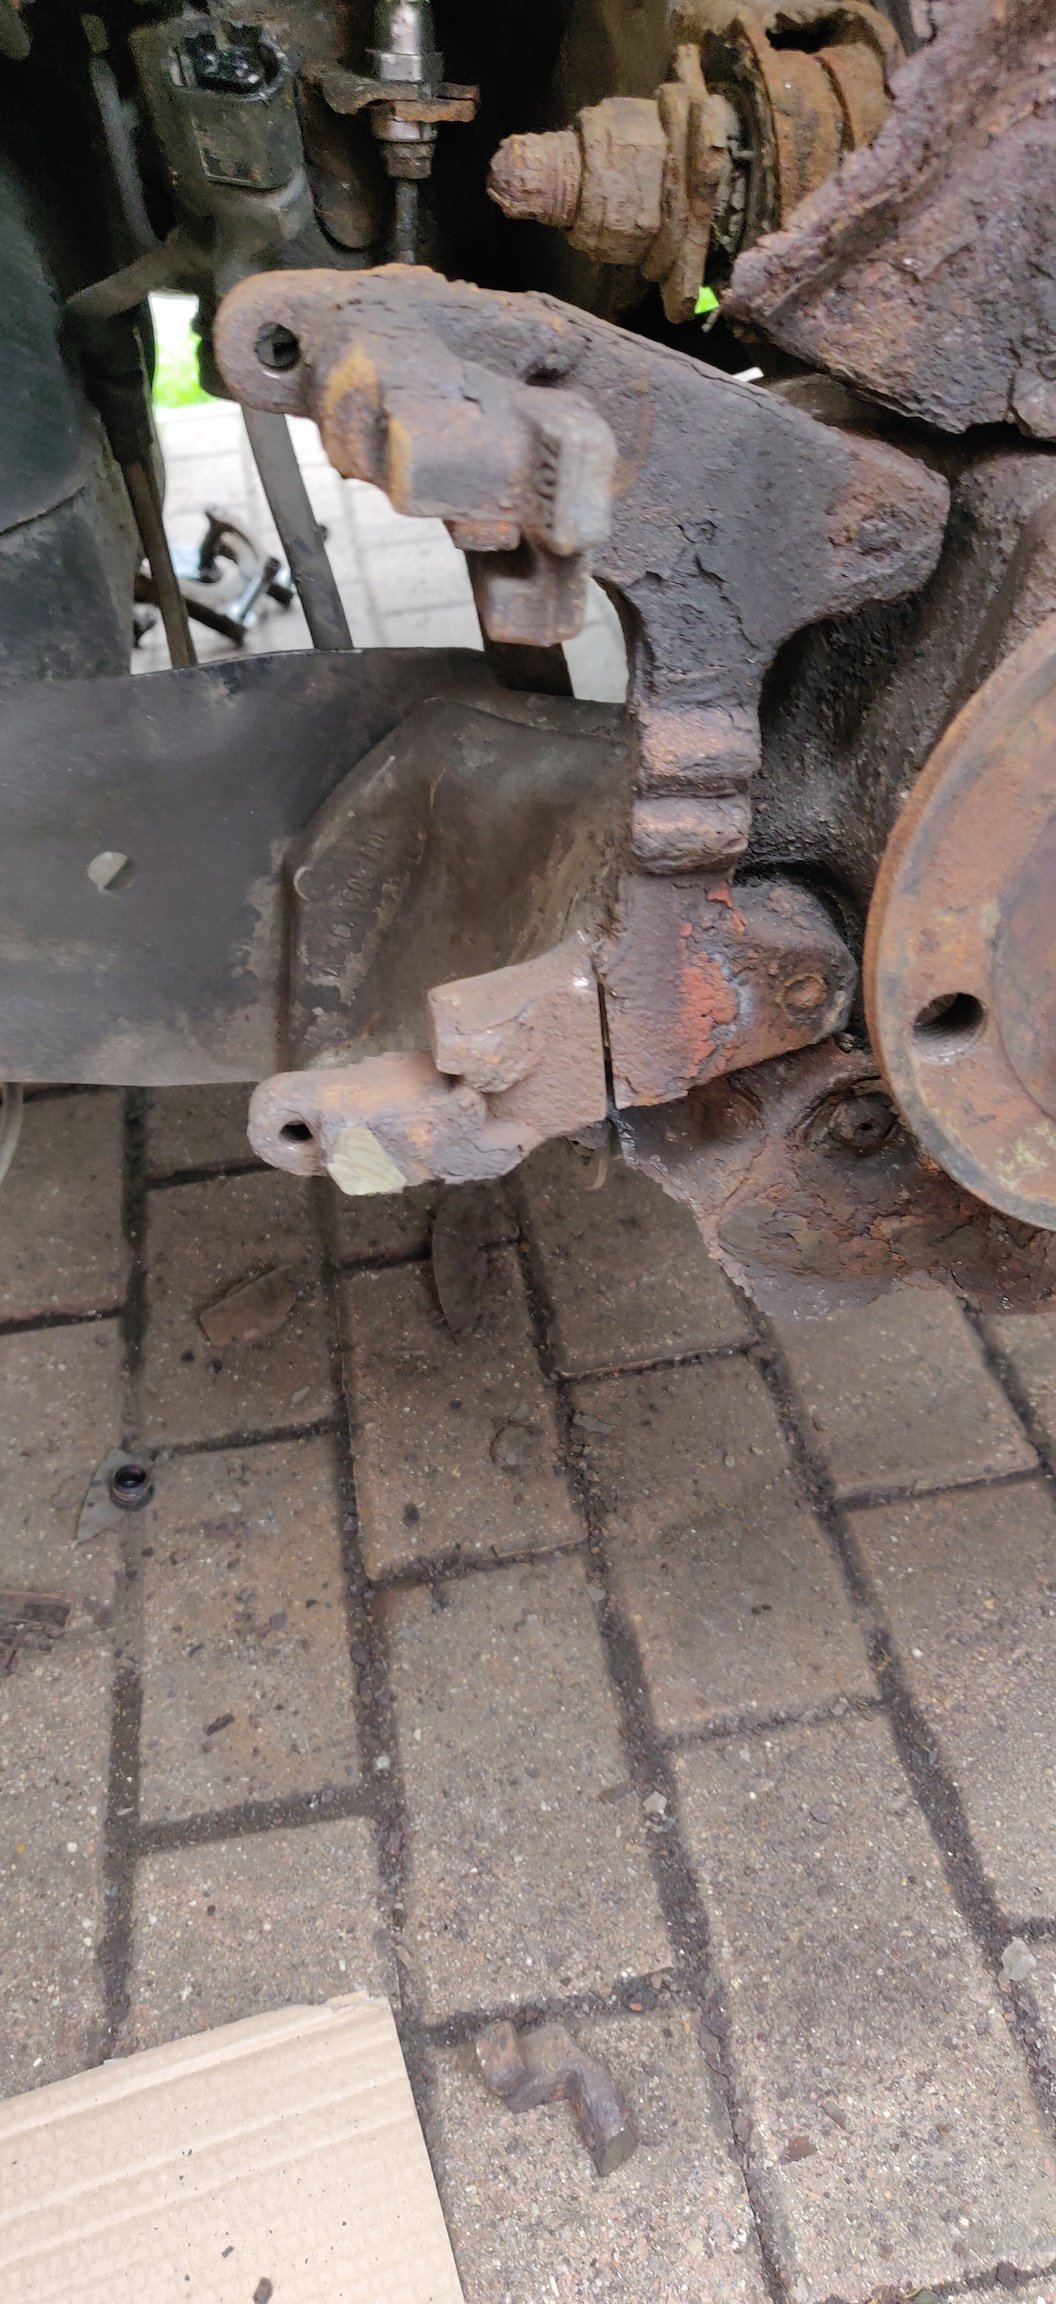
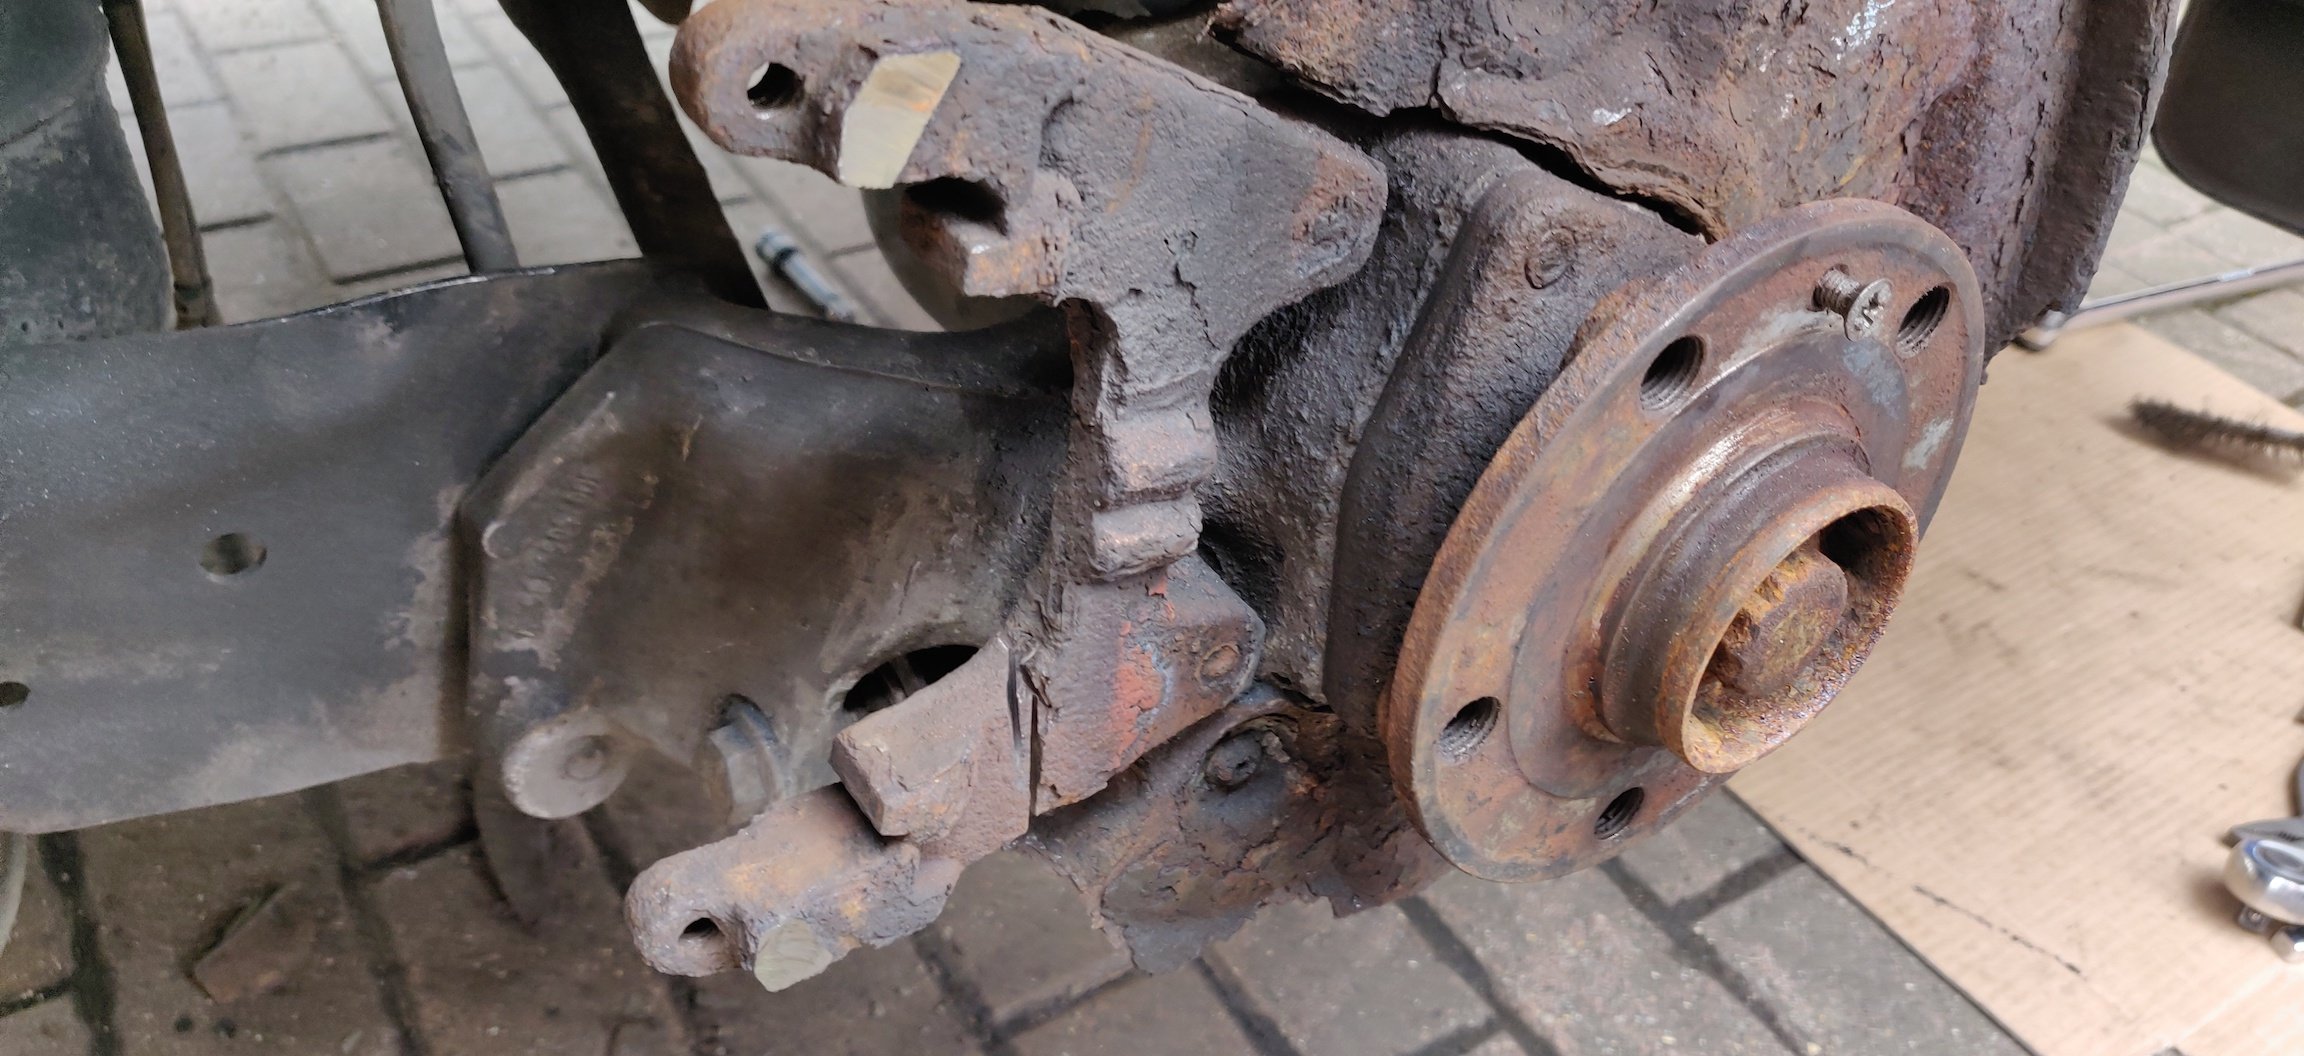
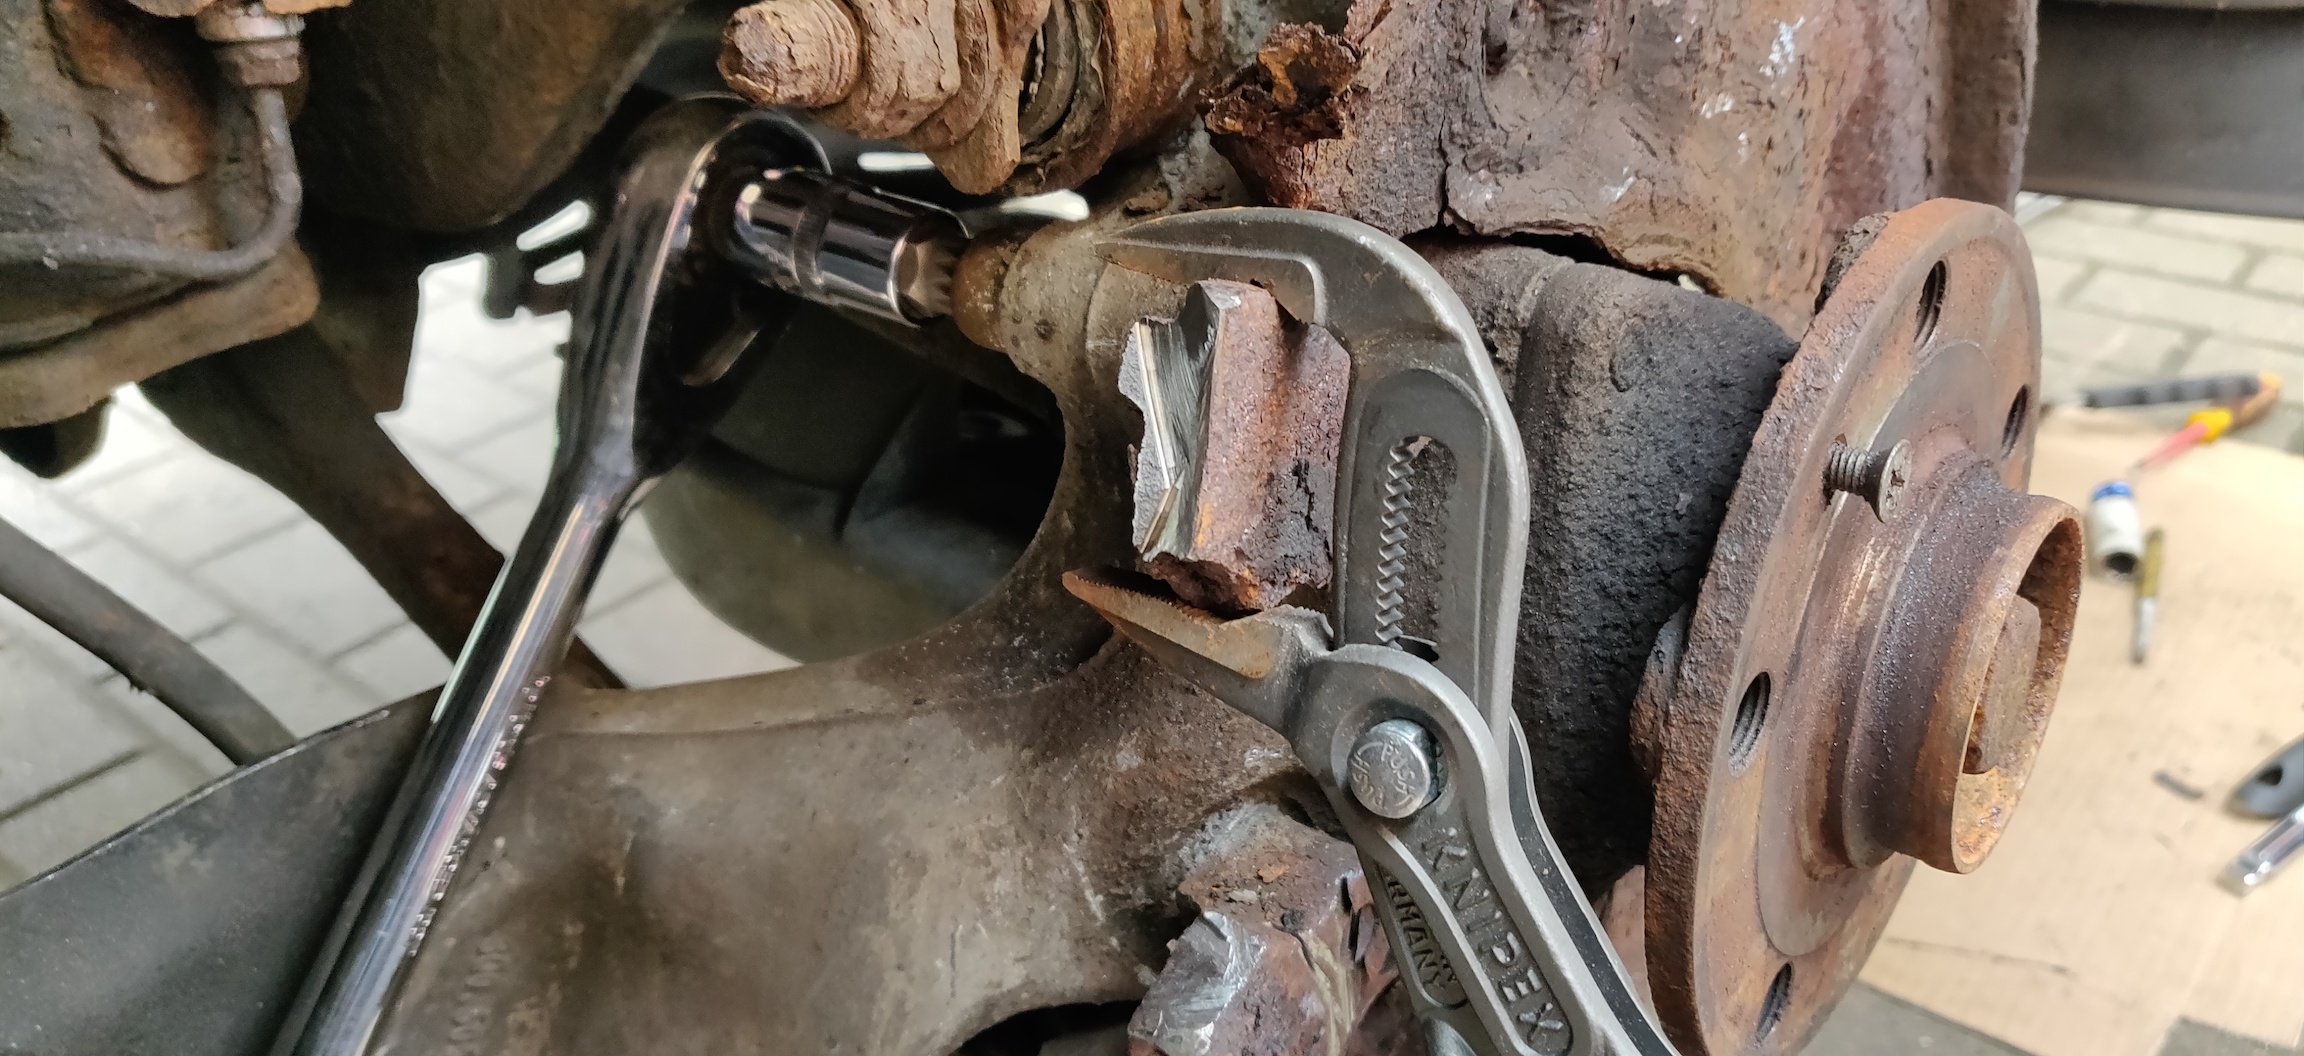
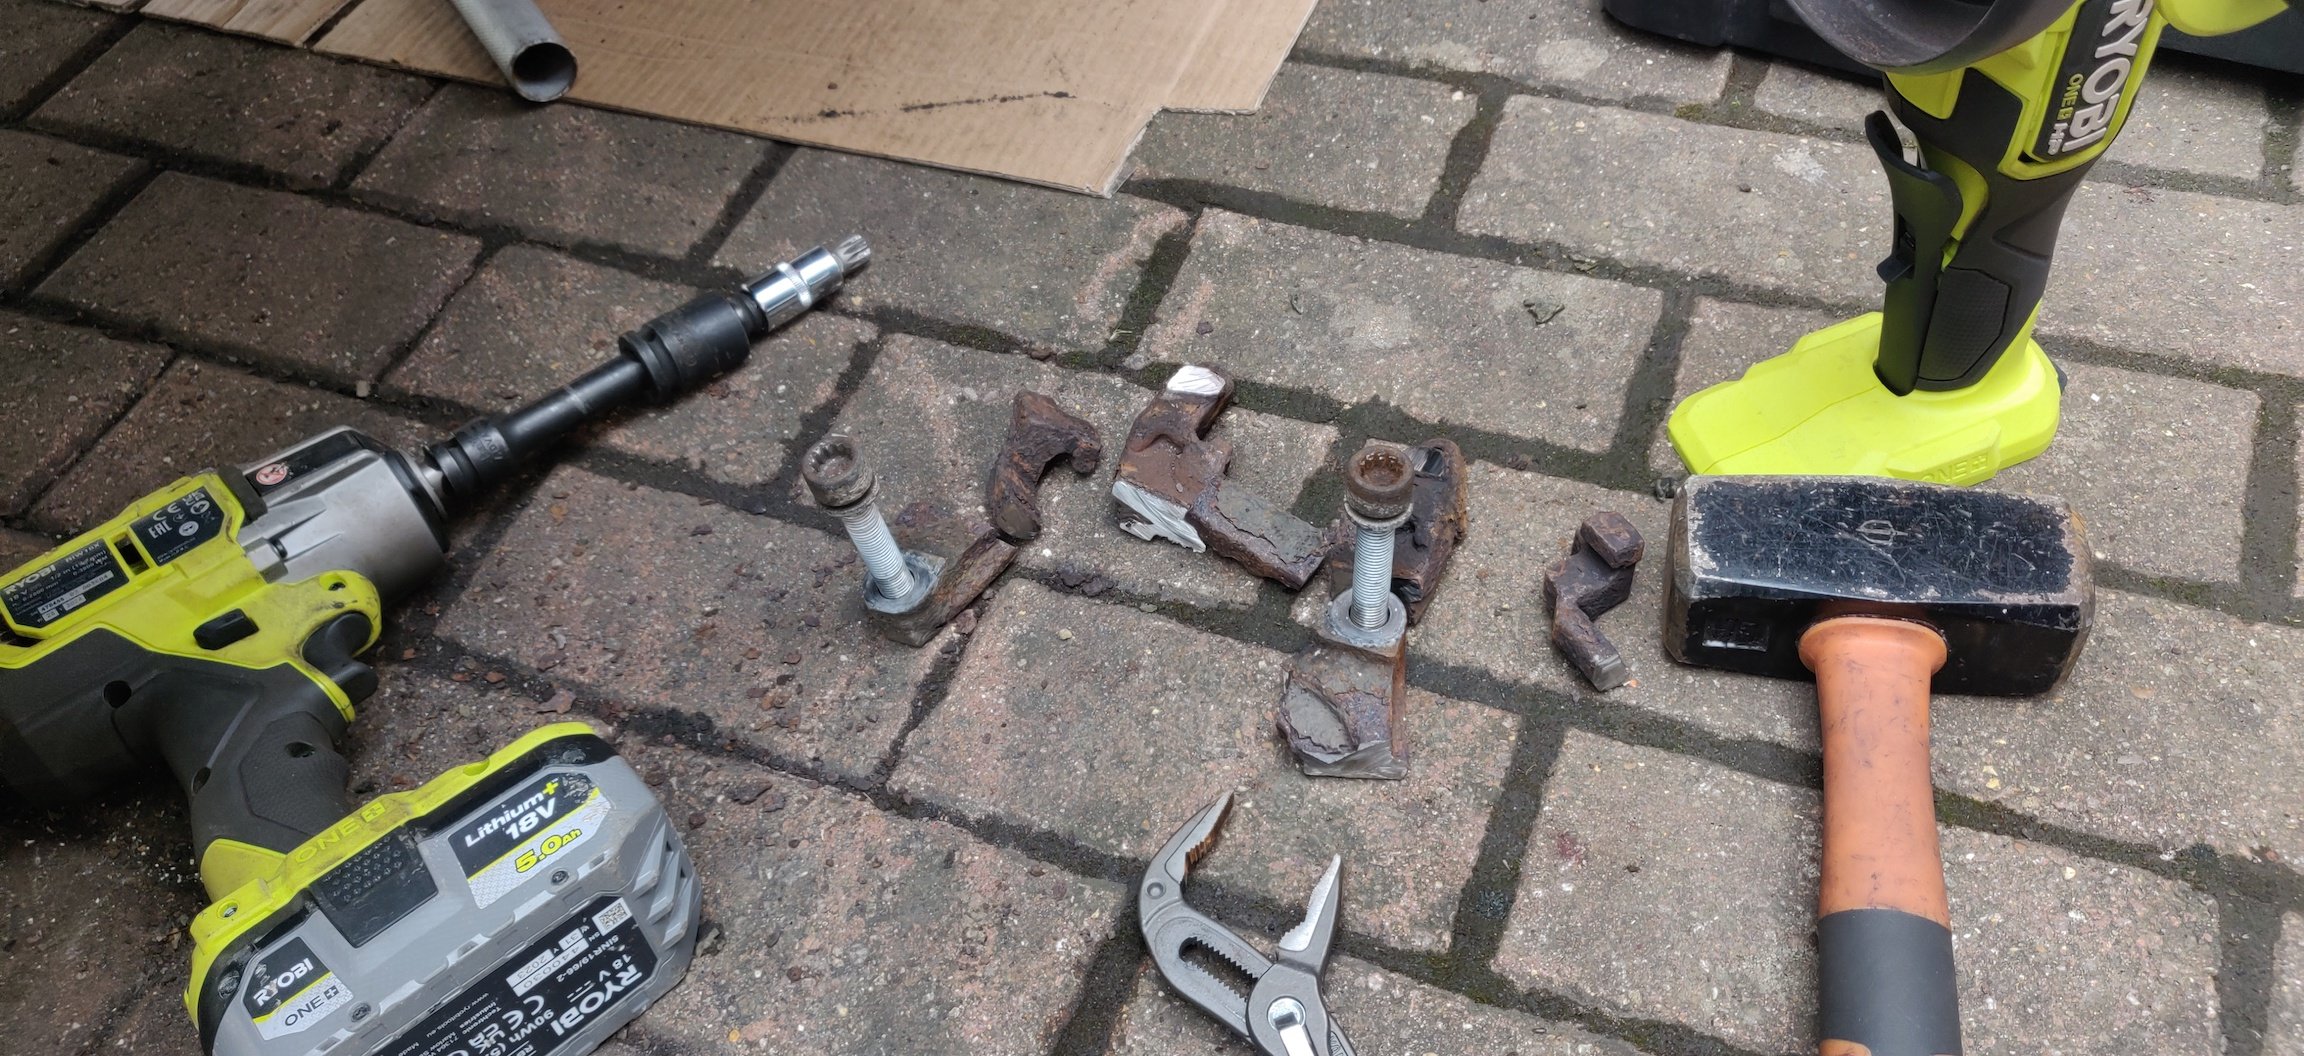
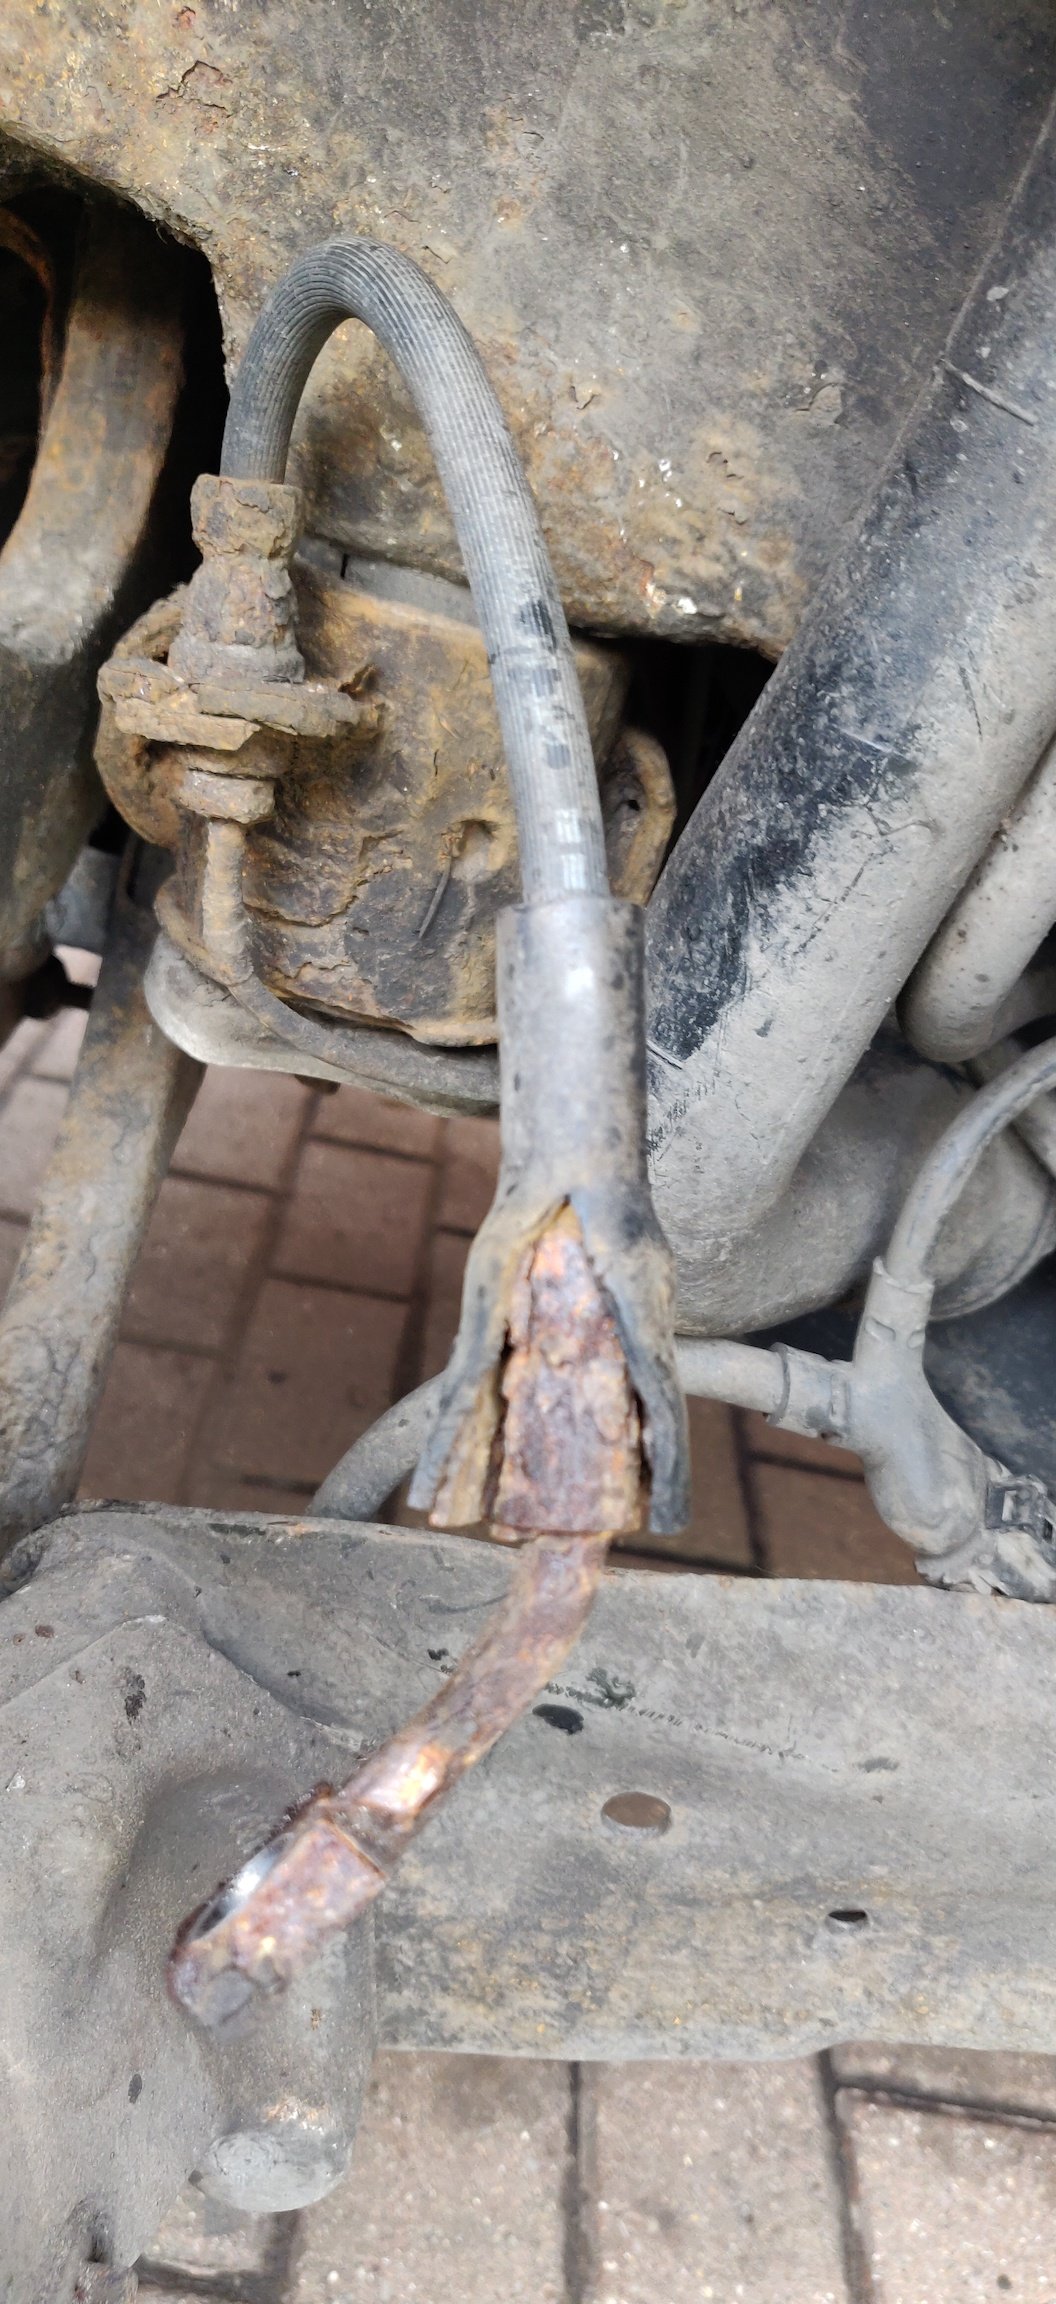
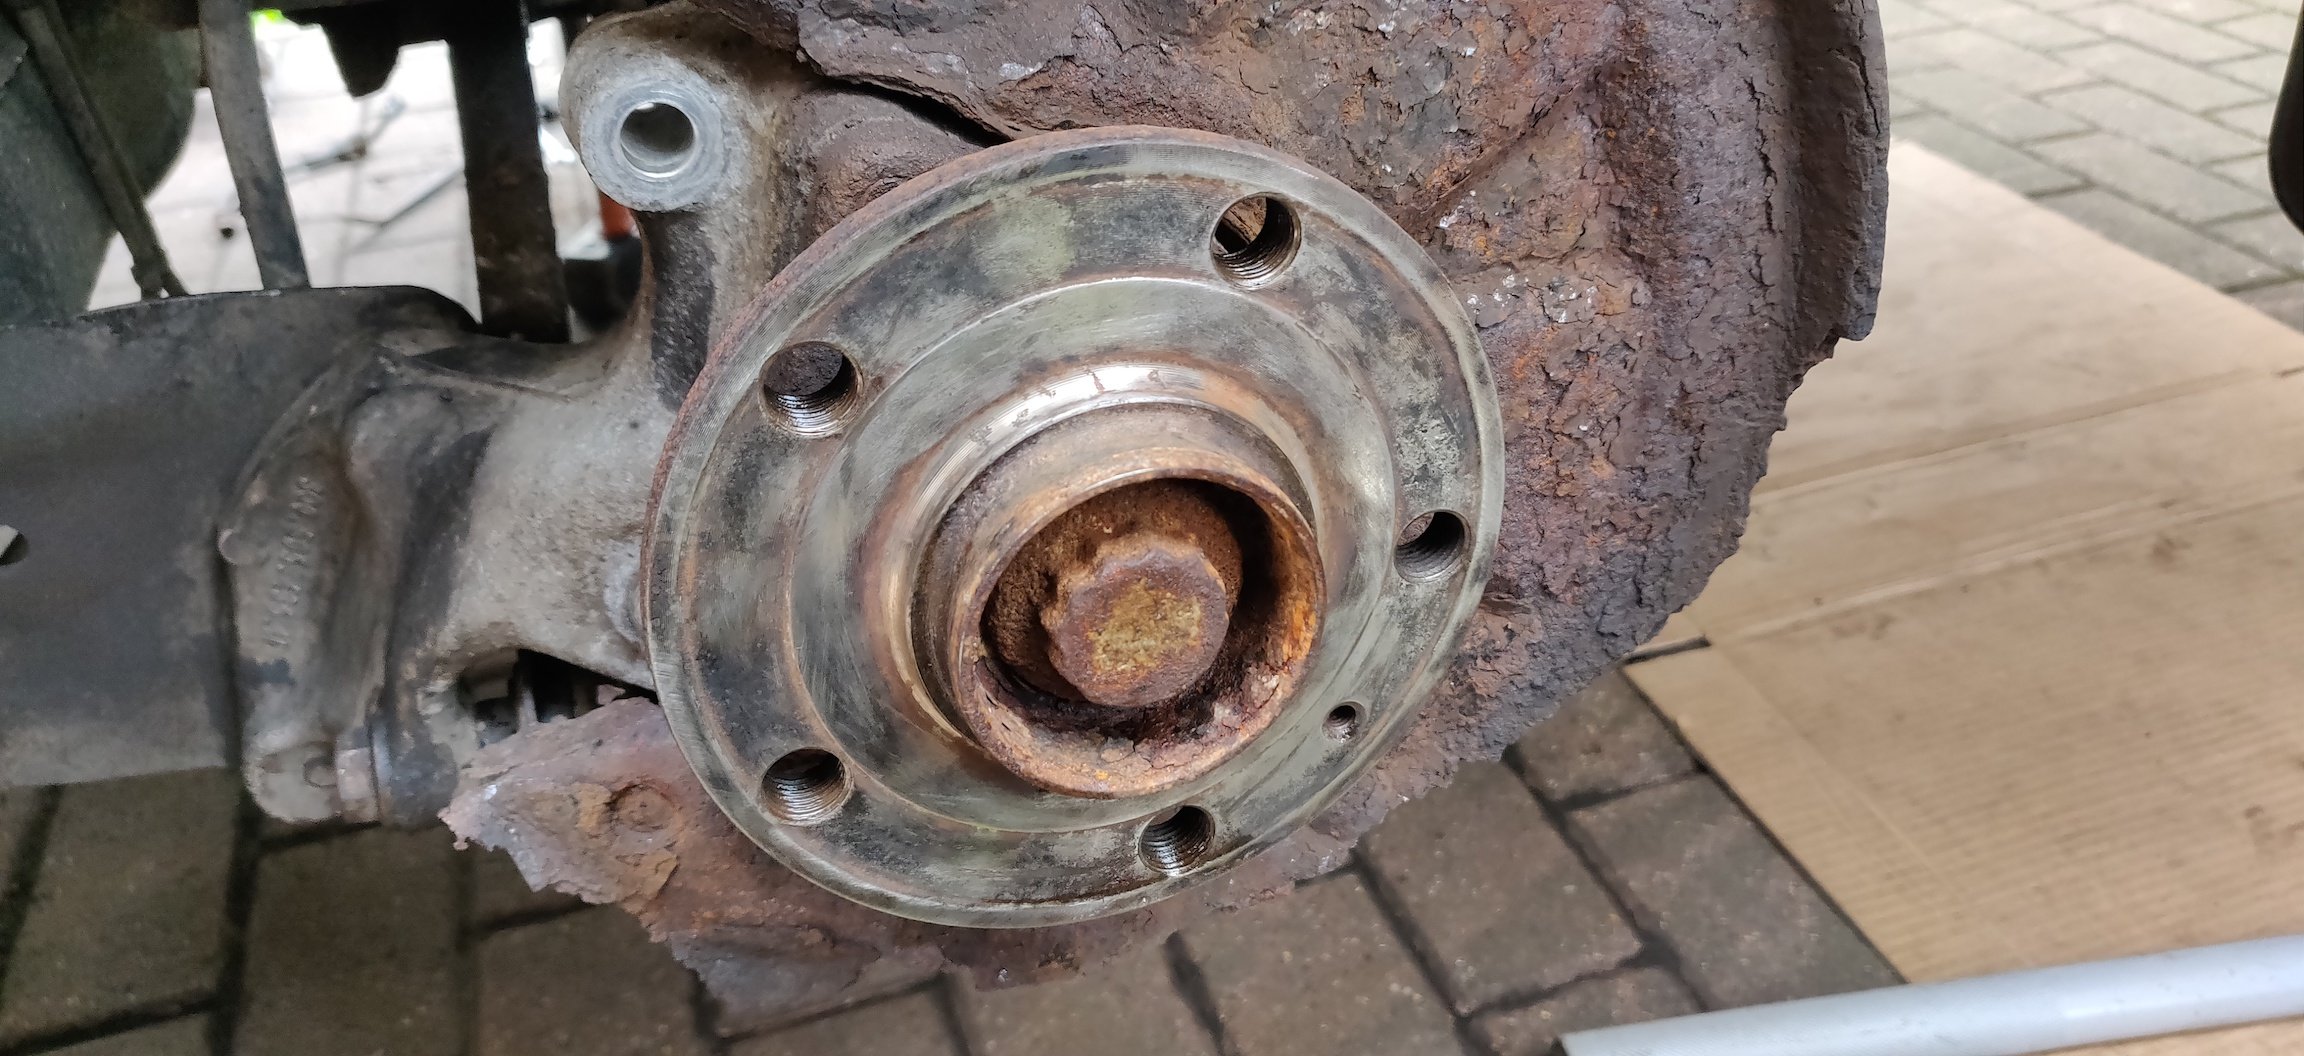
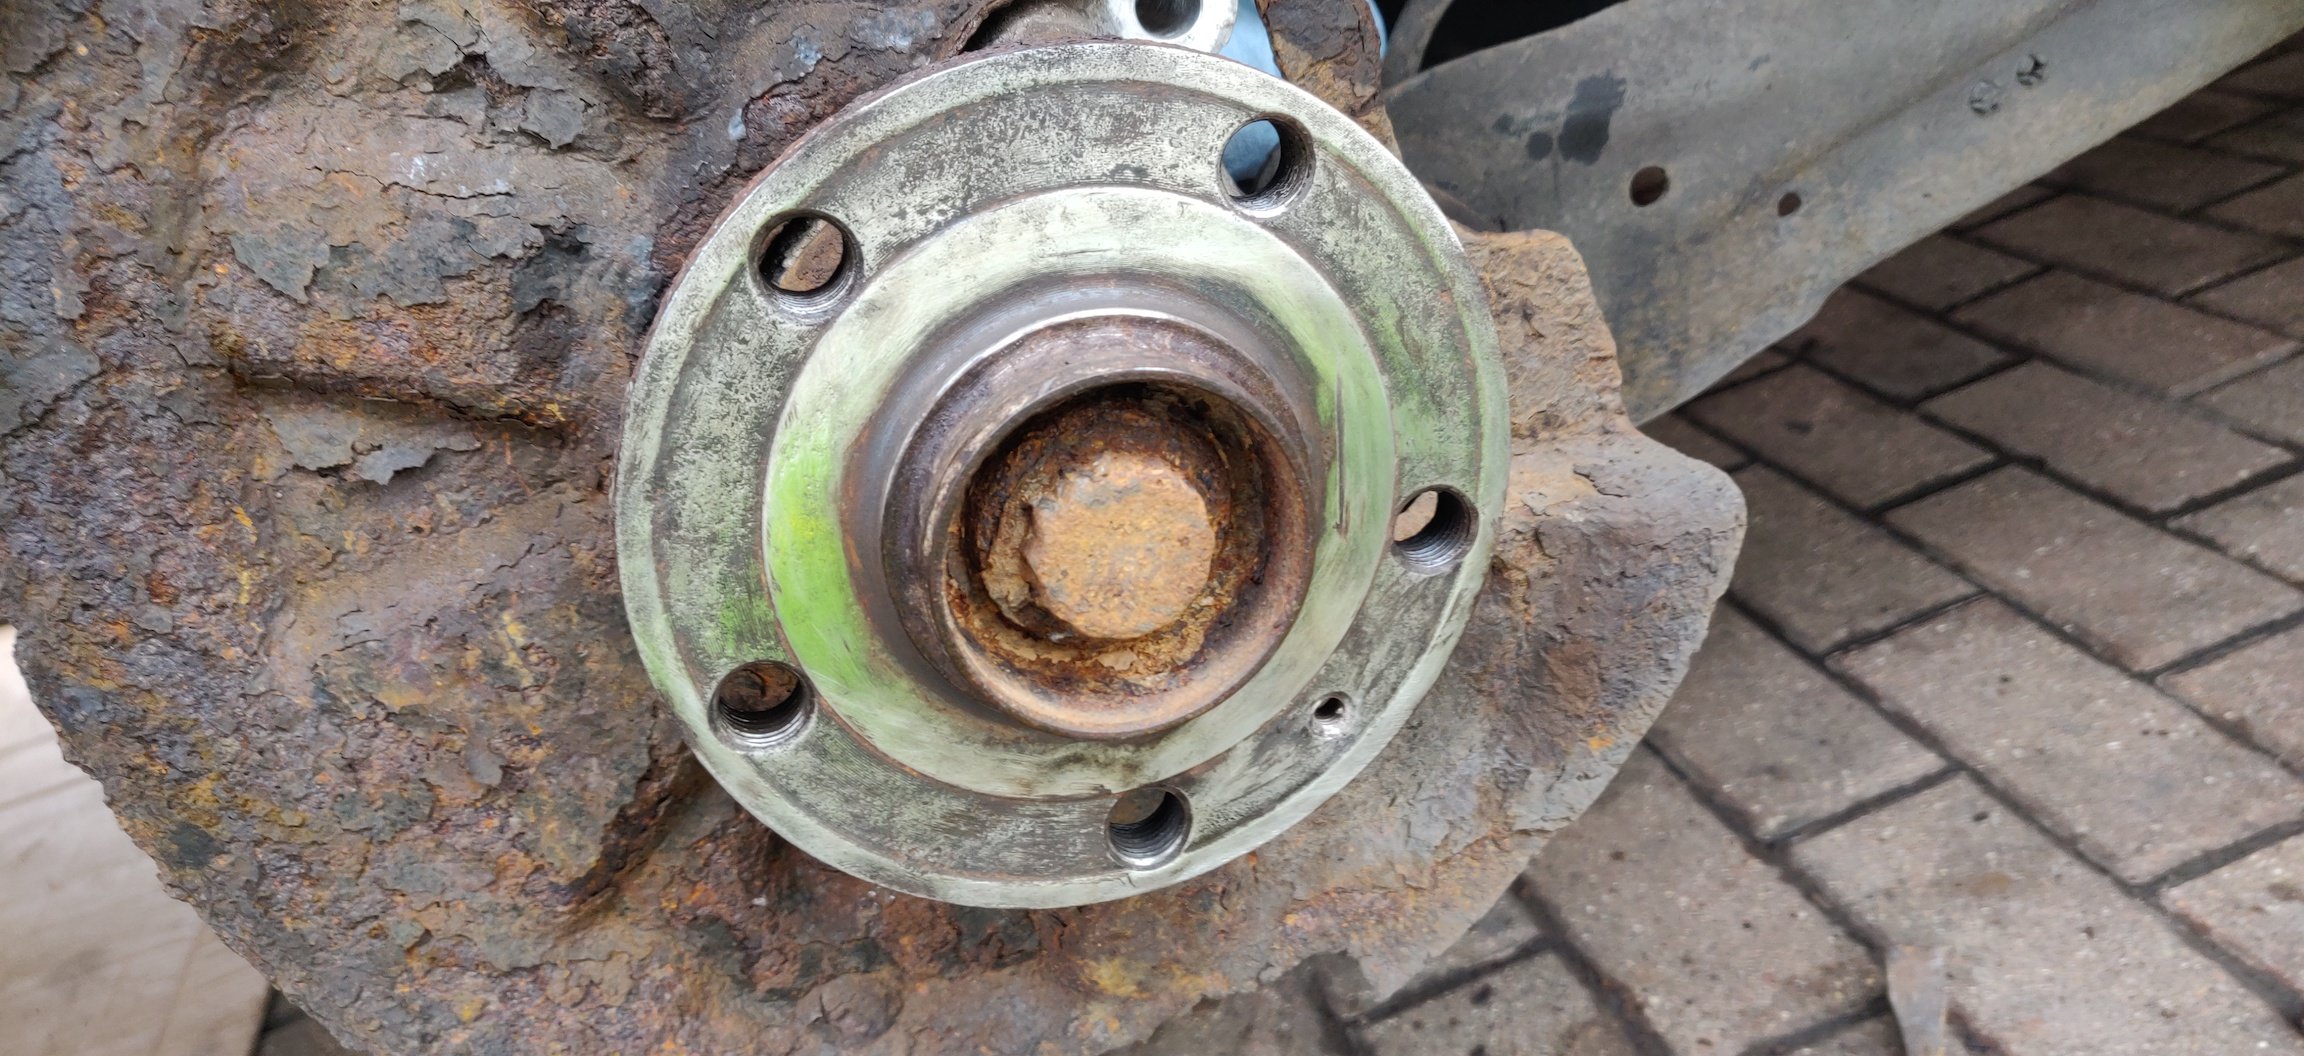
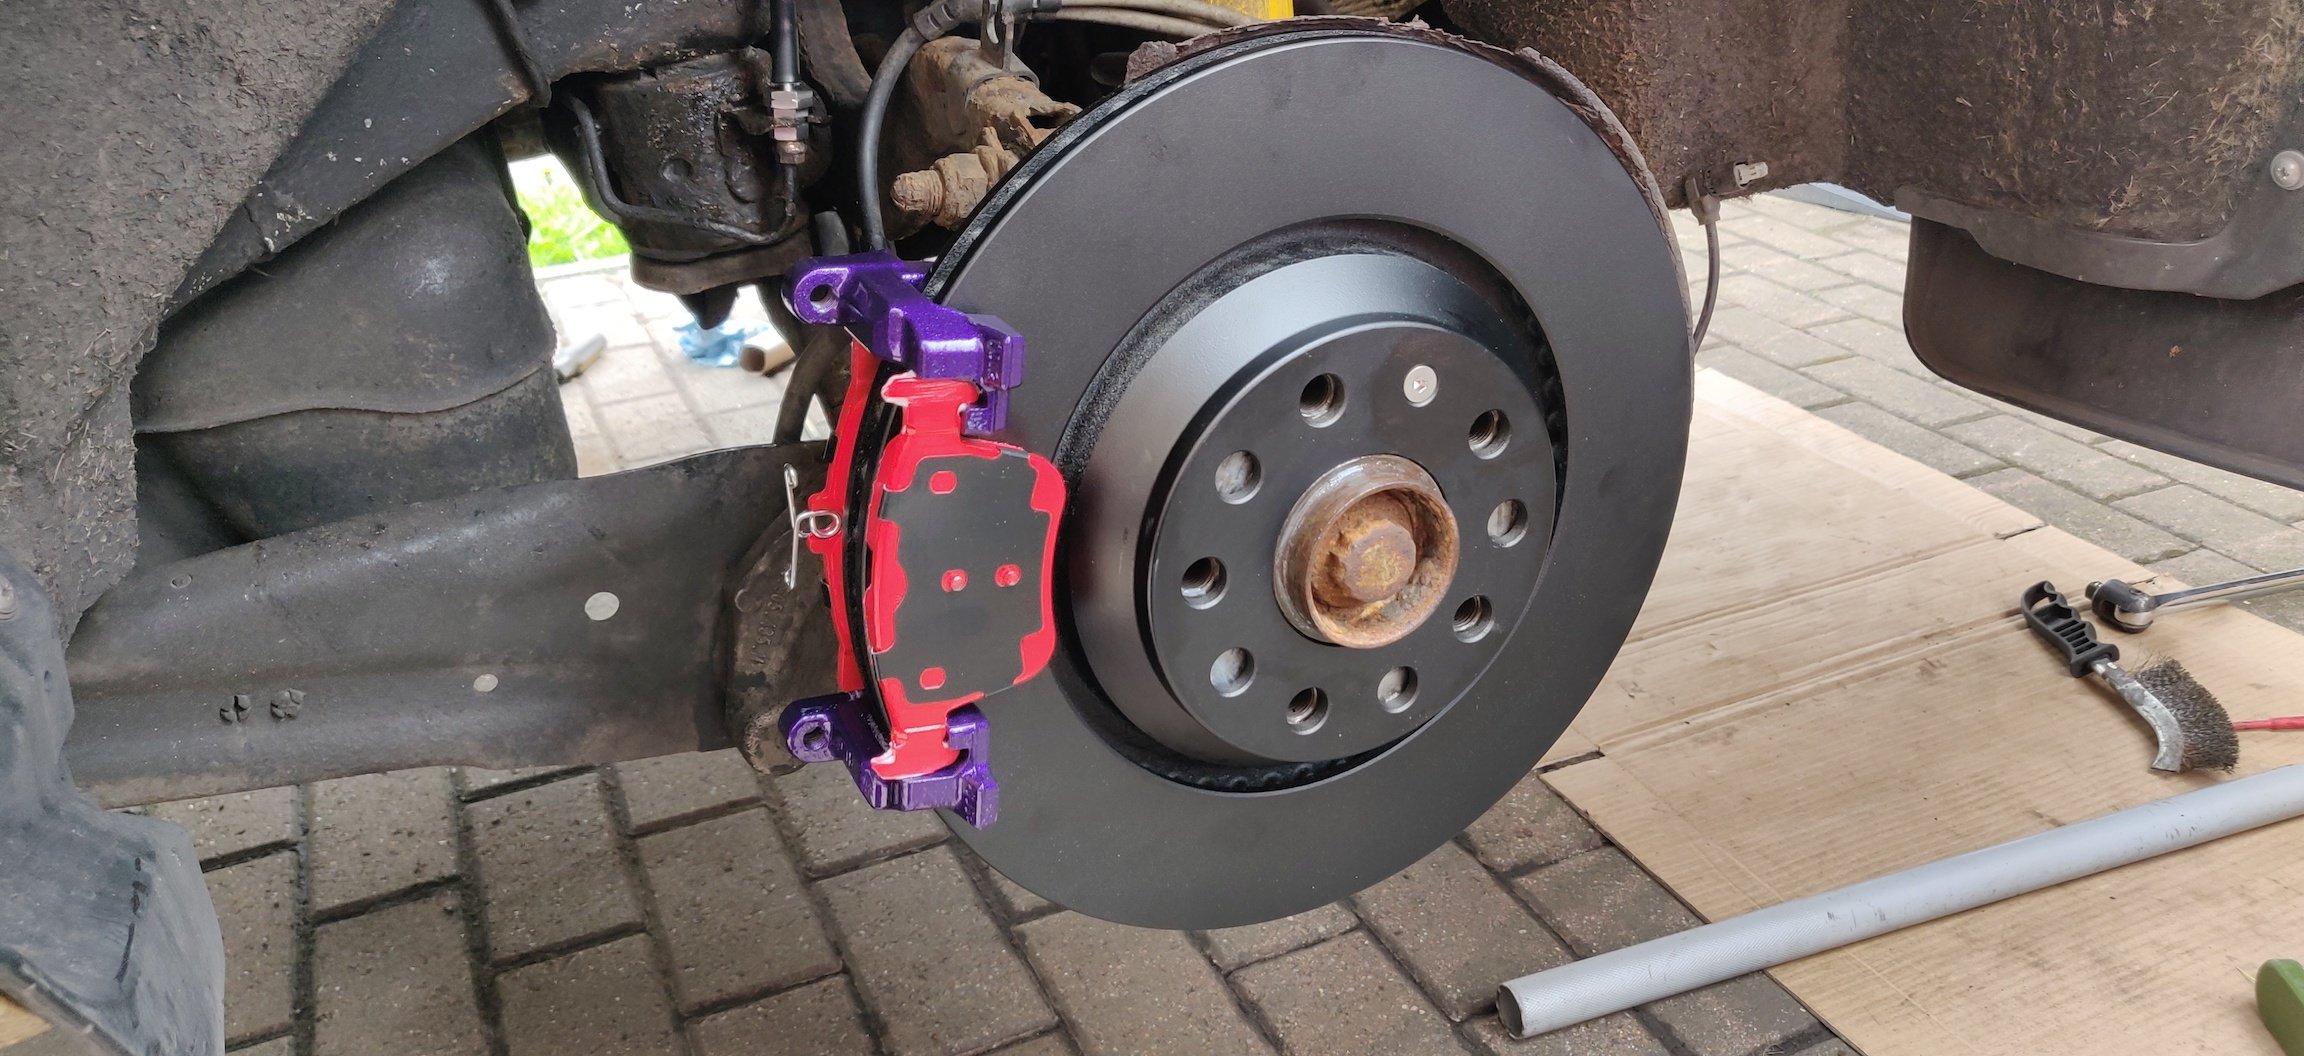
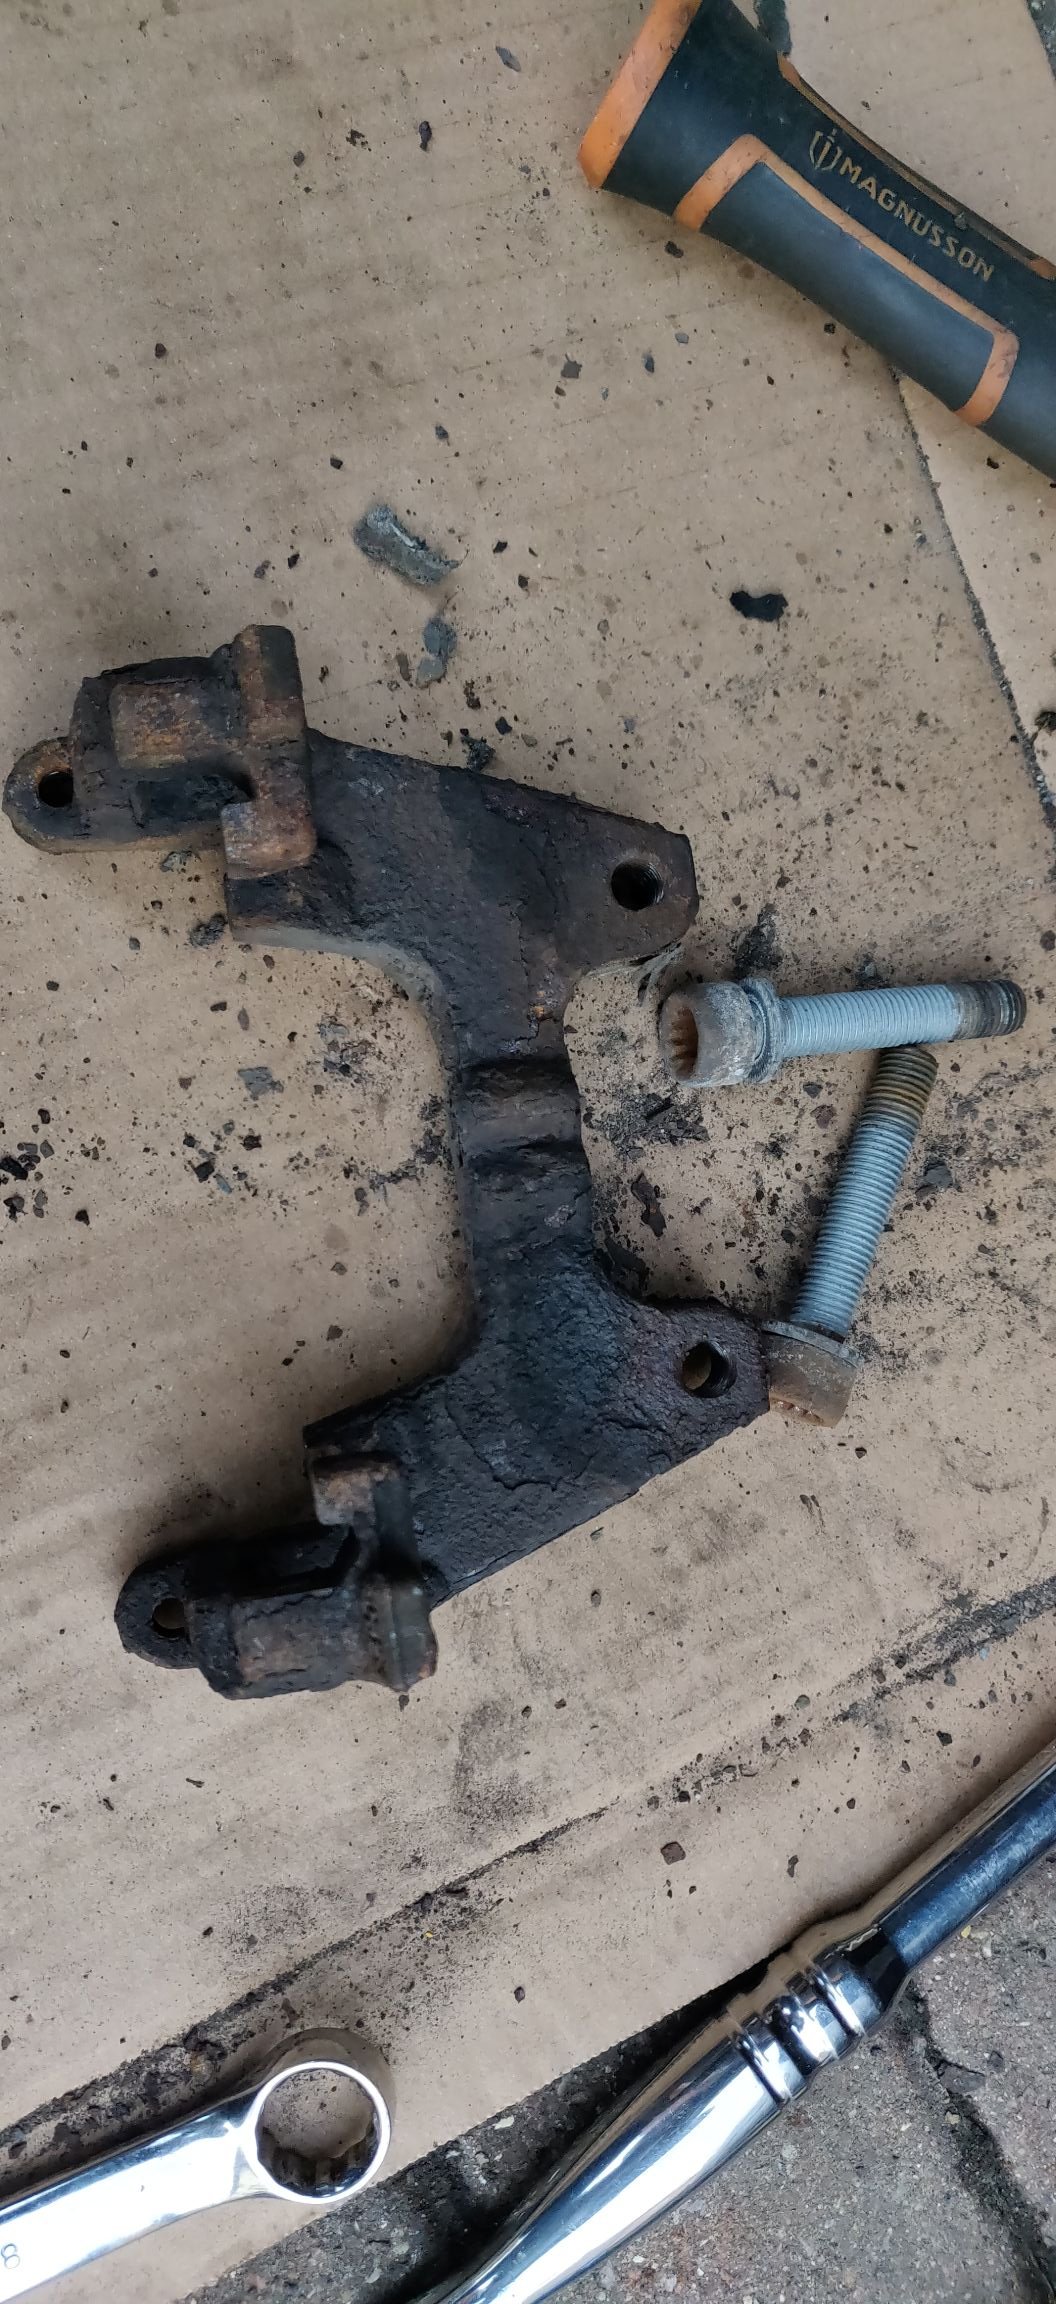
 1 point1 pointPortions of the Idaho, Montana, Nevada, Oklahoma, South Dakota, Texas, Utah, and Wyoming road networks have 80 mph1 pointSo, on with what I did today. Yesterday, the left pad carrier bolts were tight as buggery. I think it might have been possible if the car was lifted off the ground sufficiently enough to get maybe a couple of pipes on a wrench to get enough leverage. Another attempt early in the morning was no better, so went absolutely mad. Do not try this at home: Started having at it with the angle grinder. Original plan was to go straight at the bit with the bolts, but the angle grinder was bumping into things like the pad carrier ears and the bearing hub. So just starting taking it out in chunks, as seen above, the bottom ear has already been chopped off. Just basically went at it slow and steady: So ears cut off, bit more on each bit and then the central bit, to leave two separate bits: Started to cut at the bolt, but at an angle as the wheel bearing was in the way. Wasn't actually really necessary, as I decided instead to get a lump hammer out and went at them. They actually started to turn, so then got the socket and wrench on the top: Then some additional thwacks and the bolt started to come free, so with some pliers: Was a case of twisting and hammer thwacks until: So nearly there. The bottom was a little stubborn, but also had enough space for an impact socket with a UJ and extension: That, and additional hammering then saw the bolt start coming free: Then just impacting for about 15 seconds and it comes away: So yeah, very drastic measures, but luckily nothing else was hurt in the process. Would not have been this destructive if another replacement wasn't at hand for sure! I imagine the reason the bolts were stuck was similar to the front struts: Bits of aluminium corrosion, which presumably held the bolts in tighter than normal. So next step is to remove the old calipers. So in goes my trusty bleed hose into a water bottle, and the bleeder loosened: Then to get into the car: Using a brake pedal presser tool to keep the brake pedal pressed in. The workshop manual says at least 60mm, so just pressed it in until about there. This acts as a means of stopping brake fluid going all over the place once the brakes are disconnected. The bleeder being loosened allows the excess fluid to leave, rather than push the pistons on the two calipers out (which would be a potential disaster). My poor Honda Insight in the garage has its own tool with the pedal pressed for about 3 months now! So with that done, got an impact wrench on the banjo bolts to get them loose, would have probably been awkward otherwise as the calipers are just dangling freely: Then just unscrew the bolts and have something underneath to catch excess brake fluid: This is the unchanged right side brake hose, you'll have seen this before. The left side hose has already been replaced before, so I know it's been greased up and should be easy to undo. The right was an unknown. So first step was to remove the hose clip: Which probably if anything went exactly how I thought it would: Not the end of the world, but just a tiny bit fiddly with a hammer and chisel to get that stubborn bit out. With that out, and applying some fire around the union as part of mentally preparing for this, went at it, 11mm union at the bottom and a 17mm spanner around the top: In a non-salty world, the brake hose at the top would be held whilst the brake union at the bottom would be loosened, and that turned until it came free. Over in the UK though, it's the opposite, as there's no way the union would not have seized to the pipe, which this one has. It's a case of doing both until it started to loosen, then holding the bottom union in place whilst the hose at the top is undone. I was then met with: Looks like a copper pipe. So this tells me a repair around here was done before. I'd be very interested to see how that was done, as the pipe run disappears around the fuel tanks and subframe. Shame they didn't put a dab of grease between the union and pipe though, as that would have prevented the seizing. Anyways, repeated this on the other side so the old hoses are now out. Next step was give the wheel bearings a quick clean: Used the angle grinder again, with an abrasive disc, which seems to do a fairly decent job without looking like its ruining things. The right wheel bearing face looked a lot rougher than the left: So took a little longer to clean up: Not sure what the green tint is there, camera must be on the blink. So then its time to start assembling things. I went with the approach of the pad carrier first: With new bolts, slathering corrosion block grease around the middle of the bolt, leaving the ends clean. Then for the left side, slid the brake disc on: With the new stainless retaining bolt, lots of grease. Did it the other way around on the right side, brake disc first. That was probably a tiny bit easier as no need to wiggle the brake disc and whatnot. The brake hoses for now are just twisted onto the unions, with a dab of copper grease on the union threads: Did them hand tight then snugged a little with the 17mm spanner. It looks like I've lucked out in terms of the orientation of the hoses, as they are almost dead on to where they would need to be for the caliper. That's usually why the union is the one that turns, as the hoses should be put in place (with clips) first. Onto the pads: The workshop manual references a grease, which after some searching, looks to be lithium grease, which seemed off. So went with a dab of ceramic brake grease on the ears of the pads before putting them on. I'm hoping that as the carriers are all cleaned up and painted, then rust won't be a factor. Could still be dirt and stuff being a factor though. Then it's the caliper: So greased up the new slider pins with the grease that's supplied, slid them through the rubber boots a few times to make sure its all lubricated, and onto the carrier. I've actually used the old banjo bolt to connect to the caliper, with the requisite new copper washers. Both this banjo bolt and the slider pins were tightened to 35Nm. I've left the tightening of the pad carriers for now, because to be honest, I'm not looking forward to it. Just the clips to do, decided to fill the holes they go in with some corrosion block grease, in an attempt to prevent the nightmares encounted on the old calipers. But essentially, that's the rears done. I'll spend a bit of time tomorrow double checking things and bleeding them through. Decided to then jack up the front right and go about looking at the front calipers. To do so I wanted to turn the wheel to the right to get better access to the pad carrier bolts. Now, with the steering lock on, I nonchalantly pressed the starter assuming it would go into ignition and unlock the steering. Instead the car turned on, as the brake pedal was pressed! Quite surprised but quickly turned off the car and scrambled around. Looks like nothing affected. Small drama over, it was wheel off, and then a 17mm spanner and 13mm to remove the bolts for the caliper: The brake hose is quite long, and help by a clip on the wheel hub, so removed that clip and the hose is long enough to leave the caliper on the floor. Perfect for leaving room to try out the new caliper: Unfortunately the front retaining screw for the brake is buggered on this side, so had to be careful with the brake disc whilst trying to get the wheel on, to see if there's any clearance issues. So it looks like the 17" wheels fit: But unfortunately: The caliper fouls on the face of the wheel. Amusingly these wheels are ET40, the most I could get. With some checking on willtheyfit.com when I was researching wheels, the site says: Which looks to almost be what I appear to be missing to clear the brakes. I wondered if the 19" wheels would have been, then realised I've sold those. So a bit of a bust, took the caliper off and back in the house for now. I don't anticipate the car needing to be used in the immediate future, so for now, just scrambled to get a set of 3mm and 5mm spacers to see whether I can get away with the thinner ones. Amazon for £20.98. Hopefully they'll arrive soonish and I can check all this again. Assuming the spacers are ok, the main obstacle for the front brake replacement is probably the brake hoses. But we'll see how we get on. Maintenance: £2860.27 Upgrades: £4536.80 (+£20.98) Miscellaneous: £820.07
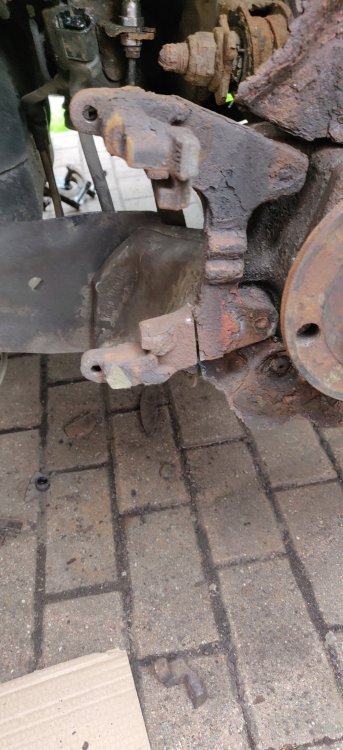


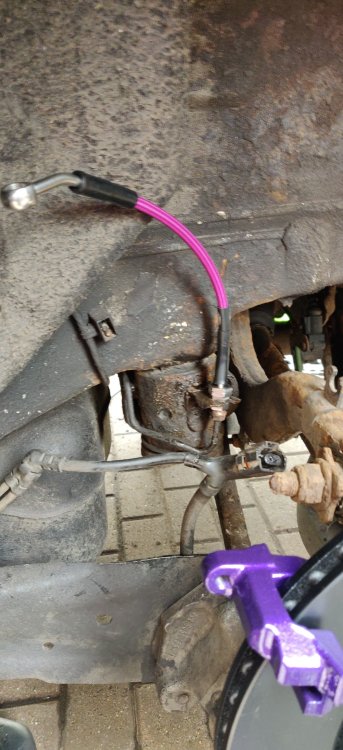


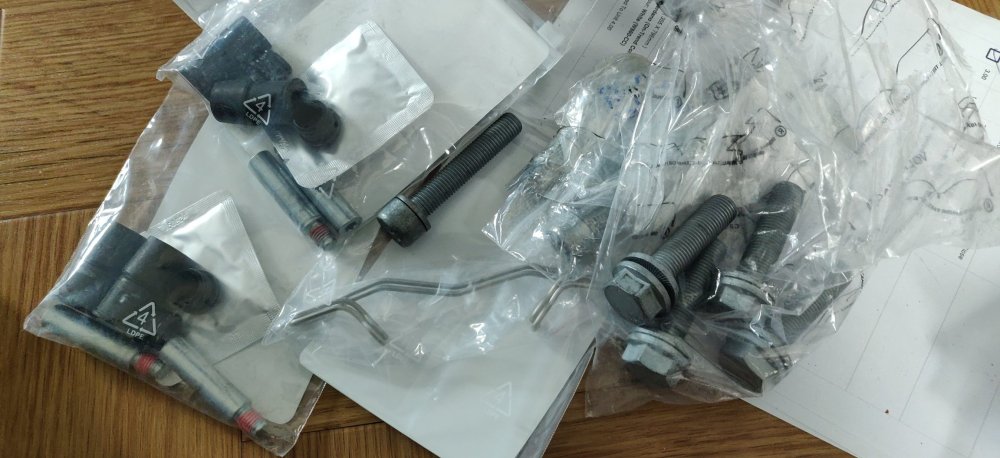
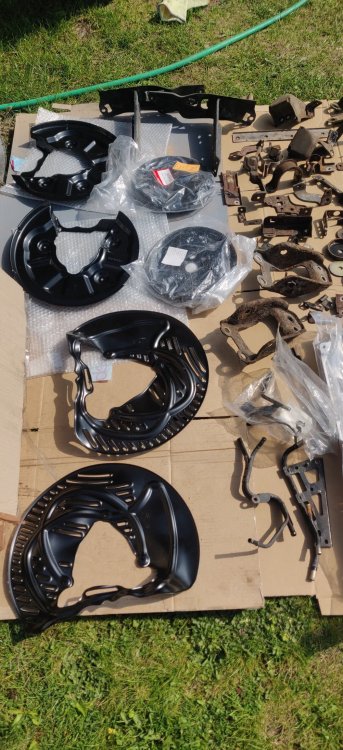
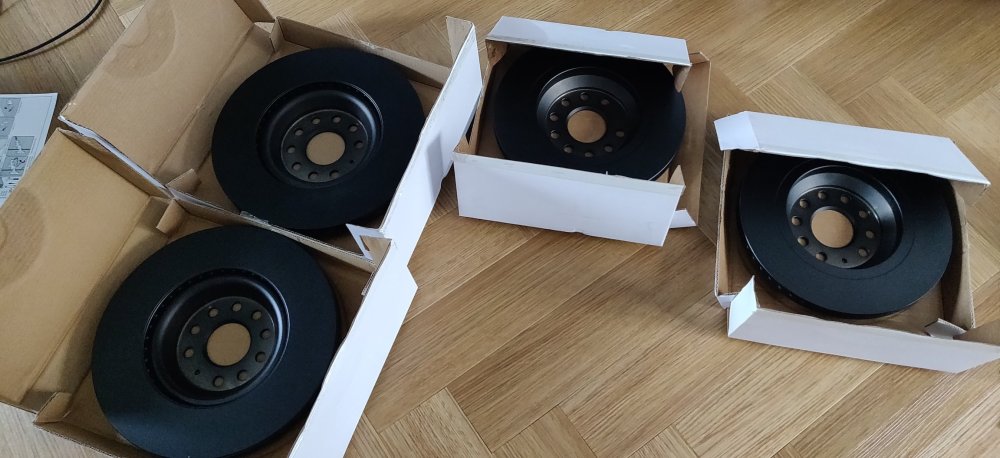
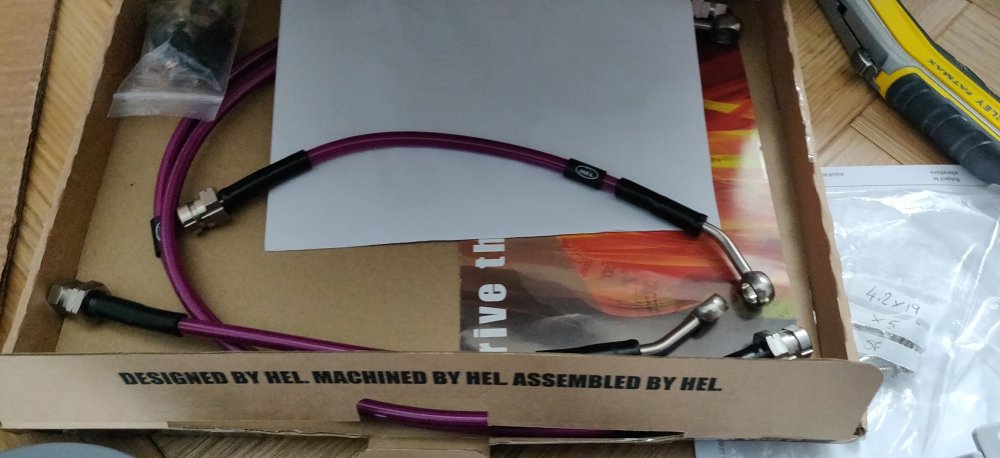
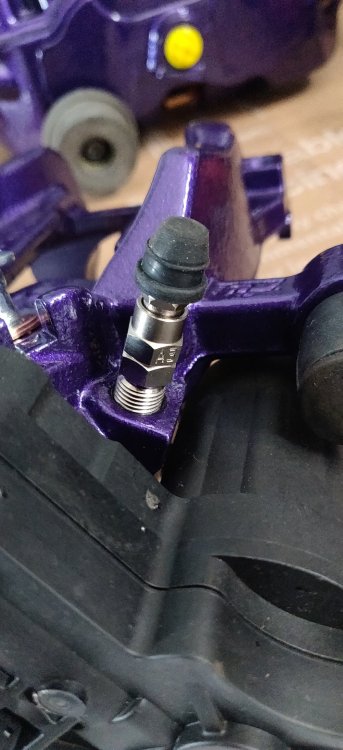
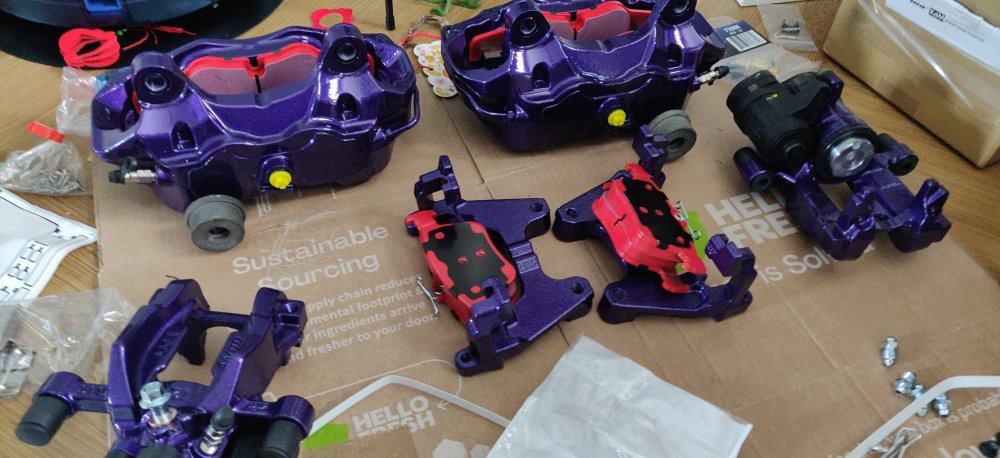
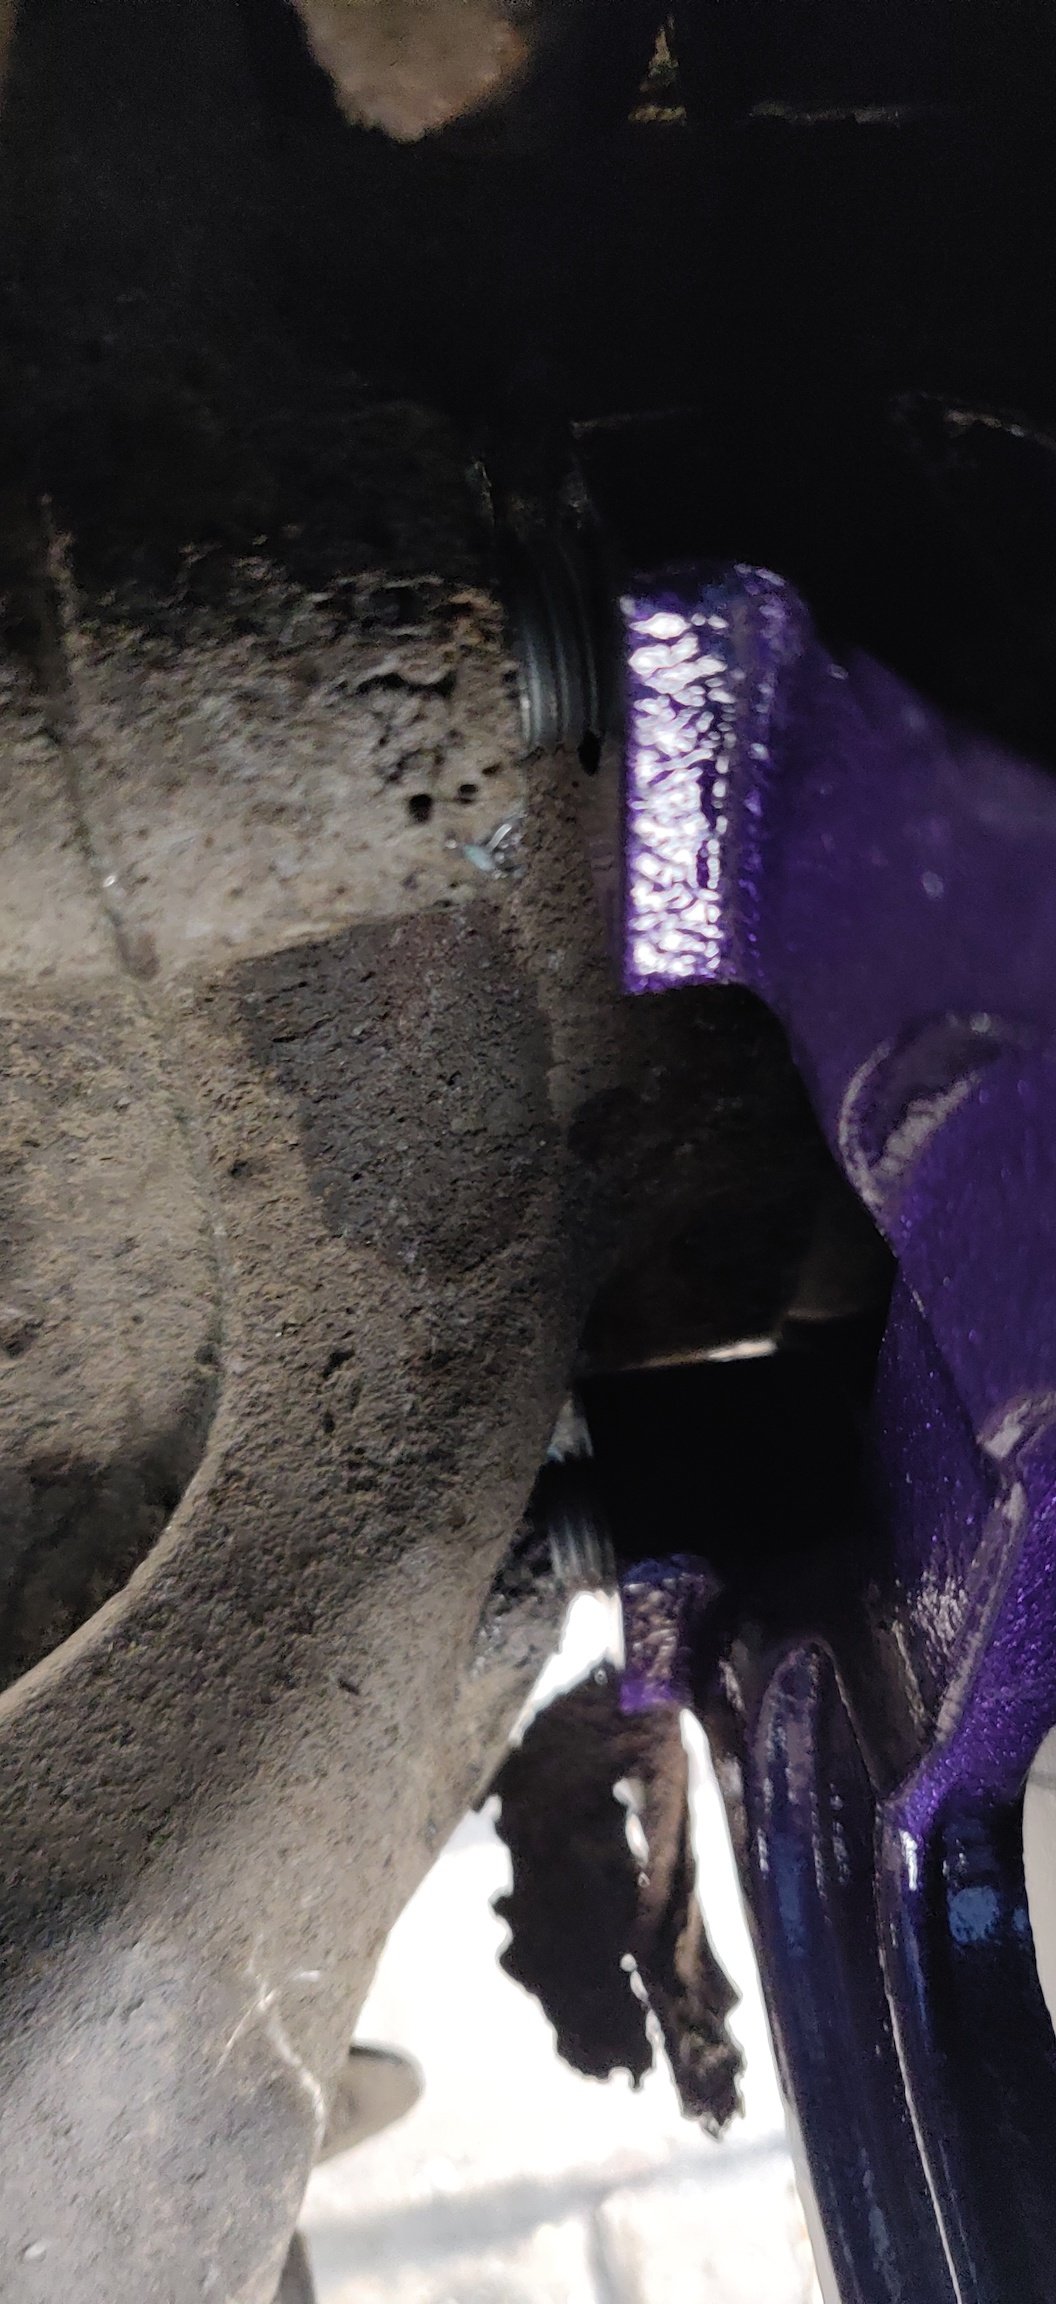
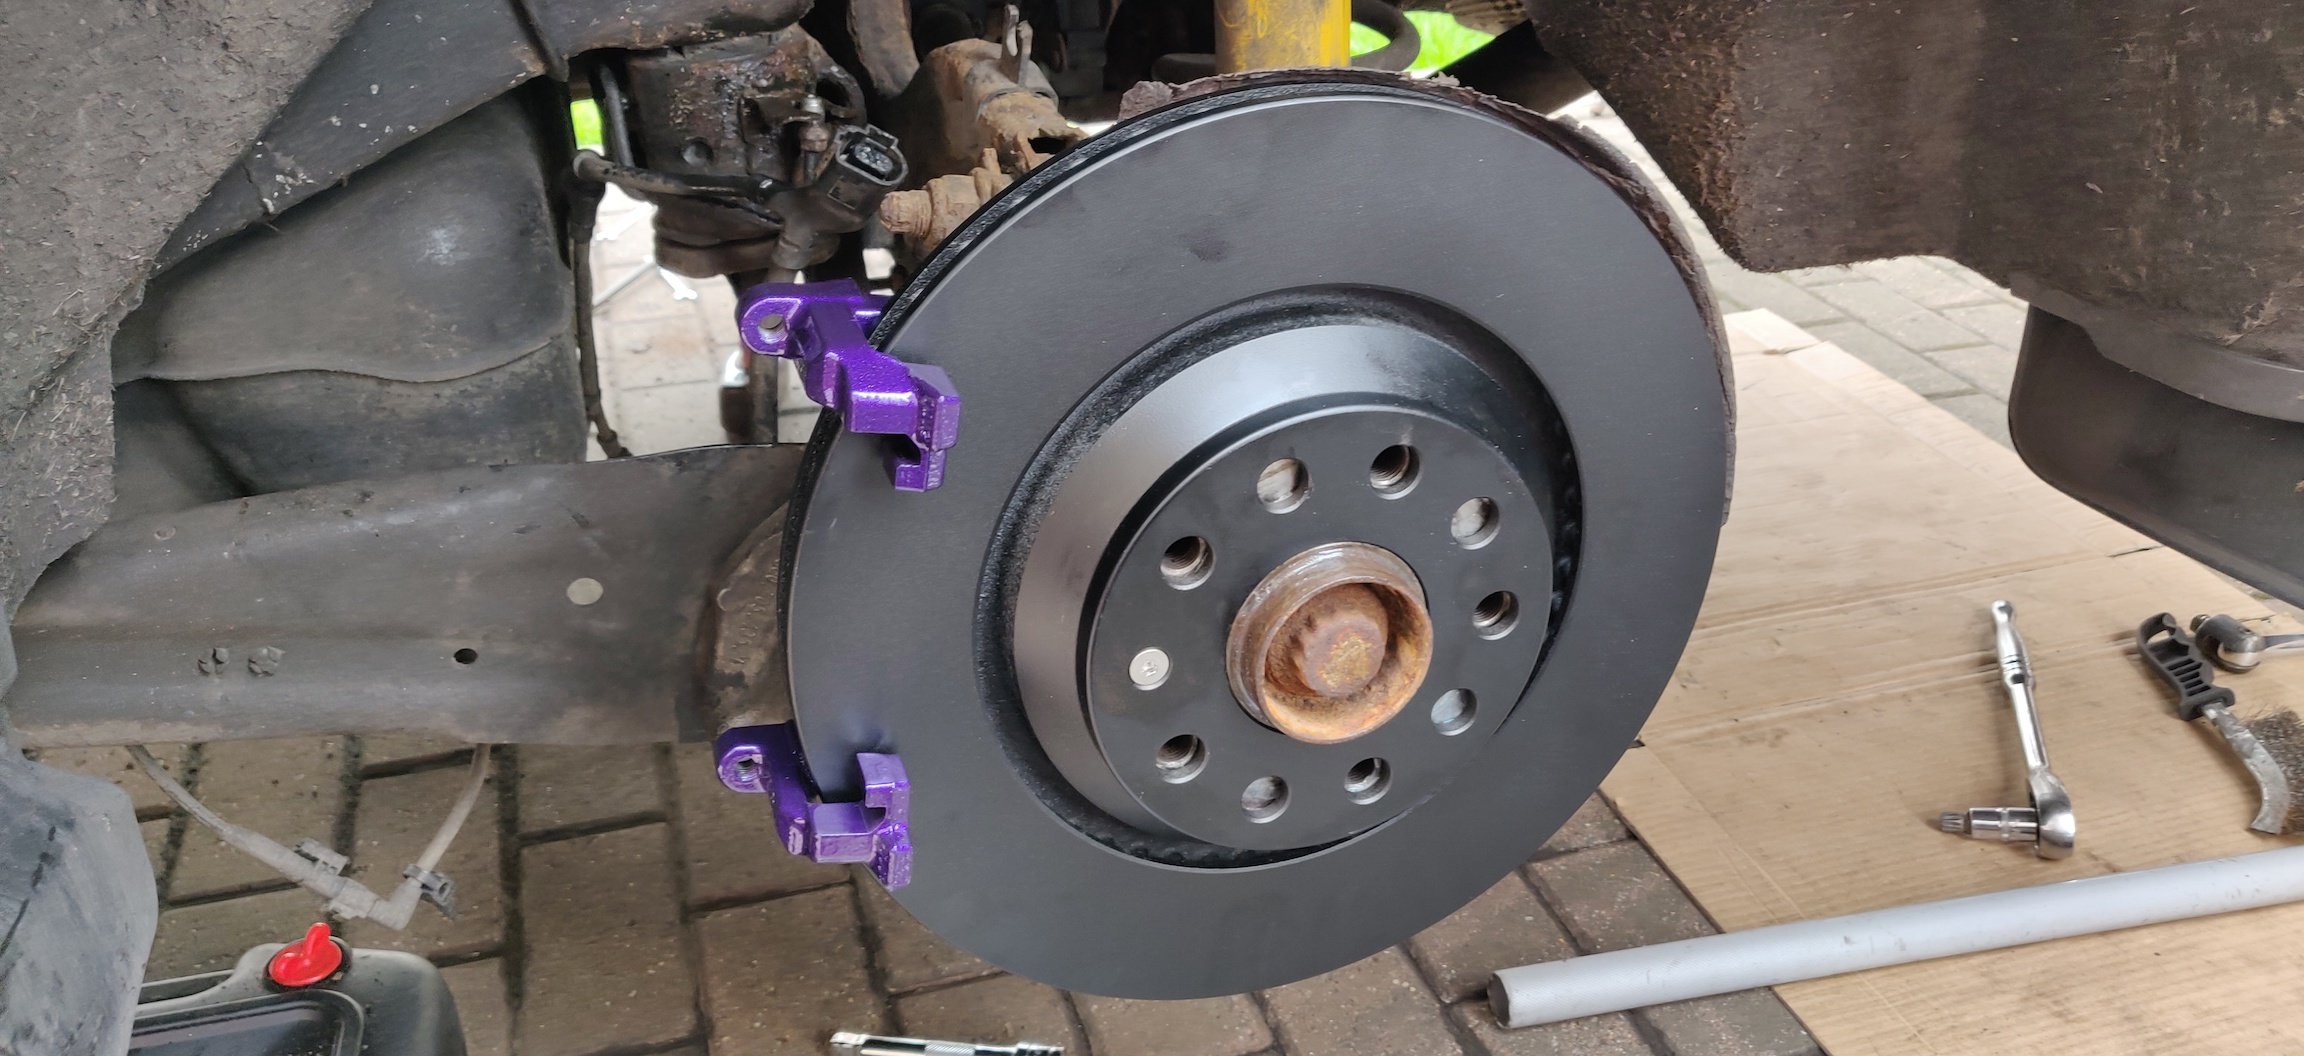
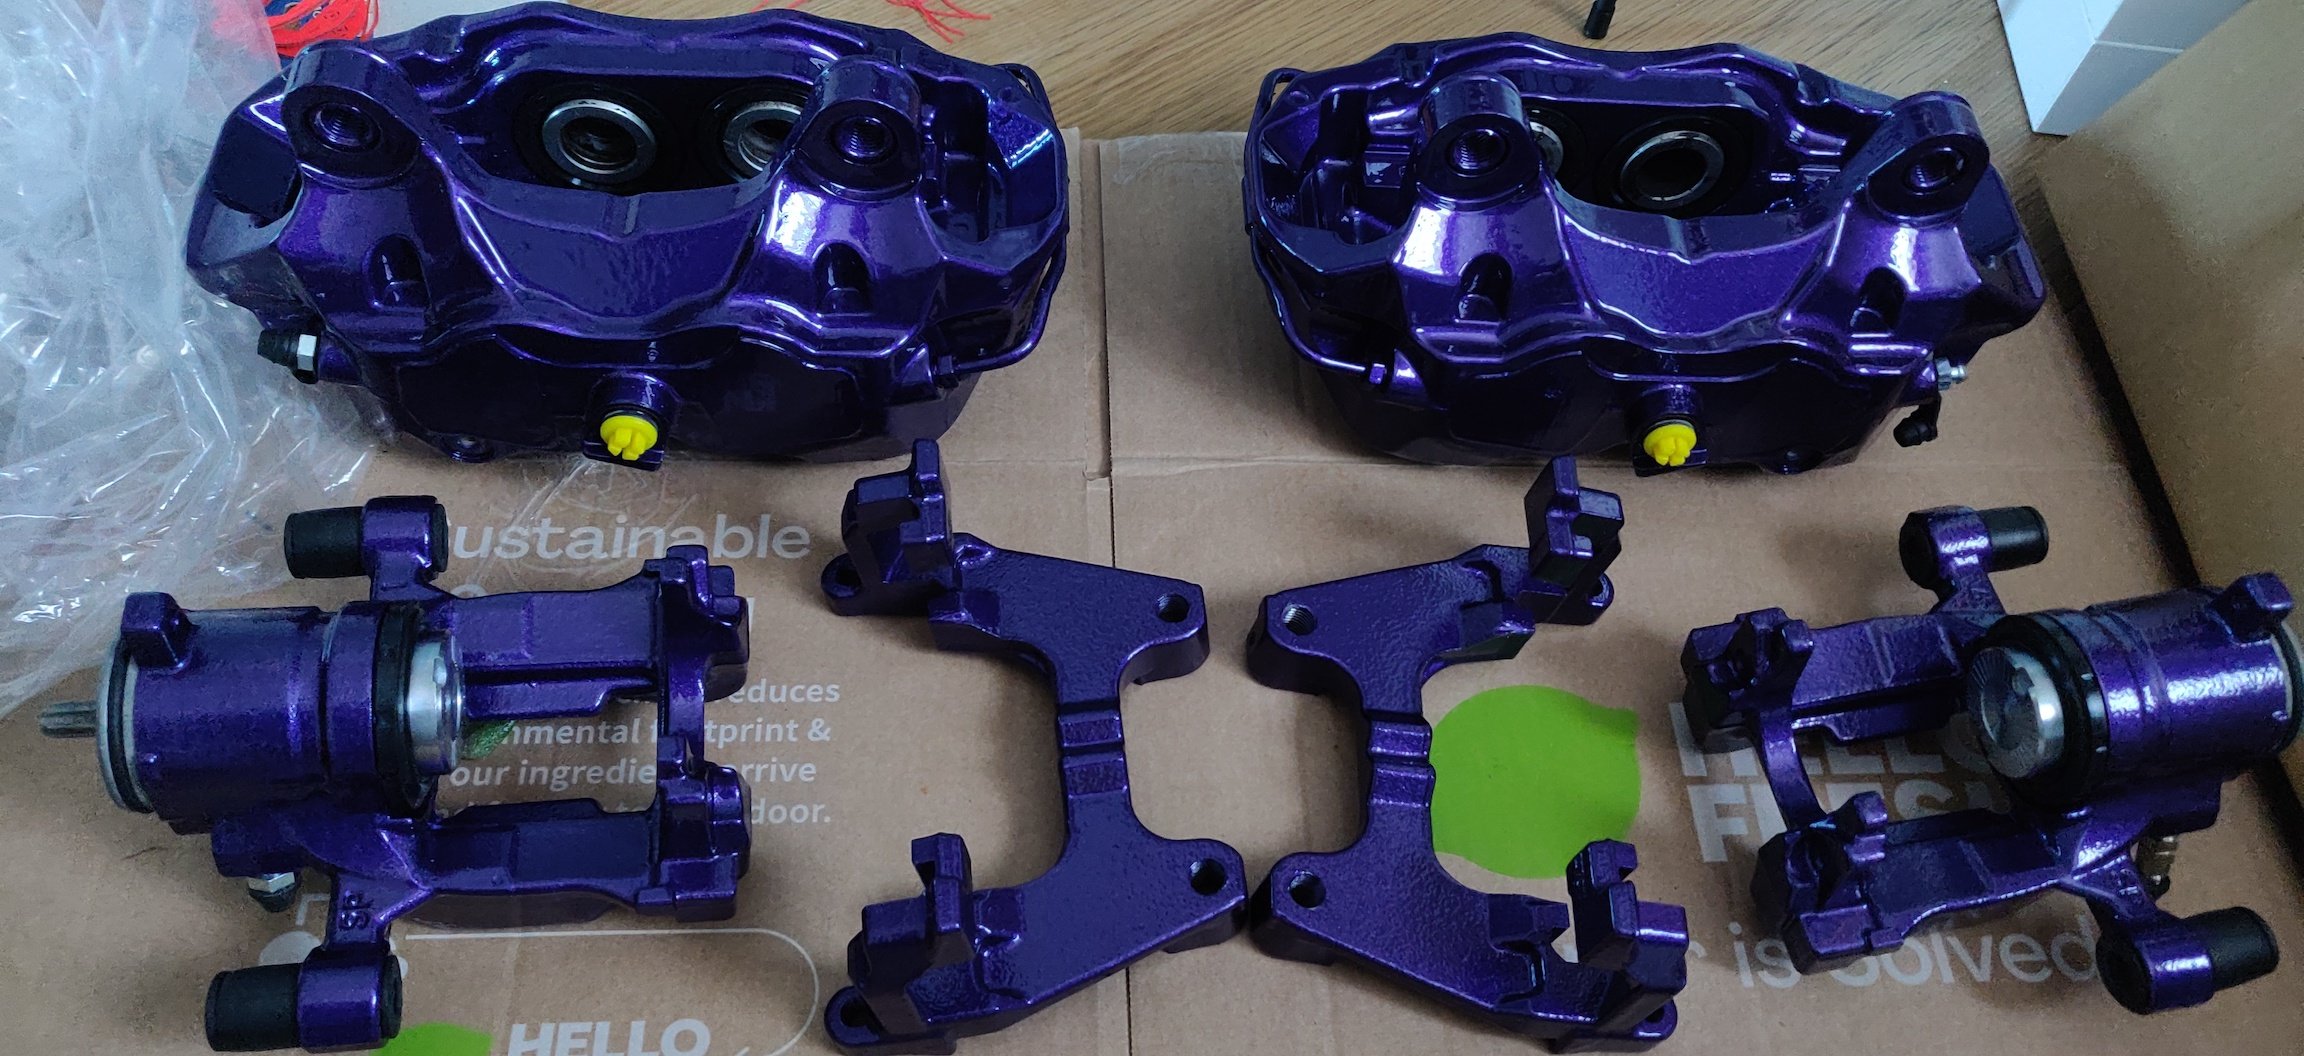
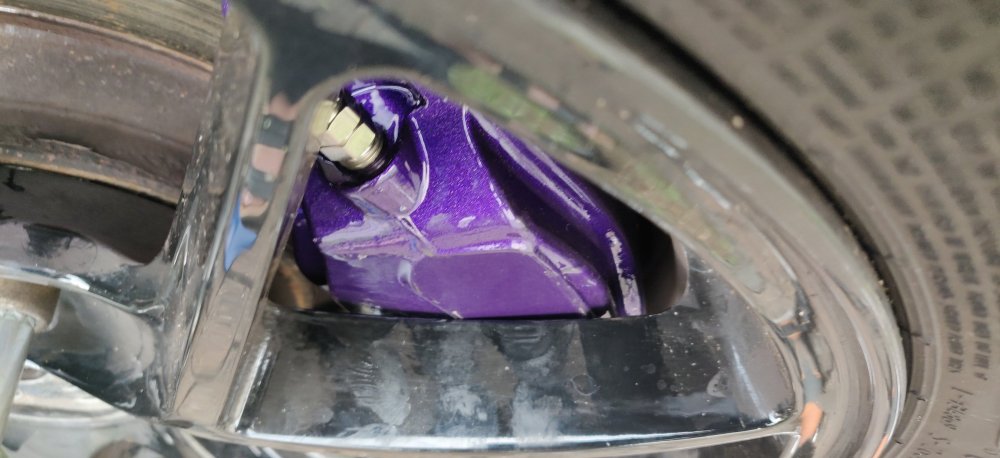 1 point1 pointIIRC, there is an auxiliary coolant (not oil) pump to alleviate risk of excess heat transfer to oil on engine shutdown.1 pointBusy day today on the rear brakes, but first, a post that will probably infuriate a certain someone. So something that has been on the list of things for this car: Some Audi TTS calipers to replace the fronts. The aim was to scour for these until they were at a price I couldn't refuse. This was the case, as not only was it a good price, it was also all 4 calipers, front and rear. Came to £409 with a discount. I did reduce the delivery cost by picking them up myself, so a 3 hour round trip if I remember correctly. This was mid February, and from there, was a case of sourcing the other bits. So things like: Caliper bolts front and rear, and the rear caliper gubbins, like slide pins and those clips that were buggered. Front bolts probably don't need replacing as they're not TTY, and I'm sure they would fit the Audi TTS calipers, but got them anyway, N 910 84 901 at £10.87. The rears are TTY, got Febi Bilstein 48817 from eBay, £12.78. Not pictured are bits for the front calipers, 8W0 698 231 are some clips to keep the pads in place and for the pad contact area to the caliper, £28.87. A pad wear sensor for the Audi TTS caliper, 8S0 615 121 A from eBay at £19.49. The slide pins for the rear (£10.83) and the clips (£6.89) were from eBay, just aftermarket bits, notable that the 7mm socket is now a T40 torx on these pins. I'll have to make a note of that somewhere for future work (probably scribble it on the brake disc or something). Some other random bits like brake hose clips (£3.23) and brake retaining bolts (£3.25), stainless ones, and probably really for the new wheel bearings once those are ever in place. Just random bits from eBay, as it'd be mad to use genuine retaining bolts and risk them seizing. Also a set of brake shields front and rear: Obviously the bits on the left side. The rears need replacing as seen on previous posts, and the Audi TTS ones have these air vent bits, which I suppose is for cooling, yet, feels like it defeats the purpose of shields. Fronts are 8S0 615 311 D and 8S0 615 312 D at £57.20 for the two from lllparts, and the rears are from eBay apparently parts 5Q0 615 611 K and 5Q0 615 612 K at £40.70. All the other bits are for my Honda Insight, basically in a state of disassembly, with a huge amount of rust, in such a way that means I'm not worried about the Skoda. All the bits are being sent to be coated, to something hopefully more corrosion and scratch resistant. Lest the rear shields disintegrate away again. The grand irony being the Insight is aluminium, so it's the rest of the bits that have really rotted away. Anyways, brake discs: I've used MTec for brake discs for a lot of my cars, mainly because they do coatings which seem to help keep the unbraked surfaces hold up reasonably well. Sometimes not perfect though, but the price of the discs make it hard to argue. Set of 4 large discs for £228.48 seems hard to beat. One has to start chasing big money for lighter discs or "better", whatever that may mean. Whilst the wallet was being emptied: Set of HEL brake hoses. Picked purple for reasons to be revealed later. Given the state of the rear hoses, and the fact the Audi TTS ones need to be a tiny bit longer than the standard ones, meant this was a decent chance for fancy braided ones. These were from Progressive Parts at £108. So whilst the calipers were sat there, with these shiny bits alongside, the general grottiness of the calipers meant this was probably the best time to get them refurbed and rebuilt, and I guess be repainted before they were fitted. So dropped them off the Brake Caliper Specialists at Long Eaton, and a week later: So all in purple. Bit much perhaps, but all looking nice and fresh. If the calipers were to stick after this, I'll put the car into a ditch or something. Divert your eyes: this cost £697, where £50 was added because the pistons in the rear calipers were buggered and needed replacing. The TTS calipers are using the same pistons originally, shame they weren't spruced up, but hey ho. They'll probably get dirty quickish once actually used. In spare moments, the calipers were all fitted up, electronic parking brake and stuff like that, in addition to: EBC RedStuffs. I don't anticipate tracking this car, so no YellowStuffs. The Reds spit out less brake dust, so hopefully good news for the shiny calipers and wheels. The fronts are DP32256C and were £116.87 and the rears are DP32173C at £53.84. The rears were ordered circa a year ago, just sitting happily waiting for disaster. Continue to divert eyes: Stahlbus bleeders have been fitted throughout. The rears have the bleed screw in frankly a stupid place, difficult to get any spanners in there. So the idea is that the Stahlbus bleeders stick out a bit more due to it being two separate pieces, so an even longer one means it sticks out even prouder. Hopefully this makes future bleeding even easier. Annoyingly, the TTS caliper does 2 bleeders each, and these bleeders are not cheap! The rears are M10 x 20mm lengths at £52.31 and the fronts are M10 x 16mm lengths at £96.19! Those and the painting of the calipers were certainly not necessary, so a moment of madness. This looks like madness, almost two grand, but is essentially a full brake refresh, and the procurement of parts was pretty much over the course of a year and a bit rather than all purchased in one lump. One can easily spend more once things like big brake kits or more exotic friction materials are involved, so it could have been worse. Been a long post, I'll need a break before I post what I actually did today! I guess the maintenance bits really boil down to the brake disc, pads, and I suppose the rear brake shields. Maintenance: £2860.27 (+£439.89) Upgrades: £4515.82 (+£1515.91) Miscellaneous: £820.07
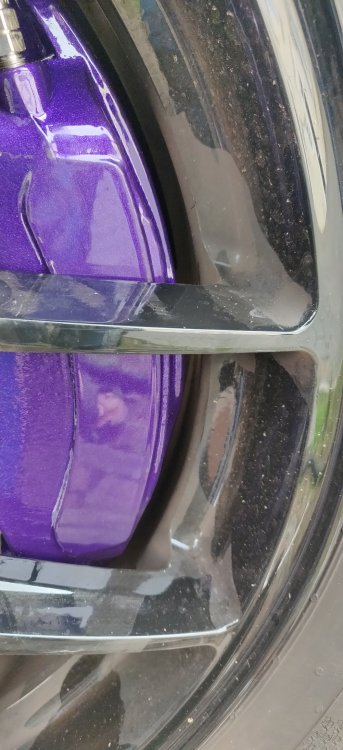
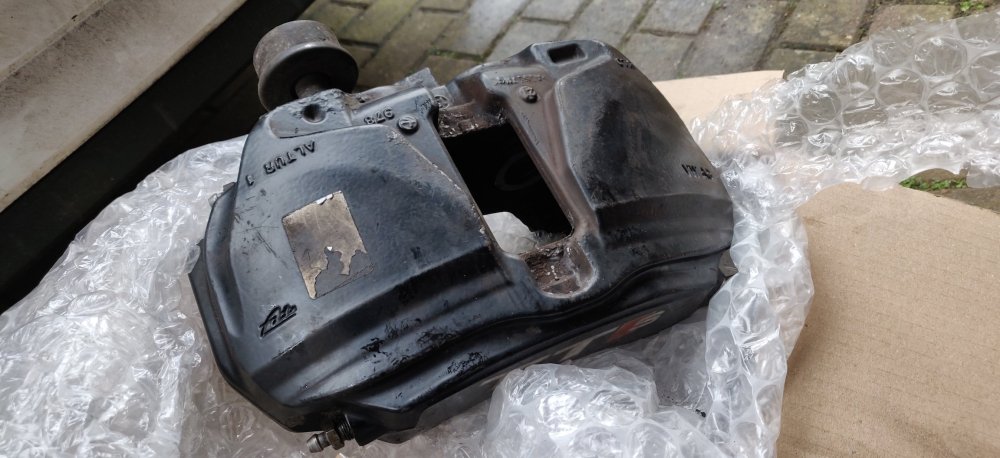

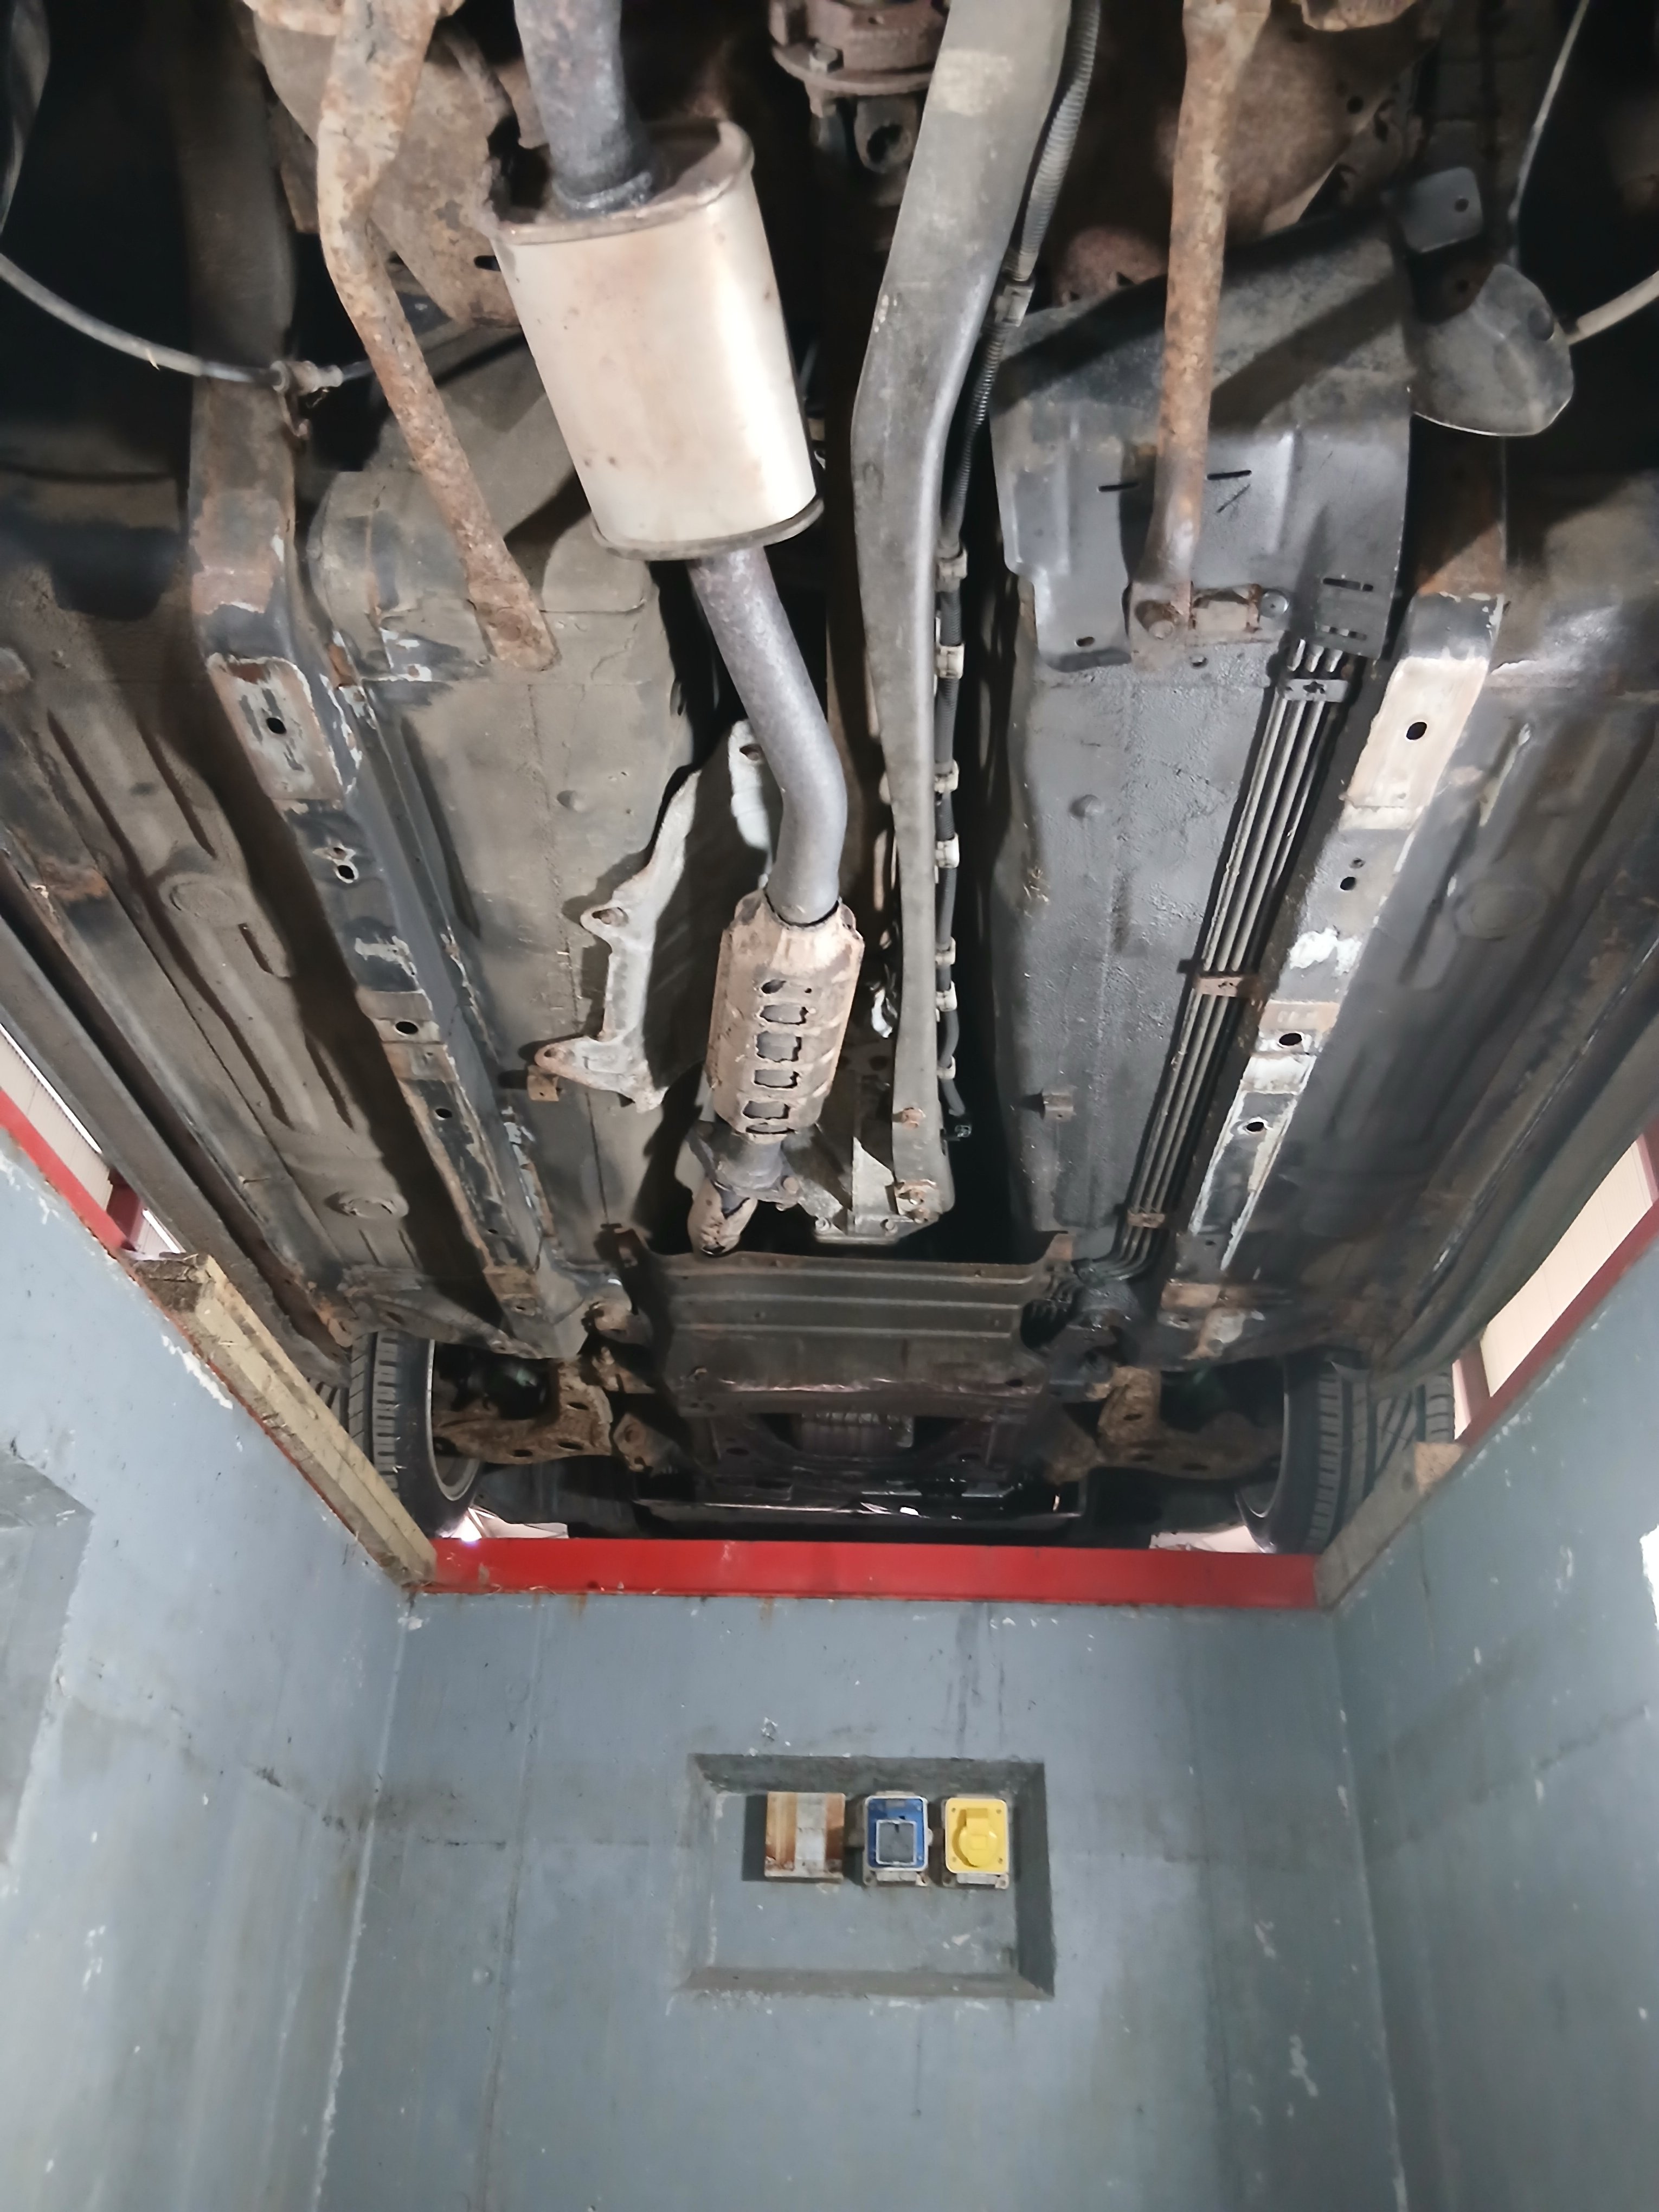
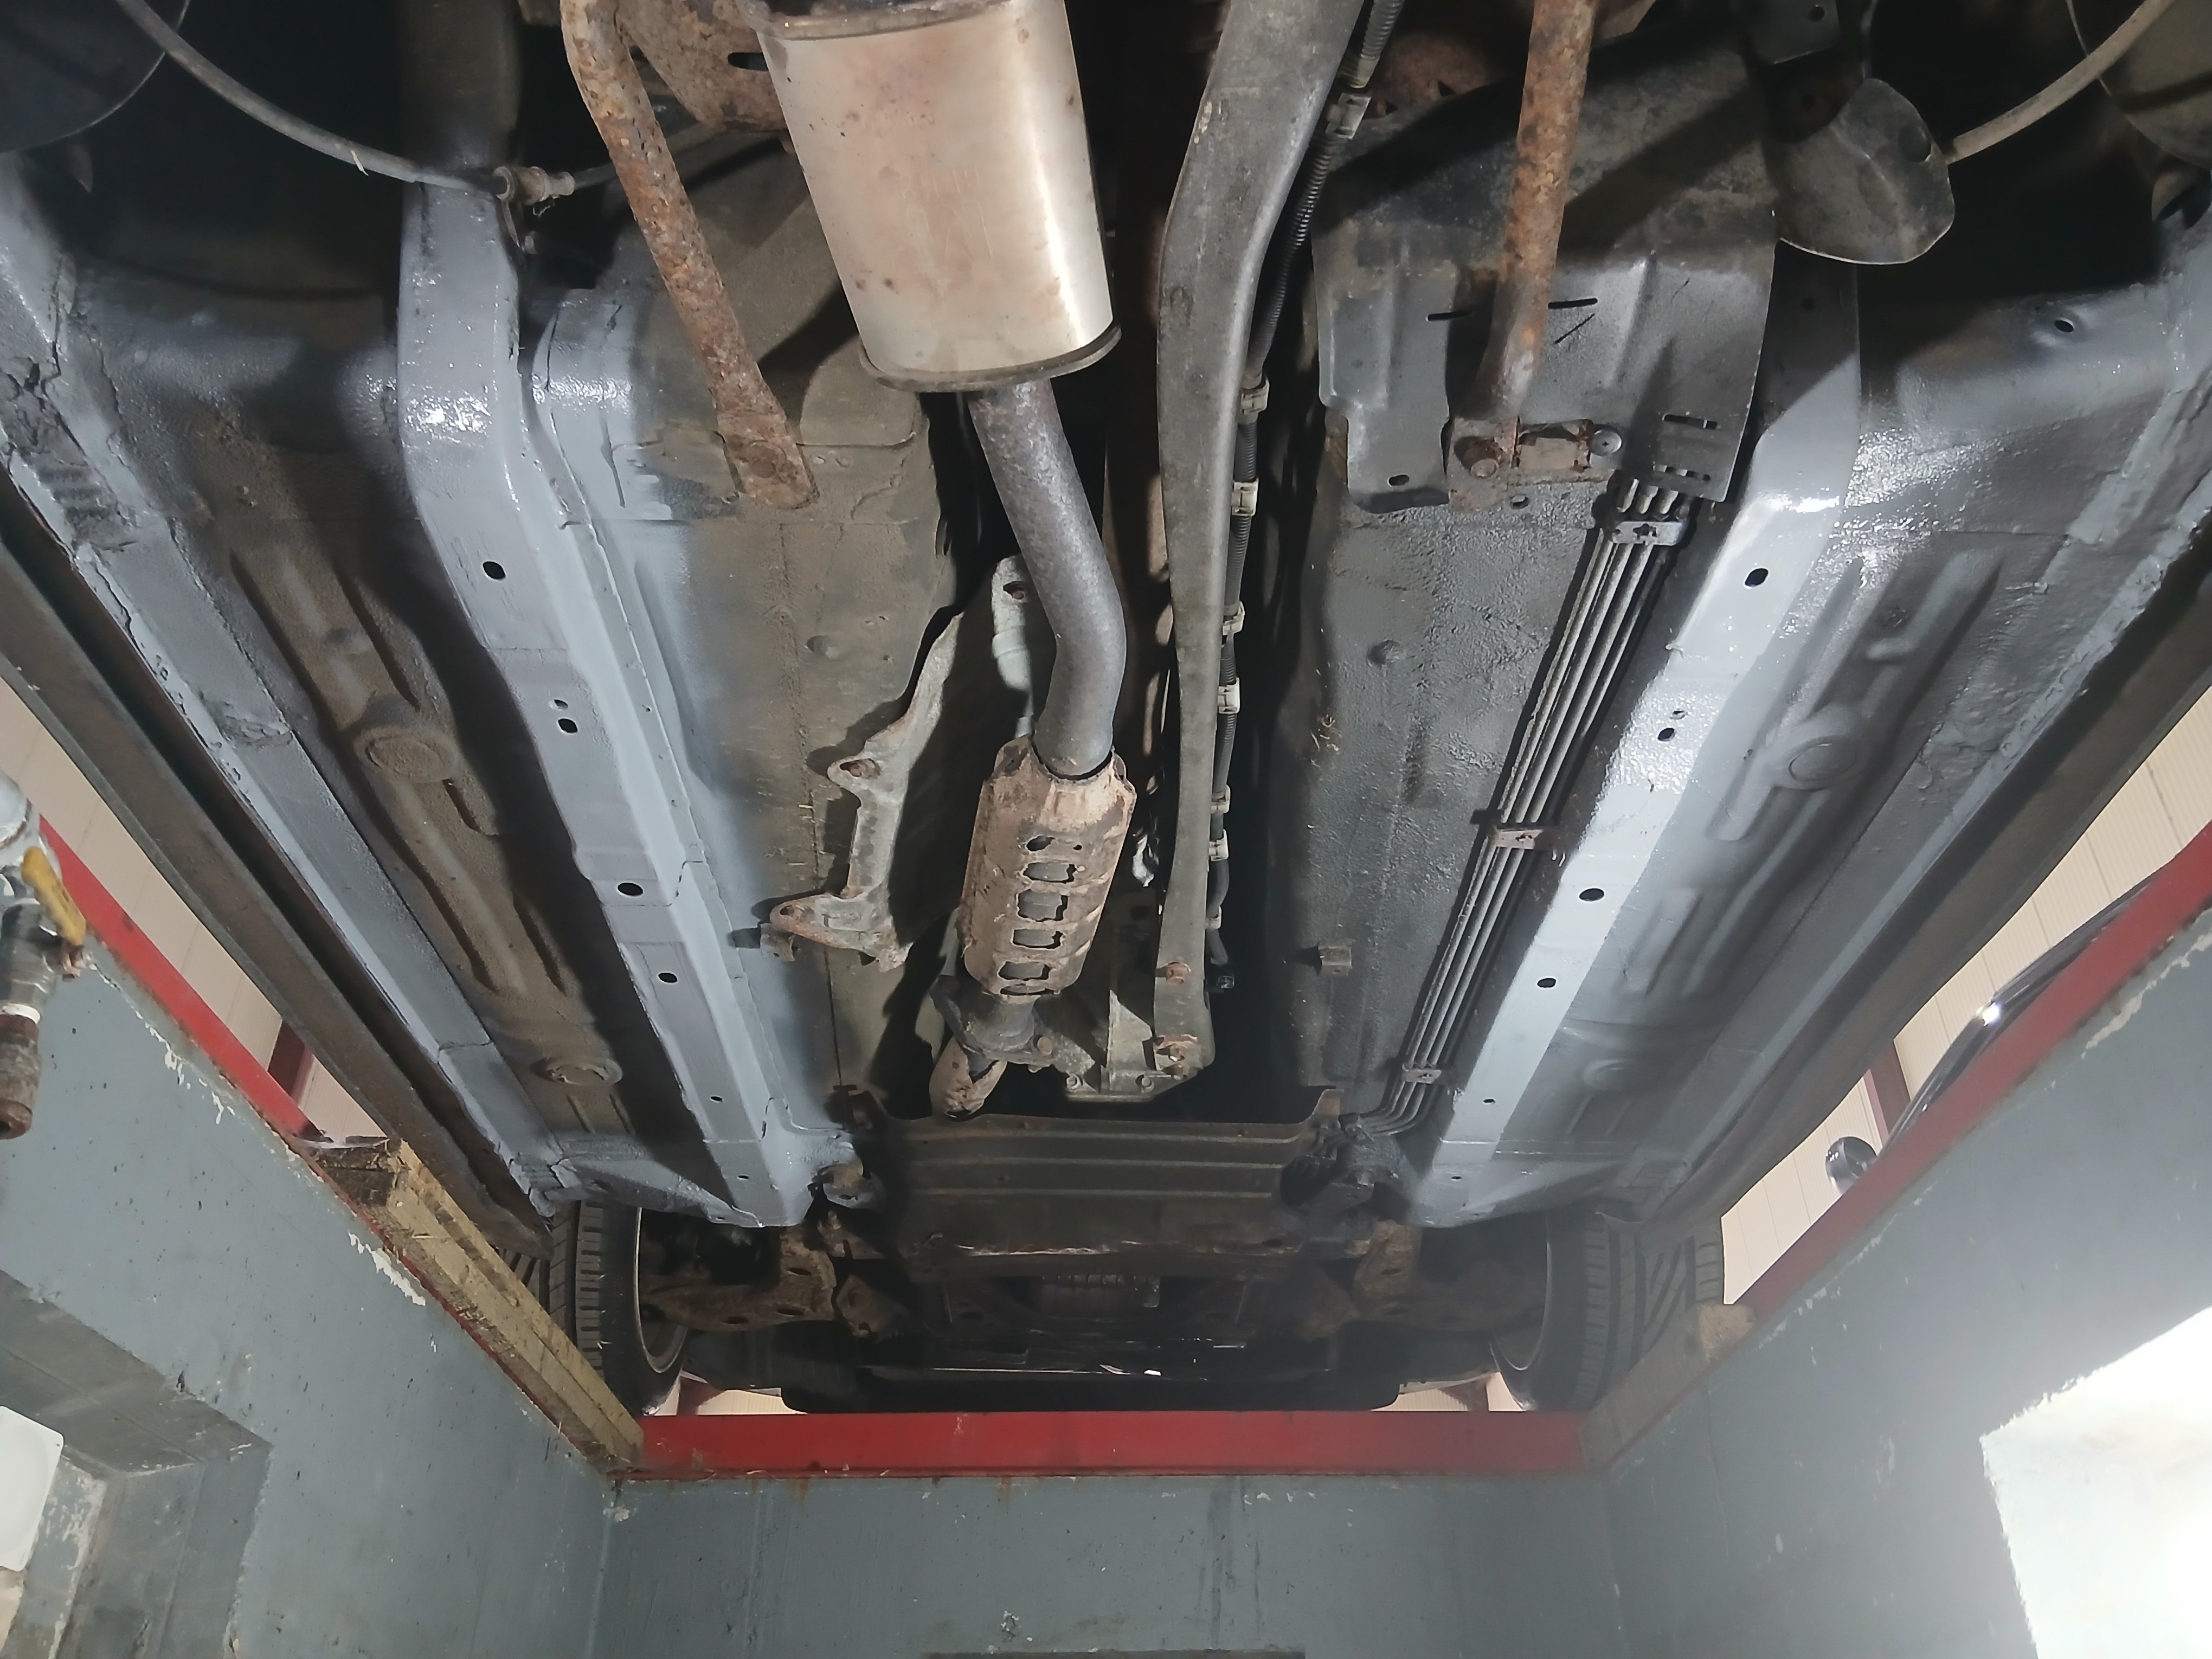
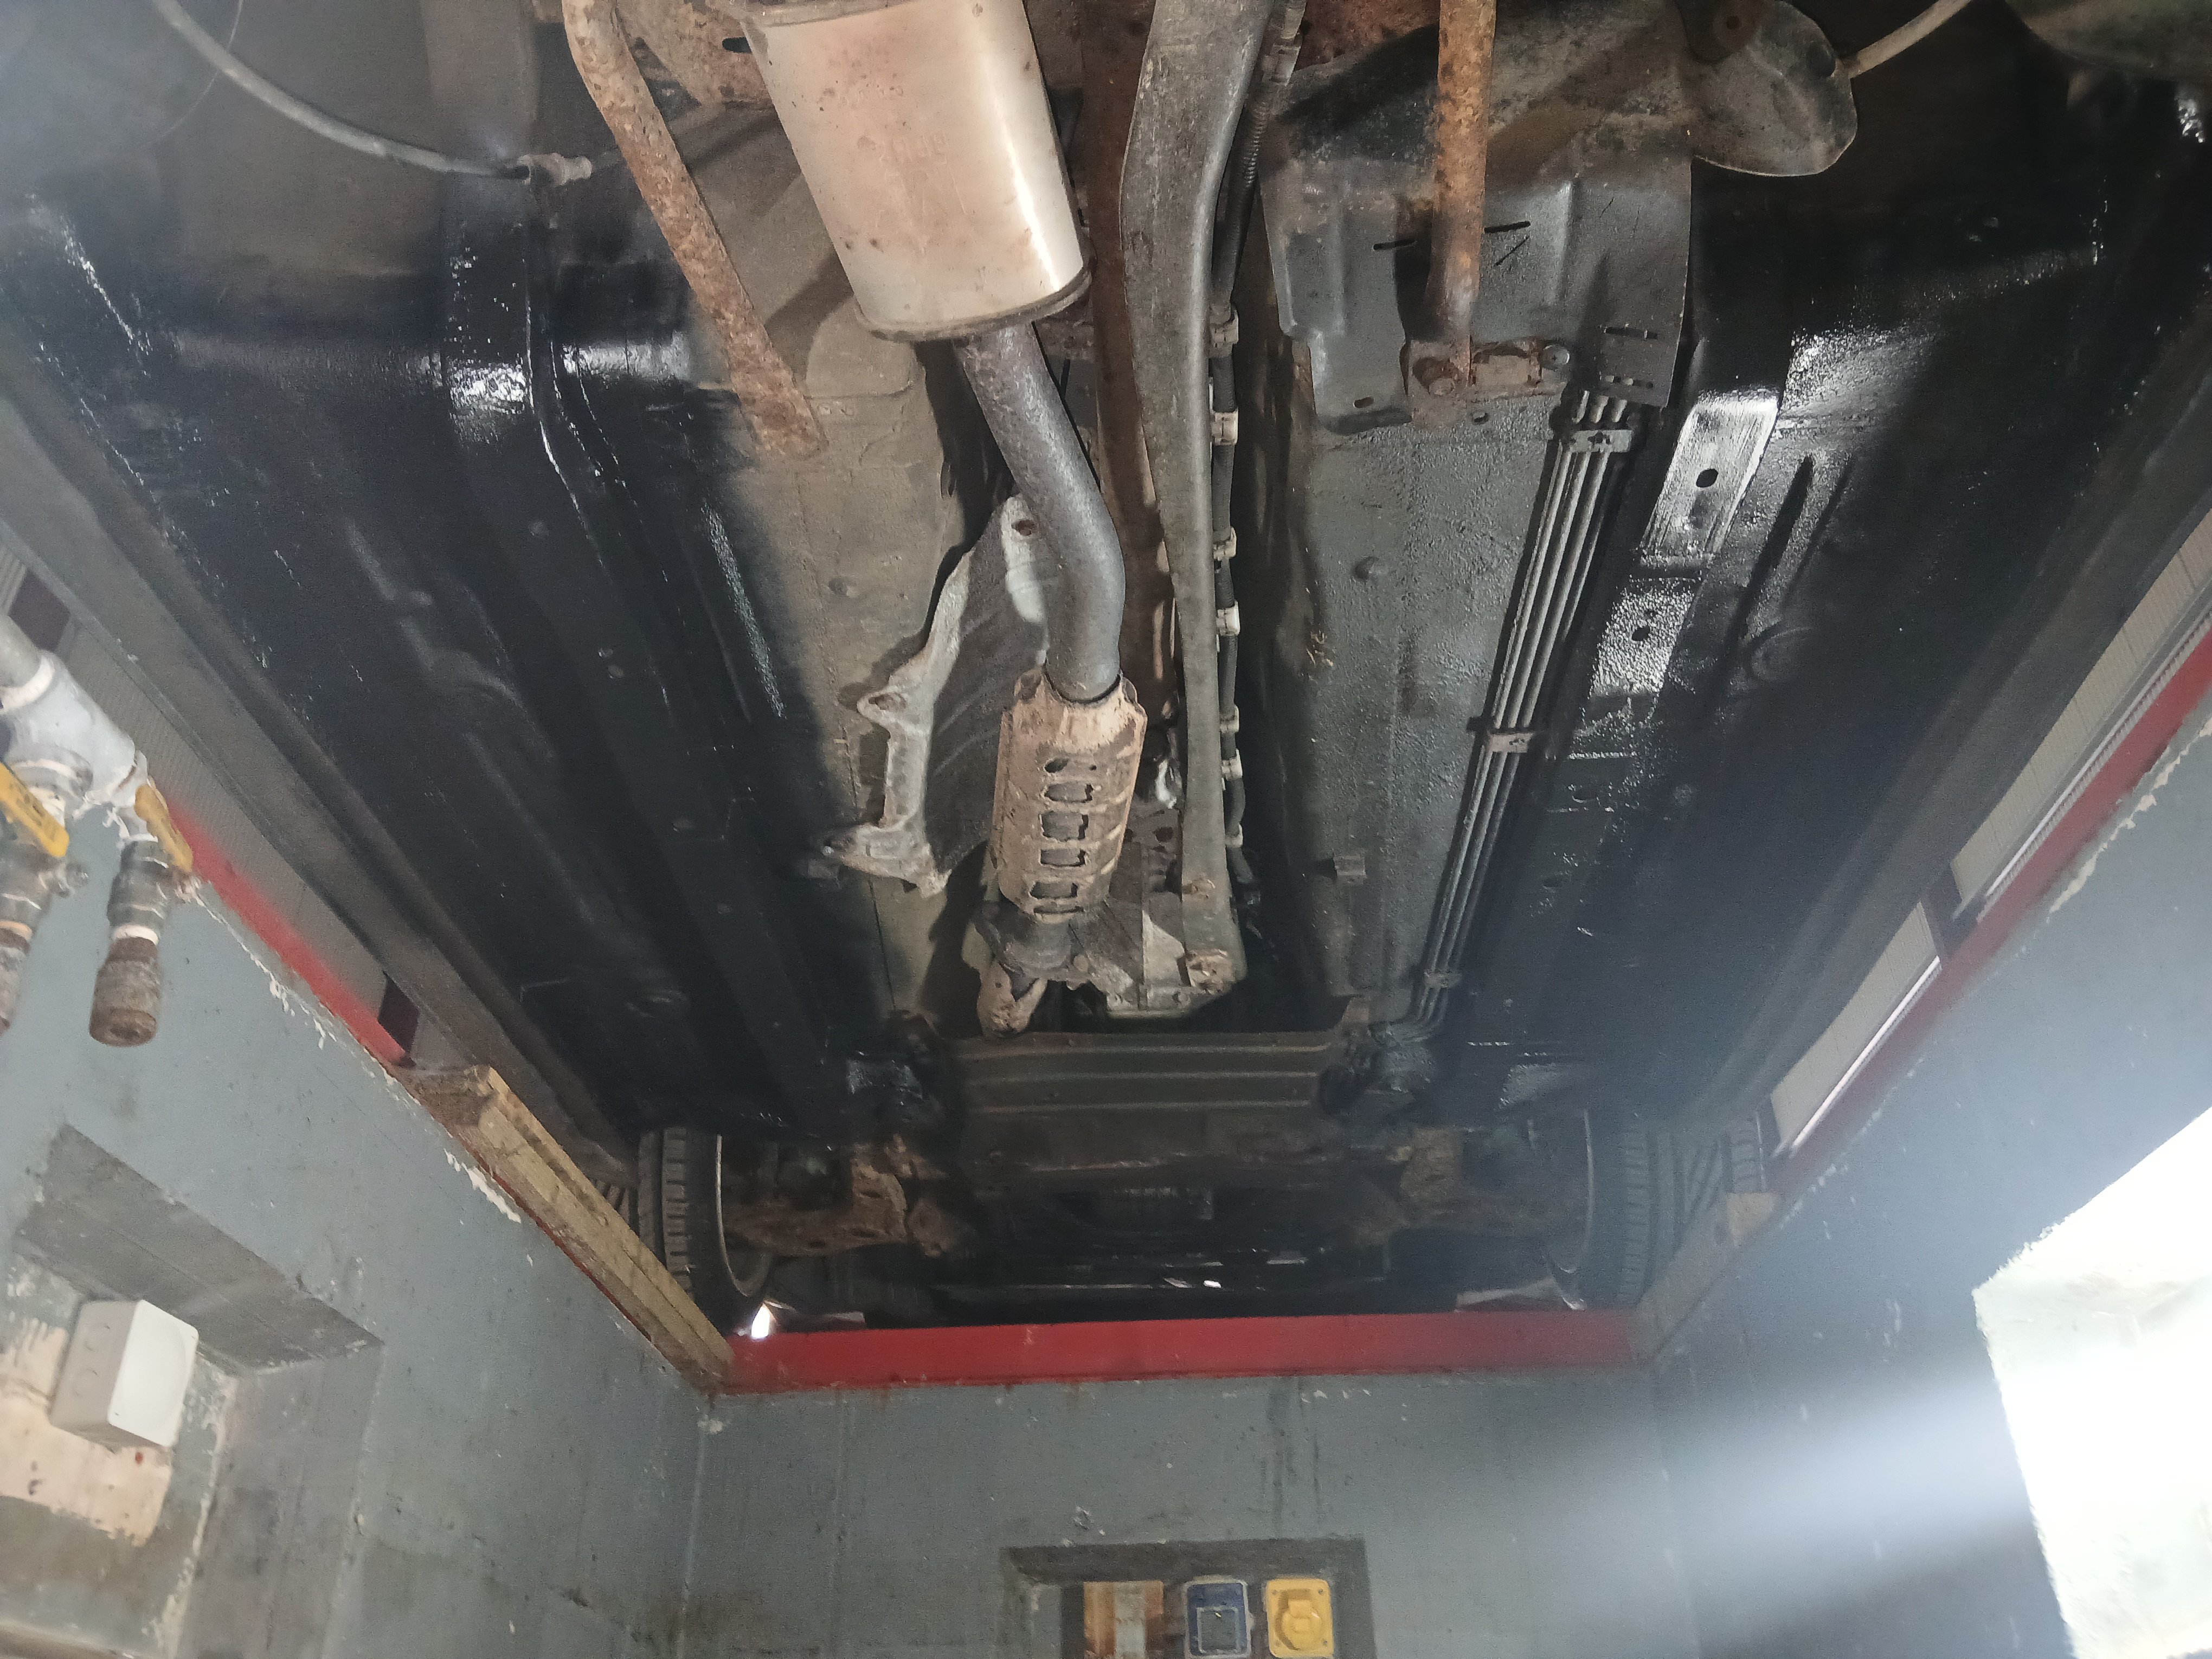
 1 point1 pointThanks all for your input. The answer turned out to be simple, once thatis, the YT video that nta16 kindly posted a link to. It turns out that like my 2022 Superb, there is a rubber pull handle to close the boot, only mine had been chewed away by the previous owner's dog- so I didn't know there was one. I only found this out when I got into the boot via the back seats, and did the screwdriver trick to open the boot. Quite simply, because the boot had been closed for so long, the rubber seal had sort of stuck to the frame of the car enough not to be able to open with the hand outside, but once the leverage of the screwdriver had done its work, I could hear the seal unsticking bit by bit. I would never have thought of that so thanks nta16 for the link.1 point1 pointCurrently tackling some surface rust underneath. Won't be used in winter, or do massive driving so won't need to be perfect.
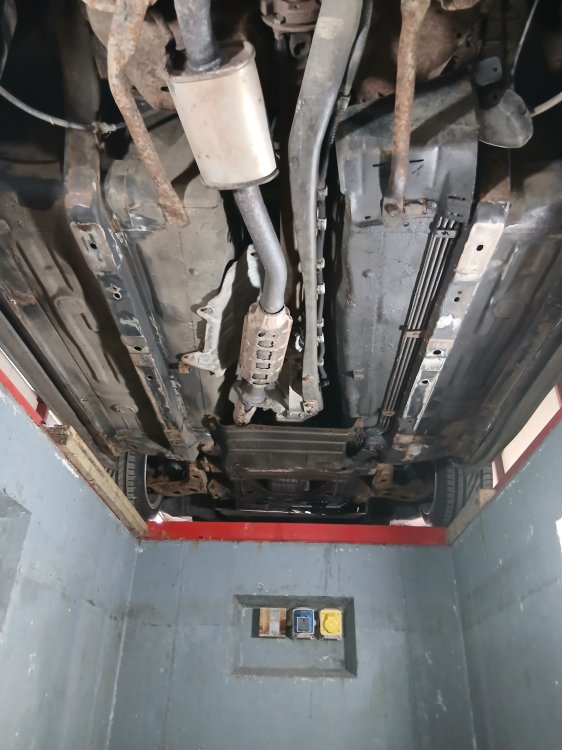

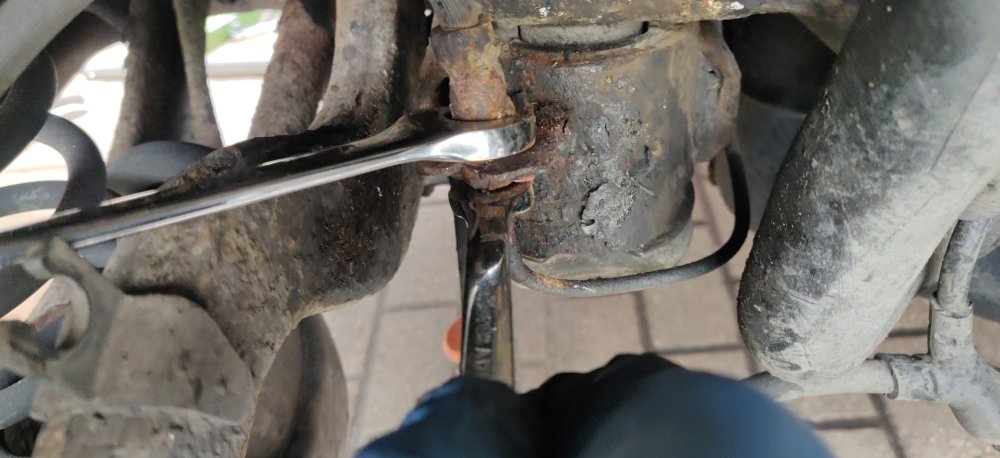
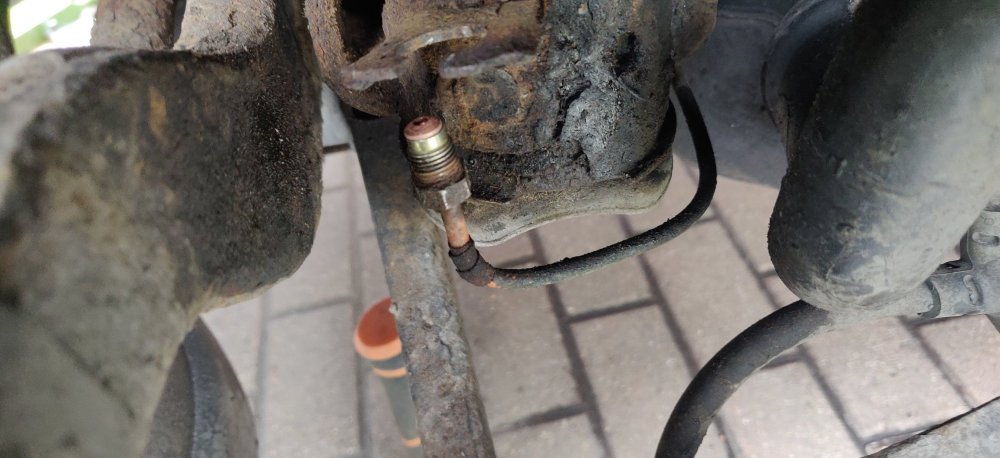
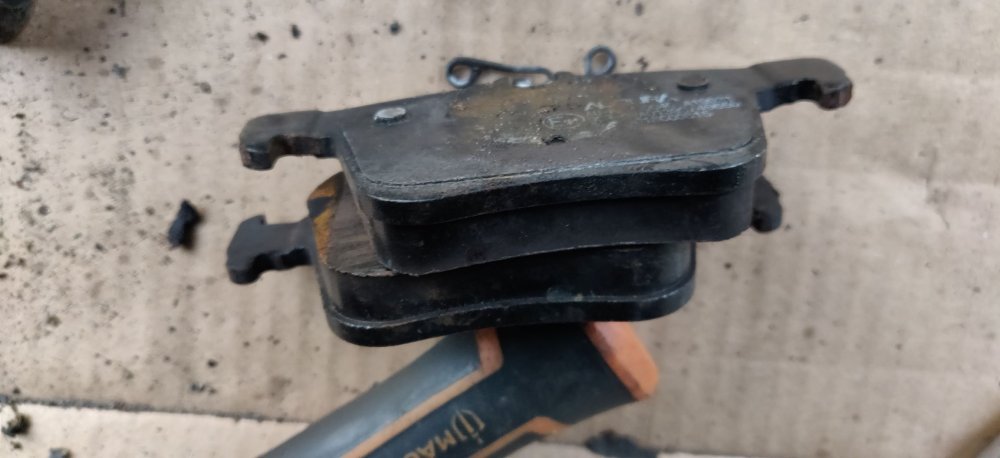
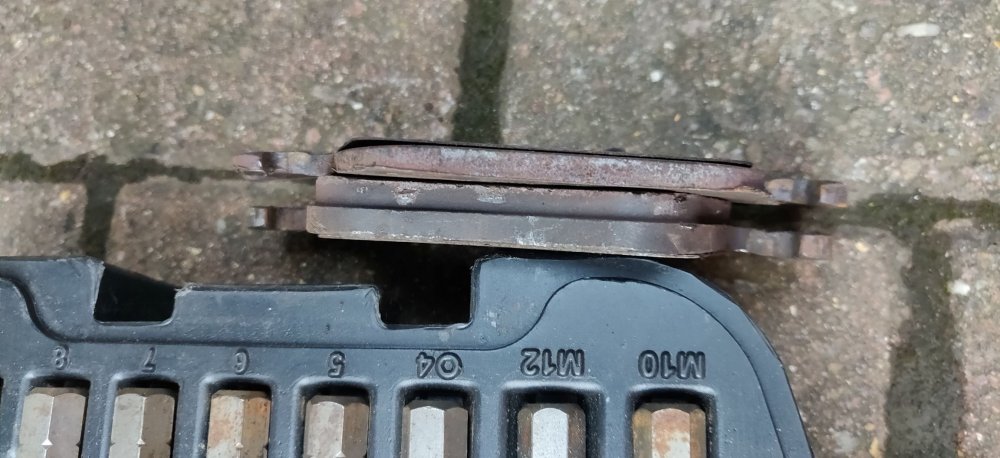
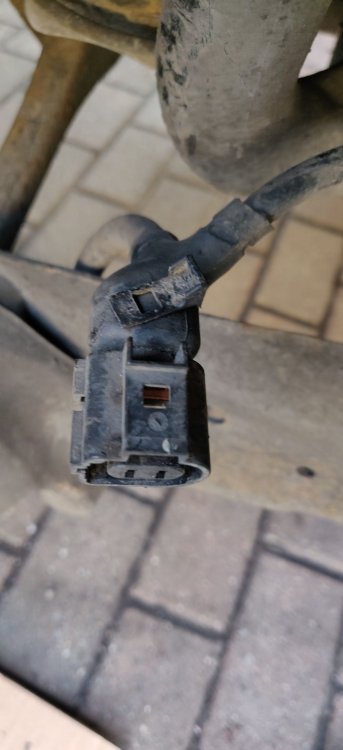
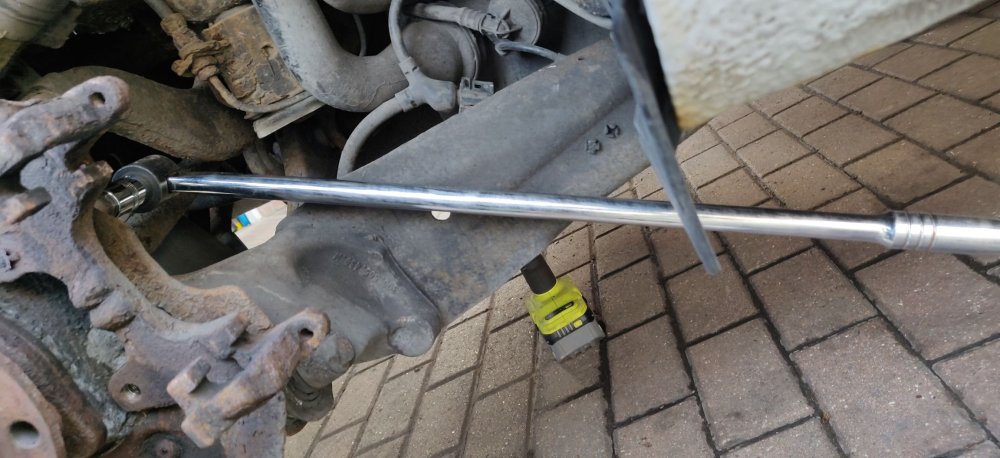
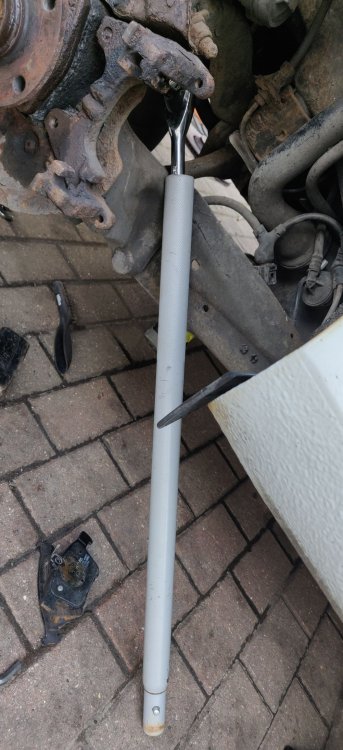
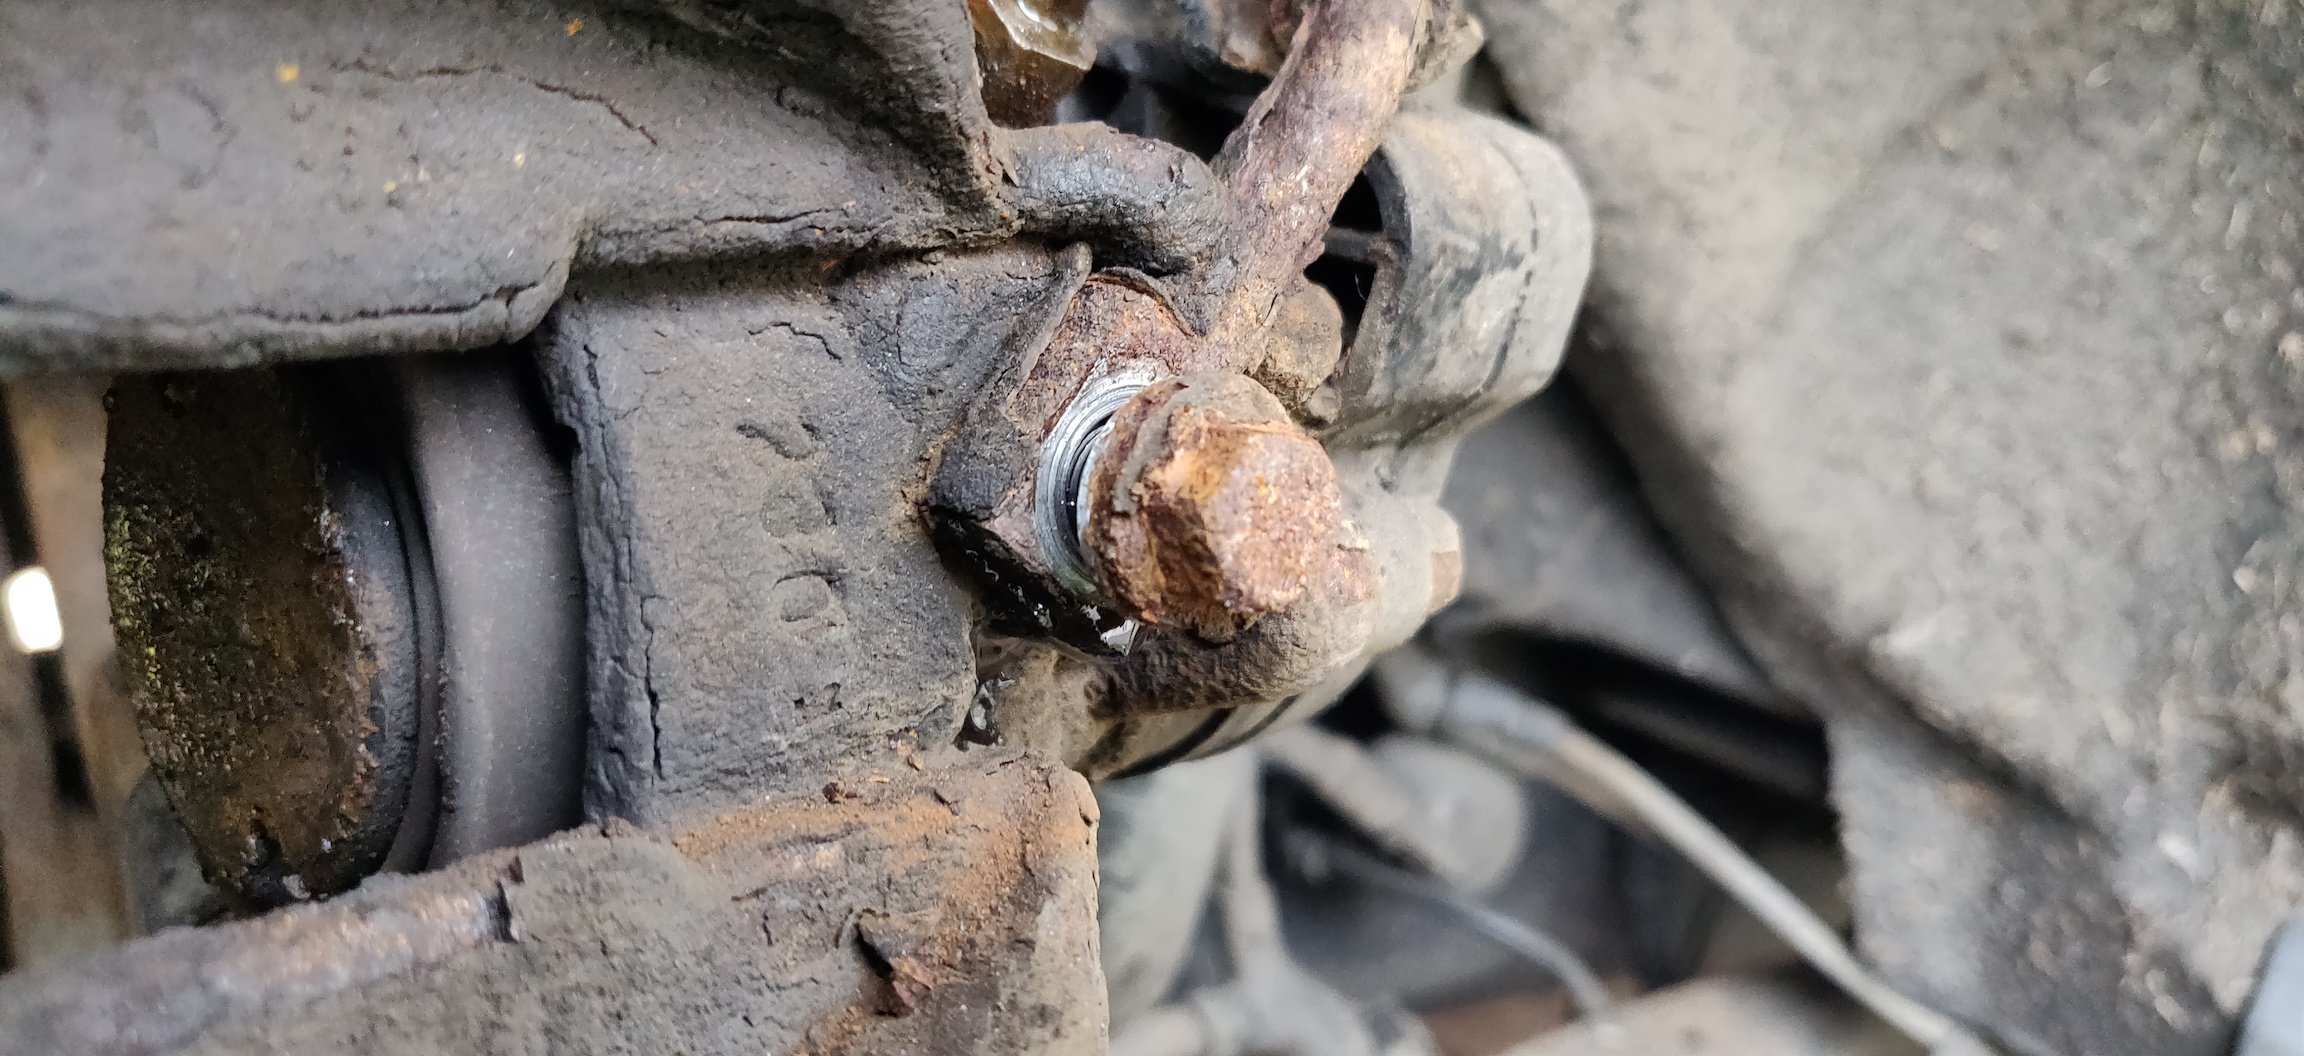
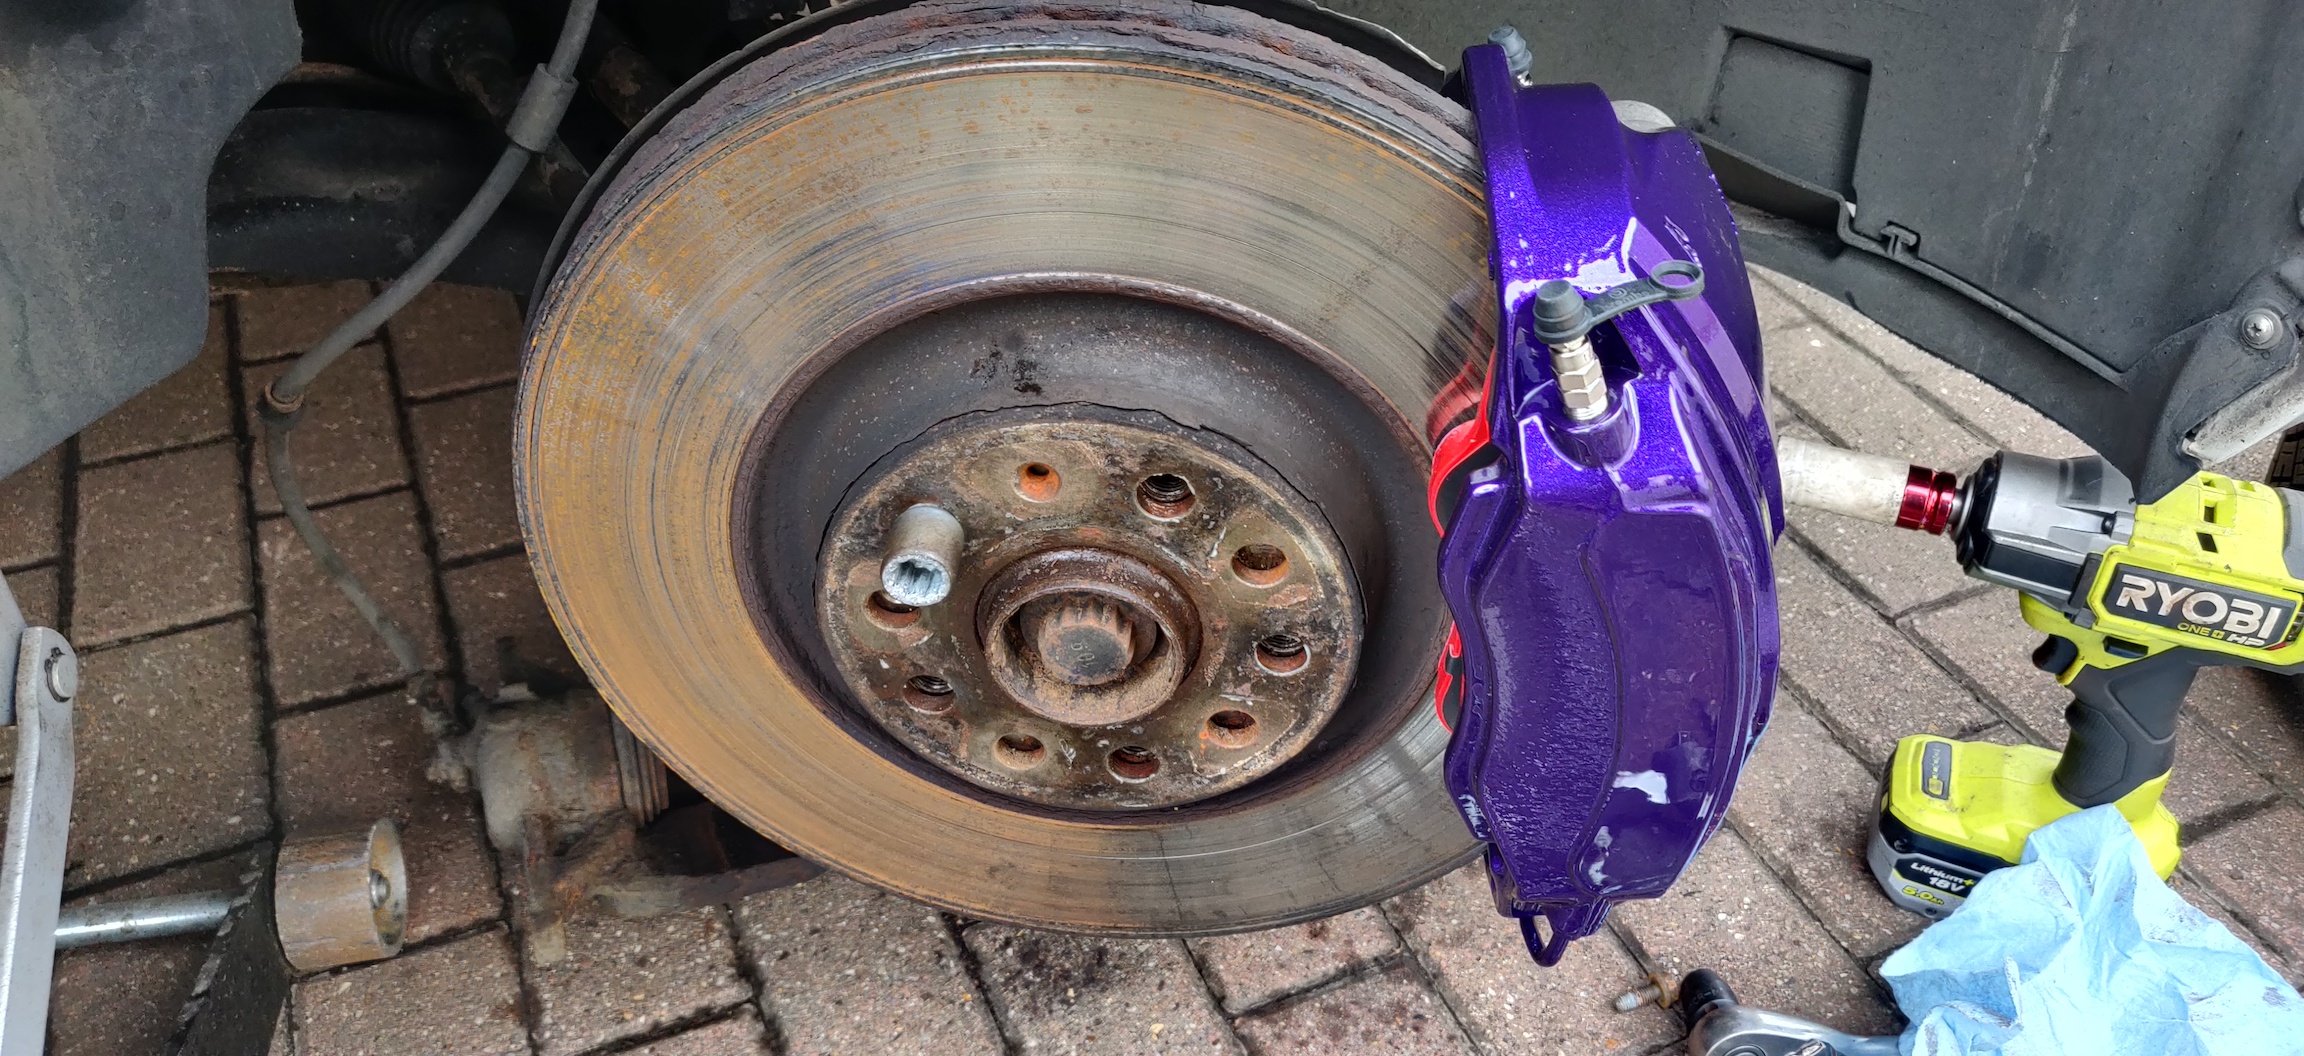
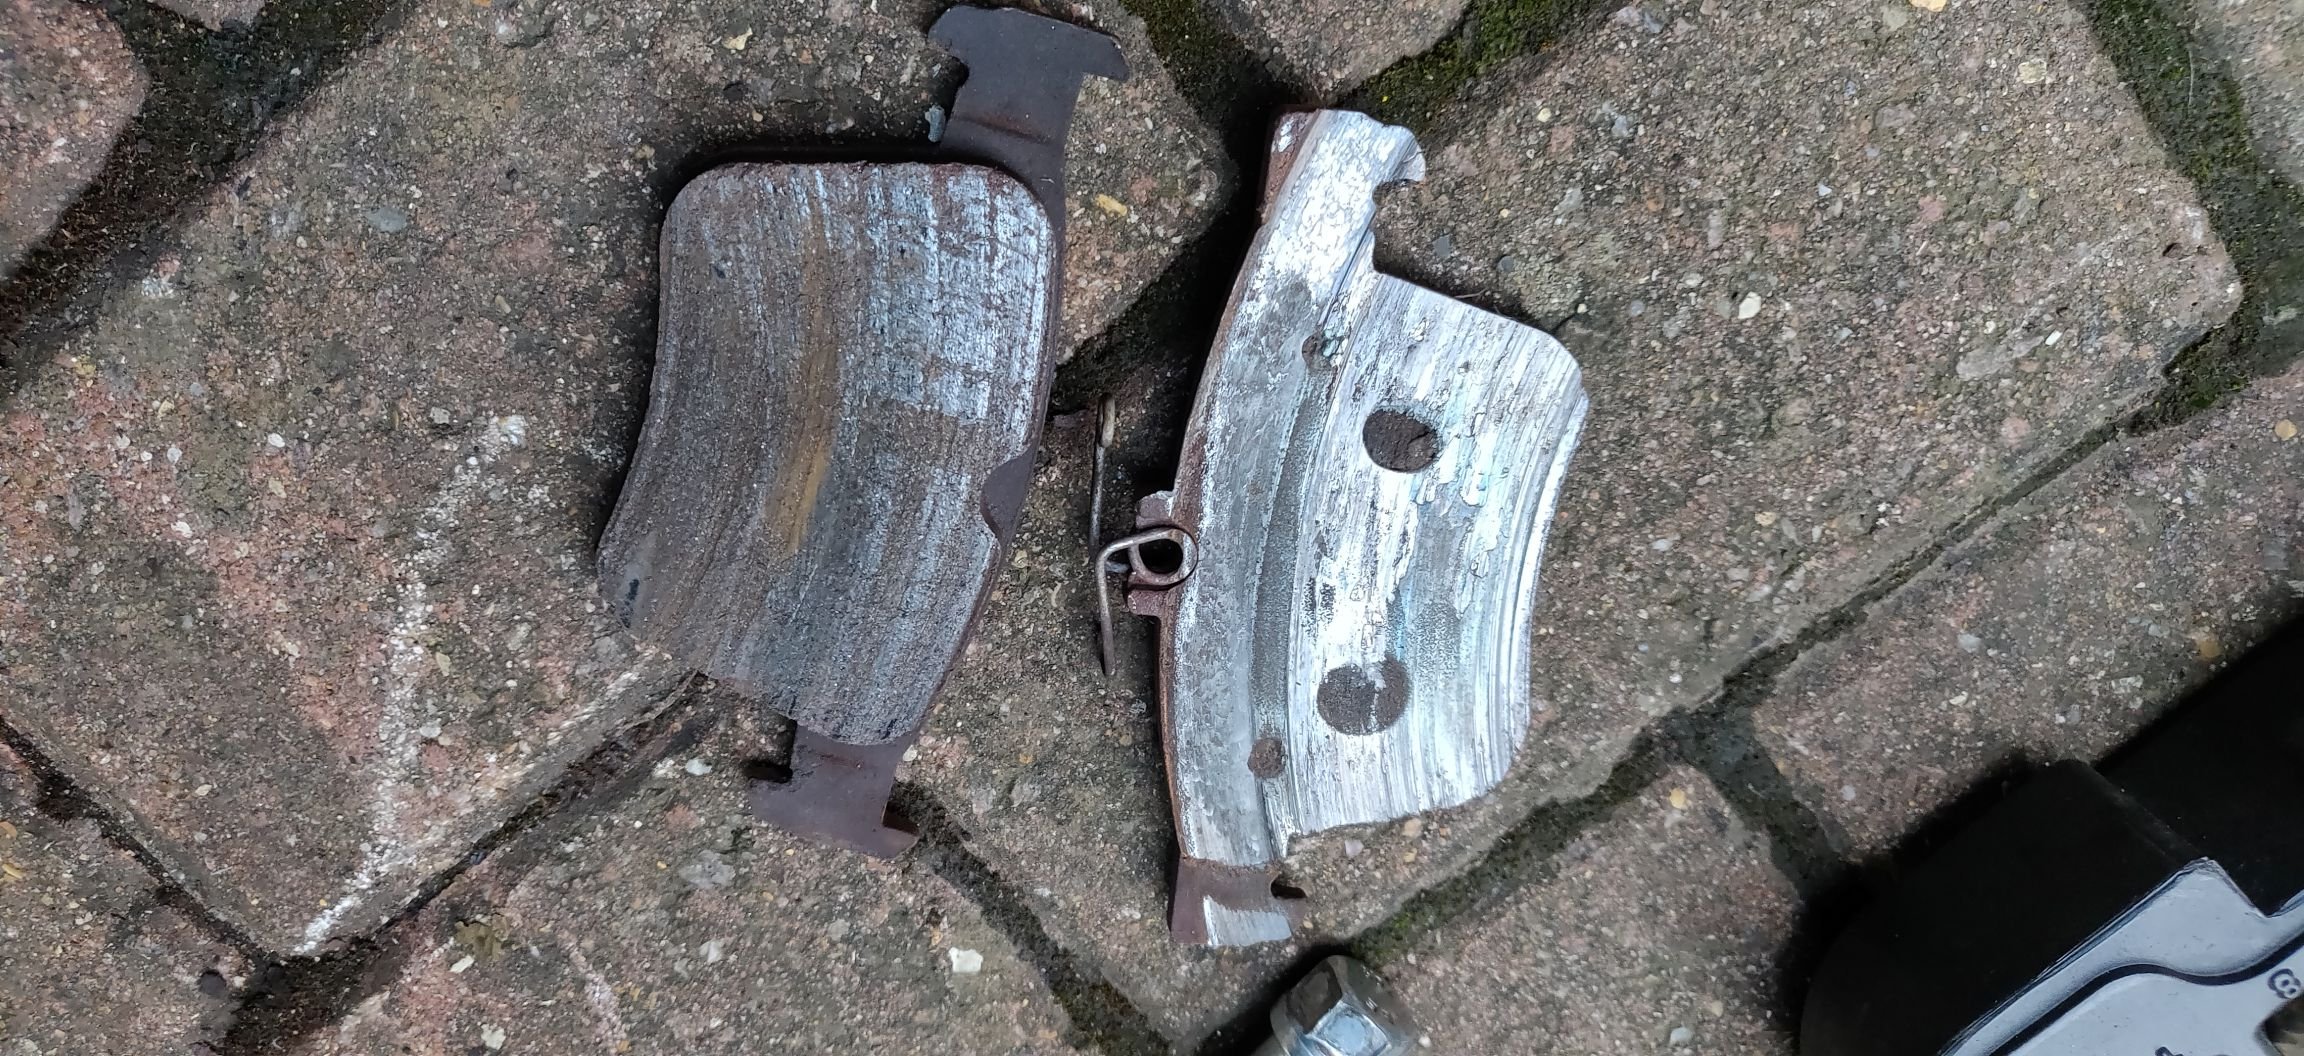
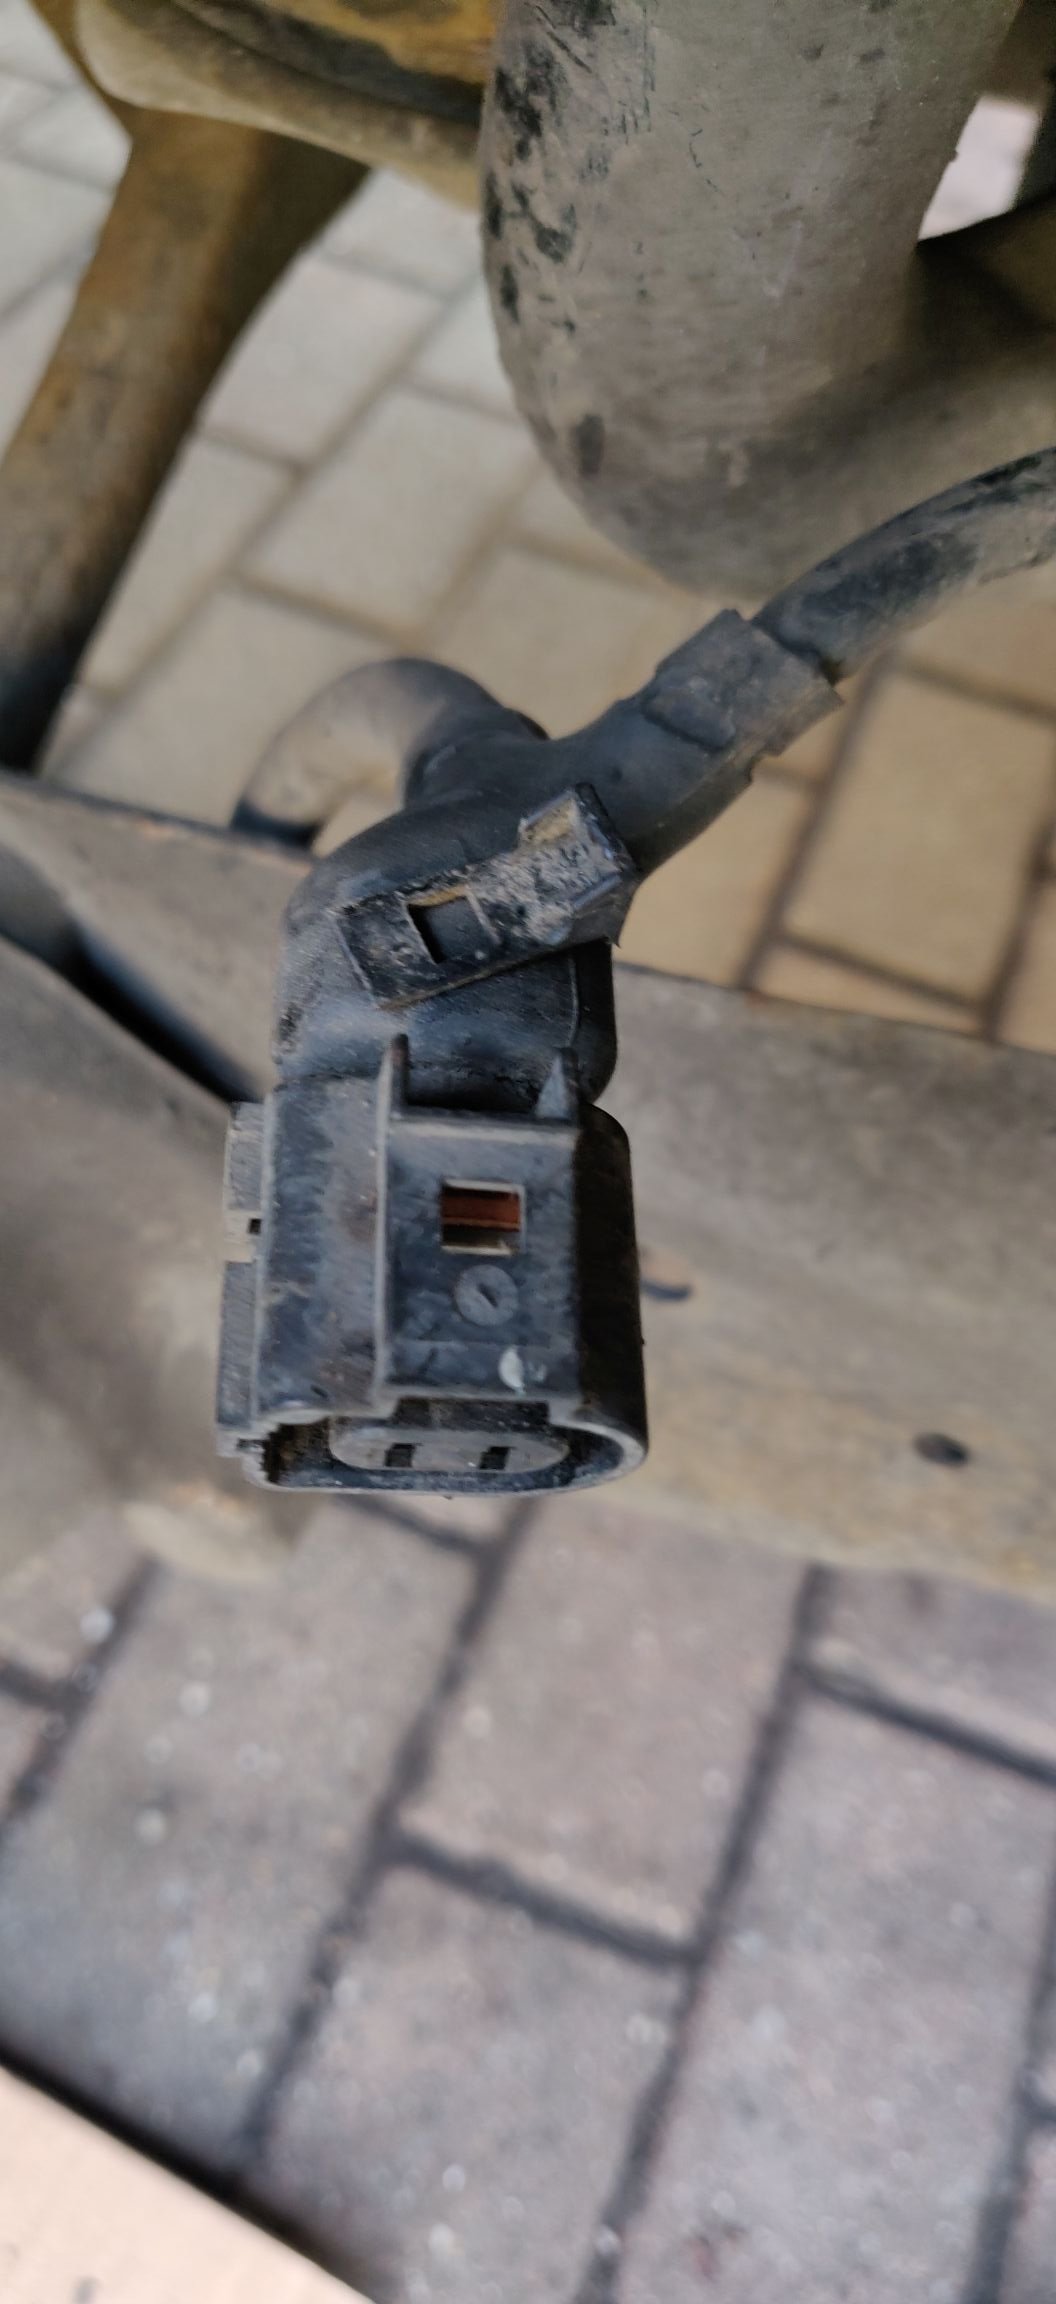
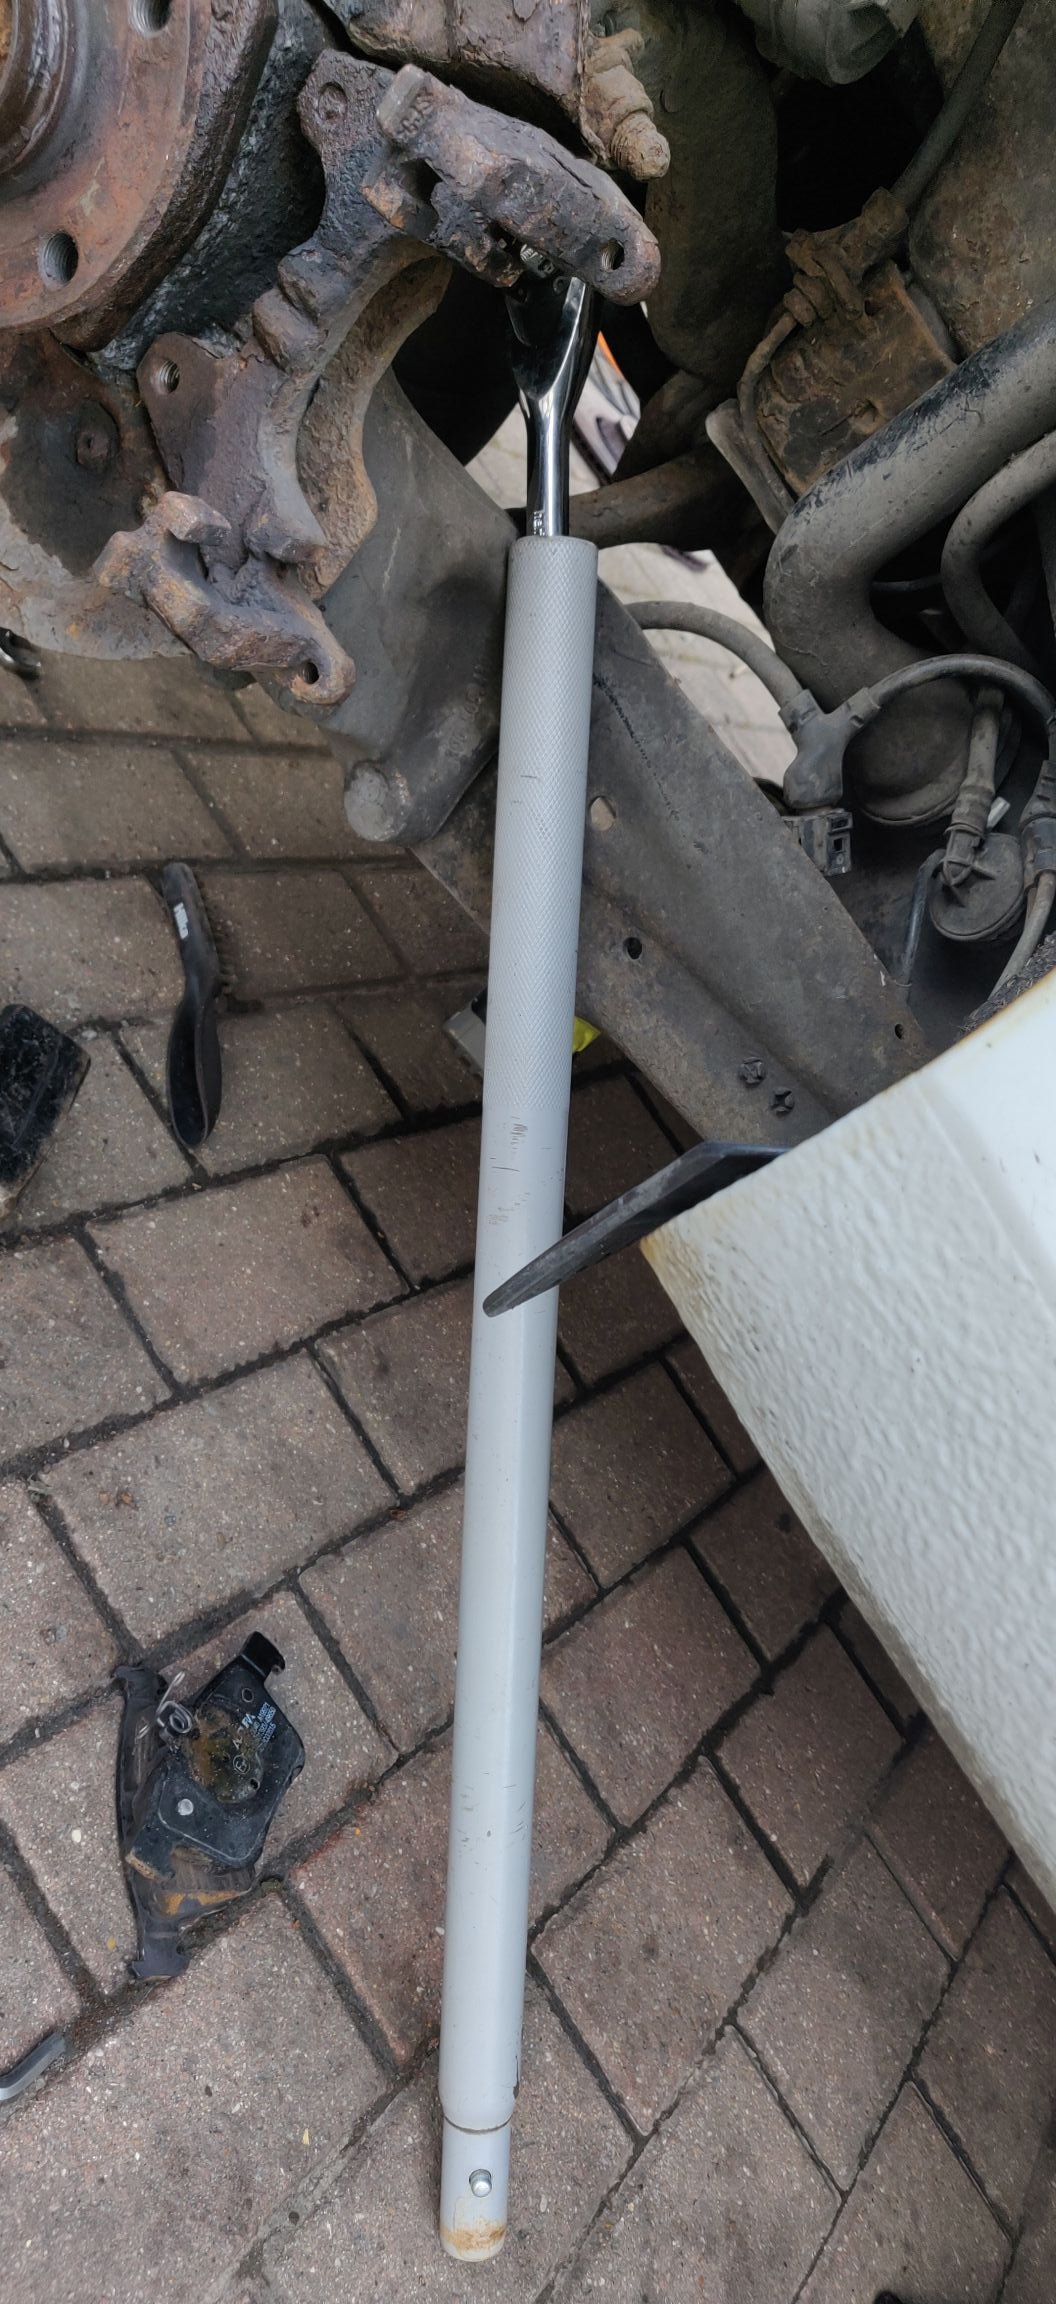
 1 point1 point£60! for a little more you could have a spare wheel. If your tyre is badly damaged no amount of gloop will seal it.1 pointI have 20 inch wheels, but the original Contis lasted less than 20 000 km. Meanwhile I drove several sets of Pirelli Scorpion Verdes, they lasted about 40 000 km. Last year I tried some Michelins, desingned for electric vehicles. They are supposed to last longer, but actually lasted only for 17 000 km. Now I have Barum Bravuris 5. Have probably done 30 000 km on them (as I change the wheels for the winter, then hard to tell exact mileage) and seems they will last another 20 - 30 000 km. Pretty quiet and surprisingly good it rain.1 pointHi again, So given the last post was a while, and I believe 9 March when I replaced the rear pads, I've been forced to add an update, luck not on my side. The hope was that changing the rear pads would be enough, but the rear left caliper unfortunately looks like it was still sticking. It appears I didn't do a post about replacing the rear hose to the caliper, which I saw as another possible cause for the sticking. I was probably not in the best of moods at the time so didn't take many pictures. The main concern was undoing the brake union: A case of hitting it with some heat and deep breathes until the union started to turn. You guys know the state of the rear of this car, so the brake union was never going to turn without the pipe. So had to undo the rest via the hose, otherwise the pipe would twist and that would be a very bad day. In a few years time and some luck, I'll probably attempt a subframe drop, which seems the only way also to address these brake lines in a proper manner. Anyways, replacing the actual hose is just reverse, really hoping that screwing the new brake hose in would result in being the right orientation for the caliper. I think it ended up near enough. The hose was £12.99, nothing fancy, as it was all to try and buy me some time... Less than 1000 miles later, and after lots of evidence of the caliper still sticking (super hot), we were hearing metallic scraping sounds. I was hoping it wasn't going to be the rear pads. The reason I wanted to buy time was because I have replacements ready to go and ideally wanted to do it in the late summer or autumn as part of changing other things like the brake shields and wheel bearings, which could be a terrible time and so wanted a decent uninterrupted block of time to tackle it steadily. However, it was now looking like the front right caliper is also starting to get hot compared to the left, so my hand is forced, and all the brakes will need to be changed. So undoing the rear calipers and removing the pads for the right hand side: Absolutely fine, barely run in. The same can't be said for the troublesome left side: So the metallic scraping sound was the caliper being stuck enough that the inner one has worn to buggery. I've only seen this one other time where it started to grind away the actual pad backing. So my hopes that the rear pad change would tide over the MoT coming next month are somewhat dashed. We literally can't drive this any more at risk of doing all sorts of damage, which may already have happened to that poor caliper. I suppose another set of cheap pads might tide it over for another month, but I imagine the MoT would fail on the state of the brake discs. Was always blasé about these calipers and brakes due to intending to replacing it all though. So for now, the plan is to just do the brakes and leave the shields and bearing for a later time. Of course, attempting to undo stuff has led to: Broken electronic hand brake connector. I seem to have this happen too often with VW stuff (coil pack connectors usual suspects). I'm hoping the moulding to that connector is just rubber and so the connector itself could be replaced by extracting the original pins. If not, then I need to plan some sort of bodge. I guess a lot of time exposed to dirt gets into the nooks just enough to make undoing things awkward, and then slightly too much force. Other than that, the main obstacle is the removal of the pad carriers. This has meant various attempts at breaker bars, extensions and ratchets with a pipe over: The bolts are an unorthodox M14 bolt. Or at least that's the name of the socket used. Given the wife used to have a Seat Ibiza, I've had a set of these sockets available for a while. Fortunate as the Halfords tool set I have only goes up to M12. For the right hand side, I was somehow able to start the lower bolt with just the ratchet, and the lower bolt has just enough space for a wobble UJ, extension and impact driver to get out. It's all super fiddly with the driveshafts, rear damper, rear spring and suspension arms all conspiring to basically get in the way. The top involved an attempt with the breaker bar as seen above which wasn't successful, so the ratchet with the trolley jack handle as a pipe was used: Almighty cracking noises ensued, but the bolt was starting to loosen: So that's that side sorted. Absolutely no luck with the left side. I imagine the heat cycles from the sticking caliper has not done any favours. I'm just about able to use my feet against my garage wall for leverage (essentially horizontally shoulder pressing the damn ratchet and pipe) but still no luck. Put some plus gas on it for now and will try tomorrow morning. If heat doesn't suffice, then I will happily get violent and cut the pad carrier out, given I have a replacement. I'm still not sure why on earth they decided these bolts were the ones to go for, especially considering the front ones are just normal (albeit chunky 21mm socket I think) bolts. Bolts that aren't TTY either. I will probably post up a bill of materials and pricing of the replacements tomorrow evening depending on how things go. Those of a nervous financial disposition will need to look away! Maintenance: £2420.38 (+£12.99) Upgrades: £2999.91 Miscellaneous: £820.07
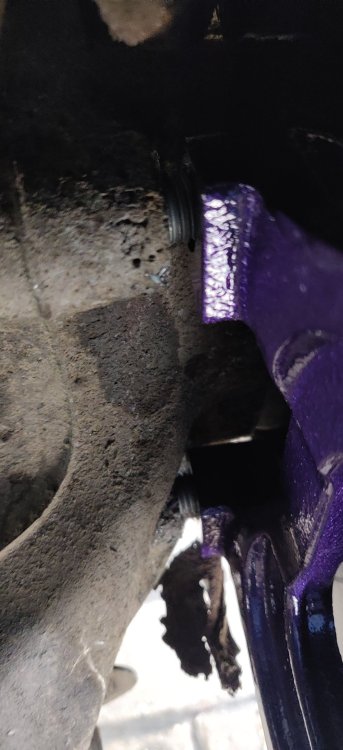
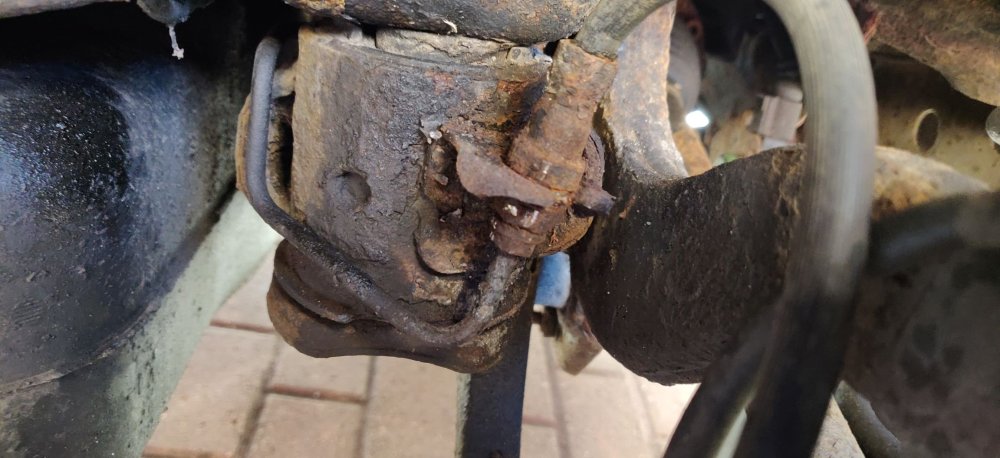


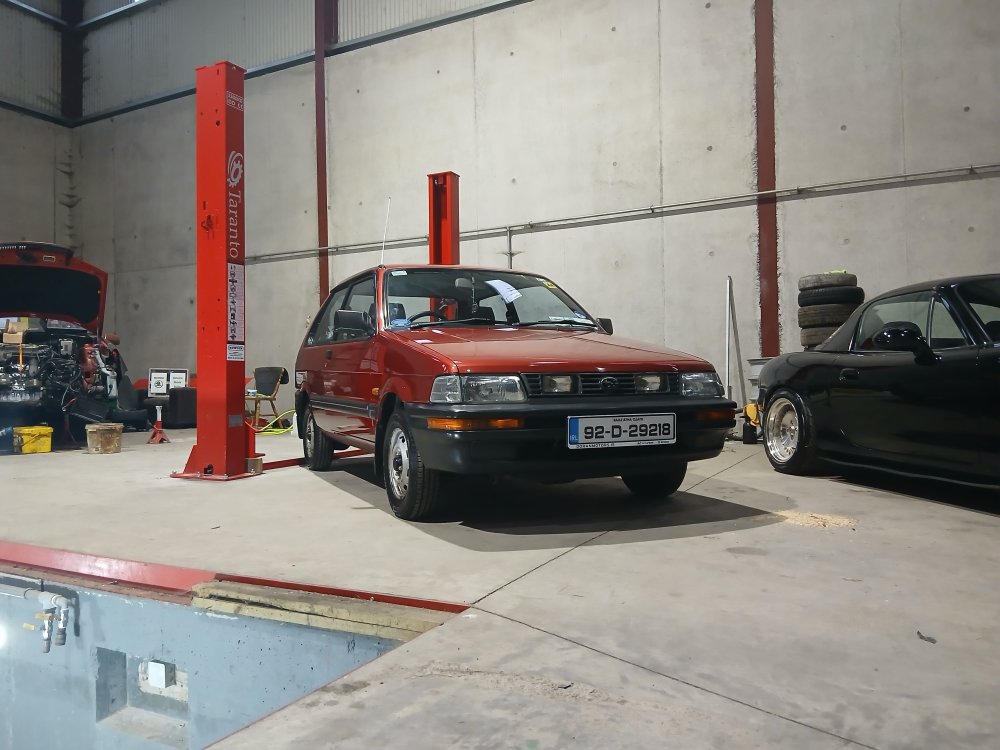
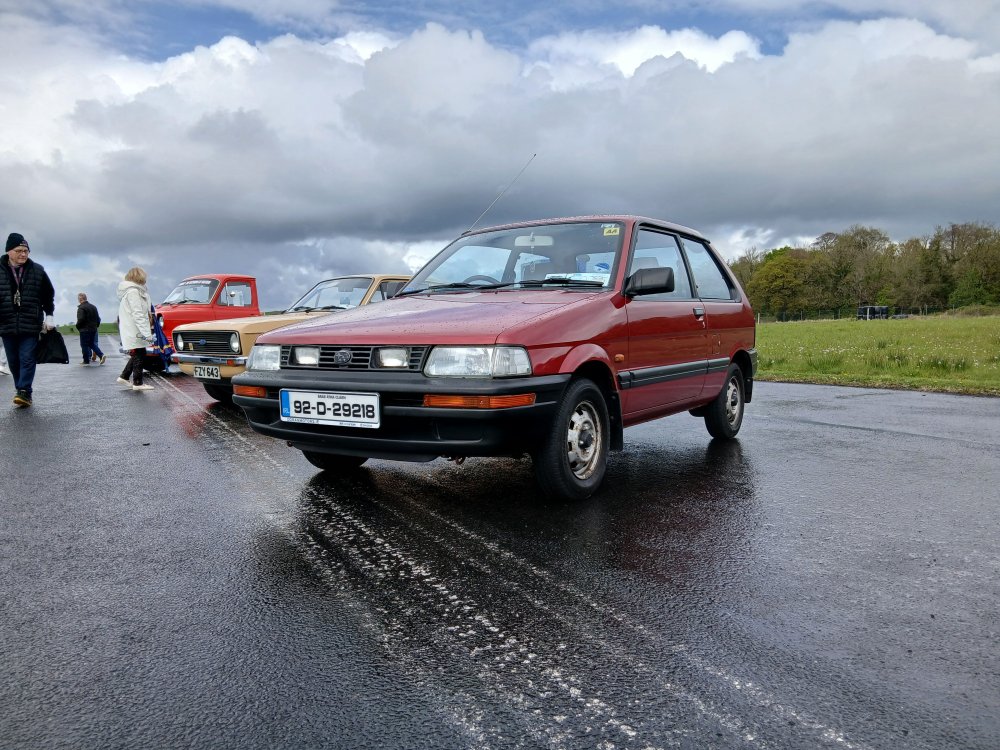
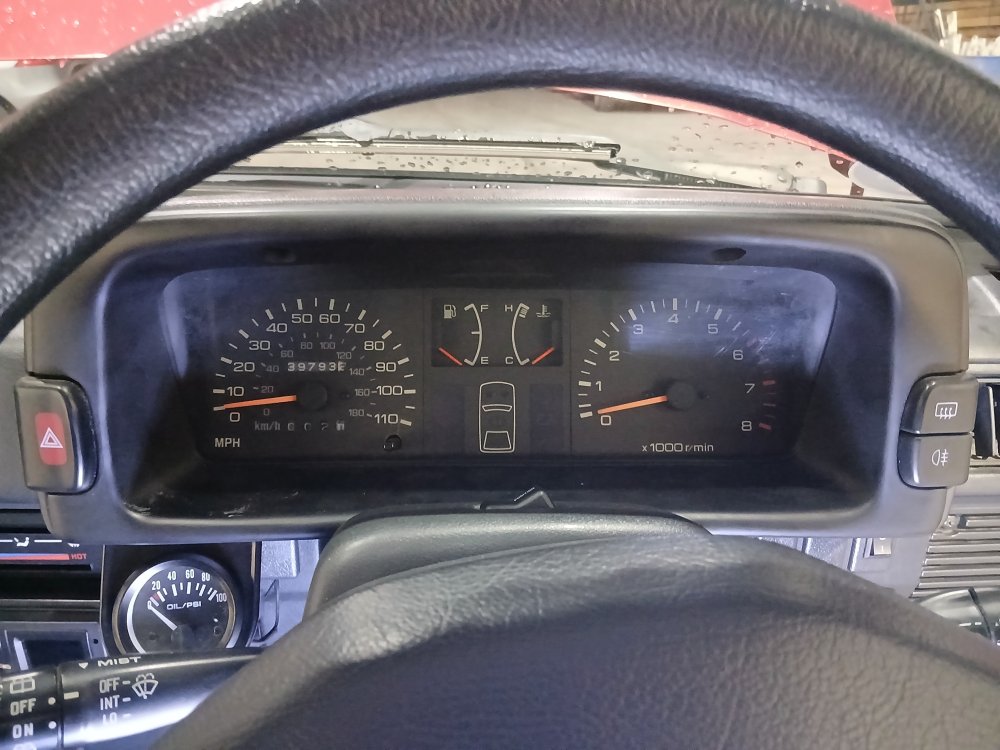
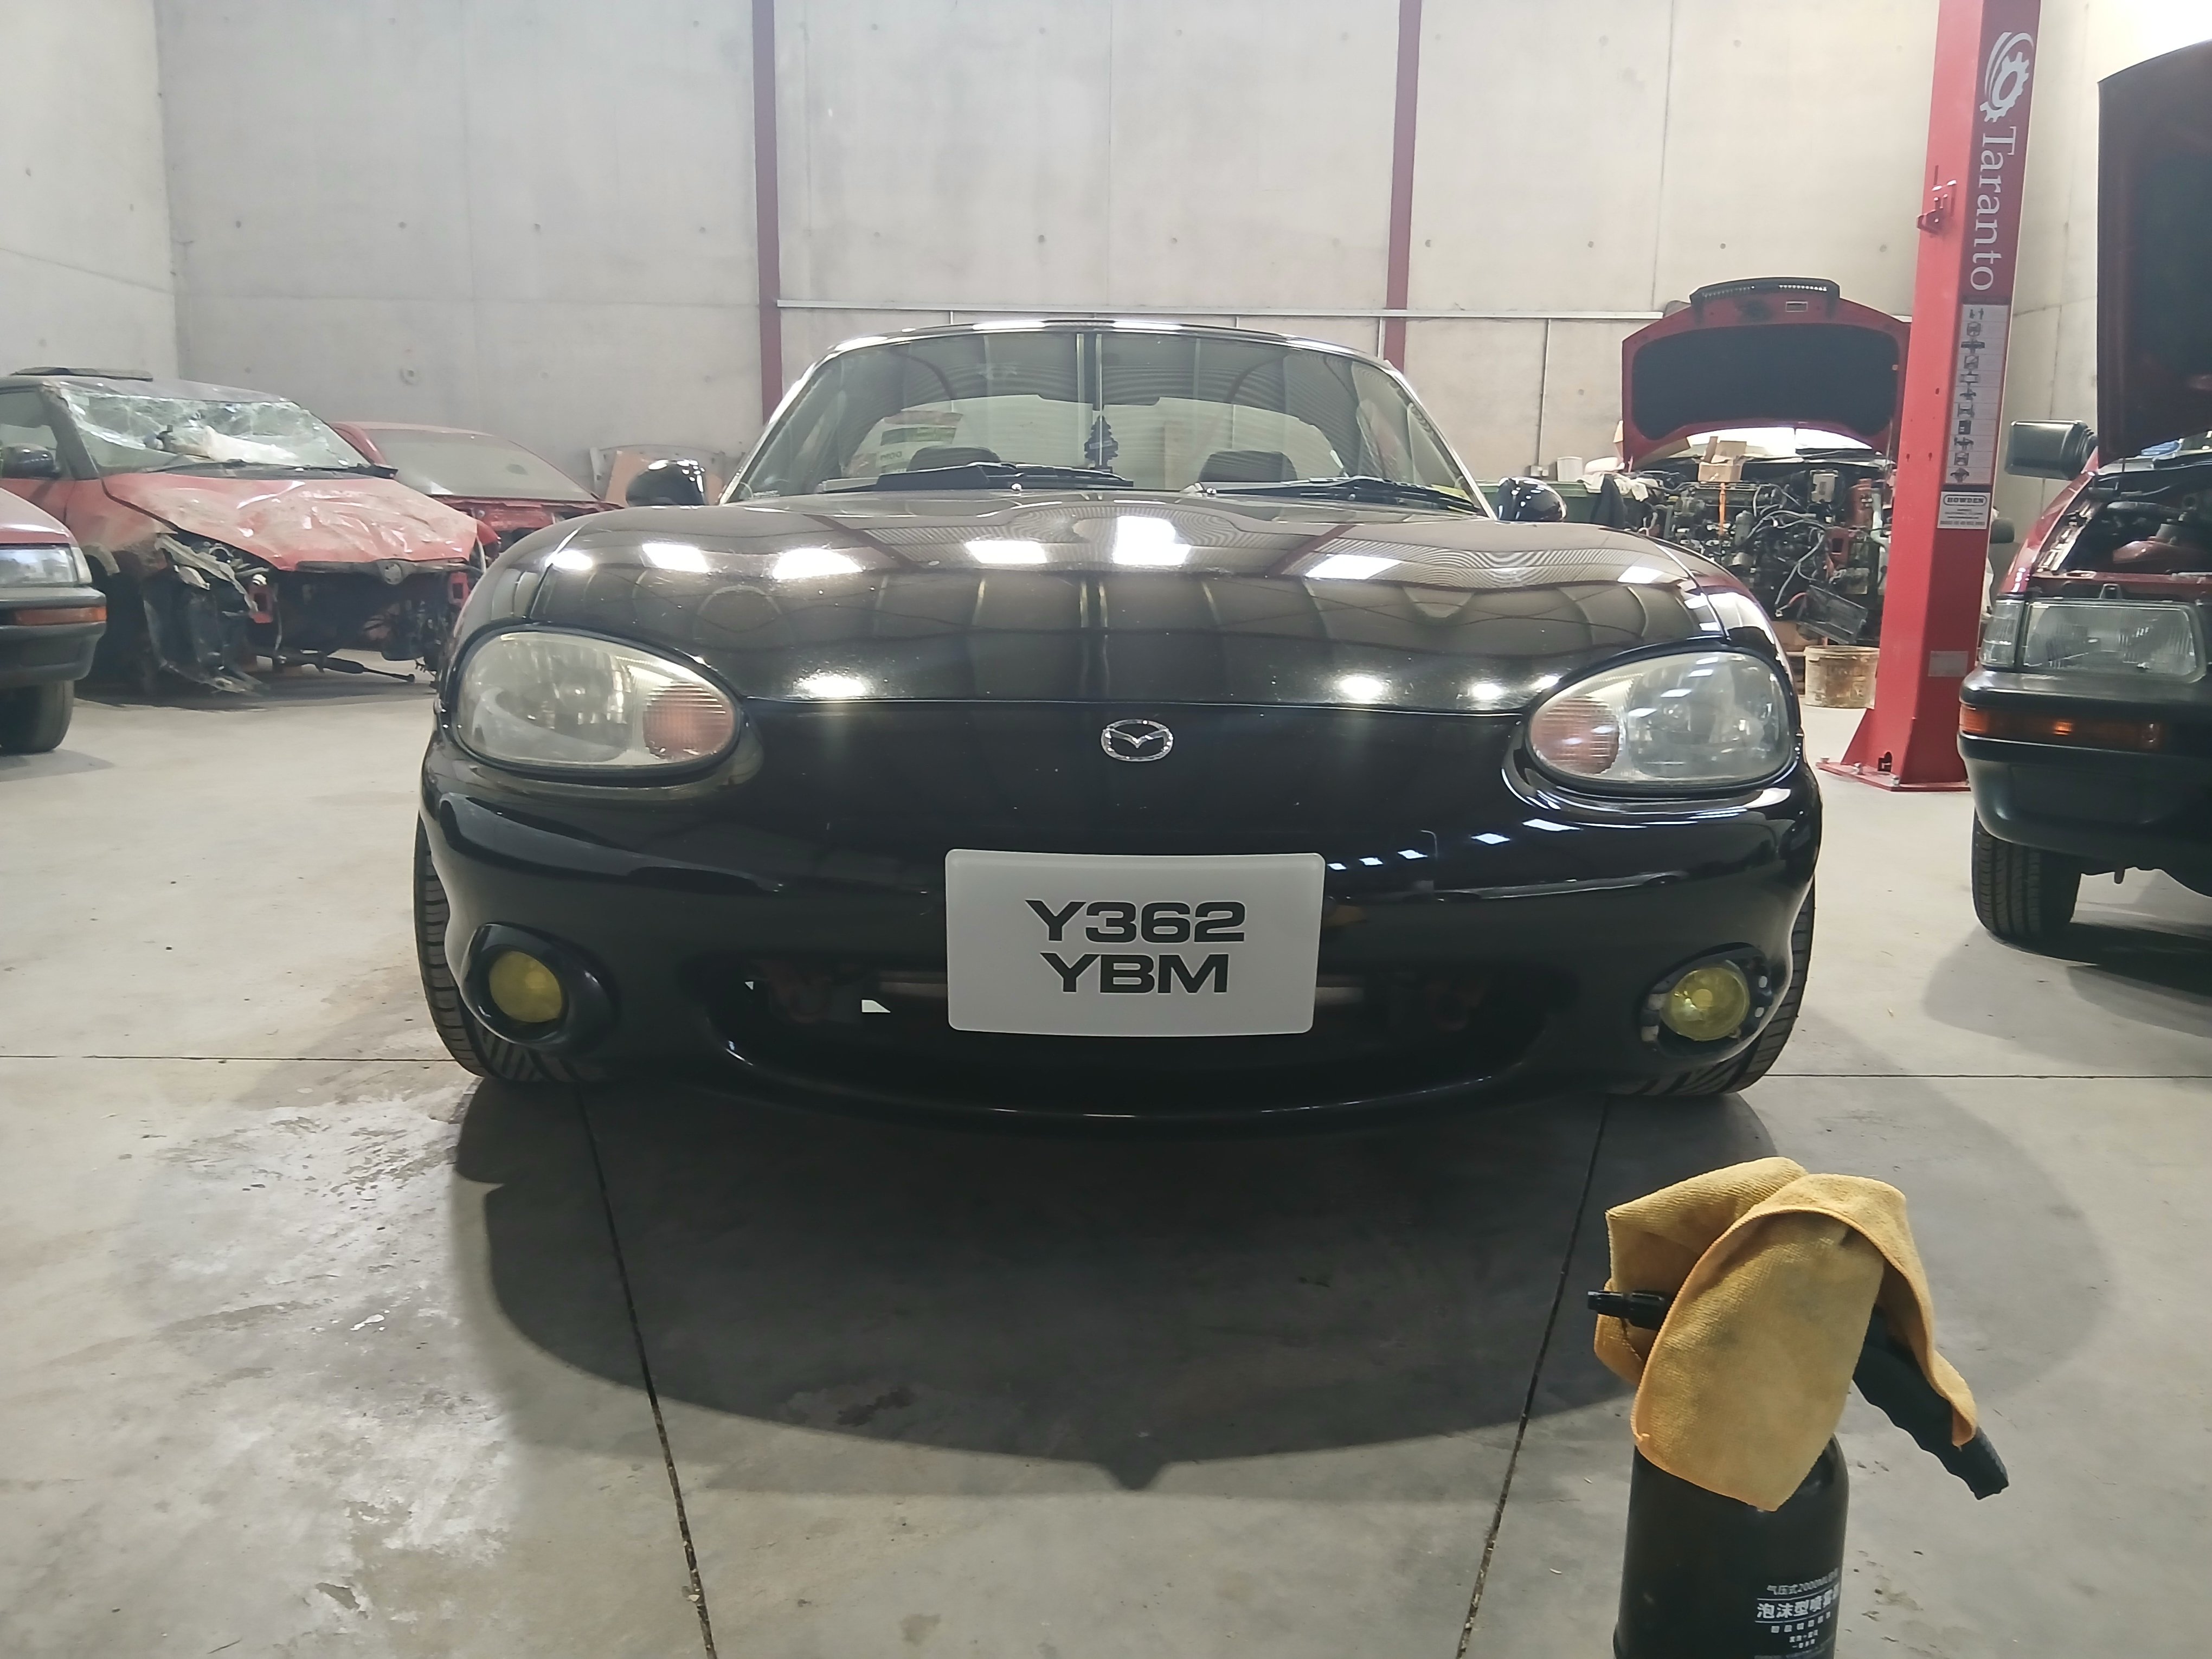
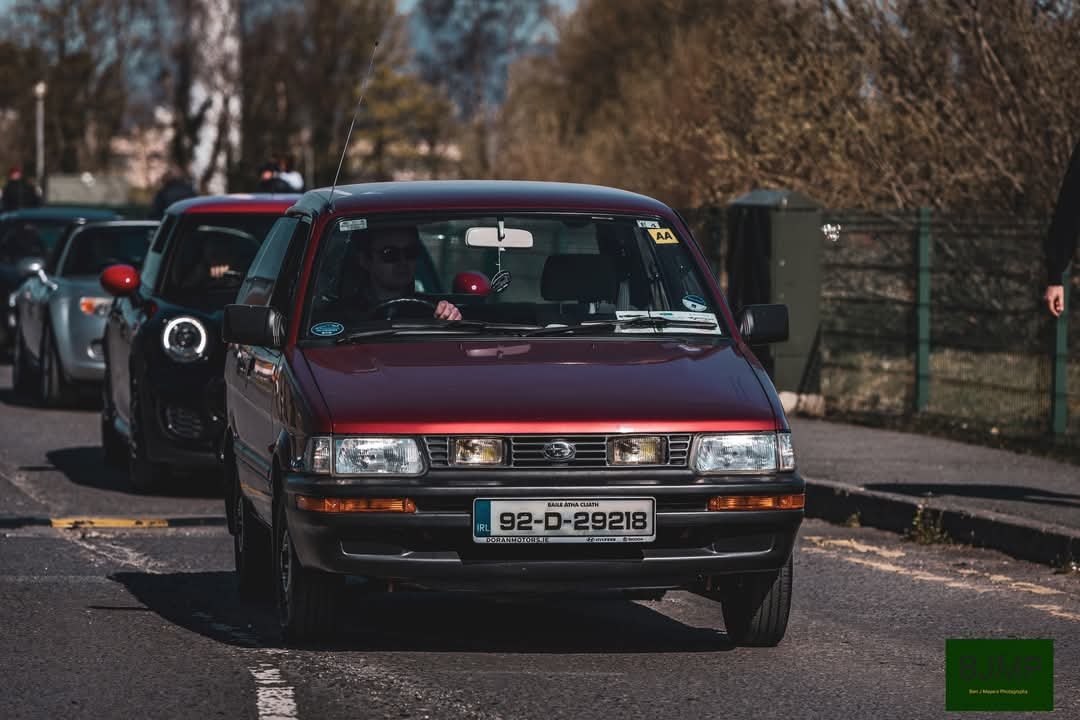
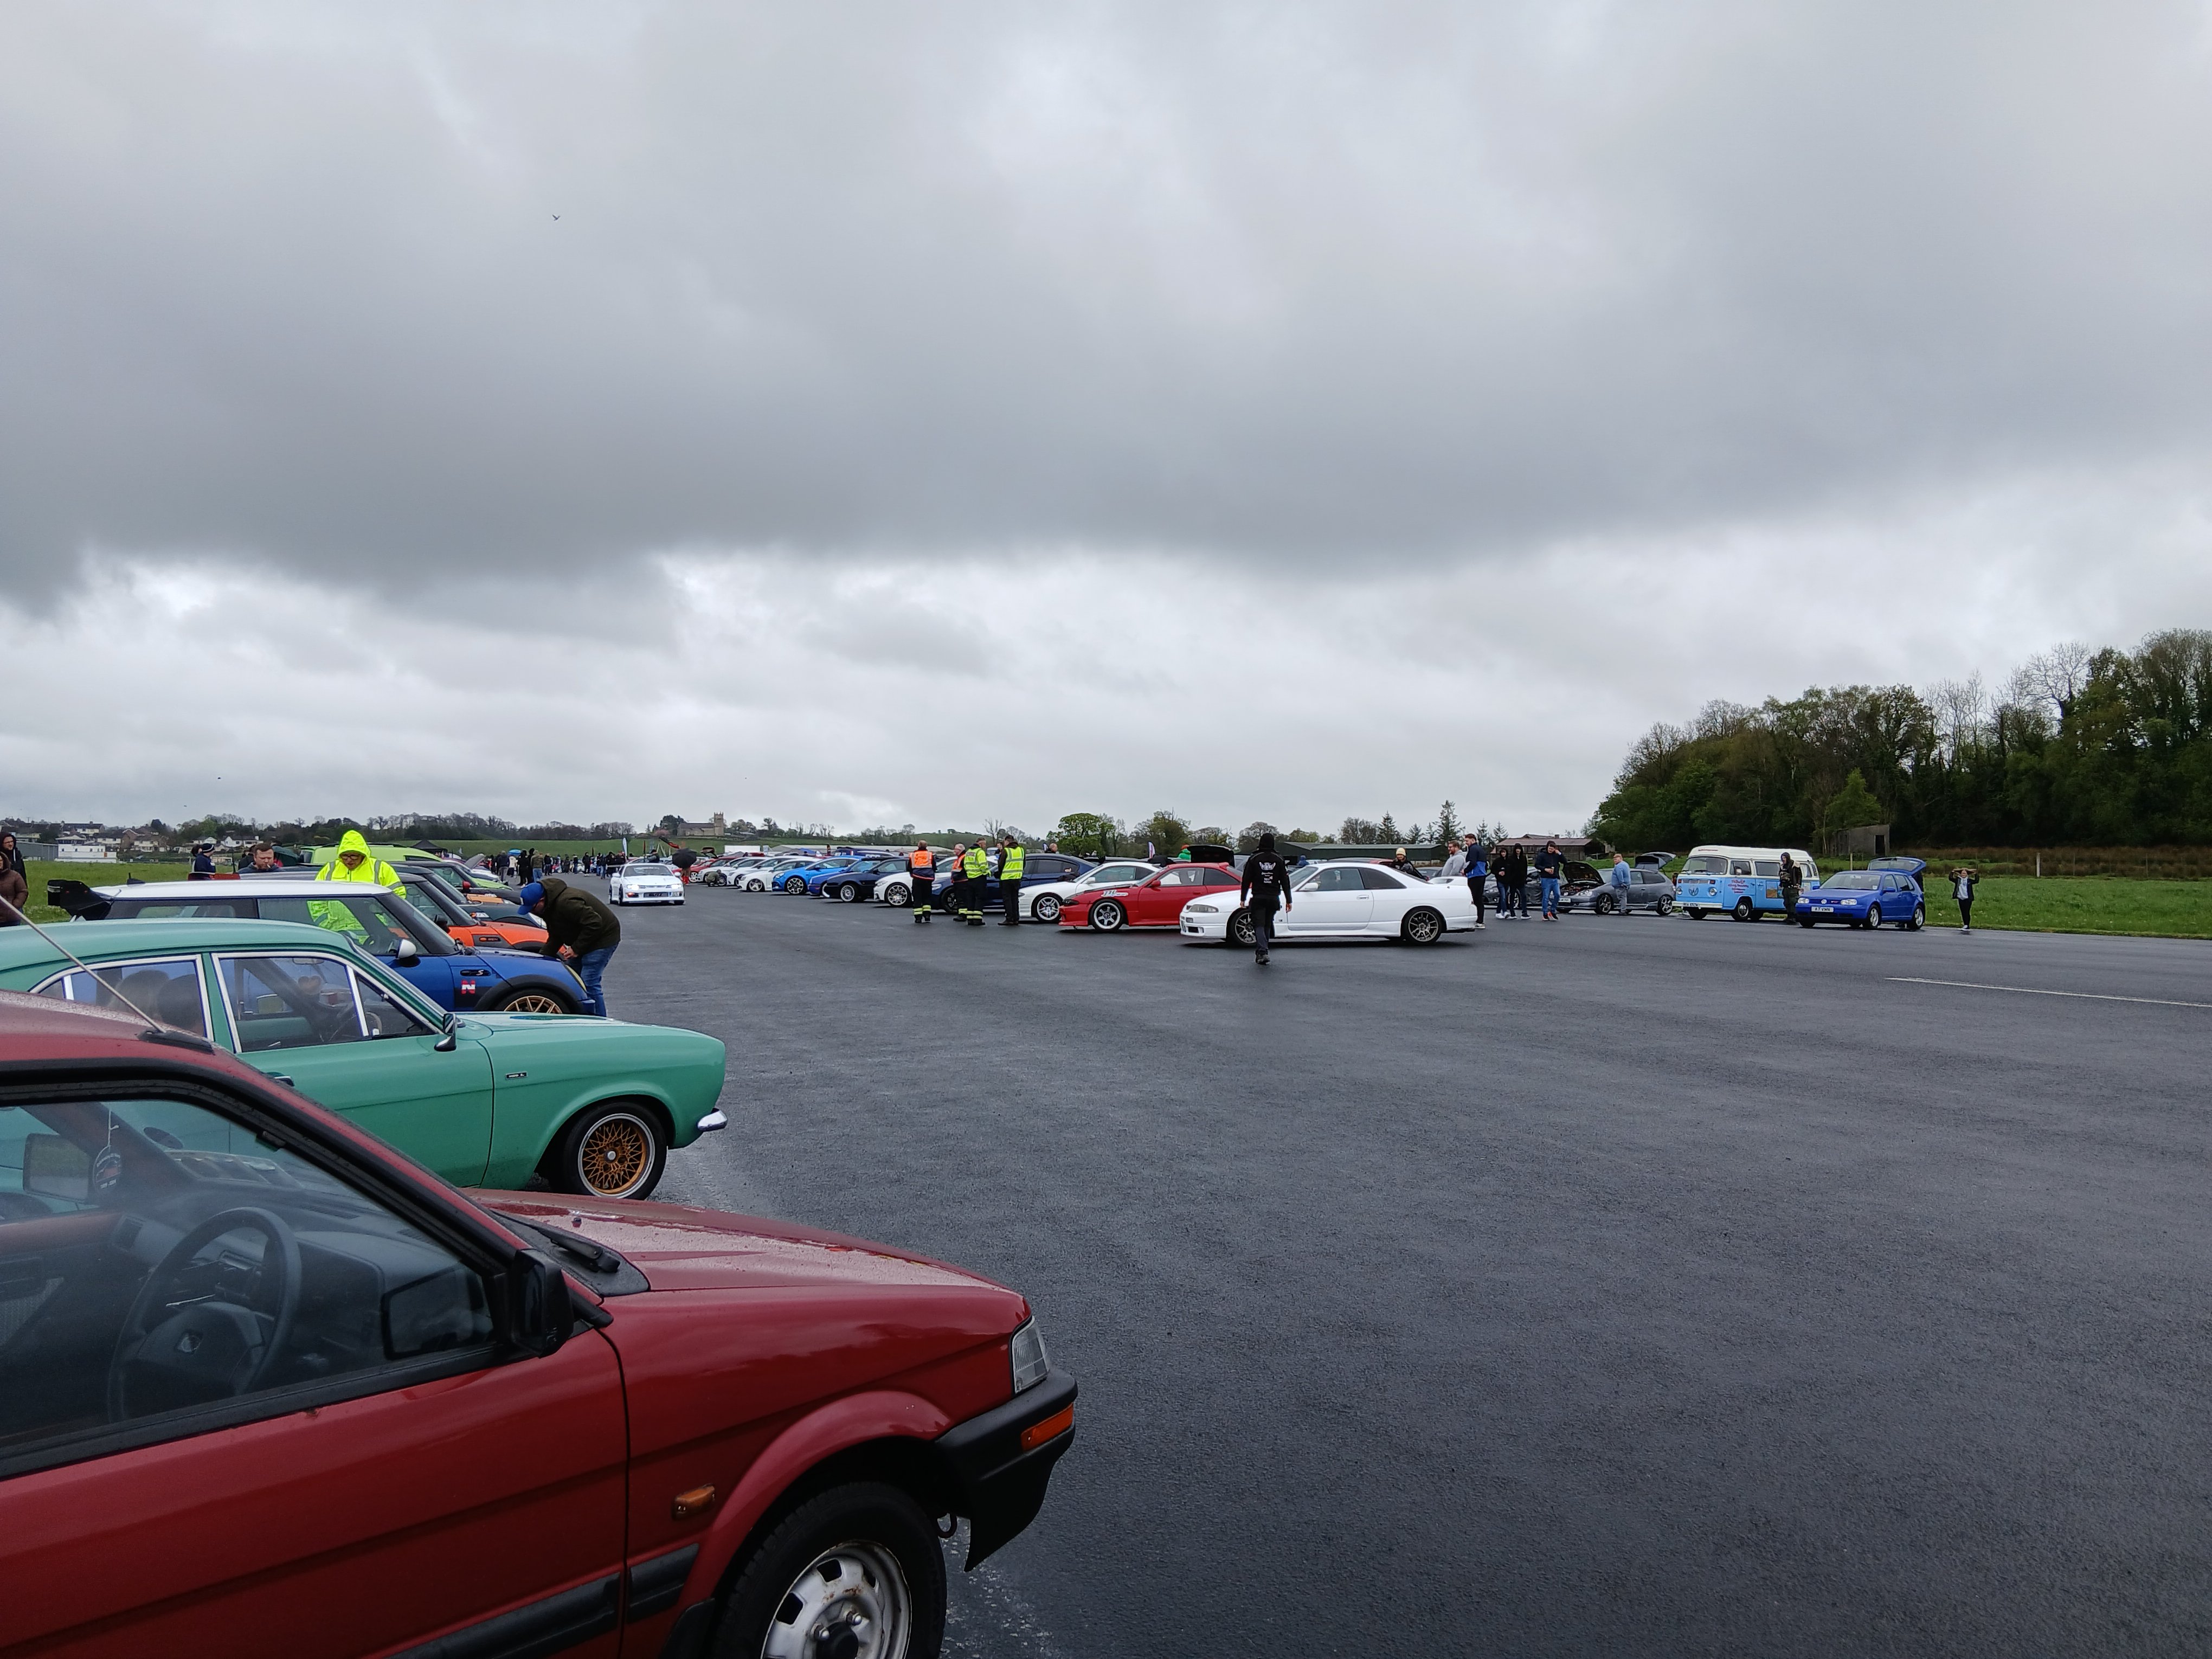
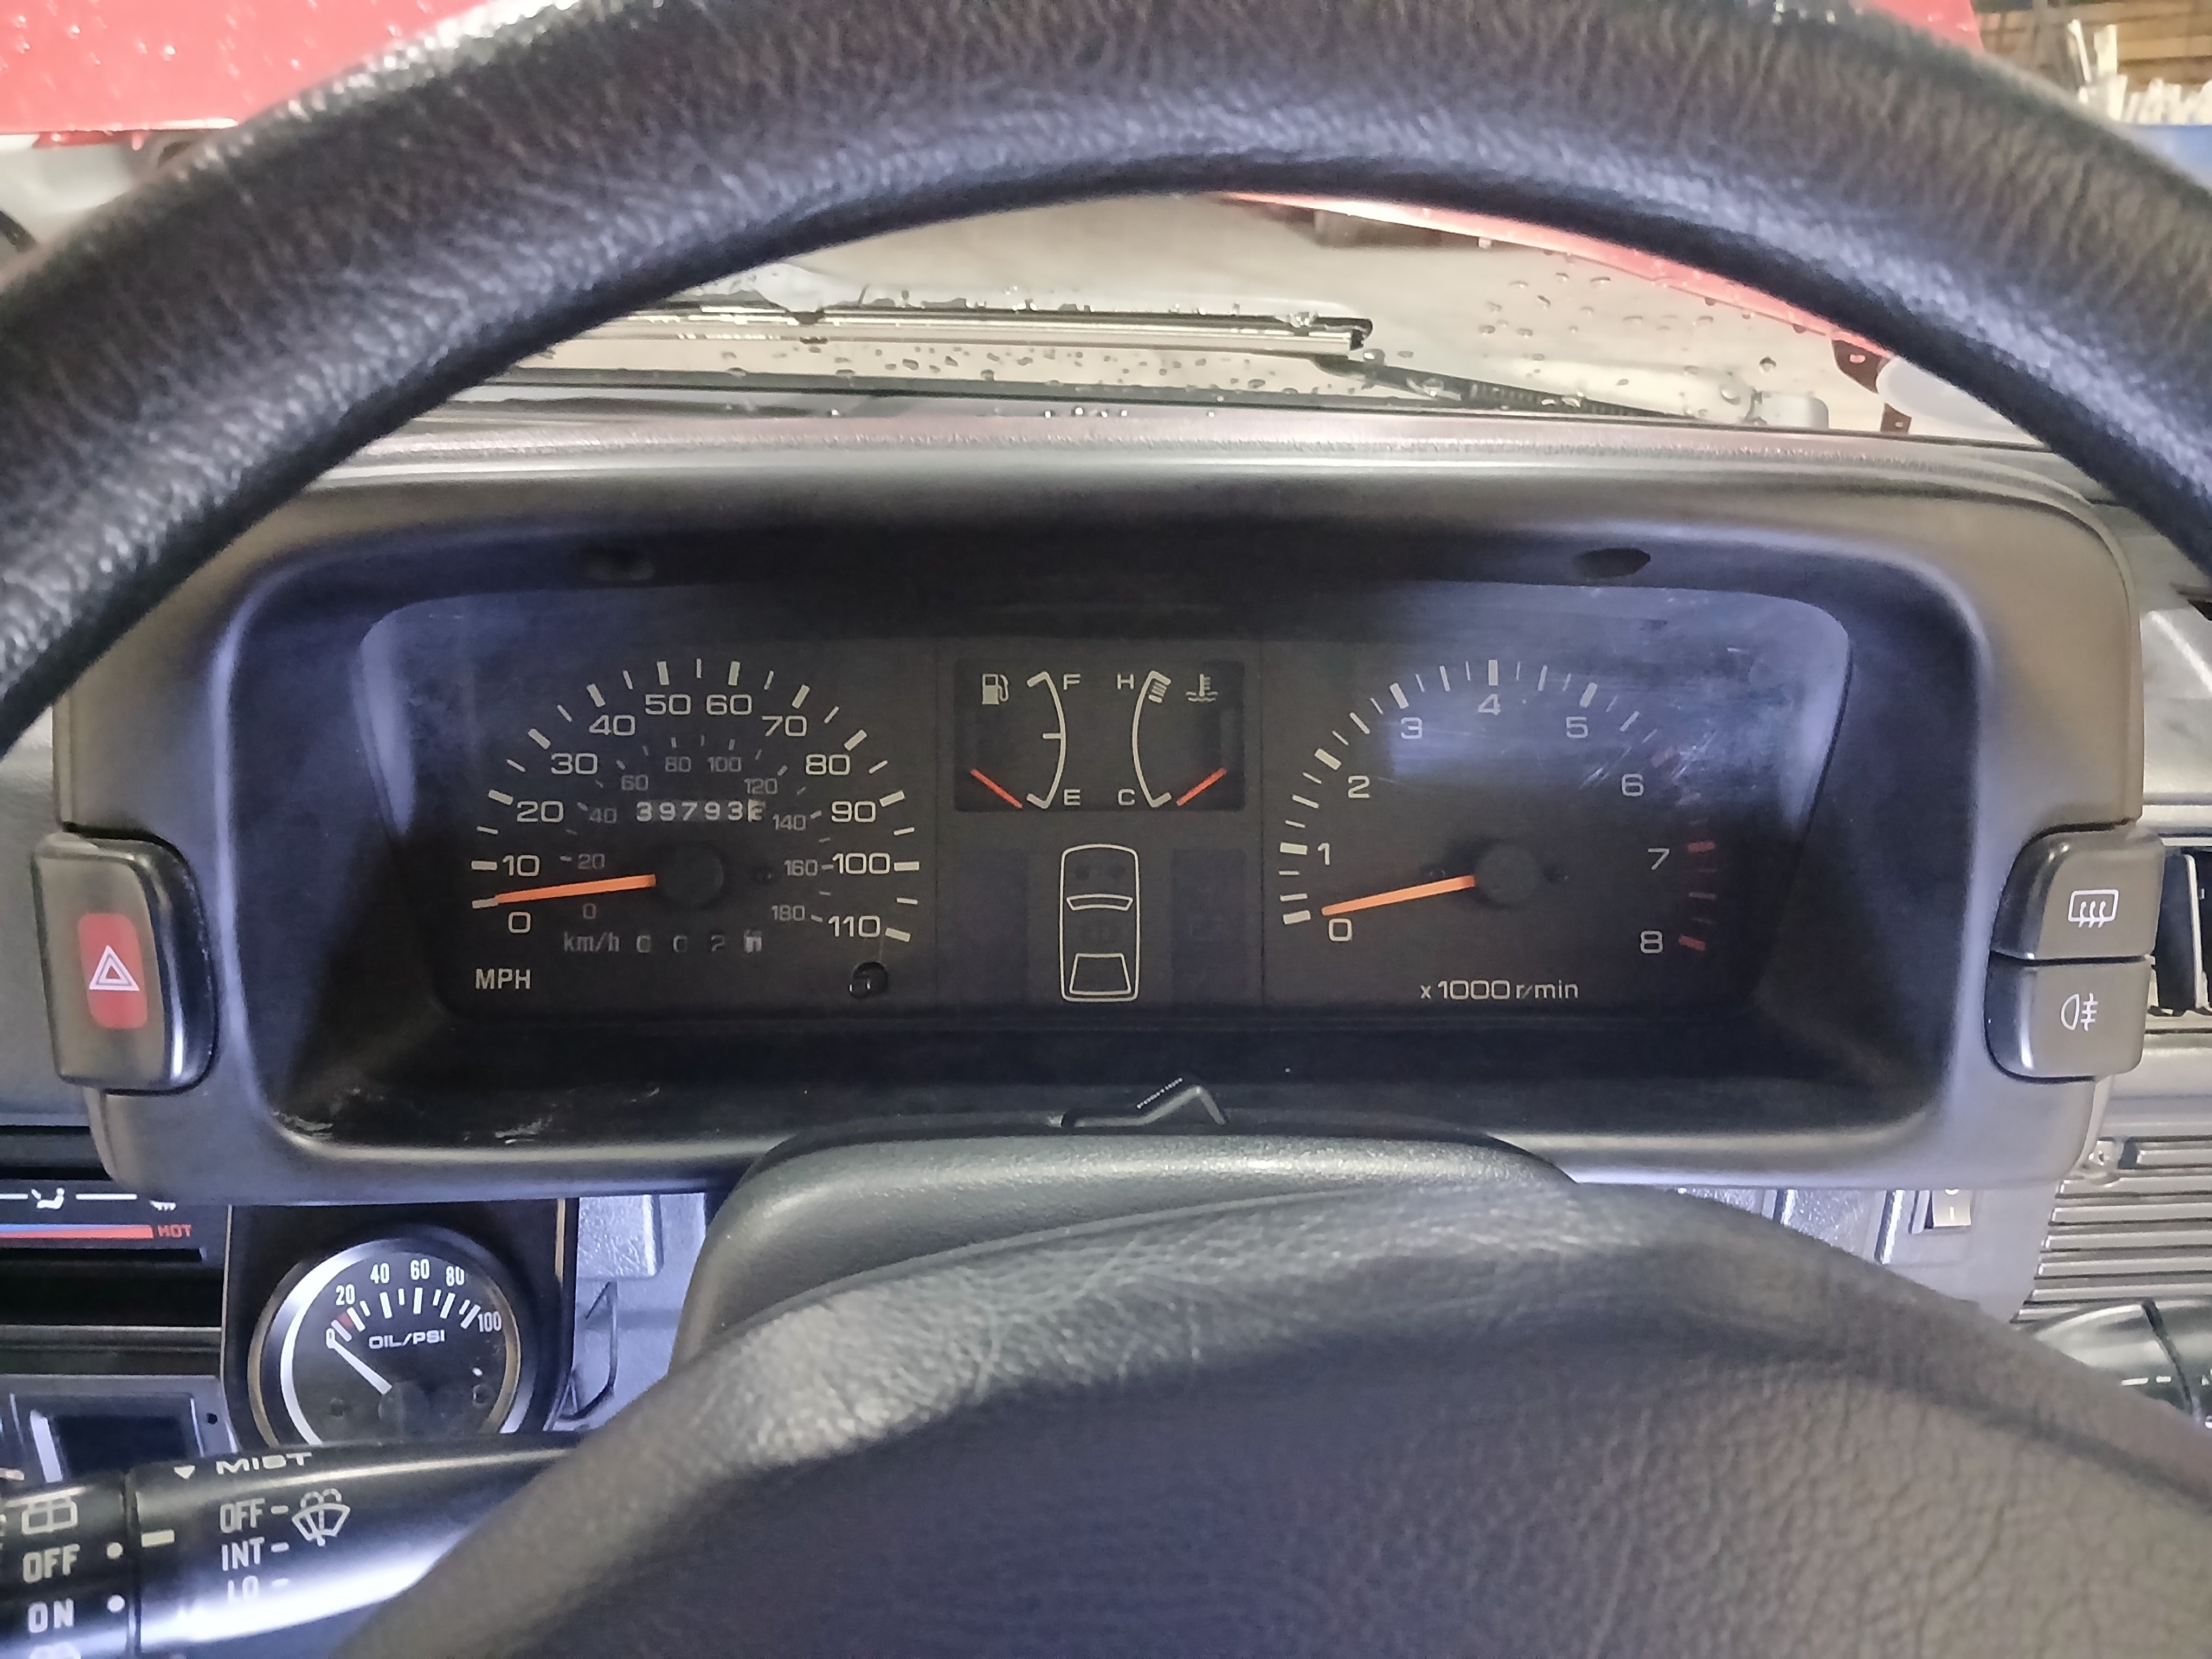
 1 pointThis thing is going pretty well. Slackened the clutch cable some more and that's stopped it slipping. Had it up in Enniskillen Easter Monday for a car show, good mix of driving. Had changed coolant and adjusted the timing a little so it was more a shakedown run than anything. Fairly packed, weather was horrid so made it a bit of a wash. Some nice stuff at it. Just the weather put a damper on it. Filled up with some e5 since I was up north and got 50mpg on the way back. Very surprised. Seems to be going well, really hoping it'll do goodwood in a few weeks. Installed an Oil pressure gauge too. Fixed up some wiring to the spotlamps aswell. Only thing I'd like to get sorted is the starter but we'll have to see.

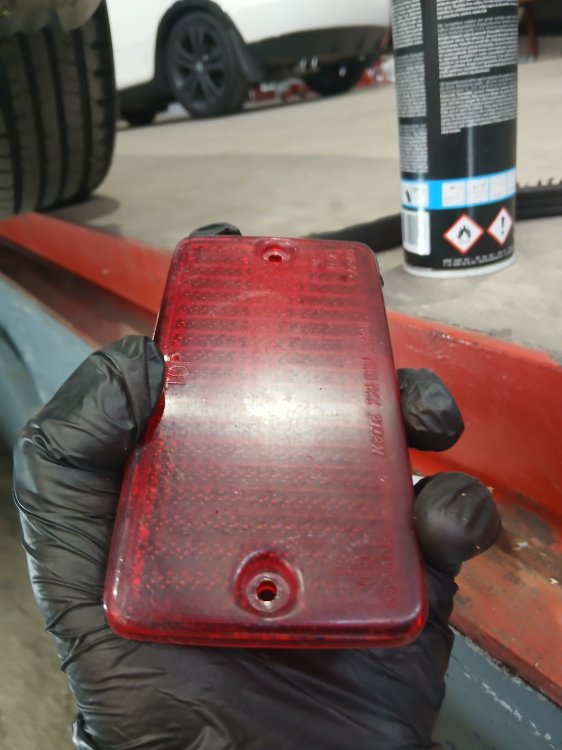
 1 point1 pointThis must be wiring between the drivers door and the body of the car. There is a rubber gaitor that covers the wires. Peel the gaitor back and check the wiring. Because of the dual switch in the drivers door power goes to that switch then out again to the passenger side switch. Intermittent then complete failure by reasoning it has got to be the wiring at the point where the wiring is flexed every time the door is opened and closed. Kev.1 pointGood repair, another one back on the road. As Leaf depreciate, £1000 will increasingly look like "beyond economical" repair. Leafspy is really a wonderful piece of software. Recently my wife's Leaf started having knocking sound to the front left. Got ATS to do free suspension check and they diagnosed with failed shock absorber. Lower control arm had been recently replaced (3 years ago for right and 1 year ago for left). So looks like it'll be a £600 job for both sides. I'll be doing rounds to get quotes from local garages later today.1 point0 pointsI broke this little part 4x times.. on the originals and on the new ones.. xD .. So I ordered new running lights... they are on the way.. The running light units where also a little damaged on the edge.. so I hope the new ones are better.. I also recognized that the E sign was wrongly made.. so how its called.. upside down? Are yours in the right position? Thanks for the pic.. I started at the edge.. so on the outer part.. maybe that was the mistake..
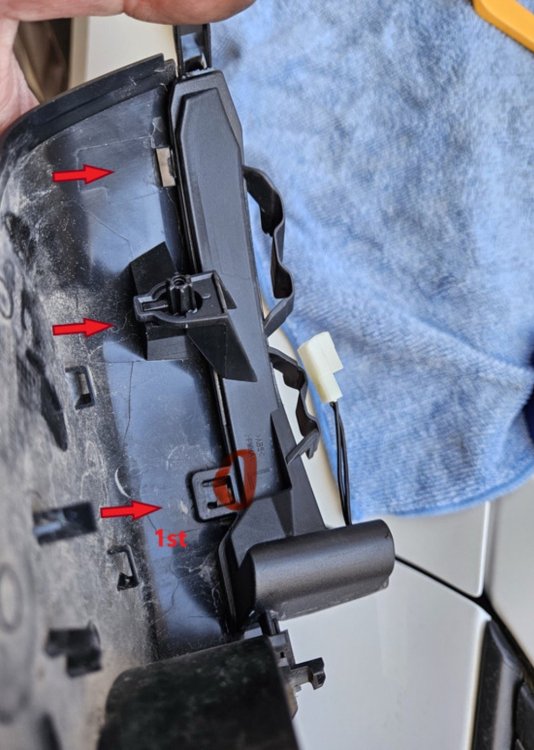 0 points


.thumb.jpg.06721e8c8b33ed0eea16572ff131b291.jpg)


.thumb.jpg.f83a46b9b3c0d976b9dbffbb523c9874.jpg)


Important Information
Welcome to BRISKODA. Please note the following important links Terms of Use. We have a comprehensive Privacy Policy. We have placed cookies on your device to help make this website better. You can adjust your cookie settings, otherwise we'll assume you're okay to continue.
Account
Navigation
Configure browser push notifications
Chrome (Android)
- Tap the lock icon next to the address bar.
- Tap Permissions → Notifications.
- Adjust your preference.
Chrome (Desktop)
- Click the padlock icon in the address bar.
- Select Site settings.
- Find Notifications and adjust your preference.
Safari (iOS 16.4+)
- Ensure the site is installed via Add to Home Screen.
- Open Settings App → Notifications.
- Find your app name and adjust your preference.
Safari (macOS)
- Go to Safari → Preferences.
- Click the Websites tab.
- Select Notifications in the sidebar.
- Find this website and adjust your preference.
Edge (Android)
- Tap the lock icon next to the address bar.
- Tap Permissions.
- Find Notifications and adjust your preference.
Edge (Desktop)
- Click the padlock icon in the address bar.
- Click Permissions for this site.
- Find Notifications and adjust your preference.
Firefox (Android)
- Go to Settings → Site permissions.
- Tap Notifications.
- Find this site in the list and adjust your preference.
Firefox (Desktop)
- Open Firefox Settings.
- Search for Notifications.
- Find this site in the list and adjust your preference.