


Leaderboard
-
JR RS
FREEDOMLite7Points4,412Posts -
pinkpanther
FREEDOM6Points3,911Posts -
langers2k
Resident Member5Points8,590Posts -
.jpg.1006585dfe4e2977315b67c3d642e37b.jpg)
Guest_
FREEDOM5Points83,824Posts


Popular Content
Showing content with the highest reputation on 11/05/21 in Posts
-
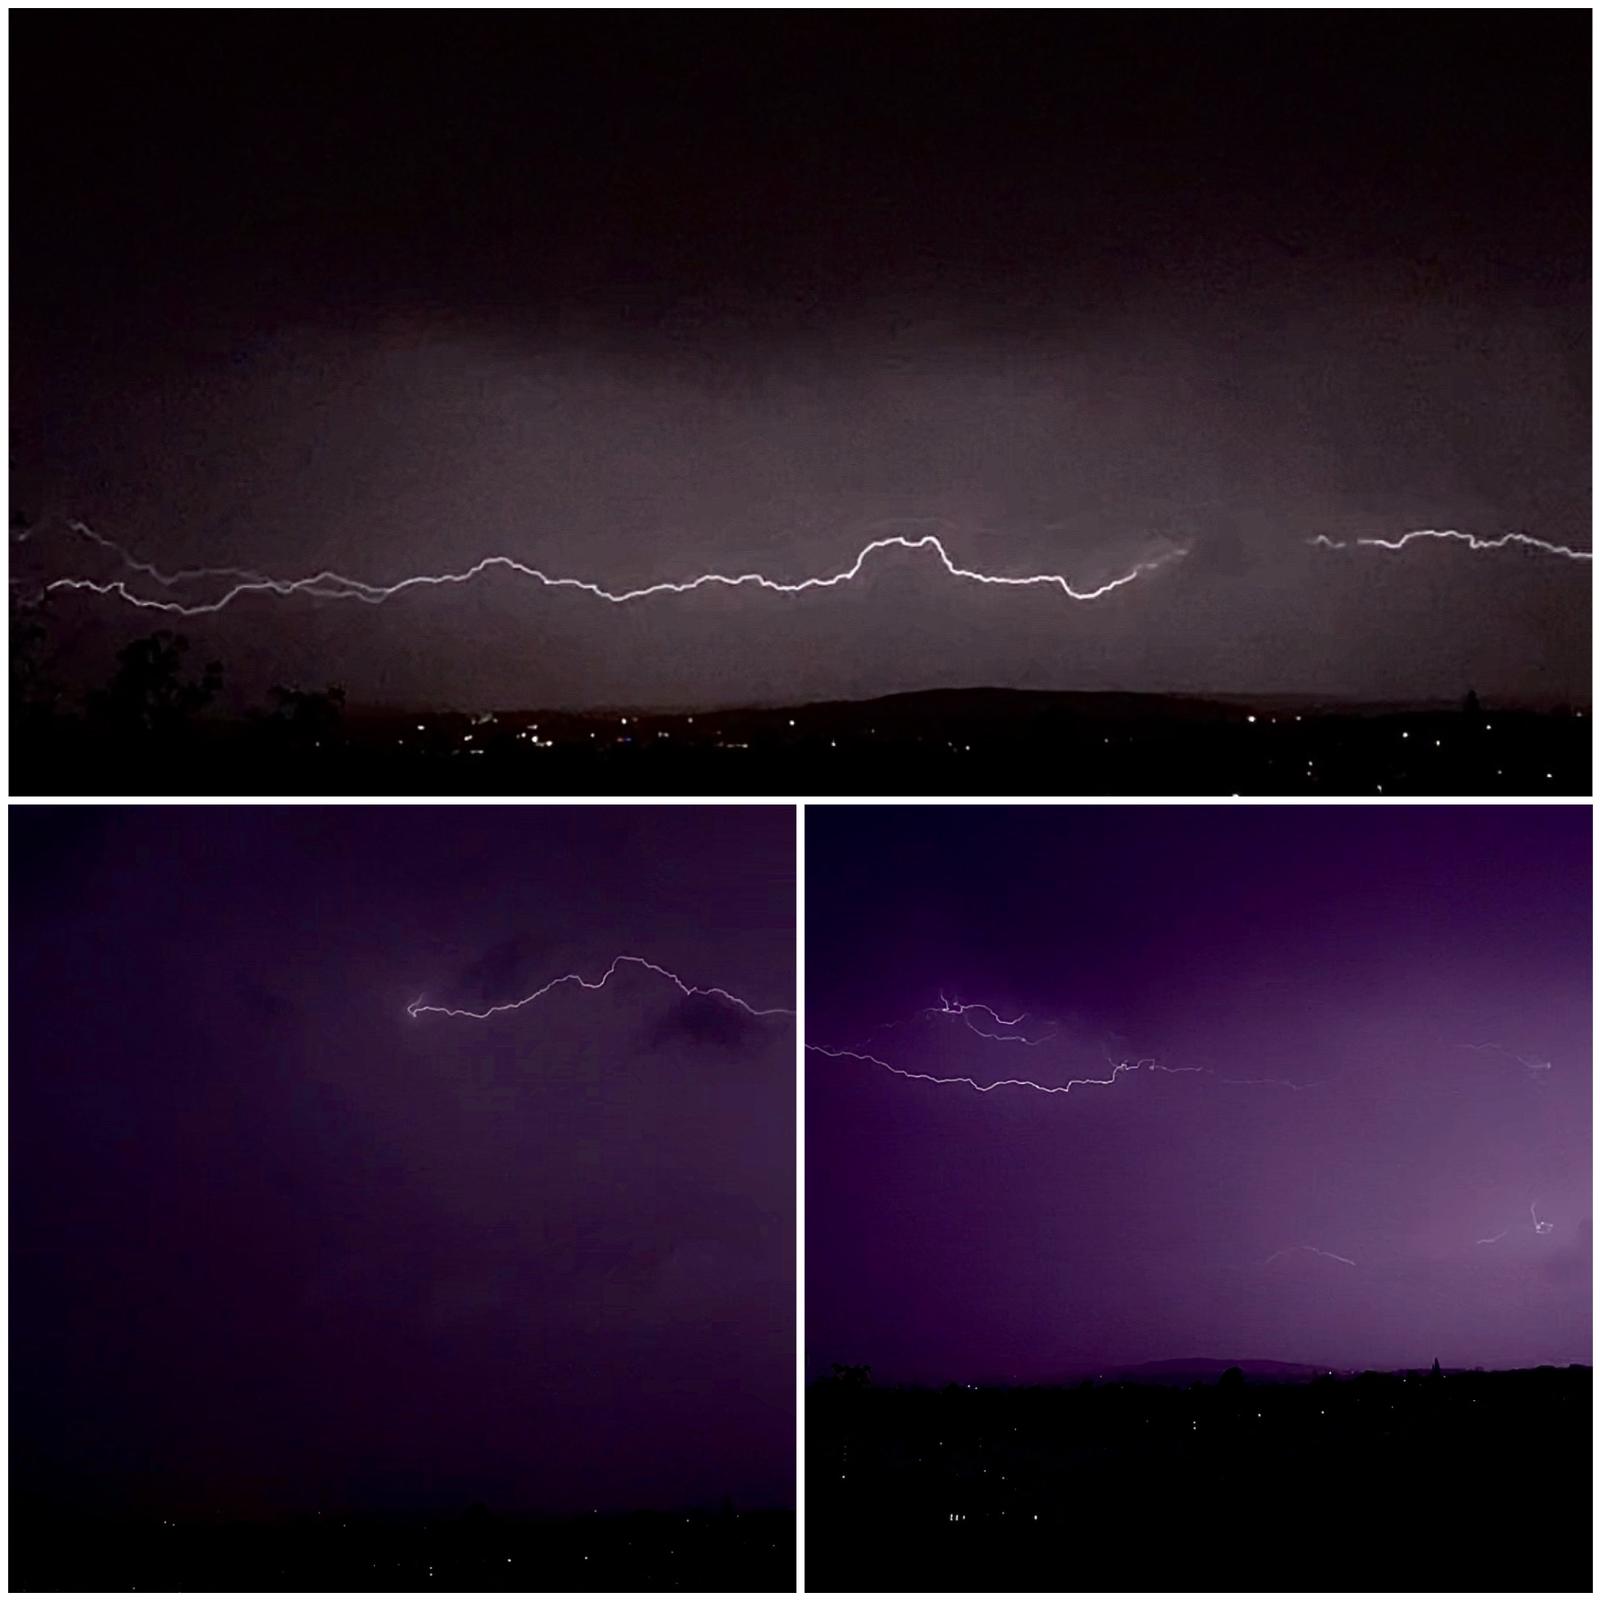
3 points3 points3 pointsFound a new spot for watching the sunset last night (also spotted some excellent Rainbows)


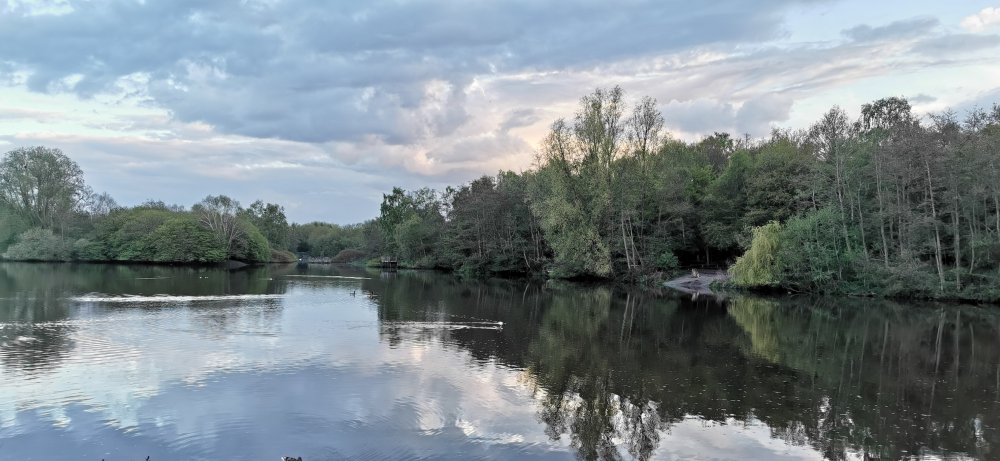
 3 points2 pointsWe had some dramatic weather earlier, although it's all quite placid now

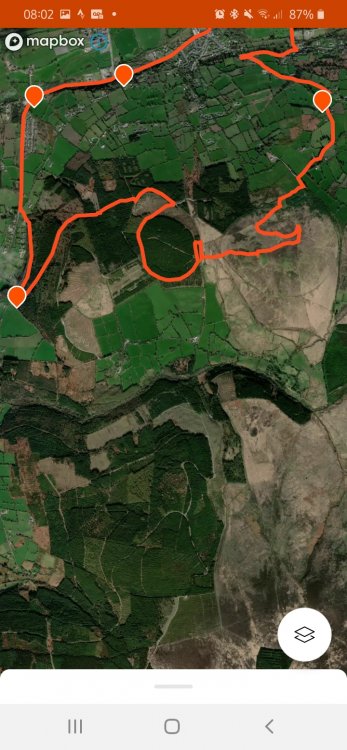
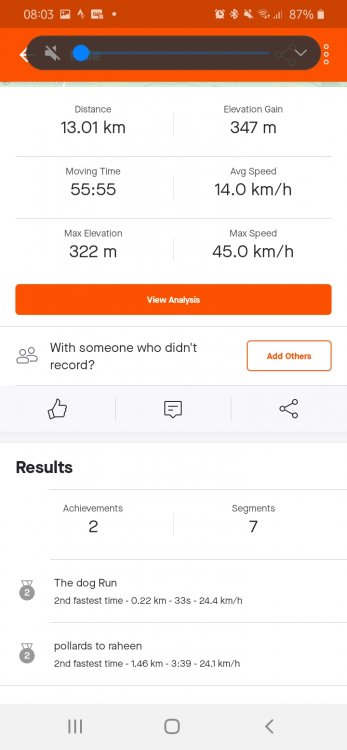
 2 points2 points2 pointsGood luck! My only suggestion would be to check it works by connecting it in the front footwell before running the wires though the car etc2 pointsand another beautiful morning on the hills... did nearly the full circuit of the top of the christmas tree walk, then broke a down a tree trail rather than the fire break. i need a bike with shocks dumped me out a good bit farther from home than usual, but still a 13k route in under 56mins, so im happy
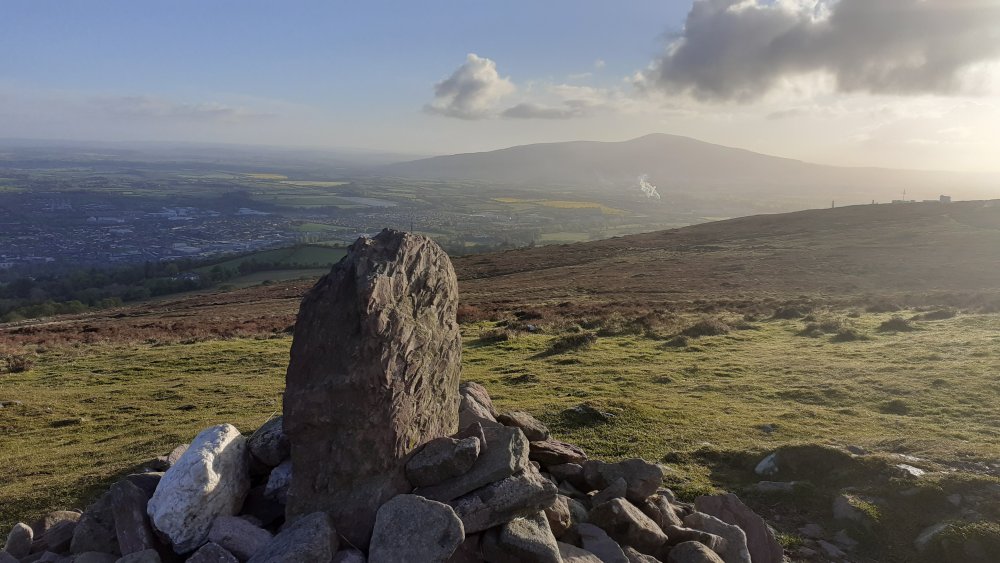
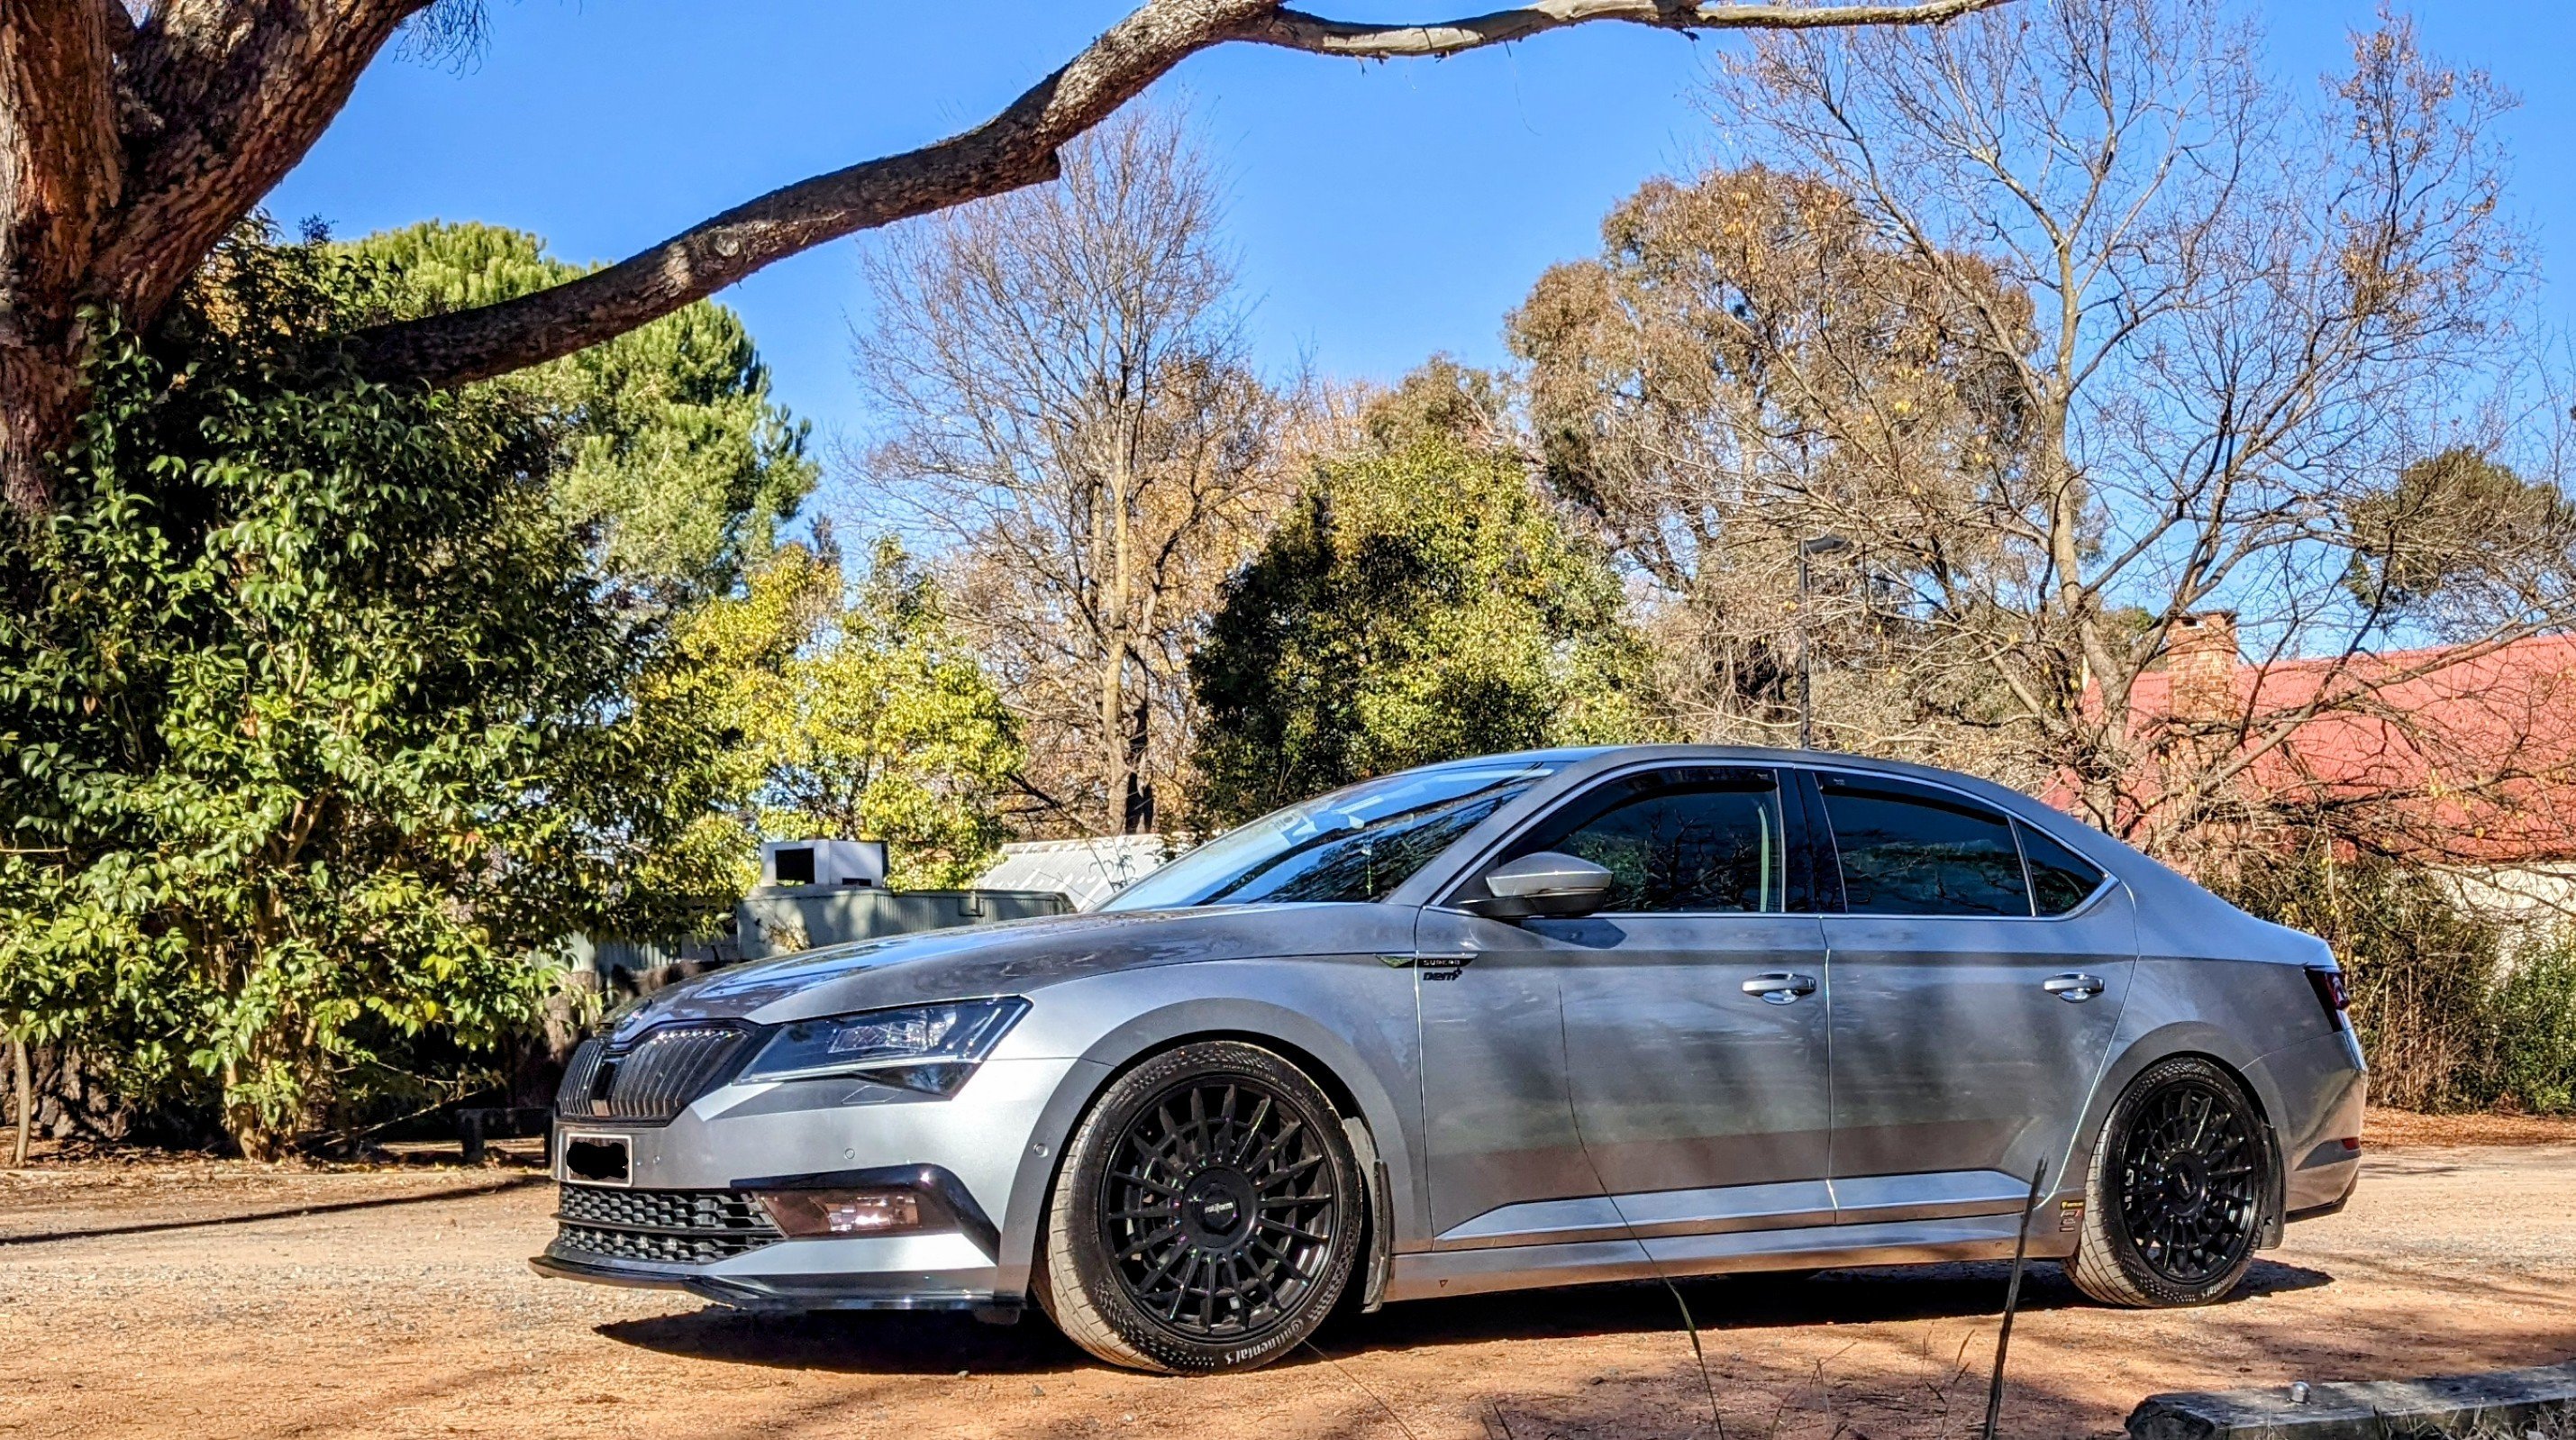
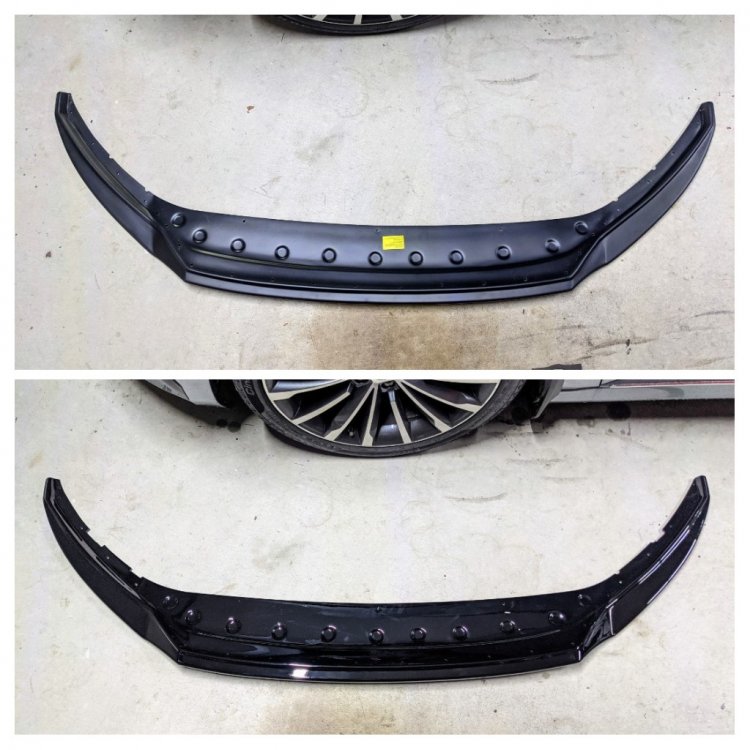
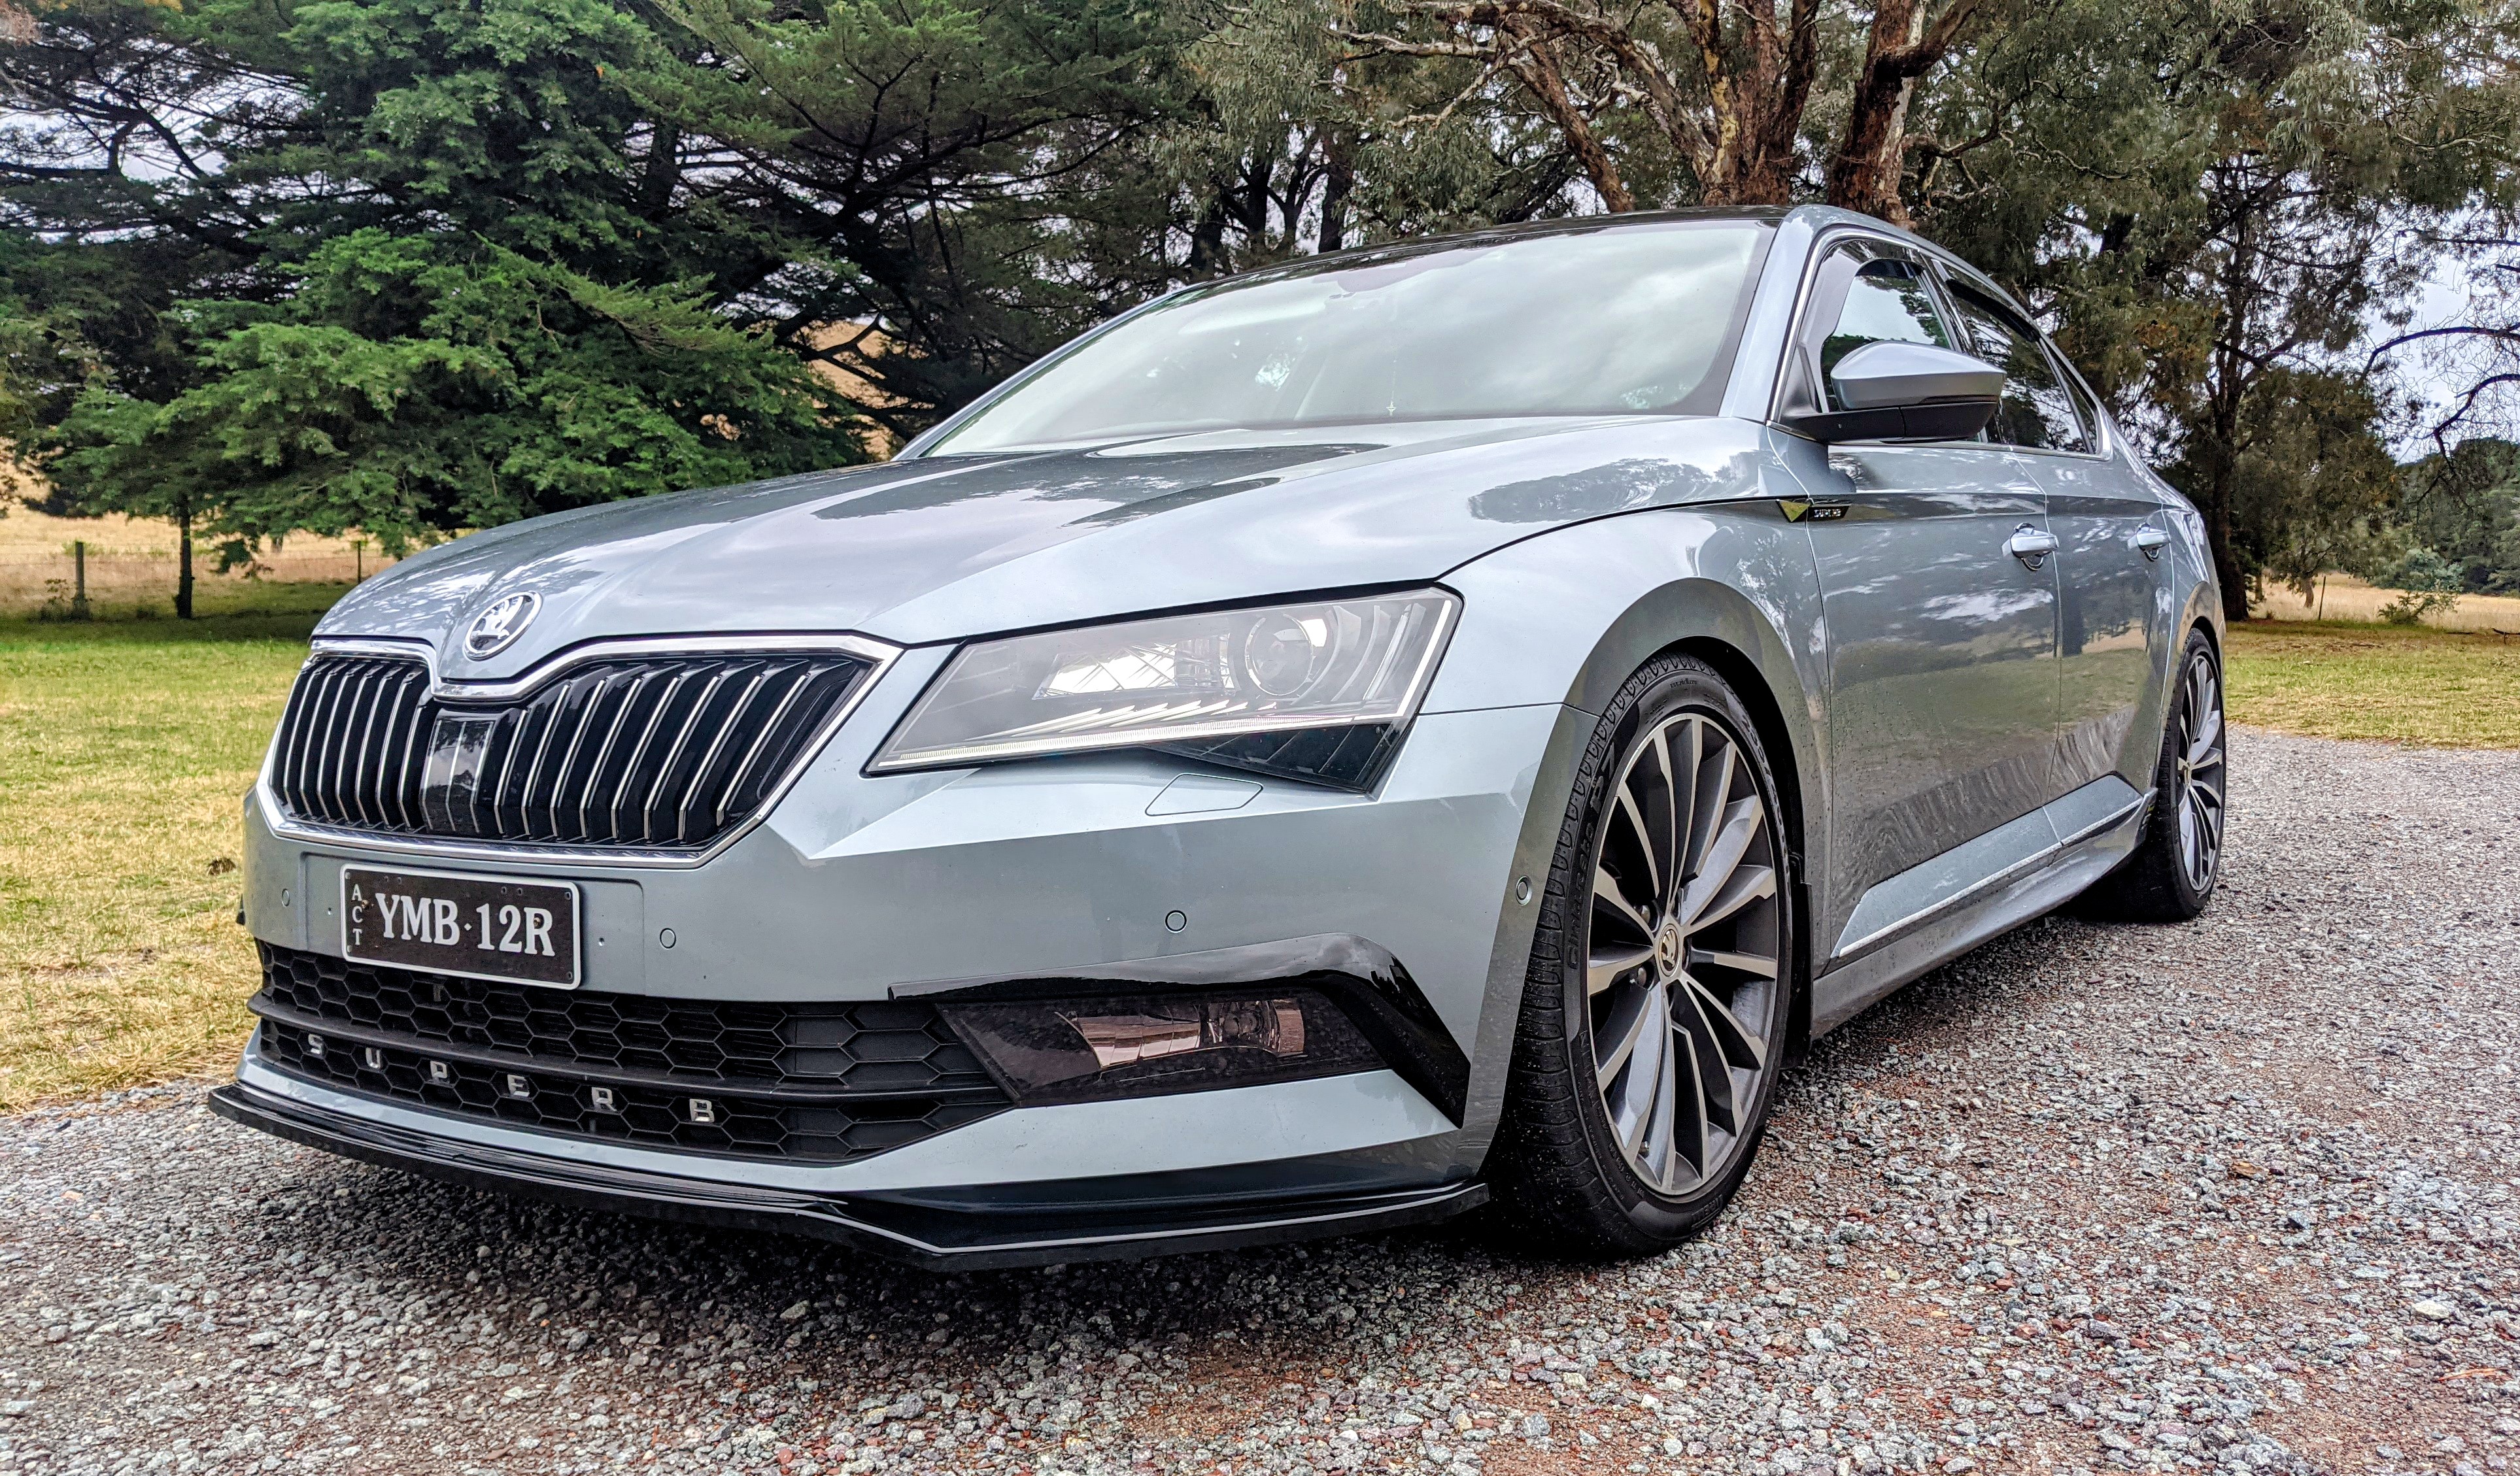
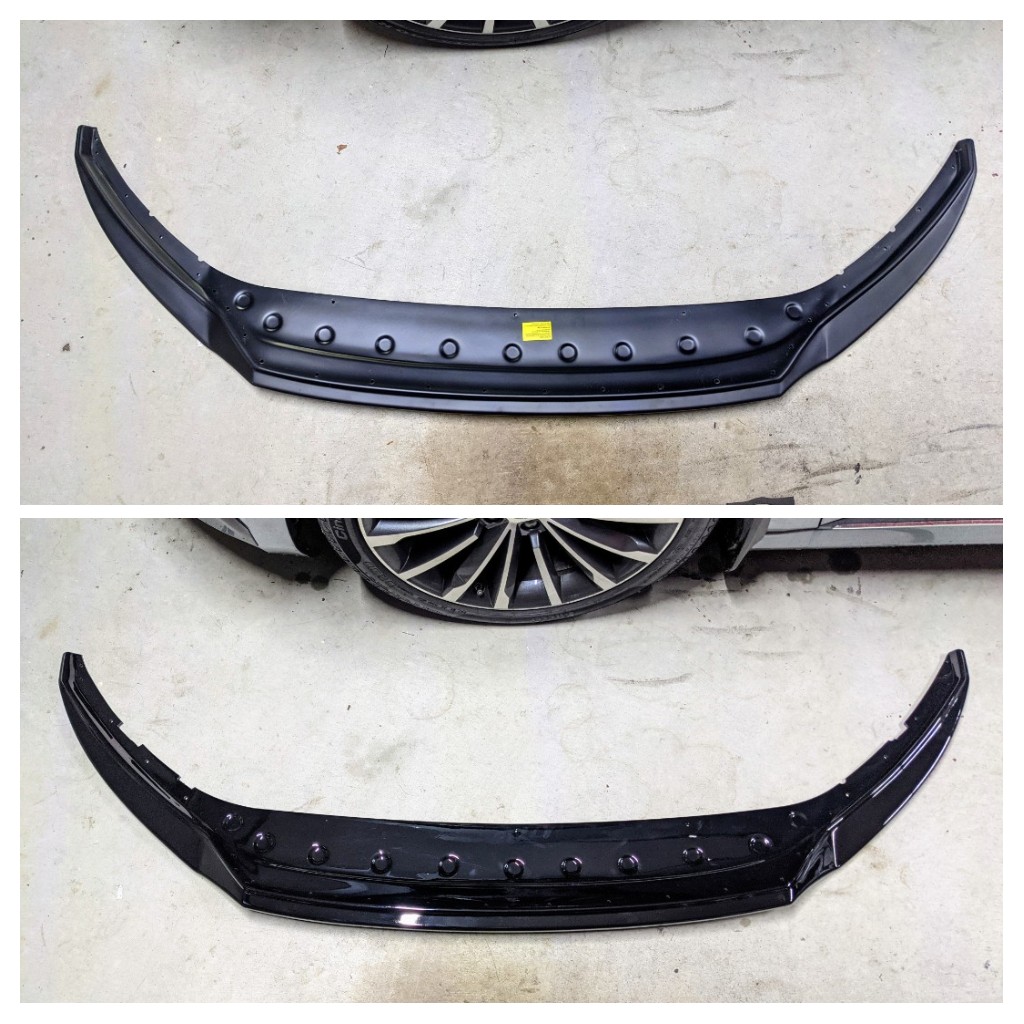
 2 points2 pointsUpdating the build thread now that the splitter, finished in gloss black now, has been fitted. Been almost a week now, and I've been doing well thus far in not scrapping it!!! The front splitter sides r 11mm of the ground. The middle section bit sits 13mm off. The lowest point (behind front wheels) of my Rieger side skirt sits 10mm off the ground!!!

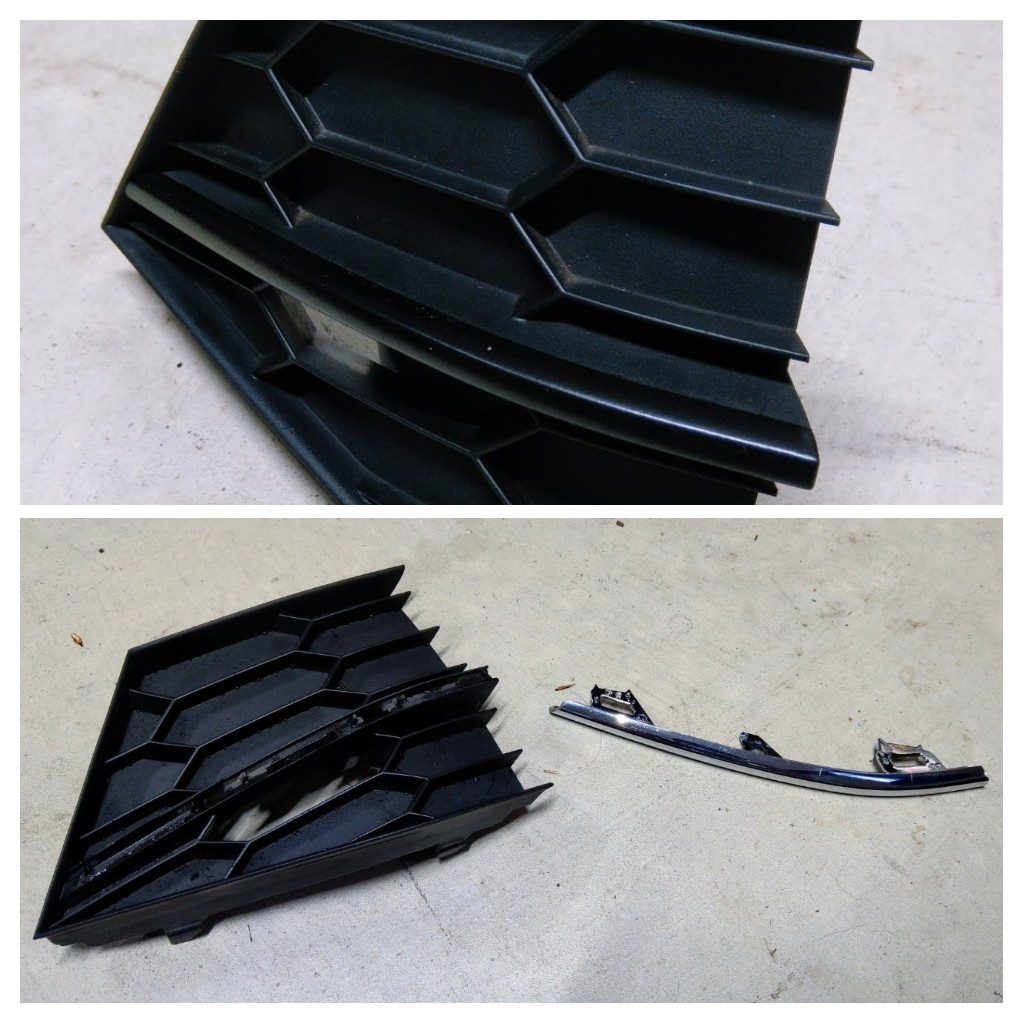
 2 points2 pointsi spray-painted, using Plasti-dip, the chrome trim on my lower grille. u could buy these bits from superskoda, in black already, if u wanted to, instead of painting it urself. i removed the actual chrome trim from the grille, so i could spray it properly. the upper grille would b more involved i'd imagine, and i myself haven't separated it.
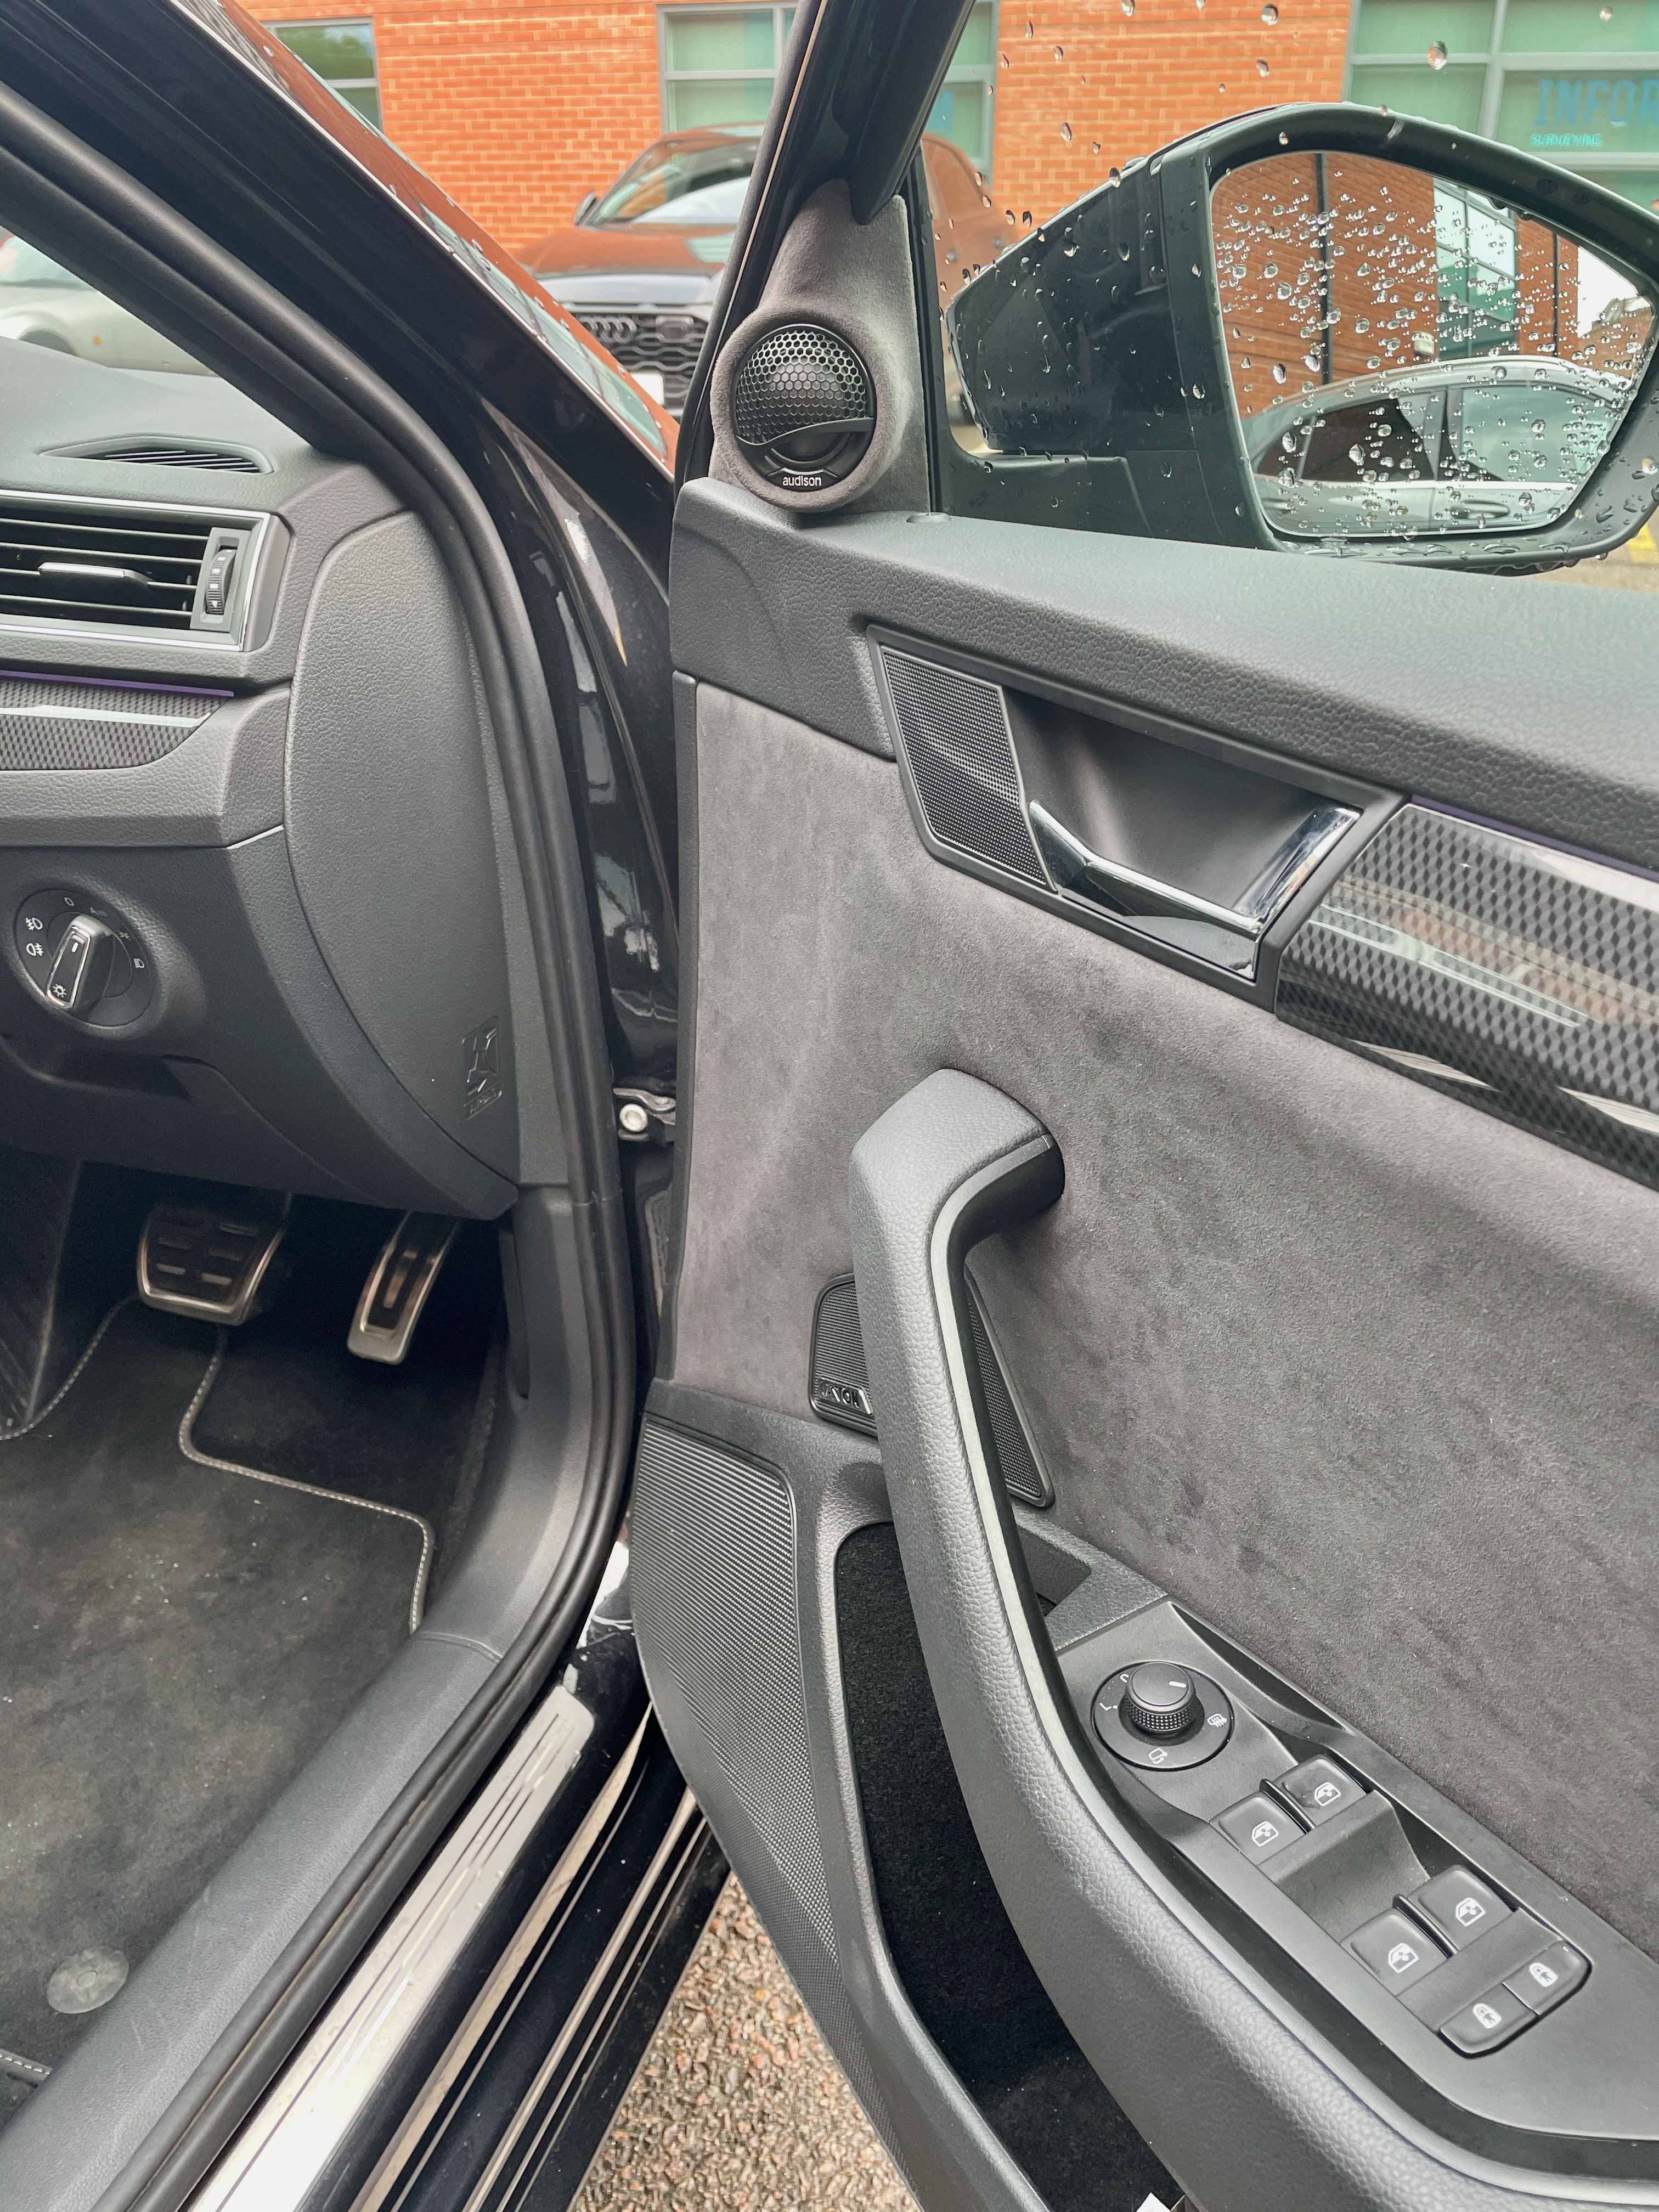
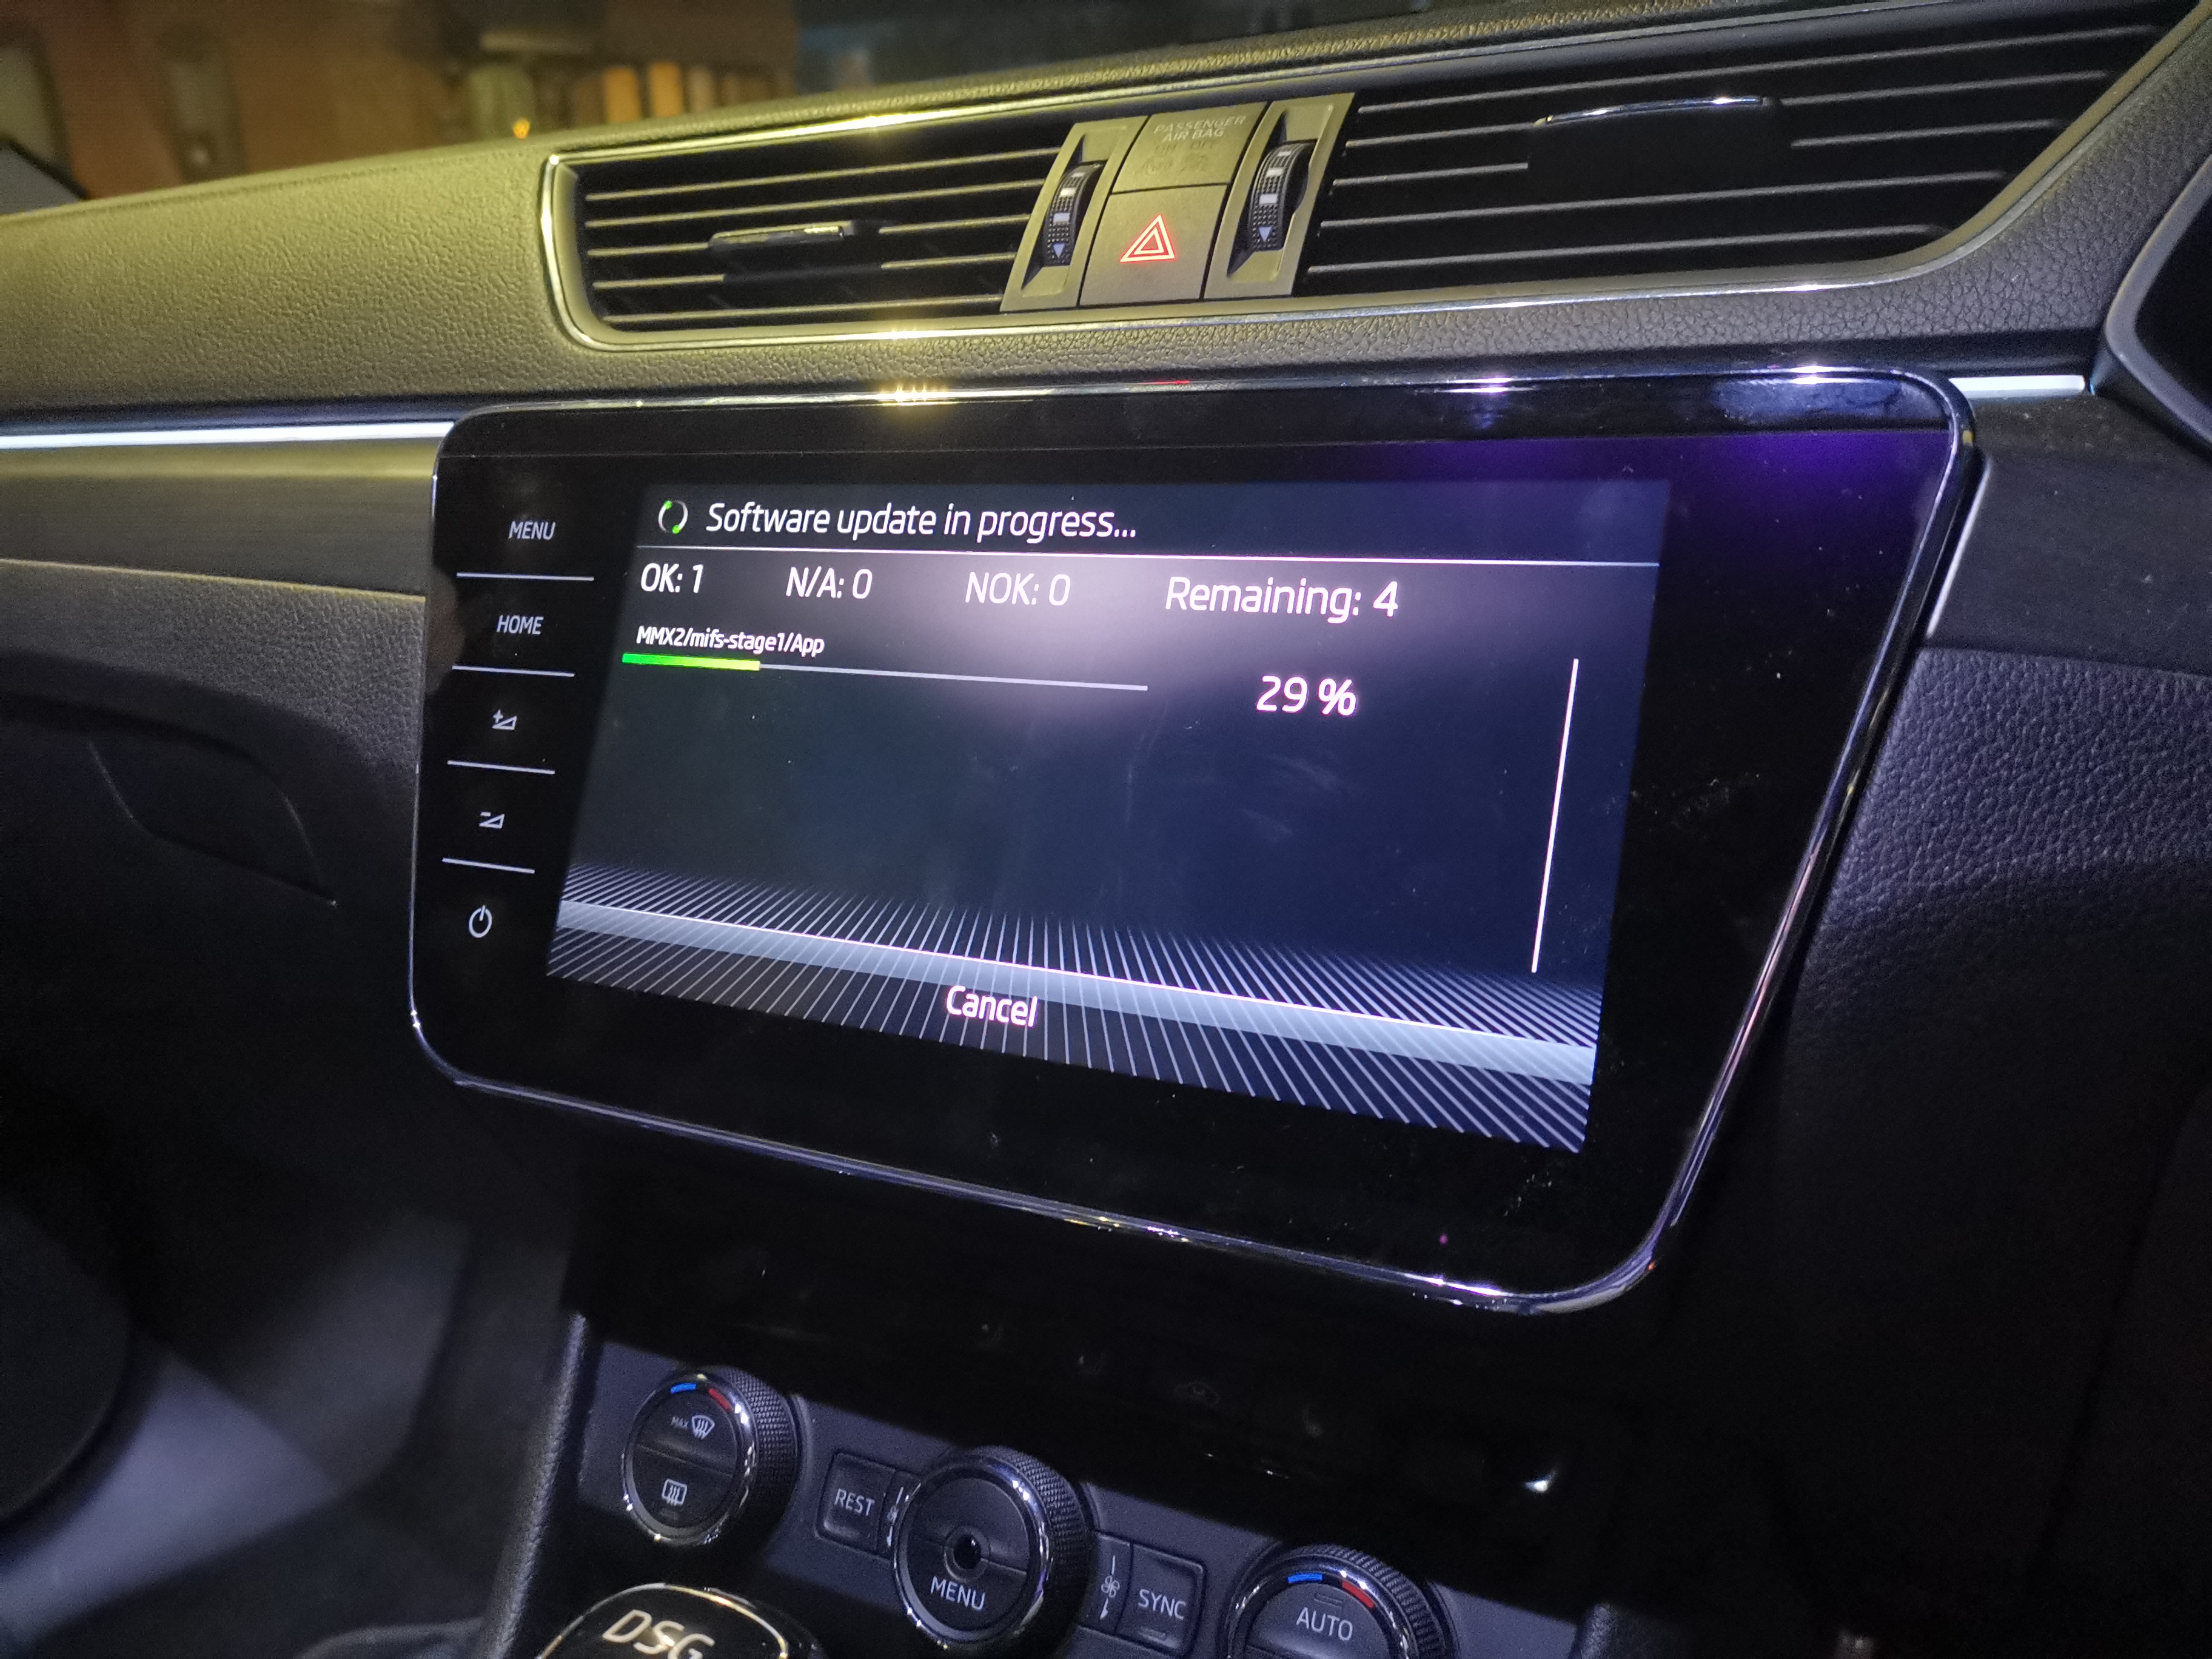
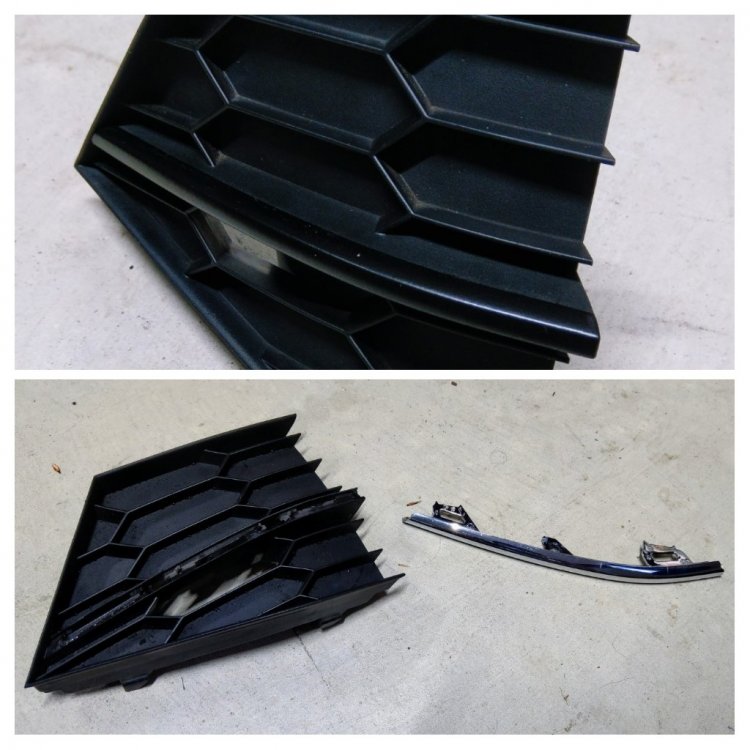 2 pointsTook a full vcds admap of module 5f, Removed the MIB2 columbus unit and screen and installed columbus MIB2.5 with 9. 2 screen which I got from ebay. Took a full vcds admap of new unit, used winmerge to compare adaptations and set it up properly for my car as my old MIB2 was, updated nav maps to 2021, updated to latest firmware, installed mib toolbox, tomorrow will do component protection removal and enable video in motion
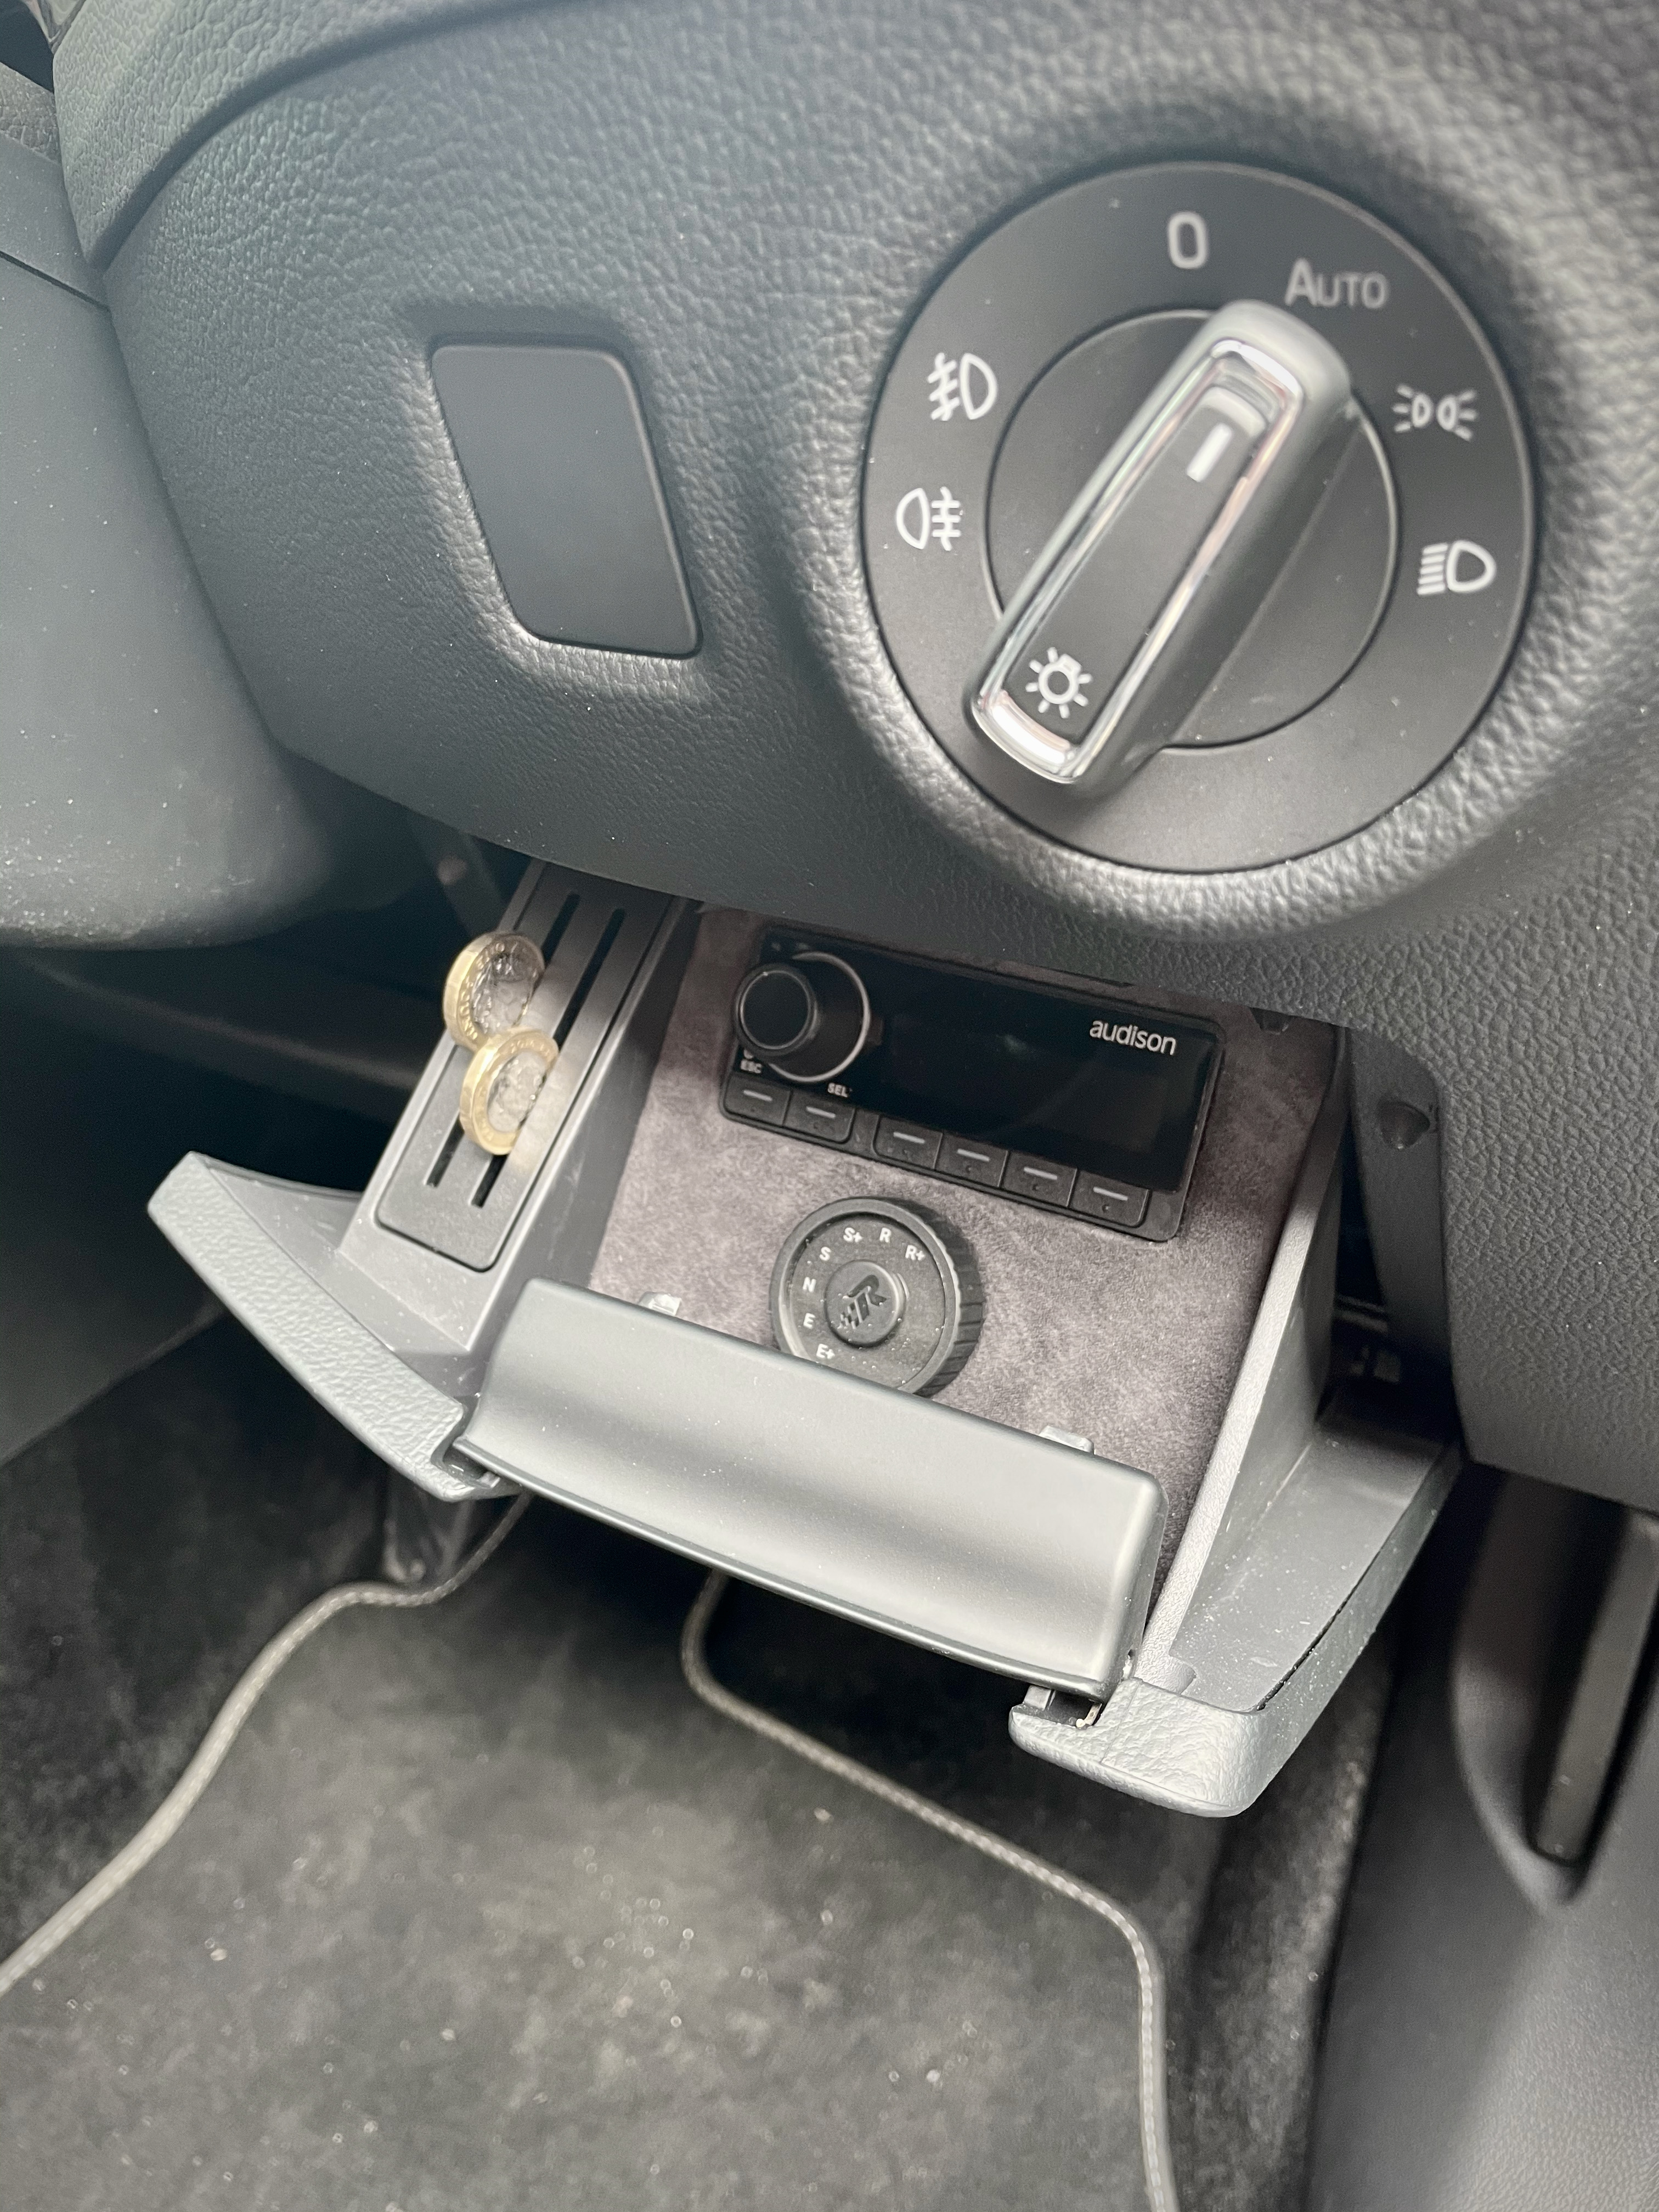
 2 pointsLatest Updated Speedcams - May, 2021. My car has only just come back from a crash repair centre after two months of waiting so I've been unable to do any updates as I haven't had the ability to test them in a vehicle before posting them. So anyway, here's the latest update of my customised version of EUR Speedcams ( May, 2021). They consist of the full EUROPE speed cameras which I've split up into four consolidated poi categories i.e. Fixed Speedcams, Average Speedcams, Variable Speedcams and Redlight Speedcams. They come supplied with my own preferred personal choice of icons, shown below, to match each of the categories. Remember to Install them as I explained in the first post in this thread i.e. after extracting the zip file remember to open the newly extracted folder and place only the PersonalPOI folder and metainfo2.txt file onto your sd card ( Please Note: a usb stick will not work! ). Also, please remember to select/tick the relevant newly added poi categories and the poi audible warning alert in your infotainment map menu settings after performing the update or they will not display on your map or audibly alert you. Hope you all enjoy them! EUR Speedcams May, 2021.zip


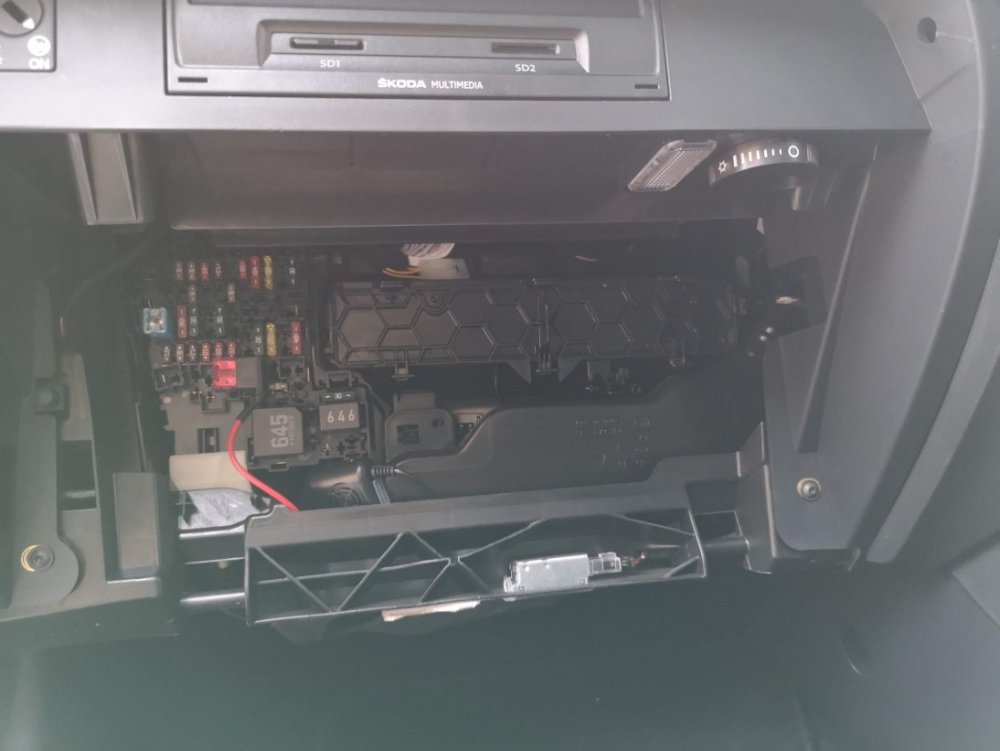
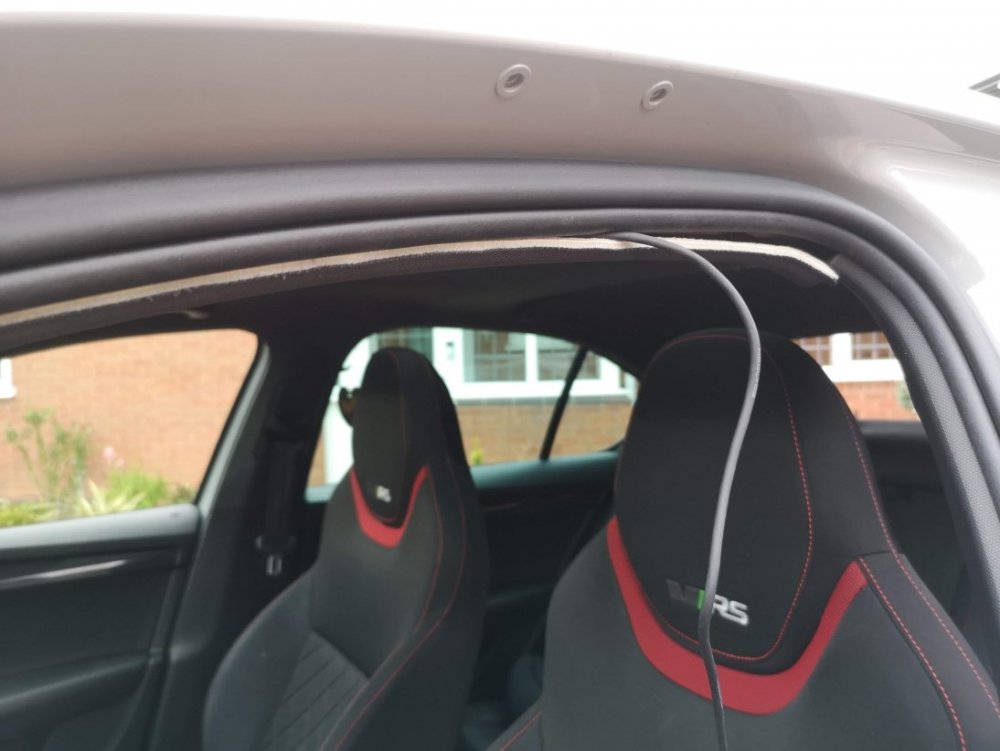
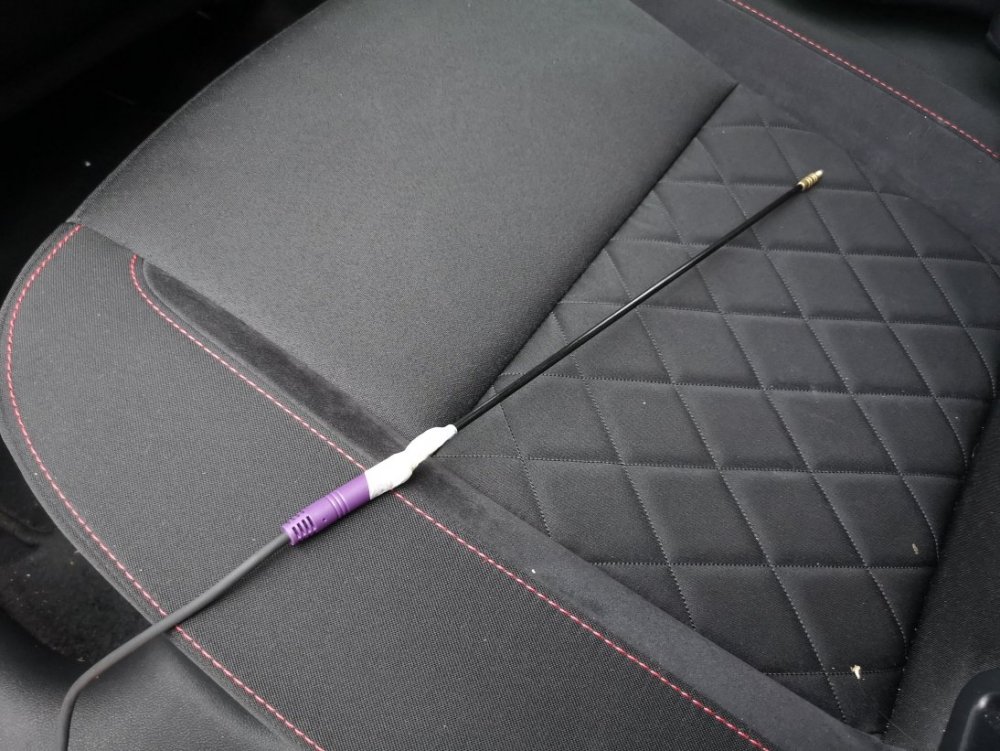
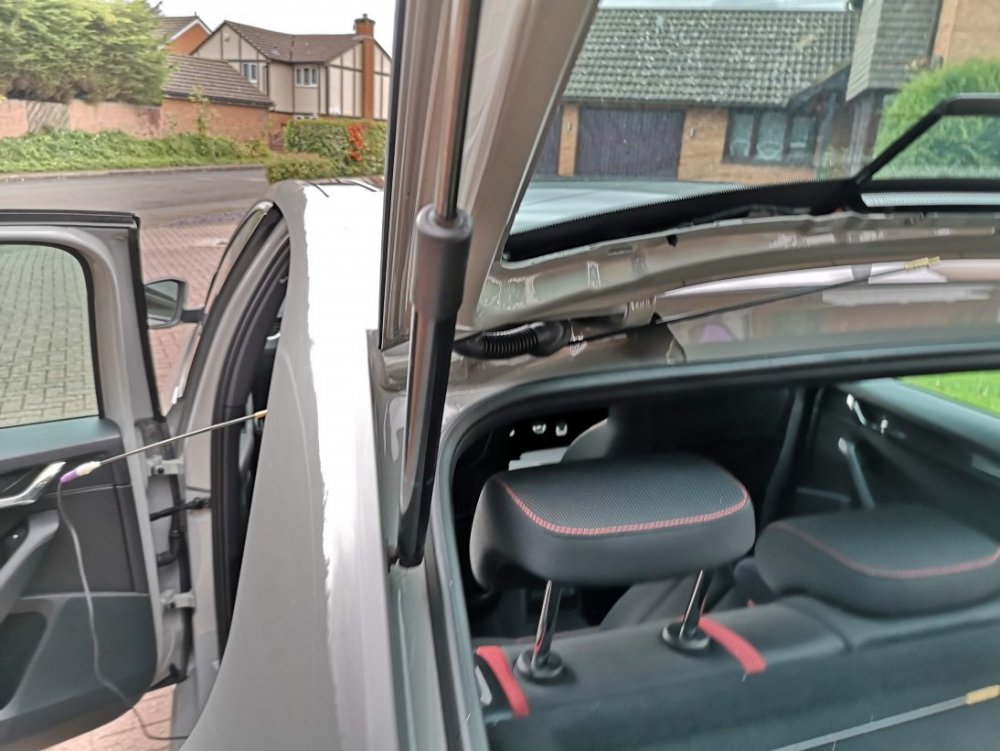
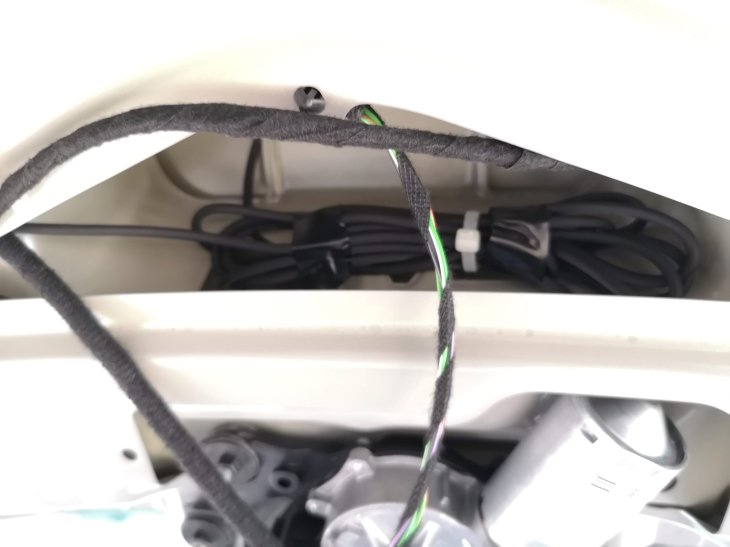
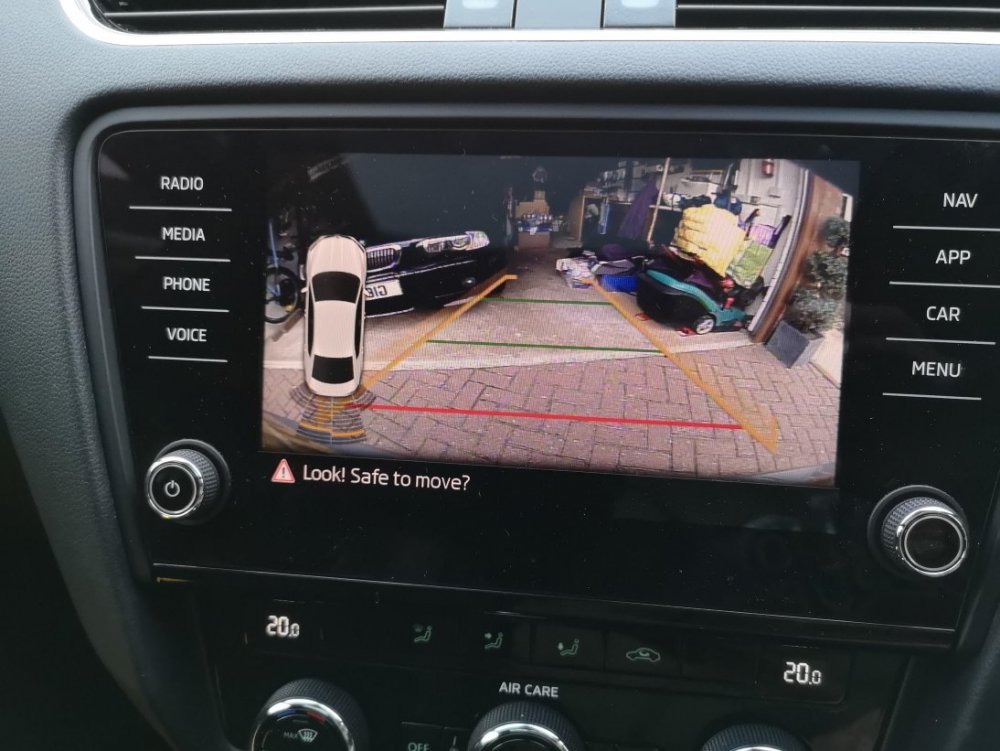
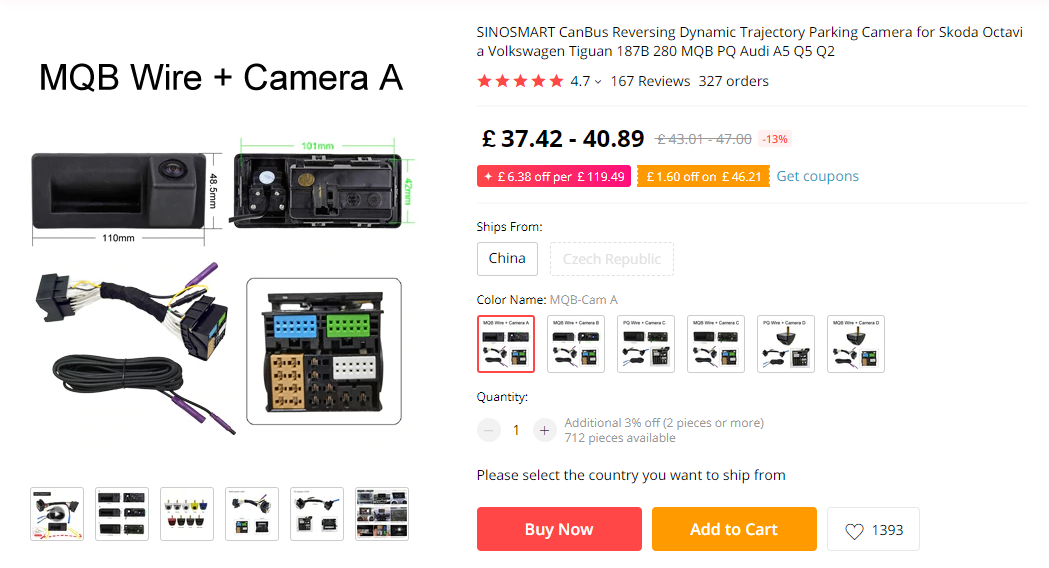
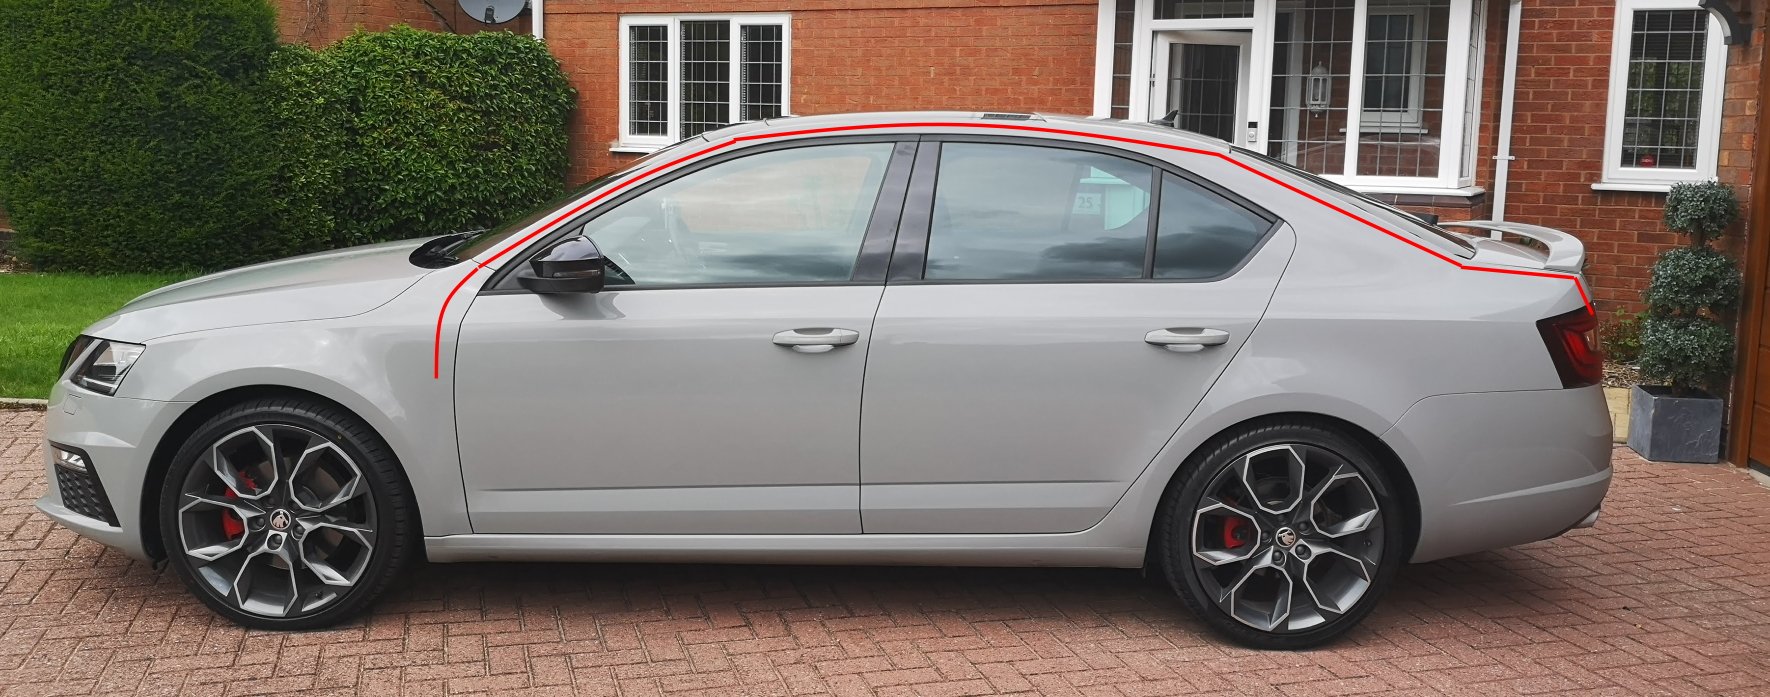
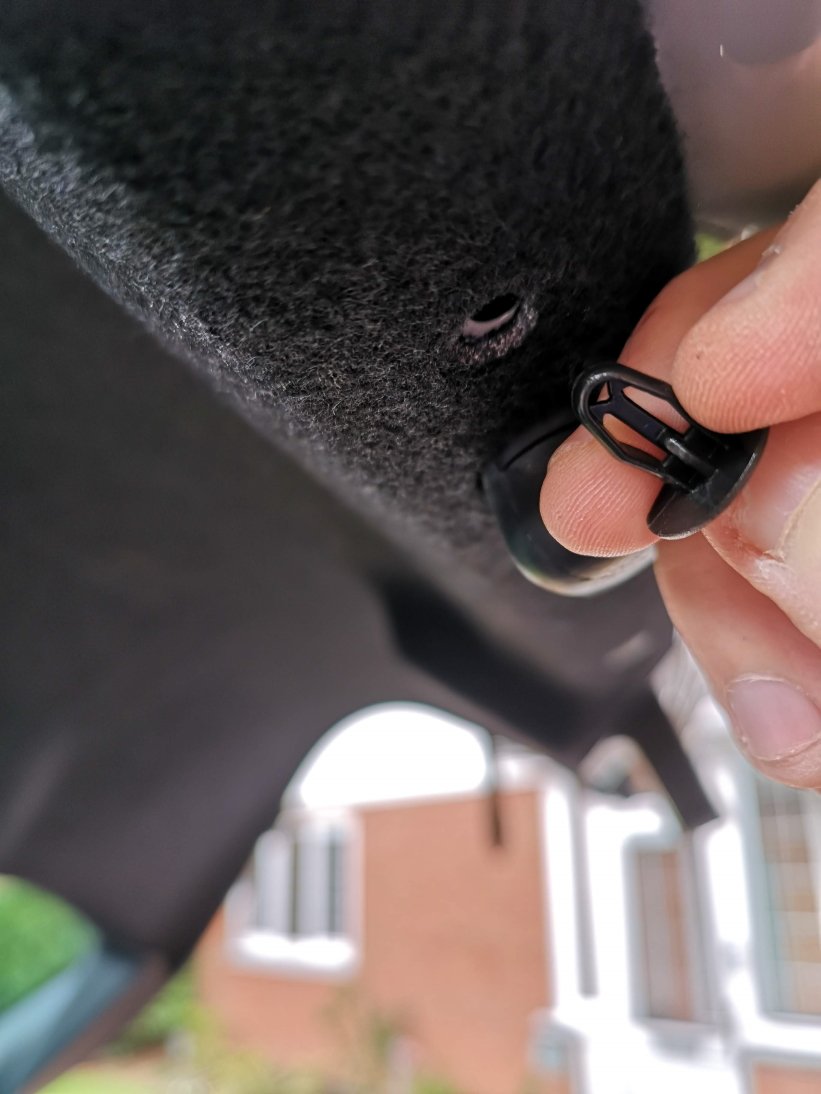
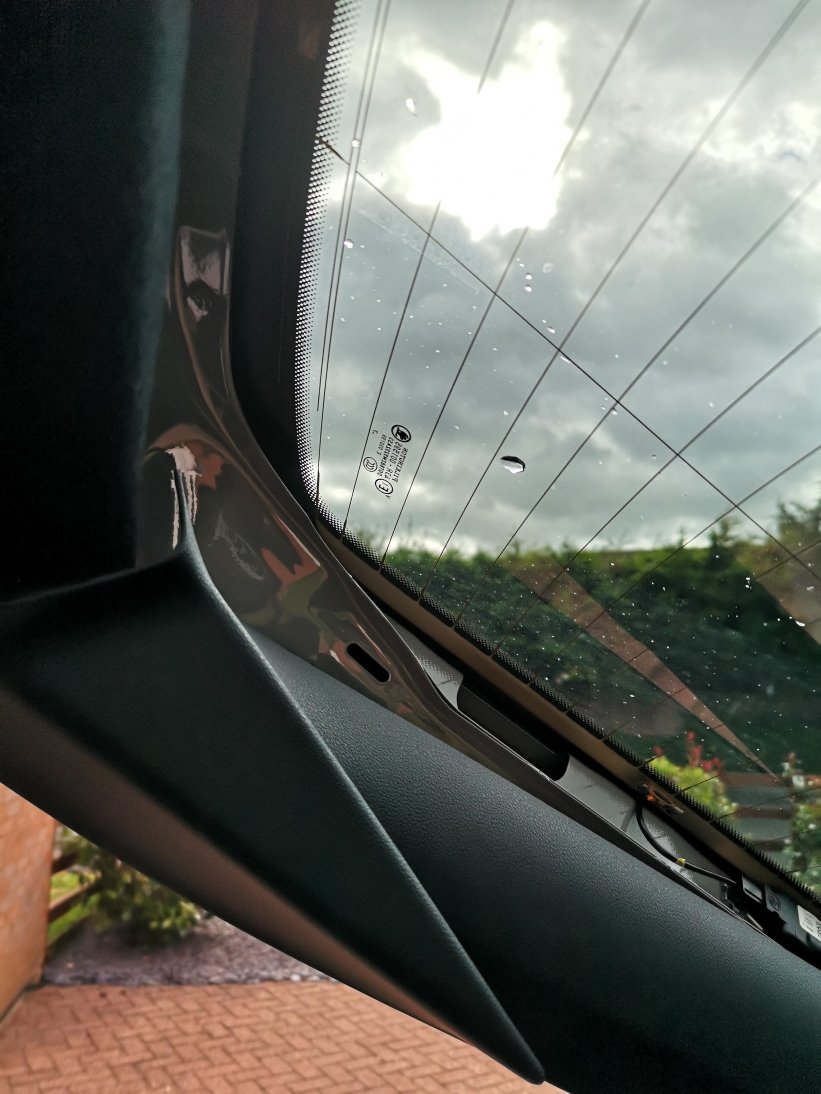
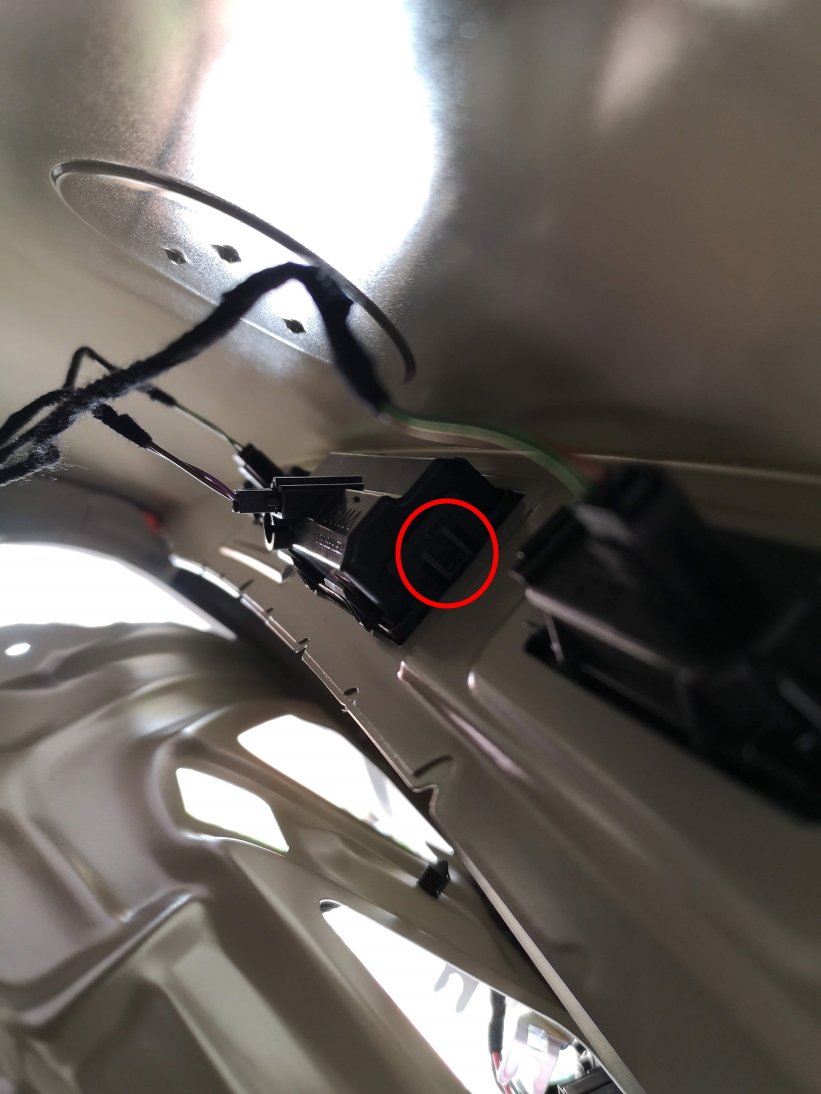
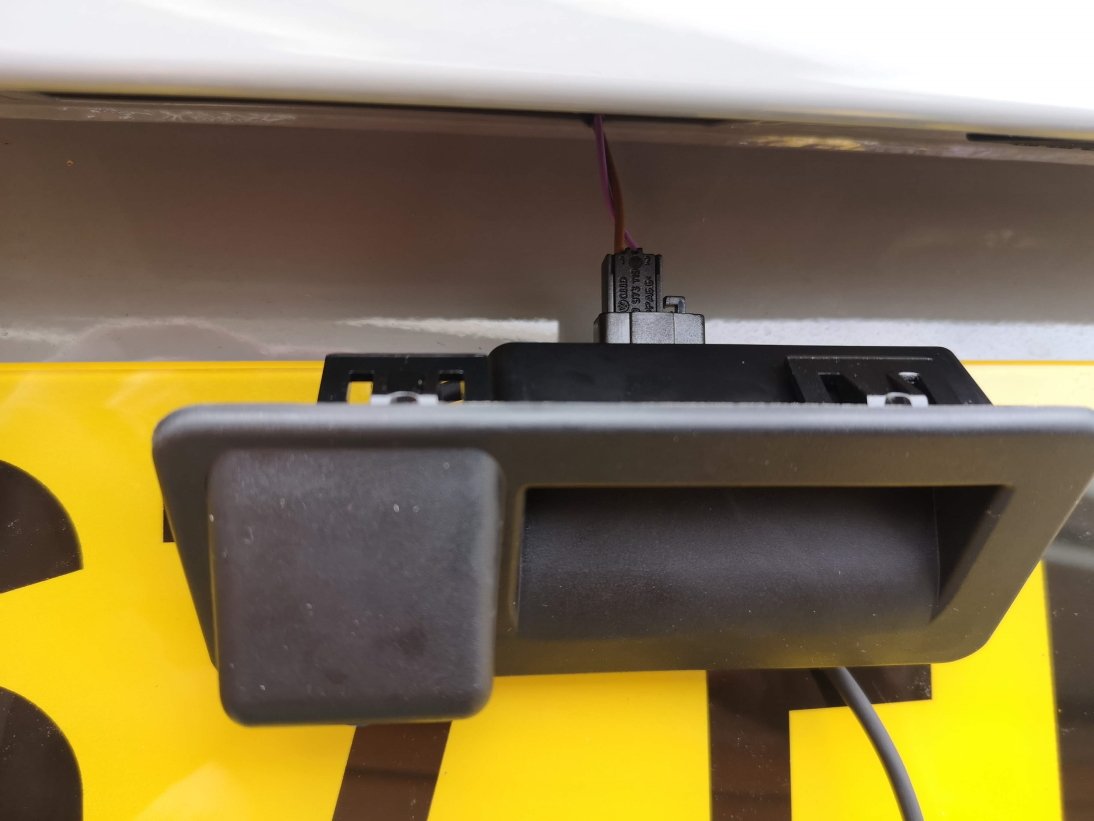
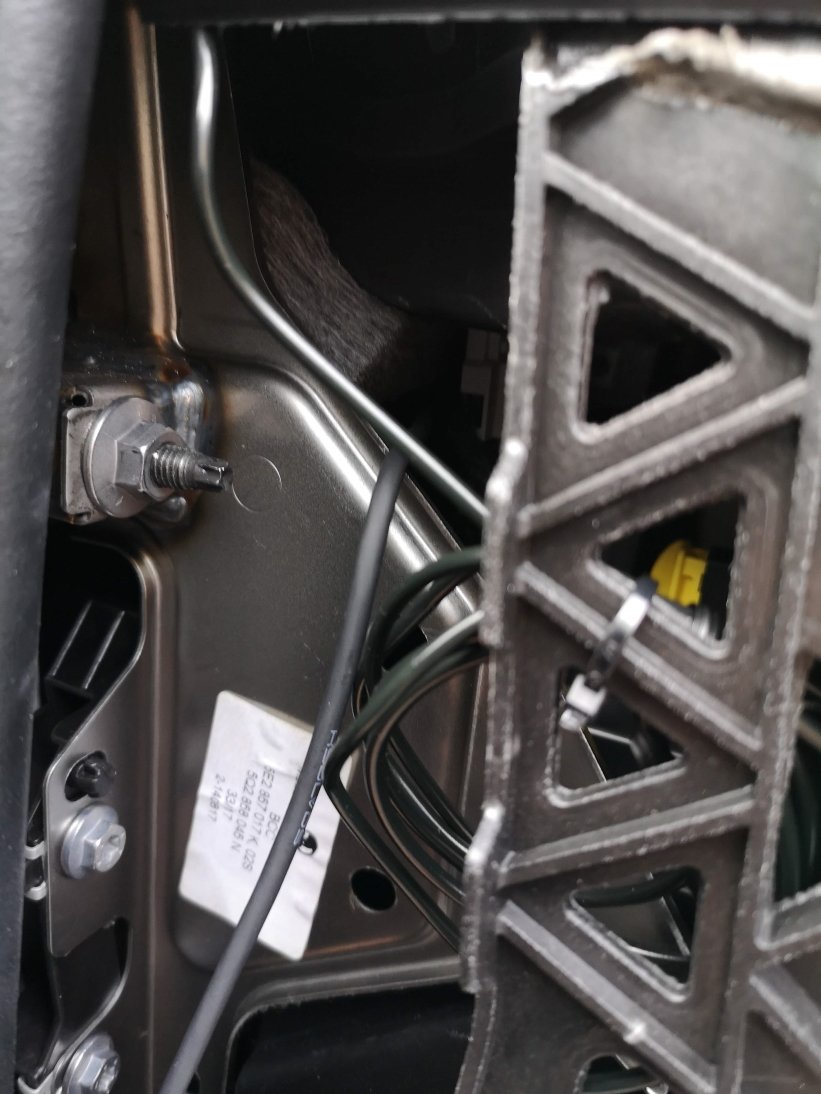
 2 pointsAs there seems to be a lot of people asking questions about this lately, I thought I'd put together a quick guide showing how I fitted my reverse camera to a facelift VRS hatchback. They way that i've fitted this will apply to most models, with the key differences being the size of handle (based upon car model year) and whether hatch or estate (but this is just inside trim differences), there may also be wiring loom differences for earlier cars or none VRS models. I've benefited from info from these forums so hopefully this will be useful to others. I am by no means an expert & I won't be able to answer all of your questions, hopefully others will chip in and can add other info as well. First of all, this is the camera that I ordered for my MY 2017 VRS (Camera A/Handle A): https://www.aliexpress.com/item/4000230897829.html?spm=a2g0s.9042311.0.0.40694c4dTEPT93 (link may no longer be valid when you read this so screenshot below) No programming is required for this camera and it supports dynamic reverse guidelines Tools: Trim removal tools would be useful, but otherwise plastic tool that won't mark your car, or screwdrivers or similar with masking tape over the end. A T20 torx head tool is required if you have a hatchback to remove the pulldown boot strap Cable rods are very useful, I couldn't have fitted through the roof lining without. Stereo removal tools unless they come with your camera kit Cable route - I went with an OEM route for my cabling, following existing cables through the roofliner and out to the back as show by the red line below. The camera: The first thing that I did was to check that the boot release switch was working on the new unit - there's no way you want to wire this in and find it is faulty. You'll need to start removing the boot trim to access it. Remove the plastic clips from the lower boot trim- this consists of a few plastic clips which easily pop out with trim remover/screwdriver. There are 8 of these on the hatchback. After that start removing the upper plastic trim, this simply requires forces to release the metal clips. You don't need to remove all of this for now, but it will all need to come off later Remove the lower upholstered trim covering the tailgate. More metal clips - work your way around. You'll also need to remove the pull down strap with the T20 torx head. When this is down you should be able to drop the boot liner which will give access to the boot release handle. This can be awkward to remove, but can be done by pushing in the clip on one on the ends whilst also pushing down on the handle from the inside (ignore the clips along its length) - it should then pop out. Repeat for the other side. Unplug the harness and plug the new handle in - check the release switch works. You can either now push the new handle in until it clips, or leave it out to test the video connection later before fitting. To wire it in Remove the glovebox (open, rock left to right whilst pulling up & you'll hear the bottom clips release. Raise the glovebox lid up and inside the housing and reach in and remove the dampening on the left hand side) Use the stereo release keys to release the multimedia unit. The kit used here comes with a replacement harness that sits between the original one and the media unit & includes the video feed cable. Some people have removed the upper glovebox section to provide more access, be careful not to unplug the airbag connector if you do this. This can be fiddly, but I found the best way was to lie on my back with my head in footwell looking up at the unit from underneath. With the media unit slid fowards this gives access to the harness. It's the large one at the bottom and there is a locking connecting that needs to be pushed backwards to release. Check how it works on your replacement harness. Unplug old harness and plug it in to one end of the new one, push the harness in to the void and plug the new connector block in to the media unit. This took me a while to get it all to fit in. When done you can now test the video feed to the rear camera before your start wiring it in permanently. I took the camera cable over the top of the fusebox cage & out through the side panel I then ran the cable up the A Pillar to the roof lining and all the way to the end. Cable rods were really useful at this point, especially to get around the B pillar , and to go from the end of the roof liner through the cable exit point behind the rubber trunking where the original boot cables are. You can also run the cable in the trim above the sill and work your way back up to the roof lining on the C pillar. When you get to the end of the roof lining you'll need to unclip the rubber gator at the top of the boot so you can get the cable out of the roof liner and in to the boot via this gator. If you install the same way as me you only need to peel the roof liner down a few cm, being careful not to deform or damage it and you'll see the OEM cables behind. Once you've got the cable this far it's a case of feeding it through the rubber gator, up the side of the boot and over to the handle; connect the video cable and tidying up any spare cable. Everything should now be up and running. Retrace your steps to refit your trim. You now have a fully working reverse camera, activated when reverse is selected and with dynamic guidelines. The parking sensor guide now shifts to the left of the screen the same as an OEM reverse camera. I will come back and re-edit this tomorrow and resize pics as it's getting late. I'll tidy up any errors as I see them so please don't jump on me straight away!


 1 pointI have been after a Dragon Skin Green Superb Sportline 280 hatch for some time and found 'the one' in deepest southernist England, then COVID happened and I had to wait and finally missed it. With all the uncertainty around work at moment, I decided to play it safe and went for something that would cope with a longer commute if I have to find a new job and cost a hell of a lot less..... So ater 2 years without a vRS (bus till a Skoda), vRS No.5 has been acquired. Money Pit section subject to continual additions over time (UPDATED 22/02/2022): Windows tinted Skoda main dealer timing belt&pump, AC service & Brake fluid change Official Skoda winter rubber mats Team Heko wind deflectors Front lower bumper gloss black trim piece Extra gemini alloy sourced and refurbed with the other 4 to all one colour (BMW A22 Sparking Graphite) 4X new Skoda center caps for the above refurb 4X Michelin PS4's on freshly refurbed wheels New colour coded and black round Skoda badges front and back Black rear vRS badge Rear lettering banished (have black lettering but not using it) My reg of course Start Stop deactivated Skoda LED number plate lights fitted and coded New front and rear cameras fitted and hardwired Additional 12V sockets and USB charging port / charge station installed in glove box New Pagid rear discs & pads Android head unit fitted (AliExpress job) Front splitter fitted (The AliExpress special) Official Skoda mud flaps front & rear New Bosch wipers all round New rear wiper motor, arm, blade, end cap and grommet (when in Rome...) New Varta battery (factory one retired due to age / fear) Skoda main dealer service & headlight alignment Dynamic LED wing mirror indicators dark tint Fitted carpet floor mats Reverse Camera / boot latch New drivers door window switch pack New fuel filler flap actuator 4X new vRS honeycomb style centre caps to replace the failed Skoda ones, that replaced the failed Skoda ones... DAB+ added to Android head unit Genuine coolant expansion tank without 'MIT SILIKAT' (went into main dealer for timing belt @ pump change and came back with different tank, didn't have silicone sachet in before, didn't notice for a year GURRRRR) vRS decal insert for dash pod
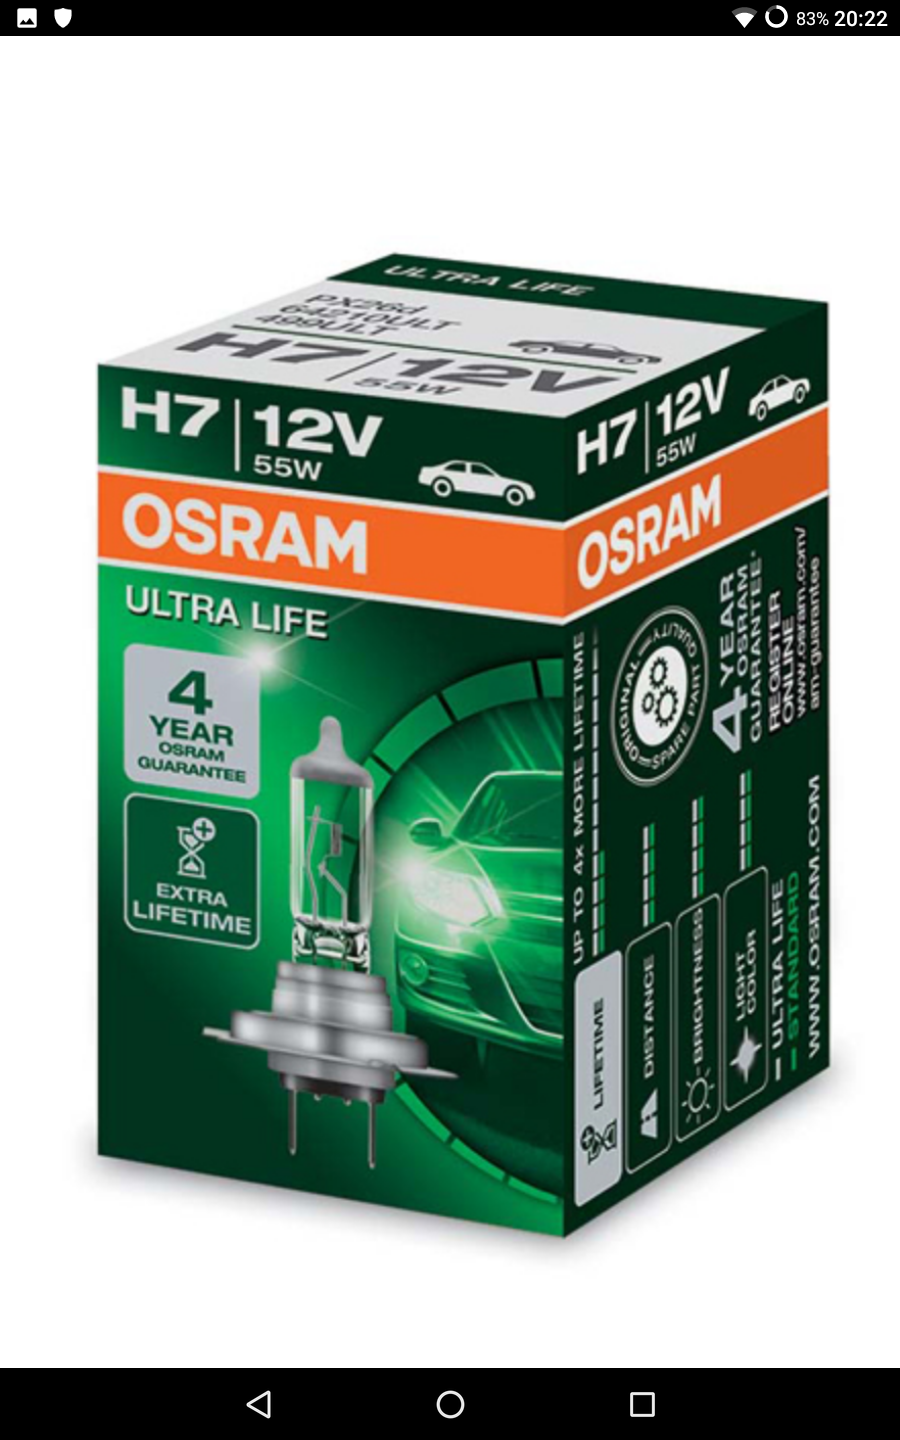
 1 point1 point1 pointNot sure about that, i believe they can see if any software modifications have been done to the ECU, so be carefull about that warranty!1 pointYou need these, Osram Ultralife H7 - 4 yr guarantee, £5.59 from Eurocarparts, just as bright as normal H7 bulbs. (Eurocarparts Product Code: 48177022L)
 1 point1 pointIf the cars been mapped, factory warranty will be void for the turbo. Revo would be my choice for the mapping work.1 point1 pointI believe @skinnyman has just does to his as he was in the same boat. So he might have some wisdom on the matter.1 pointPicked the car up this morning and all is well the Cruise Control is working well and the Stop/Start is as well, I tested it as I stopped for at least 4 minutes and it was as it should be. Happy days, the problem was the indicator stalk they had one sent up overnight and it was fitted and tested by 11.00 am so I’m a happy boy.1 pointIf they have access to the VW back-end system (ie they are a VW Group dealer) and they've done this work, then it should be listed - otherwise, it is just trusting the selling dealership who has done the work.1 point1 pointEven when it comes to my mk1 I was lucky to get much of the stuff required to put it back together, including a set of vRS spyders for 180 euro. Even with Covid prices on everything deals are about. Cheeky drilled airbox for more noise1 point1 pointCatback shouldn't affect anything, performance wise. Induction kit is more likely to sap power unless it's a fully enclosed one, but they ain't usually cheap.1 pointPluged in tester .got code p0001 fuel volume regulator control-open circuit . wiring regulator control solenoid.1 point1 pointI'm unsure of what exactly you're trying to establish with that? You're not new on this website and now you get bragging rights as a Skoda expert? You can have that one for me buddy.1 point1 pointHad the brake fluid changed last year. Its a 2 ltr TA diesel automatic. Thanks for responding.1 point1 pointThat 400 pound would work out to be just a little less than what i'm in for all my suspension mods AND my exhaust. Granted I bought the exhaust used, but especially in the UK it should be easy to atleast get a used 'sports' backbox on FBM for the likes for these cars. Doesnt take much to freshen up a backbox so long as its not rotten, bit of spray, bit of autosol and it should come out good. In the OP he wants to make his HTP sound good and on a budget. £400 is a good chunk of change to be spending on a first car, especially for just an exhaust. I have no doubt that company would do a great job and its probably worth it on the likes of a vRS, but perhaps that money could be better spent elsewhere on a HTP. I bought an Ulter backbox for mine last Sunday as I made a deal for a darkside downpipe and noticed he had the box for sale too (was only asking 25 euro for the box alone). I say that not to sound jammy, but to show that you can get a nice exhaust for cheap if you're a bit patient and can wait for something to come up. A brand new Ulter backbox is near £200 for our cars, and I got a used one for a fraction of that.1 point1 pointI'm really pleased with Rieger splitter. I like that it's not in ur face. One would need to take a second look to understand wat they saw.1 point1 pointDid it in September last year - no stone chips or peeling. Been holding up well. Been through a number of high pressure washes to. So far so good.1 pointA quick google of the battery part no. suggests it's probably the original one! So 12 years isn't bad going tbh, have just ordered a Varta E441 point1 pointThat is a 'dumb' camera, there is no CAN-bus connection, moving lines or anything fancy. It'll spit out a video signal whenever it's got power. If you use it, you'll need to connect it to the reverse lights to turn it on/off. You'll probably need either a time delay relay or a signal filter to get it working properly1 pointLatest dyno print from Road Rage Performance after my visit today. Since moving premises and changing his dyno he's found his old setup overread torque so my old peak torque of 336Nm was inaccurate. Since then I've added a DIY cold air feed, MST turbo inlet and the big change was the 2.5inch turbo-back exhaust with sports cat. I'm now seeing peak bhp of 183bhp @ 6170rpm and 296Nm @ 2820
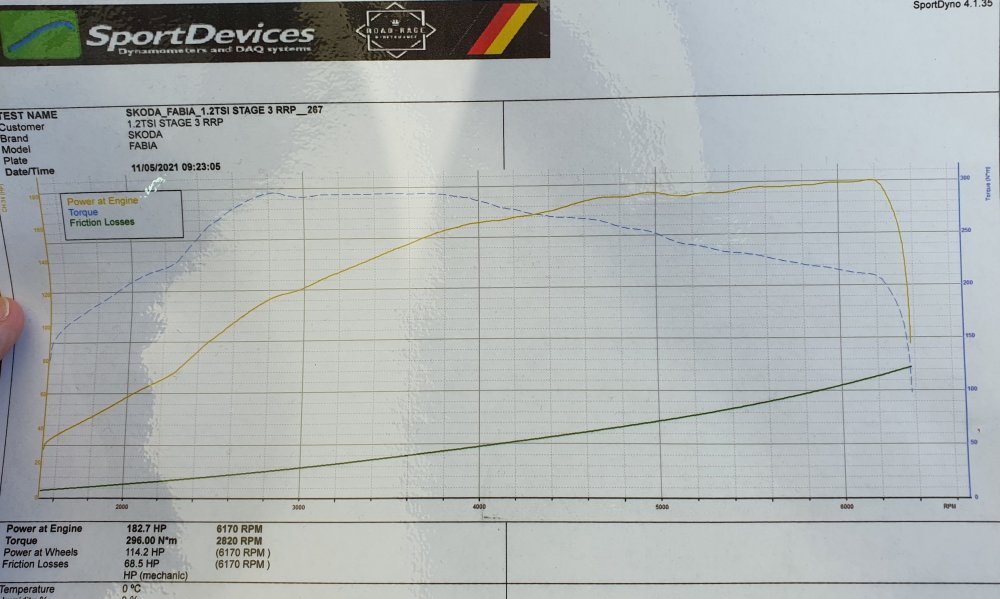 1 point1 point1 pointThe OEM highline and lowline cameras both have a permanent live connection from fuse 18 (IIRC). They only turn on when needed, the highline gets a CAN-bus signal and the lowline uses a feed from the reverse lights. The lowline uses the separate power feed to avoid interference from the bulb monitoring system. As for Chinese versions, I'd hope the CAN-bus versions used the same logic. The 'dumb' versions with only power/ground connections will depend how you've installed them. Then again, there are so many different but similar looking versions for the Chinese cameras, it's impossible to know exactly what they do until it arrives. Even more so given the number of caveats/incompatibilities mentioned by the Sinosmart seller linked by @Vahids. As for MQB vs PQ, the MK3 Octavia is a MQB platform car so I'd suggest that version...1 point€1800 for OEM , sounds right for the DCC, springs and mounts and installation from the main dealer. (Although the main dealer in limerick quoted me €1300 for replacing front DCC only . (no springs or mounts) I have ordered the bilstein DCC replacement, but I am already waiting 5 weeks and it will take another couple of weeks I guessing. I getting all 4 corners done with mounts, (keeping original springs) , bushes etc for €1800.1 pointOfficial Skoda service is not capable of doing such retrofit - they are limited with the tools they use. Additionally, unit must be hacked to support features that are not assigned to your VIN. I can deliver full set for installation, if you are interested pls contact me on PM.1 point1 pointCheers guys. Well, it was an Instagram purchase, believe it or not Ive gotta get up for work, but I’ve got a few on the wife’s car to do, so will get some more pics of the tool etc and little explanation.1 pointMy lab sits in her bed in the estate boot.. My jack Russell/whippet I simply chain to one of the hooks in the boot to keep her there. I can’t really see the point in all these metal bars. I’d actually say they make are probably dangerous for the dogs as they would be for humans.1 pointI went for the handle rear view camera since I already have LED number plate lights (that are fully E marked and TÜV friendly).1 point1 pointThis worked for me. I am able to store and access all music using this method.1 point1 pointAnd this from the Uniroyal site sums it up - "The rear axle ensures the tracking stability of a vehicle."1 pointDon’t know if it’s still the same but pressing the engine start/ stop button without a foot on the brake pedal switched on the ignition without the engine starting.1 pointThe last comment on page1 gives a part number & on page 2 a comment from BJM on 7/2/20 lists another part number1 point1 pointhttps://www.michelinman.com/auto/tips-and-advice/advice-auto/tire-buying-guide/mixing-tires#:~:text=Deeper tread tires on the front axle can improve wet,consumer's preference to the contrary. https://www.dunlop.eu/en_gb/consumer/learn/when-to-replace-your-tires.html https://www.continental-tyres.co.uk/car/all-about-tyres/tyre-change-fitting/mixing-tyres https://www.uniroyal-tyres.com/car/tyre-guide/tyre-knowledge/good-tyres-on-front-or-rear#:~:text=Regardless of the drive type,tracking stability of a vehicle. Surely this thread has run it's course. The advice from all tyre manufacturers is unanimous..... The thread is now only interesting to see some peoples reluctance to understand the reason......1 pointI recently bought this from aliexpress, very good quality
 1 point1 pointPre Winter servicing meant turning the airfilter housing or lid so that the intake was to the rear or over the manifold instead of sucking cold / fresh air in as it did in the Summer position.1 pointI've had five DQ200's (7 speed dry clutch)and four of those required warranty work. The last one a Mk3 Octavia had £5500 worth of warranty work on the DSG. But I've just bought another and it will be covered by warranty. I wouldn't have one without. I've also had three DQ250 (6 speed wet clutch) DSG's and yes you need a service every 40k miles on these but over 200k miles and not a single issue.1 point1 pointFor clarification, that should have said "I don't push it too hard". It may well be very stable if you give it a good push.1 pointThen, still on the red theme, for some inexplicable reason I detest seeing the paint on the window frames. I've managed to cure those feelings of hatred by applying black velvet Fablon (sticky black plastic). I made up templates with masking tape and it's come out perfectly on the front and rear doors.
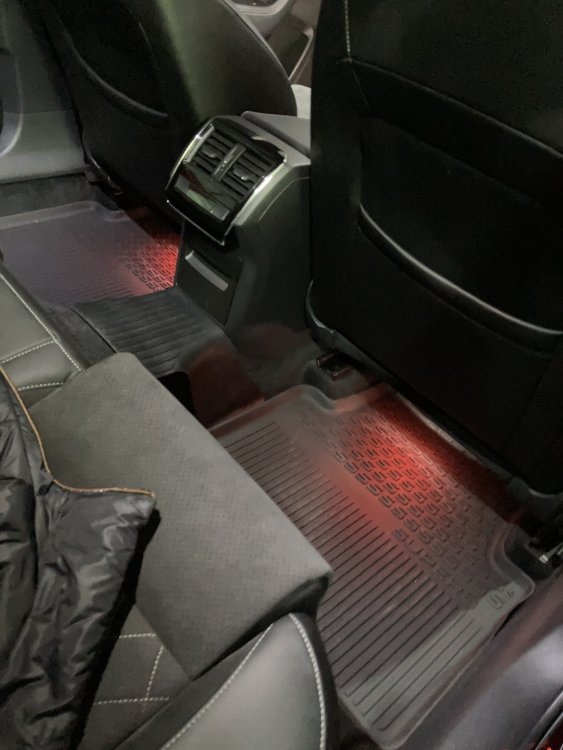
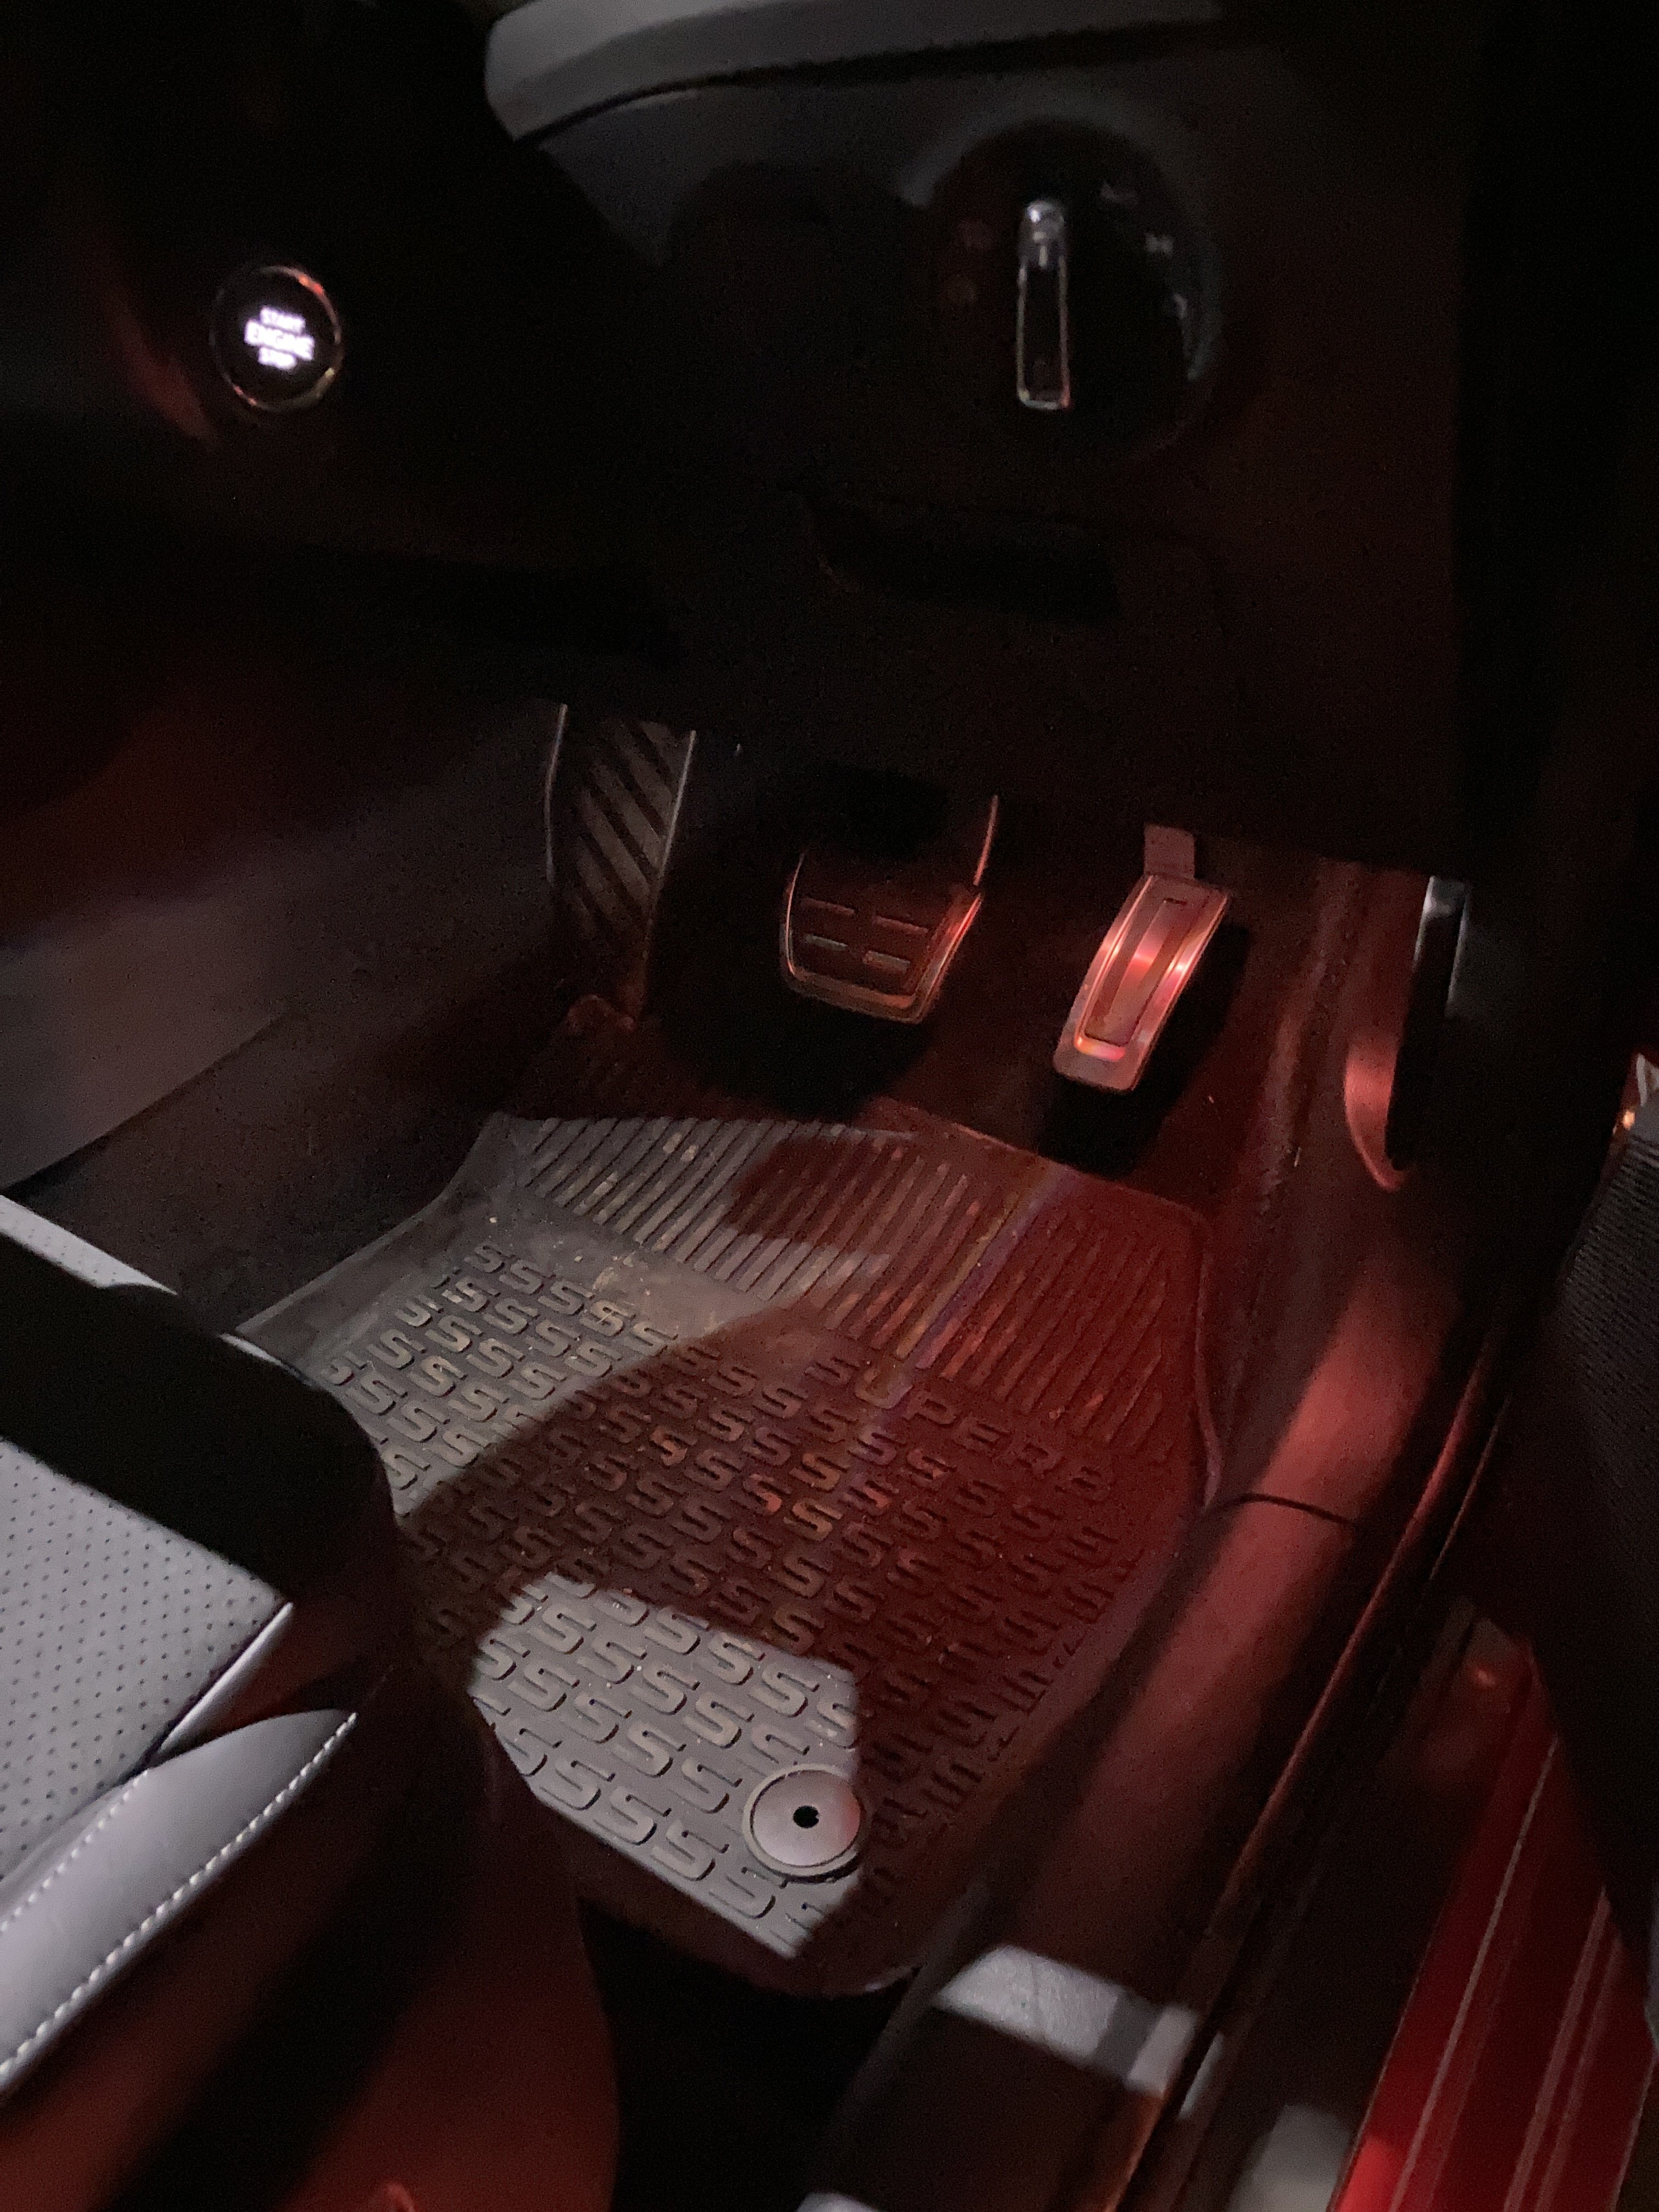
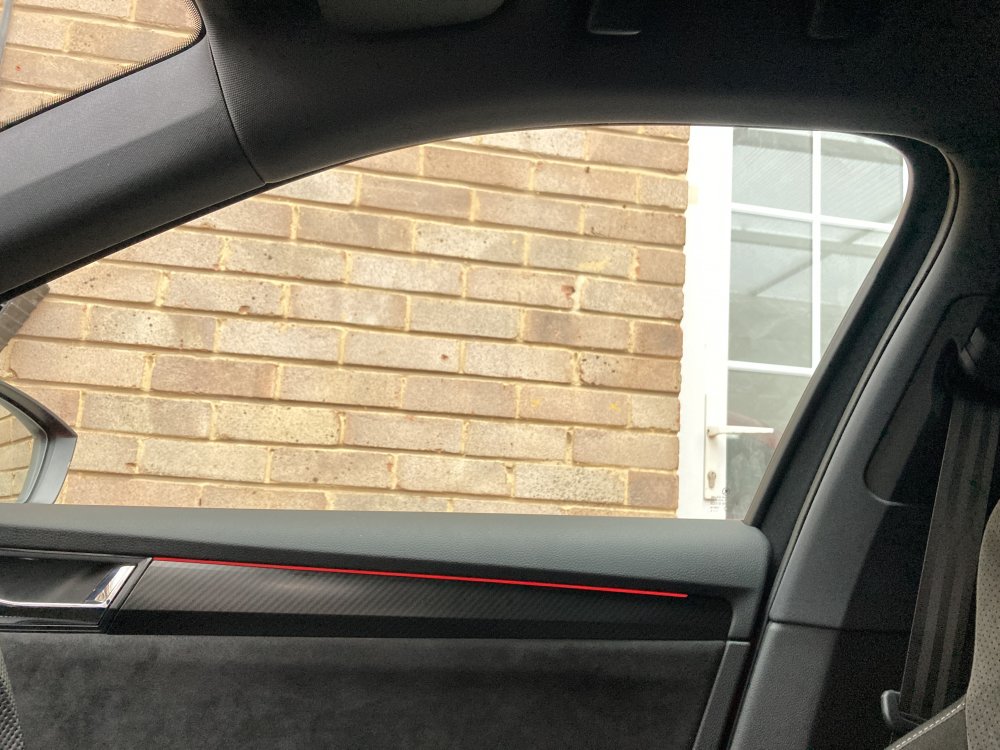 1 pointWith a Velvet Red machine, you can really only have red ambient lighting (in my humble opinion), so I took the easy route and applied some rear light repair tape to the footwell lights, works a treat (pictures are slightly washed out by the garage lights).
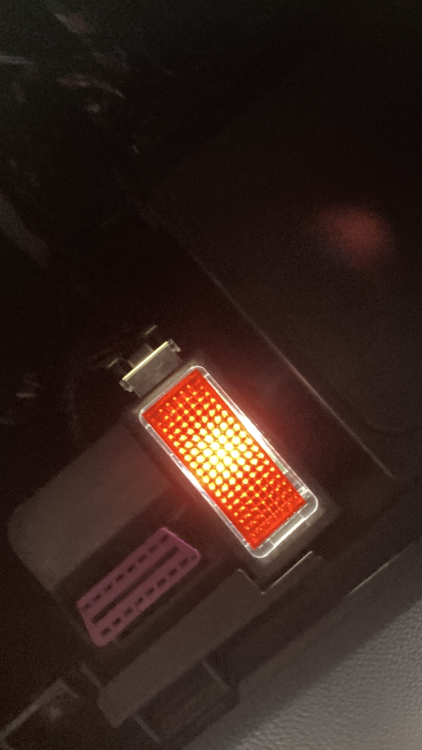

 1 pointodds on that's a better pratnav than any $car-manufacturer system.1 point


.thumb.jpg.06721e8c8b33ed0eea16572ff131b291.jpg)


Important Information
Welcome to BRISKODA. Please note the following important links Terms of Use. We have a comprehensive Privacy Policy. We have placed cookies on your device to help make this website better. You can adjust your cookie settings, otherwise we'll assume you're okay to continue.