Leaderboard
-
Lady Elanore
FREEDOM29Points24,878Posts -

Lee01
FREEDOM27Points36,174Posts -
Robjon
FREEDOM21Points2,916Posts -
.jpg.1006585dfe4e2977315b67c3d642e37b.jpg)
Guest_
FREEDOM11Points83,824Posts

.thumb.jpg.9dd3f612ba7f13d10be5c518d3c8d255.jpg)


Popular Content
Showing content with the highest reputation on 25/03/24 in Posts
-
2 pointsWhat wheels & tyres did you fit? Are they all the same rolling radius?2 points
-
2 pointsThis just published in Autocar https://www.autocar.co.uk/car-news/new-cars/hidden-skodas-unlocking-brands-secret-museum-room2 points
-
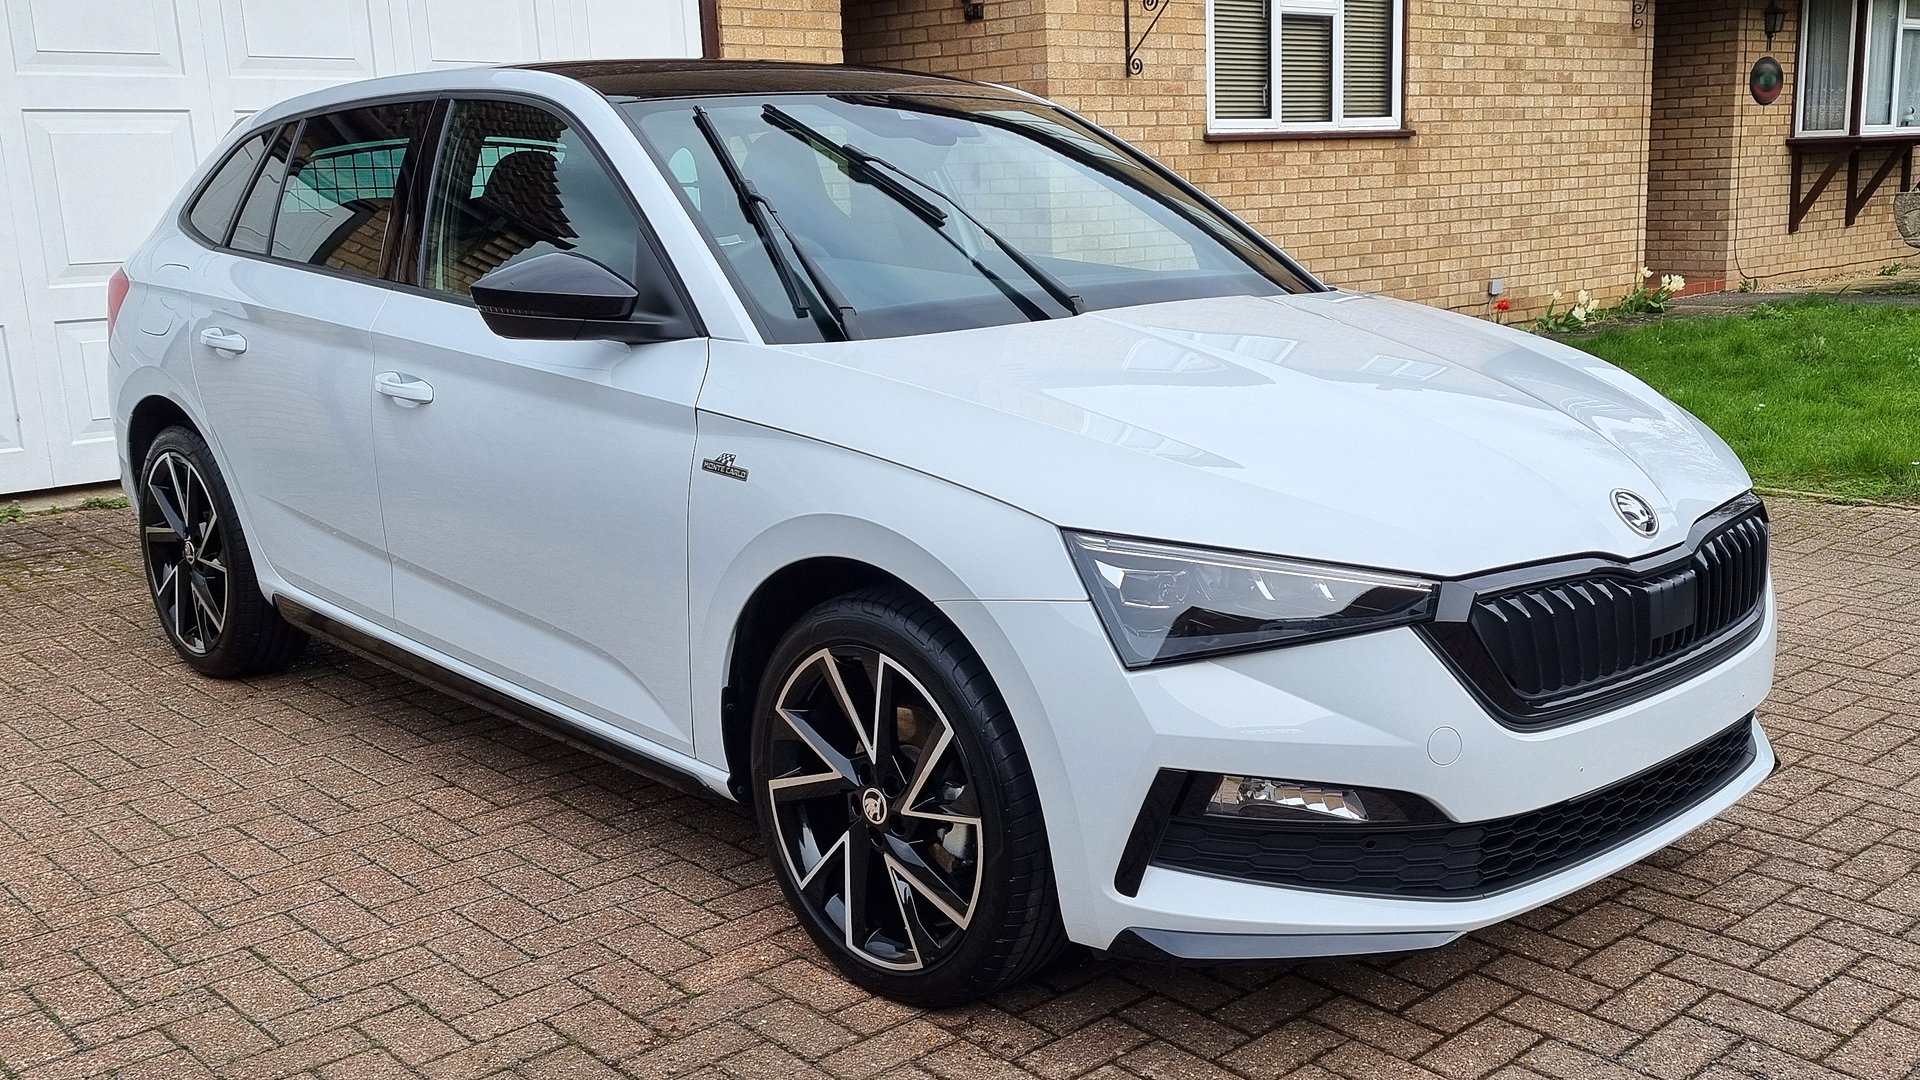
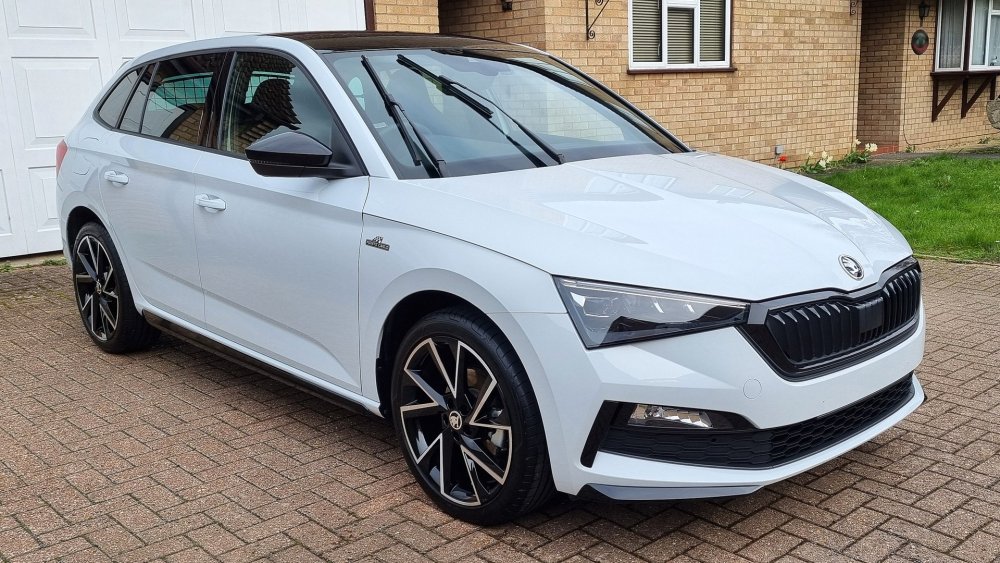
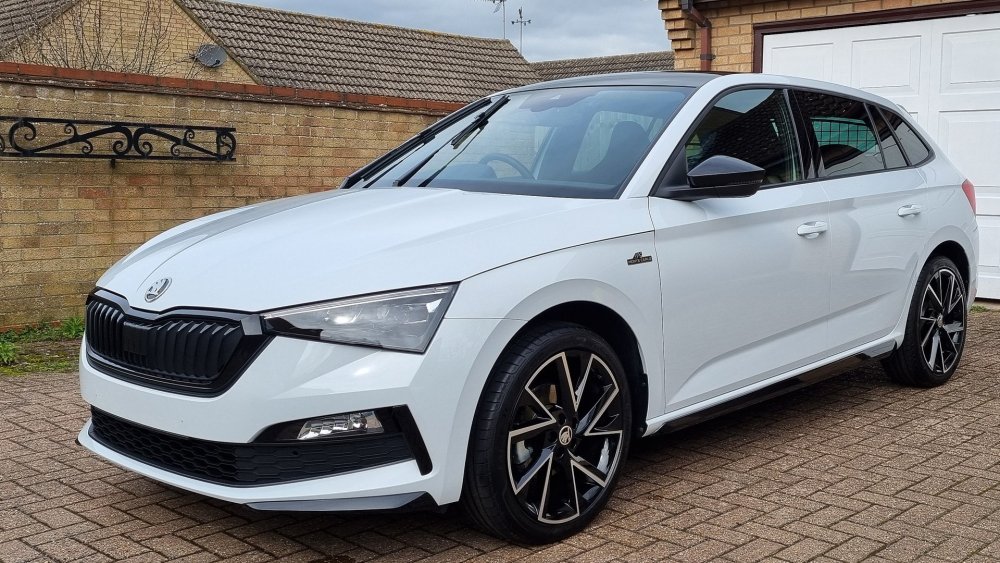
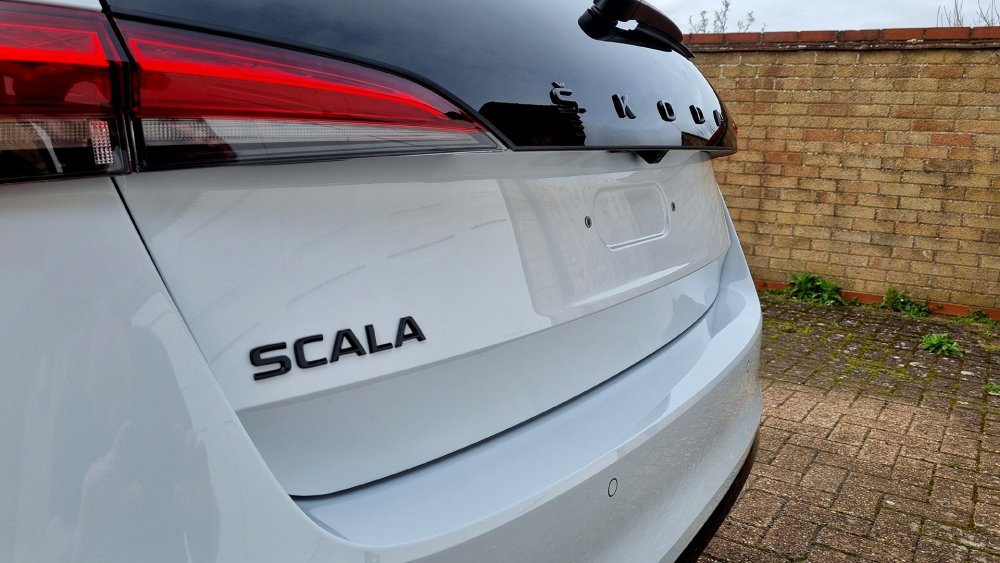
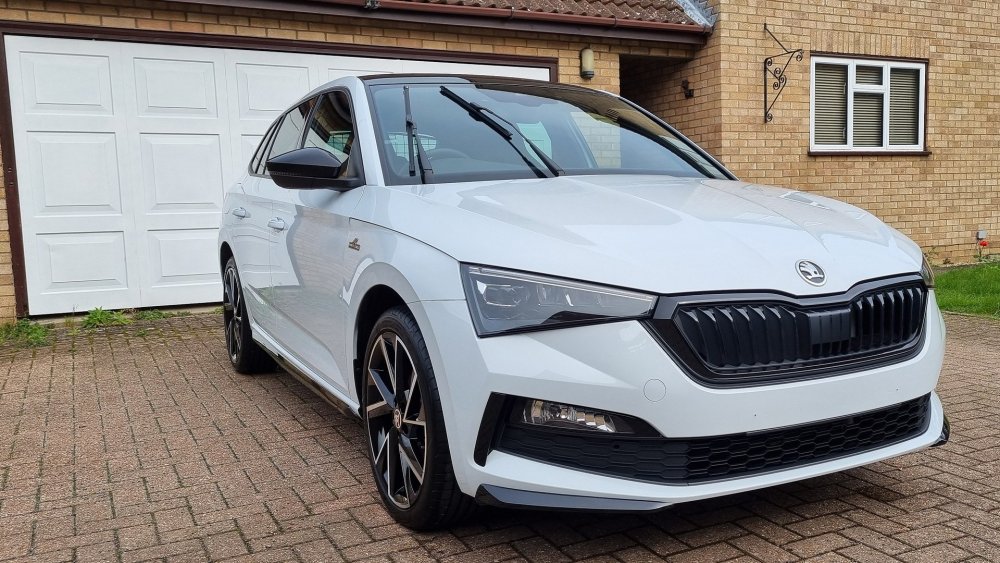
2 points11 days after picking up the wifes '23 plate ex demo Scala Monte-Carlo, I finally got round to a proper wash and wax (doubt its had that in its near year of dealer scratch and polish 😜) A bit of Iron-X, rinse, Bilberry wheel cleaner, Bilt Hamber snow-foam and 40% traffic film cleanser mix, 2BM wash with Bilt hamber shampoo, pressure wash rinse, towel pat dry with Monster XL towels, Rain-X front and rear windows, Fusso99 wax including pan roof glass and side windows, wheels treated with Bilt hamber doublespeed wax followed by Sonax BSD, Top Kote tyre dressing, and finally the gloss black door pillars coated with Autoglym SRP ('cos it helps hide the swirls and on a daily use car I CBA to buff them out 😛). The car is moon white metallic, not that you would know unless the sun is shining bright to pick up the subtle metallic-ness ! Hopefully some epic beading to come when it rains ! I thought the reflections weren't too bad seeing as it is overcast here. .
 2 points
 -
2 points
-
2 points
-
The water pump on the 1.4 TSI is that the opposite side of the engine from the timing belt so no, they wouldn't have replaced the belt while they were doing your water pump.2 points
-
2 points
-
+++ 2024.11.24 +++ -> next 2025 cross compatible on: Škoda Amundsen (MIB2), Seat Navi (MIB2), VW Discover Media2 (MIB2), Audi MMI ?-?-? (MIB2), MAN Media VAN Navigation started yesterday by @bigade1 -> https://www.briskoda.net/forums/topic/512842-amundsen-mib2-map-updates-2024/?do=findComment&comment=5837727 tested by @Tell # ECE AS(A1) 2024 15.5 Gb VW portal: https://vw-maps-cdn.lighthouselabs.eu/vw-maps/DiscoverMedia2_EU-AS_2210_V19.7z VW portal: https://navigation-maps.volkswagen.com/vw-maps/DiscoverMedia2_EU-AS_2210_V19.7z Files inside: 2023.05.12 Downloadable: 2024.03.21Published: 2024.04.?? Škoda portal: https://infotainment-cdn.skoda-auto.com/base/maps/STD2_2210_EU_A1_202425.zip Files inside: 2023.05.12 Downloadable: 2024.05.31 Published: 2024.--.-- # ECE 1 2024 6.9 Gb VW portal: https://vw-maps-cdn.lighthouselabs.eu/vw-maps/DiscoverMedia2_EU1_2210_V19.7z VW portal: https://navigation-maps.volkswagen.com/vw-maps/DiscoverMedia2_EU1_2210_V19.7z Files inside: 2023.05.12 Downloadable: 2024.03.21Published: 2024.04.?? Škoda portal: https://infotainment-cdn.skoda-auto.com/base/maps/STD2_2210_EU1_202425.zip Files inside: 2023.05.12 Downloadable: 2024.05.31 Published: 2024.--.-- # ECE 2 2024 6.6 Gb VW portal: https://vw-maps-cdn.lighthouselabs.eu/vw-maps/DiscoverMedia2_EU2_2210_V19.7z VW portal: https://navigation-maps.volkswagen.com/vw-maps/DiscoverMedia2_EU2_2210_V19.7z Škoda portal: https://infotainment-cdn.skoda-auto.com/base/maps/STD2_2210_EU2_202425.zip # ECE 3 2024 5.4 Gb VW portal: https://vw-maps-cdn.lighthouselabs.eu/vw-maps/DiscoverMedia2_EU3_2210_V19.7z VW portal: https://navigation-maps.volkswagen.com/vw-maps/DiscoverMedia2_EU3_2210_V19.7z Škoda portal: - - https://infotainment-cdn.skoda-auto.com/base/maps/STD2_2210_EU3_202425.zip # ECE 4 2024 8.6 Gb VW portal: https://vw-maps-cdn.lighthouselabs.eu/vw-maps/DiscoverMedia2_EU-DL1_2210_V19.7z VW portal: https://navigation-maps.volkswagen.com/vw-maps/DiscoverMedia2_EU-DL1_2210_V19.7z Škoda portal: https://infotainment-cdn.skoda-auto.com/base/maps/STD2_2210_EU_DL1_202425.zip # ECE 5 2024 8.7 Gb VW portal: https://vw-maps-cdn.lighthouselabs.eu/vw-maps/DiscoverMedia2_EU-DL2_2210_V19.7z VW portal: https://navigation-maps.volkswagen.com/vw-maps/DiscoverMedia2_EU-DL2_2210_V19.7z Škoda portal: https://infotainment-cdn.skoda-auto.com/base/maps/STD2_2210_EU_DL2_202425.zip # ECE 6 2024 8.1 Gb VW portal: https://vw-maps-cdn.lighthouselabs.eu/vw-maps/DiscoverMedia2_EU-DL3_2210_V19.7z VW portal: https://navigation-maps.volkswagen.com/vw-maps/DiscoverMedia2_EU-DL3_2210_V19.7z Škoda portal: https://infotainment-cdn.skoda-auto.com/base/maps/STD2_2210_EU_DL3_202425.zip # ECE 7 2024 7.0 Gb VW portal: https://vw-maps-cdn.lighthouselabs.eu/vw-maps/DiscoverMedia2_EU-DL4_2210_V19.7z VW portal: https://navigation-maps.volkswagen.com/vw-maps/DiscoverMedia2_EU-DL4_2210_V19.7z Škoda portal: - - https://infotainment-cdn.skoda-auto.com/base/maps/STD2_2210_EU_DL4_202425.zip # ROW 1 2024 7.4 Gb VW portal: https://vw-maps-cdn.lighthouselabs.eu/vw-maps/DiscoverMedia2_MRM1_2210_V19.7z VW portal: https://navigation-maps.volkswagen.com/vw-maps/DiscoverMedia2_MRM1_2210_V19.7z Škoda portal: https://infotainment-cdn.skoda-auto.com/base/maps/STD2_2210_MRM1_202425.zip # ROW 2 2024 4.6 Gb VW portal: https://vw-maps-cdn.lighthouselabs.eu/vw-maps/DiscoverMedia2_MRM2_2210_V19.7z VW portal: https://navigation-maps.volkswagen.com/vw-maps/DiscoverMedia2_MRM2_2210_V19.7z Škoda portal: https://infotainment-cdn.skoda-auto.com/base/maps/STD2_2210_MRM2_202425.zip # ROW 3 2024 5.5 Gb VW portal: https://vw-maps-cdn.lighthouselabs.eu/vw-maps/DiscoverMedia2_MRM3_2210_V19.7z VW portal: https://navigation-maps.volkswagen.com/vw-maps/DiscoverMedia2_MRM3_2210_V19.7z Škoda portal: https://infotainment-cdn.skoda-auto.com/base/maps/STD2_2210_MRM3_202425.zip # MRM DL1 2024 6.1 Gb VW portal: https://vw-maps-cdn.lighthouselabs.eu/vw-maps/DiscoverMedia2_MRM-DL1_2210_V19.7z VW portal: https://navigation-maps.volkswagen.com/vw-maps/DiscoverMedia2_MRM-DL1_2210_V19.7z Škoda portal: https://infotainment-cdn.skoda-auto.com/base/maps/STD2_2210_MRM_DL1_202425.zip # MRM DL2 2024 1.4 Gb VW portal: https://vw-maps-cdn.lighthouselabs.eu/vw-maps/DiscoverMedia2_MRM-DL2_2210_V19.7z VW portal: https://navigation-maps.volkswagen.com/vw-maps/DiscoverMedia2_MRM-DL2_2210_V19.7z Škoda portal: https://infotainment-cdn.skoda-auto.com/base/maps/STD2_2210_MRM_DL2_202425.zip ======= coverage ======= # ECE AS(A1) Albania, Andorra, Austria, Belarus, Belgium, Bosnia and Herzegovina, Bulgaria, Croatia, Czech Republic, Cyprus, Denmark, Estonia, Finland, France, Faroe Islands, Germany, Gibraltar, Greece, Hungary, Iceland, Ireland, Ireland, Italy, Kosovo, Latvia, Liechtenstein, Lithuania, Luxembourg, Macedonia, Malta, Moldova, Monaco, Montenegro, Netherlands, Norway, Poland, Portugal, Romania, San Marino, Serbia, Slovakia, Slovenia, Spain, Sweden, Switzerland, Ukraine, United Kingdom, Vatican City State # ECE 1 Andorra, Belgium, Faroe Islands, France, Gibraltar, Iceland, Ireland, Ireland, Luxembourg, Monaco, Netherlands, Portugal, Spain, United Kingdom # ECE 2 Albania, Belarus, Bosnia and Herzegovina, Bulgaria, Cyprus, Denmark, Estonia, Finland, Greece, Kazakhstan, Kosovo, Latvia, Lithuania, Macedonia, Moldova, Montenegro, Norway, Romania, Russian Federation, Serbia, Sweden, Ukraine # ECE 3 Austria, Croatia, Czech Republic, Germany, Hungary, Italy, Liechtenstein, Malta, Poland, San Marino, Slovakia, Slovenia, Switzerland, Vatican City State # ECE 4 Andorra, Austria, Belgium, Croatia, Czech Republic, France, Germany, Hungary, Italy, Liechtenstein, Luxembourg, Malta, Monaco, Netherlands, Poland, San Marino, Slovakia, Slovenia, Switzerland, Vatican City State # ECE 5 Andorra, Austria, Belgium, Croatia, Czech Republic, Faroe Islands (land-use only), France, Germany, Hungary, Iceland, Ireland, Italy, Liechtenstein, Luxembourg, Malta, Monaco, Netherlands, Poland, San Marino, Slovakia, Slovenia, Switzerland, United Kingdom (incl. Isle of Man), Vatican City State # ECE 6 Andorra, Belgium, Denmark, Faroe Islands (land-use only), Finland, France, Germany, Iceland, Ireland, Luxembourg, Monaco, Netherlands, Norway, Sweden, United Kingdom (incl. Isle of Man) # ECE 7 Albania, Austria, Belarus, Bosnia and Herzegovina, Bulgaria, Croatia, Cyprus, Czech Republic, Estonia, Greece, Hungary, Italy, Kosovo, Latvia, Lithuania, Liechtenstein, Macedonia, F.Y.R.O., Malta, Moldova, Montenegro, Poland, Romania, San Marino, Serbia, Slovakia, Slovenia, Switzerland, Turkey, Ukraine, Vatican City State # ROW 1 Israel, Argentina, Brazil, Fr. Guyana *, Guadeloupe *, Martinique *, Mexico, Turkey * # ROW 2 India *, Chile * # ROW 3 Australia, New Zealand, Botswana *, Lesotho *, Mozambique *, Namibia *, South Africa, Swaziland *; Reunion *, Brunei, Indonesia *, Malaysia *, Philippines *, Singapore, Thailand, Egypt *, Algeria *, Bahrain *, Jordan *, Qatar *, Kuwait, Morocco, Oman *, Saudi Arbien *, Tunisia, United Arab Emirates * # MRM DL1 Argentina, Brazil, Mexico, French Guiana, Guadeloupe, Martinique # MRM DL2 Israel, Turkey ======= instruction ======= Don't ask me details, i have Columbus Mib2H. all what i know, files must be extracted to original(Škoda's) SD Card some questions have been already answered in previous treads: -> 2024 -> 2023/24 -> 2023 -> 2022/23 -> 2022 -> 2021 -> 2020 -> 2018/20191 point
-
Hi, I wish I would have known this before I bought my car..... On Friday I had the issue of not being able to charge the car. Called Skoda Assist, and they guy came out, ran the diagnostics and said it needed to go to the dealership for repair. I have Citygate Watford 6 miles from me, but they are not an HV garage. Nearest one is actually Alan Day in Finchley North London - They are on stop with Skoda Assist as they have too many vehicles. Here is where it gets interesting. I was told I could take it 8 miles away to a battery centre (willis in Ruislip) even though they could not do the work. They were not happy about accepting the car, and I did not get a chance to take it to them over the weekend. This morning the car was completely flat, called Skoda Assist, same guy came out and said that I needed to take it to Citygate Brentford. When I contacted them, they said that they were now also on stop and the earliest I could take the car to them was August.... So, after a bit of calm conversation (!!) Skoda Assist have now towed the car 33 miles away to Slough. The reason I needed it to be towed was to ensure that the car is looked at within 72 hours. If you can drive it there, then there is no timeframe given. Also, if you get it towed, Skoda assist will provide a hire car, but if you drive it, it is the dealers responsibility to provide a car. The key for me is that however much people want to support electric cars, Skoda are not geared up to maintain them, I dont know how long the repair actually takes, but I dont expect to see my car anytime before middle of next week (especially with Easter at the weekend)1 point
-
1 pointYes I've seen a picture with the A55 which was never in the original, with a finger pointing at it, by a satisfied person who got the down load working on Seat. They also went on a hacking session like you to get it to fit. Reckon that's the only difference with Skoda you don't have to do the part number edit. It was never sorted out 5 years by Seat people, with only 50% managing to update, then the world moved on to mib2 and the trail went dead. Nice to give them a boost with the maps more up-to-date.1 point
-
1 point
-
1 point
-
I'll raise you downwards to 30p including postage from China! Well 30p each if you buy 10 of them! They do actually have an important function aside from stopping dust which may cause the valve to leak after the next refill, if the valve core does leak the caps have a seal inside and are rated to stop any leakage of system pressure. Go to any fast fit tyre depot and you will find dozens of them forming a commune on the AC recharge machine, just like the wheel centre caps on the tyre changing machines!1 point
-
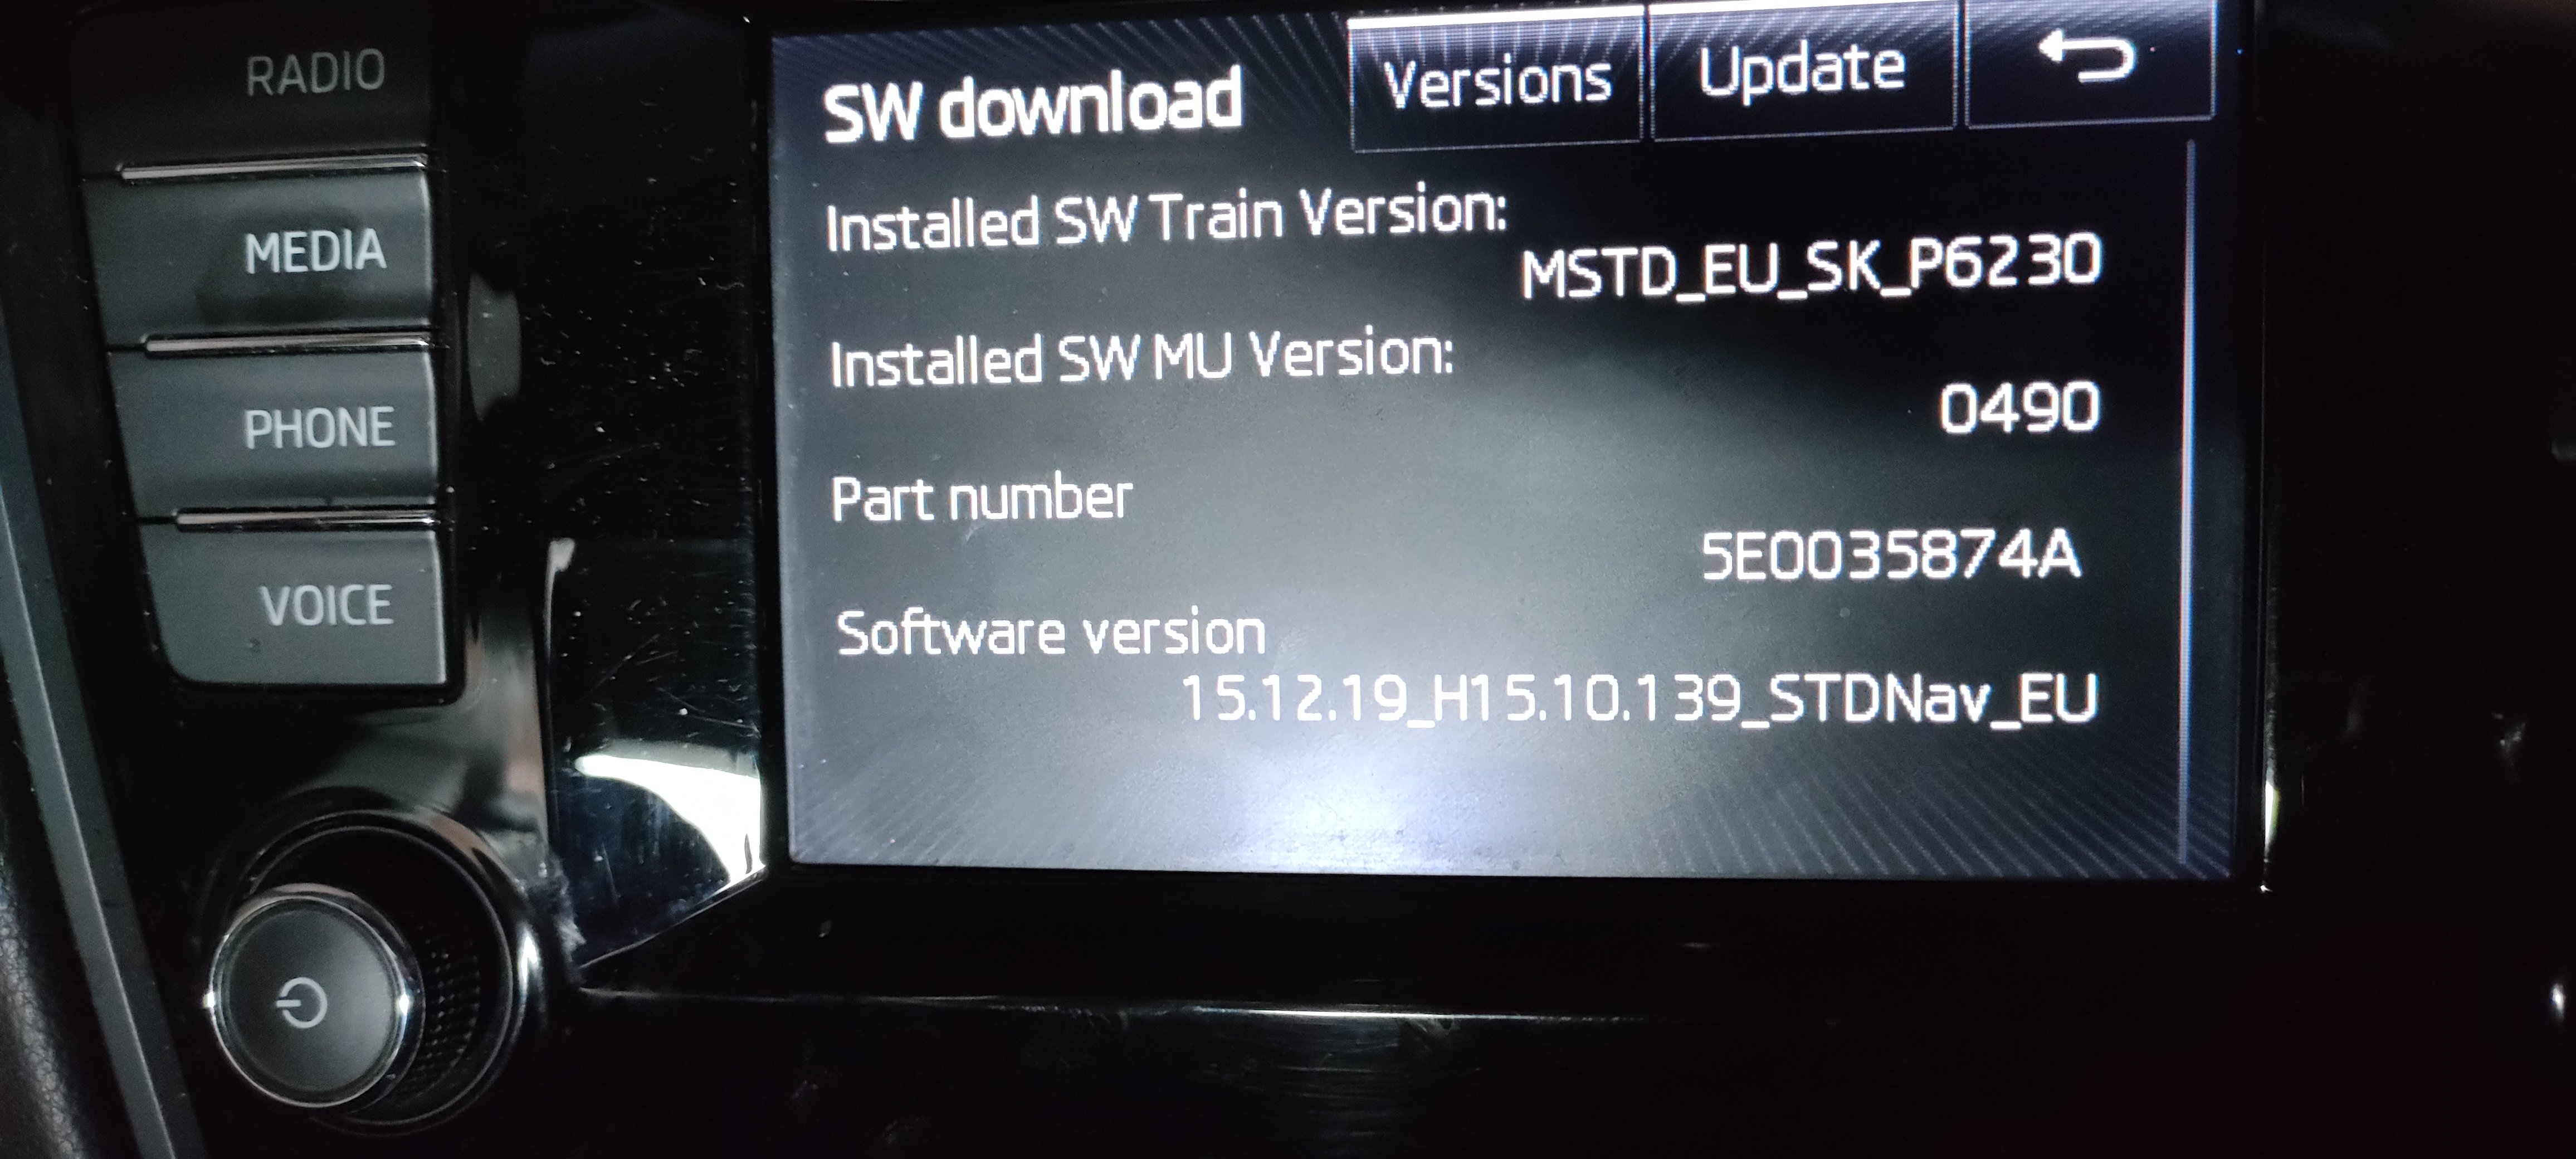
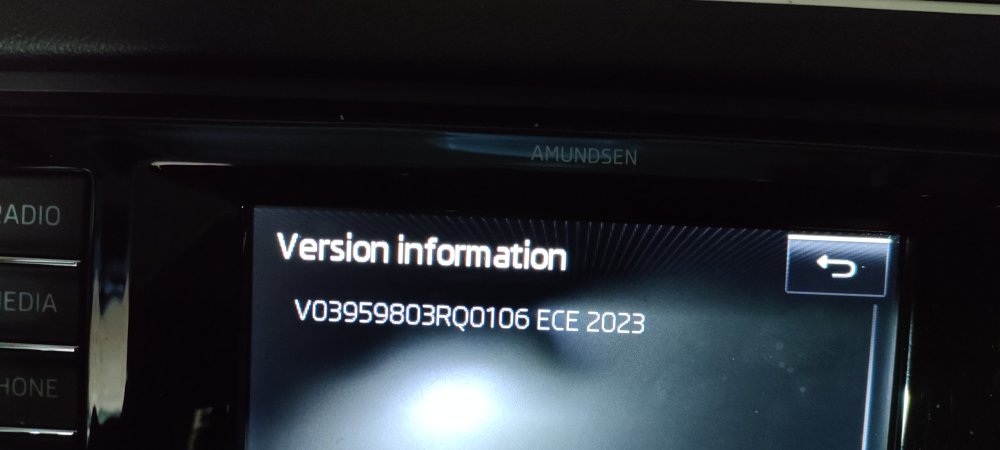
1 pointI've just done this update, so thank you for the above. I just deleted the old info on the card and didn't format it. The file size was just a few MB too big so I just deleted a few countries I know I won't be driving in. I didn't change any part numbers and it worked. Attached is the current version. It does appear to be updated, but I forgot to take a pic of the old version.

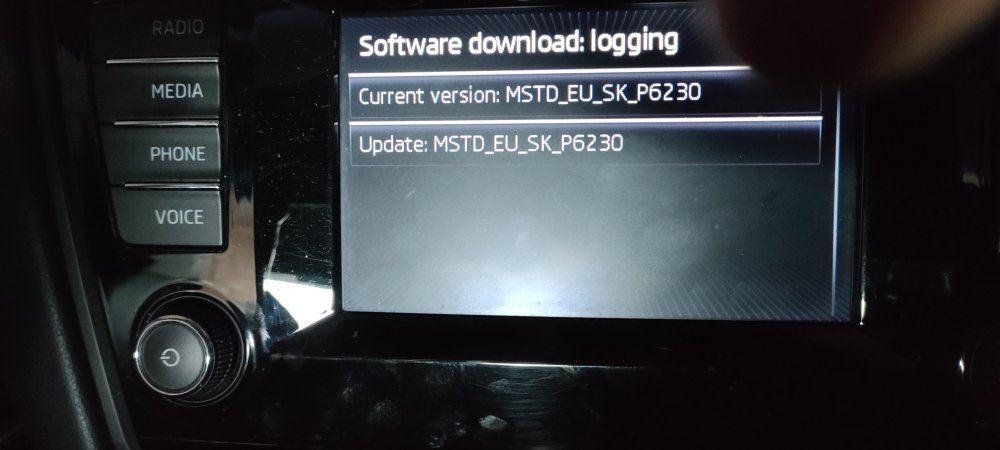 1 point
 -
1 point
-
I will contact my local dealer to see what they will charge me for this, but since I am driving the past 1-2 years with very little invested in the car (it serves me well) I might treat it with a 17£ plastic cap. 😊1 point
-
Skoda had nothing to do with it, it was the Dealership staff. That is up-selling. Amazed they never said 80% worn. The cars they have for sale will likely be the same and they are not fitting new discs and pads before the new owners gets it.1 point
-
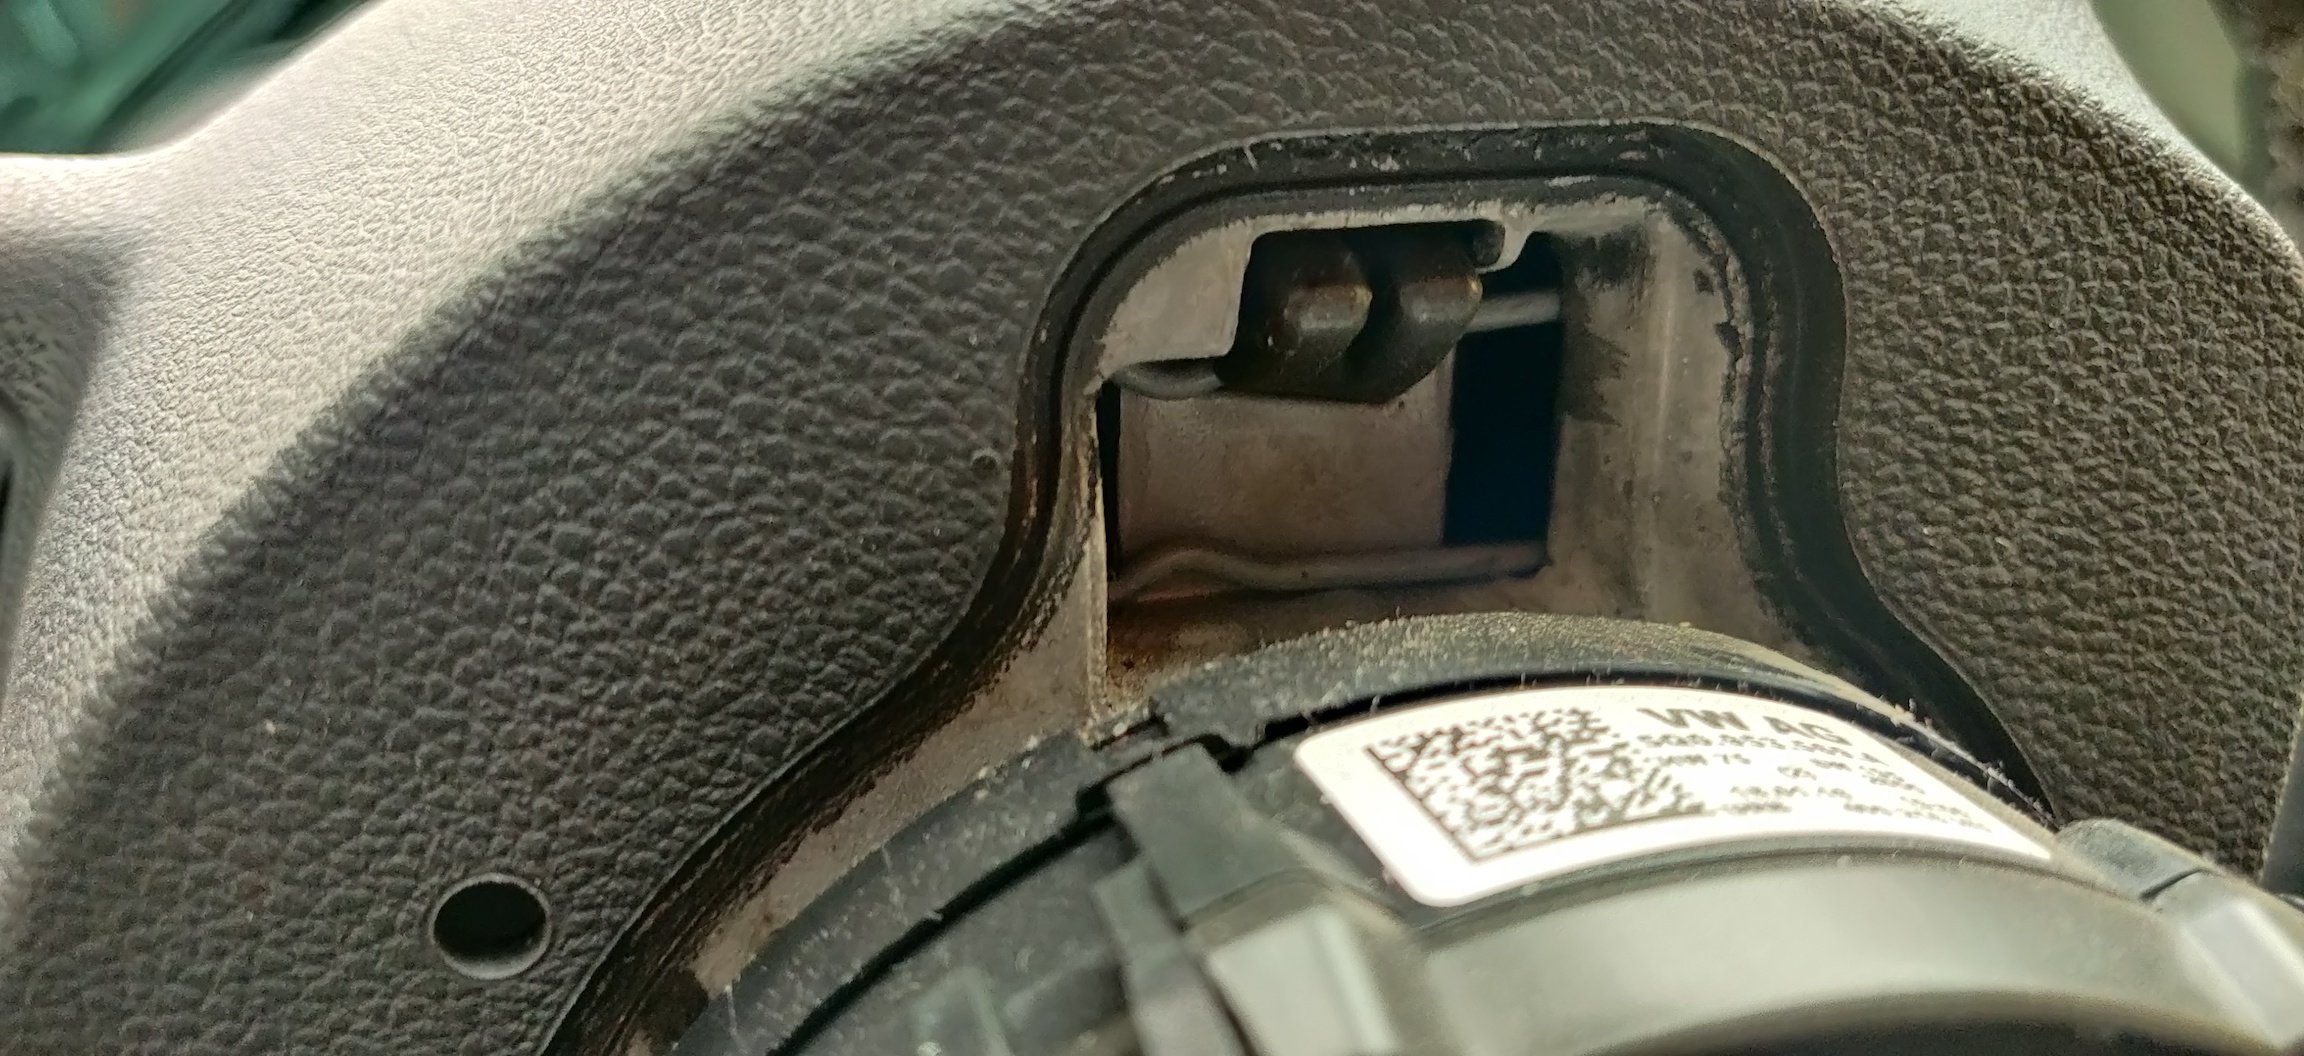
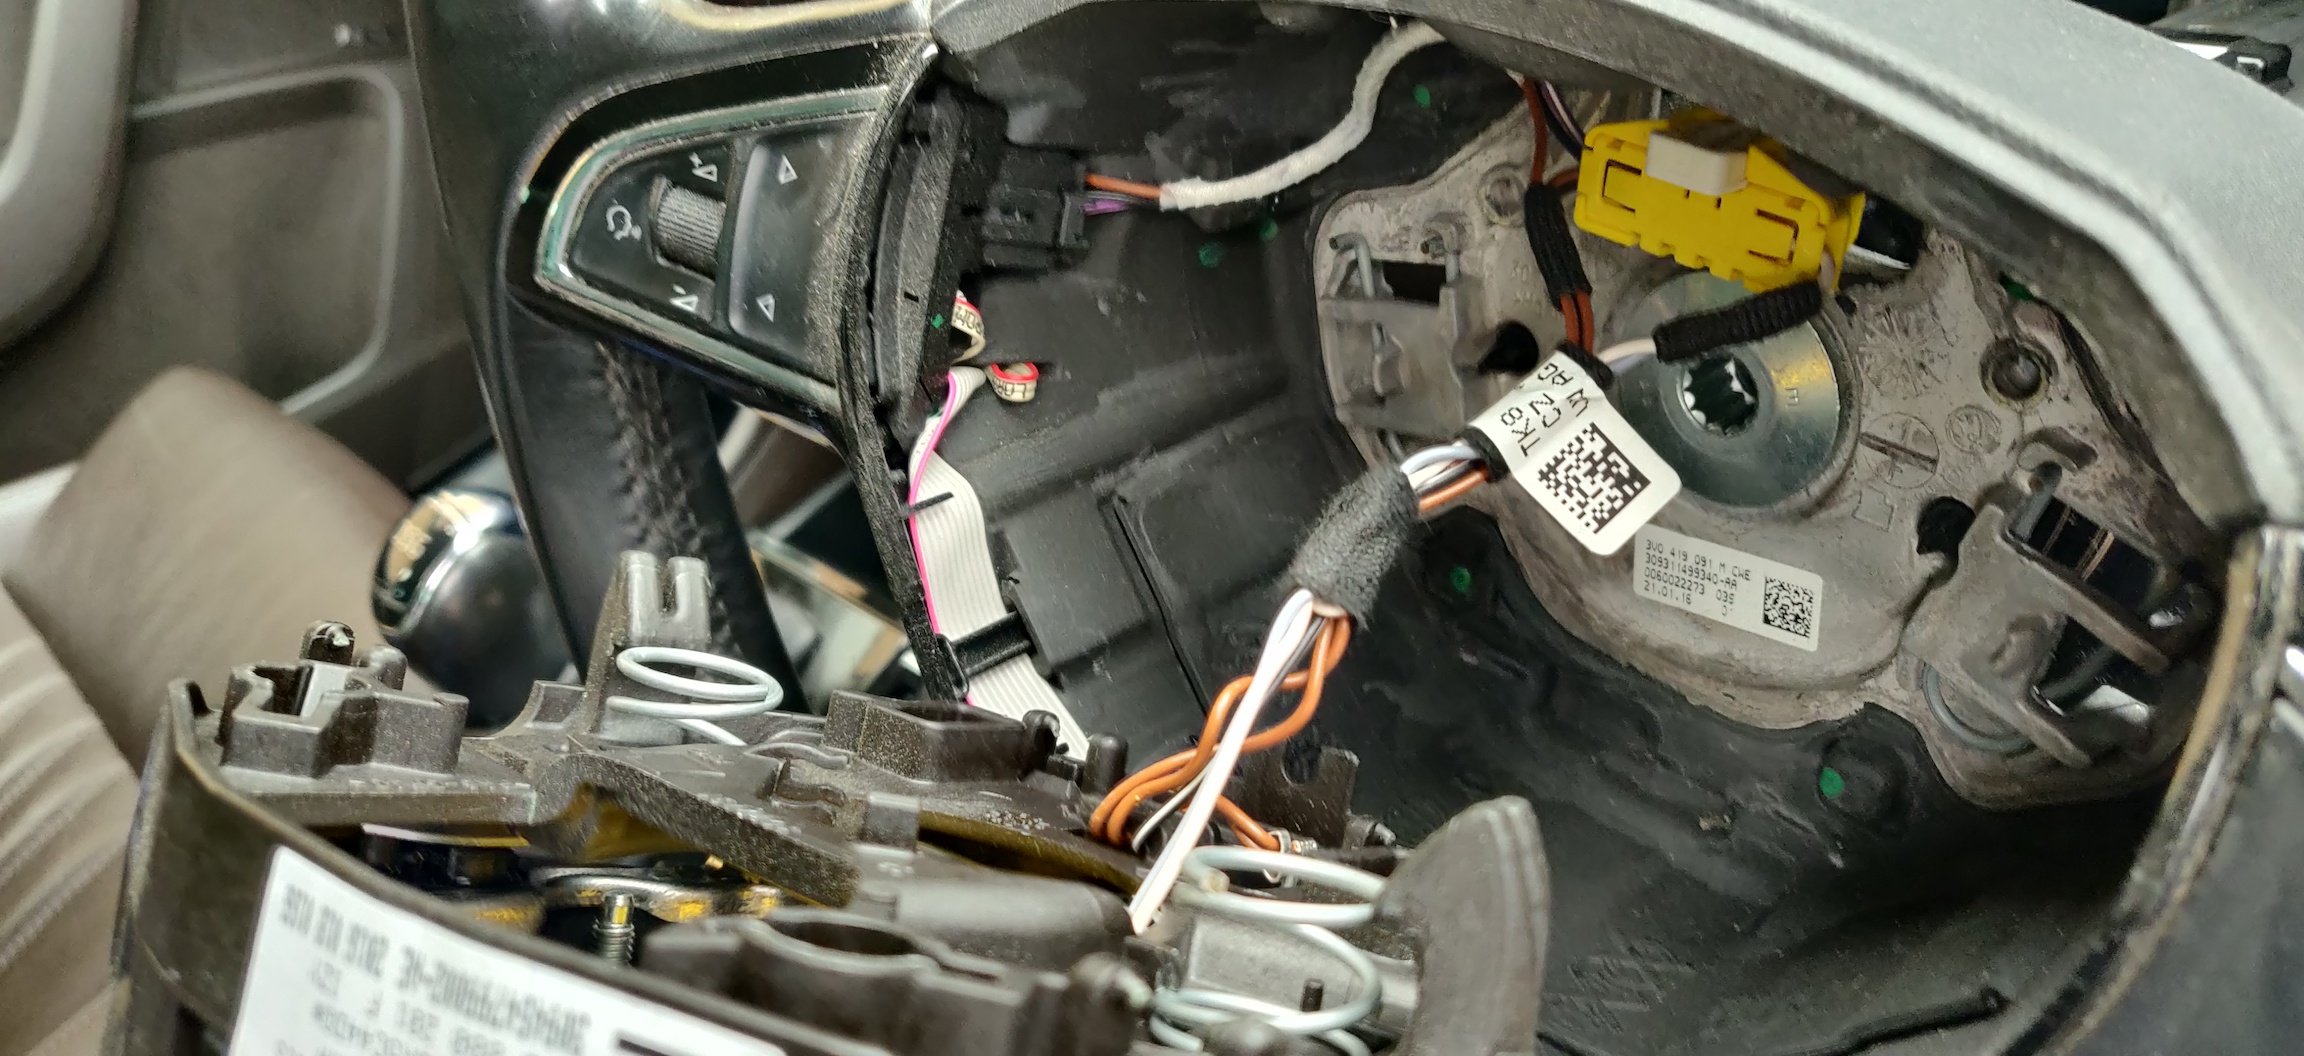
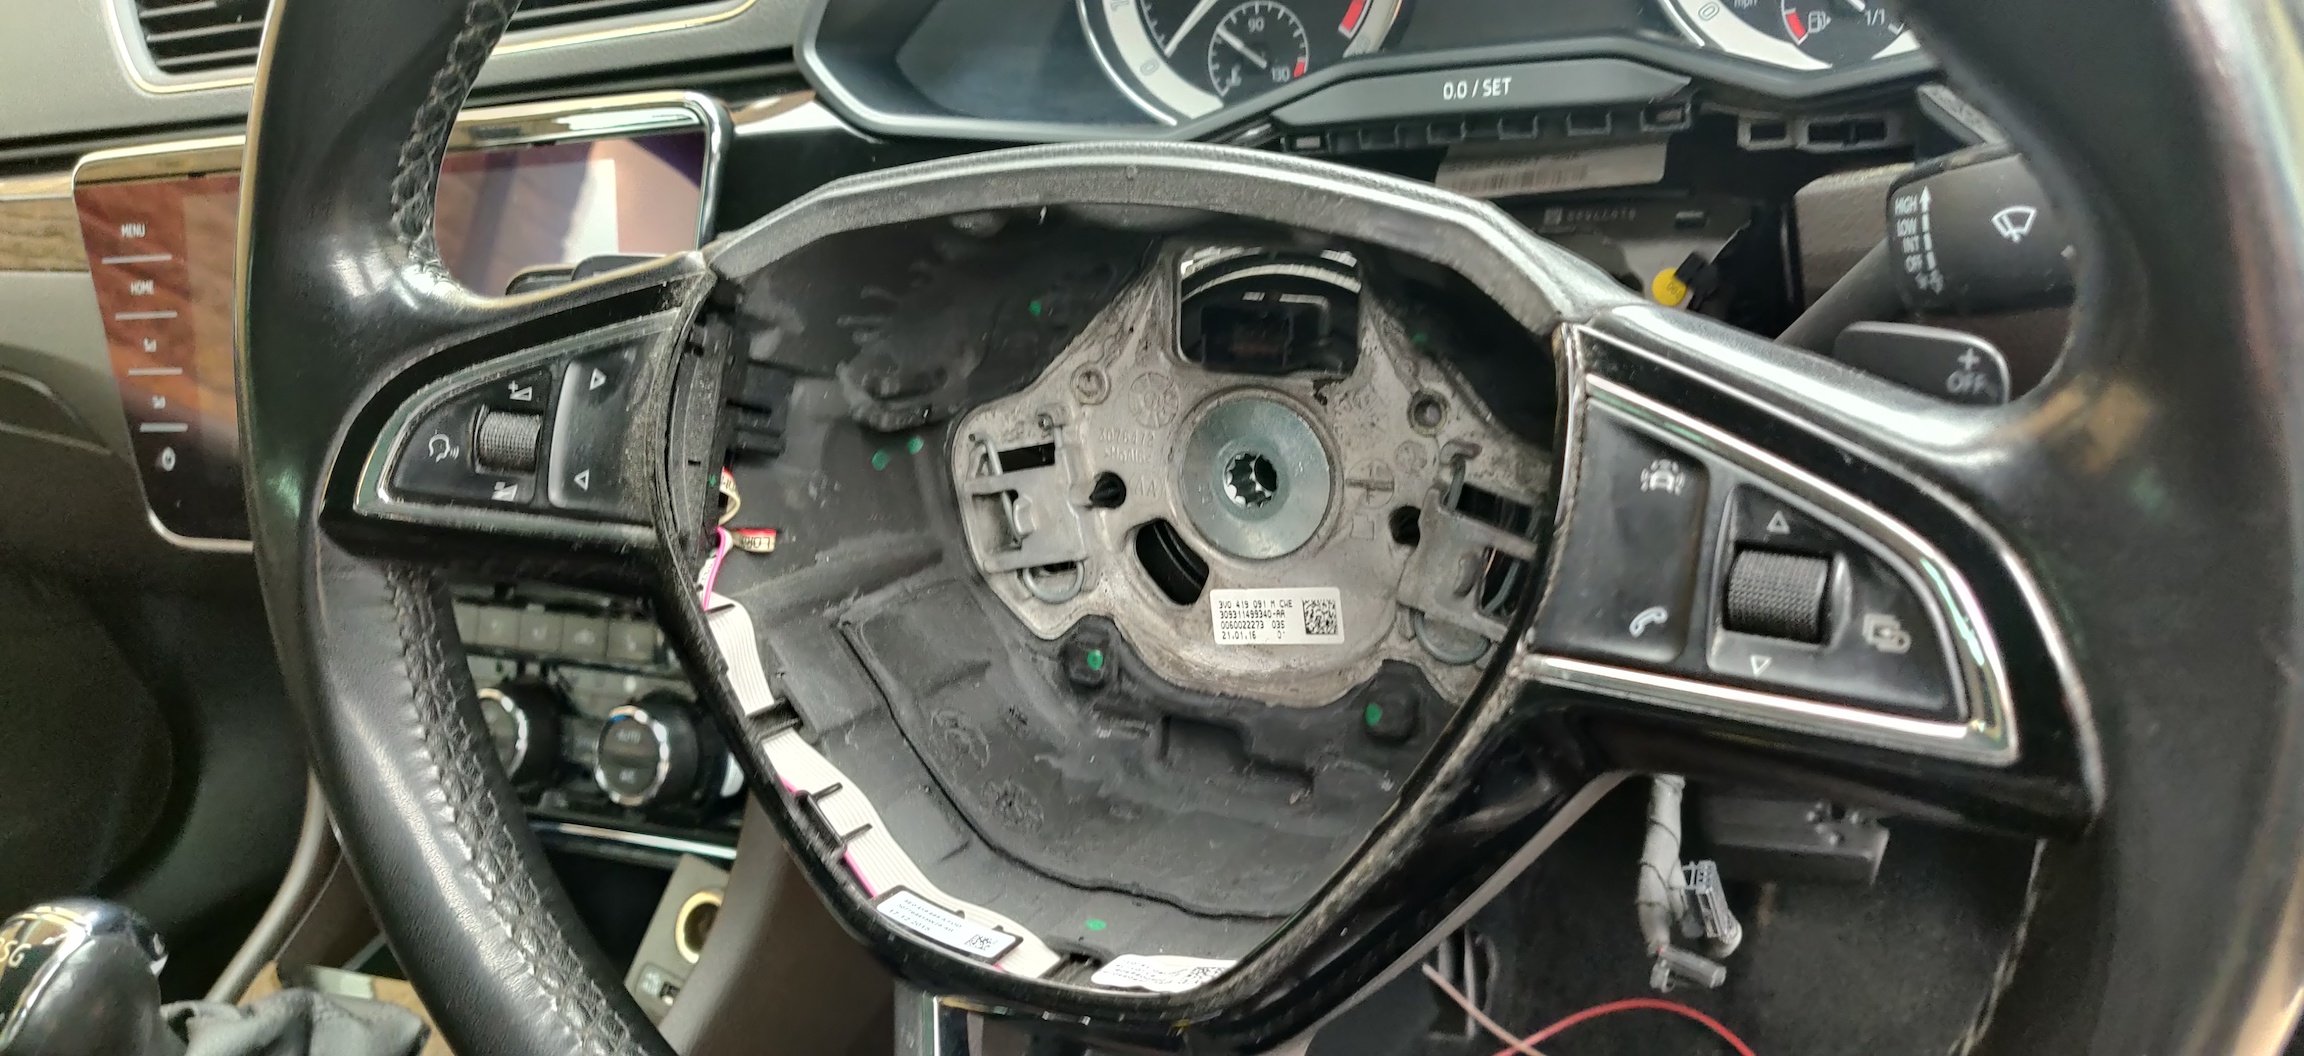
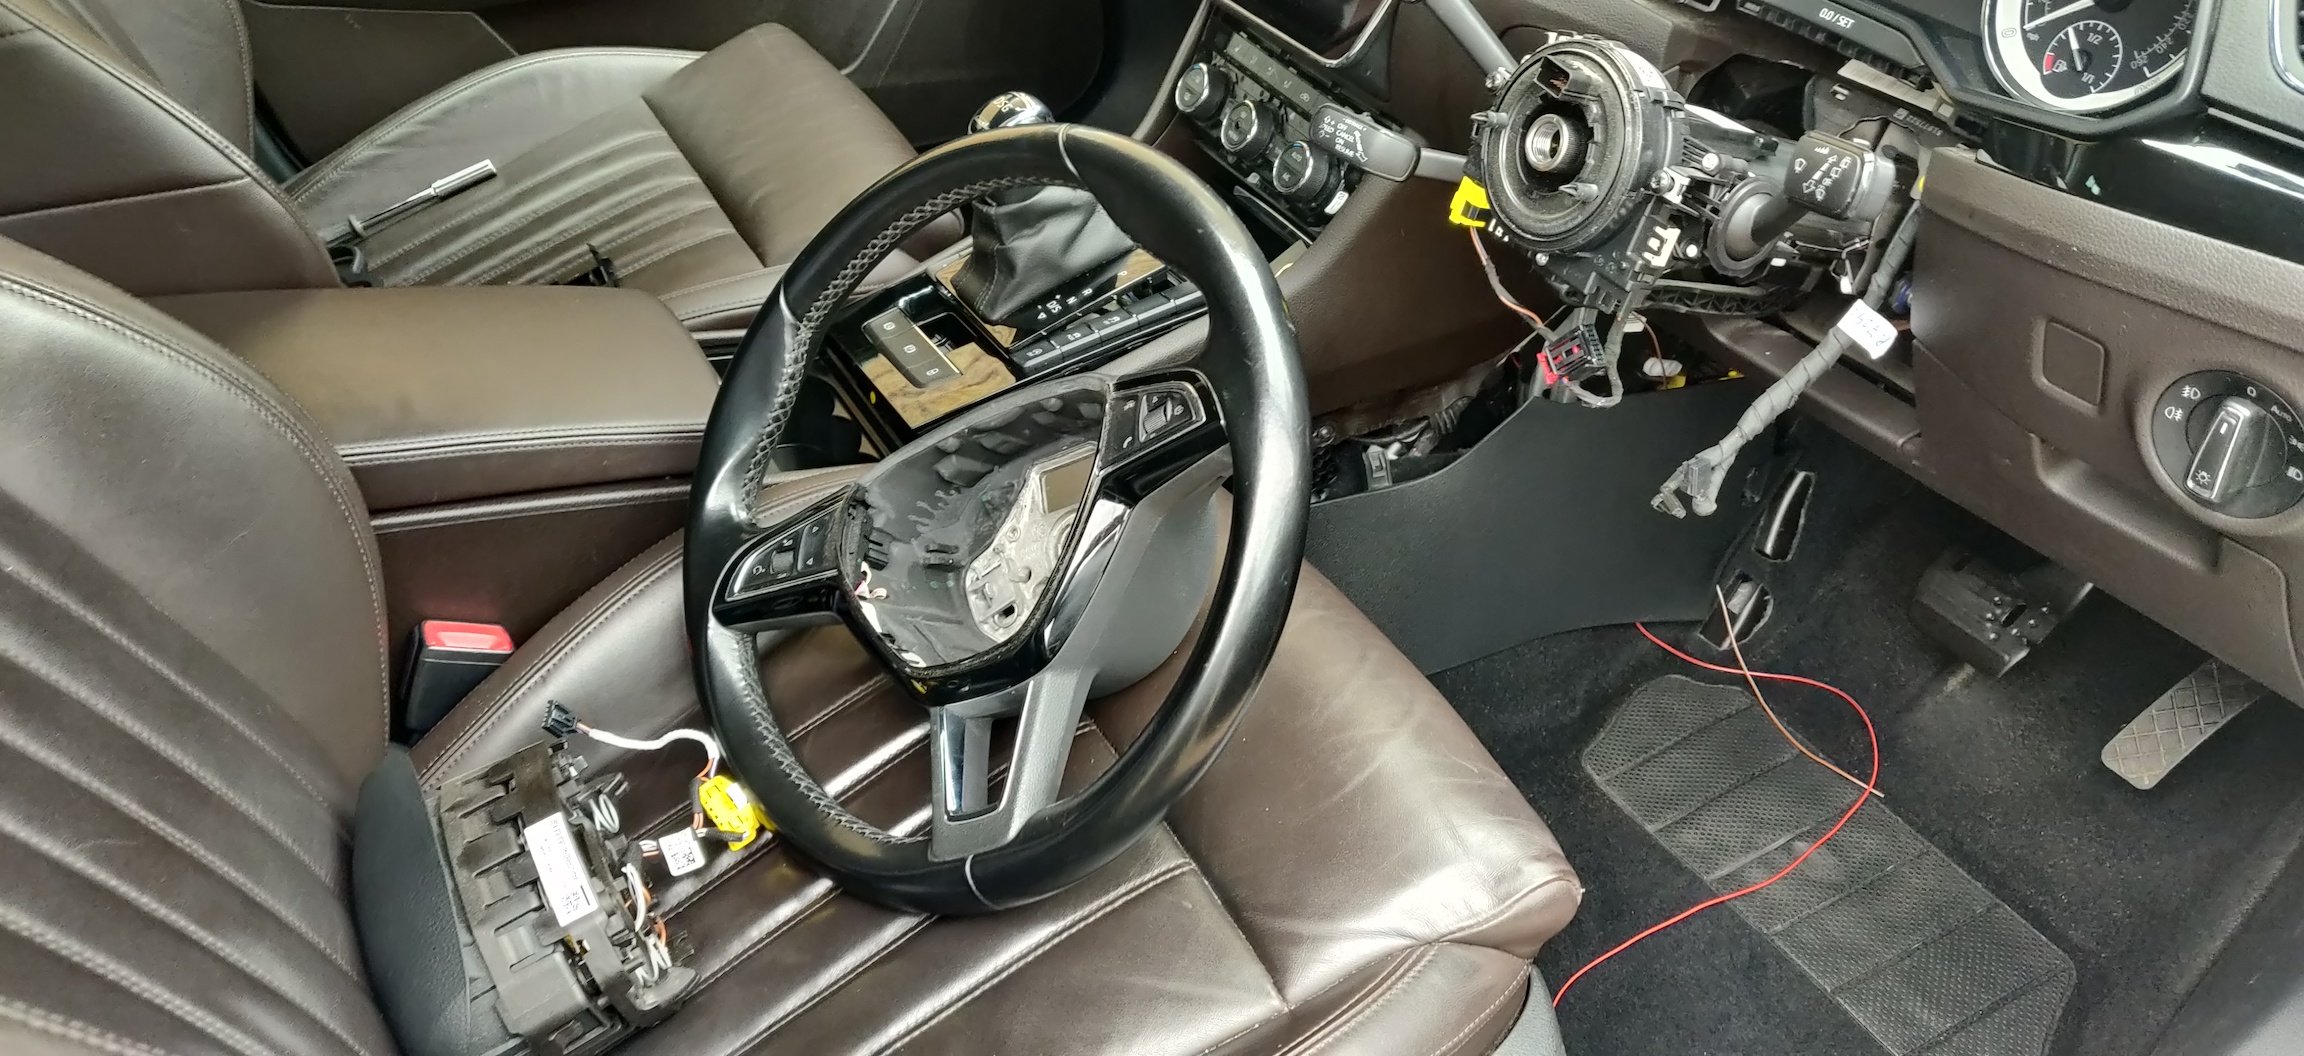
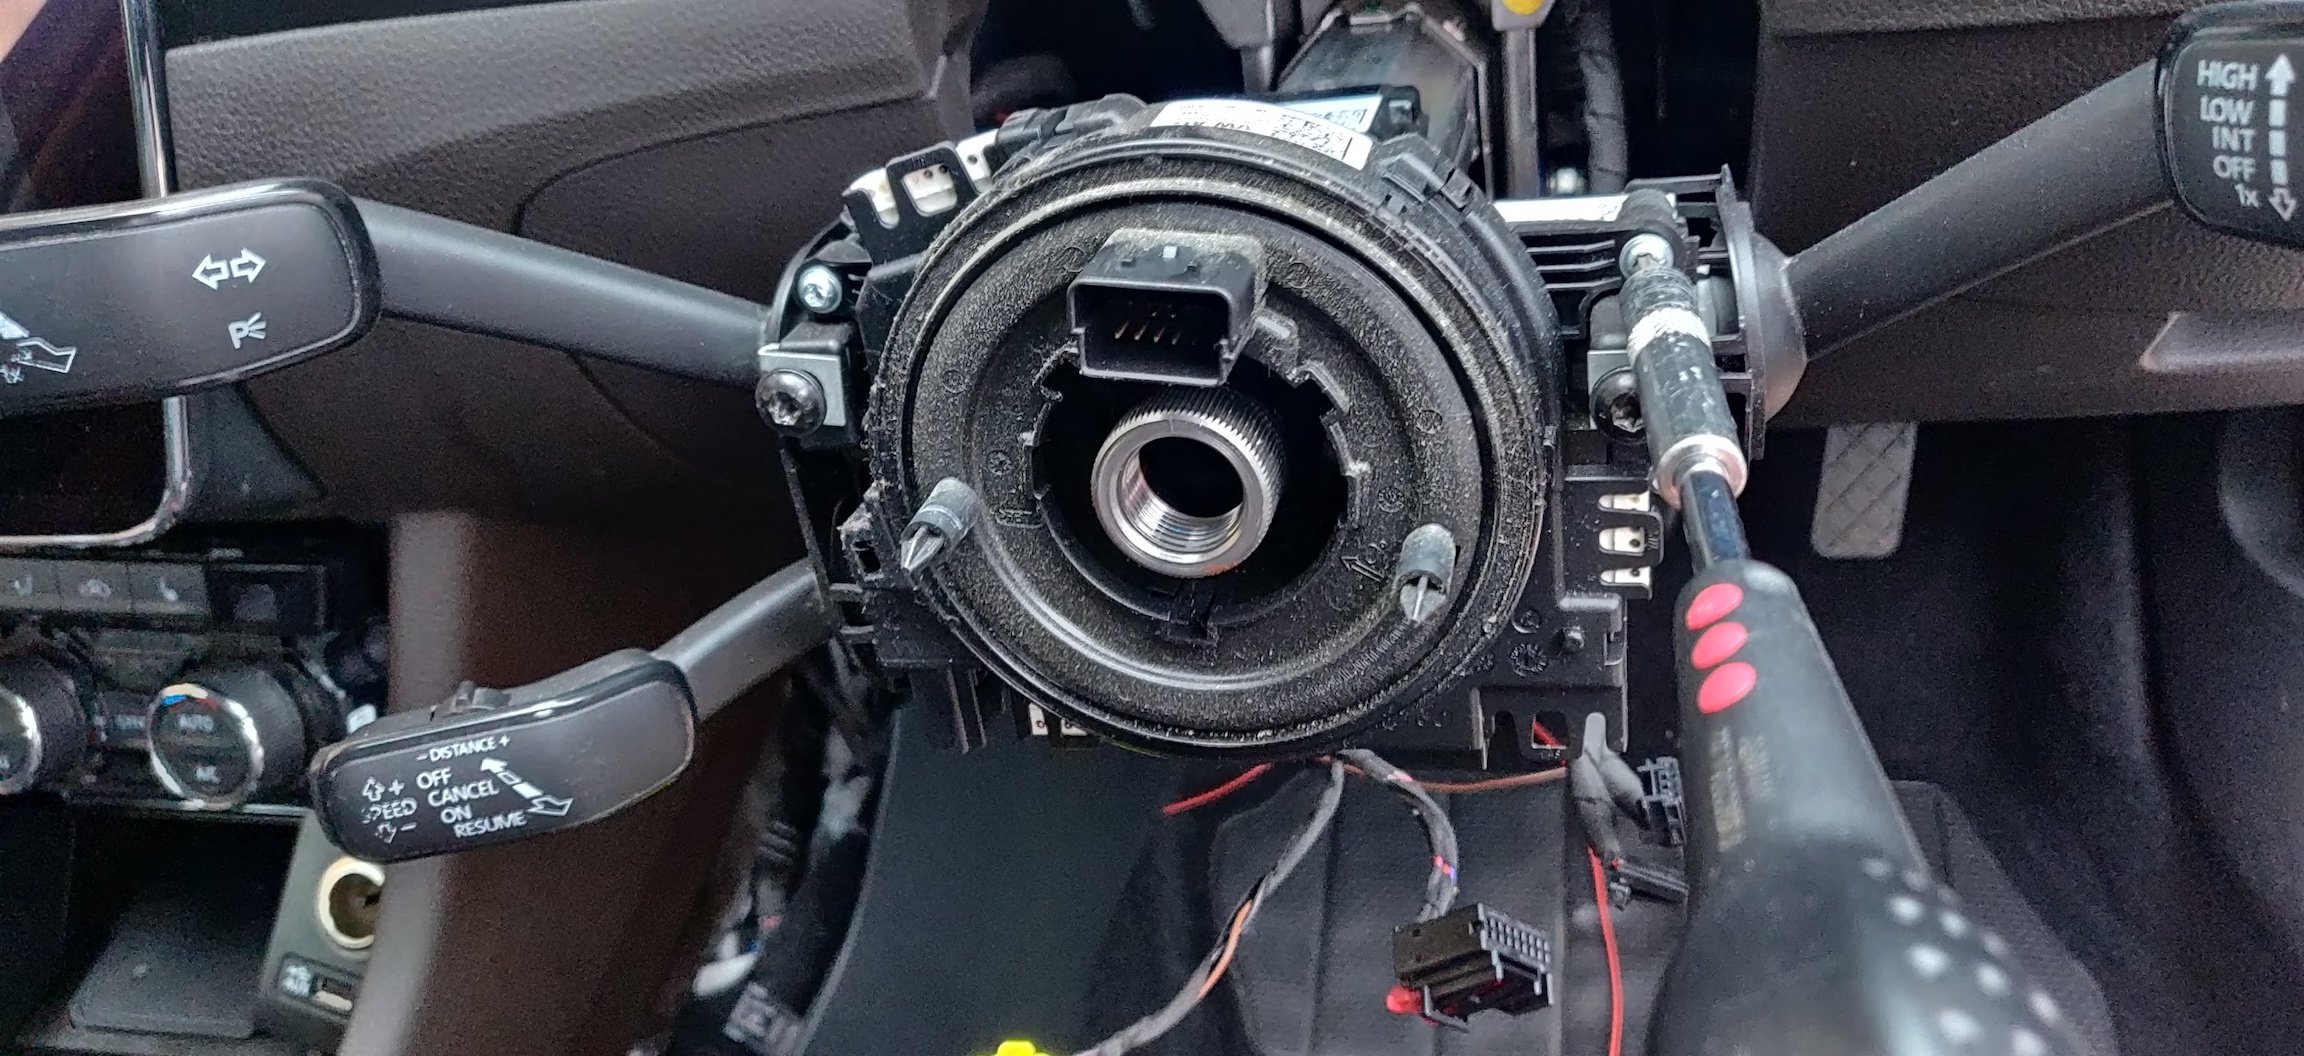
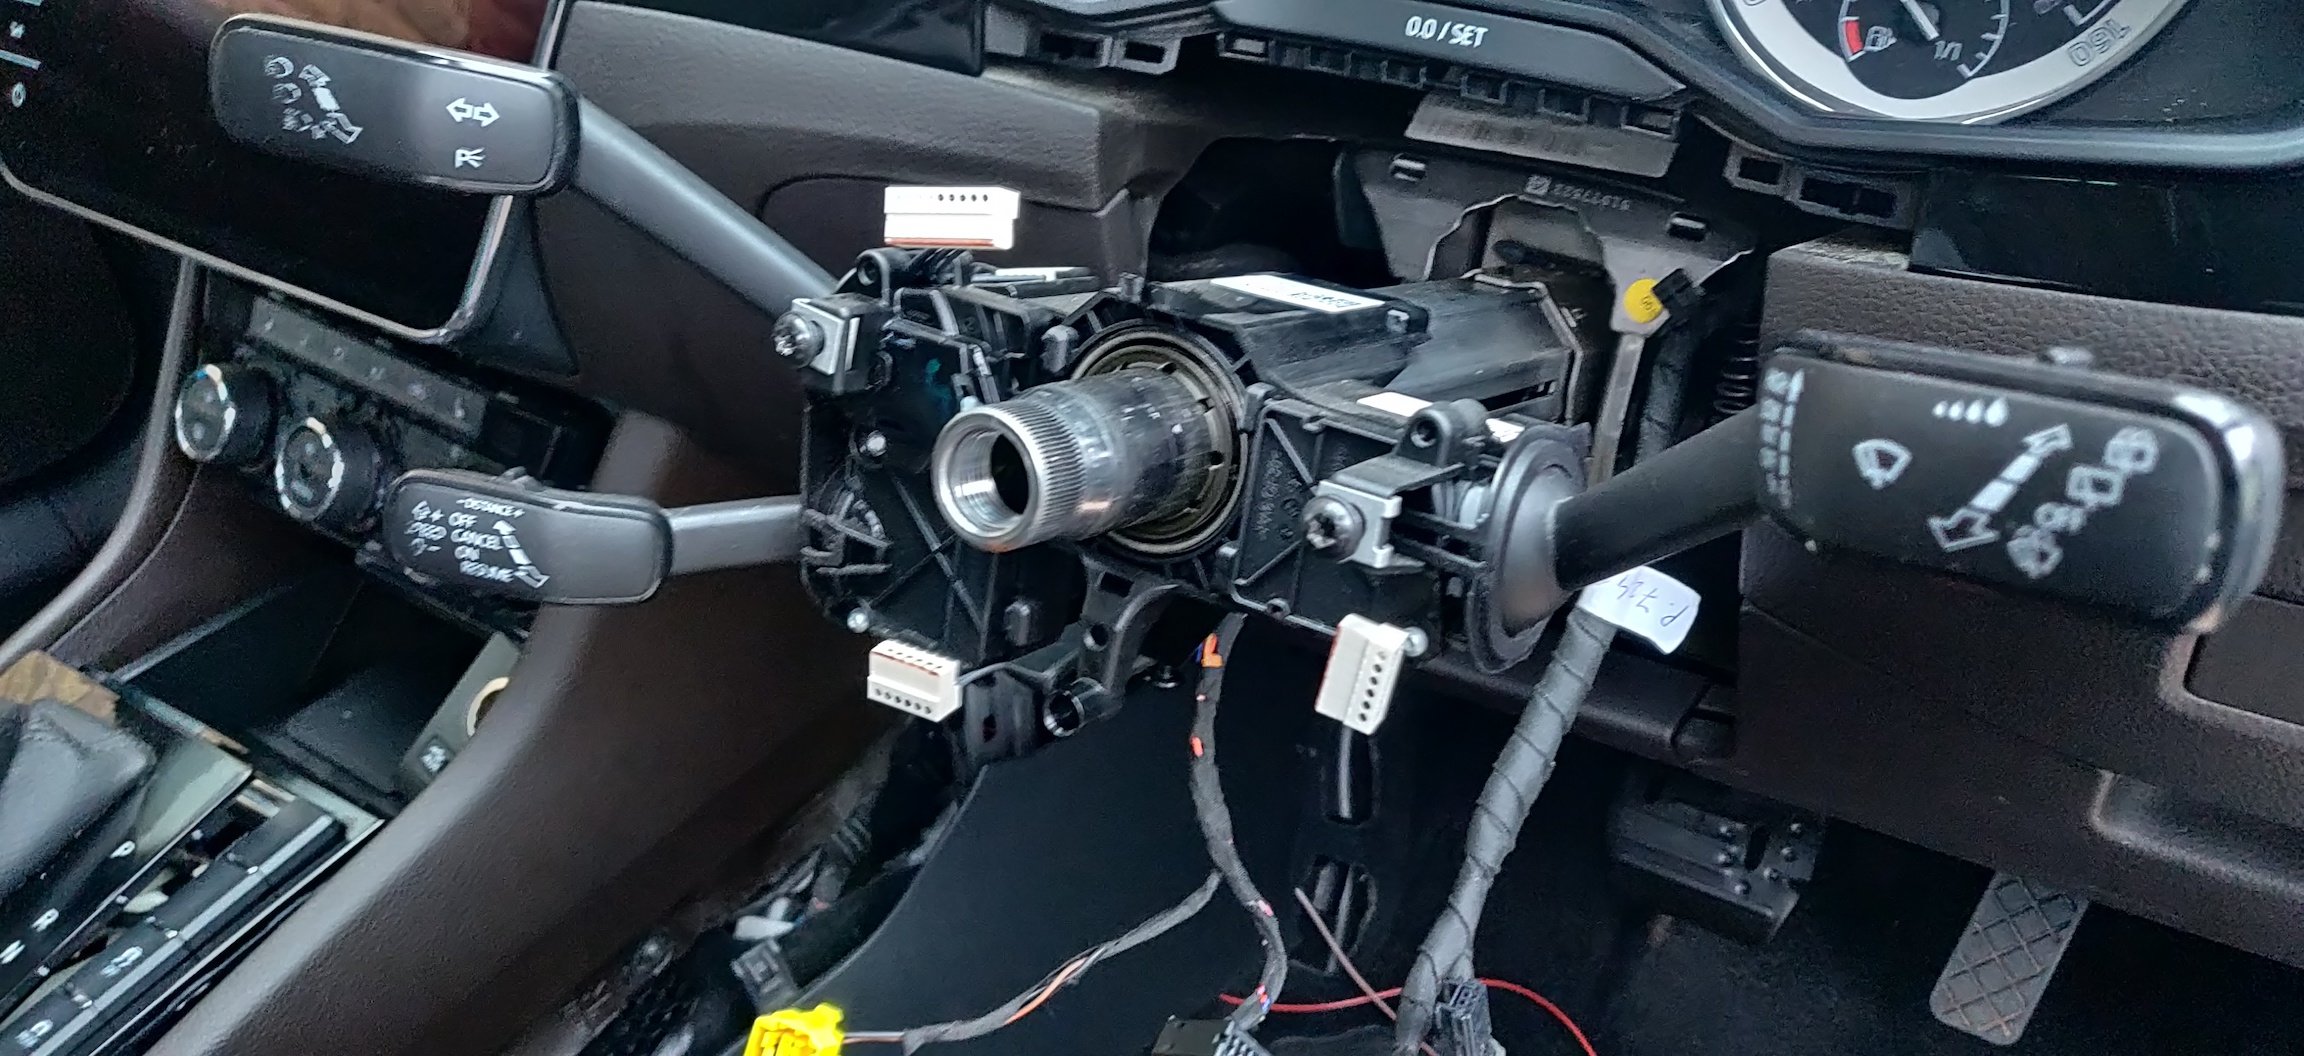
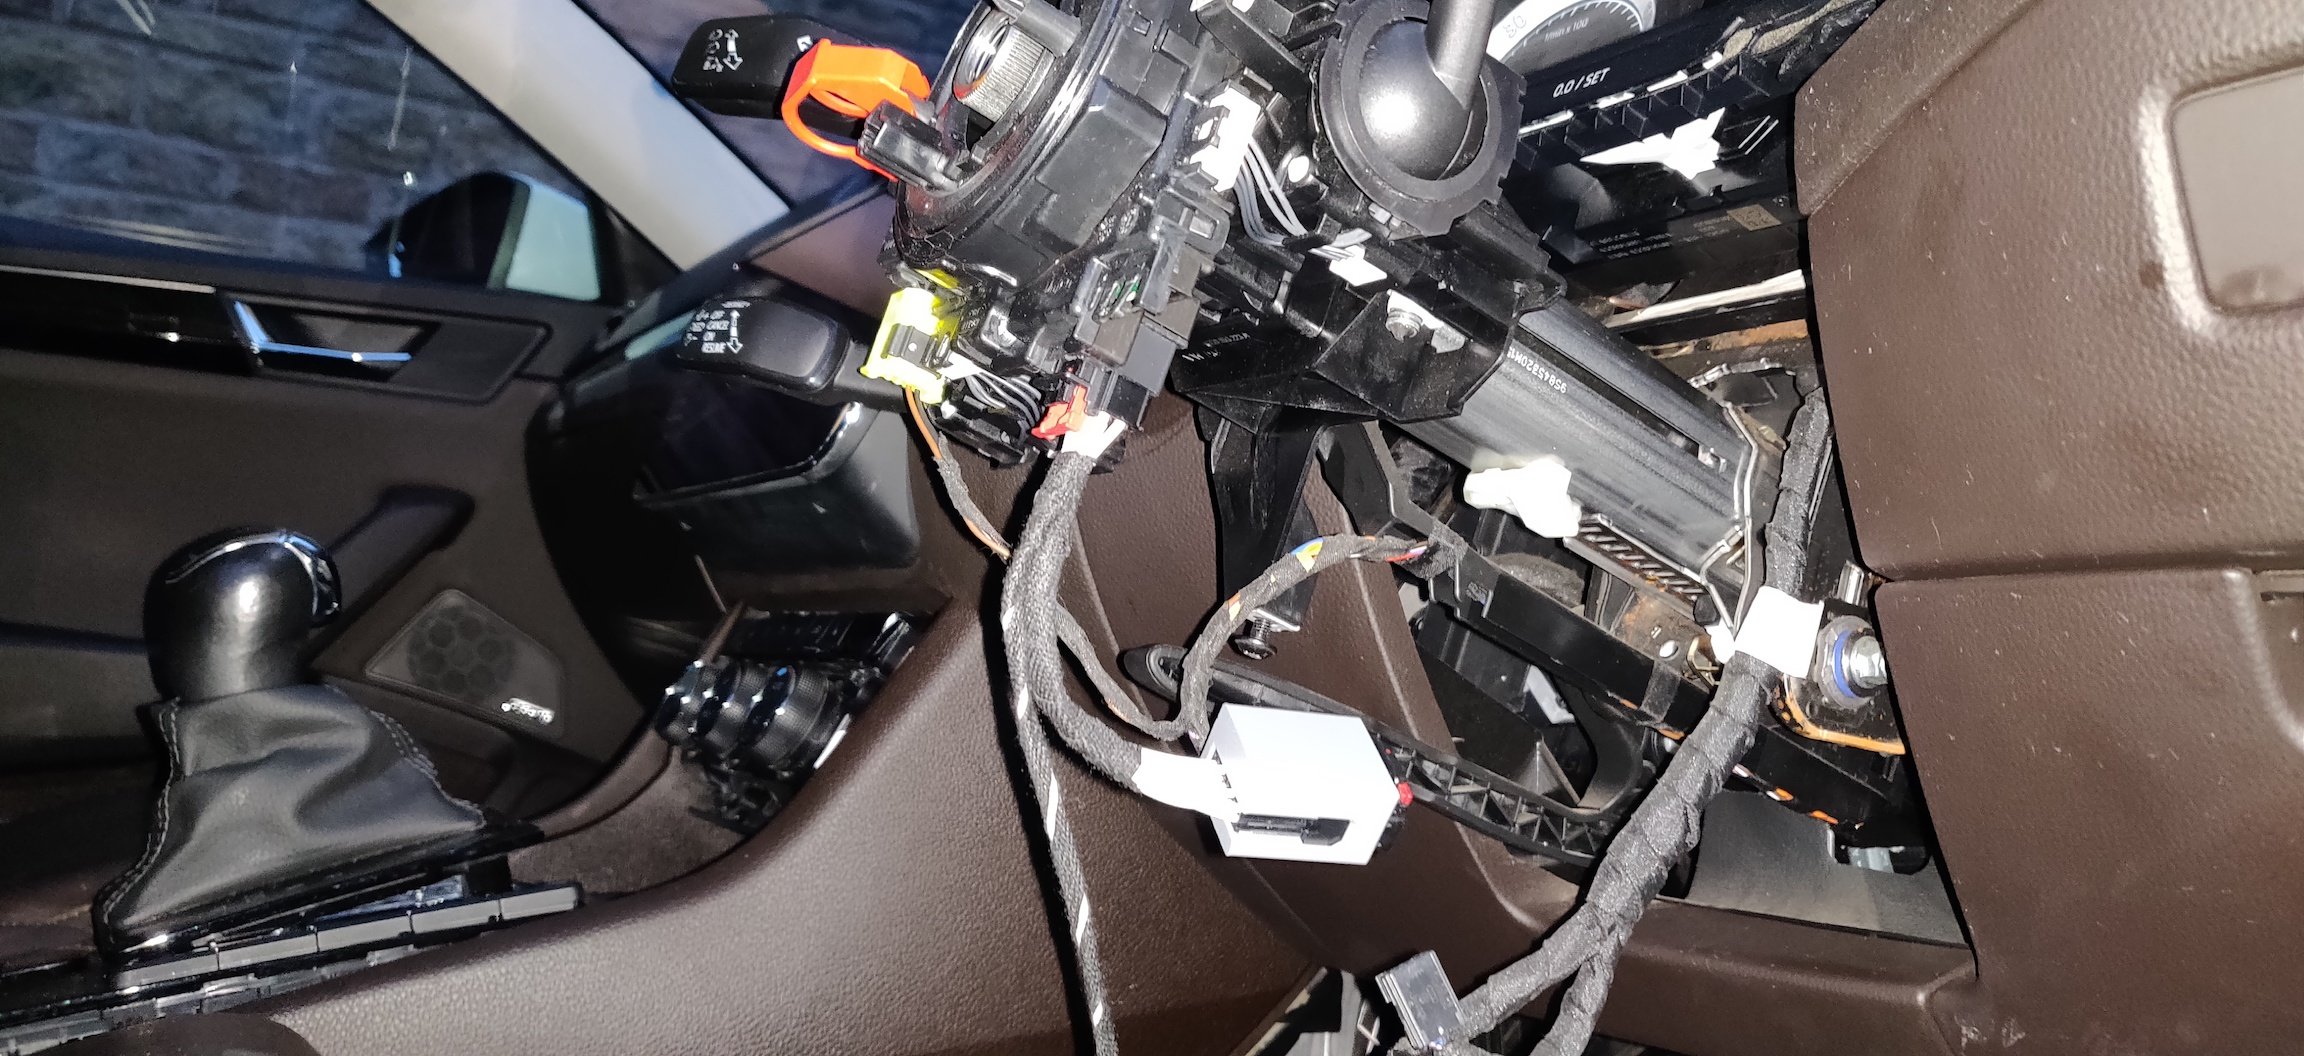
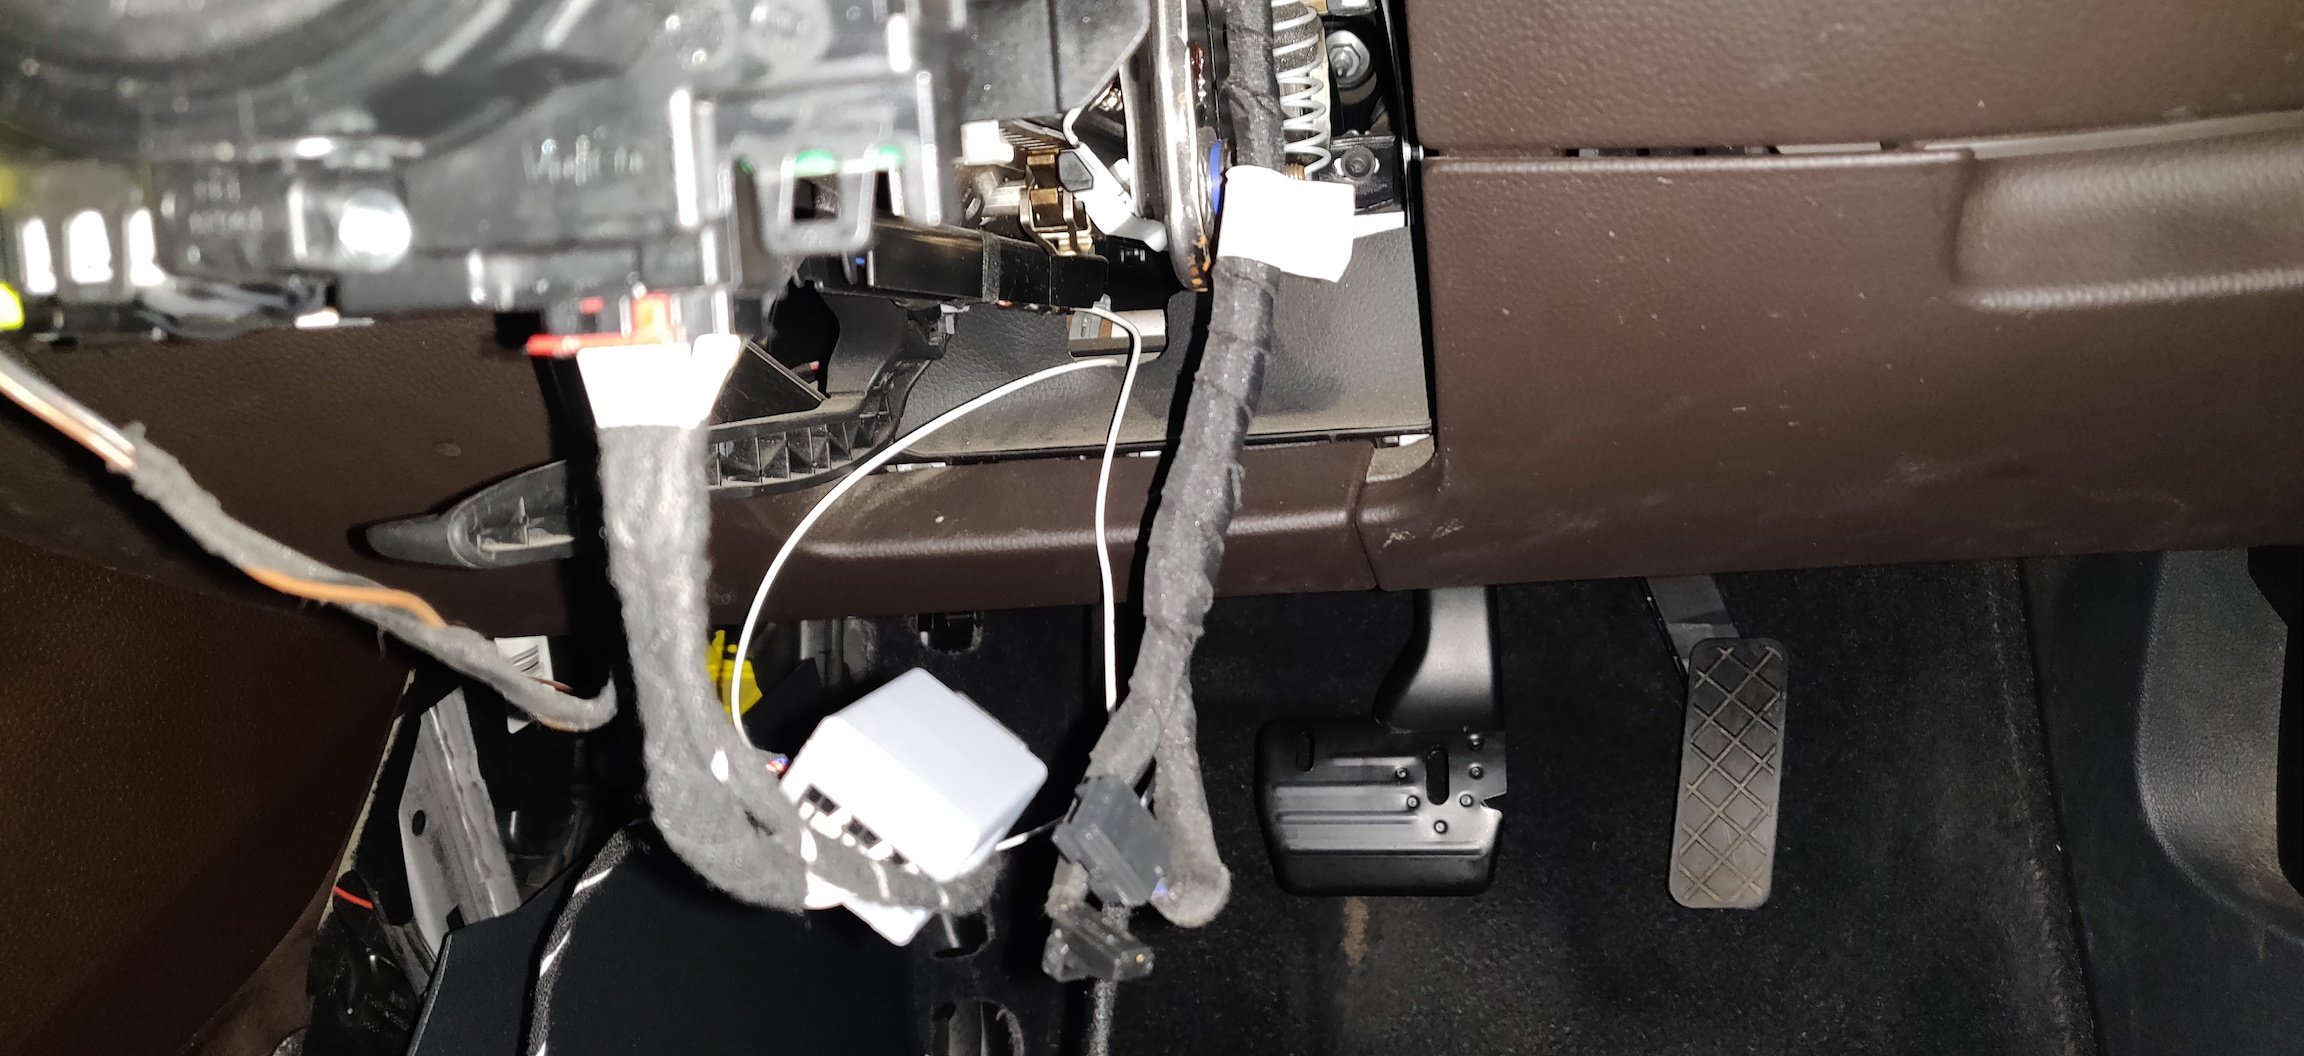
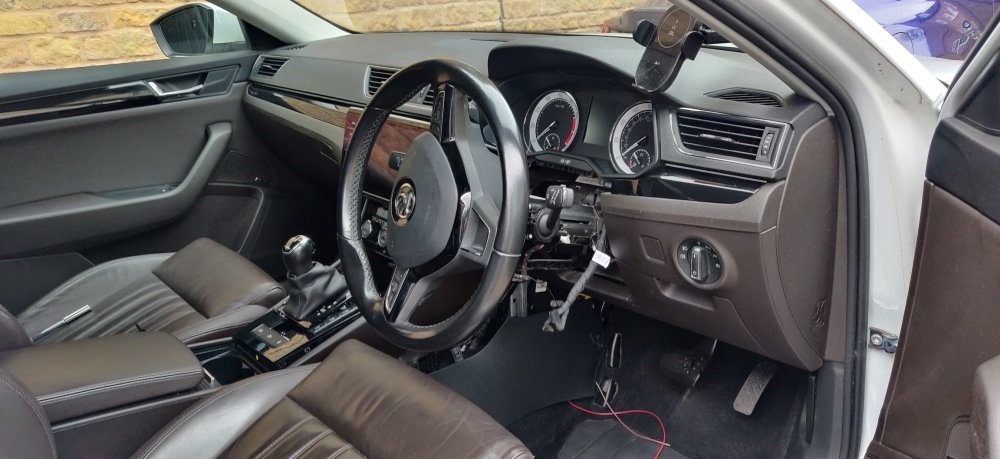
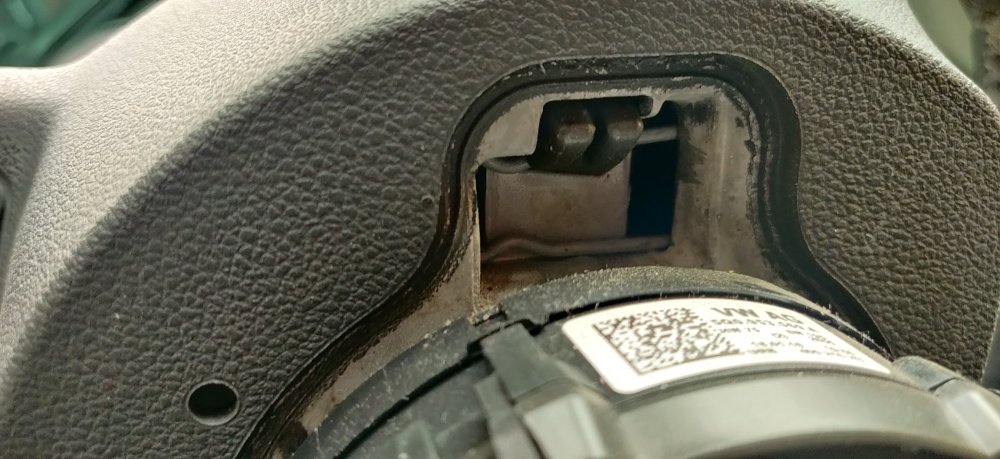
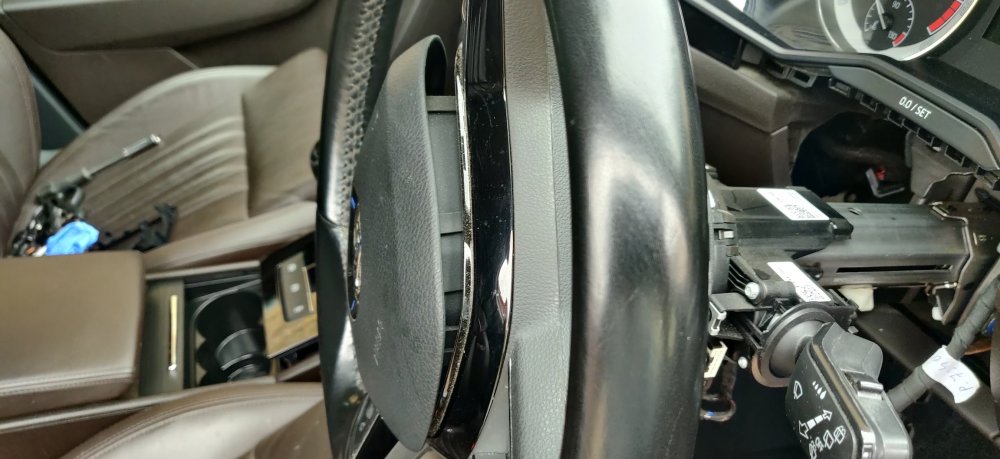
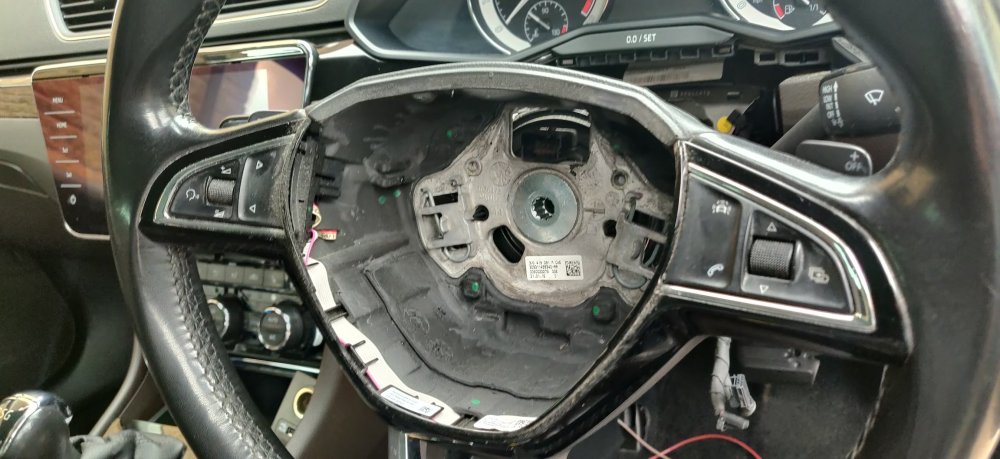
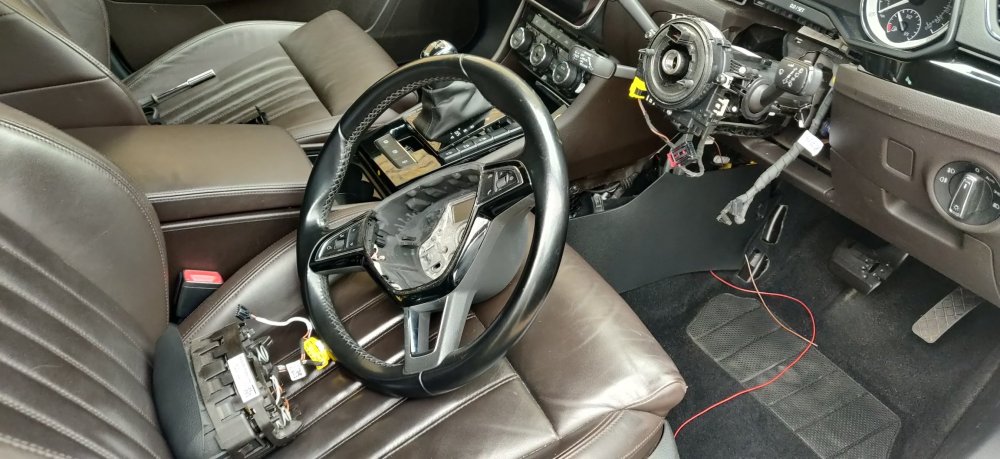
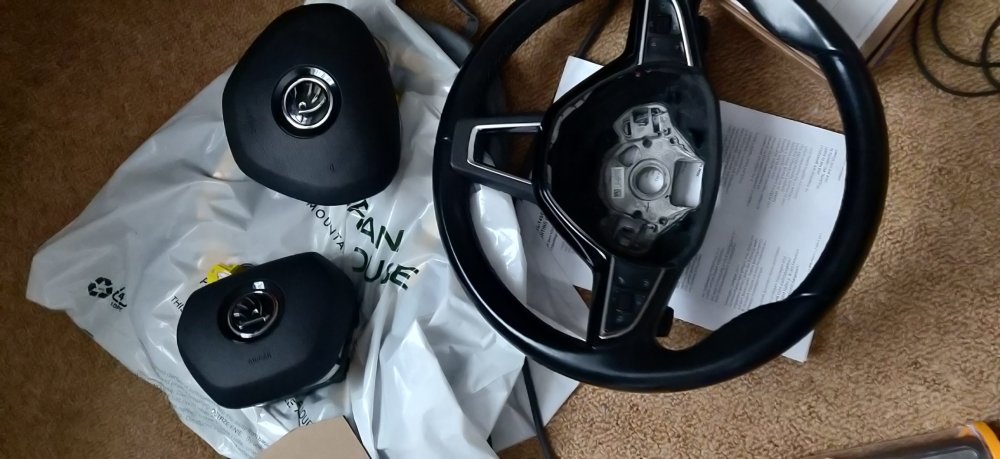
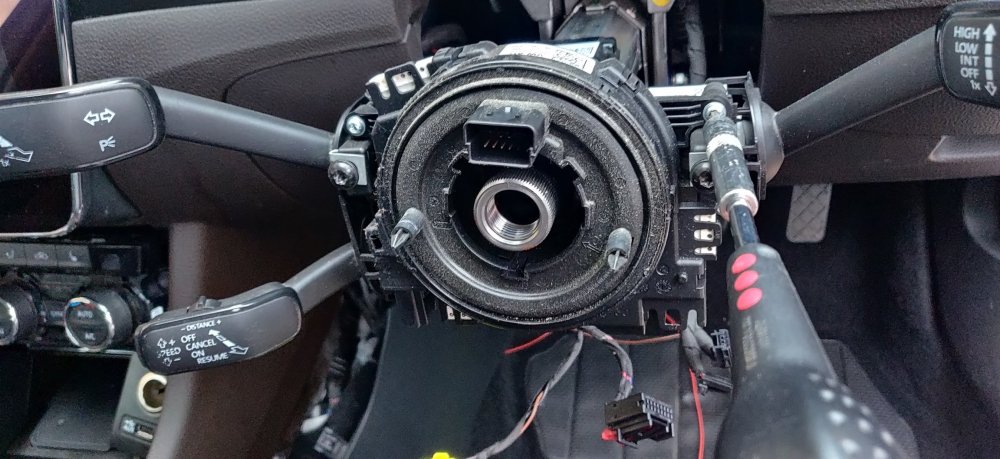
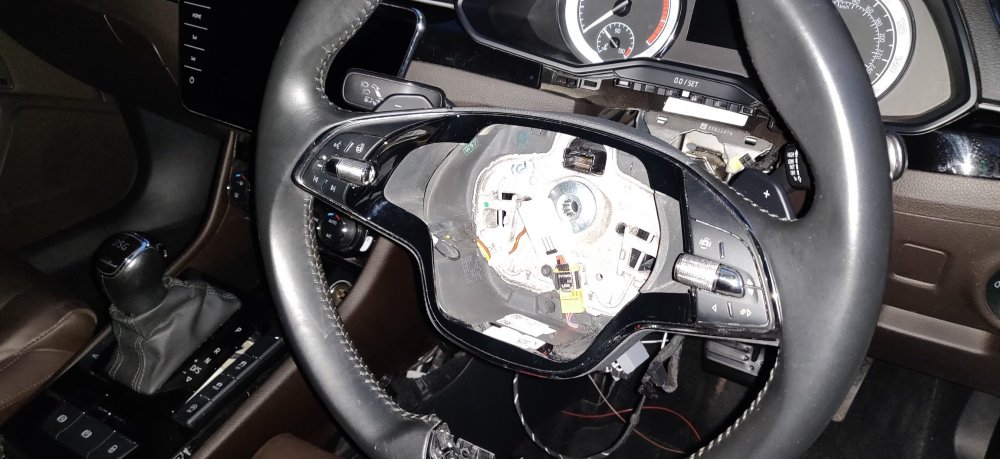
So now that the battery was disconnected with the ignition on, and the wheels are off the ground, I figured this is the best time to have a look at the steering wheel and removing it: So an earlier post had me doing this with a steering column off the car, and the steps are the same. So turning the wheel to the left and looking at the back: Reveals the hook for the airbag and the metal retaining clip thing. My stubby screwdriver was back to wedge itself around in the top right of the gap, and then wiggled to try and lever the metal clip to get it free of the airbag, and once done, it'll pop out: So turn the wheel to the opposing side and do the same thing, so the airbag pops out pretty much entirely: Then its the white tab on the yellow connector, pulling that out to allow the yellow connector to be disconnected, and the one on the left to the buttons. It's a tiny bit of a faff as it's pretty tight against the steering wheel, compared to the facelift wheels where this connector is at the bottom of the wheel. Once those connectors are sorted: It'll be the M12 spline bit to undo. Used my impact wrench whilst holding the wheel just in case it decided to spin freely: The wheel comes out without much drama. Compared to something like the Lotus Elise, where a puller is required, it's nice that it simply slides out. Brought the old wheel and airbag back into the house: Newer design is just a smidge smaller. So it's time to get the new clock spring that's been sitting there to be installed. The old one is removed first, three T15 torx screws: Then the three white connectors need disconnecting, just some wiggling with the black retaining tabs and so on: Which should allow the clock spring to slide out. With the new one in place, I connected up the yellow connector in addition to dry fitting the Kufatec loom: I'll need to do some rejigging of the loom to put that large white connector block somewhere without fouling anything. I took the main power and ground from the loom and followed it: Down along the other wiring into the abyss it seems. Hopefully I can remove the trim below to gain access, primarily to get the newer wiring into there and spliced into the loom. So that's really it, put the new steering wheel on, making sure the centre line notches on the column and wheel are aligned, and started dry fitting the bolt and connectors: It was getting dark, hence the camera flash over exposing the wheel and the connectors. You can just about see the adapter I bought from https://skoda-acc.com/Skoda-steering-wheel-buttons-adapter-Full-S0001F. I actually don't remember if I've tallied this into the cost. This was ordered on 1 March, and arrived on the 16 March. The order came to €268.37, primarily due to also order a set of all weather mats, and shipping of €27.42. It came to £239.44 according to the credit card statement. It's an expensive adapter, really hope it works. So once the Kufatec loom is spliced into the two wires I bodged in on the weekend, there isn't much stopping the power from being disconnected. We'll see how the week and Easter break goes! Maintenance: £1794.17 Upgrades: £1126.54 (+£239.44) Miscellaneous: £608.14


 1 point
 -
If you changed the tyre width then the diameter is different, as for the sensors if you wiggle the valve it will move easily without sensors and you will feel some resistance if it does have them.1 point
-
1 pointThose brown marks look like rust, and if so the reflectors in the headlamps may have deteriorated as well. If that's the case the only answer would be replacement headlamps. There are plenty of units available via breakers - eBay is a good starting point - and when I last checked you could pick up a pair of units for under 100 squid. Remember you will need facelift lamps, not pre-facelift.1 point
-
It’s only nagware so nothing drastic will happen. Mine recently popped up and I reset oil and inspection myself as I’ll be doing it myself in summer time1 point
-
Was 2018 when the change happened 6 speed DQ250 with 40,000 mile service schedule to the DQ381 and 80,000 miles?1 point
-
@mickymouse Assuming would be a mistake. A FULL SERVICE HISTORY should show the HISTORY of SERVICING. So you will see what is done. But a Full Service History does not mean that at a DEALERSHIP everything was done to the Schedule, Recommendations, Guidelines etc, Extras needs paid for over and above the Oil & Inspection Service & the EXtended Scope.1 point
-
I gave up on photobucket and moved to Flickr. I even pay for membership as I don't want the site to go full advertising or collapse. Photobucket just became a pain for my needs sadly1 point
-
had something similar to this on a test drive the other week. I suspected flywheel, possibly one of the clutches or input shaft bearings. Why? because in that context the car shut up in N, but was whiny in D or R when moving. So if no load was on the gearbox, no whine. But as soon as load was put on (even at tickover), there was whine. There is an SSP for the box available which shows the power movement through the box, though this may only be for the DQ381. Has the oil been changed at the correct interval and did you already try reading codes?1 point
-
No problem. As you've probably seen, not only can you navigate up/down the parts menus there to find out anything you like, but they also sell genuine parts at very decent prices.1 point
-
Maybe some here - sadly Photobucket, which was what people used back in the day when it was free, has added large watermarks. https://www.briskoda.net/forums/topic/213596-skoda-museum-factory-visit-mlada-boleslav/ And maybe here https://www.briskoda.net/forums/topic/169801-pragueskoda-museum-car-pics/1 point
-
The tyre ratings are for the external noise they generate, not the internal noise, but certainly the Conti All Season I now have are substantially quieter in the car than the P7’s they replaced.1 point
-
1 point
-
1 pointJust over 600, I need to go in for final map tweak, should see between 610 - 620 and pretty much done now as for power wise. The next step would to put an RS3 engine in which very unlikely to happen.1 point
-
G12 should have better corrosion protection, which is crucial on these engines. But you have to flush the engine properly, as G11 and G12 don't mix well. G12+ supposedly mixes better with G11, but I wouldn't risk it.1 point
-
There is a difference though from a 1.4 TSI PHEV and DSG, 6 speed and a 1.5 TSI ACT 7 speed dsg when it comes to 1st to 2nd. You can always with a DQ200 DSG go to S if you are going to be down to 1st gear and crawling or going over speed bumps then the DSG does not change up or try to until a higher RPM. Same if crawling along in traffic to stop it going up and down 1st to 2nd. The other thing is a 1.5 TSI ACT running down to a slow speed might well be in 2 cylinder mode and as it gets some accelerator is back into 4 cylinder mode.1 point
-
Thanks for suggestions @MarkyG82 - No, my heel is attached to the floor and accelerator is not used, as the speed I am going over these bumps are very very slow which makes sense for gearbox to go into 1st gear, half way through the speed bump I slightly and gently apply the accelerator and the gearbox does not change to 2nd until engine revs to 2800-3200rpm. I will try to make a video of the car going over these massive speed bumps.1 point
-
1 pointMany of us have chosen a 3D printed replacement from Etsy/Ebay: Here's the search link for the Etsy page: Skoda Karoq Cup Holder - Etsy UK1 point
-
1 point@SailorP The "blanking plate" is actually the front of the head unit. The screen in the dash is just the screen. I wouldn't concern your auto leccy with removing the unit. If you do you will pull out a box with a load of plugs in the back. As you have canton I believe that makes it harder to link up any additional source. It would also need coding to allow you to select a different source. All of which would like invalidate your warranty. By far the slickest route would be spotify or similar on the phone. Cheapest would be ripping the CDs and saving them on the phone. Another convenient option would be a low profile USB stick with it all saved and left in the car.1 point
-
OT: The issue with selecting quiet tyres is the dynamic of the tyre might change depending on wheel size, car weight, tyre pressure, tyre profile, tread depth, car design....... It's an expensive game hunting for quiet tyres that perform to expectations. Potentially worth it depending on you attitude and driving habits though. FWIW the GTE and iV weight near enough the same as their ICE 4x4 couterparts so normal tyres are acceptable. To get the best economy in summer you massively compromise winter safety so a second set could be wise. On topic: Sounds like you could have some sort of issue with the gearbox. Is it at all possible that it's a driving style thing @Vlady? Does your heel come off the floor as you go over said speed bumps causing you to mash the go pedal and tricking the gearbox into 1st? Just trying to cover all bases.1 point
-
1 pointAppeared around the same time as new brochure (on link) came out, brochure is dated 14th March https://www.skoda.co.uk/_doc/71165c49-62c5-4f74-b29a-be6ad40d73731 point
-
Or they took inspiration in IT. HDMI and USB naming is just mess.1 point
-
1 pointThe evap drain is there even if the AC doesn't run. There should be also an intake drain - or at least there is on non-ac cars. The sponge really just creates a humidifier. Not the best thing when you want to demist the windshield.1 point
-
1 pointThe location of the screw means any repair would still affect the rigidity of the tyre. No reputable firm would attempt a repair so close to the sidewall so would have thought all tyre centres would all recommend the tyre is replaced. A self-sealing tyre only enables you to get to a tyre centre, it's a temporary fix, not a permanent fix.1 point
-
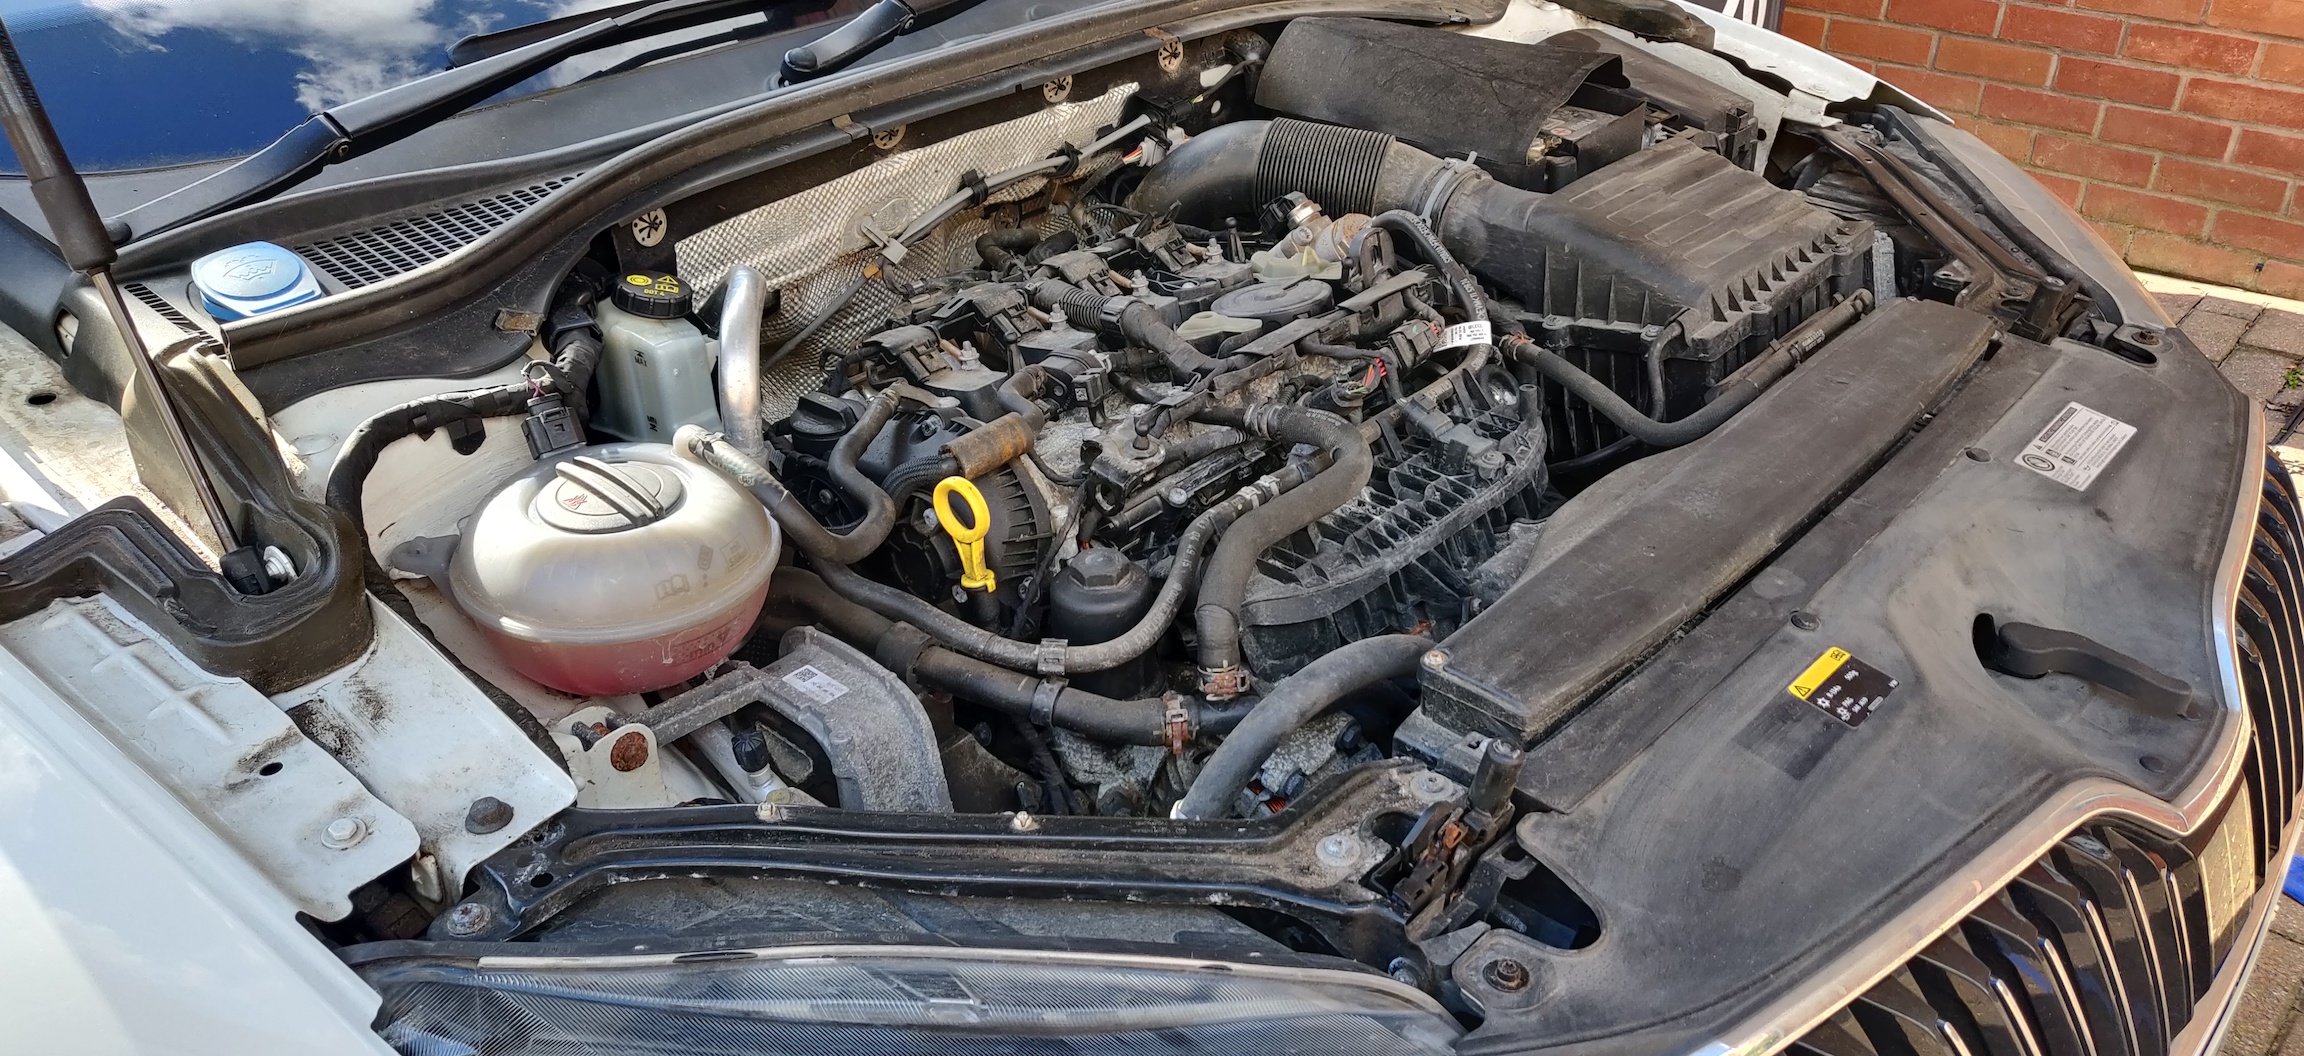
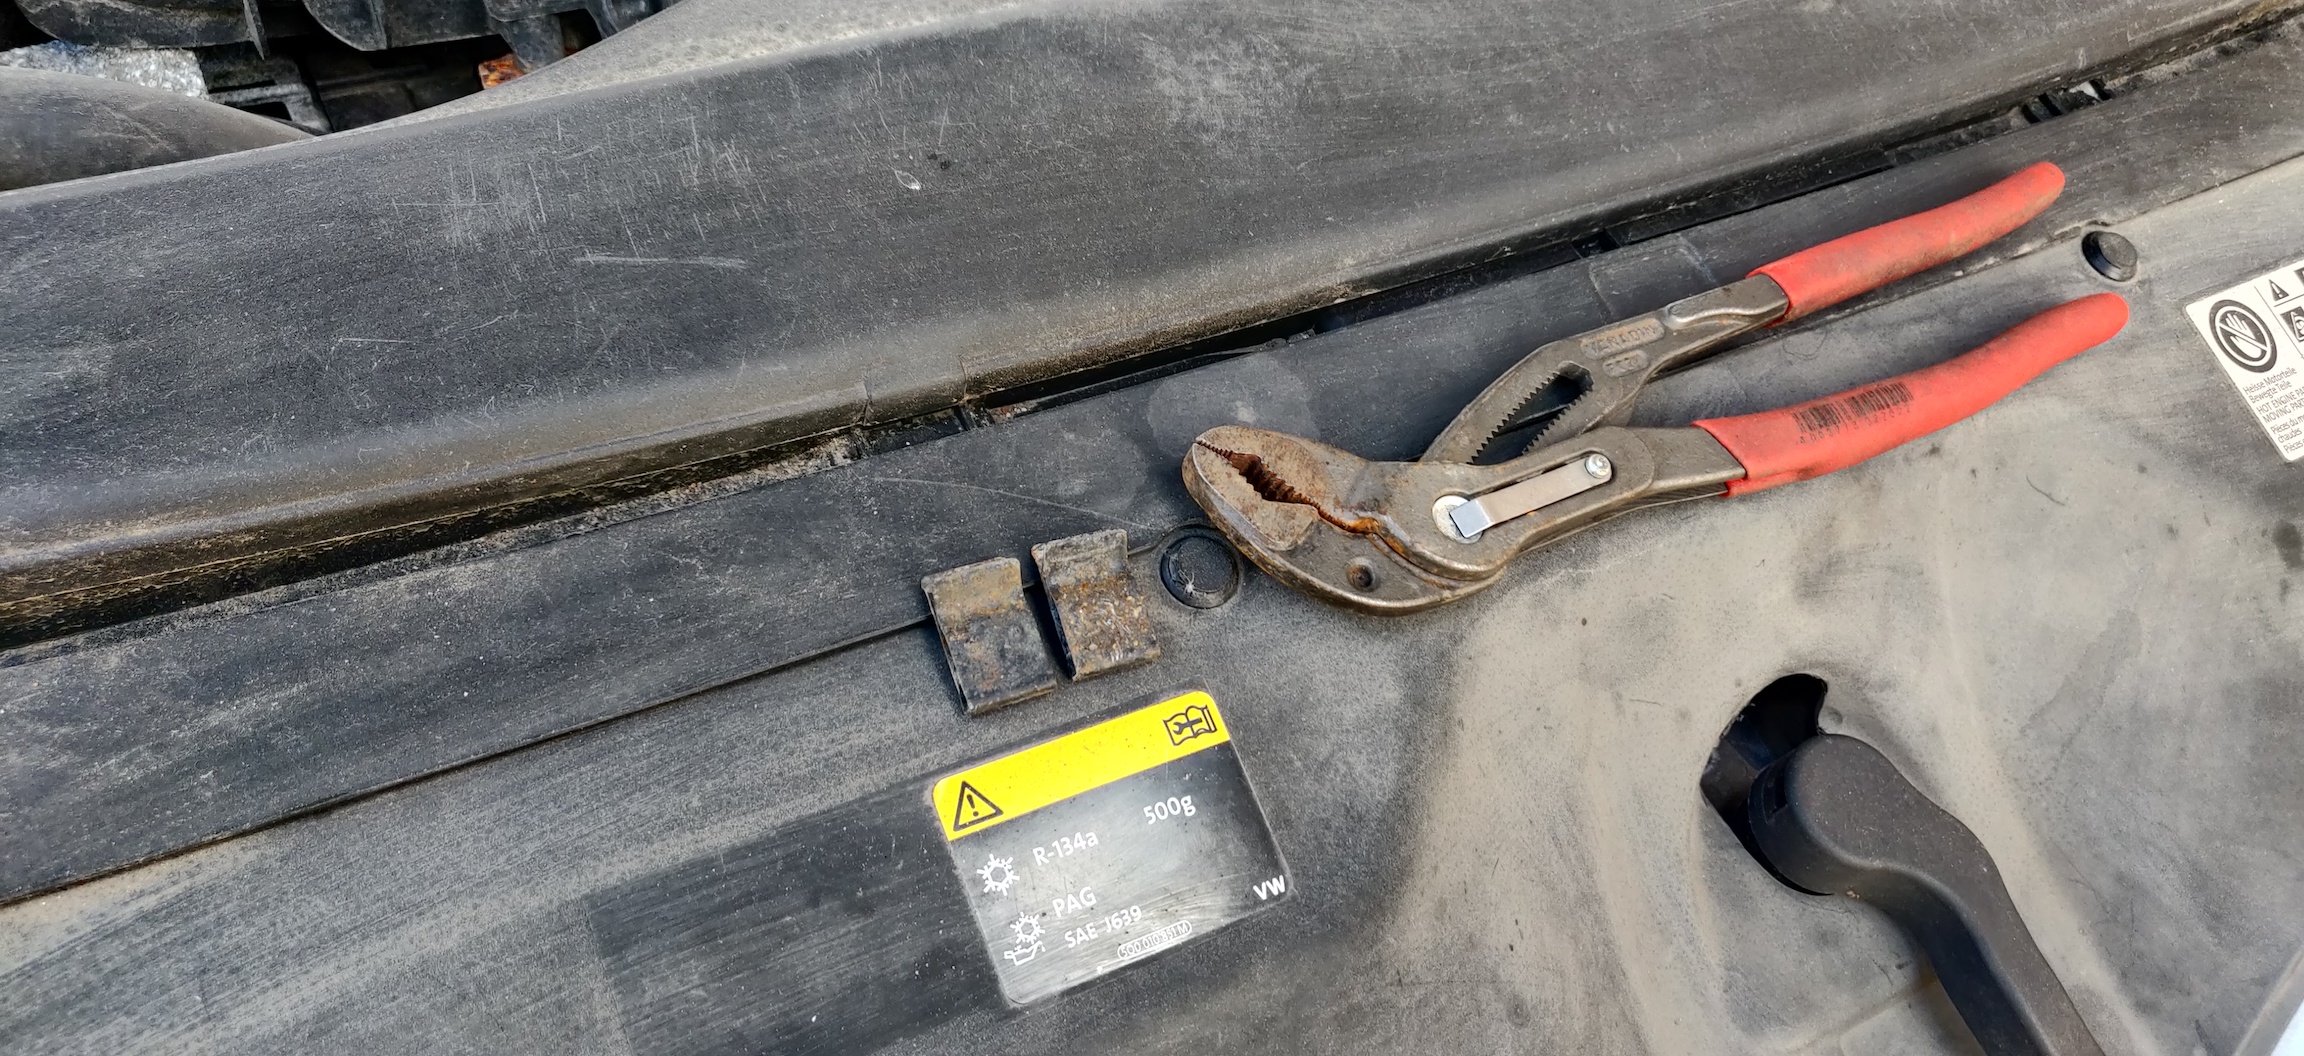
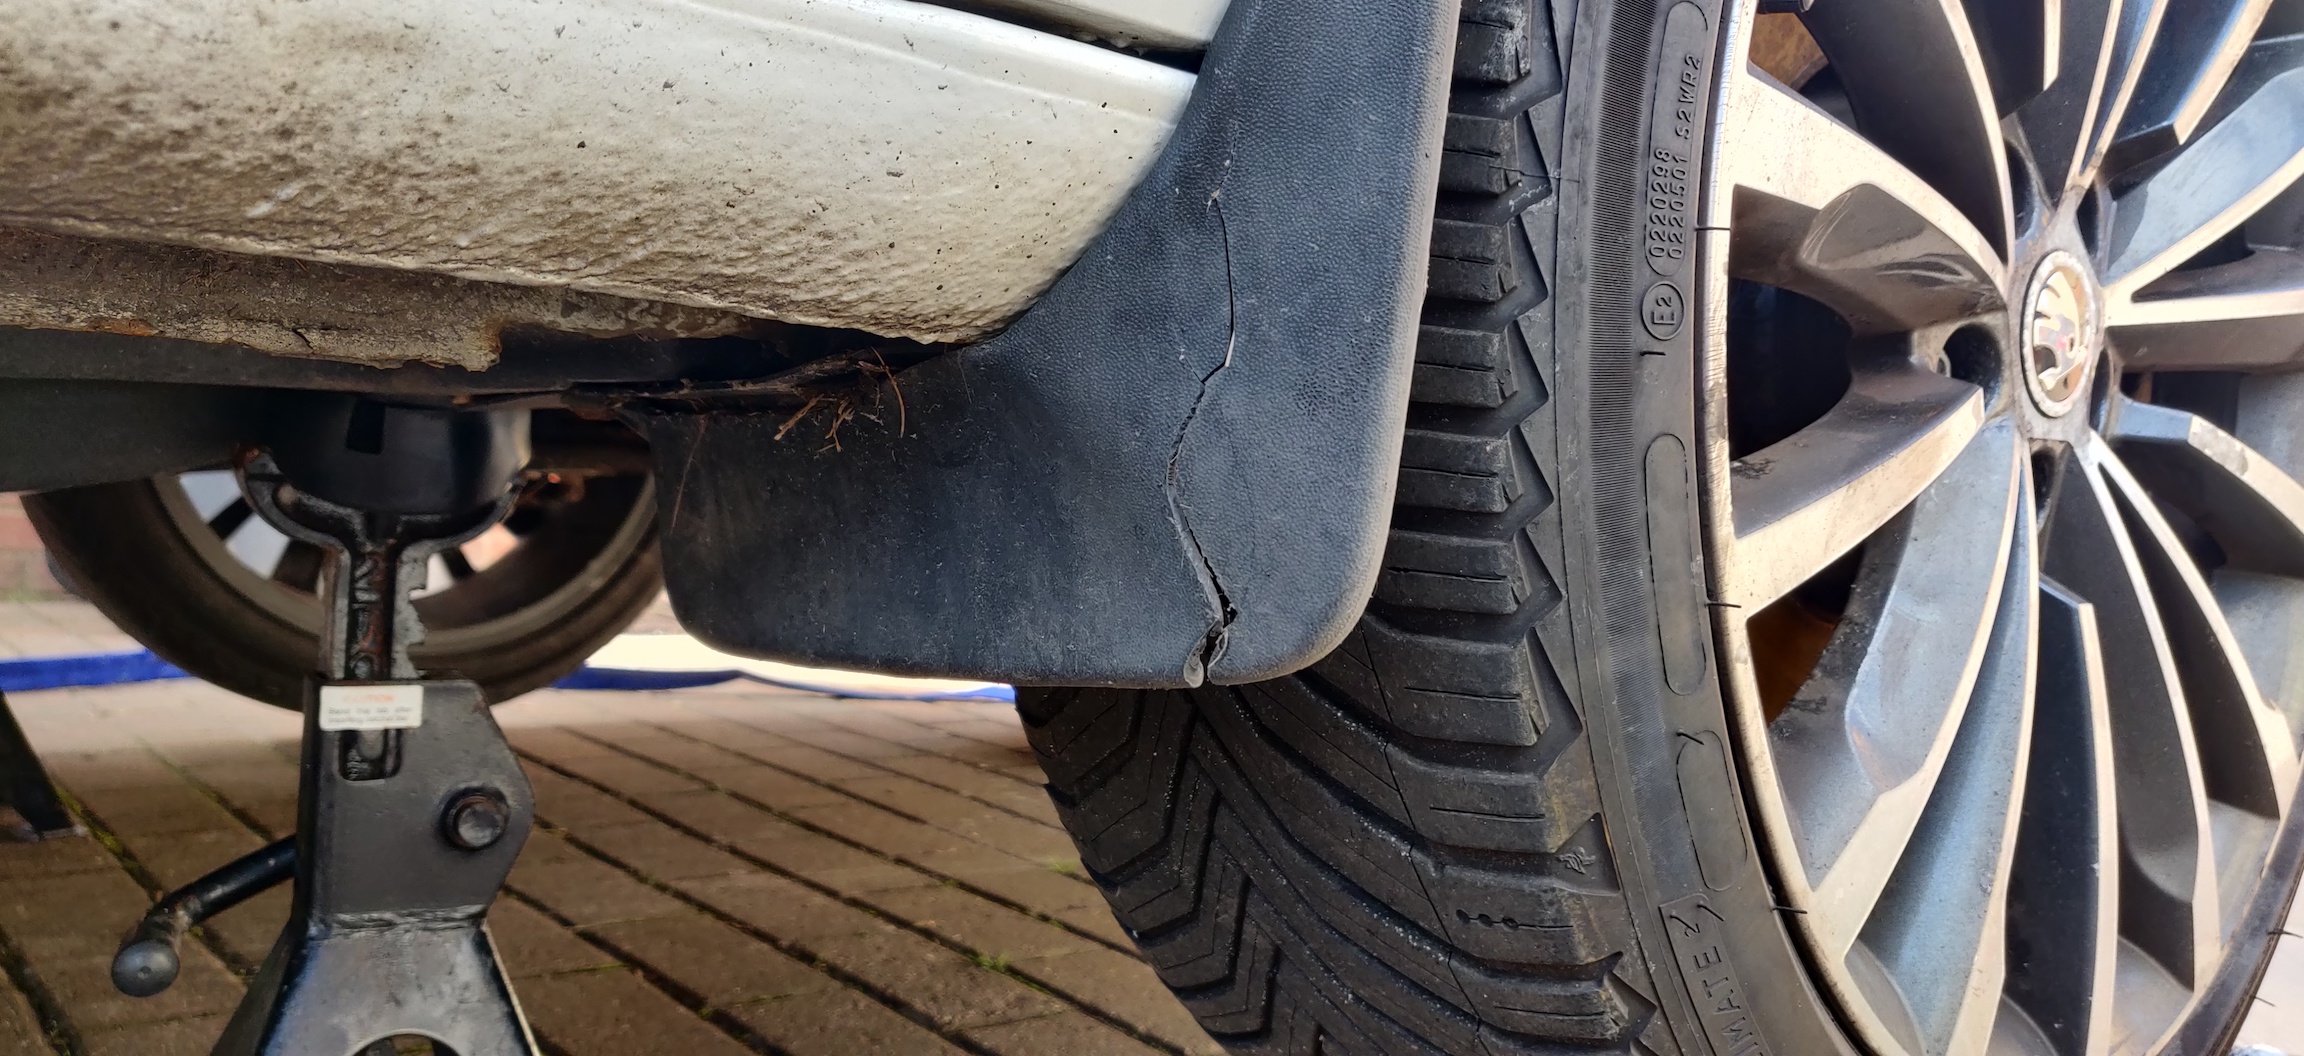
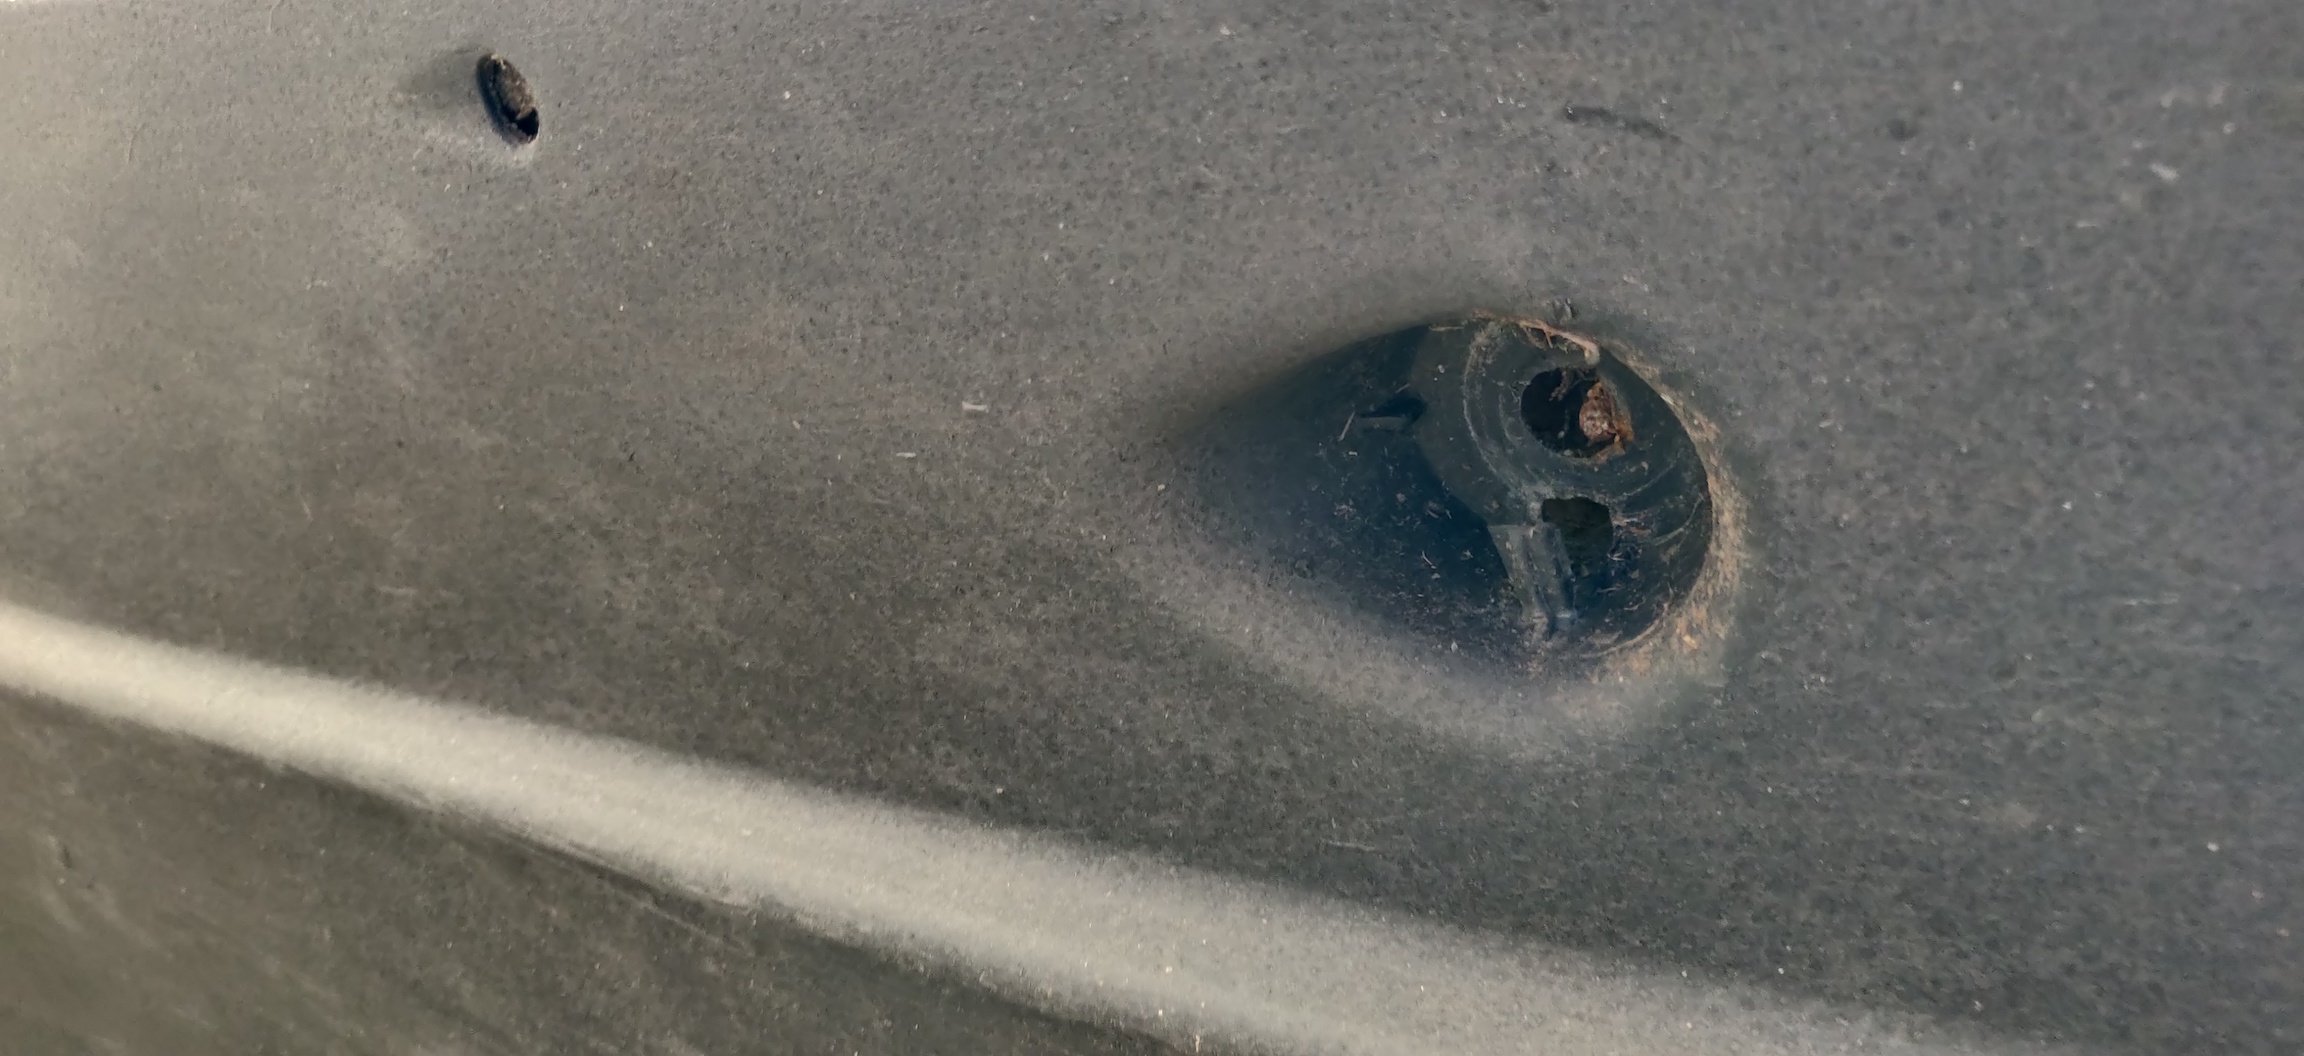
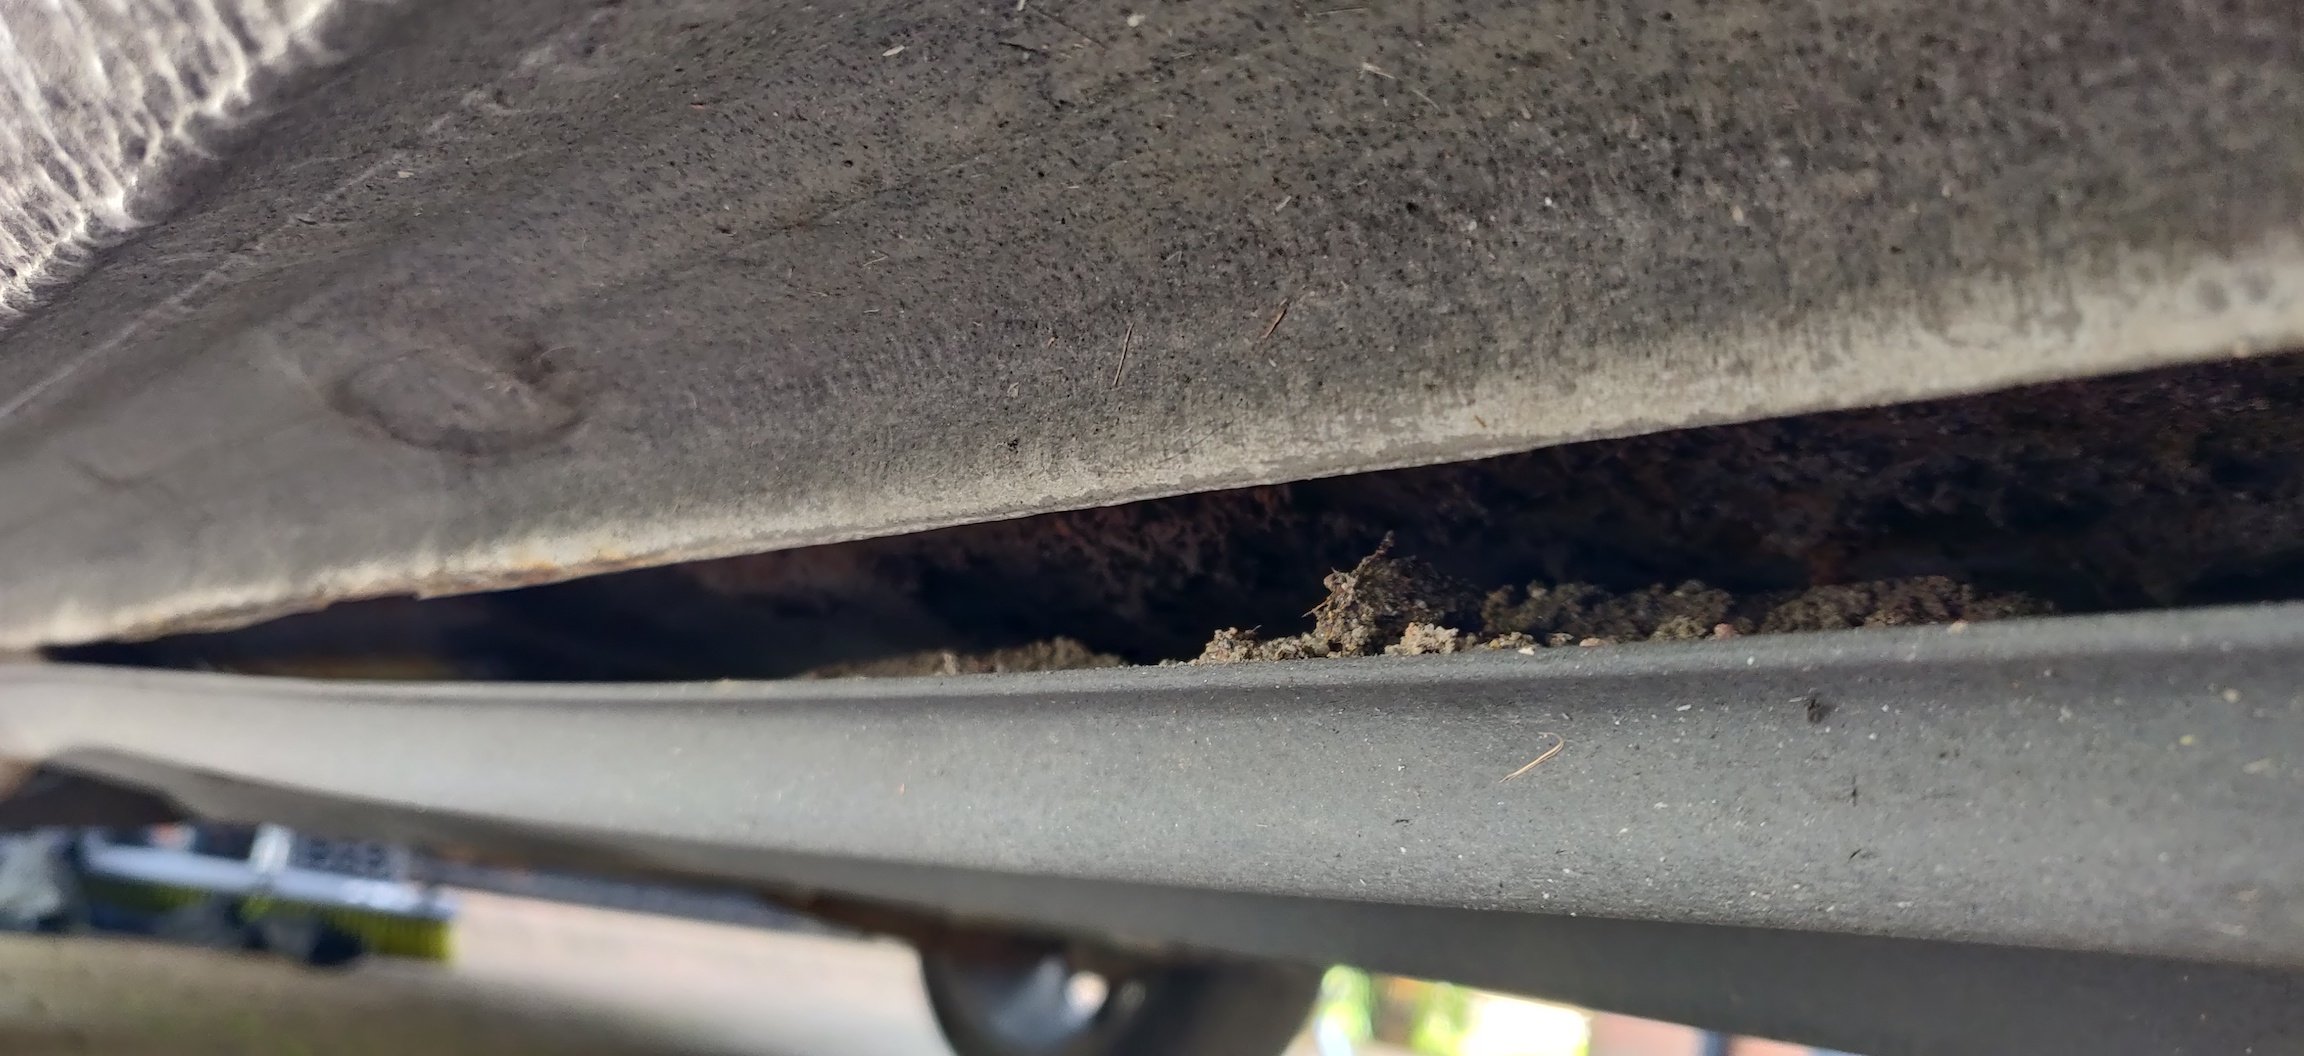
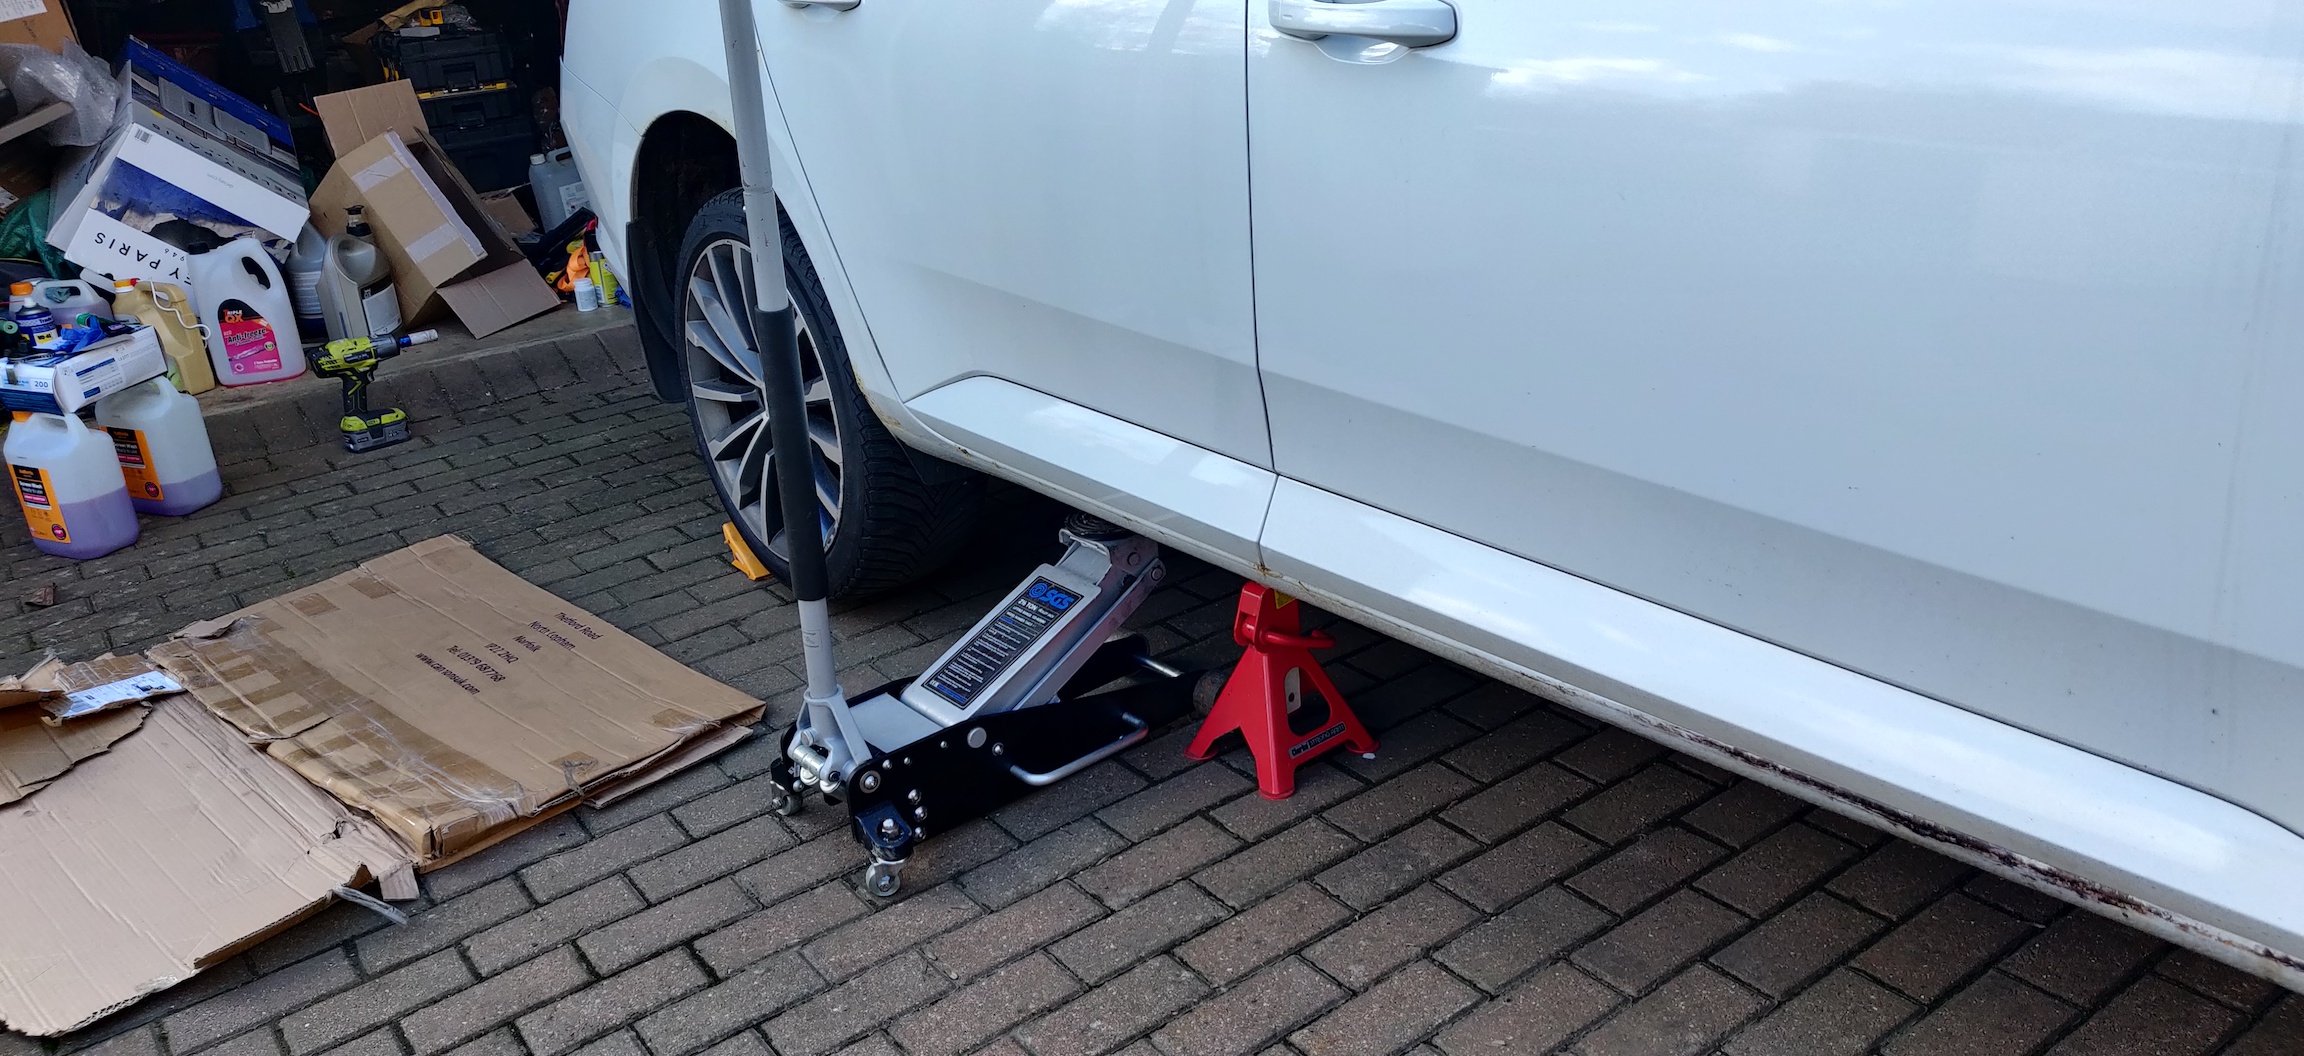
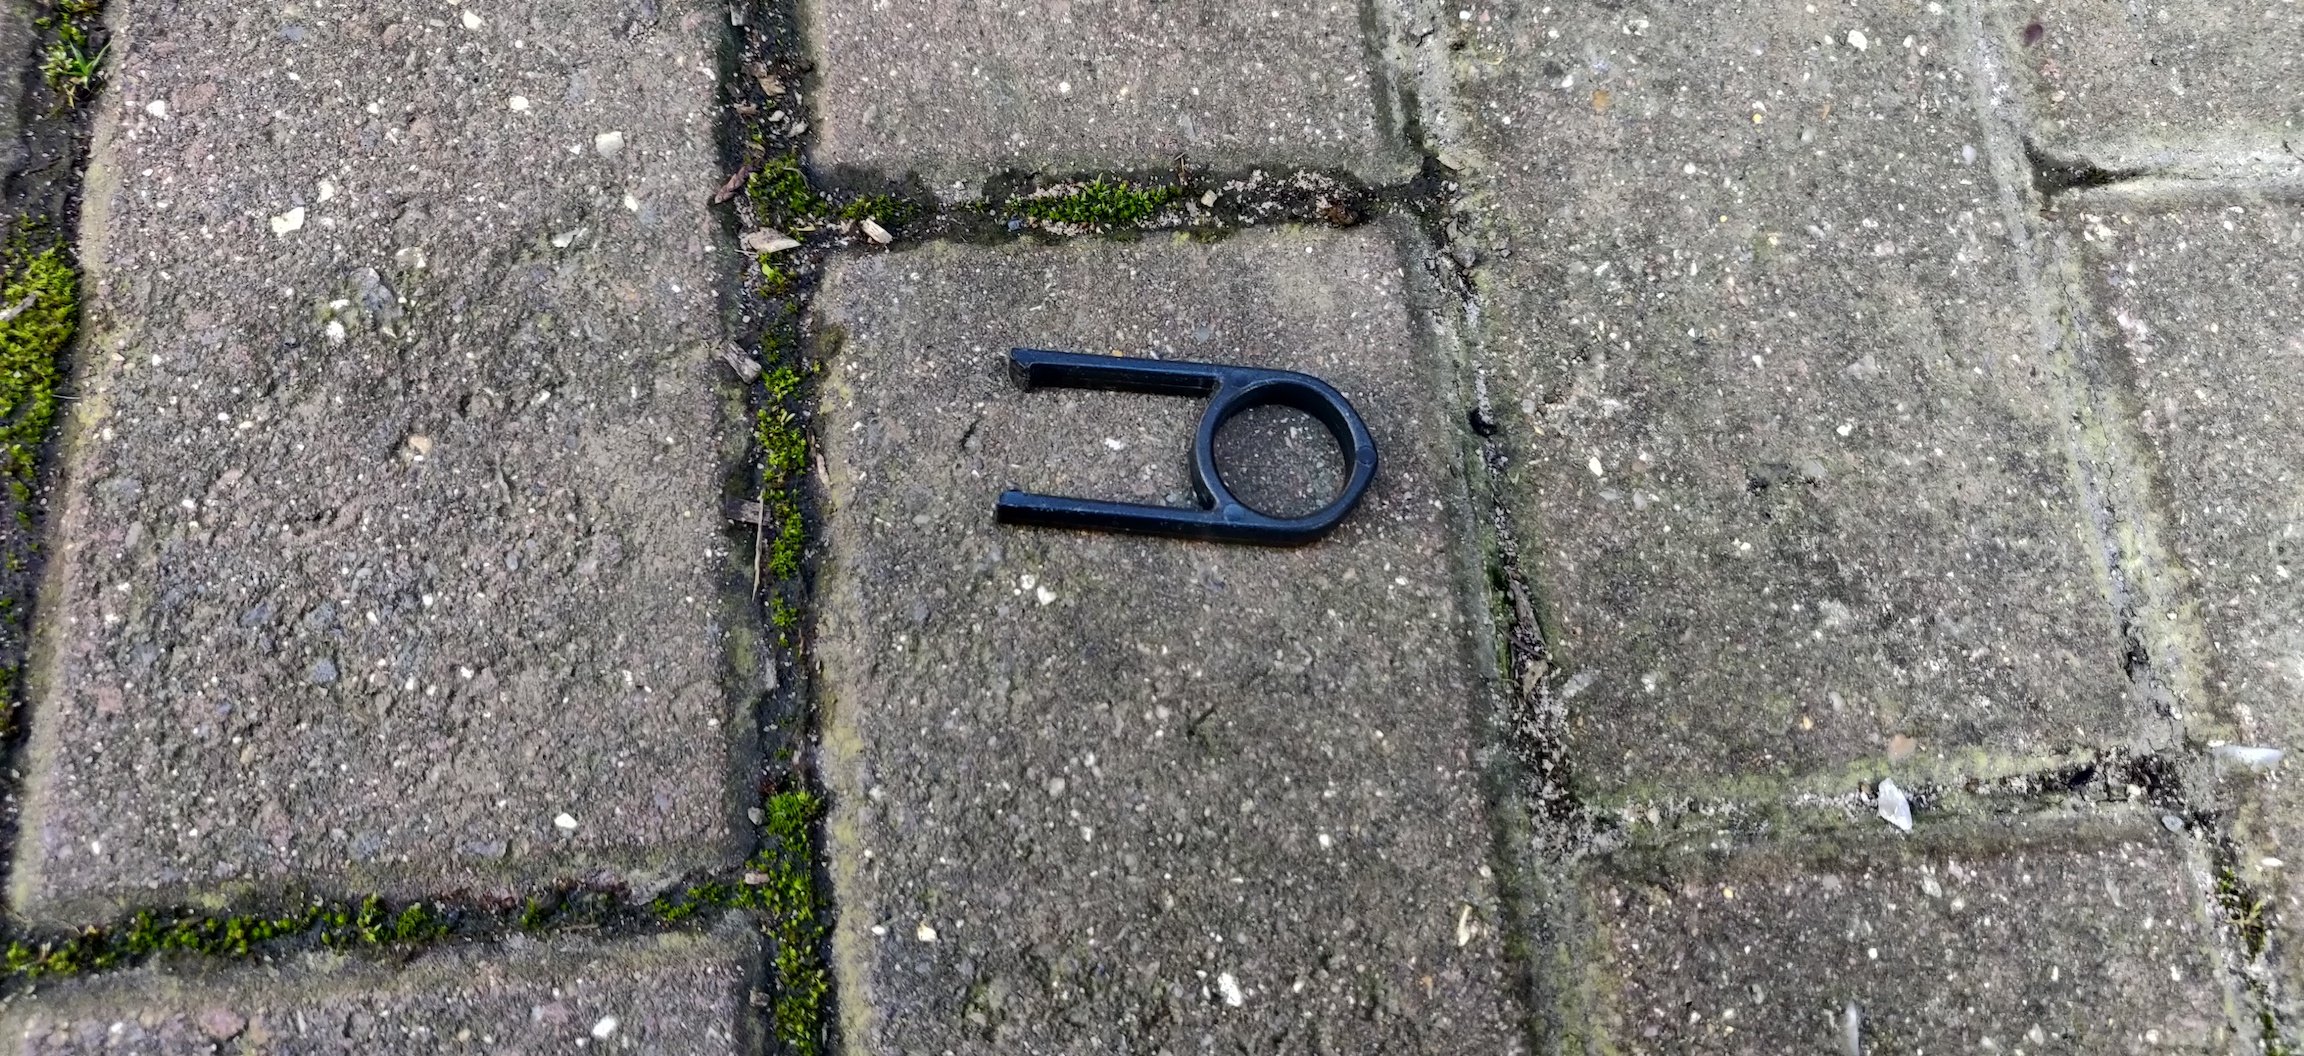
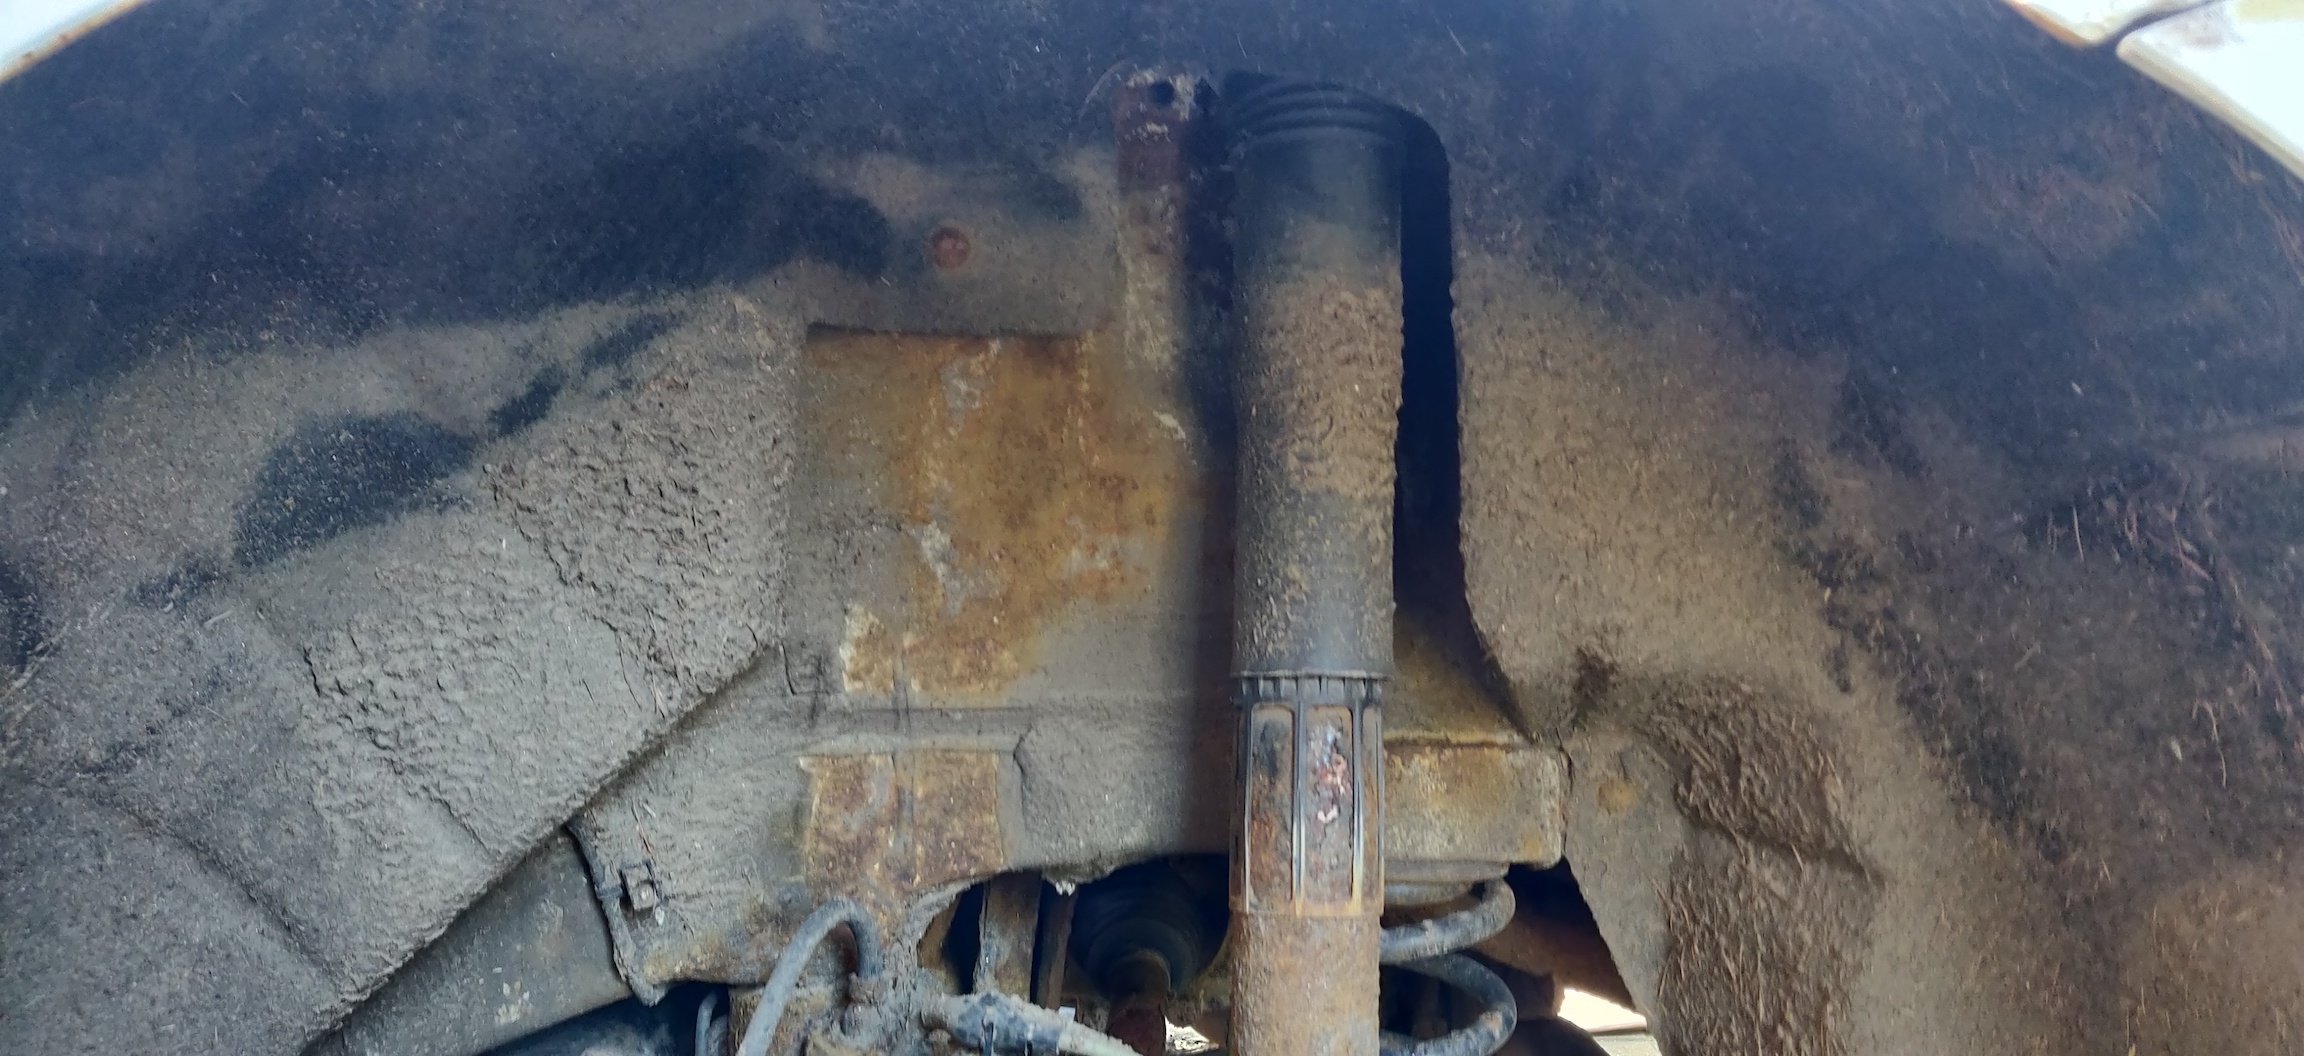
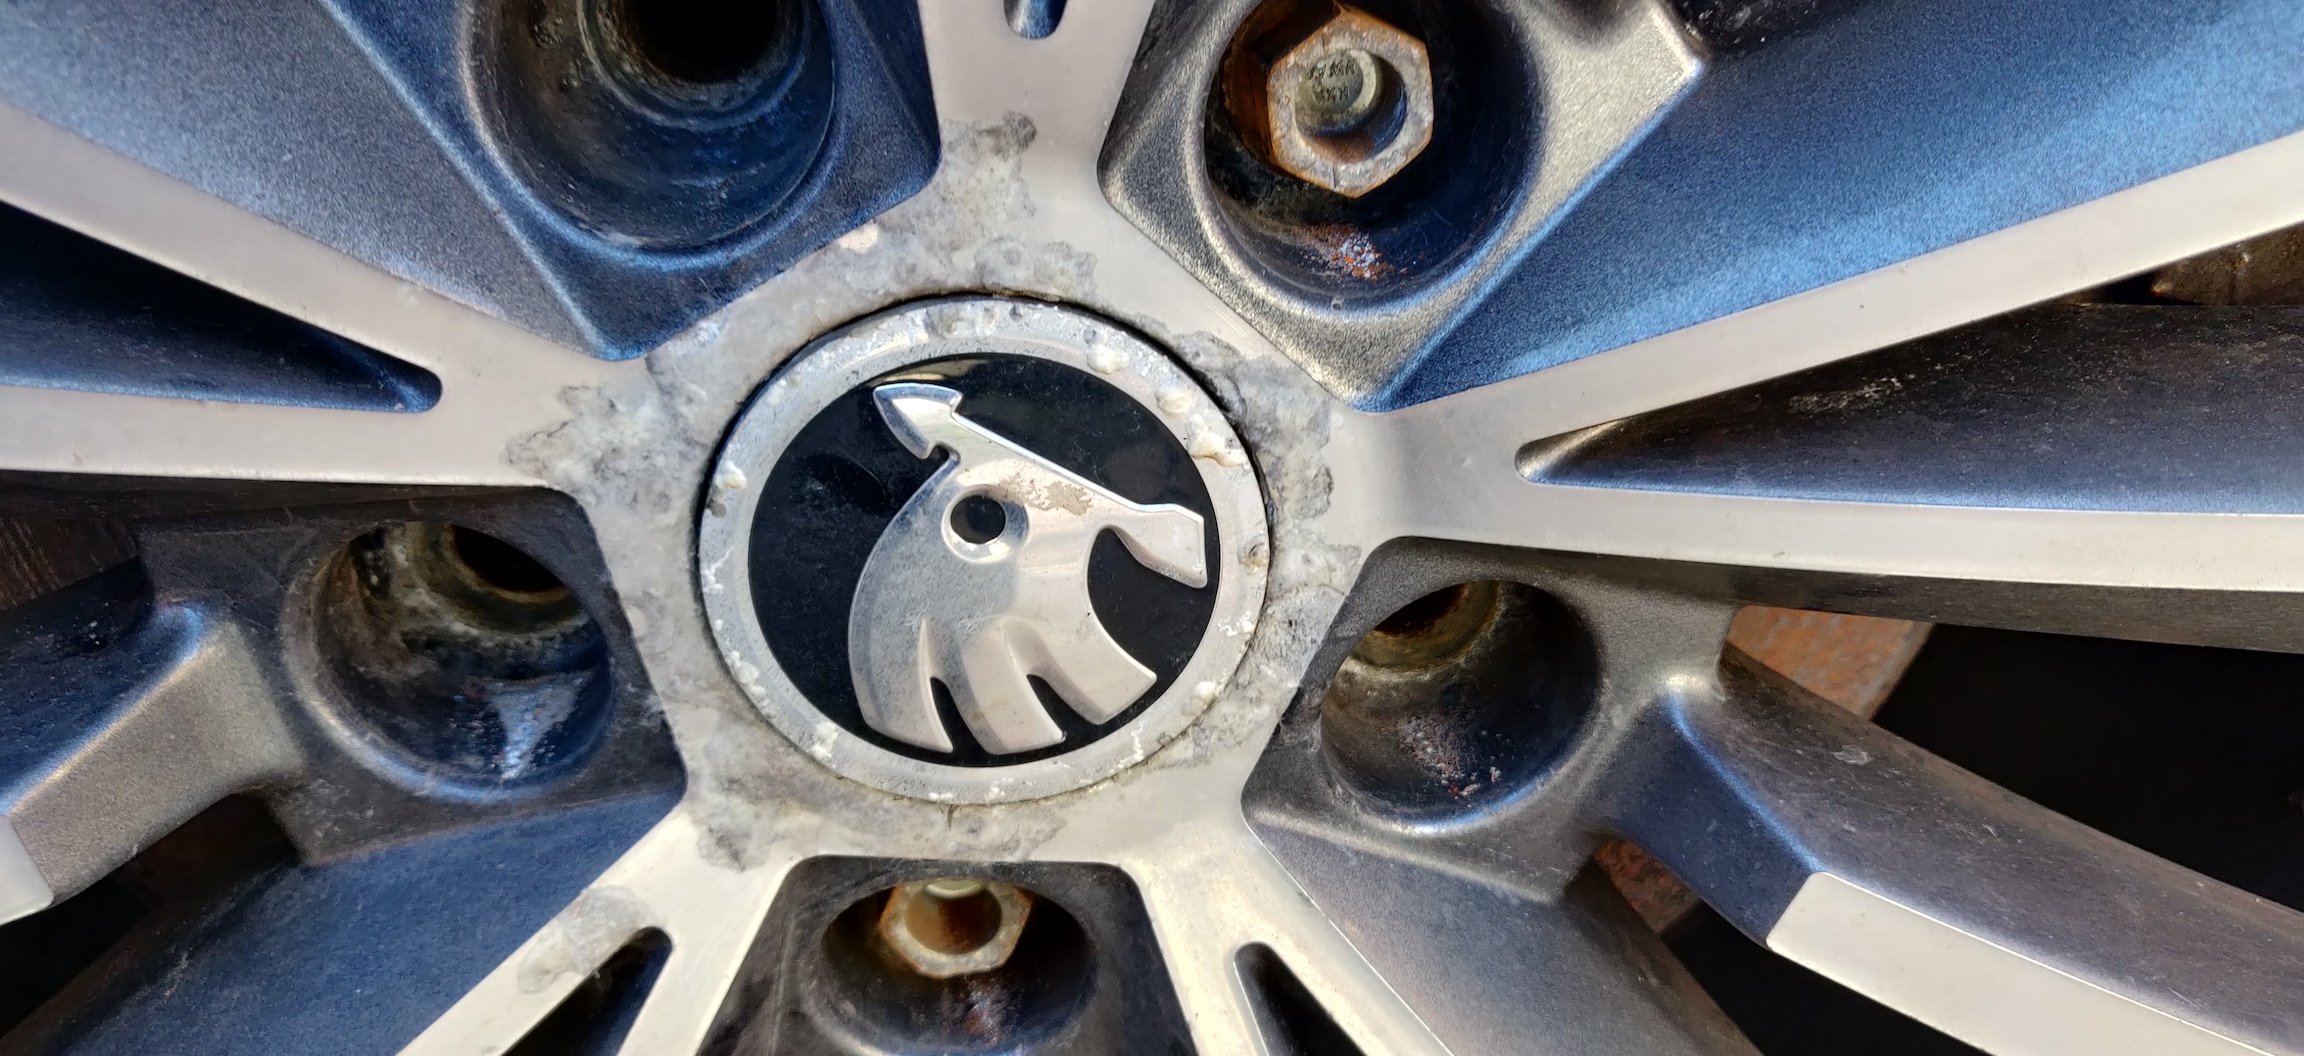
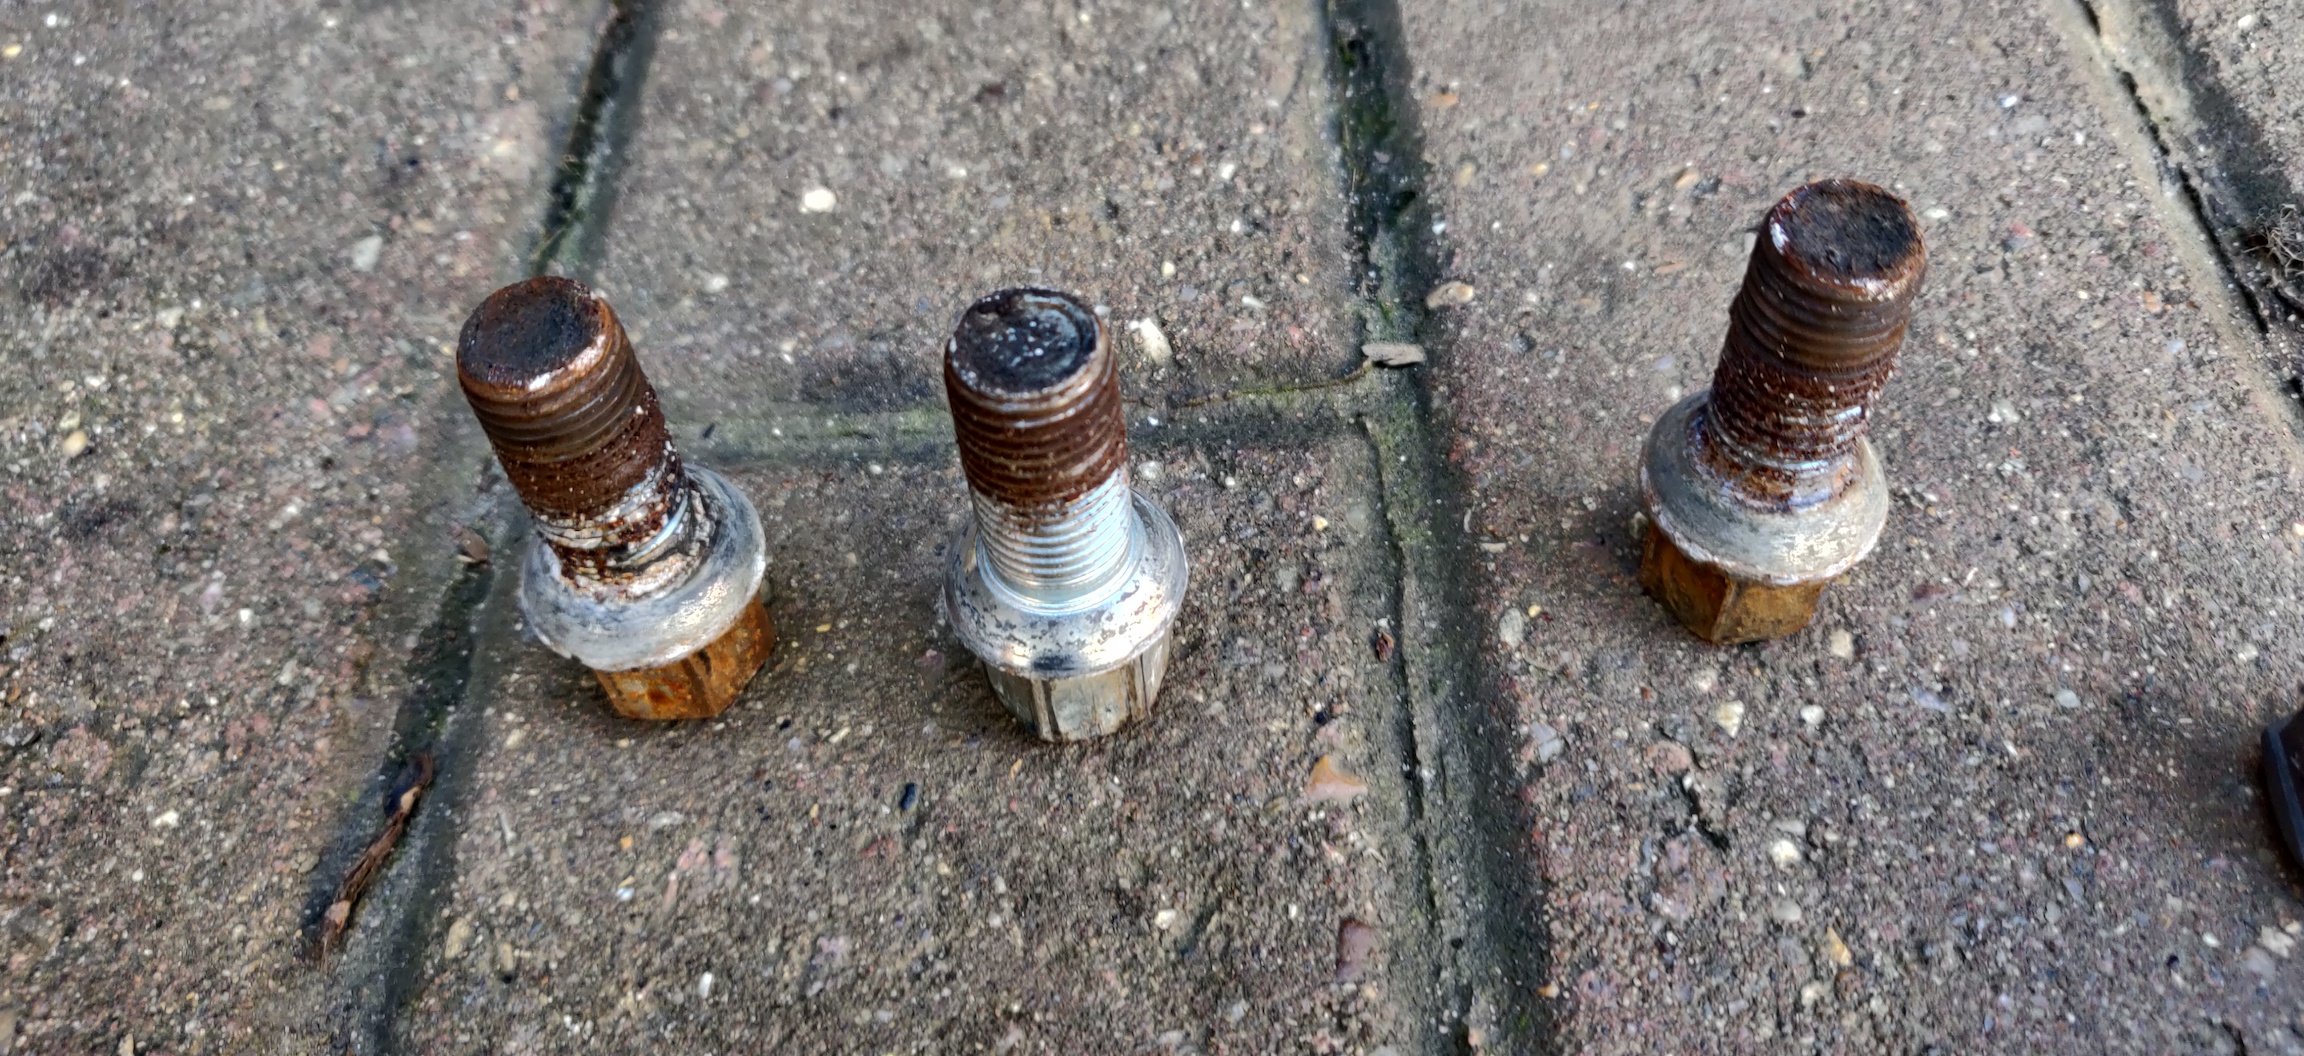
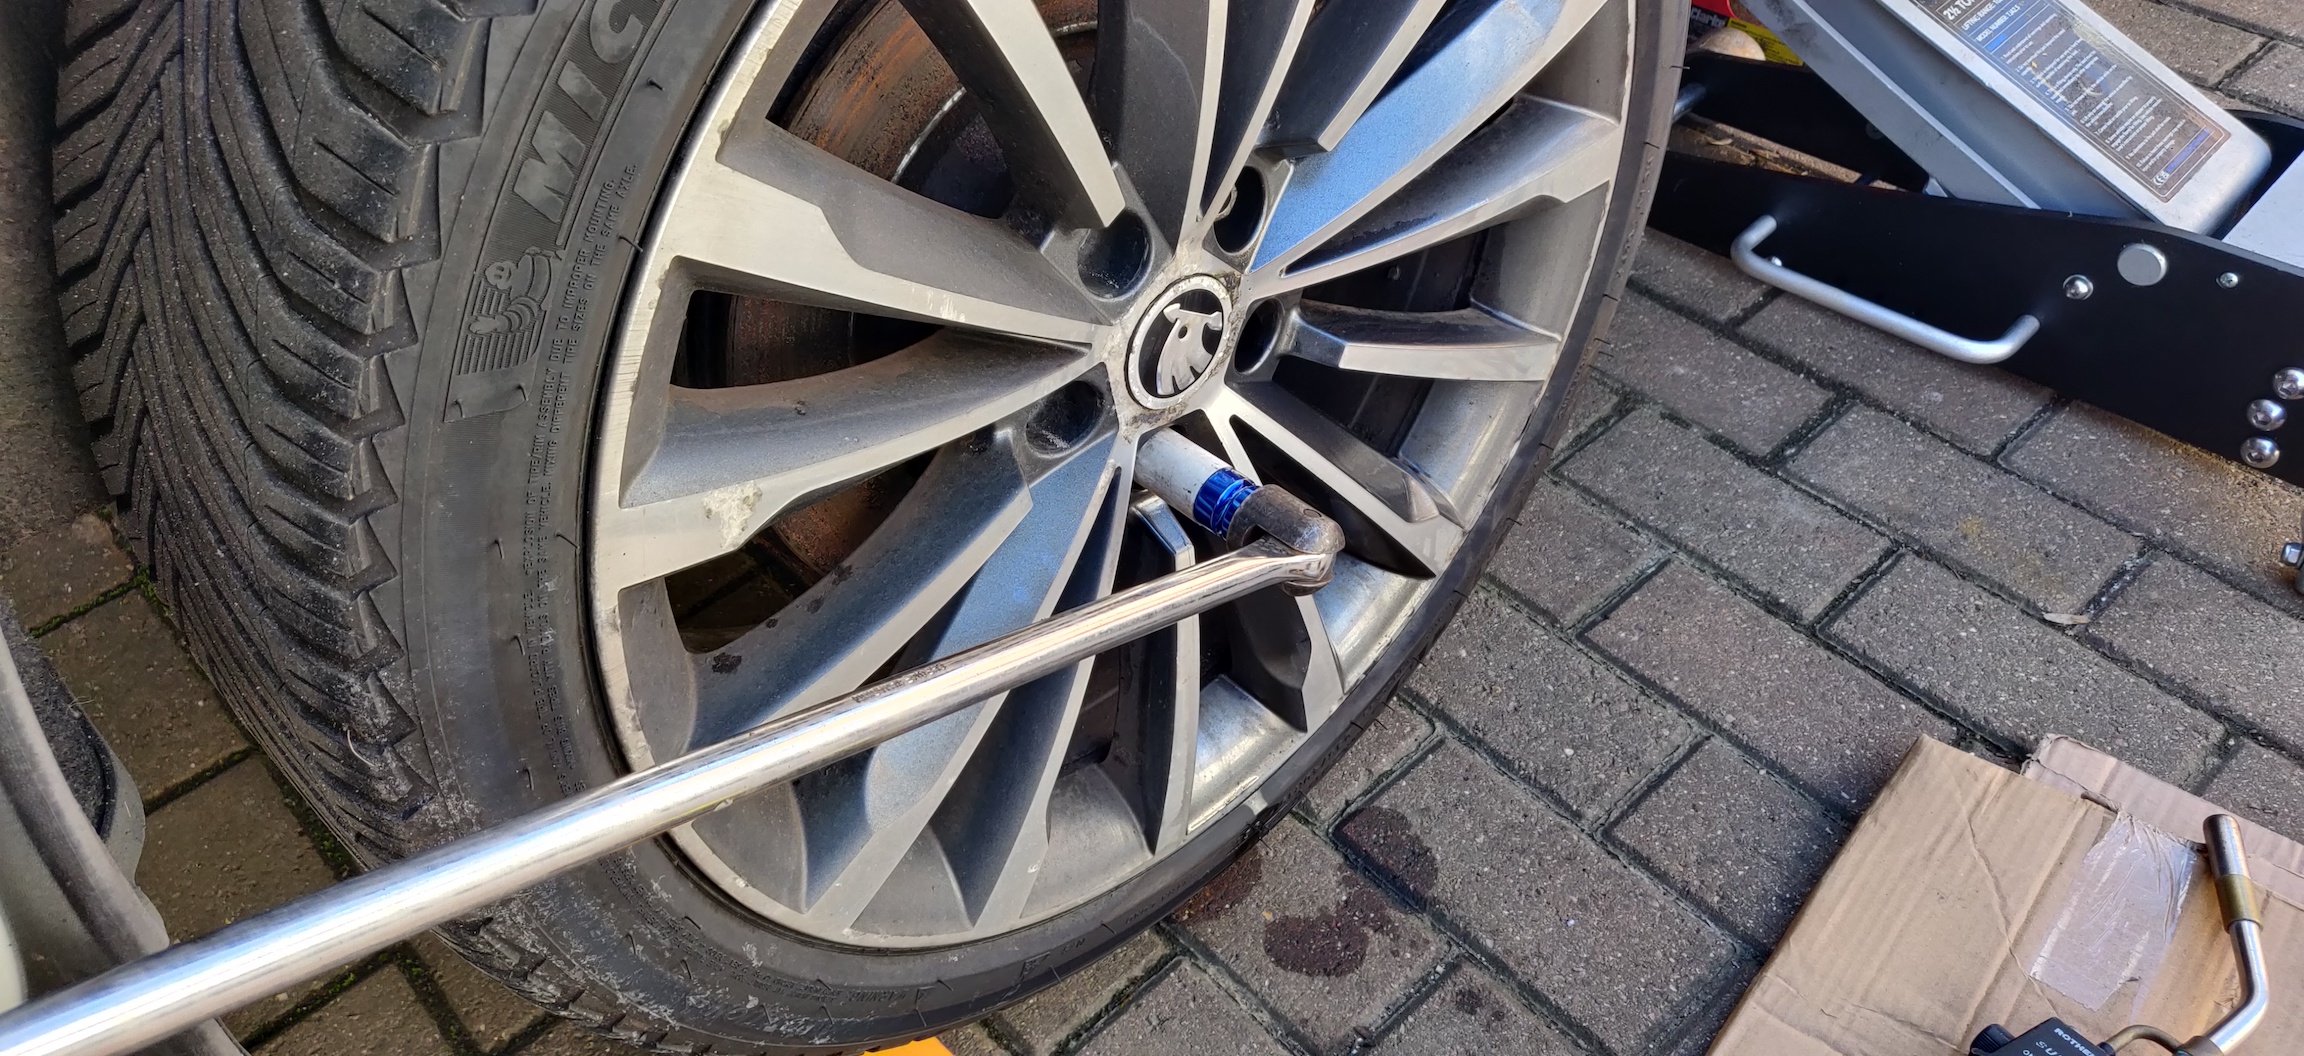
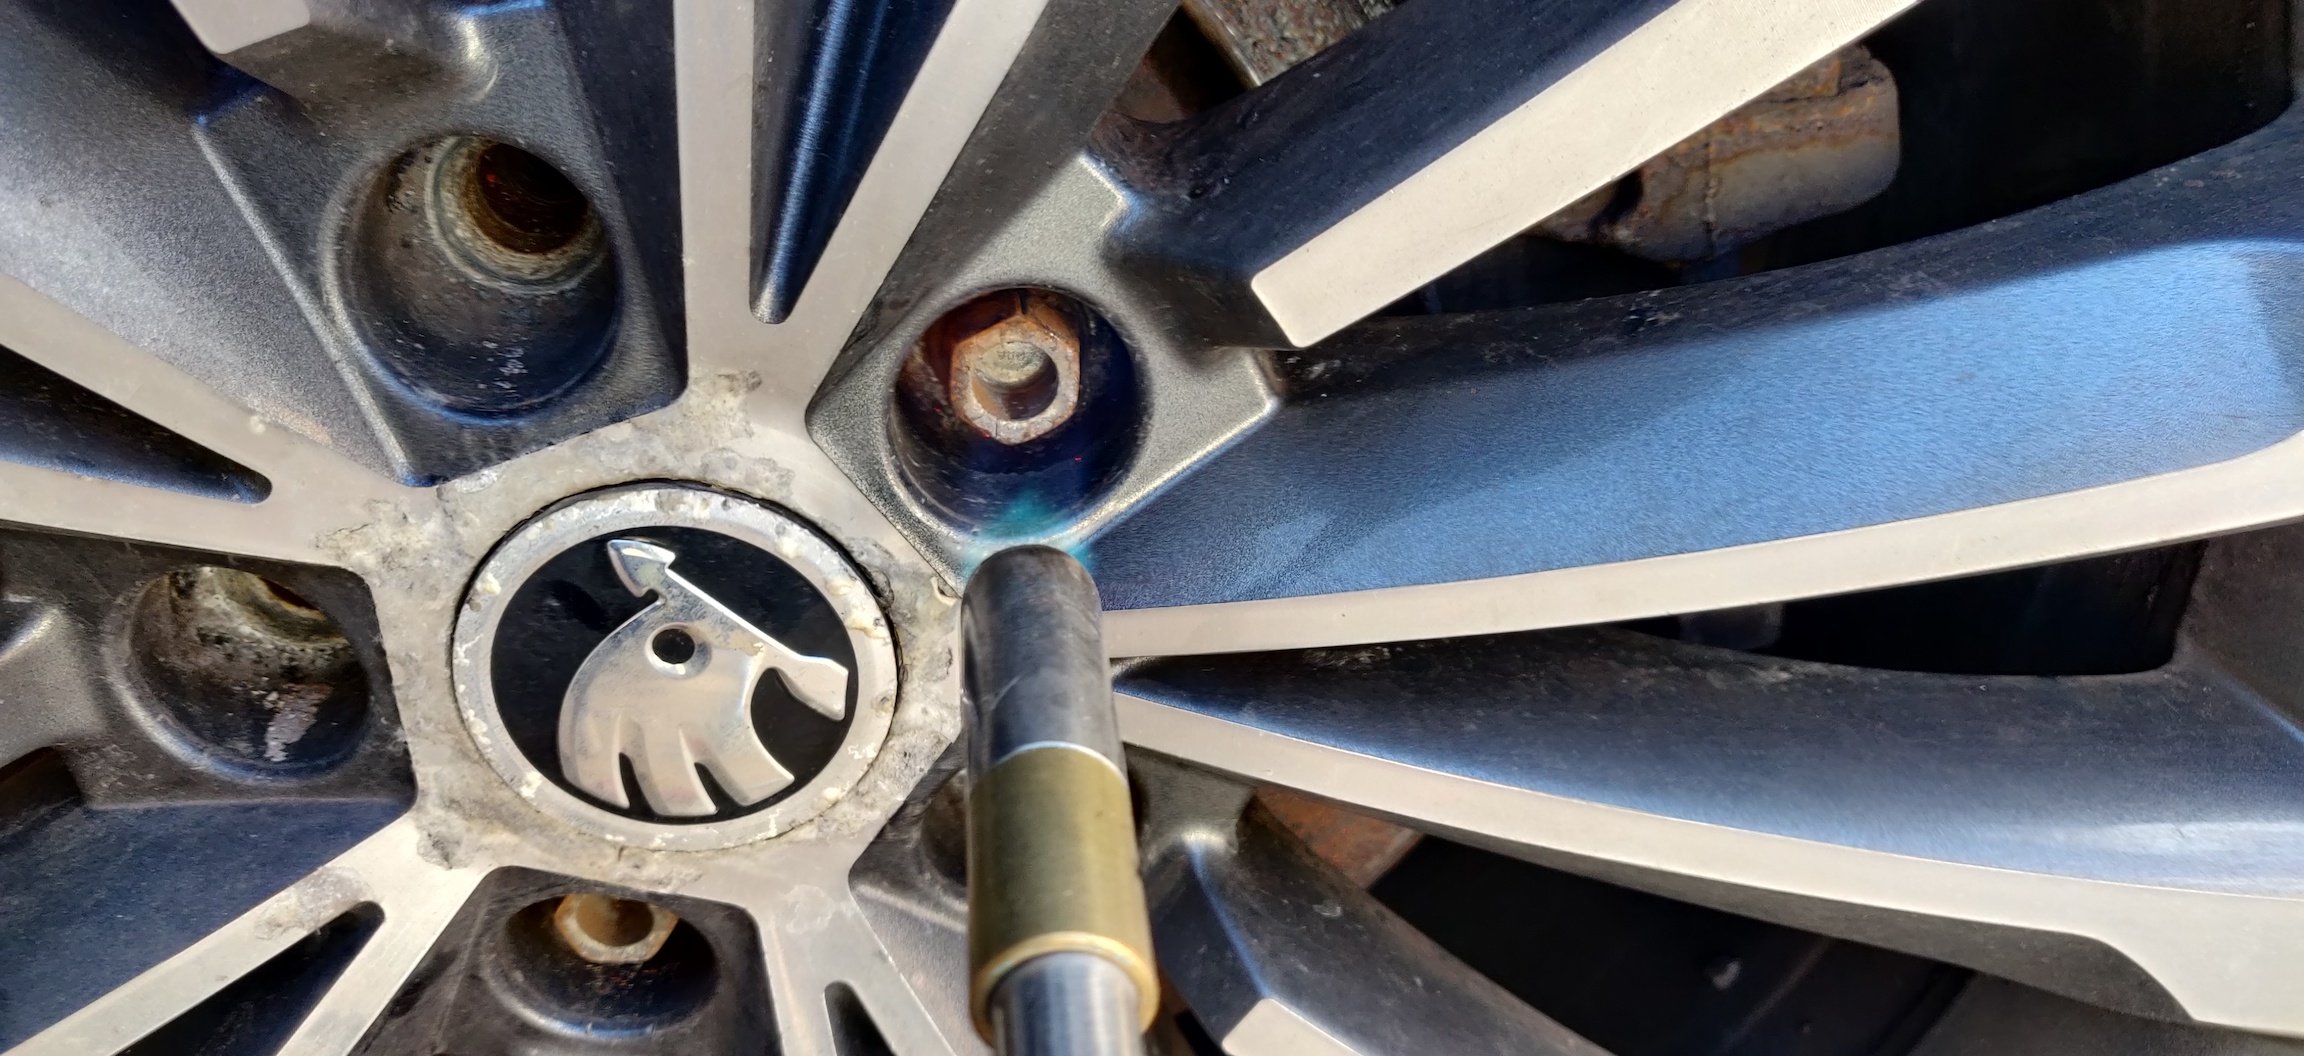
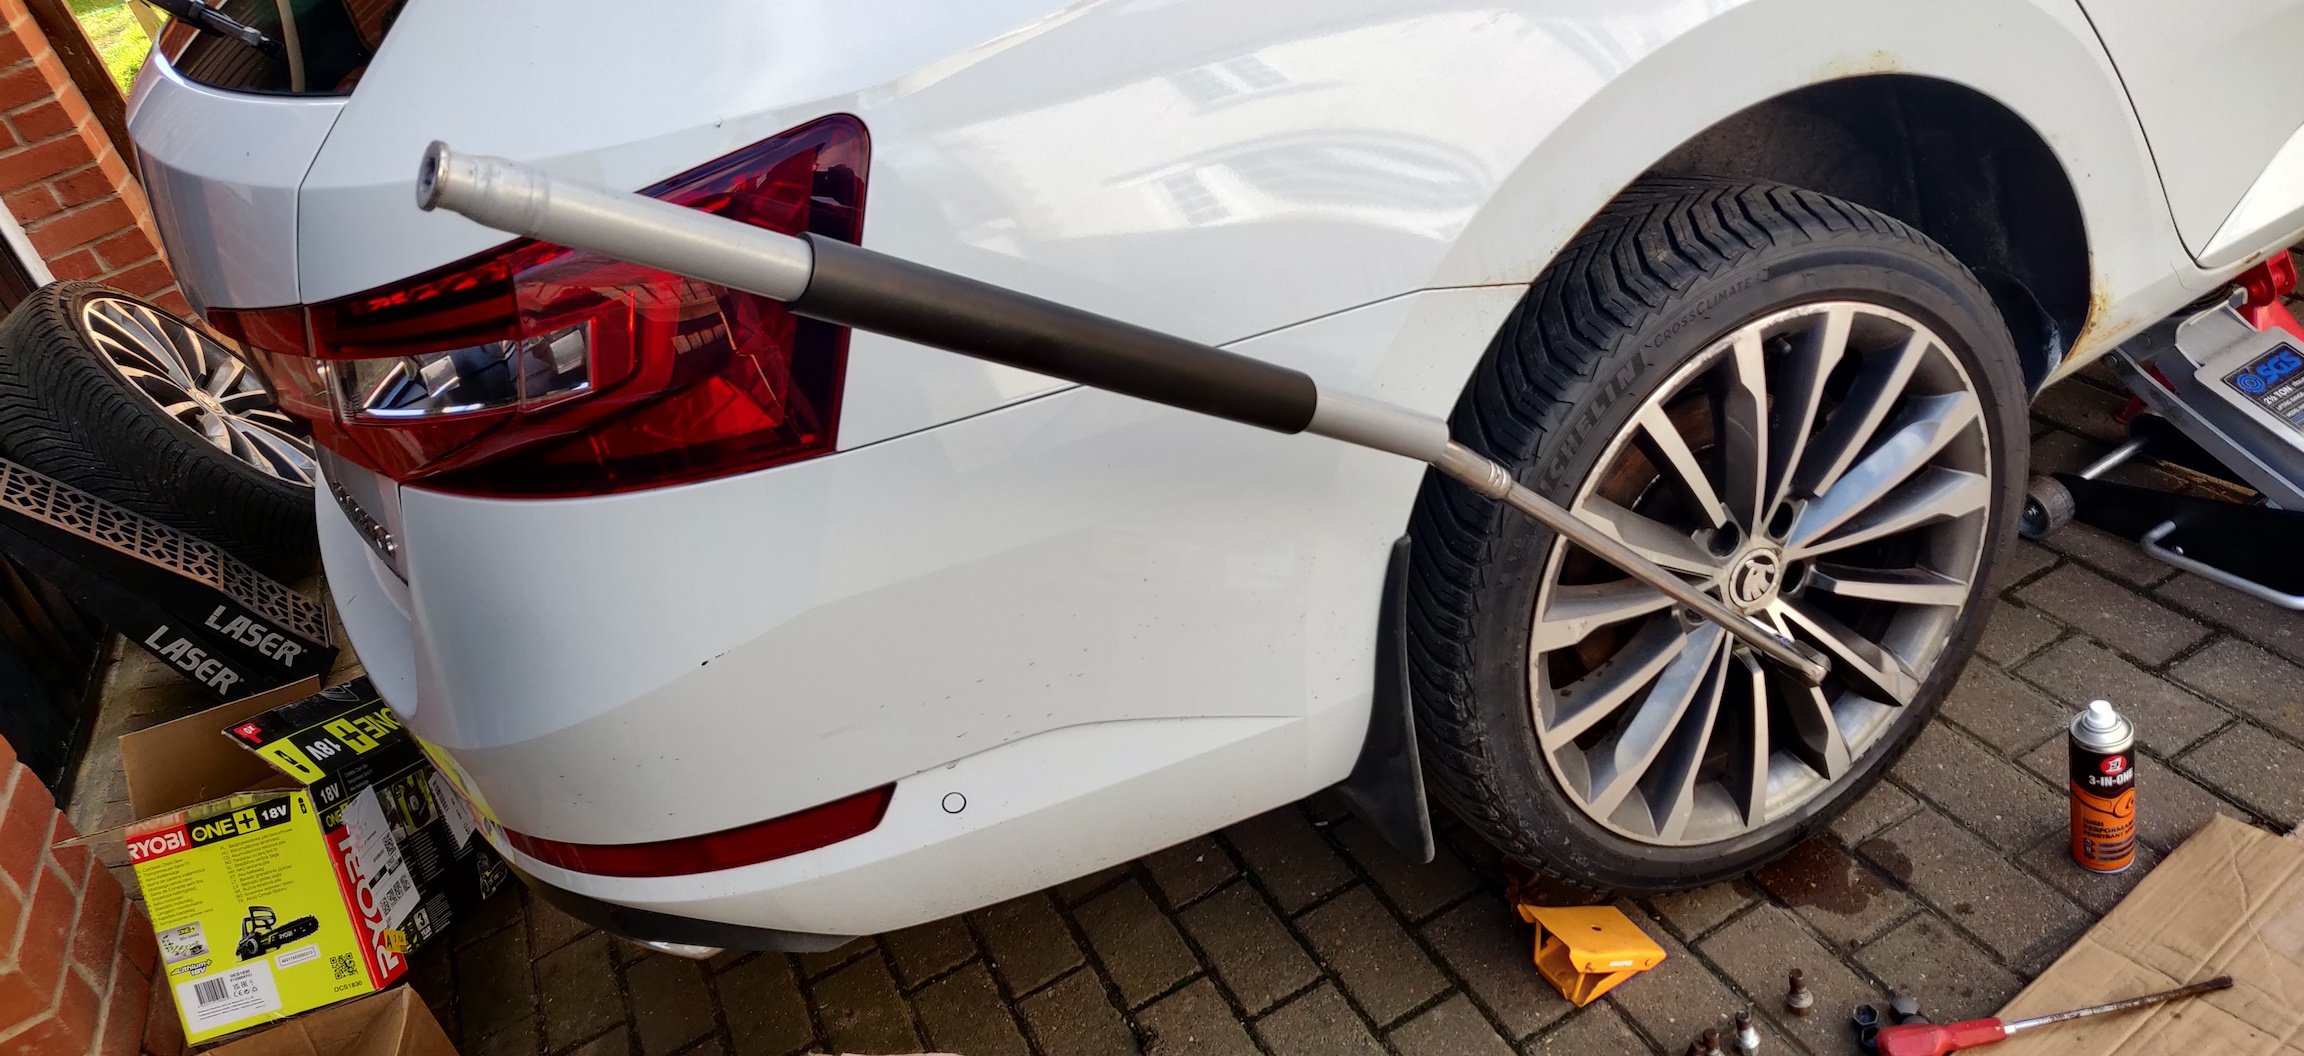
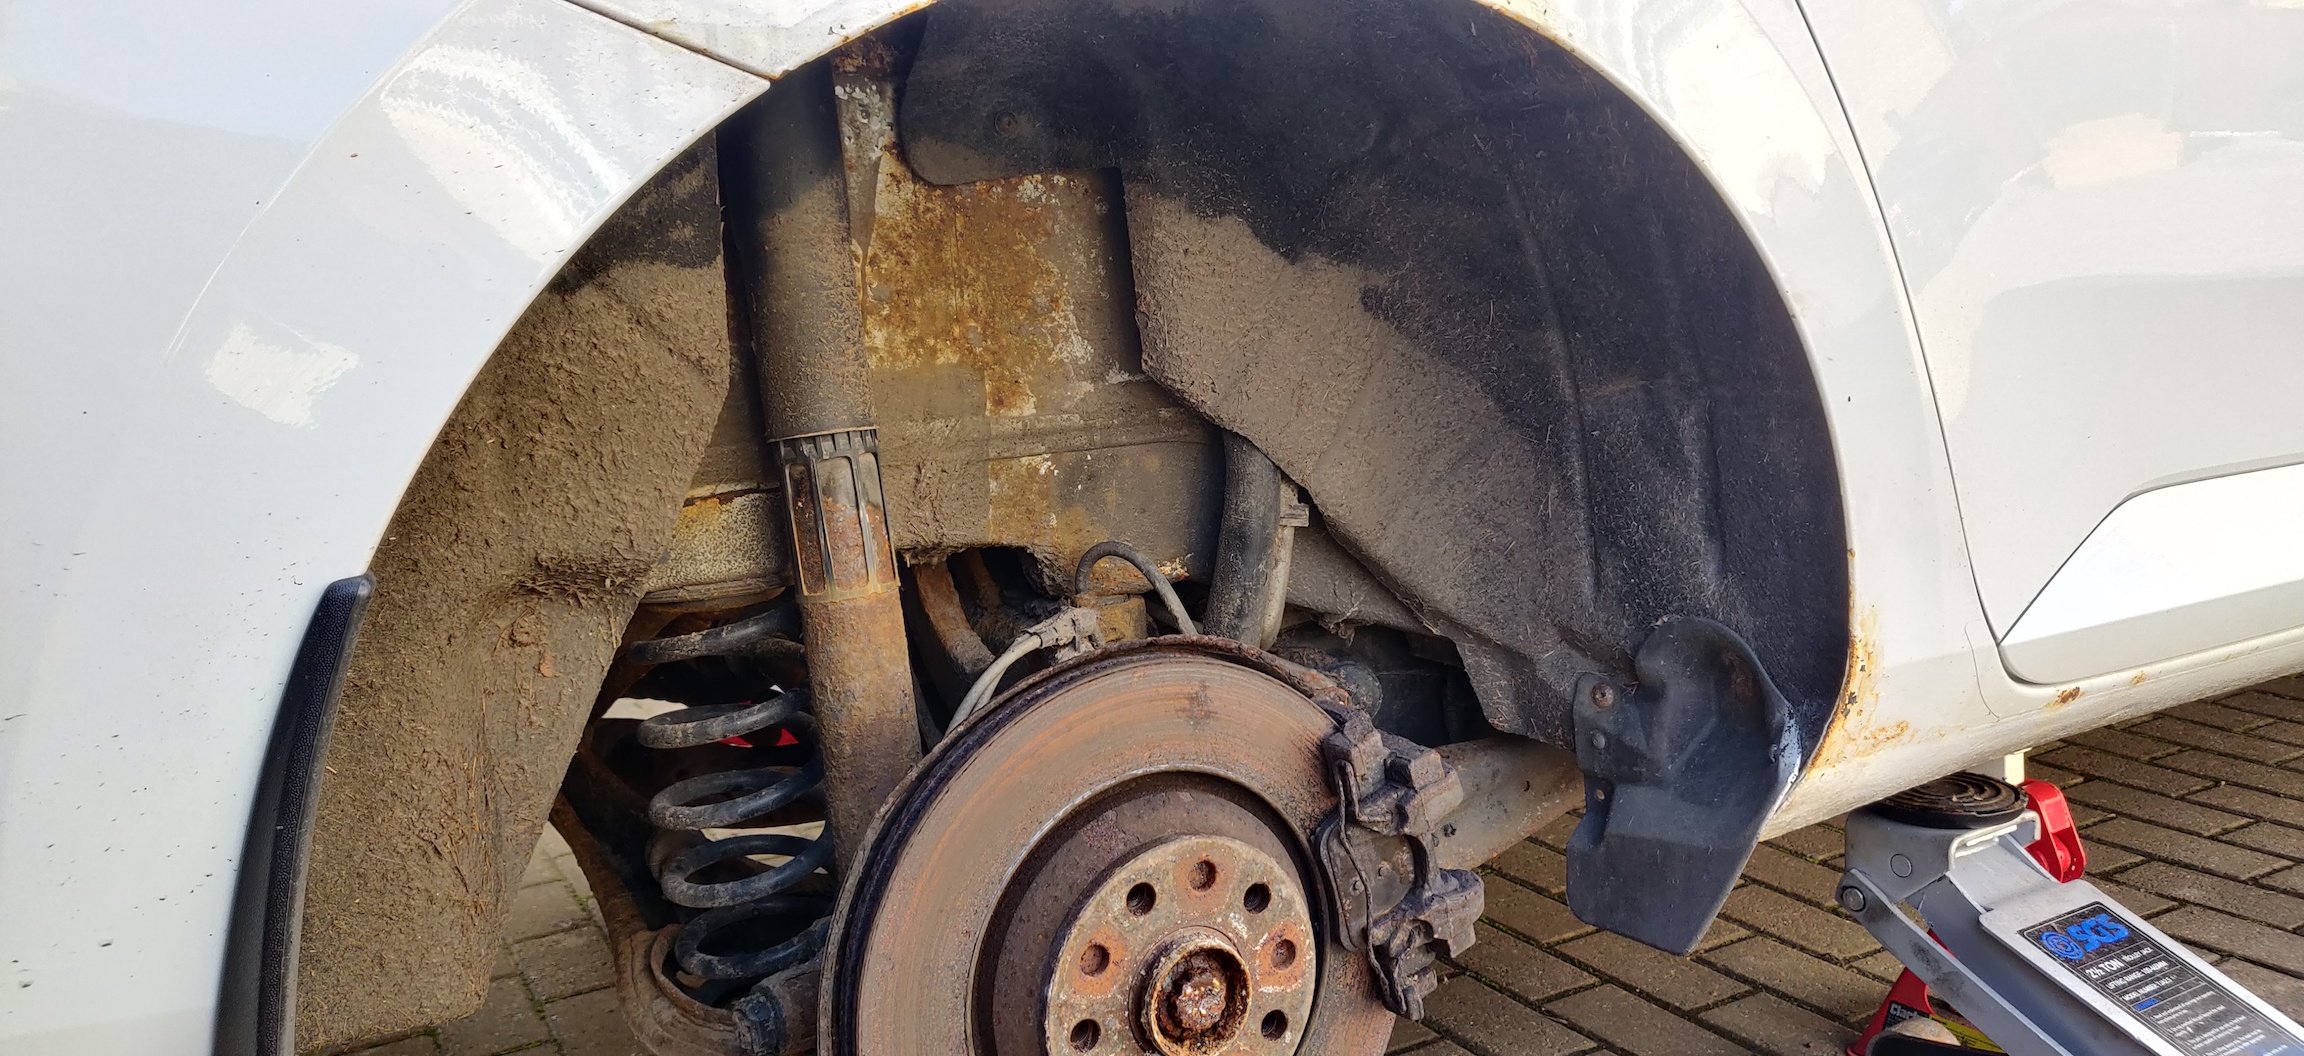
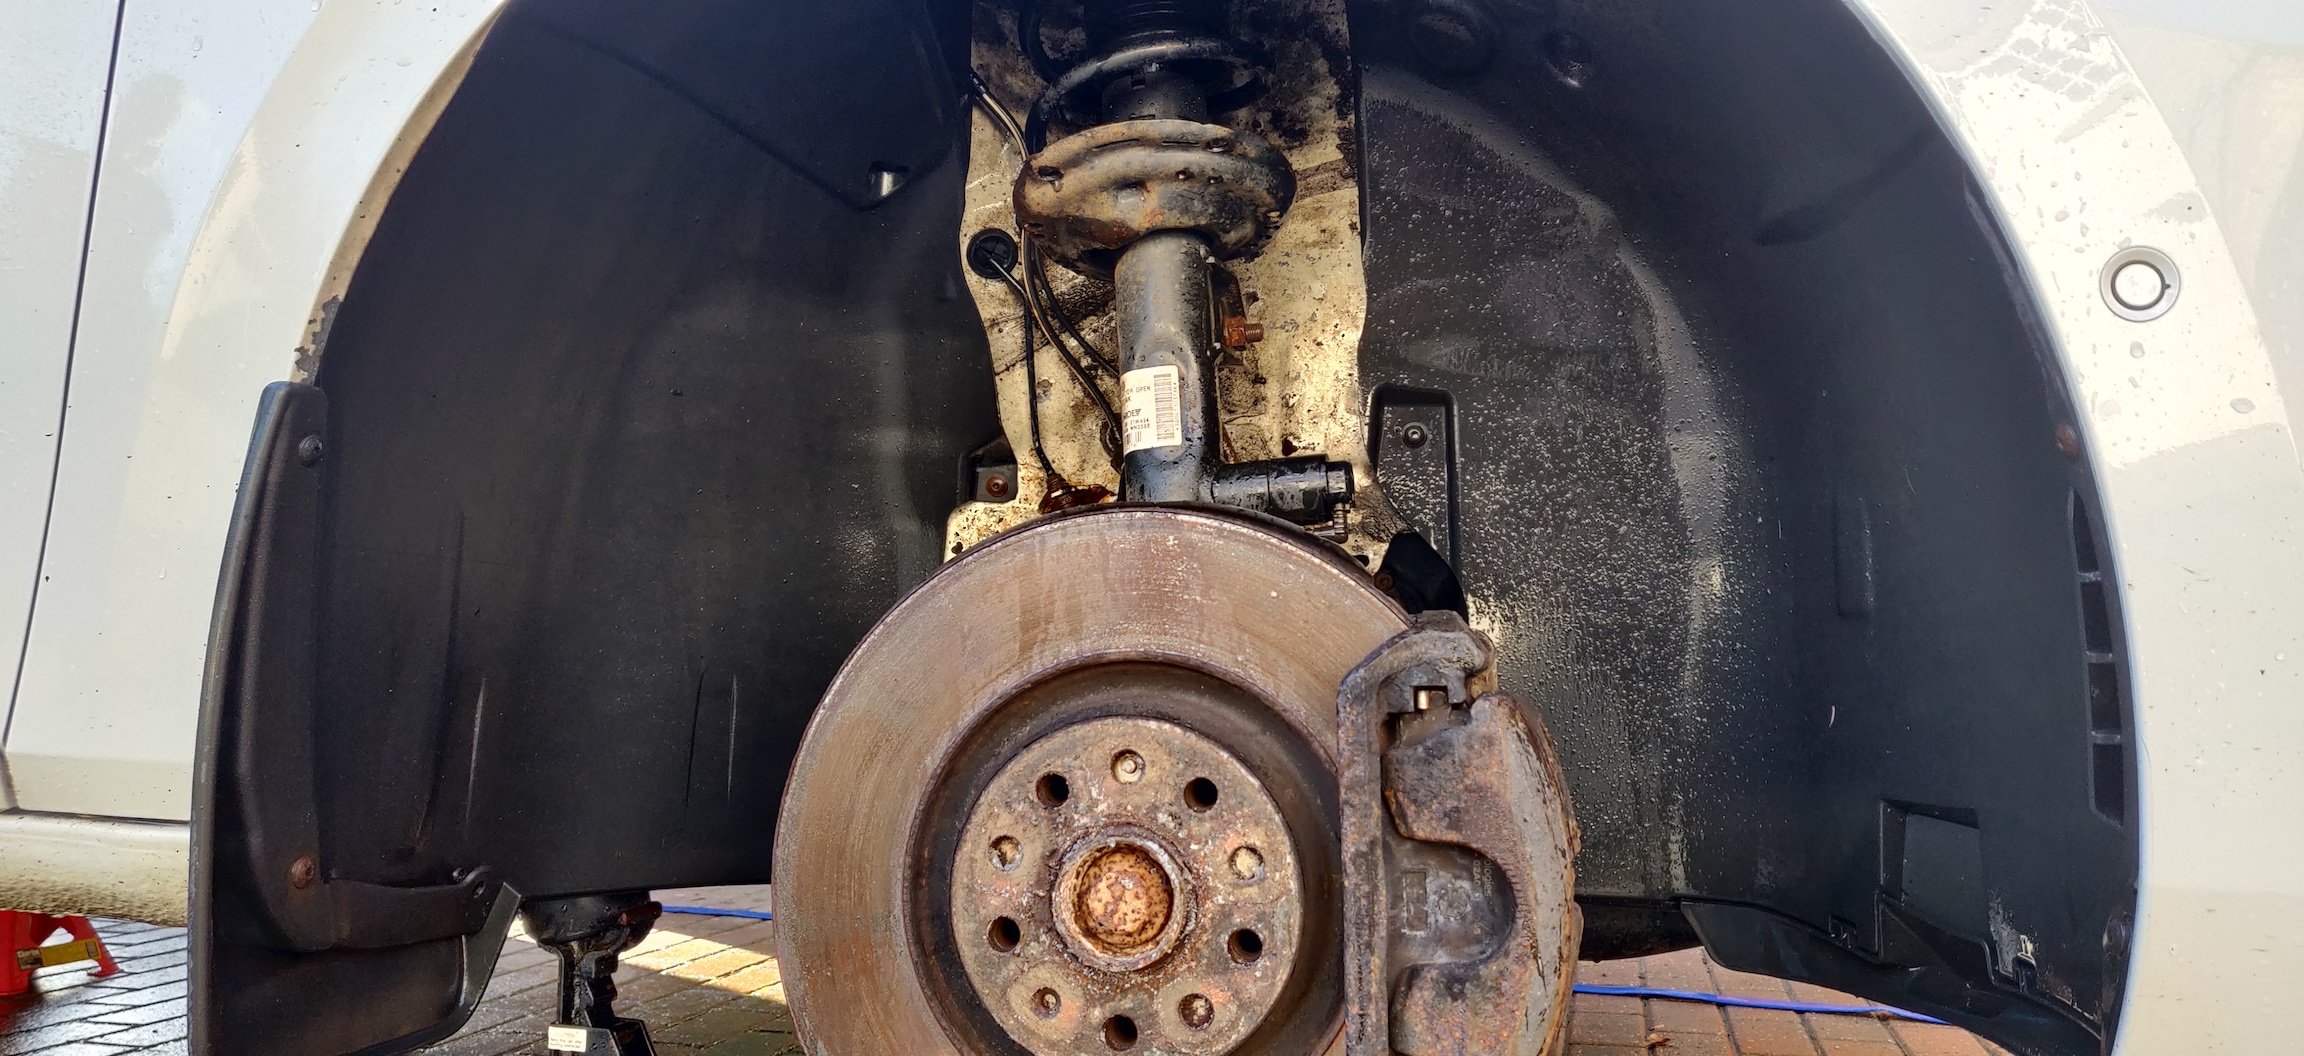
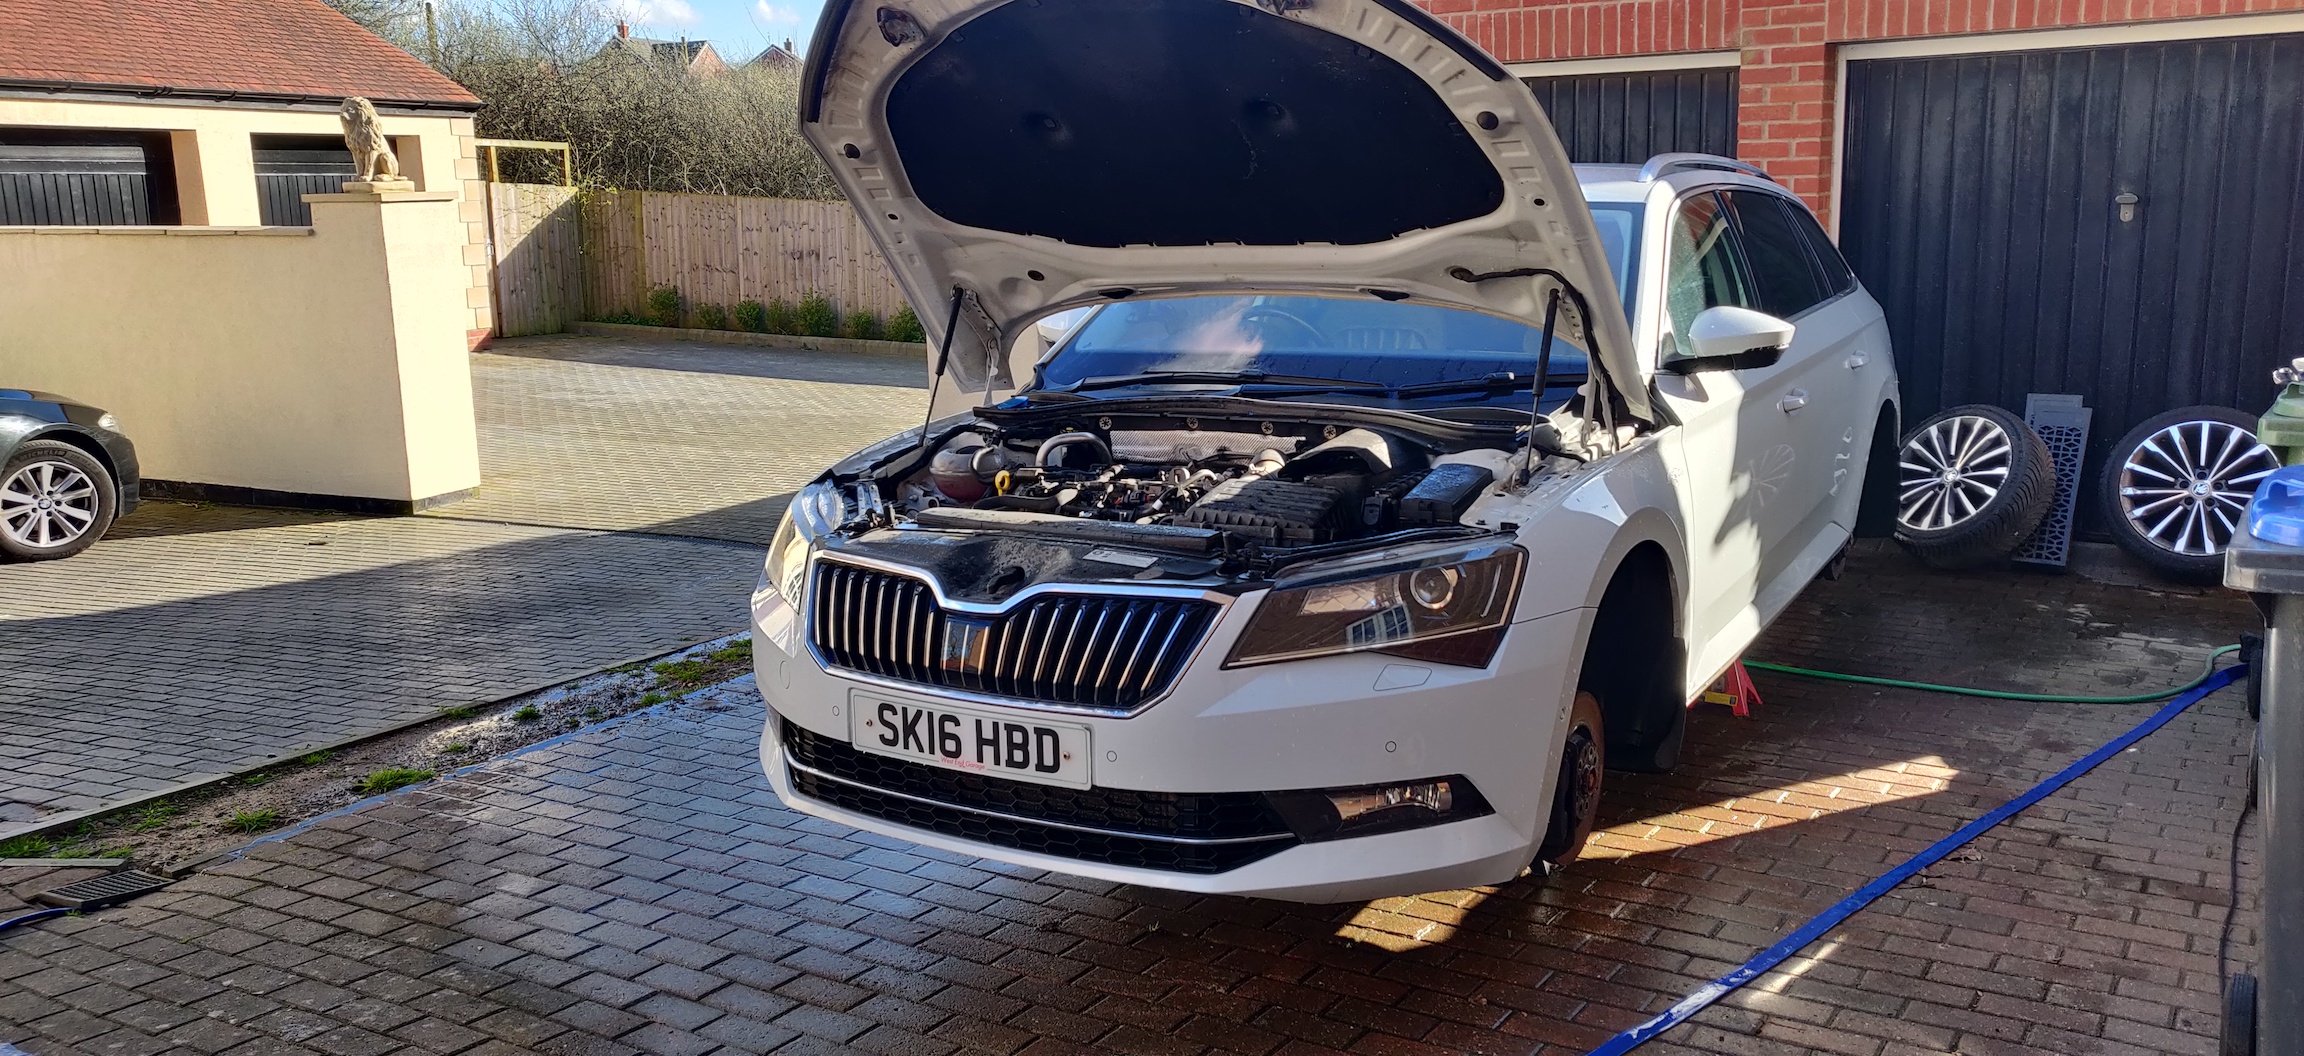
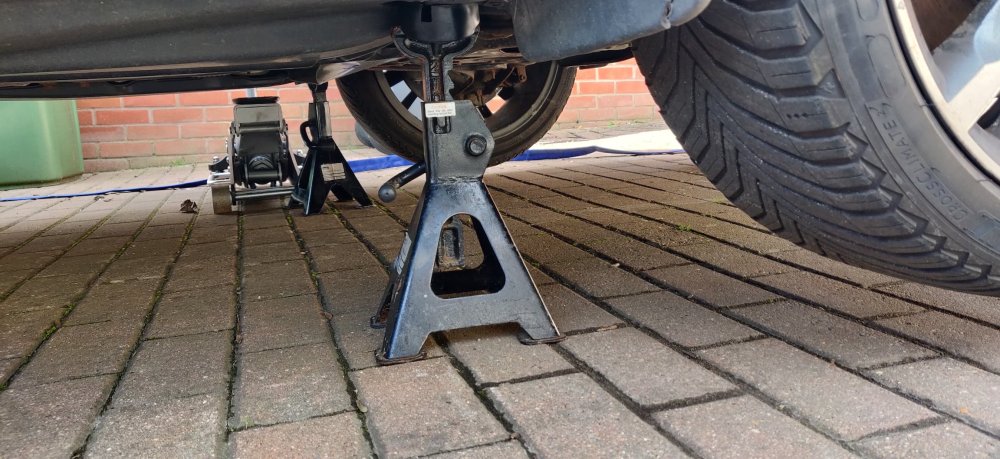
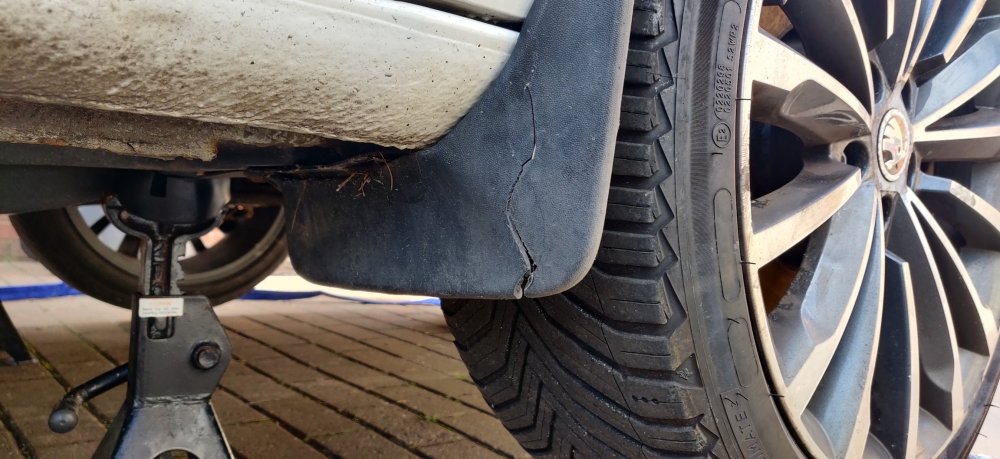
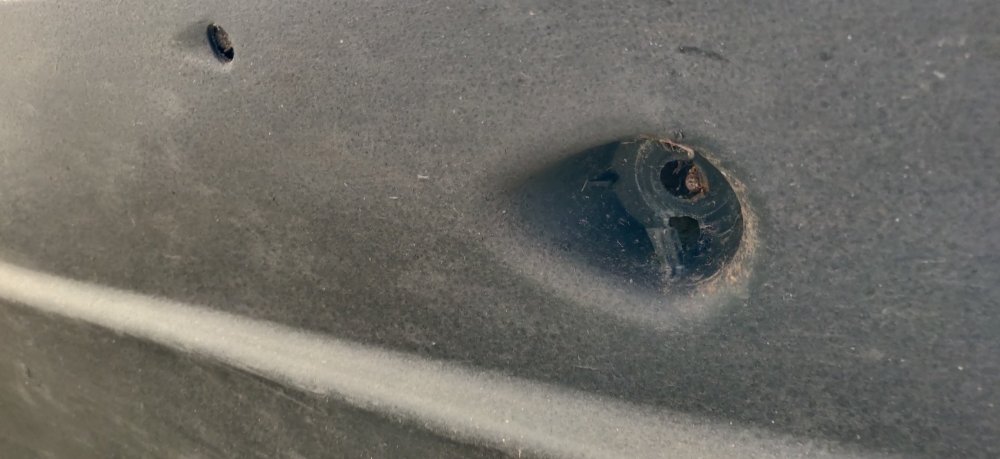
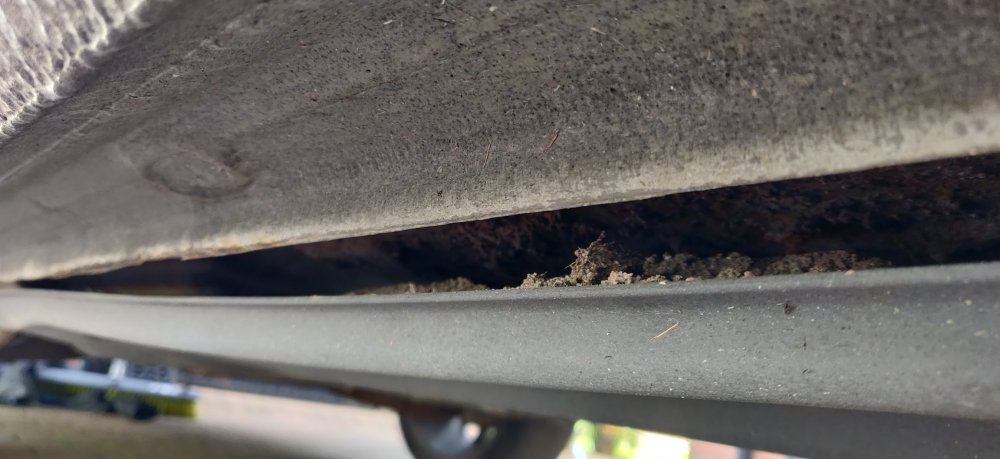
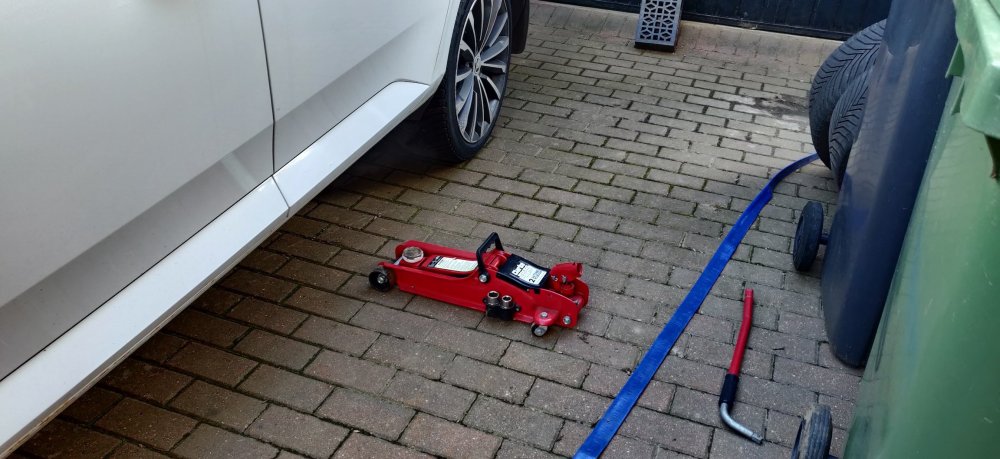
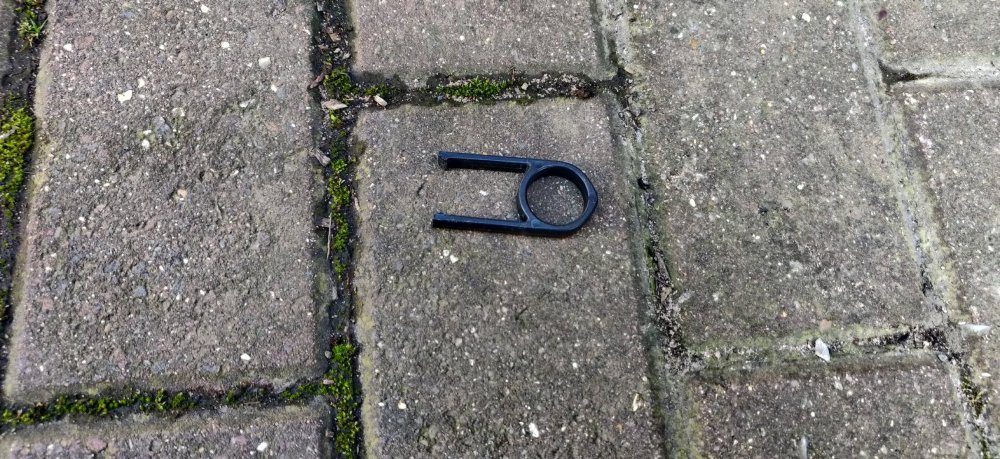
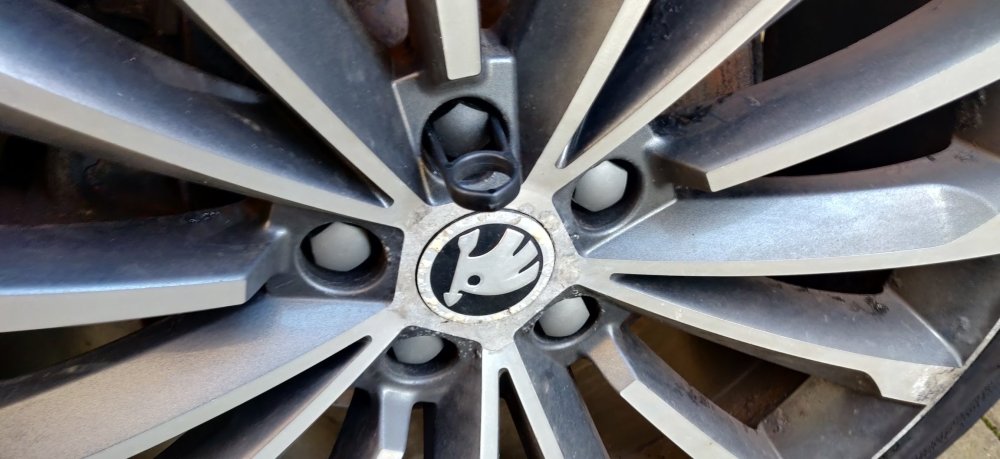
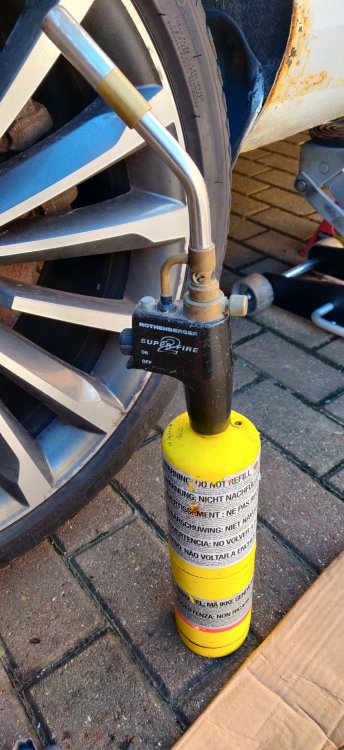
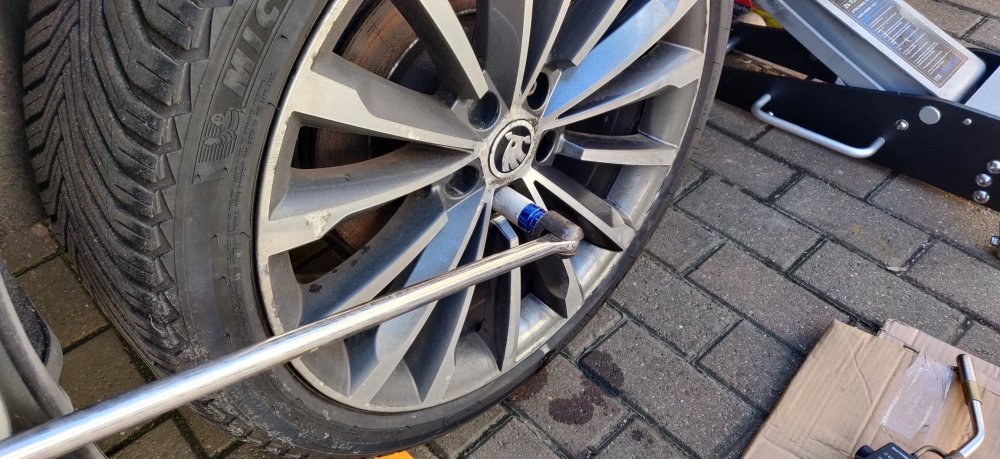
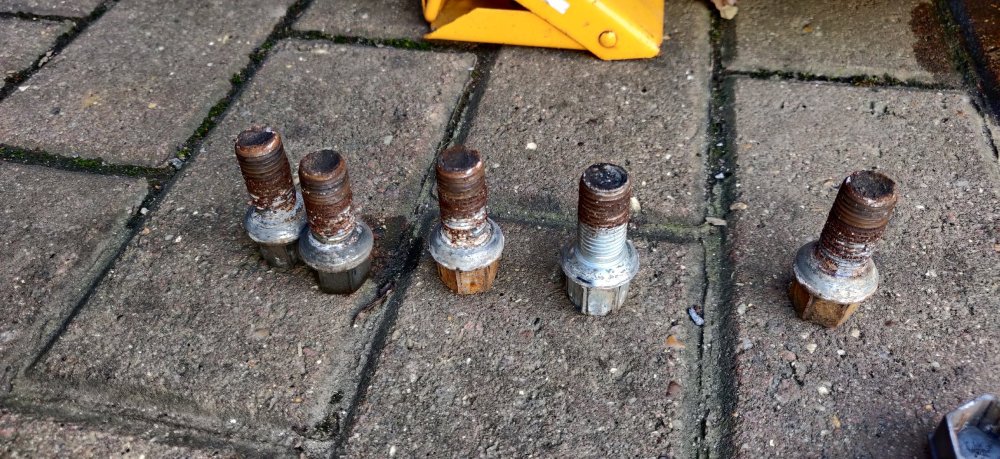
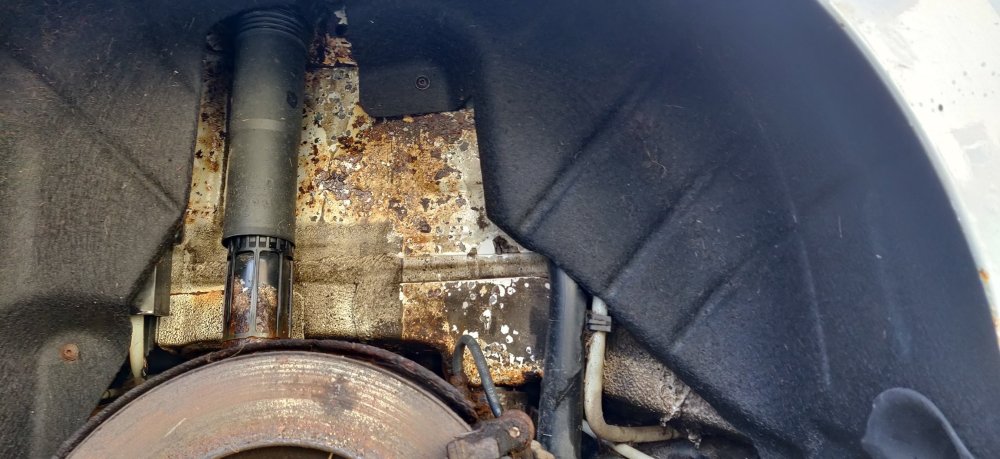
With the afternoon looking bright, I decided to finally do something not with the interior: First pic of the engine bay I guess? I've taken the engine cover off a while ago, giving it a clean. On my wife's old 1.2 Seat Ibiza, the cover also housed the filter, which is neat, but as far as I can tell, as per far too many modern (usually German) engines, its just a lump of pointless plastic. But anyways. I probably should have structured the day a bit better. I decided to randomly try and remove the windscreen cowl/plenum cover: So removed the two metal clips with some gentle persuasion with some Knipex pliers, which is definitely overkill. The seal is then next. It then occurred to me that I would need to remove the windscreen wipers. So decided I'll leave that for another day for now. I've ordered replacement windscreen cowls ages ago now, and you can't see on the pic above the damage to the left of the trim. Want to remove them primarily to gain access to the three bolts each side for the suspension, but also to inevitably give that whole area a clean. But yeah, decided at this point to jack up the front. Got a trolley jack onto the sill, and then axle stands roughly under the rubber bit slightly inwards. Well, the right side had a rubber cover, and the left had nothing: I noticed the jack was awful close to the stand, meaning I couldn't get the axle stand dead centre. Hopefully it's good enough. I'll probably need to source some jack adapters to aid locating them (and to fill that missing one on the front left. Wasn't jacked up super high, but potentially enough to get working on it. Ideally I want the car to be as level as possible ready for the Haldex and DSG oil fills, but that'll be something I'll sort out a little later. So noticed this: In addition to: So the mudflap needs replacing, and there's a missing retaining bit on the right side underside plastic panel. I lifted the panel down slightly: So that's an ominous amount of mud. I'll need to remove these bits and have a big clean out. At this stage, I remember I actually have two jacks, which would have made the process of jacking the front up a bit easier, so did the same process for the rears: Now, from other posts in the forum, there's apparently a plastic trim piece at the rear, but on this car, it wasn't present, so just went and slotted the axle stand in place: Whether I source replacement plastic panels or not, will depend if I can find the part numbers I suppose. So time to remove the wheels. The bolts on this car had those plastic covers on. Luckily I recall spotting this in the garage during my rummaging for other bits in the recent past: Basically then slots in and pulls out the cover: Amusingly, the grey ones on the wheel in the pic above came out without drama, but the black one was on tight. I had to resort to that thin screwdriver again, to wedge the edge of the cover, and once it decided to budge a millimetre, was loosened enough for the tool. The wheel bolts for the left rear came off without any drama, and the wheel came free with a slight pull: The wheel arch itself has probably what could be assumed to be 8 years of wear and rust: The wheel arch on the rear is the same sort of fabric like wheel arch cover that I saw on our old (now dead) Ford Focus, a moisture and dirt trap perfect for this sort of rusting. Don't really know how best to approach this. I'll probably just spray the wheel arches with something to buy a year or two before I think about something more (hopefully) permanent. The bolt for the brake disc on this side looks newer (cross head screw is a usual giveaway), but evidence of grease on bolts and the wheel face is good to see. I've had nightmares of cars simply not having any and being a pain. On that note: I struggled on these two wheel bolts. I've not had any wheel bolts where my Impact wrench has struggled with before, so this is quite novel. The ones that came free: Look like a sign of what happened, caked in rust and no grease! A breaker bar didn't help: Even with me actually standing on the damn thing! So I got a little desperate: I've never had to resort to a blowtorch on wheel bolts before: But this, with some penetrating spray on it, still didn't budge. I had to keep the heat on it a few times, and then resorted to further dramatics: I needed something to extend the breaker bar, and the trolley jack handle fitted the bill. One bolt gave a hell of a crack, and the other eventually loosened with some forceful belly flopping of the super long bar: Absolute ball ache. Amusingly, the wheel itself just came free with a pull akin to the other side, so either no grease, or someone just deciding to go as RFT as possible, or both. The arch is the same as the other side: I suspect I'll need to remove the wheel arch to gauge properly the state of the arch, but what is seen here is probably the same for the whole arch, just a bit tatty really. The fronts were nowhere near as bad as this. The bolts came free and the wheel fell off of the hub, so plenty of appropriate use of grease there. I was left a little miffed with that rear right wheel, so left it at that. I'll need to remove the front wheel arches anyway as part of addressing the rear washer jet pipe issue. So in advance of this, I pressure washed the arches: The rear arches will need to be taken out to truly get them sorted as they kept coming out dirty constantly, probably the years of dirt buildup. The front wasn't as bad: For the front right arch, the pressure washer stripped off a tiny bit more of the paint near the mudflap. Another thing for the poor body shop to sort out once I get to that stage. Slapped a bit of corrosion block grease on it for now. So here she is waiting to dry out a bit before I close the bonnet and the day: I feel like the rear axle stands are a little more to the front than I'd like, but I assume most of the weight of the car is at the front, so unless the engine is removed or something, I'm hoping its stable enough. There's technically nothing to stop the car being serviced now. Again, I probably should plan this, but I'll probably end up just doing things in an adhoc manner. Hopefully, I'm still able to reach the engine bay ok with the car raised, as I've said in previous post, I'm on the short side, so I'll probably have to rely on stools and what not for when the battery needs removing for the DSG bit. Once I've calmed down a bit, I'll probably clean up the trim I bought in the house, and that's that for the day. Maintenance: £1794.17 Upgrades: £887.10 Miscellaneous: £608.14


 1 point
 -
I would be more bothered about not getting caught out by an unexpected frost / very low temperature and wrecking the engine. Just run the ratio for the conditions / temperatures you experience all year. Or use a different ration / strength Summer / Winter. If you dare.1 point
-
I am not suggesting you purchase from overseas. I use "skoda eshop cz" purely for information because they are quite good at putting photos up of the various alloy rims in the "Skoda alloy rim accessory catalogue". Here is a link to the "2023 Skoda alloy rim accessory catalogue". However, I prefer to use "skoda eshop cz" which shows the same Skoda alloy rims. The UK VAG parts departments price shouldn't be much different from that Czech website, although you would need to check. The UK VAG parts departments can order in exactly the same parts as their European counterparts. 2023 Skoda alloy rim accessory catalogue https://www.skoda-auto.com/_doc/a1a05a53-26b1-4278-9251-515531f22ecb "skoda eshop cz" (the alloy rims from the Skoda accessory catalogue are shown on this website) https://eshop.skoda-auto.cz/cs_CZ/alu-kola/c/alloyWheels1 point
-
1 point.. and I've had mine for 2.5 years, just clicked over 71000 kms in that time. Issues / replacements: - front disks and pads last summer - lower ball joint at the same time - one wheel bearing (total around 800€) - Battery was replaced 1.5 months ago (-33C really did a number on the car..) (300€) - Adblue system pipes replaced two months ago (-33C seems to have frozen the adblue, too... ) (1200€) just serviced at €650 including the Haldex, Engine oil + filter, and the battery. Oil services on 1 year schedule, haldex just done. The summer tyres are still good for one season, the winters are fine. Both are 215/55R17. Both were new at the time I bought the car / directly afterwards. Nothing serious obvious on the horizon apart from the cambelt change. I've also swapped all the interior bulbs to w5w philips LEDs and stuck a Lazer 18 Elite on the front under the numberplate. That lights the place up nicely. Oh, and it has a decent stereo in there, too. I commute to Helsinki regularly; that's 400km in one direction. I do both in one day and have no issues. The car is a great long distance cruiser, quiet. It has enormous grip and stability - we have lots of snow and it will happily plough through quite a lot of the stuff at reasonable speeds; Haldex really pushes the power to where it's needed pretty much imperceptibly if it's working correctly. I really enjoy the car. I would like better ambient lighting - for 6 months of the year, 90% of my commute is darkness - and the xenon lights are lacking, especially high beam. But that's fixed with the additional light. The stereo was meh, but I've also fixed that. The only reason I'm changing is I want something with lower mileage. don't really need better kit, the majority is there and it works very well.1 point
-
1 pointHi @silver1011 The early 20s salesman was good but he did waffle a bit on things he really didn't know for sure - salesman eh 😁 I see you're from York, which part can I ask? From there myself (Haxby) but left in my late 20s - long time ago. Fabulous city.1 point
-
1 point
-
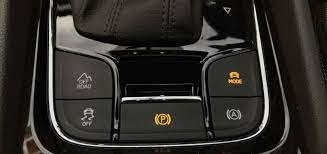
If you have a drive mode button next to the gearstick (the one top right in the picture, highlighted yellow because a mode other than ‘normal’ has been selected), then press that to cycle through the modes, or press then select the mode you want from the infotainment screen. If you don’t have a drive mode button, then you can’t. Edit: but as others have said, this adjusts throttle repsonse and when the DSG ‘box changes up/down (and a few other things). It doesn’t permanently engage the ACT / 2-cylinder mode - there is no way of doing that.
 1 point
 -
Just to add an update to this, I was told about a little black sticker in the back of headlights you can remove that opens up 2 square holes in the back of the lights to allow air in and moisture out. I also noticed that there was some water lying on white hex screw adjuster on the light directly below the gap on the wing and bonnet. Applied a little bit of rubber mastic tape over it to try and divert the water. Not sure how much of a difference that made. But so far so good. There's been some heavy rain showers here since and not a drop of condensation in the light since. I'll add a bit of tape back over the holes and see how that goes.
 1 point
 -
1 pointHello! i found this Version (P102_N60S3MIBS2_EU_NT) on mibsolutions. I wonder if this is a newer Map for the MIB1 (MSTD?) FW on my unit is MSTD_EU_SK_P6320. Regards1 point
-
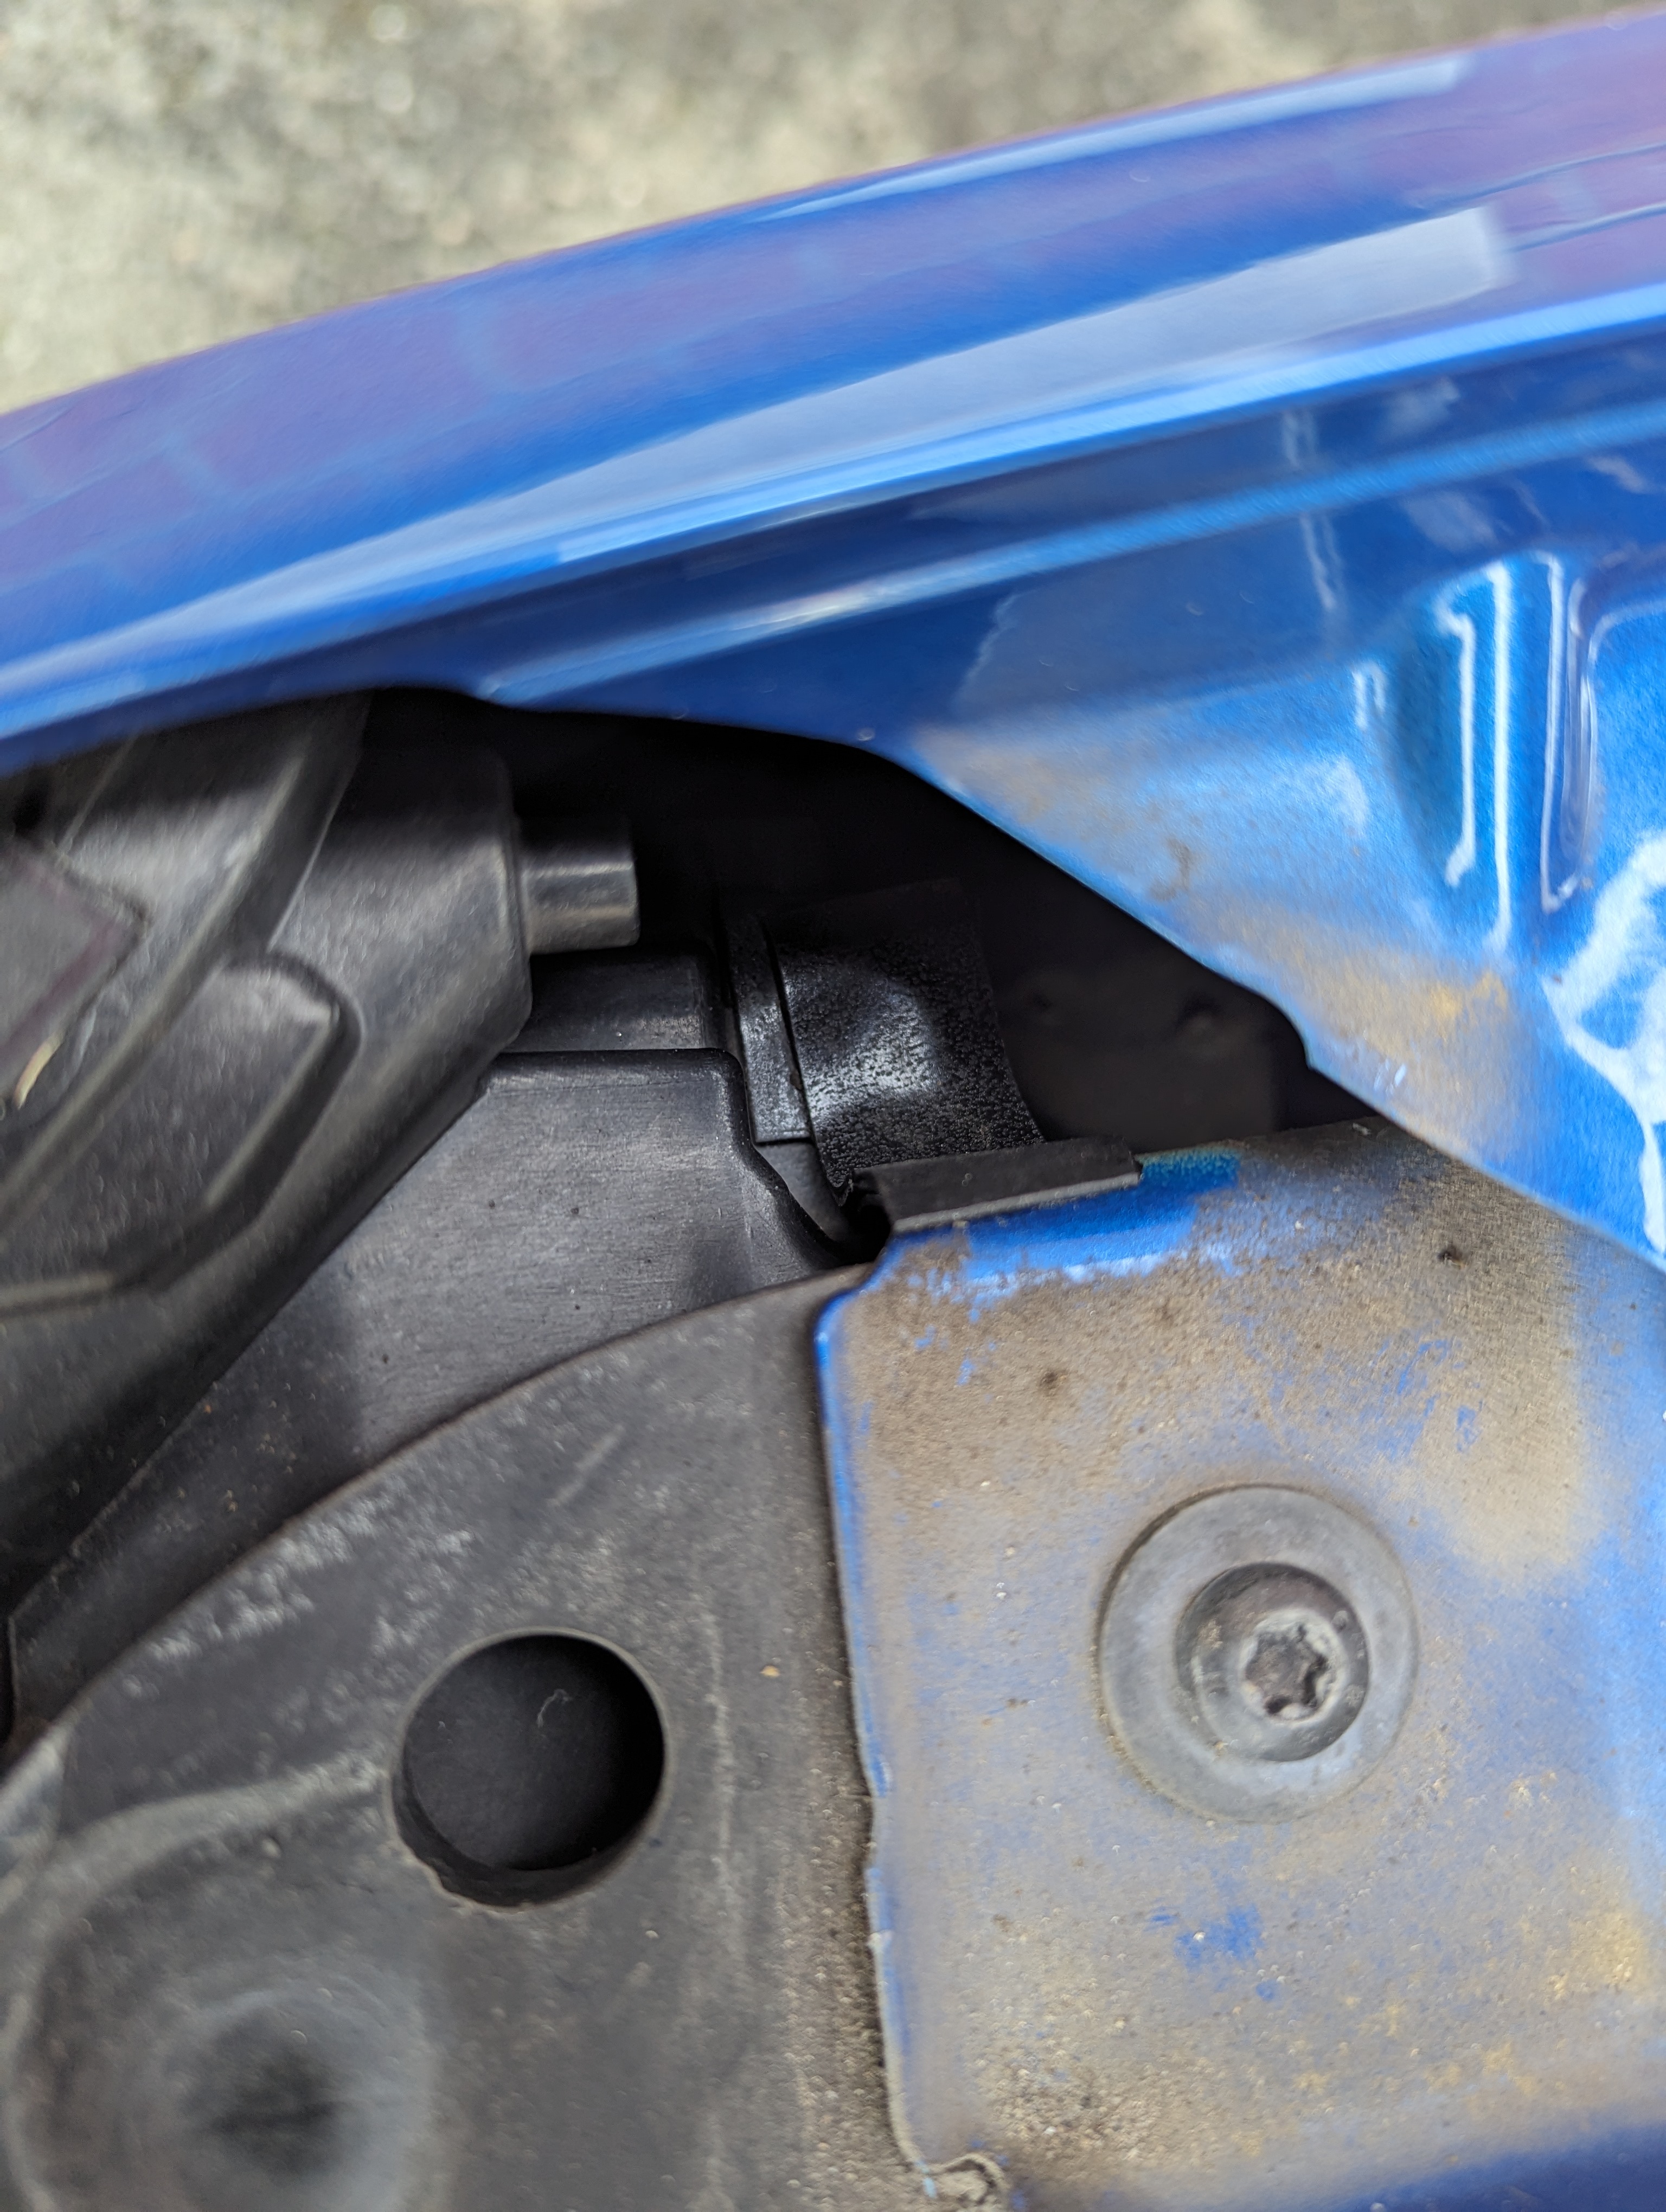
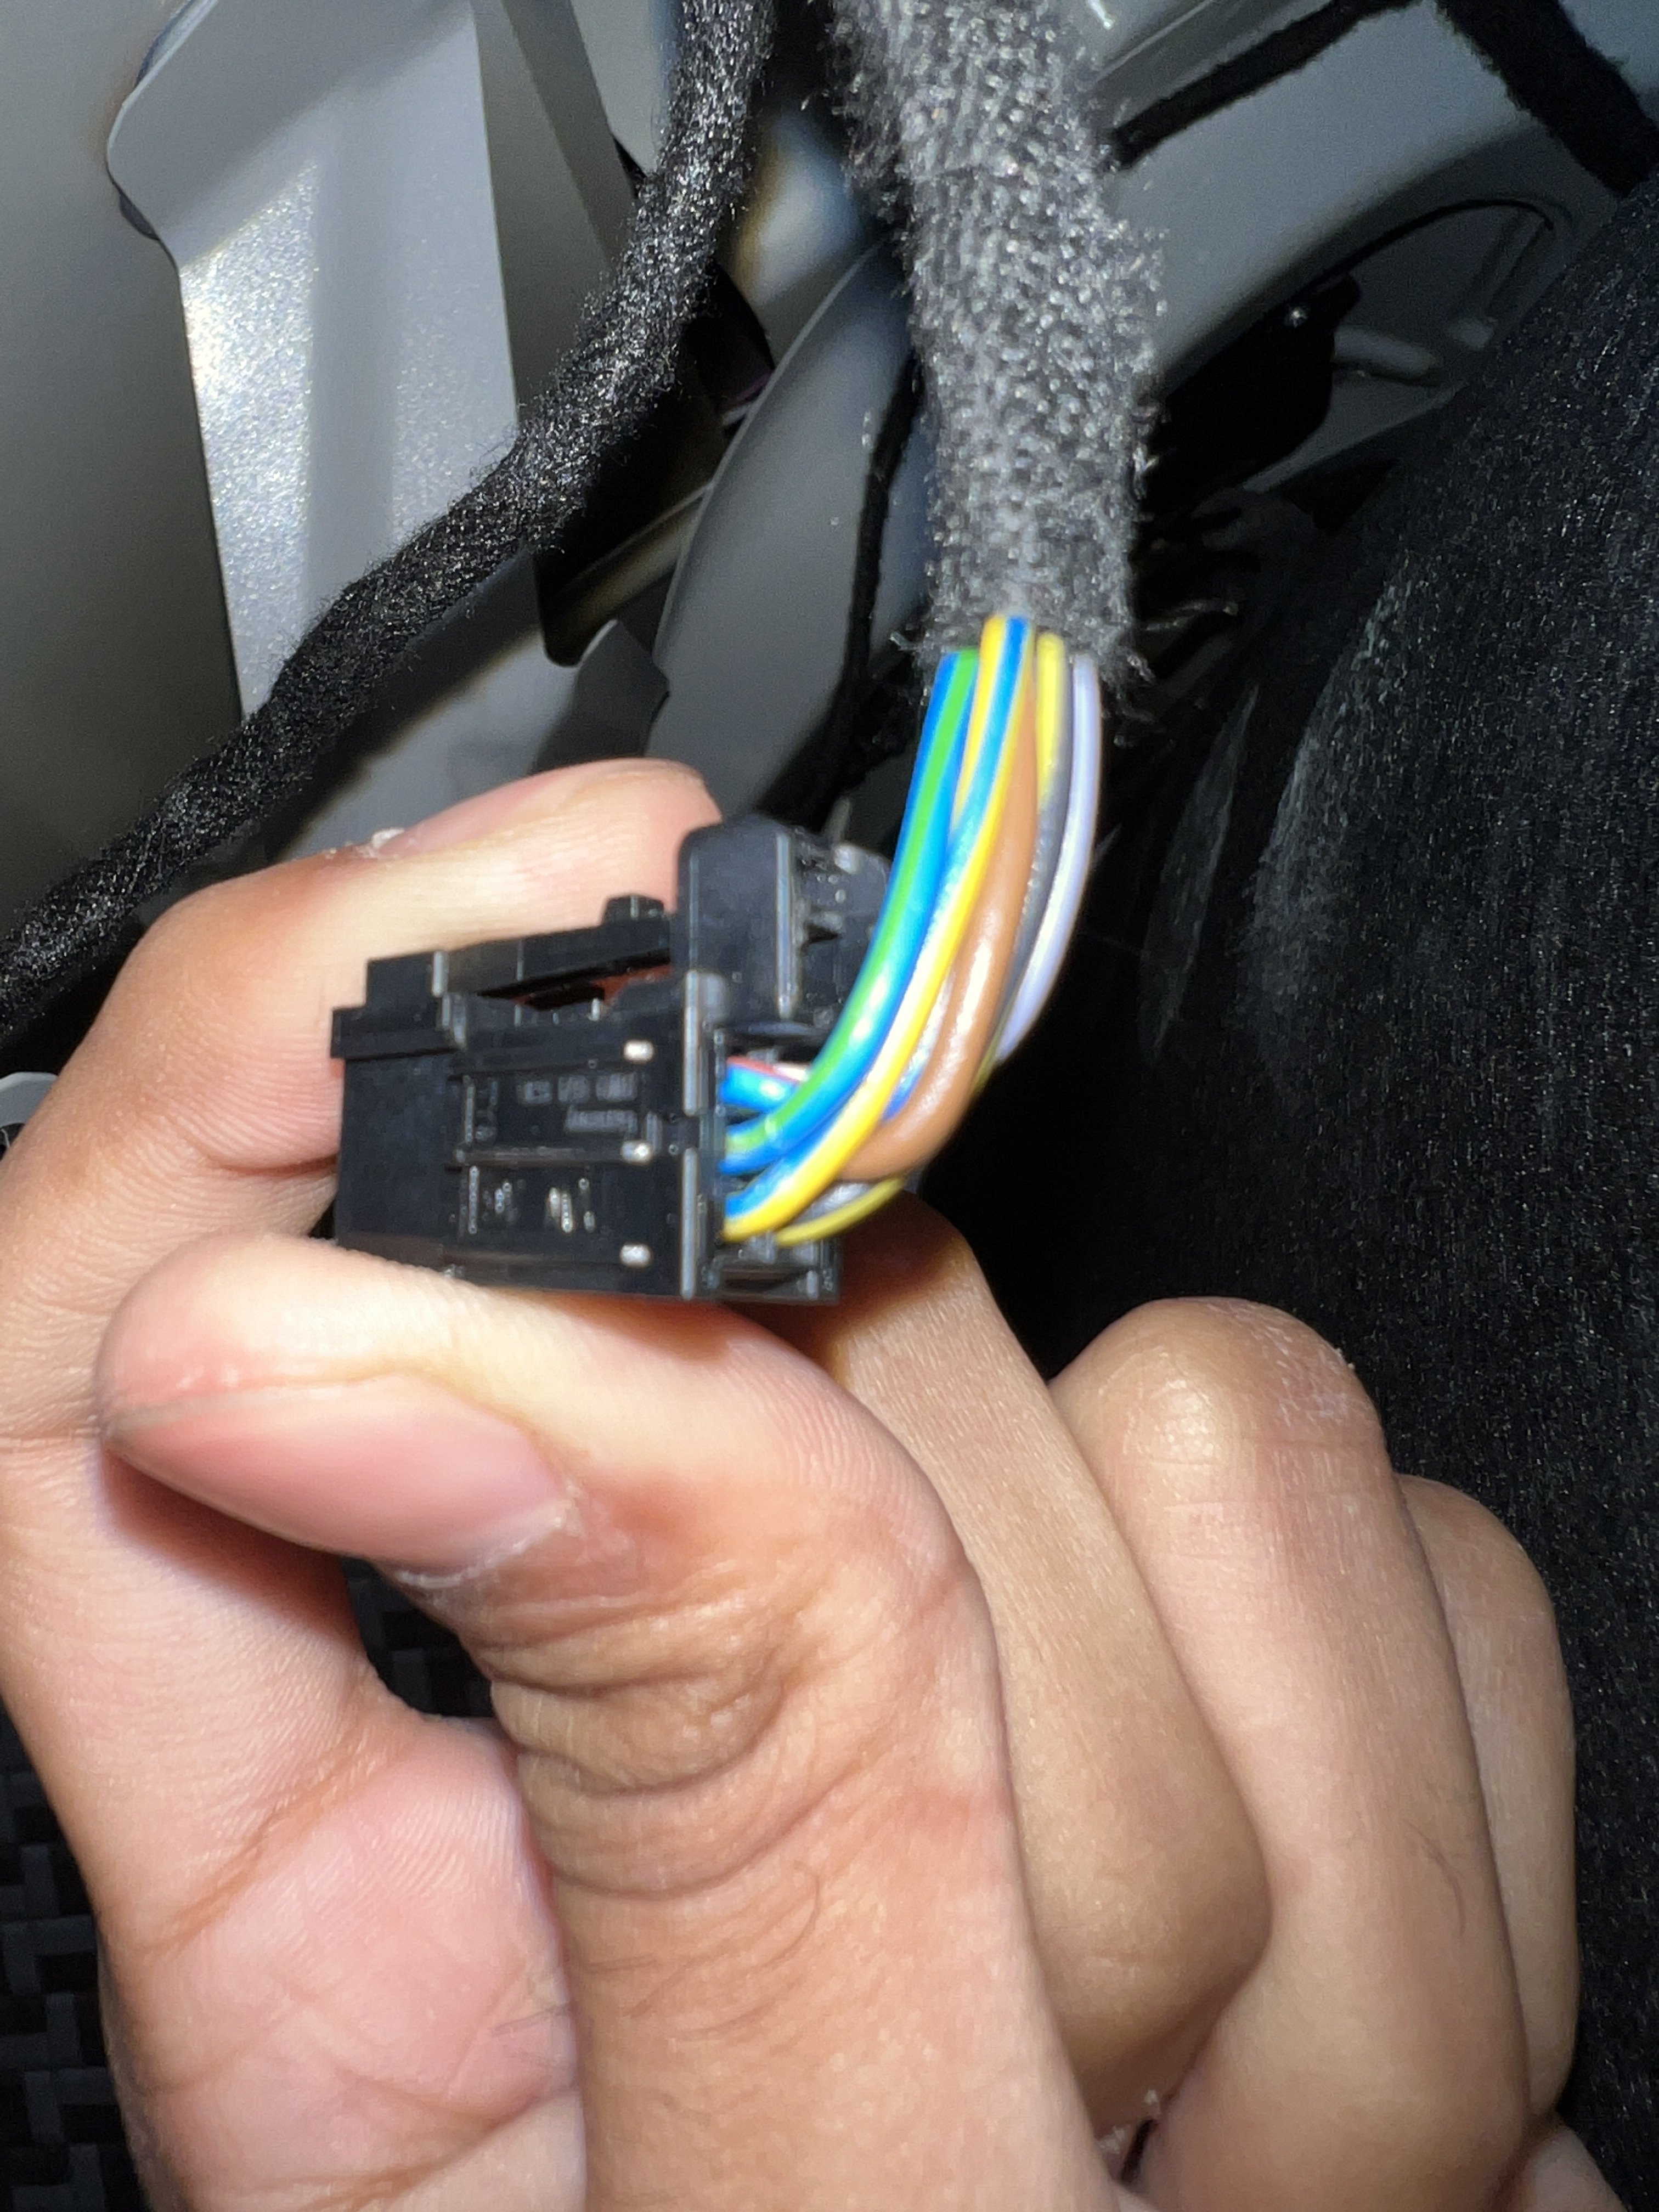
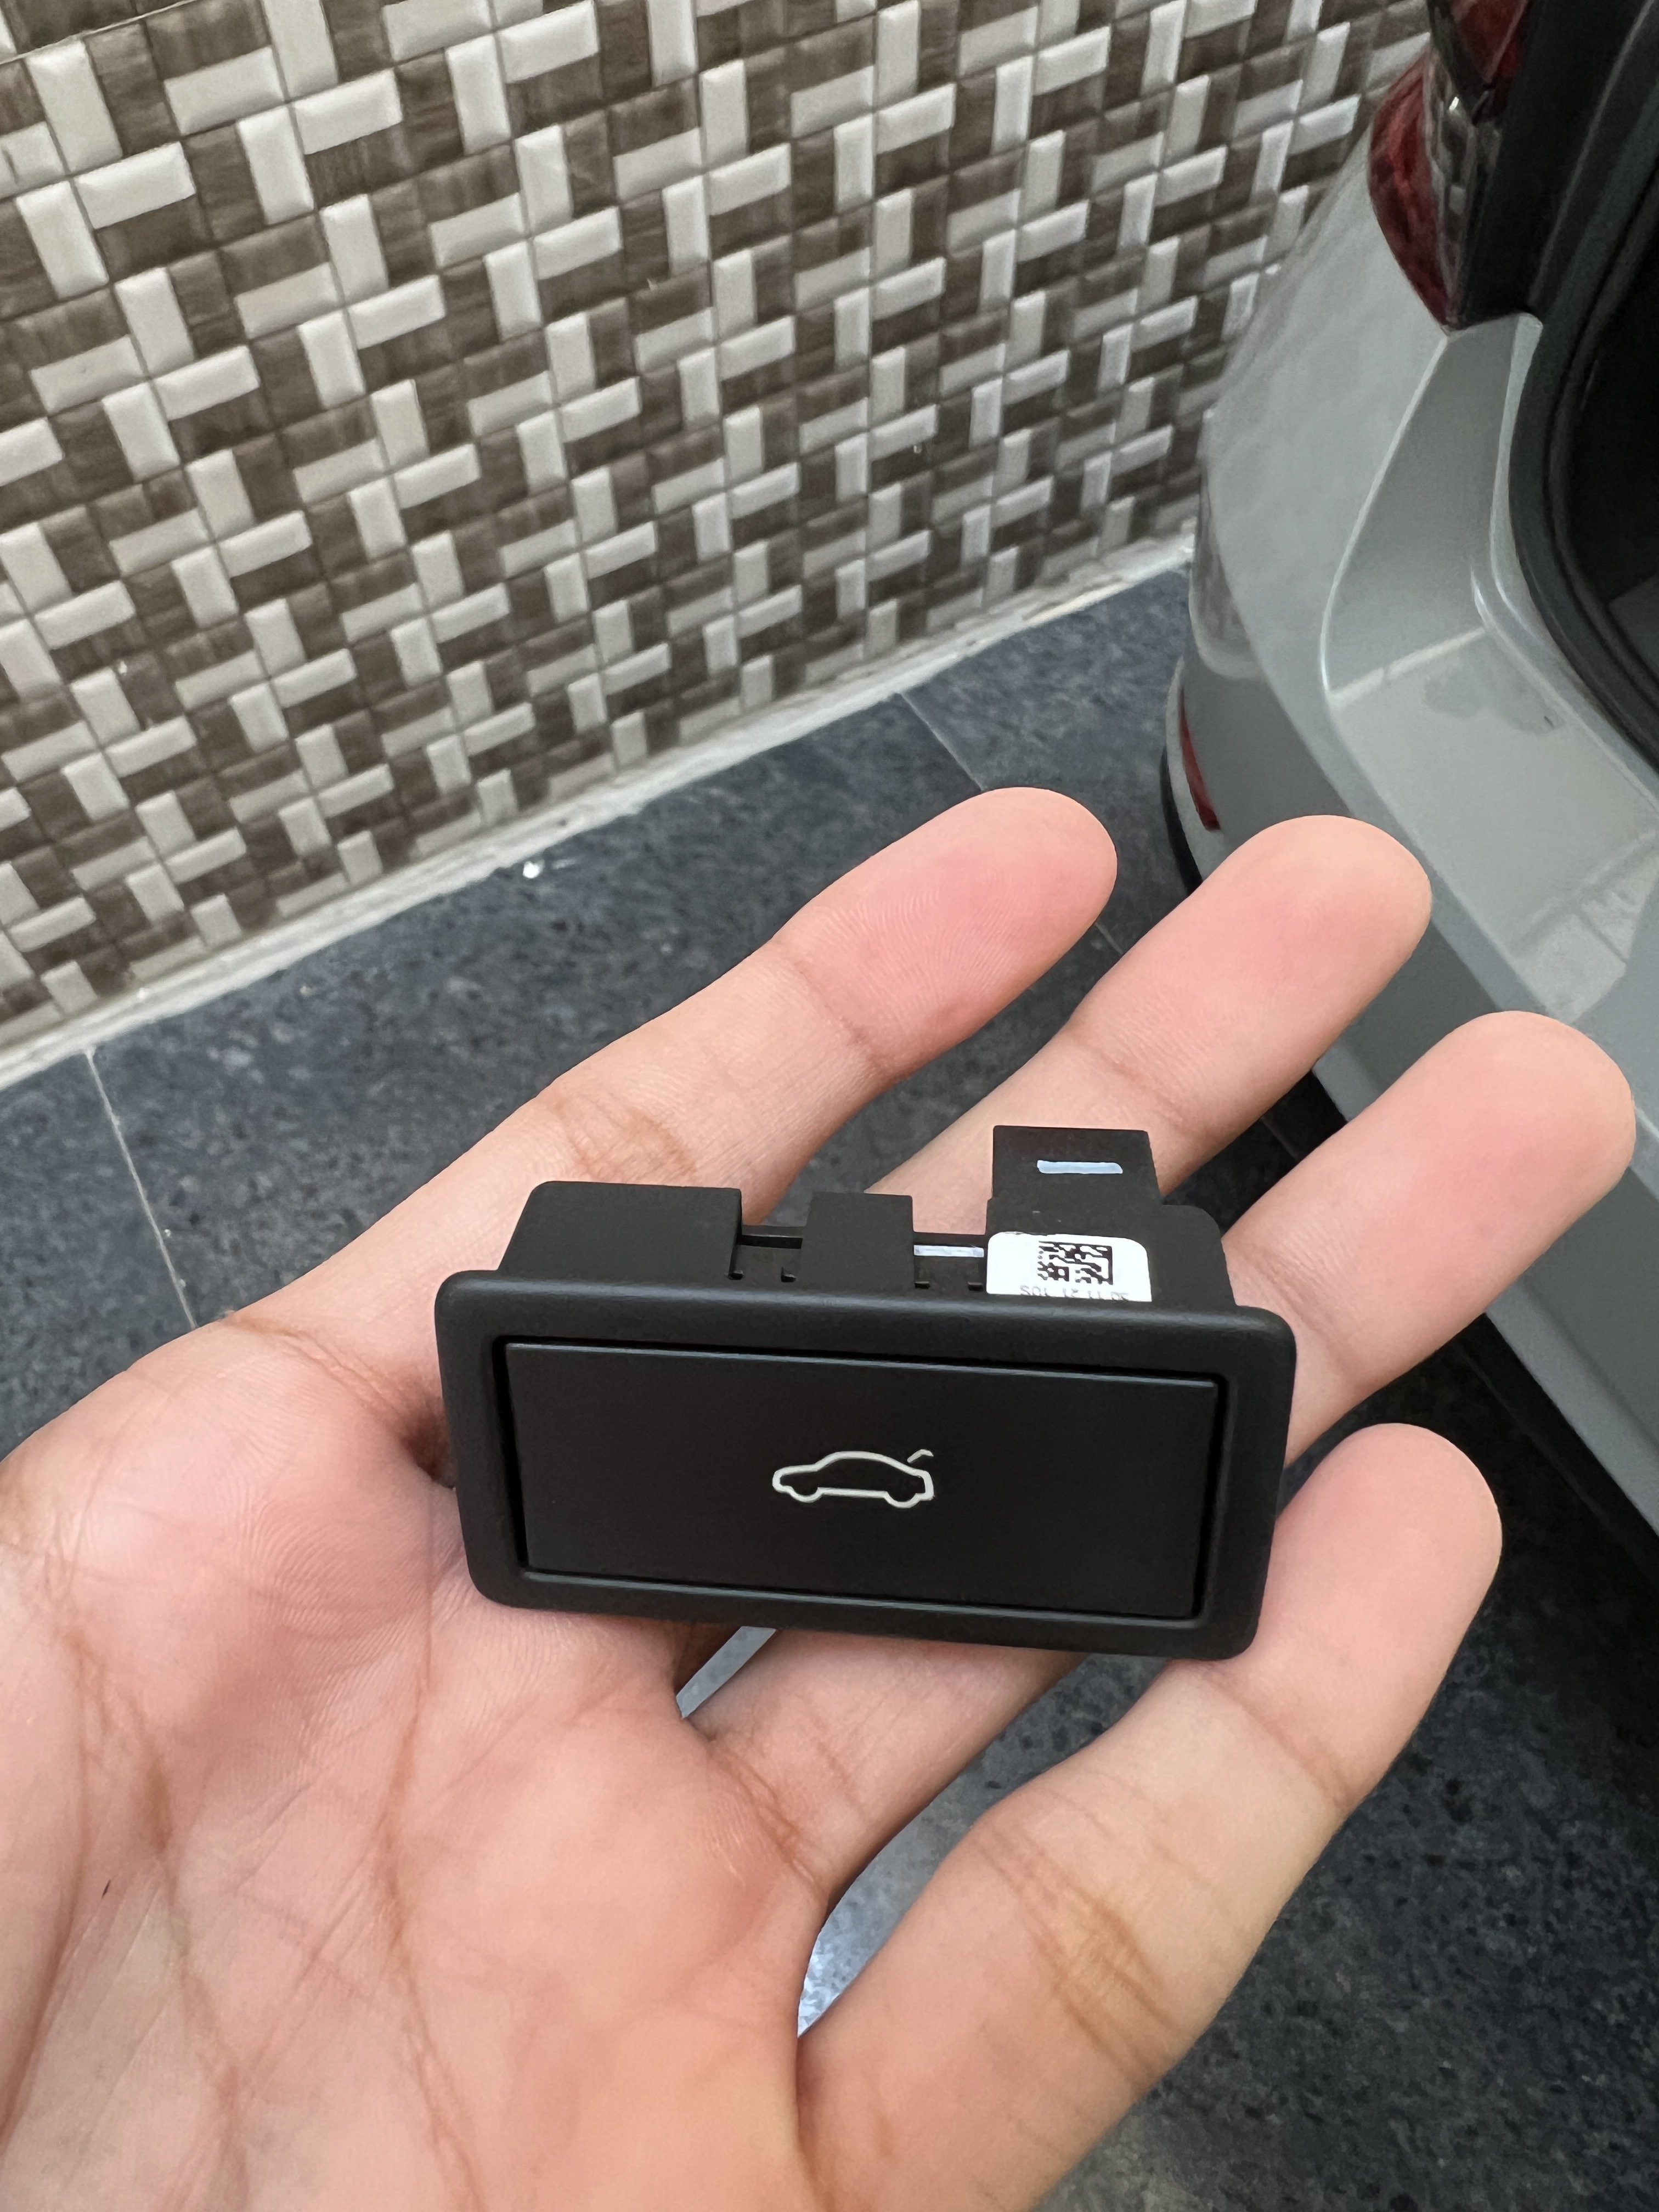
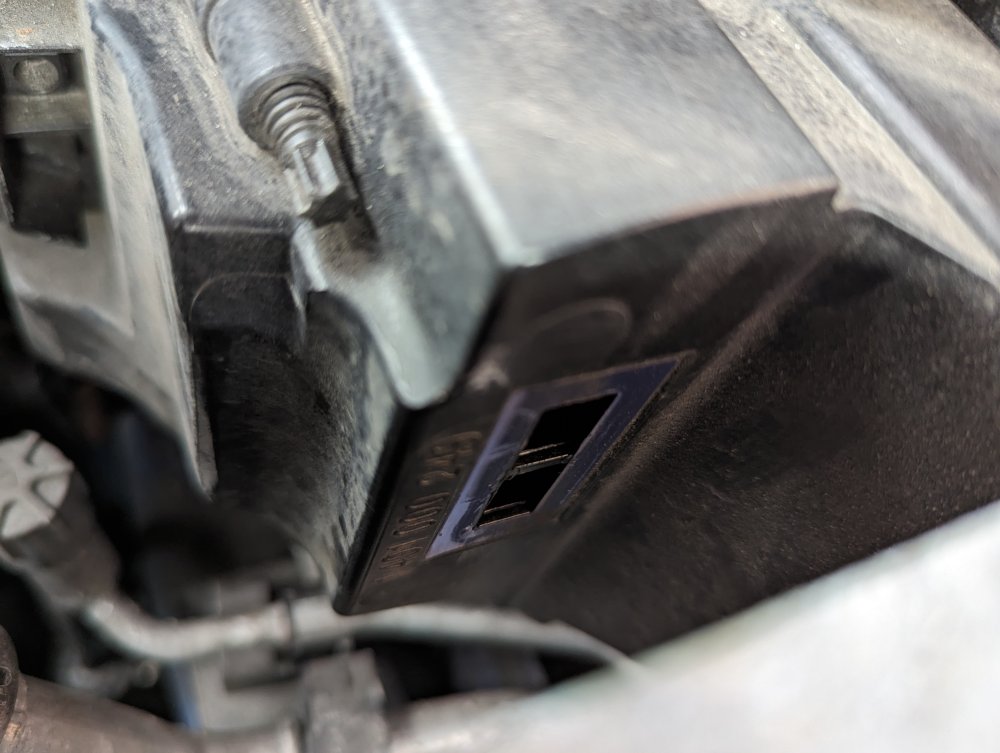
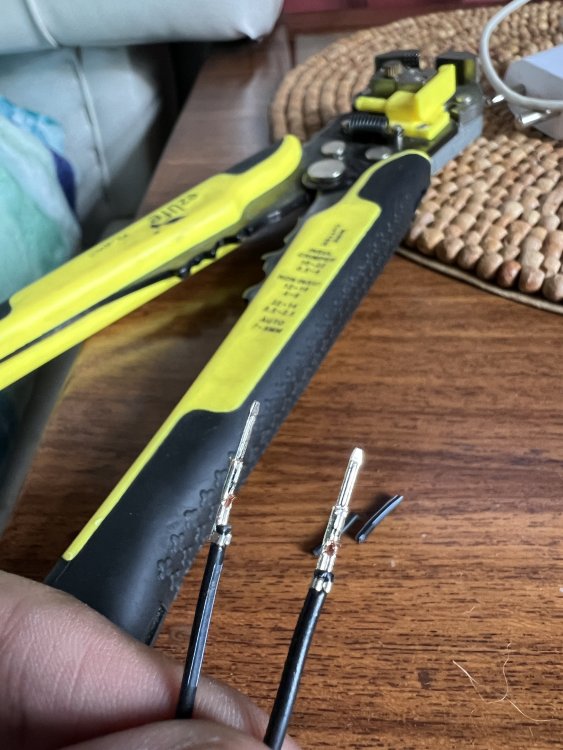
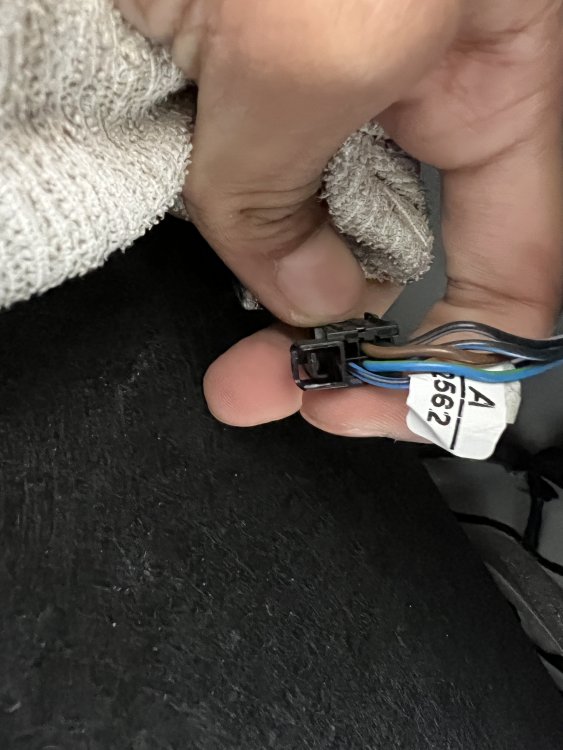
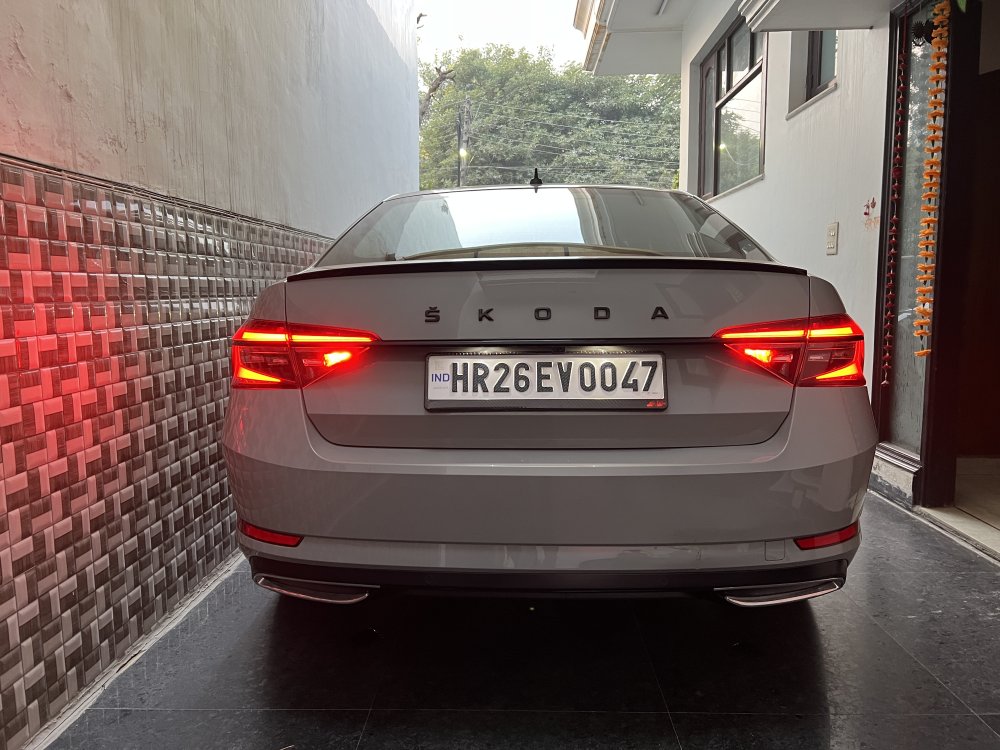
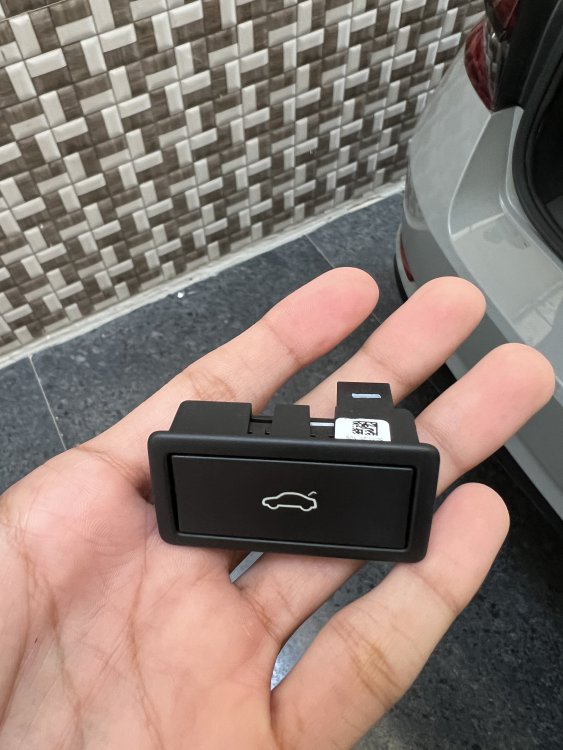
BOTH REAR FOGS FOR 2020+ MODELS I’ve The 2022 Facelifted Superb With The All LED Tail Lamps Setup I Was Scouting For A Long Time To Do This Mod Too As Only A Rear Right Side Fog Light Made It Look Like A Cost Cutting On Their Flagship Car! Then I Came Across This Post & Wanted To Give It A Try Firstly Let Me Tell You That I Tried All VCDS Codings & None Of Them Work NO VCDS CODING IS REQUIRED FOR IT It’s Just A Case Of Hardwiring It From The Right Lamp To The Left One 😁 And As No Proper Way Is Listed Anywhere For 2021 Onwards Models And Our Connectors Are Totally Different From The Previous Gen Lamps, So Let Me Share The Whole Process With You Guys 🤪👍🏻 STEP 1 - Unclip The Boot Closing Button & Remove It Aside, And Then Remove The Rear Trunk Liner (Which Is Held In Only By Metal Clips), So Pull It Apart In Downward Direction As Shown Earlier In This Thread With Plastic Trim Removal Tools STEP 2 - Find Both The Connectors For Both Left & Right Lamps As You’ll Notice From The Above Pictures, The Left Light Connector Has 5 Wires Going To It & 1 Empty Slot In The Connector Whereas, The Right Light Connector Has All 6 Wires & No Empty Slots STEP 3 - Take 2 Pin Crimp Connectors (You Can Find These Easily In Old Computer Cables, Just Pull Them Out Of Any Lying Sockets) See The Attached Picture For Reference STEP 4 - Attach Both Of These Connectors To Both The Ends Of A 1-1.5m Long Wire And Solder Or Electrical Tape It Properly! STEP 5 - Now It’s Just The Matter Of Putting One End Of The Wire Into The Empty Slot Of The Left Connector (Refer Step 2) And The Other End Of The Wire Gets Joined Into The Bottom Right Light Purple Coloured Wire Which Is For The Fog Lights! Now Pack Everything Back To As It Was AND VOILA YOU’RE DONE! ✅ Enjoy Both Fog Lamps Working With The Same Switch 👌🏻 I Wonder Why They Provide Lights On Both Sides But Different Wiring 😞
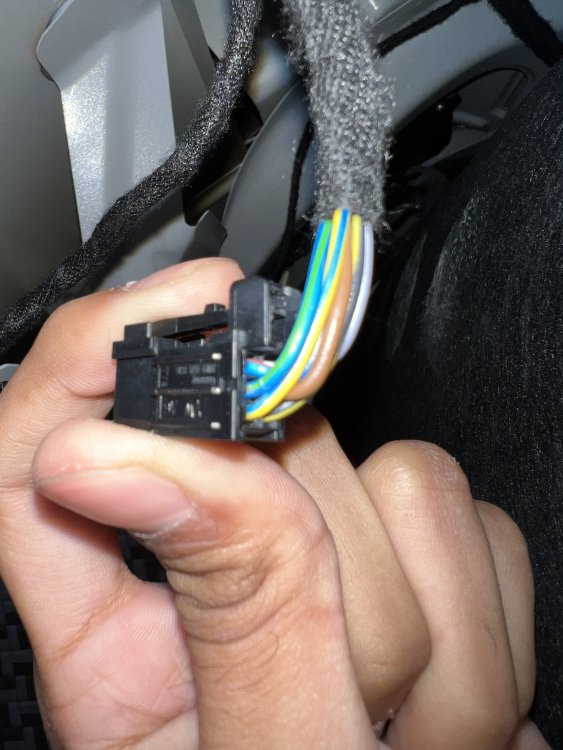
 1 point