Leaderboard
-
.jpg.1006585dfe4e2977315b67c3d642e37b.jpg)
Guest_
FREEDOM18Points83,824Posts -
.jpg.68c7823d355ff3e5b20e82ddbf78398c.jpg)
PetrolDave
Resident Member13Points8,216Posts -
Tilt
FREEDOMLite12Points3,939Posts -

Lee01
FREEDOM10Points36,450Posts

.thumb.jpg.f83a46b9b3c0d976b9dbffbb523c9874.jpg)

.thumb.jpg.9dd3f612ba7f13d10be5c518d3c8d255.jpg)
Popular Content
Showing content with the highest reputation on 14/01/25 in all areas
-
5 pointsYou've just opened a whole new can of worms. Is a source that's funded by a commercial organisation dependent on oil/gas reputable? Is a source that's funded by a commercial organisation dependent on renewal power reputable? Both of those will tend to fund only research that produces the "right answer" for their commercial interests, so some would say any research they fund is NOT independent and hence could be argued not to be "reputable". Truly independently funded research which will report what they found without bias is incredibly hard to find now that most Governments have abolished or drastically cut back on non-commercial funding.5 points
-
4 pointsUpdate from my car: I have the software update installed about a month ago. No failure notifications or failure to start since then. Hope it stays that way. Please note that my mileage is not high so this may not be the most reliable source of information.4 points
-
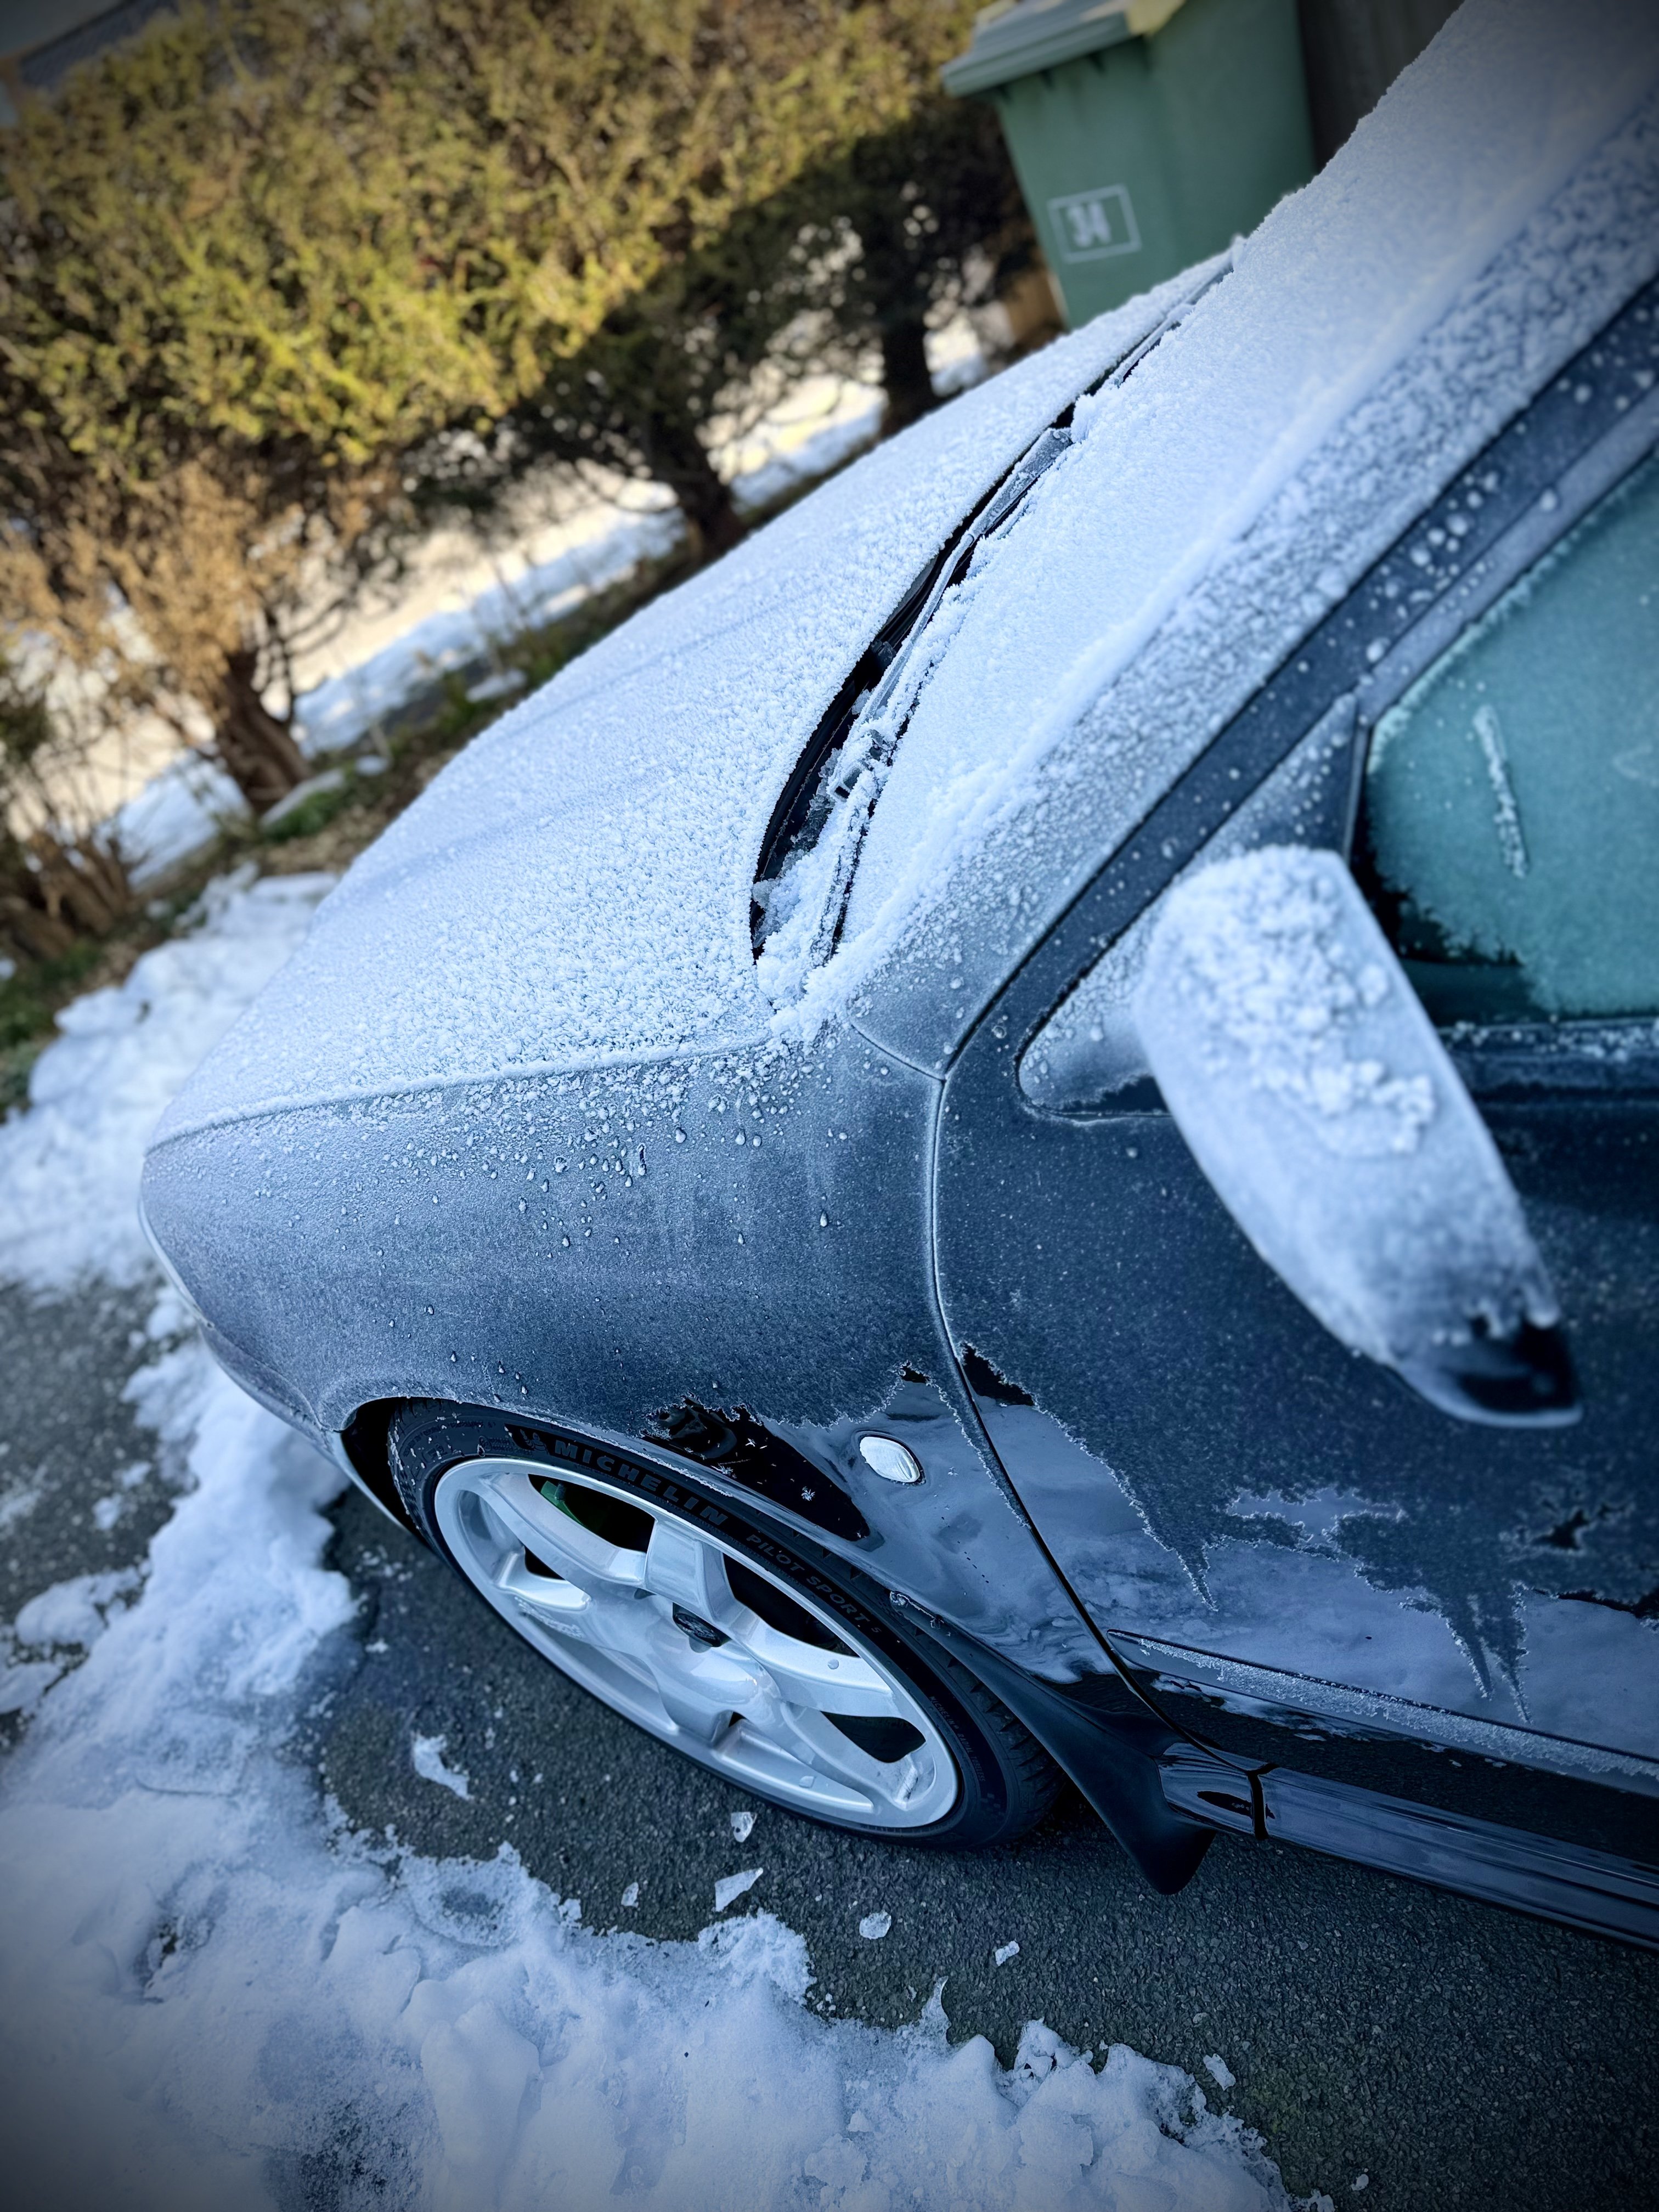
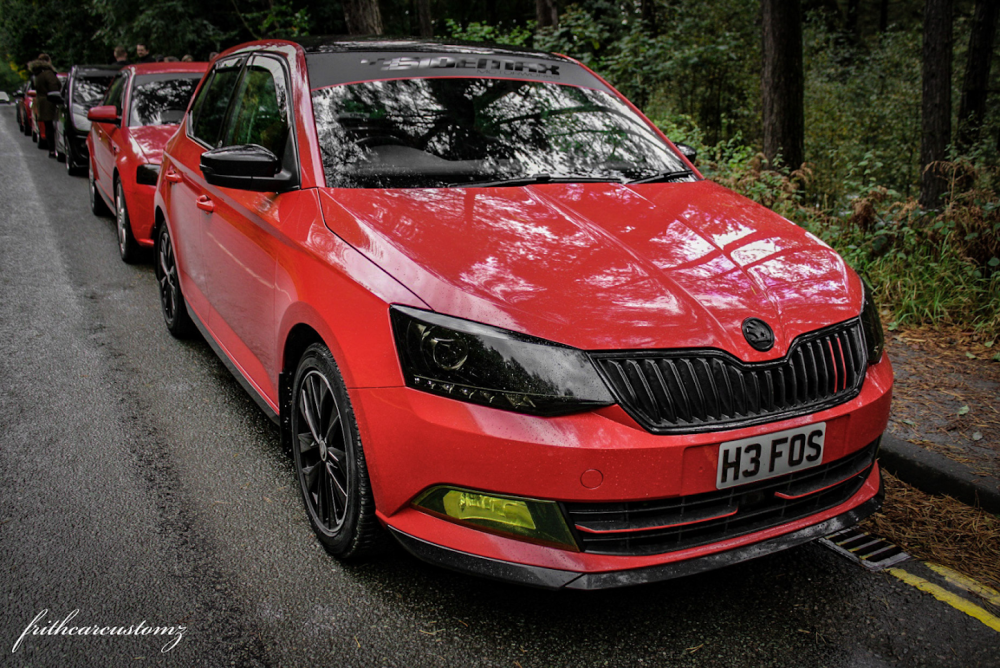
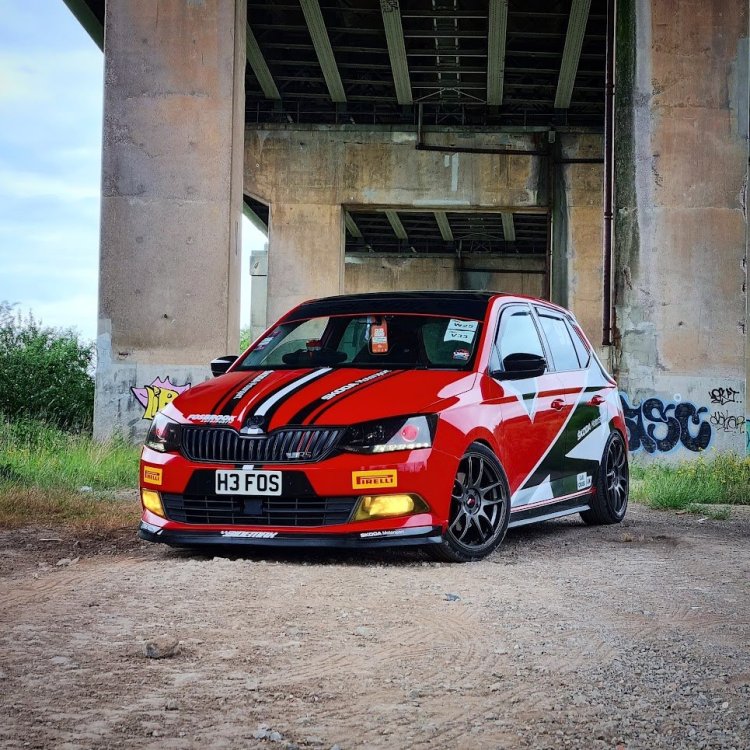
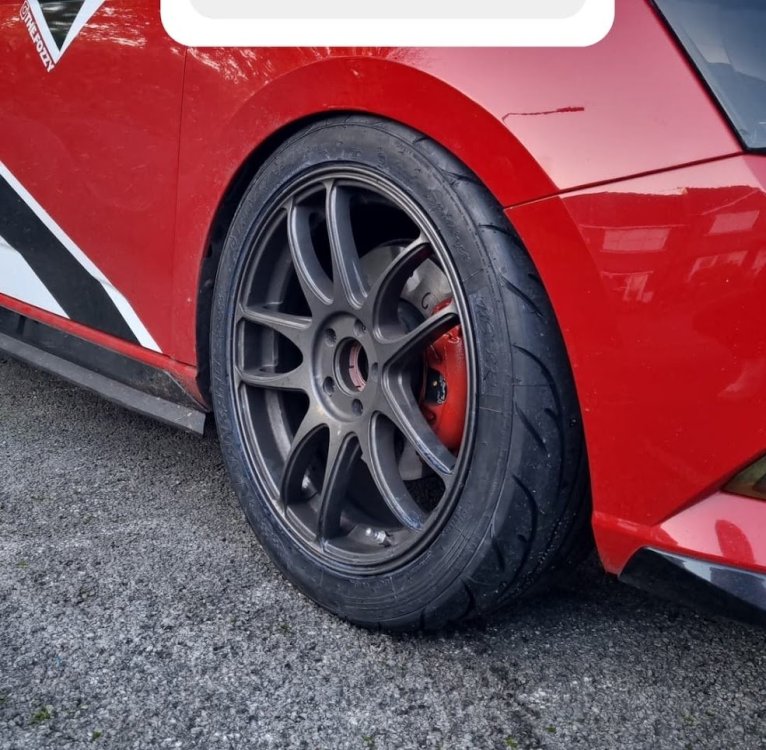
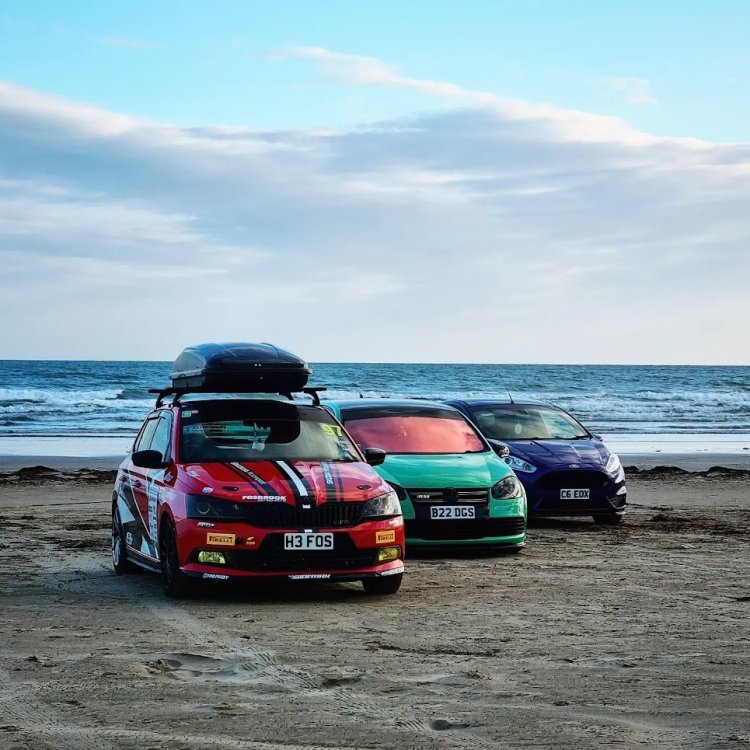
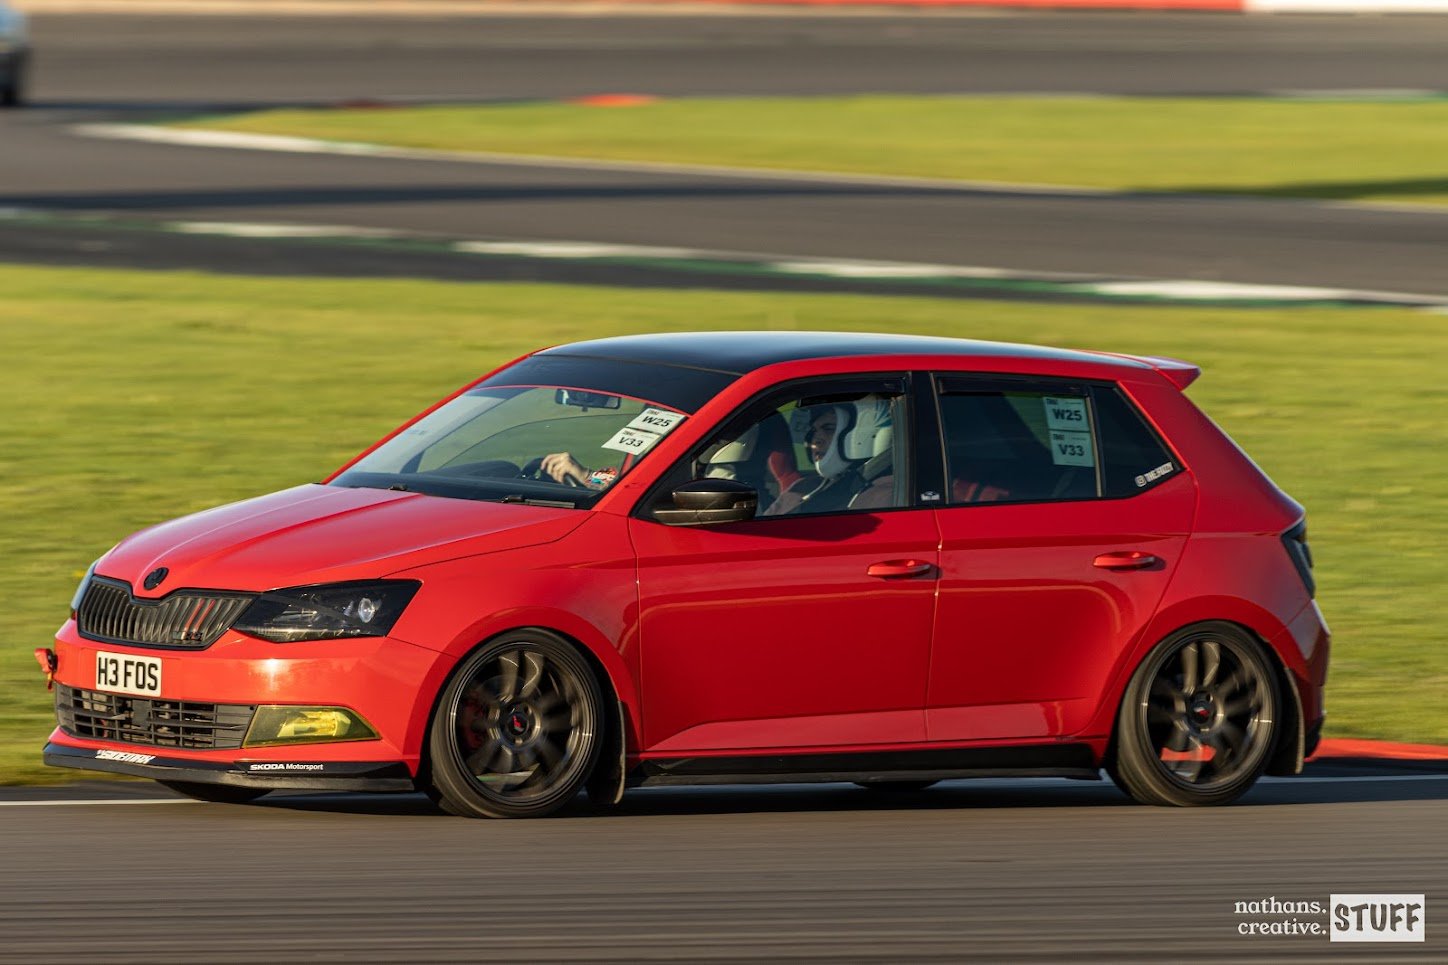
3 pointsnEw cAr DaY! It's a beaut, only managed to take it for a 13 mile drive. It's filthy already, but that's the time of year (and maybe having brightly coloured car). It did take me a few minutes or sort my feet out, and I did accidentally use my left foot for breaking twice when taking it off my driveway and down the road. Mine has Bridgestone potenzas again 🤷♂️3 points
-
2 pointsYes, there was an ice age. Hurrying it up makes no difference then. Fire up the coal fired power stations again, burn peat & just get on with fracking. In the south of the UK. PS. To the French there is no English Channel, just the Channel. / La Manche.2 points
-
Look at, or post a photo of, the end view of the alternator belt pulley. If all you can see is a big nut, you don't have a freewheeling pulley. I don't think the exciter wire can be the problem because when that breaks, the battery light never works at all. The other thin wire is for monitoring only, and doesn't affect charging. I think voltage regulator/brushpack is the most likely problem.2 points
-
I’m guessing that “batten bearings” could be bottom bearings or big end bearings - the bearings on the crank shaft that the connecting rods from the pistons are attached to. What is the engine oil level like, if it’s been run with low oil or low oil pressure that could cause bearing wear over time. It might be possible to have the oil analysed if it contains significant levels of white metal bearing material that would support the initial diagnosis. When you say regular servicing is that annually so it’s had 6 oil changes or is it flexible which could fewer if the latter it might be a factor.2 points
-
Could also be worn brushes in the alternator. It may manage to charge at higher revs on longer journeys but not at start up.2 points
-
2 pointsMight (or might not) be the first of a series of gremlins on the horizon. 8 years is a good innings though.2 points
-
2 pointsIf it is holding oil now then take the car to someone that will do the helicoil or change the sump at less than £100 odd an hour plus VAT.2 points
-
Injectors + DSG + DFP (+Adblue). Is this how my car will end up being non-viable in the medium term?
2 pointsLike J. R. I am in France too and live in a rural area. It is absolutely necessary to develop advanced mechanics skills as the garages here are not very reliable in terms of calling one back, 'forgetting' to send out repair quotes or simply overcharging you( € 150 they ask for a diagnose on their OBDII diagnostic computers) Therefore is is paying off to investing in tools as OBDeleven or VCDS and car specific tools. this works for me already more than 40 years. I wish we had YouTube tutorials in my early days.... but Haynes manuals also helped a lot. The thing of keeping the Superb running lies in the fact that almost everybody loves their cars and want to keep them running as long as possible I am 70 years old now and I concur with this statement 😏:2 points -
2 pointsYea I would have thought that myself. It had been cleared by a few different garages probably about 3 or 4 times. Yes it is the original battery, I was actually just talking to someone yesterday that said I will probably look to replace the battery soon as it's coming up on 8 years old, though bar this tyre indicator light has never missed a beat.2 points
-
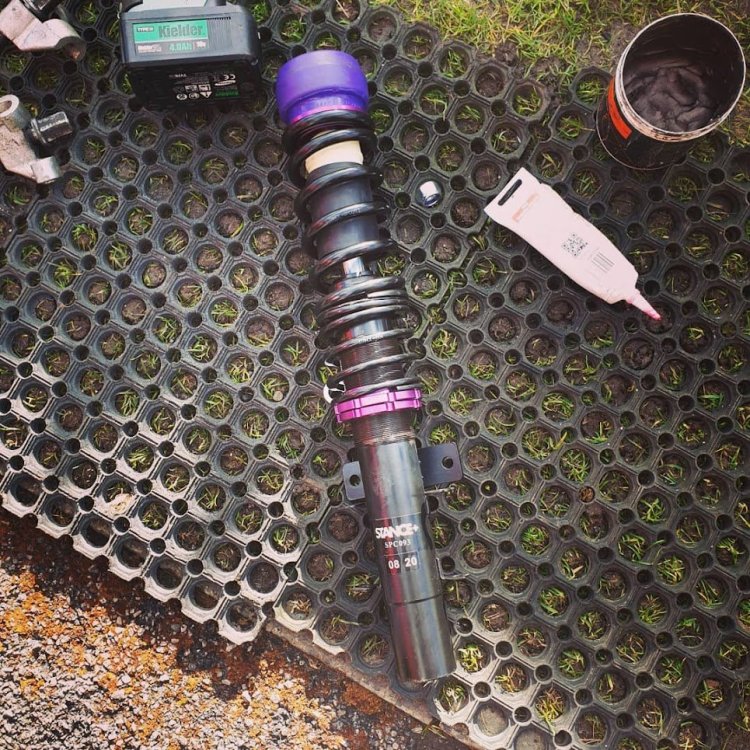
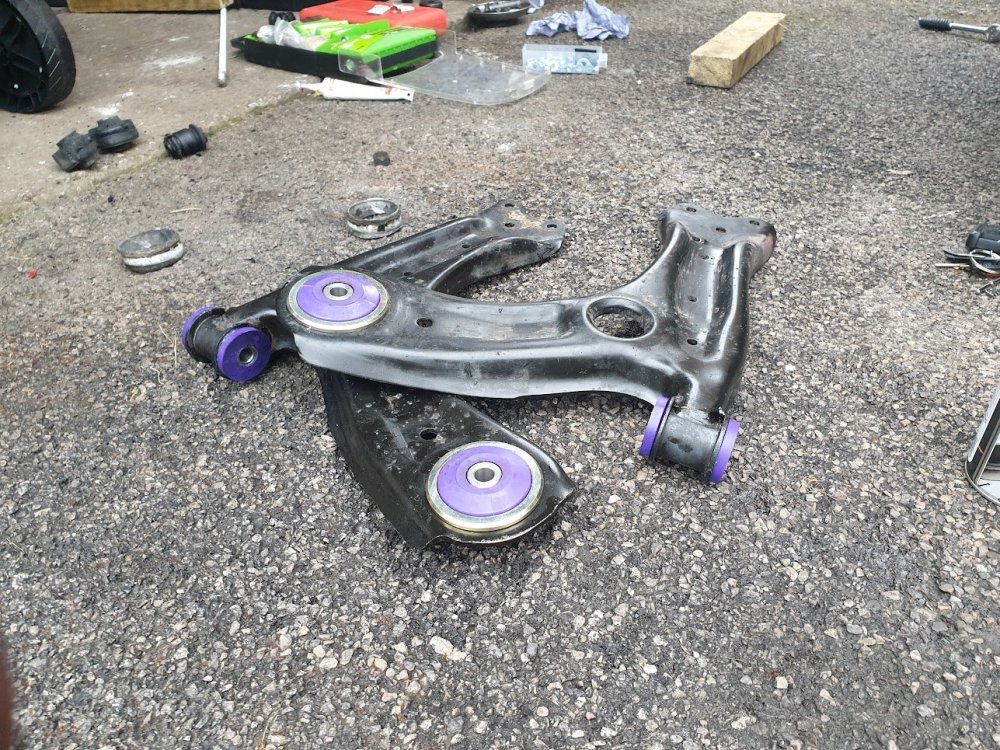
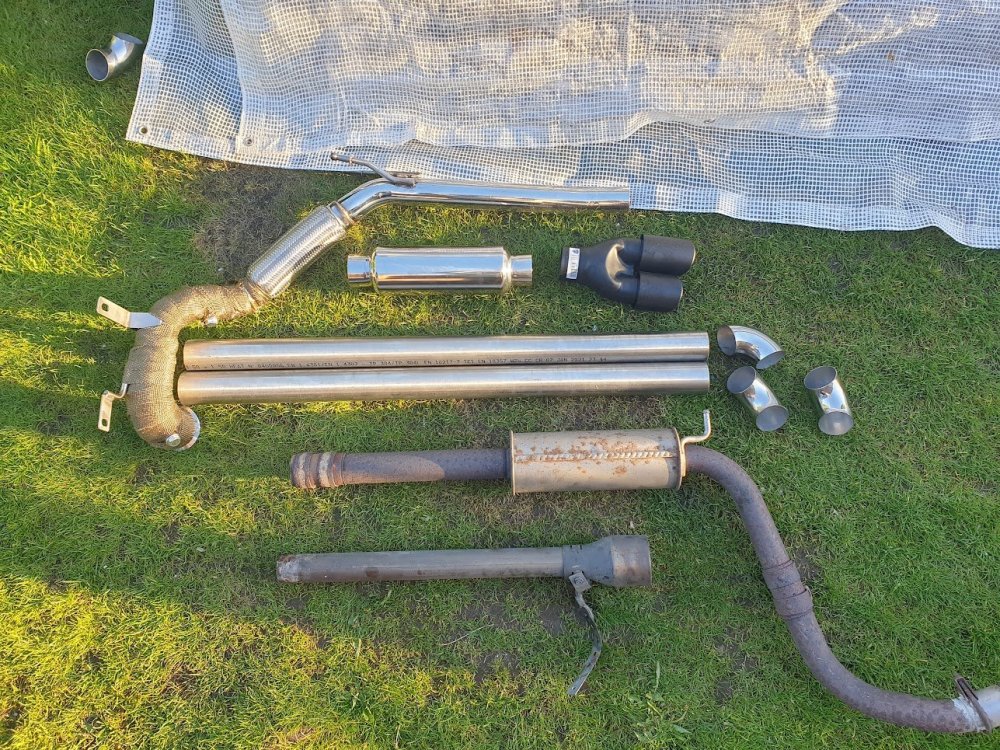
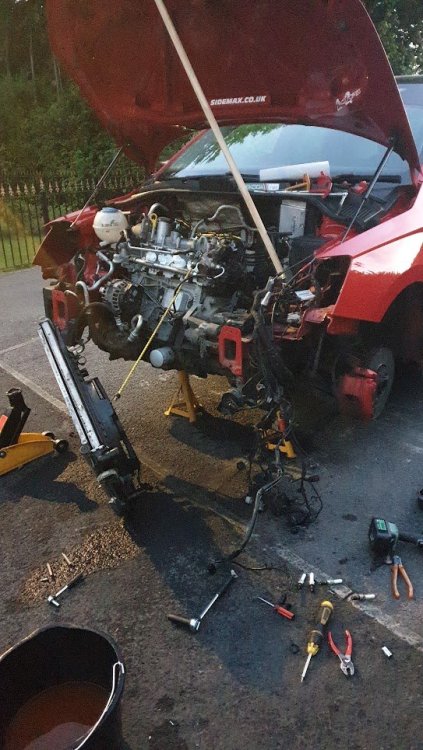
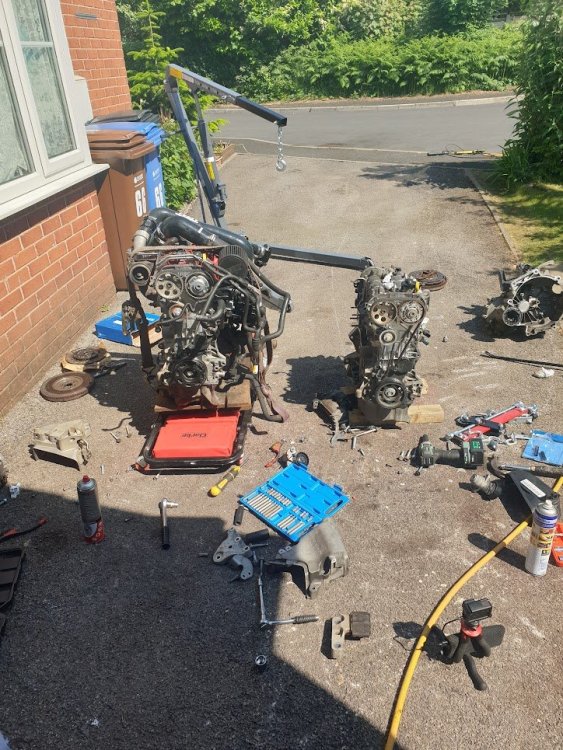
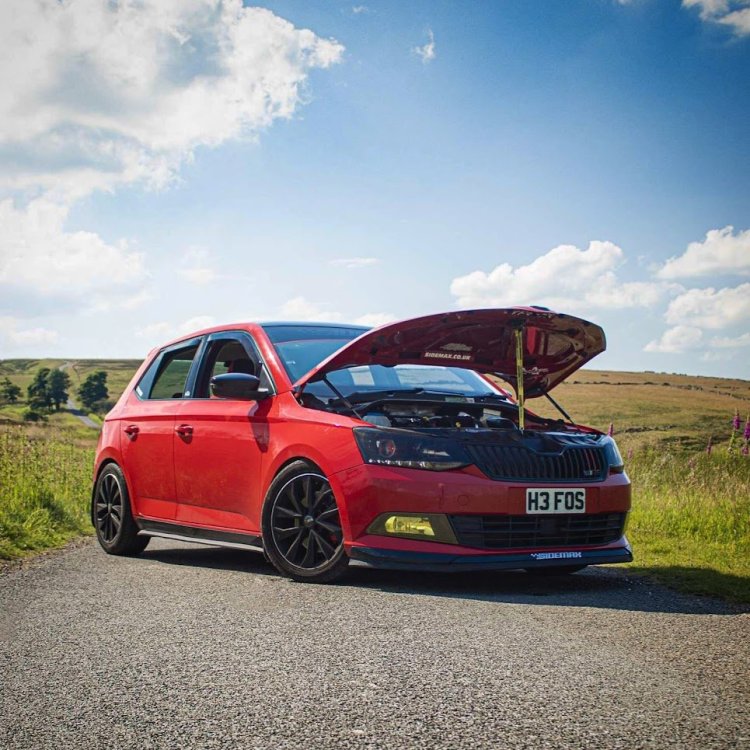
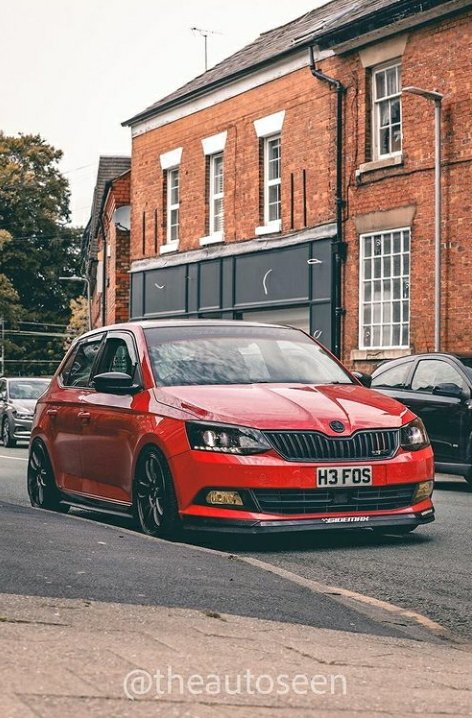
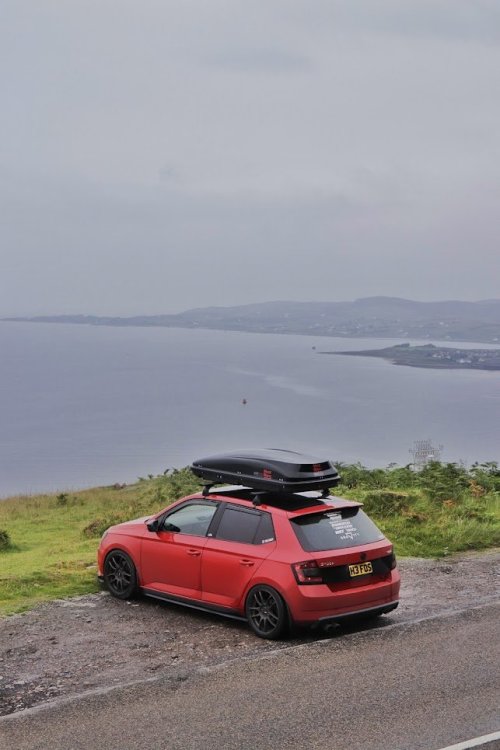
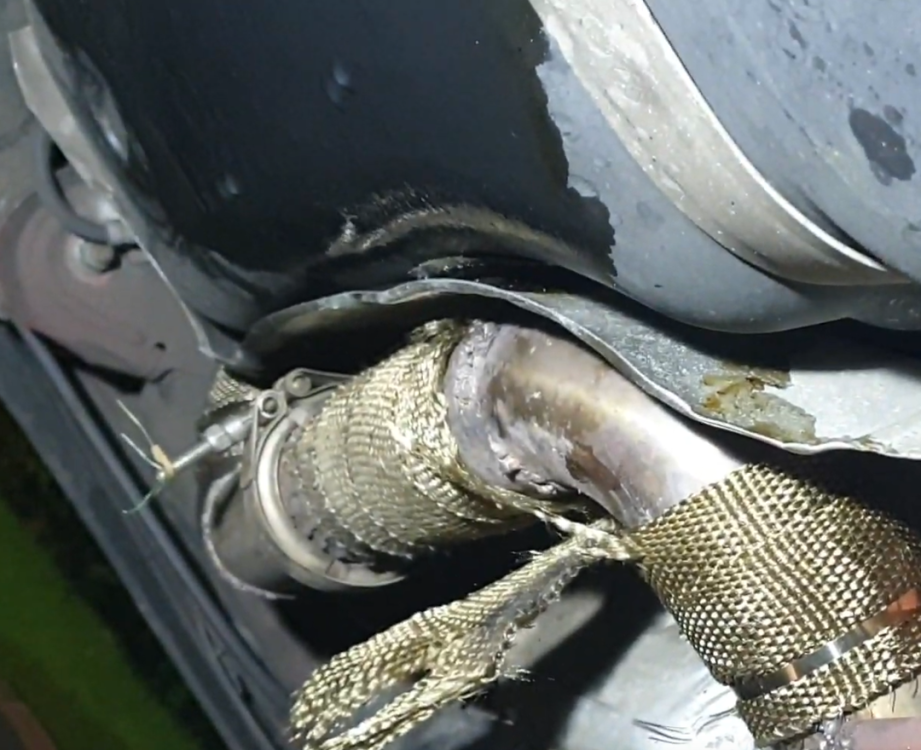
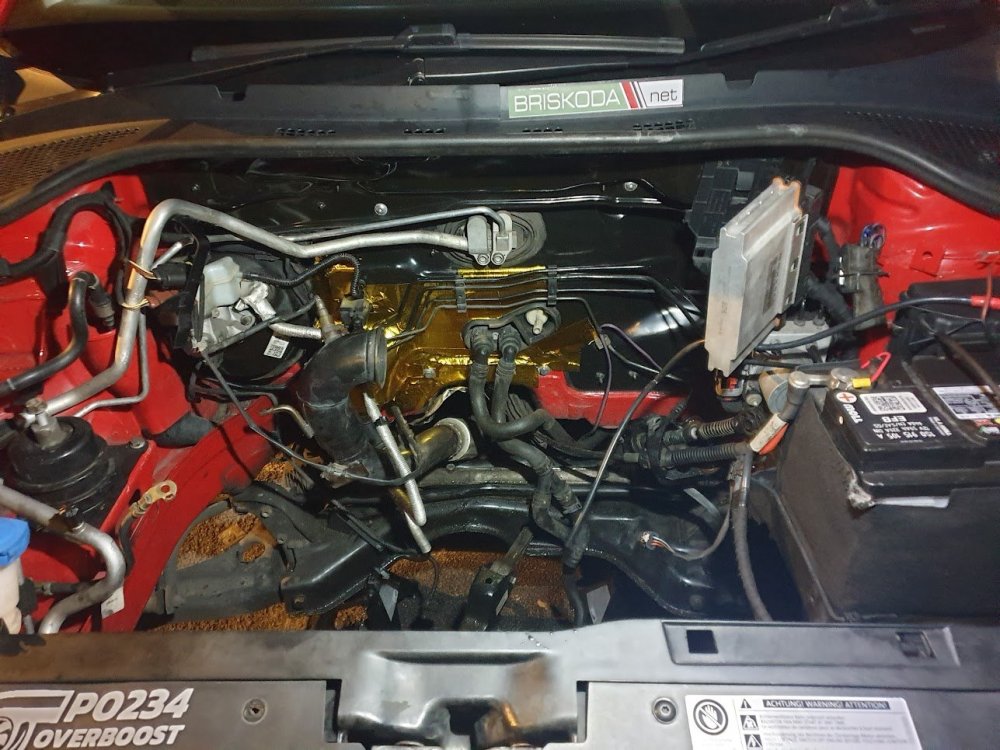
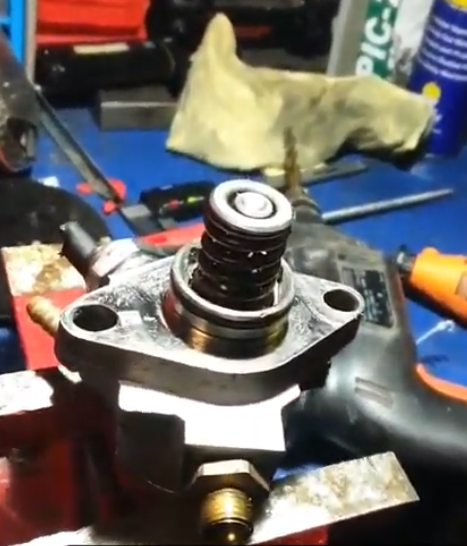
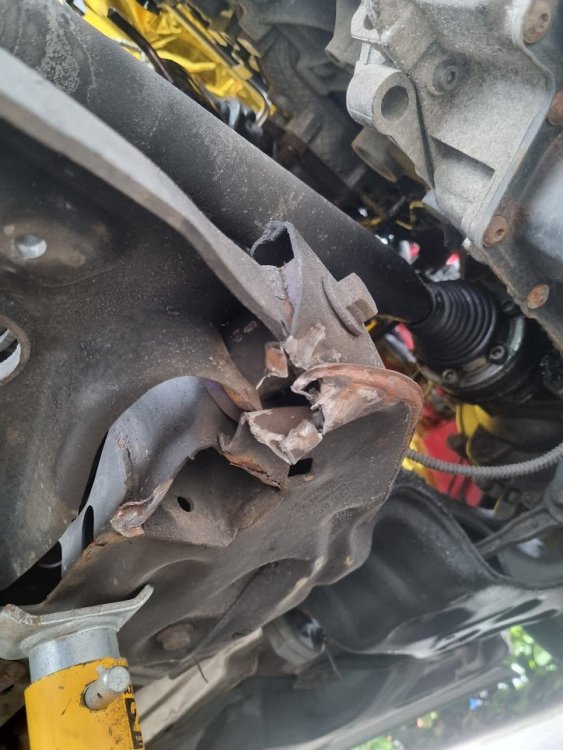
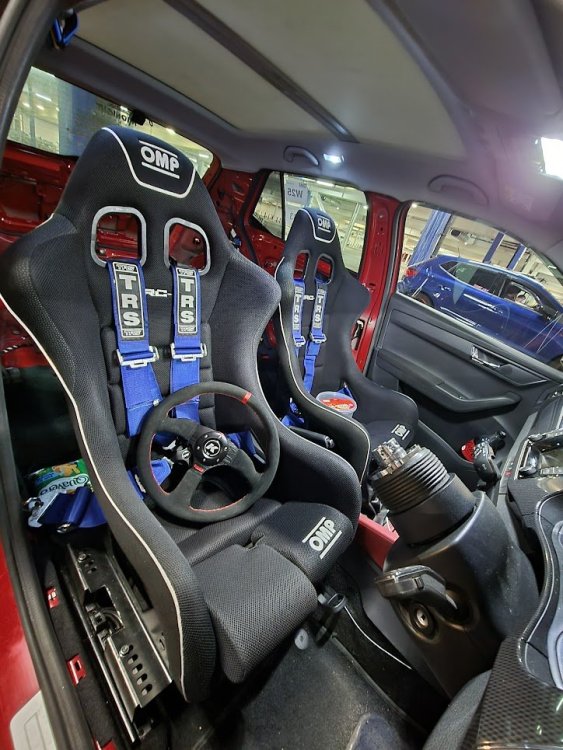
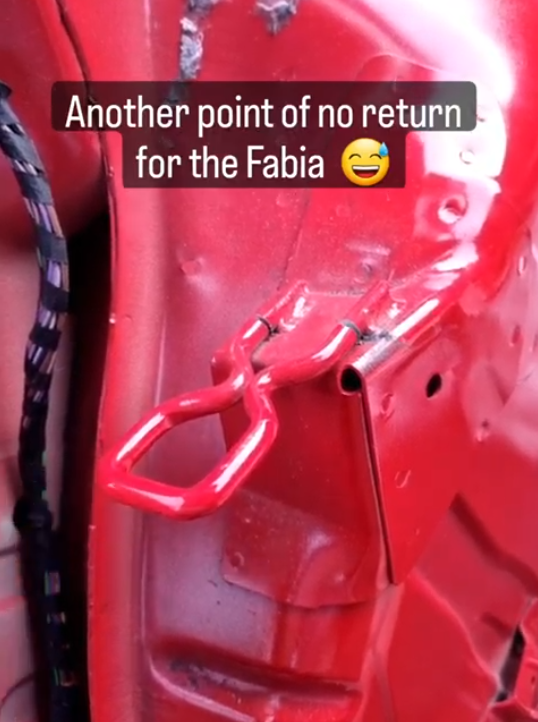
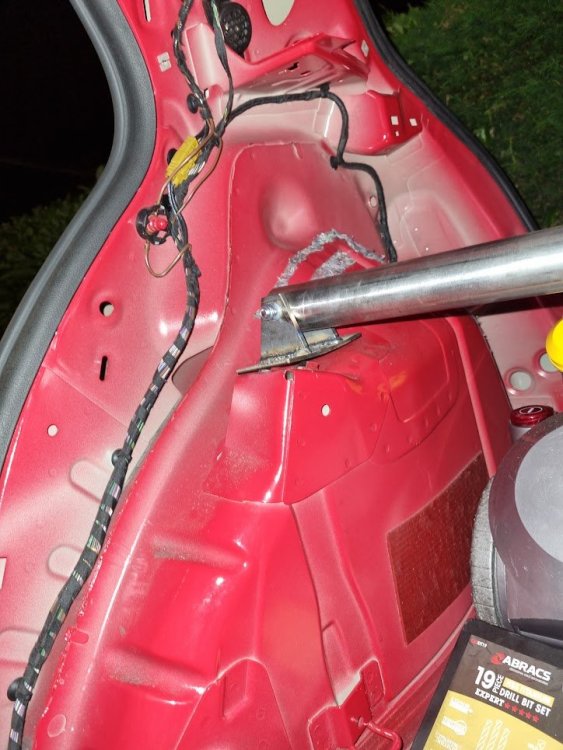
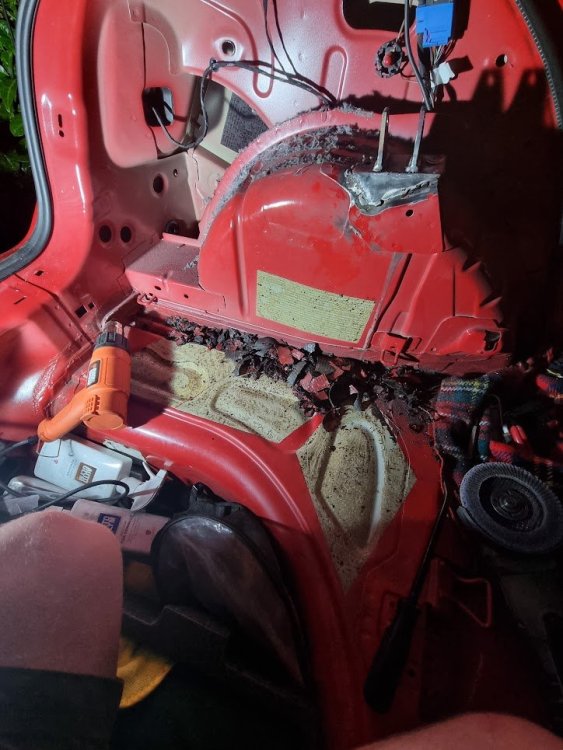
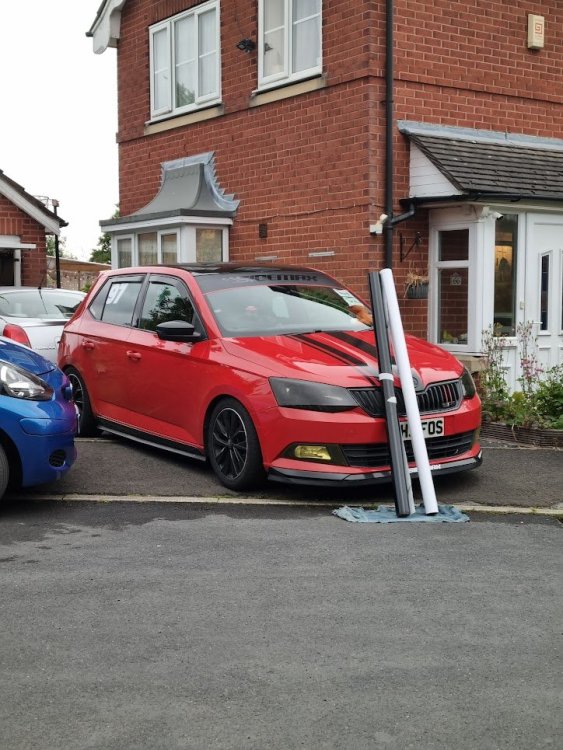
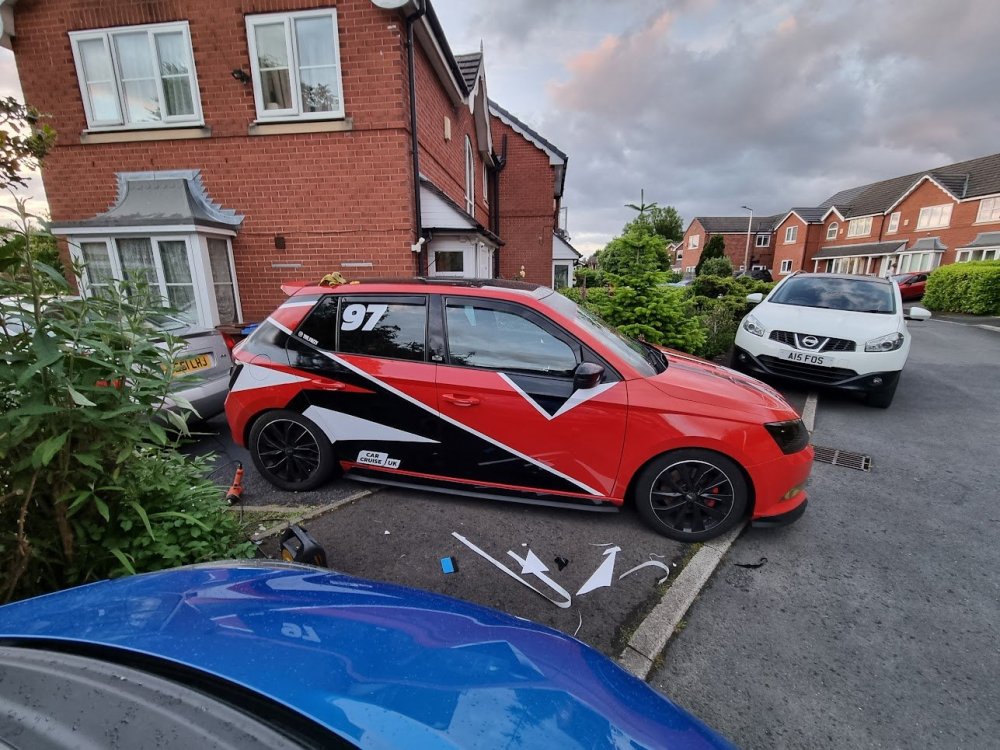
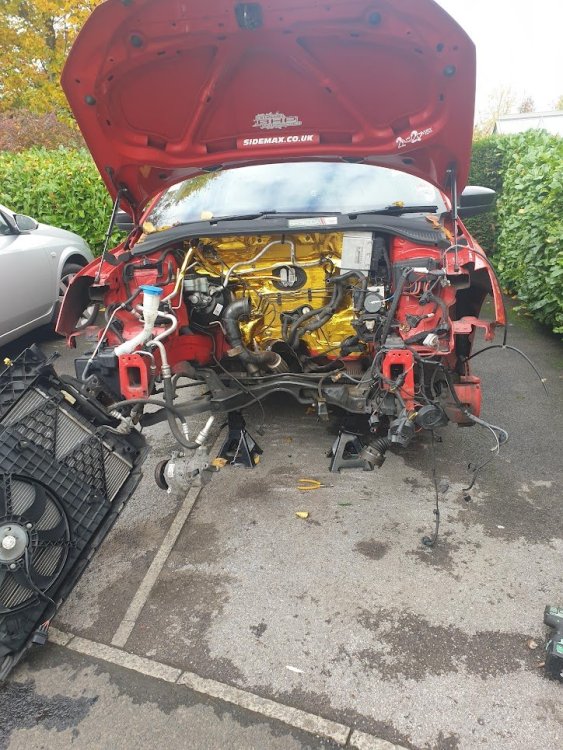
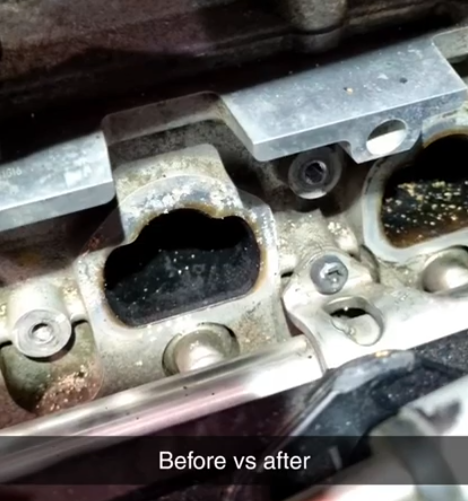
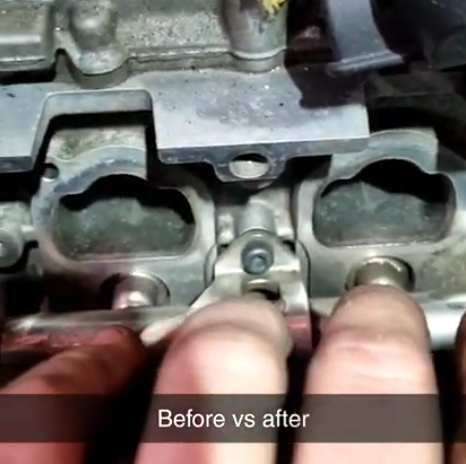
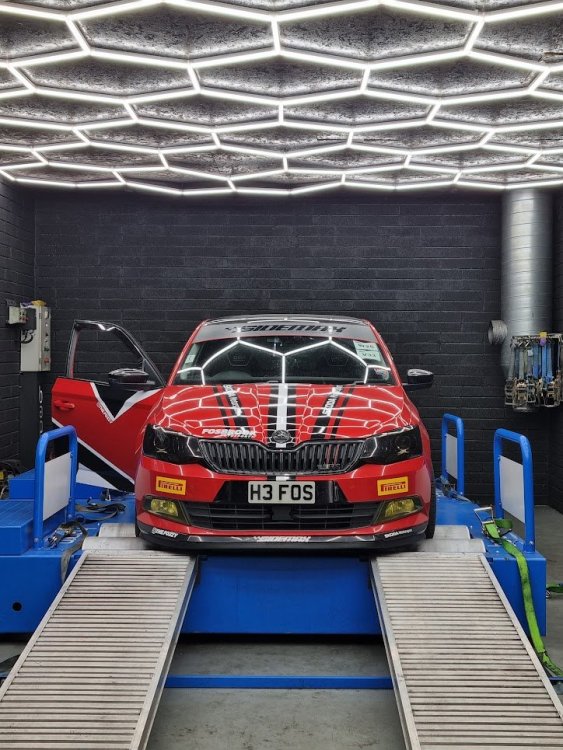
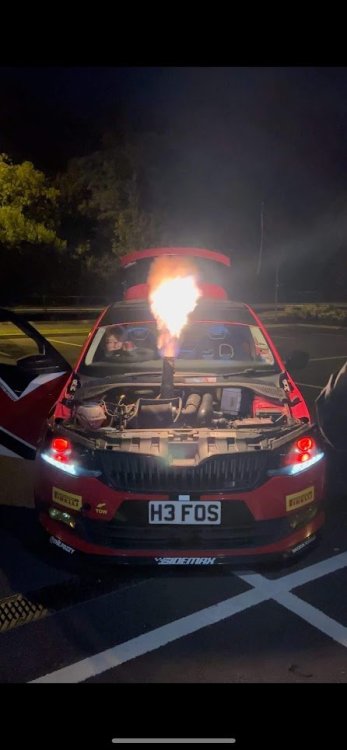
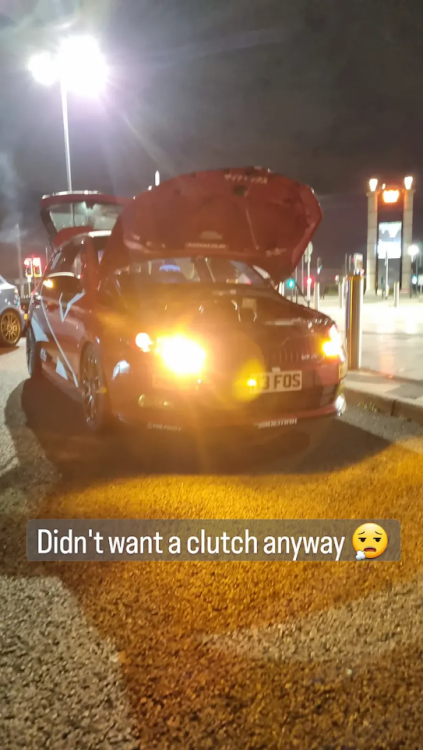
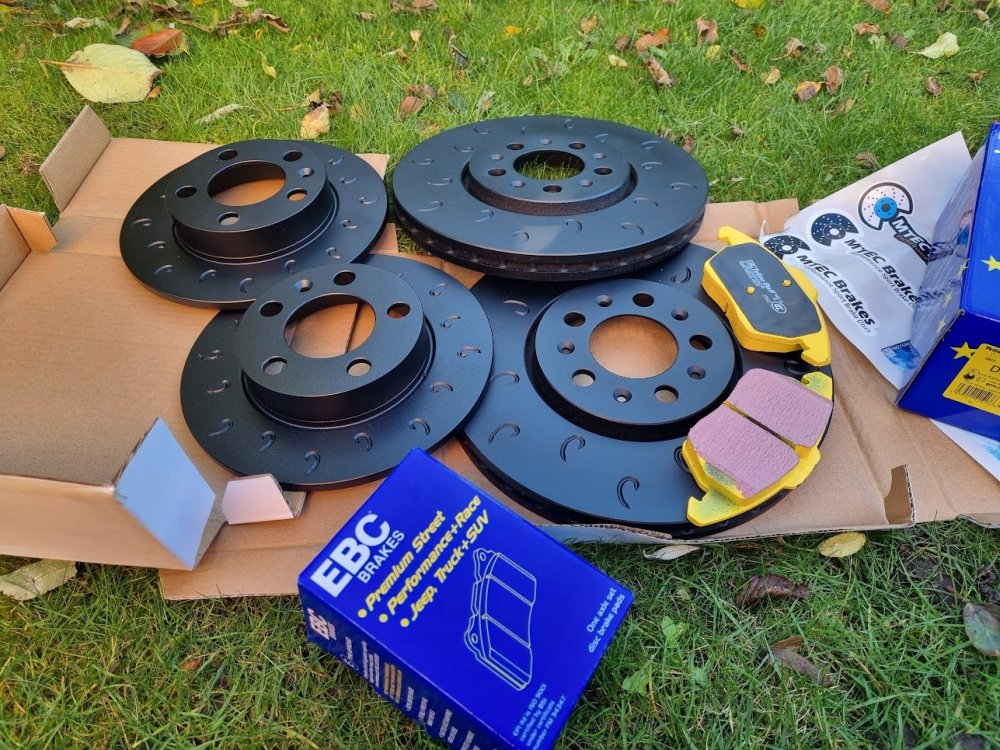
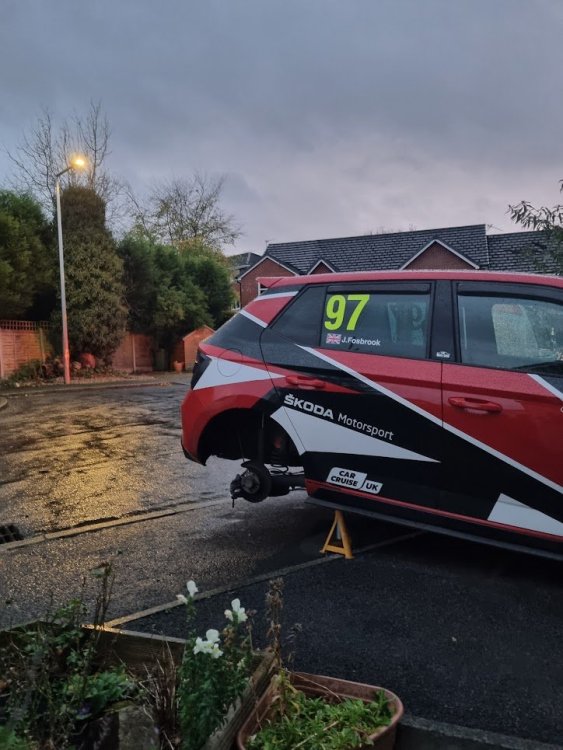
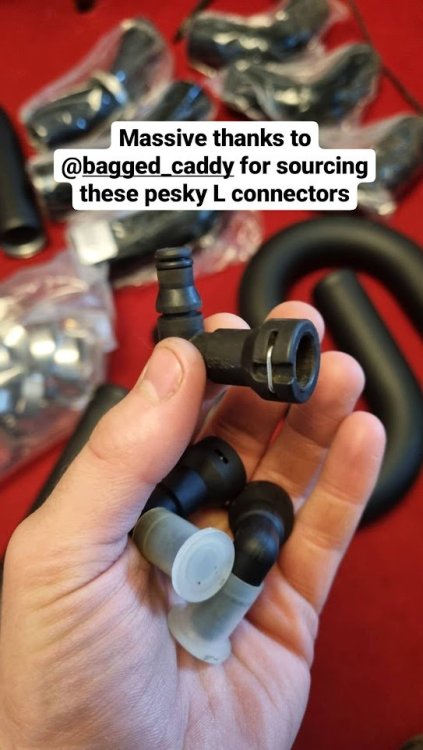
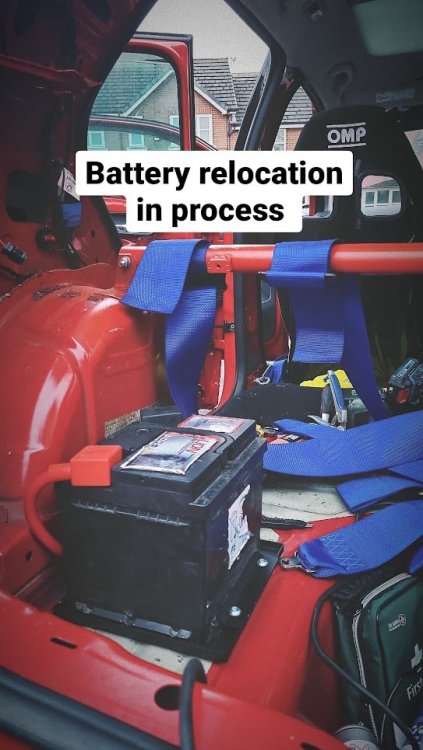
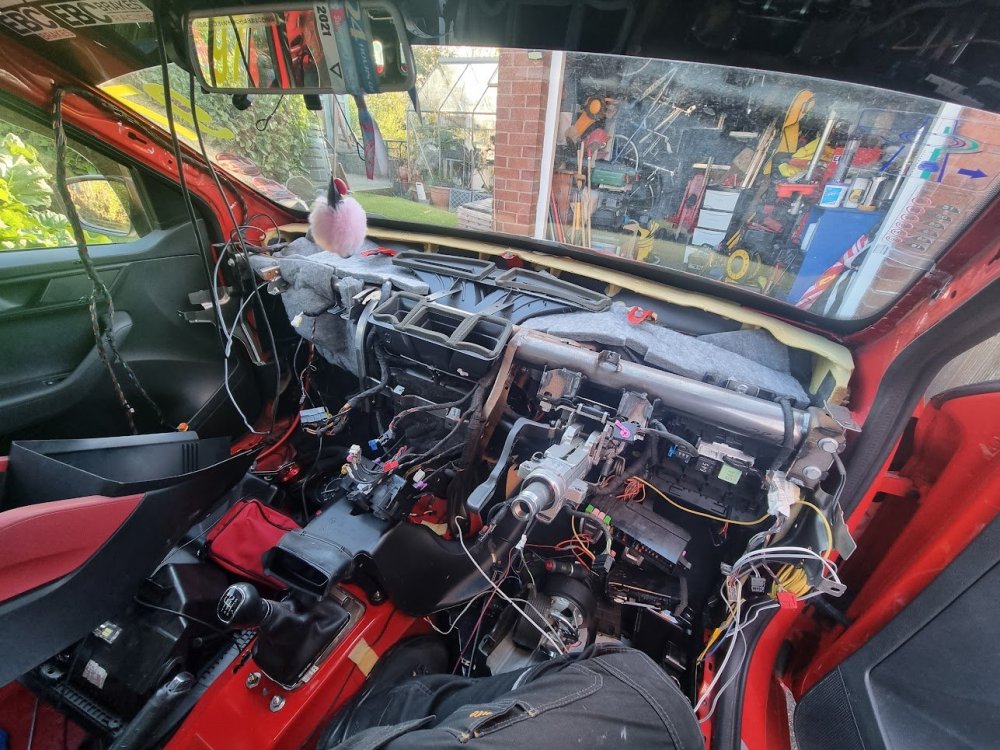
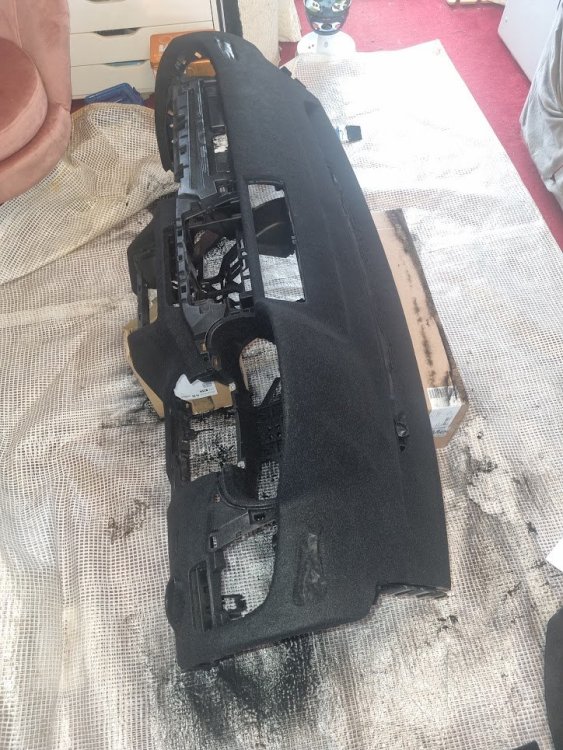
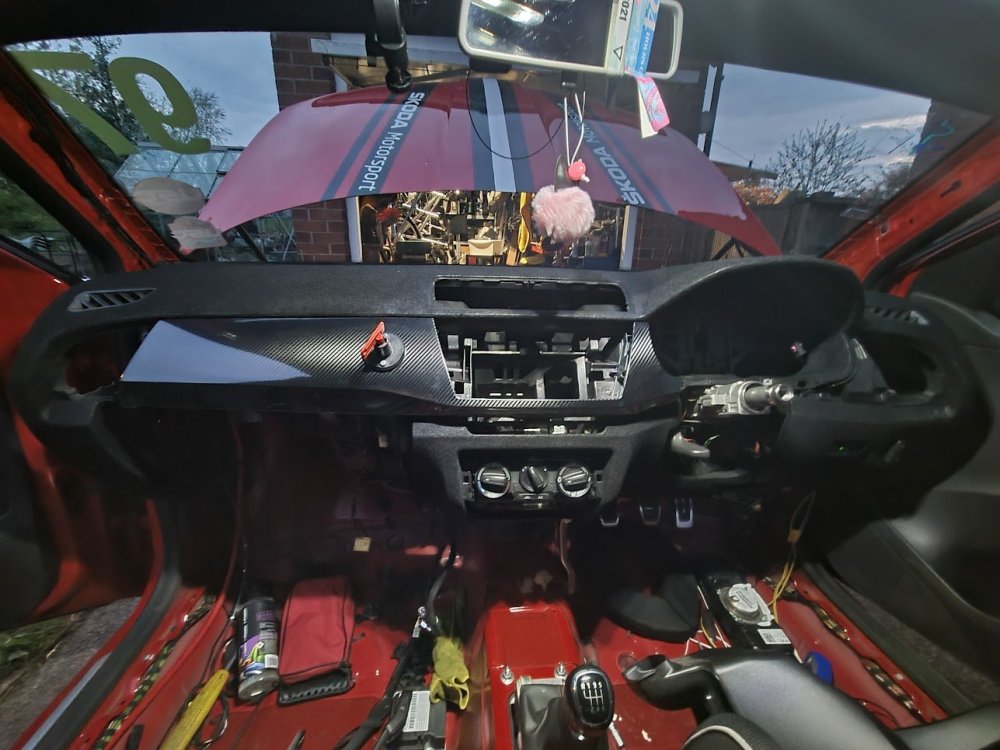
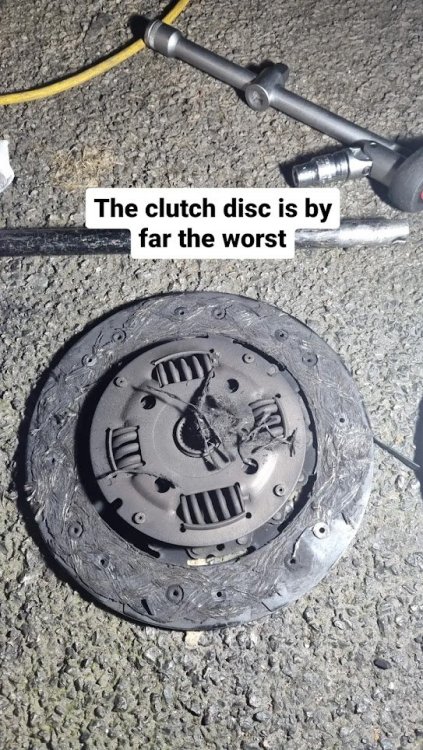
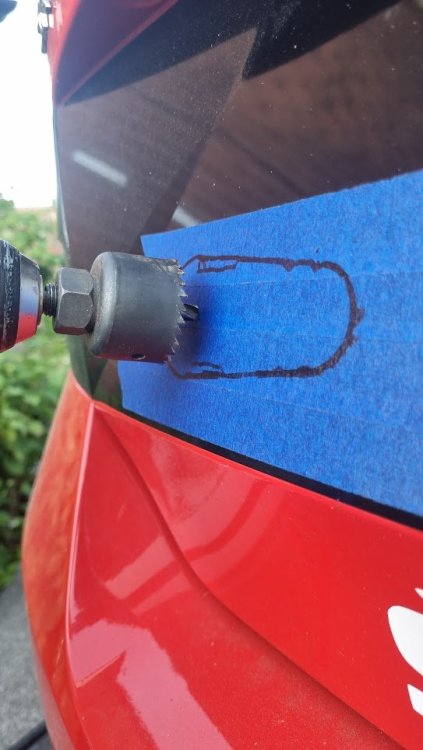
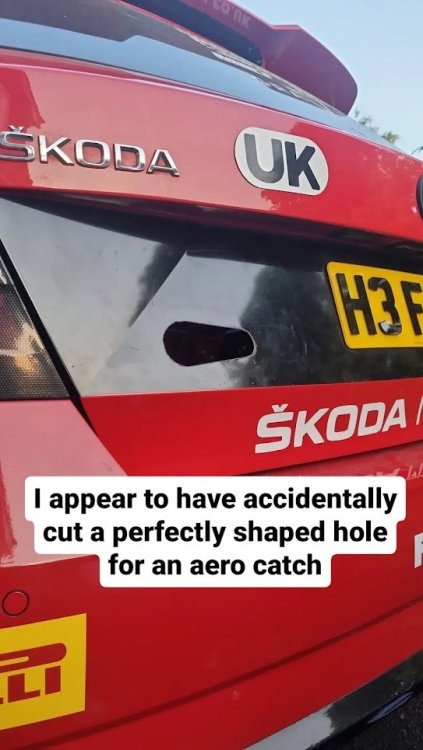
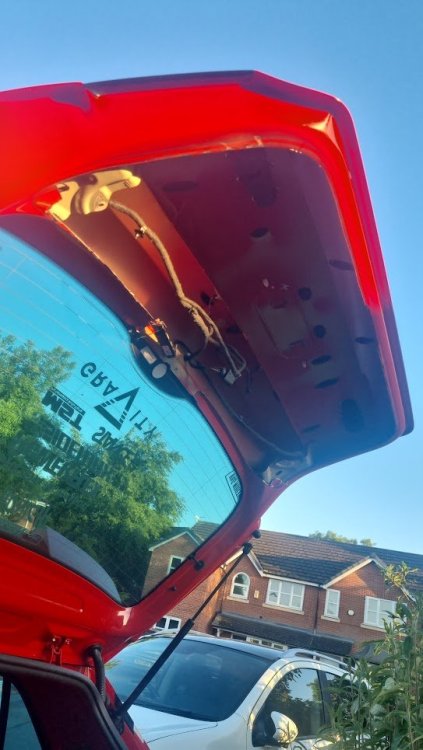
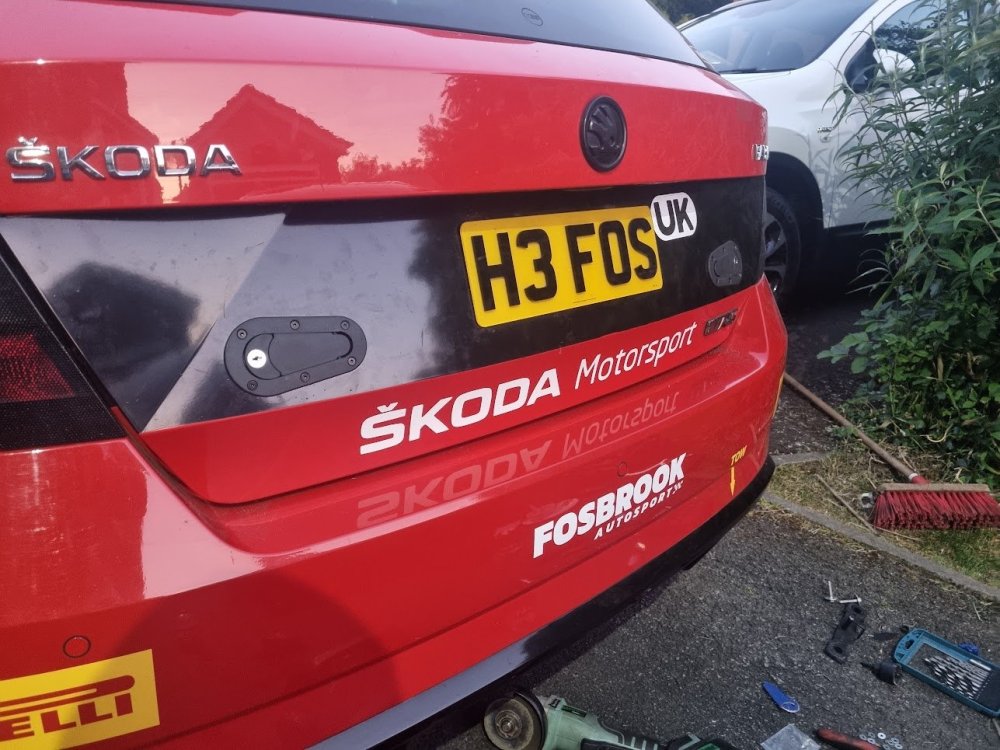
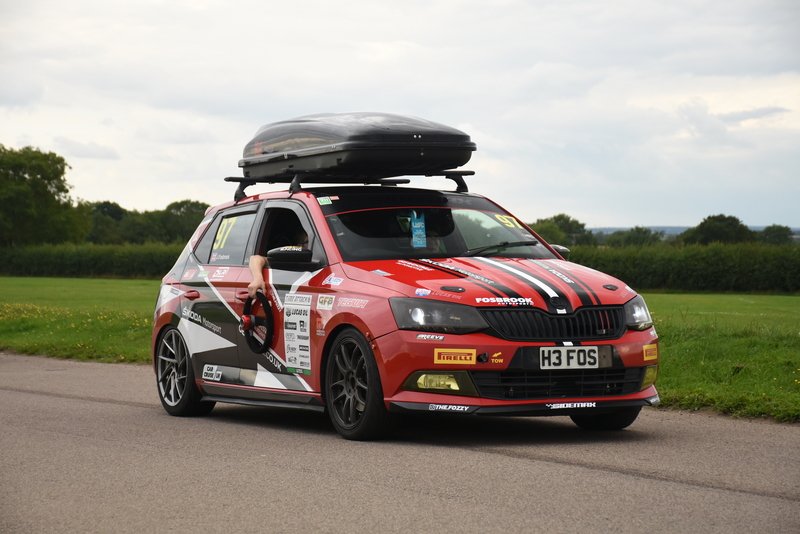
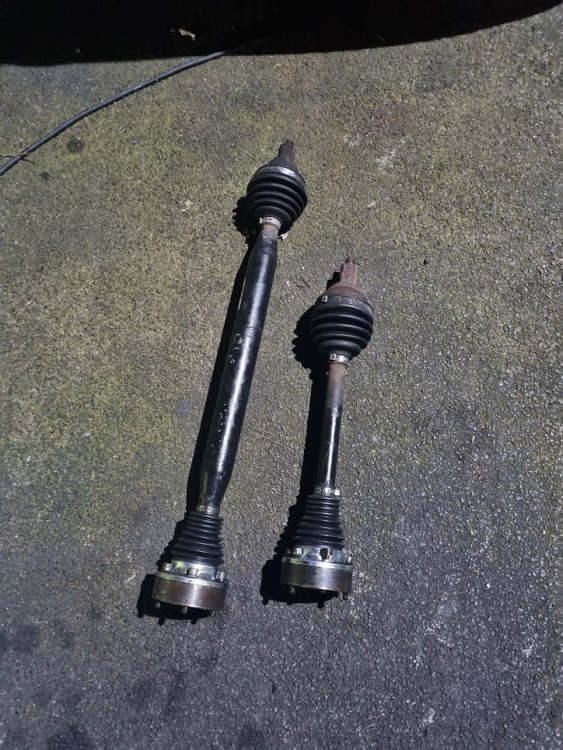
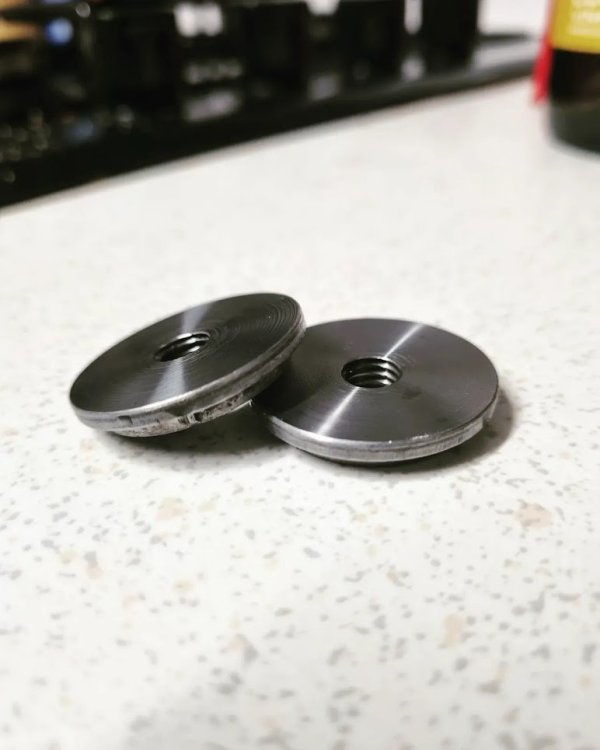
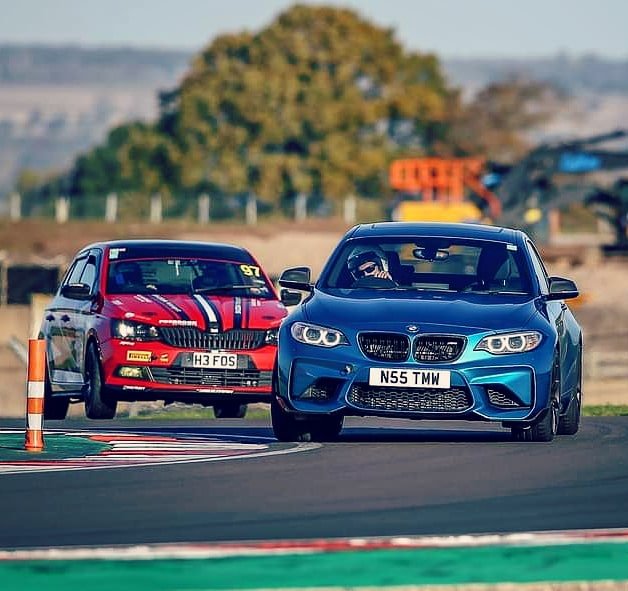
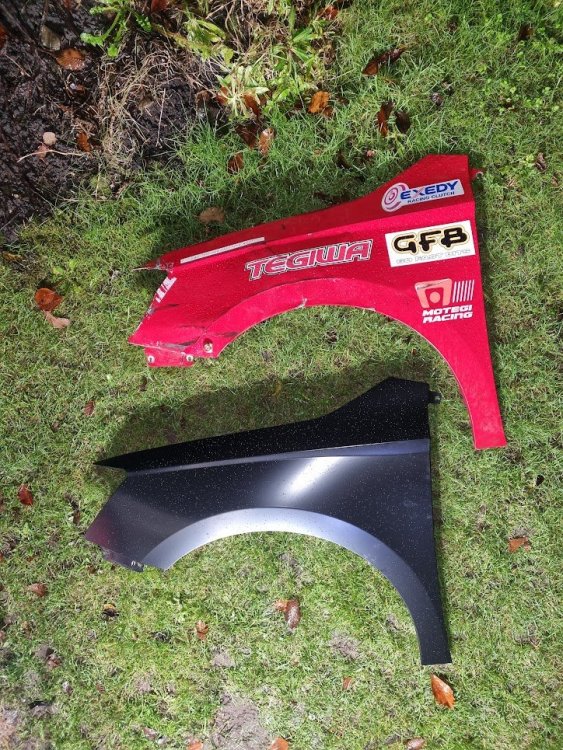
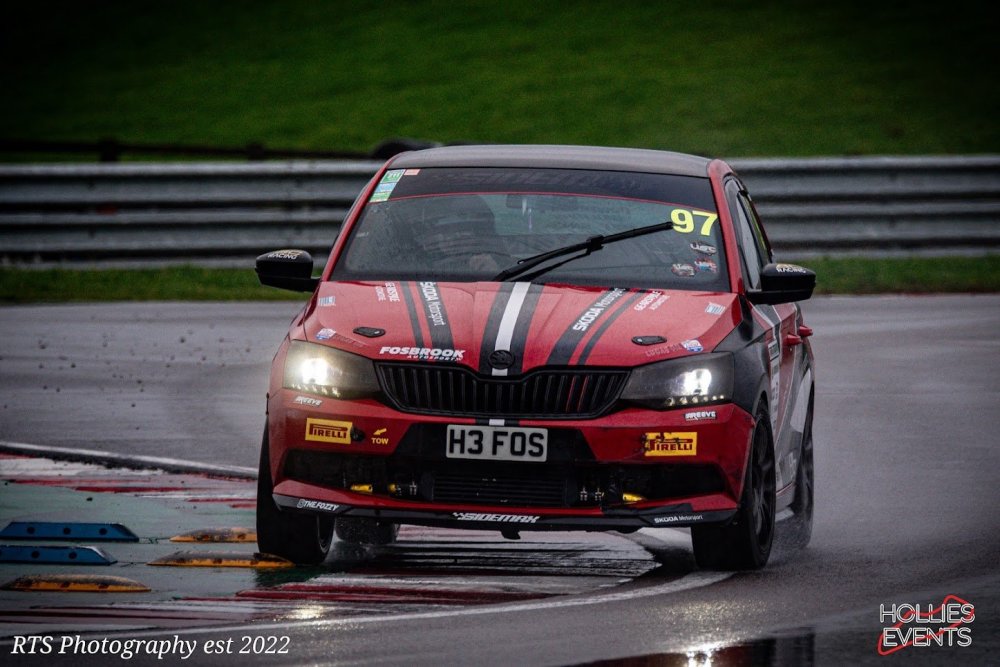
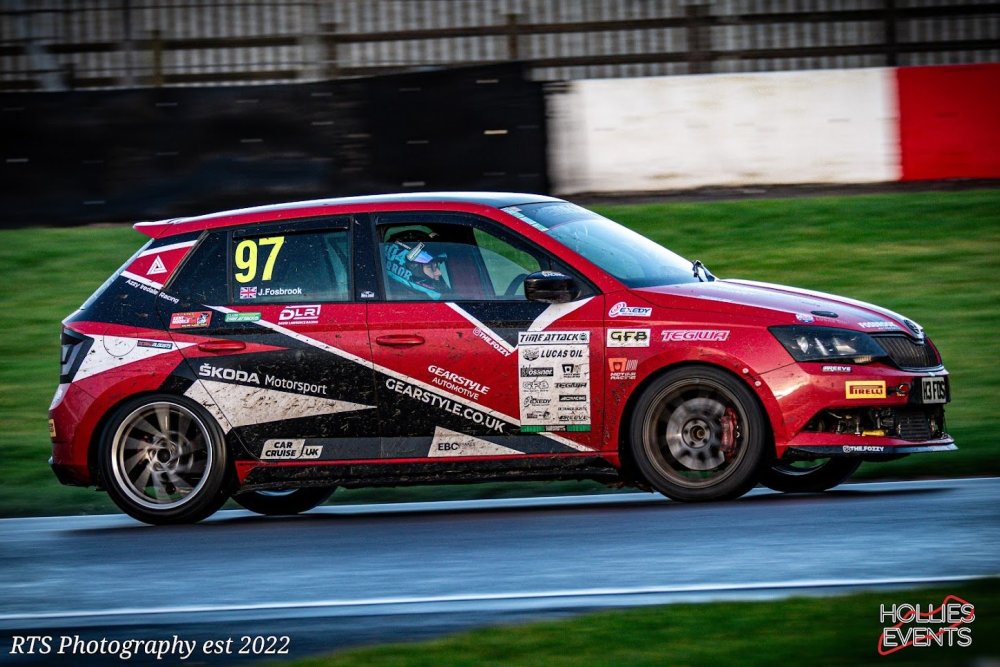
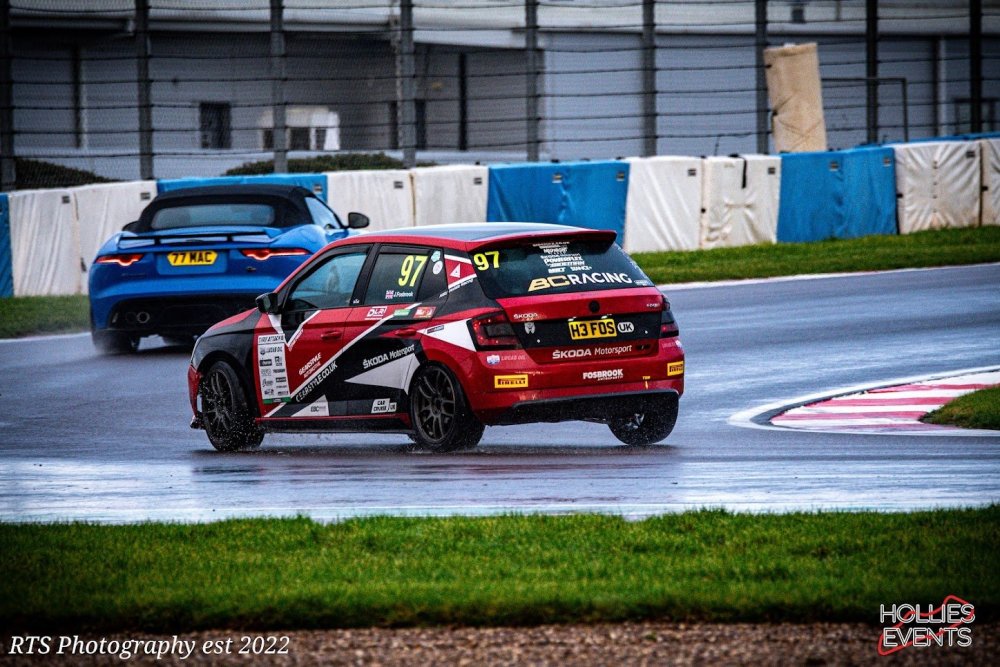
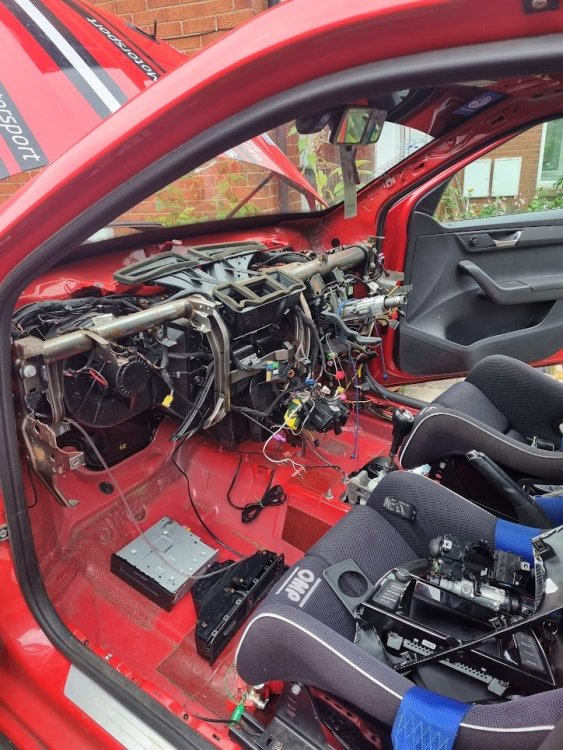
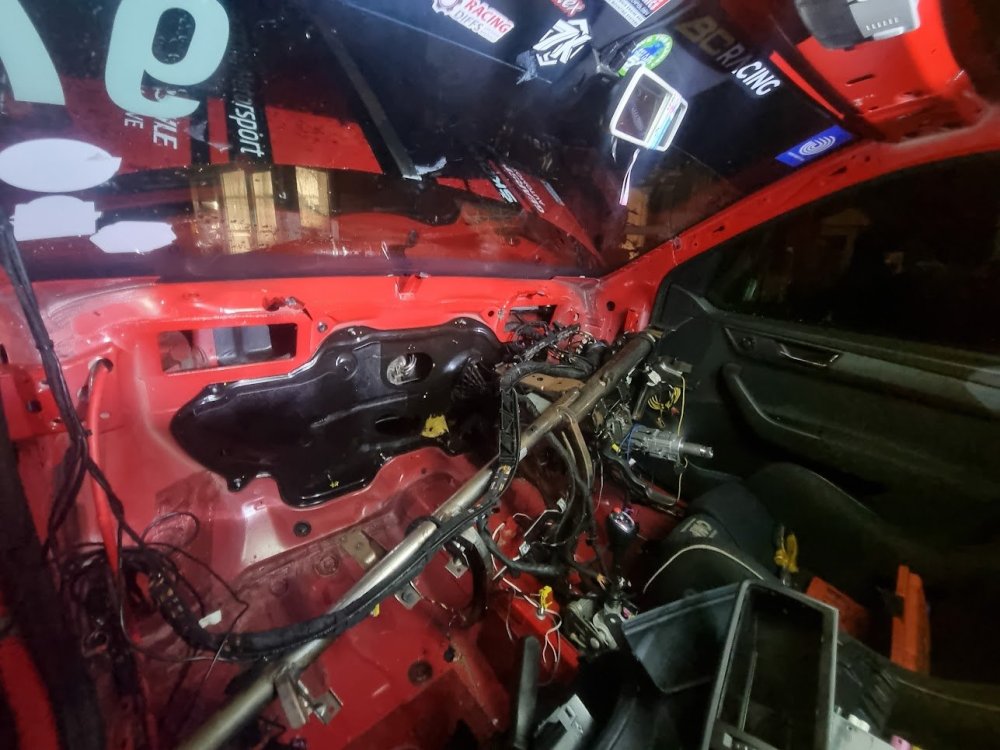
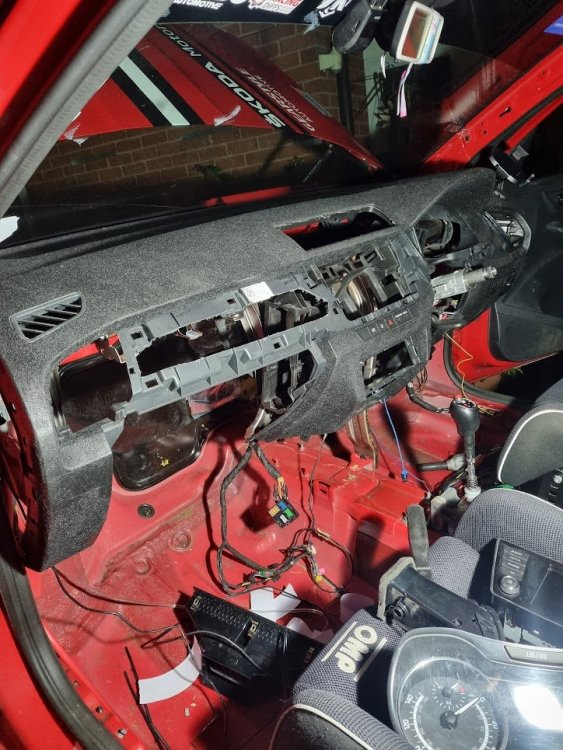
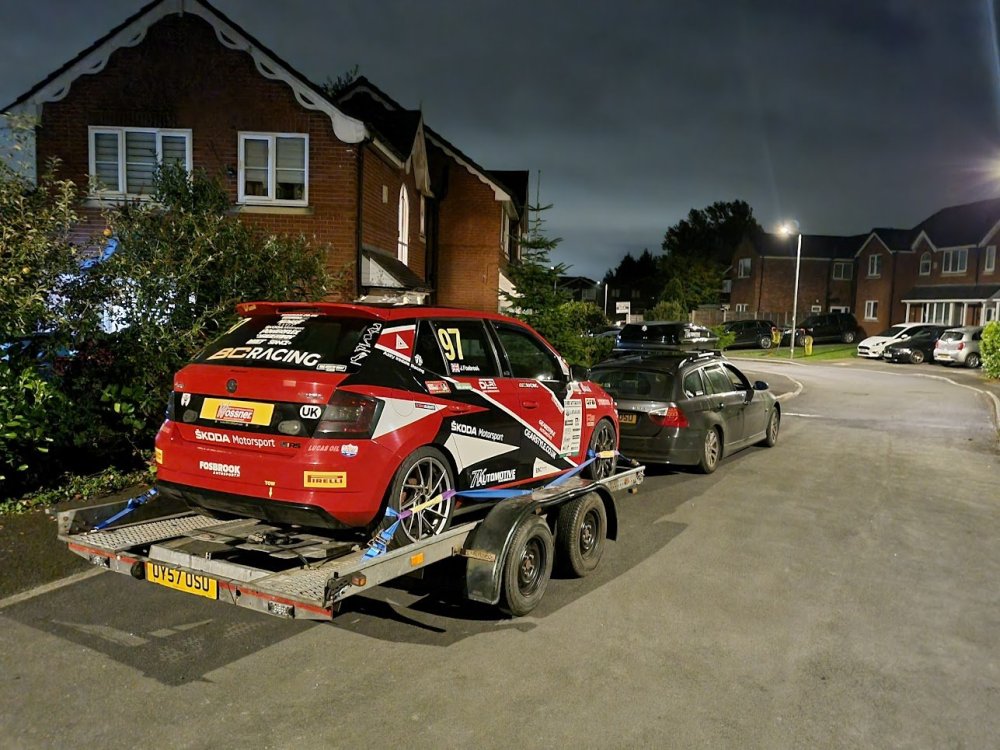
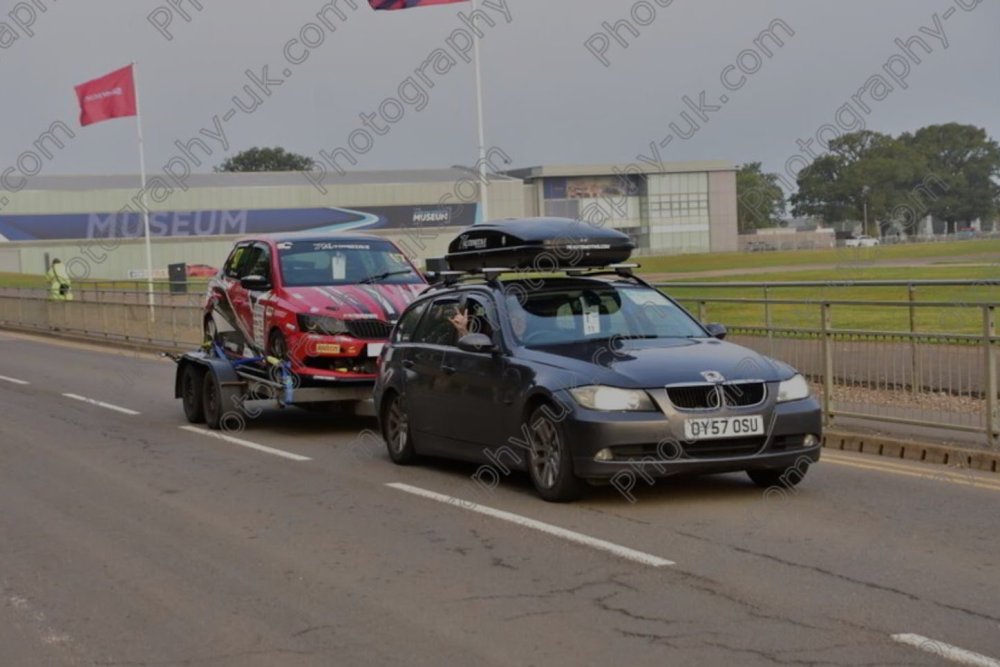
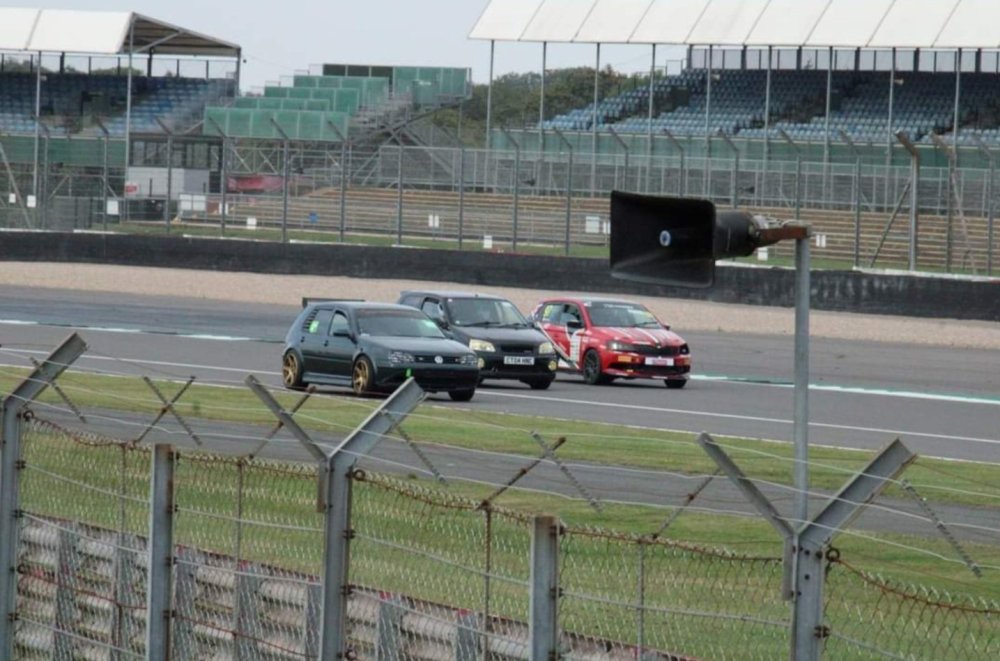
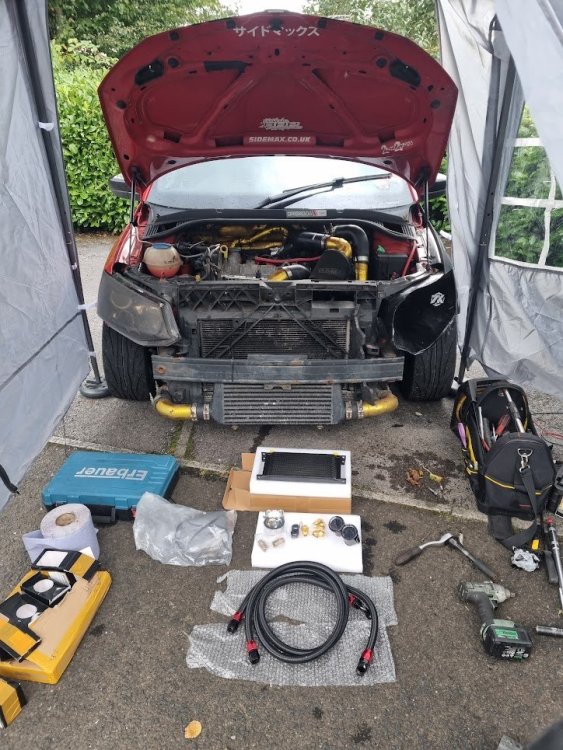
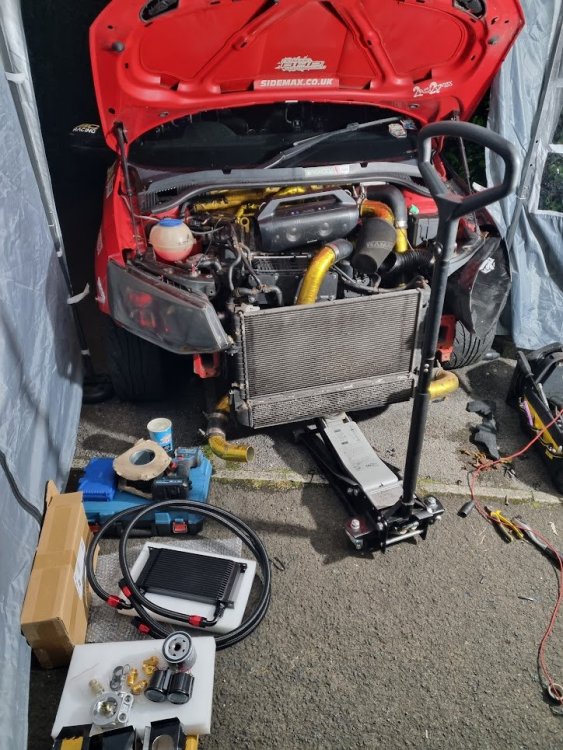
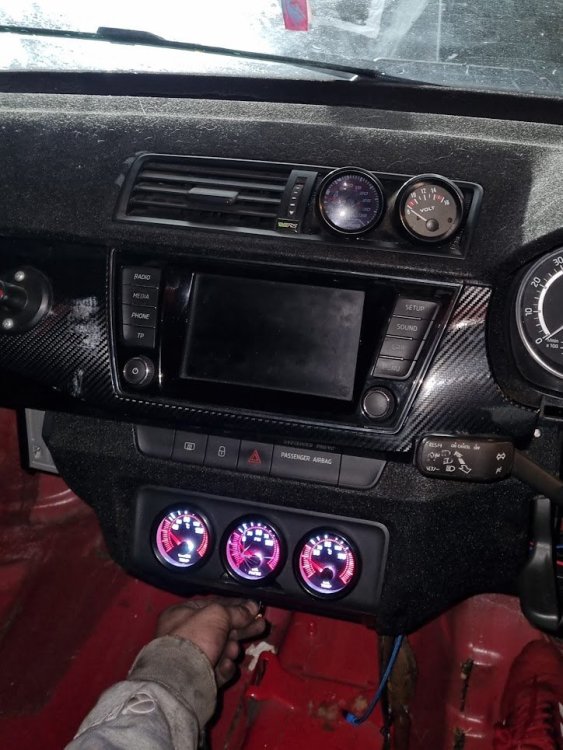
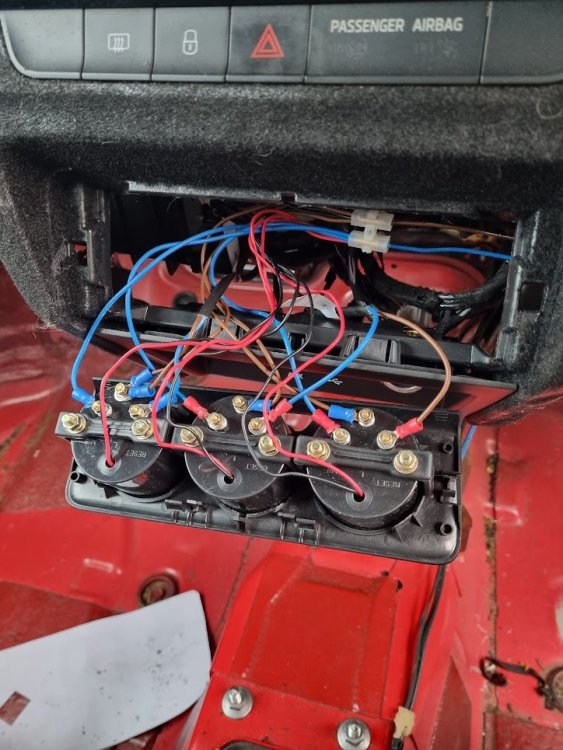
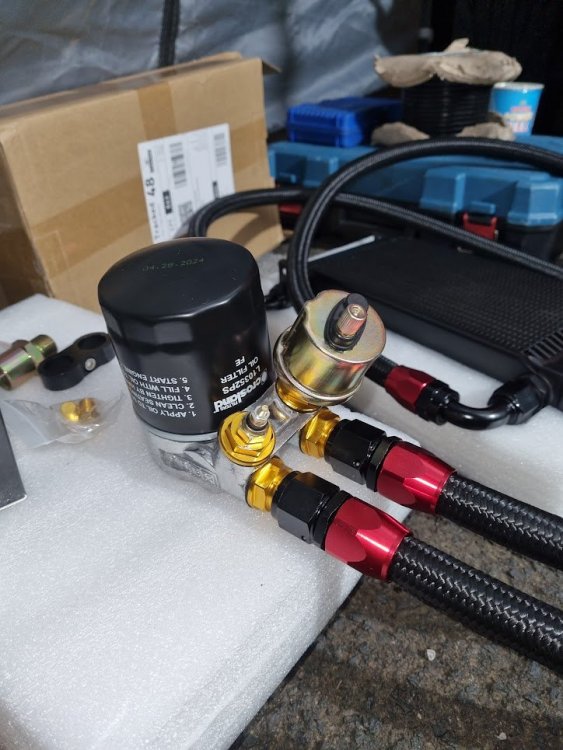
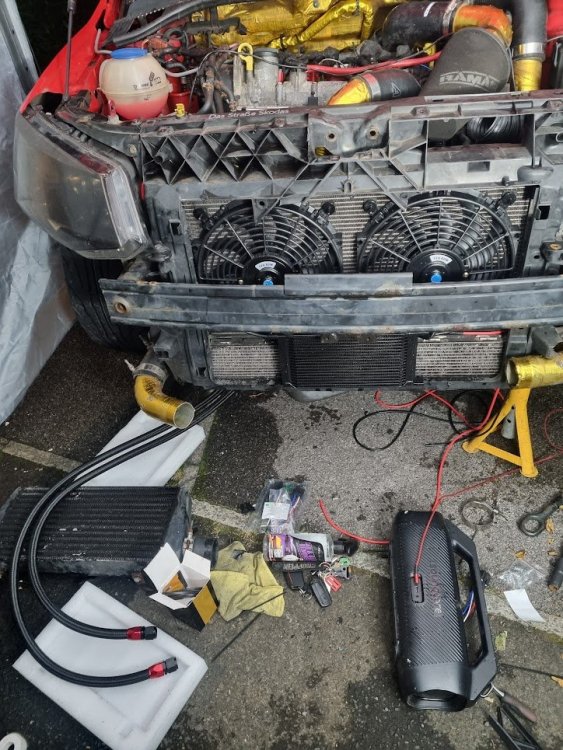
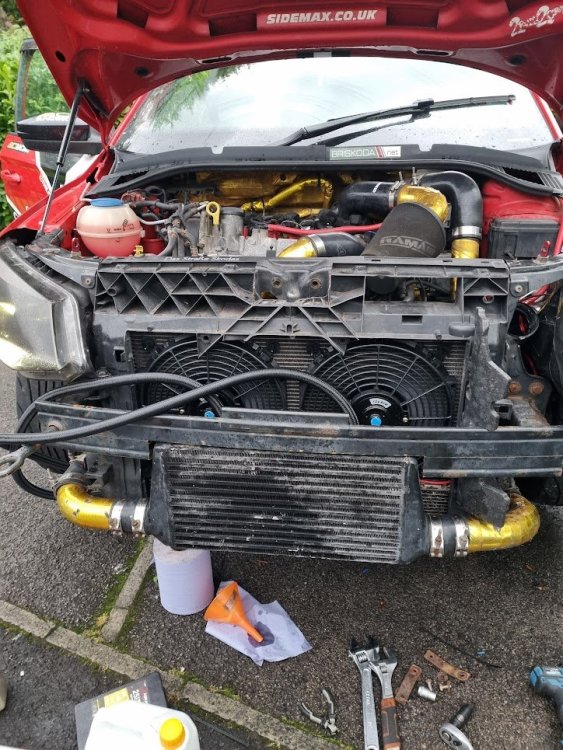
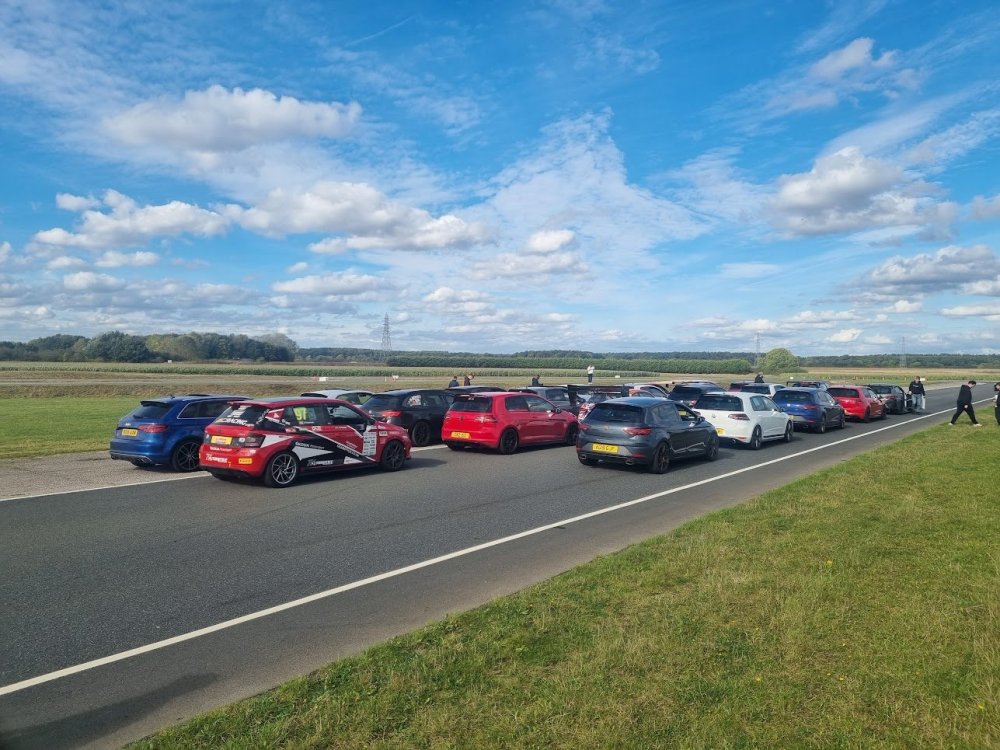
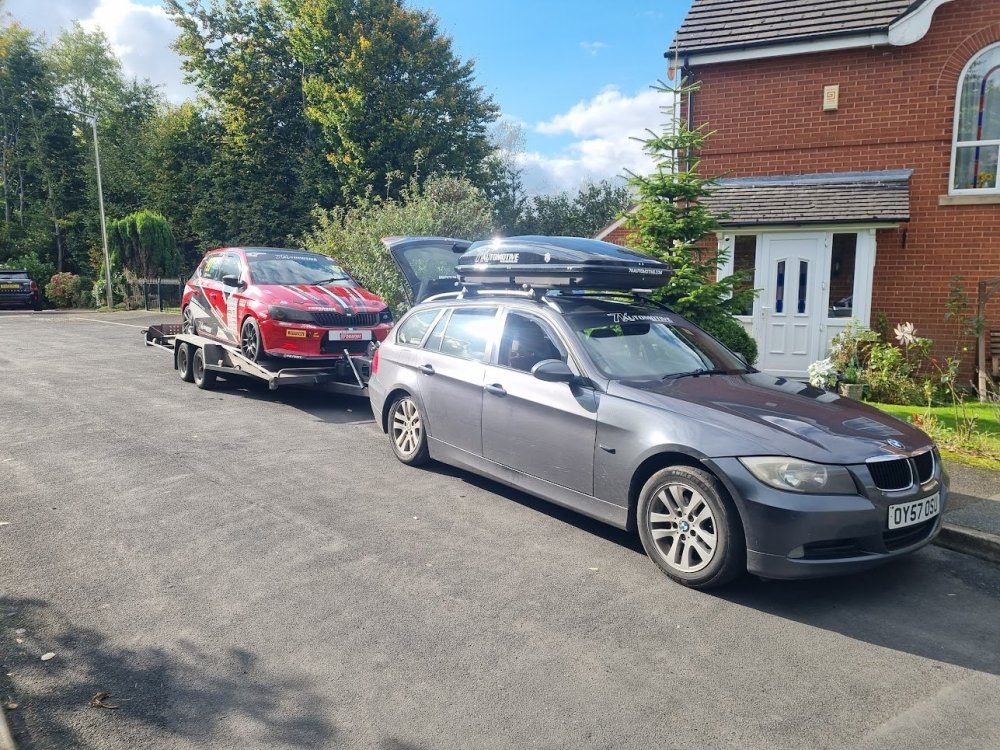
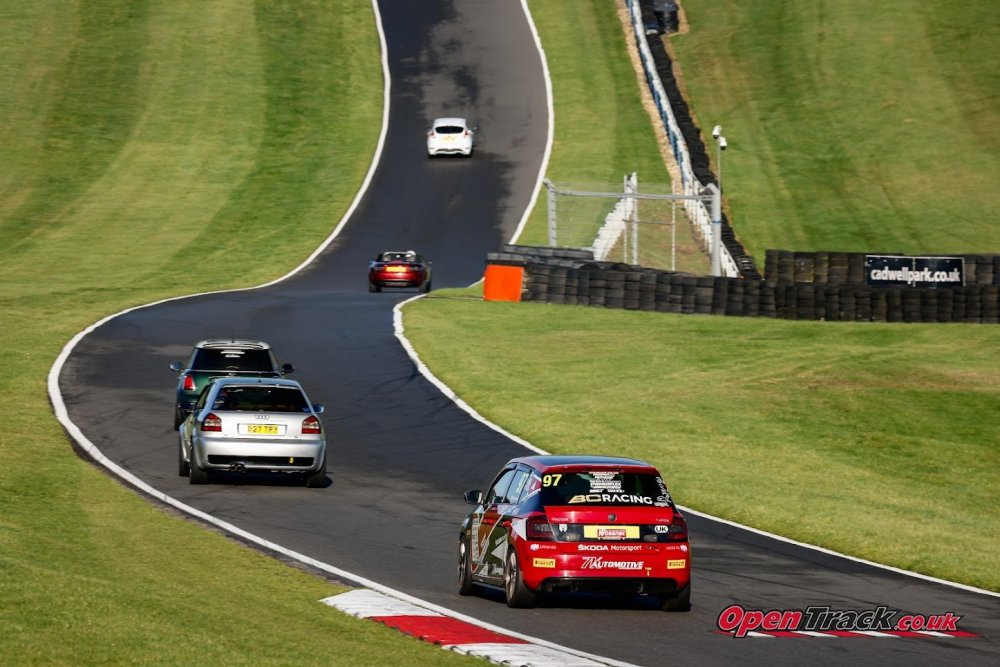
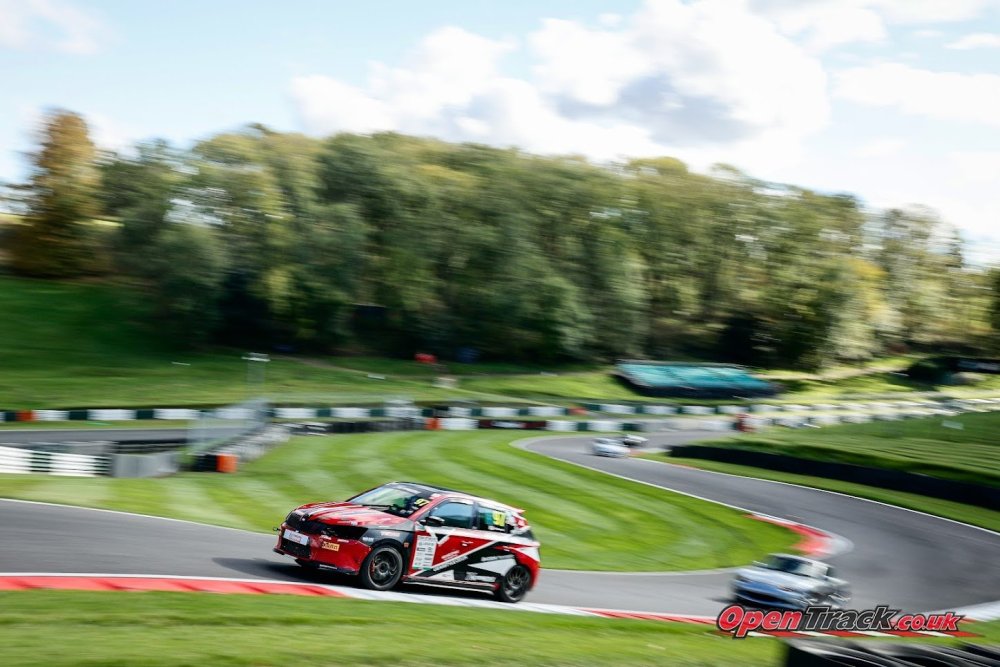
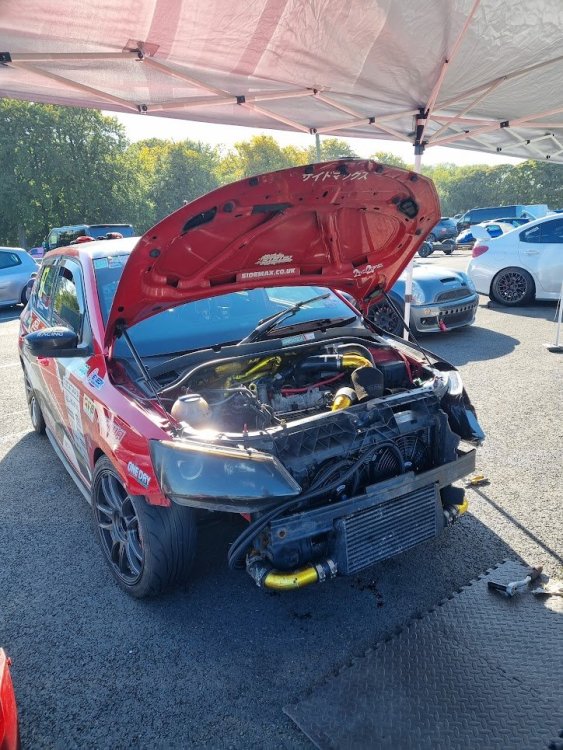
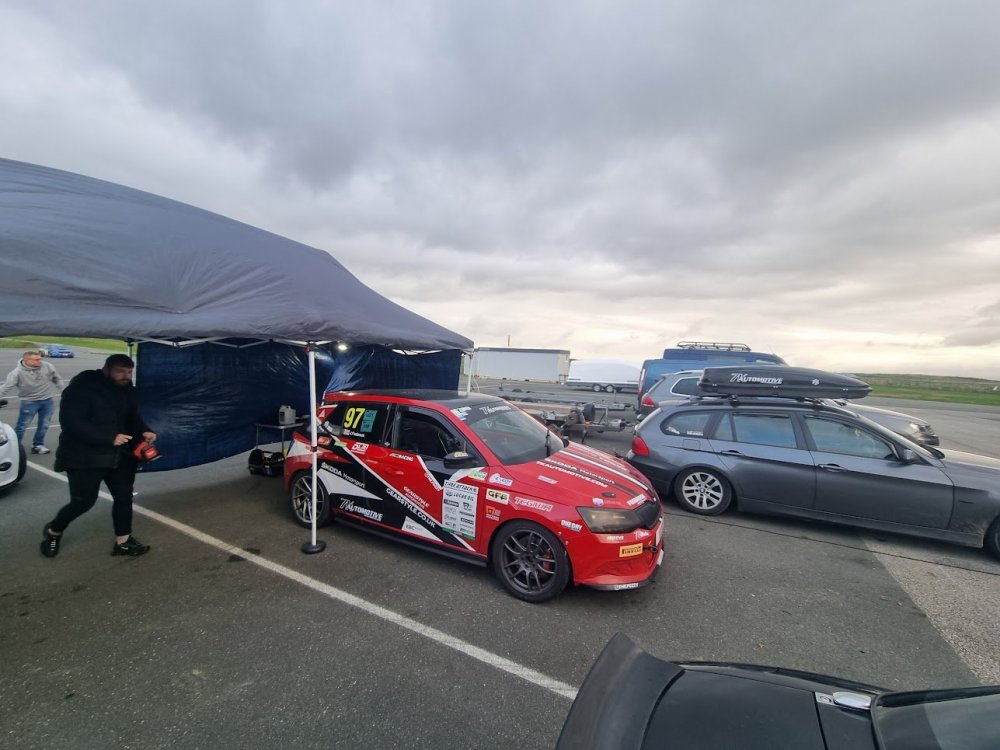
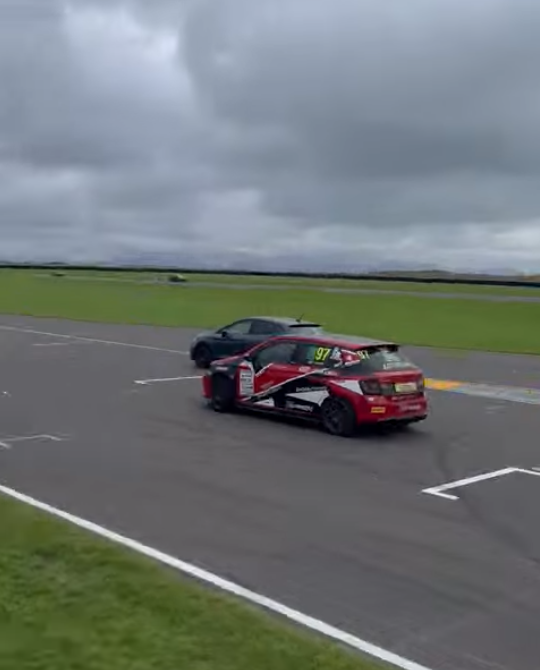
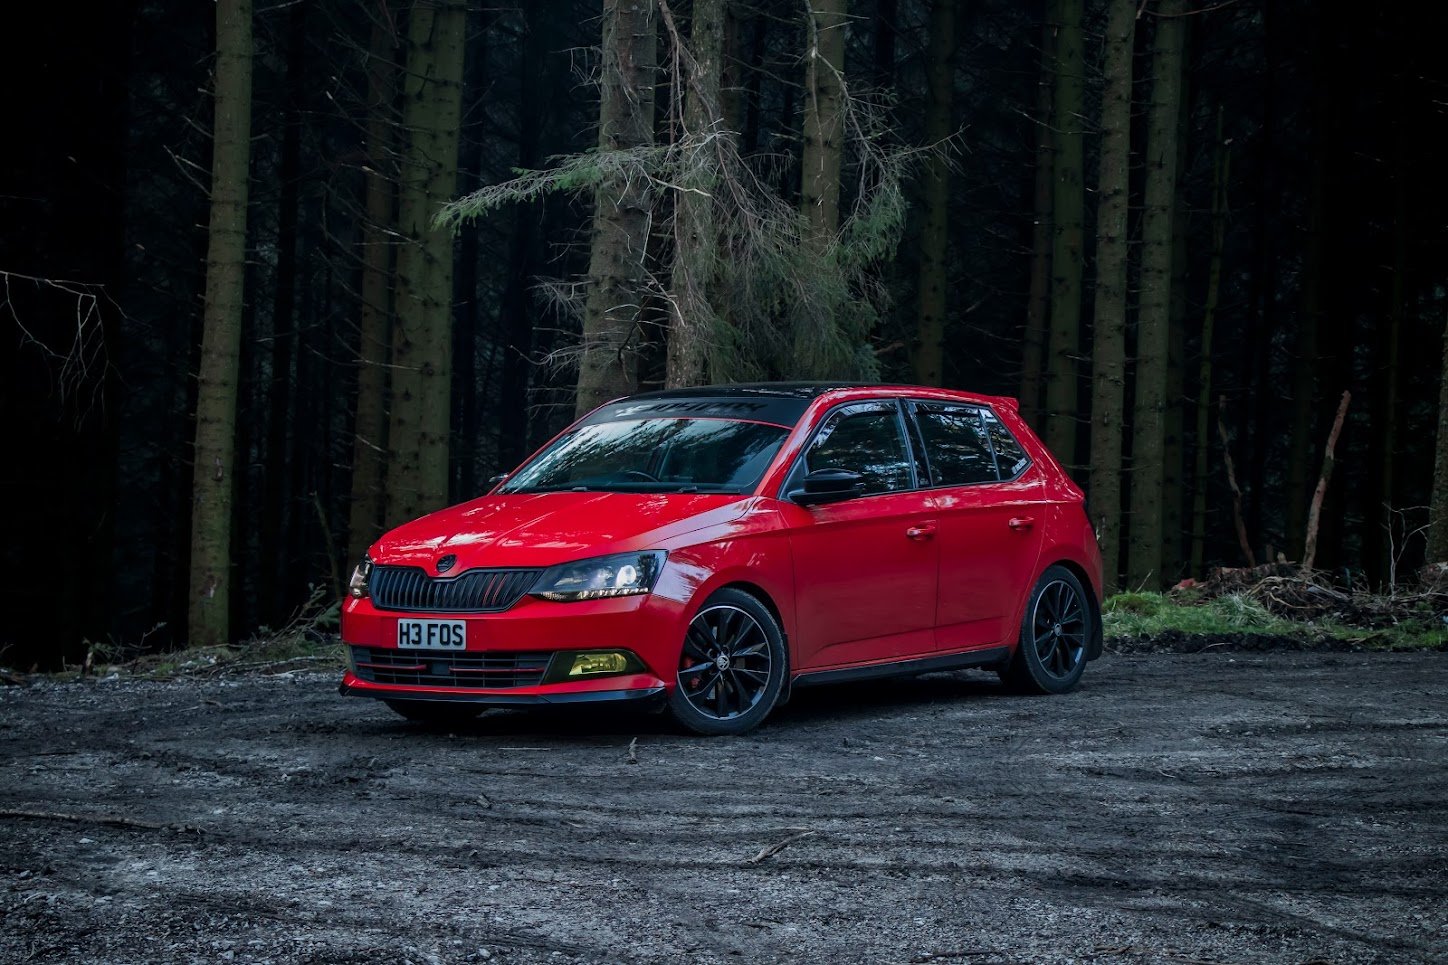
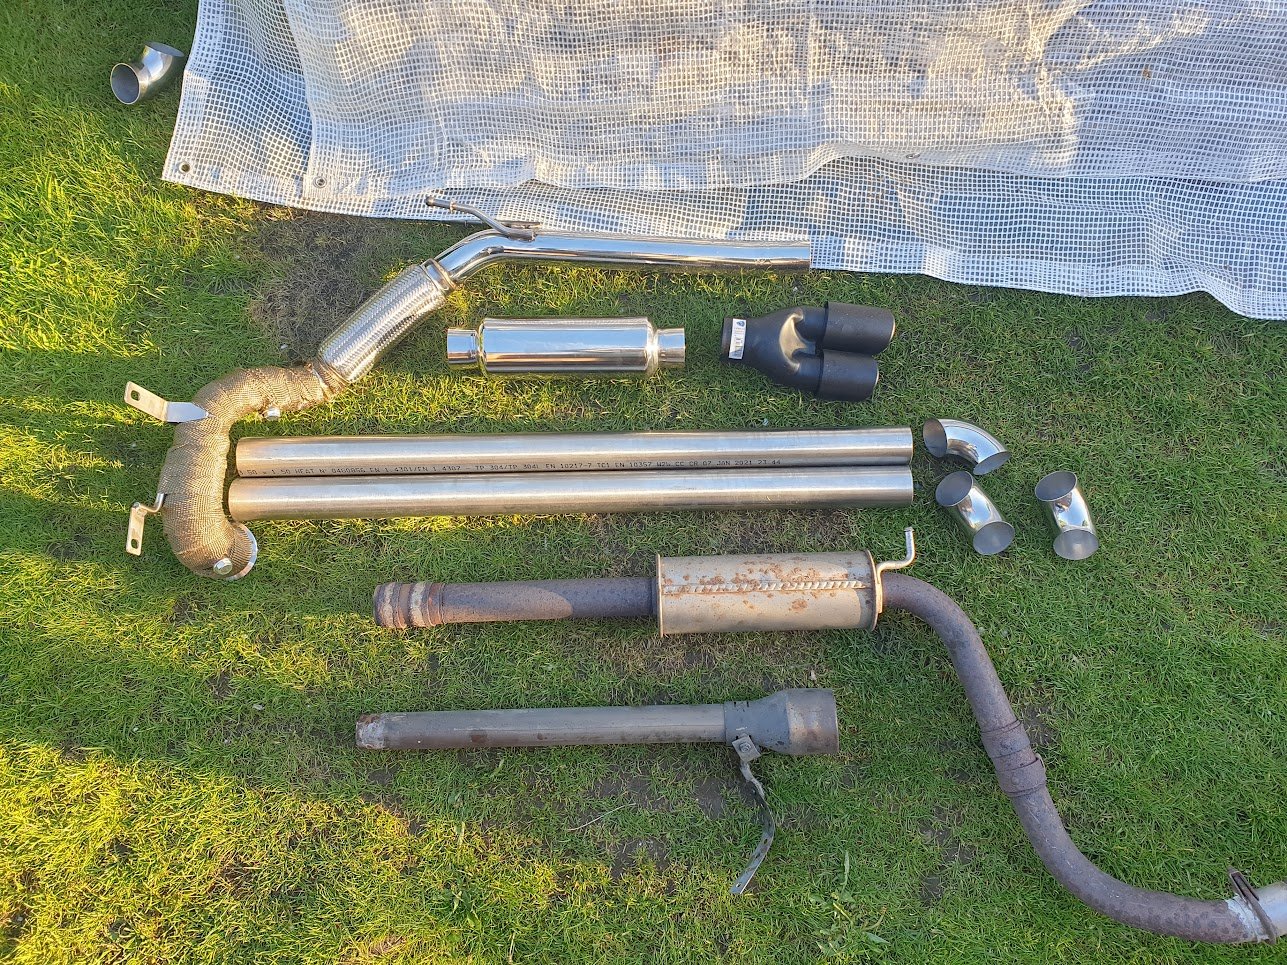
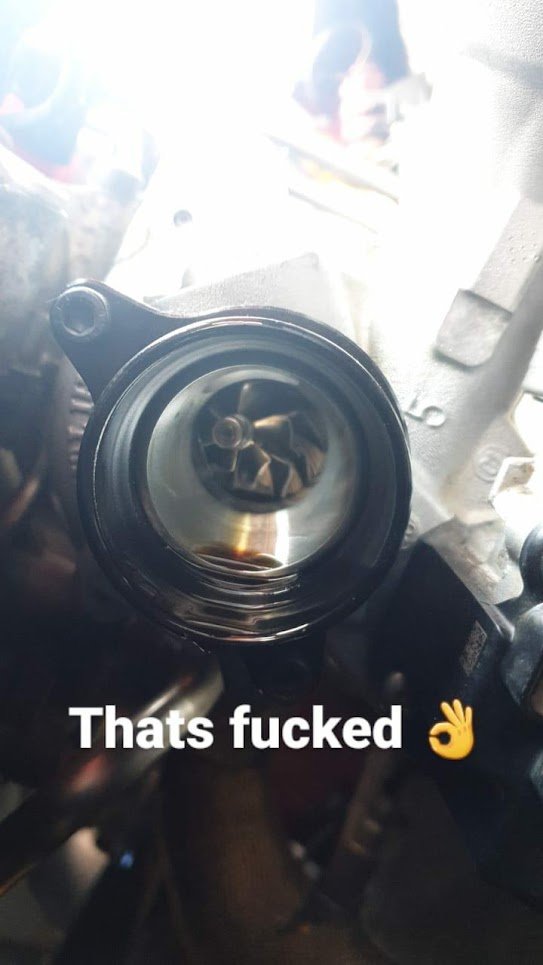
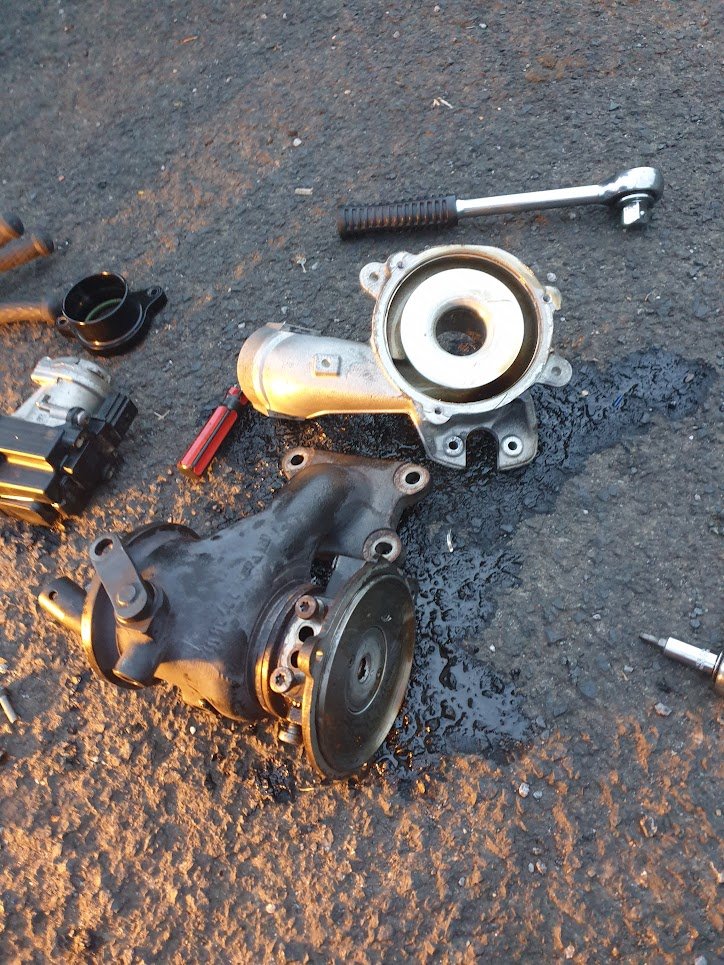
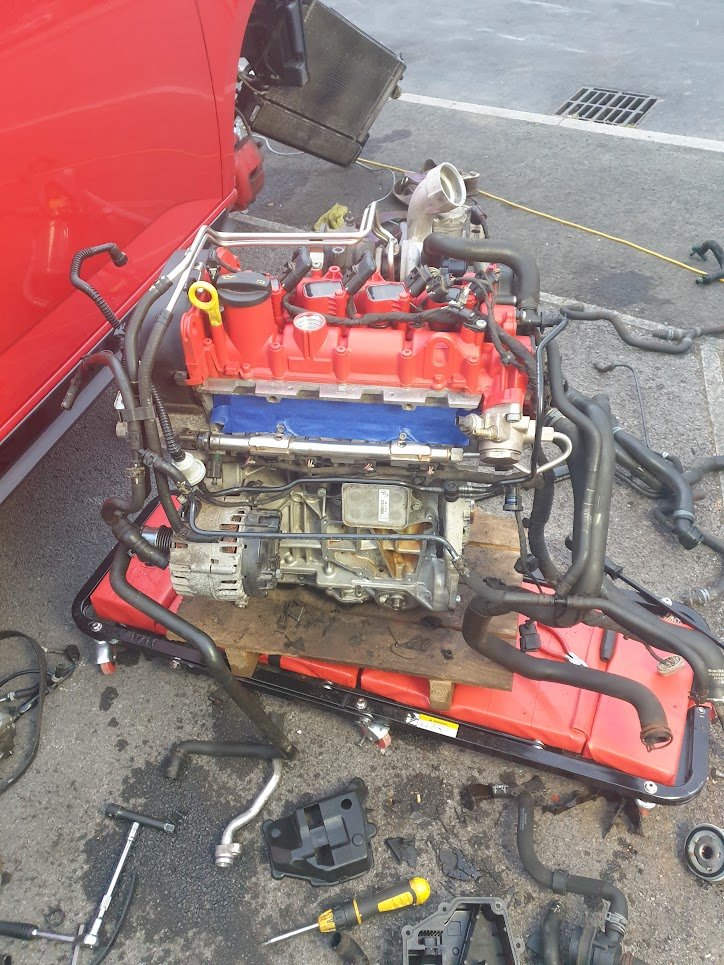
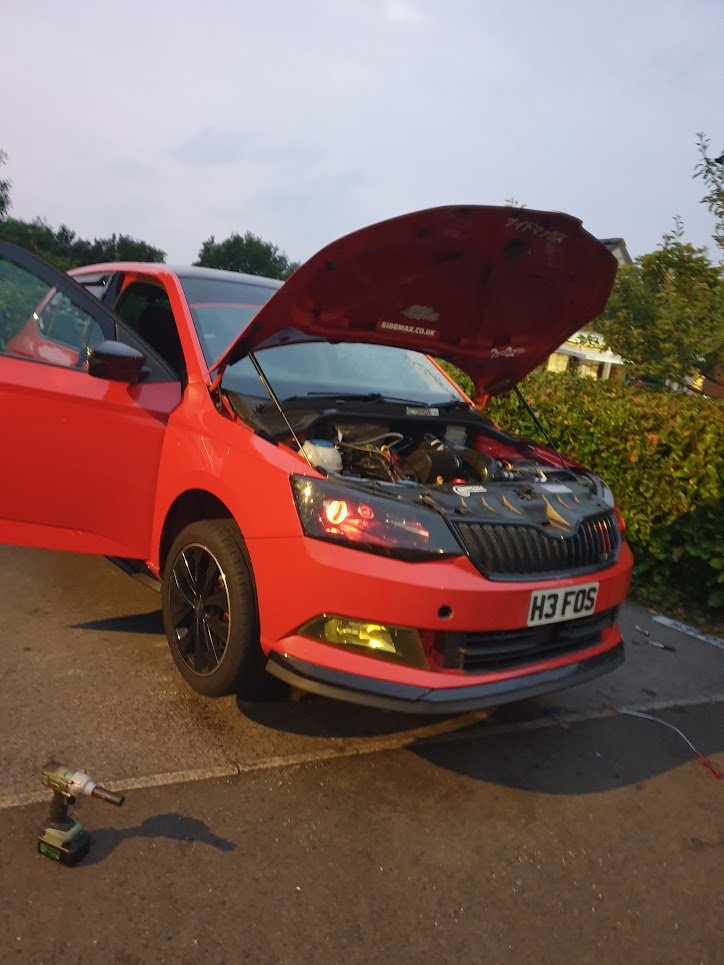
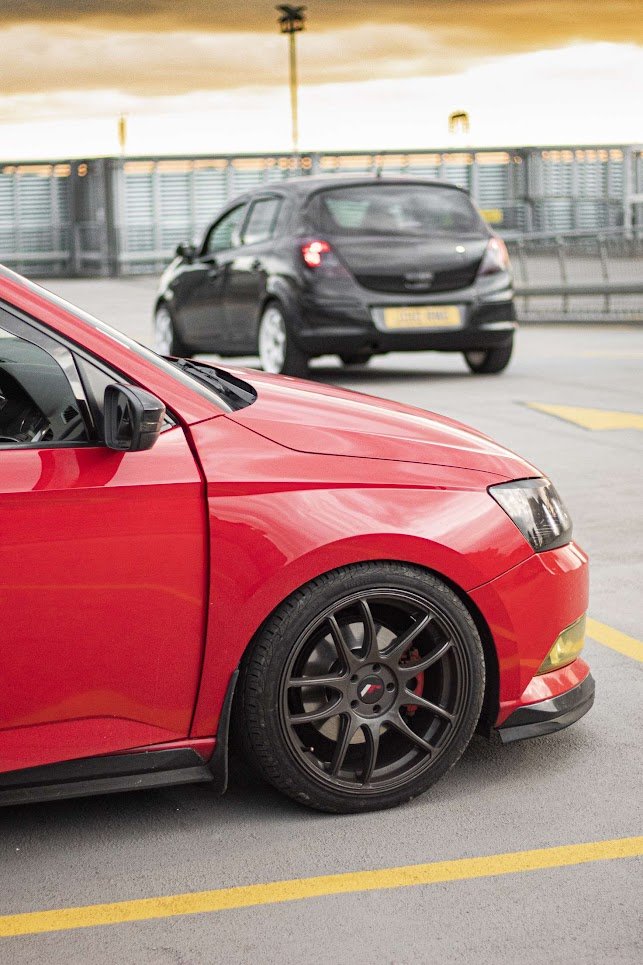
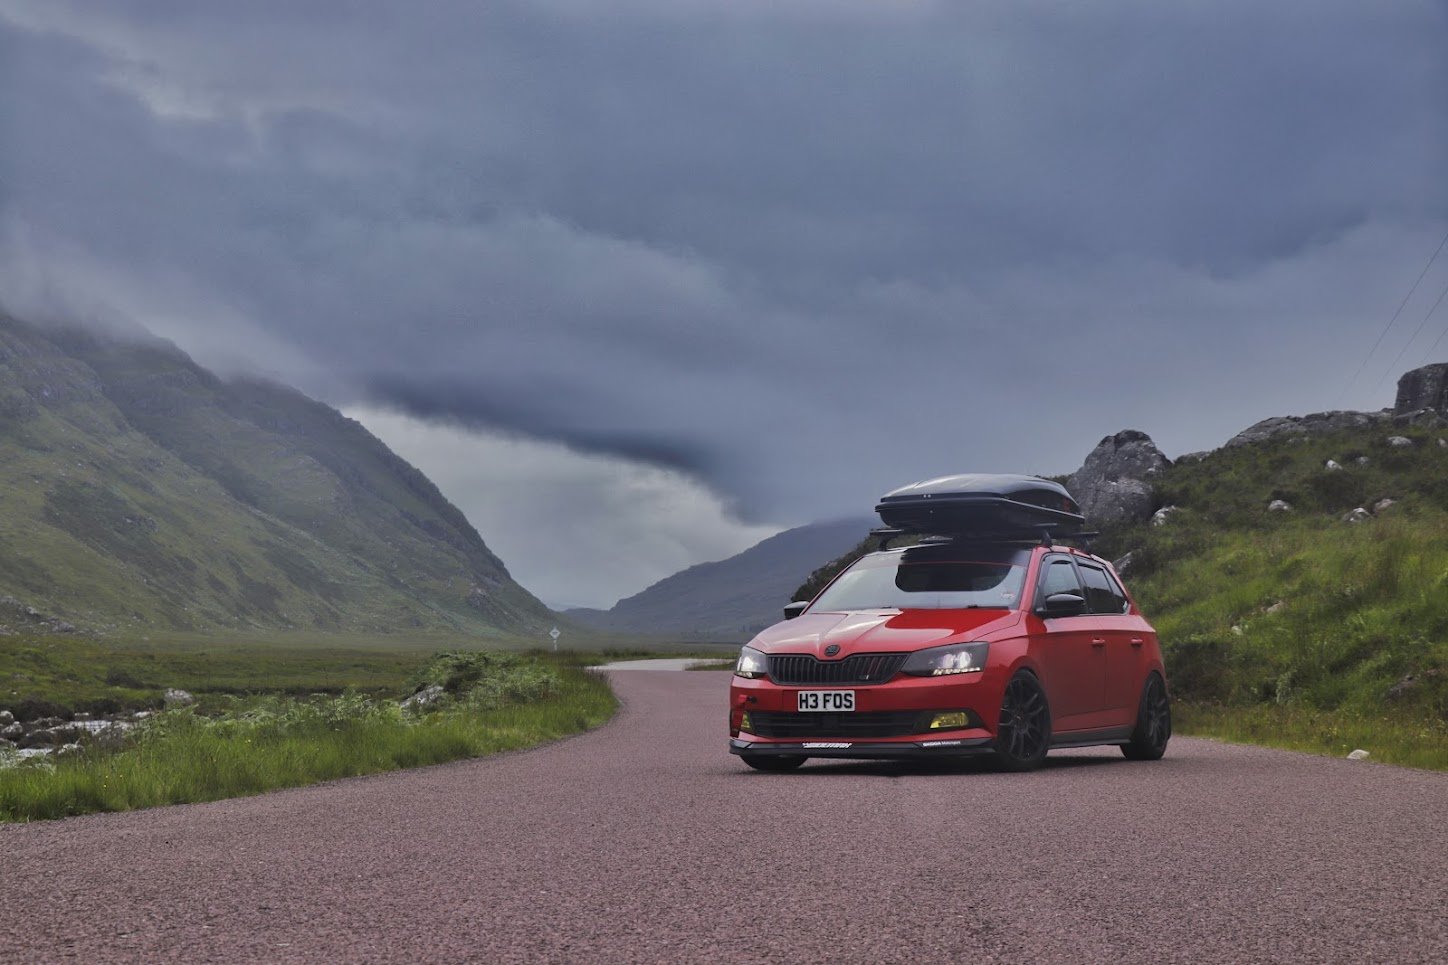
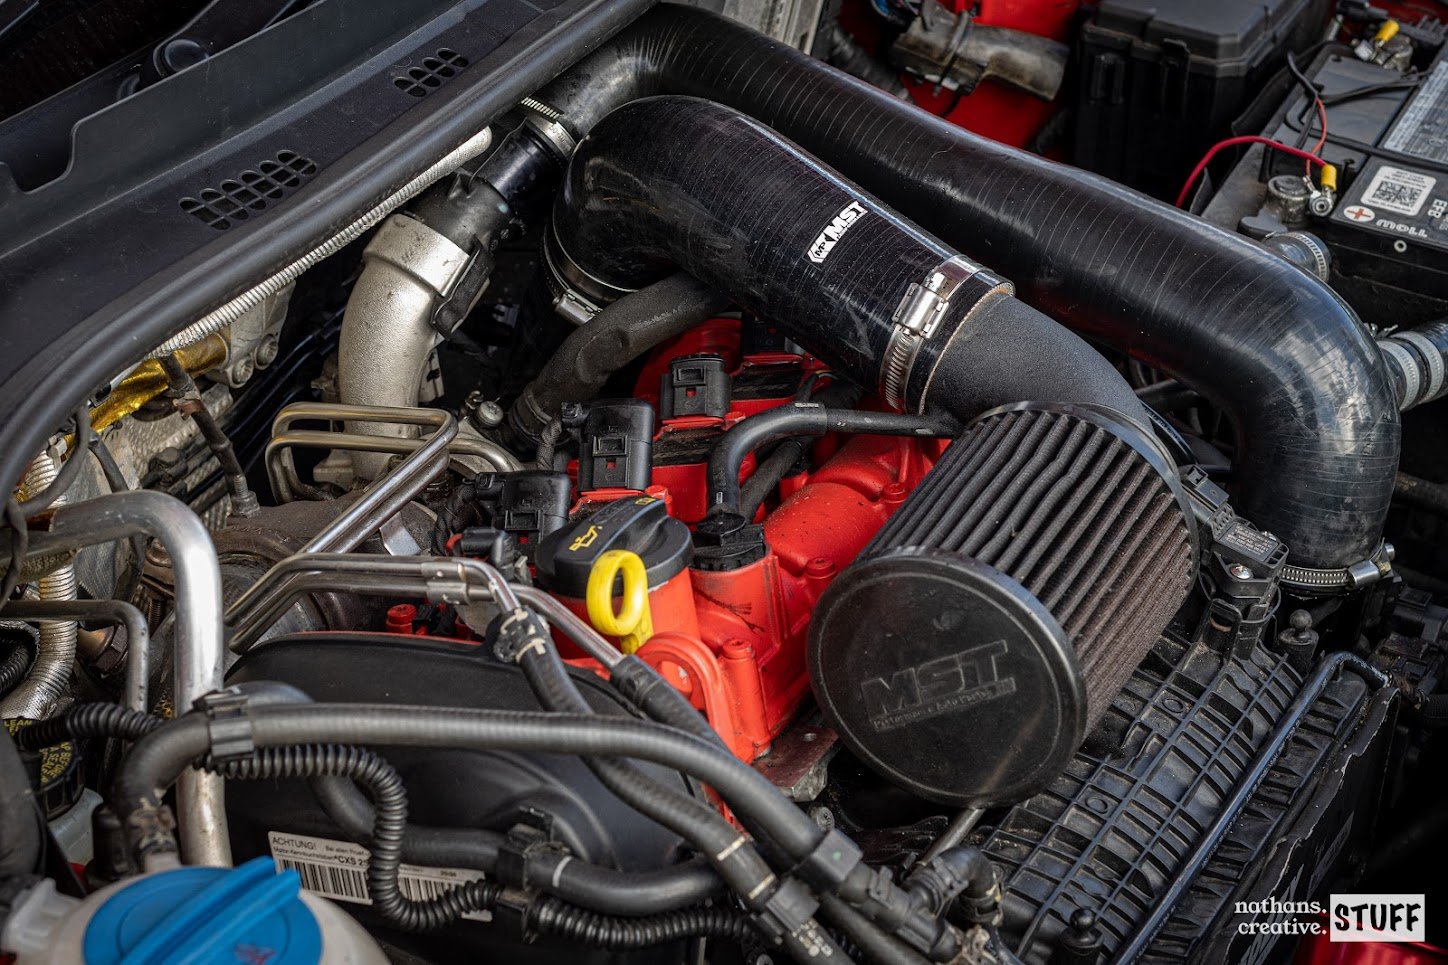
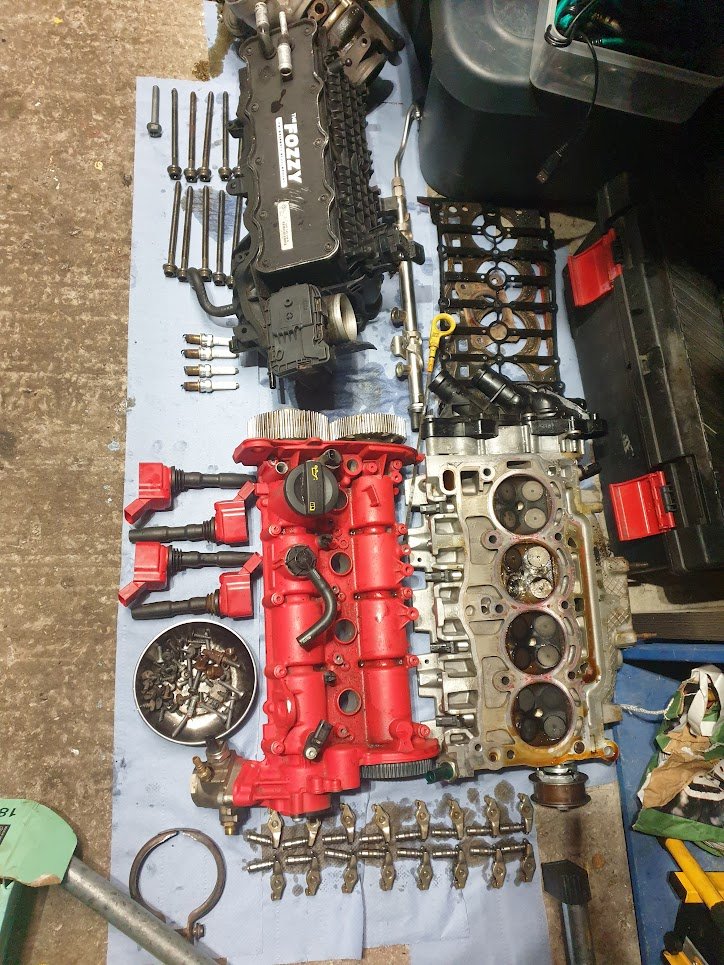
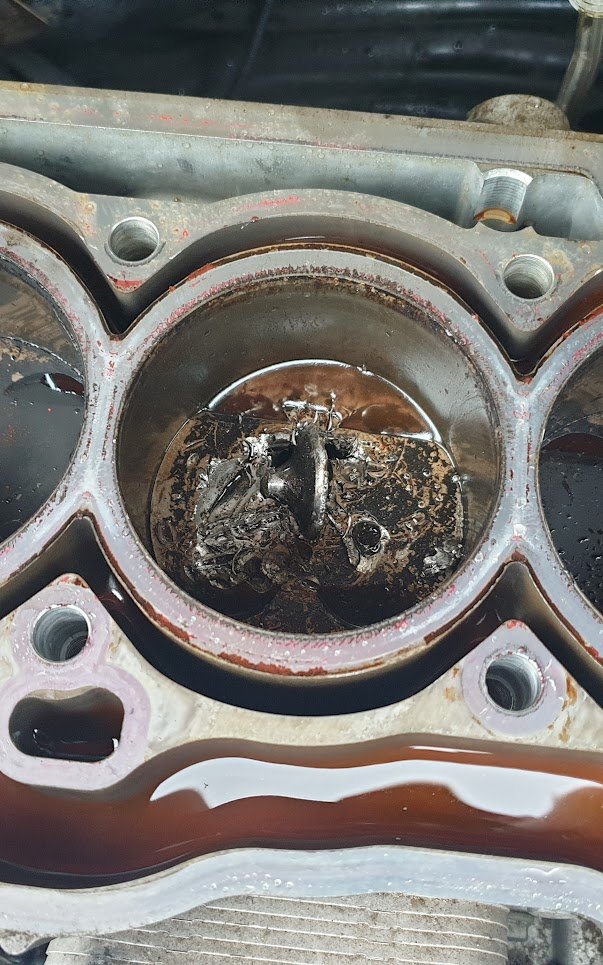
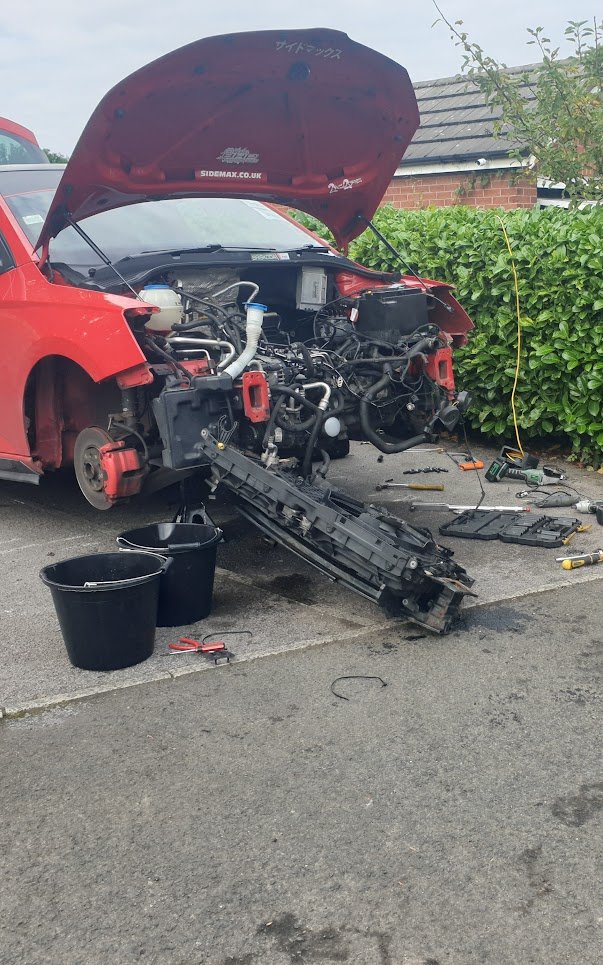
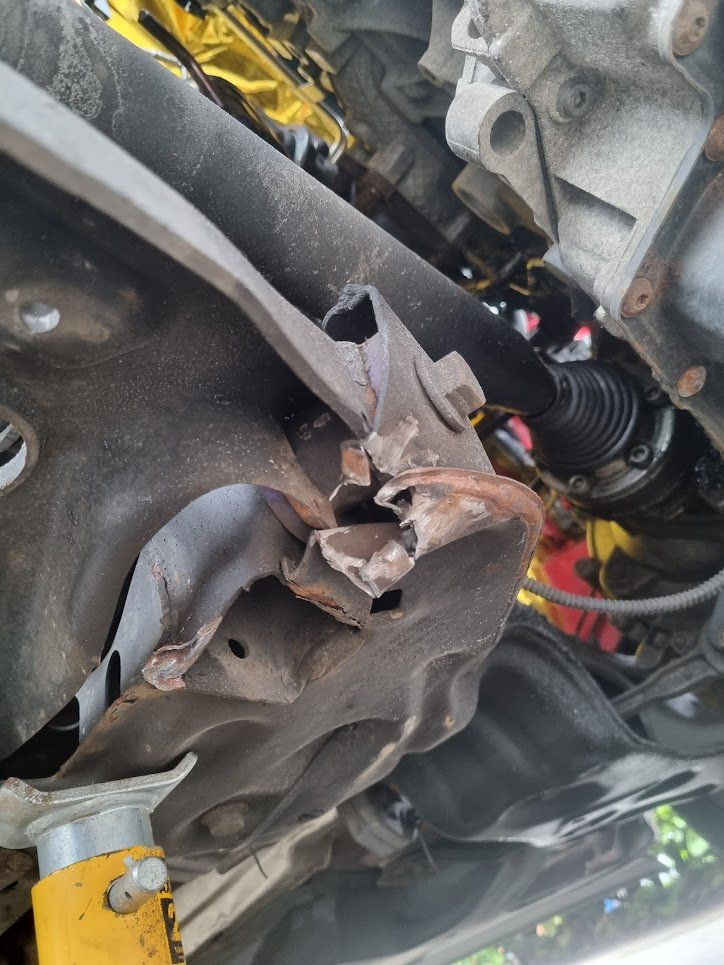
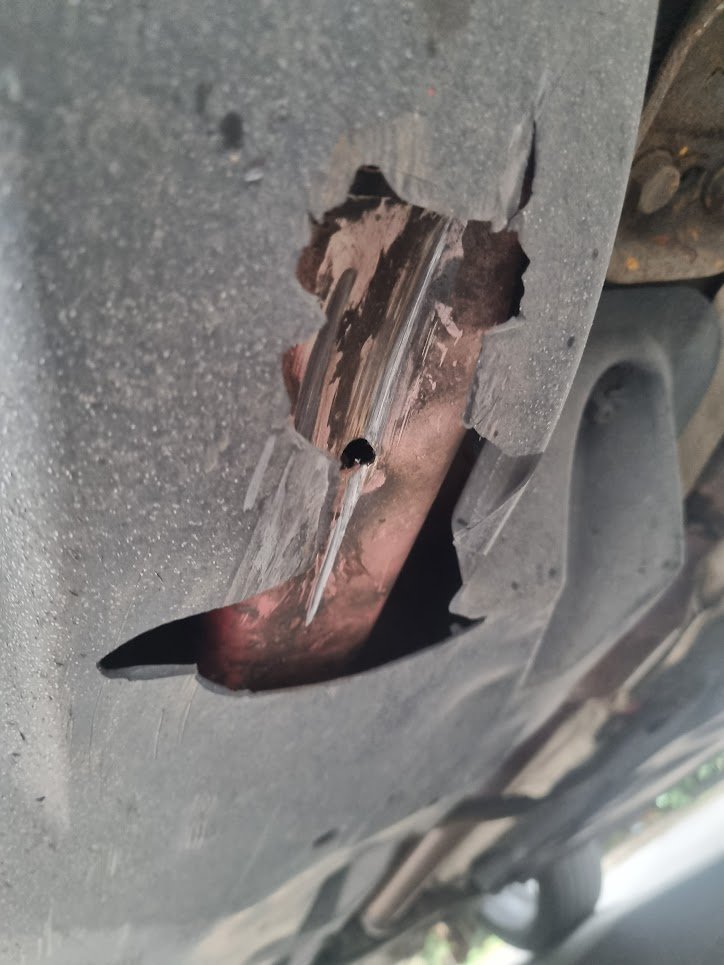
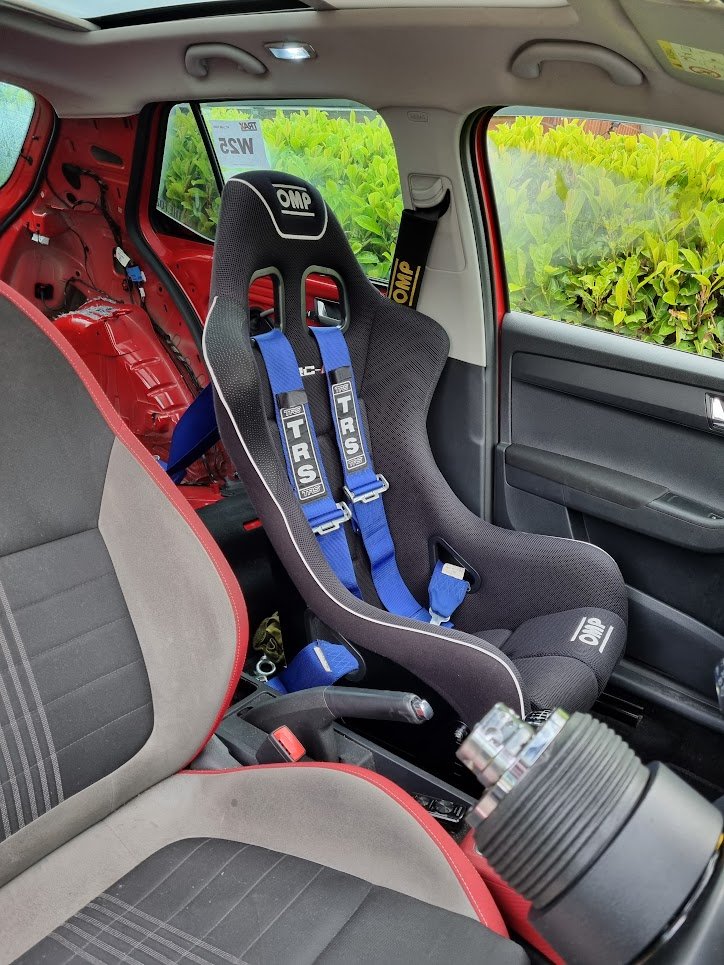
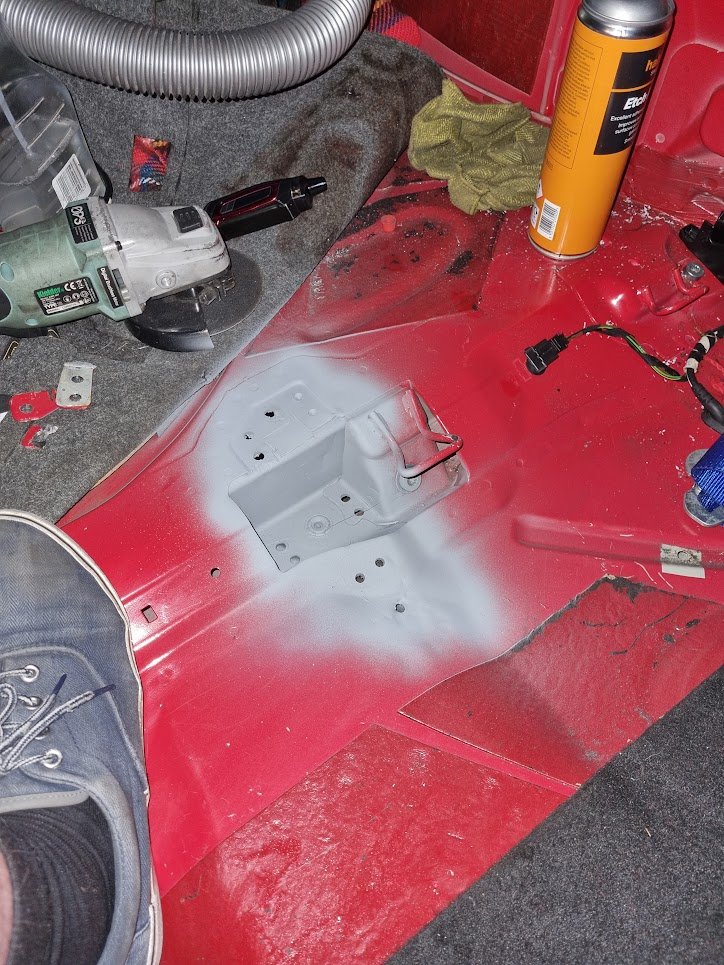
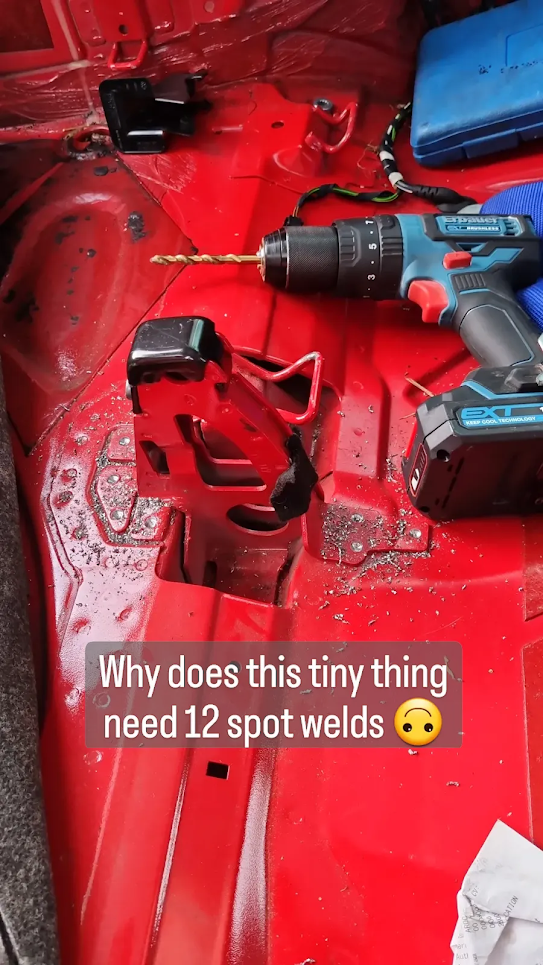
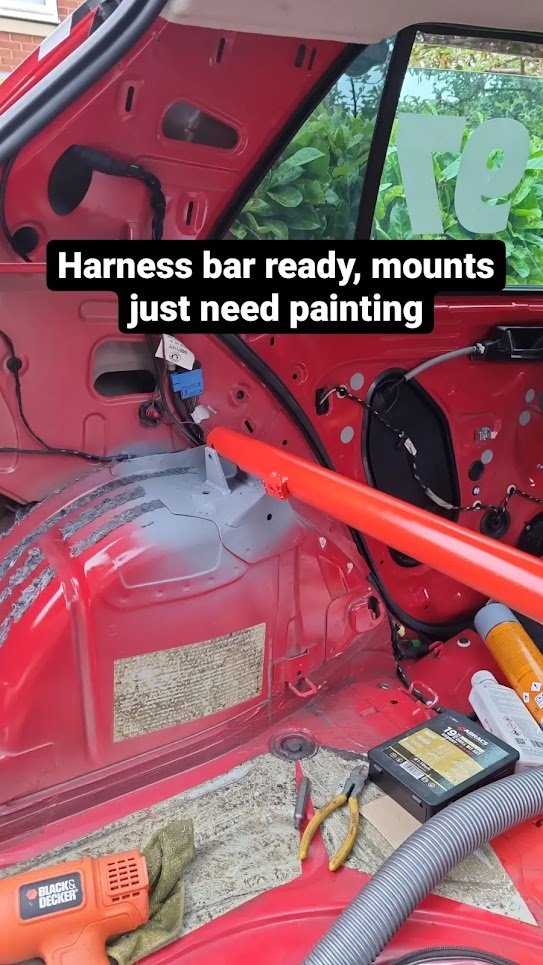
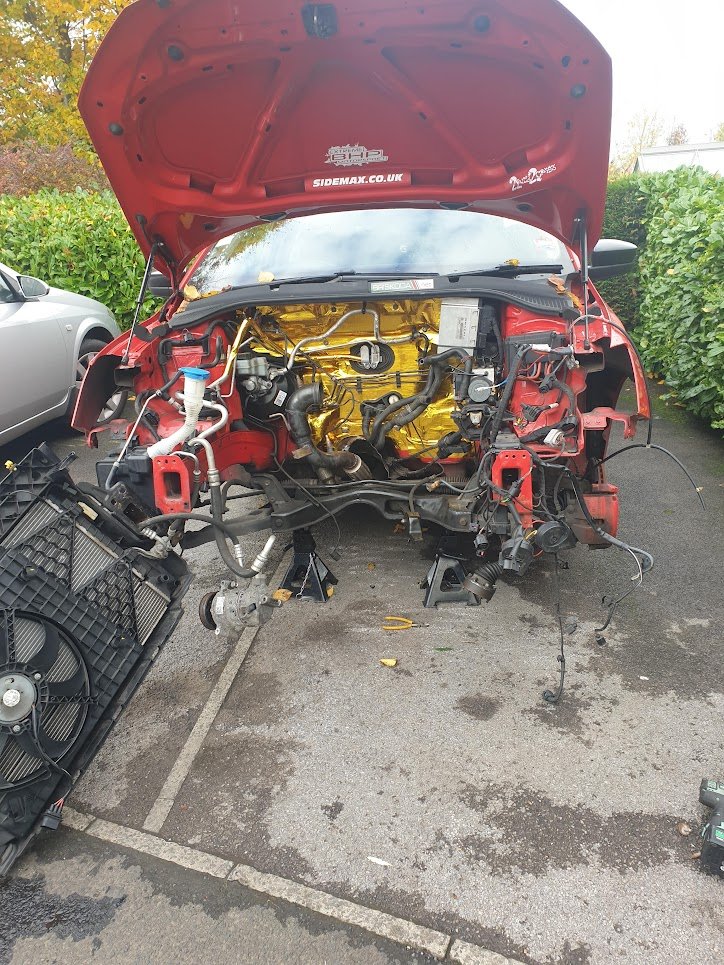
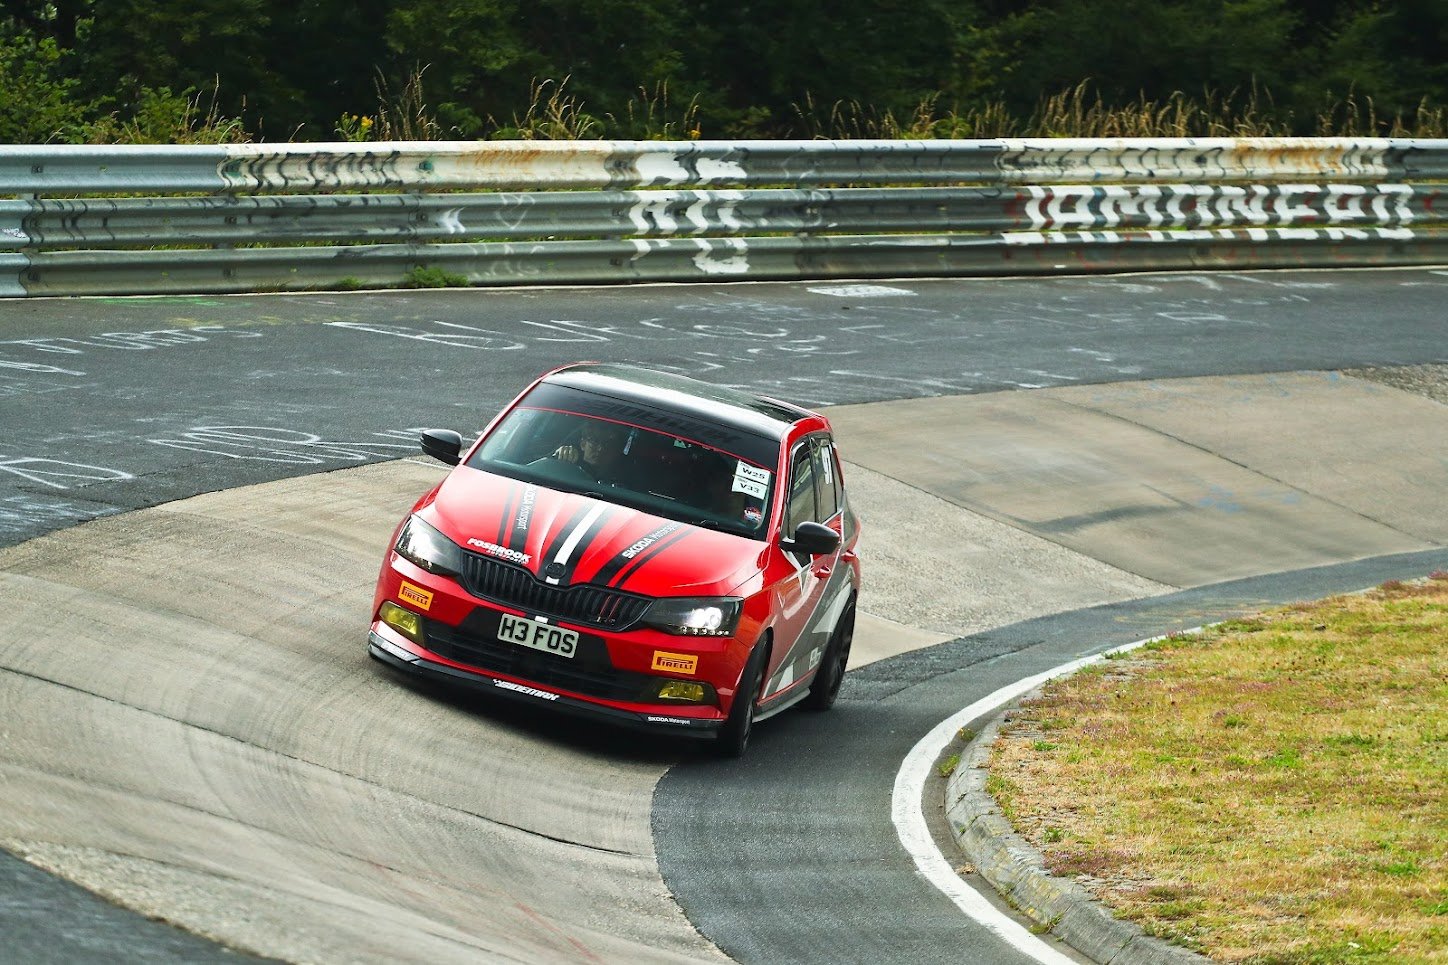
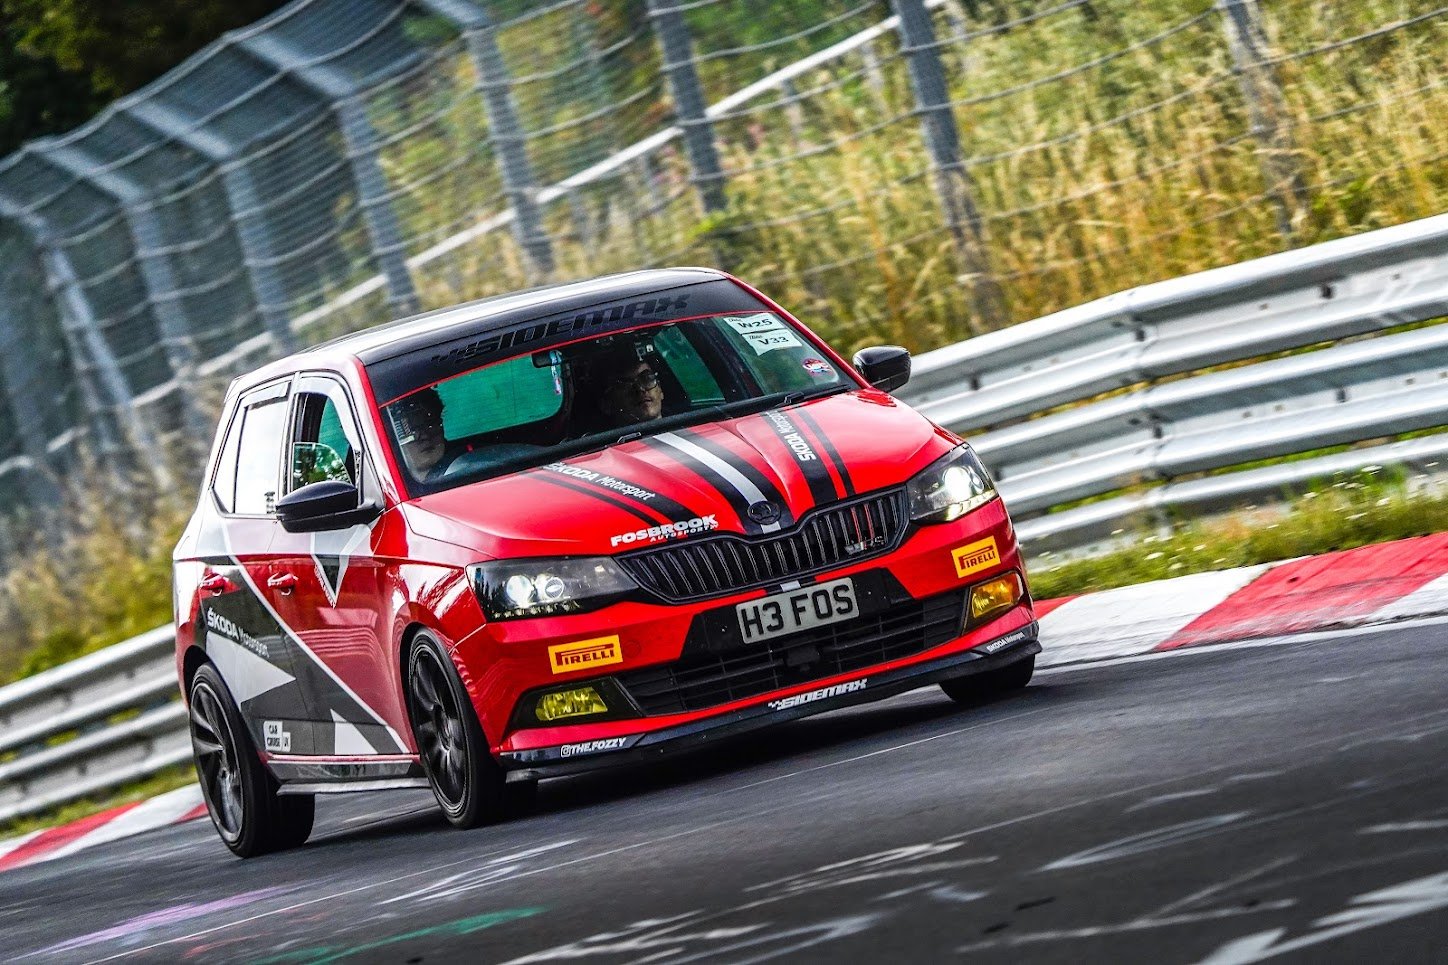
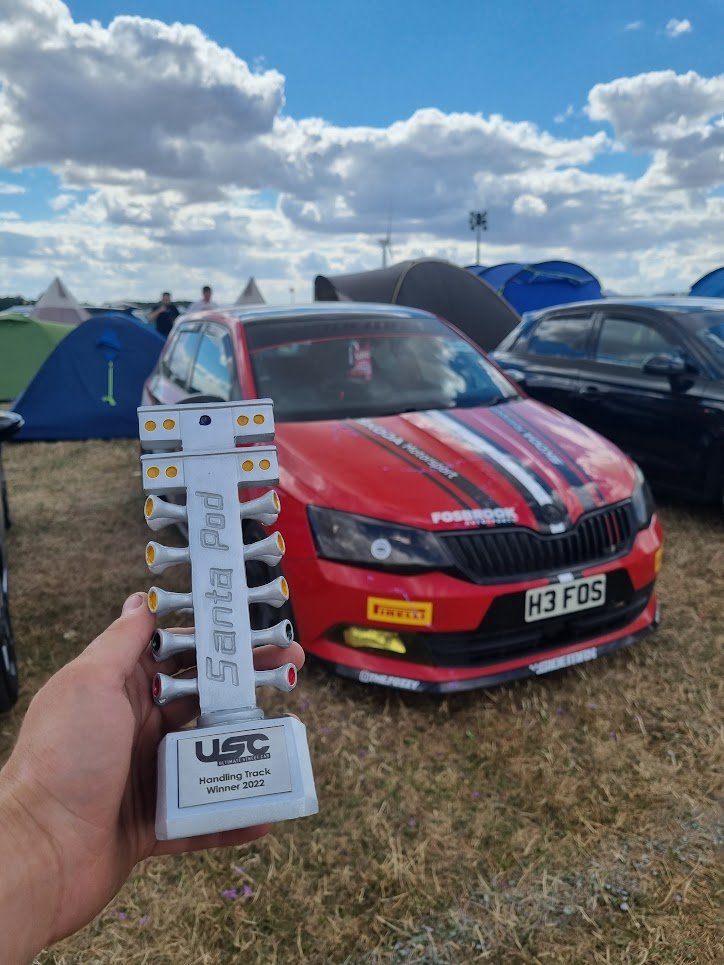
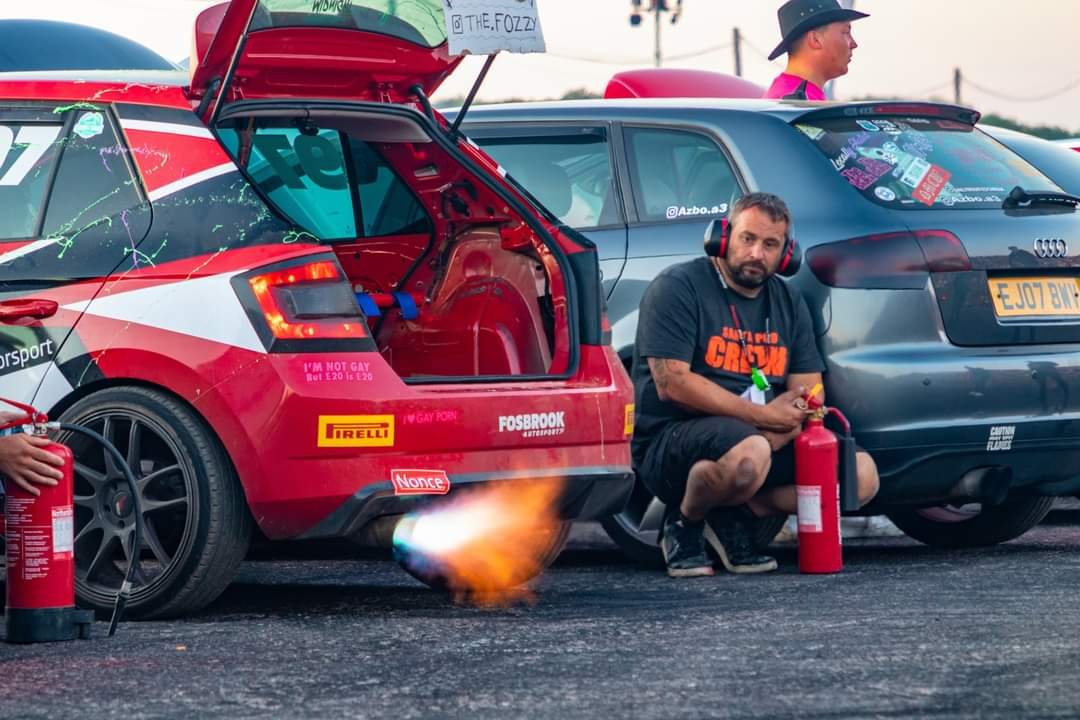
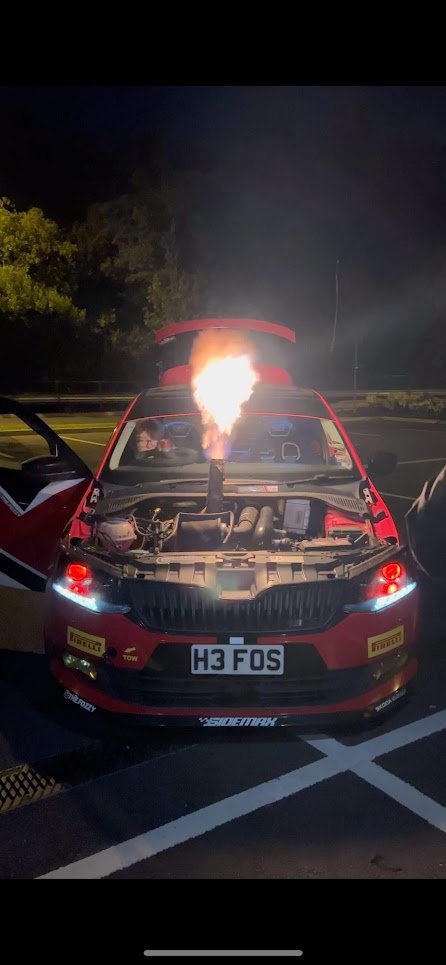
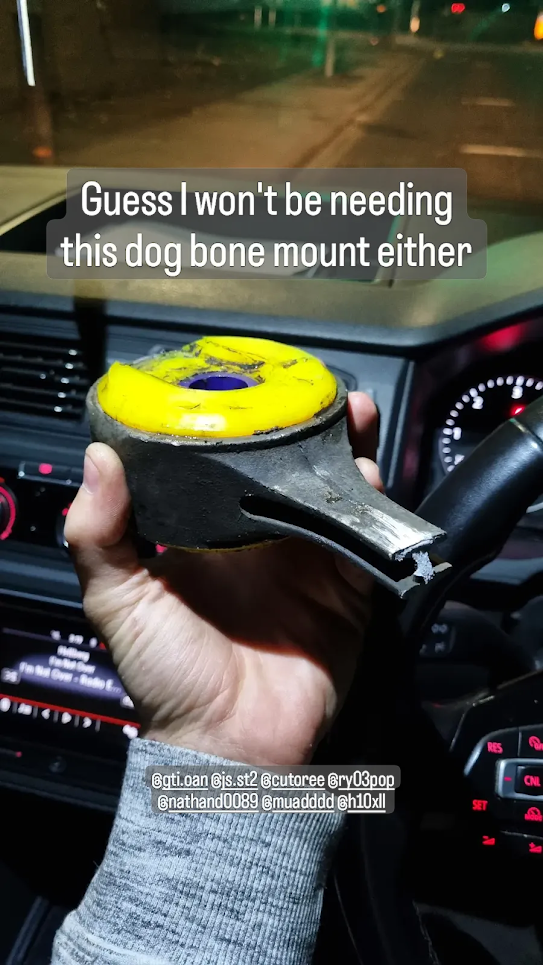
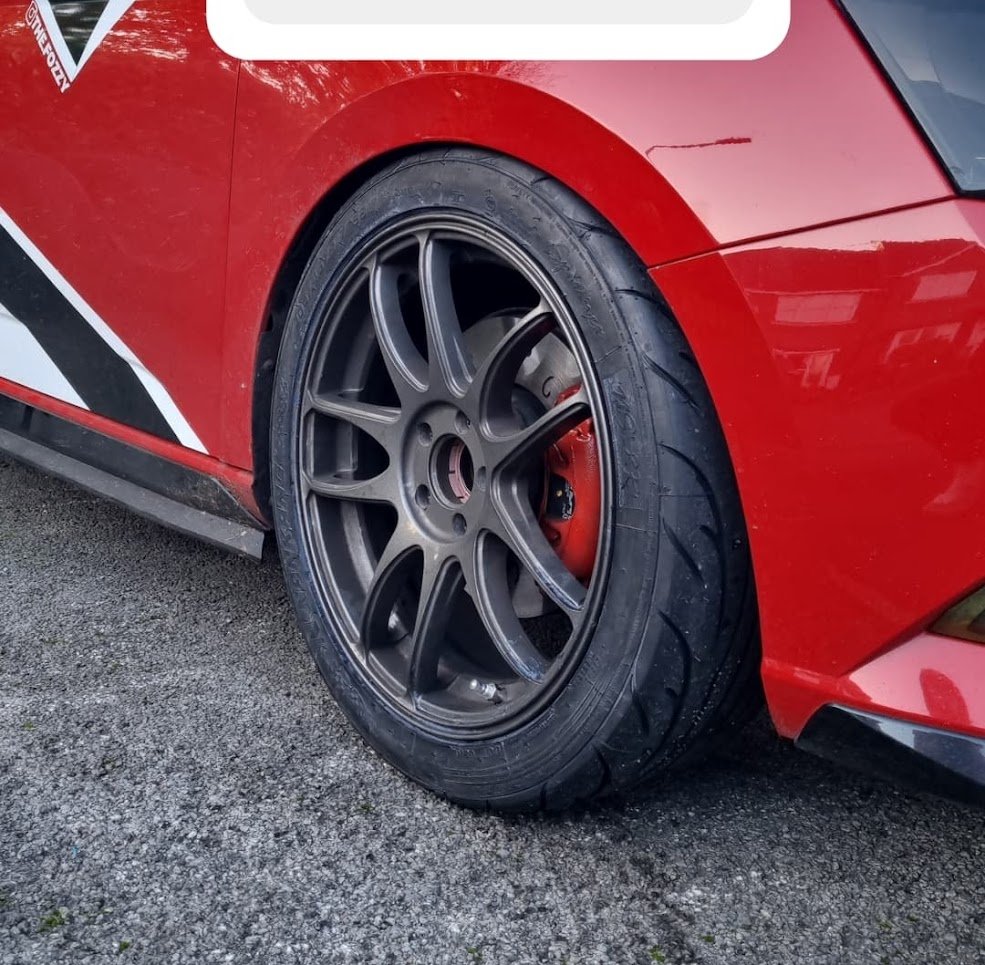
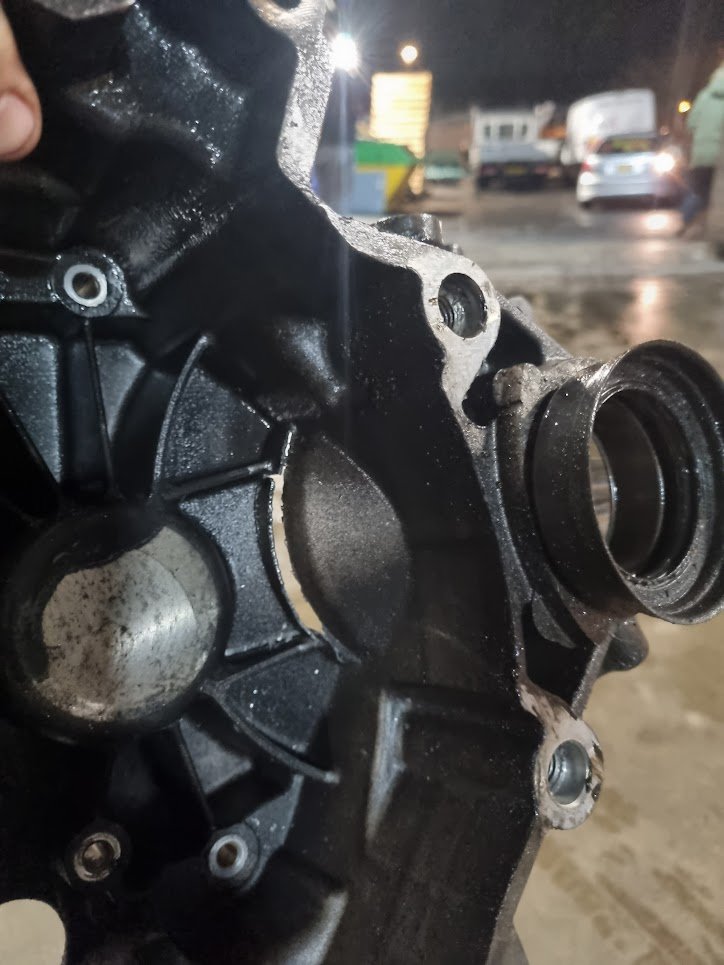
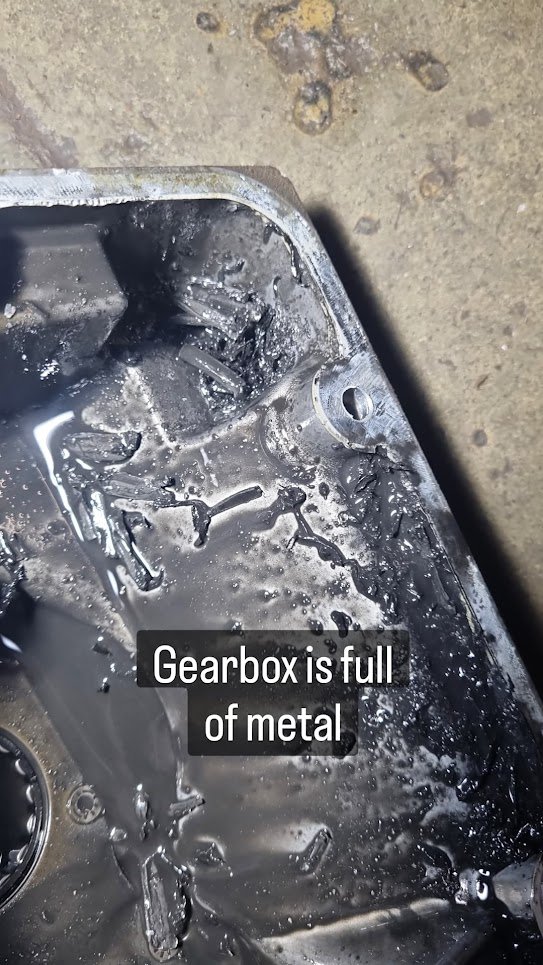
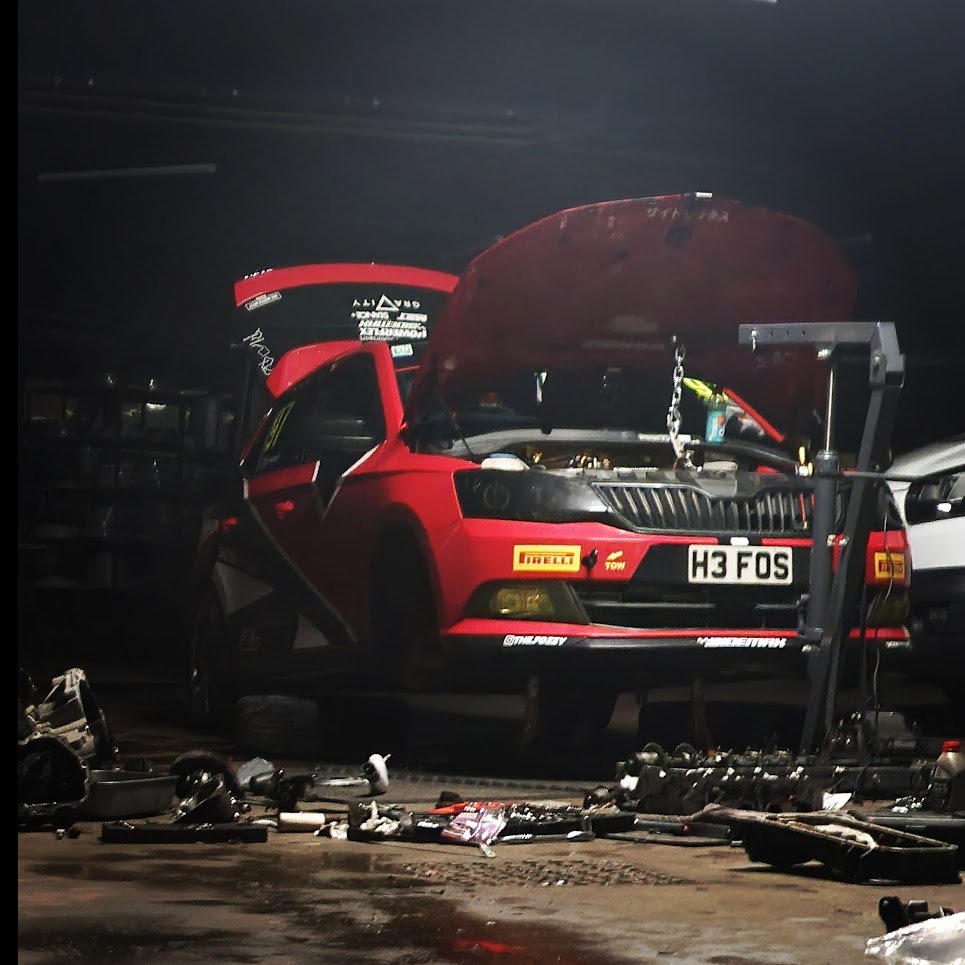
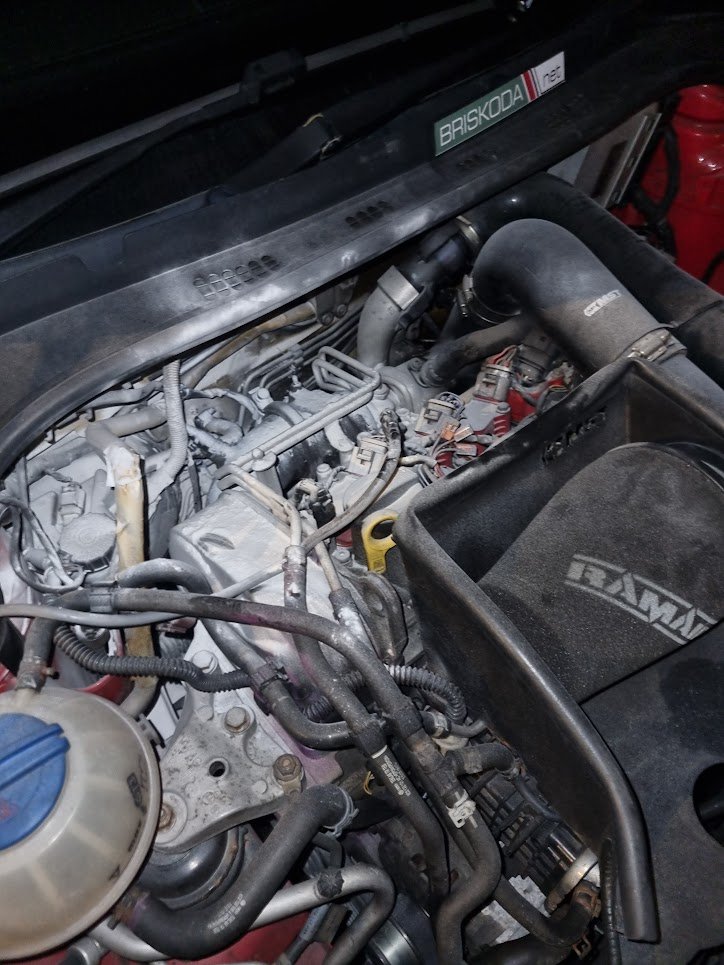
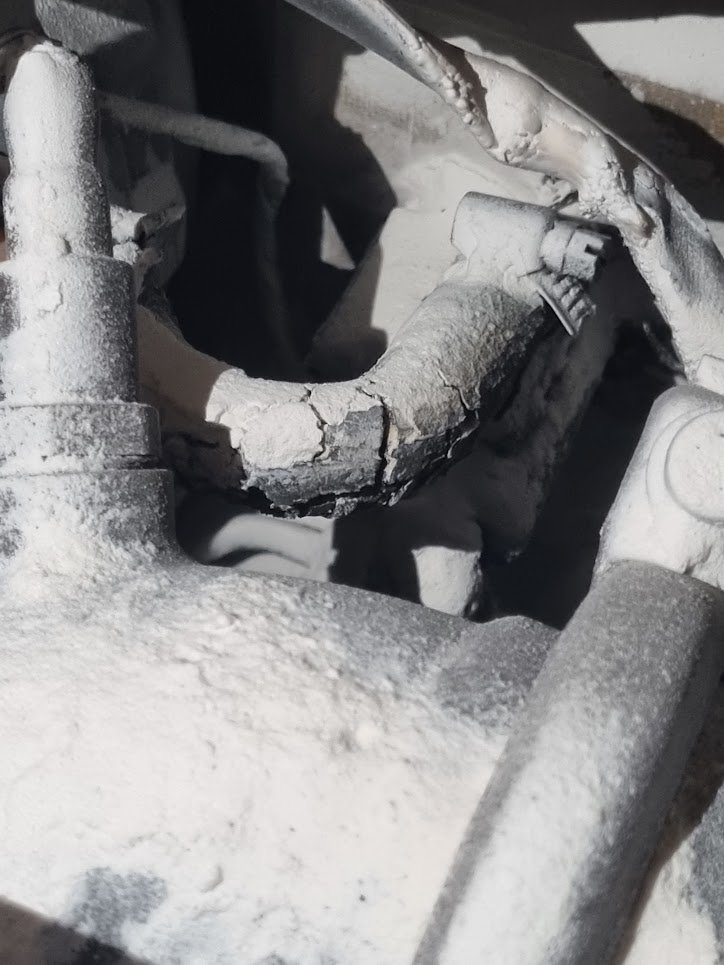
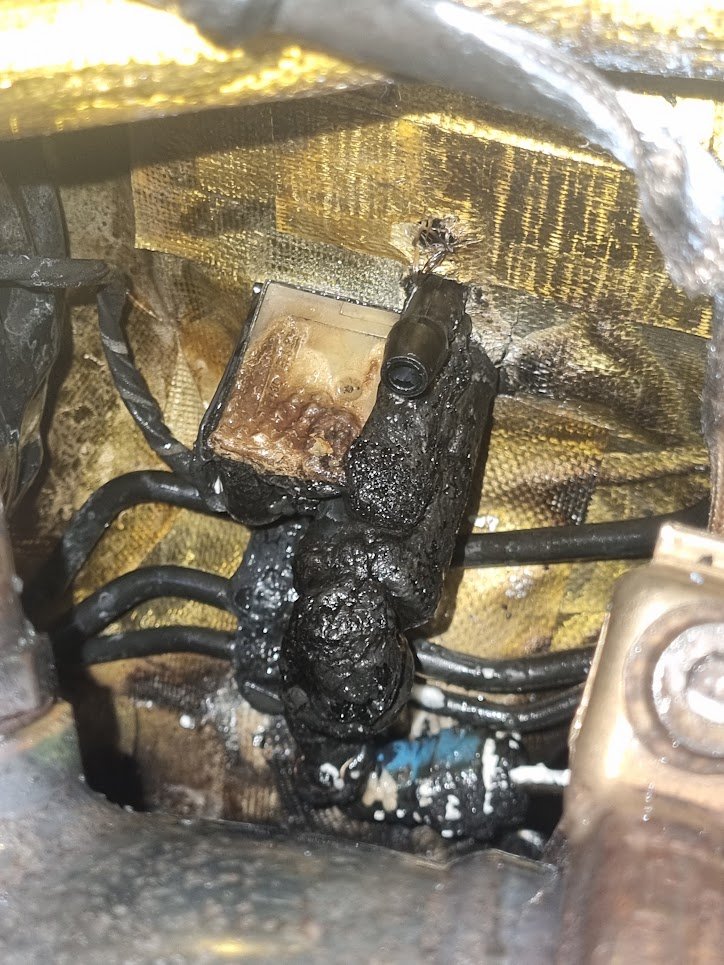
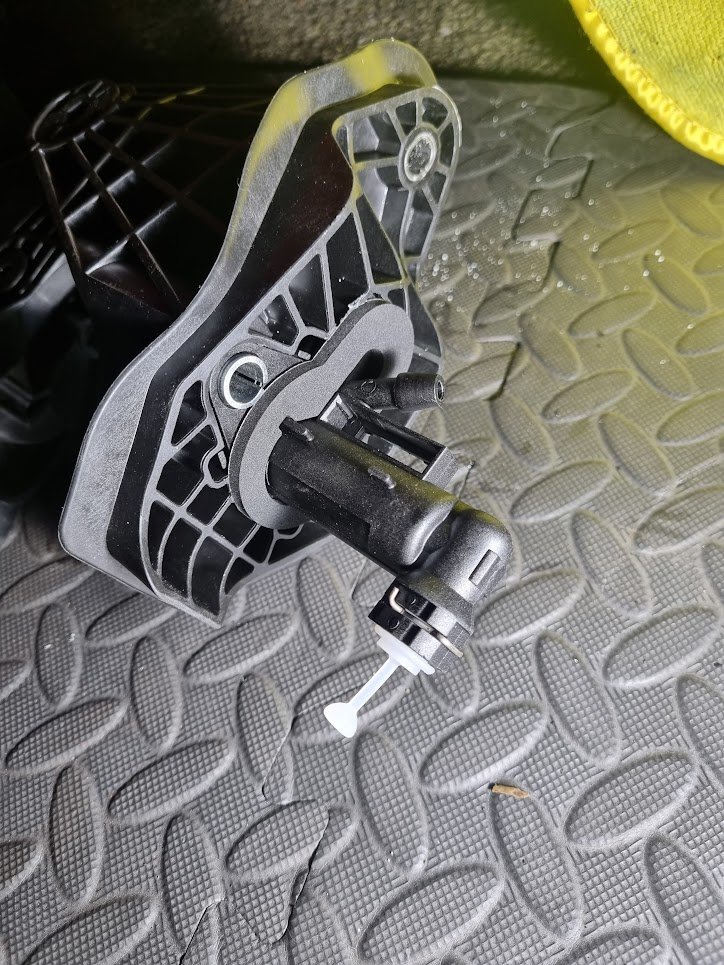
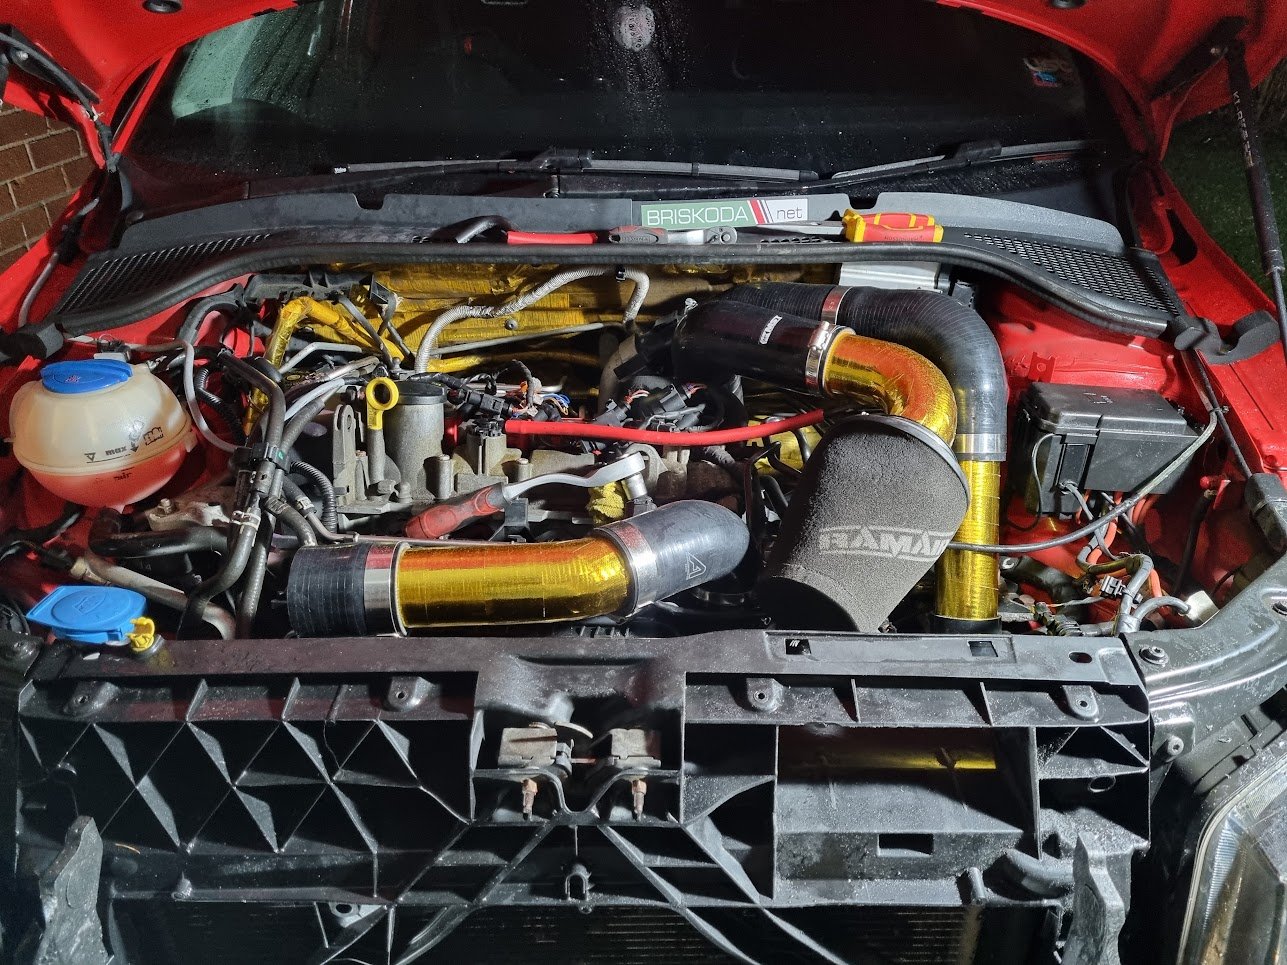
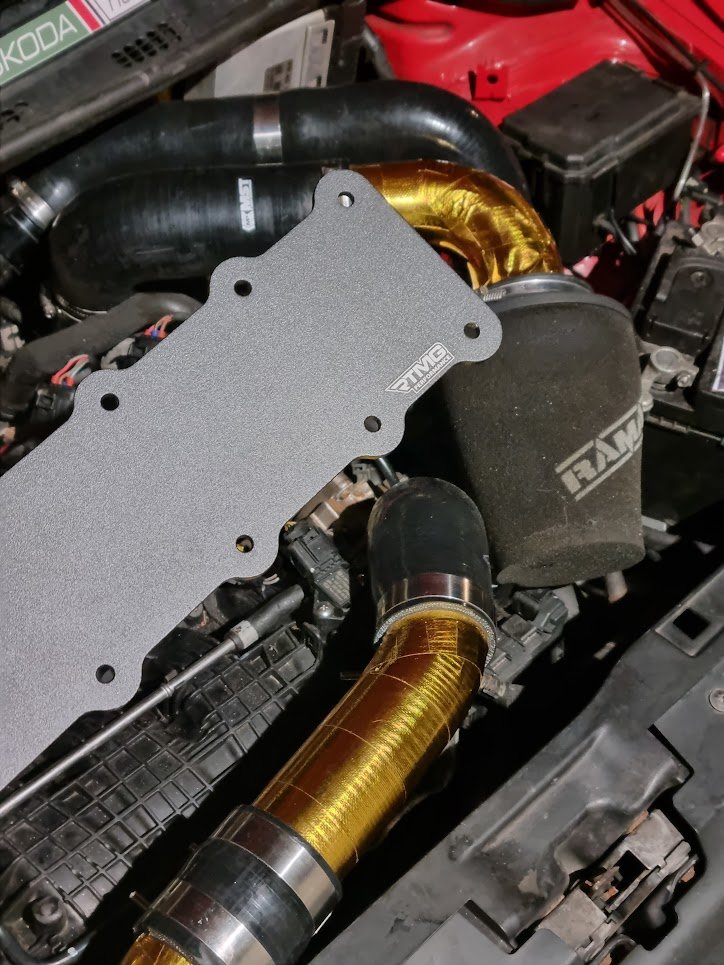
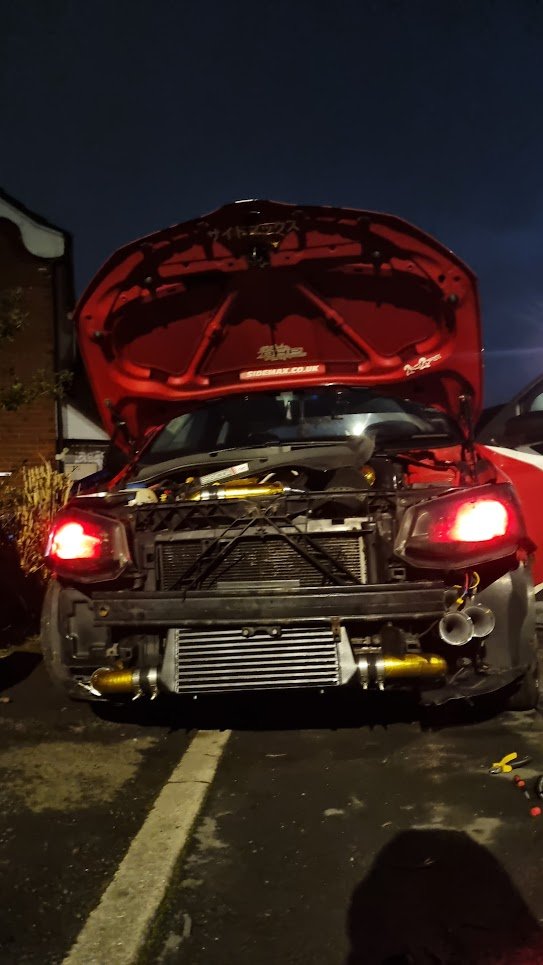
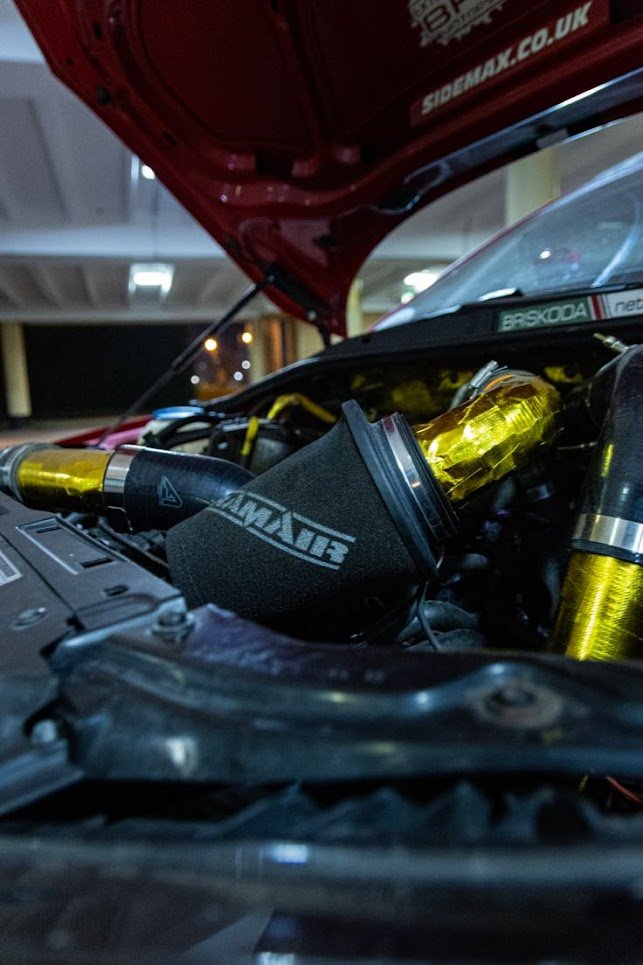
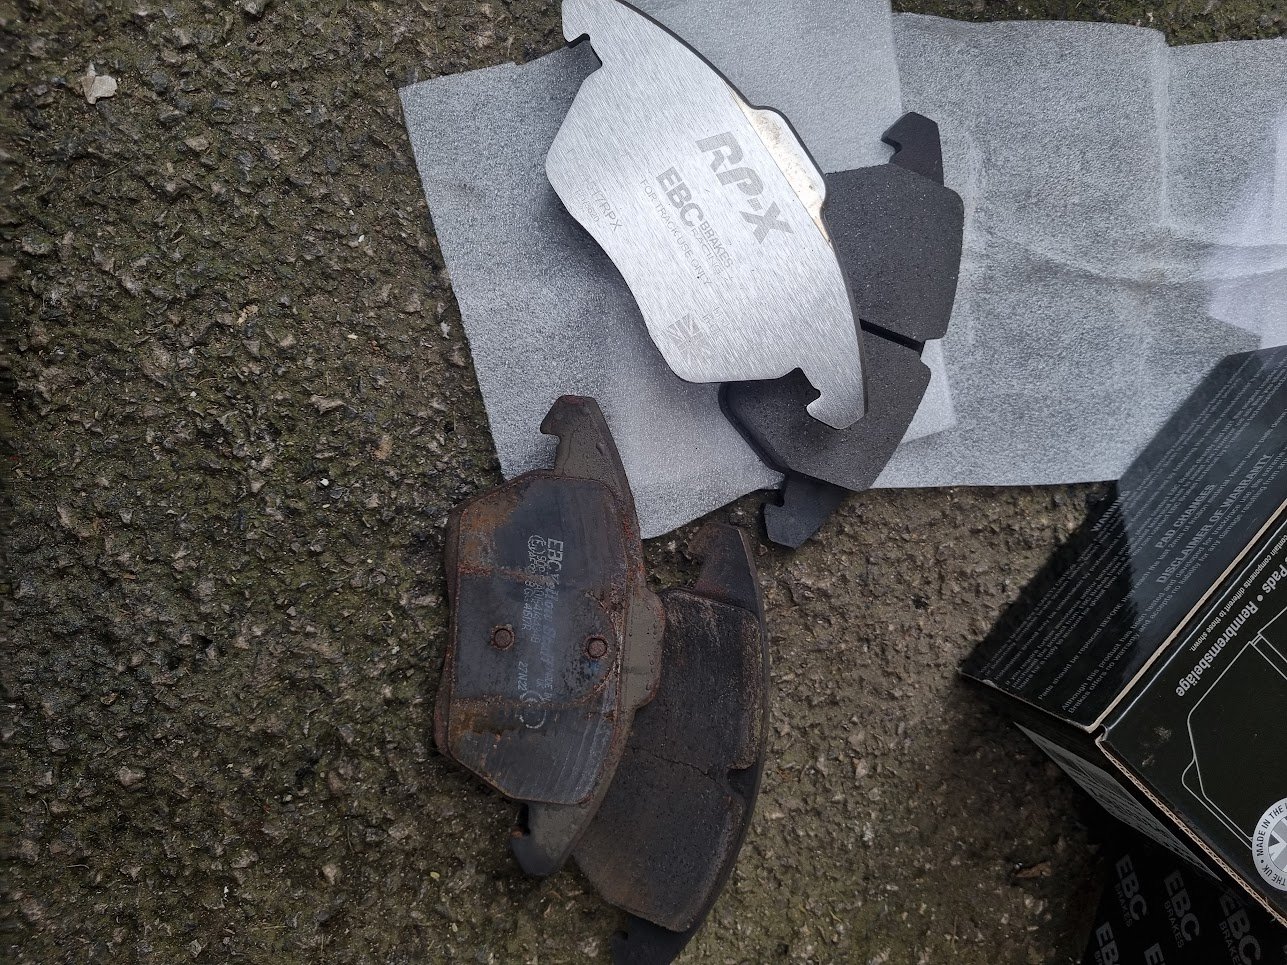
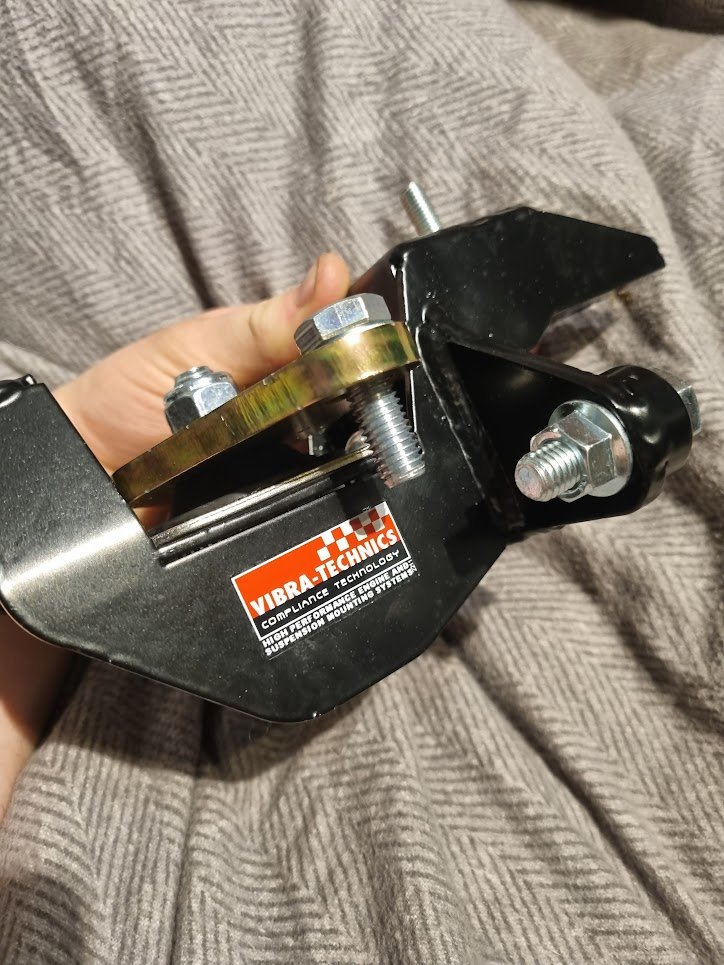
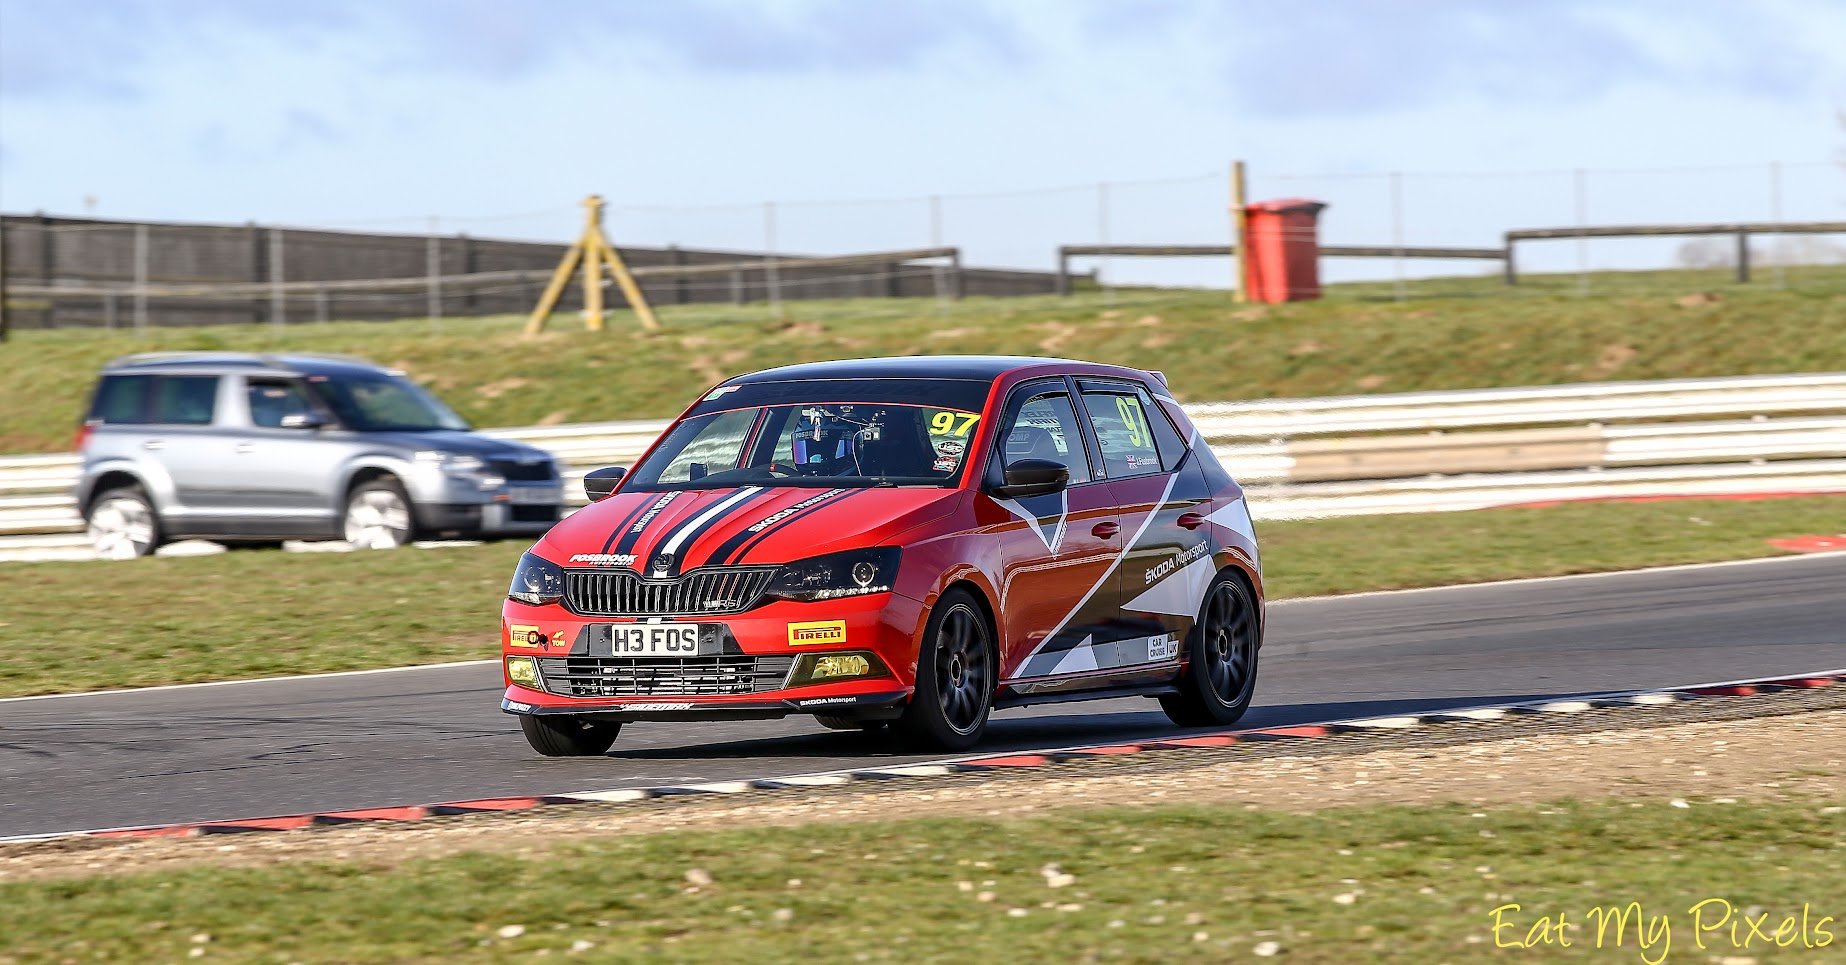
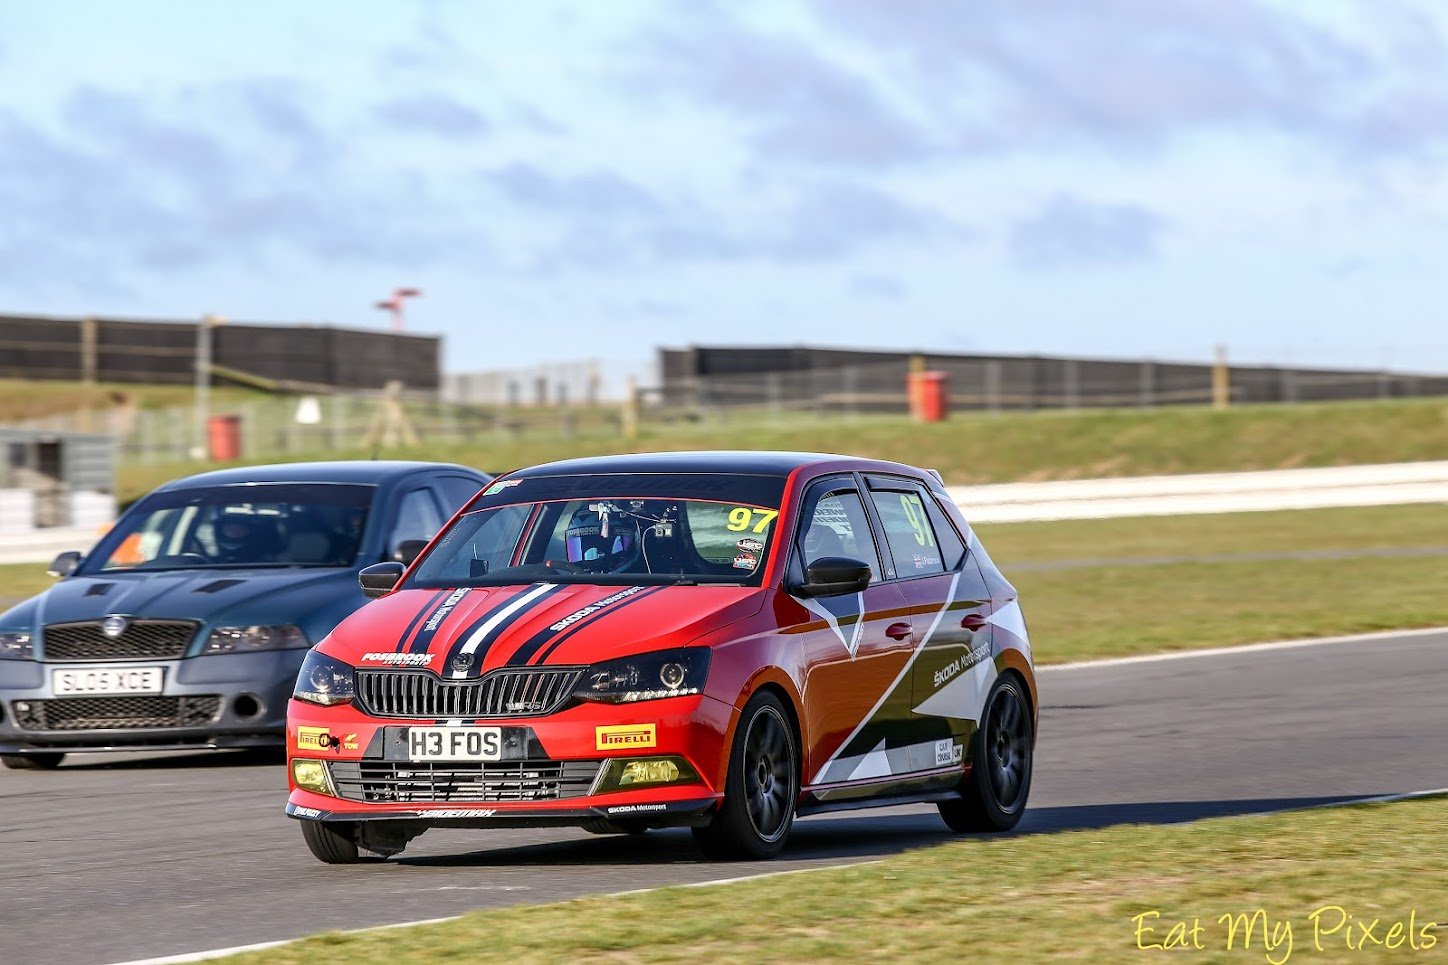
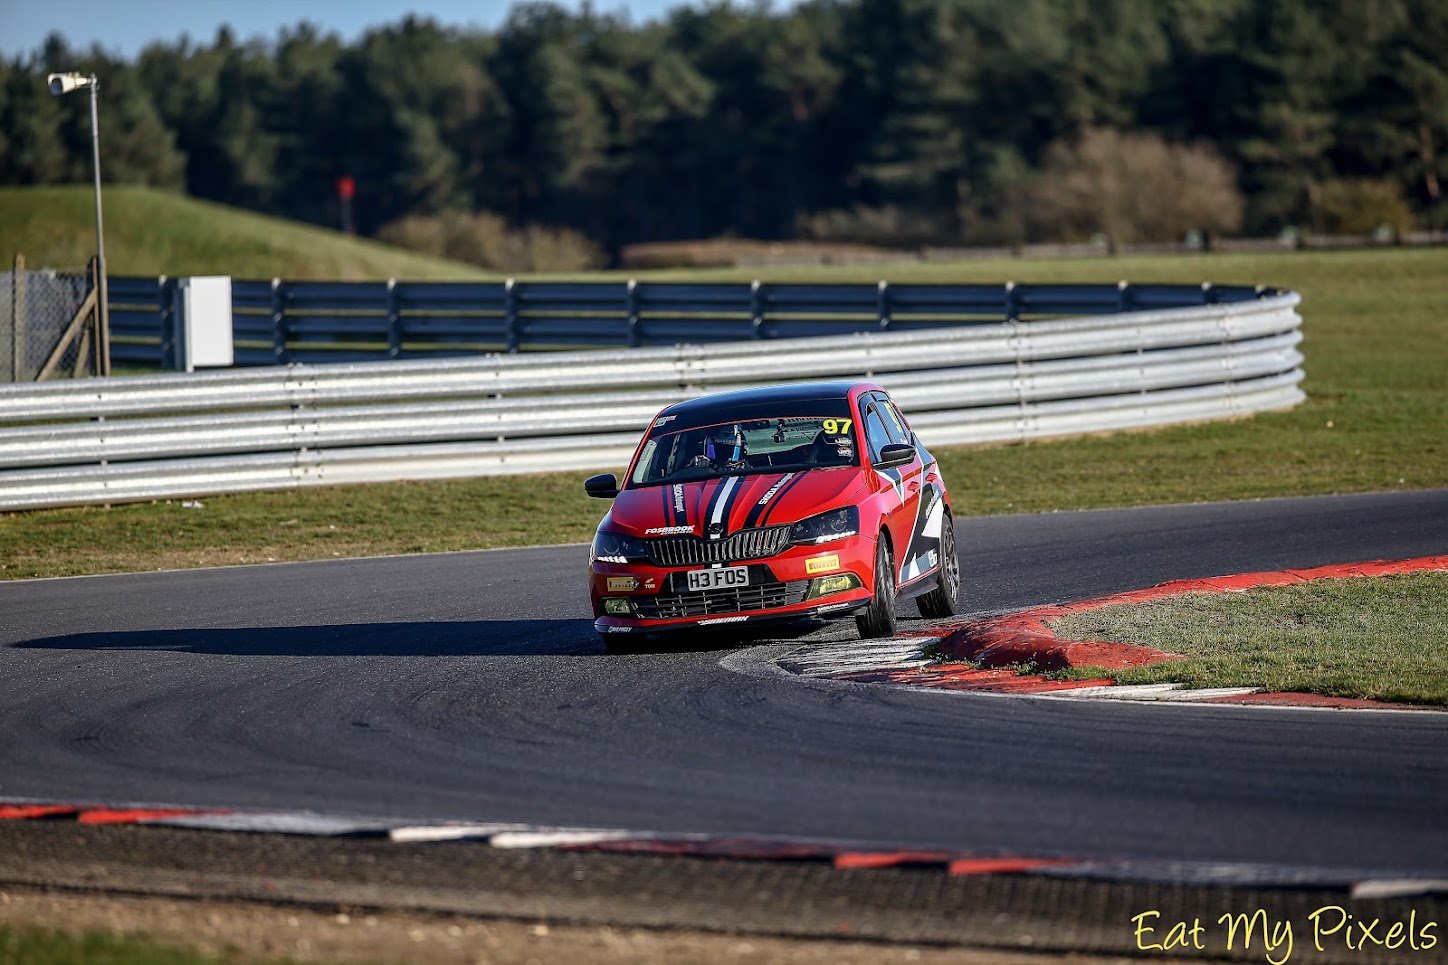
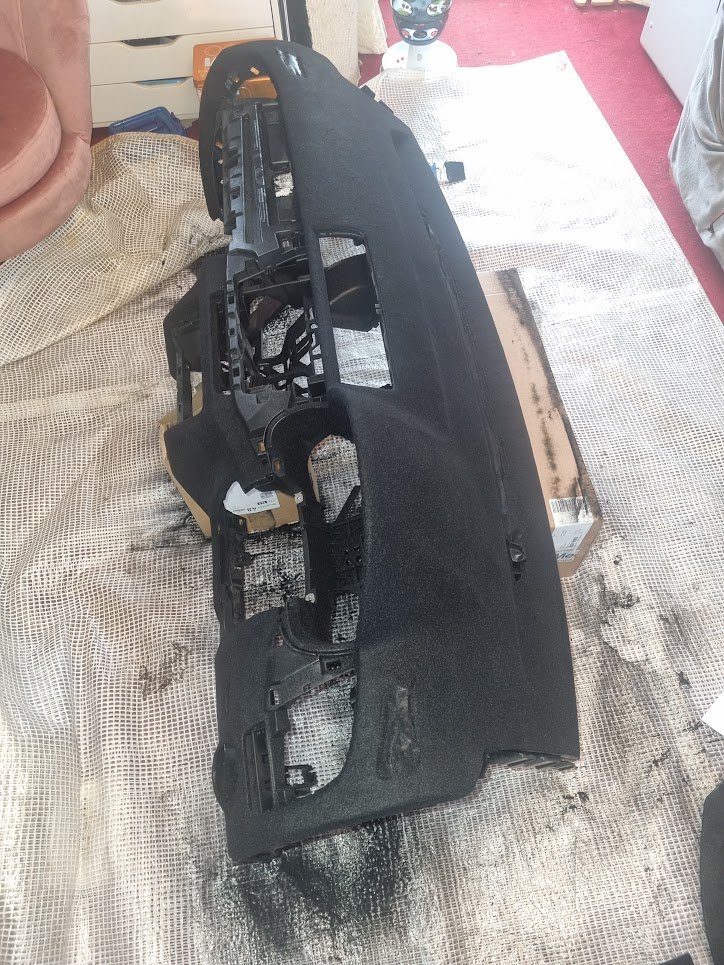
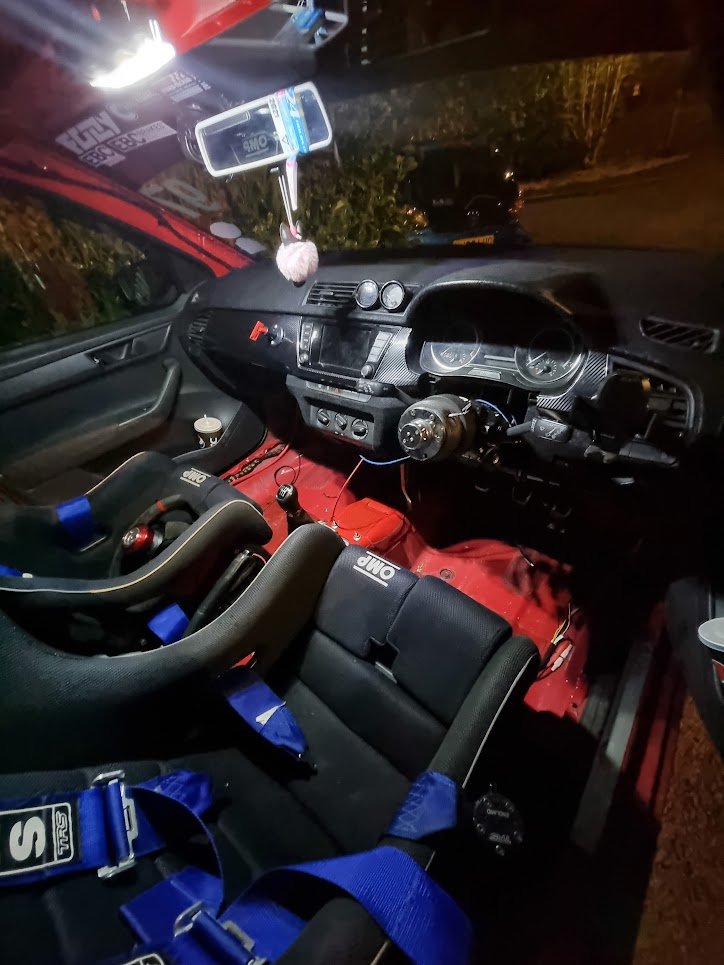
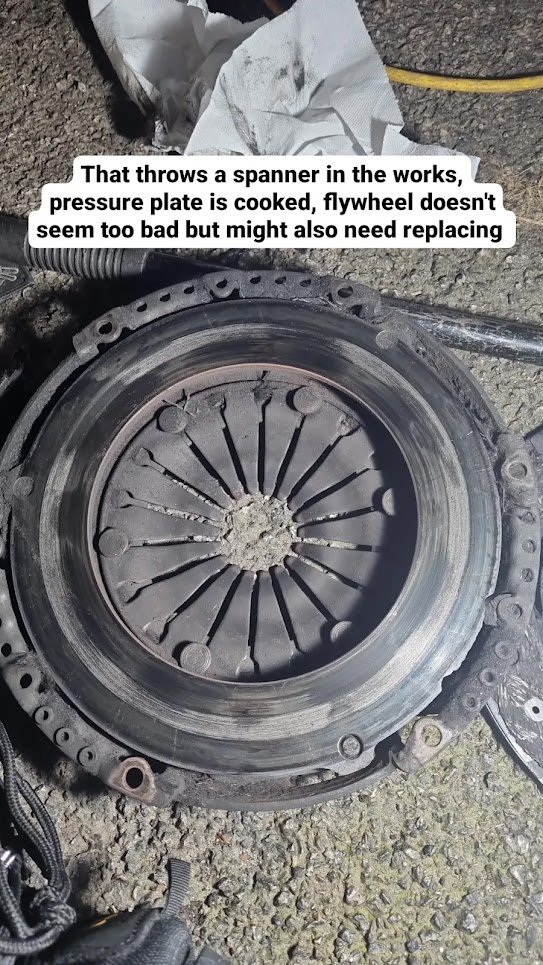
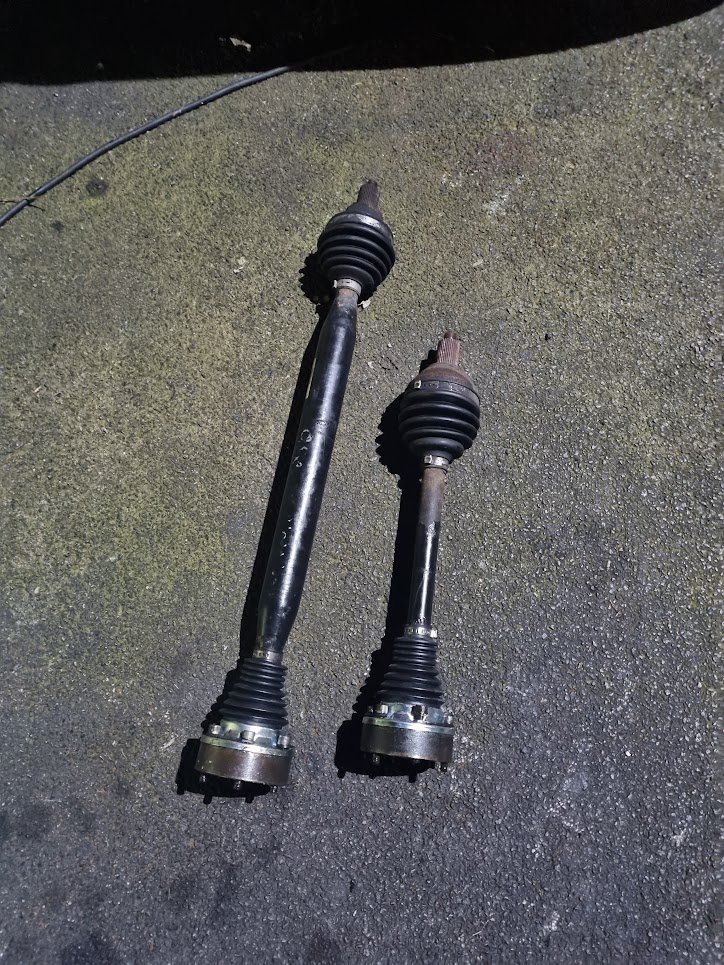
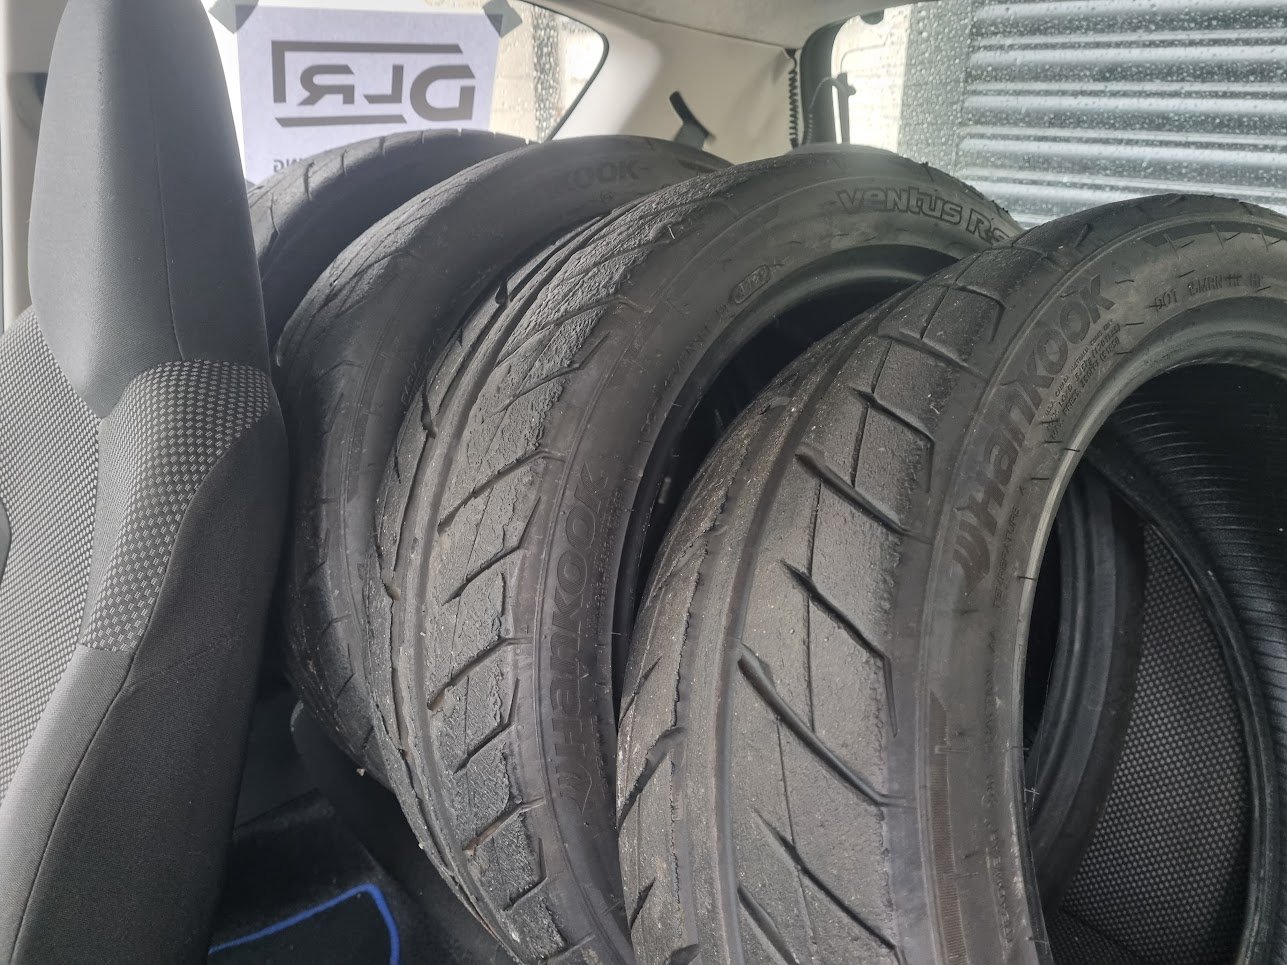
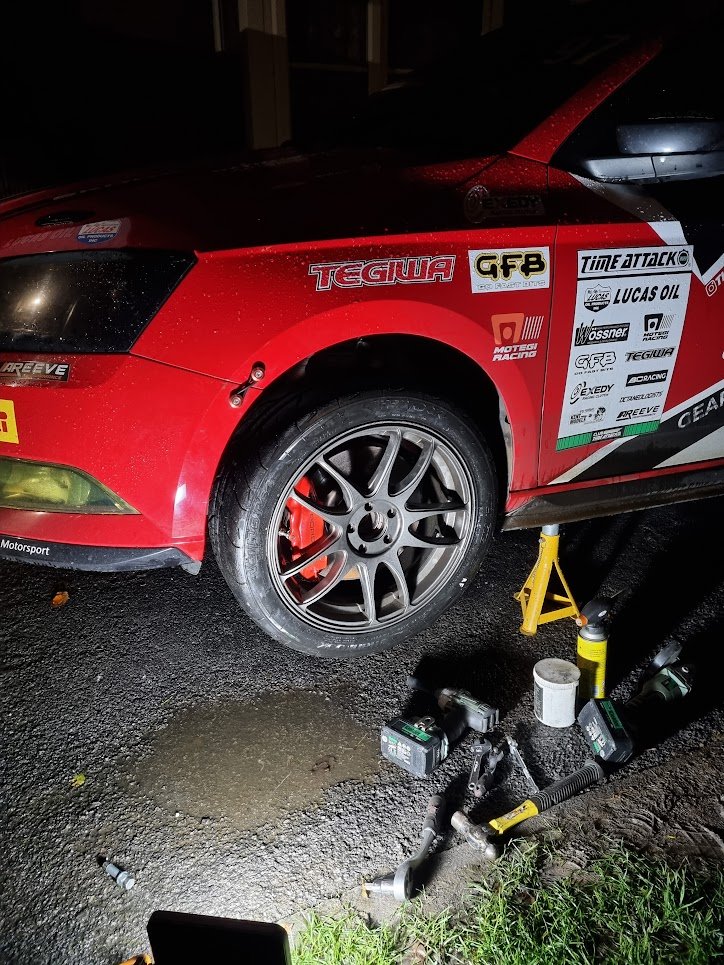
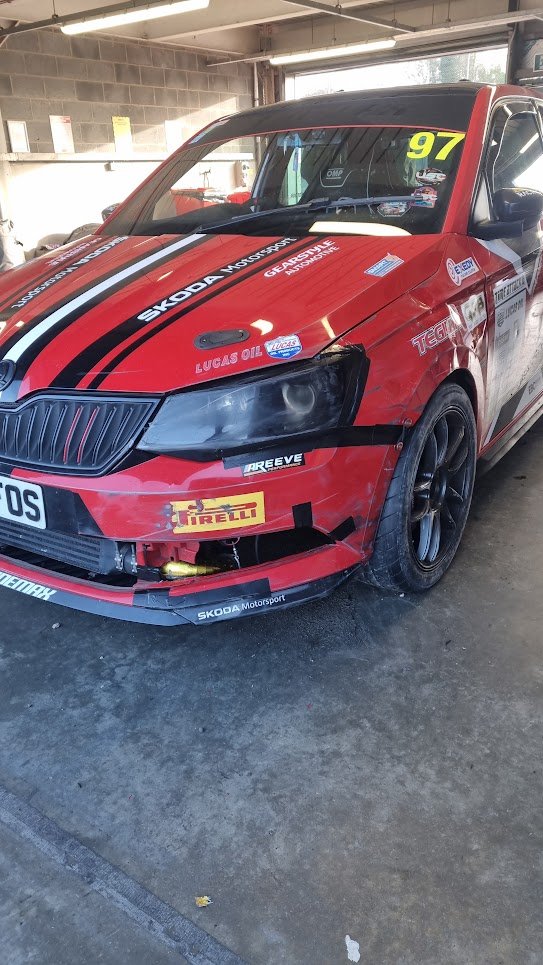
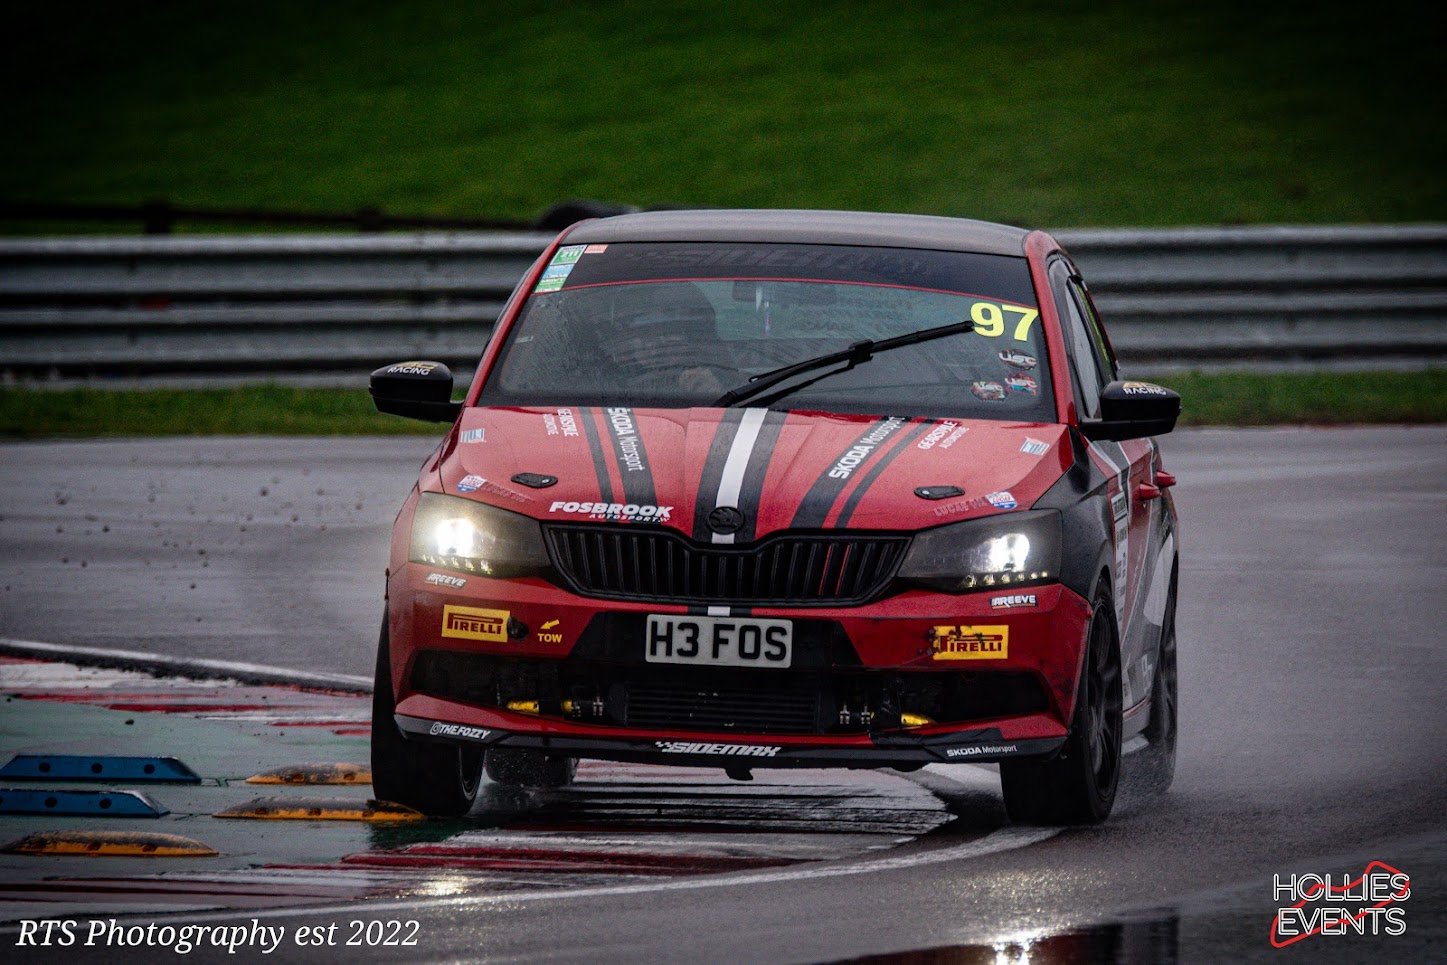
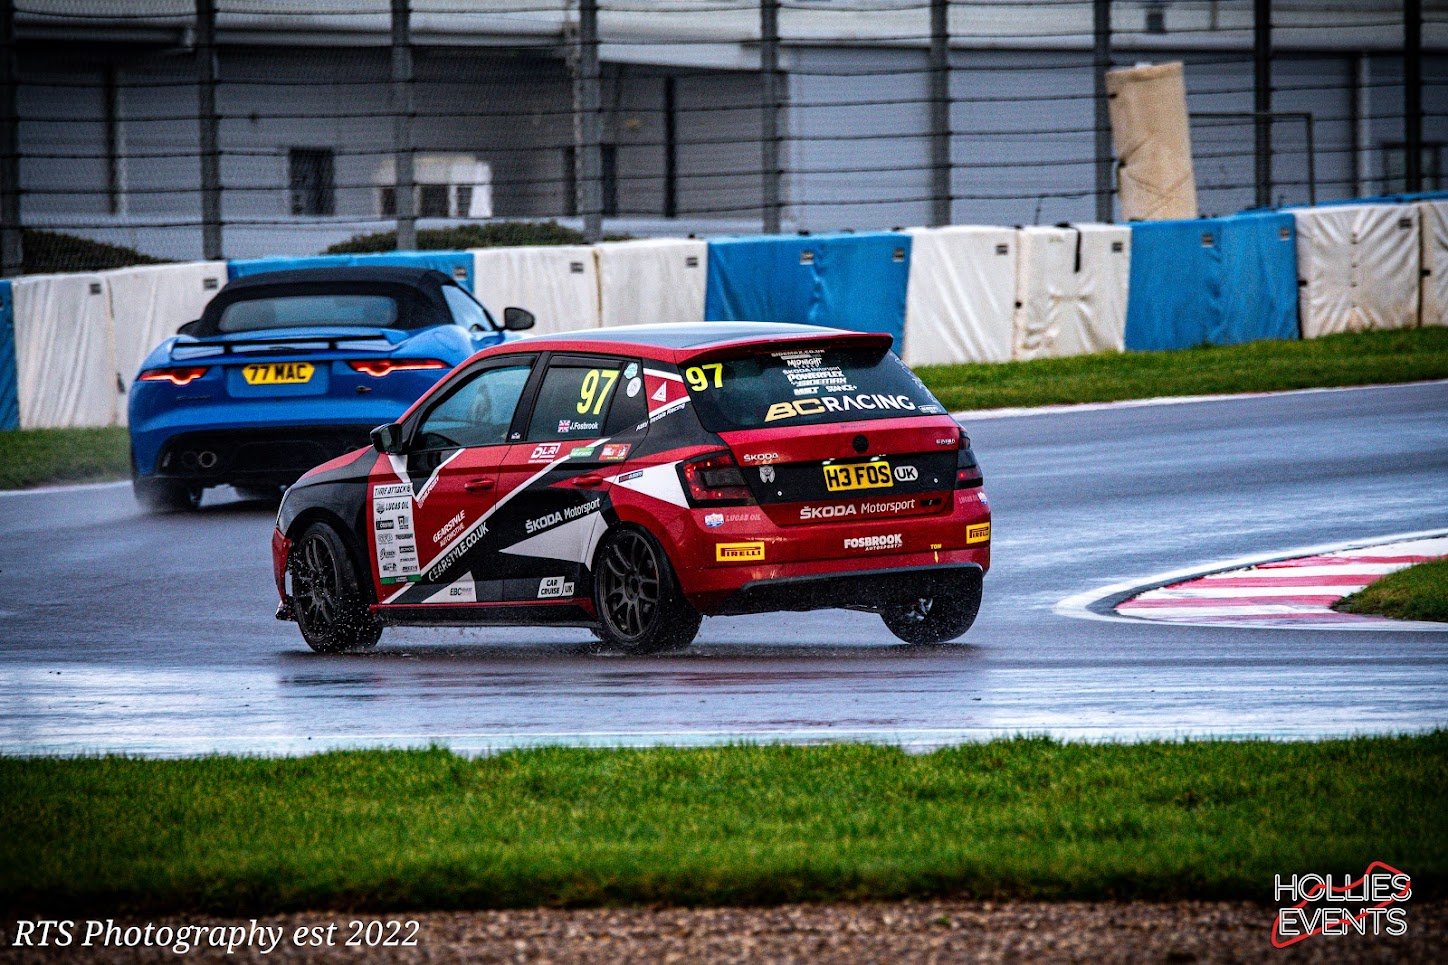
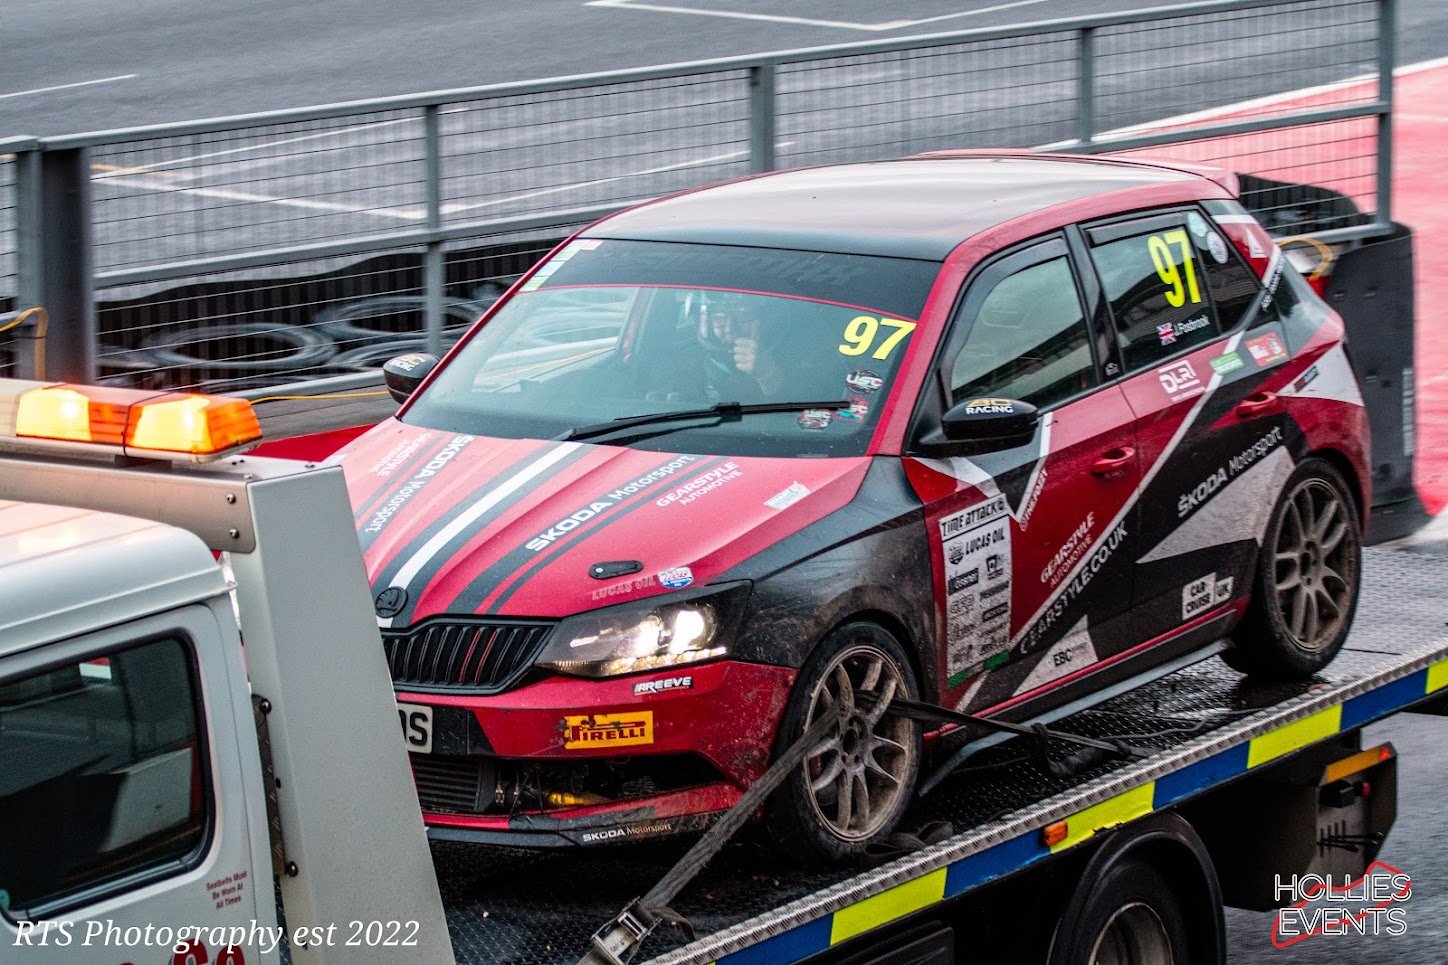
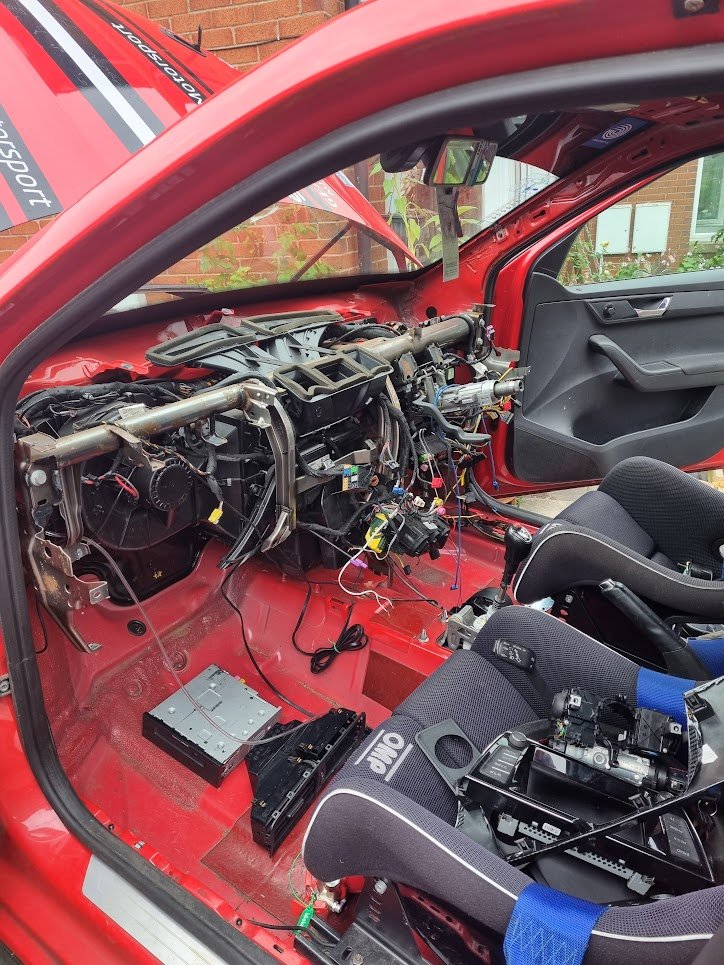
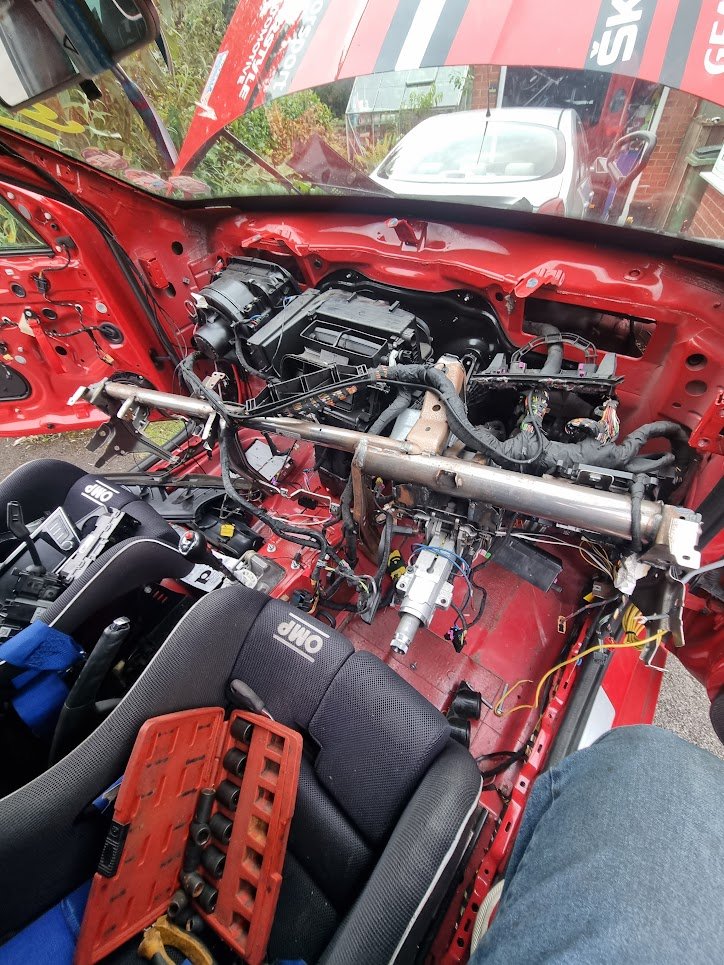
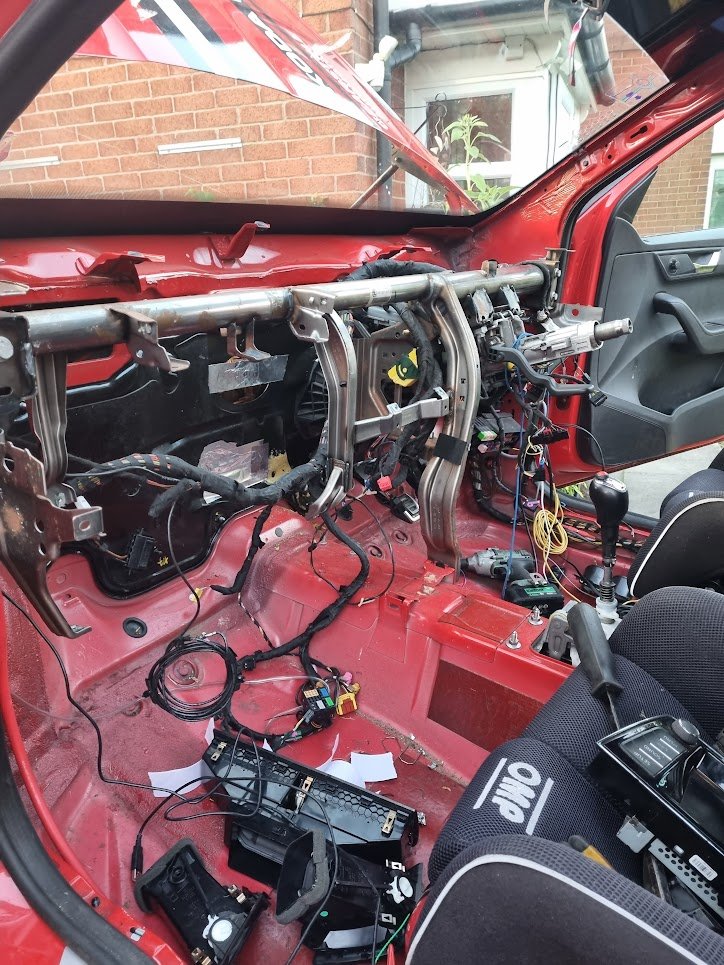
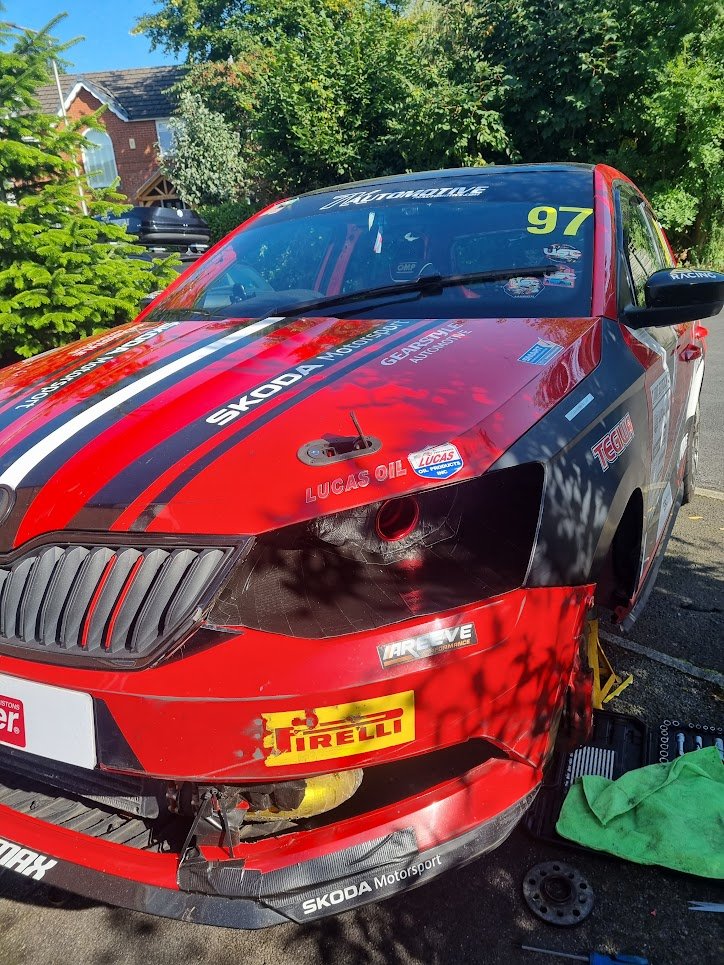
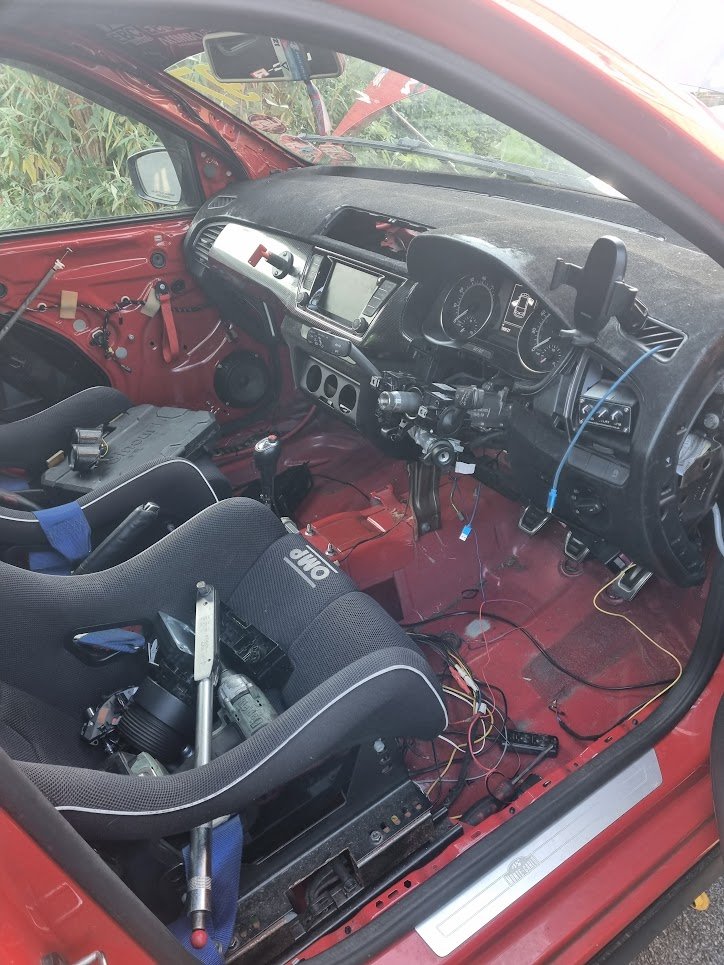
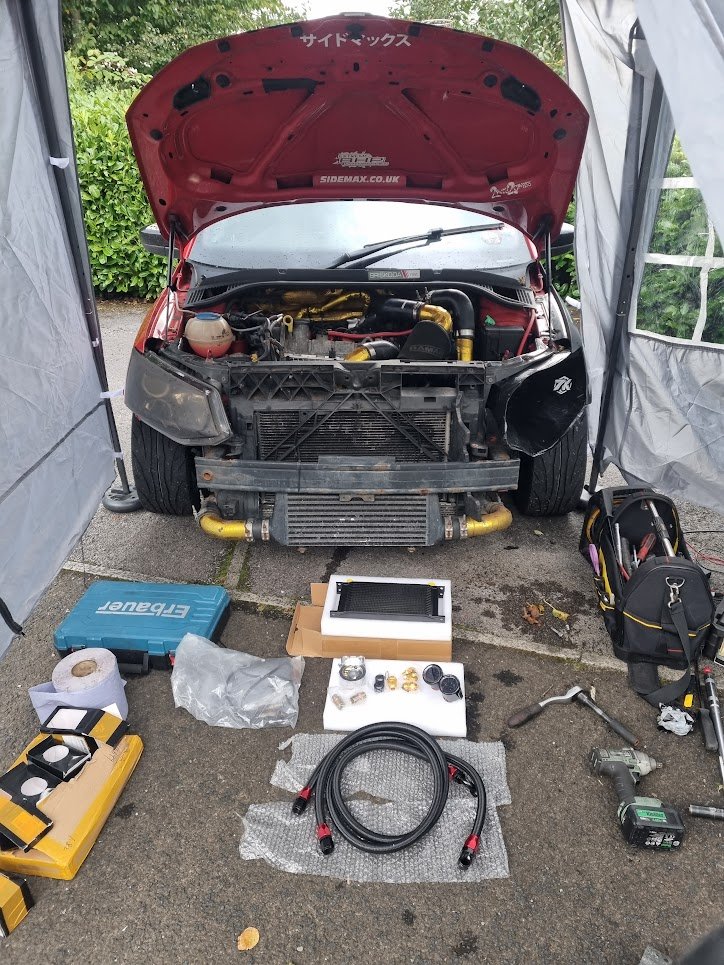
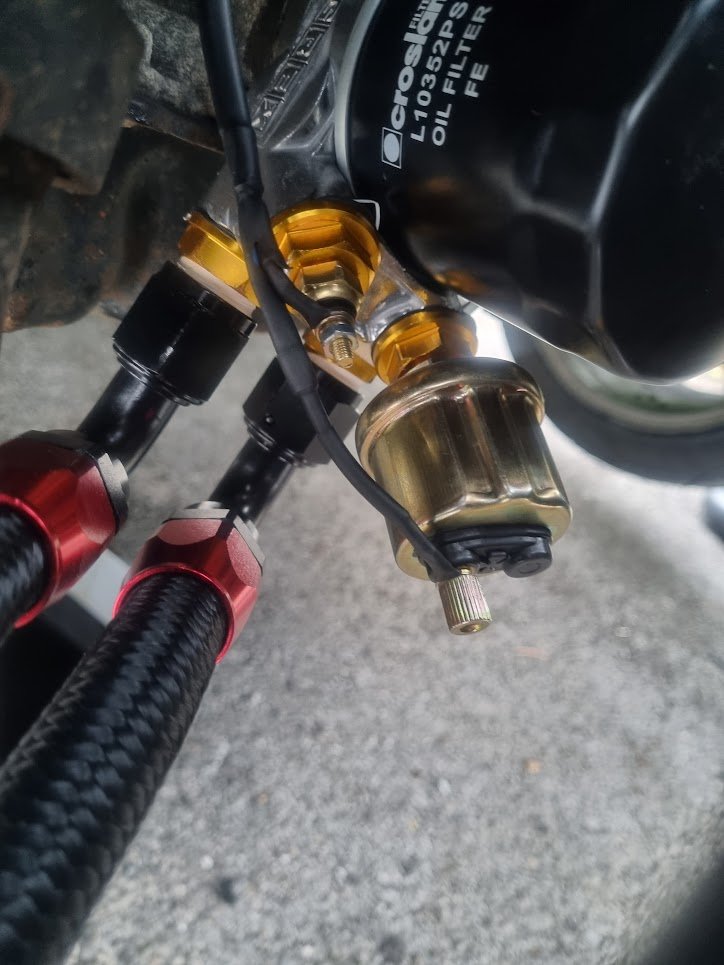
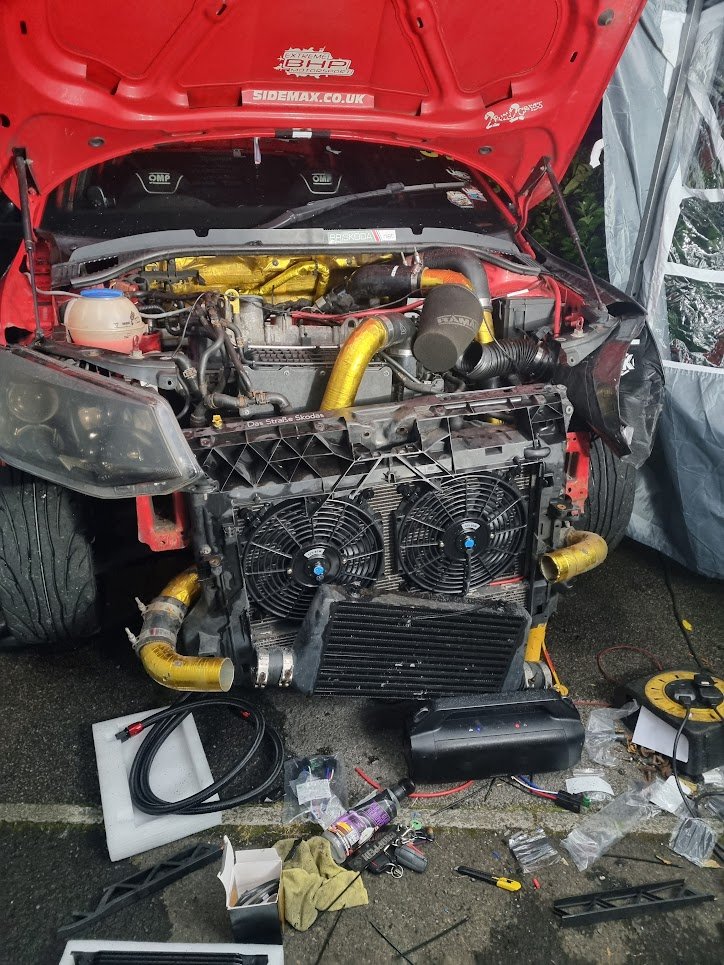
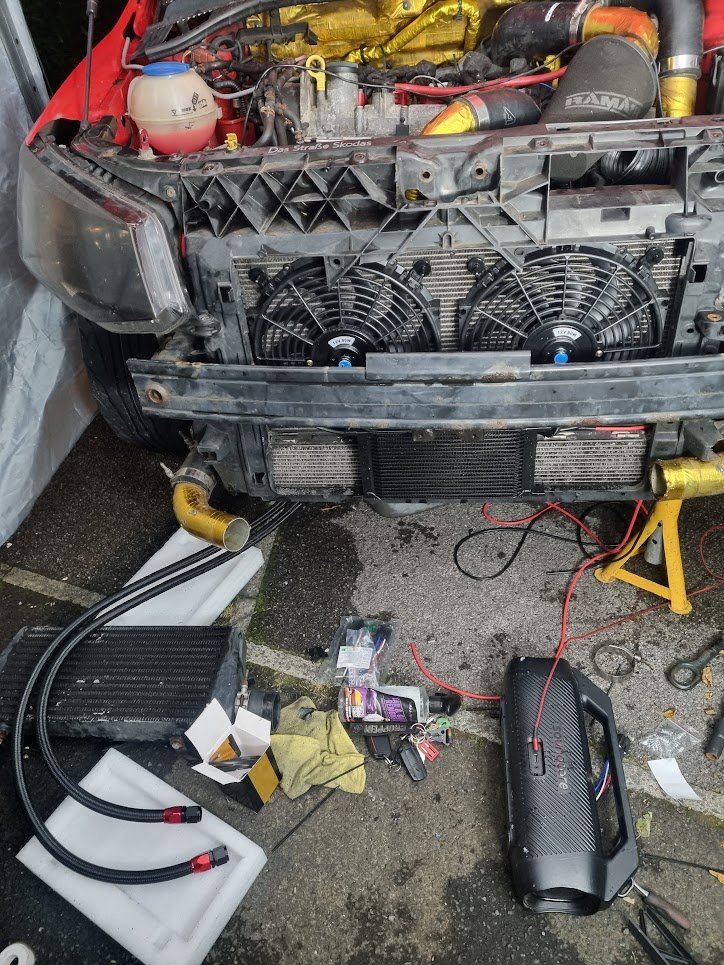
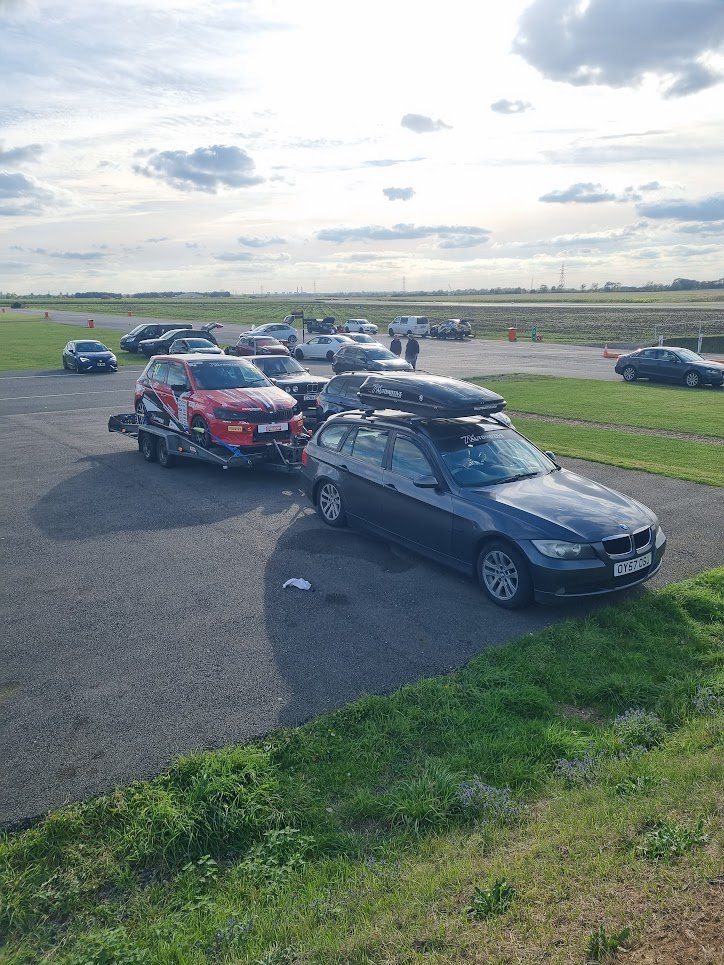
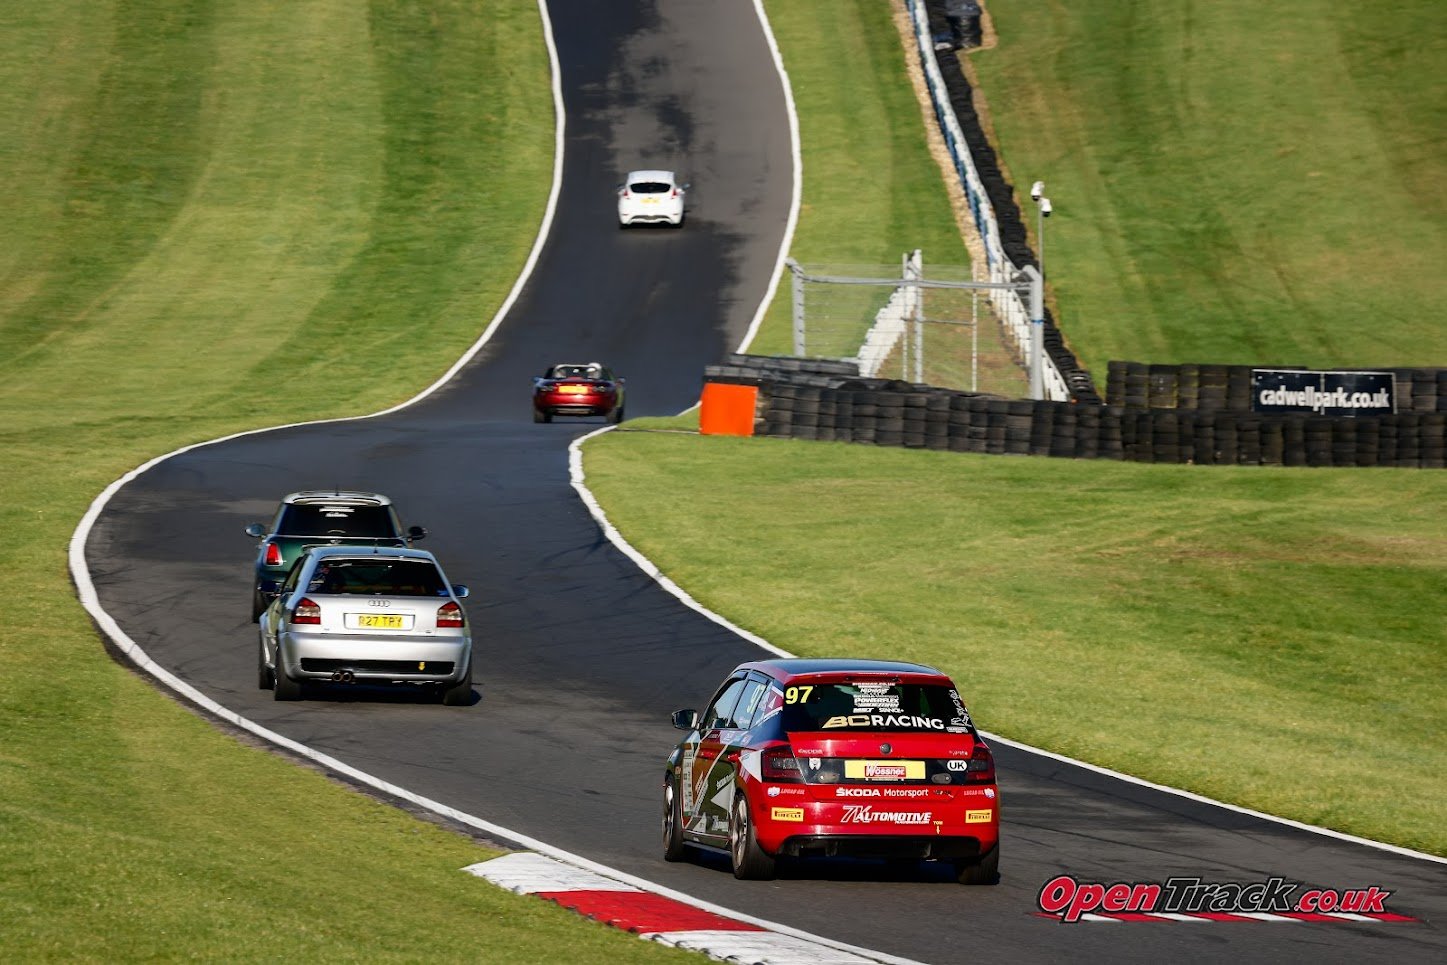
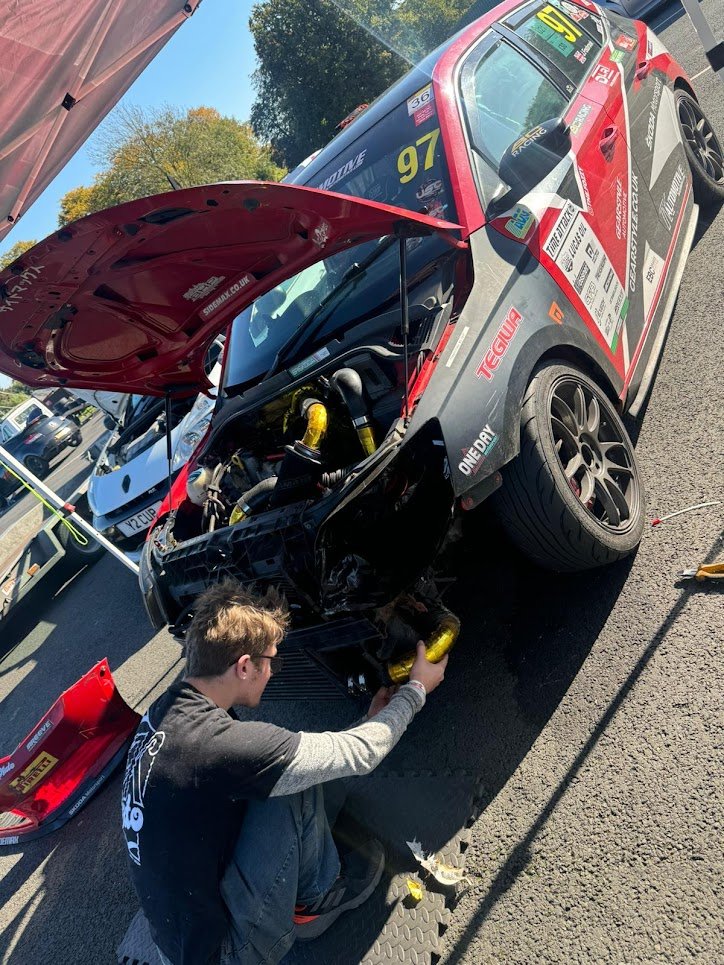
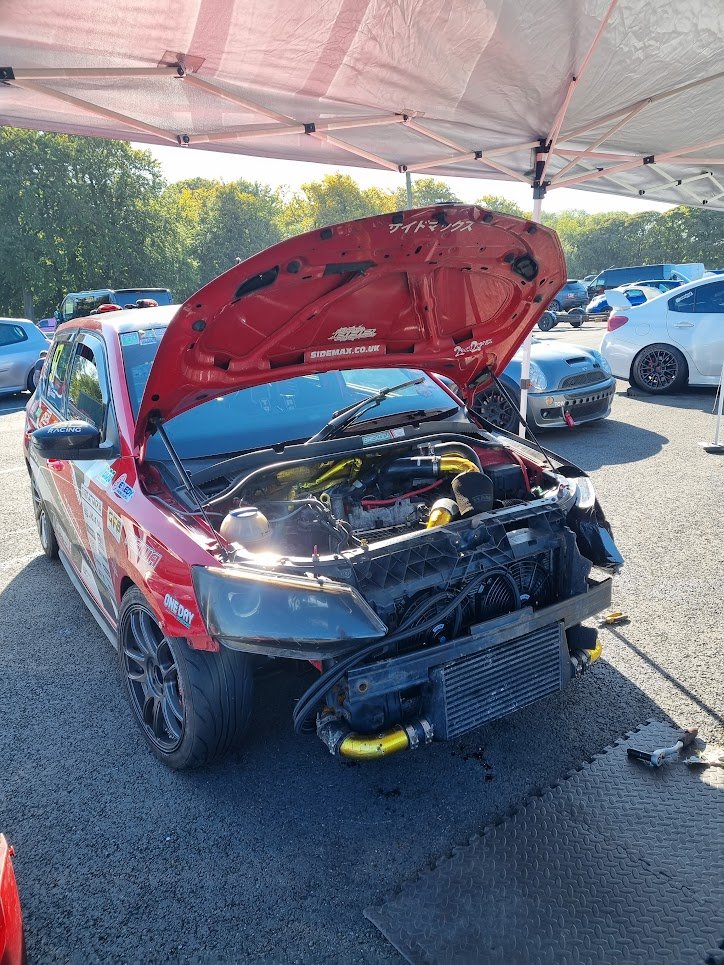
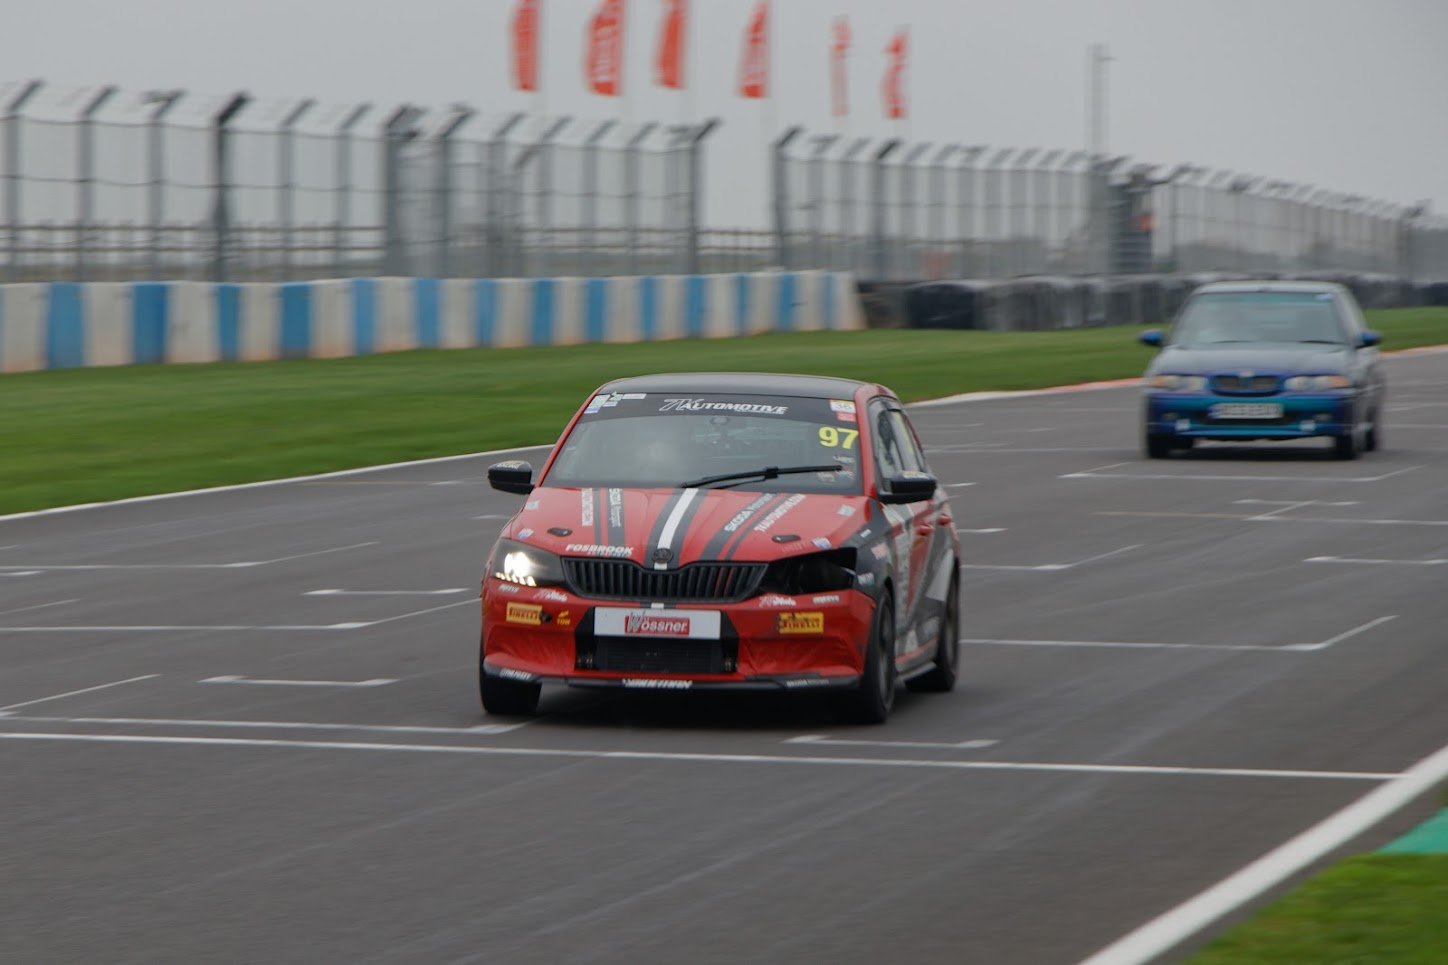
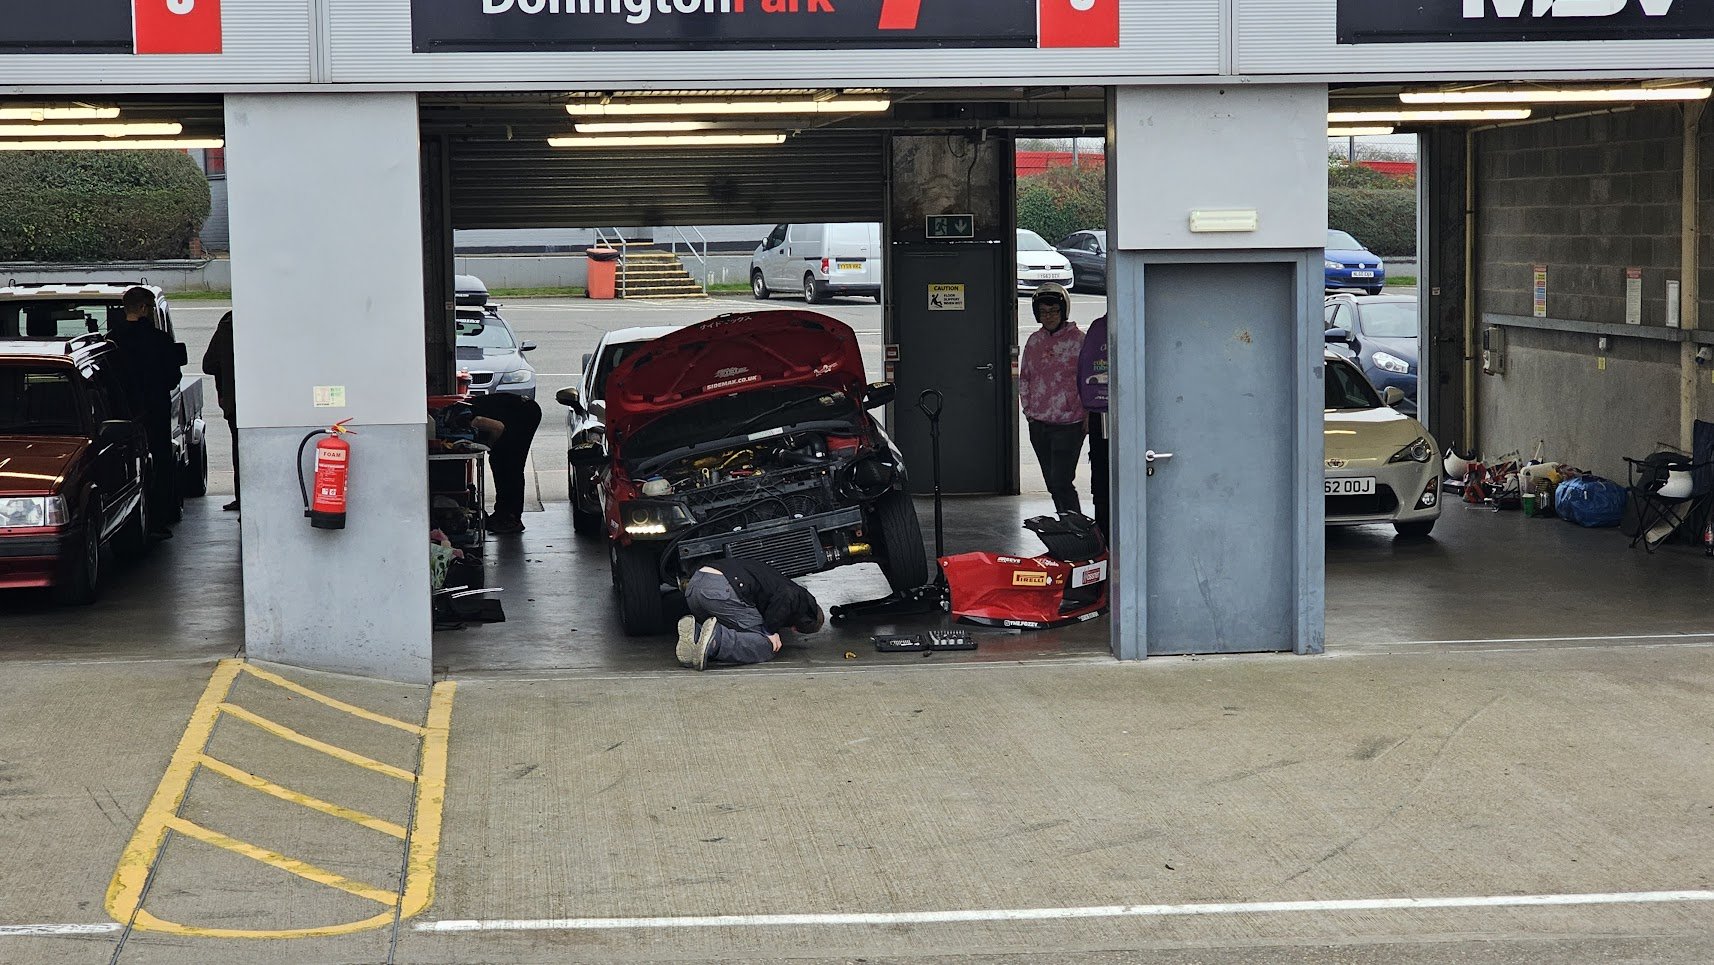
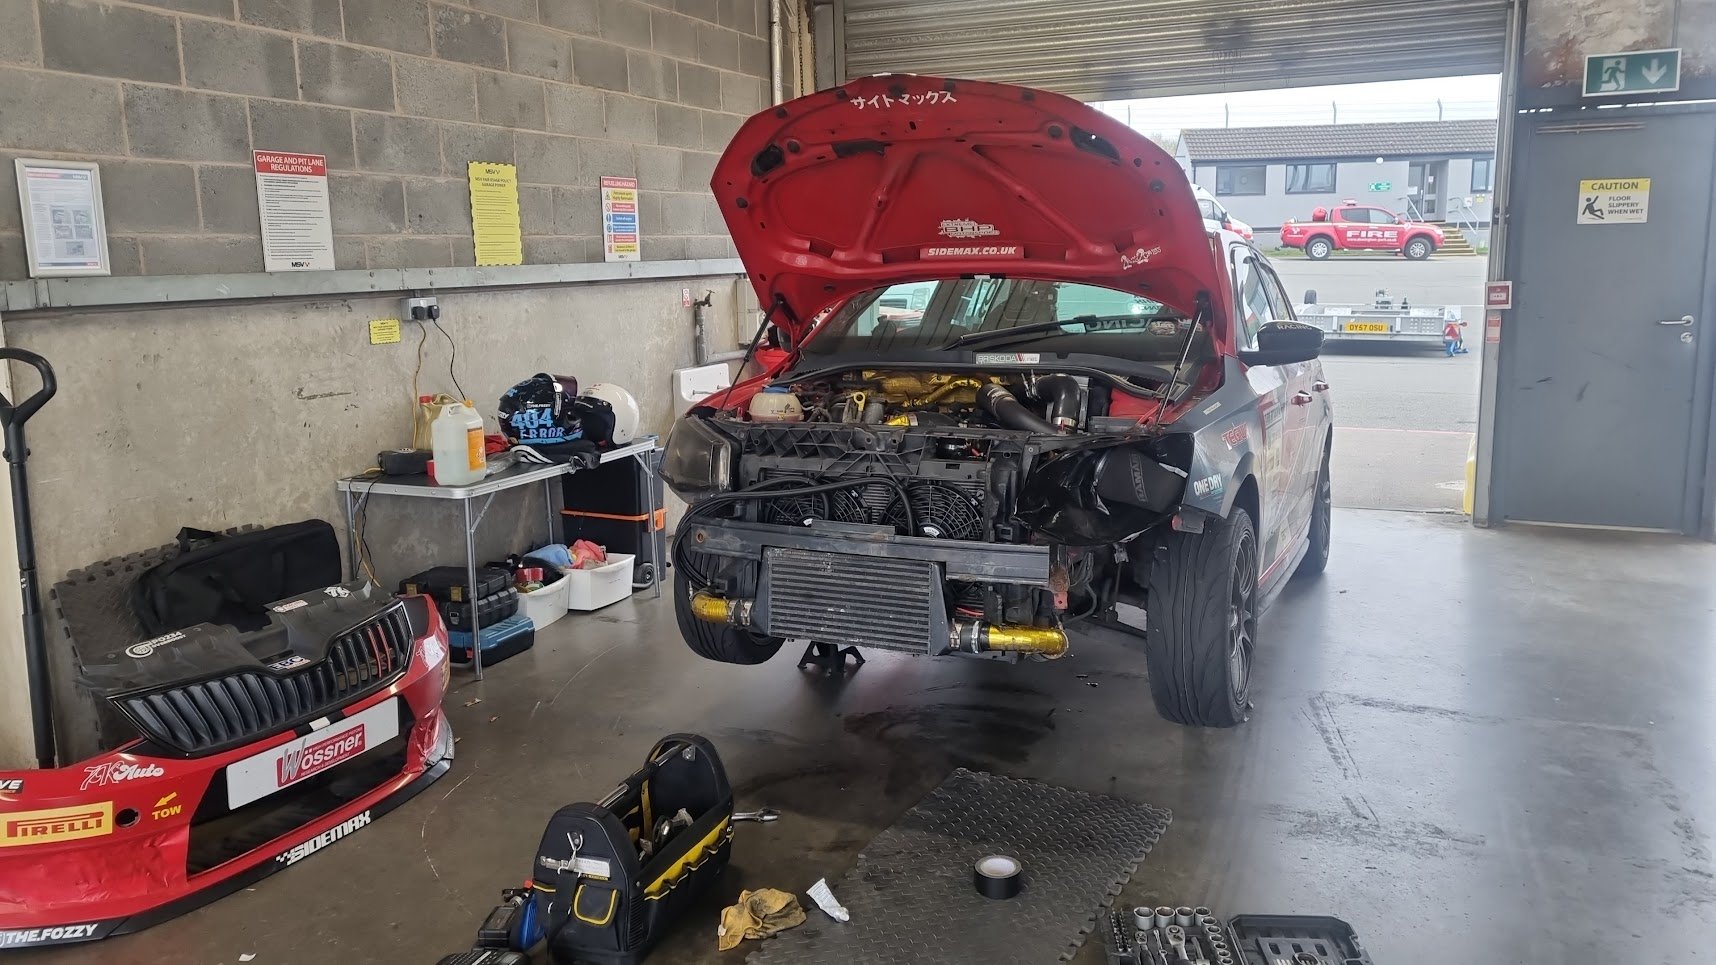
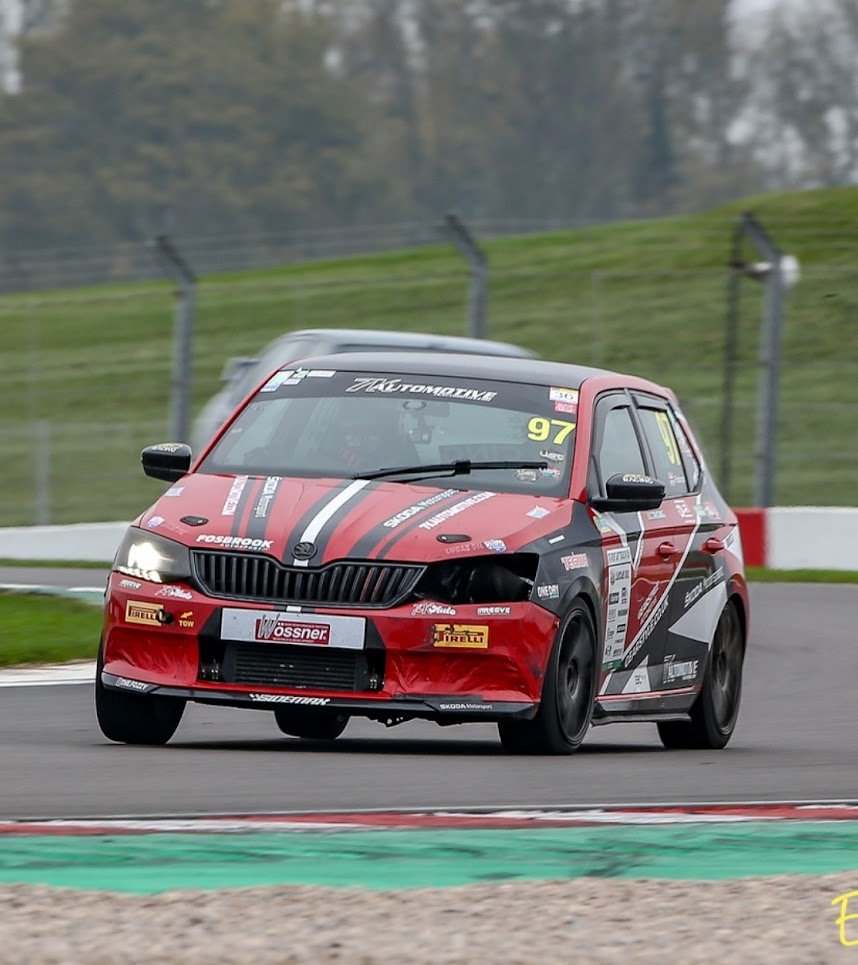
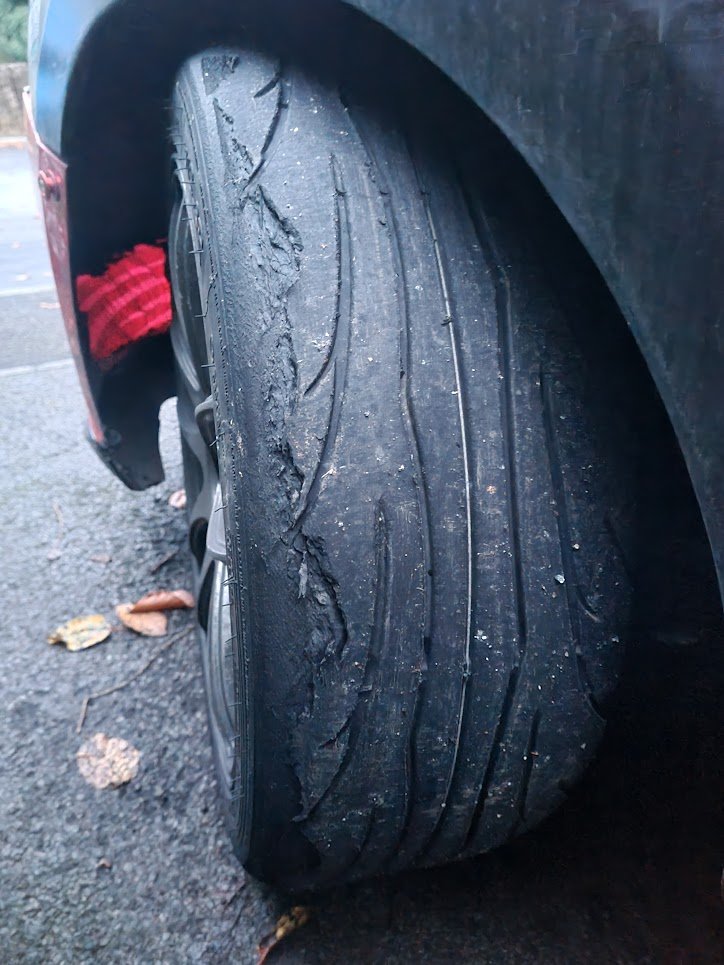
So its been a good couple years since I've posted on Briskoda and I never actually created a thread for my build, so I'll start from somewhere near the beginning, it's a wild ride filled with pain and success, and the project is still ongoing. For anyone interested in heavily modifying their Skodas with EA211 engines, I have a shop opening soon specializing in motorsports and EA211 engines with all the knowledge I have gained over the last 5+ years, and I will update this post once the store is live and engine building services are available at my new unit. (will be speaking with Briskoda about club discounts) Now back to the start, I bought the car stock in 2019 as my first car, I figured if I was going to pay silly money for insurance, I'd rather be paying £2k a year for a nice car vs a cheap dinger. I didn't do much in the first year an a half, just some small cosmetic mods such as tints, stickers, some red pin-striping, a sun strip, yellow fog lights and an MST induction kit. End of 2019/start of 2020 I started to get a taste for track days (I had been professionally sim racing for a few years and wanted to get on track in my own car) so started with Three Sisters in Wigan and went from there. 2021 is where it really kicked off for my project. At this point I had only ever done some simple mods and regular servicing to my car. I had no idea what I was doing, when it came to fitting suspension or anything more complex. so I researched and watched some YouTube videos, bought some more tools and had a go at fitting powerflex poly bushes and upgraded the suspension to coilovers. This went quite well, I even bought a welder and taught myself how to weld to make my own custom exhaust. I even painted the calipers red along with a few other small modifications here and there, including a rear wiper delete. Now that I had sportier handling and noise, I wanted more power. So in the summer of 2021 I figured instead of spending money on a stage 1 remap, only to pay for a more powerful map later down the line, I decided to go all out and bought a bigger 1.4tsi turbo and fitted it to my car with the aim of going straight for 170bhp ish. I also swapped in colder Denso ixu27 spark plugs and paired them with APR coil packs. Went to get it tuned and the tuner blew it up 🙃 The tuner basically hit the page up button on boost and fuel, rather than properly remapping it on the dyno and got the numbers wrong. Ironically I had a P0234 overboost sticker in my engine bay, and thats exactly what happened. The engine ran too lean, too much pressure was put on the turbo and it overheated, which warped the turbine shaft causing the internals to explode, sending fragments of compressor through the engine. At this point I could've should've scrapped the car or had it written off by insurance, or I could put a fresh engine in and keep going..... i chose pain... I figured if I had to replace the engine, I may as well go bigger and picked up a cheap CXSA engine with around 50k miles on the clock, drove to London to pick it up and transported it back to Manchester in a mate's Audi A3. Little bit of info on the CXSA engine, it's an updated version of the CMBA engine which had oil consumption issues with the cylinder head, but the CXSA engine was preceded by the newer and somewhat improved CZCA engine. I went about striping down my car ready to remove the engine and started swapping some of my mods onto this new engine, I spent an additional £500 on various service items, new spark plugs, fitted a fresh clutch whilst I was at it and painted the cam cover red. Interestingly, the cam cover on the EA211 engines for those who don't know, is also the cam ladder, as the camshafts are built into the cover, so it can't easily be removed without having to remove the timing belt, so I had to mask everything off in order to paint it. Once I had the new engine fitted, I rebuilt the front end of the car, and fitted RGB demon eye lights in the projector headlights whilst I was at it. The swap between the CJZD to the CXSA was relatively straight forward, the high pressure fuel pump is identical between the two engines (both identical Hitachi HPFPs with the same plug - this will be important later on), using the original engine wiring loom and ECU from the 1.2 CJZD, The 1.4TSI engines have an additional oil pressure switch and solenoid at the back of the engine to switch between low oil pressure and high oil pressure, for performance and an easier swap, these can be left disconnected. The engine will always run with higher oil pressure, like the 1.2tsi engines. Once the car was running, I booked it in at a different tuner who were able to apply a base map for the 1.4tsi and tune it to around 180bhp and 260nm of torque, I even got pops and bangs *sigh* I now had the first engine swapped MK3 Fabia in the UK. (Mid 2021) Somewhere during all this I fitted 15mm spacers on the front and 20mm spacers on the rear for better fitment, and realized I needed some wheels. So after getting the car back on the road, I went on Facebook marketplace and managed to pick up an almost new set of JR29 wheels for £200, no cracks, buckles, welds or damage. Fitted a nice set of Pirelli P-Zero tyres and got some tuner bolts as I had snapped the locking keys for my standard bolts. I also fitted black badges and some rubber strips to extend the standard Monte Carlo splitter and sideskirts. The car was now in a good spot and looking good, so I took it to Santa Pod for USC with some mates and went down the drag strip, followed by a road trip round the NC500 a few weeks later. The quarter mile time was 15.8 seconds at 86mph iirc. The road trip round the NC500 was a lot of fun with great roads and scenery, but in true project car fashion, the spirited driving took it's toll as the exhaust shifted, kevlar heat wrap failed, and a heat shield got loose, resulting in a slightly melted fuel tank. 1 week later, I had a new fuel tank and replaced the damaged one, and took the car to Trax car show, where I got some track time and met @Monkey_Dan in person for the first time. I also got speaking with a few other people getting more ideas for my car. It was around this time I started looking into getting the R5 rally wide body kit (about £3.5-4k), but then the project car curse struck again 2 days later and engine number 2 went pop as I left Tesco with full tank of premium. At this point, I start looking for another car, very nearly bought a slightly rotten mk1 MX5... I wish I did. Instead I bought a Toyota aygo as a cheap daily and decided to turn the Fabia into my weekend/track car. I contemplated the Idea of swapping in a 1.8tsi from the Polo GTI or a 2.0tsi from the Golf GTI/R, the 2.5L TFSI RS3 engine also crossed my mind, but these were all out of budget. So another 1.4tsi it was. The engine was stripped down to find out what went wrong, this time I took the cam ladder off and removed the head to get a deeper look now I was more confident in my mechanic skills. As we took the intake manifold off, we could see one of the intake valves missing in cylinder 2, I didn't expect to see it embedded in piston 2 when we took the head off... As much as I hated it, seeing the Fabia with the front end fully disassembled was a familiar sight. After some further inspection and sifting through data logs, my best guess for what happened is a perfect storm of a spark plug failing, mixed with a poorly looked after engine (remember I bought this engine cheap off the internet), a lot of carbon buildup, and some damage likely caused by the pops and bangs. (yep, I'm getting old, pops and bangs are not cool) I ended 2021 with a second blown engine and a cheap daily. This time I bought a CZC engine with 30k miles on the clock in better condition, had it shipped to me, and repeated the same process as last time, swapping good parts over to the new engine, including the clutch which only had about 12k miles on it at this point. (yep, engine 2 lasted 12k miles) Whilst I waited for the new engine to arrive, I went about heat shielding the firewall with gold insulation tape from funk motorsport. This time round I didn't bother painting the cam ladder, instead I had problems getting the car to start due to fuel pressure from the HPFP. Remember how I mentioned the Hitachi HPFP earlier? The CZC engines use a different HPFP to the CXSA and CJXC/D engines which wouldn't work with my wiring loom or ECU. Eventually after much trial and error, I modified one of the Hitachi HPFPs to fit the CZC engine which required some re-drilling and adjustment with the dremel to move the bolt holes. It was a bit of a bodge, but it worked. The Hitachi HPFP can also be upgraded using the EA888 HPFP upgrade kits. The fuel pump workaround fixed all the issues, and the car was back on the road for a few months until a HGV propshaft decided to ruin my day on the M6 by damaging the subframe, front suspension, destroying an alloy, ripping out an abs/wheel speed sensor and a causing some other damage underneath. Insurance were kicking their feet about fixing the car because of how heavily modified the car was, so after 2 months waiting, I took the car back and fixed it myself. Unfortunately I couldn't find any more JR29s so had to settle for a single bola b25 to fix the car as cheaply as possible. Fitted a new subframe, new control arm, re-terminated the abs sensor wire and treated the damaged metal to stop it from corroding. With the Fabia fixed again, I went back to modifying, going even more track focused. I fitted an aftermarket steering wheel with a custom wheel boss and quick release setup. Doing this meant I lost the steering wheel controls, so I came up with a way to keep them, I removed them from the standard wheel and zip tied them to the wheel boss kit. Somewhere along the way I installed a boost gauge and volt meter in one of the center air vents too. Seeing as I was going full track car spec, I had been looking at the OMP WRC-R seats for a few months and found a pair with 4 point harnesses on marketplace which I was able to get at a bargain £650, vs £1400 for the pair of seats and harnesses new. I went about stripping out the standard seats front and rear and fitted the new seats. Getting the seats to fit required making up some custom brackets as the standard seat mounting is offset. Installing the seats straight onto the default mounts resulted in being sat a couple inches left of the wheel, making for an awful driving position. I temporarily bolted the shoulder straps for the harness to the standard rear seatbelt mounts whilst I waited for a custom harness bar to arrive. The harness bar arrived, and to mount it, I cut away the rear seat mounting loops and boxed in the bar mounts with 2mm steel and a lot of weld to make it as secure as possible, if I crash, I don't want that harness bar coming loose. The whole thing was painted red to match the interior and adjusted to fit, and the harnesses mounted to the bar. When fitting harnesses, they need to be fitted correctly in the right position and with the right angles, don't mess around with safety when your life may depend on it. As part of removing the standard rear seat mounts, I removed the centre mount which had 12 spot welds and panel bond - absolute pain to remove. (Drop the fuel tank if you do this, the tank sits directly below and you dont want to drill into it) Whilst I was at it, I also started removing some of the bonded sound panels from the boot area (ADHD got me on a side quest there) The next addition came mid 2022 when I decided it was time for a race car livery, earlier in the year I designed some liveries for my car, and went about doing it as cheaply as possible. I went to a local vinyl supplier, bought £80 of sign vinyl because it was cheaper than proper cast vinyl and spent every evening after work for a week cutting vinyl with a ruler and pair of scissors and applied it to my car. I also used a vinyl plotter to cut out some additional stickers to complete the race car livery look. After the livery, it was time for some Nurburgring prep, full service again and walnut blasted the intake valves, I fitted a 2-step controller for flat foot shifting and launch control with an aftermarket wiring loom and went to get the car remapped again, this time for a slightly safer map running 170hp and 250nm of torque running less boost but with better fuelling. The pops and bangs were gone, and replaced with anti-lag which doesn't come in until 5k+ rpm, and the redline was raised from 6500 to 7000rpm. The Nurburgring trip didn't quite go to plan, we were staying in Belgium for the week for Spa 24H, and went to the ring on one of the first days. My car decided to start misfiring and wouldn't behave, so I took it on for a lap anyway, managed to get a 9:58 lap on 3 cylinders. Later on diagnosed the issue to be the aftermarket wiring loom for the launch controller, managed to fix it and got home just in time for USC at santapod again, this time I entered the autosolo and won, then entered the flame show for a laugh. I got some more track time at Silverstone in September in 2022, and got bored in October so made a bonnet exit exhaust for fun (not for road use - car shows only) The Fabia then decided it wasn't done being a project car, snapped the dogbone mount which also snapped the clutch line, so I replaced it with a thicker dogbone from a 1.8tsi Polo GTI and fitted powerflex inserts, along with replacing the broken clutch line. (I dont seem to have any photos of the new dogbone mount. Next up was some Trackday prep for Oulton Park. I switched out my old P-Zeros for NS2r semi slicks, I didn't want to go full fat semi-slick as I still wanted the car to be drivable in the wet. I also put fresh discs and pads on the car with j-hook disks and EBC yellowstuff pads. The pads were properly broken in for track use, some suspension adjustments were made and the spacers were removed for clearance over practicality. I also swapped out the white #97 on the side windows for proper MSA spec DayGlo yellow numbers and name on the side windows. It was also around here I stopped bothering with centre caps on wheels as they just melt off on track with how hot the wheels and brakes get. The Oulton Park trackday was wet, glad I chose the NS2r tyres. By the afternoon I was getting some good laps in (I wasn't timing) and I was chasing down and overtaking 2 of the 3 GR Yaris' on the track - impressive for a little 1.4 powered Fabia. The EBC yellowstuff brakes didn't last... After 1 day at Oulton, I had burnt through all 4 pads on the front axle. An EBC rep got in touch and sent out some Bluestuff NDX pads to try on the rear and RPX pads to try on the front on my next trackday. On the way home from Oulton my gearbox blows up. Driving along in 6th gear and it suddenly becomes a neutral. As I nurse it home, it starts popping out of 5th gear, then stops going into 5th completely. Last few miles im having to hold the gear stick in 4th. I order a new 6 speed PRQ gearbox from a scrap yard, get my car trailer-ed to a mates unit and swap the gearbox over the Christmas holiday. Merry Christmas to me I guess 😂 I did also strip the box to find what happened, diff casing exploded, lost oil, 6th gear was smoooooth... The dogbone mount on the gearbox was also cracked so It's possible that the dogbone snapping couldve also caused some damage there. Now we're in January 2023, the new gearbox is in, and the car is serviced. I get home from a Tesco shop and my car sets on fire. No I'm not kidding, despite all the heat shielding, it caught fire. It wasn't the common fuel rail failiure that caused it, instead the heat from the turbo and exhaust melted through the brake fluid line that goes from the reservoir to the clutch master cylinder. The line that failed, I had upgraded with a fuel resistant silicone line and jubilee clips during a previous engine swap. Luckily, I had a powder fire extinguisher in the glove box (seriously keep a fire extinguisher around if you have a project or track car) and I caught the fire early enough to put it out. To top it all off, I had a trackday booked just under 6 weeks away The fire took out the clutch master cylinder, clutch position sensor, some wiring and part of the clutch line (which I had only just replaced a few months prior) I replaced almost all of the damaged parts, other than one part of the clutch line. When looking for this part, it turns out only to be available with the whole clutch line kit, which Skoda had also updated to a new version which would require me purchasing a different clutch master, different clutch slave and the whole line kit. Instagram came in clutch (no pun intended) and someone sent me some 90° connectors which I needed to fix the clutch line. It took a month to find this part. So now its crunch time, the car doesn't run and I have upgrades planned before the next trackday, I get the fire damaged parts replaced, fit the new RPX and NDX pads which EBC kindly sent over and the big ticket upgrades - Vibratechnics engine and gearbox mounts, a front mount intercooler setup and a battery relocation. At this point, no one in the UK had fitted a FMIC on a MK3 Fabia, so I ordered a 610mm 12 row universal intercooler along with a universal pipe kit and a selection of silicone hoses. I also ordered an RTMG charge cooler blanking kit and some miscellaneous pipes to bypass the charge cooler. I also ordered a battery relocation kit and a battery tray for an 063 Aygo battery because I had one laying around and it's 3kg lighter than the OEM battery. I also repurposed parts of the MST intake to relocate it and used the dremel to cut out a section of the plastic radiator shroud to direct air straight to the intake. Once I had everything, I chose my final routing for the intercooler, installed all the parts and my car became the first MK3 Fabia in the UK with a FMIC - managed to beat @Monkey_Dan to it by about a month. (sorry) With the car prepared and ready, I drove down from Manchester to Snetterton for the first of many trackdays organized by @BossFox to shake the car down and see how it behaved with the new additions and lots of abuse, doing about 50 laps and also meeting a couple other Briskoda members, @Volf included. The Fabia did handle the abuse quite well, pulling 1.3G in the corners and 1.2G under braking, I did notice an issue with braking performance straight away. When slamming on the anchors after being on wide open throttle, I had no power assisted braking for half a second before the brake booster came back in. This was consistent through the day and post trackday diagnosis uncovered the vacuum line from the engine to the brake booster had been damaged from the fire just over a month earlier. The RPX pads were easily able to take on the late braking, and a full day of driving with no brake fade. The car did eventually start to overheat in the afternoon so I had to back off a little and do more mid session cooldown laps. Jumping forwards a few months, I start working for a motorsports team racing in the UK Time Attack Championship, Racing Hondas Championship and 750MC Club Enduro Championship as a race mechanic. From this I started gaining additional mechanical and motorsports knowledge and started making my Fabia even more un-usable on the road. The bucket seats came back out and I started removing the carpets, rear door cards, more sound insulation and also removed the dash for a DIY flocked dashboard. At this point all airbags were removed, along with the airbag controller to remove the airbag light on the dash, all wiring in the roof of the car for lights, airbags and the radio were removed to kick off the start of a more extreme diet. After flocking the dash in the living room I fitted an electrical cut off switch and wrapped the carbon effect dash inserts with carbon fiber wrap. I also dropped the gearbox again to replace the clutch, flywheel and pressure plate after burning them out driving in the snow with semi-slicks 🤦♂️ Next up on the extreme diet was removing the standard bonnet catch, cutting holes and fitted aero catches, because race car I guess... Whilst I was at it, I also removed the standard bonnet catch, welded in 2 brackets cut away a lot of metal from the boot and fitted more aero catches. Why the boot too? a) Race car. b) Whilst at Snetterton, something electrical went quite wrong, the boot started unlatching from the wiper stalk and the front wiper was stuck on unless the rear wiper was turned on (which was already deleted) and it was easier to simplify with aero catches, than spend ages messing with electrical issues. (i still have to leave the wiper stalk in the rear wiper on position for the front wipers to work normally to this day) Along with the aero catches came a livery update, working for a team racing in Time Attack gave me access to the championship sticker packs which I applied to my car and I started considering building my car for Time Attack. Once this idea got in my head, I haven't been able to shake it for the last 2 years at the time of writing. Regulations have been studied many times and from this point, the car is going in the direction of the Pocket Rocket class in Time Attack UK. Next we jump from mid 2023 to September 2023 going for more performance upgrades and some additional maintenance. I rebuilt the driveshafts, replaced the seals and packed them with fresh grease, then dropped the gearbox again to disassemble it and upgrade the standard diff with a plated LSD conversion from Racing Diffs, this required some custom machining of shims, to make it work. This is a much cheaper option than a quaife or wavtrac LSD at £300 vs about £1200, the main trade off is the Racing Diffs plated conversion kit requires rebuilding once a year. To improve handling, I finally purchased a whiteline rear anti roll bar and fitted that to the car on the same weekend which I set to the stiffest position. I also converted the front wiper setup to a single wiper, because race car of course. A month after the diff rebuild was more trackday preparation, I picked up a slightly used set of Hankook RS4 semi slicks cheap from the racing team to see how they compare to the NS2r tyres. At this point I needed new discs and pads again so upgraded the standard 288mm discs to 312mm discs from the Audi S1, had a set of caliper brackets machined and fitted a set of Porsche 987 4-pot calipers with another set of RPX pads from EBC. The calipers I purchased from ebay were damaged and unusable so a second set was ordered and I had a friend pick them up for me and drop them off same day as it was now 2 days before the trackday and I had no brakes... A set of HEL braided brake lines was acquired for the caliper upgrade and we fitted them in one evening, followed by immediately bedding the brakes in. To improve the geometry setup on the Fabia, I ordered a set of solid adjustable top mounts for a MK4 Golf which can adjust camber and castor, which I set up for maximum negative camber and shimmed the rear hubs in the same way it's done on many race cars for some negative camber and a little more toe in to control the over excitable rear end. We now come to the next trackday, November 2023, another hosted by @BossFox. The day gets off to an exciting start with BossFox right behind me in his Subaru P1, already pushing the car when the tyres were still a bit cold and I hadn't got my tyre pressures up, only to have a couple of very sideways moments 😅 A few laps later and the car already starts overheating, I take a cooldown lap and go at it again only for it to start overheating again 2 laps later so I come in to find the coolant boiling over. The rest of the morning becomes a battle over coolant and oil temps and trying to keep them down. come the lunch break and I've removed the front grill and fog lights to no avail, so I take the front bumper off, grab the angle grinder, and start cutting out the blanked off part of the upper grill in an effort to get as much cooling as possible. Straight after the lunch break I jump out on track and push too hard on cold tyres sending me off after turn 1 and straight into a wall, didn't even get to see if my "cooling upgrade" works. The good news is the harness bar is still solid as ever, so my welds are working great, and wearing a harness with a helmet and neck brace meant I was unharmed. However, the Fabia looked a little worse for wear as it gets dragged into the pits. Over the next 30 minutes I remove the front bumper, pop it back out and tape/zip tie it back together, I then rip off the damaged wheel arch and take a mallet to the front fender, bashing it out to make it a bit straighter and to clear the wheel. Put the car back together, check the alignment and get confirmation from track control to take the car back out. From crashed to beaten back in shape took just 30 minutes - skills as a race mechanic coming in there. My favorite comment of the day was someone saying it was like watching a rally team patching their car back together. The handling and tyre and brake upgrades now meant I was pushing 1.4G in corners and 1.4G under braking and made a massive difference to how the car handled. The LSD conversion also made a massive difference in corners, being able to put power down earlier without wheel spinning, though it did come at the cost of introducing more torque steer. Lap times only 6 seconds slower than a Golf R around the Donington GP layout. (as for the sticker on the last picture, i had to joke about it otherwise id be a bit miserable) Next challenge was repairing the damage, which I managed for under £100. Bought a new wing and some headlight tint, removed the damaged wing and fitted the replacement, had to bend the mounting bracket back into place for it to fit properly. I then re-taped the front bumper and reinforced with zip ties. The £10 tint on the headlight saved me £500 on having to replace the whole unit. I had to plastic weld a couple of tabs on the headlight for where it mounts, and once I removed the damaged tint, there was only one scratch in the lens, vs having a completely ruined headlight. New tint fitted and the car is ready for the next trackday. There are some scuffs on the bonnet, a couple dents in the door and more scuffs along the side of the car and wing mirror, I like to call those battle scars 😅 As for the next trackday, that was a day after fitting the new parts. Donington GP again, but this time it was just an afternoon session and very, very wet. This was actualy a no noise limit trackday with everything from track cars, to supercars and even full on race cars. Being overtaken by an LMP3 race car in a hatchback is a surreal experience. I found myself gapping a lot of the supercars as I was one of few people actually pushing in the rain, most people were struggling to gain any traction so this little Fabia was actually showing up cars it shouldn't even be able to touch... until it wasnt and the car aquaplaned going into craner curves, spitting me off into the gravel. At the end of the day, I also got the car weighed at the track, and it comes in at just a fraction under 1000kg. To finish off 2023 I felt a bit seasonal, wrapped the grill in red tinsel and wrapped the whole car in 1600 LED christmas lights (about 80 meters of them) Most people seemed to love it, along with a lot of coppers - except for one... The Fabia spent the first half of 2024 sat on the driveway doing nothing, and I did nothing with it until a week before Shed Fest, 2 of my old NS2r tyres were fitted to replace the bald RS4 tyres, and thats it. I took the car to a couple of race weekends with the racing team, where I managed to brake the pan roof - I'm surprised it lasted this long, and finally made the decision to take it off the road permanently. It's now a track-only car. Mid 2024 I also bought a new daily, an e91 320d which I now use for towing. The Fabia was then trailer-ed to tatton park VAG show, and Trax at Silverstone for more track time. A few days before going to Silverstone I decided it was the perfect time to strip the dash out again, this time to remove the AC lines and the heater matrix, along with cutting out some of the additional plastic behind the dash, along with removing a headlight in favor of additional cold air for the intake to try and combat some of the temperature issues I had in 2023. The day before Trax I spent putting the car back together and working through the night until I had to load the car onto the trailer. I took my full trackday toolkit and spares with me just in case, and finished assembling the car in the paddock at Silverstone with Street Skodas. The Silverstone track time was a lot of fun, overtaking a lot of hot hatches that again, a Fabia shouldn't be able to touch, but looking back at the onboard footage after the track time, I noticed I had been at full race pace with 130+°C coolant temps and 150+°C oil temps. Over the last few trackdays I also noticed the car was loosing power, so where my track times should be improving, the data was showing slower acceleration and lower top speeds on the straights. After doing some compression tests, the compression is lower than it should be across most cylinders, so I've probably cooked the piston rings and/or headgasket. After the continued overheating issues at Silverstone I decided it was time to sort the cooling out for good. I ordered a set of auxiliary fans, some wiring, relays and a switch, I also ordered a 19 row oil cooler, an oil cooler sandwich plate, in-line coolant hose sensor insert, coolant gauge, oil pressure gauge, and oil temp gauge along with their respective sensors so I could keep an eye on everything. I removed the front end, followed with the radiator shroud, I then removed the AC condenser in front of the radiator, fitted a new oil filter with the sandwich plate, fitted the sensors and gauges, it turns out the OEM heater controls cover was the perfect size to fit 3 gauges, with the hole for the centre dial cut open wider. I wired everything up and tested them, followed with fitting and wiring up the auxiliary fans onto a relay and a new switch on the dash, fitted the 19 row oil cooler and plumbed everything in. With the oil cooler and auxiliary fans where the AC condenser was, I couldnt mount the intercooler back to where it was originally, so the angle grinder came back out to cut away part of the front crash bar to re-mount the intercooler. The plastic radiator shroud also had to be trimmed to accomodate the auxiliary fans. This cooling crunch was all as a rush for another trackday... yeah I always seem to fix or modify something days before the car needs to be somewhere... Before taking the car to the track, I taped up the front bumper with colour matched tape to create an area of higher pressure in front of the car, forcing more air into the cooling setup and reducing drag, very similar to how a lot of time attack cars are designed, and similar to the R5 Fabia rally car. Took the Fabia to Blyton park with MQB Track Cars for a shakedown, no cooling issues, fans worked, no issues with the car. I then booked onto 3 more trackdays, throughout October and November, first off at Cadwell park, where the only issue I had was a boost pipe coming off the intercooler twice. I followed this with another one of @BossFox's trackdays at Donington, same again, no issues other than the boost pipe going into the intercooler popping off, this time it was 4 or 5 times. And to finish off 2024, I went to Trac Mon Anglesey. This time it didn't go to plan, the car would not behave, blowing the boost hose off every other lap until I decided to bypass the intercooler all-together because I wanted track time which I eventually got in the afternoon. And that brings us to today. I haven't touched or moved the Fabia since Anglesey in November 2024. I have no current trackdays or shows planned for the car as it's now going into a fully developmental phase. In some of the Donington pictures mid corner, I can see the tyre is rolling onto the sidewall still, despite the camber, so more negative camber is required with further geometry adjustments, and the last picture with a set of 2 month old NS2r tyres shows the tyre delaminating from overheating and the tyre rolling onto the sidewall. The car needs a new engine - it has low compression, and I want more power. I'm limited by engine size with my aim for the Pocket Rocket class in Time Attack so I'm sticking with the EA211 family of 1.4tsi engines, so the next move is possibly a fresh CZC engine, or a CZE engine as those engines have twin VVT (this will require a new engine wiring loom and ECU). Forging the engine is on the cards, along with EA888 fuel injectors, an IS20 or IS38 turbo, a custom 7K Automotive widebody/aero kit for Time Attack, a full roll cage, and many other adjustments and upgrades, including a lot of carbon fiber. Hopefully I will be able to spend 2025 developing the car and by the end of the year, shaking it down in an almost complete state, ready for the 2026 season of Time Attack. So there's work to do. The build has come a long way, with multiple evolutions, but there's more to come... project cars are never really complete.


 2 points
 -
2 pointsWhoever you spoke to at Listers was talking out of thier arse... IT IS NOT A WET CAM BELT. It is expensive because the timing adjustment is complex and has to be done very precisely due to the fact that the engine has cylinder deactivation and thus requires specialist equipment to do so. Dealers also generally tend to do it over two days due to its complexity, so the labour costs are very high.2 points
-
2 pointsThis is one of the two main (basic) solutions with electronic systems: 1. Check the cable 2. Reboot the system 😄2 points
-
2 pointsExplainer by CEO of Osprey, in plain numbers, why public rapid charging are so expensive: As I keep saying, EV transition is not just about swapping one powertrain to another. It's a change of mentality to grazing, plug in as much as possible.2 points
-
2 pointsDifficult to strip a thread when removing, far more likely it was damaged by someone who had it out in the past cross threading on the way back in. £820 for a sump is pi55 take surely! Steel or alloy can't see why an in situ Helicoil repair wouldn't work, certainly worth a look as it would cost very little.2 points
-
1 pointIt's a mechanical link connected to the sensor so if it is link is broken I don't think there will be any fault codes but the car will unable to determine the height of the car to adjust the headlights properly1 point
-
1 point8 years is a very good duration. I don't know if your car "sleeps" in a garage, but it helps a lot in winter... My Mk3 sleeps outside and I changed it preventively after 6 years, just before winter...1 point
-
1 pointI'd replace it if you were wanting to keep your car, considering the mileage you are covering. I've covered 70k now within my Octavia with the same engine as yours, still original timing belt. If you do decide to change it using a main dealer, ring around, I had one quote me as low as £500 all in to change one on my last 1.5tsi ACT, just over a year ago now. North East England area.1 point
-
1 pointceramic coating doing the protection on the wheels and paint @ccvaletinguk

 1 point
 -
1 pointWas that long ago or last year? If you do not count Motor Homers as tourists is suppose some might see it as quieter.1 point
-
1 point"More accurate" - aka less shi* I agree though - watching the oil temp go from cold to over 110° sometimes, the coolant never changes from 90°... yeah right.1 point
-
1 point
-
Be cautious about getting rid of your wheels if you ever intend to sell your Sportline. If you're going to run it into the ground, then no worries. If you're going to sell it, buyers may expect it to have 19" wheels, if that's what's standard.1 point
-
Sorry to hear of your problem. Has the low oil pressure light (red) been seen to be lighting correctly when the ignition is switched on - and going out after the engine starts? Has the car EVER been run with the red oil pressure light showing? Are you in the habit of physically checked the engine oil level on a regular basis?1 point
-
Had the same problem with my BXE but it was the actuator that was sticking causing overboost and random limp mode. Turbo made a high pitched whine/whistle etc but disapeared once the actuator was freed up. I sprayed all I could with wd40 and manually operated it back and forward until it moved smoothly.1 point
-
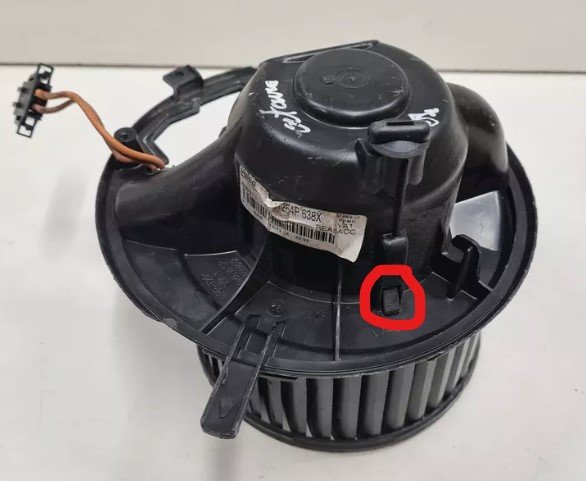
1 pointHi Mike, I 'think' I was able to tell whether the motor was seized by reaching my fingers through the pollen filter opening (beware it has some very sharp edges to it that draw blood easily) and that led to me taking it off. From memory the motor and fan itself were attached to the base mounting plate by a large rubber fitting that had three push fit rubber tabs onto the mounting plate, so I had to use a screwdriver to compress the rubber tabs enough to remove it the motor and fan from the mounting plate and get access to the bearing. It's all eminently doable but did require a bit of scrabbling about to get the motor out and back in, albeit with everything else possible on a work bench.
 1 point
 -
Top speed 136 mph so near double the UK Motorway speed limit. Just push down the accelerator it going to have enough speed / acceleration to get on it,s way.1 point
-
I think if you limit the battery to 50%, the battery will drain at the same rate as normal until it reaches the 50% mark. Effectively you will have 40-60miles of high mpg driving and then the rest will be at a lower mpg. Take this with a pinch of salt as I've only done it a few times haha. It definitely feels nippy on the motorway, plenty of power to overtake in my opinion, especially in sports mode if you need the extra responsiveness.1 point
-
1 point
-
1 pointOh result, clearing the code in code readers should have sufficed though. BTW is your car still on original battery? If so might be time to replace in the near future1 point
-
Hi Sudeepg, I installed a rear dashcam and threaded the cable through the roof lining. I used a glass fibre rod (as used by electricians) to pull it through. Just make sure the cable runs behind the airbags - as close to the metal body, not the cosmetic stuff. If you check through the early posts in this thread, you’ll see where others (including me) had an issue and found a work around/solution from this forum.1 point
-
1 point
-
Friarton Bridge across the Tay on the Edinburgh - Dundee M90 was closed from just after 3 am because of yet another fire underneath or nearly underneath. Recycling Centre fire. There will be media coverage later, hopefully nobody killed or injured this time.
 1 point
 -
1 point
-
1 pointYou weaponising a completely different topic to "dissent ruthlessly suppressed". Just like you used bogus CO2 graph to make your point many moons ago. I've never seen posting anything against climate change on Xwitter/Zuckbook get censored. Again, different things. Threatening to report you is about protecting my image. Your accusations were false, purposefully done in order to put a black mark on my name. The dissent you were saying that were "ruthlessly suppressed" are usually poorly written papers that cannot pass peer review. Please do speak up if you think you are, in any shape or form, the voice of dissent where you feel you are fighting "the cause". All I see is a social media know-it-all that doesn't believe in authority, thinks your opinions can be dressed up as statement and does not need fact checked.1 point
-
1 pointI always find it astonishing that anyone can strip a sump plug, but what's done is done. I don't see why a helicoil should not be a permanent repair, especially given the low stress on the component. In some industries tapped holes in castings are helicoiled from new for extra strength. It's a proper engineering solution and by no means just a quick fix. An alternative would be to get the sump casting tapped oversize and have a larger standard or custom made plug fitted by an engineering shop. Main dealers are often pretty hopeless at thinking of cheaper alternatives, they are too tied into simple part swapping.1 point
-
1 point300 miles and 545 pence is not 1 pence a mile now us it? To be getting 1 pence a mile with 1 kWh @ 6.7 pence you would need to get 6.1 miles a kWh. *** 300 miles from a 81.4 kW/h battery means getting 3.7 miles a kWh. ................... Channel 5 @ 9 pm. Petrol vs Electric . Which is better? No idea if a repeat.1 point
-
1 pointAwoke to this sky earlier........ Although within half an hour the sky was on fire (I can only imagine the Shepherds are worried!!):

 1 point
 -
1 pointIll try to film it too when it happens im starting to thinking about wrapimg door handles1 point
-
1 pointFor me if i take some microfibre cloth and clean the handle out and inside helps. simple as that last time today- snow inside i took microfibre cleaned it and again it start working.1 point
-
1 pointI have a 2016 Amundsen which doesn't have the SIM so I'll have to let someone else answer that.1 point
-
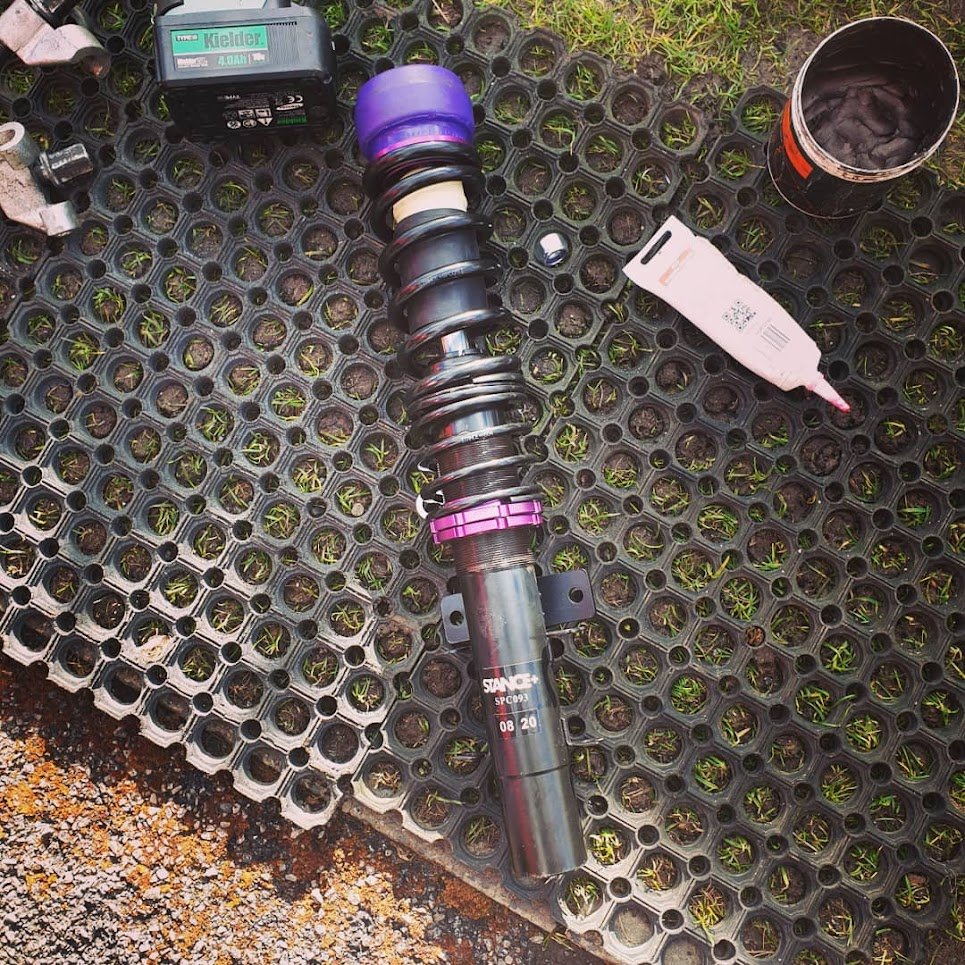
1 pointBack to work, lots of stuff to fit: Titanic-level rust exhaust clamp replaced: New springs, oem sachs shock absorbers and bolts: Also replaced the bottom washer, only one of them was fitted, i replaced 2: New top mounts and rubber bumps: I also applied bilt hamber wax to the rear beam, springs and wheel arches.1 point
-
1 pointHopefully no tourists in motorhomes see this thread... it can't get much worse up there.1 point
-
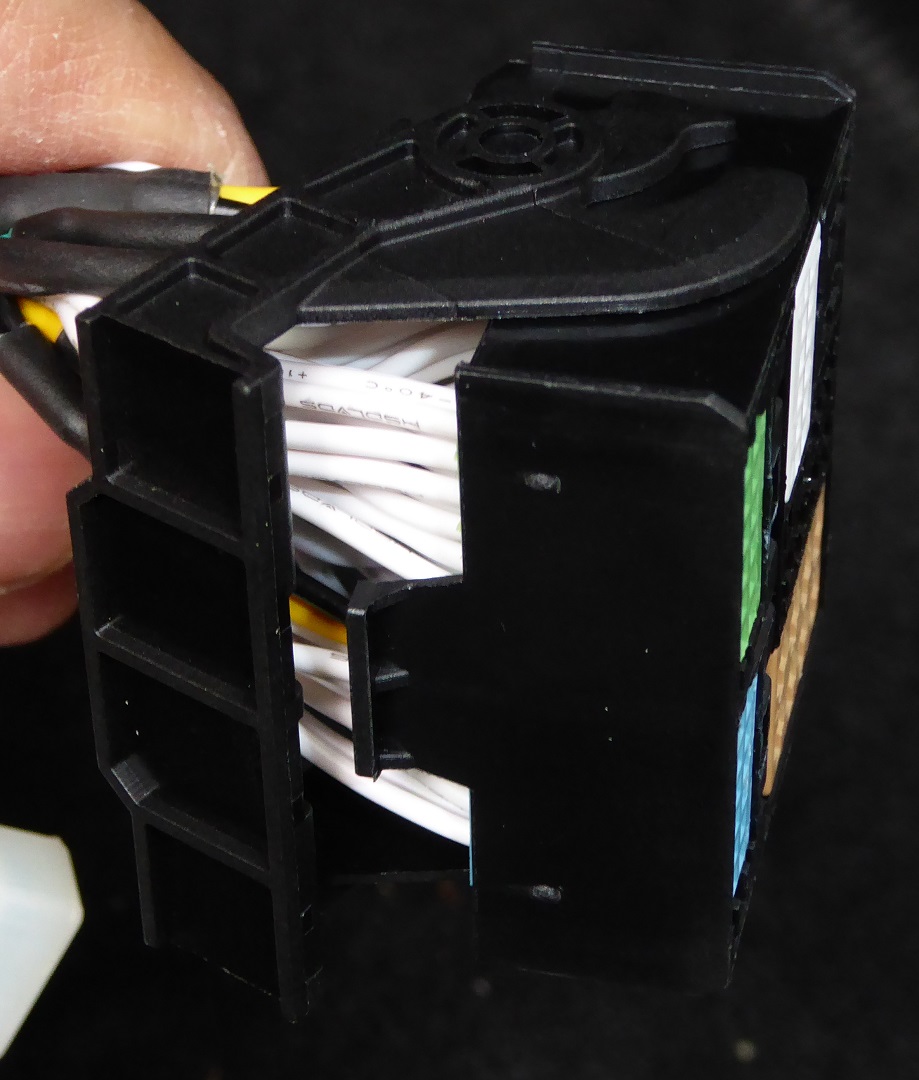
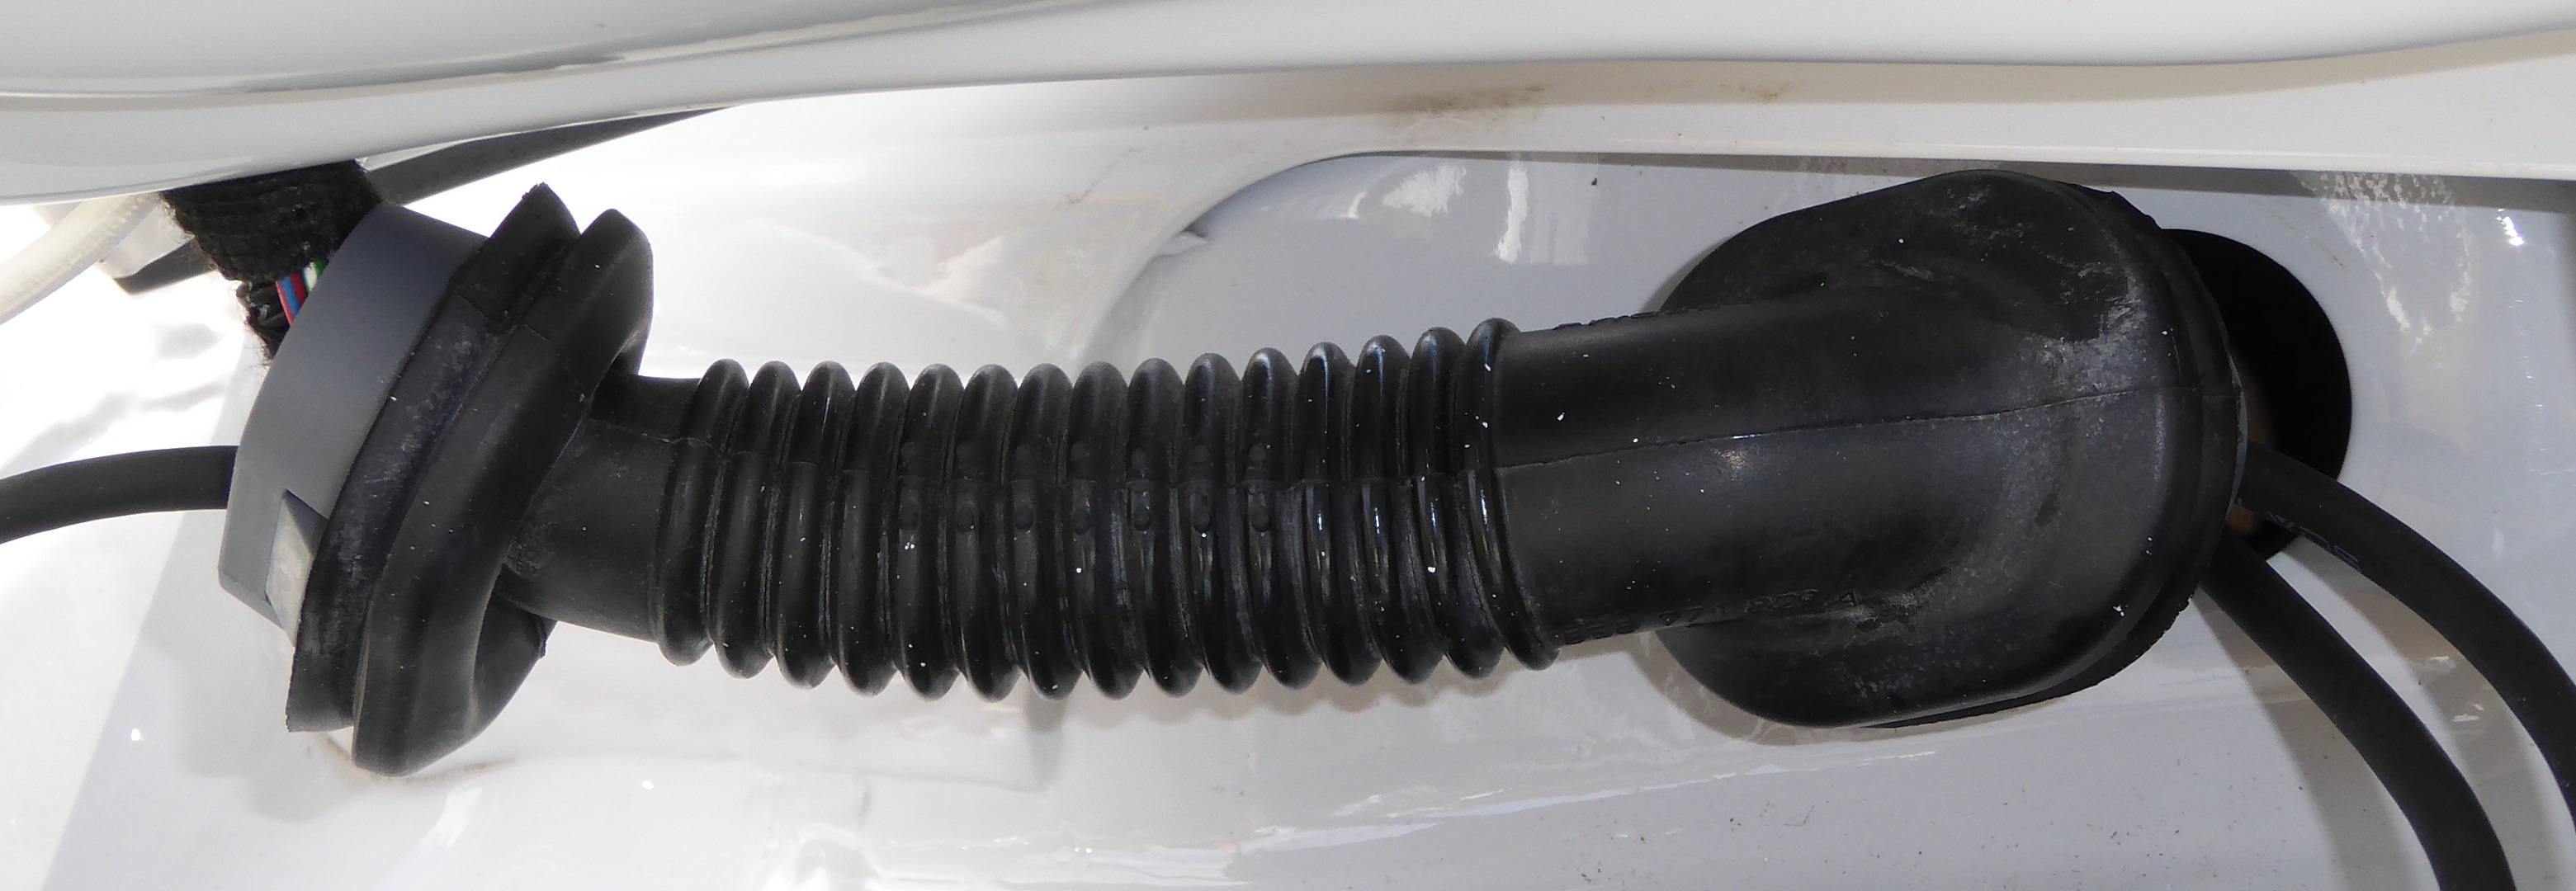
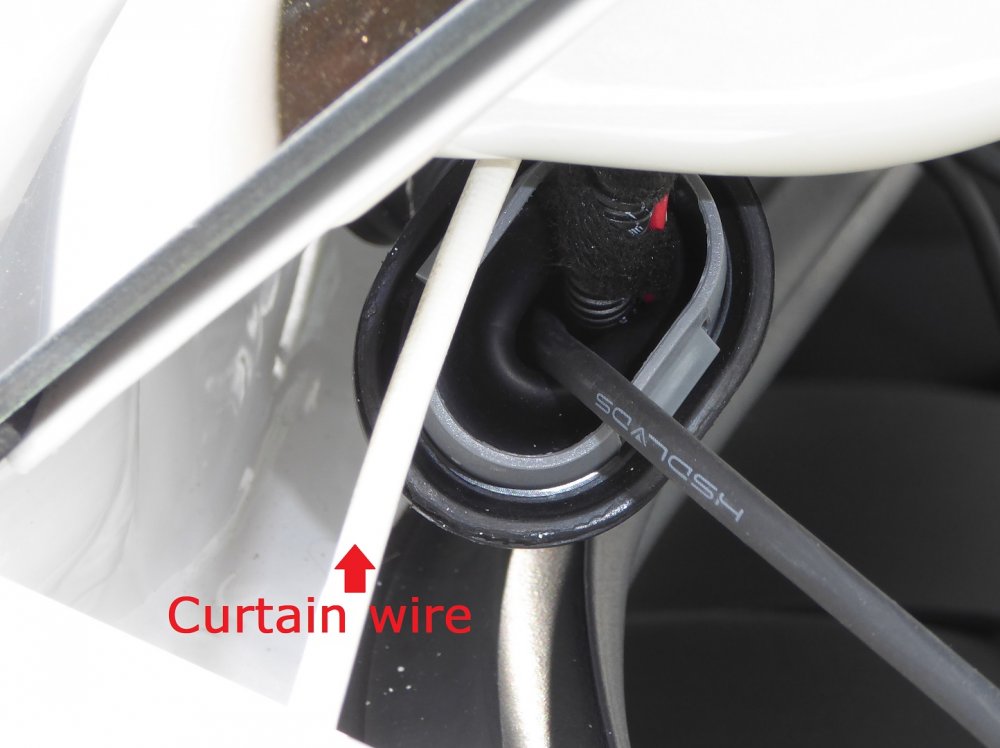
I have just fitted the Sinosmart reverse camera and the info in this thread was invaluable. notes:- 1) make sure you check which camera you order, I was sure I had ordered the correct one and it was only when i checked tracking that i found i had ordered cam C !! for me it should have been Cam B Contacted Sinosmart and they asked me to fit the quadblock and the camera that they had sent when it arrived to check everything worked ( only the camera shapes are different) Did this and they said they would send me a replacement camera only for £10 but the del date ws 26th may , however it actually arrived on 17th may. 2) Fitting : ( sorry no pics). I had already fitted the quad lock by this point and left the camera and cable in the glove box (hardest bit of this was getting the removal tool out of the right hand side of the media unit, but follow instruction earlier in this thread - need a bit of jiggery pokery to get it out ). Pop the lower trim off the tail gate and remove the slow close mechanism ( 3 off quarter turn locks) the most difficult part of this was getting the old boot handle out , not a lot of room and in hindsight really needs a right angled pick to press the tabs in . once out easy enough . Pop out the rubber gaiter at the top of the tailgate ( make sure you get the hard plastic parts out with the gaiter as it is impossible to get the rubber back on while in place , i did get them out after feeding the wire through and reattached before popping back in on completion. make sure you have a curtain rod before you start ----- ( 89p from B&M !!) to feed through the tailgate up to the first hole. gently pull cable through spray rubber gaiter with silicon spray ( tip from earlier this thread) so much easier to get it through the rubber. push curtain rod through hole and into cabin behind quarter panel ( quarter panel pops off very easily and draw cable through again use curtain rod to fish down to bottom of door channel ( just prise up slightly with trim tools. and pull camera cable through . the curtain rod can be used from here to feed right along the channel under the trim bypassing the B piller and beyond to the Front passenger door trim pull cable though to here . Again use curtain rod but this time feed down from behind glove box and in to channel below passenger door , tape camera cable to it and gently pull through . connect cables and bingo working camera . This was when i found that the gaiter at the tailgate would not slip back on to the plastic clips in the holes . I had to prise them both out and then refit the rubber to them before they could be popped back in easily . Check all your connections and trim is secured and you should be good to go. probably took me about 2-2 1/2 hrs to complete including the hassle of getting the handle out and the gaiter back in so a small price in time and cost to get a working camera Thank you to every before me on this thread as it made me confident that i could get this done and i hope that my small contribution helps someone else One other thing , i was impressed by the service from Sinosmart as i did not expect any real assistance when i had the issue with the wrong camera ( MY FAULT) and fully expected to have to buy a whole new set up , so 5 stars to them for their assistance.1 point
-
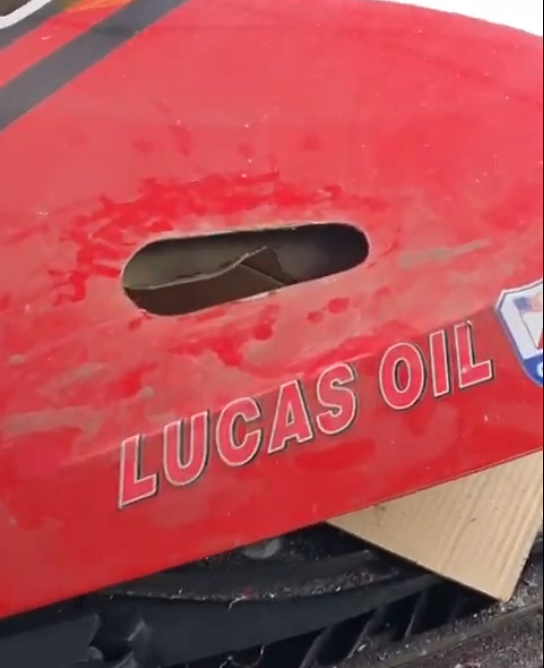
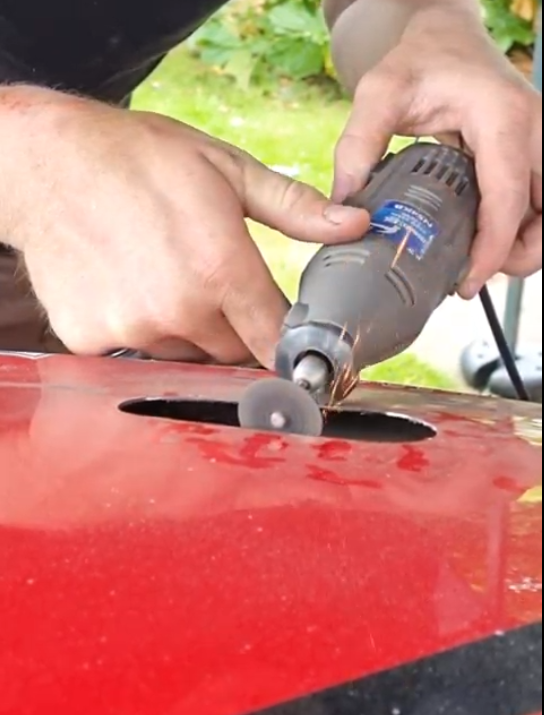
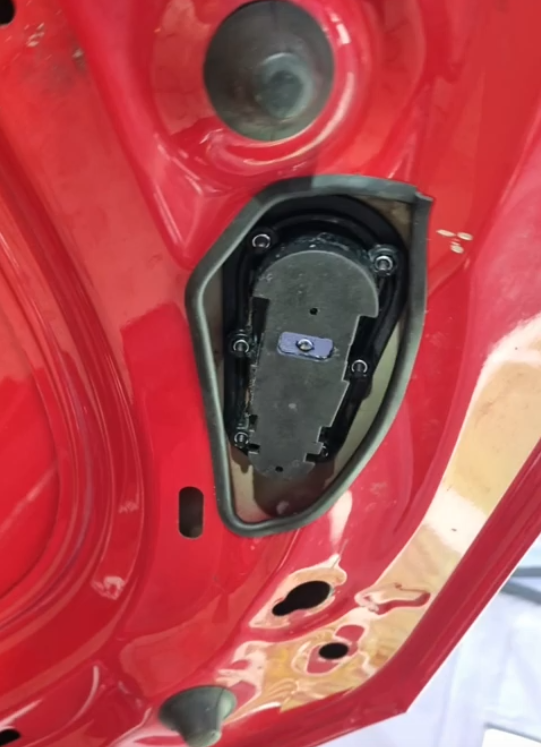
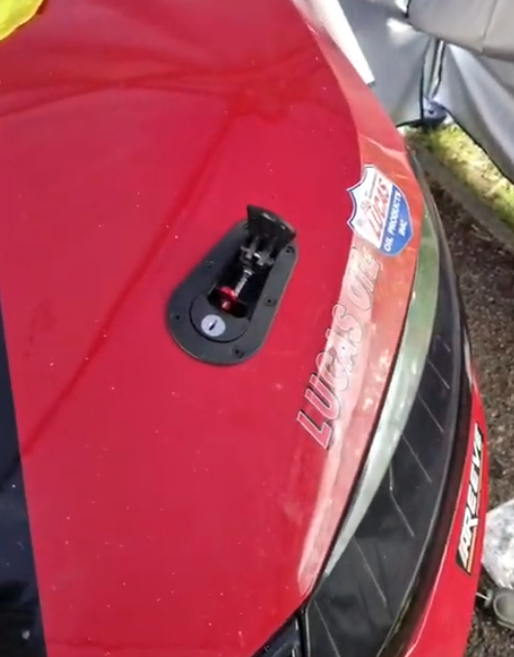
Solution in case anyone searches this issue in the future and comes across this thread: Contacted the seller on AliExpress who sent a replacement camera unit for $20 USD (no harness, camera only). Plugged new camera directly into harness in and it re-coded the infotainment system and worked as expected. Unplugged and reconnected the original camera which now works as per usual, just like a stock one. It seems that the original camera lost whatever it does to re-code the infotainment and the new one was required to do this bit. Original camera working is a win in that I didn't have to take the boot trim off to replace the boot latch again.1 point
-
1 point? Are the VW Group who were once the biggest car manufacturer in the world and Skoda unaware of that? Strange they are turning out cars with just a pip squeek of an audible warning and have been for years now. http://briskoda.net/forums/topic/489000-horn-is-embarrassing http://briskoda.net/forums/topic/491176-horn-replacement http://briskoda.net/forums/topic/466908-that-horn-again-replace-with-twin-horns http://briskoda.net/forums/topic/436335-horn http://briskoda.net/forums/topic/480254-horn1 point
-
1 pointA horn gives a warning to other road users, not just pedestrians and cyclists. If it can't be heard it's pointless. So having just bought a Kamiq I'm certainly planning to change the horn as the standard one is useless as a warning to most drivers.1 point
-
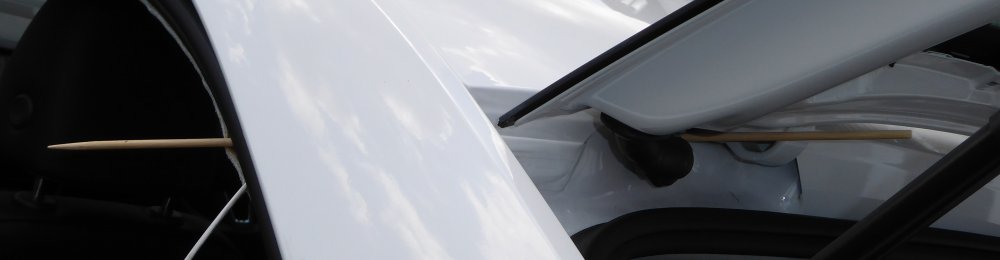
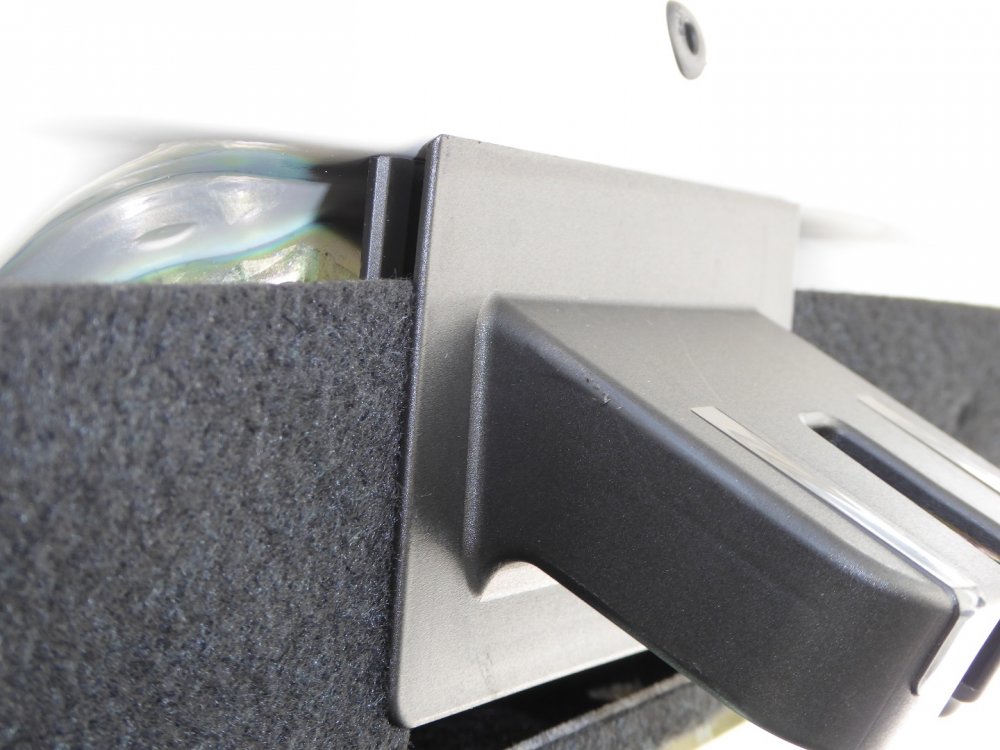
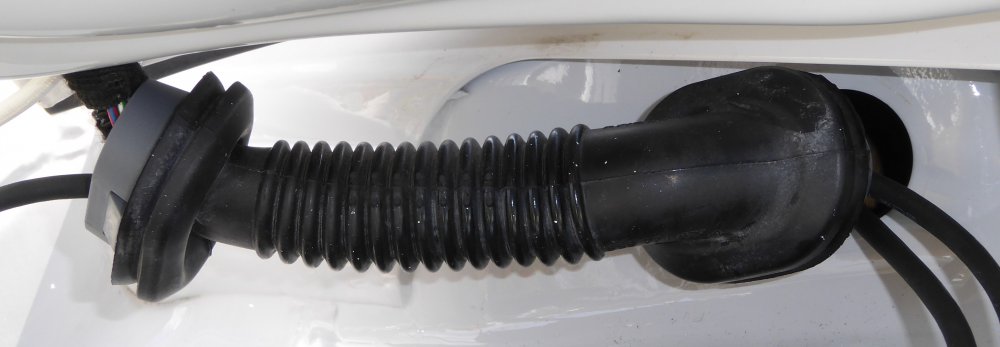
Thanks to @weyland's excellent instructions, and tips from a few other Brisky members in various threads, I fitted my (long overdue) reversing camera today. I have some observations based on my experience today that may help people fitting their camera. 1) The media unit has plenty of room behind it. Also it can be pulled quite far out with the cables still attached. However I noticed my unit had cables which were trapped behind something initially, which made getting the media unit to move more than about an inch very difficult. As Weyland suggested, getting down into the footwell and looking up with a torch allowed me to see what the problem was, and move the cables free to allow the media unit to be almost completely pulled out. 2) I tested the camera in the car. After connecting the main connector, I simply rested the camera on top of the media unit and checked to see if it worked. That way ensured I found out if I had what seems to be the most common fault, poor connection, at the earliest opportunity. When refitting the media unit, be sure to position the camera wire correctly to the side, as it can get trapped behind the media unit. Ditto the cables out of the new inline double socket. It's quite fiddly so expect it to need some care and patience. And a torch! Note the connector has a lever-lock action to secure it in place. The lever is at the bottom of the connector, so it's not hard to lift the lever to remove the socket it from the media unit. I found that with the lever lifted, the socket came out fairly easily, with little force required. I plugged the new socket in very carefully, and pushed it right in, using the lever-lock purely as a lock once connected, not as an aid to pulling the connector into place. 3) I went the Weyland/OEM up and over route, and it was fairly straightforward. I started at the head unit, and went towards the back of the car. Arguably, this is the "wrong" way to do it, as the connector for going this way is larger than the other end. Something that was a particular issue when I got to the rubber connection between the hatch and the car body. The tip to use net curtain wire as a guide to pull the cable through was invaluable, but I also used a dowel as a guide for the rear hatch hole to the C-pillar and I think around the B-pillar too. . I attached the cable to the pull wire/dowel with self-amalgamating tape, because it doesn't leave a sticky residue. I also found a "One step back, several steps forward" approach worked best, rather than simply pulling the cable through. I'd gently pull the cable back, to ensure it was moving freely, then pull it through with the curtain wire until I felt resistance. Then repeat the back/forward action. It worked pretty well. 4) Pushing an end clip on the boot handle as well as pushing out from behind (a two handed operation) worked a treat, but it's fiddly and awkward to do. Don't let the pictures fool you, there are a load of obstructions in your way and it's a pain. Be patient and use careful force on the end clip, and you'll be fine. The electrical connector into the boot handle switch has a little lock that you need to release to remove the connector. When refitting, slot the inner edge of the connector above the number plate for an easy refit. 5) Removing the rear trim from the hatch is straightforward enough, but it requires some confident force to remove those clips and it's a real PITA putting it back. A 2nd pair of hands is very useful. I've uploaded some pics so you can get an idea of where to expect the clips. Note there are four clips in the bottom (furry) half of the trim which are at a different angle. (Either side of the wiper motor bulge.) Note use of picnic mat to prevent damage/soiling to rear trim. Also the furry trim slots into the boot lock, in case you were wondering. (See pic.) 6) The dowel was very useful for finding the route from the rear hatch hole to the front of the C-pillar. 7) A particularly tricky part of the job I found, was feeding the socket through the rubber hose between the rear of the car and the hatch. It's a snug fit. Also the hose has hard plastic clips in it, it's not all rubber. Edit: I forgot to say, I used aerosol silicone spray as a lubricant to both help the cable through, and ensure the rubber seals made good watertight contact when refitted. I'd advise against using oil on rubber as it does not do it any good in the long term. https://www.amazon.co.uk/WD40-Performance-Silicone-Lubricant-250ml/dp/B00KPUBRJ8 . Allow about 4 hours, including time for struggling with tricky bits, taking pictures, and generally not rushing and damaging anything. By the time I was almost done, I was pretty fed up with the whole business, and was replacing the uncooperative rear trim in a pretty foul mood, so I had to try and chill out a bit to ensure I didn't rush putting it back and damage something. All in all, it is fairly simple to do, but being simple doesn't make it easy. Good luck!
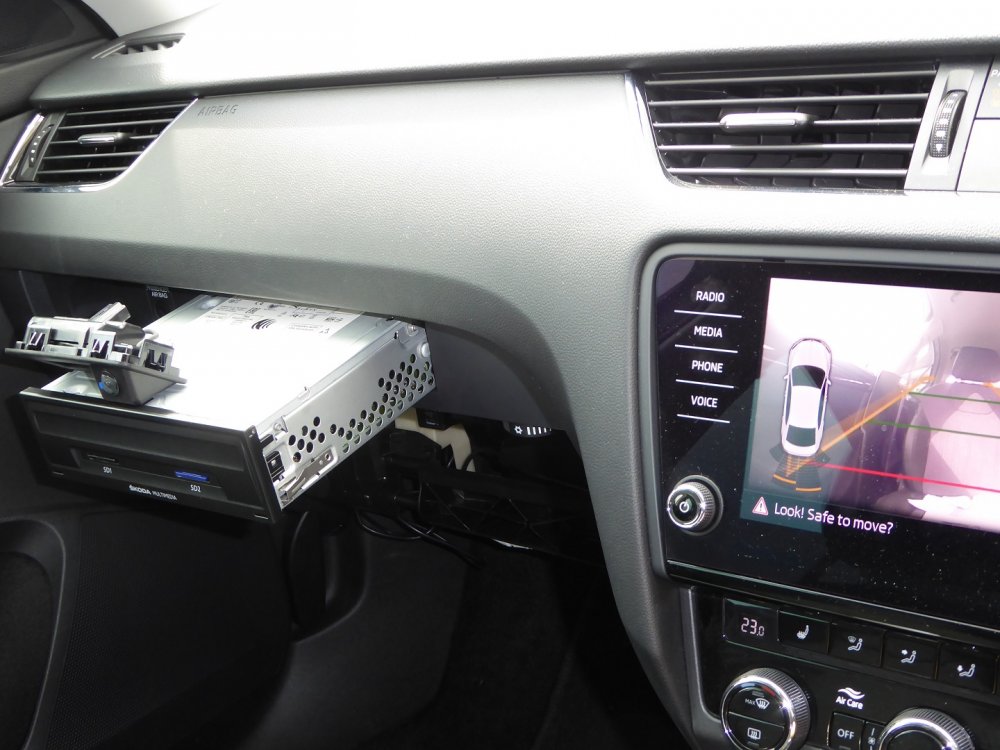

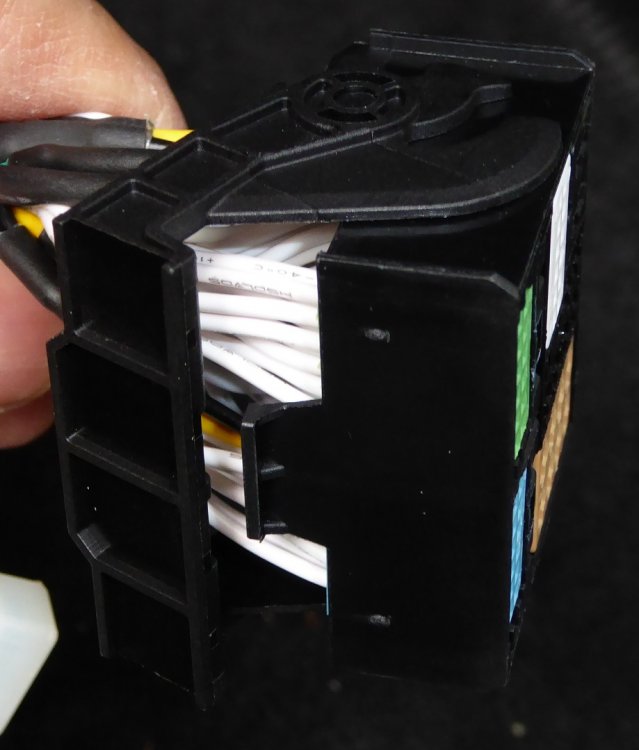
 1 point
 -
Successfully fit the ug in and play unit this morning. Here are my tips from a complete amateur point of view.. Start front end to back. DO NOT Disconnect the airbag switch if you take out the glovebox surround, guide says be careful too but don't be like me and just discon it. Test the camera at the front end before removing the boot trim. Cheap trim removal tools will suffice and you will need some sort of cable rod for pushing the cable through into the boot. I used net curtain wire for this. Once tested remove boot trim. When you get to the boot along the roof you will need WD40 to push the cable through the rubber trunking. I tried for ages without and it wasn't budging. Hope my failures help someone. Brilliant guide thank you. Alan1 point


.thumb.png.26e4ef1cd991d7943ece4e7bf5baf72f.png)