


Leaderboard
-
langers2k
Resident Member8Points8,590Posts -
Breezy_Pete
Sponsor8Points24,183Posts -
anton
Members7Points161Posts -
J.R.
Resident Member6Points15,266Posts


Popular Content
Showing content with the highest reputation on 01/09/20 in all areas
-
My trusty Octavia and I have done ~146,000 miles in the last 6 years so it's finally time to say good bye and move on. It's been a fabulous car over that time, drinking some ~11,800 litres of diesel to give a healthy ~56 mpg over my ownership. As for costs, ignoring any mods we're looking at: - £14,500 for fuel - £1400 for servicing - £1000 for maintenance (brakes, cambelt etc) - £1000 for tyres - £500 for repairs - £lots for depreciation Not too bad considering the mileage and zero unexpected down time, certainly good enough for me at least As for my next car, I've put down a deposit on an '18 plate Octavia vRS '245 edition' which I'll hopefully have in the next week or two. Should be quite a change from a CR140! I've pulled a few bits off before selling the car so if anyone is interested, there are few bits advertised in the for sale section. I think it's within the rules to link to the sale threads but if not, admins feel free to remove the links: - https://www.briskoda.net/forums/classifieds/item/456-pair-of-octavia-fl-mk2-xenonhid-headlights/ - https://www.briskoda.net/forums/classifieds/item/455-genuine-octavia-mk2-hatchback-led-rear-lightsclusters/ - https://www.briskoda.net/forums/classifieds/item/457-mk3-style-climate-panel-for-octavia-mk2/ - https://www.briskoda.net/forums/classifieds/item/458-mk3-style-leather-mfsw-and-airbag-for-mk2-octavia-mk2-superb-and-yeti/ - https://www.briskoda.net/forums/classifieds/item/459-amundsen-mib2-pq-std-style-with-cp-unlocked-and-all-functions-activated/3 points
-
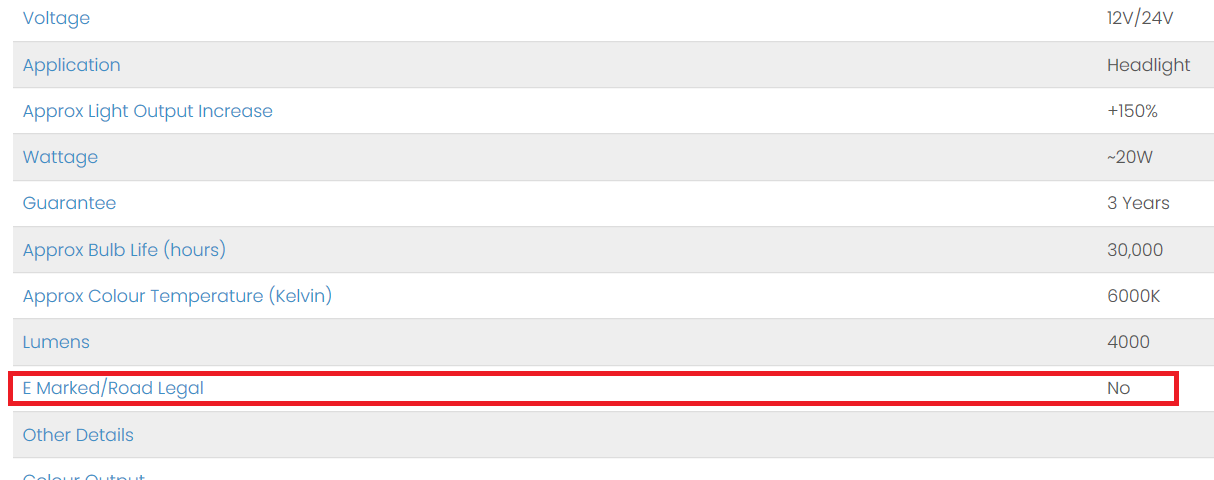
3 pointsCorrect. There are currently no 'drop in' conversions that meet the ECE requirements and therefore none are currently road legal (regardless of the MOT) If you do want LED or xenon lighting, the simplest way to stay road legal is to retrofit new stock LED/xenon headlights to the standard of a factory install (washers/levelling etc) as this means you would be covered by the same ECE approval.3 points
-
2 pointsAny smaller capacity engine will ultimately start to struggle once laden and going uphill. You need to drive them to suit and that usually means revving them, which decreases economy. I am not a fan of smaller engines but equally I understand the need for manufacturers to do their bit and make more economical cars. If money allowed I would spend the extra and get the 1.4tsi.2 points
-
2 points
-
2 pointsIts been six years since my mother collected her Fabia as a new 64 plate on 1st September 2014 :- https://www.briskoda.net/forums/topic/326968-1st-september-2014-delivery Here is the 1000 mile update https://www.briskoda.net/forums/topic/349890-1000-mile-update Here is the 1st year update https://www.briskoda.net/forums/topic/369998-fabia-vrs-1st-year-review Here is the last update to purchase the car outright https://www.briskoda.net/forums/topic/441770-fabia-pcp-decision-mad The car has only done 19362 miles in that time with the only breakdown being the battery completely failing so the AA was called. There was an oil leak but the fix was covered by Skoda https://www.briskoda.net/forums/topic/432730-oil-leak It's passed very MOT with only the tyres being closed to legal limit in 2019:- 28 August 2020 19,348 miles 21 August 2019 17,360 miles 31 August 2018 13,931 miles It is really a cheap car to run with it averaging 35-40 mpg with normal town driving and a best run of 52 mpg on a long run based on 57 fill-ups costing £2,846.14 in 6 years. The most the Fabia has done on a tank of fuel is 482 miles and used 55 liters. It still is a good car today a bit basic compared to later models but it makes it more appealing. Gave it a clean. Still looks good. Center caps could do with replacing Really like the 1.4 Twin-Charger unit. Had no issues as it doesn't use any oil. Very low mileage in 6 years Hopefully the car will carry on being a good runabout for the next few years.2 points
-
2 pointsI'm sure that if I still had normal vision I would probably glance down to use the rotary buttons and to see what setting I had moved them to, I cant without endangering other road users so I have learned to do it by feel, something we all do with many every day tasks be it doing up a watchstrap, buttons, zips etc etc. Traditional controls have git better & better ergonomics over the years, the important things to look at are on the speedo binnacle so people with normal vision can still keep an eye on the road, important controls are on the column stalk or steering wheel, light switch cloes to hand and tactile so it can be used in the dark, heater controls also tactile but further away etc etc. Given that most drivers will have their social media or satnav on the display to use any of the heating controls must need several touches and changes of menu. I am confident that common sense will eventually prevail, even the young become old one day!2 points
-
2 points
-
My manual 245 would average 45mpg on a decent run but when I drove the 7 speed DSG 245 I managed 50mpg on my 27 mile commute something which I could not manage with the 6 speed manual so I would advise anyone thinking of buying one to pick the DSG which should use less fuel particularly on a motorway due to lower revs at the NSL.2 points
-
2 points
-
2 pointsErrrrrr, no! At around £250 for a bonnet respray at a Skoda approved repairer I'll take the risk.....(got mine done after 5 years\75k)2 points
-
Wow nearly 2 years since i last updated this.. ALOT has happened. Will start to update again. 😀2 points
-
Hi all, After much procrastinating I collected a Superb 280 Sportline Estate at the end of January. I was toying with getting a new Skoda Superb and found the posts on this forum really valuable. I've been on here quite regularly as a guest, reading your experiences, hints and tips and am very thankful for all the useful info. I've only just registered an account so by way of giving something back here are some details of a 2-channel dashcam I've just fitted to my Superb. Hope this helps anyone considering a similar install. I decided I wanted a good quality but discrete 2-channel dashcam system recording front and rear simultaneously and ideally one which would do a little stealth recording whilst parked and switched off. I wasn't worried about a built-in screen as I'd take videos off with a smartphone or simply pull the memory card out when necessary. I've tinkered with car audio in the past and am not afraid of a little wiring if required, but I wouldn't call myself an expert by any means. Enthusiastic amateur if you will... I first looked at the Nextbase Duo (https://www.nextbase.co.uk/dashcams/in-car-cam-duo/) which has a screen, but decided against it due to the fact the Superb estate is such a long beastie, I doubt it would see much out of the rear window. In addition the front and rear cameras do not pivot up and down so once you've set the front angle best to see the road ahead, some people had found the rear camera recording more of the headlining or interior. It was quite a sizable thing and the inclusion of screen made me think I'd feel nervous about leaving it in the car. I decided against. Blackvue models looked good, in particular the DR650S (http://blackvuehd.co.uk/product/blackvue-dr650gw-hd-2ch-2) however for "parking-mode" recording it needed an additional "Power magic" adaptor thing, or a very expensive battery pack which added additional cost and complexity. Definitely looked the best in terms of aftersales support though. After much research I settled on one from Lukas/Qvia. A relatively unknown company I found initally, with very few reviews on the web, but with most of these things being made in China, Taiwan, South Korea etc, being from the latter didn't particularly concern me if there was a knowledgeable UK distributor. TTW were the guys and I found the one I wanted here: https://lukashd.co.uk/product/qvia-ar790-wd-2ch-dash-camera/ I chose the snappily named Qvia AR790-WD. It looked very similar to the Blackvue above, being quite small and with no screen included. It came with a very small front and rear camera and the inclusion of a super-capacitor (rather than a battery) meant it would last better in hot sun / cold weather and because all the power "smarts" were built in, no additional battery packs or adaptors were required. Once fitted, the super-cap charges up and holds some current and the camera has a built-in fail-safe setting to shut down if it detects the car's battery voltage drops below a certain level. The cameras can then be set to record when motion is detected front or rear, or to continually record on a kind of timelapse mode. So far I've opted for the former and it's worked well. Fortunately the only thing it's picked up so far are cars coming and going and the odd late-night wheelie bin deployment by myself and the neighbours. Anyway, on to the install. You can see enough pics of the camera itself at the lukashd link above, so here's how it went for me: First of all, the installation instructions provided are not that great. Enough to give you an idea, but given the breadth of cars out there, clearly not enough for your average novice in a specific vehicle. Proceed with caution and if you're not comfortable pulling bits of trim off your shiny car, get a friend to help or professional to do it for you. The instructions said to mount the front camera first and run the wires behind the headlining. This dashcam has two wires - one to supply power and one to connect the rear dashcam. Both cables would be run across the headlining to the passenger side of the car. The power cable would run down the A-pillar to the fuse box behind the glove compartment and the rear-camera cable would stay at the headlining level, running to the rear of the car. Fortunately the front lip of the Superb's headlining had a nice recess into which cables can be easily tucked (it's like the expect them all to be used as taxis...) What you see behind the rear view mirror - i.e. not very much: (and the eagle-eyed of you will see I took this picture after I'd finished as you can see the rear camera in the mirror) Next task was the remove the front left A-pillar trim. Not complicated, I had some cheap trim removal tools but this one was easy enough to prise away with fingers. Pull outwards away from the pillar at the top edge and continue pulling away from the pillar down the windscreen side. Eventually you can pull upwards slightly away from the dash and it should come free. Behind you can see the airbag and some other wiring. I chose to run the power cable above all this keeping well away from the airbag: Power cable secured with some cable-ties: (I wanted to avoid anything rattling around after all the trim was back in place.) Cable tucked down through the same hole through the foam insulation. Next, open the passenger door and remove the side dashboard trim. No screws, just find a leading edge you can get a trim removal tool under and prise outwards. Note: the trailing cable is still laying ready to be tucked down through the foam insulation at this point (previous pic). Close up of the side panel removed. Get your hand in there and fish out that power cable poking through the foam insulation: Again, once fished through I decided to cable tie to something solid in order to prevent rattles: At this point I removed the glove box, which the manual explains fairly well and I see others have covered in other articles. What comes next depends upon your specific vehicle and the fuse you have. This dashcam requires a permanent 12v supply and a ignition or "accessory" fed supply, along with an earth connection. The dashcam came ready for hardwiring, but I understand a cigarette lighter kit was an option. I opted to use 19x19mm piggy back fuses: https://lukashd.co.uk/product/fuse-holder-adapter-ato-19-x19-mm/ but you might prefer using the mini 11x16mm fuses https://lukashd.co.uk/product/fuse-holder-adapter-mini-111-x16-mm/ The idea with these is that they're a simple way to extend an existing circuit. They come with two slots for fuses - one for the original circuit and one for your new added dashcam circuit. You remove an existing fuse, place the removed fuse into the unoccupied piggy-back holder fuse slot, ensure your 10A dashcam fuse is seated in the other slot and then press the adaptor into the position you removed your vehicle fuse from. I used a tester to find the 12v and accessory feeds, with a little trial and error turning the ignition on and off. Fuse 38 (Trailer electrical socket) was live with the ignition on and Fuse 48 (Blind Spot detection) was a permanent 12v. This is what I ended up with: (Fuse 38 is the top piggy back and Fuse 48 the bottom one) In my case both fuse positions were empty - no fuses present as I have neither of those options on my car. So I had to buy another couple of 10A fuses to complete the circuits. The ground wire was easy to attach, but I didn't take a picture of it. There's a convenient earth screw position just under the glove box to the left hand side. Easy to find. With wires in place it was on to running the cable to the rear camera; by far the most time consuming part of the job. I didn't bother taking pictures of tucking the cable into the headlining across the front left passenger door and rear left passenger door, as it was fairly trivial to feed the cable behind. Just remove a little of the headlining tuck the cable behind and replace. It's very tight around the b-pillar, but again with a bit of help from the trim removal tool, it wasn't too hard. Once you get the cable to the C-pillar that's where the fun starts. In a saloon I guess you have it easy and run straight across the rear headlining. However in the estate (and hatchbacks as well I guess) you get the quandary of how to get the cable through to the rear window properly. Ideally you don't want a loose cable spanning the gap between the headlining and the boot, especially when the hatch opens and closes. This is the cable tucked just into the headlining, optimistically thinking there'd be some easy way to go from here to the boot lid. Nope. The only way to go is through the c-pillar, out through the connecting boot grommets and up into the tailgate. So C-pillar trim needs to come off and cable threaded through into where that top grommet meets the left side of the car. Here's the C-pillar with the trim removed (comes off much like the A-pillar one). The cable needs to come down from the headlining into here: Enter stubby oaf-like finger to tell you where to run the cable. I chose the C-pillar to hold all the surplus cable. Don't do what I did and thread it all through to the tailgate, only to find you there's no room for all the surplus up there. Don't pull it all through to the tailgate like I did, only to have to pull most of it back through again... This was not fun. With one hand poking the cable up through the c-pillar, somehow you have to feed it to the hole where that rubber grommet was. I opted for cable ties and insulating tape. If you can get the cable ties through to your cable, tape the insulating tape to the cable (carefully protecting the metal plug on the end) and pull it carefully through the hole: Now we're on one side of the grommet ducting thing. The cable needs to go through that and there isn't much room in there. Enter the cable-ties again to pull the wire through: Note: those grey plastic bits hold the rubber grommet ends tight to the body panels. They are easy to get off and a right pain to get back on again - especially if you have chubby fingers like me. Deploy the missus or someone with small fingers to help. Now the cable's ready to be threaded into the boot lid. My worst fears - the whole boot interior trim has to come off. Lower section has to come off first, then the upper section around the glass. First of all, pop out the electric boot release button (if you have one) and the two interior lights. Remove the plugs from all three of them and poke the wiring back into the holes inside the boot lid. The lower interior trim section just pulls free now - again like before pop out one section (I started near the very bottom of the boot lid) and work your way carefully around, popping out the trim panel with a trim removal tool. The clips are much harder than the interior trim and I was quite worried about damaging the panels. Everything went OK for me, but go careful! Bottom panel removed: One the lower panel is removed, you can start on the upper panel around the glass. This time I started around the sides near the gas struts. Again, level and pop them out carefully working your way up each side first, then across the top. Once free the whole lot pulls downwards away from the raised boot lid. The upper panel removed and laying in the boot: (just so you can see all the clips) With both trim panels removed, the top edge of the boot lid looked like this: You can see the cable hanging out from the rubber grommet. Use the cable-ties again, threading one through from the left hole in the boot lid above to the grommet hole. Tape the camera cable to the cable tie again and pull through. This whole part took me a couple of hours to do tidily and safely but it was worth it. The camera can then be mounted where you choose on the rear window and the cables will be tucked safely out of harm's way. I wrapped the cable in a little extra insulating tape to protect it where it passes under the rear trim. Up to you. Test the camera, make sure everything works OK then refit all your trim panels. Here's the rear cam. There's a little raising of the interior boot lid panel, which I guess could be solved by cutting a small notch into it. However it doesn't bother me that much. The rear camera cable would've been better with a right-angle plug in my opinion, but again, not the end of the world. Hope this helps. Any questions, feel free! Roy.1 point
-
1 point
-
Indirect works by measuring the tyres rotational speed using the ABS sensors in each wheel. Hence if one particular tyre is losing air faster than the others, i.e. a slow puncture, then that tyre will rotate at a different speed, which the sensors will pick up, and warn u via the TPMS. U want actual values, u'll need to retrofit direct TPMS. The factory OEM ones r not an easy install. Alternatively, u can fit aftermarket tyre pressure sensors, and connect to an app on ur mobile via Bluetooth. They give u the actual tyre pressure reading, which u can monitor.1 point
-
1 pointIt's the infotainment unit. MIB2 = original one, from MY15 on, with buttons. MIB2.5 = from MY18 onwards, no buttons, flat face n larger 9.2" screen. MIB3 = from MY21 onwards, new features, larger screen, always connected, wireless capable, plus more.1 point
-
If it makes any difference, I tend to use a complete 1ltr can of brake fluid when changing brake fluid, maybe if planning to carry out a fluid change, you should consider how much you should "vent" out of each wheel cylinder/calliper than only think about system capacity.1 point
-
1 point
-
My neighbour speny ages looking for the holy grailof one that hadn't been "fixed" He is very easy to wind up so when I had done a VCDS scan & some reprogramming for him I said that I downloaded the latest engine software for him as well & he would really notice the difference 😀1 point
-
@maxychat my Citigo had exactly the same configuration, yet Pin 17 was not there... BCM list can be found HERE altough, following the before mentioned list my module being High+ (***-937-090-***) did not have the required pin. More Pins on the module, higher the chances that all the features You already have will be supported plus view more. Always double check. P.S. It doesn't have to be a Up/Citigo/Mii module. A lot of VAG will share same module across the range. It just needs to be recoded using VCDS or similar.1 point
-
Hi, the tyres I was thinking about are the Goodyear Efficientgrip Performance 2 (B/A rating, not AA) Take a look at something like tyre reviews UK 2020 - these rated 2nd after the Continental Premium Contact 6.1 point
-
1 pointYes the Karoq has a larger boot than the Yeti making taking a wheelchair easier, it appears to be more economical as well.1 point
-
1 pointMy mum has a 1.0tsi 115 scala and we've been 5 up in that and the otherwise quiet engine did struggle a little bit and sounded quite worked. My dad was driving at the time and said 'I'm having to keep the revs up to keep us moving.' He's driven my car and says an engine of that size wouldn't be suitable unless you're prepared to rag the nuts off it all the time. I've had a go it my mum's car and for 1 person to go to work, nip the shops or go anywhere else local, it's competent enough. If it was needed for longer journeys with more people and more luggage more often, we would have steered towards an octavia with a 1.5tsi 150 engine. So in your case, I would say a 1.4tsi would prove a better purchase.1 point
-
1 point
-
Welcome to the forum. Best read up on the possible issues you can have with a Euro 5 1.8TSI engine. Look at the pinned thread at the top of the Mk2 Octavia Section and maybe do a search in the Yeti section. There are obviously engines with no issues, but then there are also vehicles that have had engines rebult or replaced.1 point
-
They're different part numbers so perhaps one is for the hatchback and the other for the estate?1 point
-
The same engine is used in their vans. I’m sure there will plenty of reconditioned engines sitting around should you need one.1 point
-
1 pointThere will be a bunch of codes on the headlamp somewhere, it's can be: - on a sticker - moulded into the body - moulded on the lens - a combination of these Most codes are listed here: https://www.danielsternlighting.com/tech/lights/codes/codes.html Example sticker from a pre-FL MK3 halogen headlight, the HC and HR codes state it has halogen low and high beams: At least in the OP's case, the tester should easily be able to see the aftermarket LED sticking out in the middle of the reflector. Given no manufacturer has anything like that as stock, it'll be super obvious it's not right. It's impossible to make an LED meet the requirements for a H7 bulb as the requirements basically need it to be halogen. It would be no brighter (just whiter) as the bulb specification defines the maximum output It's very hard to actually make an LED match a filament bulb as they have completely different characteristics. Even more so when trying to get the LED to fit in the same size/location as a filament with 360 degree light output. You can see below the halogen filament is pretty consistent where as the xenon and LEDs both have much brighter 'hotspots' which would need controlling by the headlights optic design: The washers have nothing to do with heat or keeping the xenons cool as xenon systems should run cooler than halogen systems as they are more efficient The washers are there to keep the lenses clean (ish) as dirt on the lens causes the light to diffuse and can cause glare to other road uses. All headlight systems with an output over 2000lm require washers I think all LED system require self levelling too if I remember correctly...1 point
-
1 point
-
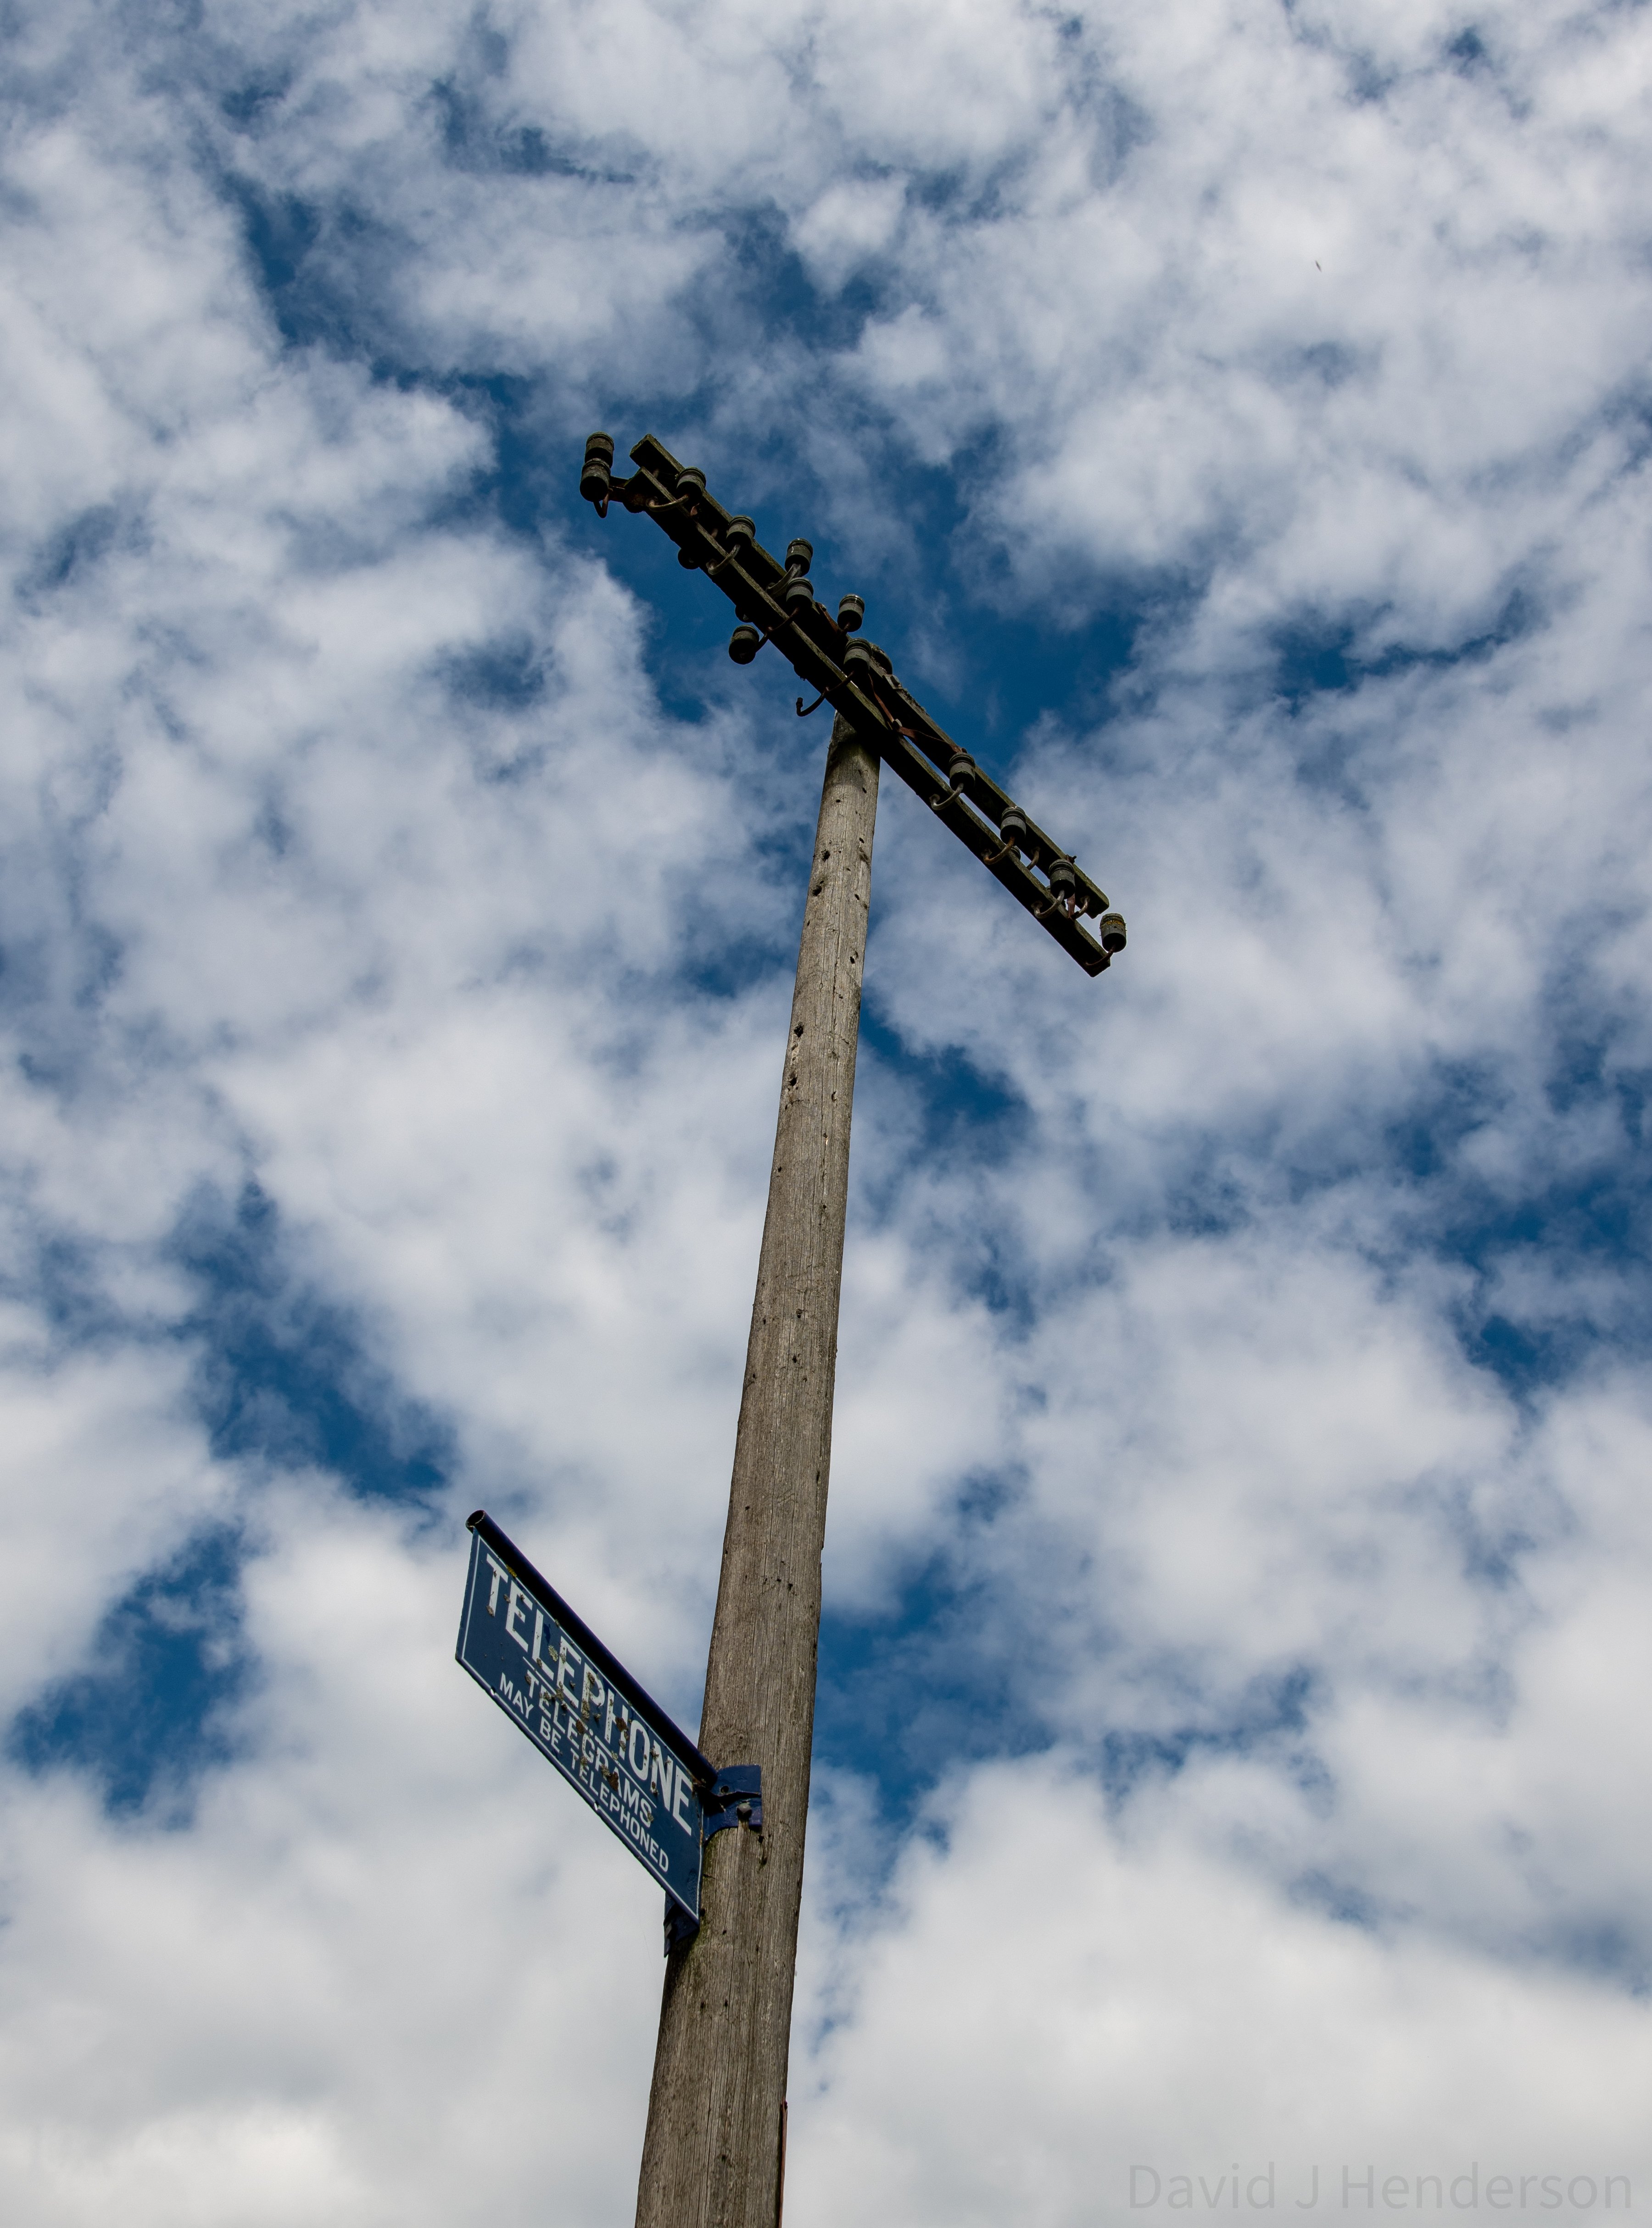
1 pointA few from around the Tyneham area yesterday, the photo of the deer was an accidental one, it wasn't until I had the photo up on the laptop that I saw him/her

 1 point
 -
1 point
-
1 pointPoint taken & well made. Regarding the previous I never said that I dont take my eyes (eye) off the road, I said that I dont need to to use any of the physical controls and that includes the heating controls on my current car with a simple non Climatronic system, twist left know for heat up & down, centre know for fan speed up & down & RH knob to direct air. I cant actually make out the legends without changing glasses so I really do use them by feel, I think I did have to glance at the various buttons on the previous Climatronic. The indicator mark is on the side of the rotary control knobs & tiny, impossible for me to see so I decided to extend it across the front face with paint, not realising that the front face does not turn 🙁1 point
-
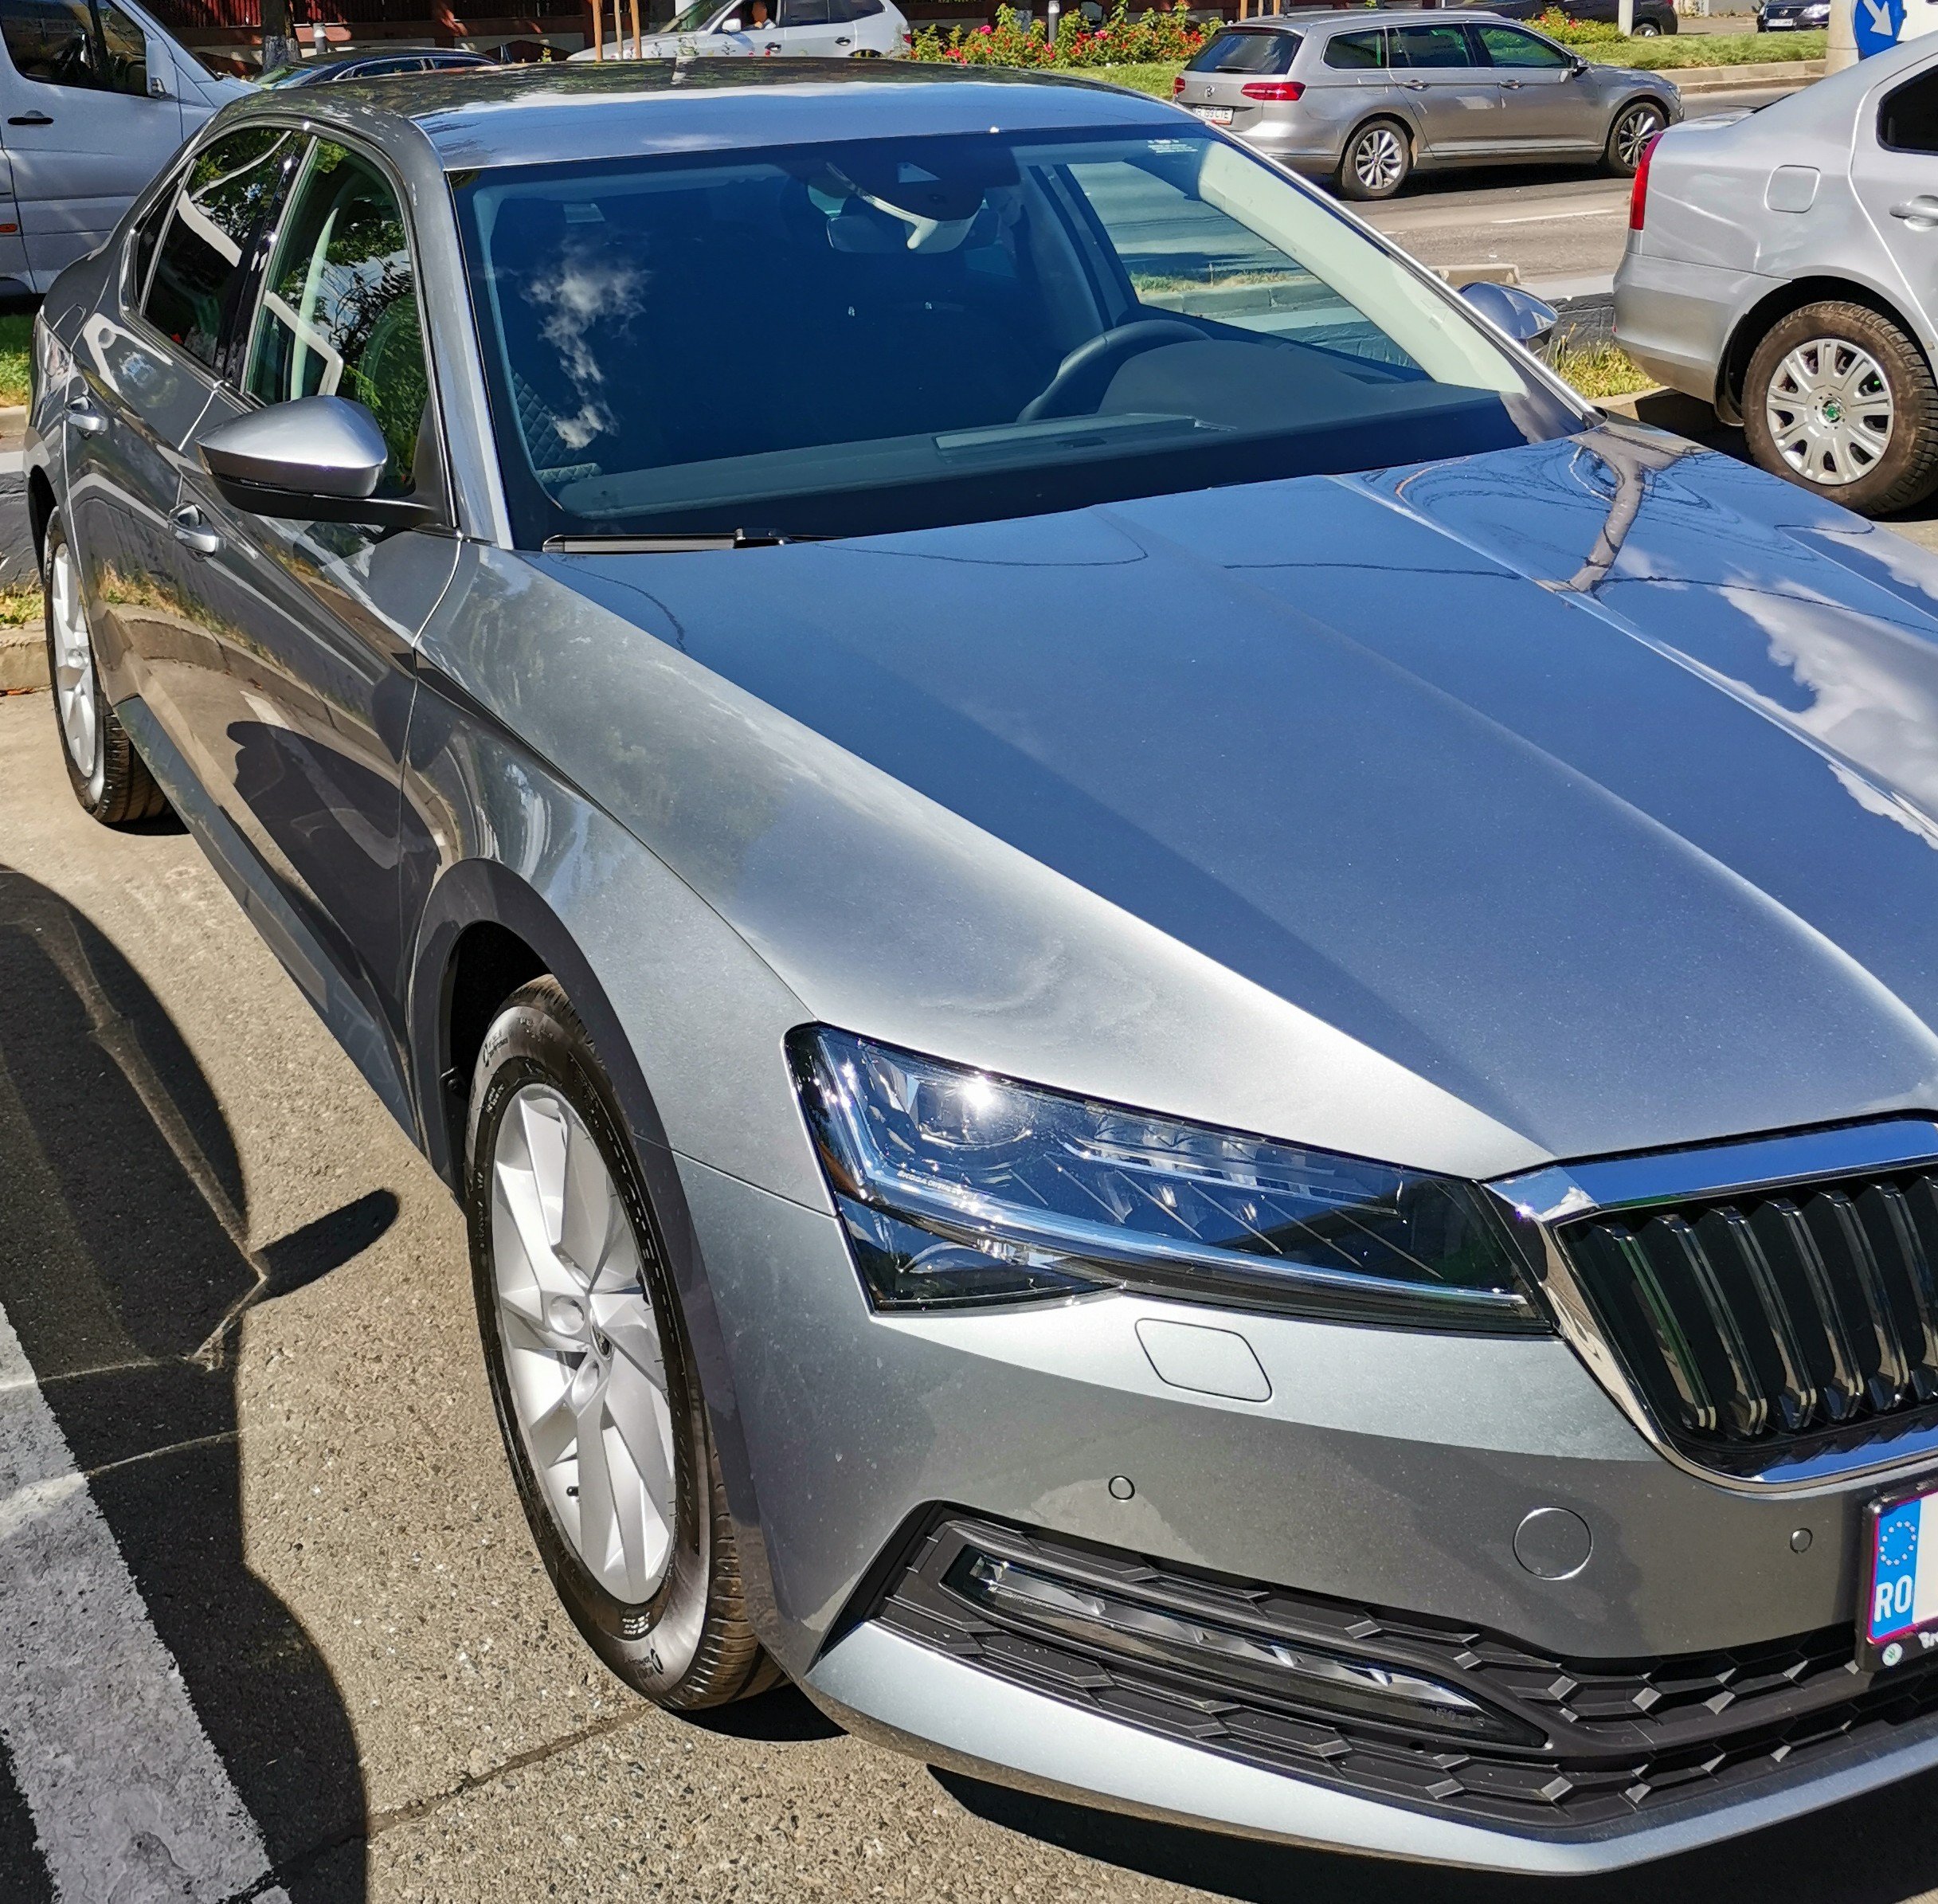
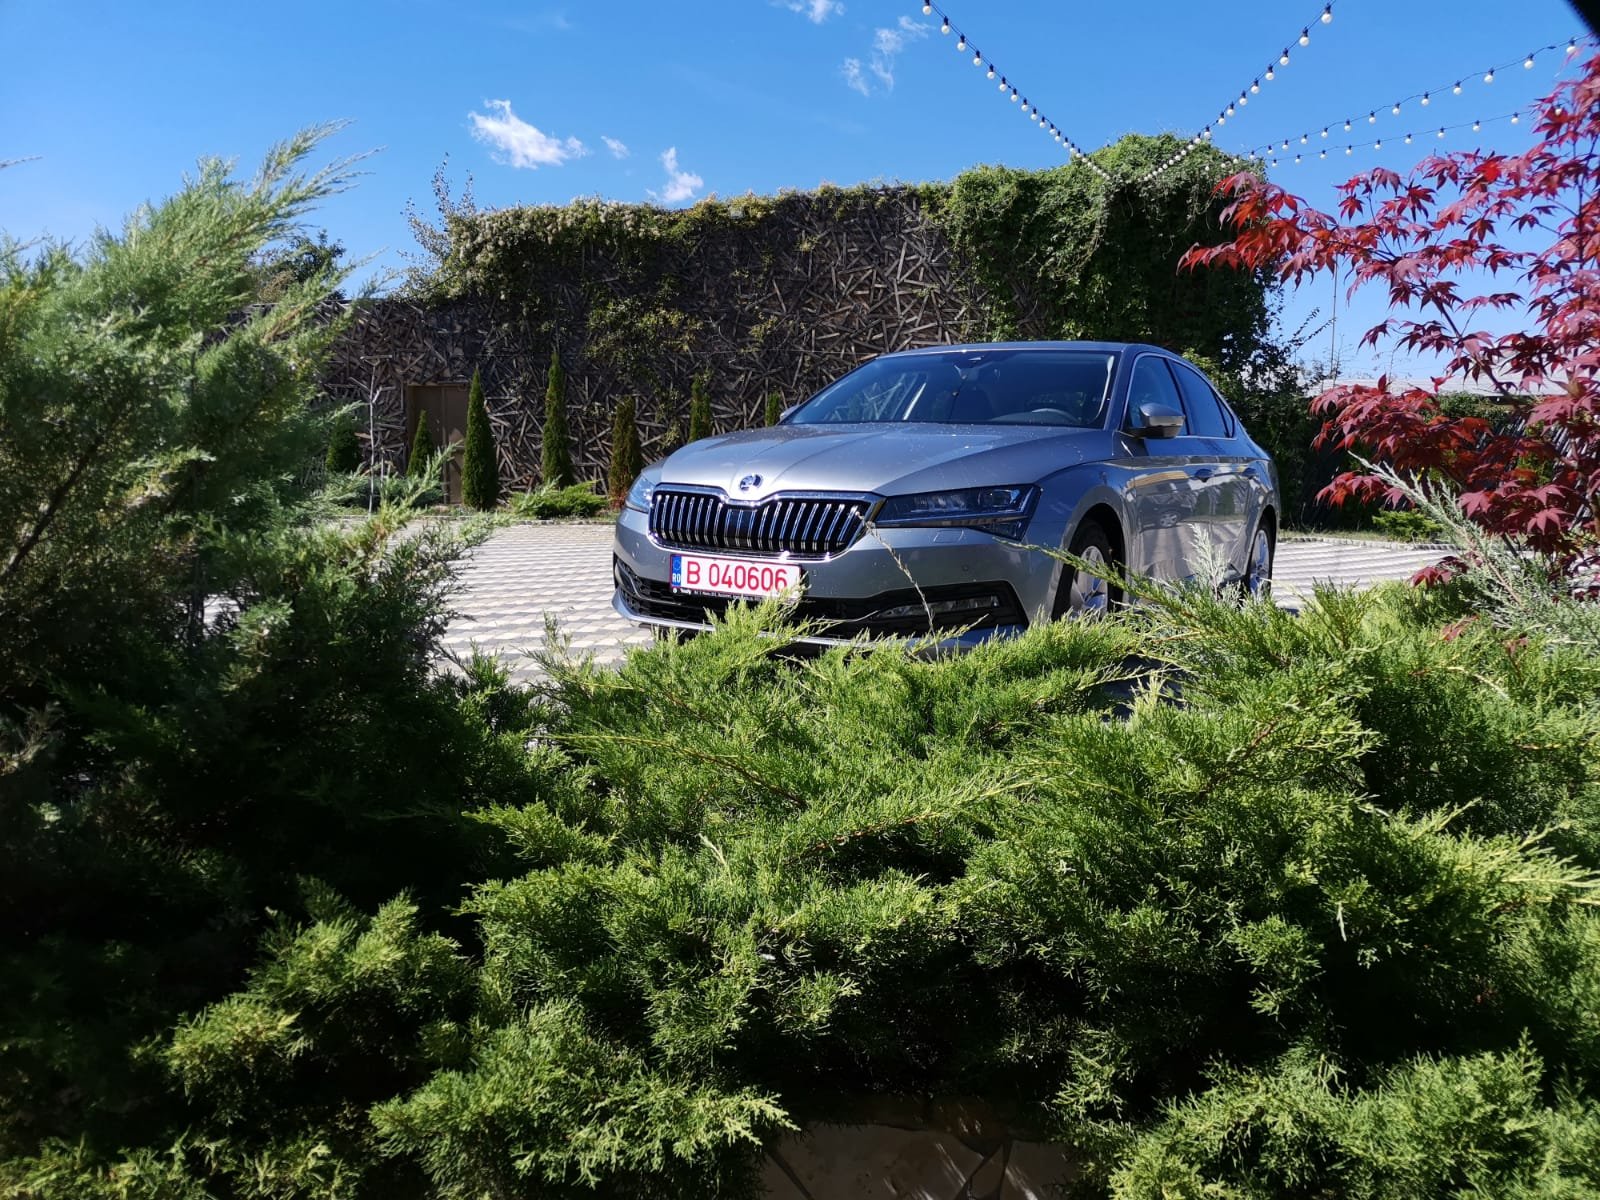
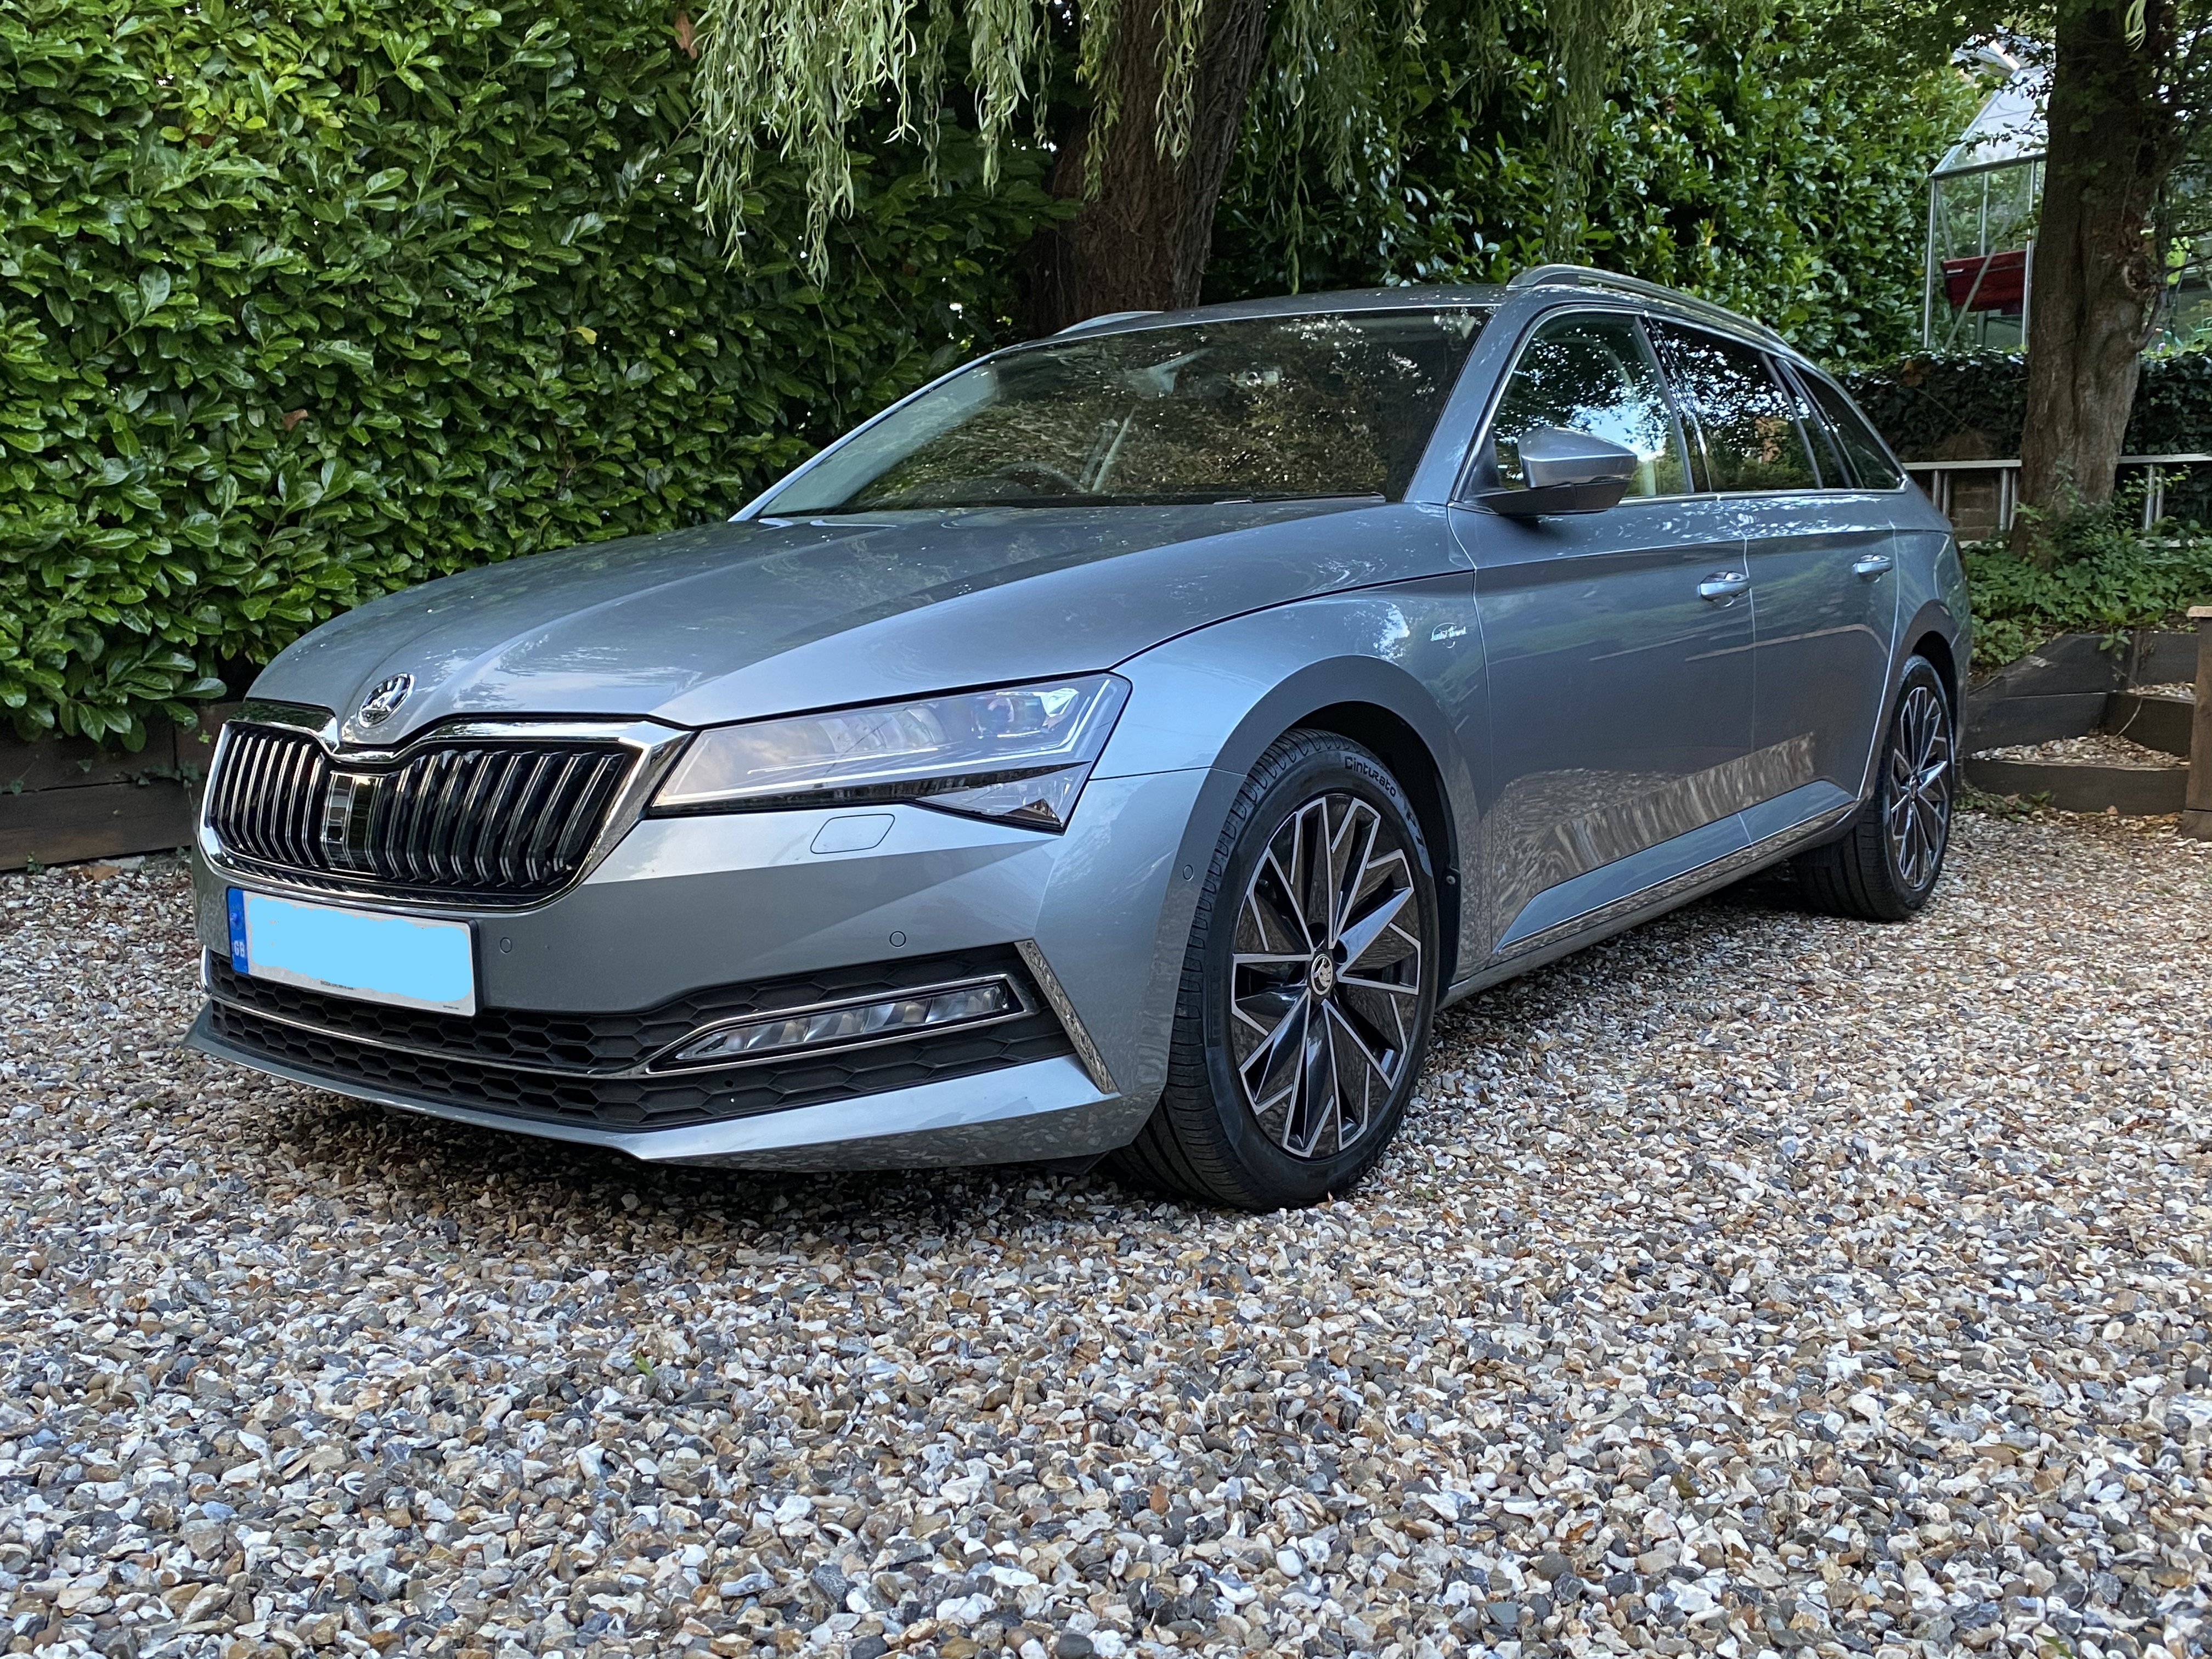
1 pointMy new (to me) toy. Business grey L&K 190 TDi 4x4 DSG estate, 11 months old with 6,000 miles on the clock. Still getting used to all the fancy gizmo's but loving it so far. Replaces an 8 year old TDi 140 Elegance estate with which I had 7 years of trouble free motoring. Hope I have the same success with this one.
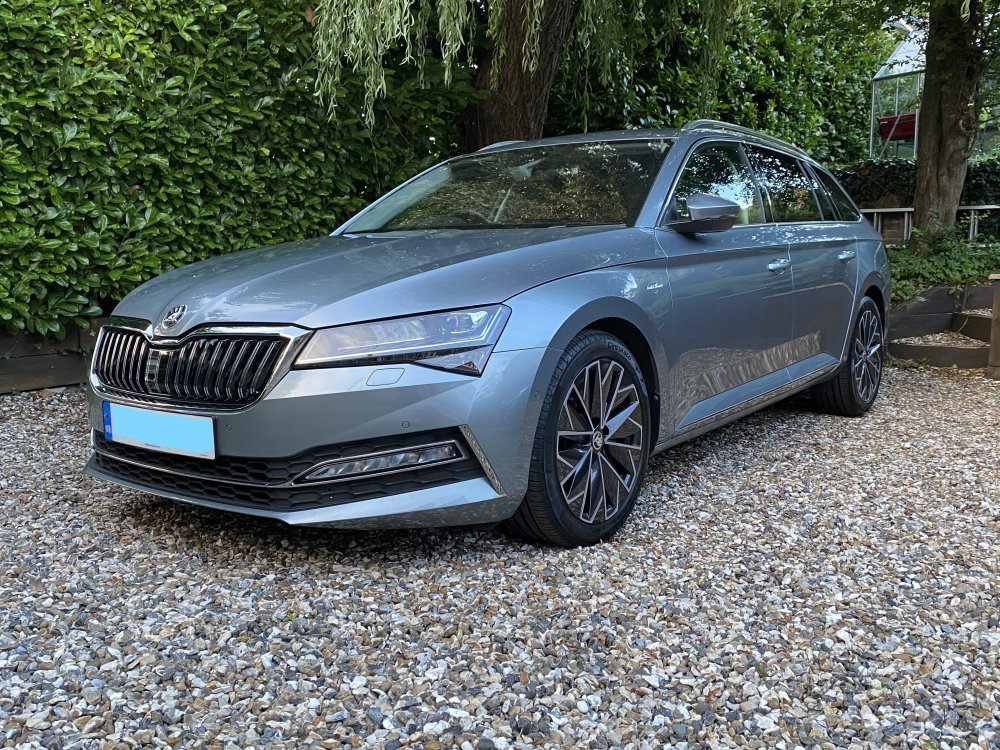 1 point
 -
1 pointImmobiliser - No. You can’t recode keys. You can manually resync a remote but you can’t recode keys. And contrary to popular myth, keys don’t “fall out of programming”. The immo uses a solid state memory which memorises the key even if no power to the car for months. A key can be faulty - faulty aerial not sending signal to the car - but in any case of it was a key issue you will get a warning on the dash that key is not recognised. Fuel Cut Off - Again I doubt it. Fuel cut off will just make it sound like I are trying to start a car with no fuel. It won’t cause the clicking Relay noise u are hearing. My money is still on a battery issue. See a lot of it. Lights on dash will flicker a bit and you can hear relays clicking on and off. In some cases putting jump leads or a jump pack on is not enough. You need to remove both + & - leads from car battery and put jump pack straight onto the leads. In some cases a bad battery on the car can drain the new power source if it’s still in the circuit. If you can do a short video and post it, we might see and hear the symptoms better.1 point
-
1 pointI think the German court judgements I linked too confirm it’s a bad idea. I can use a touch screen intuitively, as can SWMBO , but both think it’s dangerous whilst driving. Plus phones have hepatic feedback and cars don’t.1 point
-
1 pointFog lights only light up a few meters in the road and not in the distance. Okay for maneuvering but at anything above 10mph are useless. People fit new bulbs but dont get them setup properly. Some are still set too low and consequently arent any better. Others are pointing up too high which again is pointless but causes dazzle to oncoming traffic. Most mot garages have the equipment to align the bulbs correctly.1 point
-
1 pointSome valid points if not at least somewhat unkind and thoughtless. I have been driving for 48 years. The worst that has happened is one parking fine and one speeding ticket for a motorway event. My current experience of divers is they frequently move from lane to lane without notice or indicating, whilst being so close as to not be able to stop without rear ending should an emergency braking be necessary. Undertaking now appears to be a common rule of the the road, minor driving errors are now seen as a green light for abuse and fist waving. Where has the old fashioned courtesy gone? I live near a very busy junction and the number of accidents are becoming legend, red traffic lights are seen as a signal to go not stop, broken white lines at a junction are seen as an option to ignore them and has resulted in a couple of very bad accidents. I could go on but what is the point. If modern day drivers used the road properly, us elderly drivers would not be distracted by such dangerous behaviour. I am not alone with my comments. I have park assist on my car, used it once to amuse by grandson he was fascinated by it, never used it since as I am a very capable driver; when i feel I am not, i will voluntarily hand in my license.1 point
-
1 pointThe Maxidot on my 2010 170 over-reads by about 15%. Suggests longterm average is over 50mpg, reality is about 44/45. Can get a genuine 50+ on a run if driven carefully. Andy1 point
-
1 pointNew discs and pads for all 4 corners and brake fluid cost me £140 at my local Motor Factors for MK2 Fabia vRS. That is for Ferodo and they perform just as they should. Like discs and pads should. http://briskoda.net/forums/topic/442915-pagid-vs-brembo-vs-bosch-brake-discs-and-pads
.JPG.5435123cfb36a0fa2f001974eb26f175.thumb.jpeg.5fa92d92b59b5feb040c85f2e39cfb45.jpeg) 1 point
1 point -
1 pointMine turns off immediately, i want it to stay on for a while or above certain speed.1 point
-
1 pointI/we used to change cars every 2/3 years, but I've owned my Superb 2 since February 2013 & I still can't find anything to replace it. SWMBO drove it back home yesterday & enjoyed the drive enough to state that we should keep the old barge for a few more years, if only 'cos "it's fun to surprise other drivers". I had a test drive in a '69 plate Volvo S60 last week & 20 minutes later I was happy to give it back to the dealer. At £27k it was a good price, & a nicely-made car but the "fun factor" is missing. As for cheap cars as projects, I do "get it" but I'm too old to want waste my last years rebuilding a car. Been there, done that, etc...1 point
-
1 pointIt will just be what ever cam belt covers they had lying around. Mine was the same. Engine code will be on the sticker in the boot.1 point
-
1 pointMy 2011 CR 170 TDi (Revo remapped, lowered, Bilsteins and updated ARB’s ) averaged brim to brim 41.2 mpg over 64500 miles driven ‘con brio’ on Shell V Power. Driven like Miss Daisy, I regularly saw 55+ mpg on the Maxidot. The replacement Karoq 190 TDi DSG is giving just over 40mpg @ 1400 miles, driven less enthusiastically to date!1 point
-
1 pointhttps://www.autotrader.co.uk/car-details/202008262945723?colour=Green&colour=Multicolour&radius=1500&advertising-location=at_cars&include-delivery-option=on&make=SKODA&onesearchad=New&onesearchad=Nearly New&onesearchad=Used&sort=relevance&model=SUPERB&postcode=wf84fs&page=2 https://www.autotrader.co.uk/classified/advert/new/202003108247377?colour=Green&colour=Multicolour&radius=1500&advertising-location=at_cars&include-delivery-option=on&make=SKODA&onesearchad=New&onesearchad=Nearly New&onesearchad=Used&sort=relevance&model=SUPERB&postcode=wf84fs&page=2 https://www.autotrader.co.uk/classified/advert/new/202008242874343?colour=Green&colour=Multicolour&radius=1500&advertising-location=at_cars&include-delivery-option=on&make=SKODA&onesearchad=New&onesearchad=Nearly New&onesearchad=Used&sort=relevance&model=SUPERB&postcode=wf84fs&page=2 https://www.autotrader.co.uk/car-details/202006130096052?colour=Green&colour=Multicolour&radius=1500&advertising-location=at_cars&include-delivery-option=on&make=SKODA&onesearchad=New&onesearchad=Nearly New&onesearchad=Used&sort=relevance&model=SUPERB&postcode=wf84fs&page=2 https://www.gumtree.com/p/skoda/2017-skoda-superb-1.4-tsi-150-sport-line-5dr-dsg-petrol-green-automatic/13827440871 point
-
1 pointI had a sprint yellow Octavia vRS. It's the only car that got washed to death and detailed regularly to try and keep it clean. Dragon Green is lovely but there is a big downside, unless you work for a car washing company or similar.
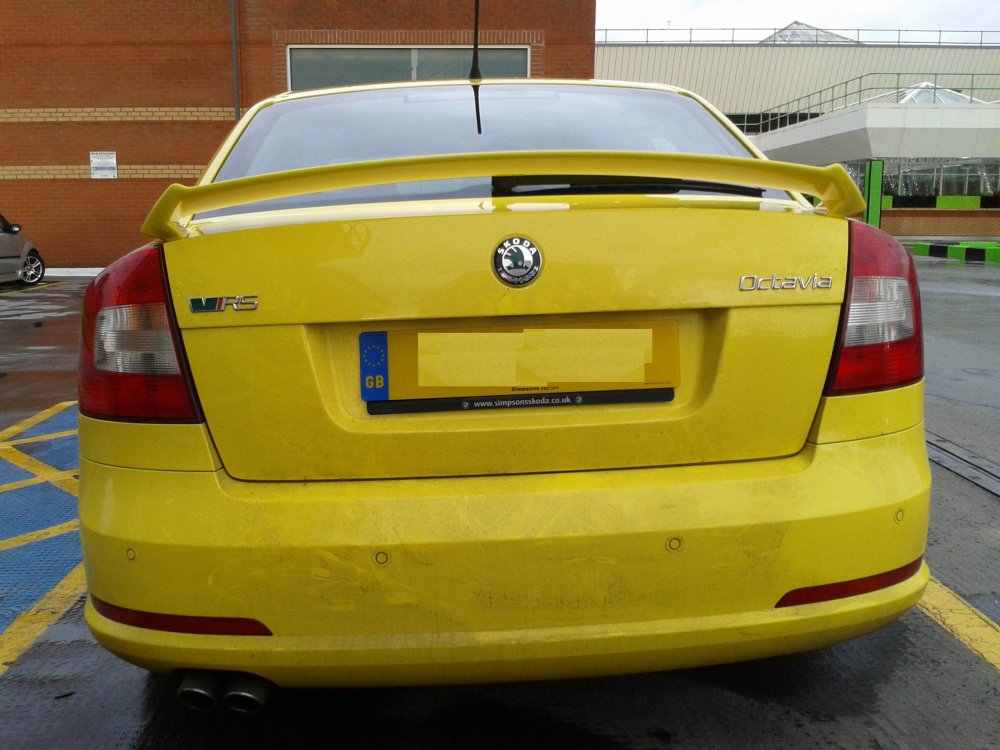 1 point
 -
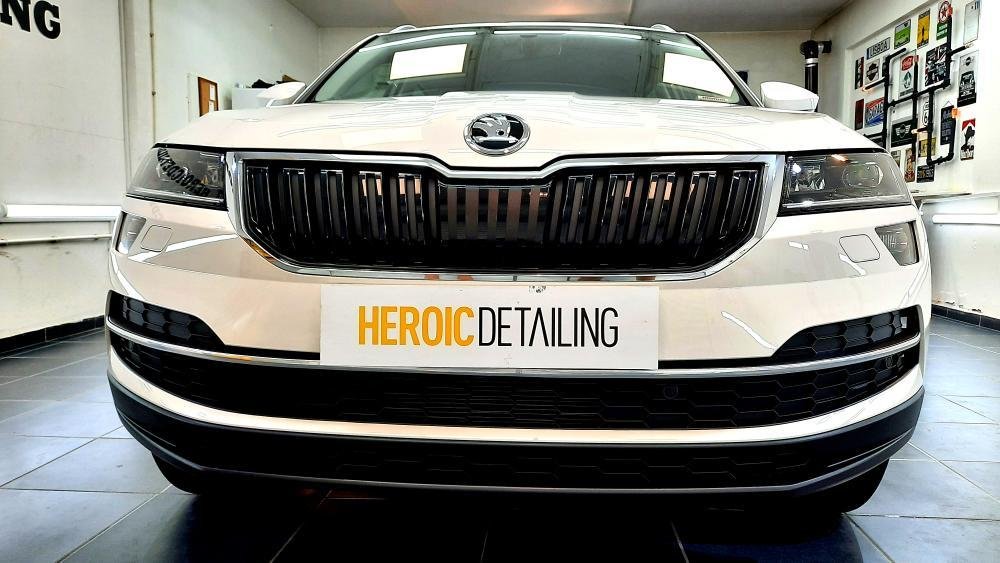
1 pointSasha stick out for the dragon green. You've recently missed out on a fully optioned dragon green Sportline 272, I think it was £28K in Mansfield. I looked at it as I love the colour. However I am now totally spoilt by the comfort and options on my velvet red L&K, the Sportline only lacked ventilated seats. Having had a rallye green VRS, you'll get used to the marmite or more likely the 'I love it' comments. You'll also never have to search for it in a car park amongst all the black and grey cars. My tip is to buy a very low mileage 6 month old ex-Skoda mgmt car just after the reg change, which is how I bought my first VRS and recently the Superb. I saved £14K this time according to list price, yes before anybody chips in, I know nobody pays the full list price. Check the ads for cars with Milton Keynes area plates.1 point
-
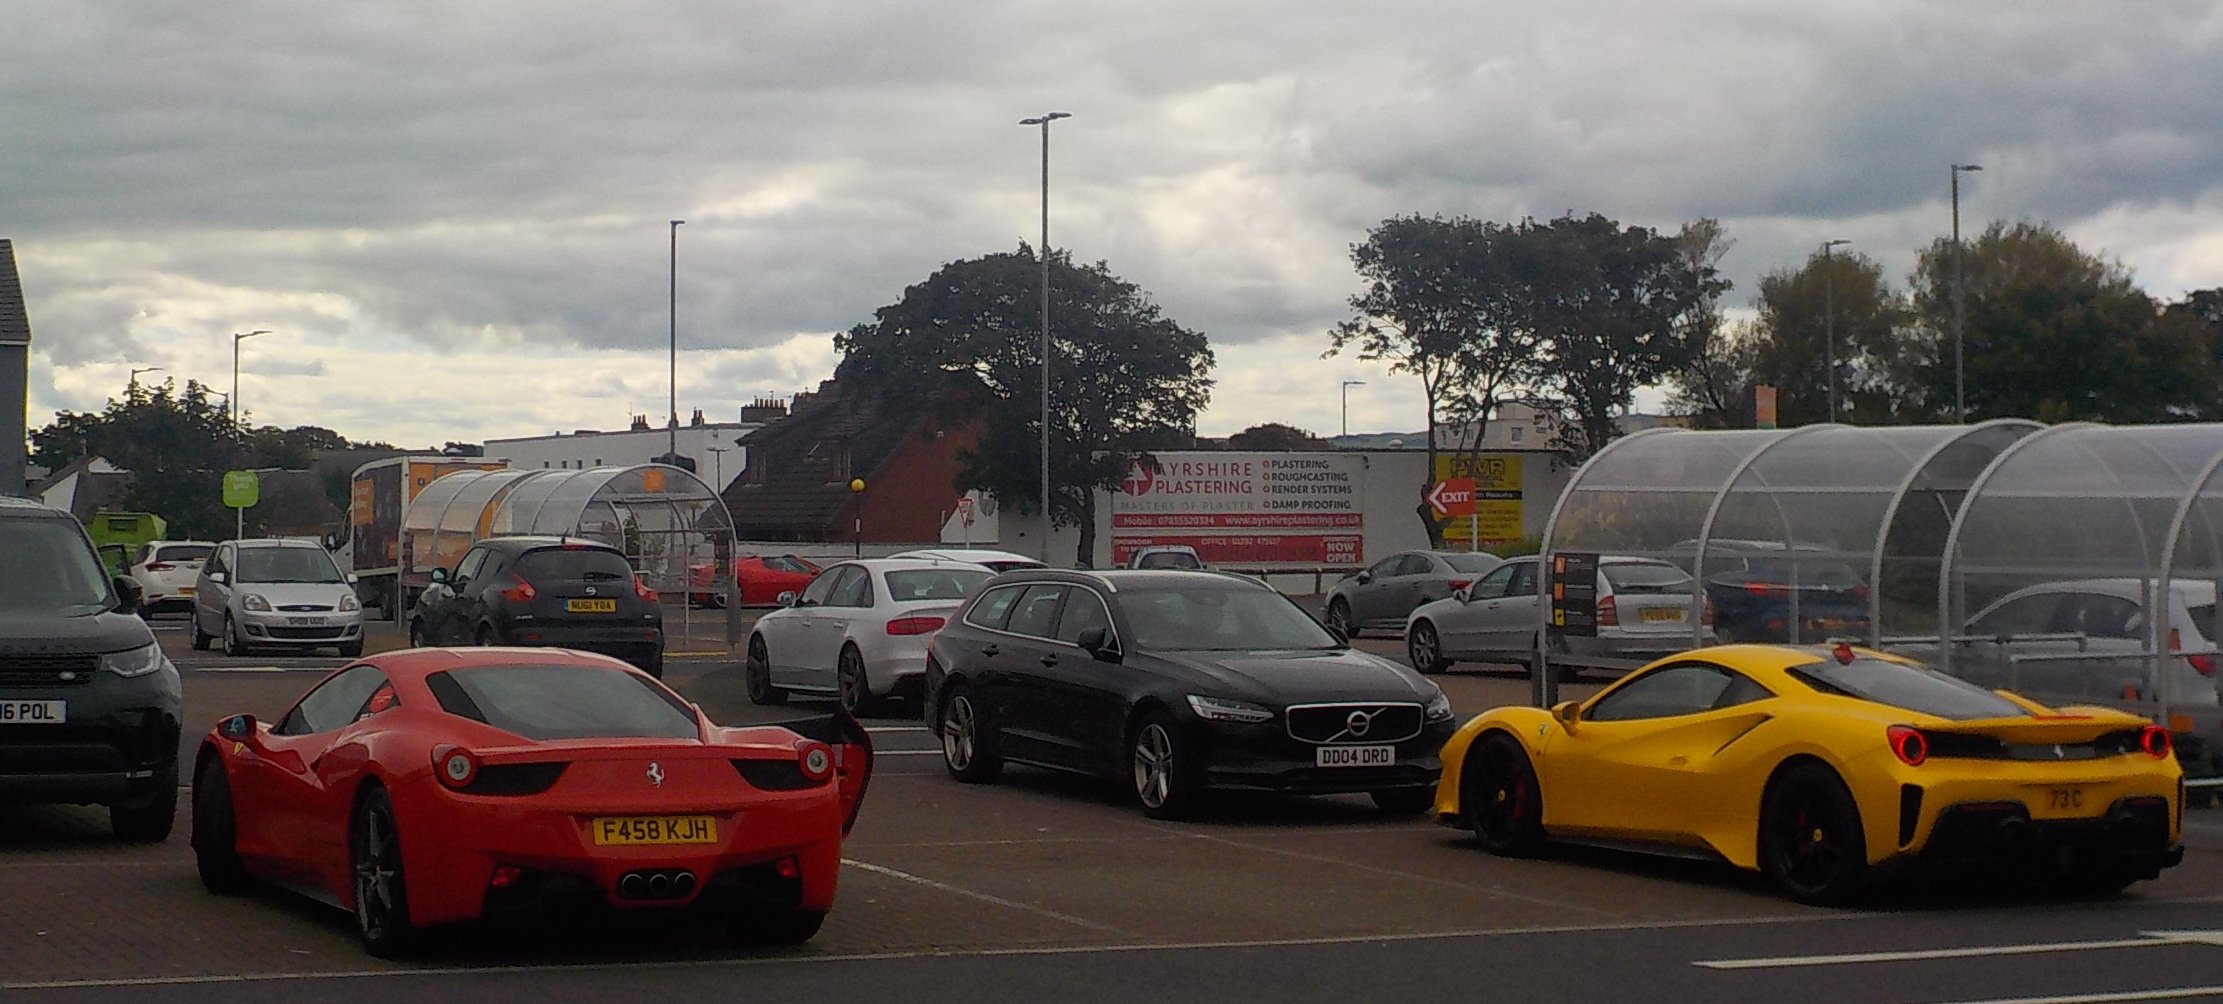
1 point1 pointIt's a Jeep patriot judging by the wheelarch and front wing1 point1 pointAuto.cz have just published some photos. I can't speak /read Czech but photos on that site are so good, it's worth looking at. I ran the article through Google Translate, they say they don't know if these are leaked official or photoshop, but if they are photoshop, then someone has put a lot of time and effort into them. https://www.auto.cz/tasi-nova-skoda-octavia-eso-z-rukavu-prohlednete-si-luxusni-verzi-ktera-nemela-vzniknout-1357981 pointIn a manual car you control the clutch directly via the left foot pedal and can feel it engaging. In a car with DSG you control when the clutch engages indirectly via the engine revs, and this is a bit less precise. Most of the time this doesn't matter, but occasionally more precise control is desirable, e.g. when shuffling backwards and forwards in a tight parking space, or on a car ferry when you have already stopped and then need to get a few inches closer to the vehicle in front. This is just a slight inconvenience with DSG, and it gets easier with practice and familiarity with the vehicle. Apart from this, DSG is generally easier, particularly in stop start traffic queues. With DSG there is more to go wrong and repairs are likely to be more costly, but these days they seem to be reasonably reliable. May be worth considering an extended warranty. Regarding economy the official test figures suggest there is not much difference between DSG and manual. I tend to think that in real world driving there is more scope to adopt an economical driving style in a manual car, although the DSG has its own eco mode. Arguably a manual car offers a more involving driving experience. The DSG has the facility to change gears manually, but I think most drivers will be happy to just let it do its own thing. On the whole I prefer DSG, mainly due to greater ease of use in most situations. I have owned my Octavia Scout DSG for almost 5 years and am still very happy with it.1 point1 pointQuestion, what steps should you take if your car catches fire? Answer, Bl**dy long ones!1 point


.JPG.5435123cfb36a0fa2f001974eb26f175.jpeg.e6390293785a7a5ace94f62e6896c226.jpeg)


Important Information
Welcome to BRISKODA. Please note the following important links Terms of Use. We have a comprehensive Privacy Policy. We have placed cookies on your device to help make this website better. You can adjust your cookie settings, otherwise we'll assume you're okay to continue.