


Leaderboard
-
MikeTheThinker
FREEDOM12Points8,509Posts -
Aspman
Resident Member11Points21,209Posts -

john999boy
Honorary11Points11,233Posts -

Raymundo91
Members10Points84Posts


Popular Content
Showing content with the highest reputation on 22/10/20 in all areas
-
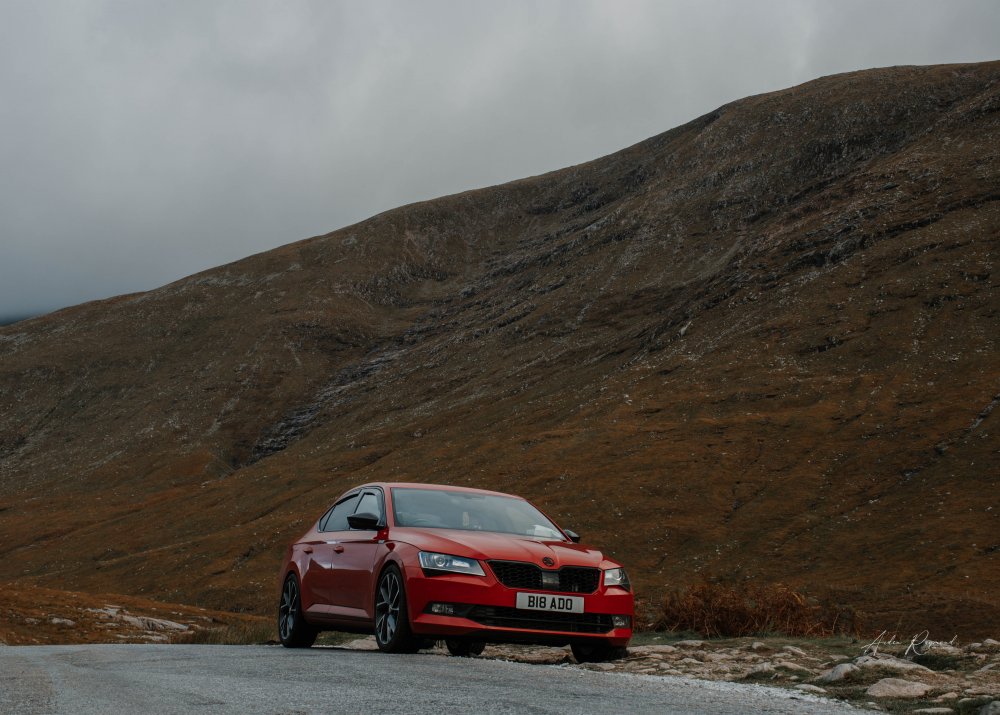
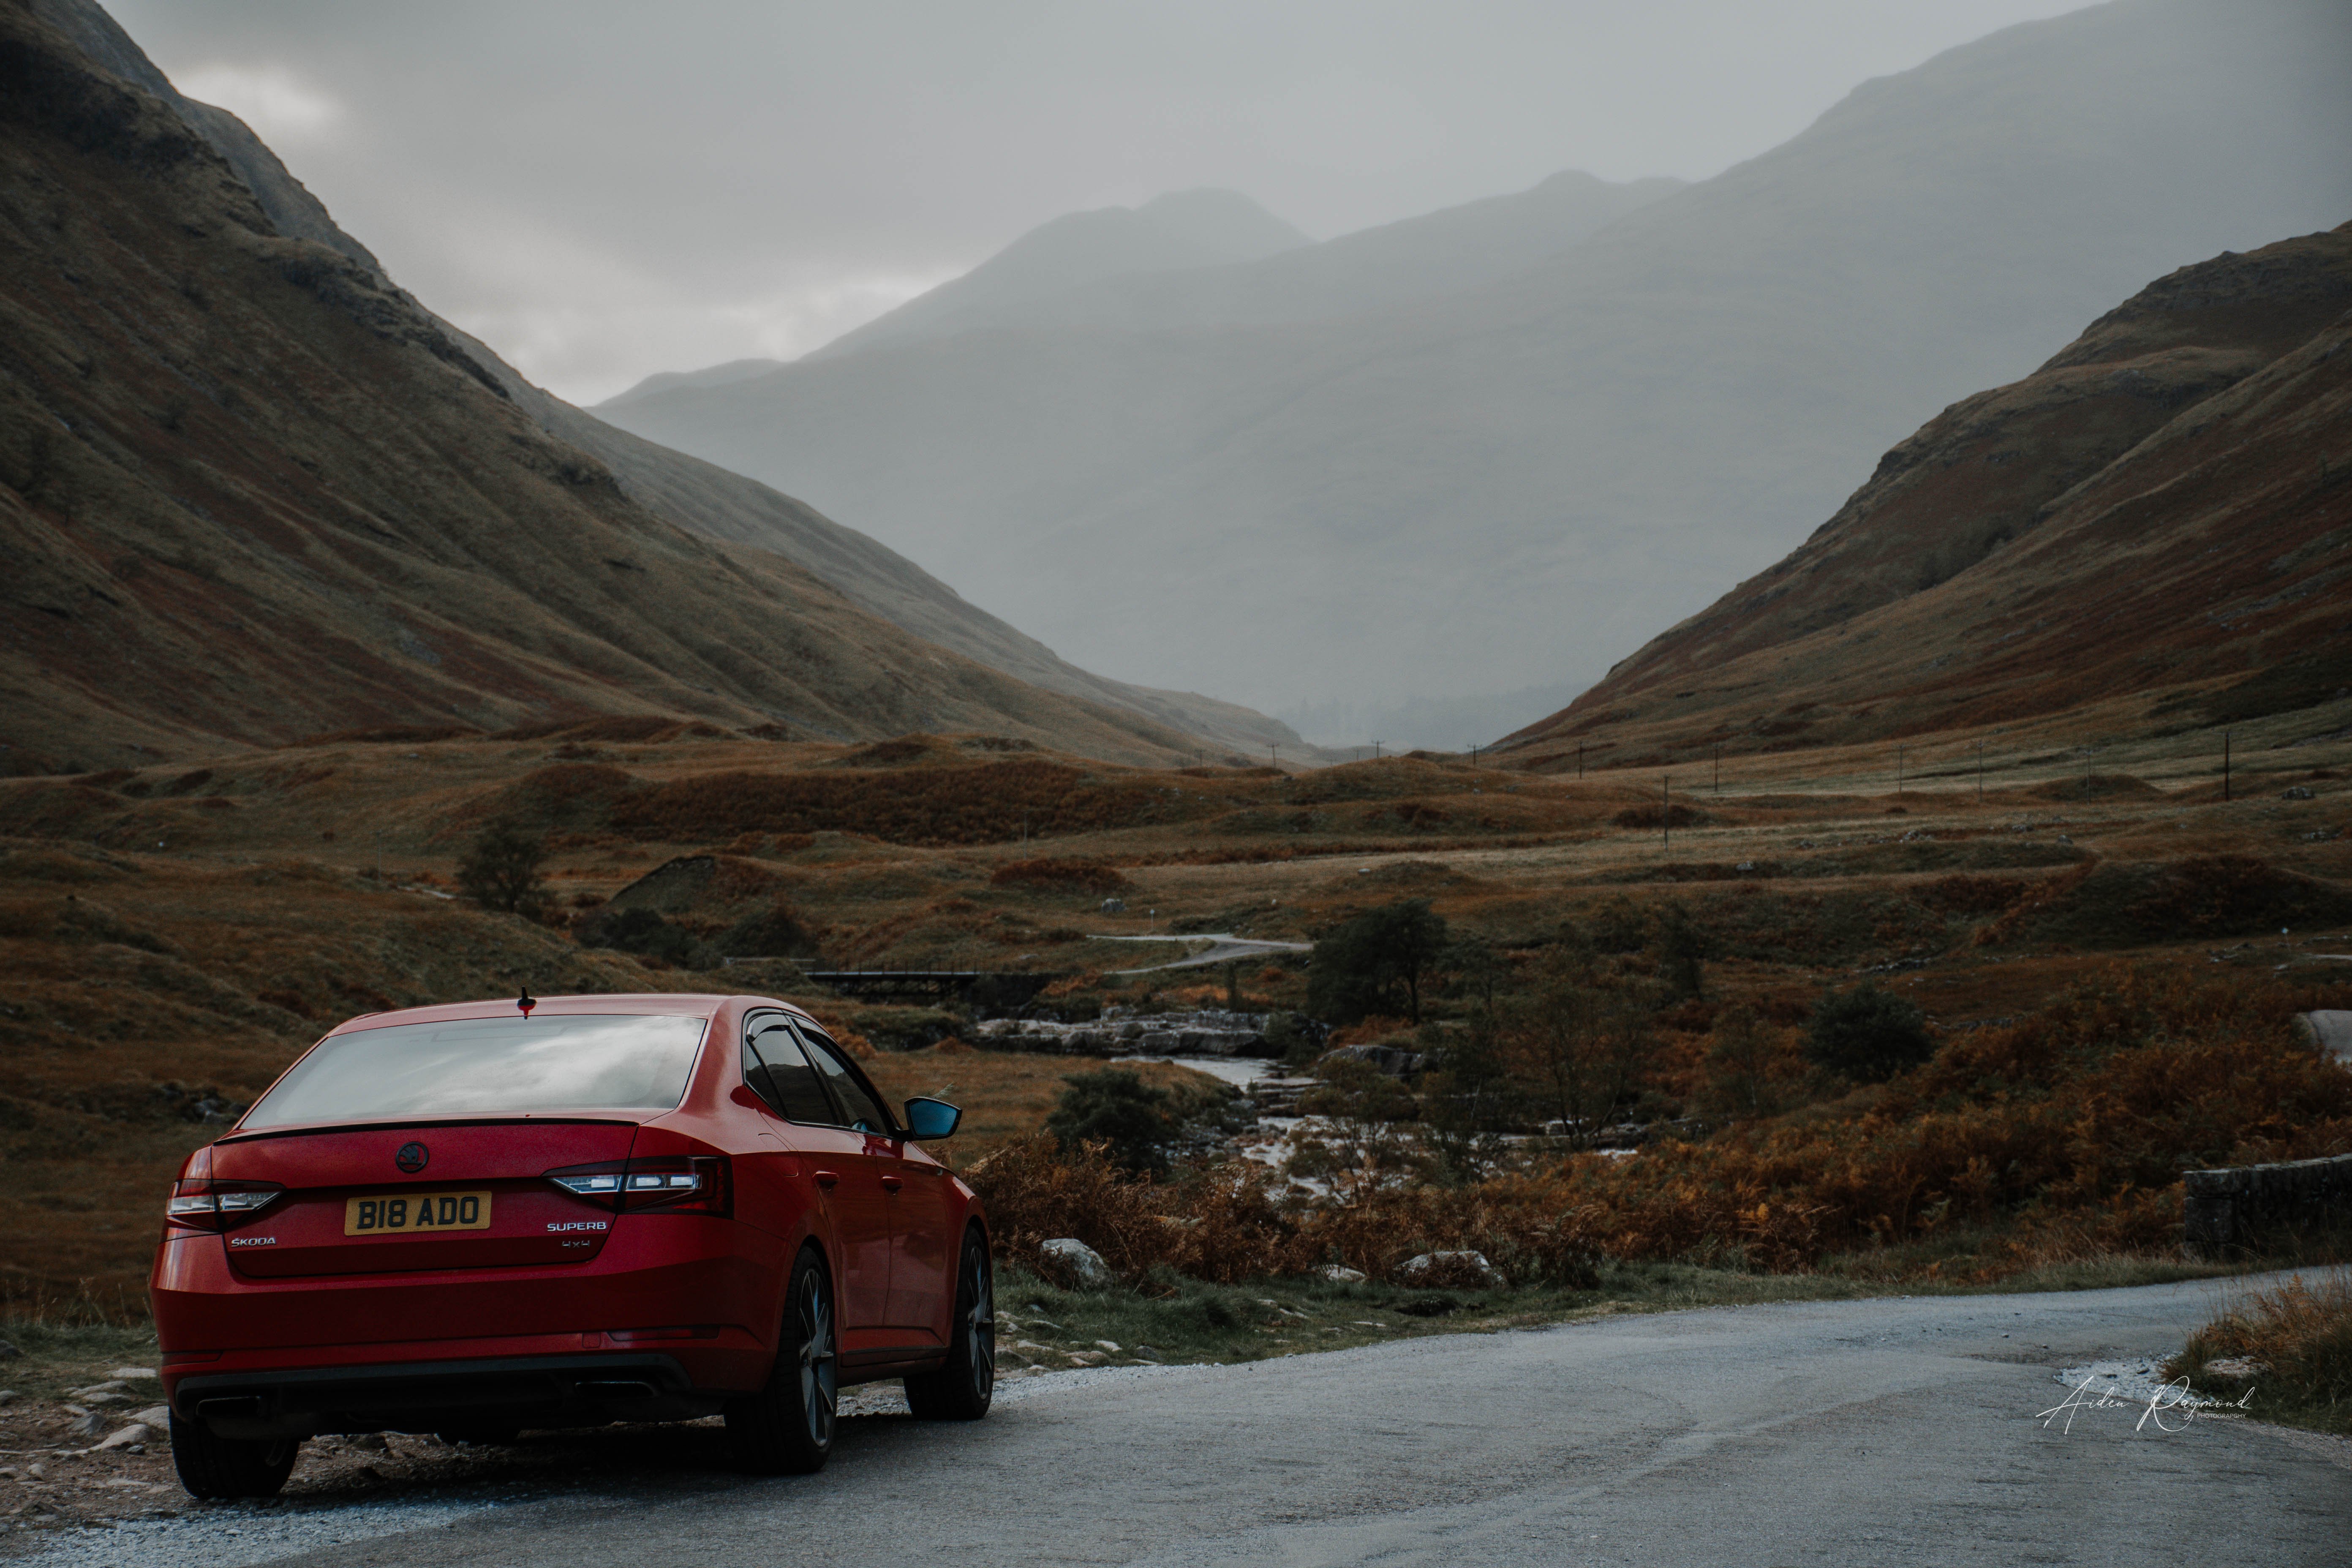
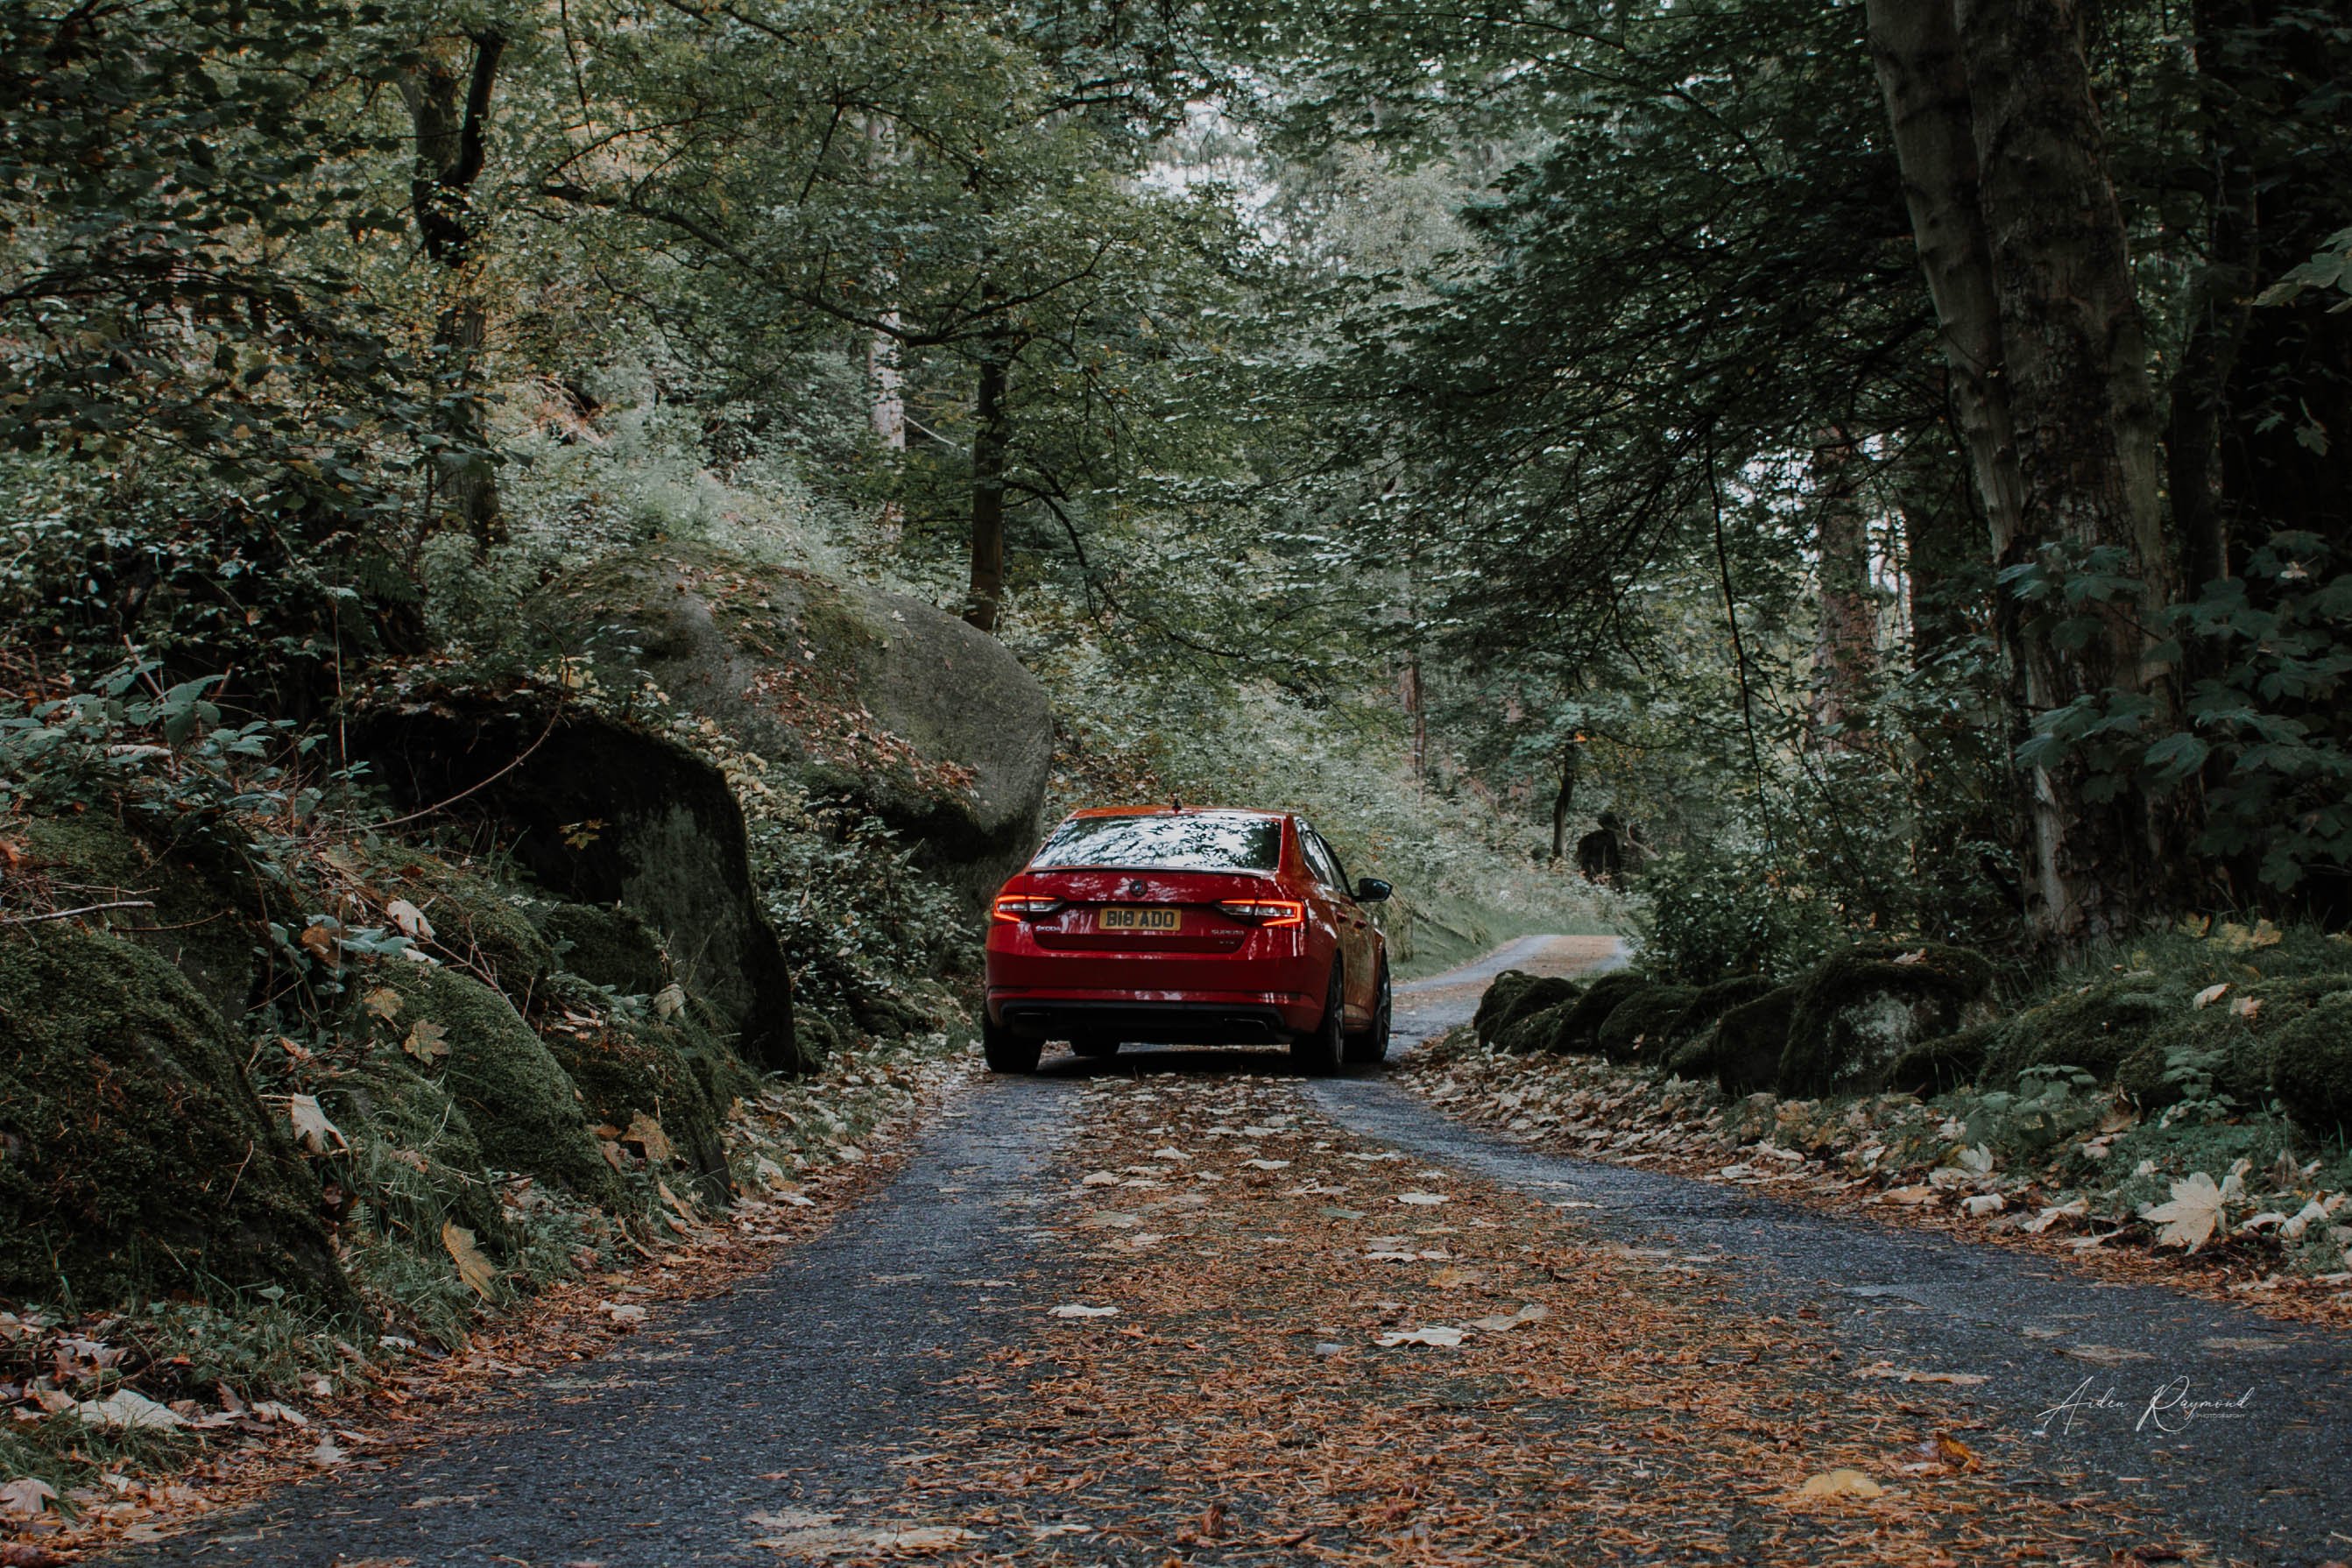
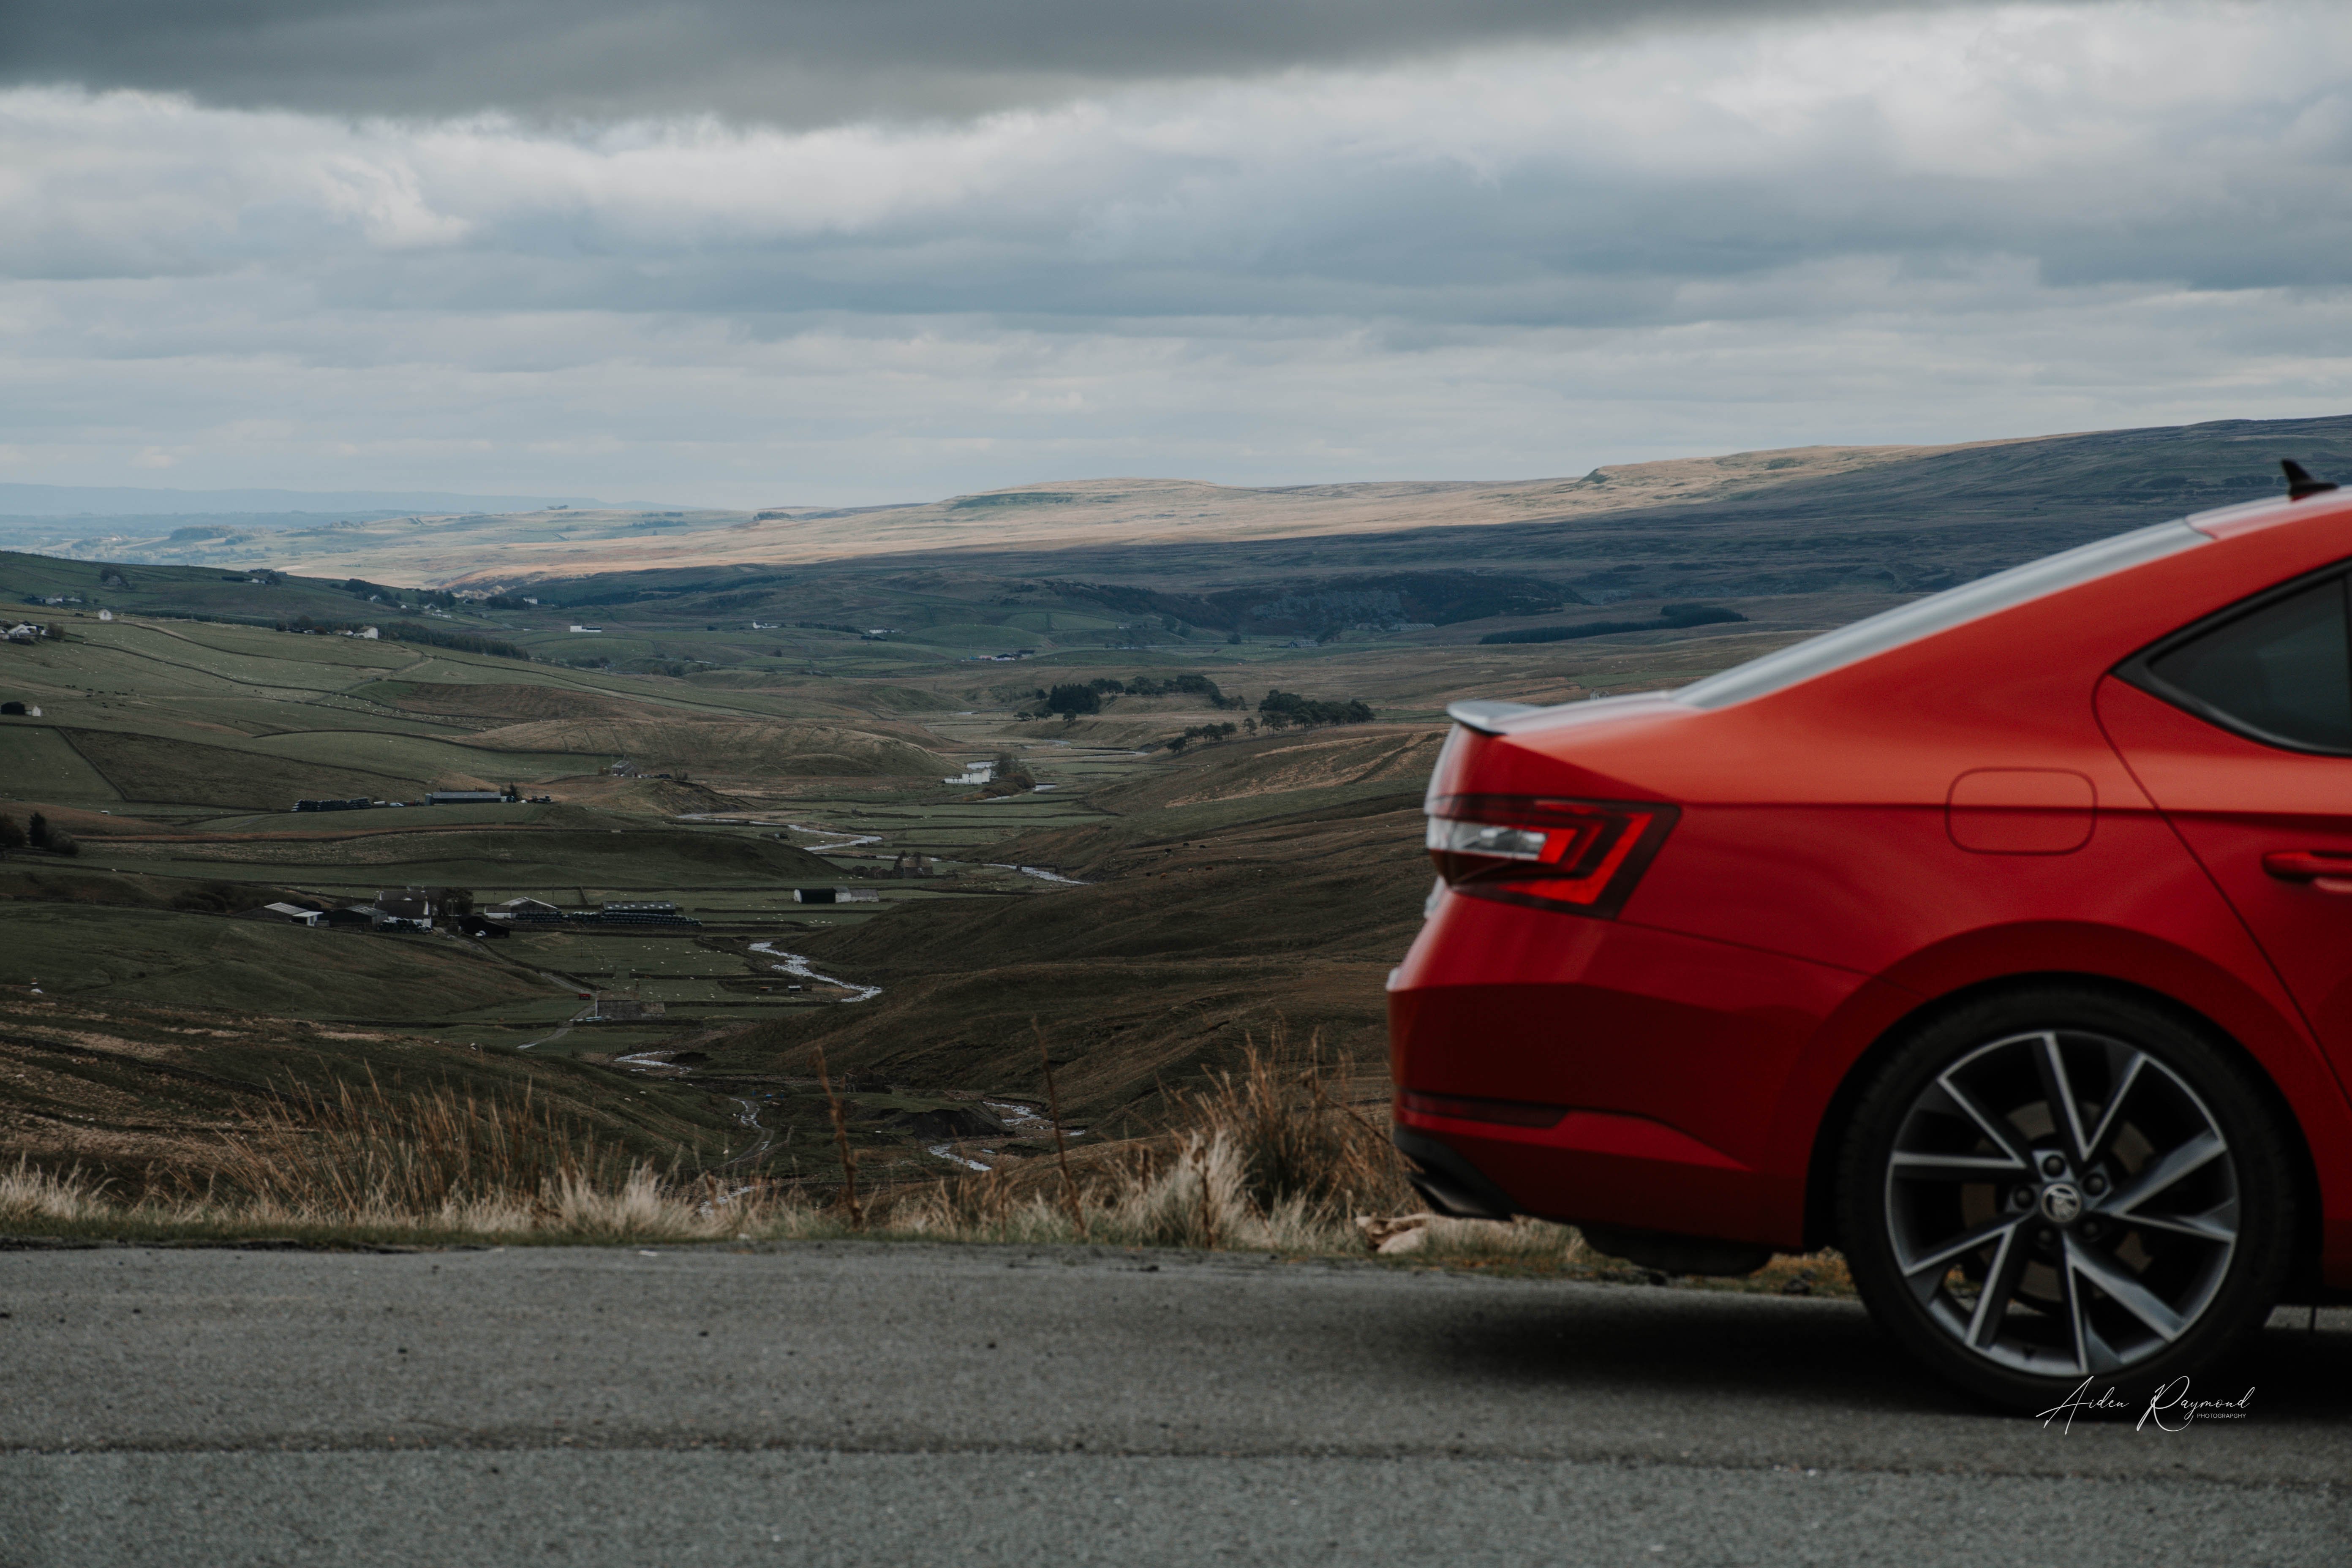
10 pointsNice trip upto Scotland last week! 1200miles and never skipped a beat! Managed to get nearly 500 miles to a tank which i'm well happy with! Normally only managed 380-400 to a tank! Had 20mm spacers fitted 2 days before we left for Scotland as well and love how it sits now! Didn't like how they made it look at first but i've got use to it now


 10 points
 -
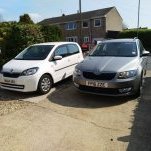
4 pointsFollowing on from the photo by @pinkpanther's friend, this reminded me of one I took a few days ago.
 4 points
 -
3 pointsI've had the chance to drive about 10 mi in it. so impressions at the moment are restricted to. Fk me it's big. Nah it's bigger than that. I'm physically looking down on most SUVs Lots of pretty touch screens but I still think they suck for a car. Buttons buttons everywhere The most complex ICE ever. I mean I've worked in IT for 20yr and I'm struggling with some of it. The seats, oh lord the seats are comfortable It's actually quite nippy for a 2T truck, plenty of poke Steering a lot slower than the BM that'll take a bit of getting used to the driving mode defaults to comfort which is a bit wafty for me, I have to keep changing it to dynamic and there is no way I've found to make it stick. £80 to fill the tank, which was less than I thought. short run got 32mpg, I'm guessing the paper figure of 38 might be possible which would make it no worse than the 335d. We'll do some more miles over the weekend and we have some load lugging tasks for it which should be good.3 points
-
2 pointsThat's great and all, not really sure how it relates to my post about a hybrid Octavia though2 points
-
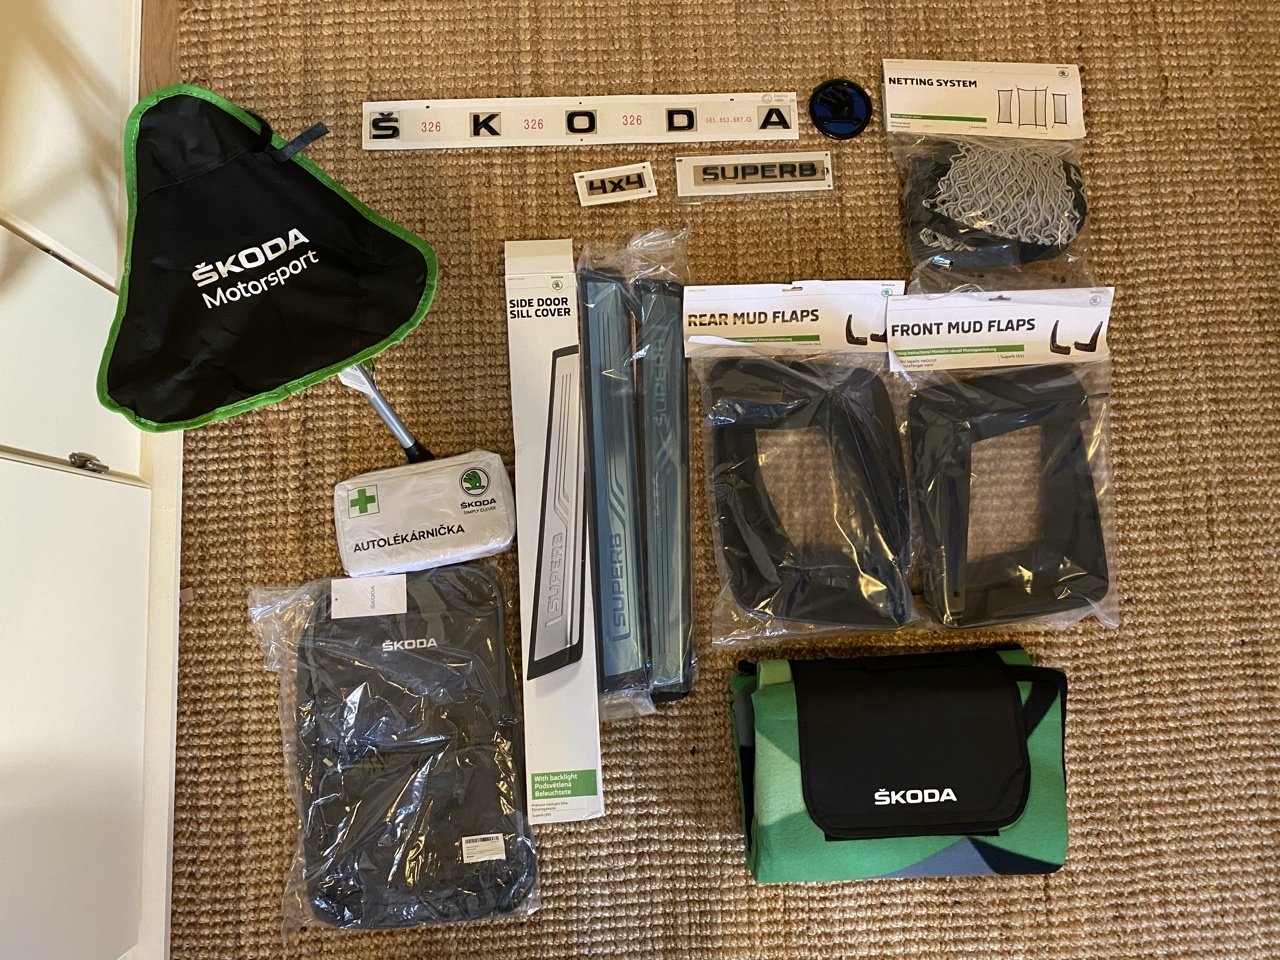
Some goodies arrived today. SuperSkoda. Will be a few weeks before I get a chance to fit them. Have to wait until the paint guy is finished before adding the new bits. Car being debadged for a 2 stage Polish to remove swirls that the dealer put on car with weekly washing. Then being nano coated with the self healing stuff. Then I will fit the new stuff. Most excited about the backlit door sills. But the new black badges ( still can’t believe they don’t come standard on a Sportline), and the mudflaps will make a big difference to looks.
 2 points
 -
2 points
-
Twice this week at different chargers there have been Tesla's on type 2 chargers and i parked next to them and used the CCS chargers. Each of the drivers when they returned said the chargers would not start charging on the CCS so they used the type 2. Neither of them thought on calling the number on the charger to get it started and had ever done that in the past having had the same issue often and saying the cars have an issue. I would say the issue could be that they lack the common sense they were born with.2 points
-
2 pointsTerrible problem on the Octavia's..... I do think once you have completed the job and bled the brakes you will find that all will be ok (taking into account all the above suggestions of course, ie 'working' the piston a few times carefully though, and removing reservoir cap. I doubt you have warped anything Just a good clean off of everything and possibly a bit of filing, refit using Ceratec grease rather than copper grease, especially on the rubbers, bleed them and you should be fine... A G clamp is your friend for pushing piston back in...2 points
-
2 pointsNot the ENAYAQ (and in Slovakian) but the ID.3 looks pretty promising in the snow... -2 points
-
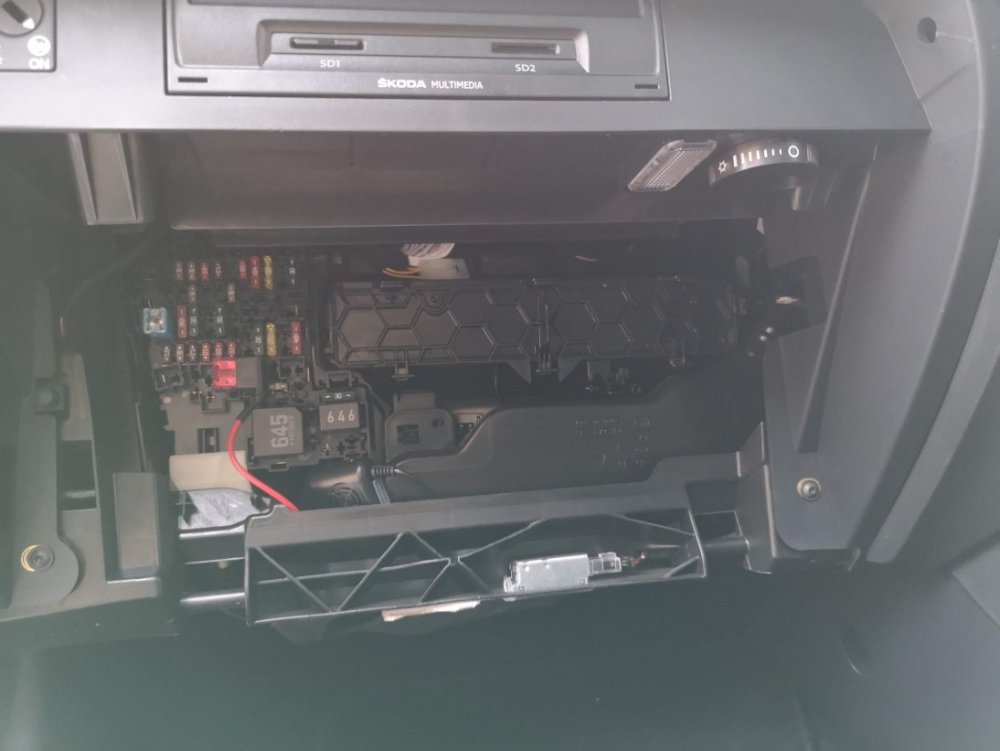
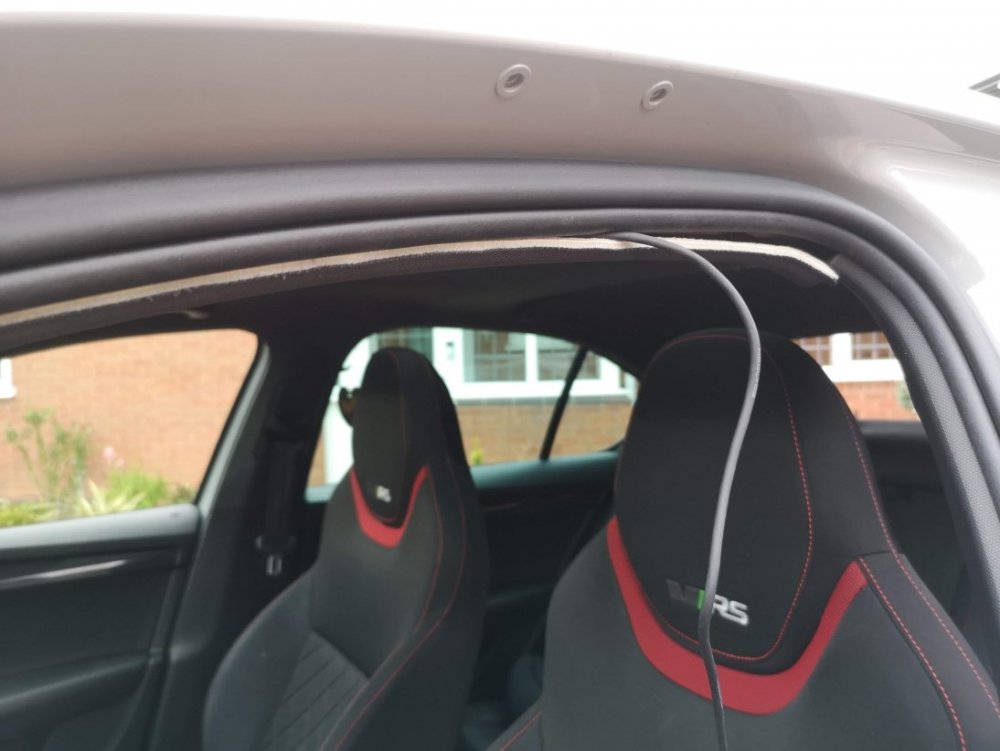
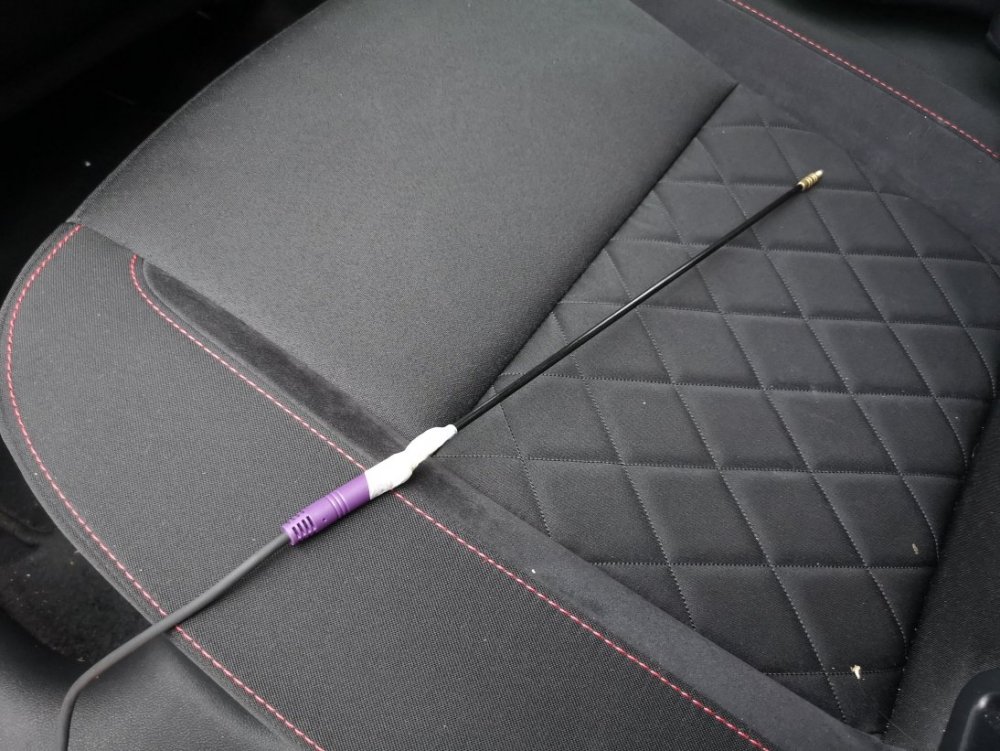
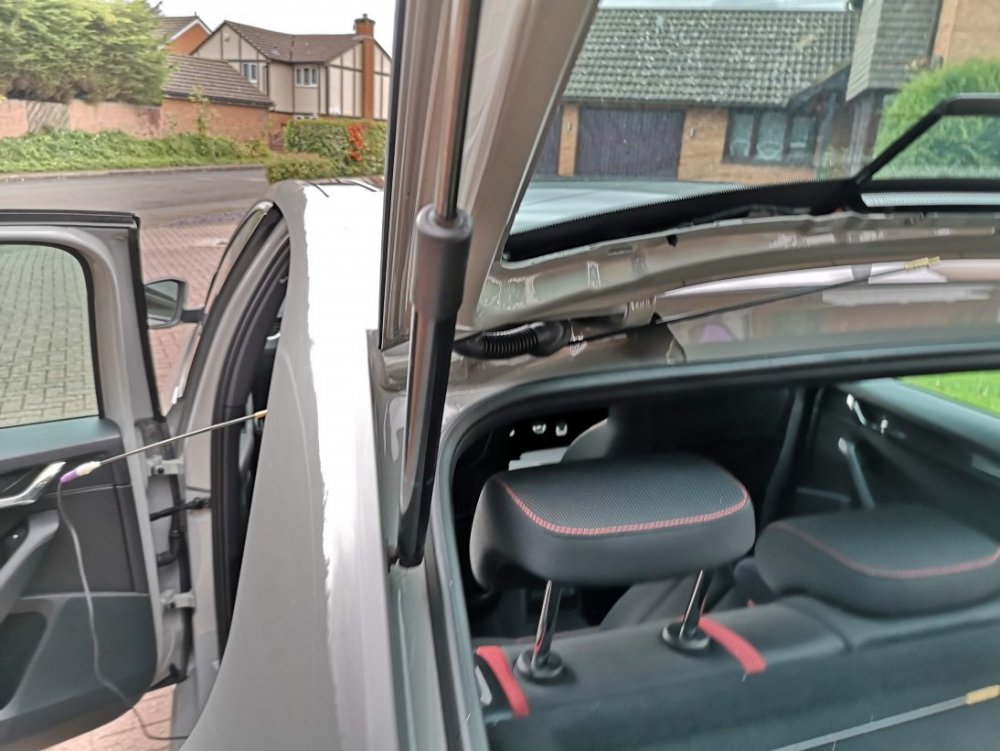
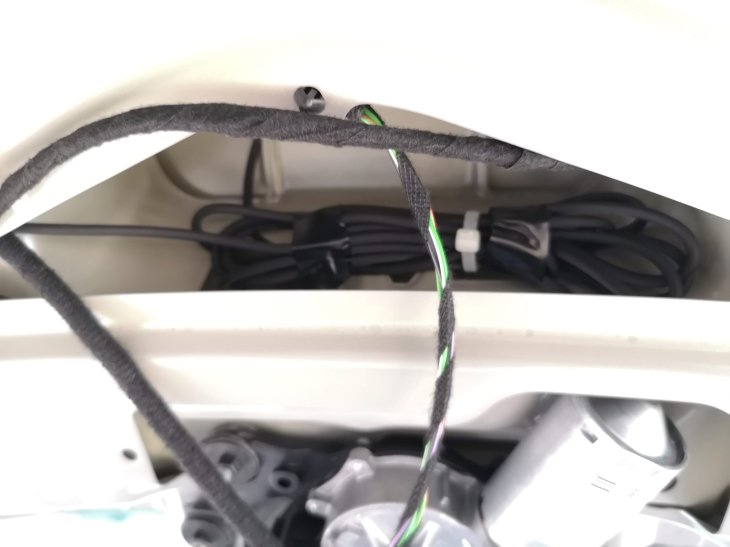
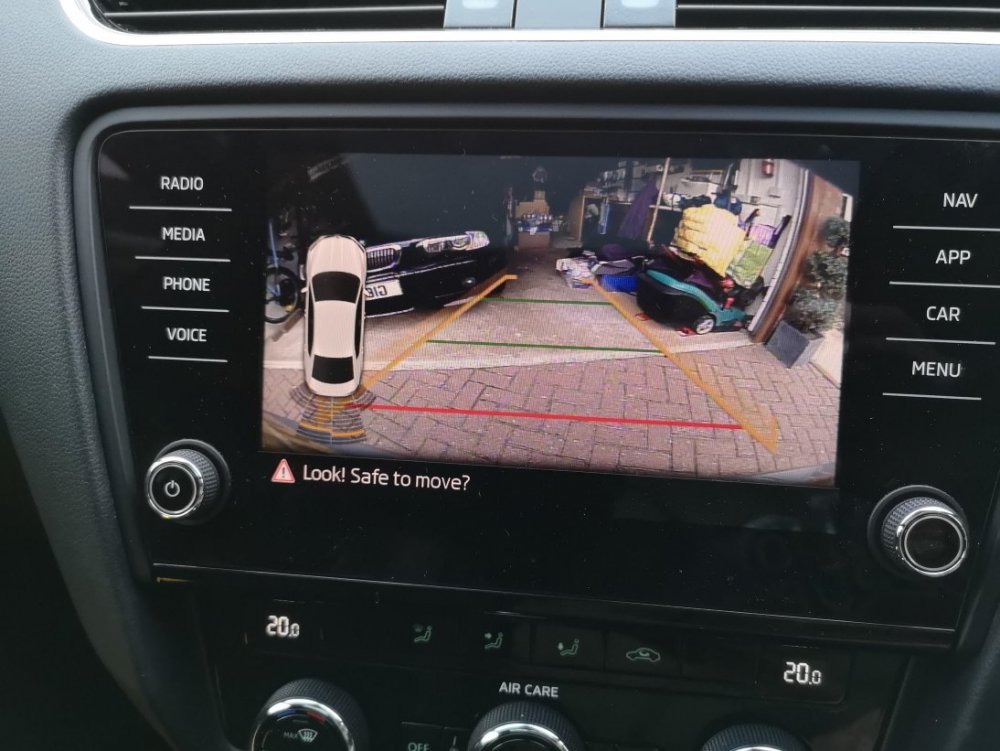
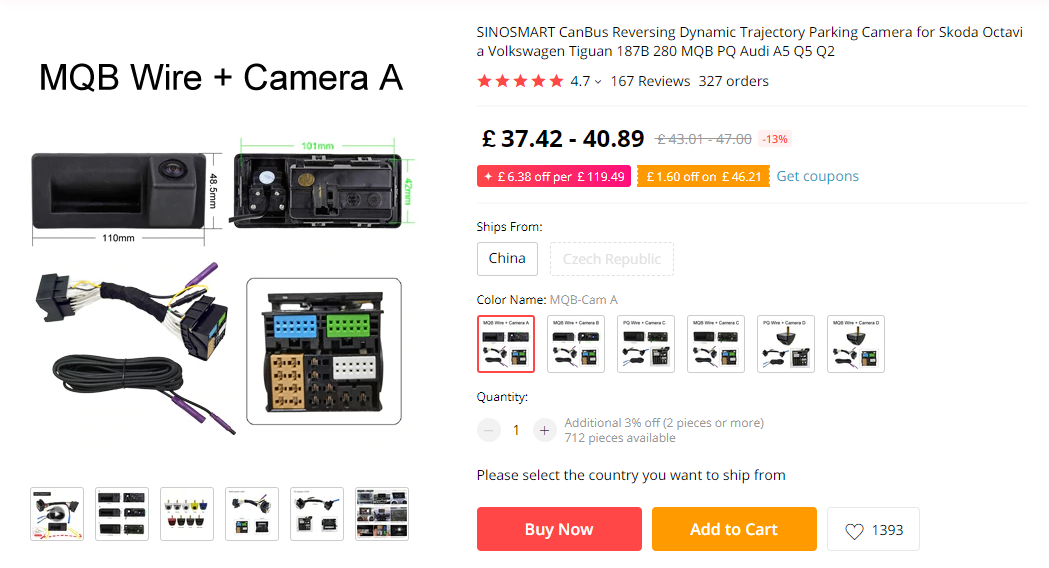
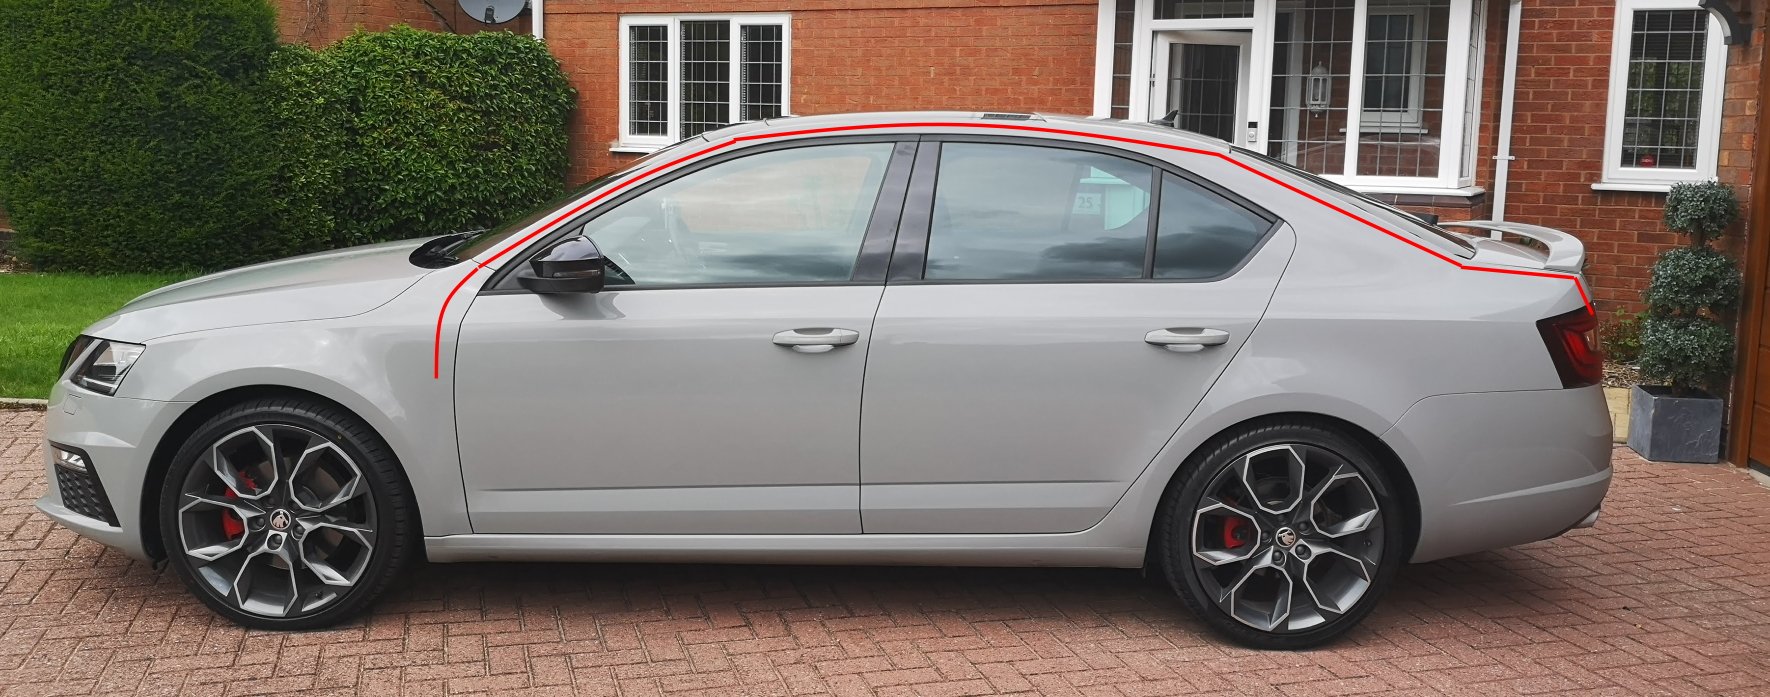
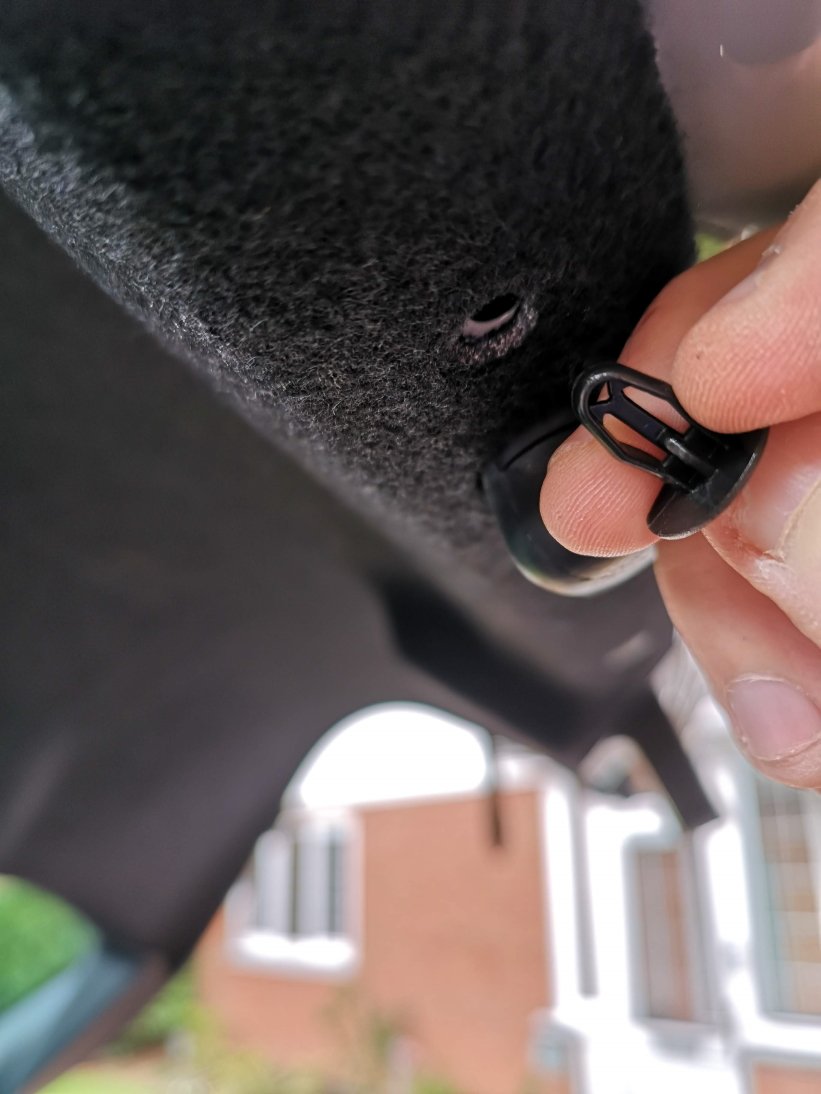
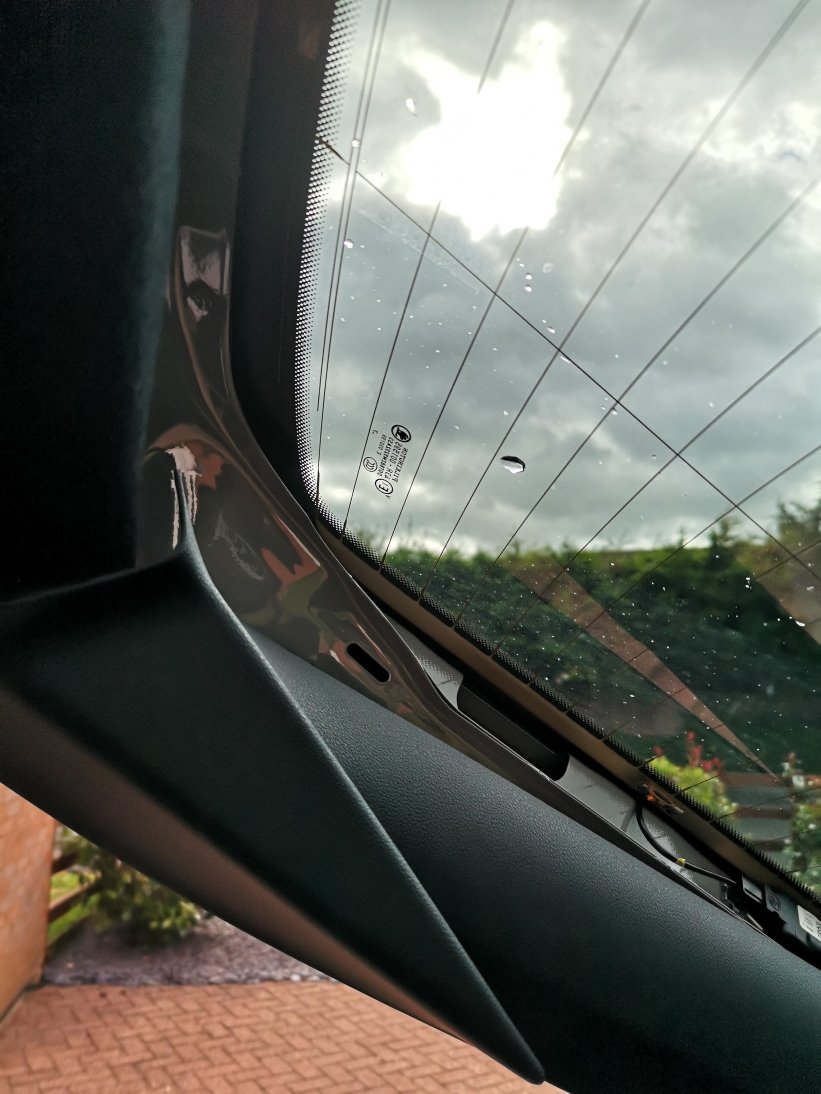
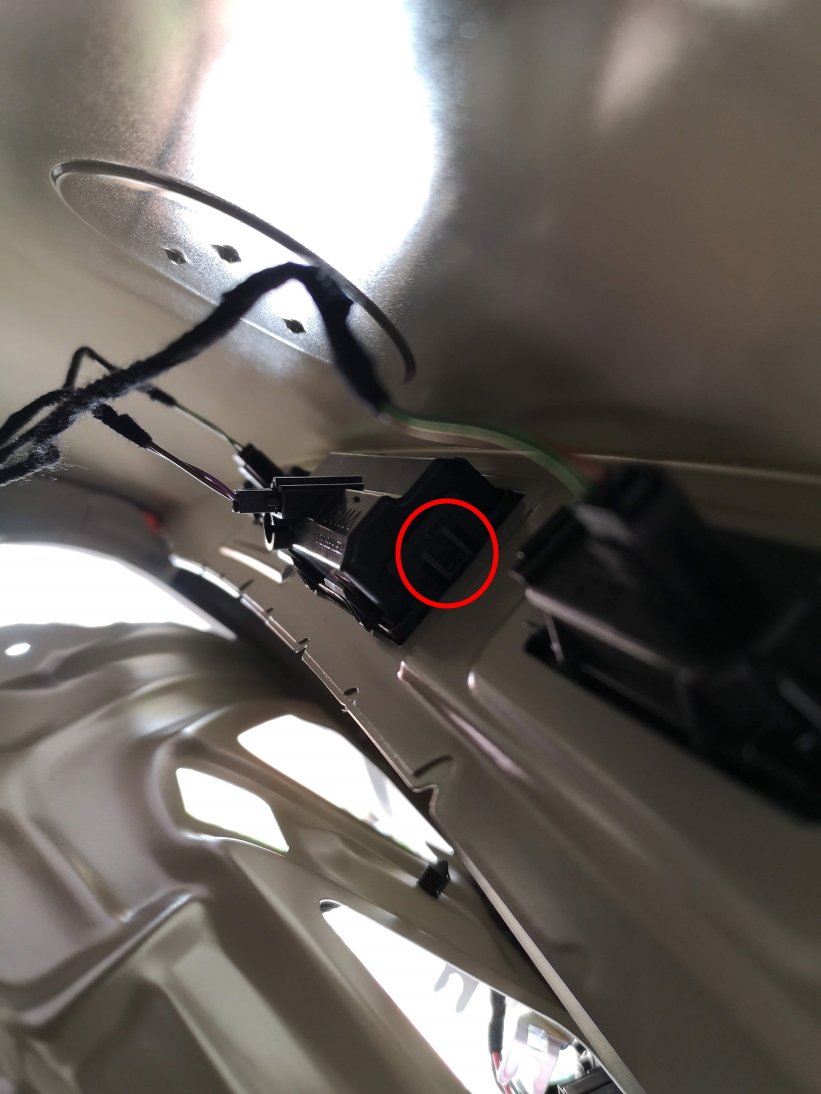
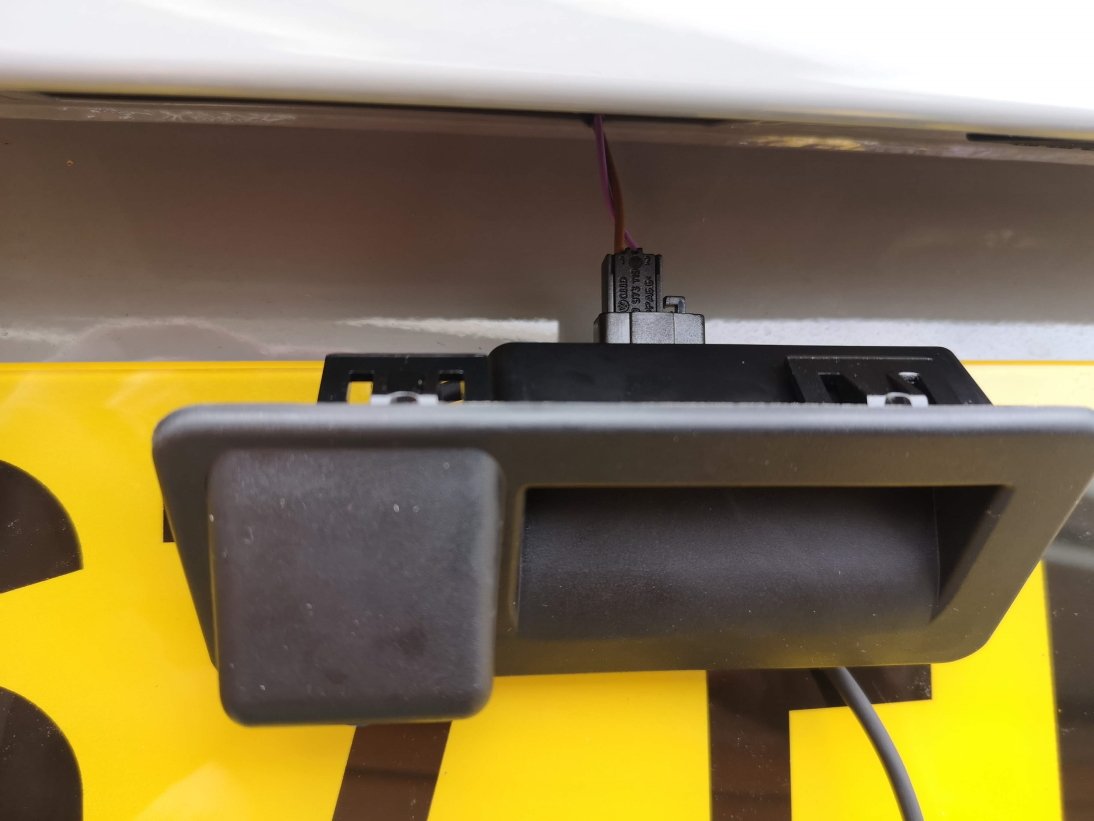
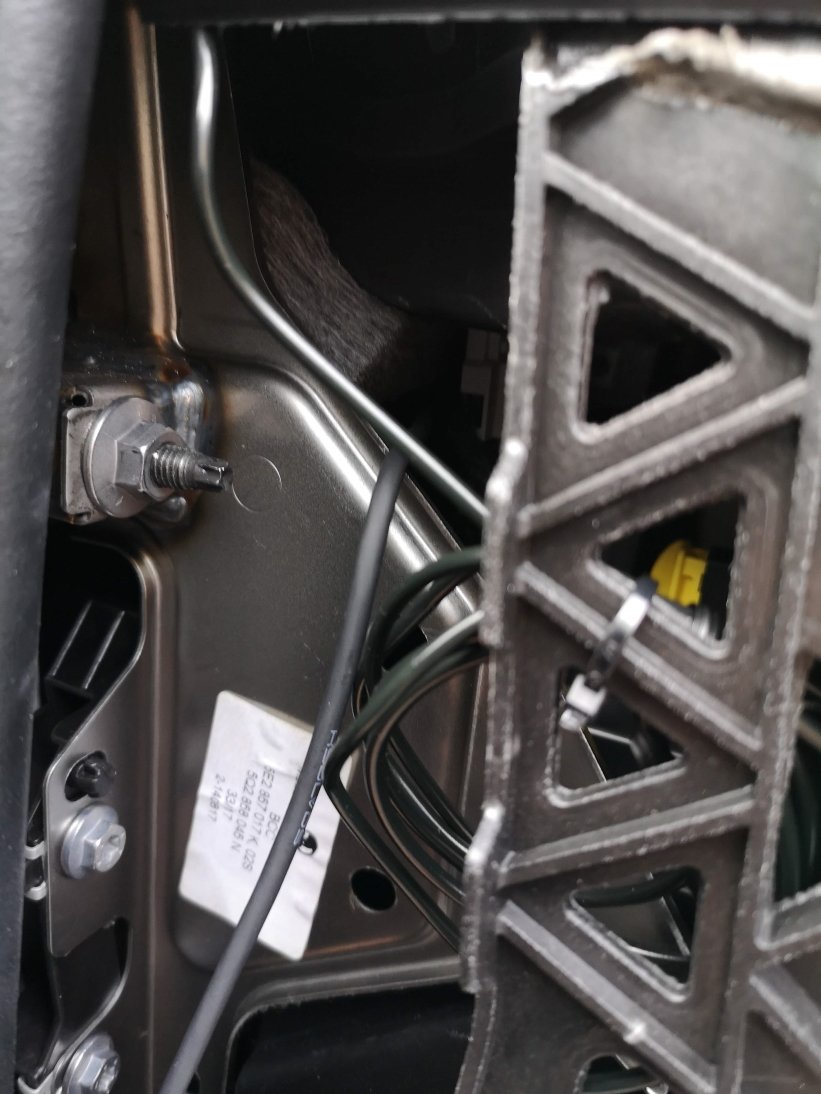
As there seems to be a lot of people asking questions about this lately, I thought I'd put together a quick guide showing how I fitted my reverse camera to a facelift VRS hatchback. They way that i've fitted this will apply to most models, with the key differences being the size of handle (based upon car model year) and whether hatch or estate (but this is just inside trim differences), there may also be wiring loom differences for earlier cars or none VRS models. I've benefited from info from these forums so hopefully this will be useful to others. I am by no means an expert & I won't be able to answer all of your questions, hopefully others will chip in and can add other info as well. First of all, this is the camera that I ordered for my MY 2017 VRS (Camera A/Handle A): https://www.aliexpress.com/item/4000230897829.html?spm=a2g0s.9042311.0.0.40694c4dTEPT93 (link may no longer be valid when you read this so screenshot below) No programming is required for this camera and it supports dynamic reverse guidelines Tools: Trim removal tools would be useful, but otherwise plastic tool that won't mark your car, or screwdrivers or similar with masking tape over the end. A T20 torx head tool is required if you have a hatchback to remove the pulldown boot strap Cable rods are very useful, I couldn't have fitted through the roof lining without. Stereo removal tools unless they come with your camera kit Cable route - I went with an OEM route for my cabling, following existing cables through the roofliner and out to the back as show by the red line below. The camera: The first thing that I did was to check that the boot release switch was working on the new unit - there's no way you want to wire this in and find it is faulty. You'll need to start removing the boot trim to access it. Remove the plastic clips from the lower boot trim- this consists of a few plastic clips which easily pop out with trim remover/screwdriver. There are 8 of these on the hatchback. After that start removing the upper plastic trim, this simply requires forces to release the metal clips. You don't need to remove all of this for now, but it will all need to come off later Remove the lower upholstered trim covering the tailgate. More metal clips - work your way around. You'll also need to remove the pull down strap with the T20 torx head. When this is down you should be able to drop the boot liner which will give access to the boot release handle. This can be awkward to remove, but can be done by pushing in the clip on one on the ends whilst also pushing down on the handle from the inside (ignore the clips along its length) - it should then pop out. Repeat for the other side. Unplug the harness and plug the new handle in - check the release switch works. You can either now push the new handle in until it clips, or leave it out to test the video connection later before fitting. To wire it in Remove the glovebox (open, rock left to right whilst pulling up & you'll hear the bottom clips release. Raise the glovebox lid up and inside the housing and reach in and remove the dampening on the left hand side) Use the stereo release keys to release the multimedia unit. The kit used here comes with a replacement harness that sits between the original one and the media unit & includes the video feed cable. Some people have removed the upper glovebox section to provide more access, be careful not to unplug the airbag connector if you do this. This can be fiddly, but I found the best way was to lie on my back with my head in footwell looking up at the unit from underneath. With the media unit slid fowards this gives access to the harness. It's the large one at the bottom and there is a locking connecting that needs to be pushed backwards to release. Check how it works on your replacement harness. Unplug old harness and plug it in to one end of the new one, push the harness in to the void and plug the new connector block in to the media unit. This took me a while to get it all to fit in. When done you can now test the video feed to the rear camera before your start wiring it in permanently. I took the camera cable over the top of the fusebox cage & out through the side panel I then ran the cable up the A Pillar to the roof lining and all the way to the end. Cable rods were really useful at this point, especially to get around the B pillar , and to go from the end of the roof liner through the cable exit point behind the rubber trunking where the original boot cables are. You can also run the cable in the trim above the sill and work your way back up to the roof lining on the C pillar. When you get to the end of the roof lining you'll need to unclip the rubber gator at the top of the boot so you can get the cable out of the roof liner and in to the boot via this gator. If you install the same way as me you only need to peel the roof liner down a few cm, being careful not to deform or damage it and you'll see the OEM cables behind. Once you've got the cable this far it's a case of feeding it through the rubber gator, up the side of the boot and over to the handle; connect the video cable and tidying up any spare cable. Everything should now be up and running. Retrace your steps to refit your trim. You now have a fully working reverse camera, activated when reverse is selected and with dynamic guidelines. The parking sensor guide now shifts to the left of the screen the same as an OEM reverse camera. I will come back and re-edit this tomorrow and resize pics as it's getting late. I'll tidy up any errors as I see them so please don't jump on me straight away!


 1 point
 -
1 pointA stage 1 mapped 245 2.0 TSI will make 480Nm and theoretically out -accelerate the hybrid.1 point
-
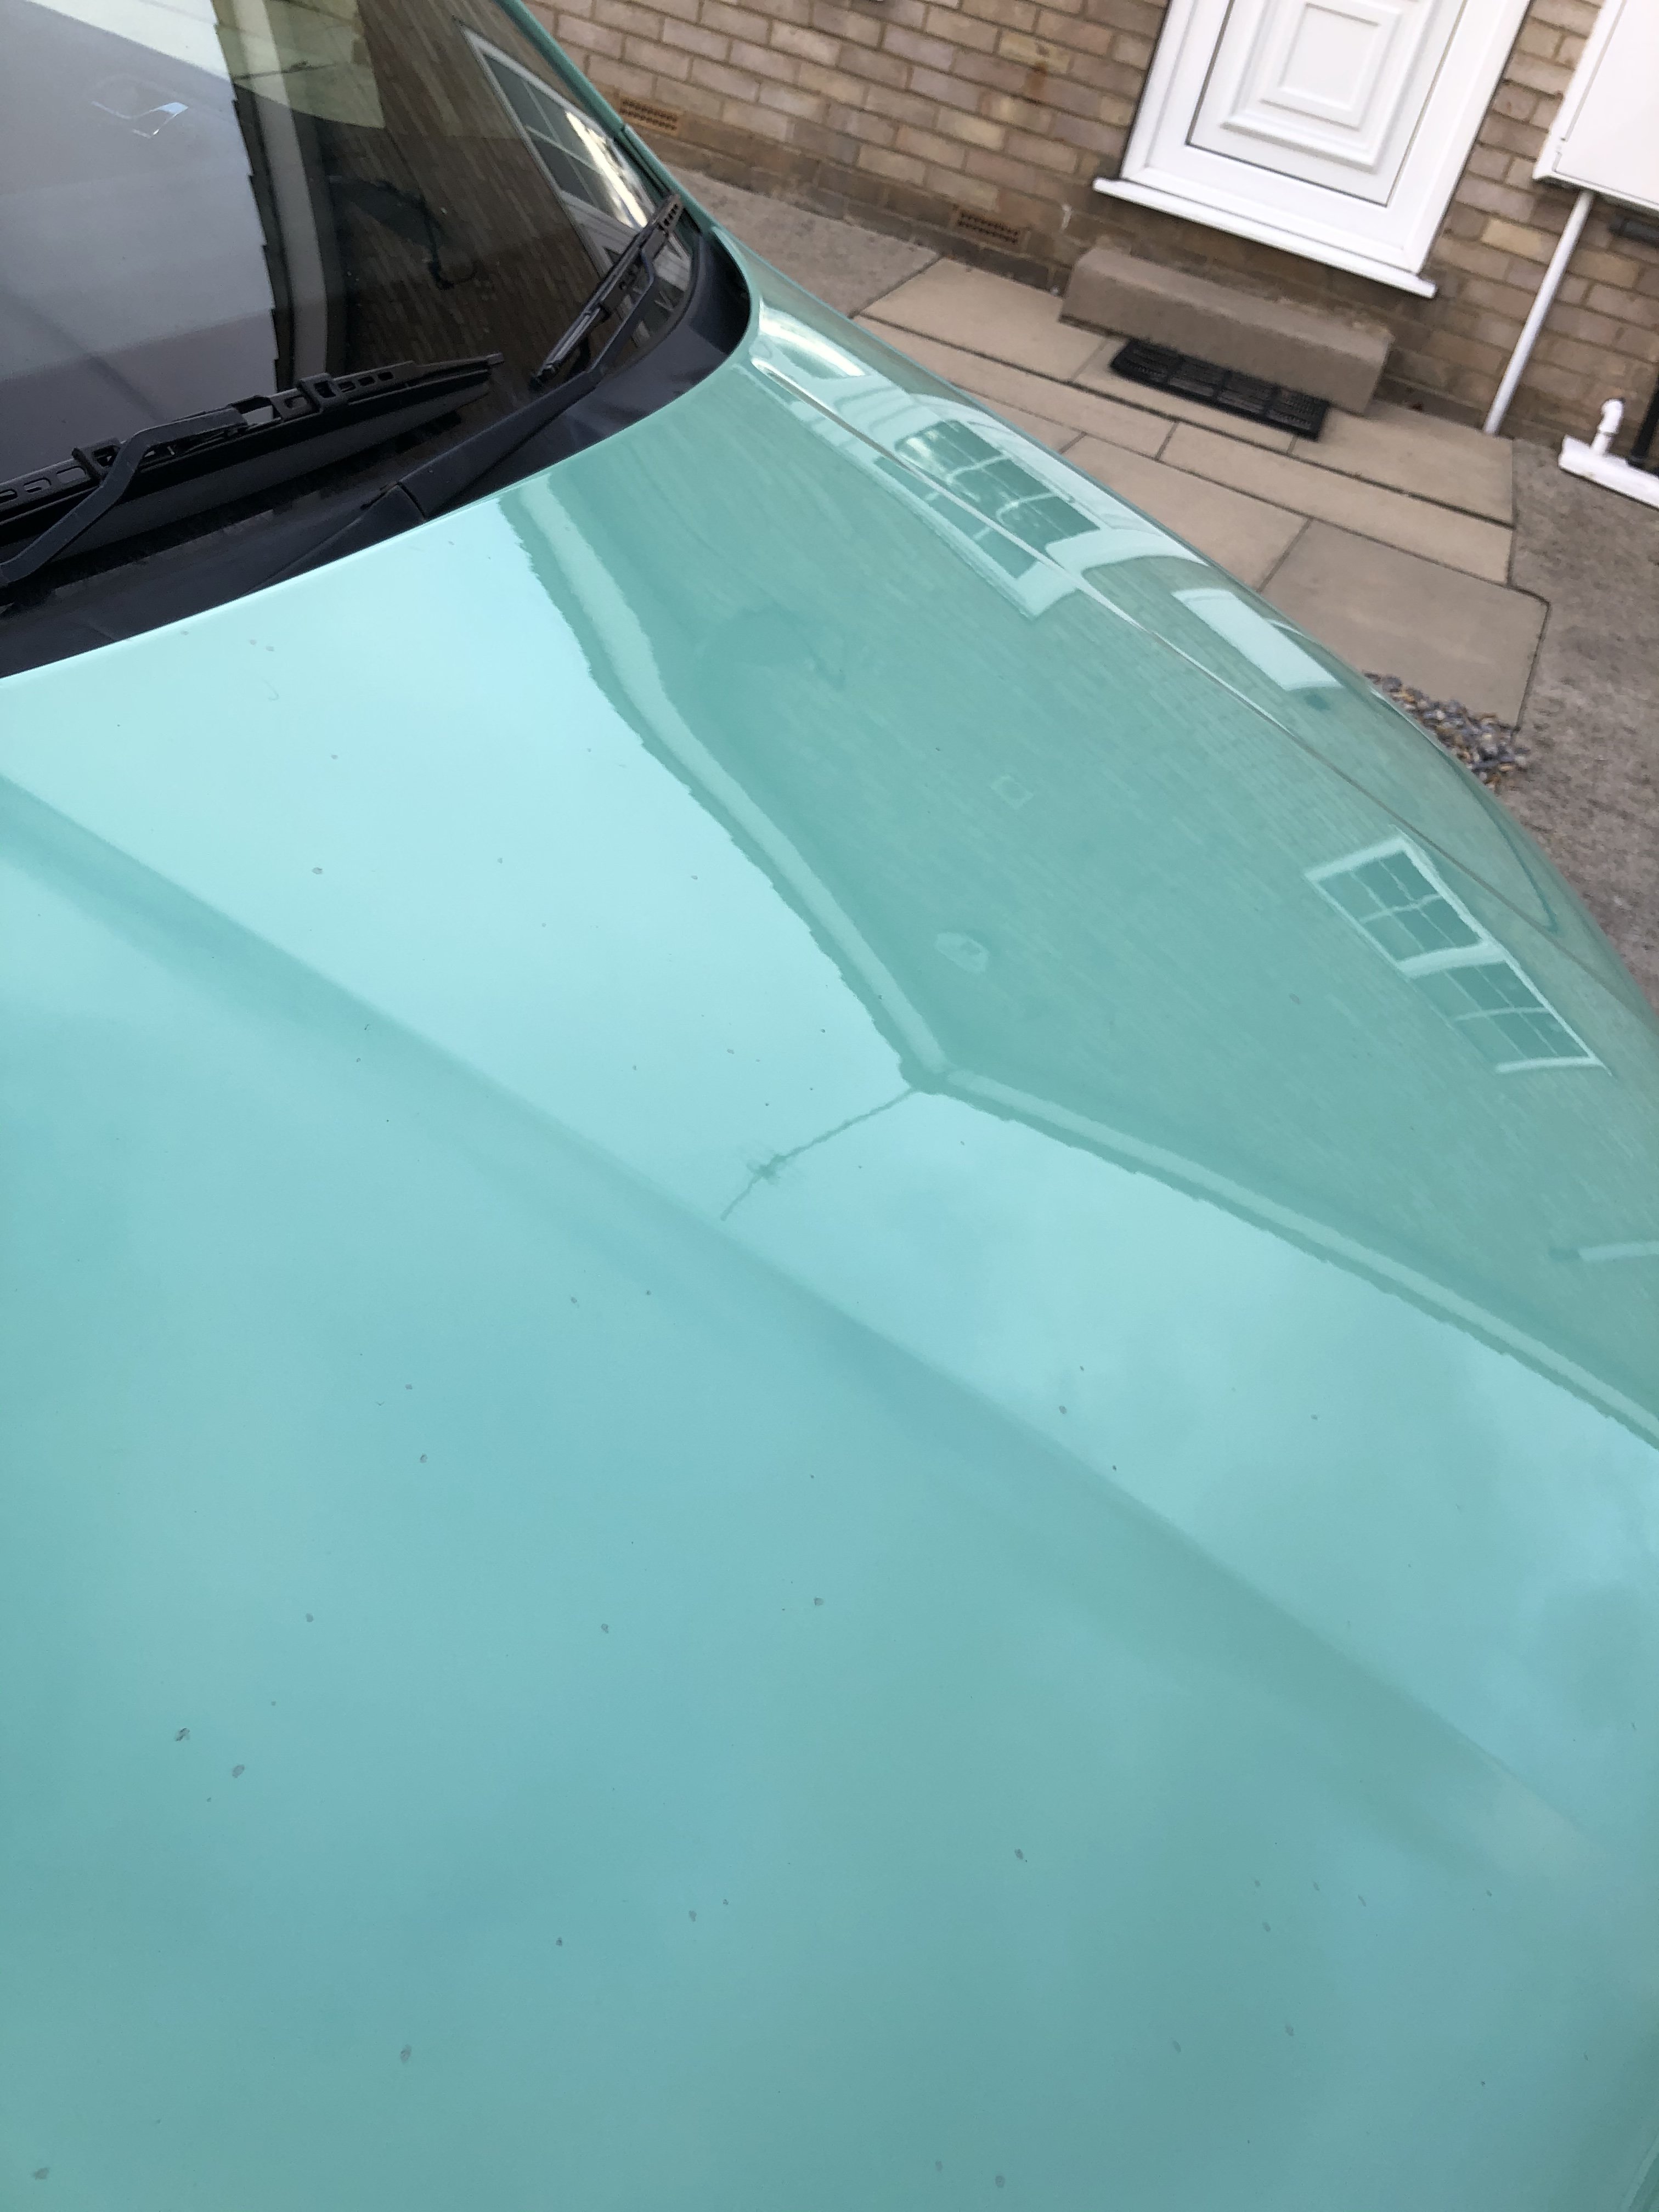
Pro, as well beyond me. i thought pretty cheap £400 as there was probably 12 little dinks Plus the weird crease in bonnet1 point
-
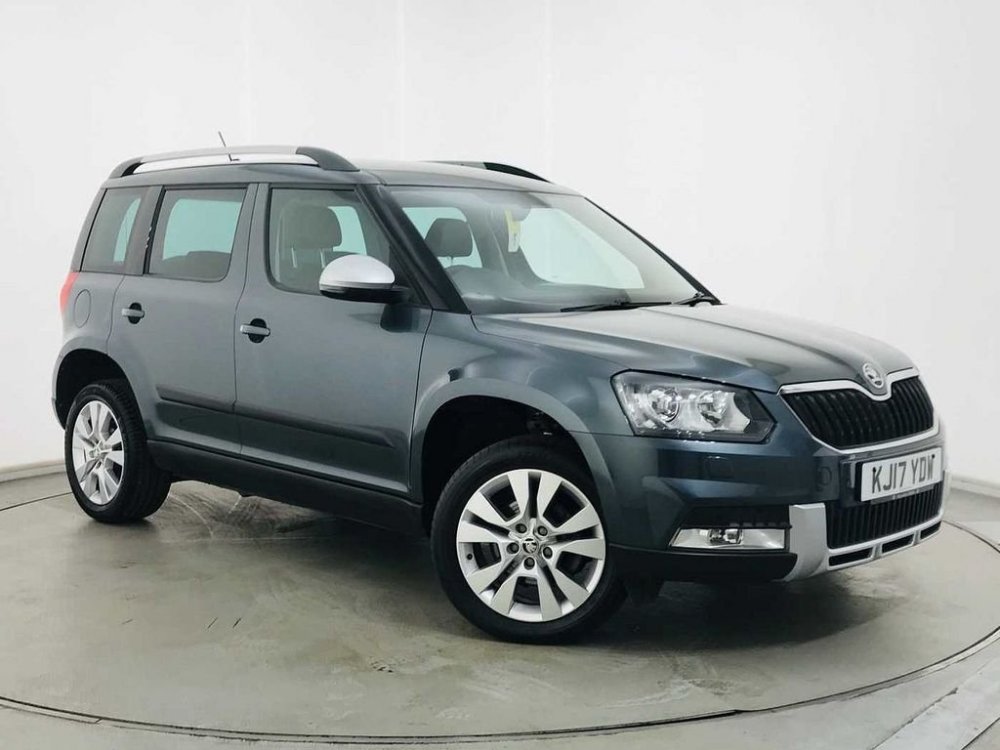
1 pointFinally picked up the Yeti from the dealer today. Wasn't supposed to be getting it until next Friday when the wifes redundancy money gets paid, but with potential lockdown restrictions coming in where I live I wanted to get it sooner rather than later. Thankfully my mother stepped in and lent me the cash to pay for it. I ended up putting some of the purchase price on Skoda/VW finance to get the warranty extended by a year and two services for £79. I will be withdrawing from the finance in a day or two and settling the account. Had a nice drive home in it, now got to read the handbook to learn whats what and get Apple CarPlay working. First expense will be Haldex clean, Skoda have done the 3 yr Haldex service but probably won't have cleaned the sieve. Then I'll be getting a towbar fitted for the caravan, and a Hatchbag boot liner for the dog. 2017 Yeti 2.0L 4x4 150 DSG SE L OUTDOOR DRIVE - PEARL GREY
 1 point
 -
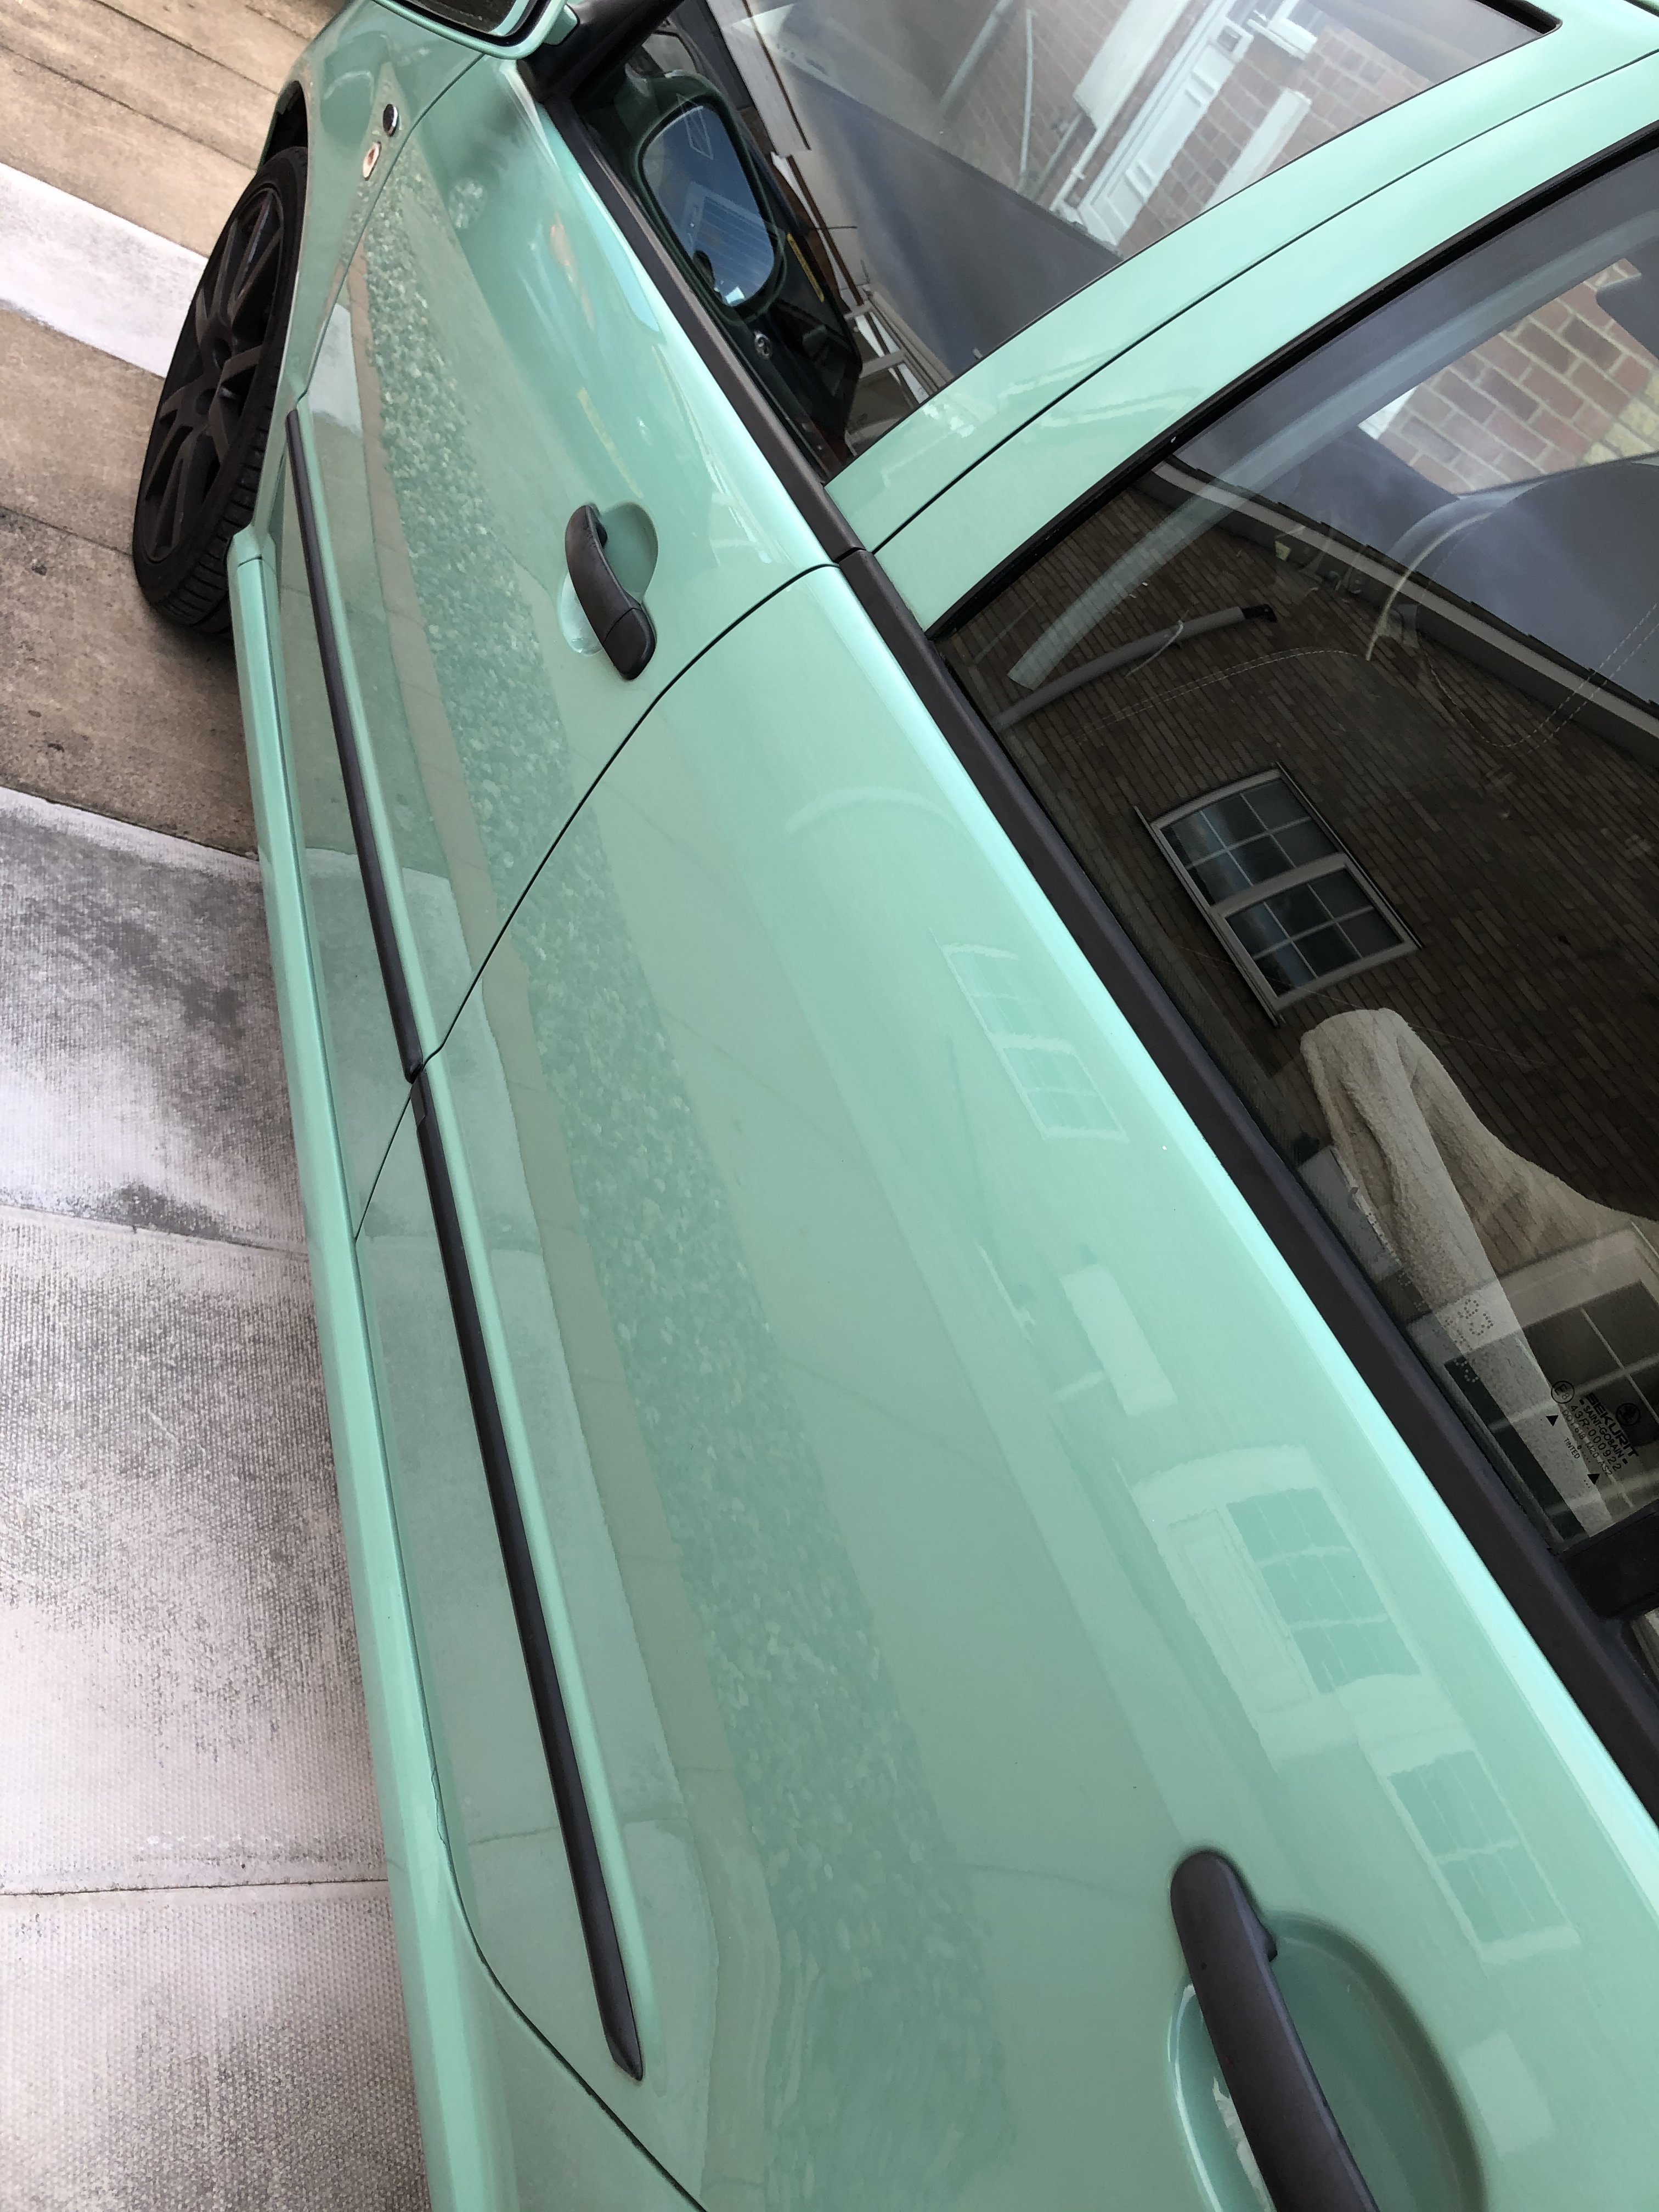
1 pointLast time I took it for a wash was a month ago. And just last week I used glass cleaner that I had bought from Halfords1 point
-
1 pointAre you serious about the smell of vinegar? I would not bother then. You wet a cloth with vinegar and wipe the window and it cleans it. Or kitchen towel. Just as you did surely with the Halfords Glass Cleaner. Your Dads and others might not have what ever was used on your screen. I would be getting the windscreen wash out that you have and fill with what you usually use so you know what is what.1 point
-
1 pointLooks like your Wash & Wax from the car wash means you need to be really cleaning your windscreen after using it. I would try Vinegar if there is any in the house to cleanse the screen well.1 point
-
Is it a 87 litre tank, so a few gallon still in before filling?1 point
-
It doesn't work like that. I'm becoming less and less a fan of what OBD11 does the more I see posts like this. Coding is like playing with the Windows Registry. Some stuff seems trivially simple and some hives like HKEY_LOCAL_MACHINE exist for all computers. But where HP might add a specific tree "HP", it would be a little... obtuse to expect Lenovo to do the same or MSI. Just because it's a Windows 10 machine doesn't mean any changes you make are going to work and be without side-effects. You may or may not be able to see or experience those side-effects immediately. The registry may or may not be case-sensitive. You won't know until you try and even then it might not be clear without damage, like not being able to start the computer up any more. Having a backup or plan b starts to be important at that point. Back to VCDS: reading the VIN is trivial as it's in the top level of the ECU. Connecting the VIN to a setup and / or software and firmware versions is something that I see as being well beyond both the remit and capability of the log-reading companies and comes across as naive. It's not even in the capabilities of ECP and co, whose business model depends on them selling you the right thing, and even dealer information isn't always 100%. So why should it be possible for a small outfit to know definitively? If you don't know what you are doing, you should leave it alone. If you understand what you *want* and *why* it should work like that, then you'll also know that you should be taking care to ensure you have a record of "was" before anything changes and the changes you make. Understanding the principles of "leuchtfunktion", that side and tail and DRL lights are all seperate and each side is treated differently, that the BCM is trying to play nicely with the various electronic systems of the car, that the complexity of the systems involved is significant - the connection between headlight switch and LED is at the level of "tell the LED to turn on" being sent by bus and no longer "just" a relay or switch connecting. Like the facelift wasn't just a facelift and 2016 cars differ from 2015 ones (MIB version is a starting point), the facelift brought a whole bunch of changes - this is non-trivial information which seems irrelevant to those who are not versed in the ins and outs but may actually be quite important. Long coding gets around some of this by allowing you to understand that you changed the value of Byte 1 from 0x0011 to 0x0111, which is the better way to do it. Then you really should have a note of what the preceding state was and what you did to "fix" it.1 point
-
1 point
-
1 pointMy August 2017 Vrs245 when tested on a rolling road using 99 octane petrol actually produced 400nm and not the 370nm Skoda claimed at the time. The new hybrid is just over 1,700kg with raised suspension and has a top speed of 139mph for £35,000 for the hatch. My 2017 weighed 1,370kg and cost £27,595 and was very well specified as standard. It would also do an indicated 160mph as standard, 168mph at stage 1 and 177mph at stage 2. Better to spend £35,000 on a Superb IMHO.1 point
-
Have a good holiday and I hope the tests are negative. What happens if there is a +ve result? Will you be prevented from travelling or is it a case of self confinement during and after the holiday?1 point
-
1 pointYou also need to understand the maximum permitted weight of caravan your car can tow - I think it's 1500kg but your handbook will confirm.1 point
-
1 point
-
Hi Shy, you said you liked a challenge and I remembered this thread from the archives. You and your family have a good break.1 point
-
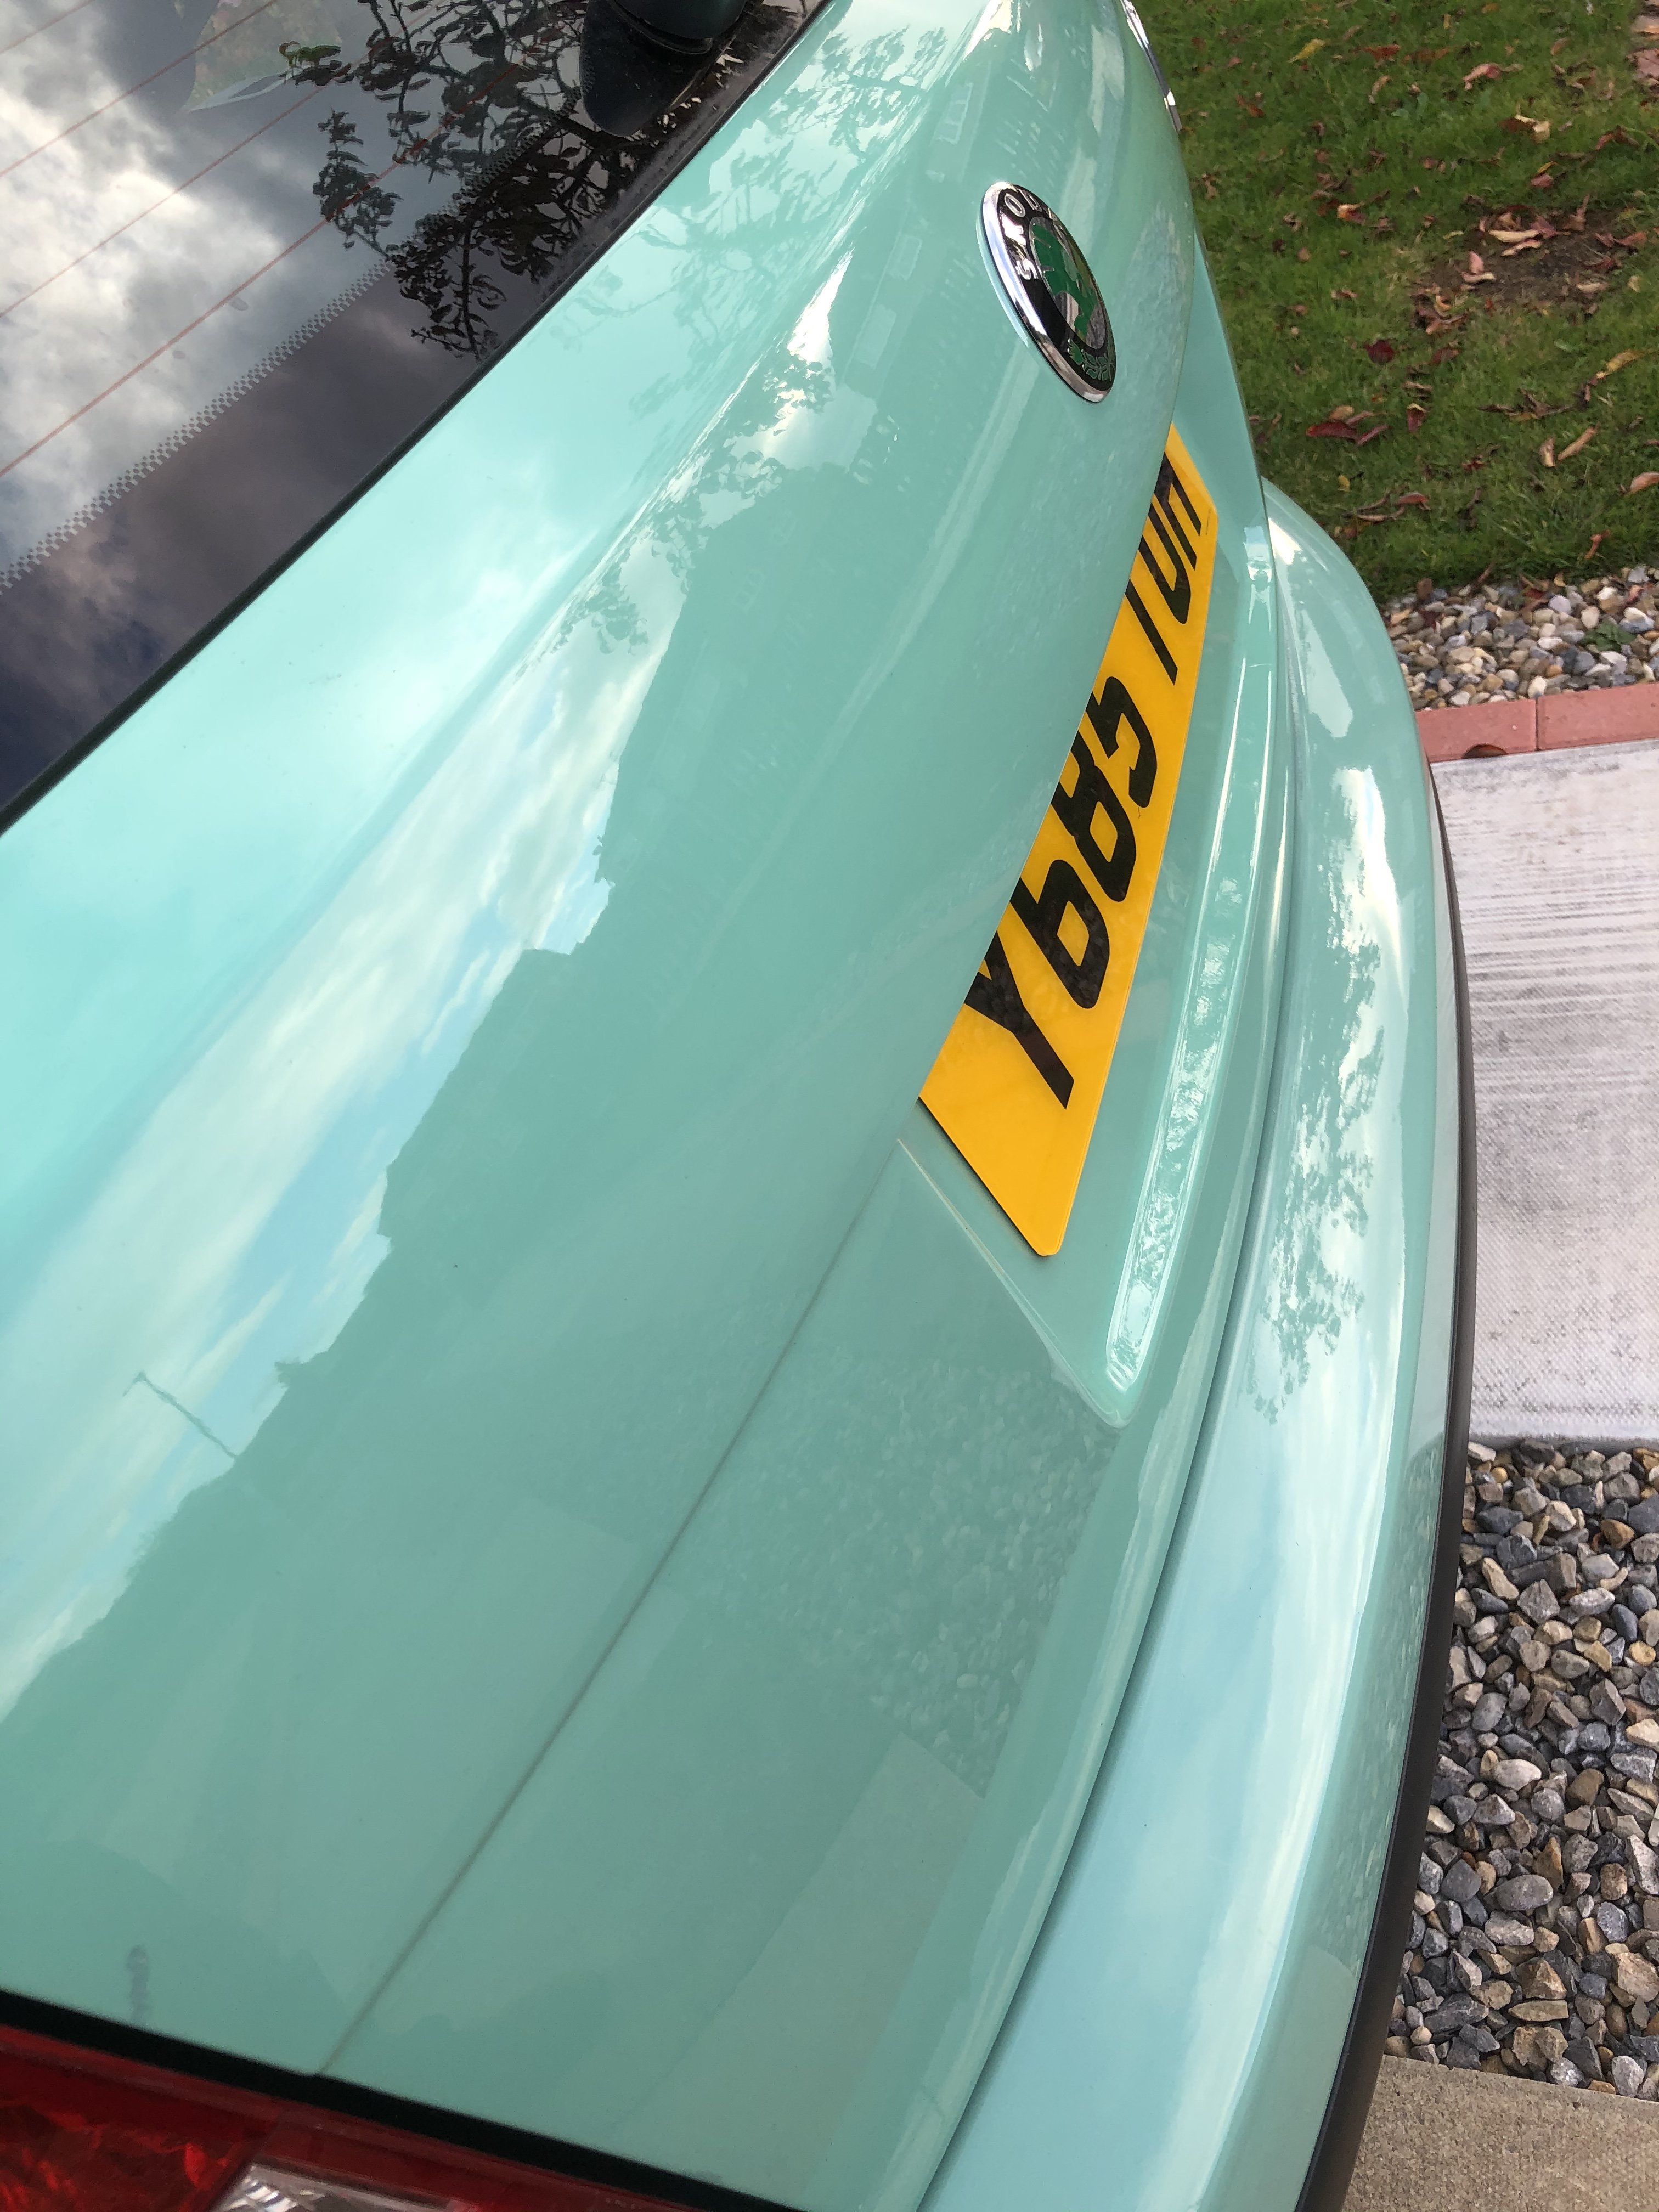
1 pointfrom what I understand with the yellow cars, the colour fades under the clear coat thus meaning a full respray i may be wrong, but it’s what I am lead to believe.1 point
-
They feel like you are driving a taller Fabia Estate. Which you kind of are. They can be modded just like a Fabia wheel / suspension wise and be used as campers as members have and as shown in the Roomster & Roomster Project sections.1 point
-
I strongly advise you don't use the OBD11 'one click' mods because of the number of times I've tread people on here having problems caused by them (there's a new thread today from someone). As you say - more research required to find the exact coding/adaptation changes needed for the mods you want. BTW it's worth checking Golf 7 forums too - since the Octavia 3 shares many electronics modules.1 point
-
I've owned two Roomsters and I currently own a Yeti. There is definitely more room in a Roomster, particularly if you intend to carry a spare wheel. Roomster's spare wheel lives in a well in the floor of the boot, so doesn't take up any boot space. Yeti's spare wheel lives on the floor of the boot which if carried, effectively raises the floor of the boot to the level of the sill. The spare wheel shown in e-Roottoot's first picture is not in the manufacturer's intended location. Also note the sill in Roomster's boot is closer to the ground than Yeti's (around 6" from memory) which makes loading easier. Hope this helps.1 point
-
1 pointNot everyone is loaded... Some folk have to make compromises if possible where they can. Maybe the op needs to. Very hard times for some.1 point
-
1 pointAsk Skoda for the service history they hold on their system.1 point
-
1 point
-
1 pointAmazing modifications and a few of like but a practical question before I do anything and with 88 pages sorry if you have answered but how do you get on with insurance? It must be an enormous list to declare so I assume it needs a specialist provider?1 point
-
Single manual strut to hold the heavy bonnet and NO Matrix LED headlights available even as an option. Penny pinching again from VAG compared to the Tiguan R.1 point
-
1 pointHi, Gabriel, yes I'm Spanish as well myself and I had a bit of nightmare time when we bought our previous car (Volvo XC60 2.4 AWD) while in the UK, as it was the same situation: 3 Pirelli Scorpio and one Pirelli P Zero Rosso. At least same brand. In the UK and other countries (Finland in this case) you are allowed to mix and match as long as the tyres are of the same specification, ie, summers or winters, same speed rating and same width-wall ratio percentage. Obviously I knew about the rule in Spain of not being able to mix tyres and we always were going with the ferry back there for holidays in the summer, so I was wondering and pondering what to do until a friend of mine that work for the green chaps (Guardia Civil) told me not to worry, as they usually don't look at that, but also as a foreign plate car I am not obliged to follow that ruling as long as the MOT (ITV in Spain) was OK and in date, basically legal in your country (EU countries only, by the looks of it). Anyway, I have read a bit more and it seems that before if the diameter of the tyres had more than a 3% diference, then it could be a problem with the diferencial and AWD systems, being Subaru a very picky one that would give you troubles no end until either the offending tyre was changed or the AWD system would pack up. And apparently having same size (235/45 18 in my case) doesn't warrant that as there is manufacturer's difference even amongst their own different models within a given brand. But also the pattern of the tyre matters as well. The P7s and the Ventus 3 seem to have very similar ones and apparently (correct me if not right), the Superb MKIII Haldex is gen 4 or 5, but in both VAG got rid of the problems they previous generations had with very tight operating margins meaning that the Haldex will fail if you were not running same tyres or the thread difference would be more than 3mm in any given tyre or axle combination (can't remember). Anyway, after all the reading and research I think it will be safe to just do what I thought, which is match thread depth next year with the missmatched tyres in the front, so they wear off quicker and then hopefully be able to change the 4 tyres at the same time. We don't do many kilometres (5000 so far since January) and mainly in highway with no crazy speeds (Finland has a mainly 80-100kph speed limit with some 120kph motorways nearing Helsinki and a fair amount of speed cameras). Unless, that is, the car starts veering from the perfect straight line that is doing now. Still want to hear from you guys about your experiences with summer tyres. The Michelin PS4 is deffinitely an option (thanks BAP33), although the most expensive one. I was thinking of Goodyear F1 assimetrics. I had them before and were quite OK. I also had Dunlops SP Sports that were also OK. Thanks and sorry for the loooooooooooong post ;).1 point
-
1 pointFind one with service history. They’re not rare, won’t be that hard to find one.1 point
-
1 pointDid you work the piston a few times to ensure that it is free, should there be anything on the piston surface under the boot it can get transferred back into the caliper bore causing stiction. Just be sure that when working a piston you do not force it out too far. There is also the chance that the flexible hose could have collapsed inside.1 point
-
I have just bought a 2014 mk3 1.6 tdi. I had the same problem with poor heater and discoloured coolant in the expansion tank. i tried the heater flap reset but this did not cure the problem. After trawling this forum it looked like the heater matrix was the fault. i checked the coolant pipes at the bulkhead as they go through into the heater matrix and they were just better than luke warm. I did a ring round of the usual suppliers and the best i could get a matrix for was £90 inc vat. I'm in the trade so this was with trade discount. buycarparts.co.uk kept popping up on my browser so i thought i would take a look. The company is based in Germany but their prices are much much cheaper than anyone else. So i typed my reg number in and was given something like 15 options of manufacturer of a heater matrix that would fit my car. I opted for the cheapest one £20.99 inc vat plus delivery of £8.50 3-5 working days. it was manufactured by VAN WEZEL based in Belgium (checked their website). Part came 4 days later unboxed it and all looked ok. drained the coolant from the car and removed and binned the mit silikat expansion bottle. a Quick shake of the bottle revealed the bag was still in there but it was the one placed between the walls of the bottle so no chance of getting it out. A new bottle was sourced from GSF as they had a deal on but in hindsight i should have ordered it from Germany and just paid one lot of postage. Coolant system was flushed out with the hose pipe until it ran clear and left to drain. Moving inside the car i removed the glovebox which was very tricky but i later watched a youtube video and it could have been a lot easier but i got it out with no damage and all of my skin still on my fingers. The side trim for the centre console was removed, one t20 screw and the panel just unclipped. there was a foam trim under the heater motor that was held in with two plastic wing nut type screws this came off to reveal the heater motor that needs to come out to enable the matrix to be removed. The motor is held in with 3 t20 screws and there are two clips that need easing away to enable the heater to drop down but before this you need to unplug the power connector underneath. Sorry forgot to say before the heater motor comes out there is a heater vent that directs air to the passenger feet, this needs to come out and there is one t20 screw that holds it in, the screw faces you just by the fusebox, once this is out you have to contort the vent out after pulling it free of the heater box. It was a bit fiddly but it came out ok. With all these parts out if you look towards the centre console side of the dash you will see the heater matrix pipes. covering the heater matrix is an oblong black cover held on with 3 t20 screws. the screws need removing and there are 3clips that also secure the panel. I covered the floor area with a plastic sheet to contain any leaks from when the matrix pipes were removed. The pipes are secured by a clip and a clamp. the top pipe has a clip that has a locking tab that needs to be lifted before the clip can be slid backwards to remove. The bottom pipe has a clamp that is held together with a 3mm allen bolt. Before removing the pipes there is a plastic piece that bolts to the transmission tunnel (it's what the t20 screw that holds the centre console trim screws into) peel the carpet back and there are 2 10mm nuts that need to be removed. Once this is out of the way it gives more movement of the heater pipes as they need to be moved to enable the matrix to slide out. A quick tug on the pipes frees them from the matrix along with 200ml of coolant ( i had an old ice cream tub on hand to catch as much as i could). Once the pipes are removed you can then unclip the oblong cover that covers the end of the matrix. It has a green seal all the way around presumably to help seal the air into the heater box. As stated earlier the pipes need to be jiggled around and the matrix should slide out towards the heater motor housing, it will hit the housing but then a slight movement downwards will let it come past and the matrix is out. I looked inside and could not see any blockages but when i filled it with water it did not flow very well. Fitting the new matrix is basically a reversal of the procedure above. things to be careful about are: when sliding the new matrix back in be sure to get your head right up behind the matrix to make sure the top pipe is not fouling the fins on the back of the matrix as this will hinder it going back in. The new matrix i got seemed a little tighter to fit than the old one that came out but i took my time and made sure it went in evenly to make sure it was fully home. remember then the oblong cover needs to go on before any pipes are fitted. I cleaned the pipes and re used the old o ring seals and just put a tiny smear of rubber grease on the o rings which helped them slide back into the new matrix part number of the seal and clamp kit is 5Q0-898-400-A same part number whether sourced from VW SEAT or SKODA but VW are the cheapest at £5.51 whereas Seat and SKODA wanted £9.91!! getting the top clip on for the pipe was easy but the bottom one gave me a bit of pain. I think because it was slightly out of round where i had removed it but i took it back off and fitted it to the old matrix to make sure it was shaped properly. After all this i refilled the coolant and what i am about to type may not be to everyone's liking but i filled the coolant with G12 as it's what we use on the commercial vehicles we repair that have aluminium radiators. Also we run a fleet of VW caddy vans and i checked our 67 plate caddy that has the same engine as my octavia and the coolant tank on the caddy states G12?? Unfortunately i did not get any pictures but there are videos on youtube of this repair being done. Book time is 1.4hours, probably doable if you worked at skoda but i would allow 3 hours to comfortably do it. like most things if you take your time and watch youtube so you have an idea of what is involved then doing the matrix on one of these is not a scary prospect. Tools wise i used T20 screwdriver 10mm socket and ratchet 1/4 drive ratchet with T20 bit for rearmost heater motor screw Flat blade screwdriver 3mm allen key Torch and that's it! Heater now works a treat with heat evenly at both sides. Hope this helps1 point
-
I have a 2012 140cr and they would not work as bought - gave the bulb out warning. I had to fit resistors. I think it depends on your car's exact spec.1 point
-
1 pointI scanned that and cant see anything related to spare tyres, but whilst having a spare / kit is not a MOT requirement, if you have one it surely would have to be legal. Mine left the factory with a repair kit but was MOT'd twice with a spare tyre. A spare is far better as I found out when i got a puncture outside Glasgow 6pm a few years ago on my way back to East Yorkshire and was able to put a spare on and carry on my journey safely.1 point
-
Assuming you have climatronic (the full auto system), try a servo end-stop relearn. This process runs each air control servo to the ends to learn where they are. Hold down the AC and face-level vent button. The lights will flash alternately and all the vent flap servos will move and learn their end-stops. When the lights stop flashing, the process is complete. This video demonstrates it: Failing that, you'll need a scan with VAS or VCDS. I've previously had servo wiring fail (for the recirculate control, not the servo you're talking about) and got a message as below so VCDS might show you a failed servo or wiring: 9472881 - Motor for Fresh Air / Recirculated Air Flap B108B 71 [009] - Actuator stuck Confirmed - Tested Since Memory Clear 9472882 - Motor for Fresh Air / Recirculated Air Flap B108B 54 [009] - Missing Calibration / Basic Setting Confirmed - Tested Since Memory Clear 9476881 - Position Sensor for Fresh/Recirculated Flap Motor B109B 11 [008] - Short to Ground Intermittent - Confirmed - Tested Since Memory Clear1 point
-
1 pointScaremongering makes no sense, I've used high tensile steel wire inserts (helicoils) my entire professional life and I can categorically state that when used and installed correctly they are stronger than the material they're replacing. You don't know what you're talking about. In engineering **** does NOT just happen, **** happens for a reason, in this particular case there is no reason for your statement whatsoever.1 point
-
1 point20200917_165916 by geof worrall, on Flickr dog making choice out of vast options1 point
-
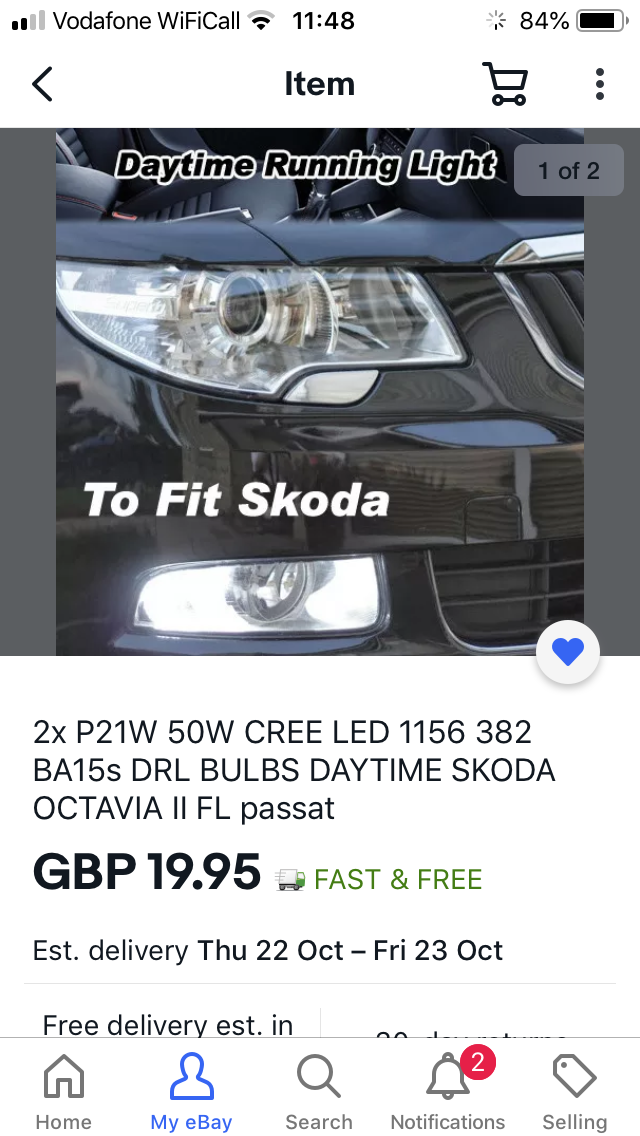
2 separate bulbs from memory I don’t recall the seller it was from eBay. Out of the 2 I got 1 failed quite quickly and was replaced promptly by the seller. It’s important for me they throw no bulb warning and need no additional resistors. I have been happy with them so far. Example auction picture attached. Remember to read how to remove the combined bulb holder it’s a little tricky. uTube your friend.
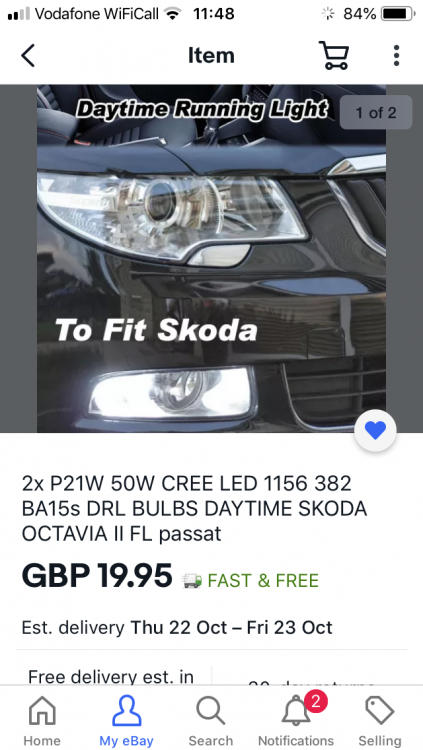 1 point
 -
Do you have halogen or like me bendy self levelling Xenons? When I purchased my s2 estate a few years back the fog/drl combo never llluninated it was always headlights. I had them coded back to DRL and headlights on when dark on auto. The DRLs are very weak and some people don’t like them.1 point
-
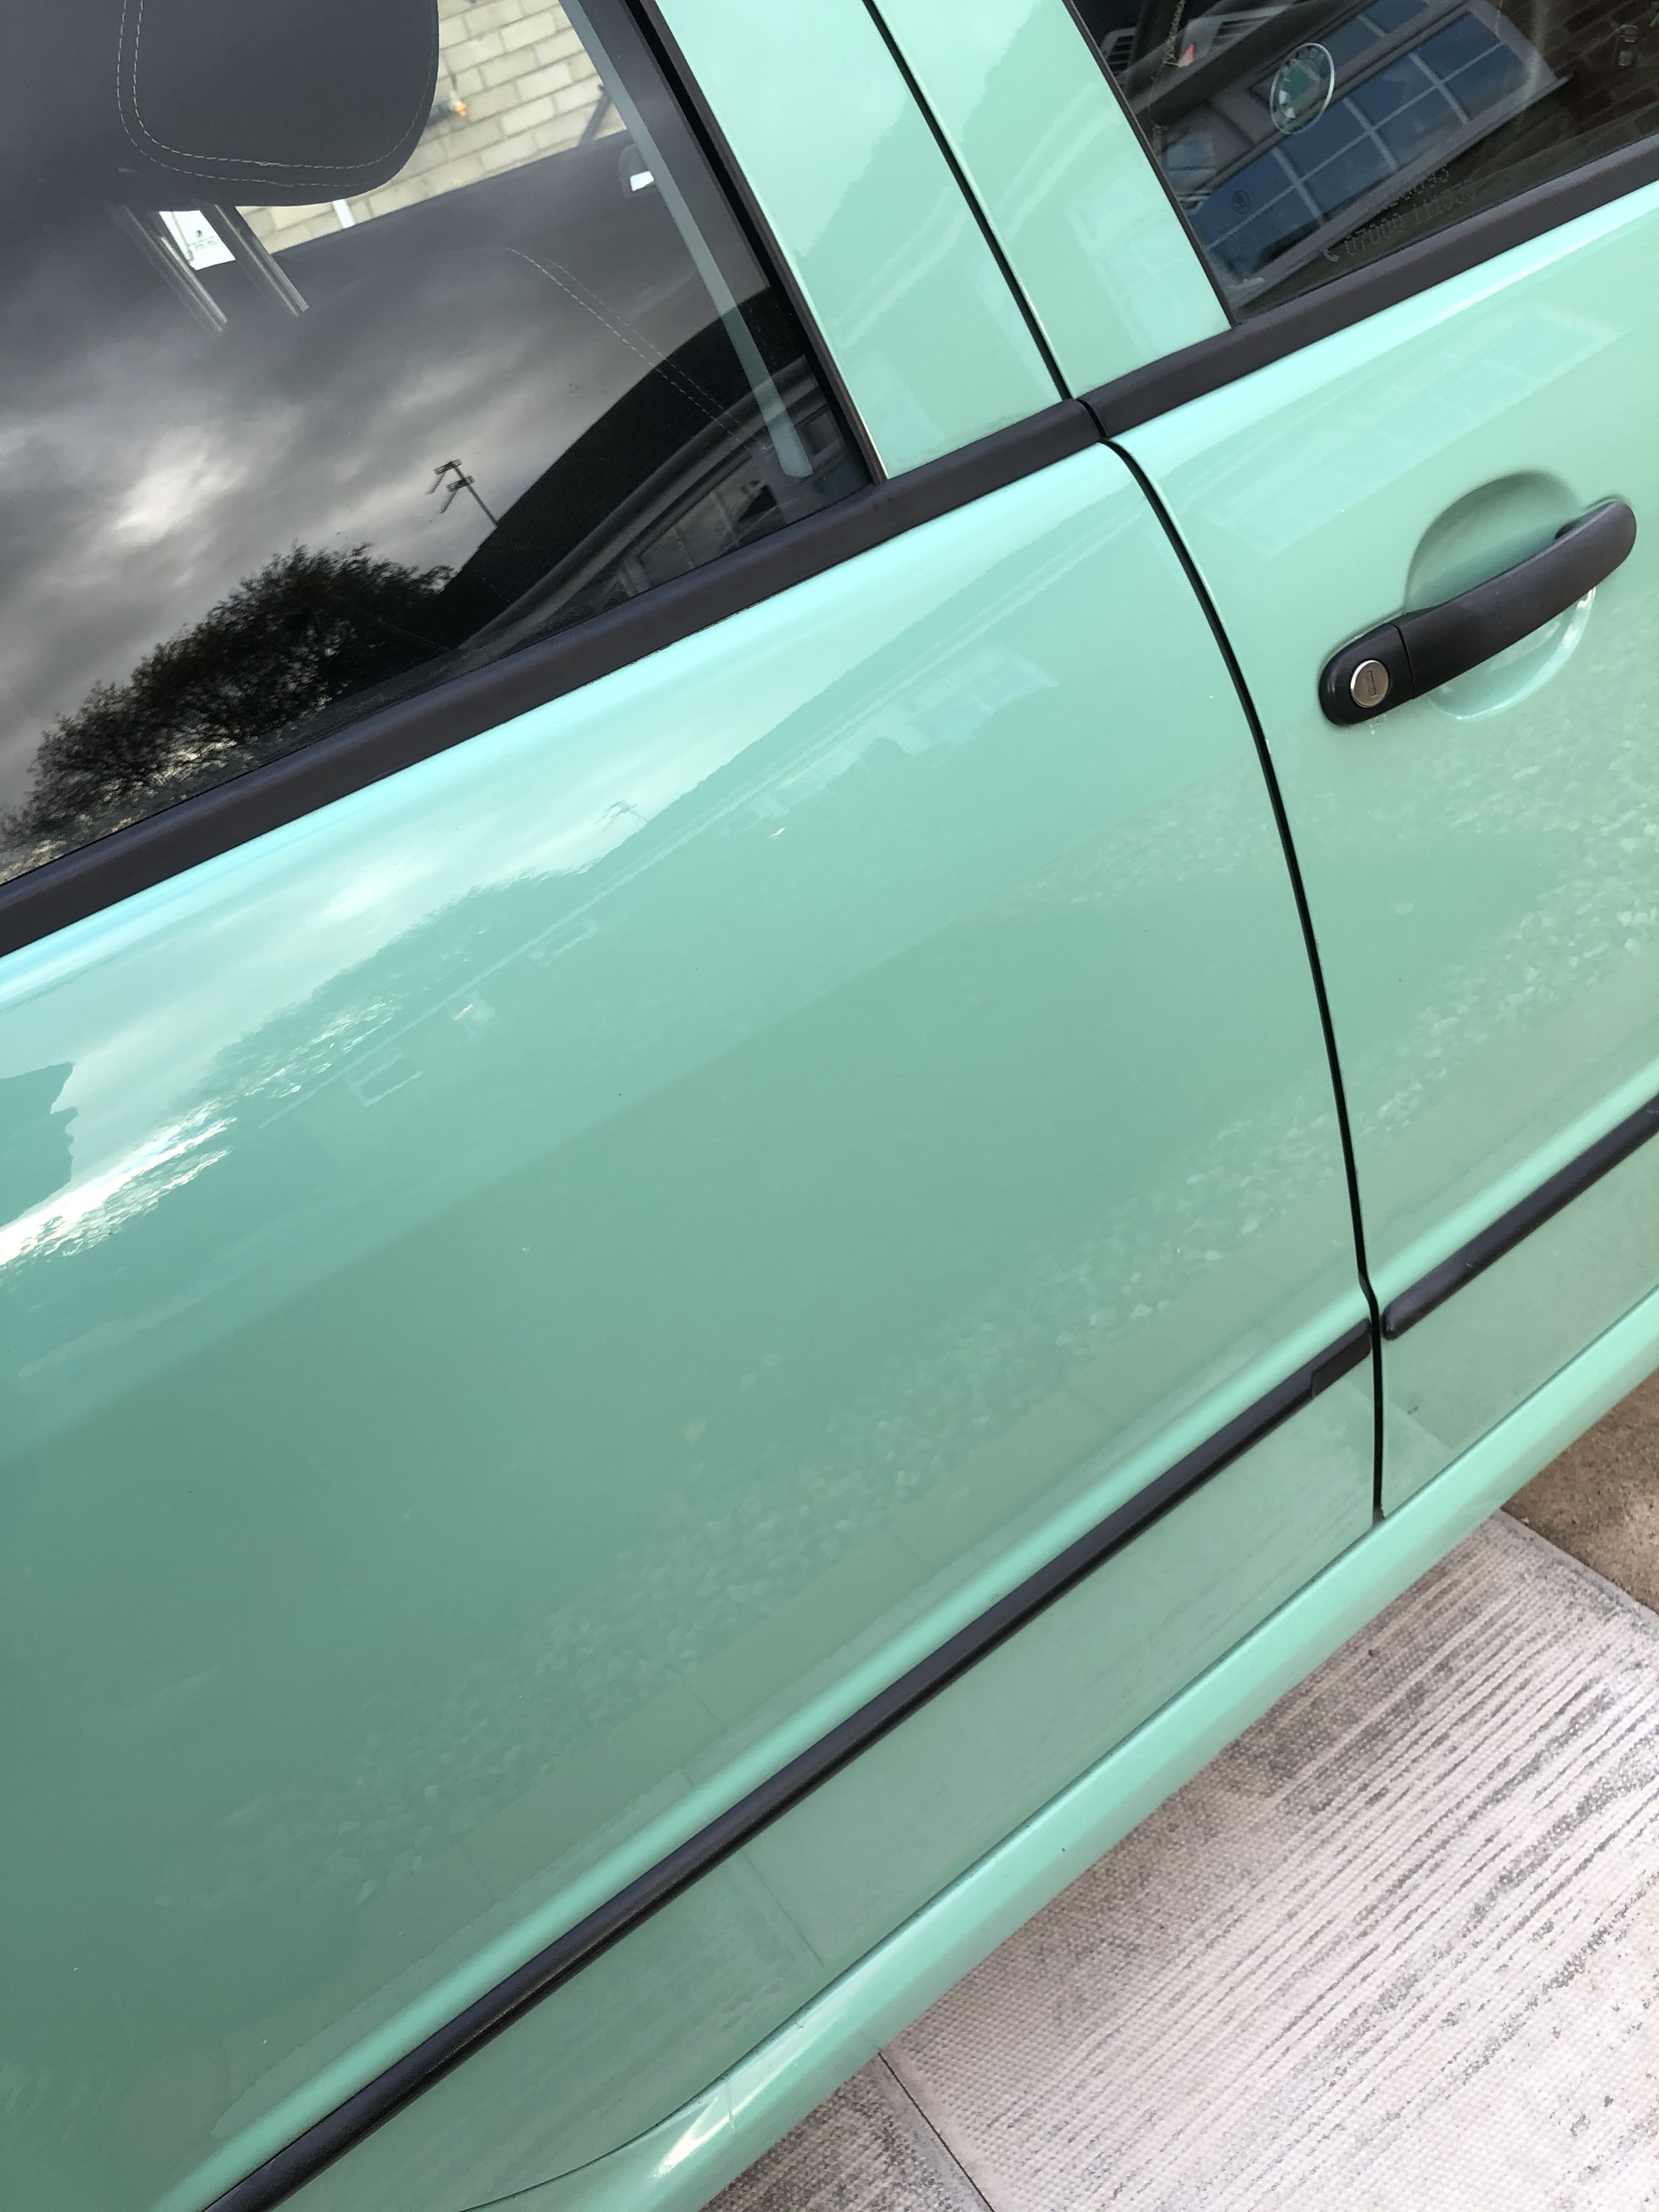
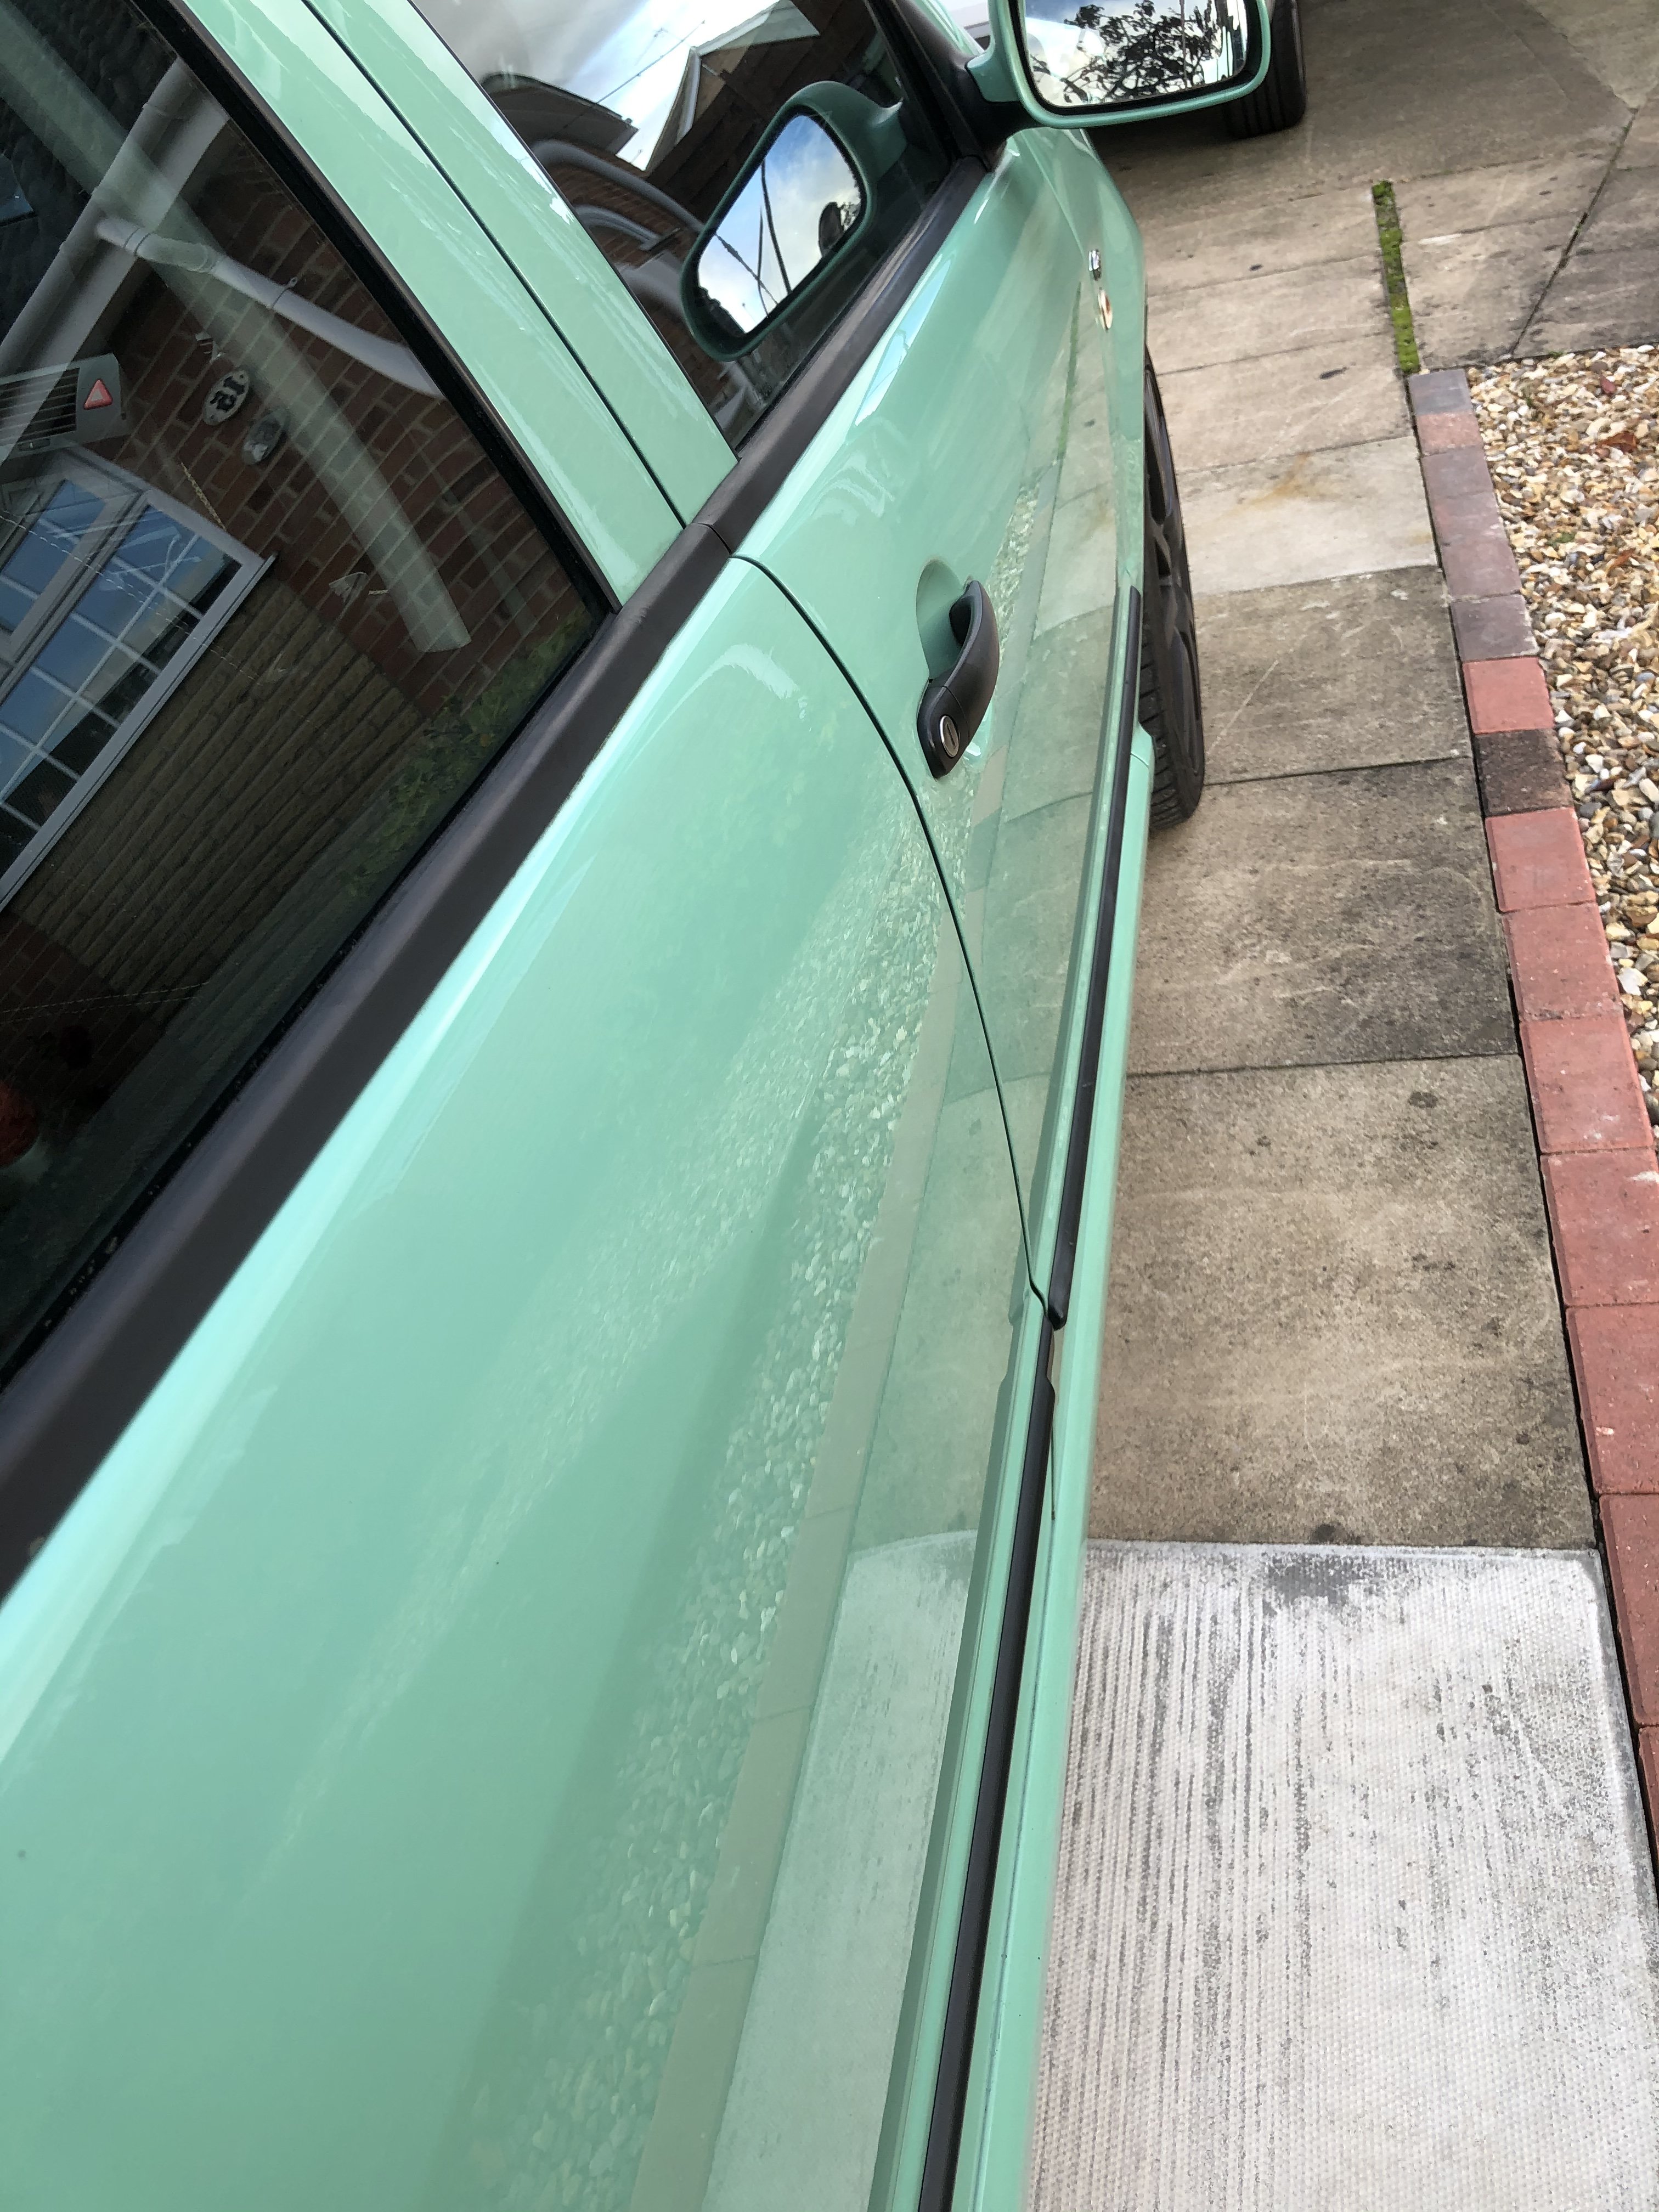
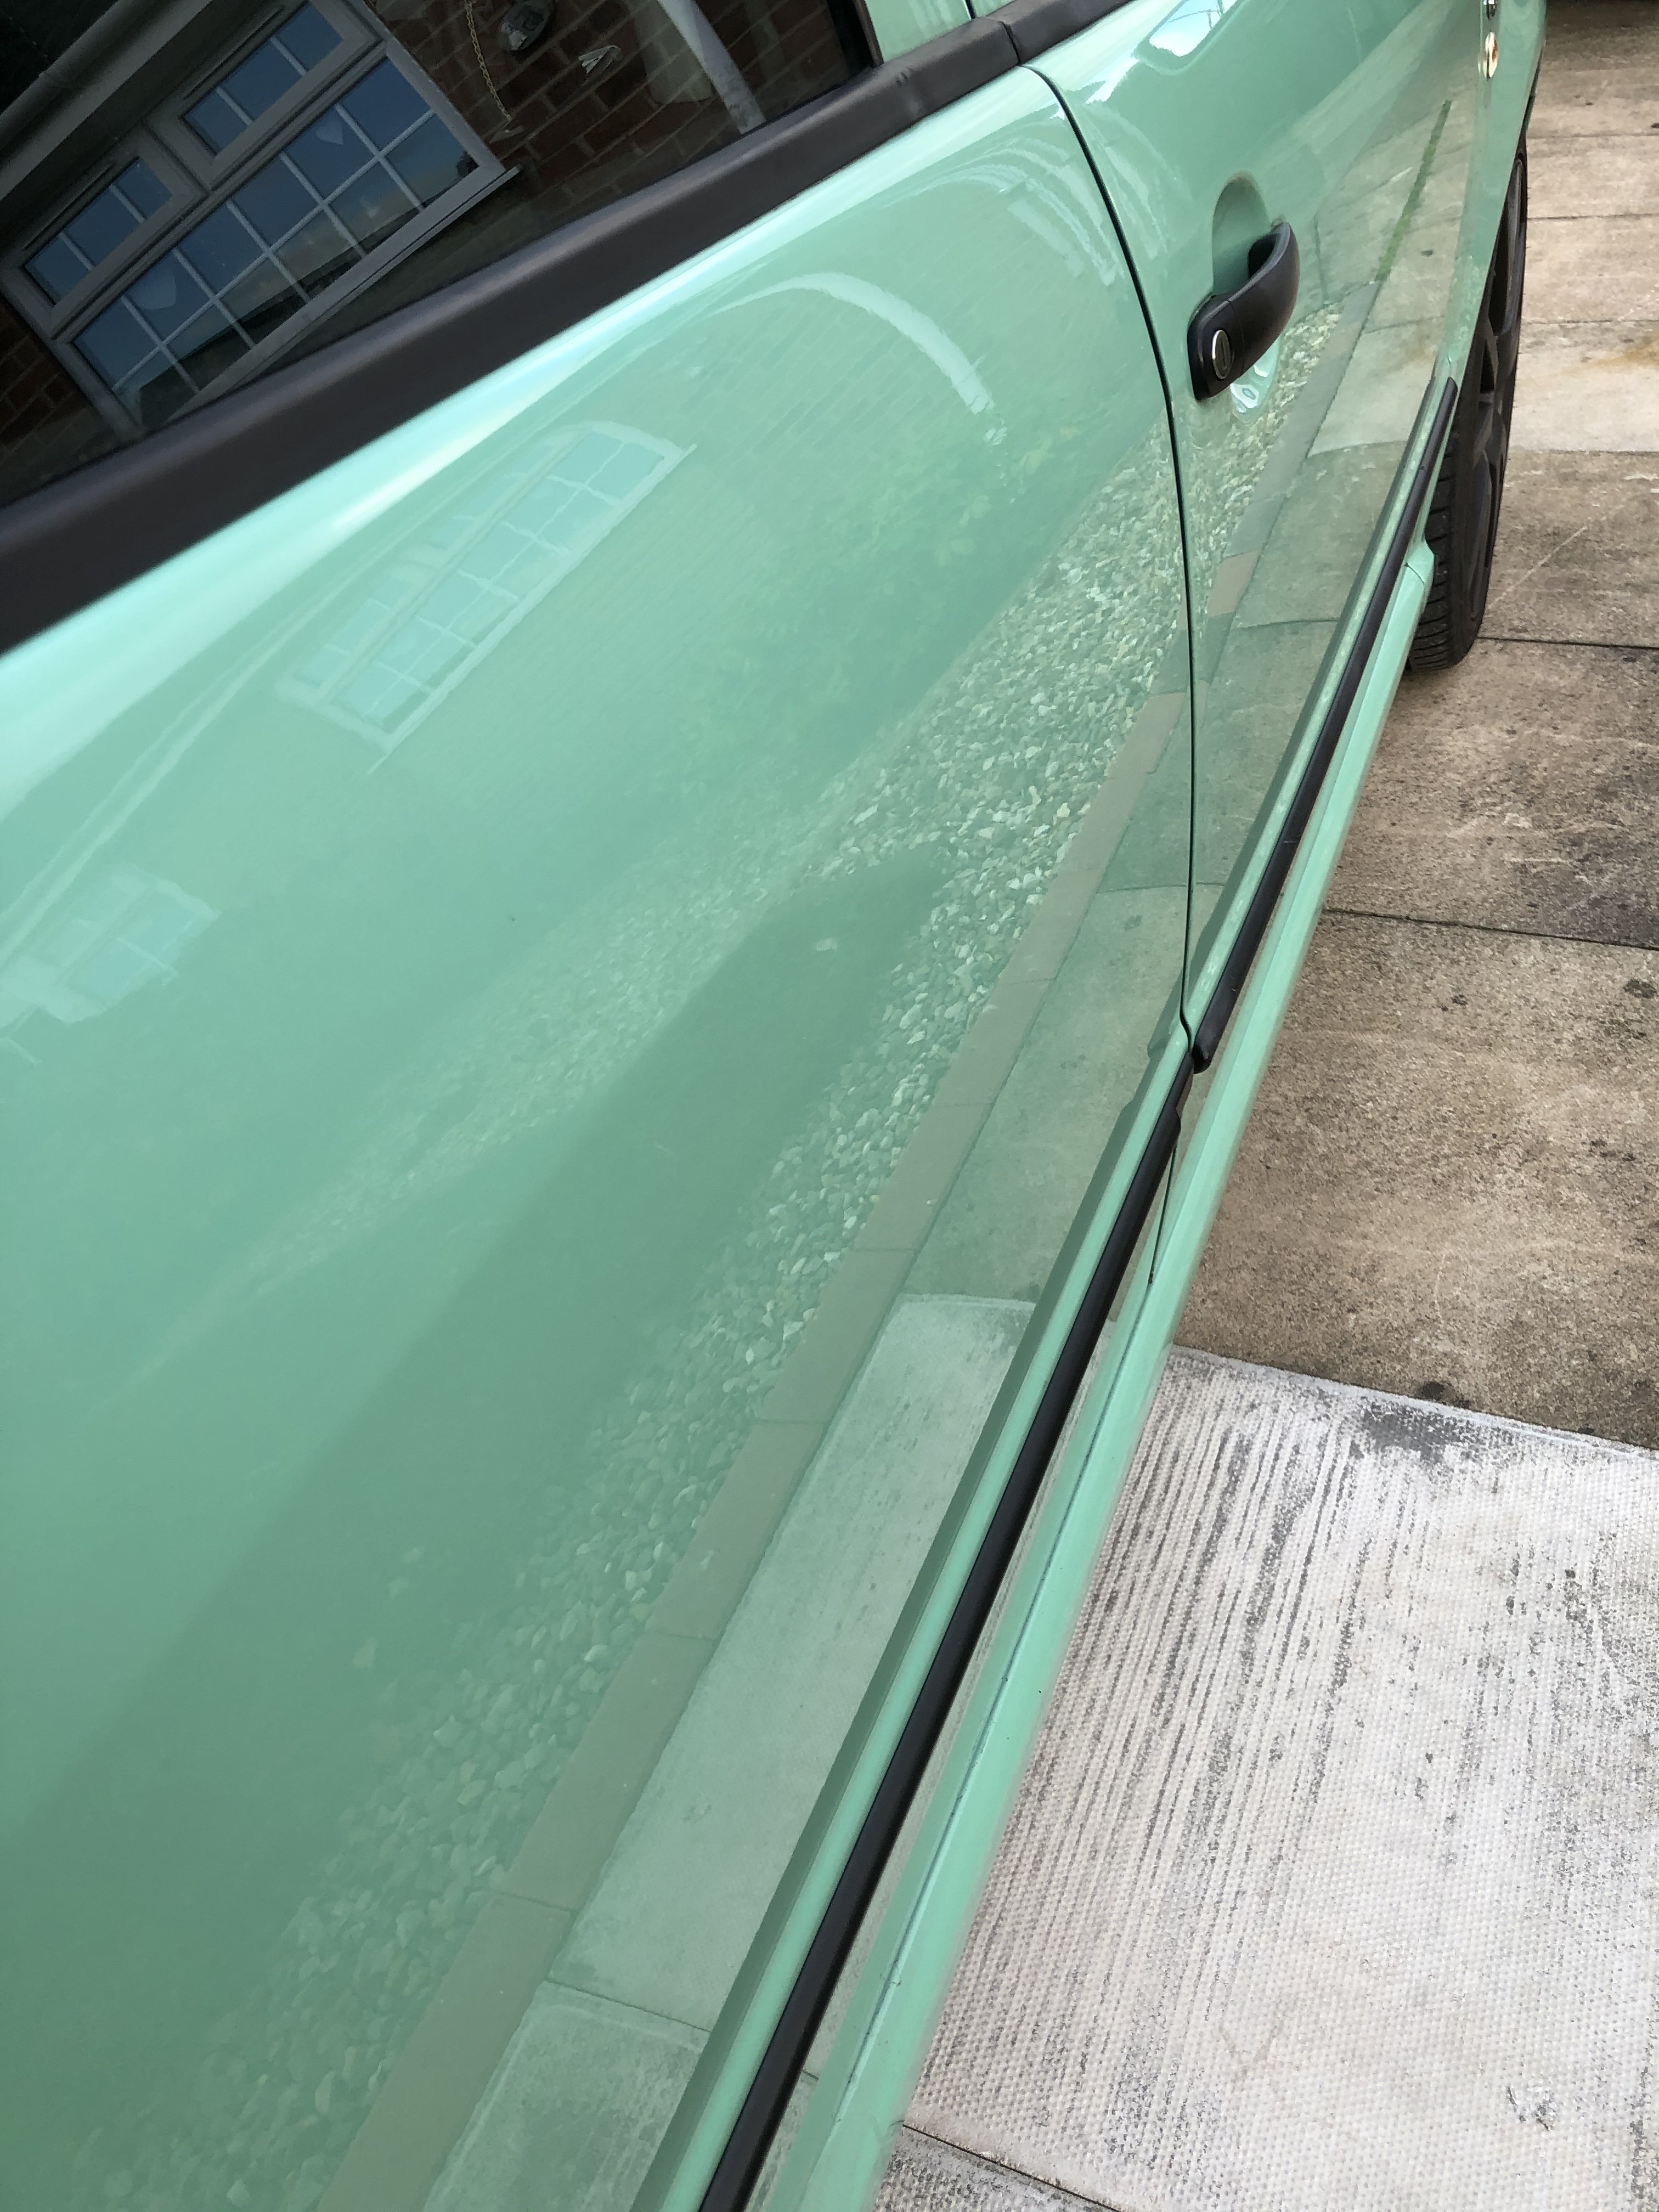
1 pointYou have to pull it upwards. I found this out on my 20 year old Fabia,when I noticed if I slammed the drivers front door the seal lifted on the handle end on its own. I just used silicone seal to hold the seal in place . The seal has an aluminium core. In your photo I can see corrosion of this inner metal which shows as bumps on the outside, just like mine. I have just noticed you car is also 20 years old.1 point
-
Hi Shugmo Its an original part 5E0 713 146 D I bought it with some other parts from skoda-parts.com for around €18 with €8 delivery. It’s only a two minute job, put the lever in drive for more space pull the lock button back and with a thin piece of plastic/ screwdriver inserted in the front flick it out (the go round into the back seats and retrieve it :-) )1 point
-
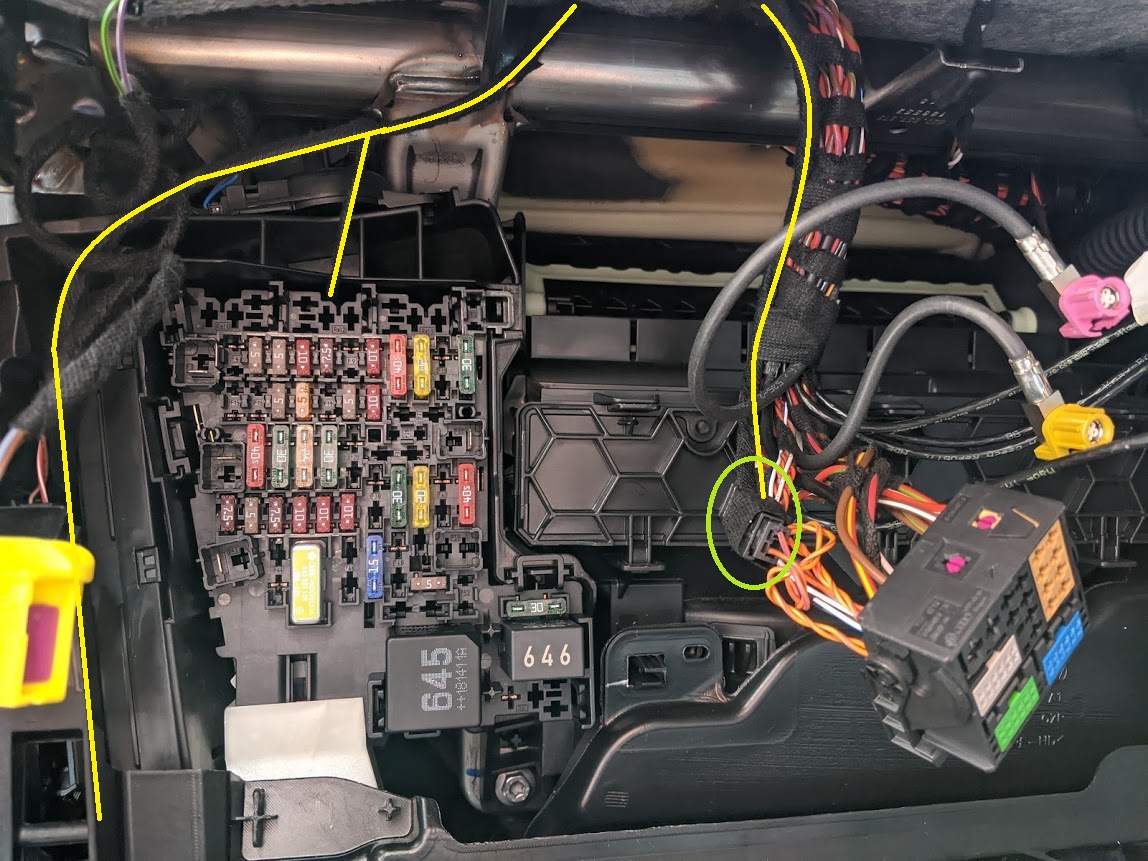
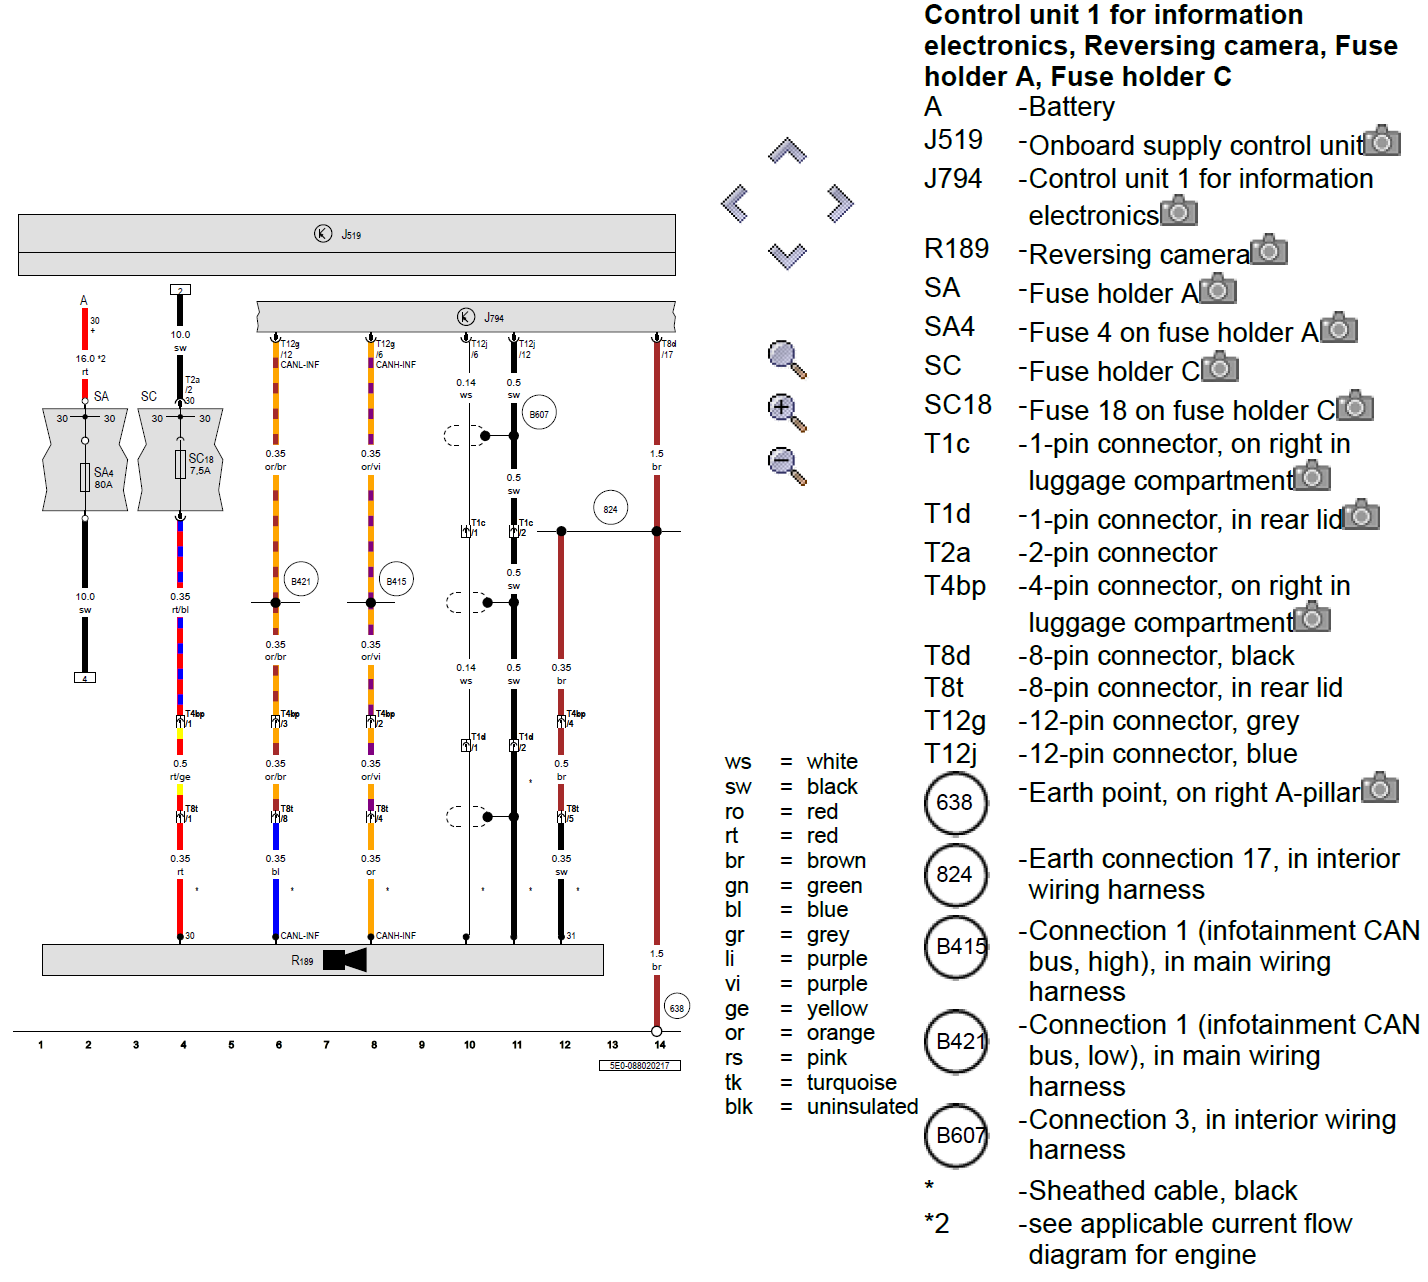
1 pointNice guide, shame you didn't write it two days ago when I started fitting my camera As I did a few things differently, I'll add some extra info as it might help others. I used an OEM/original high camera from AiDU Auto on aliexpress. At time of writing they offered: - a highline kit for the MK3 Octavia at ~£75 - a highline kit with washer jet for a Tiguan also at ~£75 After a quick chat, they were happy to parameterise the Tiguan kit with an Octavia file so I bought the Tiguan kit. Given they were the same price/size/shape it seemed daft not to get the bonus washer jet Unfortunately, the washer jet pipe was slightly too short but I was able to remove the fittings on either end and use some PVC washer hose (4mm ID, 6mm OD) of the right length instead. I took a slightly different cable route, shown in yellow: Unlike the kit above, it's not 'plug and play' so you end up with a bunch of wires that need to be connected to the appropriate places. The cables are pre-terminated but as I already had the correct crimps, I cut them to length rather than having loads spare. Factory wiring diagram for the highline (PR-KA2) camera is as follows: The earth wire was shorter than the others so I used the earth point in the boot below the rear seatbelts: For power, I removed the fusebox and used fuse 18 as per a factory install: After trimming and terminating the wires, I ended up with this: - new wires highlighted in yellow - new connector tapping into the CAN-bus circled in light green For the CAN-bus connection, I de-pinned the original quadlock connecter and moved the two CAN-bus wires into a separate connector, this means I didn't need to cut or modify the original wiring to tap into the CAN-bus: The eagle eyed amongst you may notice I used a 5a fuse in slot 18. After a quick shopping trip, I've now replaced it with a 7.5a fuse as per the factory wiring diagram. Coding was super easy: - Address 19, add 6C to the installation list - Address 10, coding, tick byte 2 bit 4 - Address 5F, adaptions, change Car_Function_List_BAP_Gen2-VPS_0x0B to "activated" - Address 5F, adaptions, change Car_Function_List_BAP_Gen2-VPS_0x0B_msg_bus to "Infotainment data bus" All works just like a factory install with the various modes etc. As expected, the only error code currently stored is "no basic settings" so I'll need to print out a VAS6350 board and calibrate it at some point

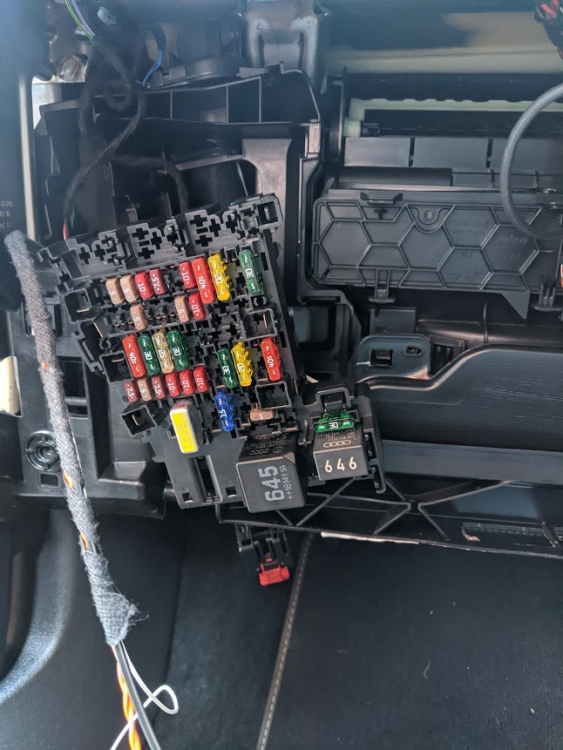
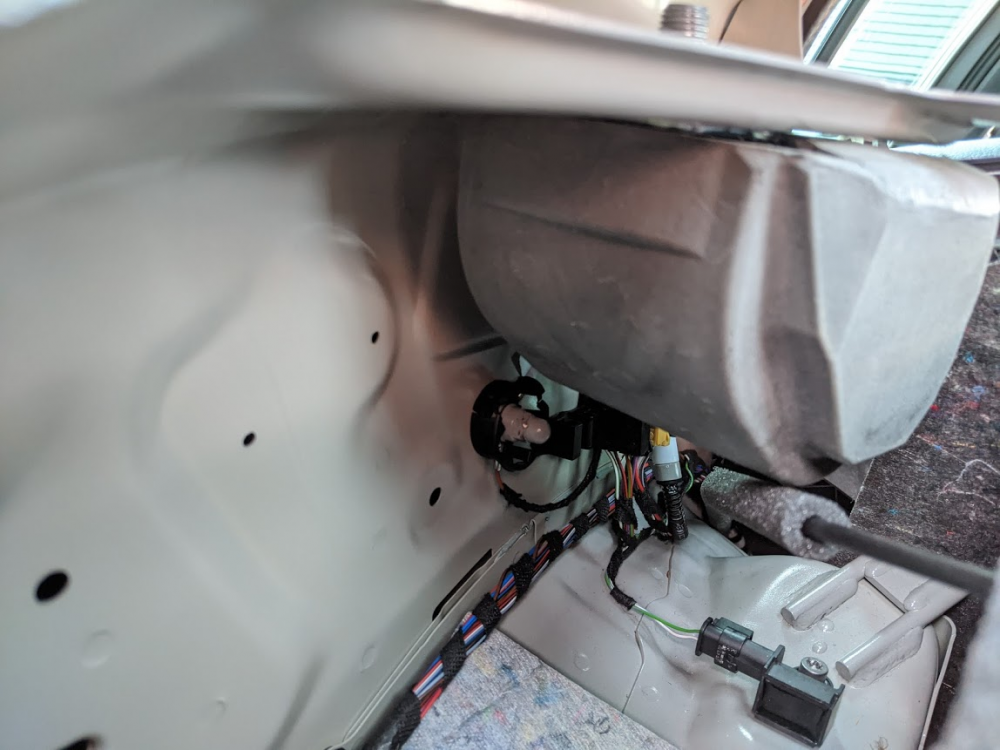

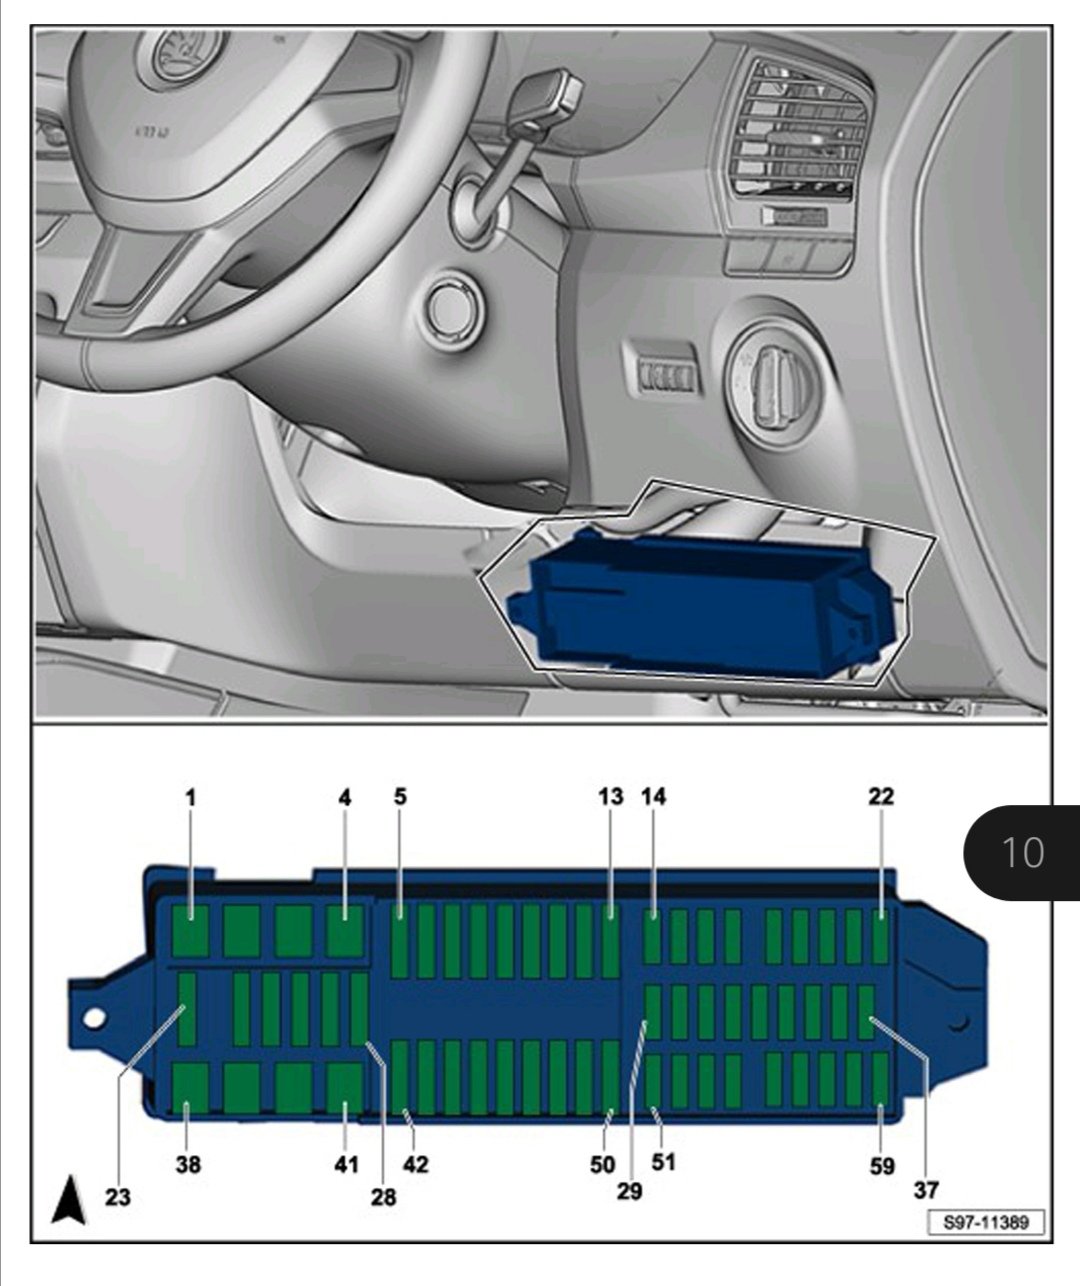
 1 point@Brizoo from the diagram it looks like BCM (Body control module). It is situated just above the pedals. when I was retrofitting light sensor and MFSW I removed the driver seat and laid on my back and found it easier to access it. Otherwise you will twisting and turning to find the correct cabling etc.1 pointNo pin number, but fuse number. Position 35 in fuse box! Follow the schematic or open car manual. Fuse 30 is written in the manual, but in order not to have to change the pin on the cable, I put it on fuse 35, which was free
 1 point


.thumb.png.26e4ef1cd991d7943ece4e7bf5baf72f.png)


.thumb.jpg.f83a46b9b3c0d976b9dbffbb523c9874.jpg)


.thumb.jpg.40bce6877f2a9e576258620ab7161cbc.jpg)


Important Information
Welcome to BRISKODA. Please note the following important links Terms of Use. We have a comprehensive Privacy Policy. We have placed cookies on your device to help make this website better. You can adjust your cookie settings, otherwise we'll assume you're okay to continue.