


Leaderboard
-

Lee01
FREEDOM5Points36,157Posts -
JR RS
FREEDOMLite3Points4,412Posts -
ckyliu
Members3Points430Posts -
SurreyJohn
Resident Member3Points3,479Posts
.thumb.jpg.9dd3f612ba7f13d10be5c518d3c8d255.jpg)


Popular Content
Showing content with the highest reputation on 07/07/21 in all areas
-
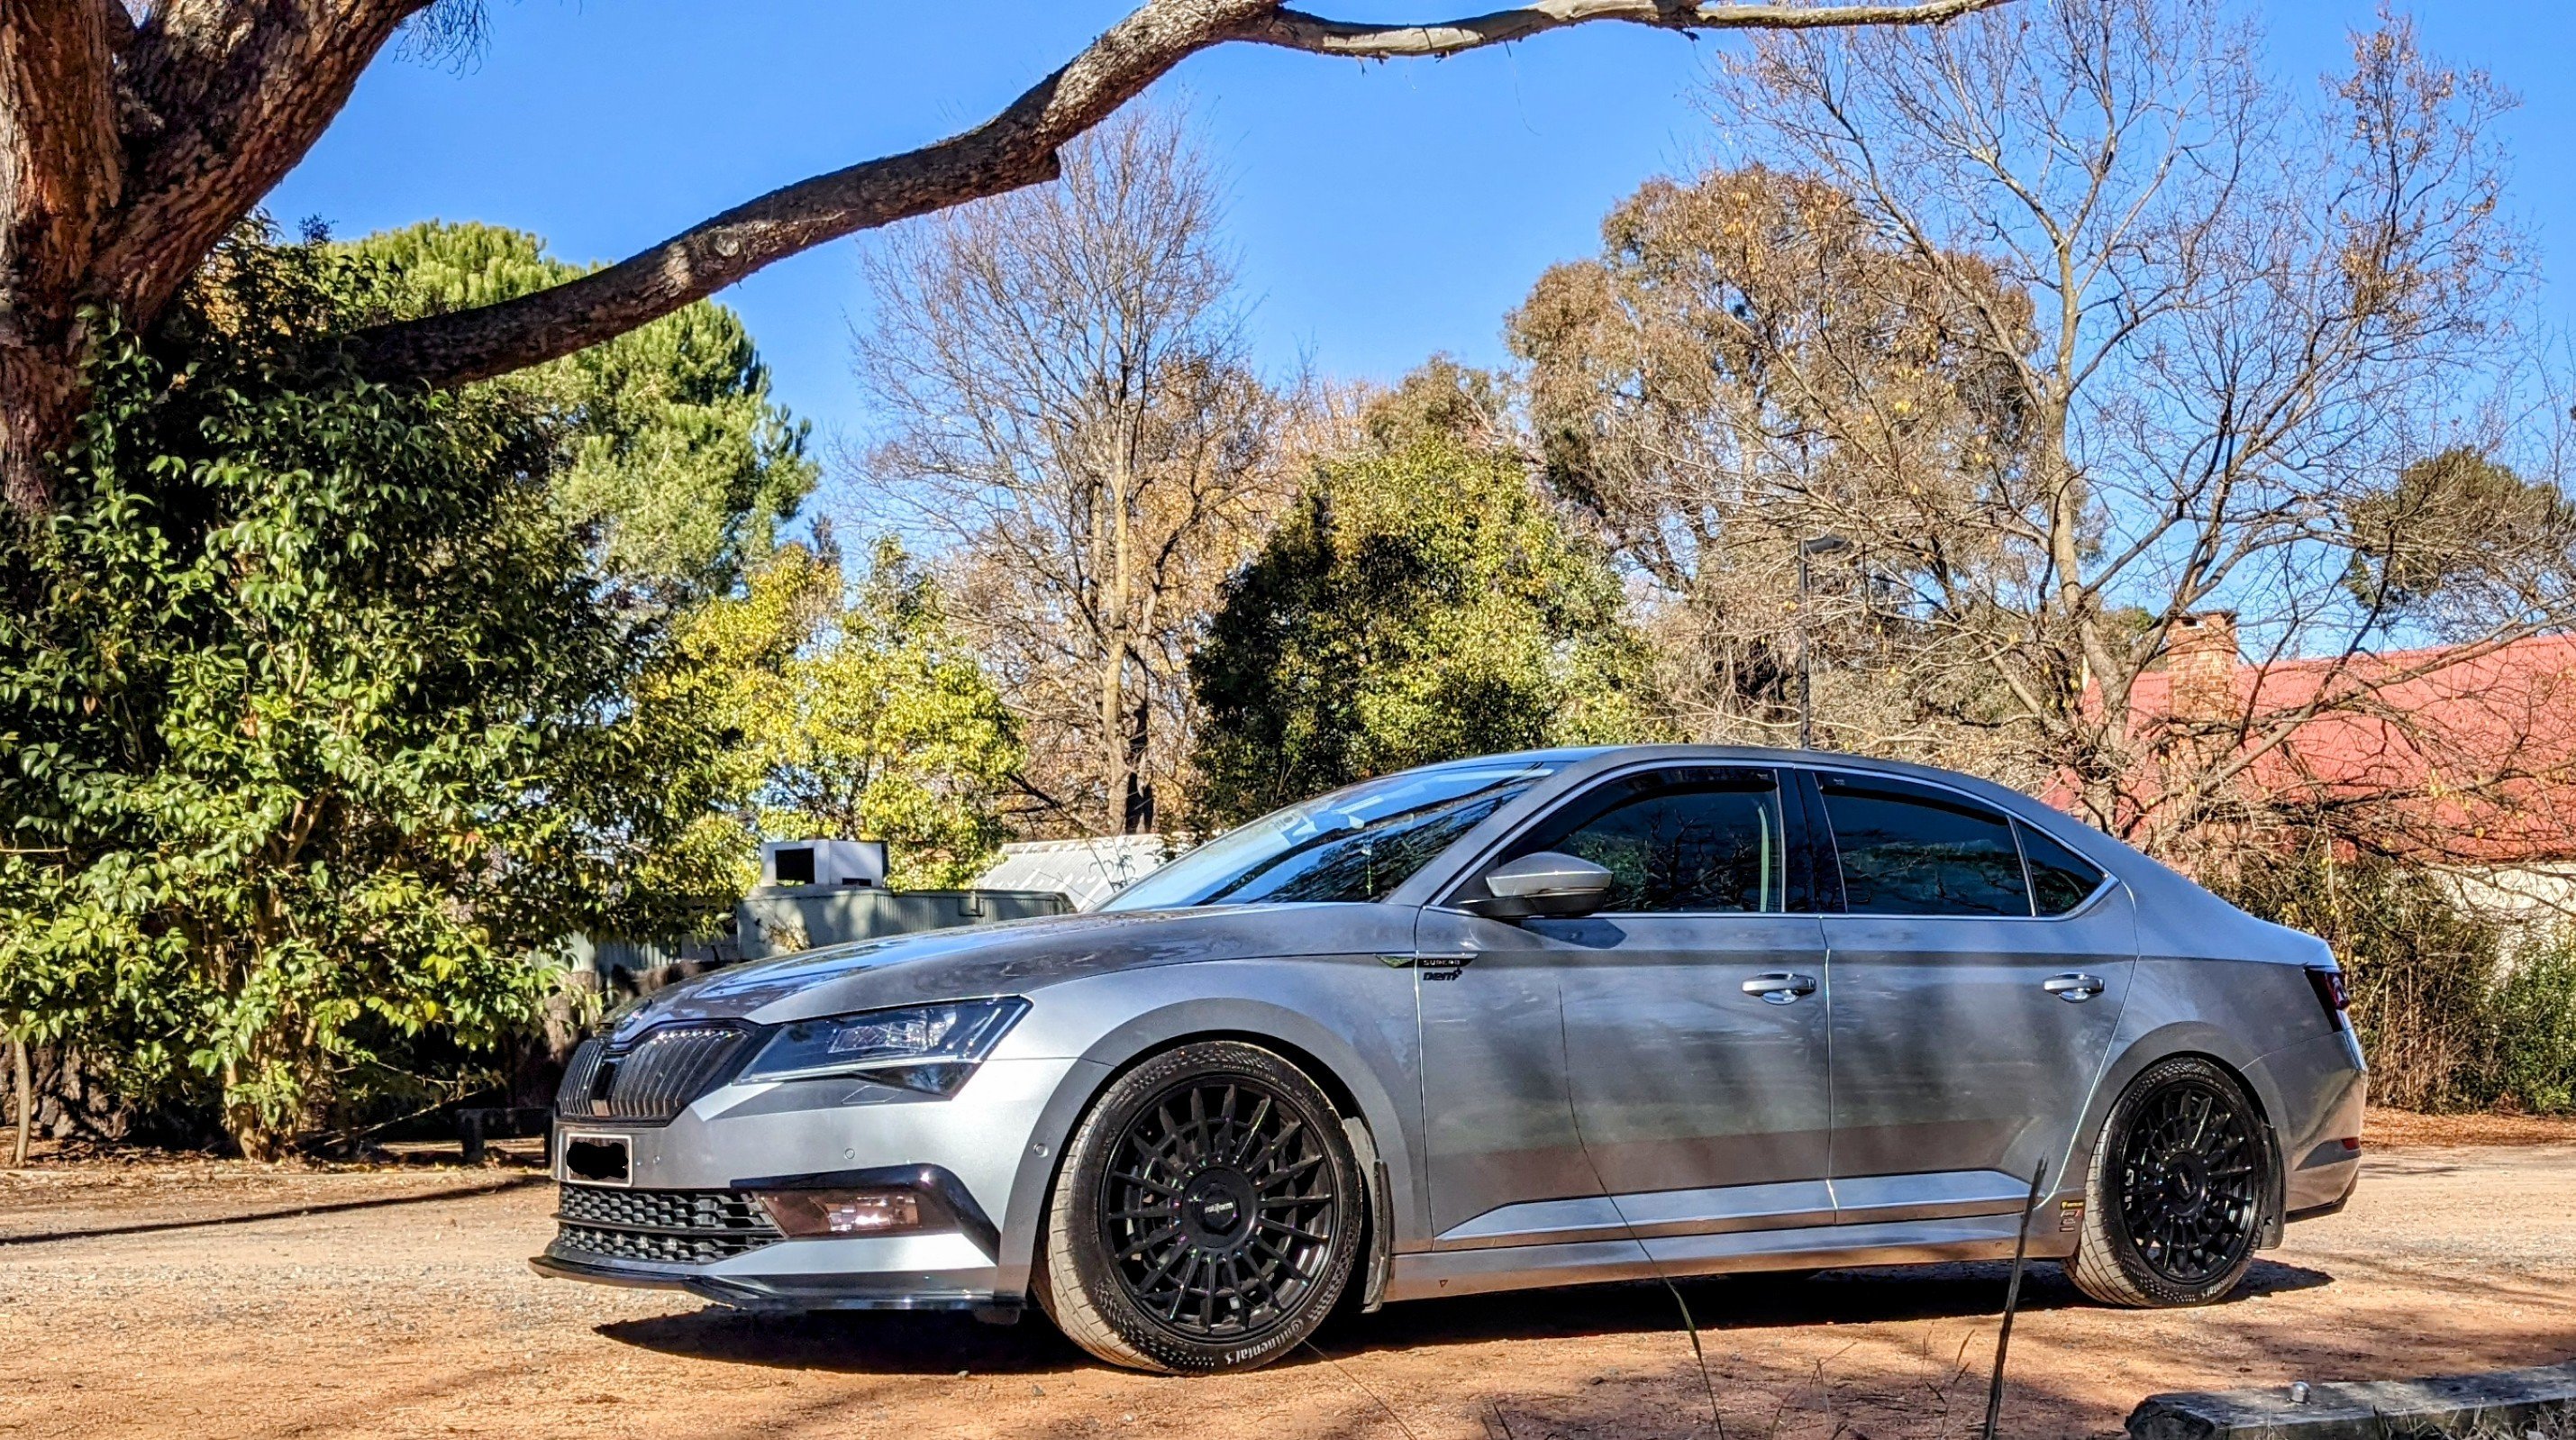
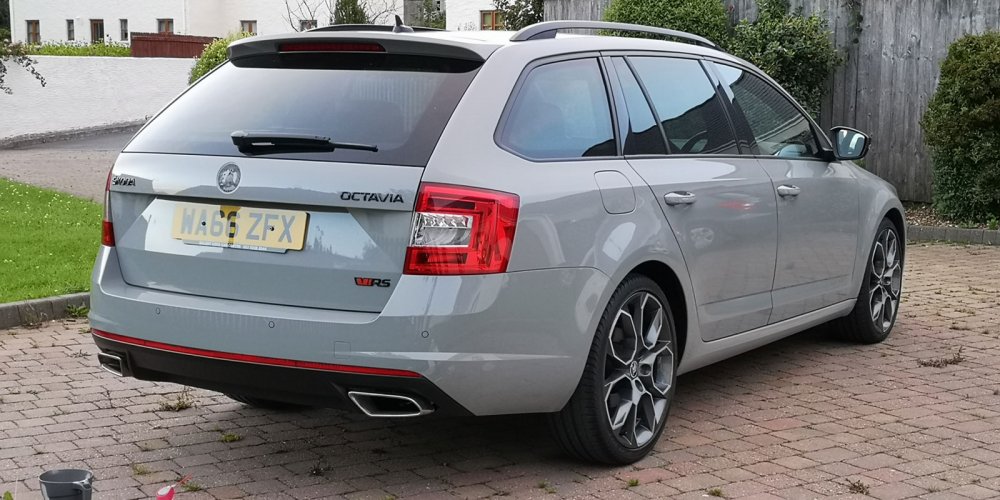
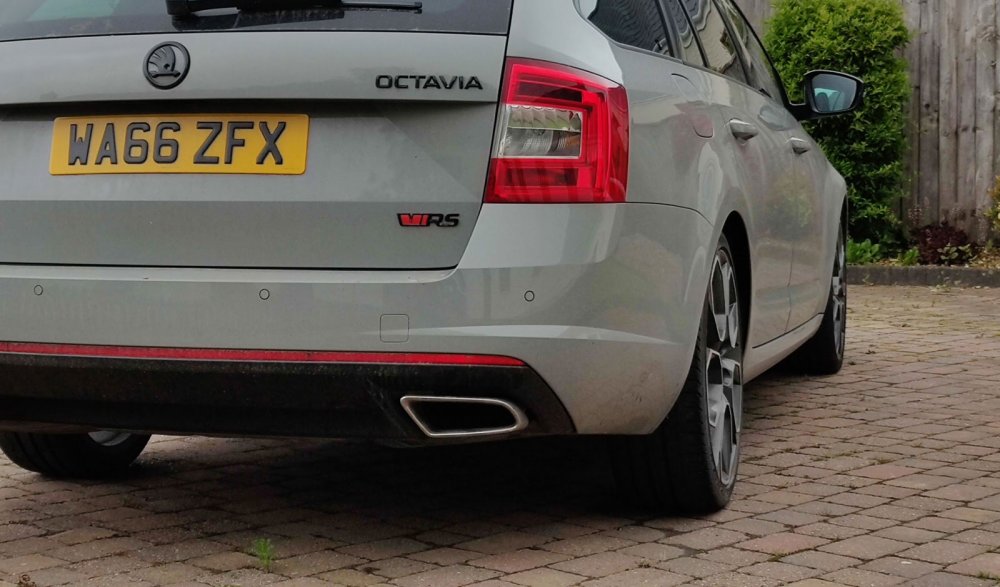
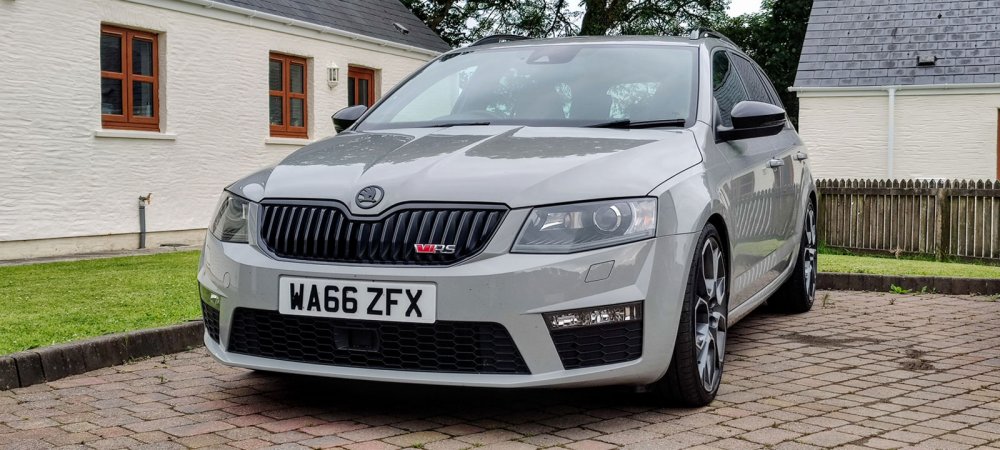
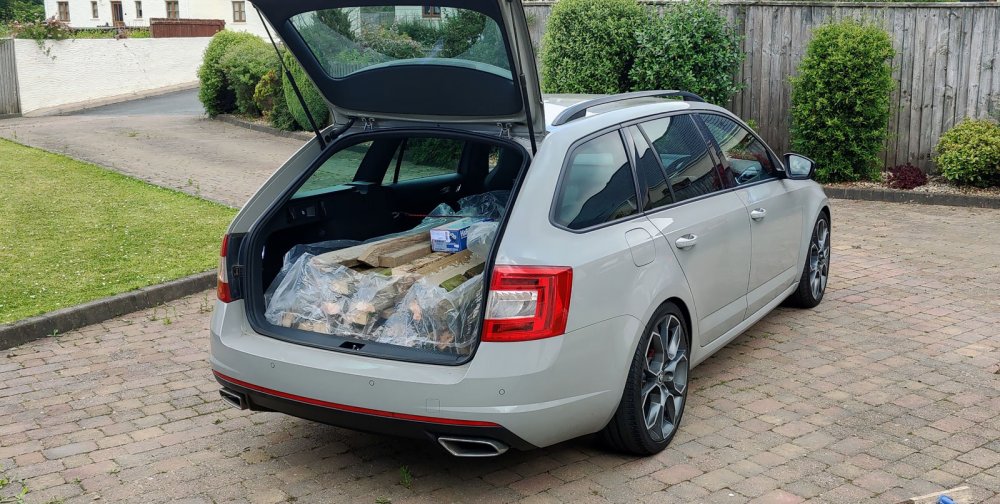
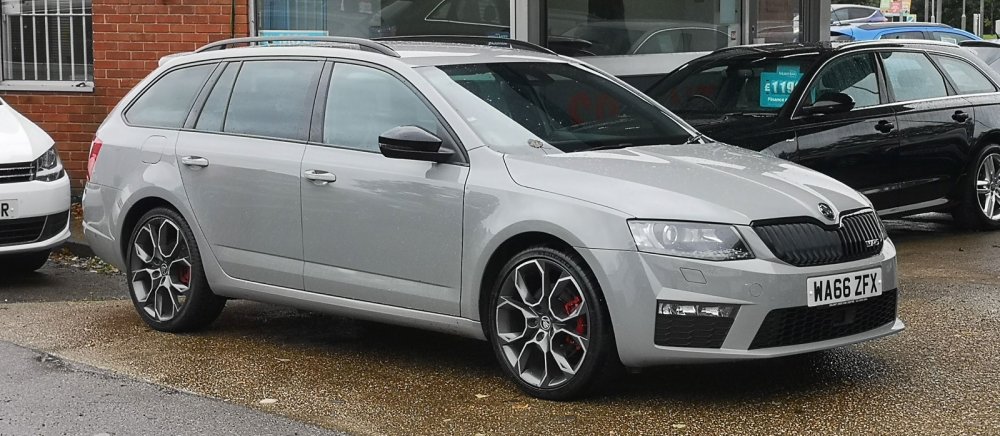
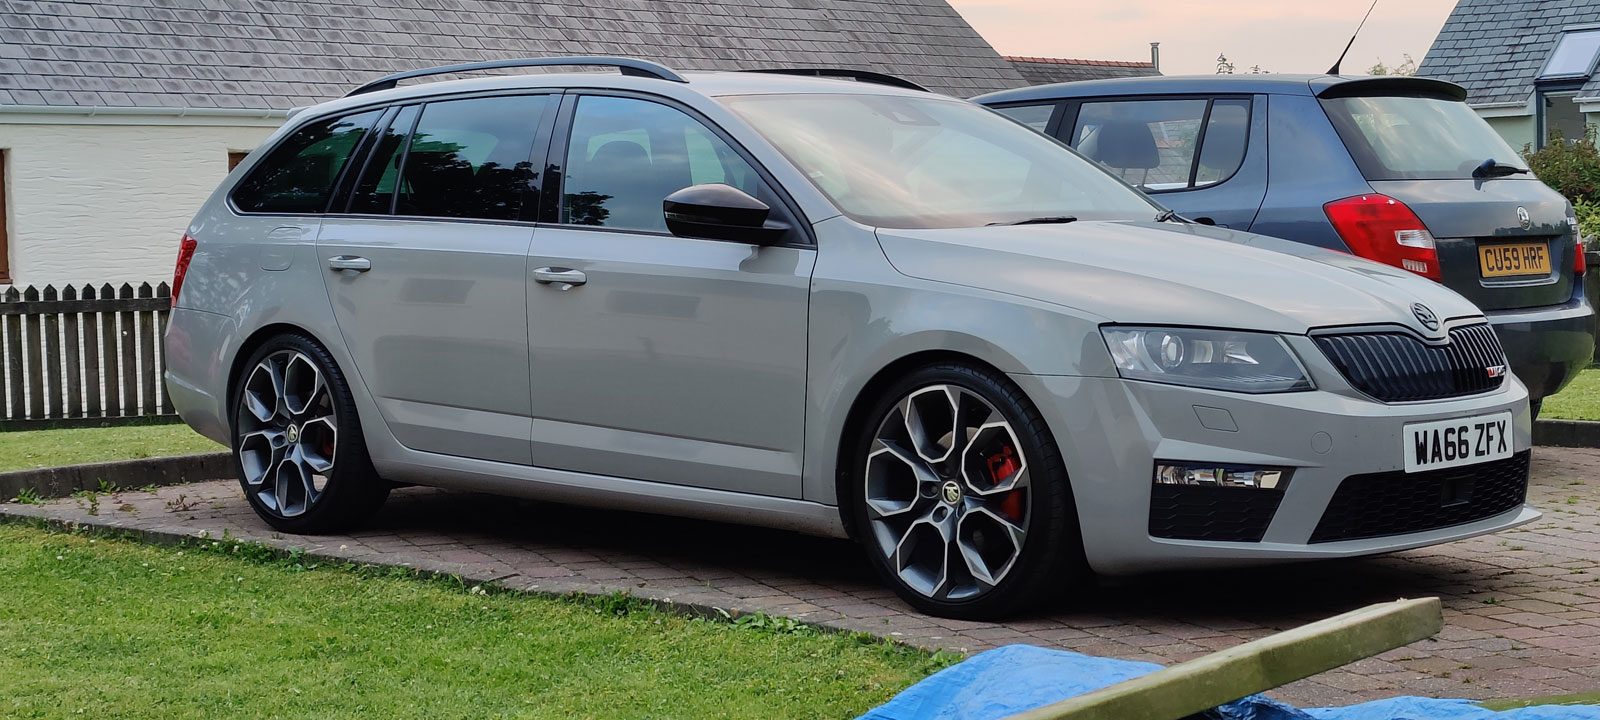
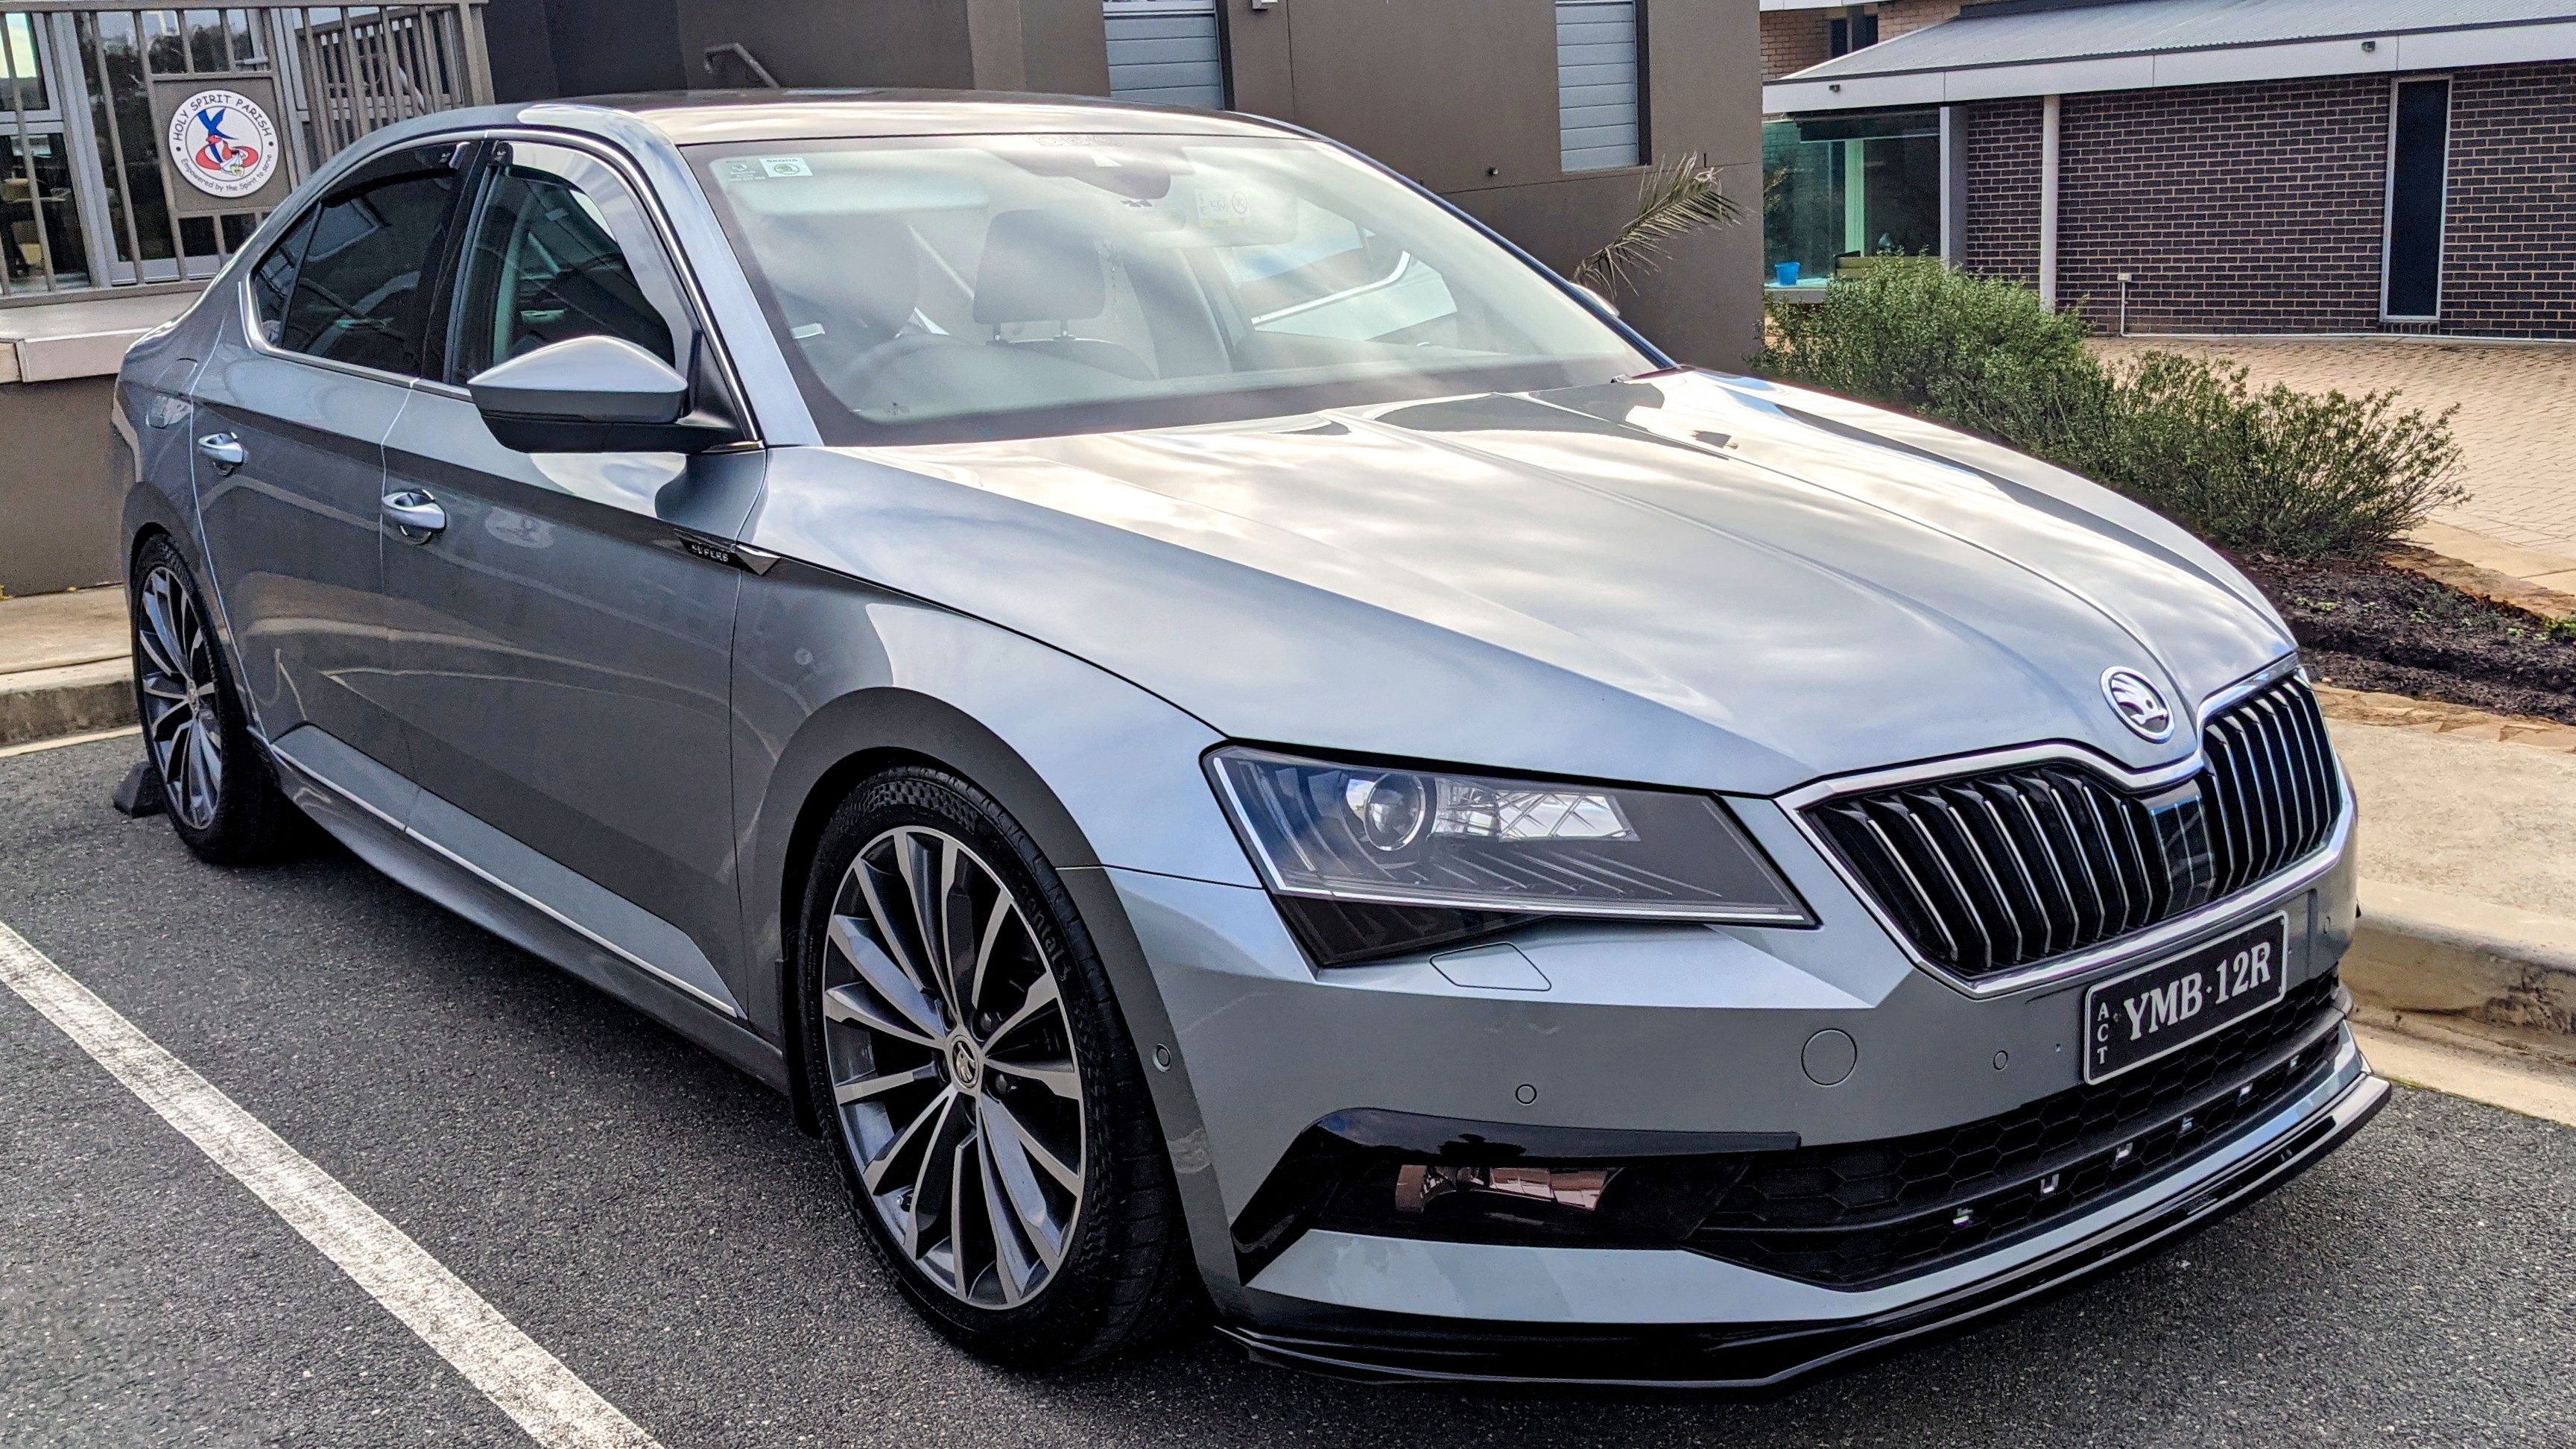
Hey guys, hope everyone is doing well. I am basically writing this post because I had wanted to improve the stance of my VRS since I bought it (18 months ago), but I'd always get put off by the thought of ruining the car and then chicken out of it. I didn't want to spend hundreds of pounds trying to make it look better if it was going to be scraping over speed bumps, the ride quality was going to be worse, the handling was going to be worse, I wouldn't be able to fully load it without the wheels rubbing, etc, etc... but so many people were seeming to do it without any issues, I thought bugger it I'm gonna do it too! Well all I can say is, if you are currently thinking of lowering/wheel spacering your VRS and you have the same reservations I had.... just do it! It's the best thing I've done to the car. Okay, maybe the pedal box & remap were the best thing, but this is definitely up there! The car looks so much better, ride quality is much improved in my opinion (even my wife agrees, and she hates cars and the fact I fiddle with them all the time ), and I'd say it definitely handles better. I'm so so pleased with the results and I urge you all to do it if you are thinking about it. Lowering springs are H&R 40mm and the wheel spacers are H&R Trak+ 20mm at the rear and 10mm at the front. Probably could have got away with more on the front, but I was being cautious and wanted a fully functioning car on the awful backroads around where I live. So this is the car when I bought it... And this is it after lowering & spacers... The difference is so subtle, yet massive at the same time, I love it! Here's another shot before lowering and spacers... And then after... Here's one where it had been lowered, but I hadn't put the spacers on yet... And then after the spacers ... And from the front, this one is with the car lowered but the spacers hadn't been fitted yet... And then with the spacers fitted... I'm so so pleased with how it turned out and I hope this puts your minds at ease if any of you are thinking of lowering but are unsure like I was. Any questions just give me a shout PS - You can still load it up and go to the tip no bother too!


 3 points
 -
3 pointsMy understanding is it is a camera, but doesn’t monitor the whole visible (to the eye) spectrum, and takes in some infra red. The data is then interpreted by a computer in the car. It therefore works well if the white lines are properly painted, but gets confused where lines are faded, incomplete, have been poorly erased, smothered with blank gunk etc. Any lengthways mixed surface (rather than joins across the road) can also cause problems because the reflectiveness is different thus creating a false line. So basically it seems to be a great idea in theory, let down by shoddy British infrastructure.3 points
-
3 pointsKeep your eyes on the road where the real hazards exist especially the myriad other people staring into their phones while driving. You could try placing the mirror at the rear of the car facing down & in the field of view of your rear view mirror, that way when you glance to see the traffic behind you would see the dog at the same time.3 points
-
2 points
-
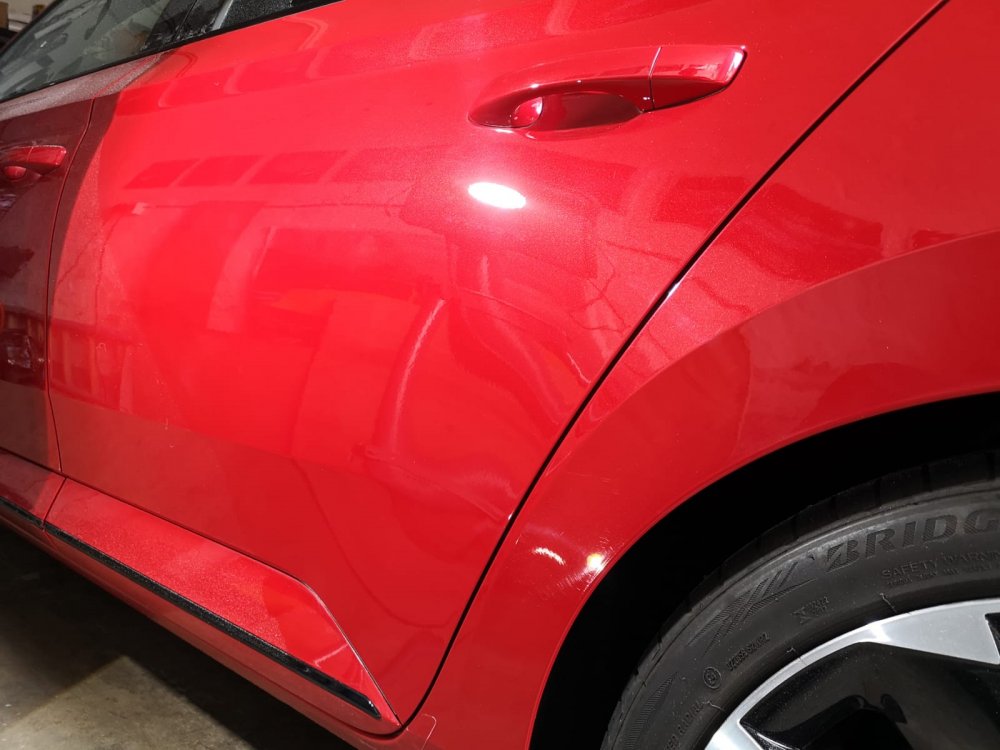
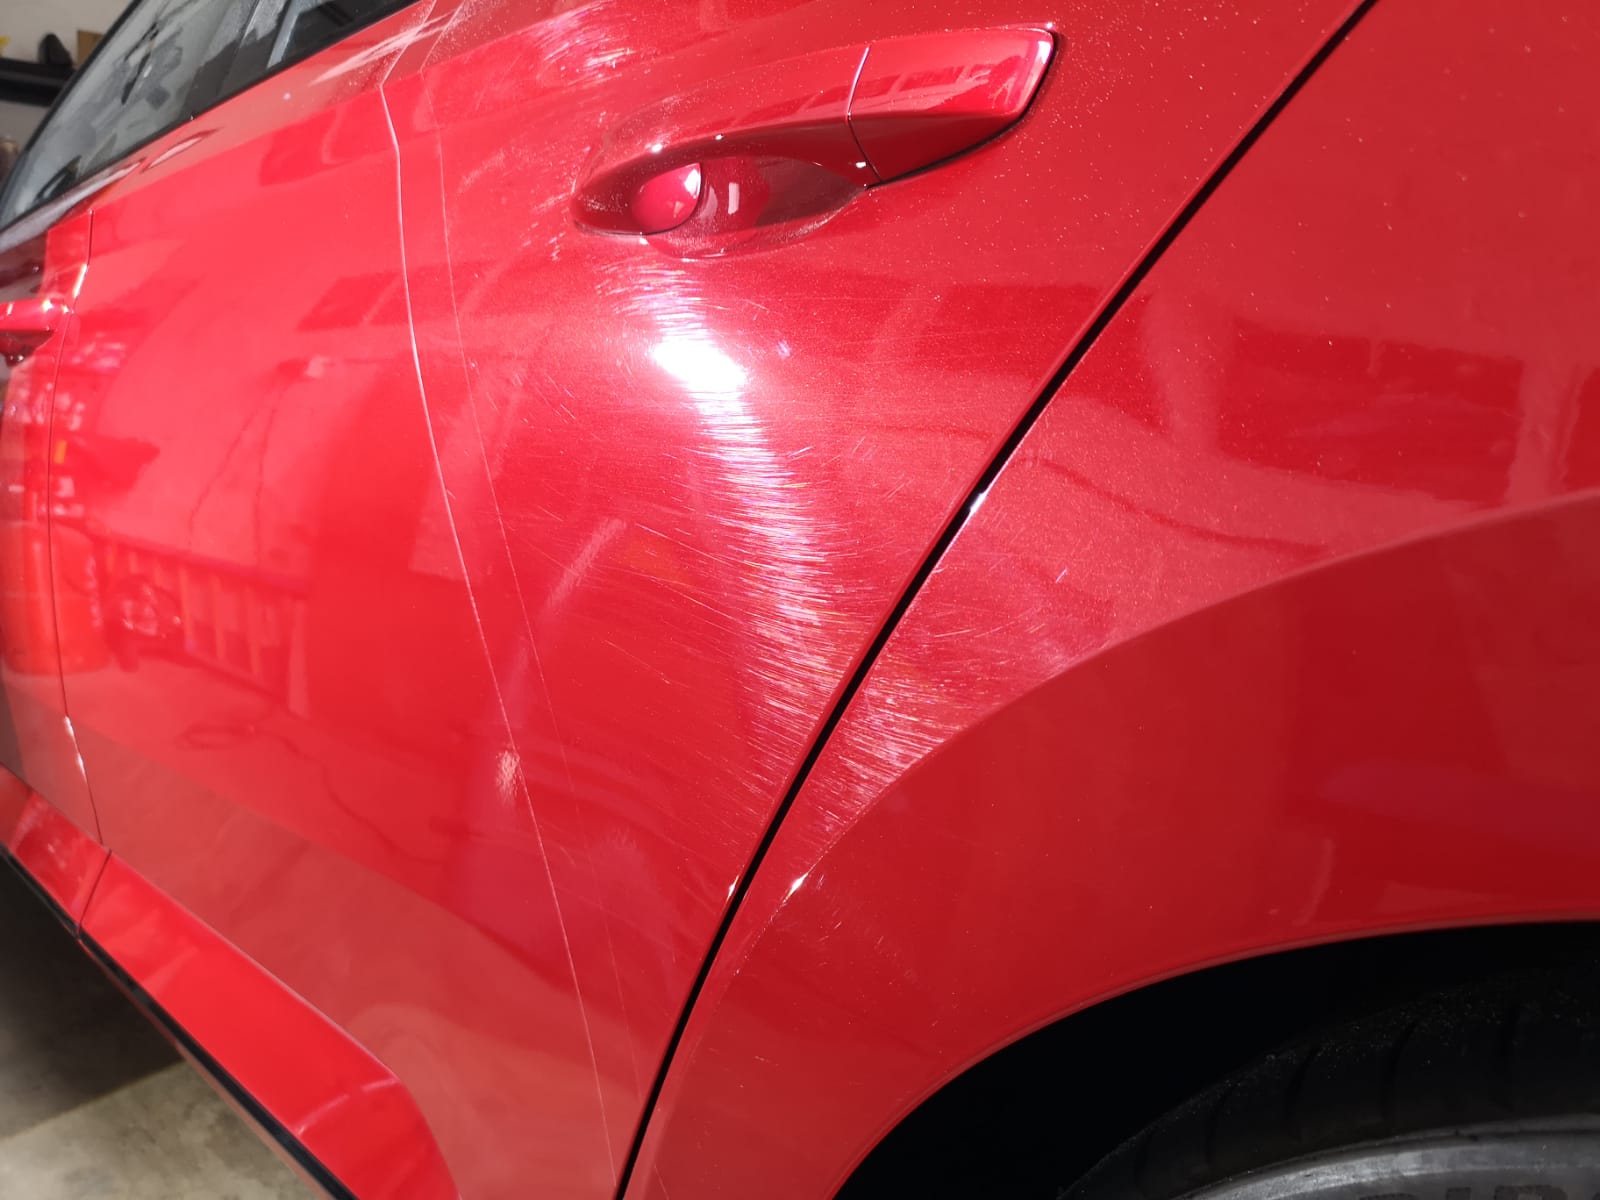
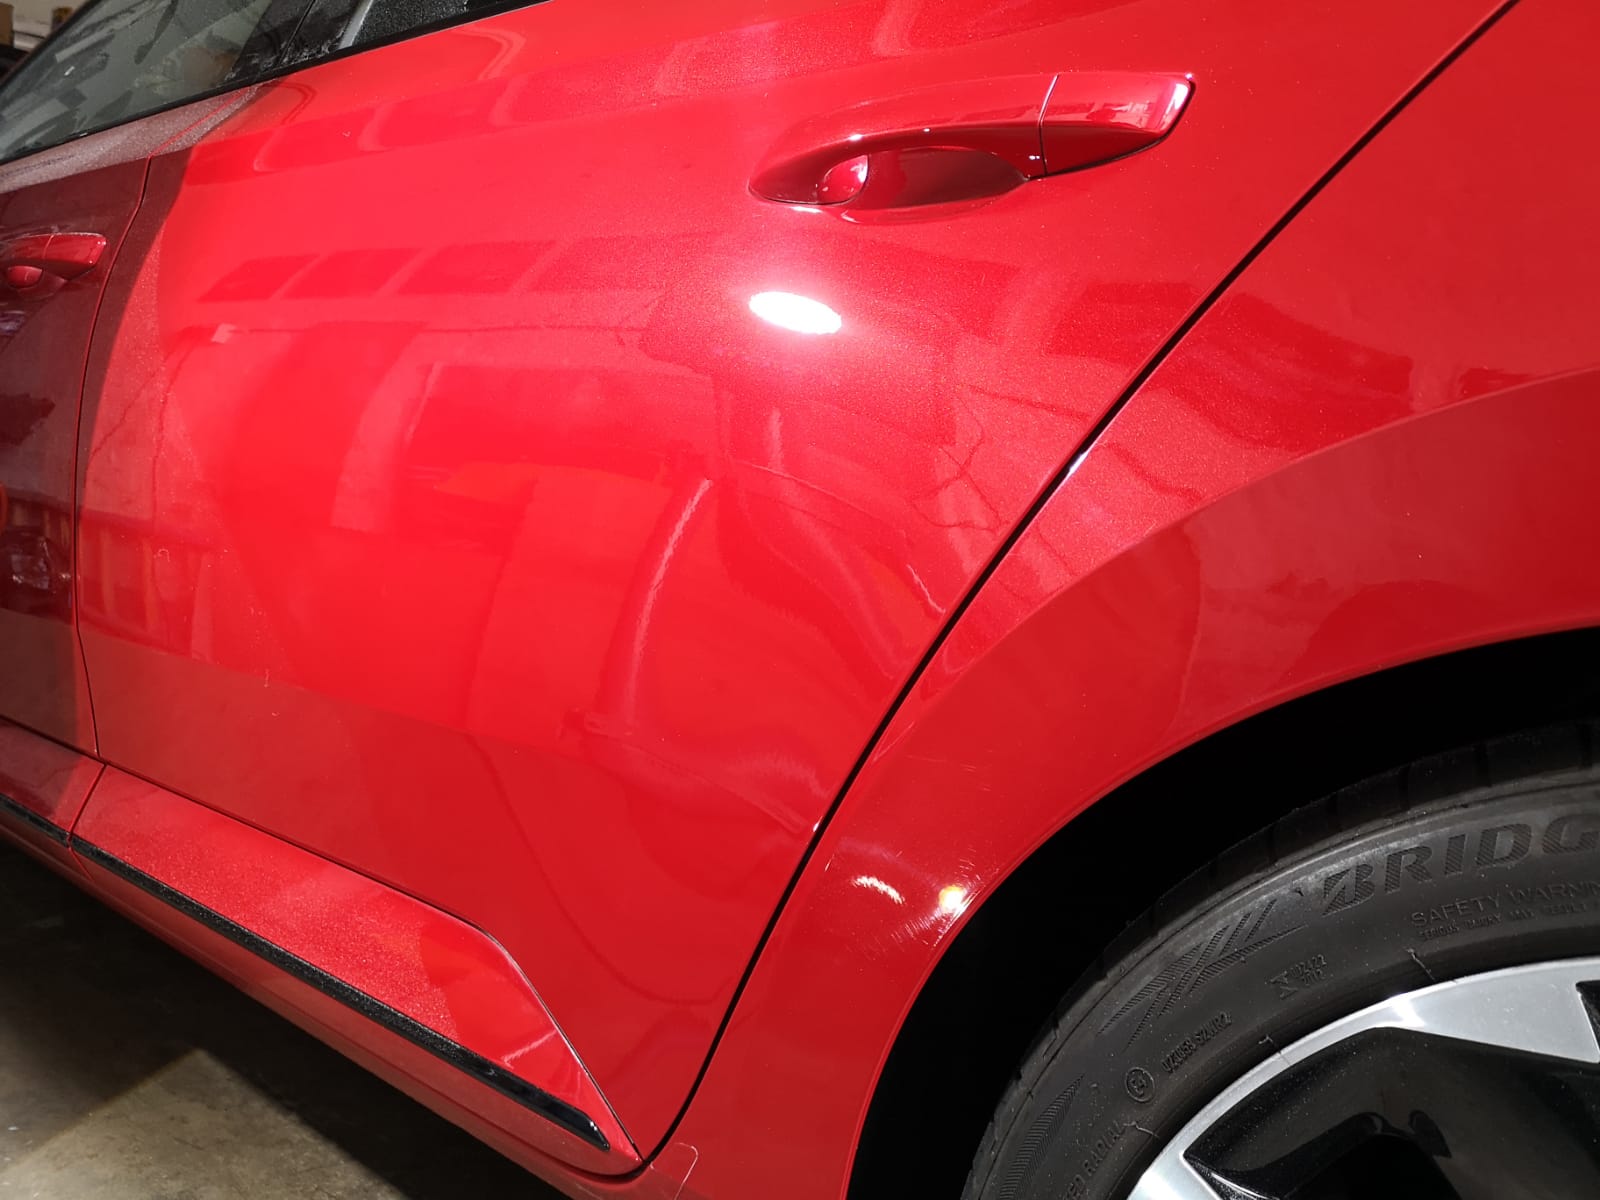
Not done by me I must add Cars in at the detailers. Didn't think it was this bad to be fair but what a difference on the Velvet red. Can really see the metallic now. 😀😀

 2 points
 -
I don't usually mask up when hand polishing, unless you're dead set on getting right up to the edge of seals and trim it's not necessary, you also immediately spot if you get any polish where it shouldn't go and if you're in quick with the isopropyl alcohol mix it's usually straight off. WD40 will shift a lot of polish too but leaves behind a greasy film. A pencil rubber works well on plastic with a grain. You can then bring up plastics afterwards with your favoured trim treatment (I like Carpro PERL). Machine is a completely different matter though, you can really ram polish into places you don't want very quickly and remove the grain from textured plastics so you need to mask thoroughly and well (look at my smurf MX-5 earlier in this thread). You want a decent low tack masking tape if possible so you're not leaving goop behind, 3M 3434 is excellent but pricey, a cheaper alternative is SP80. If you are planning on masking then don't trim gel beforehand as the masking won't adhere well!2 points
-
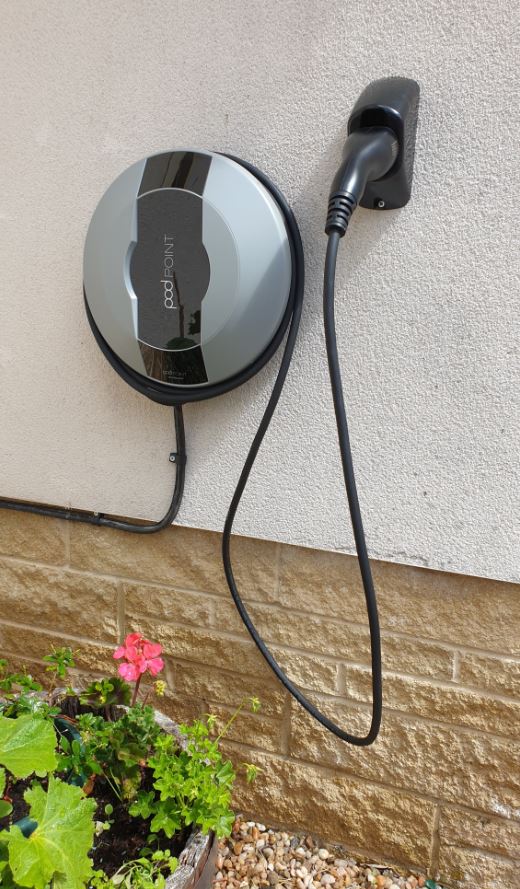
2 pointsThat's our tethered PodPoint installed. Very neat and tidy and very professional installer. All we need now is the Enyaq.
 2 points
 -
2 pointsMine doesn't beep it just tries to fight with me. As a Police trained driver I only indicate if there is someone there to benefit from it. This isn't good with lane keep assist. I leave the stop start on as it doesn't bother me at all but the lane keep gets turned off every time.2 points
-
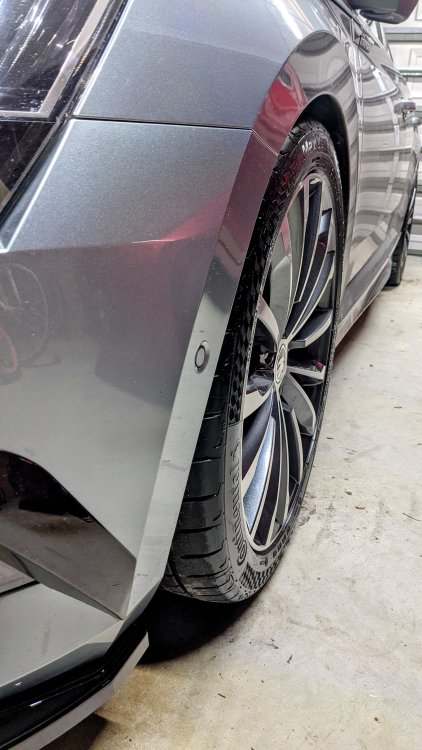
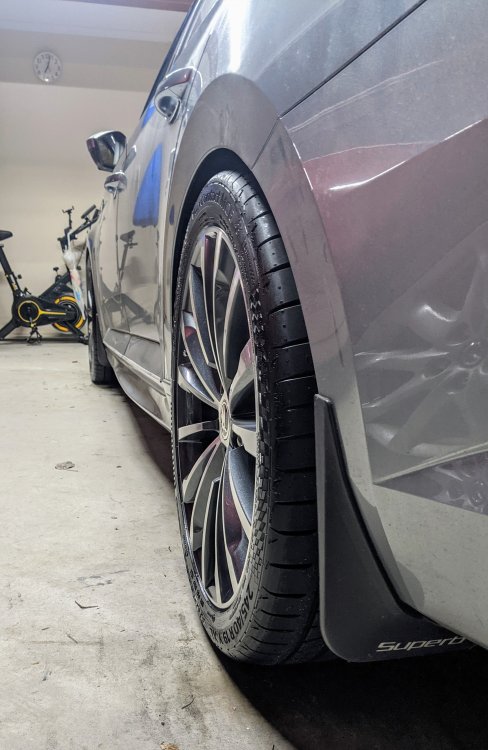
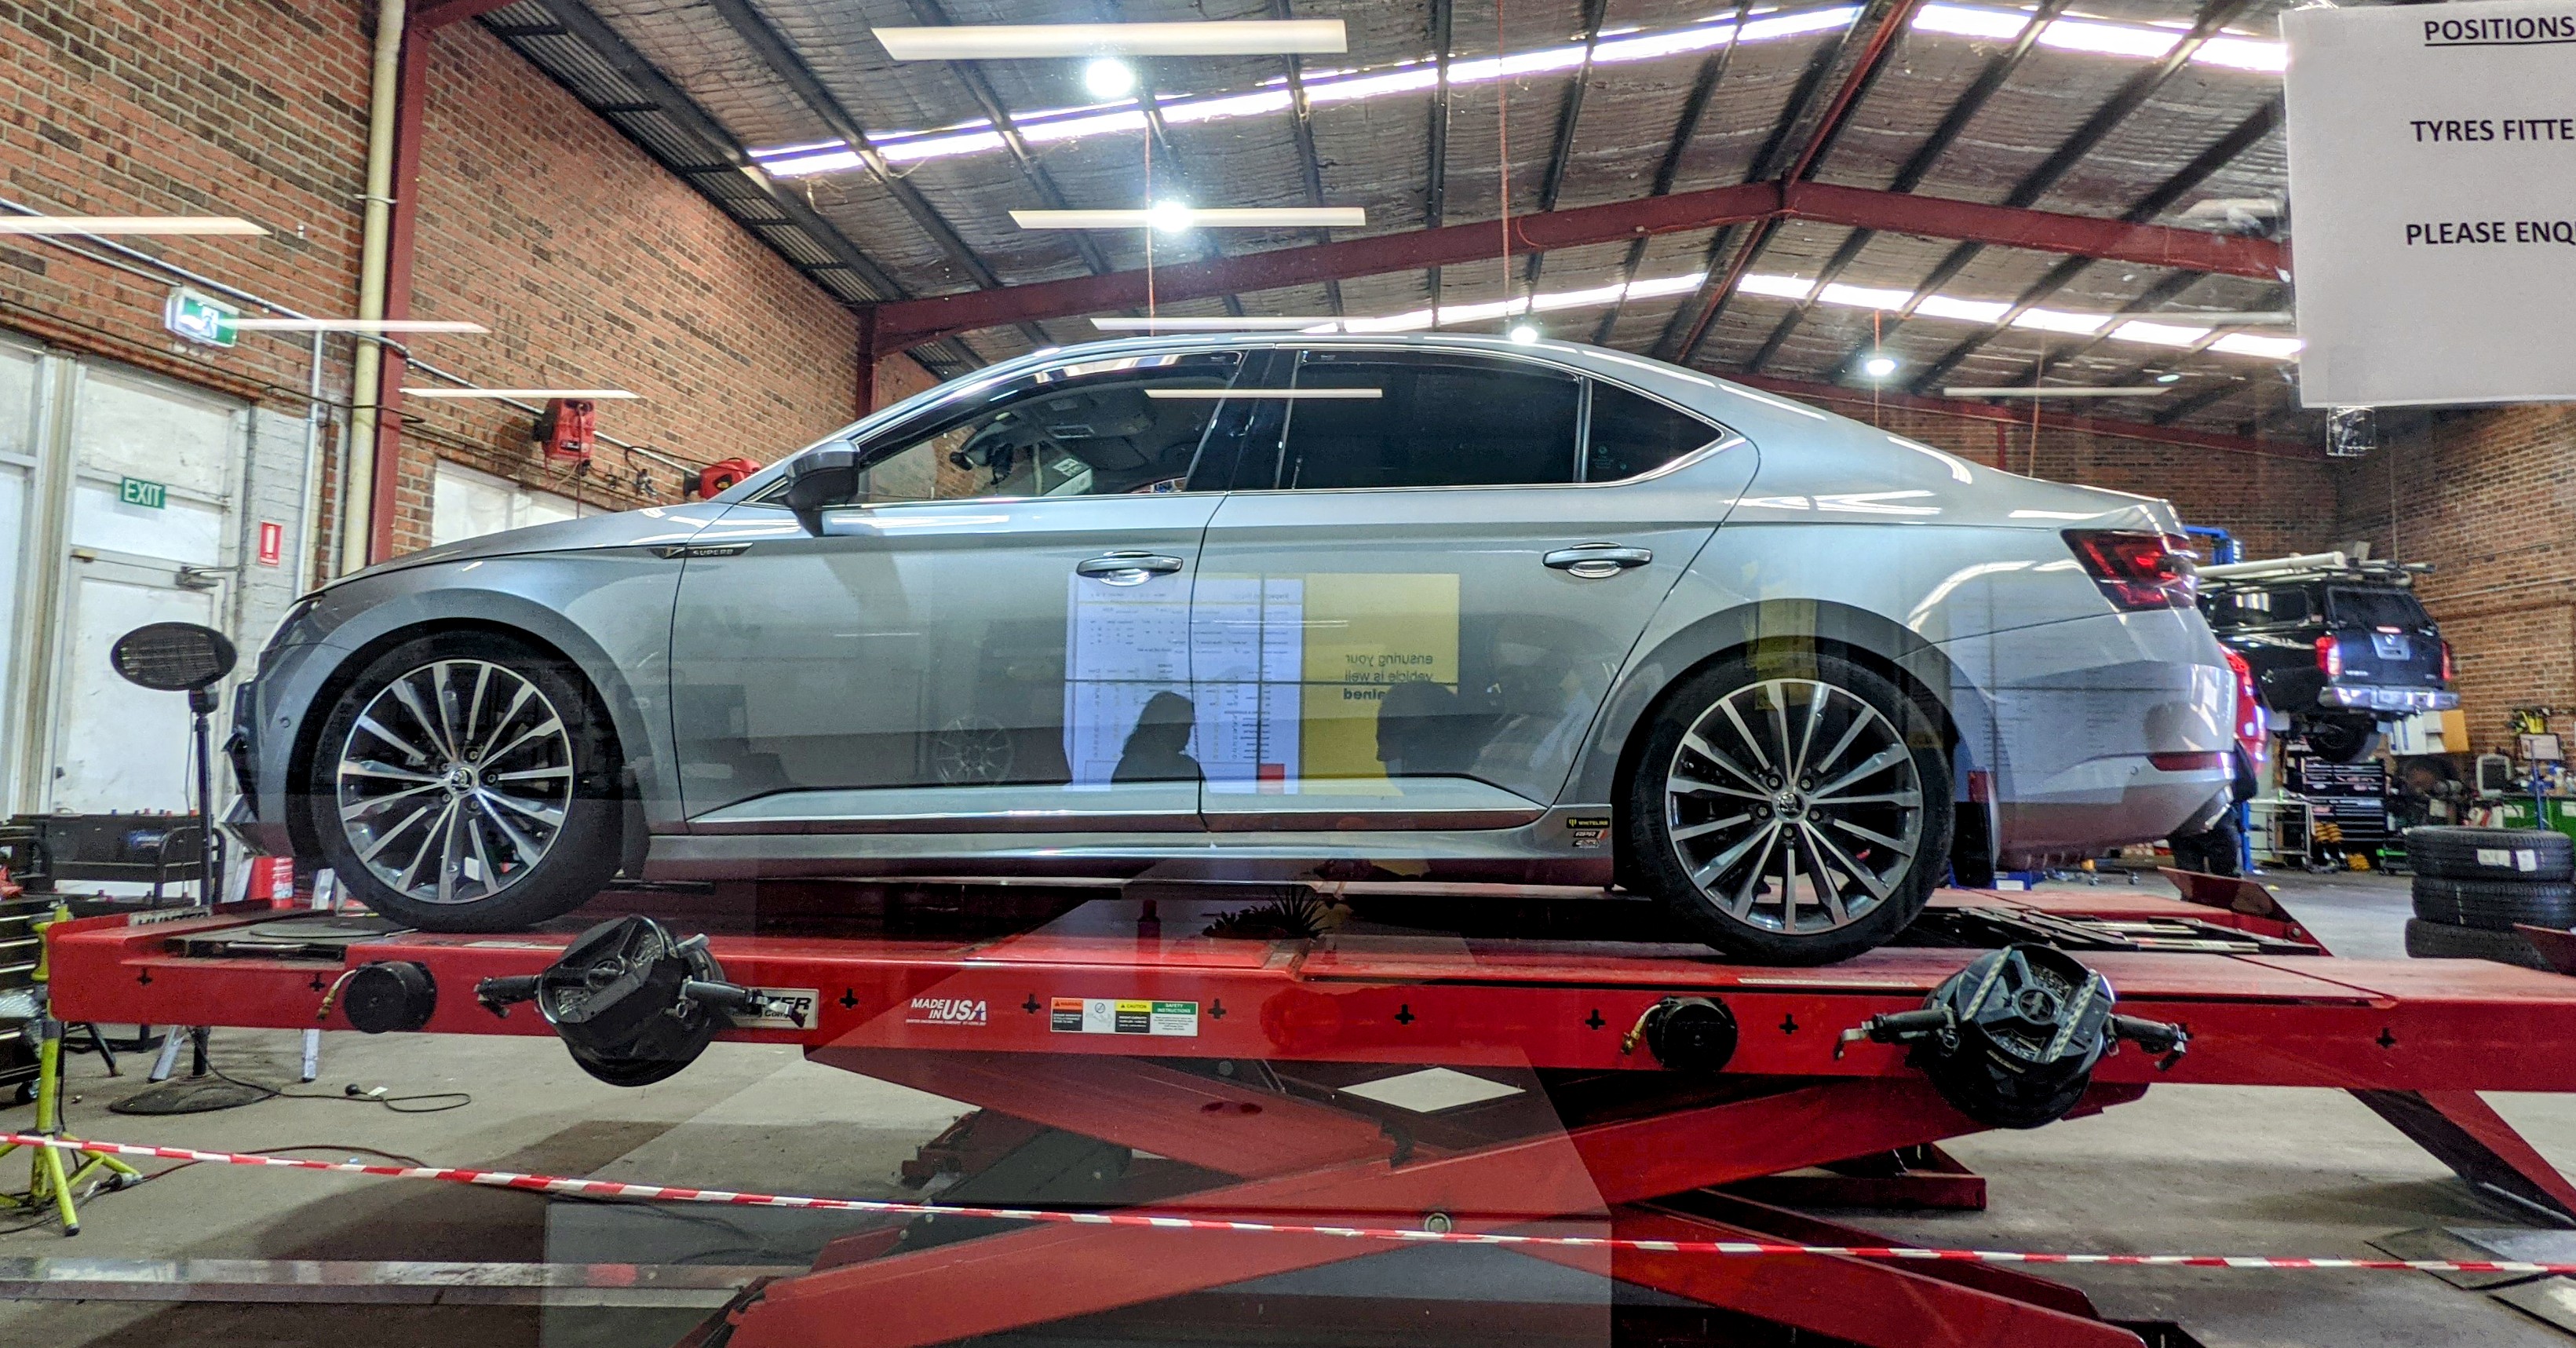
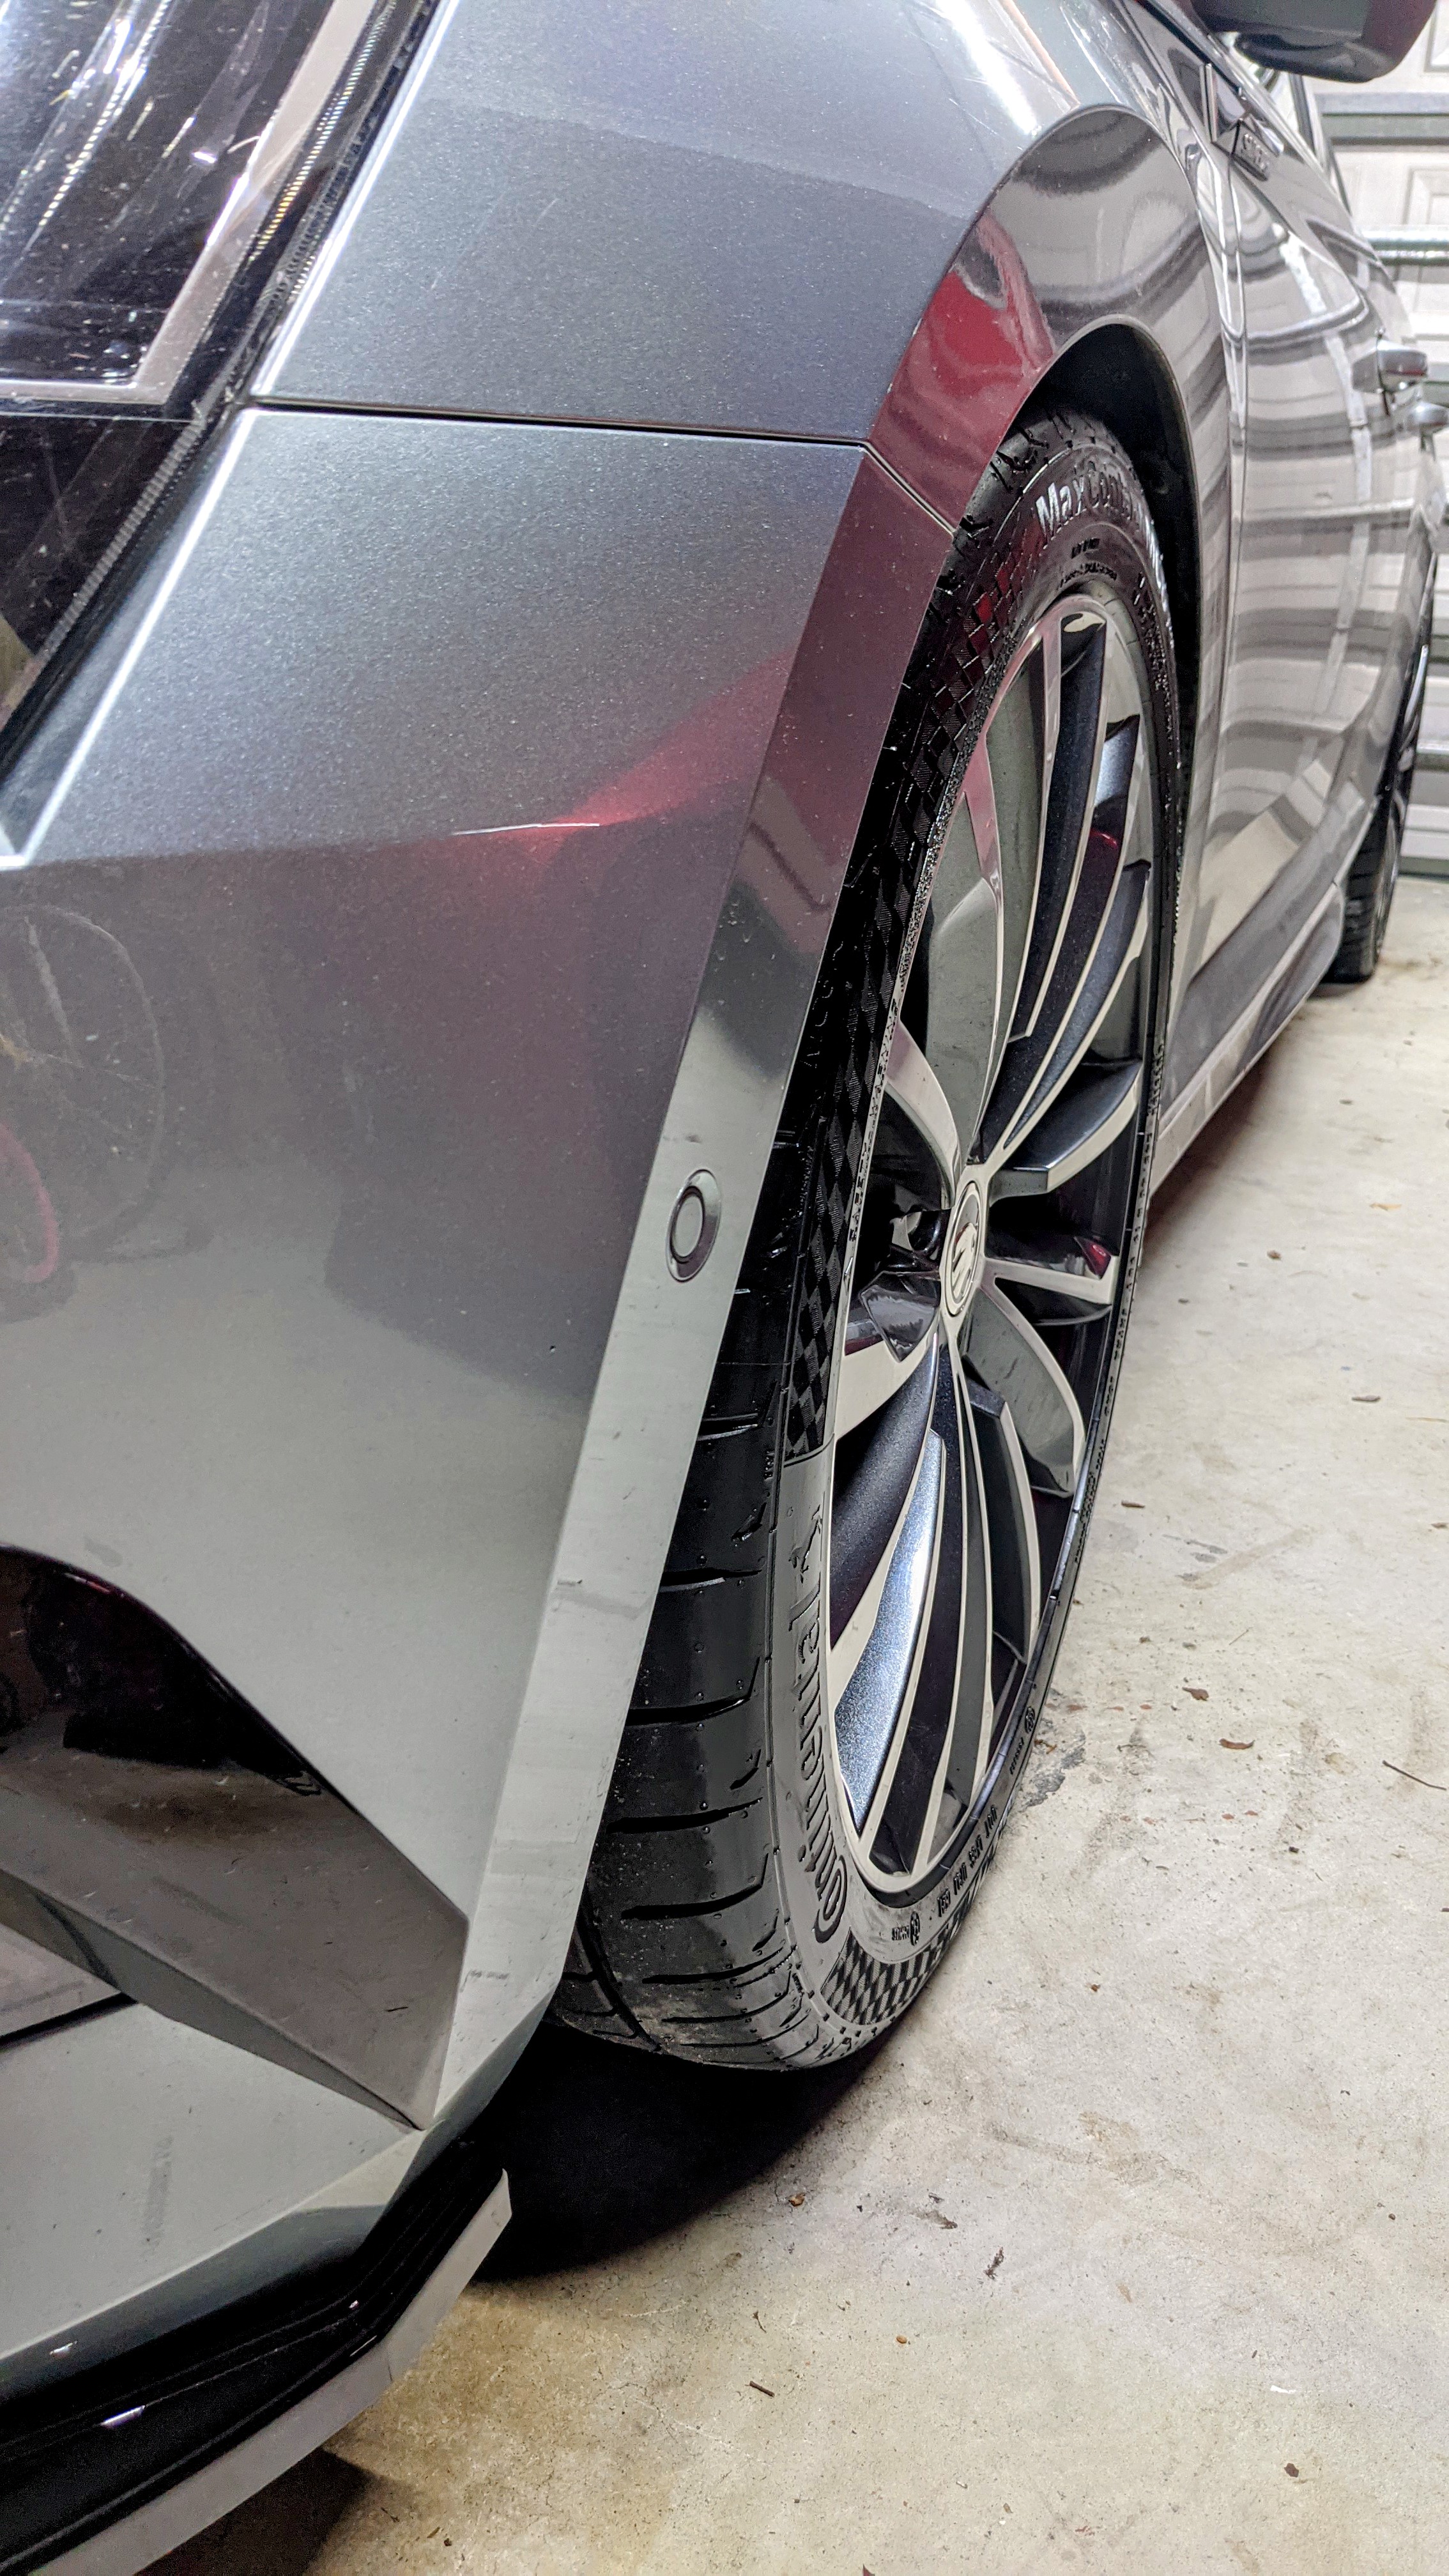
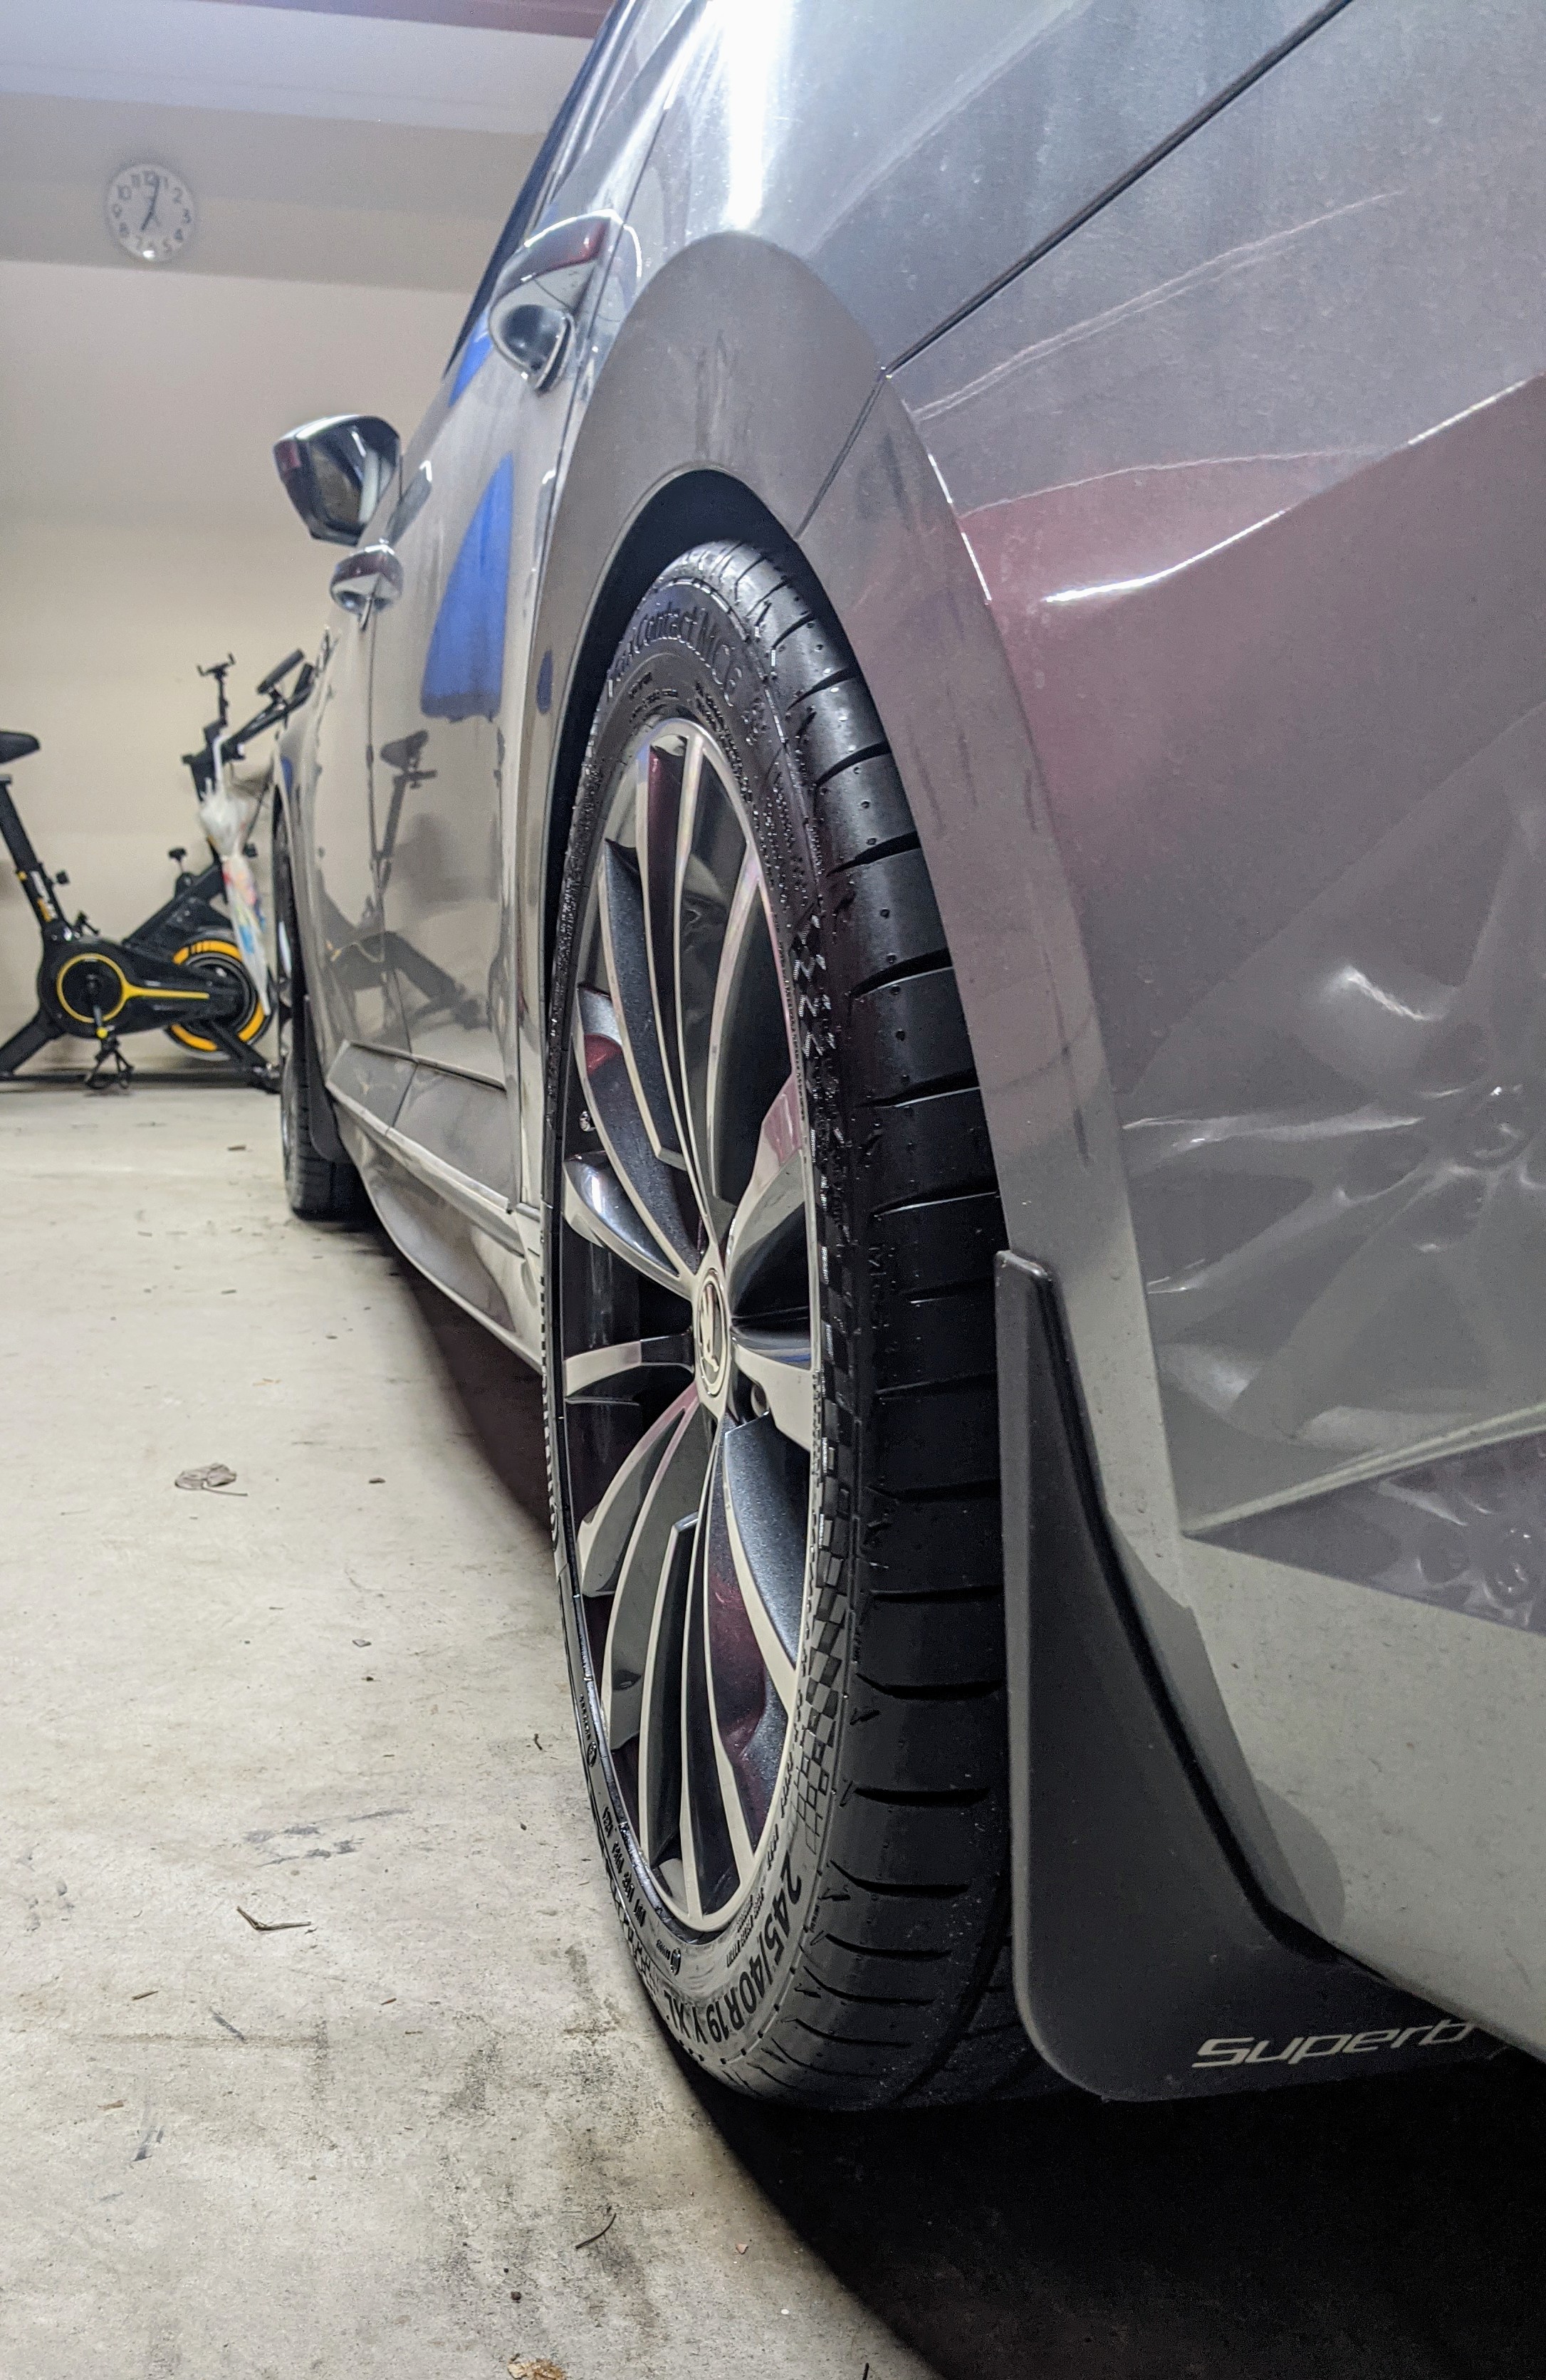
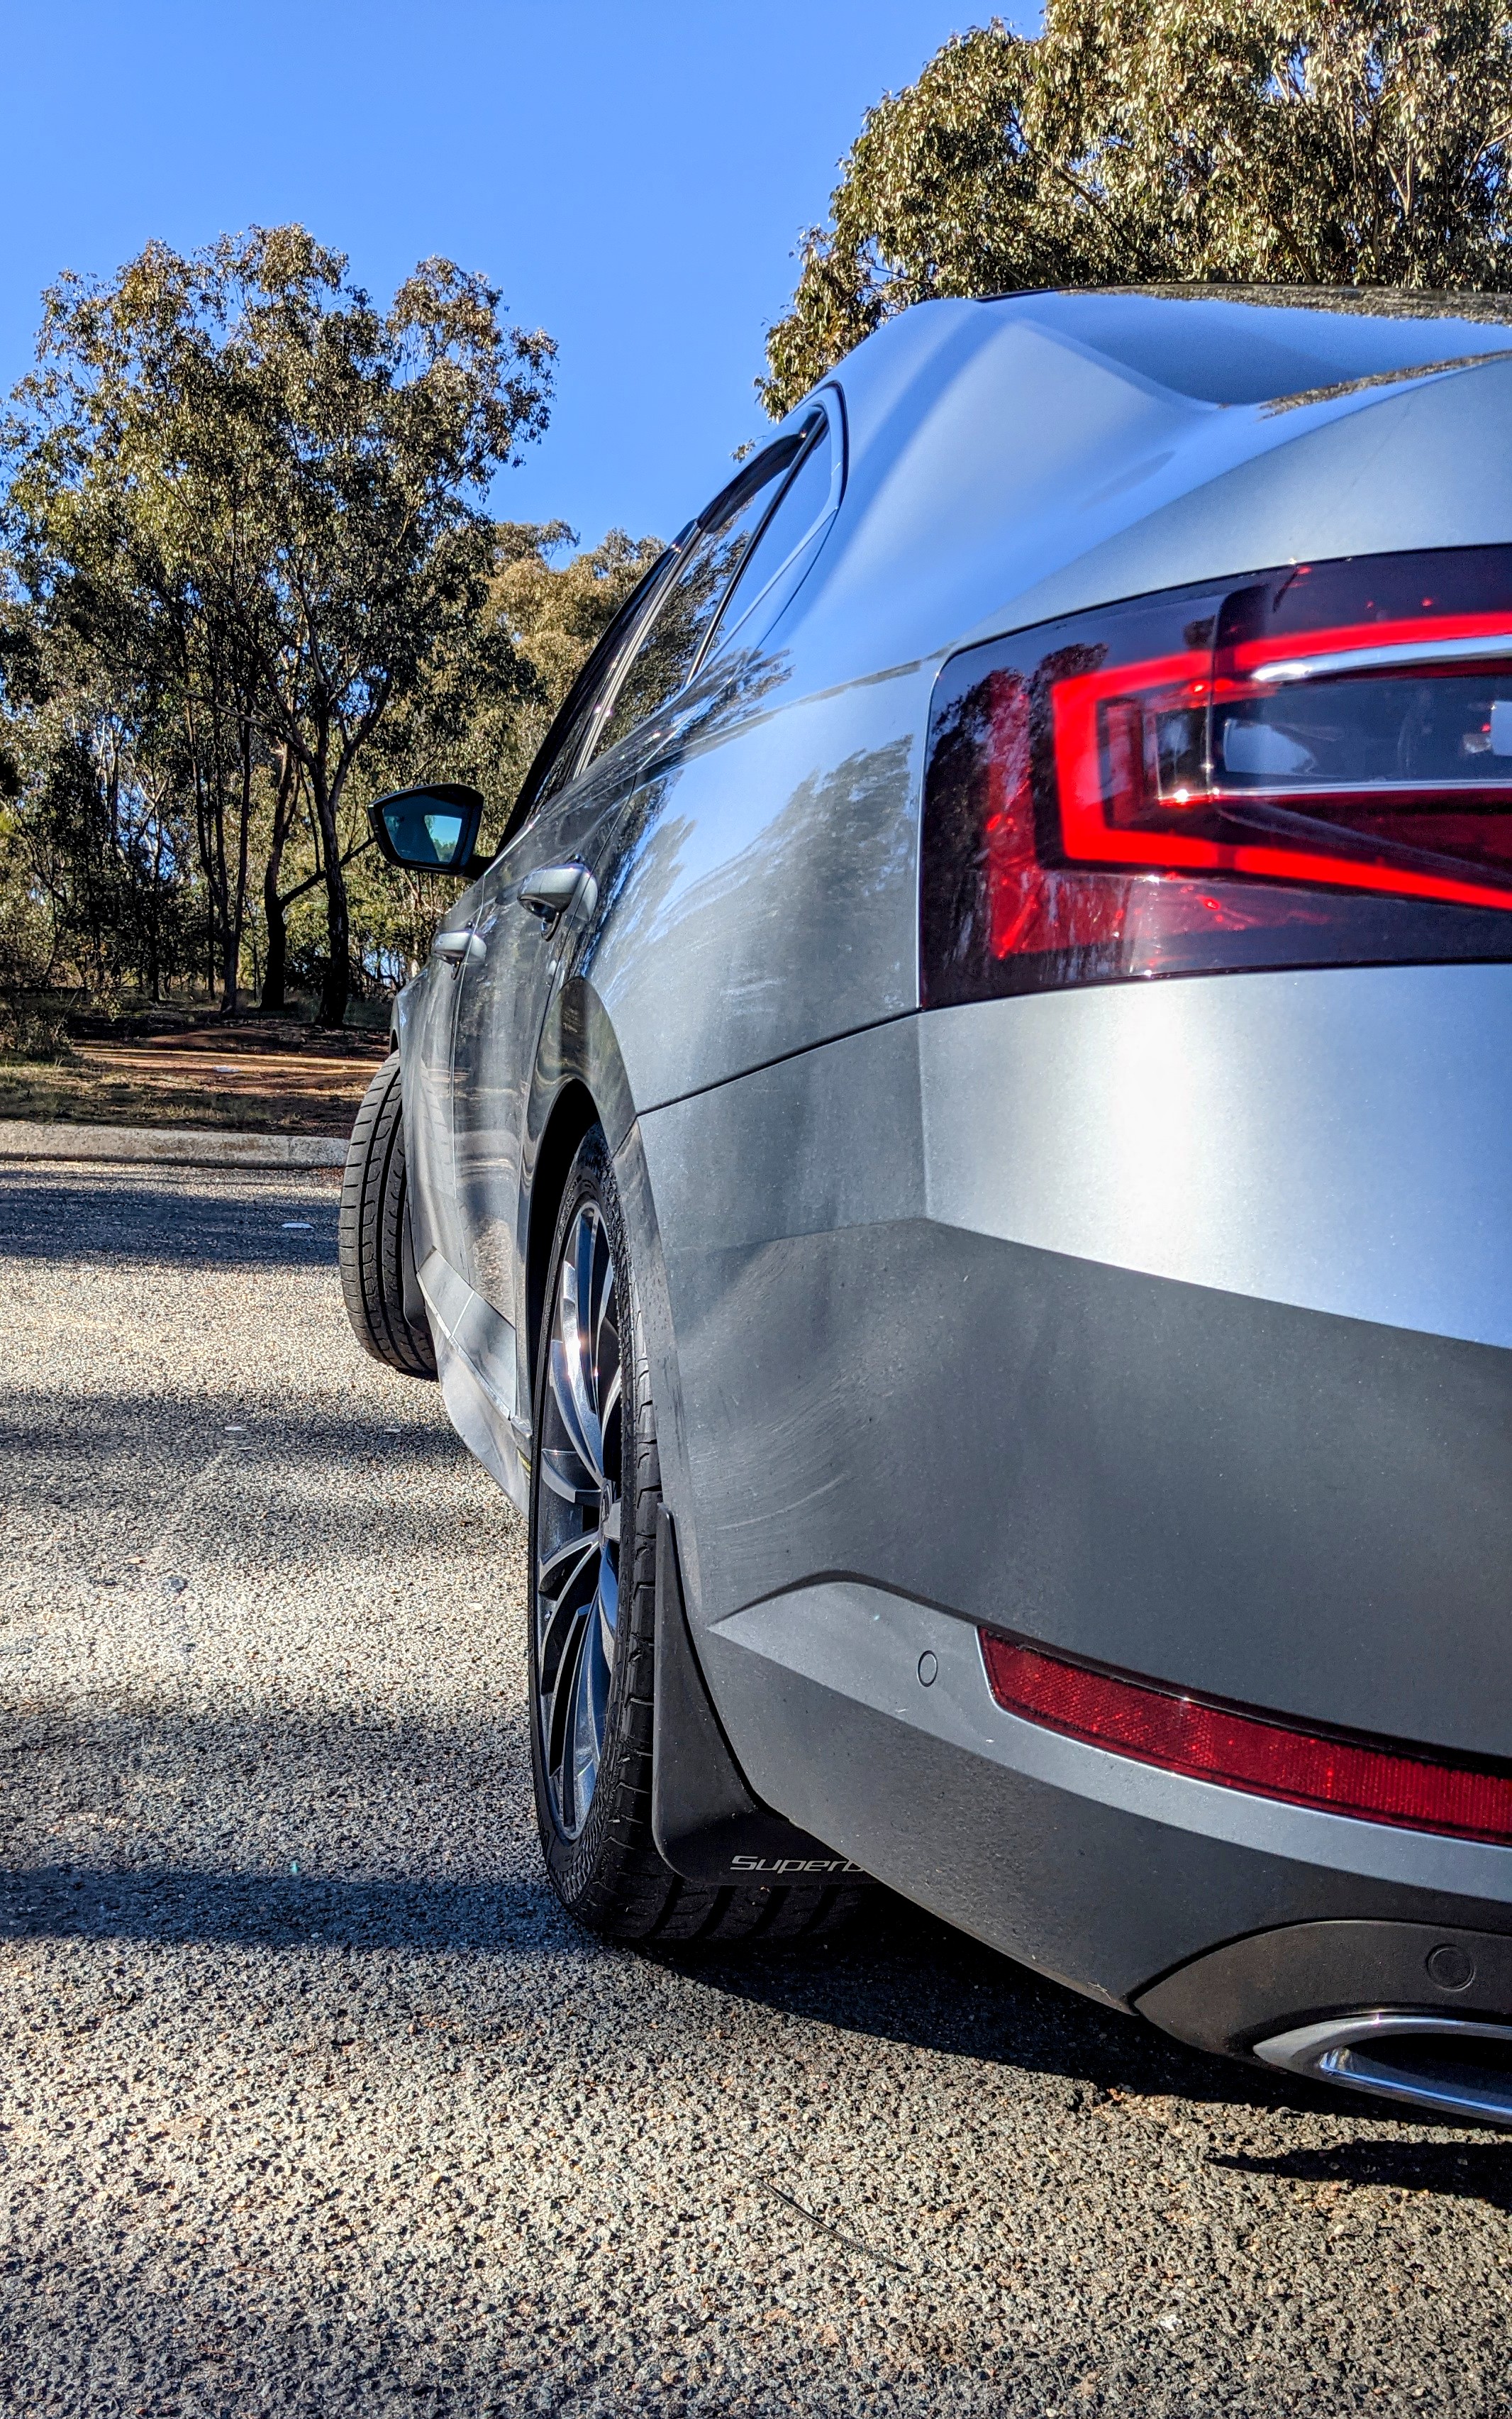
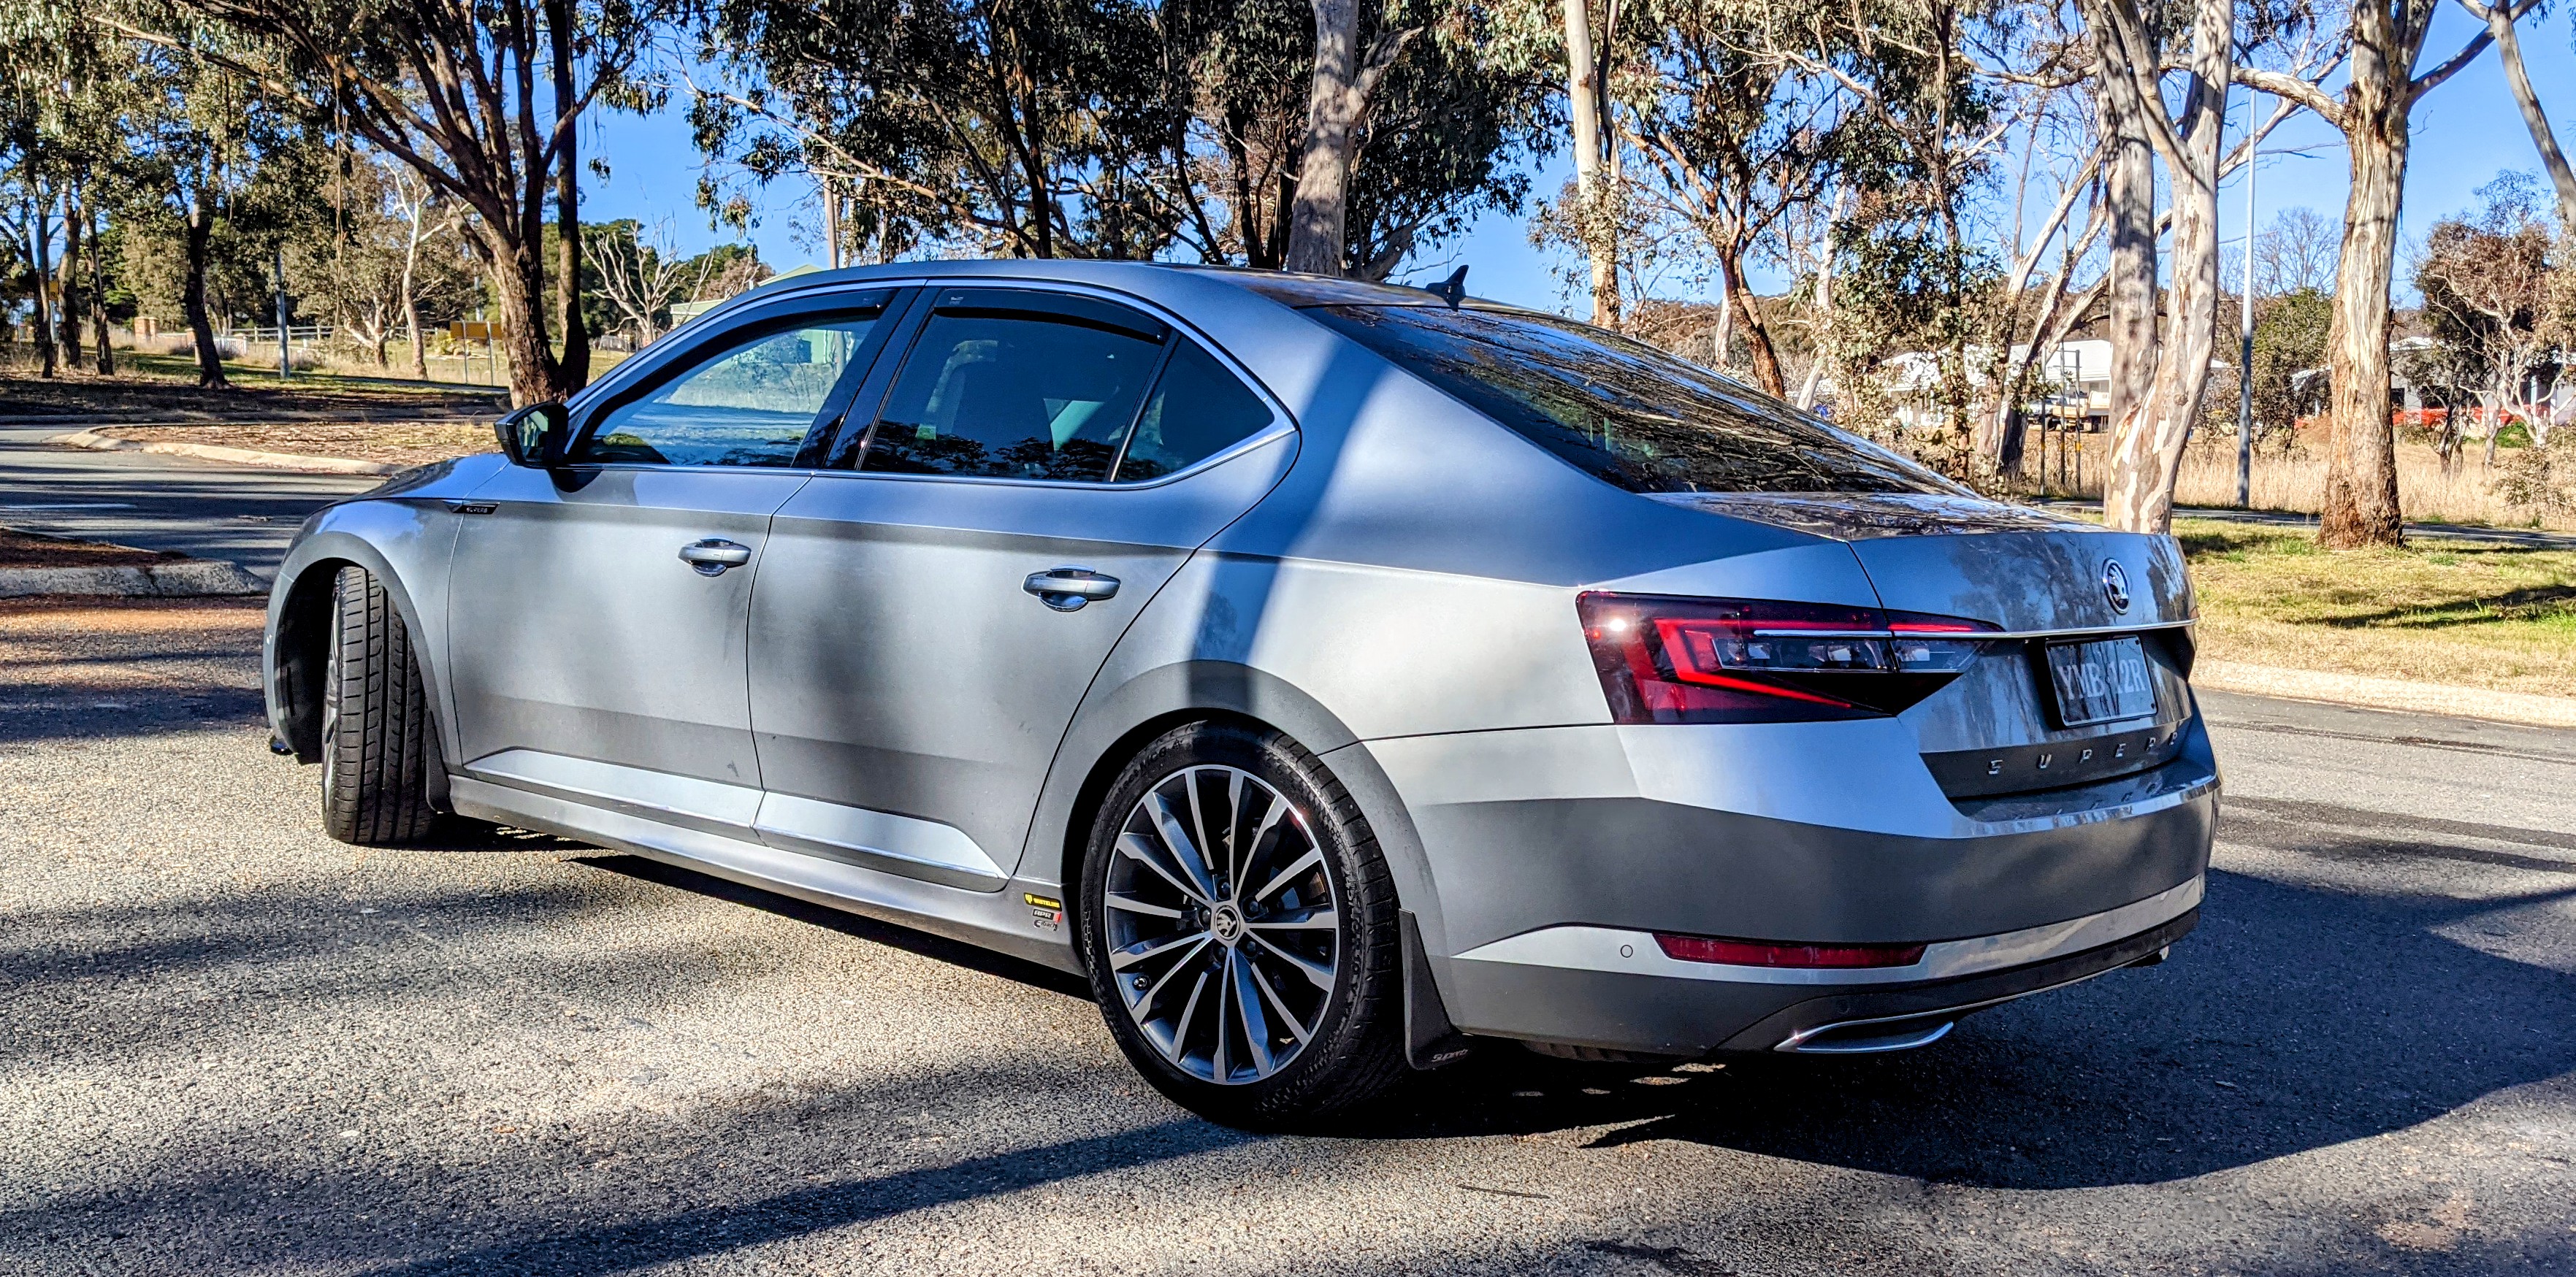
After 4 yrs, and almost 55k kms, the factory Pirelli P7 has done it's time and has been replaced with ContiMaxContact6 tyres. While I was at, changed the tyre profile to 245/40R19, saving more than a hundred bux a tyre! With the car already lowered on Eibach Springs, I had to remove my rear 15mm spacers as they scrubbed a little while turning or going over speed bumps with passengers in the back! Front is great. Just a wee bit too much poke at the rear.....

 2 points
 -
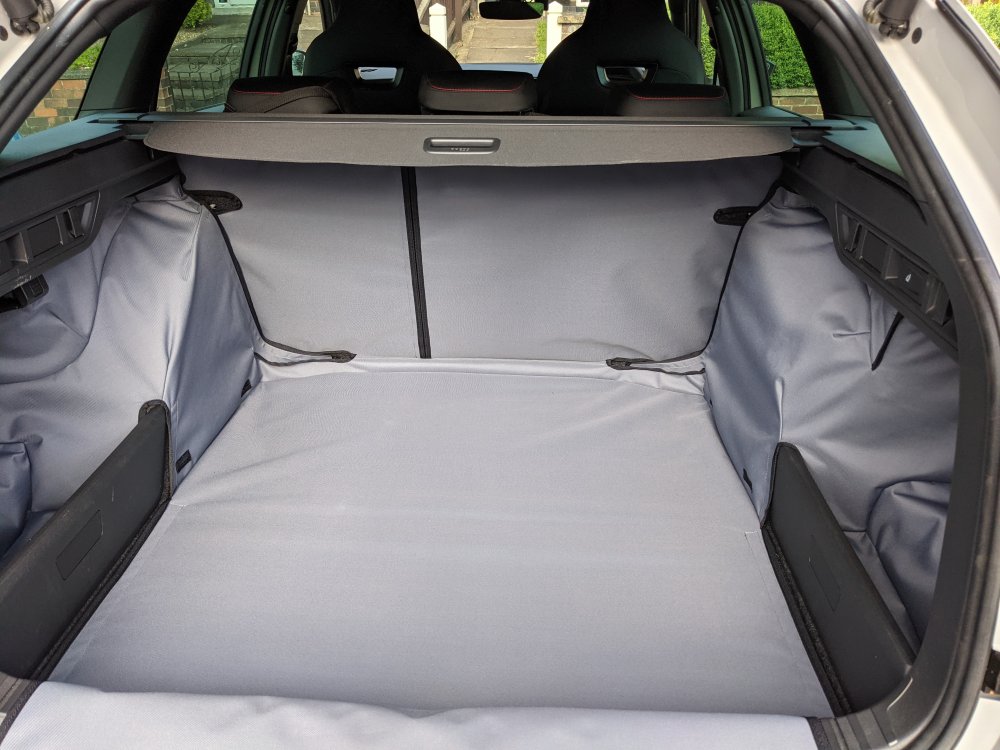
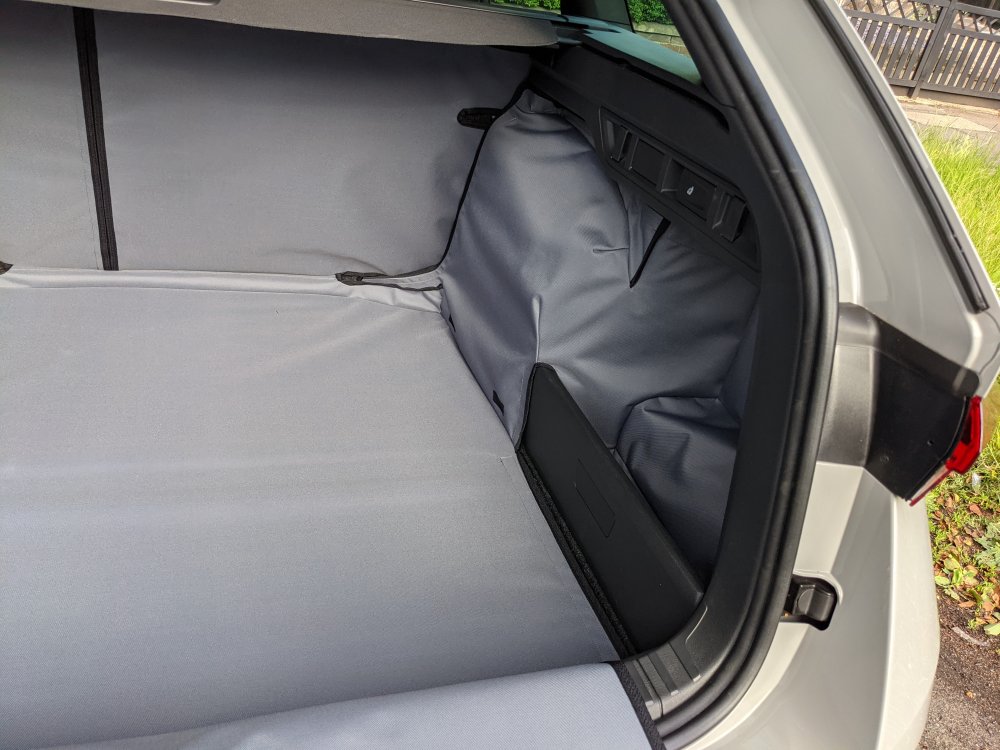
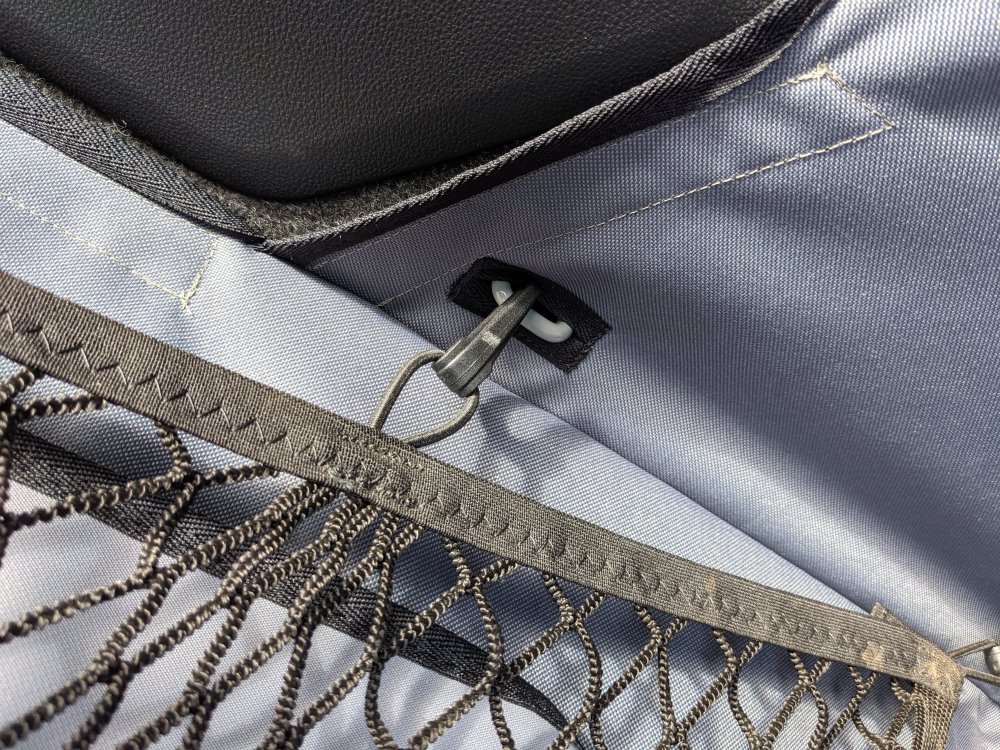
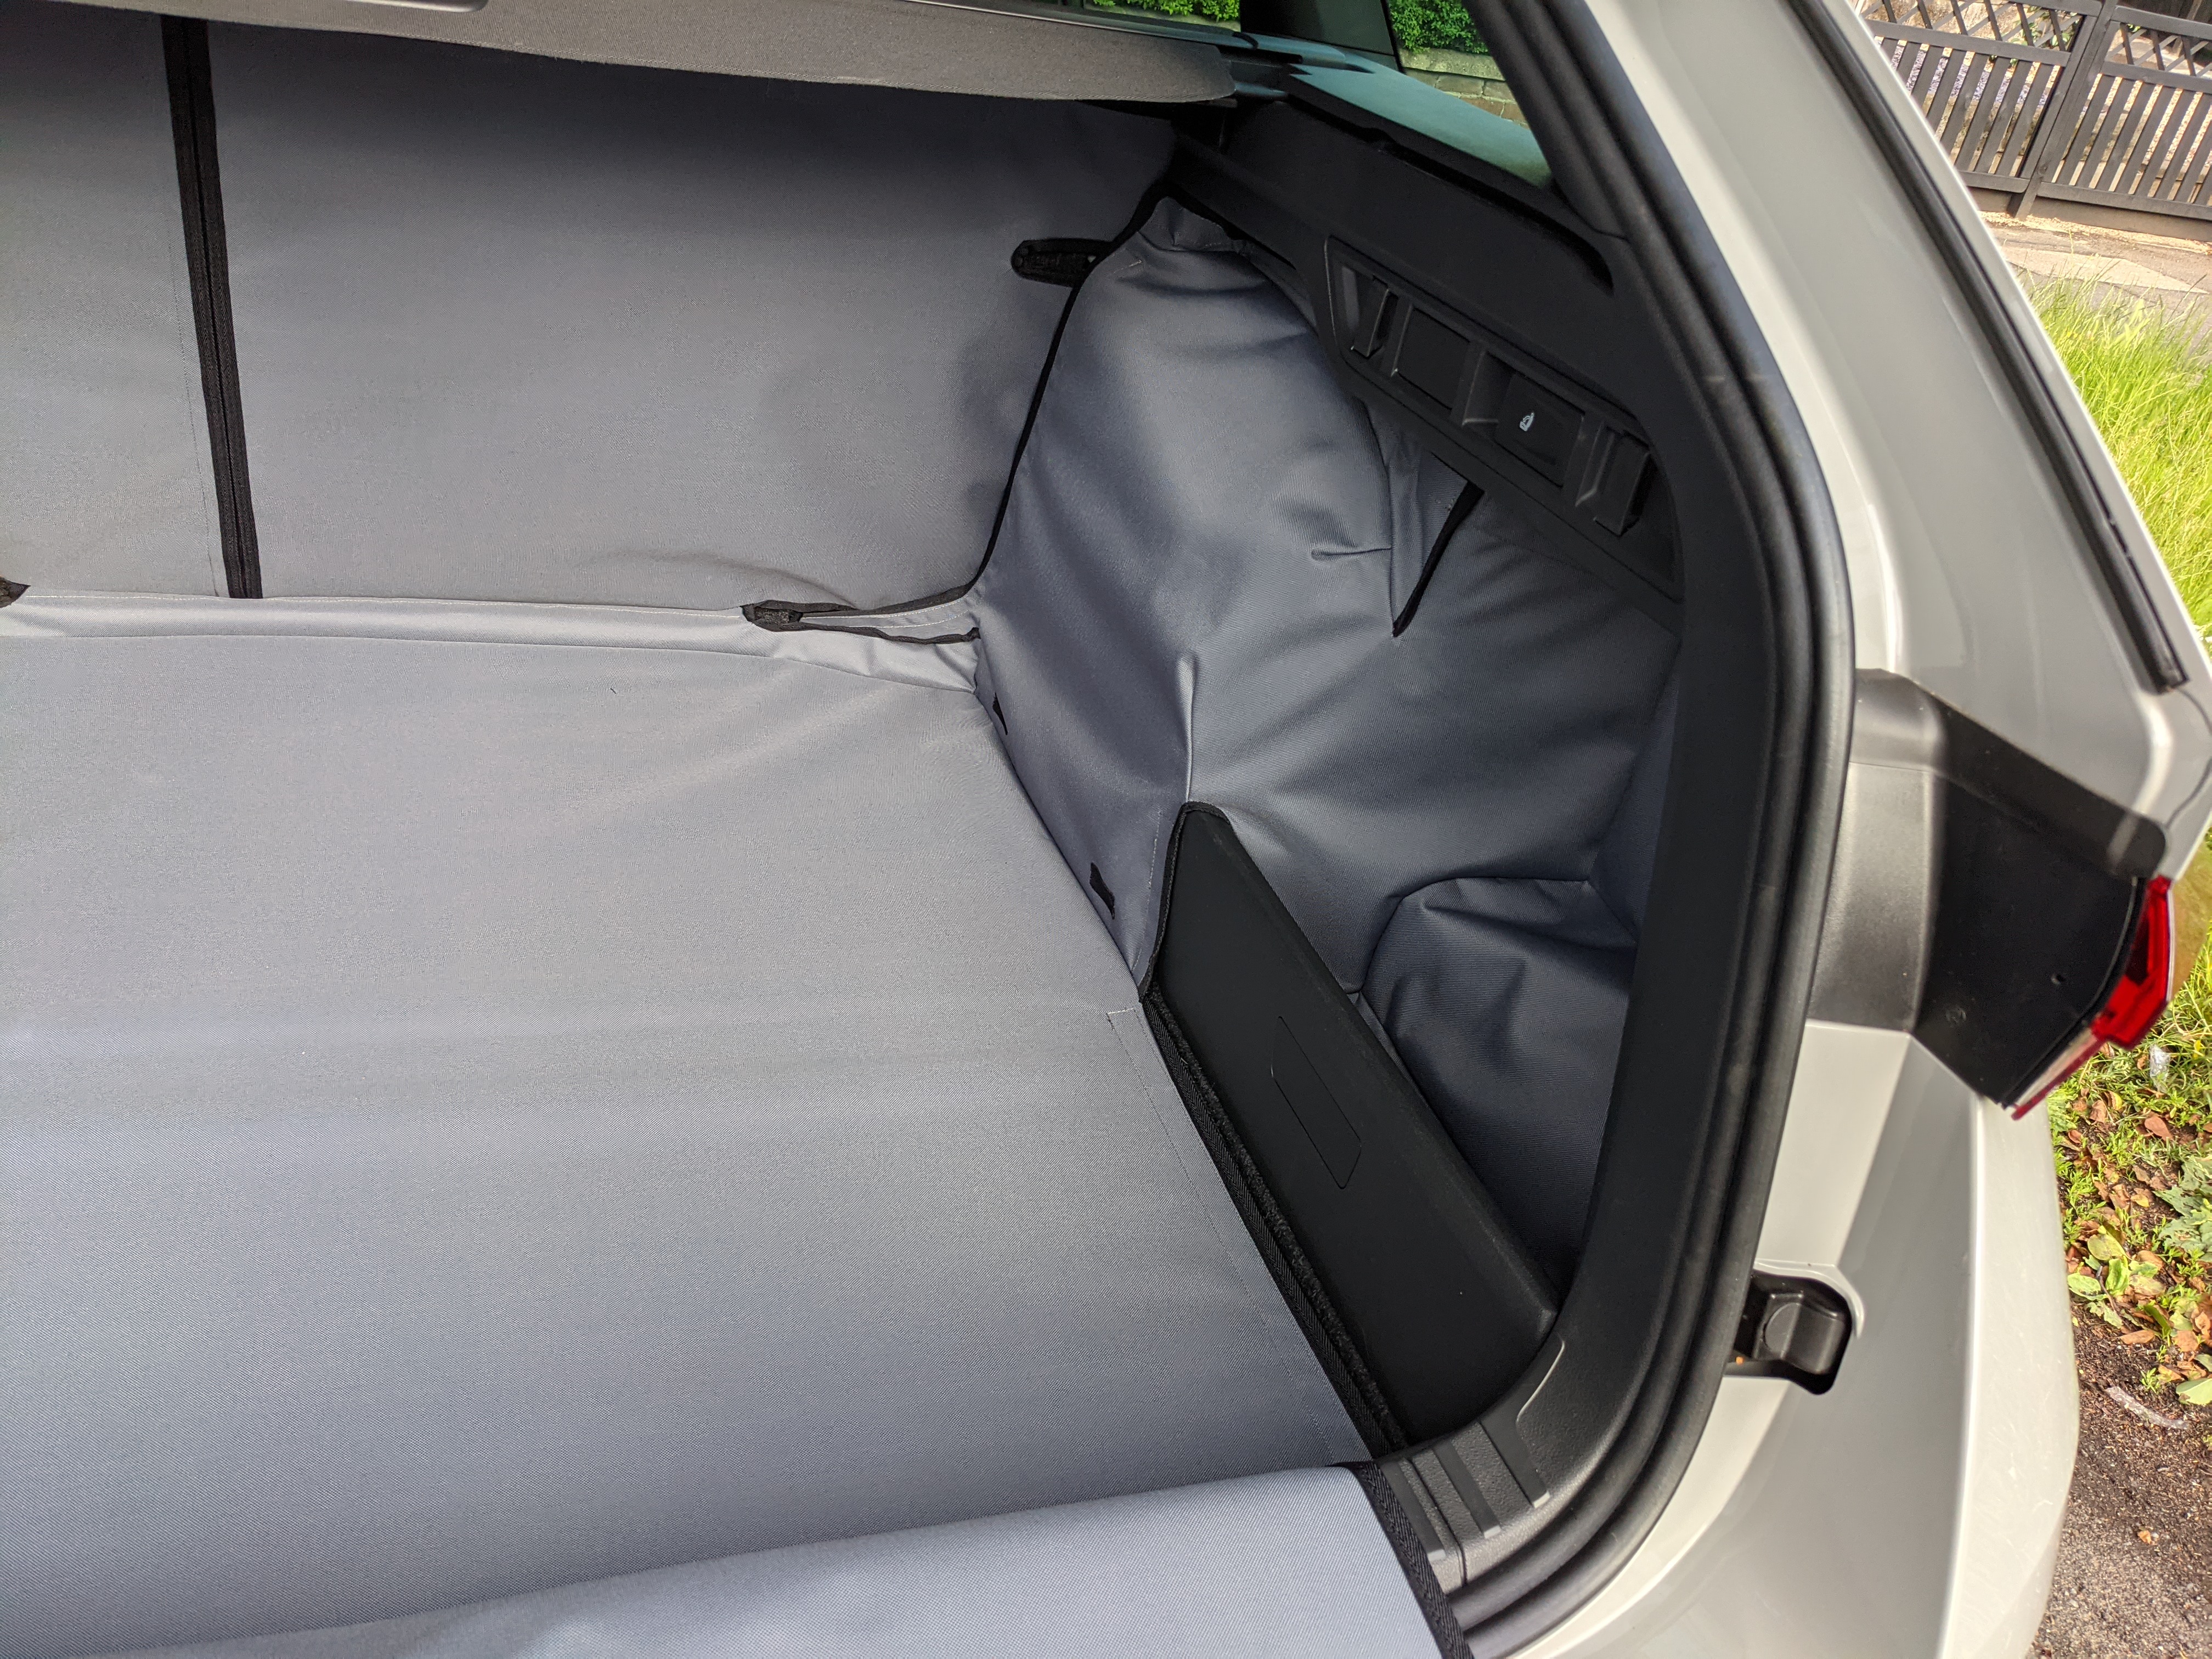
1 pointRecently I had some radiator issues on my Superb ... luckily the level sensor in the coolant container works, so it started detecting that the coolant level was too low. So, naturally, you just top it off and continue driving ... and such a fix held up for a week or two. I never found any coolant anywhere in the engine bay or under the car (and no, it can't just evaporate without any trace). So i figured the coolant container must be leaking somewhere, since I saw some scale traces on the sides , and some coolant drops on the bottom, like there was some leak on it, which gets active with the increase in system pressure. A few days afterwards, the coolant error came once again, and it started appearing more often. Did some close inspection, and found out that the radiator was leaking, ever so slightly, on the bottom right front facing side (you could see it through the bumper), and this was the obvious leakage source. Replaced the radiator, topped up the coolant and was happily driving until two days ago. Started the car and was greeted with the well known message that the coolant level is too low. Topped it up, and saw a coolant puddle appearing below the car after starting the engine (some half liter went down over a few minutes). I was confused, since all the apparent sources of leakage were inspected and fixed (previously all the hoses were checked, just in case - no cracks or any other visible damage on them). Well, the hood (bonnet, for you brits ... ) was up once again, and I tried to find the source of leakage, and this time it couldn't be a small one judging from the amount of the coolant that leaked within minutes. After some time under the hood, the issue was found - the radiator coolant hose adapter which connects to the cabin from the engine bay (under the windscreen). The culprit was the plastic connector, which, over time, failed to properly seal, due to various whatever-it-was that was slowly accumulating over the rubber o-ring inside. The connector is a Y-shape element, and luckily, it structurally failed on the smaller hose when dismantling (literally fell apart), which meant the adapter definitely had to be replaced (without that failure, I'd probably just replace the o-ring, without paying much attention to its general condition, which was concealed with the hoses). I've managed to figure out the OEM part number by doing an online search (the connector is widely know as a "pa66 gf30", which is imprinted on the adapter body, although you'll hardly get the proper part by that alone). The part no. in question (mind you, a 3.6 CDVA engine) is 1K0122291C. Prices vary, I've managed to obtain a new one (Febi Bilstein mfc.) locally for roughly 4 GBP (you'll find a MSRP up to 20 or 30ish GBP at some online shops). It helps for the procedure if you have smaller hands and proper tools. The only thing that was taken off under the hood was the air inlet hose that goes from the air filter box over the engine to the air inlet valve/flap. The car is now 13 years old, with 223.000 km on the clock. Not sure if these adapters are known to fail/degrade as it was in my case, but I'd suggest to anyone having a similar age car to inspect this part before it disintegrates/melts/crumbles/whatever in the coolant hoses, making the repair that much harder. P.S. The smaller, missing head piece of the Y- element was still stuck in the thinner hose (which connects to the coolant fluid container on the upper left side of the hood), and was successfully pulled out with a screw that was screwed into it while still stuck inside the hose. The thin cylinder part was basically dust/gunk that was stuck to the sides of the hose, and had to be dug out.1 point1 point*update* Boot liner is here! Also with cut outs for boot nets if that's your thing:
 1 pointThanks for your help. I simply copied the original non hyperlink and opened it in a new window1 point@nta16, hey come on, give yourself a pat on the back, these links do do what you expected!1 pointWot!! ? !! No paper printed, so reliable, copy of the Owner's Manual!!! Well ain't that progress. Luckily, if you have a reliable device, and reliable connection, and the website isn't down you can download an electronic copy of the Owner's Manual, I always strongly suggest using a PC with wired connect by I realise this is as strange as like suggesting to use a landline phone to some. Here's the link that works on my hand-cranked PC, whether it works on one of these 'marvellous' latest mobile device like a "smart"? phone sorry I won't have a clue, forgive my cynicism but I've had to put up with computers and mobile phones since the 1970s and 80s and their overall reliability has gone full circle despite them being able to do a lot more, but only when they're working. Fabia Owner's, Manual Issue date: 14.6.202, Part number: 6VA012720AA - https://digital-manual.skoda-auto.com/w/en_GB/show/1d1c2693afde670eac144525194ab158_1_en_GB?ct=1d1c2693afde670eac144525194ab158_1_en_GB If that link doesn't work for you, go to - https://manual.skoda-auto.com/004/en-com/Models HTH, cheers, Nigel.1 pointLooks like it has been re fitted wrongly after a service. Easily sorted with a jack and about 5mins of time. You will need to purchase some screws. Or speak to the garage you purchased the car from to sort it.1 point1 point1 point1 pointI found another rattle in this area. It's the bonnet release handle resting against the trim when in the closed position. My solution was to slide a little piece of black heat shrink under the door rubber so that it sticks out and in the path of the edge of the handle making contact with the trim. The heat shrink I used was 15mm wide and cut 18mm long, just enough to stop the rattle.1 pointhttps://youtu.be/LWCn8uRXXpA There you go, it's easier to watch on video but basically you need to connect one wire to your O2 cable(normally red wire) with posi tap connector so the box can read data from it as well1 point1 pointThe strut on mine gets replaced on Friday. Skoda have had difficulty getting hold of one. Hopefully this fixes the problem.1 pointYup, they r the 19" Phoenix/Trinity rims, ET44. 15mm hubcentric spacers front & rear. Car is lowered 20mm. Had no issues with 235 tyres and the 15mm spacers on the rear, but the same setup with the wider 245 tyres scrubs (where the rear bumper joins the rear qtr panel) every so lightly. The poke was also a bit too much to my liking, so I've now removed the rear spacers. No more scrubbing.
 1 point1 pointRegular update is 0253. But if your unit is hacked then I recommend to leave it as is...1 pointThanks JR , now elevated you to genius status. Warmed bottle up, tried again and sure enough fan kicked in, cold air in cab and climatronic fault codes gone. Guage reading low side of green. Bottle weighed 1250 g at start, down to 800g, so presume used nearly all gas. We'll see how long it lasts, and if Winos theory about fan was correct or there's a leak elsewhere. Thanks again for your advice and all other contributors, particularly Wino who seems to have the schematics for Skodas imprinted in his head !1 point1 pointI have 1803 SW and just seen an update over the air. It did not say what it was , it did however have a space to tell you what the update was but no one at Skoda bothered to list the changes. Ill do their beta testing again. So far tho 1803 is near prob free apart from sat nav forgetting and climate 22 degrees forgetting1 pointIf you mean the door card, then there are screws around the edge and two in the handle and one hidden behind the speaker/window switch.1 pointI think the "min 12.4v" is likely to be a guide for storage prior to sale, and/or a pre-sale tick box exercise*, judging by this extract from a Yuasa "technical/need to know": " 1. Batteries should be installed ideally within 15 months after manufacture. The voltage should be (worse case higher than 12.25V) ideally higher than 12.4V at the time of installation. 2. Batteries require recharging when the voltage has dropped below 12.4V due to extended warehouse storage. " * It was good when we sold it - we ticked the box. Regards, John H P.S. With that in mind, I think I'll put our old battery back on charge again....1 point1 point1 pointBy and large, manufacturers quite deliberately create fear, uncertainty and doubt about oil, by saying in my manual "To find out which type of engine oil you can use for your vehicle, contact a specialist garage" - this is to send you into the arms of a dealer, for reasons of profit. Basically, go for 504.00 - as I said, most brands will meet or exceed this spec. My manual also says to refill with "VW 502 00, ACEA A3/ACEA B4 or API SN, (API SM)", so even that lower spec appears acceptable. The thing is about 502, 3->7,8 etc is that they are increasingly higher specs, mostly for diesels but the Citigo engine does not really need the higher spec stuff. It is true that there are a lot of VW engines that have design features that require a very particular oil spec, but the little non-turbo triple is not one of them. As for C2, C3 etc, these are about ash content, which is quite important for diesel DPFs, but not important for a Citigo petrol engine (which has a GPF, but they're way less fussy than a diesel DPF). [edit] - I just found this: https://www.oilspecifications.org/volkswagen.php1 pointThere are occasions - on motorsport events that radio cars need to be in position at very early hours. It is easier to recline the passenger seat, remove all three rear seats, get into position, and all is well. Woke up once in mid Wales covered in snow - lovely and warm under the snow blanket. As you say - everyone has one.1 point1 pointI think the glib answer to the thread title is - badly! I have the issue that on rural roads it just can't work out where I am and gets really upset over worn or wet strips on the road and generally any surface that's not a nice even blacktop. Aside from trying to steer me into the middle of the road the loud beep is off-putting to say the least. Must be some form of camera as it can determine between different types of white line on main roads, and if there's no white line shows a 'rough' edge to the road otherwise which I'm sure radar couldn't do. Probably why it gets confused over other line-like markings on the road. I'd also note (sorry if this is obvious) that the display will dim if you go below 30mph as it turns off below that speed.1 pointI never understand the logic behind these 'conversions' of small cars to 'campers', where would you use this when most layby's in UK don't allow overnight stops? 3am knock on the window from police patrol anyone? No thanks, too small, too cramped, too claustrophobic, how do you shut the tailgate, how do you get out in a hurry - and where do you store all of your kit (potentially wet clothes, wet boots, food, kettle, chairs, knick knacks etc) overnight when you are taking up so much space lying in the back? In my opinion there is too much compromise, too much potential to damage the expensive interior with random bits of wood and this takes no account of the fact that being an average 6'2" and 15 stone my companion would need to be the size of Kylie Minogue. For me, carrying a day tent such as a Coleman Octagon which packs up fairly small and light at about 20kg is a much cleaner solution. It's 4m x 4m, 2m high and takes 15 mins to pitch single handed and can be bought for less than the cost of a replacement torn seat over/door trim/headlining, it sleeps 3 comfortably, gives you space to relax and leaves you better prepared for the next day. But as they say, opinions are like bum holes, everyone has one1 point1 pointYes, but there are several VW specs. You use an oil which meets the one it states in the manual. Anything else is automatically guaranteed by the oil meeting that spec. If you create a login at erWin Skoda you can peruse the lists of oils that are compliant (and tested by VW group as being so) with each spec.1 point1 pointI think we all know about viscosity Vs spec but it's actually hard to pick up a good brand that doesn't meet VW spec these days. Generally, most products are over-specced for these engines. I'd just stick with the majors and not worry too much! Opie is a good place to start...1 pointI have VLT20 on the fronts and VLT70 on the privacy glass rears. When first installed it was perfect however under some ambient light situations the fronts can look a touch darker than the rears now which I don't like the look of. I did originally ask for VLT50 on the rears but the tinter said that would be too dark with the privacy glass to match the rears. Here's my pic.
 1 pointI got the lend of a racechip tuning box and installed in it my 2.0T 220bhp for a short while.. took it to a local rolling road and it put out 289bhp and 350 Lb/ft.. I run on super unleaded also..1 pointThank you, I'm thinking of sending it away to get this done as I'm not sure I'll manage myself 🤔1 pointNo mate its at flywheel, and yes i have installed it myself....fairly easy but had access to ramp which made it lot easier....tapping into O2 wire was bit stressful but easy enough....then running the obd cable through firewall took some time but easy as well1 point1 pointGot the car back. Turned out to be a vac pipe had somehow come off on the intake, causing the problem. . Hopefully that's the end of it.1 pointNo, 220bhp.. Well specced too.. It was basically Sportline Plus spec. I got it with 9.2 Columbus, front sensors, heated seats, electric boot and spare wheel. Added a detachable towbar too.. It's gone and all now.. Fella said it would be in the auctions next week and the dealers would go mad for it.. Will keep an eye out and see what it goes for sale for.. I know, although 3 rows stops the kids from hitting each other.. LOL..1 point1 pointLikewise, not quite 100k miles yet for me - 94k miles. No real issues, just front brakes and a couple of broken springs - oh and 1st lockdown upset the battery (never failed per say, but replaced anyway) . I extended to a five year warranty but having owned from 14months old but I never needed it for anything. Overall I'd agree - fantastic car. Reliable, refined, comfortable, economical AND I fit in it!1 pointGreat advice! A little tip I have discovered helps with the problem of getting polish on the unpainted plastic trims: cover them in your bumper/trim gel of choice before you apply the polish. If you get any on the trim after that, it just wipes off. If you don't want any bumper gel on your paint, apply masking tape before you apply the bumper gel.1 point1 pointI'm sure it's a camera. On motor ways and dual carriage ways it works well where the lanes are clearly defined, until you come to a row of cones that make you steer to the right. On backroads it becomes annoying when you steer to the middle to avoid broken road edges, cyclists etc. I once drove along a road where a truck had spilt a trail of white paint in patches in the middle of the lane. The steering command gave up and told me to take control. I certainly would not trust my life to it but maybe on a motor way it may be a useful as a back up warning.1 point1 pointI can't understand how you guys can like the start/stop system. I would say it's one of the most annoying solutions in the automotive history. I'm actually quite frightened just thinking of motor being turned off when waiting on the side road trying to turn on the main road with heavy traffic. I turn off the start/stop system with every drive I make. I'm already doing it automatically.1 point1 point1 point1 pointI don't have an Enyaq, but its elder brother - ID.4. I have found after my DSG Karoq that the driving experience is very similar, but acceleration better. I think the acceleration is better due to no gear changes or wait for turbo boost and it certainly gives confidence. Over time I've got very confident in the range available, its been very consistent over the 3.4K miles we've done. So confident that we've spent the weekend away in an area with no chargers, confident we had 'motoring around' miles and enough to get home again. (which we did without drama). Recently have started using eco mode as we've been using the car's punch more than really needed on hills. Eco blunts the acceleration a bit but gives better efficiency. From what I'm seeing on-line the Enyaq 60s are giving better m/kWh than the ID.4s which is probably due to the lighter weight battery and slightly better aerodynamics. Its very noticeable that most Enyaqs seem to be the 60 version.1 point1 point@whitevxA lot of the brands discussed are not available in bricks and mortar stores in the UK either, we have to order online or from specialist detailing suppliers. I use stuff from all over the world: Chemical Guys, Poor Boys and Collinite are American, Koch Chemie and Scholl are German, from Britain I have Meguiars, Autoglym, Dodo Juice, GTechniq, Autofinesse and CarPro. In terms of products it all depends how deep down the rabbit hole you want to go! Polish, protect and shine really needs two products for best results. I assume you are applying by hand, so my recommendation would be an All in One (AIO): Autoglym's Super Resin Polish. This isn't an abrasive polish, more of a "glaze" meaning it fills fine marks to achieve a smooth finish and shine enhancement, rather than removing a thin layer of top coat paint. It easily achieves nice results by hand although after a few months the fillers will wash out and it will need treating again, if you want it to last longer top with a durable sealant or wax and you'll probably see 6 months longevity from it. Shake well before use, apply 3 skittle sized blobs on a firm foam pad and then work in small circles over an area about the size of half a door. Wait until dry to a haze, buff off the residue with a quality microfibre (not the crap they sell in supermarkets on the cheap, something like 350+ gsm Korean edgeless plush microfibre). If it gets a bit dusty coming off then dampen with a fine water mist. And don't get it on plastic trim or rubber as it's a pig to get out! Autofinesse Tripple is worth looking into too, it's a similar product AG SRP and some prefer it but could be harder to obtain down under. Autobrite Cherry Glaze is magic stuff, smells lovely(!), fills excellently and gives everything a warm glow but the longevity is rubbish, it lasts about a month outdoors if you don't top it with something. Probably an online order job in Aus too. If you prefer permanent correction of minor defects and are willing to put in the elbow grease, Gtechniq Nano P1 is one of the most effective by hand but it's long, slow and hard work. There's no protection layer at all with this as it's purely fine abrasives, so you must top it with something. When cutting to correct you'll want a good firm foam pad, otherwise all the rubbing is for naught. If you're happy to do a two stage process there's loads of easy "spray on, wipe off" waxes and sealants that can give a few months protection and a bit of shine but they're not going to hide any scratches so you would need one of the above polishes first. Think of this as an optional second step to make your work last longer: TAC Moonlight, Gtechniq C2v3, Gyeon Wet Coat or Kamikaze Overcoat are all hardy examples of the spray ceramic breed Very easy to apply, generally misiting a couple of sprays onto a panel, spread around with one microfibre and remove excess with a second microfibre almost immediately; some are recommended to go onto a car that is damp after washing or be rinsed off immediately so do check the instructions. Waxes, sealants etc generally don't bond well to SiO2 coatings, so don't waste your time topping these with anything other than top-up sprays of the same chemical after a few washes. Collinite 845 is a hybrid liquid wax that I've sworn by for years, it lasts 3-6 months and leaves a lovely waxy glow on darker colours. It's more work to apply then the spray stuff as it has to be wiped on with soft foam then buffed off after a quick cure and I do two coats. If using ensure you warm the bottle first and shake very well, then 4 penny size blobs is enough to do a whole door, you want it on really thin otherwise it's awkward to remove later. Whatever you polish with, ensure the car is as clean as possible first because you're going to be rubbing all it all over and don't want to be dragging dirt across and creating scratches. One of the biggest things you can do to protect your car's finish is wash it carefully: that means spraying an All Purpose Cleaner (APC) on the lower areas to loosen as much dirt as possible, pressure washing thoroughly, then using a well lubricated shampoo with a deep pile or chenille noodle washmitt. Under no circumstances should a sponge go near your paint! And for drying afterwards, you will want a big plush microfibre, no old bath towels or chamois leathers! Poor wash technique imparts many fine scratches (swirls) that really dull the finish shine over time.1 point


Important Information
Welcome to BRISKODA. Please note the following important links Terms of Use. We have a comprehensive Privacy Policy. We have placed cookies on your device to help make this website better. You can adjust your cookie settings, otherwise we'll assume you're okay to continue.