


Leaderboard
-
Lady Elanore
FREEDOM9Points24,875Posts -
.jpg.1006585dfe4e2977315b67c3d642e37b.jpg)
Guest_
FREEDOM8Points83,824Posts -

Guest__
Members8Points1,770Posts -
Arkaig
Members6Points1,039Posts


Popular Content
Showing content with the highest reputation on 19/08/21 in all areas
-
There are a couple of guides but they don't explain every step. I struggled to fix mine but in the end it is a simple fix. 1.Take out parcel shelf and lay upside down on a bench with the pull out part towards you. 2.Look at the end caps and you will see 4 slits. You need to remove the right hand one as you look at it. In the car it will be on the left but you now have it upside down. 3.Insert screwdriver and break off piece of plastic between the slits.This part may not be necessary but it made it easier to see inside. 4.You should now be able to remove end cap with a bit of force and by pushing the locking tabs in. 5.The cap has two parts with a large spring in between. 6.Take roller out completely, it just pulls out easily, and wind up as if you are rolling wrapping paper. 7.Put back into the sleeve. 8.Keep pressure on the rolled up shelf so it does unwind. 9. Take the piece of the end cap with the notch in that matches the notch on the end of the roller and match the two together. 10.Rotate the cap towards you about 15 times. This creates the tension.It is important to turn it the correct way. 11. This is the tricky bit. Push the cap back into the roller without releasing it or the roller will unwind! 12.Once the cap is slotted back in,replace the outer part of the cap and the spring by sliding it back on. 13.It should now work properly. If it retracts too slowly repeat step 10 and wind it a few more times. I hope this helps. Difficult to explain but very simple once you figure it out. Took me ages the first time but if I have to do it again it will take five minutes.2 points
-
2 points
-
2 pointsI chose manual mainly because i like it. And it's fine on this car apart from the occasional jumpyness on the 1st gear. I've driven dsg equipped VAG cars now and then and while they are nice in traffic, i hate the feeling of not being in control.2 points
-
2 pointsGot the car looked at yesterday by Aberdeen Volks Centre who diagnosed that the timing had been set up incorrectly ! They rectified and don't believe any lasting damage has been done thankfully. Car is now back to being nice and quiet as it always had been Now need to seek reimbursement of the bill from the original garage that did the cambelt last week...2 points
-
2 pointsMany hundreds of years ago I was taught that when you are sitting at lights you always engage neutral and apply the parking brake. Sitting with the clutch depressed and the foot brake applied puts unnecessary wear on the clutch release bearing, and if you have been braking heavily before coming to a stop the brake pads will be putting all that heat back into the disc.2 points
-
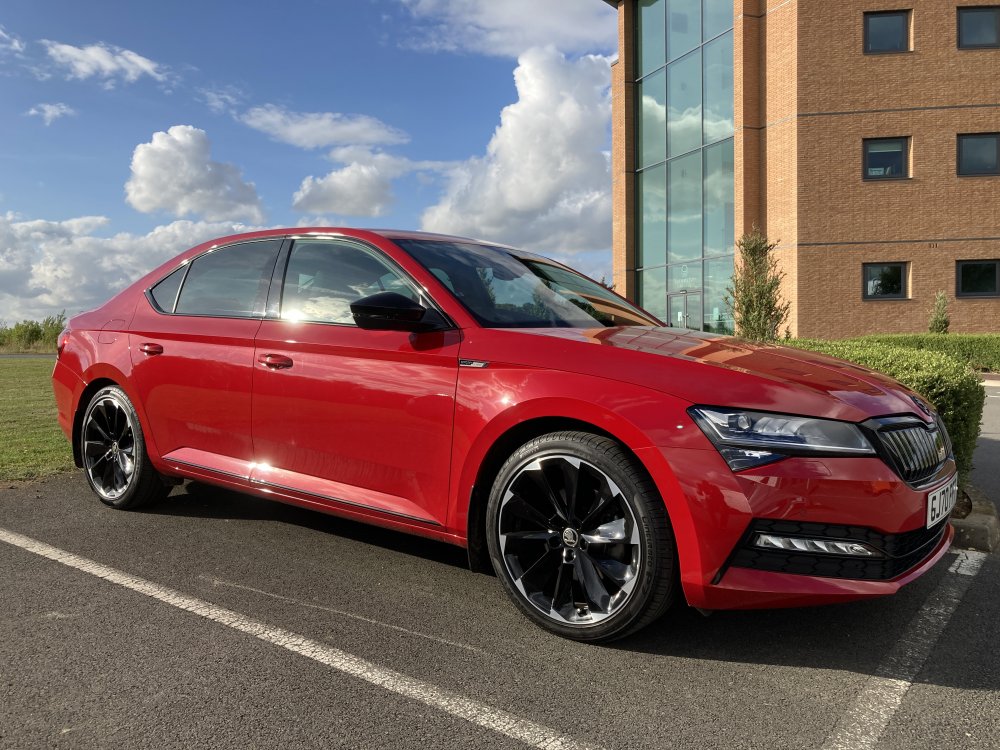
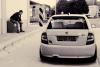
2 pointsRemastered this shot taken a couple of weeks ago. Quite like the look of the car without any sponsors or stripes.
 2 points
 -
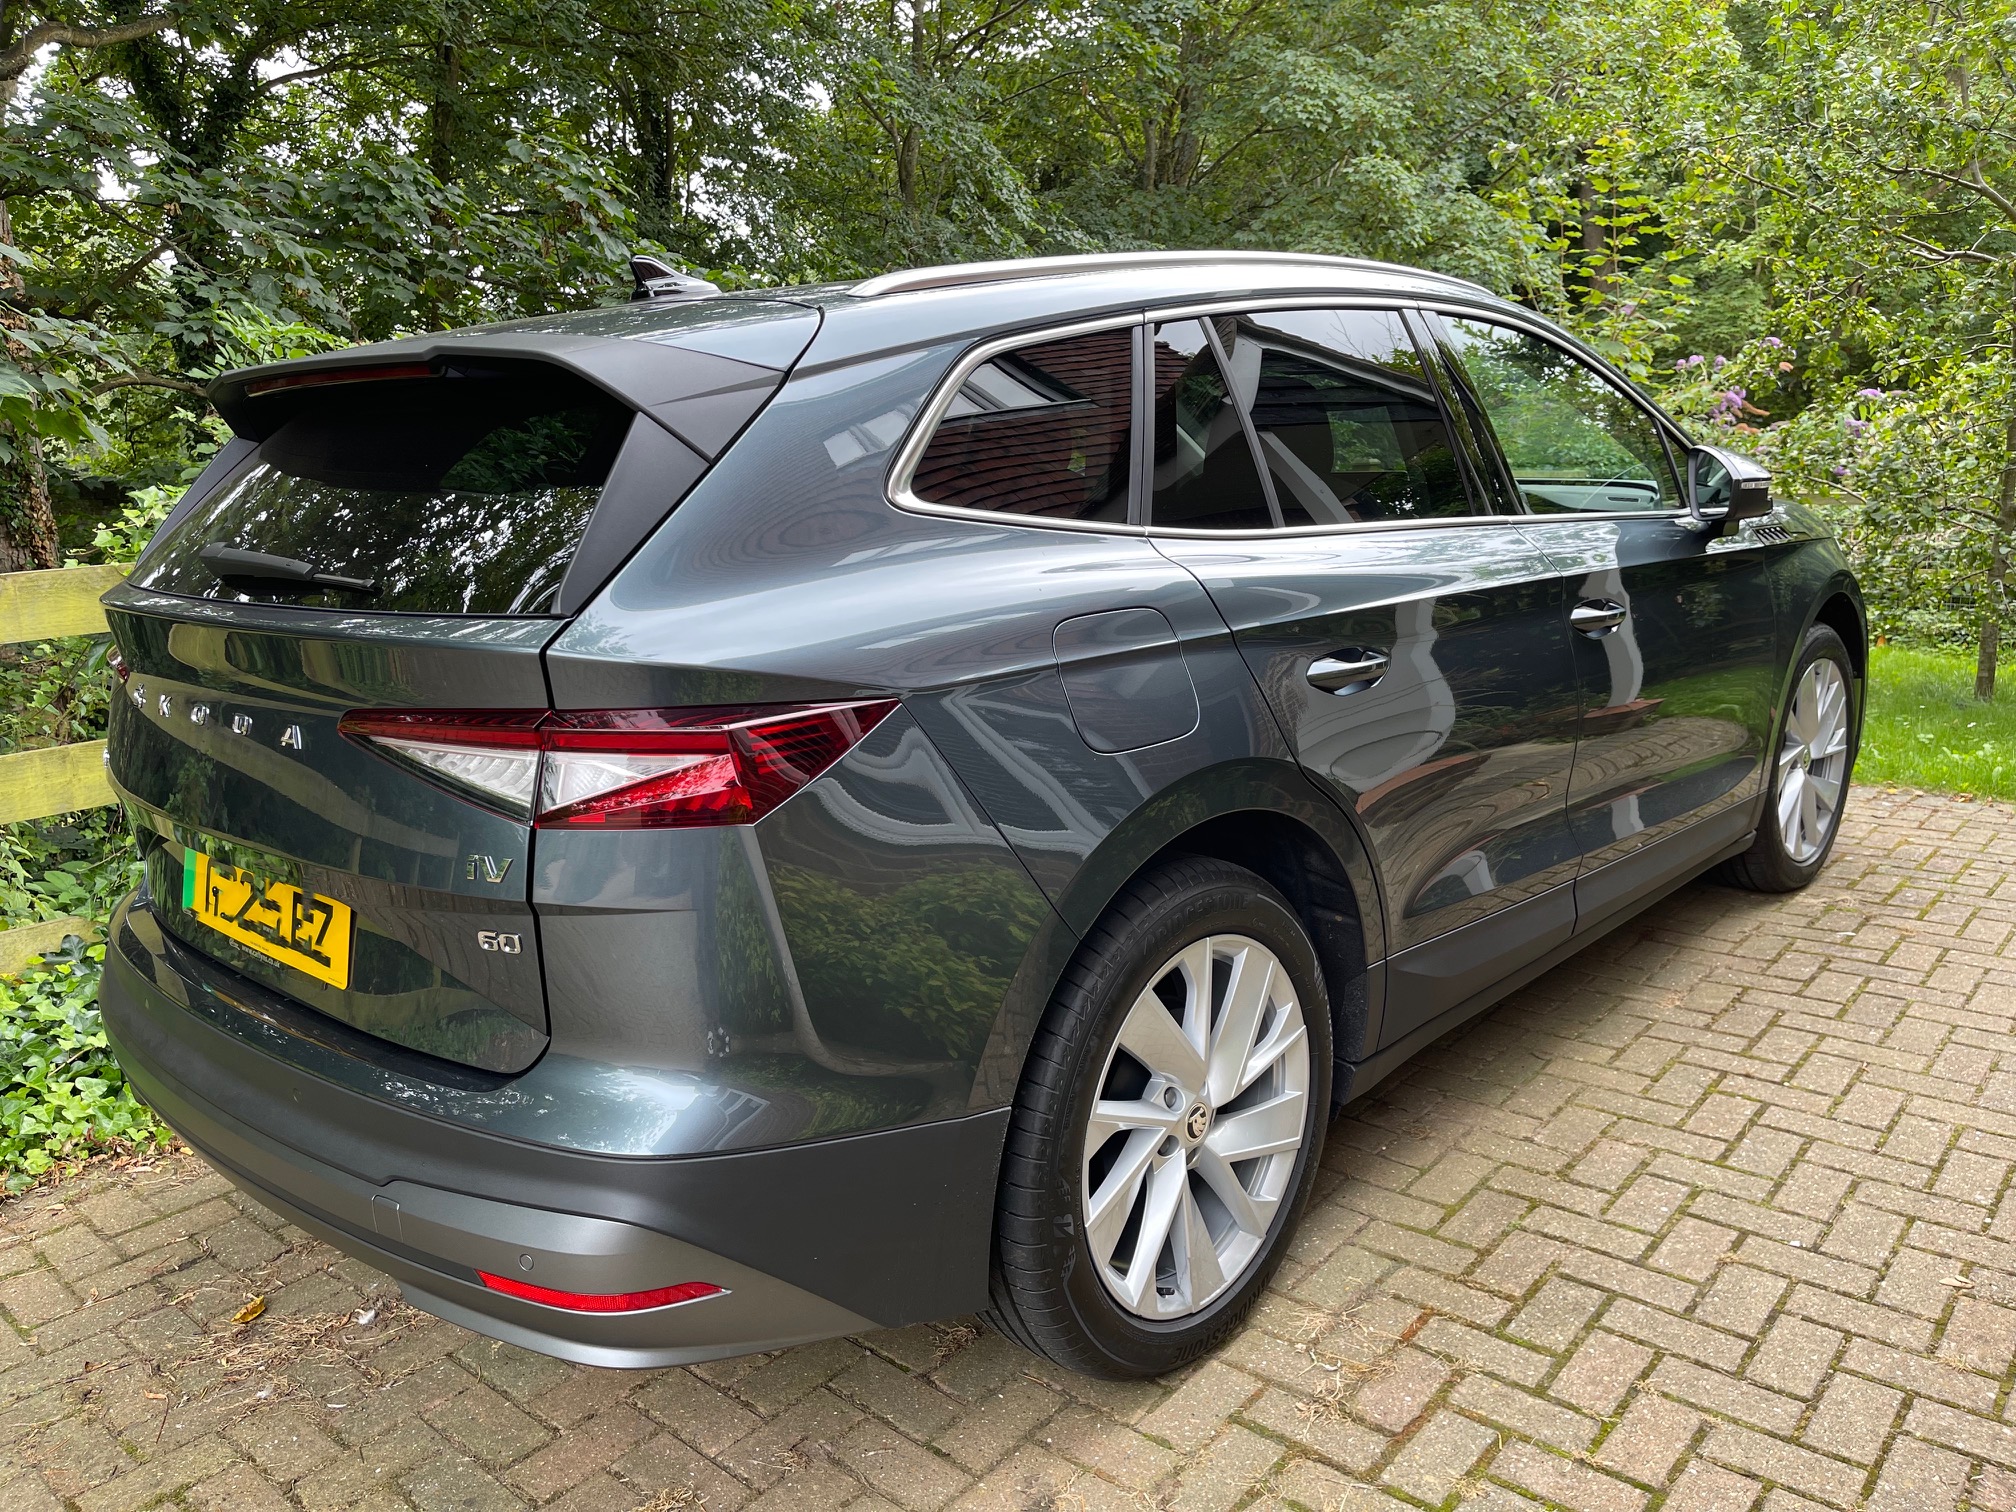
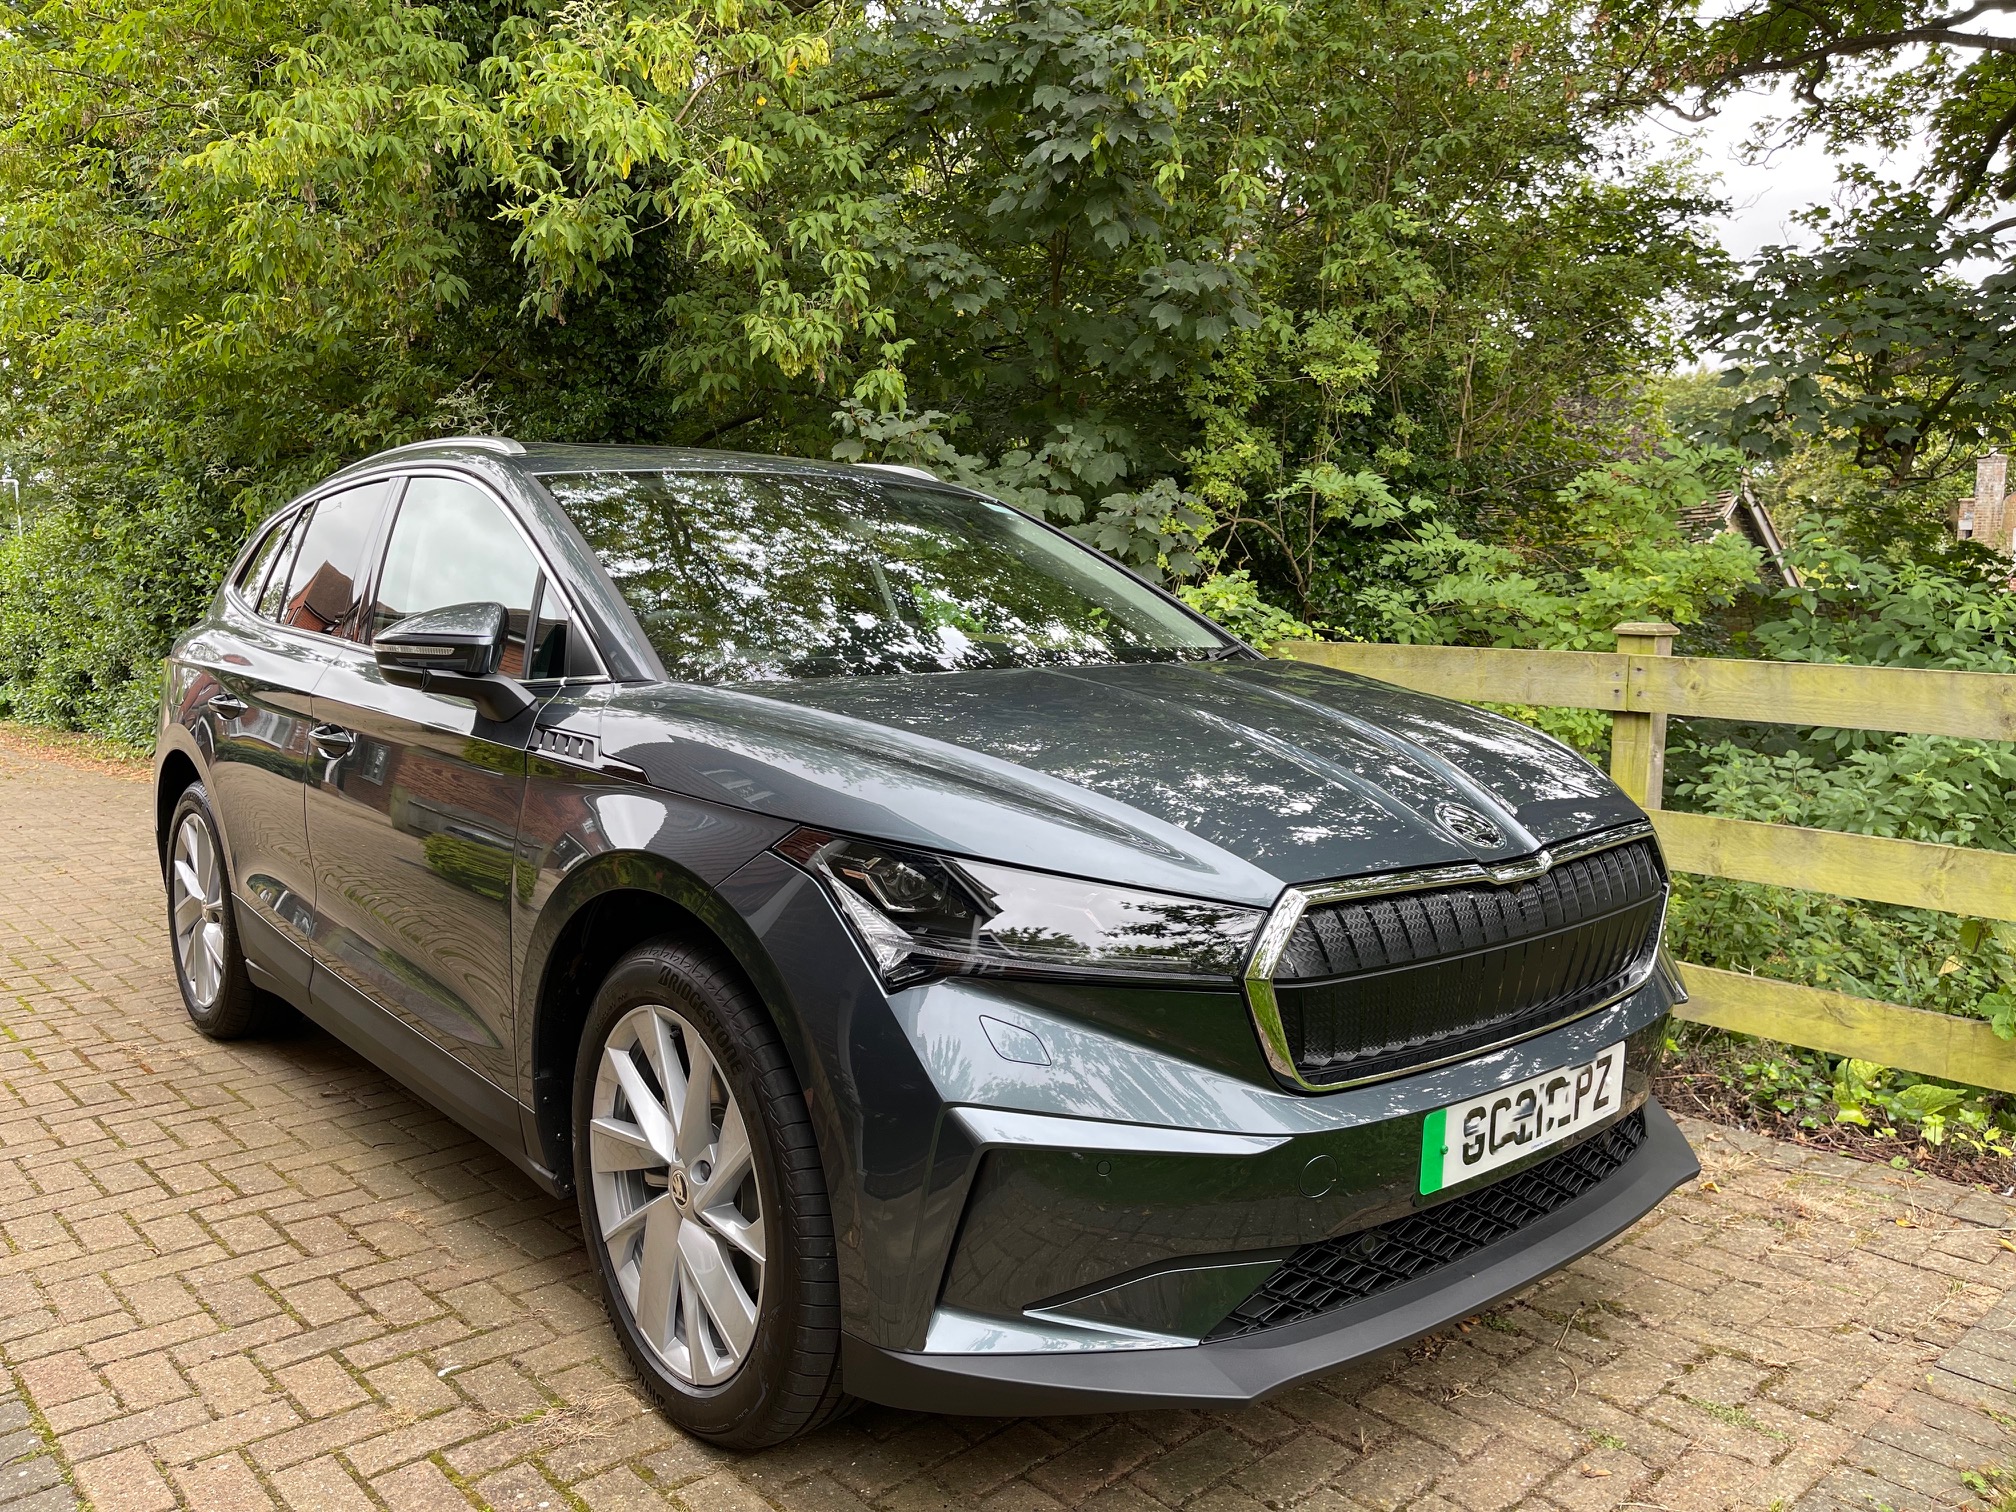
Yup (I’m the guy on the review video who’s unearthed a very old Briskoda account). It’s a case of hitting the driver assist button on the wheel then clicking the right-hand silver scroll wheel in. You have to do this each ignition cycle tho - same as on the current Octavia vRS.2 points
-
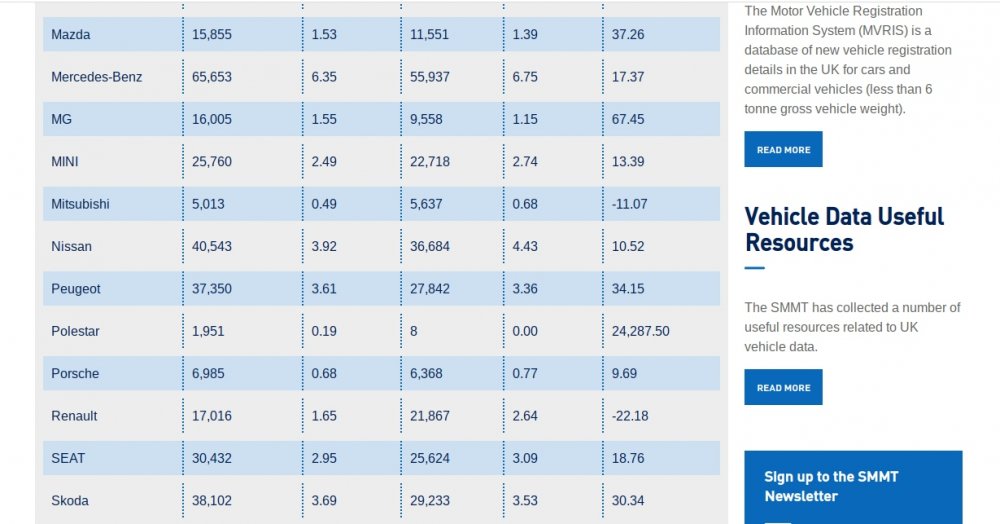
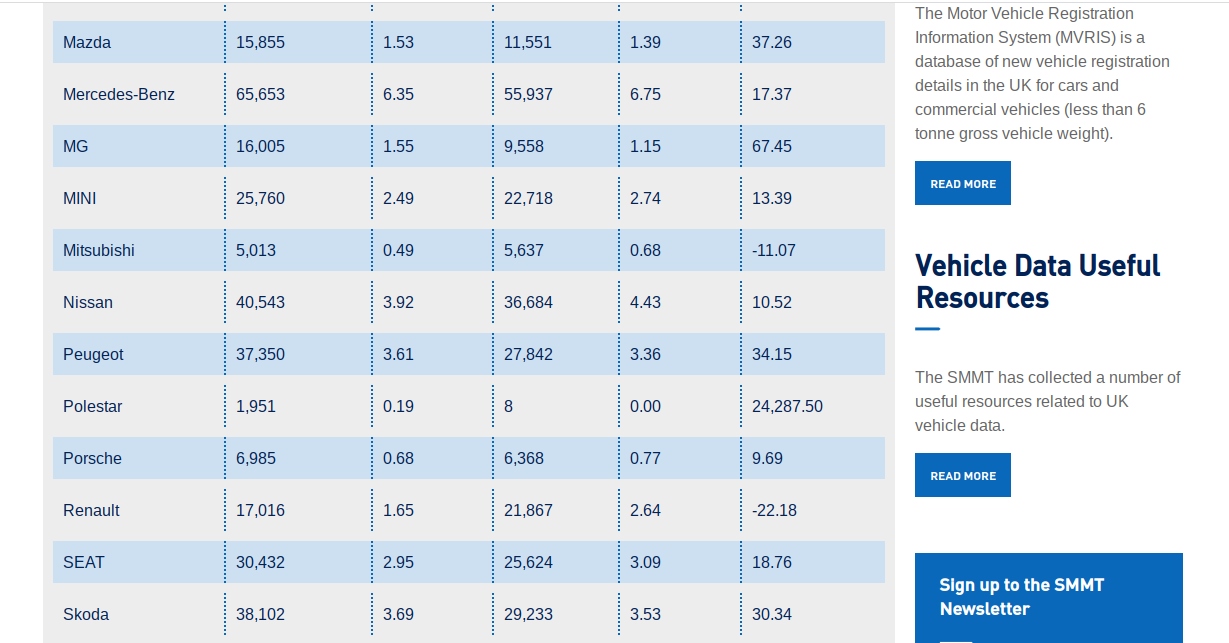
2 points@Joss1733 If you go on here you can check by Manufacturer First Registrations month by month. Or year to date. http://smmt.co.uk/vehicle-data/car-registrations

 2 points
 -
1 pointHi guys, I've done a video review today of my Octavia which I thought I'd share. It's very basic, literally me with my phone and some scribbled notes on an envelope Hopefully people will find it interesting or useful anyway. https://youtu.be/gnBw-VZMtiE Cheers1 point
-
1 pointIts a 3 cyl engine 🙃, I haven't tried swapping the sides over but I have unplugged them one by one, the sound happened less frequently and quieter when I unplugged the injector closest to the timing belt side of the engine, although it didn't make the sound go away completely so I don't think it's related to the injector/ignition on that cylinder, might swap out the spark plugs regardless and I'll need to take a look at the belt for the squeeking but probably won't get around to anything till Sunday so I'll update then1 point
-
1 pointAnd yes I took the filter out of the box, it looked like it had been changed recently1 point
-
As above, other folks opinion is almost irrelevant. A decent test drive will answer your question. I’ll be considering the same question next time. But I think the answer will pop out when I lay down my “must have” criteria. With 5 growing grandchildren within reach my 7 seats are being used more often. My “essential” extras are clear in my mind. My list of “don’t want” is equally clear. 4x4 will not be mission critical. I’ll happily consider petrol. Fuel consumption isn’t my biggest issue, but driving enjoyment is. I won’t be willing to sacrifice comfort, space or decent Grunt for overtaking purposes for example. The £40K cost impact is important. Some cars are getting silly expensive these days.1 point
-
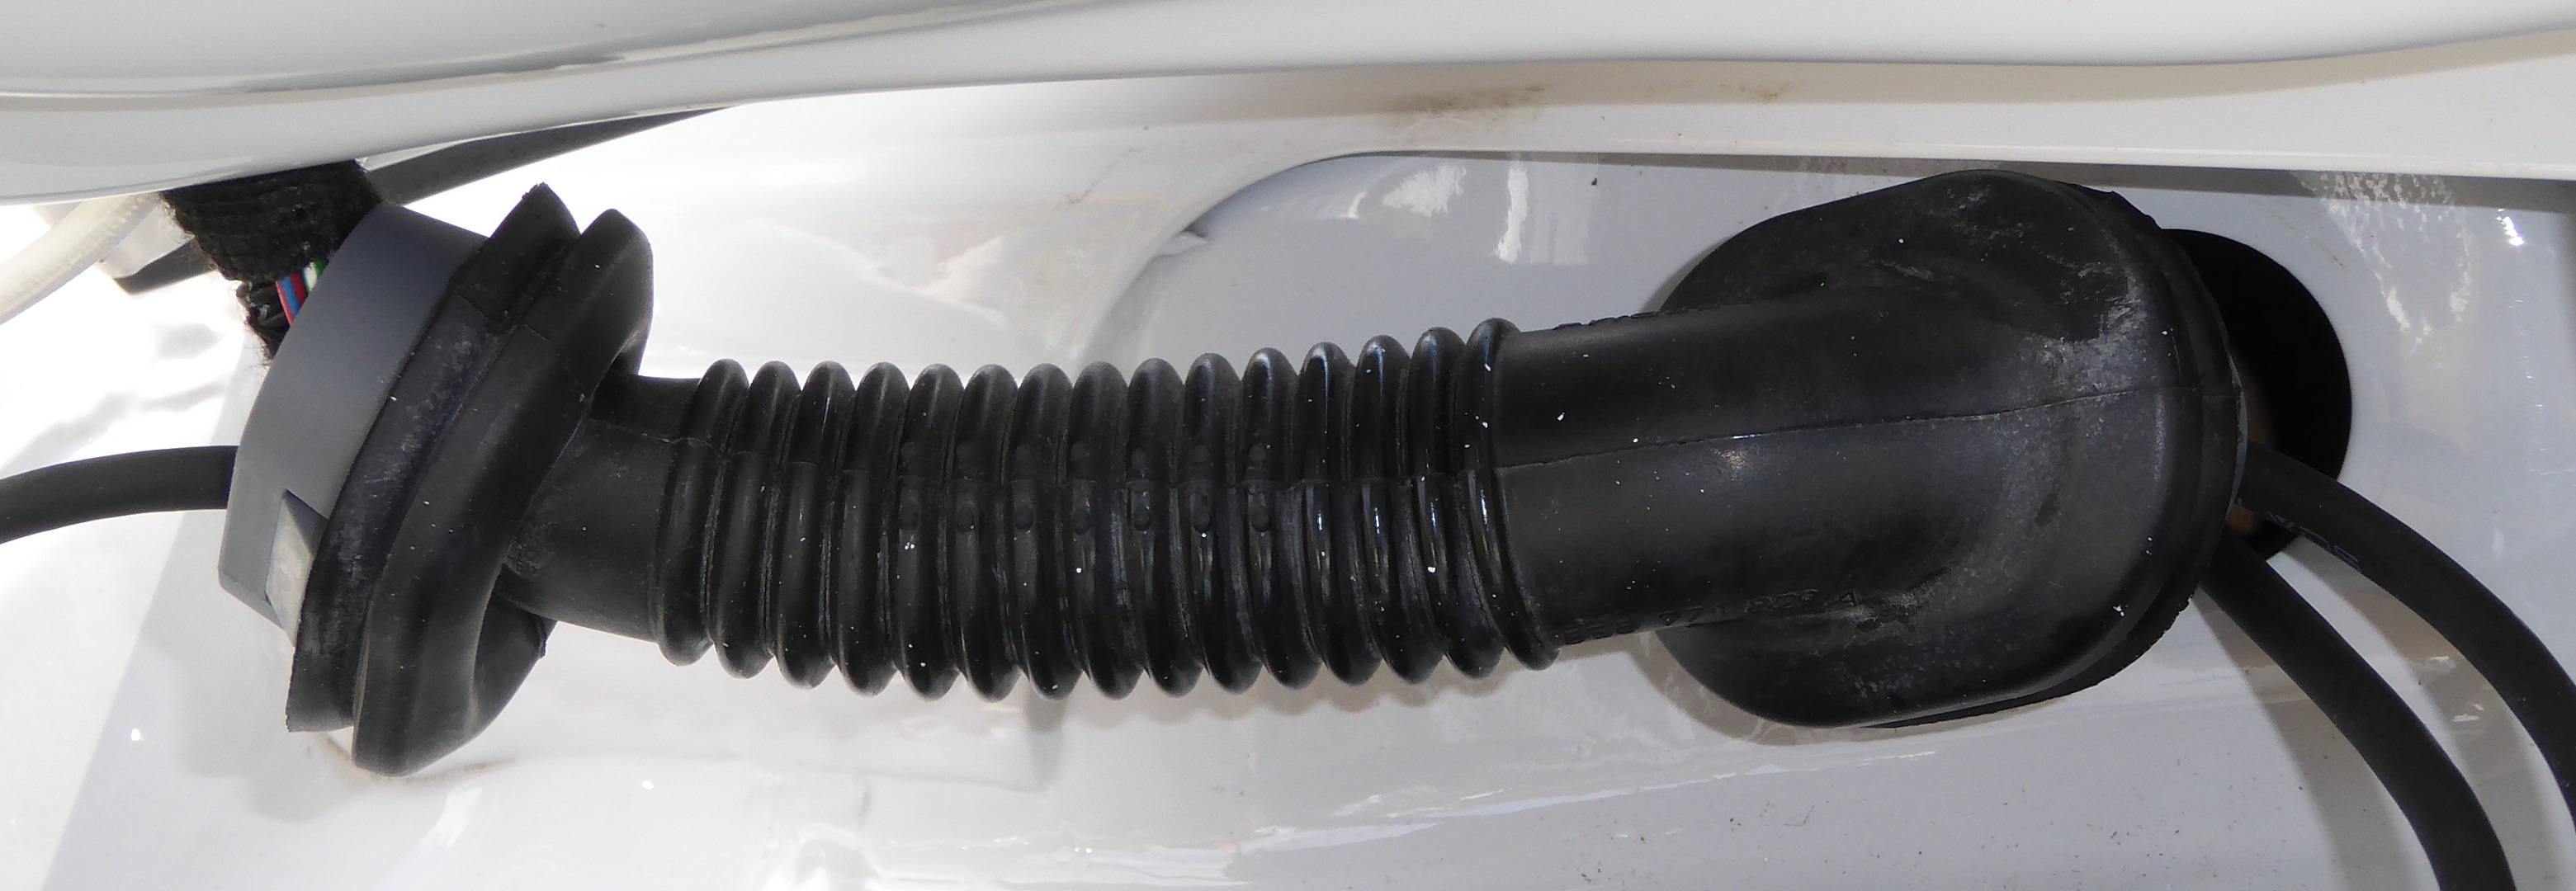
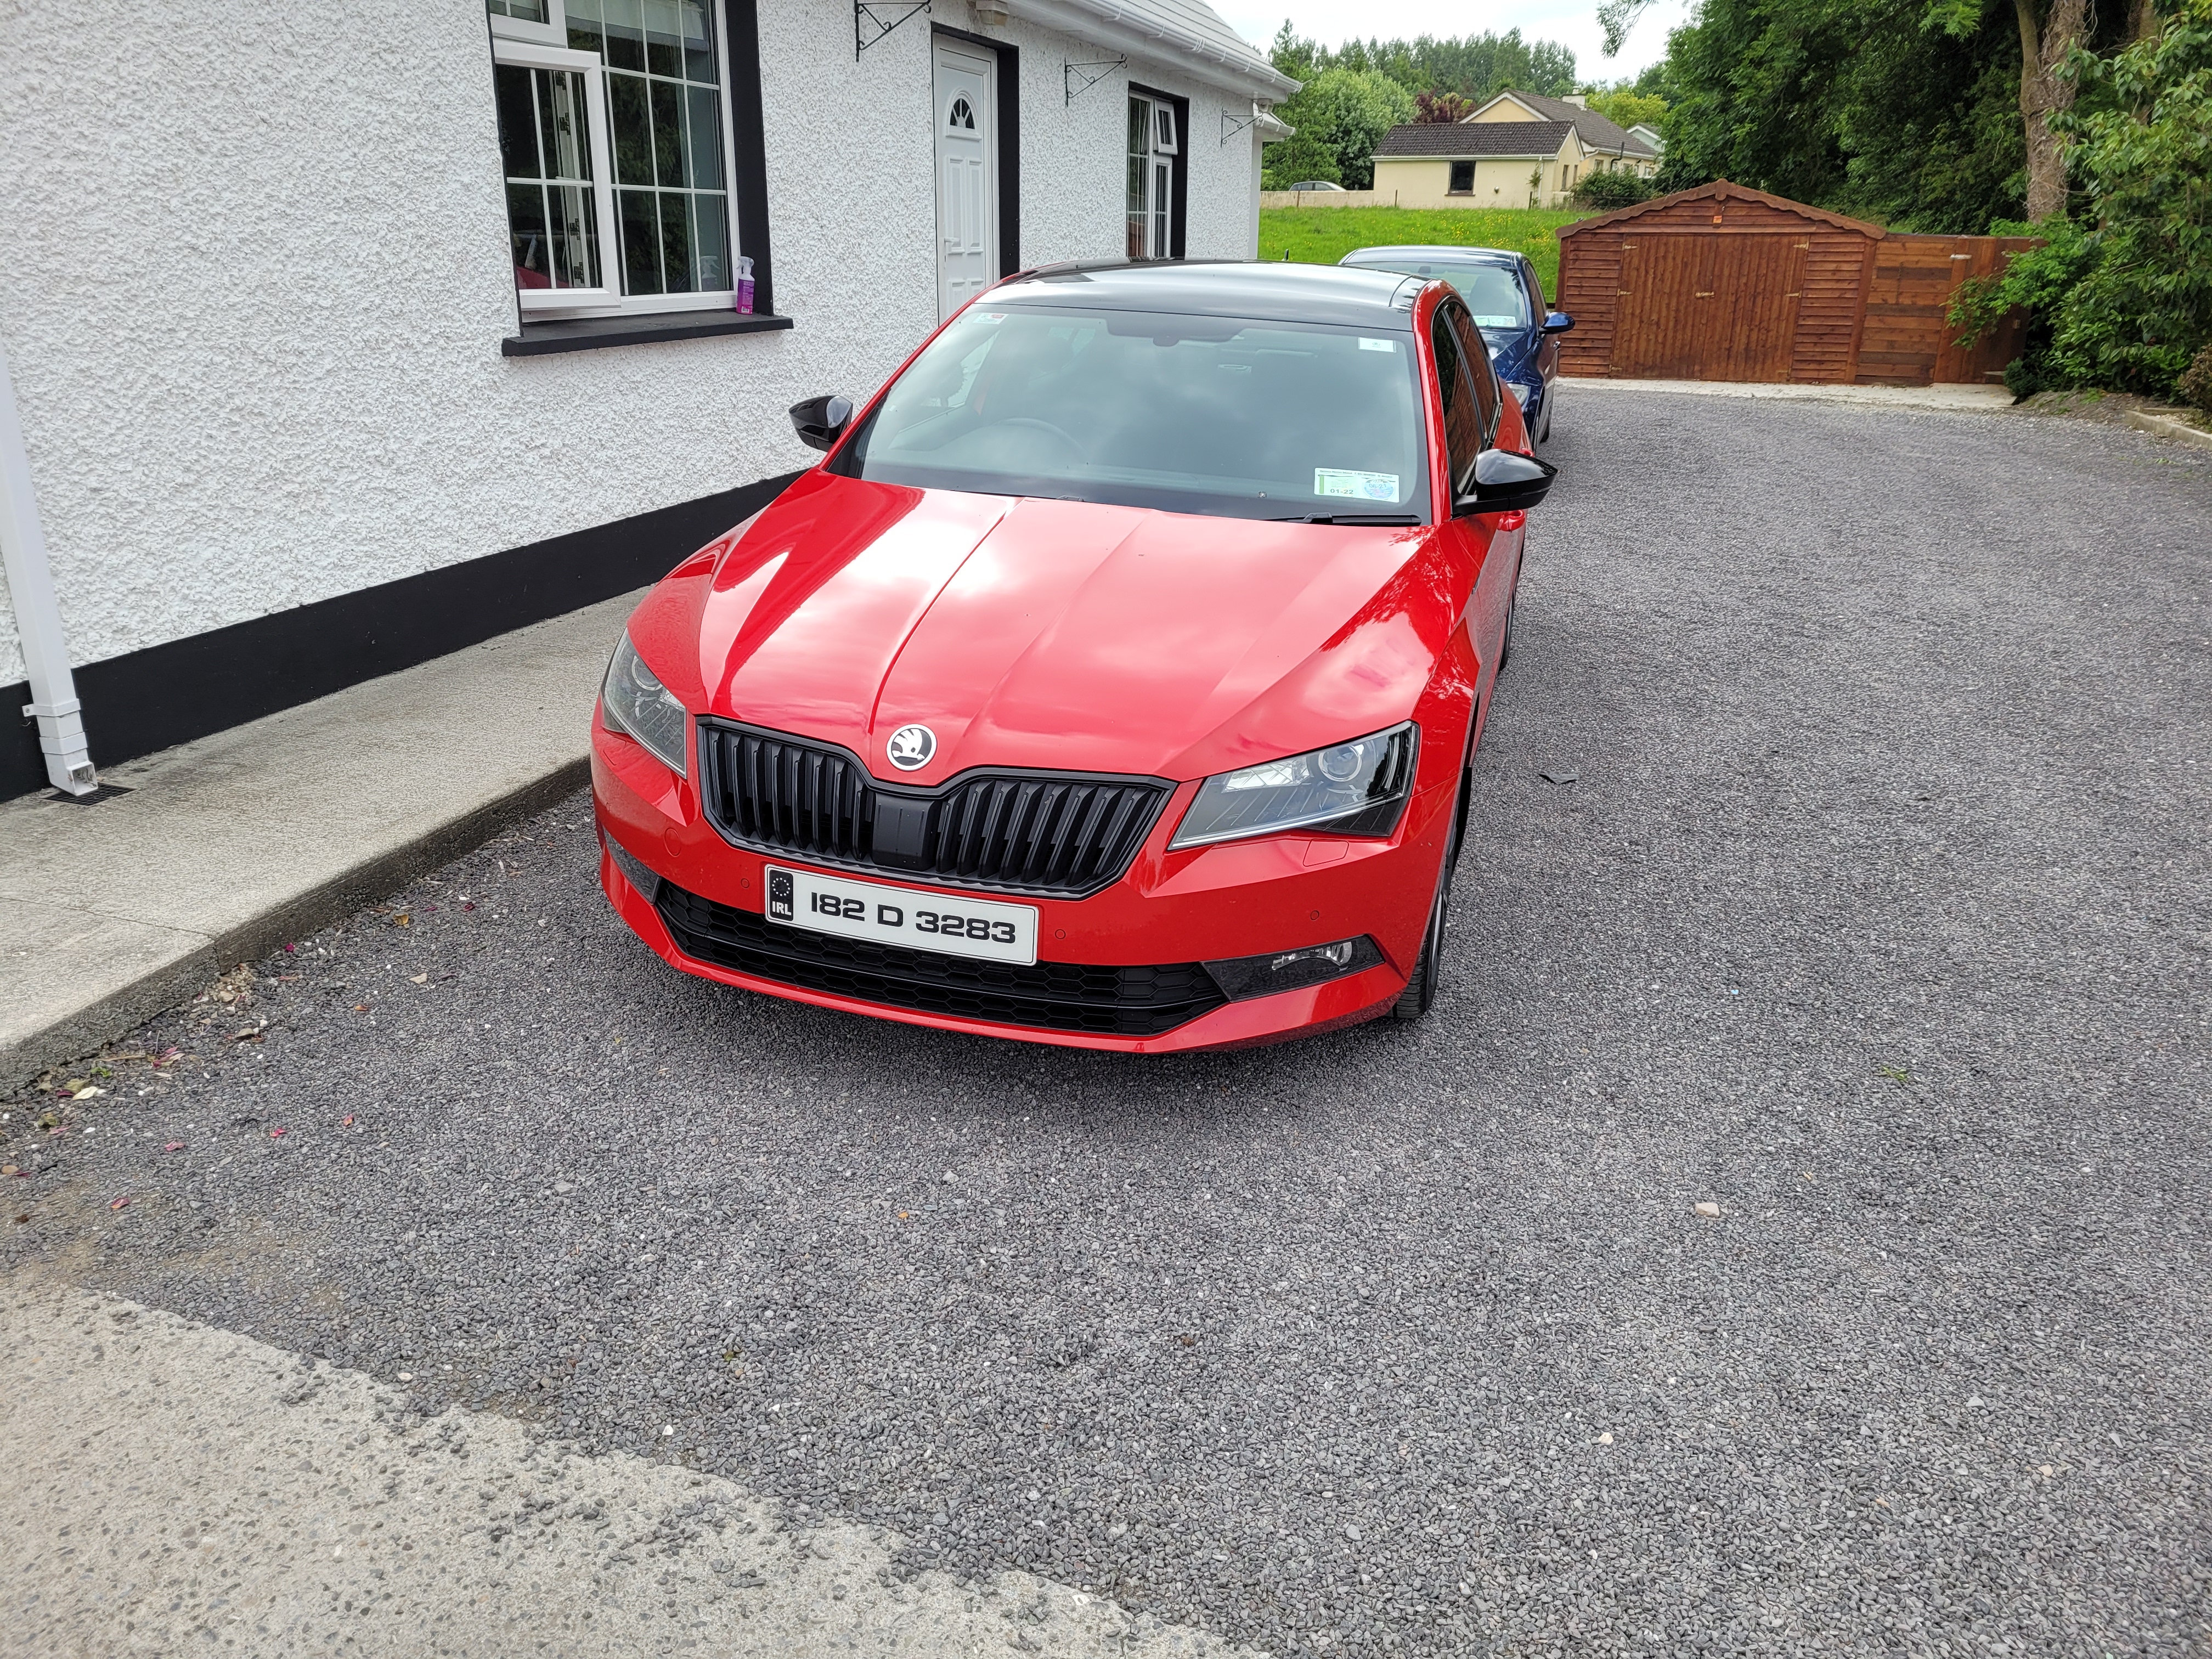
1 point1 point1 pointHey dude, and welcome! Thanks for the video, I really enjoyed that. It reminded me of all the reasons why I still love mine. Long may you enjoy yours! Cheers and stay safe.1 point1 pointObviously you mean except for circa £100 for VAT and 2.5% import duty. VAT and duty are both applicable to anything imported to the U.K. costing >£135. There you go…1 point1 pointEVs shouldn't be towed as the car's electric motor is mechanically linked to the wheels and can't be placed in neutral. Towing one can cause lasting damage to the car's powertrain. Say the makers.1 point1 pointI've just checked my car as I didn't think it acted the same as above. It turns out I was correct too. If I come to a stop with the autohold on then putting the gearbox into neutral causes the brake to be released and the car to roll. Maybe others can check their car's operation?1 point1 pointGen 4 and Gen 5 both advertise as being predictive. Wide open throttle or large torque demand with steering lock on etc should engage the rear wheels before slip is detected or certainly within a few degrees of slip. This is a good video in slow motion of haldex 5. The rears are driving and back end squatting with hardly any noticeable front wheel slip.1 point1 pointI used Autoglym leather cleaner successfully when I got hand cream on my steering wheel.1 pointThanks for that, I could not see the image clearly yesterday but can today now the sun is not reflecting on the screen. I can make out the ball in the cup now and reckon that the orientation when fitted in the car would be either exactly as photographed or perhaps rotated minus 90°, I cant see the small detail clearly enough to decide. Thanks to your photos I am 100% confident now that its worth the trouble of releasing the reel knowing that I can access the parts that are locking and decide if the mounting angle is wrong. Finding the time? - Now that is something else entirely, I'm in the middle of a house and garage between countries and two property sales, the rare passengers I have will just have to poke up with it.1 point1 pointNo, but there's no point unless you're doing further tuning and/or racing the car. What would be a good idea is one of the variations on a Swiss cheese, pikey or Audi grille mod for your RH inner arch, to let out more hot air faster.1 point1 pointUpdated for MY22 cars. All cars have a unique 17 character identity code – their Vehicle Identification Number or VIN. For Karoqs this is displayed at the bottom lefthand corner of the windscreen, on a sticker at the base of the middle body pillar, and stamped into the righthand suspension turret under the bonnet. It takes the form: TMB LJ7 NU 7J5 012345 and can be decoded as follows: The first 3 characters are TMB for Škoda cars. The 4th character tells you the chassis type: J = left-hand drive FWD, K = right-hand drive FWD, L = left-hand drive 4x4 and M = right-hand drive 4x4. The 5th character tells you the engine: E = 2.0 TSI 190PS, G = 1.6 TDI 115PS, J = 2.0 TDI 150PS, M = 2.0 TDI 190 PS, P = 1.0 TSI 115PS, R = 1.5 TSI 150PS. (Anyone know the code for the 2.0 TDI 115PS engine or Russian 1.6 MPI engines?) The 6th character tells you how many airbags the car has: 2 = 2 front airbags, 4 = 2 front and 2 side airbags, 5 = 2 fronts + 2 sides + 1 knee airbag, 6 = 2 front airbags + 2 sides + 2 heads, 7 = 2 front airbags + 2 sides + 2 heads + 1 knee airbag, 8 = 2 front airbags + 4 sides + 2 heads, 9 = 2 front bags + 4 sides + 2 heads + 1 knee airbag. The 7th and 8th character tell you the vehicle model: NU = the Karoq (2017 on). The 9th character is a check digit to validate the code. The 10th character tells you the car's model year: J = MY2018 (ie manufactured between summer 2017 and summer 2018), K = MY2019 (ie manufactured between summer 2018 and summer 2019), L = MY2020 (ie manufactured between summer 2019 and summer 2020), M = MY2021 (ie manufactured between summer 2020 and summer 2021), N = MY2022 (ie manufactured between summer 2021 and summer 2022). The 11th character tells you where your car was built: 0 to 4 = Mladá Boleslav, Czechia; 5 = Kvasiny, Czechia; 7 or 8 = Vrchlabi, Czechia; B = Solomonovo, Ukraine; H = Nizhny Novgorod, Russia; J = Osnabruck, Germany; K = Kaluga, Russia; N = Mladá Boleslav, Czechia. Then finally the 12th to 17th numbers are the unique production number for that production line and year. If anyone has a character in their VIN not listed above, please give me the details so I can update this guide. Thanks Chris1 point1 pointThere is but that only seems to set the volume on start up. I've switched off the speed dependent volume so I'll see if that helps.1 point1 pointI managed to get a few more details from the lease company yesterday. Apparently my car has been built, they have the chassis number, it's just waiting to be shipped. I guess it's parked up waiting for a microchip.1 point1 pointYes you can, budget was precisely to fit this car and it was on the stock very nicely equipped with virtual cockpit, lane assist, Columbus, 17", matrix lights, etc, can't recall everything. But, I am fully agreed that DSG is better choice with such a _not_ fun car to drive. The other car we drive, from the signature, is the funnier one.1 point1 pointNot necessary with a DSG if 'Autohold' is enabled to put in neutral as long as you have your foot off the accelerator or brake, the car is held there. If the Stop / Start is enabled then in D with 'Autohold' touching a pedal will fire up the engine, and if the engine is running you can just move off. If you want to use N and the Parking Brake / E-PB then you can. Just as you can have Stop / Start functioning if you want. Some VW Group vehicles have the brake lights on when 'Autohold' is functioning and some do not have them on. .................. Regarding Parked cars and the Parking Brake releasing & letting a car run away, then there are cases of that happening. http://briskoda.net/forums/topic/427195-handbrake-release-close-shave http://briskoda.net/forums/topic/443202-electric-parking-brake1 point@JR RS I know. The most important is that it suits YOUR taste! 👍😉1 point1 pointI may be biased but Velvet Red in the sunshine is hard to beat....
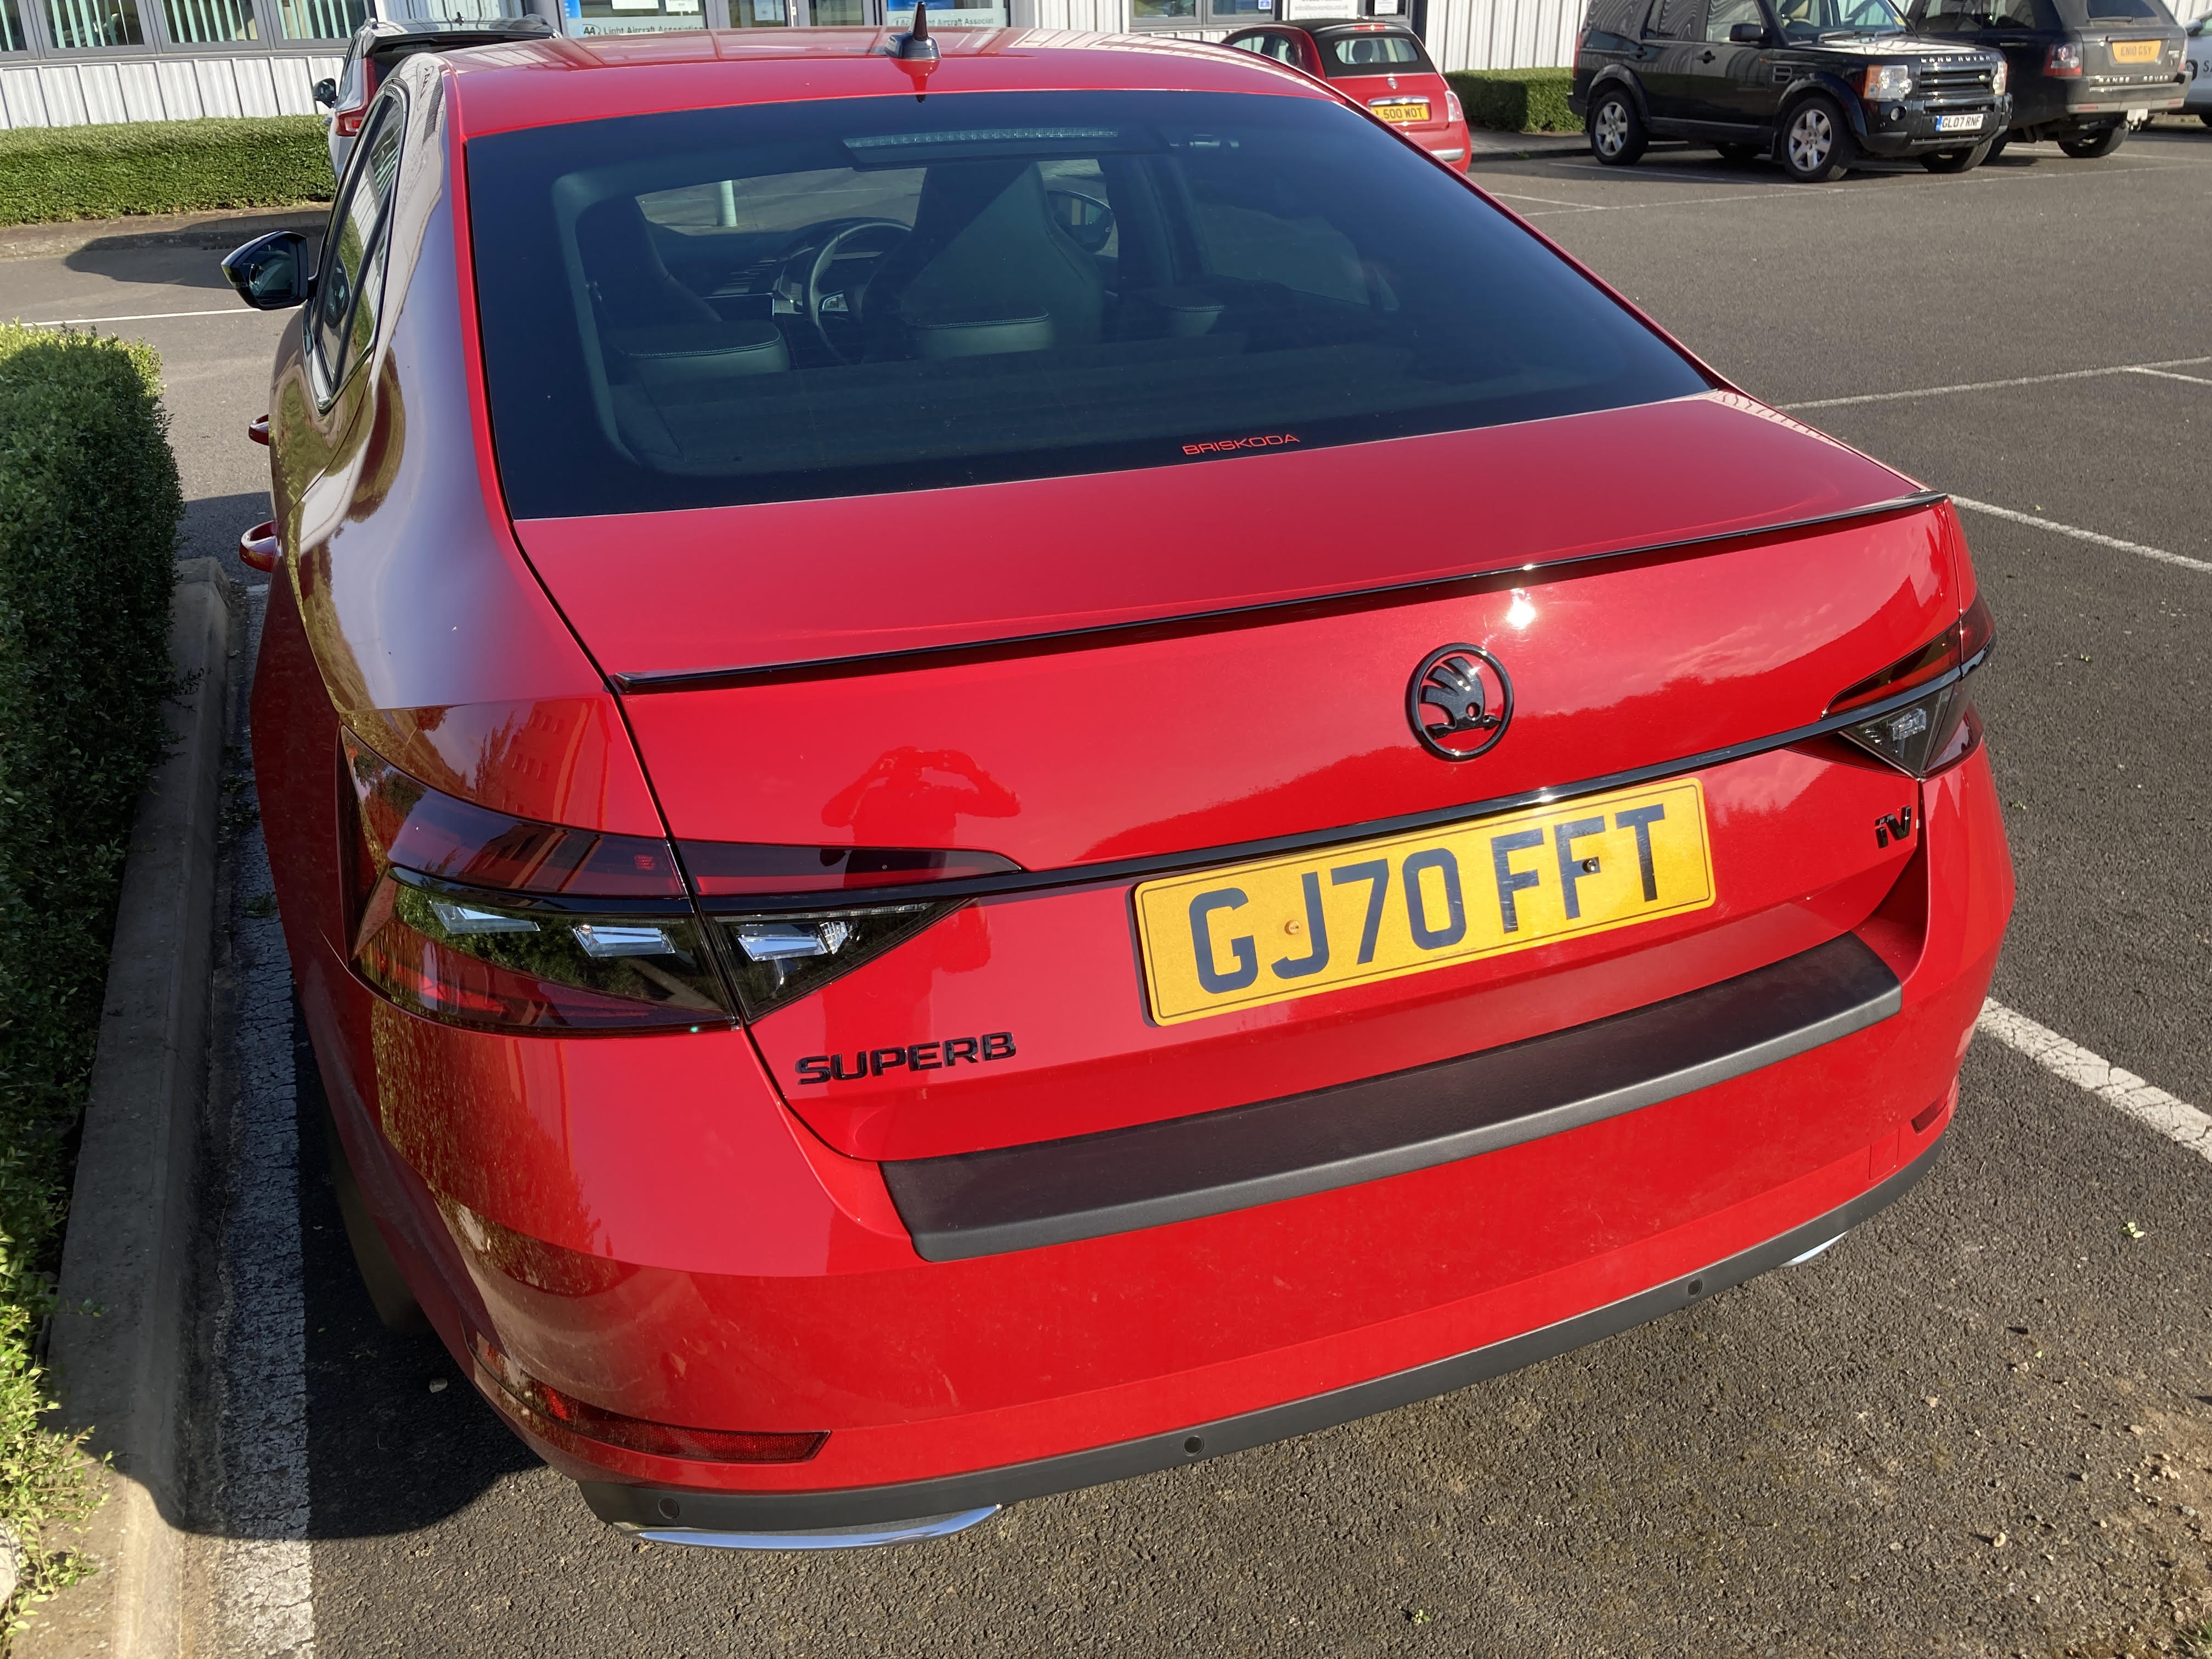
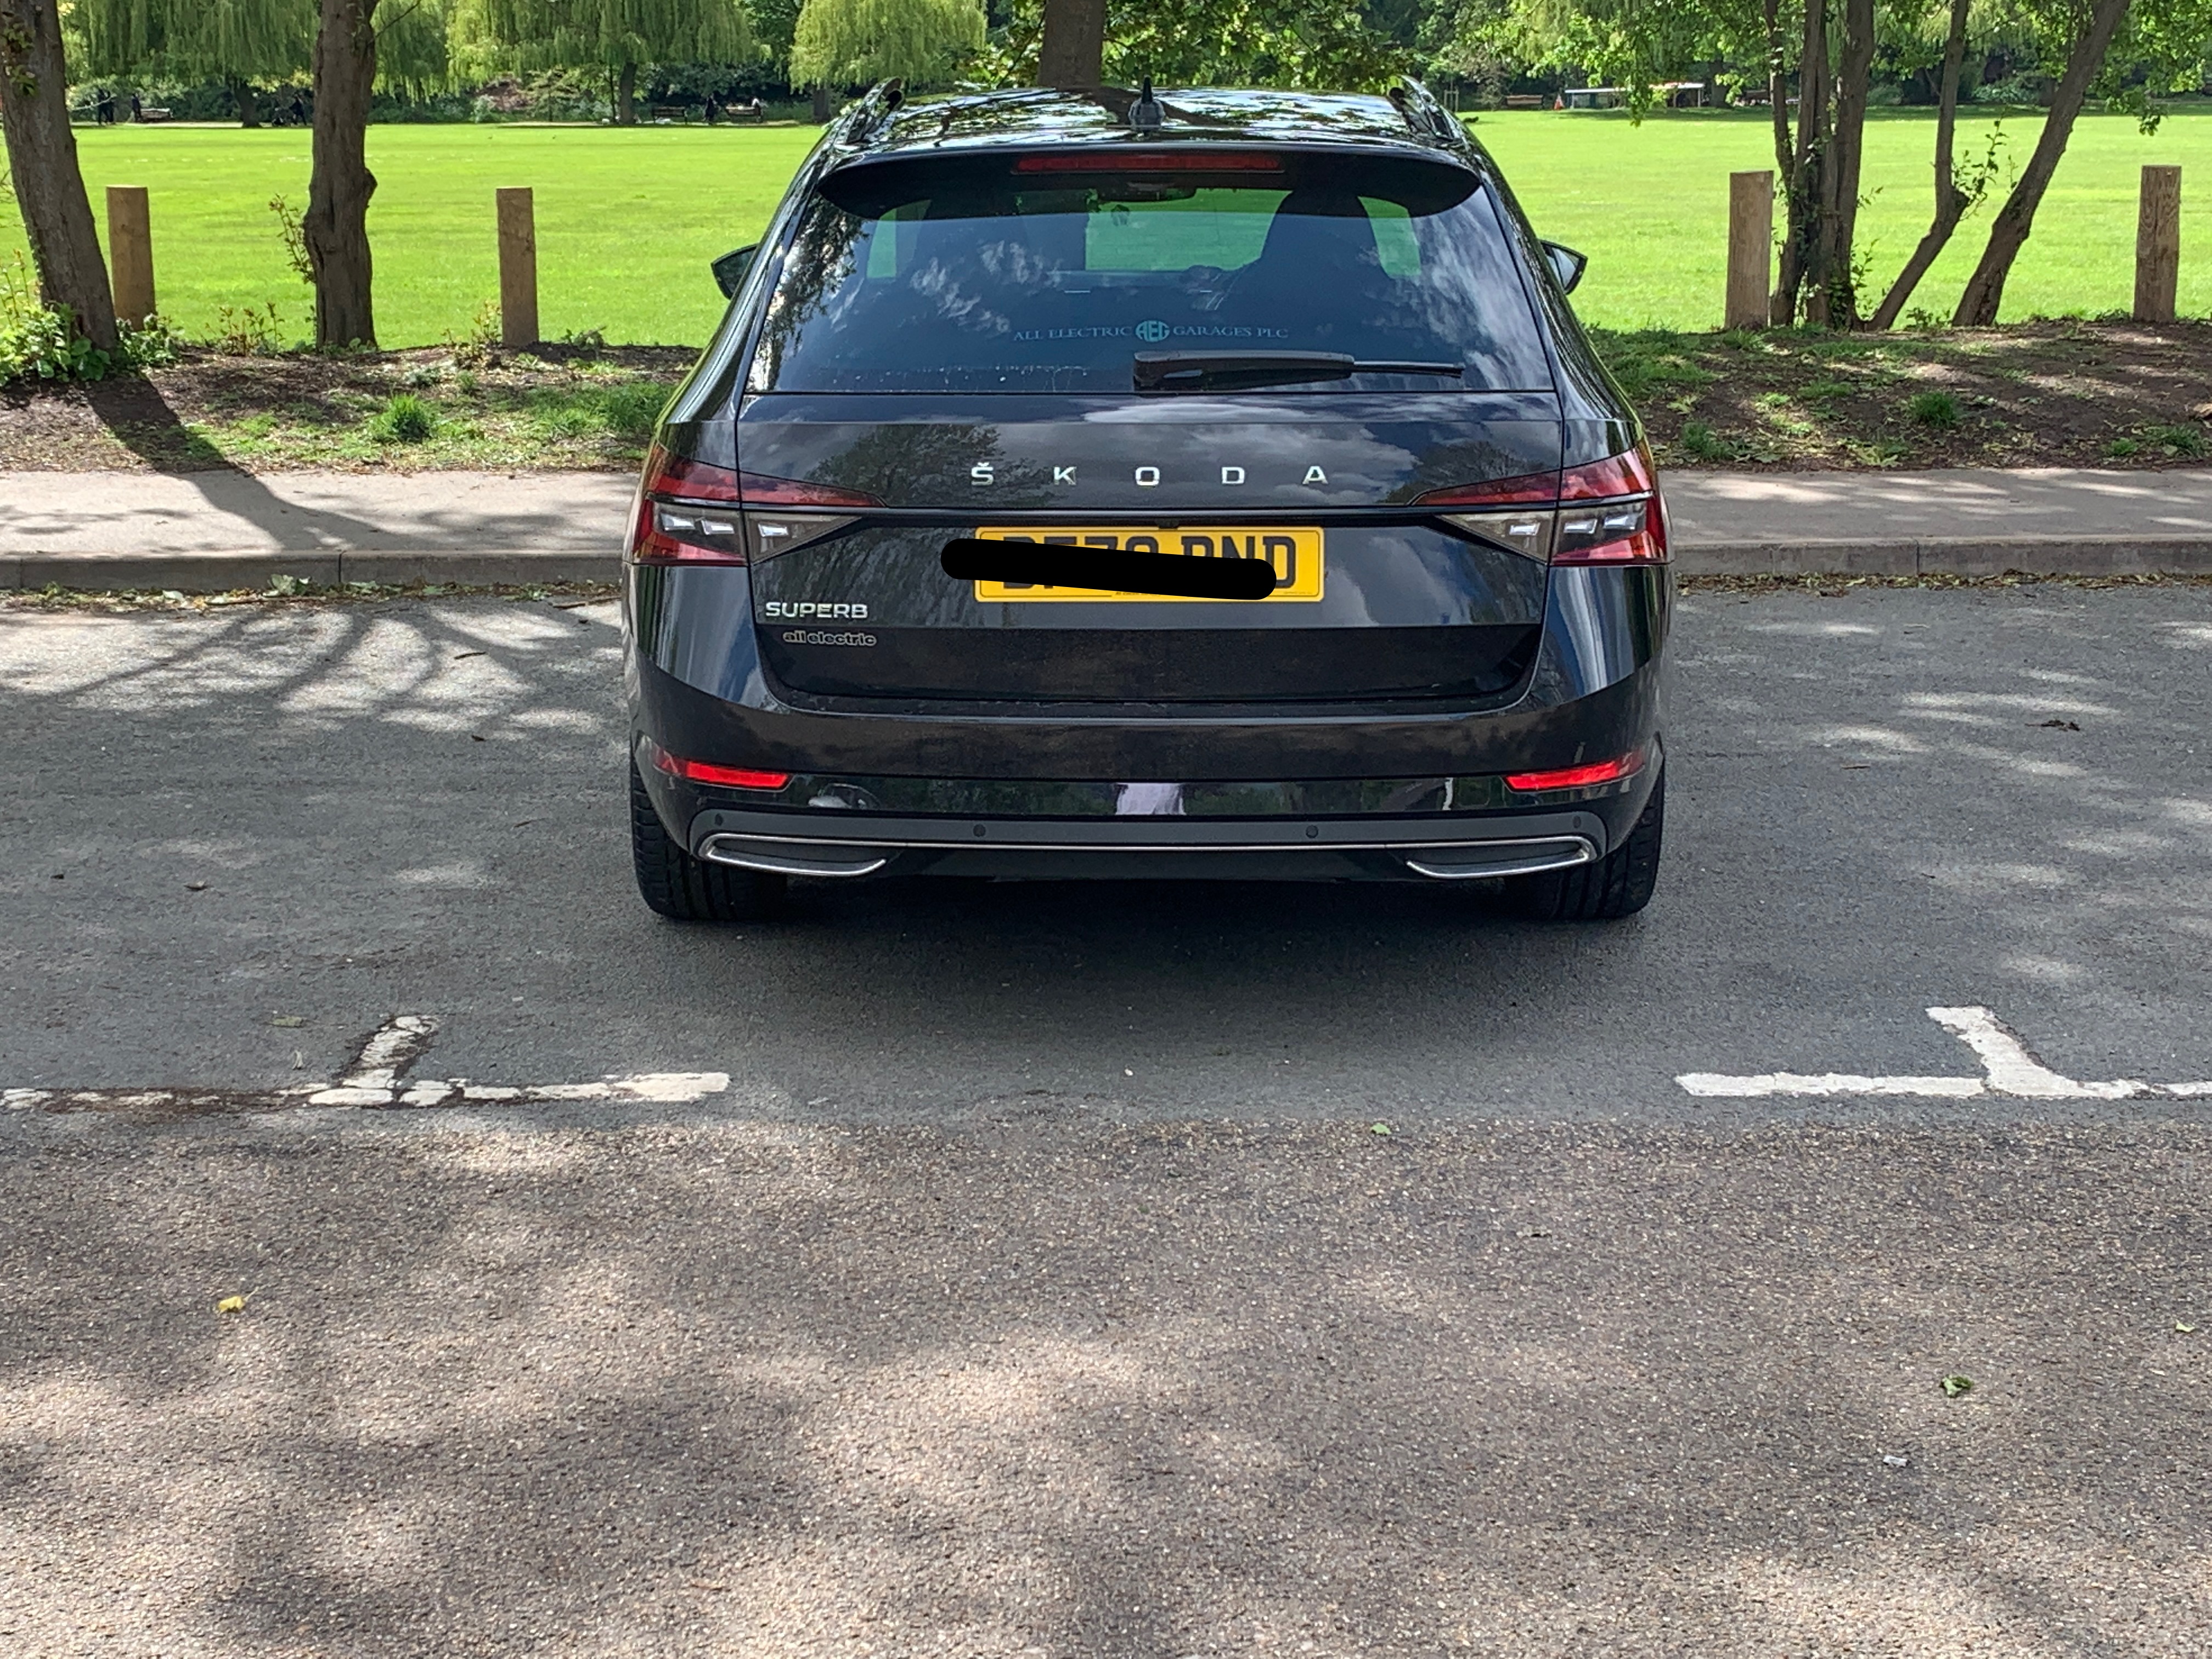
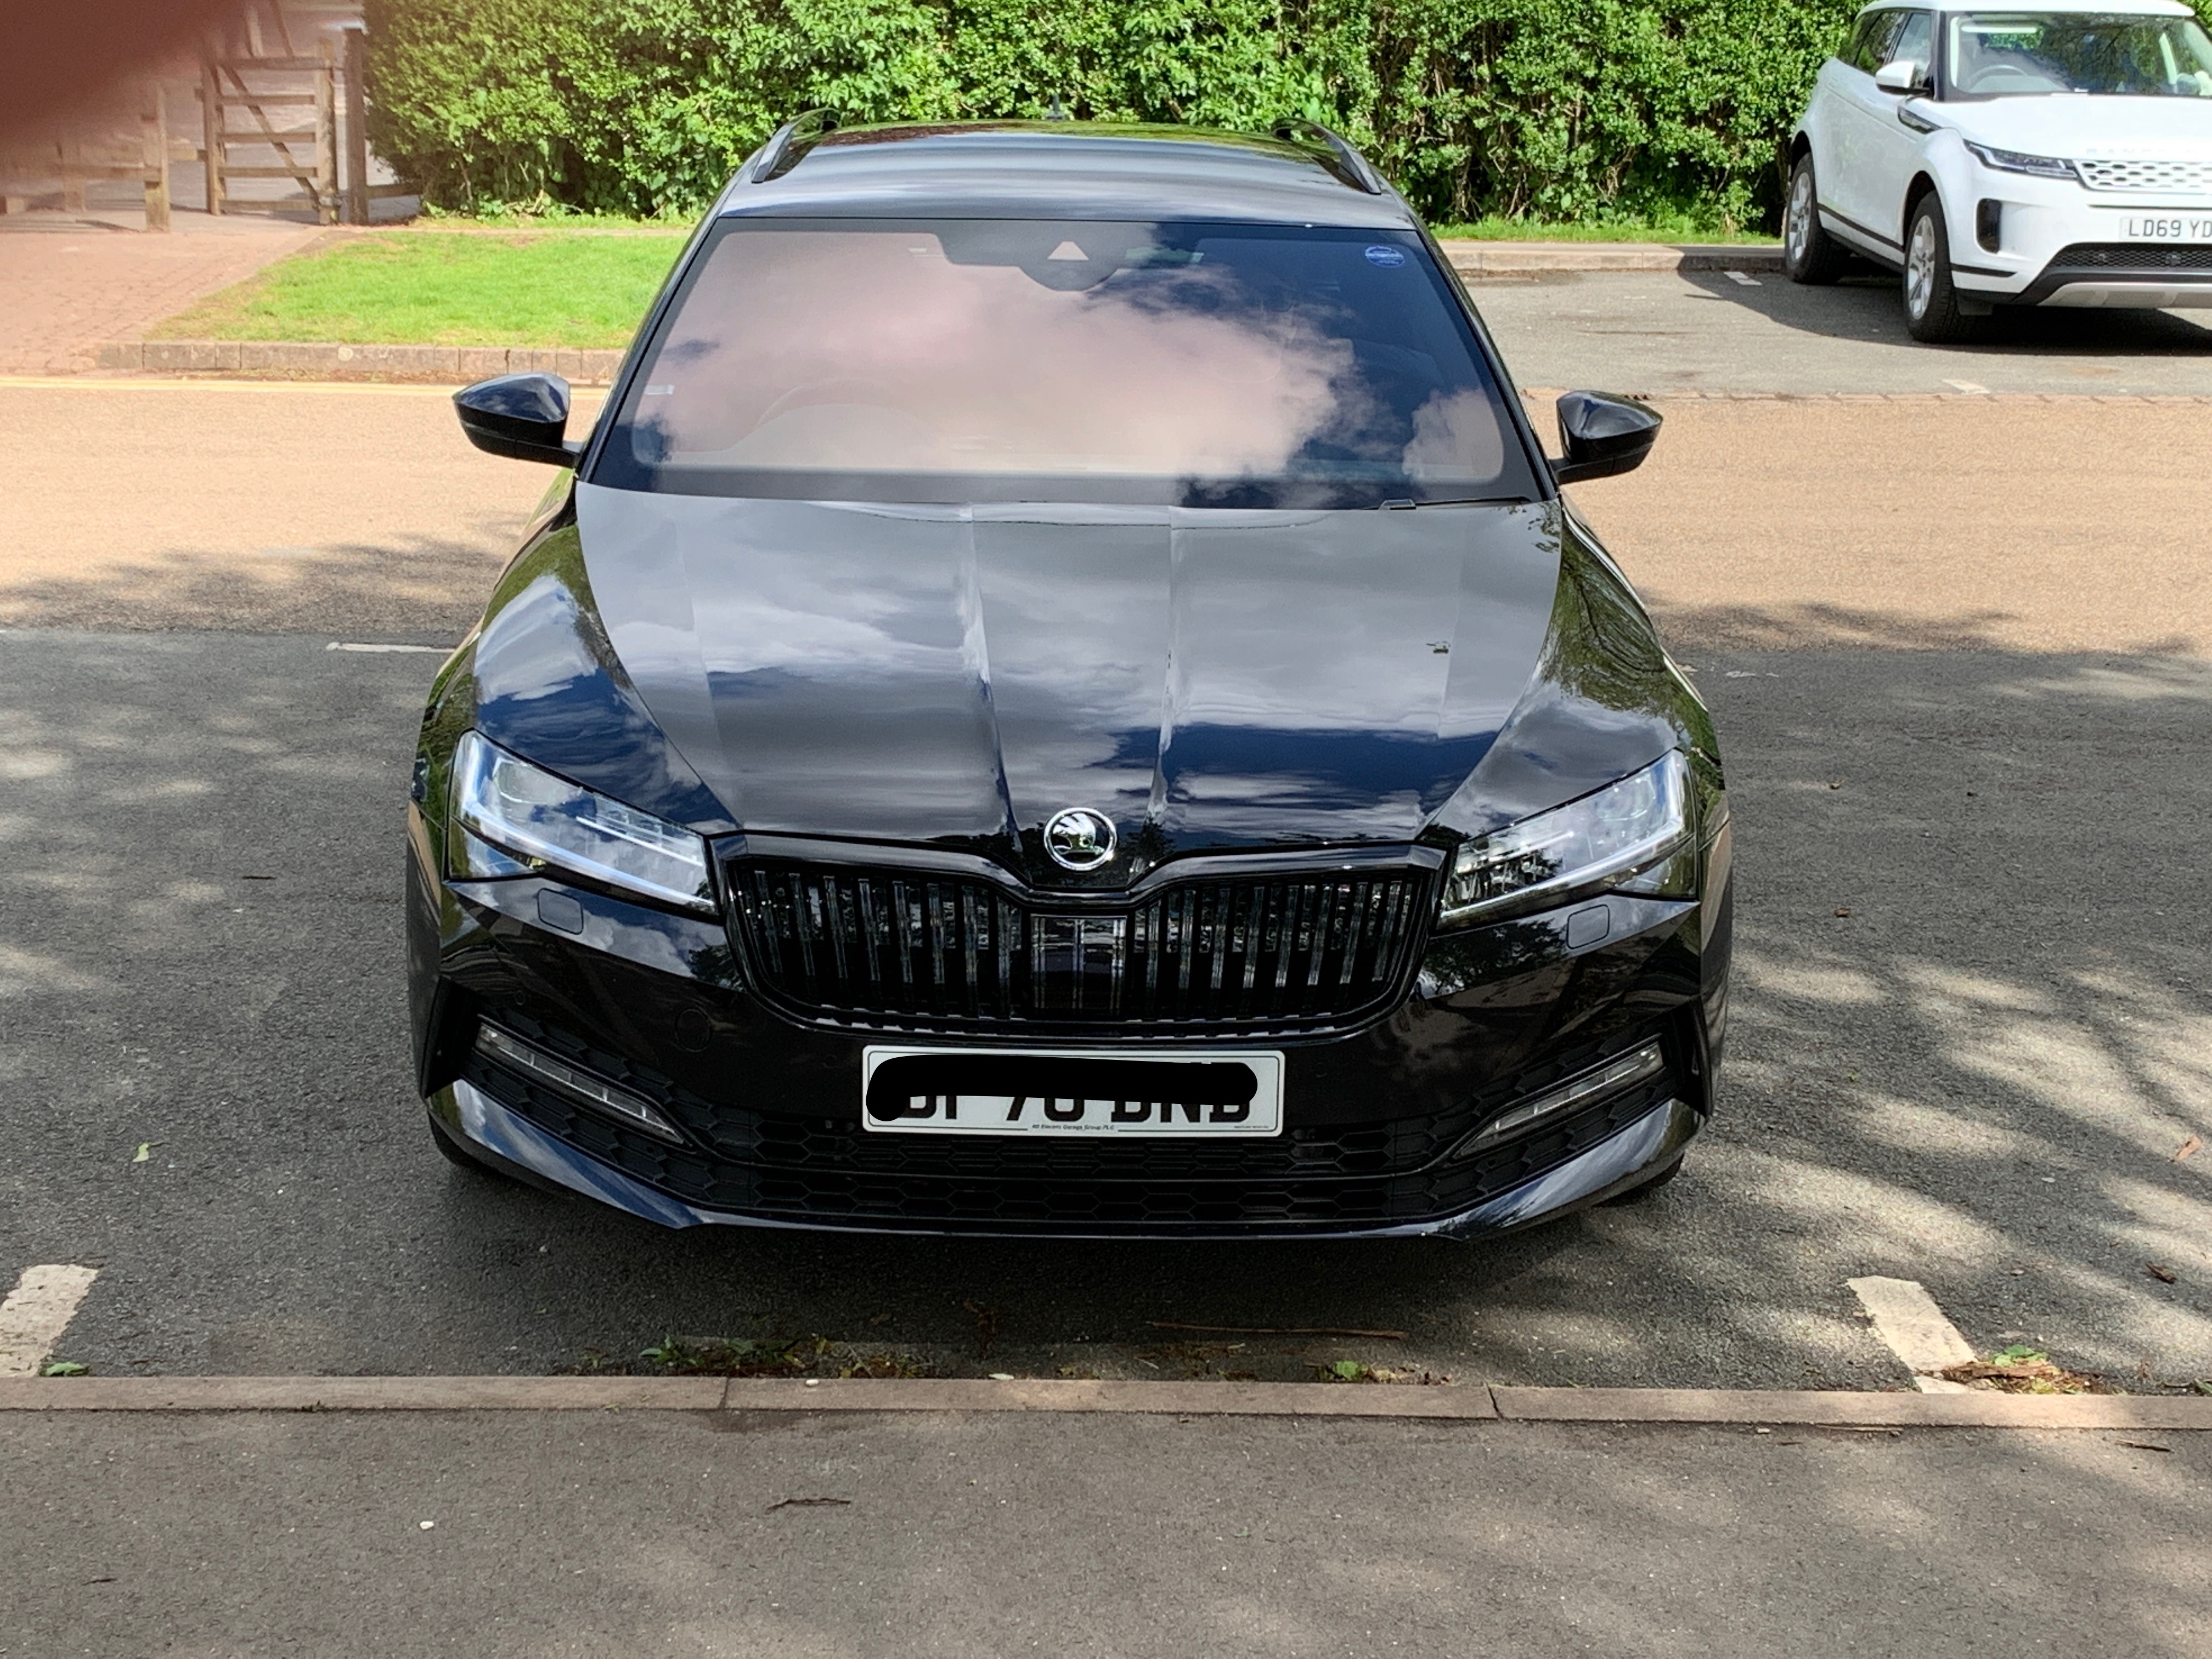
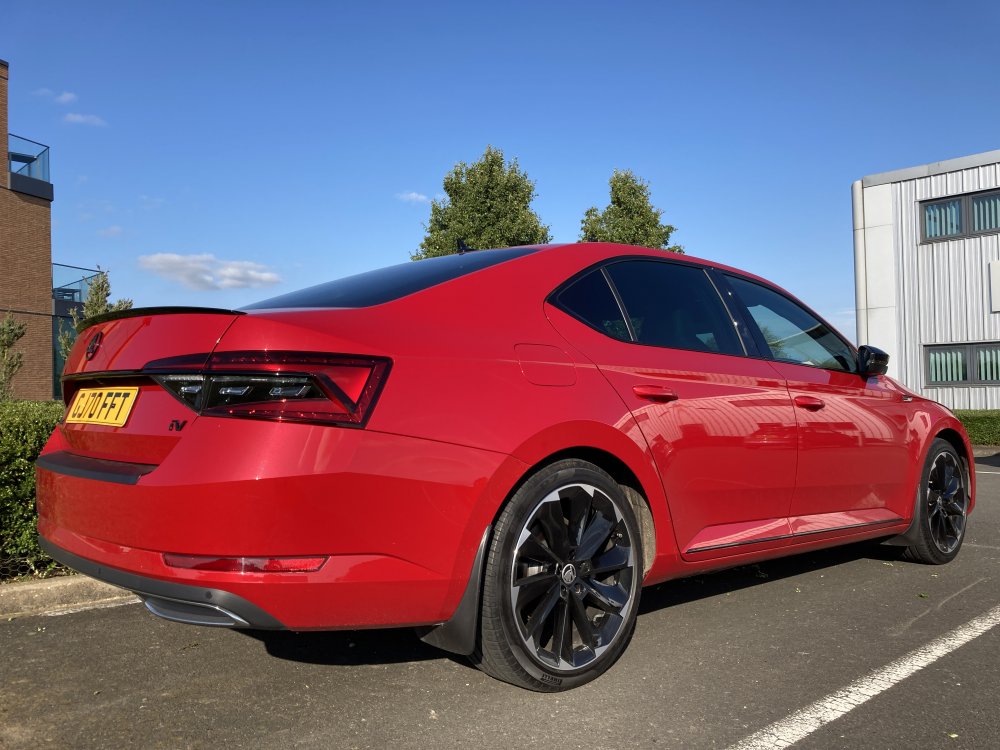 1 pointAs reported in the Black Badging - Skoda Superb Mk III - BRISKODA thread, front and rear black Skoda emblems fitted (originally had the S K O D A on the boot lid):
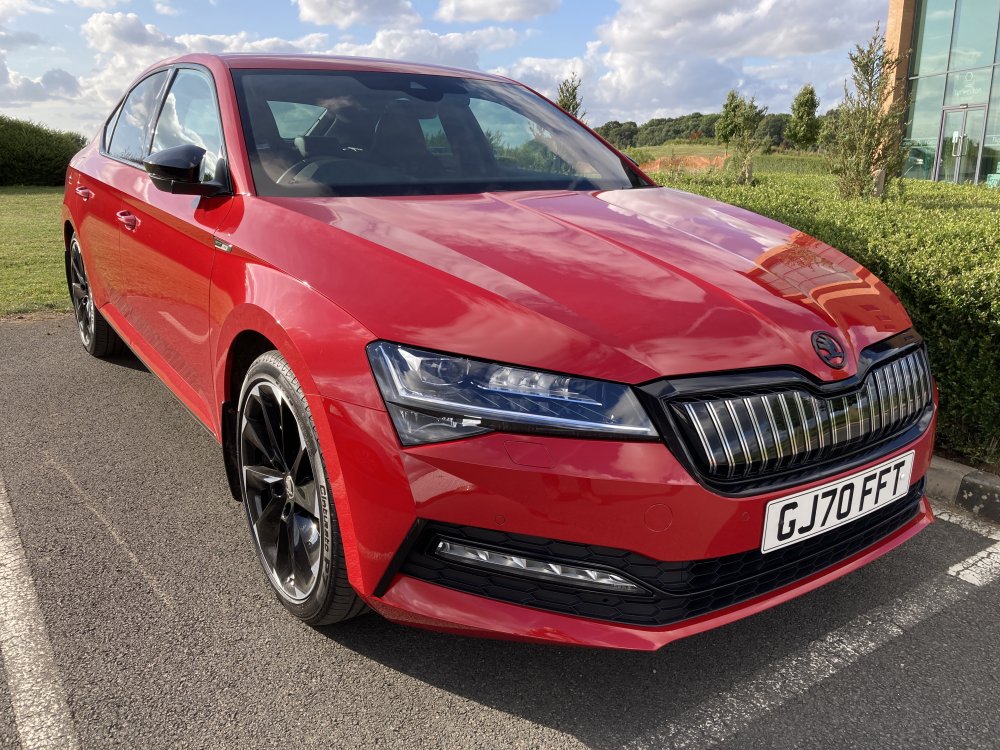
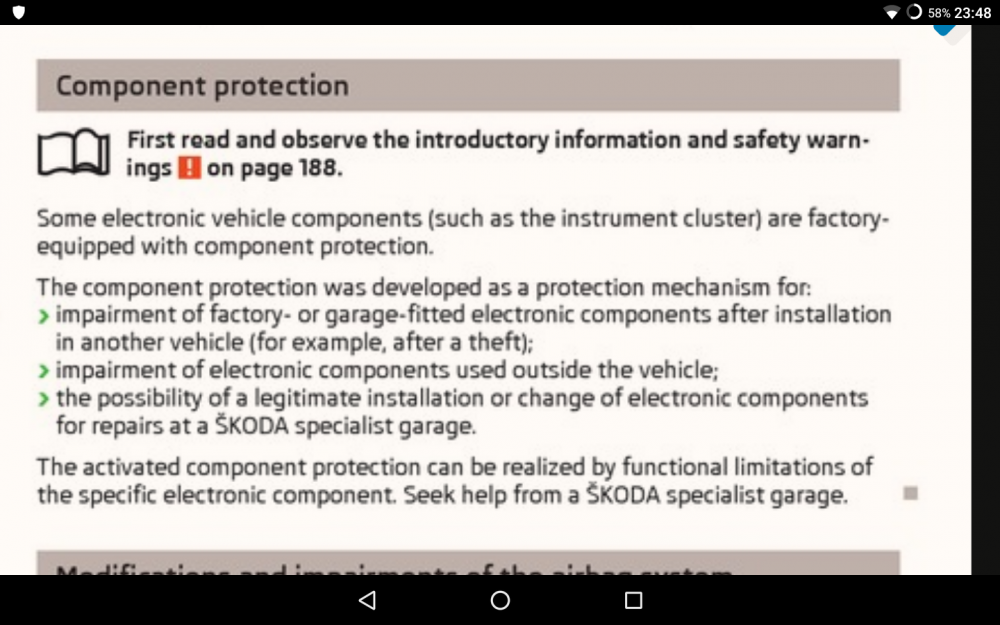
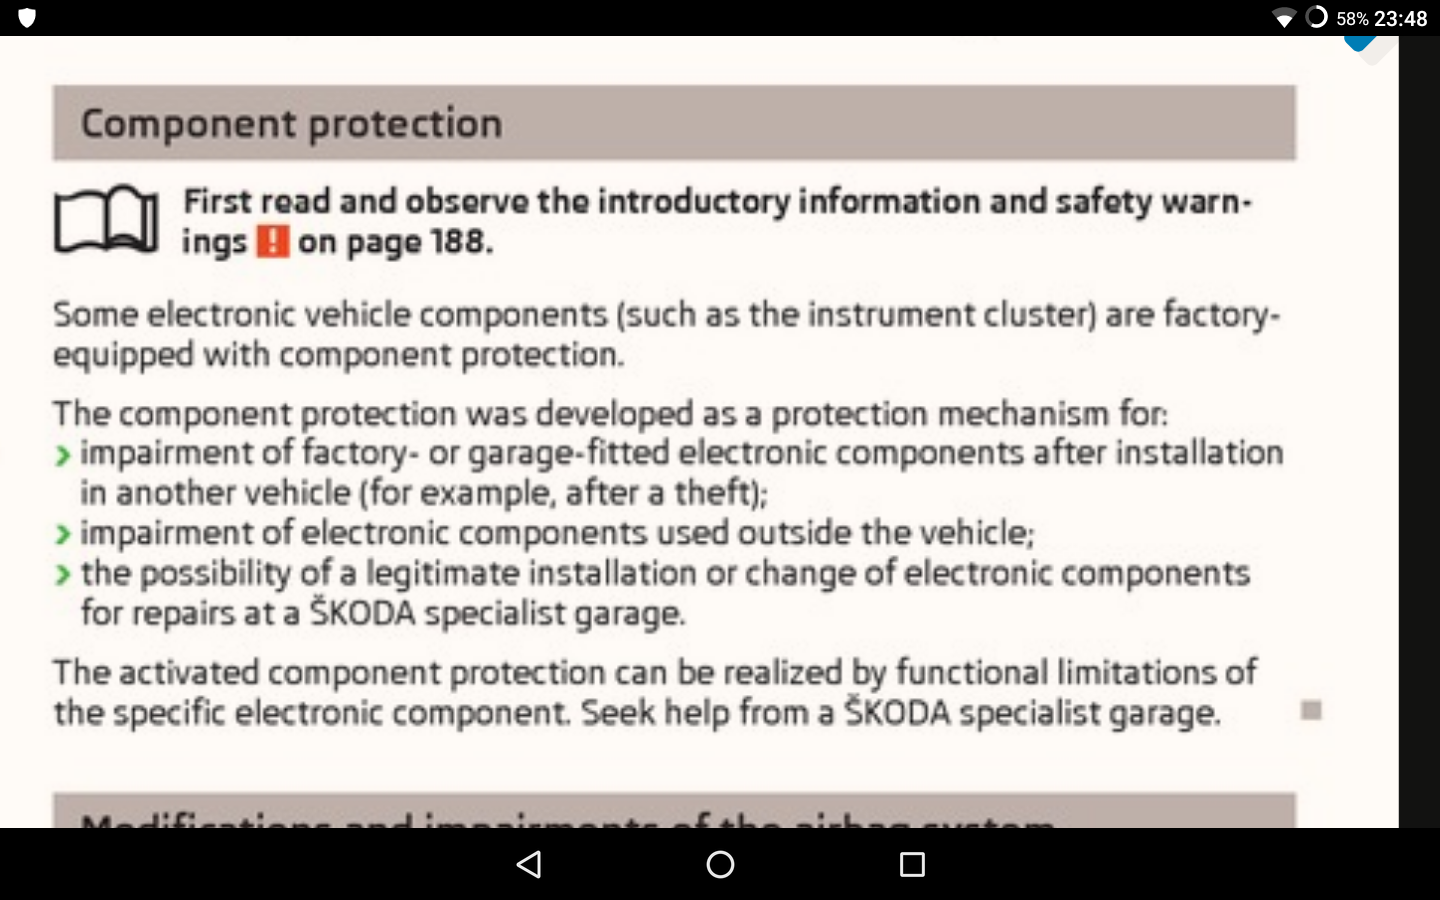
 1 point1 pointWe bought it! It’s in cracking condition, aside from a few stone chips on the front bumper it’s really hard to pick fault. The interior was spotless. And, of course, it swallowed our pushchair with ease! We didn’t realise it had the under-floor storage as well (no spare wheel) so that and the side pockets mean the storage is vast. Thanks again to everyone on this thread for sharing your experience and opinions.1 point@varaderoguy Yeah it's not many. 5.71 tonnes:25000 miles in a diesel vehicle doing 50 mpg (UK) src: https://calculator.carbonfootprint.com/calculator.aspx?tab=4 So I don't do that sort of mileage, but I have lots of power hungry stuff and the driving I do do, tends to be local <30miles over hilly ( peak district ) so I use the 5.20 plan: https://ecologi.com/business/checkout That covers me at a most basic level. Of course one needs to decide if one trusts a checkout page with rough summaries or a bit of fact checking elsewhere. Because 12months of 0.9 is more than 5.71 tonnes. Then again there is all the home stuff, boiler, tv, internet modem, bar fire and so on... All said, anything is better than nothing, and something is a start For less than a round (4 people) I feel slightly better about ragging a 2l petrol car up and down dale... slightly... goes of to punish myself.1 point@MarkyG82 on 2.0 TDI FWD Hatch Romans-cc has installed Eibach ProKit E10-79-012-04-22 (for AWD Hatch) which contains these springs - front F11-85-042-03-FA rear F11-79-008-01-HA https://www.drive2.ru/l/573382395697299820/ while Eibach ProKit E10-85-042-03-22 (for FWD Hatch) contains - front F11-85-042-03-FA rear F11-15-007-04-HA1 point1 pointI kept the OEM springs and replaced with Koni red dampers - wow what a difference. Everything is firmed up but not harsh. No more wallowing. Recommended1 pointThis is true - VAG have dropped updating the old MIB1 units. The other way forward on that one is that you will need an MIB2 replacement unit.1 pointProbably eibach prokit if I do it. Been trying to find part numbers for suitable superb sportline springs that would drop into my passat as it's difficult to fine springs for a factory lowered passat with my transmission. Some Superb prokit springs are listed as compatible with the 280/272 and iV which would suite me fine if I can find factory springs. The 30-35mm drop is a touch too low for my liking and the 15mm factory drop would be perfect. Edit: I do have some upper spring perches ready to fit though which can add up to 10mm to the ride height. Back end sits too low IMO. The spring assisters I have bring it back in line so will probably fit the new pads when fitting the rear roll bar and keep them there if lowering.1 point1 pointIf you open the doors you will see locating holes for roof bars. They have a foot that physically sits on the edge of the roof and the strap goes under the door seal and holds them on. Thule will be the easiest most available option.1 point1 pointSince everything else is newish, it's most likely to be the angle sensor playing up.1 point1 point1 pointPics would be nice so others can see what's what. From your description it sounds as if both the radar unit and its mounting is damaged. In which case I would be inclined to go through insurance. Tell the other party you are looking at over 1500 pounds worth of damage to the radar, associated hardware, labour and an expensive recalibration. The genuine unit is €875+ or more Add to that labour, bear in mind that only Skoda dealers can fit it due to component protection. There may be other damage behind the bumper for instance. Then ADAS calibration costing up to £700 depending who does it.
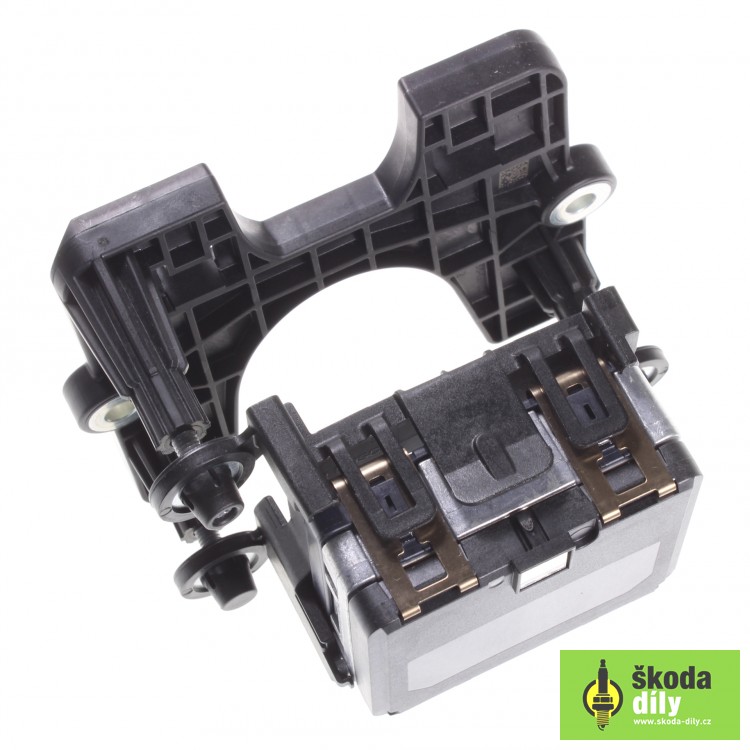
 1 point1 point@xmanthank you for your concern. I took the cover off and can physically see a plastic cap of the radar is broken off, sitting in the well, and the brackets are bent and plastics brackets have snapped off. I don't know what else could be wrong without seeing the extent of how it's damaged underneath but on the surface (covers on) it looks like nothing happened. I am documenting the conversations but I cannot record an admission of guilt without explcitly stating I'm recording (for it to be admissible) especially since he so desperately wants to do it privately I don't think he will until a last resort. The car is insured, that much I know. I am playing it safe, informed my insurers saying I'll let you know what I want doing..here's to people being honest and owning up to it when the time comes.1 pointYou see if you don't do something every month, when you do finally sit down to catch up, it feels like a mamoth task. Had a really tough May, June and July. Physically, emotionally & mentally. For some reason I woke up today and gave a hoot again So anything today is a win. Here is June's Trees, your trees: https://ecologi.com/briskoda?treeId=611a9902d372d223665bf4ad1 point1 pointGot a shot on the front cover of a mag! Not quite Rankin yet, though I’m chuffed
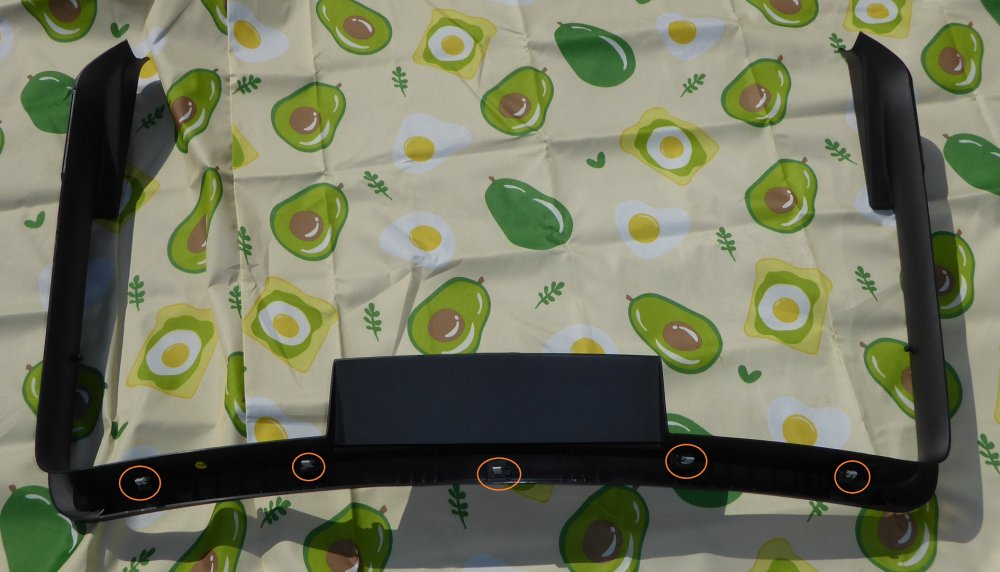
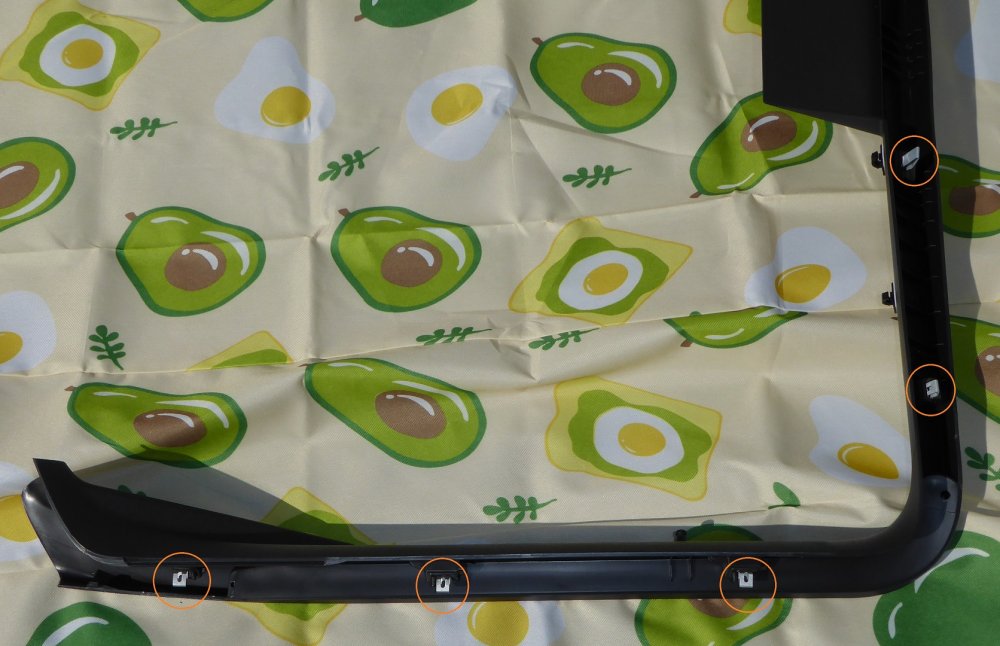
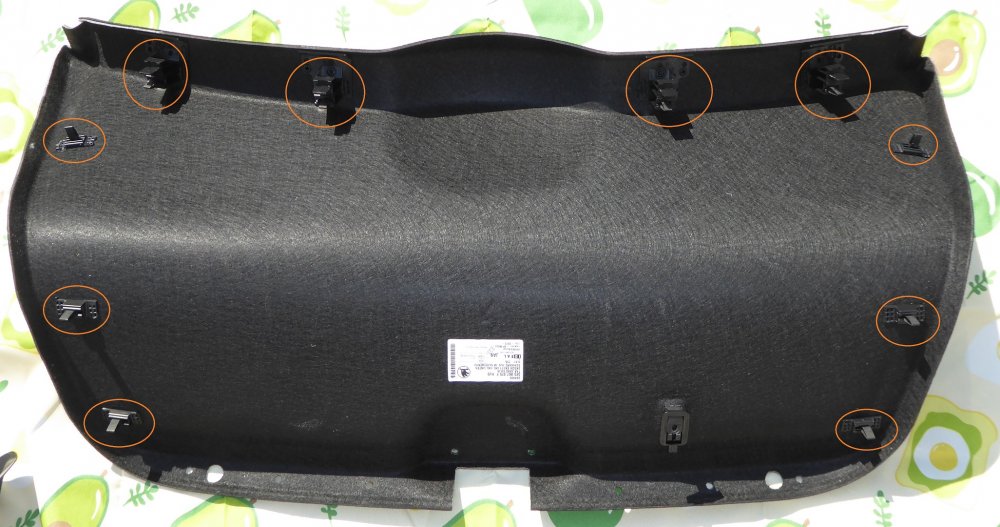
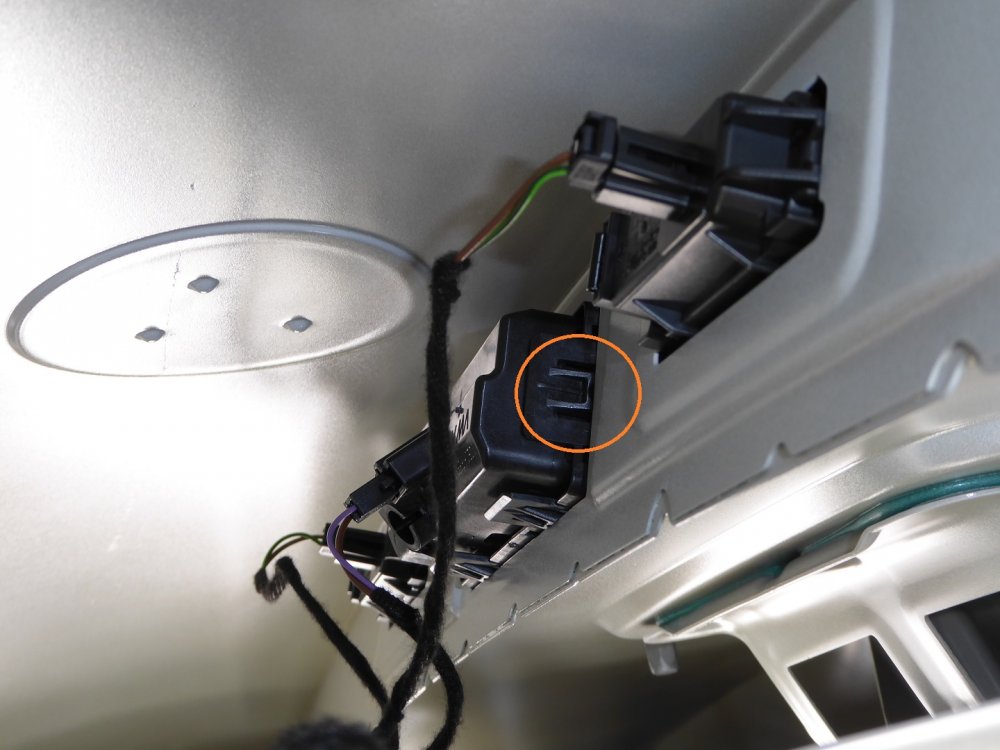
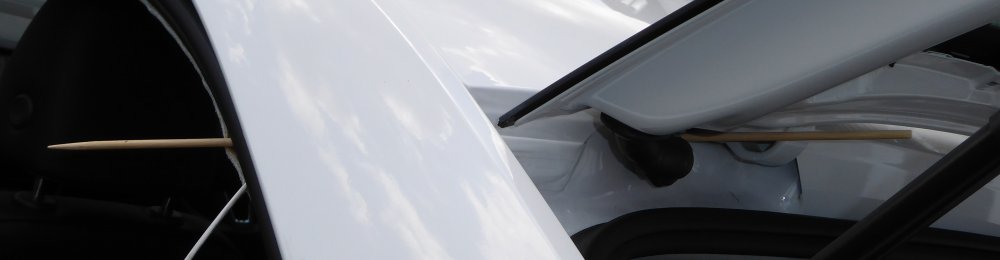
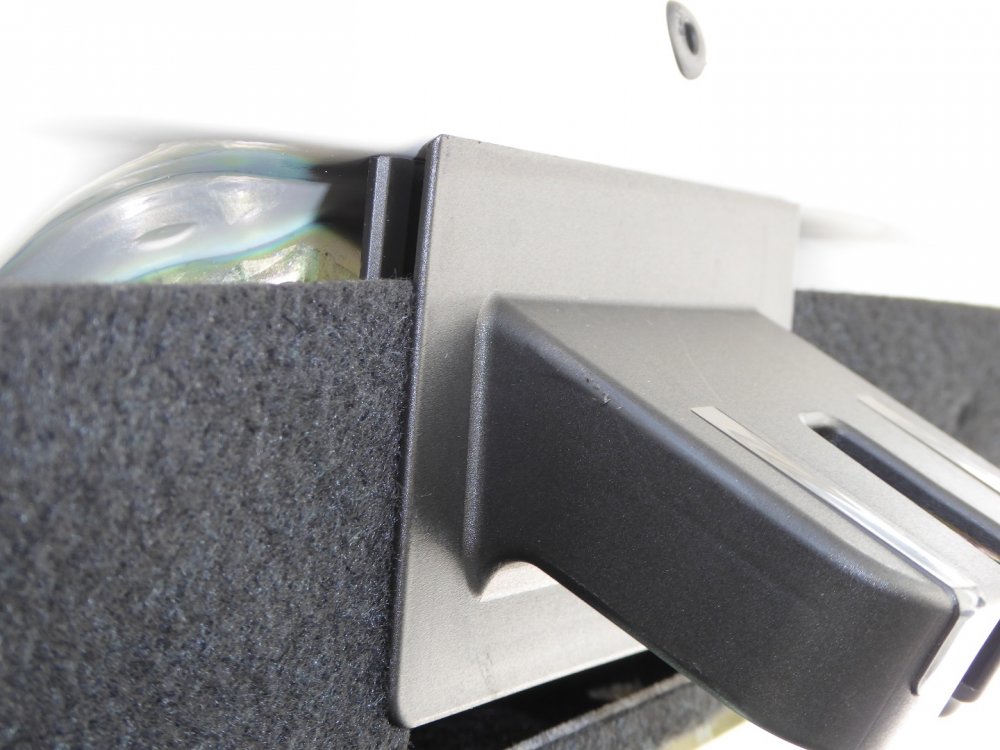
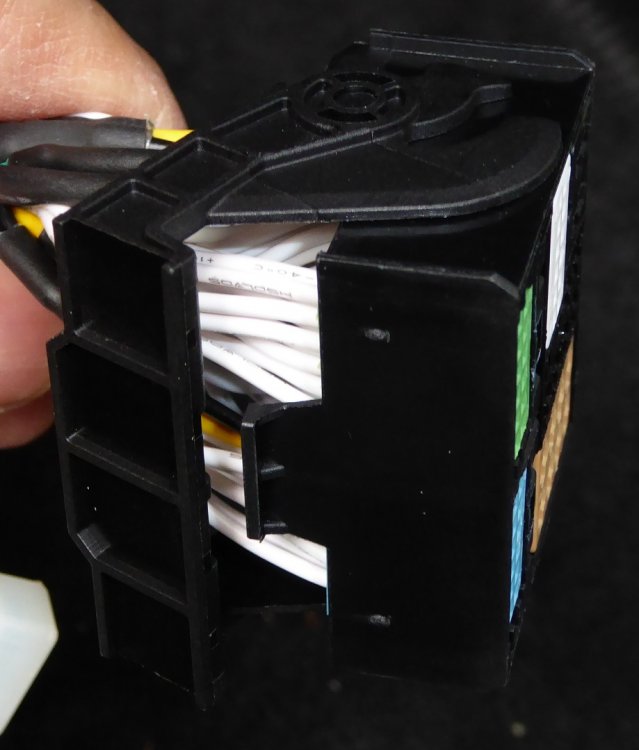
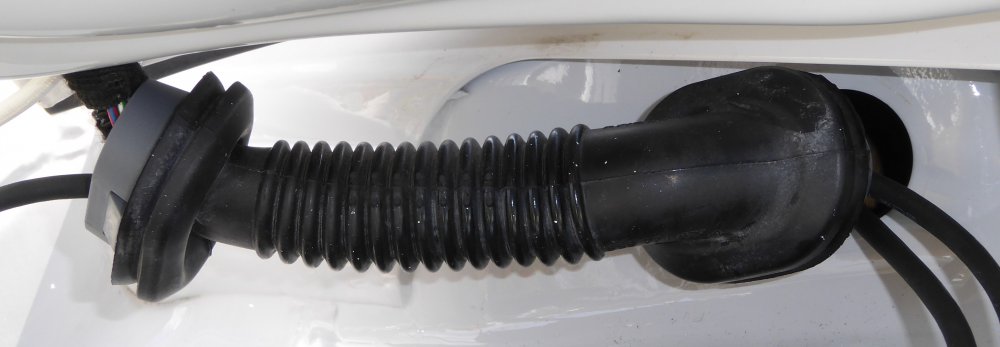
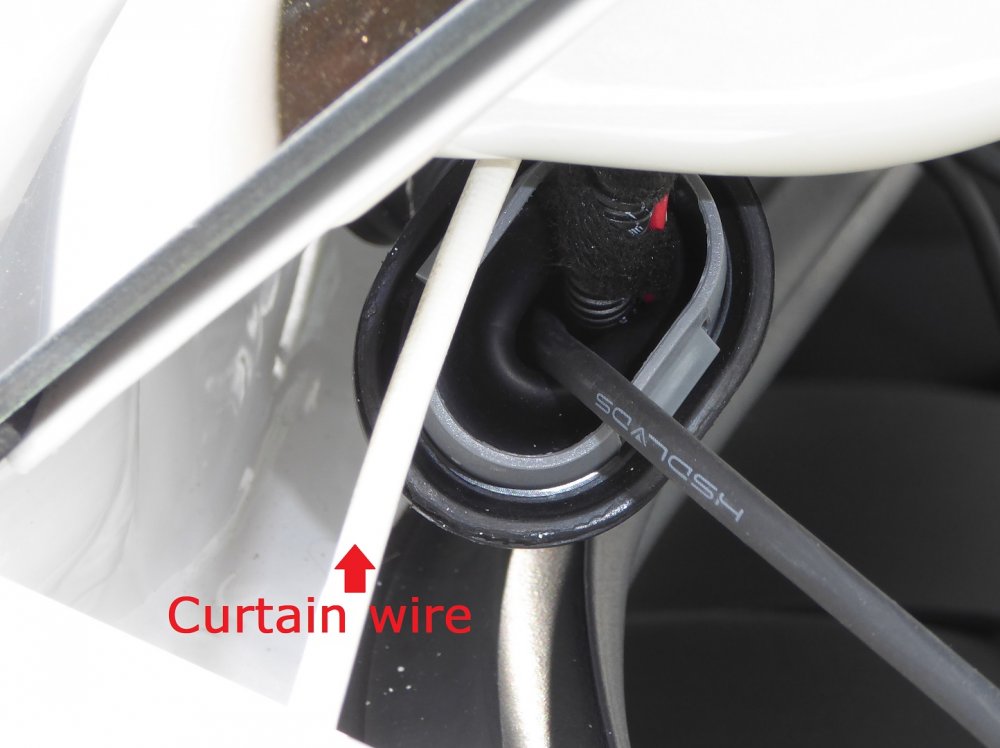
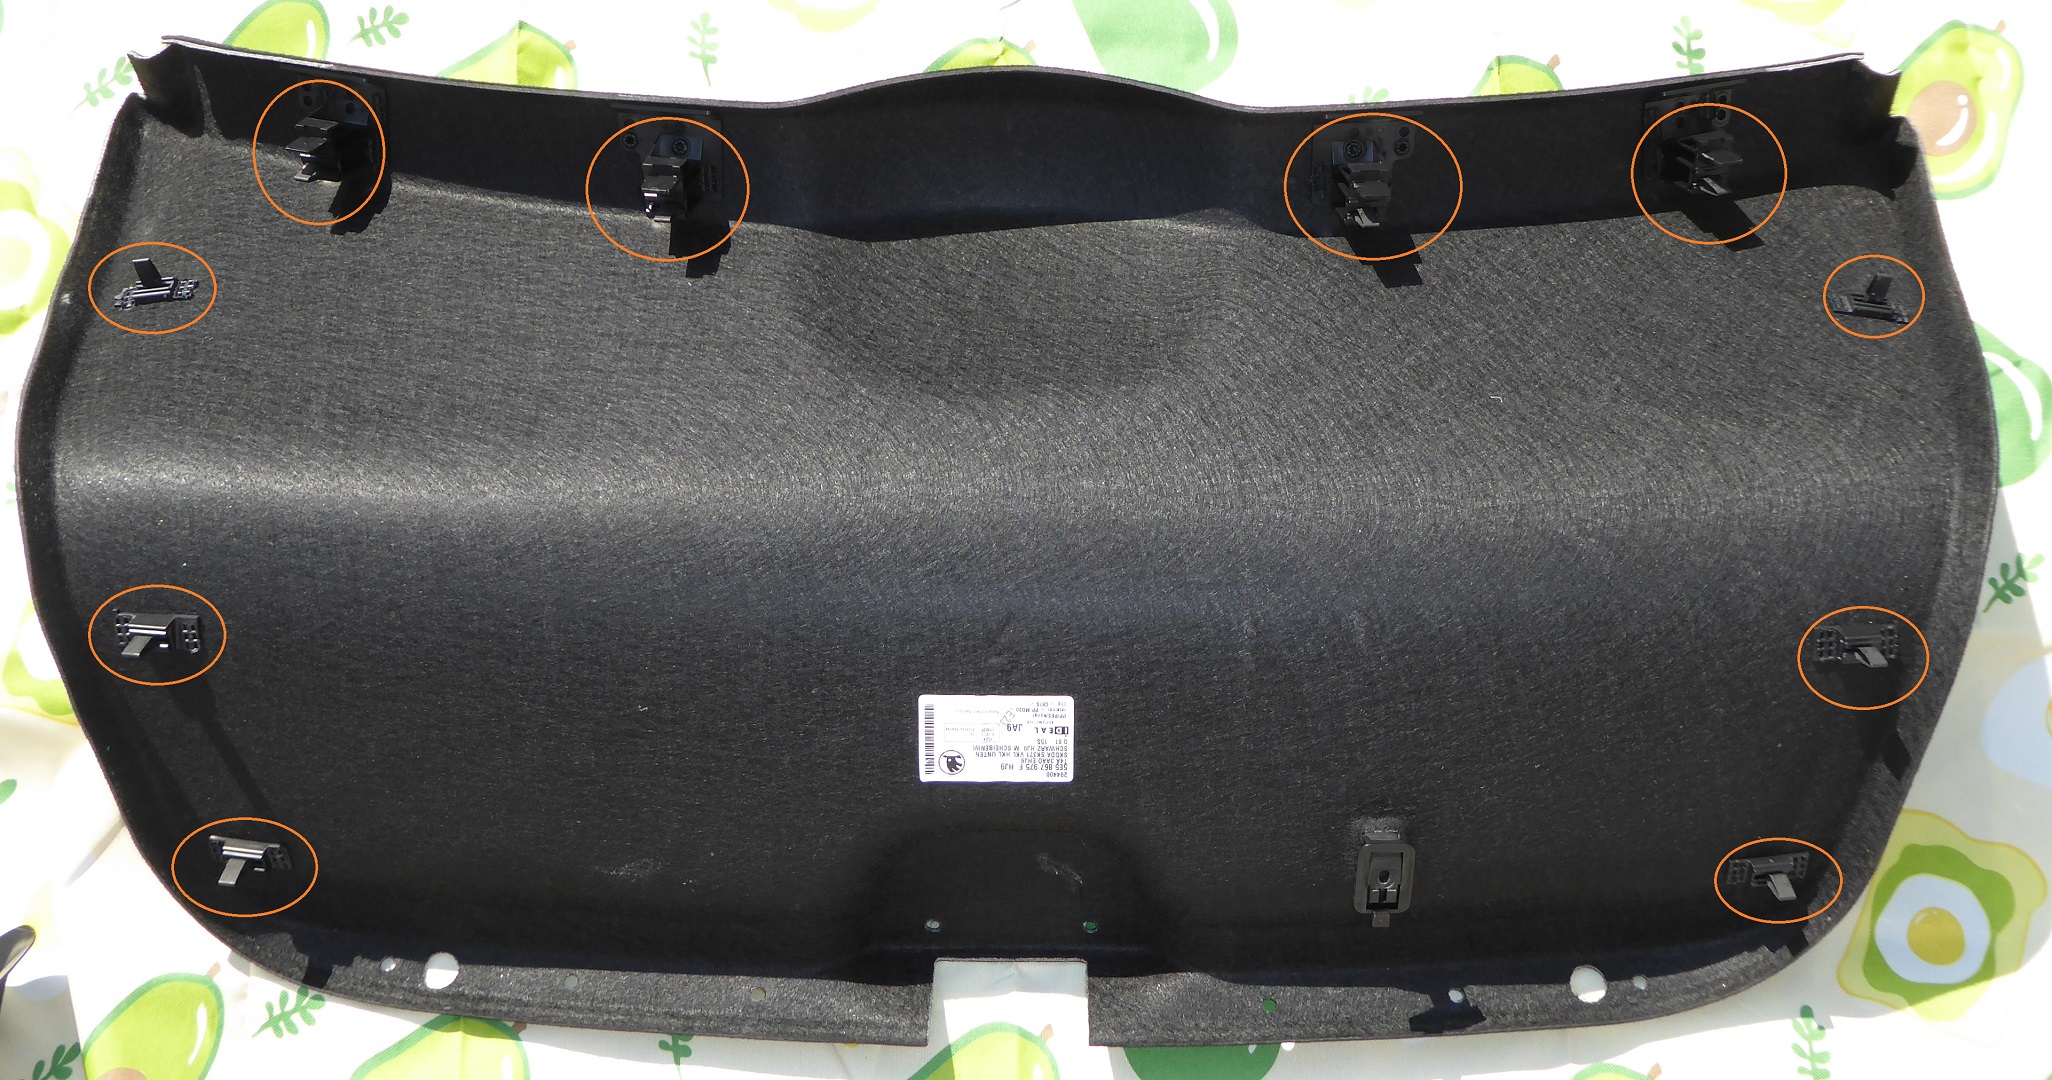
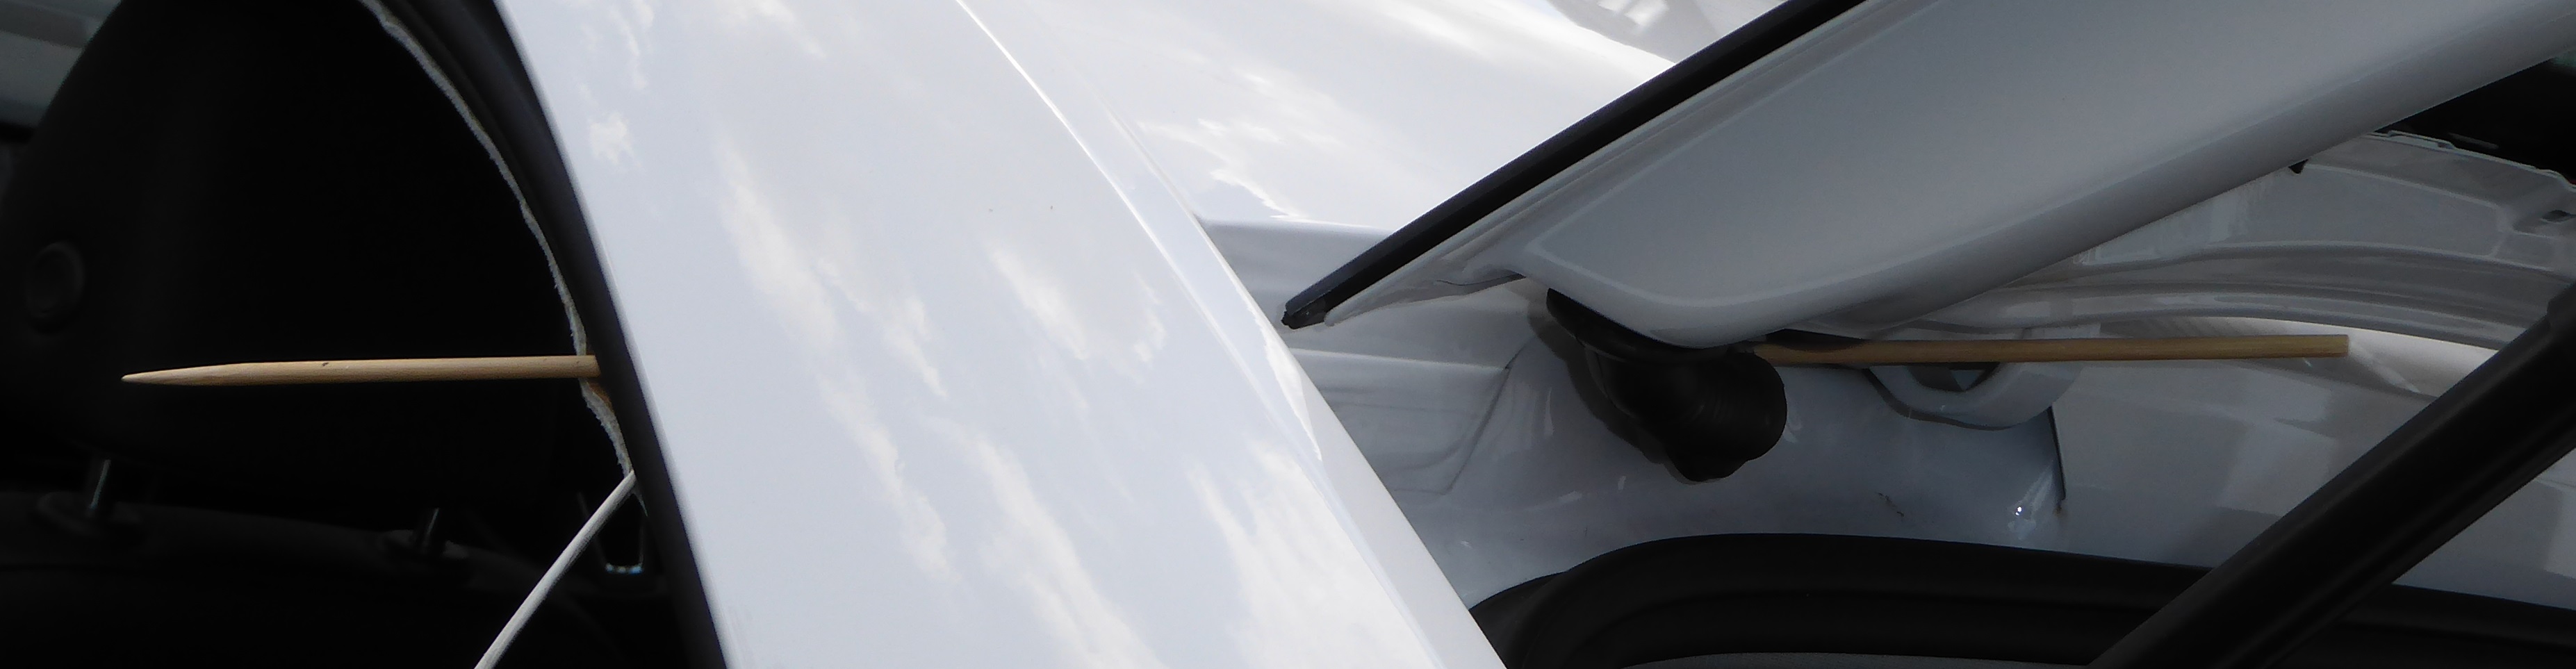
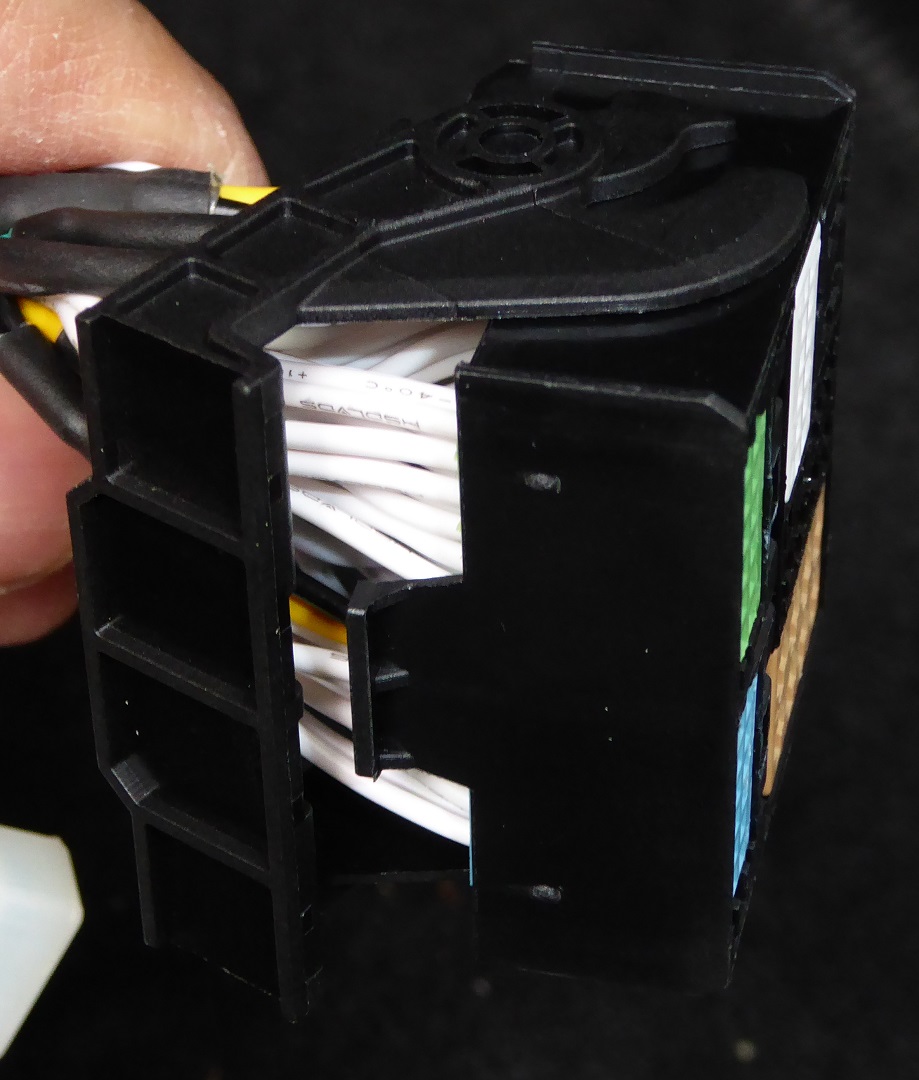
 1 pointThanks to @weyland's excellent instructions, and tips from a few other Brisky members in various threads, I fitted my (long overdue) reversing camera today. I have some observations based on my experience today that may help people fitting their camera. 1) The media unit has plenty of room behind it. Also it can be pulled quite far out with the cables still attached. However I noticed my unit had cables which were trapped behind something initially, which made getting the media unit to move more than about an inch very difficult. As Weyland suggested, getting down into the footwell and looking up with a torch allowed me to see what the problem was, and move the cables free to allow the media unit to be almost completely pulled out. 2) I tested the camera in the car. After connecting the main connector, I simply rested the camera on top of the media unit and checked to see if it worked. That way ensured I found out if I had what seems to be the most common fault, poor connection, at the earliest opportunity. When refitting the media unit, be sure to position the camera wire correctly to the side, as it can get trapped behind the media unit. Ditto the cables out of the new inline double socket. It's quite fiddly so expect it to need some care and patience. And a torch! Note the connector has a lever-lock action to secure it in place. The lever is at the bottom of the connector, so it's not hard to lift the lever to remove the socket it from the media unit. I found that with the lever lifted, the socket came out fairly easily, with little force required. I plugged the new socket in very carefully, and pushed it right in, using the lever-lock purely as a lock once connected, not as an aid to pulling the connector into place. 3) I went the Weyland/OEM up and over route, and it was fairly straightforward. I started at the head unit, and went towards the back of the car. Arguably, this is the "wrong" way to do it, as the connector for going this way is larger than the other end. Something that was a particular issue when I got to the rubber connection between the hatch and the car body. The tip to use net curtain wire as a guide to pull the cable through was invaluable, but I also used a dowel as a guide for the rear hatch hole to the C-pillar and I think around the B-pillar too. . I attached the cable to the pull wire/dowel with self-amalgamating tape, because it doesn't leave a sticky residue. I also found a "One step back, several steps forward" approach worked best, rather than simply pulling the cable through. I'd gently pull the cable back, to ensure it was moving freely, then pull it through with the curtain wire until I felt resistance. Then repeat the back/forward action. It worked pretty well. 4) Pushing an end clip on the boot handle as well as pushing out from behind (a two handed operation) worked a treat, but it's fiddly and awkward to do. Don't let the pictures fool you, there are a load of obstructions in your way and it's a pain. Be patient and use careful force on the end clip, and you'll be fine. The electrical connector into the boot handle switch has a little lock that you need to release to remove the connector. When refitting, slot the inner edge of the connector above the number plate for an easy refit. 5) Removing the rear trim from the hatch is straightforward enough, but it requires some confident force to remove those clips and it's a real PITA putting it back. A 2nd pair of hands is very useful. I've uploaded some pics so you can get an idea of where to expect the clips. Note there are four clips in the bottom (furry) half of the trim which are at a different angle. (Either side of the wiper motor bulge.) Note use of picnic mat to prevent damage/soiling to rear trim. Also the furry trim slots into the boot lock, in case you were wondering. (See pic.) 6) The dowel was very useful for finding the route from the rear hatch hole to the front of the C-pillar. 7) A particularly tricky part of the job I found, was feeding the socket through the rubber hose between the rear of the car and the hatch. It's a snug fit. Also the hose has hard plastic clips in it, it's not all rubber. Edit: I forgot to say, I used aerosol silicone spray as a lubricant to both help the cable through, and ensure the rubber seals made good watertight contact when refitted. I'd advise against using oil on rubber as it does not do it any good in the long term. https://www.amazon.co.uk/WD40-Performance-Silicone-Lubricant-250ml/dp/B00KPUBRJ8 . Allow about 4 hours, including time for struggling with tricky bits, taking pictures, and generally not rushing and damaging anything. By the time I was almost done, I was pretty fed up with the whole business, and was replacing the uncooperative rear trim in a pretty foul mood, so I had to try and chill out a bit to ensure I didn't rush putting it back and damage something. All in all, it is fairly simple to do, but being simple doesn't make it easy. Good luck!
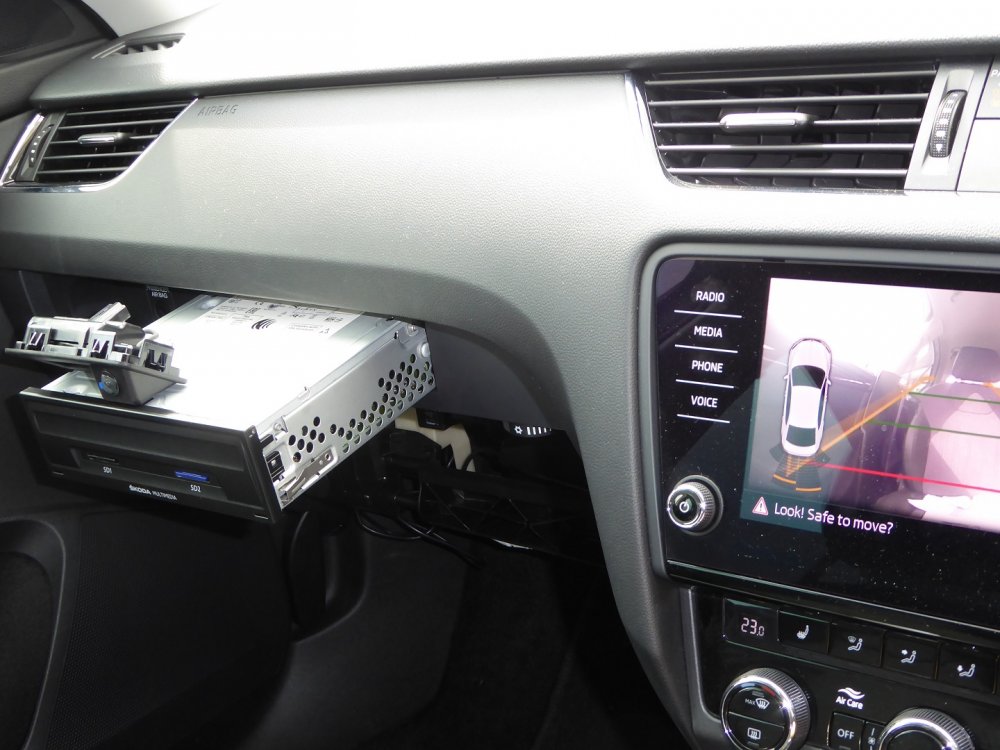

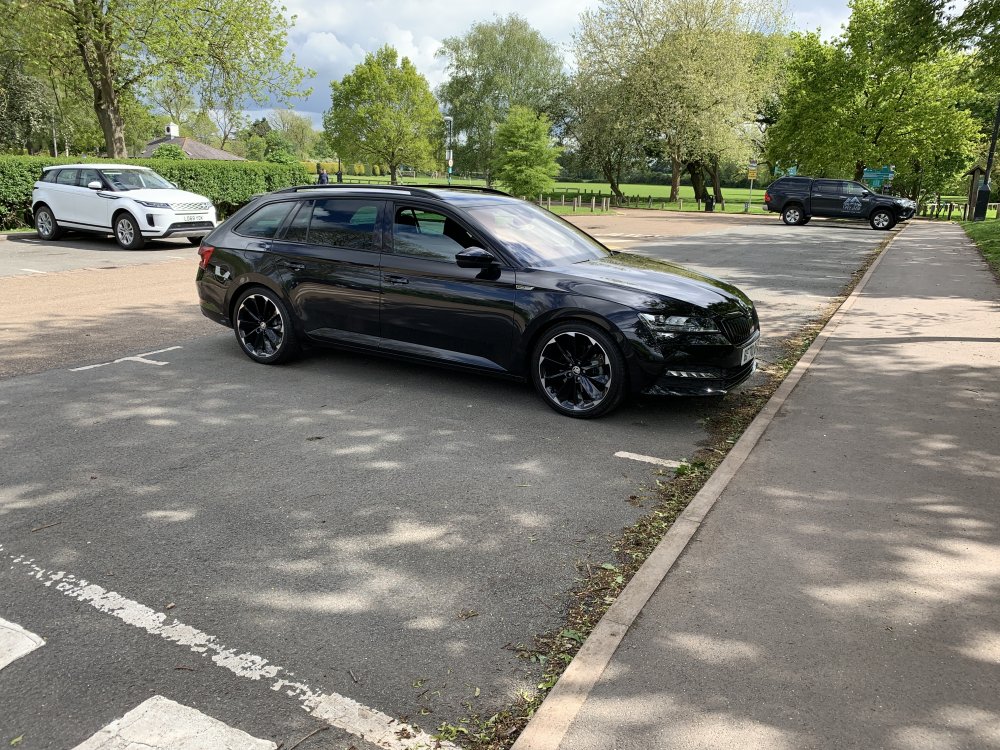
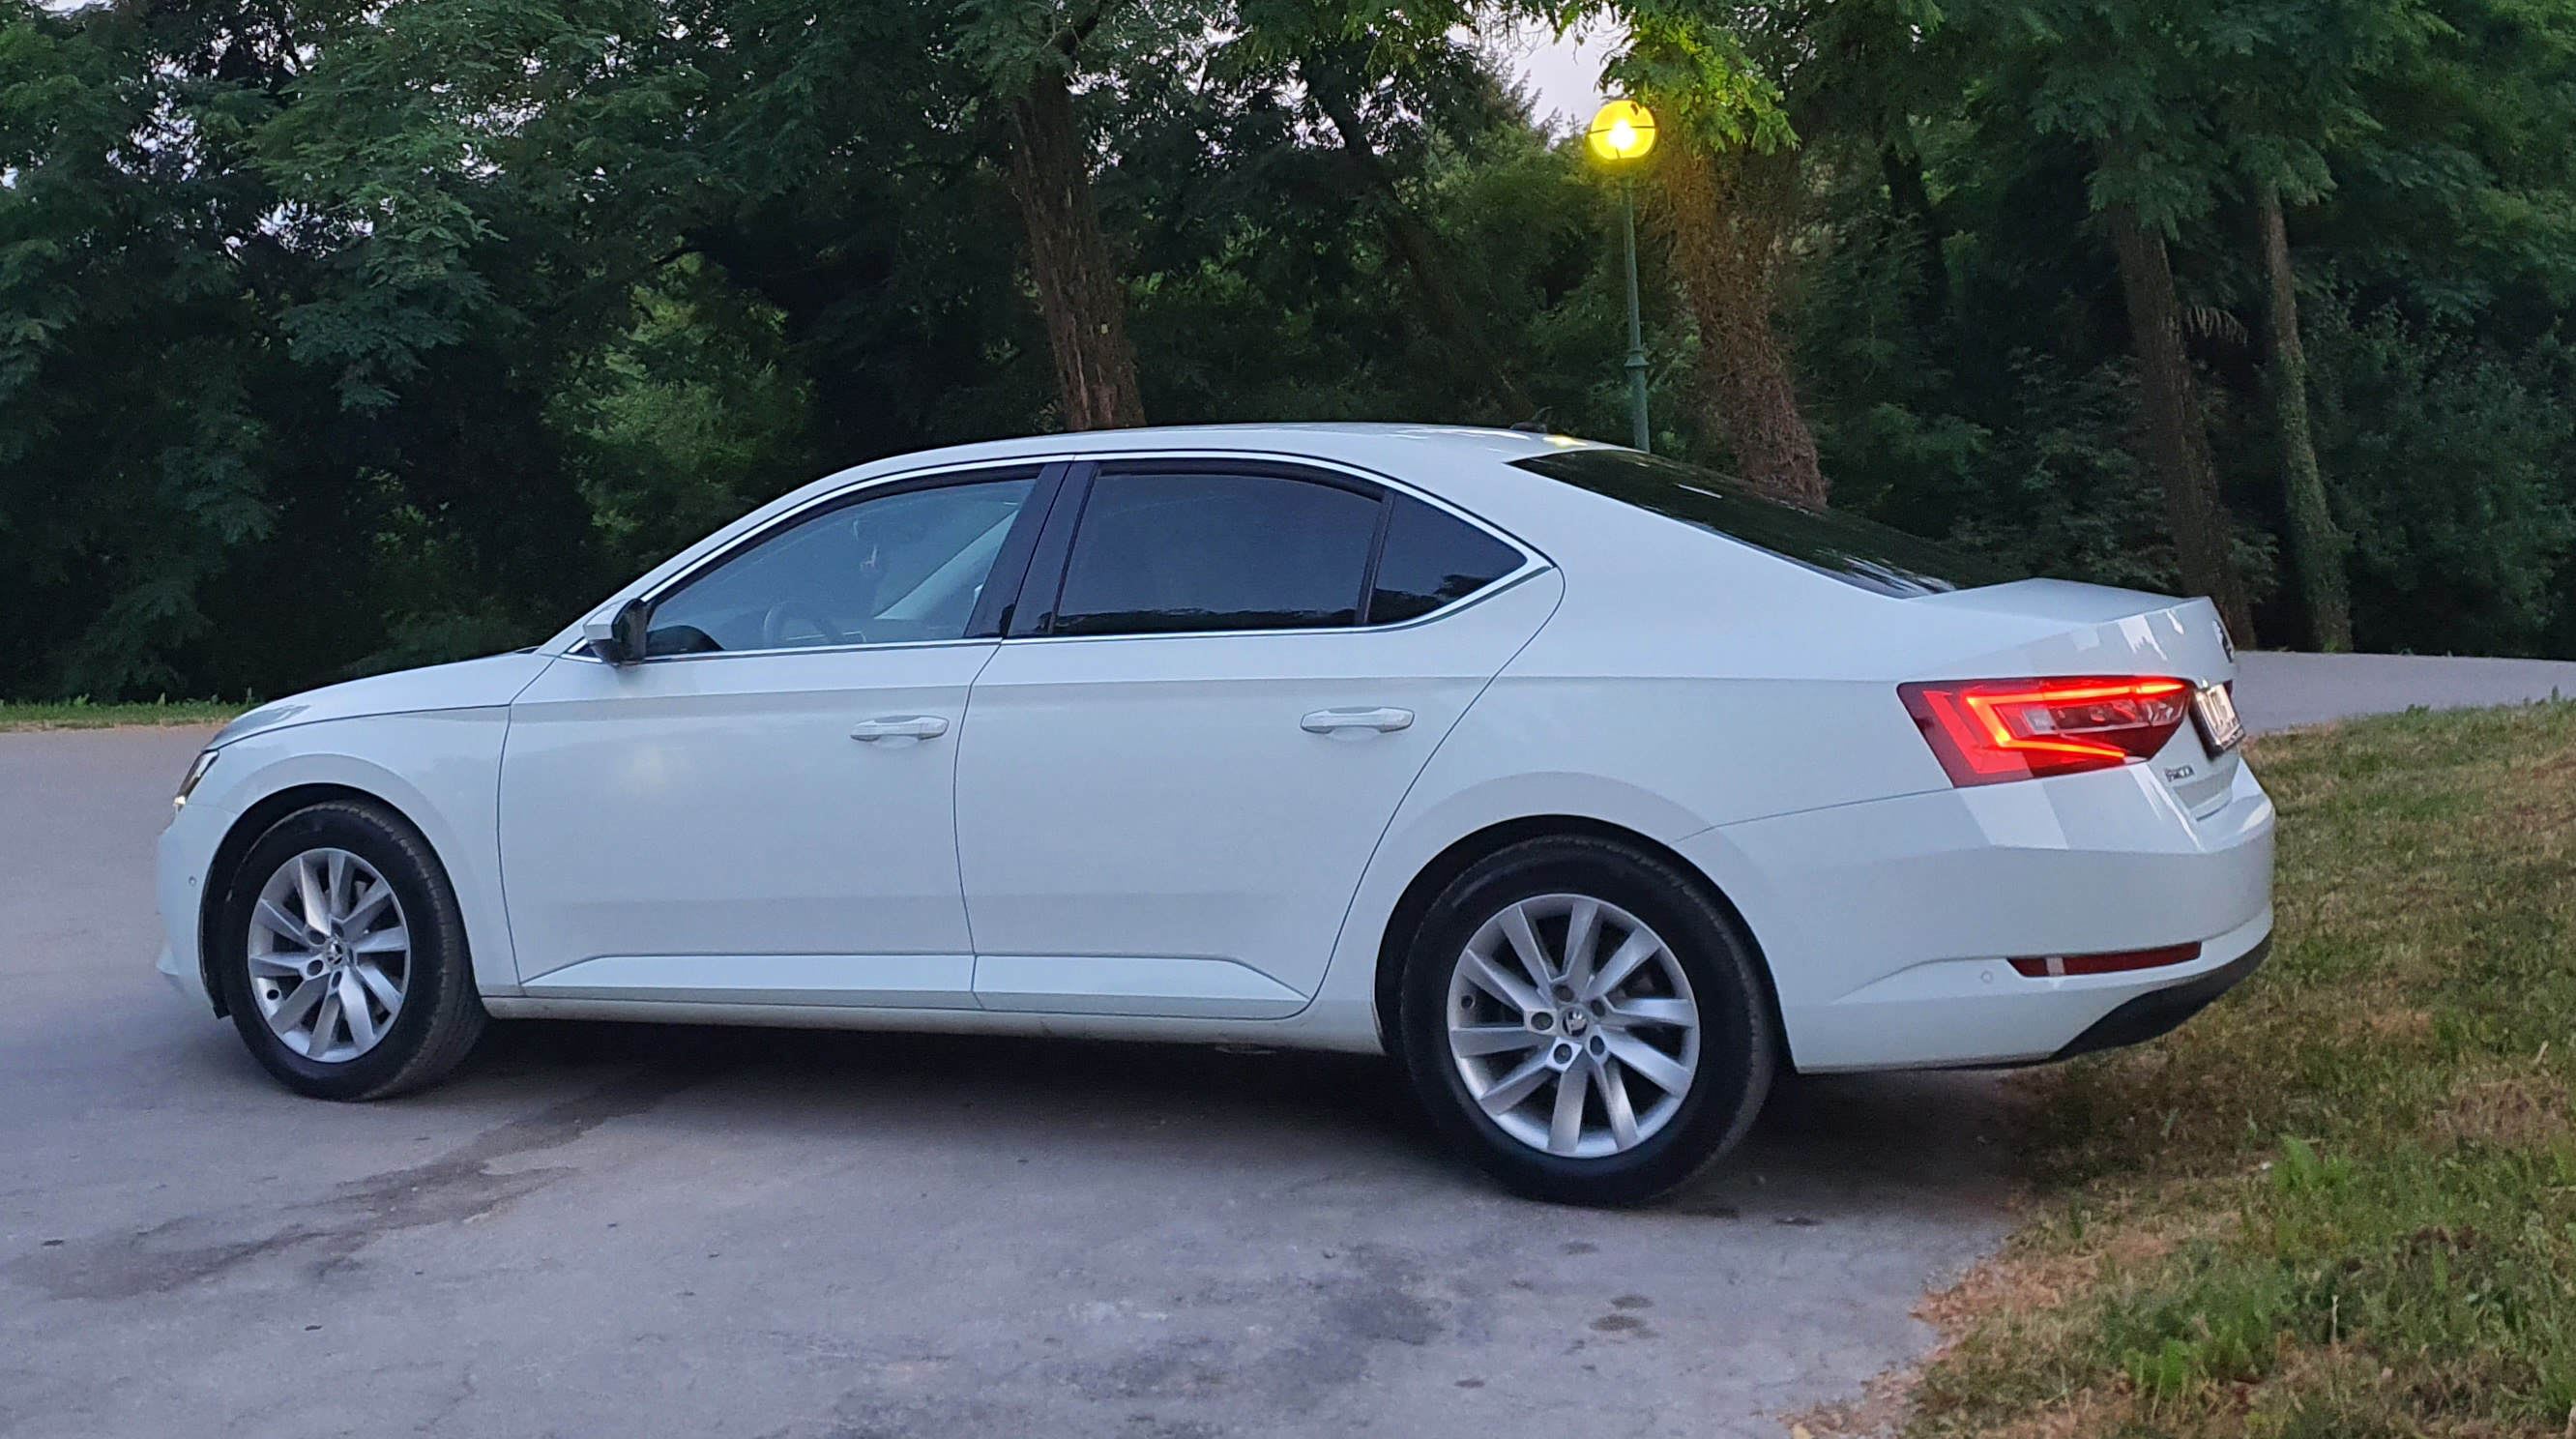
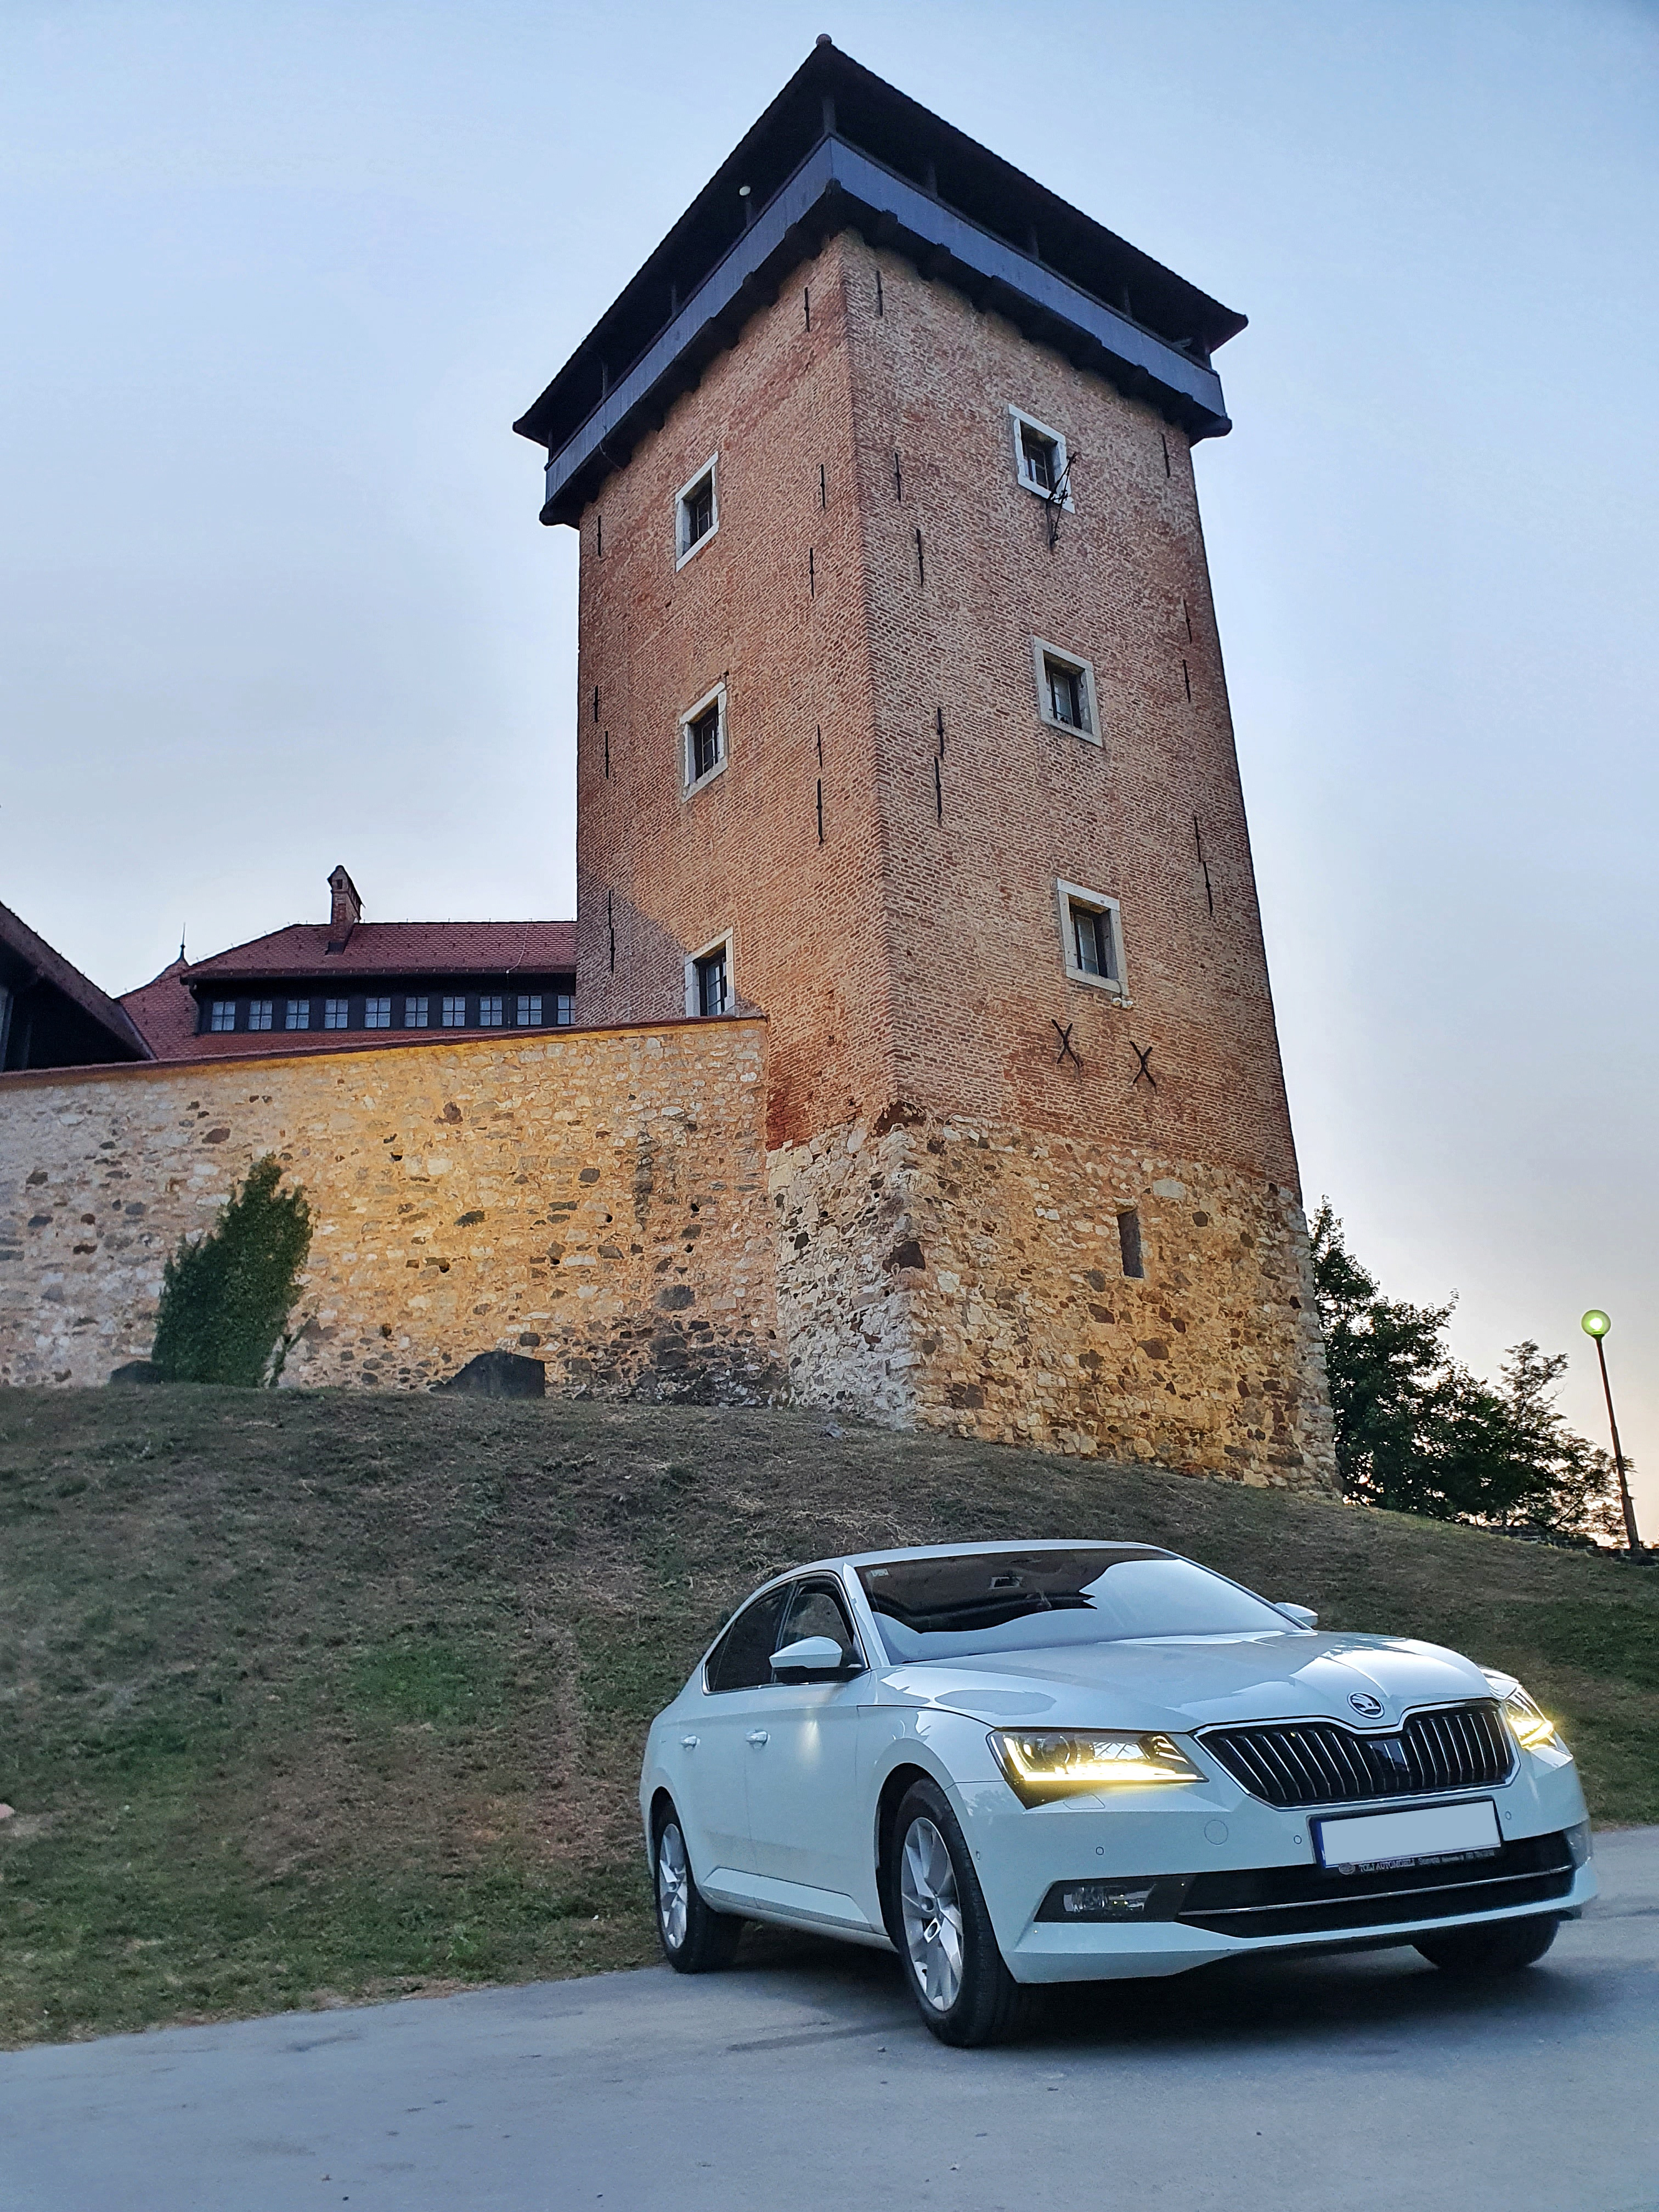
 1 point1 point1 pointso many amazing superbs here, im amazed they are all just superb. Here is mine, bought it a week ago, still getting to know her 2.0 dsg, 110kwh, 85k km. First car this big, amazed by it and getting a lot of positive commentaries. Lots of work on it, but it depends on finances. Like wheels, and stuff like that, but will enjoy it along the way Cheers from Croatia
 1 pointThank you to all who have contributed to the trees. A bit of a milestone, together we've planted over 5k trees around the planet in less than a year. BRISKODA as a part of the legal entity has been chugging away with 226 tonnes of co2 offset too.. way more than we use, but that's no bad thing. That is, 174 long haul flights or 562,641 miles in a car. Although not sure if thats a citigo or a 280 superb. Probably something in between, heck all I know is it's more miles than I did last year.
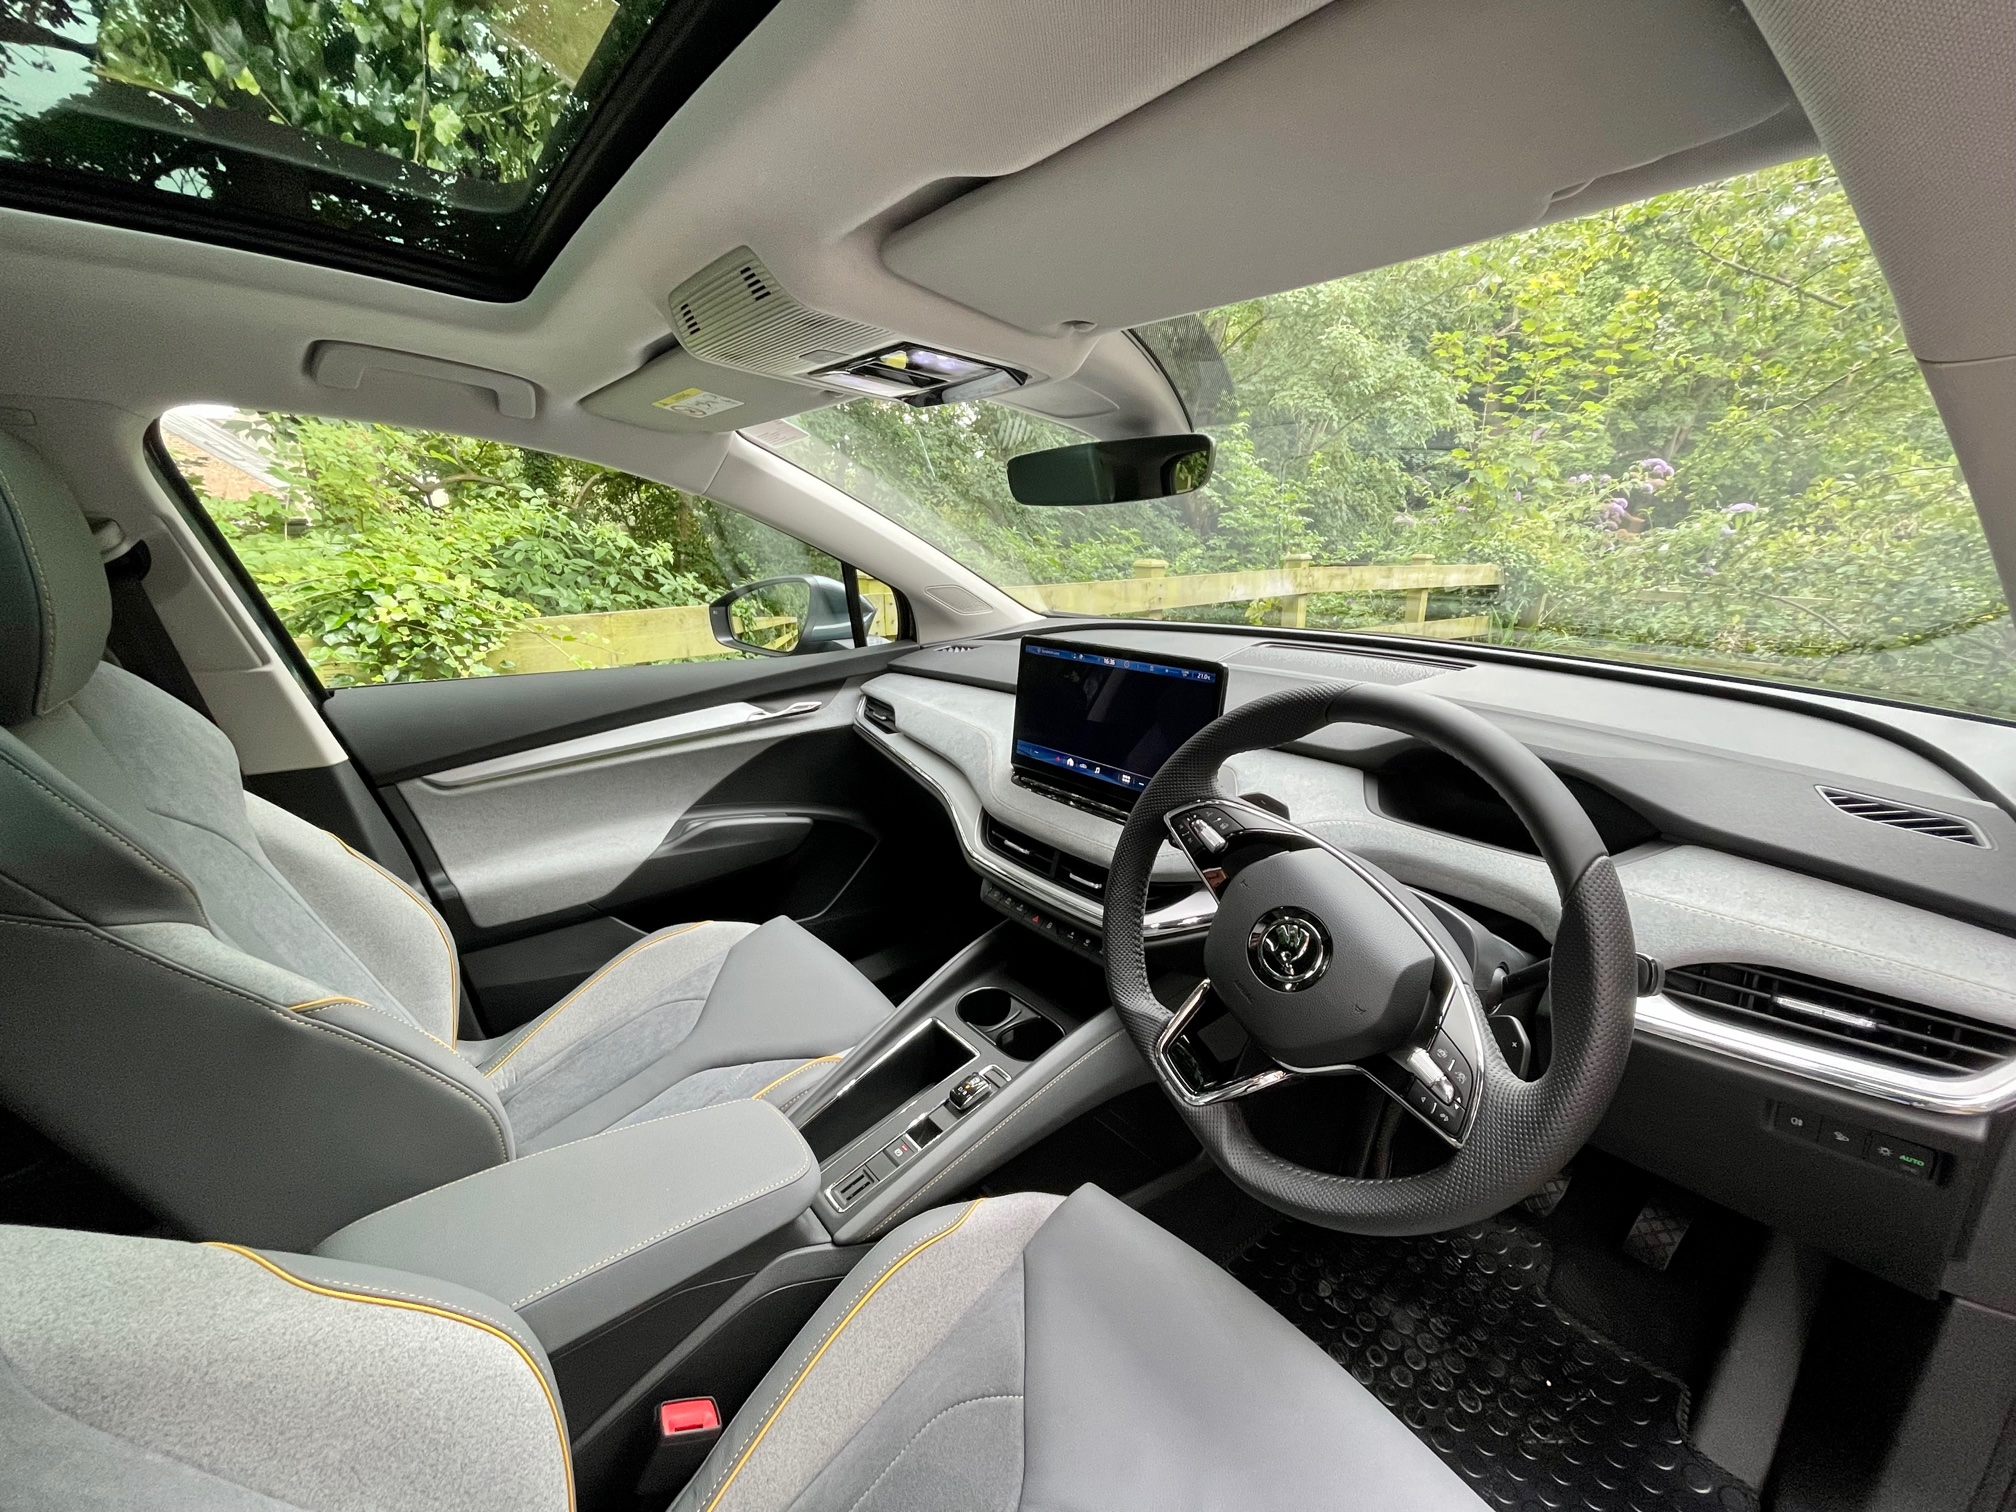
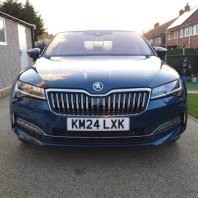
 1 point1 pointNew to me, went to buy my second Karoq but this was in the show room and couldn’t resist even the wife was impressed and before my coffee was drunk I had bought it
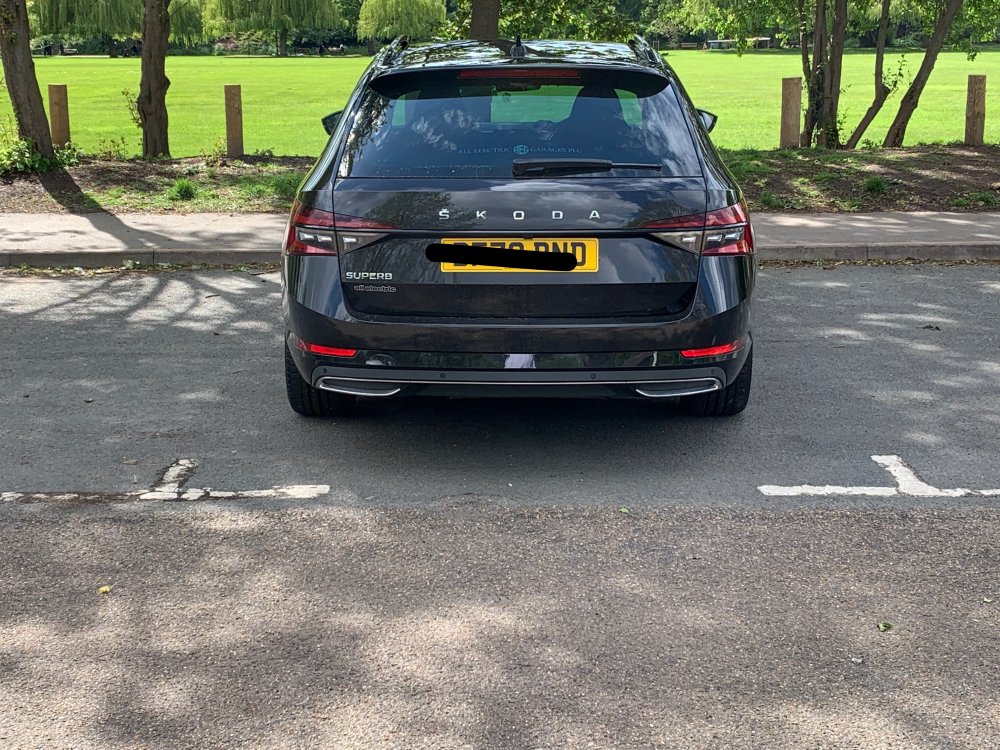

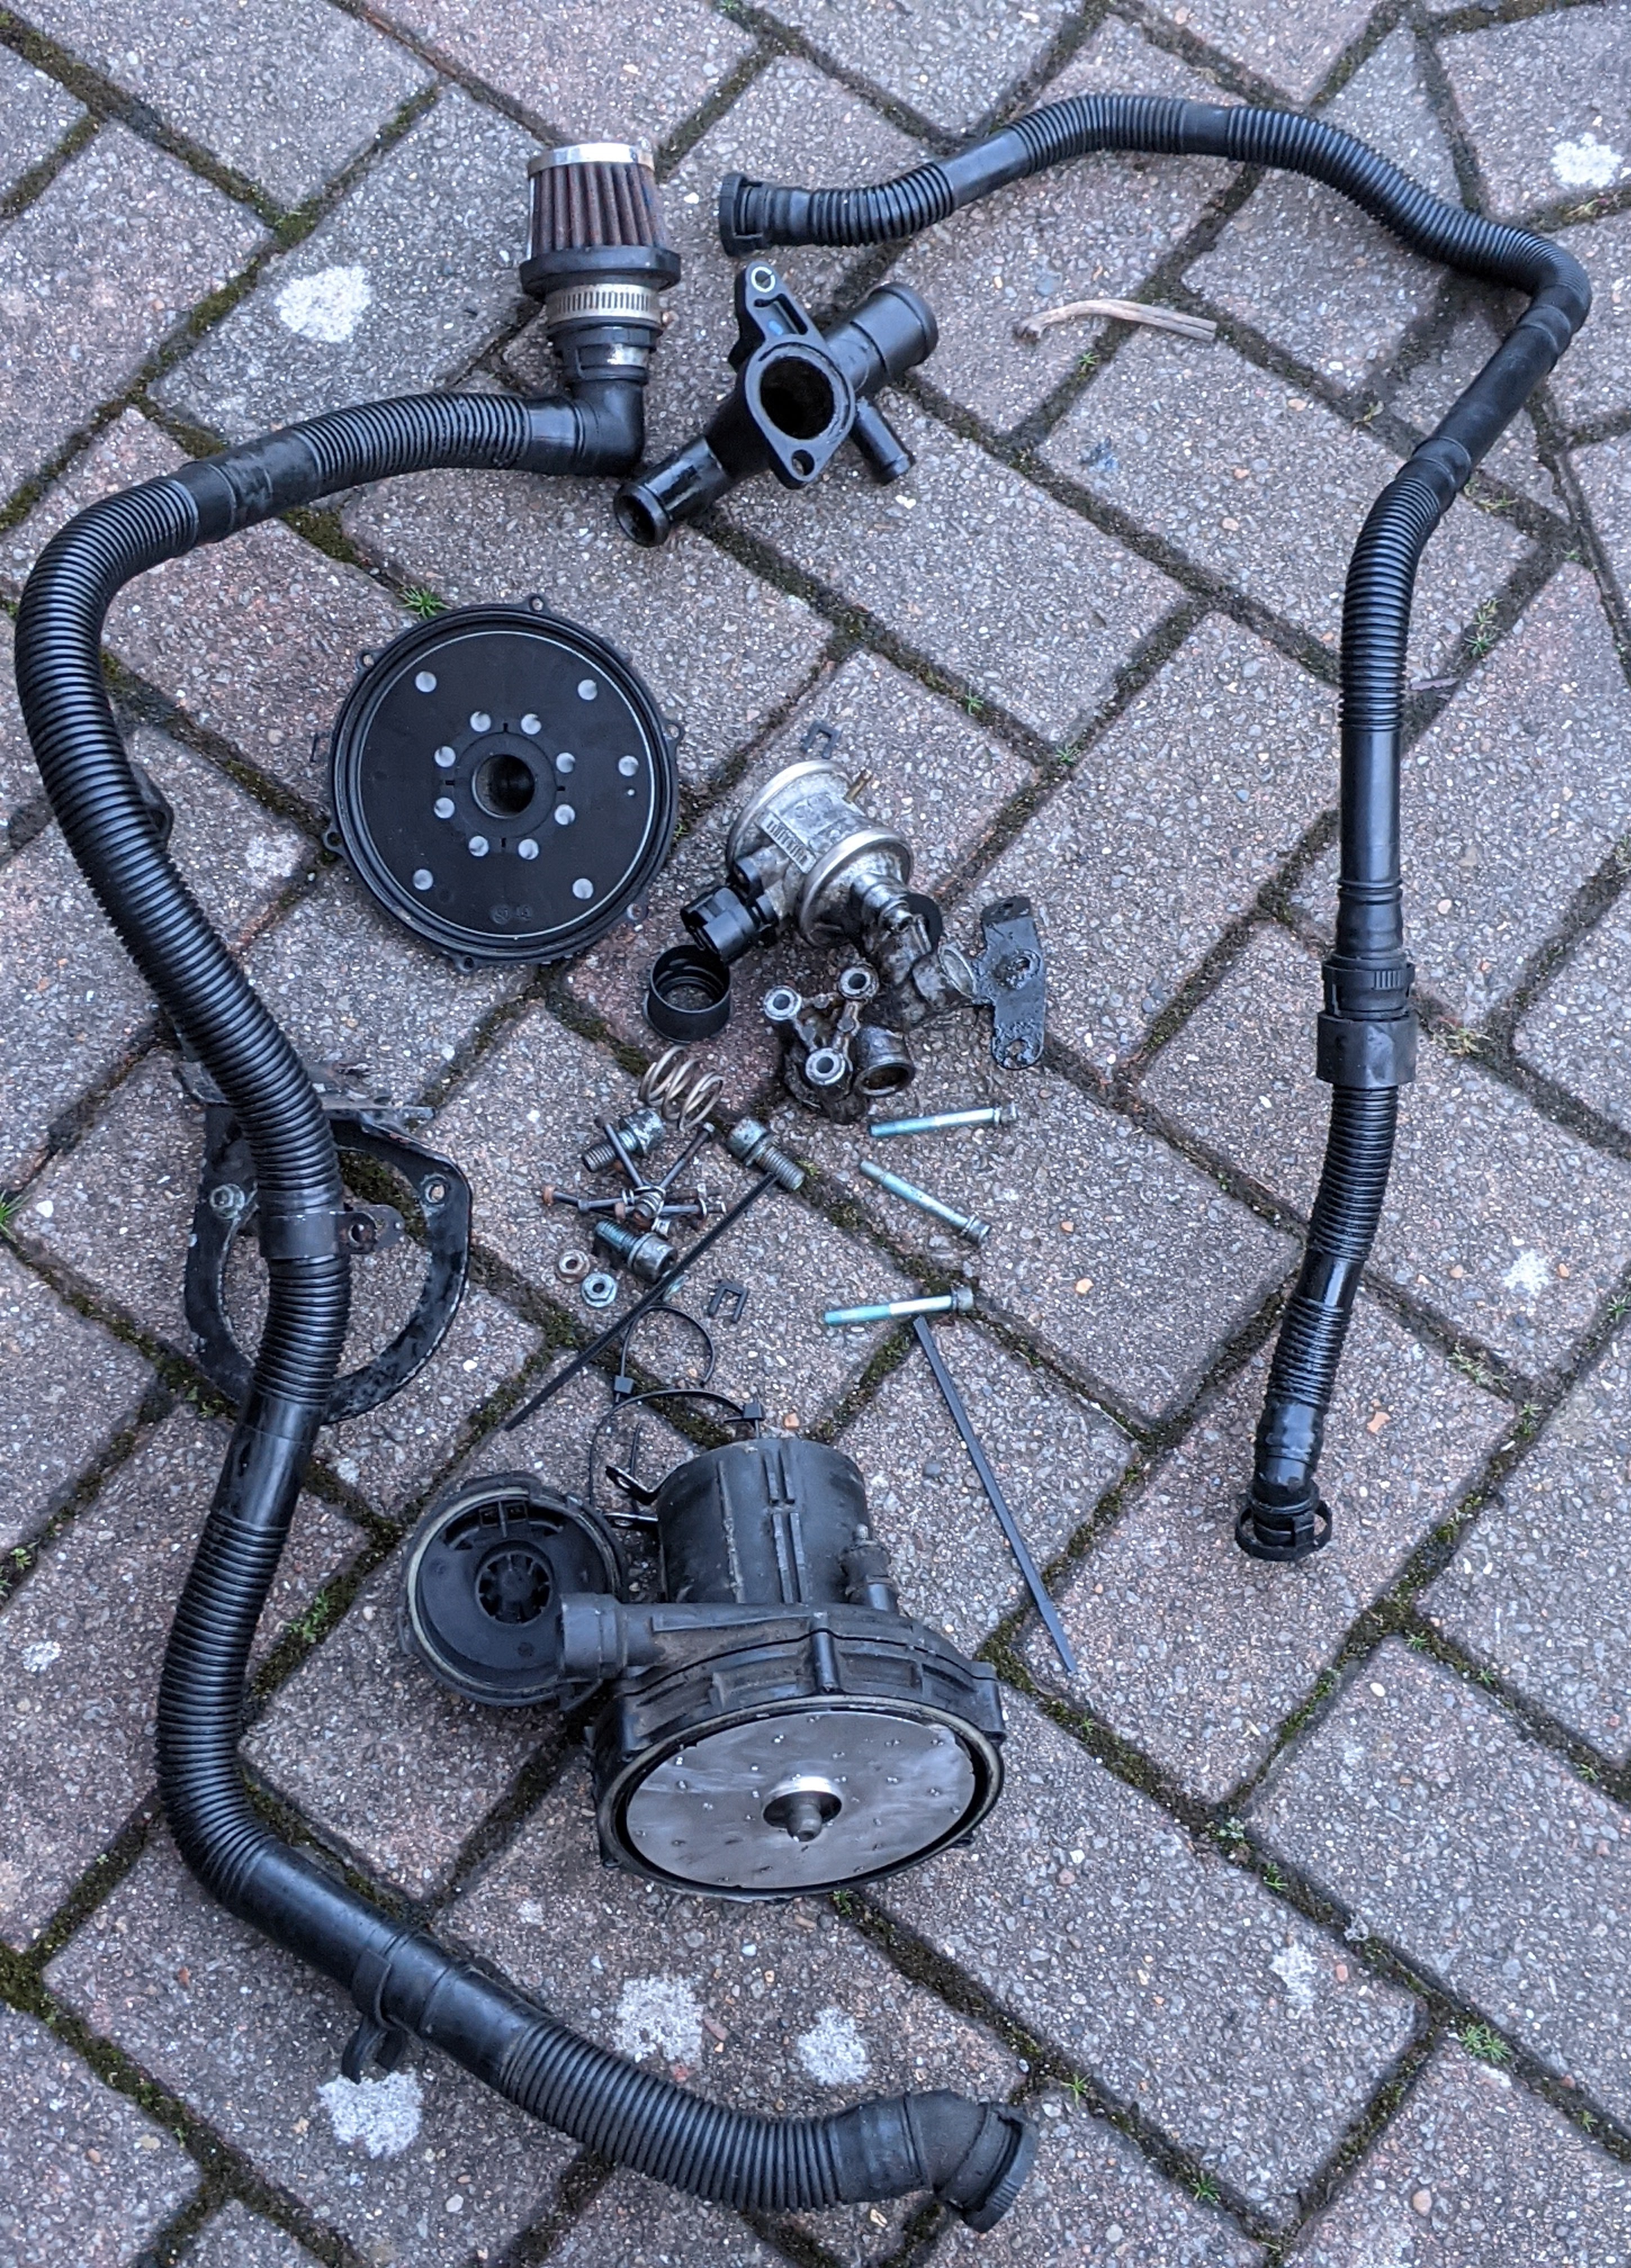
 1 point1 point1 pointToday was spent deleting the SAI. It went well for the most part but there were a few stumbling blocks. I had to dismantle the pump to remove it as there wasn't enough room to wiggle it out in one piece. The top bolt holding the bracket on was a pain to get to as was removing the SAI combi valve - I hadn't realised there was a second 10mm bolt holding it in place at the back along with the hard pipes. Apart from that and losing about 2l of coolant it was reasonably straightforward. I ran out of daylight to take some final pics but did get one of the parts I removed.
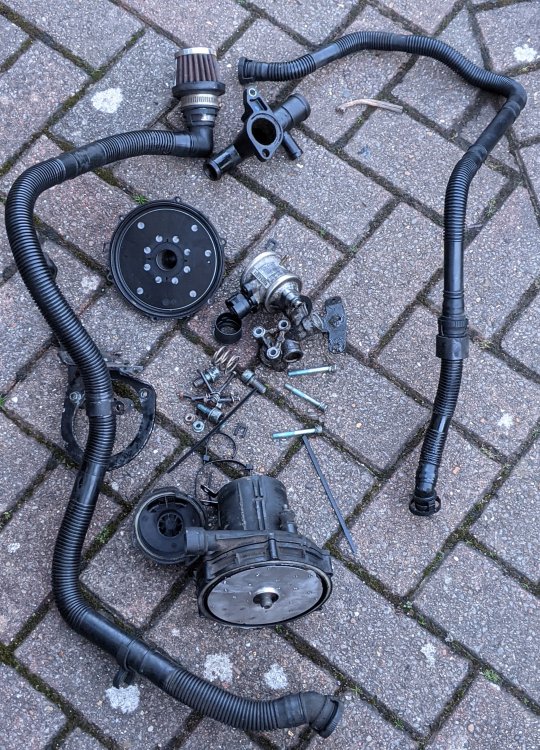 1 point


.jpg.22b10ea8ec2f6eb2a3ebb6af9fc2b8a5.jpg.b4bdd51d8b3e39b658dd1d5a1e65405d.thumb.jpg.74162820e0b5d517db91d7bf32c1d286.jpg)


Important Information
Welcome to BRISKODA. Please note the following important links Terms of Use. We have a comprehensive Privacy Policy. We have placed cookies on your device to help make this website better. You can adjust your cookie settings, otherwise we'll assume you're okay to continue.