Leaderboard
-

Lee01
FREEDOM11Points36,174Posts -
Lady Elanore
FREEDOM8Points24,878Posts -
MikeTheThinker
FREEDOM8Points8,484Posts -
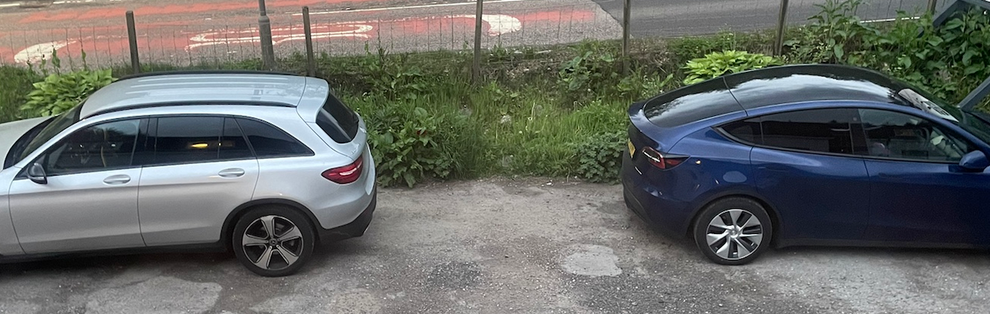
.jpg.1006585dfe4e2977315b67c3d642e37b.jpg)
Guest_
FREEDOM8Points83,824Posts
.thumb.jpg.9dd3f612ba7f13d10be5c518d3c8d255.jpg)


Popular Content
Showing content with the highest reputation on 03/06/24 in all areas
-
Don't worry - We've all been there and got the T Shirt !!3 points
-
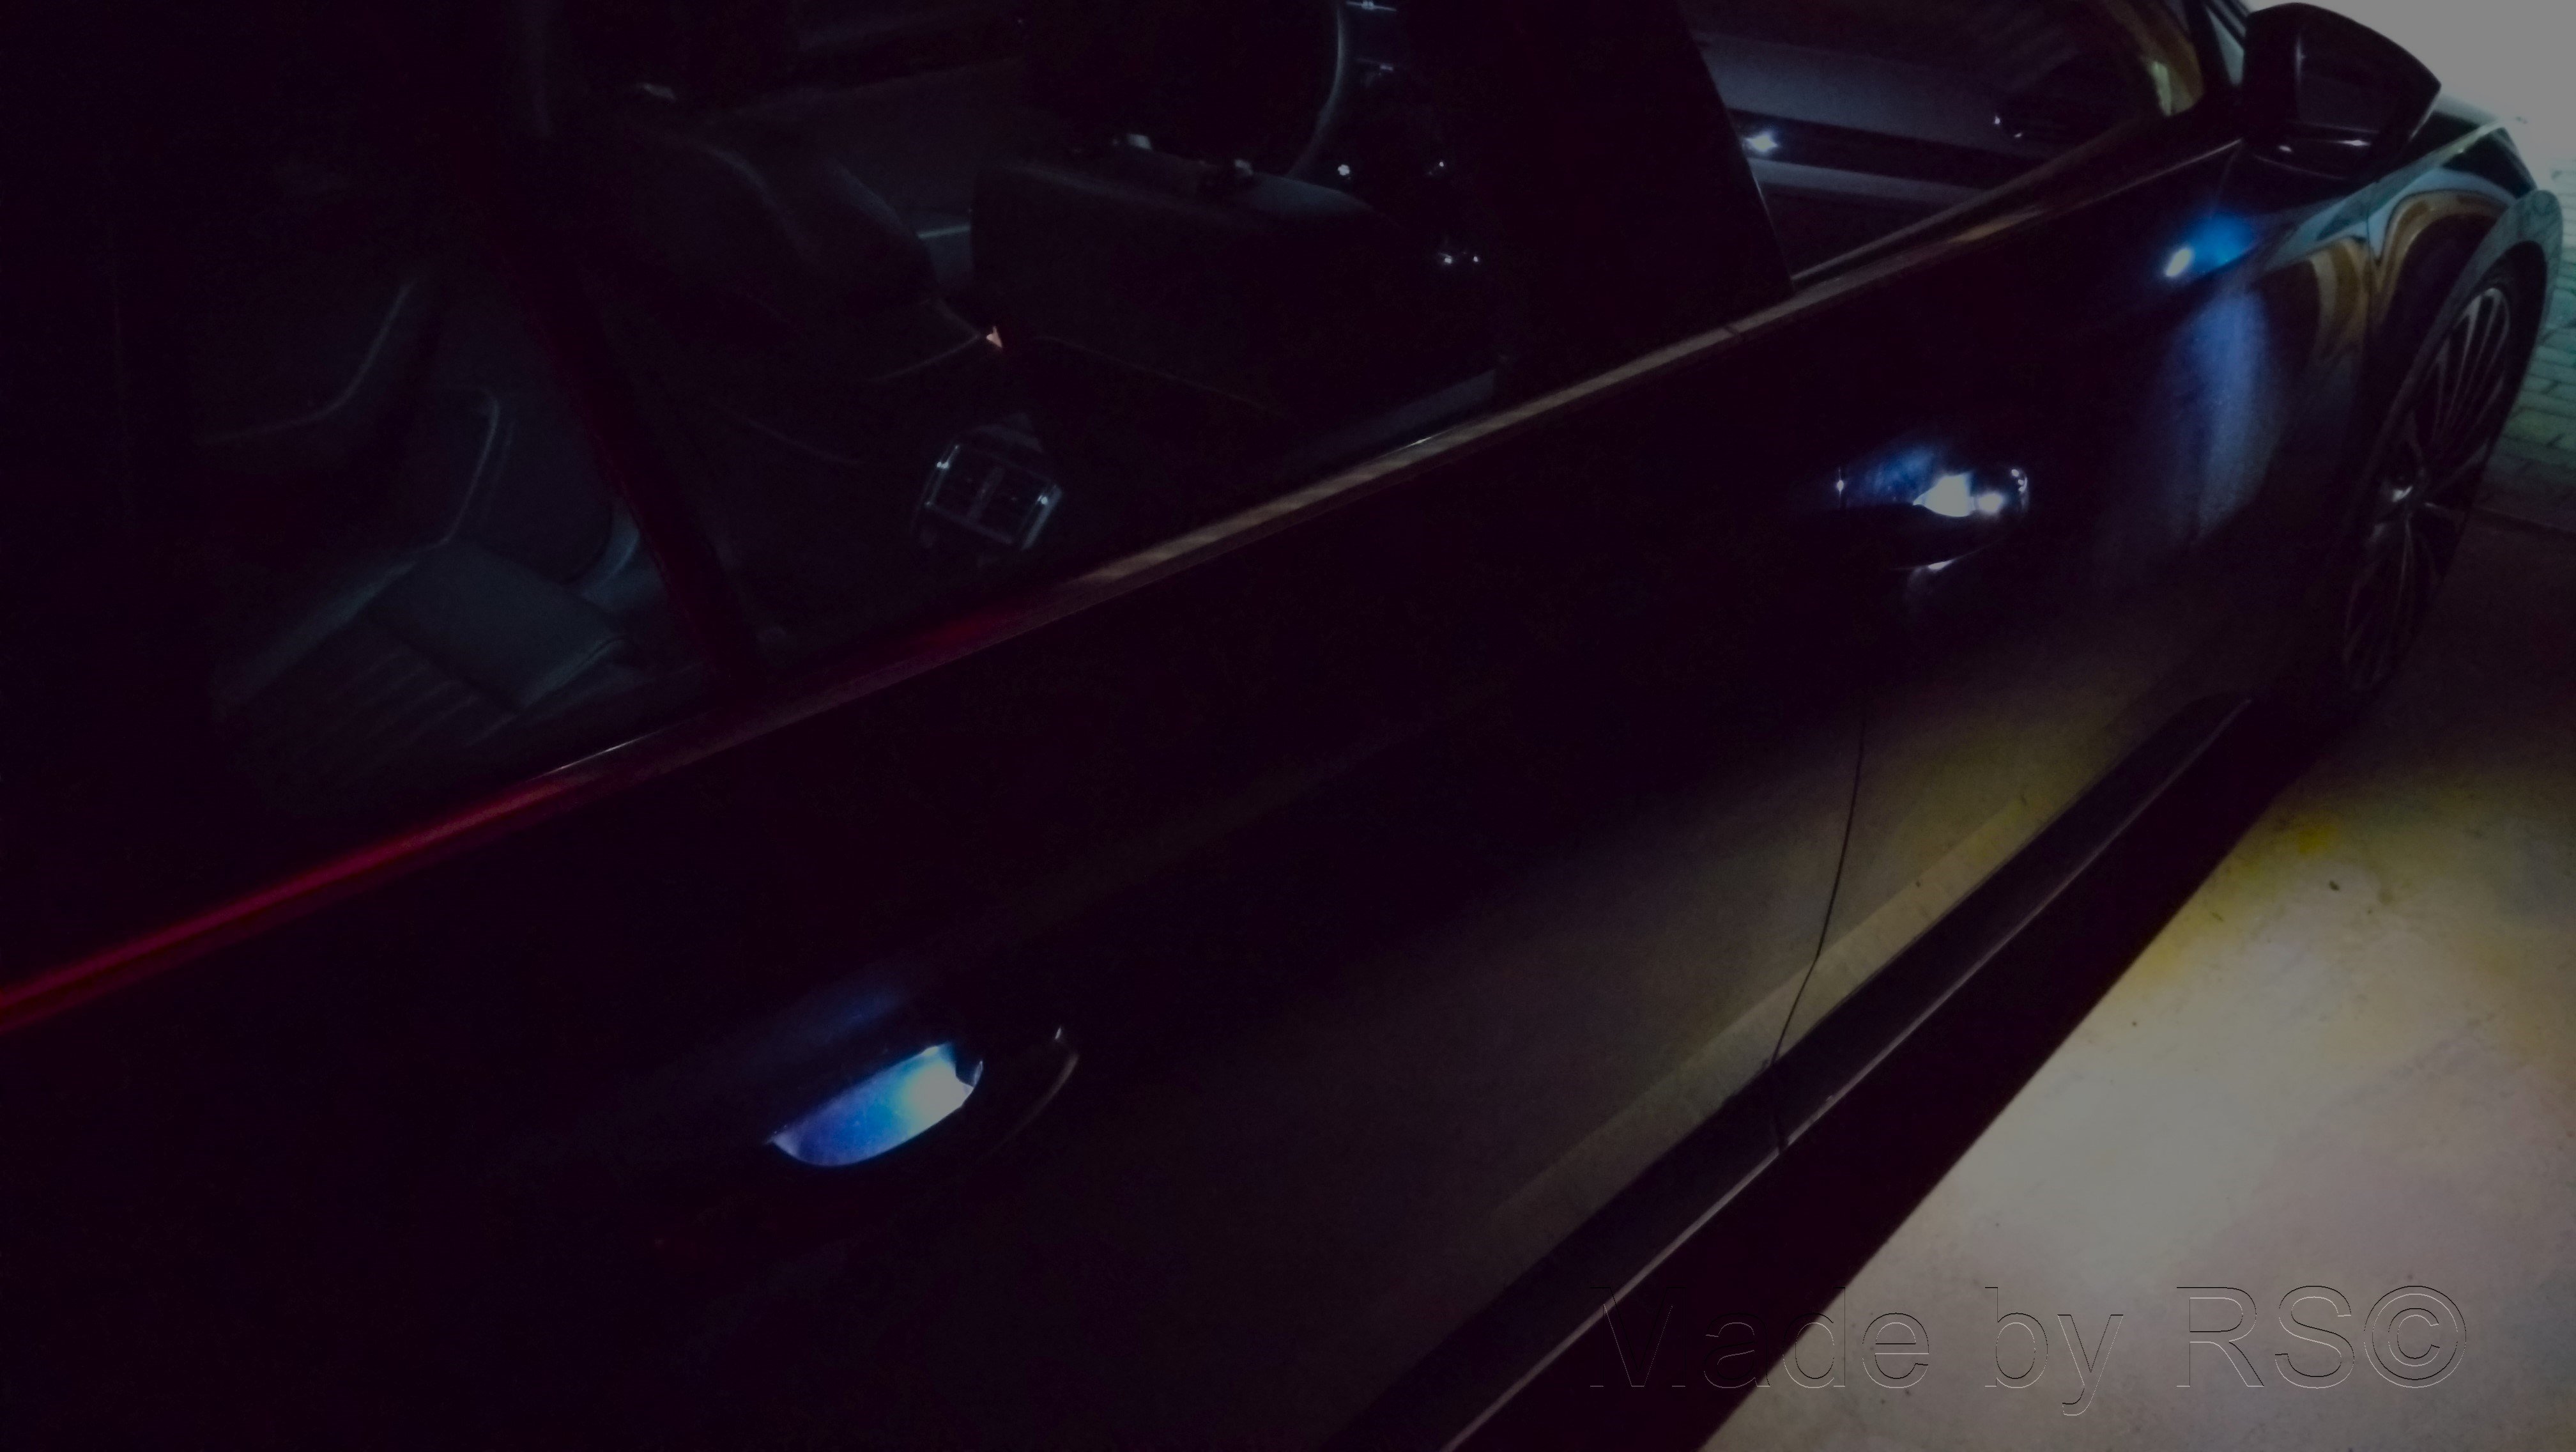
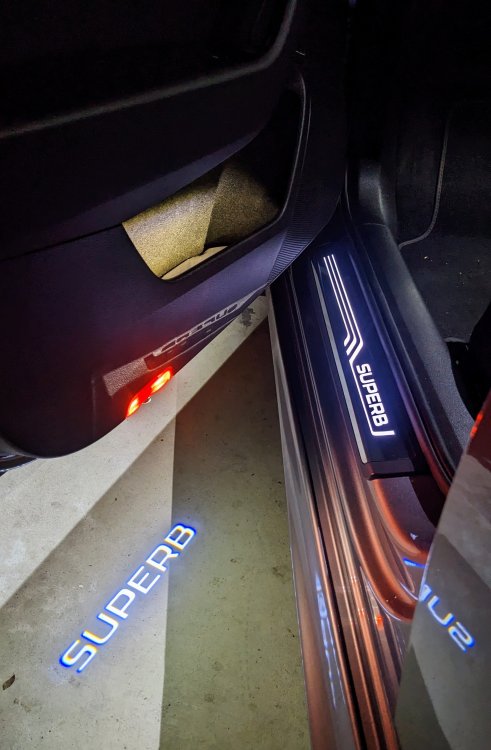
3 pointsIlluminated handles on the outside are now also available. Can now also be found in the dark. 🤩
 3 points
 -
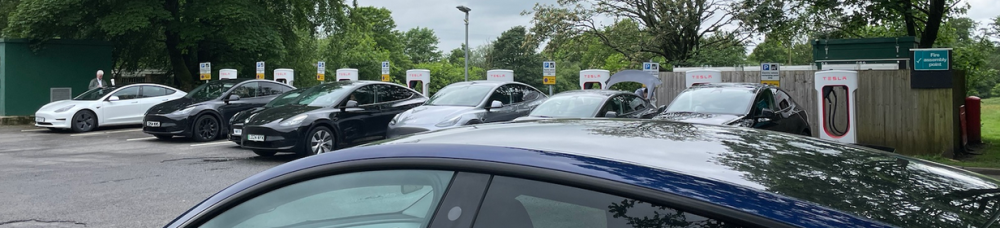
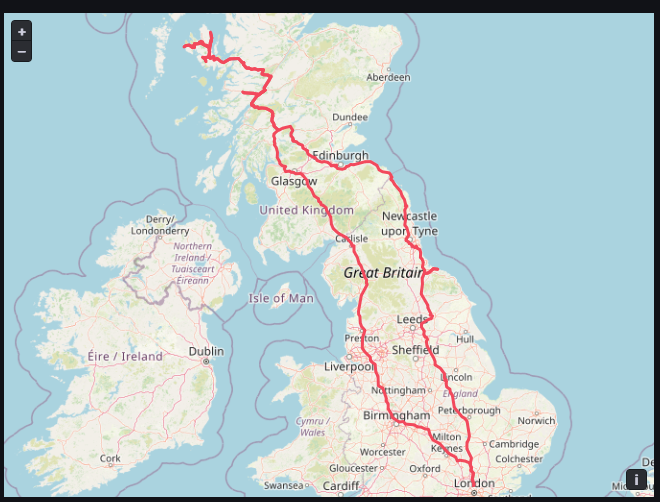
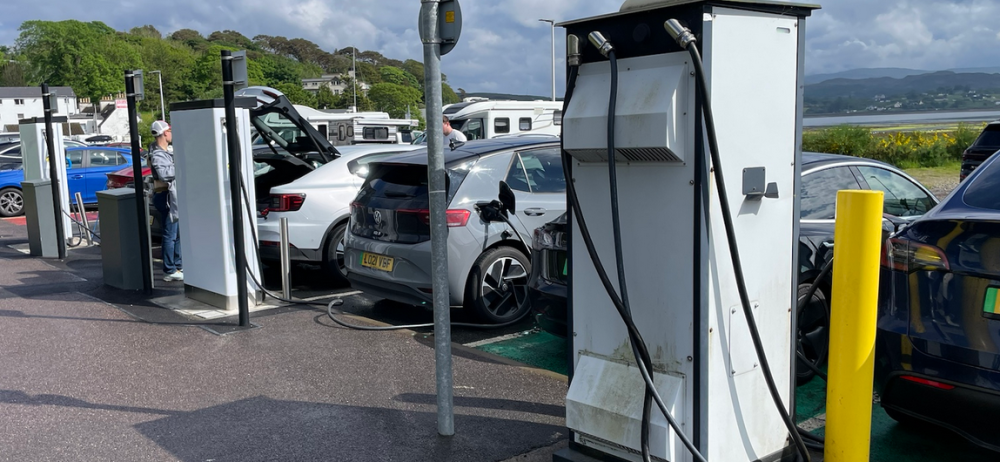
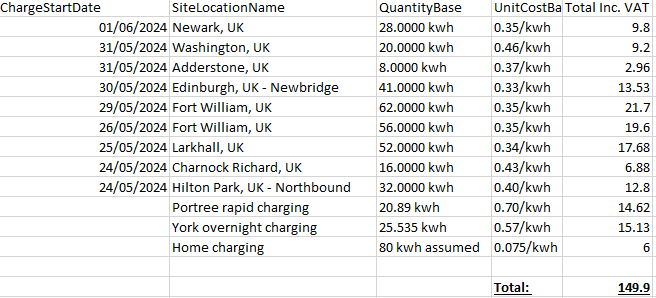
2 pointsLast week, done 1560 miles from my home in N London all the way to Isle of Skye (Scotland) and back. The outbound weekend was bank holiday weekend. Sorry to say it was a fairly uneventful drive. None the less, I thought a recount might be useful for people to learn what's it like driving EV long distance. For usual daily use, EV is extremely easy to use: never think about charging, never need to stop to refuel, never think about remaining range, ready to go every morning. Just plug in when parked on the driveway. But for long distance driving, charging will be required just as refuelling is required. Fully loaded car, 4 adults and 1 child, luggage completely filled boot, under boot compartment and frunk. Also travelling in convoy with another family driving a diesel Merc GLC for most of the trip. Their car is also fully loaded with 4 adults and 1 child. (A pair of walkie-talkie is highly recommended, especially in no mobile signal mountains) Summary stats: 1559 miles, 390 kWh and 4 mi/kWh counted by the car trip computer for driving. Total used is 436.5 kWh according to TeslaMate data logger, this also includes sentry mode I had on 24/7, cabin overheat protection, etc. Total cost of all public charging sessions + extremely pessimistic 80 kWh recharge at home back to 100% = £149.90. I asked the other family with diesel Merc GLC, they estimated £220 diesel cost. Their car returned 42-48 MPG throughout the trip. They refuelled at least 6 times that I am aware of. But their refuel strategy is to do it at cheapest place they find and don't like to see it drop too low. Remember, unlike diesel/petrol, same 1560 miles distance would have cost just £33 charged at home on EV tariff. What I have found is that people needed more rest stops than the car. Here's a quick rundown of rest stops that also charged: Friday 24th 312 miles Left home 100%. Hilton Park service (Birmingham) for lunch, 36min 57% to 94%. 1-4 other cars throughout my time there. Charnock Richard service (after Manchester, before Preston) for rest stop, 18min 67% to 87%. About 2/3 throughout (3 more where I am) Carlisle for late afternoon stroll around and hotel, no charging. Saturday, 25th 244 miles Left hotel 52%. Start driving in convoy, other family drove up Friday midnight. Larkhall Supercharger hotel for rest stop and introductory chat/planning, 34min 17% to 83%. Quite busy, ~2/3 full throughout, but always space for cars arriving. Overnight stay at a hotel near Fort William (all accommodation in the town were full when booking 5 weeks in advance), no charging. Sunday, 26th 144 miles Left hotel 33%. Breakfast at Fort William McD and buy supplies at Morrisons, also done Supercharging, 53min 28% to 98%. No one around...... Portree main car park CPS rapid charging, only 3 chargers, this one was very busy, I was lucky to have a space available when arriving. There was 45min charging time limit to avoid overstay fee, so I came back at 30min and waited a bit, 2 more EV's came look for charging whilst I was there. The old knackered rapid charger only provided pitiful 30 kW and expensive at 70p/kWh. Ended up charging for 43min and moved the car, waited for others to come back from their stroll around Portree. 54% to 79%. AirBNB near Portree, trickle charged at 5 amp to be safe, packed up the cable in the evening due to rain, 77% to 79%. Monday, 27th 75 miles Left AirBNB with 78% Old Man of Storr parking had 11 kW AC and a 50 kW rapid, not on any of the maps, I plugged into 11 kW AC. 1.4 hours 75% to 95%. No one else charging, forgot to take a photo. AirBNB trickle charging overnight, with 6 amps, 10min on and 10min off to ensure no chance of house circuit overheating whilst I sleep. 69% to 82%. Tuesday, 28th 69 miles Left AirBNB with 82% Back at 54% Wednesday, 29th 252 miles Left AirBNB with 52% Fort William Supercharger whilst we eat lunch in town, 52min 18% to 97%. This time it was quite full, 2 stalls available when i arrived but one was inaccessible due to non-Tesla and short cable. When leaving, I was only one there, guess most other drivers were also eating lunch. Arrive in Edinburgh Park hotel at 48%, no charging. Thursday, 30th 10 miles City break, wonderful tram into city, no driving. The older folks of the party wanted an afternoon nap. I've been to the city so I volunteered to take them back to hotel and I went for charging. Tesla Edinburgh service centre supercharger, 38min 42% to 93%. I also had a sit in the new Model 3, I like the rear screen. Only a few other cars at this 16 stall location. Friday, 31st 248 miles Left hotel with 87% Extremely short toilet break at Adderstone service, the superchargers were busy but I didn't need to wait. 6min 57% to 67%. 1 car was waiting when I was leaving. Another short toilet break at Washington supercharger hotel. 12min 42% to 66%. It was V2 but slightly less than half full so got full speed. Hotel at York, this one has destination charging but more expensive than supercharging. So arrived with 28% and only charged to 55%. Saturday, 1st 205 miles Left hotel with 55% Railway Museum is worth a visit. Other family parted ways to go to Leeds. Stopped at Newark on Trent supercharger for quick toilet break, 13min 19% to 53%. This one was completely empty and it was cheapest along A1, no brainer. Arrived home with 14%. All charging, taken from Tesla supercharging export spreadsheet and added other paid charging manually: As can be seen, simply charged up whenever convenient. Only 4 times took on more than 50% of the battery, never needed people waiting around the car. At all times charging period is dictated by our needs to use eatery/facility nearby. Charging is often done before we are. Also interesting to note, we only 200-312 miles each day. It is entirely possible to comfortably drive most days without needing to charge en-route. If every overnight location had well priced charging, this whole trip becomes completely effortless and doesn't even need so many expensive charging hubs to be built. So my take-away: - Destination charging at overnight stay can make trip effortless - At busy locations, try to avoid meal time to avoid possibility of queuing - Tesla supercharger are cheap and entirely dependable. ChargePlace Scotland charging is super expensive and not dependable - Home EV tariff is super cheap - UK roads don't allow travel fast enough to really need any longer range EV - Long range EV already drive long enough and charge fast enough compared to people's needs - Tesla Autopilot is awesome


 2 points
 -
If you have DCC, stick with DCC. As much as it can be coded out, it’s an awfully painful job to do as it’s sowed into all the other systems. the rear level sensor would need re wiring to the bcm instead of the dcc module. Stick with it and get either Monroe shocks or bilstein. regarding the brakes. OE are poor in my opinion and have a huge amount of brake dust. I’m cleaning mine weekly. Id go with Pagid or TRW ceramic pads, and mtec painted discs.2 points
-
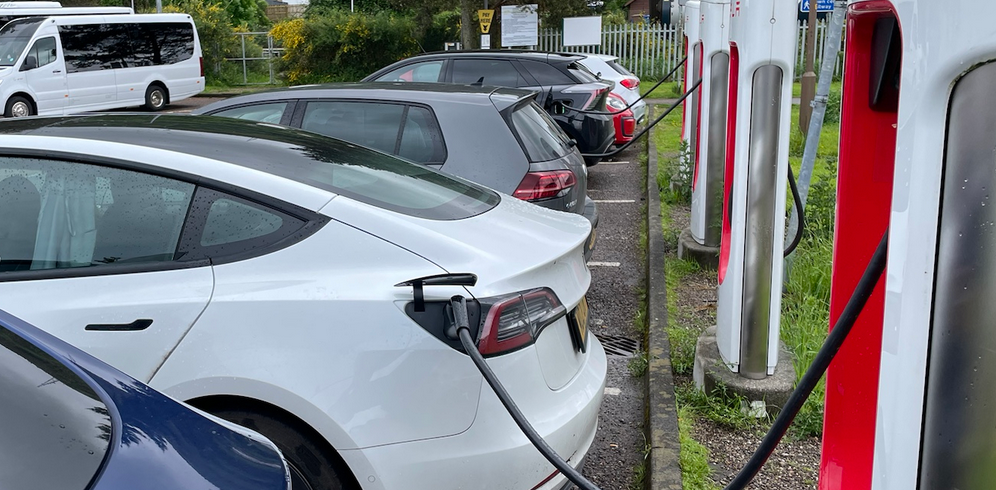
2 pointsMultiple 3 or 7 kW destination chargers are much much cheaper to install compared to single 50 kW rapids. If four 7 kW charger isn't enough for hotel guests, they should install more. The ideal situation is for hotel car park to become slow charging car park for all guests. I'm with Lucky on this one. There's 2 types of charging for 2 types of behaviours, destination and rapid. I wouldn't want to move my car at destination charger unless there's prior arrangement (eg. workplace lunchtime being asked by colleague in the morning). 50 kW rapid charger doesn't give much charge during a short stop but still require typical rapid charging behaviour: wait around to vacate. I typically stopped 15-30min mid-journey, the charger need to be able to replenish enough during that time. Waiting around for cars to charge really shouldn't be needed these days. EV charging works around the user. This is my point with this thread, apart from Portree CPS rapid charging and Edinburgh supercharging, all other charging were part of rest stops. I didn't have to do anything different compared to the other family in an ICE vehicle. In our EV, we stop and people stretches legs and use eatery/facility and the car recharges in parallel.2 points
-
We all do such things, me all the time. At least you can admit it to yourself and others, many simply can't.2 points
-
2 pointsWhy move it if its charging? This is my whole point about destination charging. If my hotel has a charger for overnight 7kW charging, plugging into that for many hours while I sleep is preferable to plugging into a rapid then having to get up / go out to move the car when charged. I'm not blocking the charger if I'm charging and I don't need to move it. I plan to arrive at such places at low SoC if on a road trip and charge up ready for the next leg - plug in last thing at night and leave it charging for the 10 or so hours it will need for the charge needed.2 points
-
2 pointsGuilty...... As a car enthusiast - it's not just about functionality, but it's also about fun and personalization. The little touches make a car "special", instead of being the usual boring sheep. It's not always about the look at me factor or wanting to b the centre of attention - far far from it.

 2 points
 -
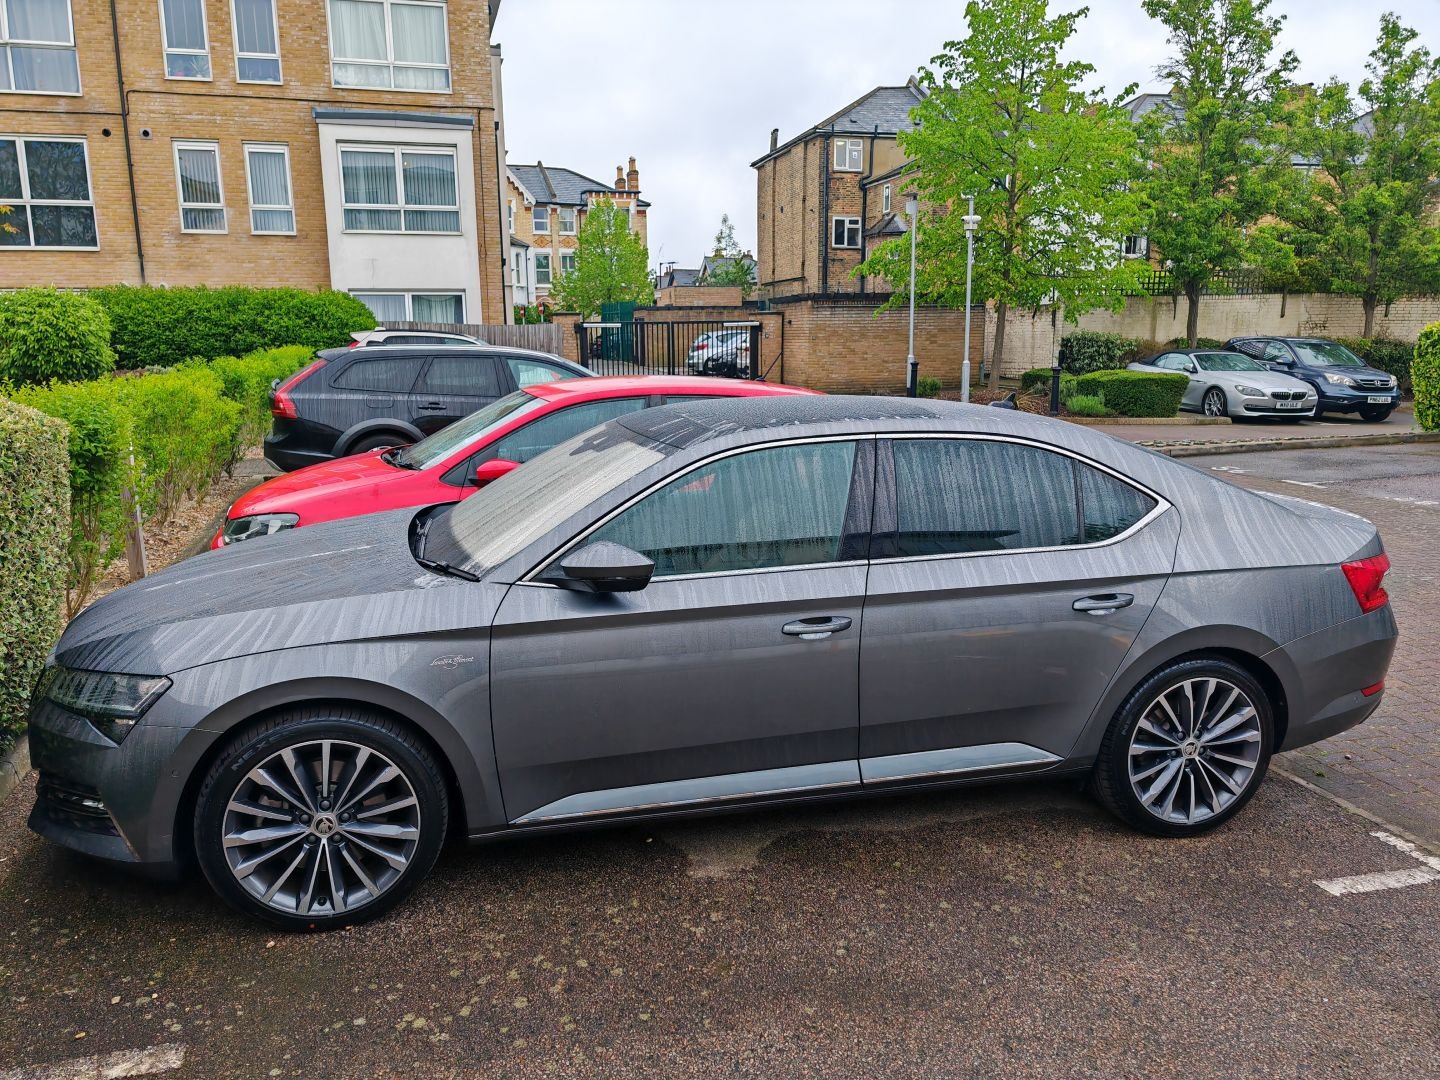
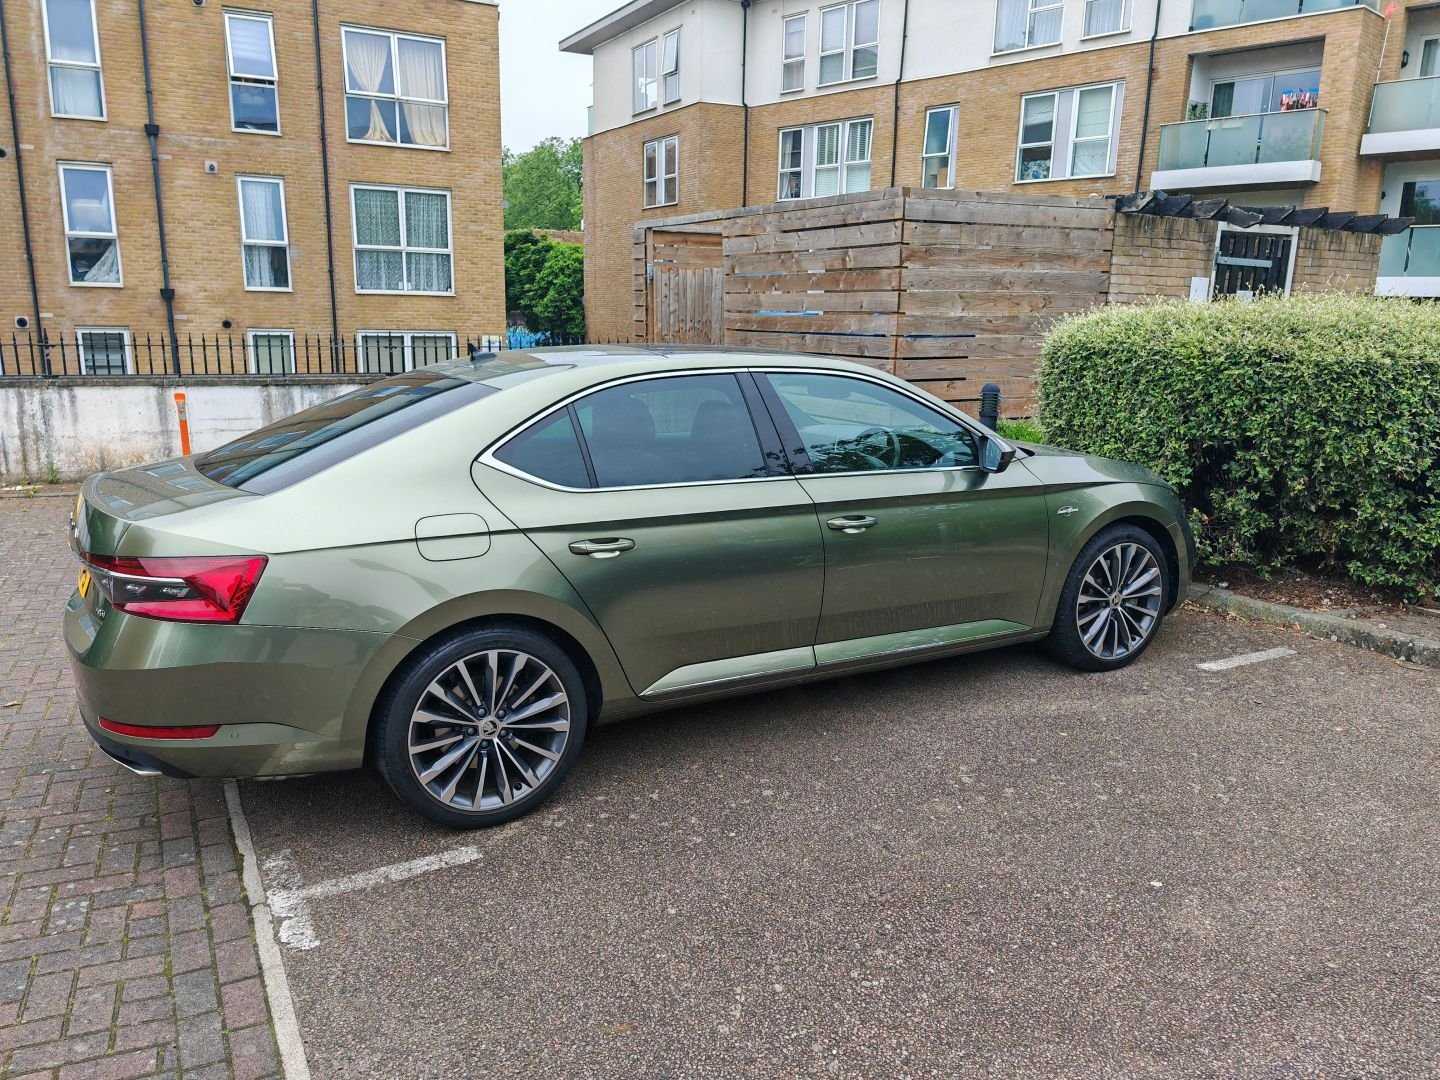
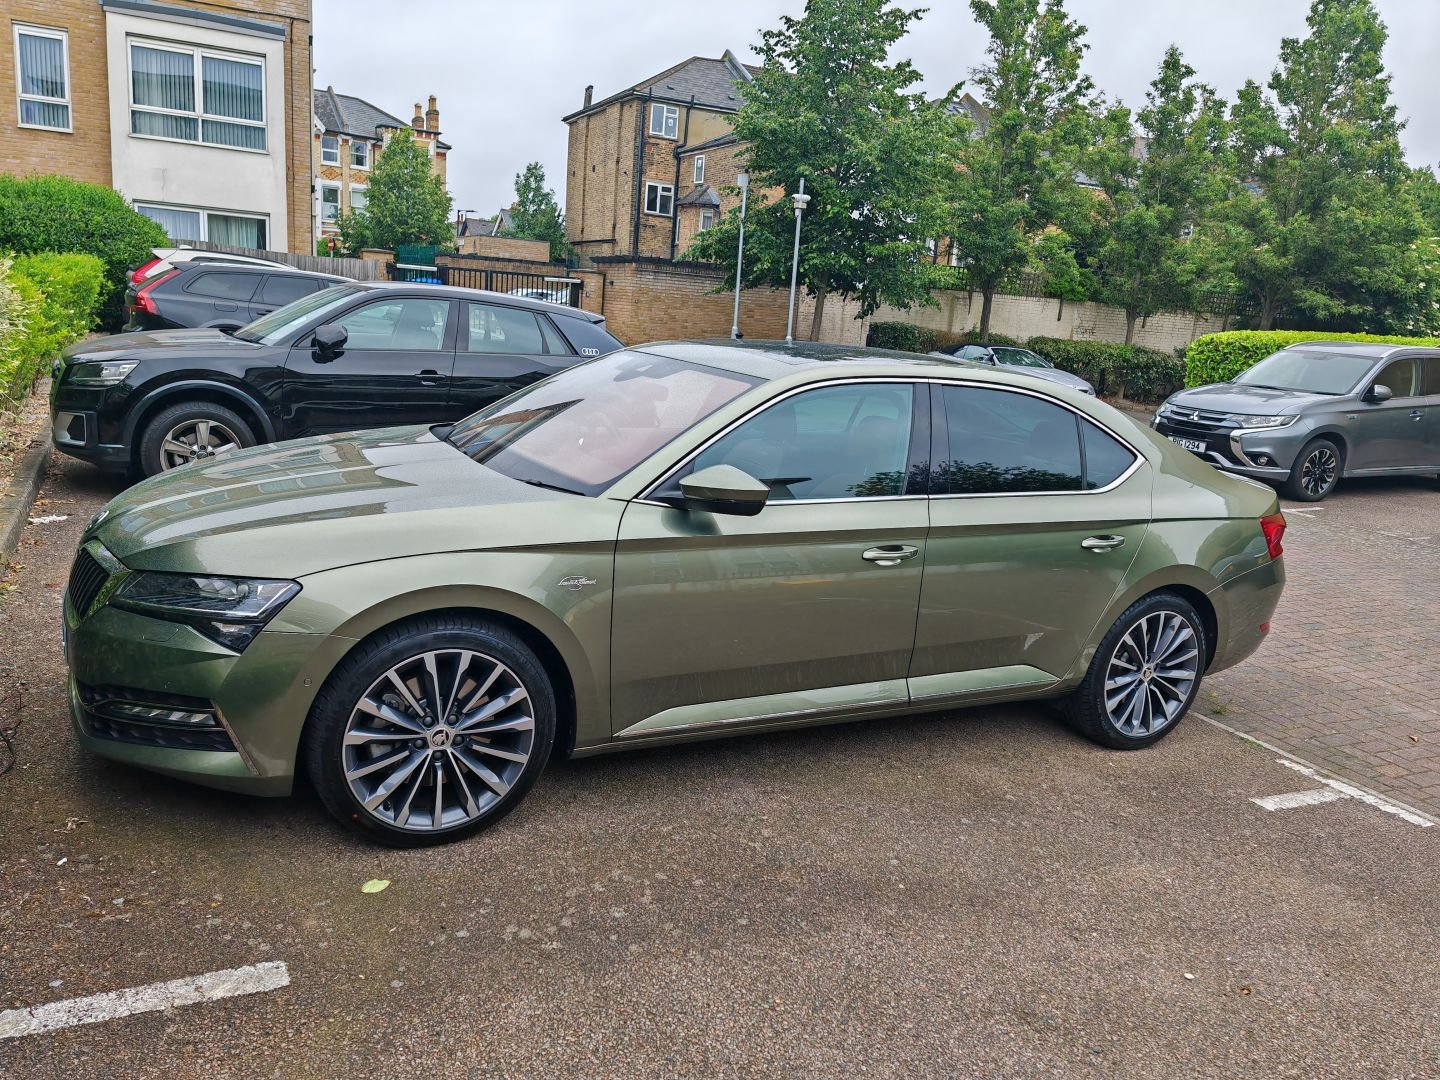
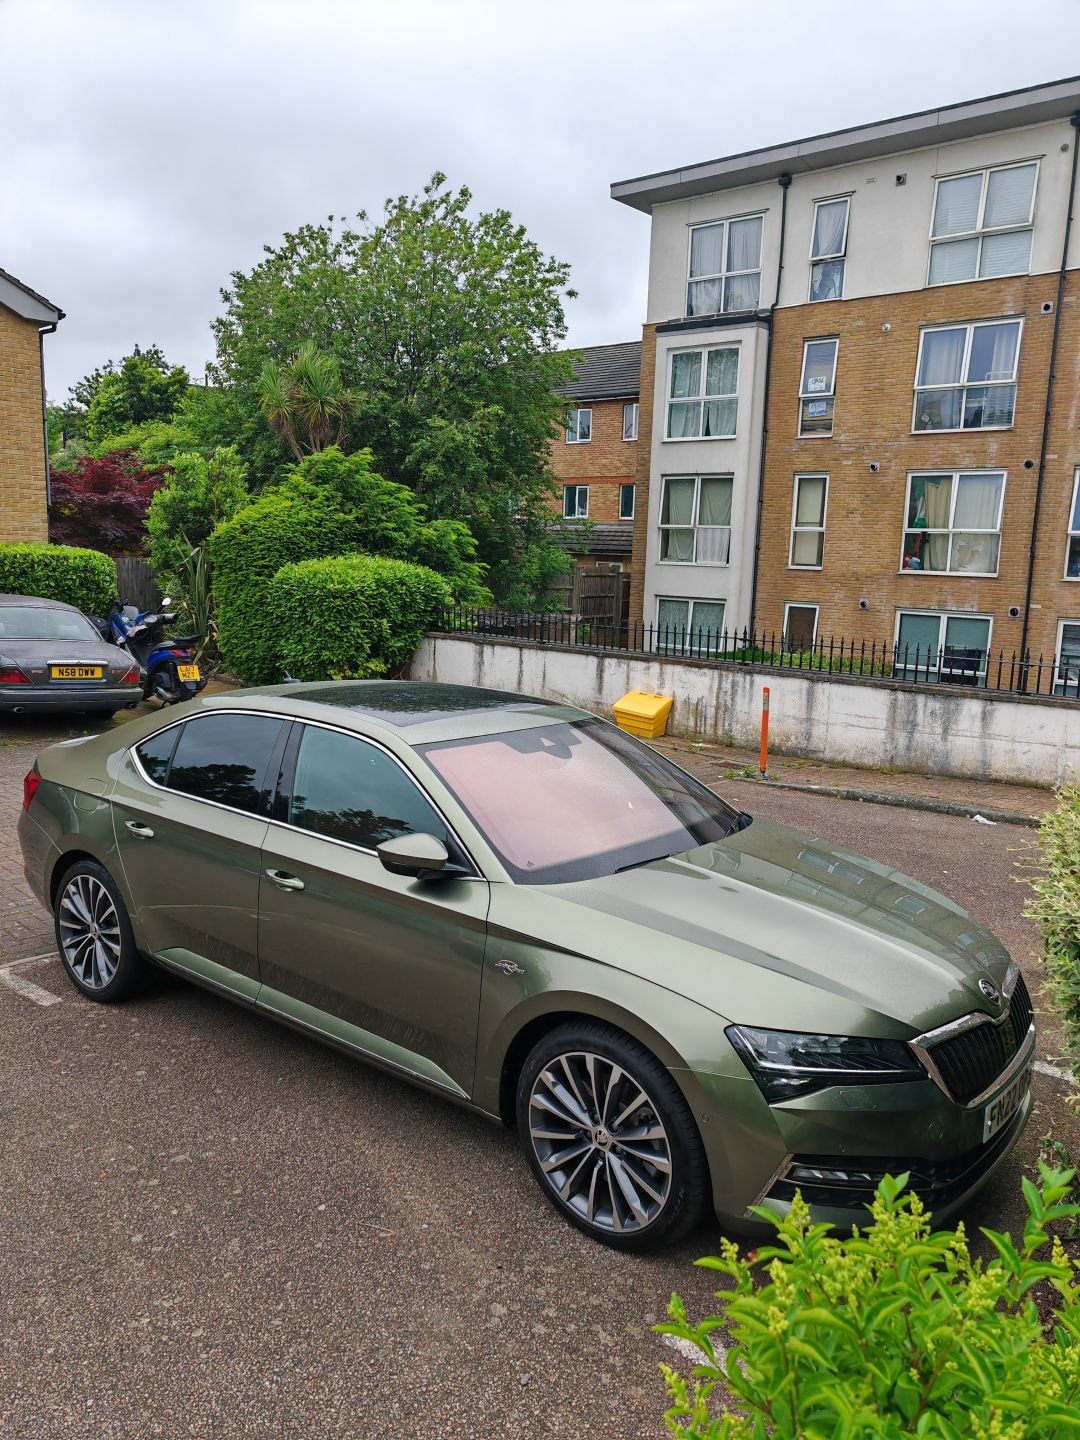
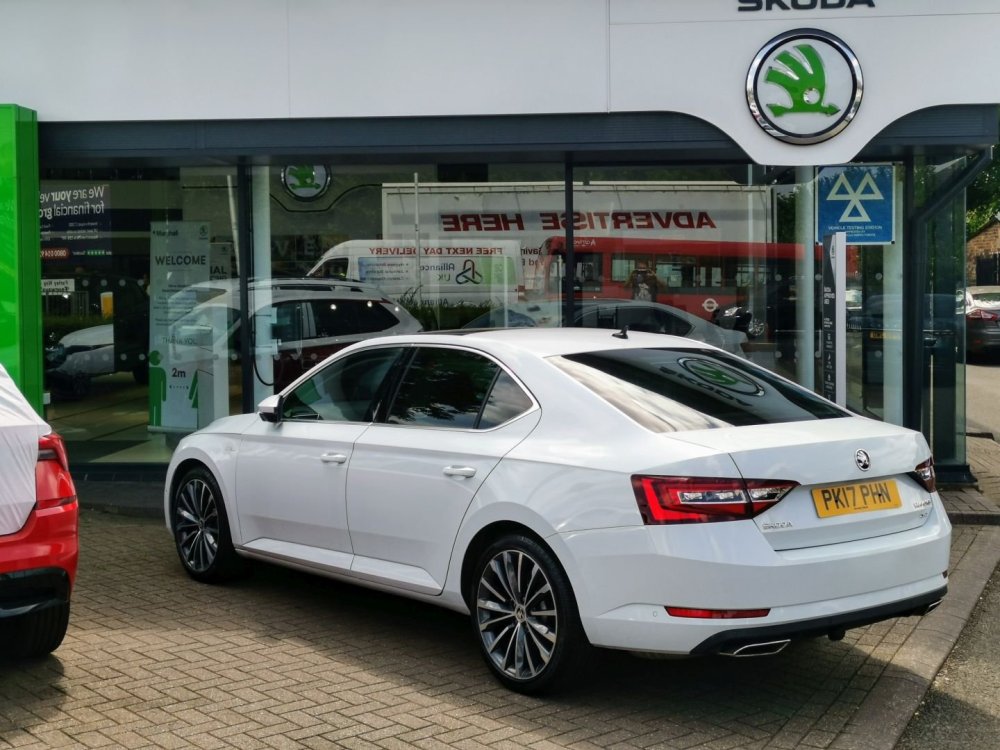
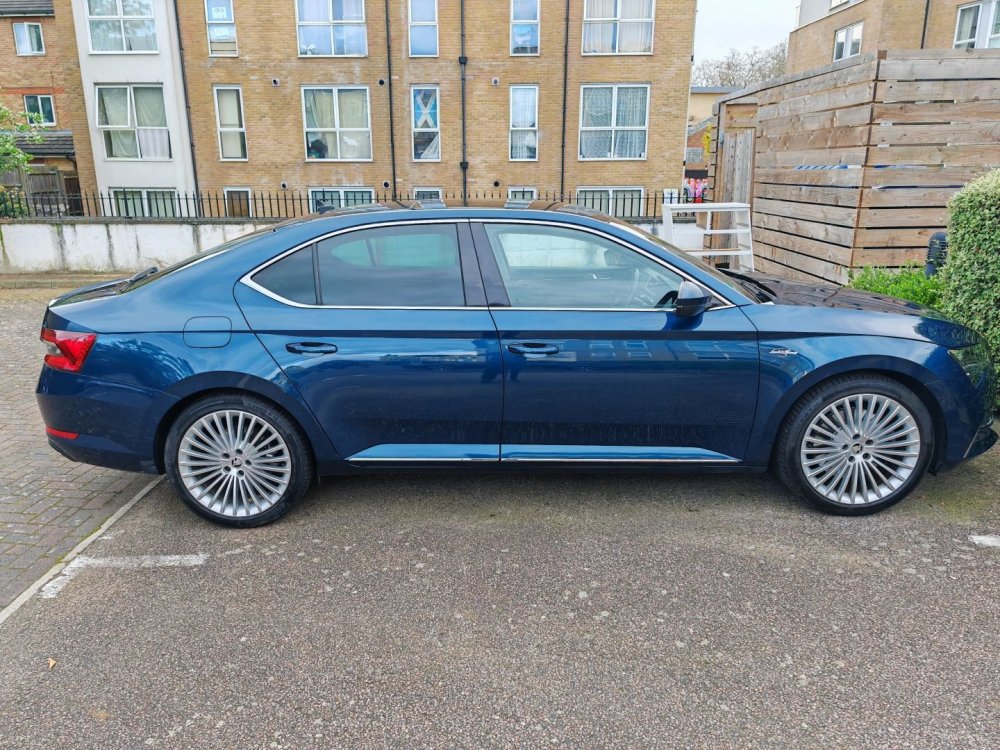
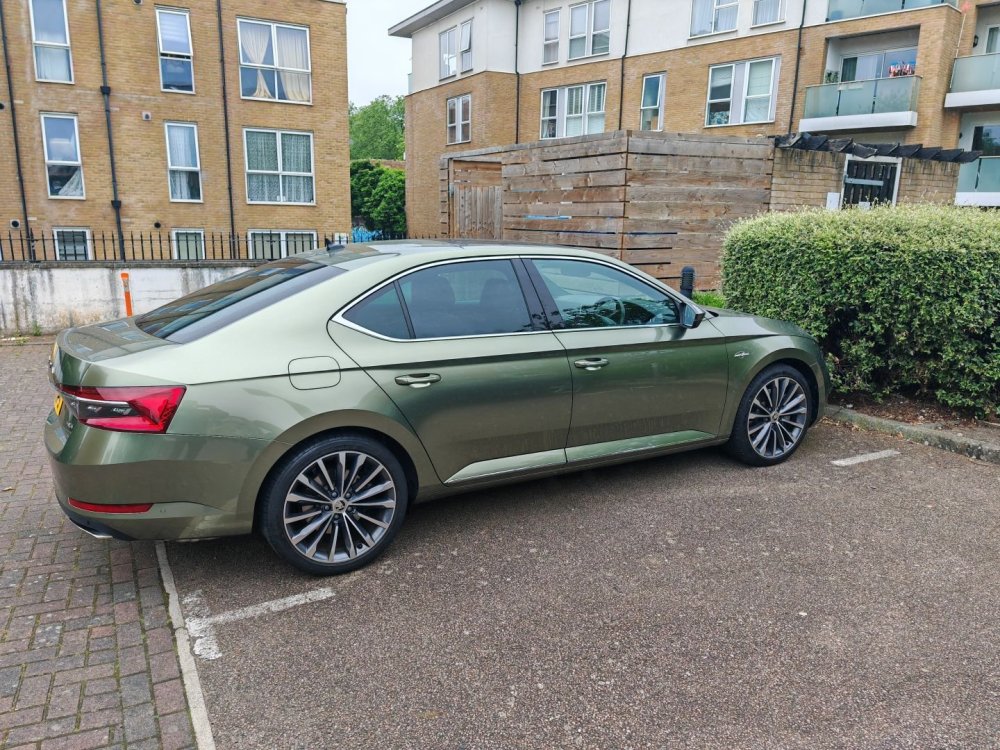
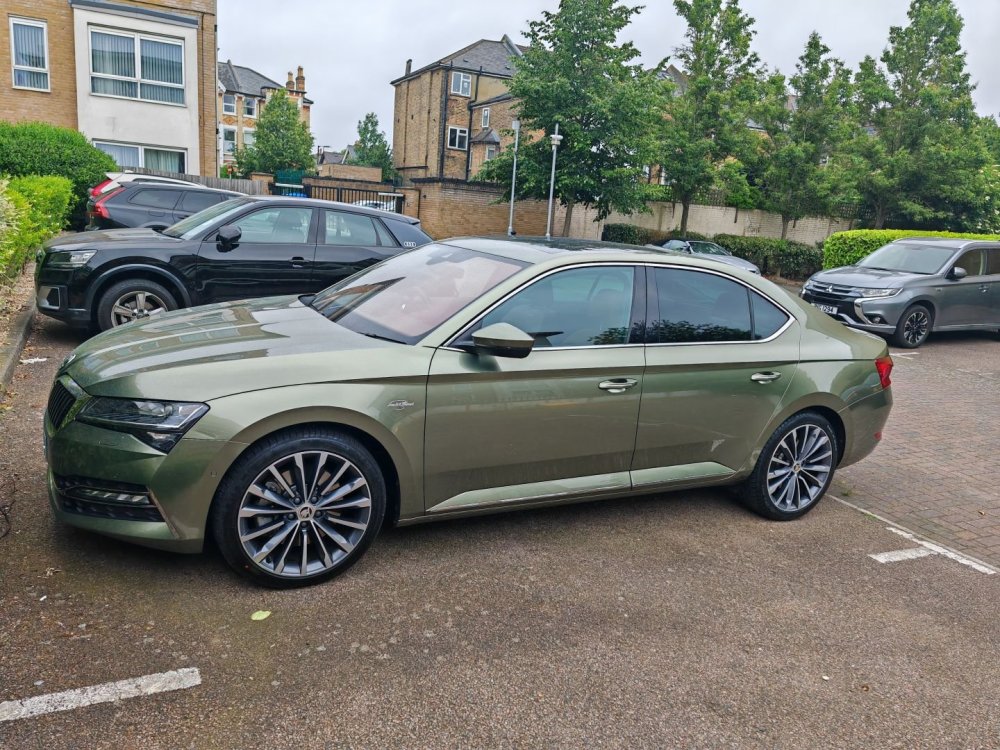
2 pointsI love the Superb MK3 with EA888 engine, I'm on my third model now, all Laurin & Klement. Awesome car and spec for the price. Initially I had the white L&K 280 with DSG6. I then changed to the newer L&K 272 with DSG7 and virtual instrument cluster. Was very happy with the petrol blue colour. Changed the alloys to 19''. Now I've swapped that against the last iteration of the MK3, back to 280bhp. Despite not being un-enthusiastic about the grey colour. It doesn't offend me, it's nice enough, but personally I find it a bit generic and boring (apologies to all owners of grey Superbs, beauty lies in the eye of the beholder). So I had it vinyl wrapped with Teckwrap Wilderness Green. Now I'm considering having it de-chromed as I reckon black contrasts better with the green than chrome.

 2 points
 -
Thank you @NottsIan That worked, my name, phone contacts, radio channels all gone in one reset 👍 Had visions of needing to go into numerous different pages to remove stuff so that saved a great deal of anticipated angst2 points
-
Lads (and possibly ladies). I know it's only the 2nd June but I must qualify for some sort of buffoon of the month award. After reading the replies on here I went to check, and I do indeed have a S/S button, just to the left of my gearstick. I was going to end with a facepalm emoji but I don't think there's one big enough.2 points
-
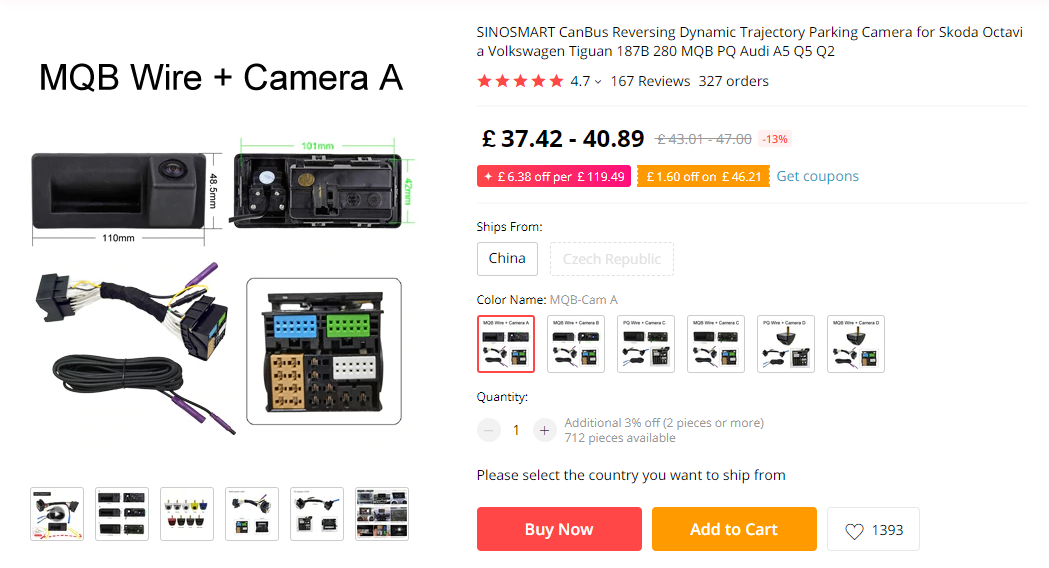
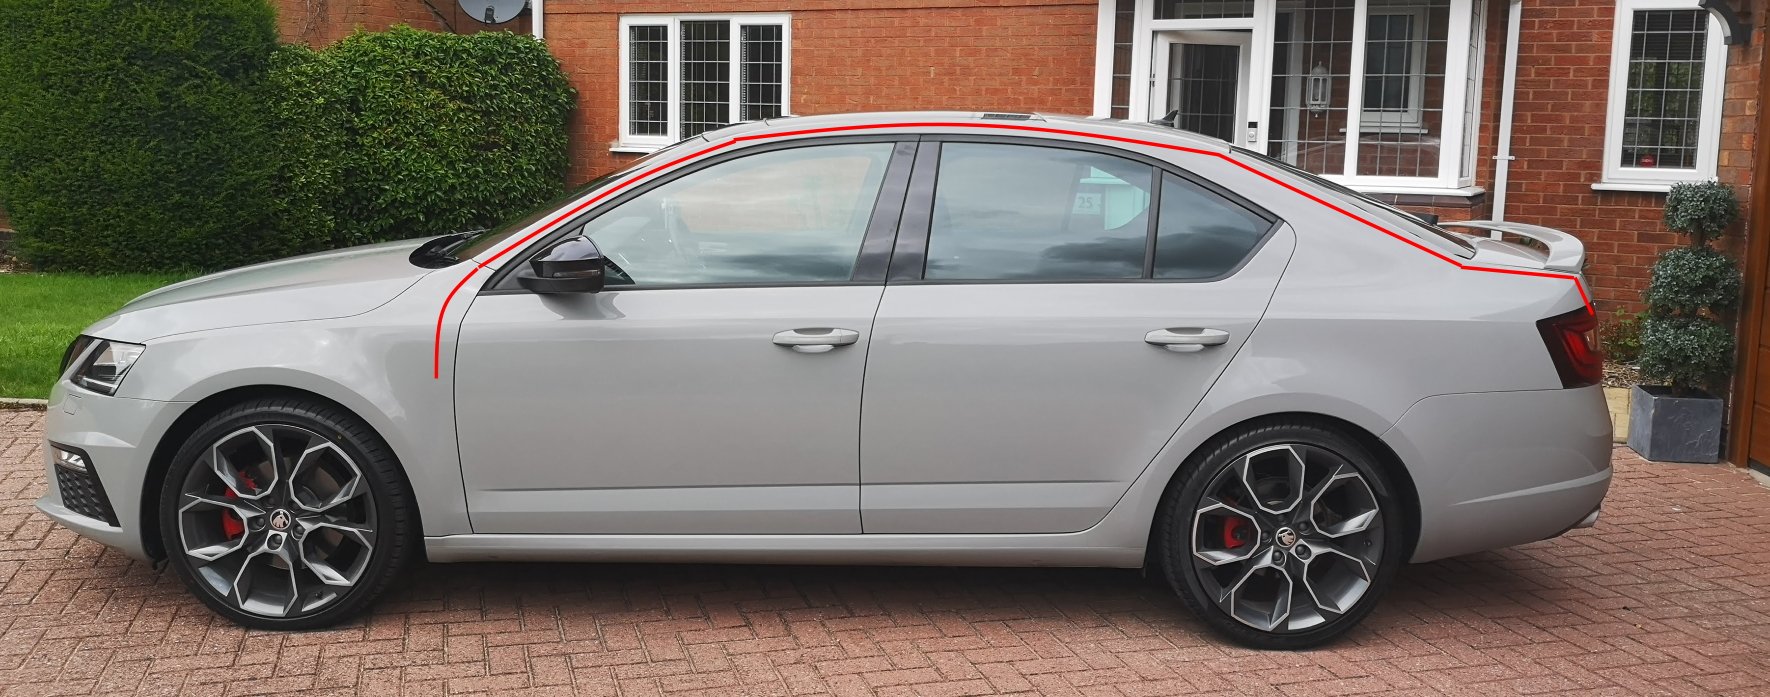
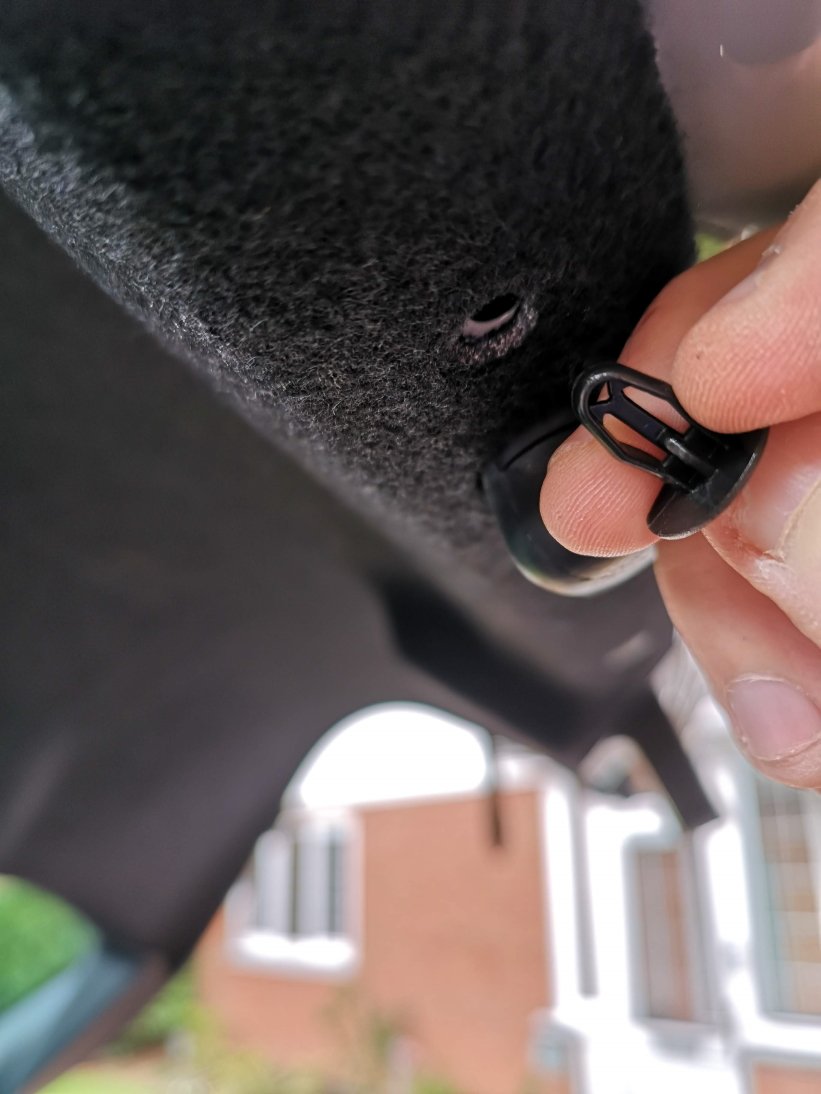
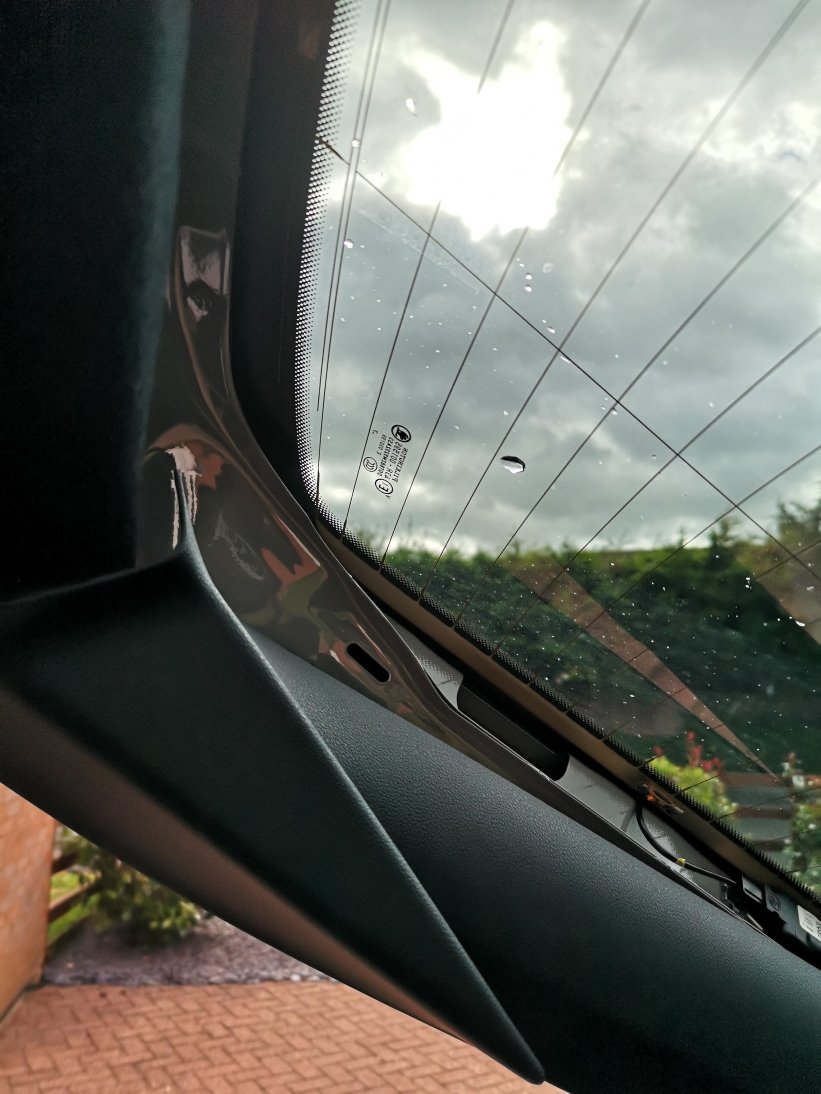
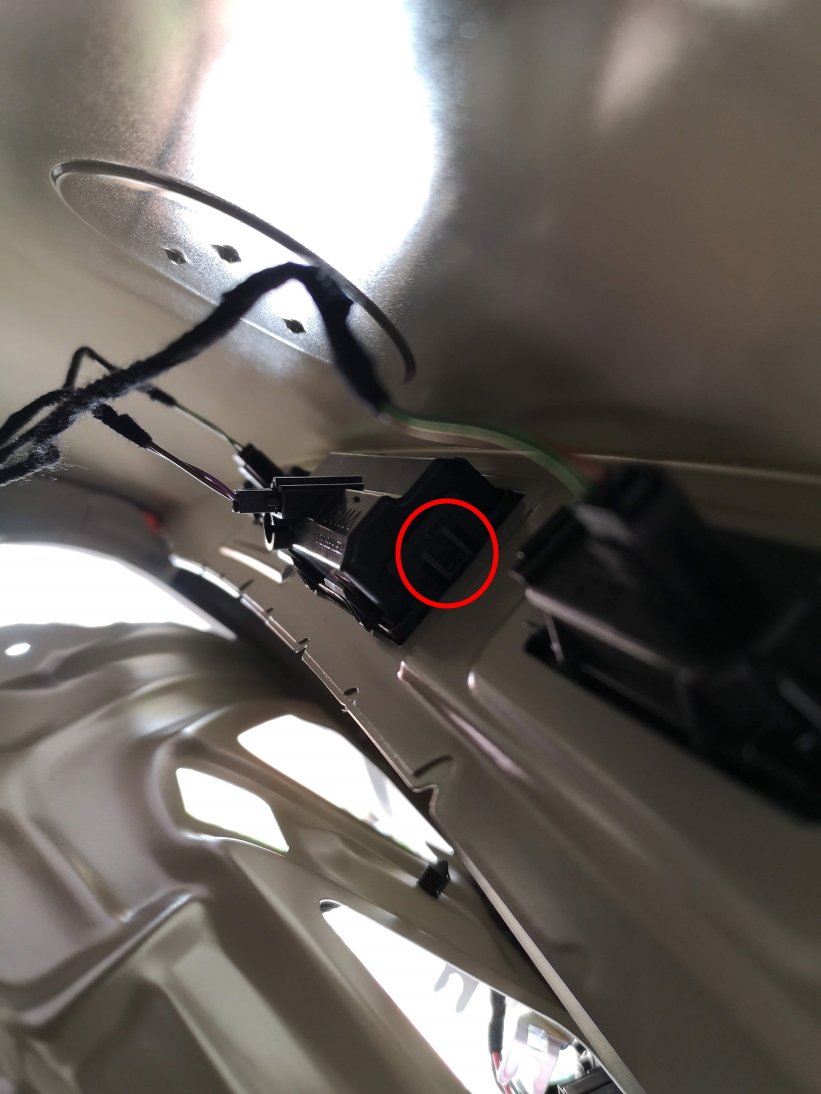
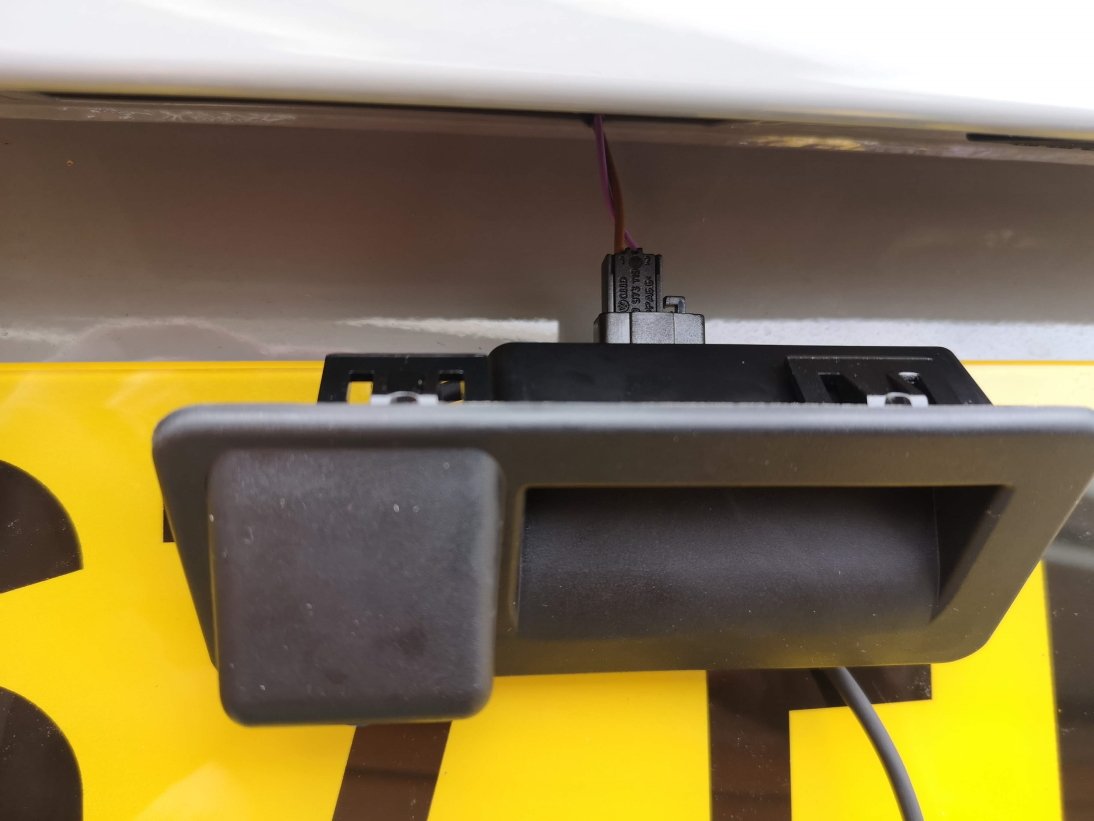
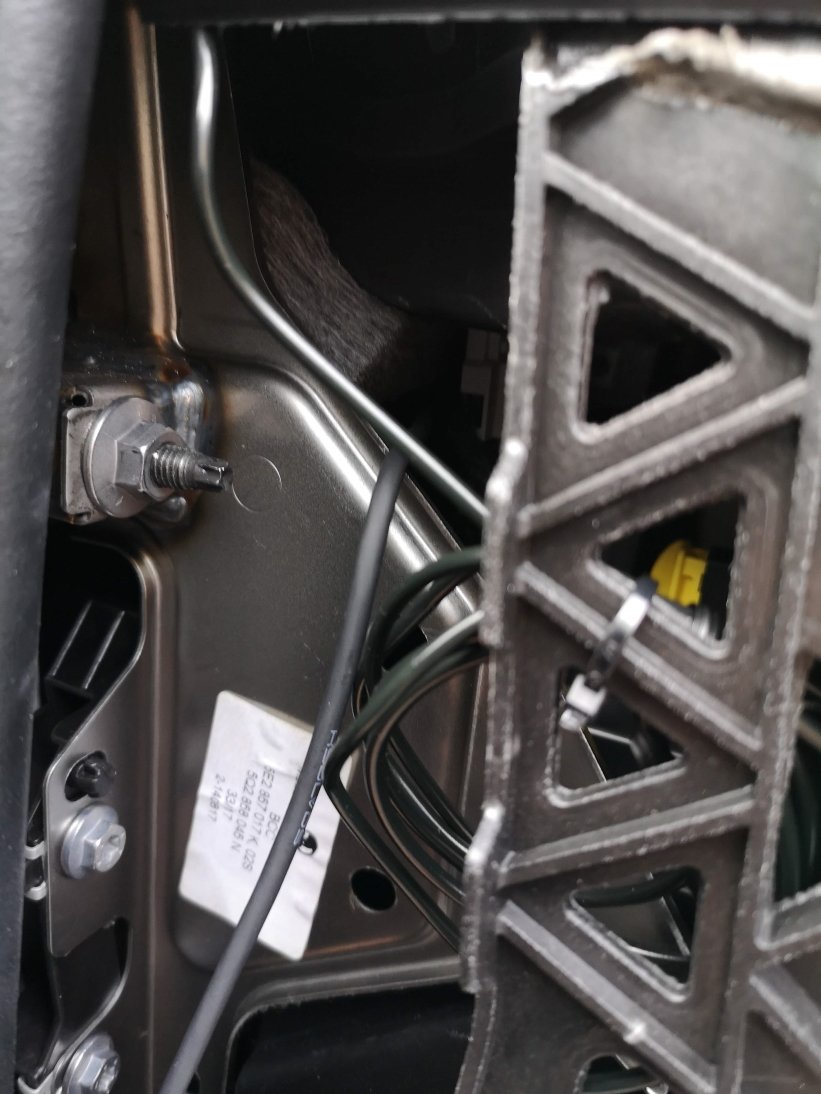
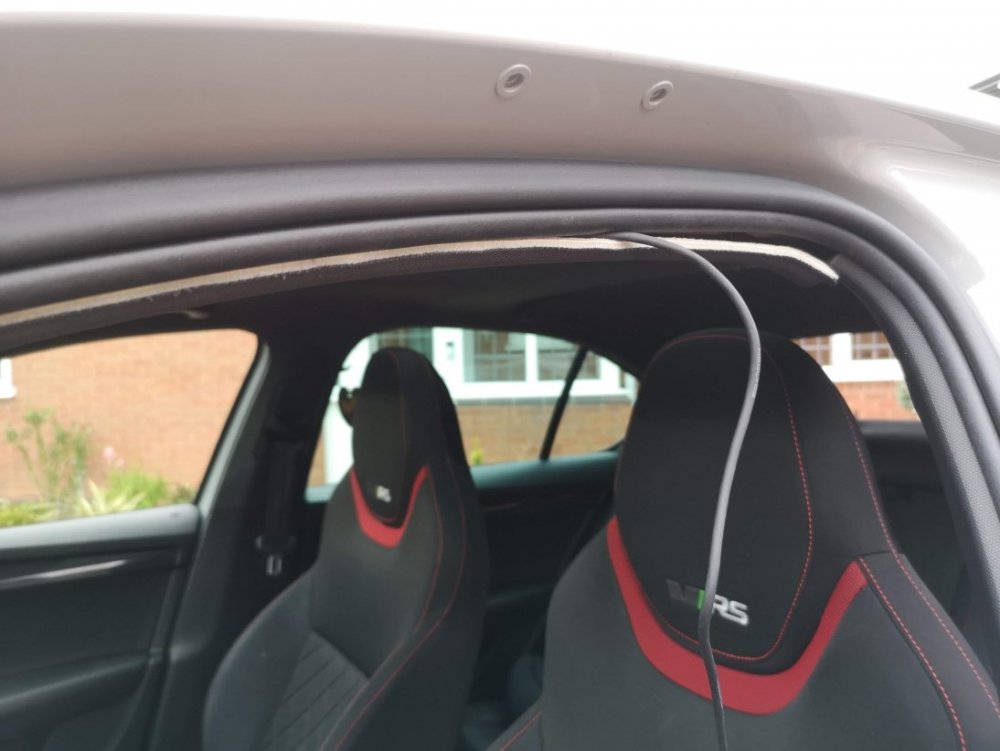
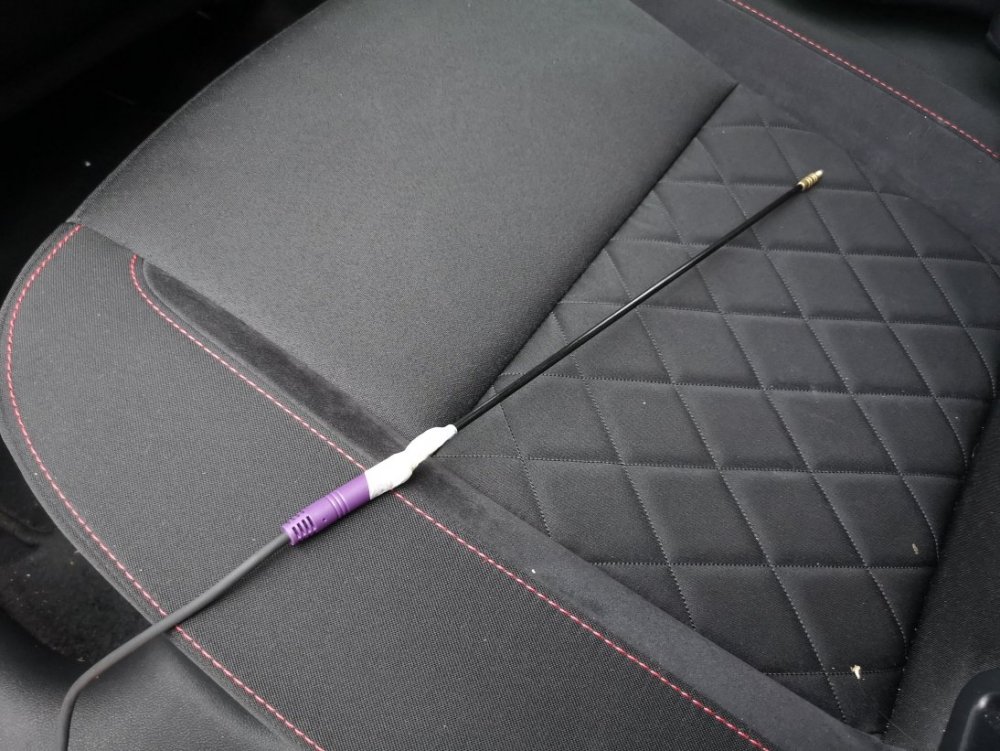
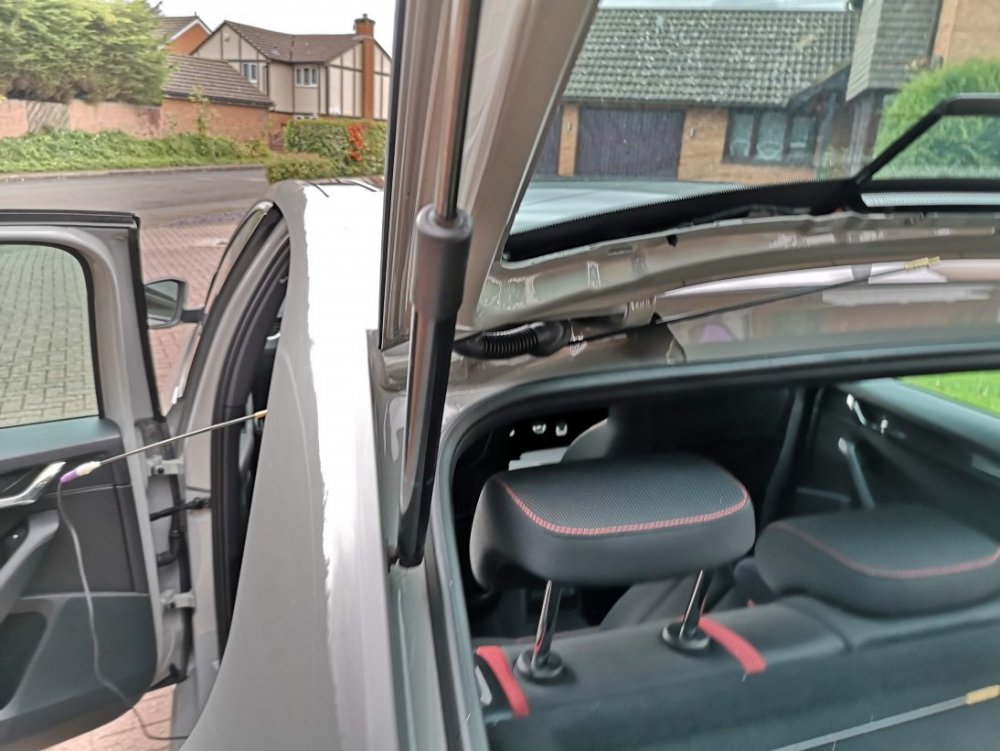
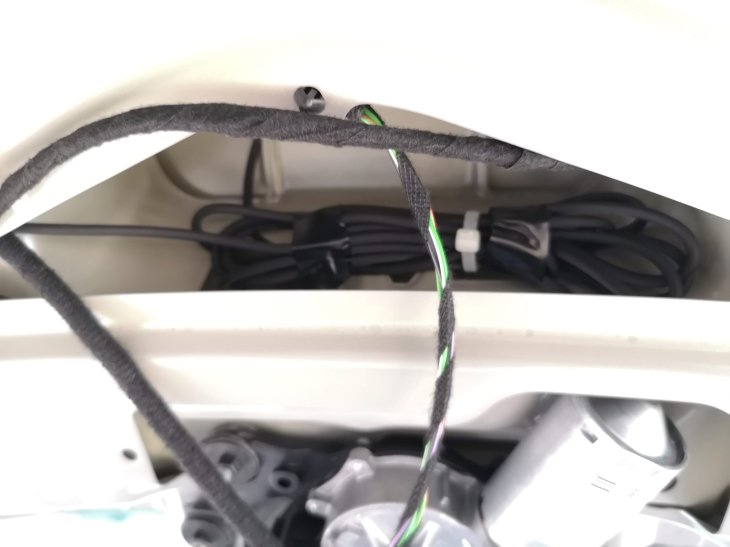
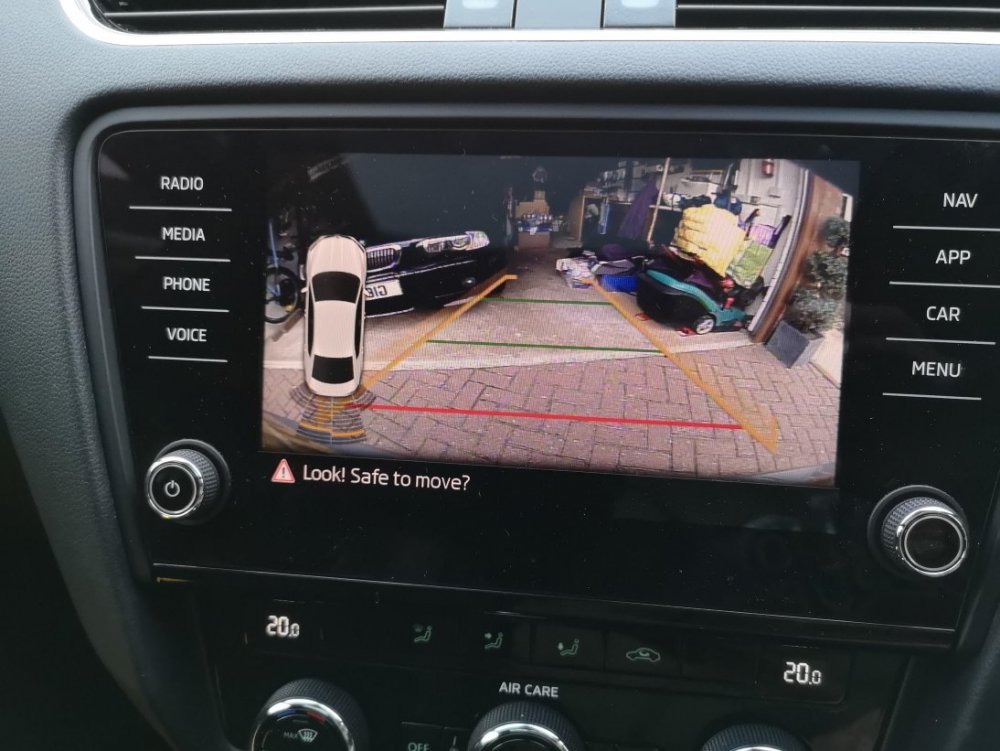
As there seems to be a lot of people asking questions about this lately, I thought I'd put together a quick guide showing how I fitted my reverse camera to a facelift VRS hatchback. They way that i've fitted this will apply to most models, with the key differences being the size of handle (based upon car model year) and whether hatch or estate (but this is just inside trim differences), there may also be wiring loom differences for earlier cars or none VRS models. I've benefited from info from these forums so hopefully this will be useful to others. I am by no means an expert & I won't be able to answer all of your questions, hopefully others will chip in and can add other info as well. First of all, this is the camera that I ordered for my MY 2017 VRS (Camera A/Handle A): https://www.aliexpress.com/item/4000230897829.html?spm=a2g0s.9042311.0.0.40694c4dTEPT93 (link may no longer be valid when you read this so screenshot below) No programming is required for this camera and it supports dynamic reverse guidelines Tools: Trim removal tools would be useful, but otherwise plastic tool that won't mark your car, or screwdrivers or similar with masking tape over the end. A T20 torx head tool is required if you have a hatchback to remove the pulldown boot strap Cable rods are very useful, I couldn't have fitted through the roof lining without. Stereo removal tools unless they come with your camera kit Cable route - I went with an OEM route for my cabling, following existing cables through the roofliner and out to the back as show by the red line below. The camera: The first thing that I did was to check that the boot release switch was working on the new unit - there's no way you want to wire this in and find it is faulty. You'll need to start removing the boot trim to access it. Remove the plastic clips from the lower boot trim- this consists of a few plastic clips which easily pop out with trim remover/screwdriver. There are 8 of these on the hatchback. After that start removing the upper plastic trim, this simply requires forces to release the metal clips. You don't need to remove all of this for now, but it will all need to come off later Remove the lower upholstered trim covering the tailgate. More metal clips - work your way around. You'll also need to remove the pull down strap with the T20 torx head. When this is down you should be able to drop the boot liner which will give access to the boot release handle. This can be awkward to remove, but can be done by pushing in the clip on one on the ends whilst also pushing down on the handle from the inside (ignore the clips along its length) - it should then pop out. Repeat for the other side. Unplug the harness and plug the new handle in - check the release switch works. You can either now push the new handle in until it clips, or leave it out to test the video connection later before fitting. To wire it in Remove the glovebox (open, rock left to right whilst pulling up & you'll hear the bottom clips release. Raise the glovebox lid up and inside the housing and reach in and remove the dampening on the left hand side) Use the stereo release keys to release the multimedia unit. The kit used here comes with a replacement harness that sits between the original one and the media unit & includes the video feed cable. Some people have removed the upper glovebox section to provide more access, be careful not to unplug the airbag connector if you do this. This can be fiddly, but I found the best way was to lie on my back with my head in footwell looking up at the unit from underneath. With the media unit slid fowards this gives access to the harness. It's the large one at the bottom and there is a locking connecting that needs to be pushed backwards to release. Check how it works on your replacement harness. Unplug old harness and plug it in to one end of the new one, push the harness in to the void and plug the new connector block in to the media unit. This took me a while to get it all to fit in. When done you can now test the video feed to the rear camera before your start wiring it in permanently. I took the camera cable over the top of the fusebox cage & out through the side panel I then ran the cable up the A Pillar to the roof lining and all the way to the end. Cable rods were really useful at this point, especially to get around the B pillar , and to go from the end of the roof liner through the cable exit point behind the rubber trunking where the original boot cables are. You can also run the cable in the trim above the sill and work your way back up to the roof lining on the C pillar. When you get to the end of the roof lining you'll need to unclip the rubber gator at the top of the boot so you can get the cable out of the roof liner and in to the boot via this gator. If you install the same way as me you only need to peel the roof liner down a few cm, being careful not to deform or damage it and you'll see the OEM cables behind. Once you've got the cable this far it's a case of feeding it through the rubber gator, up the side of the boot and over to the handle; connect the video cable and tidying up any spare cable. Everything should now be up and running. Retrace your steps to refit your trim. You now have a fully working reverse camera, activated when reverse is selected and with dynamic guidelines. The parking sensor guide now shifts to the left of the screen the same as an OEM reverse camera. I will come back and re-edit this tomorrow and resize pics as it's getting late. I'll tidy up any errors as I see them so please don't jump on me straight away!


 1 point
 -
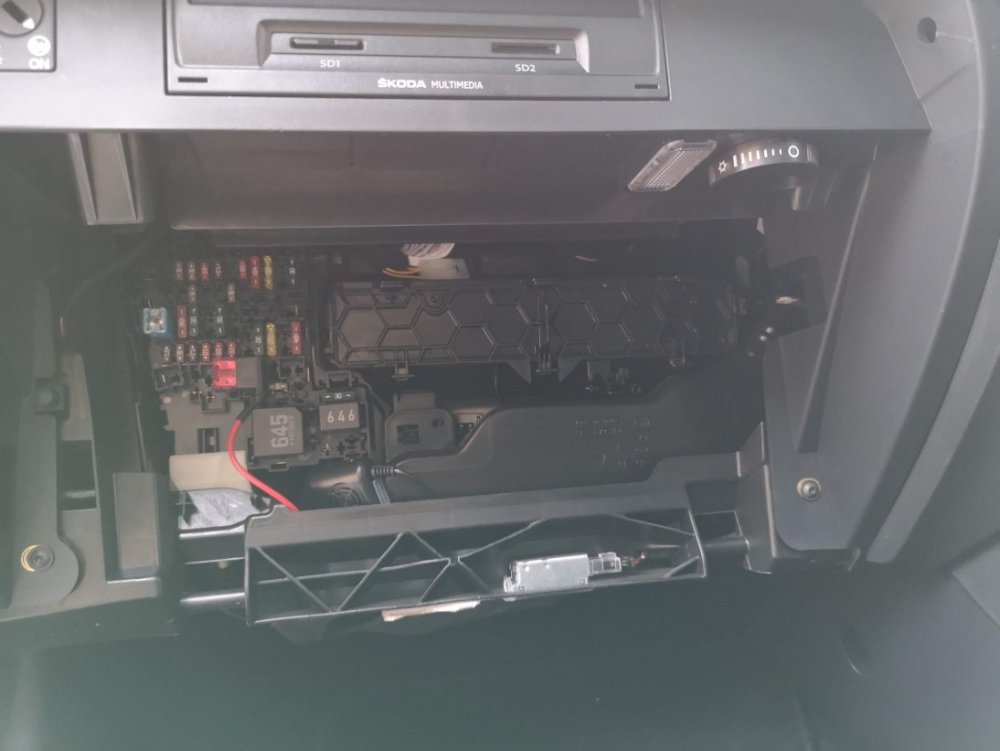
So after some searching I have figure out a way to this with Android Auto. It is basic but does the job. You need Dashobd from google play (not available for IOS fans and car play as far as I know sorry) https://play.google.com/store/apps/details?id=com.ecm.dashobd&hl=en_US An ELM 327 dongle that works, the cheap blue one I purchased from amazon would not work for 8 quid odd so I bought this one https://www.amazon.co.uk/Bluetooth-Scanner-Diagnostic-Adapter-Android/dp/B07CP632CL?pd_rd_w=KqmGT&content-id=amzn1.sym.c8a5b9ab-9876-4c56-aa13-e746c73e193d&pf_rd_p=c8a5b9ab-9876-4c56-aa13-e746c73e193d&pf_rd_r=5BY3CMCNXASEJ2YZ1RV2&pd_rd_wg=BIqDJ&pd_rd_r=d9f276b9-8ede-4dcc-88e2-574d6ee7f89c&pd_rd_i=B07CP632CL&psc=1&ref_=pd_bap_d_grid_rp_0_1_ec_pr_ppx_pop_dt_b_bia_item_i You can now run dashobd on your android phone and android auto screen like you used to be able to run Torque on android auto which at some point stopped working. Should be in the list for AA automatically or you may need to go to AA settings and edit the list and select it. No need to have a second device running with screen on to see real time data, I wanted to keep it on the screen in the car for ease of use and periodically checking to see if and when the car is doing a regen. Click on auto (car icon) on dashobd screen on phone and click the + button to go through the list of PID's until you find Particulate filter regen status, the message on screen will show not in progress or in progress when the car is doing a regen. If you buy the paid version you can create custom PID's but so far I have not got that far to see what can be done or not. https://postimg.cc/hQdGCNPN Literally all I wanted was something on the android auto screen that would show me the car is doing a regen and when it stops, as it happened I picked the dongle up set it up and straight away the car was stating to do a regen so I took it for a drive to let it complete, as if you don't it will keep trying and trying using more and more fuel trying to regen, so now I can see and work out how often and when its likely to do so and hopefully make sure they always complete where possible. Like I said its basic but does the job I want it to.1 point
-
1 point
-
This should not be affected by how you lock the door. When you open the drivers door after being parked a few hours the fuel pump primes the system ready for starting when you open the drivers door. Before any key in Ignition or keyless starting. Listen closely next time as you open the door.1 point
-
1 pointAn AC charger is so much less to install and is more efficient of course, especially as 3 phase. Please to see the new Scenic, European COTY, is still maintaining the 22 kW AC. Need to get all chargers to accept credit card, hopefully American Express and it will be heaven.1 point
-
1 point
-
1 pointI'd want compression readings before making any decisions. Post back with numbers for all four cylinders.1 point
-
1 pointLet VW confuse you with their additional specification numbers. - https://www.volkswagen.co.uk/en/owners-and-services/servicing-and-parts/spare-parts-and-oil/oil.html Then perhaps consider a good quality oil from an English blender that covers the range of additional VW numbers. - Millers EE Performance Engine Oil C3 5w30 - ETA: based on Ootohere's later info change to Millers XF PREMIUM ENGINE OIL C5 VW 0w20 (and better as the oils get greater availability) - https://www.opieoils.co.uk/p-162388-millers-oils-xf-premium-c5-vw-0w-20-fully-synthetic-engine-oil.aspx As you can tell I'm not a VW fan or of their, ever changing, additional numbers or not specifying weight/grade range of oil or silly 9,400m/1yr or flexible (20k-m(?)) oil changes, change at 10k-miles or 1 year whichever is the soonest and use a good quality oil. I'm sure others will be along here soon with official VW engine oil dictates. Good luck.1 point
-
1 point
-
1 pointthat's now my car!!! it's on a private plate now.... did you own it from new? I've owned it since Sept '20 and done 30k trouble free miles in it... i love this car!!!1 point
-
Same in all walks of life unfortunately, there are always selfish bungholes who take the ****. I could do the same, but do not. The examples I gave above are actually just that - examples.1 point
-
Actually the £21 million or whatever the Robert the Bruce Museum was to cost back 13 years ago had lots of funding from lottery, or Scottish Heritage or South Ayrshire council etc and for a SNT property. @Graham Butcher when I say Free charging I mean free to the person getting the charge. Obviously the electricity costs, and can be costing people without cars. But so does pollution and emissions and the Triple Lock and much else cost them. But as this is Scotland and the Electricity keeps costing us all that use electricity or pay bills then so be it. I would rather someone gets a free charge in Scotland than down south on the UK the likes of yourself has a low home tariff yet your getting expensive imported electric.1 point
-
I've just done 1500 miles road trip, write up here: I whole heartedly agree with this, need more destination chargers:1 point
-
1 pointI stand corrected - yes, apologies. On non-FL model, this was standard.1 point
-
1 pointMy guess is it hasn't been allowed to complete enough DPF regenerations and is now becoming blocked. When you say "fully carbon cleaned" do you know what that means? Was that the DPF or some other part of the engine? At 156k it could be a new DPF time. They don't last forever.1 point
-
1 pointYou need the front wing/bumper layout for a 2017-2020 car (known as MK3.5 as opposed to MK3).1 point
-
Robert Burns Birthplace Museum Ayr. 2 x 7 kW AC sockets & free. Charge place Scotland charging. Maybe a tariff after the first 12 months of being free. Car park and chargers just open during Museum opening times. Culzean Castle National Trust Scotland 4x7 kW AC type 2 socket chargers Free to use.1 point
-
Cheers all. Very solid discs on the rear - so must be the 272's.1 point
-
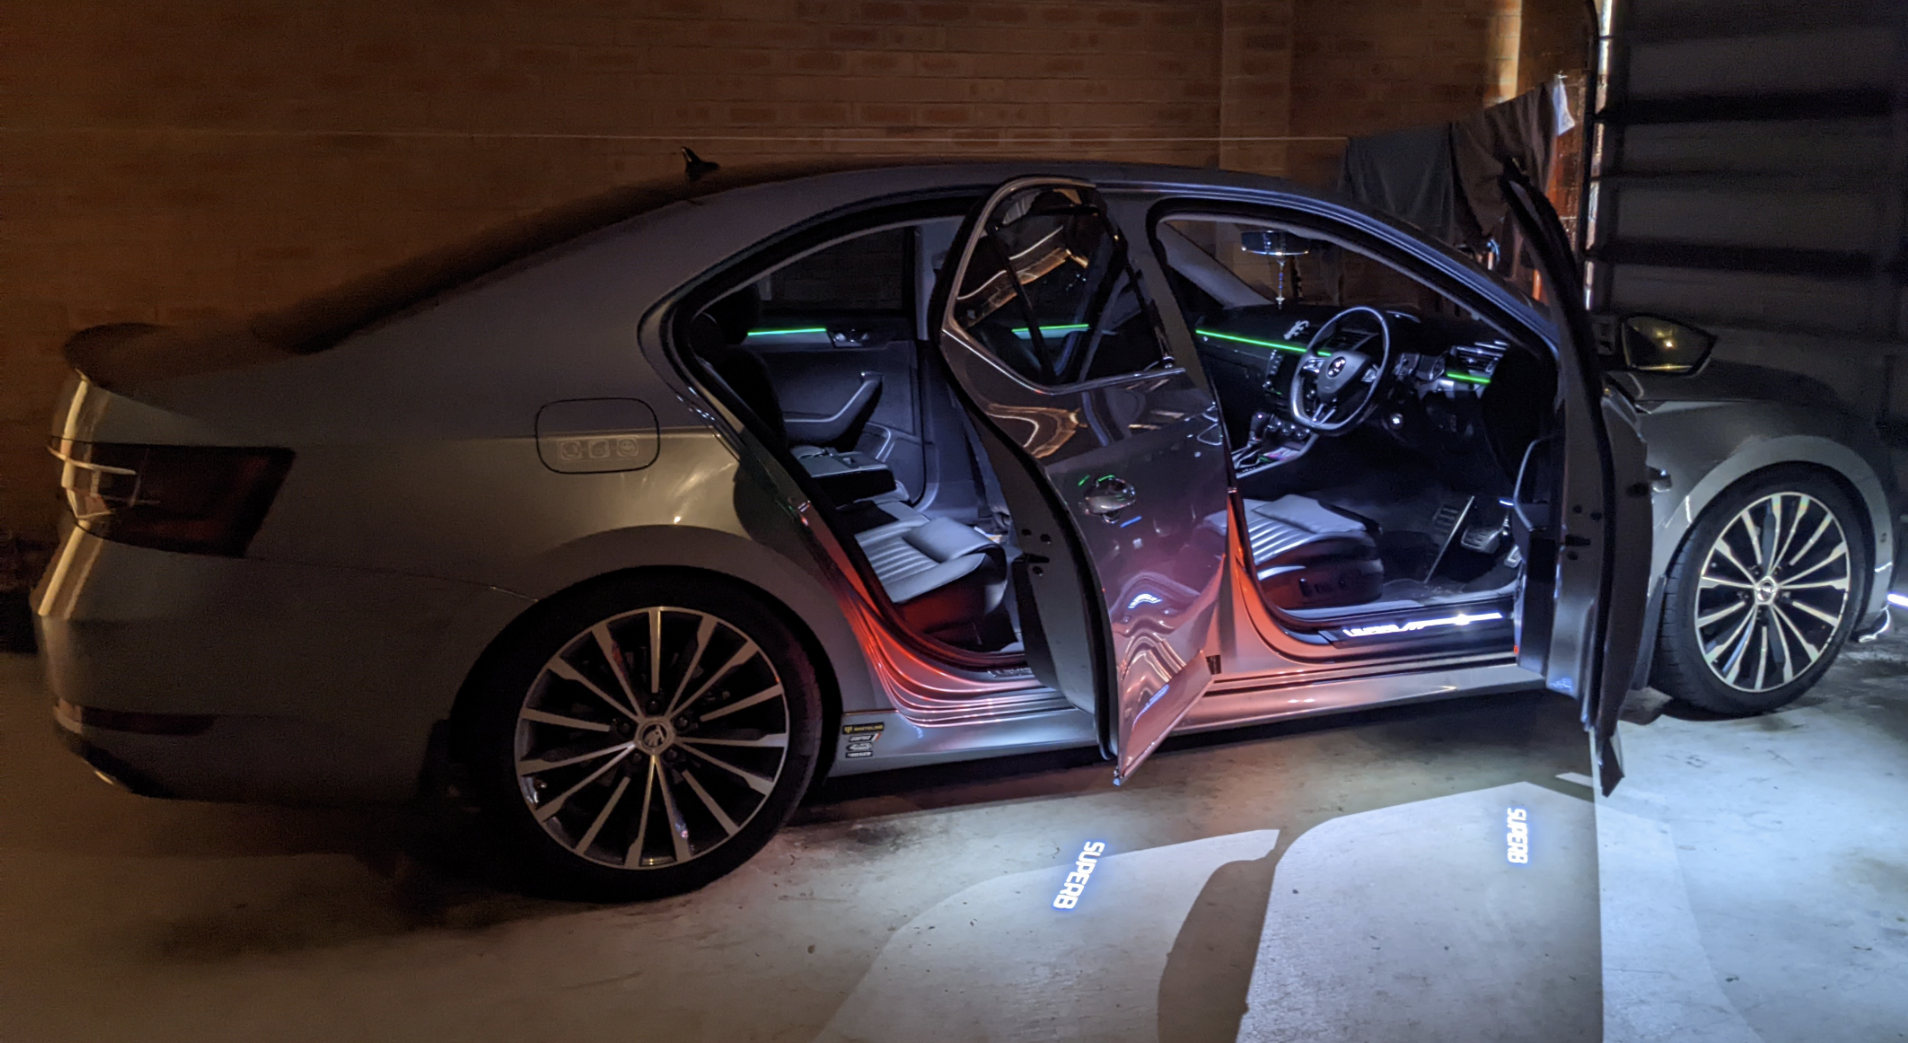
1 pointOh c'mon you need to embrace and feel that bling bling feeling ... illuminated external door handles gets you into uncharted territory ☺️ Next is illuminated door sills so you can silhouette the car in the dark 😁 Jokes aside, I like the idea of the illuminated door handles 😊1 point
-
1 pointPrices seem to vary significantly. I had quotes for £1600, £1800 and £2500, all plus vat. That is in the south London (and South of London) area. For most wrap manufacturers flip colours are more expensive (plus £300) but for teckwrap prices seem to be the same across their range.1 point
-
Hi, I've finally finished with them (took about a month longer than planned to get the time to do it) and the process was relatively straightforward if a little nerve wracking. I tried to find a local dealer to fit bars before reaching out to this group but none of them ever responded. I've messaged miechom to see if they still want them, but if they don't then they'll be available. Thanks to Kathyrn1990 for passing them on to me.
 1 point
 -
1 pointAlways could be located in the dark before courtesy of the remote key fob operating the lights when unlocking, or are they concerned that modern owners/drivers with KSSY system don't know how to press a button on a key fob?1 point
-
1 pointDe Walt jobbie. But, cracked it - neighbour on the breaker bar, me holding the wheel 👍1 point
-
Same here - Having had my Fabia for 12 months now, it's becoming second nature every time I start a journey to a) press OK to switch off the privacy display, b) switch off the start/stop and then c) switch off the ridiculous "Lane Assist". Who was the idiot that dreamt up the idea of "lane assist" ??? Positvely dangerous feature if you are crossing over white lines a lot of times driving in towns. The sudden pull of the steering wheel is very disconcerting.1 point
-
1 pointNormally all you lose is the clock time and trip mileage. There will be a few warning lights up on replacement but a short drive including steering lock to lock and they auto clear.1 point
-
1 point
-
There should be a 'Restore factory settings' option in the main settings menu. That should clear everything....1 point
-
Also @RichardStandard10 Well, this certainly looks the part for sealing joints at water system temperatures.1 point
-
I just got back from my 1560 miles trip. I'll write about it up in another thread next week. Certainly didn't need 18 charging stops I charged whenever convenient, total 12 times but only 4 times took on fairly large amount (35 kWh or more, or more than 50%). Reality is people always need more breaks than the car. My friend in a diesel fuelled up at least 6 times that I know of whilst travelling in convoy. Of course, he stops at cheapest we find along the way, which isn't optimum refuel strategy for minimum refuel count.1 point
-
1 pointWasn't me that spotted it, but I remembered it as a handy one. Credit to @T2000 for mentioning it here https://www.briskoda.net/forums/topic/523335-wheel-guide/#elControls_5849646_menu1 point
-
@Thefeliciahacker @RichardStandard10 I've never made a water pump gasket, but I've made thermostat gaskets for Ford Kent and Pinto, BL A and B series and Vauxhall HA and HB engines from Cornflakes packets. That said I did use a smear of Red Hermatite as well.1 point
-
1 pointIf you measure the disc diameter, look at pad shape too, that should help pinpoint which brake system choice. My Yeti had 2 choices, but only one was for 280mm discs.1 point
-
The standard phantom fault for long crank times at random startups that can't seemed to replicated or diagnosed... Some say ECU update fixes, some mechs say random parts changes to line their pockets... I say live with it, we all have it sometimes...1 point
-
1 point
-
There is some kind of airlock. Check the header tank levels. It's worth checking to see if the Silicone 'bag of death' has split in the header tank. If it has, you need to get a coolant flush done asap, otherwise it will chaos with silicone getting into the cooling channels on the block etc.1 point
-
Just seen the previous answer; if the fan is coming on after every journey, this means the car is trying to so a regen. I think a longer journey to let the car complete it's regen is appropriate. It might be worth getting the calculated soot levels for the DPF. If the car had a blocked DPF, it would throw a code (suggest investing in a ODBELEVEN dongle). 200kms...engine is barely run in! I hope you don't have an oil burner (keep an eye on oil consumption) and run some decent super diesel through it occasionally (or my personal option is a Cetane improver - especially if you are using supermarket fuel)1 point
-
Apologies for those seeing it before but it may help here1 point
-
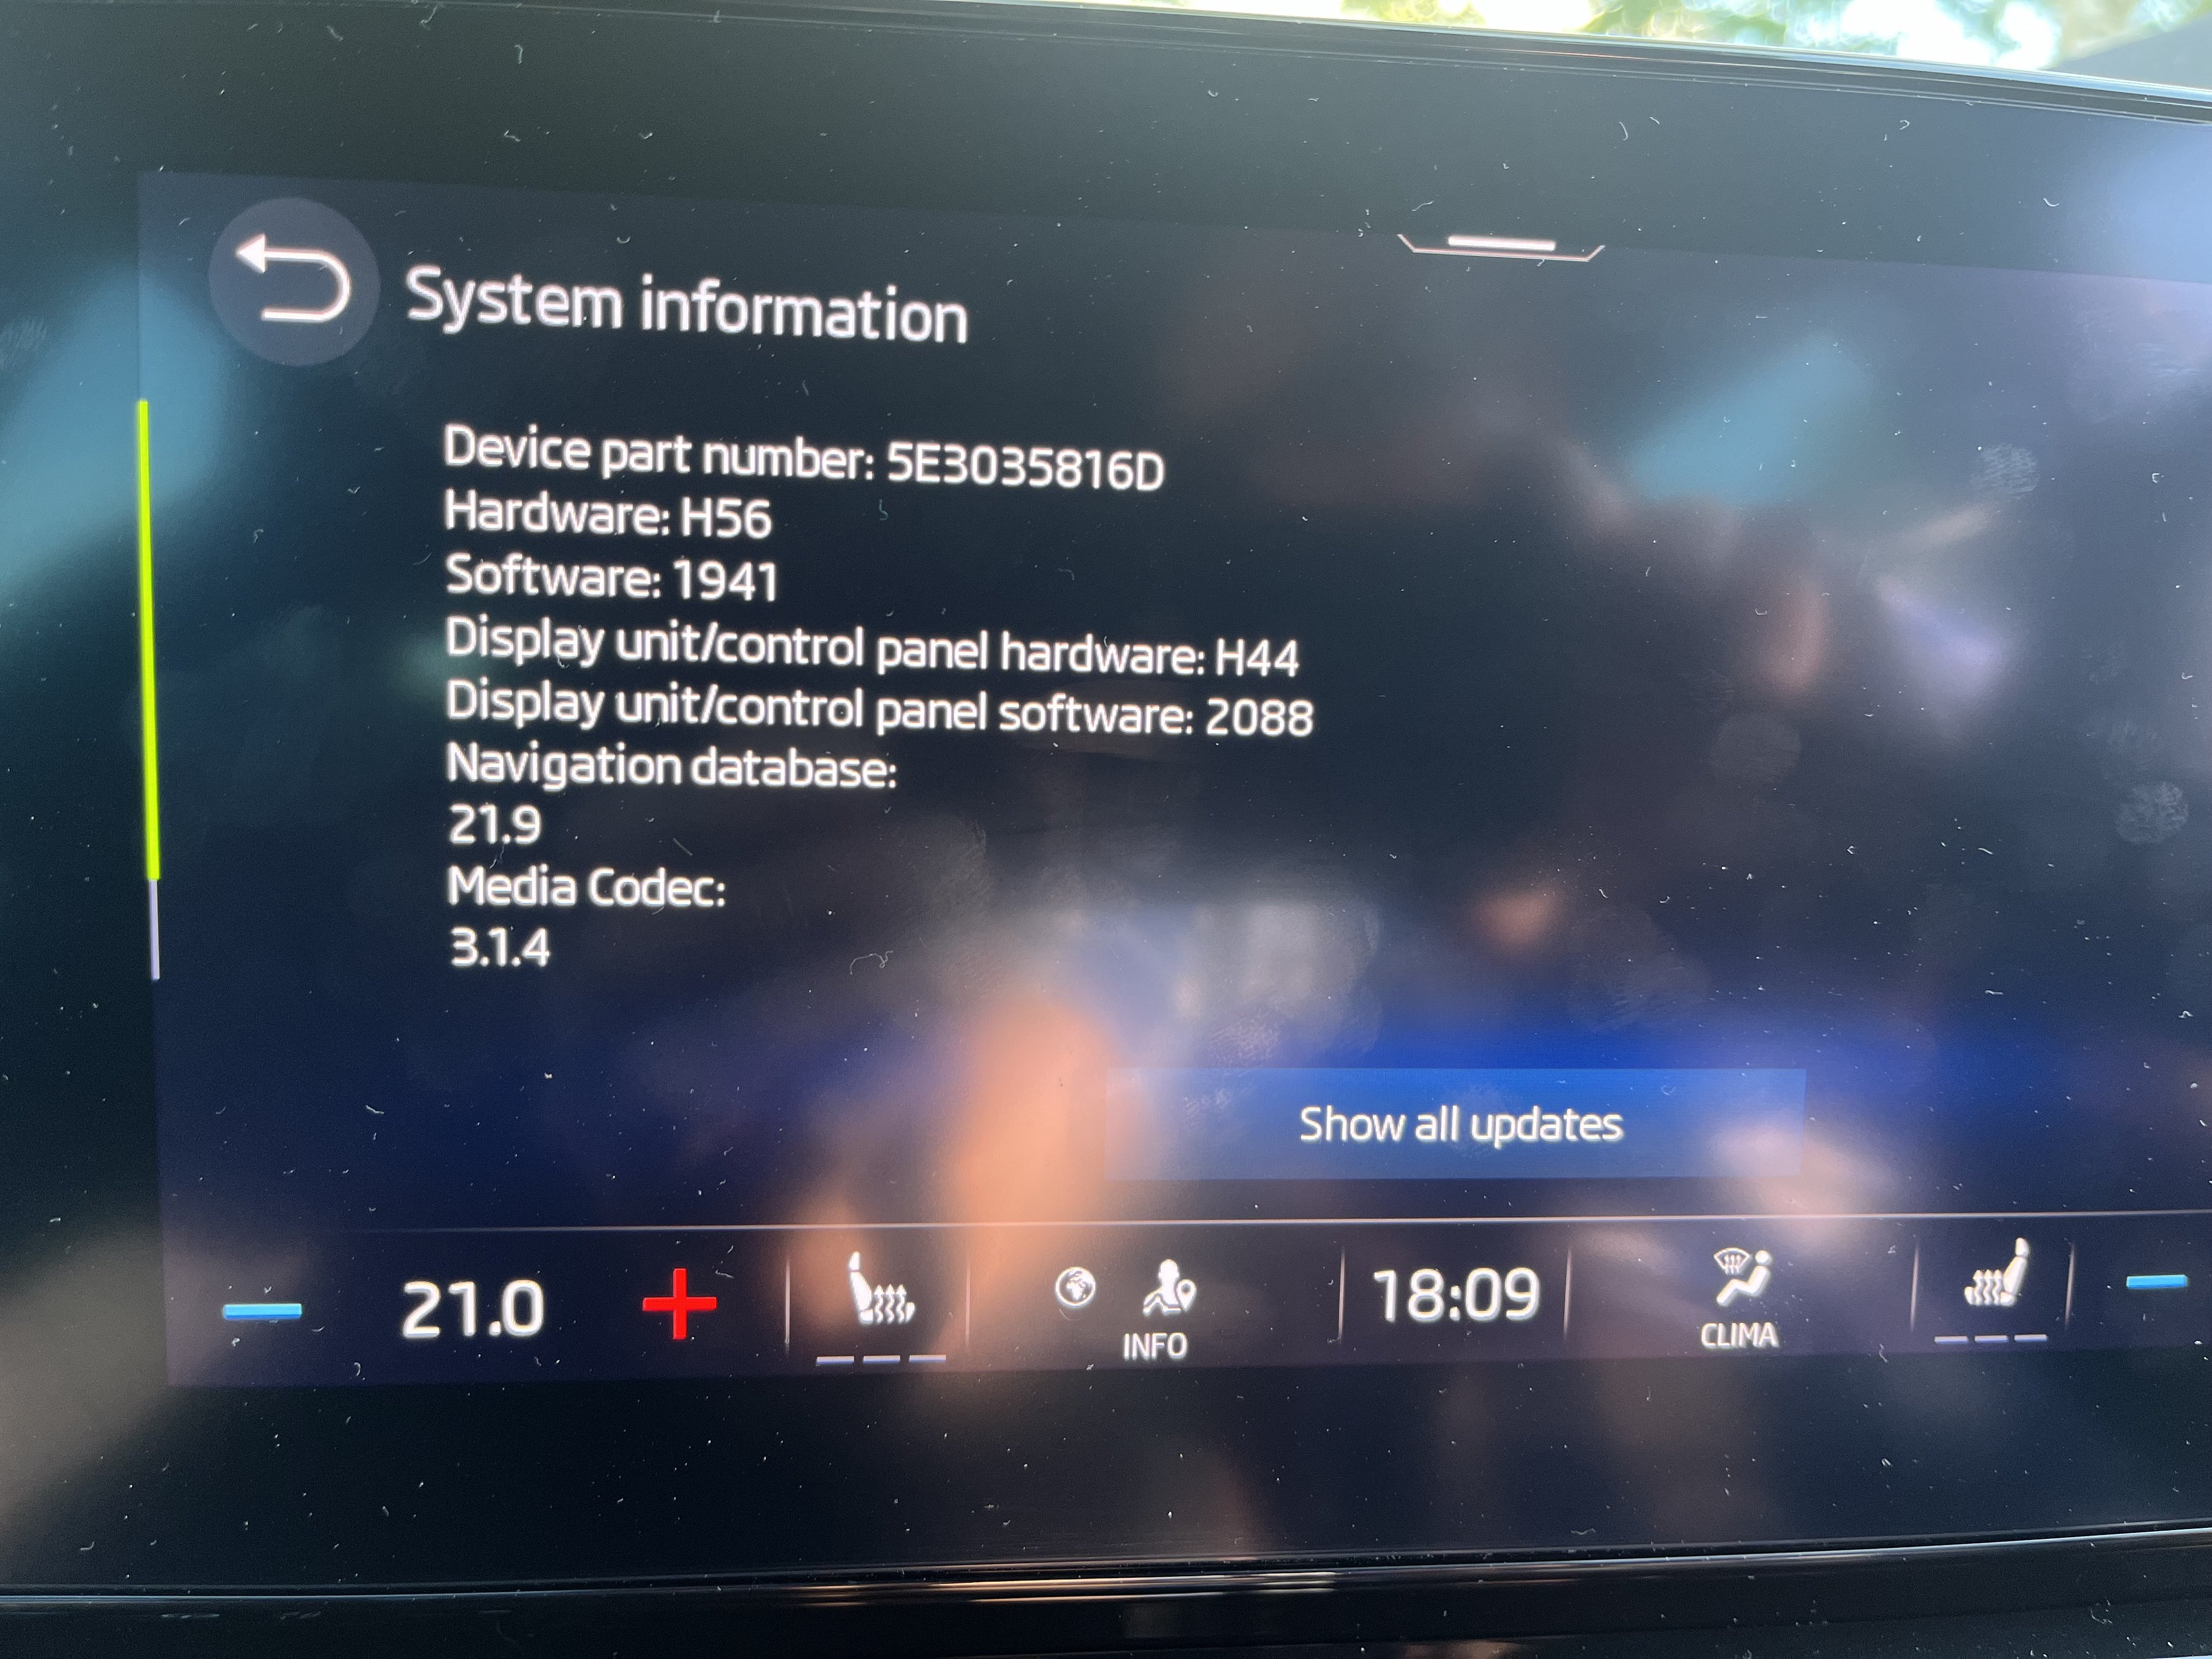
Great news! I finally got the dealer to update the climatronic module from 0341 to 0531 my hardware revision is 5WA907727P. Aside from working as it should, the menu appears to be a lot more responsive and the same for animations - e.g between menus within the Clima menu.1 point
-
1 pointYeah, I've paid the price a few times but like a cat seem to have 9 lives.1 point