Leaderboard
-
Stonekeeper
Resident Member16Points2,883Posts -
MikeTheThinker
FREEDOM8Points8,509Posts -
Jim H
Resident Member8Points6,290Posts -
Graham Butcher
FREEDOM7Points6,642Posts


Popular Content
Showing content with the highest reputation on 27/11/25 in all areas
-
3 pointsI have signed up to the Pay per Mile consultation and it demonstrates just at what an elemental stage the government is at with the questions they are at. Garages would need to do a certified check as the mileage on those EVs and Hybrids end of year 1 and two, possible at service time but some cars only need a service every two year 18k or so miles. Revenue for garages which are being left doing a lot less chargeable work with EVs as they need less maintenance and use less service parts so typically earn garages much less revenue so this would be a way for them to earn some more and do a check on the car where they could possibly get some more work by hook or by crook. The consultancy questions got more obscure as one worked way thru the question paper. Typical politicians construct, all over the place, clearly trying to consider multiple strands of how to do. If the government get a coherent policy by 2028 I will be amazed. Just create some more toll roads and gave electronic tags like most other places, base tax on Gross Vehicle Weight and vehicle type and actually reduce VED.3 points
-
Oil change even at the lower mileage always makes a noticeable difference. DSG oil was changed at something like 26-27k the first time and then yesterday again at 52k. DSG oil was slightly brown but not bad. Oil change has made a very noticeable difference in smoothness and changes even at the low service interval. It’s due plugs again next year and I think I’ll replace all the coils as a precautionary measure to avoid even a slight miss, at the same time. Can’t do any harm, except to my wallet.2 points
-
The change applies retrospectively, meaning that most vehicles registered from 1 April 2025 will not be required to pay the charge. Any vehicles taking out a second licence with effect before 1 April 2026 will be required to pay one year of the charge only. A further legislative change also ensures that all vehicle licences which first have effect on or after 1 April 2026 are subject to the increased threshold, regardless of when the licence is applied for.2 points
-
2 pointsYes I live Greece. All shop with odis online can remove cp protection. Cp protection is simply, install from shop chassis number to module and unlocked. Programming and installation complete from me.2 points
-
Revo advice for mine at stage 2 was genuine plugs and OEM oil. With the only restriction being that they are both changed more frequently. I normally run Castrol LL at 5w-30. None available when I needed it, so have as of yesterday, changed the oil with Castrol LL 0w-30. This leaves my personal intervals at 6 months instead of 12, and about 5k miles between changes. DSG also running Revo software, and I had already dropped the factory interval for oil change down to every 3 yrs instead of 80k. DSG serviced yesterday as well for the second time at 52k with genuine bungs, filters and oil from TPS.2 points
-
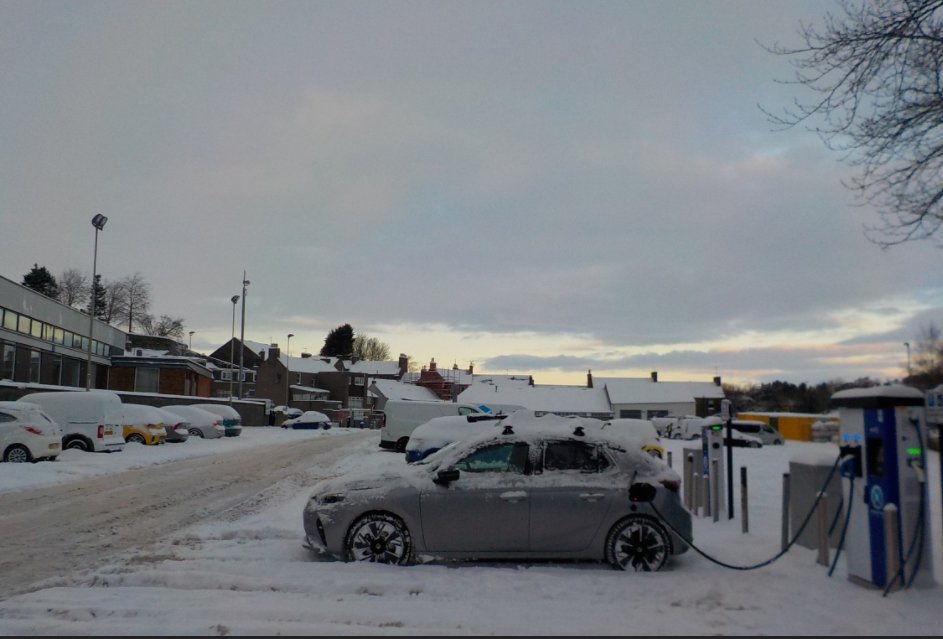
The Greenline was white with frost this morning. Got the slightest glimmer of the engine turning over slowly before getting just clicks. Tried jump starting it from the BMW, with no luck. The battery had been showing signs it was getting old, with the stop-start cutting in less and less. So I bought an AGM 096 battery that my local GSF had in stock for £138.37. Swapping batteries was pleasantly easy. 10mm nuts on the terminals, plus a 13mm bolt on the clamping bracket next to the air filter housing, reachable with the longer extension bar from my socket set. And the battery heat insulation blanket to pull out by hand. I used my Launch 919 tablet to tell the car it had a new battery. At first I couldn't figure out which category of battery to put as there were no "AGM" nor "Fleece" options. After a bit of googling I realised that "Fibreglass" was probably the appropriate battery type (part of the joy of using an unofficial diagnostics tablet, with iffy translations). I ended up hitting the road two and half hours later than expected.2 points
-
Radar recalibrated to restore front assist and ACC functions, and MOT passed with no advisories today.2 points
-
Hello, hello to all members Briskoda.net. Thanks for having me.1 point
-
Hi all, Well, one more for the road? After the front brake pads, here are the rear ones... :warning: DISCLAIMER: Do not attempt this operation if you do not feel capable. This deals with the brakes! It is necessary to access several vehicle control units using VCDS (diagnostic tool to perform the work correctly)! This is only a the story of my own experience on this subject. I do not require or encourage anyone to do the same. I accept no responsibility in case of problems. I do not guarantee the absence of typos or errors! :warning: Here is a new tutorial to replace rear brake pads on a Kodiaq Mk1. To begin, here's the system: Only guide rods #16 need to be removed. There's no need to replace them. Required tools: - Flathead screwdriver to remove the covers #17 - 7mm Allen key for the guide rods #16 - Flat pliers for the spring #8 - High-temperature grease (graphite or copper / not even a pea-sized amount for each pad) - G-clamp and wooden block (or piston retraction tool) to push the piston back - Brake cleaner spray - Fine sandpaper - 600 grit minimum - VCDS diagnostic tool Tightening torque: 35 Nm Step 1 - Preparation: - Turn the ignition on, engine off. - Release the electric parking brake. - Connect the VCDS diagnostic tool and go to 03 - ABS/Brakes > 02 - Basic settings. - In the drop-down menu, select Start Lining change mode. - With your foot off the brake pedal, click "Go!" and listen to the electric parking brake motors disengaging and wait for them to stop. At this point, it will beep repeatedly 😳, because several systems are malfunctioning: ABS / ESP / Rear Traffic / ACC, etc. 😱 and you might wonder why you didn't stay home and watch TV 😄! - Turn the ignition off. Step 2 - Removing old brake pads and installing the new ones: Next, as for the tutorial on front brake pads replacement, I wouldn't do better than this video which helped me a lot, even though I had already done it on my old Superb 3: What this video doesn't explain: - The necessary tools (see the instructions above) - The tightening torque (same) - The inner and outer brake pads are different (those with spring #11 are the inner pads). If any doubt, just take a look at the old pads. You'll see the pistons imprint on the inner pads anyway. - High-temperature grease should be applied to the tabs at the top and bottom of the pads to ease sliding in calipers (once you know this, you better understand what he's doing at ~4:55 and 5:25). - :warning: Before pushing back the first piston, and especially the second piston :warning:, it's best to check the brake fluid level in the tank to make sure it won't overflow. If necessary, remove some with a syringe to bring it close to the maximum level or just above. - :warning: Before restarting the engine and pumping the brake pedal :warning:, you must close the brake fluid tank; otherwise, it will definitely overflow. IMHO, the video is misleading on this point. - :warning: Before refitting the wheels :warning:, do not grease the threads of the wheel nuts (clean them with a metallic brush and blow them with an air compressor if possible). The Skoda workshop manual clearly states that grease should not be applied on the threads of wheel nuts. IMHO, here again, the video is misleading on this point. Step 3 - Exiting Maintenance Mode: Once the brake pads have been changed and your Kodiaq has been lowered to the ground, - Close the brake fluid tank and turn the ignition on (engine off). - Pump the brake pedal several times. - Connect the VCDS diagnostic tool and go to 03 - ABS/Brakes > 02 - Basic settings. - In the drop-down menu, select "End Lining change mode". - With your foot removed from the brake pedal, click on "Go!" and listen to the electric parking brake completing its learning cycle for the new stroke, taking into account the additional brake pad thickness. - With your foot on the brake, manually activate and deactivate the electric parking brake a few times using the button on the center console. - Run a complete scan using VCDS and clear all fault codes generated by entering maintenance mode (in each control unit containing a fault code, go to "02 - Fault codes", then click on "Clear Codes"). - Check the brake fluid level and top it up if necessary. That's it! :)1 point
-
1 point
-
On the mk4 pre-fl it was common for the engine fake induction sound in sport mode to cause rattling / vibration sound.1 point
-
1 pointWe made our annual trip to Donna Nook earlier this afternoon 🦭 https://www.lincstrust.org.uk/get-involved/top-reserves/donna-nook/weekly-update Literally a few minutes old............


 1 point
 -
1 point
-
1 pointPTC heater is going to either eat up the electrical energy of the batteries and whilst it may be near 100% efficiency and then will need topping up by that ICE with its efficiency of 30 or 40% or so. The Heat Pump would gave an efficency of circa 300 to 400%. PTC are only used in EVs that are the cheap ones where cost is wanted to be kept right down. Think the new R5 FIVE is going to have this type of cabin heating ie no Heat Pump, no DC charging, absolute bare bones model. Surprises me so few PHEVs have Heat Pumps, even expensive models but all about biuld price i suppose.1 point
-
I know on the earlier Mk4's some people had a rattle coming from the centre speaker in the dash, think from memory it was the speaker grille/cover, so that might be worth investigating. Rattles are hard to pin down.1 point
-
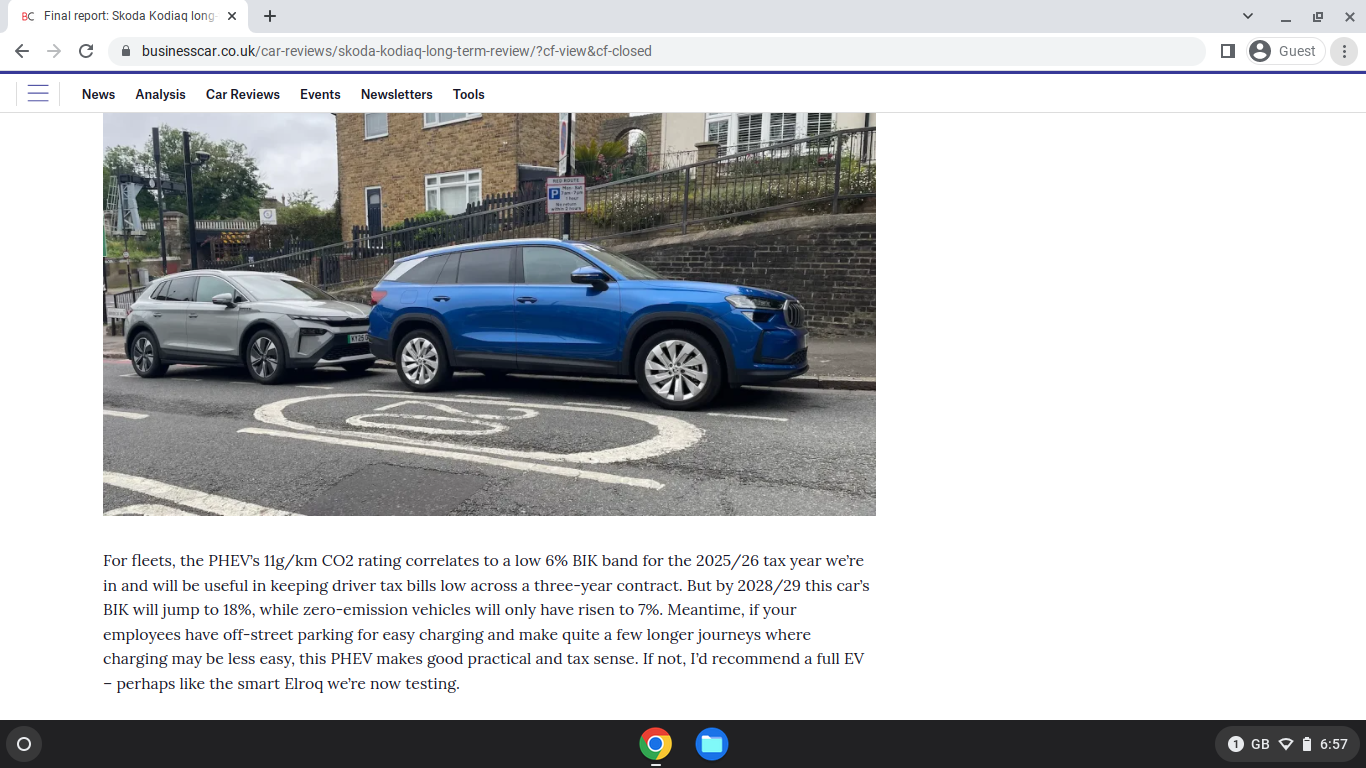
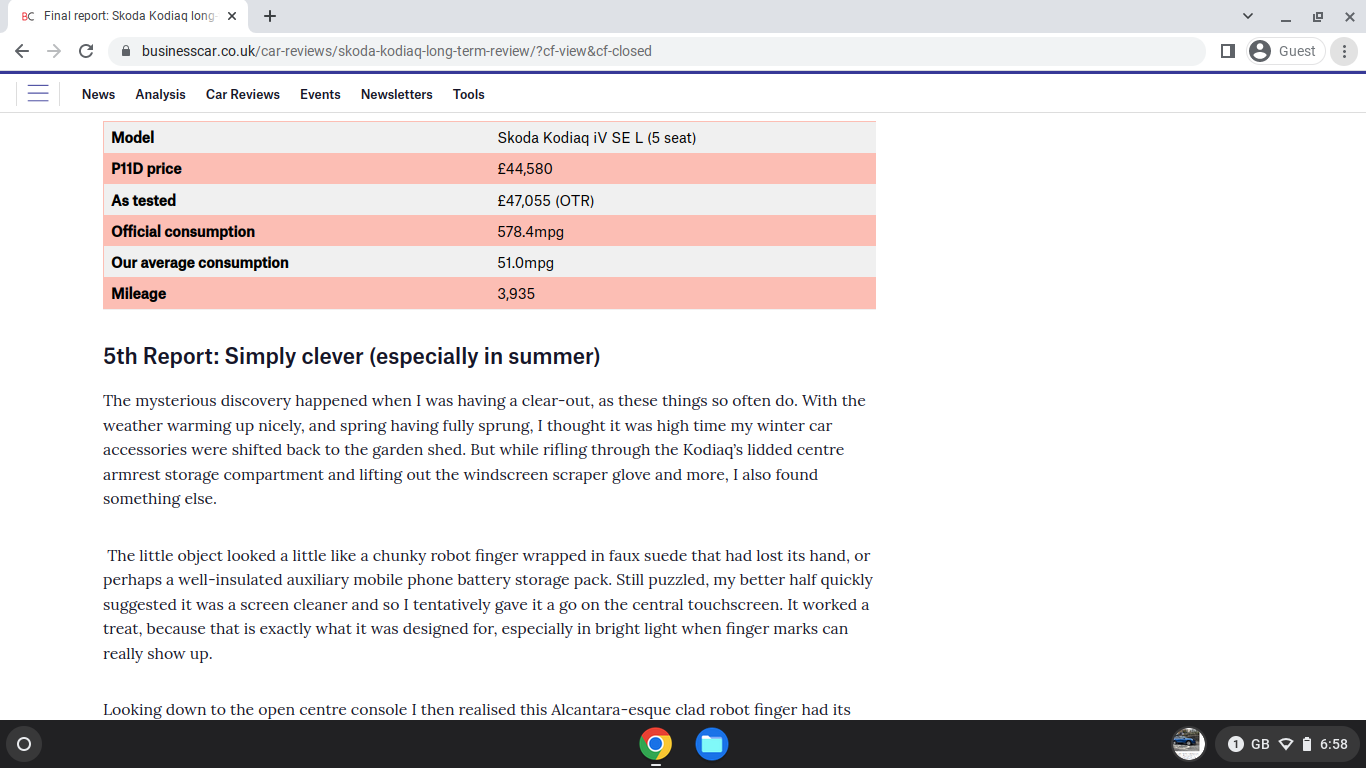
@lol-lol 70 miles on Electric or 578.4 MPG. Amazeballs. Now MP,s and Lords or the Realm should get their mileage allowance based on that. Most those that travel the furthest could travel from and to their constituencies for less that £30. see the 3rd report.


 1 point
 -
You only notice it if you try to notice it. Same on mine. Thanks AG Falco1 point
-
1 pointAh but they do over 700 mpg, ha ha. 20 kwh should get you 70 miles or so even for a fat / heavy PHEV with two whole traction systems !1 point
-
1 pointNo storage bins available to my knowledge; I use a supermarket 'bag for life' and hang it off the hooks. Welcome to the mk4 BTW. They're lovely cars...1 point
-
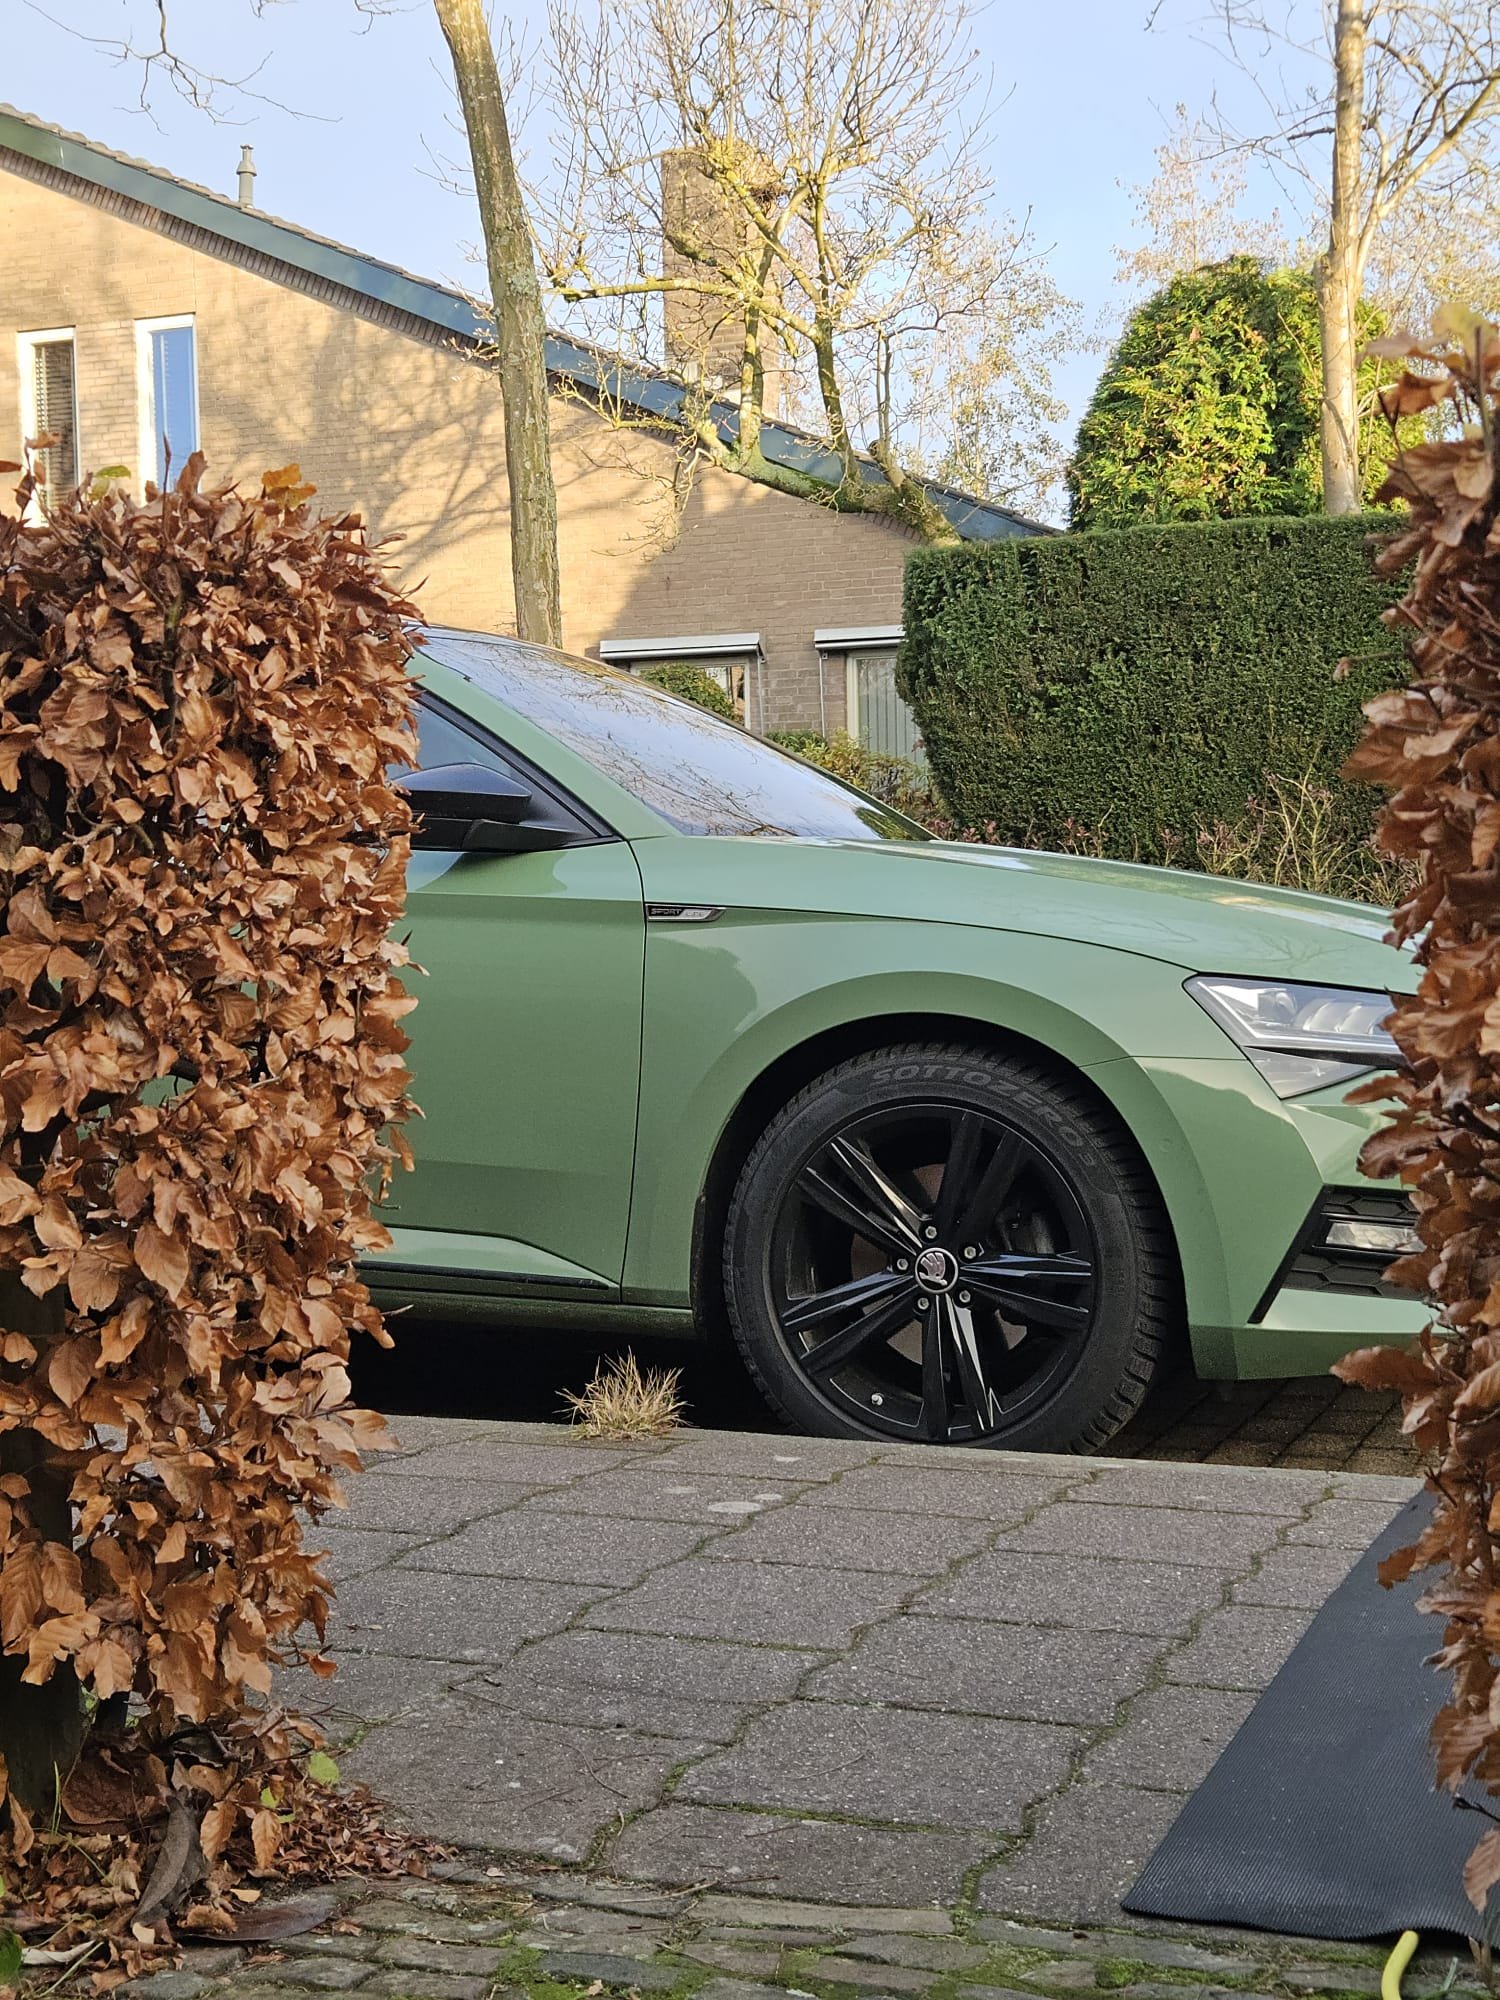
Winter wheels coated with Carpro CQuartz and left to cure in the shed pending switchover this weekend. Not fussed about the job but anything that makes them easier to keep clean is good by me. Now to dig out time to polish the whole thing and get some on the paint.
 1 point
 -
Afternoon All, Have just joined to research the Fabia estate and hopefully buy a good one. Looking at 2015 or newer - I "think" there was a facelift / revision then? Have had various VWs and Audis over the years but not a Skoda - yet.1 point
-
1 point
-
Probably should be covered by the warranty - but entirely depends on what is covered and what is not, especially in the small print. I'd suggest a thorough read-through of your warranty.1 point
-
1 point
-
dont use 5w40, it is old A3/B4 oil, since your car have particulate filter, if you didnt remove it, it demand low saps oil. in manual says 5W-30, 0W-30 / VW 504 00. if you live in colder area then 0w30, if you live in warmer area 5w30. in all other cases use 0w30, shorten intervals, 5000 miles, and your car will be happy. nevemind if it would consume more oil, those modern oils are superb. mine tuner also with revo map on 1.5 tsi 150 ks / 250 Nm, remaped to 190 ks / 290 Nm said me use 5w40. nonsense, i am using shell helix ultra AV-L 0w30 from beginning. all great, only consumtion of gasoline and oil increases, but that is normal. that chip tuners and remappers are electronic and informatic technitians, not car mechanics or mechanical engineers..1 point
-
Maybe all Company cars can be registered in Eire1 point
-
Still not comment on mileage done whilst not in the UK. It appears that mileage done in other countries will have to be paid for also. https://www.telegraph.co.uk/business/2025/11/27/drivers-face-annual-mileage-checks-at-mot-centres-for-ev-ta/ 'The pay-per-mile charge will apply even to motorists who drive a significant number of miles outside the UK, for example motorists who live in Northern Ireland but regularly drive in the Republic of Ireland. Taking readings each year is preferable to other methods that could exempt miles driven overseas because it is the best way to protect privacy, according to the consultation documents. In future, cars’ in-built telematics systems may be able to report mileages to the DVLA, although this will always be optional, the Government said.' Obviously this is a moving picture with the charge not due to come in until 2028 so it could change but that seems to be the current expectation.1 point
-
1 pointMy charger is an Ohme... So I guess the trick would be to try and activate the charge so it straddles two 30 minutes slots if the requested charge is likely to take less than half an hour. As I don't need to do much home charging, trying to get as much of my home use on to the cheap rate will probably determine which tariff is best overall.1 point
-
1 pointMinimum IOG amount on Octopus app (assuming you haven't got Ohme? That's a different system) is to add 10%. But if you ask for car to be charged (+10%) and ready in the following hour for the morning, it will force their hand and give you cheap slots. The slots are only active if your "smart device" (their T&C wording, in case of IOG, it is the connected EV) is charging. So if your car becomes full within 10min, you'll only get that first 30min at cheap rate. So in your example, you will get 30min to 1 hour of cheap rate, depend on how much your car charges. Depend on your charge point. You can also keep IOG smart charging turned off. With my Indra charge point, it would just flash white for waiting for schedule, wouldn't charge unless I press BOOST button on it. I can then turn on IOG smart charging in bed instead of go out and plug it in. The end result is the same, IOG detects smart device and allocates a schedule.1 point
-
1 point
-
If they properly diagnosed 48V battery then no further questions. If they just quickly checked logs and seen 48V errors, but did not investigate properly what triggered them, then idk. Knowing Skoda techs nowadays I would not trust they dived deep, unless perhaps they could present printout of 48V battery test to support their claim? Like in my case I had gearbox failure and electric drive failure, and that was what was left in errors logs. But the cause was unstable voltage in 12V system.1 point
-
This might be worth it then if plugs are on the radar - Black Friday Spark Plug deal Yeah my DSG isn't the buttery smoothest. Always had a gentle thump on 3rd to 4th manually (and sometimes 5th to 6th so seems common on the shaft) so I'll probably prompt for this at MOT in march in that case. Given there are absolutely no intentions to move this car on any time on the horizon, I'll benefit from all preventive maintenance so any hit to the wallet now is a reduction from a 4-figure repair bill later in the worst case.1 point
-
I’d get rid of it. This era of the engine is known for high consumption with sticking piston rings etc. check get mapped/ Peter hawthorn on Facebook1 point
-
1 point
-
1 pointLook carefully at how good winter/all season tyres are in the wet. Some are shocking. Sons got GT radial all season and plenty of grip in wet plus pretty good in snow/cold weather. I generally like to have the same tyres on each axle but have had mixed before with no problems on the rear. Would still match the front ones though. Alasdair1 point
-
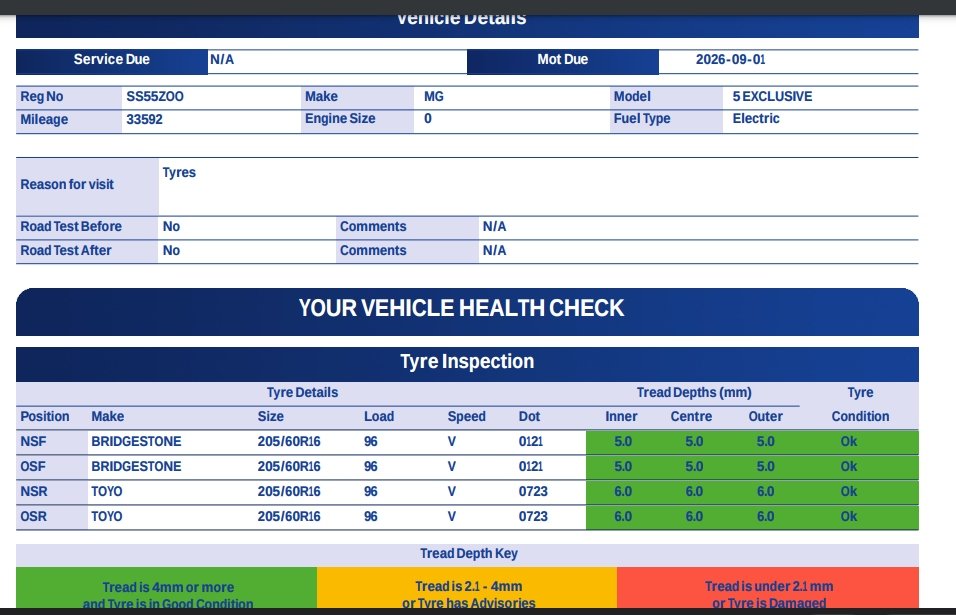
@classic I never ran the Tyres the car came on for long enough, just long ennough to know they were ditch finders. Nearly new Toyo & brand NEW Bridgestone. Binned. (The garage fitted them before i bought the car. ATS Euromaster on the site the Dealership owns.) I would not have used them on the roads i drive & the conditions i drive in. I doubt very much there is any loss of range with the CrossClimate 3,s. If anything they would be more efficient. & regardless of that all that matters is you can get about in snow and in and out of Charging bays because they never seem to get cleared of snow. Over the past winters my experience is ploughs actually make them worse in many cases pushing snow to cause a barrier. .............. The MG5 EV is very keen to spin the wheels. & the steering is very light. Good tyres are essential IMO. The Corsa & MINI were very sure footed on All Seasons in all conditions.
 1 point
 -
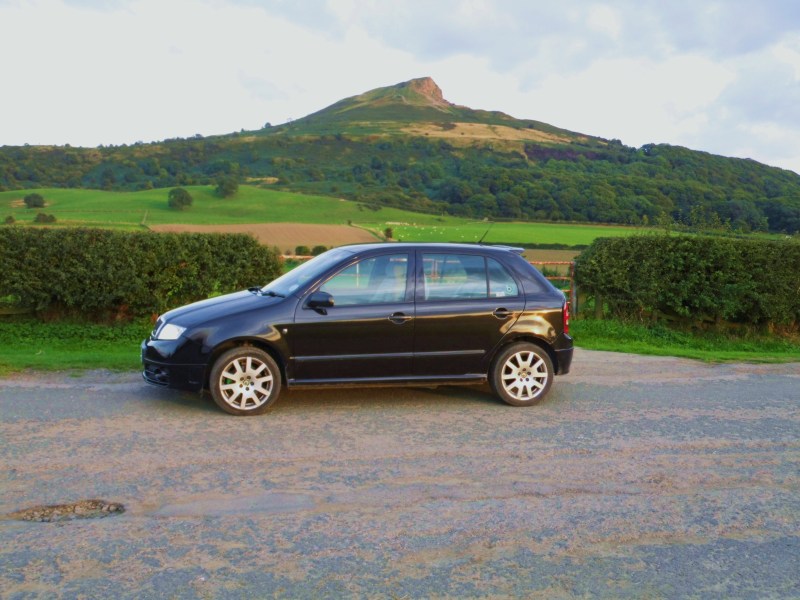
1 pointWow MkI Octy. There's so much stuff about them on here about modding them. Peter Drury, Bowders, Delcac, Beryl's Chief Test Pilot, Monkhai......1 point
-
1 pointThere’s that but still there’s no E marked ones available that I’m aware of Annoying as I’d love them1 point
-
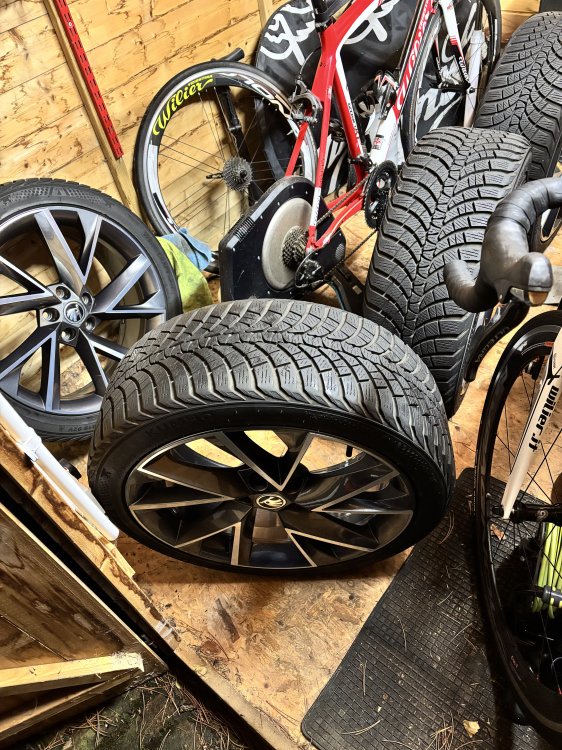
1 pointFound some custom wheel caps on Etsy, 66 to 56mm with a Skoda logo. Very good quality. Ended up with some Volkswagen Sebring rims.
.thumb.jpeg.83f9e92d7cafe205b6155870ebb8665c.jpeg)
 1 point
 -
All Pie in the Sky stuff from a Government that can not organise a p!th up in a brewery but think AI might help them out by 2028. The TV Licencing is a total joke as is the DVLA & HMRC. High time they sorted out vehicles & the Registered Keepers or Vehicles 'In Trade' ANPR can flag up various things like even Registered Keepers being a Banned Driver. Yet so many Uninsured or Untaxed vehicles are still out and about and these days 'E-Bikes that can reach 100 mph & that riders are using and taking the Micheal out of Police Officers. Sur-Ron's & others.1 point
-
But would the higher 50k threshold apply to previously registered EVs, or just ones registered after 01APR26? If not there will be a horrendous slow down on EV sales for the next few months. Edit: Answered my own question, see below from the full budget report: Vehicle Excise Duty (VED) – Expensive Car Supplement (ECS) – The government will increase the Vehicle Excise Duty Expensive Car Supplement threshold to £50,000 for zero-emission vehicles only. This change will take effect from 1 April 2026 and will apply to ZEVs registered from 1 April 2025 onwards.1 point
-
Or alternatively it could be viewed as 'buy an EV and contribute a small amount in a similar way to per fuel duty' 😀1 point
-
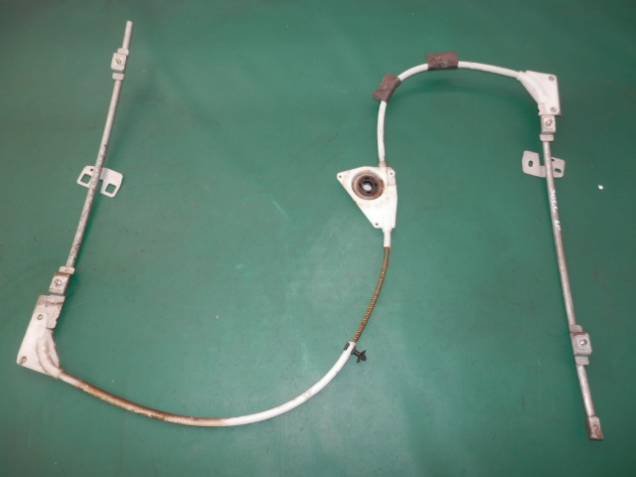
The factory mechanism works by pushing a metal spiral through plastic tube. That plastic tube always snaps on the electric regulator due to poor quality. Manual regulator has thicker and softer tube, so they aren't damaged that often.
 1 point
 -
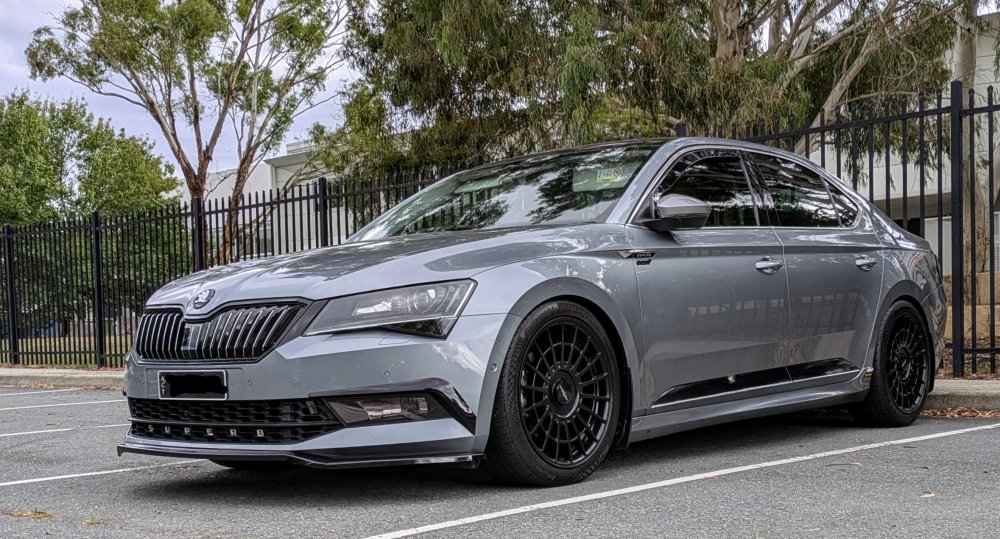
1 pointi had no issues using 15mm spacers with the factory 19x8" (ET44) rims and 235/40/19 tyres. i had slight scrubbing, at the rear only, on full compression when i switched to 245/40/19 tyres. at this point i changed to 10mm spacers. i'm now running aftermarket 19x8.5" (ET35) rims with 245/40/19 tyres - no spacers required.
 1 point
 -
One of the advantages of the Kombi variable-height floor is the storage space beneath it in the raised position - roof bars, breaker bar, torque wrench, tow straps, golf umbrella, etc. all live under there.1 point
-
Copper grease is old school wise (my mechanic father always used to do the same) but the torque settings I think are meant to be a dry bolt so on the face/spigot is good but on the threads isn’t the thing to do any more buddy.1 point
-
1 point
-
1 pointHad a similar knock on my Octavia Front and rear. On inspecting front drop links they seemed solid with no movement. I decided to replace them anyway and only when they were removed discovered they were worn out. Weird thing was I was convinced it was coming from rear but the front ones were the problem. Theres also a dog bone bush that connects the gbox to chassis or perhaps engine mount. If its clonking all the time it may be coming from there. If replacing it watch the bolt lengths. The shorter one on the fabia MK1 goes at rear below rack. If you mix them up you can damage the steering rack. Alasdair1 point
-
Should be possible, pls share VIN so I can check1 point
-
Well, yes, but needs must. I don't want to hit a walker on a dark verge.1 point


.thumb.jpg.9dd3f612ba7f13d10be5c518d3c8d255.jpg)


.jpeg.890eade7bb911dea3f51a5001ae0308e.jpeg)