Leaderboard
-

Lee01
FREEDOM26Points36,412Posts -

chills
Members9Points1,689Posts -
Aspman
Resident Member8Points21,204Posts -
Warrior193
FREEDOM7Points6,420Posts
.thumb.jpg.9dd3f612ba7f13d10be5c518d3c8d255.jpg)


Popular Content
Showing content with the highest reputation on 29/01/26 in all areas
-
Got rid of the last persistent bit of lingering cigarette smell, when looking over my shoulder. It was lingering around the plastic headrest post holes, and I’ve never changed the position of the headrest…I moved it up to discover both metal posts covered in cigarette smoke residue! Just done a 100 mile trip and no more smell!3 points
-
3 points
-
3 pointsThe problem was at the coolant temperature sensor, i changed it and now works good.3 points
-
2 points
-
2 pointsI just mute mine. Regarding the strip under the screen - it took me a long while to work out that you need to slide your finger along it (or maybe it matters where along its length you touch it).2 points
-
2 pointsThis is the main reason to stick with the manufacturer recommended wheel/tyres sizes as they will all give a very similar rolling circumference to ensure you will keep within the homologated vehicle speed calculation. I don't know if you can program non standard sizes via VCSD or OBD11 ??2 points
-
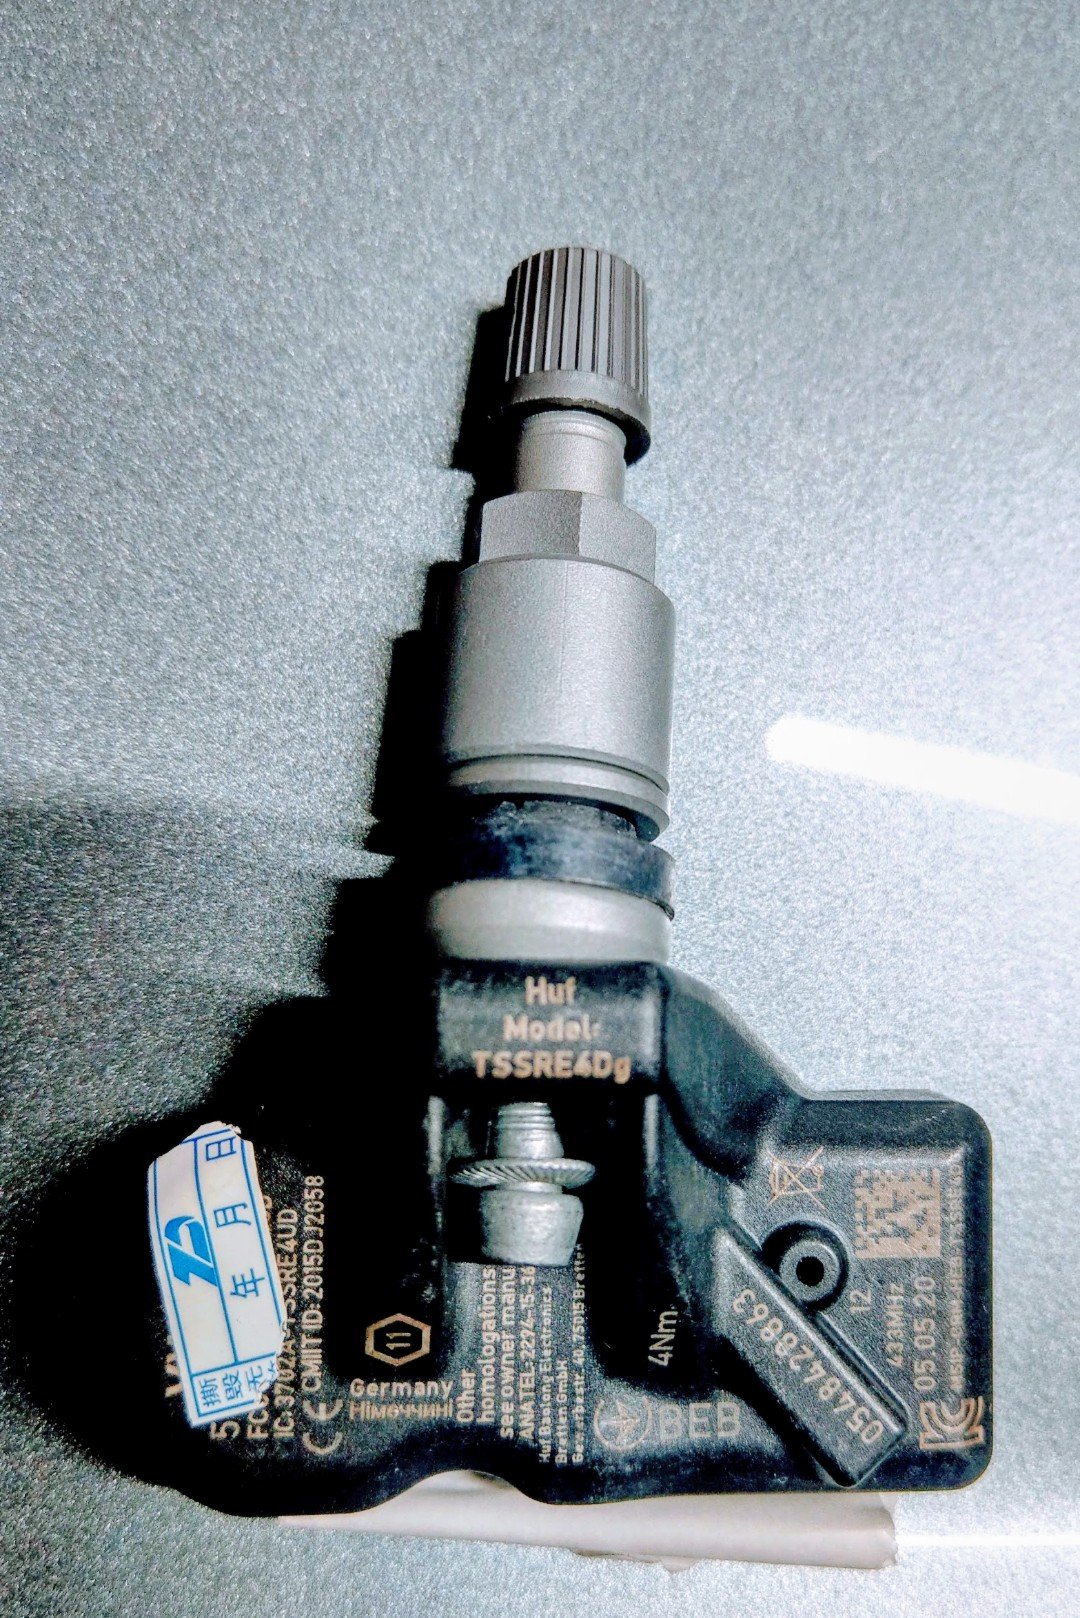
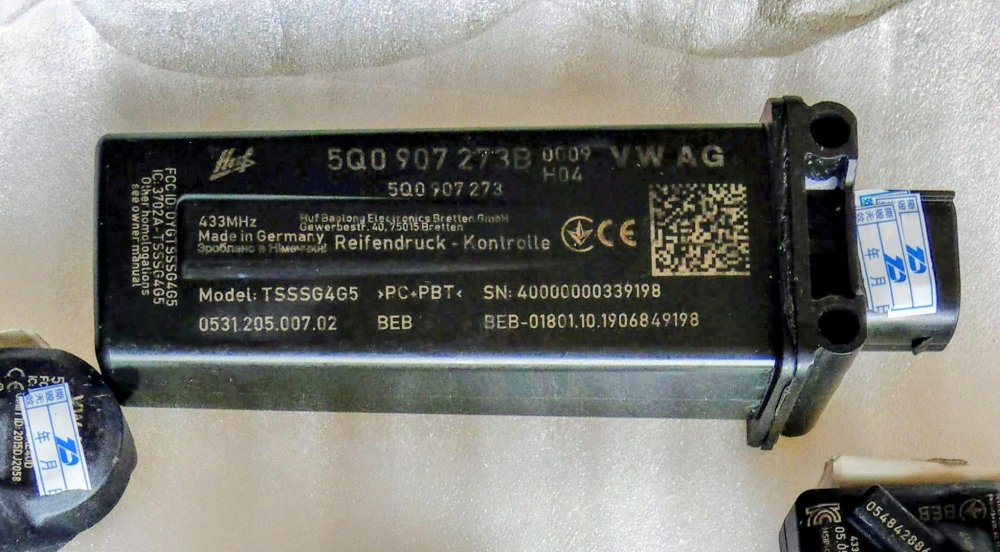
This is the module and sensor I got from AliExpress 6+ yrs ago....looks "original". woOot

 2 points
 -
I just fixed this issue on my Scout. I used an endoscope to look at the flap motors (you might be able to squeeze around the pedals to see it, but it's just easier to use the tool) - for me, there were no issues, and they were moving around fine. The coolant in my expansion tank was a brown, muddy/scummy colour - not the lovely pink it should be. I then purchased: 1x New coolant tank without the silica bag - metalcaucho 03344 from Autodoc - you can use the old tank's lid 1x New heater matrix (double check part numbers before you buy, as there are a few different fitments) 1x 5L concentrate of G12evo (successor to the rubbish G13 coolant) 1x set of hose clamps (amtech 3 piece set) 5x 5L Distilled water 1x Bottle of coolant flush chemical Tools I already had, which you may need to buy if you don't have: Spanners, sockets, screwdrivers, big set of pliers, tin snips, torx bits, a 1 meter rubber hose with an internal diameter matching the outer diameter of the coolant return hose that feeds into the top of the expansion tank, a small victoria clamp to fit around the aforementioned hose, the garden hose connected to the tap (ideally with an adjustable and lockable sprayer on the end), a rubbish towel I don't mind ruining, plastic sheeting to go under the towel, a few buckets, and a tupperware container the wife hopefully won't notice going missing. I started by warming the engine up to operating temp, you can do this by driving around or just idling. Once at temperature, I disconnected the coolant return hose, put it into the rubber hose and secured the victoria clamp to prevent it from leaking - I then ran the rubber hose into a buckets, and let the engine run. The old coolant ran into the bucket, and I topped up the expansion tank with the garden hose, occasionally changing which bucket the hose emptied into so I could monitor the colour of the water coming out of the car. Be aware that if the water level in the expansion tank falls below the sensor, the car will sound an error on the dashboard. You don't have to worry about this as long as there's always liquid above the feed hole at the bottom of the tank. Once the worst of the discoloured water had stopped draining, I then reconnected the return hose to the tank and added the coolant flush - I let this run through for 20-30 mins. Whilst the coolant flush is doing its thing, it's a good time to prepare the heater matrix for replacement by removing the glovebox, footwell vent, centre console side panels and heater matrix retaining clip. BodriG has a good video on this, along with the rest of the heater matrix replacement steps: https://youtu.be/oHfQ_27dDRM?si=Rnah_XBRDNAvrNV5 Once the coolant flush had done its thing, I reconnected the return hose to the rubber drain hose and continued draining the coolant into a bucket and topping up the coolant tank with tap water. After the coolant had started to run clear again, I turned off the car and installed the new coolant tank and heater matrix. Once I had replaced both items, I then continued the flushing process, except this time topping up the tank with distilled water. I kept 1 bottle of distilled water to the side for mixing with the coolant, and once I'd used up the fourth bottle of distilled water, I then used the coolant concentrate to top up the tank - using 4 litres from the 5 litre bottle. Once I'd put 4 litres of coolant into the car, I reconnected the return hose to the coolant tank, reattached all hose fixings, and all was done! I also poured the remaining distilled water into the remaining coolant concentrate, such that I now have a bottle of readymix coolant to top the car up if required (I used a bit of this readymix to top the tank up to its correct level after I reconnected the hoses) Cleaned up all the mess I had made, and now my car's heating is lovely and toasty warm on both sides. There are videos on YouTube which run through the processes as well.2 points
-
1 point
-
1 pointDunno about Carista, but I switched off lane assist (remember last setting) using OBD11, plus did a few other simple mods which enhance the pleasurability of everyday use of the car for me personally.1 point
-
1 pointI had an Arteon from new in 2021…it’s front suspension creaked not long into ownership, and sounded awful when it was running in EV mode, you could hear every creak and squeak! With regards to top mounts, we replaced the shocks on my wife’s Smart last summer; 7 years old with less than 20k on the clock. One of the top mounts fell apart and dropped ball bearings everywhere when we removed the shock, and both front shocks could be pushed down by hand!1 point
-
1 pointHello everyone on this forum. I'm from Upper Silesia. I already have my second Fabia. I named it TurboFabcia. I've been a Skoda driver for almost 15 years. I hope our collaboration will continue well. I wish everyone all the best. Tomus.1 point
-
1 point
-
1 pointThere'll be a fuse somewhere, it'll just be shared with other things. I tend to just continuity test them all one at a time in situ1 point
-
1 pointI have a 2024 Kamiq so similar sat nav I presume. Have you checked preferences as you may have ticked to avoid certain road types, also if you select quickest route it will divert you round road works, traffic jams etc so may take less obvious routes. Is your map software the latest, believe mine is now on 26.1 so must have updated recently OTA. Also must add I’ve never experienced the problems you seem to be having.1 point
-
1 pointChalk and Cheese. MK3 Scout 2013-2016 had slightly juggly springs. Can be corrected with 2017-2019 Scout springs (revised MK3.5 Scout). It is +10mm higher than standard. VRS 2018 revised MK3.5 springs - firmer than standard - less roll. VRS has 10mm lower than standard ride height.1 point
-
1 pointOn the steering wheel are several buttons and a silver scroll ‘wheel’ on each spoke. The left one of these is the volume; scroll it to increase/decrease the volume or click it to mute. Also, under the infotainment screen is a touch sensitive bar, it is also a volume control.1 point
-
1 point
-
1 pointI'm bsw and for sure the egr and egr cooler comes off before the turbo and exhaust manifold afaik all 1.9TDI are like that. On every design I've seen the egr cooler bolts to the exhaust manifold. That's what the three bolt holes are for on any 1.9tdi exhaust manifold online. I think it's one of those that looks harder than it is. Once the intake and egr are out the way it's a case of three bolts on the back of the egr cooler to take it off the manifold and I think 3 bolts on egr itself aswell as 2 bolts for egr connection pipe afaik there is only 8 bolts once you've got the intake and various intake pipe work off. That said, snapping bolts could be a PITA. I've done worse TBF though1 point
-
1 pointYes I had a set of Michelin C/C 3 sport fitted last year and the difference is like night and day. Standard tyres from the factory had poor traction and road noise. But I did get 35K out of the Bridgestone's with a some left when I changed them.1 point
-
1 pointRotate the spring as it may not be seated properly - I have had OEM Arteon Top mounts fitted aswell to in the quest to removing the creaking, but after fitting them i was still getting it, so took it back and got them to rotate the spring and it worked.1 point
-
For examble https://ovoko.de/gebrauchte-ersatzteile/tan254339-5q0907273b-volkswagen-t-cross-steuergerat-reifendruckkontrolle-rdk1 point
-
1 pointOn previous Skoda turning off the rear wiper when reversing option stopped the intermittent rear wiper operation. Just meant you have to flick the rear wiper if reversing, a small price to pay for the annoying rear wiper operating when not required, especially when it does it on a dry rear screen.1 point
-
I just meant that's where I found the height adjustment for the drivers seat, obviously this didn't relate to your car, or the seat has been changed. Just to see the mechanism and be able to perhaps zoom in and see any faults or jams there. I can't think the seat frame is so close to the floor and you have deep enough carpet pile to restrict or make difficult the seat movement as I've experienced in a display car and my mates when he had it reuopholstered. You've a good suggestion of trying to loosen the bolts and see if that free things up, perhaps there is some sort of twist in the frame(s) or rail(s) or you introduced one. Driver's seat tends to be most worn for obvious reasons. As you put it was fine before so I'm sure it can be again. Good luck.1 point
-
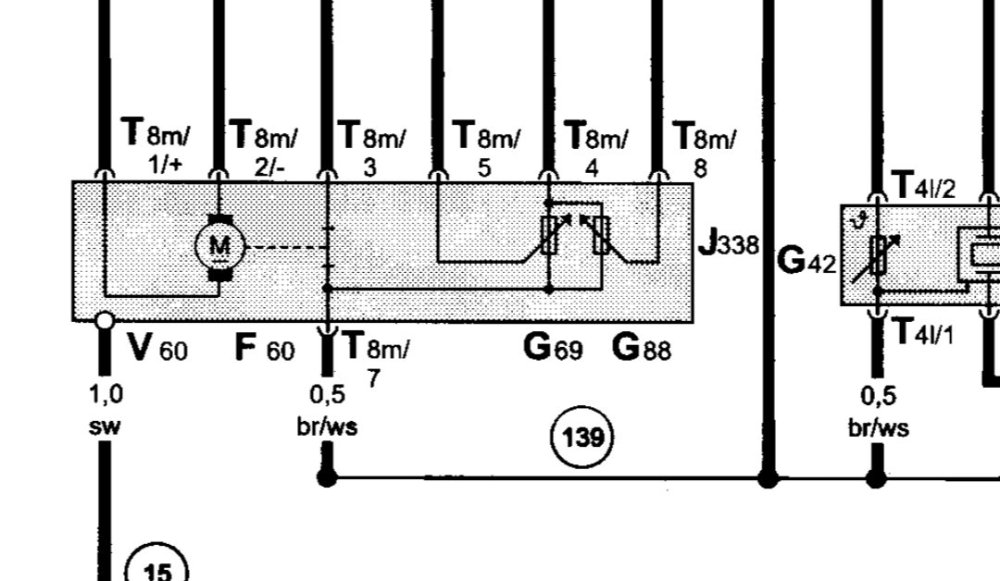
According to schematics, pins 1 and 2 are for actuator. Potentiometer pins are 4, 5 and 7 for absolute position and 4, 8 and 7 for idle position (two potentiometers, 7 is common ground, 4 is common voltage input from ECU and 5 and 8 are outputs of each potentiometer). The engine on the photo is EA827. Felicia has an entirely different engine, EA111, which was derived from 0.9-1.3 engines used in Polos.
 1 point
 -
1 point
-
1 point
-
The ''dark area" is factory, not artificial. I have seen in the past ''crystal clear'' aftermarket lights in CZ stores.1 point
-
1 pointI really can't see that working out, the sheer amount of power needed to charge those trucks is massive and its fine saying that will have those charging locations at roughly 4.5 hours distance from each other to coincide with the legal driving hours of a truck driver. That does not take into account of where the truck starts its working day and or the traffic/weather/road conditions etc all of which will have massive impacts on the distance travelled in that 4.5 hours from their starting location. Take 2 of the top 15 truck fleet operators in the UK, Eddie Stobbart and Turners of Soham who have almost 6,000 HGV's between them, if they all get plugged in to charge overnight, then those 2 operators alone will take as much power from the grid as 2 cities the size of Birmingham takes. So 2,700 HGV's (Eddie Stobarts fleet alone) @ an average of 200KWH charging speed equates to a staggering 540MW per hour. The city uses daily 13,424.6MW so divide that by 24 gives a figure of 559MW per hour. It is estimated that drops to 30% at night, that drops to approximately 168MW per hour, these figures are not allowing for heating, so add on the HGV total charge per hour, 540+168=708MW. Bear in mind that there will be some element of solar energy supplied during the day, zero at night, so the extra energy will no doubt come from fossil fuels before Hinckly Point C comes online in about 10 years time but it will only supply 3,200MW so we still need many more stations to power the massive demands of electric road transport if the above figures are correct, and they only allow for just 1 fleet of 2,700 HGV's. Bear in mind that there are approximately 742,000 HGVs registered in the UK currently and this is growing. Edit to add some more precise info on some electric trucks. i.e., Volvo have battery capacities to 565 KHw and designed to charge from DC chargers 250KW to 350KW, full charge on 250KW in 2.5 hours or 350KW in 90 minutes and has a range of upto 300Km or 180 miles, so roughly London to Sheffield (140miles). So that trip would require a minimum of 90 minutes to recharge for the return trip, and that is twice the time normally allowed for a drivers break by law, which is 45 minutes after 4.5 hours driving.1 point
-
Hi, Pay attention, that an axle set doesn't contain 4 identical brake pads. Inner and outer pads are different.😉1 point
-
1 pointRear brakes seem to go earlier as they get used for ACC; but that tends to be pads rather than discs. I’d had a similar experience re soft brakes but they just needed bleeding again. Worth a look at that bit good it got sorted. Belts - not sure about. Petrol is chain so nothing to consider but plenty will advise I’m sure.1 point
-
Thanks. Not a reflection, that's how it always looks. I'll let the dealer know that this could be the issue.1 point
-
Unless it's just a reflection, that round sensor looks wrong and could be the problem.1 point
-
The damn fools have put the A45 spoiler on the wrong end!1 point
-
1 point
-
Pay €8 for access to Erwin. You can get full spec and option codes. And also download all the service and repair manuals. Service history you would need to approach a dealer to get them to download it for you.1 point
-
I didn't update my previous Superb post recently but my car is 2 years old now and booked in for the 60k km service next week. The oil consumption is still high but has remained constant at ~1L per 7000km. The garage will again check for signs of oil in the usual places but I assume they will say all is fine & higher consumption is normal with this engine & 0W30 oil.... They suggested that going back to 5W30 might improve the situation but advised against it until the warranty was over in case there was really something wrong which I wanted to claim against the warranty. As the car is running fine, I will probably stay with the standard oil. I've found it around £40 for 5L so pick up a tub each year I come back to the UK. My fuel economy is good for the DSG 4x4 (5.8-6l/100km) so I'm happy to accept the explanation of the dealer so far. Gabbo1 point
-
I totally understand the logic of getting 4 done at the same time with regards to removing the inlet manifold. But it’s a taxi and it’s just a question of cash flow unfortunately.1 point
-
1 pointThe Expensive tool as in as was @ £3,000 back in 2019/20 & when even some main dealers did not have it is no longer that expensive. & they can be hired. It is involved removing parts to replace the Cam Belt 1.5 TSI ACT. The belt can be inspected without all the work...1 point
-
SORTED! The battery has been replaced and the car is back on the road 👍 Cheers all!1 point
-
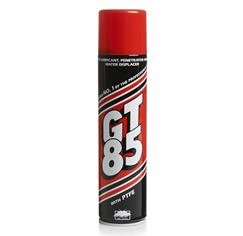
1 pointIt's the might in that sentence that I'm surprised at. If you got 7 years out if the car and only had this issue you have got away lightly in my experience of my wife's (not mine) 2016 Fabia. It might not be quite as bad as HereBeBeasties had it (do Fabias have sunroofs?) but that depends on the source of the leak and how far the water has run or wicked. HereBeBeasties gives a good idea of what it can entail. I'd not bother with a wet 'n' dry vacuum unless you really want or need one, things can still be done without power tools, synthetic type chamois and sponges can get the water out after soundproofing had dropped and dripped water inside cabin. Alarm going off could be as described or other. Let us know how you get on and how much water and effects of water you find. If you get GT85 it's a longer lasting lubricant (than WD-40 Multi-Use), good penetrating/releasing fluid, water disperser and smells nice. - https://gt85.co.uk/
 1 point
 -
1 pointI’ve added it to my favourites bar (top left of the screen in the picture above). Easy to turn it off when parking…1 point