


Leaderboard
-
MikeTheThinker
FREEDOM14Points8,484Posts -
Gaz
FREEDOM12Points7,749Posts -
.jpg.1006585dfe4e2977315b67c3d642e37b.jpg)
Guest_
FREEDOM11Points83,824Posts -
Warrior193
FREEDOM10Points6,281Posts


Popular Content
Showing content with the highest reputation on 24/04/24 in all areas
-
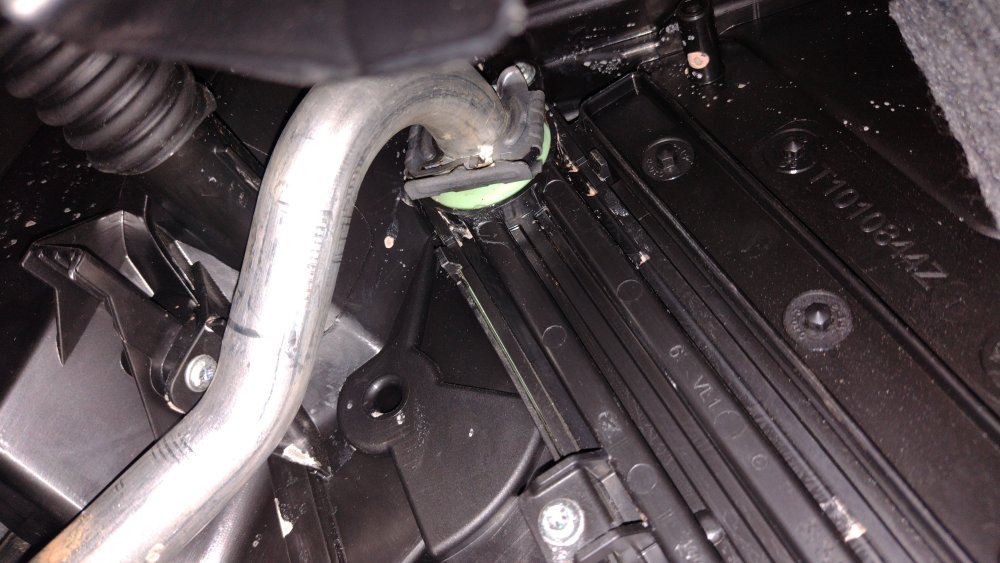
Possibly a faulty new matrix, or the coolant pipes have not been seated on to the matrix correctly - IMO. Either way I'd be taking it straight back to the repairer. Gaz I found this video quite helpful in terms of seeing what's what:3 points
-
3 pointsYou need to have access to a battery charger - preferably one of the modern 'smart' chargers. The battery can be charged while it is still fitted to the vehicle, but it is important to attach the negative charger lead to the correct tag which is located on the engine compartment firewall.3 points
-
3 pointsFour teeth of slippage sounds like major damage that will require a major rebuild. Dubious that it's worth it. Probably cheaper to swap a known good engine in, trouble being finding one that's known to be good at a decent price.3 points
-
3 pointsSounds like your 12V battery is too low to start the car, so I suggest you connect a charger to the 12V battery.3 points
-
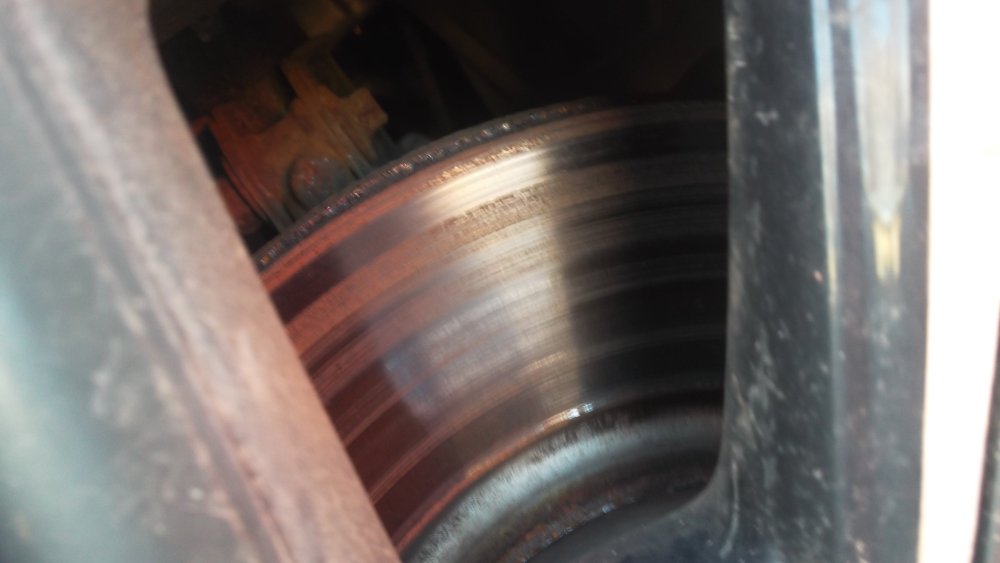
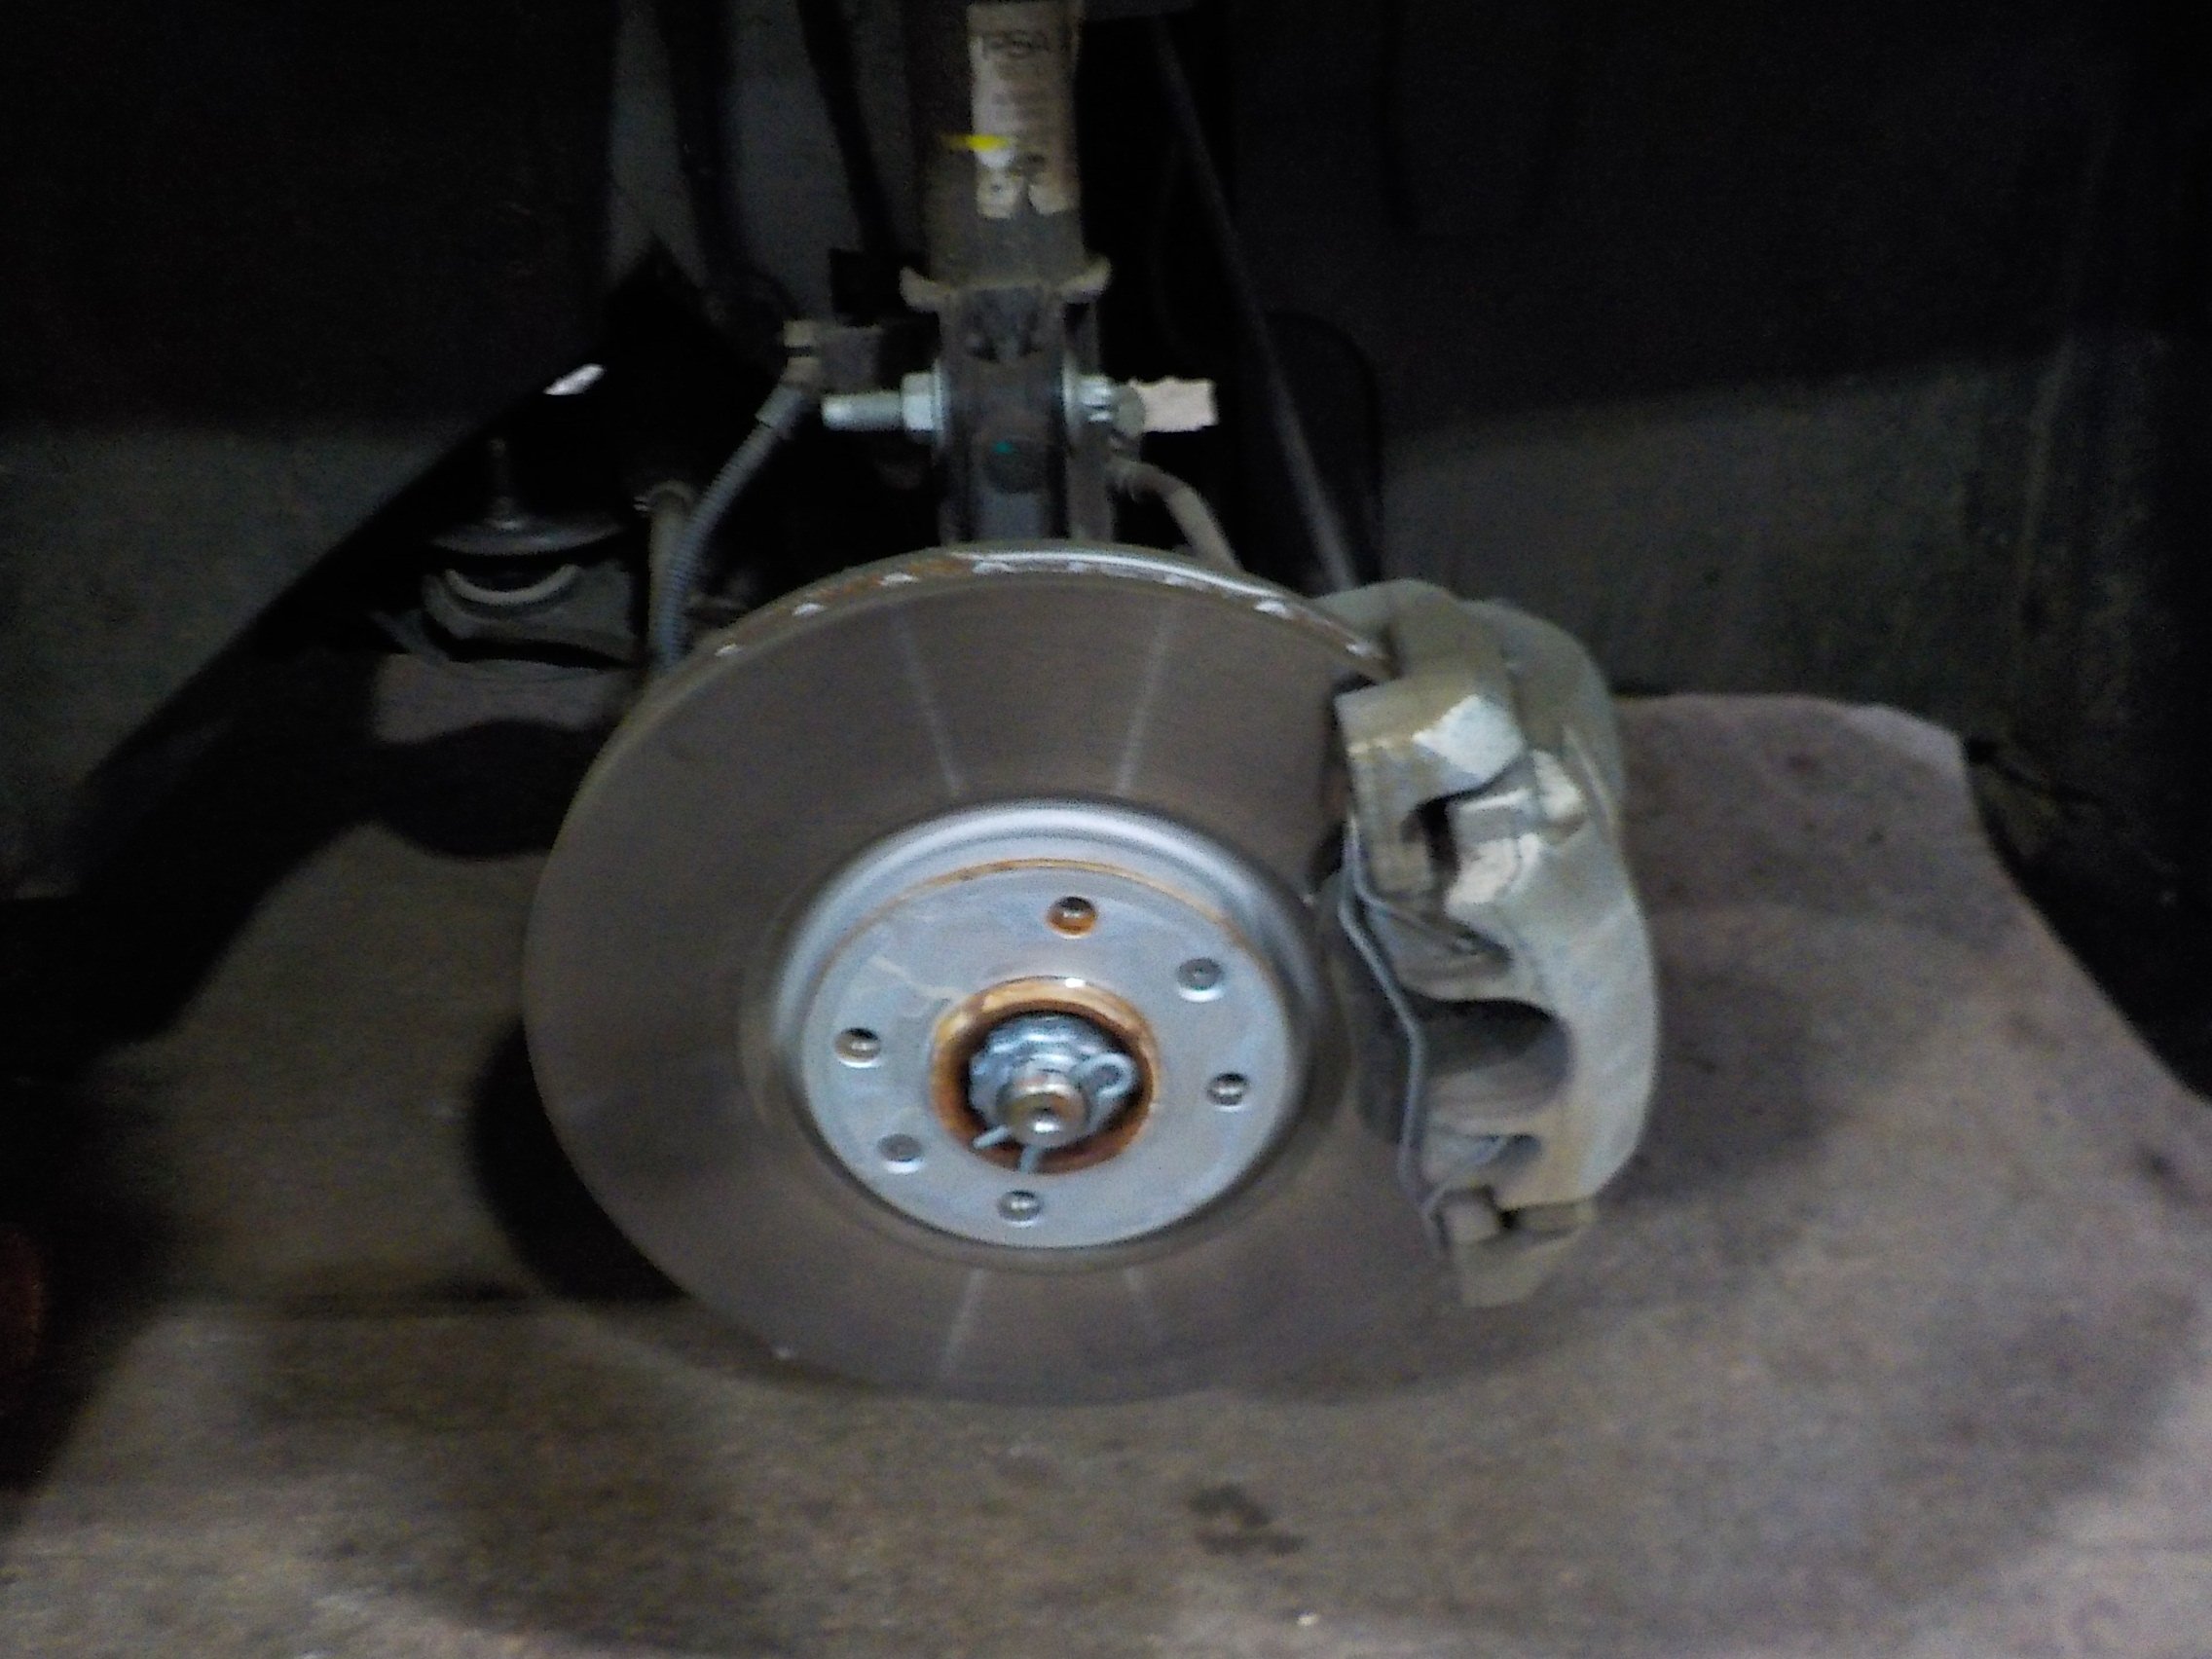
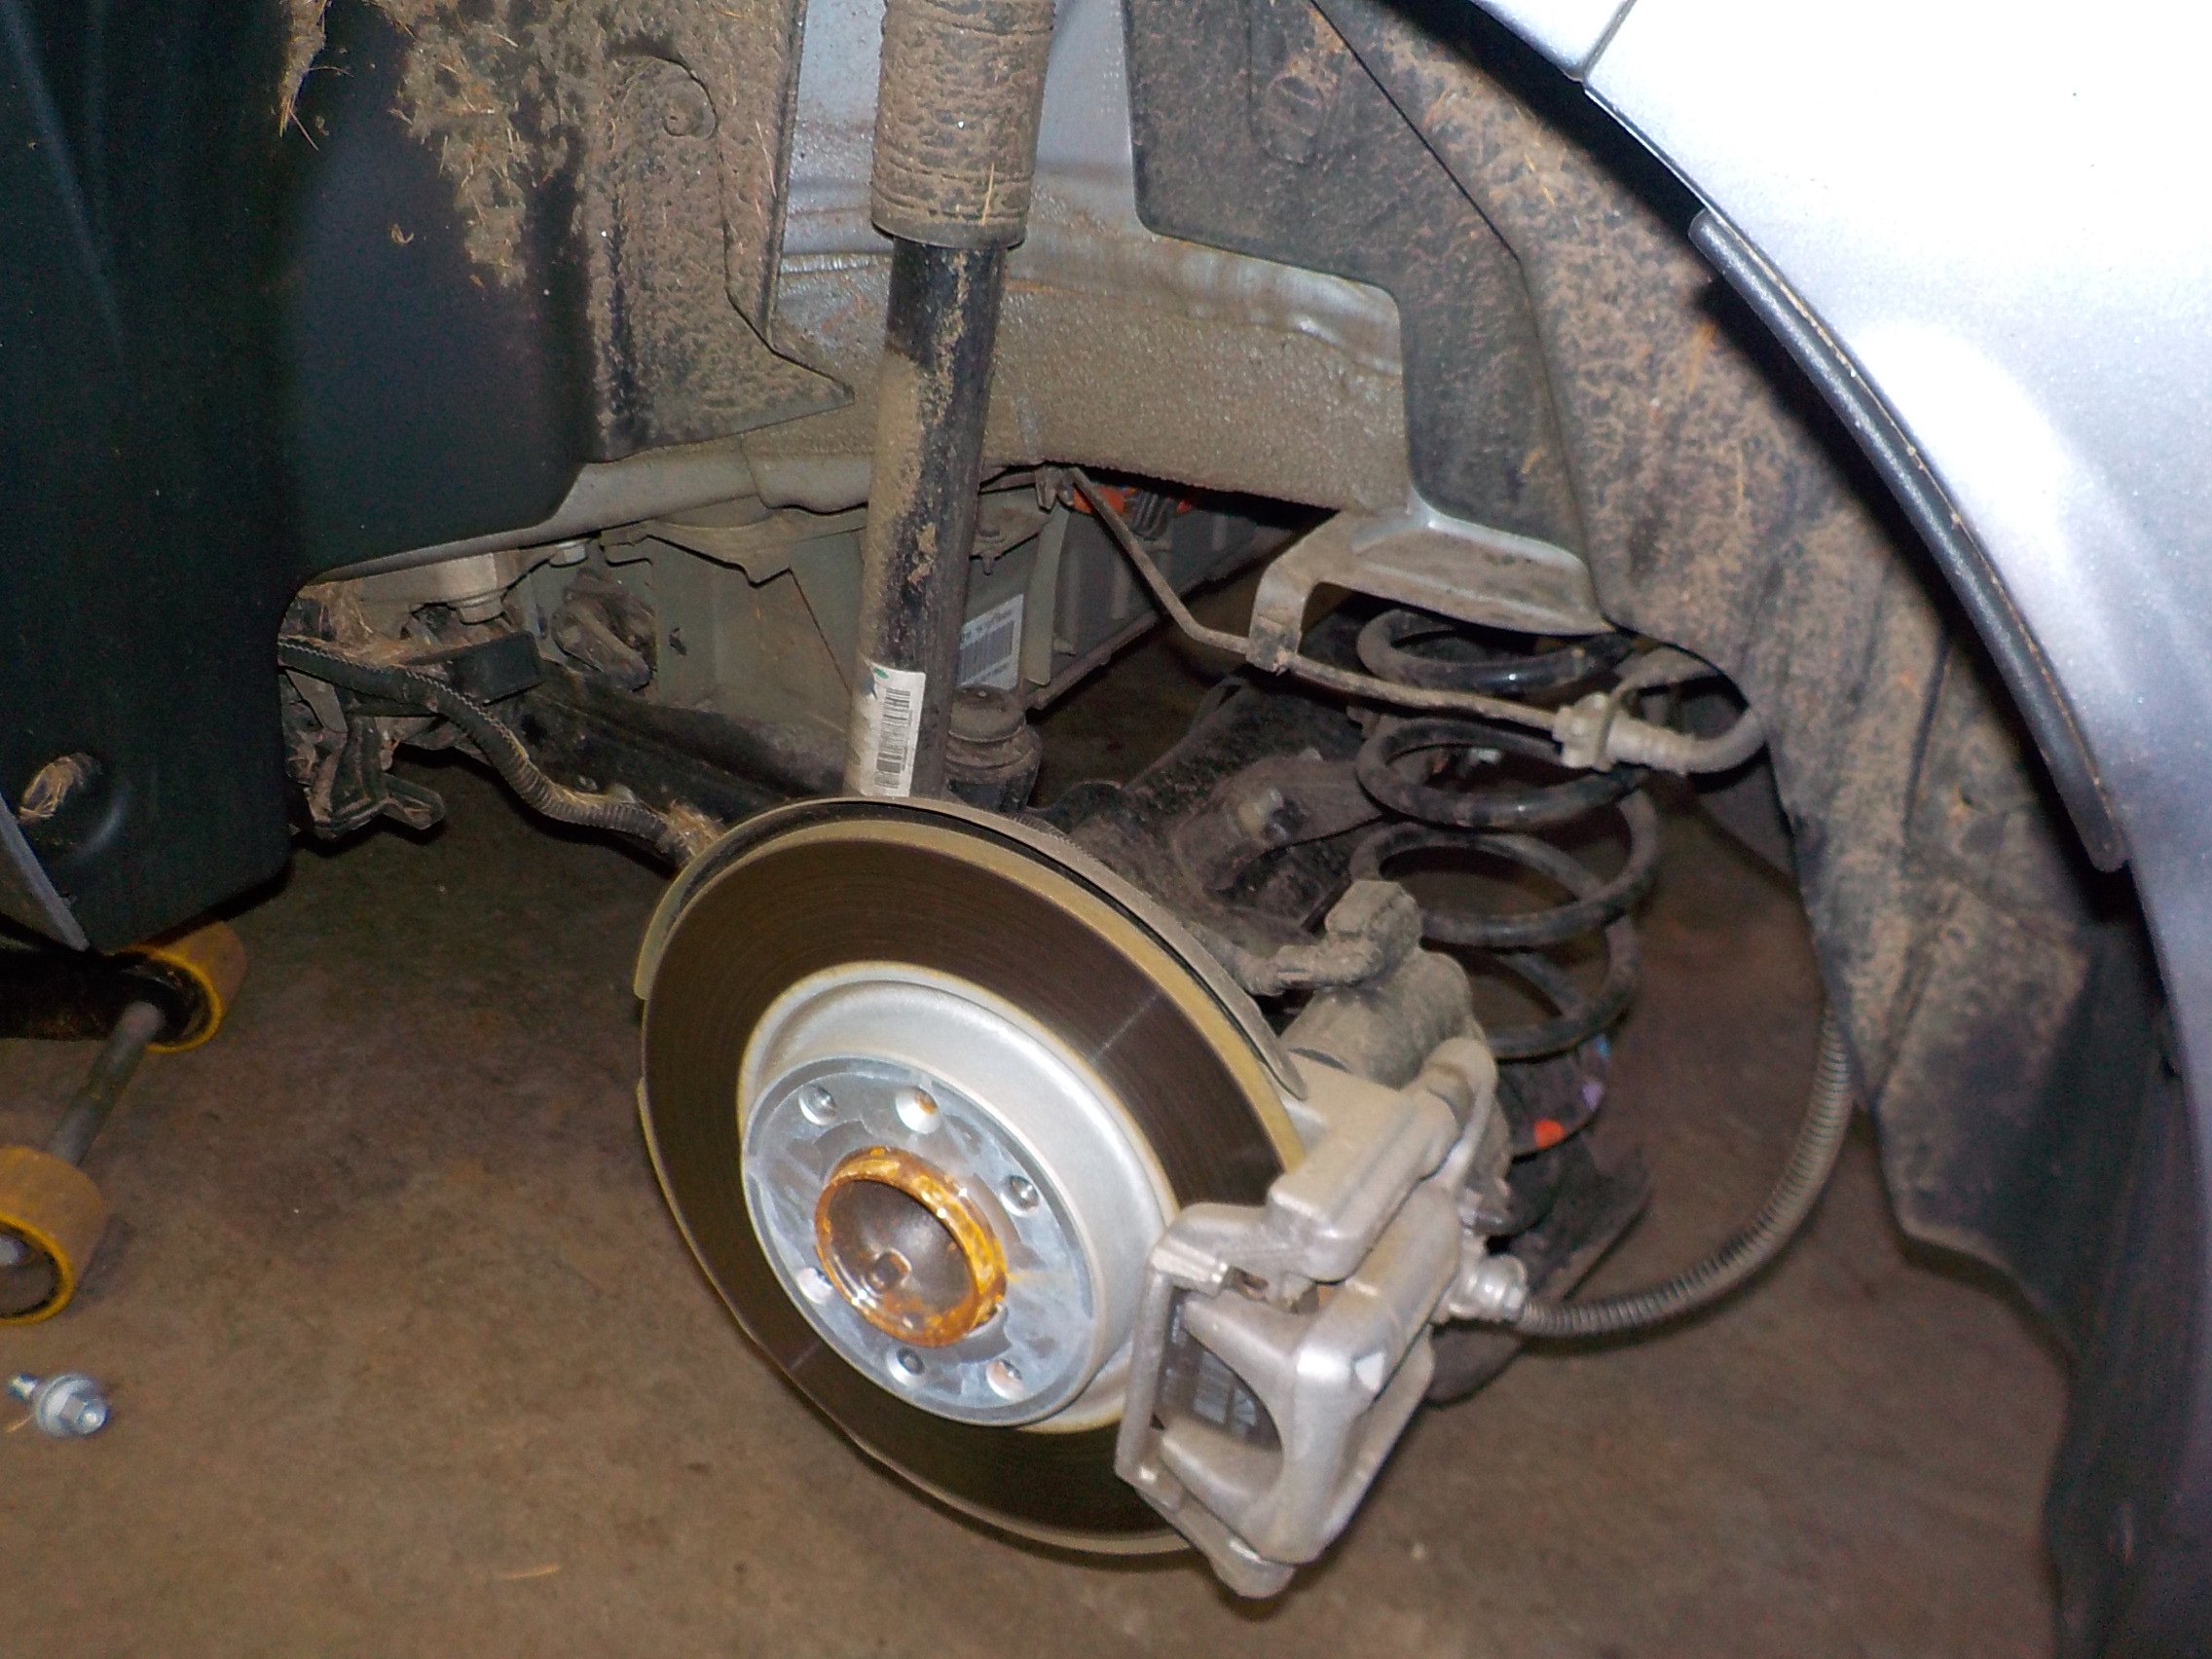
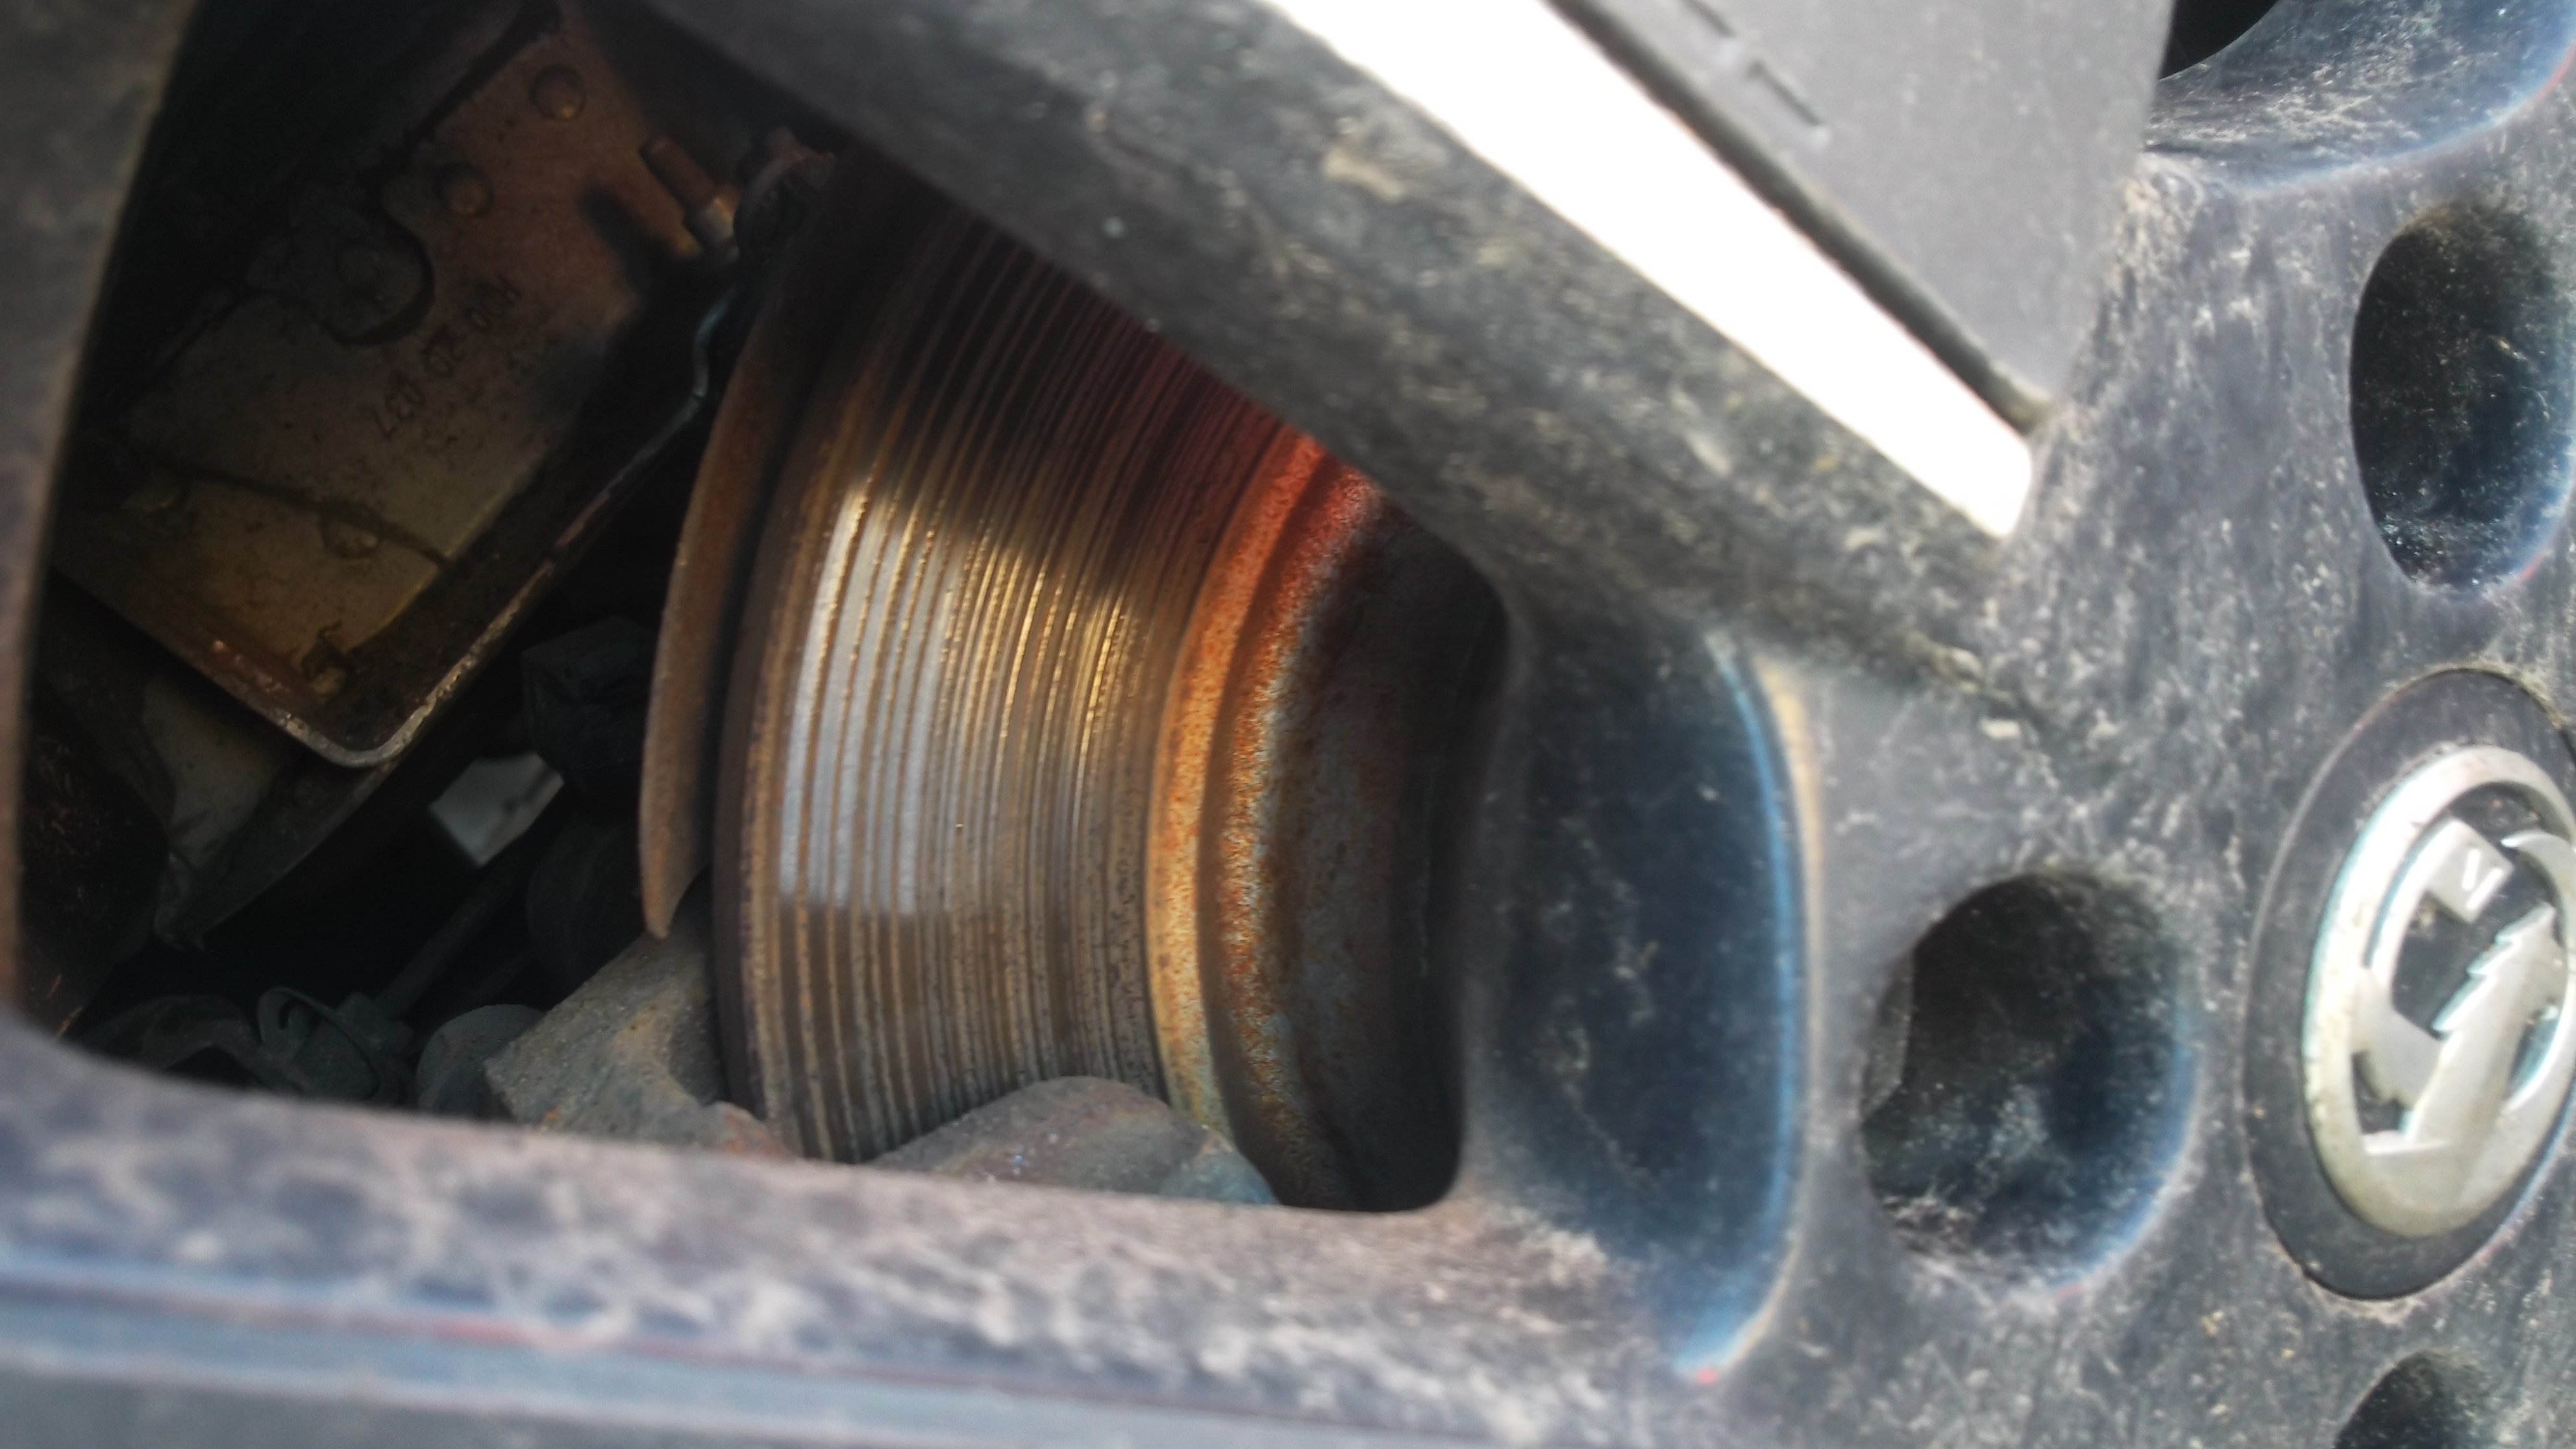
What a load of b0ll0cks on BEV brakes. Some quality brakes might be lasting longer, front discs and rear drums, rear wheel drive or all wheel drive. But then there are all BEV, from Stellantis when there is cars are built on the same platform as the ICE cars and have they same brake parts, pads & discs that rust and need replacing not from doing miles, but not getting used much with the brake pedal and the e-brake not really usable to clean them off. The pads are getting some wear and there is lots rust dust. My Vauxhall Corsa Electric got the 3rd set of discs fitted before going to a new owners after it's 1st MOT. Just the same crap as fitted to ICE cars. As they were when OEM tyres were changed a week after i got the car, and then like ****e beforethe first winter was over,


 3 points
 -
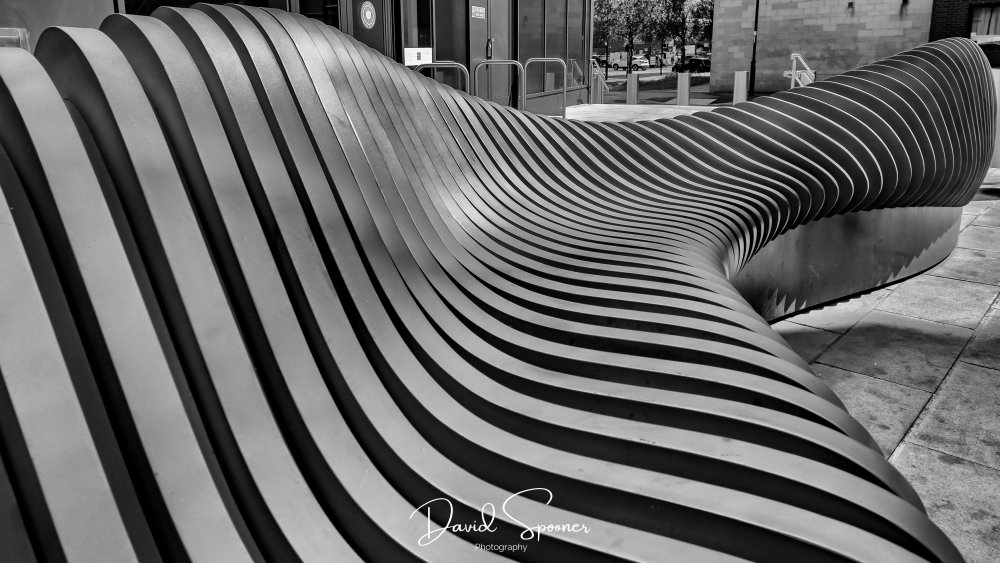
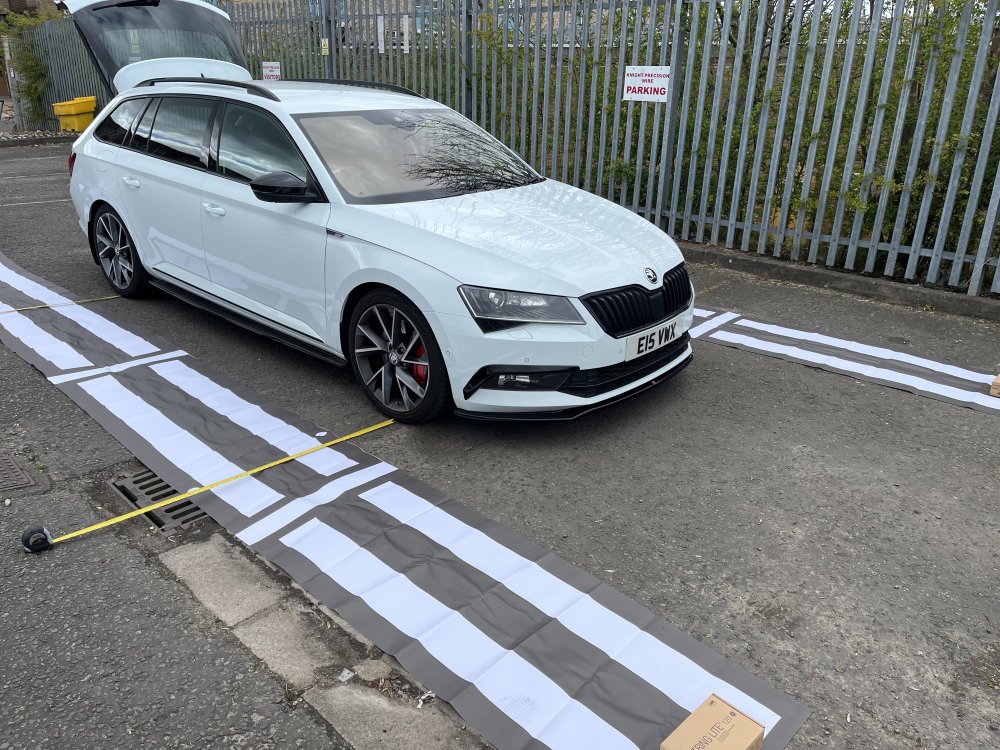
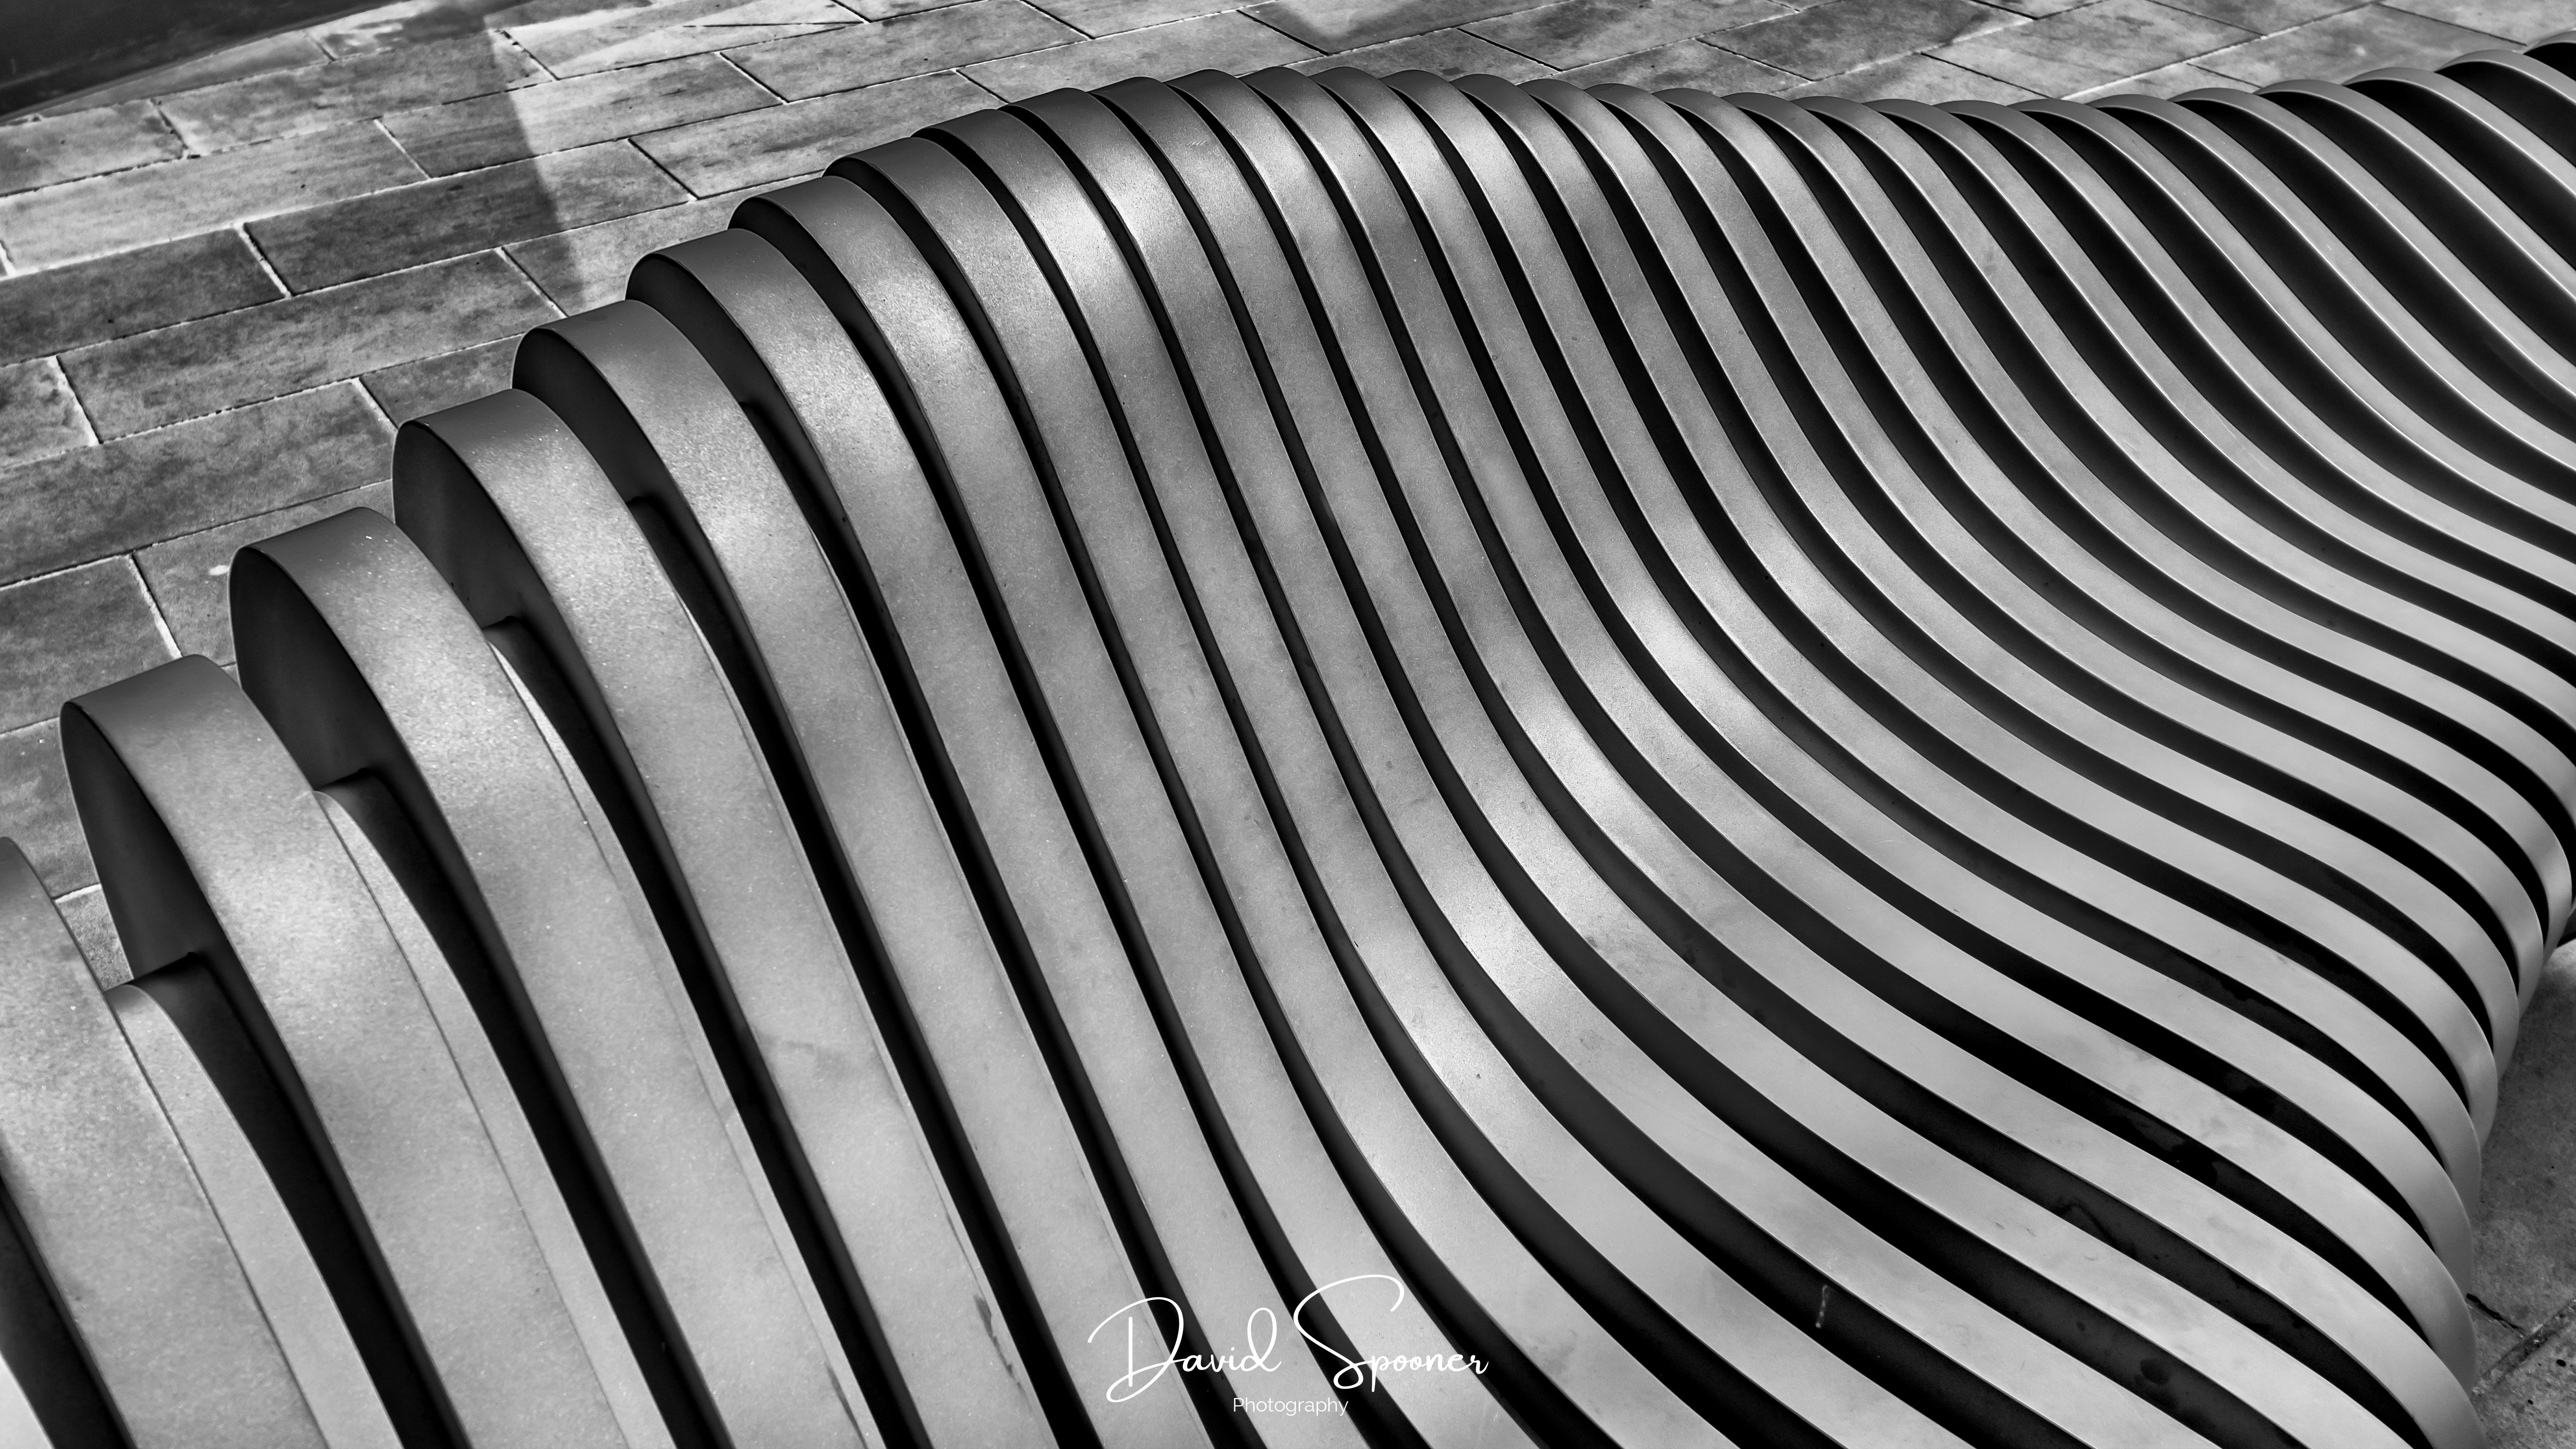
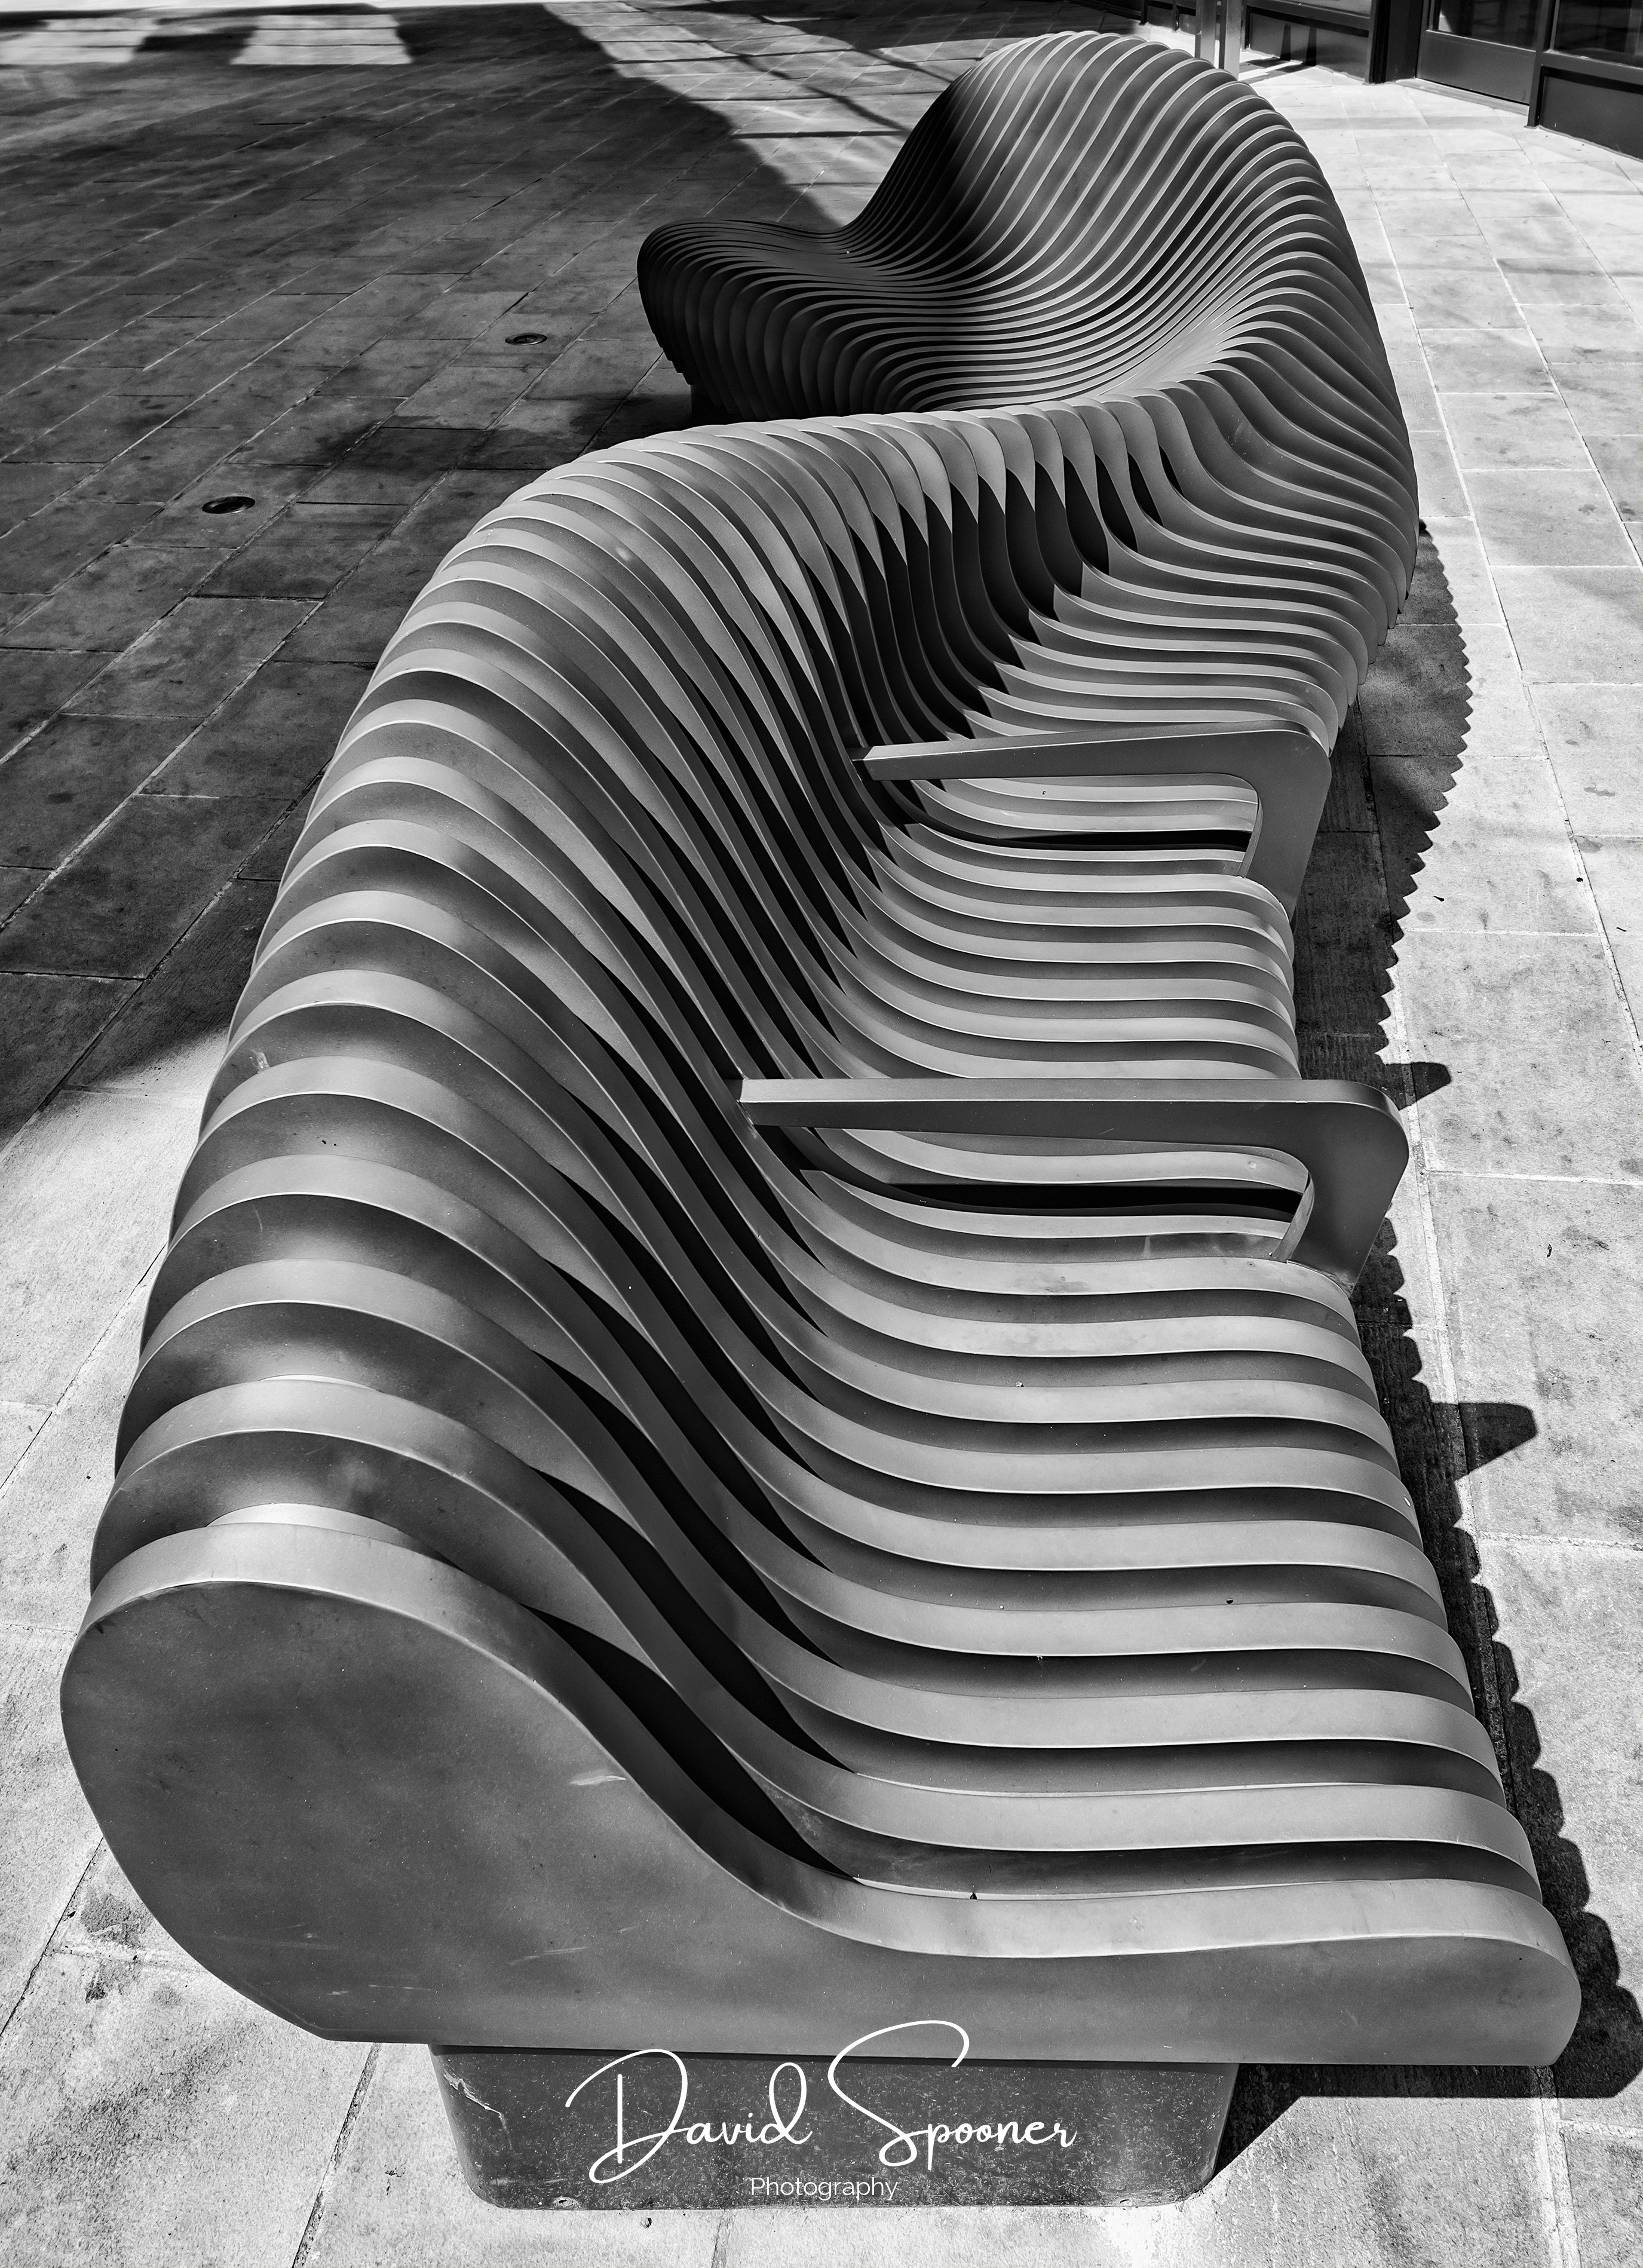
3 pointsA few I got in New Era Square in Sheffield a few years ago. The lines caught my eye.

 3 points
 -
Another MOT pass today but only after a fail! Supposedly one of the LED brake lights wasn't working. Mechanic asked which one and of course they were working fine! Seems it was a one man MOT and he was using the mirrors to look for reflections, in bright sunlight!! Timing belt and water pump changed, rear discs and pads changed, whatever service it was due done. I'll adopt the required position when the bill arrives!2 points
-
2 pointsQuick walk around the Res this evening (think it was a little too late to spot any ducklings sadly)...............


 2 points
 -
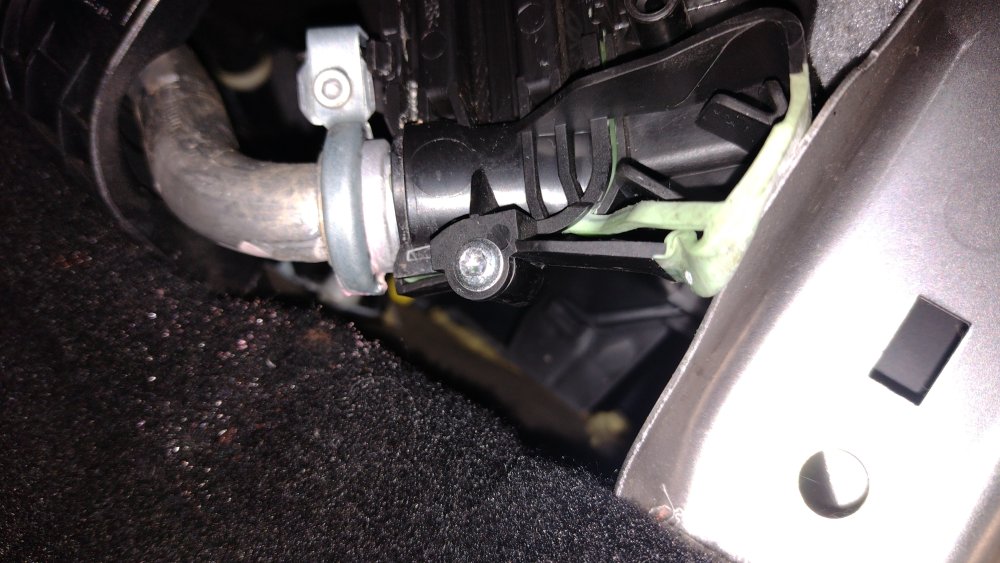
This is what I found after removing the panel. The new heater matrix and red spray just where the carpet is soaking.
 2 points
 -
I had a few hundred km on the road today and I used the time to play with the ventilated seats ... you really have to be paying lots of attention to hear them ... in any case a great addition. I remember as a teenager toying with the idea using a PC fan installed somewhere and put it in my dad's 405 🤪 Then I read in a magazine Saab put them in the 9000 (I think it was) and I thought they stole my idea 😝2 points
-
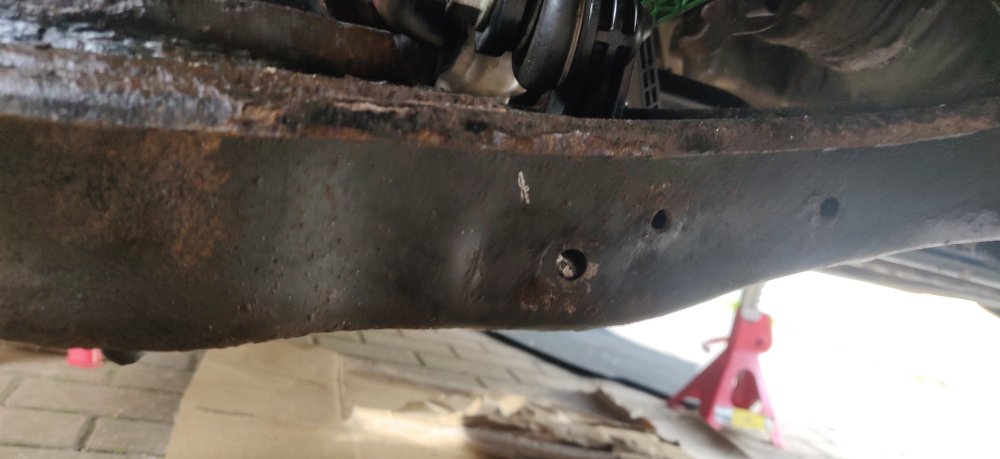
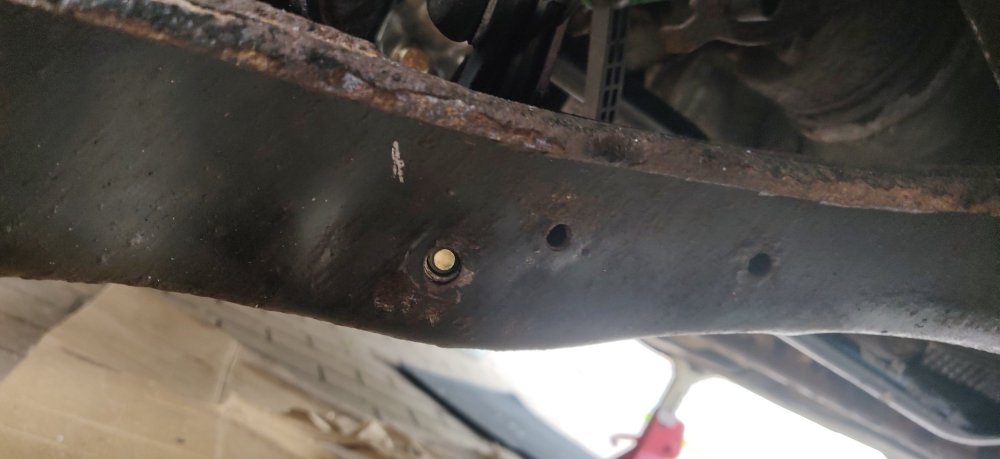
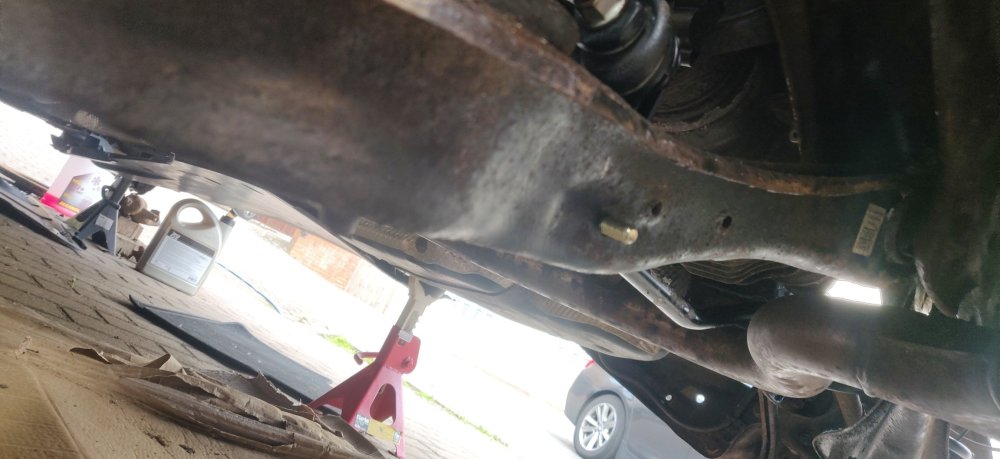
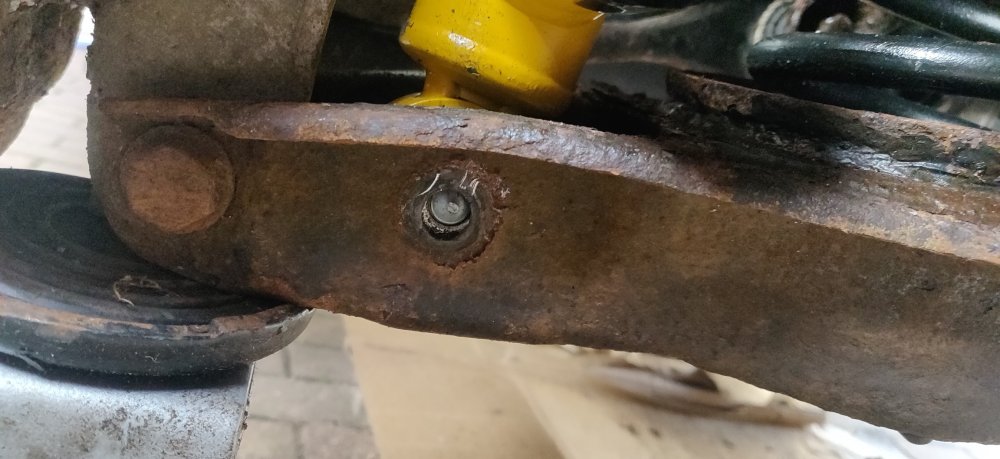
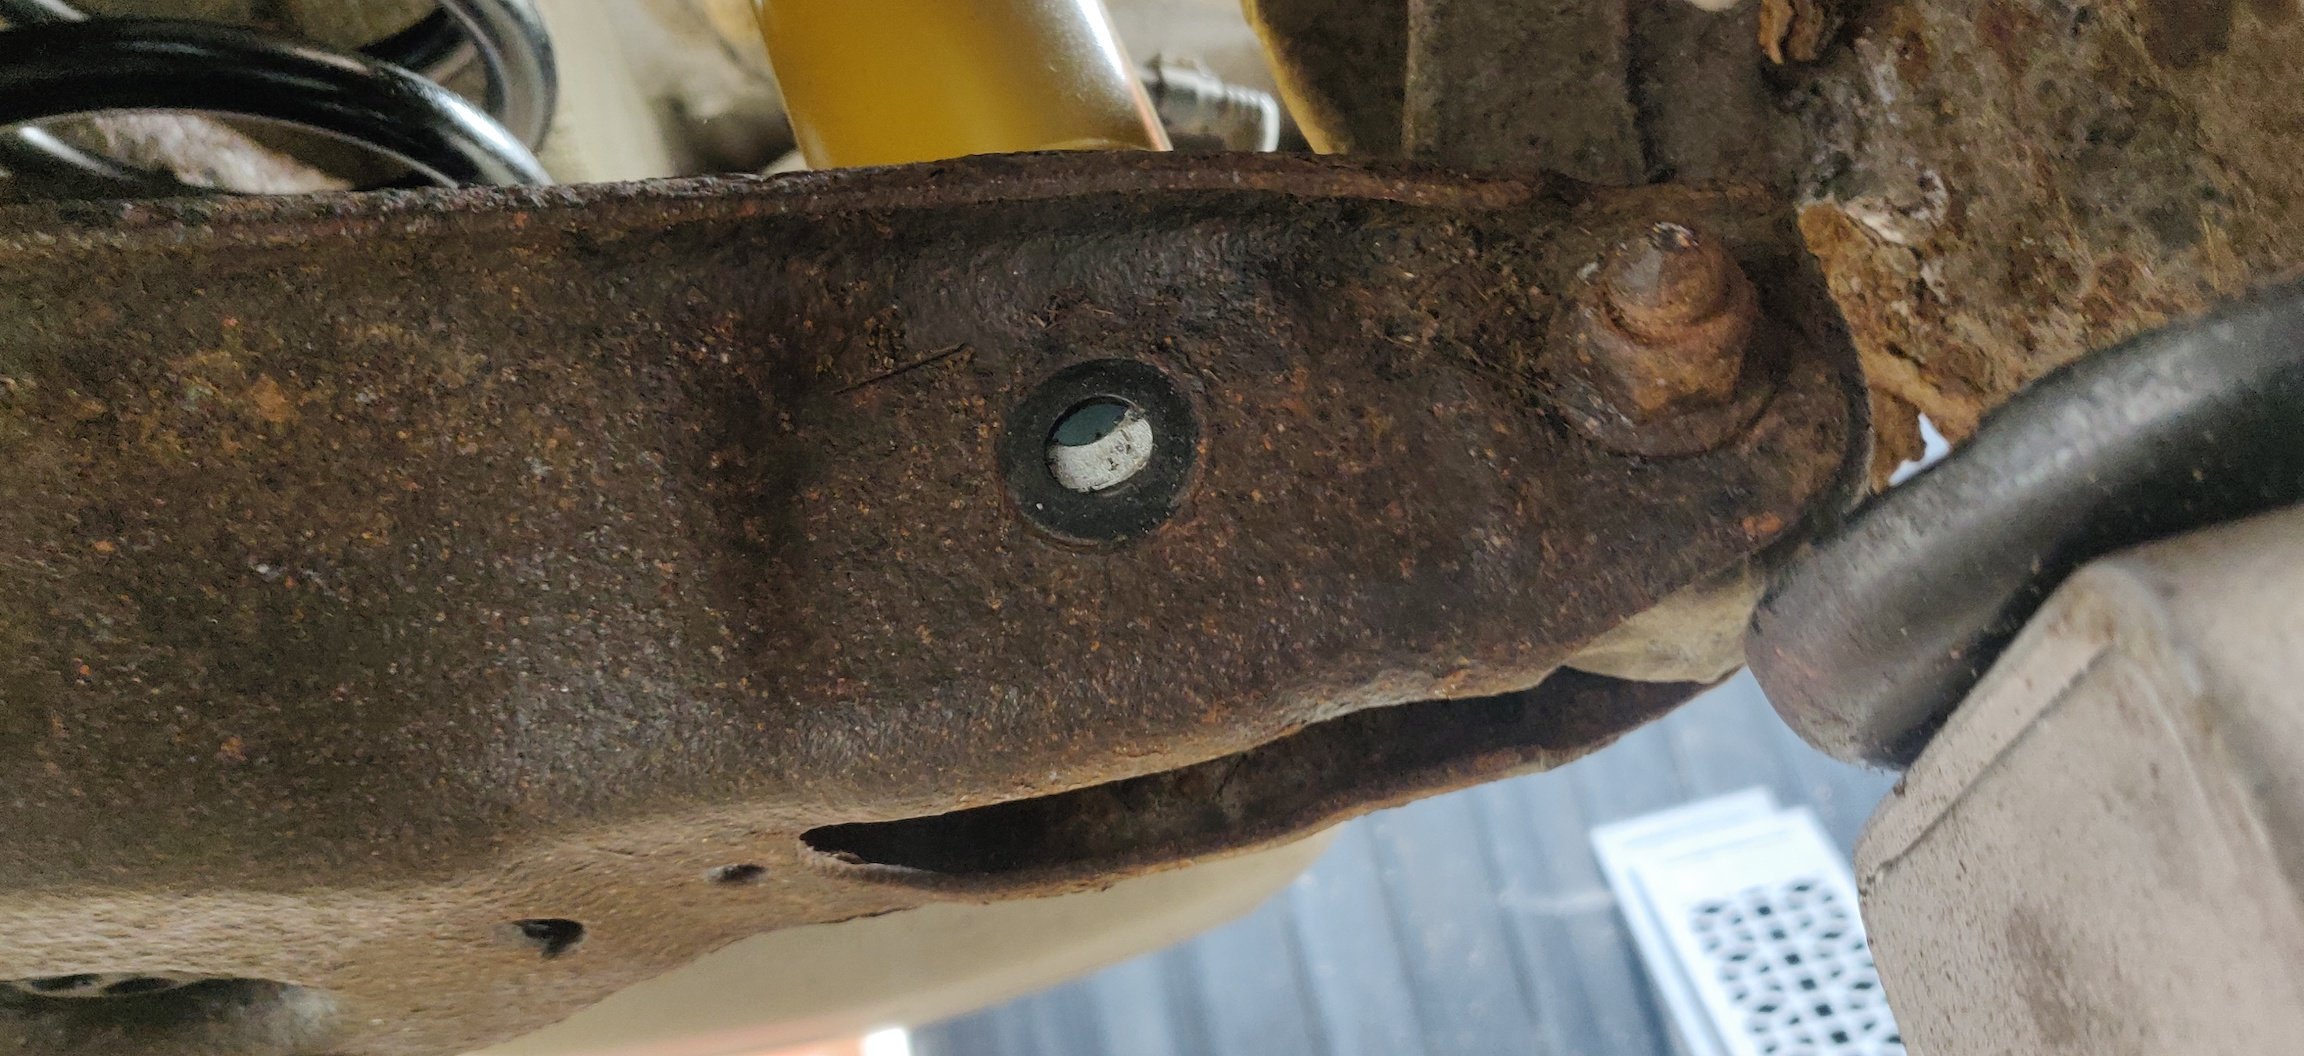
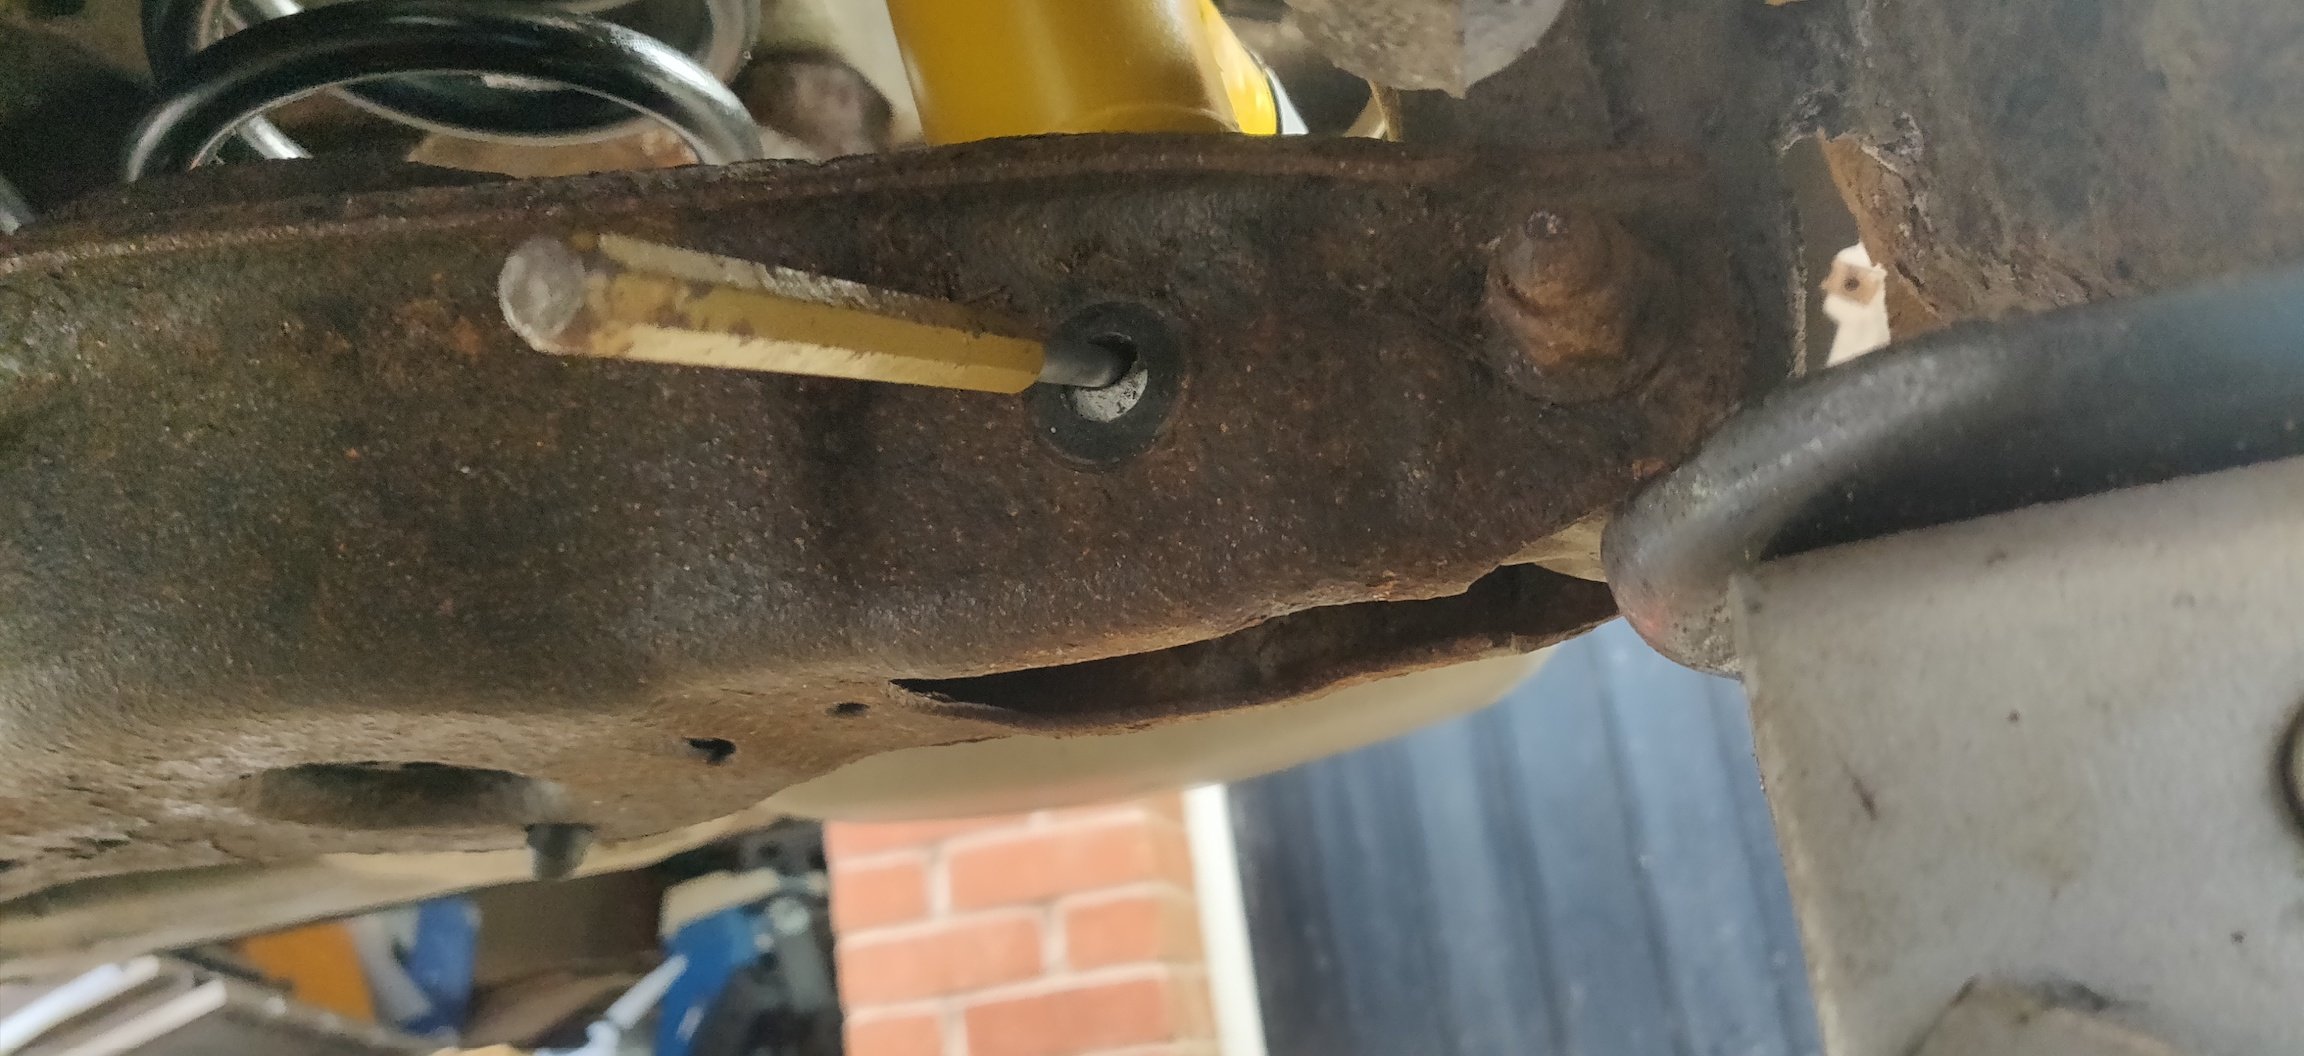
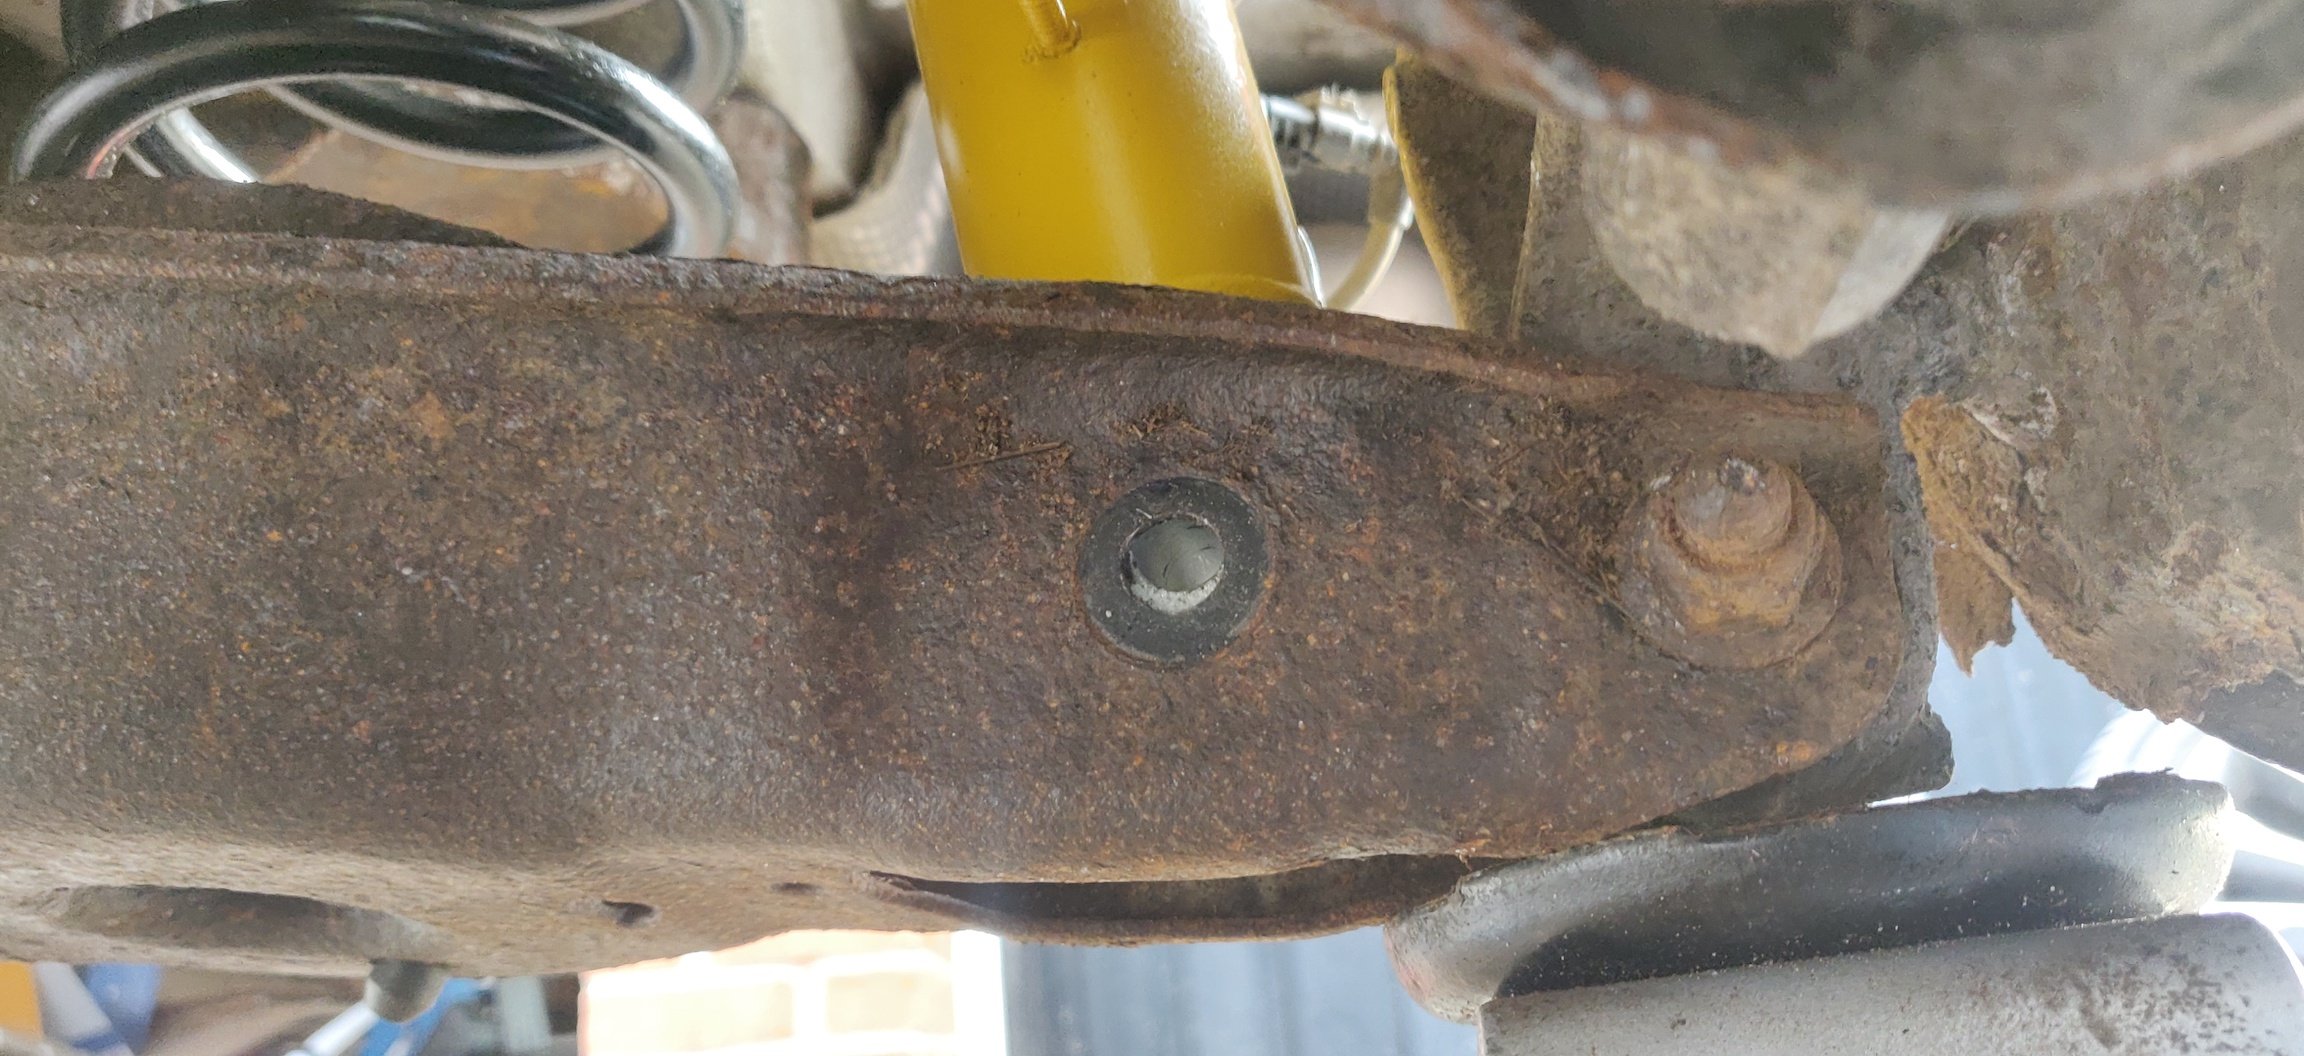
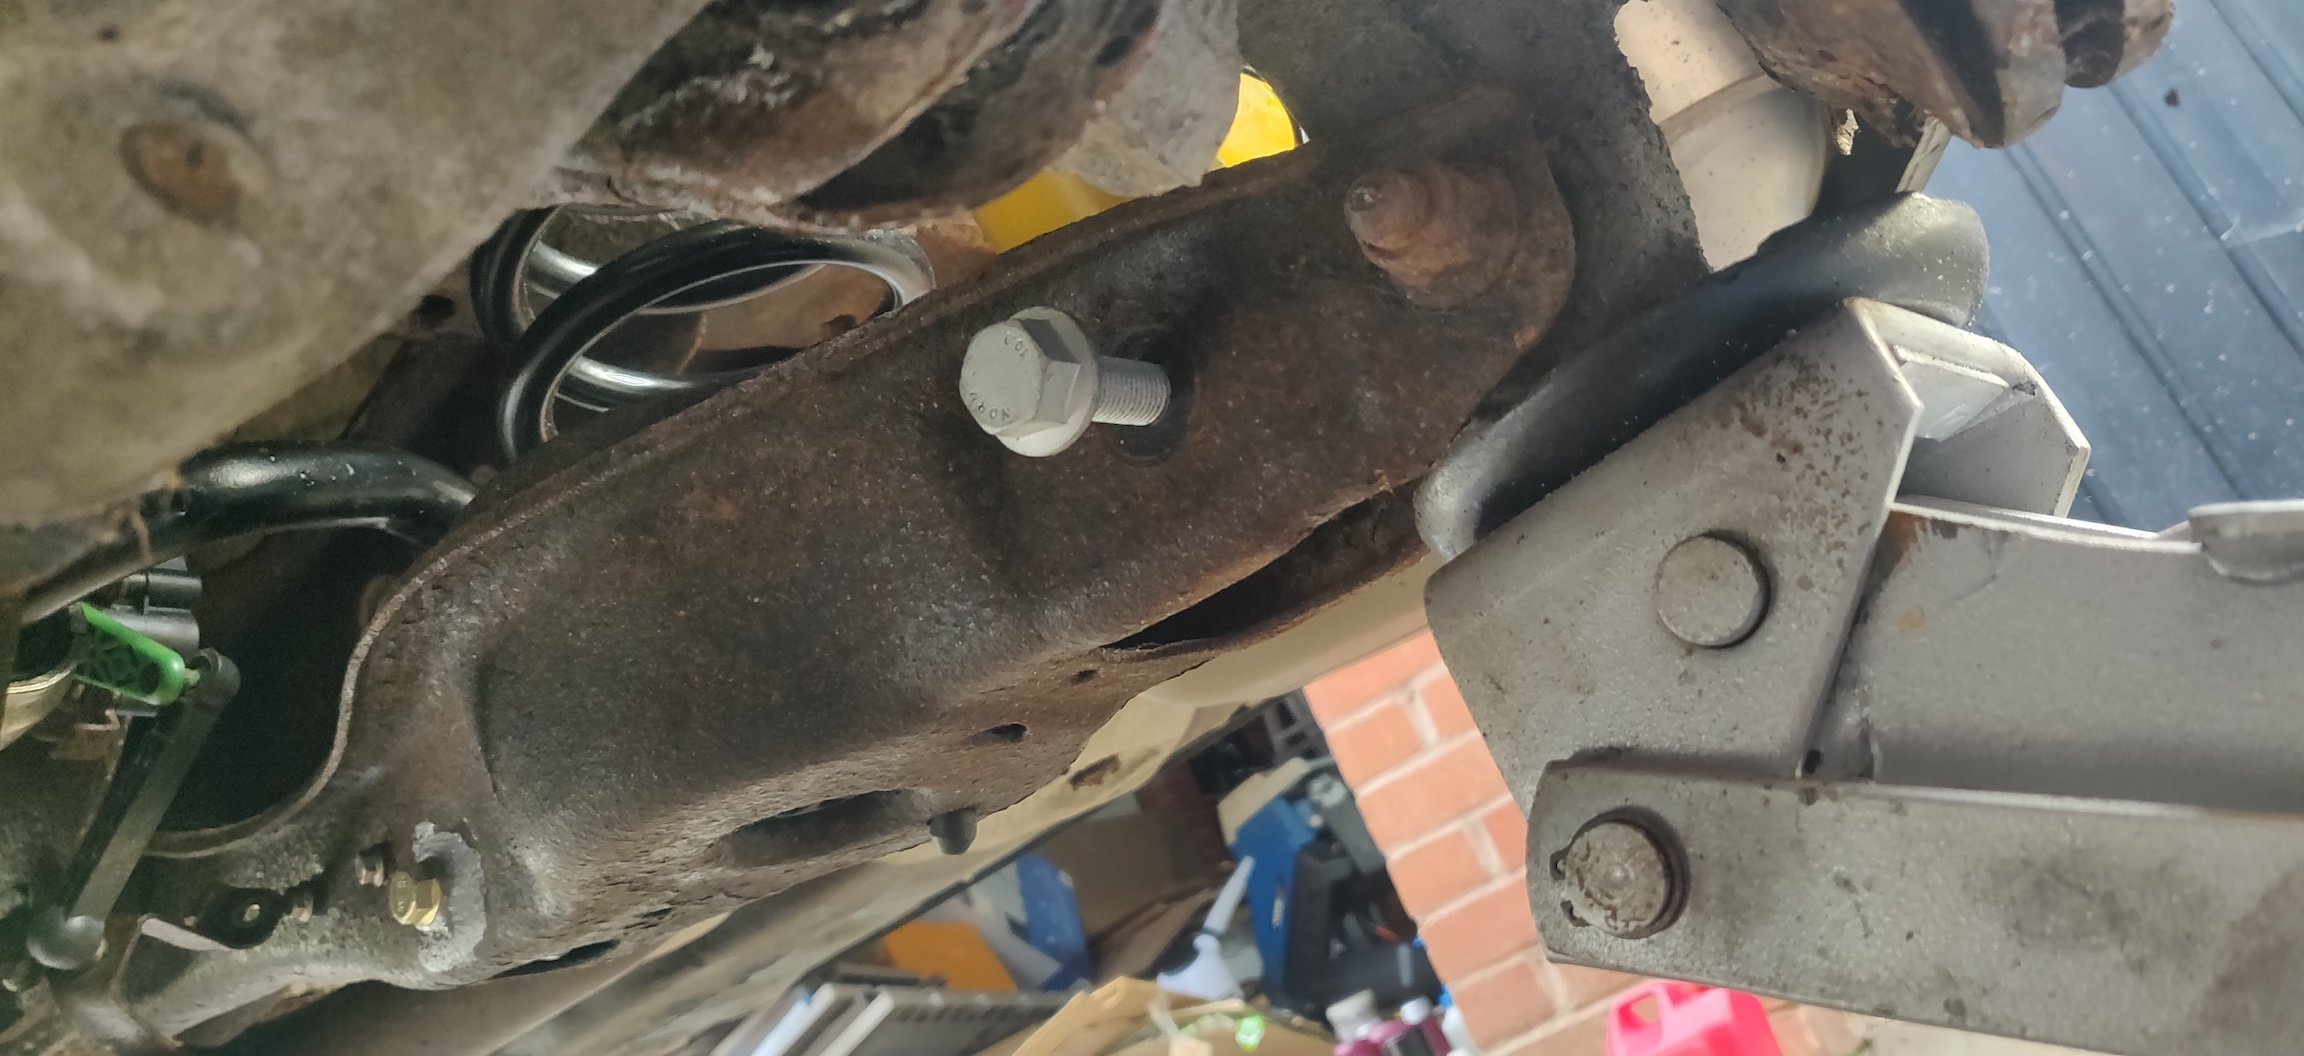
2 pointsJust following up on the point @J.R. has made - I agree - the fundamental issue is the differential is not fit for purpose if it is leaking, regardless of the hole, and clearly you still have a non-functioning 4x4 system. Personally, I wouldn't be happy with a second hand differential that has had a 'hole drilled i it' either. I'd therefore be pushing for another replacement differential and for them to fully sort the 4x4 system. They've already had one go at fixing it and have failed so I think it's now a case of rejecting the car or taking some legal advice on what to do next.2 points
-
2 pointsServive books haven’t existed for quite a few years. its all done online through the Skoda portal now2 points
-
2 pointsFurthermore, it seems to me as if the ubercheap ebay fix did in fact work but you failed to enable the extra 2 settings that you were asked to perform using VCDS/OBD11. So yours is already activated. As I stated earlier in this thread have a look at the mr fix videos on youtube. This is the one that applies to your situation: https://www.youtube.com/watch?v=EdBYaaIVfVE2 points
-
2 pointsI wouldn’t worry too much about those three things myself, however, alloy wheel locking nut- make sure that is there and for peace of mind I’d check it’s the right one.2 points
-
Nowadays getting a full tank of fuel from a dealer is a win 🤣🤣2 points
-
Hi all, I had my windscreen replaced some months ago by my local dealer. Everything went well, except... I didn't noticed they had broken (and glued to hide their mistake 🤬) the retainer for park tickets! Since, I was not able to prove this several months later, I've bought a new one to replace it on my own. A good opportunity to make a tutorial. P/N : 3V0 867 333 - 0.72€ First of all, wash your hands before starting to avoid dirty finger prints on the trim panel, especially if you have light grey or 'ivory' interior, To remove the A-pillar trim panel, use a large and flat lever (a wooden spatula should be ok too ). Insert it on the upper part between the door seal and the trim panel, so that you can push approximately the center part of the panel on the rear side to unclip it: Then repeat this at middle height of the trim panel to keep on uncliping the trim panel. In red circles below, the 2 clips once the trim panel is uncliped. Now, you just need to pull the trim panel upward to remove it completely. Once this is done, if you have a sun roof, start uncliping the water drain hose of the sunroof (red circle), to get a better access to the spreader rivet which fixes the park tickets retainer (both in blue rectangle): Then you just need to pull the spreader rivet head (if necessary, use a small fork ;)): Now put the brand new park tickets retainer in place and press the spreader rivet head to fix the retainer. You can now start reinstalling the A-pillar trim panel. Be sure to engage correctly the lower outer corner in the door seal and the lower inner edge in the dashboard: Then get out of the car and stand along the A-pillar and adjust the trim panel height, looking thru the windscreen: Check the lower clip is in front of the slot in the A-pillar. Do the same for the upper clip Then just press firmly the trim panel, starting with the lower clip. If necessary, don't hesitate: A firm hit with your closed fist 😁! Press the trim panel at the upper side to completely clip it. You may then have to make some slight adjustments to get a nice positionning (no bump, no dent under your fingers, when sliding your hand along the trim panel). Done! 😎1 point
-
Why not use Googlemaps Speed limit alerts and drive within them, then you don't have to worry where they are? https://support.google.com/maps/answer/9356324?hl=en-GB&ref_topic=3292869&sjid=4937796780056475035-EU#zippy=%2Cturn-speedometer-on-or-off1 point
-
1 point
-
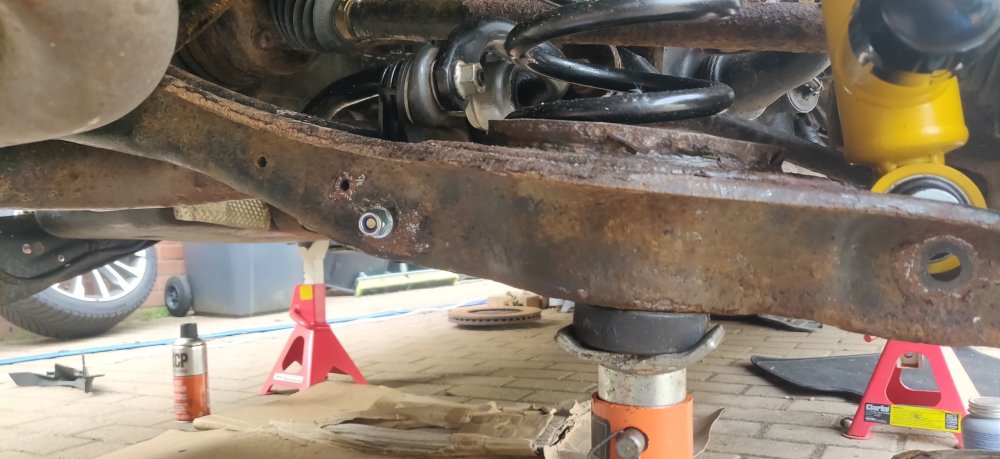
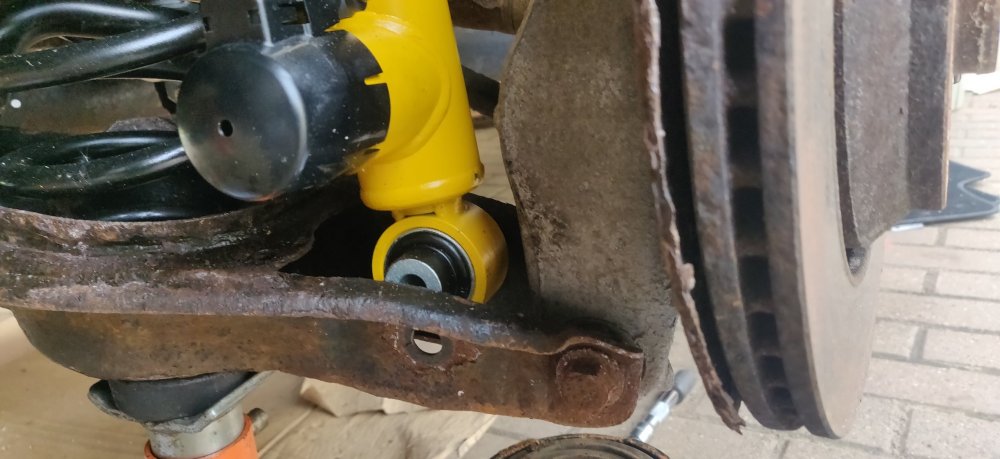
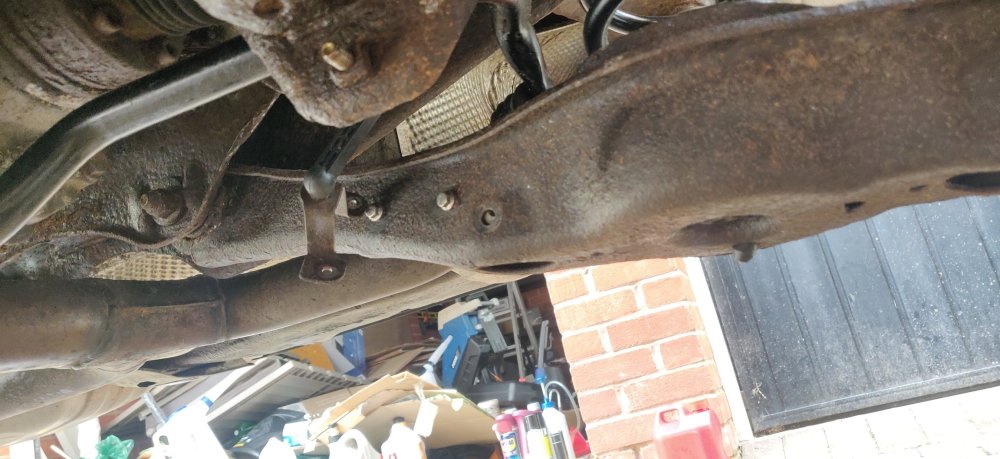
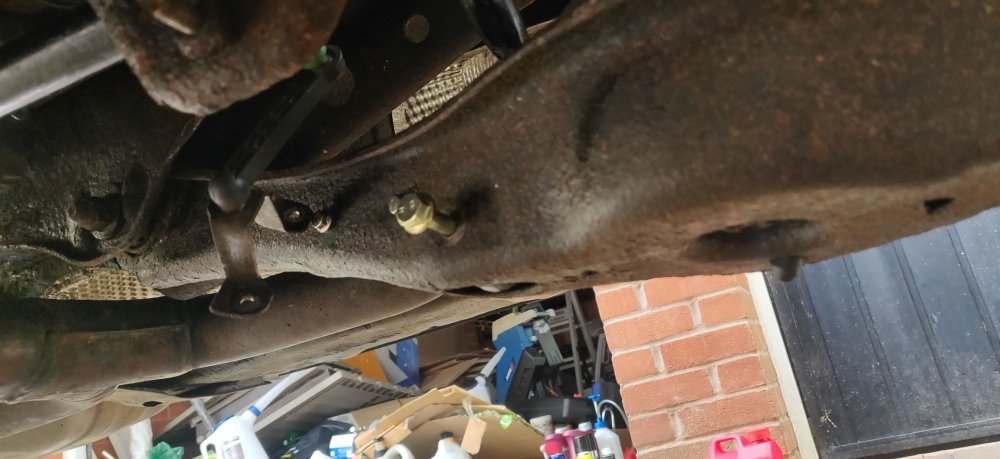
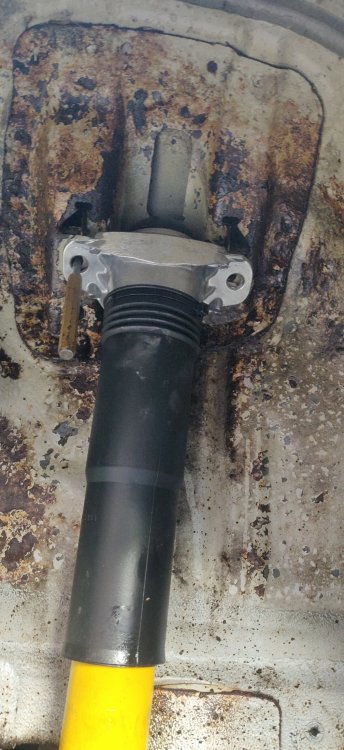
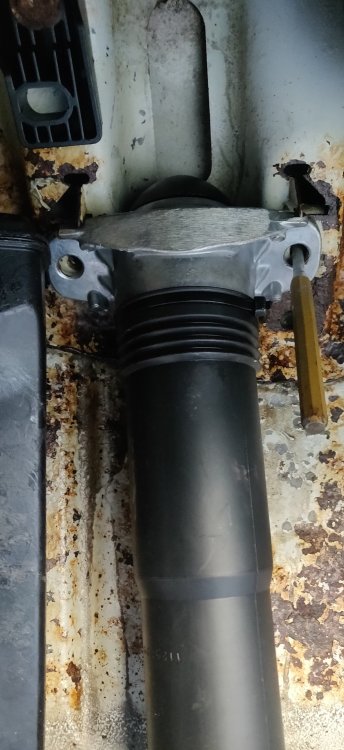
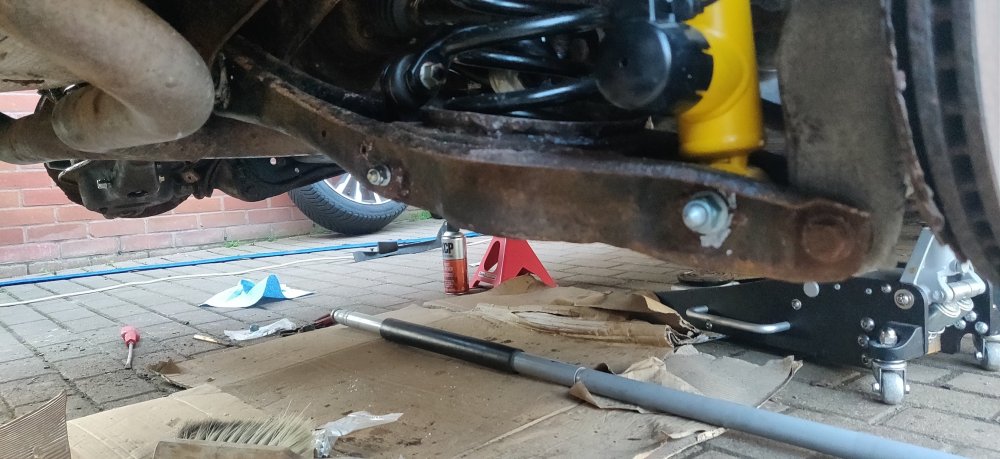
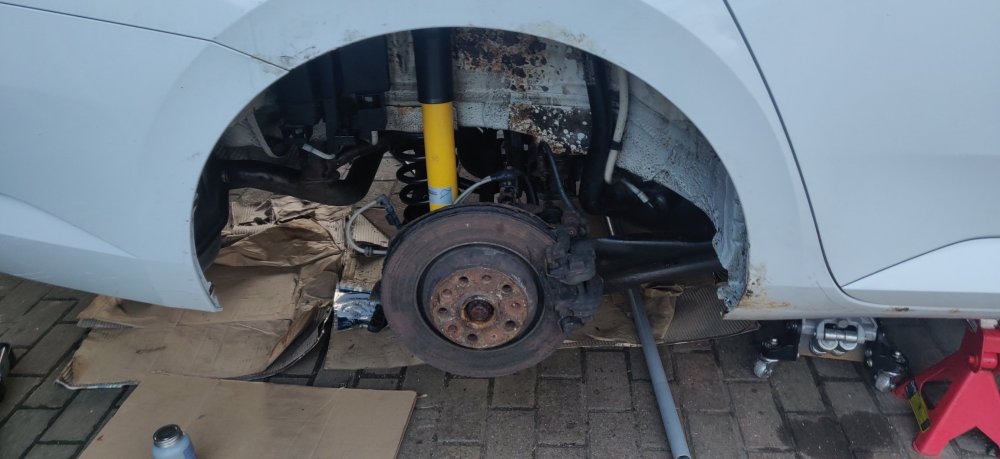
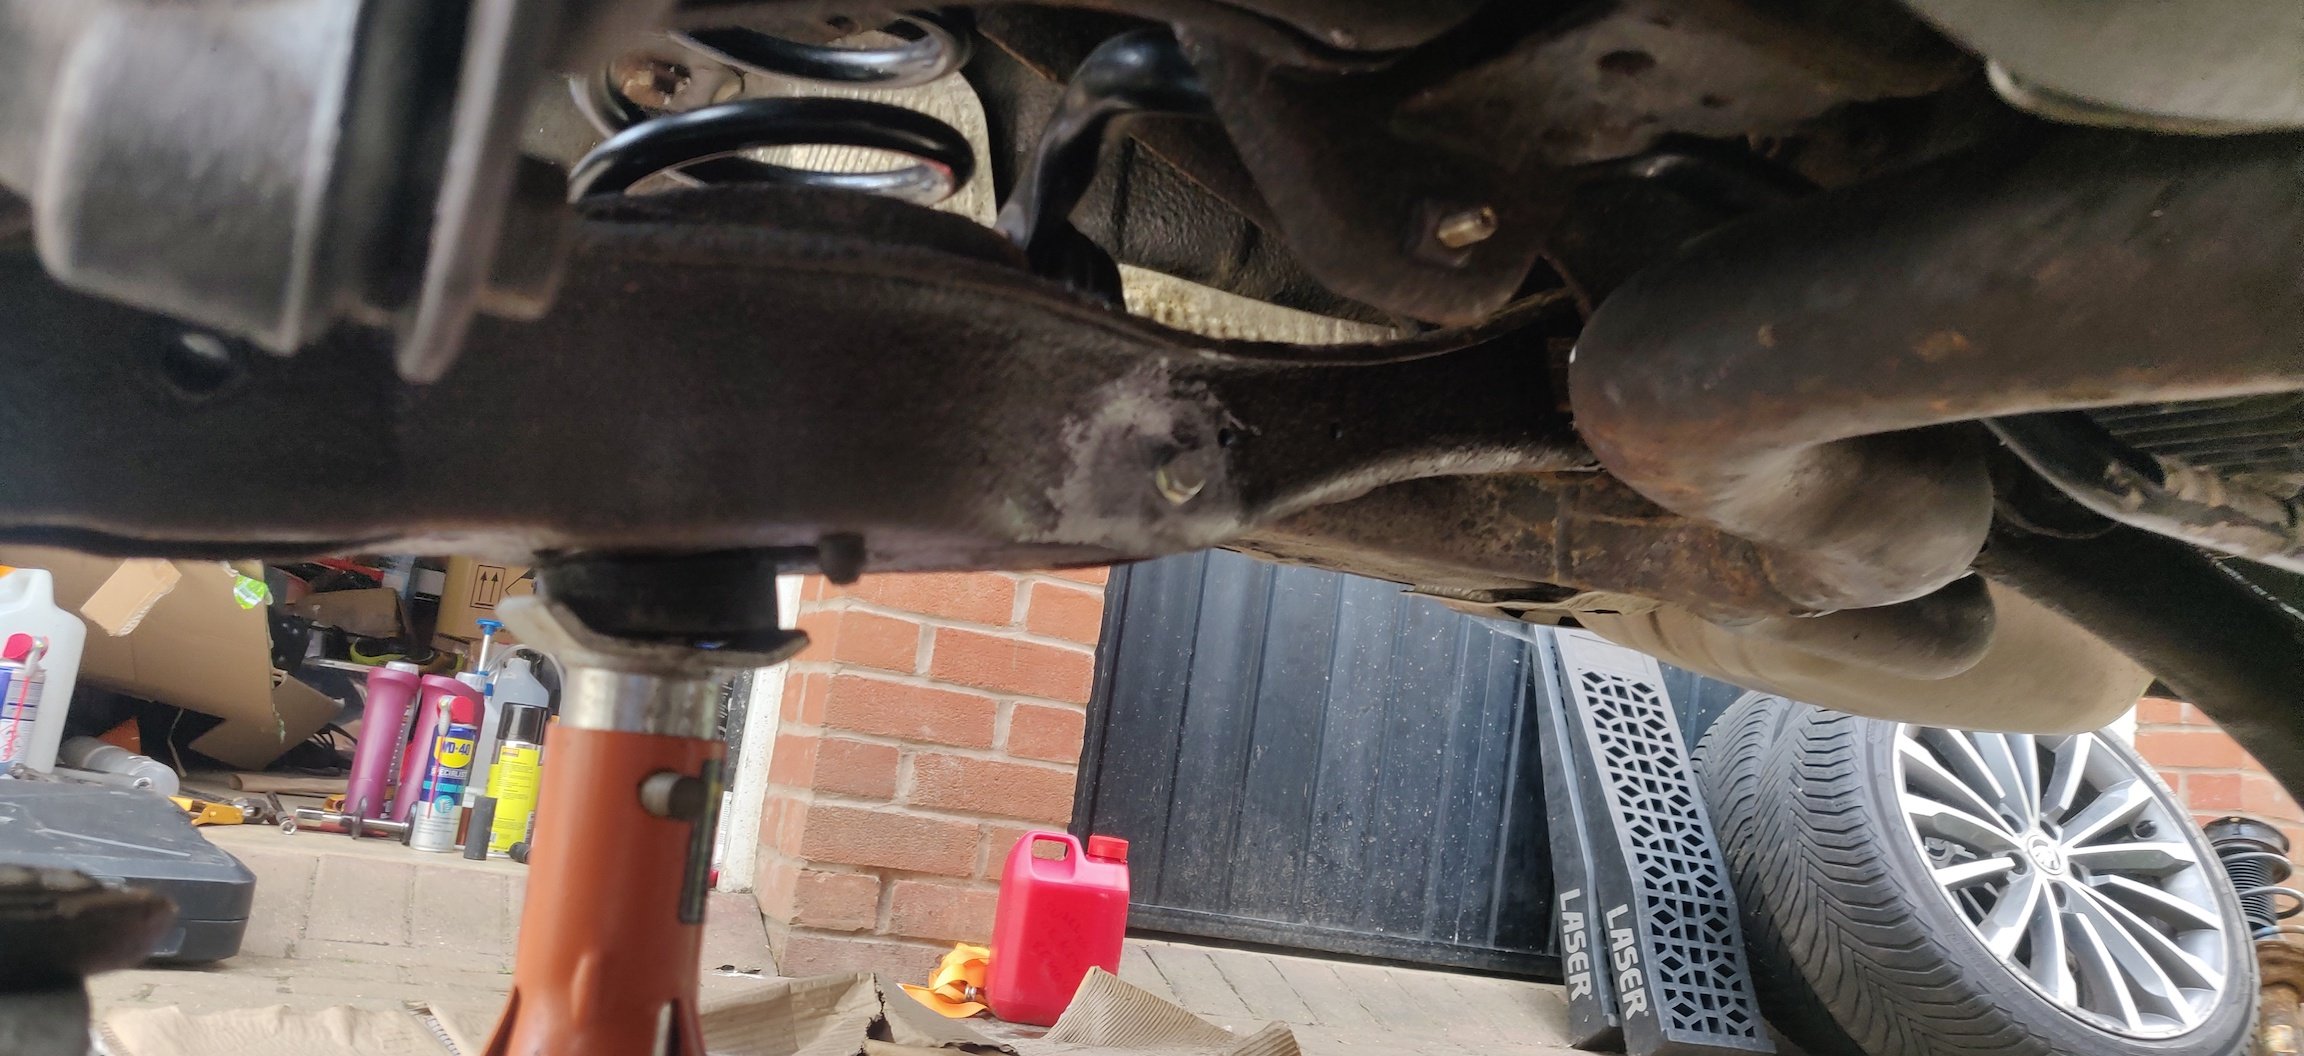
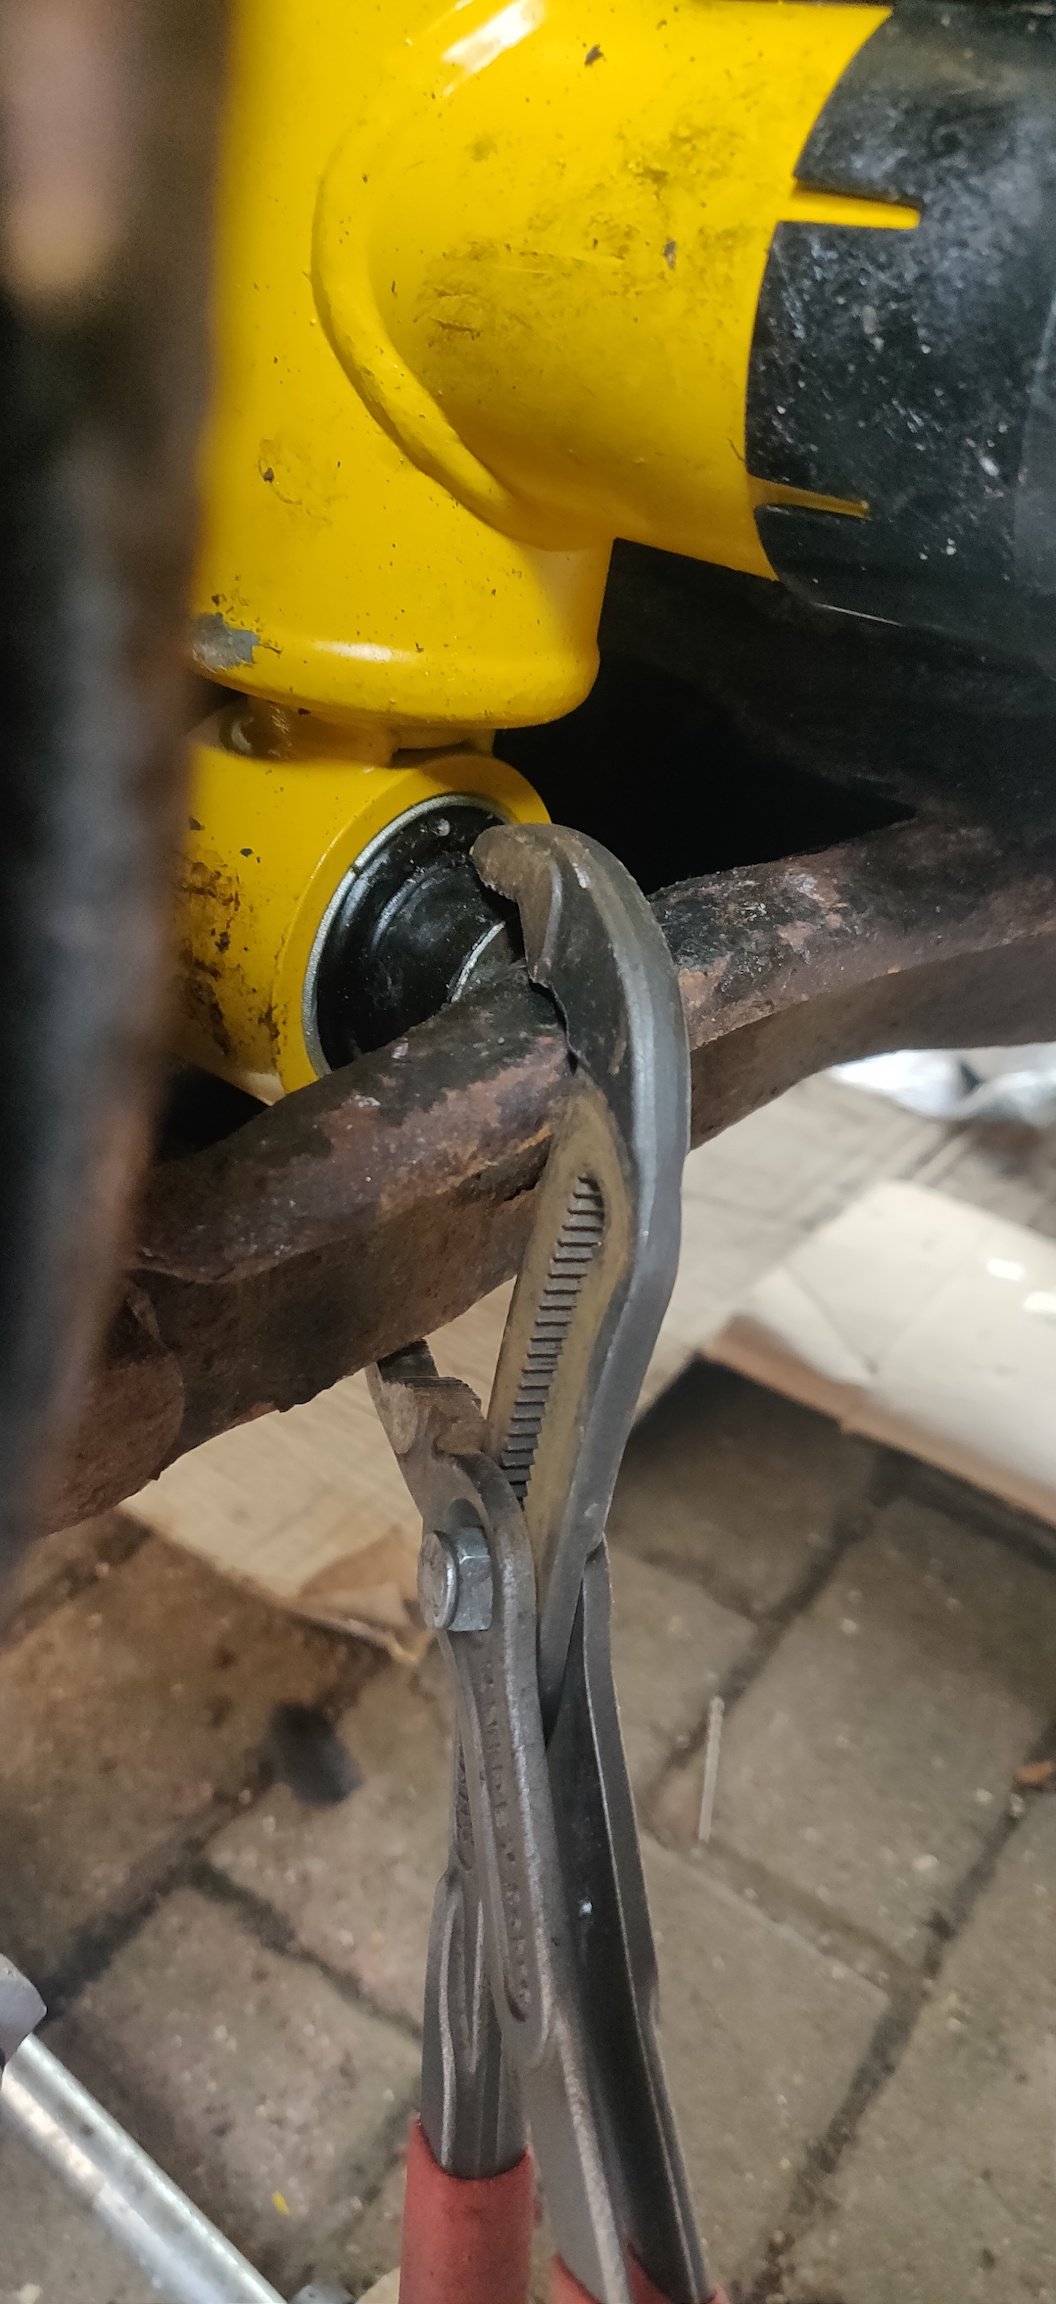
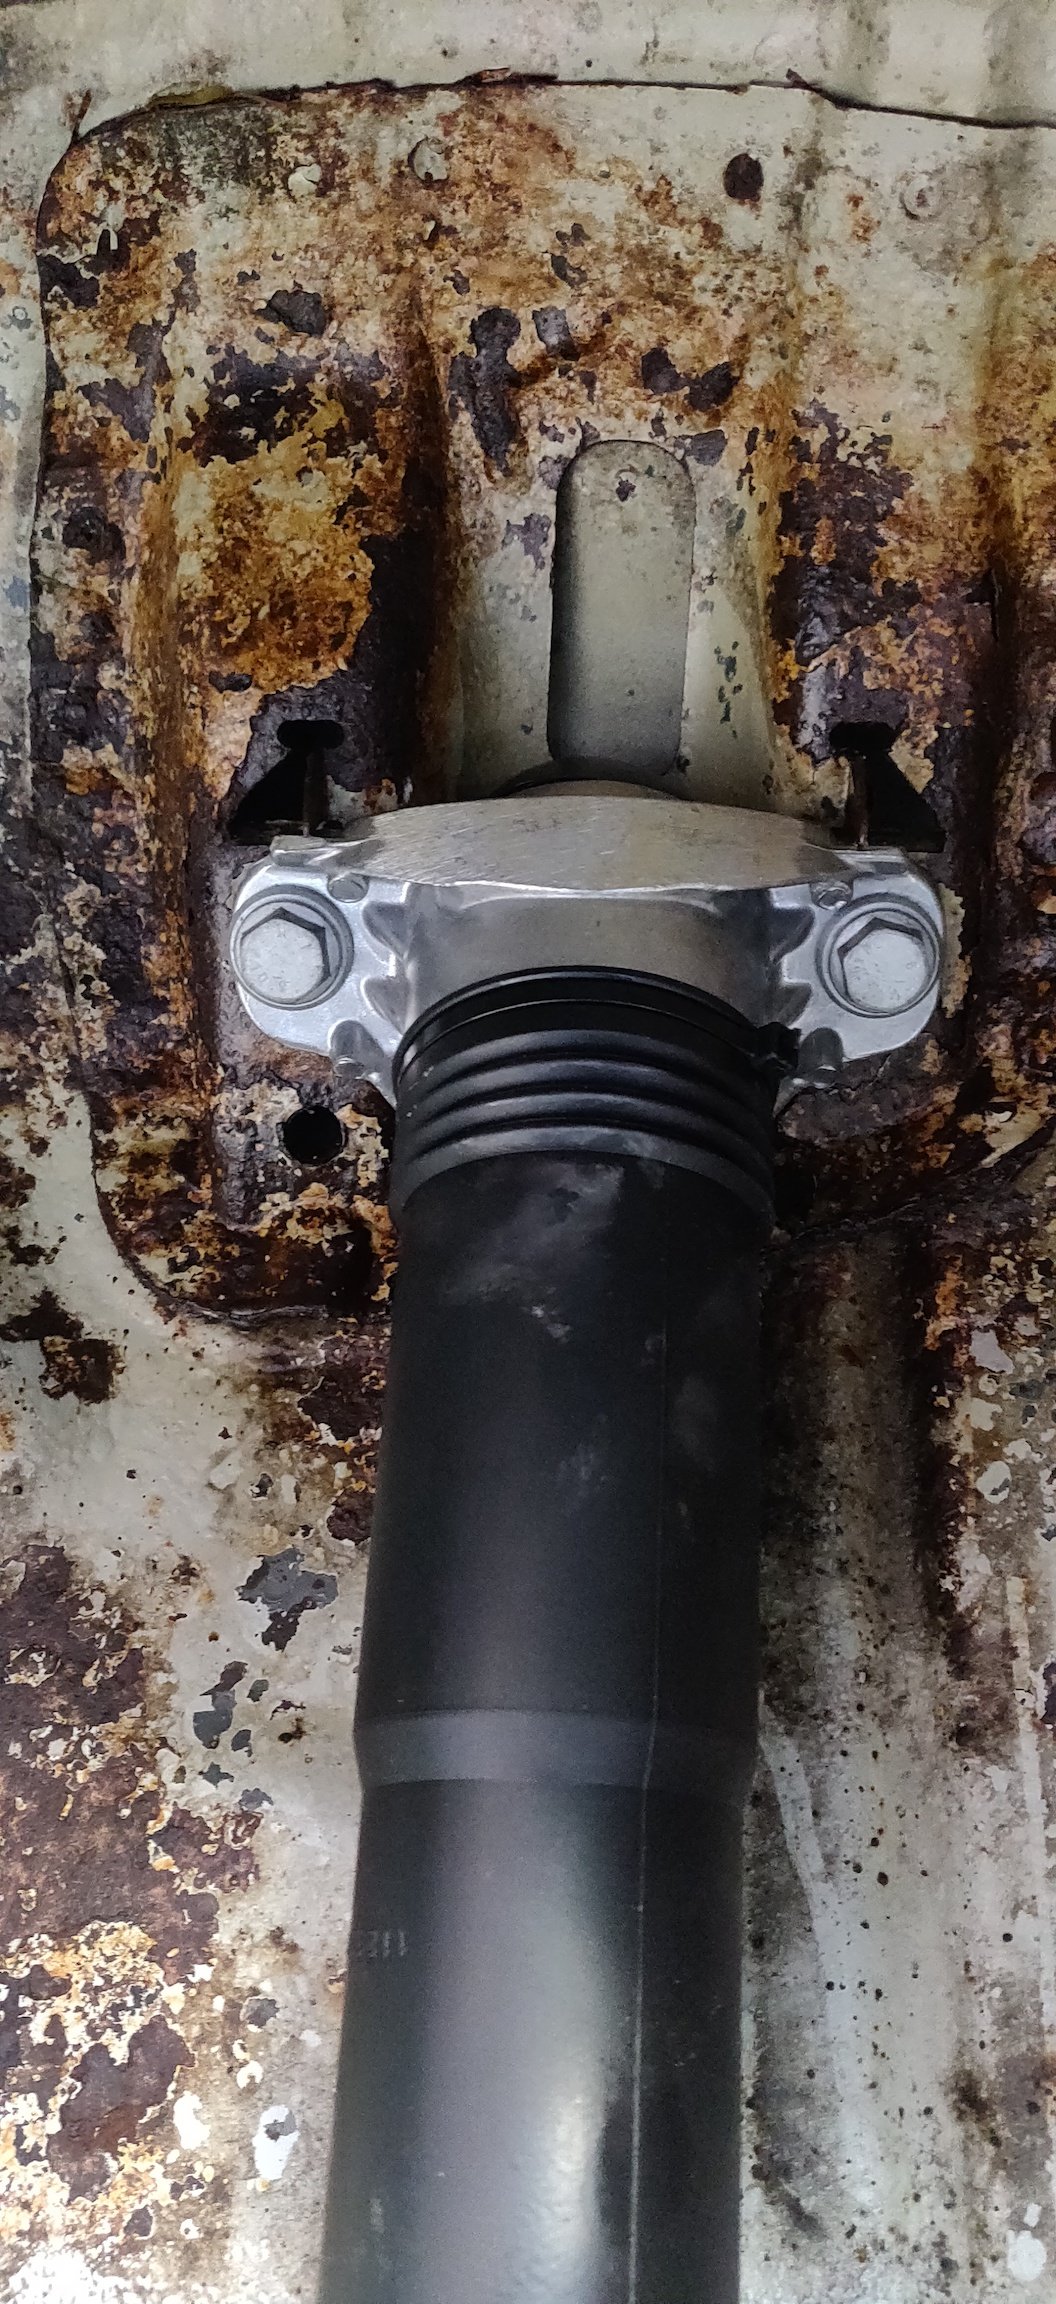
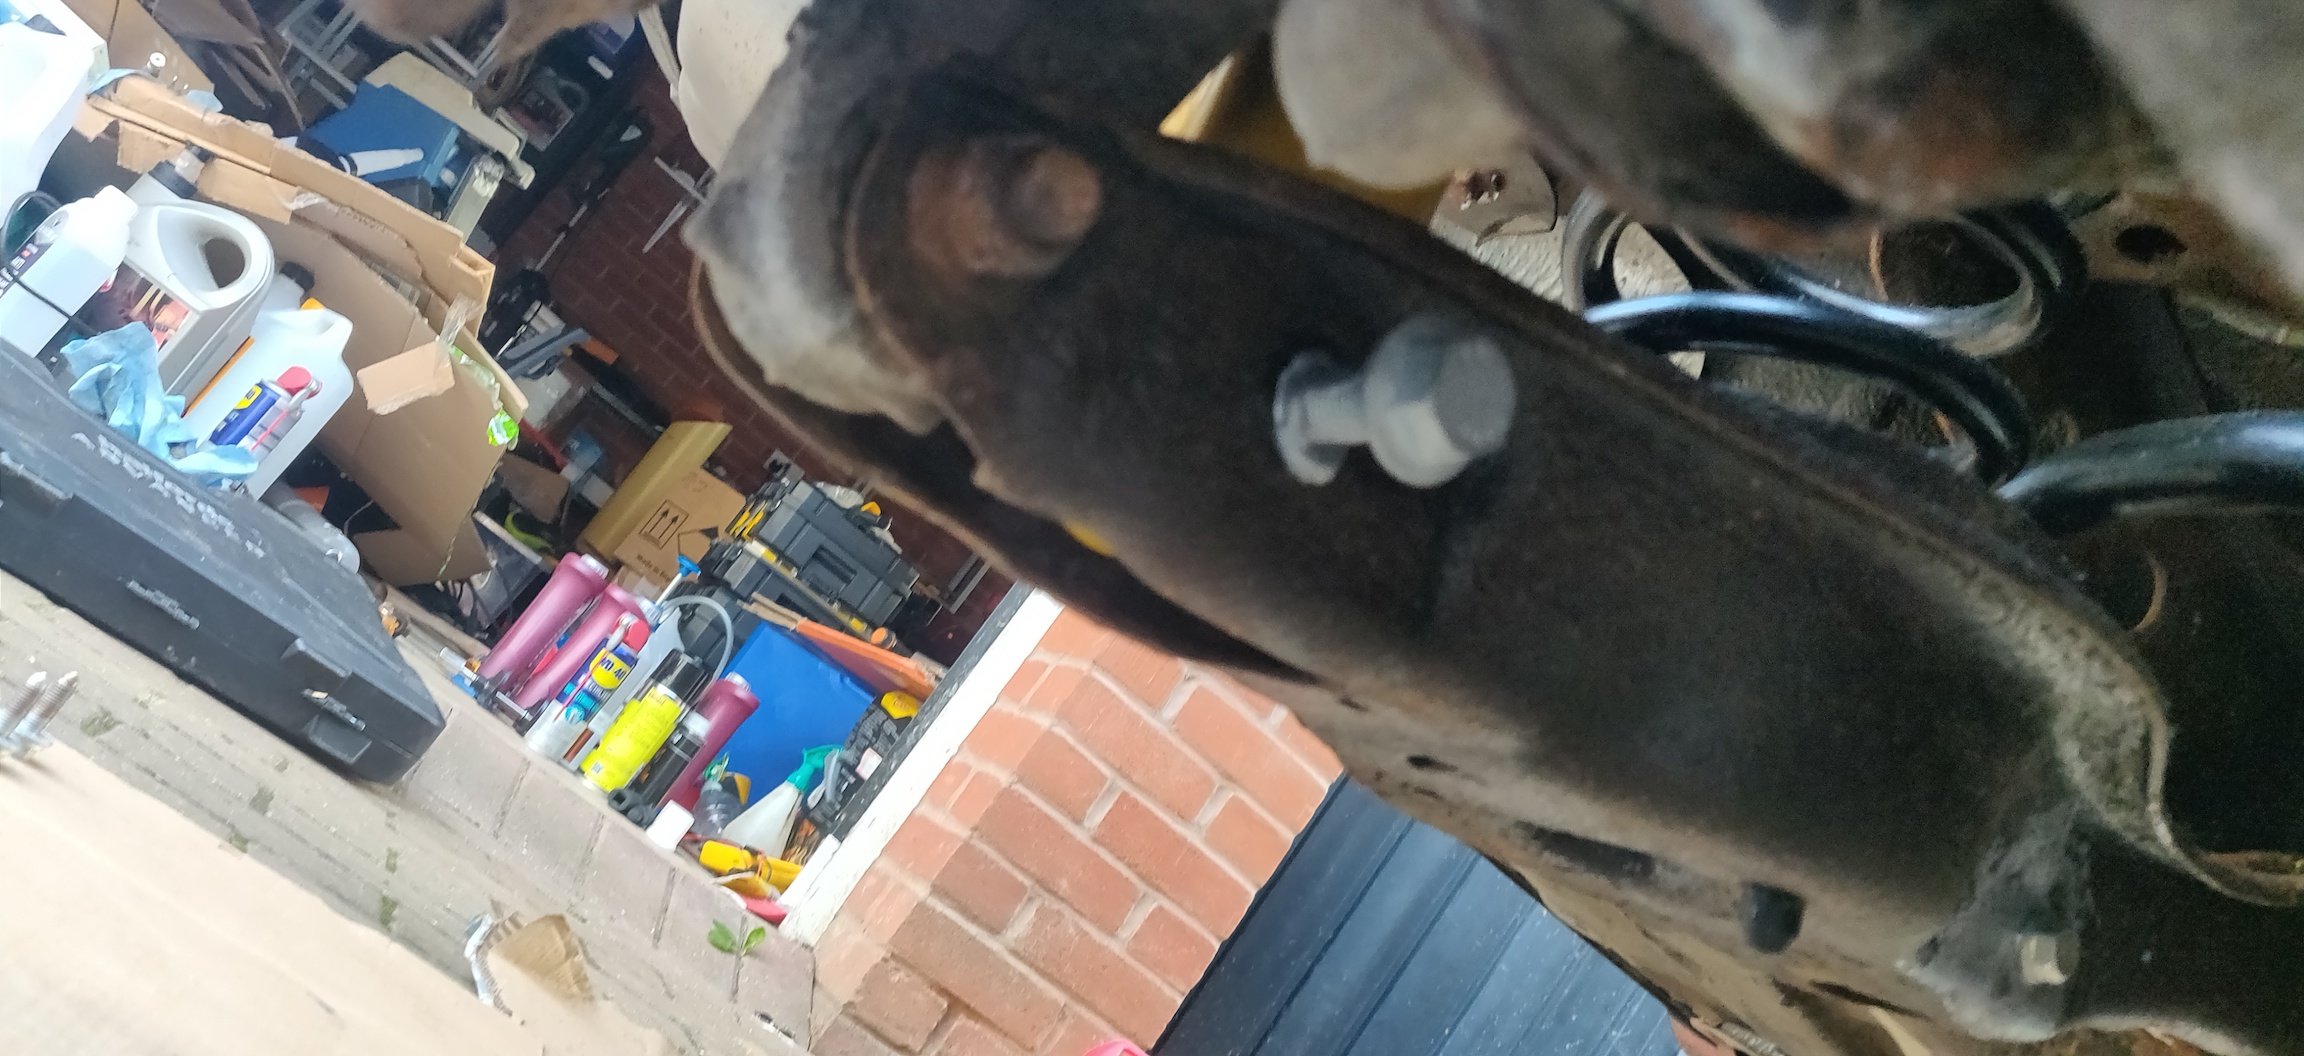
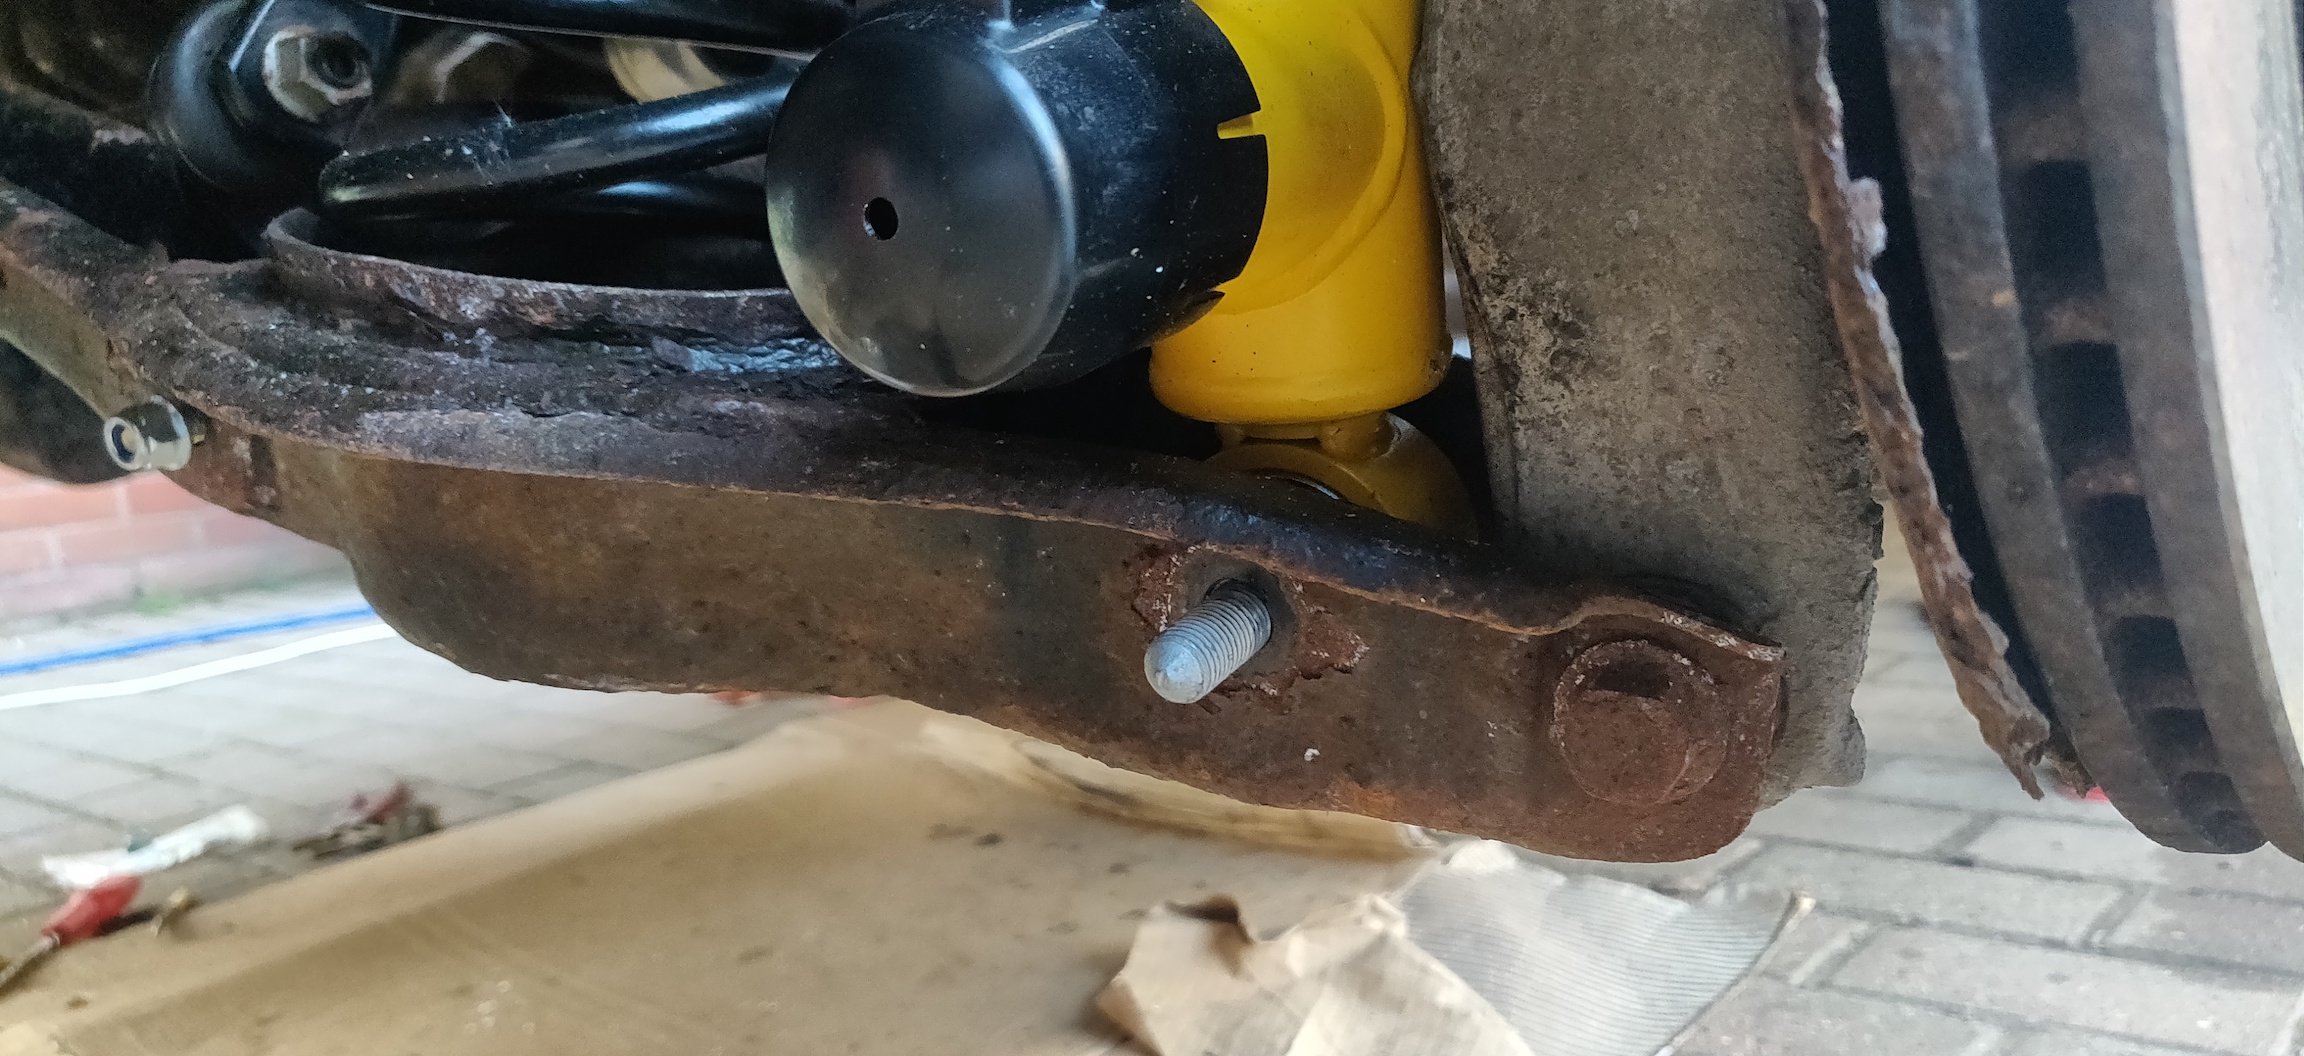
Tiny bit more before supper: Got the right anti roll bar bolt into place into the lower arm: Didn't take pics of this side as simply forgot to. This left the strut on the arm: Which seemed to be a bit stuck. So went ahead and did the opposite anti roll bar link, with pics this time. Essentially, its a case of clumsily using a jack to raise the lower arm: Then using a pry bar or some such under the suspension arm to move the link and try and get it aligned. There's a gap under the lower arms to do so, and after lifting it up a bit more, the side was clear enough to slip the bolt in: Once done, went and slathered a load of anti seize on the bolt before reinserting. The bolt stops roughly where the other side hits the arm: So it's then a case of raising and lowering the arm to try and rejig the link and get it clear: Tried not to raise it too high so as to start clearing the rear jacks, but eventually, this and more pry bar action eventually gets the bolt to be visible, so a few taps with a rubber mallet on the bolt head: Then it's clear enough for the nyloc nut to go in place. I've used aftermarket bolts, which are 8.8 bolts, so I'll double check the internet for recommended torques for such a bolt. It'll be the same as what I've used for the anti roll bar clamps to be honest. I then struggled with the struts. No amount of lifting the arm up and down was getting it to go in smoothly, so had to resort to being a bit ham fisted: I firstly used Knipex pliers with a widened jaw to try and clamp it into place, which got it started. From the opposite side: The hole for the bolt was starting to be visible, so just went at it with a chisel and hammer on the bushing part of the strut to get it a few millimetres further in: Then managed to get a punch small enough into the hole, and used it as a pry to get it further into place: Then a few more taps with a hammer was able to get a bolt into place: So once done, more anti seize before refitting. From there, it was a struggle with a hammer and chisel to get the other side further down and into place: This was as far as I got, before I decided to try a different approach. I went and undid the top strut bolts, and it immediately looked like the better option: Basically, once the top bolts were undone, the strut flies out, seemingly straightening out, which then meant the bottom bushing of the strut was easily manoeuvrable in the lower strut arm, hence the nut being put into place in the pic above. So it was then a case of trying to get the top mount aligned: This was met with a bit of resistance, but essentially, with some convincing, I was able to get it positioned a bit better, then a jack to lift up the lower arm helps locate it a bit better, then as per above, used the punch to help align the bracket with the holes, and once one bolt is in, the rest is straightforward: So yeah, lesson learned, do the bottom bolt first. Undoing the top strut bolts on the other side immediately dropped the strut into the lower arm, so it was actually not an issue at all getting the bottom bolt in: The strut can then be wiggled to get the bolt through: Significantly less drama. The top still has some resistance when being mated to the top: But it's pretty much the same thing, jacked up slightly, and using something to align it to get a bolt in. So went and nipped up the bottom bolts: Just to get the nuts in place for now, 18mm for the strut bolt, and 13mm for the aftermarket ones for the anti roll bar link (it's not a Japanese car, but the car still probably wishes me bad luck). So that's that: Just torquing up left. As the bottom strut bolt is bushed, I'll need to tighten it formally once it's on it's wheels. I'll probably do so and get some ramps so I have some semblance of clearance to do the tightening. It's similar to the Lotus, where the weight of the car acts as the reference point for the suspension, and when tightening up any bushes on the suspension, it essentially clamps the rubber at that point, so when the suspension goes up or down, the rubber bush will rotate but essentially settle back to its relaxed unstressed point. Tightening the bolts whilst raised as above will mean the rubber bushes will be in a slightly stressed position once back on terra firma, so shortening it's life as it goes up and down. This doesn't actually apply to the top strut bolts so not sure why I haven't tightened those up yet. I'll do that at the next possible opportunity, as with that, I can fit the rear wheel arches back onto the car. Can also reattach the rear level sensor, so best remember that too. Getting there! Maintenance: £2217.41 Upgrades: £1322.97 Miscellaneous: £684.25


 1 point
 -
1 pointHeid yins of various manufacturers importers wanting grants again for plug in's. The Government not going to cut the VAT on Public Charging. Even wealthy people with an understanding of money on the likes of Wake Up to Money on Radio 4 have lost half the value of a new Sporty BEV. There are now Porsche Taycans available for £40,000 grand. Senior citizens having to check if they have tax to pay or a bill coming because of a little increase in income. The Government could not give a monkeys, they are jumping ship anyway from front line politics and have nice new jobs lined up. The Manufacturers & Dealerships need to be using area of land they have to get more chargers in and get the Zero Emissions cars at the prices to sell or lease because if not they will be missing the percentage of first registrations and paying huge penalties. The kidology of Partners that had BEV,s built and selling to get the Fleet Average Emissions has not helped them now. There are still shortages of some of the electric cars people actually do want to drive.1 point
-
1 pointI did a search on some Audi and VW sites - Is your EPC fault light lit on the instrument panel? Is there any indication of high coolant temperature?1 point
-
1 pointOn ITV4 @ 20.00-21.00 tonight 24th April 2024. Highlights from the British Rally Championship 2024 round 2. Rallynuts Severn Valley Stages. Gravel Stages.1 point
-
1 point
-
1 pointHello snuffy, welcome to the forum. The leak will almost certainly be from the recent repair.1 pointMany thanks for the very quick response - I'll take a look this afternoon and see if percussive maintenance (hitting it 😊) will temporarily solve the problem while I wait for a delivery from Autodoc.1 pointI would say "real" watch her running before she gets hit1 point1J0919506M is your fan controller part number, I'm pretty sure. Has two relays inside, one powered by that fuse 8, the other by one of the strip fuses. It hangs off a bracket on the nearside chassis leg, quite near to the thermoswitch. Stuck relay will be the problem, another module swapped in should fix it.1 point1 pointNo torch in my 2022 SE Drive. Check to make sure you get the holders that fit on the back of the front seat headrests so rear passengers can put a tablet on them. Also the plastic things that velcro onto the boot floor to hold bits and pieces in place. I removed mine as I didn't need them but they should come with the car. I had the gunge kit but took it out and bought a spacesaver spare and jack. A full size spare wheel won't fit (too deep).1 pointIt's winter so obviously there's gonna be some mist and also, that's not exactly 4K video is it.1 point1 pointI would be more concerned about the reported leaking driveshaft and propshaft seals. I dont see any evidence of leakage on the photograph. The damage looks like it was sustained in the salvage yard from the donor vehicle being lifted. The "drilling" will be more BS101.1 pointA misty day? My money is on that the video has been Sepiaised (a word I just made up) I bought a charming sepia photo of my now ex street in the UK taken when it was built in 1958 from the antique shop in the village, turns out I was scammed because my neighbour had a print of the original B&W photo, much sharper definition, clearer but not as nostalgic or saleable, the major difference was the misty skyline, on my photo my house did not have a chimney, on my neighbours unadulterated original photo it did! It still does have the chimney. We are not living considerably longer, infant mortality is massively reduced with modern medicine and the welfare state, that is the reason for the numerical rise, it is an average, it could well be that those who do not die as children, the vast majority of us, are actually dying earlier than our ancestors of heart disease, diabetes and cancer. My father and his siblings lived to their late 80's early 90's but they were 5 children who grew to adults out of 10 children born to the mother who died of malnutrition and beating at 34, my father had a twin who died within days, the average lifespan of the adults in that family would be around 45. Had my parents had 10 children it is likely that we all would have survived, we could all have died in our 50's 30 years younger than our parents and their siblings yet our average lifespan would have been higher than theirs.1 pointIf your starter battery is original, it's very possible that it is failing. Get it fully charged, then tested - preferably with a high discharge load-test.1 pointHave moved this to our vcds/diagnostics. Bit more travelled than the non skoda projects bit. hopefully a knowledgeable member will be along shortly1 pointas Mark Twain said: “There are 3 kinds of lies: lies, damned lies, and statistics.”1 pointwell based on this FOI request officially only one death in England and Wales in the period 2001 to 2021 had exposure to air pollution (International Classification of Diseases, Tenth revision (ICD-10) code Z581) recorded on the death certificate. https://www.ons.gov.uk/aboutus/transparencyandgovernance/freedomofinformationfoi/ukdeathsrelatingtoexposuretopollutionorpoorairquality Noted the disclaimer that It is unusual for wider contextual factors, such as exposure to pollution or air quality, to be recorded among the causes of death1 pointCheck the door drains. Is there any sign of water in the boot? Also, you should have the AC on all the time. Generally, you have colder weather with more moisture in the air up there and AC removes the moisture from the air in the cabin; it’s not just to reduce temperature.1 point1 pointMaybe cargo nets in the boot ( I rarely use mine) and check if there is a spare wheel , sometimes previous owner specifies one.1 point1 pointPerhaps it's intake 'roar' as normally the intake is external to the cabin.1 point1 pointDeadlocks were introduced in the 90's along with immobilisers to combat rapidly increasing levels of car theft. Generally this was successful - well until KESSY introduced anyway. You get a dash warning on turning off when about to leave the car - it is however usually possible on many VAG cars to lock doors without deadlocks by double pressing the lock button, this usually disables most of the alarm as well.1 point1 pointYes given the overall checks have been fine, I’ll stay put. My guess is, this is ex-management, hence the ignorance. But for now I’ve requested a written acknowledgment of my email detailing what they have to do.
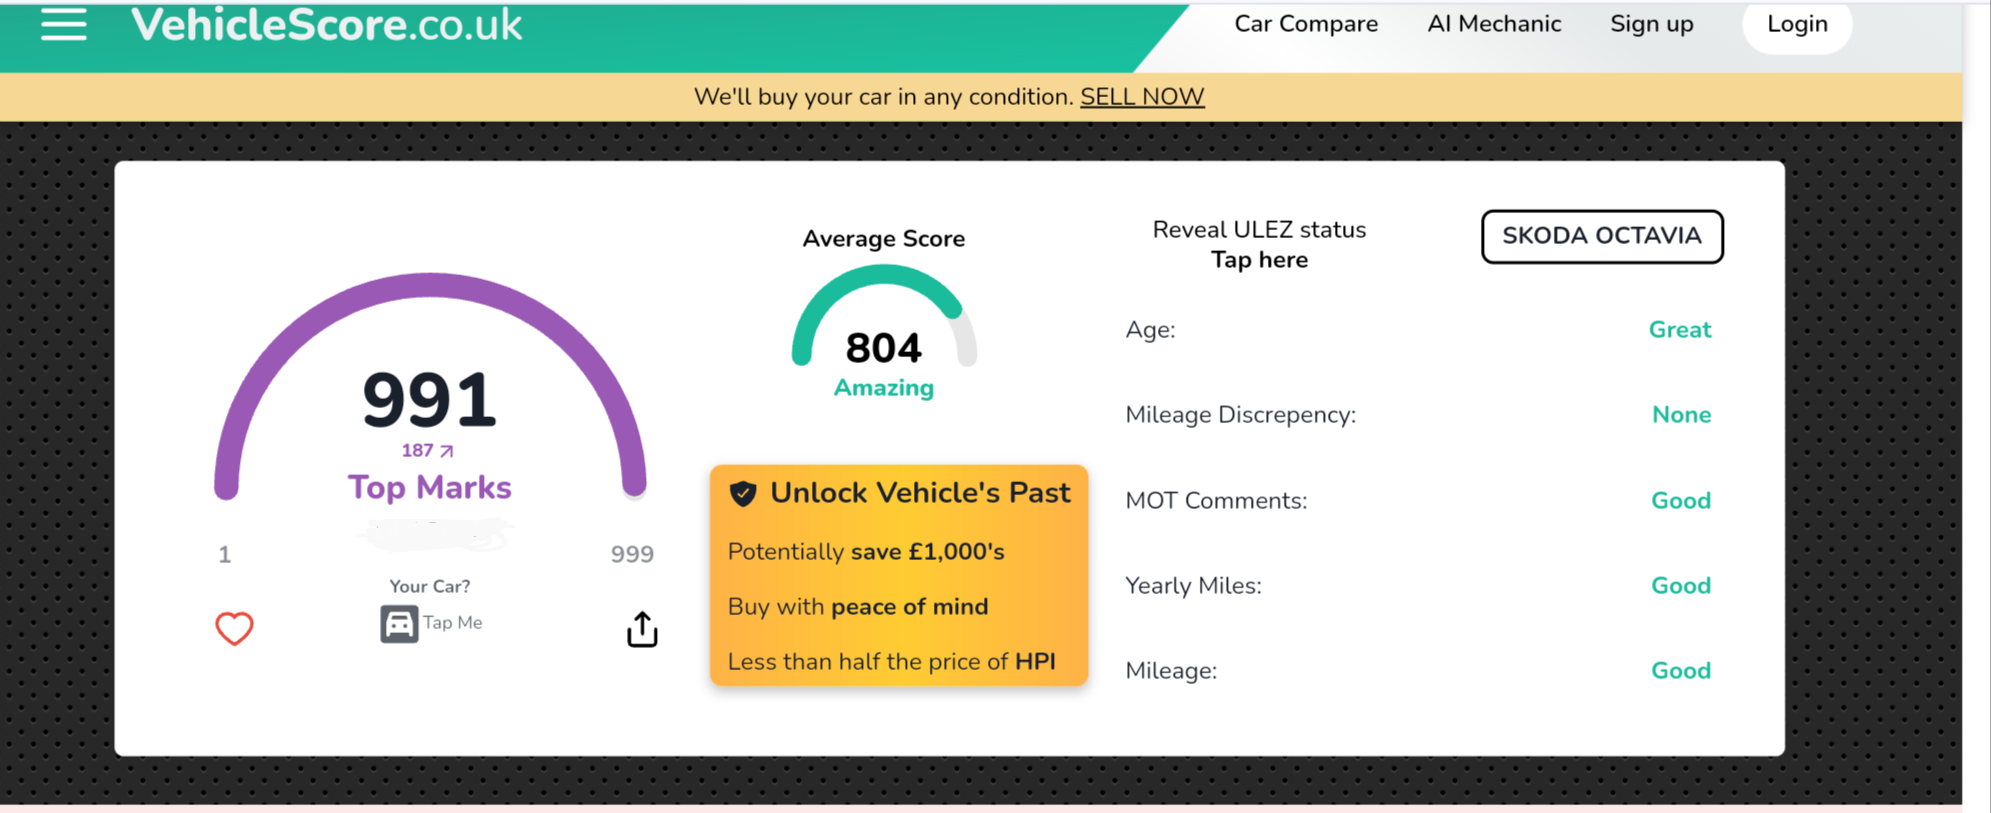
 1 point1 pointBetter'n mine: Albeit mine's a year older than yours, and not an Octy. Gaz
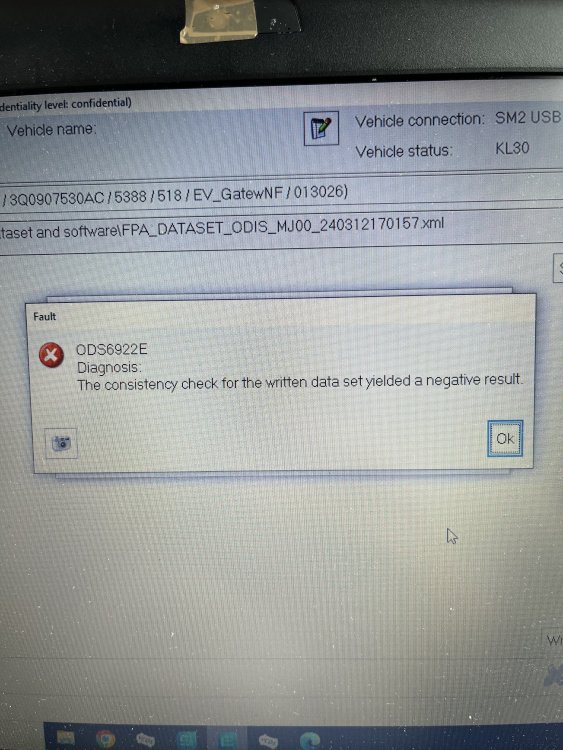
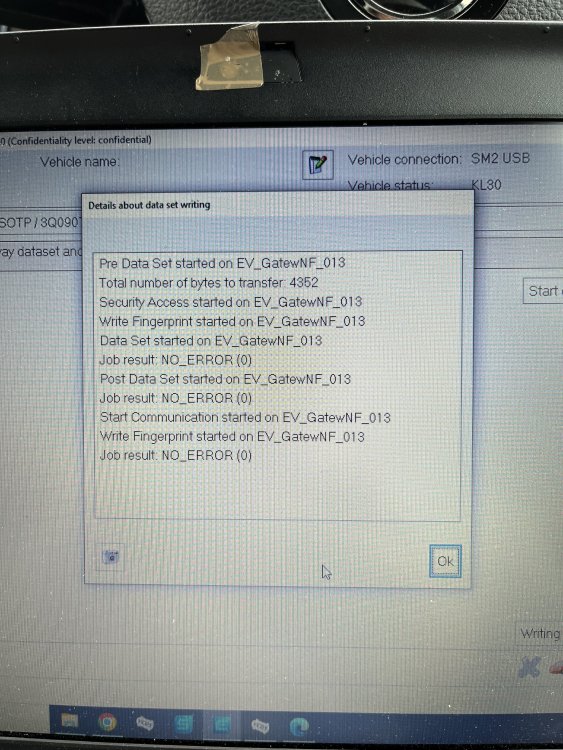
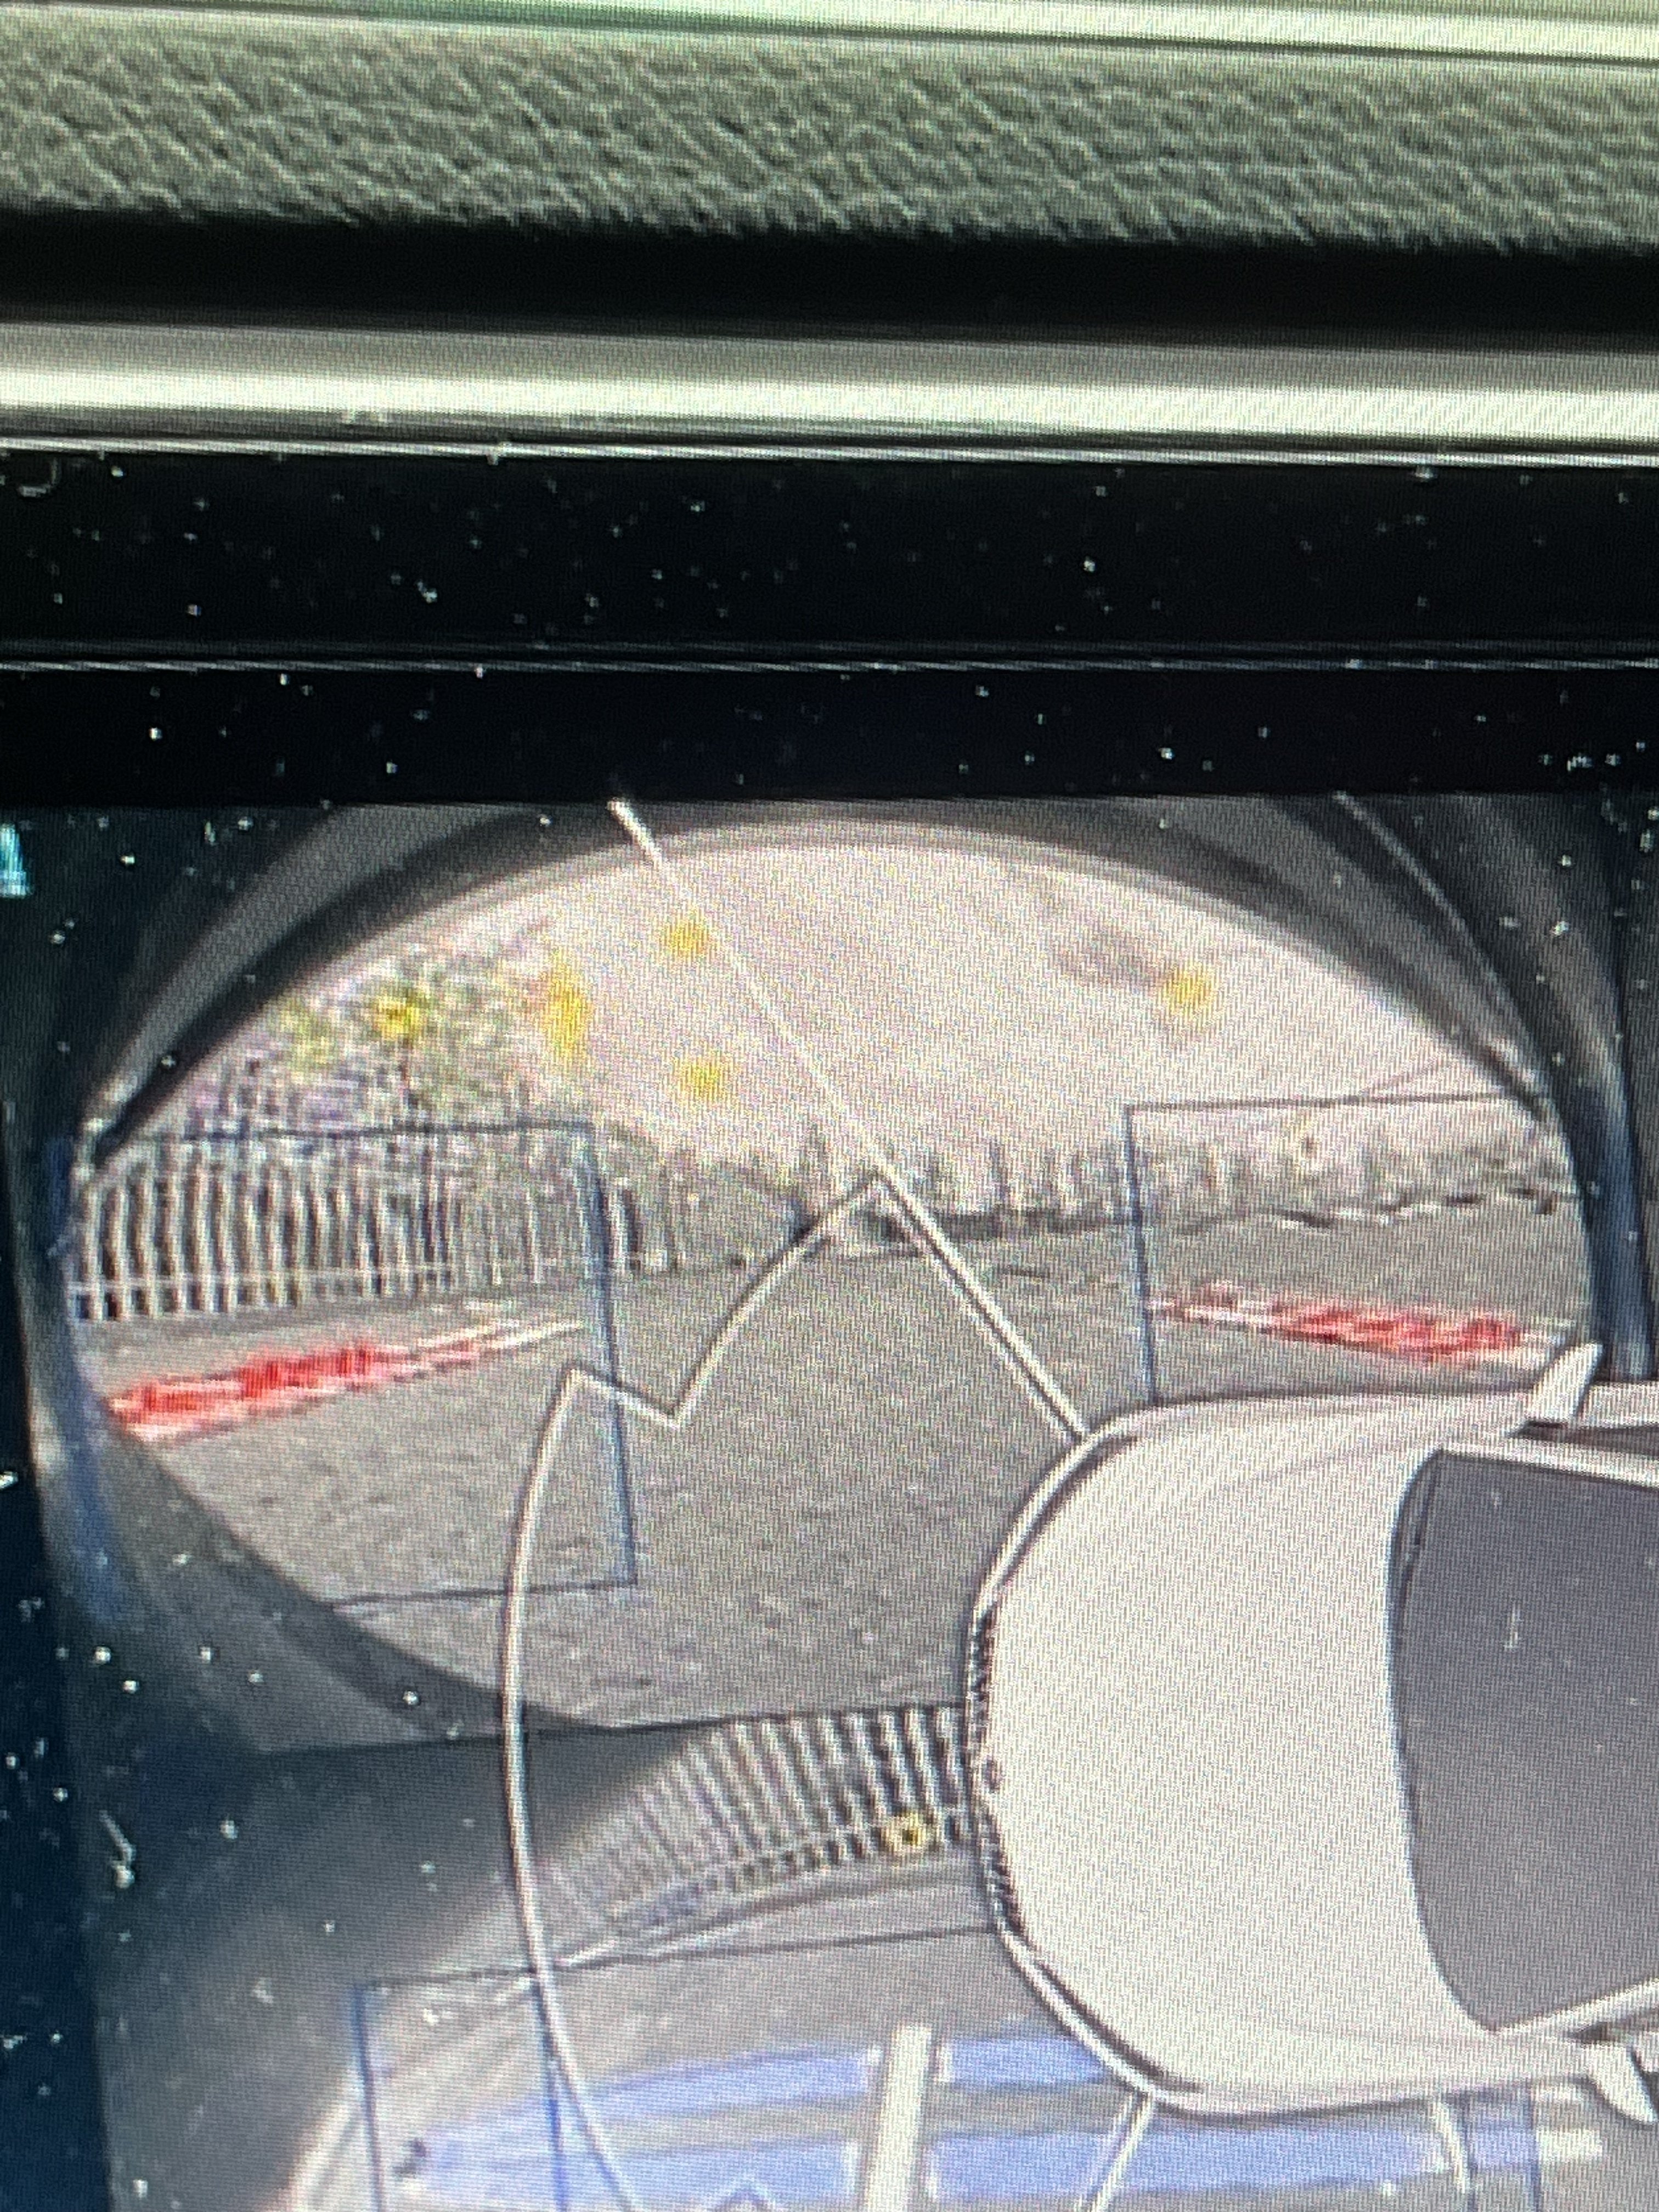
 1 pointI’m thinking of giving them a chance and also asking them to throw in the rear console replacement. If they agree, all well and good. I love the brand, it’s just a shame how everything has been with mk4, never heard of so many issues with a Škoda before.1 pointThat'll do, won't it? Provided that's the outcome, and you've got it in writing. Bloody palaver, but reasonable if it makes things all good. Gaz1 pointSo a few further updates: Areaview fully coded and 'working The coding for areaview is actually really straight forward, the hard part is the hardware and wiring. Gateway - Install list - Add 6C (same as reverse camera) Parking Sensor - Coding - Change to areaview camera type '20' 5F Infotainment - Adaptation - VPS_0x0B to activated Then all the relevent coding in 6C areaview (manual/auto, bodytype, make, model and such, same as reverse camera again) Dataset needs uploading to 6C - only datasets I have are tiguan, passat pre-FL, passat FL Calibrate the camera using vas721001 calibration mats and a diagnostic tool Now I was unable to calibrate the areaview as it keeps picking up errors on the front camera, both sides and rear are perfectly fine. The red lines means its detecting part, but not all it needs (turns blue when it finds all it needs) the yellow dots in the sky are things it thinks its looking for, so that gives us the next issue to work out why and ive narrowed it down to many things: The mats need to be wrinkle free Needs to be done indoors with uniform lighting to prevent sky issues The calibration mat isnt perfect as the forward white lines SHOULD go directly to the end. not stop short. The dataset currently on there is for a tiguan which has a different camera placement, i may try a passat pre-FL which is much more similar to my setup. The camera I have fitted is too low and not in a suitable location, could try lifting the car up level on bricks 2/3 inches or may end up having to change camera mounting location, yikes. All of these need to be worked out so i can fully calibrate the system and have a seamless image. Next up, the heated washer jets were coded, real straight forward: BCM 09 - adaptation - Window heater-Waschduesenheizung to active The heated steering wheel again was real straight forward and all done through HVAC 08 - coding: Byte 11 bit 2 - 1 (Enable heated SW) Byte 11 bit 3 - 1 (Enable multi-stage heated SW) Byte 13 bit 2-3 (Decide if you want it to auto come on with the heated seat or outside temp) The phone charger with antenna base again, very straight forward on coding, all in 5F infotainment - coding: Byte 15 bit 0 - 1 (Enable baseplate) Byte 15 bit 1 - 1 (Enable antenna amplifier in baseplate) Byte 15 bit 2 - 1 (Enable wireless charger) This came with a fault code - B156401 - Antenna for telephone mount, electrical error and working out exactly what this fault code relates to will be fun, the below are the options that need further diagnosis: My coding has a possible problem and im either missing something or wasnt meant to enable bit 1 My fakra cable from charger to amplifier is faulty My amplifier is faulty Amplifier not receiving power, ground or switch on signal Faulty charger or roof antenna (but both brand new so id hope not) Faulty fakra cable between amplifier and roof antenna The USB hub was next, this added a second USB port in the centre console that is fully supportive of carplay/android auto and everything else and coding was very simple again, all in 5F infotainment: Byte 19 bit 6 - 1 Byte 19 bit 7 - 1 (Both of these will already be on if you have a carplay/android auto USB port) 5F Adaptation - Interface for external media activation - connection 1 → activated Interface for external media activation - connection 2 → activated Straight forward and no faults with this, fully working and no issues! The TV tuner was next, now this im only half way through sorting and have yet to disable component protection which means i cant currently see anything and my TV list only shows liverpool tv, so something is very very wrong here but im yet to work it out. There are no faults for any open antennas or such, which is a very good start! The coding so far is as follows: 5F infotainment - adaptation: Gateway component list: TV Tuner - enable TV_tuner_0x2C - enable TV_tuner_0x2C_msg_bus - currently not sure, possibly Terminal 15? menu_display_tv_tuner - enable Gateway - installation list - 57 TV tuner Now with this coding I have no fault codes anywhere except component protection, which is a good start! Im yet to fiddle around and see if anything works on this side so when i find time ill do this In preparation for the DCC retrofit, A custom gateway FPA dataset is required, this now gets a small bit complicated. So a lovely gent managed to decode the entire gateway dataset to allow reverse engineering. The only issue, you need to have a gateway with at least version Q, mine was C. I thought id give it a go, so first I intercepted my own dataset from ODIS for version C of gateway, when looking at it under a HEX editor you could see the differences already between a version C and Q dataset. Namely the section that holds the FPA data starts at address 0B80 on a Q dataset and is exactly 4352 bytes. On my C dataset the address with 4352 bytes started at 0320 which is NOT 0B80, this is an issue. I tried picking out the individual bits I needed but this was no good. Annoying as I would of prefered to make small changes to my current dataset instead of creating one from scratch. Next I scrapped the idea and started from scratch and began using the FPA editor to create a dataset - http://www.mqbtools.nl/fpa/ Once this dataset was done, I couldnt upload it as its only suitable for Q and onwards software. So the gateway module now needs an update! There are two paths for 19 gateway modules that are 3Q0907530 - Lear and Continental. Both have the same suffixes for hardware and software but are NOT interchangable. If you do that, youll brick the module. So as I have continental (can read through diagnostic or physical checking label) I know that my software numbers start with 5, whereas lear start with 4. So my continental software was C - 5287 (Lear C - 4287) and I needed to get to at least Q - 5344 (Lear Q - 4344) (With gateway, as long as its a valid software, you can flash forward, backward, skip some, do whatever. No risk of bricking) So I made the choice to jump to the newest version which is AC, or in full 3Q0907530AC - 5388 (Lear 4388) after this, everything worked perfectly except for loosing coding, adaptations and many fault codes..... I then used ODIS-E to reconfigure the coding and adaptations to what they were before, no issues here and now almost all the fault codes are gone and no more dash errors. The custom made dataset was then uploaded to the module (ODIS-E did not like this but still accepted it) as the checksum was incorrect, but still a valid dataset. The only additional coding to enable the DCC options to appear in profile selection was 19 - coding - FPA_Funktion_DR (DR for damper regulation) Everything is now working, but im left with a single fault code that there is no documentation on "00301 - 769 - C115531 - Analog measurement input, No signal" and although it causes no issues, This will be a seamless build with no faults left so i done some digging. I found a single other person who had the same issue and they advised I roll the software from AC to AA - 5366, I am yet to try this but I have acquired the software, so that will be my next test to see if it fixes it. The only saving grace, all datasets for anything from Q to AC are the same and can be uploaded with no issues. We currently have a working DCC slider and options displaying (but of course not doing anything until the coding for DCC and damper fitting)
 1 point1 pointI know it sounds simple but it's not possible. When car is remotely locked, it uses dead bolts and then it can't be opened from inside.. Asking these questions makes me think if I am stupid and missing something but it's Skoda who have messed this up in design when converting from LH drive to RH.1 point1 pointIn electronic parlance perhaps the clockspring would just be called a ribbon cable!1 point1 point

.thumb.jpg.f83a46b9b3c0d976b9dbffbb523c9874.jpg)


.thumb.jpg.9dd3f612ba7f13d10be5c518d3c8d255.jpg)


Important Information
Welcome to BRISKODA. Please note the following important links Terms of Use. We have a comprehensive Privacy Policy. We have placed cookies on your device to help make this website better. You can adjust your cookie settings, otherwise we'll assume you're okay to continue.