Leaderboard
-
pinkpanther
FREEDOM8Points3,908Posts -
Warrior193
FREEDOM7Points6,237Posts -
MikeTheThinker
FREEDOM7Points8,481Posts -

Lee01
FREEDOM7Points36,146Posts


.thumb.jpg.9dd3f612ba7f13d10be5c518d3c8d255.jpg)
Popular Content
Showing content with the highest reputation on 19/10/25 in all areas
-
2 pointsA few from Clumber Park this morning - great to see so many Swans (Avian flu decimated the population a few years back)


 2 points
 -
2 pointsIt's the modern way - the fuel gauge fronts gubbins that smooths out small changes so that fuel gauge won't move around wildly. SO if you put a small amount of fuel in it may not register. I've experience this with a few courtesy cars where I just put in a few litres to cover a relatively low mileage covered - I always get a receipt to show the dealer but the gauge doesn't always seem to move.2 points
-
2 pointsThat's a brilliant result. Just need the code for black now!!2 points
-
2 pointsWhat year is your Octavia ? My 2016 has a strap not a handle at the bumper end of the boot floor2 points
-
2 pointsSee how you get on at payday when you fill the tank or take the gauge well passed the low positions, things might free up with use and out of sticky range.2 points
-
On the infotainment under the Car screens you will find a TPMS reset option.2 points
-
2 points
-
2 points
-
2 pointsIf the rest of the head lamp assy is in good shape, is not brave because you're poor, but the right thing to do 😉 To throw away the entire thing for one burnt LED ... no no! Let us know how it goes!2 points
-
2 pointsMany thx to all of you, I'm brave, because I'm poor , so I will open to fix with Aliexpress parts..2 points
-
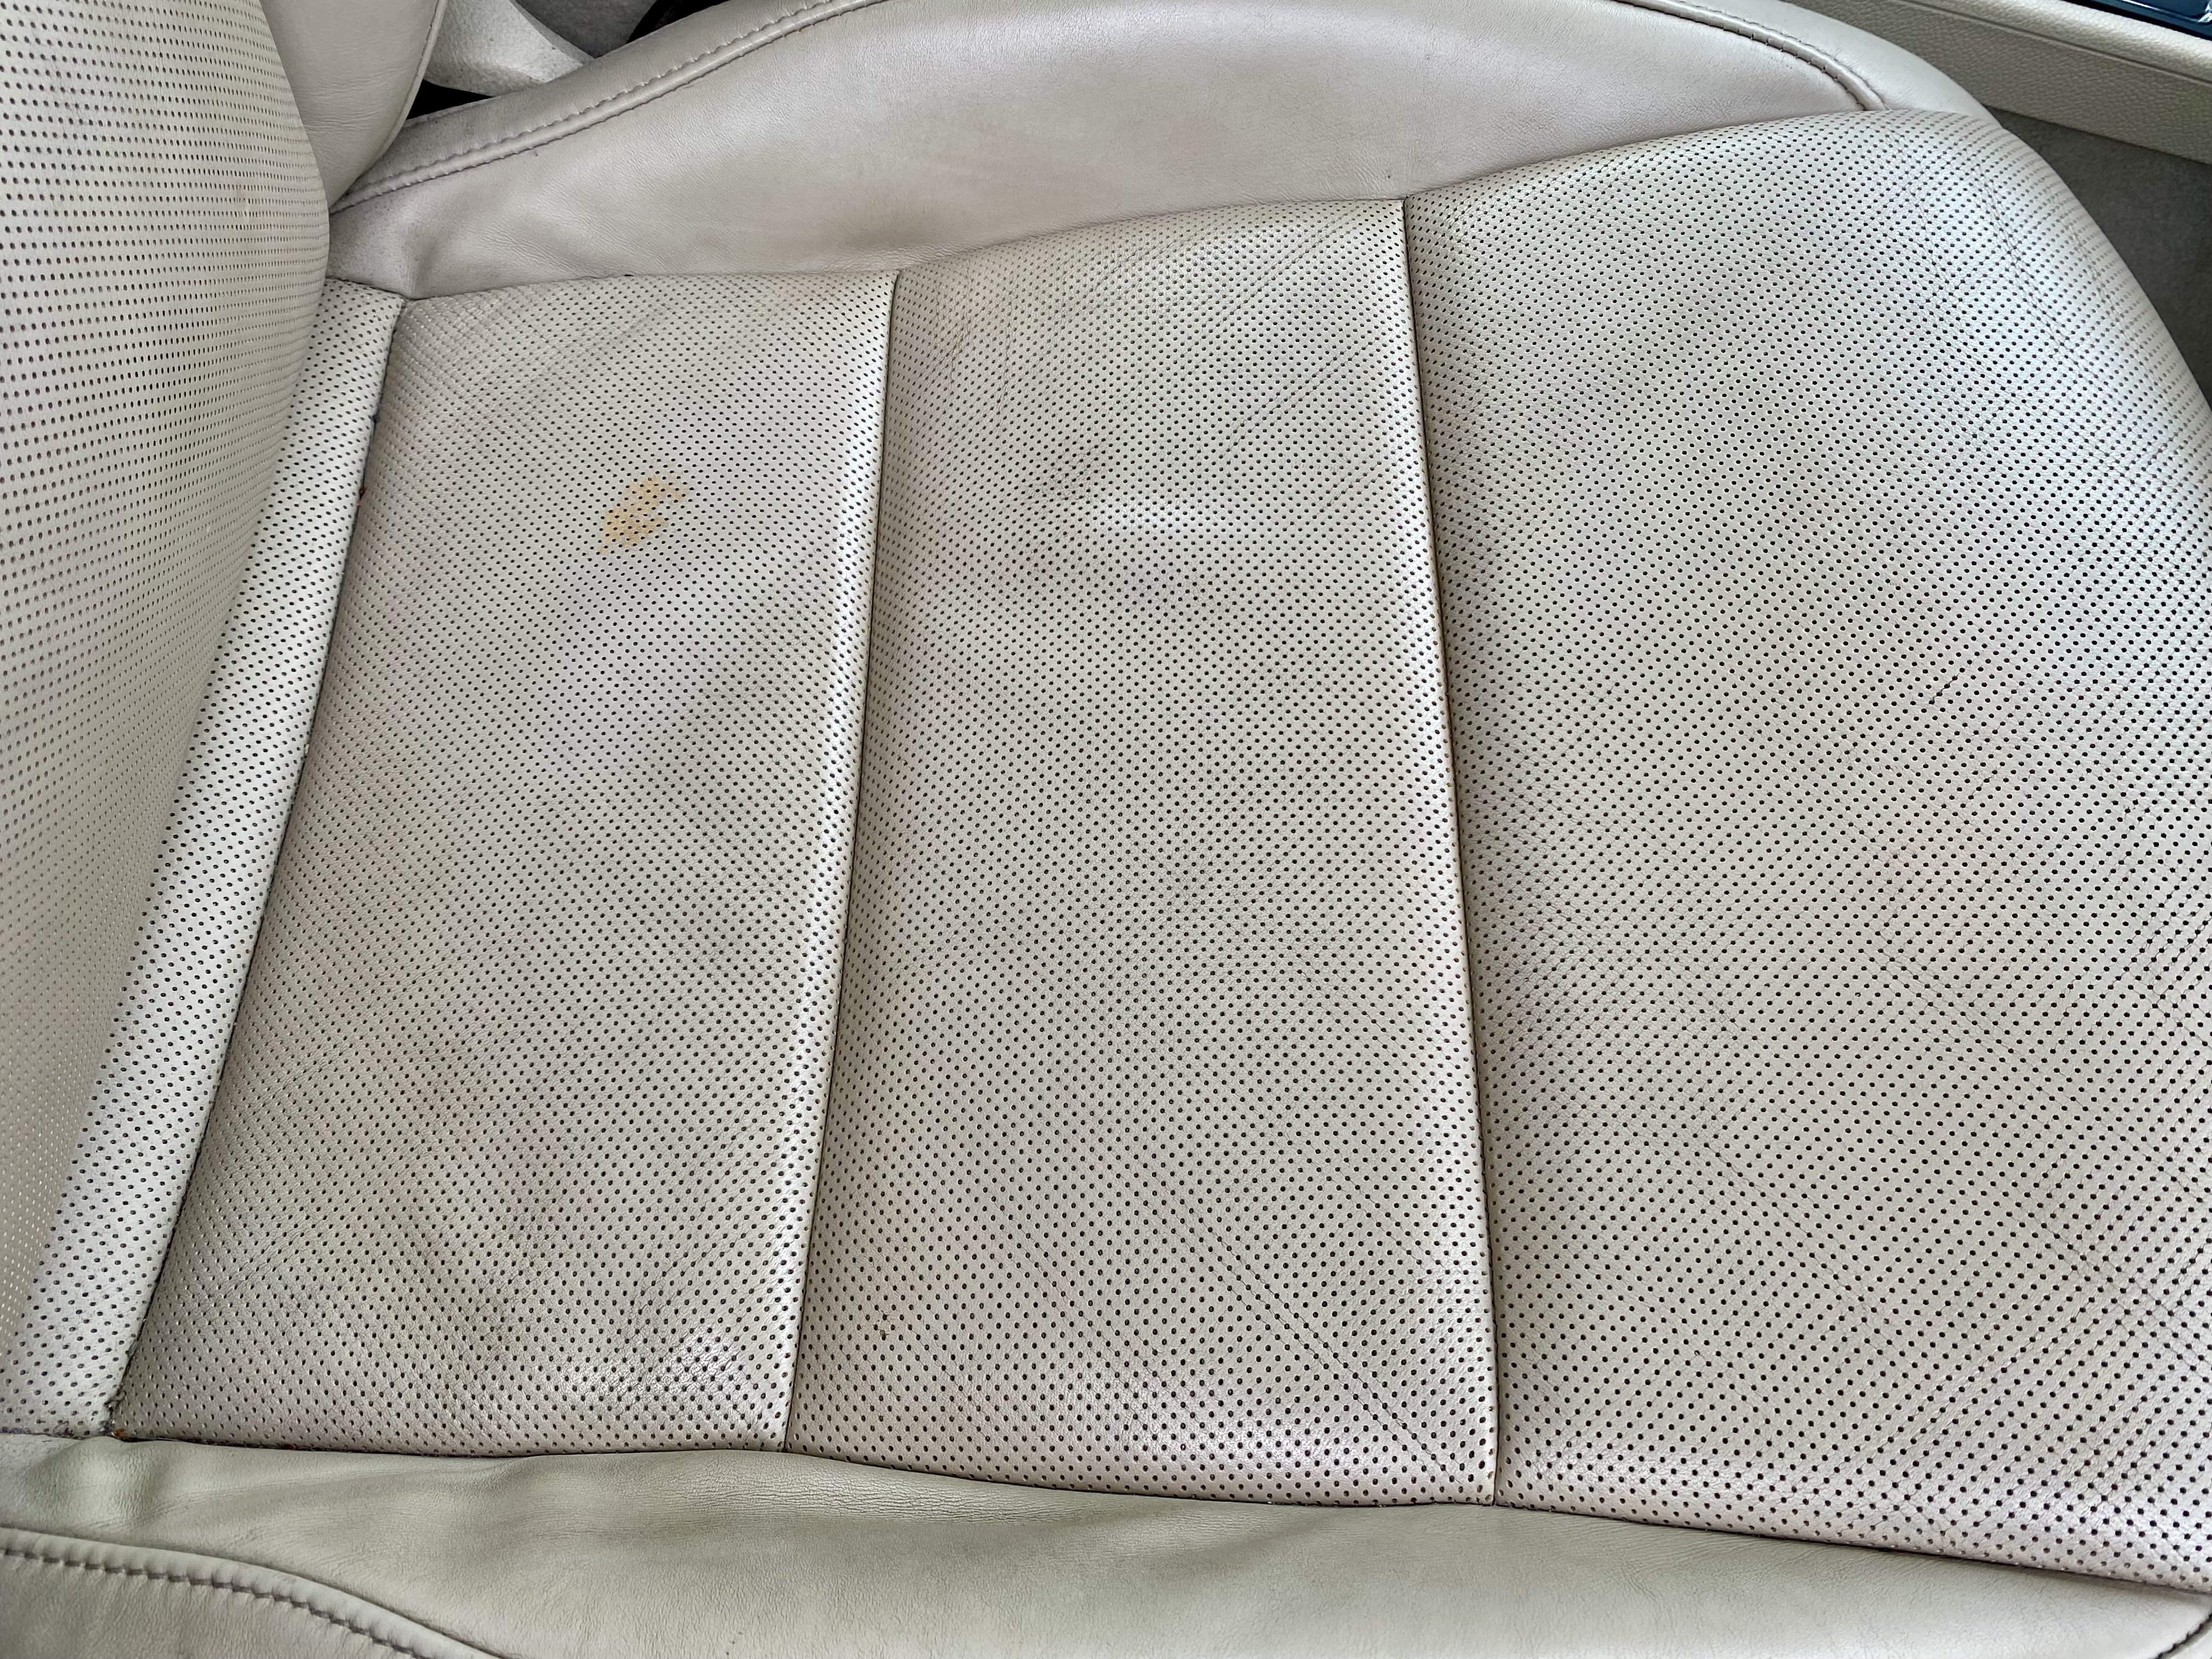
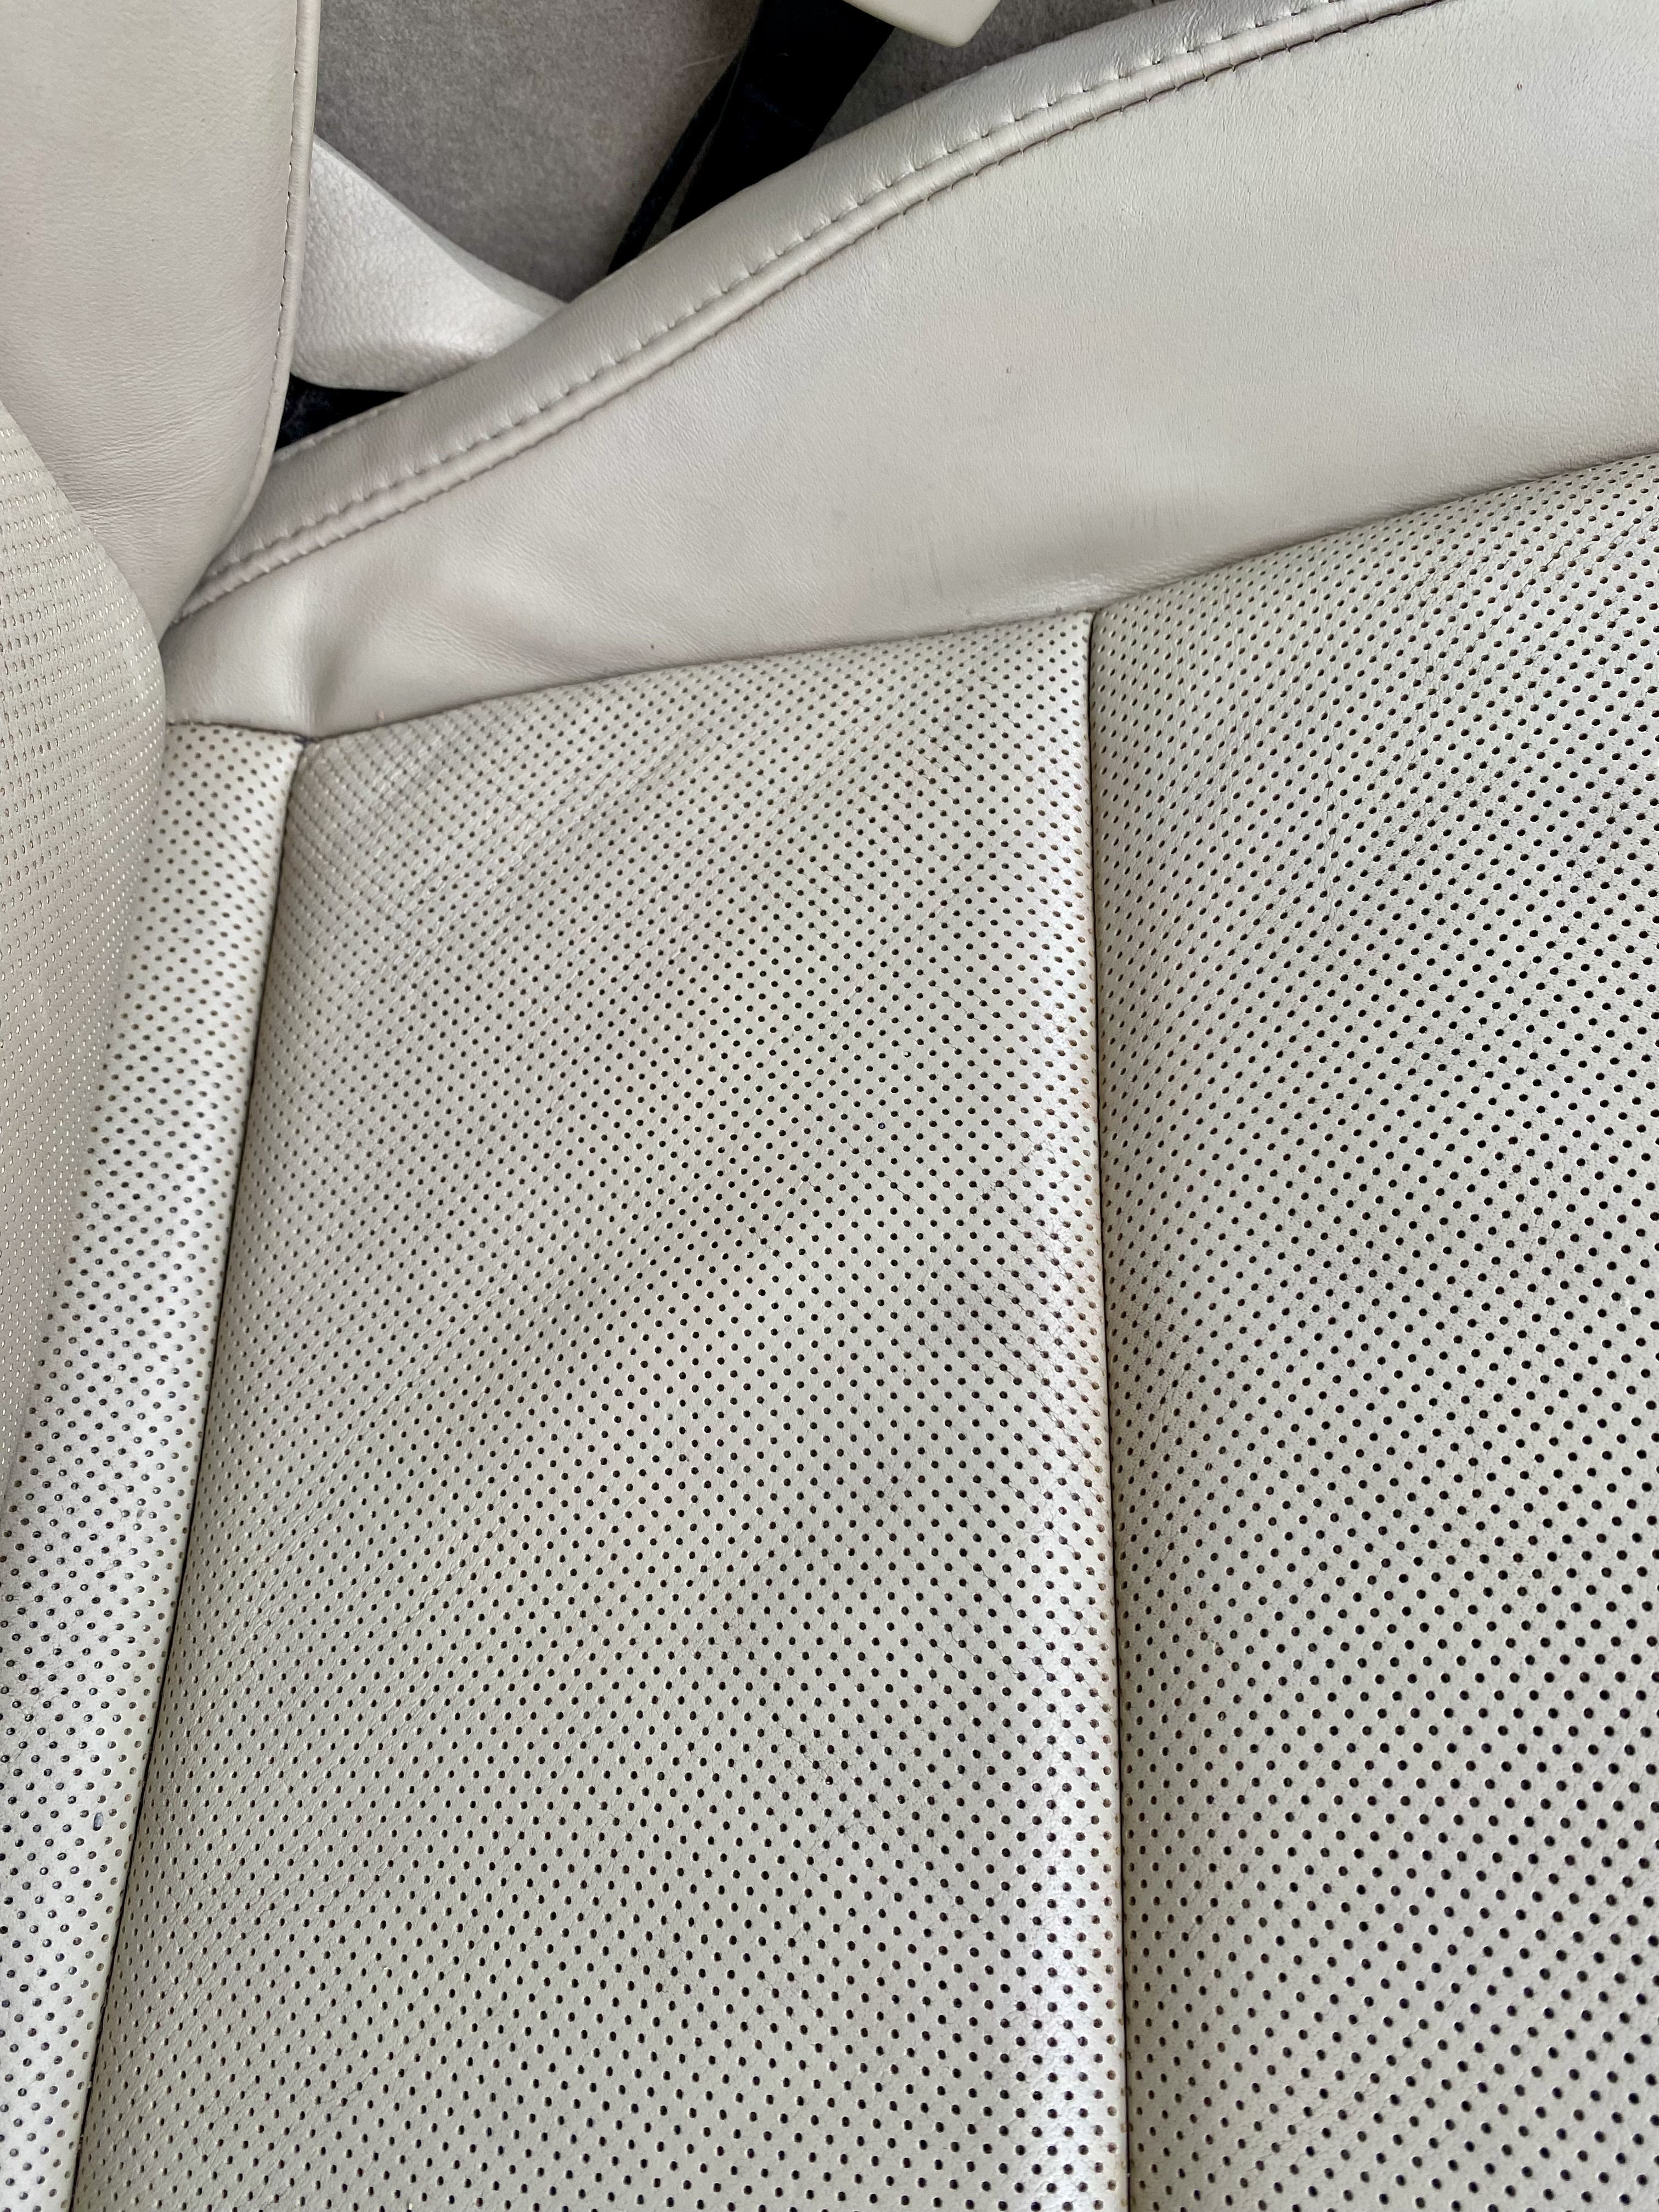
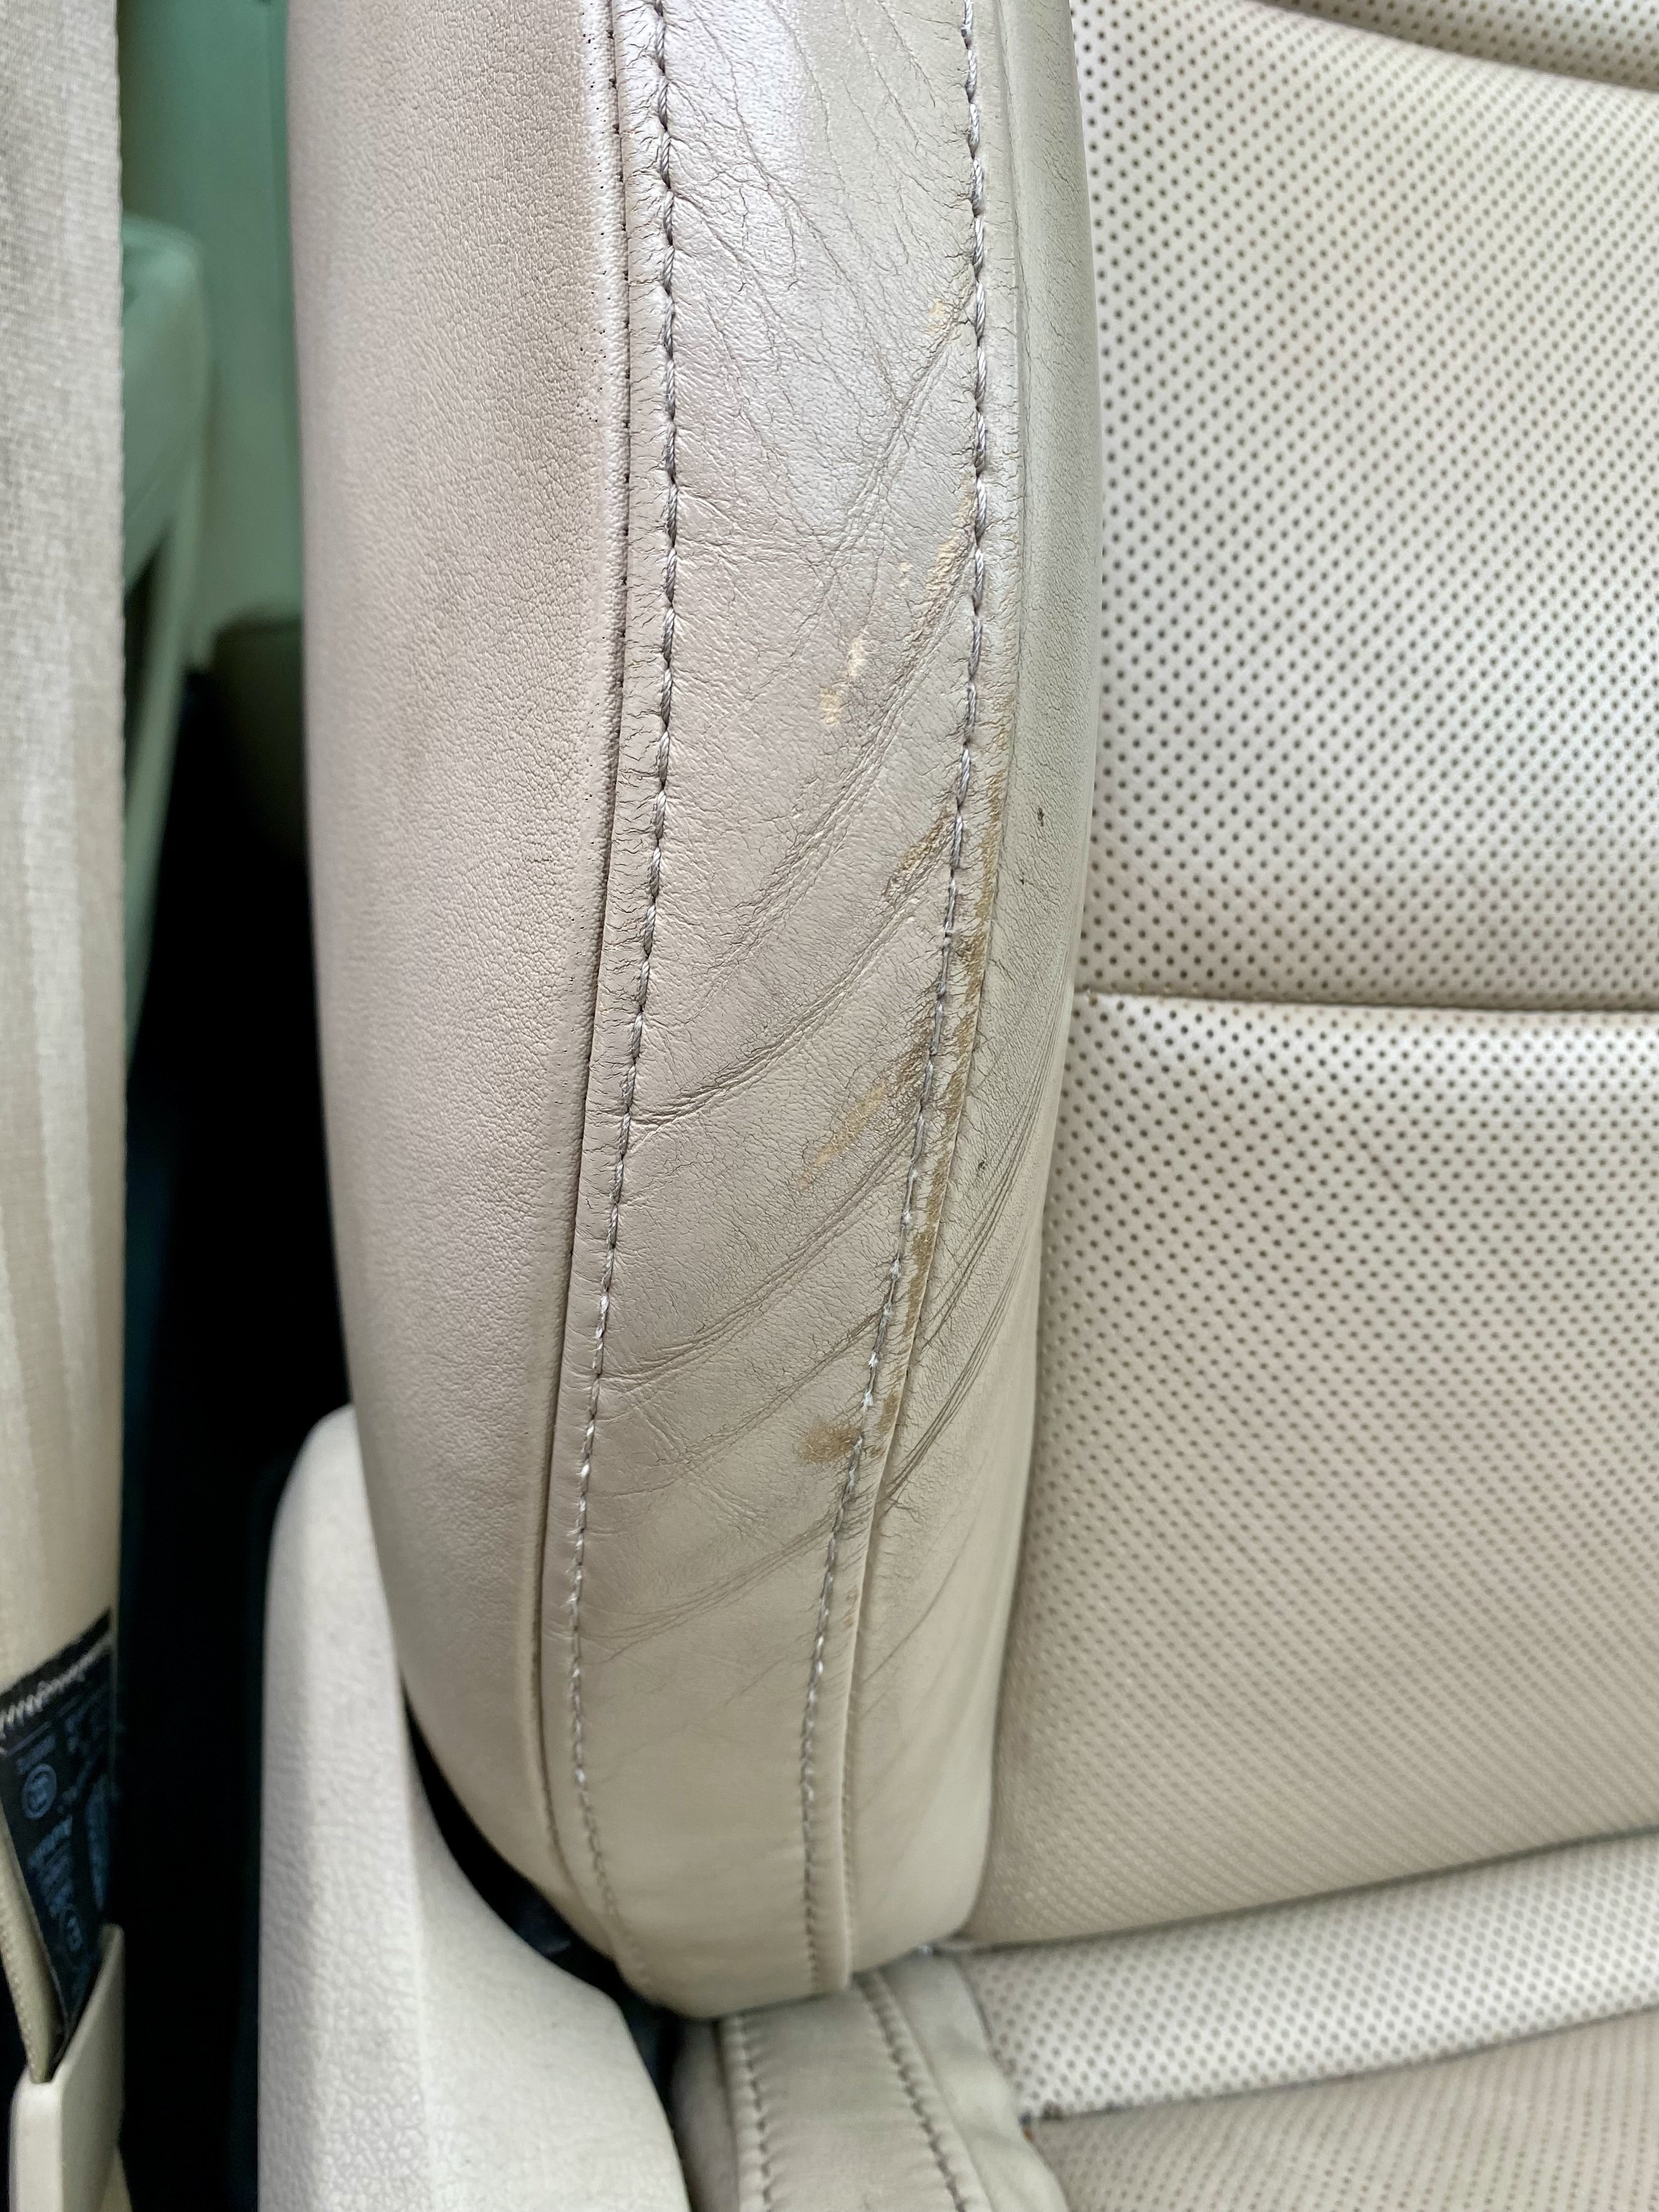
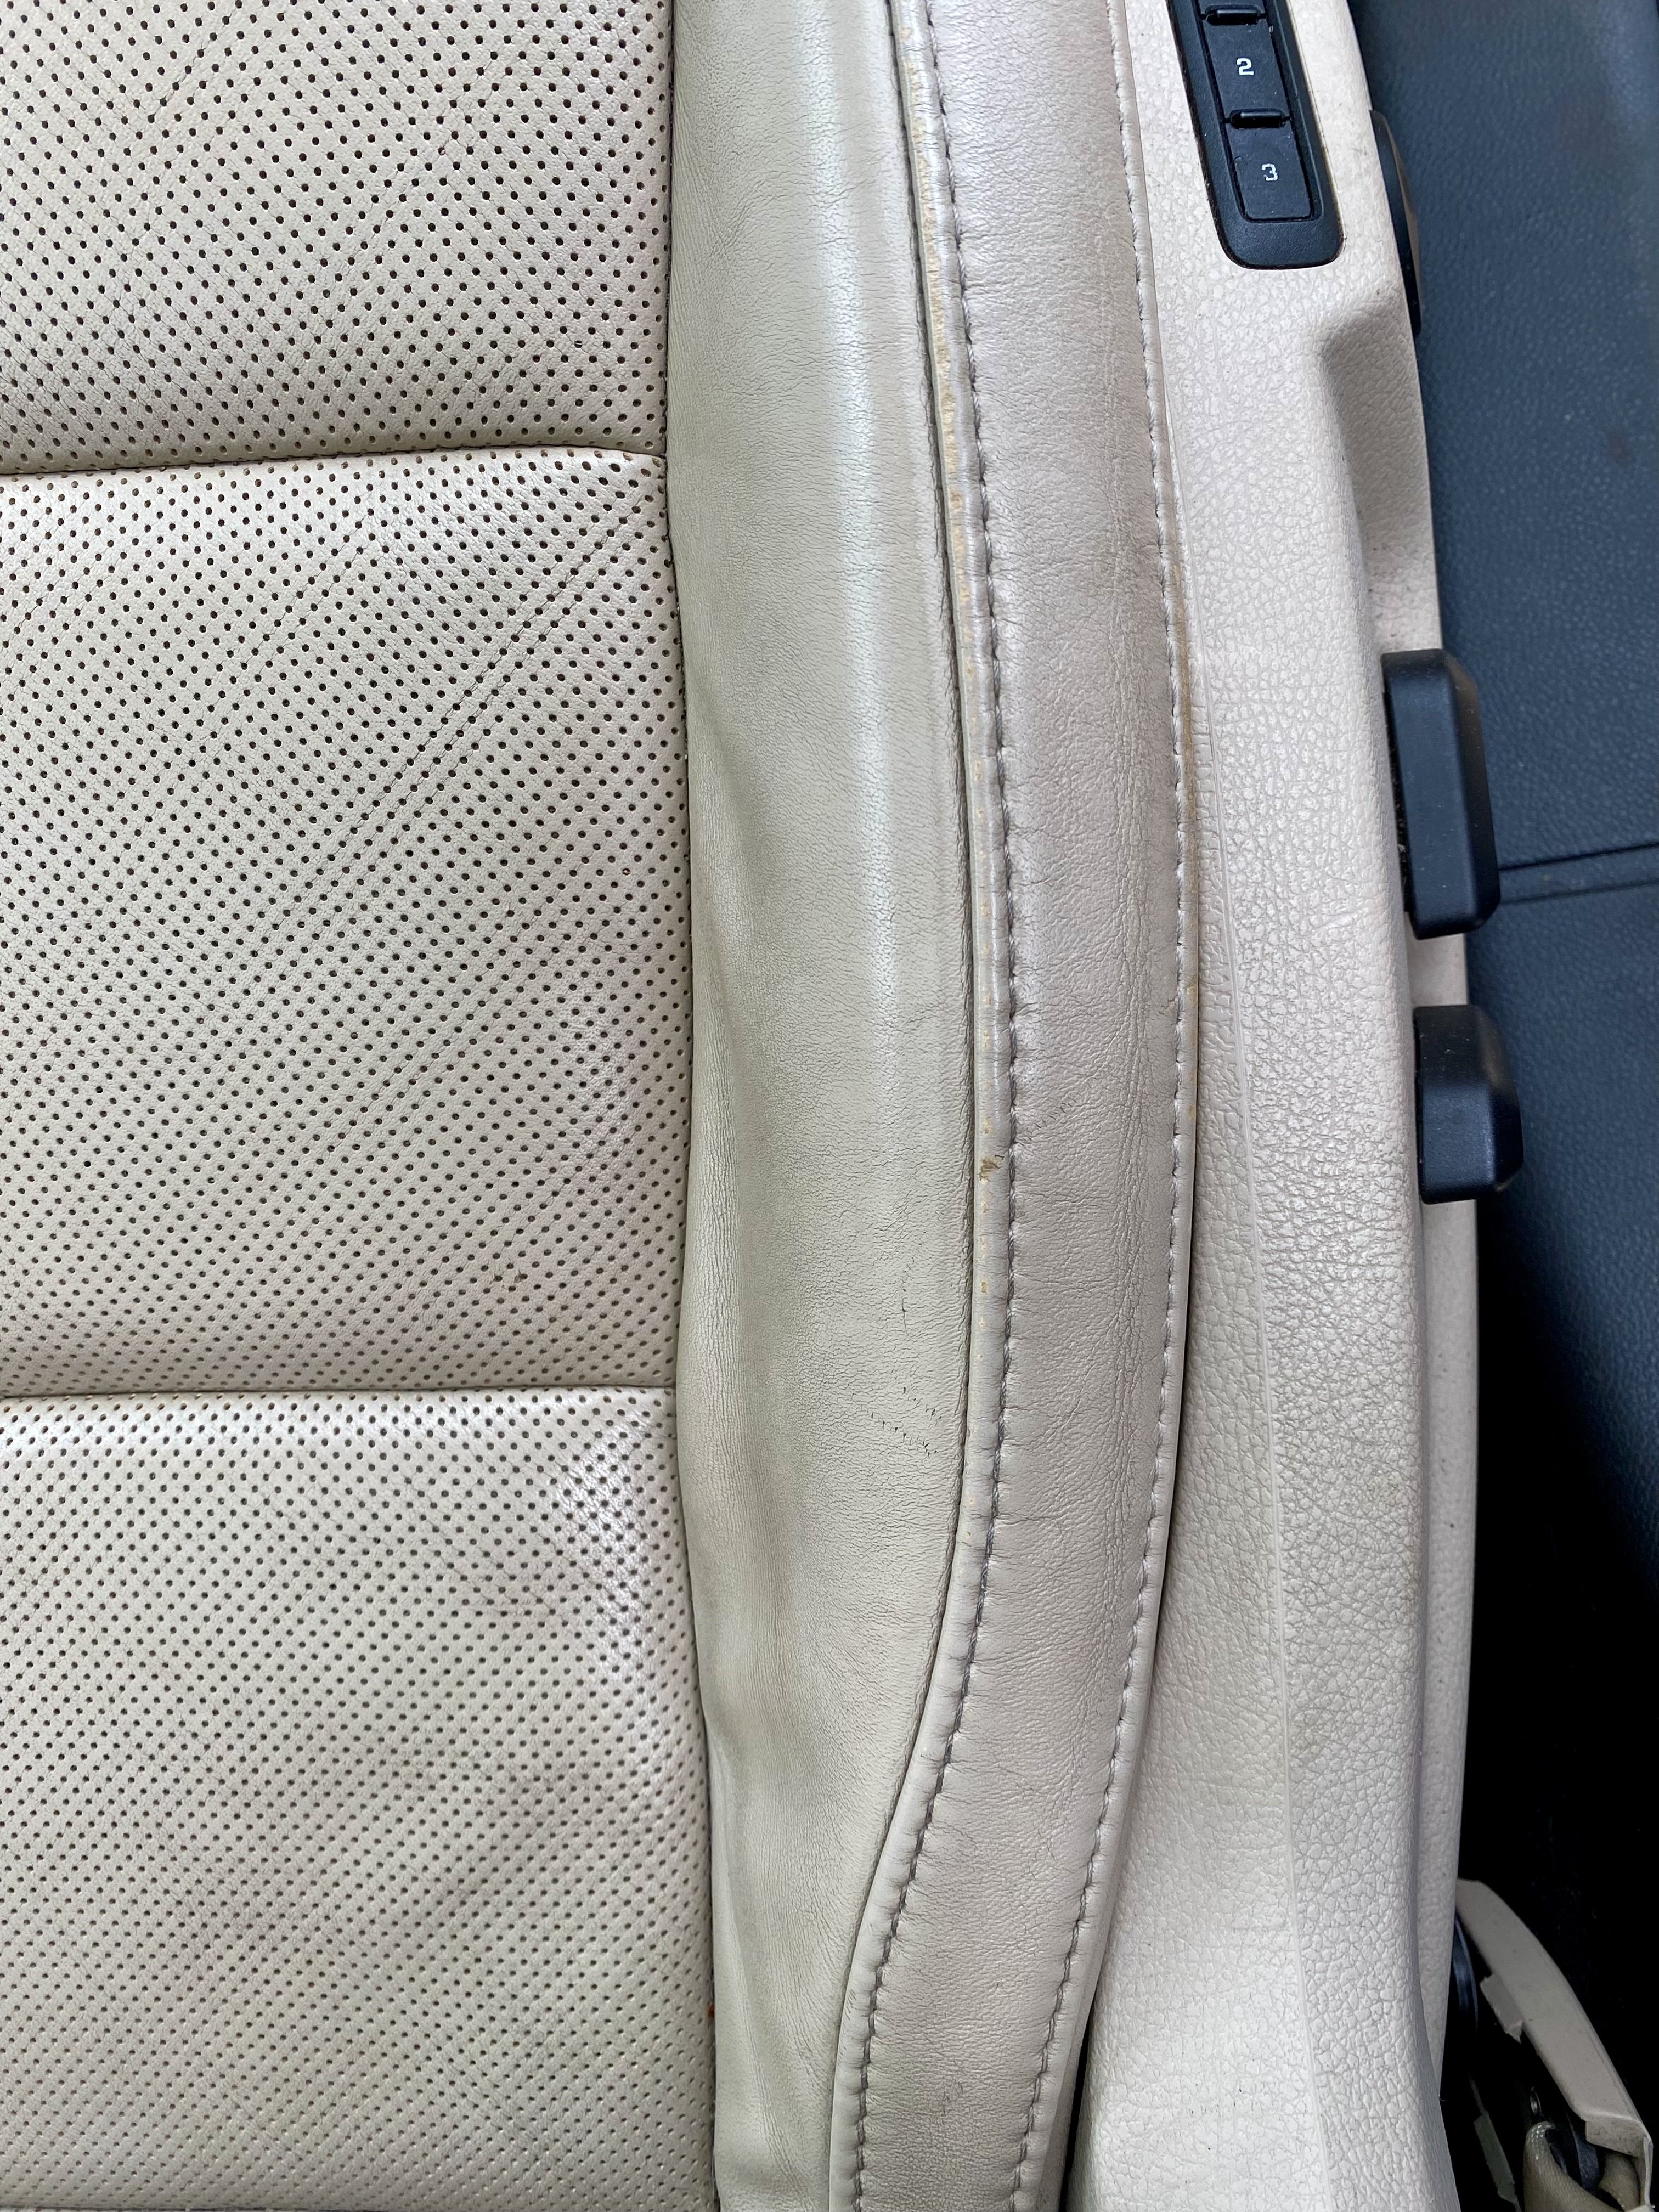
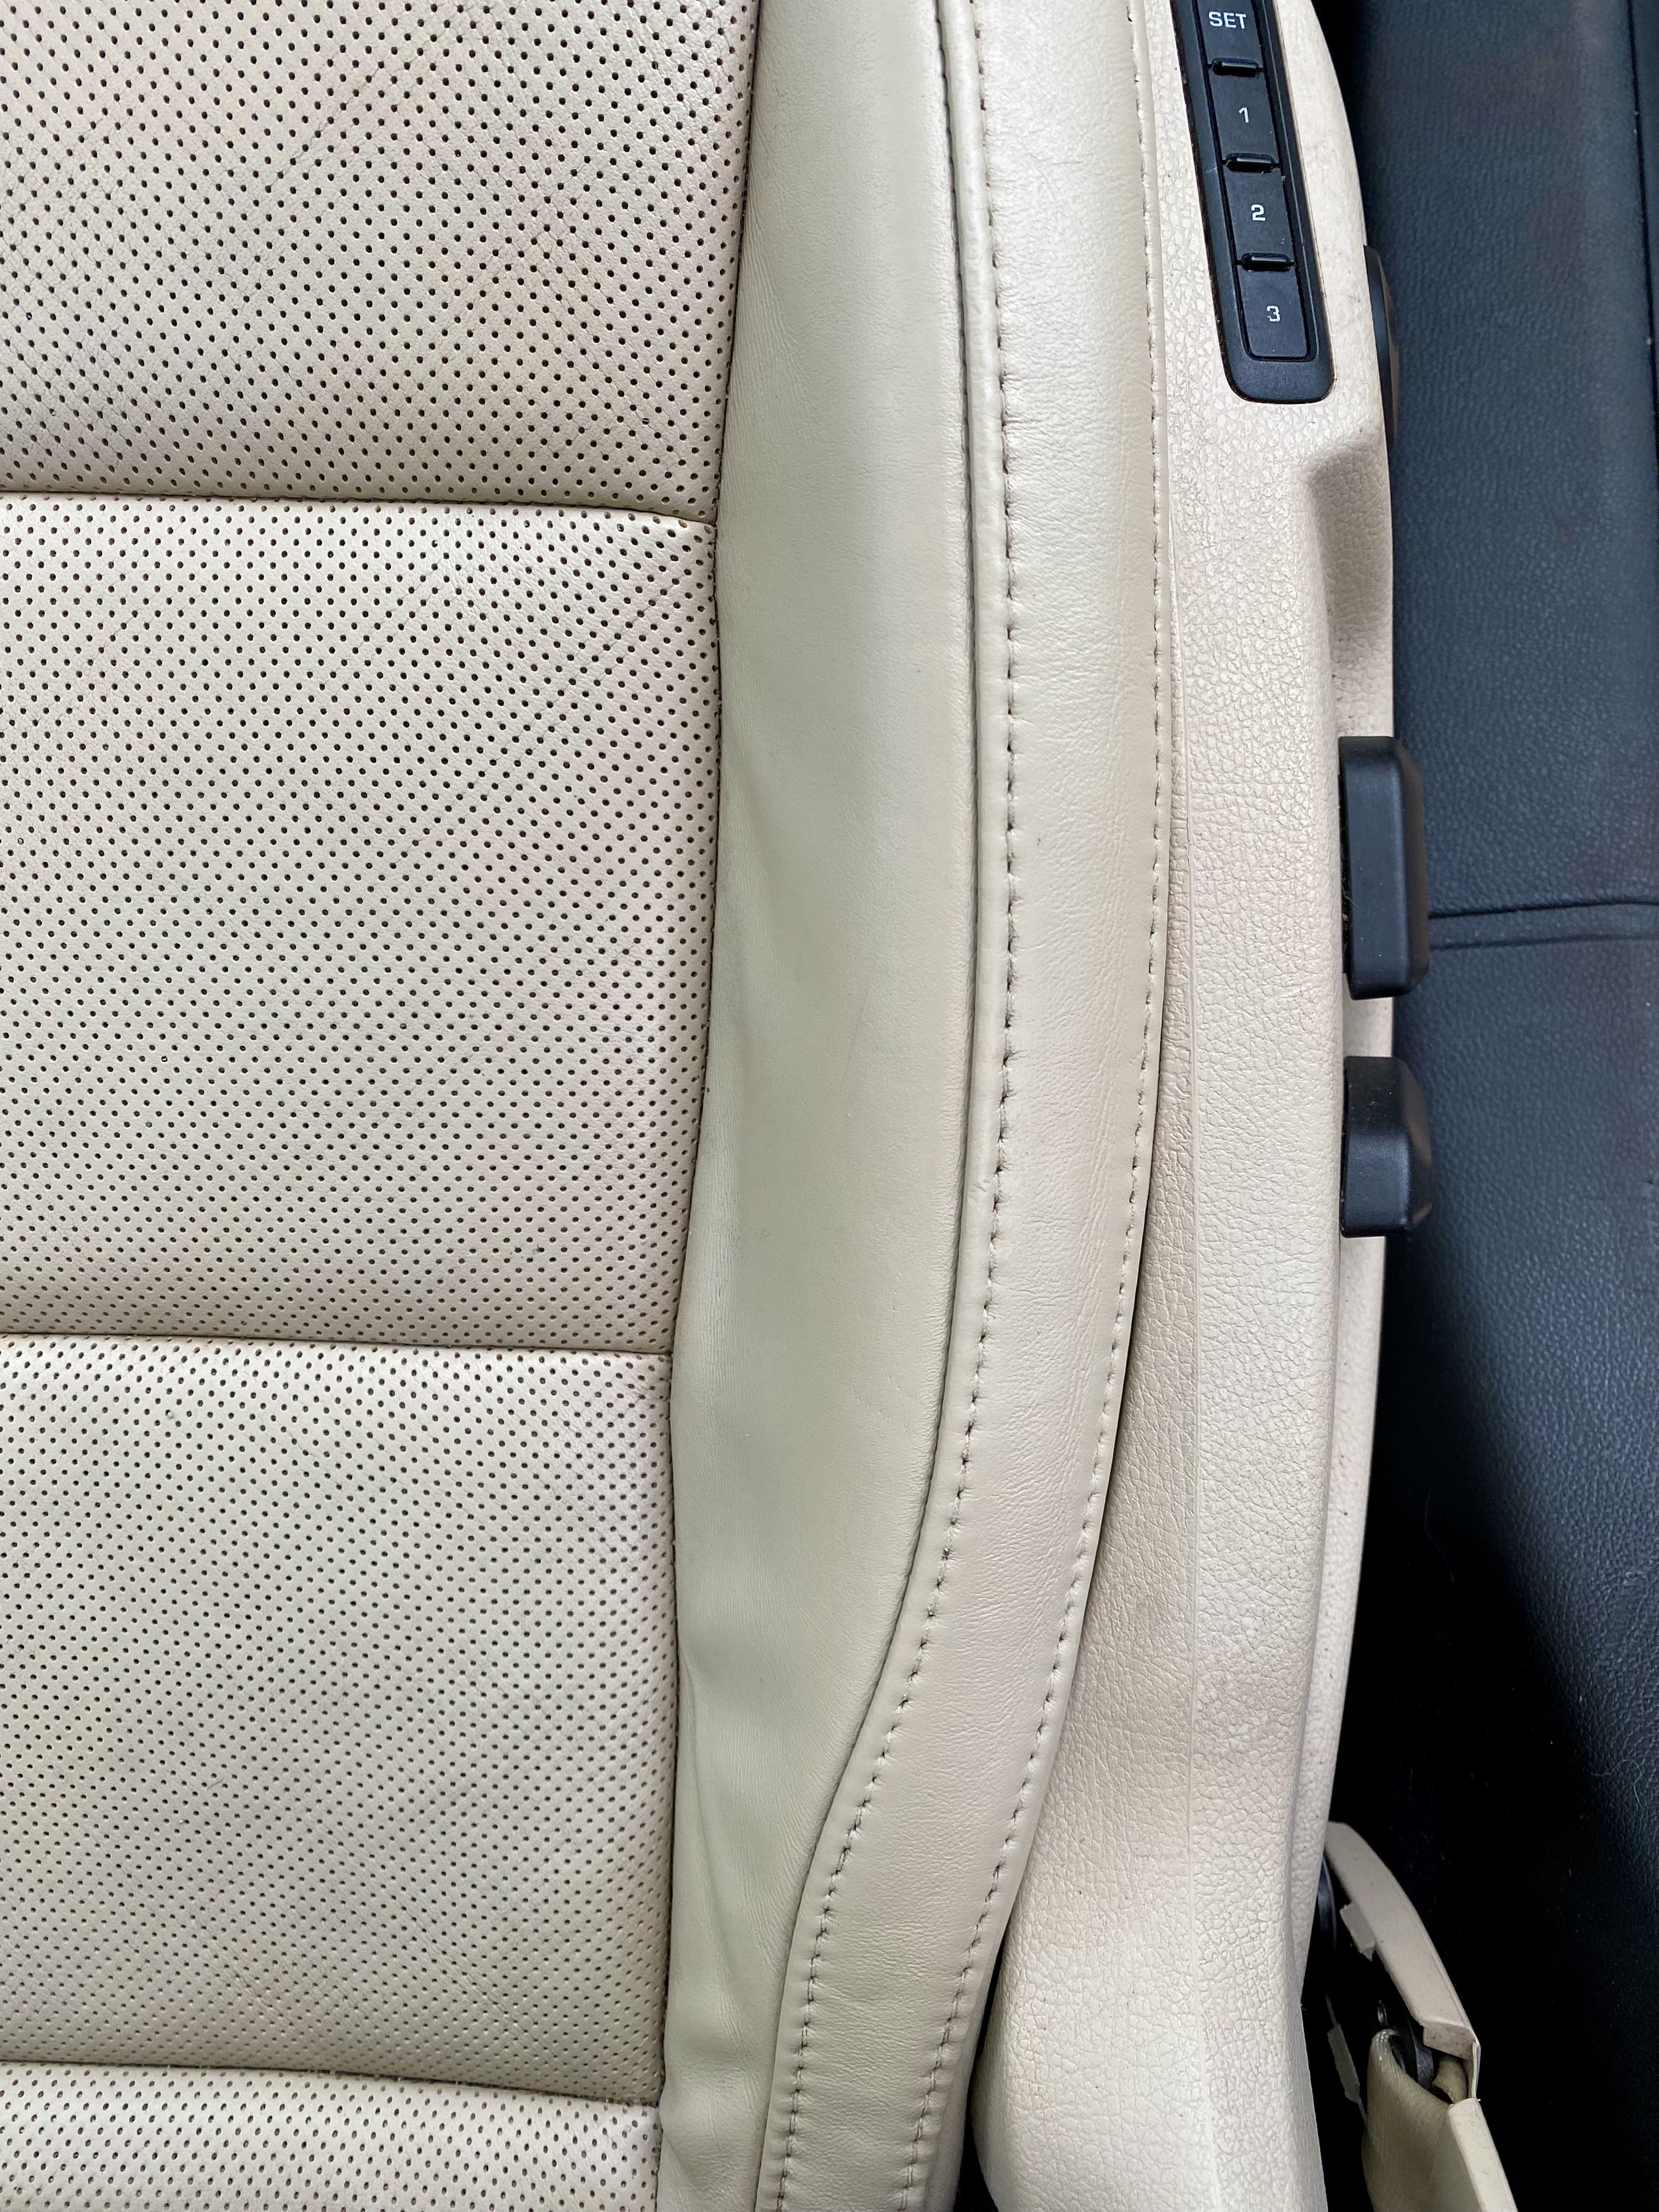
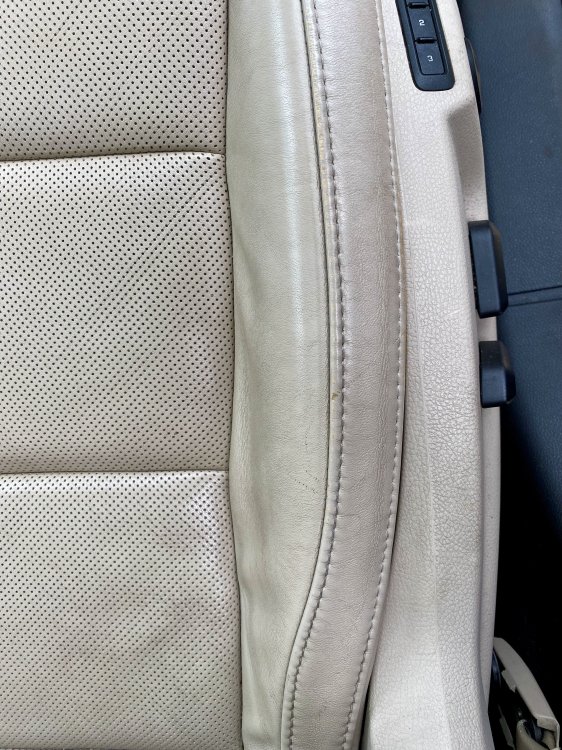
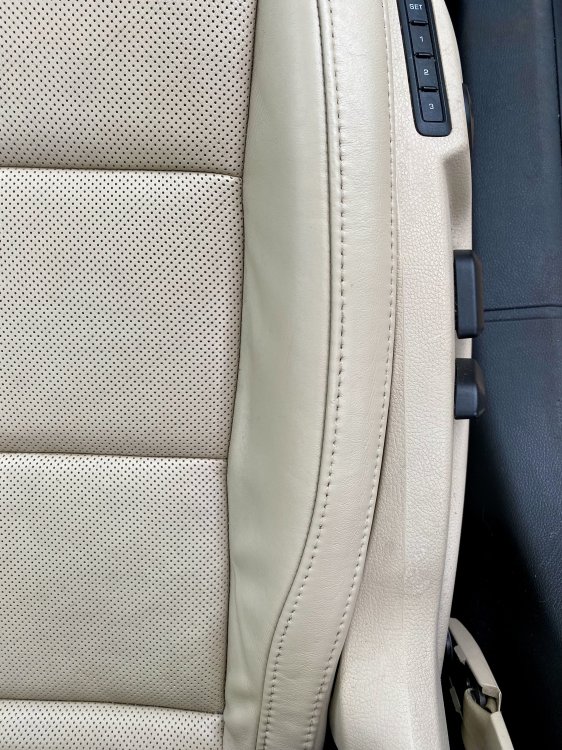
After 13 years and 85,000 miles, the driver’s seat on my 2012 Superb was looking slightly tired, with minor wear and some colour loss, especially on the bolsters. I also had an annoying little patch on the seat base where the colour had worn through to a yellowy-orange layer. A couple of weeks ago someone posted that they’d used Furniture Clinic leather repair paint with good success, and included a colour code for their 2012 Superb with ivory leather, same as mine. If you’re reading this, thanks! I contacted Furniture Clinic to confirm the code, and their response was understandably cagey - they cautioned that the match might not be perfect on my car due to differing wear use and sun exposure, but I took the gamble and ordered 50ml quoting the colour code KM8127. I also gave a description “2012 Skoda Superb ivory”. I figured that if I took a sample from an inconspicuous area, or even if I sent them a headrest, the wear and exposure would be different from the seat base anyway. When I received it I was a bit sceptical. The paint looked too “biscuity” in the bottle. But I tried it on an inconspicuous area and the match was as near perfect as you could hope for. It went on the correct colour, and was virtually indistinguishable once dry. So yesterday I spent the afternoon working on the seat. First, I cleaned the whole area (not just the bits that obviously needed attention). I didn’t buy the special cleaning product; I used dilute Fairy liquid on a cloth and dried it with kitchen paper. Then I degreased - instead of using their alcohol cleaner I used electrical contact cleaner on a clean cloth, and immediately wiped over with kitchen paper to mop up any greasy residue. I also considered using spectacle lens wipes - I reckon that would have worked as well. Then I shook the paint vigorously and started applying thin coats onto the areas that needed repair using an artist’s paintbrush, which allowed me to gently work it into the cracks. I allowed about 30-40 minutes for each coat to dry naturally, and did 3 coats using the brush. I was a bit more generous on the edge piping. In places, particularly on the bolsters, the leather had darkened with age and the colour match wasn’t perfect. But I had used only minute quantities of paint so I could afford to cover the wider areas. I did this by cutting a 1 inch square from the corner of a washing-up sponge (fresh out of the packet, obviously!). Using a small piece allowed me to saturate the sponge without using huge amounts of paint. I dabbed this over the wider areas, doing a second coat where necessary. On the perforated leather I kept a cocktail stick handy so I could unblock the holes if needed. I also found it seemed to work well on the plastic base, around the seat position buttons. And I’m delighted with the results! It was slow work, but quite satisfying. Time will tell how well it lasts; I suspect the prep is the key, so I hope my improvised degreaser did the job. More pictures…


 1 point
 -
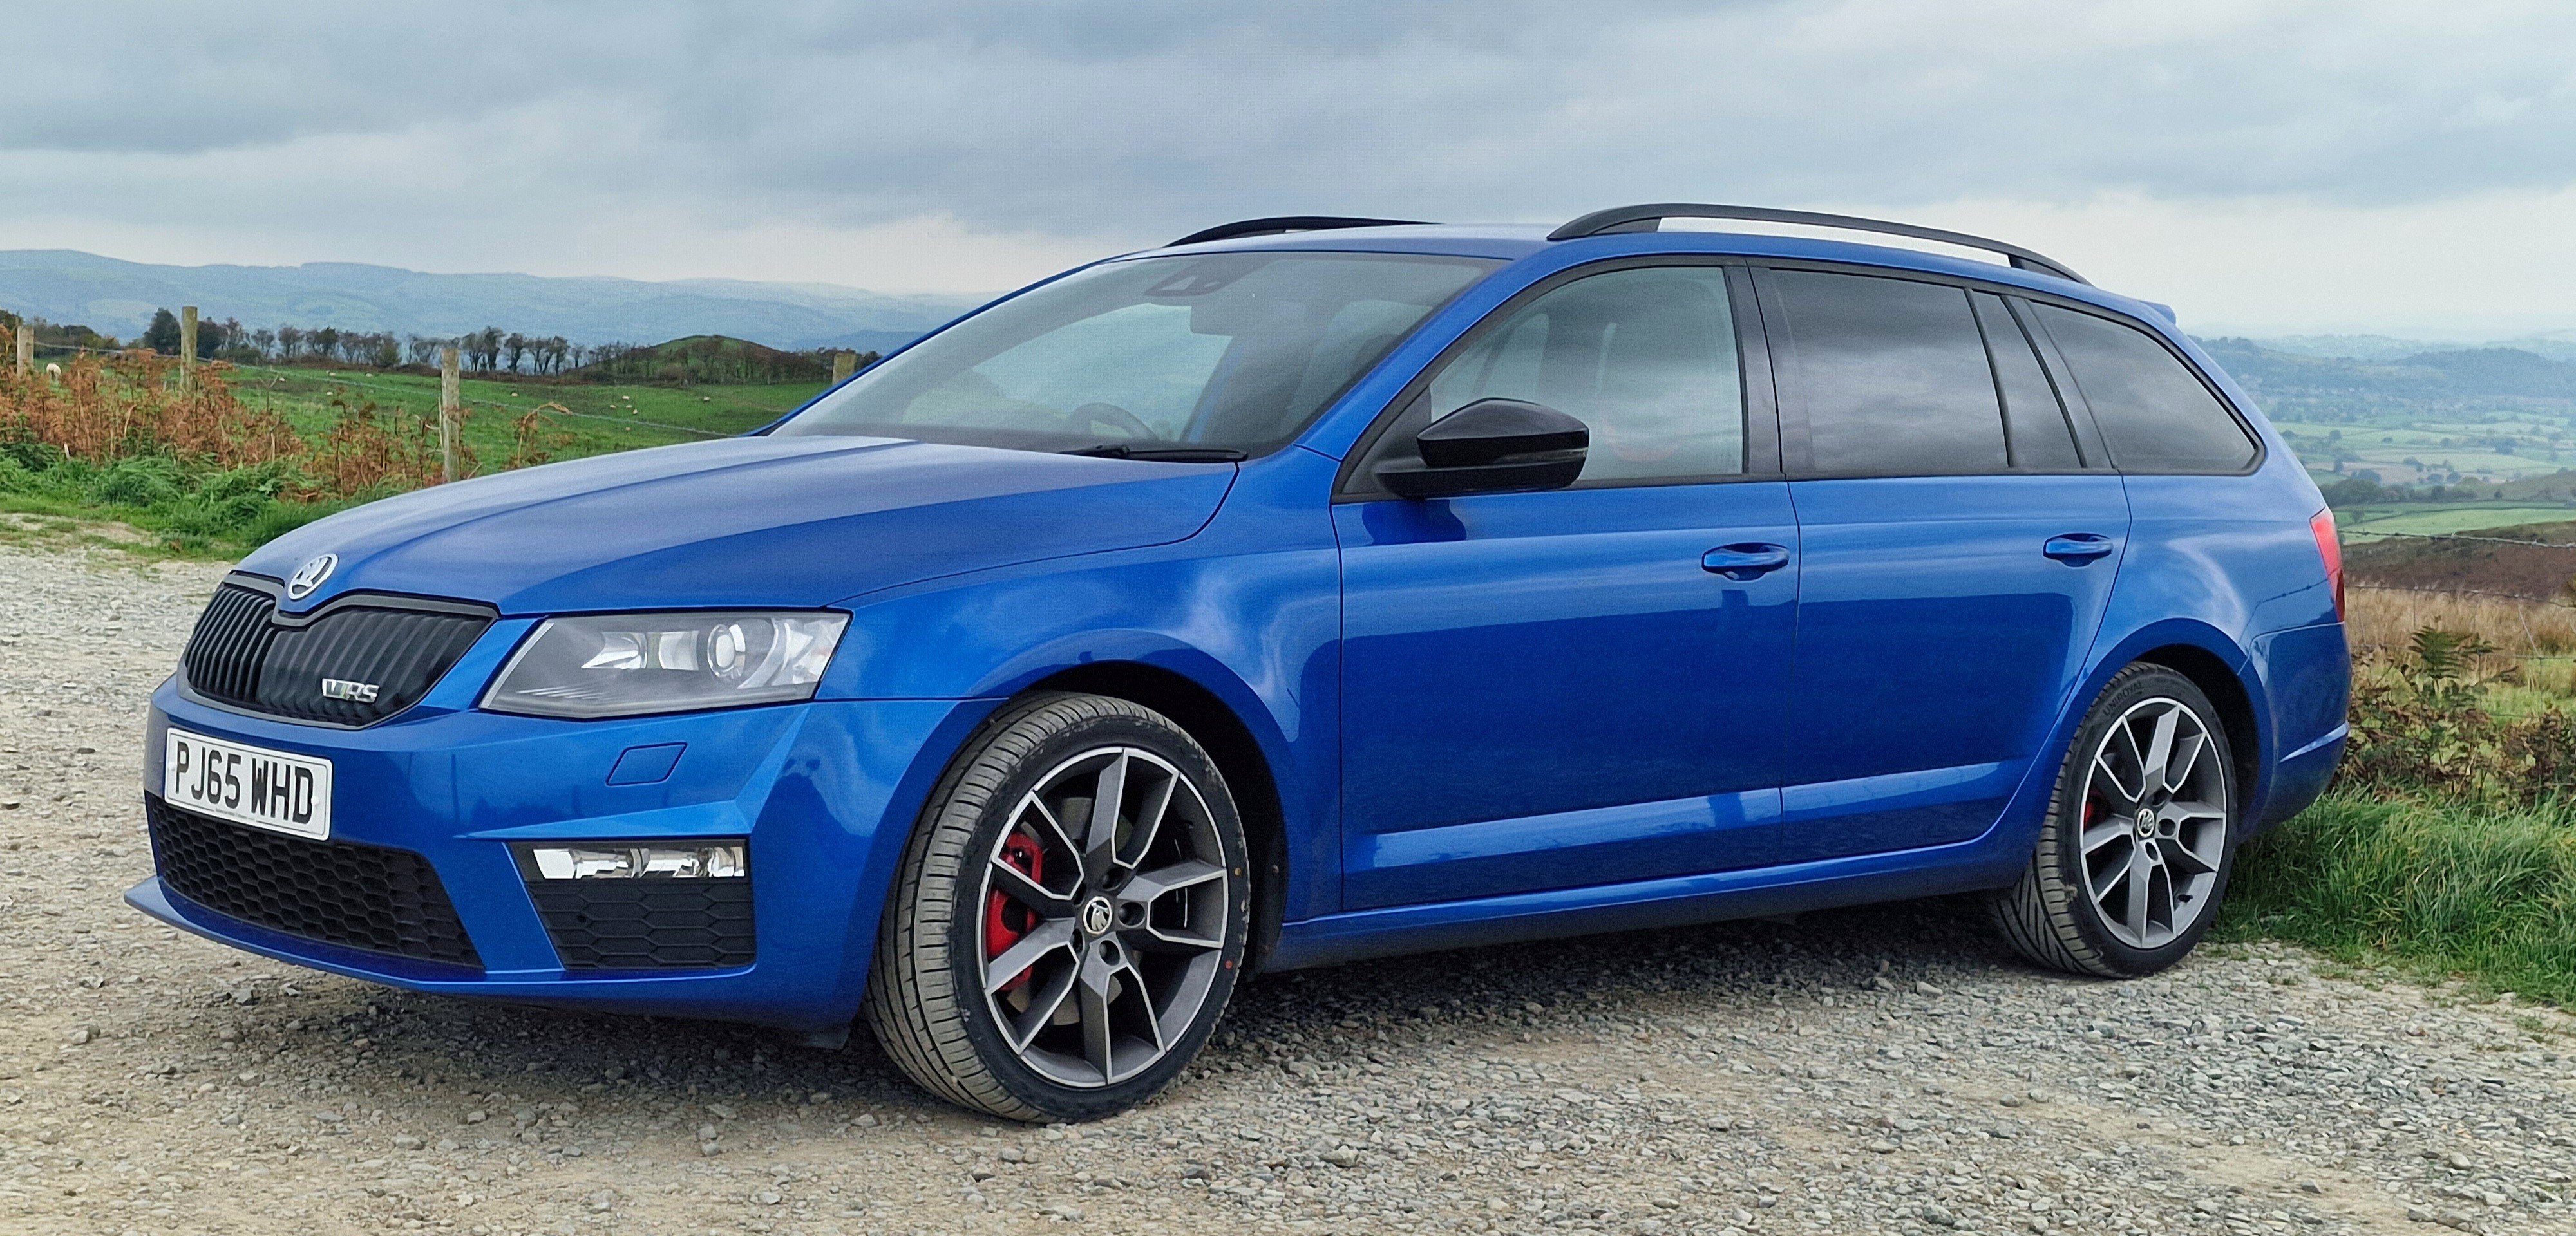
1 point2015 diesel estate in best colour blue Leather seats Outstanding service history, looking forward to munching miles in it
 1 point
 -
1 pointThere is a workaround for AA notifications not working an App AA notification forwarder you have to enable developer options in AA and tick allow unknown source.1 point
-
You made a school boy error! Diesel cars do not have a throttle valve to control engine speed like a petrol does, they only have them for EGR and anti-shudder purposes. Glad you got there in the end!1 point
-
1 point
-
NOPE NOPE NOPE, throttle body flap or TPS was not the problem. The wastegate actuator was stuck, used penetrating oil and got it moving again, seems to have fixed these issues.1 point
-
Even so if you are changing the water pump on a TDi it makes absolute sense to change the cambelt as the water pump is cambelt driven so it's little extra cost. On the TSi's the 2.0 camshafts are chain driven and the water pump on the 1.5tsi is not driven from the cambelt so waterpump change on the TSi's doesn't interact with the cambelt.1 point
-
1 point
-
1 pointHello , I am Asad . Interested in Navigation updating for SKODA CARS. still learning and improving by time .1 point
-
1 point
-
wow. That’s great thankyou for sharing the experience as everyone with ivory will know it looks lovely but needs care to keep it clean. Liquid leather cleaner is good too. Not the conditioner, while that is good, it’s the cleaner that cleans.1 point
-
My new to me VRS diesel estate was fitted with a brand new front n/s tyre for my purchase Driving home on collection the front right (which I don't know if that meant O/S or N/S) pressure warning light came on I checked and the new tyre had close to 50 psi in it 🤦♀️ I adjusted it to the correct level So, how do I cancel the light? Cheers1 point
-
Suggest you check all tyres for the correct pressures and then set the TPMS.1 point
-
I think it's a case of the water pump comes as part of the timing kit and there is no history of the belt being replaced. I see you can buy the water pump itself but it would appear most garages just do the belt at the same time as the labour cost is the same. Makes sense if you know you have 70k on the belt or if it's 5 yrs old but it's a gamble what condition it's in if it hasn't been recorded. I'm hoping for a call tomorrow saying the car is ready to collect but I've lost a lot of faith in the garage tbh as I'm unsure what they've done to cause the car to be un-driveable after what should be a routine process. Fingers crossed.1 point
-
1 pointJust got an Octavia 2018, previous car had for 13 years a Kia Carens, hope the Skoda lasts as long. Should see us out if it does. 75yrs old and live in Orkney, ex mechanic from the 70's early 80's.1 point
-
1 pointThanks, yes a little breezy here, is a gale anywhere else 😀. Looking forward to learning lots from these forums. Being a bit 'out of the way', our nearest Skoda dealer is 120 miles and a ferry trip away.1 point
-
Hi all, I bought a new Scala in August this year and mine is the same just a tiny amount down to the right. I retired 8 years ago from 49 years working on all types of vehicles the last 32 my own business but that aside I can say I have remedied this many times on earlier vehicles simply by adjusting the track rods evenly. To even up the steering wheel the r/h side needs to screw in and the l/h side needs to screw out, this will pull the steering wheel back to centre position. I would initially undo the r/h lock nut 2 flats and screw the track rod in till the nut is back to the track rod end then lock it up. Then on the l/h side just unlock the lock nut enough so the track rod can move then watching the nut screw the track rod out exactly 2 flats then re-lock the nut. This way means you have centered the steering wheel but haven't altered the tracking. I will mention this at my first service which is paid for in advance and if no joy from them I will do it myself.1 point
-
1 pointYou can't have the radio off as it's a combined system, but what I do is turn the radio volume down to zero - the sat nav volume is separately adjustable.1 point
-
1 pointSwapping out sensors without knowing what you're doing is never a good idea. First you have to determine the actual fuel pressures, both the low pressure side (between tank and high-pressure fuel pump) and the high pressure side (in the common rail). Both can probably be read by VCDS. If you know which sensor has the faulty reading, you replace it with a different meter. If it still reads too low, you know what the problem is. But remember, when a fuel pump does not produce enough pressure, the fault does not have to be in the pump itself. It can also be a problem in the wiring or the control of the pump.1 point
-
1 point
-
Thanks for the replies. The official dealership is a rip-off… they quoted $180 for the alignment, while an independent garage can do it for about $45. :O1 point
-
1 pointI wouldn’t say that was the original battery. Looks like a dealer replacement battery, part number begins with 000. The year is usually stamped on the negative post. That Yuasa battery will do the job.1 point
-
Very random it's going to dealer on Friday for a diagnostic and infotainment update as have a lot of communication problems between the modules.1 point
-
1 pointMine's the opposite, it likes to roll back from Auto Hold and so I have to give it extra revs from stationary.1 point
-
1 pointJust to close this off the connection did indeed restore itself when the car was restarted after 3 weeks parked up at the airport. As soon as I started it and the screen came on the icon turned white. Once I was home I checked the app and that is back to normal, although there is no trip data for the time the car was offline. I guess there is no cache on board and if the car can't update the server in a timely manner that data is gone.1 point
-
Does the stop start system work? Mine didn’t and it got a new battery recently after 6 months and 4,000km1 point
-
1 point@Alasdair1 thanks for the info, ive got some multipurpose grease so ill apply a thin layer, ive also got a new abs sensor, literally everything getting changed!1 point
-
I also did the arm rest, and a little dabbing on the passenger seat bolsters. I’ve probably got at least 2/3 or 3/4 of the 50ml bottle left. £16.99 well spent.1 point
-
1 pointWhat stuff exactly? I would have expected the timing to be controlled by the ecu in a 99 model car. Crank angle sensor sets the mark and the ecu does the rest1 point
-
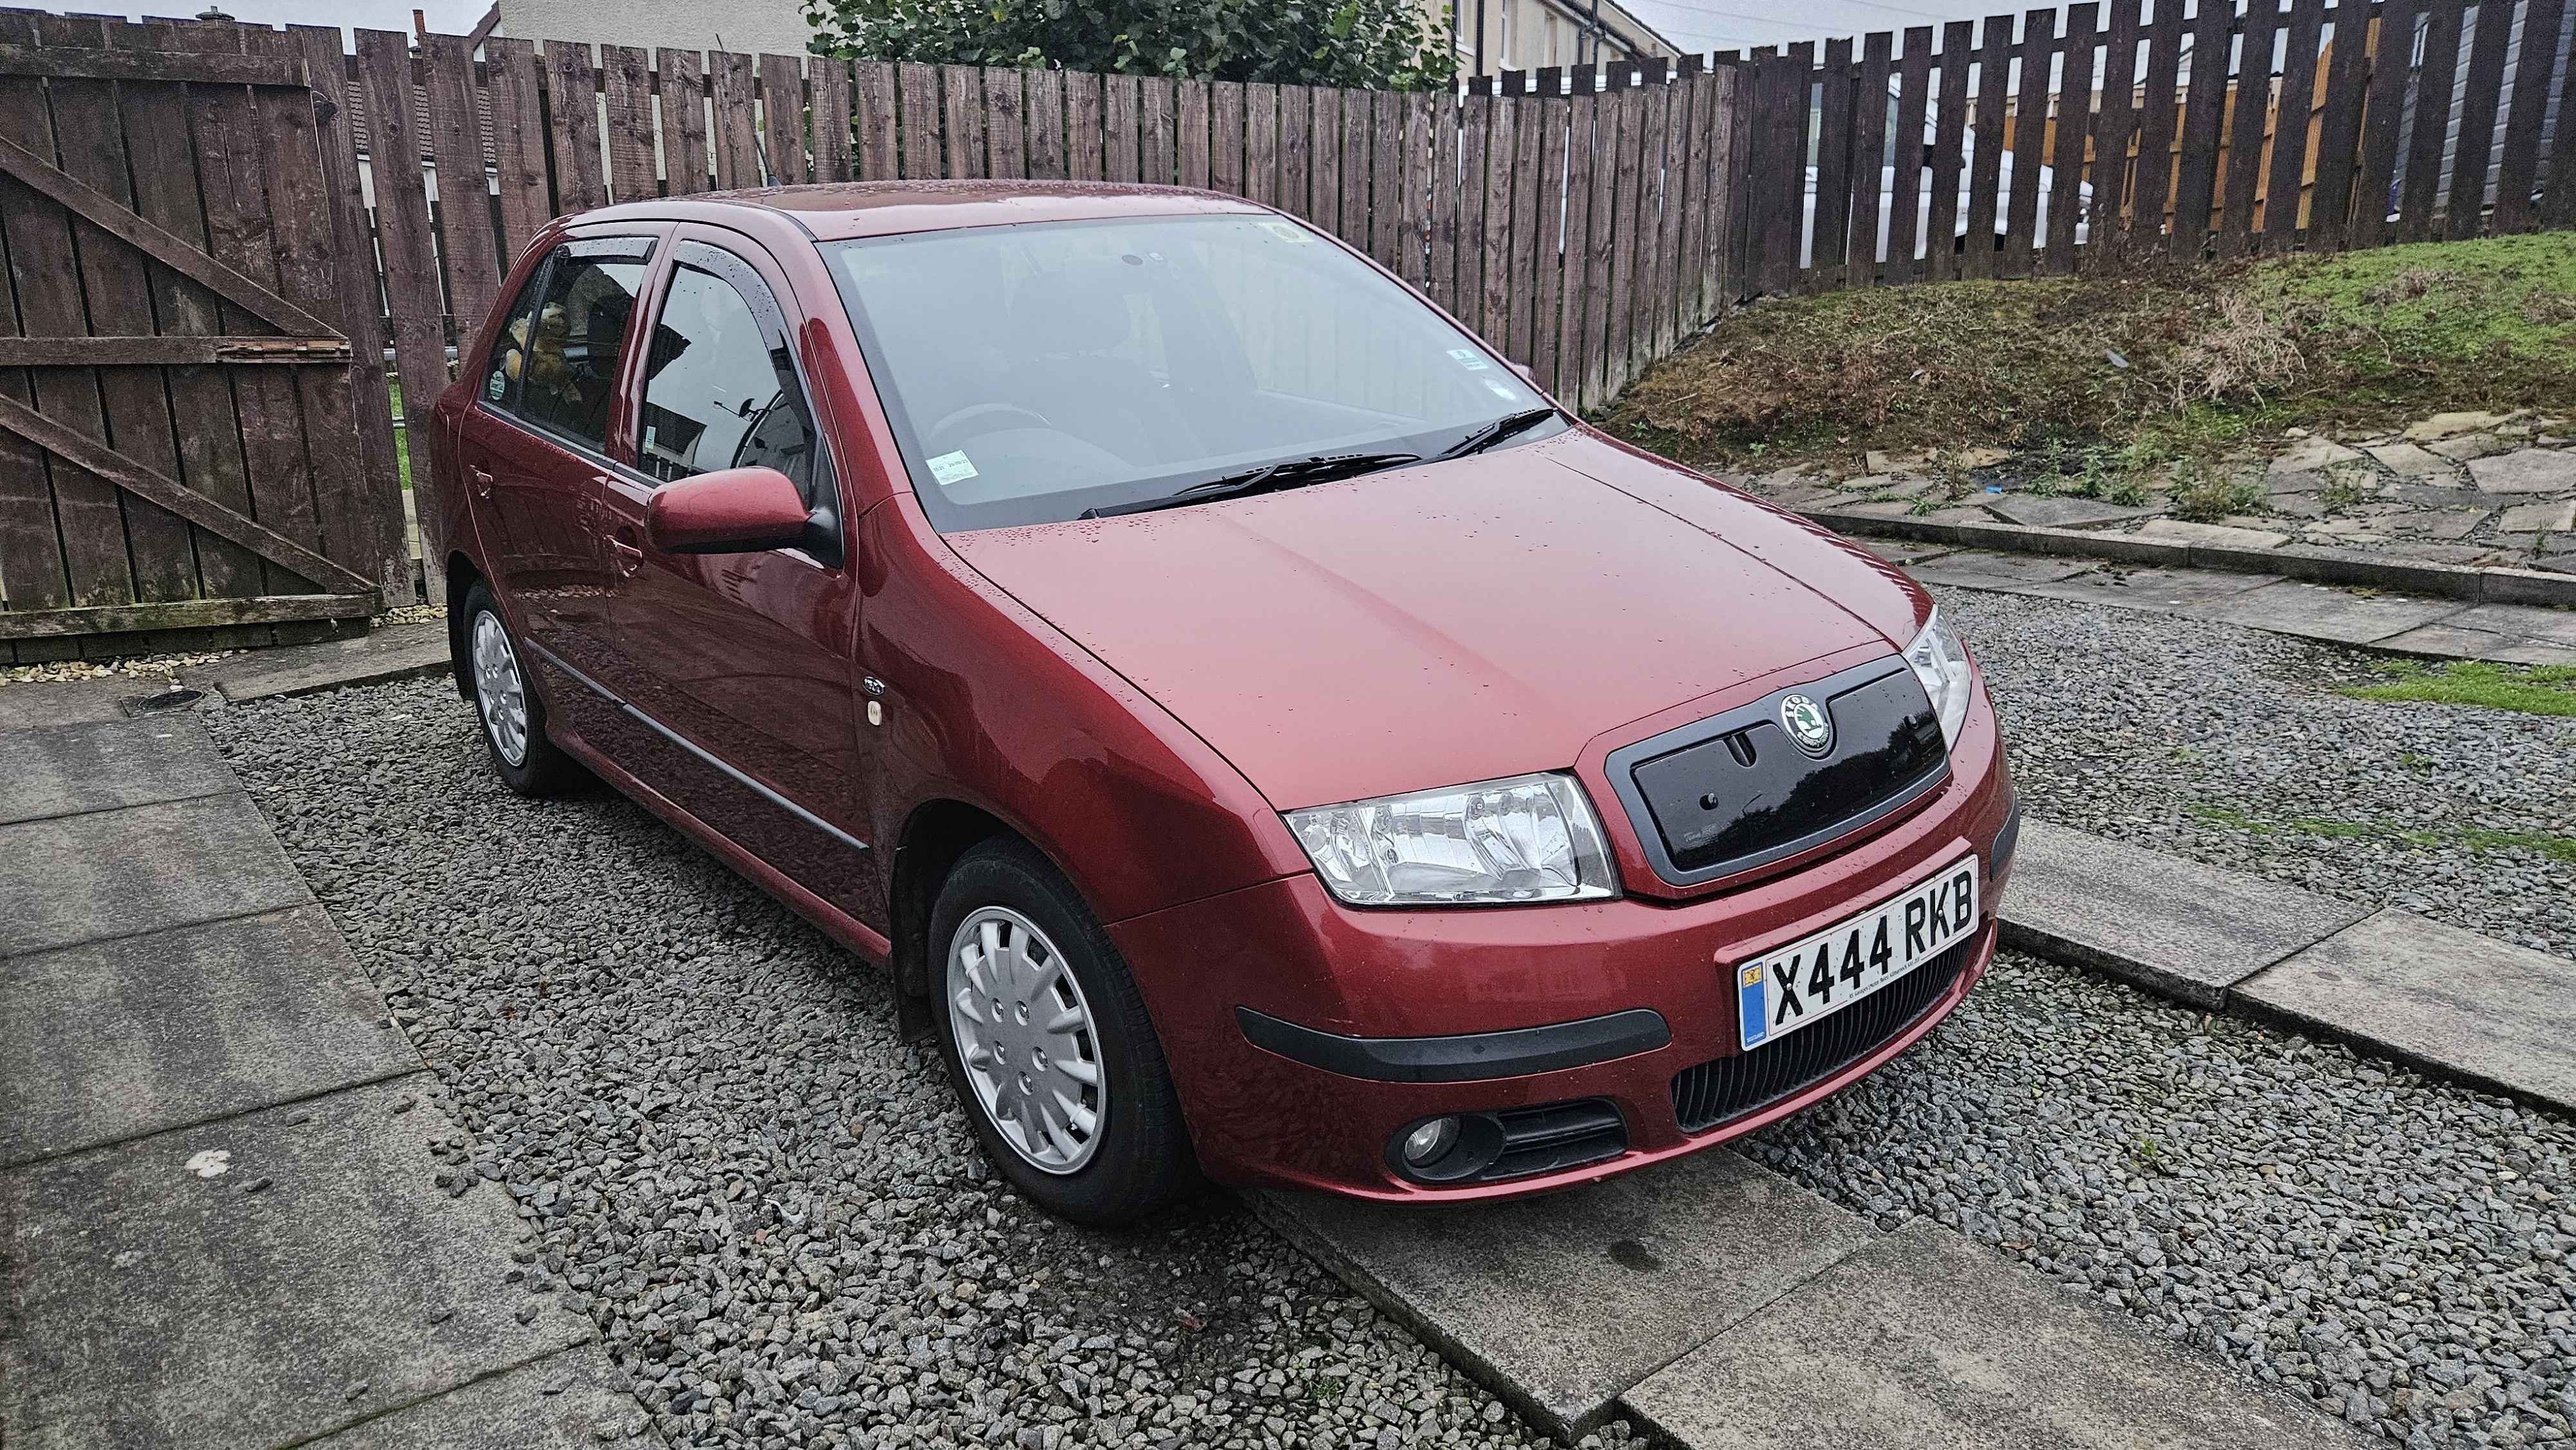
Welcome back folks. It's been a little while away. It's been running okay for me. Not brilliant, however. Work really is needing done (see below), and it needs some time away to get that sorted (with my mate, also called Ryan). All plans are in place for the car to spend a wee while down there. This is how it's sitting at the moment, with the Team Heko grille on to try and let it warm up quicker (there is some difference, in my not-so-scientific tests at least). The good news is that I finally got around to booking @Tech1e to fit my cruise control, and it has seriously improved the driving experience of this car. I wasn't too sure how cruise would be on the small 1.2 12v, but it's competent enough when I need it. Issues I've noted so far: - Rear axle isn't looking too clever, up for replacement with a disc conversion since the other Ryan will be in there. - Front end shake, it's got a wobble up front and doesn't feel stable at speed. Same way it felt before the wishbone bushes were done. - Knackered balljoint (probably related) on the driver's side front, as well just having the arm replaced at the same time. - Struggling to get up to and stay at the correct temperature, suspected thermostat. - Sort out wiring for electric rear windows to communicate with front. - Interior light wiring. If the interior light is on, it turns off as the front passenger door is opened. - Rear right tweeter beginning to fail. (I'll sort this myself) I think that's all. I'll take it out tomorrow and probably find the rest of the issues. All in all, it's not bad for a car nearing 19 years old and 110k miles. It's doing well considering what I've thrown at it. Hopefully I can keep it going for a while yet - it might be end of life in the eyes of many, but I'm not one for giving up.
 1 point
 -
1 pointWhat has BMW 5 series got anything to do with Mini? Electric or not. Similarly, what are you trying to compare Model X or Spectre against? Both are EV but you haven't provided a point of reference. But need to remember the weight of special doors on the MX. By the way, Spectre is not a grounds up EV: https://en.wikipedia.org/wiki/Rolls-Royce_Spectre "It is Rolls-Royce's first electric vehicle (EV) and rides on the same platform as the Phantom and Cullinan." I'm not saying EV are special, in fact, I'm saying they are not special in the weight sense as people make out. Yes, I agree ICE cars come in difference size, shape and weights. EV is the same and they are designed to fulfil all kind of different roles. People choose petrol/diesel based on a number of factors, not many choose petrol/diesel based on lifestyle choice. EV is the same, it's another way to power the vehicle and not special in any way as a vehicle. The only possible way EV are special is their role to play in combating climate change. It has nothing to do with lifestyle, size, shape, weight or class of vehicle. It's a powertrain that can be entirely powered by renewable with ultra high efficiency. Its battery is part of answer to mass adoption of renewables. But as a vehicle, it's not special at all, quite boring actually. Only you are treating EV special, as though some sort of satan's creation.1 point
-
1 pointWelcome to the forum. Best suggestion surely would be to have the fuel pump pressure tested?1 point
-
You forgot: Keep your sunroof drains unblocked. I've just bought brush/line for this purpose and will definitely be doing it now!1 point
-
1 point39mpg on a commute to work 51mpg on a journey at the weekend with more free flowing roads. I am struggling to work out what the problem is. Did it used to read more on the commute?1 point
-
1 pointFor what it's worth I bought my 2013 Excellence right at the end of the Classic run as I wanted the quirkiness of the earlier styling. It's the 1.2 petrol, has 90,000 miles on the clock and other than tyres, a battery and replacing the front shock absorbers (picked up as "misting" at an MOT rather than they failed) have had pretty much 12+ years of trouble free motoring. As you may have picked up elsewhere there are a few 1.4 petrol models around if you can track one down but the consensus seems to be the 1.8 petrol is for those with deep pockets. My understanding is there wasn't a step change from the pre to the post facelift Yeti, it was more building on what was a solid car from launch. One thing I have picked up from this forum, and I stand to be corrected, is the Amundsen unit in the FL seems to have more problems than the earlier Bolero so it's one of the things to look for when you are looking around but there's a lot of information on this forum and You Tube about fixing/replacing the unit. Although the car inarguably is getting a bit long in the tooth now (well, they stopped selling them in 2017) it's still a fun and versatile car to drive. Keep your expectations sensible and I don't think you will be disappointed.1 point
-
My Karoq is Quartz Grey so I'm think Black or Dark Anthracite at the moment as most Greys would be too similar to paint. Was thinking possibly satin rather than gloss though, more of a sleeper that way1 point
-
I had the diamond cut 'sportline' alloys on my Superb re-done in BMW orbit grey all over and dumped the diamond cut. Way better to maintain, can be touched up with normal paint, no more white patches where the laquer fails. Cost me £355 for all 4 including one that needed minor straightening. I will be honest I think I actually prefer the look to diamond cut on my car which is white. I used Max powder in Apsley https://maxpowder.co.uk/ happy with their work.1 point
-
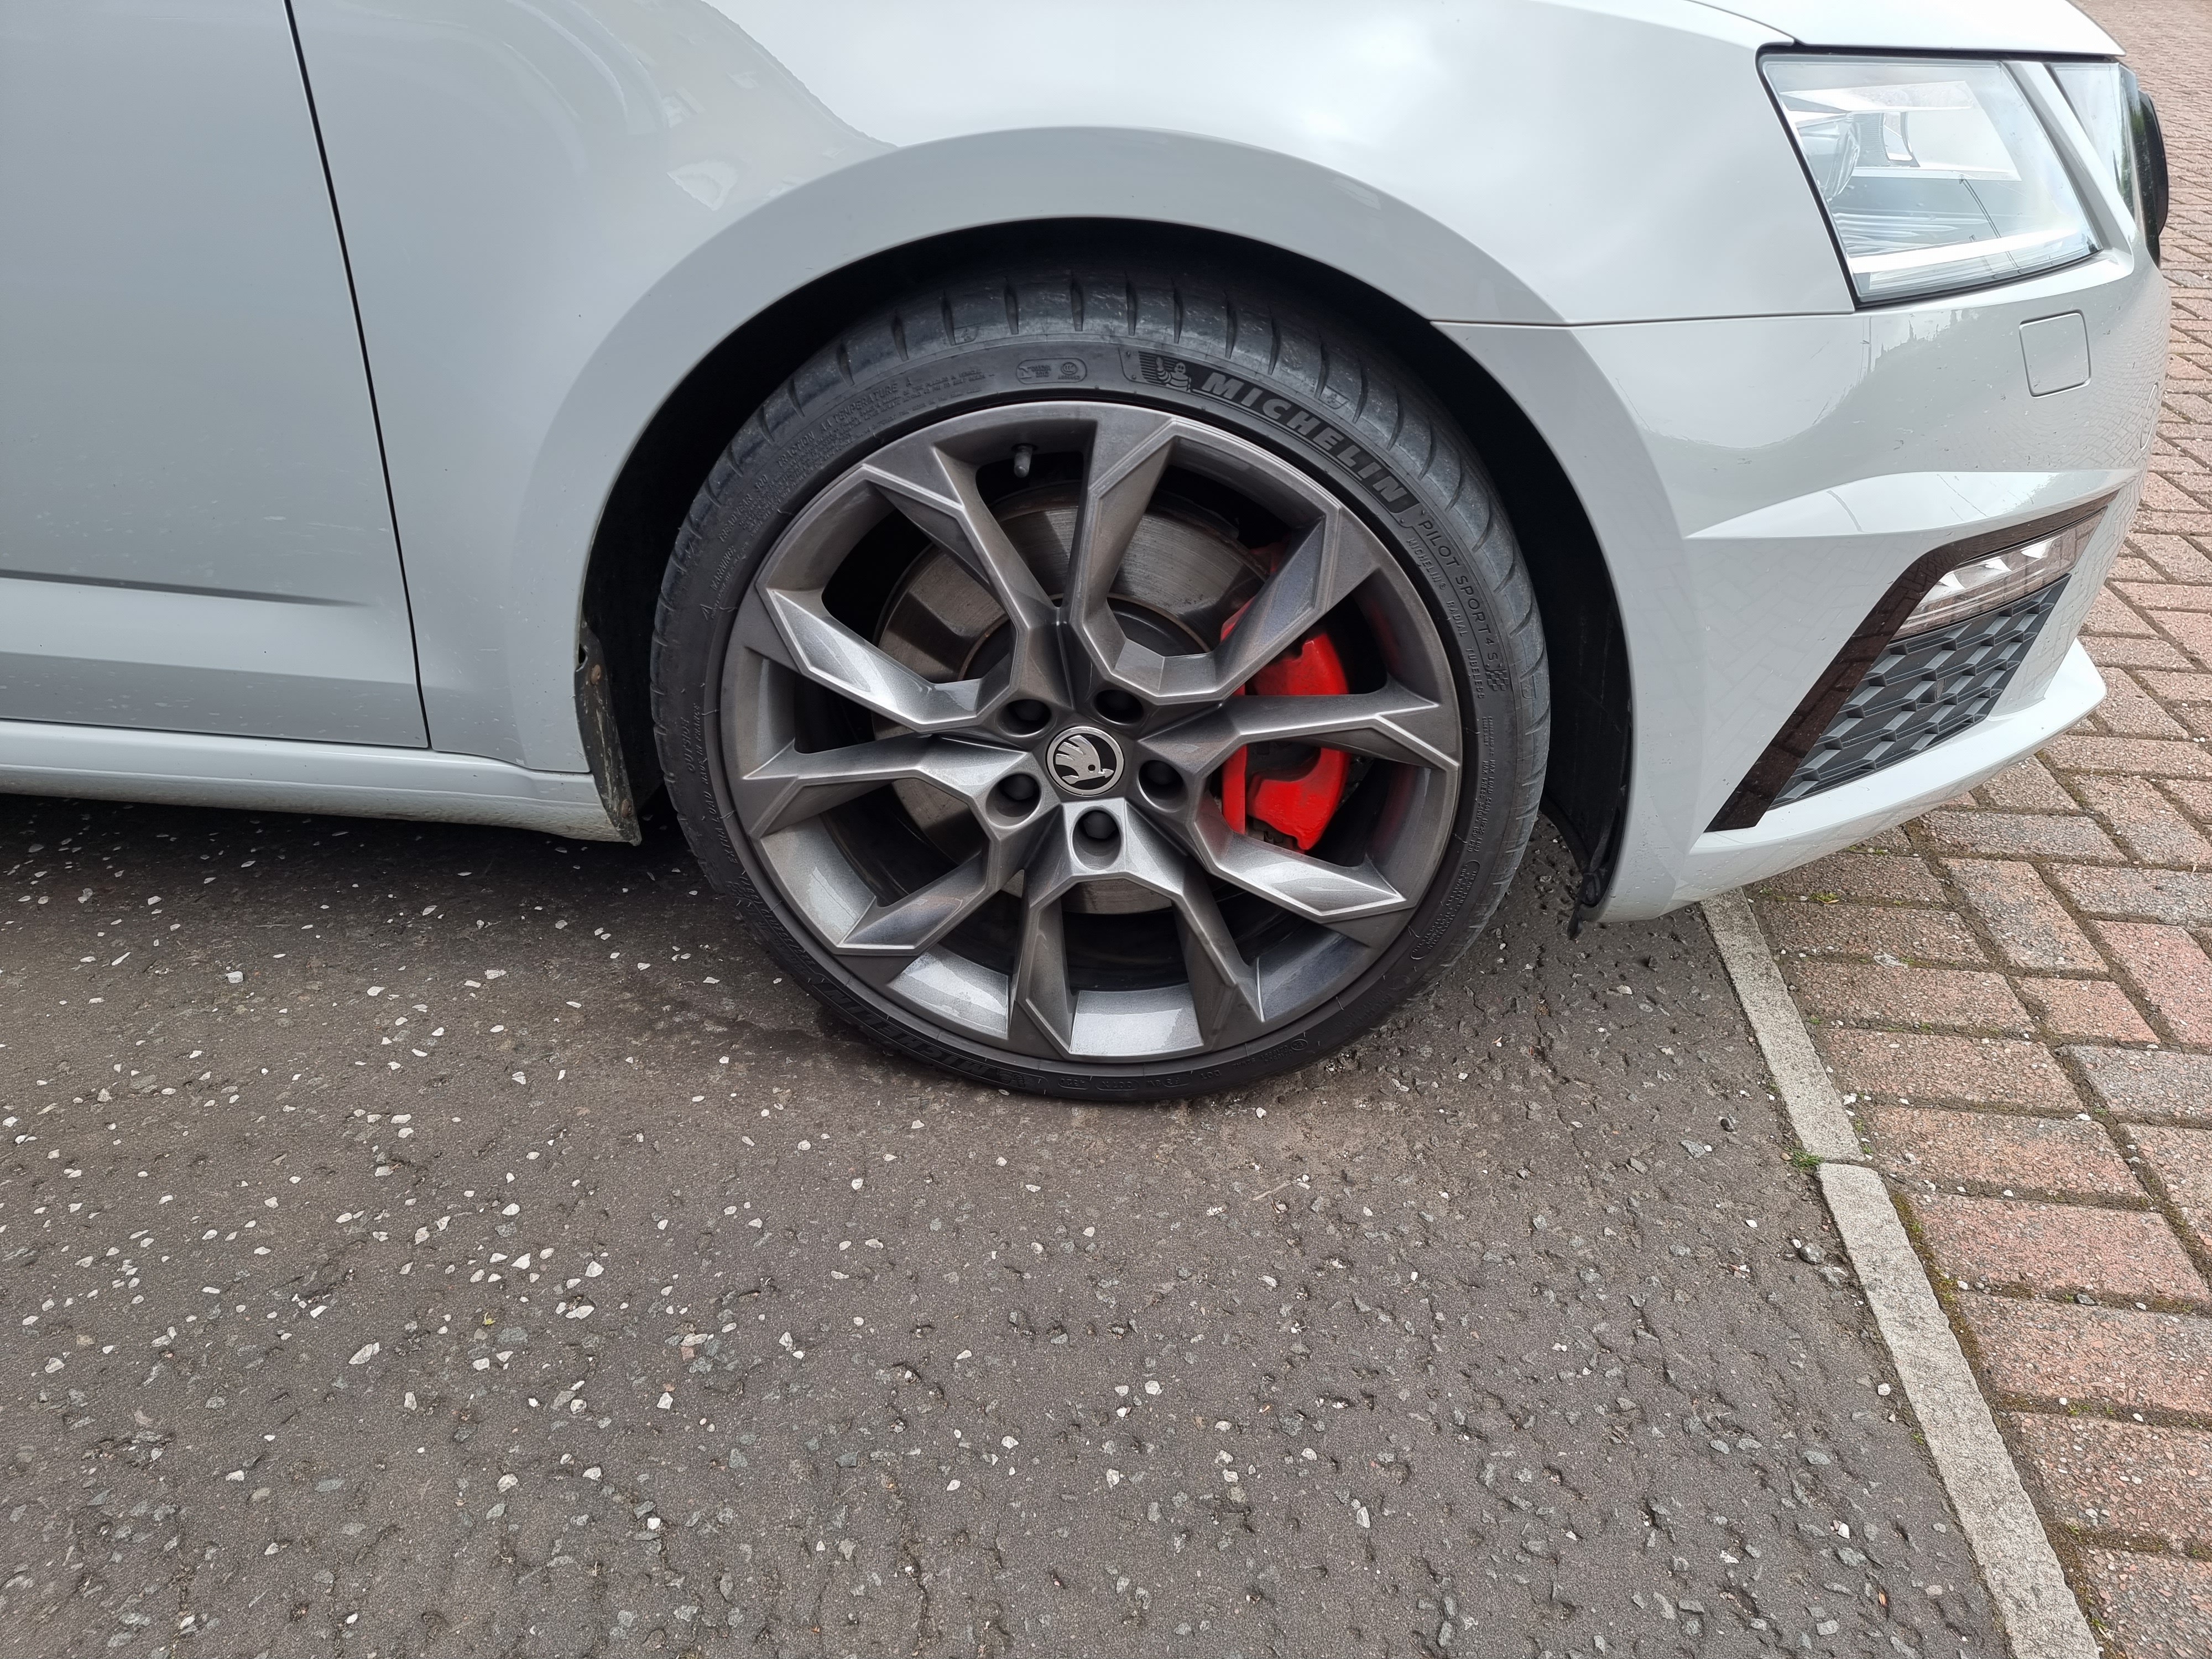
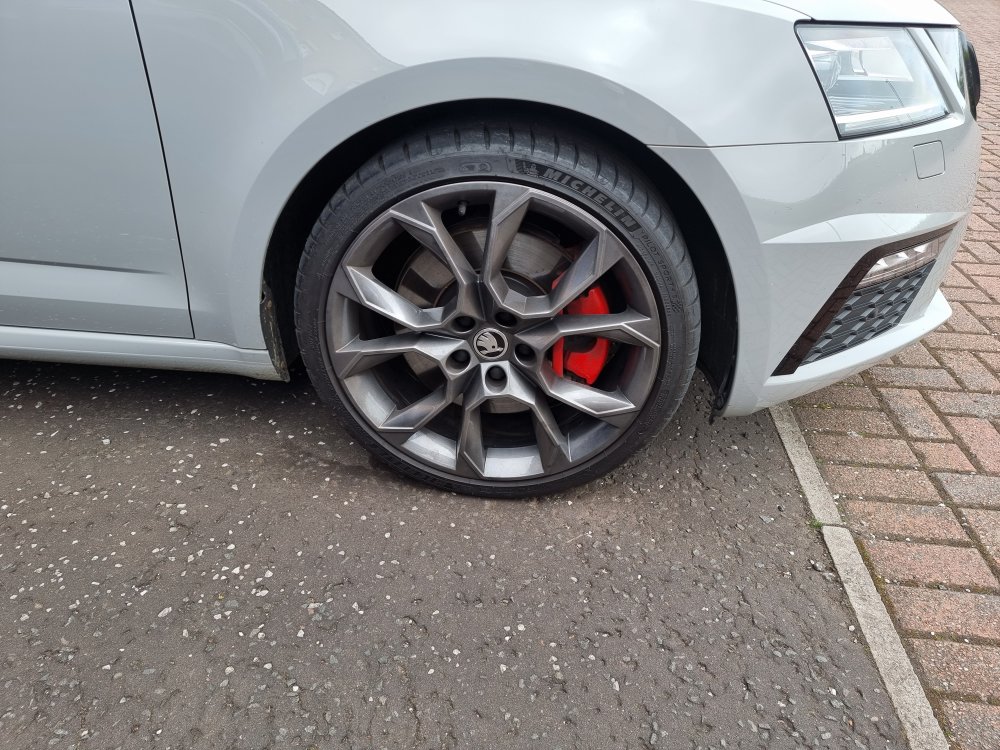
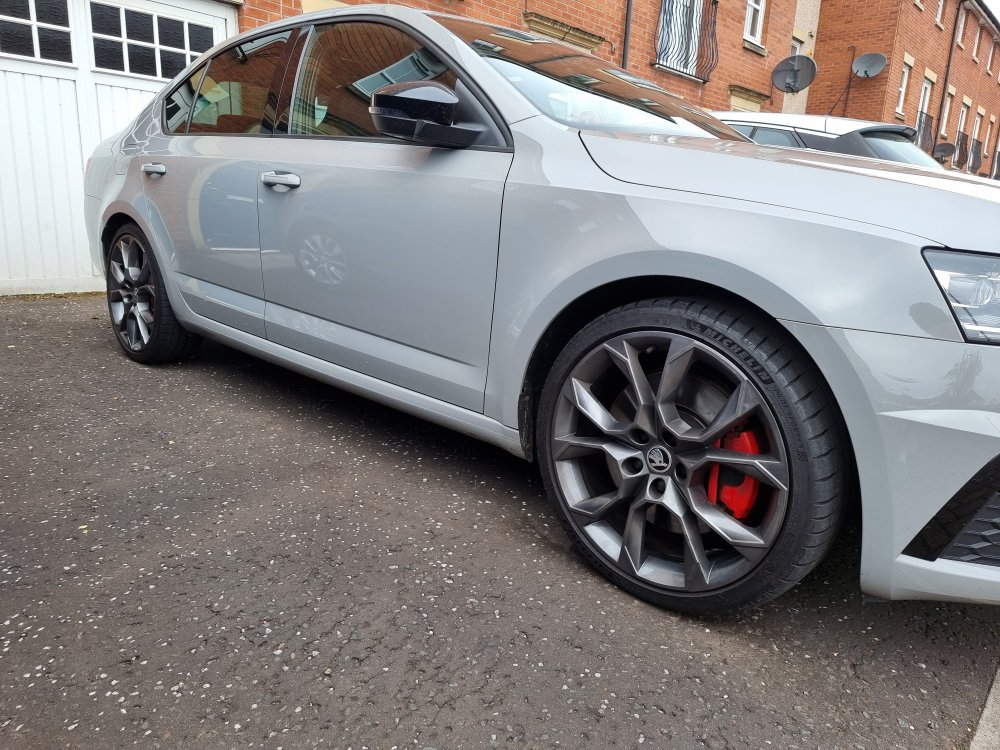
This is the gloss gunmetal in a dirty state. Yet to get any decent pictures! Finish is good so any odd bits showing on pics are water marks or dirt. Very different look to the satin black as shows the full wheel shape, but I like it as a lot of cars around here have black alloys. I really didn't like the standard Xtremes as once I saw the flower petals it's all I could see.
 1 point
 -
Thanks for the comment, looks like it’s beyond economic repair. Sad end to a great car.0 points
-
So your assumption is that cells will catch fire, only question is what happens afterwards. Whereas everything single statistical analysis, including a video you've shared, shows well managed battery cells self igniting are vanishingly rare.0 points


.thumb.jpg.f83a46b9b3c0d976b9dbffbb523c9874.jpg)