Leaderboard
-
MikeTheThinker
FREEDOM17Points8,481Posts -

mac11irl
FREEDOM16Points16,636Posts -
Lady Elanore
FREEDOM12Points24,873Posts -
Jim H
Resident Member10Points6,285Posts


Popular Content
Showing content with the highest reputation on 02/11/25 in all areas
-
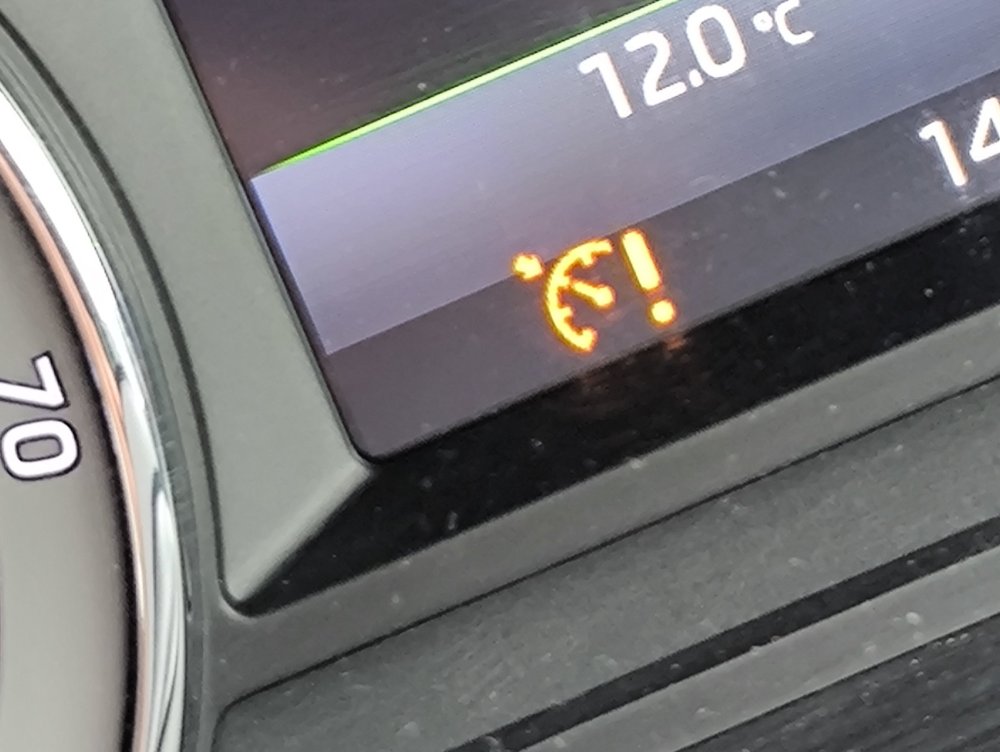
2 pointsJust to make others aware and hopefully help someone else fix a similar issue. I own a Skoda Octavia MK3, 2017 model (new facelift), chassis type 5E, engine code CZDA. Recently, I had a problem with the cruise control: it stopped working. When starting the engine, everything seemed fine, but after driving past about 20 miles per hour, an error appeared on the dashboard and the cruise control became unavailable. No other faults were shown anywhere. When checking the car with VCDS, I was getting the following errors: 01-Engine – Status: Malfunction 0010 - This fault kept coming back every time, even after clearing it with VCDS. 16-Steering wheel – Status: Malfunction 0010 - This error could be cleared, but it returned at the next engine start whenever the cruise control was activated. Address 01: Engine (J623-CZDA) Labels:. 04E-907-309-V1.clb Part No SW: 04E 906 027 HD HW: 04E 907 309 BH Component: R4 1.4l TFS H26 3742 Revision: R7H26--- CVN: 65239CB2 Coding: 01190032232401080000 Shop #: WSC 73430 031 00000 ASAM Dataset: EV_ECM14TFS01104E906027HD 001007 ROD: EV_ECM14TFS01104E906027HD.rod VCID: 6DD17CB3BC91F7F308-8038 VINID: 91D4924C779519A0001091021CE819DDF1 Center armrest control head 1: 1 Fault Found: 17165 - Databus U1123 00 [00100100] - Received Error Message Intermittent - Not Confirmed - Tested Since Memory Clear Freeze Frame: Fault Priority: 6 Fault Frequency: 1 Mileage: 128339 km Date: 2025.10.31 Time: 10:51:44 Engine speed: 993.00 /min Normed load value: 11.8 % Vehicle speed: 14 km/h Coolant temperature: 88 °C Intake air temperature: 28 °C Ambient air pressure: 1000 mbar Voltage terminal 30: 14.536 V Unlearning counter according OBD: 40 Acceleration: -0.270 m/s² Cruise Control System (CCS): status-Bits 0-7: 2 Cruise_control_shutoff_conditions_irreversible-Bits 0-7: 0 Cruise_control_shutoff_conditions_irreversible-Bits 0-7: 0 Cruise control system: temporary deactivation-Bits 0-7: 255 or 24 Accelerator pedal travel: 0.00 % Cruise control switch actuation-Bits 0-7: 49 Cruise control switch actuation-Bits 0-7: 129 Readiness: 0010 0001 Address 16: Steering wheel (J527) Labels:| 5Q0-953-549.clb Part No SW: 5Q0 953 507 GD HW: 5Q0 953 549 F Component: Lenks. Modul 003 0140 Revision: -------- Serial number: 24031704221492 Coding: 1400 Shop #: WSC 73430 790 00000 ASAM Dataset: EV_SMLSKLOMQB 020002 ROD: EV_SMLSKLOMQB_018_VW37.rod VCID: 7EF34BFFE1F77C6BA1-802A 2 Faults Found: 229163 - Turn Signal Switch B1144 13 [00011000] - Open Circuit Intermittent - Confirmed - Not Tested Since Memory Clear Freeze Frame: Fault Priority: 2 Fault Frequency: 3 Reset counter: 3 Mileage: 128339 km Date: 2025.10.31 Time: 10:51:43 Operating time: 204269 min Terminal 30 power supply: 14.8 V Vehicle speed: 16 km/h Voltage at switch: 4.98 V Terminal 15 status: active System status: 30 FF U Blinker GRA Plus Minus AD value: 254 FF U Blinker GRA Resume Cancel AD value: 254 FF U Blinker GRA Main Switch AD value: 193 229179 - Turn Signal Stalk; Switch for Cruise Control B1144 F3 [00011000] - Electrical Malfunction Intermittent - Confirmed - Not Tested Since Memory Clear Freeze Frame: Fault Priority: 2 Fault Frequency: 3 Reset counter: 3 Mileage: 128339 km Date: 2025.10.31 Time: 10:51:43 Operating time: 204269 min Terminal 30 power supply: 14.8 V Vehicle speed: 16 km/h Voltage at switch: 4.98 V Terminal 15 status: active System status: 30 FF U Blinker GRA Plus Minus AD value: 254 FF U Blinker GRA Resume Cancel AD value: 254 FF U Blinker GRA Main Switch AD value: 193 After investigating the steering wheel turn signal stalk, I discovered a nearly broken wire that was hanging on by just a single strand. I had to unplug the cruise control wiring to inspect the entire section, as it was hidden inside. Because the wires aren’t long enough, using the stalk for signalling causes them to pull and push slightly up or down. I assume the damage occurred due to this repeated movement over time. You don’t need to remove the entire steering wheel unless the issue is more complicated. I only had to undo one screw underneath and the two screws hidden behind the steering wheel. These become visible if you turn the steering wheel halfway to the left or right to remove the cover. The stalk has a small cover behind it, which you need to take off to access the wiring and the circuit board for the cruise control.
 2 points
 -
2 pointsI know this should not happen but why would you leave your Kessy keyfob in the car, I have never done that, even with the old keyfobs. I put the key fobs in my pocket so when I get out so does the fob2 points
-
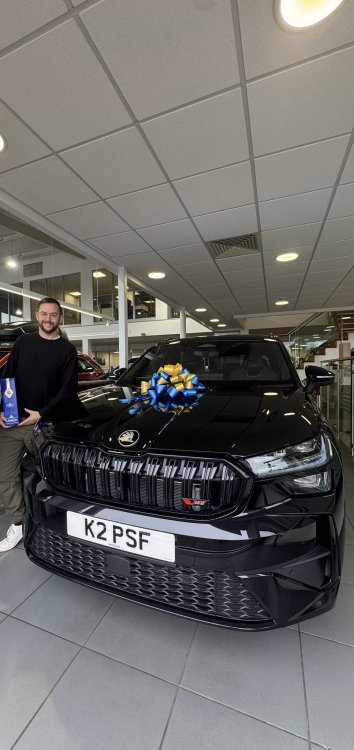
2 pointsHi all, Long time member, but I have been absent for a number of years, despite still owning Skoda's during that time. My name is Paul, based in Cheshire, and I used to be a frequent visitor and poster on this forum way back. I have recently purchased a 2025 Kodiaq 2.0 vRS in Black, which I am loving at the moment! 😀 This is my 13th Skoda I think (hopefully not unlucky!) Anyway, I am back to contribute where I can, linger, and post every now and again. Thanks Paul
 2 points
 -
2 pointsOh my god. This is definitely now the bitchiest busiest thread on here. Guys, Seriously ease up on all the personal slagging and unveiled insults! Colin is big on self regulation but as we know when things get very dirty he and the mods will step in and force a ceasefire.. I only pop in here every few days and in the 4 days since my last advice there’s been 6 more pages of just pure arguments and insults fired back and forth. It’s gonna get locked if ye don’t start breathing more slowly before posting. Here’s a line ———————————————— Now, why not pretend the previous 435 pages of bickering doesn’t exist and start again with some civility? New line and attitudes start here? Or I will report this… ———————————————————2 points
-
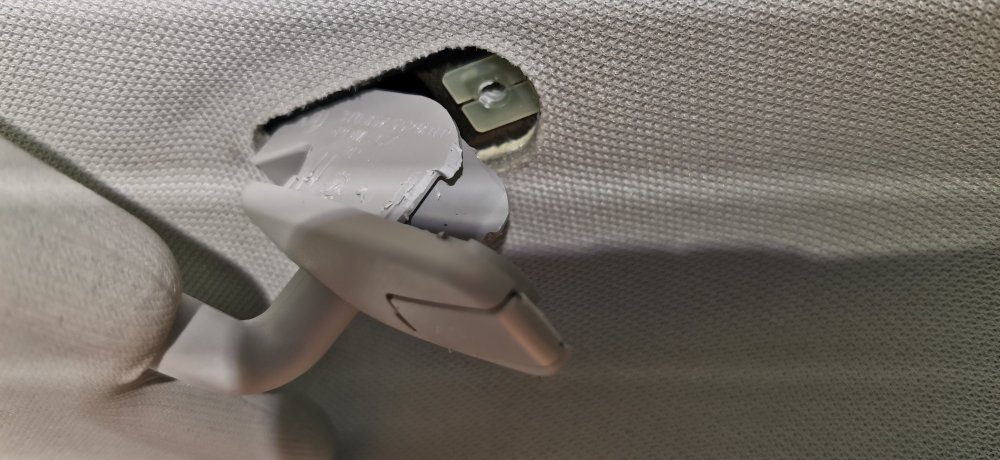
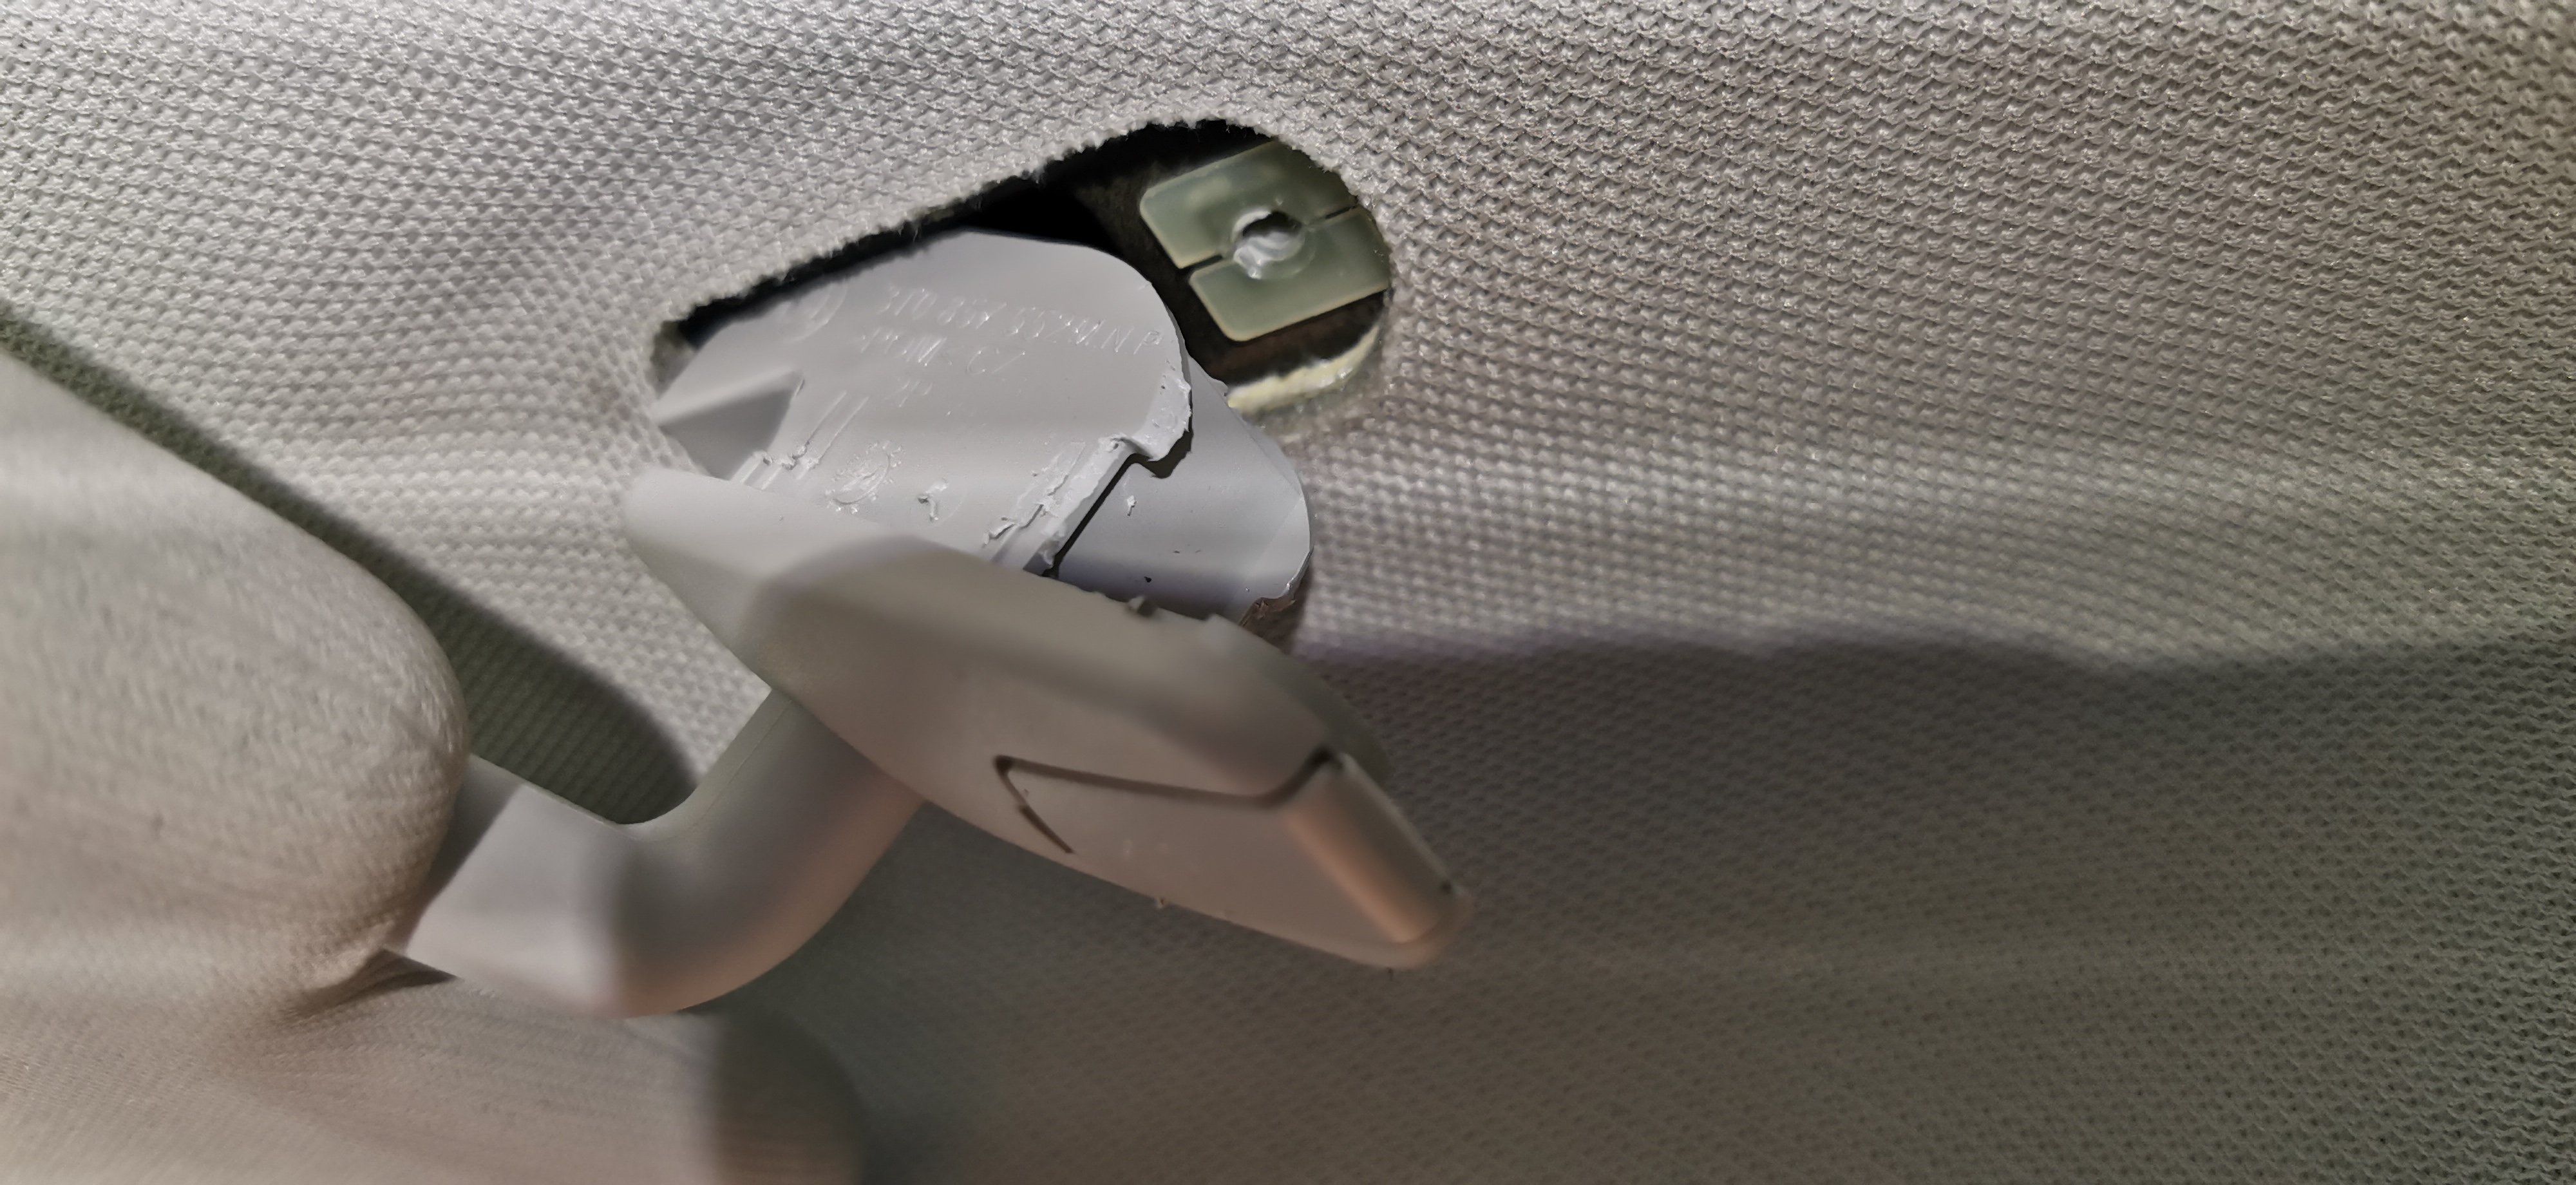
2 pointsThe sun visor hinge point is removed by: Opening screw cover (pointed trim tool or carefully with corner of small flat blade screws driver/knife) Remove screw (torx T20) The fitting will pull or drop down a bit but likely won't come out as pointed out by others The fitting is held at the end towards the rear of the car. So, it needs to be pushed towards the windscreen to disengage the end towards the rear. Then pull that end down and it can be removed. It may be easy or difficult despite the bits of plastic holding it in perhaps only being 1-2mm My driver's side needed levering down gradually to remove. It causes some damage to those tiny points of plastic holding it in, but it will be held by the screw when refitted, so not the end of the world. My passenger side came out easily first go. .... Now who will be the one to point out this is reviving an old thread when that's, a) completely irrelevant and, b) they're incapable of contributing anything of use themselves?
 2 points
 -
1 pointOh Lee, not you too… NASA aren’t a reliable source of REAL science information 🤦🏼♂️ 🤣🤣1 point
-
1 pointI love when people roll out the “an ice berg melting doesn’t raise sea levels, so the Arctic melting won’t change anything!” argument, because it’s like listening to a flat earther describe why the horizon isn’t real. Loads of technobabble and science words, but doesn’t actually hold water (hah, water humour) when applied to actual science. Yes, It’s true, the Arctic SEA ICE melting isn’t itself a major risk factor for rising sea levels, because it is an ocean. However 2 things - 1) the reduction in the annual surface area of artic sea ice IS indicative of rising average temperatures. I hope why is fairly self explanatory. 2) the glaciers that are melting in, eg, Greenland and the Antarctic are ON land. So when they melt and fall into the ocean that water DOES cause an increase in the oceanic water volume thus DOES cause sea levels to rise. And the volume of water frozen in those glaciers is HUGE, so all of them melting or just sliding into the sea will be a major rise in levels. It’s been asked in several other threads to not post unsupported or just down right wrong information. So here’s another reminder for in here too. If a report or study or experiment has not had its results peer reviewed and accepted as accurate there’s a good chance it’s ****e science or comes with an agenda.1 point
-
Hi all. Anyone got the instructions for replacing the drivers door handle on a Mk3? I bought a pdf download off Estsy but the pictures are all blank. One source had the picture but I can't find it now. I think it was something like, '1-insert at 90 degrees', '2-close then push towards hinge point'. The handle fits back with no real force at all, but then does not unlock the door, so the above makes sense to me but that's not to say it's correct. All help appreciated, Thanks, Mike1 point
-
Hi, hope this helps! -Maciej D4B8049159B-General_body_repairs__exterior-pages.pdf1 point
-
1 pointWhite Tsi 1.4 petrol, 2017, thousands of em according to the above link 🤣👍1 point
-
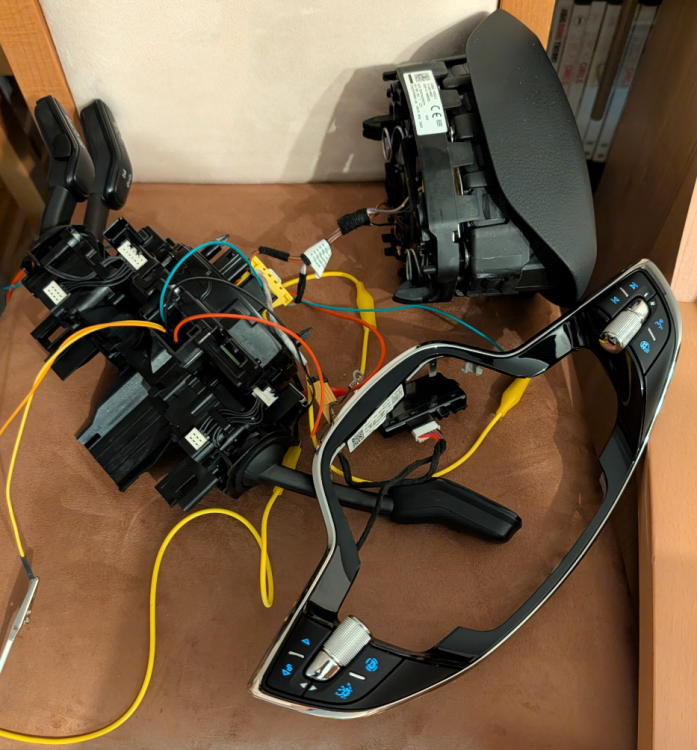
So, the monster lives! 😜 Successfully using the MFL (multifunction steering wheel) at the table today. Here's the configuration: The new MFL buttons (sub 19) Gateway (19) Multimedia System (5F) Steering column control unit (16) "Analog" speedometer (17) Coding, adaptation, and data set creation were all done, of course. The starting point was a Conti 3Q0907530C as hardware and AA as software.
 1 point
 -
Her mobile phone. Thanks. AG Falco1 point
-
That suggests a dying injector to me.. on cylinder 4. If you can, swap 1 & 4 around, then re scan. If the massive difference also changes cylinder, that’s more vidence that the one currently in 4 is on the way out. It’s pretty common.1 point
-
1 pointNo - it's the one in Newbury. I've always found them helpful and the service reception people are also generally very good in my experience.1 point
-
I'd disagree. Thicker oil can still be DPF compatible. Oil viscosity is more related to climate and bearing clearances than DPF life. Low ash 5W30 exists yeah1 point
-
1 pointStop using the parts cannon and check the wiring to the "faulty sensor" properly.1 point
-
1 point
-
1 point
-
1 pointUpdate New phones use Bluetooth v5.0 and are not compatible with infotainment. Skoda have to build an update to fix this issue.1 point
-
1 point+1 to the above. Think of the unit as a PC linked to a monitor on your desk. The desk in this case being the dashboard.1 point
-
1 pointThis. I wouldn’t go trying to pull the cover off expecting to find a random hole there. That’s the MIB unit for the screen.1 point
-
1 pointHey m8, this is an old thread you know. Sunvisors didnt exist after 2018, my 2015 Yeti didnt come with them 😆 Oh and don't even think I would write m8 normally sat at my PC.....1 point
-
1 pointI've had this on both my kodiaq and superb, I fixed both by levering out the switch and spraying contact cleaner onto the switch connector contacts, only takes five minutes...1 point
-
1 point
-
1 pointI love petrol cars, even diesel ones but they are killing huge numbers of people and fuelling climate change. I chose to be an Engineering Officer in the Merchant Navy, worked on 20,000 hp main propulsion diesel engines as well as 1000 hp disel generators. Studied thermodynamic in my Engineering cadetship as well as at honours degree level. But the Internal combustion engine has had its day, or even century, and decades, at that was a few years ago now and time to move on and try and save the world else hurricanes like Malissa will just get worse and worse. I hope COP 30 will see a leap forward. Now Ethopia has there new hydroelectric dam they have sensible stopped importing of most ICE cars. Citizens should buy EVs and use the abundant and cheap electricity. STOP BURNING STUFF !!!1 point
-
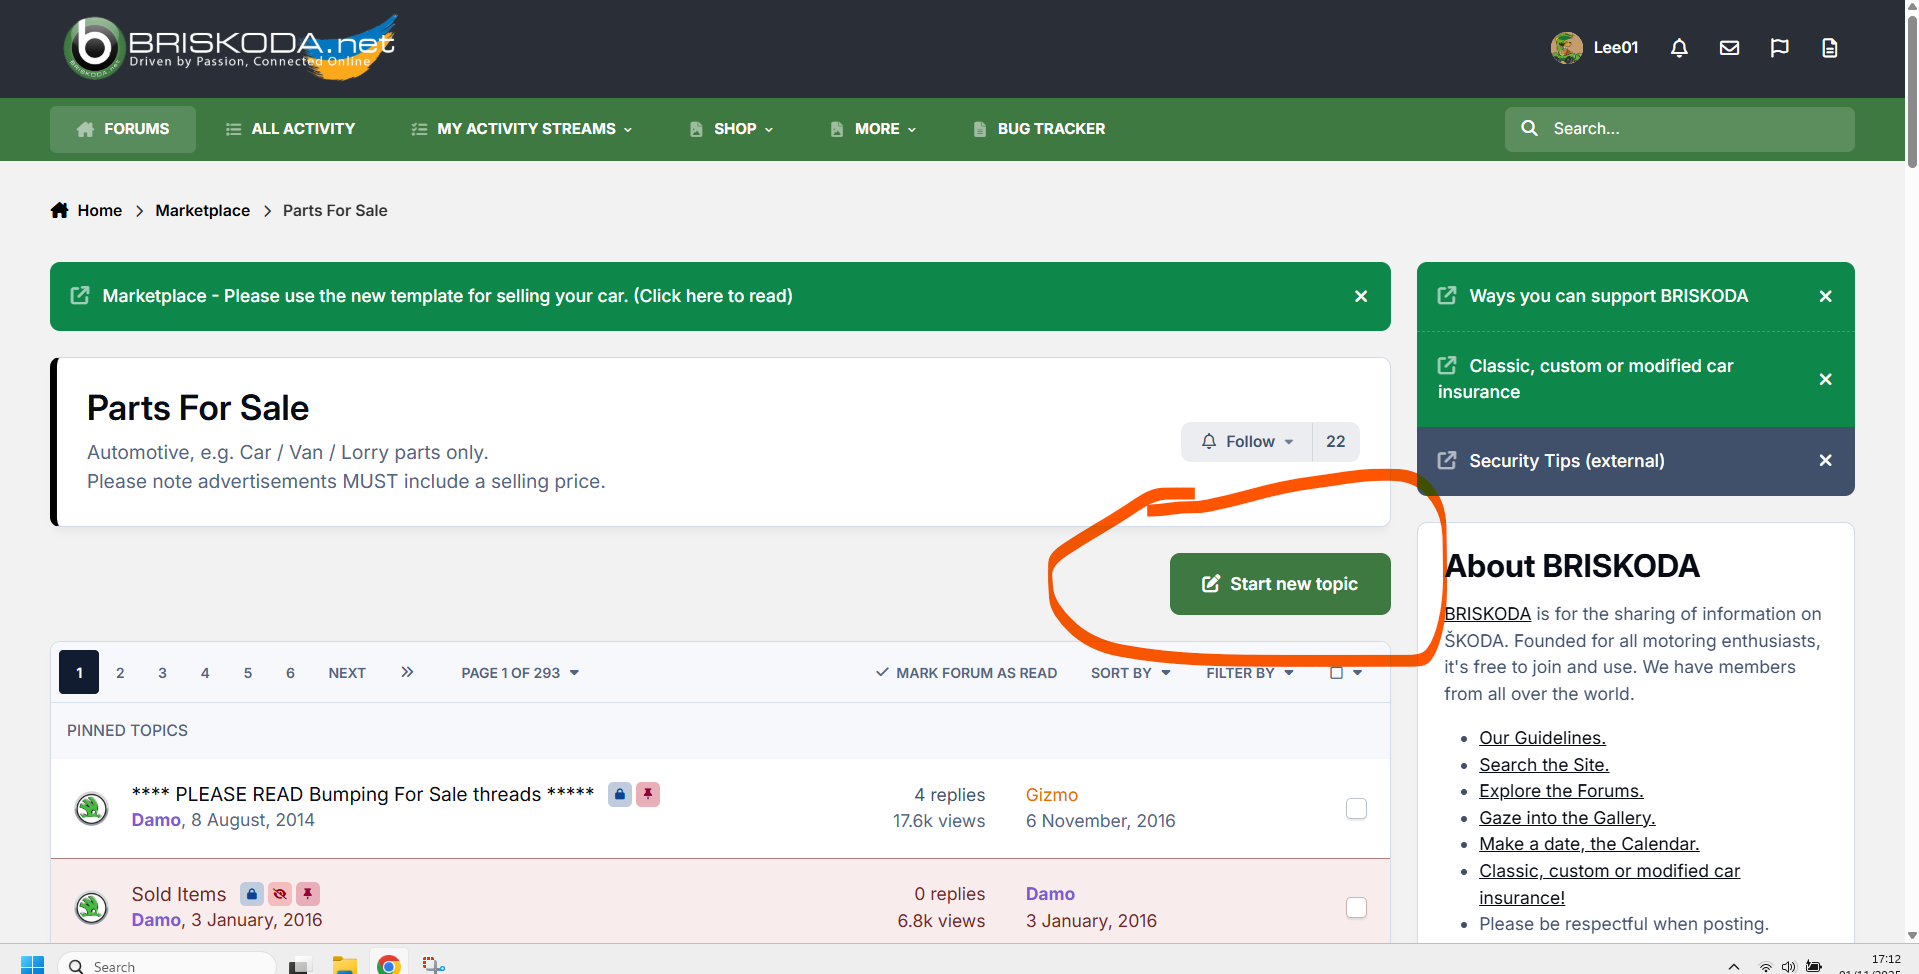
1 pointDo you not see the 'Start new topic' button in the relevant section?
 1 point
 -
1 point
-
the turbine actuator lever on the axles has air for sure, it can rattle like that, there are fuses that secure it so it doesn't rattle.
 1 point
 -
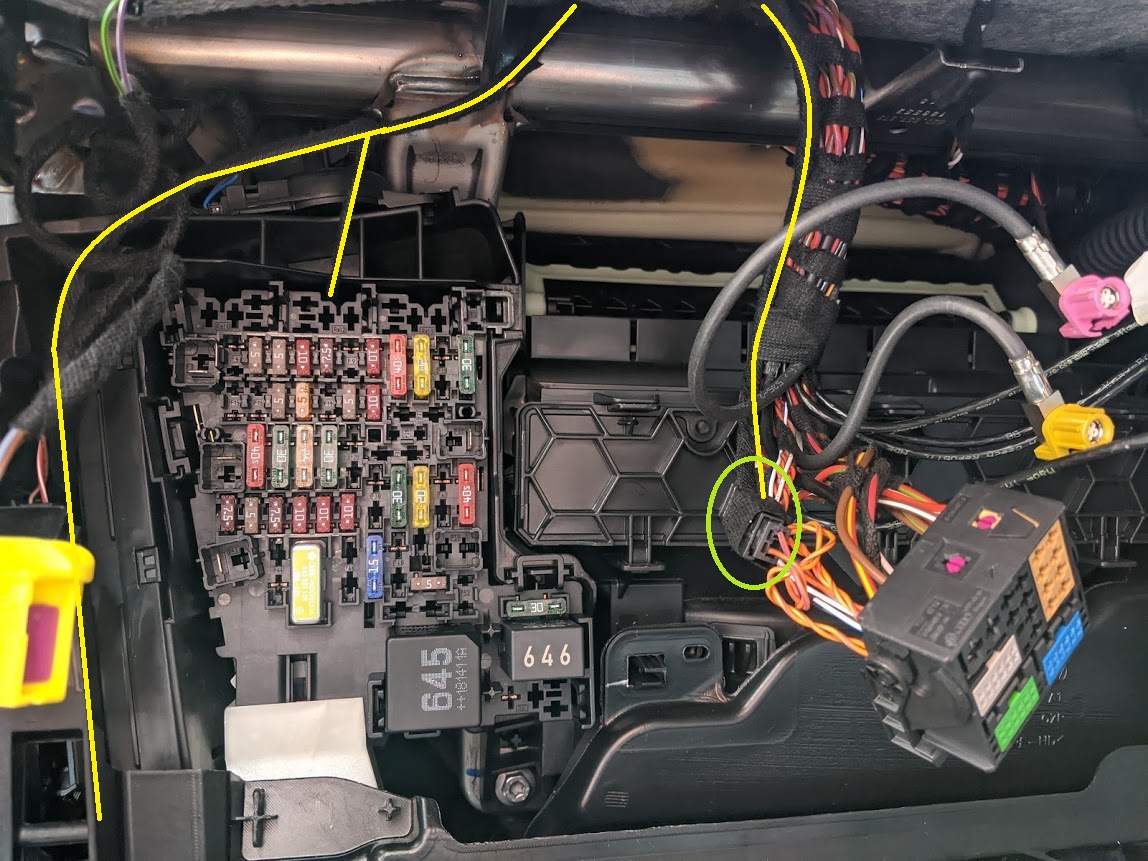
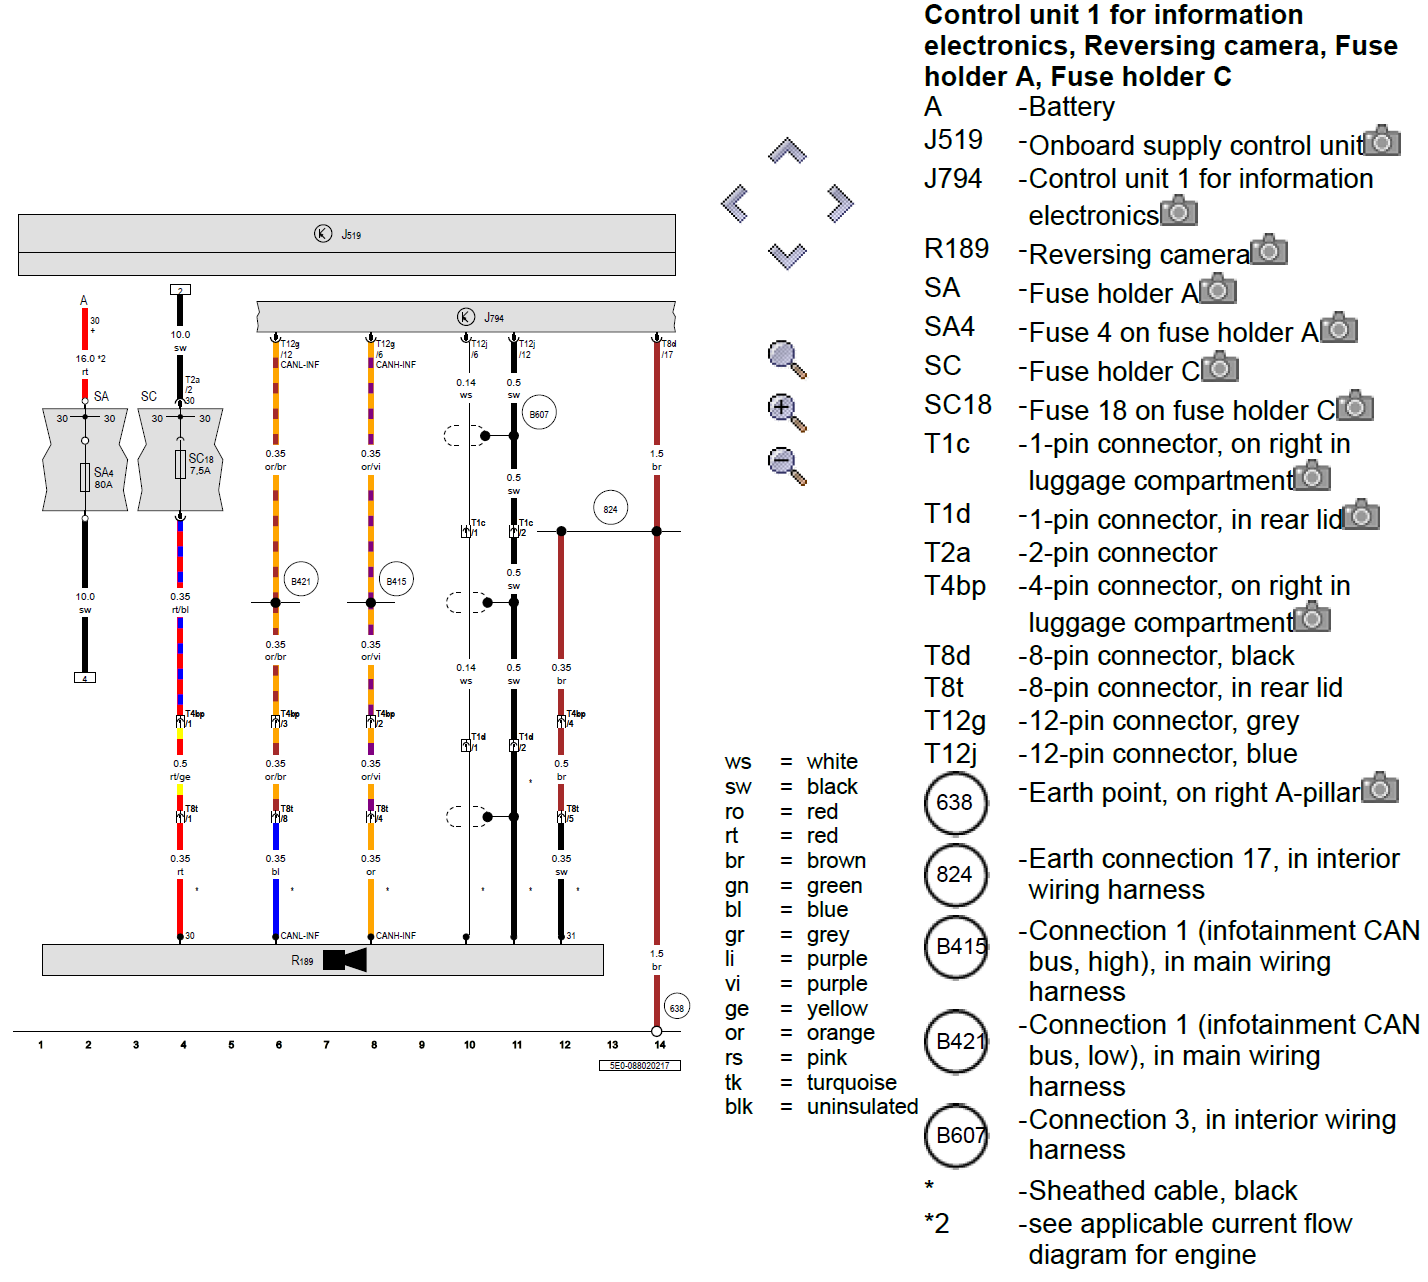
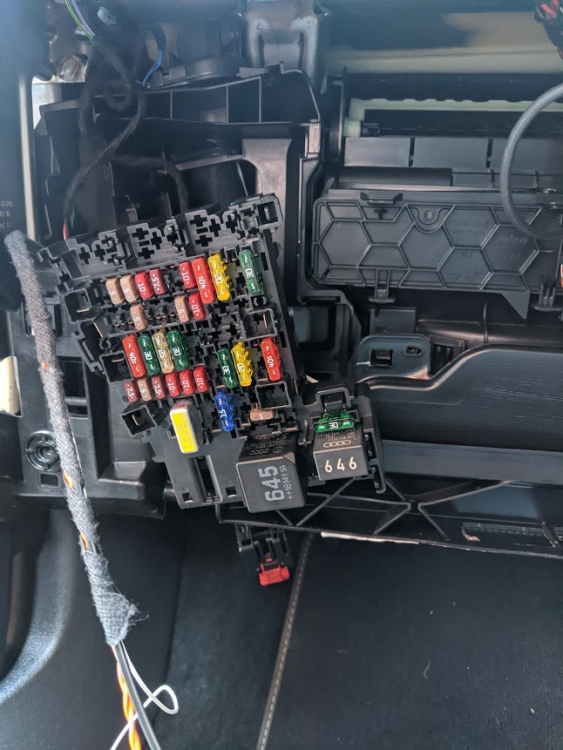
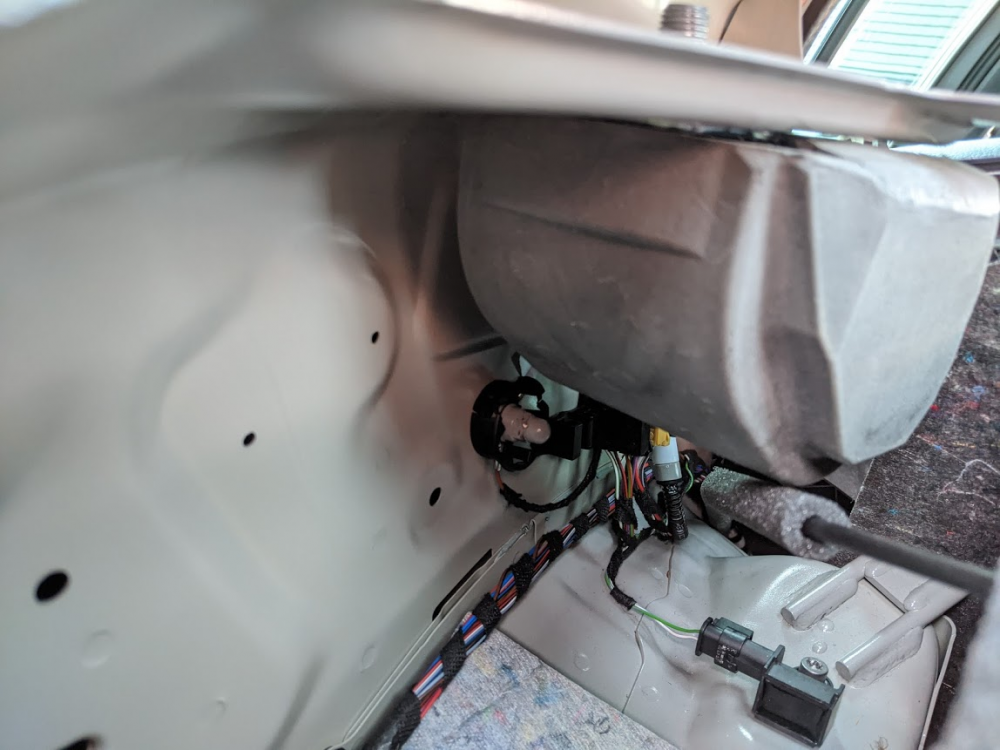
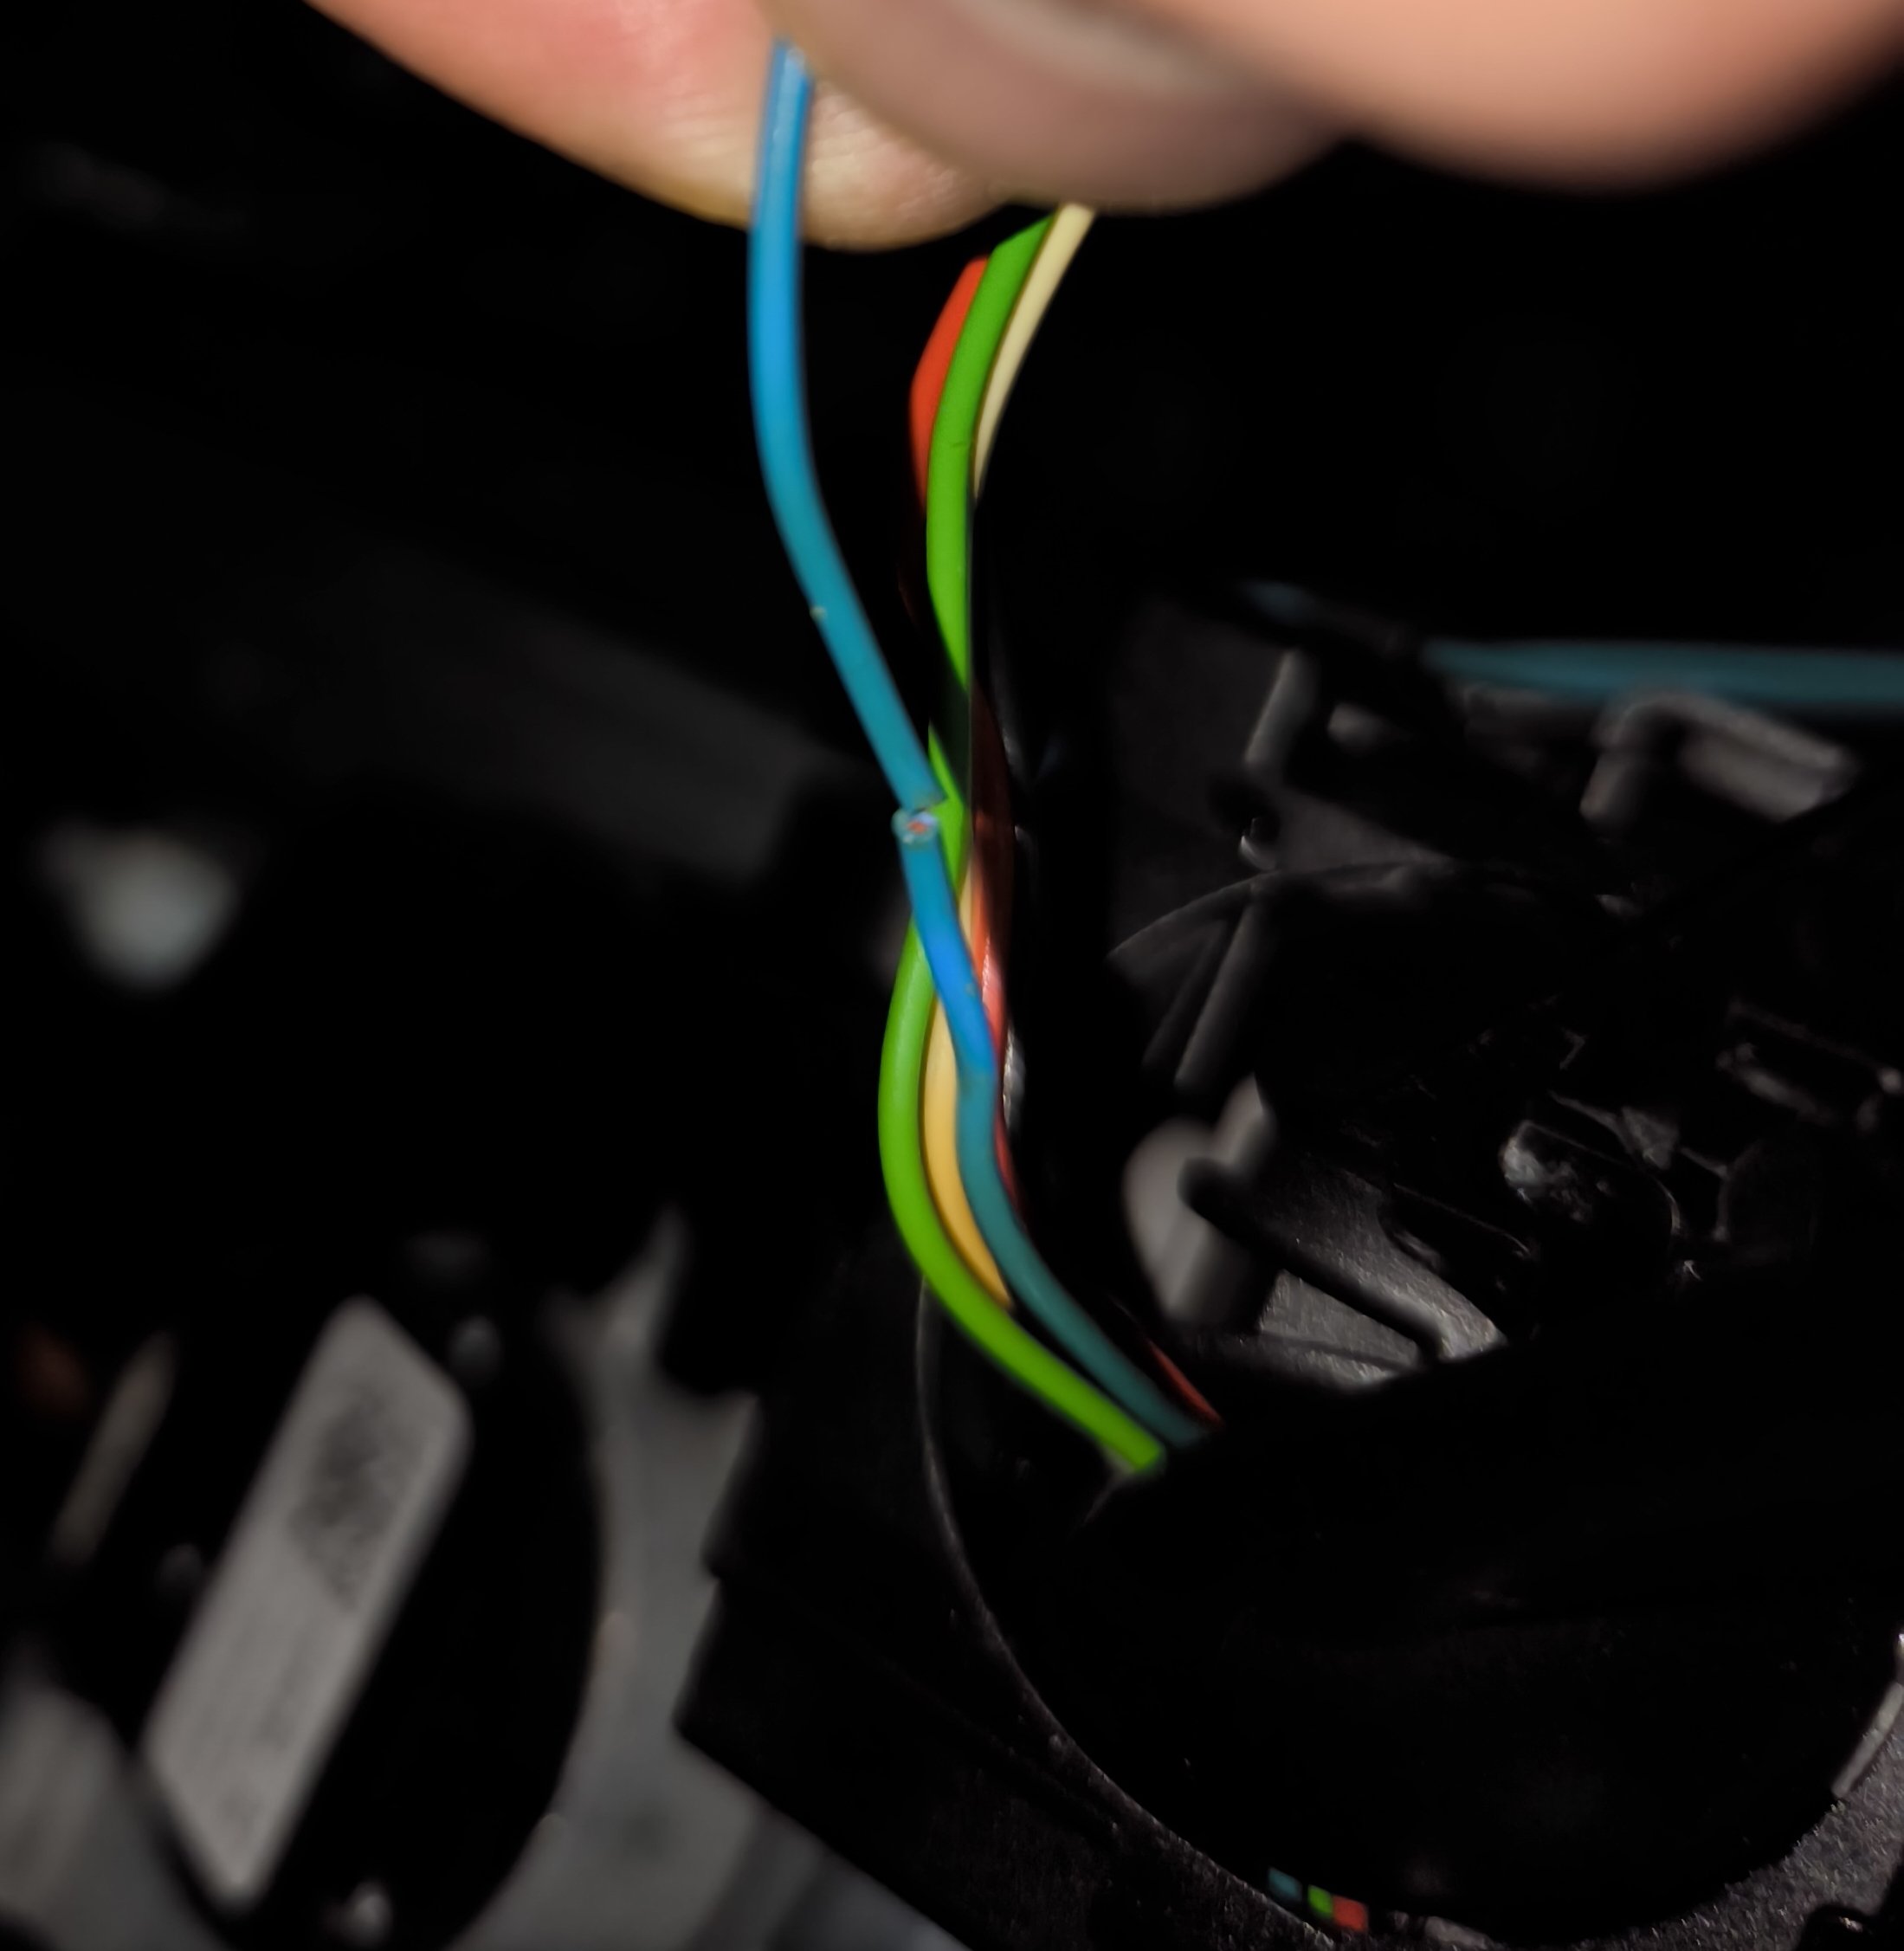
Nice guide, shame you didn't write it two days ago when I started fitting my camera As I did a few things differently, I'll add some extra info as it might help others. I used an OEM/original high camera from AiDU Auto on aliexpress. At time of writing they offered: - a highline kit for the MK3 Octavia at ~£75 - a highline kit with washer jet for a Tiguan also at ~£75 After a quick chat, they were happy to parameterise the Tiguan kit with an Octavia file so I bought the Tiguan kit. Given they were the same price/size/shape it seemed daft not to get the bonus washer jet Unfortunately, the washer jet pipe was slightly too short but I was able to remove the fittings on either end and use some PVC washer hose (4mm ID, 6mm OD) of the right length instead. I took a slightly different cable route, shown in yellow: Unlike the kit above, it's not 'plug and play' so you end up with a bunch of wires that need to be connected to the appropriate places. The cables are pre-terminated but as I already had the correct crimps, I cut them to length rather than having loads spare. Factory wiring diagram for the highline (PR-KA2) camera is as follows: The earth wire was shorter than the others so I used the earth point in the boot below the rear seatbelts: For power, I removed the fusebox and used fuse 18 as per a factory install: After trimming and terminating the wires, I ended up with this: - new wires highlighted in yellow - new connector tapping into the CAN-bus circled in light green For the CAN-bus connection, I de-pinned the original quadlock connecter and moved the two CAN-bus wires into a separate connector, this means I didn't need to cut or modify the original wiring to tap into the CAN-bus: The eagle eyed amongst you may notice I used a 5a fuse in slot 18. After a quick shopping trip, I've now replaced it with a 7.5a fuse as per the factory wiring diagram. Coding was super easy: - Address 19, add 6C to the installation list - Address 10, coding, tick byte 2 bit 4 - Address 5F, adaptions, change Car_Function_List_BAP_Gen2-VPS_0x0B to "activated" - Address 5F, adaptions, change Car_Function_List_BAP_Gen2-VPS_0x0B_msg_bus to "Infotainment data bus" All works just like a factory install with the various modes etc. As expected, the only error code currently stored is "no basic settings" so I'll need to print out a VAS6350 board and calibrate it at some point


 1 point
 -
0 points@mac11irl I just simply ask you to do the little experiment with ice cubes floating in a glass of water, mark the level of the water with the ice cubes floating and then wait till the cubes melt and check the water level again, is it the same or lower? It could well be lower as some water may have evaporated, it certainly won't be higher. So how will the ice caps cause sea/ocean levels to rise?0 points
-
Like JohnMack, I pensioned off my 2008 BKD engined Octavia diesel earlier this year to buy a 2016 vRS diesel with the CUNA engine on around 145,000 miles. Like any car, previous maintenace is vital and the car I bought didn't have much recent history - silly me! The memsahib and I both loved the car when we saw it but after a few weeks, the problems started. The pale orange engine light came on shortly followed by the curly glow plug light which sent it into limp mode; I'd also noticed a heavy oil consumption -~ 1/3rd litre in 200 miles. To cut a long story short, it's had three exhaust gas temp sensors, two DPF pressure sensors, EGR valve cooler and DPF all replaced at a total cost of around £3,000. The heavy oil consumption turned out to be a leak from a missing gasket somewhere in the turbo area which allowed oil to leak onto the manifold but it's still a lot higher than I am used to. It is because the oil used in these engines is so thin (0-30) that it just disappears. If thicker oil is used, the residues clog up the DPF which will ultimately block with replacements available at £1,200 - £1,800 depending on where you get them from. Ignore re-worked ones as a bad job. Notwithstanding the above horror story, we both still love the car; it seems to be well engineered, (DPF system aside) has more than enough power and handling to keep a retired rally driver happy in his dotage!!0 points


.thumb.jpg.9dd3f612ba7f13d10be5c518d3c8d255.jpg)