Leaderboard
-
Stonekeeper
Resident Member11Points2,876Posts -
Aspman
Resident Member10Points21,179Posts -
Lady Elanore
FREEDOM7Points24,896Posts -
.jpg.5f5908b5afb5ed410c43d763df801089.jpg)
Evolution13
FREEDOM7Points2,393Posts




Popular Content
Showing content with the highest reputation on 15/06/26 in all areas
-
2 pointsI got repeated warnings over a few days recently, probably 4 or 5 journeys during that period, that the key fob battery needed replacing. As you say it’s quite easy to replace them…2 points
-
2 pointsLol that's hardly turned a wheel. But £16k for a 14yr old volvo c'mon low mileage or not. Someone is selling a Bentley GT near me for 8k, what could go wrong?2 points
-
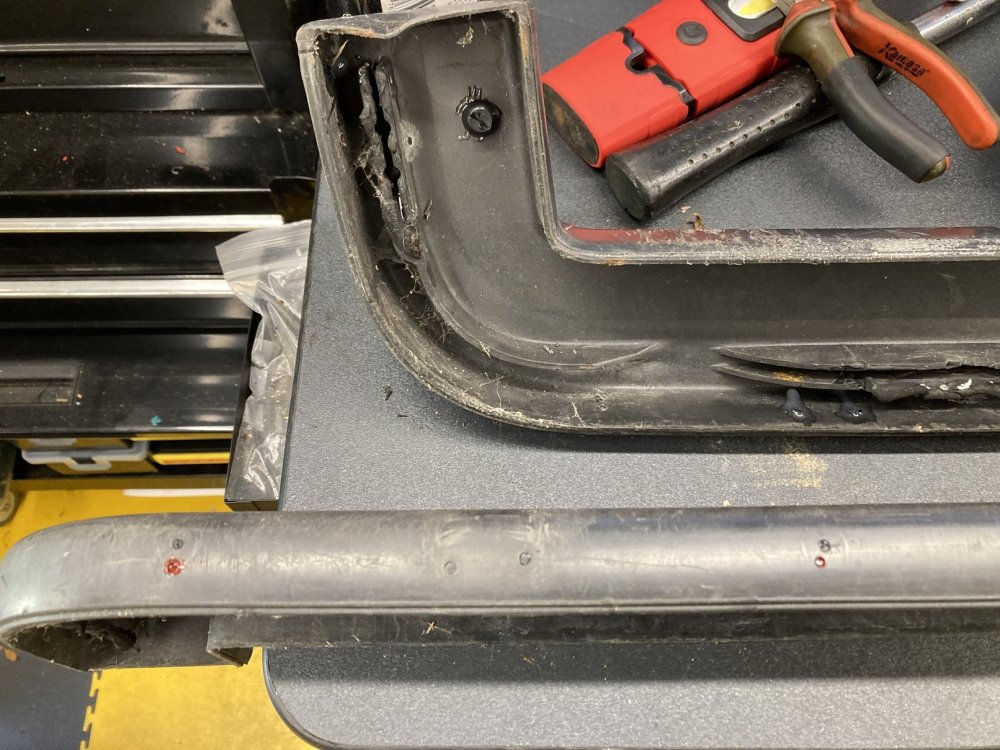
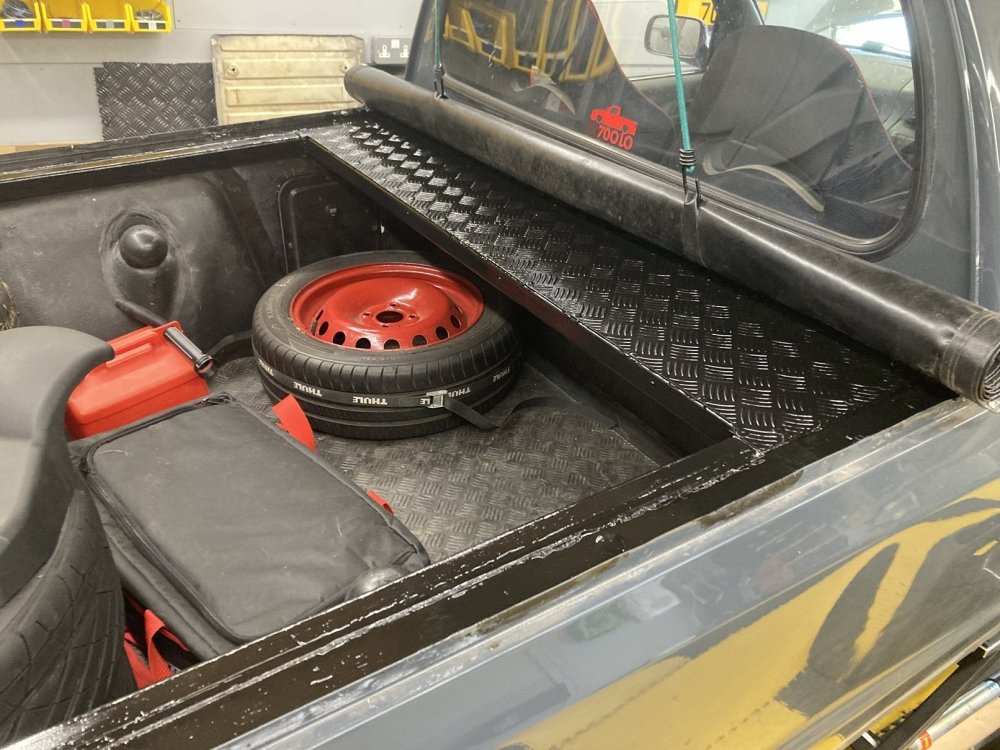
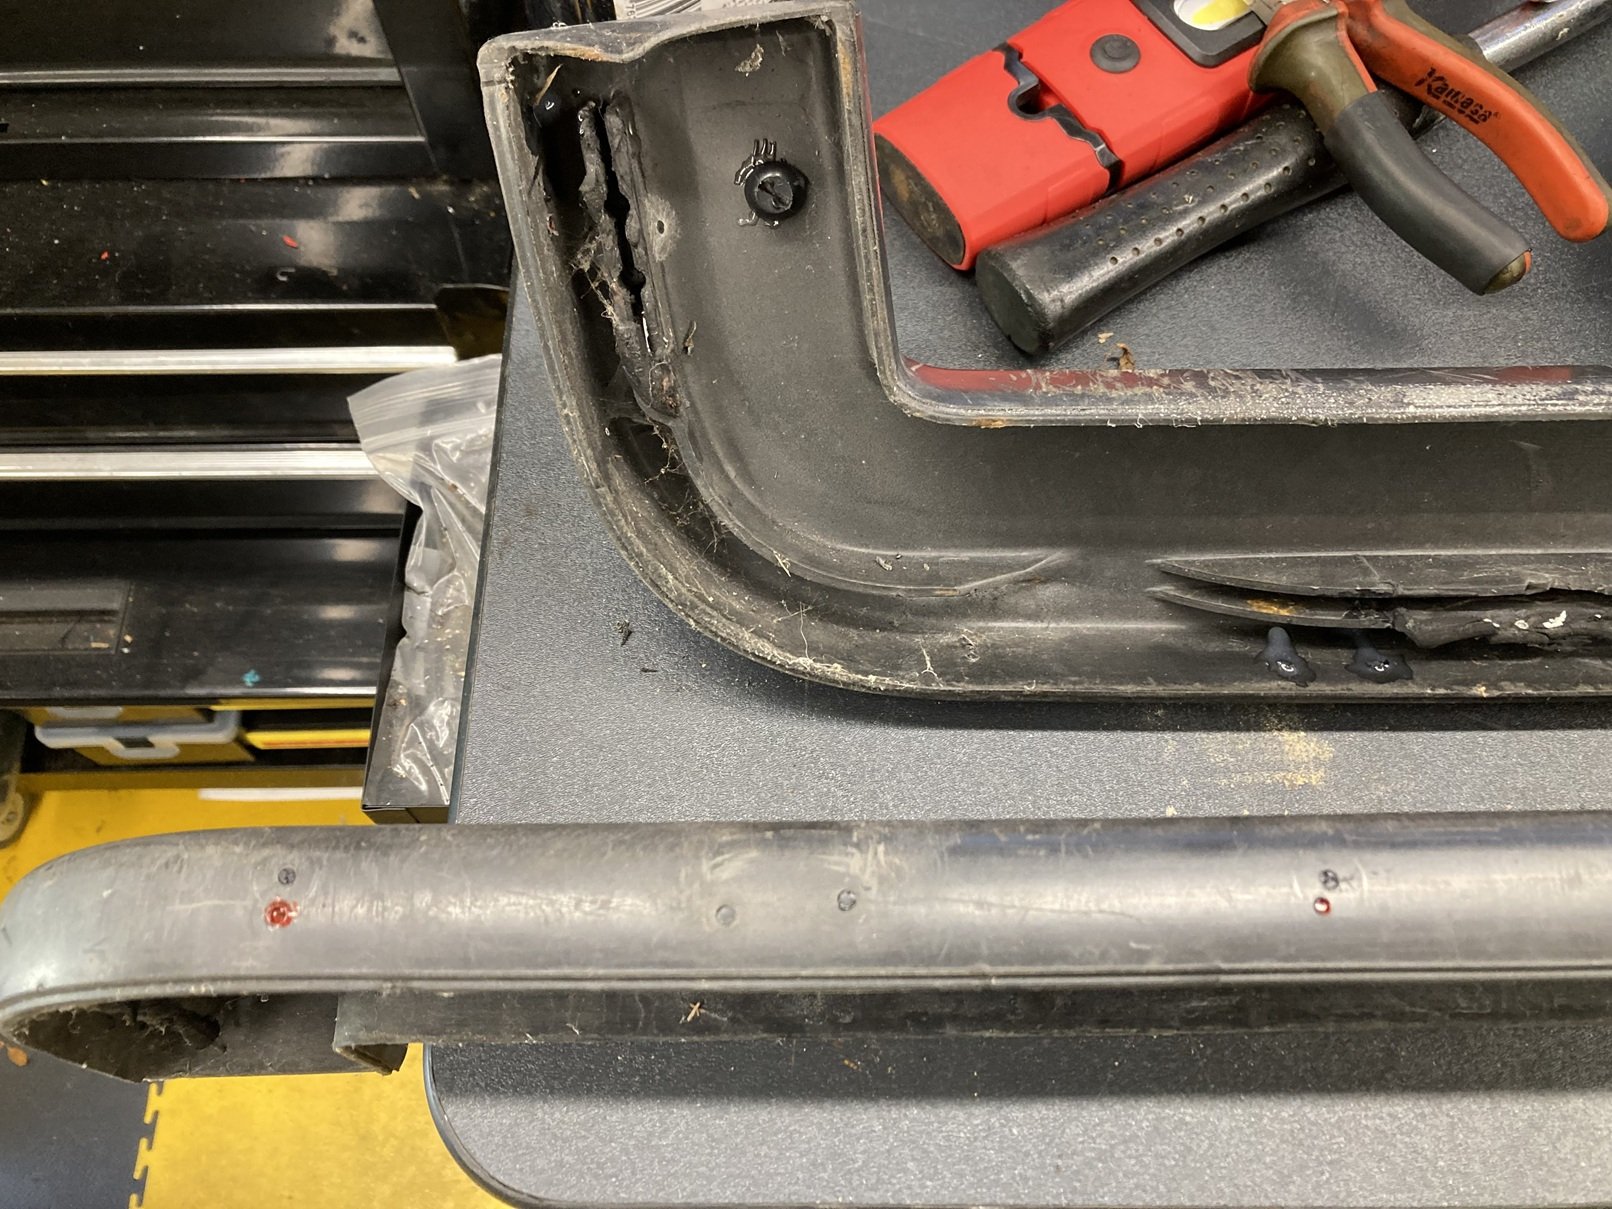
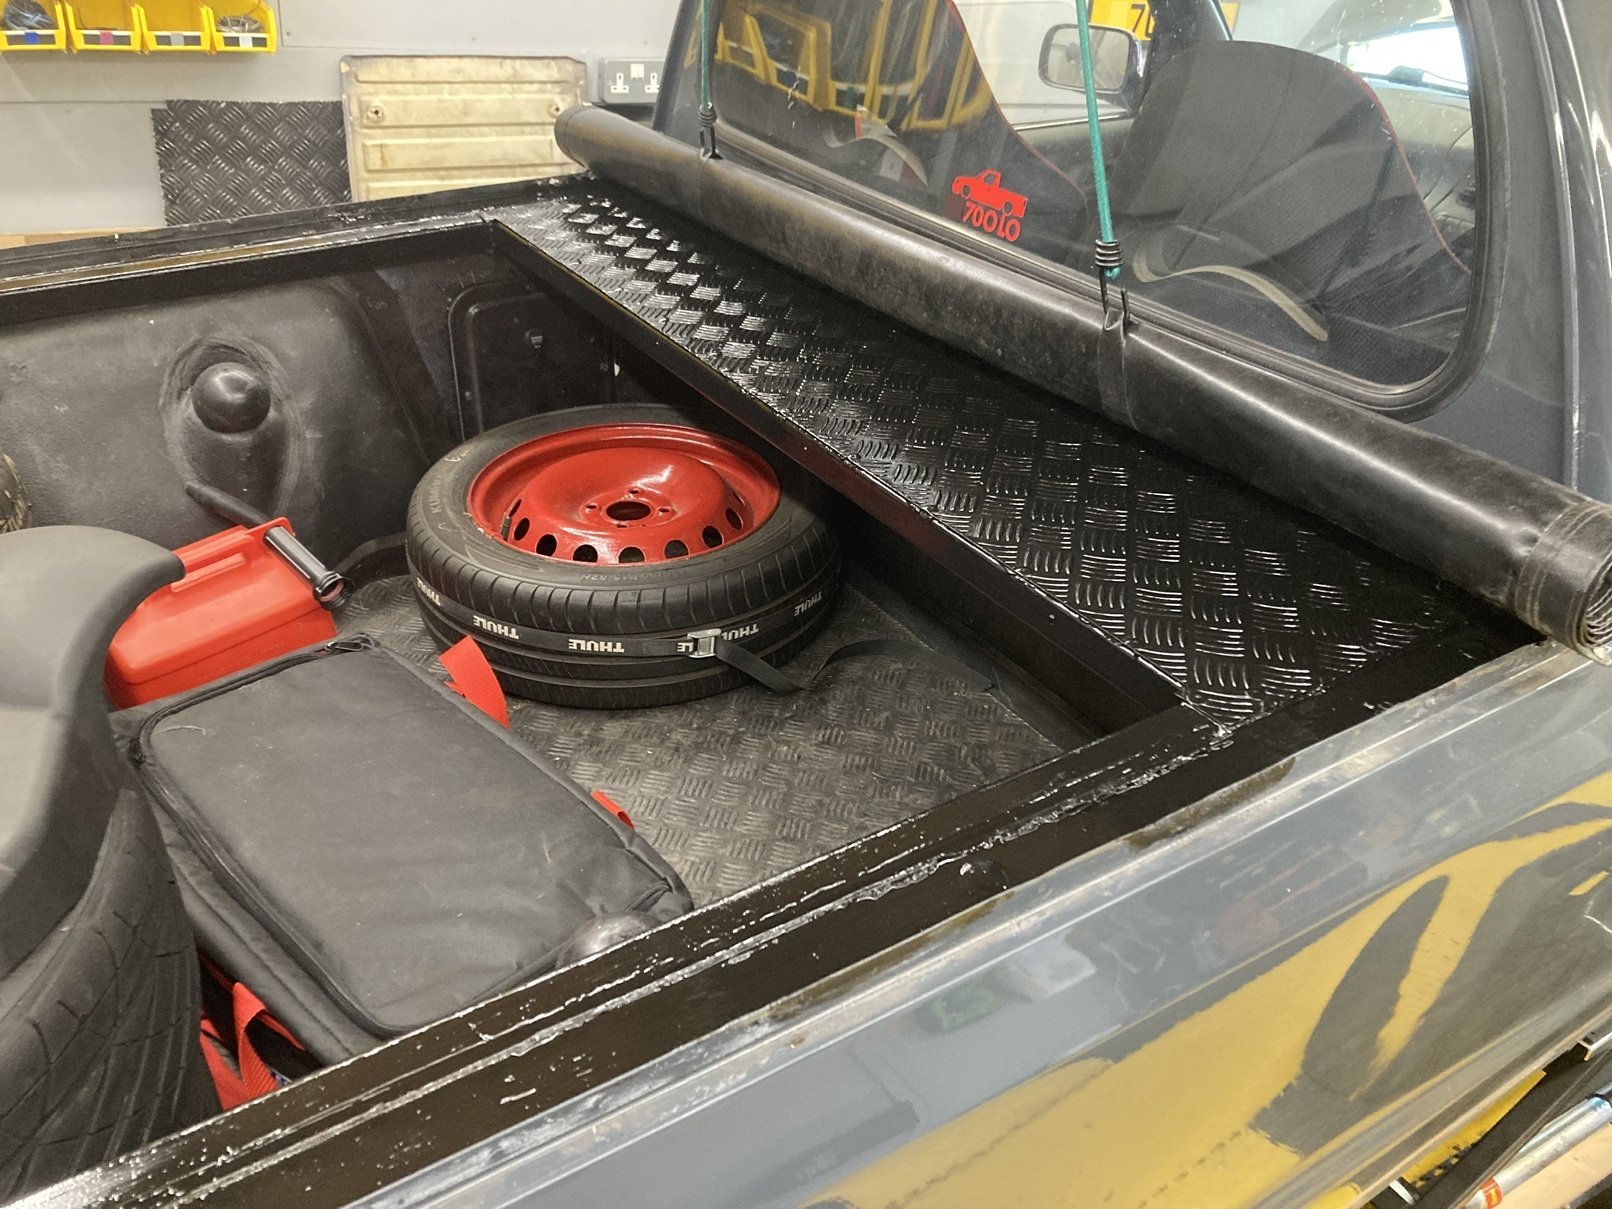
2 pointsIt has been a long time since I have updated this thread. My Caddy has not been forgotten, but it has largely been abandoned in favour of my Ibiza project (the SEAT variety, not a Balearic housing development). The Ibiza is now finally MOTed and in use, so I can turn some attention back to the Caddy. The pick-up has been enjoying the comforts of my garage workshop for a while because it is far from watertight. If it is parked out in the rain, both the passenger side footwell and the rear load bed fill with water. The windscreen seal is the obvious suspect for the wet carpet in the cab, on which more later, but the route for the water to get into the back was less obvious, given that it is rarely left without the tonneau cover in place. Suspicion fell on the front corners of the load area, where the ‘hockey stick’ top trims had been cut to finish more or less level with the cab back rather than extending across the B-pillar as standard. This appeared to have left a route for the water to get past the end of the trims and into the back, which warranted further investigation. Neither the side nor the rear top trims had ever been fitted particularly well in place. With the side pieces I had resorted to putting a couple of rivnuts in the top of each body side and screwing the trims down, which kept them in situ but was pretty unsatisfactory. The trim at the top of the tailgate had always sat high at the offside end, and whilst it did not obviously contribute to the water ingress it was worth looking at whilst the sides were being addressed. When I removed the tailgate top trim I discovered that the flange on the tailgate onto which it slots was folded over at the offside end, which was preventing the trim from sitting properly in place, and the captive bolt at that end was absent from its (broken) mounting, suggesting that possibly a previous owner had over-tightened the nut in an attempt to overcome the obstruction caused by the fold in the flange. I had a couple of used spare sets of trims in the shed, which were complete (as in not obviously broken or butchered) although not great cosmetically, so I selected the best set to trial fit. It became immediately apparent that the trimmed shape at the front of the side trims had masked the fact that they had not been located properly. I located the front of the trims onto their mounting flanges, then gave them each a couple of gentle taps with a rubber mallet on the rear corner to position them flush against the cab back before applying the mallet all along the top to ease them down to where they are supposed to be. The original parts had never fitted so well, and the gap at the front corner is no more. The folded mounting flange at the top of the tailgate was easily rectified via judicious use of a set of mole grips, after which the replacement trim sat neatly where it is supposed to. Now I knew the spare set would fit properly, I could turn my attention to the aesthetics. When I fitted the non-standard tonneau, I located the press studs on the top trims by progressively pulling the tonneau into position and drilling a hole for a stud so it lined-up with the other half of the fastener on the cover. It was not a massively professional (or patient) method, although the end result had looked OK. With the trims off the Caddy, however, it was clear that the press studs were neither particularly well aligned nor exactly evenly spaced. Now I decided to do better. I applied some masking tape to the outside face of each of the trims, and marked a straight line for the studs to follow at the correct depth for the tonneau to fit snugly. With the side trims I fitted them in place temporarily to give a location for the front press stud, then marked locations for the others at even intervals along the line. For the tailgate trim I measured out from the centre to the required locations for the end studs, then marked the others at even intervals in-between. Once I had drilled all of the new holes, only two of which corresponded with existing holes in the trims, I marked them all with red paint to show which were the ‘right’ ones, as the trims now had a lot of holes in them. The trims I had chosen to use had at some stage had the ‘goalpost’ style mountings for an original tonneau, and subsequently had another set of holes for press studs. All of these ‘extra’ holes would be invisible with the tonneau in place, but I had a cunning plan to deal with them. I had used a 2.5mm bit to drill the new holes, and I realised that I had some black plastic drive rivets which had a central shaft of very similar diameter. A trial fit confirmed that these handy little nylon cylinders were a perfect fit for most of the unwanted holes, requiring a couple of taps with a mallet to get them in place, and being nigh-on impossible to dislodge thereafter, so I set-to cutting a load of drive rivet centres in half, tapping them into place, and putting a dab of araldite on the back to be absolutely sure they would stay in place. Both replacement side trims had a small hole in the top surface by the rear corner, almost certainly where a screw had been used to keep them in place. I could not use the same technique to fill these holes, as the top surface of the trims is too thin. Instead I drilled the holes out and tapped them for M6, so that I could screw (and glue) black nylon number plate fixing screws in from the underside. Once the glue was set I trimmed the thread down to the level of the top surface of the trim. Various clamps, and judicious application of a heat gun, enabled me to correct a few places where the trims were mis-shapen, and then a bit of sanding further improved the look of the now-filled holes before priming and painting. I could have saved myself a lot of time and effort by using filler in all of the unwanted holes rather than faffing about finding bits of black plastic to glue into place, but I decided this solution would be more durable for when I am using my pick-up for its intended purpose. I do not want to have to worry about cracks appearing in the filler when things are (inevitably) dropped onto the top trims. Only time will tell whether my efforts have been worthwhile. Whilst the top trims were off, I decided to give the checkerplate ‘shelf’ and additional side rails a couple of coats of paint. I had some Hammerite black satin so that was what I used. Once the top trims are eventually back on this should have it looking much smarter in the back.
 2 points
 -
2 points
-
2 pointsSurprise surprise NOT! The UK Government has and is consultation with the car manufacturers & are looking like making an announcement on altering or in truth U TURNING on the requirements and timeline on when passenger cqrs have to be EV,s getting First Registered. It will be more than just CARS even though that is what the News Readers / Presenters and media say. Lack of interest, sales, infrastructure built, public charging and the cost to charge in public. The social divide of those that are Business users and get tax breaks and home or work chargers & those with none of these. Basically it is to do with governments & advisers not knowing their arse from their elbow or the ability to organise a p1$$ up in a brewery. Just a bunch of muppets that are not capable of understanding hard working or not working or not stupid people and the 'Real World of motoring and transportation needs or wants'.2 points
-
So who is up for this one on Sunday 28 June 26 10-4pm ? Name and Car you bringing ? Maybe include anything you wanna buy or sell in this thread. Could not find another for this meet1 point
-
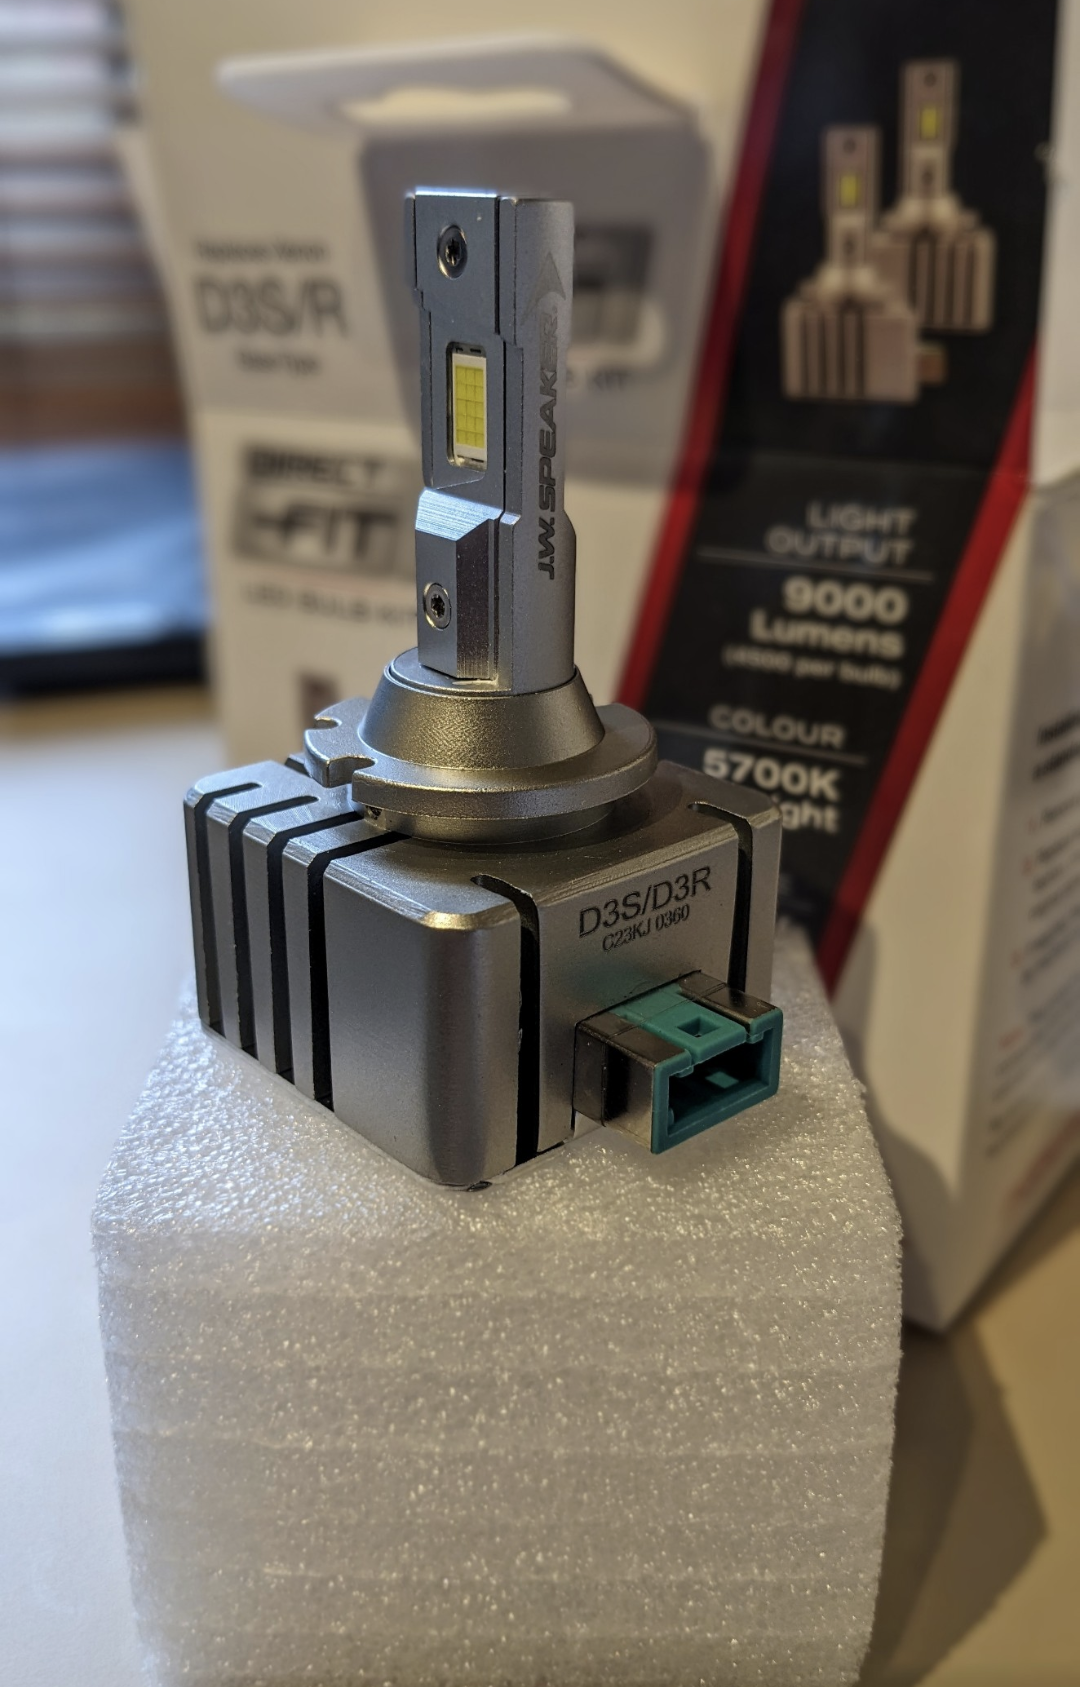
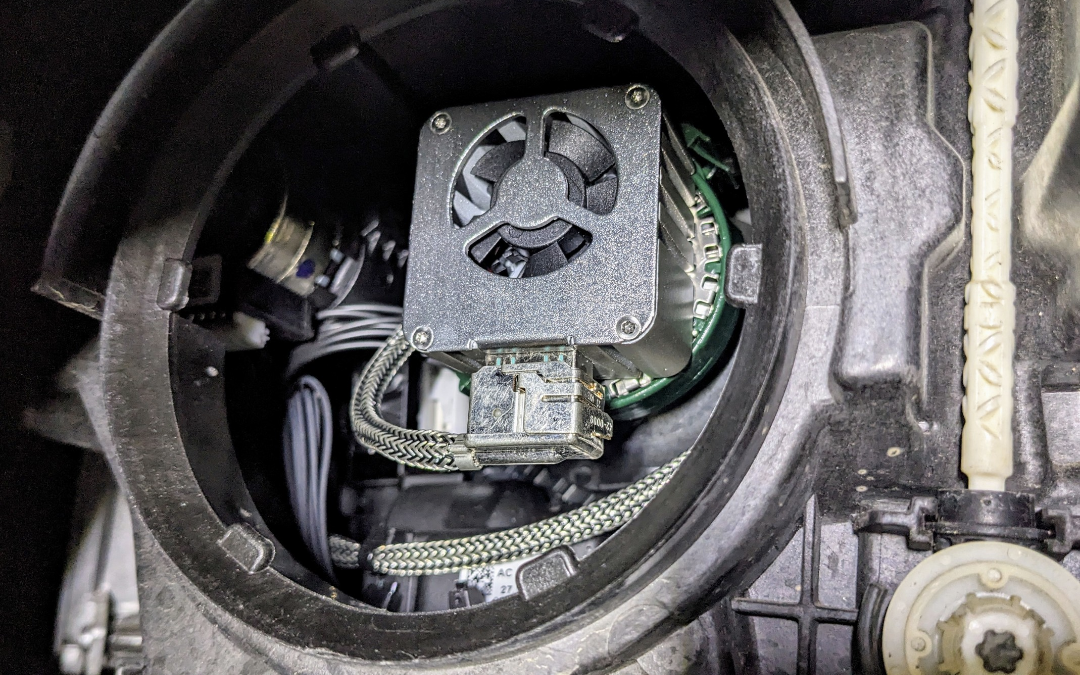
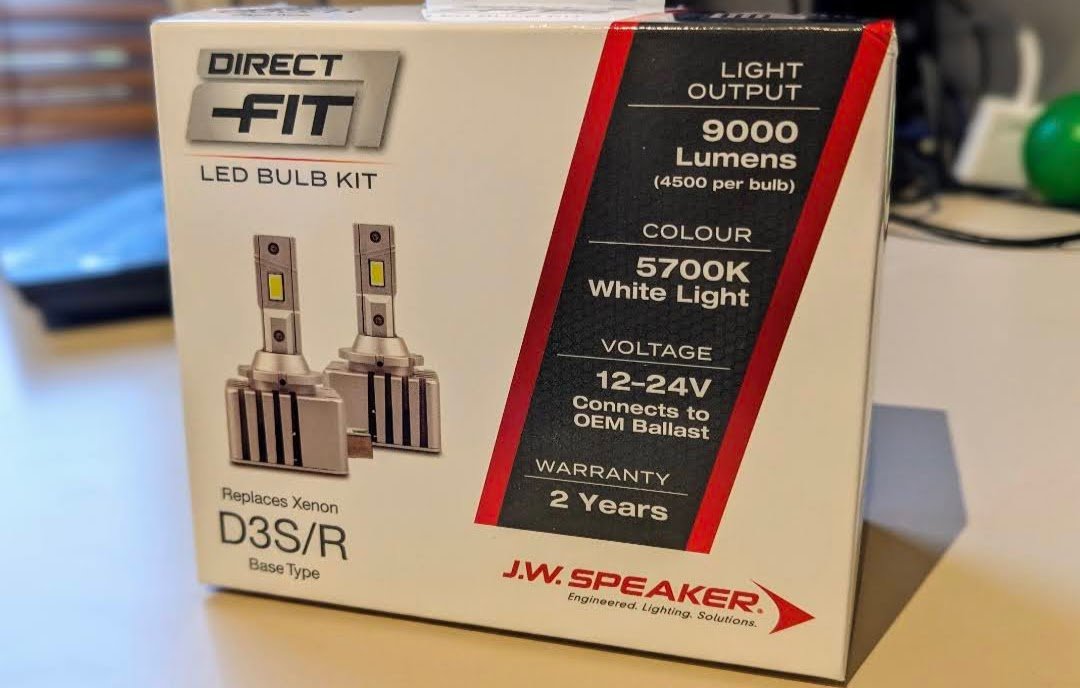
1 pointA few of us have switched the xenon bulbs to LED D3S bulbs, including myself. Highly recommended. I got JW Speaker LEDs in my Superb MY17. A huge improvement over the Phillips xTremeVison Gen 2 xenon bulbs i had before. It's got a built-in heatsink and fan - very important for cooling. Plug'n'play. No coding required. No CANBUS errors or warnings. Footage from my dashcam.
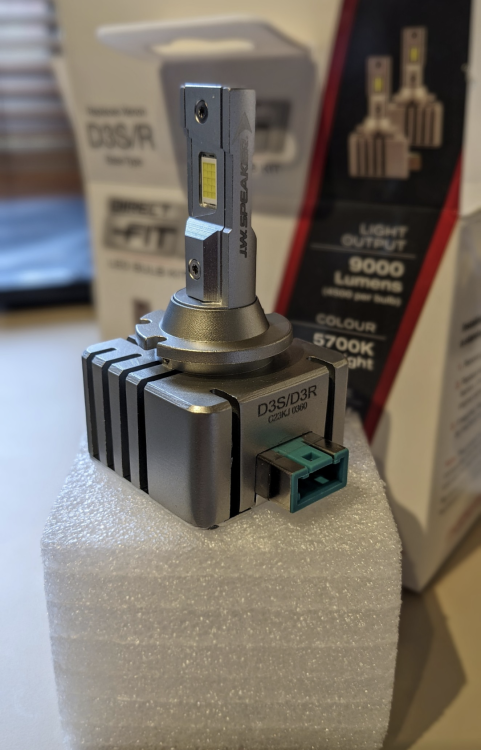
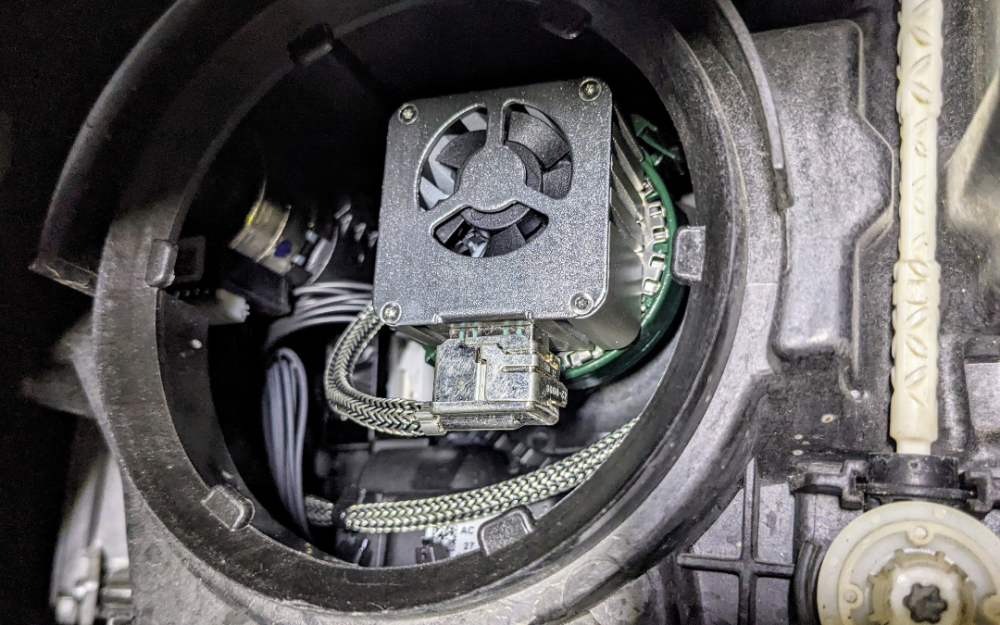
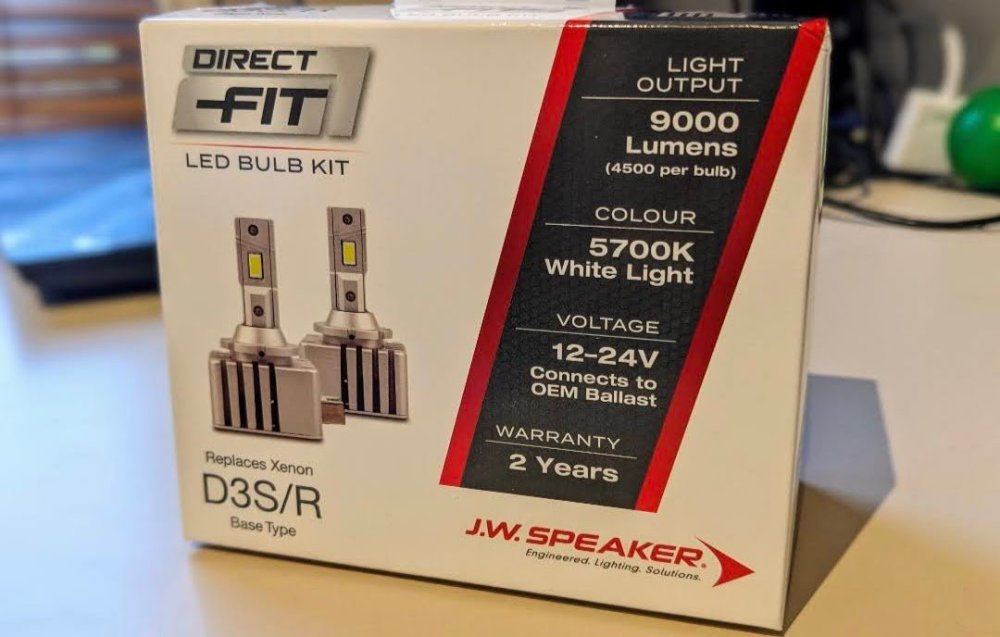 1 point
 -
Update time: I decided to plug in my scan tool and discovered that there were no fewer than 17 fault codes stored in the ECUs, and to be fair, I only did that because the car decided that it would not start because of a flat battery. I fitted a new battery last Sept, so I did not suspect that it could be duff. I cleared all but 2 codes which kept coming back: one was the digital aerial has a short to ground, and the other was a faulty air quality sensor on the AC. After clearing the other codes the seat has come back to life again, so the windscreen fitter must have disconnected the battery but never cleared any errors after reconnecting again. Anyway, the battery, it seems was faulty and a new replacement one fitted today1 point
-
Great advice, thanks. I've ordered a replacement part, but your fix looks like a good option too. Thanks so much for your help!1 point
-
@skoda_cat When I bought this pick-up it had a checkerplate load cover which was hinged to the square section tube under the back edge of the remaining bit of checkerplate. I removed the load cover years ago, but I left that bit in place just because I thought I might replace the cover at some point. That is now vanishingly unlikely, but the bit that is still there does not get in the way, and adds a bit of extra rigidity to the rear bodywork, so I decided to keep it.1 point
-
1 point
-
1 point^^^ The thing is you posted the alarm was still sounding when the engine was running.1 point
-
1 point
-
Jan 2016 apparantly. I'm not sure as yet if there is a service history/invoices.1 point
-
Mines 130k miles! Definitely needs new brakes. But have bought the proper high temp ate grease so I can check the pistons and pins.1 point
-
1 pointIt seems (like I thought they would) that the electrical industry and also the regulators of the wiring regs etc, are fighting Ed Miliband over the introduction of the plug-in solar panels for domestic use. The reason you cannot plug in a power source into a socket is quite logical, really; it breaks every safety rule, and that system (as used in Europe) has already been the source of many accidents and, I think, a fatality.1 point
-
Brembo aftermarket brake pads - they tend to be of lower quality than Brembo pads for Brembo brakes, it has been said. Their worst weakness is the quality of the pad backing piece which frequently seems to be slightly too small and roughly cut out whereas OEM quality pads backing pieces get punched out for accuracy - to minimise/stop this rattling. That if is not from my personal experience, but from someone who works on/tests brake parts.1 point
-
Trusting what ECP, Autodoc etc. suggest for compatibility is often a bad idea.1 point
-
The banging is probably due to that flap motor assembly having lost its positional feedback, a common issue for any flap motor on any VW Group over the past 20 or so years! Or, the flap it is trying to move has ended up with restricted movement. In its "lowest" form, this just leads to a knocking noise as the servo system ends up "hunting", at its worst, it will have forced apart the motor casing or even broken its mounting frame and some ones. The weakness in these flap motors can end up being that they are never "exercised" enough, so the potentiometer track and/or its contact end up getting "dirty" as far as being able to make good contact is concerned, so it ends up being demanded to move from its usual clean position to a new position - but the track can be dirty at that point, so the positional feedback control gets lost - and the system ends up hunting back and forwards trying to get to its demanded position which is done by applying a known voltage that has been stored during initial setup - but it can't reach that exact position. Edit:- no doubt someone will reply with help on how to replace this flap motor or at least help you look into why/what is causing this, I've only had, so far, one car with that issue, and it was a 2000 VW Passat 4Motion - and that motor in a RHD version of that car, was located too close to the side of the car to let me just swop flap motors, so that function remained U/S after it started to fail as I wasn't going to go the bother of removing the dashboard - I think Fabia etc is easier to work on though!1 point
-
Check out this post from @leolito who mounted one under the passenger seat.1 point
-
1 pointHi, welcome. If you have not already seen them, along with all the other subjects and forums on Briskoda is the Superb section with the Superb Mk2 and Superb Projects forums where you can find and ask about lots of real world information and advice from Superb owners and others. - https://www.briskoda.net/forums/ HTH.1 point
-
Bilstein B4 22-183712 and Bilstein B6 35-250852 front shock absorbers are both sold to replace OEM part number 1K0413031BL. These are both listed against fifteen different OEM part numbers. KYB 334834 is listed against fifty eight different OEM part numbers, so they might not be a close match to 1K0413031BL. As well as the Octavia MK2 with increased ride height, 1K0413031BL front shock absorbers are also used on the Yeti.1 point
-
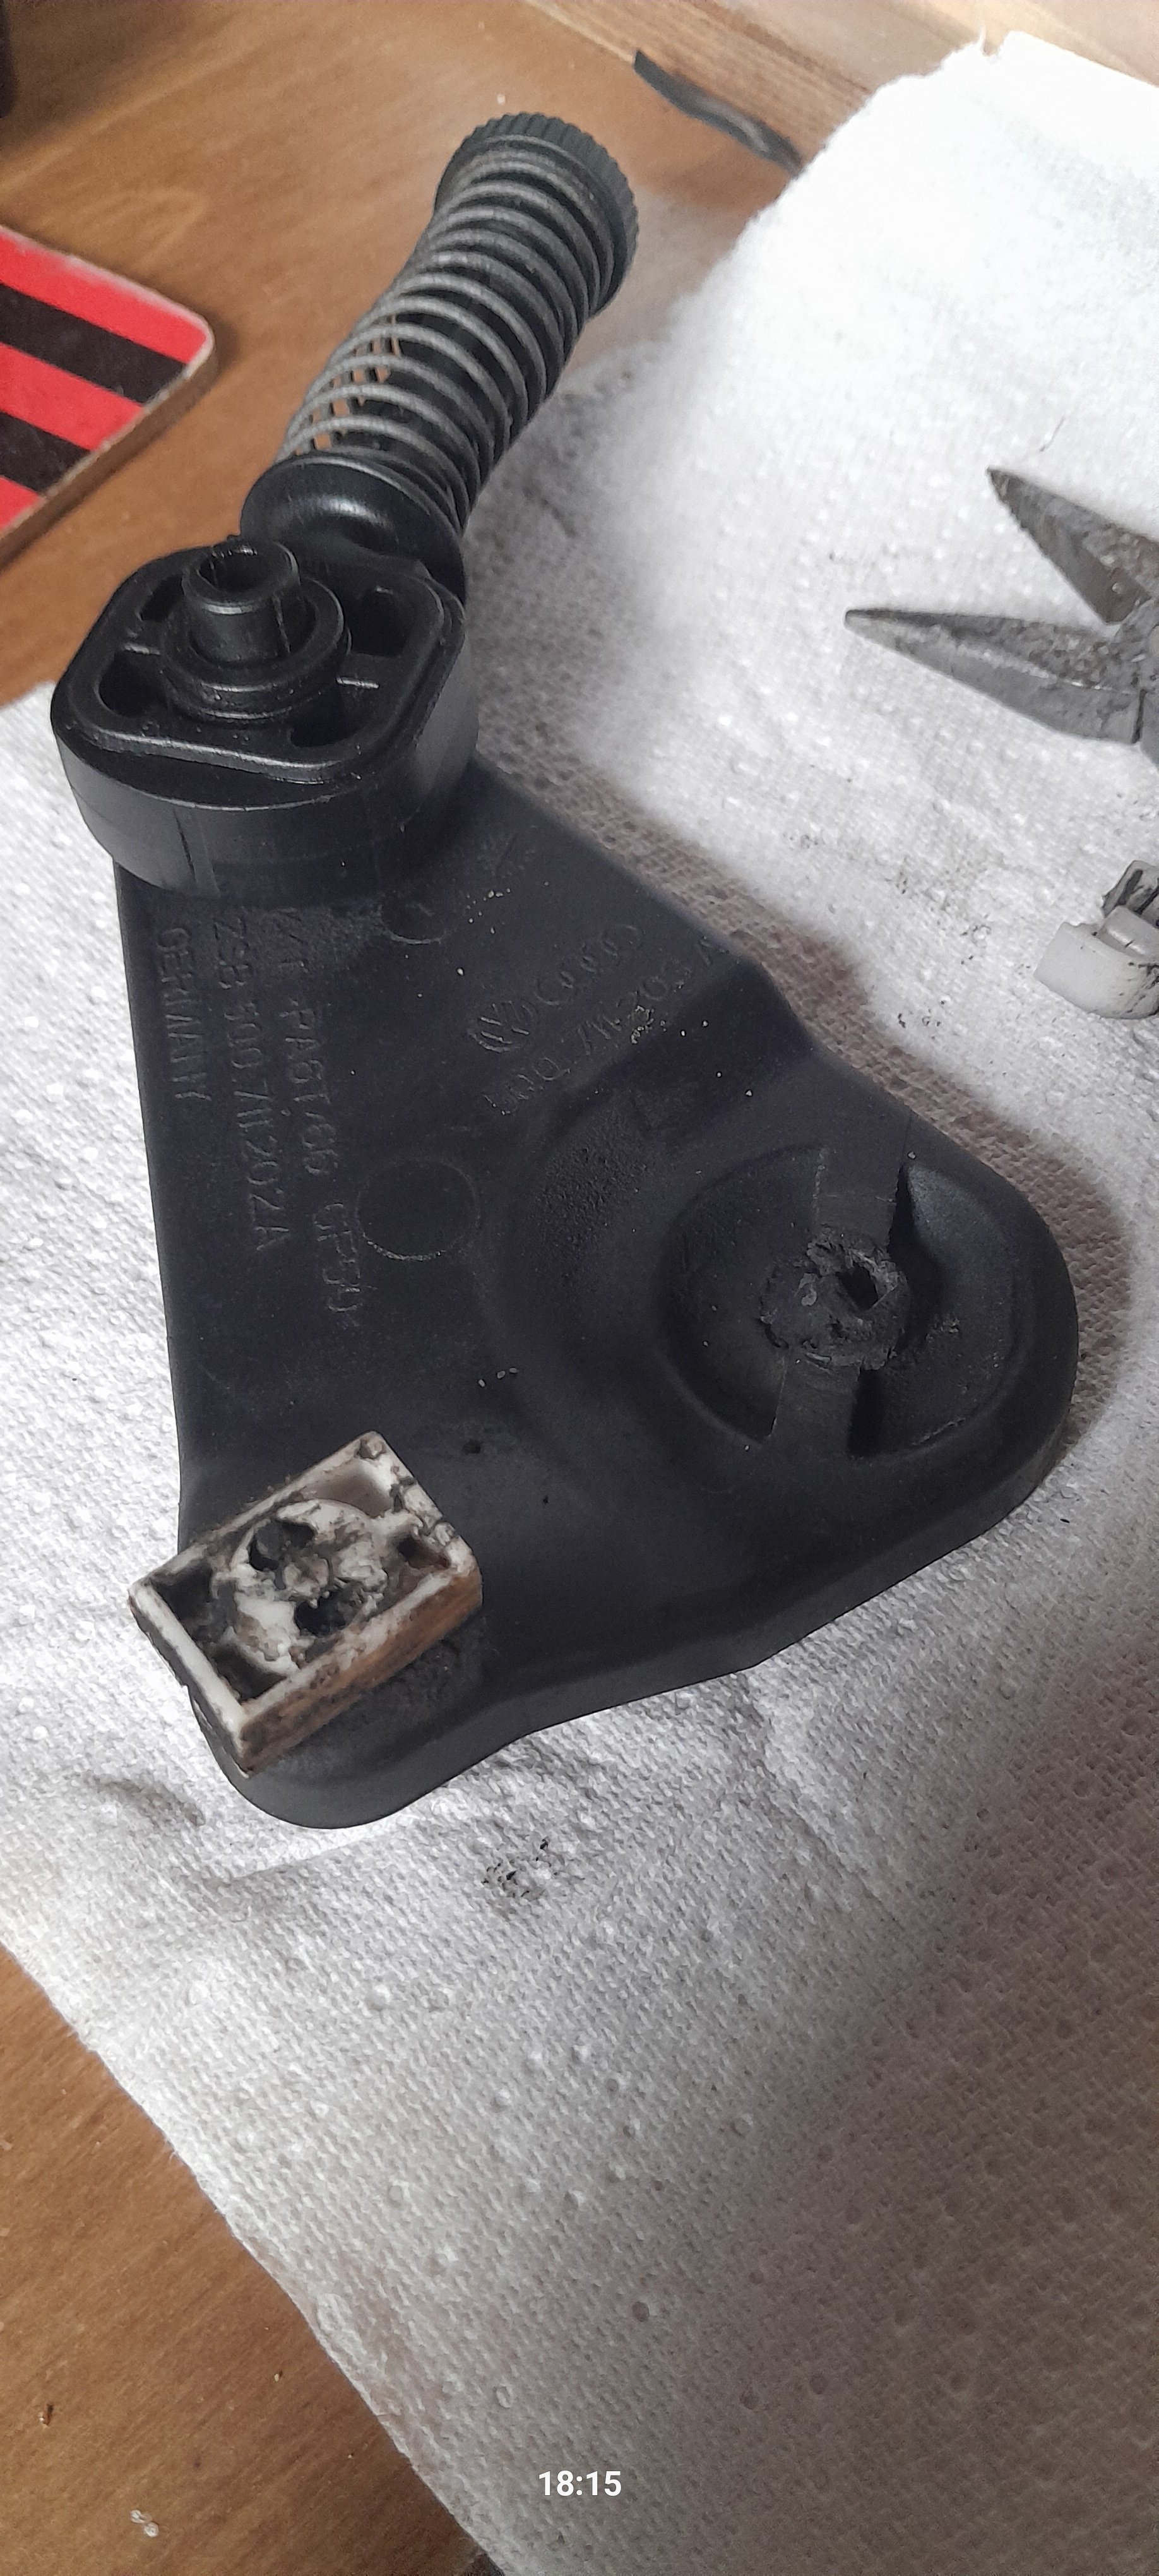
@Alasdair1 Thank you. You were right, where the plastic spigot goes through the metal casing was seized and I broke it too as I tried to get the car into reverse, it did go into reverse and I thought I'd solved it but then no gears, so I checked and the spigot had broken. The oil i used didn't get it free. The video was useful too btw. Should the gbox selector locking pin be set verticle or horizontal? Horizontal allows the pillar to go up an down, so I guess that's correct. Any tips on how to get the plastic spigot out of the metal cast hole? Can I remove the metal case unit with causing more issues, do you know? At least the problem is known.
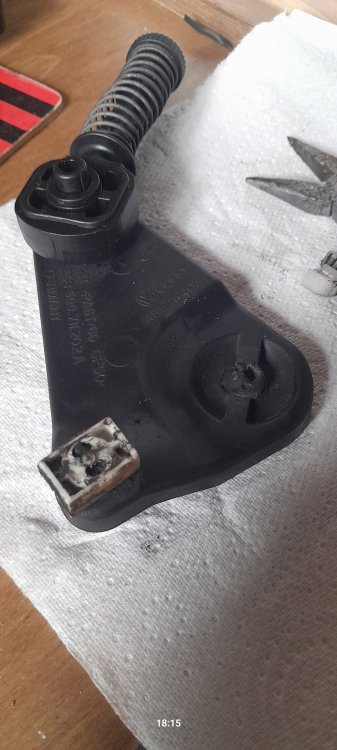 1 point
 -
It normally seizes where the plastic spigot goes through the cast unit. I snapped mine by trying to force into gears so had to get a new one but reckon a good spray of penetrating oil and let soak followed by small careful movement it might free off. Worth a little grease afterwards. The small plastic clips as said are prone to get brittle and tend to snap if not very careful when removing. As for setting gear cables this a link to the process. Its on a fabia but the process is the same on most VAG group cars. Think its around 3mins in. The only other thing it may be is the Gbox selector mechanism itself. The metal selector with the small locking angled pin. It should go left right and also up down. Alasdair1 point
-
Hi. I have all the manuals. I’ll dm you. Also if you state you are a garage they don’t actually check. I’ve paid for access a couple of times to get manuals for mine and my wife’s cars.1 point
-
1 pointI would recommend buying a new alarm unit as others have found that the secondhand units have come from old crushed cars sources or other sources and only last a short time. Once you start to have alarms at random, you will not be popular with your neighbours. The internal battery is NiMH and cannot be replaced by a LiPo or Li-ion battery. See also the sticky posts above these threads.1 point
-
You will not get wireless functionality just because you upgraded software. For wireless you need to pay licence code in skoda dealer, where they will enable it in your car maybe even add some dongle in system. And this upgrade/change will be noted under your car VIN on official servers, so noone could erase this functionality after. The cheaper way is to buy aftermarket dongles that serve as wifi carplay devices. BR Djadjo1 point
-
1 point
-
I would first of all try restoring unit to factory settings. It is strongly suggested after any SW update. Fixes a lot of issues.1 point
-
I'm hoping to be there with my Octavia 230. Looking forward to seeing the Superb 280 @gav_is_con1 point
-
On the MK2 there is a plastic linkage in engine bay near selector housing on Gbox. Looks like this It can seize up and stop you selecting I think from memory reverse and 4th/5th. Make sure its moving freely. I snapped the one on my old Seat after it was sitting for about the same time. Also check the cast metal weighted lever as well is secure and hasnt come loose. If they are all fine and not seized then maybe reset the cables. Careful if removing the white plastic clips as they get brittle with age. Alasdair1 point
-
So the car has gone in today for it week of investigation, they have lent me a Fabia 1.0 for that time. All I can say is it is so much smoother than the 1.5 , smooth acceleration, no lag and just more relaxed drive. Also there is a bump coming in to our village where the Scala skips and makes a loud clunk, the Fabia just rides it like our old Octavia Vrs and our Kodiaq used to,not at all unsettled.1 point
-
1 pointThe dealer put my car up to 1985 when it went in for a service in February. It was absolutely fine, and my only negative experience with it was that there seemed to be far fewer radio station logos. Last week the car went in for an OCU update, and they also updated the infotainment to 1989. So far it all seems fine, and there seems to be a lot more radio station logos available now. I know looking at the threads on this forum that some people who've updated to 1989 have benefited from doing a factory reset of the infotainment after the update completes. When I picked the car up from the dealer I did have to login again, set myself as primary user, etc. So I suspect they did a factory reset (but I know the OCU update was also forcing people to sign in again).1 point
-
1 pointSo it's time for a competition "who's alarm battery lasts longer from which brand-model and which location-enviroment temperature". This will take some years to complete...1 point
-
1 pointPM Sir Keir Starmer MP is getting out announcements before he might be in a challenge against him for the Leader of the Labour Party & Prime Minister & also he has opposition parties saying they would bin EV Mandate plans. He set up a new company last week for getting in money / donations to go to fighting his leadership challenge. Who will be donating? Any car manufacturers or Tech Bro's ?1 point
-
I began with the 2 round switches, the door-lock switch and one gauge and here it is finished: meanwhile the car was with the console full of marked cables and dust: I use a cordless hand vacuum to remove the dust and i telephoned to the car-electrician for an appointment to fit it, he said after 10 days with no charge due to the assistant's fault.
.jpg.cfcd5e6ebfd8ec4ccf4746497bdf3e59.jpg)
.jpg.e1c6ce45bd7f412f1174062532cef293.jpg)
.jpg.aaf64798eedac606856defd5e1aeed6b.jpg) 1 point
1 point -
If you are not too concerned about high line camera, I can highly recommend the AliExpress cameras. Work surprisingly well and are plug and play without coding. Had mine for 6 months or so now and works great. And only £30! https://www.aliexpress.com/item/4000230897829.html1 point
-
1 pointI would suggest that your problem is not with the key fob, but with the alarm system itself - if the fob is disengaging the immobiliser to allow the engine to start, this suggests to me that the fob is working correctly. Disconnecting the vehicle battery should not stop the alarm, as it has a self-contained, internal battery.1 point
-
1 pointBeen here a little under 7 years. Great forum, I'm sure I'll hang around still but I've moved my octy on now for a VW Tiguan. The Octavia was a cracking car, reliable too. I took it from 47k to 120k miles, and it really didn't disappoint. The only issue it had was the heater matrix, which I had replaced eventually after freezing hands in winter!! It will pass to a new owner with full service history (Independent Vasstechnik in Eastbourne who are just great with all VW group cars). I've left a note in the handbook for the new owner telling them about how well I cared for it, and all about the DPF regeneration cycles. Let's hope they find the Forum too.1 point
-
1 pointHi I’m Allebab from Denmark I am driving a Skoda Fabia combi from 2017 tsi. Really happy with it. Before this one I had a Fabia combi mk2 tdi 2009 that I also enjoyed. I will hopefully be more active in this forum. To learn and to share. I like to clean and care my car and I’m looking to style it for looks and performance1 point
-
I believe the lower spec Kamiq doesn’t have rear speakers fitted, so won’t have the fade option on screen. What model do you have?1 point
-
1 pointResult!! "Dear Mr. Davies I’m happy to let you know we have successfully recovered the costs involved in your vehicle damage claim from the responsible party. This claim has now been closed in your favour and I’m pleased to confirm that the no claim discount has not been affected. Yours sincerely Minna Jacob Minna Jacob Recovery Claims Consultant"1 point
-
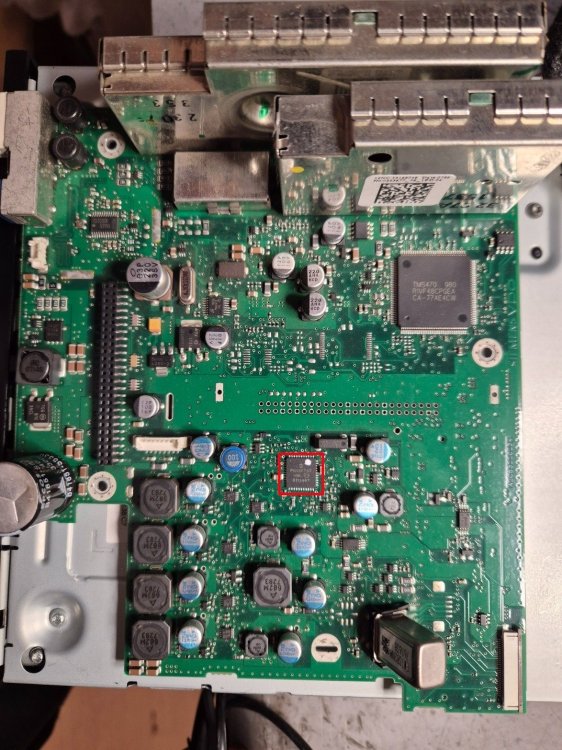
1 point@Spudskoda unfortunately it's not possible to "isolate" this issue.
 1 point
 -
With practice, it gets easier. I just need to reverse more slowly than usual and keep an eye on the edges of the rear sensor zones. They turn red (or something similar) when an approaching vehicle is detected, even before it starts braking. That’s how I handle it, and I actually find it to be useful safety training for myself. 🙂1 point
-
That’s a shame Ryan I was hoping you could see my Superb 280. Plus I see you might not be fully fit ? I appreciate it’s a proper trek for you1 point
-
I stopped mine slamming on as i reversed through my gates by doing it slower. Sensors still scream that it's too close.1 point
-
1 pointMaybe "one day in the not too distant future..." ...a man (or woman, it could be a woman) will put a V12 into one of these as a restomod. Happy times will ensue and a lot of spannering1 point
-
For everyone interested, I put the newest versions ALL in ONE link: MIB3_Skoda_SW_1941_1969_1985_1989 I upgraded with this files one by one, no issues. Hope it helped.1 point
-
You may be resetting the wrong option. There are actually 2 resets. "Oil Service Reset" and "Inspection Reset". Turn the Ignition off press and hold in the " SET" button and then keep holding it in while turning the ignition on. First option comes up on the display " Oil Service Reset " do not release the "SET" button, keep holding it in and after a couple of seconds the display will change to " Inspection Reset ". Then release and press the button again quickly to reset that option. I suspect you're only resetting the Oil Service and that's why you're still seeing the "Inspection Due" message. I may be wrong but that's the way it works on my Octavia. Just to add that my vehicle is on a Variable/Long Life service regime and using the above method will automatically change the car's settings to a Fixed service regime. I then use VCDS to return the car to my original regime after doing the oil change. Here's a video I found:1 point
-
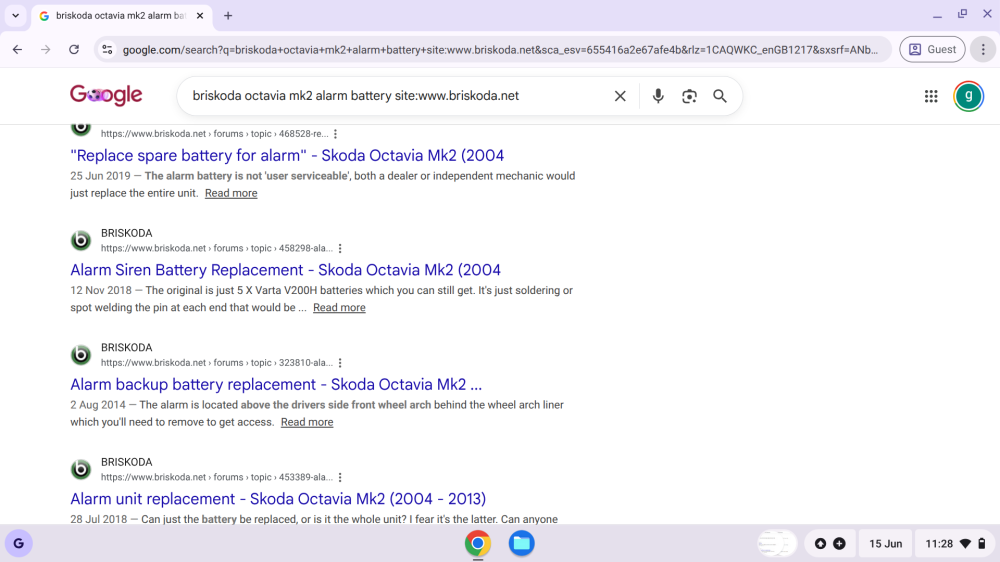
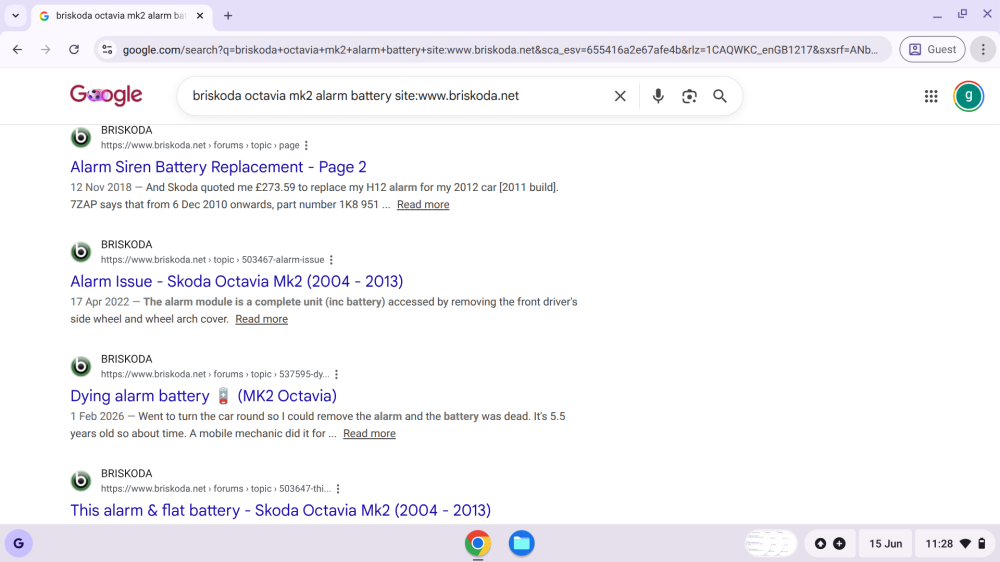
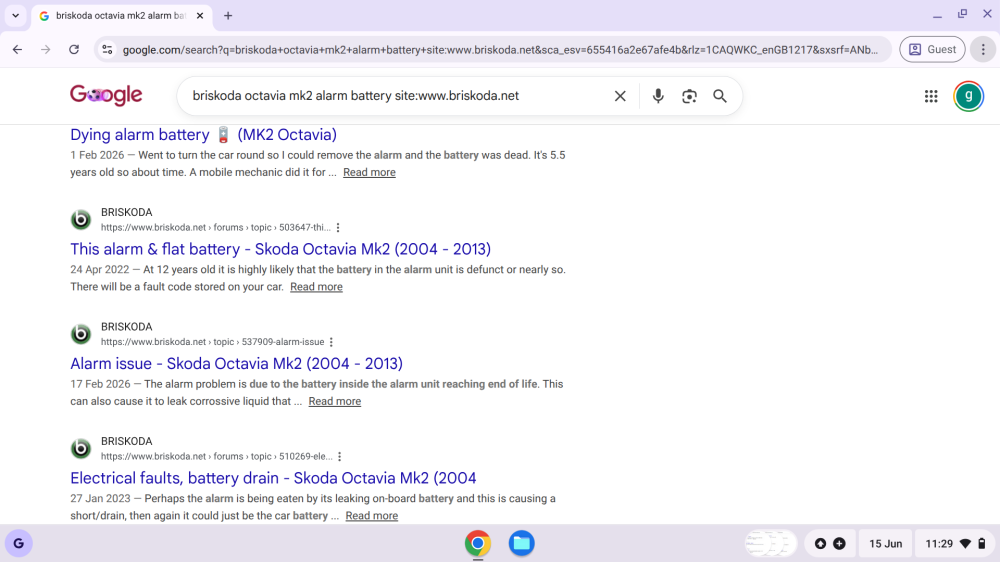
0 points@D.FYLAKTOS Different alarm, in a different model and in a different environment / climate. So maybe someone with similar to the op in a similar location can comment on their alarm battery life. Not exactly an unknown issue!
 0 points












.thumb.jpg.9dd3f612ba7f13d10be5c518d3c8d255.jpg)