Leaderboard
.thumb.jpg.9dd3f612ba7f13d10be5c518d3c8d255.jpg)


.jpeg.2be1ff23db65b1928106364ab86f4b3c.jpeg)
Popular Content
Showing content with the highest reputation on 17/06/26 in all areas
-
3 pointsWith JLRs recall problems over thier DC to DC converters and other electrical issues that insurance quote is probably a blessing in disguise3 points
-
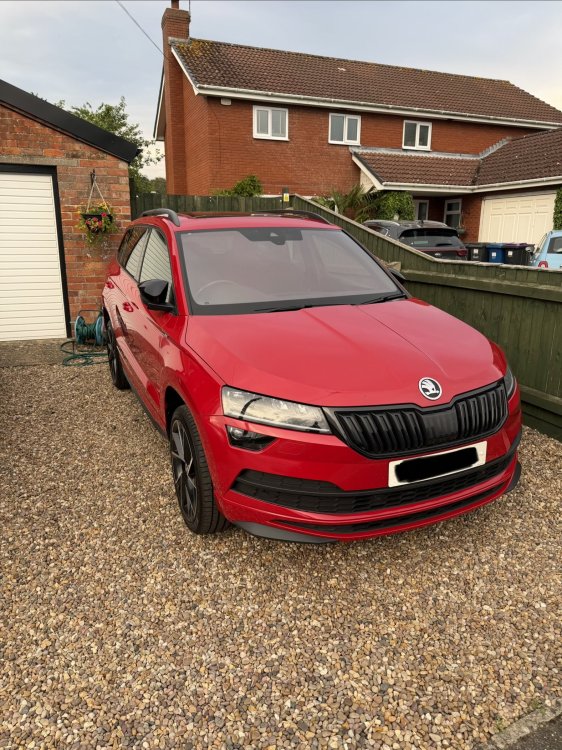
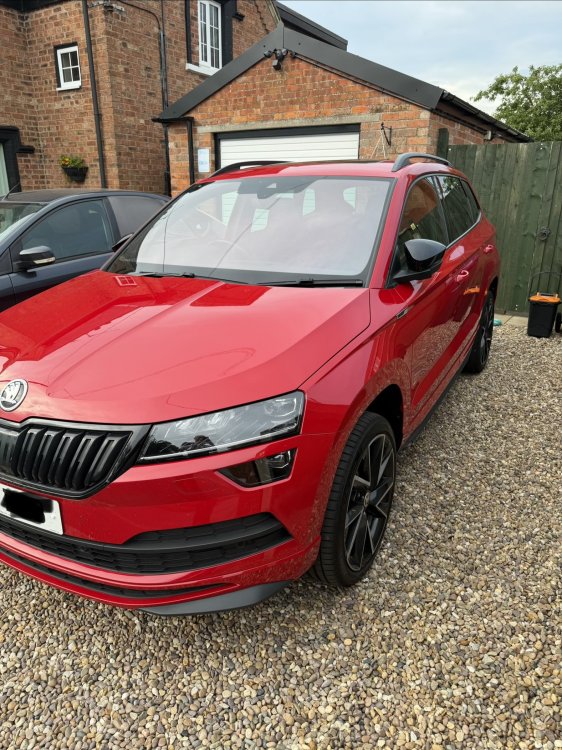
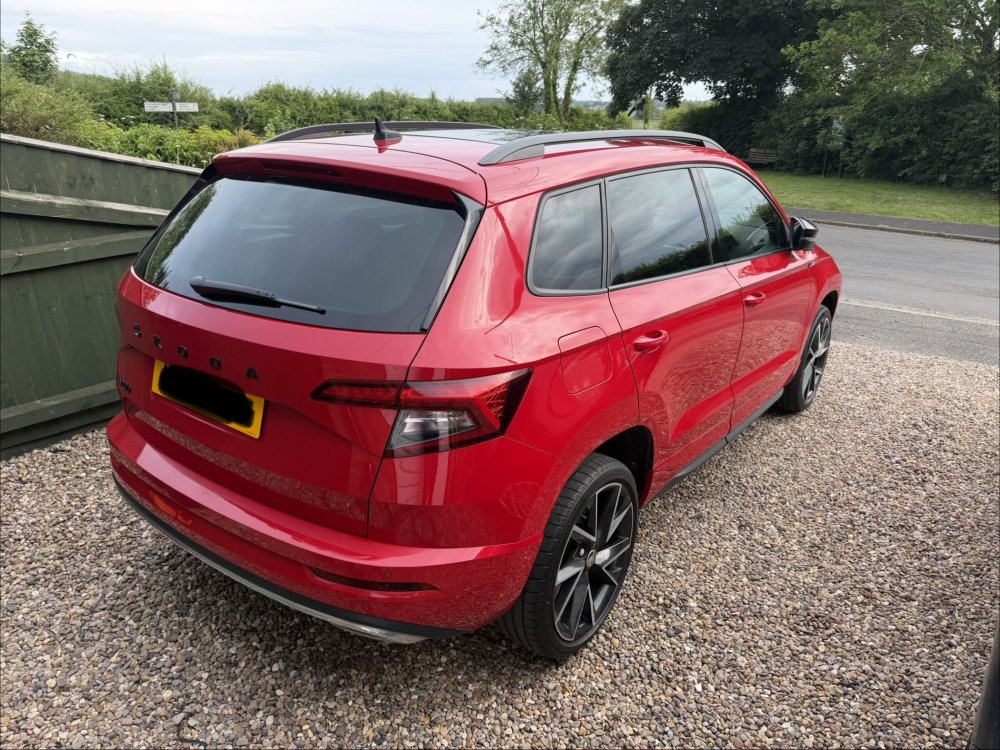
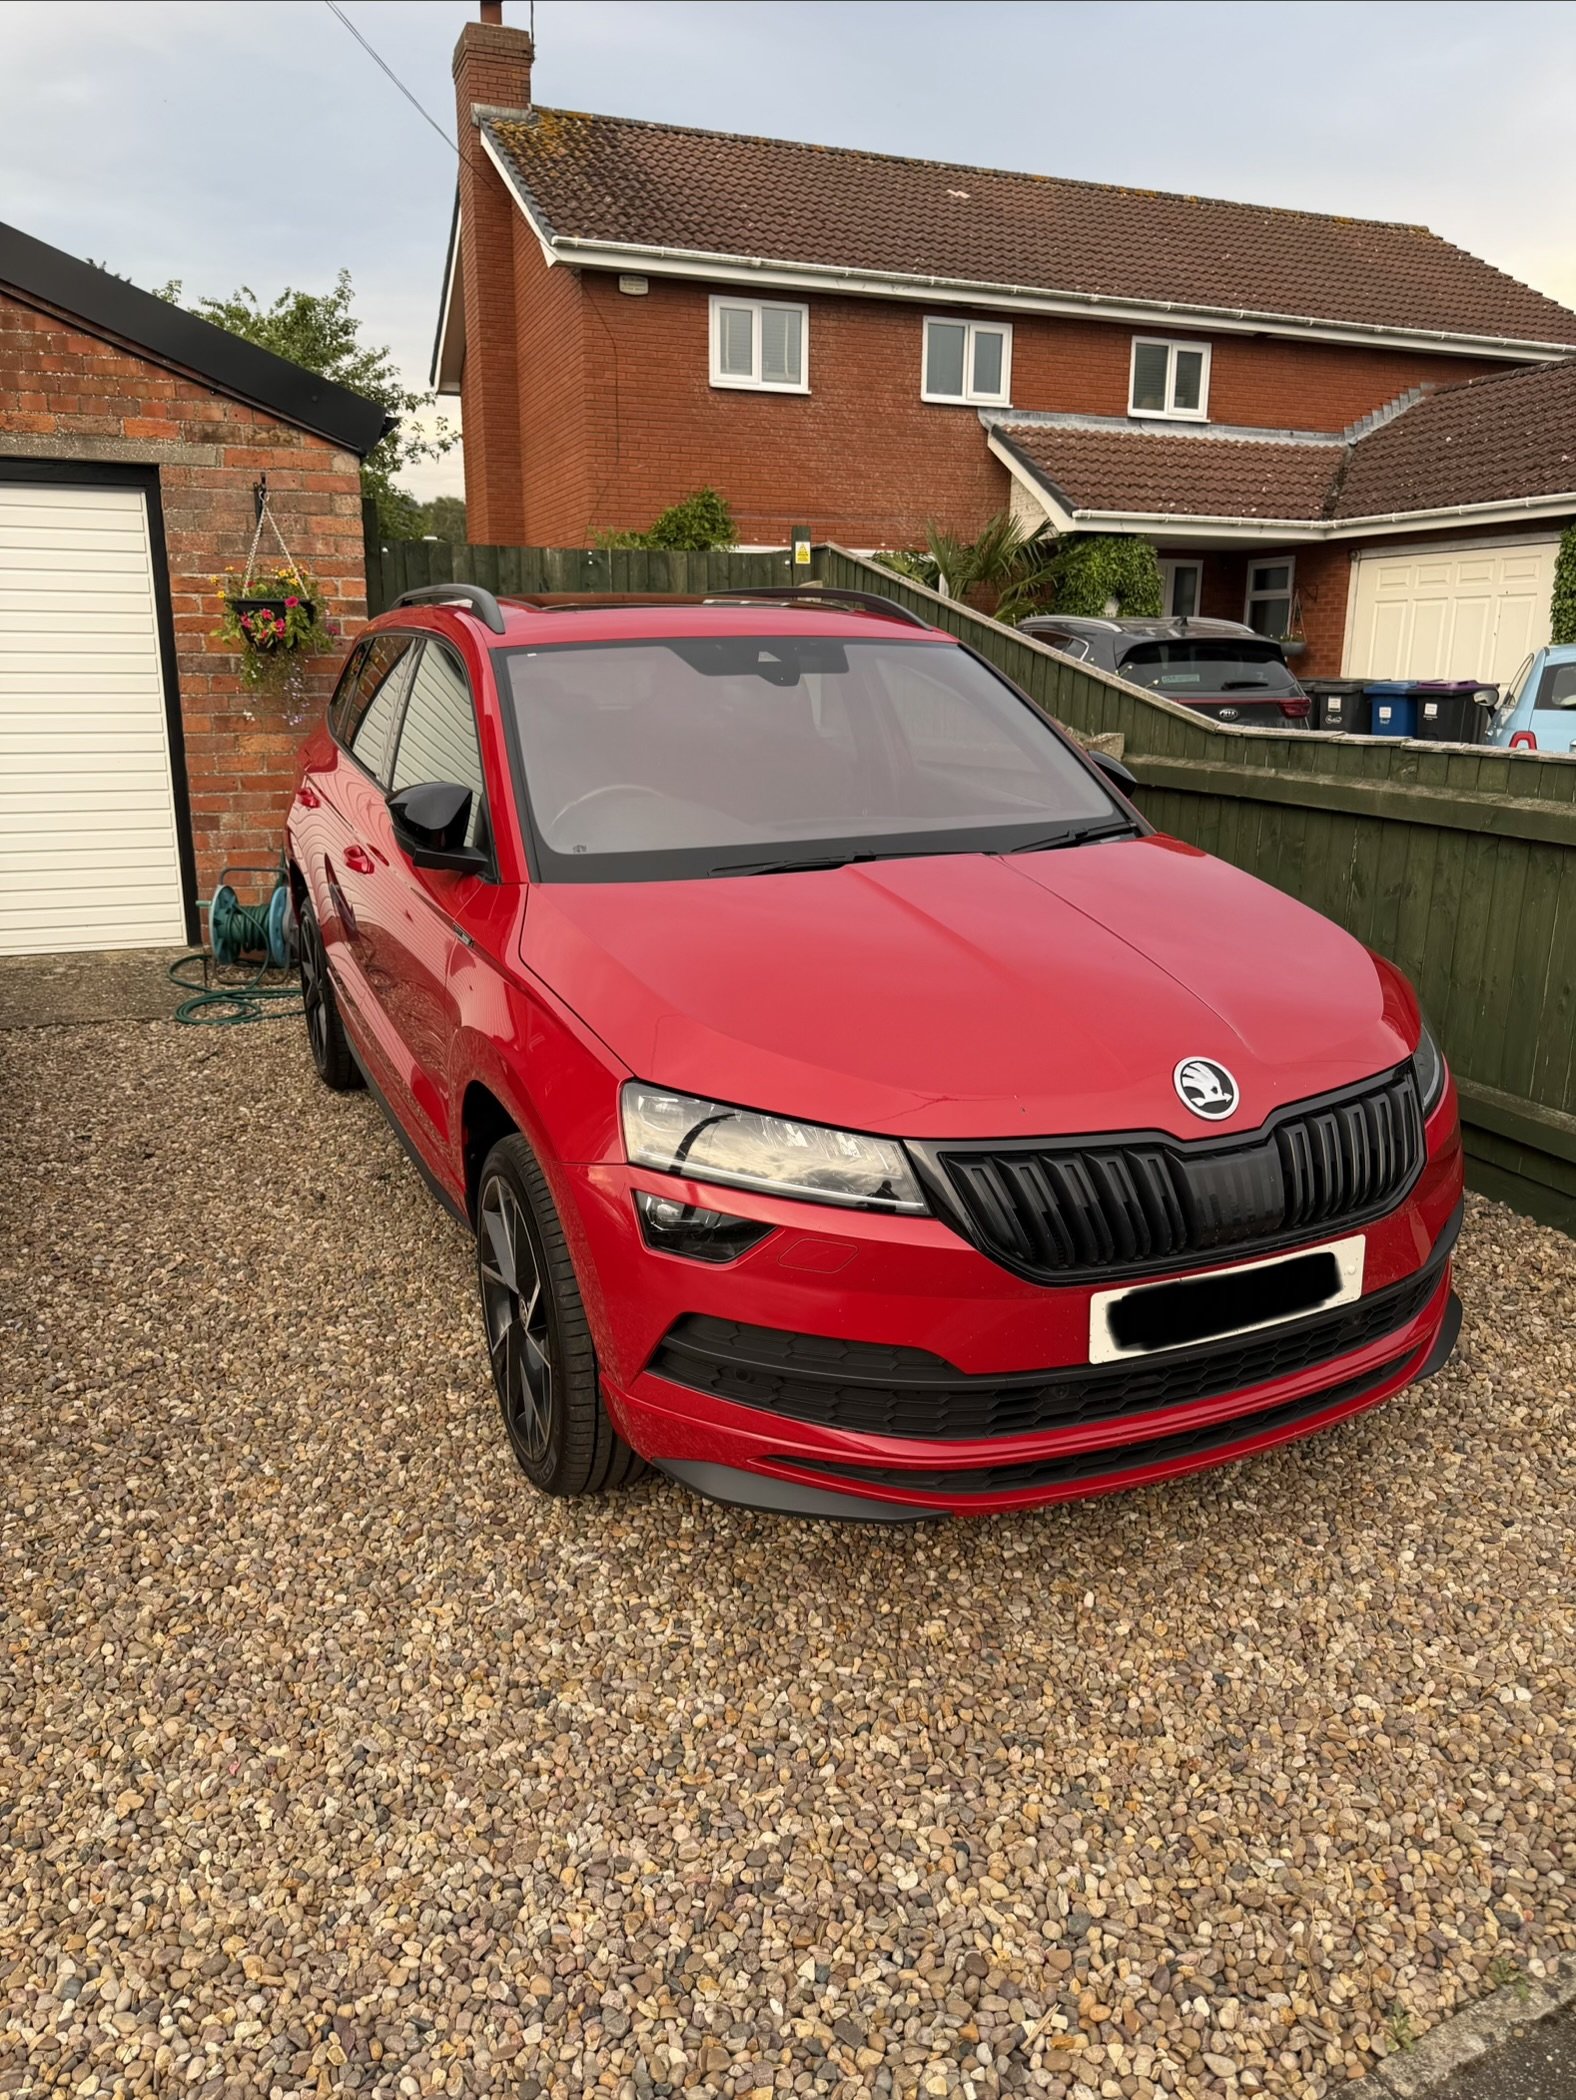
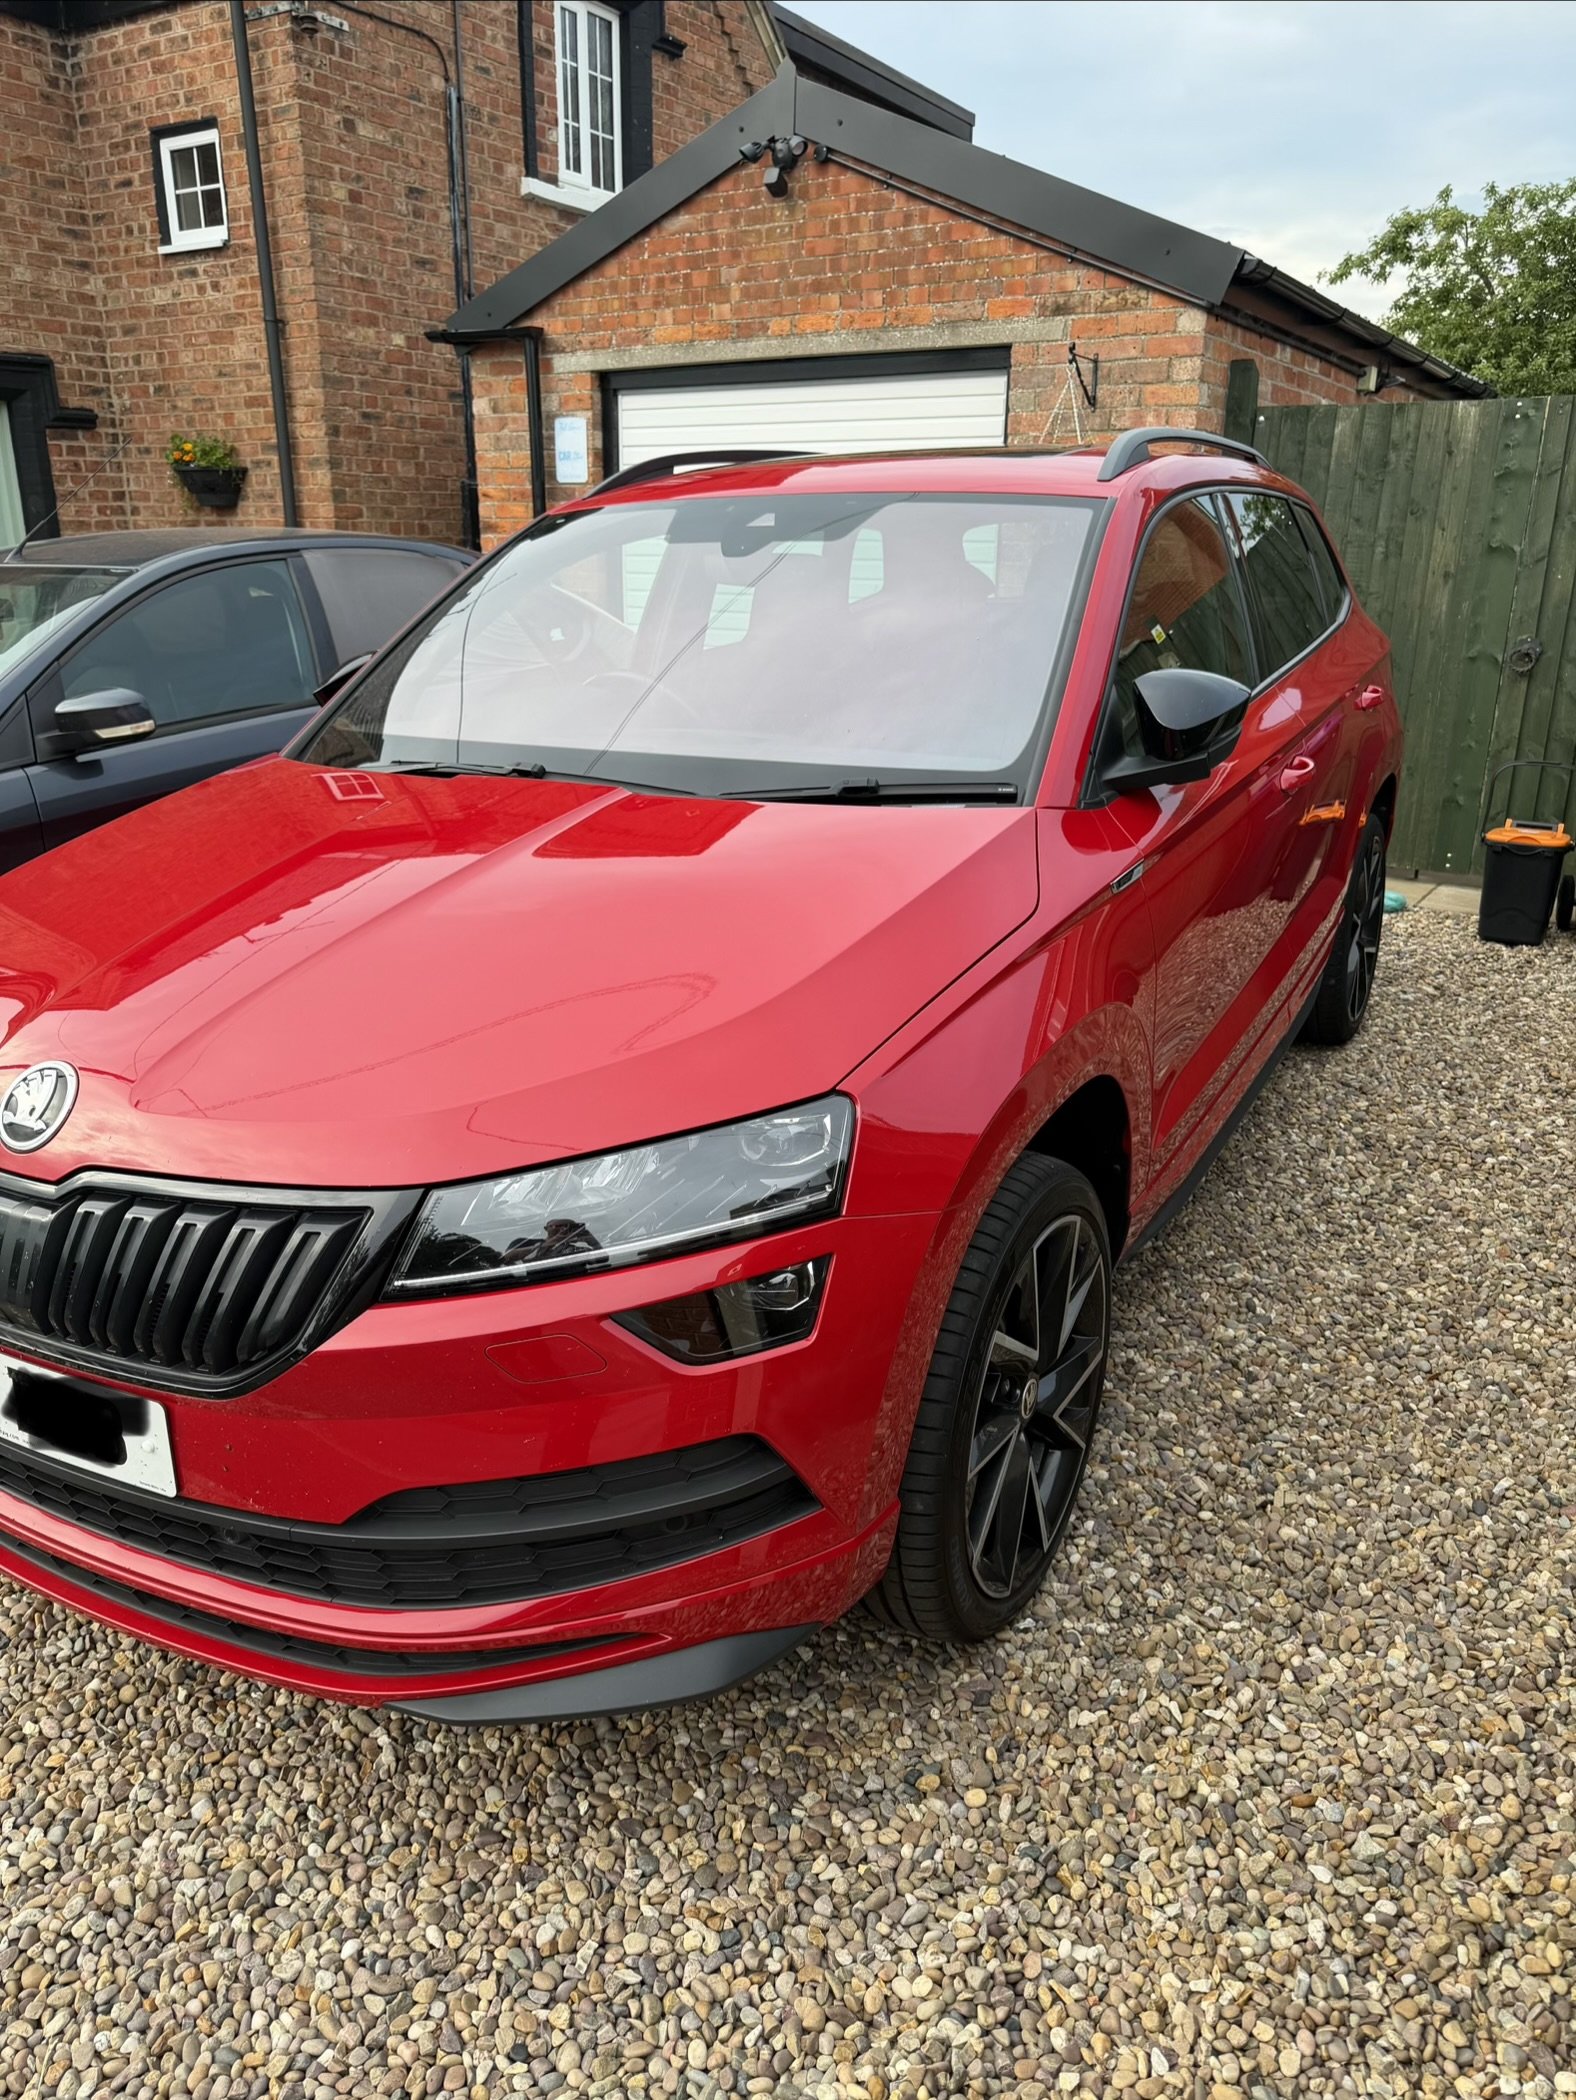
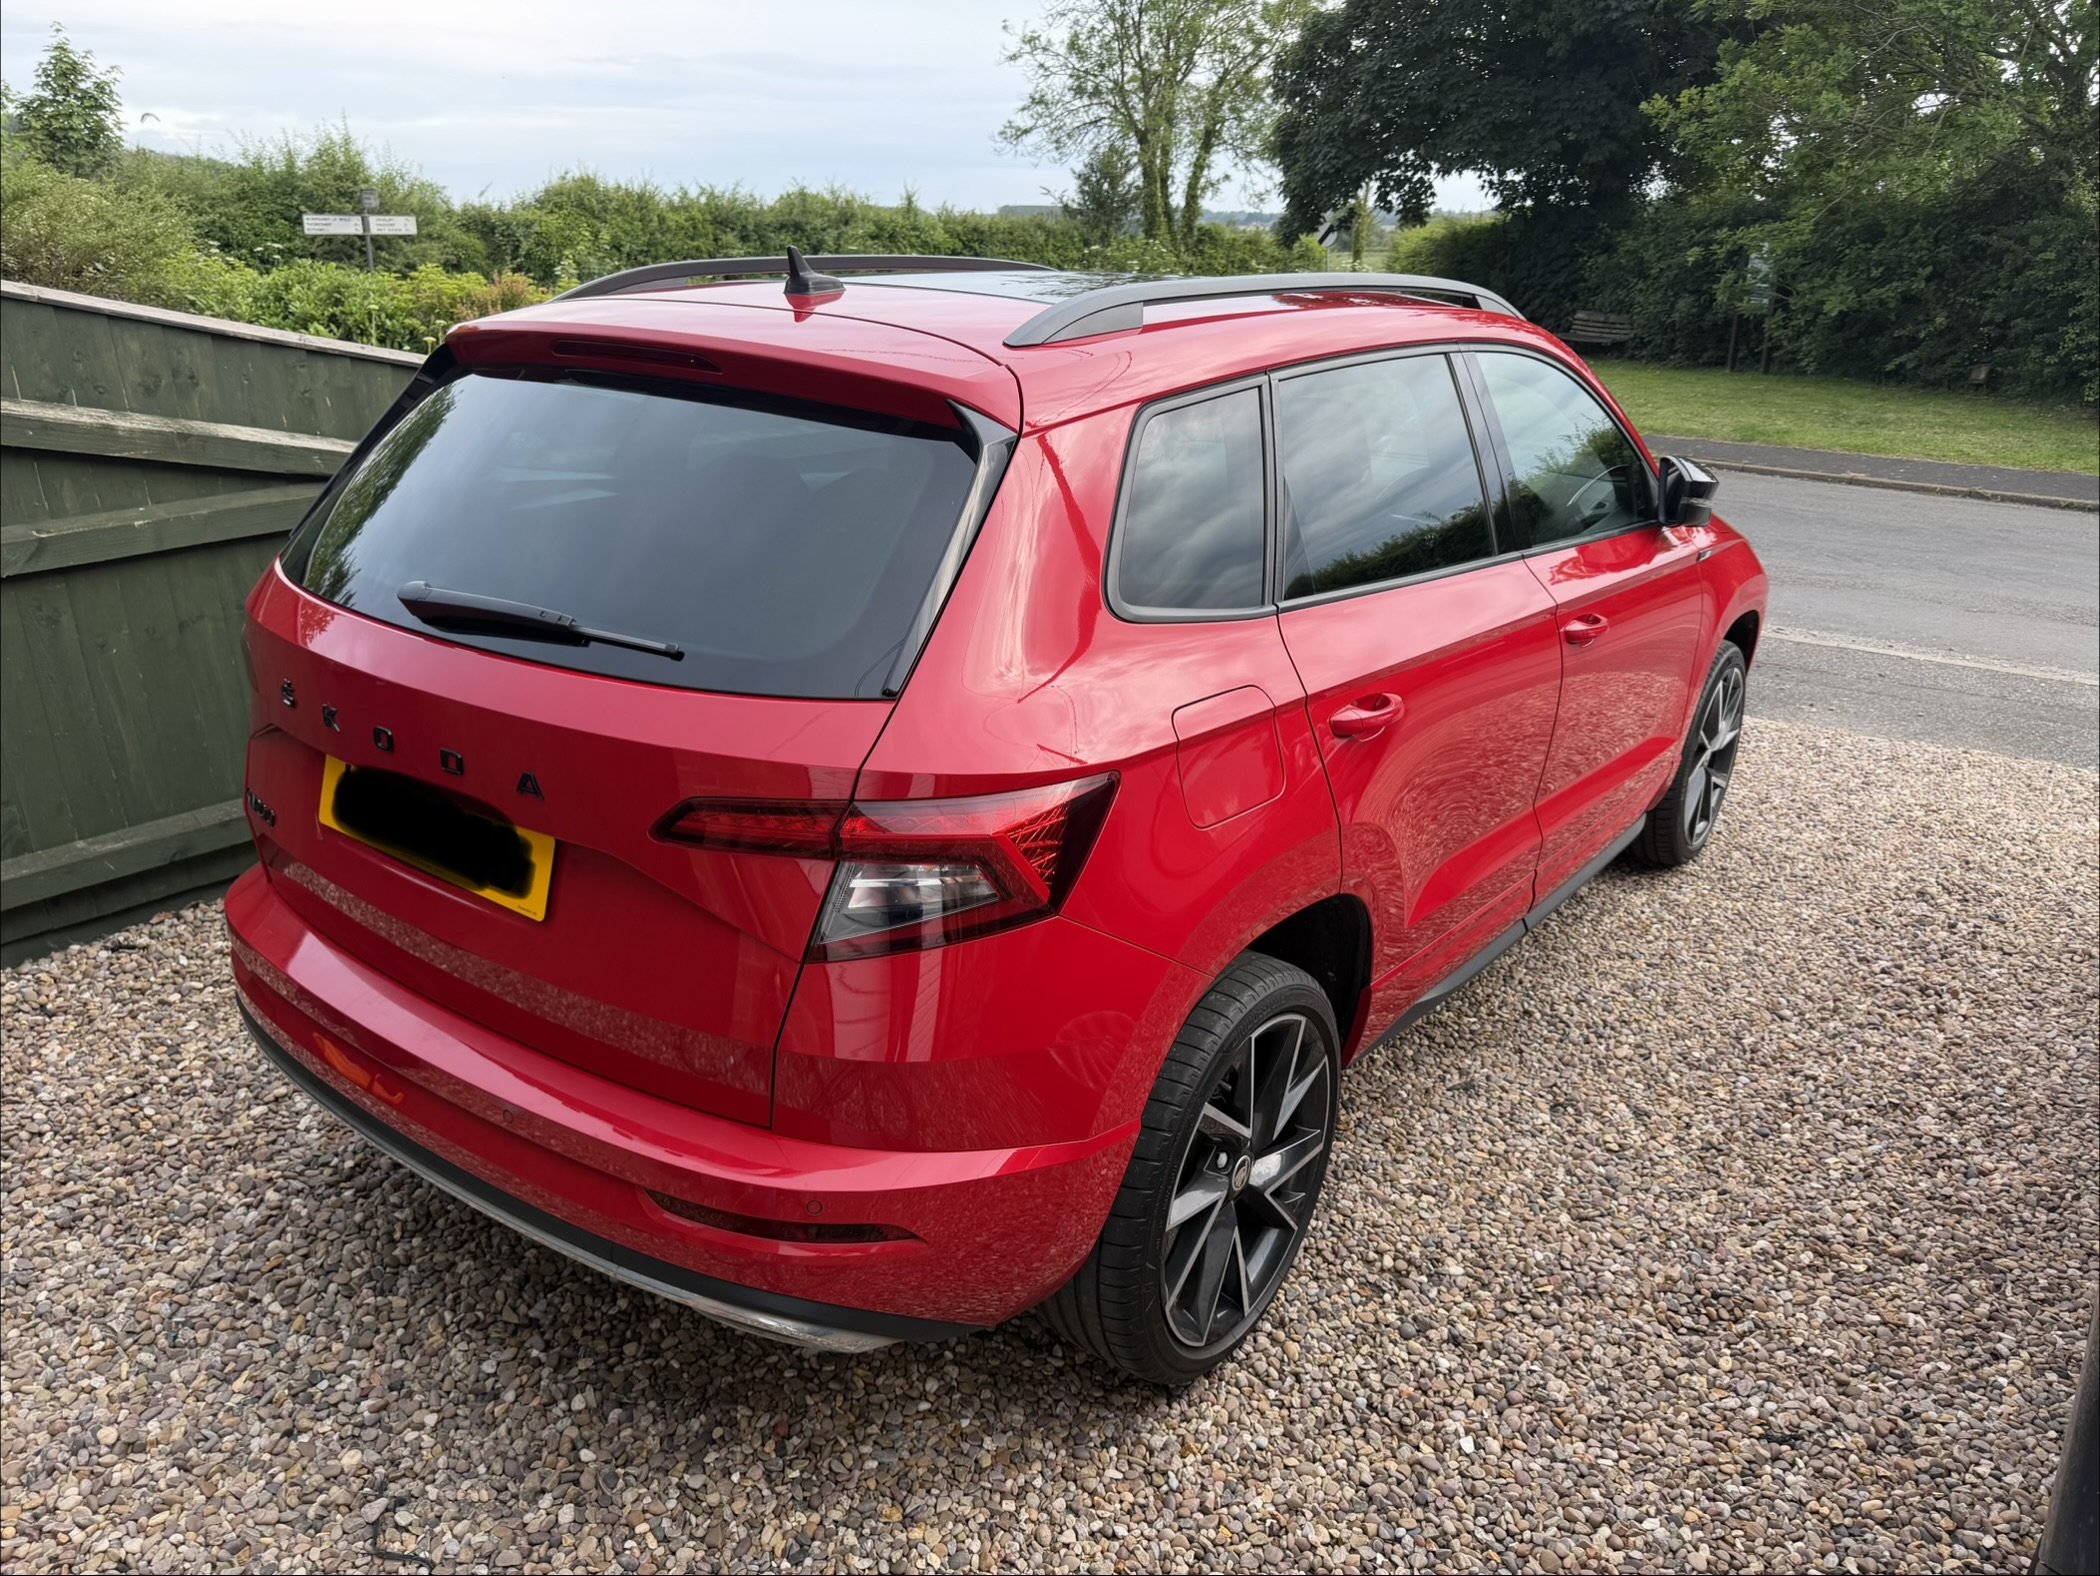
3 pointsHello, I just became a proud owner yesterday of a 2021 Škoda Karoq 1.5 tsi dsg sportline in velvet red. I’ve only done 50miles in it so far but absolutely love it. There is a few firsts for this car, first car to auto gearbox, first car in approx 20 years to not be a diesel and my first Škoda or VAG car.
 3 points
 -
2 pointsThink I might have ID the next motor. Merc C43 AMG Estate Fast without being pointlessly fast plus cheaper in every way than the C63.2 points
-
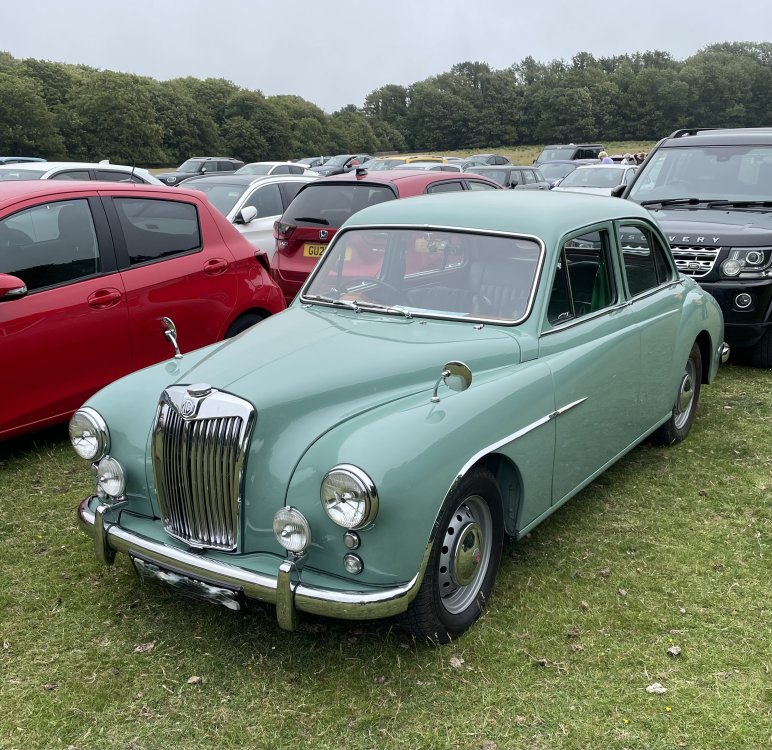
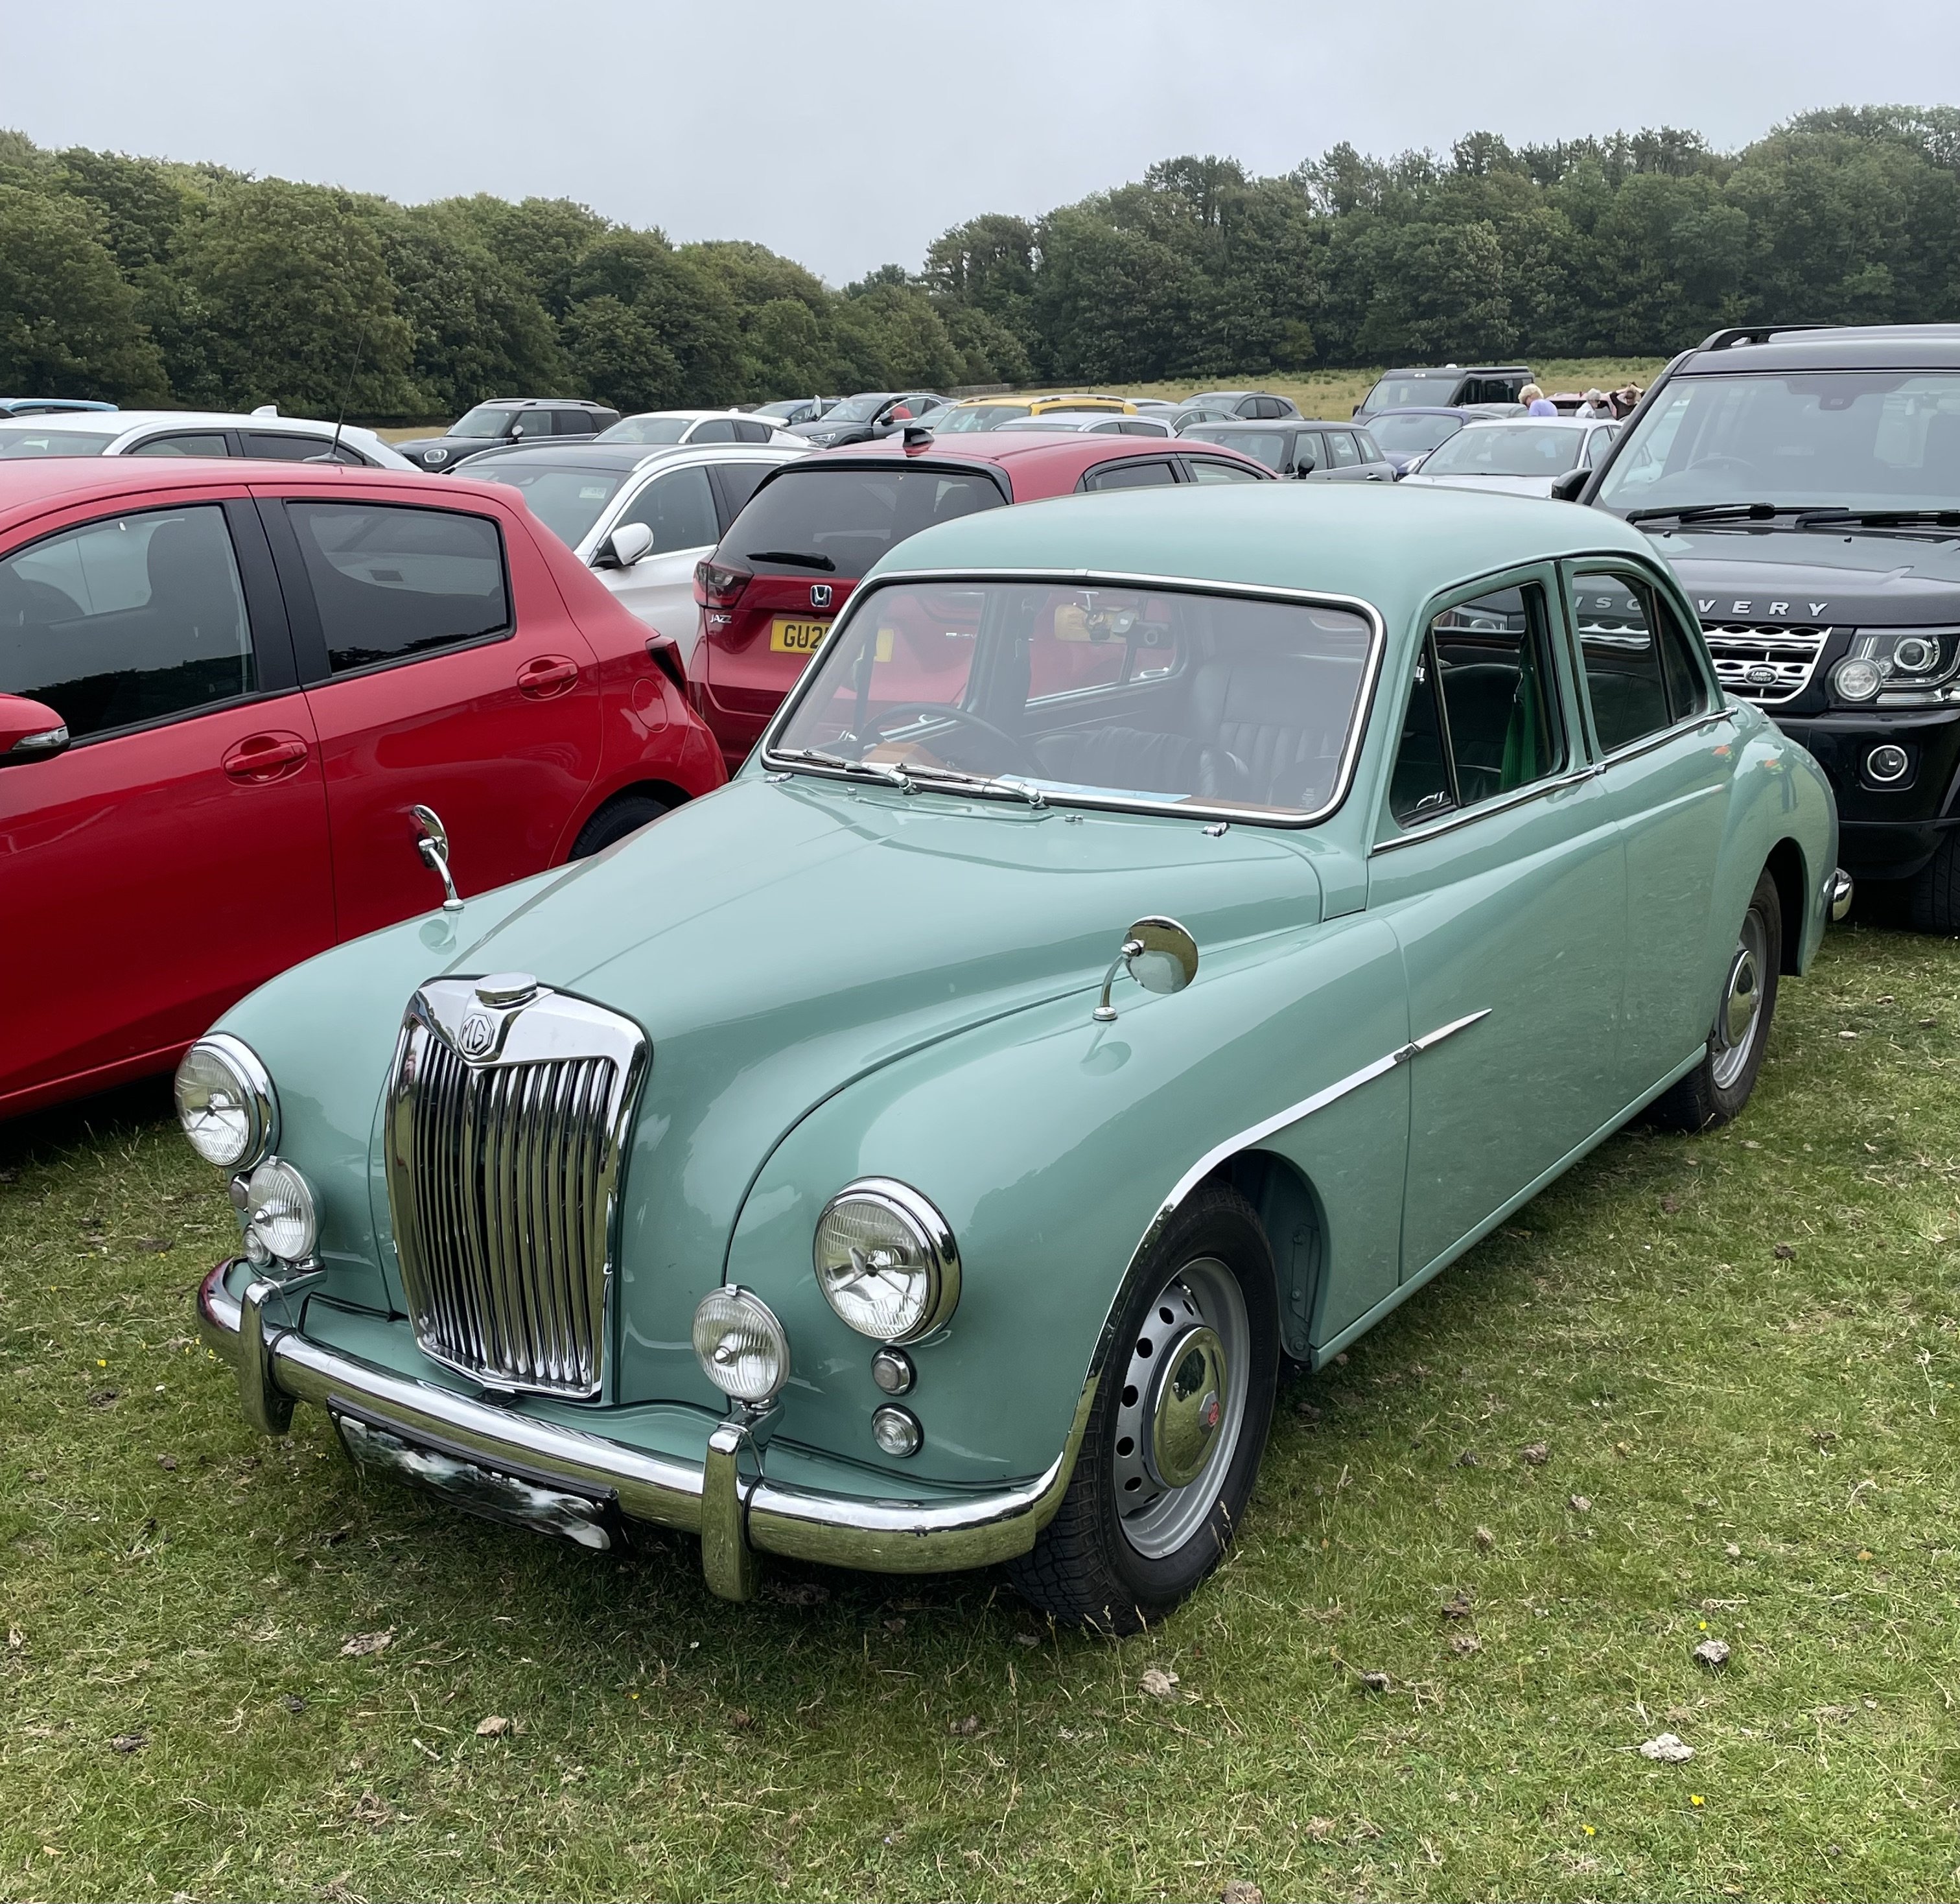
Friston Place had an open garden today. What a lovely setting (never been there before). Spotted in the car park, just a few feet away from me was this lovely little MG 😎: Gaz
 2 points
 -
2 points
-
2 points
-
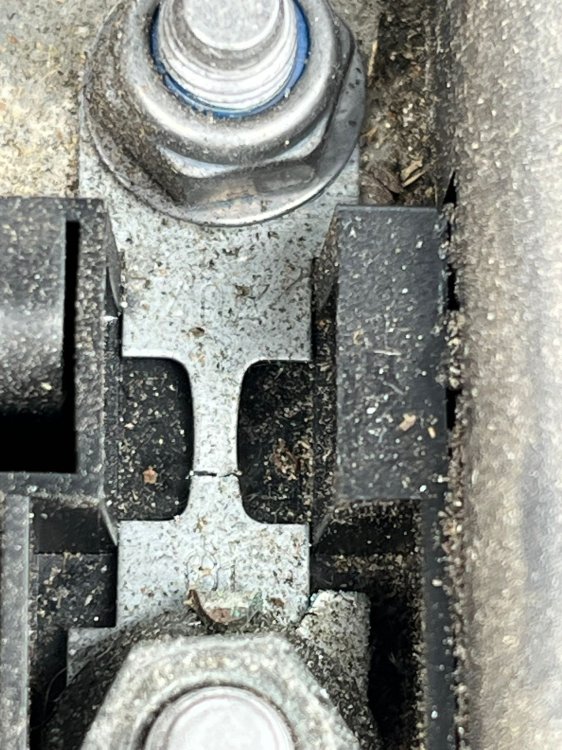
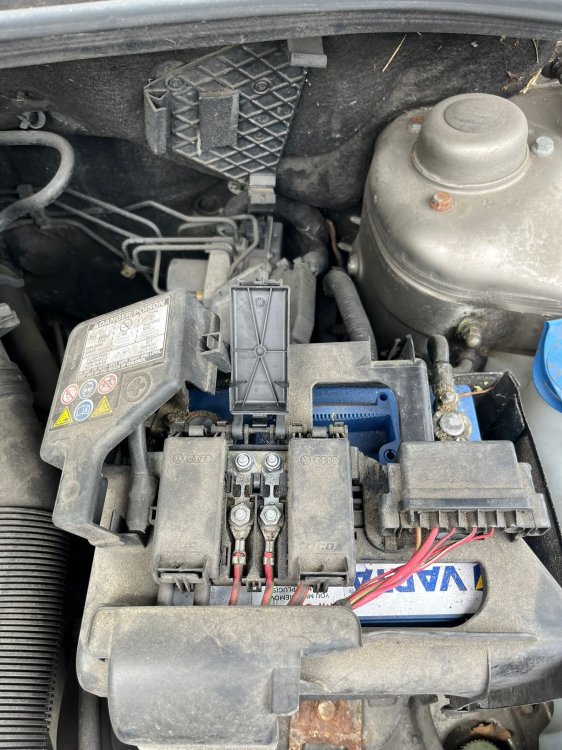
2 pointsJust typed the error codes into google. Found this video and hey presto it was the fuse after all. https://youtu.be/59sFUSS3VLw?si=k5ADuD4rfsid8ylJ Thanks Pete for suggesting that from the beginning - turns out I was looking at the wrong bank of fuses. Doh!
 2 points
 -
1 pointI thought I would post about this issue where my car was holding onto third gear, initially on a random basis. I could move the lever to manual and change up as normal. There were no codes and when my mechanic tried reading live data, the car was changing normally. I tried posting on Facebook but all doom and gloom, mechatronics faulty, clutch gone, etc. My car is now 18 years old any of those repairs effectively mean scrapping the car. I had read somewhere that the gearbox takes a signal from a rear abs sensor and that these are prone to rust damage. At only £40, I tried this and fitted a new left hand rear hub complete with abs ring. Happy days, all is back to normal.1 point
-
Worth a shot. Ignition on but engine not running. Bonnet open. Can always go back. Dont forget to scan and clear any fault codes after.1 point
-
1 point
-
https://forum.obdeleven.com/thread/12881/superb-2020-assist-coding-procedure1 point
-
Be aware that the messages I got were transient. If I remember correctly they appeared after turning on the ignition but before starting the engine, after which the message went away until the next ignition on.1 point
-
Octavia 2.0 TDi CEGA overheating, no heat from heater matrix and constant pressure in expansion tank
1 pointThis and other similar posts are incredibly helpful for those with similar issues and also drive traffic from the search engines! Bravo good sir!1 point -
If you have the app, this will allow you to lock/unlock the car without the key/remote. As noted, fob in the cupholder will allow the car to start If you keep spare batteries in the car, bear in mind that the childproof packaging is really really difficult to open.1 point
-
Have you considered it might be creaking from the seams (see my original post on this thread … it’s worth considering if you haven’t already.1 point
-
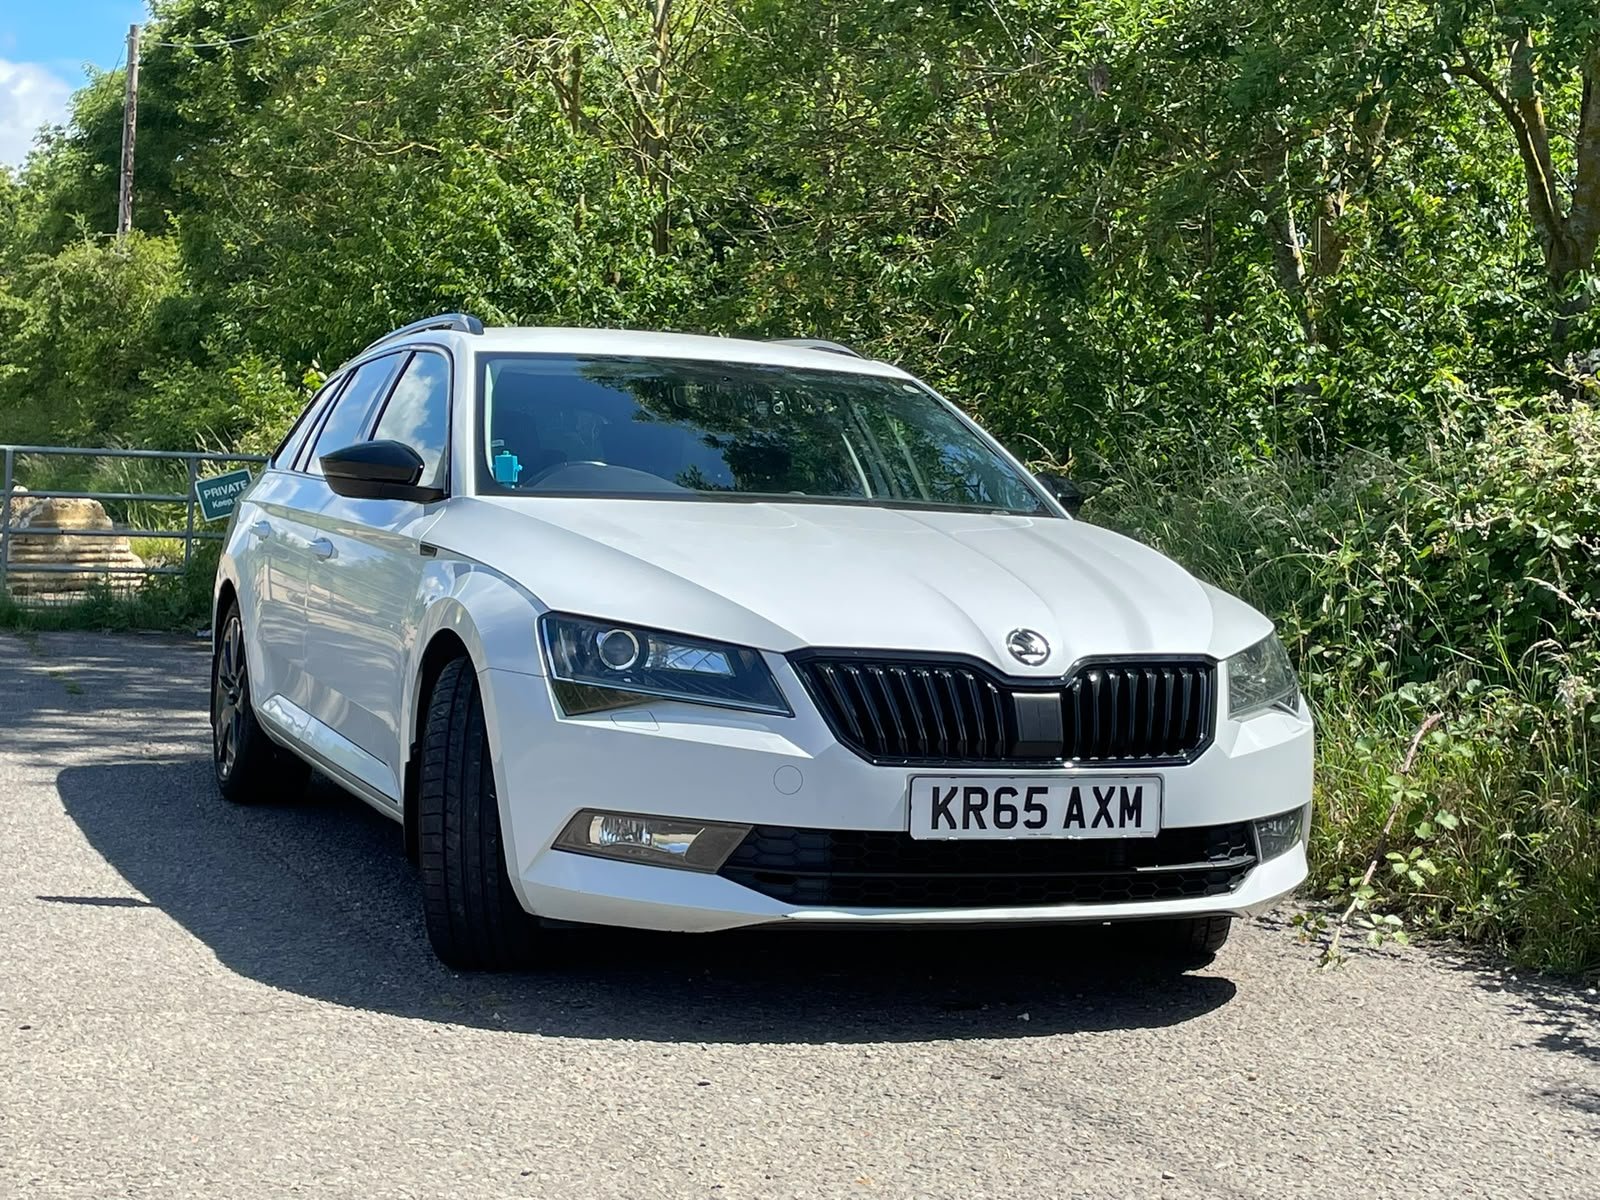
Quick wash today so took the opportunity for some updated photos in the sunshine. More pics in the main picture thread.
.thumb.jpeg.655714f8ed121b7eb5f14fb584d9a04d.jpeg) 1 point
1 point -
1 pointMaybe in the keyfob? Would be 3.2 V to 3.3 V when new. If the "low battery" appears check both fobs1 point
-
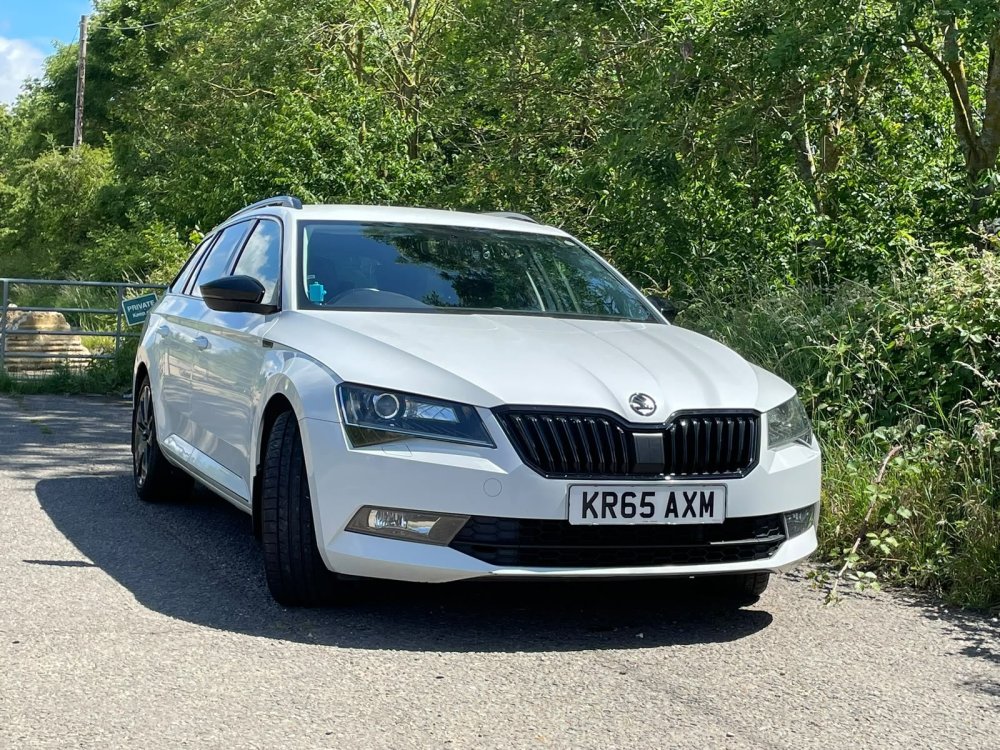
1 pointNow the decrhome project is complete I thought it about time I took some more photos.
.thumb.jpeg.2c6893c338338b083848ba9bd555bb30.jpeg)
.thumb.jpeg.45a9657d0cef2b388a85e3c6a2c12715.jpeg)
 1 point
 -
1 pointAnd timing chain and cam bearing issues. Just out of interest I could insure an AM Rapide S for £900. They really don't want any LR on their books do they1 point
-
Had read that battery needs coded if start stop. All my octavias and fabia arent so dont need coding. If the battery charging light is on it may be the small exciter wire that goes to alternator thats broken Check the voltage accross battery when car is running. It should read 13.5-14.5v if its charging. Alasdair1 point
-
@ords I asked two garages and an auto-electric specialist and they all said that they'd never heard of needing to recode. I can see that the battery charging warning light is on, so I'll keep asking around. @Alasdair1 I used a bolt as you suggested and got the car moving through all gears. Thanks for your help!1 point
-
Unfortunately I think you will require a visit to a dealer, or an independent garage if they have the tools to update software. I'm not 100% sure but I think it's the OCU that will need a firmware update to resolve this issue, and possibly some other modules too. This issue has come up a number of times on the forum, so all of the dealers should be very familiar with it and the steps needed to resolve it. However, many will say they need to investigate, send a report to Skoda, etc. All of which risks adding costs to your final bill. So if you can find a good dealer then that may be beneficial to you. My local dealer is Marshall Skoda Letchworth, and they have been very good over the years in sorting out all of the software issues with my car.1 point
-
1 pointJust seen this thread but as per the post above I'm pretty certain that the steering weight can be set using a ELM327 dongle and Carista or Car Scanner app as it was an option present when I changed some settings on my Kodiaq1 point
-
We get this on our 21 FL Kodiaq. You can manually download and install the updates but I haven't bothered to so far as I don't have a USB to USB C adaptor.1 point
-
Hello, Yes, I'm also experiencing this on my 2021 Superb MK3 FL, doesn't prevent me from using the car so I'm not planning to take it to the dealer before my next scheduled maintenance though.1 point
-
1 pointThought we were headed back to JLR for a bit then I did an insurance quote. £2000. For a comparison the Subaru was £250. I’ll keep looking i think.1 point
-
Hi, I think I have the same rattling sound, but on the driver's side of my Kodiaq. I found that when I push the driver's door slightly while driving I hear no sound. In your case, have you tried pushing the passenger door? Did you manage to solve the problem?1 point
-
1 point
-
1 pointNarrower tyres would help lighten the steering especially if the car is currently fitted with the wide 235/45R18 or 235/40R19. The contact patch of 215/60R16 is slightly narrower than 215/55R17, due to the higher aspect ratio. However, 205/65R16 would be even better than 215/60R16. 205/65R16 would fit on the standard 6.5Jx16 ET41 rims. 205/65R16 has the same 95(690kg) load index as 215/60R16, so there's no problem with the tyre supporting the full axle loads of the car. Michelin Primacy 5 205/65R16 95W (Euro label C A 70dB) (Example tyre, not a recommendation) https://www.mytyres.co.uk/rshop/tyre/Michelin/Primacy-5/205-65-R16-95W-EV-Suitable/D-1393071 point
-
1 point
-
Only time I had a rattle was from my spare glasses case in the overhead cubby hole, took me weeks to realise what it was as I swore it was coming from the dash area 😂1 point
-
1 pointThat's the Subaru sold. Again with motorway that was £2-3k over any trade in offer. Seems a bit mad. Why offer such rubbish trade ins then bid higher on Motorway? It's been main dealers every time for me on motorway as well. Having a dig around thinking maybe something like a 540i Estate would be ideal but again like rocking horse poo There is an older E320 estate not too far away, I'm just not sure I'm old enough for a merc.1 point
-
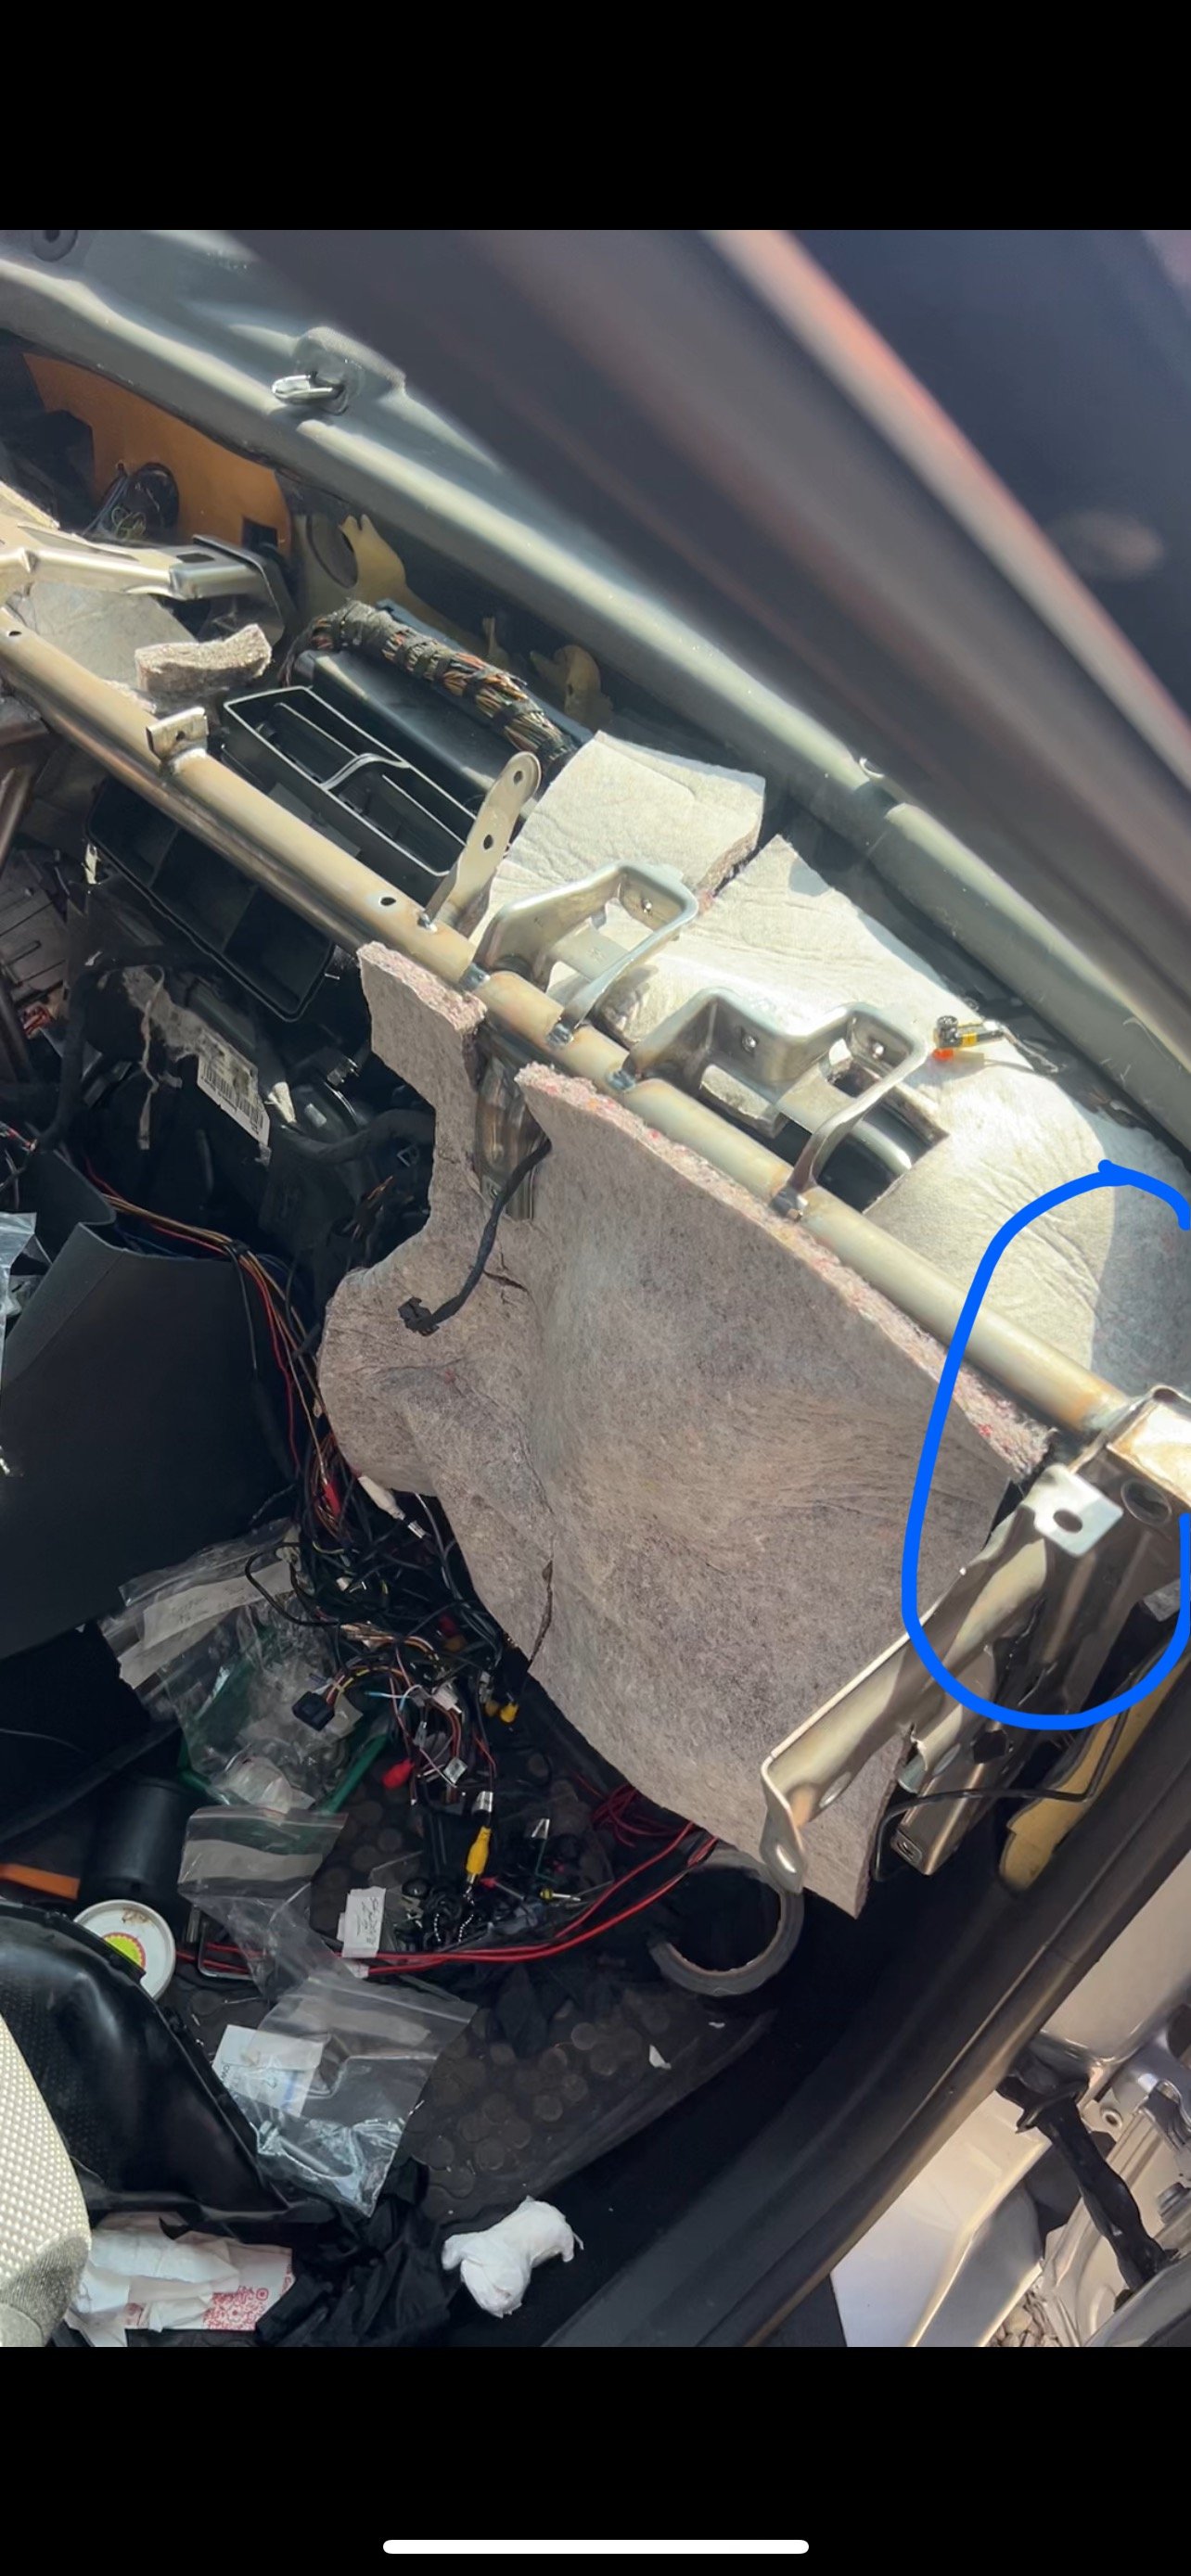
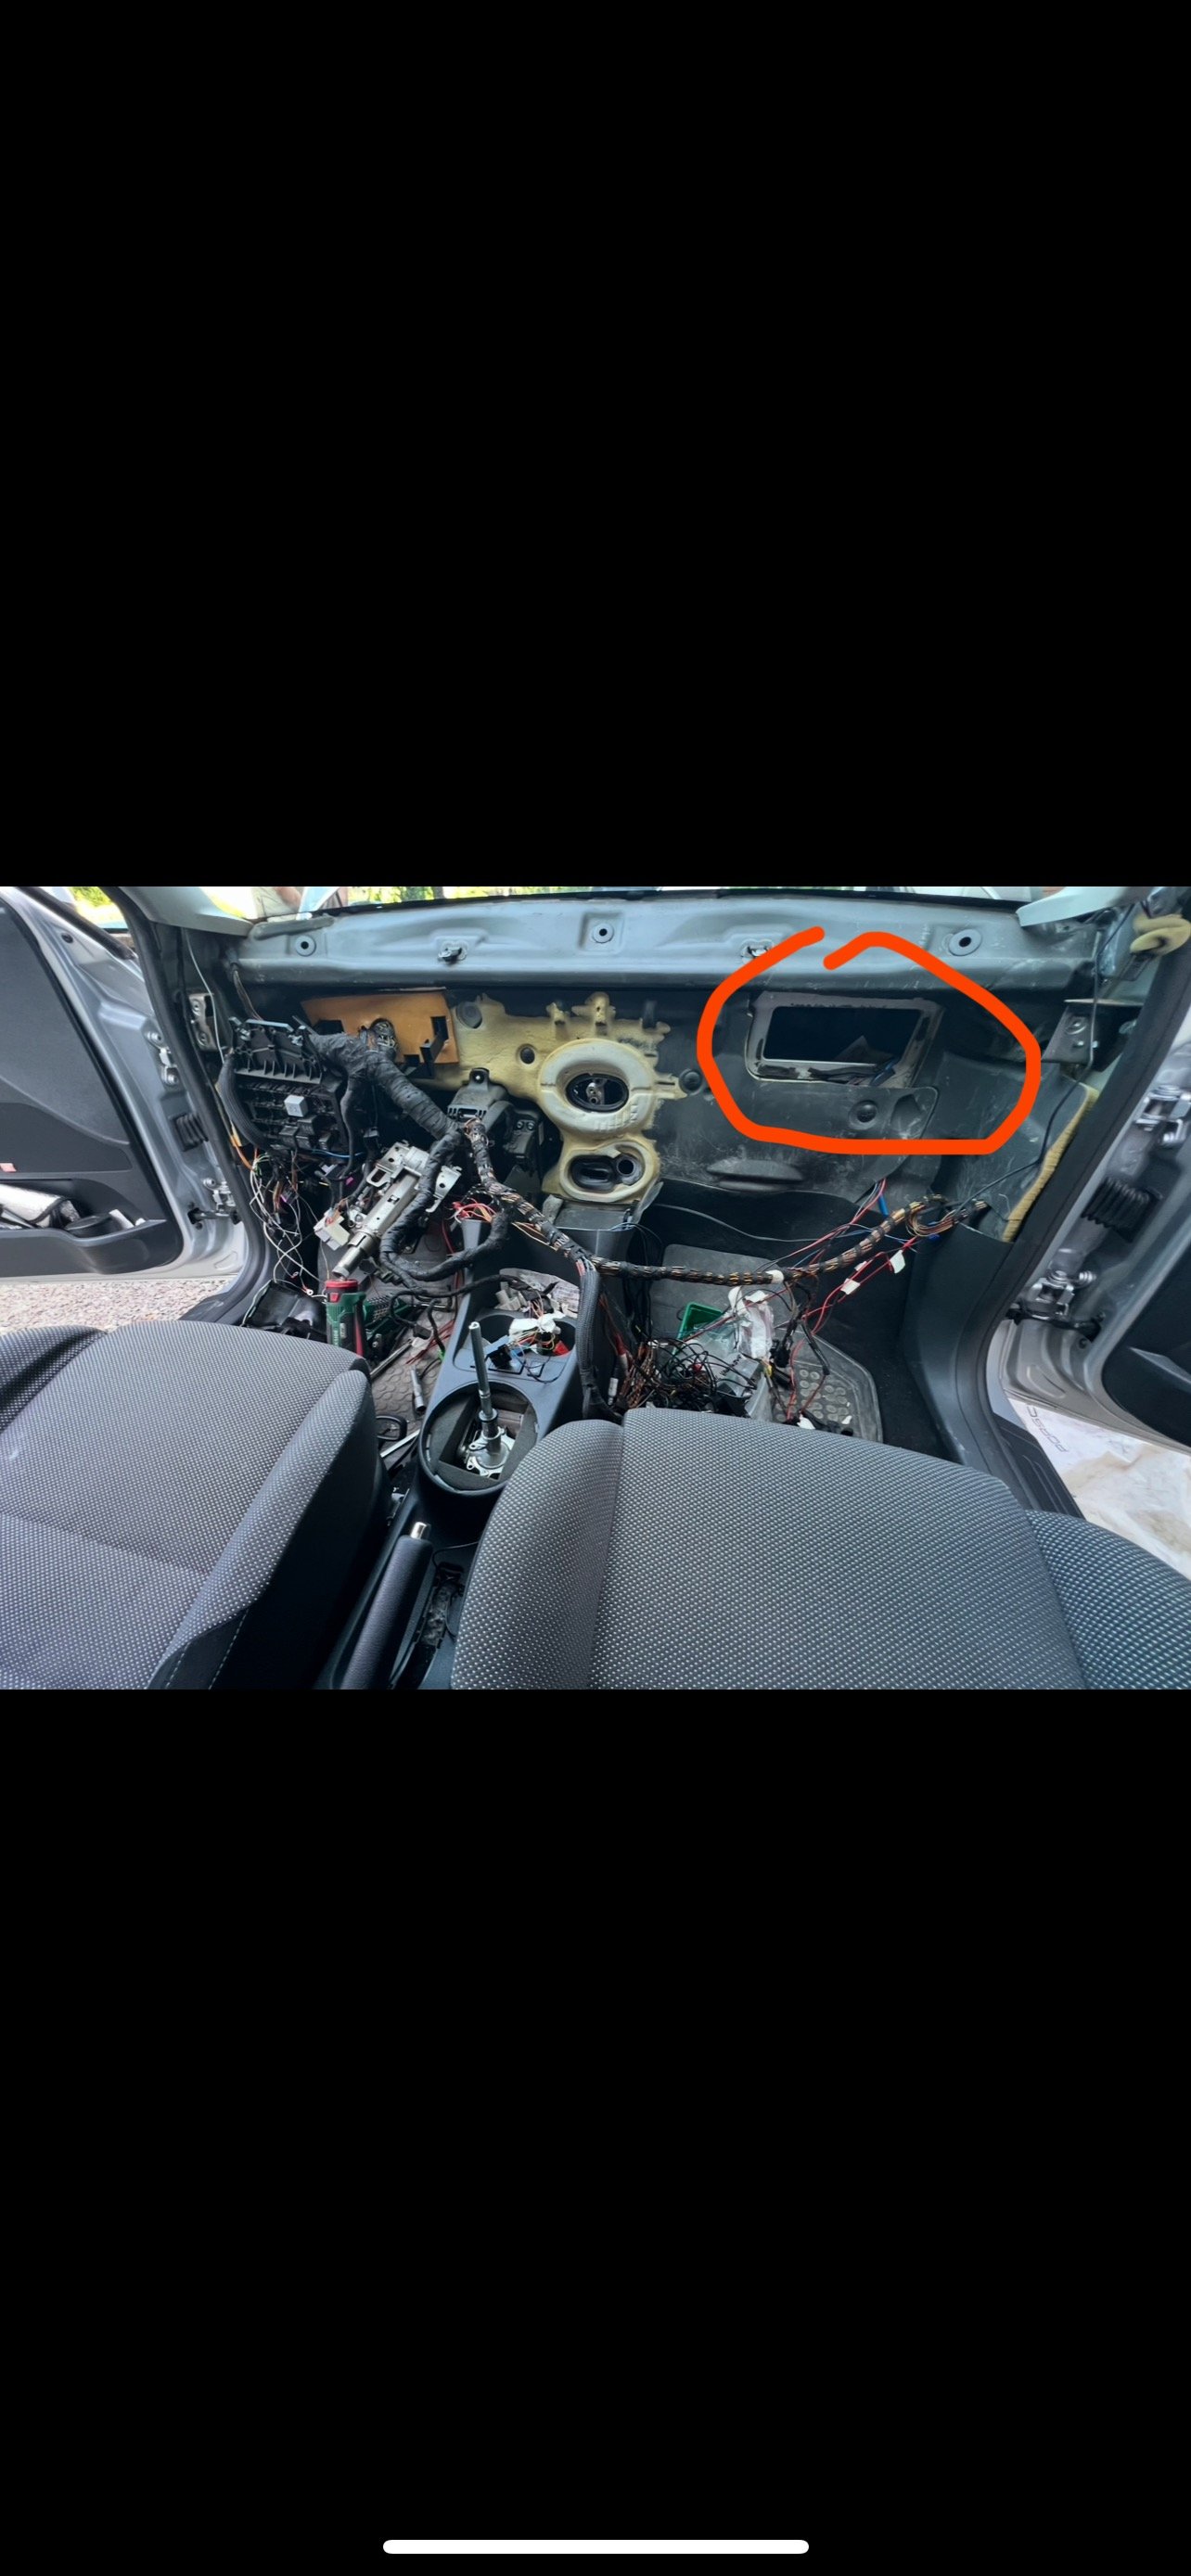
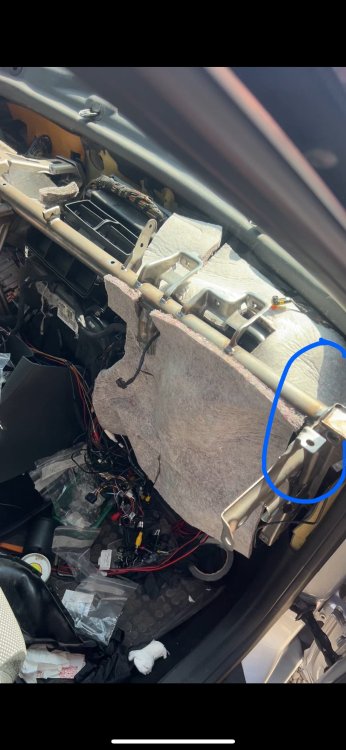
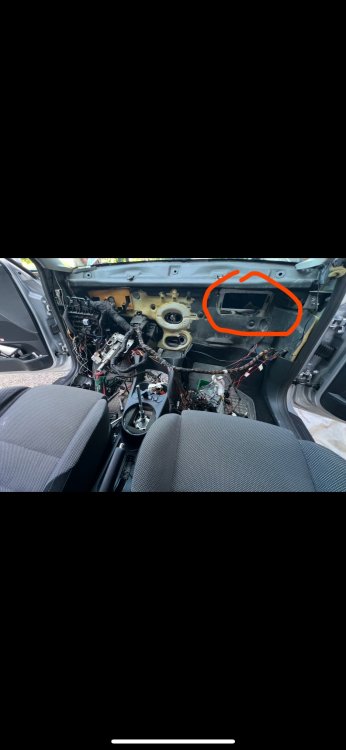
I'm retoftitting the climatronic in my 2013 fabia, trust me to reach the flap motor is a nightmare It’s in the blue area in the picture under the noise insulation In the red area is where the havc system takes the air and beside that there is the servo motor
 1 point
 -
1 pointYou would have to crimp on a pin and a ground point for the positive and ground wire. The positive wire needs to go in a BCM plug that is available for coding, the negative to a ground point somewhere. The Mr-fix video is probably your best bet for seeing the principle of the mounting. I haven't seen the wiring diagram for the Fabia, so I don't know where the footwell light is supposed to go from factory, but maybe it is available in one of the other subforums.1 point
-
You won't harm the battery by going a few days without coding it1 point
-
I got repeated warnings over a few days recently, probably 4 or 5 journeys during that period, that the key fob battery needed replacing. As you say it’s quite easy to replace them…1 point
-
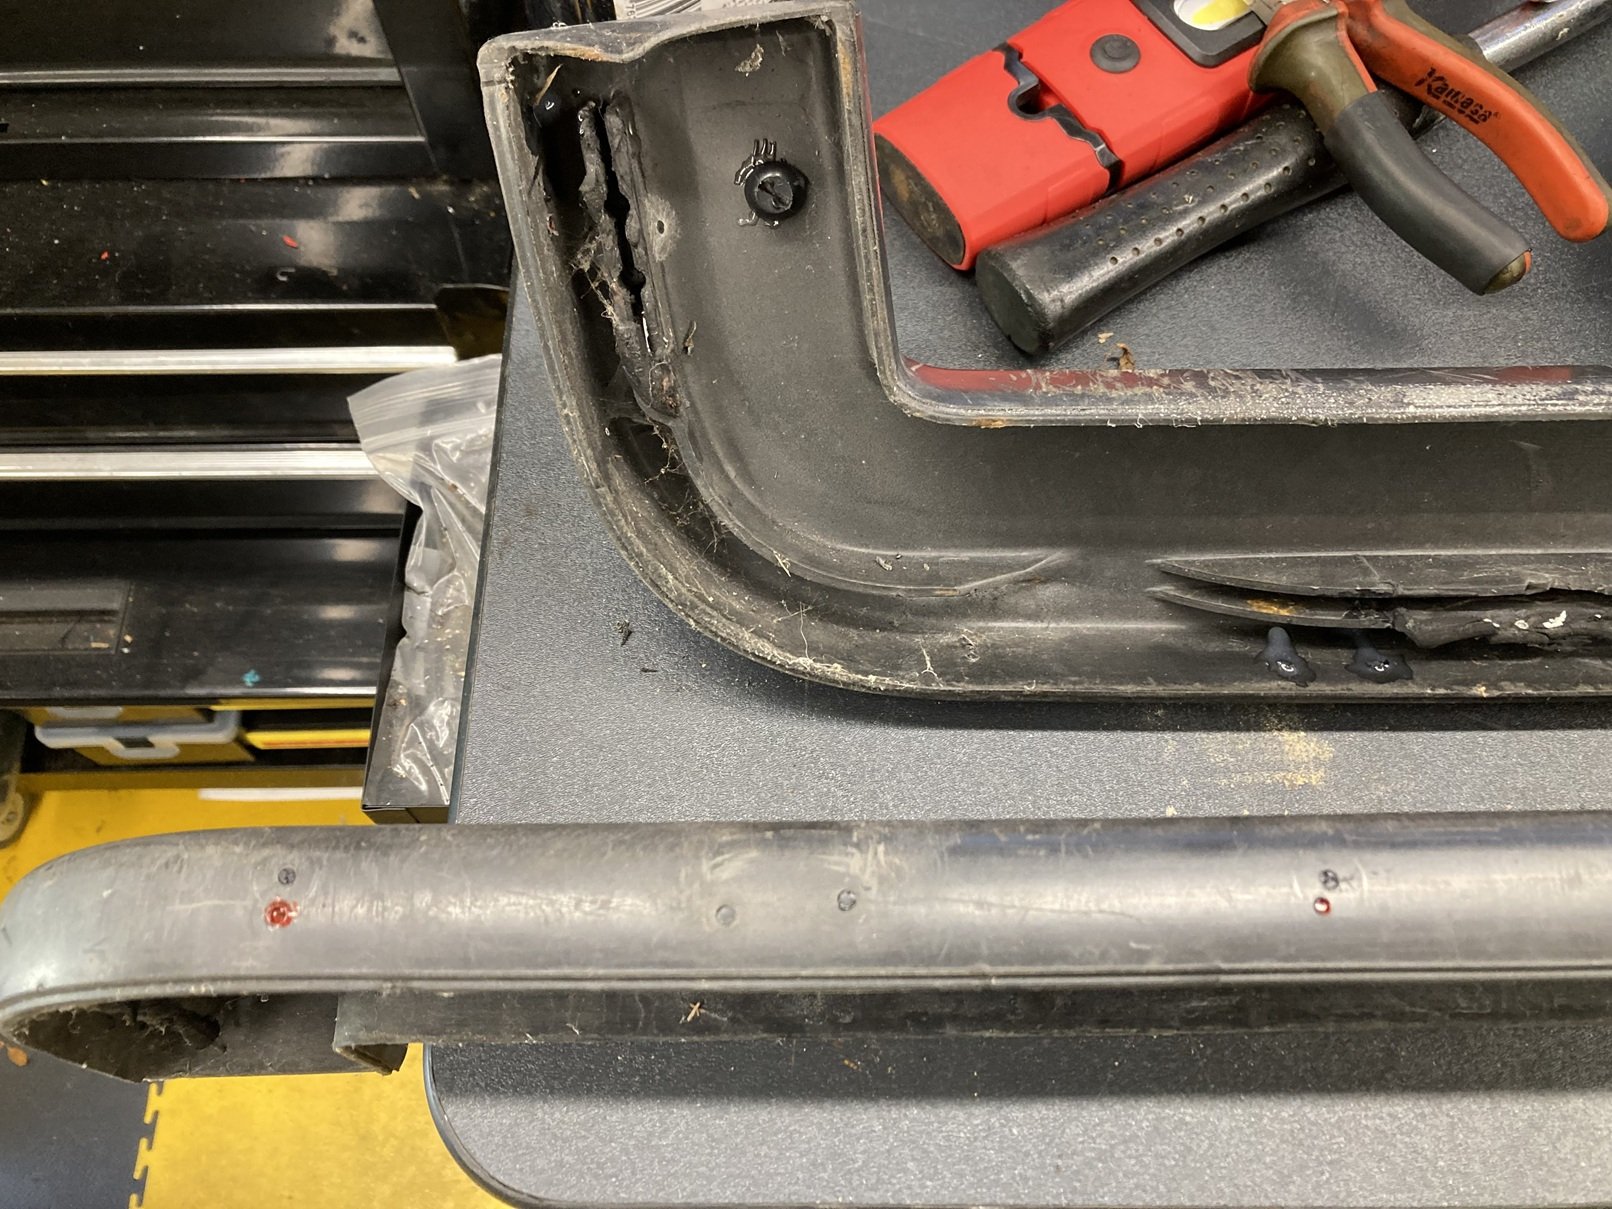
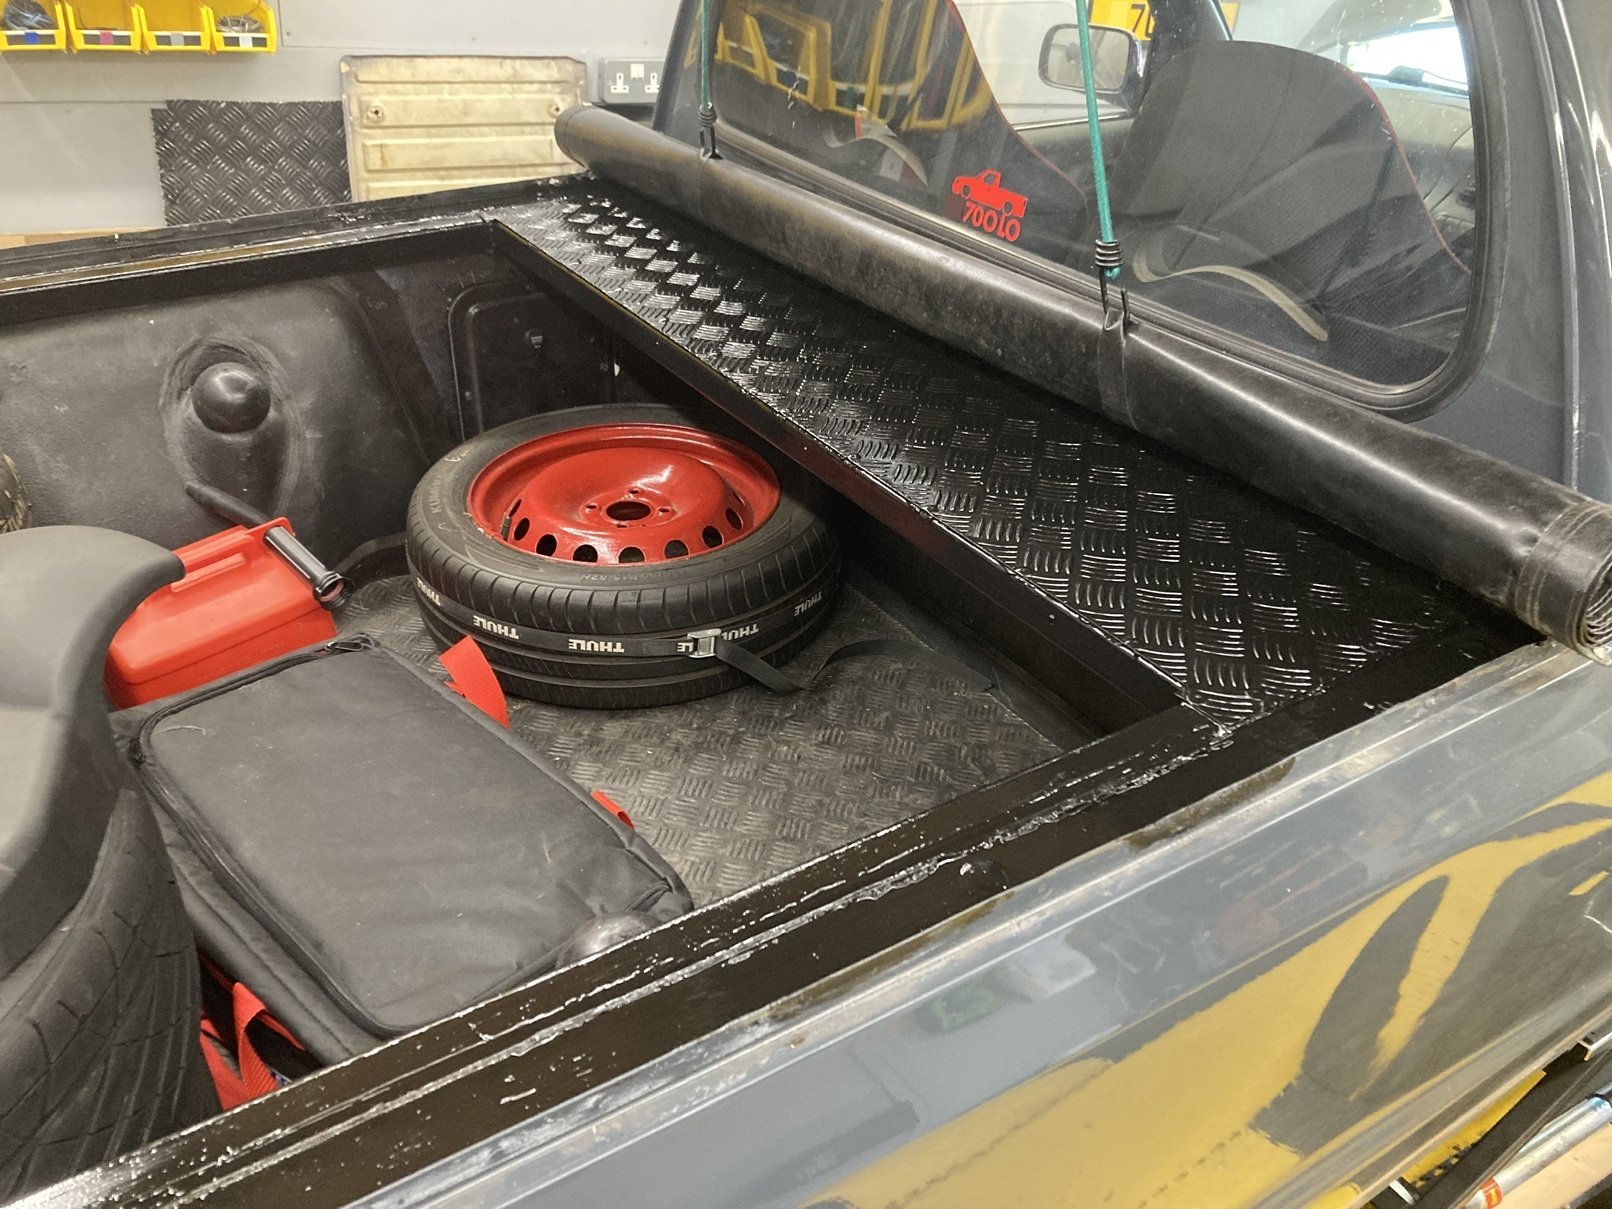
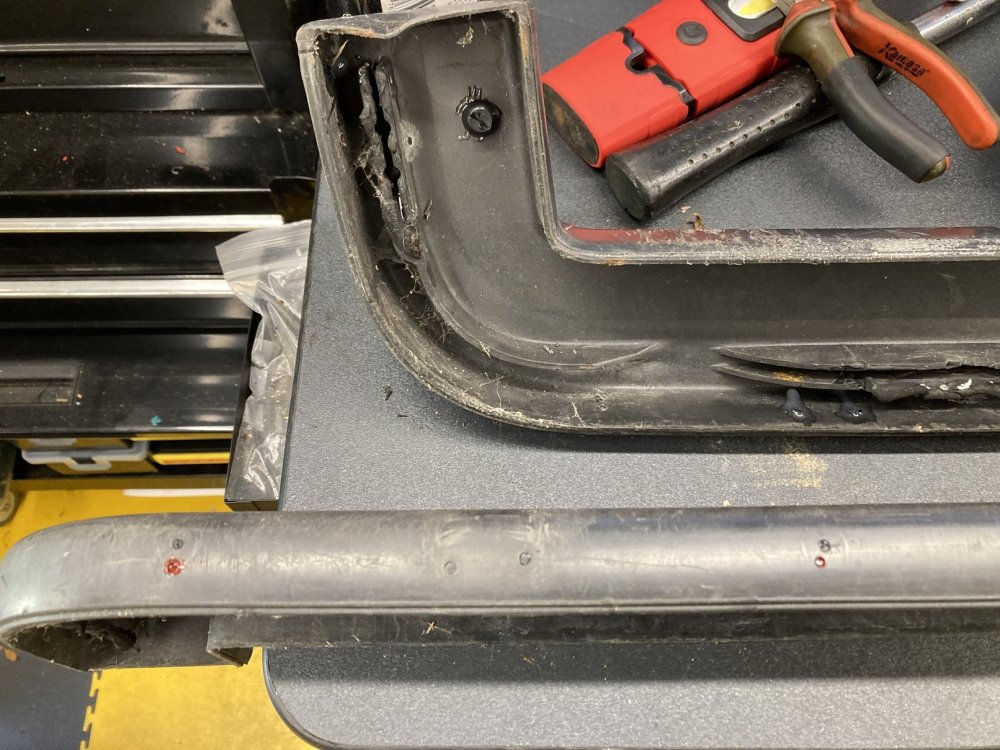
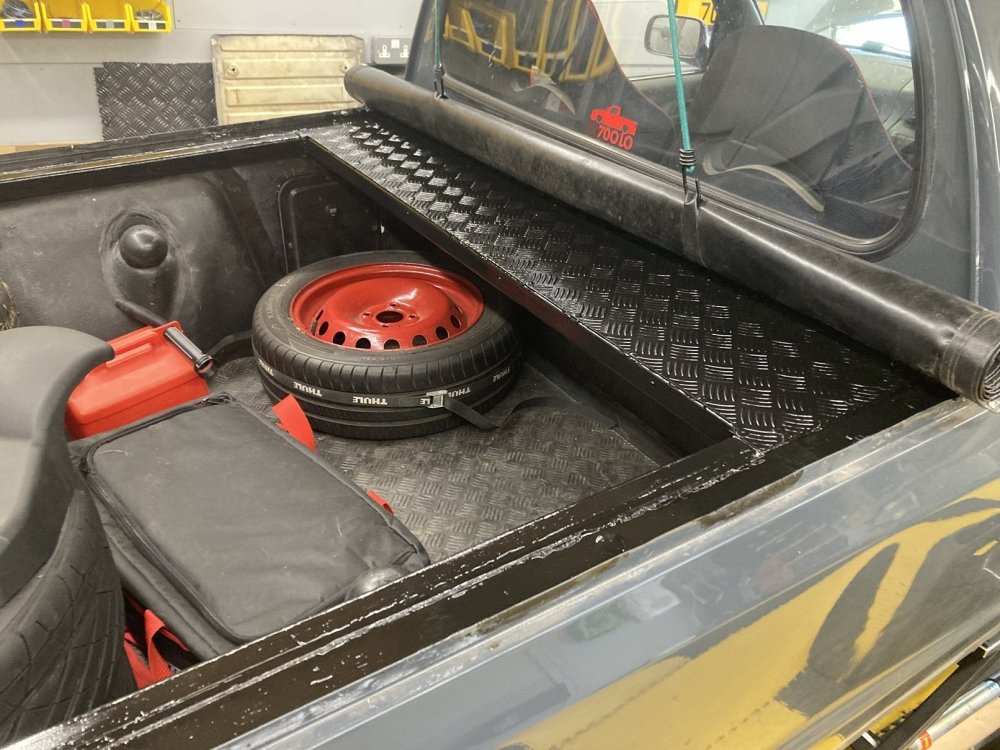
It has been a long time since I have updated this thread. My Caddy has not been forgotten, but it has largely been abandoned in favour of my Ibiza project (the SEAT variety, not a Balearic housing development). The Ibiza is now finally MOTed and in use, so I can turn some attention back to the Caddy. The pick-up has been enjoying the comforts of my garage workshop for a while because it is far from watertight. If it is parked out in the rain, both the passenger side footwell and the rear load bed fill with water. The windscreen seal is the obvious suspect for the wet carpet in the cab, on which more later, but the route for the water to get into the back was less obvious, given that it is rarely left without the tonneau cover in place. Suspicion fell on the front corners of the load area, where the ‘hockey stick’ top trims had been cut to finish more or less level with the cab back rather than extending across the B-pillar as standard. This appeared to have left a route for the water to get past the end of the trims and into the back, which warranted further investigation. Neither the side nor the rear top trims had ever been fitted particularly well in place. With the side pieces I had resorted to putting a couple of rivnuts in the top of each body side and screwing the trims down, which kept them in situ but was pretty unsatisfactory. The trim at the top of the tailgate had always sat high at the offside end, and whilst it did not obviously contribute to the water ingress it was worth looking at whilst the sides were being addressed. When I removed the tailgate top trim I discovered that the flange on the tailgate onto which it slots was folded over at the offside end, which was preventing the trim from sitting properly in place, and the captive bolt at that end was absent from its (broken) mounting, suggesting that possibly a previous owner had over-tightened the nut in an attempt to overcome the obstruction caused by the fold in the flange. I had a couple of used spare sets of trims in the shed, which were complete (as in not obviously broken or butchered) although not great cosmetically, so I selected the best set to trial fit. It became immediately apparent that the trimmed shape at the front of the side trims had masked the fact that they had not been located properly. I located the front of the trims onto their mounting flanges, then gave them each a couple of gentle taps with a rubber mallet on the rear corner to position them flush against the cab back before applying the mallet all along the top to ease them down to where they are supposed to be. The original parts had never fitted so well, and the gap at the front corner is no more. The folded mounting flange at the top of the tailgate was easily rectified via judicious use of a set of mole grips, after which the replacement trim sat neatly where it is supposed to. Now I knew the spare set would fit properly, I could turn my attention to the aesthetics. When I fitted the non-standard tonneau, I located the press studs on the top trims by progressively pulling the tonneau into position and drilling a hole for a stud so it lined-up with the other half of the fastener on the cover. It was not a massively professional (or patient) method, although the end result had looked OK. With the trims off the Caddy, however, it was clear that the press studs were neither particularly well aligned nor exactly evenly spaced. Now I decided to do better. I applied some masking tape to the outside face of each of the trims, and marked a straight line for the studs to follow at the correct depth for the tonneau to fit snugly. With the side trims I fitted them in place temporarily to give a location for the front press stud, then marked locations for the others at even intervals along the line. For the tailgate trim I measured out from the centre to the required locations for the end studs, then marked the others at even intervals in-between. Once I had drilled all of the new holes, only two of which corresponded with existing holes in the trims, I marked them all with red paint to show which were the ‘right’ ones, as the trims now had a lot of holes in them. The trims I had chosen to use had at some stage had the ‘goalpost’ style mountings for an original tonneau, and subsequently had another set of holes for press studs. All of these ‘extra’ holes would be invisible with the tonneau in place, but I had a cunning plan to deal with them. I had used a 2.5mm bit to drill the new holes, and I realised that I had some black plastic drive rivets which had a central shaft of very similar diameter. A trial fit confirmed that these handy little nylon cylinders were a perfect fit for most of the unwanted holes, requiring a couple of taps with a mallet to get them in place, and being nigh-on impossible to dislodge thereafter, so I set-to cutting a load of drive rivet centres in half, tapping them into place, and putting a dab of araldite on the back to be absolutely sure they would stay in place. Both replacement side trims had a small hole in the top surface by the rear corner, almost certainly where a screw had been used to keep them in place. I could not use the same technique to fill these holes, as the top surface of the trims is too thin. Instead I drilled the holes out and tapped them for M6, so that I could screw (and glue) black nylon number plate fixing screws in from the underside. Once the glue was set I trimmed the thread down to the level of the top surface of the trim. Various clamps, and judicious application of a heat gun, enabled me to correct a few places where the trims were mis-shapen, and then a bit of sanding further improved the look of the now-filled holes before priming and painting. I could have saved myself a lot of time and effort by using filler in all of the unwanted holes rather than faffing about finding bits of black plastic to glue into place, but I decided this solution would be more durable for when I am using my pick-up for its intended purpose. I do not want to have to worry about cracks appearing in the filler when things are (inevitably) dropped onto the top trims. Only time will tell whether my efforts have been worthwhile. Whilst the top trims were off, I decided to give the checkerplate ‘shelf’ and additional side rails a couple of coats of paint. I had some Hammerite black satin so that was what I used. Once the top trims are eventually back on this should have it looking much smarter in the back.
 1 point
 -
1 point
-
I changed the cambelt and water pump at home a few years ago on my vrs tdi, wasnt really too complicated, plenty of videos on youtube from start to finish. Had the engine resting on a trolley jack when i removed the engine mount, hardest bit was probably lining the engine mount back up with the car when your doing it yourself, might be easier having an engine support bar on top rather that the trolley jack. Id have no issues recommending anyone doing it themselves all you need is a good set of tools1 point
-
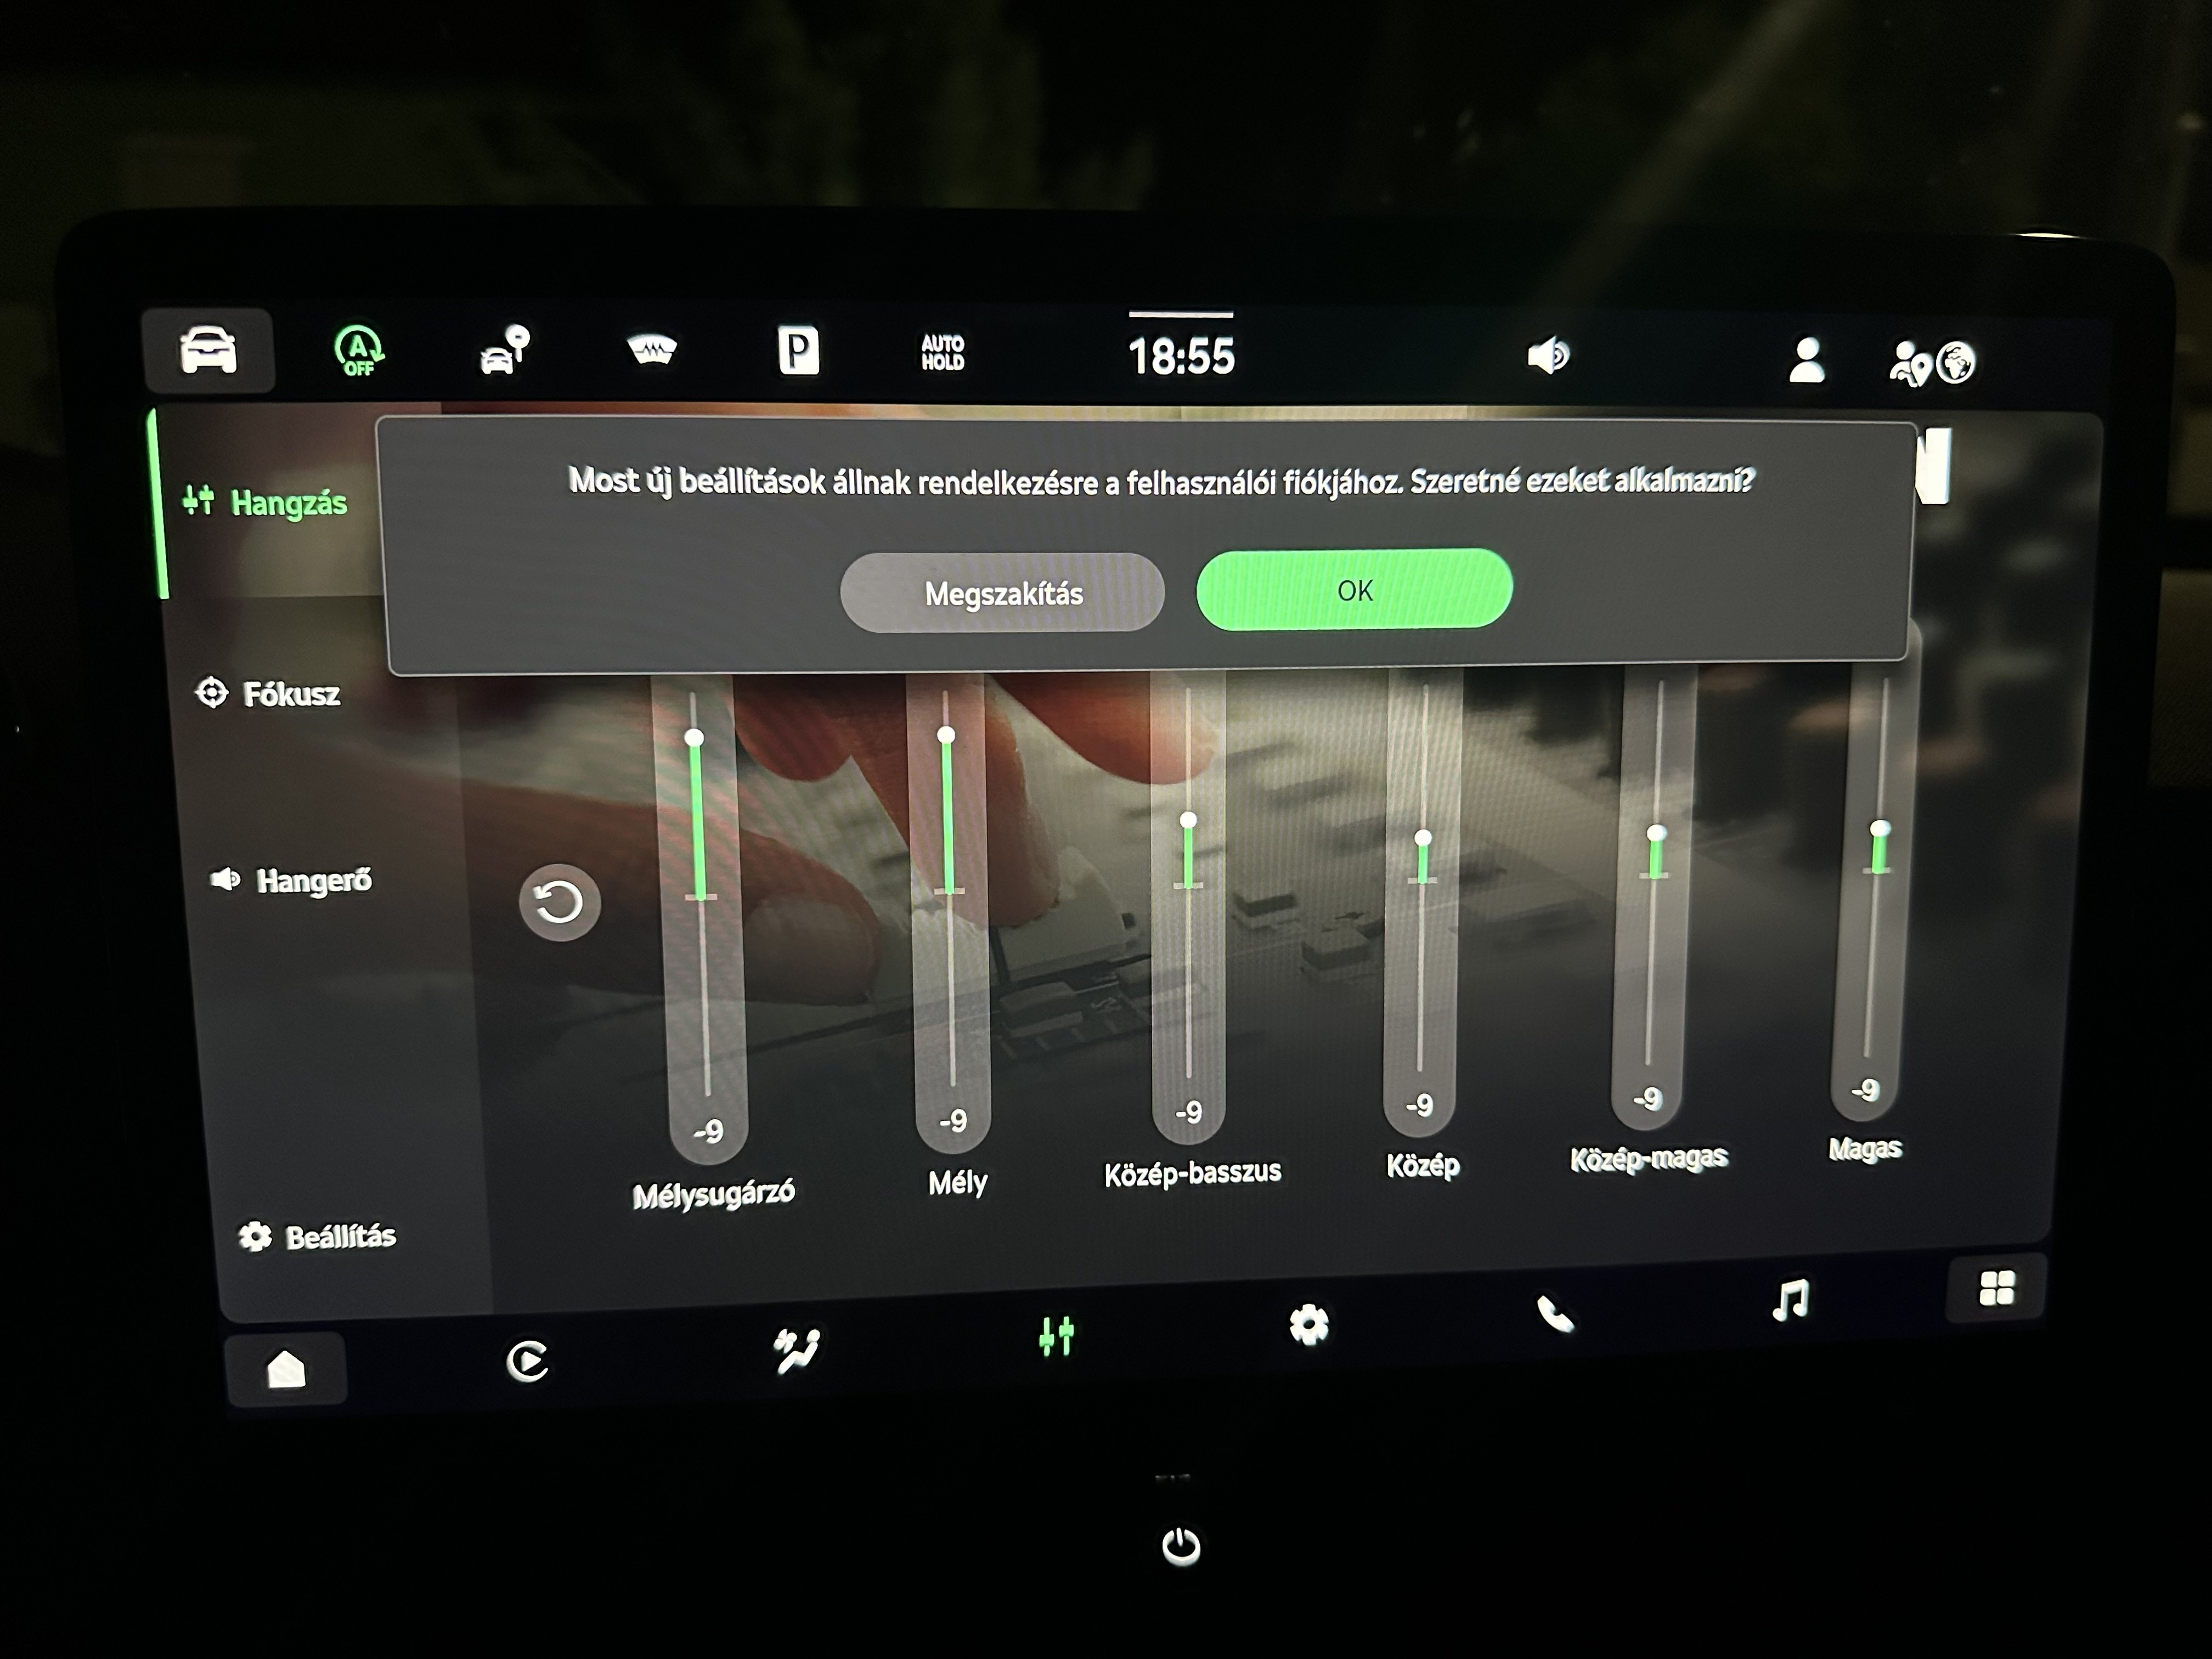
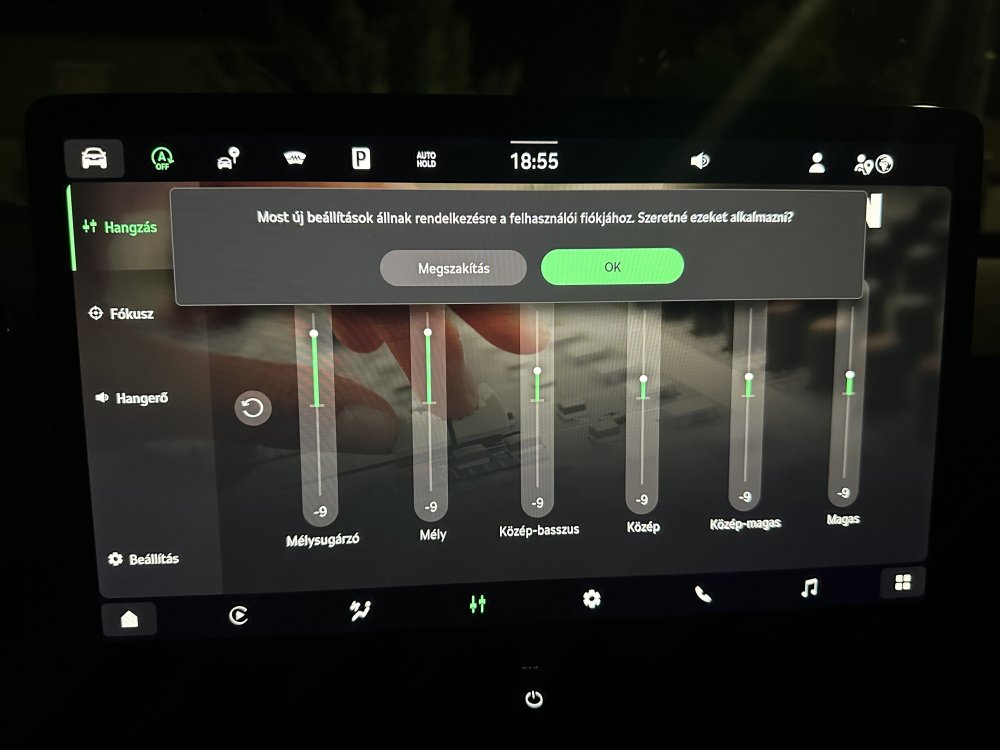
Hi all! Recently got my Superb, and there is only one annoying software habit of the car. Every start begins with a question from the car, you can see it on the picture. It says “New settings are available for your profile. Would you like to apply them?” If I choose OK, then it would ruin something - deflate lumbar support, reset side mirror positions, or any random thing. If I choose “megszakítás” which is abort, everything stays normal. Does anybody have the same issue? Thanks a lot in advance!
 1 point
 -
Latest Updated Speedcams - April, 2026. Here goes - Happy Easter lol. Once again here's the latest update of my customised version of EUR Speedcams ( April, 2026 ). They consist of the full EUROPE speed cameras which I've split up into four consolidated poi categories i.e. Redlight Speedcams, Fixed Speedcams , Average Speedcams ( which also include European tunnel speedcams ) and Variable Speedcams. They come supplied with my own preferred personal choice of icons, shown below, to match each of the speedcam categories. Remember to Install them as I explained in the first post in this thread i.e. after extracting the zip file remember to open the newly extracted folder and place only the PersonalPOI folder and metainfo2.txt file onto your sd card ( Please Note: a usb stick will not work! ). Also, please remember to select/tick the relevant newly added poi categories and the poi audible warning alert in your infotainment map menu settings after performing the update or they will not display on your map or audibly alert you. Hope you all enjoy them! EUR Speedcams - April, 2026.zip * Once again credit goes to jungblume2005 from Gpsurl for sharing his files which I borrowed and then converted in order to make this compilation.


 1 point
 -
Latest Updated Speedcams - January, 2026. Here goes - my first upload for this year. Once again here's the latest update of my customised version of EUR Speedcams ( January, 2026 ). They consist of the full EUROPE speed cameras which I've split up into four consolidated poi categories i.e. Redlight Speedcams, Fixed Speedcams , Average Speedcams ( which also include European tunnel speedcams ) and Variable Speedcams. They come supplied with my own preferred personal choice of icons, shown below, to match each of the speedcam categories. Remember to Install them as I explained in the first post in this thread i.e. after extracting the zip file remember to open the newly extracted folder and place only the PersonalPOI folder and metainfo2.txt file onto your sd card ( Please Note: a usb stick will not work! ). Also, please remember to select/tick the relevant newly added poi categories and the poi audible warning alert in your infotainment map menu settings after performing the update or they will not display on your map or audibly alert you. Hope you all enjoy them! EUR Speedcams - January, 2026.zip * Credit to jungblume2005 from Gpsurl for sharing his files which I borrowed and then converted in order to make this compilation.
1 point
-
User setting / privacy and settings / and disable online personalisation1 point
-
0 pointslow battery indicated remove battery check voltage if 3v clean battery around the area where the contacts touch and the contacts also isopropal will do refit battery will save a new one0 points
-
0 pointsI have 245/35/19 tires, but it's not a tire issue, it's due to my reduced mobility.0 points













.jpeg.b7df4fc946a1c08c552ea08dd0483852.jpeg)

.jpeg.77bcf6659ecca10d604bd4a12c722b41.jpeg)
.jpeg.a4163227487390db4aada038927b6e94.jpeg)