Leaderboard


Popular Content
Showing content with the highest reputation on 27/04/24 in all areas
-
Always read the label ...
 11 points
 -
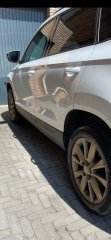
Following a bit of an off-road-edge incident, reports from partner of symptoms that sound a bit wheel-balancey...
9 points
-
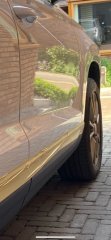
From this evenings walk.......
4 points
-
TFTD Saturday: By working faithfully eight hours a day you may eventually get to be boss and work twelve hours a day - Robert Frost3 points
-
Friday is Pizza night from the local mobile wood fired oven truck.
3 points
-
Deleted now I understand but this isn't the first time this person has caught them out.
3 points
-
These Academics and others need to remember that there are a high percentage of people without homes where there can be a charger or have no workplace with a charger or maybe even parking nearby or public transport connections near where they live or work. All these politicians and others that forget how many actually use cars that costs them out of their own pockets to run, and not all are 'suits', able to work from home, or fixed work places like offices or even factories. There are trades people who are self employed or contractors that might seldom see or visit the head office.2 points
-
No connector plug on the harnesses. The cruise control loom just has the terminals to plug into the BCM, the stalk connector, and the engine control unit. It is possible to make one, but by the time you have got the terminals, the labour of making the harness, the stalks (£130), no one would pay it. I've fitted plenty of them in the past.2 points
-
First Ducklings we've seen this year.......
2 points
-
Formula e Gen 3 Evo car - platform for the Gen 4 cas coming in in about a year and a bit......... Key technical enhancements for the new GEN3 Evo race car include: The quickest accelerating FIA single-seater race car – Capable of 0-60mph in 1.82 seconds (0-100kph in 1.86s), 30% faster than a current F1 car. Faster, stronger, more agile – Performance upgrades providing an estimated 2% performance gain from GEN3, equating to a c.2 secs faster qualifying lap on the Monaco circuit, offering world-class racing on any track. Leaner and meaner – An aggressive new body kit designed to be stronger, more robust and more aerodynamic, delivering closer wheel-to-wheel racing. All-wheel drive (AWD) –A first for a Formula E car, available during qualifying duels, race starts, and ATTACK MODE. This feature maximizes acceleration and control, elevating the thrill of critical race moments and intensifying driver rivalries. AWD enhances both performance and strategy, providing more exciting racing for drivers and fans alike. Better grip – Optimised all-weather Hankook iON tires providing 5-10% more grip, made from 35% recycled and sustainable materials (+9% vs GEN3 spec) The fastest Formula E car: Top speed of 200mph Regenerative braking: Cars optimise the 600kw regenerative braking capacity to generate nearly 50% of the energy needed for a race, during the race itself. Enhanced performance by software: Race performance upgrades made through software engineering. Most efficient Formula car ever: An electric motor with over 90% efficiency, significantly surpassing the 40% efficiency typical of internal combustion engines. Minimising production footprint: The world’s first net zero carbon race car in the world’s first net zero carbon sport. Sustainable battery development: Suppliers of battery cell minerals selected on ethical and sustainable mining standards to ensure a positive or neutral impact on people and the planet. Lifecycle thinking: Life cycle thinking throughout the car’s construction; second life and recycling for battery cells; recycled carbon fibre and natural materials such as linen integrated into the chassis. Conscientious supply chain: All suppliers held to strict sustainability KPIs, achieving FIA 3* Environmental Accreditation certification by Season 9. Race-to-road transfer: Specific road-relevant areas of the car are opened for development by teams and manufacturers, designed for direct tech transfer to automotive industry. Ultra-fast charging capability: A new technological development still in development, designed to allow a 30sec 600kw high-speed charge for additional energy mid-race.2 points
-
Mild pride dentage I think, only, ta.2 points
-
@2cvhound Maybe? I used to work with a guy who "always had Citroens" until he discovered that the then new Xantia had very uncomfortable for him seats.I could drive one all day without a twinge of discomfort and then go out for dinner with friends. So my answer is that "it may be the car or may be you".2 points
-
As it's supposedly rated at 30 Watts charge I'm hopeful that it's USB-C as I believe USB-A is limited to 18 Watts. Either way, it's 99p and I'll find a use for it as not even sure I'll have it in the car.2 points
-
Greetings Jez Luckily, my mind's not in the gutter, and I see nothing wrong with having apertures looked after and warmed 😇 Gaz2 points
-
2 points
-
i hope so,imjust home from a retirement party, the low temp warning was on on the dash the whole way home!! 3deg at 11pm.2 points
-
Update time! Instantly felt an improvement in stability. All round more confidence inspiring. Drove it for a few days with the springs as per konis (front eibach pro, rear eibach pro with assisters). Car was very pointy and the rear although better was a bit too stiff. I took the assisters out a week ago and and the comfort is very good. The car still goes where you want with minimal body roll. It's such a shame I didn't do it this way from the get go. The car feels right. Current setup: Eibach pro from TDI 4x4 dsg Passat estate. Bilstien B6 shocks as above No assisters for now (maybe when loaded for the summer hols) 12mm front spacers 20mm rear spacers White line rear roll bar in stiff setting One comment on the konis. The rear ones rattled. I thought it was the roll bar but turned out to be the shocks! Tech showed me the state of them once off (roughly 30k miles) and they were shot. Car too heavy I guess.2 points
-
Sounds sensible. I paid £500 for mine lol1 point
-
Having just carried out this exact process on Friday (26th Apr 24) I can confirm that the new owner of a vehicle less than 12 months old, will pay the 2nd year VED rate. In my case a 2.0 TSI Sportline first registered in Sep 2023 which incurred a VED rate of £1040, I paid £190 for 12 months from 1st April 24 to 31 March 2025.1 point
-
I have used them since 2004 in France if it is road planings that you are talking about, "tout venant noir", it has lots of fines and when wackered down looks like tarmac and is very durable. I wanted to use it where I am now, its far cheaper than the white calcaire (limestone) that everyone else uses but my pal who has been in this region much longer than me says it will be untolerable during a hot summer. The other thing that has convinced me to use calcaire I discovered by accident, I wackered it down when it and the ground underneath was wet, the fines rose to the top like over-tamping very wet concrete but its given a good surface and it is nearly as hard and durable as concrete, most people use it as a sub base, dont wacker it and cover it in gravel for the crunchy sound, I have dragging the stones inside so will stick with my method.1 point
-
Ignore. Wrong question1 point
-
There is no electrical, electronic or computer connection between the force the driver applies with their leg onto the brake pedal and the resultant force applied to the brake discs (or discs and drums) through the friction material up to the point where ABS cuts in during an emergency stop. The discharged batteries that only exist in your imagination can not cause grabbing brakes period. You will have to translate that for me, I do not understand.1 point
-
I've since found a post of a guy that bought a GR Yaris new with high first year tax and sold it before 6 months. He received a refund of the £190 component but not the full 1st years tax. So it would seem any second owner just pays the standard 2nd year cost.1 point
-
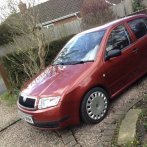
List was around £35k with the options added so I won't be in the £40k+ bracket.1 point
-
To my understanding you also need to replace the "transmission" tunnel so it will accept a propeller shaft and rear floor from just ahead of the front mounds for the rear suspension on an FWD car. It really is easier to buy a car fitted with a Haldex system.1 point
-
Looks like a bit more mud between two thirty and 9pm should even the balance out a bit 👍 Gaz1 point
-
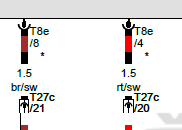
Please look at the diagram again. For the left rear door, the cables are only red/white and brown/white inside the door. They change at the connector at the door pillar... That suggests 1.5mm brown/black and 1.5mm red/black between the headunit and door pillar connector.
1 point
-
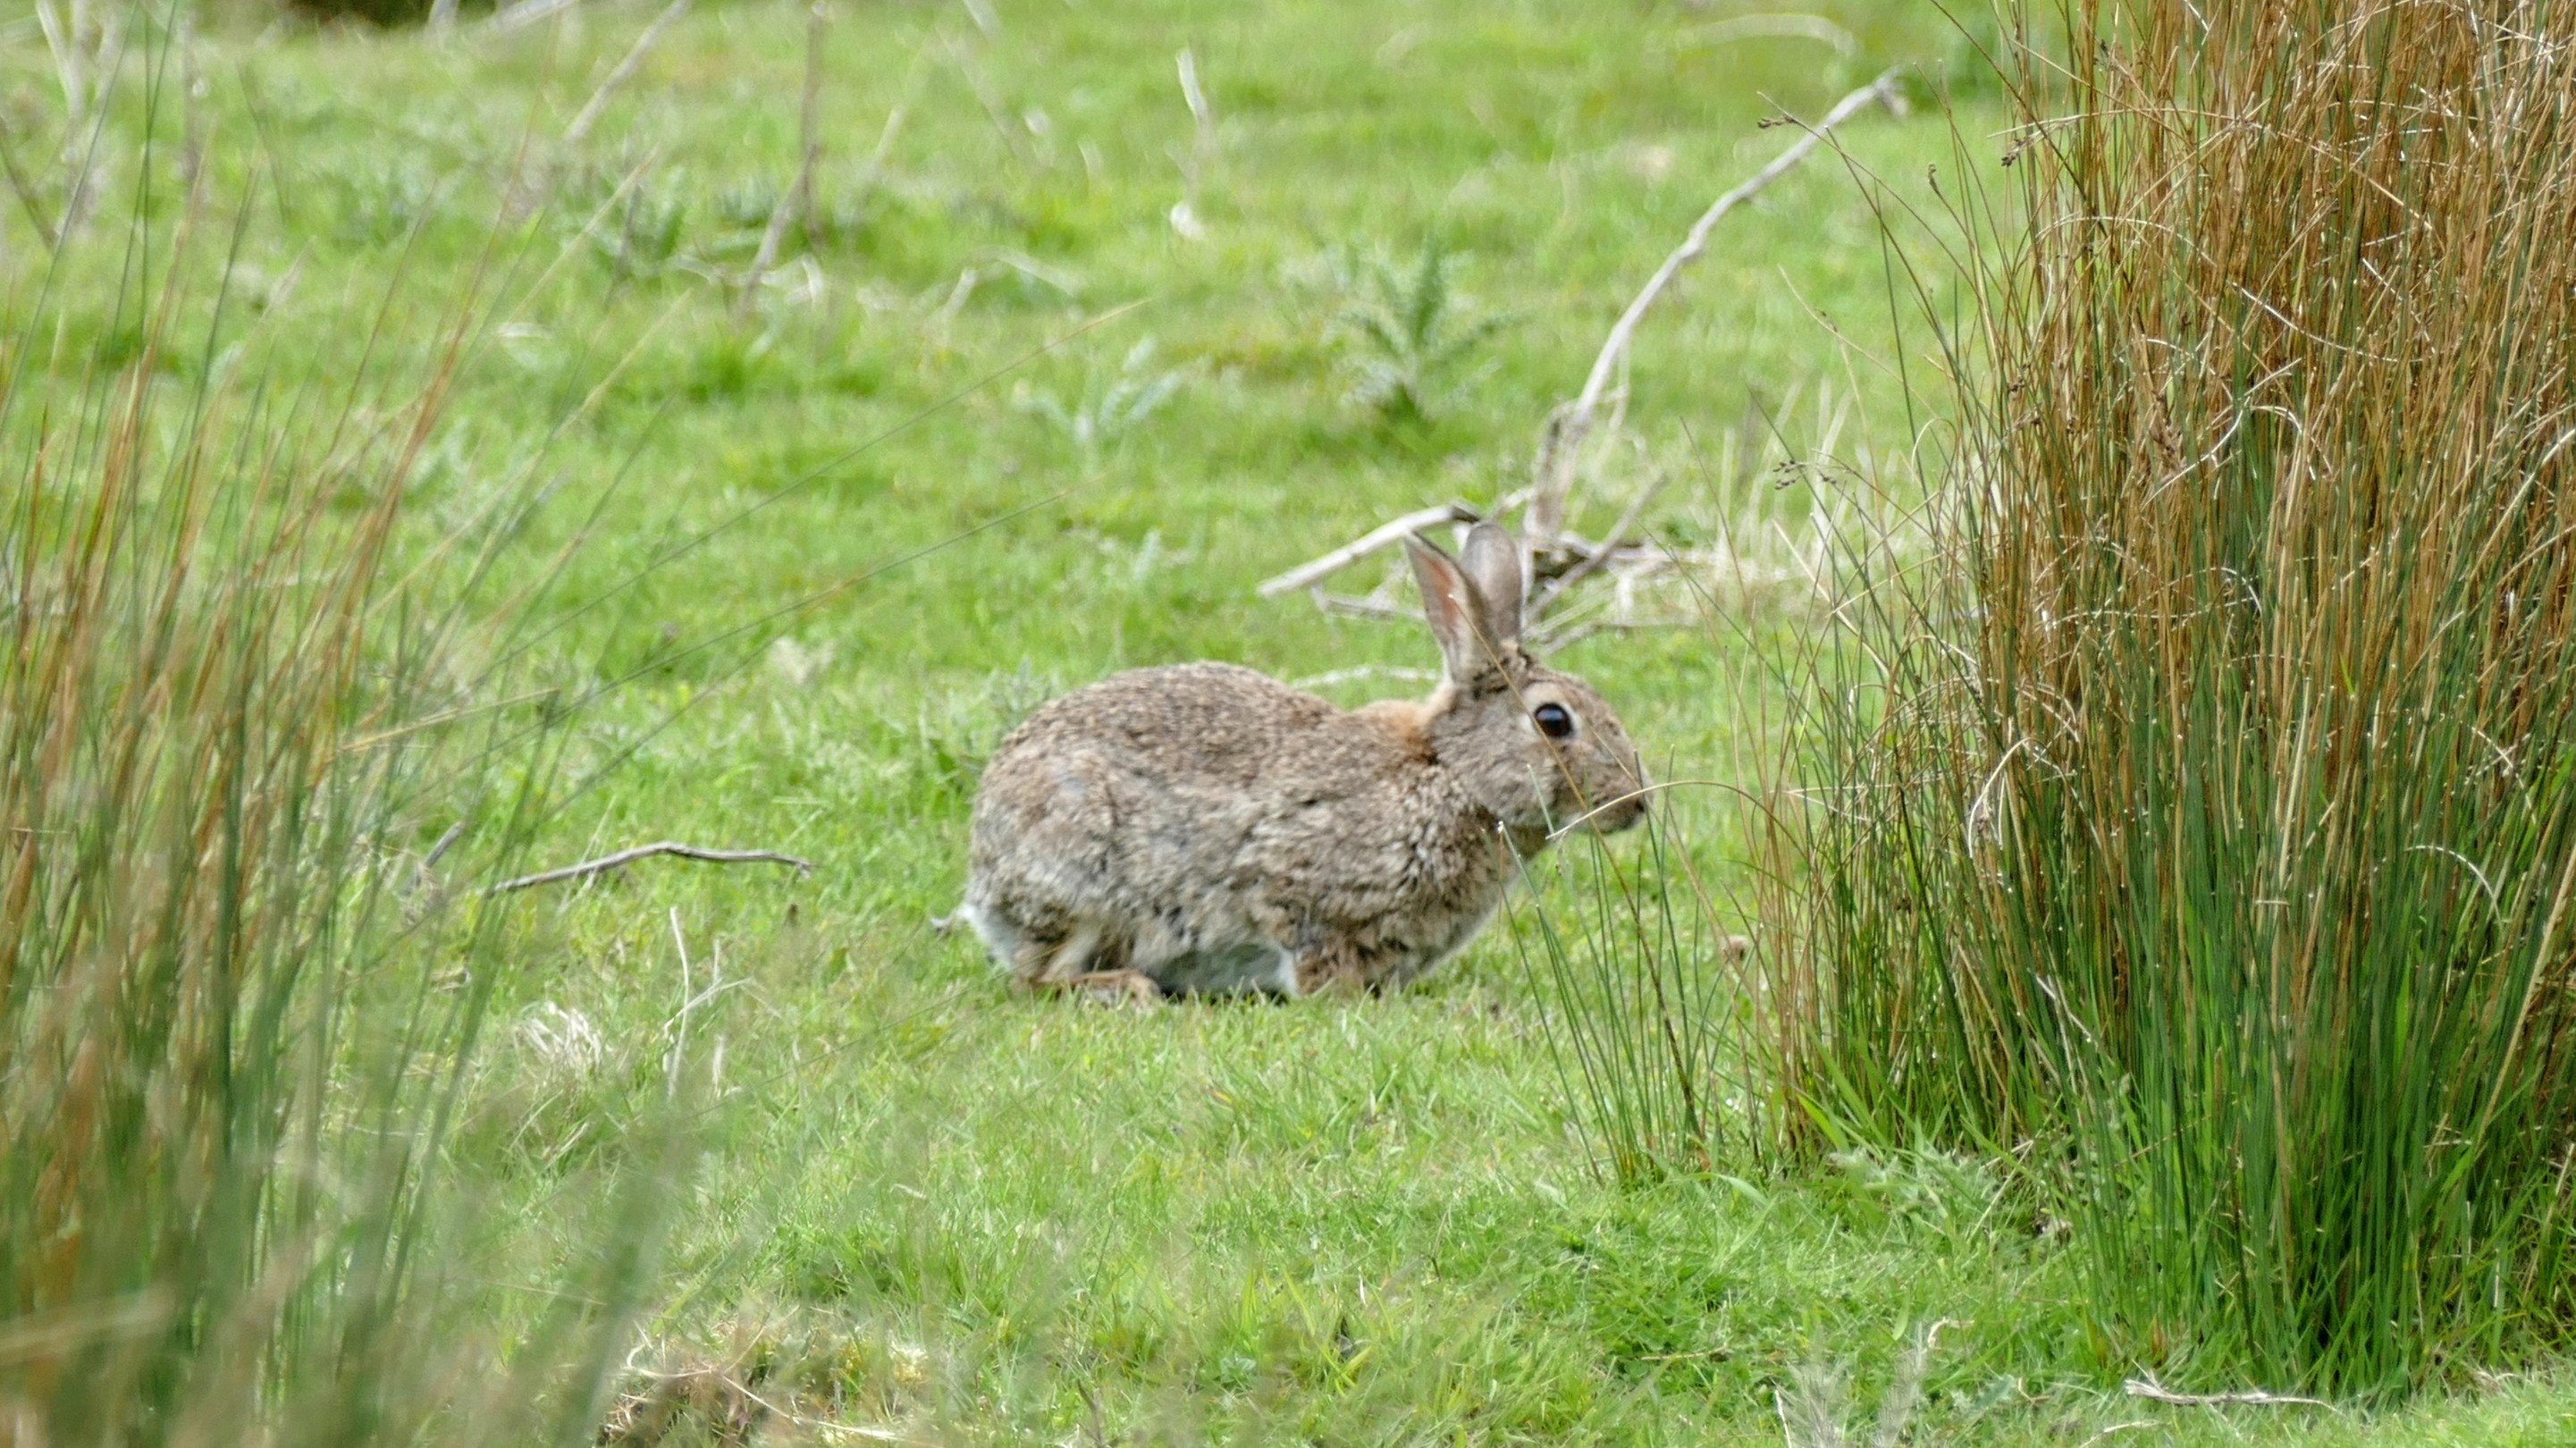
Really like the cows 👍1 point
-
sounds like similar issue to golf mk7 owners with 288mm brake discs as the brake system was designed for 312mm discs but to cut costs VW just replaced it with smallers discs and carrier leaving everything else the same, this caused the brakes to be very grabby.1 point
-
I changed my 19 inch tyres from OEM Bridgestone Potenza to Michelin Cross Climate 2 18 months ago, My average was 32.5 mpg under Bridgestone and interestingly has risen to 34.0 mpg with the Cross Climates. Another benefit was a quieter ride. Tyres were both standard 235/40 R19 and pressures were 36psi. Hope the above helps1 point
-
@smalltownmotion Welcome to a forum. Maybe if you had started your own thread answers might be more about your car.1 point
-
No there should be no movement and knocking, if they are sliding calipers then my guess is someone has removed the rubber sleeves probably when they blinged up the calipers, I hope it wasn't you!1 point
-
Sorry just being silly! I get fed up with people saying that after 100K a car is past it. I fully expect this engine to last 300K plus. There is such an expectation to upgrade and replace anything over 3 years old! ( Our newest car is 8 years old with 85K and oldest is 43 years with 140K!)1 point
-
You obviously use a Ouija board to obtain answers that don't help. With no help from this forum but mucho from VW Forum I measured fuel pressure saying injector problem. Seems you lot more interested in Trump than helping each other! Sad!1 point
-
@nta16, are you sure that what you are seeing is not just a couple of retainer wedges moulded into the body of the parking sensor - and that these just "press into" mating clips on the mounting brackets - so to remove the sensors "safely" ie without pulling the mounting brackets off the inner face of the bumper cover, the plan should be to ease something like a screwdriver in to open" each side of the mounting clips and so allowing you to ease the sensor out from these locking/retaining clips? Having evolved genuine VW Group etc parking sensors to be mounted like you describe, ie a lot like a bulb fitting, sounds to be either progress - or evidence that an aftermarket kit had been fitted to your wife's Fabia. Aftermarket kit designers will normally try to make assembling/fitting of their kits easy for "Joe Bloggs" - genuine original car manufacturer's parts, less so, aiming more for quickness and cheapness at the initial assembly point for that unit.1 point
-
I don’t think so. But I ´ll use my ‘joker’ and ask @ApertureS1 point
-
Apologies, I cannot see the video. It's not working. Yes, calipers could be loose, but I cannot see that. Knocking around the suspension area is usually associated with the strut tops though and I suggested you look there as its a known weak point.1 point
-
@Badgeriferous - Clutch; I'd check the DMF when it's open, and make an informed decision on the replacement at that time.1 point
-
You have spent more than four grand on a very rusty car, I hope you see some benefit from it, at your age (I am close) you probably thought this was a keeper but with that much rust I'm not sure that will work out to be a good idea. You are now £15K + into an 8 year old vehicle, I know second hand prices have gone crazy but that sounds a lot even for a Minter.1 point
-
Just ordered this one from AliExpress. If you do it as a first order it comes to 99p delivered, otherwise it's £8.52 if not your first order, I already have a Magsafe disc in the car so ordered this one more out of curiosity https://www.aliexpress.com/item/1005006783744838.html?spm=a2g0o.order_list.order_list_main.5.95dc1802c0QMzb1 point
-
If there is no sign of leakage from your recent trip to Italy, it may be the case that when the belt & pump were replaced the coolant system wasn't refilled correctly. It requires the use of a VCDS or similar to ensure all the air is allowed to be purged from the system. When I had my belt & pump done for the first time the garage didn't do it properly and I had the low coolant messages pop up periodically for about 2 weeks after. I topped up the reservoir each time and after a couple of weeks it stabilised. Good choice....maybe.😃1 point
-
Relevant facts would be the number of asylum seekers returned to France before the Dublin agreement ended in 2021 preventing it happening which lack several zeros compared to the numbers arriving. 2015 - 510 returns 2016 - 362 returns 2017 - 314 returns 2019 - 209 returns of which 51 to France. The modus operundi of the people smugglers evolved in response to tightened security at the Channel ports, it proved to be a much more successful and profitable strategy for them, they and their customers care not how few were returned, what is important to their business model is how many get over there, small boats is working very very well for them.1 point
-
TFTD Friday: Horse sense is the thing a horse has which keeps it from betting on people - W.C. Fields1 point
-
By way of an update for my issue, the car has now been given back to Skoda and I've got a brand new DSG version. I assume they will resale this to some other poor sod instead of keeping it off road. I can bet my yearly wage there will be some sort of recall this year or next but if course according to skoda 'there is no fault' I may be financially out of pocket but that's worth not having the fear of an accident everytime I come to a roundabout. Good luck all.1 point
-
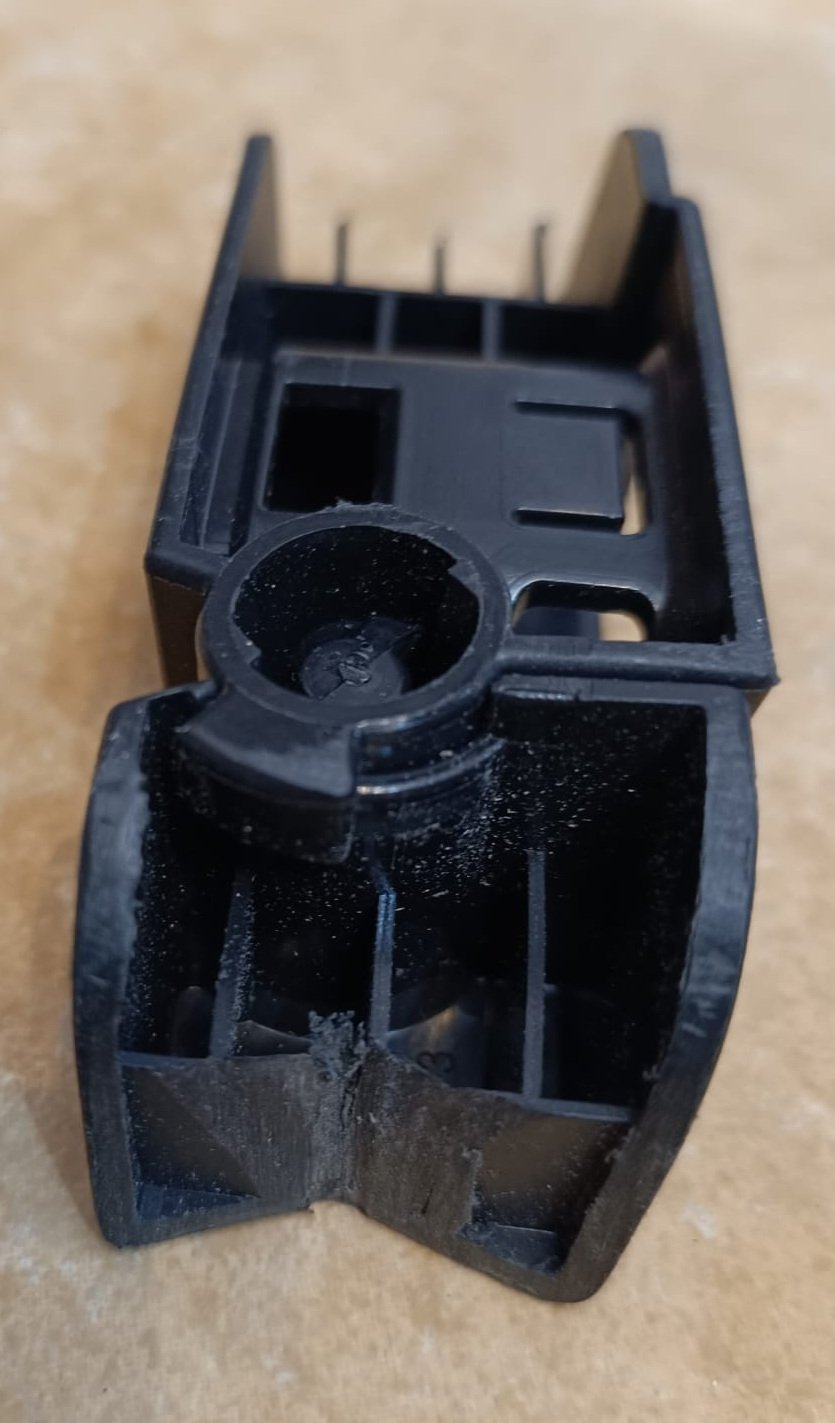
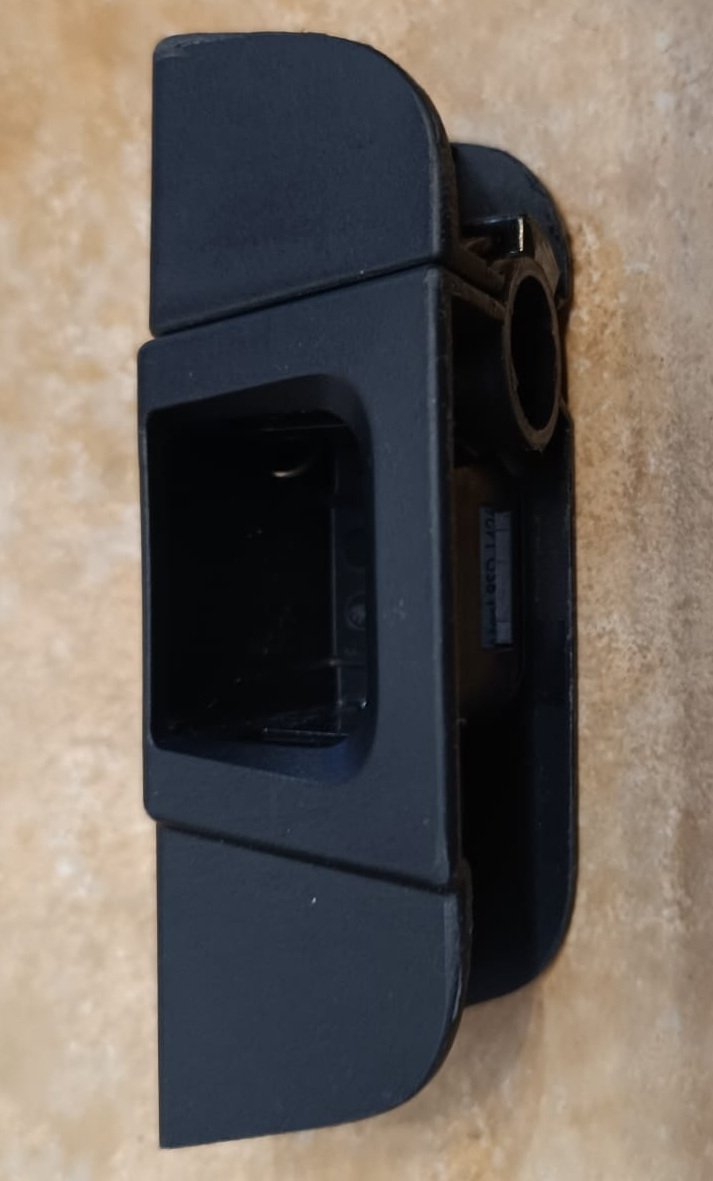
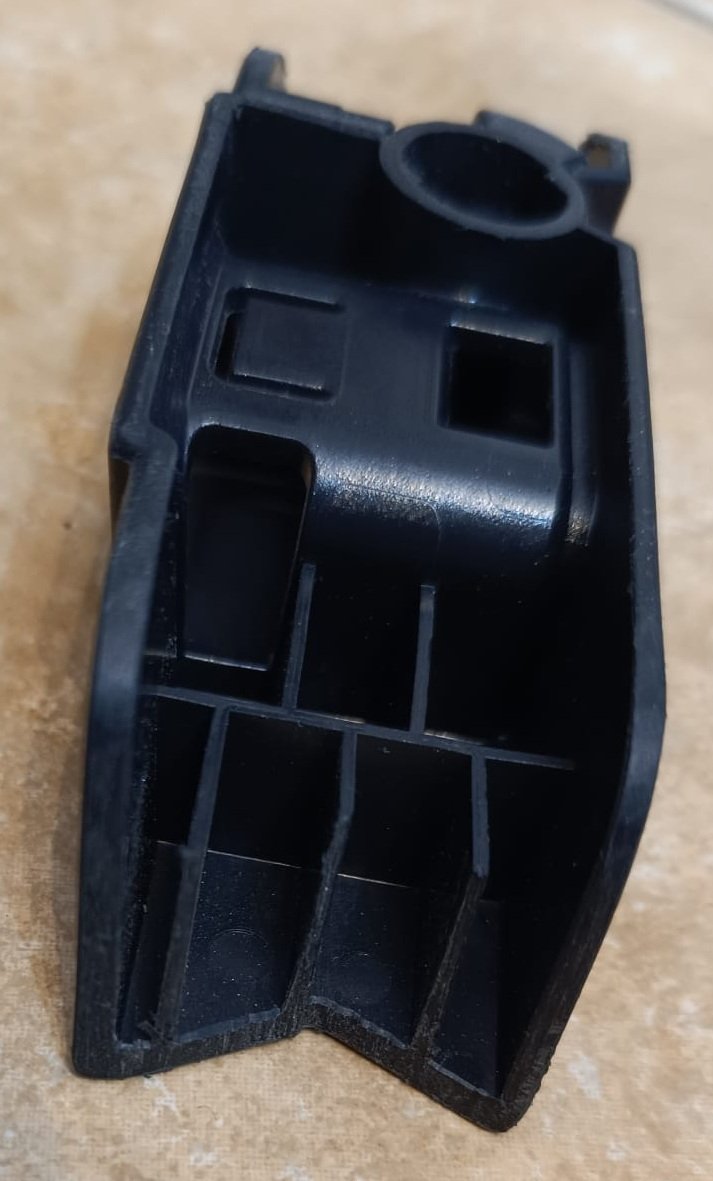
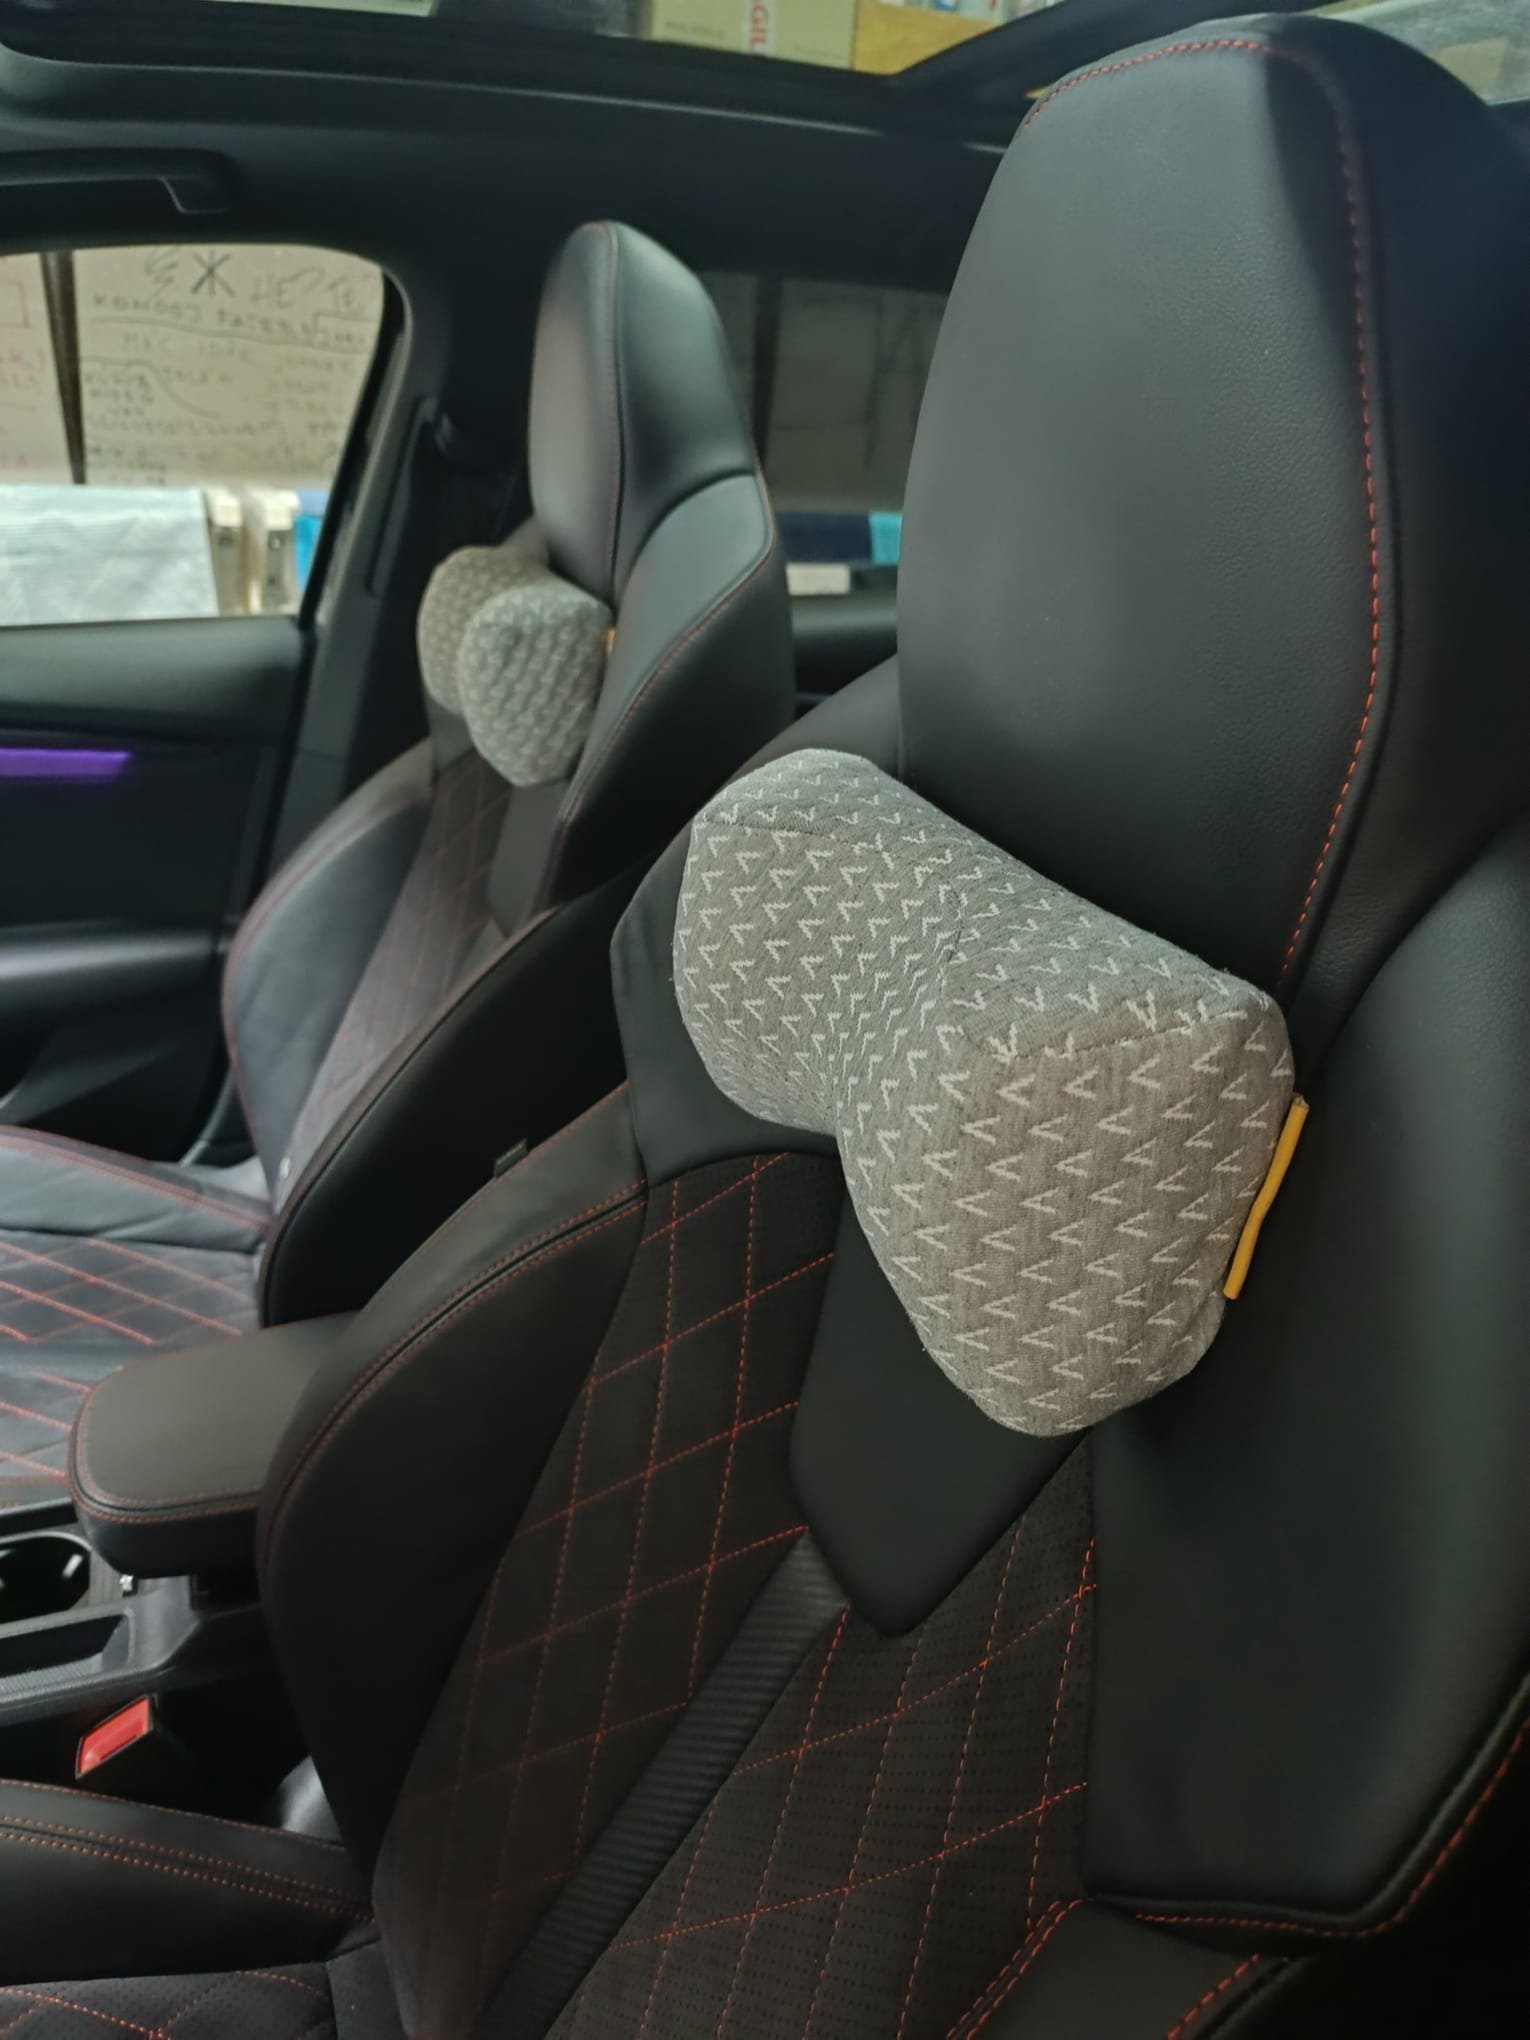
Hi guys! I thought I would share how I succeeded to transform easily the original smart holder adaptor 3V0061128 for Octavia RS sport seats so that smart holder can be used afterwards. It is a pity that Skoda still did not release an original accessory for RS owners yet. If you are in DIY mood, you can do it in 30 minutes, all you need is a saw to cut both ends shorter, a file and some sandpaper. I advise to draw the cut lines at below dimensions and shape looking at the seat hole shape first and 2-3 mm longer before cut and then file it slowly to shape and dimension testing it periodically until fits perfectly. Finally use sandpaper to make it nice and smooth. I used successfully before this solution different magnetic holders too, attached with double side adhesive tapes, but this solution has two faces for me because the other side of the adaptor can be used to attach a neck pillow with velcro solution. If someone had ever been looking for a neck pillow for sport seats, knows that is again a headache.
1 point
-
My e-bike's charger has just died. Checked the fuse, which is okay and the extent of my skill level Can't really complain as it's been used probably three times a week over the last eight years. I don't suppose we've got an e-bike charger specialist on the forum (you never know!). Gaz Edit: Well would you Adam and Eve it. As it was dead I decided to perform an autopsy (undid four screws and pulled the two casing sides apart). Saw nothing exciting, exploded or burned. Put it back together, not before losing one screw down the kitchen sink, plugged it in, and lo' and behold it came on and charged the battery as per normal 😁 Maybe that fact I'd found a cheaper (E6002) charger online gave it a reality check as to its future and being replaced by a younger model - threats and jealousy having the desired effect?1 point
-
I blame Emporer Ming the Merciless. Where is Flash when you need him.1 point
-
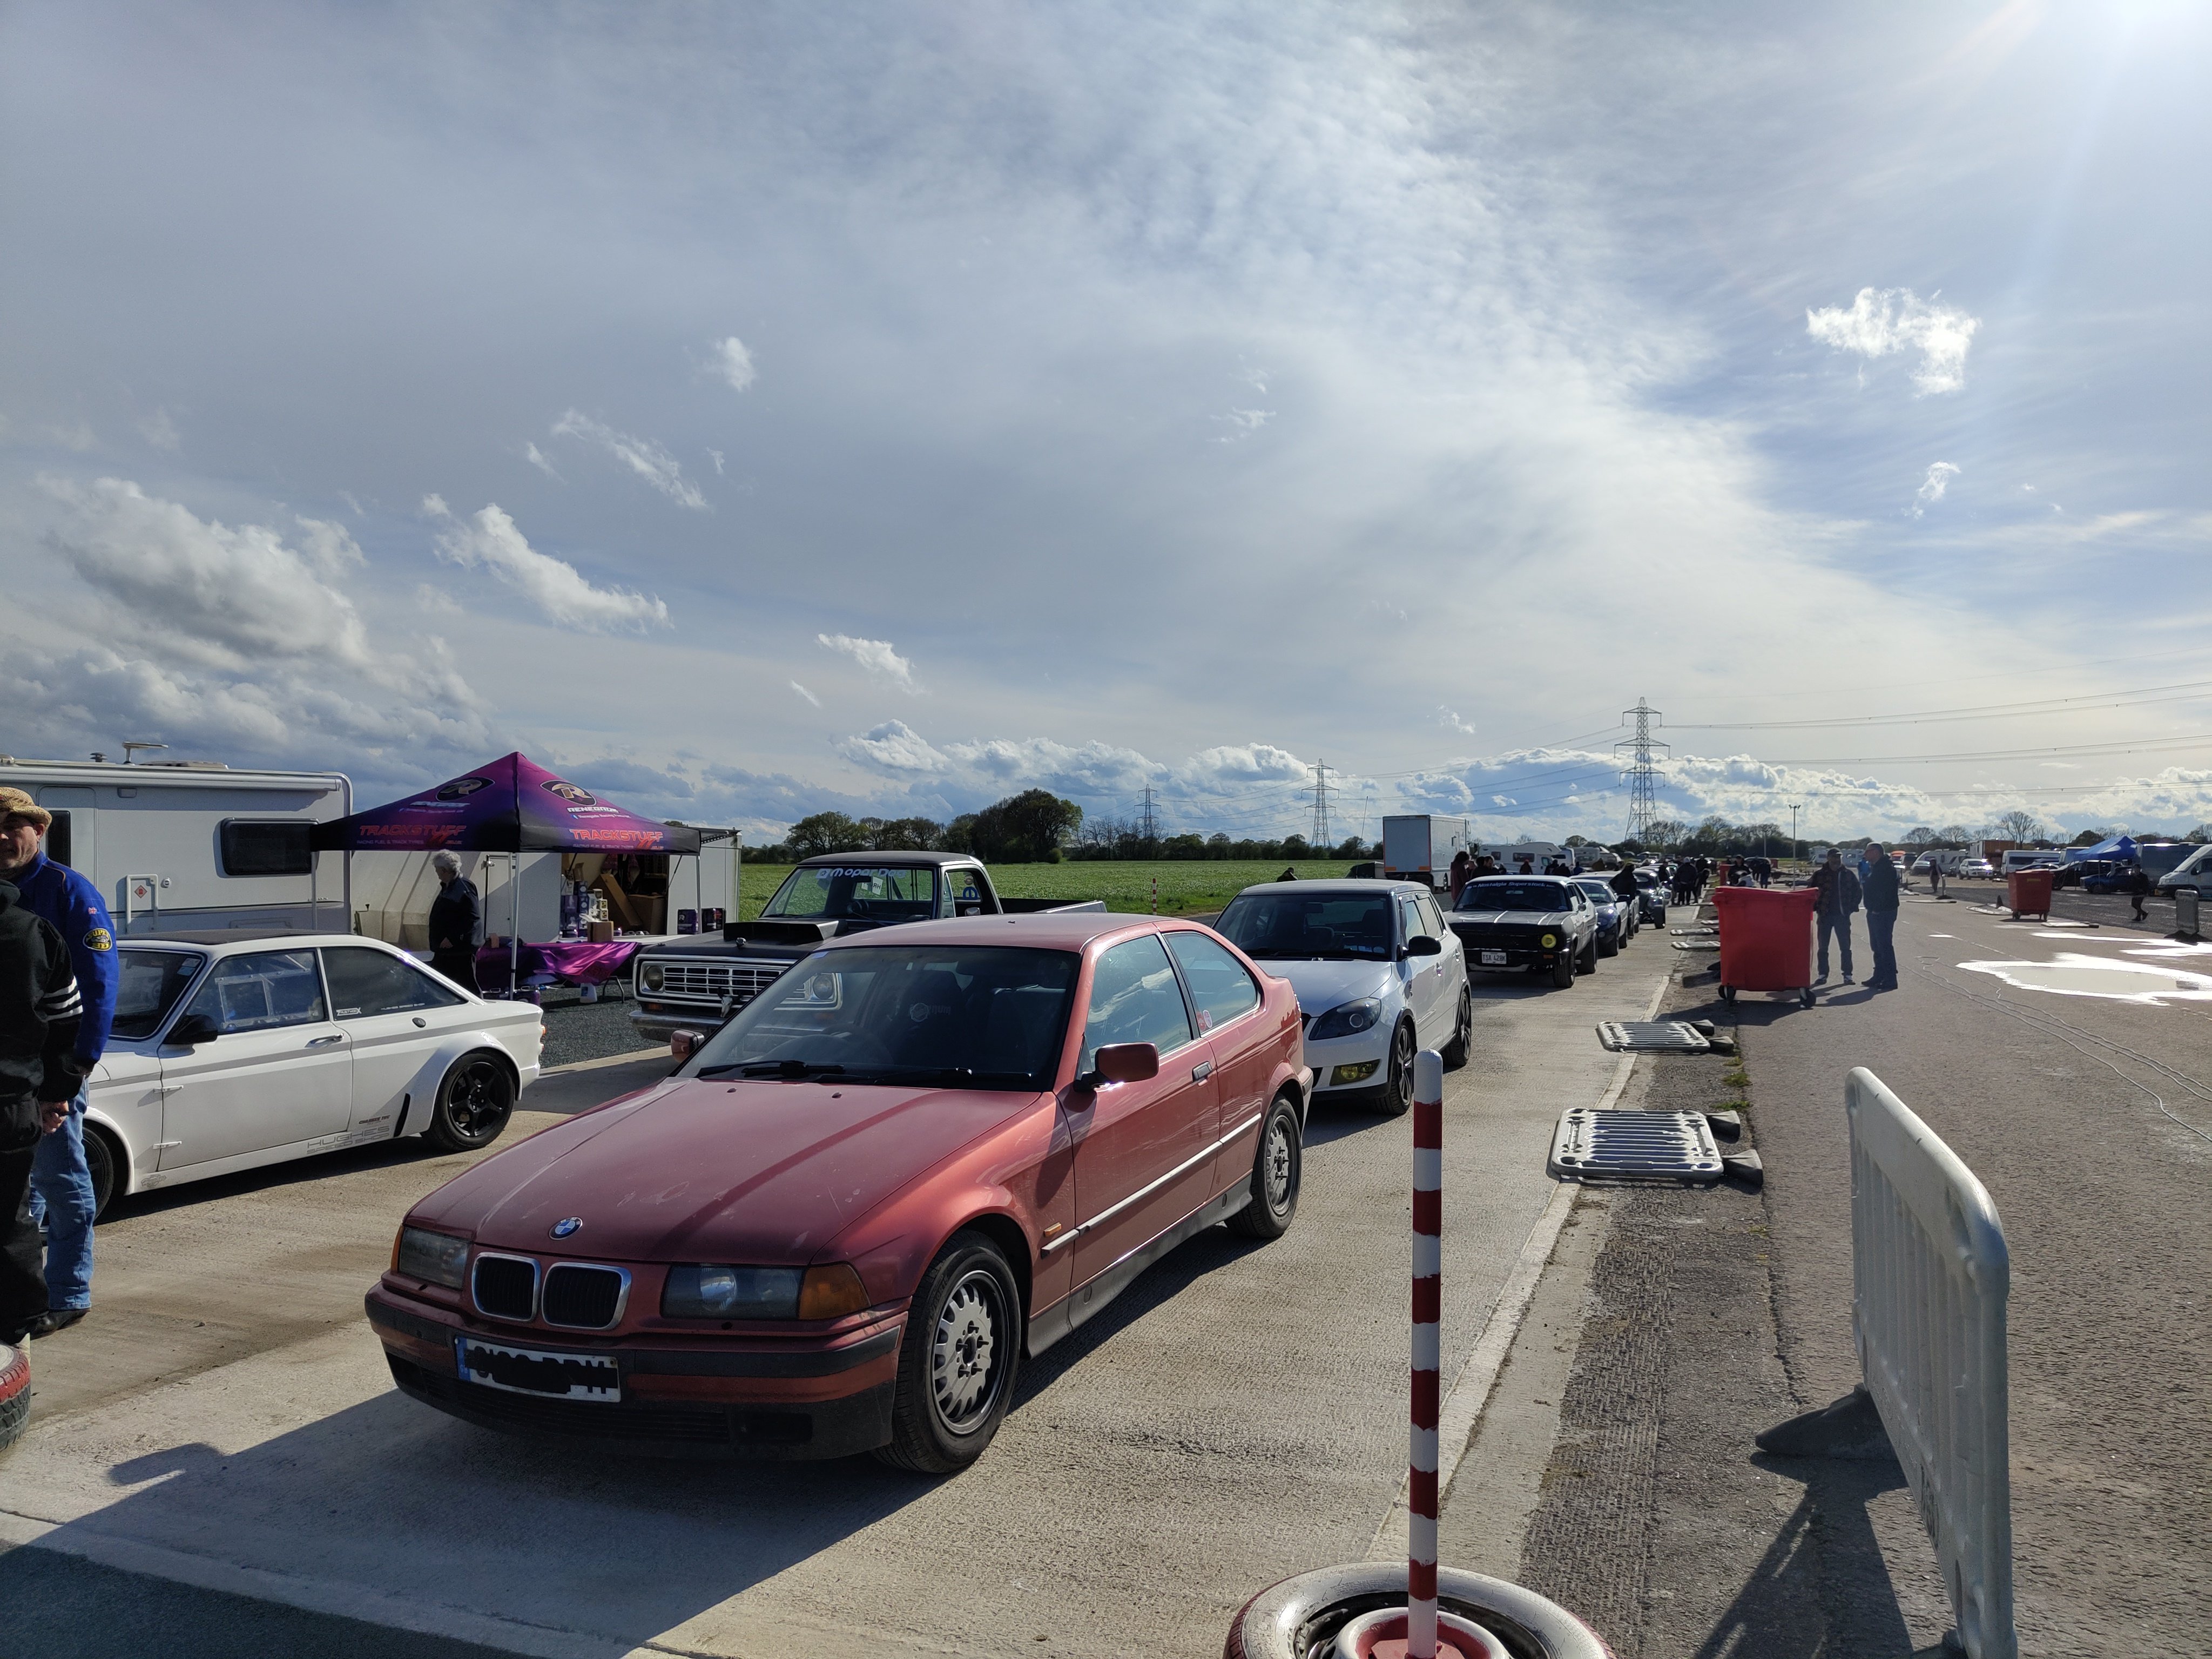
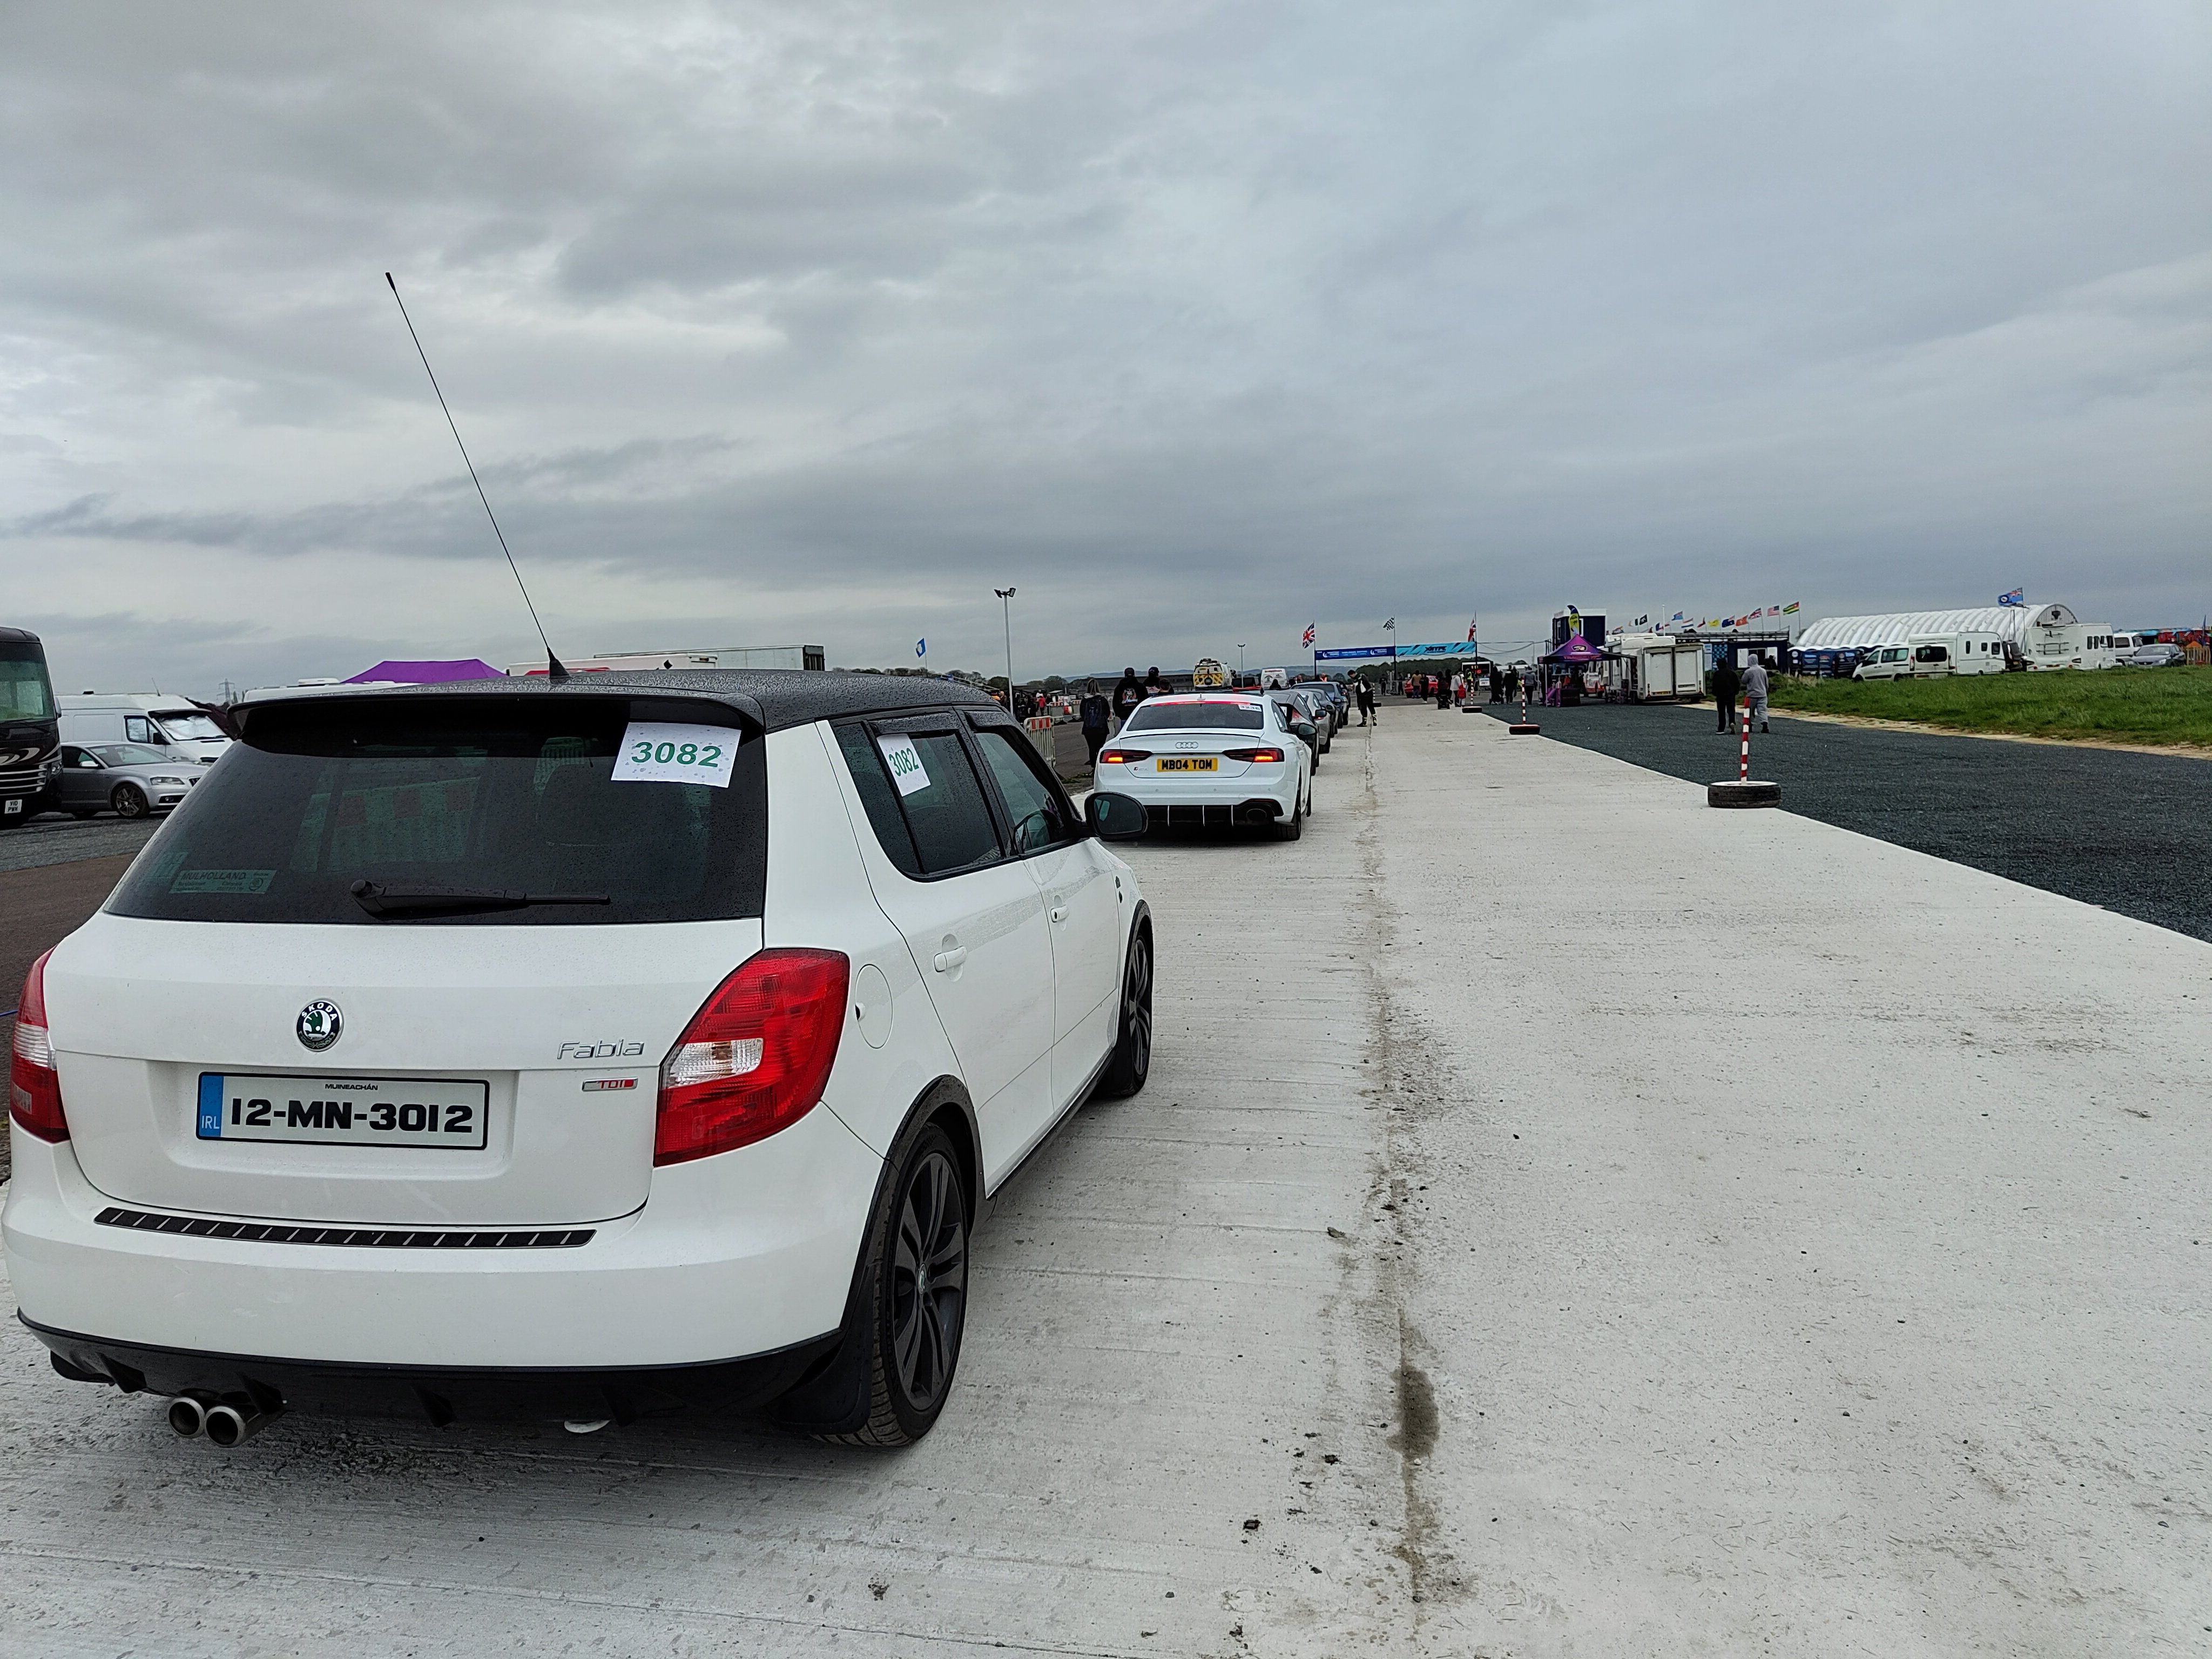
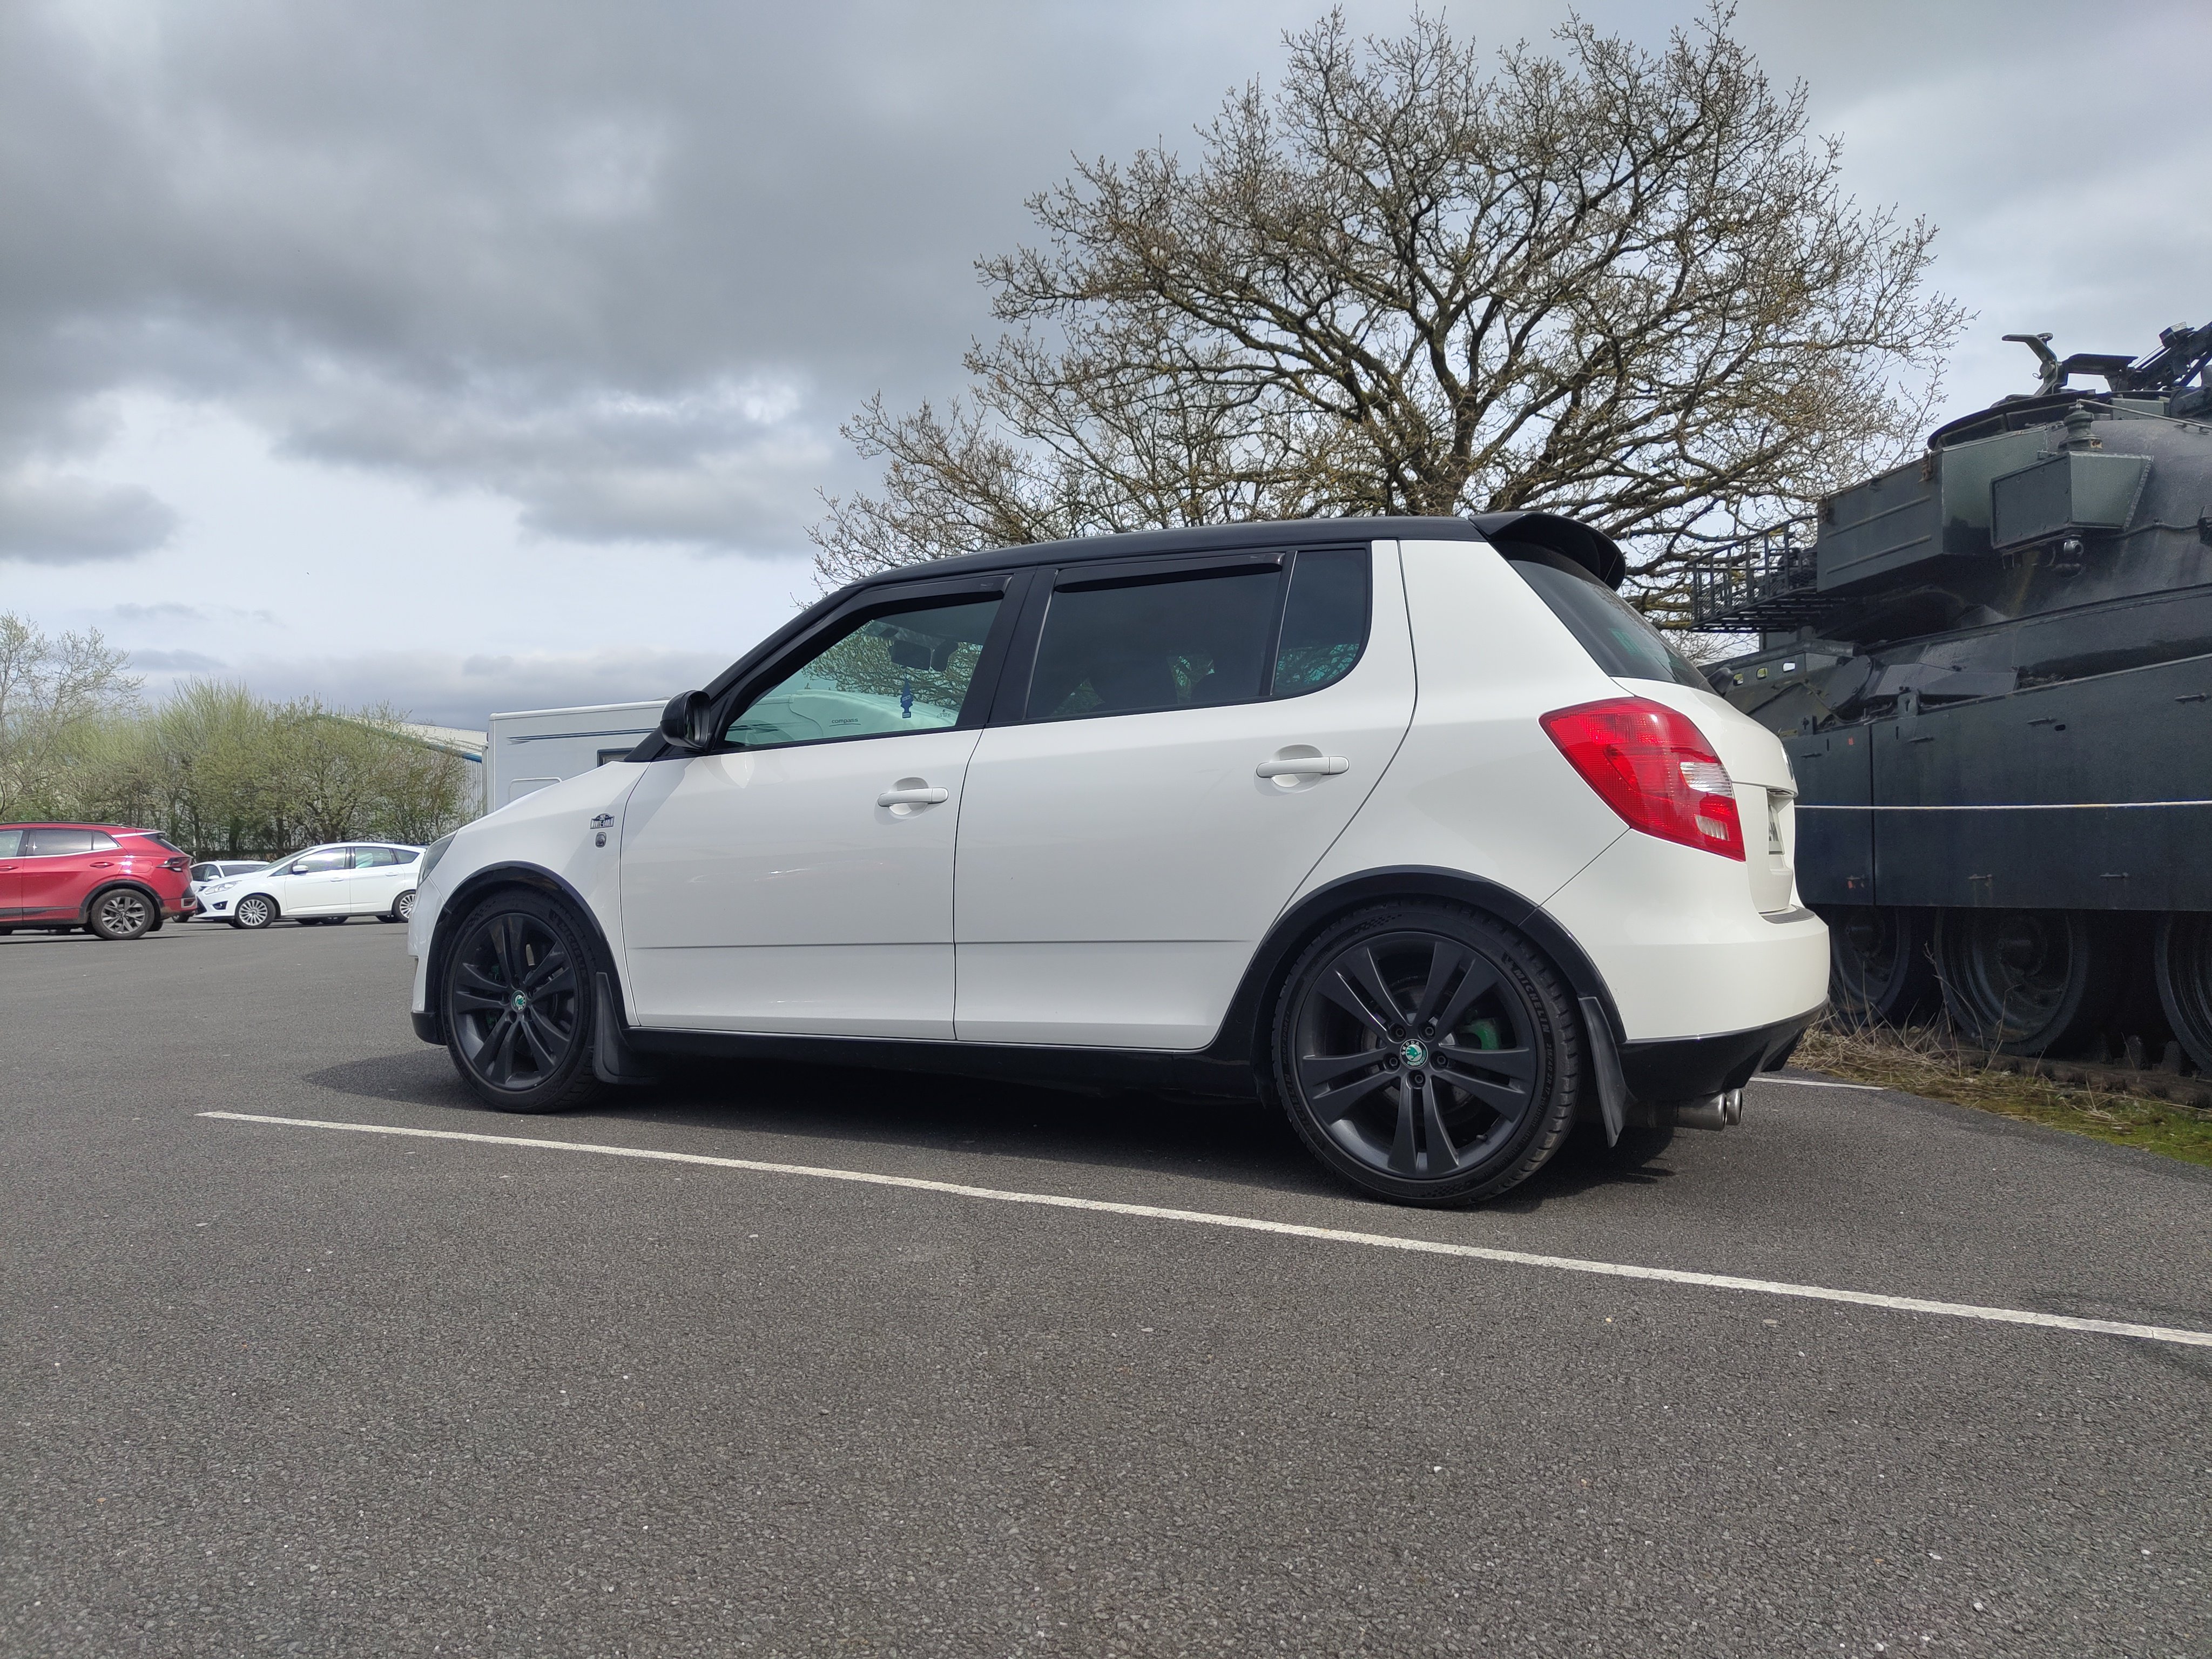
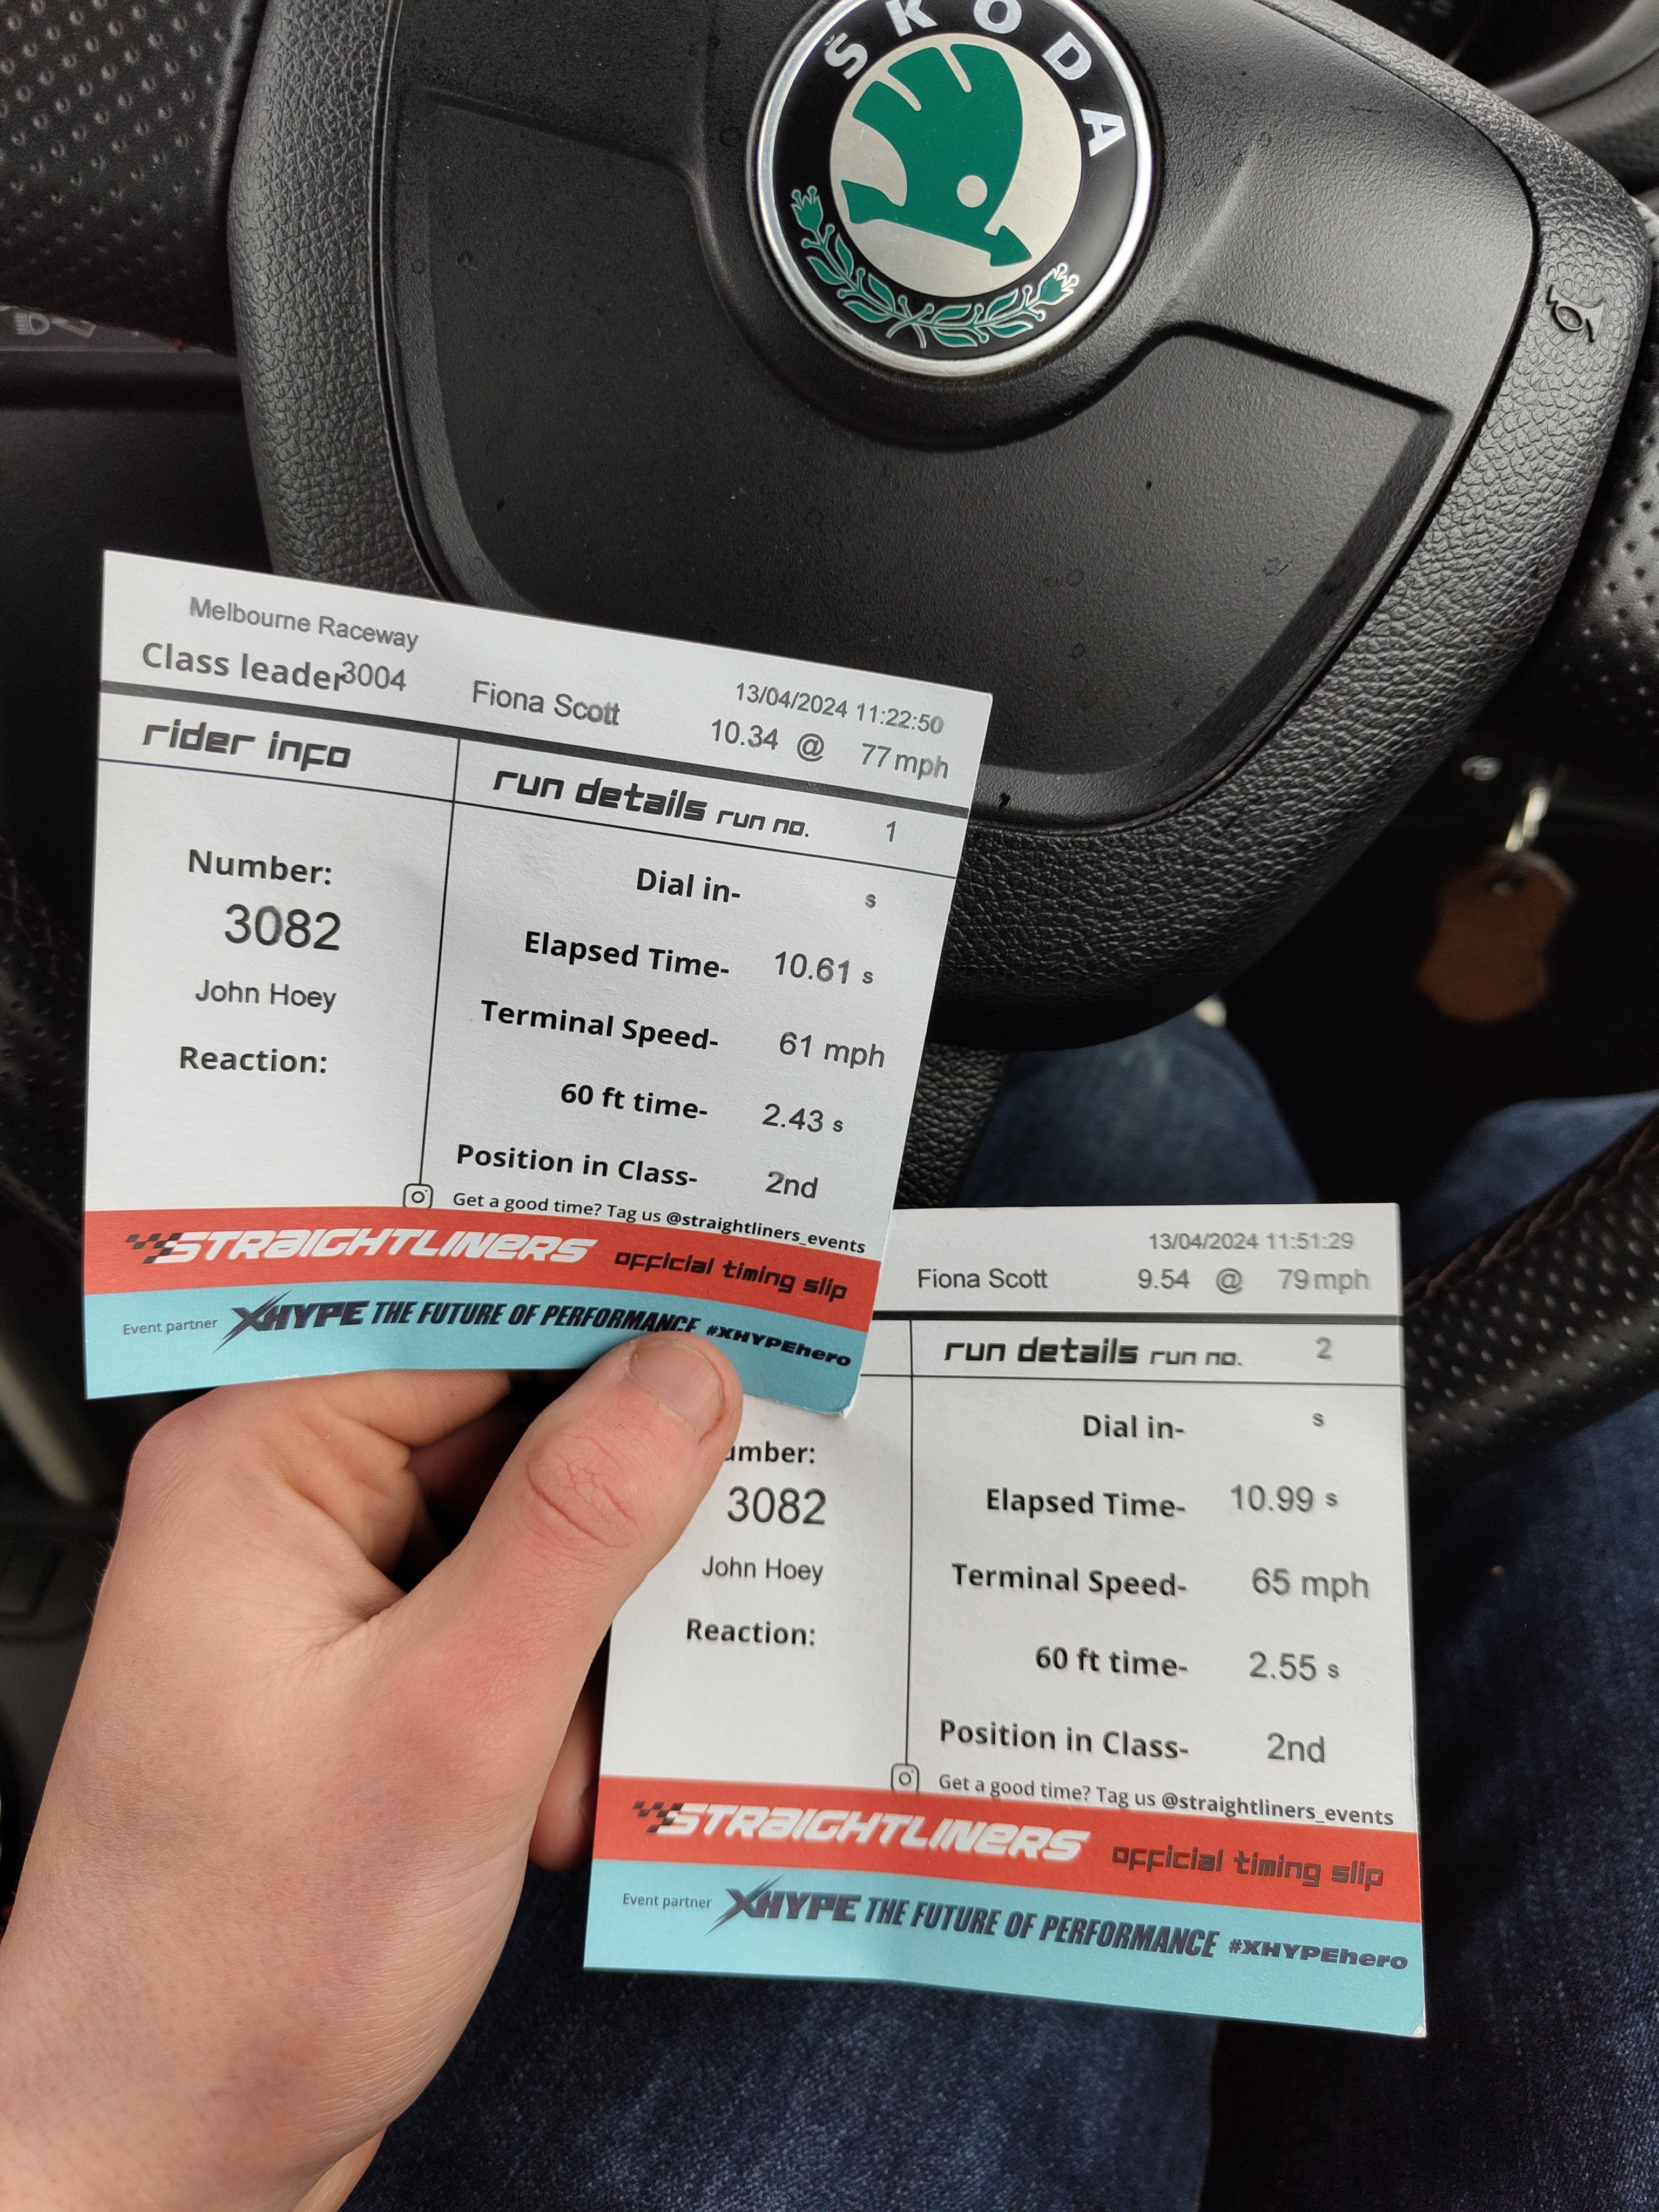
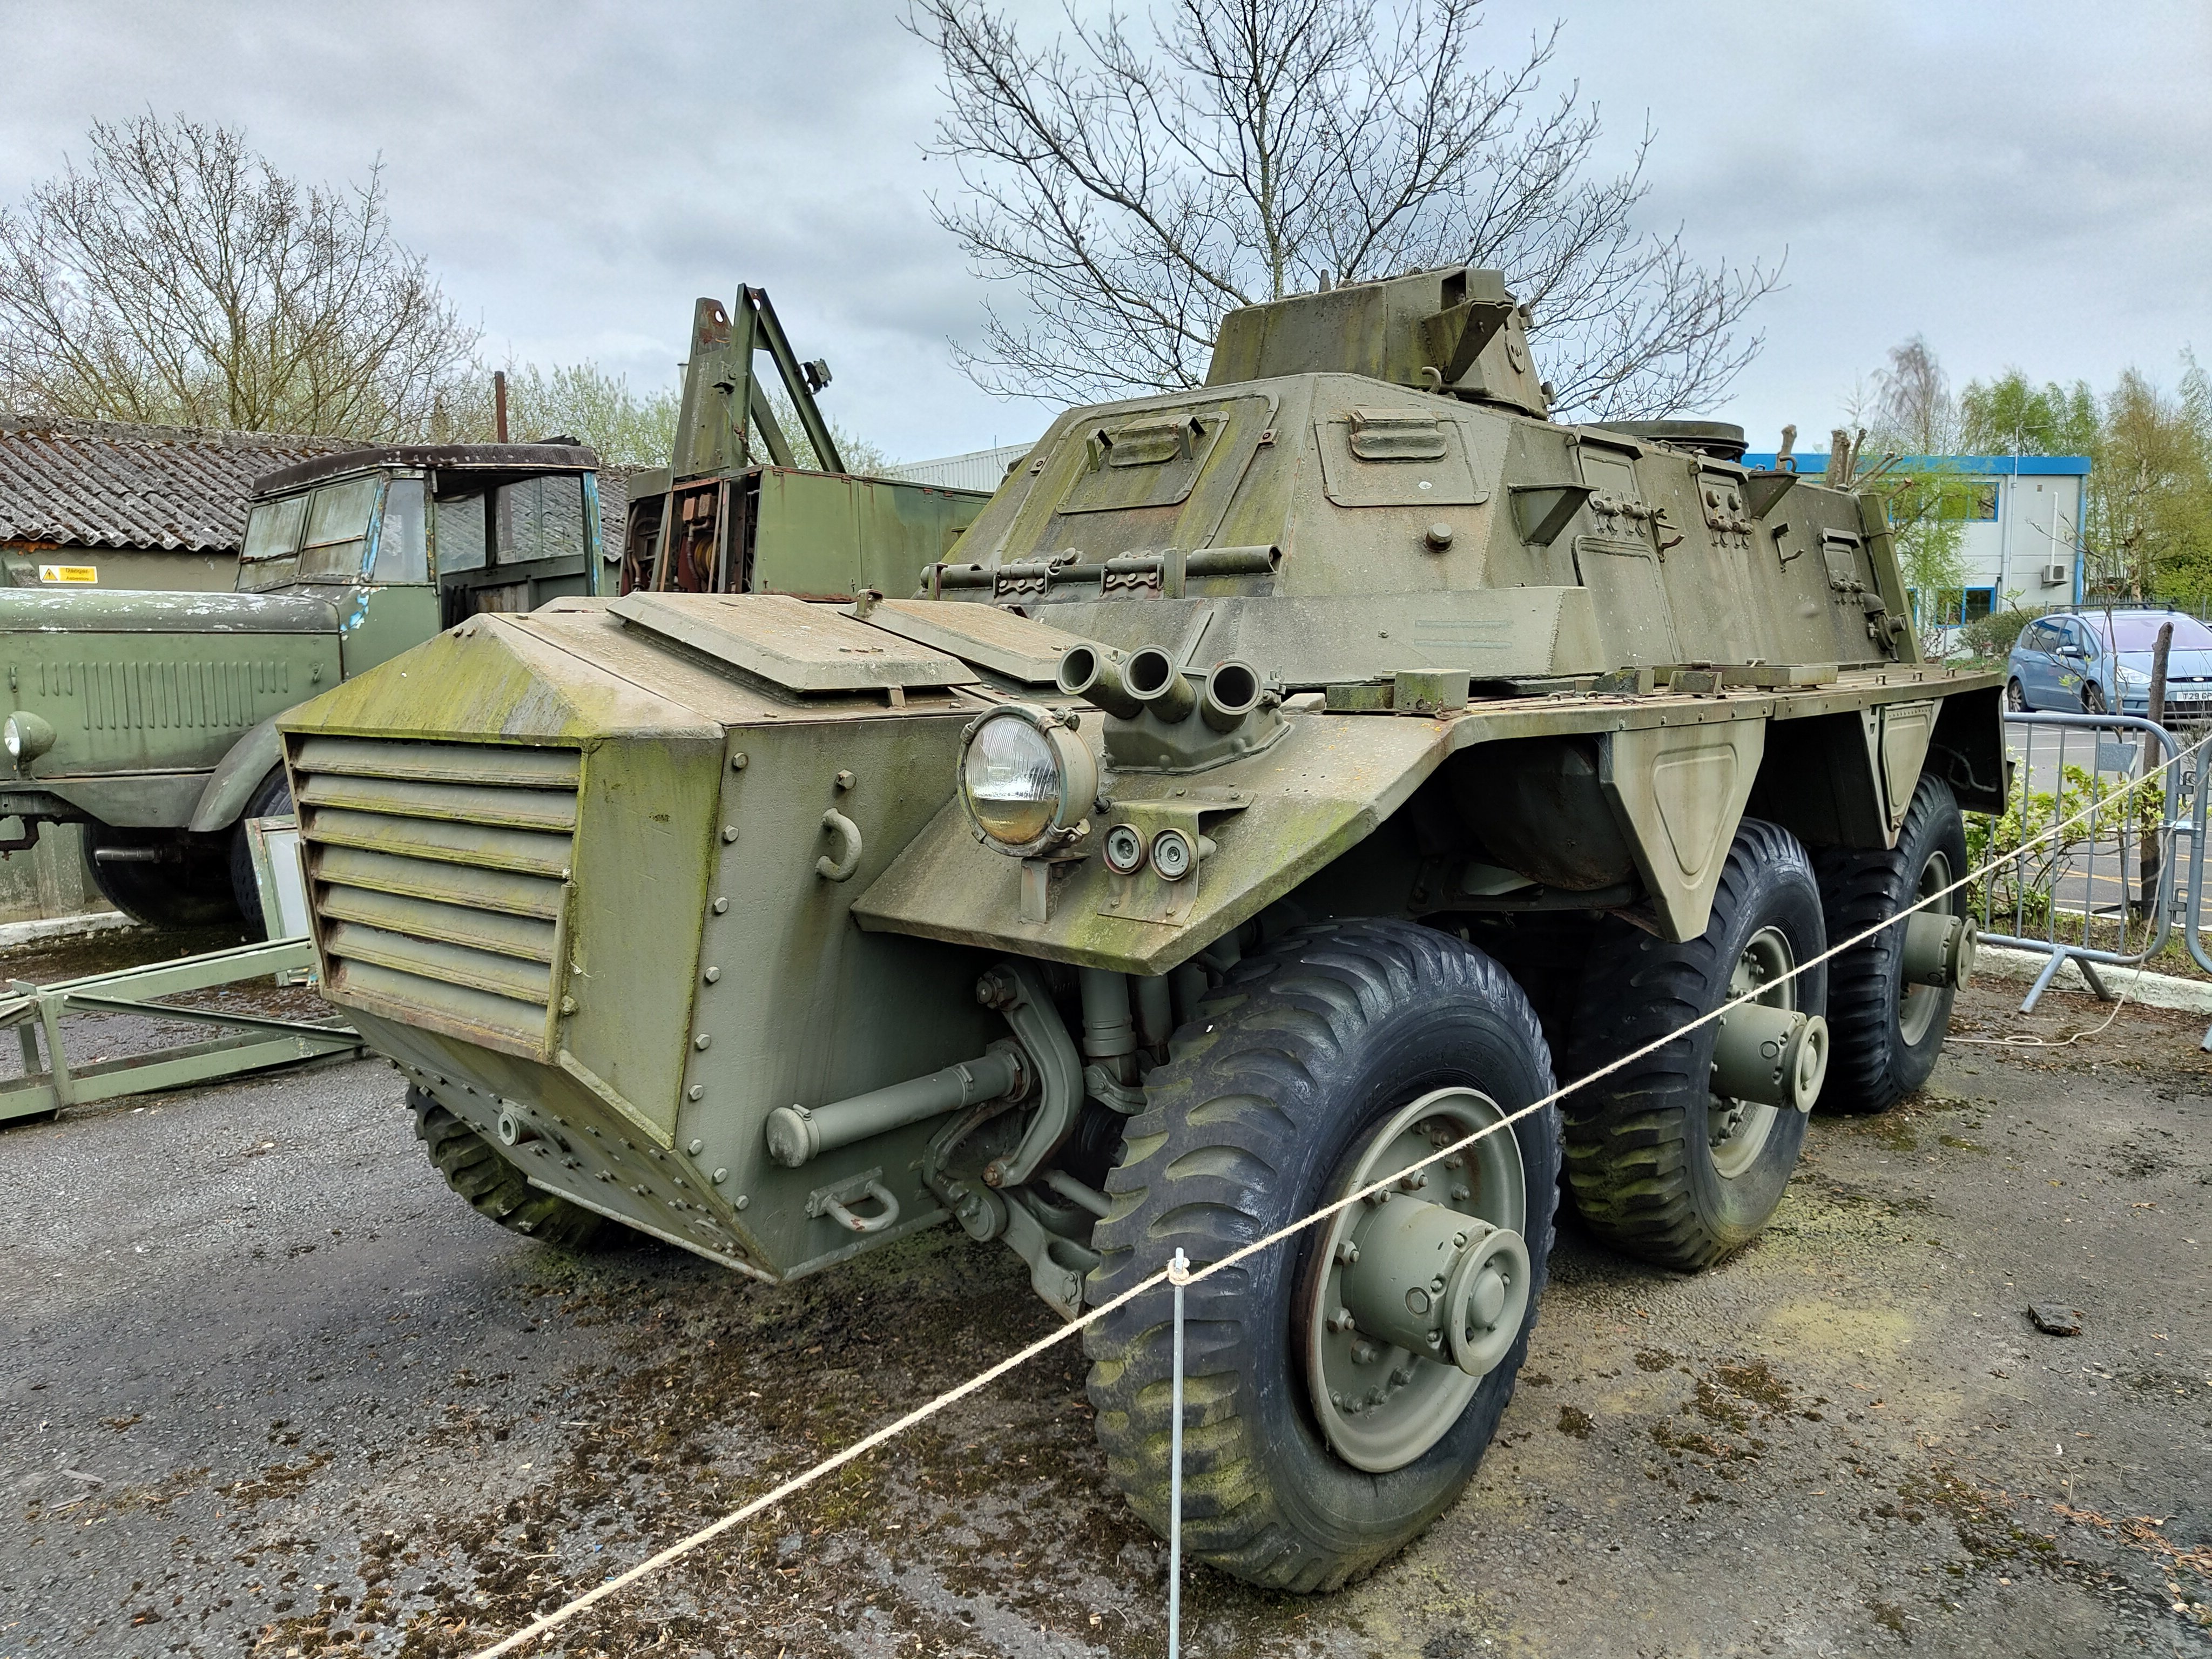
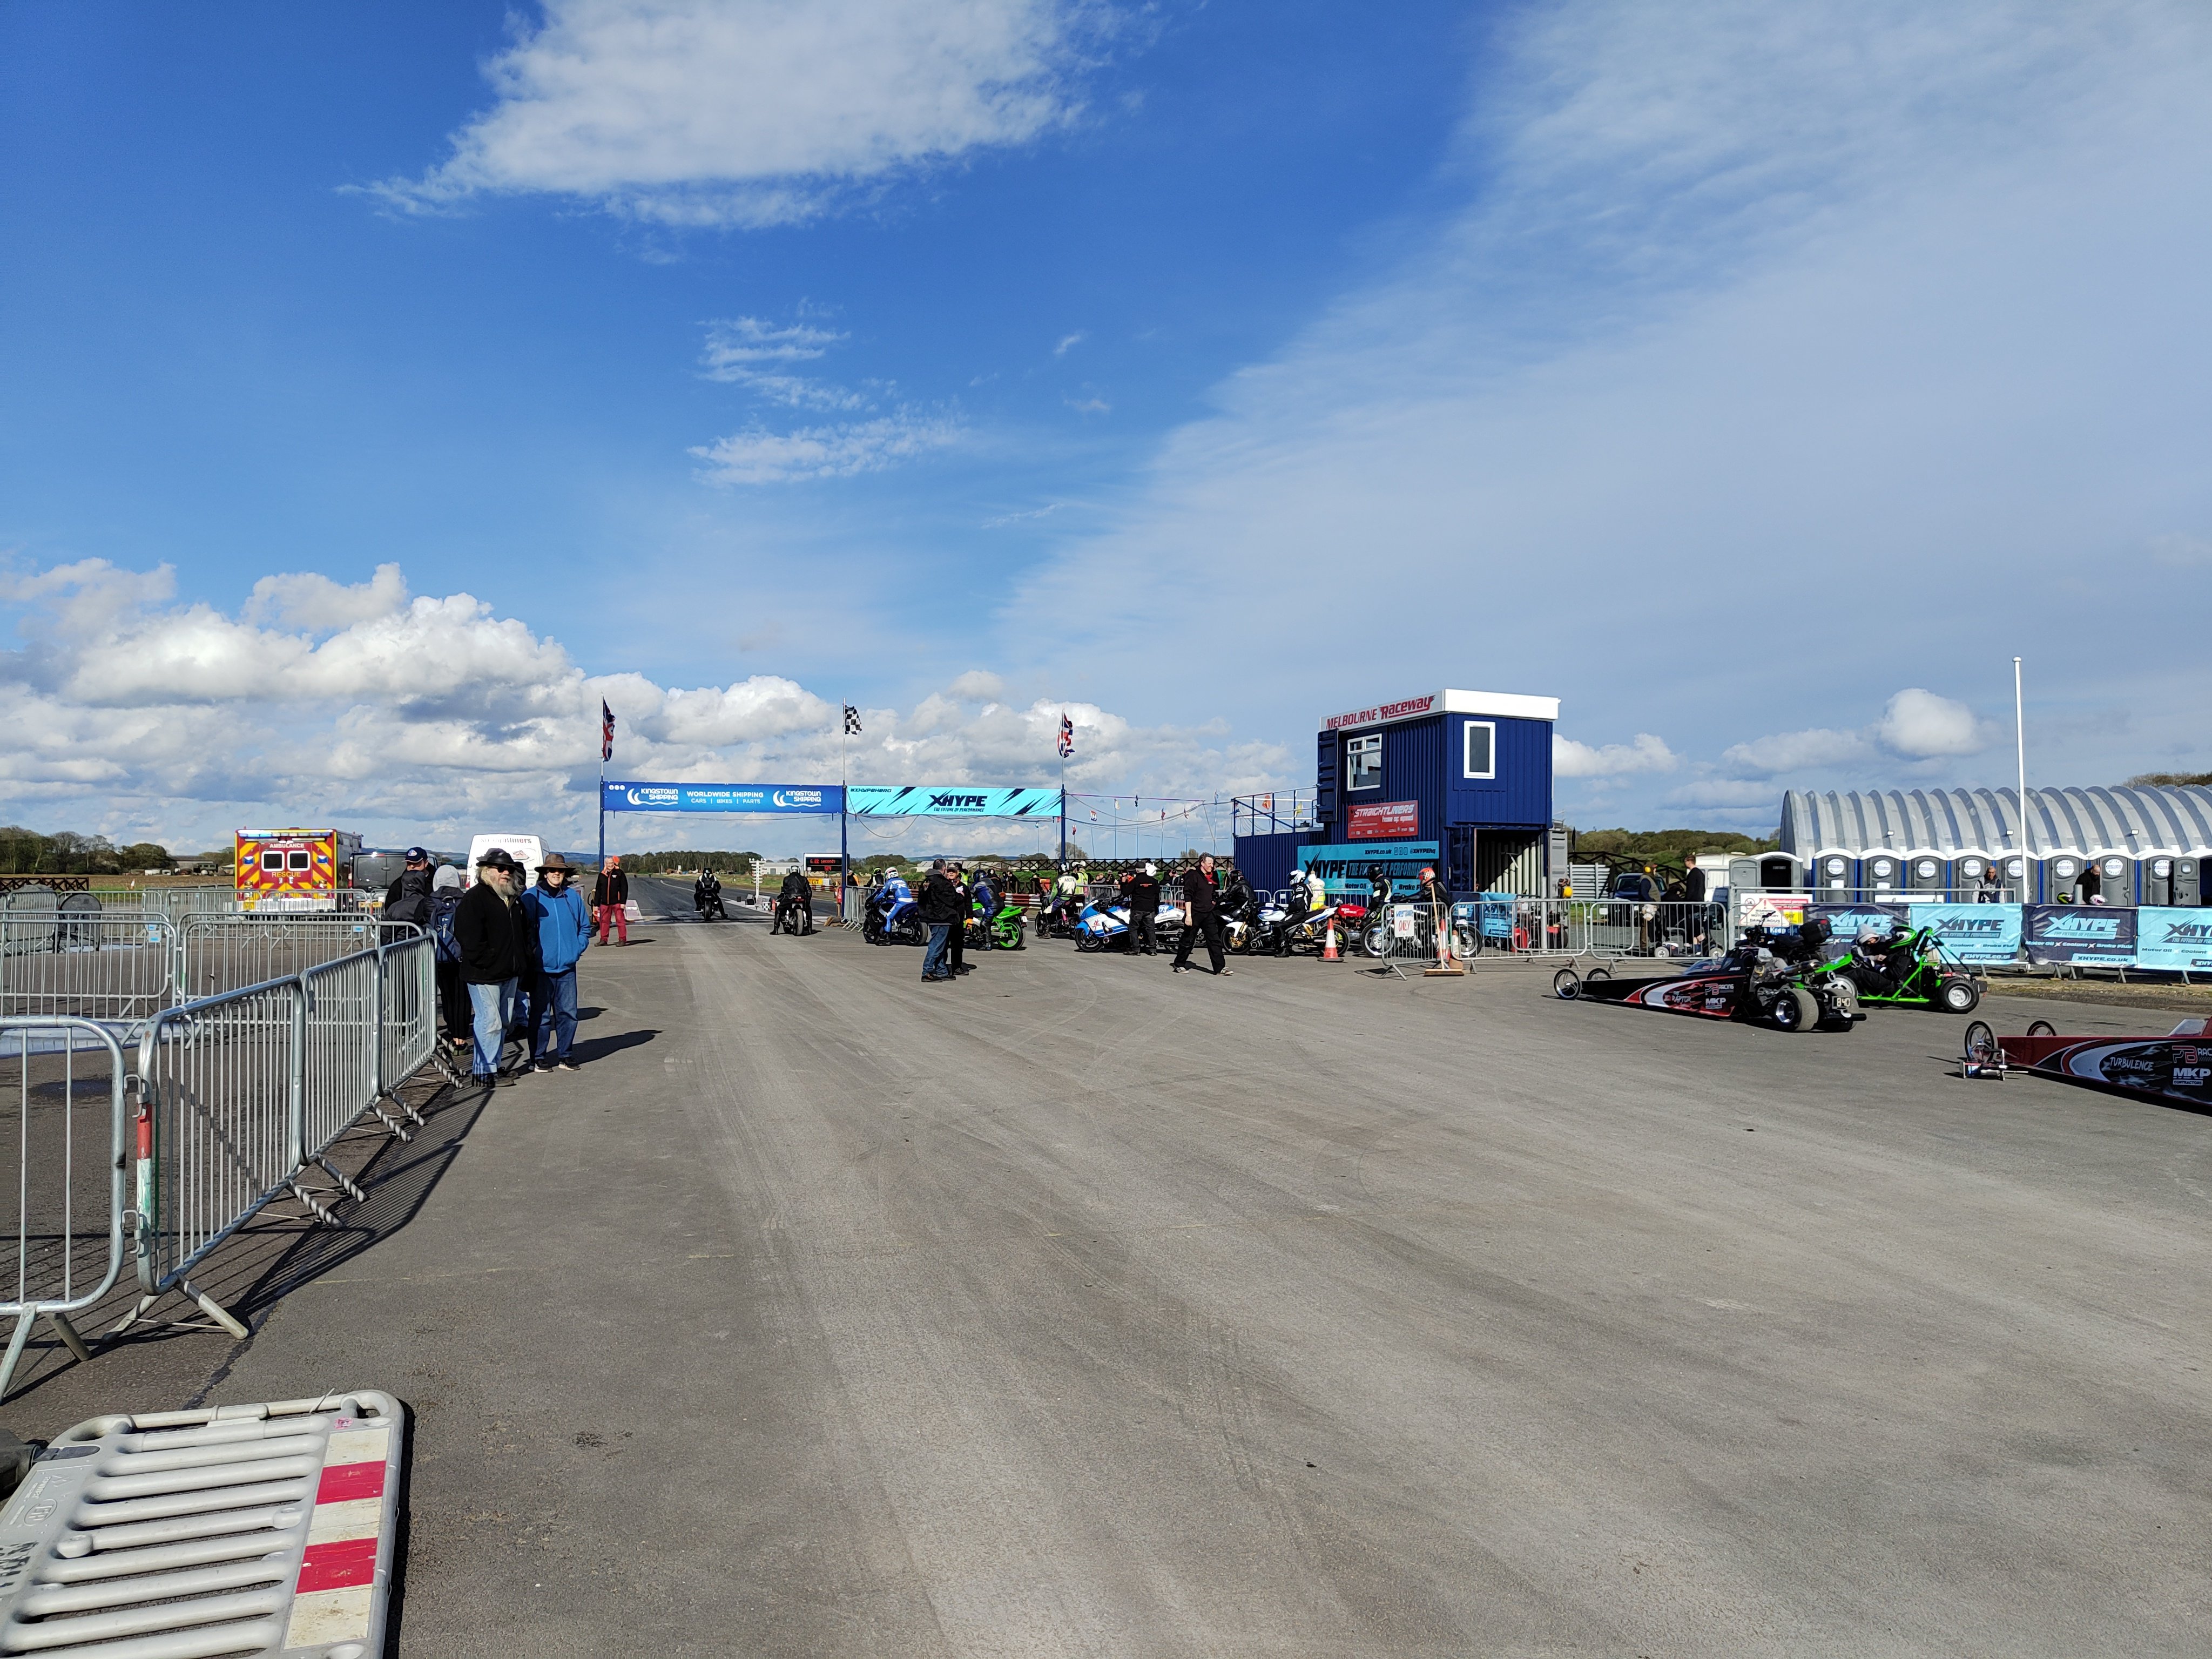
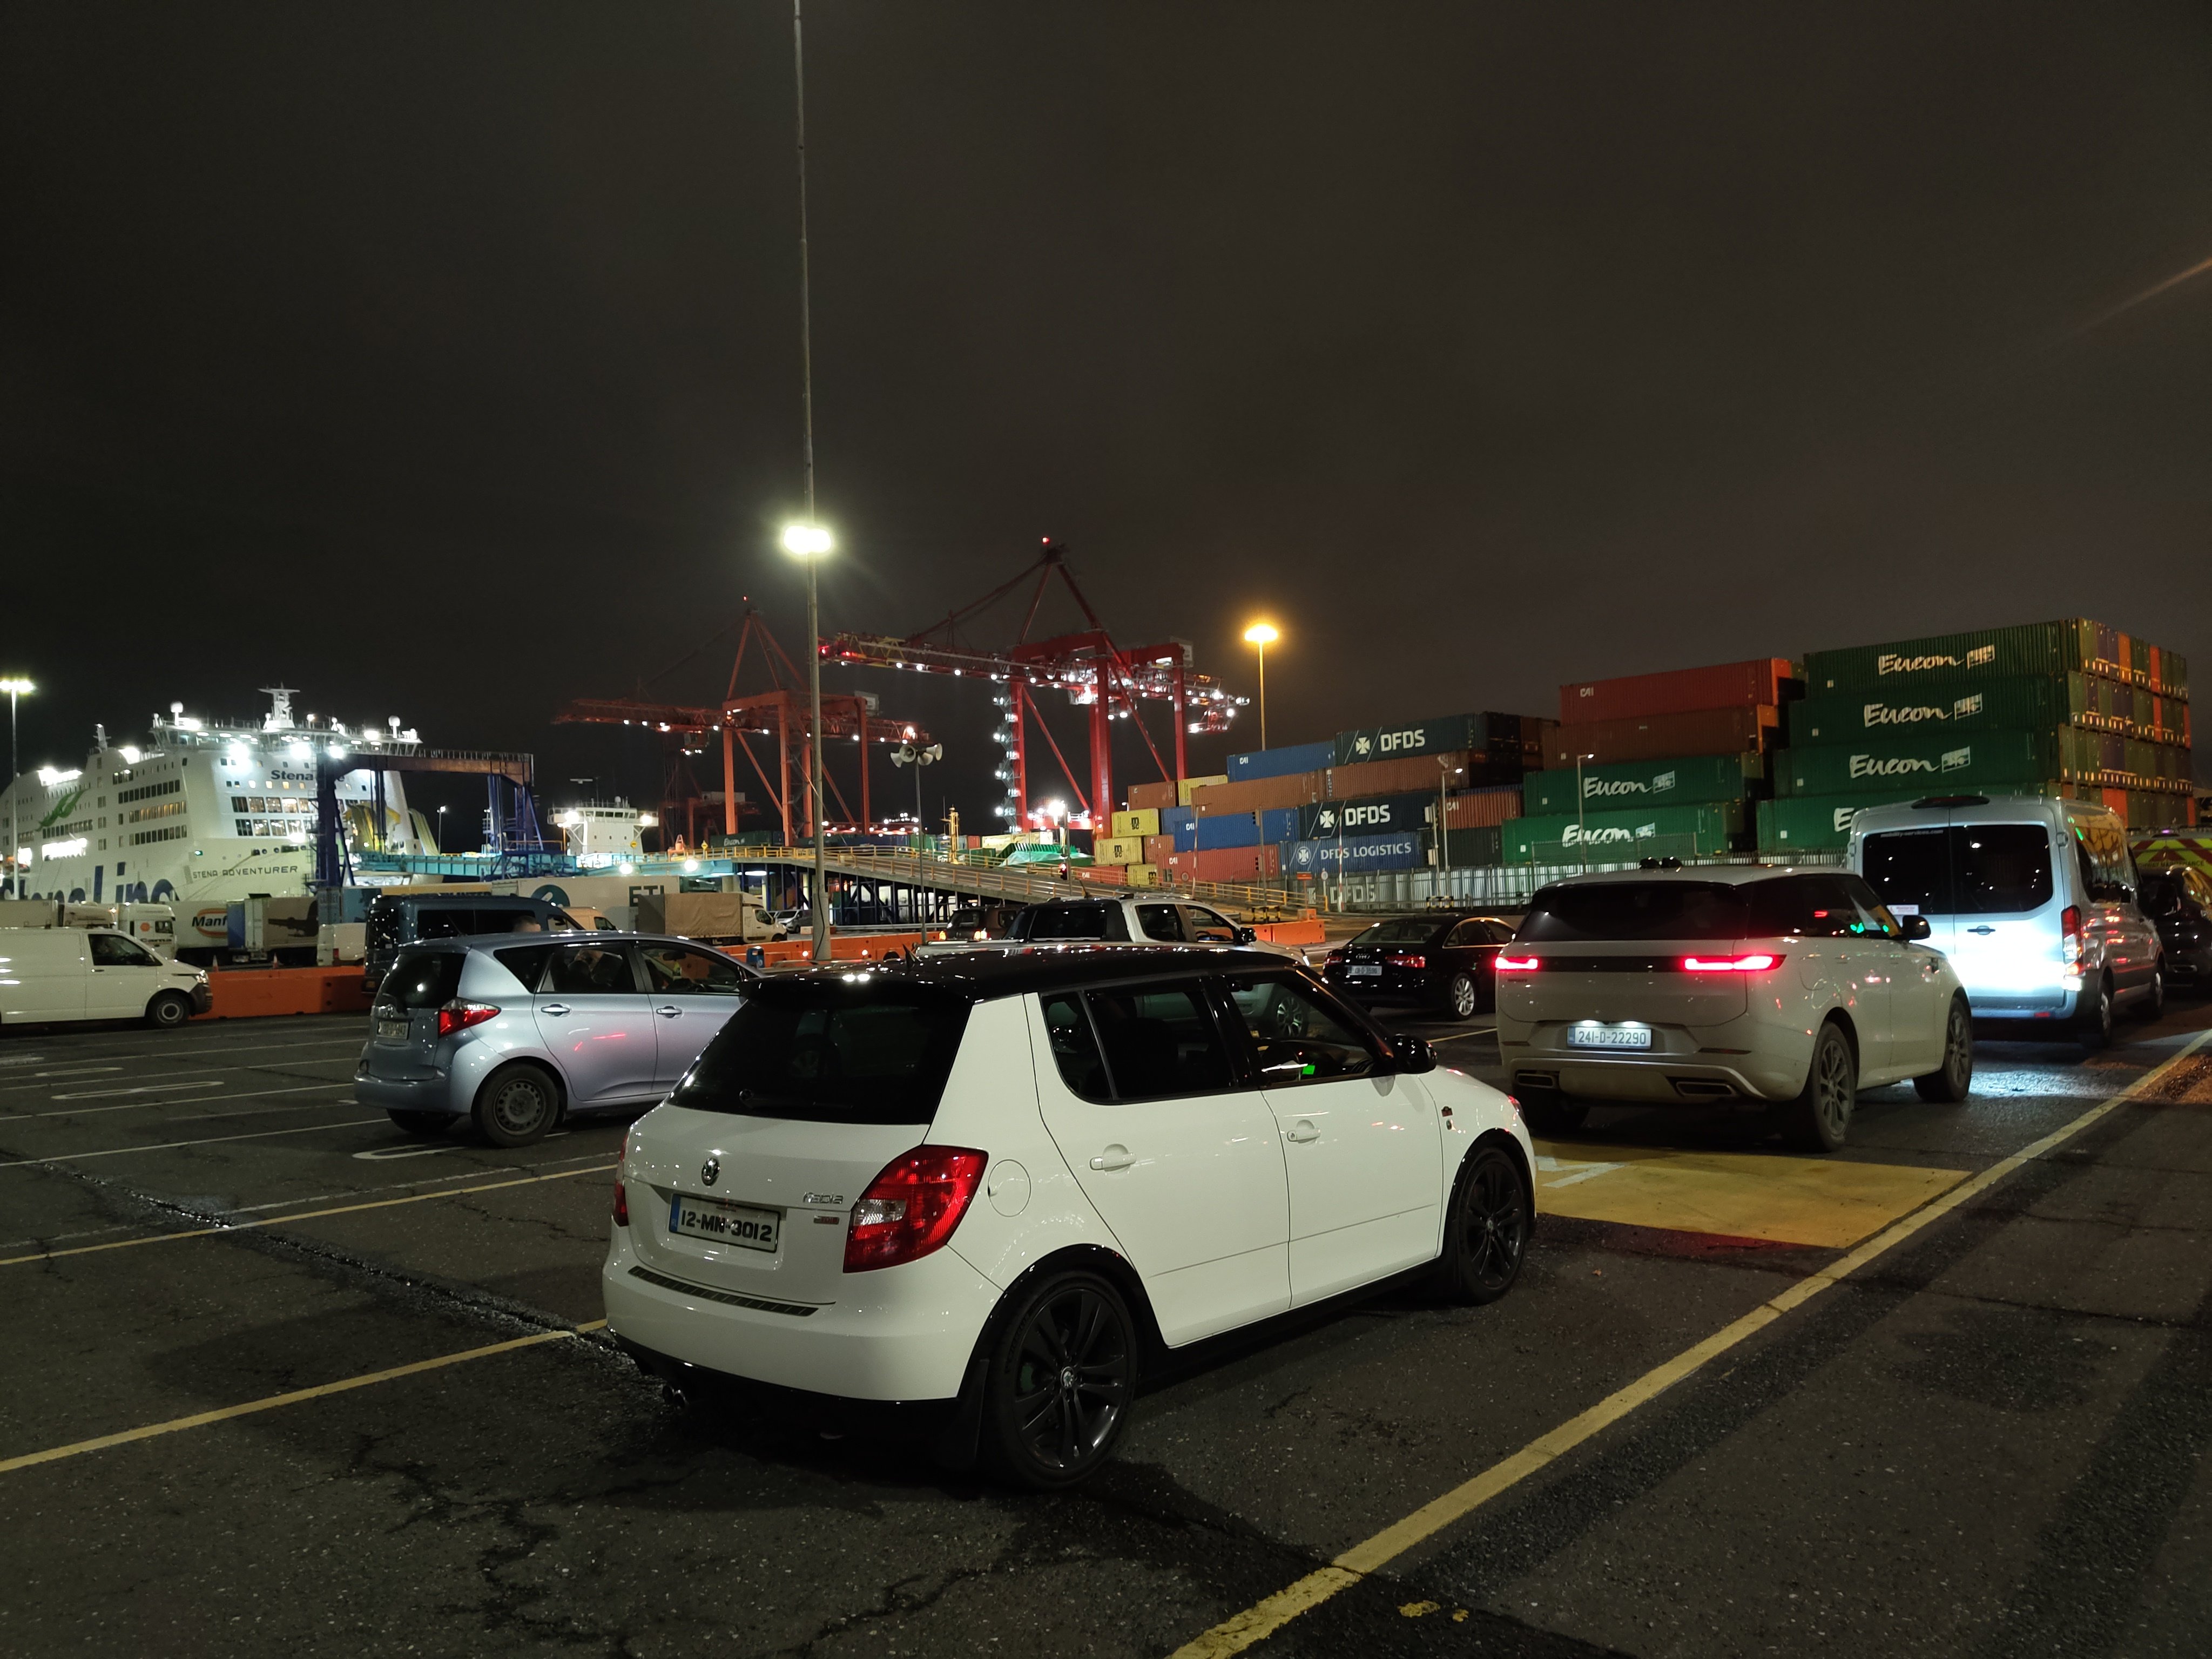
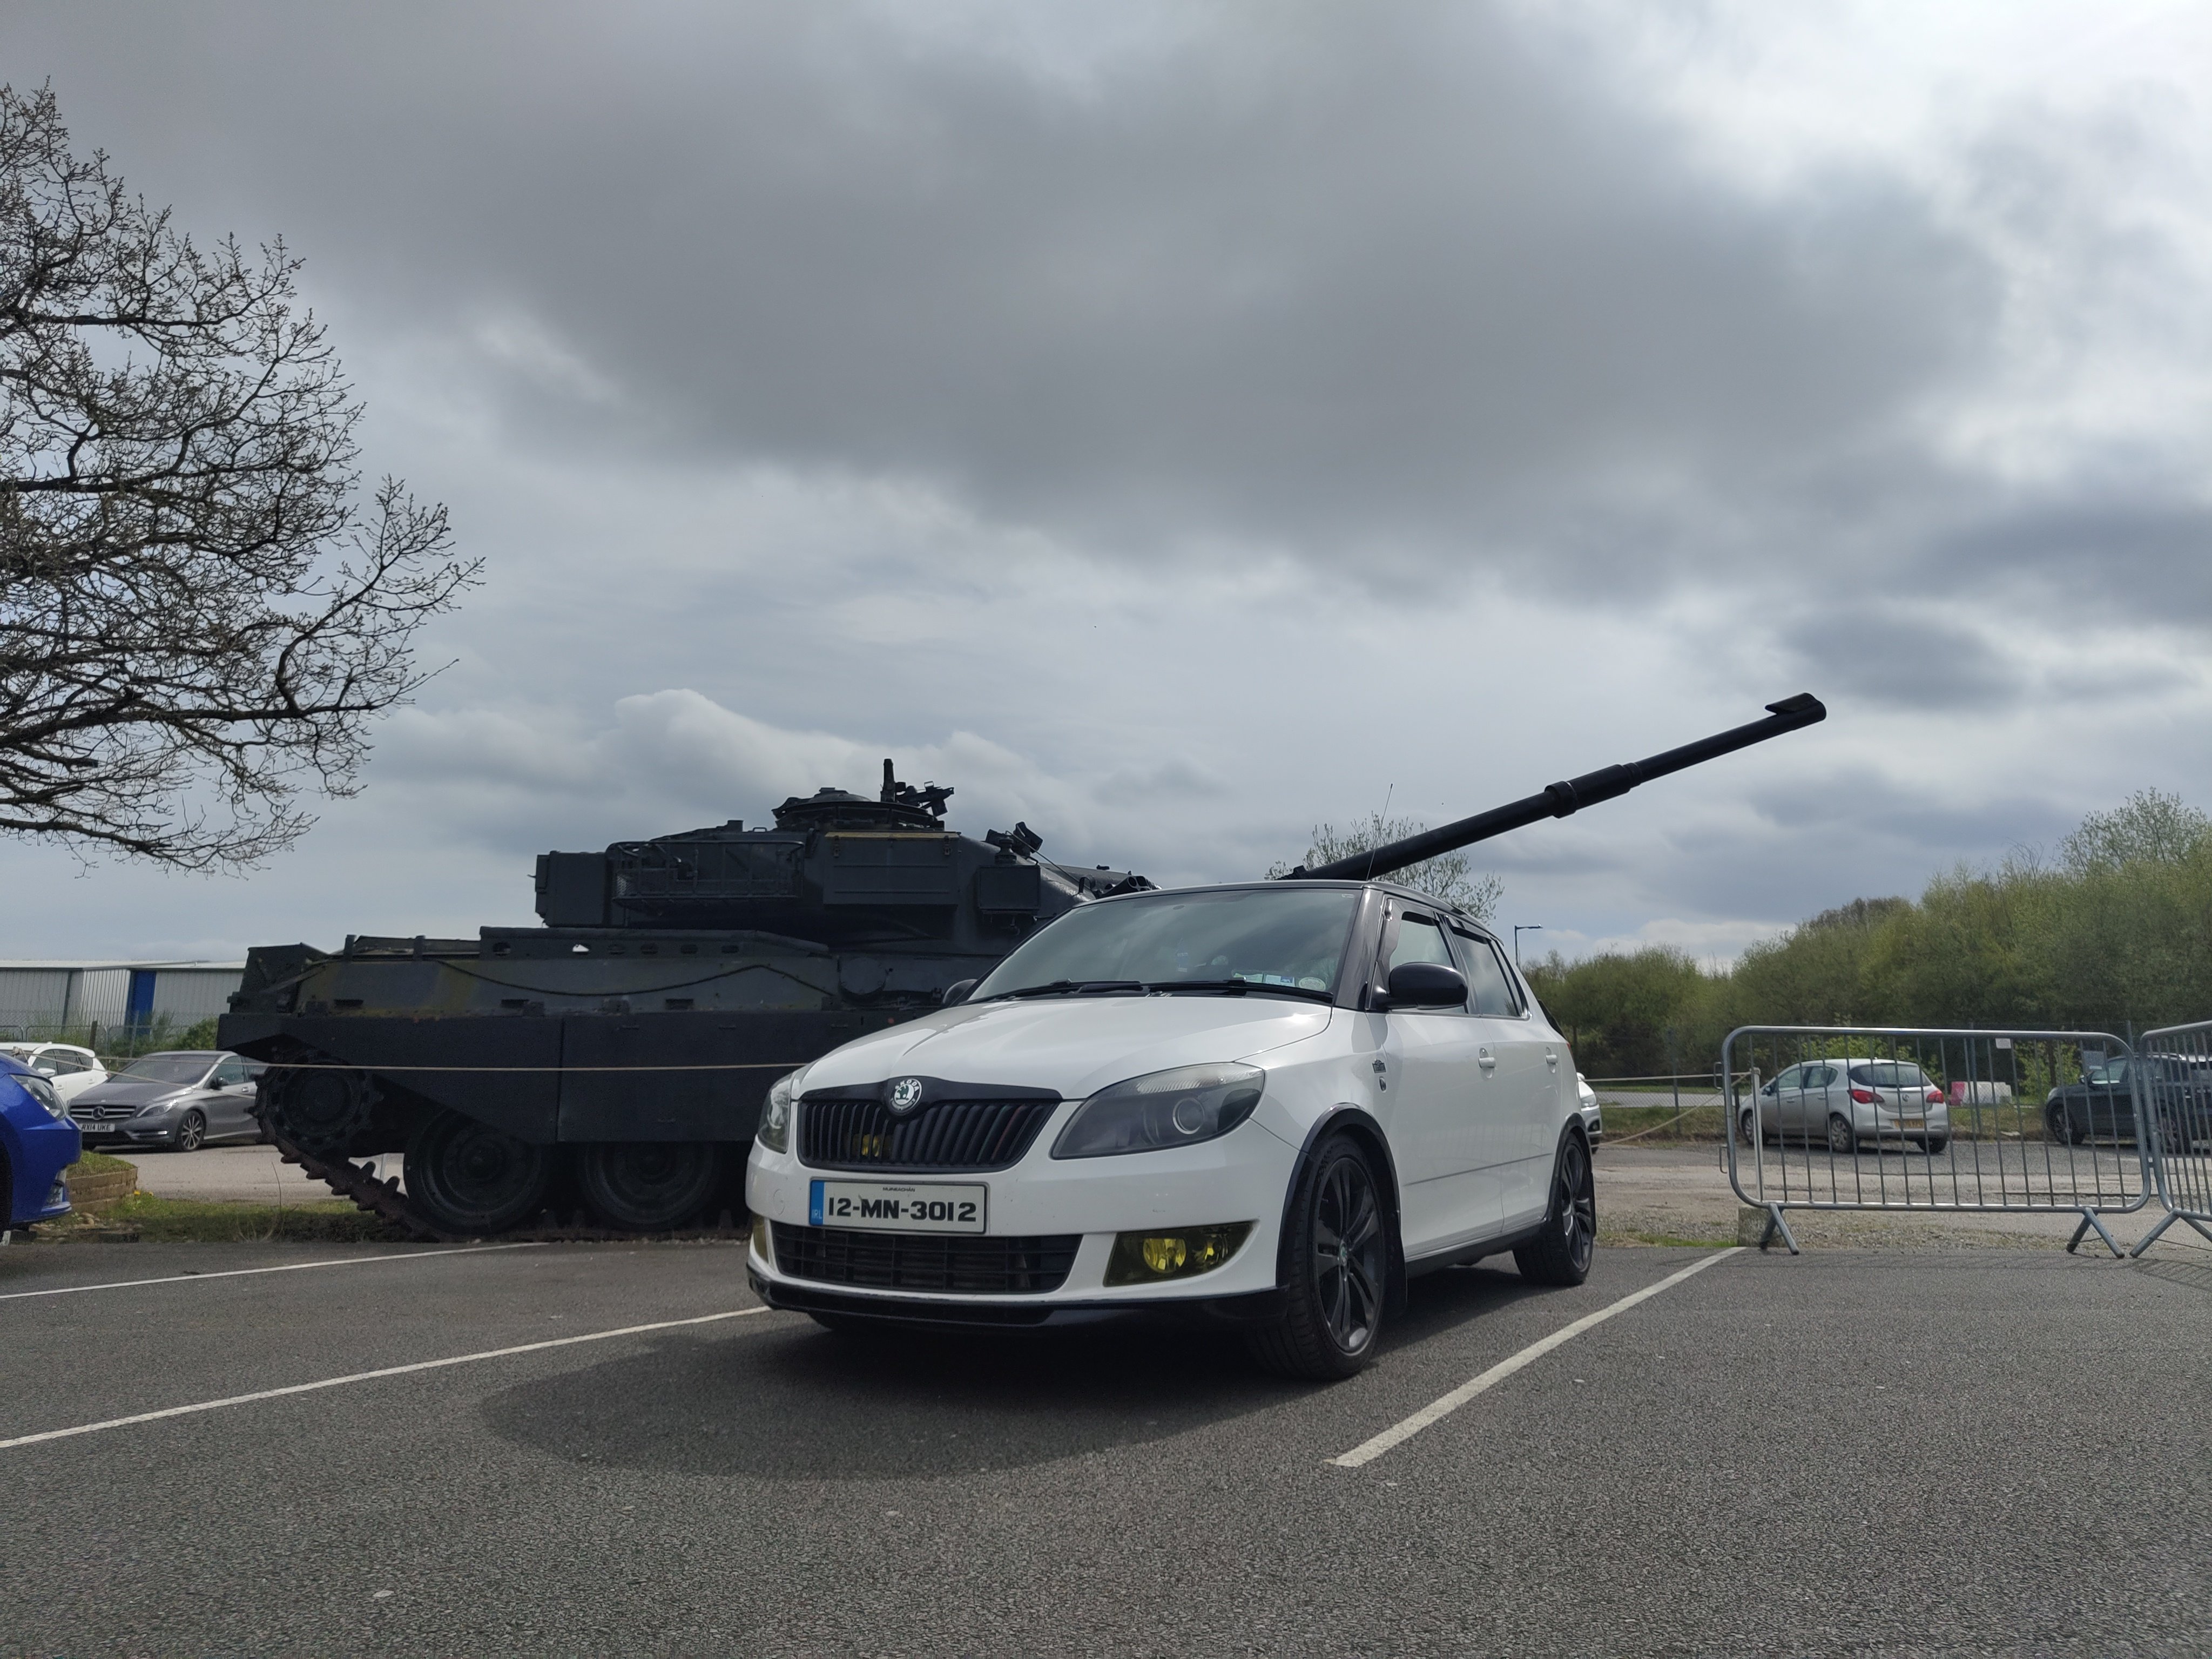
Another Trip to the UK Went to Melbourne for straight liners. Not a terrible run, mostly straight shot on the motorway so fairly little trouble. Got there VERY early so hung around York for a bit and then went to the air museum nearby. Even loaded with stuff it sat fairly well. Ended up sleeping in it, didn't bother taking a tent. Was a fantastic place, they even had a Saracen Did a few runs on Saturday And set some mediocre times. Soft limiter stopped me revving high enough so kept bogging off the line. First run was fastest and kept getting slower as the day went on. Exhaust would start rattling every time I finished a run and would stopped when I pushed it. Help from a friend bending the rearmost bracket solved most of it. Fastest time was a 10.61, slowest being 10.99 and the rest of the day was struggling in the 10.8s. Amazingly original clutch took it fine, aside from injector tick it ran fine the whole time too. Car drove very nicely over and back with the new suspension, even got 60 mpg on the way over. Pretty good weekend in all, definitely going again. Injector tick is getting worse and worse but still driving fine. It will need changed when it goes.
1 point
-
Hi all ! I've changed the brake fluid on my Superb Mk3 few weeks ago. I fumbled a bit, but the maintenance manual found on cardiagn.com helped me a lot! Requested parts : - 1,5 to 2l of DOT4 brake fluid. Don't forget to get ESP compliant one. - Break cleaning spray - Difficulty level: 2 - Operating time: 1h or may be much more... (see below... ) - Number of operators: 1 - Required tools: ¤ A bleeder kit, including container for used brake fluid. ¤ A syringe (brake fluid resistant) ¤ A wrench of 11 ¤ Torque wrench and socket of 11 ¤ Jack ¤ Cloths ¤ Multigrip pliers ¤ A small torch. Possibly 50 cm of aluminum foil + masking tape ... (you will understand below) Tools: I've bought the following brake fluid bleeder kit: It can be found under different names of resellers and on different well known online shopping sites for ~ 55 to 60 €. A little tip, when making the choice, look at the opinions of buyers, because there are several diameters (even if there is a standard for European vehicles). For the one I chose, there were a few previous buyers who had used it on VAG vehicles. A good guarantee to avoid any bad surprises... A very simple and useful improvement before starting: make graduations on the used fluid container: A graduated beaker, an indelible marker and a strip of scotch tape (to mitigate risk of erasing by rubbing (Skoda... Simply clever! )). Well... I may drink half of pint or a soda can from time to time, but assess 20 or 30cl just in a glance, is way over what I'm able to do... or ... I should drink more often ... Well, here at least , one knows how much fluid comes out ! I did the same thing on the bleeder tank, to be able to asses the remaining quantity before I start flushing the last caliper: It prevents any air from entering the brake fluid tank . Otherwise, you may need to repeat the process on this caliper. Dealing the syringe, I've bought this one for ~20-25€ (also on a well know shopping website) : 1st Step: Preparation. First, check that the dip tube in the bleeder tank is correctly set and goes deep enough to the bottom to avoid any risk of defusing the system. The bleeder tank must then be filled with 1.5 to 2l of brake fluid. If you fill it with only 1.5l, place the tank so that the dip tube is really at the low point (not obvious in the engine bay, that it is perfectly horizontal, especially if you remove the wheels and use a jack) Keep the new brake fluid cans, once you've poured the brake fluid into the bleeder tank. You'll need them to collect the old brake fluid to bring it to a recycling center. Once here, start pumping to pressurize the bleeder system (still NOT connected to the brake fluid tank of the car) I've set the pressure ~ 1.2-1.4 bar. This is more than sufficient, even if the system is can be set up to 4 bar. Anyway, above 1.2 bar, pumping starts getting a little harder. Wait for ~30s and check there's no leaking. The pressure shall remain steady. If any leak appears, just tighten the bleeder tank cap a little bit (use multigrip pliers if necessary). When there's no leak anymore, press the pressure relief valve to make the pressure drop down. Now you can remove the brake fluid tank cap. Remove some brake fluid using the syringe, until the level gets down to the lower part of the yellow strainer. Then put the adapter cap onto the tank and tighten it firmly (with your hand is enough. And that's a good point, given the poor accessibility ). You can now connect the hose to the adapter cap: Pressurize the system again and make sure that there is no leak around the adapter plug on the brake fluid tank. (no small bubble at the bottom of the adapter cap). 2nd Step: Flush the calipers The bleeding order is the usual one: 1 - Rear Right / 2 - Rear Left / 3 - Front Right / 4 - Front Left. Considering it was the first time I flushed the brake fluid on a car, I rather removed the wheels for a better accessibility. But it should be feasible to do it without removing the wheels. In this case I would recommend to protect the alloy wheel with aluminium foil stuck with maksing tape (since very easy to remove). This is to avoid accidental damage on the rim paint. Therefore, without disassembly, we can estimate the required time to 1 hour. If you remove the 4 wheels, it is rather 2 hours. The bleeder screw is on the upper inner face of the rear calipers. It's now time to remove the protective cap from the bleeder screw. Then install the old brake fluid container, the small chain helps making the container safer (no reversal possible) : Before starting, spray some brake cleaner on the caliper and on the bleeder screw. Fit the rubber end of the collecting container securely, then loosen the bleed screw with the 11 mm open end wrench And... Here we go ... No panic, it flows very slowly ... With 1.2-1.4 bar, it allows you to take time .... At the beginning, the used brake fluid is quite dark, well ... here not that much. I really expected worse. Then, it cleared up progressively until it was really very clear ... So clear that I even said to myself: "crazy, it's even clearer than a Bud light or a Tsingtao!". .. That is to say ! Well, I give it to you, the used fluid wasn't dark as a Guinness either ! Check there's no air bubble in the system all along the bleeding operation. The recommended volumes for calipers are identical for both manual gearbox and DSG gearbox. Rear Calipers : 0,3L each Front Calipers : 0,2L each In the maintenance manual, you can also find the recommendation to bleed the clutch slave cylinder for manual gearbox only (with 0.15l). But after discussion with a professional, this seems very rarely done and is more risky since it may introduce bubbles into the brake system. So for manual gearbox owners, I let you decide to do it or not. Note that the maintenance manual does not specify whether these are minimum volumes or whether they already include margins. Even if the Brake fluid was already the right color well before reaching the recommended volume, I had rather to let it flow a little more. Therefore 1.5L is really a minimum quantity to buy! Once you think this is OK, simply tighten the bleeder screw gently with the 11-wrench. Remove the rubber cap from the bleeder screw and tighten at 10 Nm with the torque wrench. N.B.: If you haven't removed the wheels, it does not seem easy to access the bleeder screw with a torque wrench, unless you have a socket wrench (fork type)... Once the first rear caliper has been flushed, old brake fluid color is easy to check as the used container is being filled. When the 2 rear calipers are flushed, empty the old fluid container into the new brake flluid cans (but empty), which you kept from the beginning. This container has a too small capacity to process the 4 calipers, indeed For the front axle, the bleed screw is approximately at the same place, on the inner upper face of the caliper: 3rd step: Level adjustment Once the 4 calipers have been processed, the pressure in the supply tank must be released using the pressure relief valve. You can then disconnect the quick connector from the adapter on the car brake fluid tank. Warning! Pay attention to possible brake fluid drops, when you remove the whole system. Brake fluid is very corrosive on paintwork!!! Adjust the brake fluid level in the tank to set it between min. and max. marks. Don't forget to take the discs & brake pads wear into account (as mentioned in the workshop manual)! This being said, I've checked the discs and pads, they are at least 5mm above the minimum thickness and I'm almost certain that I'll have changed the brake fluid before the brake discs or pads. ! Use a small torch to try seeing the fluid level in the tank. But not that easy... When done, you can think of "finalization". Replace the brake fluid tank cap. 4th step: retarting Now everything has been tighten or closed, press the brake pedal several times. It should not go down more than 1/3 of its stroke before you feel resistance. Otherwise, the calipers must be flushed again, because bubbles may remain in the system. Note : the brake pedal may be hard with a very short stroke (1cm). But when you think you've reached the stroke end, you may notice a curious phenomenon: the brake pedal slowly fade under your foot ! Don't panic, it should go away after a test drive! A test drive will now allow checking the correct operation of the ABS system and that there is no obvious asymmetry when braking. Before starting, check that the brakes work from very low speeds. Then brake strongly to test the ABS unit and check it triggers normally. Normally, if you get here, everything is successful! Well done ! If you want workshop manuals, for maintenance and brakes, you can download them for cardiagn.com Enjoy !1 point
-
One click deadlocks the car and activates the alarm. Twice removes the deadlocks and deactivates the alarm.1 point


.thumb.jpg.06721e8c8b33ed0eea16572ff131b291.jpg)

Announcements
-
About BRISKODA
BRISKODA is for the sharing of information on ŠKODA. Founded for all motoring enthusiasts, it's free to join and use. We have members from all over the world.
- Our Guidelines.
- Search the Site.
- Explore the Forums.
- Gaze into the Gallery.
- Make a date, the Calendar.
- Classic, custom or modified car insurance!
- Please be respectful when posting.
-
Images