


Leaderboard
-
TMB
Resident Member7Points8,210Posts -
Breezy_Pete
Sponsor6Points24,189Posts -

mac11irl
FREEDOM6Points16,637Posts -

WolfyWesty
Members5Points484Posts


Popular Content
Showing content with the highest reputation on 11/06/21 in all areas
-
3 pointsAll cars have a unique 17 character identity code – their Vehicle Identification Number or VIN. For Karoqs this is displayed at the bottom lefthand corner of the windscreen, on a sticker at the base of the middle body pillar, and stamped into the righthand suspension turret under the bonnet. It takes the form: TMB LJ7 NU 7J5 012345 and can be decoded as follows: The first 3 characters are TMB for Škoda cars. The 4th character tells you the chassis type: J = left-hand drive FWD, K = right-hand drive FWD, L = left-hand drive 4x4 and M = right-hand drive 4x4. The 5th character tells you the engine: E = 2.0 TSI 190PS, G = 1.6 TDI 115PS, J = 2.0 TDI 150PS, M = 2.0 TDI 190 PS, P = 1.0 TSI 115PS, R = 1.5 TSI 150PS. (Anyone know the code for the 2.0 TDI 115PS engine or Russian 1.6 MPI engines?) The 6th character tells you how many airbags the car has: 2 = 2 front airbags, 4 = 2 front and 2 side airbags, 5 = 2 fronts + 2 sides + 1 knee airbag, 6 = 2 front airbags + 2 sides + 2 heads, 7 = 2 front airbags + 2 sides + 2 heads + 1 knee airbag, 8 = 2 front airbags + 4 sides + 2 heads, 9 = 2 front bags + 4 sides + 2 heads + 1 knee airbag. The 7th and 8th character tell you the vehicle model: NU = the Karoq (2017 on). The 9th character is a check digit to validate the code. The 10th character tells you the car's model year: J = MY2018 (ie manufactured between summer 2017 and summer 2018, K = MY2019 (ie manufactured between summer 2018 and summer 2019, L = MY2020 (ie manufactured between summer 2019 and summer 2020, M = MY2021 (ie manufactured between summer 2020 and summer 2021. The 11th character tells you where your car was built: 0 to 4 = Mladá Boleslav, Czechia; 5 = Kvasiny, Czechia; 7 or 8 = Vrchlabi, Czechia; B = Solomonovo, Ukraine; H = Nizhny Novgorod, Russia; J = Osnabruck, Germany; K = Kaluga, Russia; N = Mladá Boleslav, Czechia. Then finally the 12th to 17th numbers are the unique production number for that production line and year. If anyone has a character in their VIN not listed above, please give me the details so I can update this guide. Thanks Chris3 points
-
2 pointsGuess who’s back and so so happy to have her back! Long long chat with Aftersales Manager re. the situation and a full apology given. Apology accepted and happy to go back there again in future. Car performing great. Interesting comment picked up on…. ‘Another identical model / age in for the same fault’ so might become a common thing these high pressure pumps. Also SOS will be a software fix and expected a month away. Won’t be ‘over the air’ but one that must be booked in. Alls well that ends well!
 2 points
 -
2 pointsHello! I've posted a few times throughout the site, but thought I'd introduce myself and my 17 sportline on the 280 thread! I've had the car for a couple of months now and love it. It's got a great spec with almost every option ticked as far as I can tell! Only down side is some poor refurbishment of the wheels by the dealerership prior to me buying it.... Trying to get a resolution to this at present!
 2 points
 -
2 points"A few things to note, your car *needs* this to be working else your vehicle will not be covered by its insurance " --------- With all due respect this sounds like rubbish to me but would be very interested to see some solid proof.... Not the first time I've been wrong. Don't tell the wife ...2 points
-
2 pointsCycled up to the top of Lyme and Wood pits last night to see the sunset. Shame it clouded over though The descent was the best part!
 2 points
 -
2 pointsAs far as I am aware it's not attached to the windscreen but screwed to the A post.
 2 points
 -
2 pointsŠkoda Connect: https://www.skoda-connect.com/ Direct link for Škoda ID: https://skodaid.vwgroup.io/account

 2 points
 -
2 pointsAn update. It was the rear wishbone bushes. Think the technical term is gubbed. I replaced the front pads and discs last week, lots of life left but discs badly grooved. My local Indy sorted the bushes and changed brake fluid. Job done.2 points
-
2 pointsThe disc screw number is N 10648301, last time I bought 4 in 2018, they were 35p each. that number crosses over with other VAG models, so you can get them from VW dealers as well as Skoda dealers. Running without screws can be a real PITA if you need to do a quick wheel change without it all floating about. The screw itself changes from a philips head to a torx, and is an M6 x 16 The ABS sensor bolts can be 1 of 2 options, Either an M6 x 16 or an M6 x 22, both are socket hex screws. Part numbers are N 01474011 for the M6 x 16, and N 0147348 for the M6 x 22. Low speed ABS kick can also be caused by a cracked sensor ring on the drive shaft, but is fairly easy to check with the caliper and pads out of the way and a powerful torch. On the door screw, I think from memory it is an M5 x 9, but that is not a certainty, as it is about 3 years since I last did a lock. Can you not get it back out with one of the extendable magnet tools that are available like this one - https://www.ebay.co.uk/itm/383705242028?epid=2008906134&hash=item59569d59ac:g:4poAAOSwNxxfUSuI The link was just to show what I mean, I have not used the seller so you might be wise to search for the best seller as always. Hope it helps. Phil.2 points
-
2 pointsI've been sat here for a while waiting for the clouds to form a pleasing arrangement ..............
 2 points
 -
2 points
-
I thought Top Gear were able to show you can go too fast for a GATSO, but that it was about 165mph.2 points
-
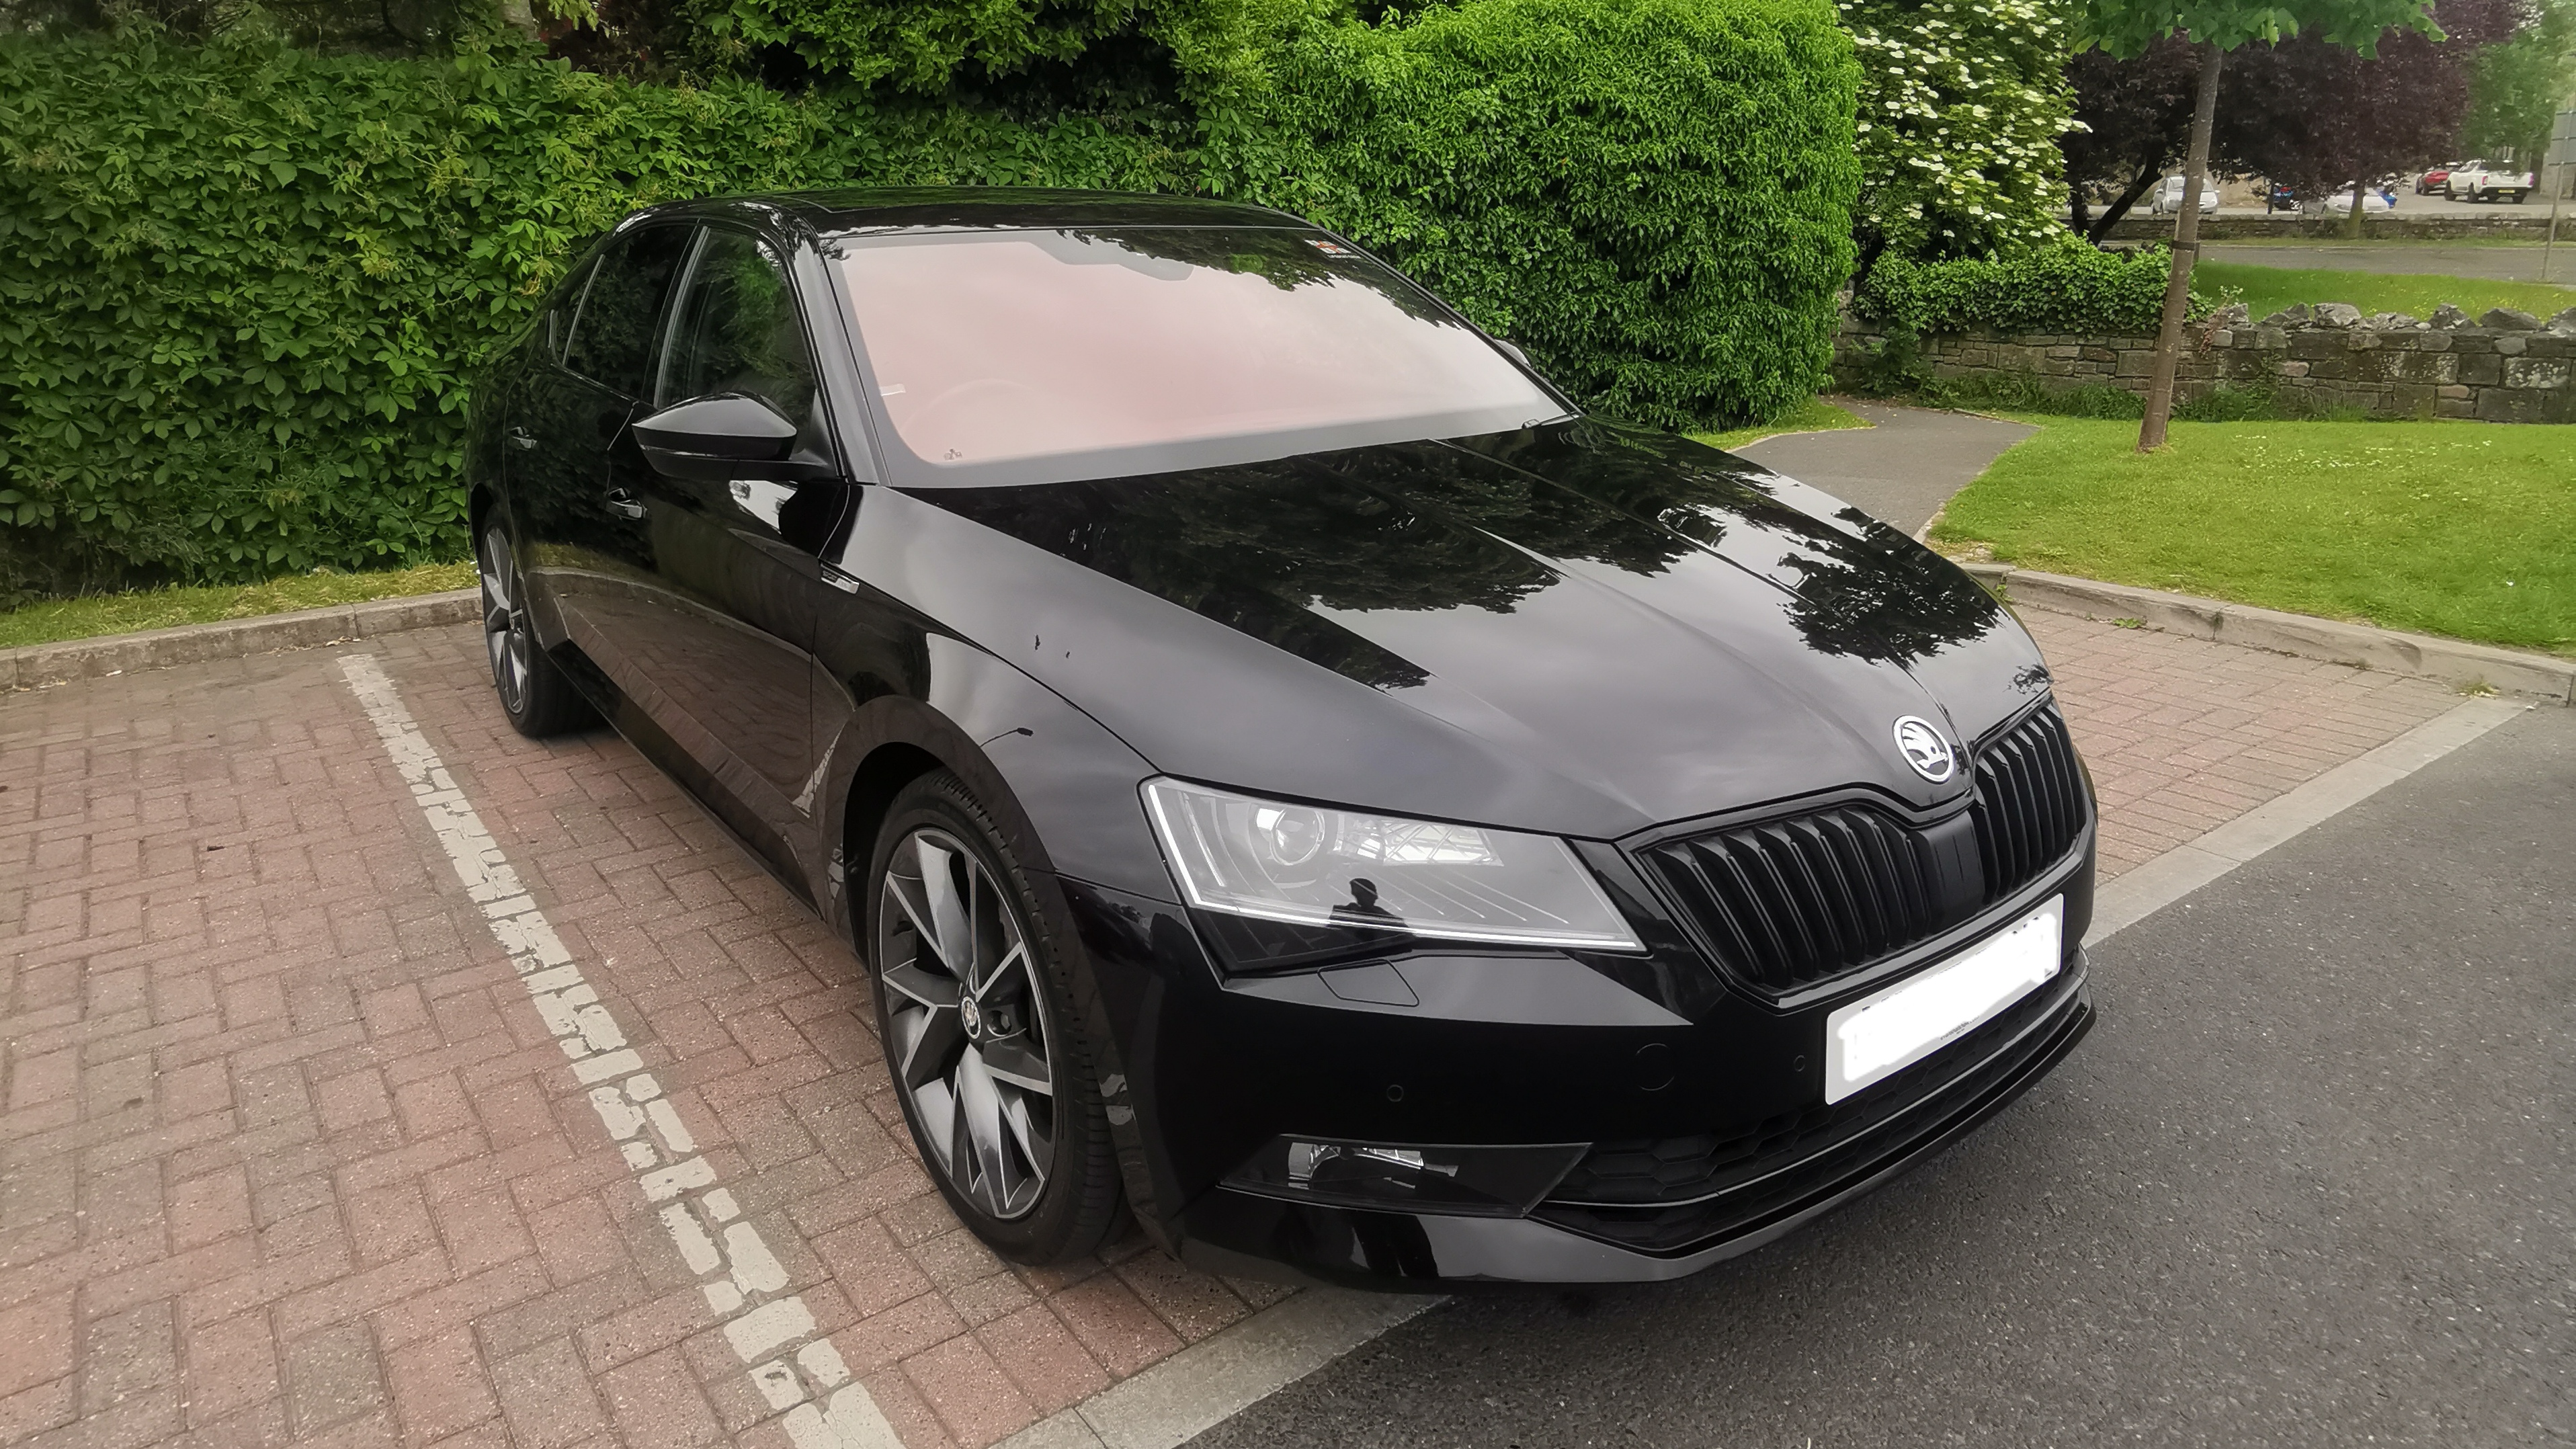
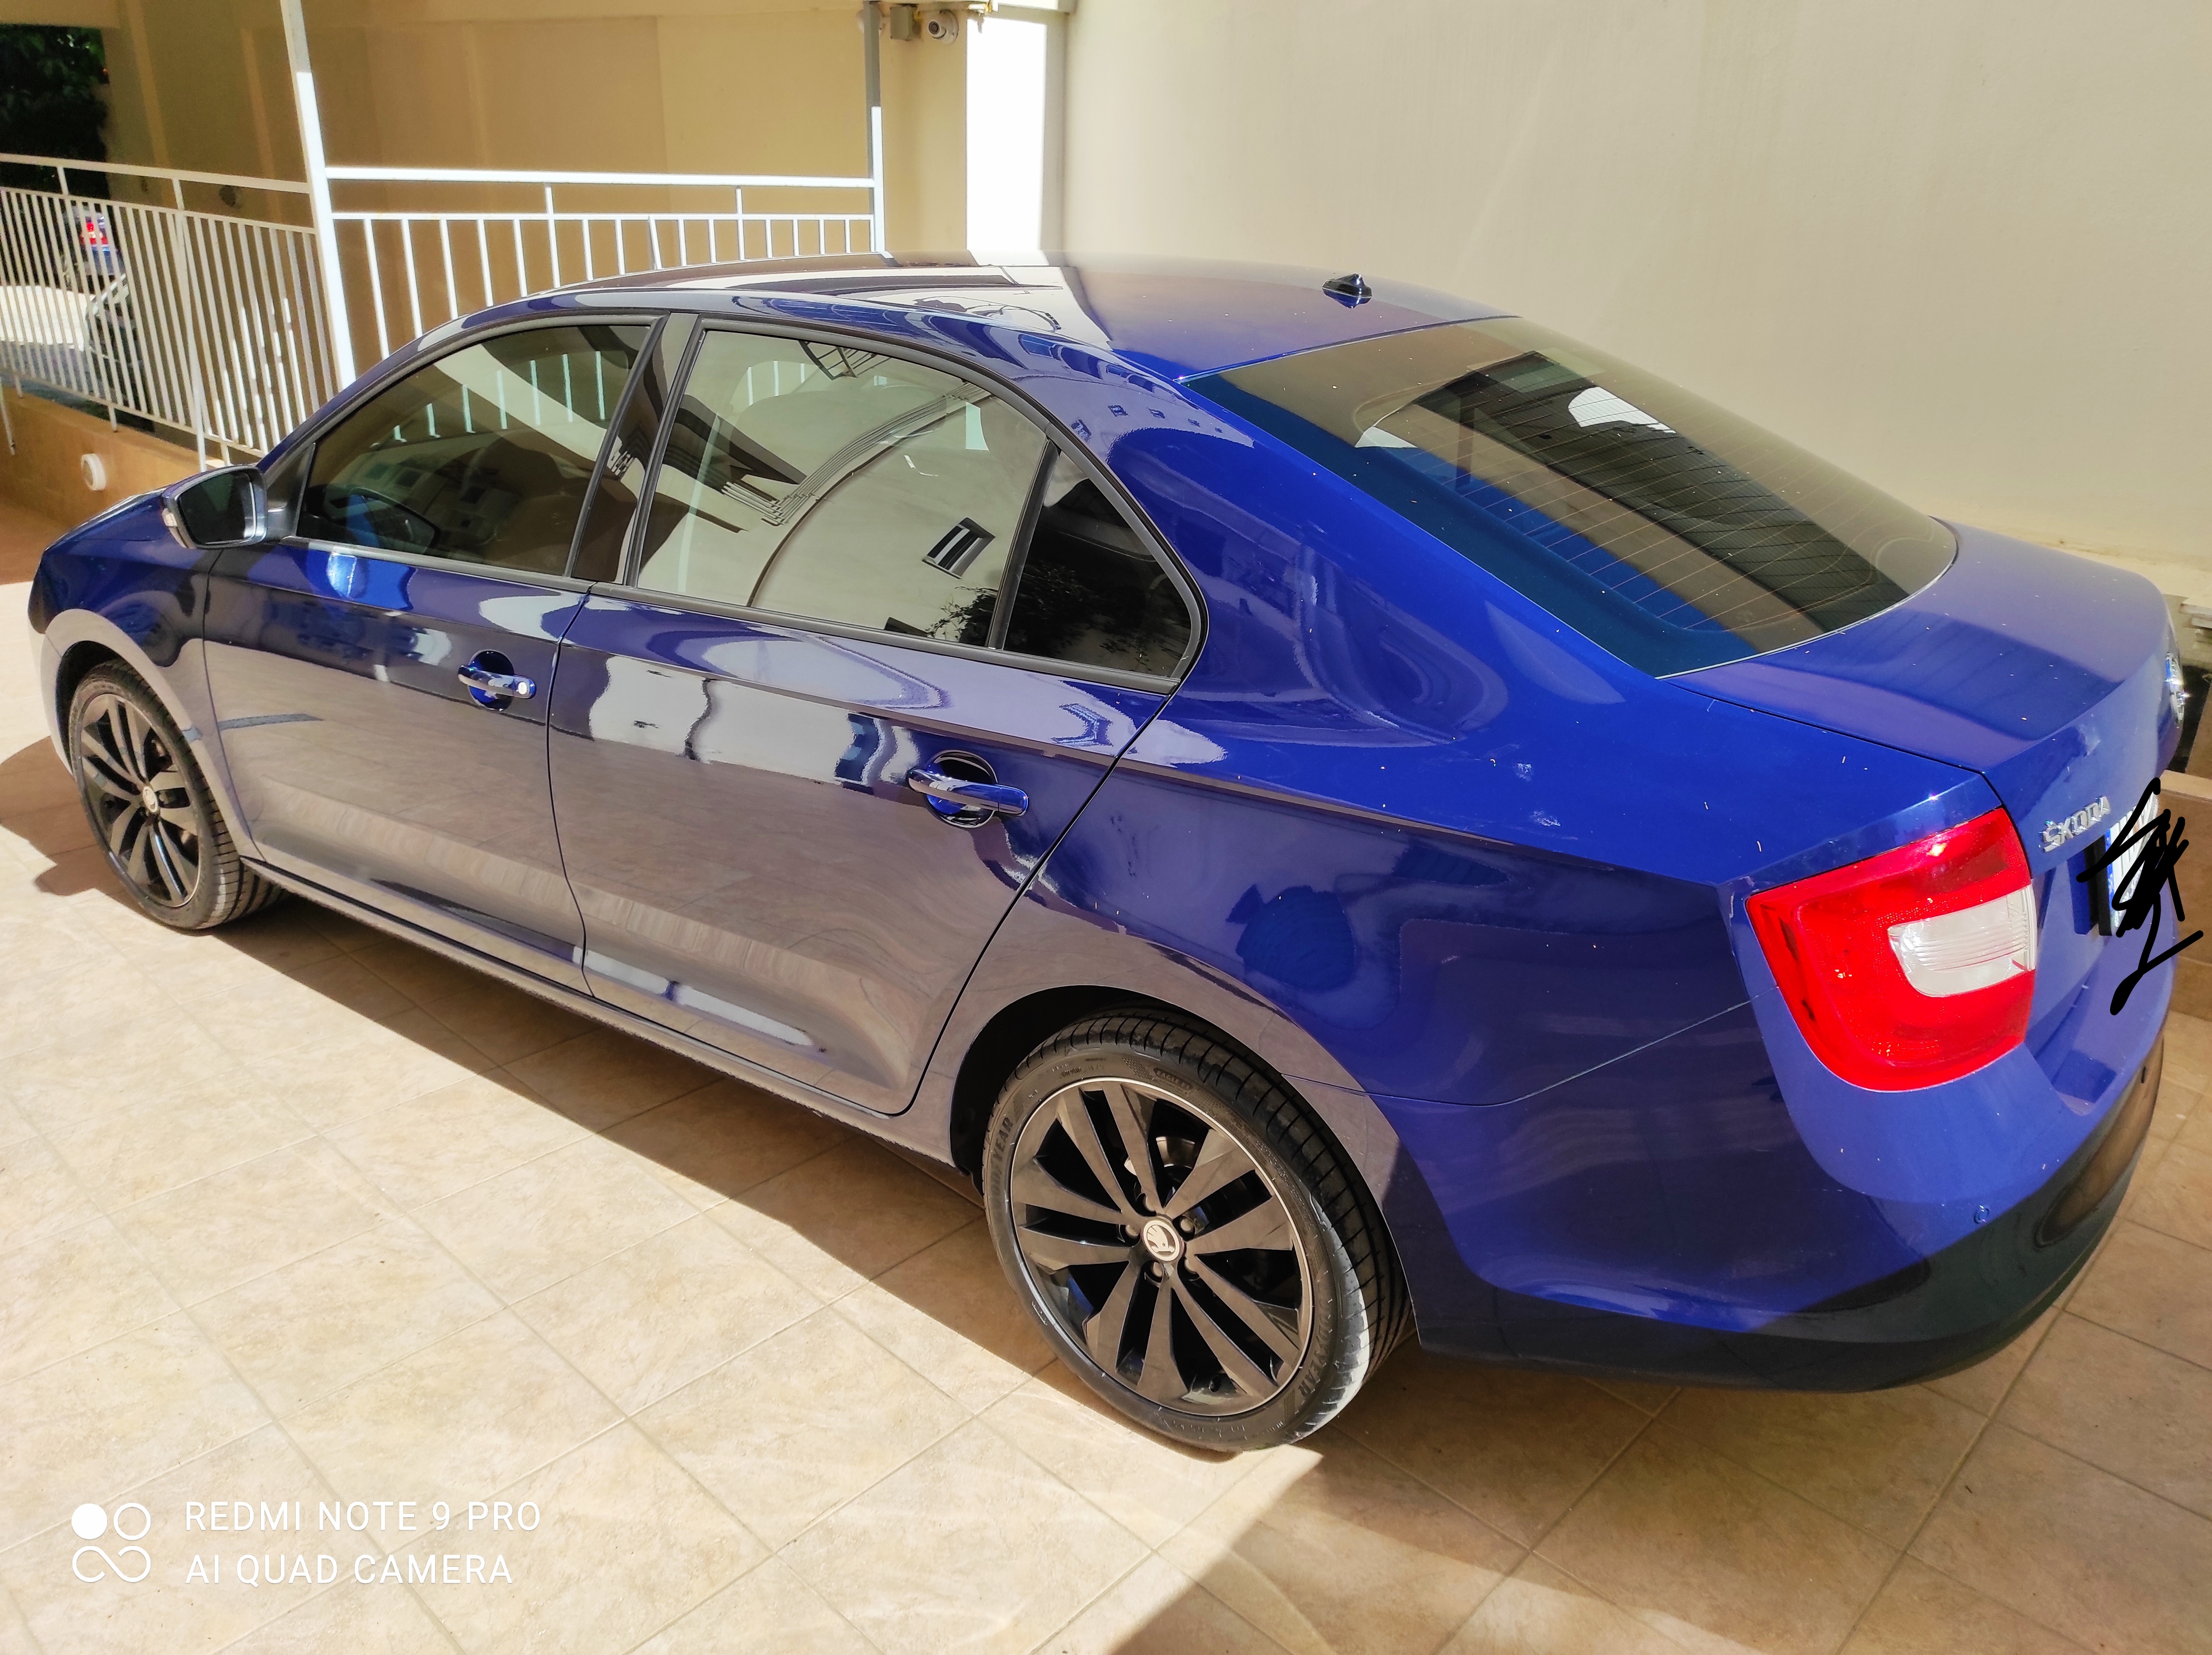
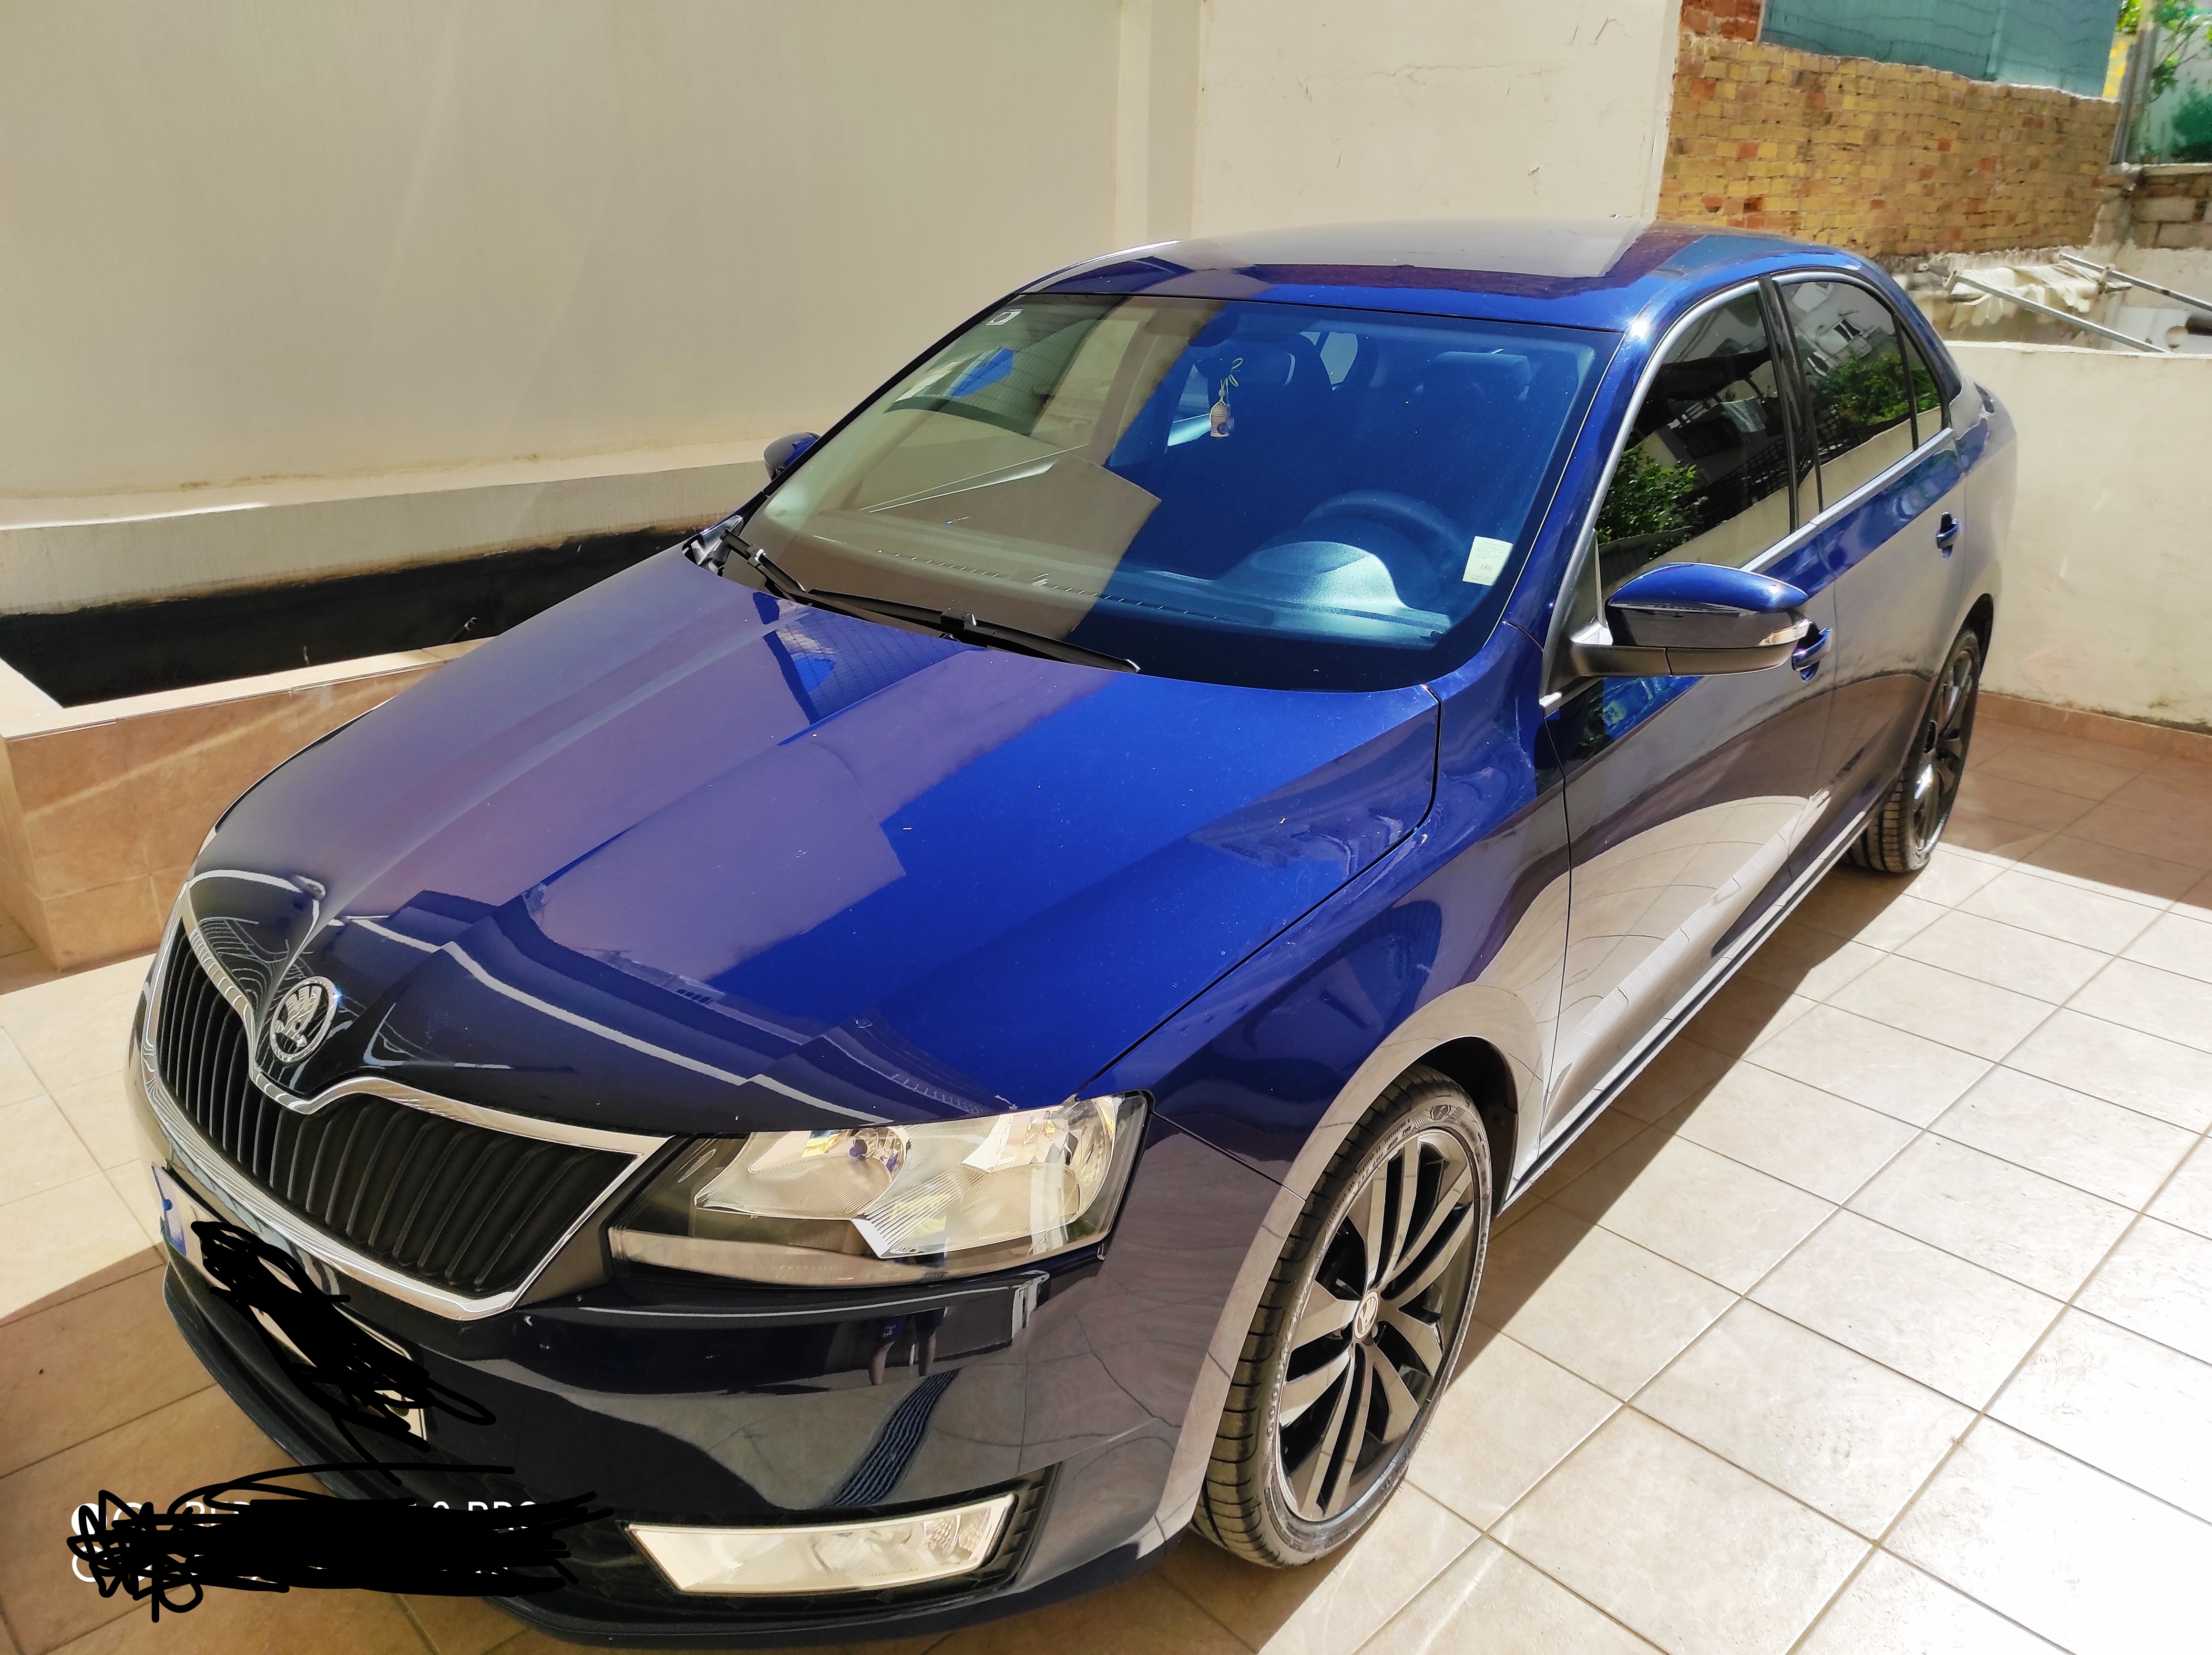
2 pointsNew to me, went to buy my second Karoq but this was in the show room and couldn’t resist even the wife was impressed and before my coffee was drunk I had bought it

 2 points
 -
1 pointAfternoon all, Recently taken the plunge and hard tailed the bike - put the rear tyre down by 3psi which helps compensate for bumps in the road. When hard tailing, I realised my cheap eBay solo seat wasn't up to the job, so replaced with a Biltwell Slimline Diamond pattern seat and 2" springs. The height of the bike is low, but it's looking how I've wanted it since getting the bike standard 3 and a half years ago. Not to everyone's taste I'm sure but that's life!
 1 point
 -
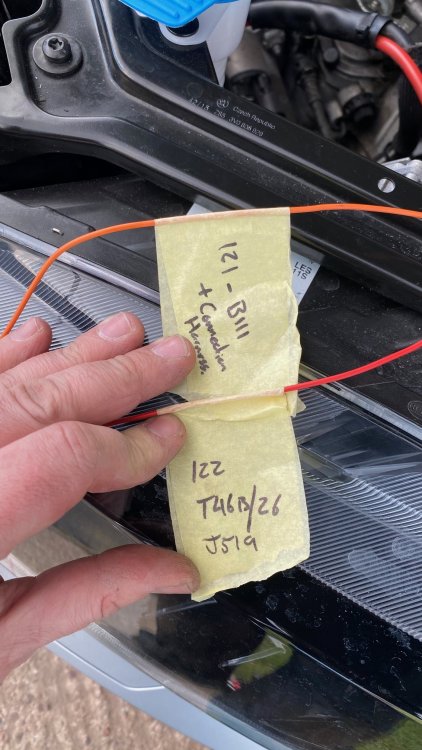
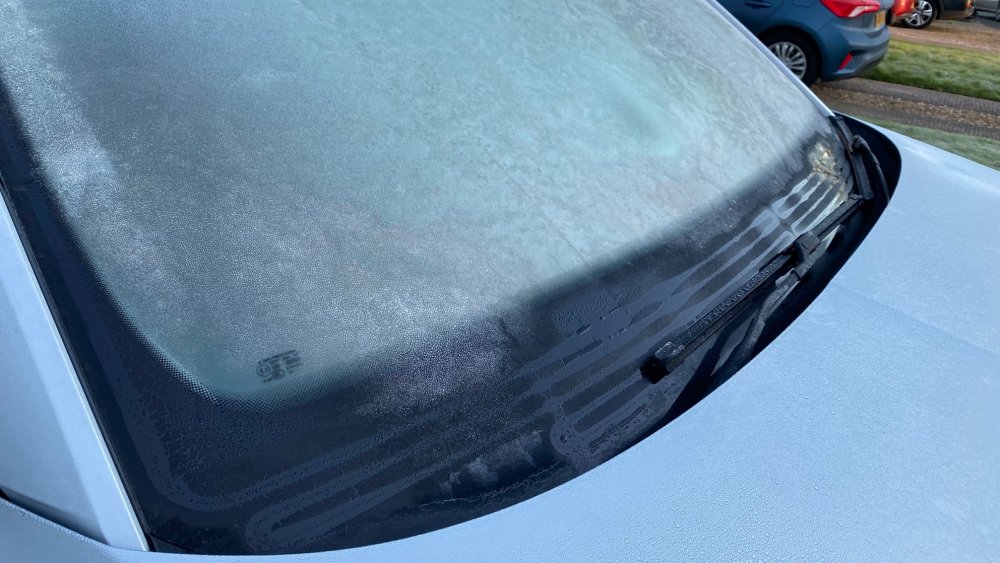
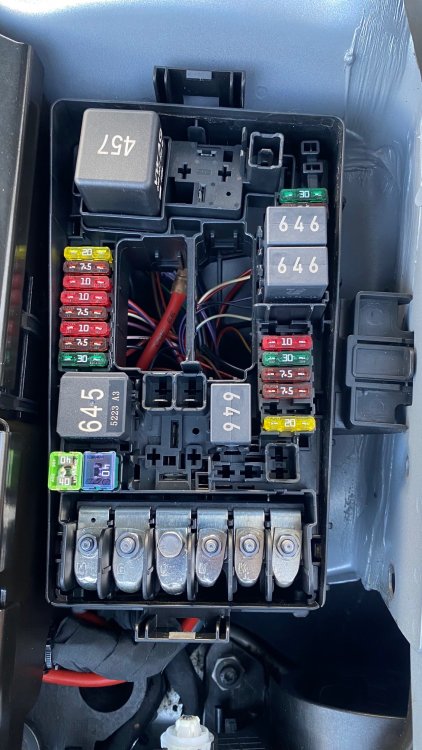
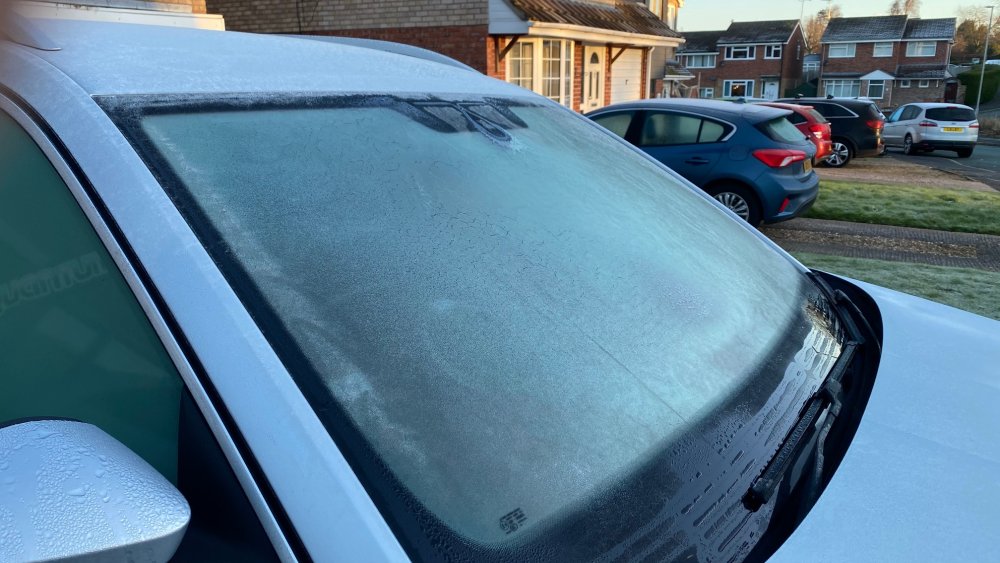
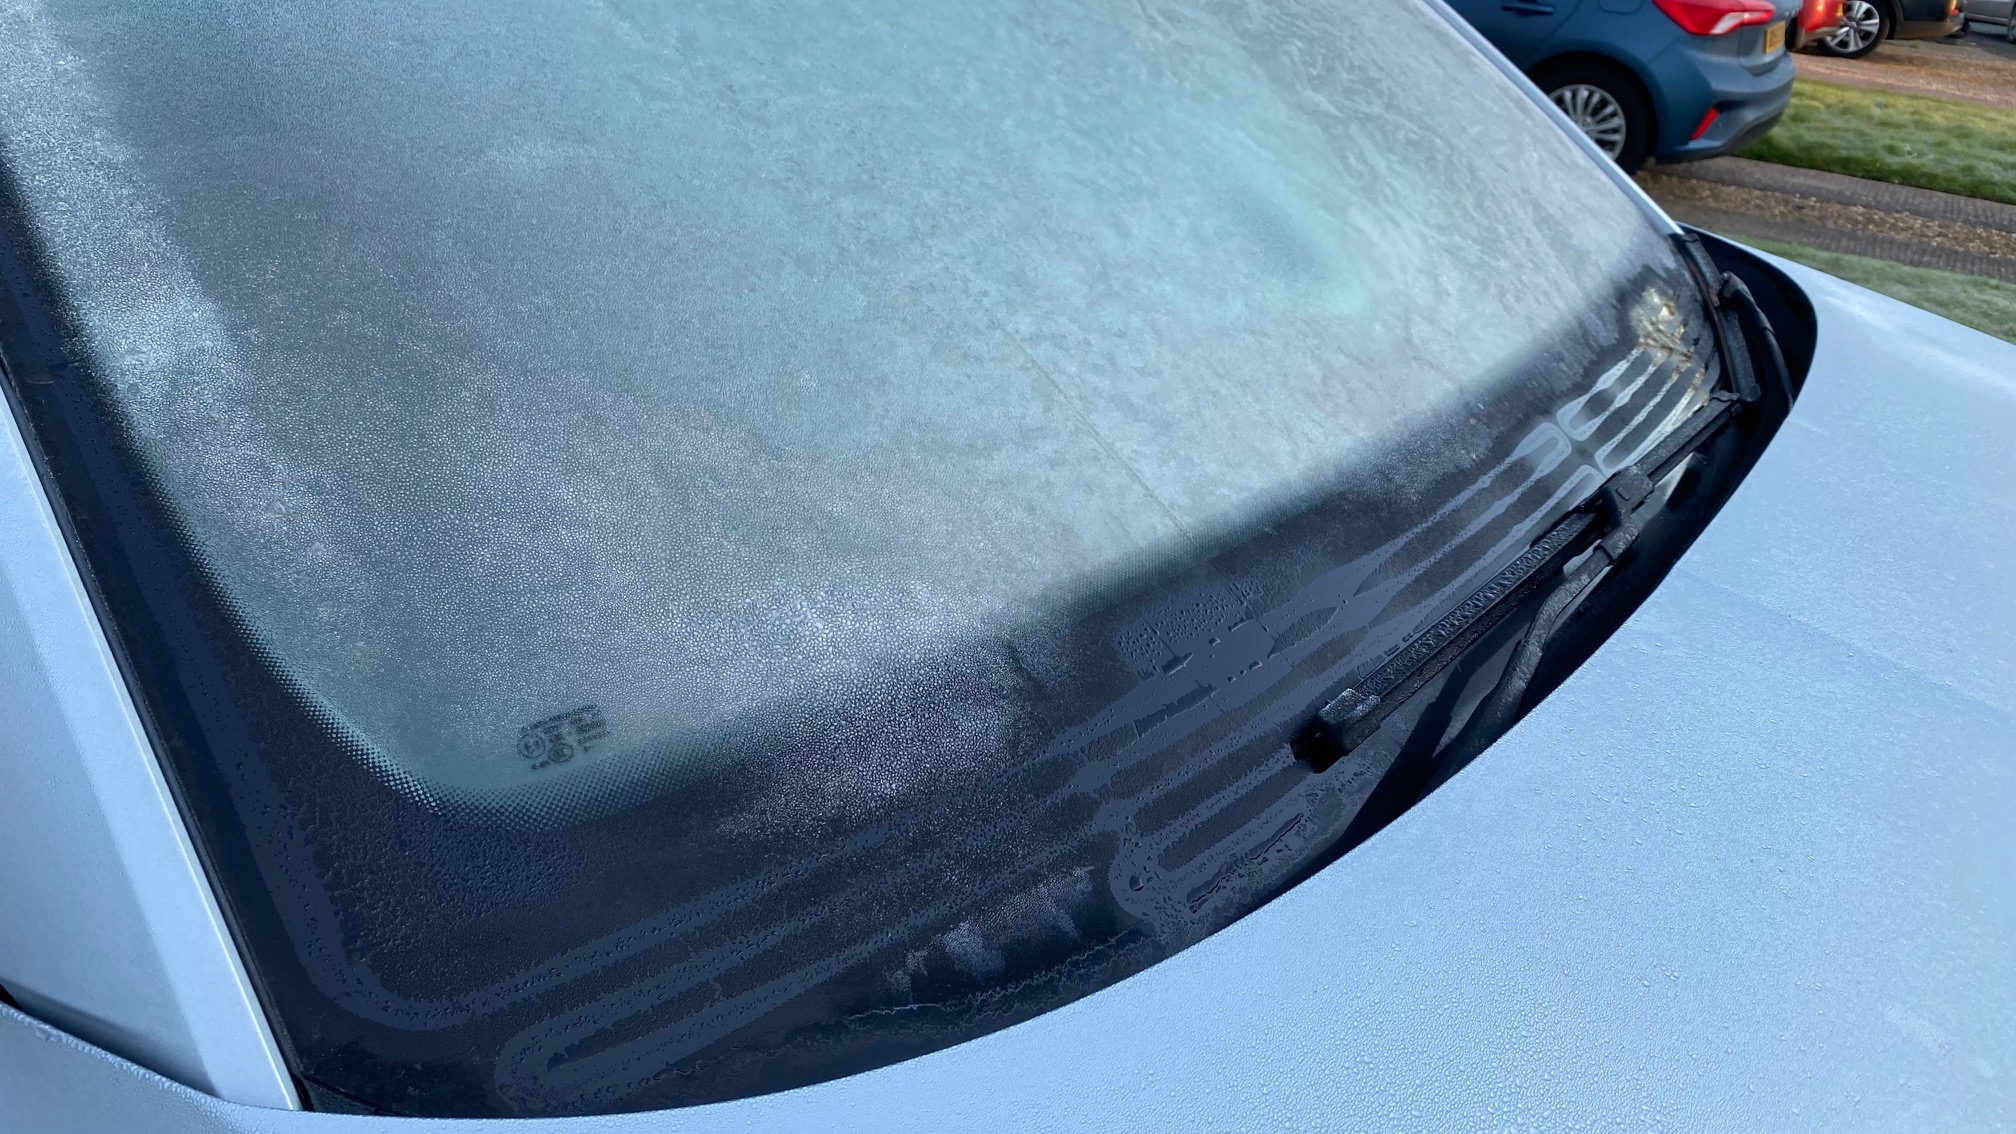
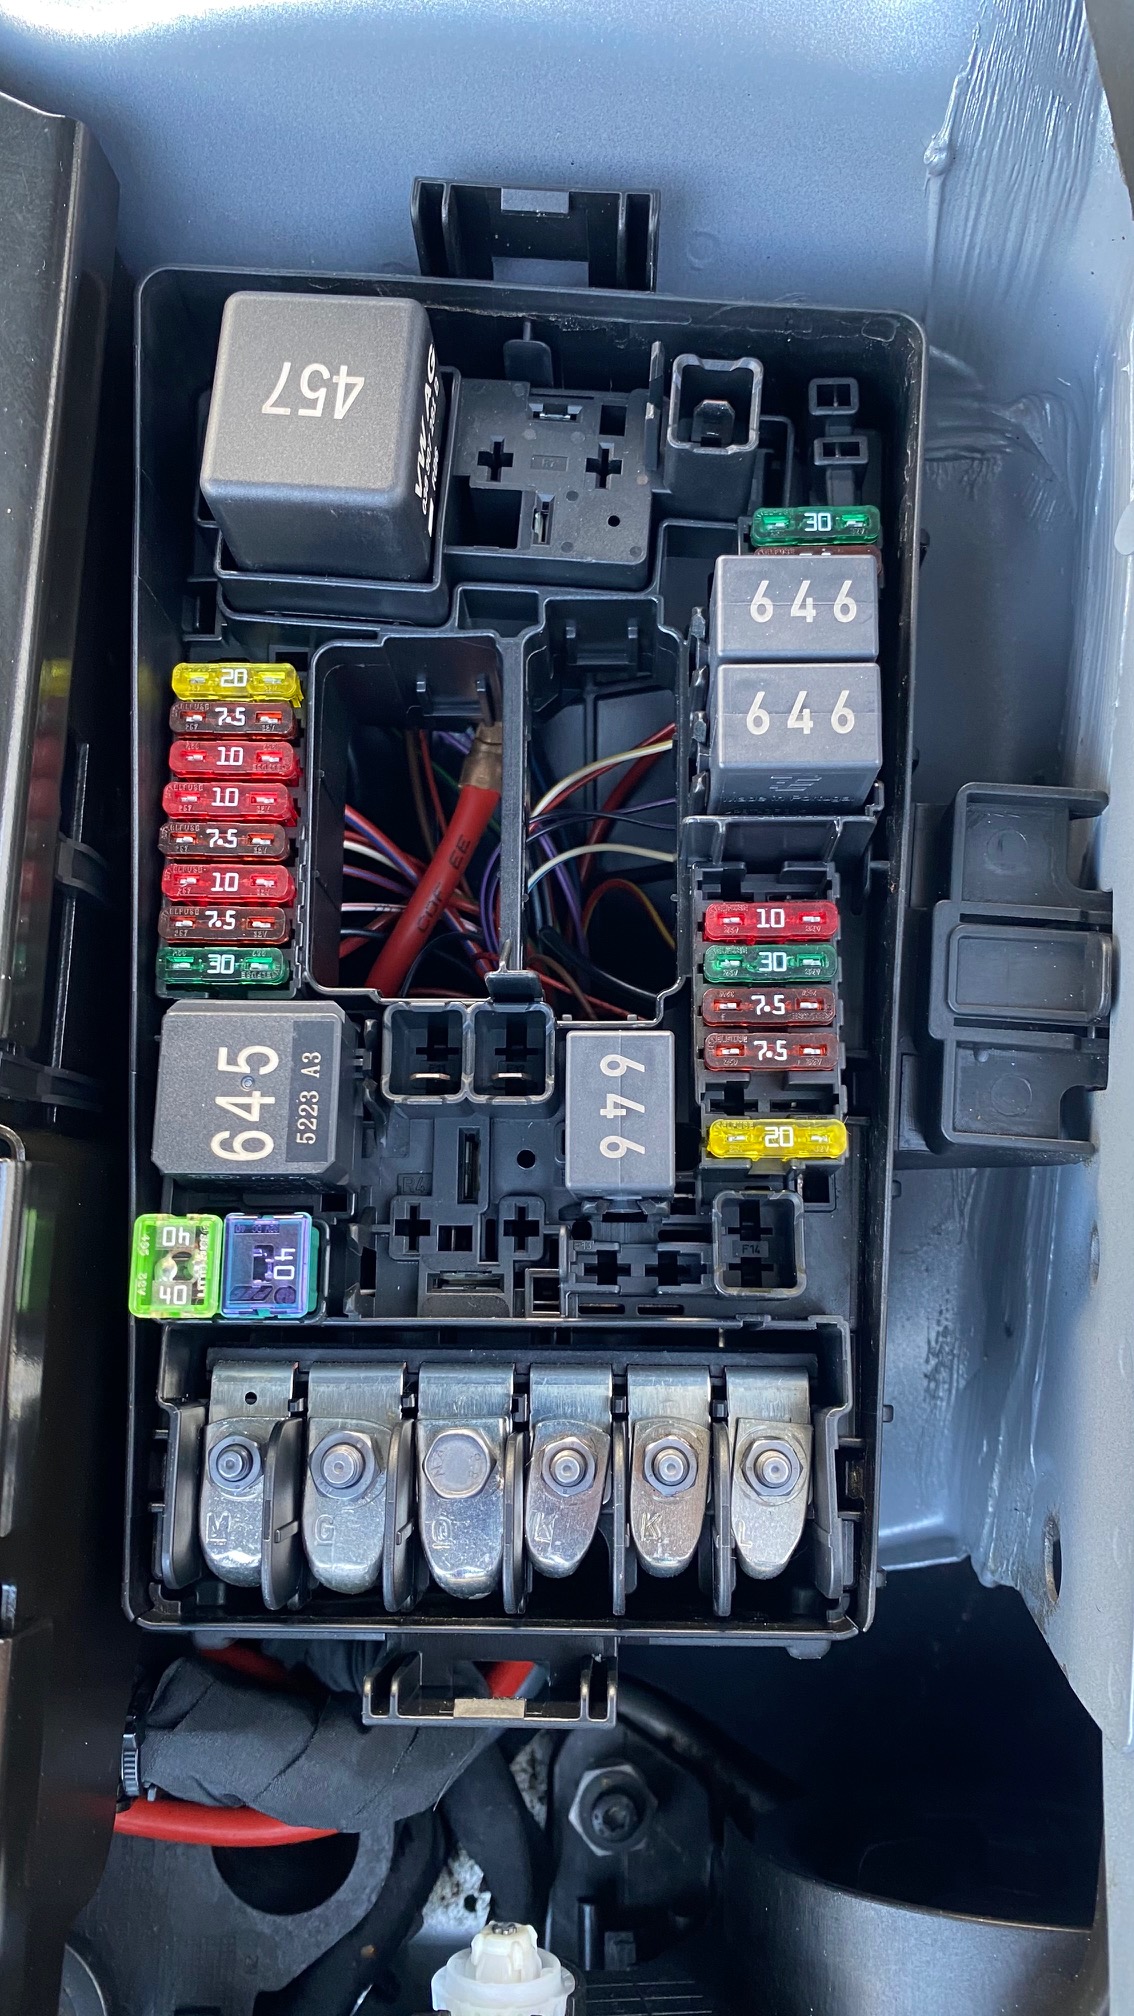
1 pointHello all! This is my first time writing something like this so forgive me if I seem repetitive or Firstly let me say this has been a great challenge from start to finish and what a difference it has made already and I’ve only had the screen in for 5 days as of writing this (27/02/2021.) The whole reason for wanting to fit the heated screen was down to the fact that every winter morning I would get into the car and the screen was misted up and would take forever to clear both the ice and mist on the inside. Parts list for this project is as follows: 1) 000979986A – 6mm repair wire. Approximately 5m long. £6.80+vat 2) 000979985A – 4mm repair wire. Approximately 5M long. £ 8.57+vat 3) 071973851 – Housing (connectors for the heated screen positive connection.) £5.59+vat each (x2 required) 4) 000979425E – 6mm wire with terminals on for relay connection terminals 30 & 87 - £8.64+vat 5) N91186305 – 50A fuse for position 14 in under bonnet fuse box - £5.69+vat 6) 5Q0937507D – Relay plate for the heated screen relay in under bonnet fuse box - £3.79+vat 7) Used under bonnet fuse box from Ebay with all the relays, fuses and terminals still in the housing - £16.66+vat 8) Used Heater control panel from Ebay - £62.50+vat (matching PR codes to your current vehicle apart from finding the correct PR code for heated screen to add to your current codes for the correct part number (3V0 907 044 T YMS for my car) 9) 3V0 845 011 AD NVB – Heated windscreen from TPS - £448.28+vat 10) Soldering iron and solder 11) Heat shrink of varying sizes and colours (optional but it was the best was I found of waterproofing the connections under the bonnet. Might I add that none of the connections that I’ve made have been twisted and taped together! That’s just not done in my eyes, in my opinion you’re asking for trouble if you even contemplate doing that! 12) Electrical cable rod to get the wiring through the grommet in the firewall to make internal connections. So I started off by first making sure that the body control module was the same as one from a Superb that had a heated screen so that I knew that the internal relay was present in my control unit for outputting an earth to the switched side of the screen relay. Luckily it was the same as the superb with a heated screen so onward I went. I started by fitting up the relay plate in the under bonnet fuse box, the 6mm repair wire comes with two terminals on it (one either end) one end went into position 123 and the other in 125 of the relay plate & the wire was then cut in half giving me two long tails read to connect as required. The wire in position 123 was connected one of the cables I removed from the second hand fuse box and was put into one of the openings in fuse 14s location. For the other terminal in fuse 14 I again removed one of the fuse terminals from the used fuse box and put this into the other side and connected it to a Terminal 30 connection post on the underside of the fuse box. I then extracted two of the 0.5mm relay terminals with tail wires still attached from the used fuse box and inserted them into positions 121 & 122 of the relay plate. With the power connections made and the tails for the other three wires long enough I attached extension wires to them and started routing the 6mm wire from the under bonnet fuse box along the existing wiring loom and up to under the scuttle panel where the connection would be made for the positive connections on the bottom of the screen. The other two tails for the power and earth for the changeover of the relay were loomed together and also run alongside the existing wiring loom to the grommet in the firewall. I used a small spike tool to make the smallest of holes so that I could screw the threaded end of my electric cable rod through the grommet and attached the tails to it using electrical tape. Pulled the tails through the fire wall and because I’d made such a small hole to begin with the rubber just closed up around the new wiring no problem at all! If the hole hadn’t have closed up like it did I would have put a small smear of black silicone over the opening to make it water tight again. With the glove box removed and the left hand end of the dash board removed (Right hand drive car) I could access the new wiring that had made its way perfectly to where it needed to go (stroke of luck it ended up where it was to be honest rather than having to search everywhere for it and re rout it inside the car). Again calling on the used fuse box I removed one of the fuse terminals with a long enough tail on it and inserted it into the fuse box behind the glove box (this saved routing a wire from the left side of the car and taking it all round the back of the dash to then have to find connection B111 for the heating circuit fuse and tagging into that) and used a separate 5A fuse supply for the trigger side of the relay instead of fuse 7 on the drivers side fuse box. The remaining tail wire for the earth trigger from the central electrics control unit (J519) was next. This went to terminal 26 of the 46pin connector (middle plug) of the J519. I had a terminal left over from a job at work which was the correct one for this purpose which is why I’ve not listed it above because I couldn’t find the part number for this but if you order parts from TPS then they’ll be able to have a look on ETKA for the wire you’ll be needing. Once this was connected and the two fuses were installed and the relay was installed I turned my attention to the connections under the scuttle for the screen. These were probably the easiest connections to make. As mentioned above the repair wires come with two terminals already crimped on, one terminal was then pushed into each of the two housings and the locking tabs were locked in place. Normally the under bonnet plug connectors have little rubber grommets that are crimped onto the terminal and wire to make the plugs water tight. I wasn’t going to buy a bag (30 in each bag) of these for stupid money as I only needed two. So out came the black silicone with a fine nozzle on it and I filled the two open ends up and moved the wire around so that the silicone could completely fill the connector openings to make a water tight seal. Worked a treat I might add! I then found the middle of the repair wire with the two connections on it and stripped it back enough so I could divide the wire in two and make a hole big enough for the 6mm tail to be pushed through and then soldered in place. I then used a combination of electrical tape and liquid electrical tape to make sure that the connection was water tight and fully insulated from touching any earth! I then had the screen fitted by a windscreen fitting company and they connected the positive connectors up in the scuttle that I’d wired in and connected the earth side of the screen to the earth post which is located under the light in the head liner. The very next day there was a relatively hard frost on the screen which I couldn’t have been happier about for once. In I jumped and within 30 seconds I’d gone from a frosted up screen to clear and ready to go! Totally worth the work doing it and all the time in getting the correct parts and cables to do it properly! Thanks all for taking the time to read this and apologies if it seems like It’s been written by a 3 year old but it’s the first time I’ve done anything like this so I hope it helps someone else out there that’s crazy enough to do the same as me! I know next time I upgrade my car it’ll have a heated screen already fitted! Thanks for reading and bearing with me while I wittered on for ages! Hope this helps anyone else that’s crazy enough to attempt this themselves!


 1 point
 -
1 pointAlmost 4 Grand of extra packages to bring a £40K car up to the spec of my old banger Bear. They’re having a laugh. £600 for a charging cable1 point
-
1 pointi have found some info. but really would like the wiring diagrams so i can check for circuit faults and wiring breaks/shorts etc. i am searching the web and thanks for the information. appreciate your help and advice.1 point
-
My dealer cave me usb c adapters so still using my original cables, you don't need the sd cards anymore any updates happen via Skoda connect.1 point
-
1 point
-
Try these:- USB C to USB 3.1 Adapter[2 pack], USB C Male to USB Female, Converting USB-C (Thunderbolt 3 Compatible) to USB 3.1 OTG Cable, Compatible with MacBook Pro 2018, Galaxy S9, Dell XPS & All Type C Devices: Amazon.co.uk: Computers & Accessories nonda USB C to USB Adapter,USB-C to USB 3.0 Adapter,USB: Amazon.co.uk: Electronics nonda USB-C to SD/MicroSD Card Reader, Type C Card Adapter Thunderbolt 3 SD/TF Memory Card Reader for iPad Pro 2019/2018, MacBook Pro 2019/2018, MacBook Air 2018 and More Type-C Devices , White: Amazon.co.uk: Computers & Accessories SD Card Reader, uni USB 3.0/USB C Card Reader, Supports: Amazon.co.uk: Electronics Hope this helps1 point
-
I'll move this to the right place but would guess that the ports are USB C so that's that end sorted.1 point
-
There was a big issue back in April 2018 when Skoda stopped handover of new cars with signal booster fitted. They had to be removed due to "regulatory issues", I believe under Ofcom instruction. I was driving to dealer to pick up new car when I got the call that handover had been blocked. Was quite a lot of chat on hear at the time about this. I believe this just affected cars in the UK market.1 point
-
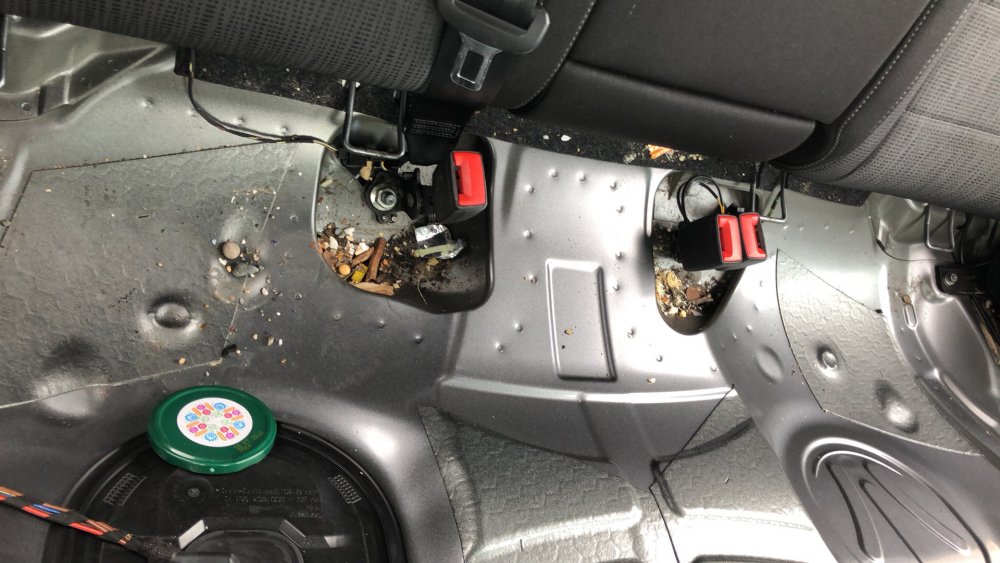
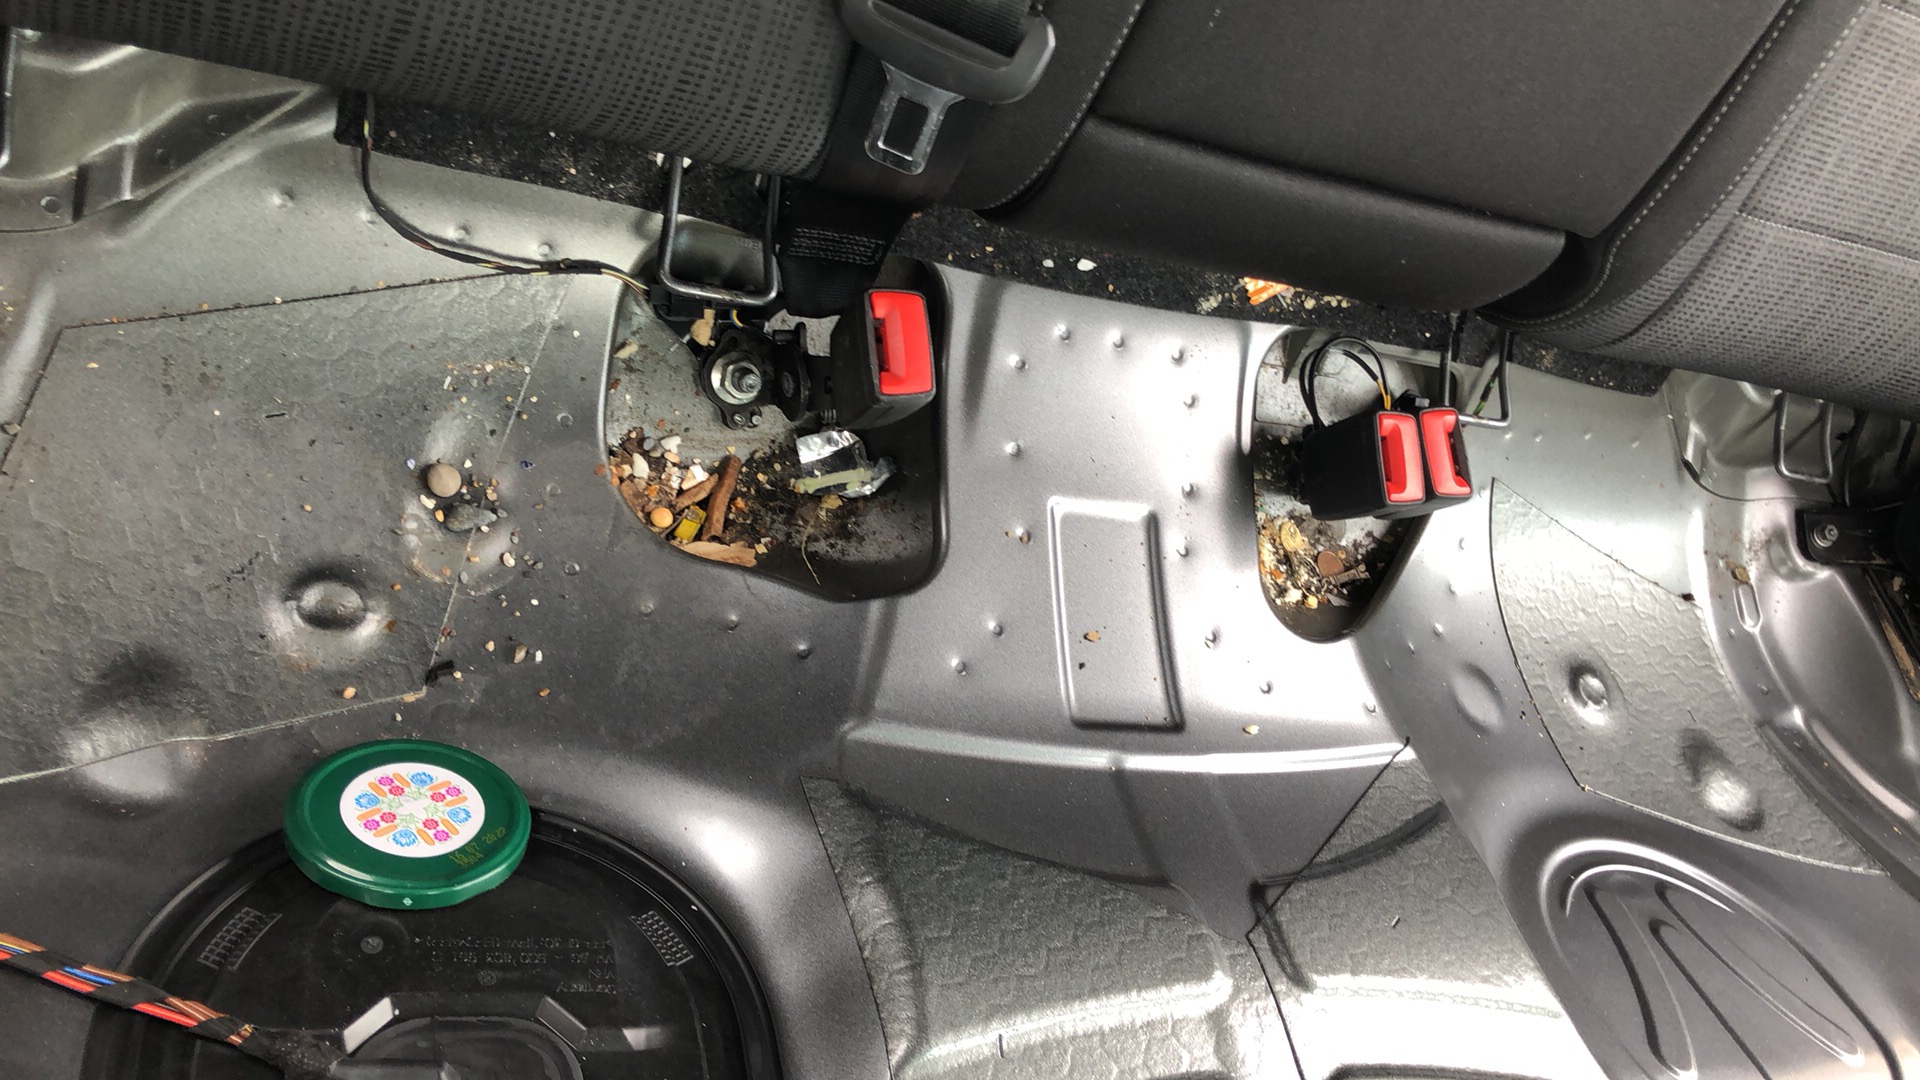
1 pointYeah it’s my third stage now after doing the boot and the doors. anyway I just started to working under the rear seats without taking the front seats out. The stuff kids leave underneath… Also what should I do with those few openings I see in the metal sheets. e.g. under the seats. I see no obvious purpose for them but they there. With the antivibration tiles I can just leave them open but will be laying the MLV now and my understanding is I should aim to close any opening as the airborne sound will get through them. any one have an idea?
 1 point
 -
1 pointEverything is accessible once the screen is in pal! If you need any help on the wiring then let me know! I’ll blast you the wiring diagrams over! FYI the earth connection is above the interior light at the front of the roof liner and the two connectors for the positive side of the screen are under the scuttle panel, perfectly accessible if your happy taking the scuttle back off once the screen is fitted!1 point
-
You can get boosting without QI charger, and with QI, mine is boosting only.1 point
-
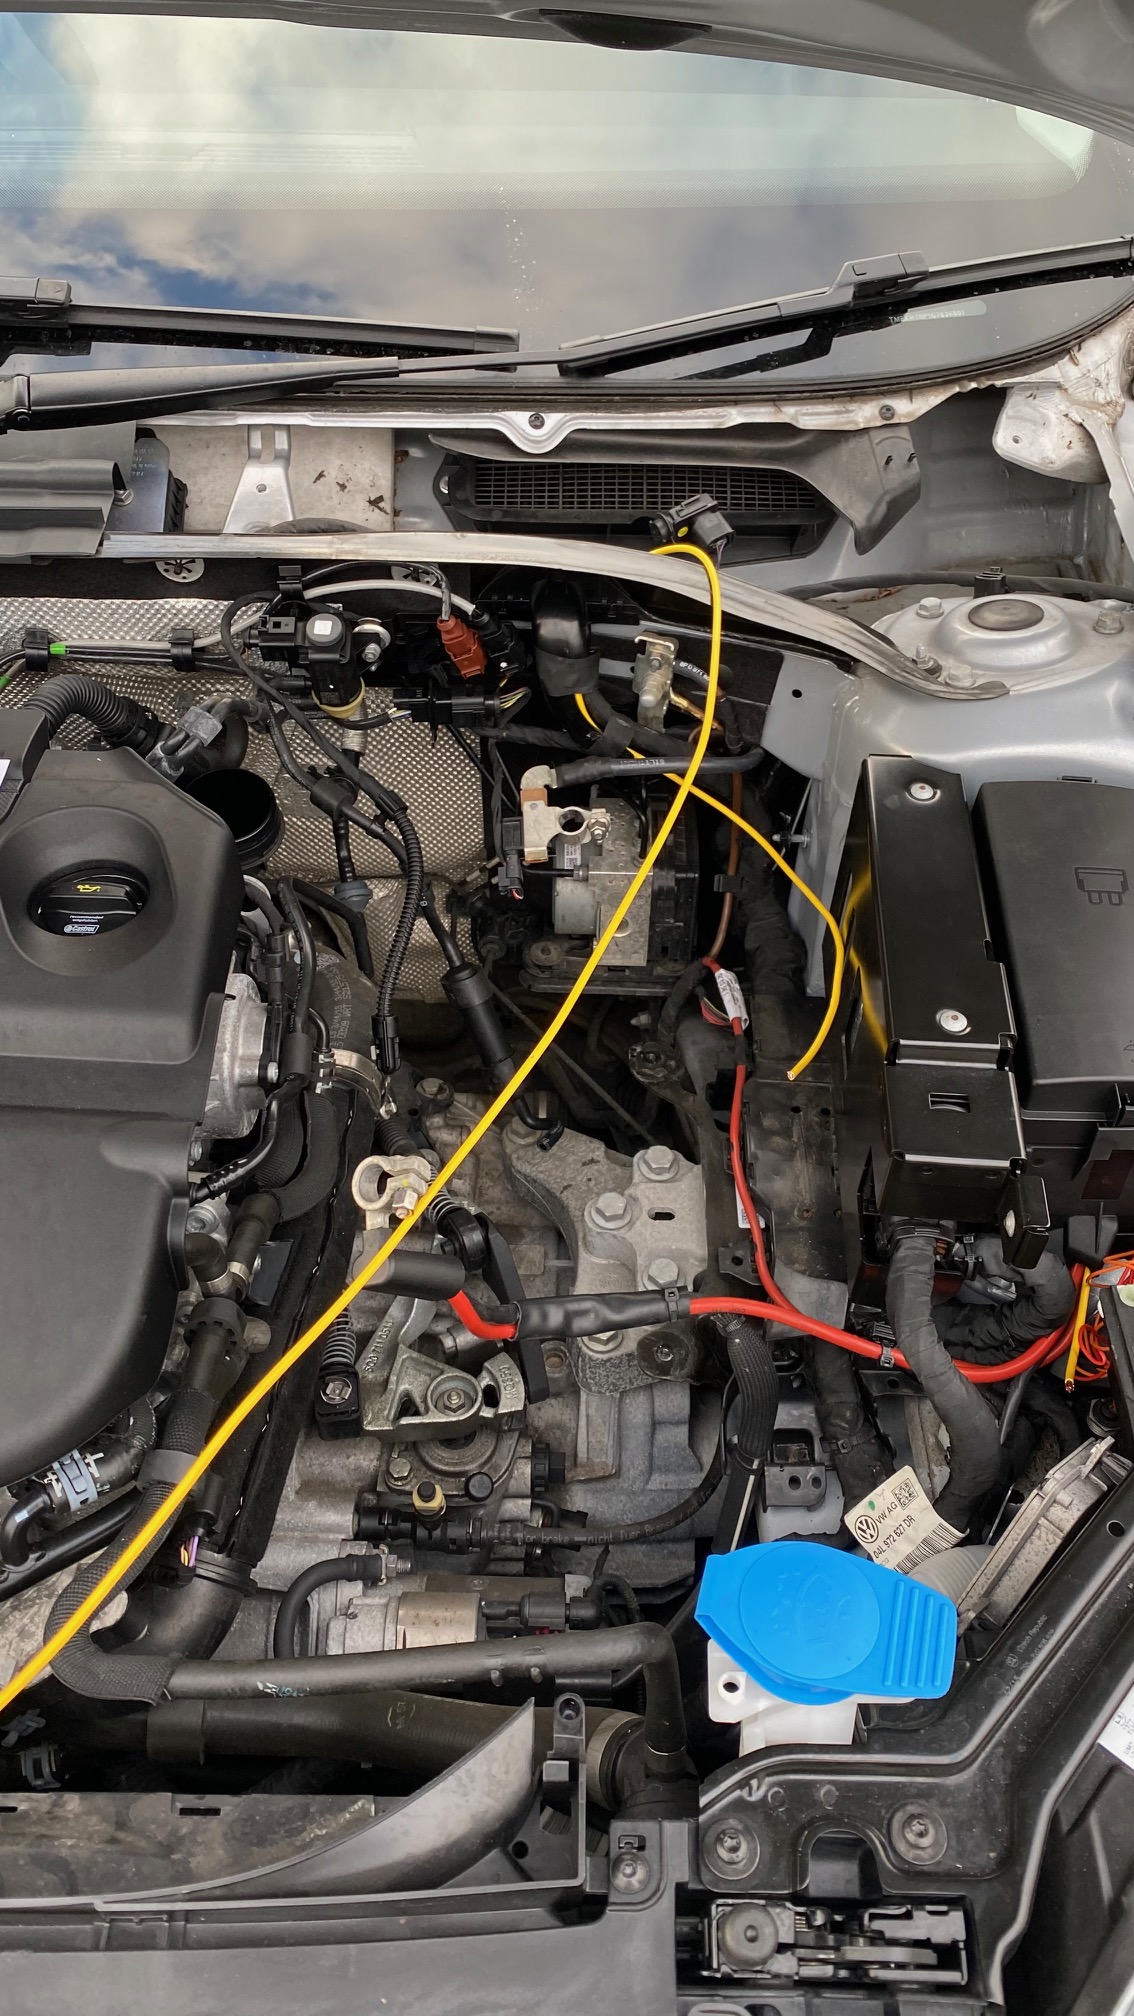
1 pointReplaced the module and still no communication; Started testing voltages at the J104 Connector and while doing so noticed the battery box had rubbed through the wiring harness near the fusebox (severing some of the wires.). So that's my job for tomorrow and will hopefully have this Skoda back on the road.1 point
-
1 pointI’ve stitched up small tyre tears with dental floss before now. But this one wasn’t salvageable...
 1 point
 -
1 pointSo - a thought. Would you like a video on how to do it (cos the videos I've seen on YouTube don't show the correct way of doing it).1 point
-
If you don't get a response from the dealership (or agent representing the seller you entered the financial agreement with) in a 'reasonable' amount of time, write back to them stating what you want, in that further to your previous communication dated ***, 1, An independent evaluation has found and stated in writing that the operation of the clutch system was defective and the fault has been identified with the mechanism outside of the excluded wearing parts listed in the vehicle warranty statement and present since the vehicle was built/prior to your ownership. 2, Under terms of the warranty, you expect the defective parts to be repaired or replaced and all other parts damaged as a consequence of the parts failure to be replaced at no further cost to yourself. 3, You allow them a stated time period to respond to the request with an appropriate plan of action (1 week from the date of the email/letter for example) 3a, (optional) You require a courtesy vehicle whilst yours is Off Road. (If you have one of theirs, it can speed up their decision making process) 4, If they fail to acknowledge the defect was present when the vehicle was built within the time stated or they fail to commit to carry out the repair to meet your reasonable expectations, state that you will make arrangement for the repair to be made elsewhere but you will seek to recover through legal means (Small claims court) ANY out of pocket expenses such as the cost of the repair, vehicle recovery services moving the vehicle to another repairer, time spent dealing with this issue at national minimum hourly wage rates, documented phone calls, costs of reasonable alternative transport arrangements made (bus, taxi, hire car, fuel@45p/mile and time of somebody else moving you about). Make a detailed record of your time and expenses accumilated whilst dealing with this since you presented the vehicle to them on day one of the failure. The more you detail, the more pressure you put on them to sort it out as they can see your costs are escalating. Don't get angry with them, it doesn't help. Be prepared to do what you state in writing to them otherwise they will not fulfil your expectations.1 point
-
Obviously. In fact, I think it was the same private road that he took me down with 175 showing on the speedo of his Lamborghini.1 point
-
By the way, found a link on here you left to a You Tube video of a chap fixing a customers 2005 Polo's air con. Broken wire in the end. Watched it all the way through, very interesting especially his perseverance and knowledge. Just need him to move near me......1 point
-
I doubt it would be anything else, unless the car doesn't have aircon, in which case I'd suspect the radiator thermoswitch. What price is a new fan module? I would say that they're usually pretty reliable, so consider 2nd hand unless new is very reasonable. If it starts up again when you reconnect the battery, you could try undoing the wire end of strip fuse 3 above the battery and lifting the crimp/wire clear away to stop it. May well be worth checking the low speed function, easy if the car has A/C, just switch that on, set it to cool and wait a short time. (Different fuse does the low speed, blade fuse no.8 over to the right of the strip fuses, under a removable cover.)1 point
-
1 point
-
1 pointThe dry and shine is fine. I’ve my lot coated with race glaze pro ceramic. So all your doing is topping up a quick spray wax over the coating. Your not getting near the paint. You don’t want anything with any sort of abrasives in it. I use Rupes Uno protect every few months over mine. It’s applied with a white foam finishing pad at speed 1 on the DA. The main reason for this is to help maintain the longevity of the coating and to aid beading and self cleaning properties. some of those so called spray ceramics are a PITA as they streak when applied. The spray and shine is a simple spray on wipe off product that lasts well. Britemax spray and shine is another good product for this sort of use. Buy some very nice, very soft cloths. Spray on and apply with one. Go over with another clean one to wipe off. Then go over the entire car with a third when finished. That’s my procedure anyway. 👍🏻1 point
-
1 pointIt all comes down to how you look after them. The wipers on my previous car (subaru) lasted 5 years.1 point
-
1 pointI change the Air and Cabin filter every year, regardless of mileage (which will never be more than around 8k anyway). Although I do feel that having to undo 6 torx head screws just to change the air filter is a bit overkill from Skoda. My previous BMW 5 series (and every other car I've owned) had clips, nice and easy. And getting the glovebox off to change the cabin filter (and then on again) is a mission in itself. What a joke! There must be an easier way?1 point
-
1 pointI'm doing this right now, windscreen should arrive tomorrow. @gazz3000could you advise - could I switch over the windscreen first, and then do the wiring, or would it be too hard to access the connection points after the screen is fitted? I'm not sure I'll have the wiring prepared ready in time before the screen fitter will come on Weds.1 point
-
1 pointYou just knew curiosity would get the better of me didn't you! The only good thing about it, is it is apparently endangered. It certainly would be if it came around here!!!!1 point
-
Ah geez......I should probably speak in a language other than English! As I previously mentioned - from factory, if optioned, the 220 comes with a 16" rim, wearing 205/55R16 tyres. 1G4 is the PR code. If u want to match rotational speeds with a 16/17/18 rim - then u can continue reading the debates.........1 point
-
1 pointI find as a rule of thumb "if it does no harm, then replace it". If you wish to replace the filters early it will not damage the car. I currently live in a rural area, and change my filters at the required time, however when i lived in Germany, near a very dusty and dirty industrial site, with a lot of airborne particulate matter, i changed my filters more regularly. I still remove my pollen filter and give Henry some lunch once a year Replacing air filters are not an onerous task1 point
-
1 pointMy general thoughts on the subject of servicing my Skoda superb 2011 till 2019 as a taxi driver i bought this car brand new, serviced it as follows: every 10,000 miles air filter, oil filter, fuel filter, pollen filter and oil.. evry 85,000 miles cam shaft belt replaced, water pump every second camshaft belt, the results speak for themselves, car at 0 miles total mileage on car when i replaced it, it was at 433,000 miles with the same engine ,gearbox, Turbo, exhaust, glow plugs since the day i drove it out the dealers, due to the regional council the taxi cant be more than ten years old, hence the reason for replacement, new car is Skoda Super 3 , happy motoring.1 point
-
1 pointThe SKoda system is fine, it detected a punctured tyre before I had noticed. Why would anyone want a complicated expensive unreliable system? There are enough complications to fail already on modern cars why add to the list?1 point
-
1 pointFirstly, have a look at the detailing section of the forum - there’s a lot of good advice there. There’s also detailing world website which is amazing but quite daunting initially. Your list of kit is comprehensive. I’d agree with Bap33 in as much as you need some form of “mechanical” decontamination (clay bar/mitt) as well as some chemical decon products. I’d think about your routine as being split in 2: you have your regular maintenance work and also a full “deep clean and polish”. For me, the deep clean and polish is done once annually as a) it takes up a lot of time which my wife is reluctant to give me and b) good techniques should make it redundant. My car is a daily driver so it’s not perfect and being OK with small imperfections is key to remaining sane IMHO. I have a dual action polisher (Carbon Collective Hex15) which is great along with a DAS6 Pro (which can be used with both 3 and 5” pads so is best for beginners or as a standalone machine). I use green Chemical Guys hex logic pads as they work well on Skoda paint. With these, I use Sonax 04-06 single stage polish which isn’t the cheapest but is very good to work with as it will remove swirls but also finish to a great gloss. Others will have their own preferences. The actual act of polishing is relatively straight forward and “safe” as long as you are sensible. Have a look on YouTube for Junkman2000 as he did a seminal video on polishing. There are thousands of other guides out there (Forensic Details is another good channel). Once you have polished your car and made it look fantastic, you’ll want to protect it. I use Gyeon CanCoat which is a “light” ceramic coating which is easy to apply and should last 6 months or so. I top it with Garage Therapy Sigma (their range is fantastic) which should last for 3 months and is amazingly glossy. Then it’s a case of the classic 2 bucket method every so often to keep it looking ship shape!1 point
-
1 pointGreat choice! Then I would say that because I have one 👍 All mods should be declared with your insurance if you're following the letter of the law. I hope you enjoy the car.1 point
-
Part number N90892101, any dealer should be able to get them for you. Ebay may also offer some but probably more expensively.1 point
-
The wire mesh once covered the whole corrugated (flexi) section, to keep little stones from getting trapped between the convolutions which might then puncture it, non-essential. The leak is probably at the dual sleeve clamp he points at at the end of the video, but may also be at the flexi. You'll have to ask. Relatively cheap to replace the front as there isn't a catalytic converter in that front section on the 1.2 engines, but there is a lambda sensor at the front end, so be careful with that if DIY'ing. There's a possibility that the leak has come about due to excessive engine movement fore-and-aft, this might result from a rear engine mount ("dogbone mount") that is allowing too much motion due to age/wear.1 point
-
1 point@charco Not declaring mods like Remaps, Tuning Boxes or other non standard factory parts or options can void your insurance. Really not a good thing for yourself, but at least there will be 3rd party cover for others if unfortunately there is any claim against you or your insurers.1 point
-
Just read this : https://www.carthrottle.com/post/why-i-bought-a-430000-mile-skoda-octavia-for-500/ Miles is still around, just shows how long these cars can last !1 point
-
1 pointQuick update. I put a note through the letterboxes of the local residents asking if they had seen anything. I mentioned the times it could have happened and that it was a silver car. Had 2 knocks on the door. First was from one neighbour who thought, like I did, that it was my immediate neighbour who has a silver Mercedes. He did say his initial thought was it was Luke, a youngster whose car is junk but who hadn’t been around. The next knock was from Luke and his dad. It transpired that he had popped home at 1am to get some “baccy” and that he’d backed into mine on the way out. He said he checked his car when he got back to where he was staying and couldn’t see any new damage and assumed mine would be OK. He didn’t tell his parents but when they read my note, they asked and he confessed. So, he’s going to pay for repairs (£650) in cash as don’t want it going through insurance (he recently drove into/over a motorbike parked outside too) which is fine with me. He seemed contrite and apologised and I felt a little guilty as he’s young and we all dropped the ball when we were youths, but, I think (hope) he’ll learn from this. The body shop repair will be essentially invisible which is good. I’ll know it’s been repaired but it is just a car at the end of the day. I promised my wife I would remember that!1 point
-


Important Information
Welcome to BRISKODA. Please note the following important links Terms of Use. We have a comprehensive Privacy Policy. We have placed cookies on your device to help make this website better. You can adjust your cookie settings, otherwise we'll assume you're okay to continue.