


Leaderboard
-
.jpg.68c7823d355ff3e5b20e82ddbf78398c.jpg)
PetrolDave
Resident Member9Points8,197Posts -
.jpg.1006585dfe4e2977315b67c3d642e37b.jpg)
Guest_
FREEDOM6Points83,824Posts -
lukk
Members4Points84Posts -
AMD87
FREEDOM3Points1,535Posts
.thumb.jpg.f83a46b9b3c0d976b9dbffbb523c9874.jpg)


Popular Content
Showing content with the highest reputation on 15/06/21 in all areas
-
Your comments/ opinions are missing the point. The point is that It's my car, i paid for the plates (the plates are not the ones that came with the car) and I didn't give my permission for the plate maker to advertise its business free of charge on my car. The plates would not be deemed illegal: use of a lip plate is outside the regulations. What you do not know and frankly none of your business is that my cherished number doubles as an advertisement for my business and has done successfully for more than 45 years. Even if I wanted to put my website address on my car number plate I couldn't because the only legal space to do so had been taken by a business that is nothing to do with me and which had the cheek to add its details without my permission. As far as i am concerned, it is a matter of principle and since it is my principle I am entitled to restrict it to some things and not others.3 points
-
2 pointsAll cars have a unique 17 character identity code – their Vehicle Identification Number or VIN. For Karoqs this is displayed at the bottom lefthand corner of the windscreen, on a sticker at the base of the middle body pillar, and stamped into the righthand suspension turret under the bonnet. It takes the form: TMB LJ7 NU 7J5 012345 and can be decoded as follows: The first 3 characters are TMB for Škoda cars. The 4th character tells you the chassis type: J = left-hand drive FWD, K = right-hand drive FWD, L = left-hand drive 4x4 and M = right-hand drive 4x4. The 5th character tells you the engine: E = 2.0 TSI 190PS, G = 1.6 TDI 115PS, J = 2.0 TDI 150PS, M = 2.0 TDI 190 PS, P = 1.0 TSI 115PS, R = 1.5 TSI 150PS. (Anyone know the code for the 2.0 TDI 115PS engine or Russian 1.6 MPI engines?) The 6th character tells you how many airbags the car has: 2 = 2 front airbags, 4 = 2 front and 2 side airbags, 5 = 2 fronts + 2 sides + 1 knee airbag, 6 = 2 front airbags + 2 sides + 2 heads, 7 = 2 front airbags + 2 sides + 2 heads + 1 knee airbag, 8 = 2 front airbags + 4 sides + 2 heads, 9 = 2 front bags + 4 sides + 2 heads + 1 knee airbag. The 7th and 8th character tell you the vehicle model: NU = the Karoq (2017 on). The 9th character is a check digit to validate the code. The 10th character tells you the car's model year: J = MY2018 (ie manufactured between summer 2017 and summer 2018, K = MY2019 (ie manufactured between summer 2018 and summer 2019, L = MY2020 (ie manufactured between summer 2019 and summer 2020, M = MY2021 (ie manufactured between summer 2020 and summer 2021. The 11th character tells you where your car was built: 0 to 4 = Mladá Boleslav, Czechia; 5 = Kvasiny, Czechia; 7 or 8 = Vrchlabi, Czechia; B = Solomonovo, Ukraine; H = Nizhny Novgorod, Russia; J = Osnabruck, Germany; K = Kaluga, Russia; N = Mladá Boleslav, Czechia. Then finally the 12th to 17th numbers are the unique production number for that production line and year. If anyone has a character in their VIN not listed above, please give me the details so I can update this guide. Thanks Chris2 points
-
It's under the strap twist to the right of the spanner and the cap extraction tool is just below it!2 points
-
Kormoran Tyres are owned/made by Michelin. Thanks, AG Falco2 points
-
2 pointsIn some countries they compromise privacy law, so they don't put them in. Must say, the local usb port is a great addition.2 points
-
2 pointsMight be worth cleaning it properly and then giving it a gentle run over with a heat gun. It won't remove the scratches but will bring the dark colour back to them and hence reduce their visibility. This worked on some external plastics on my previous Honda Civic so should work in this situation too. You just need to be careful, so you don't do more damage than good.2 points
-
Full detail with lots of products new to me, first time I've ever used a machine polisher of any kind: Pre-wash with Koch Chemie Greenstar at 1:15 dilution applied with garden sprayer, then pressure washed Fairy liquid (!) wash with an Incredimitt, then pressure washed again Clay mitt with Mer's Clay lube Katsu 850w 6" DA polisher with Scholl S20 Black One Step using Chemical Guys hex logic green pads of 3.5" and 6.0". Did about 4 passes per section. Some very old Autoglym SRP glaze applied by DA using Chemical Guys hex logic black pads - surprisingly a lot less dusty than hand application Collinite 845 hybrid wax applied by hand with a German tri-foam applicator Roof has been done previously with Johnson's blue baby bath, an upholstery brush and Fabil+UV. Black plastic trim and rubbers previously done with CarPro PERL. Wheels I could not be arsed with today! With hindsight I should've gone a bit more aggressive with the pad or polish since I didn't get all the swirls out but it is much better than it was. I am now considering some Koch H8.02 and orange hex pads for the really messed up areas. It's 6 year old soft Mazda paint and been subjected to a few dealer washes so it was very swirly. Apologies for the lack of Skoda!2 points
-
2 pointsA repair on a textured surface like that is going to look terrible.2 points
-
G'day, from wintery Cottesloe, in the antipodes. Think an early autumn day in the south of England. My wife and I are both Octavia owners, a 1Z5 wagon and a 1Z3 sedan. Both 2008, both from new. Sedan for the city, wagon for the country. We did a 3,000k round trip about a fortnight ago. The TDI did not miss a beat. I have been servicing the two cars since they came out of warrenty. I have been an avid reader of your forums over the years. Time to ask some unanswered question (or rather answers Ihave not been able to locate!). Thanks for having me... Kevin2 points
-
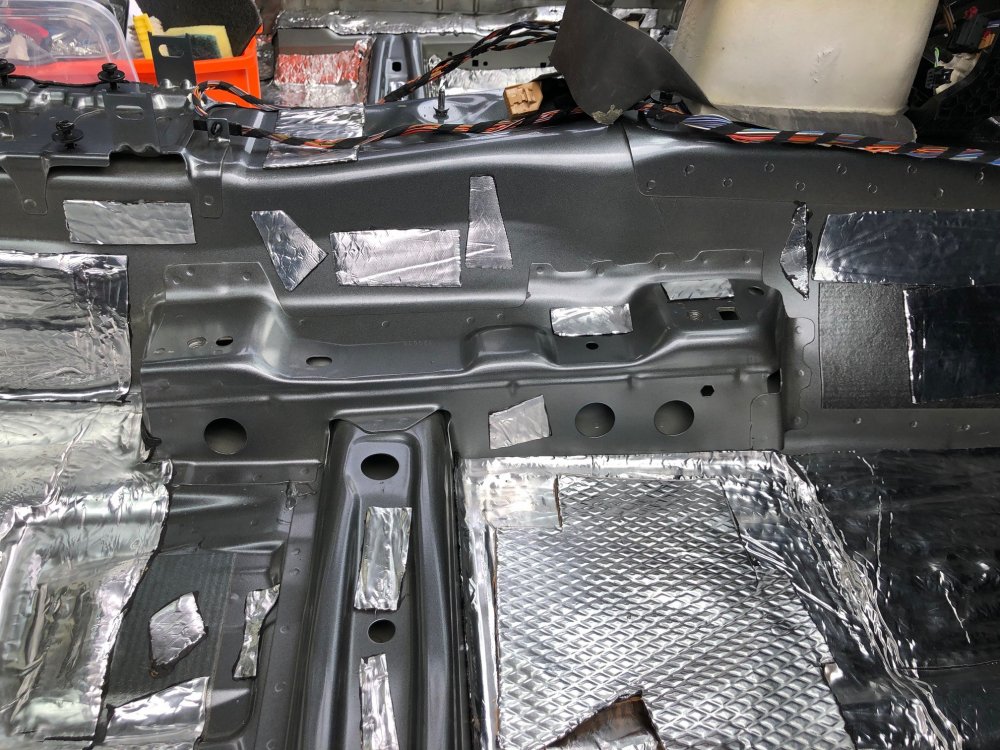
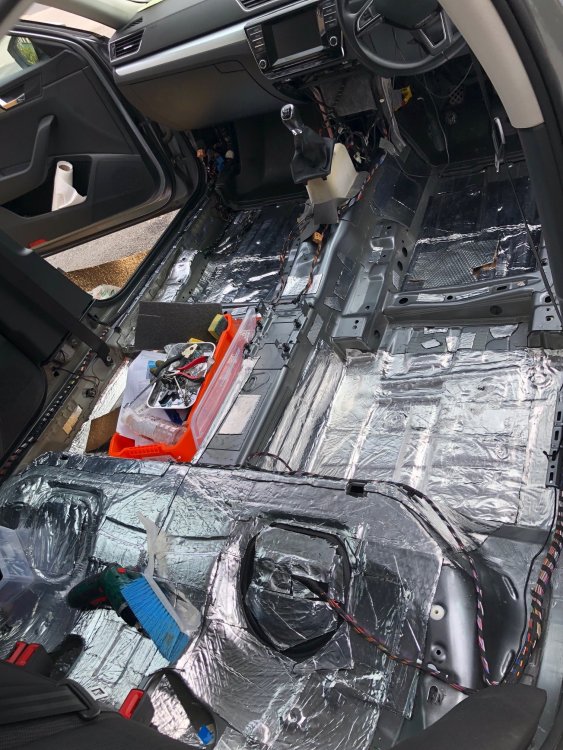
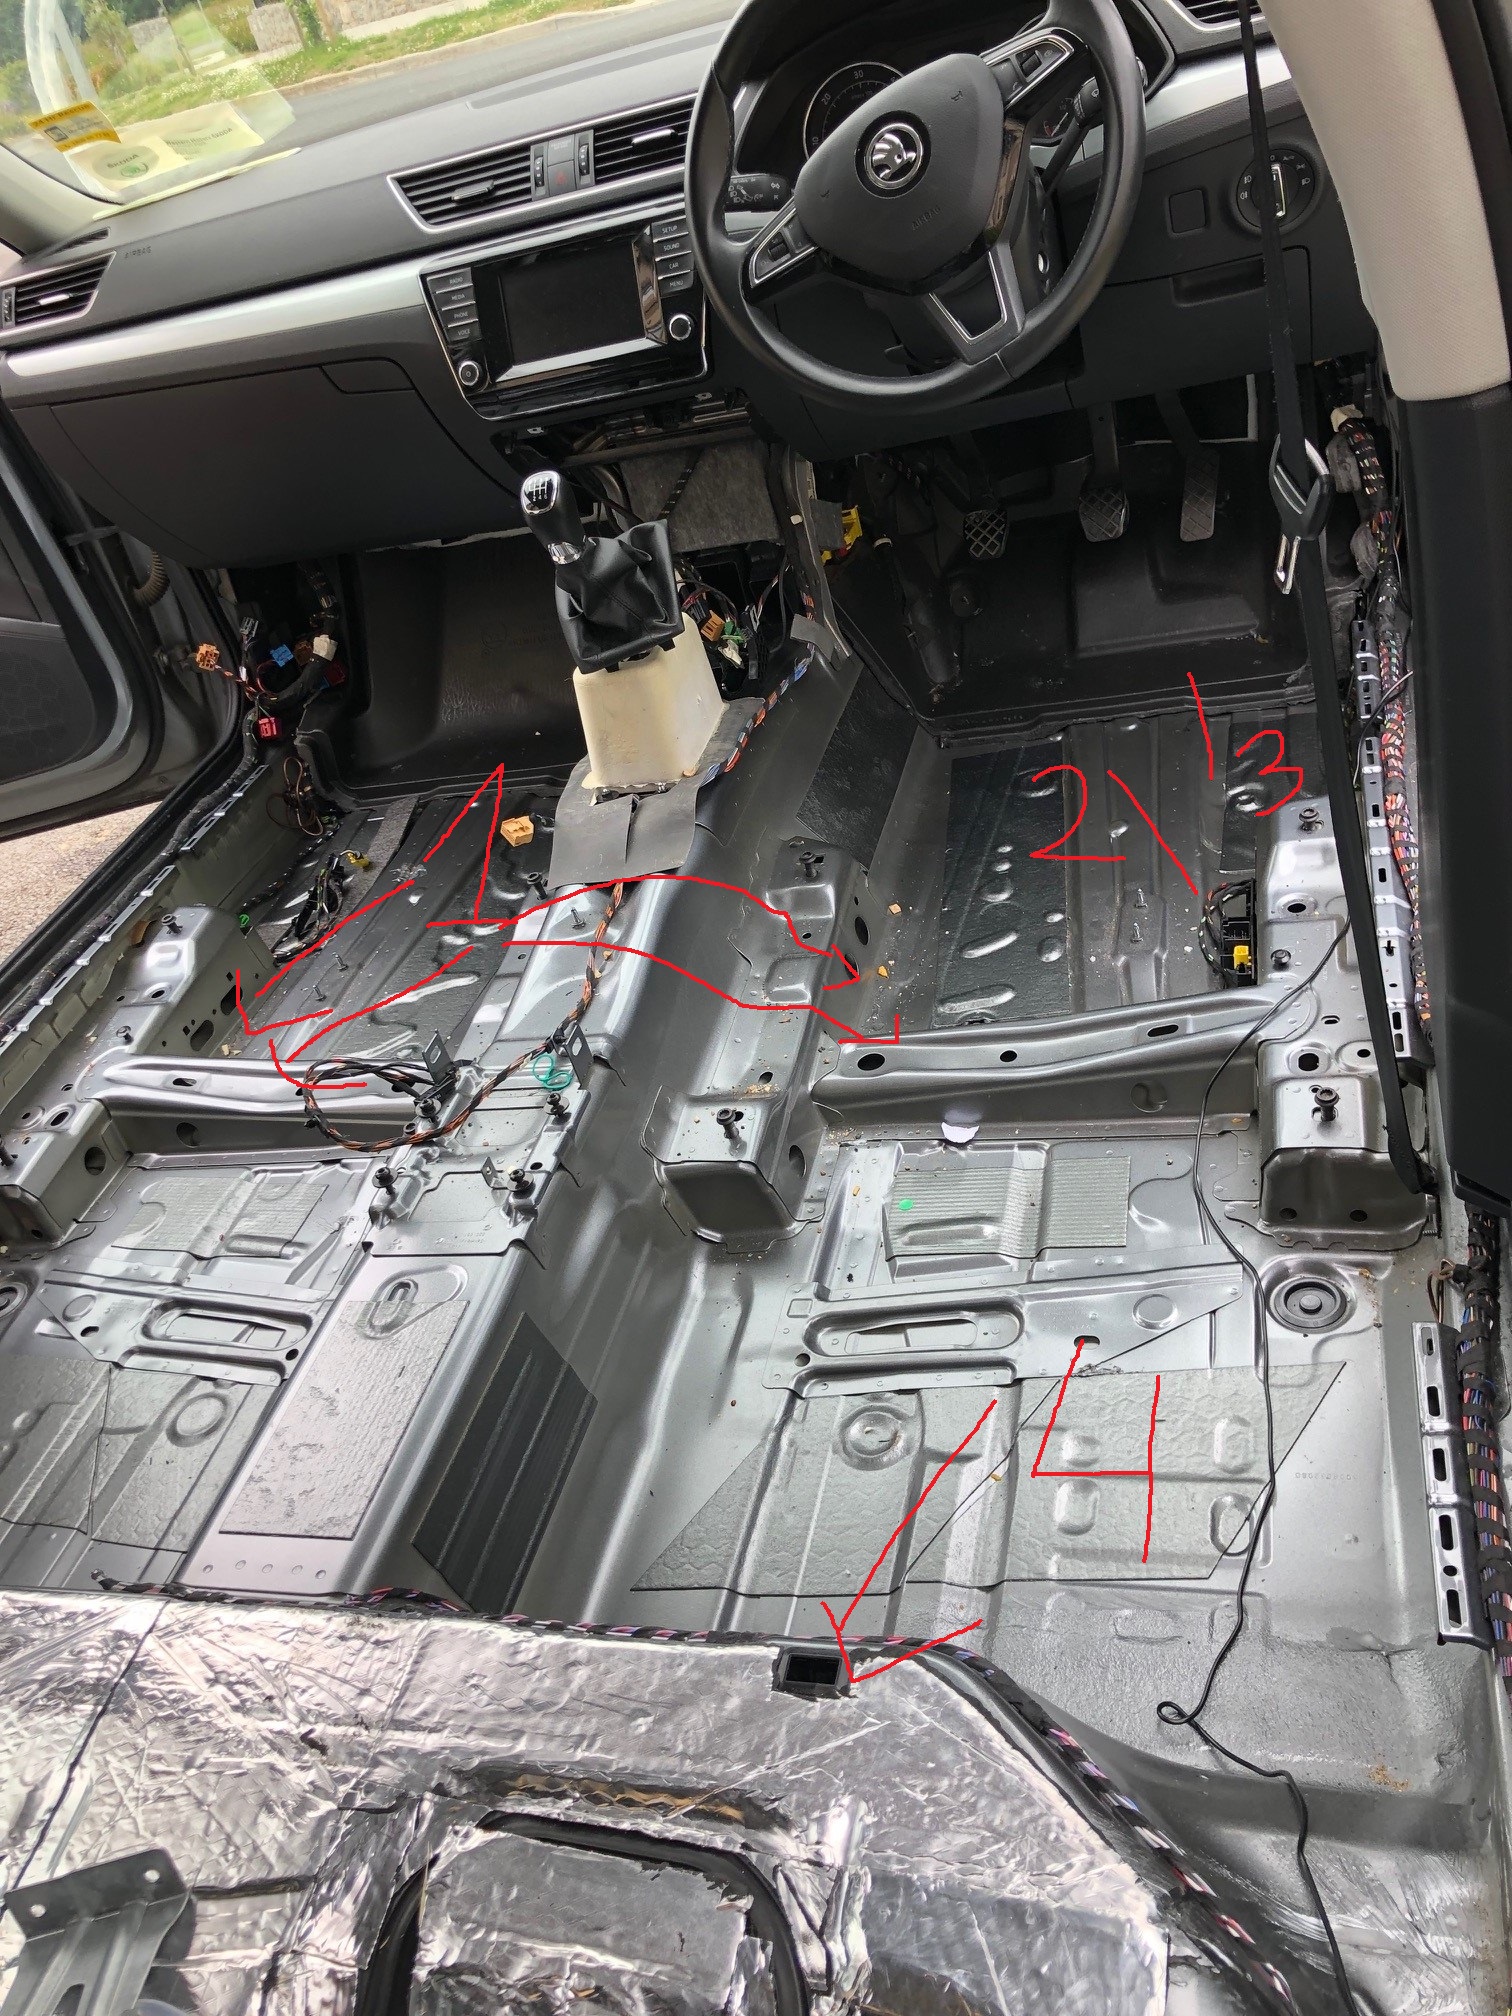
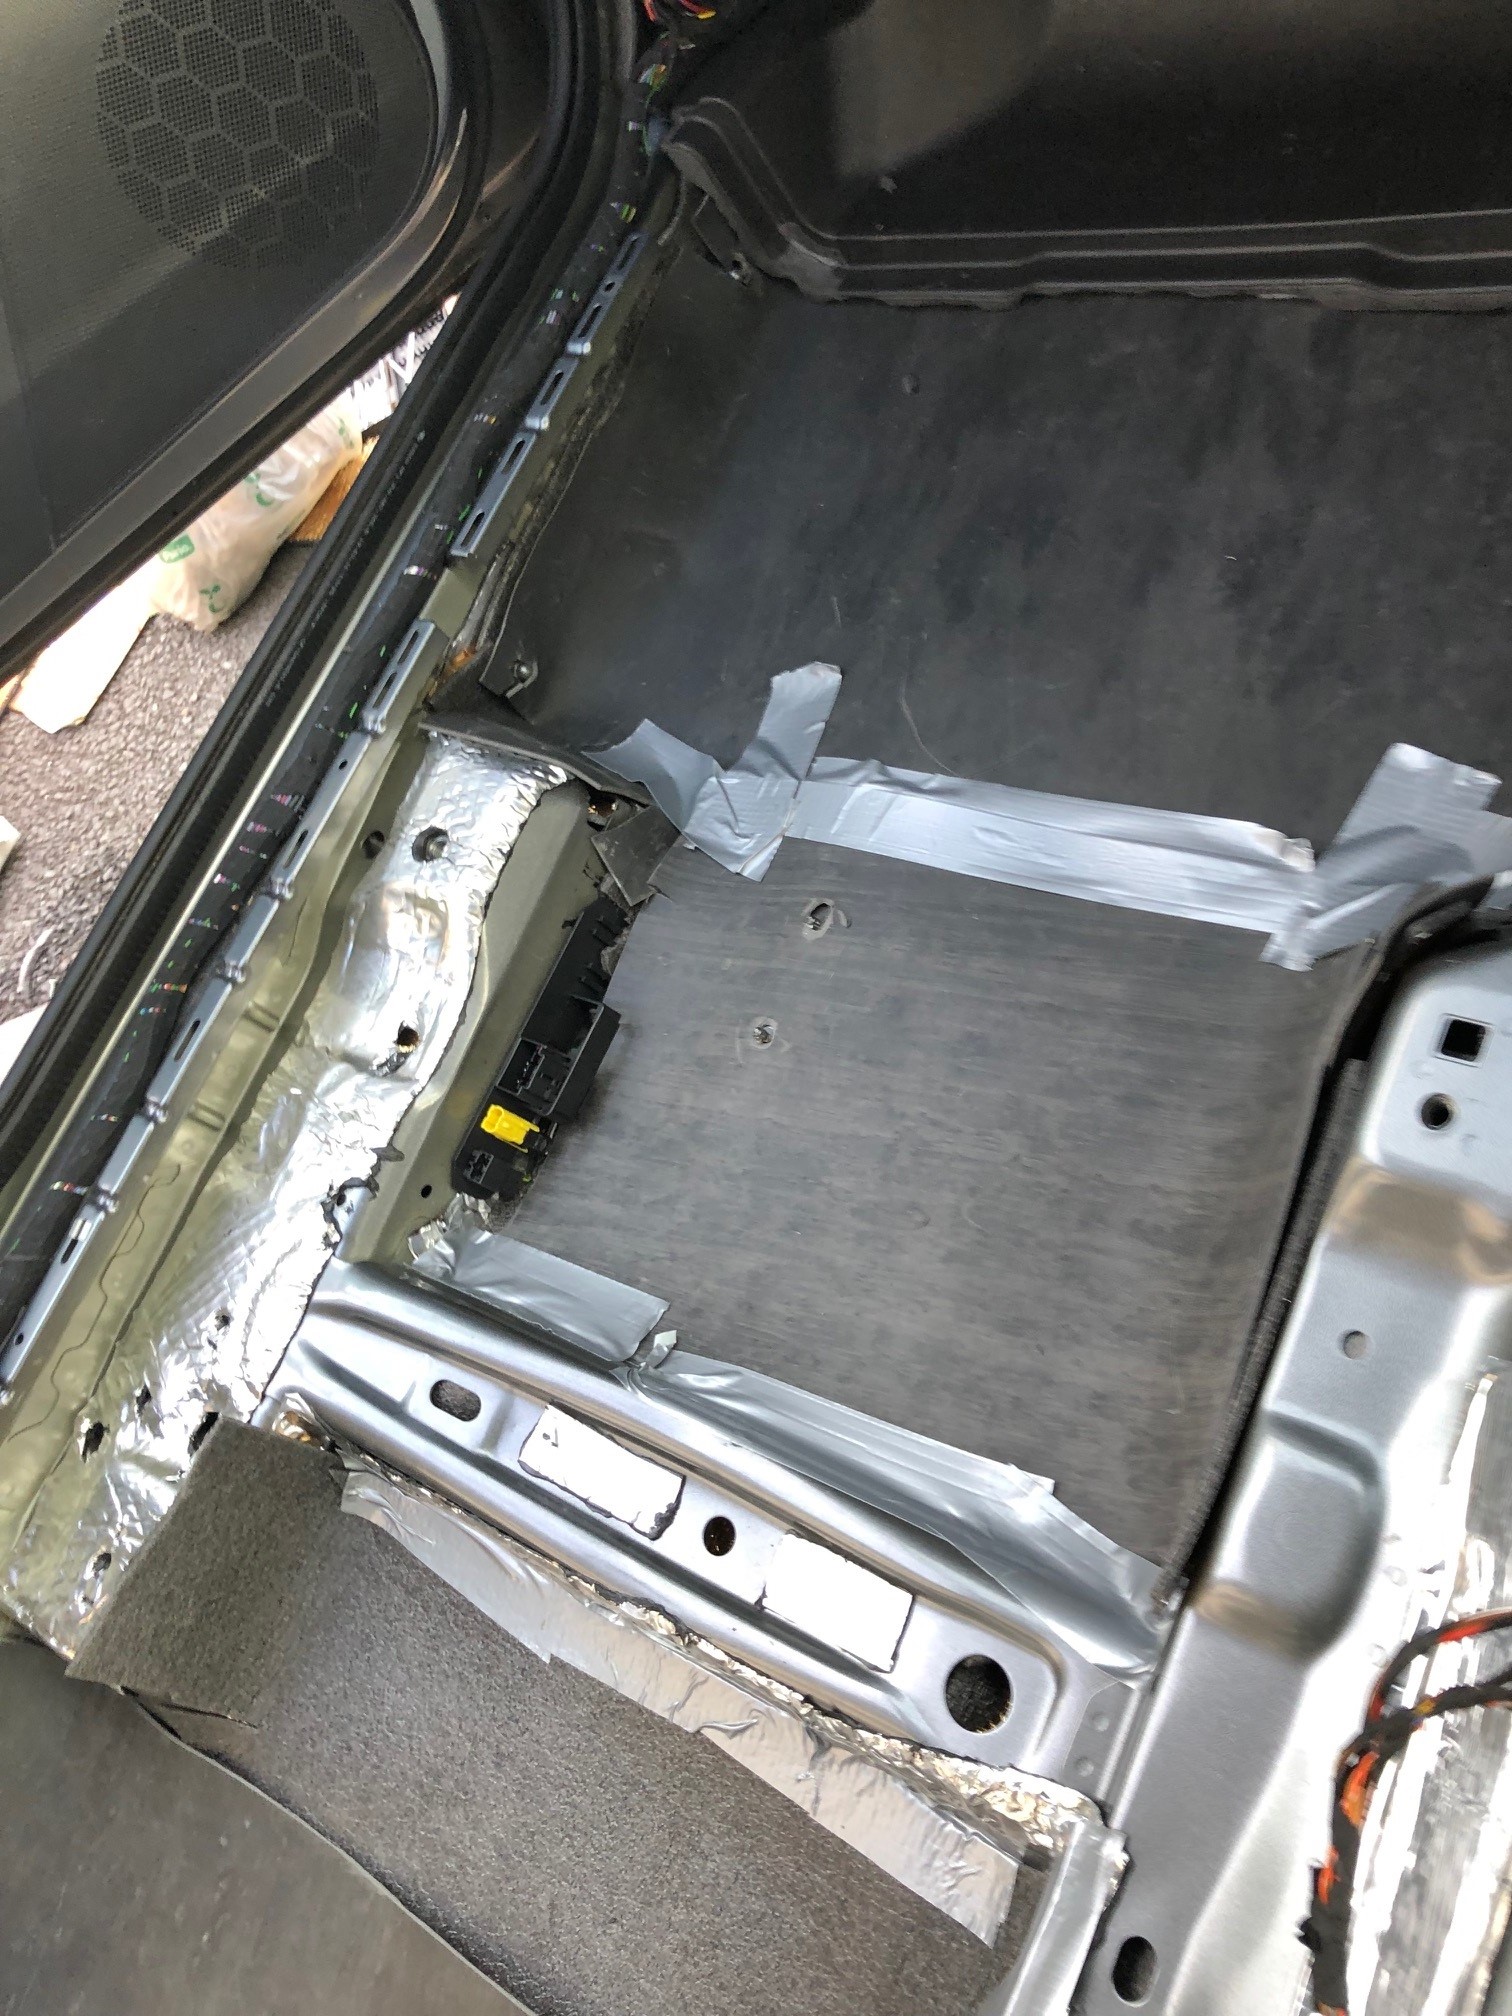
2 pointsso today I completed my work on the floor. I laid Noico 2mm, carpet closed foam underlay as decoupler, and then MLV. This comes on top of the boot, the B Pilar and the two doors done a week or so ago. This was pretty challenging and I started on Friday with taking out the back couch and laying Noico there. This would have been very easy if it wasn't for the couch not wanting to slide out. I must have spent 30min trying to do what the workshop manual was telling me to do. Only once I applied my whole body weight the thing slid out from its sockets. Other than that it was the easy bit with just laying butyl Next I proceeded to disassembling the entire console in order to be able to remove the carpet and the underlay beneath it. Unfortunately these are installed in such a way that it's impossible to keep the carpet and underlay intact without taking apart at least some bits of the console. So I entirely disassembled it. I think I was also partially driven to doing this by seeing multiple pictures on the internet with the consoles out. Looking back this I think I would have rather cut the carpet and the underlay at the 1 or 2 narrow strip that go over the console to avoid the hassle. I believe such cuts wouldn't make a difference to the quality of fitting while would save me loads of time and allow to get the carpet out. Or perhaps I would not take the carpet out at all, I would just remove the seats and bend the carpet sideways to uncover as much floor as possible. While it would be inconvenient to work with it would probably do most of the job and save loads of time Anyway, the console was out, so was the carpet and the underlay. I laid Noico beginning from the rear bench (number 4 in the attached picture) and going towards the front of the car. Unfortunately I started running out of the material hence the very front (around number 3 in the picture), is covered only partially but still to a good degree. A school error on my side but I was trying to use large, uninterrupted pieces of butyl so somehow lost count of how much was left. I should have started from the front. and work my back towards the bench. Luckily there was already some sound proofing material laid there by Skoda and the very bit under the feet / the pedals has a thick rubber / foam mat. I also added smaller strips to the sides and top of the console and other minor panels along the chassis. I stuffed hollow spaces around the seats (number 1 in the picture) with carpet underlay and this did a great job of sound deadening them. this also is very cost efficient as a big roll of carpet underlay is probably 20 euro and it can be stuffed in many other cavities in the car. In the next step I put the decoupling layer using my carpet underlay. Unfortunately it doesn't bend as great as some of the dedicated materials I see on youtube but I think it did an overall good job. Finally I laid MLV sheets. The bit with the frame for the seat screws, I did not cover it so there is a break in MLV. I didn't glue MLV sheets together either. I saw people doing it with contact concrete to create impenetrable barrier but although I bought some glue with an intention of doing the same I started to run out of time and had to cut corners. I realised that since my MLV sheets overlap each other by quite a bit and because they are quite heavy and will be weighed down by a further layer of Skoda underlay + carpet there is no need to freak out about some potential gaps .So I taped the stuff together (the tape was really crap) and started reassembling the things. In the picture it is not finished yet and looks a bit crap but I tightened the fit later. After having done the boot, the B pillar and the front doors I arrived at 73db-74db at 120km/h on my test motorway with coarse surface. This was a big noticeable improvement over the original noise levels whose db number unfortunately I don't know. At73db-74db we already found the noise levels acceptable (but not excellent) at the test speed and surface while we were pretty happy at lower speeds or on better surfaces. A reminder I have 18inch wide tires which simply came with the car. Doing the floor and rear seat bench helped cut the level by around 3db on the test road and change the frequency of the noise to a much nicer, less intrusive one. 3db is quite a lot, I believe it could be approximated to around 30% cut in audible noise. Currently there is now markedly less vibrations coming from the bottom of the car and whatever comes is much, much easier on the ears. On other benchmark road parts with poor surface but lower speed limit the vibrations have stopped altogether while they were annoying before. Was it worth it? Yes, but perhaps doing the back arches would provide a similar gain with less work, this I won't know until I get there. There are a few lessons learnt. As pointed by Digifish covering the entire rear bench in butyl might not have been the most efficient thing as the couch is made of a very thick foam which absorbs most noise. And this is true - after covering the rear bench with Noico I drove the car with and without the couch on and the difference is enormous. So the couch itself is a great sound absorber and saving the butyl used on the bench and using it in the front might have worked out better. It would also save me a few hours of work I would avoid taking the entire console out, I'd rather make two small cuts in the underlay and the carpet to remove them. Or I would just fold them to the side and laid Noico on the floors but forego sound deadening the panels on the console. That's my work-benefit analysis. This was a large part of work so it could be a good trade off to get some less sound isolation but saving yourself a hassle. There was some collateral damage. I am getting an airbag error. I think this originates from me disconnecting some of the wiring directly under the seat before I figured out this is not the way to take the seats out. While I reconnected the thing possibly something went wrong, I will need to have a look at it again and I suspect I will unscrew the seat bolts to get good access to the bottom of the seat. I will also check the cable box under the carpet. I am also left with around 10 screws which obviously I forgot to put back in their rightful places. These most likely come from some obscure fittings. The console sits very well so I don't think these 10 leftover screws are a big problem. The floor side plastic panel doesn't sit perfectly at the very forward end. The additional thickness of Noico+carpet underlay+MLV shifted everything up so one or two metal clips don't hold as firmly as before. Finally, the rear couch clicks out after a bit. Most likely the extra layer of Noico is an issue. The D-shaped hooks are not long enough to click in properly into the plastic grommets (number 4 in the picture). I have put the child seat back so the couch is weighed down for now and clicked in. But longer term I might need to take the plastic grommets out, click them onto the metal hooks, and then put it all into the metal openings? So I guess the next thing for me is to address that airbag error and in foreseeable future doing the rear arches, the bonnet and maybe the rear doors. But due to my wives pregnancy it might be weeks or even months before I get there. I don't have any noico left anyway.

 2 points
 -
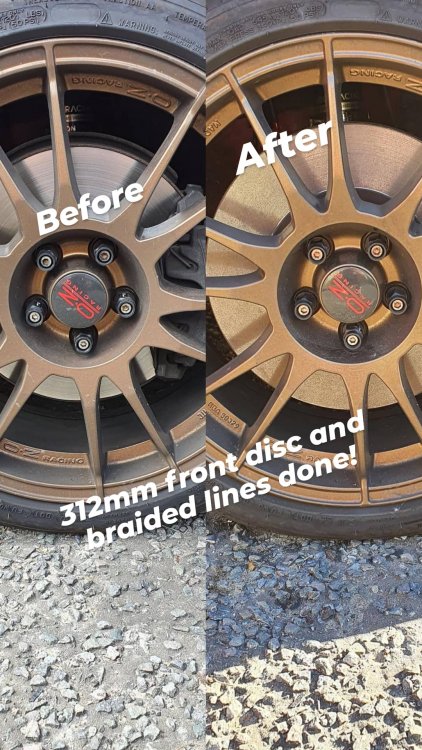
2 points2 pointsLittle update with my build, I folded and ordered an rtmg turbo and carbon intake. I fitted the turbo last week and tomorrow I'm taking a trip back to my tuner to get a cuatom map for it. Was at 183bhp and 296Nm on the 1.4 turbo. Not really expecting a massive leap, my 1.4 turbo was 2nd hand and I was getting a bit nervous about it not blowing up (know of 2 doing so fairly recently) but it was running really nice. I have absolute faith that Leon at Road Rage Performance will work wonders with the new hardware. It will be ready by the end of the day tomorrow but for logistical reasons I'll pick it up Wednesday. In other news, I completed the 288mm to 312mm front disc upgrade. I used nearly new discs and pads from a member of another group that had upgraded to a BBK on his mk1 Octavia VRS, carriers from a mk1 1.8 TT off eBay and some Hel braided lines. It feels OEM but with massive stopping power when you press on. Plus they fill the wheels better, just need to paint them now.
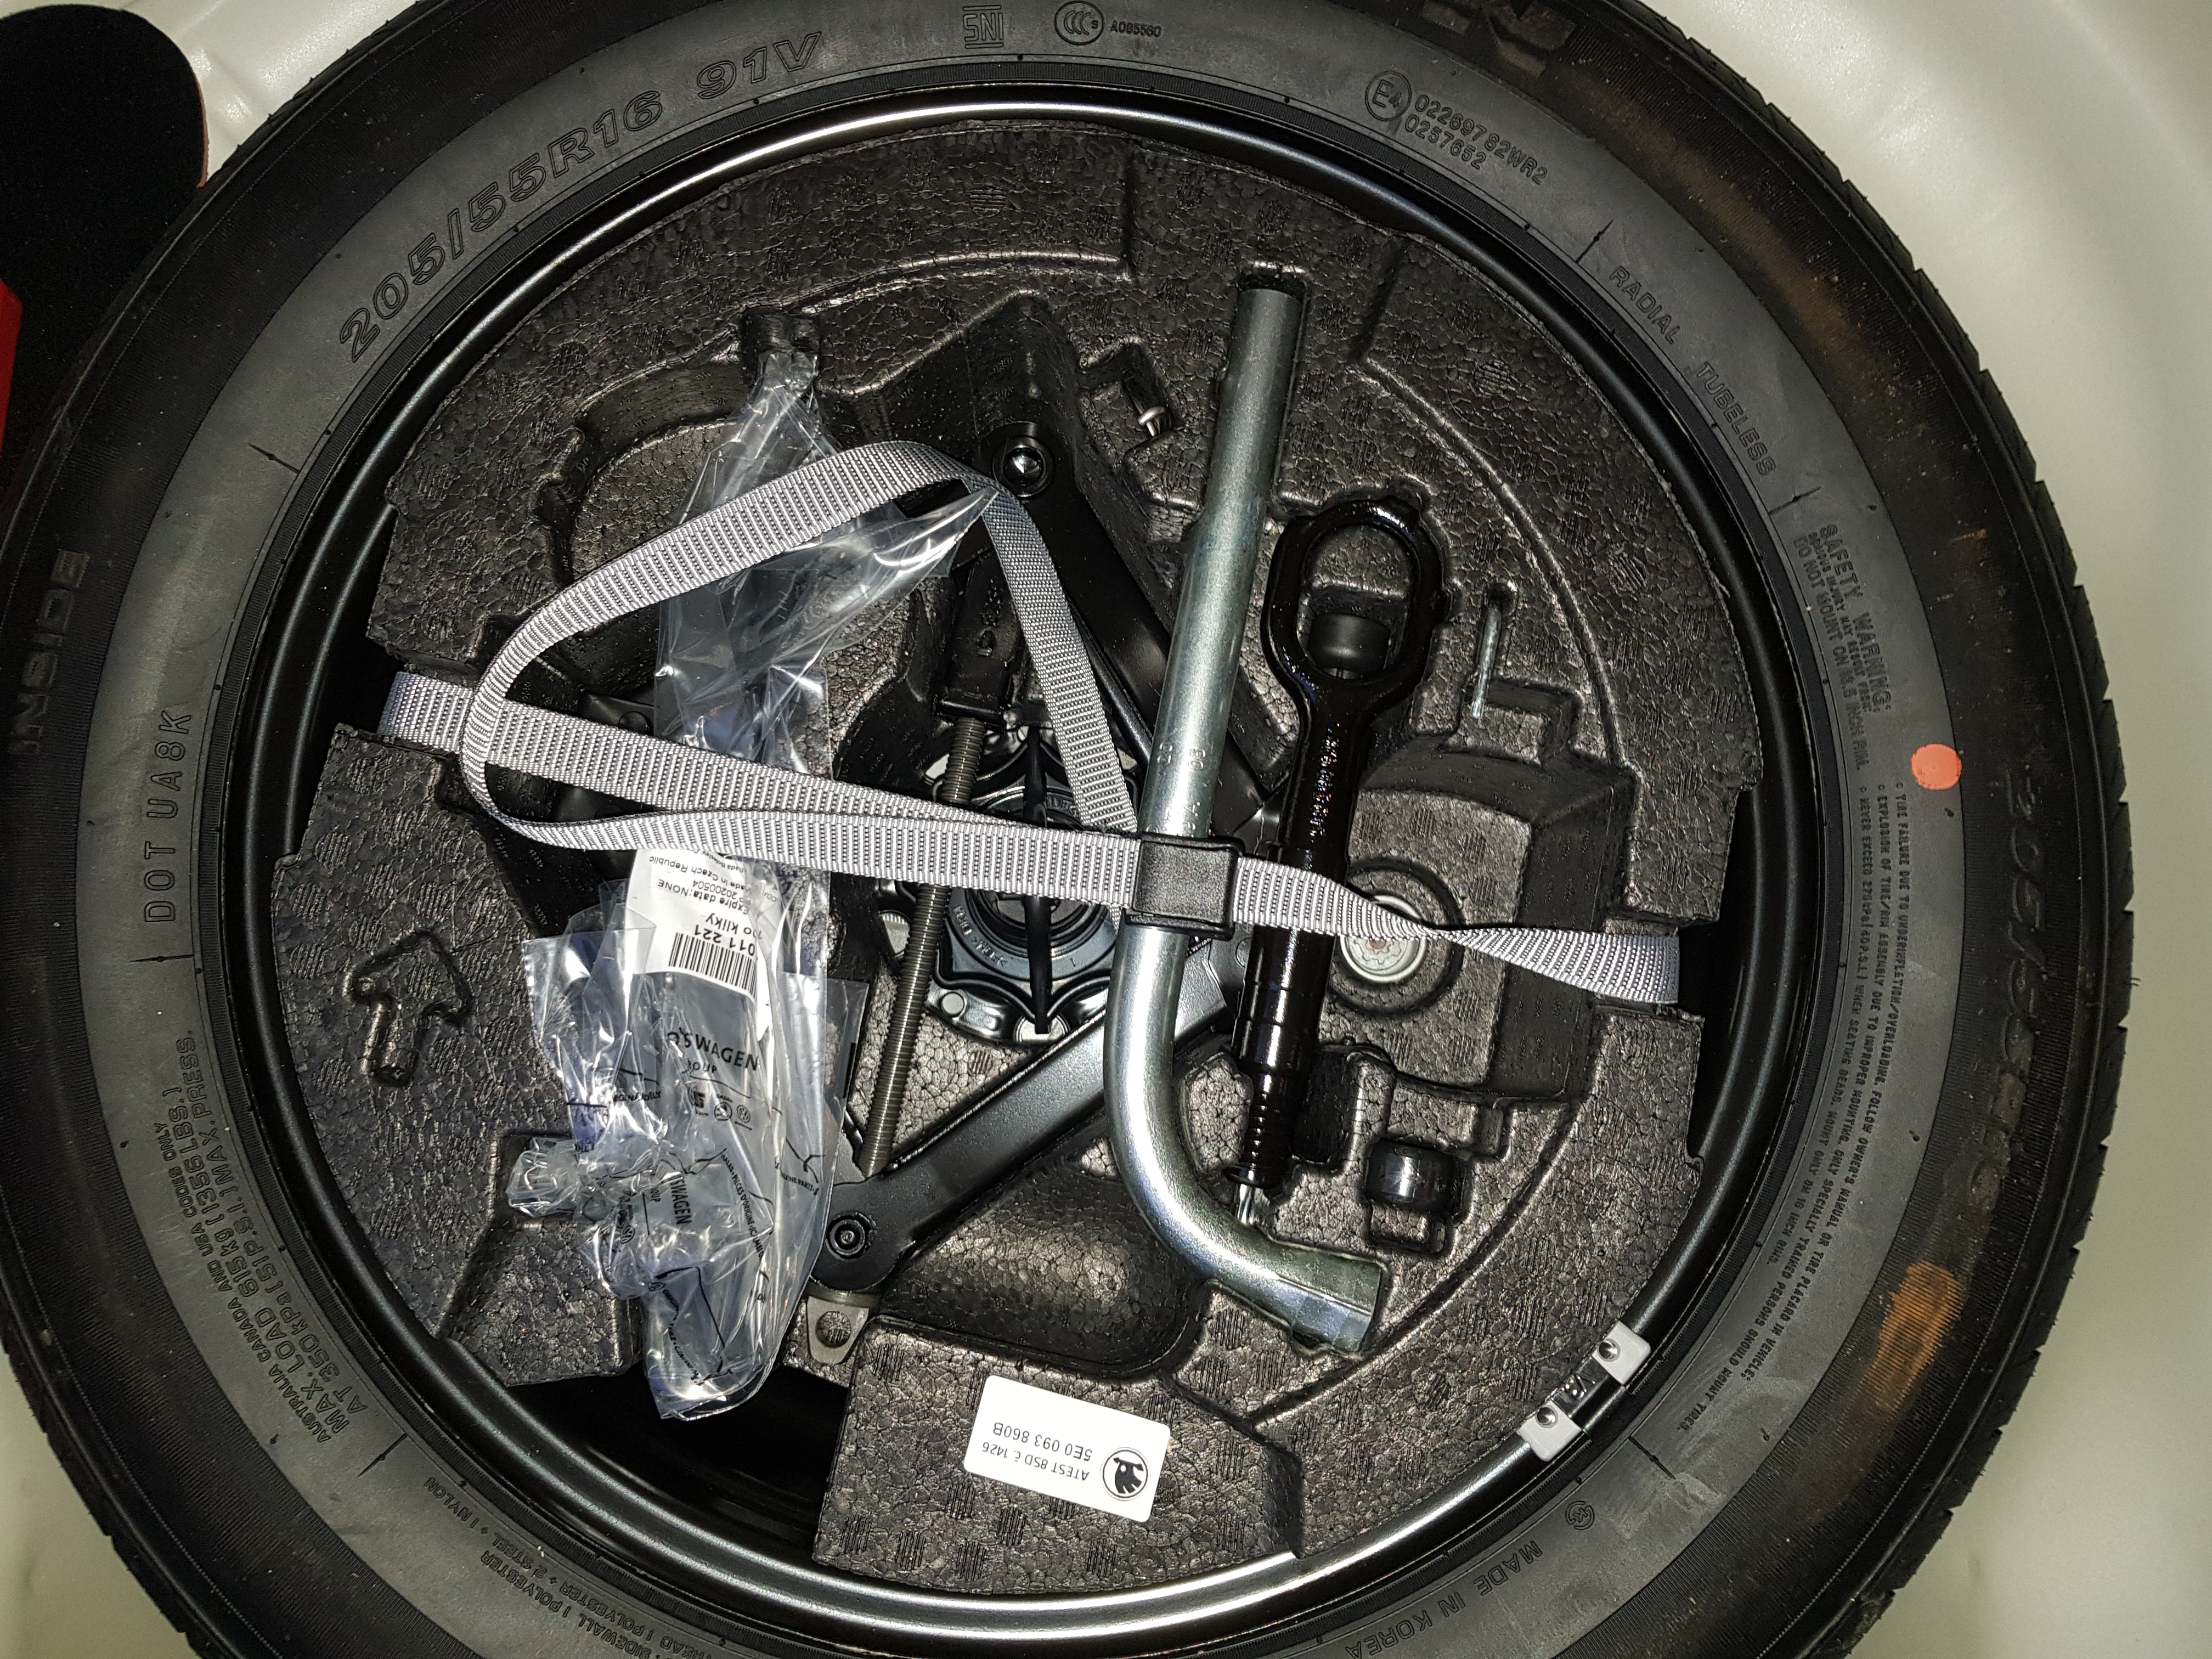
 2 points2 pointsHi all, I know there's been an ongoing issue with some radio station logos not appearing on the 8 inch version of the infotainment screen. I'm happy to say that after taking my Octavia into the Service Centre to have some rear bumper trim snapped back into place, the technicians also did a software update on the infotainment that happened to include fixing the missing logos! Finally! The layout of some of the menus has also changed to further reflect what they looks like on the 10 inch version of the infotainment screen. Just thought I'd let the community know! Thanks!1 pointThis is my spare tyre with insert. Never used it, but you get a jack, wheel nut spanner and towing eye in the insert. Looks like there's some sort of allen key thing, too. Not sure where the locking wheel nut dongle is... Edit: Oh! There it is, to the right of the towing eye.
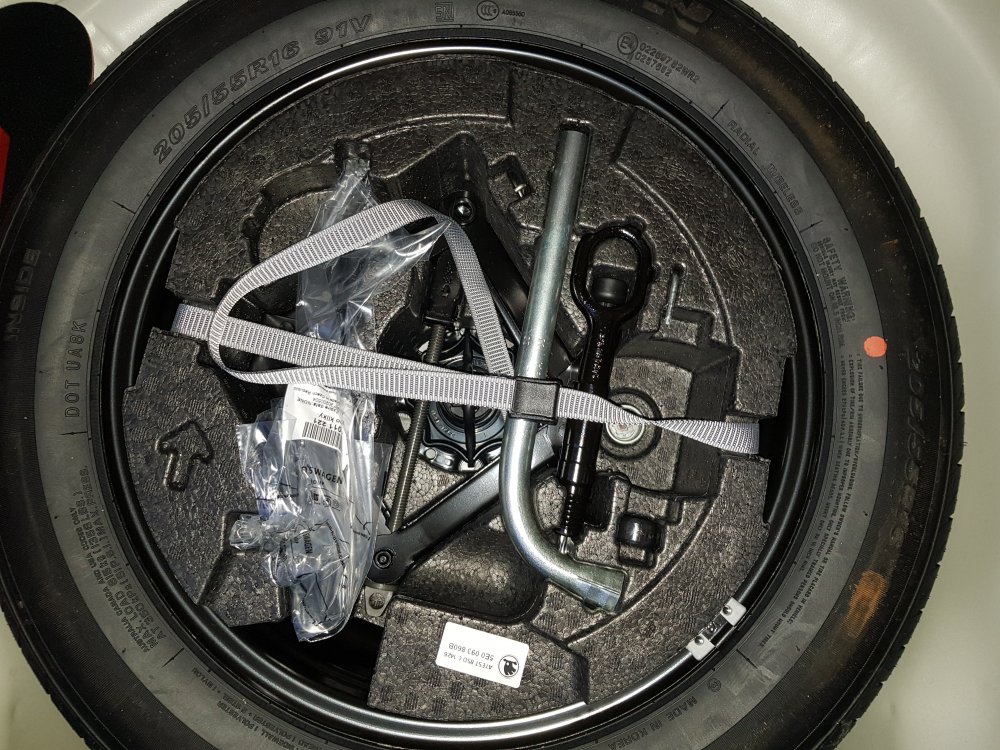 1 pointYou could just remove it. Mine was removed years ago and is still on the original exhaust now.1 pointReally interested to hear what you think, but I'm pretty confident you won't be disappointed. It's certainly got a lot more (good) attention since being fitted a few years ago 👌 VAG fanboy / nerd / too much time on hands 😅1 pointThanks @Jim2015 - that’s really helpful and confirms that given my current driving pattern a hybrid is less than optimal (and I can’t get a company car so no BIK ☹️) . I’m so pleased for you that you’ve got a car that is delivering on the economy, performance, appearance etc. I’m loving the Octavia Estate, currently a loan 1.0 e-Tec whilst my 1.5TSi is at the dealers (mph/kph issue)1 point1 pointAfter my annual mileage dropped from 30k to around 6-8k I decided to switch from a S2 Superb 170 Diesel to a 66 reg 280. Double the power & no wheelspin in any weather conditions, which was quite common in the old 2WD 170 diesel on damp roads. The extra power of the 280 is very useful when needed, even more so now I've had a REVO stage 1 remap done. The only downside vs the old diesel is the increased fuel consumption which hovers around of 25/26mpg around town & up to 36mpg on a run also, 99RON fuel is needed for best results. That said with far fewer miles being covered I can live with higher the fuel consumption & now I've experienced the capabilities of 4WD I don't think I would go back to 2WD unless it was a much lower powered model.1 point1 pointNeeds cleaning first. Then maybe a protectant will make them a lot less noticeable, autoglymm rubber and plastic protectant is what I use, others may also be as good or better, to the extent you may not need to replace it.1 point1 pointThe local dealer had one in stock for just over £20 so gunna grab that! Taa for the tips, whoever's done it before seems to have smashed the o ring and thread with it, it's only ever been serviced by Skoda before! 🙄. Thanks again for all of the help 👍👍🙂1 point1 pointAlmost certainly - but then those cars from the early 80s would also probably fold you in half if you ended up in any kind of serious collision.1 point1 pointNo This one is a great indication of the work required to dismantle the interior. Parts are 90% the same as the Superb1 point... or a phone glued to their ear...1 point1 pointFollowing on from skomaz comment above, does the original key still always work as this would probably negate a receiver coil issue.1 point1 pointOk thanks for that, I have been looking for non OEM ones online, but where theu say there £8.99 you then go to the shipping and then they add that on, then factor if you're gunna get charged as it comes from Europe etc and it ends up that anyway! And at least of its a Skoda job it'll hopefully fit! I'll give the local a ring and see what they say. Thanks again for the help and advice, it really is appreciated 🙂1 point1 pointMy guess would be that doing the doors, the bonnet and perhaps the roof would help most against it as this is what the wind hits when you drive fast. i did the front doors and it’s a bit of a bitch to open the door card. Quite a few cables to disconnect and reconnect but can be done with some patience. My main issue here was unclipping small connectors which needed to be be pushed out using a tiny screw driver - you will need one. You will also need one of those metal levers for uncliping, number 10 wrench and a small star screw driver (I cant remember the size) + patience. You will also need to disconnect the minus on your car battery before You start working there. digifish has an excellent video showing how to do it so go yo you tube and search by this nickname. I would advise you to have a small stool next to you so that you can put the door card on it at its original height while it is unclipped from the metal door but still connected by the cables which you will be disconnecting. Once I did the doors with noice and also out some carpet underlay rolls inside the outside noise has been cut greatly. let Know if you have any questions but also do watch digifish’s video. do you have the workshop manual?1 pointOop north the officers are not stupid when looking at 'Illegal / show plates', as in they know how long you were the registered keeper so know the car must have been through MOT's with an Examiner with poor eye sight if you owned that older car more than for a year. That is just if 'Points means prizes' and they intend catching you out on something. If they can not be bothered then neither do those that drive about with dodgy plates, or plates in the front window.1 point1 pointThat certainly an option. Get one you know fits your vehicle and at least you don't have to break something and have a car off the road.1 point1 pointYep, especially in the sun / when it's hot.........I sometimes worry about the effort required that it might damage the struts.1 point1 point1 pointFinally got new water cooler made with tube fin core. Now time forctesting Bosch EBP with bar plate and tube fin cooler and Craig Davies EBP25 with both water cooler and by measuring IAT during full throttle load and water temperature we will see which one is the best combo
 1 point1 pointHood went for repainting, grinding up to Trizact 3000, than polishing with 3M green,yellow and blue paste at the end. Blue sheet is dust protection 😂😂😂😂 Seriously considering wrapping the car in FlexShield transparent protective film.
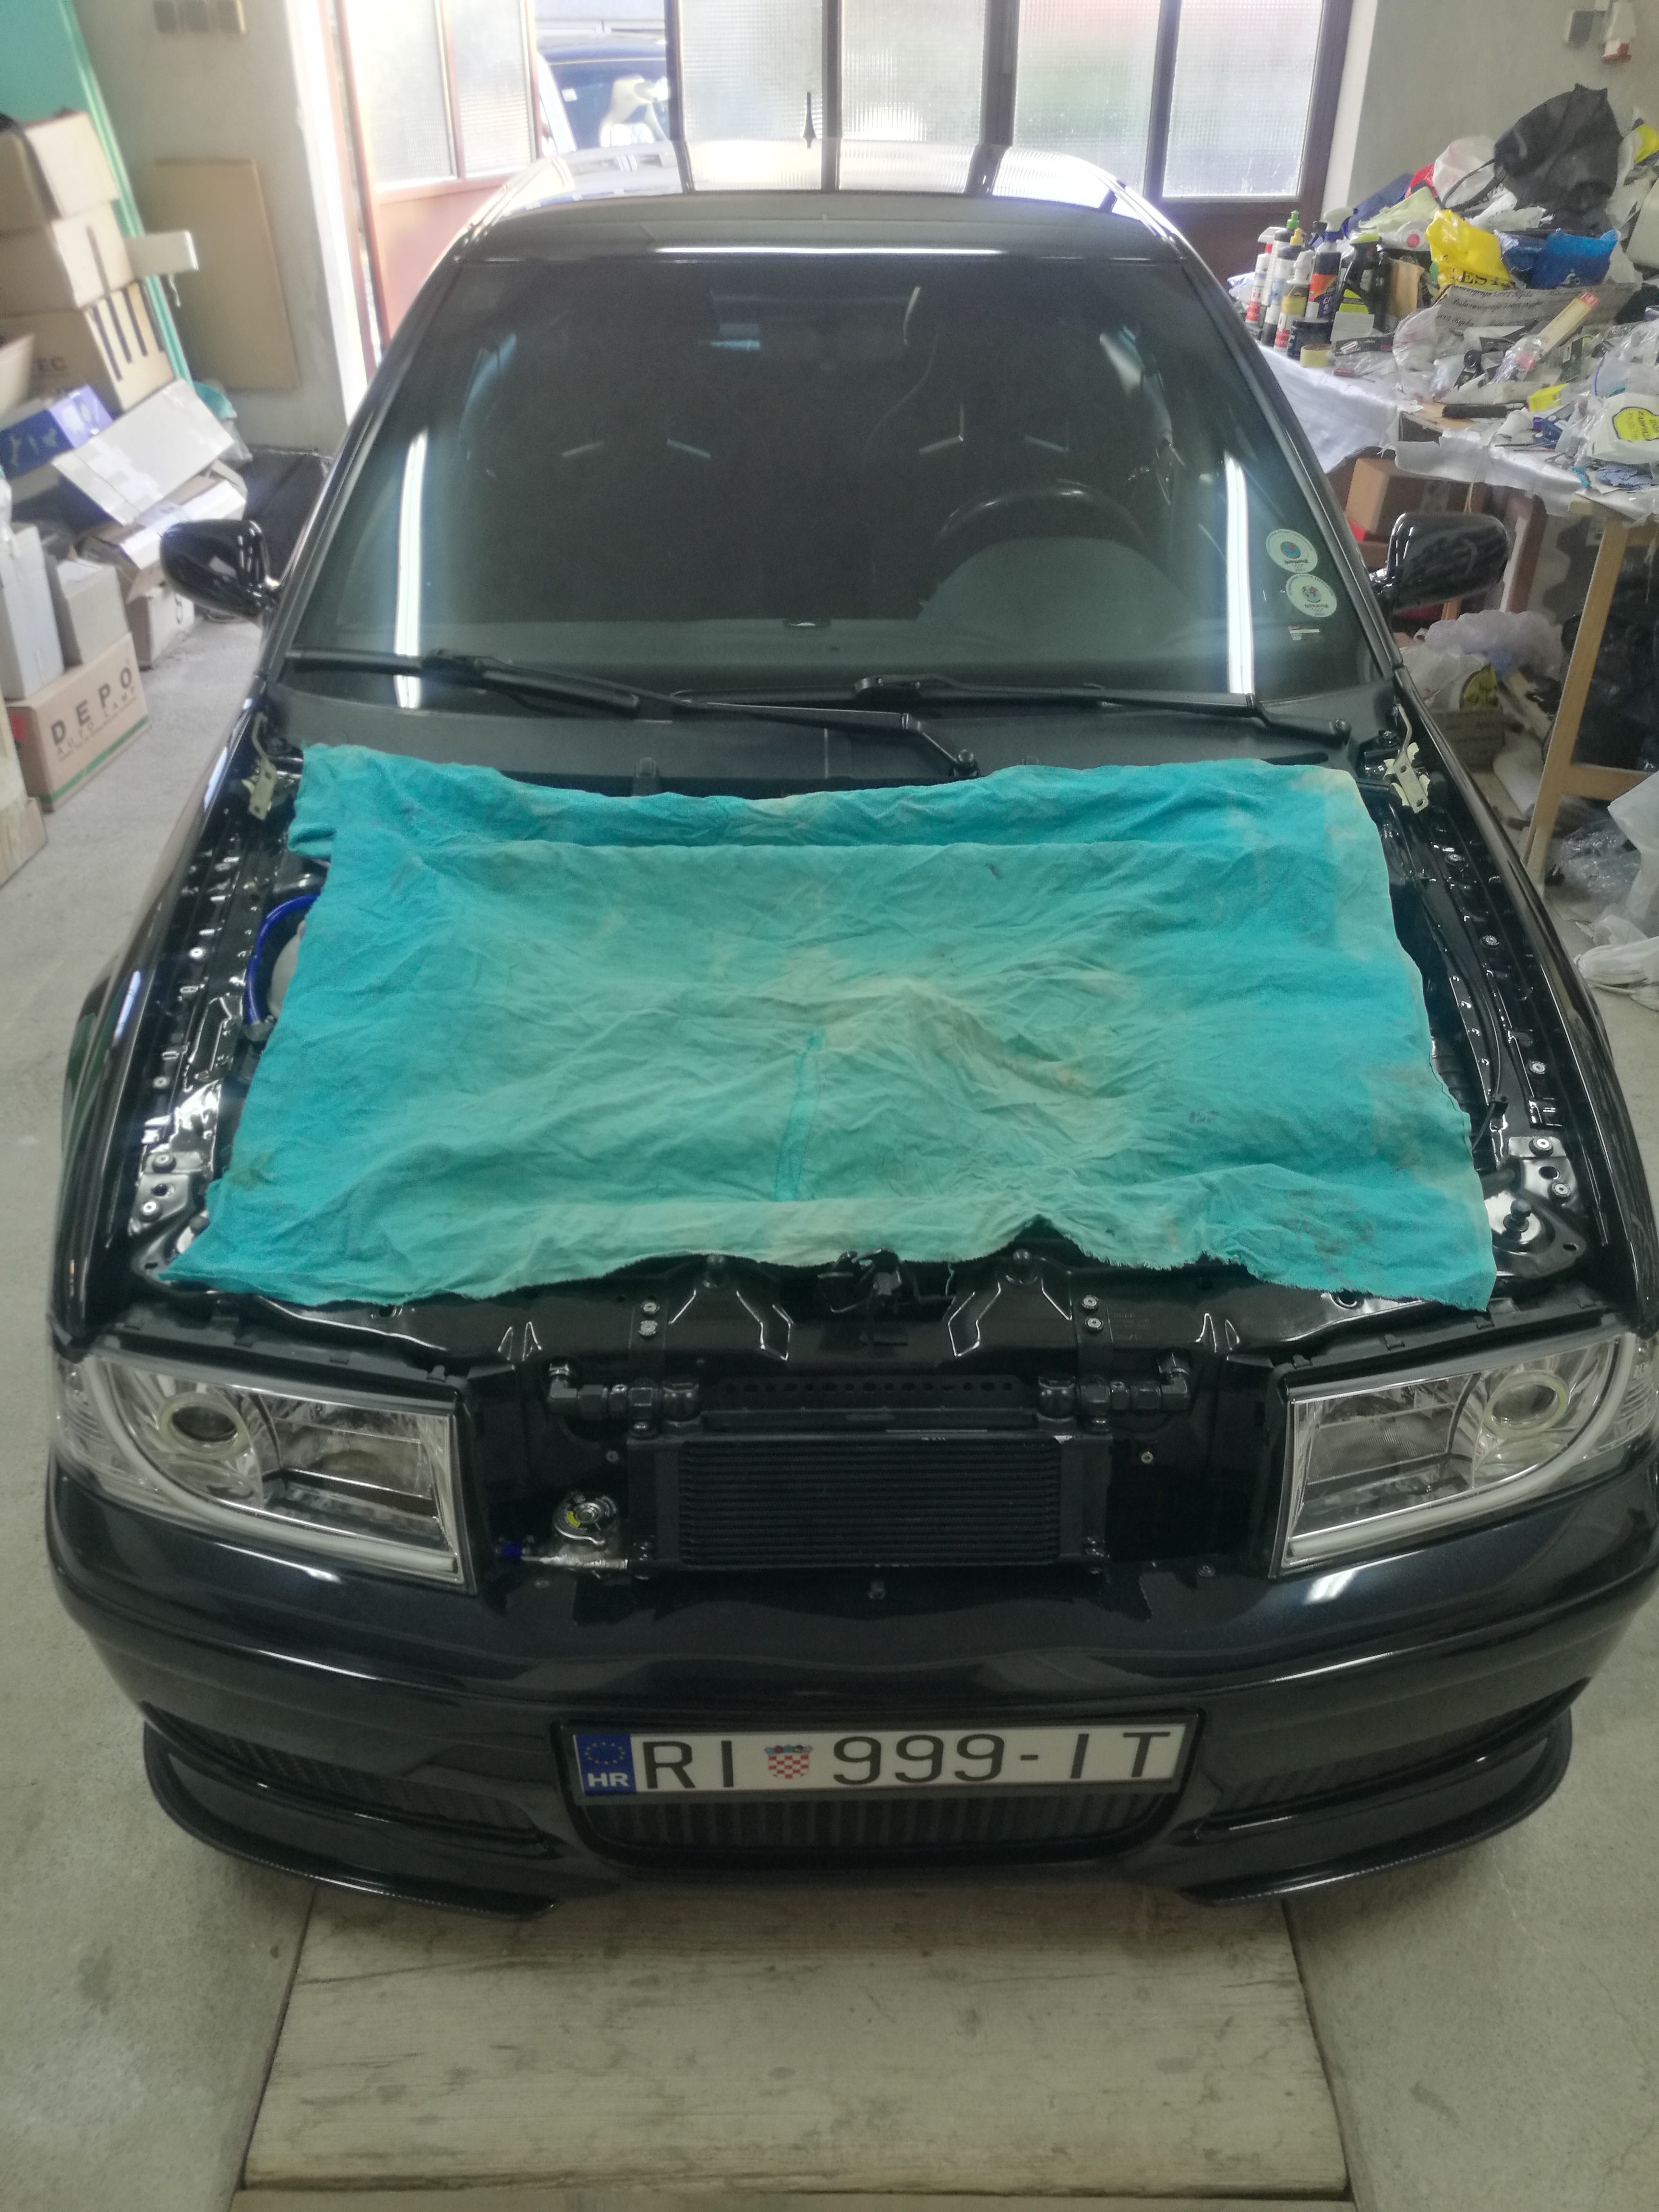
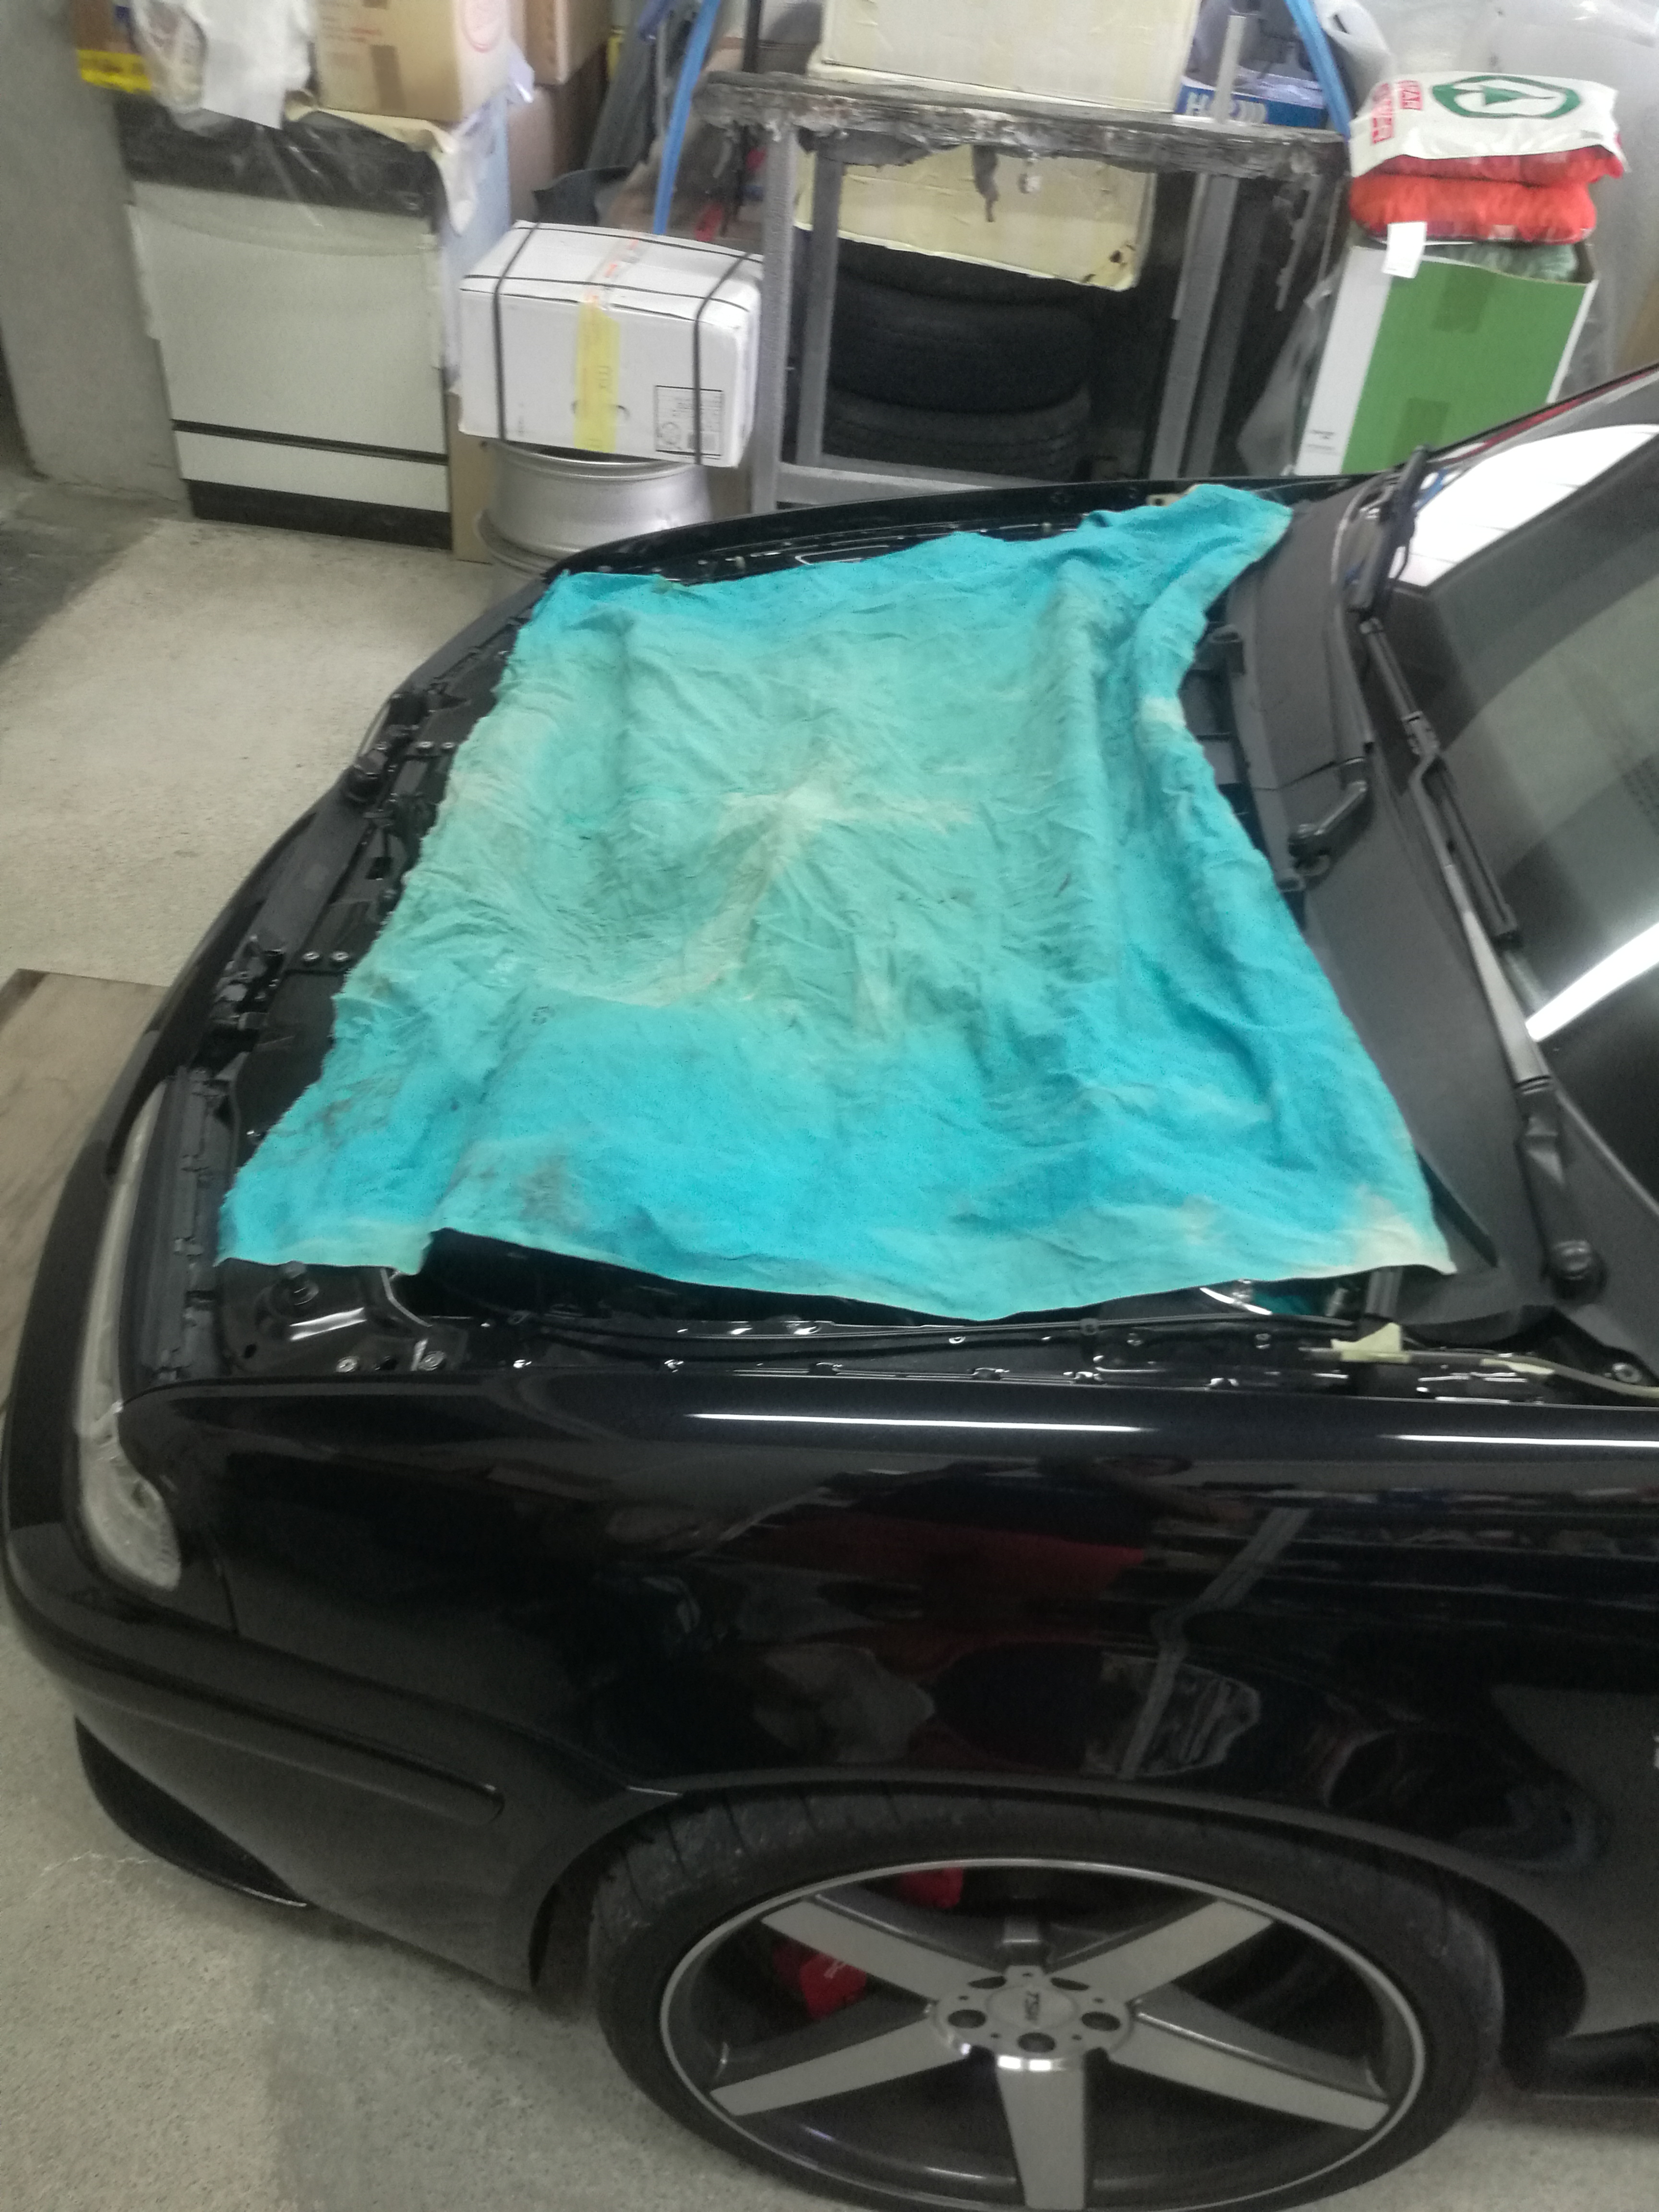
 1 pointThe headunit in a MK2 Superb only has permanent live feeds. There is no switched live... The Connects device might create a switched live from the CAN-bus messages? I'd check the the manufacturer.1 point1 pointMy garden see's a few nocturnal visitors. I think they may well be four in total.
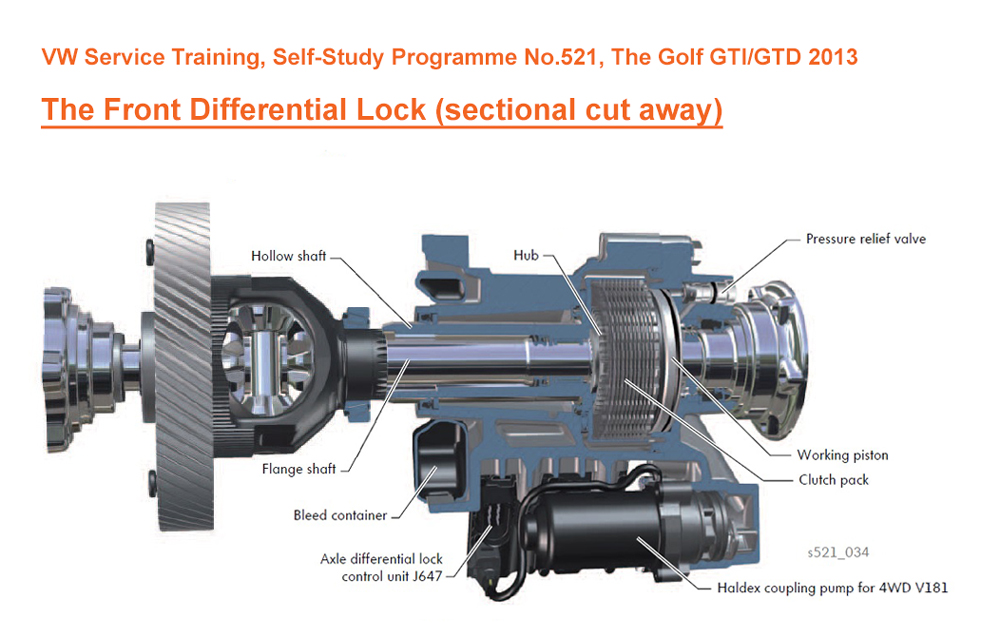
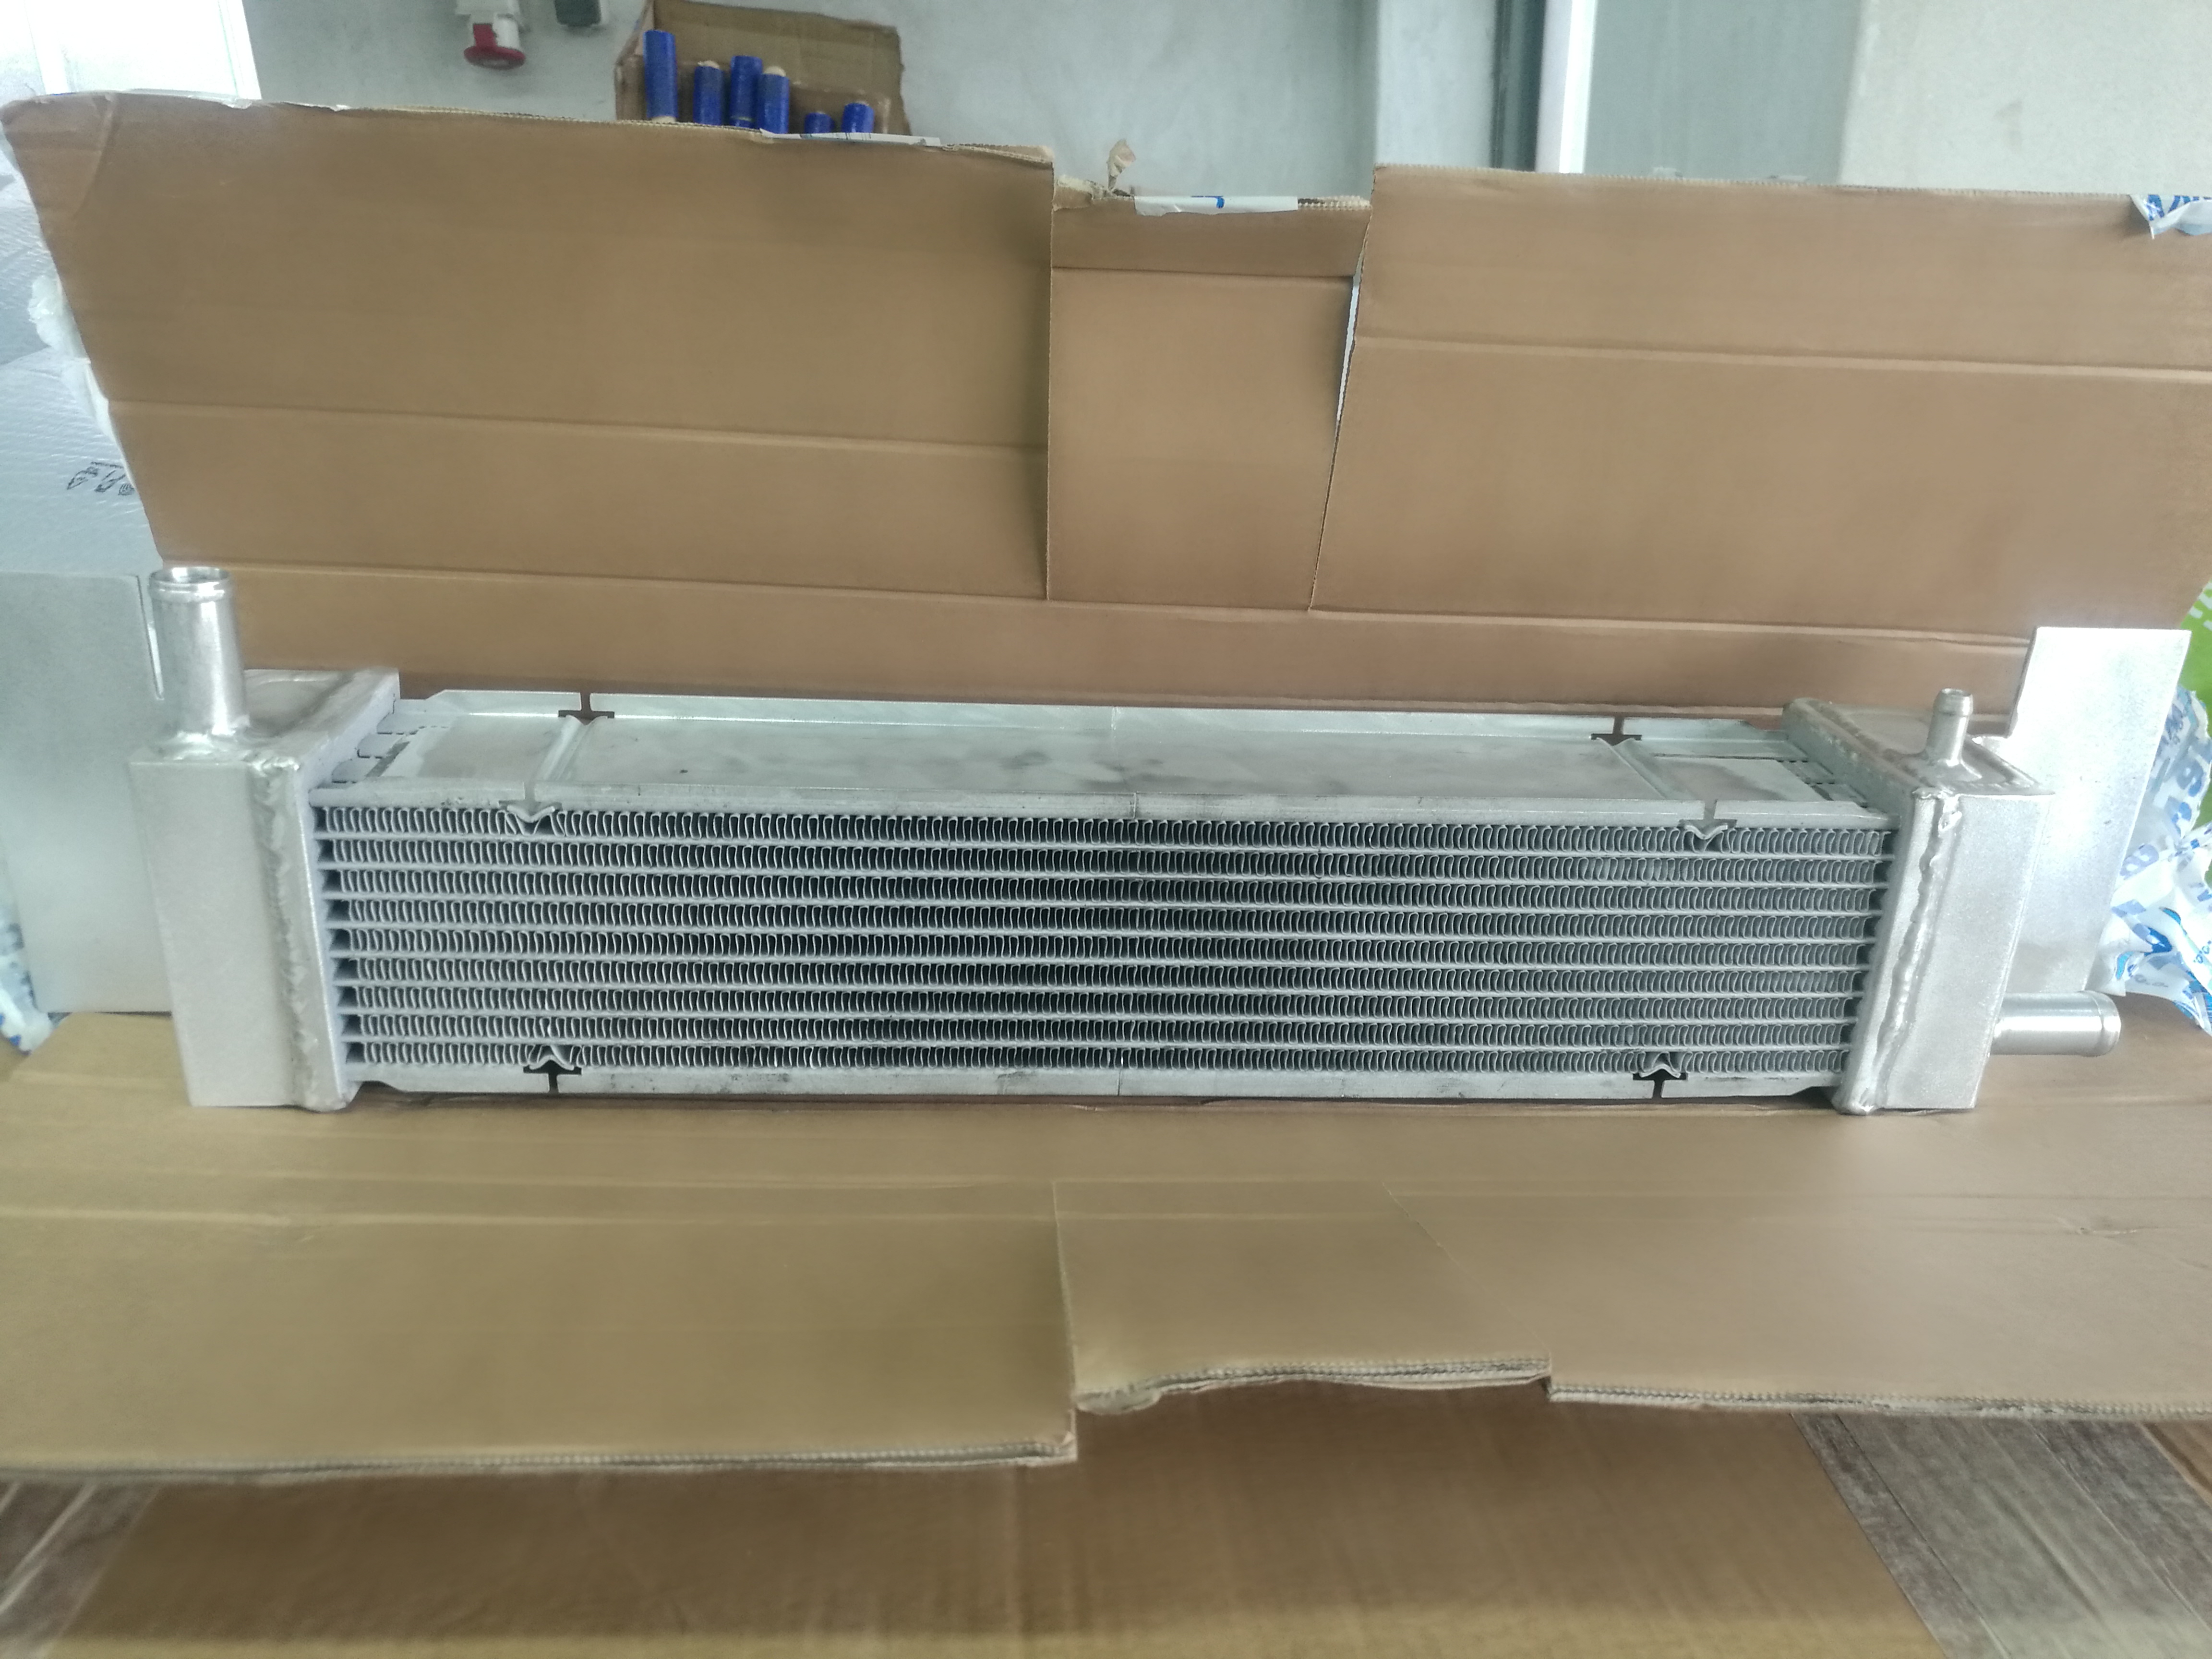
 1 point1 pointFor the same reason rain and snow doesn't. The airflow isn't forceful enough to counteract the momentum. And if you want a fuller explanation you have to do a Master's degree in physics.1 point1 point30 years of getting dirty hands and leaving finger marks on the bottom of the tailgate through refusing to try a pointless piece of rubber. My Yeti has a recessed finger grip in the tailgate bottom but inside of the sealing strip so always clean.1 pointHad a quick google over a morning coffee. Yes, I'd say the front diff and VAQ haldex oil are separate. When the dealer says the diff oil need replacing, they actually mean the VAQ haldex Few images for those not familiar with the VAQ. Nice to see the SSP still names it "Haldex coupling pump for 4WD V181" even though there is no 4x4 involved Anyway - the important notes are: - if you have a VAQ fitted, it will need the haldex fluid replacing periodically - It's around 3 years/30k miles but if you drive hard, do it earlier - Much like a rear haldex, the haldex pump should be removed and the strainer/mesh cleaned The last point is the important one as I expect many dealers won't do this as standard given what I've read of people rear haldex experiences
 1 point1 pointThat looks more like etching from bird ****. I’d leave it with them to sort, as I’ve seen marks like that before that just won’t come out completely.1 pointThanks for your reply Ads230, as usual you are very informative. I am not after a major difference in sound, just something that sounds like it should have done out of the factory, seeing as though it is a GTI engine. Don't think I should get too much noise from the boot area inside the cabin with the Scorpion exhaust, as I reinforced the boot floor space when I stuck a space saver wheel in there, rather than the gunge and foam insert. So I have on the boot floor, 5 ply wood cut to match the boot floor area, the usual carpet and then a thick rubber mat. I just hope after spending a fair amount of money on the exhaust, it will be worth it when I hear it's new sound effect.1 point1 pointFor extra braking distance when towing. All the safety systems need to be coded for the towbar.1 pointSo had a look into why the speeds were down at Crail last time and it came down to a sticking calliper. Although i guess the fact that there was smoke coming from the drivers front brake after following a friends 415whp Starlet back home gave it away i guess it's expected though considering it's done 113k now. Had to paint it yellow to match the rest One of my friend's decide she was going up to practice drifting to Crail yesterday so decided to mix up some meth and have a trip up Managed to get a 0-60 in 5.82 seconds as well which is the 2nd fastest it's done. Best was a 13.856, with 3 runs in the 13's so becoming more consistant Vs a 595 vs 530D vs Golf GTi He stalled it on his first run though vs M235i1 pointJust my regular wash cycle yesterday, but reapplied some Autoglym performance tyre dressing too. Thought the car looked lovely, so I took a snap!
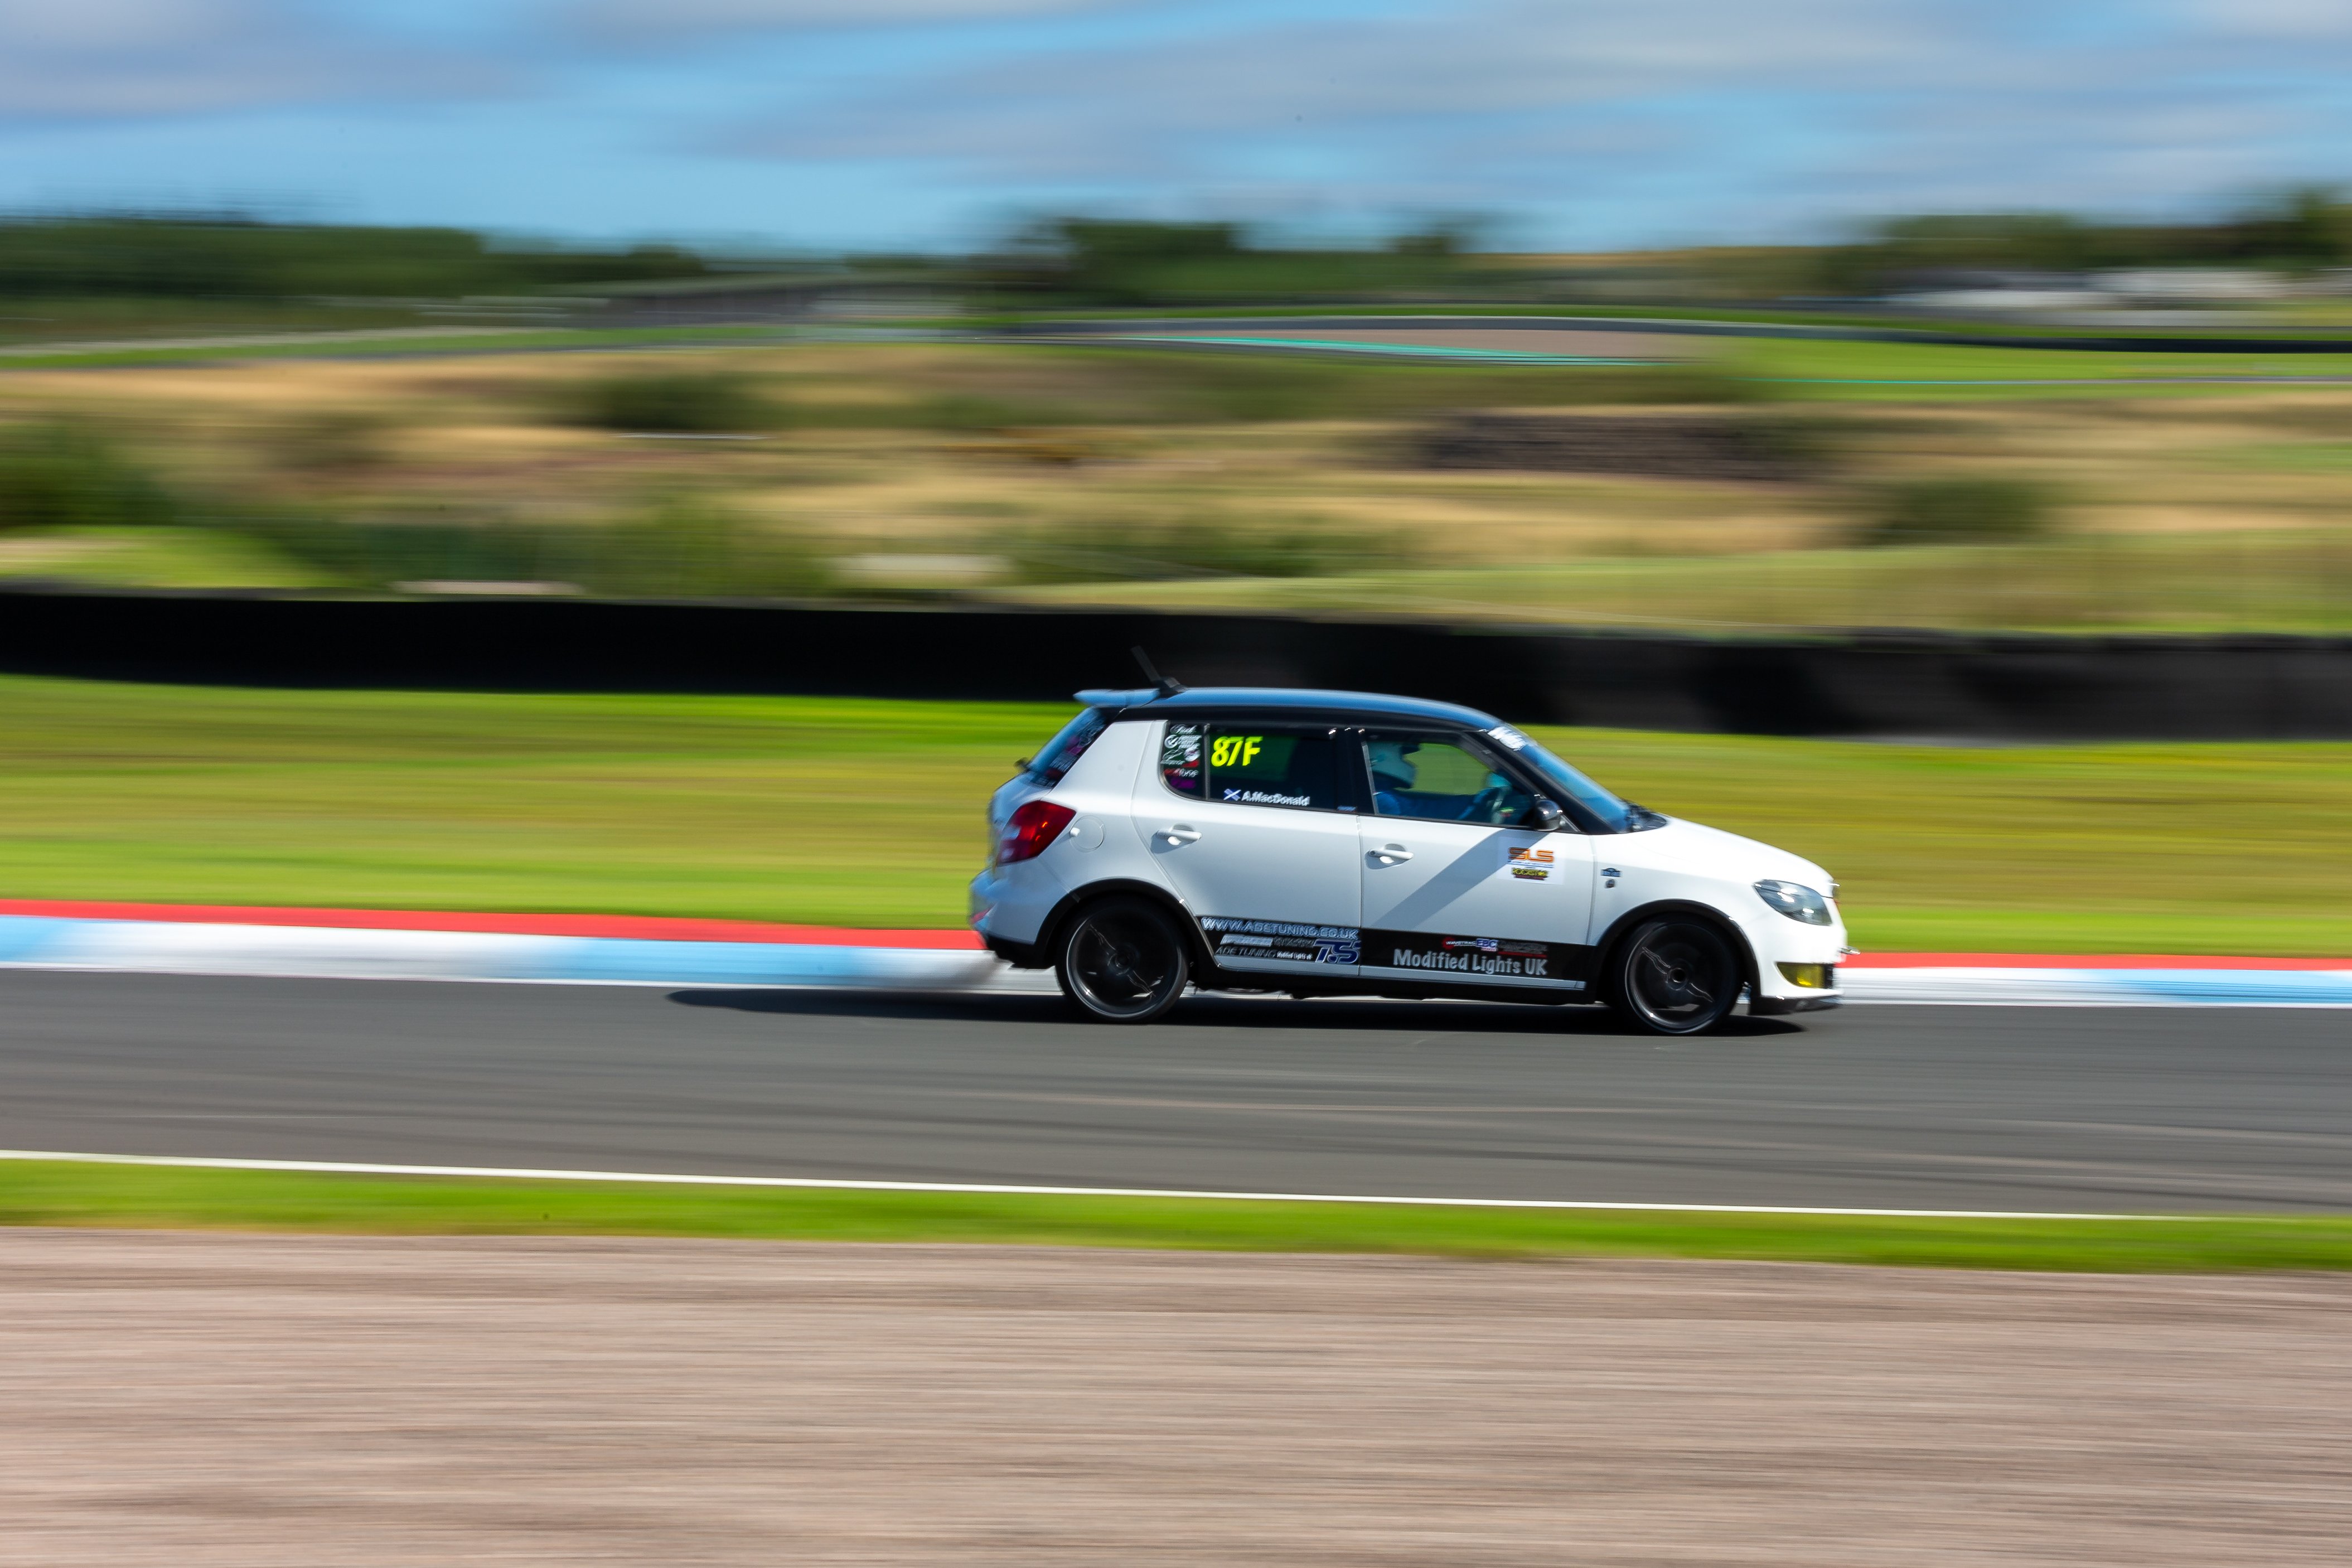
 1 point1 pointmytyres.co.uk is actually a trading name for Delticom who are a German company, all the tyres I have bought from them in the past have been imported from Germany - I wonder if they are having Customs problems due to Brexit?1 point1 pointOn a 2012 Roomster, 195/60/R15 is OK and much better road comfort, 195/65/R15 likely to cause problems at rear due to fender clearances, probably still OK with clean tyres, but problems with mud/gravel at full load etc I use 195/60/R15, also full sized spare wheel same as the rest on the car fits in the spare wheel well . 50k+ miles incl autobahn runs at full speed. Speedo is almost exact with 195/60/R15. I'm using all weather tyres, either Michelin Cross Climate or Bridgestone Weather Control.1 point195/55R15 has an outside diameter of 595.5mm 195/60R15 has an outside diameter of 615mm 195/65R15 has an outside diameter of 634.5mm Changing 195/55R15 to 195/65R15 increases the outside diameter of the tyre by 6.5% which is too much. Changing 195/55R15 to 195/60R15 increases the outside diameter of the tyre by 3.25% which is acceptable with the 1.9TDI engine (ie. the high low end torque of the turbo diesel engine allows it to pull the 3.25% higher gearing adequately). Like 195/65R15, 195/60R15 is also a cheaper size than 195/55R15. You should notice increased ride comfort from the higher sidewalled 195/60R15, and you could lower your tyre pressures by 3psi compared to the 195/55R15 size due to the higher load index of the higher sidewalled tyre. Vredestein Quatrac 195/60R15 88H https://www.camskill.co.uk/m138b0s7993p202144/Vredestein_Tyres_All_Season_Car_Vredestein_Quatrac_6_-_195_60_R15_88H_TL_Fuel_Eff_%3A_C_Wet_Grip%3A_B_NoiseClass%3A_2_Noise%3A_70dB I expect Goodyear will bring out their EfficientGrip Performance 2 in the 195/60R15 size later this year. However, I don't think you would be disappointed with the latest Vredestein Quatrac all-season tyre, as that has been made to provide good summer handling as well as good winter grip. Also consider 185/65R15. However, the 6Jx15 ET43 rims that you probably have (ie. standard fitment for the 195/55R15 tyre size on the Roomster) aren't optimised for this tyre size. 5.5J to 6J rims with an offset between ET38 and ET40 would be better. The latest VW Polo for example, fits its 185/65R15 tyre to a 5.5Jx15 ET40 rim. Alcar 4055 5.5Jx15 ET40 Steel Rim https://www.oponeo.pl/felga-stalowa/alcar-kfz-4055#203468871 point1 pointPicked up this 2020 Kodiaq, with Tech and Luxury packs, plus Tow Kit in July last year Loving it!
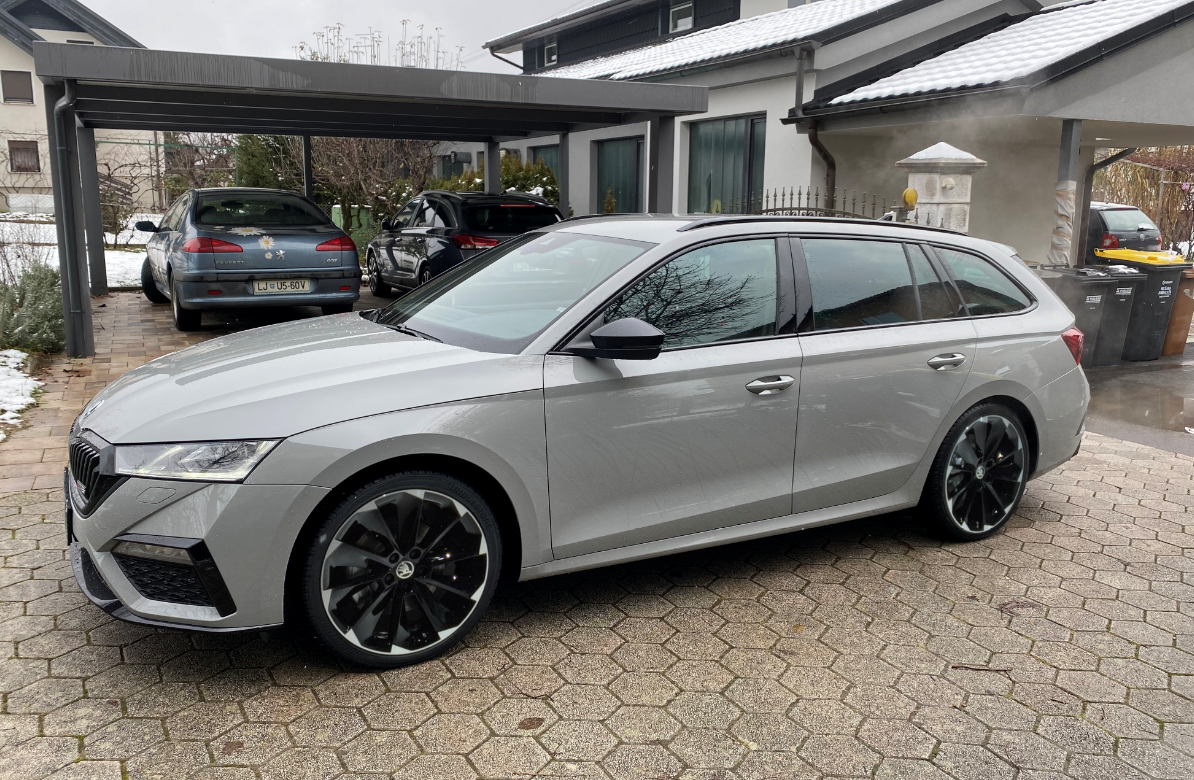
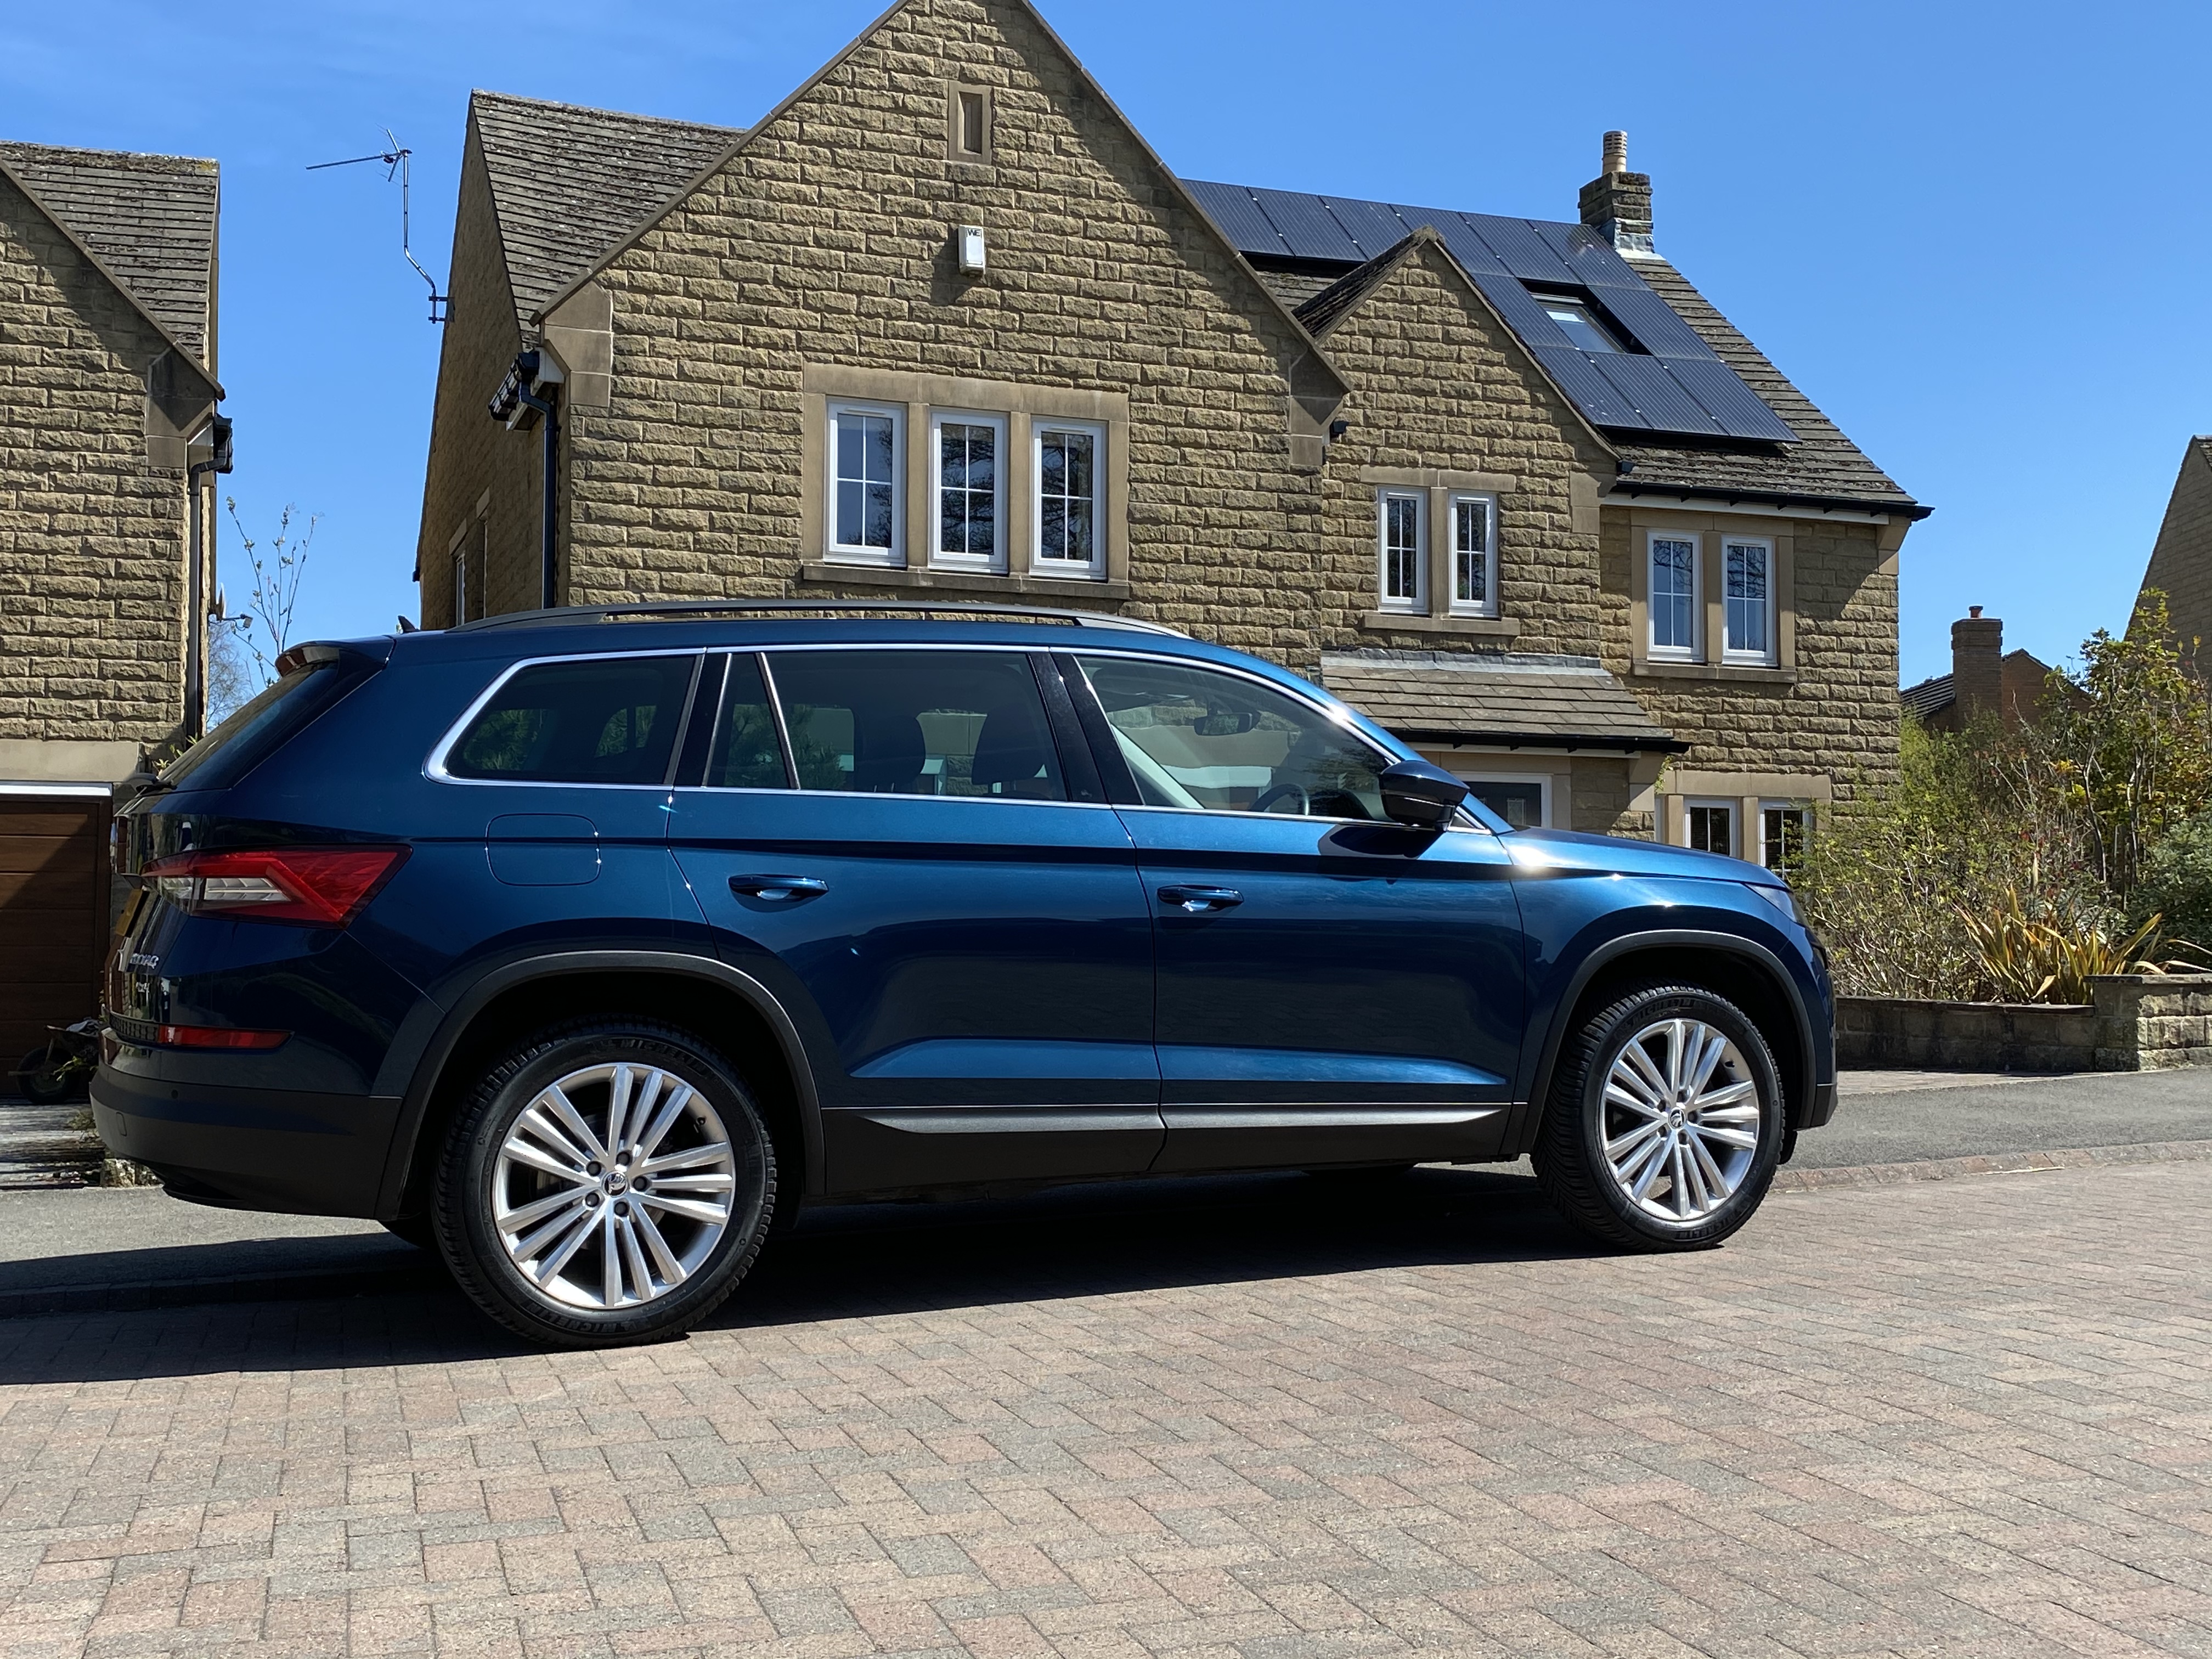
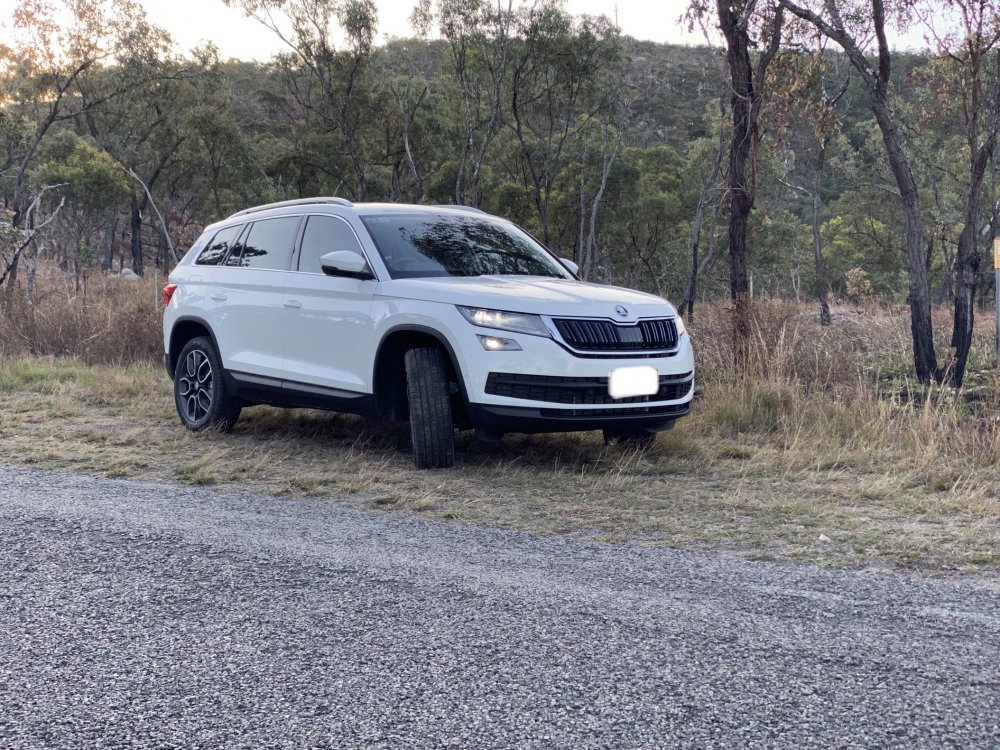 1 point1 pointHey Jordan, just got mine in Perth Australia. So far so good. Appears the vrs in Australia comes with everything as standard. Still trying to work out how it all works1 point1 pointJust joining this from from wet Sydney Australia :-) Just took delivery of MY21 Kodiaq RS in race blue. Fantastic car, but only done 30 kays so far, so not really experienced it. Hoping to get some help on a few questions, so I hope I post in the right section.1 point


Important Information
Welcome to BRISKODA. Please note the following important links Terms of Use. We have a comprehensive Privacy Policy. We have placed cookies on your device to help make this website better. You can adjust your cookie settings, otherwise we'll assume you're okay to continue.